Community Brag Posts


Great plans!
These plans were great. Easy to put together and they look quite amazing. And they are solid! Bought cushions from IKEA and the wood from Home Depot. Stained and sealed.
Built from Plan(s)
Estimated Cost
250
Estimated Time Investment
Day Project (6-9 Hours)
Finish Used
Behr stain and seal
Recommended Skill Level
Beginner
Comments
DIY Golf Locker

Golf Locker. We love it!
Built from Plan(s)
Cabinet Door Snack Table
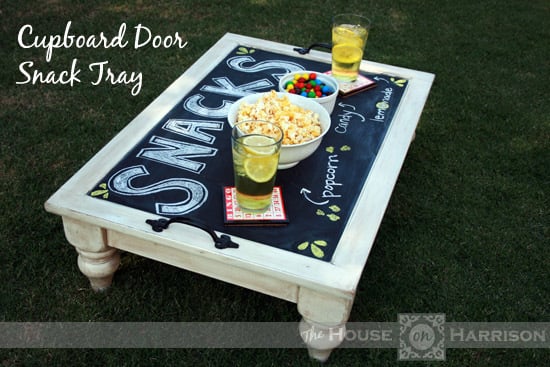
We really needed some sort of coffee table for our game room loft, but we didn't want something that big taking up space in the small room. Armed with the plans for Ana's Turned Leg Coffee Table and an old cabinet door we found on the side of the road, we made a snack table instead.
We modified Ana's plans a bit to accommodate the cabinet door. It was very simple, and only took us a few hours to build. You can find all the details on my blog.
Built from Plan(s)
Estimated Time Investment
Day Project (6-9 Hours)
Recommended Skill Level
Beginner
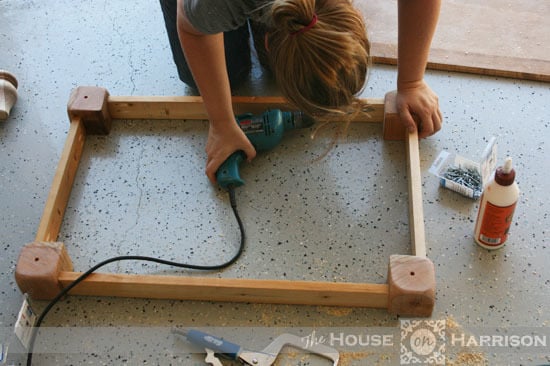
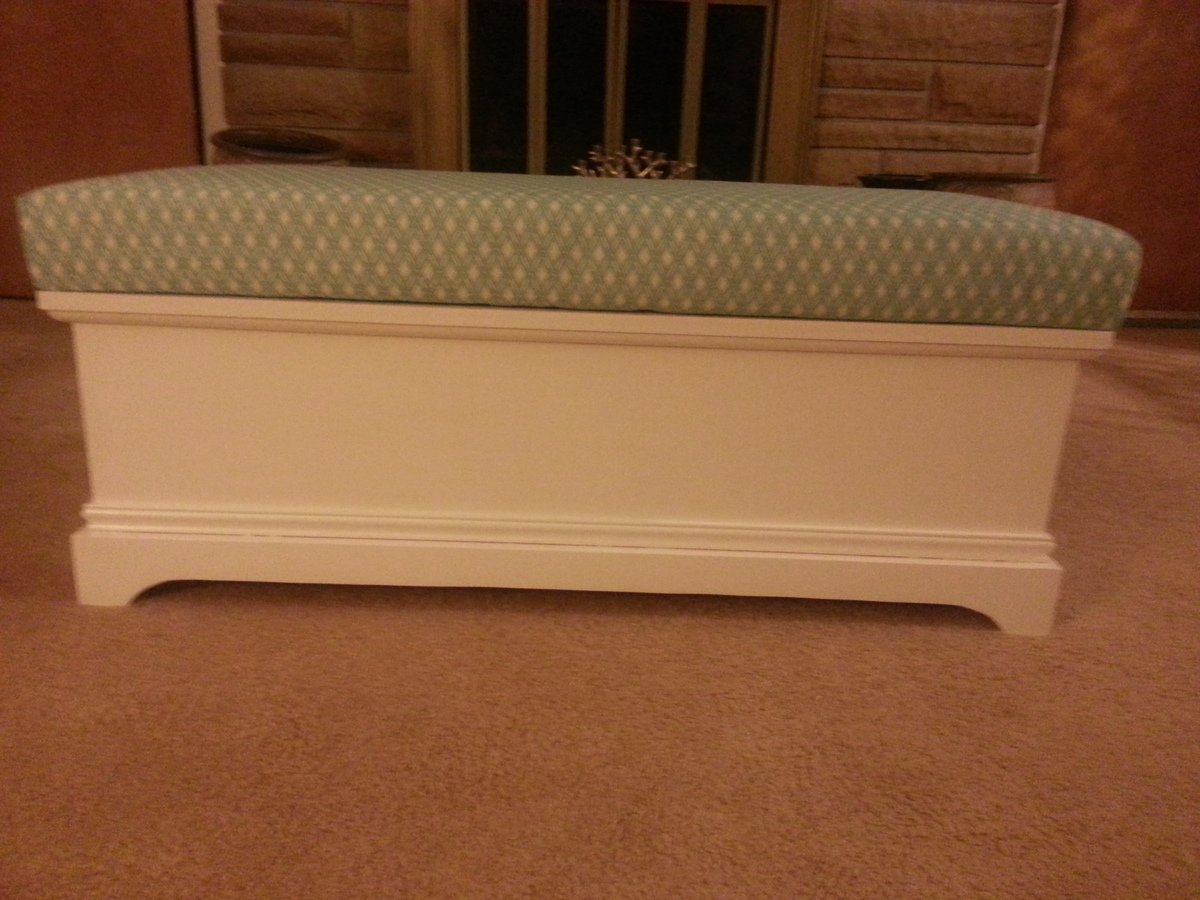
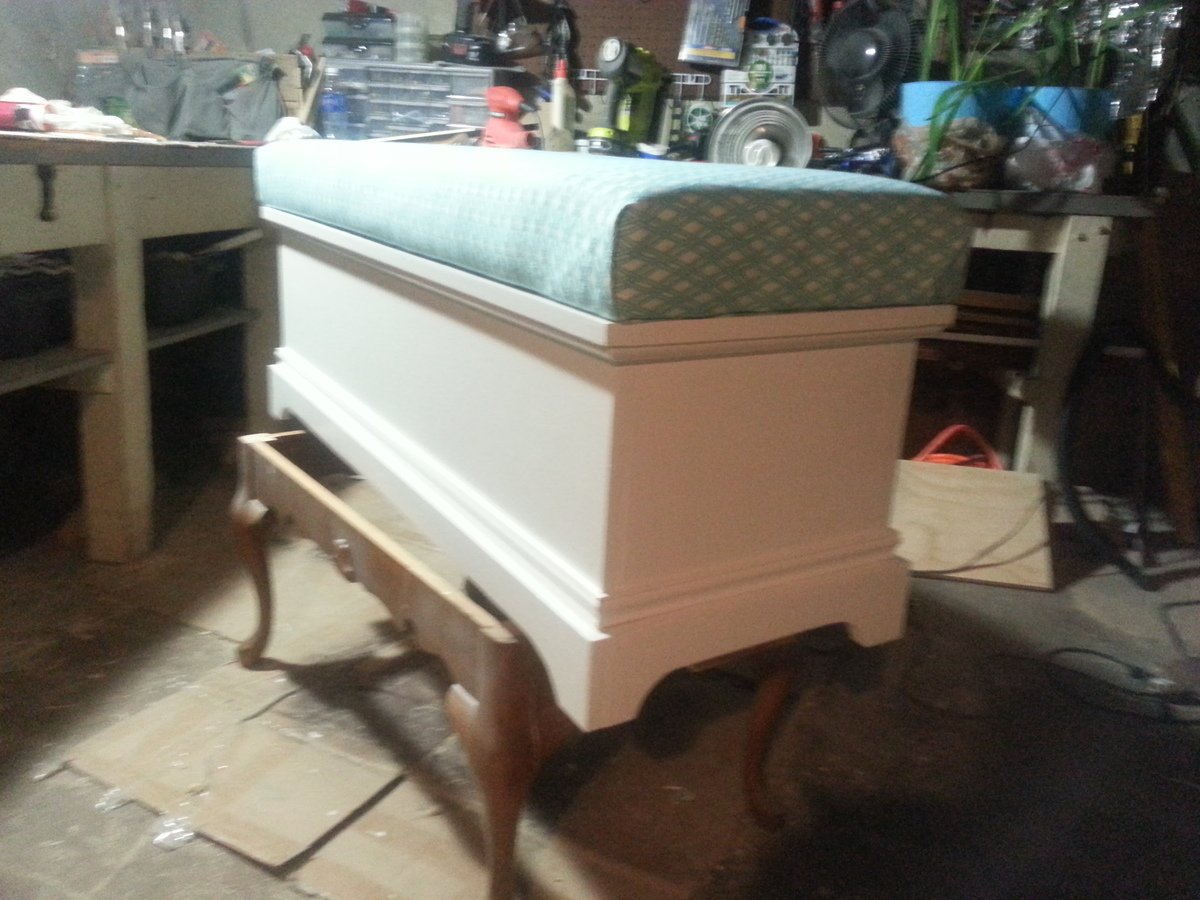
Toybox chest turned window seat
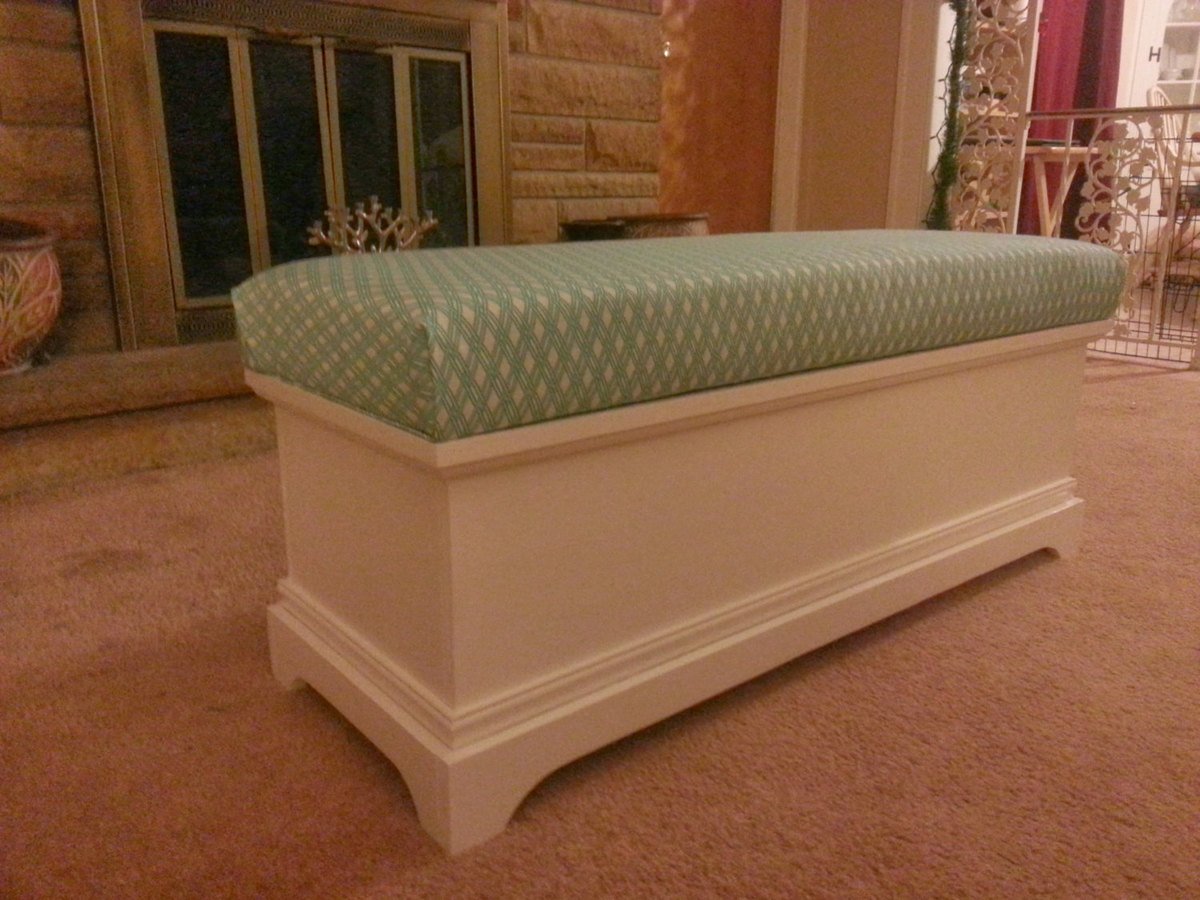
I've tried this before as a gift for a friend's new baby. I then wanted to do one for myself but change the measurements somewhat. This is 45" long and the same width as the original. I reduced the height to account for the 3" foam cushion. Besides that it's pretty much the same as the toy chest plan.
Building and sanding took about 3 days working after work only. Painting took the longest time.
Built from Plan(s)
Estimated Cost
$90 including foam and upholstery
Estimated Time Investment
Weekend Project (10-20 Hours)
Finish Used
Primer followed by white paint in semi gloss
Recommended Skill Level
Beginner
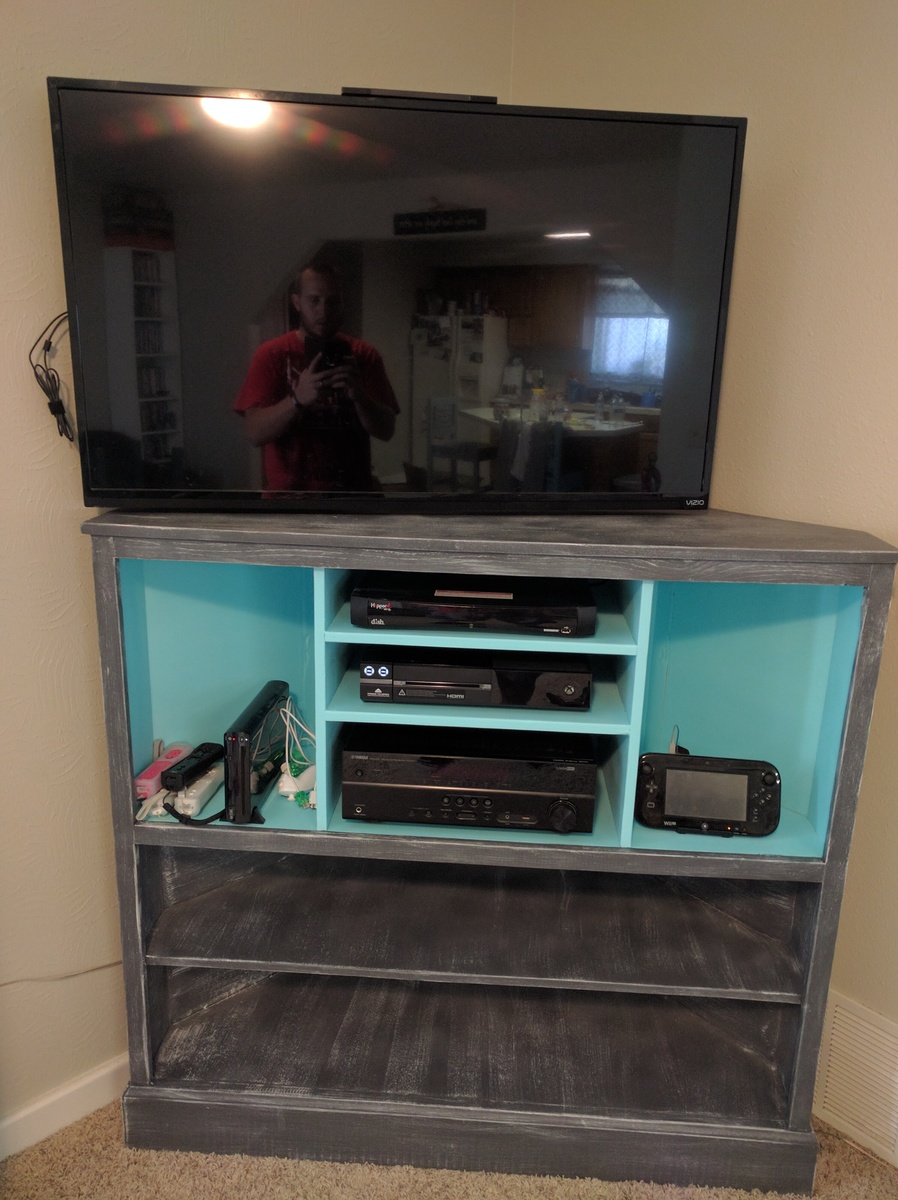
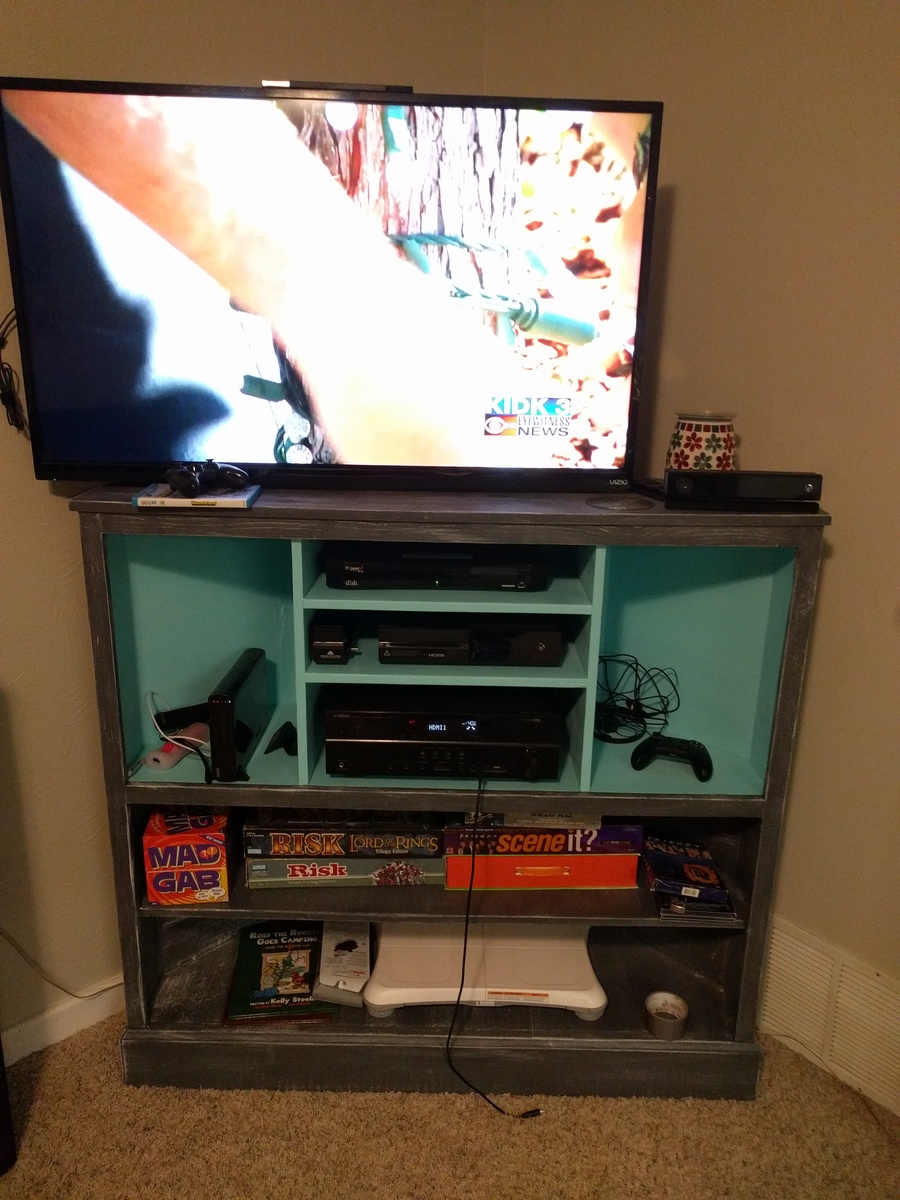
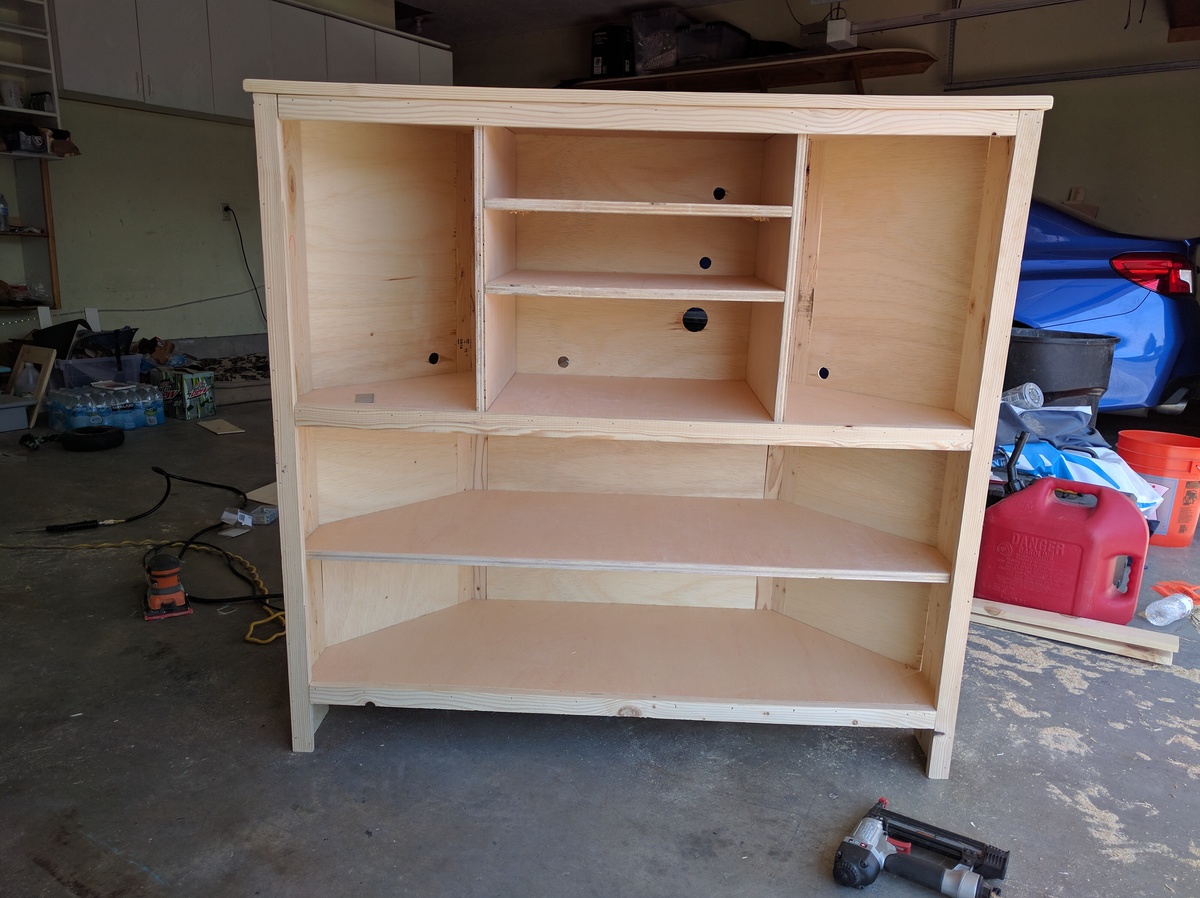
Fun
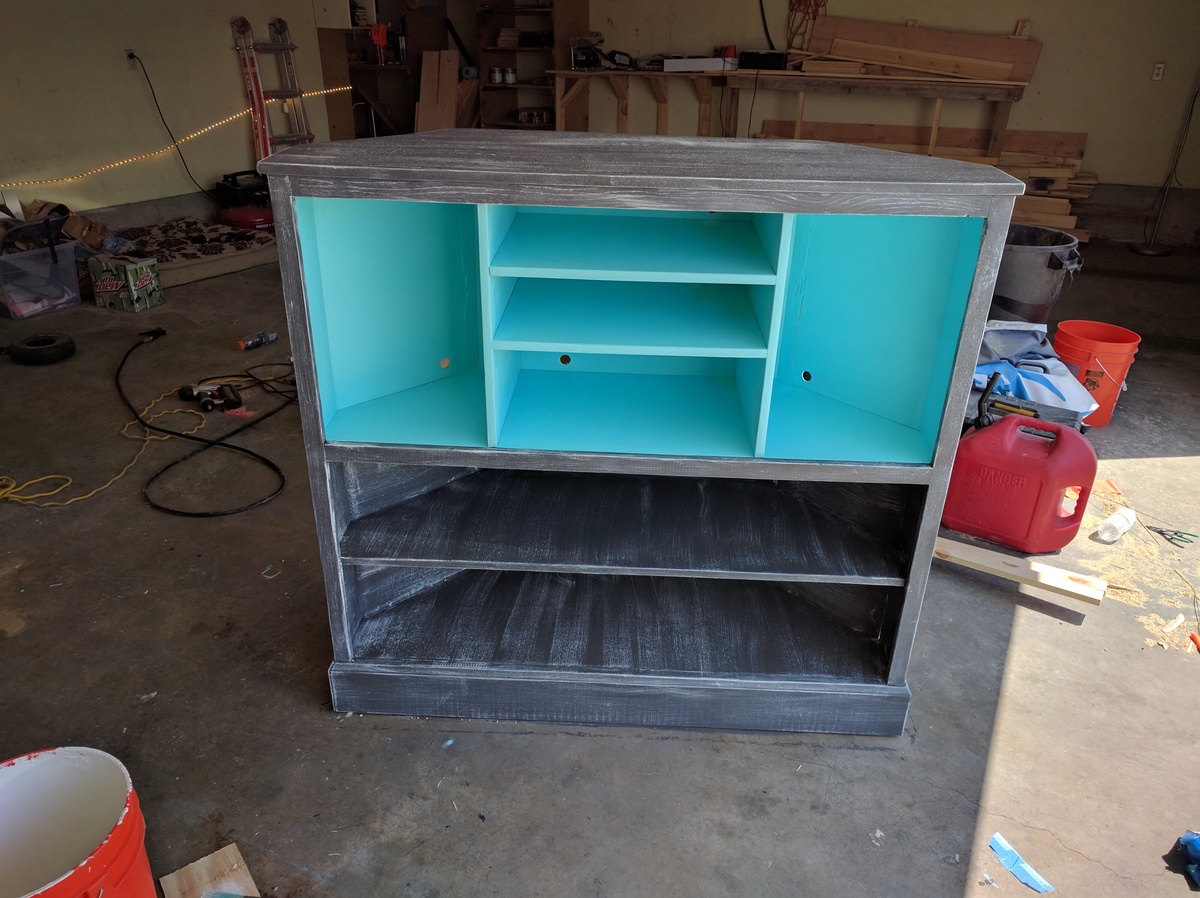
This project was so much fun. I had to make adjustments for the size of my systems, but it was well worth it. I will be adding the doors later after our baby is old enough to crawl. Thank you so much for sharing this project!
Estimated Cost
125
Estimated Time Investment
Weekend Project (10-20 Hours)
Finish Used
Paint and sealer
Recommended Skill Level
Intermediate
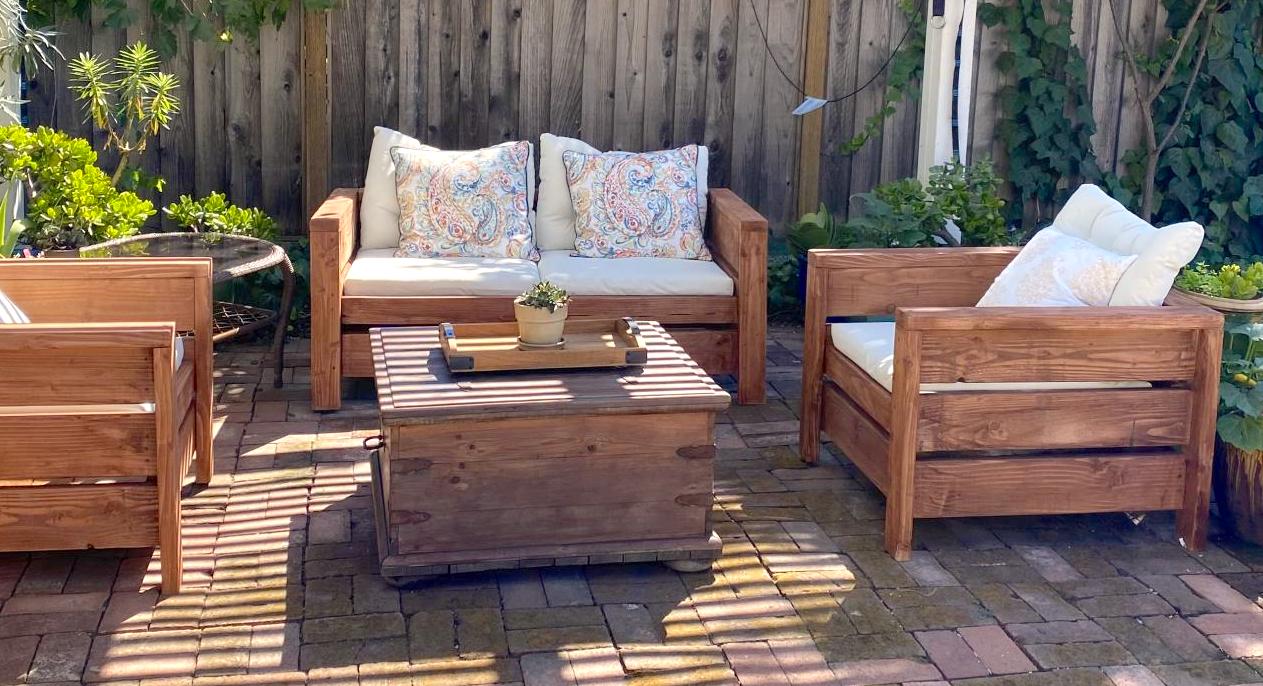
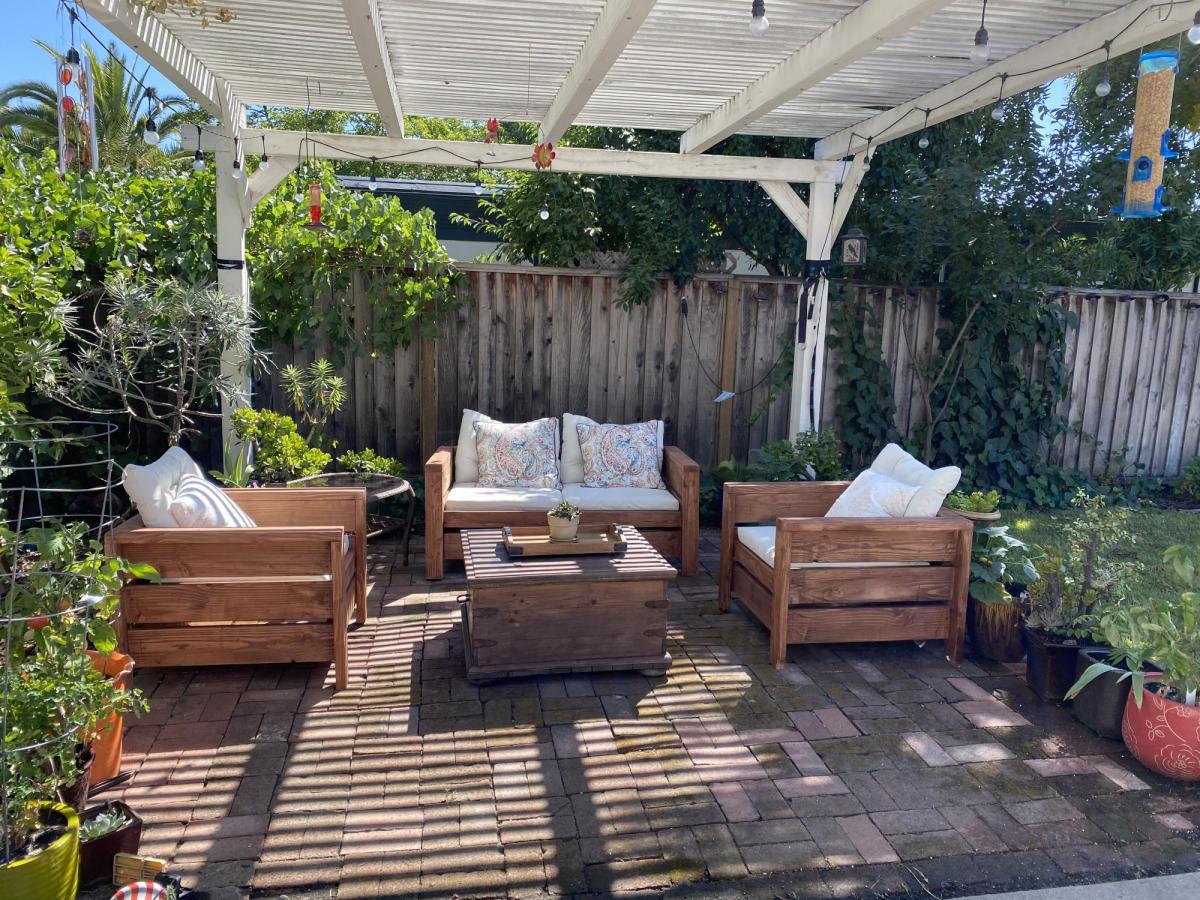
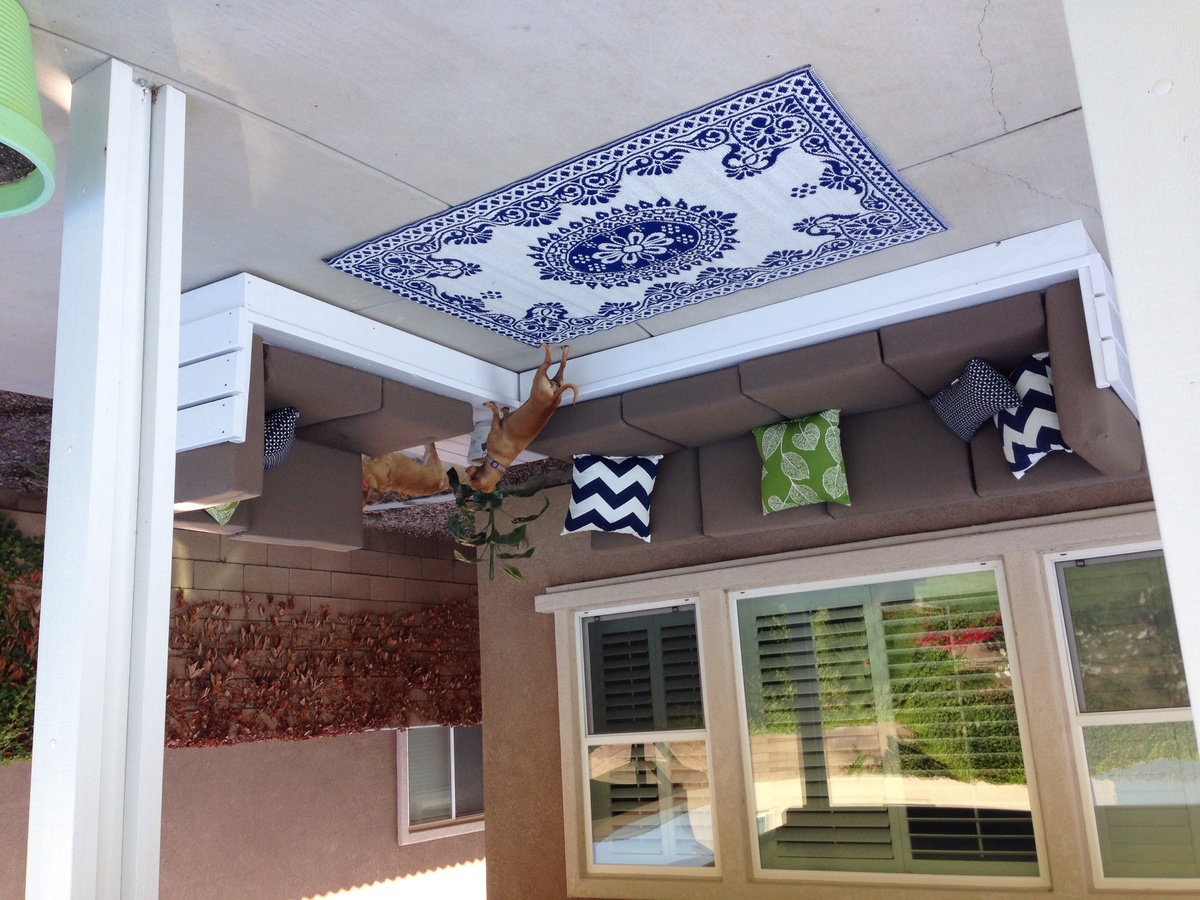
Outdoor sectional and coffee table
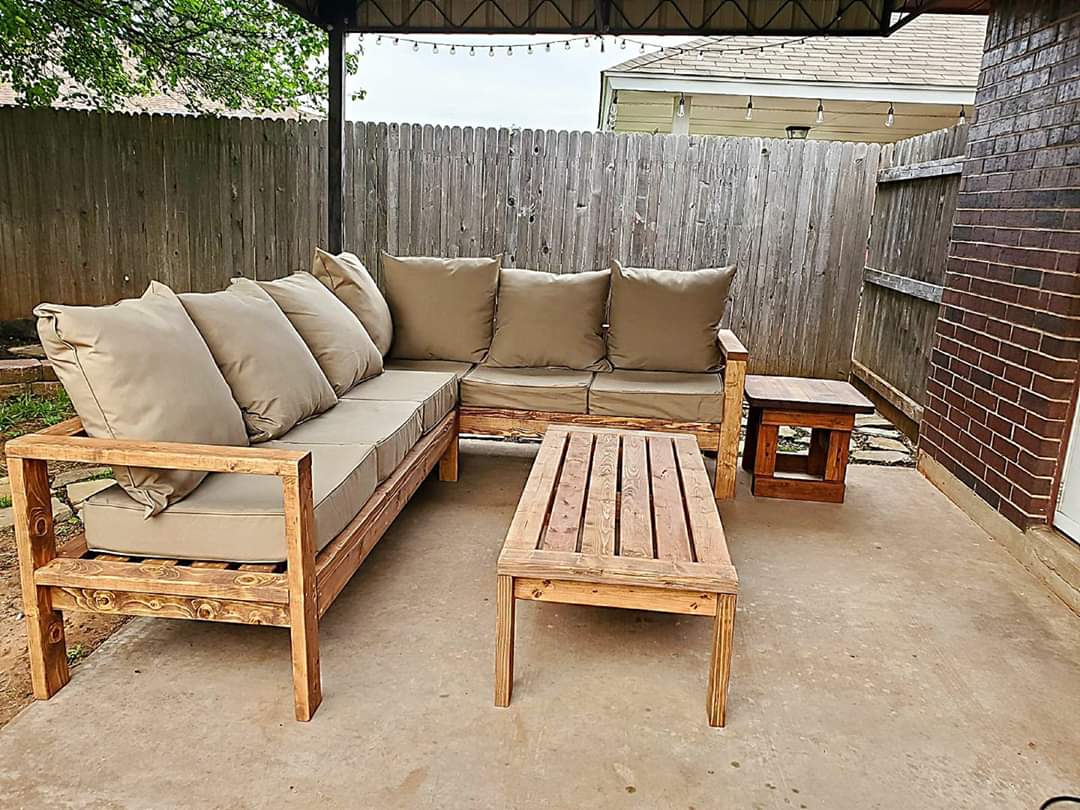
Loved these plans! Was my first project I tackled trying my hand with a new hobby of wood working to stave off quarantine craziness :-) finished project looked awesome and got me started working on other plans on the site.
**note**
Side table was just sanded and refinished, wasn't built just tried to match.
Built from Plan(s)
Estimated Cost
400
Estimated Time Investment
Weekend Project (10-20 Hours)
Recommended Skill Level
Beginner
Adirondaks
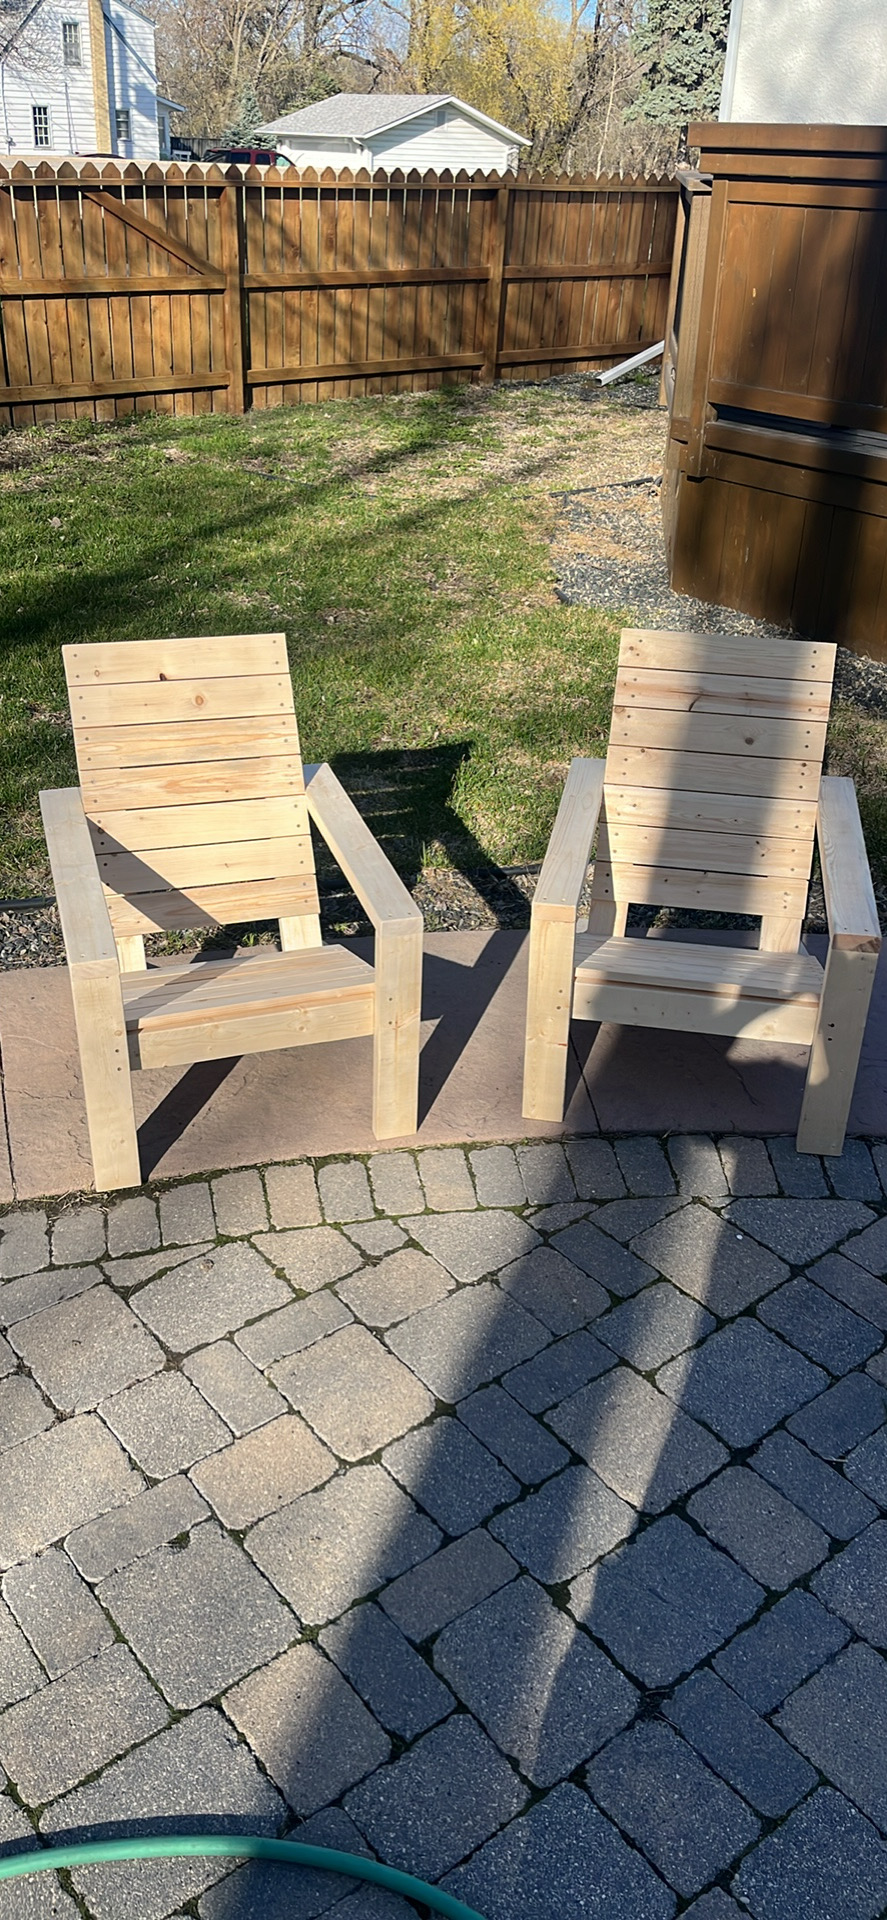
Switched 1x10 for 1x4

Built from Plan(s)


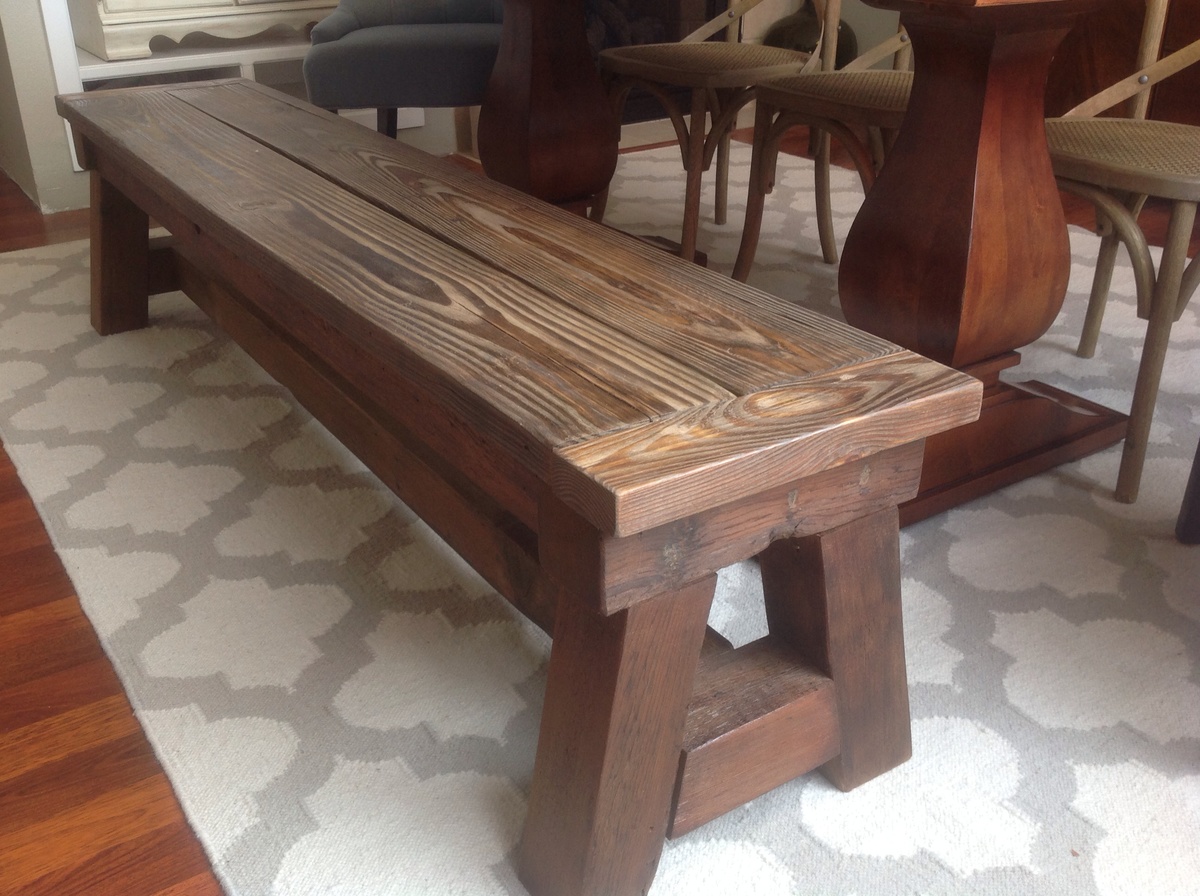
Dining Table 4x4 Truss Bench
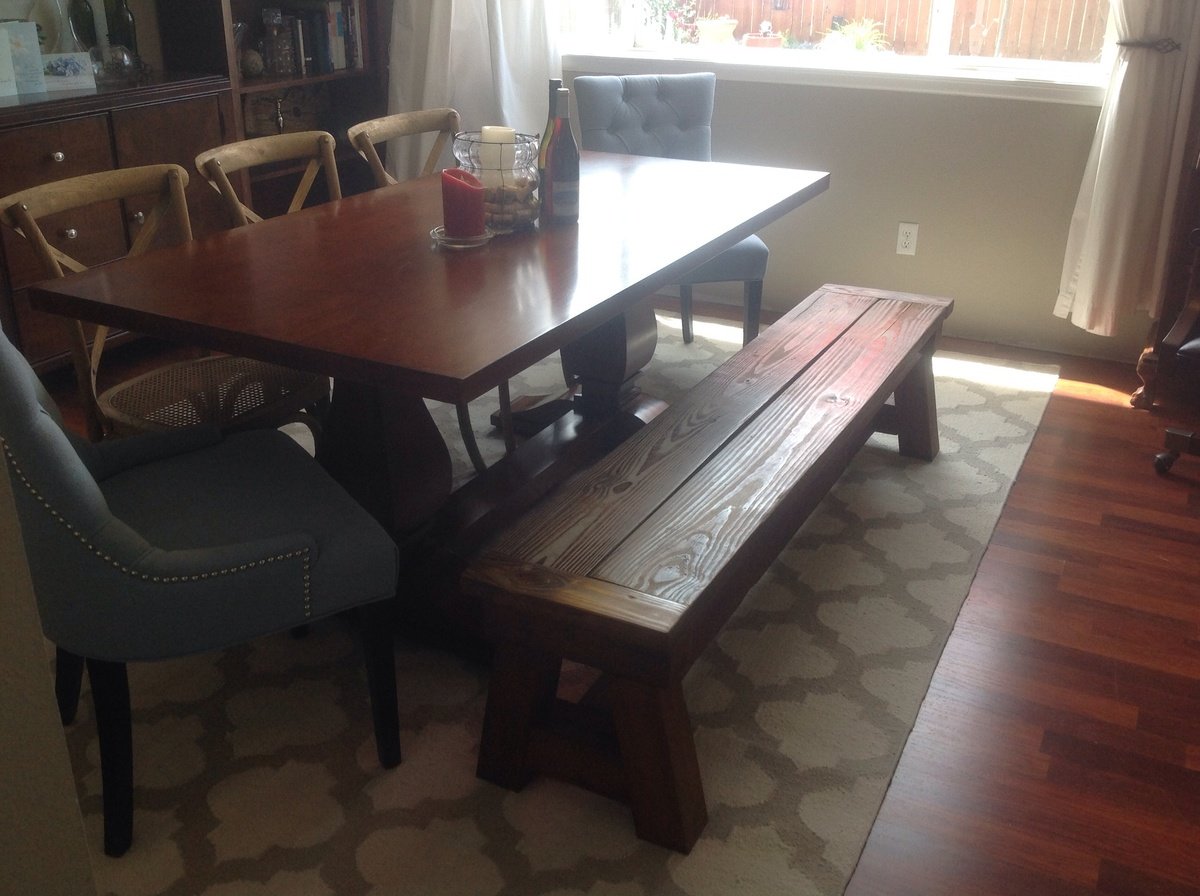
Using the 4x4 Truss Bench plan (http://ana-white.com/2013/10/plans/4x4-truss-benches), we built this bench using entirely reclaimed lumber. (We had removed an old patio and part of a fence.) We already had all of the lumber, screws, etc. so the only cost to us for this project was the cost of the stain.
We modified the plan slightly, using 2x4s on the ends.
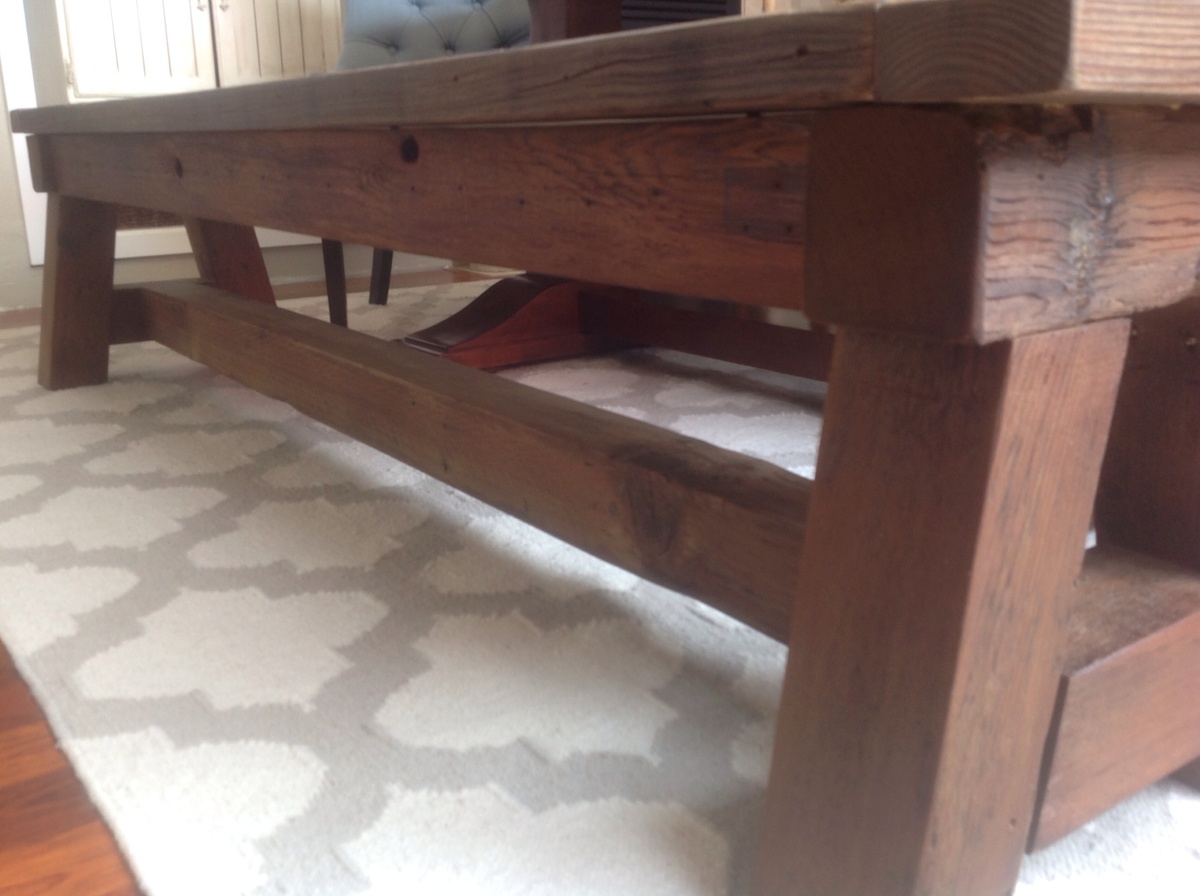
My husband is obsessed with decking screws. Thus the entire bench is held together with 2 1/2 inch decking screws. (Unfortunately, we purchased our Kreg Jig a day following the completion of this project.)
Because the lumber was very old and weathered, there is a lot of character to the wood. There were some incredibly soft spots which made sanding a challenge, and some of the boards were somewhat warped. However, we still really like the way it turned out.
I sanded (and sanded and sanded) using 60 grit, then 80... then 120... then 220. I filled the screw holes with wood filler (and sanded again). I then conditioned the wood with Minwax pre-stain wood conditioner. I used Minwax Early American oil based stain on the entire project. I then went over the top only with Minwax Weathered Oak. After about 36 hours of drying time, I used 2 coats of Minwax Fast-Drying clear semi-gloss polyurethane.
This bench is a beast! I'm sure it weighs over 75 pounds. It is extremely solid, and quite beautiful in our dining room. The plans were easy to follow, and the whole thing went together fairly quickly. (It would have been completed even more quickly had we had our Kreg Jig at the time. Lesson learned.)

Built from Plan(s)
Estimated Cost
$10
Estimated Time Investment
Day Project (6-9 Hours)
Finish Used
I sanded (and sanded and sanded) using 60 grit, then 80... then 120... then 220. I filled the screw holes with wood filler (and sanded again). I then conditioned the wood with Minwax pre-stain wood conditioner. I used Minwax Early American oil based stain on the entire project. I then went over the top only with Minwax Weathered Oak. After about 36 hours of drying time, I used 2 coats of Minwax Fast-Drying clear semi-gloss polyurethane.
Recommended Skill Level
Beginner
Outdoor Rustic X Console Table With Mosaic
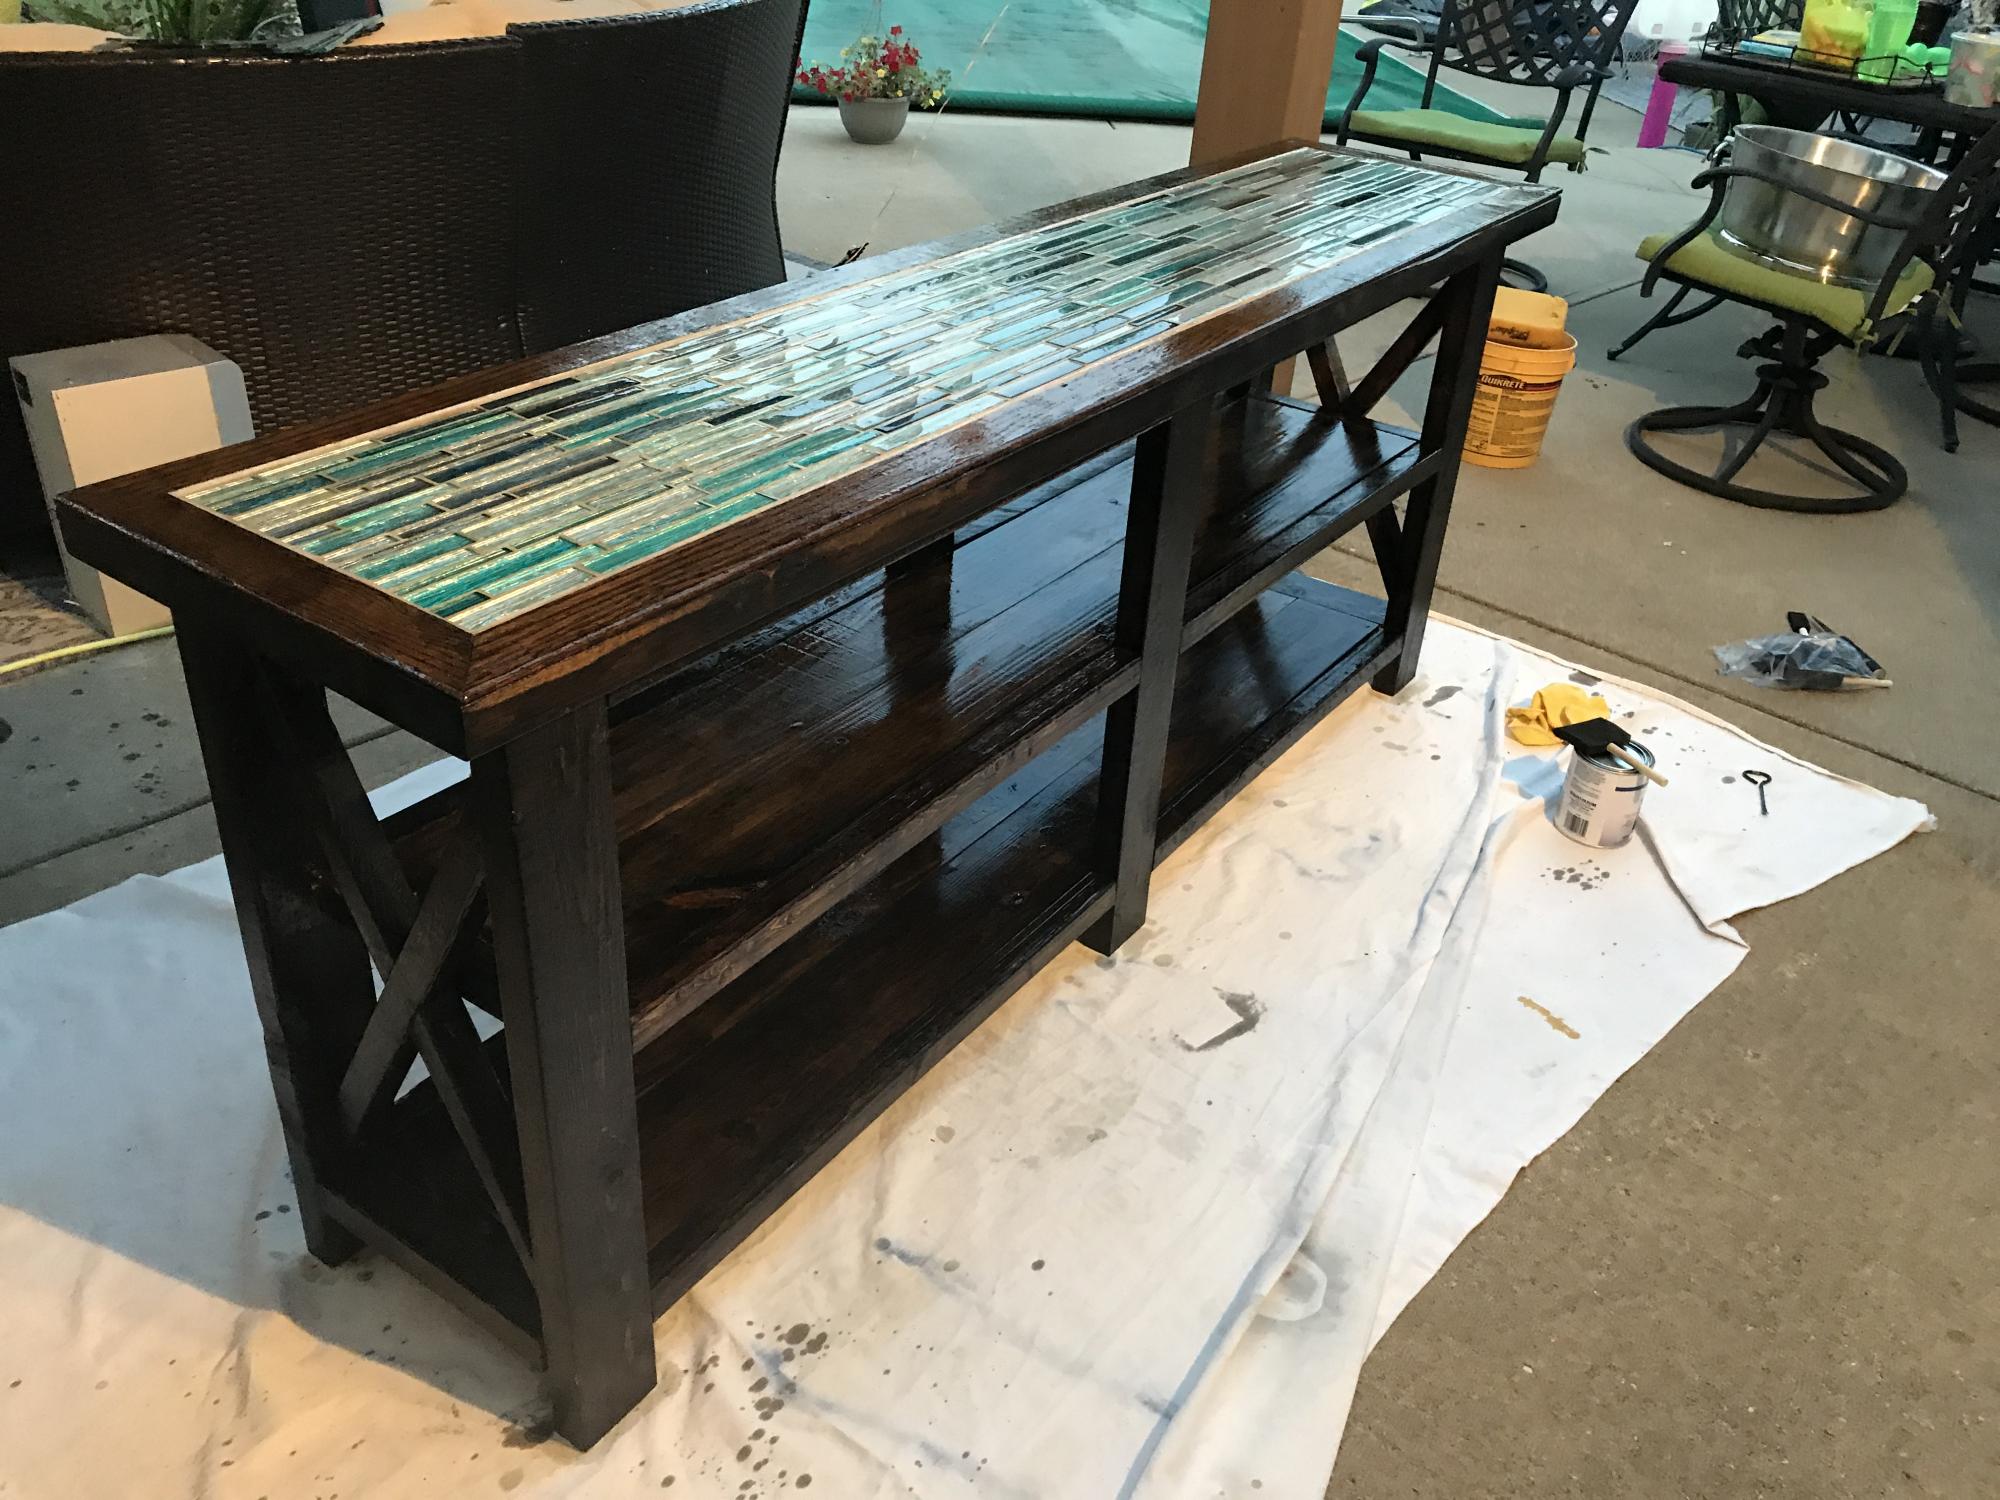
I took the rustic x console table but wanted it to be a nice piece for our outdoor seating area. I used some ebony stain, purchased mosaic tile from lowes, and finished with Spar Varnish. Around the tile, I used some old hardwood flooring strips as trim. Sanded and stained the trim to match. I'm very happy with how it turned out. And the varnish is UV resistant so it'll stand up to the rain and won't fade in the sun.
Built from Plan(s)
Estimated Cost
$150
Estimated Time Investment
Weekend Project (10-20 Hours)
Finish Used
Rust-oleum high gloss spar varnish. Ebony interior (gasp!) stain. Three coats of varnish. The UV protection should prevent the stain from fading.
Recommended Skill Level
Intermediate

Rustic Bench

I was looking for a nice project with compound angles and found this plan of Ana's, it was easy to build as well as fun and rewarding. I picked the colour as we had just returned from a trip to florida and then up the East coast and found this to be reminiscent of the beach.

Estimated Cost
10.00
Estimated Time Investment
Afternoon Project (3-6 Hours)
Finish Used
primed white then painted a teal green and sanded for a worn patina
Recommended Skill Level
Beginner
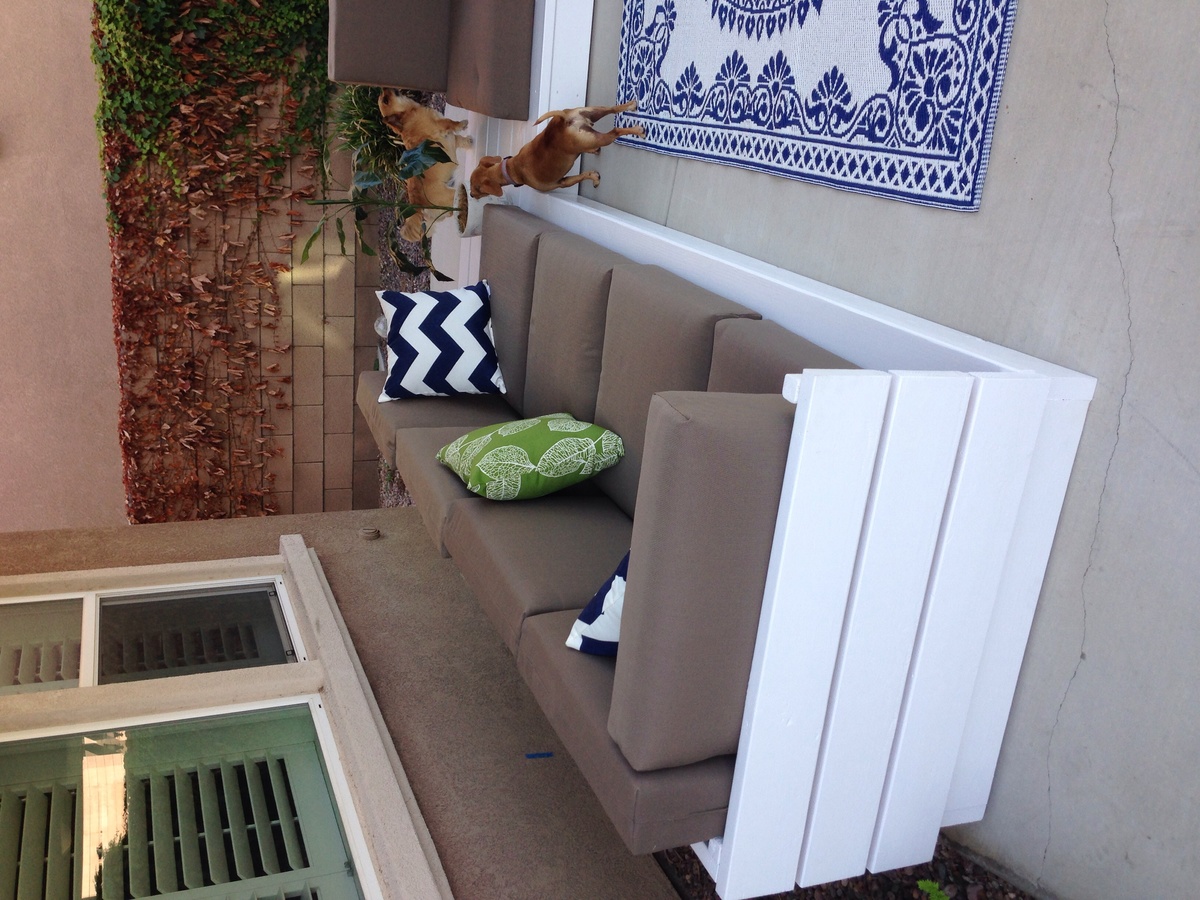
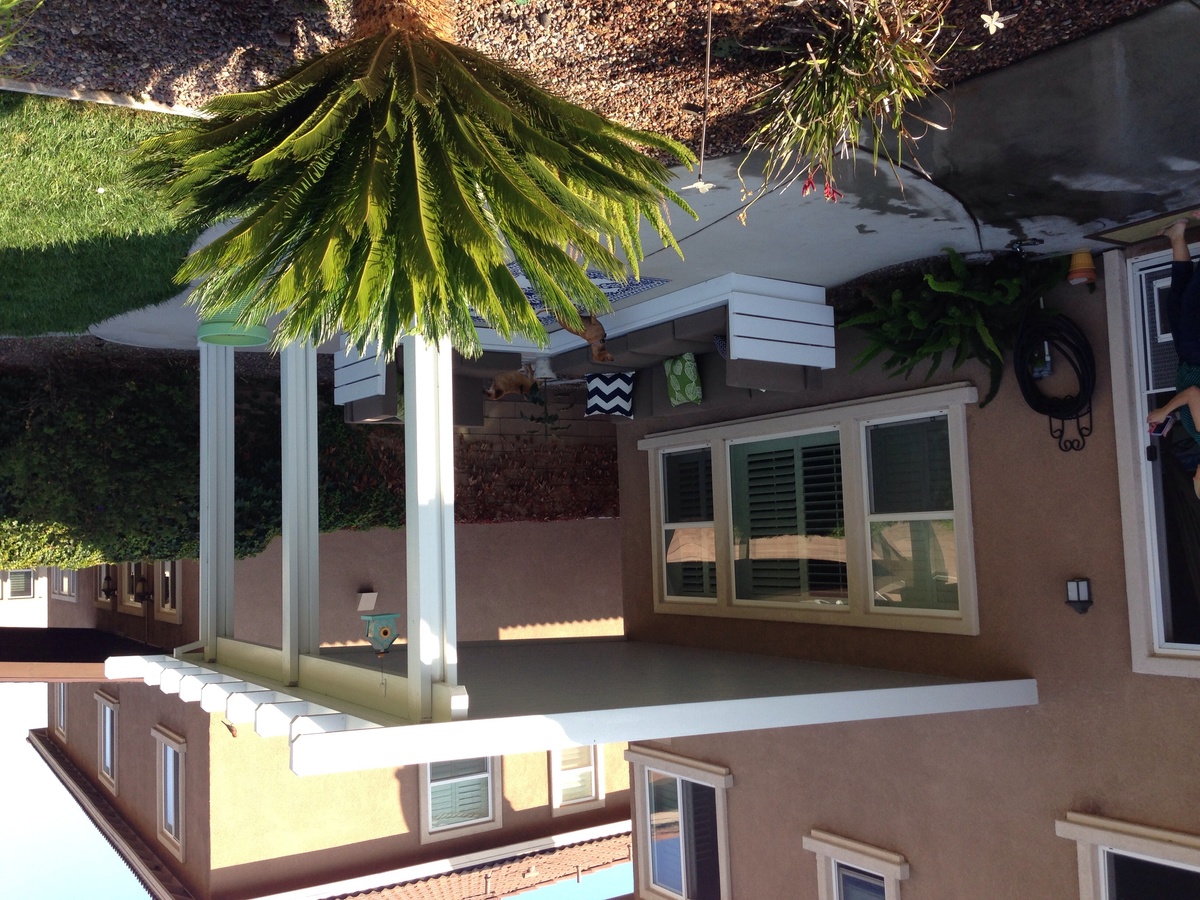
Outdoor sectional
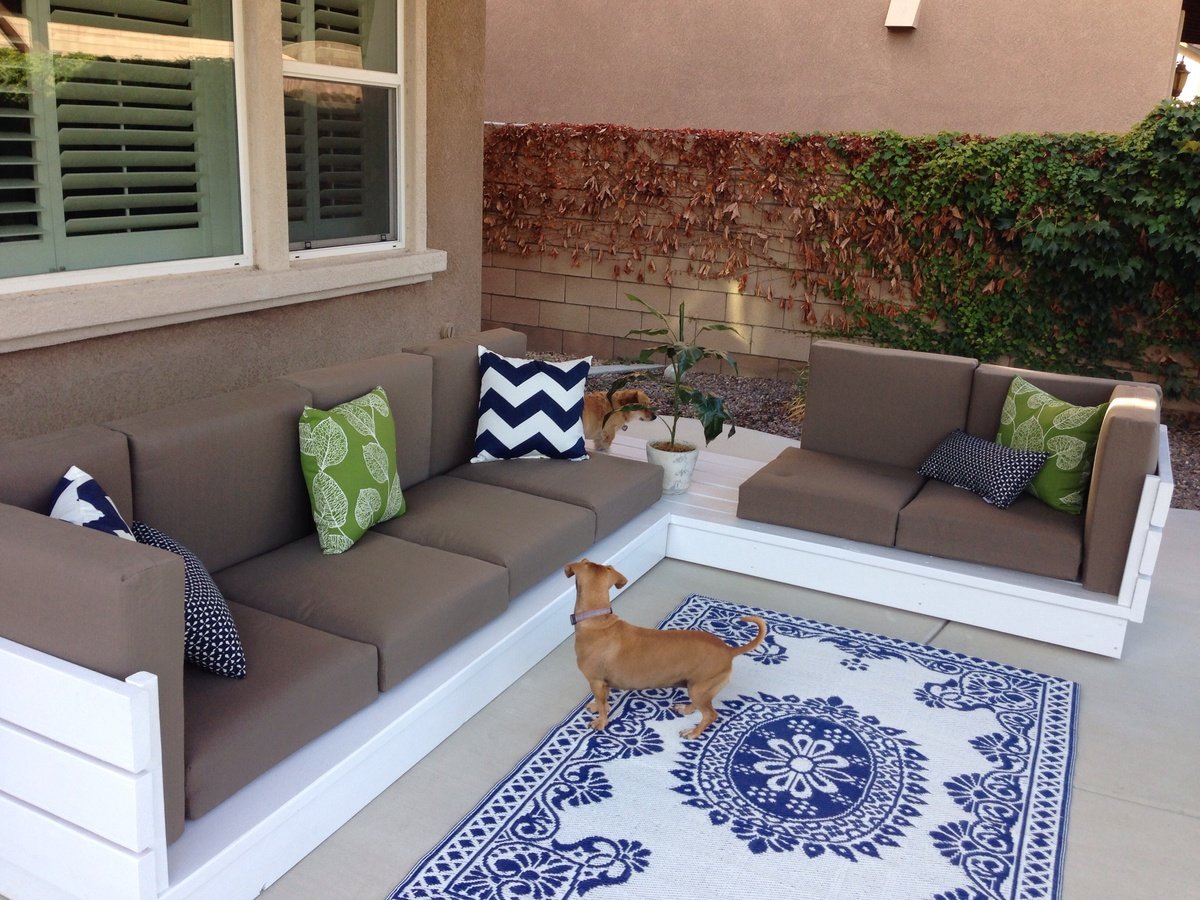
Wanted something for the outdoors. The minute I saw Ana's post I new this would be my starter project. Next on the list is work bench. Then coffee table for sectional, then some chaise loungers!
Built from Plan(s)
Estimated Cost
100 for wood, 300 for cushions.
Estimated Time Investment
Weekend Project (10-20 Hours)
Finish Used
White Valspar exterior paint/primer. Great coverage
Recommended Skill Level
Starter Project
Comments
Cedar Pub chairs
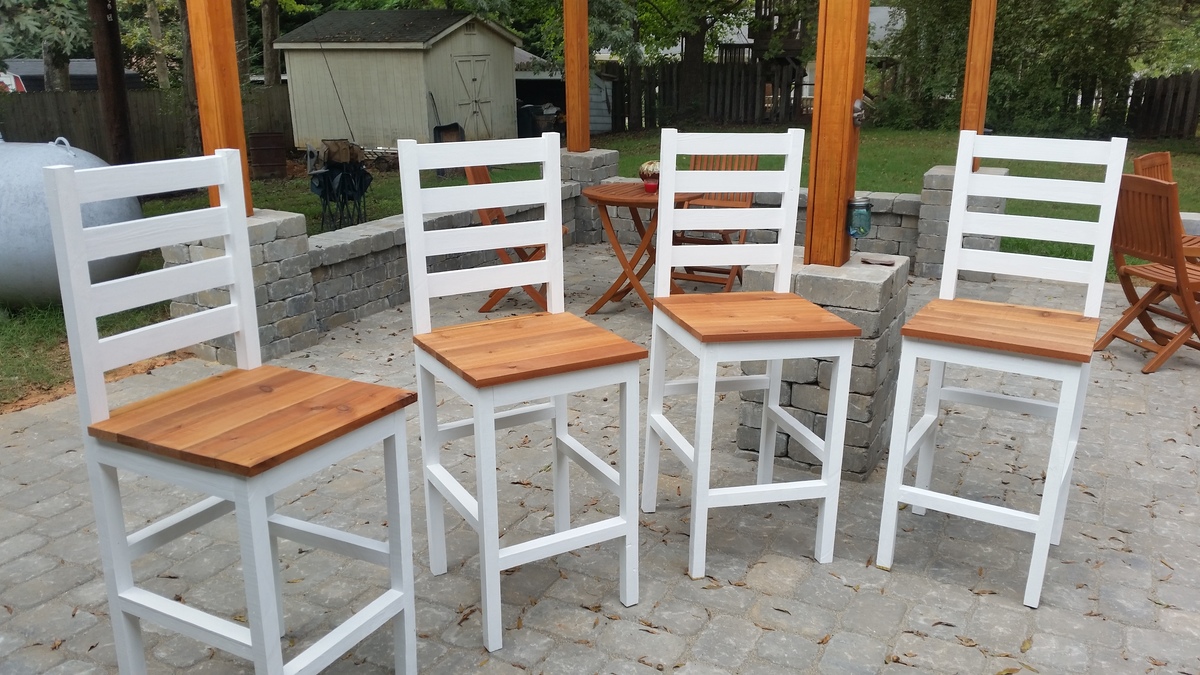
These turned out AMAZING, for more minor details see my blog Link. But in a nutshell i needed some chairs for a pub table i built and these plans worked like a charm!
I did use PT lumber for the frames, as these are meant for my patio, so i had to use stainless steel hardware which is a bit pricy, but well worth it unless you want to fall on your butt in 2 years when the normal screws corrode away. Modern PT wood is no joke on hardware!
Built from Plan(s)
Estimated Cost
$150 for 4
Estimated Time Investment
Weekend Project (10-20 Hours)
Finish Used
Exterior semi gloss
Natural tone stain
Natural tone stain
Recommended Skill Level
Beginner
Comments

Thu, 10/06/2016 - 08:57
Awesome pub chairs! Love the
Awesome pub chairs! Love the stained seats and good advice on hardware.
Rainbow Sand & Water Table
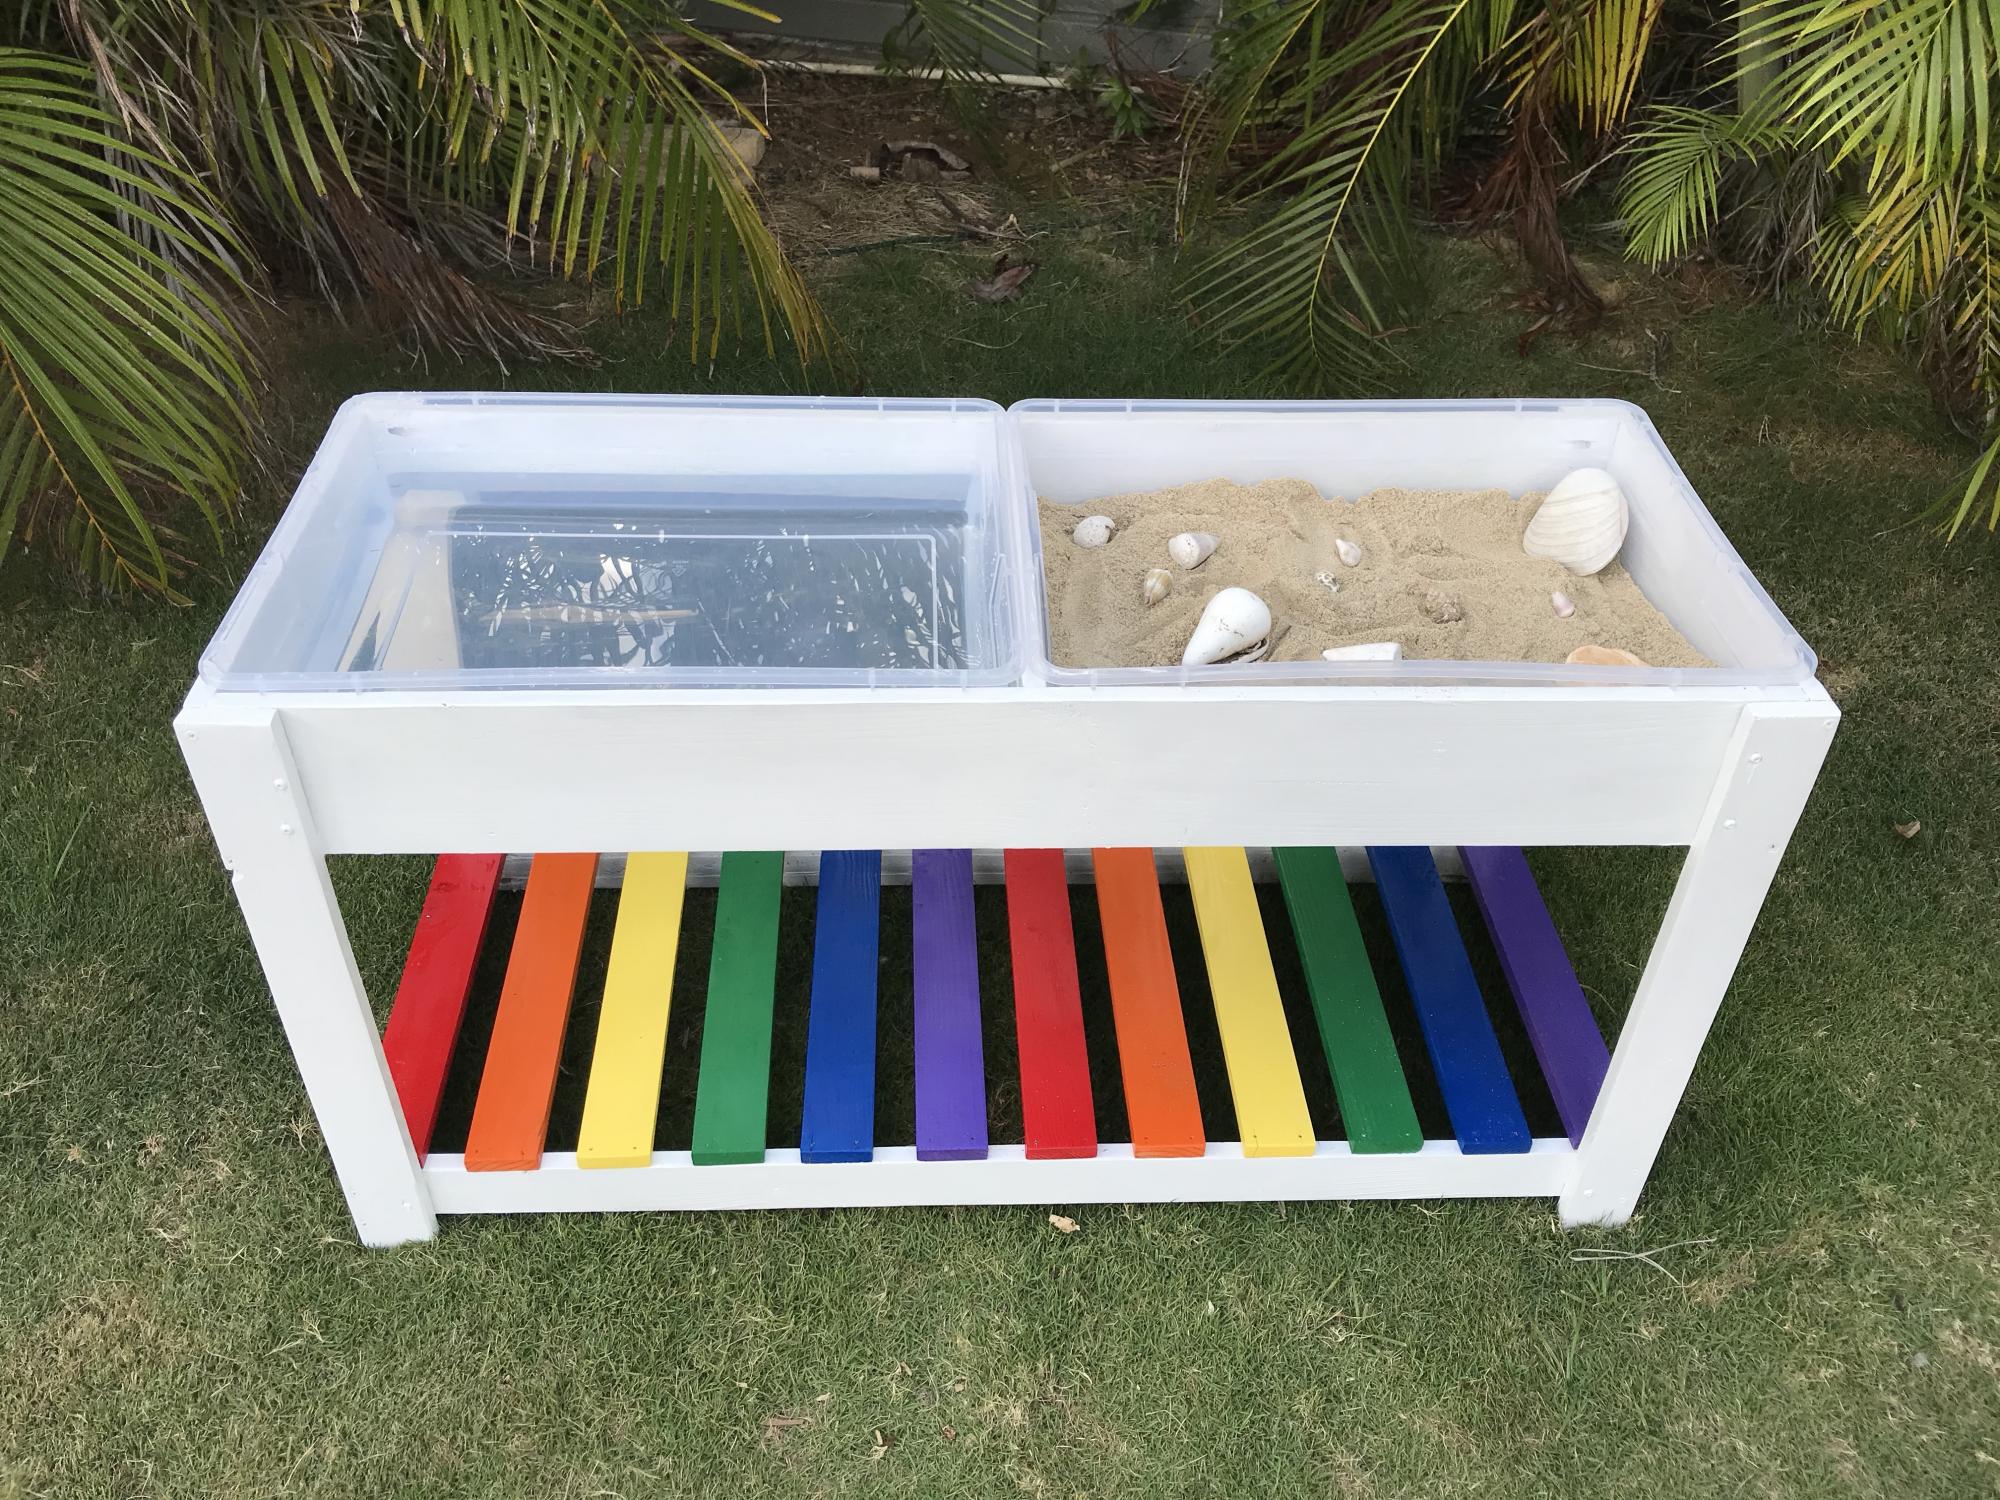
I'm new to woodworking, and this was so much fun to make! Pocket holes make it sturdy, and I spent plenty of time on sanding so no slivers for little ones. The plastic containers just barely fit so be sure to not undercut anything in the plan.
Built from Plan(s)
Estimated Cost
$20 in wood, $15 in containers, $4 each color of spray paint, white paint/screws/wood glue I had on hand
Estimated Time Investment
Afternoon Project (3-6 Hours)
Finish Used
White primer paint and spray paint for the shelf boards
Recommended Skill Level
Beginner
Comments
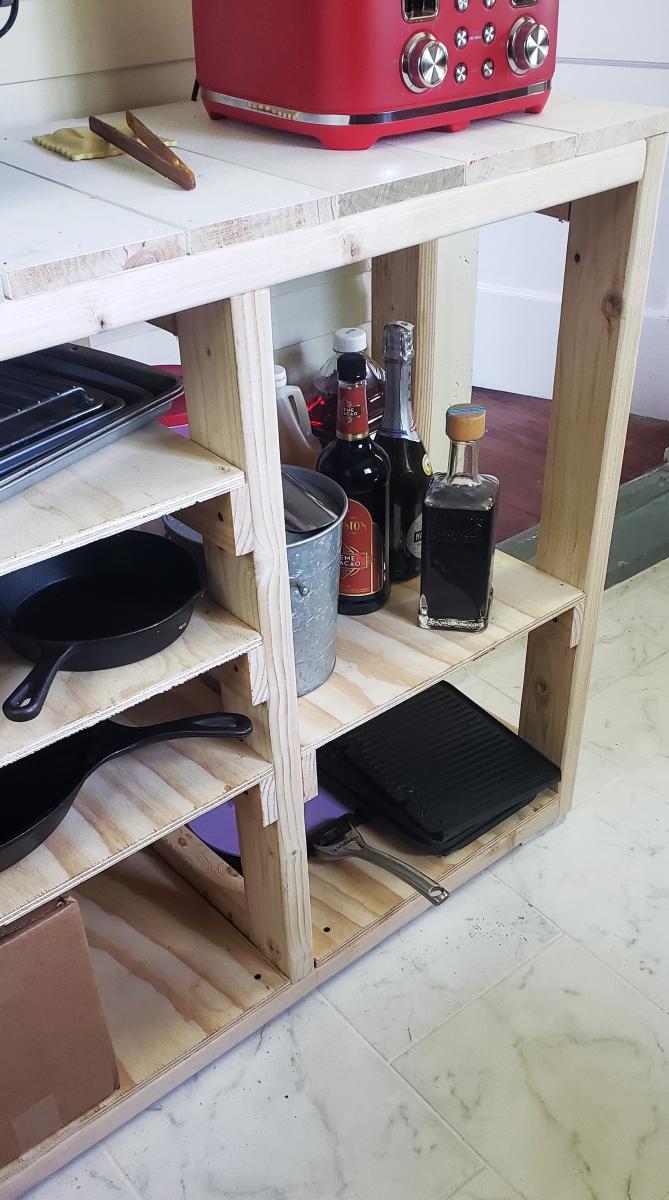
Kitchen Appliance Shelf
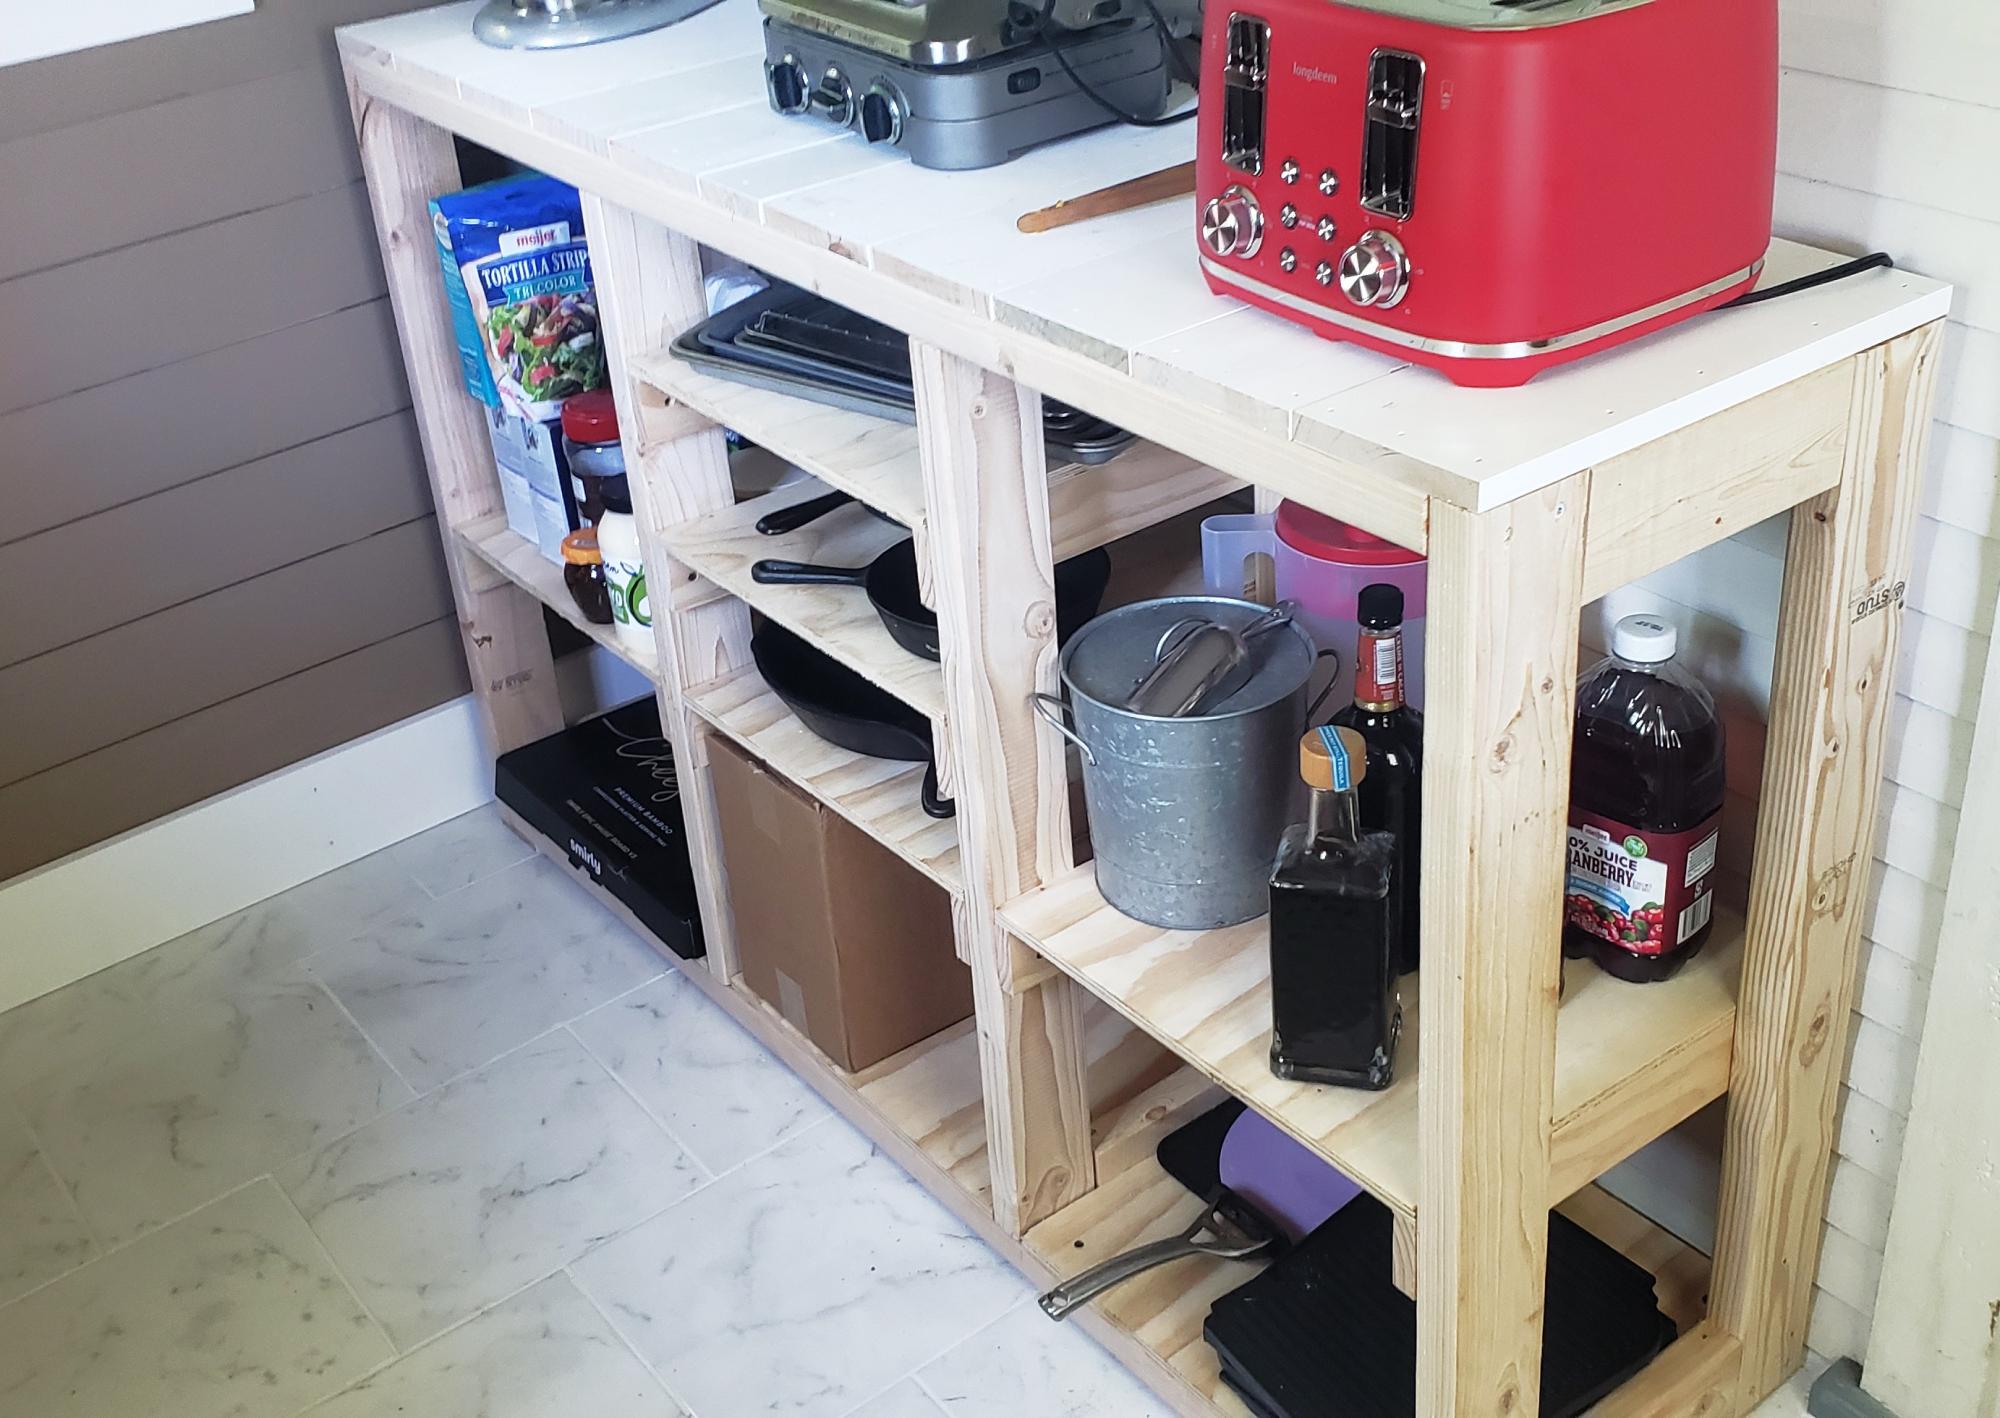
I made this pantry workstation by modifying the six laundry basket plans. Added 2x4 stretchers between the front and back frames, top and bottom. Made cleats from 1x3 for a less bulky look. And added 1/2 inch AC plywood shelves. Sand and stain later.
gypsy

Built from Plan(s)
Flip Top Console Table

First project with my new (to me) wood shop. Really liked this plan and enjoyed putting it together! It came out great!
My cost was really low on this because I was able to use a lot of wood that I already had. The main cost was paint/stain and poly.


Built from Plan(s)
Estimated Cost
$45
Estimated Time Investment
Week Long Project (20 Hours or More)
Finish Used
Coffee Stained Antique White and Cherry for the Top.
Recommended Skill Level
Beginner
Comments

Sat, 09/08/2012 - 14:29
Great work!
I love the spindle legs you chose, and the finish. It really gives the table a vintage look!
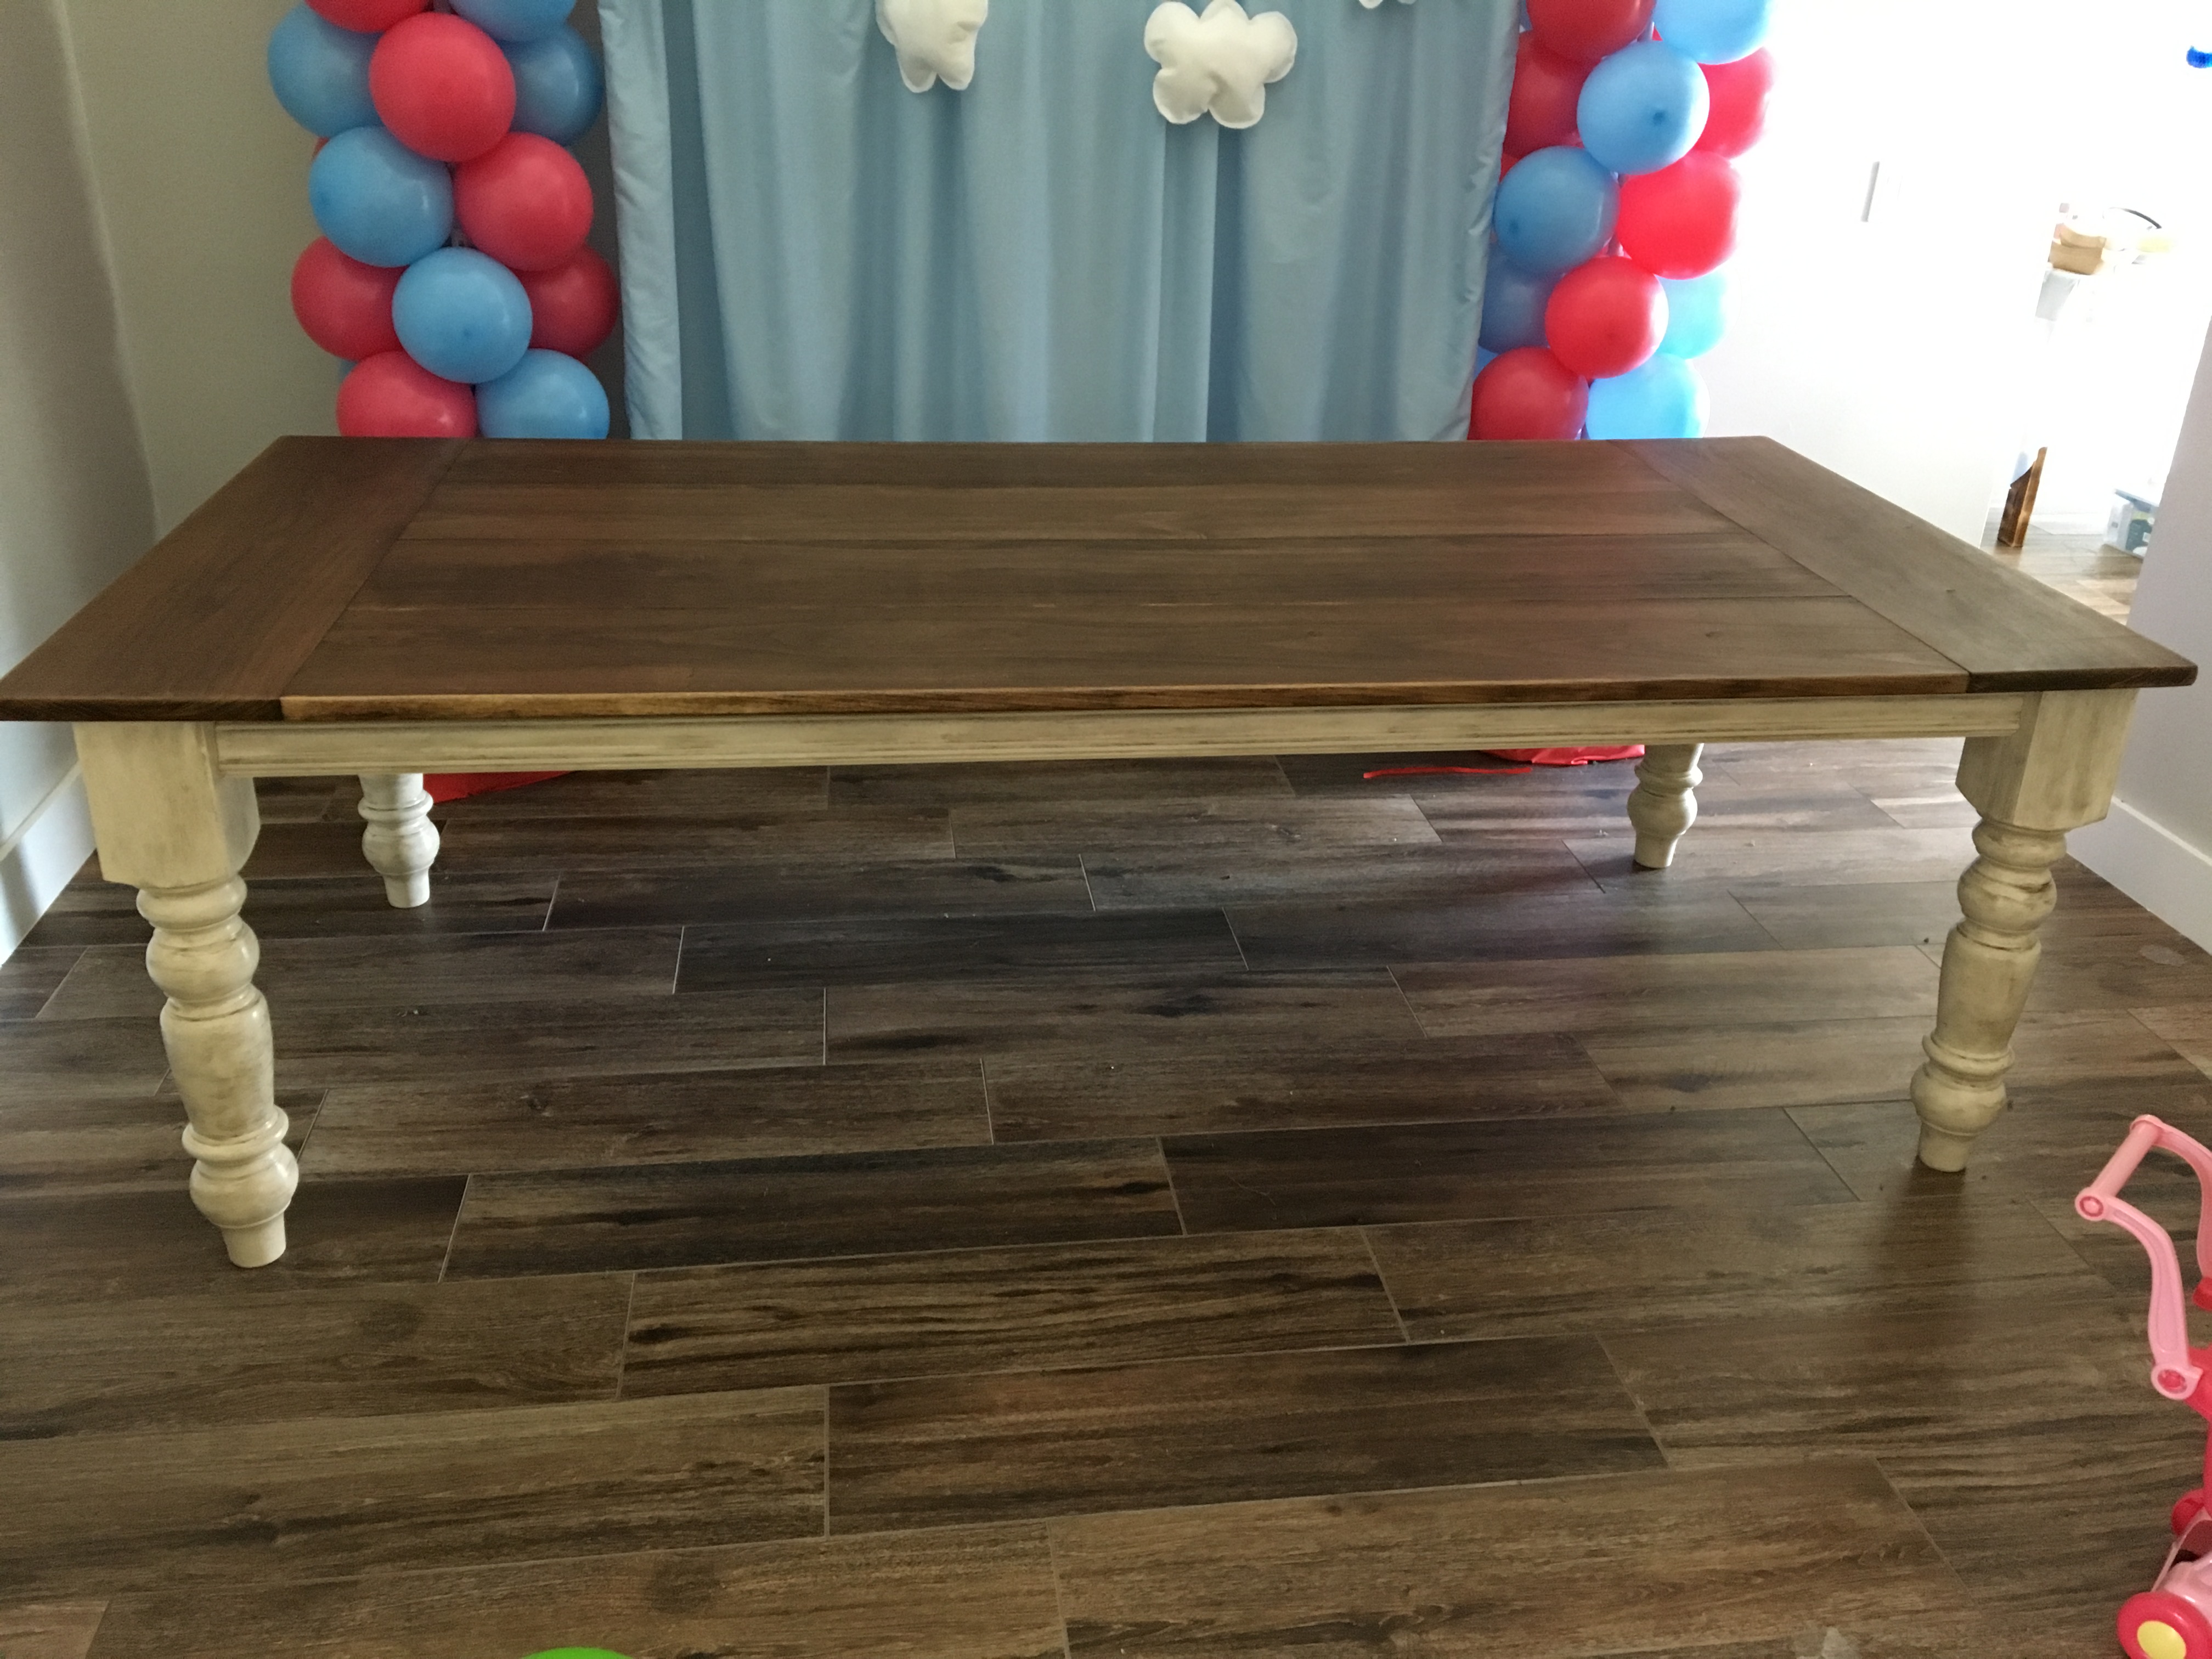
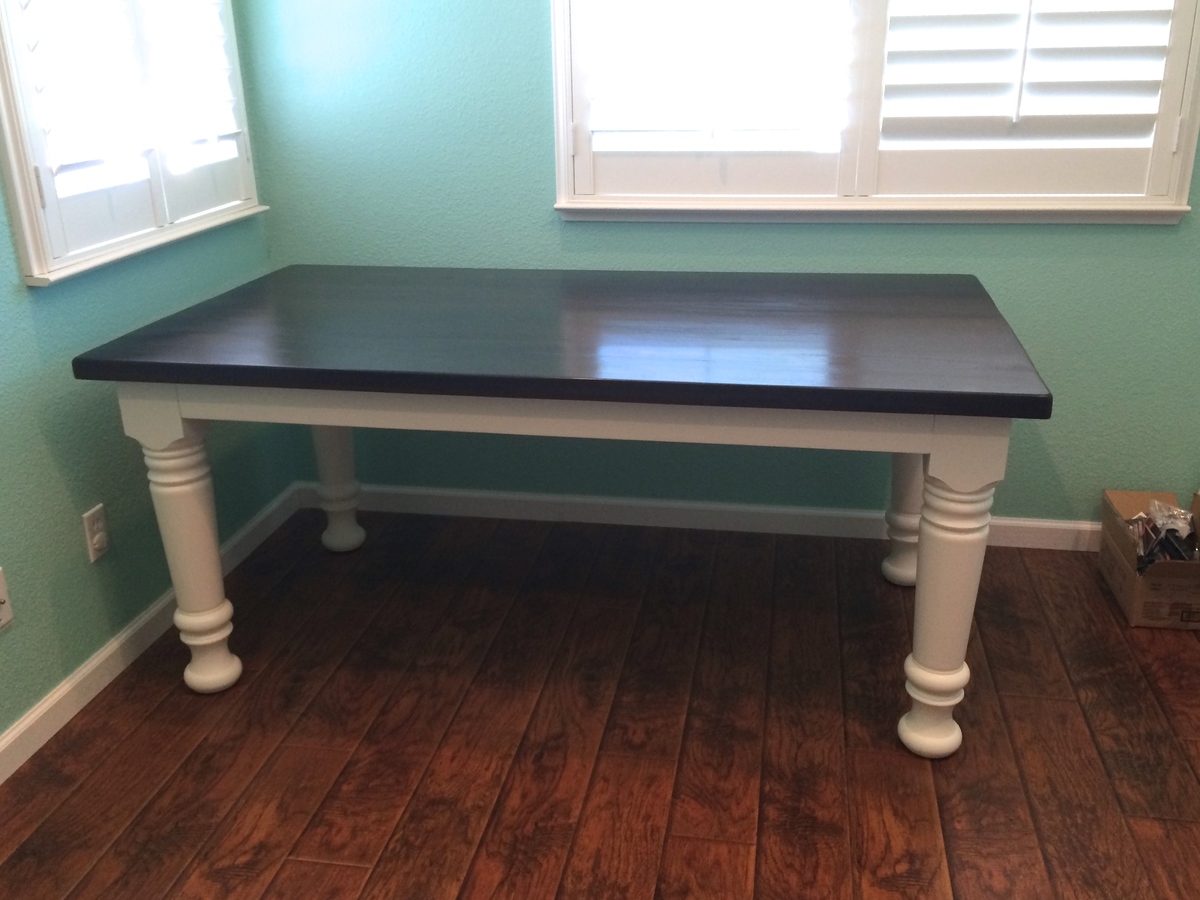
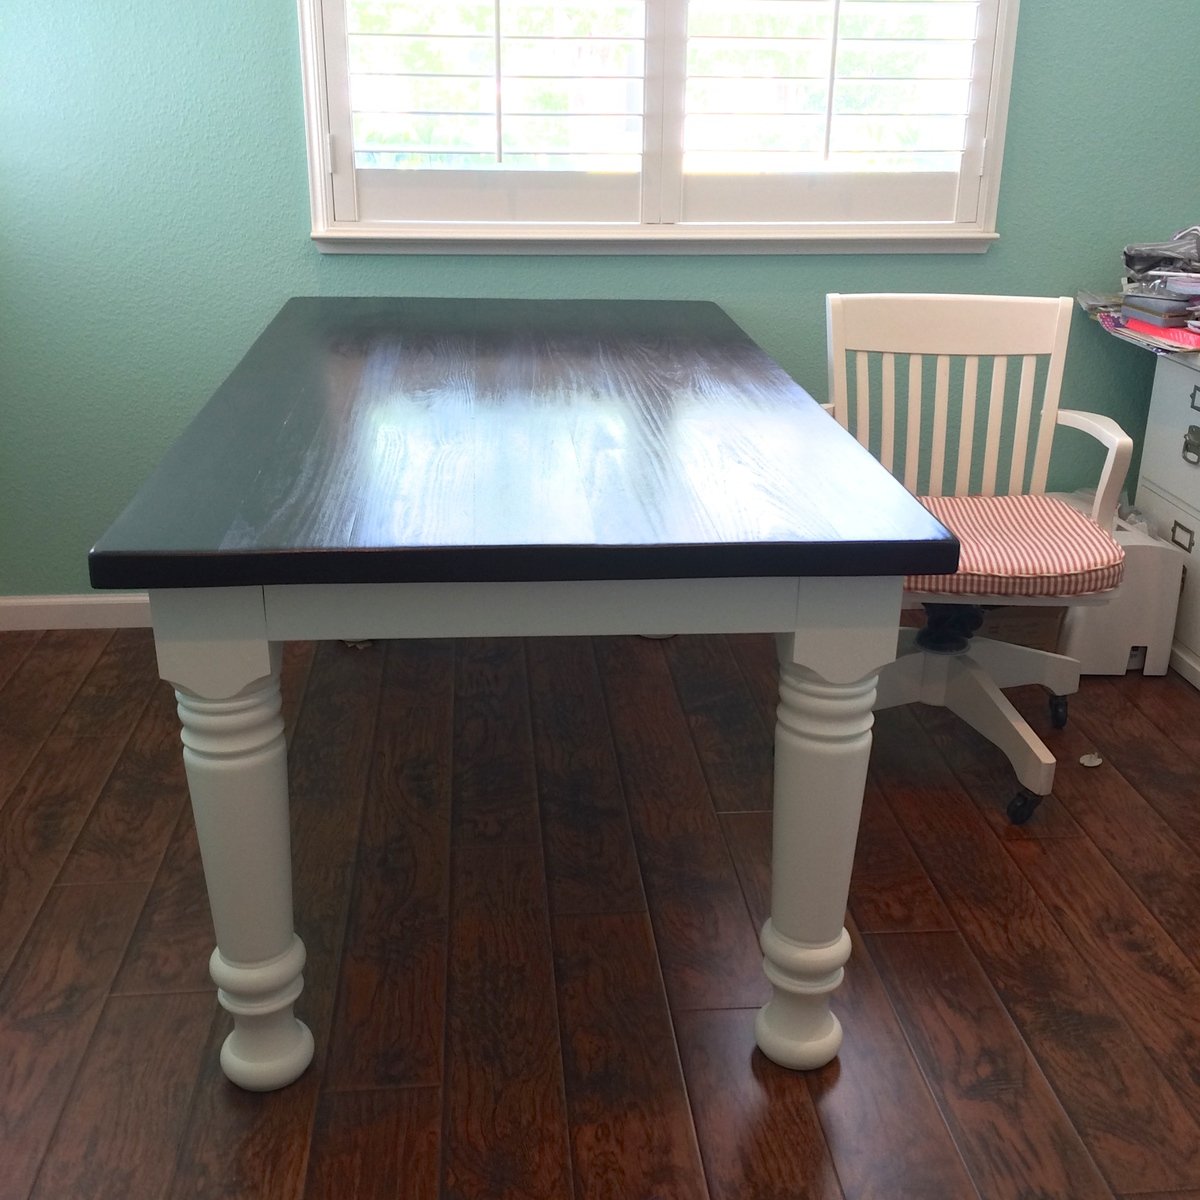
DIY Massive Farmhouse Table
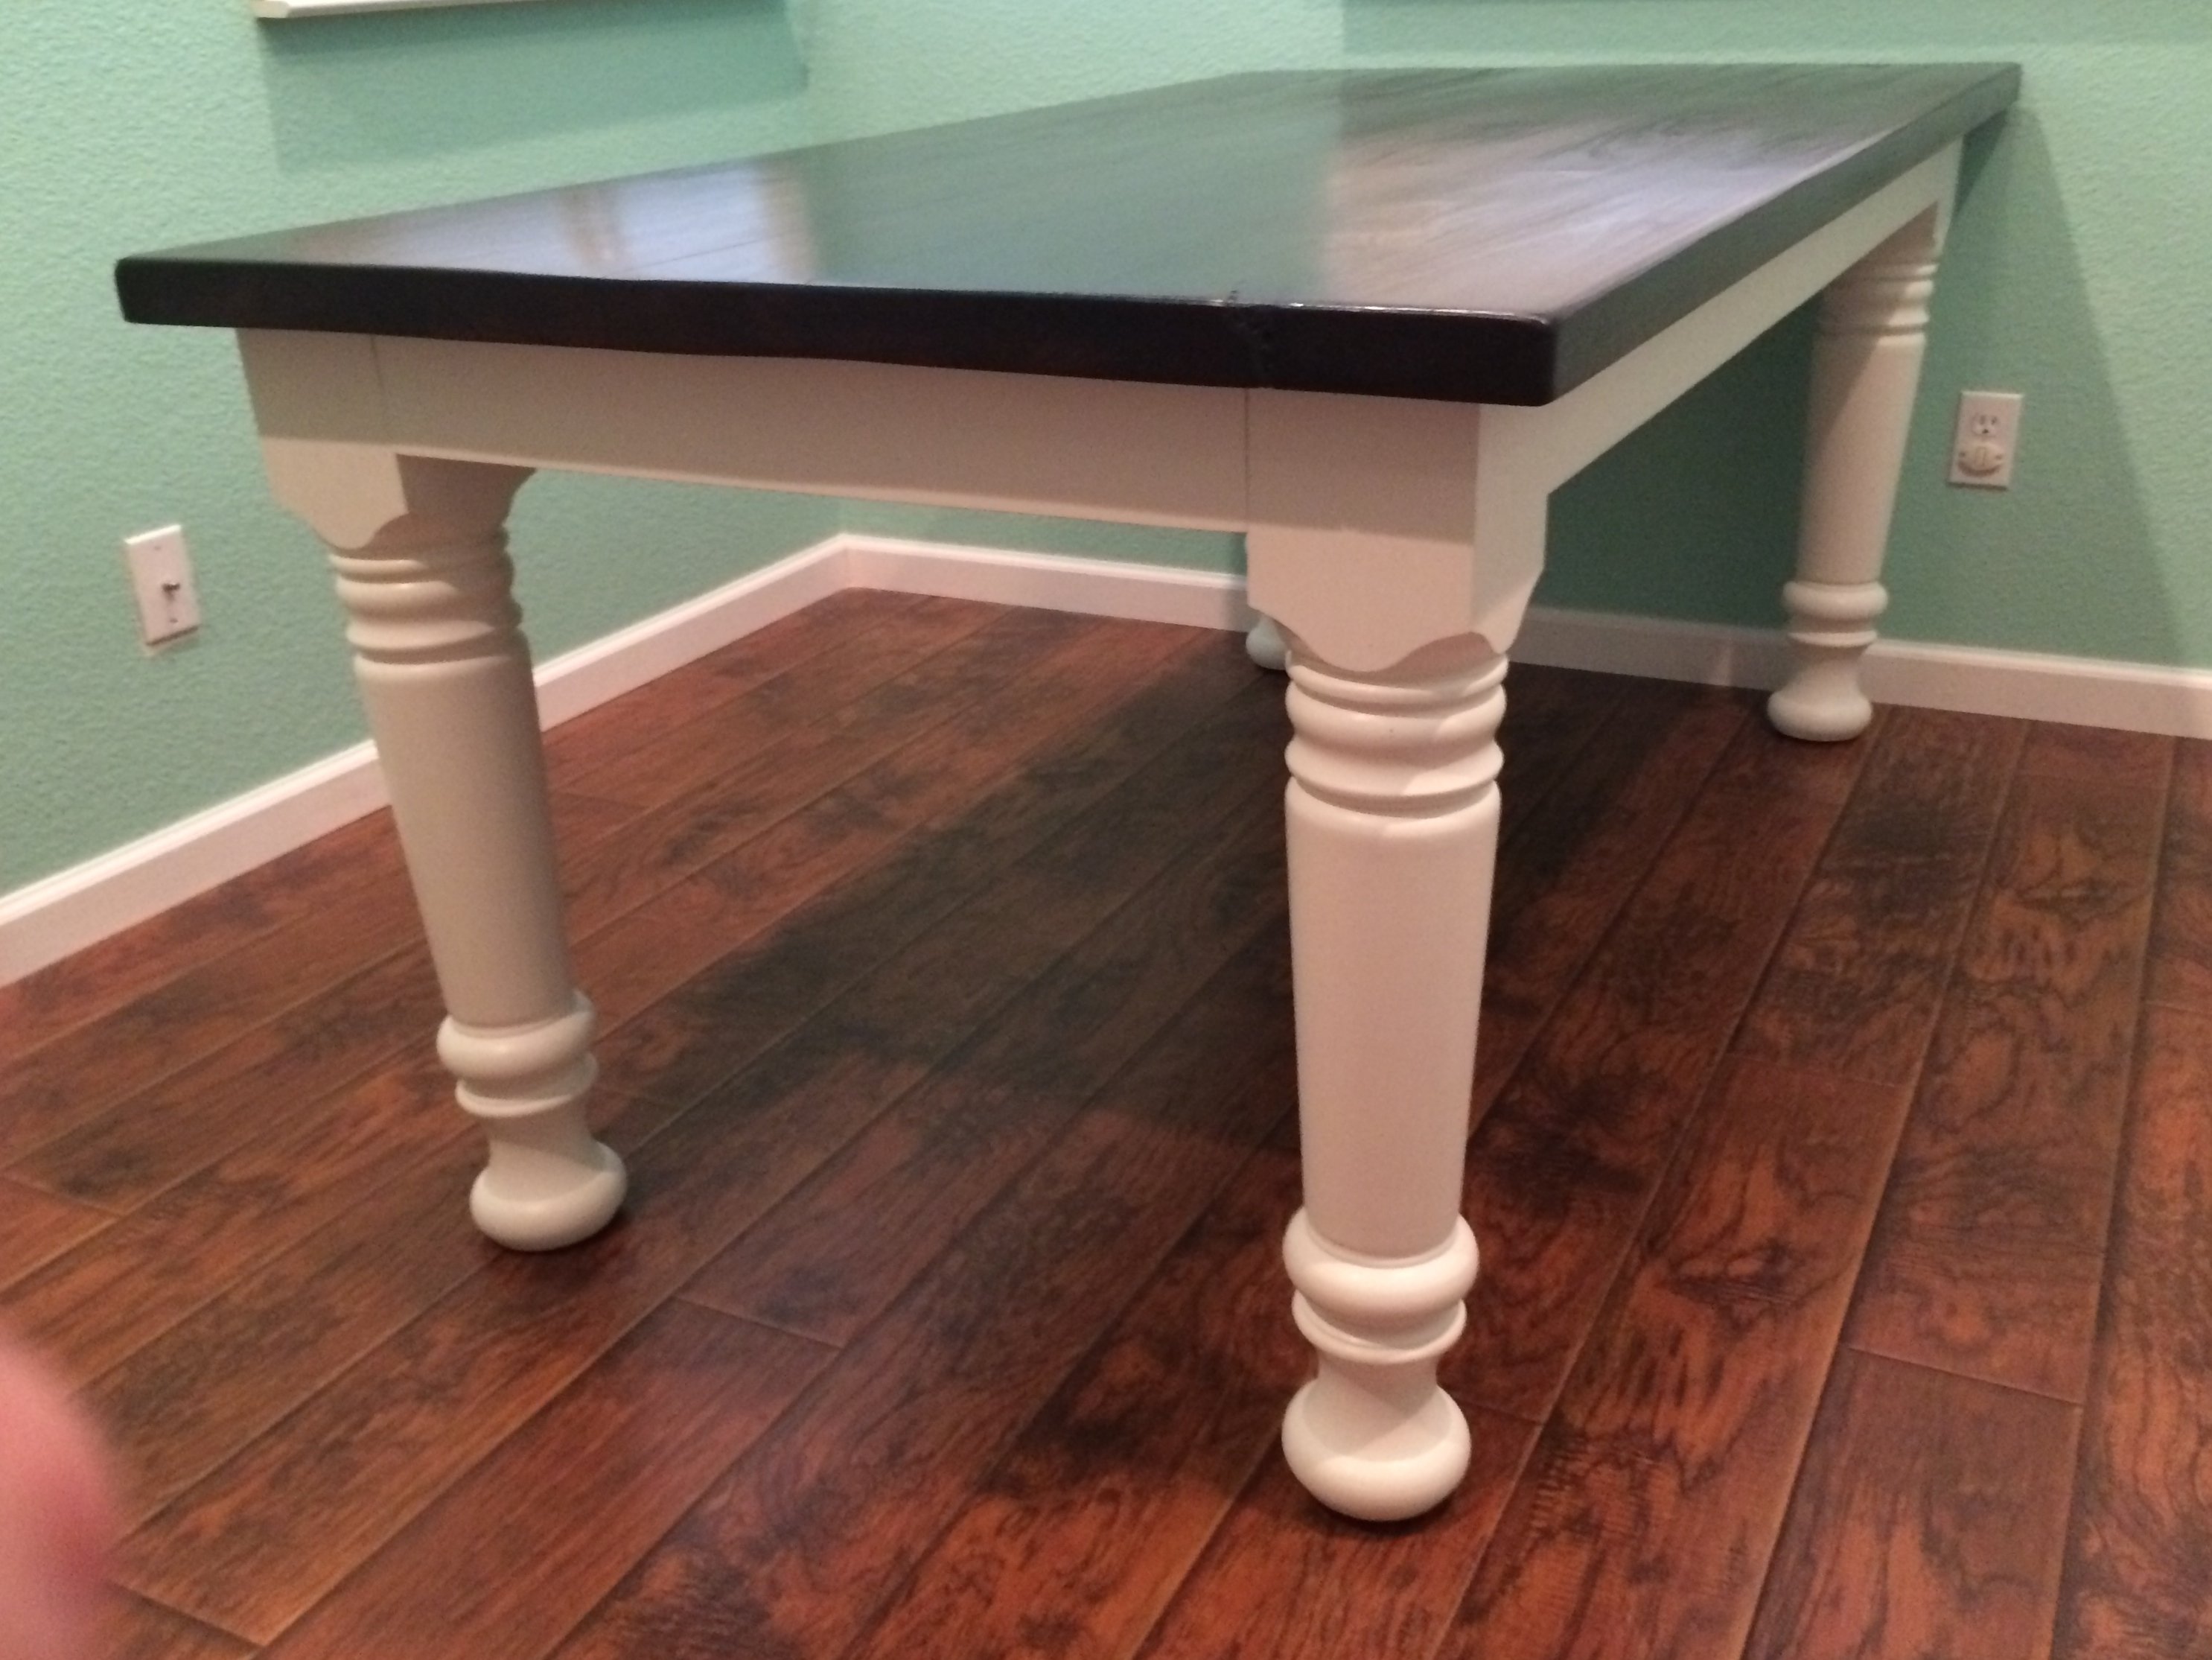
My wife wanted a rock-solid table for her sewing and craft projects, and this Ana White design fit the bill perfectly. We substituted Obsorne's Massive Farm Dining Table Legs to give it a more imposing look and feel.
I ended up spending a fair amount of time on the finish, but I couldn't be happier with the final product.
Built from Plan(s)
Estimated Cost
$400
Estimated Time Investment
Week Long Project (20 Hours or More)
Finish Used
General Finishes Java Gel stain and satin clear polyacrylic for tabletop, acrylic eggshell for the legs and apron.
Recommended Skill Level
Beginner
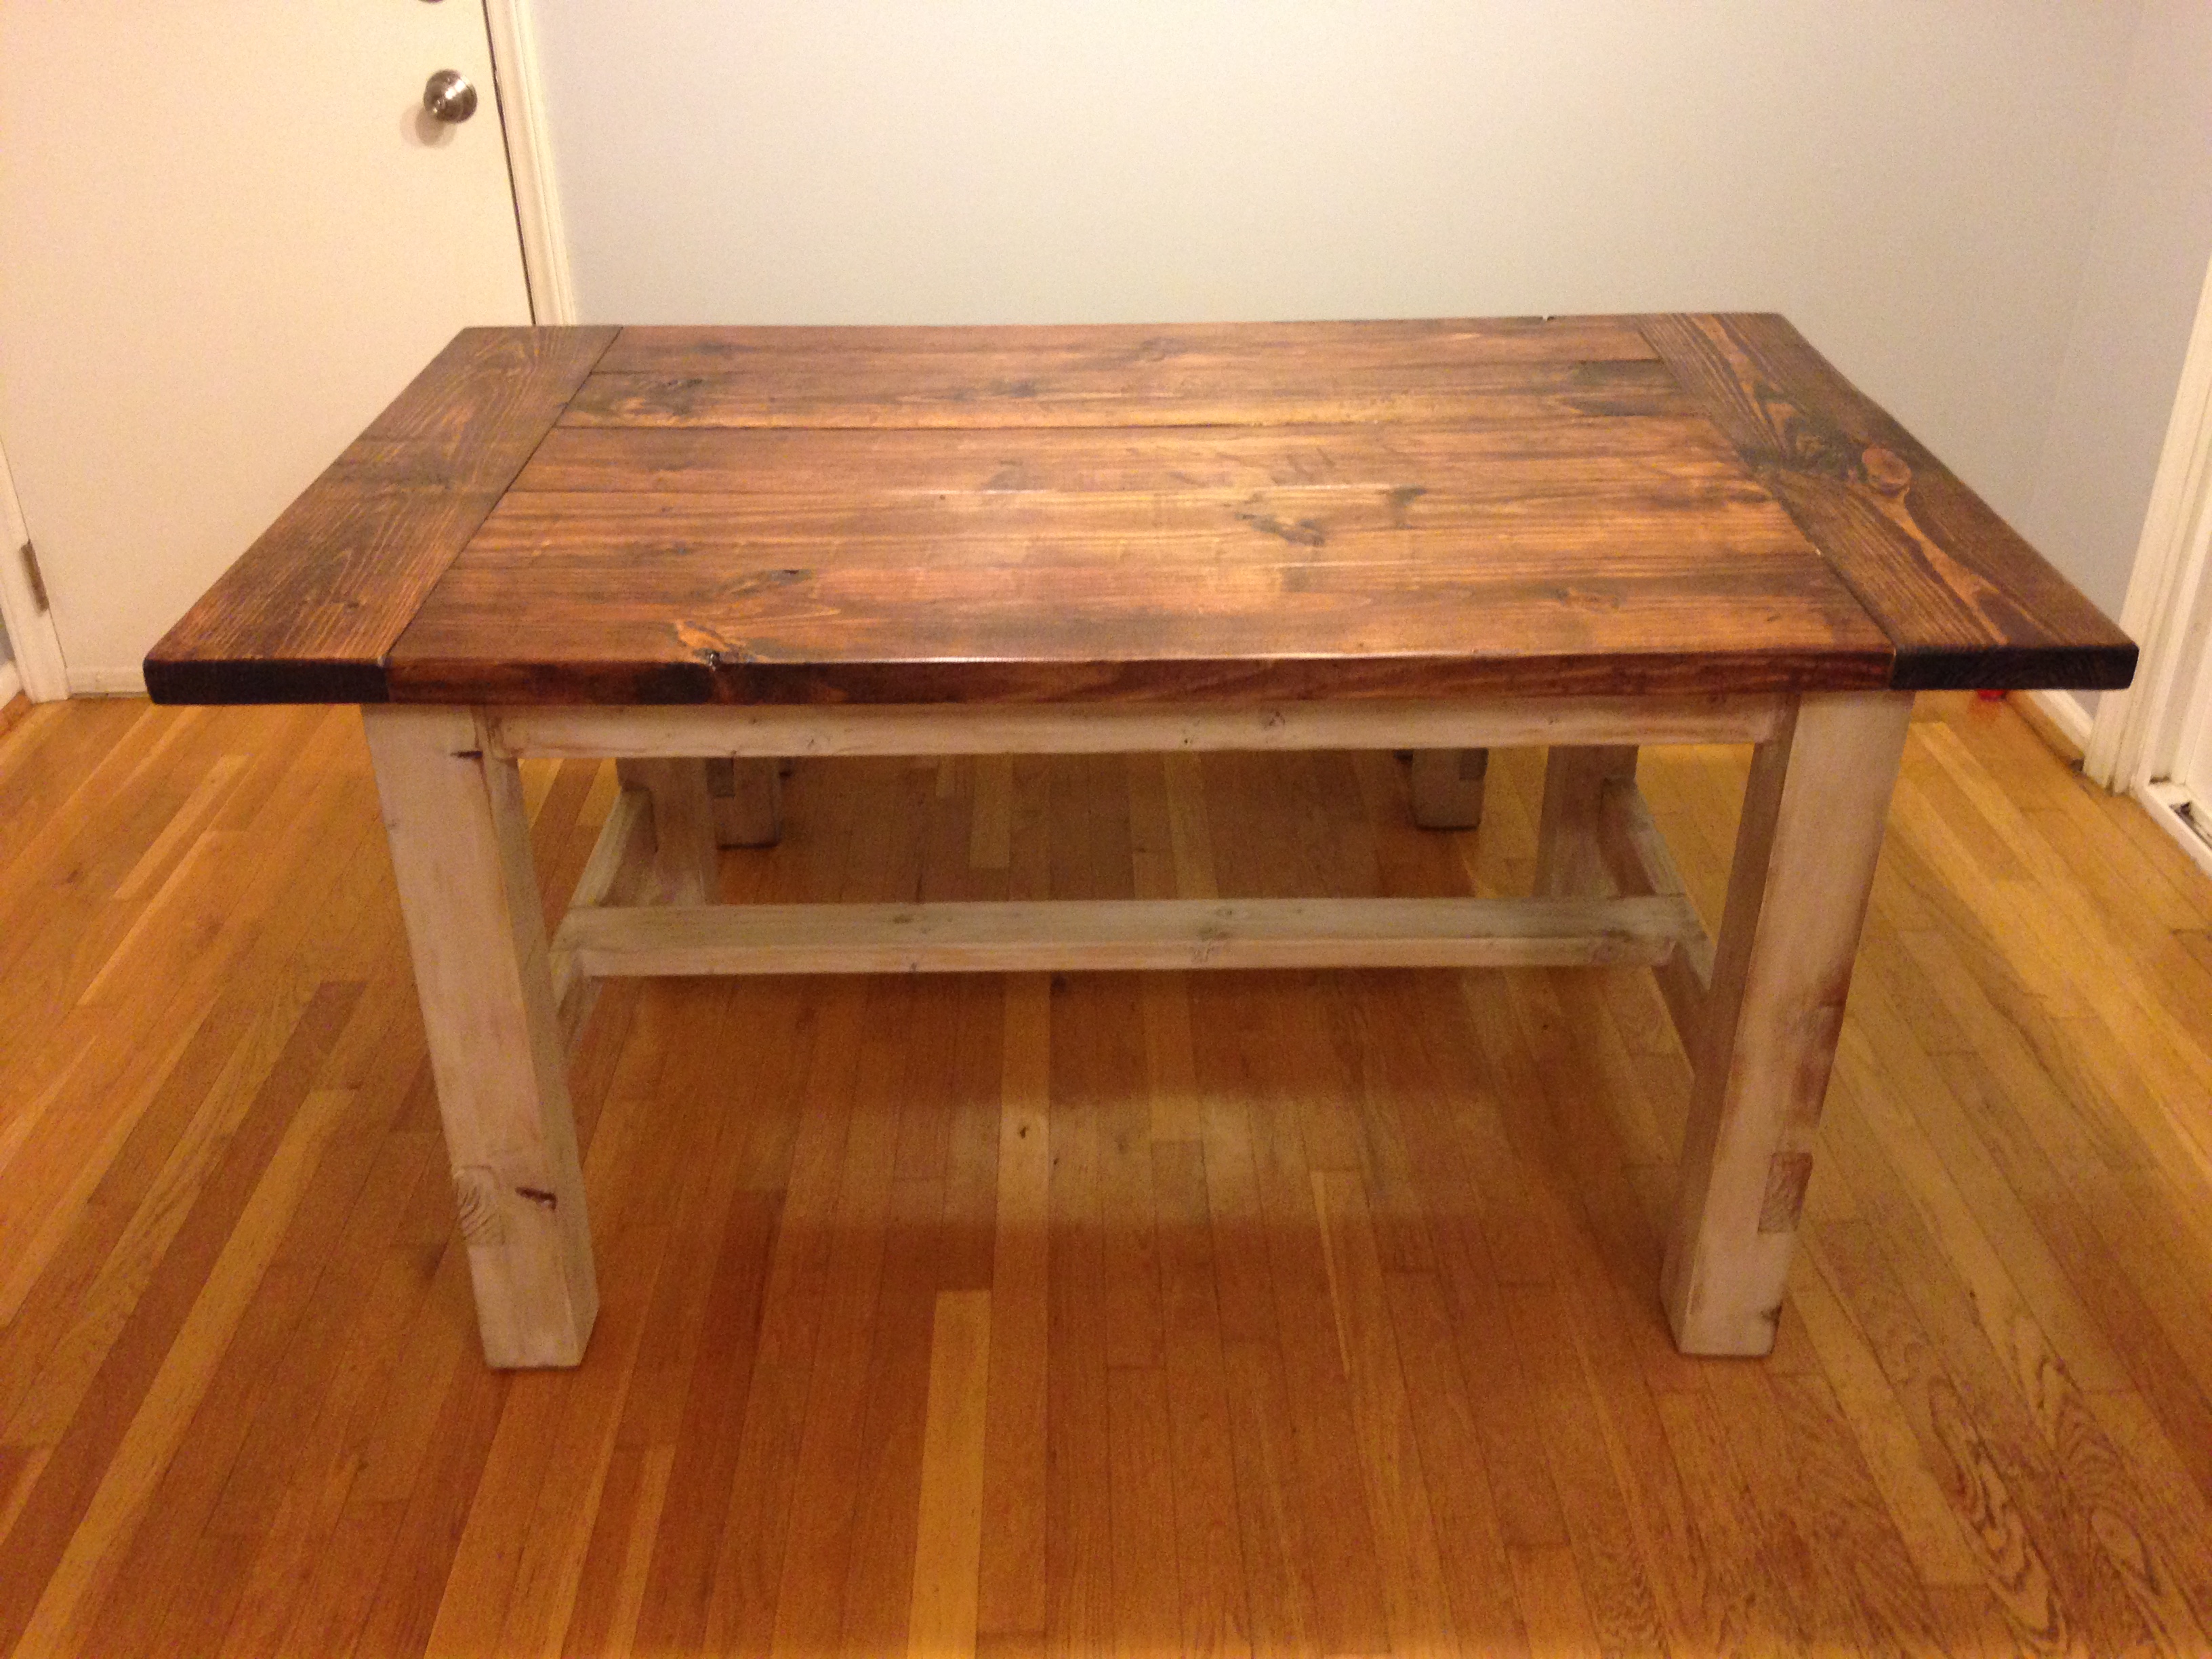
Smaller Farmhouse Table and Bench
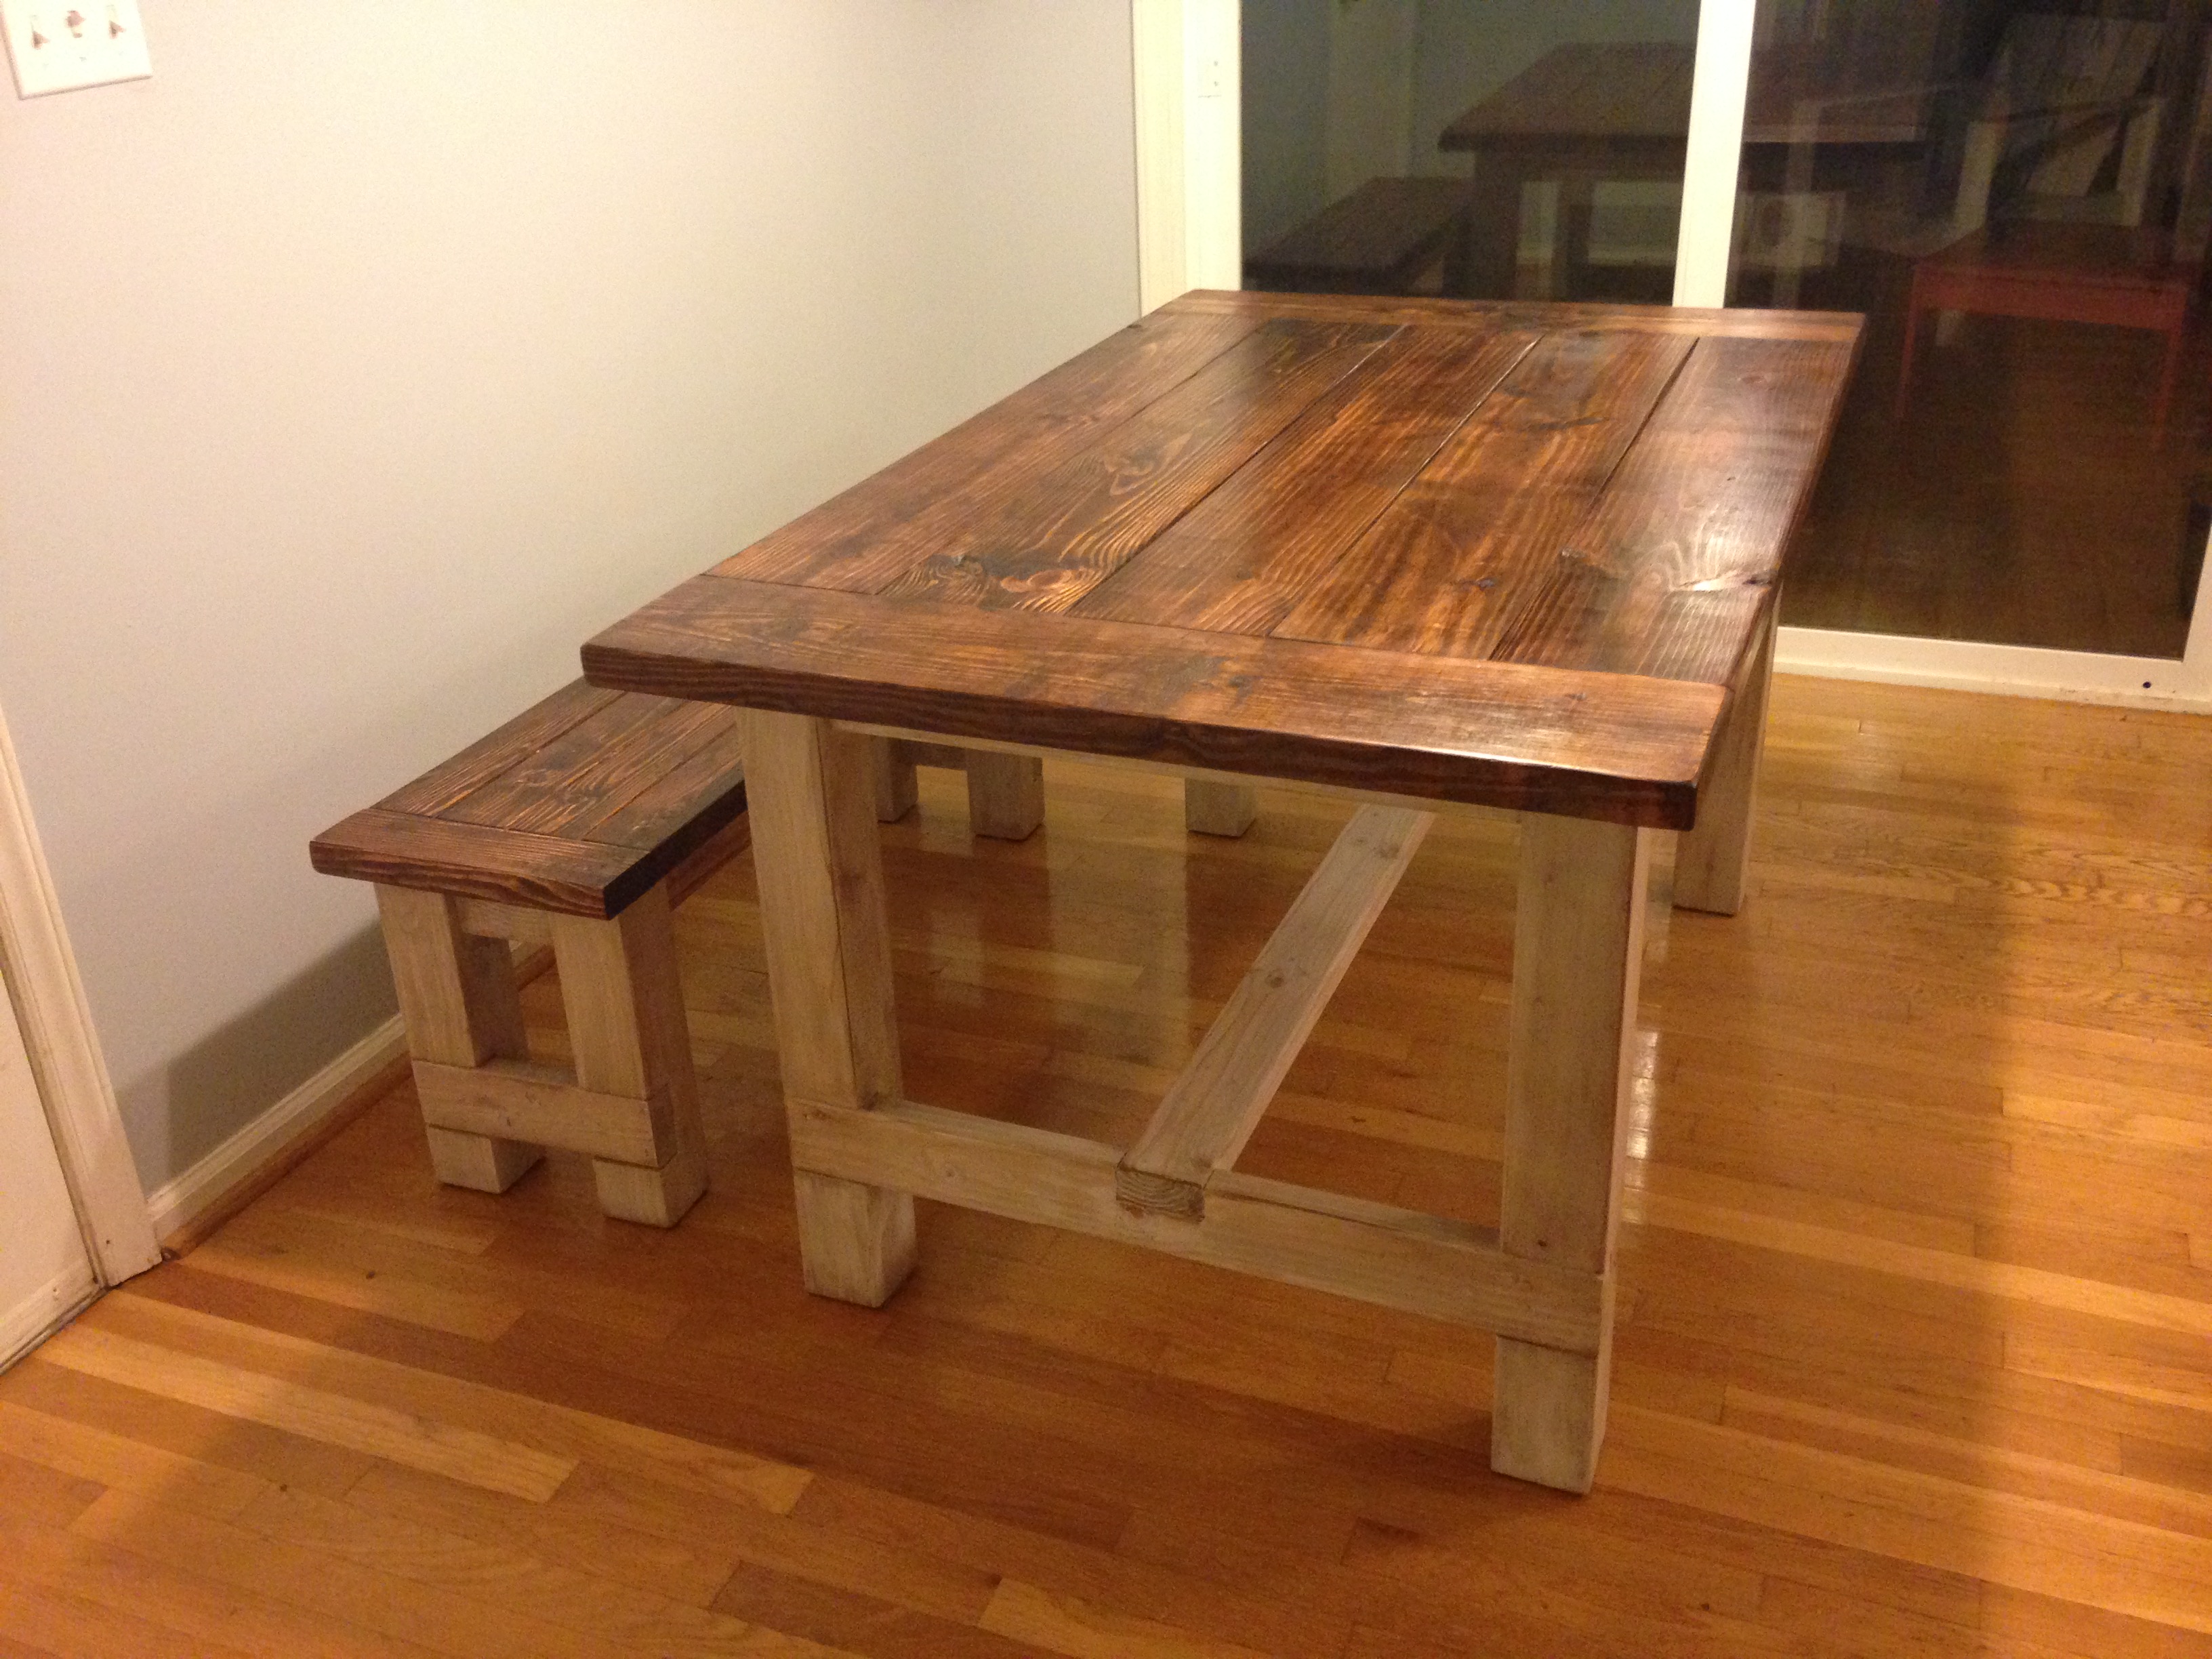
We loved the look of the farmhouse table, and I actually helped a friend build an even bigger version for his house a couple years ago. But we needed a smaller version for our new house. So with some minor alterations, we got an awesome table and bench that fits our space. The whole thing was about 150 for hardware and lumber and finish.
Built from Plan(s)
Estimated Cost
150
Estimated Time Investment
Weekend Project (10-20 Hours)
Finish Used
Tops are a red mahogany stain, a light coat of rub on poly, followed by several coats of trewax clear paste wax.
The bases are whitewashed, distressed and stained, light poly, and trewax clear paste wax.
The bases are whitewashed, distressed and stained, light poly, and trewax clear paste wax.
Recommended Skill Level
Beginner
Comments
vickitee
Wed, 06/25/2014 - 11:54
X table
WOW, first attempt looks really good. I'm scared of the X. The length and angles need to be just right. Was it hard?
Emict326
Tue, 07/08/2014 - 09:15
It took a few attempts and my
It took a few attempts and my miter saw would only go to 48deg but not hard just took some preplanning and practice on scrap wood
Emict326
Sat, 07/12/2014 - 21:16
So I tried the rustic look
So I tried the rustic look stain with tee and oxidizer, and I it came out brown, so disappointed