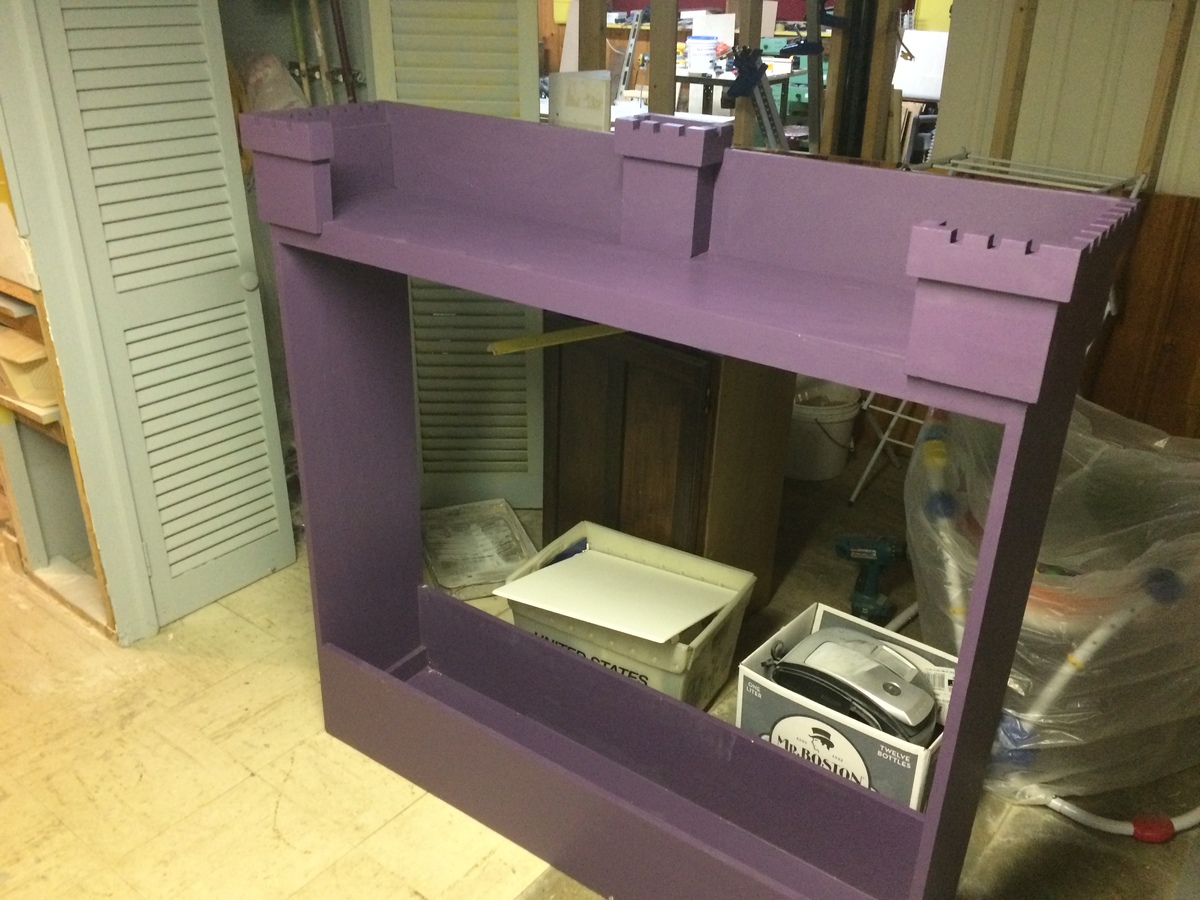
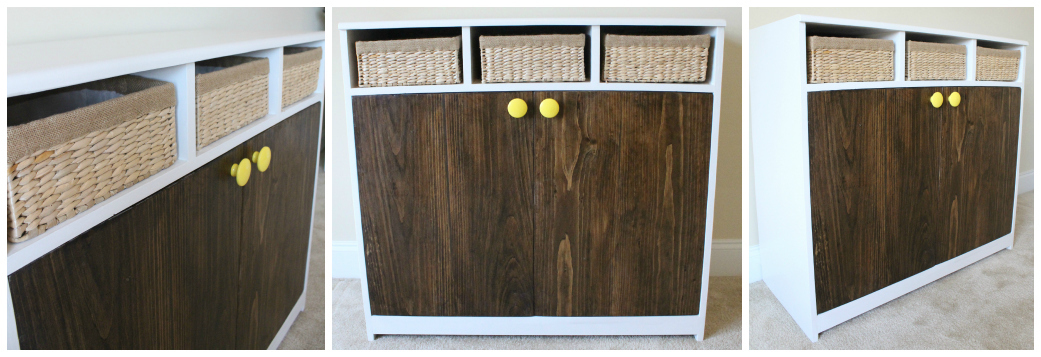
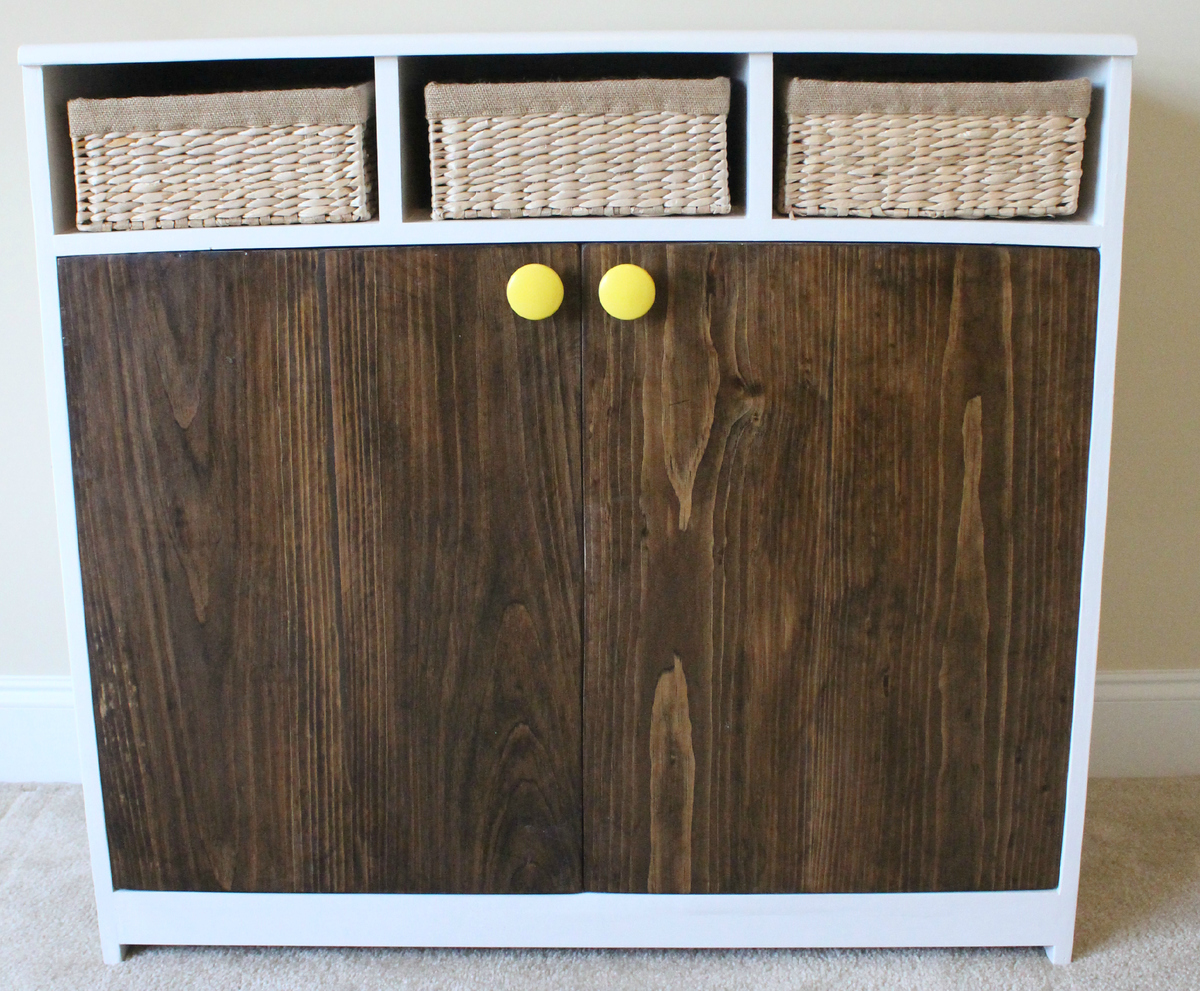
Community Brag Posts

Laundry Stand

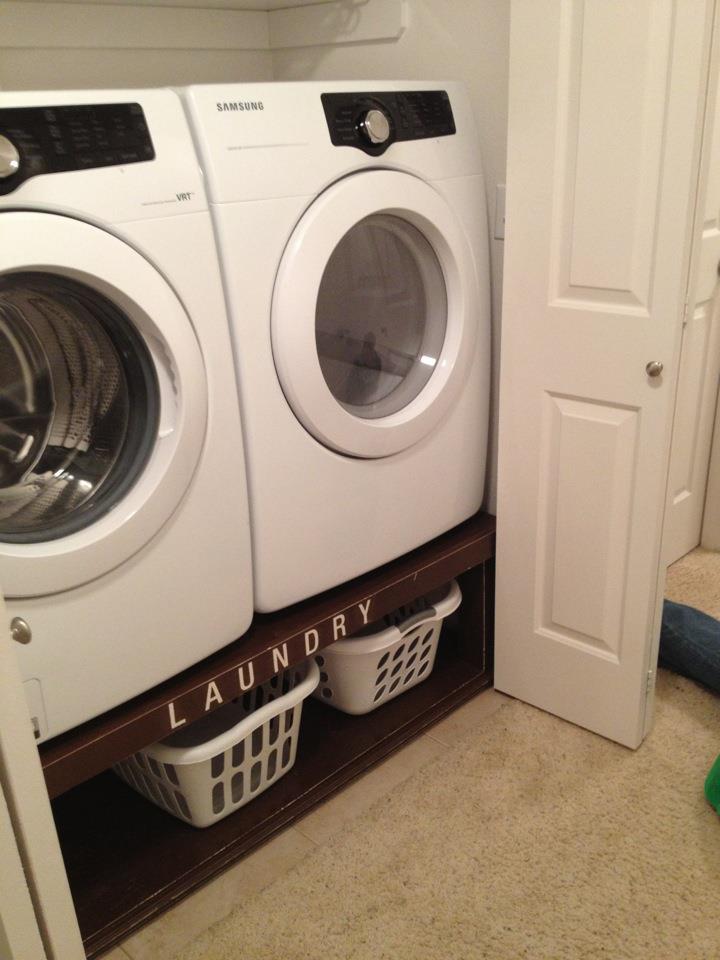
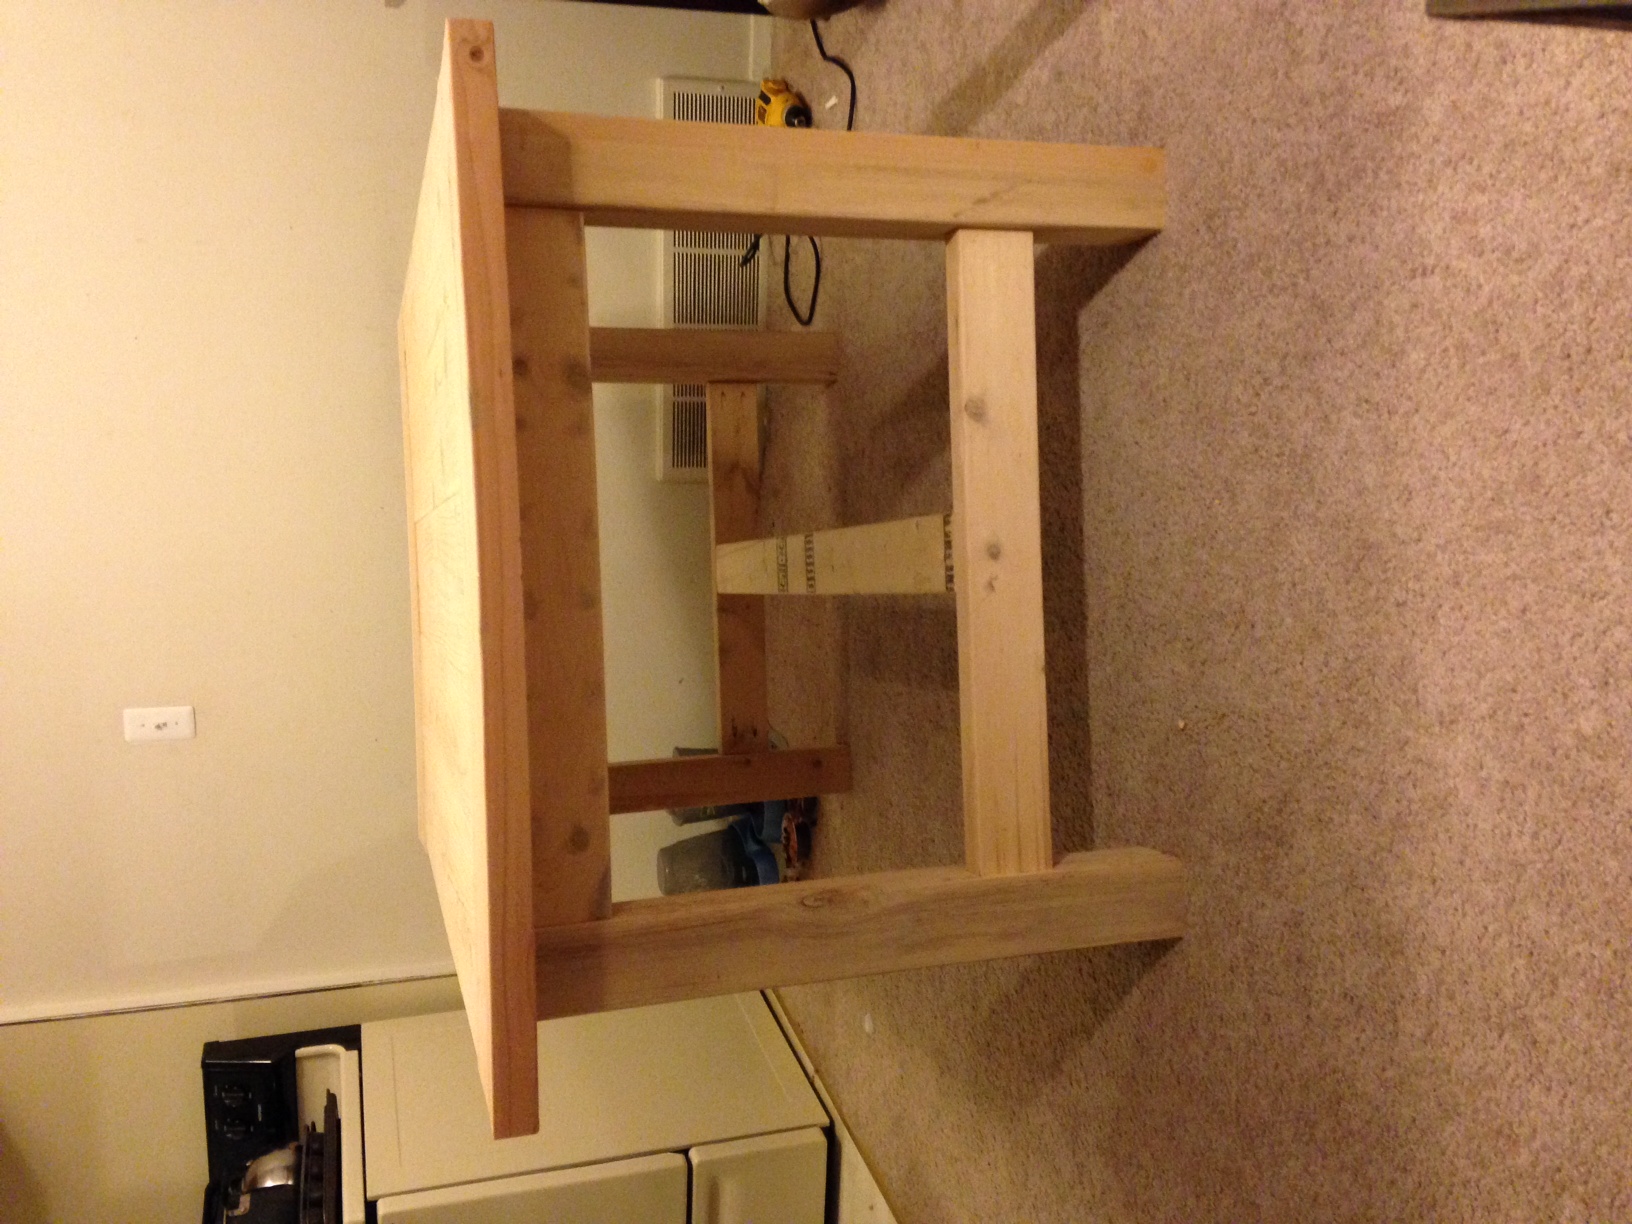
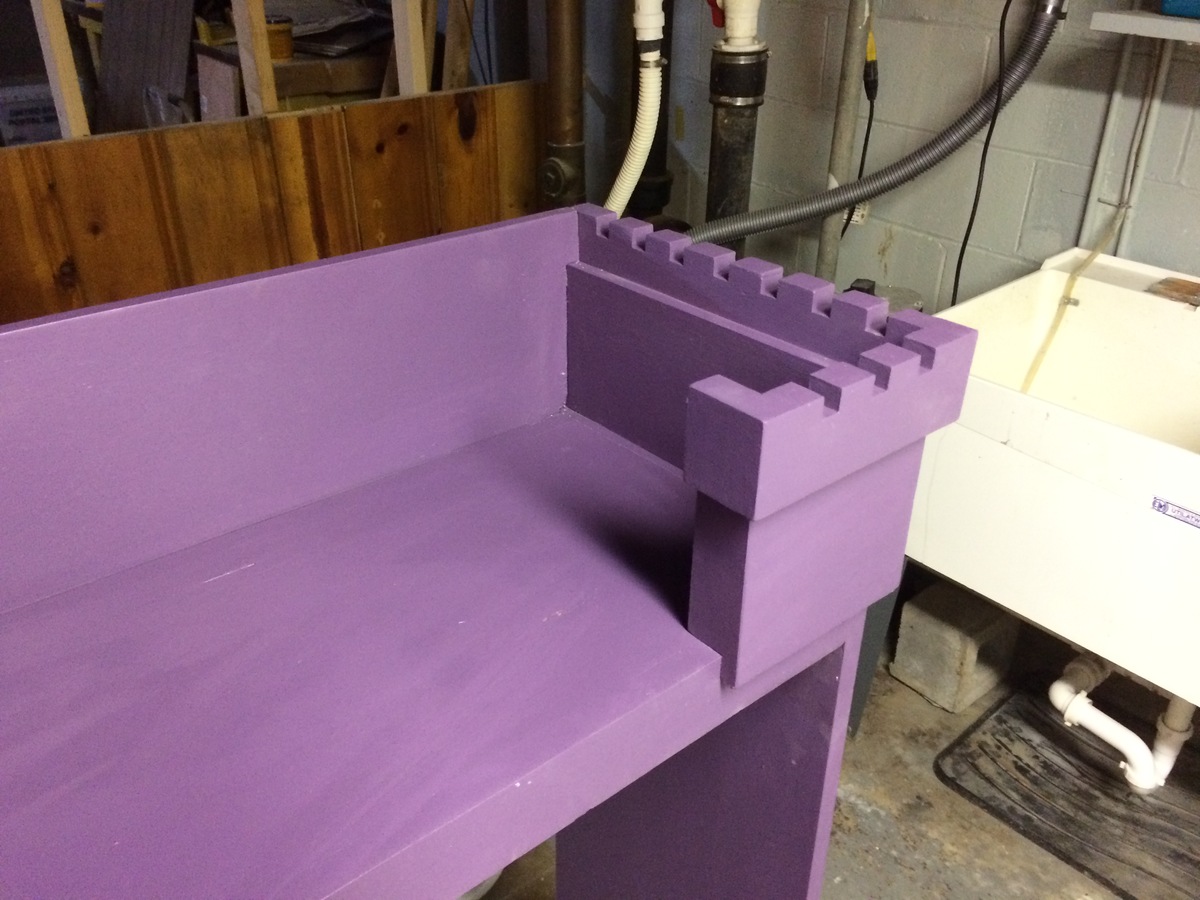
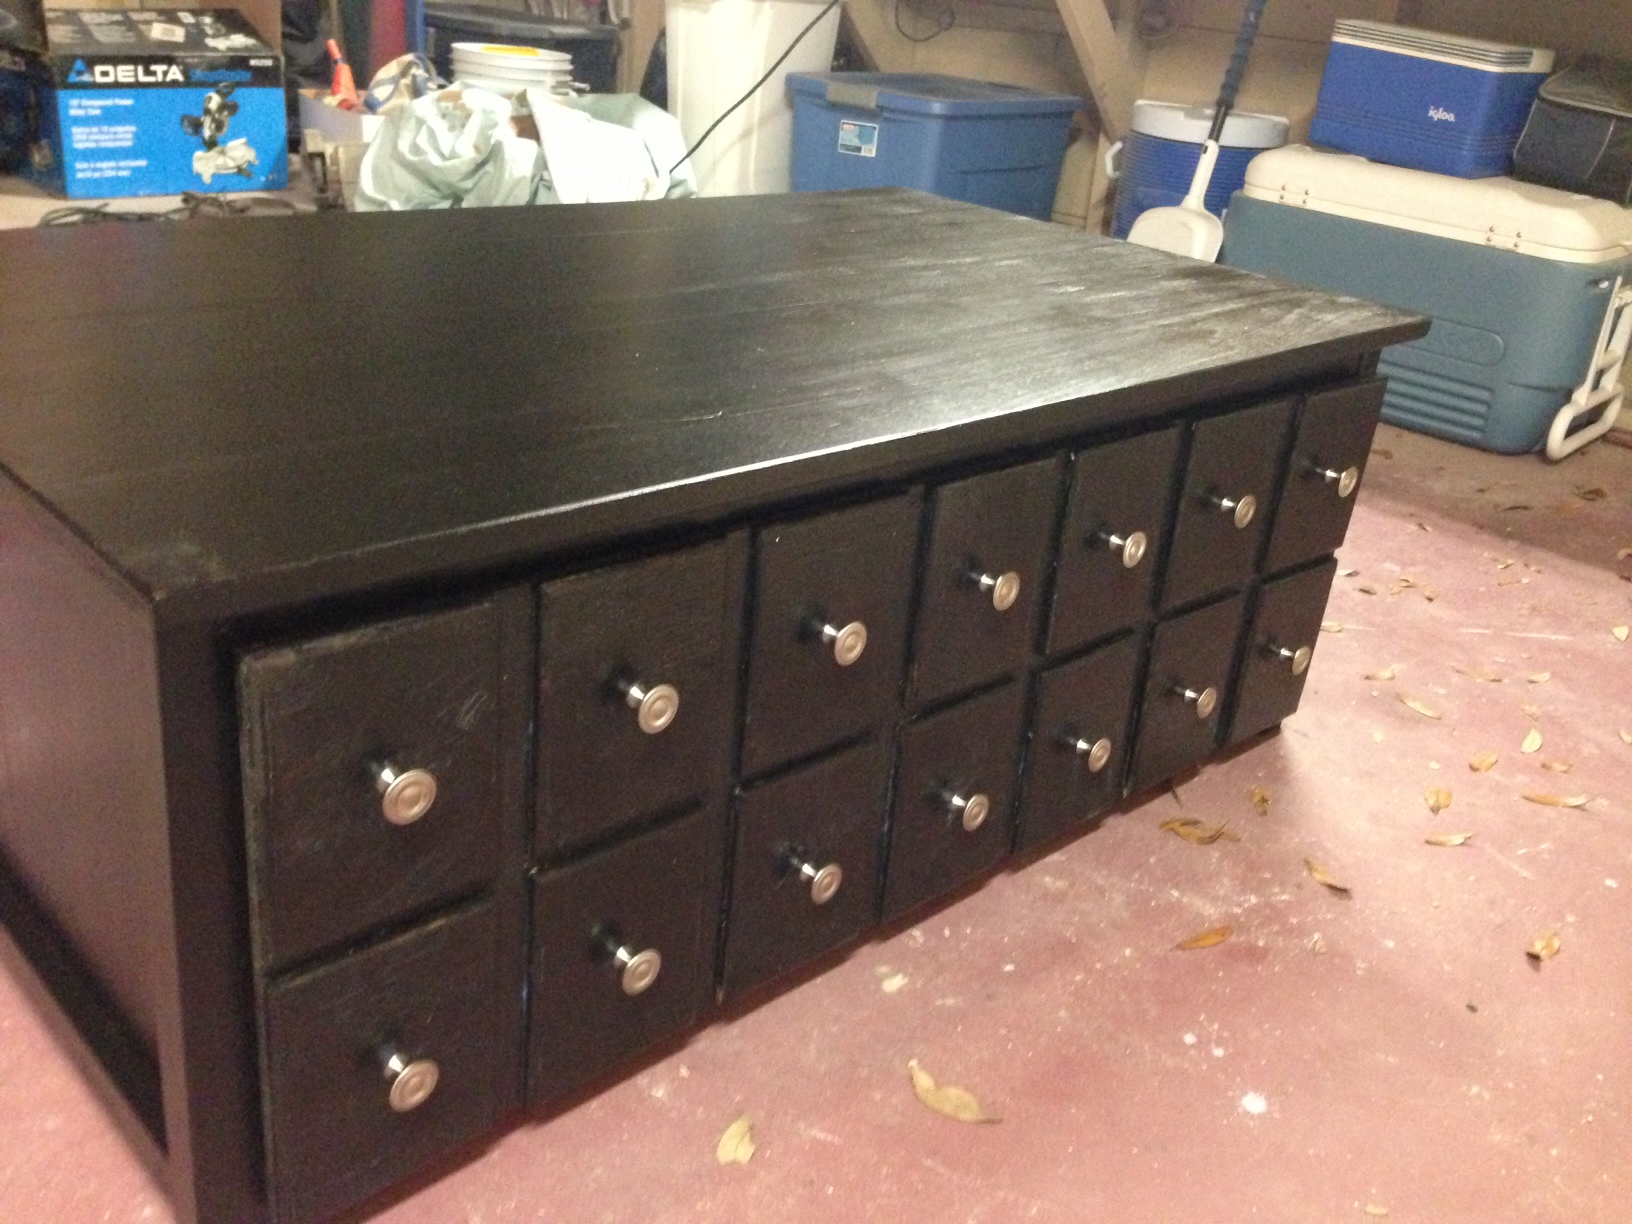
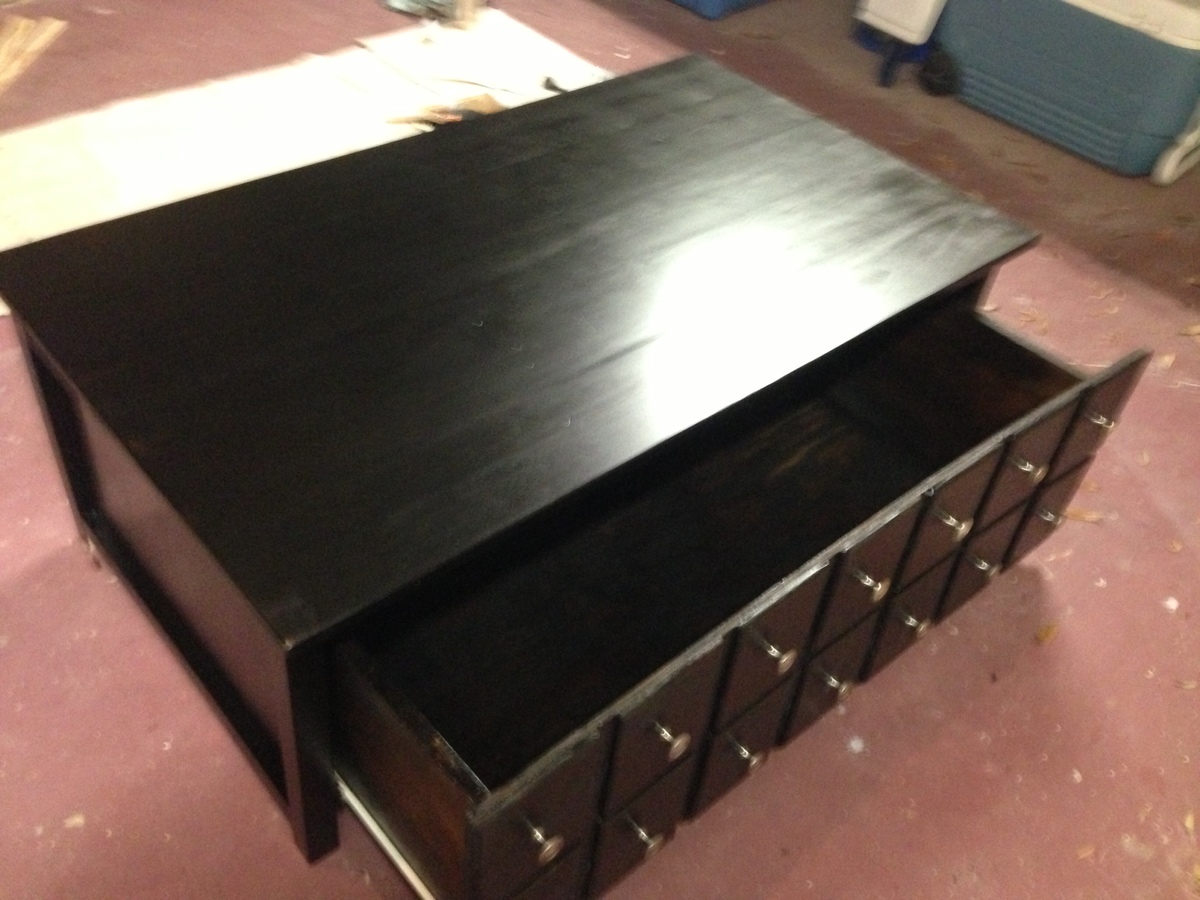
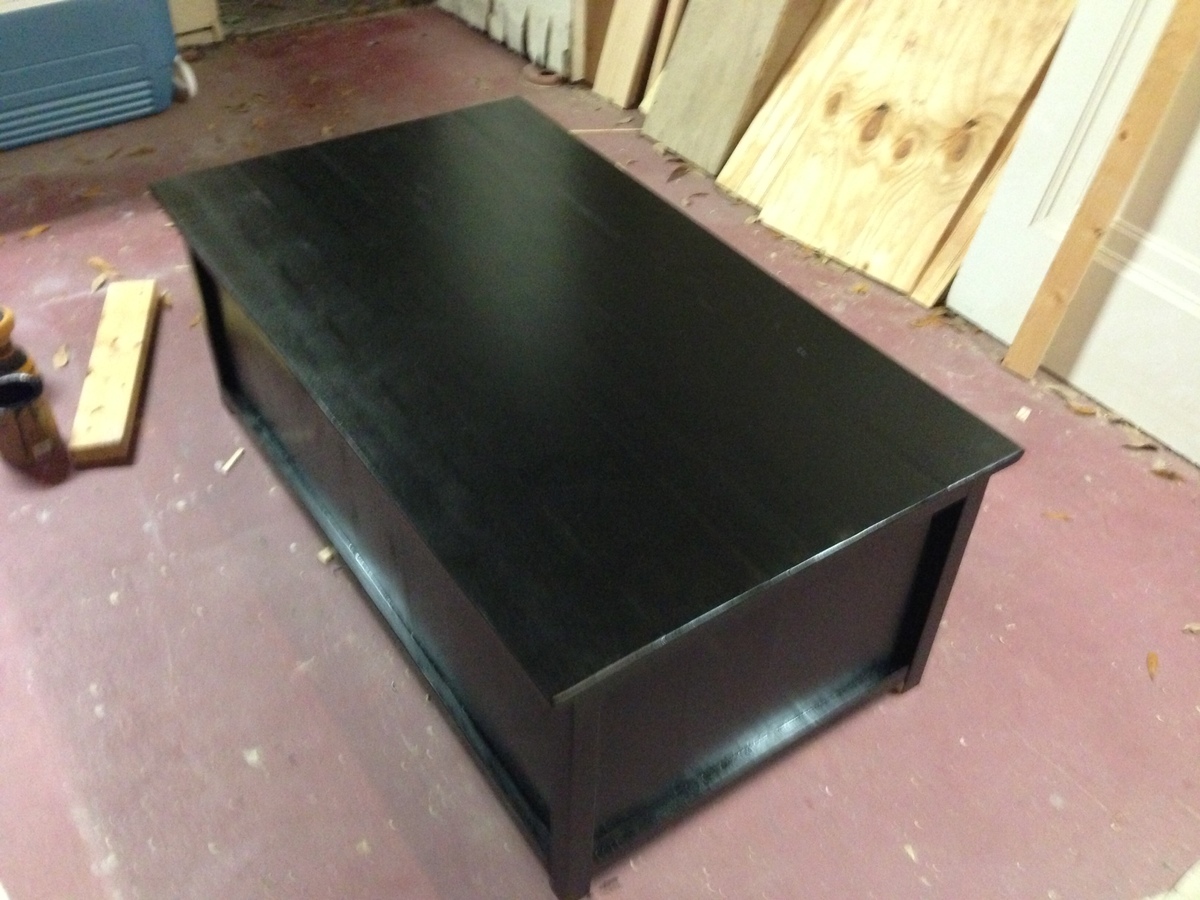
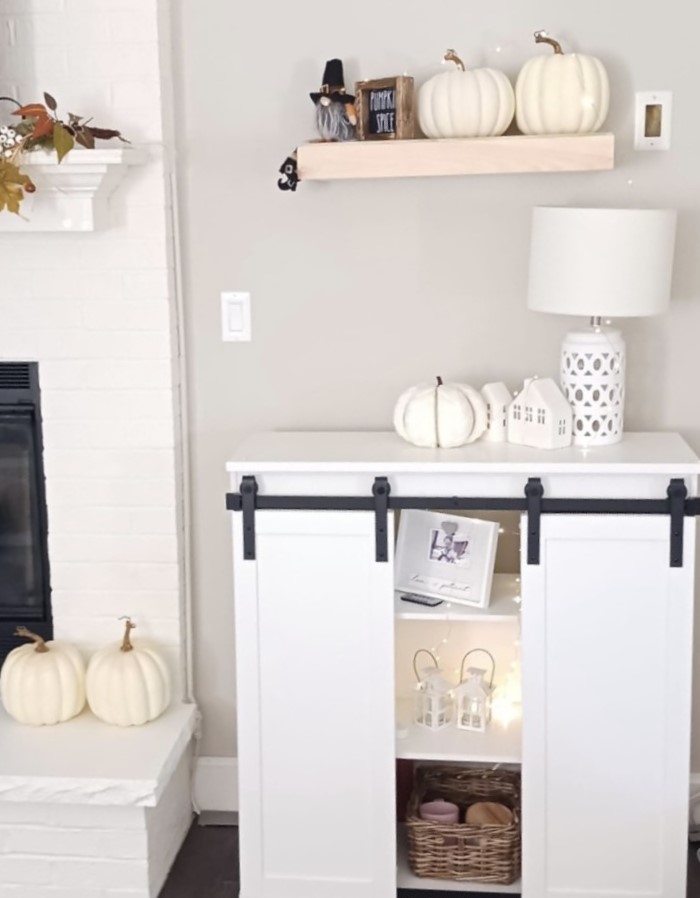
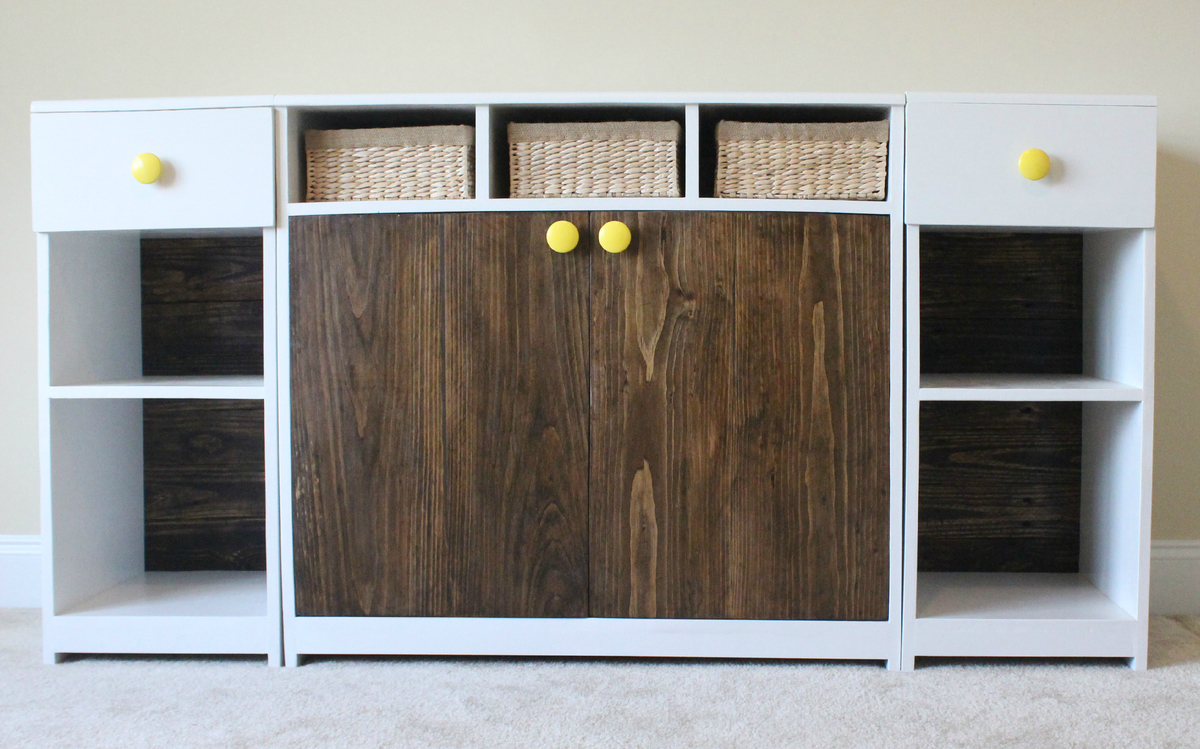
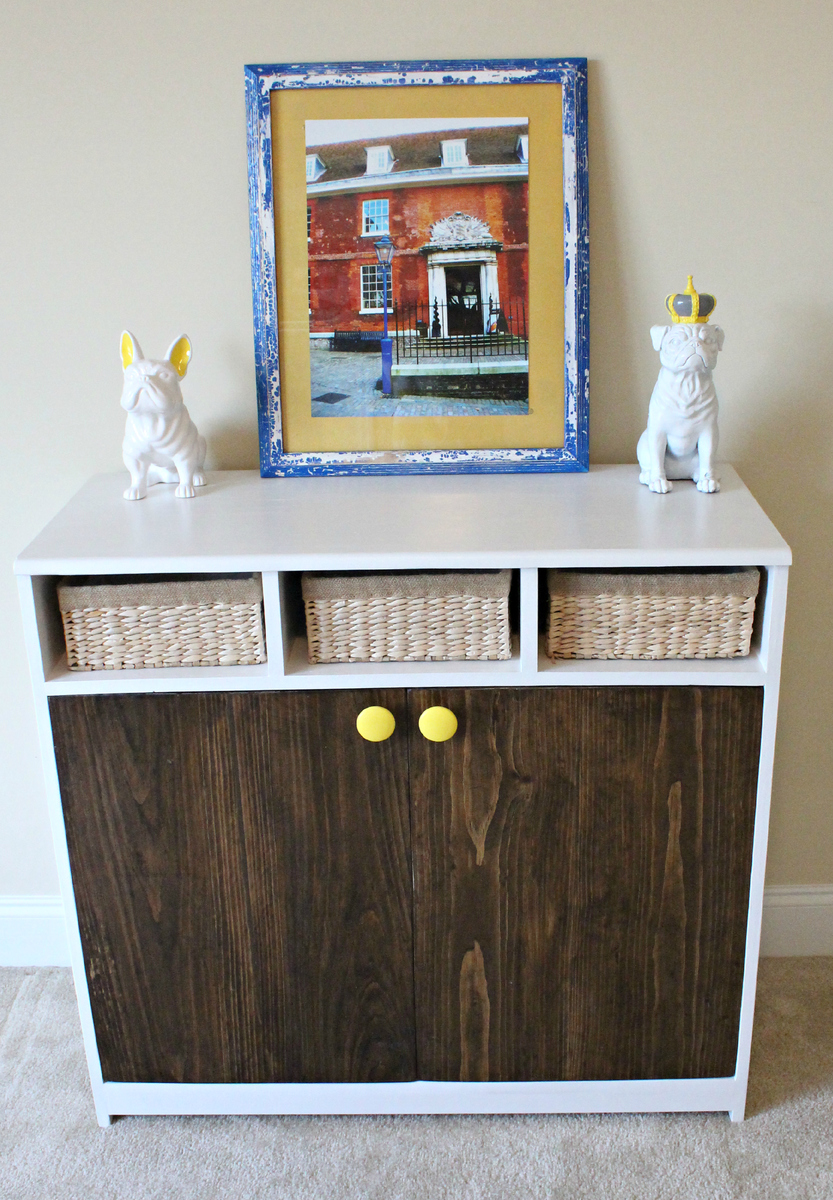
This is my version of the washer/ dryer pedestal. I changed a couple of things and made it smaller to fit in my closet but I am very pleased with the outcome. This is my very FIRST project to do in my home and although it brought tears a couple of times, it is very sturdy and extremely useful. It definitely makes a difference and my husband hasn't stopped doing laundry since we put it in so I am SUPER happy!
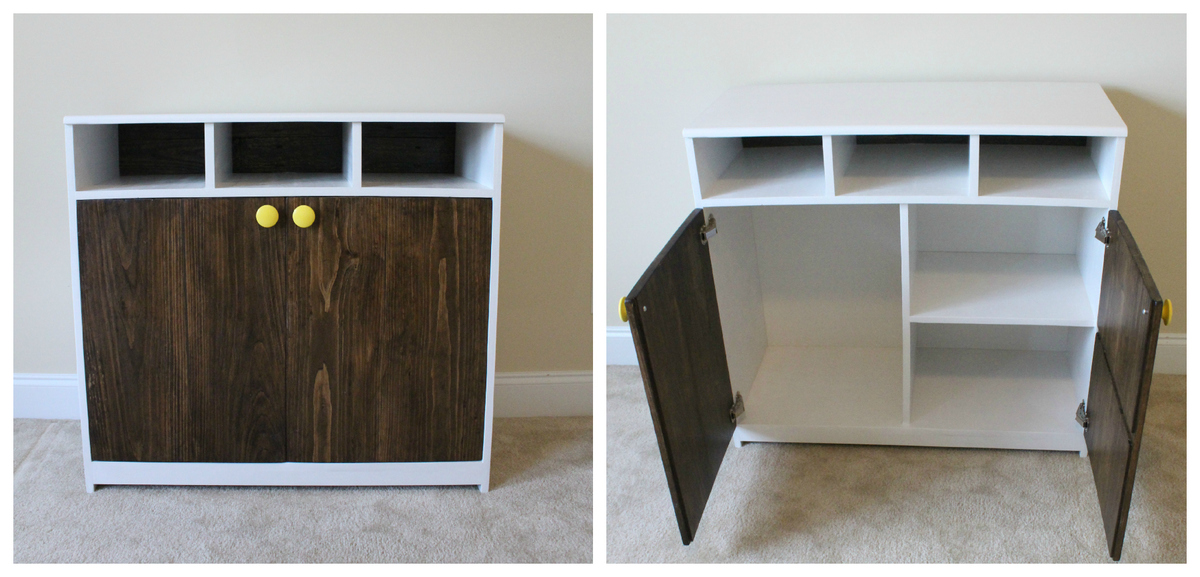
A few things about the project, it took me much longer because I am a beginner but it was definitely worth taking my time. It is not completely perfect but it goes in a closet and it for laundry so the main thing was sturdiness for me. I spent quite a bit of time painting it and researching and trying different techniques. I believe she used MDF cover for the final touch so hers looks more flawless. I need to go back and fill in a couple of scratches from where we knicked it with the dryer but it serves the purpose.

Estimated Time Investment
Week Long Project (20 Hours or More)
Finish Used
Spray paint
Recommended Skill Level
Beginner

Comments

ejahinojosa

Fri, 11/09/2012 - 19:39

I too started my first project and hand many moments of sweat, tears, and soreness( mostly the day after) but we finished it an although its not perfect it slowly started to look better...lol I just had to give you some kudos because I think it looks great and its even better because you made it. Hope to see more!

TinaMcFrina

Sun, 11/25/2012 - 23:54

Thank you so much for your encouraging words! I used quite a bit of wood filler and caulk on this project. It is still holding up so far, so I am very happy with it. The most time consuming is definitely painting.

Farmhouse Table

Submitted by DMax2010 on Wed, 08/27/2014 - 06:30

This was my first attempt at a bigger project. As with most, the finish took the most time. I modified the size of the table because I made it for my sister. It was also the first time I used a belt sander, and I loved it! It made the top nice and even. I did have a huge debacle when trying to fill the gaps of the table with clear silicone...that is definitely something that requires practice! I ended up removing all of the silicone and just allowing the top coat to sink in. Luckily, it just peels right out, although it did leave some clumps that took a little extra care to remove. But overall, I loved how it turned out, and my sister loves it too. I made the bench too.

Estimated Cost
I think the lumber was under $50.00, the stain about $20.00
Estimated Time Investment
Week Long Project (20 Hours or More)
Finish Used
Minwax Express color-Walnut Stain, the final finish was General Finishes Arm-R-Seal, which was a matte finish
Recommended Skill Level
Intermediate

Comments

DMax2010

Wed, 08/27/2014 - 17:34

Thanks Ana! It is one solid table! I can't wait to make one for me next!

Shelf/Desk Organizer

Submitted by Anonymous (not verified) on Wed, 08/26/2020 - 08:31

I loved the cubby storage idea from Ana. It was the perfect solution to help my family stay organized during virtual learning at home. I tweaked it a bit to match my more modern decor, but love it! Thanks for the inspiration!

Estimated Cost
$35 (2) 47" long organizers
Estimated Time Investment
Afternoon Project (3-6 Hours)
Finish Used
Paint
Recommended Skill Level
Beginner

Queen Farmhouse Bed

This was the first bed I built from Ana's plans... Actually it was the first thing i have built since 7th grade shop class in 97' (ew) .. It was fairly easy, but I still had my up and downs! I actually held back tears a few times and almost gave up... BUT I didn't, or you wouldn't be reading this ;) No, I pulled up my big girl pants and I finished this bad boy up, and am now laying on it while writing my brag post, holla!! Anyway, after doing it once, I think it would be super easy to build another, if I decided to. It was all worth it though, this bed is absolutely stunning and everything I dreamed it would be. In short, if you're thinking about building this, do it! It took me almost a year to work up the courage, and that's just dumb :)

Building:
I pretty much followed the directions to a 'T', but I did use 3 an 4.5 inch LAG SCREWS and did not have a nailer so I used an old school hammer. Advice: if your lumber yard, or hardware store will cut your wood for you- LET THEM! Even though I did it myself an it was easy, it would have saved me soo much time if I let them do it right there at the store (sigh). If you have any questions feel free to ask me and I'll help as much as possible!

P.S. this thing is a mammoth, so be prepared for that.

Built from Plan(s)
Estimated Cost
$100-150
Estimated Time Investment
Weekend Project (10-20 Hours)
Finish Used
Primed with Olymic's zero VOC primer, then finished with, "Milk White" by valspar
Recommended Skill Level
Beginner

Comments

TashaNaylor (not verified)

Sun, 11/11/2012 - 08:53

This bed is amazing! I can't wait to build it. I'm wondering if you glued anything together or is it done with all screws and nails? Amazing job.

JakeHen91

Thu, 02/28/2013 - 01:14

I read on someone else's page that she had made her plans for the queen matteress to be turned sideways, and that the plans needed to altered as far as measurements go,is that true? Any info would be a huge help!

wjc129

Mon, 04/29/2013 - 19:44

How did the lag screws work? Do they bolt right through and show on the other side? Your bed looks great, and I hope mine will too!

Benchmark Table

Benchmark Table, built out of pine and stained with dark walnut and a flat finish!

Estimated Cost
total cost 120.00
Estimated Time Investment
Weekend Project (10-20 Hours)
Recommended Skill Level
Intermediate

Farmhouse Table

Submitted by Anonymous (not verified) on Sat, 12/17/2016 - 08:18

Thanks for the plans! My wife loves the table that I built for her using them. Only change I made was that I used my Kreg Jig to screw all the table top boards together. I'll be building the bench next.

Estimated Cost
$250
Estimated Time Investment
Weekend Project (10-20 Hours)
Finish Used
Table base - also at Furniture paint Ultra White 740149

Table Top- Minwax Weathered Oak 270 and Minwax fast drying poly in clear satin
Recommended Skill Level
Intermediate

Farmhouse Nightstands

Submitted by idotaz on Mon, 08/31/2020 - 07:27

This was fairly easy to make. It's a lot easier when you have the right tools. It took a little while to understand how to figure the degree angle for the X braces. I also did a half lap joint for the X braces instead of 3 separate pieces. I also used drawer slides and added a drawer face to cover the drawer opening. I just think it looks cleaner. Thank you for these plans I am very happy with my new pieces of furniture!

Estimated Cost
$75 for two
Estimated Time Investment
Week Long Project (20 Hours or More)
Finish Used
Dark Walnut Stain and Pixel White paint
Recommended Skill Level
Beginner

Comments

Customized Deep Seat Chairs and Love Seat

Submitted by Anonymous (not verified) on Mon, 08/26/2024 - 09:39

Modified and expand on these excellent plans.

I used 2 x 6 lumber for the side stringers and arm rests. Arm rests were given one inch radius curves on the corner and a taper toward the back. Stringers were mounted 1 inch higher than the seat to help hold the cushions in. Added some hardwood "feet" to take the wear and tear of dragging around on the patio

The love seat is identical but with 4 ft seat width instead of 2 feet. Added a brace across the bottom seat boards, and extra backrest boards.

Fred K

Full size Farmhouse Bed

Submitted by Embreykm on Mon, 11/12/2012 - 20:16

This is my first woodworking project. The plans worked out great! However I did make some minor changes. I made the two by four under the two by six top an inch longer on each end. I also did not brad nail the 1x4 trim pieces. I used wooden dowels and wood glue. Also I bought bed rail brackets and mounted the side rails flush to the outside of the head and footboard. This piece was conditioned with Charles Neil's Prestain conditioner and stained with minwax English chestnut. Topcoat is minwax semigloss fast drying poly and rubbed out with minwax paste wax. Can't wait to get to sleep in it tonight!!

Estimated Cost
$250
Estimated Time Investment
Week Long Project (20 Hours or More)
Finish Used
Charles Neil Prestain conditioner, minwax English chestnut, minwax semi gloss fast drying poly, minwax paste wax
Recommended Skill Level
Beginner

Comments

Basetsana (not verified)

Tue, 11/13/2012 - 00:14

Good Day Ana! I just started a daycare centre and would like to make my own tables,chairs bookshelves etc. I want to know if you could assist me in this matter

God bless you
Basetsana Maboe

Storage bed

Submitted by Bandit on Mon, 09/01/2014 - 05:33

This was my first build and I throughly enjoyed it! This bed is for my three old son and it meant so much to me that I was able to build his very first big boy bed. Thanks Ana for the plans and for making then so easy to follow.

Estimated Time Investment
Weekend Project (10-20 Hours)
Recommended Skill Level
Beginner

Alternate dress rack design

Submitted by Jlabudasr on Tue, 12/20/2016 - 19:50

Tried top shelf side detail per the plans but did not like the way it turned out so I added the "castle wall" details as shown on the two photos. Wall details made with stacked dato blade on my table saw.

Recommended Skill Level
Intermediate

Rustic X Farmhouse Coffee Table

Submitted by Anonymous (not verified) on Tue, 09/01/2020 - 16:57

Rustic X Farmhouse coffee table, built for a true rustic farmhouse!

Built from Plan(s)
Estimated Cost
$60
Estimated Time Investment
Afternoon Project (3-6 Hours)
Finish Used
Light coat of Varathane Dark Walnut woodstain on each X, heavy coat everywhere else.
Minwax Polyurethane (5 coats, lightly sanded between each)
Recommended Skill Level
Beginner

Pallet Pumpkin Decor

Submitted by Anonymous (not verified) on Wed, 08/28/2024 - 12:33

Using Ana White's plans, I created these pumpkin treat holders.

Pallet wood and wood widths
I first tore apart pallets and sanded the tops with 80 grit sandpaper to keep the rustic look. Because of the varying widths of the boards and imperfections from nail and screw holes, I cut some boards at 3" wide and others at 5" wide and created a pattern.

Route the edges
I used a chamfer bit on my router table to route the edges to make them stand out more. I didn't put spaces between the boards, that's why I routed the edges. If you go this route you will need longer 1x2 for the back of your piece.

Cut the shape out
Use a jig saw with a scrolling blade to make smooth work of cutting out the curves.

Get it together
I used exterior wood glue and a brad nailer with 1" nails to hold the project together instead of a hot glue gun.

Finish
The finish is an 8 oz. sample of Behr Premium Waterproofing Exterior Wood Stain and Sealer from The Home Depot. Colors: Bright Tamra semi-transparent #ST-140 and Woodland Green semi-transparent #ST-126.

Built from Plan(s)
Seasonal And Holiday

Easy Industrial Coffee Table

Submitted by efmolly on Tue, 09/03/2013 - 12:21

I took Ana's plans for the Easiest Industrial Cart and modified them into a coffee table. I shortened the pieces of angle aluminum to 10", omitted the middle shelf, and added some 7", DIY casters, made from pulley wheels. Since I used 3/4" thick project panels, instead of 2 x 12, I was only able to drill lag screws through one side of each corner of the wood. To add stability, I added small, L-brackets, screwed to the wood and bolted to the aluminum. I included a photo so you can see the modification closely.

Built from Plan(s)
Estimated Cost
$60 plus casters
Estimated Time Investment
Afternoon Project (3-6 Hours)
Finish Used
pre-stain conditioner, Special Walnut stain, wipe-on polyurethane, dark furniture wax.
Recommended Skill Level
Beginner

Comments

Codding58

Fri, 01/08/2016 - 13:48

Great Job on this coffee table!!!   Looks very good, and the added L brackets fit the industrial look perfectly!

Triple Pedestal Bench/Table/End Stools

Submitted by Dman7196 on Sat, 12/24/2016 - 10:48

Here is a Triple Pedestal table with benches and two end stools to match everything else.

Estimated Cost
Unfinished around $400 finished $500+
Estimated Time Investment
Week Long Project (20 Hours or More)
Finish Used
For the legs we used Behr stain and sealant combo, for the top we used Helmsman Spar Urethane semi gloss
Recommended Skill Level
Intermediate

Extra Wide Console Bookcase

I started woodworking about 4 months ago and the first few things I made was a bit wonky. I didn't mind because it's solid wood and I was proud of myself for doing it.
I am 59 yrs old and I love building things! I now do better and made this shelving unit, and it's the best I've done so far.

Built from Plan(s)
Estimated Cost
About $60
Estimated Time Investment
Afternoon Project (3-6 Hours)

Floating Display Shelves

Submitted by Anonymous (not verified) on Wed, 09/04/2024 - 10:09

These were so easy thanks to Ana's plans! Took me all morning, lol. I missed a step but finished up the 2nd shelf in 5 minutes! Now time to stain and make 2 more. - Nicole Brucken on Facebook

Built from Plan(s)
Seasonal And Holiday

Madeline Changing Table Center Base

Submitted by Huthbert on Thu, 11/22/2012 - 08:16

We made some significant changes to the shelves/cupboards. Since we were on a bit of a time constraint with the impending arrival of our little bundle of joy, we decided to nix the drawers all together and instead make three open face shelves. This made the larger cupboard and door face area a little shorter than in Ana's plans. We made most of these changes on the fly while sitting in the garage..

We have a big move coming up and probably won't put the hutch, center base, and side bases together until after the move. We'll post pictures of everything put together once we get settled.

Oh, and for some reason I've been calling this the Madison Changing Table. . When it is actually called the Madeline Changing Table.. whoops!

We wrote up general directions with pictures here: http://thehuth.blogspot.com/2012/11/madison-changing-table-part-3-cente…

Built from Plan(s)
Estimated Cost
$75
Estimated Time Investment
Weekend Project (10-20 Hours)
Finish Used
Behr Irish Mist, Minwax Dark Walnut Stain, Polyurethane (on pallets) Polycrylic (on painted surfaces)
Recommended Skill Level
Beginner

Cedar planter

Submitted by Shayed on Sun, 09/07/2014 - 11:55

I used your "cedar planters for less than $20" plan and modified it to create two beautiful planters for my house. I framed out the top of the planter to give it a more complete look. Also, I added a "C" for our last name. -Shaye 

Built from Plan(s)
Estimated Cost
$20, I used a lot materials I had on hand.
Estimated Time Investment
Afternoon Project (3-6 Hours)
Finish Used
mahogany stain
Recommended Skill Level
Beginner