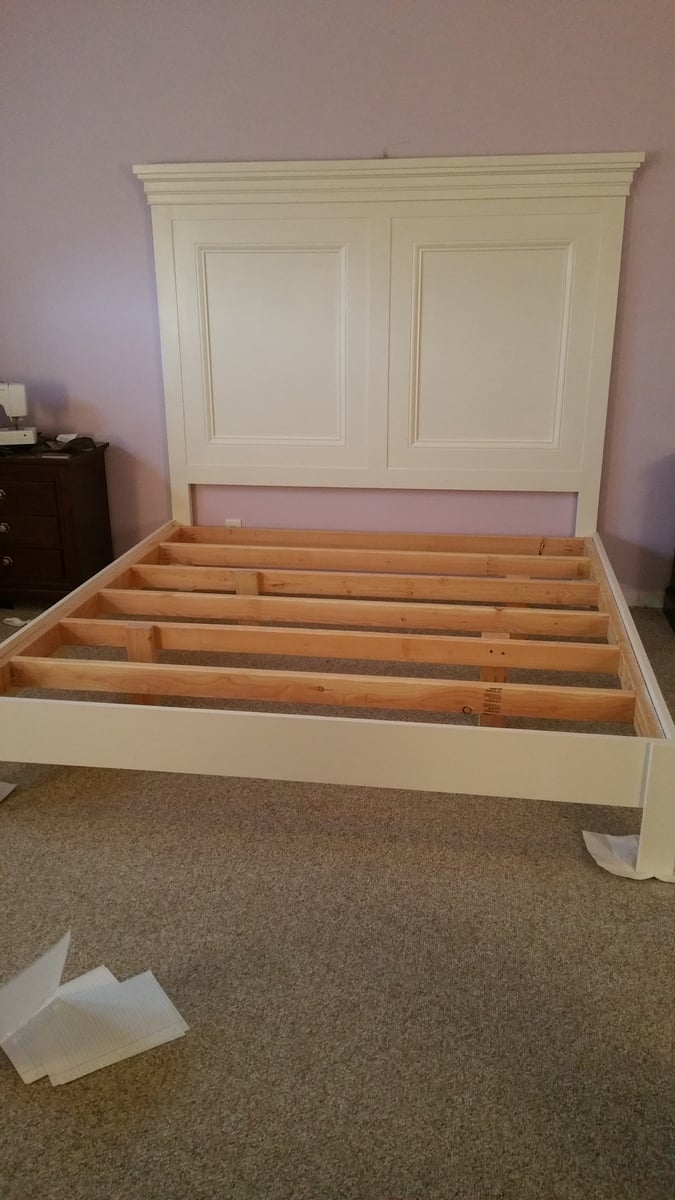
Farmhouse bed and nightstand

Queen size distressed farmhouse bed and nightstand with expanded metal inserts in door and headboard that we made rusty and then clear coated.

Built from Plan(s)
Queen size distressed farmhouse bed and nightstand with expanded metal inserts in door and headboard that we made rusty and then clear coated.
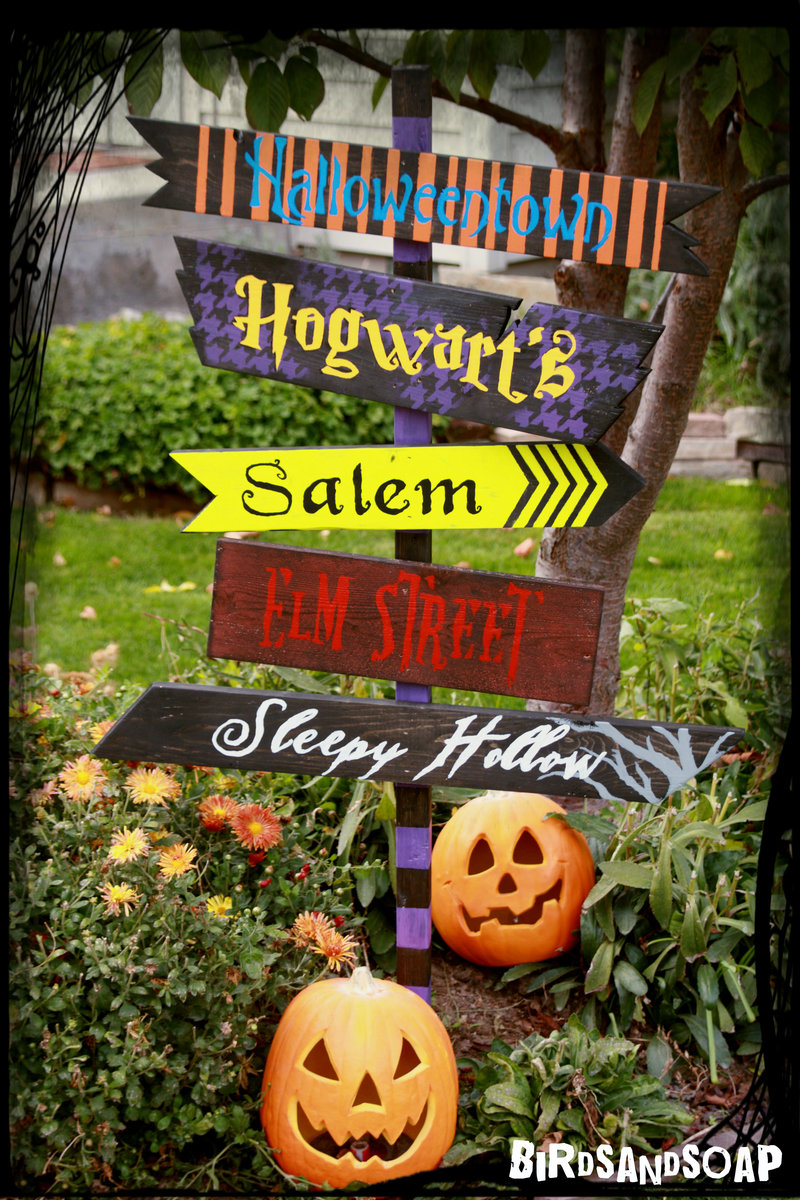
I made this yard sign just in time for Halloween. I FINALLY found a use for some of my scrap wood. This was a fun project, start to finish in one day. I used stain and paint to add bold color. Details are on my blog.
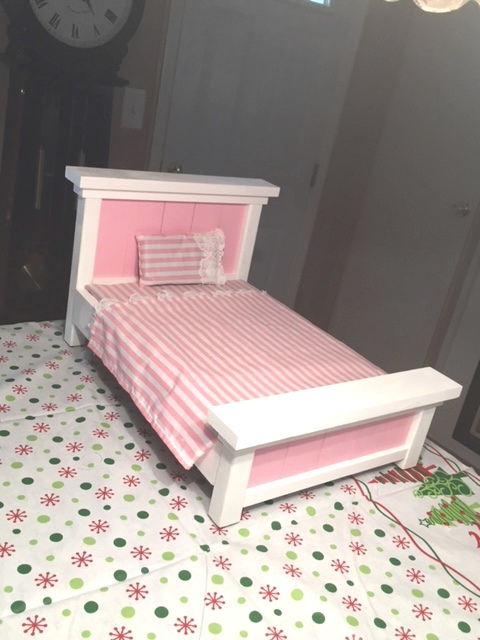
Made this for my granddaughter Reagan's American Girl doll. I made the bed and my wife made the sheets and blanket and pillow. Your plans were awesome!
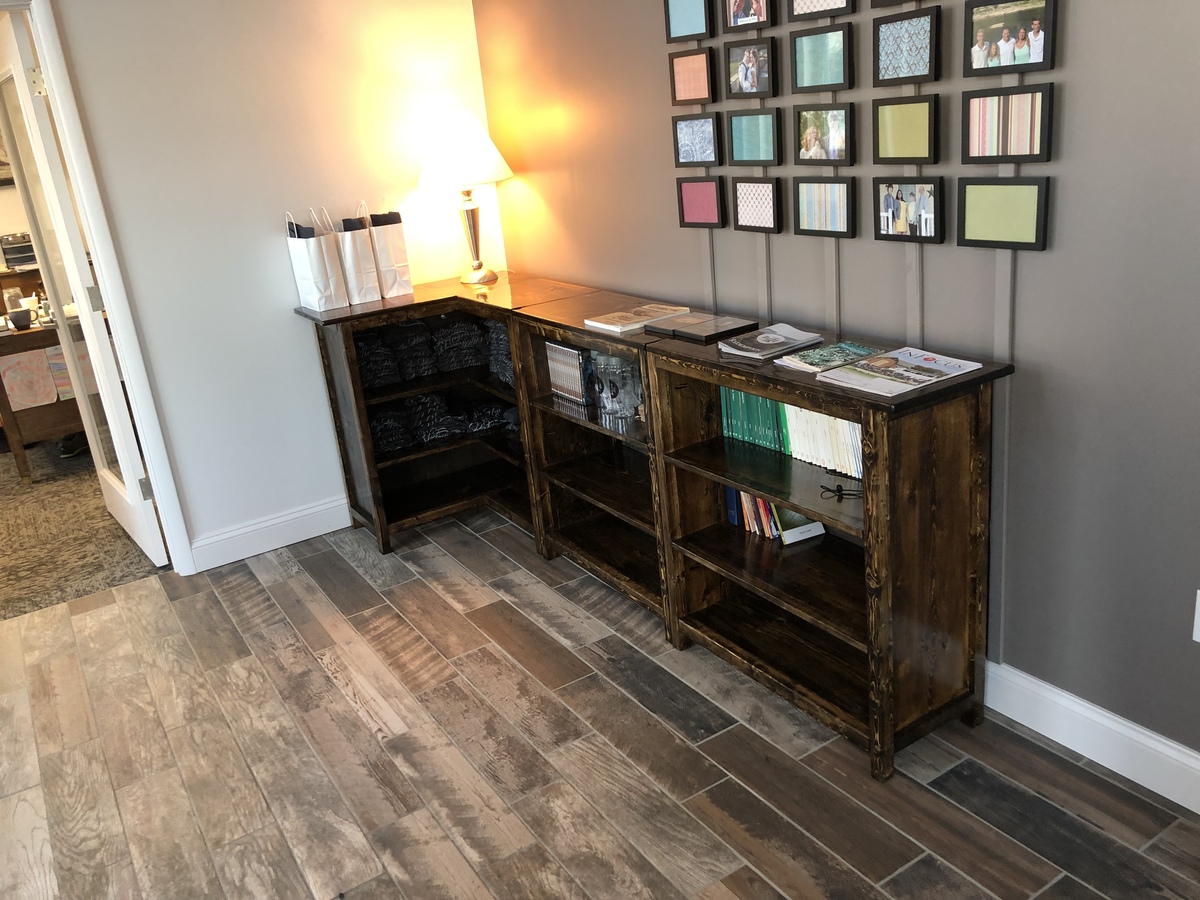
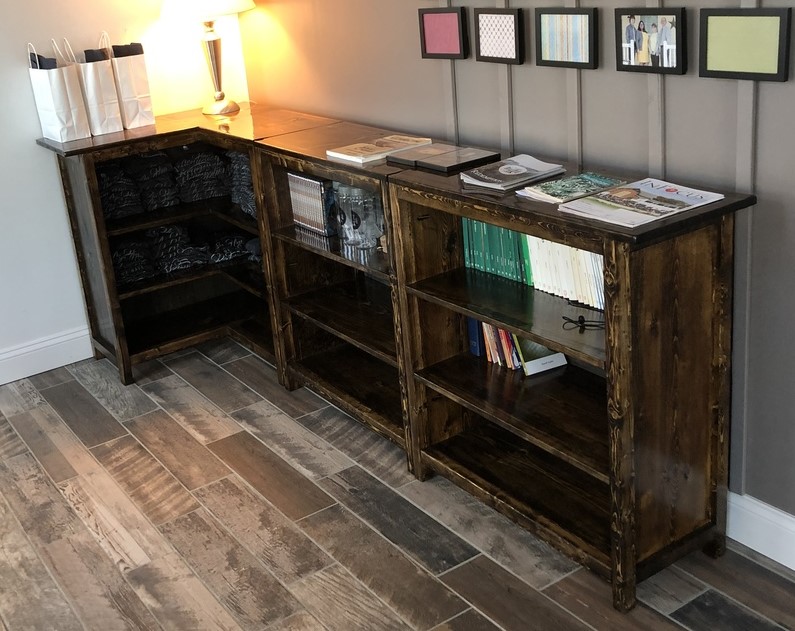
Made it taller and added a shelf

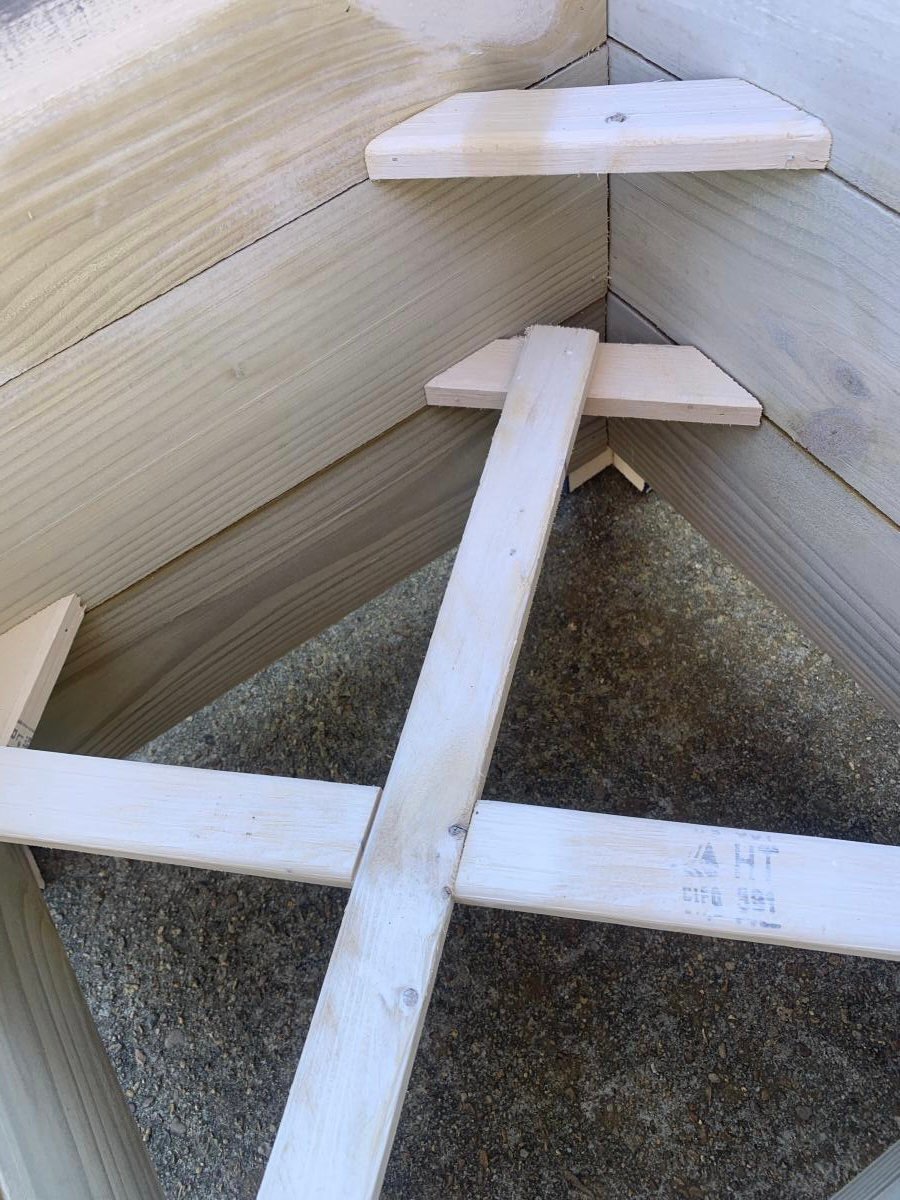
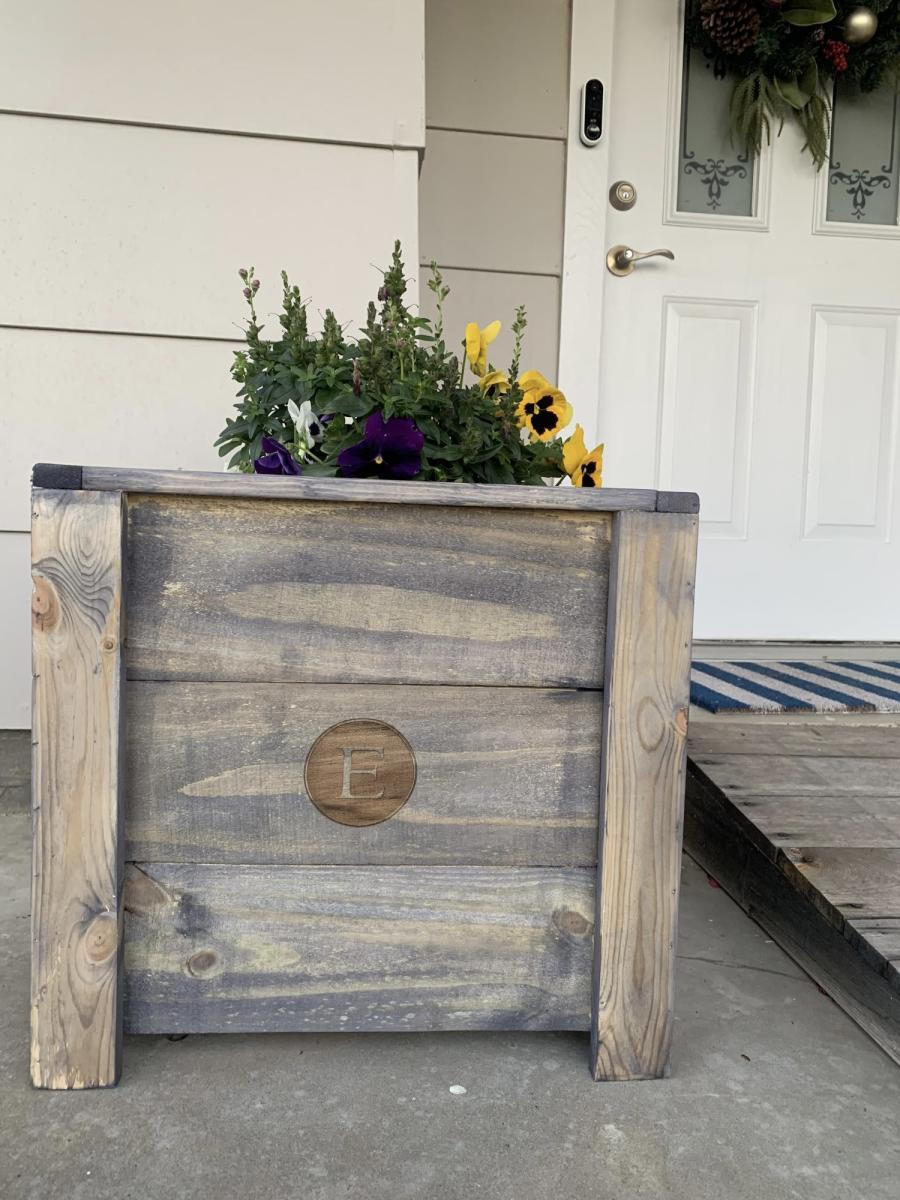
Loved building these planter boxes!
I was able to use my laser to addd some personalization.
I also added small wedges at two levels in all four corners. This not only made it very sturdy but with a half lap “x” it creates two levels to pick from for different size pots
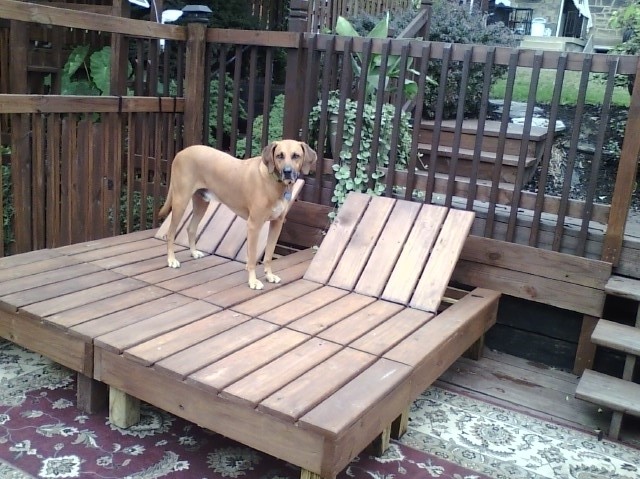
I had an idea in my head of what I wanted for deck seating/lounging in my mind but just couldn't seem to get to the "nitty gritty" of creating workable plans. Then, while googling through images of double loungers I stumbled onto Ana's site. Wow! I felt like a fish that had just found the water! With the detailed plans generously provided for a double lounger I was able to create my "vision" with just slight modifications. The loungers are actually two chairs and two ottomans that fit together or come apart depending on how much "togetherness" the situation calls for. And best of all - almost all the materials were left overs and cut pieces from another deck and fencing project. For cushions (not in this photo) I used two inexpensive "Hide A Mats" folding beds from Costco that I covered with waterproof duck fabric. I can't thank you enough, Ana, for taking the time to share your talent so freely. I'm truly grateful. As is Jake, the Redbone Coonhound, who insisted on being in the photo!
Tue, 10/04/2011 - 22:46
Beautiful job! I really need to create these for our backyard too, and Buck, our treeing walker coonhound :) lol. Jake is a cutie!
Tue, 10/04/2011 - 22:46
Beautiful job! I really need to create these for our backyard too, and Buck, our treeing walker coonhound :) lol. Jake is a cutie!
Thu, 10/06/2011 - 06:18
I would have never thought to break it up into a chair and ottoman. Brillant! I love that idea!
We made this for our sons 5th Birthday. We adjusted the measurements for a twin/XL hoping it will last him until college!
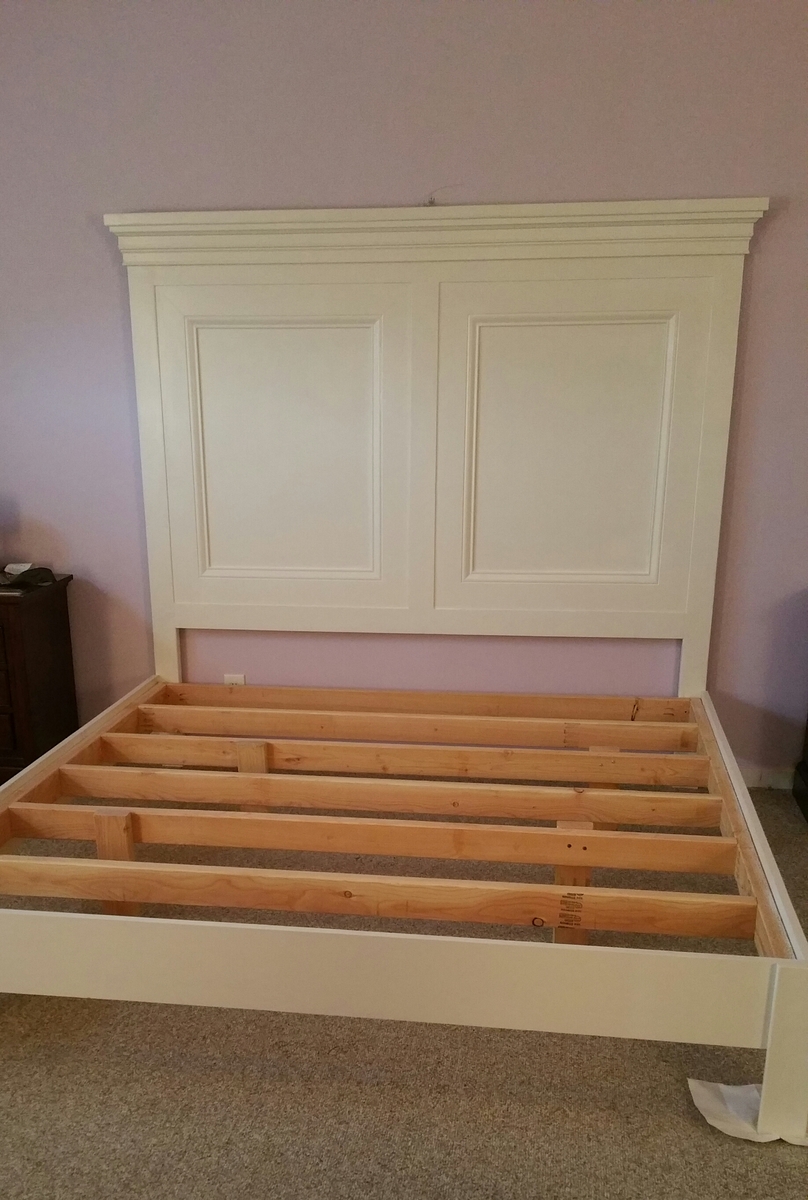
I had loved the king size panel headboard so I knew I wanted to build that, I also built the platform and remainder of the frame from the farmhouse king bed plan. It took me a while to get this built but was totally worth it.
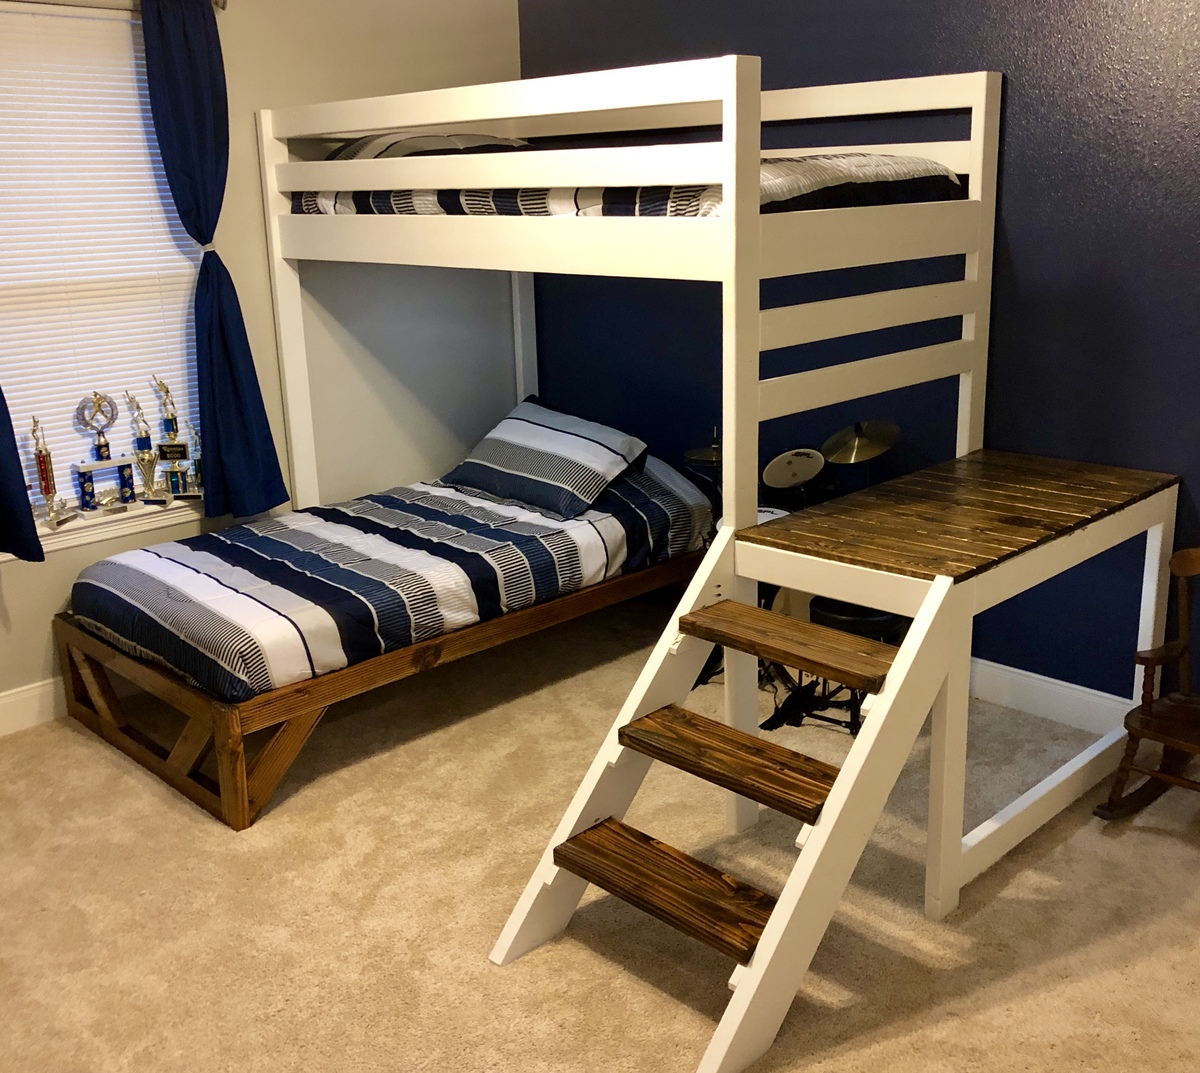
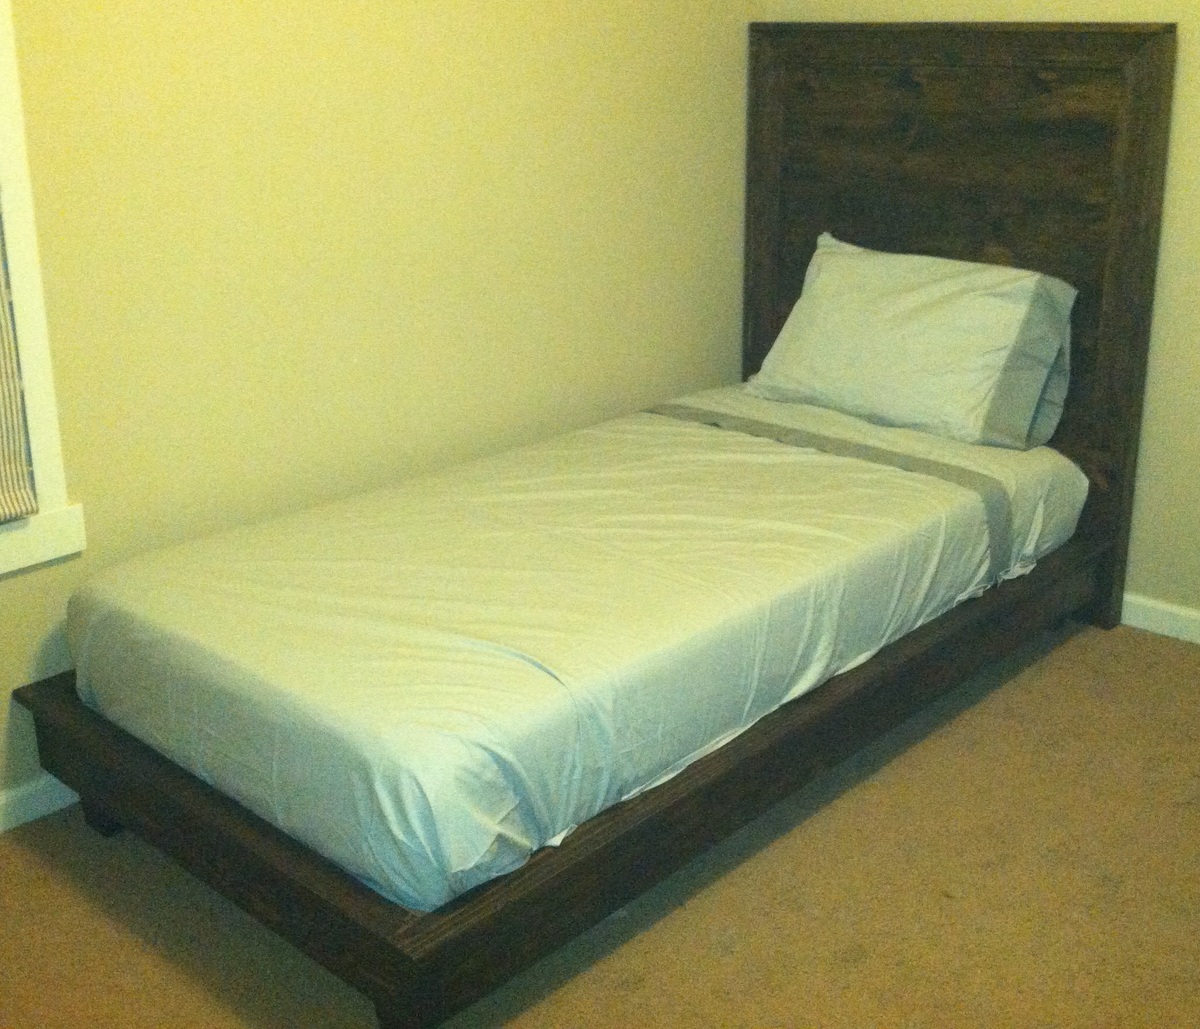
Loft bed over perpendicular twin base. Added puck led lighting for about $10.

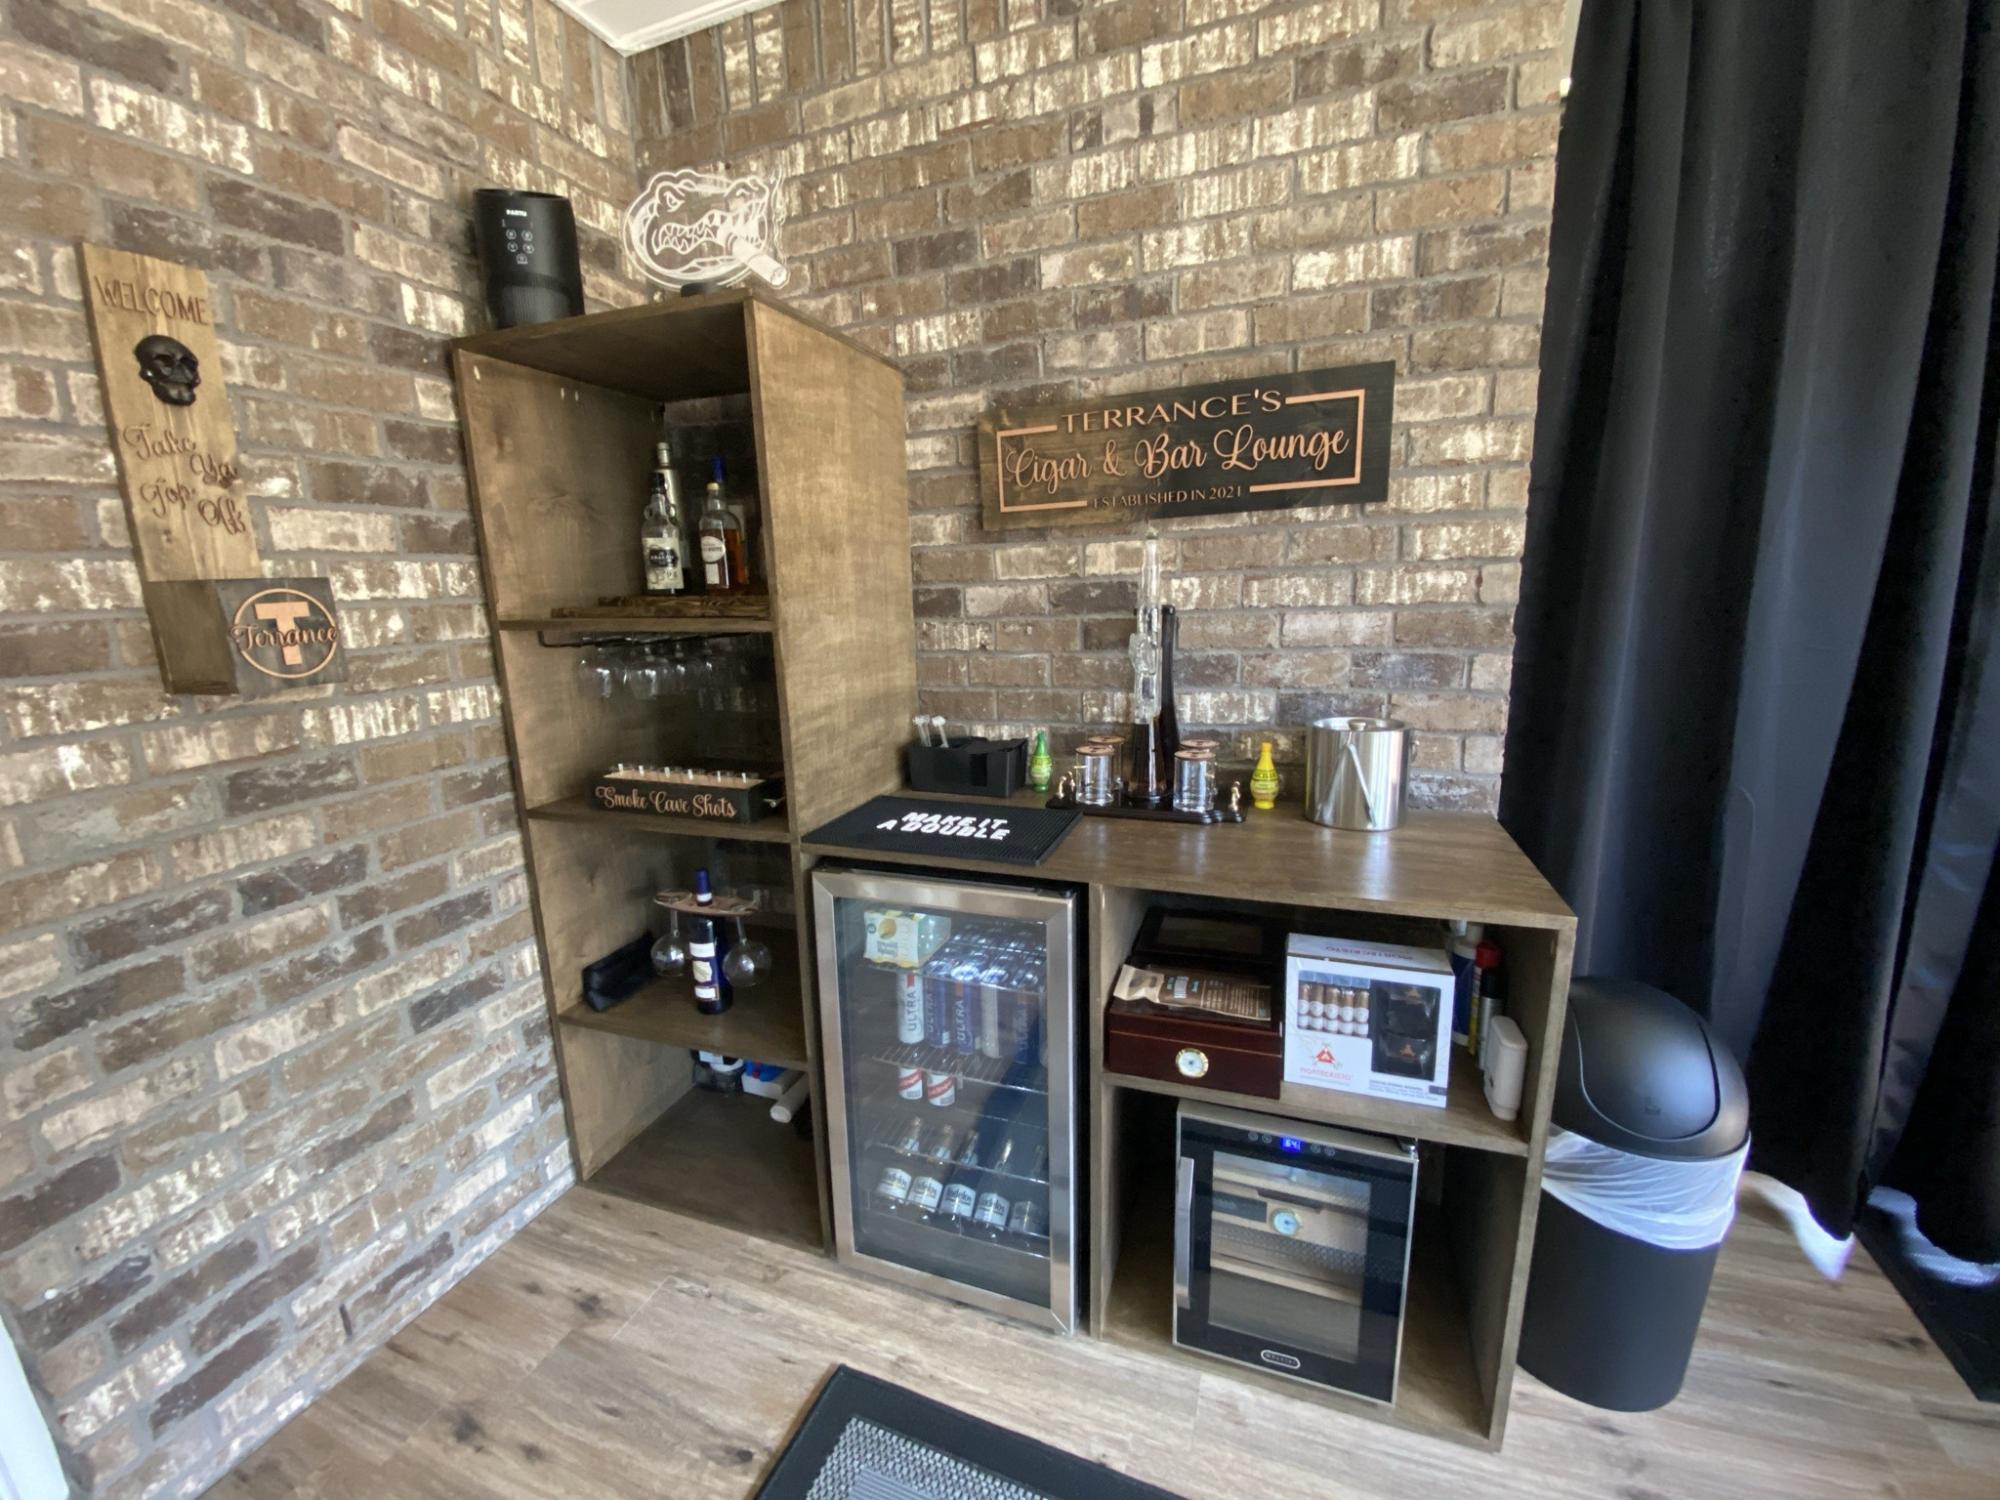
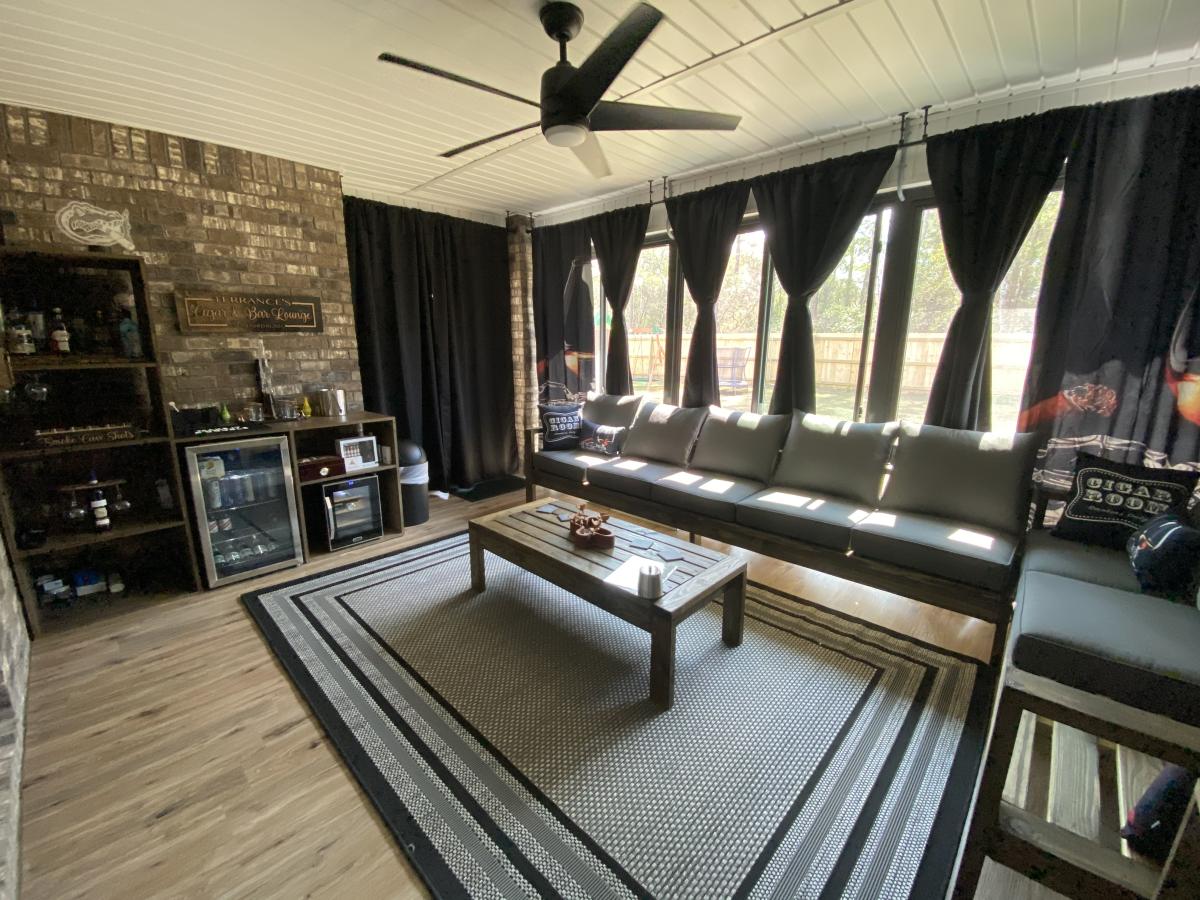
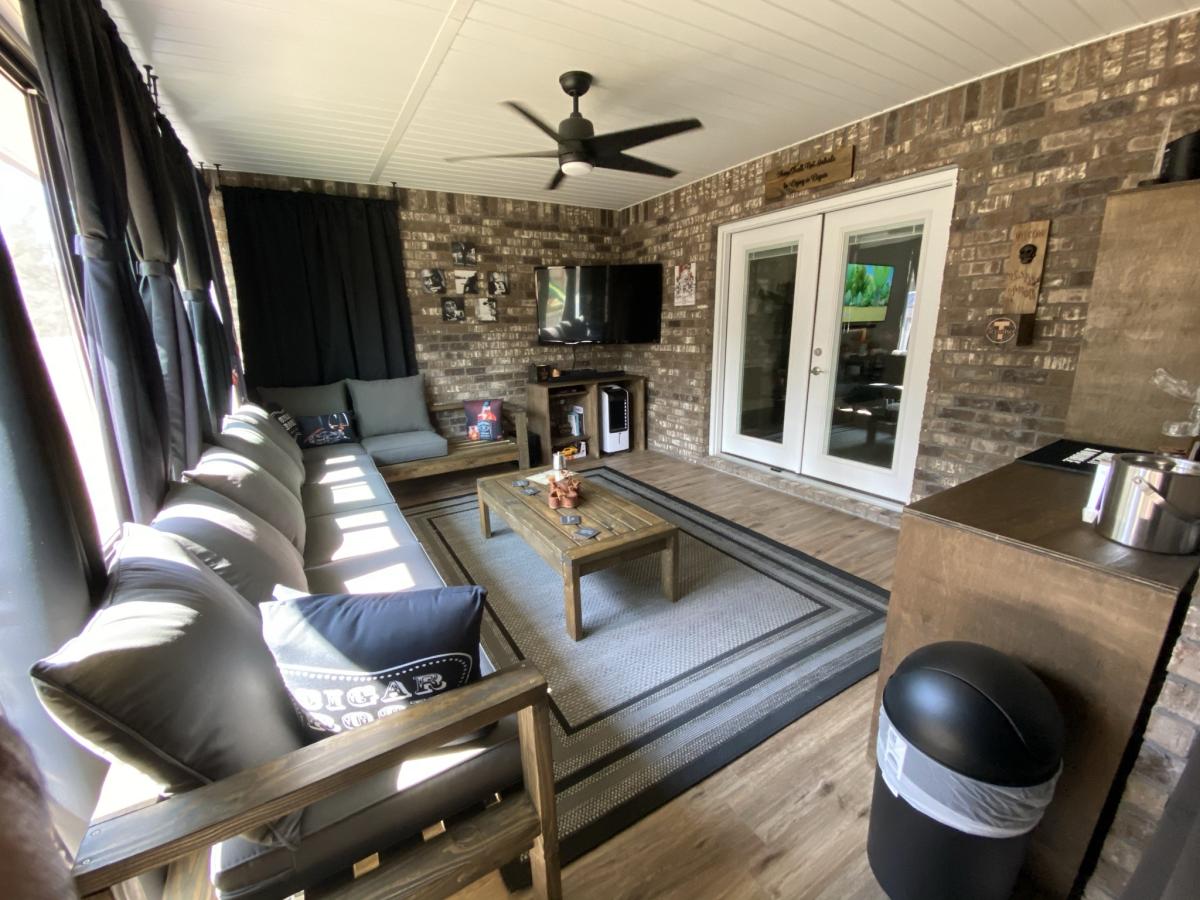
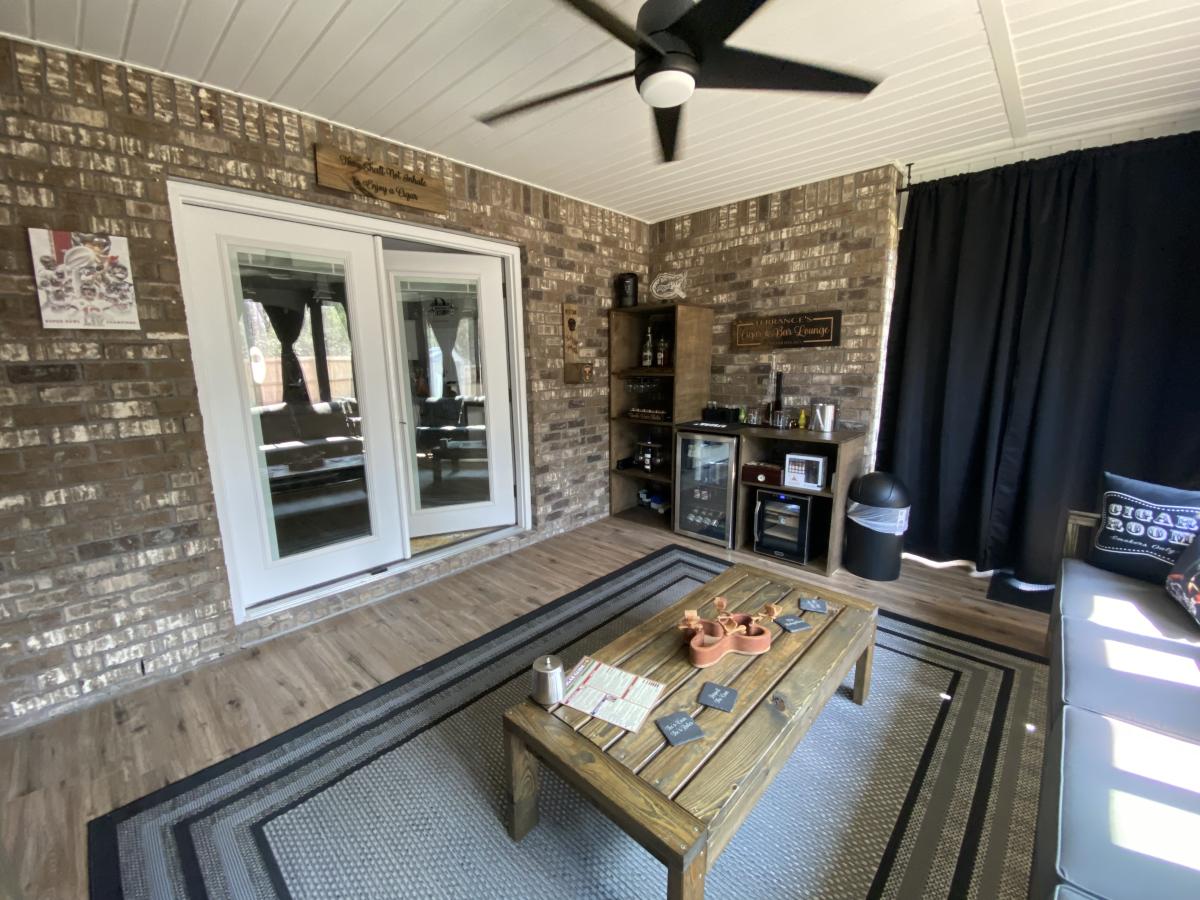
Resized the sectional to fit on our patio for my husband’s man cave! Also built the table and bar area using Ana White’s wood ordering system.
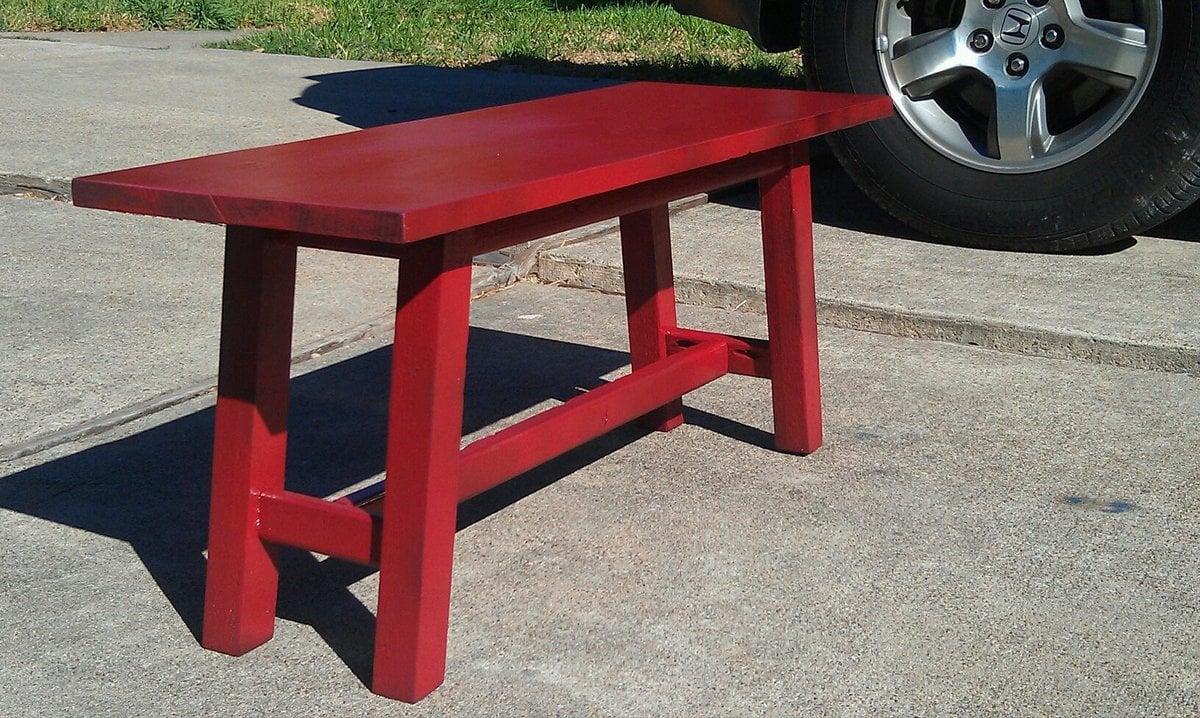
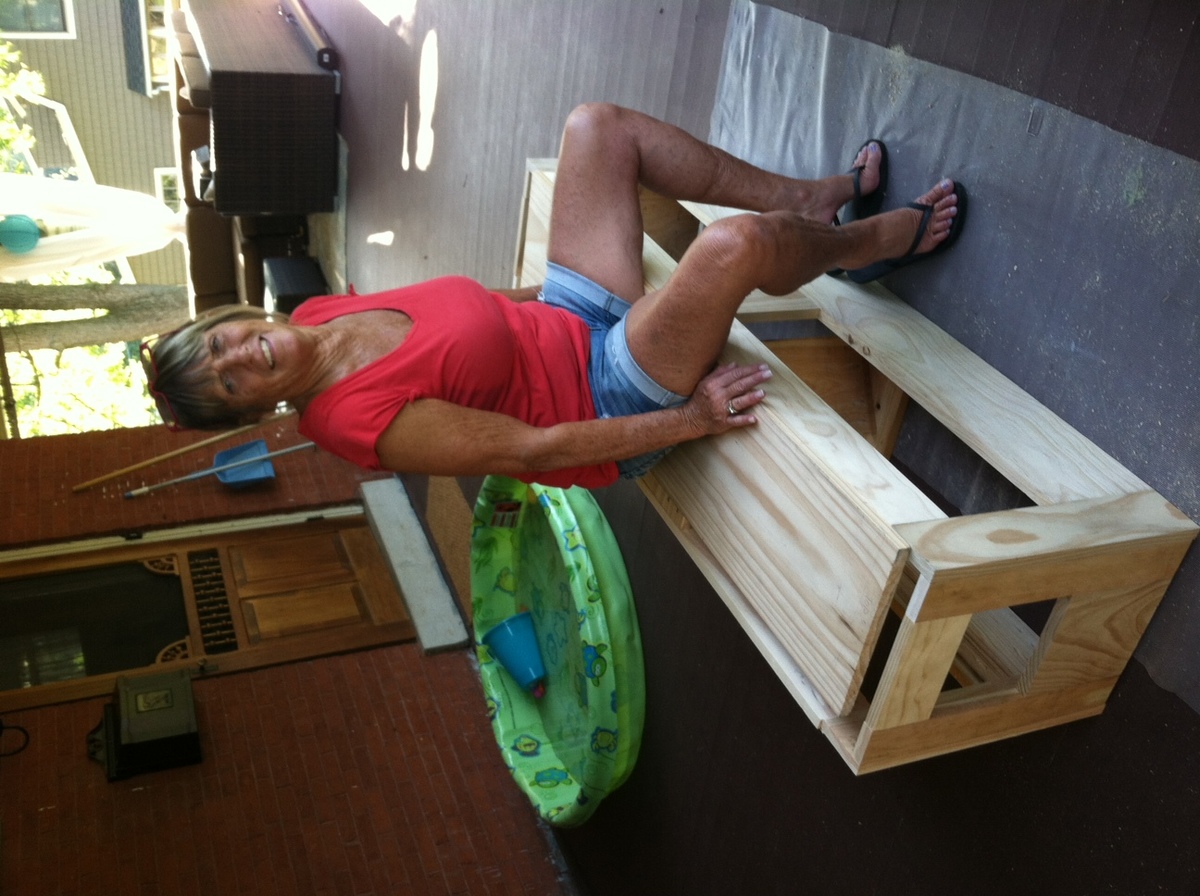
I built a couple trestle play tables for a friend of mine a few weeks ago and she needed some seating, but didn't want stools. So I used the stools as a jumping off point for a small bench for these tables.
I used the height and width of the stool, but then made it long for a bench. Used 10 degree angle cuts for legs (not double bevel), added apron and stretcher, then nailed on the top.

Love this table! We scaled it down to a 7 foot table. Very easy to make, very simple to follow instructions. This table cost us $400 to make. That is because we purchased the Kreg Jig master kit for $139. We also purchased a gallon of the stain which was $27 and a gallon of the Miniwax that was $38. You do not need a gallon of either for this project. We have other projects of Ana's that we want to do with the same color stain, that's why we bought so much of it. If you already have all of the tools and if you purchase a smaller amount of stain and Miniwax, this project will cost you a lot less to make. Keep this in mind before you go to Lowes! Thank you Ana!!


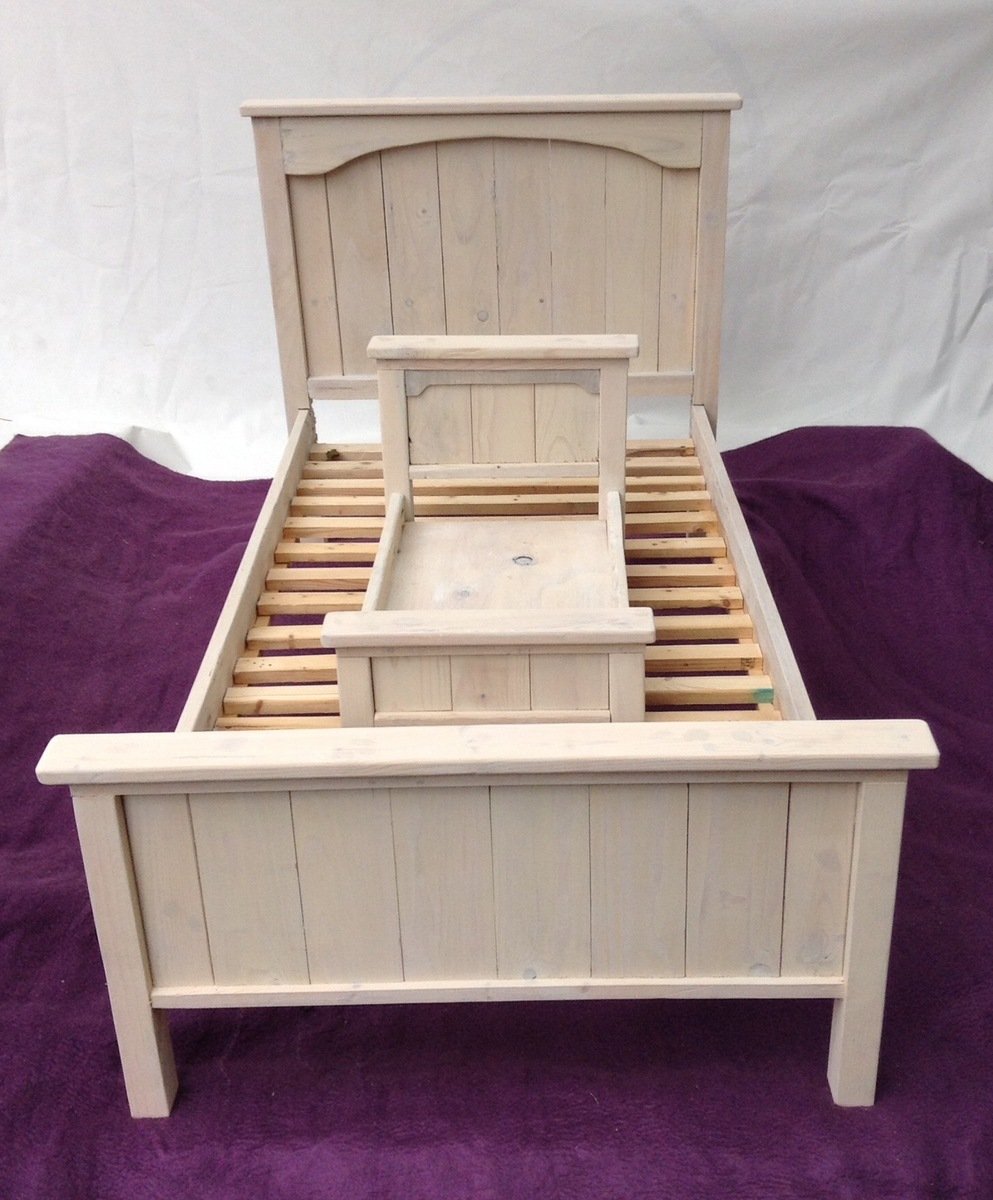
Fun to build altered the doll plan a bit with a spare peice of plywood to match the toddler bed better.

Had a lot of fun building this coop! We added a nesting box, a back ventilation door and a side doo that opens for full cleaning.


Tue, 04/07/2020 - 15:15
Love you version and add ons! How is it going in real life? I was also wondering if add a nest box no the side...

This was my first time building a hall tree. I’m a huge fan of Ana White and love watching her videos and tutorials. I’m not an expert builder, just self taught. For this project, I used bead board for the backing which cost about $31, and it’s called Rustic Barnwood. I also decided to go with something different, and chose Slate stain to give some slight contrast. I really enjoyed working on this. I can’t wait to share my next project. Thank you Ana, I’m a huge fan!


Wed, 02/01/2023 - 08:53
Great hall tree, thank you so much for sharing, can't wait to see your next project!
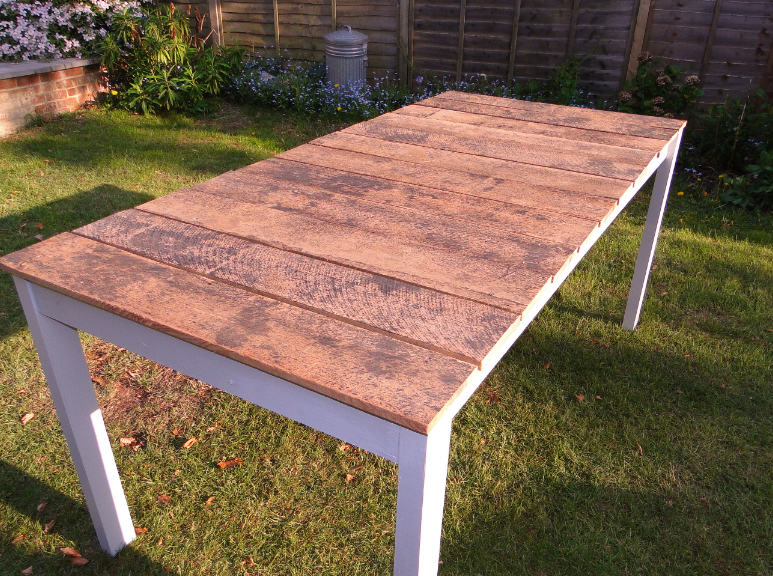
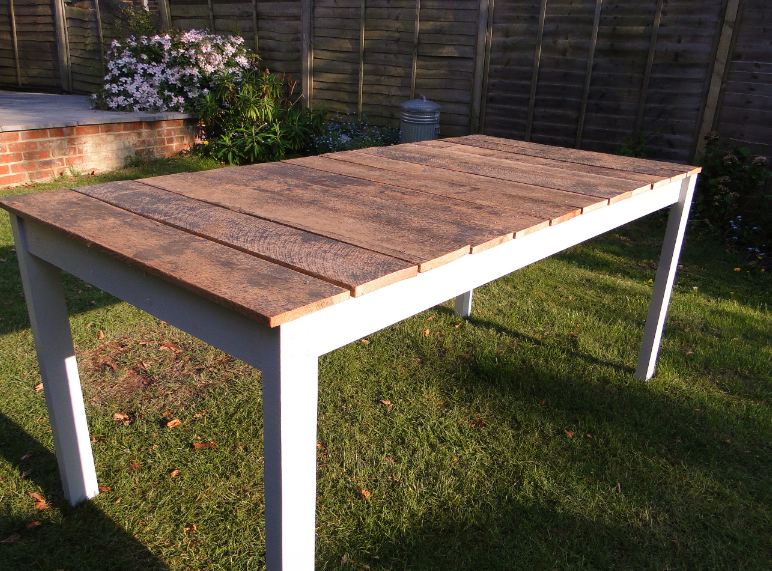
We really needed a large outdoor table for the Royal Wedding, and though the designs Simple Outdoor Dining Table would be perfect.
We used reclaimed roofing timer for the top and painted pine for the base. Really easy to build and it was a really quick solution. All in it cost us around £80 to build and took half a day.
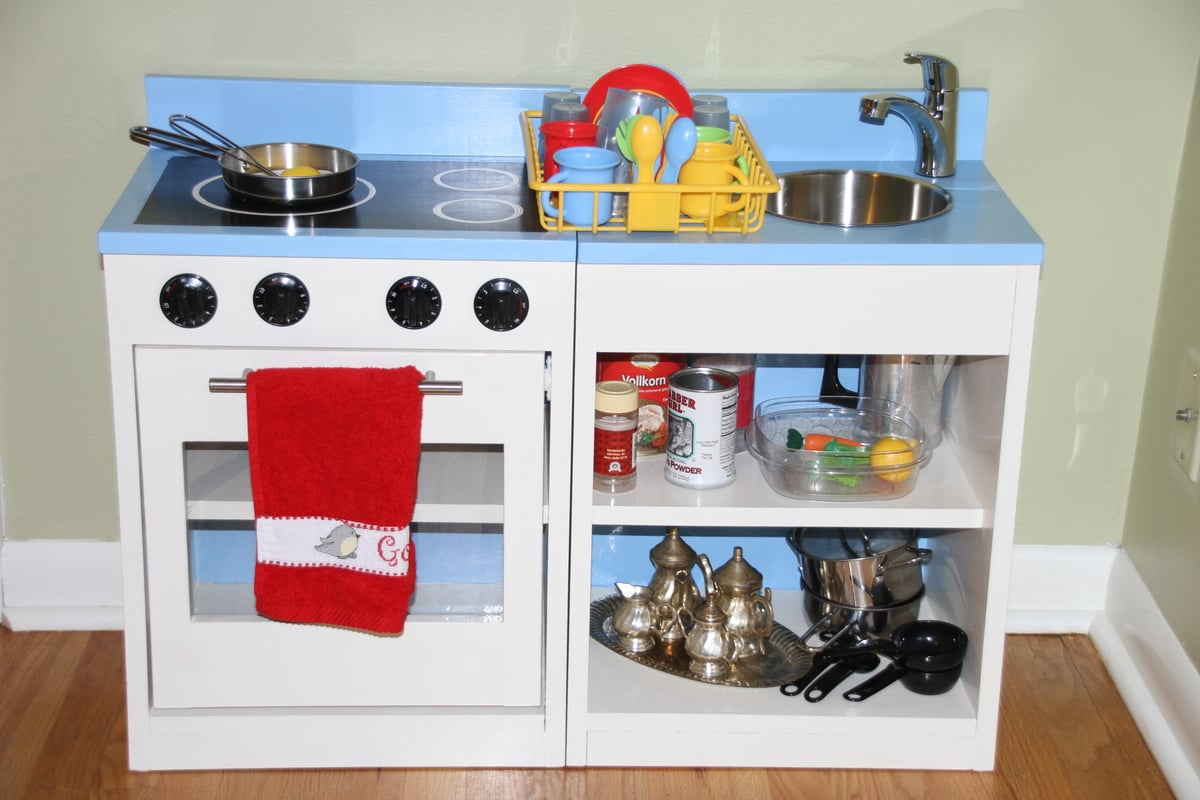
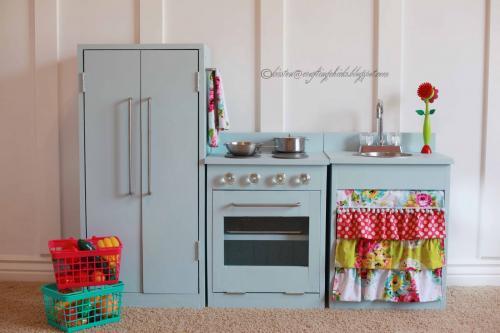
Our finished stove and sink play kitchen! It was an easy build, it just a loooong time to paint, finish and find accessories. We found stuff mostly through amazon. It took us about 20 hours to do (4 for building) and turned out great. Some tips: Prime boards before assembling. It will save lots of time! We put 3 coats of poly to seal everything in. We used euro style self closing hinges which look so nice! Also, we ended up using black paint for the stovetop and white paint for the "burners"

Fri, 10/11/2013 - 16:10
This is super cute! You did a great job on this, love the way you decorated and accessorized. :)
Fri, 10/11/2013 - 19:54
This is so cute! You did a fantastic job. Great idea to just paint the burners. It looks really good. I think I might make this my next project. Then I can get rid of the ugly plastic play kitchen.
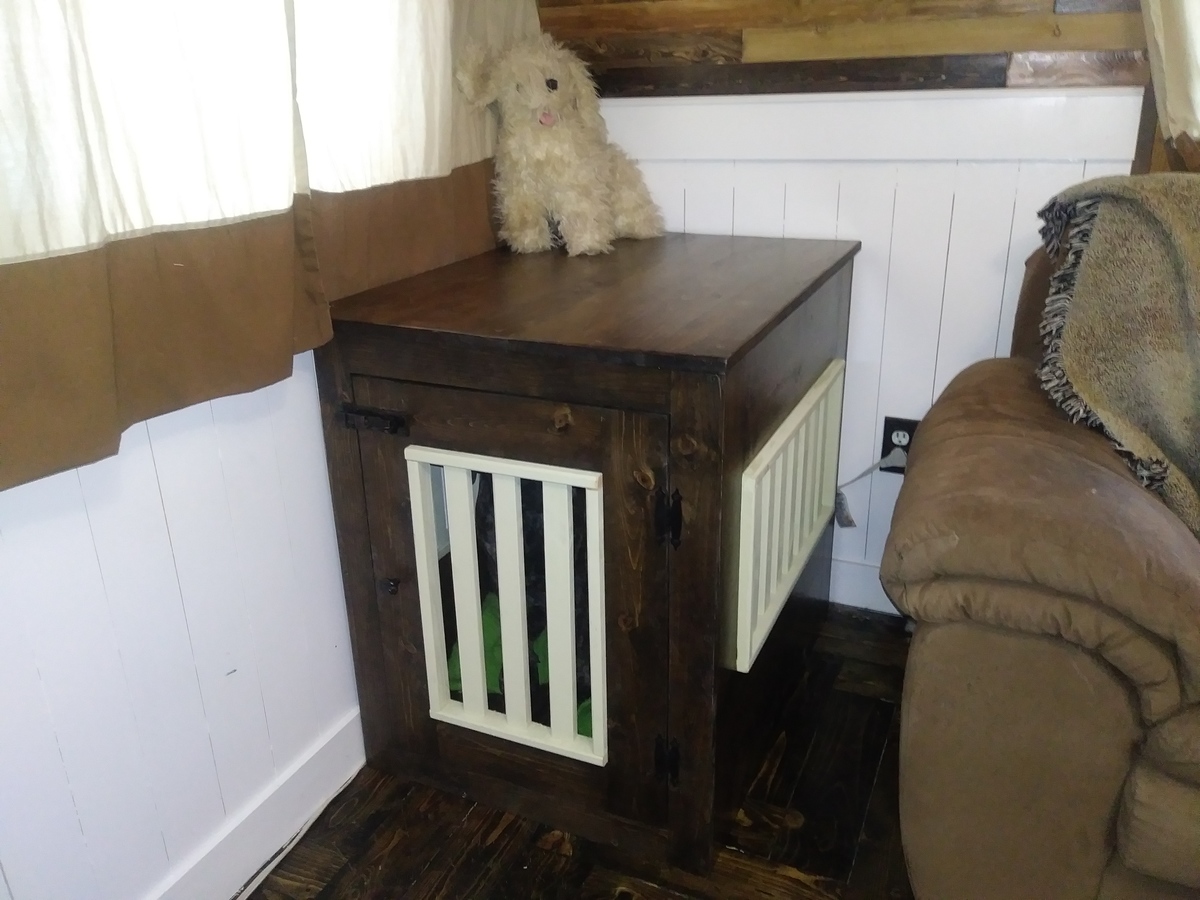
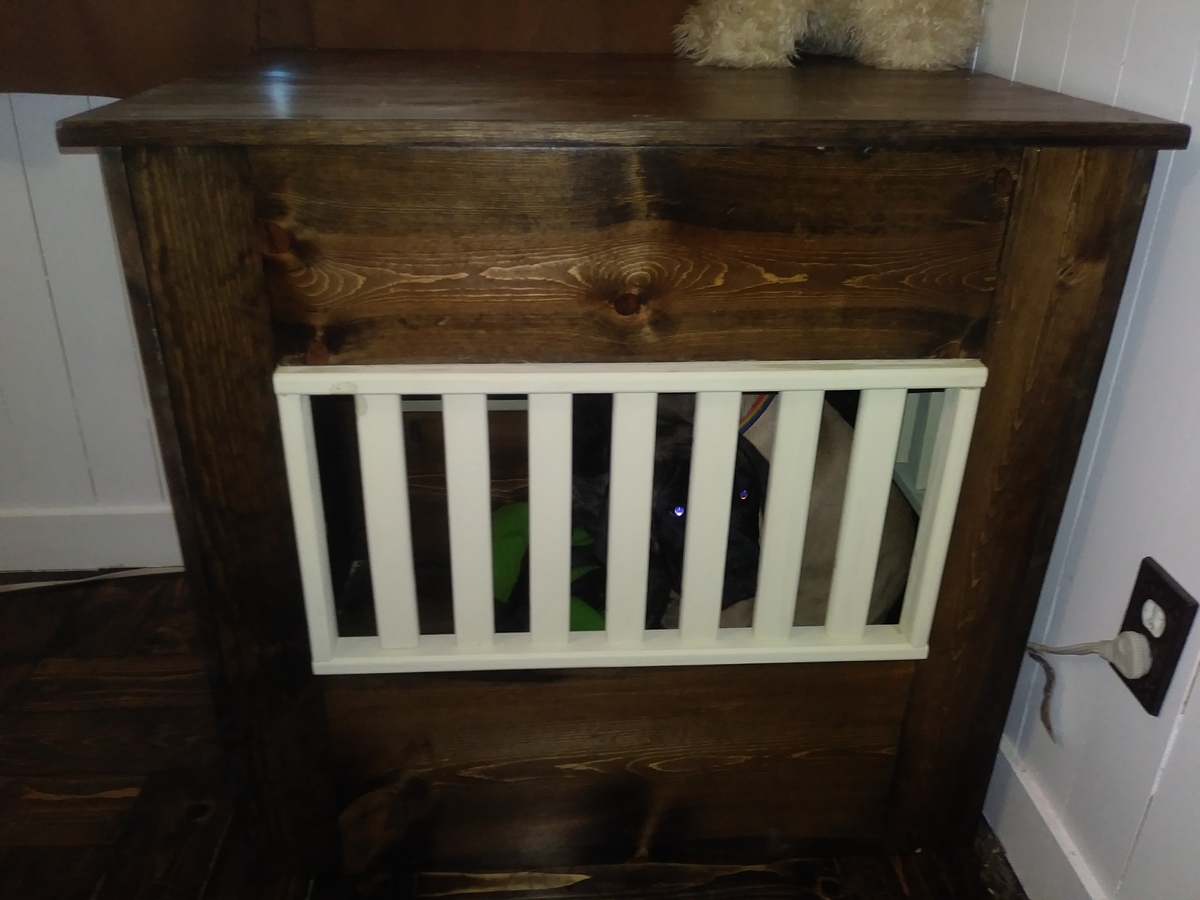
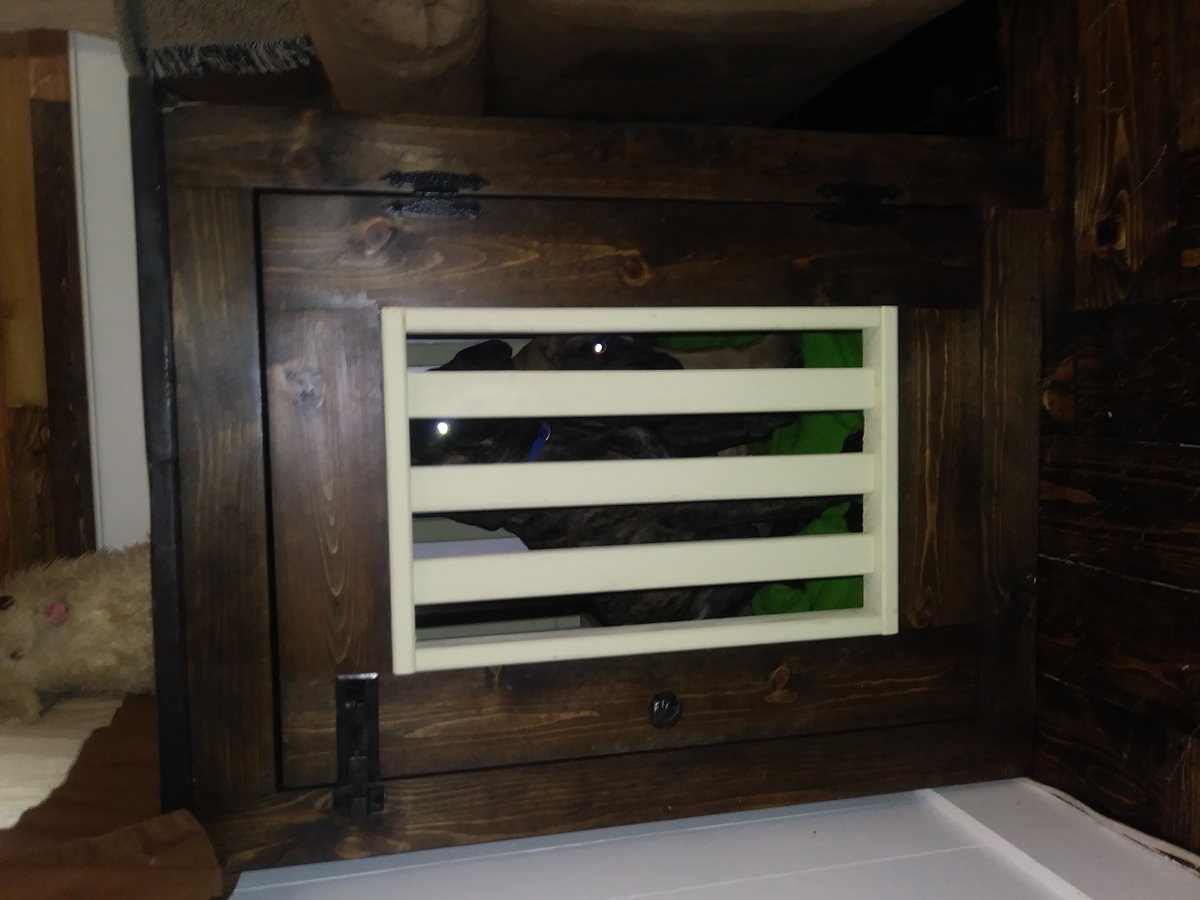
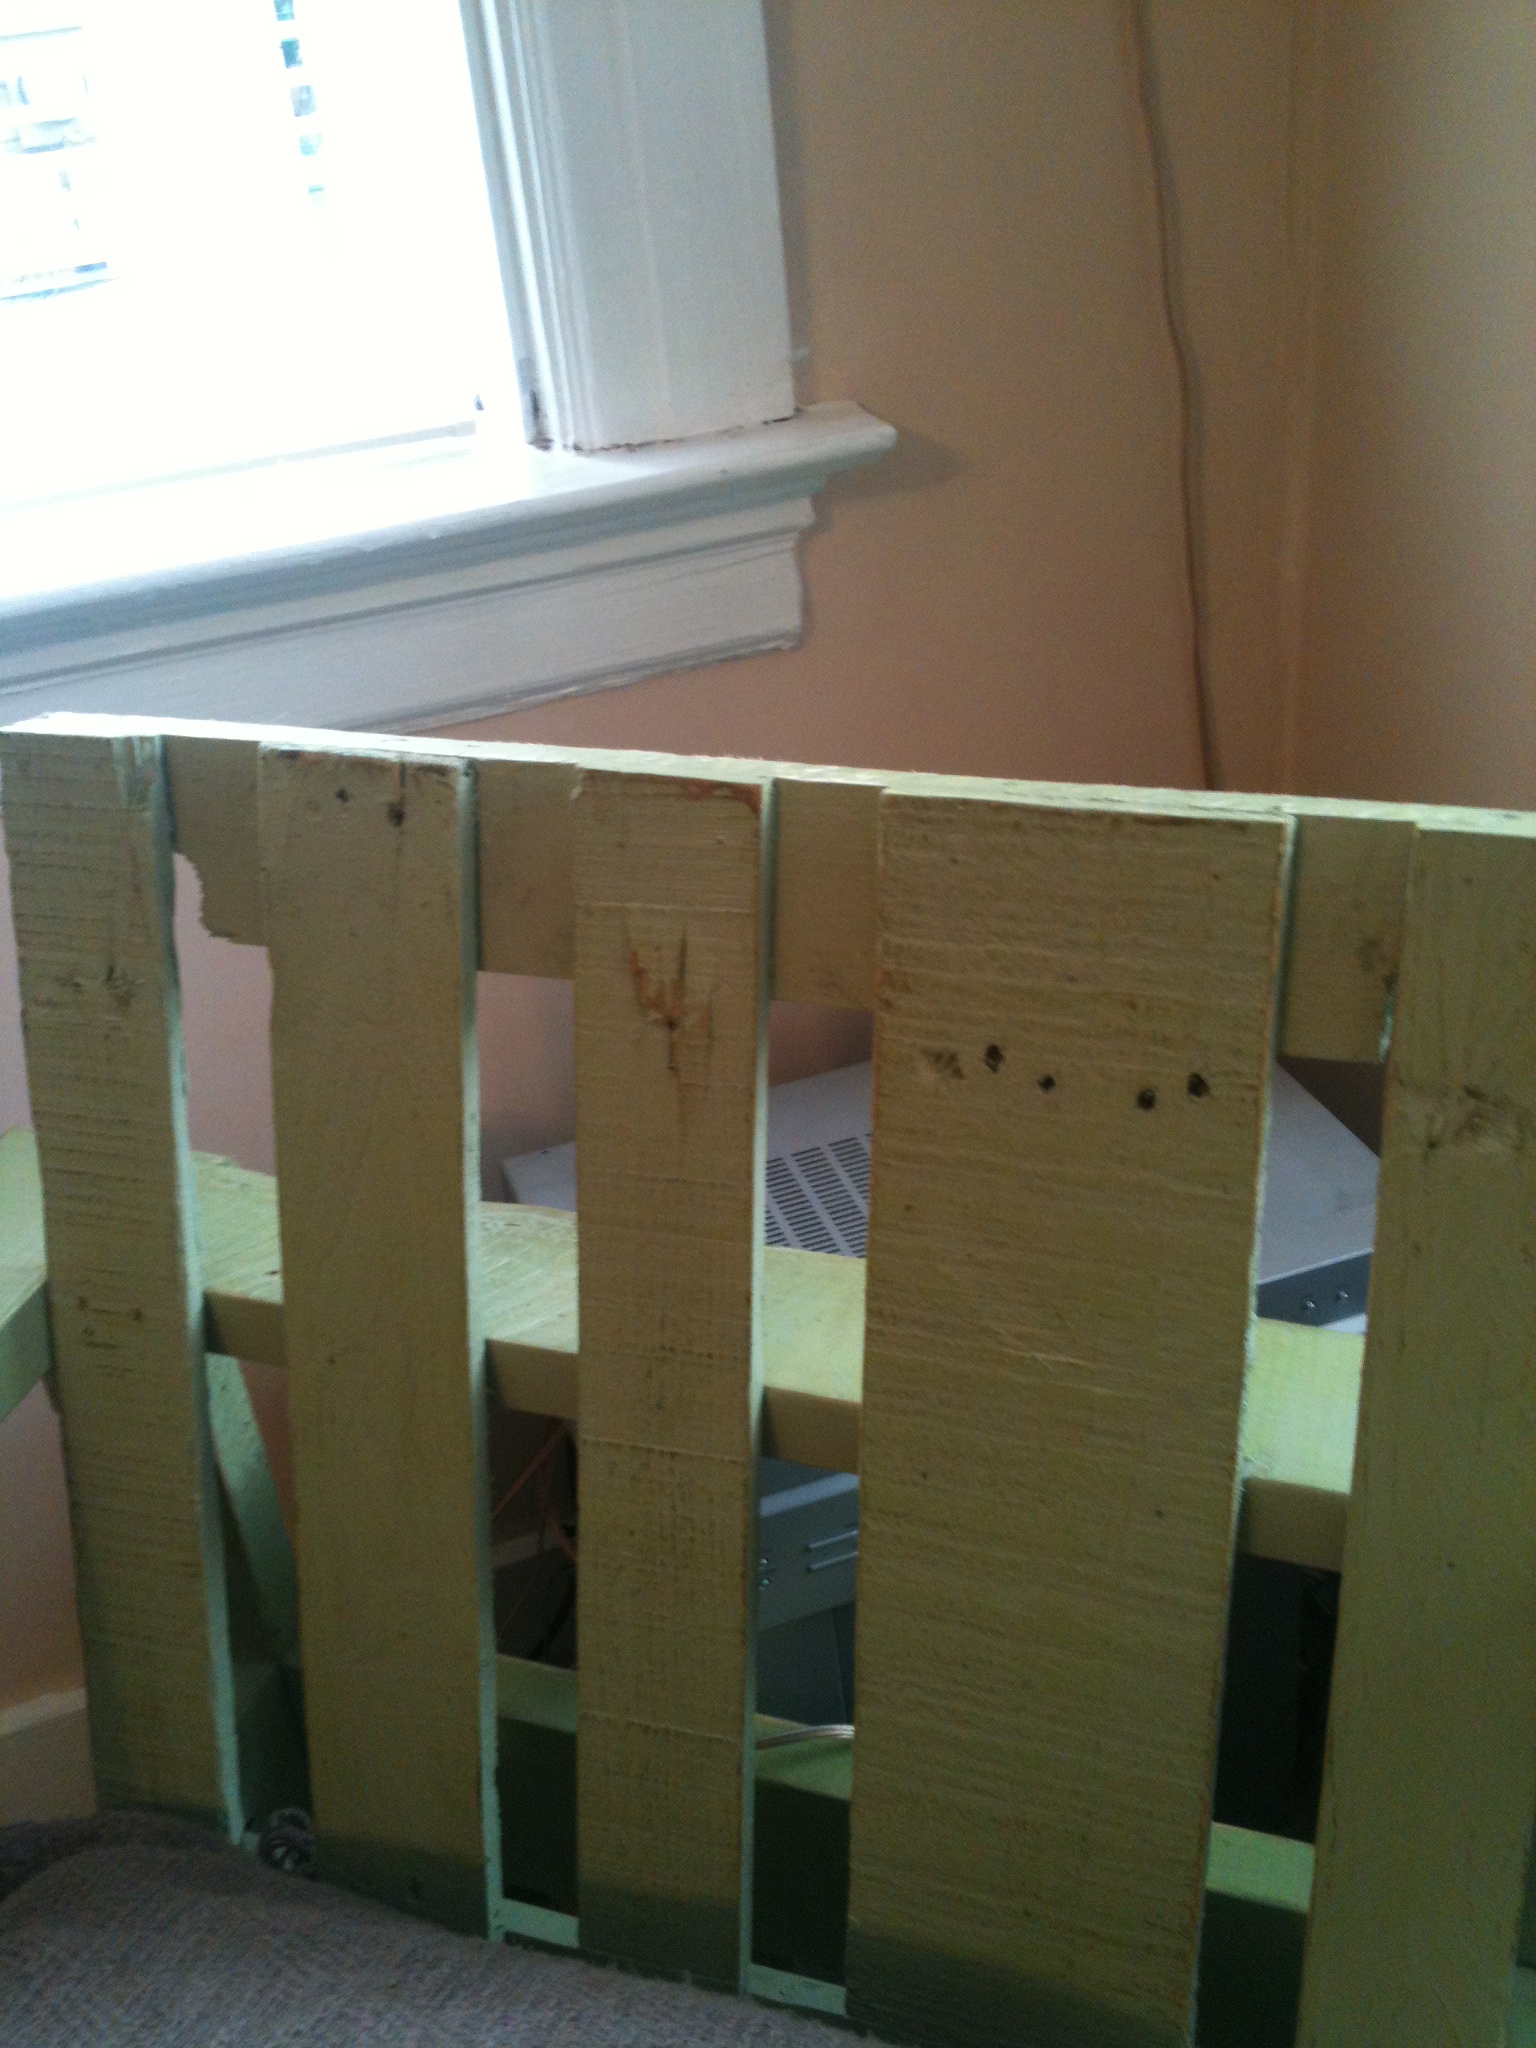
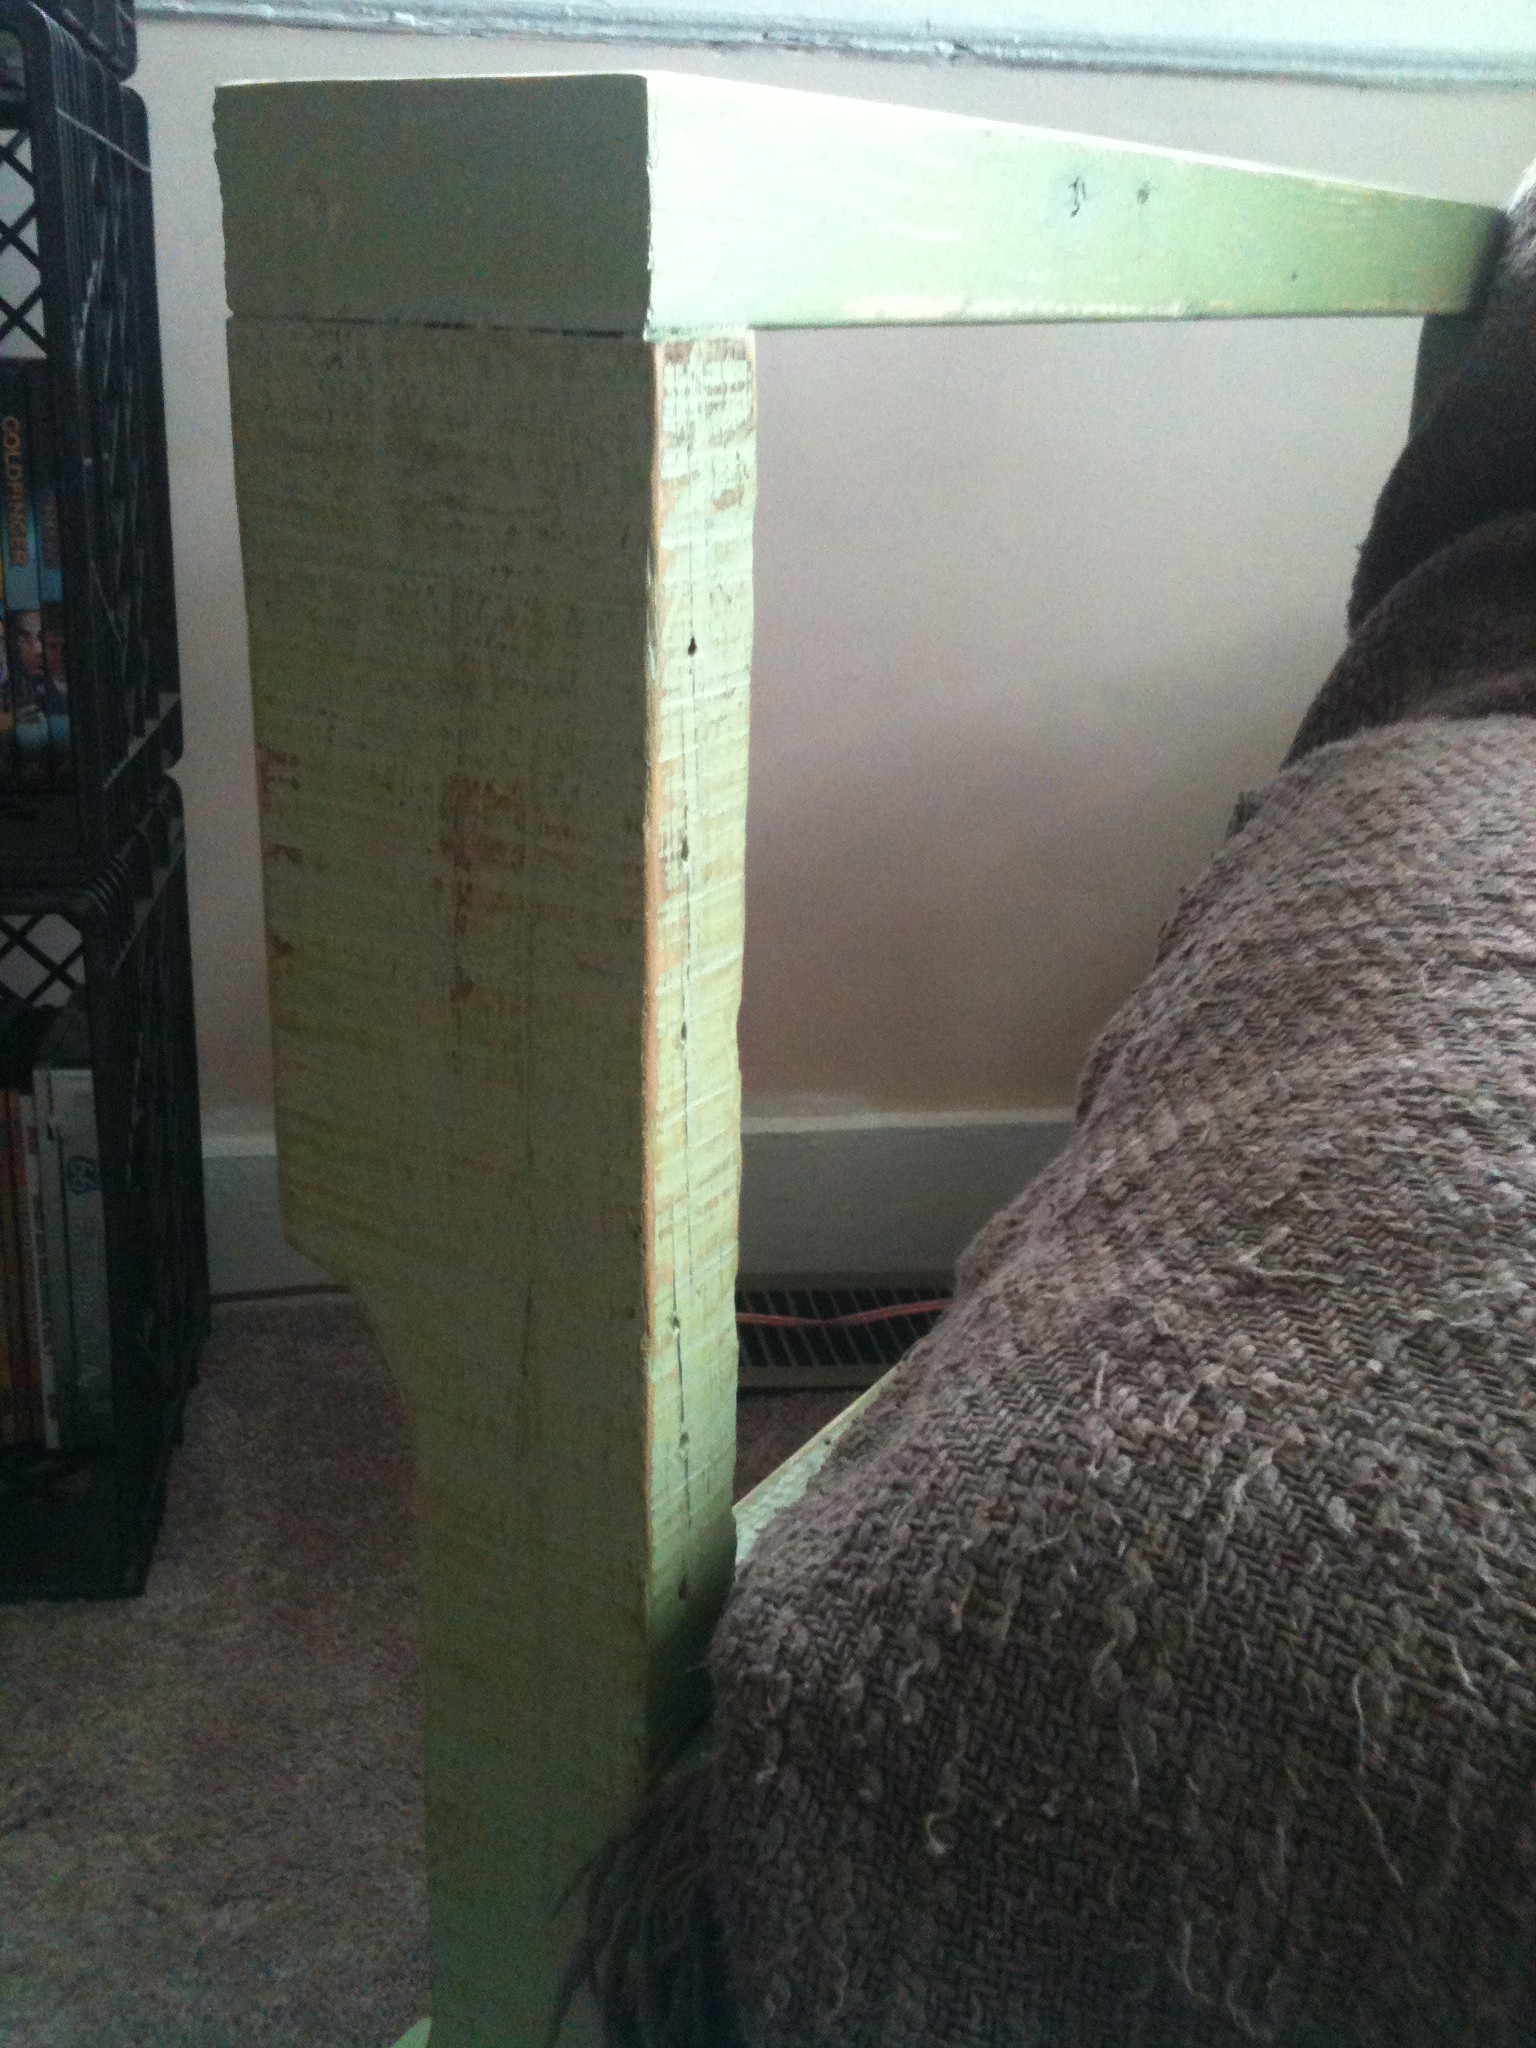
I got a puppy. A joyful, full of energy and fun-loving English mastiff puppy. Best way to potty train a 40 lb puppy is crate training and the entry way's wall was getting eaten. So I made this in a couple of days. Mostly just waiting for the stain, paint and poly to dry and it's up and working.
Hinges on sale at Lowes going out of business =$0.99
Latch on sale at Hobby Lobby 50% off = $5.50
Knob purchased at ReStore =$0.50
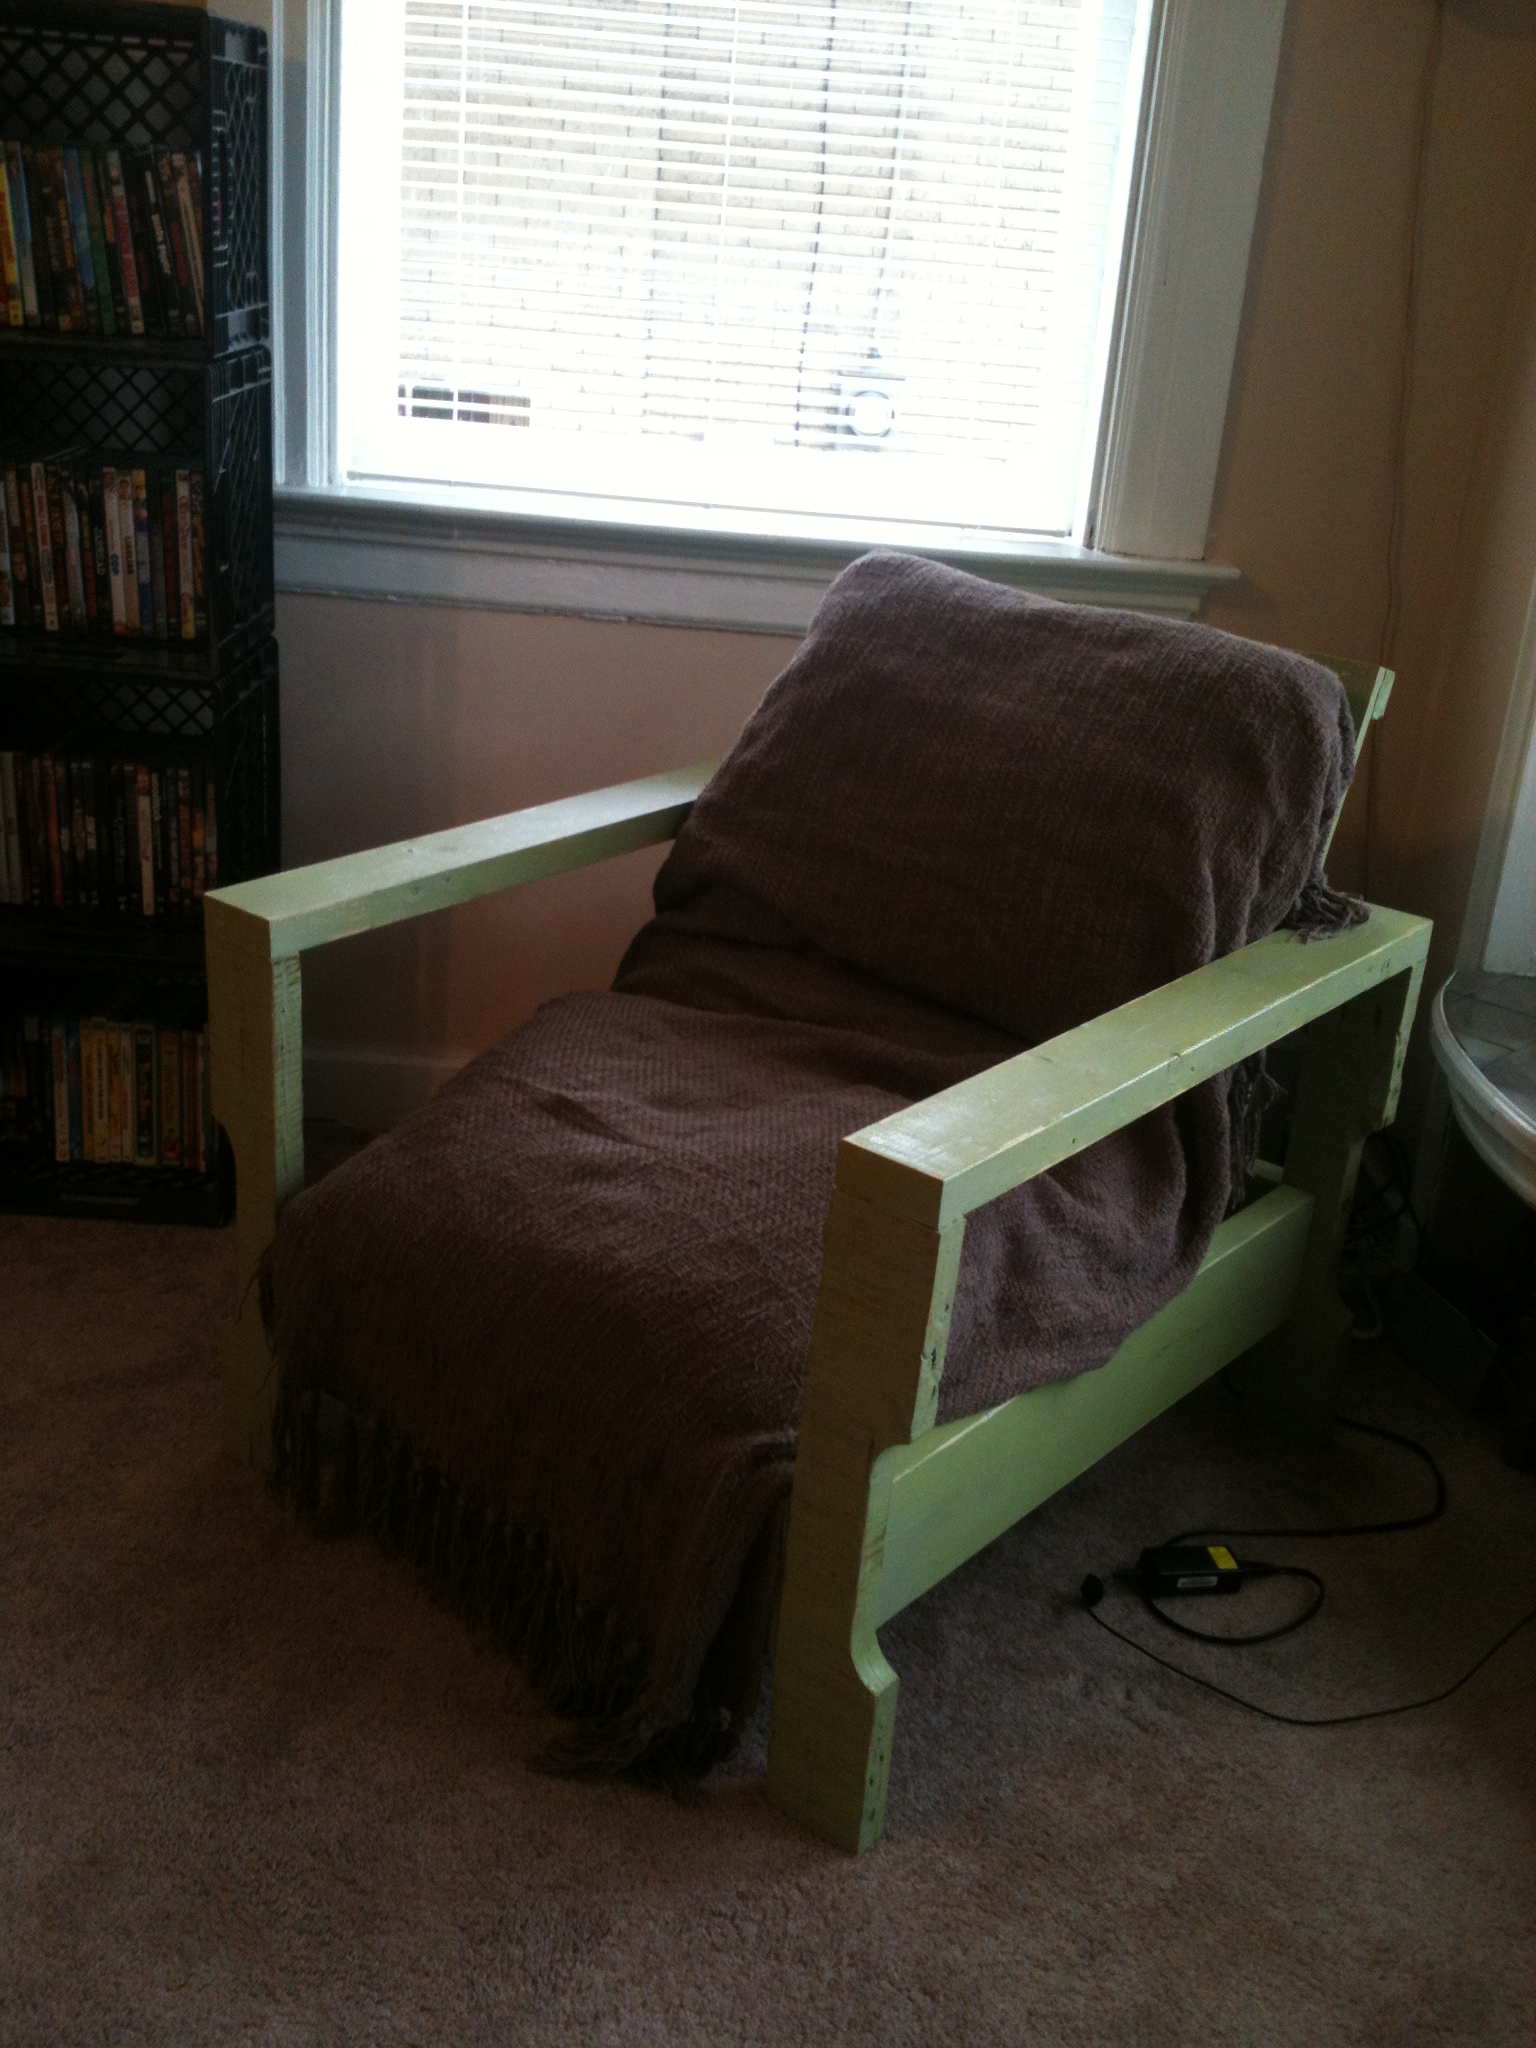
This is a continuation of my "crap the roommate moved out and I need furniture to fill the gaps before a party" series.
This one is pretty straight forward really, it's just the simple white outdoor chair with 2X4's instead of 2X2's for the arms. The slats are also a different size but that's hardly noteworthy since they get hidden by cushions anyways. Speaking of cushions, right now it just has some temporary ones covered with a throw to make it presentable, shortly here I'll make some better ones.
The plan really was quite simple and easy to make, the only thing I had to make sure of was that I could fit it up the basement stairs, so the back was left off and nailed in place once I got it in the living room.
Wed, 10/19/2011 - 20:33
Dude! I am lovin' what you've done with the pallets! Great job! And pleeaase tell me your roomie didn't take your drink station?! That piece is beautiful, and I do believe I will be mimicking that cross breed. lol.
Thu, 10/20/2011 - 18:14
Oh no worries, anything I've made stayed with me. It's just out of frame next to the glassware shelves.
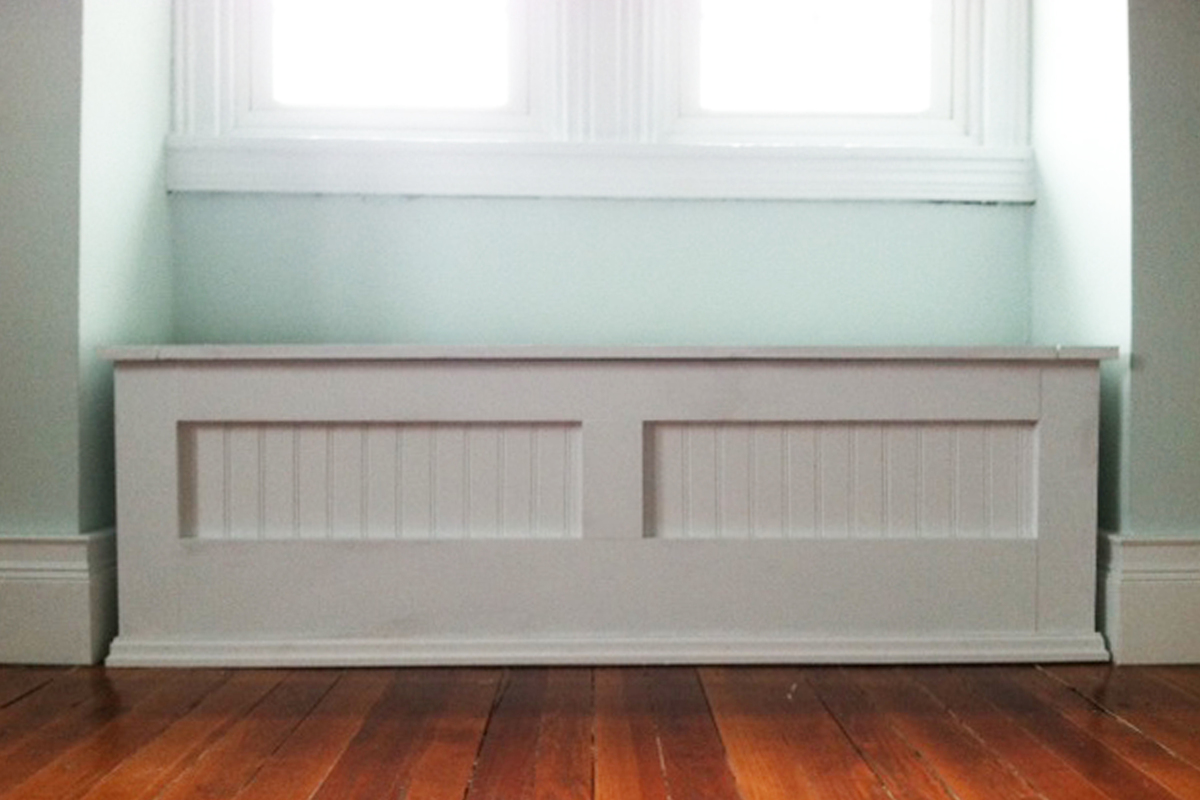
Here are some tips I outline in my blog post on http://momprojects.com
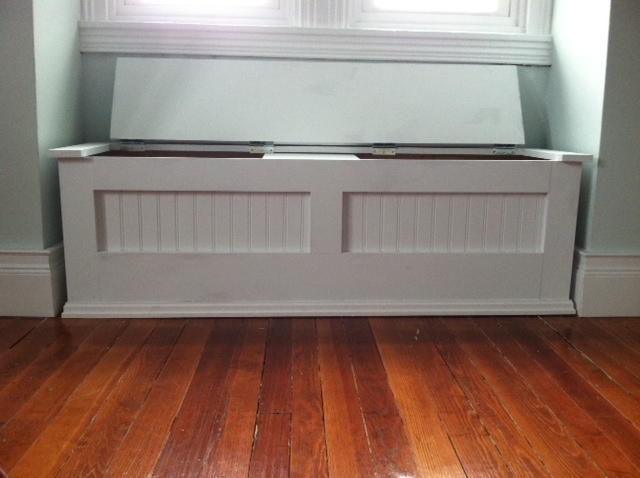
1.) wood selection- I used pine. I think I would have used poplar if I did this all over again. I found out it is a bad idea to put pine through a joiner and planer due to the sap gumming up the machine. Therefore I was not able to properly mill the boards before starting. It didn't cause the bench to be misaligned but may have been slightly easier to put together had I squared up the boards. Sorry pine...I love you but can't have a sticky joiner!
2.) I built this quite a bit longer than the plans called for and so, for support, I cut 3 boards and kreg jigged them together in the shape of an 'H'. the top and bottom were cut to fit the width of the inside of the bench and the middle board that connects them I cut in the height of the bench (minus the height of the top and bottom support board). Set the 'H' in the center of the bench and use your kreg jig to attach it (mine is way off center but still works great)
3.) It is worth the investment to throw some molding around the bottom. I saved money by not putting molding on the back. I also used a lower grade pine for the sides and the back. In retrospect I probably should have done that on the top too since there is going to be a cushion on it. Oh yea..I am making one and will post it as soon as I do!
4.) Attach the hinges and put the entire top together before attaching it to the bottom part. For some reason getting the hinges on was a little tricky and I suspect would have been a disaster if I had already put the back of the top on the base.
5.) I built the bottom part of the bench and put it in the alcove in my bedroom before attaching the top. I did this mostly because I didn't want to carry that thing up 4 flights of stairs with the heavy top popping open. Once in place I threw on some wood glue, sat the top in place and used my nailgun to securely attach it. My mom was there with the paint roller to touch up a couple spots. Thank you mom, you always leave my house looking better than when you arrived :)

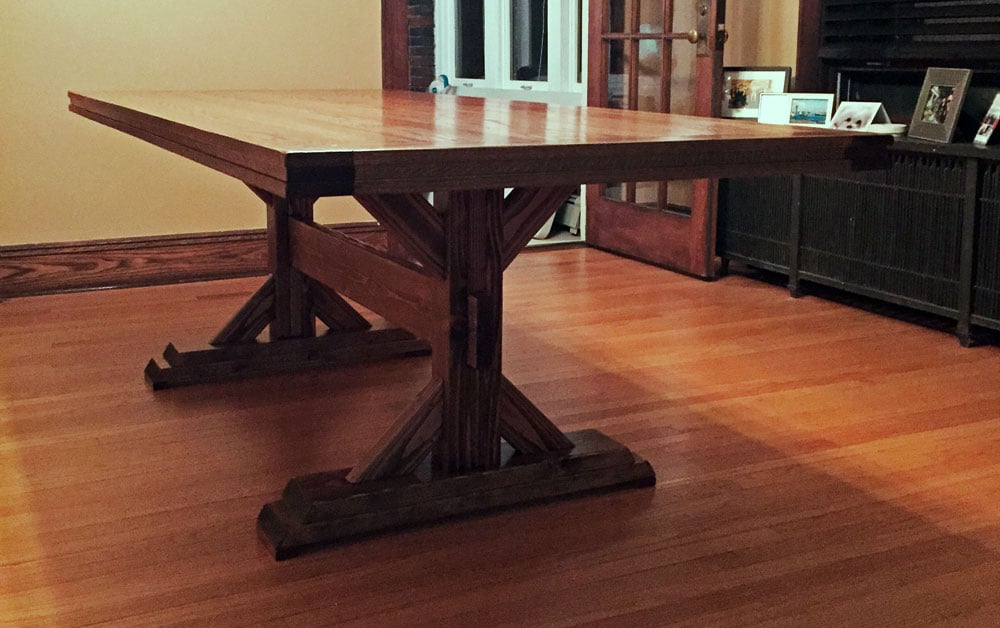
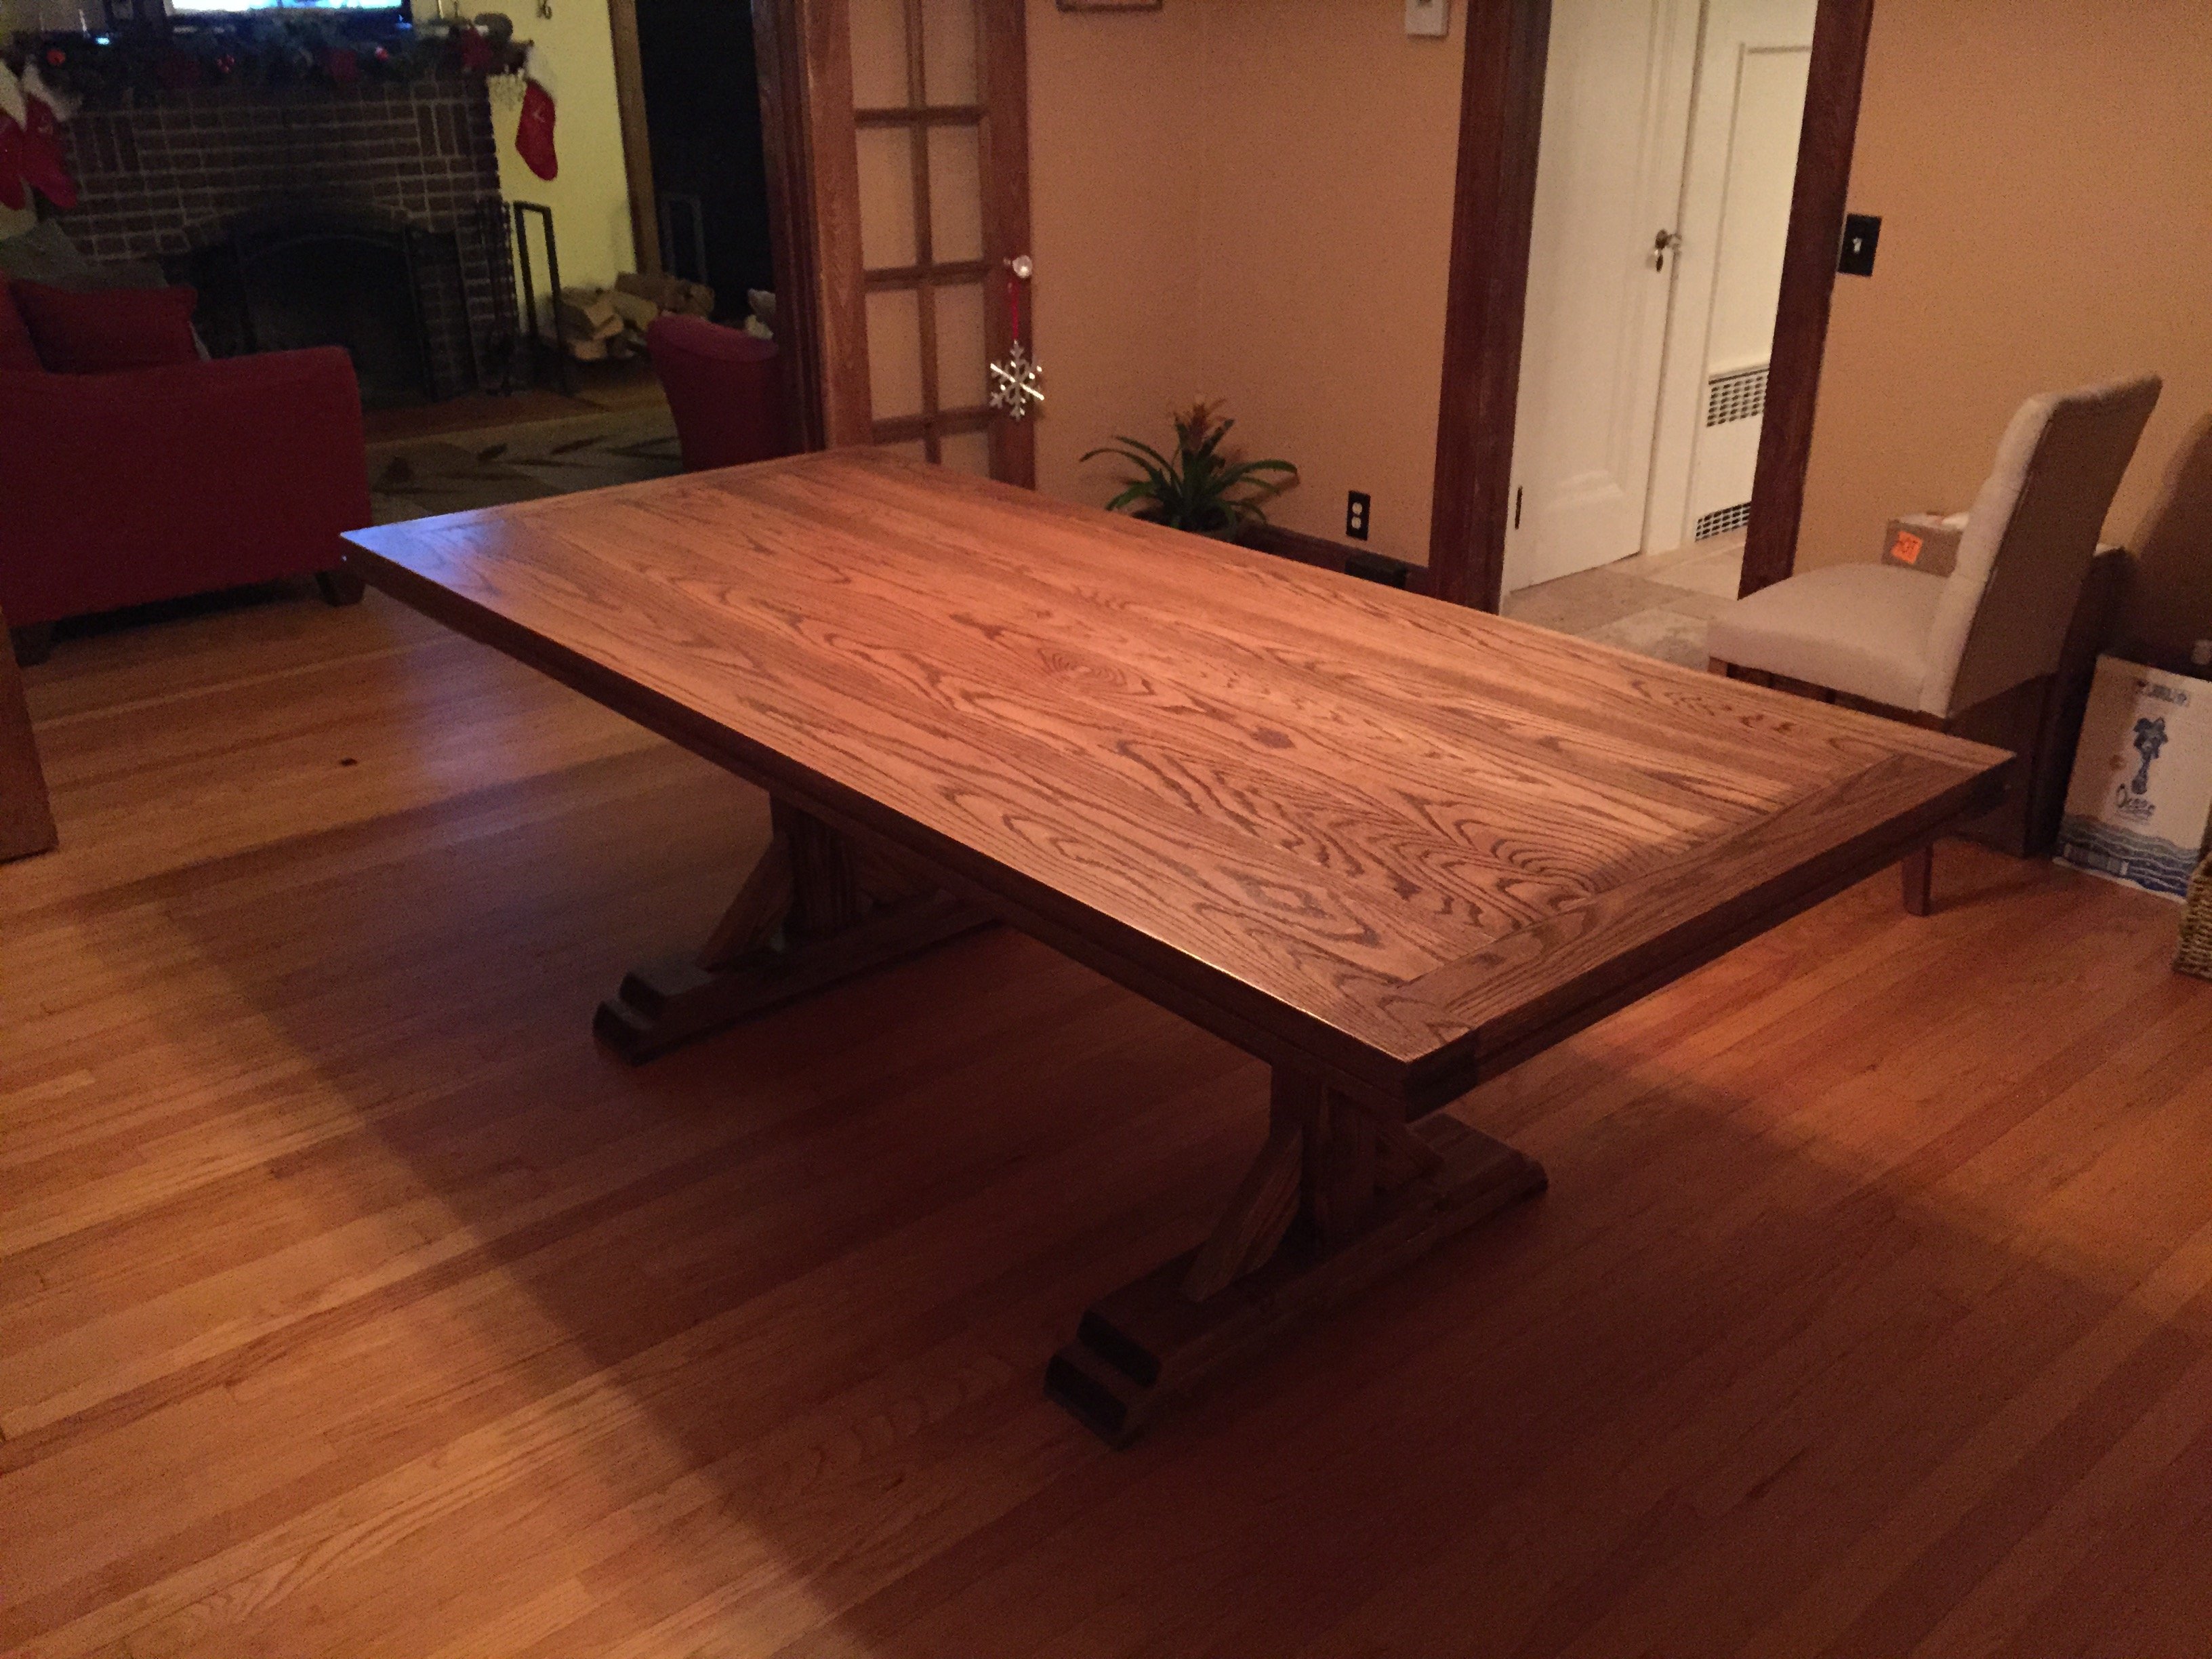
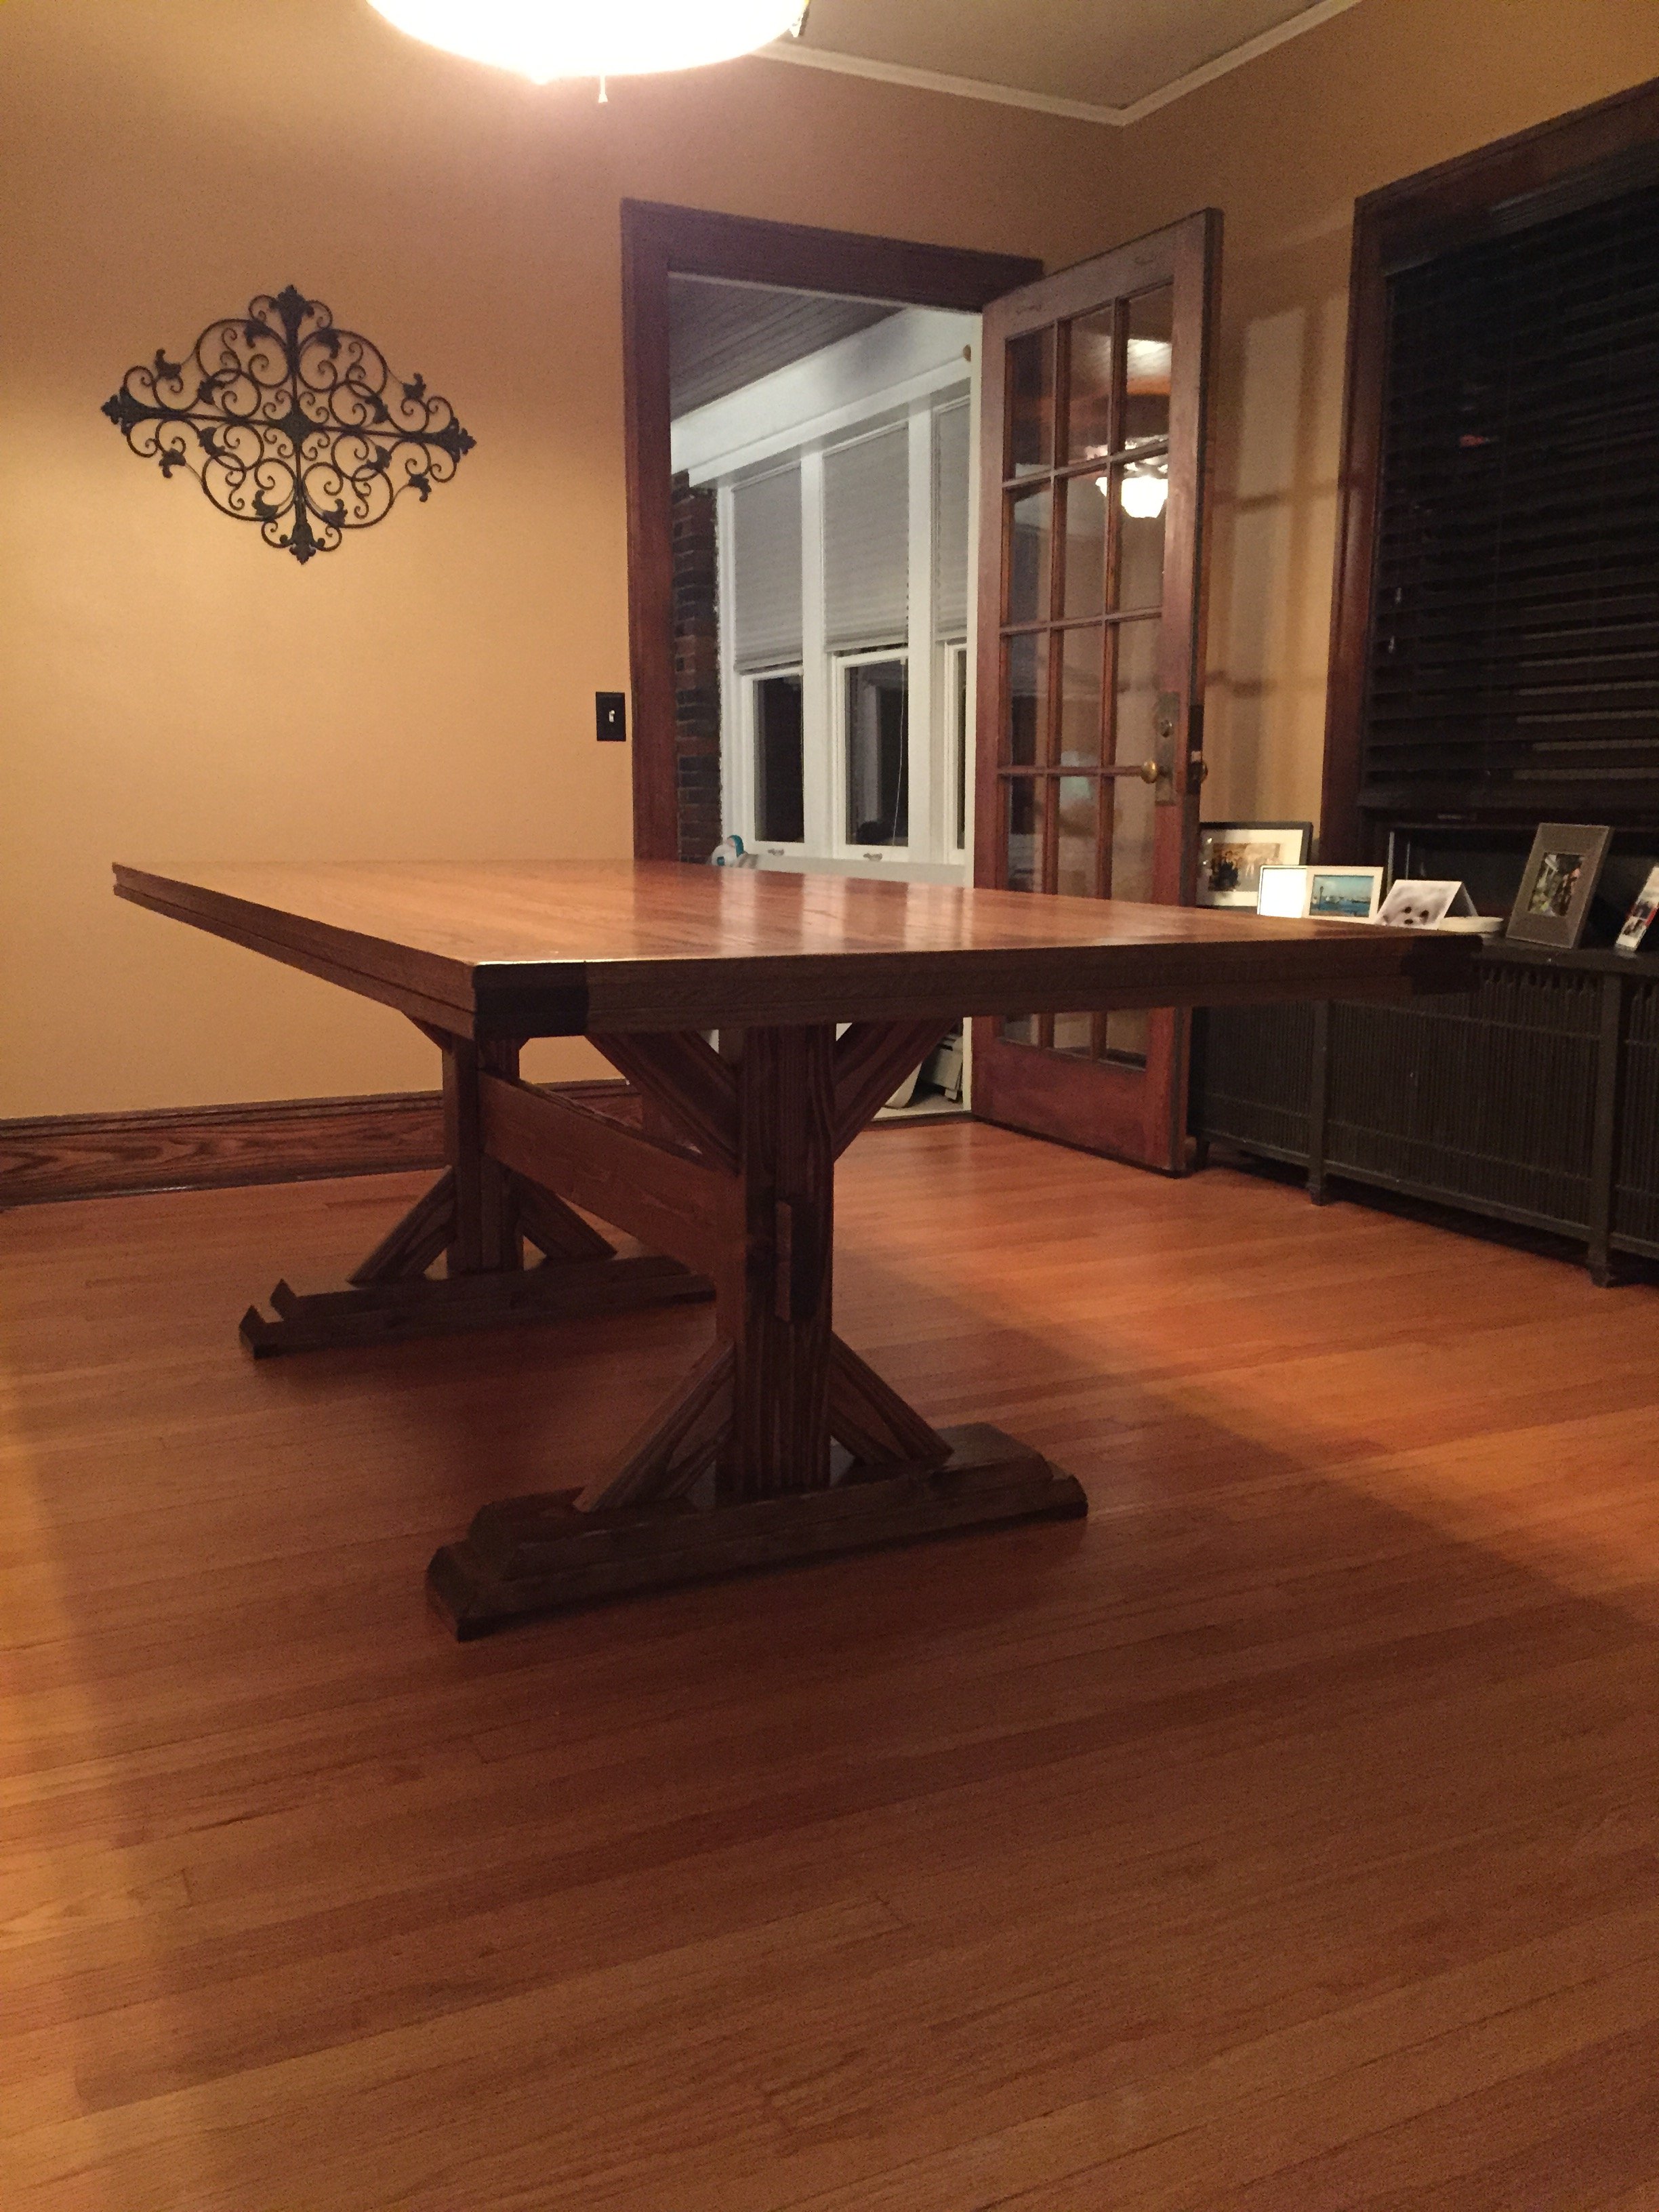
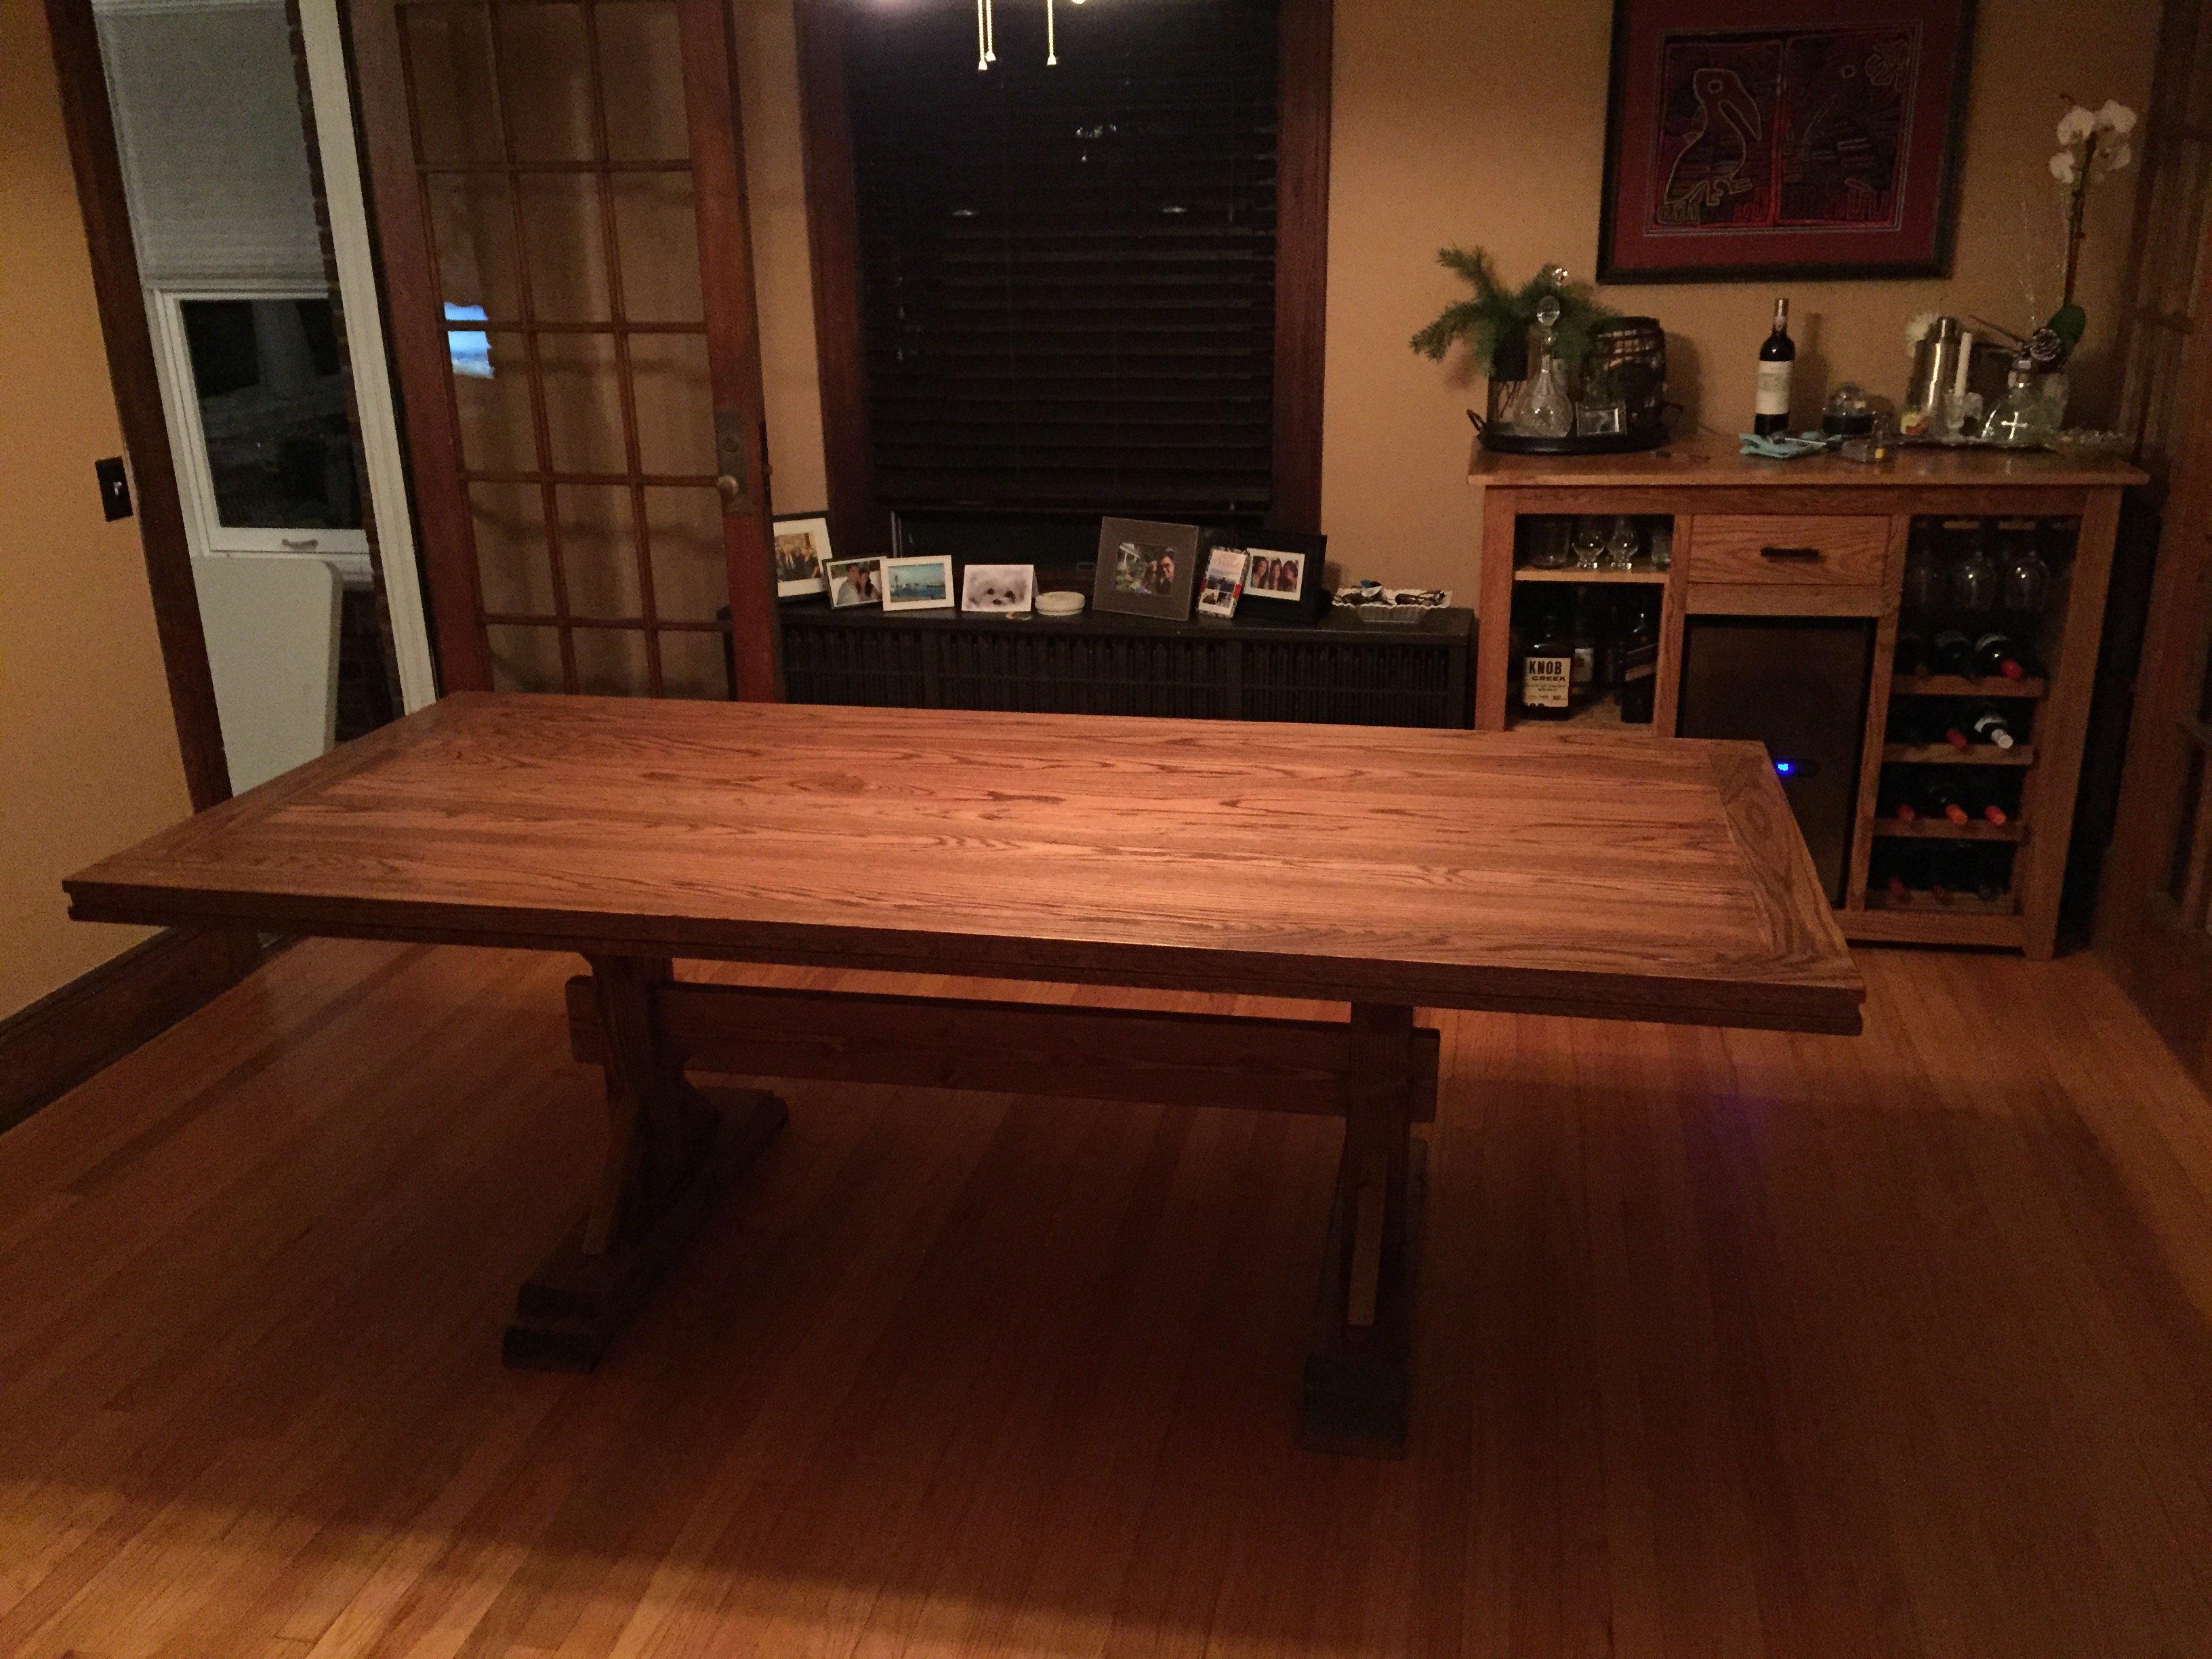
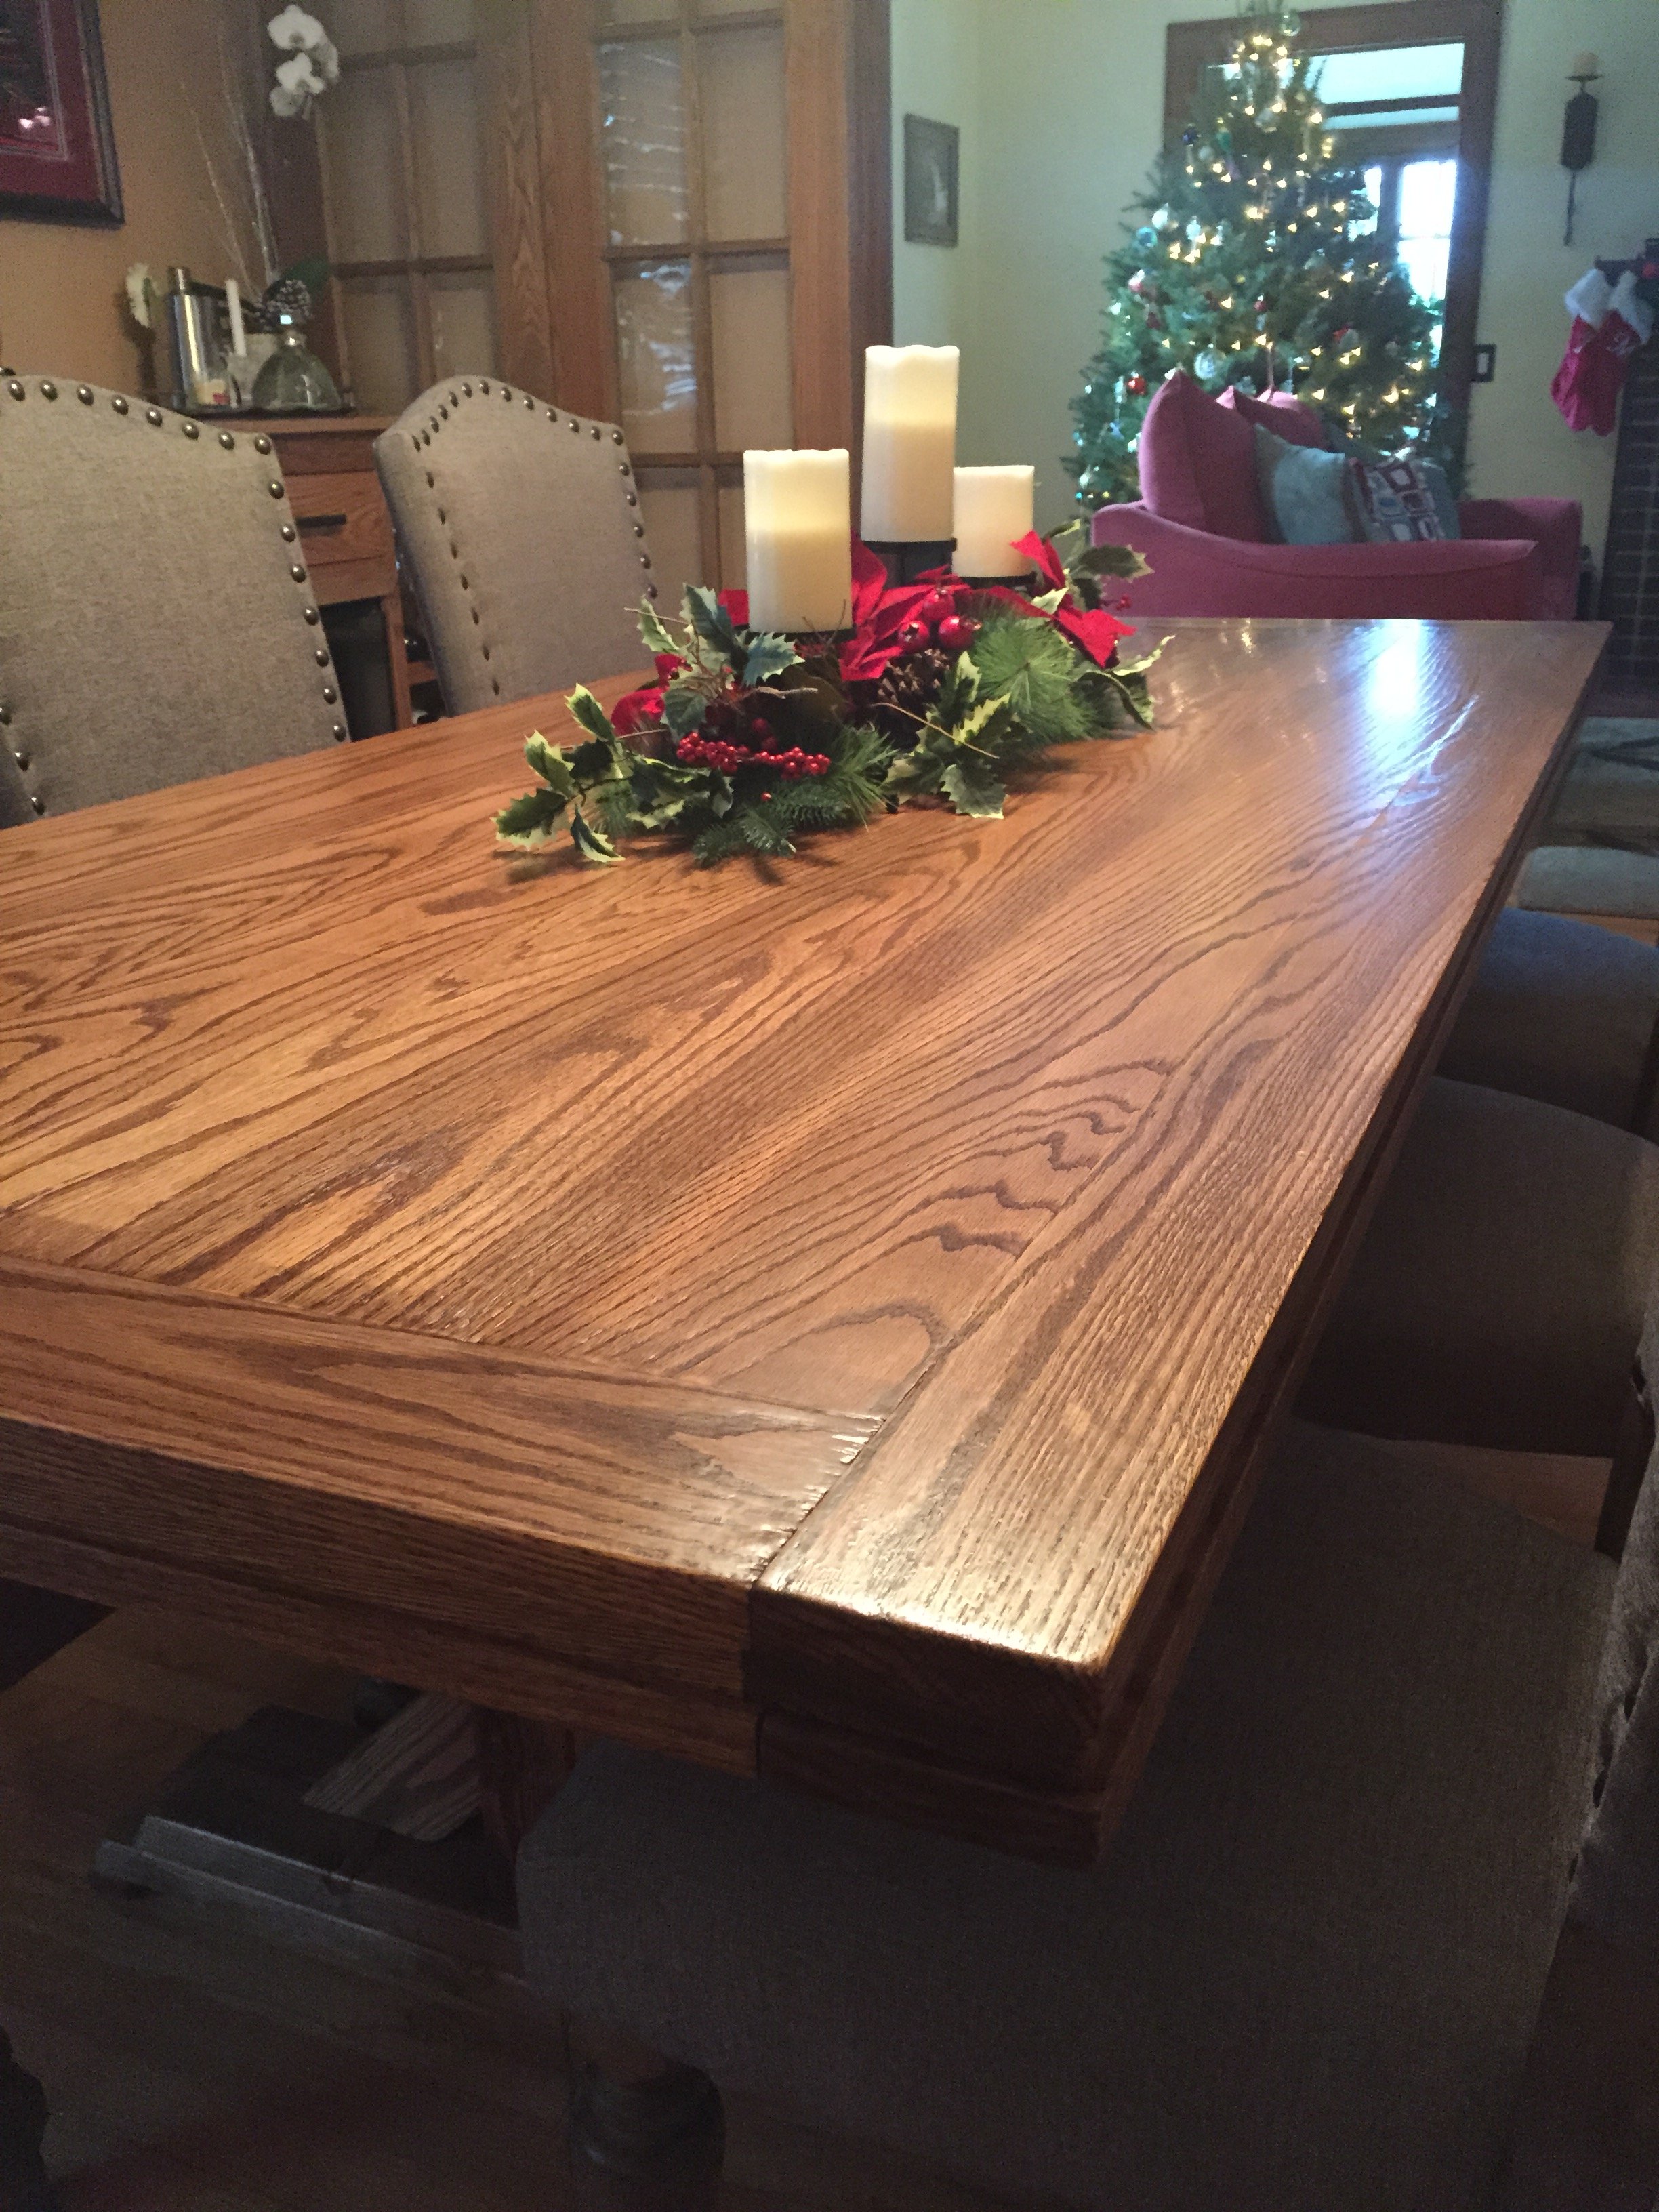
Keep on building on! This is the second peice I've built for our dining room - built a bar first. I opted to only make 2 pedestals instead of 3 that was on the plans. Dimensions are a tad smaller to fit our room nicely, measuring 90in x 40in. My wife and I absolutely love this table! I used Red Oak for the top and Doug fir for the base. Hardest part was lugging around that dense oak and looking for chairs! The stretcher was also a bit of a task as well. Had to go out a buy a rubber mallet to bang it in enough so that the slack on both ends were even. We particularly like this piece because it will be used often and many memories will be created around this table! Thanks again for the inspiration!
Comments
Ana White Admin
Fri, 01/13/2023 - 11:38
Beautiful bed!
This looks gorgeous, love the finish! Thank you for sharing.