Community Brag Posts

Minnie Mouse Storage Daybed

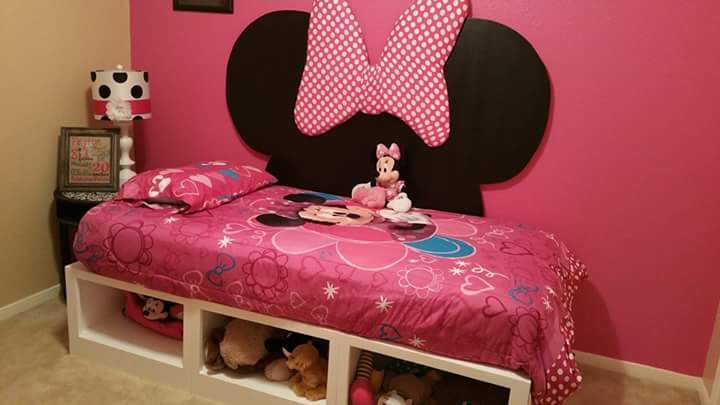
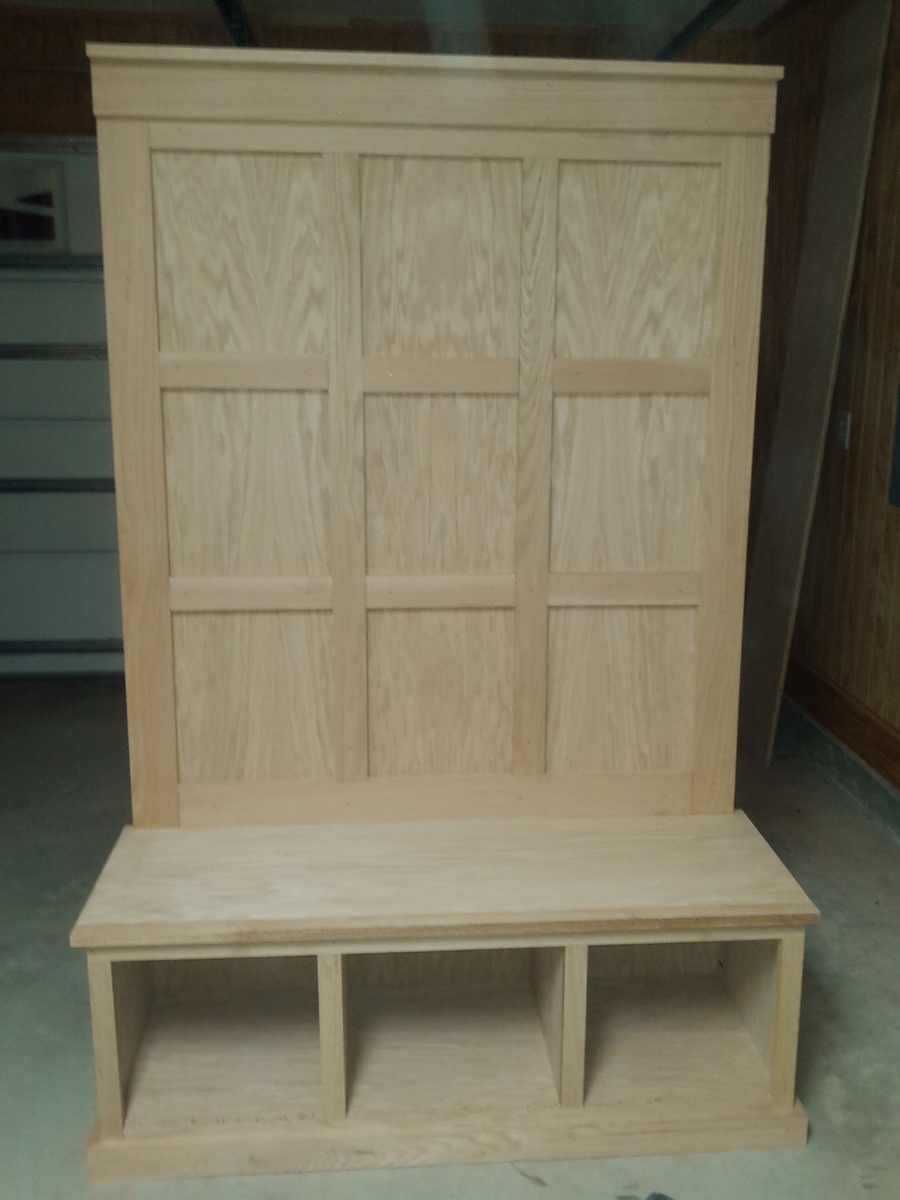
This was my first project form this website and it was a great experience.  I used the storage daybed plans and modified them slightly so I could attach the Minnie Mouse headboard for my daughter.


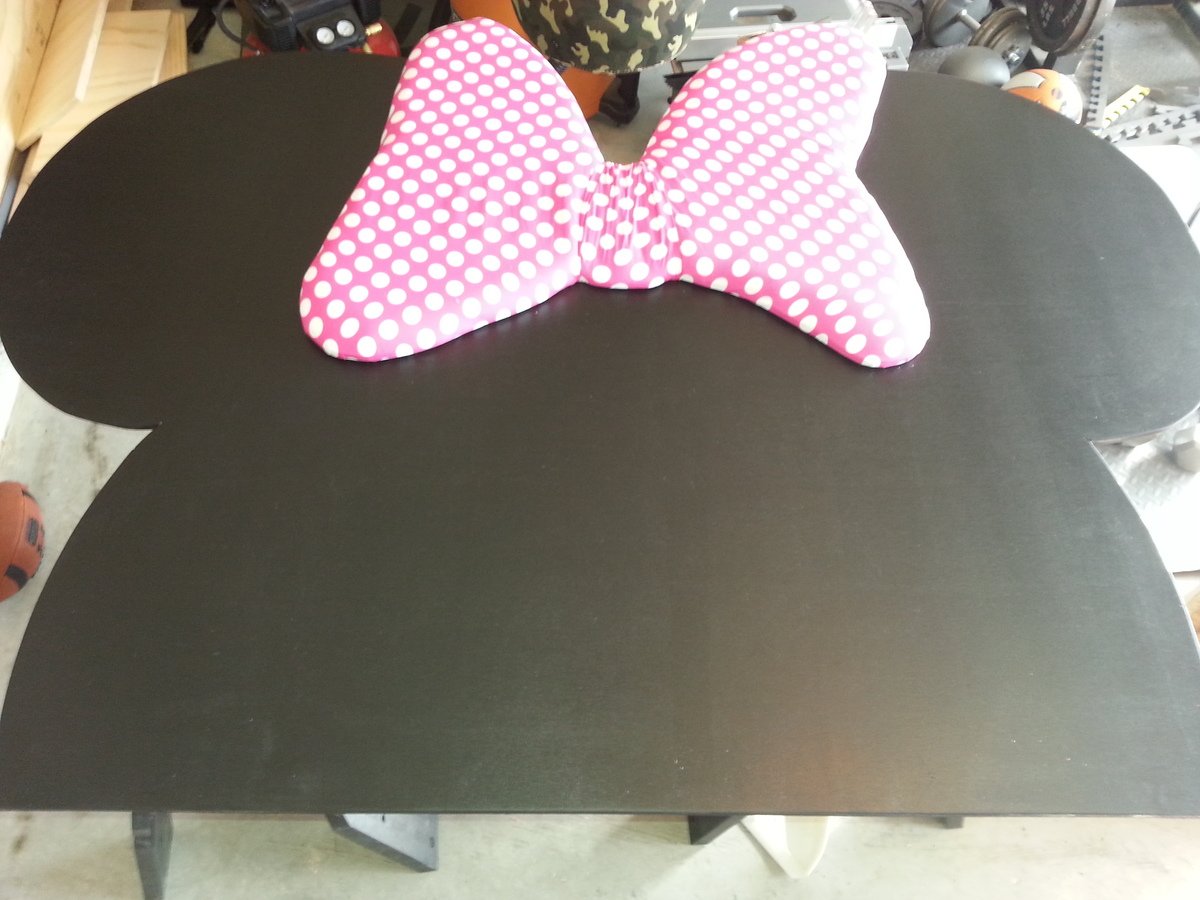
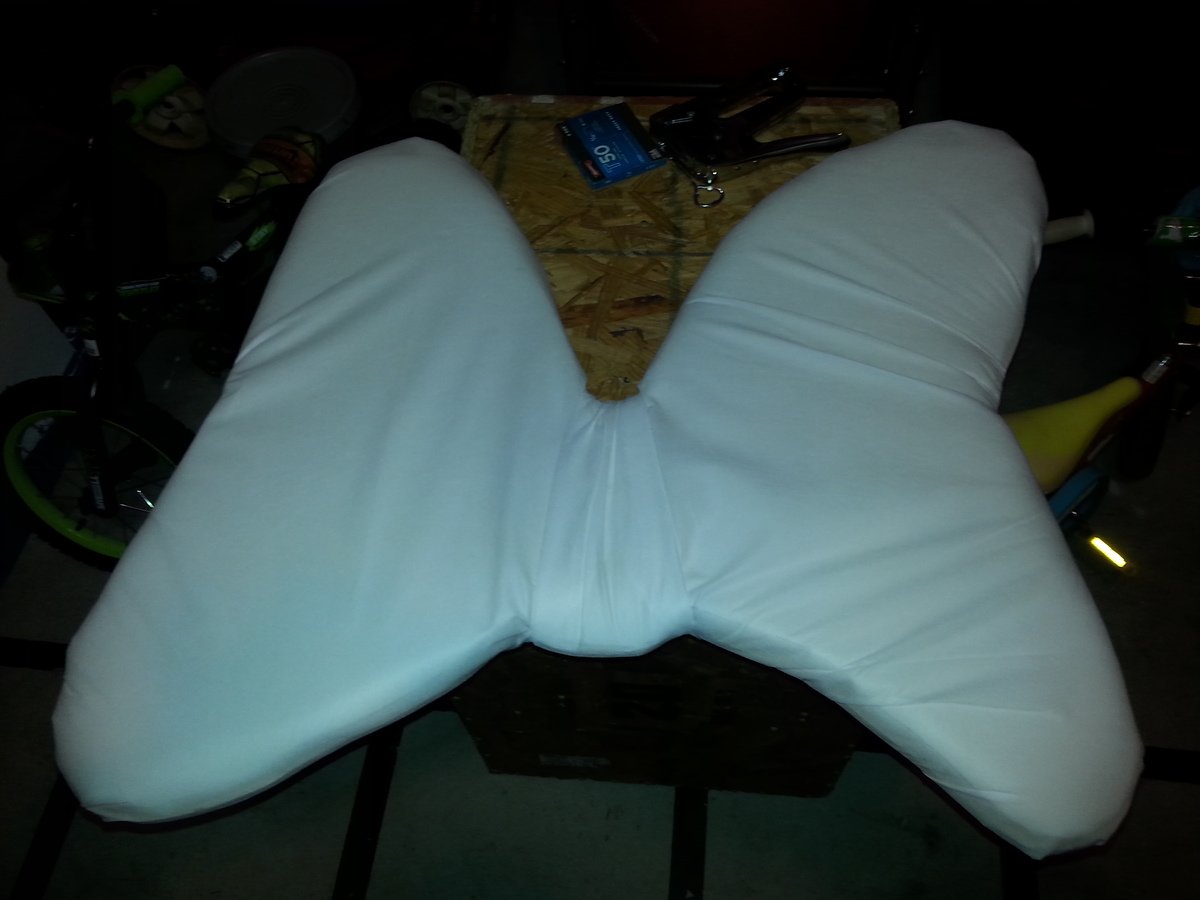
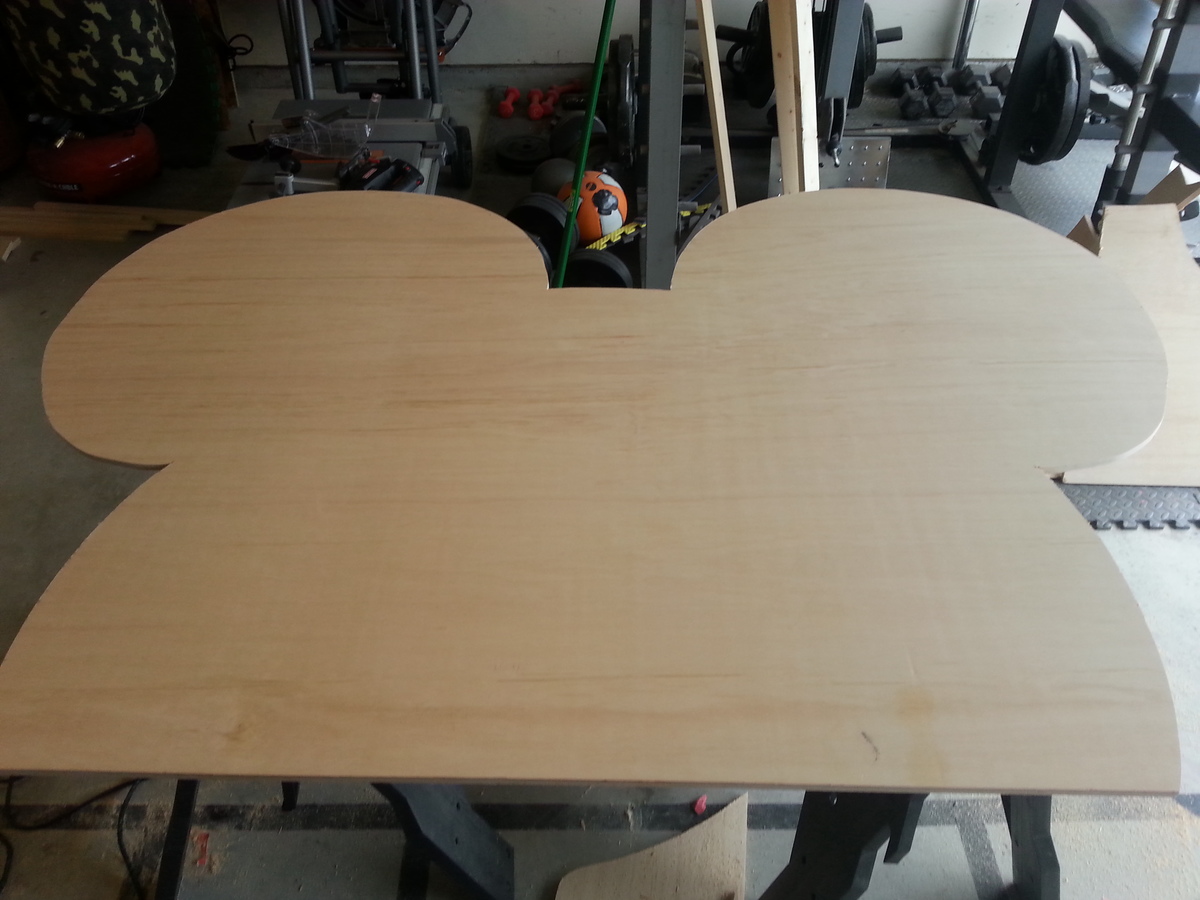
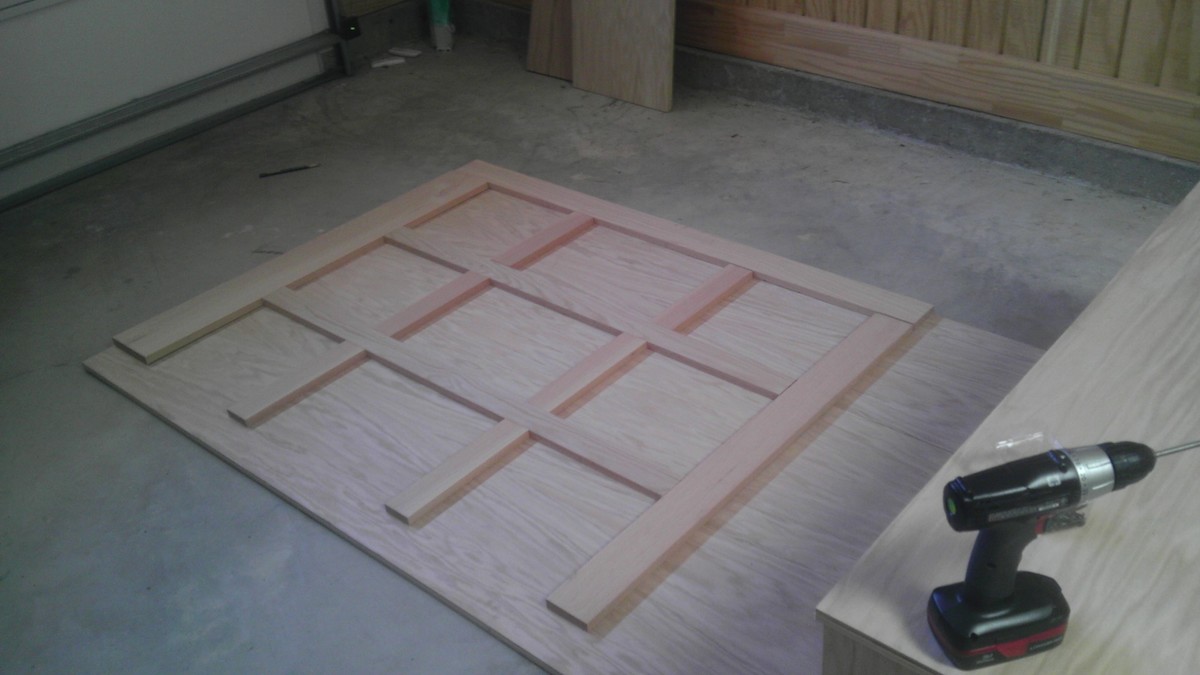
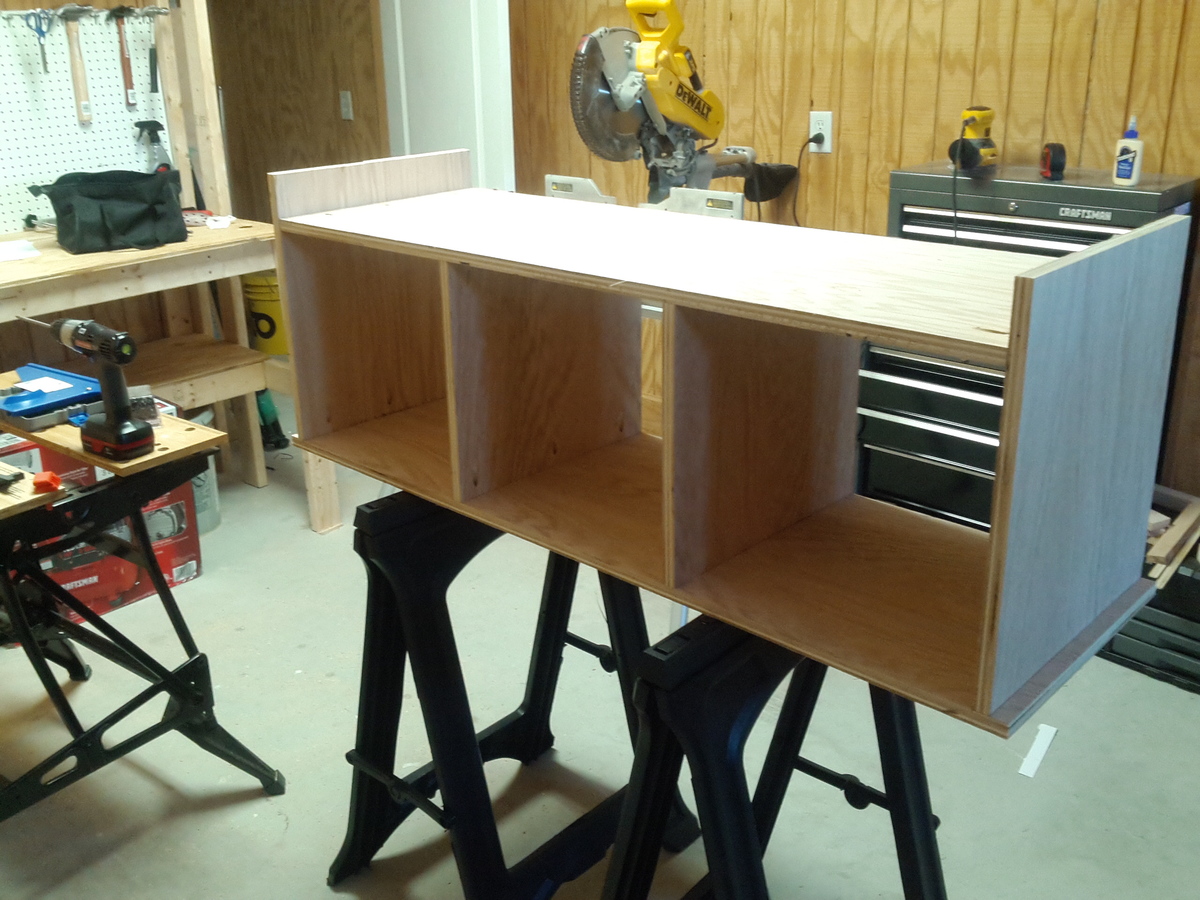
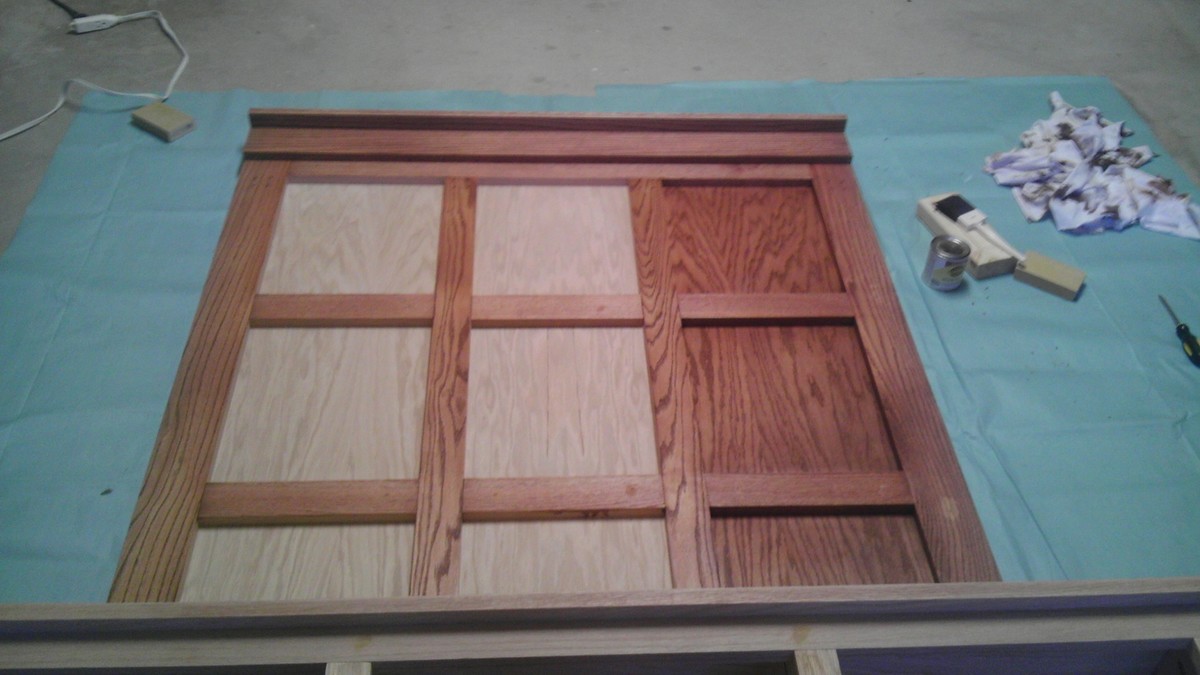
Only difference form the plans is that i did not put the trim on the back of the boxes and instead build a craddle about 2 inches deep to hold the bulk of the head board.  I used 1/2 sanded plywood to create that and the bow. the mouse head is just pained black where as the bow I got a little more creative with.  I cut out the design topped it with furniture foam then fabric backing to hold it in place and create a smooth look.  After that I streched the pink fabric over it and stapled it in place on the back before attaching it to the head.  I also used some 1 x 2 pieces to run along the back to create feet for the headboard to add stability. 

All in all this project was alot of fun and my daughter loved it.

Built from Plan(s)
Estimated Cost
Around 350 - 400. I used cabinet grade pine plywood and pine wood trim so that's the reason for the cost. You can probably do the whole thing for about 250 if you use regular plywood and white wood.
Estimated Time Investment
Week Long Project (20 Hours or More)
Finish Used
Latex paint - black and white
Recommended Skill Level
Beginner

Comments

Rustic Coffee Table

Submitted by zeuss0101 on Tue, 05/09/2017 - 12:16

Built this 8 feet rustic coffee table from your website. Thank you so much for all you do. I love love your ideas.  I want to build everything lol. I've learned so much from your website.  Thank you again. My next project is a playhouse for my son. I will be posting some pictures.

Estimated Cost
Estimated cost is about $75
Estimated Time Investment
Afternoon Project (3-6 Hours)
Finish Used
not yet decided but thinking of rustic grayish color
Recommended Skill Level
Intermediate

Farmhouse Desk

Submitted by Anonymous (not verified) on Fri, 05/07/2021 - 20:22

Based on a design I saw on this site. Used dark cherry stain plus polyurethane that I got from Ollie's for $3.99. All pallet wood- 1x4s and 2x6's. My first glue-up AND my first use of sealant. Really pleased with the result. Thanks for the idea.

Built from Plan(s)
Finish Used
dark cherry stain plus polyurethane that I got from Ollie's for $3.99. Three coats with light sanding in between applications. Dried at least an hour each coat. Paint was interior semi-gloss- two coats.

Comments

Fancy Hall Tree

Submitted by JHardaway on Sun, 03/31/2013 - 18:58

The Plans for this project made it relatively easy for a first time builder. Always wanting to build some furniture for my wife, I decided to start with this and it turned out way better than I ever expected. I used red oak and oak purebond plywood. I took a slightly different approach, using a 3/4" thick board of plywood for the back vice the 1/2 inch, which really gave the back a nice solid feel. I also assembled the lattice backing directly onto the backing plywood board and then attached the completed back to the finished Bench section (I know I didn't explain that well, the pictures show it better). Lastly I left off the arms for a variety of reasons, not the least of which was that I still need some work on cutting curves. Finished with one coat of Cabot Dark Mahogany and 2 coats of Rust-O-Leum satin polyurethane.

Built from Plan(s)
Estimated Cost
300
Estimated Time Investment
Weekend Project (10-20 Hours)
Finish Used
Cabot Dark Mahogany (1 coat) using cheap foam brushes and Rust-O-Leum satin polyurethane (2 coats) using nice-ish regular brushes. Sanded between coats with super fine (320 grit) sandpaper.
Recommended Skill Level
Beginner

Comments

Despicable Me Minion Theme Playhouse Loft bed

Submitted by Abzman on Sat, 02/14/2015 - 00:47

I built this bed when my kids and wife were away on vacation (again).  It was for my youngest (3 1/2 yrs) who loves, or shall I say loved Minions.  I had one month to get it done.  Room is small so I designed it with the stairs on the front.  I ordered minion stickers and cut out the shapes from plywood then glued the entire sticker.  The figures also serve as support for the rails.  

On the side of the stairs is a storage area while on the inside there's an opening with another storage area for chalk and toys!  There's a chalkboard inside the playhouse and a low voltage light. I left the side to the wall open which would allow using the bed in different configurations such that another bed would sit below it perpendicular to the top.  Just an idea.

Bad news is, after the initial day of excitement when she saw it, she asked for her toddler bed and didn't want Minions any more! 

The good news is that I lost about 15 lbs working on it part time after work!

The stairs are not yet finished as I will do two drawers and a shelf.

Unfortunately I never had time to put the design to paper.  It was all in my head mostly done during my commute to and from work.  I had a couple of big goof ups as a result as you would expect.


Estimated Cost
Need the final tally but I believe it was close to $500
Estimated Time Investment
Week Long Project (20 Hours or More)
Recommended Skill Level
Intermediate

Wooden Lanterns

Submitted by mrich_d60 on Fri, 05/14/2021 - 15:39

I made 7 lanterns - 6 with 18" uprights and 1 with 13". They were originally just for my daughter's backyard wedding. They aren't decorated yet because she's going to use them on the patio now and is waiting for the solar lights and LED candles to arrive. They were too nice not to use them right away!

Estimated Cost
About $9.00 each
Estimated Time Investment
Afternoon Project (3-6 Hours)
Finish Used
Varathane Ultimate One Coat coverage stain + Varathane Triple Thick one coat clear finish on entire lantern. Thompson's WaterSeal Waterpoofing Stain semi-transparent for underside and feet.
Recommended Skill Level
Beginner

Comments

Full Farmhouse Headboard

Submitted by Klem413 on Thu, 04/04/2013 - 07:22

We made this for our son with regular pine boards.

Estimated Cost
40.00
Estimated Time Investment
Afternoon Project (3-6 Hours)
Finish Used
Minwax Polyshades Classic Black
Recommended Skill Level
Beginner

Mini Farmhouse Side Table

We built this for our new grandson's nursery. The rest of his furniture is white and our daughter wanted to bring in some wood tones. We modified the table to be a little shorter than the plan so it wouldn't be too much taller than the arm of the glider in the nursery. I also added a 1x2 to act as a drawer stop.

Built from Plan(s)
Estimated Time Investment
Day Project (6-9 Hours)
Finish Used
I applied a wood conditioner and let it set for about 15 minutes. I used a combination of Minwax Weathered Oak and Early American. I brushed on the Weathered Oak first then followed with the Early American. I let that set about 15 minutes then wiped off the excess. I finished it with two coats of Polycrylic.
Recommended Skill Level
Intermediate

Comments

Outdoor Sofa

Submitted by Anonymous (not verified) on Tue, 05/25/2021 - 17:53

Made some adjustments to the original plans to help support larger cushions and pillows.

Built from Plan(s)
Estimated Cost
$400
Estimated Time Investment
Day Project (6-9 Hours)
Finish Used
Used a roll of tape as a guide to round the headrest and arms.
Recommended Skill Level
Beginner

Comments

Compartment depot bookshelf

Submitted by dinifam on Fri, 04/05/2013 - 13:06

I had just finished building the elementary trestle table when the plans for this came up! I fell in love and although I hadn't planned on building a bookshelf this needed to be done! I bought the four foot 1x12's cuz they were cheaper and they worked fabulously! The build was complicated and I redid things quite a bit but I was so so happy with the outcome! It was my final project for the room and I found the pink post it from my son the next day on his desk! Made all the hard work totally worth it! He loves his new room so so much!! Thank you ana!!! I would never have believed I could do this before

Built from Plan(s)
Estimated Cost
75.00
Estimated Time Investment
Day Project (6-9 Hours)
Finish Used
Java gel stain on outside behr bleached denim on inner shelves... Stain/paint before assembly!!!
Recommended Skill Level
Intermediate

Comments

DIY Farmhouse Bed

We built this Farmhouse Bed in 1 weekend for less than $200!

Estimated Cost
Less than $200
Estimated Time Investment
Weekend Project (10-20 Hours)
Finish Used
Rustoleum Dark Walnut Stain applied with a brush and immediately wiped off using a lent-free cloth. Sealed with Minwax Satin Spar Urethane.
Recommended Skill Level
Beginner

Comments

Rustic x coffee table cribbage table

Submitted by Anonymous (not verified) on Fri, 05/19/2017 - 20:06

Used rustic x coffee table design for base. Used paint scheme someone else used in brag post. Made giant cribbage board top from redwood slab. Majority of time involved sanding slab which came rough and finishing the polyurethane. 

Built from Plan(s)
Estimated Cost
100
Estimated Time Investment
Week Long Project (20 Hours or More)
Finish Used
Four coats polyurethane
Recommended Skill Level
Intermediate

Our "marriage" bed

Submitted by Anonymous (not verified) on Sun, 05/30/2021 - 23:24

We built a europeanized queen-size farmhouse bed. The mattress size is 160x200 cm. I had to recalculate most measurements, because the available wood dimensions didn't really correspond to the usual 2x4 etc standard sizes - and mattresses come in different sizes around here as well. Other modifications: the footboard was built exactly like the headboard, because it was supposed to end up against a wall (no point in the outside covering). We're both very happy with the way this turned out - no squeaks, no bumping *khm*.

We used commercially available pre-bent slats for the mattress support. I've marked the skill level as beginner, as we are - but we're both very thorough and exact people with the will to go step-by-step and access to in-laws' proper tools and knowledgeable advice.

Built from Plan(s)
Finish Used
stained and sealed
Recommended Skill Level
Beginner

Comments

Farmhouse Table Squared

Submitted by sraper2 on Sun, 04/07/2013 - 20:53

I used your plans for the table but changed the table dimensions to fit my space. My table is square and measures 58"x58". I also changed the chairs to have a straight back and then the top is is cut at a 6 degree angle. I love them so much!!!

Estimated Time Investment
Week Long Project (20 Hours or More)
Recommended Skill Level
Intermediate

Coffee table and end tables

Submitted by Anonymous (not verified) on Tue, 05/23/2017 - 00:34

Built from the outdoor coffee table plans.

Changed the dimensions up a bit on the coffee table and shrunk them down to make matching end tables.

Changed the top layout and the bottom shelf a little bit. 

Thank you for the plans!!!

Built from Plan(s)
Finish Used
White frame
Dark walnut tops
Recommended Skill Level
Beginner

Triple Pedestal Farmhouse Table

I did many 2020 (Covid projects) and this was my favorite. My wife has an 8' church pew that she wanted a farm table to go with it. The table ended up being 8'10" long. The most time was spent on sanding, painting and finishing. Enjoyed this project.

Built from Plan(s)
Estimated Time Investment
Weekend Project (10-20 Hours)
Finish Used
Satin Poly
Recommended Skill Level
Intermediate

Comments

Twin farmhouse bed

My first project!! Made a big boy bed and love how it turned out! It took me a weekend and several trips to the hardware store. Totally worth it and a huge savings versus purchasing a bed from land of nod or pottery barn!

Built from Plan(s)
Estimated Cost
Around $150 for everything
Estimated Time Investment
Weekend Project (10-20 Hours)
Finish Used
Paint
Recommended Skill Level
Intermediate

Mac's mantle

I changed a few things on mine. I wanted the mantle to be deeper in case we want to put a natural gas fireplace insert in it in the future so I used 1x8's for the sides I also used the remaining 48" or so 1x12 for the base and used 1x3's to trim it in to make it a bit wider. I did something similar to the top I trimmed it with 1x3's using pocket hole screws. As for the mirror, my wife had an old mirror that she wanted me to use and it was actually an after thought but it fit in there perfectly! I just used 1x3s to trim it in the front and used smaller scrap pieces and screws to wedge the mirror in the mantle in case we want to use it for something else if we install the gas insert. That's about it I used traditional cherry 1 coat and 3 coats of polyurethane I had to pull up the base board trim and cut it to get it flush against the wall. My wife was upset that I made her wait to decorated it with picture frames and porcelain birds. The polyurethane hadn't cured yet and I didn't want marks on it after spending so much time on it.
Thanks! She loves it!

Estimated Cost
$300
the crown molding was the killer
Estimated Time Investment
Weekend Project (10-20 Hours)
Finish Used
Traditional cherry miniwax
Hi gloss white Baer
Clear polyurethane miniwax
Recommended Skill Level
Intermediate

Comments

smcclafferty3

Fri, 03/06/2015 - 19:10

Thanks Ana! She wants me to build her something like what you recently posted. An entry bench/ window seat with storage space for shoes and boots. Thanks for the plans! I will have to modify it a bit to fit the space of course! I've also used your plans to make 3 sets of toddler tables and chairs as gifts for relatives with kids and they love them! Thanks again Ana!

Church pew style entry bench

Submitted by Anonymous (not verified) on Fri, 05/26/2017 - 15:02

The bench measures 54" wide x 21" deep.  We slightly modified the Rogue Engineer plans at the customers request to allow it to sit flush against the wall. 

Estimated Cost
99.00
Estimated Time Investment
Day Project (6-9 Hours)
Finish Used
Stain is 1 coat Minwax Classic Grey immediately followed by 1 coat Old Masters Dark Walnut Wiping Stain immediately followed by another coat of Minwax Classic Grey. Topcoat is Gemini Gem Coat Matte Pre-cat Lacquer
Recommended Skill Level
Beginner

Comments