Community Brag Posts

Bookshelf

Loosely based on a few different plans found on internet and books, made this bookshelf out of oak plywood and oak boards.  

Estimated Cost
$300? Can't really remember
Estimated Time Investment
Week Long Project (20 Hours or More)
Finish Used
Minwax Red Oak stain
Recommended Skill Level
Intermediate

Farmhouse Table

Submitted by Oliviaryan on Sat, 02/03/2018 - 19:47

This is my (late) Christmas present from my boyfriend, based on the farmhouse table plans. He had no idea how to build a table, so I directed him to this site! The wood is 80+ years old, all reclaimed. The table top is white pine, and the legs are cypress. I hand picked the pieces I wanted from his old wood “collection”. I plan to put a light stain on it, and use a satin, water-impervious finish. I wanted it to look old, hence the reclaimed wood. I love tapered legs, so that was a must. He still has to countersink the screws he used on the apron (!) and plug them with white pine plugs. The table is 91” long, and 36” wide. 

Estimated Cost
$0 - wood was reclaimed that we had on hand, and we had everything else we needed.
Estimated Time Investment
Week Long Project (20 Hours or More)
Finish Used
None yet
Recommended Skill Level
Intermediate

Camp Loft Bed Plan adjusted to Twin over Full Bunk Bed

Submitted by Anonymous (not verified) on Mon, 02/21/2022 - 11:15

My young boys had been sharing a full bed and it was awful. We had an extra twin mattress so it was time to make them a bed. Loved the camp loft bed plan with stairs so that's what I went with. I did the Hailey bed frame plan for the full bed underneath and made some small adjustments on the loft bed - made it 6" higher, 18" longer (wanted room for a bedside table next to the full bed underneath - I just added extra decking on the top bunk part to fill in the space), and had to adjust the stair height because I wanted it to fit under the window - so only needed two steps instead of 3. The boys absolutely love it and their sisters did too - now I'm building 2 loft beds for their room, with a platform in-between the two beds. Will post that when finished! Still need to make a headboard for the full bed as well, but it works for now!

Comments

Simple Bookshelf

Submitted by binah06 on Thu, 05/26/2011 - 18:47

Came together pretty easily. Took about half a day.

Built from Plan(s)
Estimated Cost
$20 for wood, $20 for screws, nails, sandpaper and stain
Estimated Time Investment
Afternoon Project (3-6 Hours)
Finish Used
Minwax stain in Provincial. Tung oil as a finish. Might put a better finish on later.
Recommended Skill Level
Starter Project

Clip Rail Gallery

Submitted by Debi G on Wed, 07/17/2013 - 09:16

My son and I both enjoy changing out the artwork he chooses to display in his bedroom. We will be making another clip rail for the kitchen, right above the row of coat hooks. Waiting for the paint to dry is the most time consuming part of this project. Cheap & easy!

Built from Plan(s)
Estimated Cost
$4.00 for clips and board
Estimated Time Investment
An Hour or Two (0-2 Hours)
Finish Used
Painted to match a different wall of the room.
Recommended Skill Level
Starter Project

Helper tower

Submitted by cswoodburn on Sun, 07/19/2015 - 23:26

Made this awhile ago for my nephew. I thought an English phone booth would be neat. He is probably the only kid his age who knows what a rotary phone is. He loves using it and has never had a problem climbing in.

Built from Plan(s)
Estimated Time Investment
Weekend Project (10-20 Hours)
Recommended Skill Level
Beginner

My first ever build ..Counter height table.

Submitted by twcliburn on Fri, 02/09/2018 - 19:05

I used the Pub table/farmhouse table plans modified to 48x36 with framed edge over hang 2 inch all around ..I also used the turned legs from Lowes ..

Estimated Time Investment
Week Long Project (20 Hours or More)
Finish Used
The top I used weatherwood accelerator (love that stuff) and the legs and aprons antique white
Recommended Skill Level
Beginner

Tryde Coffee Table

Made a Tryde Coffee Table with my sister in a tiny porch of her tiny city apartment. We had all the lumber cut at HD, and even though the cuts were not precise, we made it work! It was easy to build, and was also the first time using a kreg jig, and I don't know how I made everything so far without it. Love the kreg jig!!

Built from Plan(s)
Estimated Cost
70
Estimated Time Investment
An Hour or Two (0-2 Hours)
Finish Used
Will sand it, apply pre-staining conditioner and use stain+varnish to finish.
Recommended Skill Level
Beginner

Outdoor Screen

Submitted by Debi G on Fri, 07/19/2013 - 06:30

Technically, we are not allowed to store trailers or boats outside of our garage. Since our back yard faces a popular path for runners, pedestrians and cyclists, I came up with this solution and we have not been reported.

The size isn't ideal (peekaboo canoe), but I went with boards I already had. I didn't sketch this out ahead of time, just pieced it together using a 6" board as my vertical guide and a 3" board as my horizontal guide.

Instead of digging post holes, I built it onto feet so that it's free-standing and portable. We can move it any time we need to get the trailer out from behind it.

Next summer, I may put planter boxes on top and build a second panel as well.

Estimated Time Investment
An Hour or Two (0-2 Hours)
Finish Used
outdoor stain with sealer
Recommended Skill Level
Starter Project

Twin Farmhouse Bed

Made a set of beds for twin girls!

Built from Plan(s)
Recommended Skill Level
Beginner

Comments

Linderbeans

Thu, 03/15/2018 - 19:16

I love the little embelishments on the foot board and head board! did you add these on after or prior to painting?

Linderbeans

Thu, 03/15/2018 - 19:17

I love the little embelishments on the foot board and head board! did you add these on after or prior to painting?

Mudroom Locker Cabinet & Bench

Combined the Easy Three Cube Bench & Small Locker Cabinet plans to build a mudroom locker. Not quite finished as I need to attach the cabinet to the bench, add the trim and back to the locker cabinet , then stain and paint, but I couldn't wait to post. Very happy with the results, will add hooks to the lockers and should be very functional.

Thinking about staining the bench seat a dark mahogany and painting everything else white.

Comments

Ana White Admin

Mon, 04/04/2022 - 09:41

YES! It is always exciting to see the project take shape, it's going to be awesome! We'd love to see the finished picture too:)

Juan Butler

Tue, 04/05/2022 - 09:20

Will do, already got the trim completed and will be painting over the next couple of evenings. Struggling with whether to paint the bench before attaching the lockers, or wait until after I attach. Concerned about the glue that I need to put on the bottom of the lockers, if I paint the bench and then attach the locker, glue will get on the bench as I get the locker aligned. Just not sure if it will simply wipe off, or if I will need to do some paint touch up.

Animal Print Sling Chair

Submitted by jamie_C on Wed, 06/01/2011 - 21:05

Couldn't wait to build this when I saw the post go up- I bought supplies right away! Got this chair done throughout one Saturday. The sewing part took the longest (I've only used sewing machines maybe 4 times in my life! I got one for Christmas 2 years ago.. thought maybe it was time to break it in!!) Got the fabric on sale at Joann's for $8 and spent about $8 on cedar 1x2's. Did the entire project with very little help- I am quite proud of myself! I am pretty excited that I was able to make the fabric sling portion!

My 2 year old was SUPER excited about this chair... he got so upset waiting for me to get the sling put in and was crying until it was ready for him to sit in! We had a movie night in the backyard and set up this chair under our tent canopy. He loved it!

Estimated Cost
$20
Estimated Time Investment
Afternoon Project (3-6 Hours)
Finish Used
Used a clear poly spray for protection. This wood didn't need anything else- it's beautiful as is!
Recommended Skill Level
Beginner

Farmhouse table with matching bench and rooster centerpiece

Submitted by Ctarbell03 on Sat, 07/20/2013 - 14:23

Saw this table after a few people did it themselves and absolutely loved the look. I decided on using the 4x4's for the stretchers because I really liked the heavy timber look it gave to the table. This is my biggest project so far and I'm very excited how it turned out. Now I just have to make the other bench to finish it all off.

Also have to give credit to http://tommyandellie.com/index.php/2012/01/13/new-and-improved-farmhous… - Definitely amazing step by step plans on here, I just modified it a little to add a little more space on the table top by adding another 1x8 in the middle

After I got the table done I saw the plans for the reclaimed soda crate caddy so I used some scrap wood to make a rooster centerpiece for napkins and silverware.

All in all I'm very happy with everything.

Estimated Cost
150
Estimated Time Investment
Week Long Project (20 Hours or More)
Finish Used
Red mahogany stain and a couple coats of poly to give it a little shine
Recommended Skill Level
Intermediate

Comments

coltonmckey

Sun, 07/28/2013 - 13:45

Nice work!! How did you get your joints on the table top to line up so perfectly?! It looks great.

Revamping A Bland Patio

Submitted by BrookeEye on Mon, 07/27/2015 - 08:32

Completing this sectional was hard work and took us several weeks to finish (with full-time jobs and two toddlers under 4), but it was SO worth it! We used cedar 1x4s treated with Behr Semi-Translucent Deck Stain and Sealer in Pure White. The cushions are from Improvements Catalog, and they turned out to fit perfectly. The total price for the section with the cushions was around $700. We know if we had purchased it in a store that it would have cost much more, without being a customized the way we wanted it. The best part about sitting on our patio now is knowing that we did this ourselves! Thank you Ana for all the amazing plans!!

Estimated Cost
$250 for the sectional (wood, Kreg blue kote screws, stain/sealer & brushes);
$450 for the cushions;
$700 total.
Estimated Time Investment
Week Long Project (20 Hours or More)
Finish Used
Behr Semi-Translucent Deck Stain and Sealer in Pure White
Recommended Skill Level
Beginner

Round Table for my daughter

Submitted by rkisner on Fri, 02/23/2018 - 18:27

This was a table for my daughter. She loved it. I love the design and had a lot of fun building it,

Estimated Cost
$175.00
Estimated Time Investment
Week Long Project (20 Hours or More)
Finish Used
Minwax Stain and Minwax Poly
Recommended Skill Level
Intermediate

Crib size bed swing

Submitted by Anonymous (not verified) on Fri, 04/08/2022 - 17:38

This is my first real project for someone other than family. I think it turned out pretty good. It’s a crib sized bed swing.

Comments

Outdoor Canopy Daybed Modified

I really loved the outdoor daybed, but after discussing it with my husband we decided to go without the canopy feature. We, also resized the bed from a twin size to a toddler size (which happened to be almost the same dimensions as our love seat). In order to make the daybed without the canopy, I had to put the top pieces on last in order to have them go all the way from edge to edge. All in all, this was a super easy project, and I had a lot of fun doing it!

I got the crib mattress free of craigslist, and since a crib mattress is already covered with vinyl, I didn't do anything extra to waterproof it, and the fabric came from the home decor remnants section at our local fabric store for $4 a yard, which I applied a 40% coupon to. The throw pillows are not the ones we will be using, but I haven't made those yet, so these are just for looks :)

Estimated Cost
I spent a total of $63 with stain, screws and enough wood left over to make a table to match
Estimated Time Investment
Day Project (6-9 Hours)
Finish Used
I used minewax stain in ebony, and applied several coats to get the look I was going for... I don't typically like stain, and I probably won't use it for a project like this again...
Recommended Skill Level
Beginner

Comments

brookifer86

Mon, 06/06/2011 - 13:56

I love this! The fact that it's bench-sized, that it fits a waterproofed crib mattress, all of it! I'm totally doing something like this with the crib mattress we got secondhand.

CreativeBaggage

Sat, 06/11/2011 - 00:13

I think now that I have done this one, I may do one with the canopy for my daughter's room... Ana has so many amazing plans, I have the hardest time making up my mind on anything! But, so far this has held up great.

Tanya (not verified)

Tue, 07/26/2011 - 11:33

Going to be making the outdoor daybed for my daughter this weekend and think this will make a very great reading bench for her room! We are going to make a bunch of throw pillows out of old sheets and just make it nice and comfy looking!

CreativeBaggage

Tue, 07/26/2011 - 11:38

I absolutely love that idea, and the thought of re-using old sheets to make new pillows. For these ones, I used some fabric I had around and a bag of fill, but when I ran out I was in search for old teddy bears no longer being played with :) I would love to see pictures when you are finished!

(mini) Camp Loft Bed with underneath storage

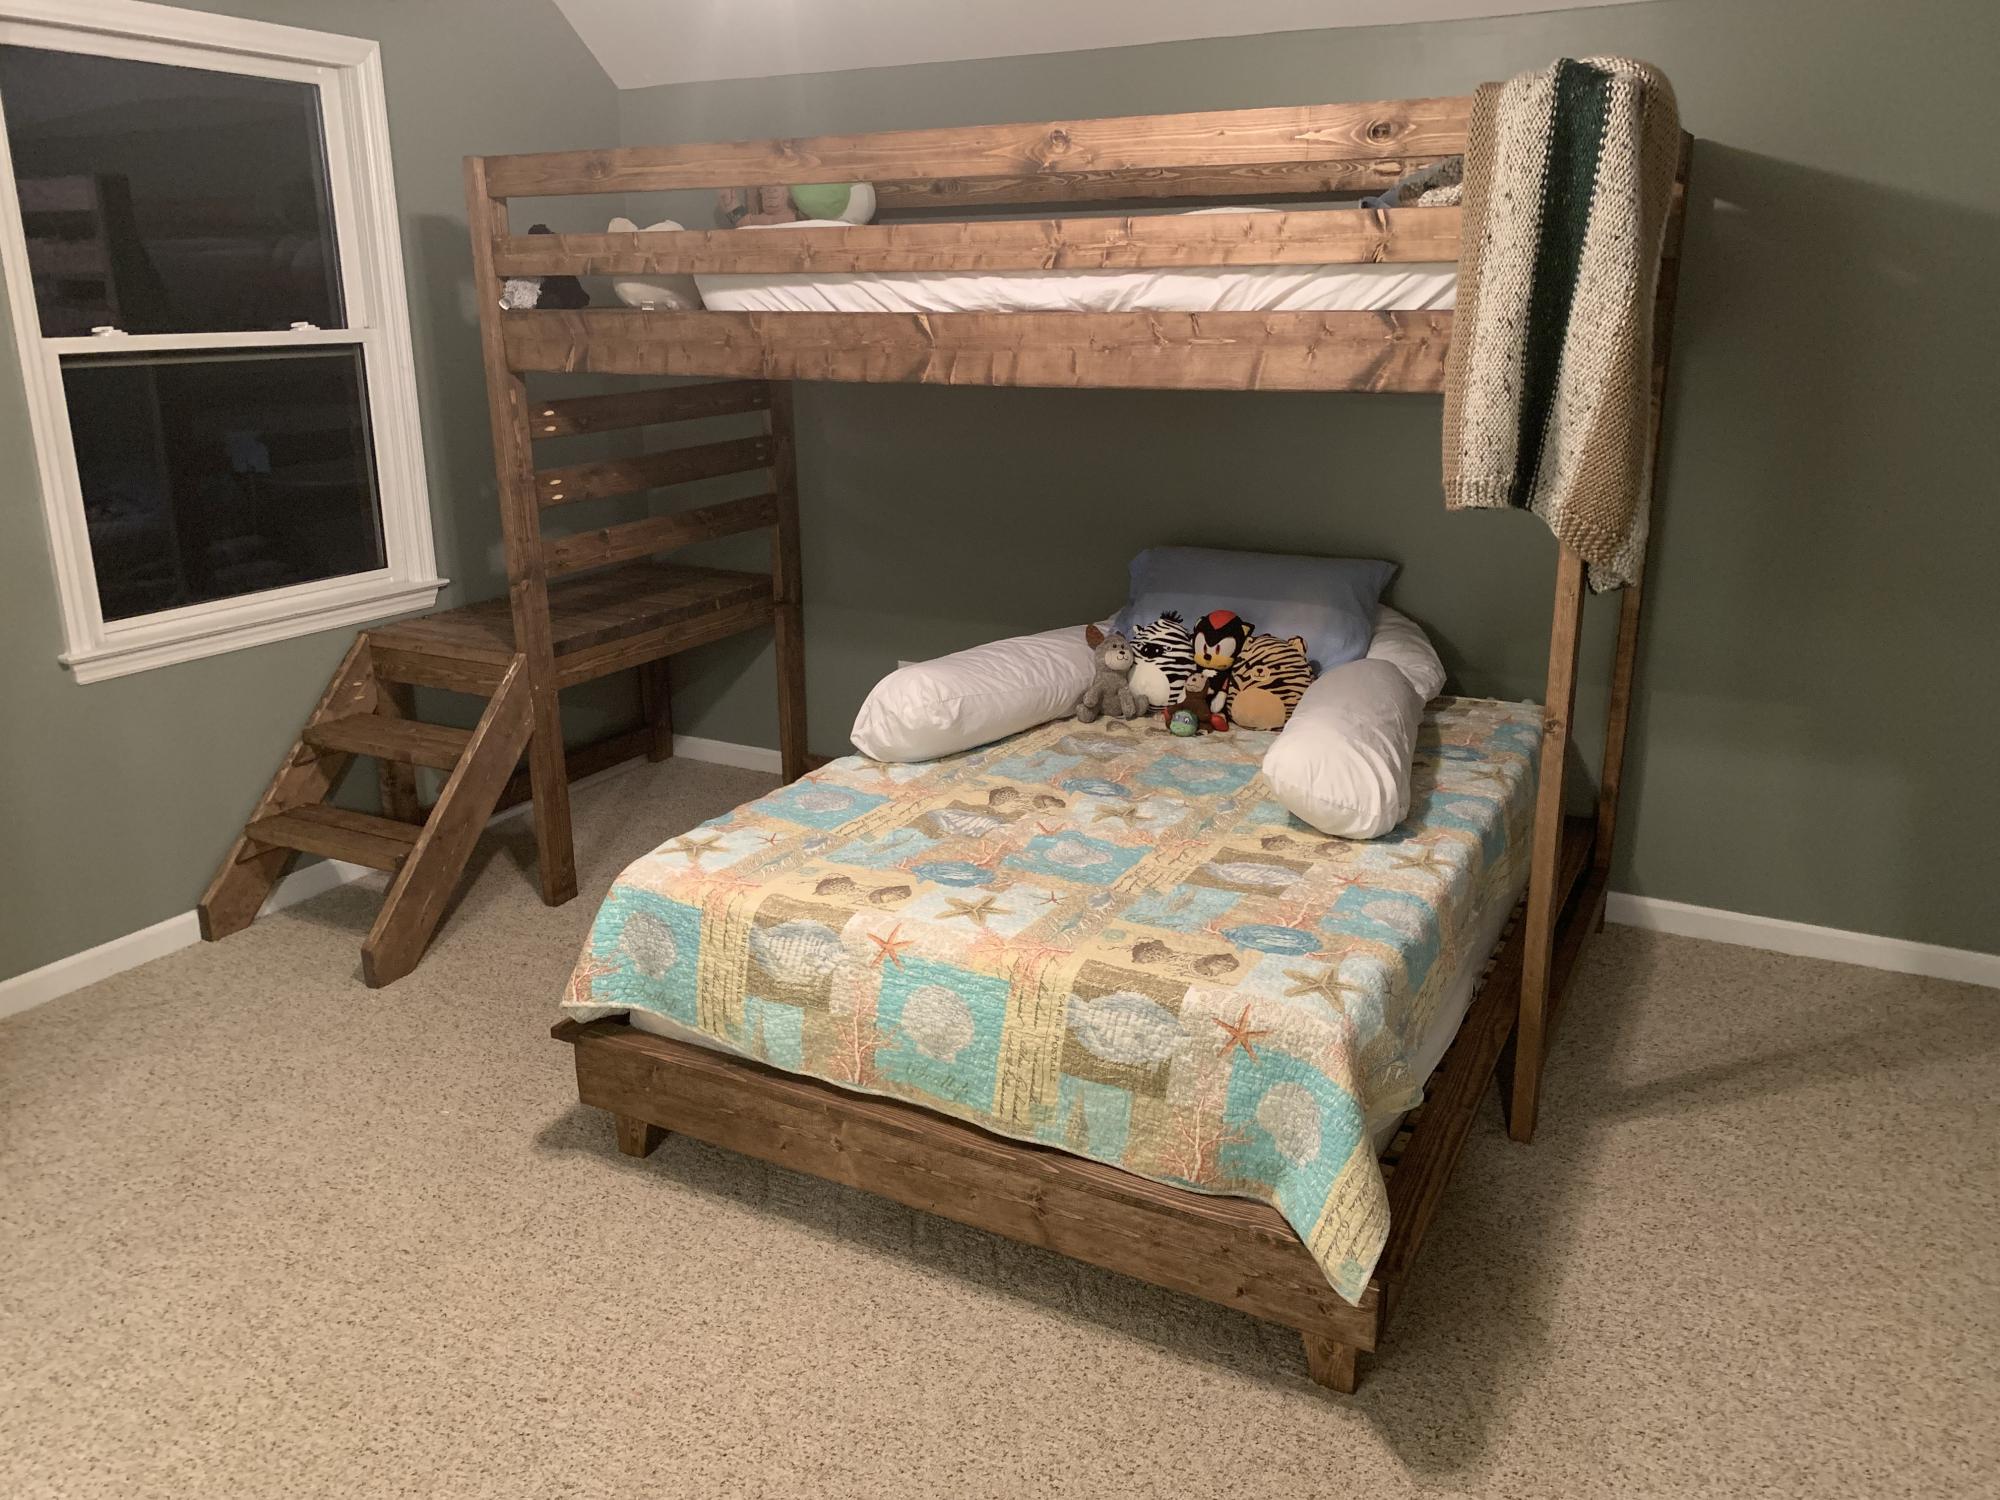
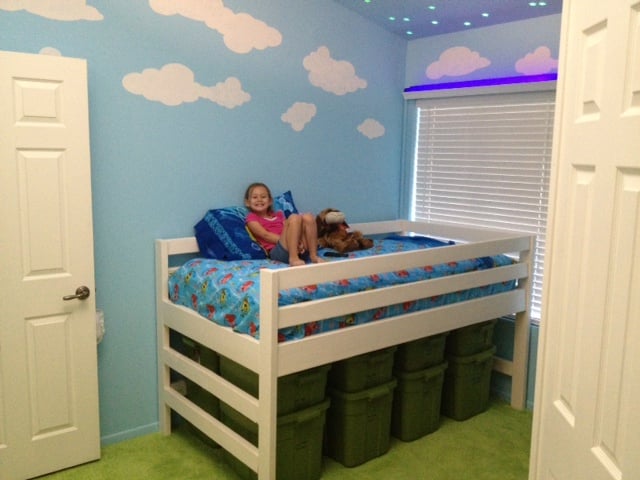
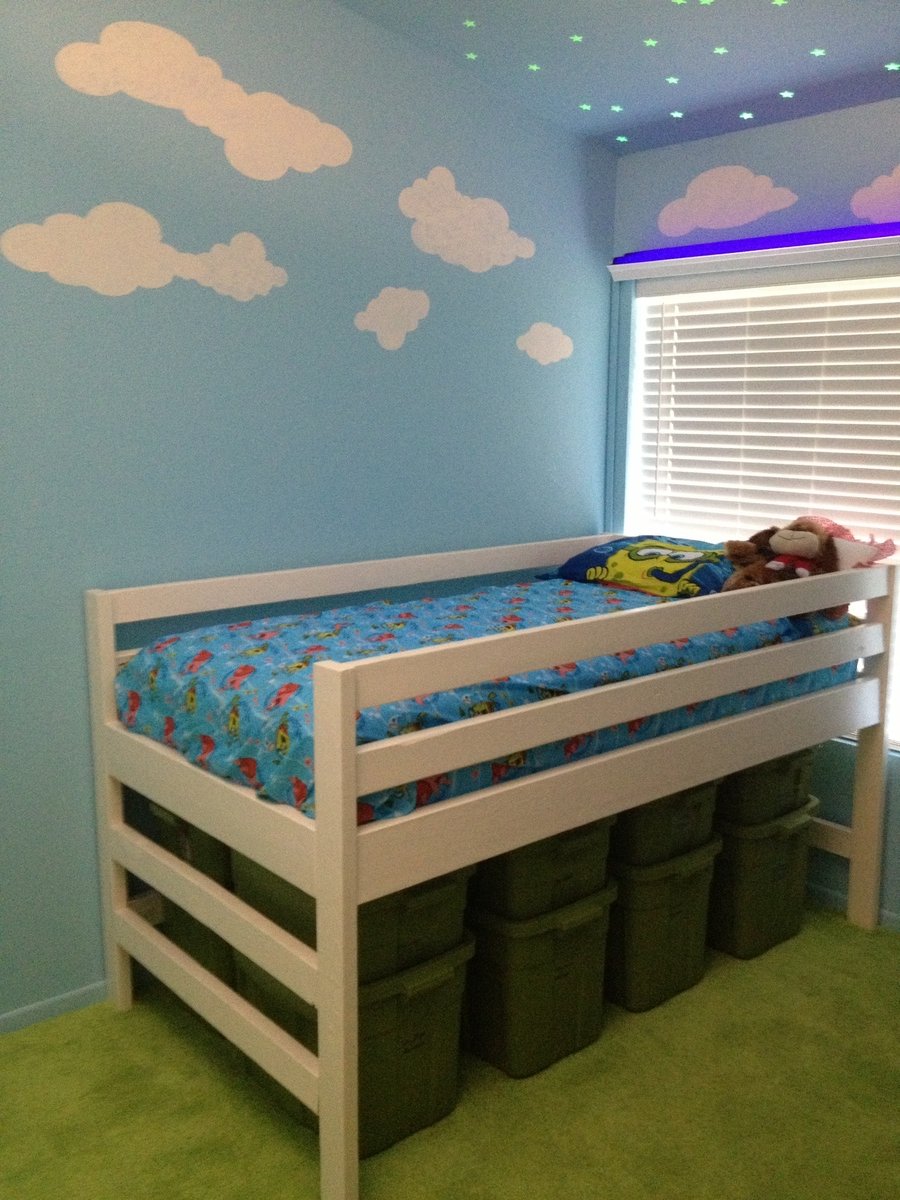
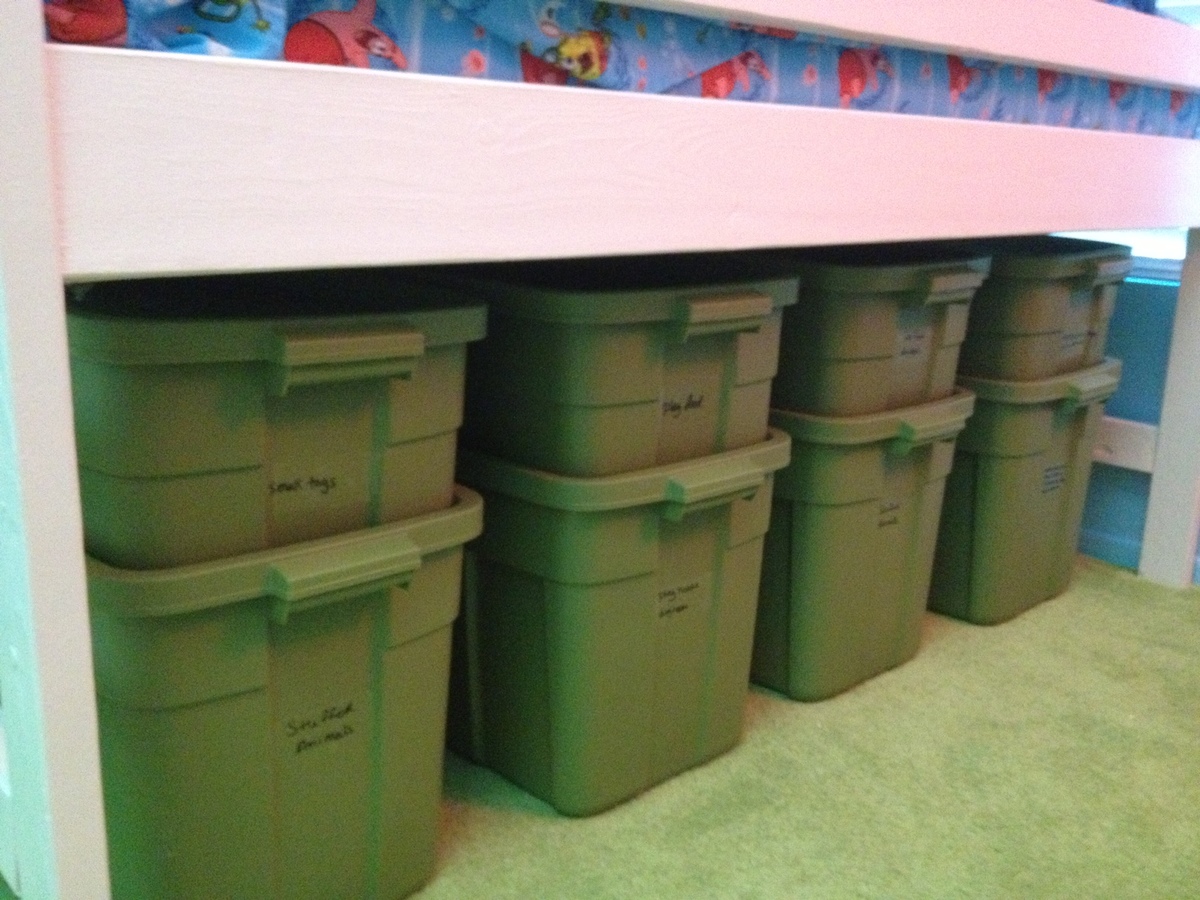
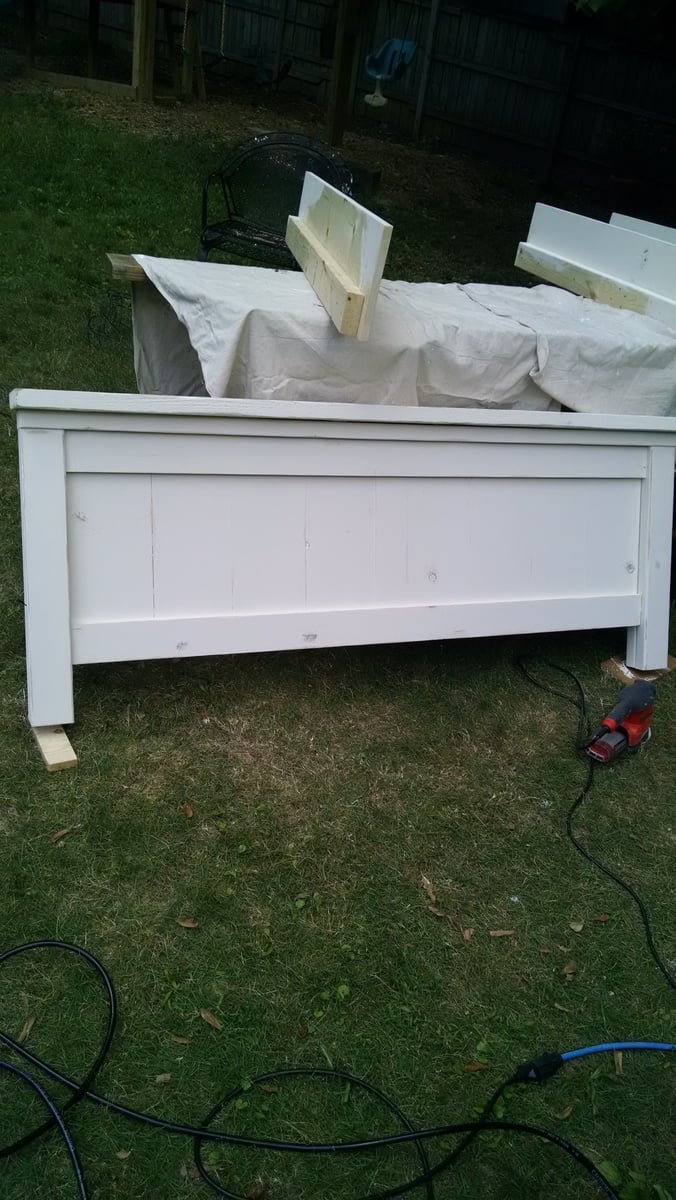
I used Ana's Camp Loft Bed plans but without stairs and lower to the ground. Our room is super small and there wasn't enough room for stairs. We also wanted to be able to lift her into the bed in case she falls asleep on our laps, etc. Our daughter is 5 and the ladder works fine. We needed as much storage for toys, etc. as possible we made it 44-1/2"H - that left 26"H underneath, just high enough to stack one 18 & one 10 gallon Rubbermaid container underneath (Home Depot). x7 = 196 total gallons of storage! She loves to lay sideways (with Shorty2) and a pillow to her back to watch SpongeBob on the TV mounted on the opposite wall.

I kept blowing out the pocket holes on the ends of the boards when I used the Kreg screws that I got at Lowes. They have a slightly larger washer head. I am a cabinet installer by trade so I used some other pocket screws (which have a trimmer head) I had on hand where I could. Their trimmer head didn't blow out as easily. For the spots that I had to use the longer Kreg screws I just grinded off the "washer" outer ring of the screw using my bench grinder. After doing that, they worked fine.

I reinforced everywhere I could (& where you couldn't see them) with L brackets. Especially under each step of the ladder.

I was originally going to put a curtain across the bottom but I did not allow enough clearance for the tubs to be slid out. It probably would have just ended up being a hassle to close and just left open all the time anyway.

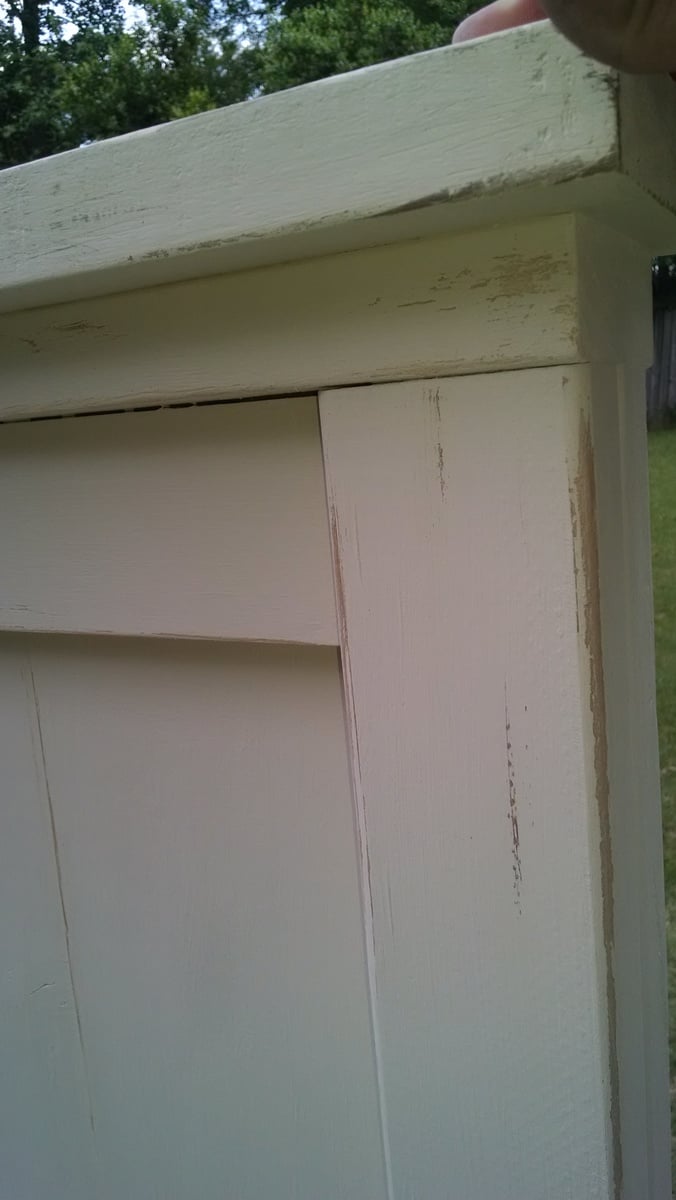
My wife got the honor of painting - I hate painting!

Thanks Ana...Good Luck!

Estimated Time Investment
Weekend Project (10-20 Hours)
Finish Used
White paint
Recommended Skill Level
Beginner

Farmhouse queen

Submitted by wmbnbama on Fri, 07/31/2015 - 07:35

Modified for taller headboard and box springs.  Also glued and screwed 2x4s together for post.  Hard to find dry untreated 4x4 post.  Antique white homemade chalk paint.

Built from Plan(s)
Estimated Cost
$225
Estimated Time Investment
Weekend Project (10-20 Hours)
Finish Used
Antique white with distressed finish
Recommended Skill Level
Intermediate

Rustic Simple Farmhouse Table

Submitted by Edziadul on Tue, 02/27/2018 - 04:51

Rustic Simple Farmhouse Table 

60”L x 36”W x 32”H 

top: (3) 2x12”

legs: (4) 4x4

Frame: 2x4s 

secured with pocket screws 

varathane Kona stain 

3 coats gloss poly sanded between each coat (final sand with 600 grit) 

Estimated Cost
$120 wood
$10 1qt Varathane Stain
$12 1qt miniwax gloss poly
$12 1qt Behr semi gloss white paint
$19.99 Kreg mini pocket hole jig
$10 (2pk) 2 1/2 Kreg pocket hole screws
Estimated Time Investment
Weekend Project (10-20 Hours)
Finish Used
Varathane Kona Stain 1 coat
Minwax gloss poly 3 coats sanded between each coat
Recommended Skill Level
Beginner