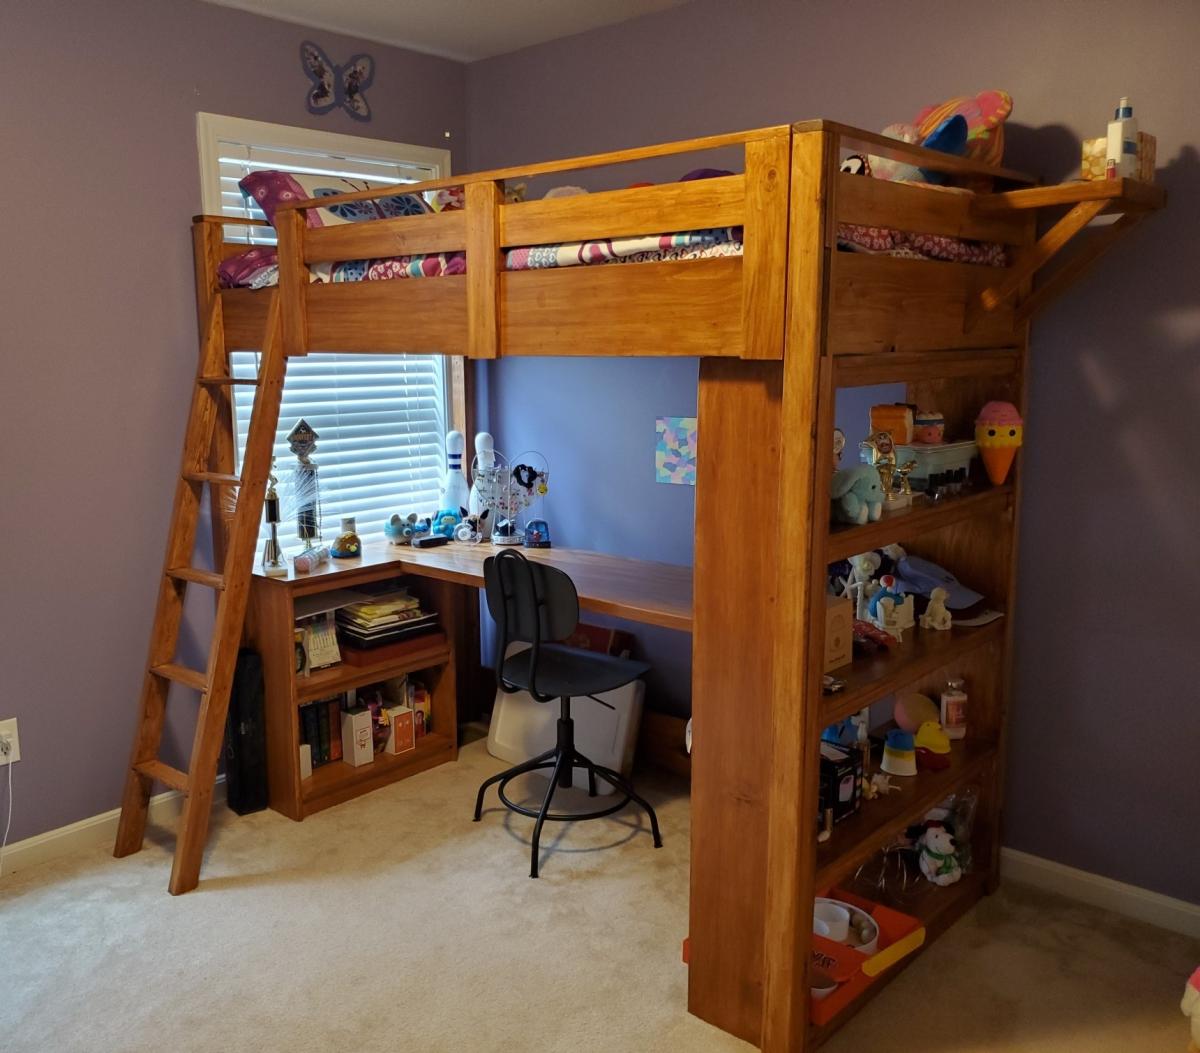
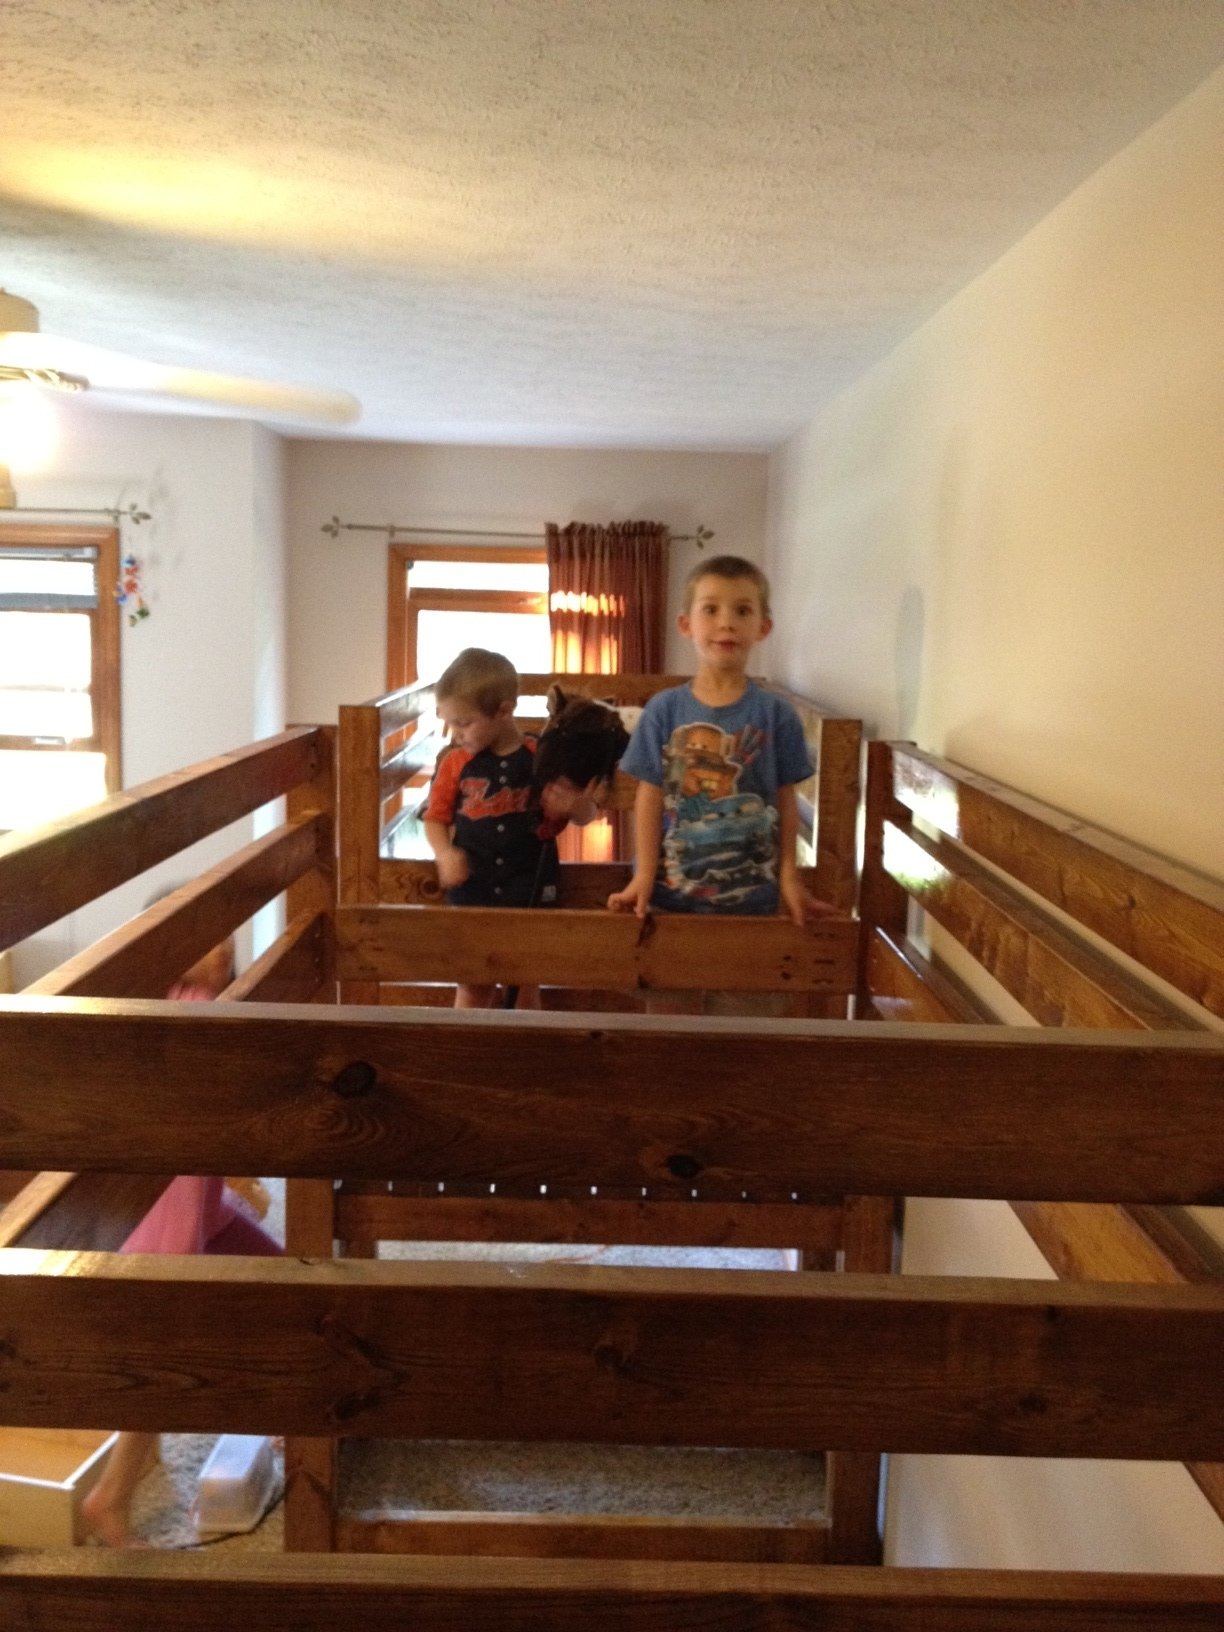
Community Brag Posts

Teen loft bed

Submitted by Anonymous (not verified) on Mon, 06/22/2020 - 20:34

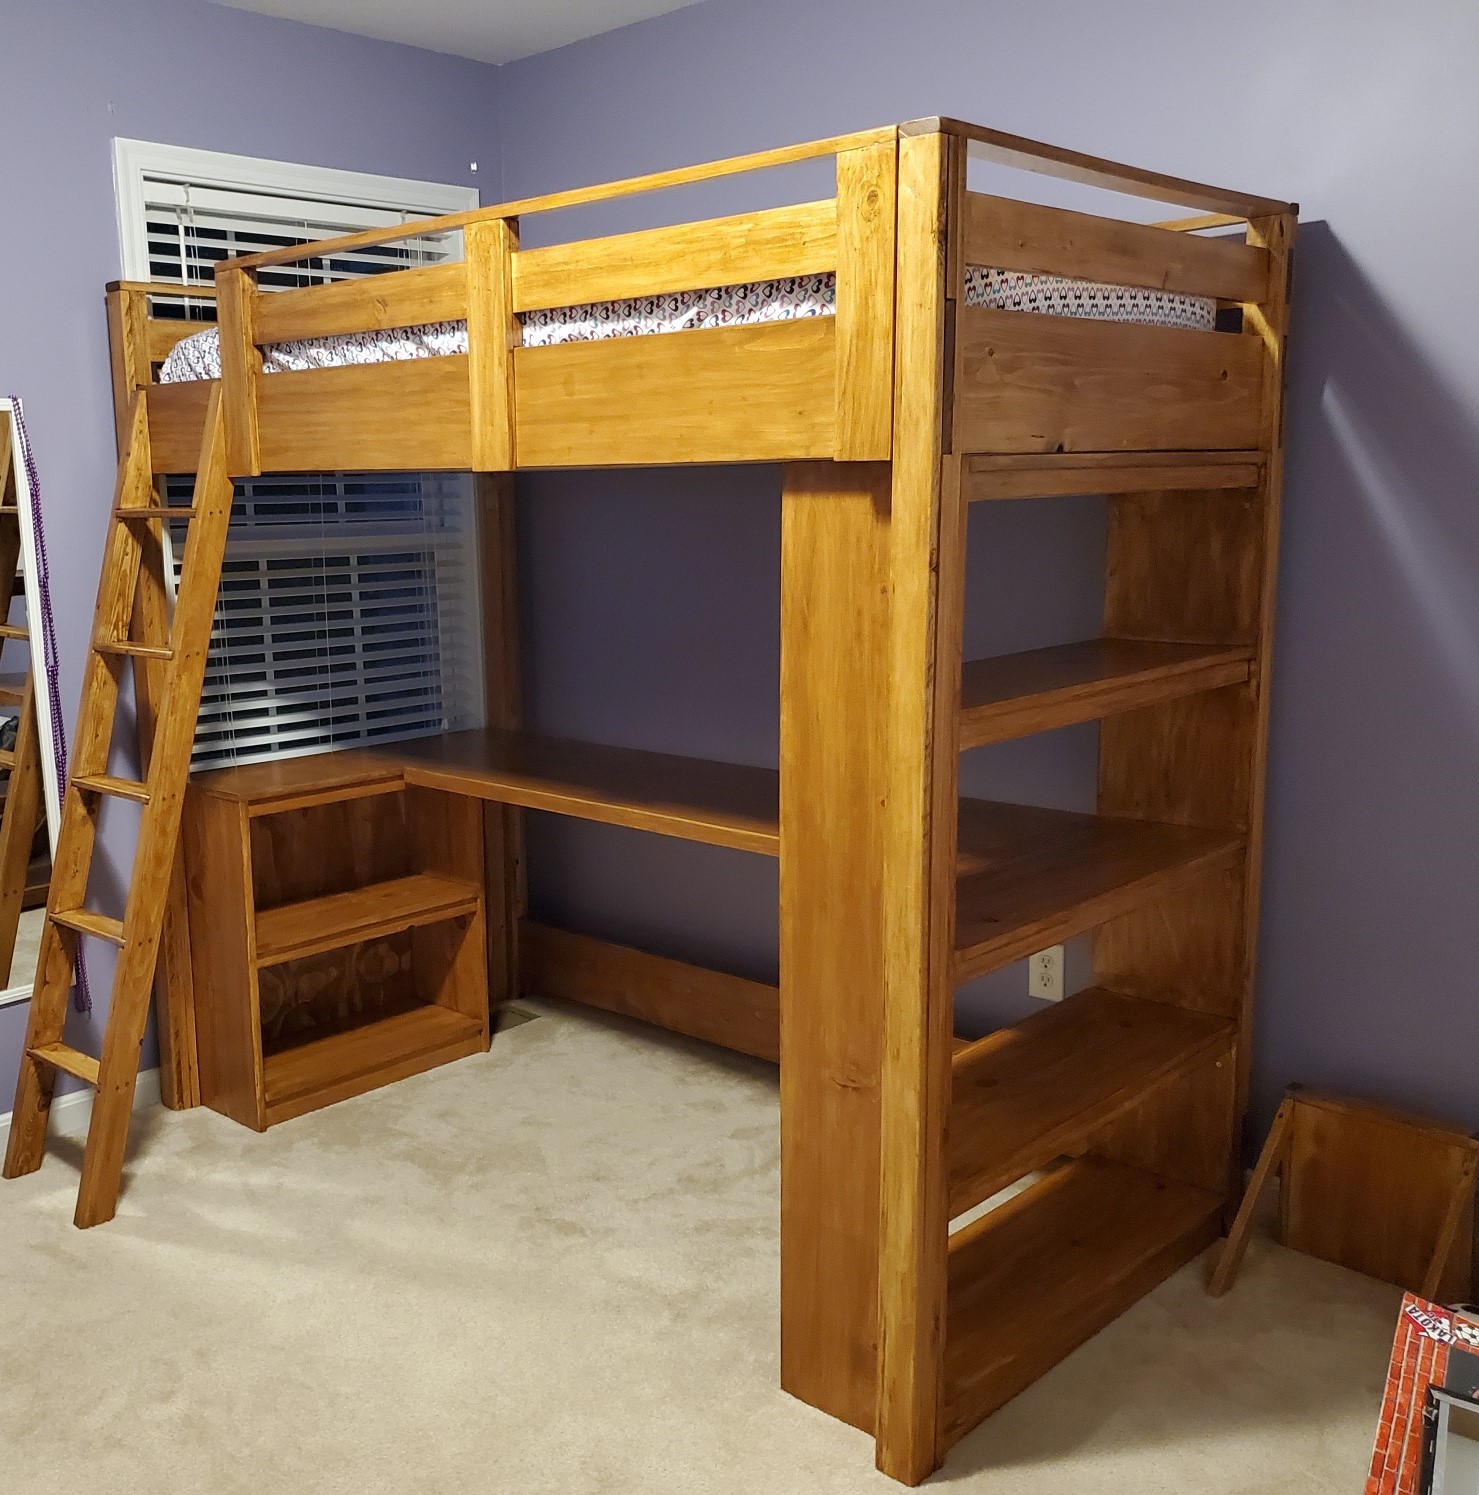
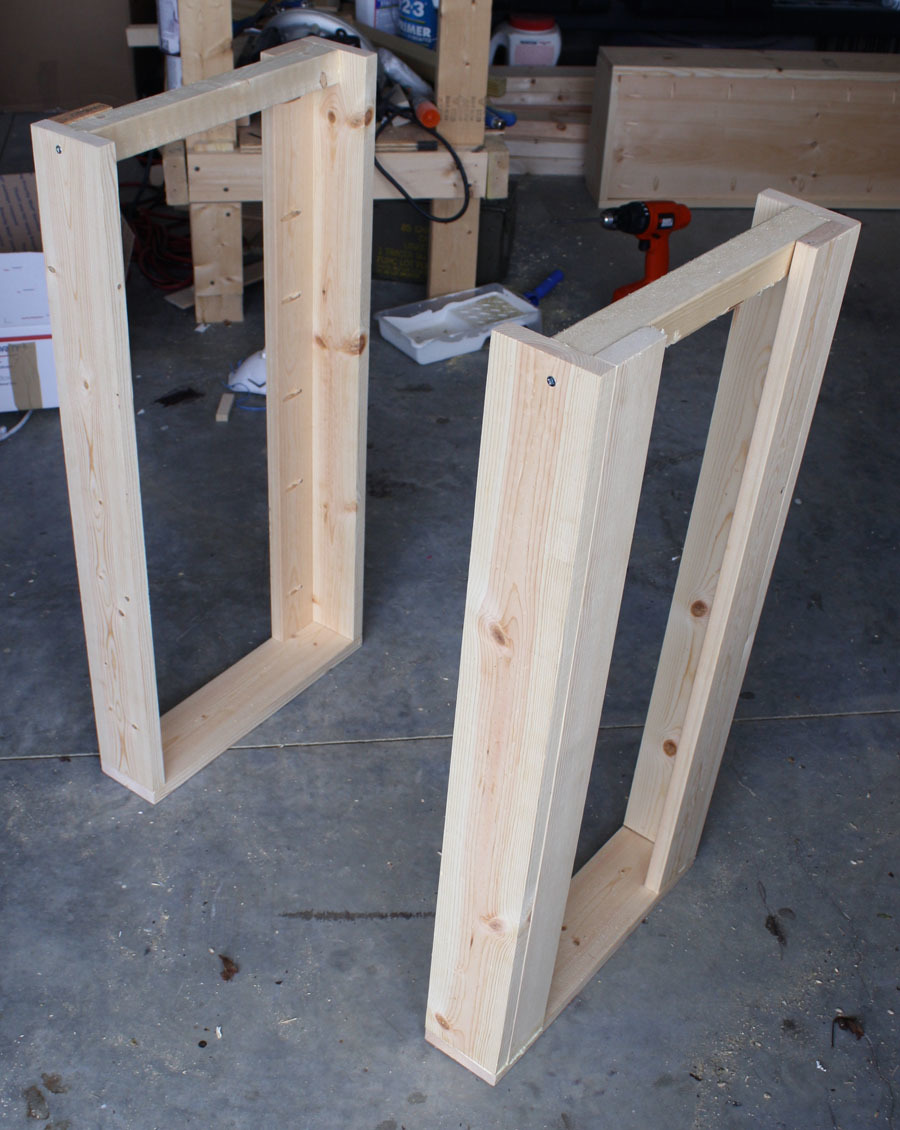
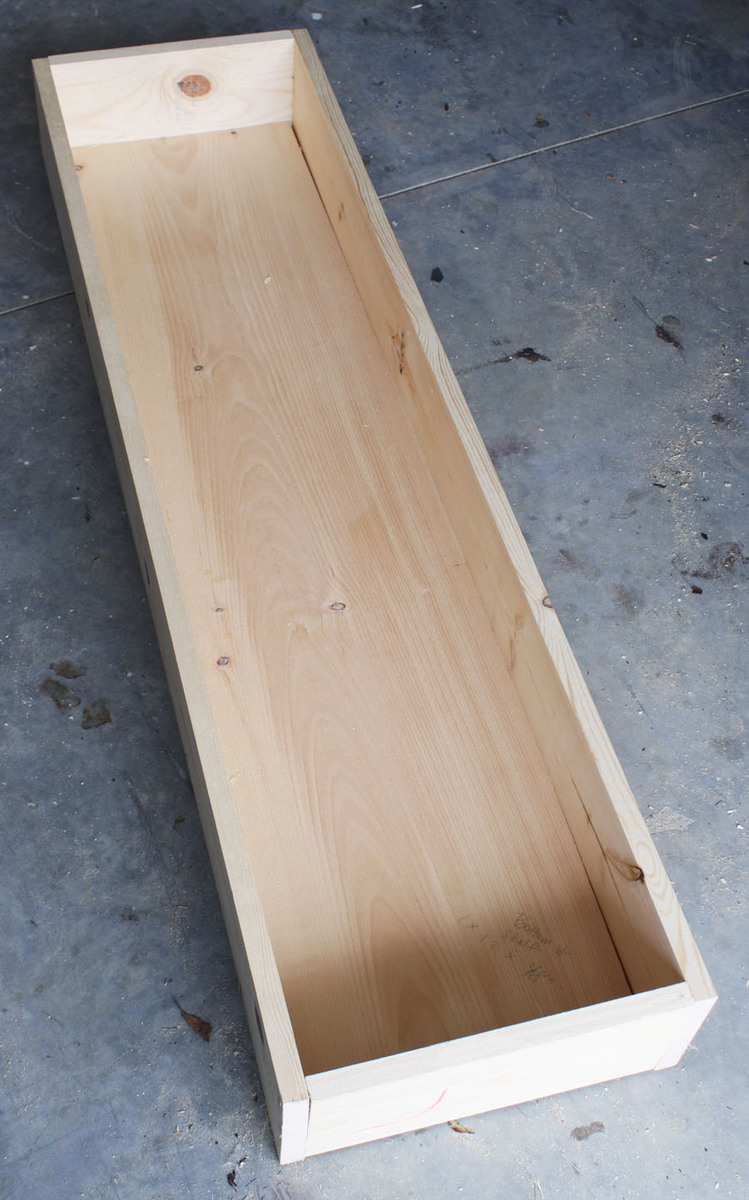
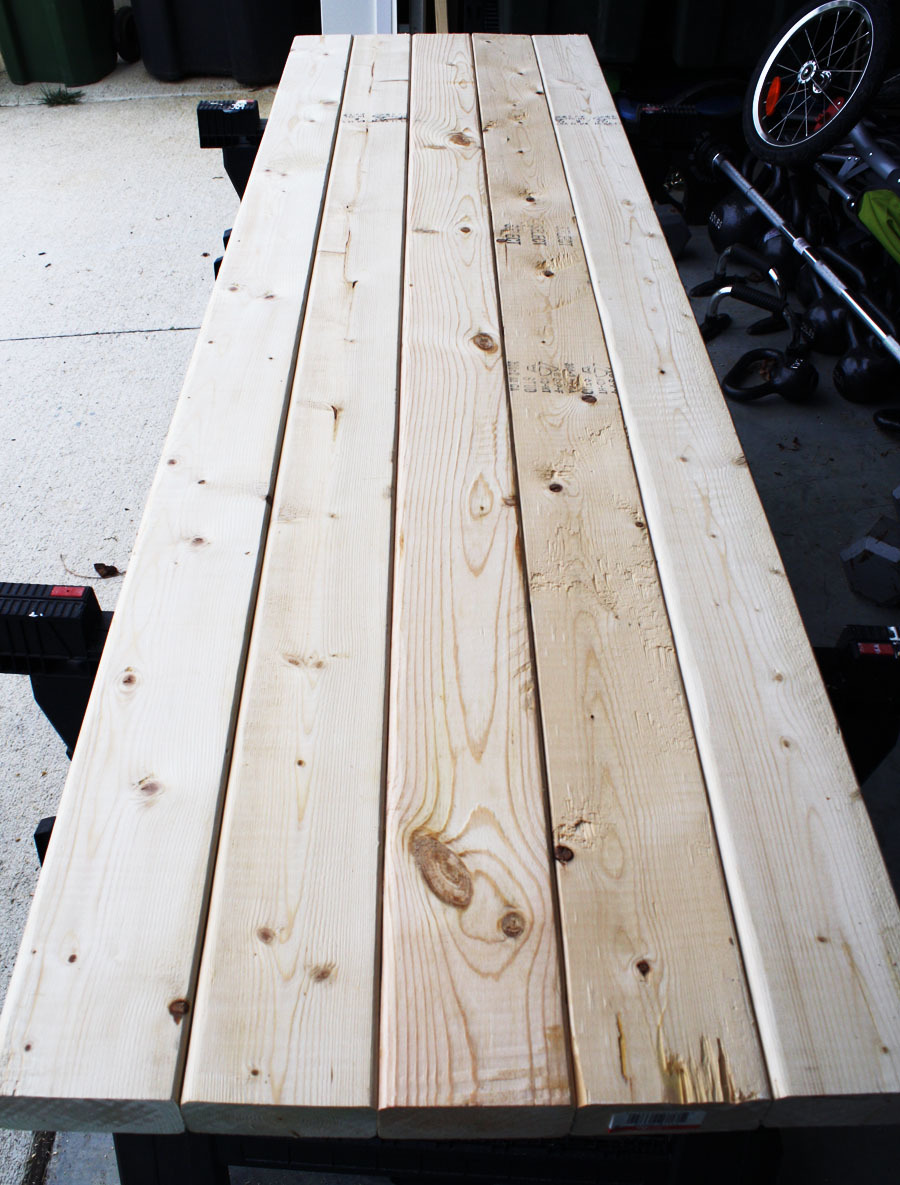
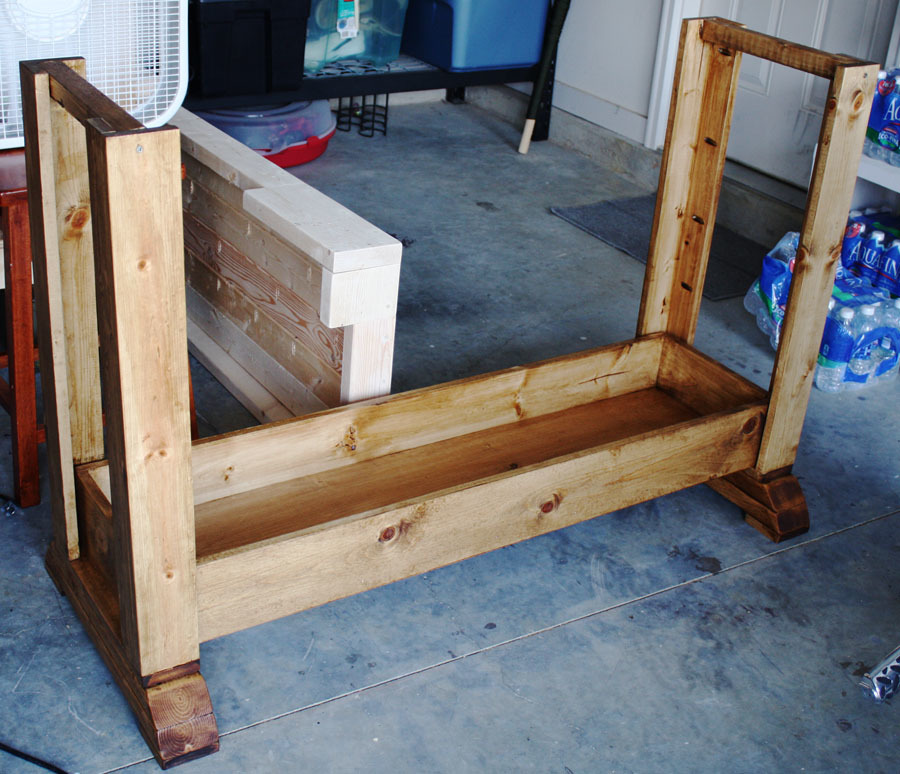
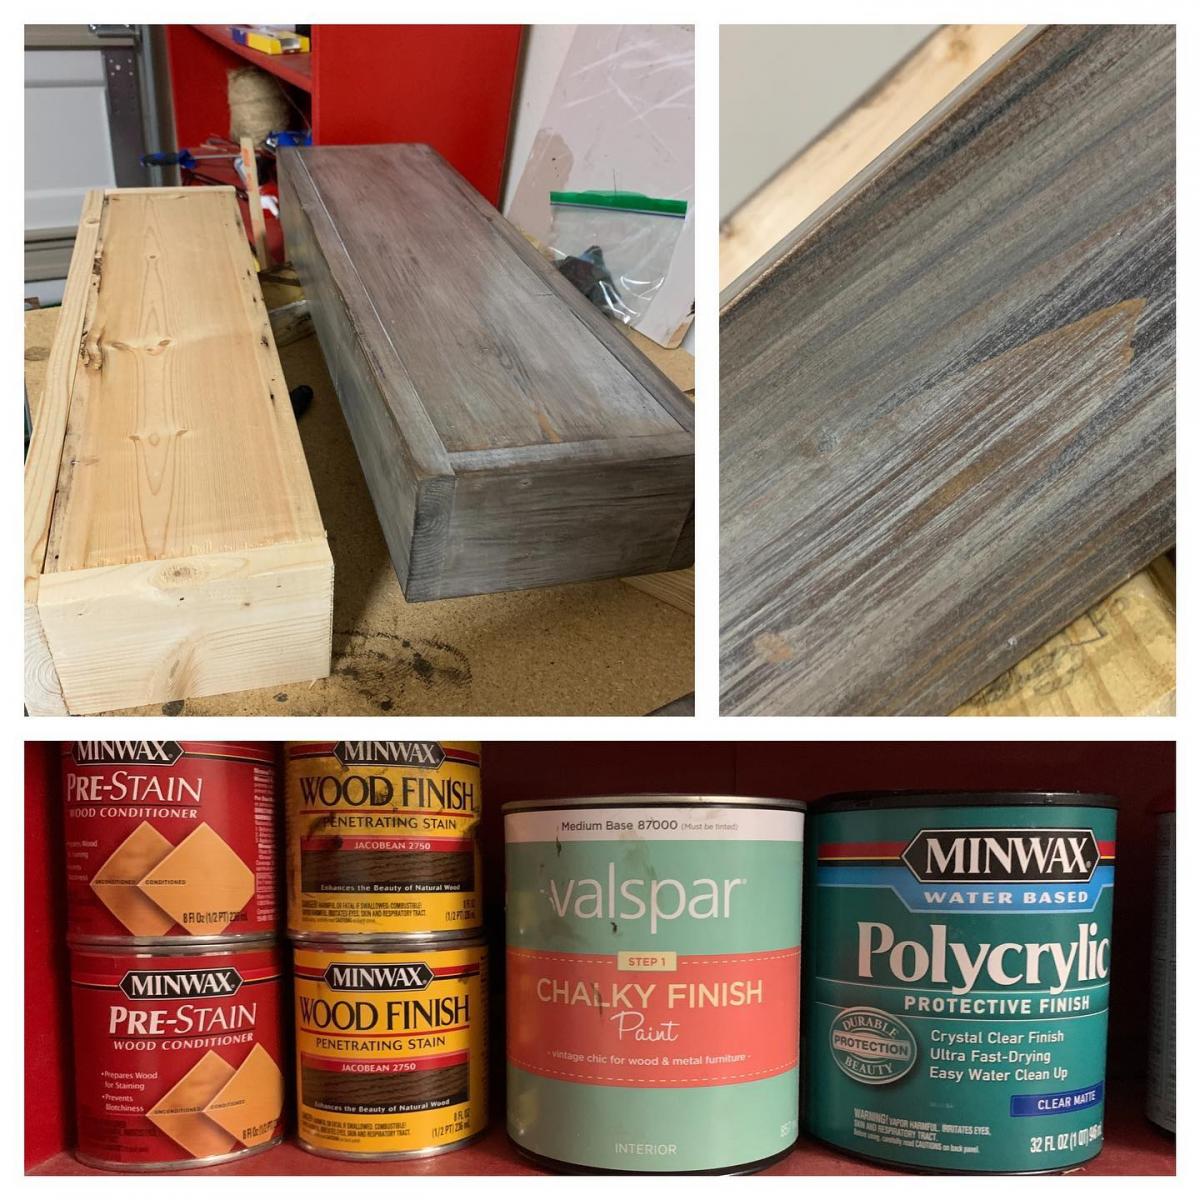
Combined two plans found on this wonderful site with our own revisions to provide a larger desk work area (20" deep). I also added a small shelf to allow for setting a book, water, whatever on it without getting out of the bed. As my first "indoor" project there were several lessons learned - one is to buy the higher grade lumber for the primary components including legs and beams. I did not do this and I had to spend more time than I should've finding good square, straight wood. Another lesson was that staining and polyurethane coating are a skill that requires a lot of practice and time. I and my daughter are thrilled with the final result but choosing to stain/poly it likely doubled the overall build time. Still no regrets, though. My 12 yo daughter just loves her new bed and thanks to this site for the spectacular ideas.

Estimated Cost
$600?
Estimated Time Investment
Week Long Project (20 Hours or More)
Finish Used
I used Minwax Cherrywood gel stain (2 coats) and Minwax Fast Drying Polyurethane (3 coats). For the gel stain, apply with cotton rag and do NOT let it sit on the wood for more than 10 minutes before wiping it off. Before applying first coat, vacuum the wood especially the knots, wipe all with white cloth, wipe with cloth dampened with mineral spirits and let dry, then wipe with tack cloth, then apply stain. AFTER the first coat and between all subsequent stain coats, let fully dry and wipe with tack cloth before applying poly. For the first poly coat, wipe with white cloth, then wipe with tack cloth, and apply poly using a china brush (specific for finishing). Submerge your brush in mineral spirits and press down to eliminate bubbles, then wipe it along newspaper until mineral spirits are nearly gone from the brush. Cut the first coat of poly 25% with mineral spirits and brush on in even strokes. AFTER the first coat, sand lightly with 220 or 320 sand paper, vacuum all dust, wipe with white cloth, then with cloth dampened with mineral spirits and let wood dry, then wipe with tack cloth, then apply second coat with full strength poly using the same process of first eliminating the bubbles from the brush. Repeat that process for all subsequent coats. Then let dry for several days before assembling the bed.
Recommended Skill Level
Intermediate

Mud Kitchen for 2

Submitted by Anonymous (not verified) on Sun, 04/07/2024 - 18:25

Mud kitchen made from scraps for my coworker’s kids. (Mud kitchen is a little kitchen to make mud pies and let the little imagination play.) They love it!

Aminnie Laws

Built from Plan(s)

Workbench Console

I built this workbench console as a housewarming gift for our good friends who just bought their first house. I'm thrilled with the way it turned out! Check my blog link for the complete play-by-play!

Built from Plan(s)
Estimated Cost
$65
Estimated Time Investment
Weekend Project (10-20 Hours)
Finish Used
Rustoleum Ultimate Wood Stain in Golden Oak with 3 coats of Rustoleum Satin Polyurethane
Recommended Skill Level
Intermediate

Wild Animal Containment Console

Submitted by Stacie on Fri, 06/13/2014 - 10:09

My home was being overtaken by wild animals. They started out confined to my son's room but with the presence of doting grandparents and other relatives, the animals quickly multiplied and were found lounging in every room. They were everywhere! We either needed to move out and put an Animal Sanctuary sign in the yard, or I had to build some type of containment system for them.

The Kendra Storage Console plans were perfect! The build was quick and the wild creatures were effortlessly corralled. My son gave each one an assigned seat. The animals love their new home and my family enjoys having them all in one location.

Thank you, Ana, for keeping our home safe from all of the wild animals!

Built from Plan(s)
Estimated Cost
$25
Estimated Time Investment
Afternoon Project (3-6 Hours)
Finish Used
Whitewash
Recommended Skill Level
Beginner

Comments

Hanging Organizer

Submitted by Coopernest on Mon, 09/12/2016 - 07:57

After following Ana for a couple years, I finally got to build something. This was made after watching the you tube video, I used old redwood fencing that was salvaged from a friend headed to the dump. I decided I wanted mine wider so I adjusted the measurements. It went together great, I hung it up before the metal was attached and found it looked funny being so wide. With the pocket hole construction, it was super easy to undo, trim and redo. Then the metal was added and walah! Done! Lovin it. I also made a TP storage hanger to fill the extra space. I will now be making them for 3 friends who have asked for them.

Estimated Cost
$15 is about what I spent for the metal bar and hooks and screws. The wood was reclaimed.
Estimated Time Investment
An Hour or Two (0-2 Hours)
Finish Used
sanded to allows the chippy paint to come off, but not all the way. I like the weathered look and sealed with 2 coats of Valspar clear matte sealer spray.
Recommended Skill Level
Starter Project

2X4 Outdoor Sectional

Submitted by rhonda68 on Fri, 06/26/2020 - 20:35

I've been searching for a deck set and I didn't want to spend a lot of money. I altered the plan to include a table instead of another seat (I used a piece of square patio glass from my old patio set). I made this sectional in an afternoon using green-treated lumber and cushion sets from Walmart.

Estimated Cost
200
Estimated Time Investment
Afternoon Project (3-6 Hours)
Finish Used
None
Recommended Skill Level
Beginner

My first DIY Project - Barn Beam Ledges

Submitted by nikkirumm on Fri, 08/24/2012 - 07:38

These ledges were my first DIY project. They're not perfect by no means, but I'm proud of them and they are still attached to the wall after 6 months. They look great in my kitchen and I love the fact that when we move again with the Army, I can take them with me.

Built from Plan(s)
Estimated Cost
$10
Estimated Time Investment
Afternoon Project (3-6 Hours)
Finish Used
Minwax Ployshades Mission Oak
Recommended Skill Level
Starter Project

Pull Up a Chair

I built ten of these for my dining table. I'm so pleased with the result. I added the suggested support bar at the bottom for extra strength. I was surprised by how sturdy these are...and comfortable. I blogged about them over here http://skonkers.blogspot.ca/2014/06/pull-up-chair.html


Built from Plan(s)
Finish Used
I used CIL semi-gloss paint in the following colours, Chile, Deep Russet, Egyptian Earth, Golden Amber, Calypso Green, Racing Green, Middy Blue, Fashion Passion, Rum Raisin, & Razz Berries
Recommended Skill Level
Beginner

Comments

Rustic X Console

Submitted by Anonymous (not verified) on Wed, 09/14/2016 - 22:38

I followed the plans for the rustic x console table, making only a couple of adjustments for height and width (I made it taller and not quite as long as the plan called for). I am thrilled with how it turned out, and equally thrilled that I can get rid of the ugly tv stand we had before!

Built from Plan(s)
Estimated Cost
$70
Estimated Time Investment
Weekend Project (10-20 Hours)
Finish Used
I stained the top and shelves, then used a matte finish acrylic paint on the rest. After the paint dried, I sanded the edges a bit to distress, then applied stain to sanded areas with a q-tip.
Recommended Skill Level
Beginner

Floating Bathroom Shelves

Submitted by Kamoanui on Mon, 06/29/2020 - 15:58

Very quick and easy! We did 6 in. boards and weathered the boards with stain, paint, and sanding. Looking for other places in the house to use this plan!

Built from Plan(s)
Estimated Cost
$25
Estimated Time Investment
Afternoon Project (3-6 Hours)
Finish Used
To get the weathered look, I used pre-stain, then Jacobean stain, then chalk paint. Let it dry overnight, then sanded it with a hand sander and applied another coat of the Jacobean stain. To finish and protect it, I used polycrylic clear matte sealer.
Recommended Skill Level
Beginner

Dog Crate / End Table

Submitted by kristine on Sun, 08/26/2012 - 15:46

The husband and I have been very inspired by the awesome women (and men) on this site that have created their own pieces of furniture. They all look so amazing! So the husband wanted to give it a shot and try creating this dog crate / end table as his first ever project. Now mind you, he hasn't done any sort of woodworking since wood shop class in high school... and that was at least a decade ago.

I have to say that I'm quite proud of the hubby's first finished project! Although, he did mess up a bit with the table top being an inch too short width wise. I really didn't want him to create another one because that would mean I would have to stain another one and I really REALLY do not want to stain again! So we compromised and ended up gluing a thin wood trim on the side end of the table top to cover up the mistake.

Built from Plan(s)
Estimated Time Investment
Weekend Project (10-20 Hours)
Finish Used
minwax stain in mission oak, behr semi-gloss paint in a light grey color, and wax
Recommended Skill Level
Starter Project

Comments

See Saw Memphis red

Submitted by Mriddle on Fri, 06/20/2014 - 11:27

Fun project to build, and more fun for the kids. Ages 7-3 have been loving it. I used pressure treated 2x4s since it would be outdoors all the time. Thanks for the idea.

Estimated Cost
26$ with paint
Estimated Time Investment
Afternoon Project (3-6 Hours)
Recommended Skill Level
Starter Project

Comments

Custom 42 inch bath vanity

Submitted by milleall on Thu, 07/02/2020 - 08:09

Needed a custom build to fit the plumbing and size requirement for my master bath.

Estimated Time Investment
Afternoon Project (3-6 Hours)
Finish Used
Behr paint in Juniper Berries
Recommended Skill Level
Intermediate

Comments

mfast10

Tue, 06/13/2023 - 18:29

This is the exact size and style I am looking for as well. Would you mind sharing the plans with me as well?

Tapered Wood Planter

Submitted by Anonymous (not verified) on Wed, 04/24/2024 - 10:53

Made this for our patio area very fun build, my wife loves it so of course she wants another one! Back to the wood stove.

Blair K

Built from Plan(s)

Double Wide Camp Loft Bed!

Have two boys who where in need of more floorspace to play. Saw the great plans for the Camp Loft and decided to make a double wide. One platform and two beds.

All in all went together as designed. Eliminated the stairs for a ladder. Works great if you have a long wall.

Estimated Cost
$85 for all the wood; 50 for stain and poly
Estimated Time Investment
Weekend Project (10-20 Hours)
Finish Used
Minwax
Recommended Skill Level
Beginner

Comments

Corner shelves

Submitted by Kate_14 on Sat, 07/04/2020 - 13:33

I built these beautiful corner shelves for a friend. It is a great beginner project. I used a 1x8 board but you could also use a 1x10 board. You could also build 5 shelves instead of 3. I used pocket hole joinery.

Estimated Time Investment
Afternoon Project (3-6 Hours)
Finish Used
Oil I find at my local mill.
Recommended Skill Level
Starter Project

Custom Toy Box

Submitted by Anonymous (not verified) on Sat, 04/27/2024 - 11:30

Your plan for this toy box was sooo easy to follow, but I added the feet. My grandson loved it. I have 2 other projects from your plans for him as well.

Charlene

Built from Plan(s)

Back Entry (Mudroom) Shelf

Submitted by lbrown on Thu, 08/30/2012 - 07:06

With my beadboard installed and the trim board for my hooks in place in my back entry I was ready to get building. I decided to tackle the shelf first since that would be easier to install without the bench in the way.

For my shelf design I planned it together with my bench so that I could cut everything but the bench top and face framing pieces from a single piece of plywood. Also, the width of my space is a little strange and the shelf couldn't be too deep because of my window location.

I think the shelf turned out cute and I can't wait to prime and paint it and add the coat hooks. I plan to do the finishing work at the same time as the bench so I need to build my bench first though.

For more details, check out my blog: http://homeandawaywithlisa.com/blog/2012/8/30/building-a-storage-shelf-…

Estimated Cost
$45
Estimated Time Investment
An Hour or Two (0-2 Hours)
Finish Used
I plan to paint it white
Recommended Skill Level
Beginner
Back