Coffee table
Fun project
Built from Plan(s)
Recommended Skill Level
Beginner
Fun project
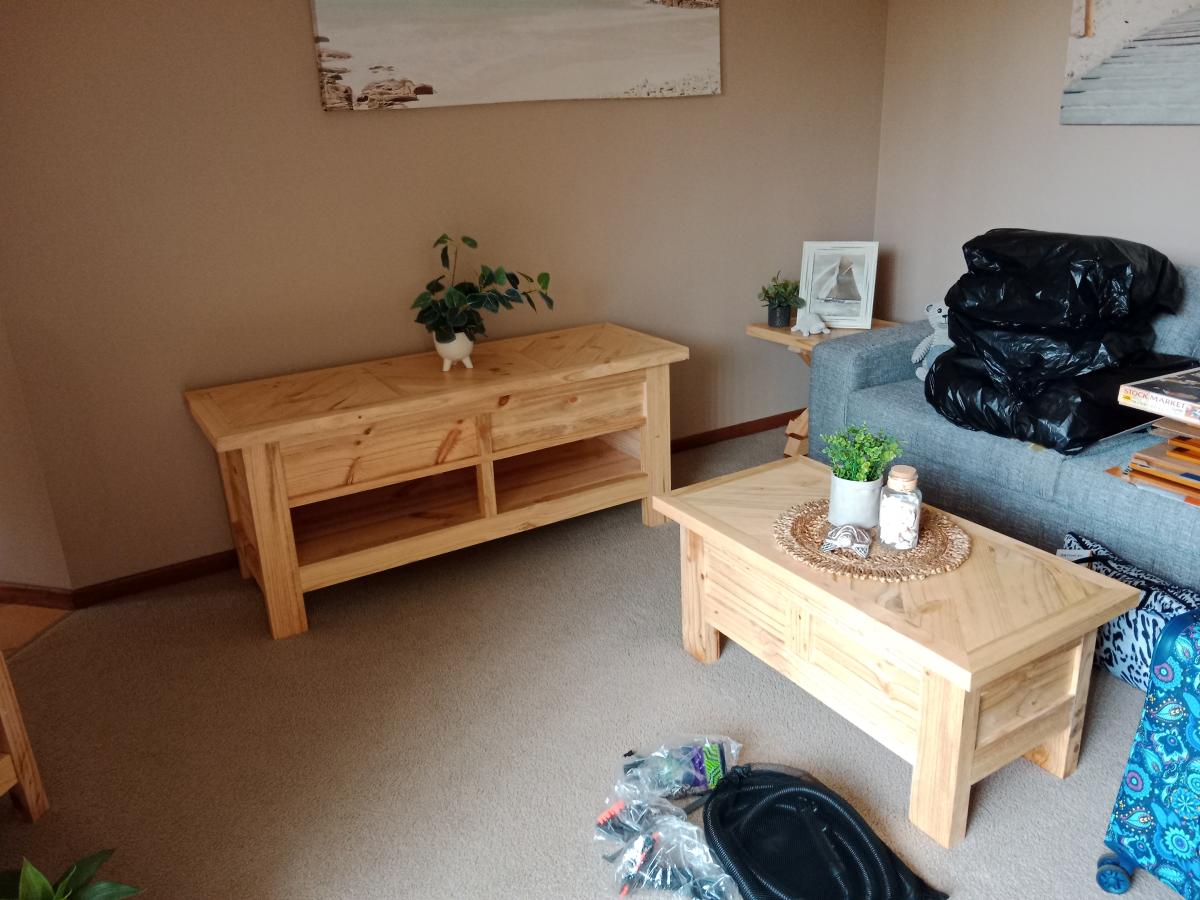
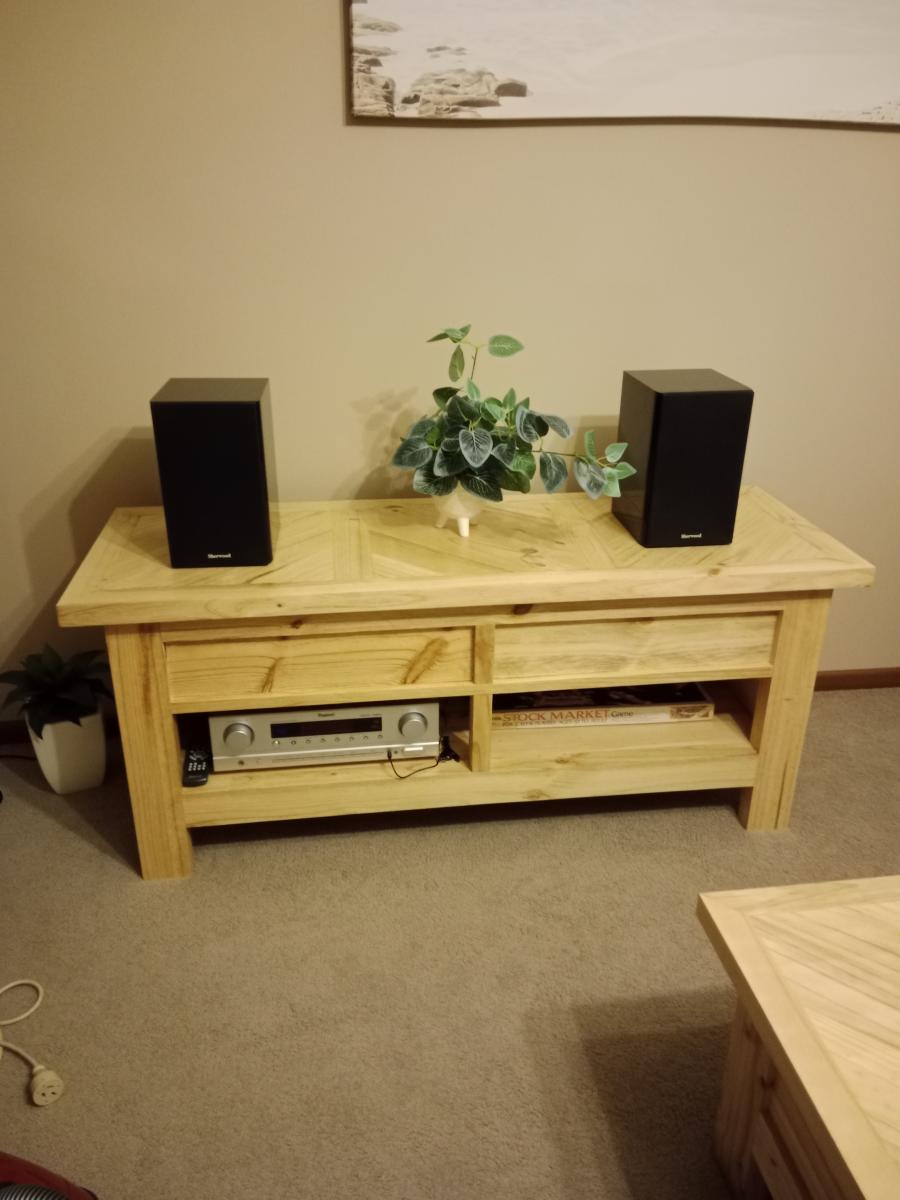
This entertainment unit was inspired by the 4x4 x base pedestal dining table with planked wood top. It completes the set which also includes the Table, coffee table and lamp table.
All 4 pieces have the same top design
Made from 200mm x 50mm pine sleepers and finished with Cabots benchtop clear finish
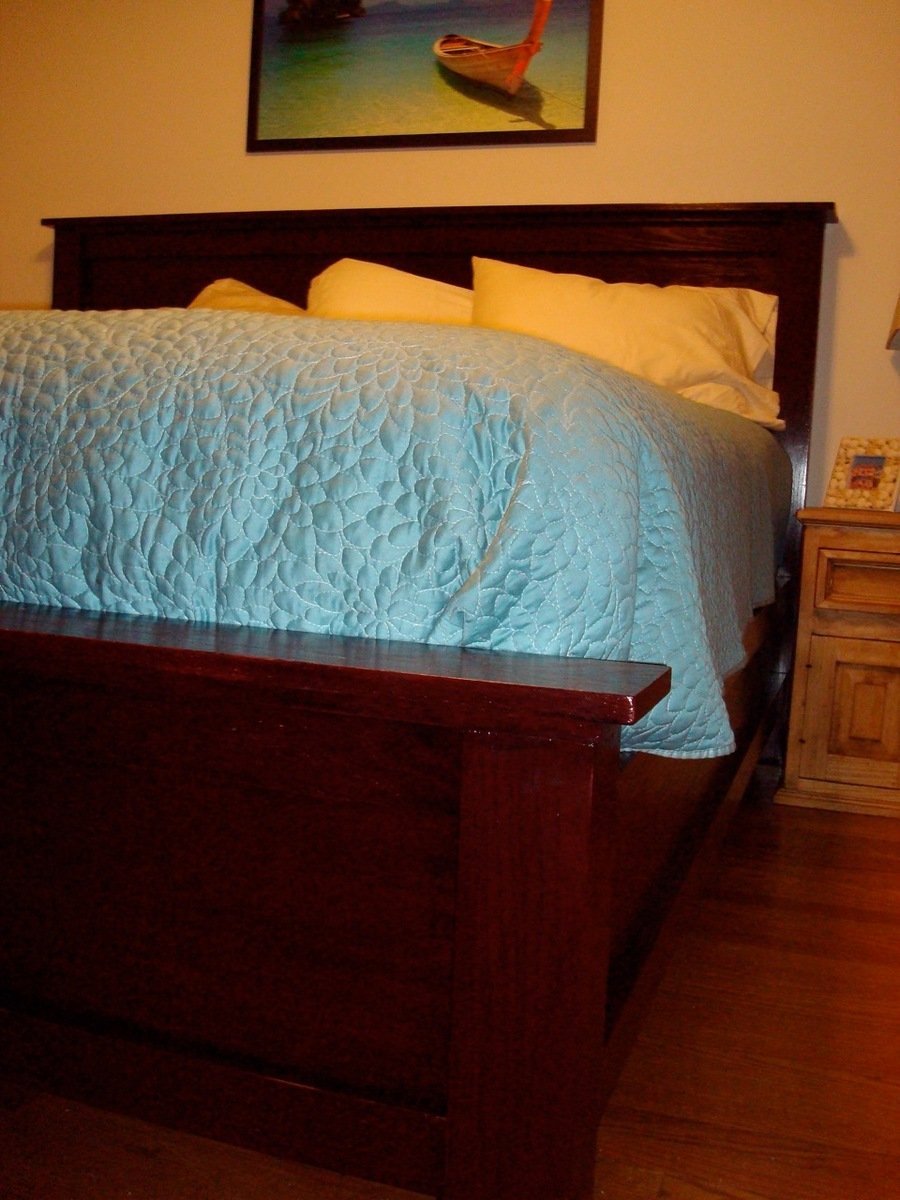
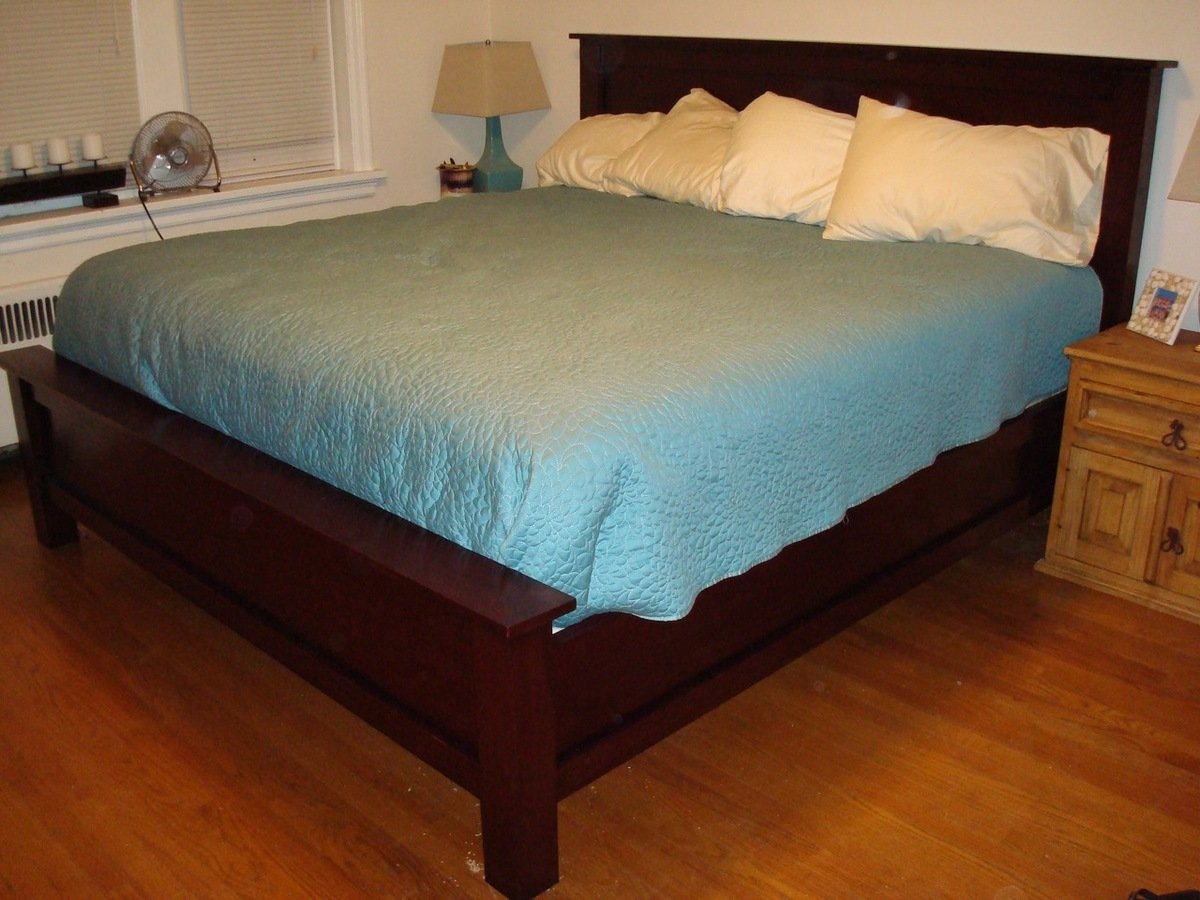
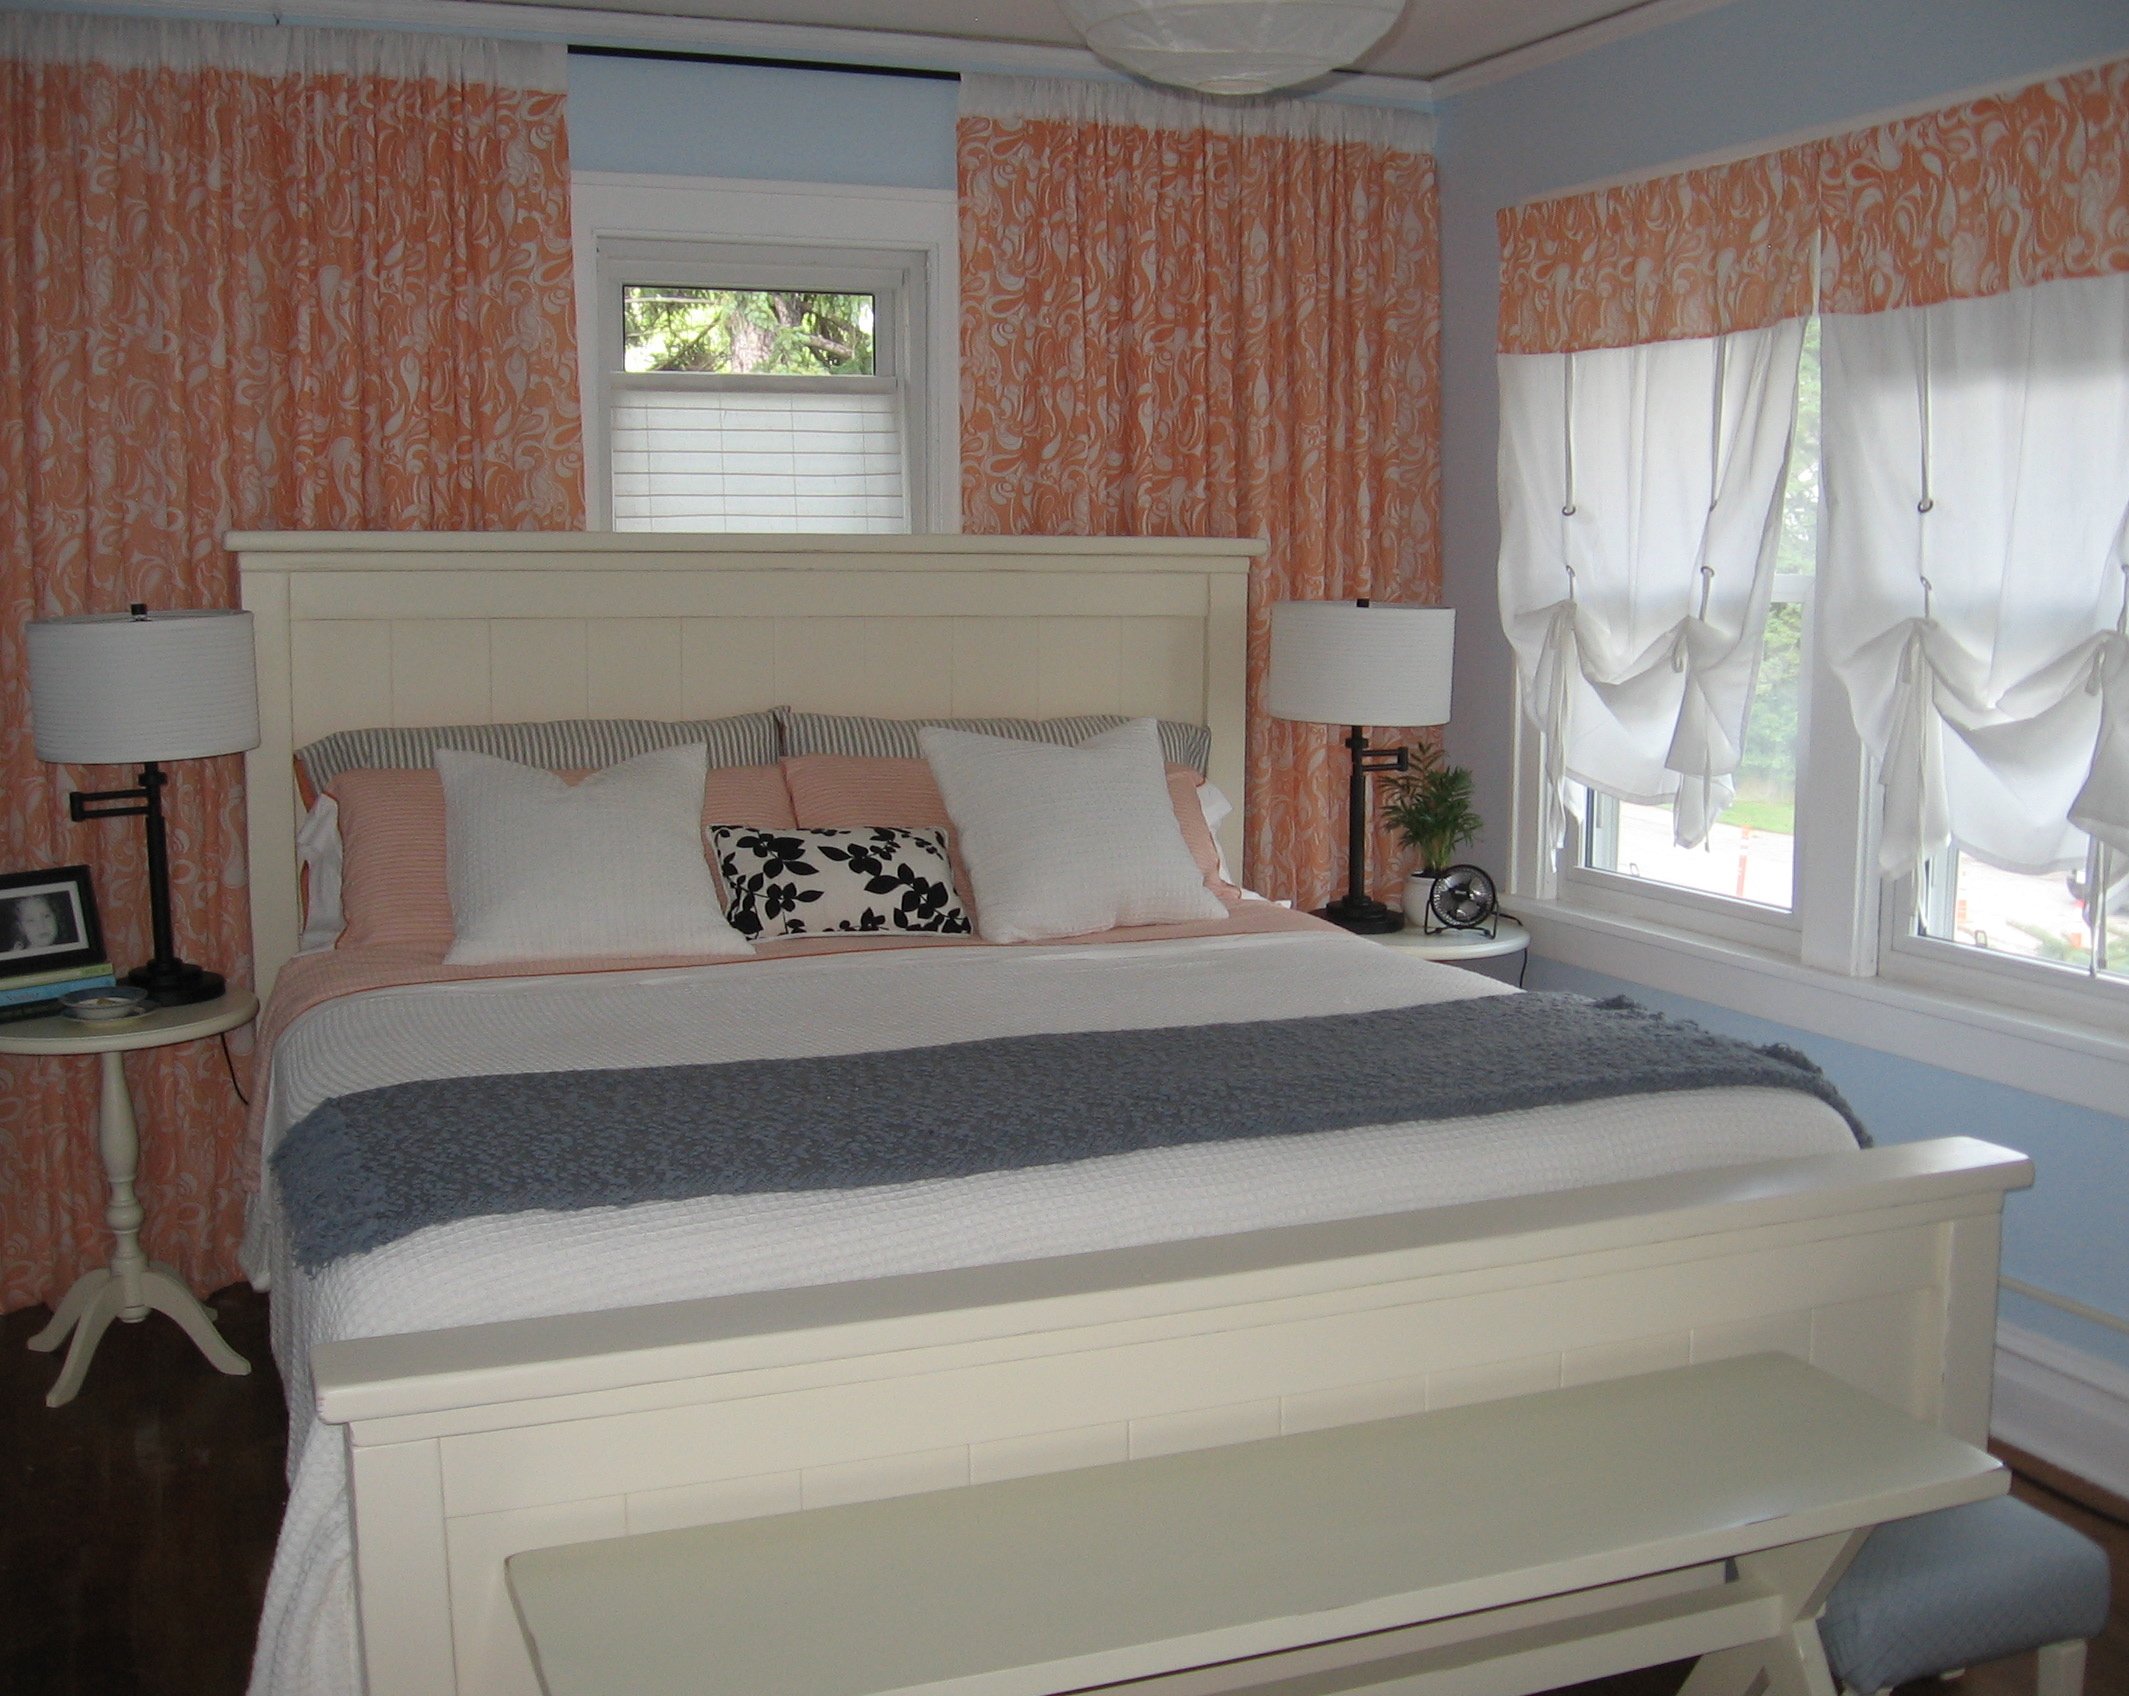
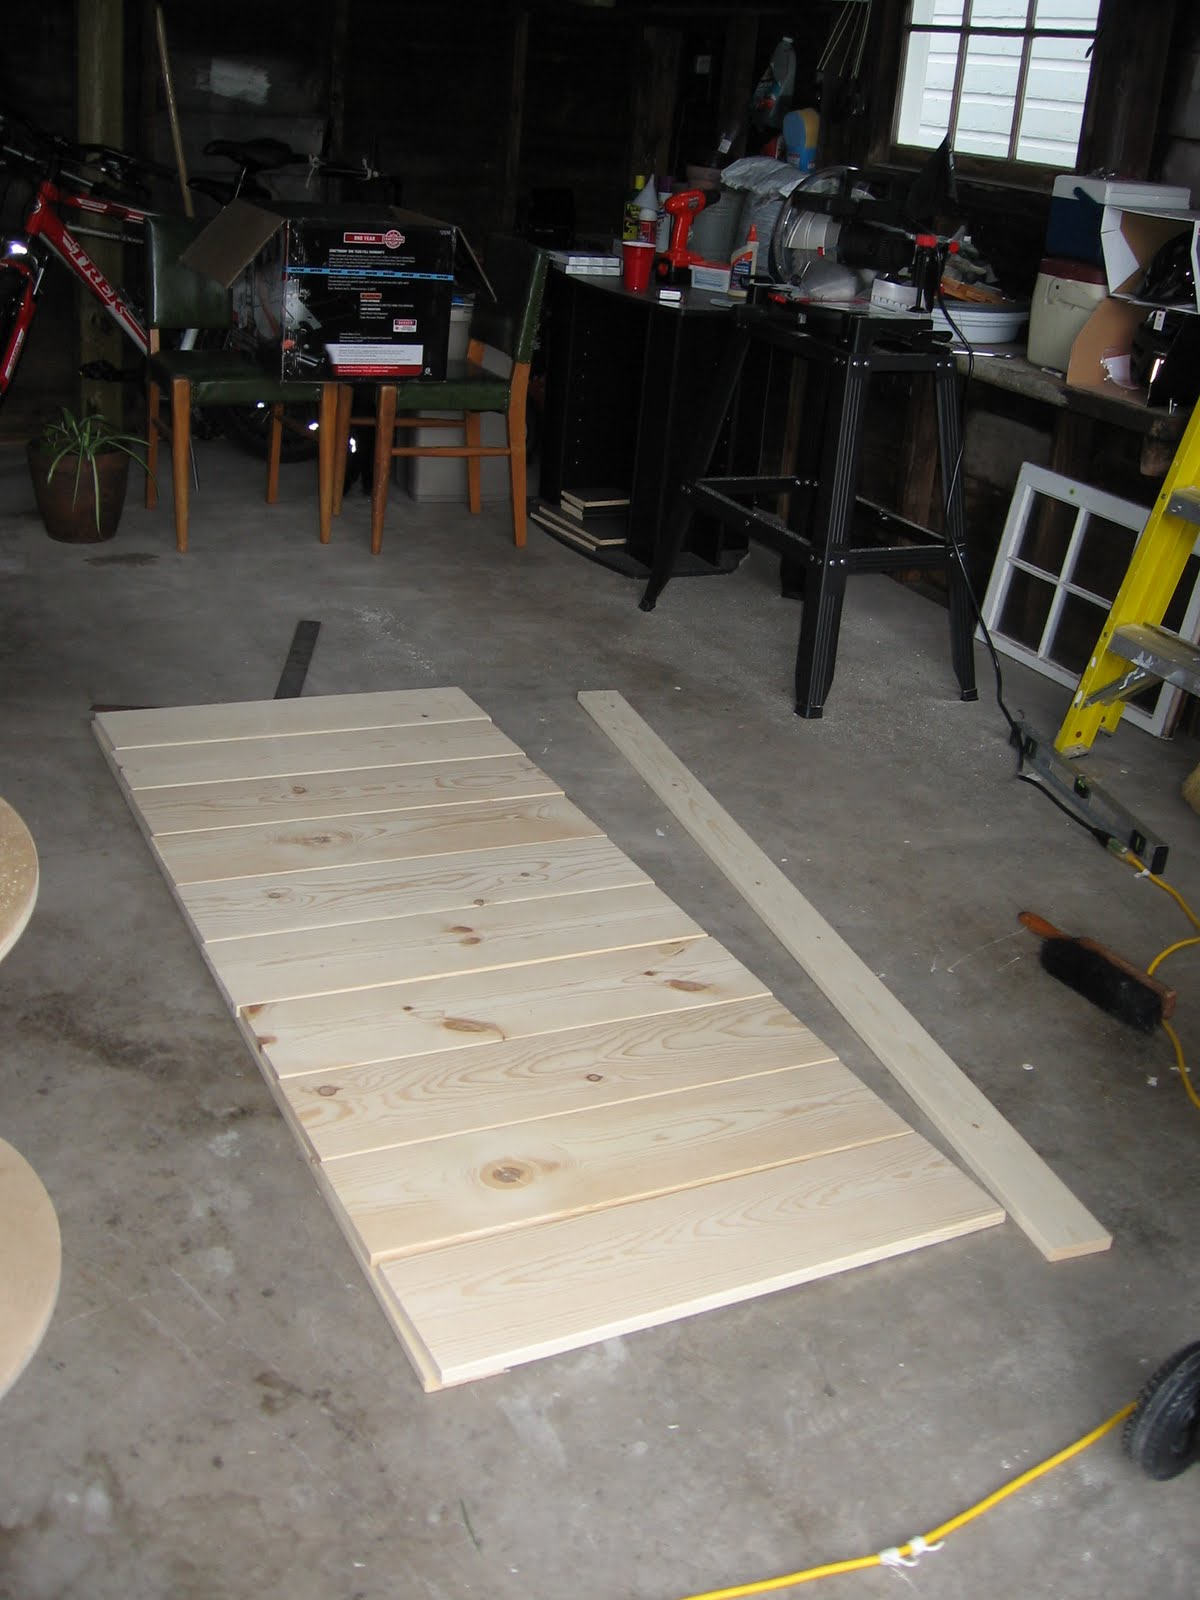
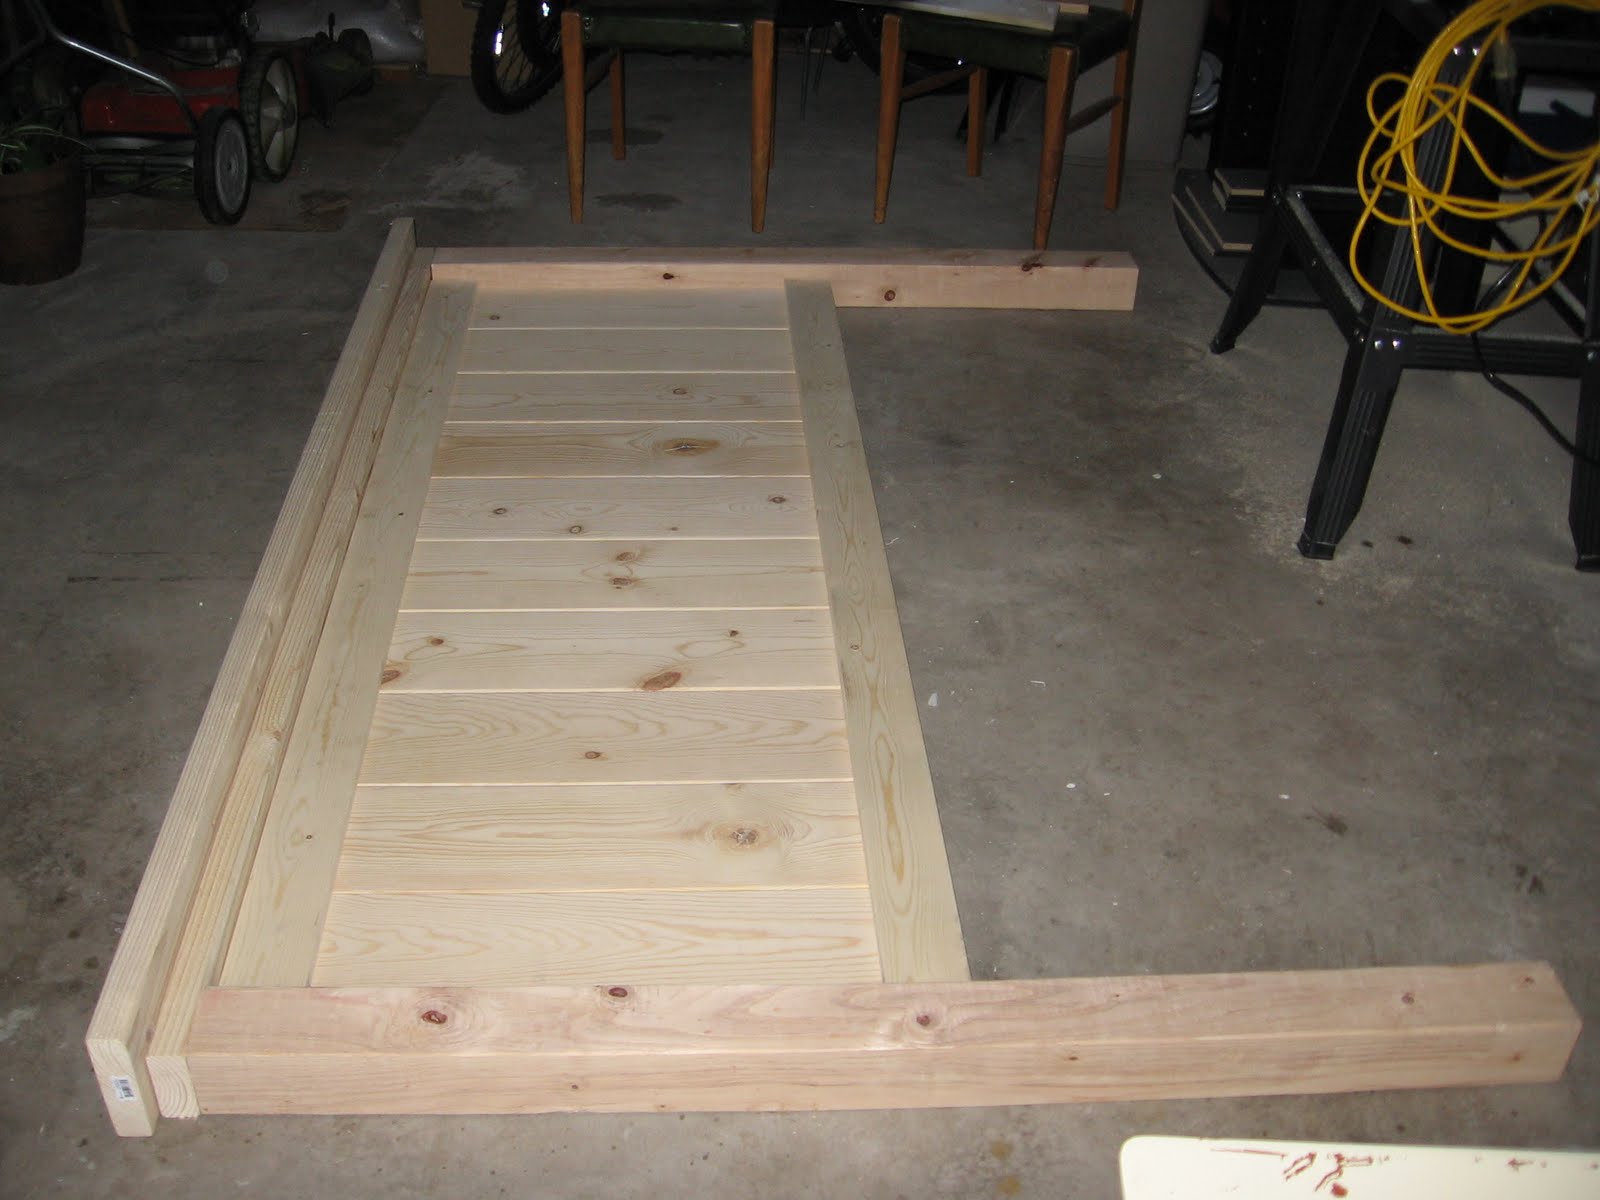
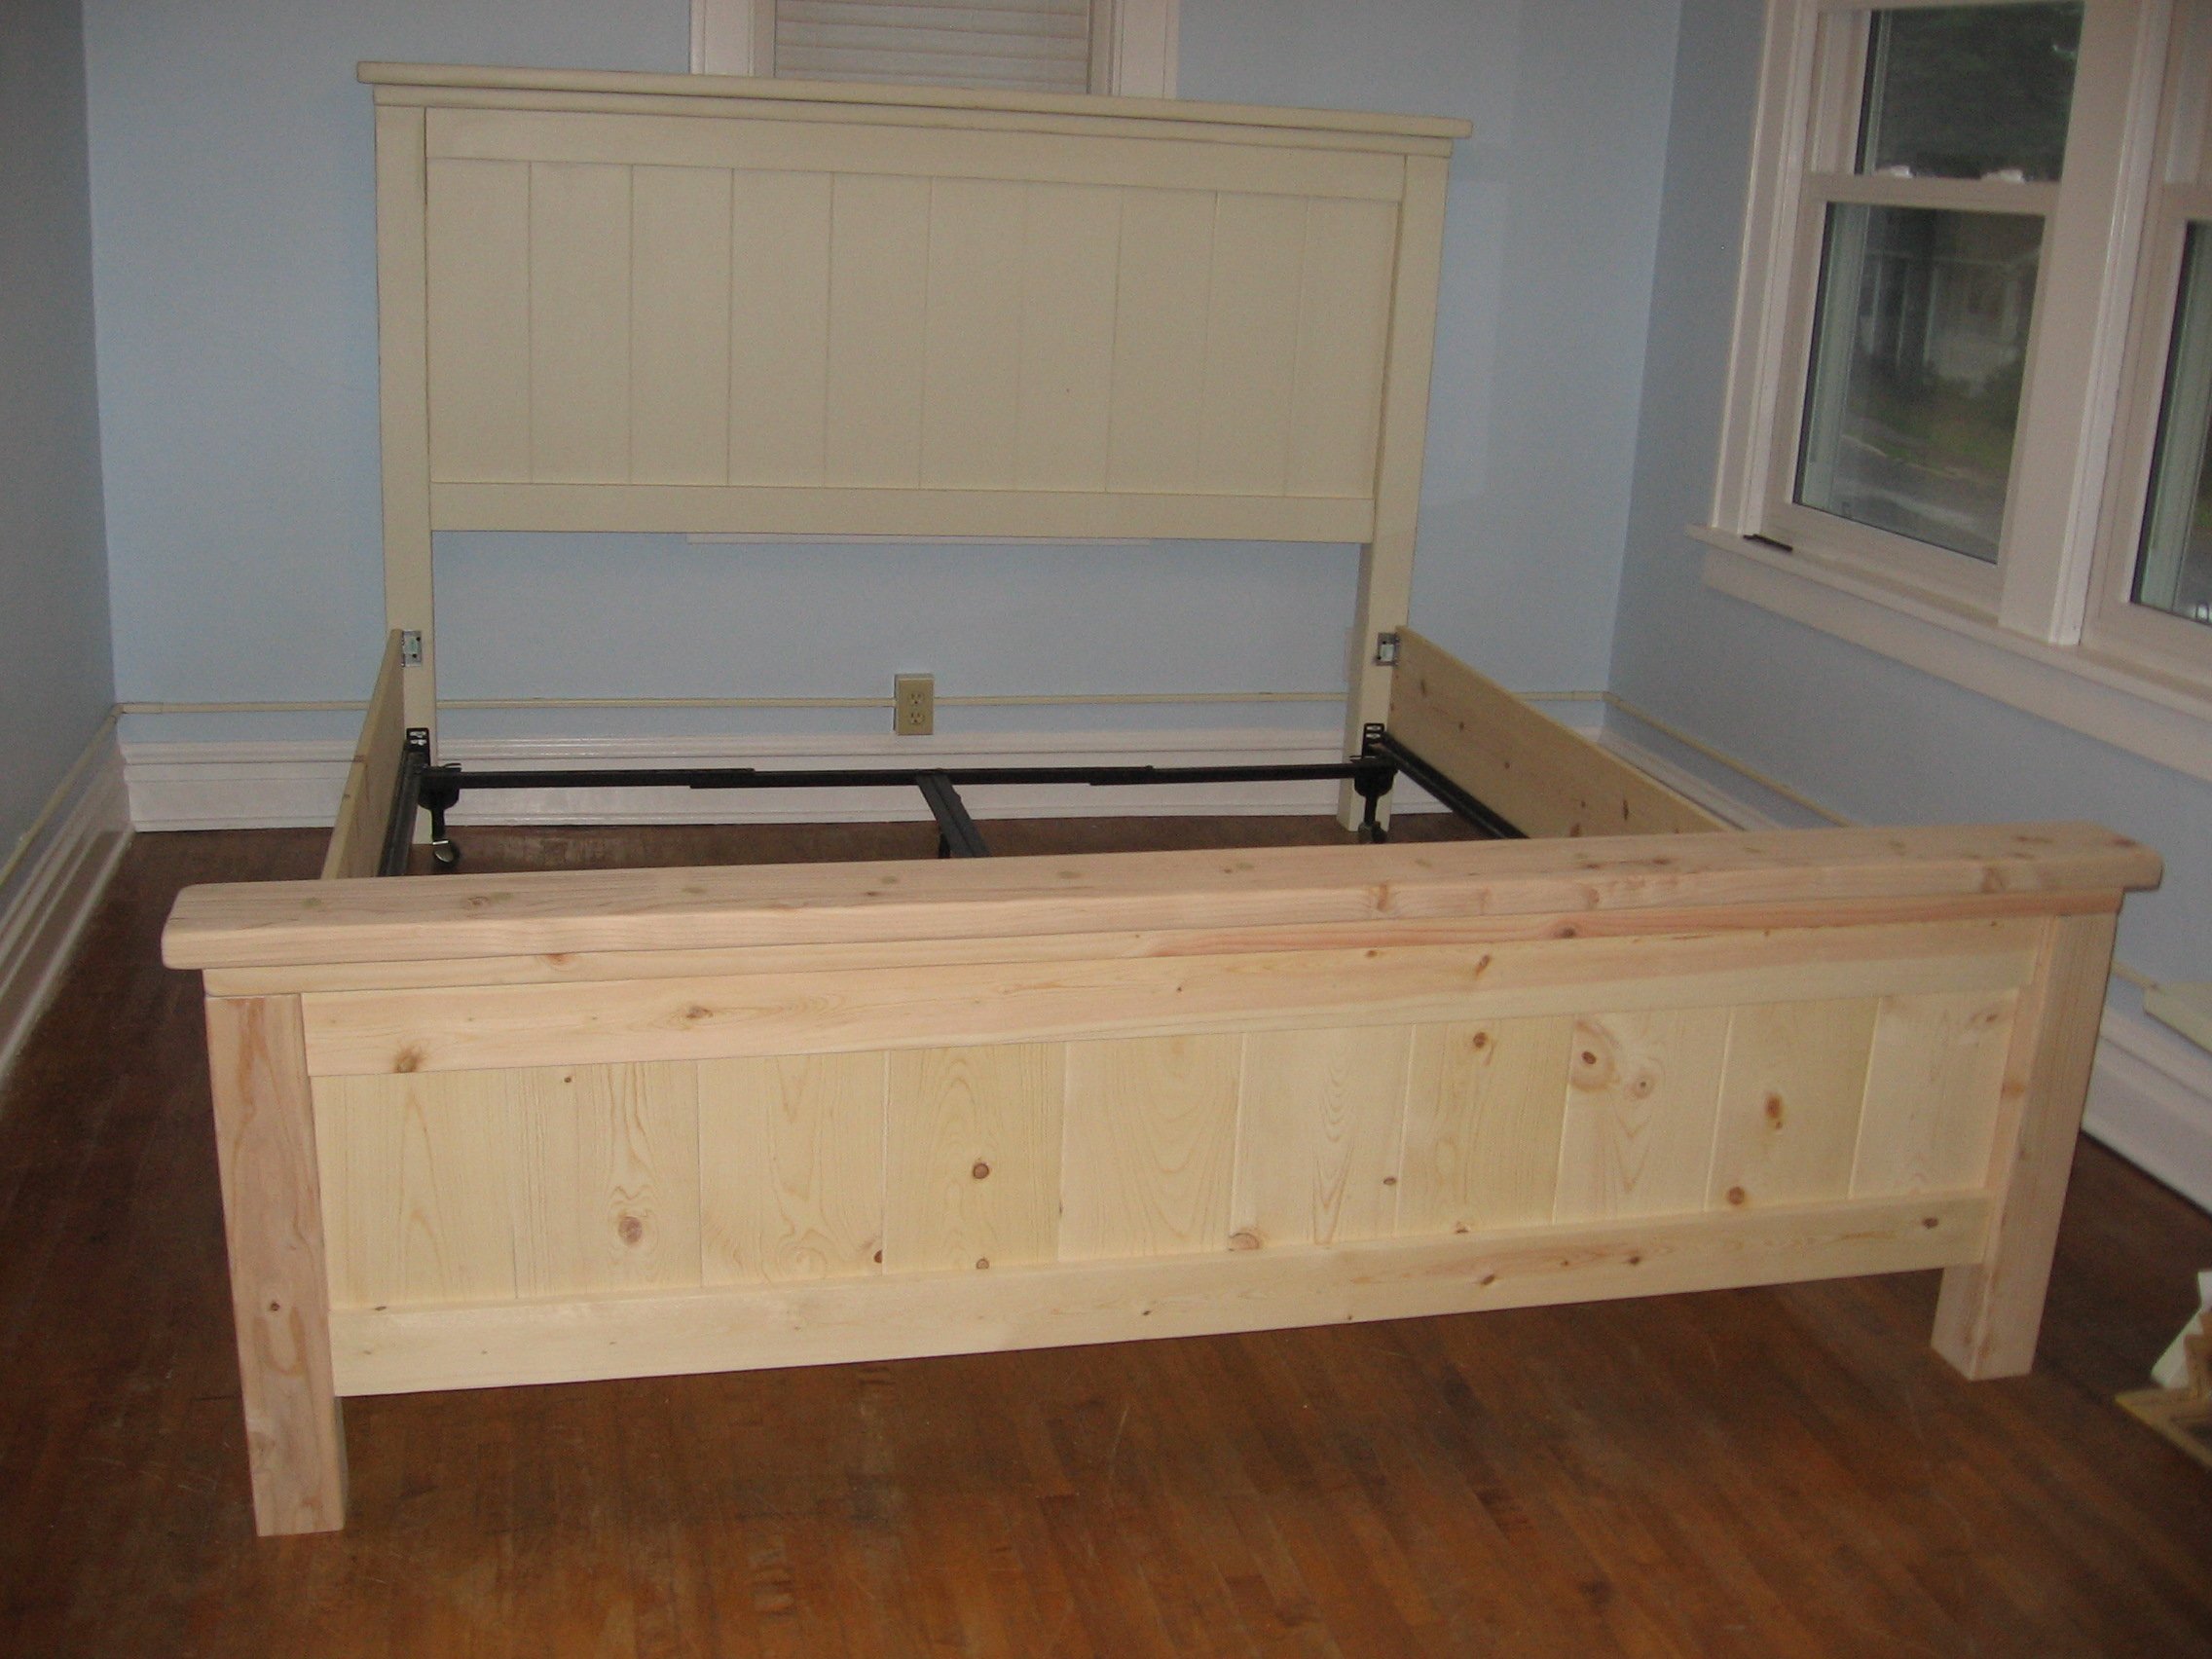
Got a new (and larger, King sized) mattress this summer, and wanted to have a real bed/headboard for the 1st time ever instead of just using one of those metal frames. Looked online for awhile, and somehow stumbled on this site - and so so glad I did, it saved me tons of $$! I really liked the farmhouse beds from PB, so decided to modify the plans from here to look more like that one - with a solid headboard and footboard (I used plywood for it).
It took me a long time to finish because I did all the sanding by hand, and used a hand saw to make cuts that I didn't get done when I bought the wood (the only power tool I own is a drill - and prior to this I'd only ever used it for drilling to hang shelves on the wall).
I've definitely got the building bug now, and have so many ideas for other projects I want to tackle. Thank you so much for this site and all the inspiration! Even though its not absolutely perfect, I absolutely love my new bed!

Thu, 09/08/2011 - 07:03
You should be very proud of this piece, it looks wonderful! Very nice work with the hand saw and sanding, you worked hard and it shows!
Thu, 09/08/2011 - 11:46
I have been thinking about this project for some time. You should be proud this is a great bed.
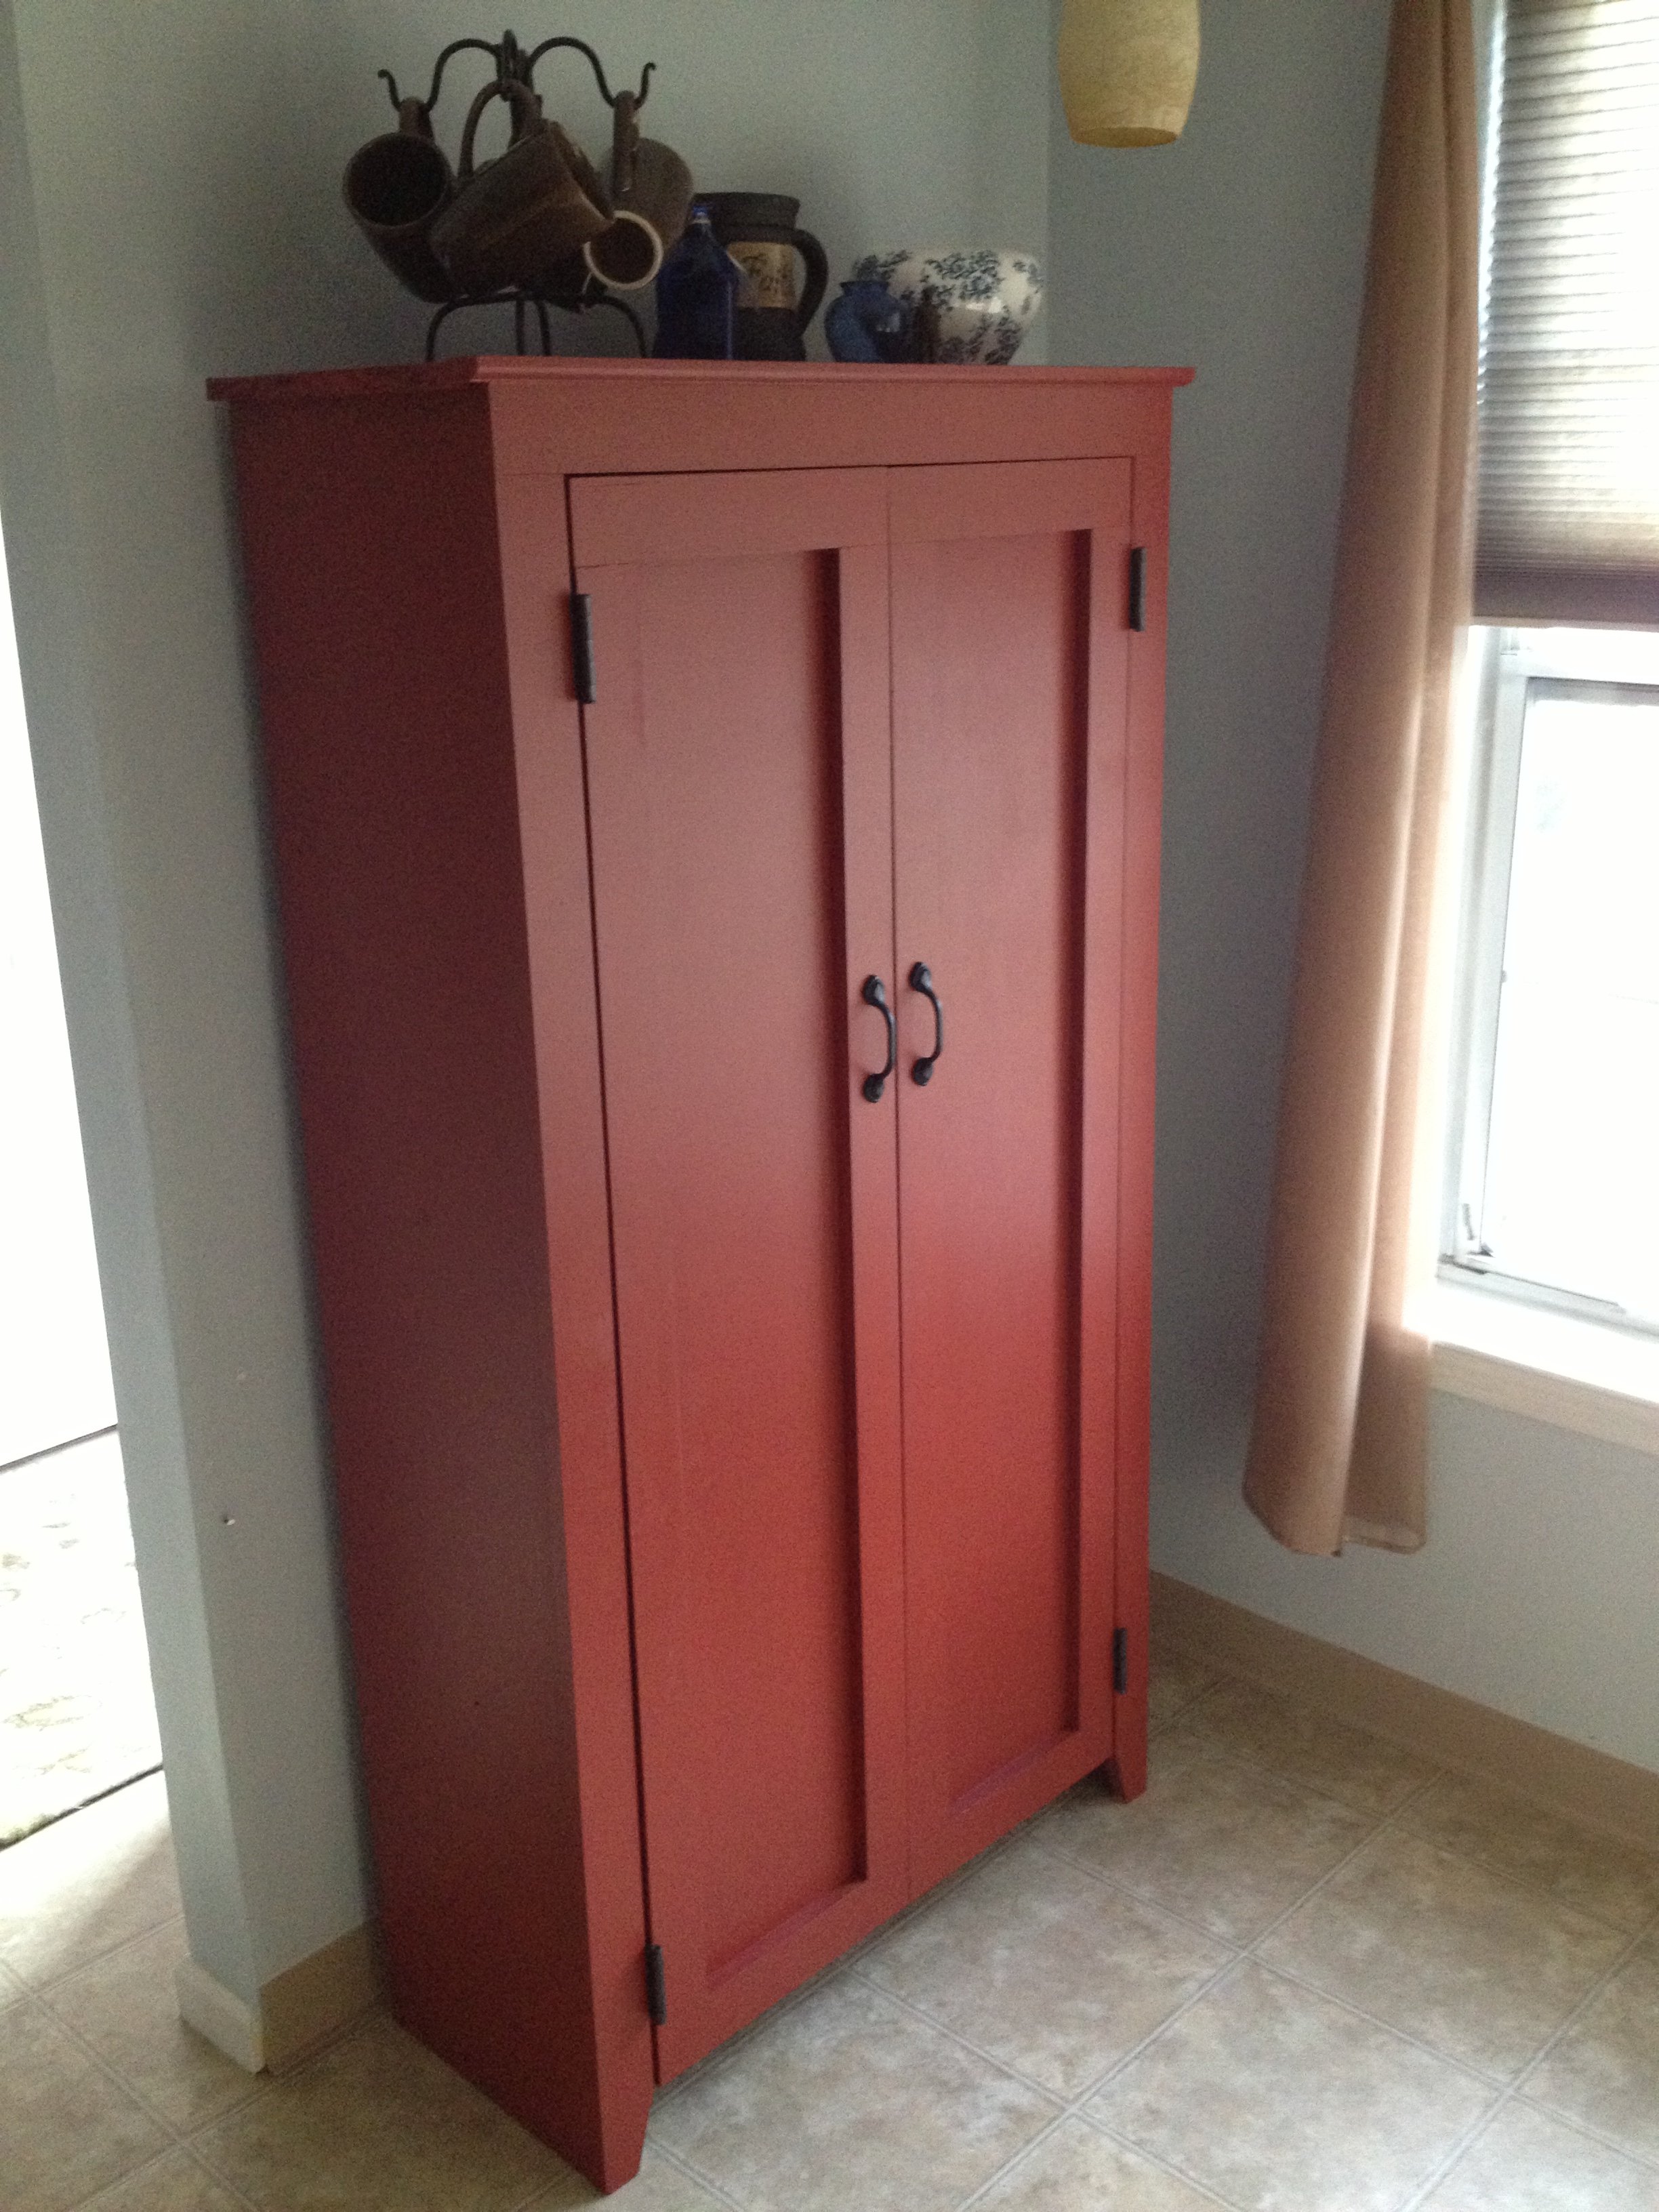
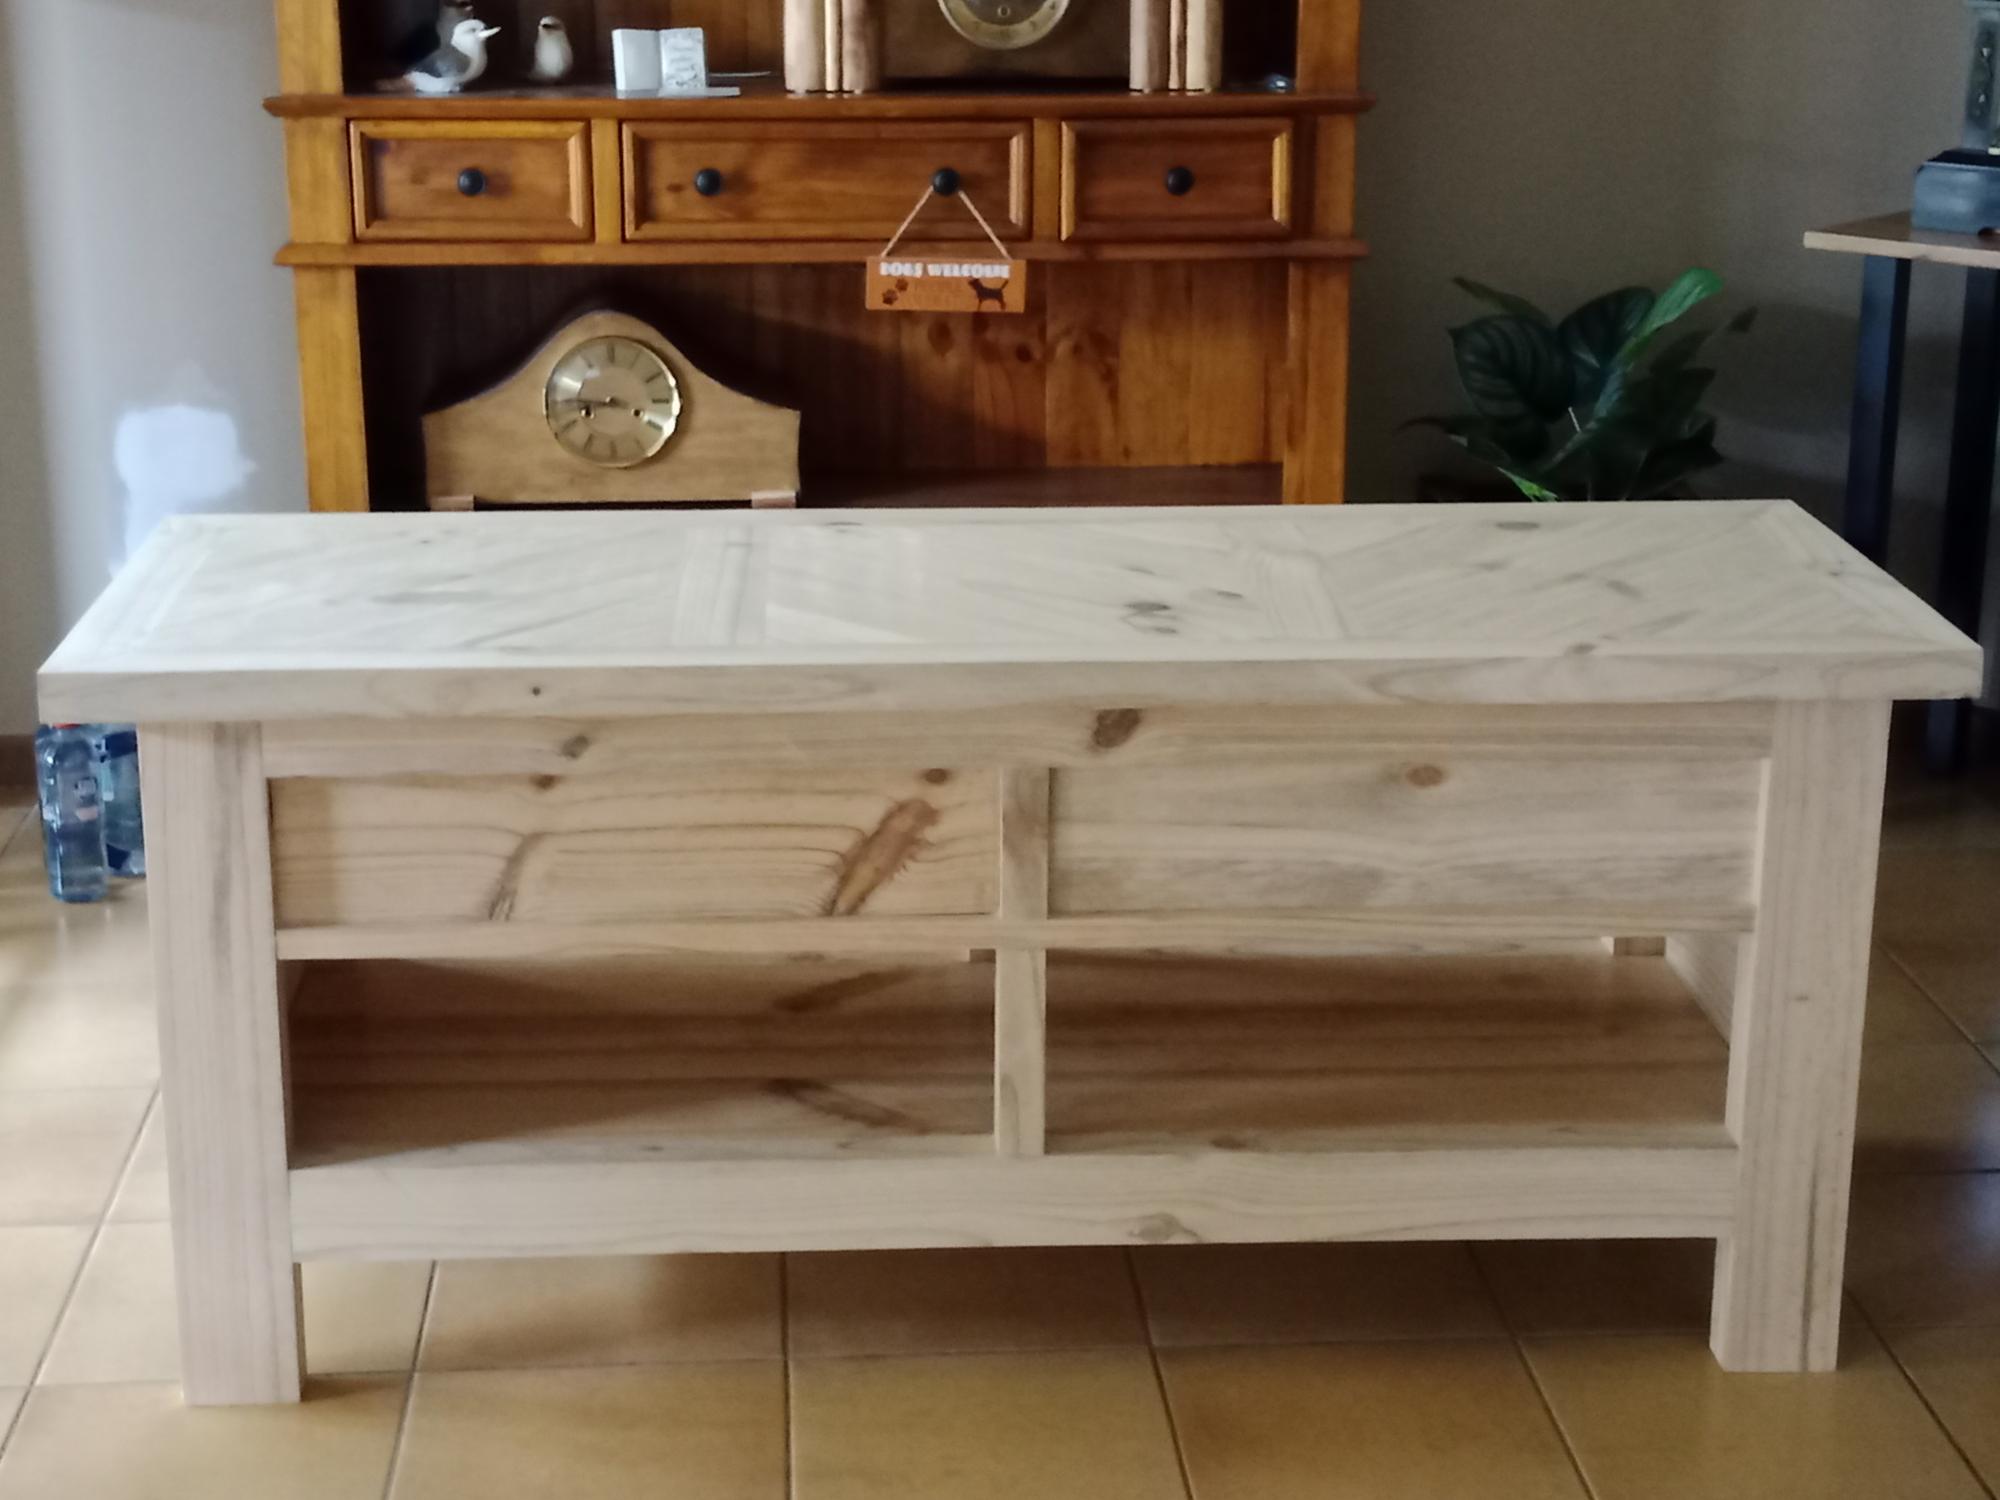
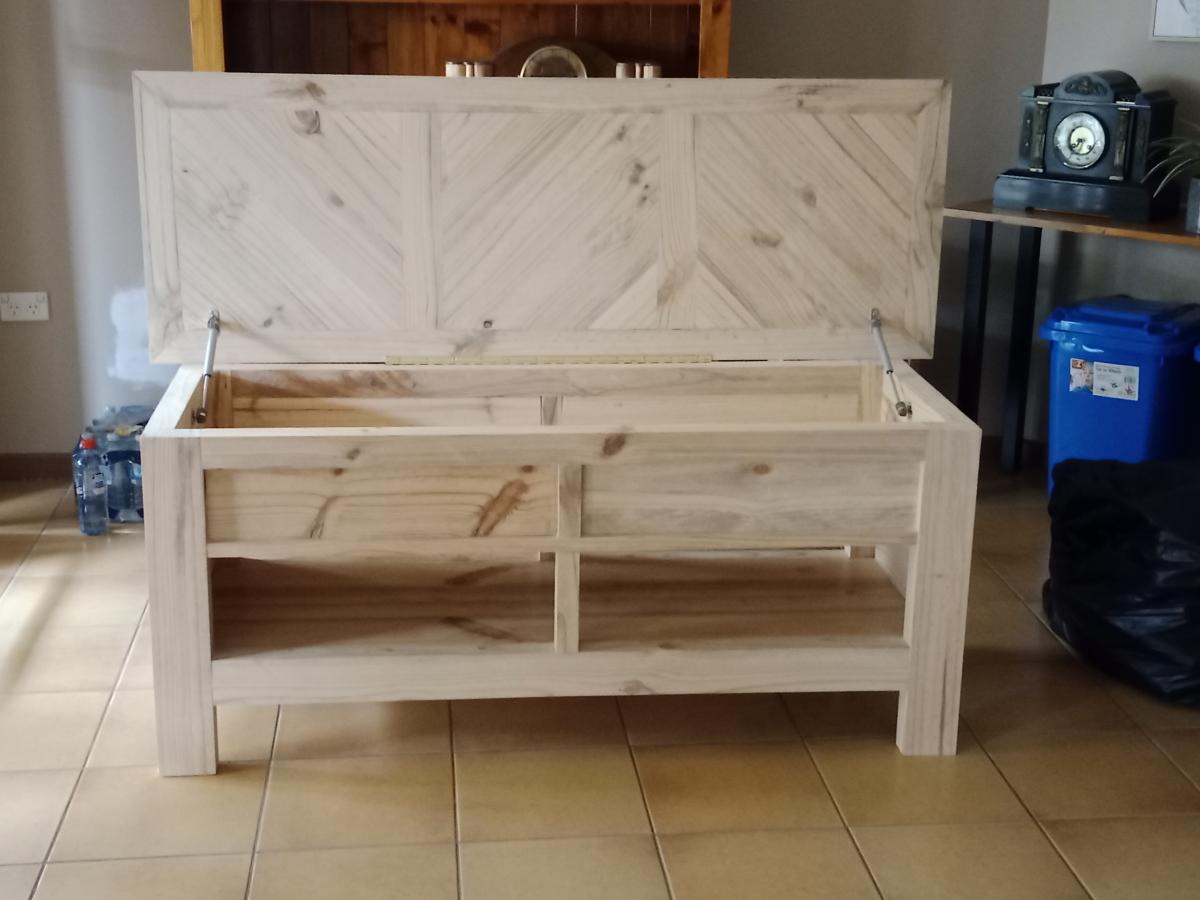
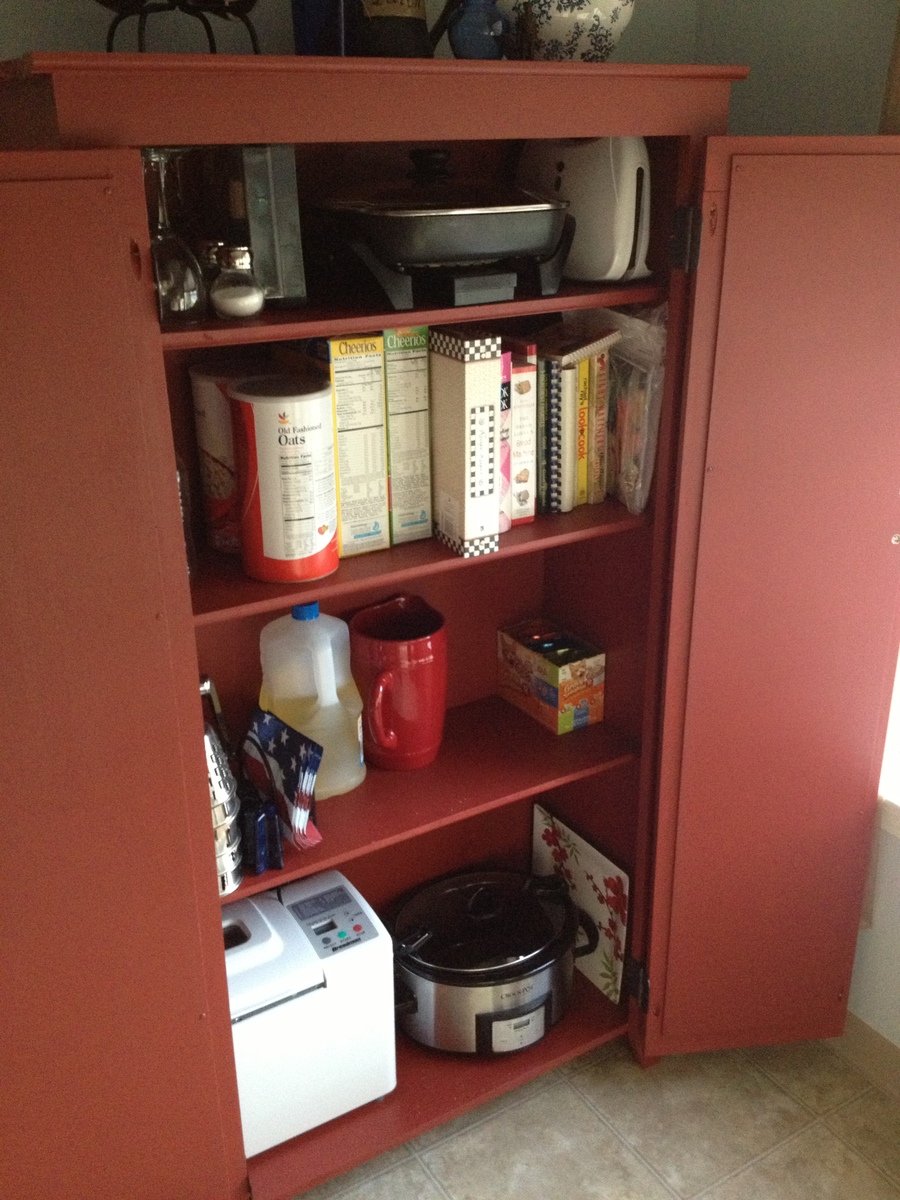
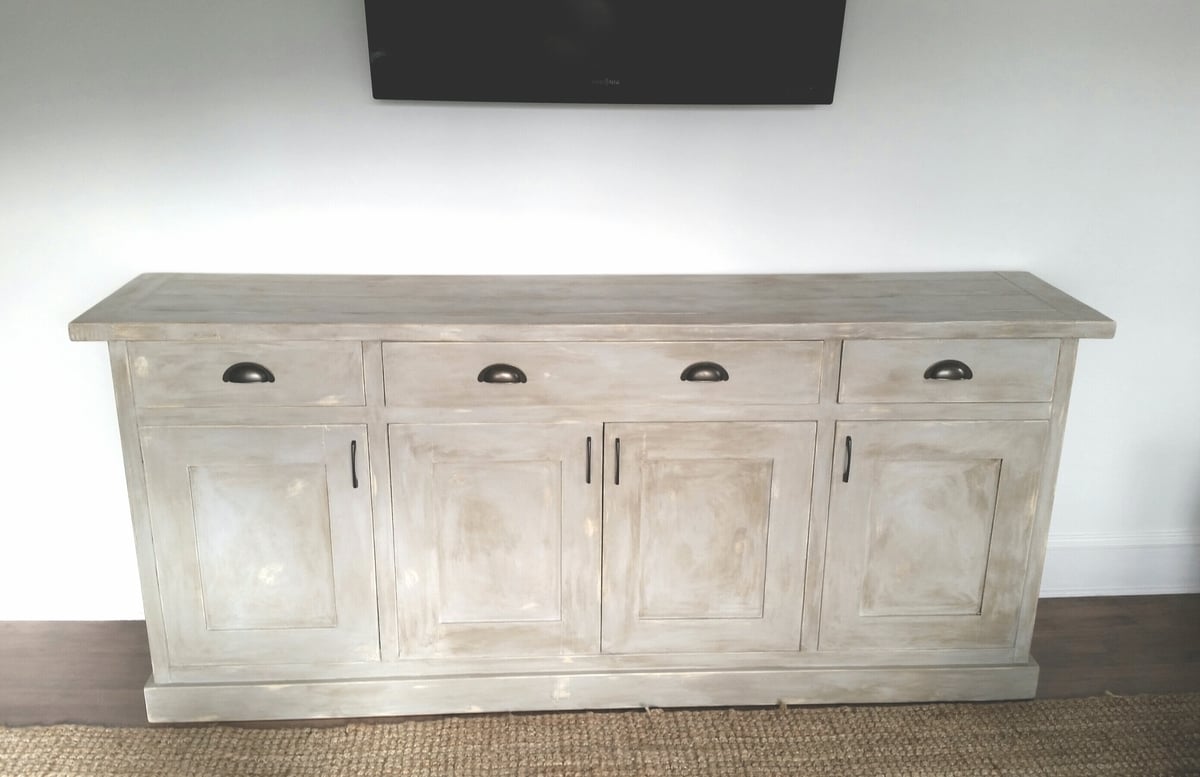
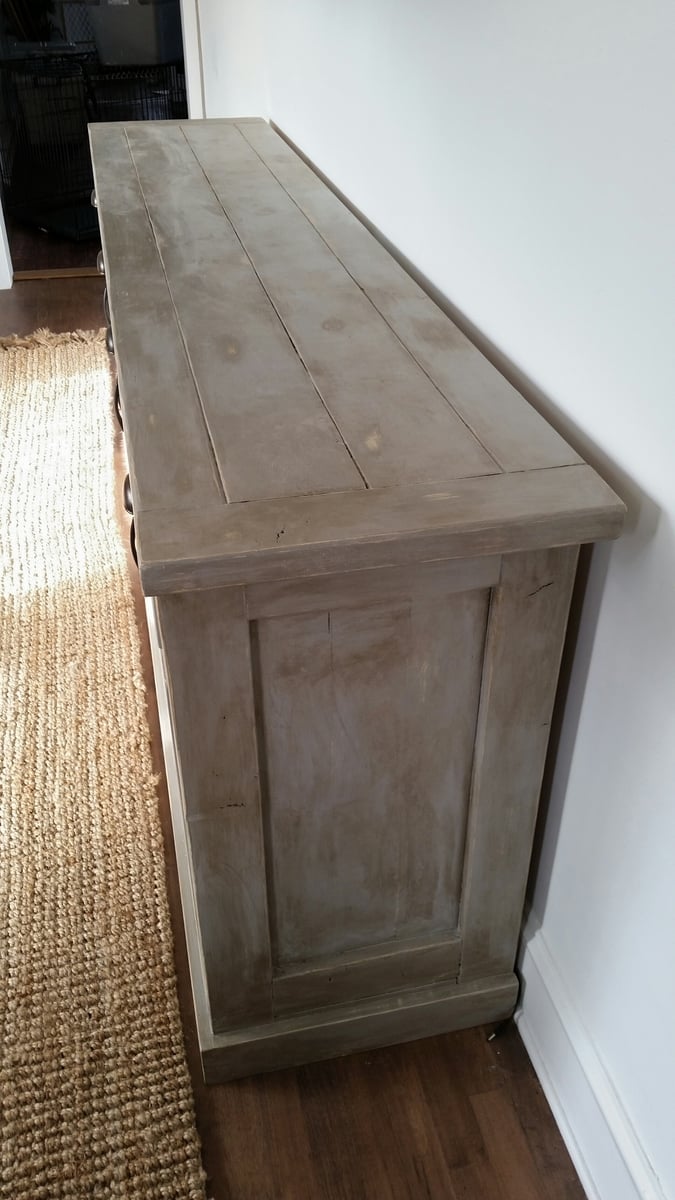
My wife and I needed space in our kitchen to store various items. This cabinet works perfectly for that purpose.

Fri, 09/27/2013 - 21:17
That paint colour is beautiful. As is the pantry, very well done. I wish you could find out the name and brand of the colour. It is stunning.
Fri, 09/27/2013 - 21:17
That paint colour is beautiful. As is the pantry, very well done. I wish you could find out the name and brand of the colour. It is stunning.
Mon, 09/30/2013 - 05:30
I believe this was the color. Red Brick S-H-170 by Behr. Hope that helps.
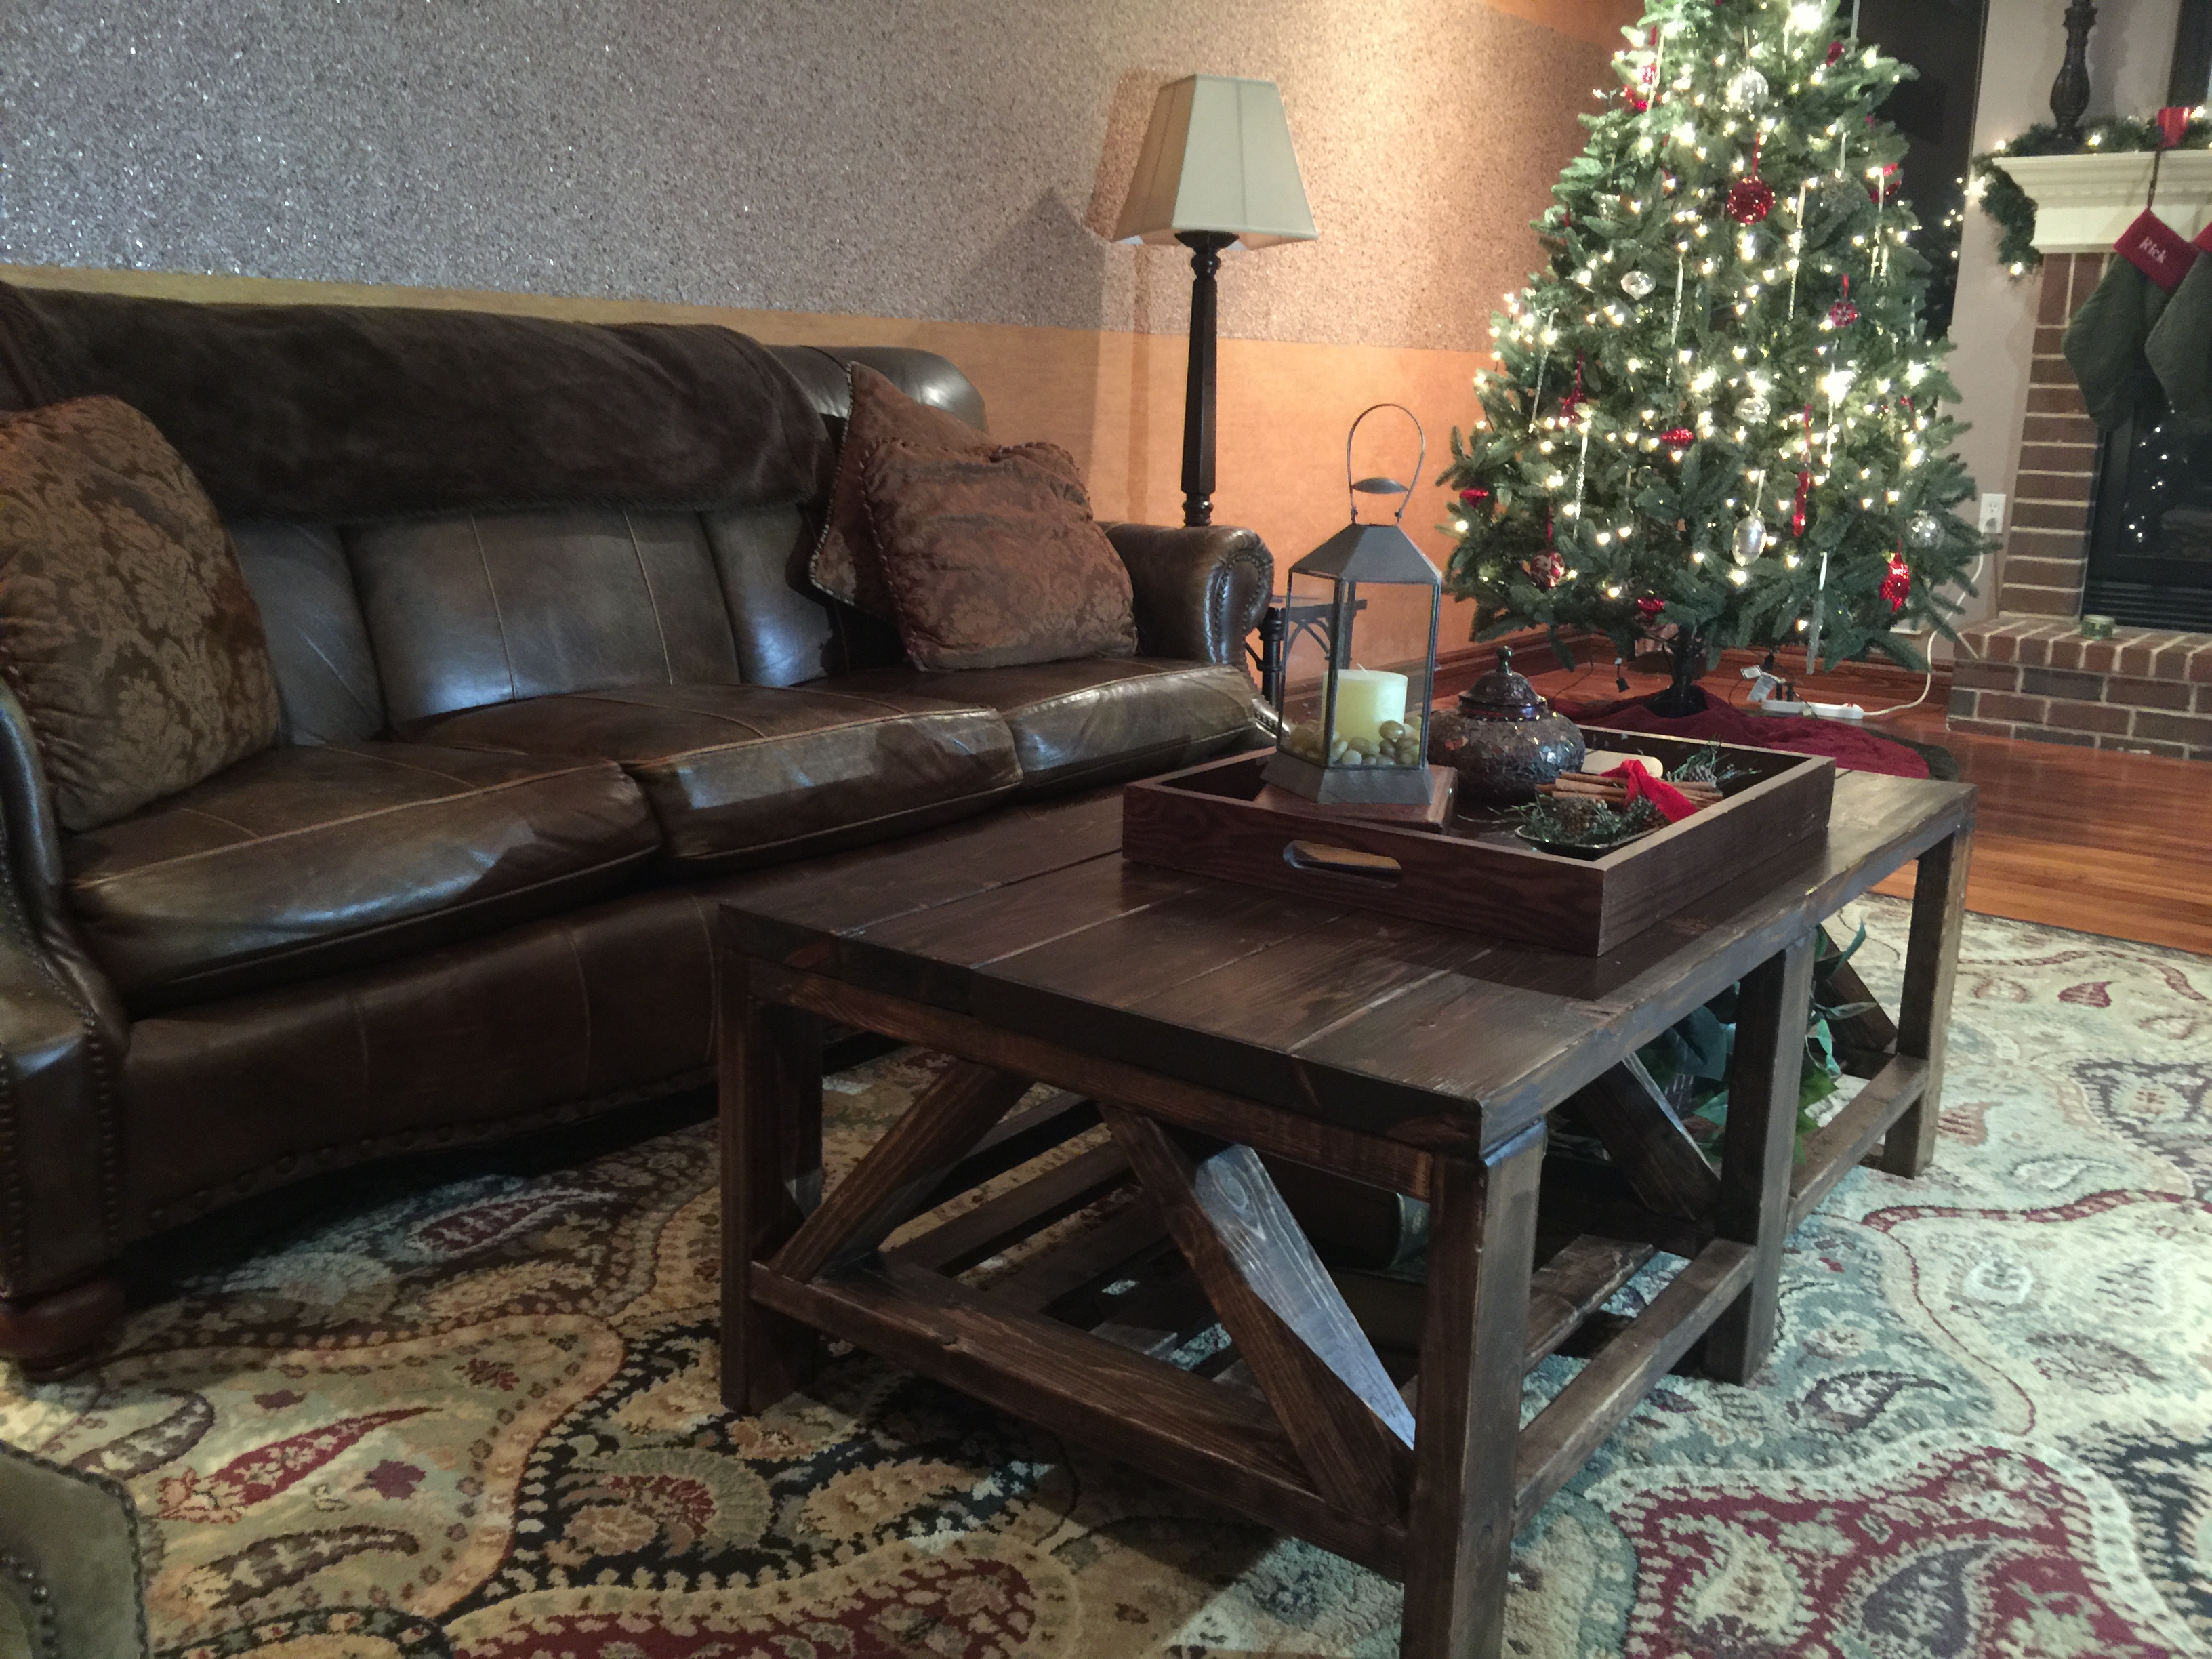
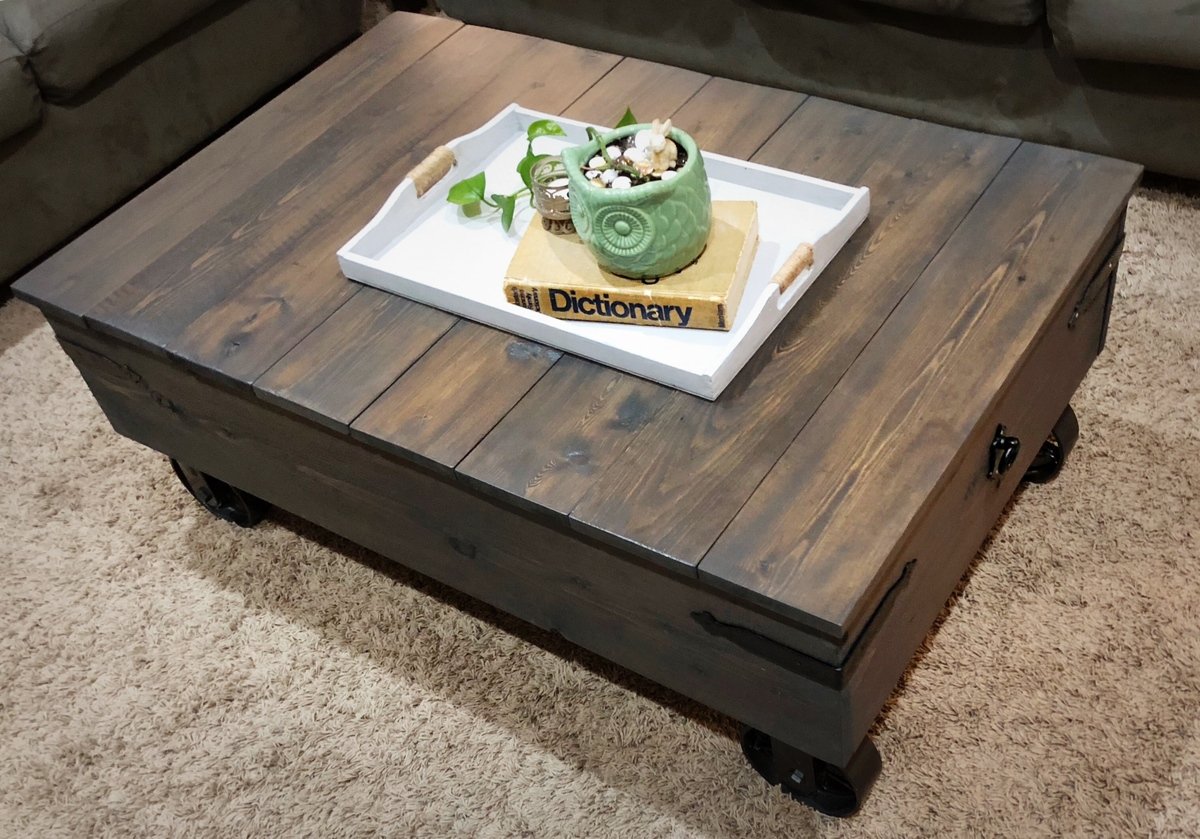
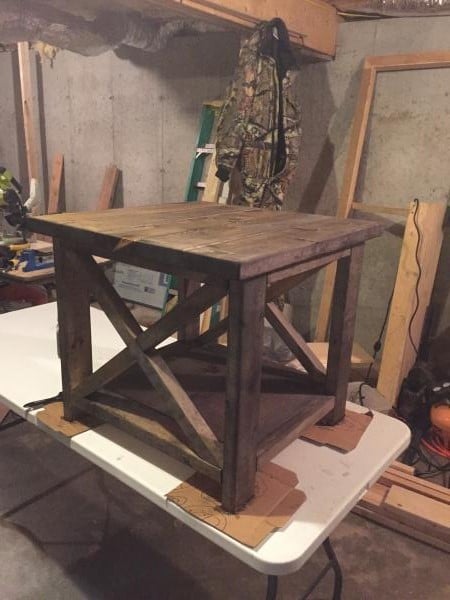
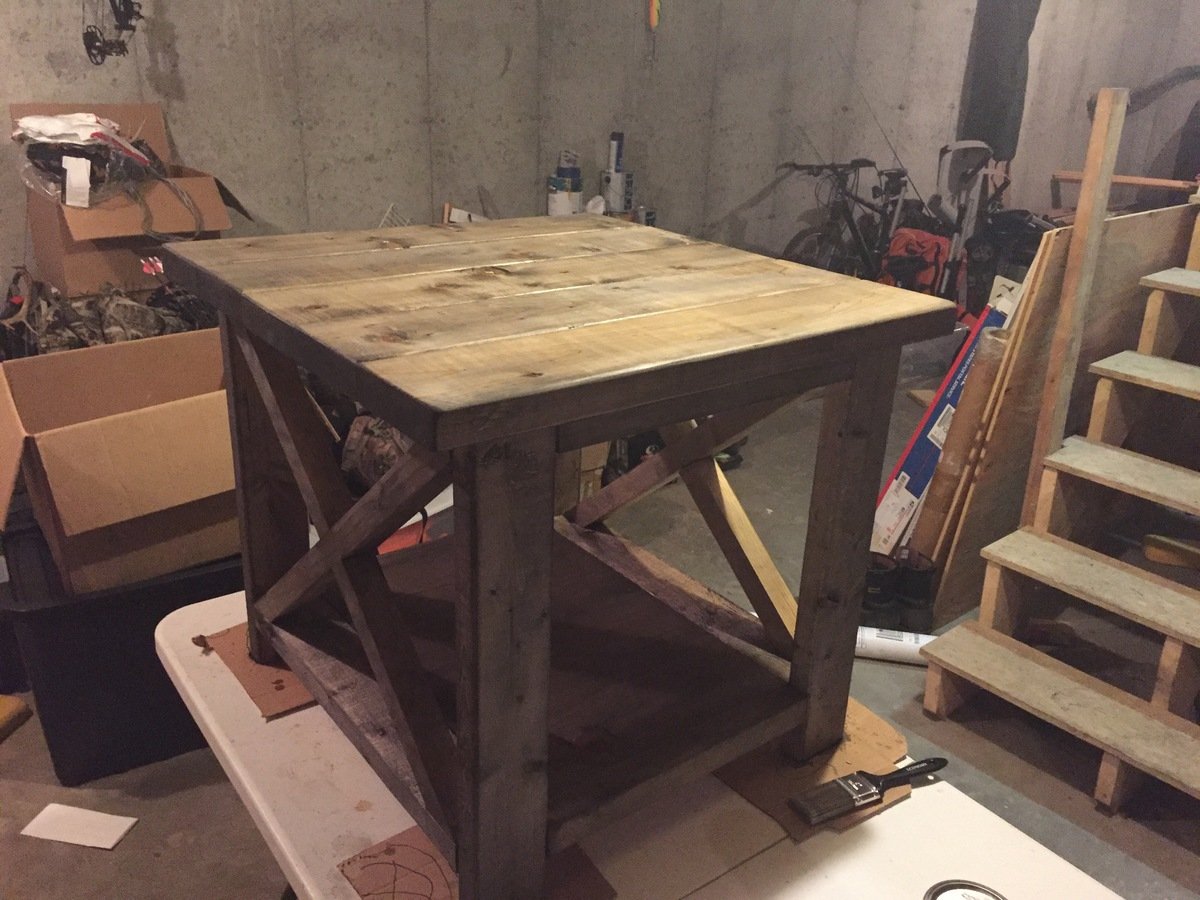
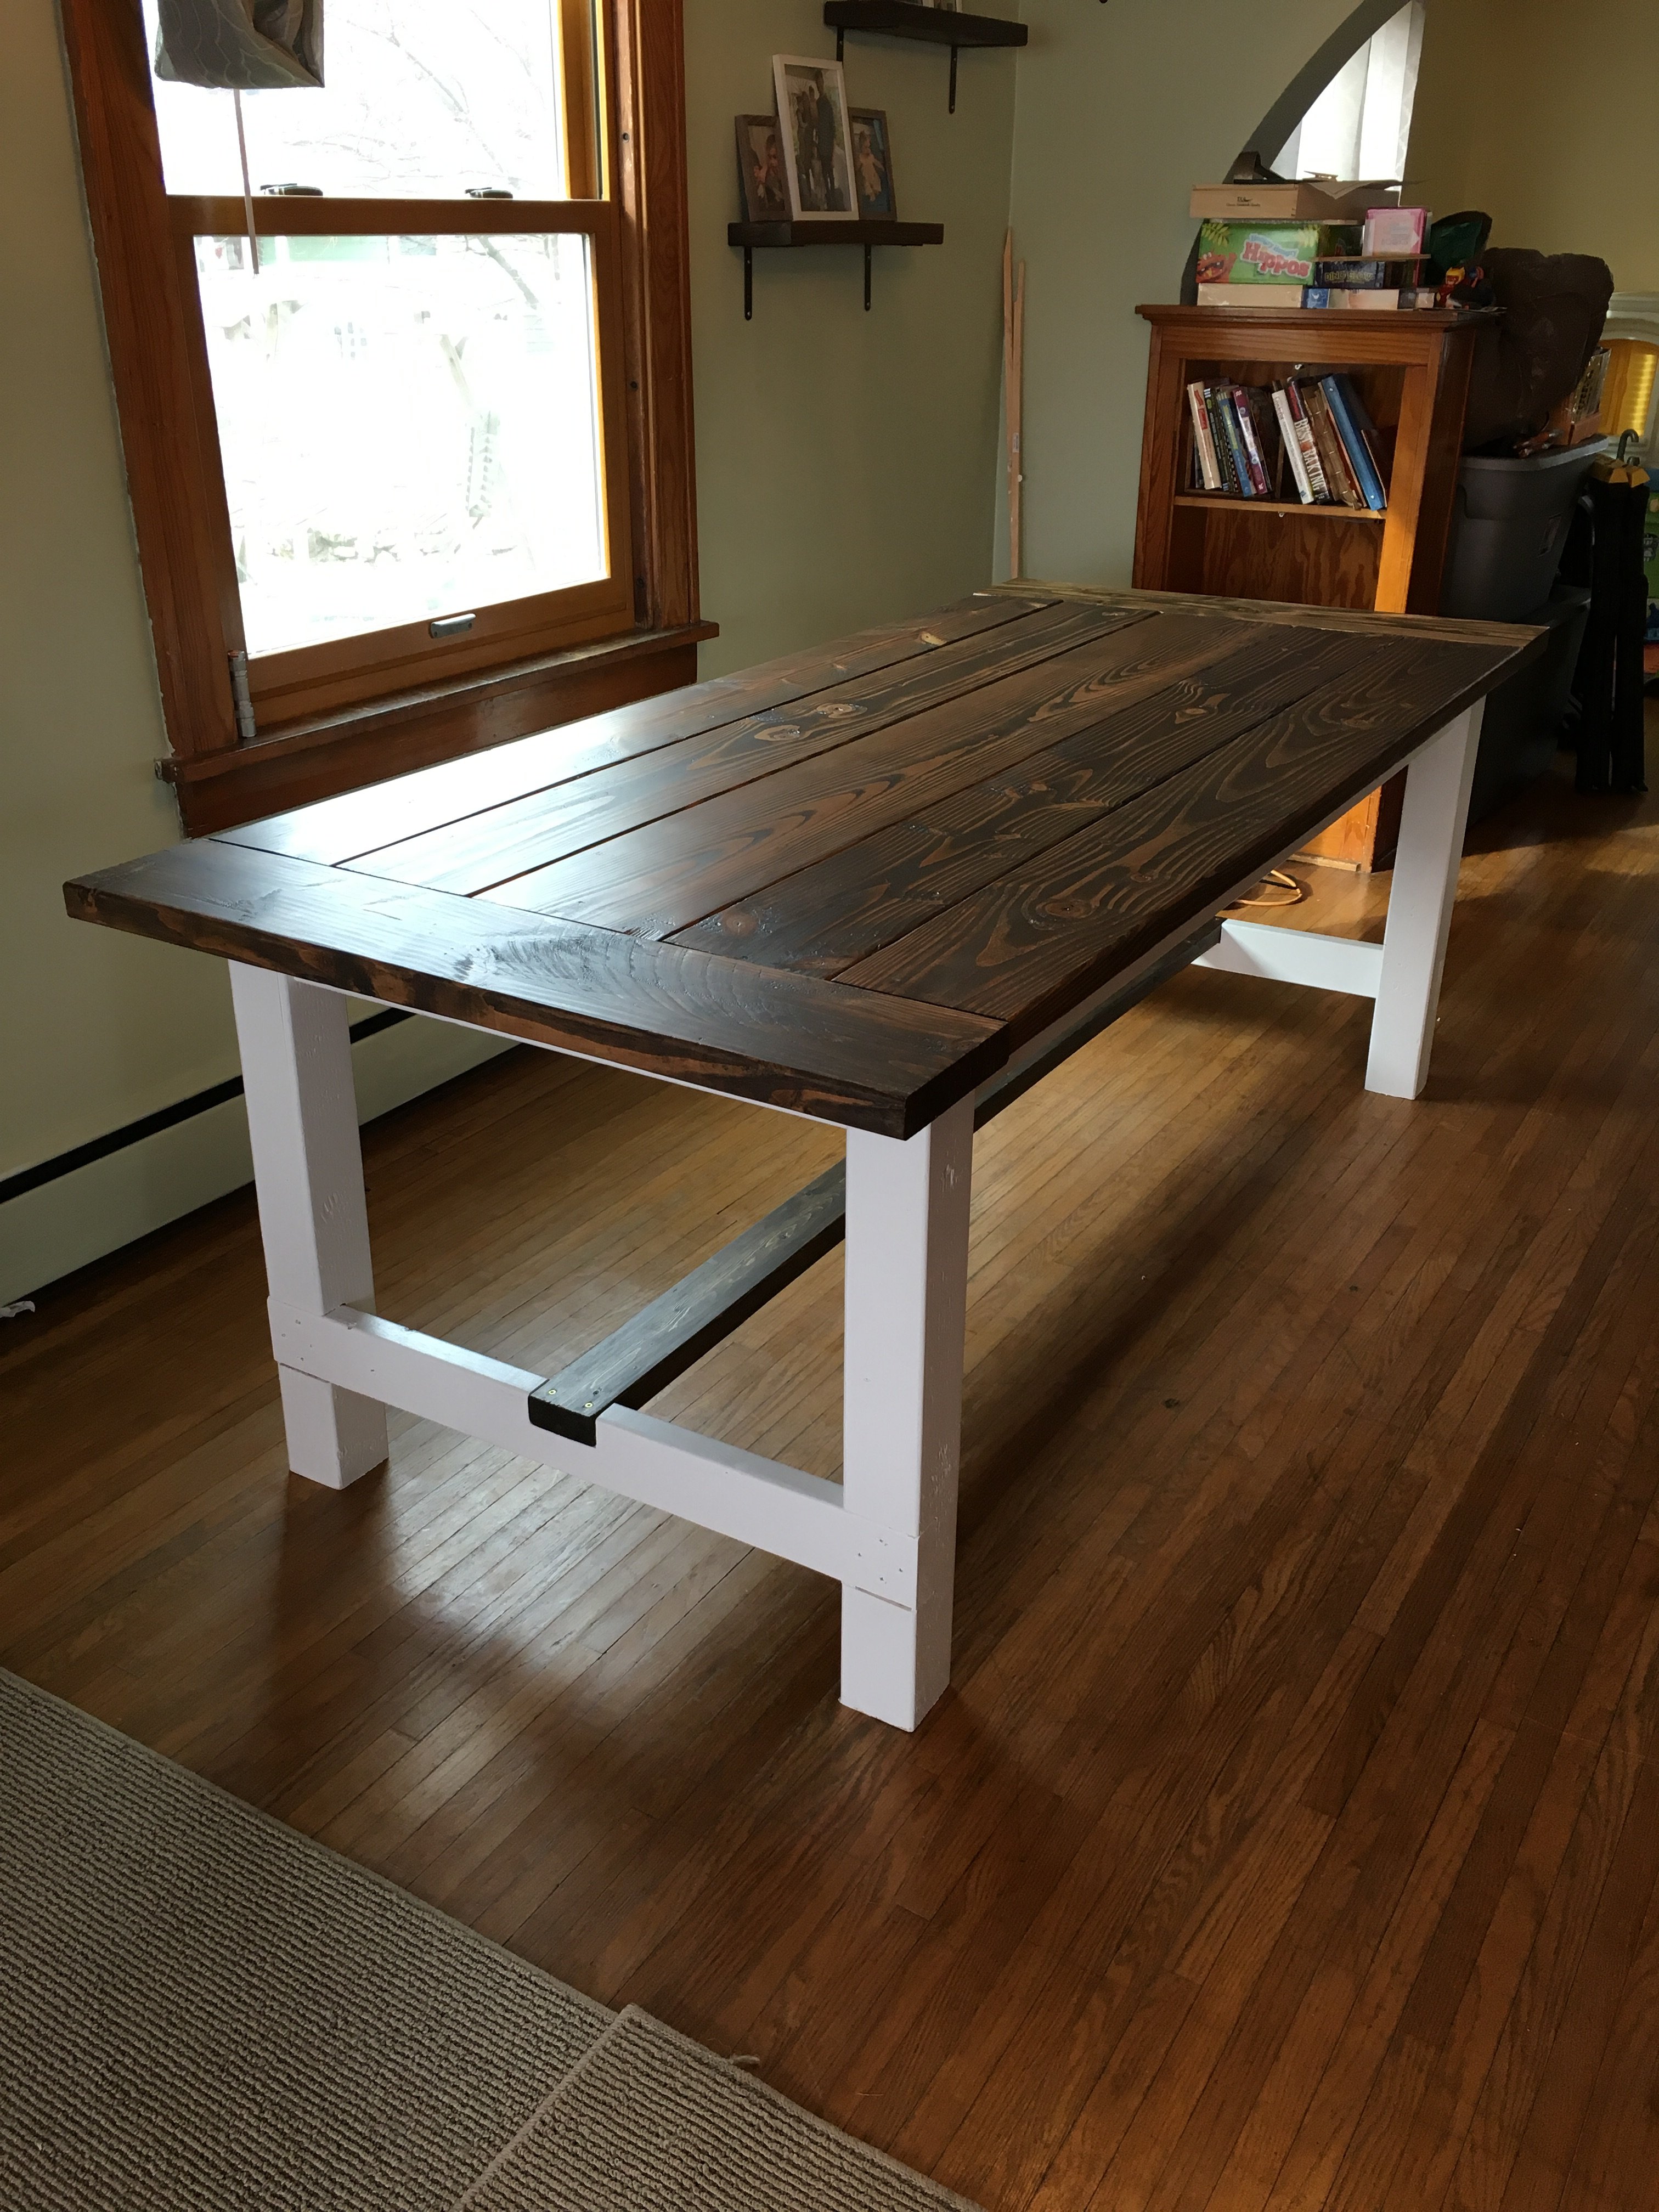
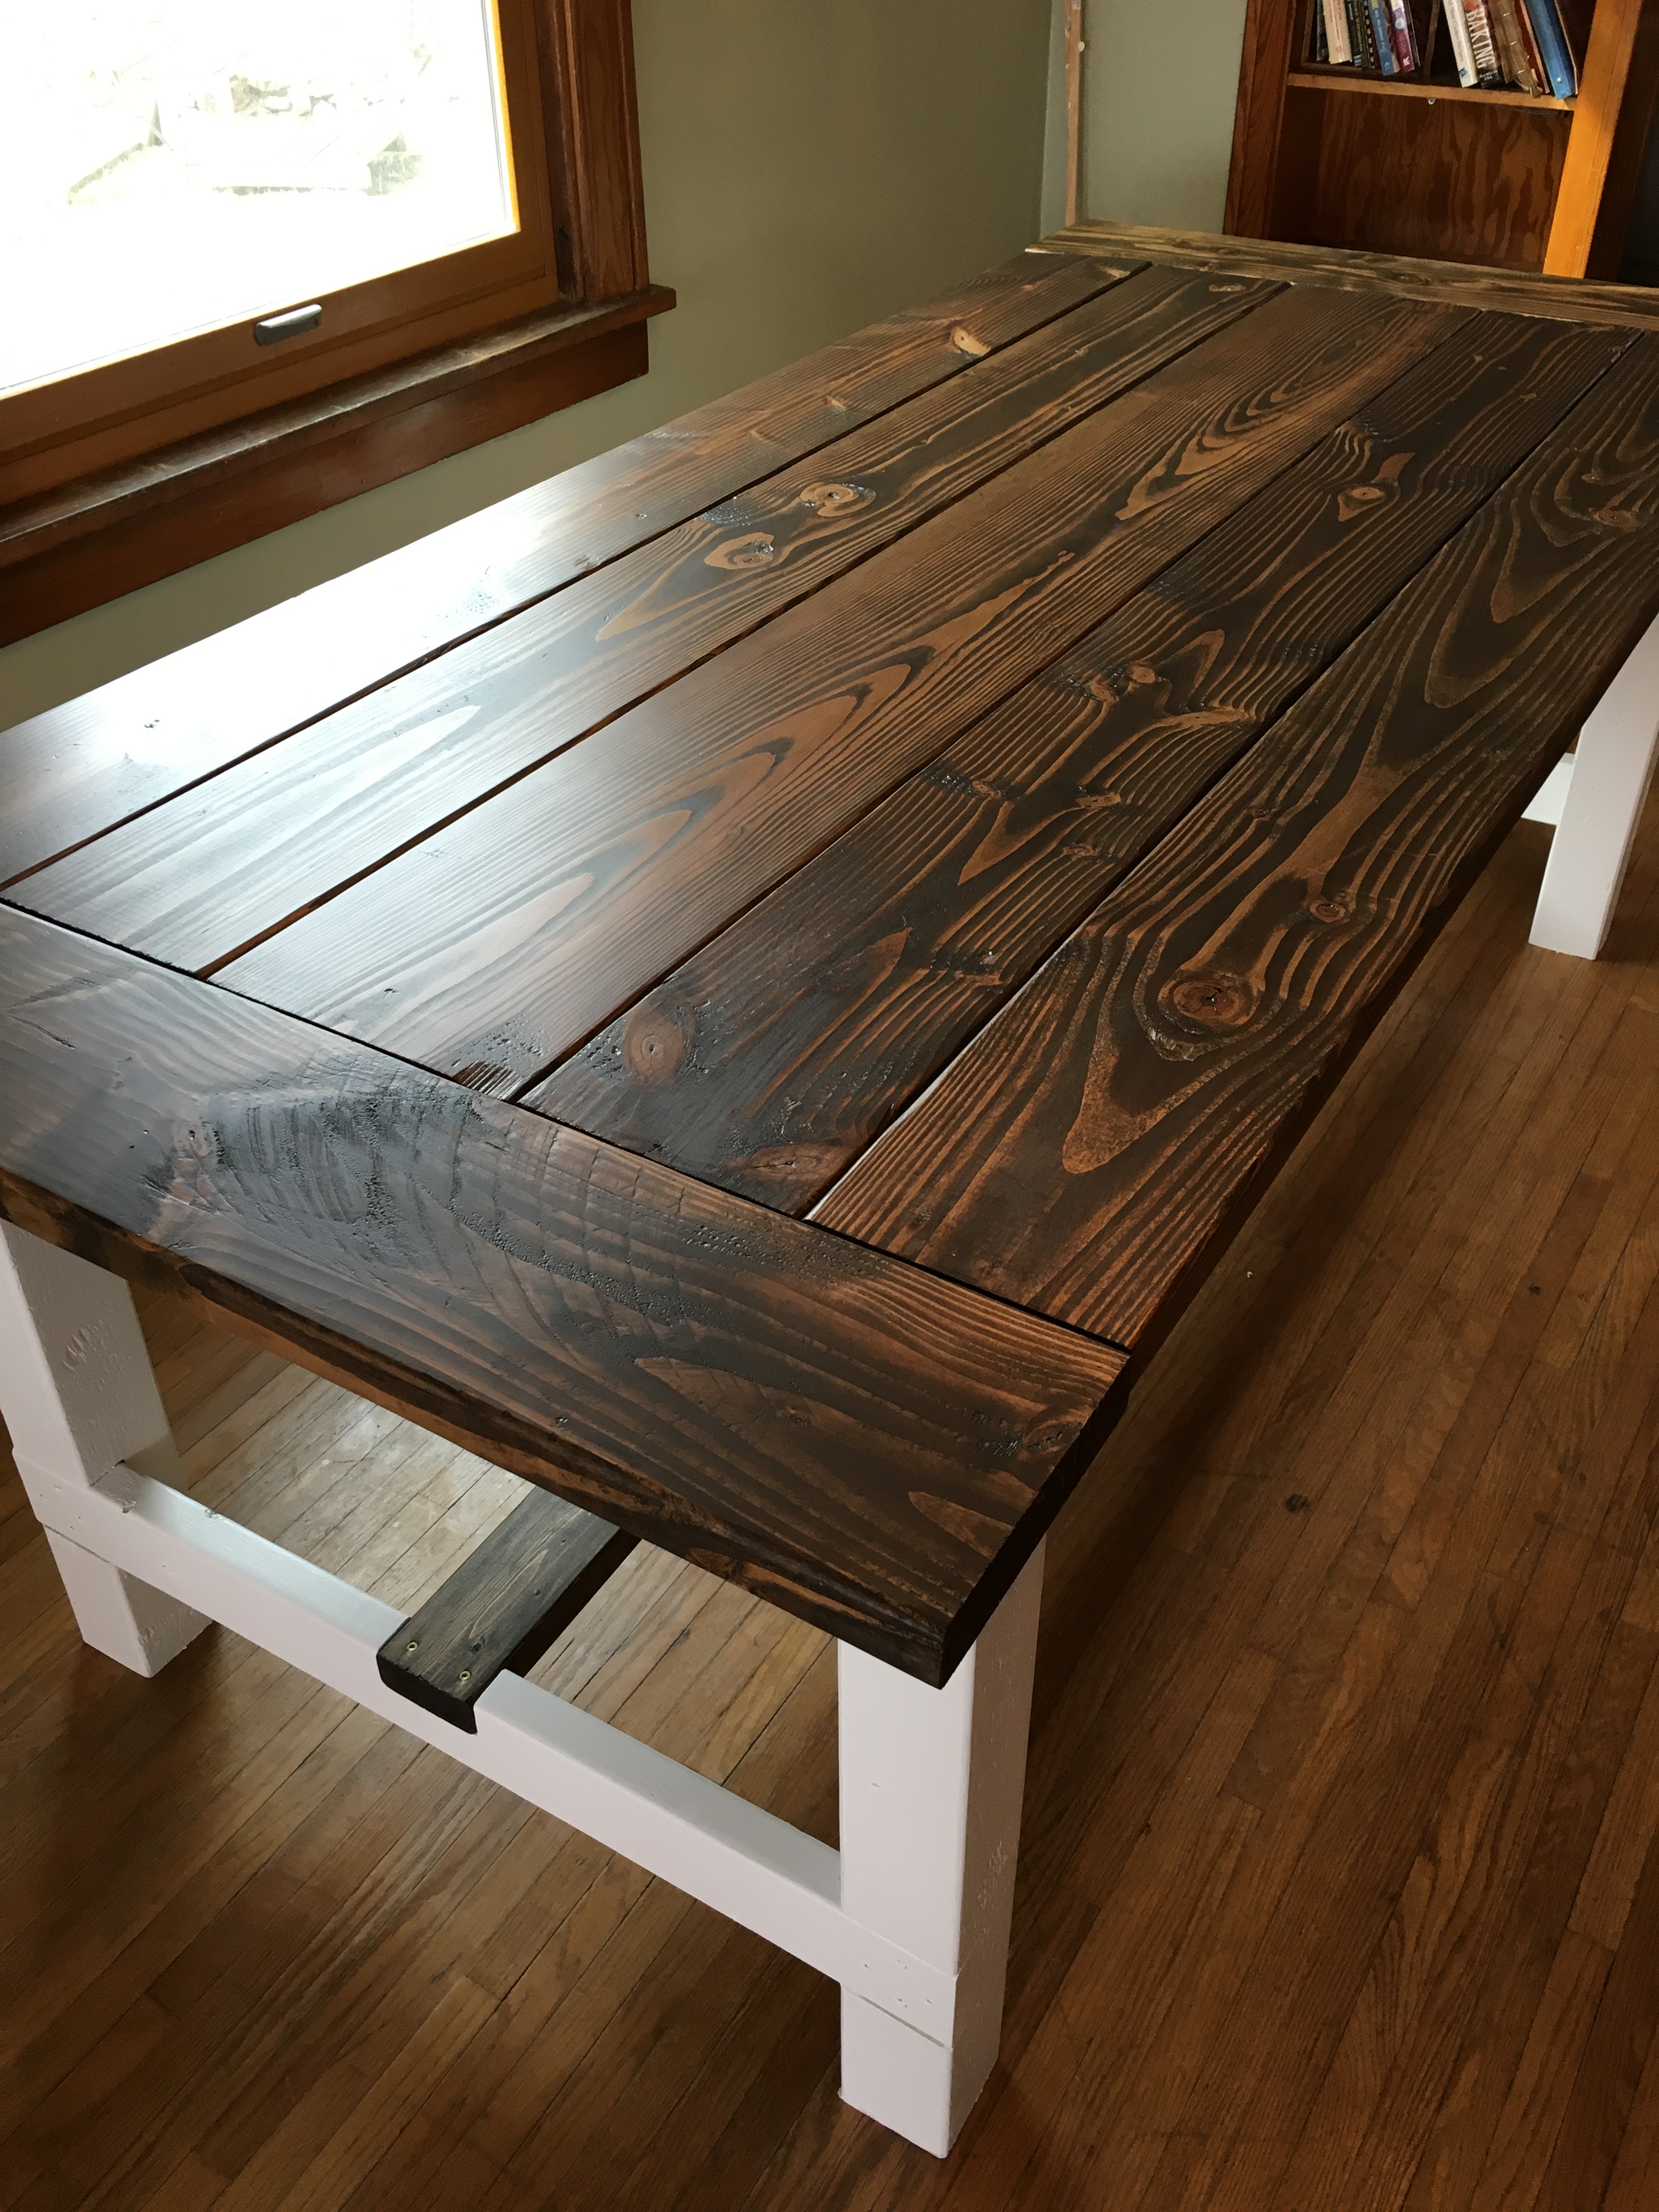
Needed a good sturdy coffee table so now I've got one. Joined each 2x6 for the top together with pocket holes and it's solid. A lot of fun to build.

Thu, 12/10/2015 - 14:54
Very nice and beautiful coffee table! Love how it turned out!
I used the basic ideas of your project but sized it to the wall in the bathroom. My first hardwood project. Pretty pleased.
Saw this on Ana's YouTube and just had to make it for my Daughter.
Thu, 12/22/2022 - 20:36
Such a fabulous gift! Thank you for sharing, wonderful job on this project.
This bed took us a long time to make as my husband and I worked on it on weeknights and weekends when our daughter napped. We spent a lot of time making the plan/design, picking our materials and determining how to assemble and finish it. Thankfully, we actually finished it (completely) the day before we ended up having our second child - just in time!
We used the measurements of the Lydia Toddler Bed but our design was based more on the Lydia Daybed/Queen Bed. For instance, we used 1x3s and 1x2s for the legs instead of the 2x2s in the Toddler plans. We also used a solid piece of the Purebond formaldehyde free plywood to get a clean look for the headboard/footboard pieces.

I seen the Reclaimed-Wood Headboard, Queen Size plan and thought hey i can do that. Well this is the result and I'm happy with it. I did do it a little different like routering a slot for the boards to fit down in. I wood burned the image and stained the inside of it to look like that. It didn't take to long to make the most time was spent sanding and staining.


Sat, 10/05/2013 - 16:06
I have a few friends that want me to make them one. looks like I'm making one for a hunter big stained deer in the headboard lol can't wait.
Thu, 10/24/2013 - 05:36
I've been woodburning for about a year. I actually built the same headboard and really wanted to do some burning on it, but never did. I was using the 5-in-1 soldering iron/woodburner from harbor freight and it served me well. Last week I picked up a $30 from a craft store and it way better than the HF one. Good luck!
Edit*
Heres the one I just got. Its worth every penny.
http://shop.hobbylobby.com/products/5-in-1-woodburningtool-kit-with-cas…
Thank you for your plans! My husband built it and I finished it with ASCP. So much storage for our living room, keeps down the clutter.

We altered the plans a bit to fit our space. It looks great - thanks Ana!
Sun, 01/01/2023 - 11:21
Such a cute night table, love the finish. Thanks for sharing!
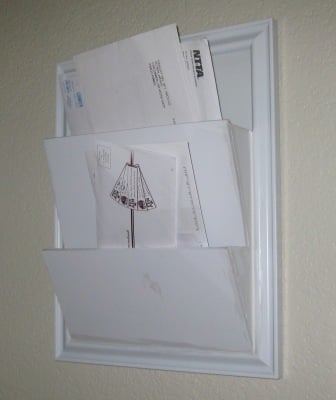
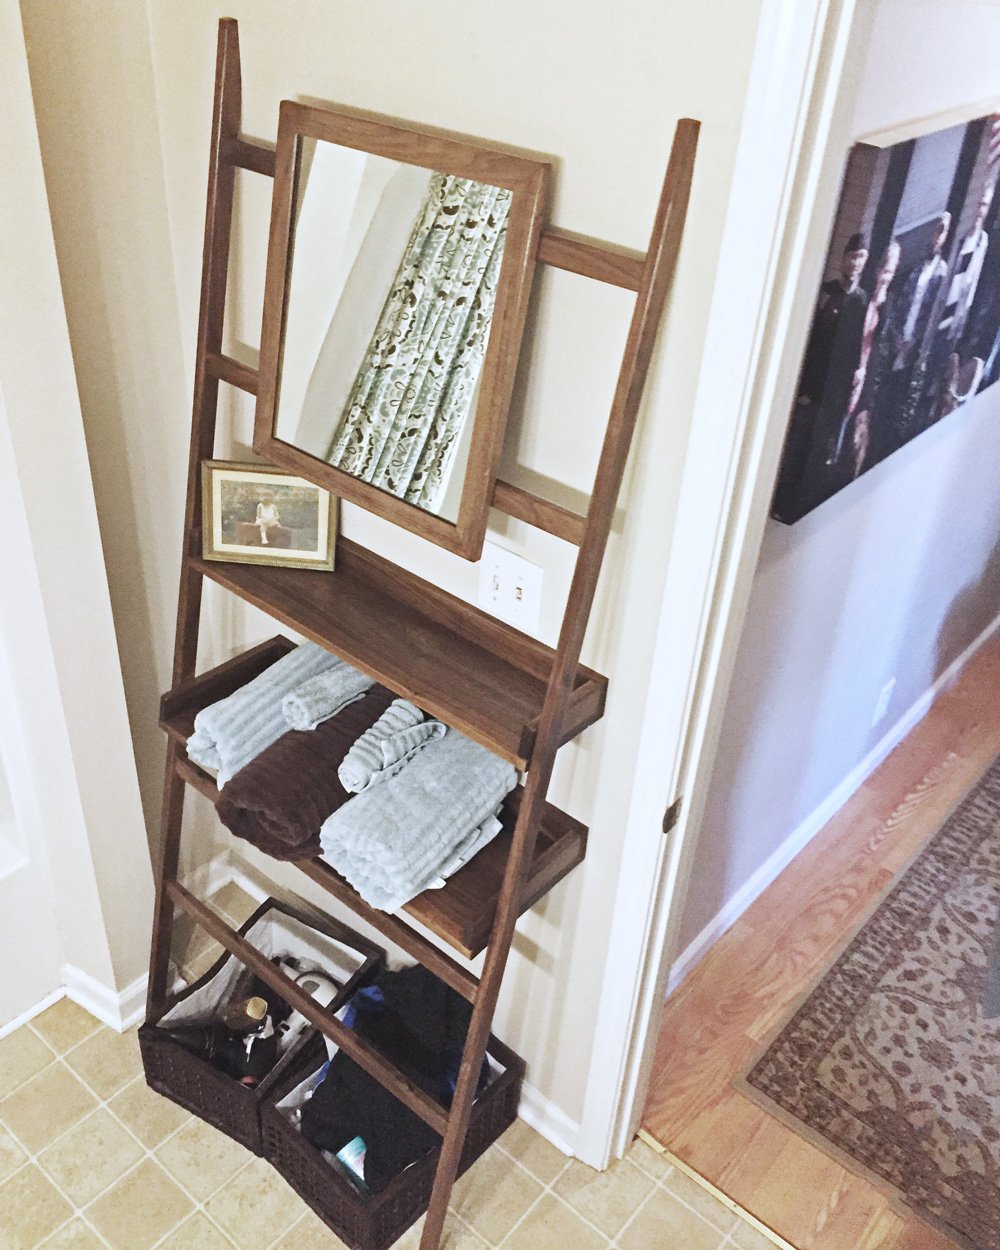
I love this Letter Bin that Lady Goats posted. I made it right away and finally just got it hung up on the wall. The frame came from Michael's for $4 and I had the scrap 1/4" MDF around the garage. My jig saw and I were not getting along that day (should've used a multi-tool) so my cuts are slightly off but I still love it. The caulk finished off the edges nice. This is perfect for our mail coming in the door and helps get even more paper off the table below (first project built...I was so excited to get it done, it made it into the house before sanding or painting). Thanks again Lady Goats for the great plans!

Mon, 09/19/2011 - 09:21
I love seeing what people do with my plans. And feels even better to be out-done. You, m'dear, out-did me :-)
Ah behold the allure of a really good set of plans. :) Famous last words, "it looked a lot easier on paper!"
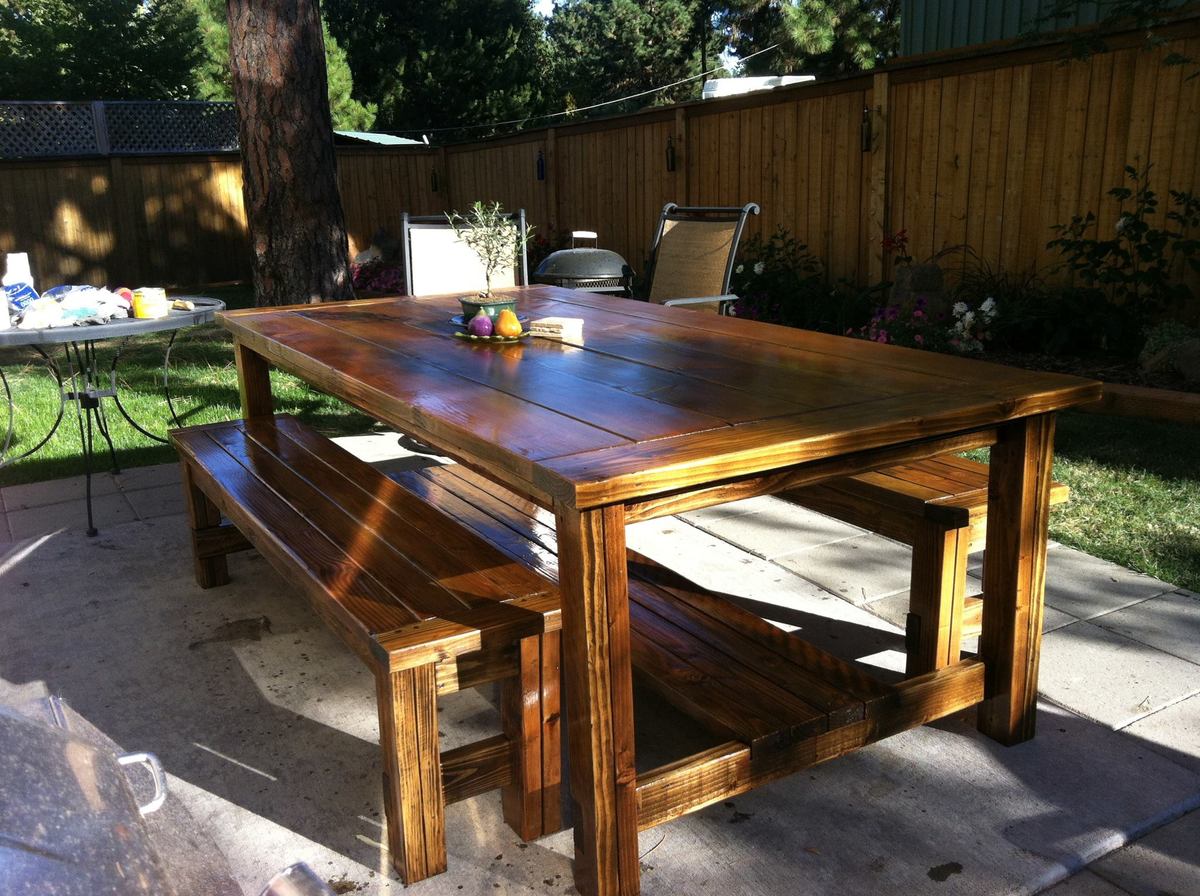
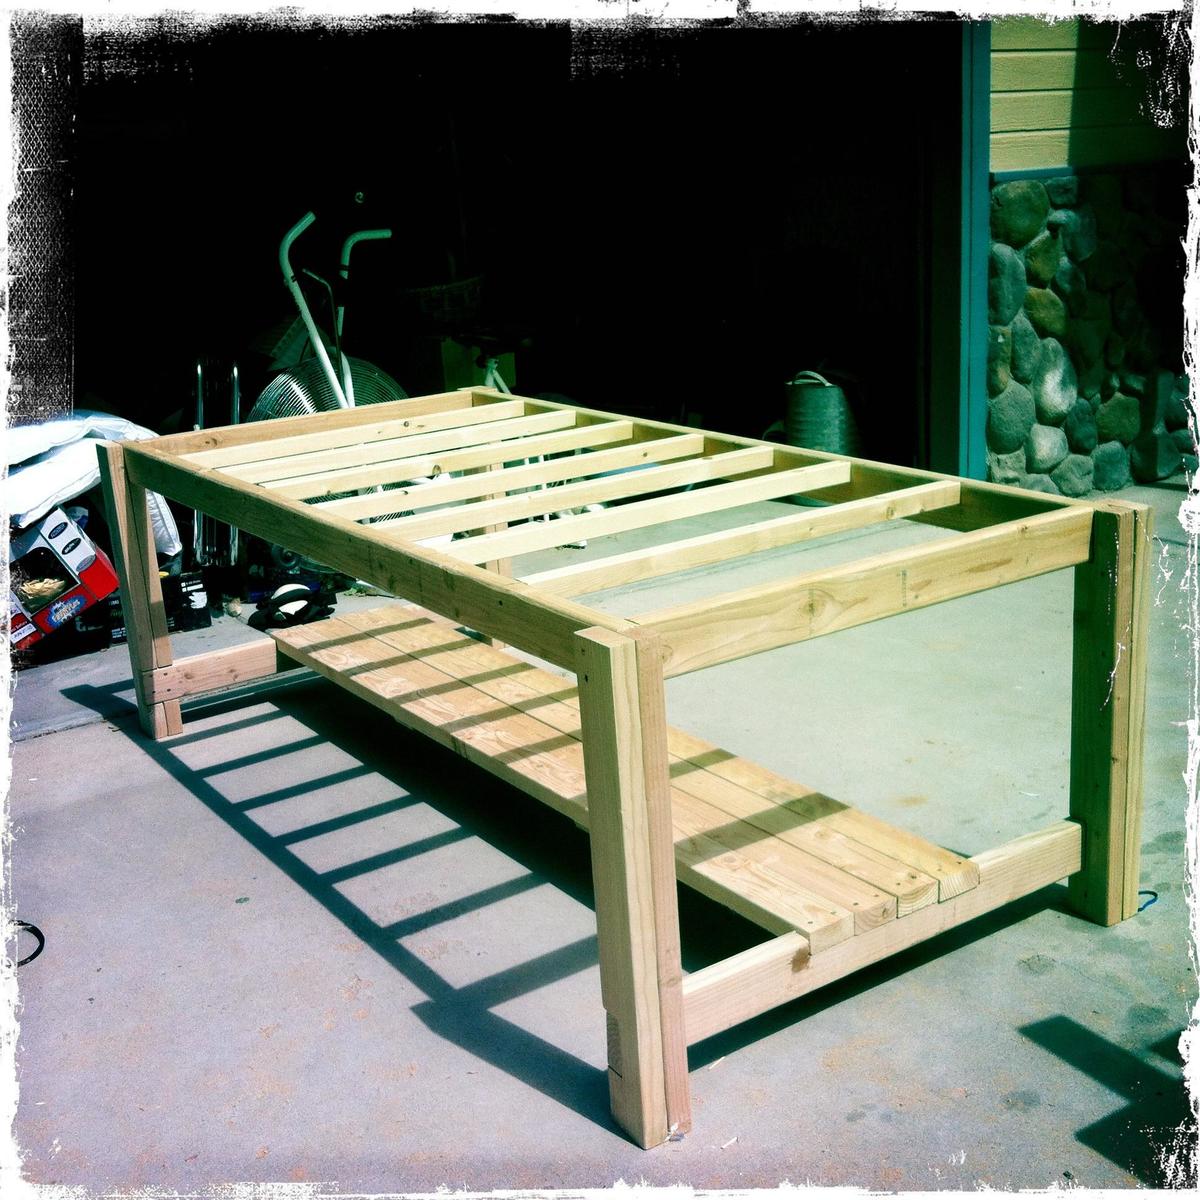
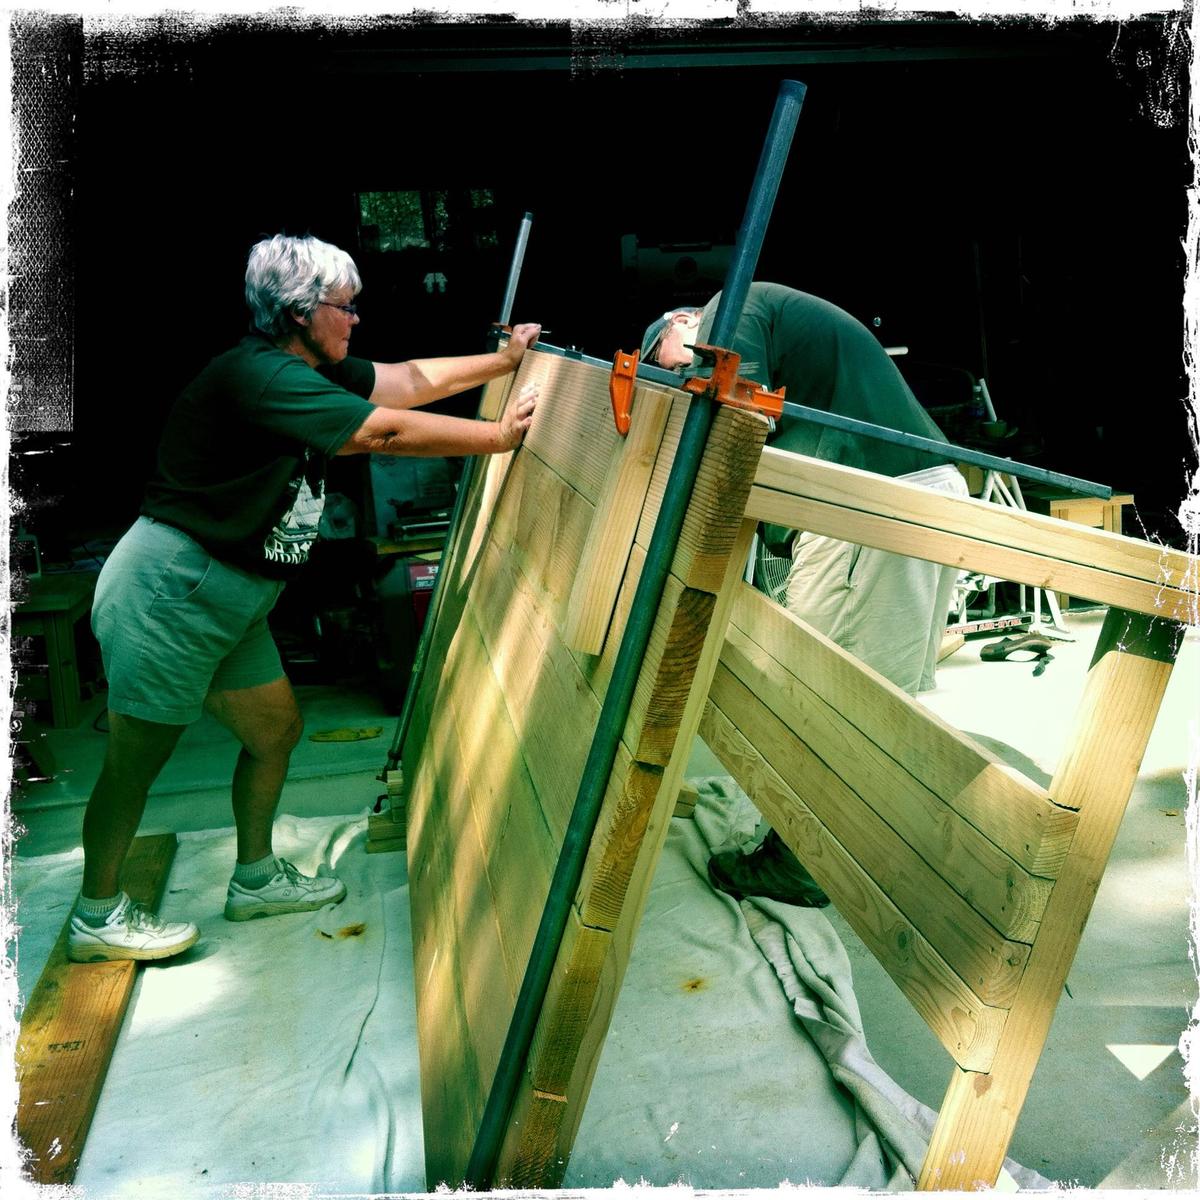
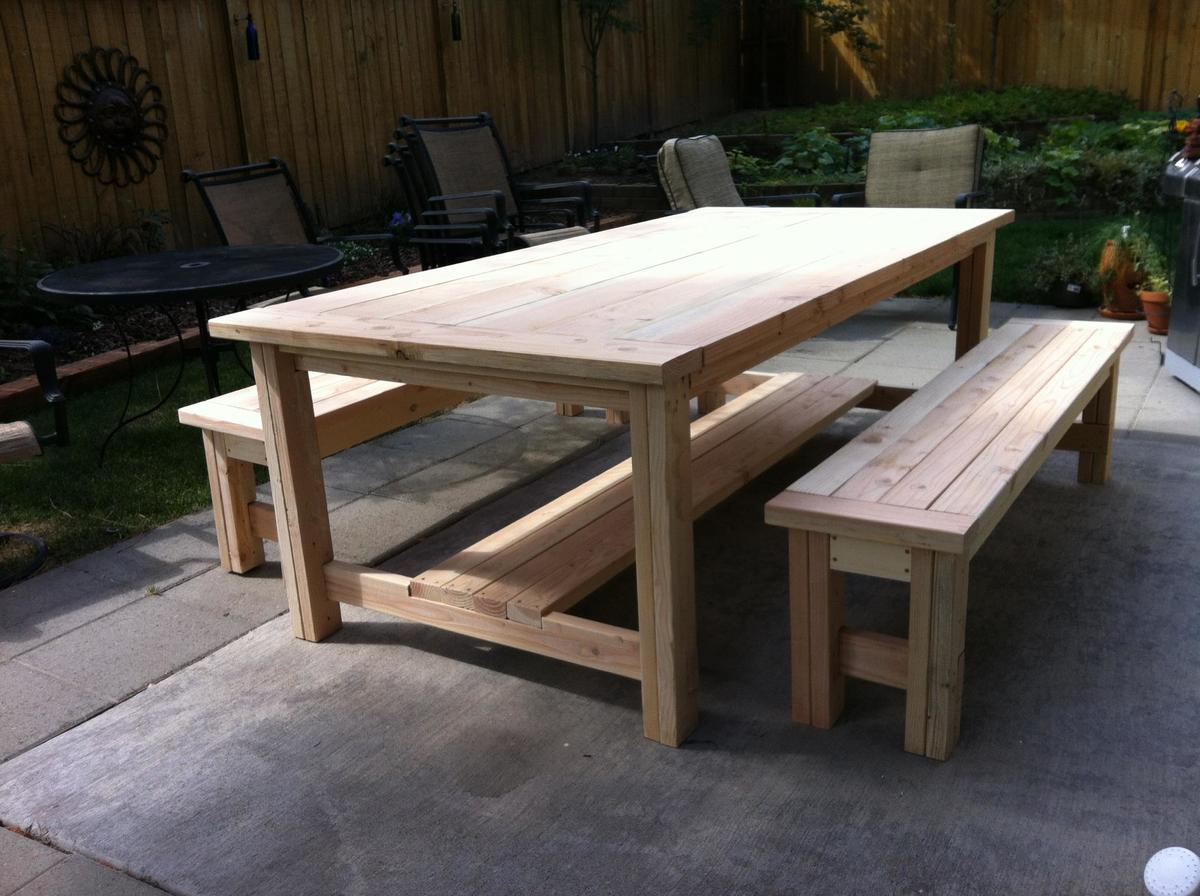
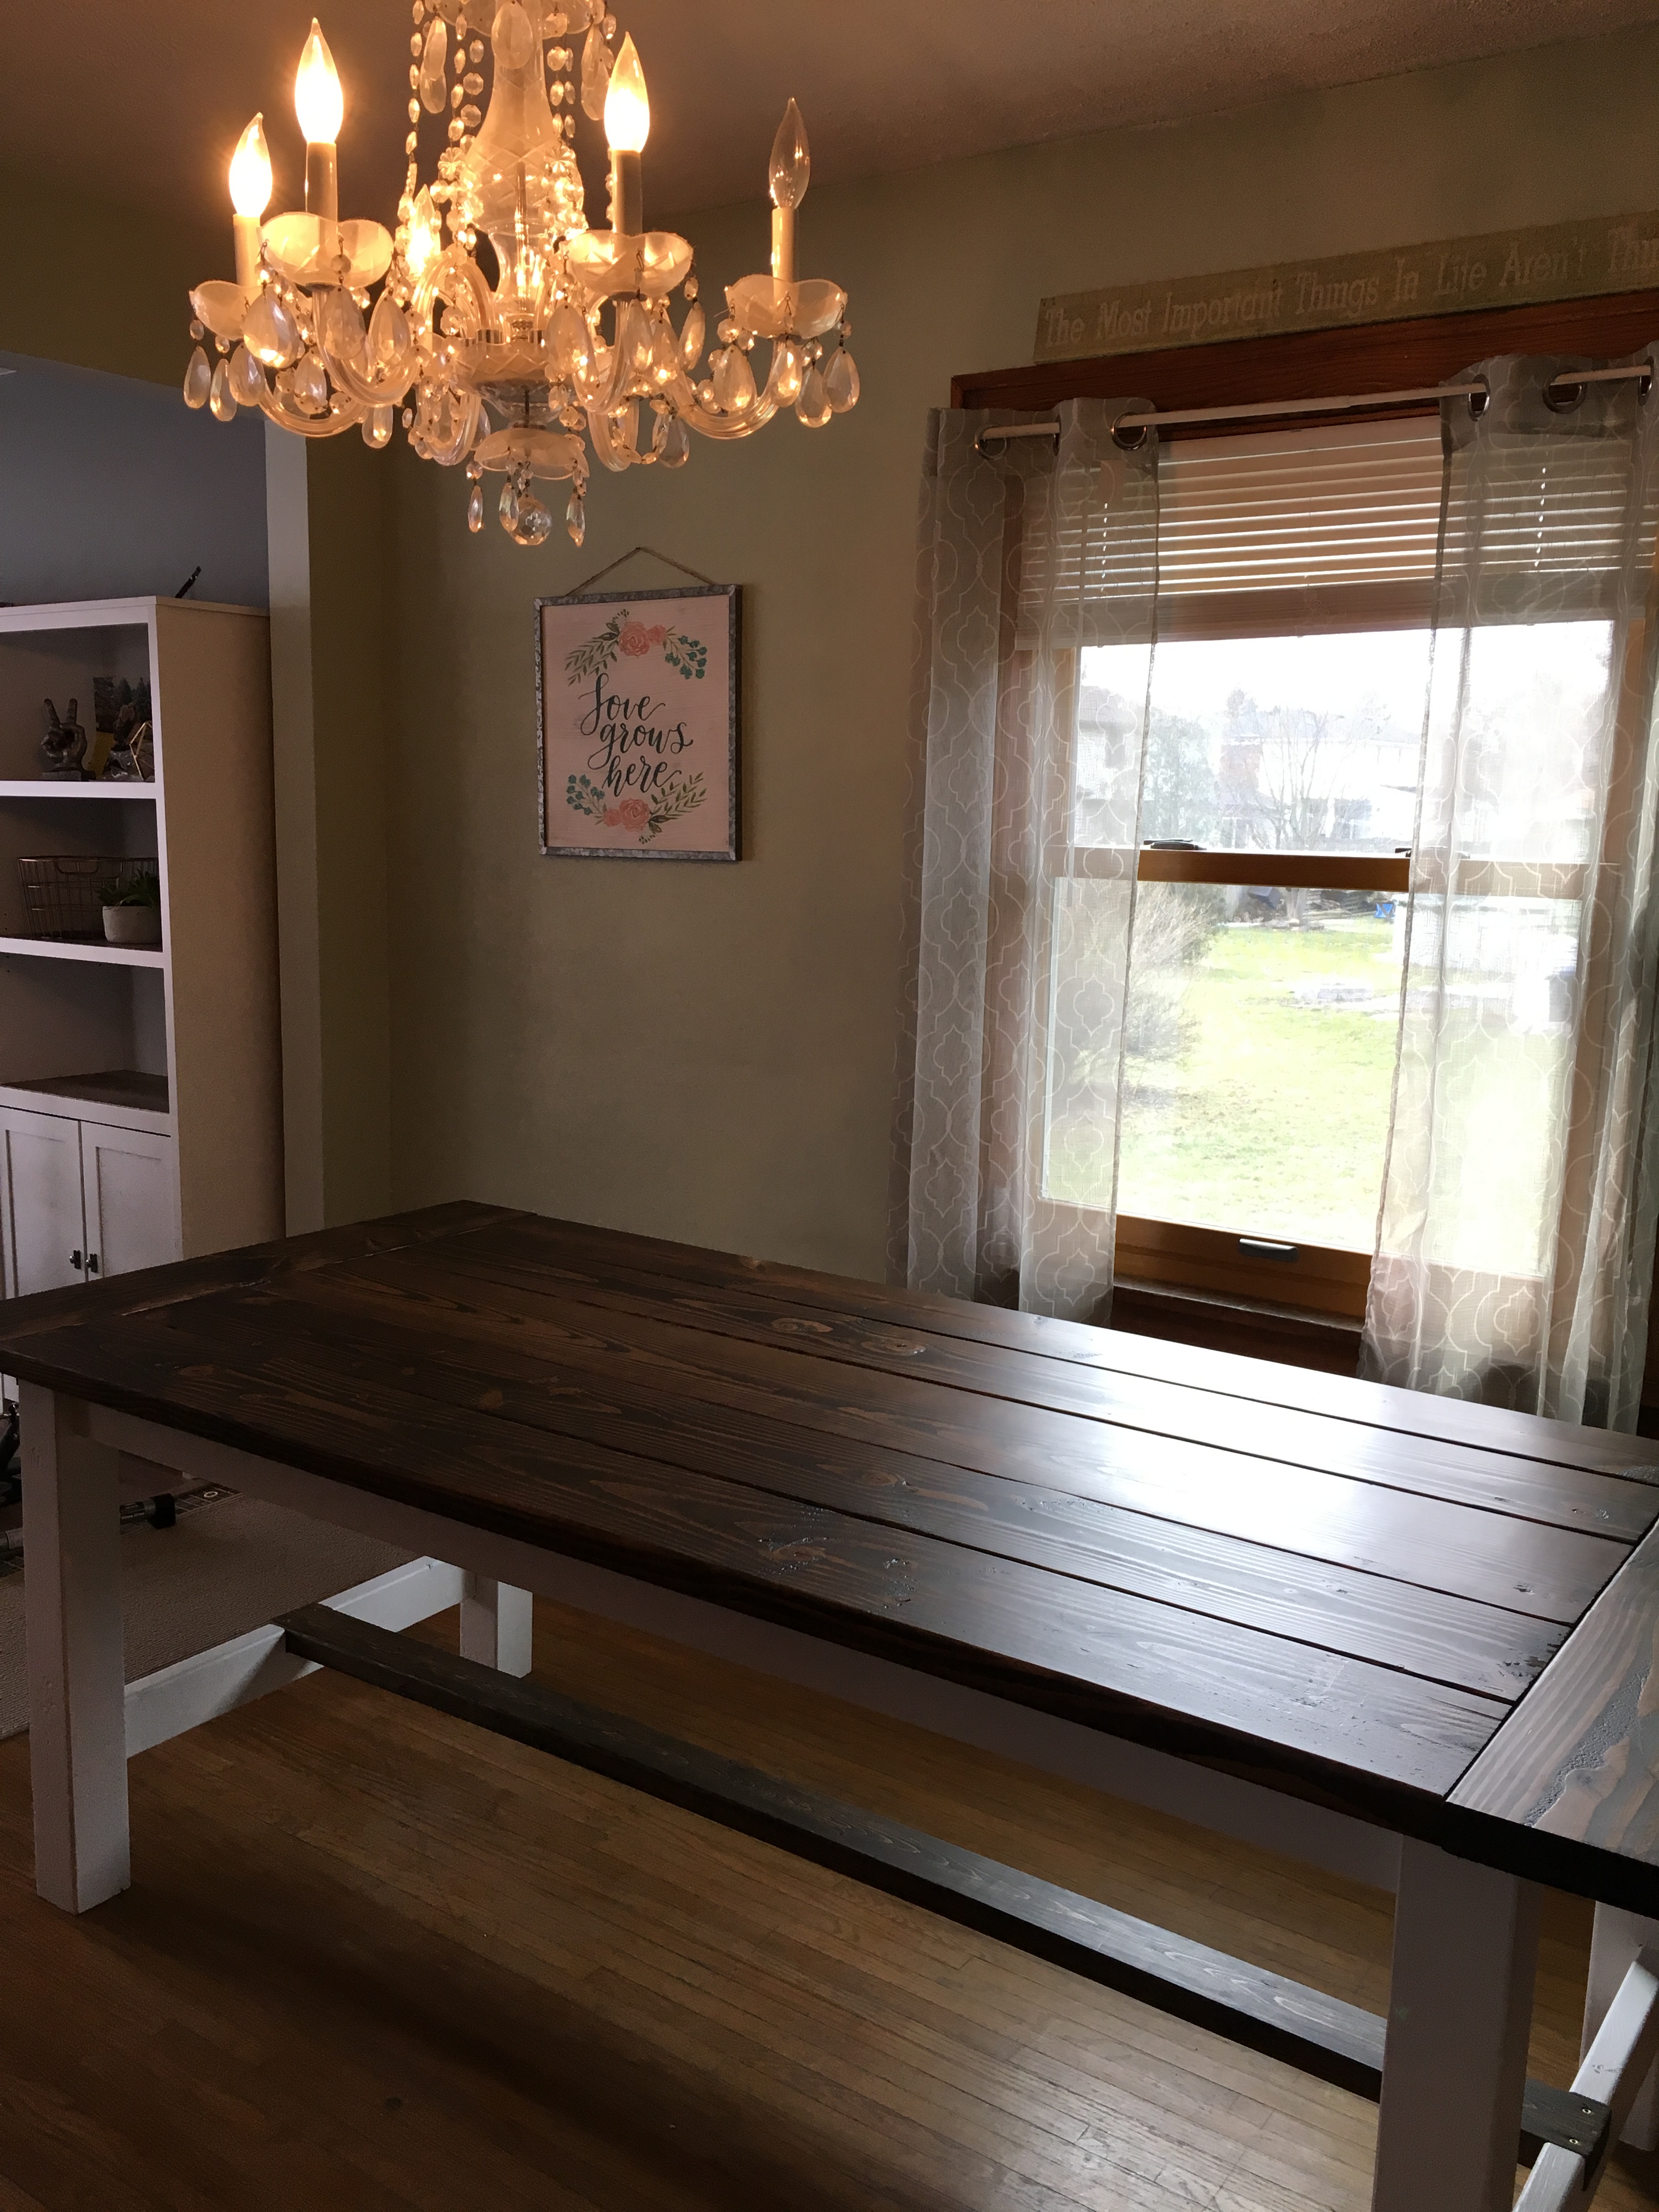
I happened across the wonderful plans for the Farmhouse Table on this site. Then I saw how it only took Handy Andy a mere 2-3 hours to make his out of reclaimed wood and thinking I would enlist my retired carpenter father to help me, easy peasy, right? Well, that was the plan anyway. :)
A couple of things to note, I purchased new fir wood as it was the most cost effective and frankly the least problematic in regards to finding the straightest boards. I did vary the design in that I added the shelf under the table for both storage as well as a footrest for diners. The design I ended up with was a little more complicated and I tried sanding as much of the boards from the beginning as possible in order to try and cut down on the amount of time spent on my knees later. Yeah, that was a nice thought.
Dad and I followed the plan provided, allowing my modifications for the footrest/shelf and I also made my top 45" wide. (I have another dining table that I had hopes of butting them together for large dinner parties if needed and wanted them relatively the same size). I will say that what I ended up with was an extremely heavy table which I transported home to stain and varathane on my own.
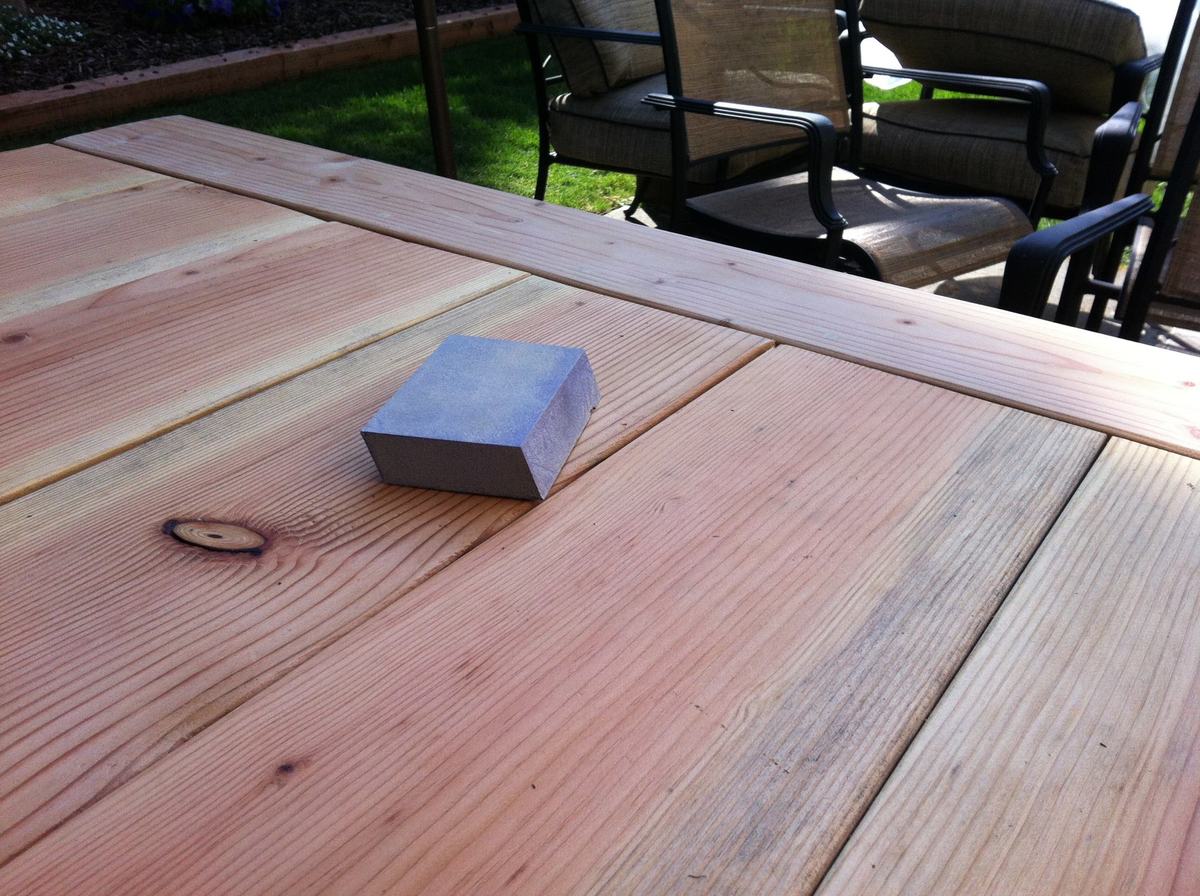
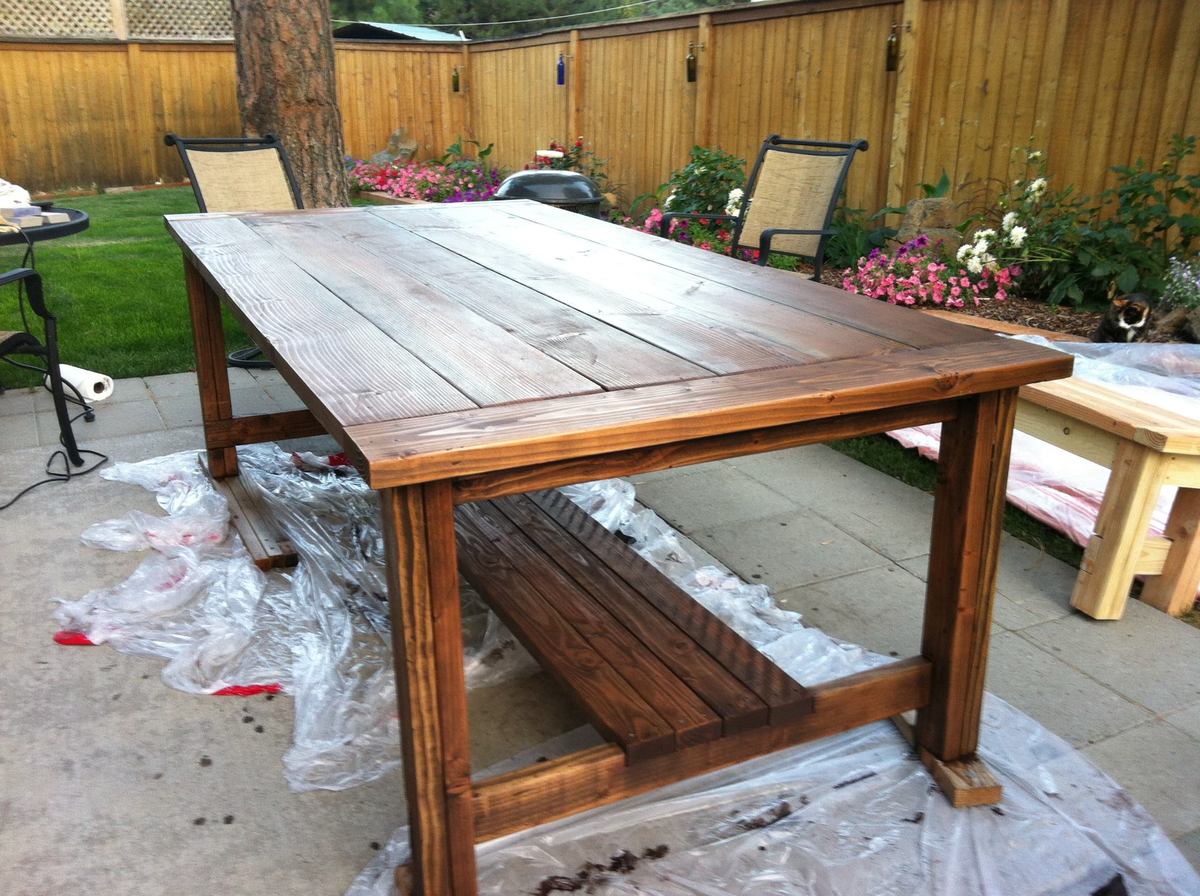
A couple of weeks later, well, the project took more than 2-3 hours (heh) but I am really happy with the results. If I were to do it again, I would probably have stained it a tad darker as this was my first staining/sanding/varathaning project and I took a little too much of the stain off sanding. It's okay, maybe someday I will strip off the varathane and restain it. Then again, it took so much time to do the first time maybe I won't!
A couple questions:
I would like to keep my table outdoors, but would like to add low profile metal feet to protect the wood. Does anyone have a suggestion where to look for heavy duty feet?
Second, any suggestions on how to get the spar varathane off my concrete patio? Yikes!
Thank you Ana for the wonderful plans!
Thu, 10/10/2013 - 14:49
Well done! Bravo! It looks as if you will spend many wonderful summers there.
Thu, 10/10/2013 - 15:13
We had a couple of lovely dinner parties this summer on it. I was surprised as to how many we were able to seat around it. A really good set of plans. :)
Project took on by my dad and painted by myself and my mom...LOVE how it turned out!

This was a very difficult project for me, getting the backstreet was the hardest part and the doors but it turned out great and I thank you for the plans!
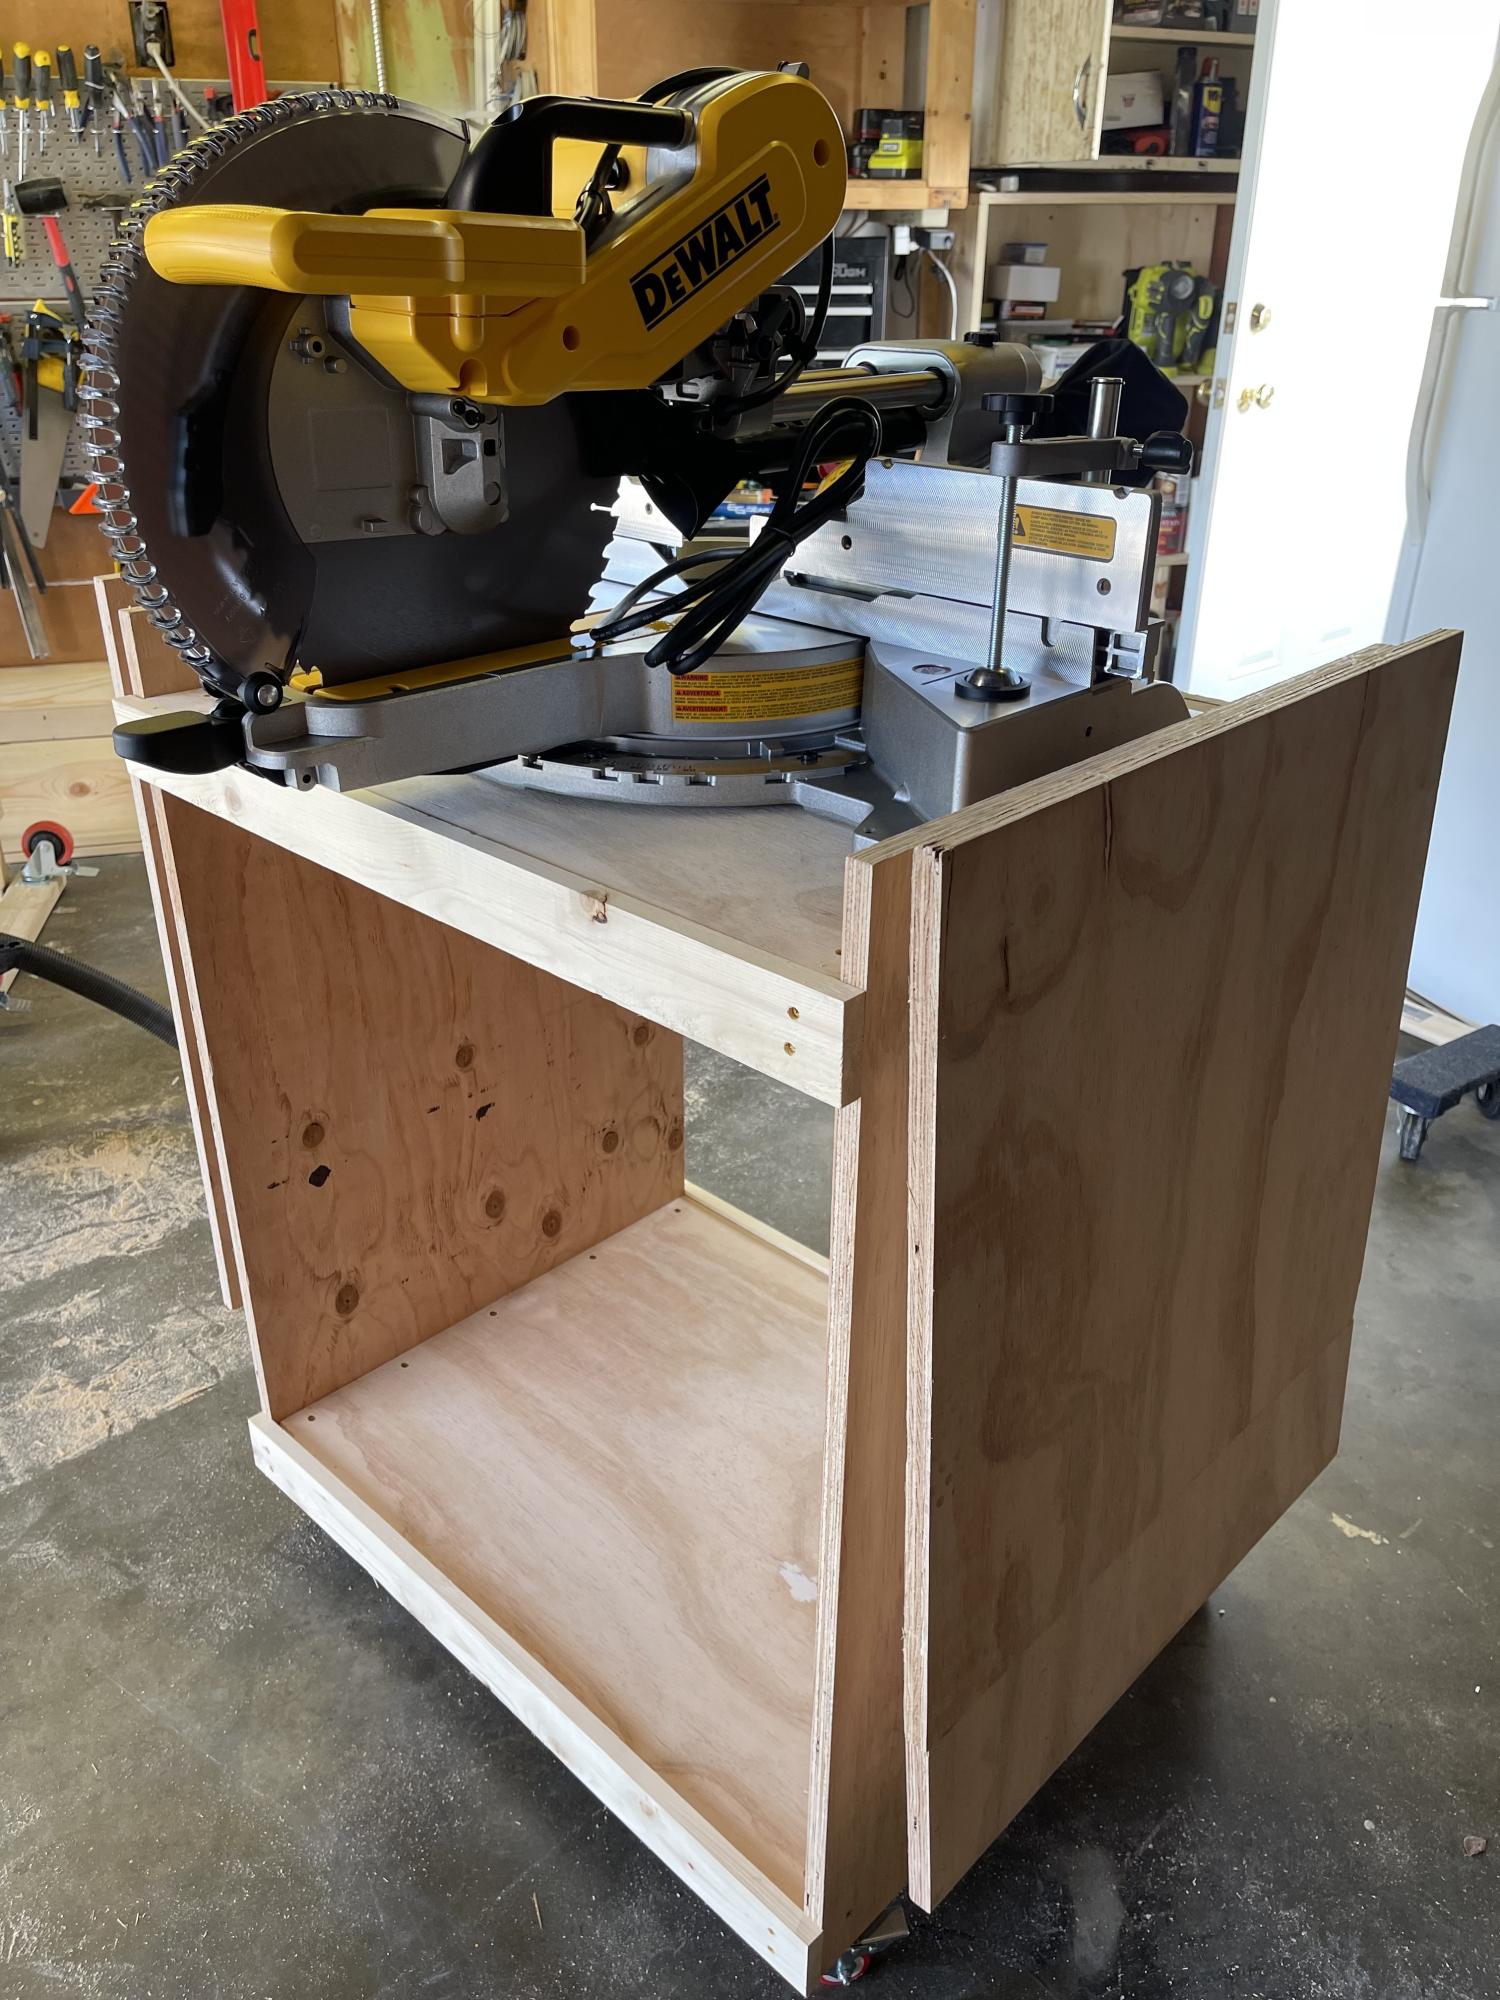
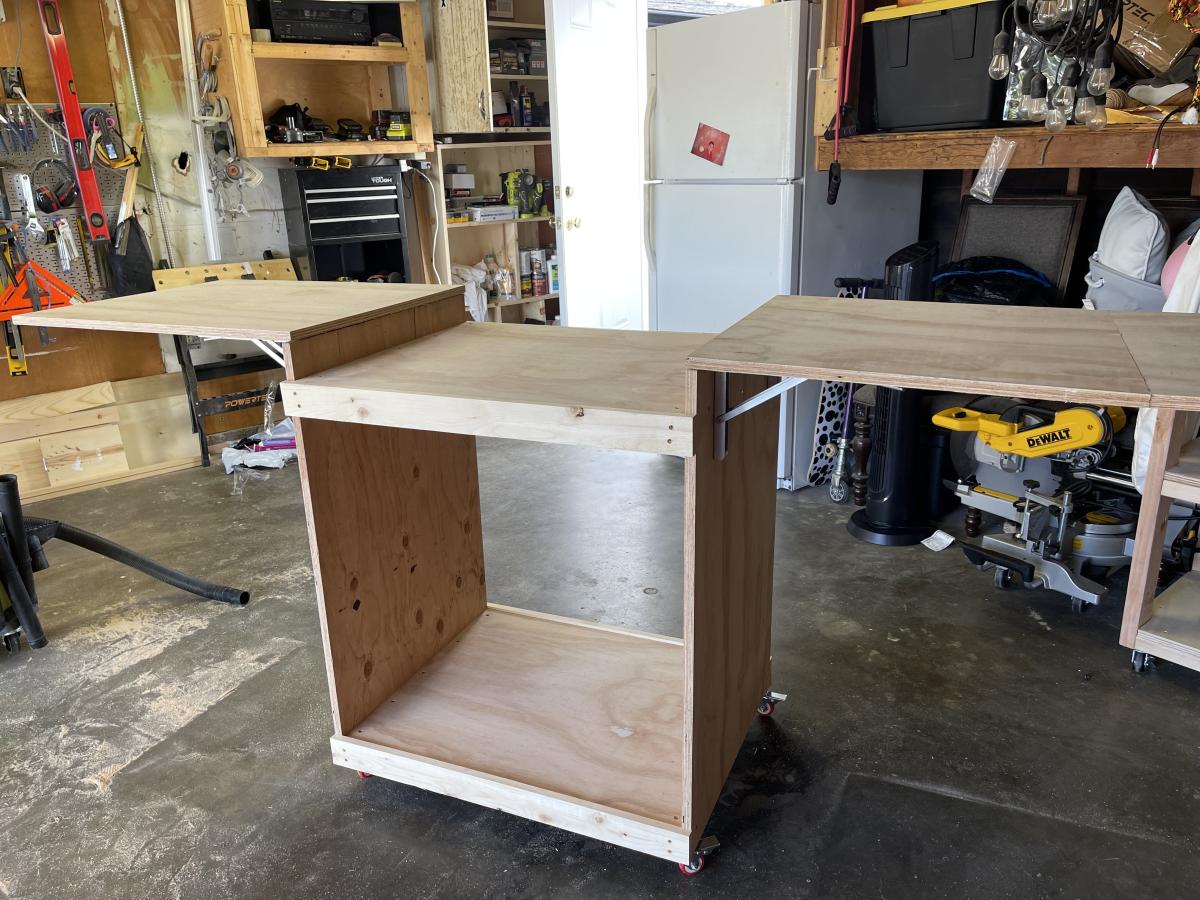
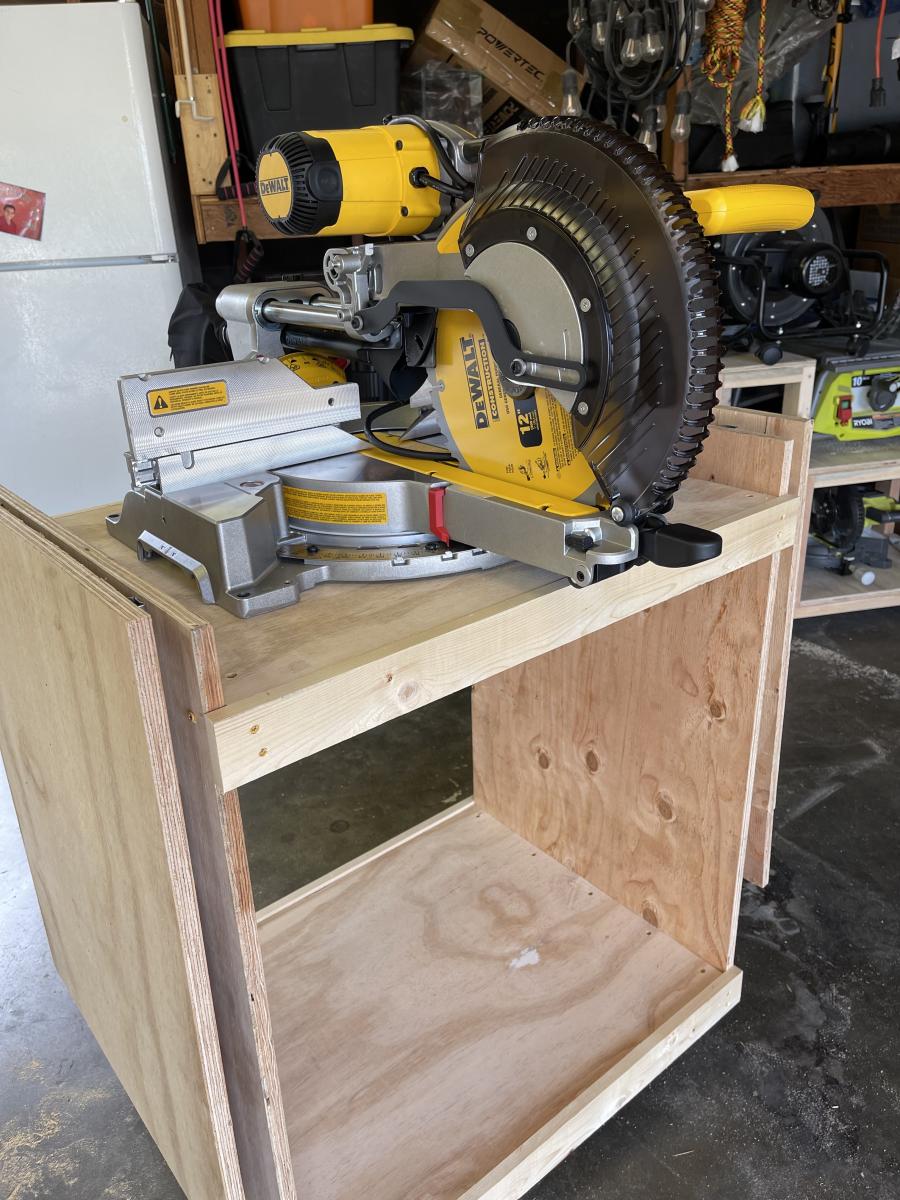
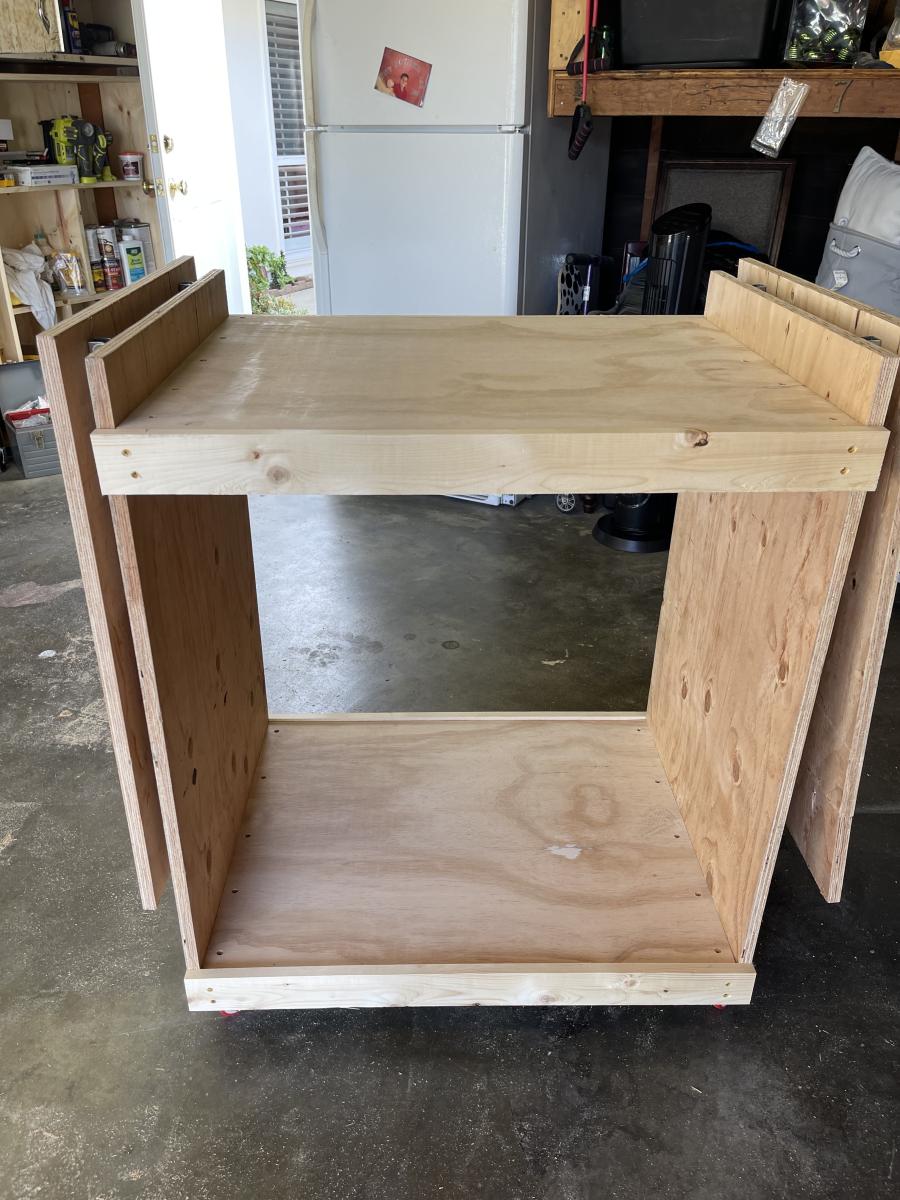
I looked at several solutions for a potable miter saw cart given that I had just purchased a new miter saw and it is quite heavy. Opted for the miter saw cart in Ana's website because it provided the most flexibility given my limited working space.
What started out as an innocent shopping trip for a bed, sparked an idea, and led me to Ana White. Next thing I know...I had built a Farmhouse Bed. All by myself! Then I started a blog to document my whole bed building adventure - http://gleeinspired.blogspot.com/2010/10/bed.html.
Thanks Ana! You are truly amazing!

Sun, 09/25/2011 - 09:32
It looks great!
Also, I'm so excited that you incorporated your existing bed frame! I also have been wanting to build this bed, but was worried about trying to make it solid enough to support our big split-base king mattress. Could you tell me a bit more about how the frame works with this? Did you attach the frame to the wood, or is the wood bed just kind of floating around the frame? Does it look odd to have the frame legs as well as the wood legs?
Sun, 09/25/2011 - 15:10
Thanks so much! I love our bed and Ana's plans make building this bed simple enough for complete beginners!
To attach our metal bed frame, I screwed it into both 4x4 posts on the headboard. Then I used 1x12 boards on each side, attaching them to the headboard and footboard with 2 L-brackets at each corner. I also screwed the metal bed frame to the side boards wherever possible. This provides a little added stability to everything. Not that the bed really needs it...it's super solid and sturdy!
Since our bedroom is long and narrow, it's impossible to see the frame legs with our furniture placement. Otherwise, I'd probably use a simple tailored bedskirt to hide them.
Hope this helps. Happy building!

Mon, 03/19/2012 - 13:28
Am I crazy? I swear I've seen this room somewhere. Did you get published in a magazine or blog feature? Love it. The color scheme is so different; seriously- how did you pull off orange and blue and get it to look so fantastic?
Thu, 01/17/2013 - 02:23
Any chance you can email mail me or post here, the dimensions? I know the length along the frame is fixed but the width of the boards on the headboard and footboard and the height of the posts on each end as well as the height of the boards in the center of the head and foot board. I am a beginner and have been looking at headboard ideas online for quite some time now and yours is the first I actually liked and want to build.
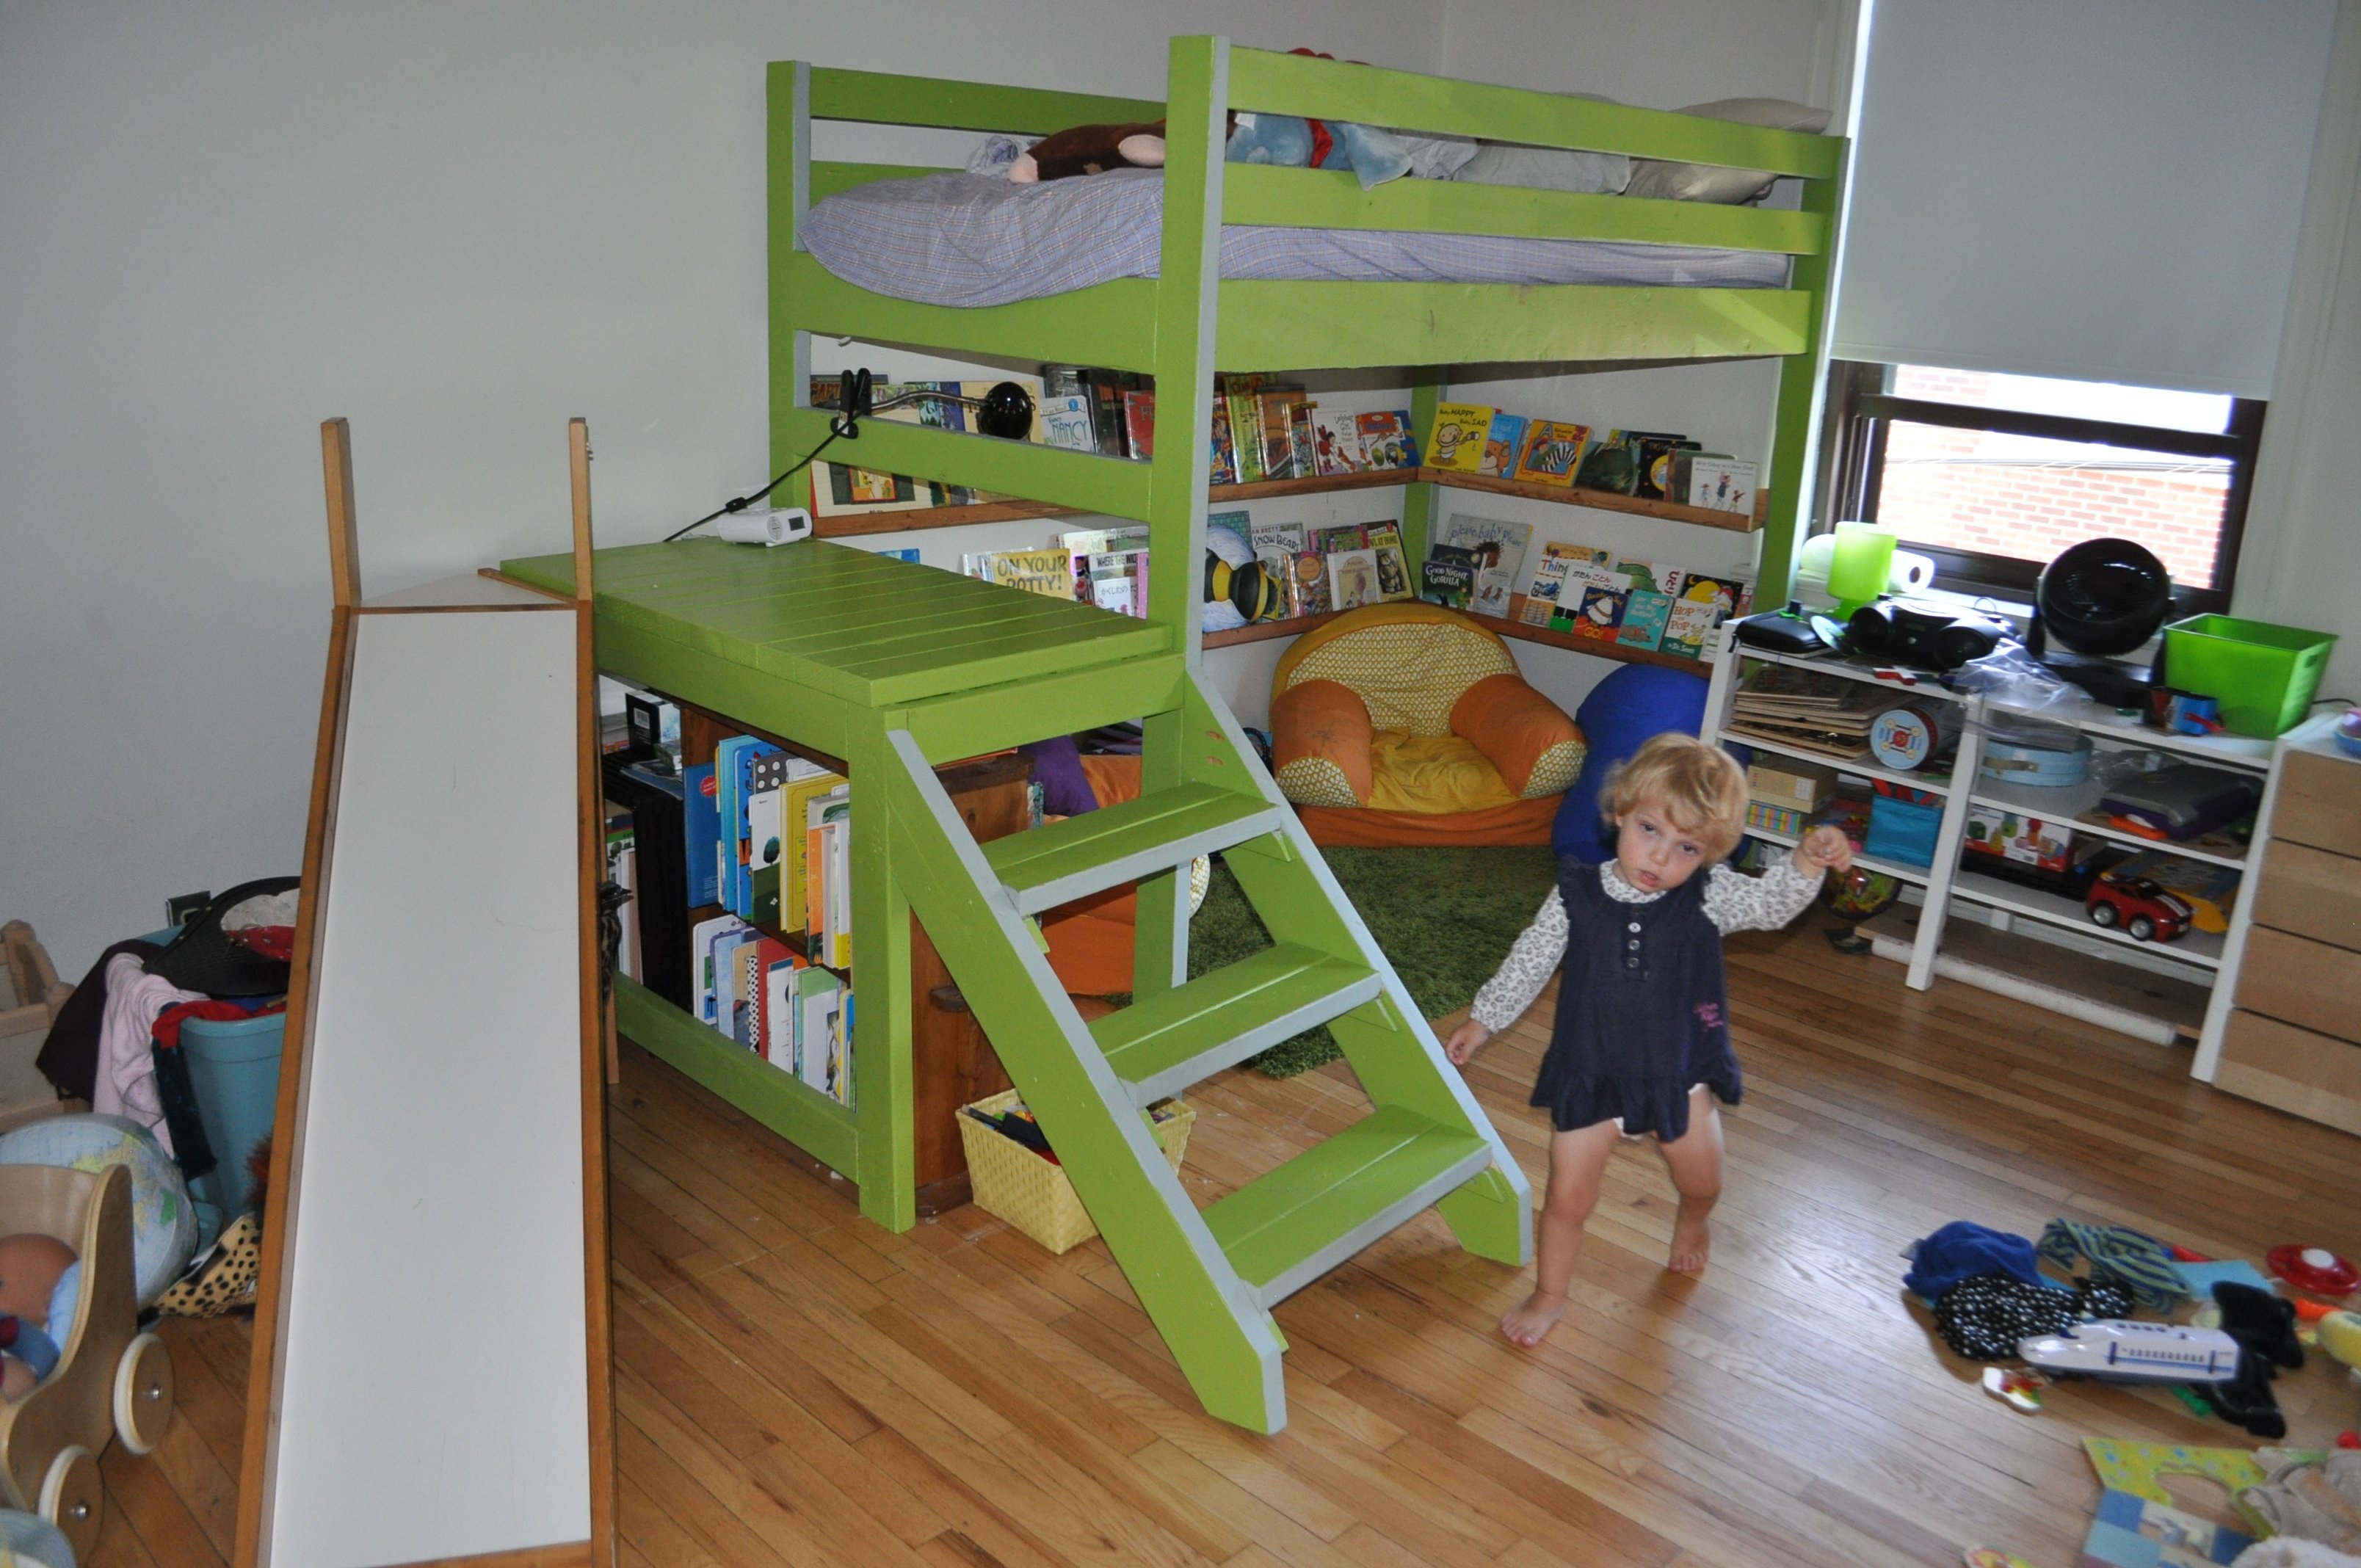
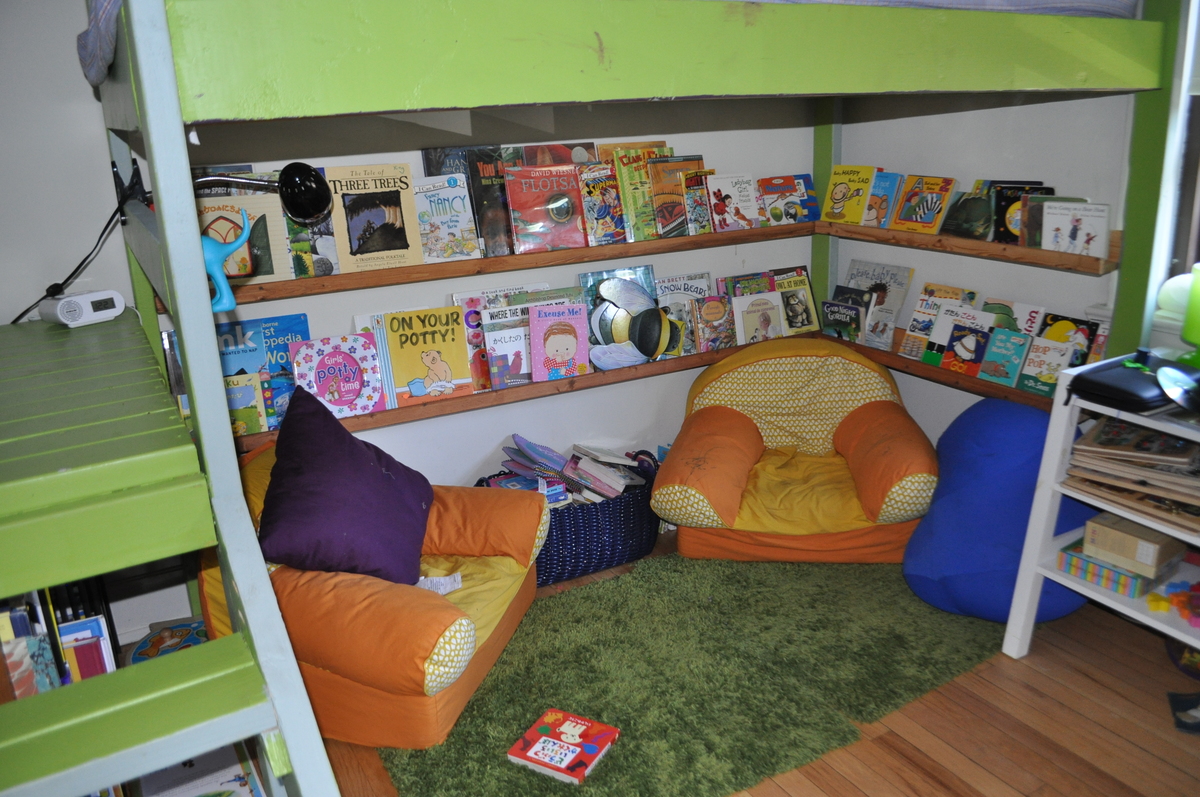
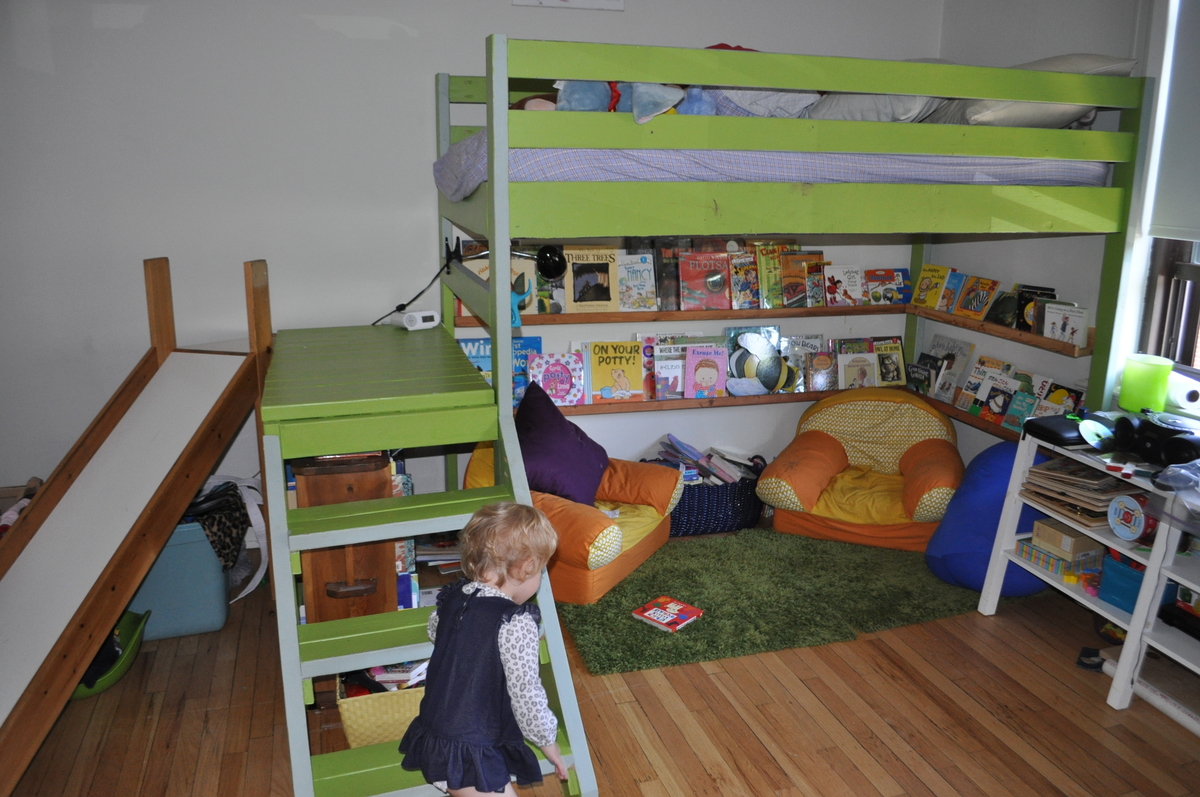
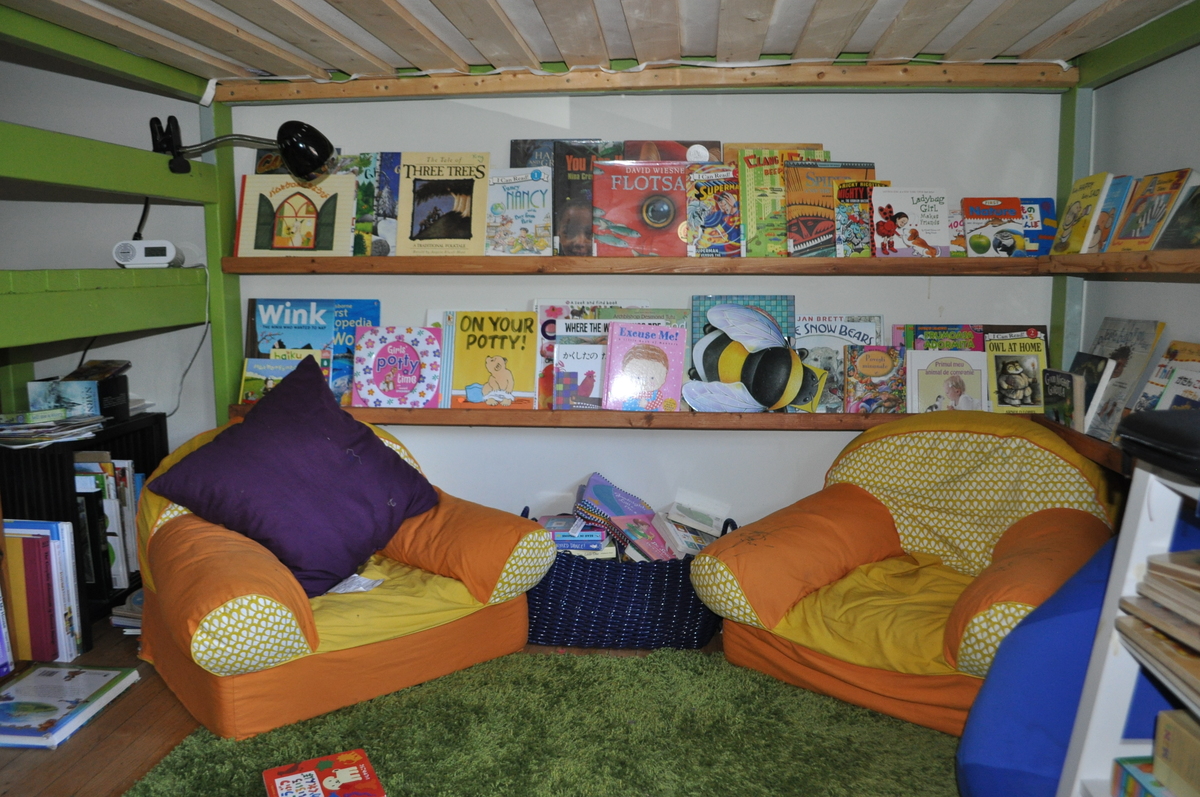
I built this bed in July in anticipation of my two children sharing a room for the first time. They love it. In August, I thought to add the $10 ledges to the frame of the bed when I realized our walls wouldn't support their weight and we're in a rental. I used 1x3s instead of 1x4s those plans called for so the shelves would sit at the same depth as the 2x4s on the frame of the bed.
I wish I knew more about painting soft wood because I don't love how the paint job turned out, though it is green per my son's request. I couldn't deal with more green, hence the ledges are stained.
I love the little alcove this has created. I added curtains and we read stories in there every night. Thank you so much for the inspiration and plans!
Loved this first project! Can't wait to start the TV stand. Thank you Ana White
Slowly, over the course of 6 months, my grandfather, my mother, my sister and I put this together. Believe me when I say if I can do it, so can you. We had to watch a lot of Youtube videos to learn to do the pocket holes, but they are so worth it!!

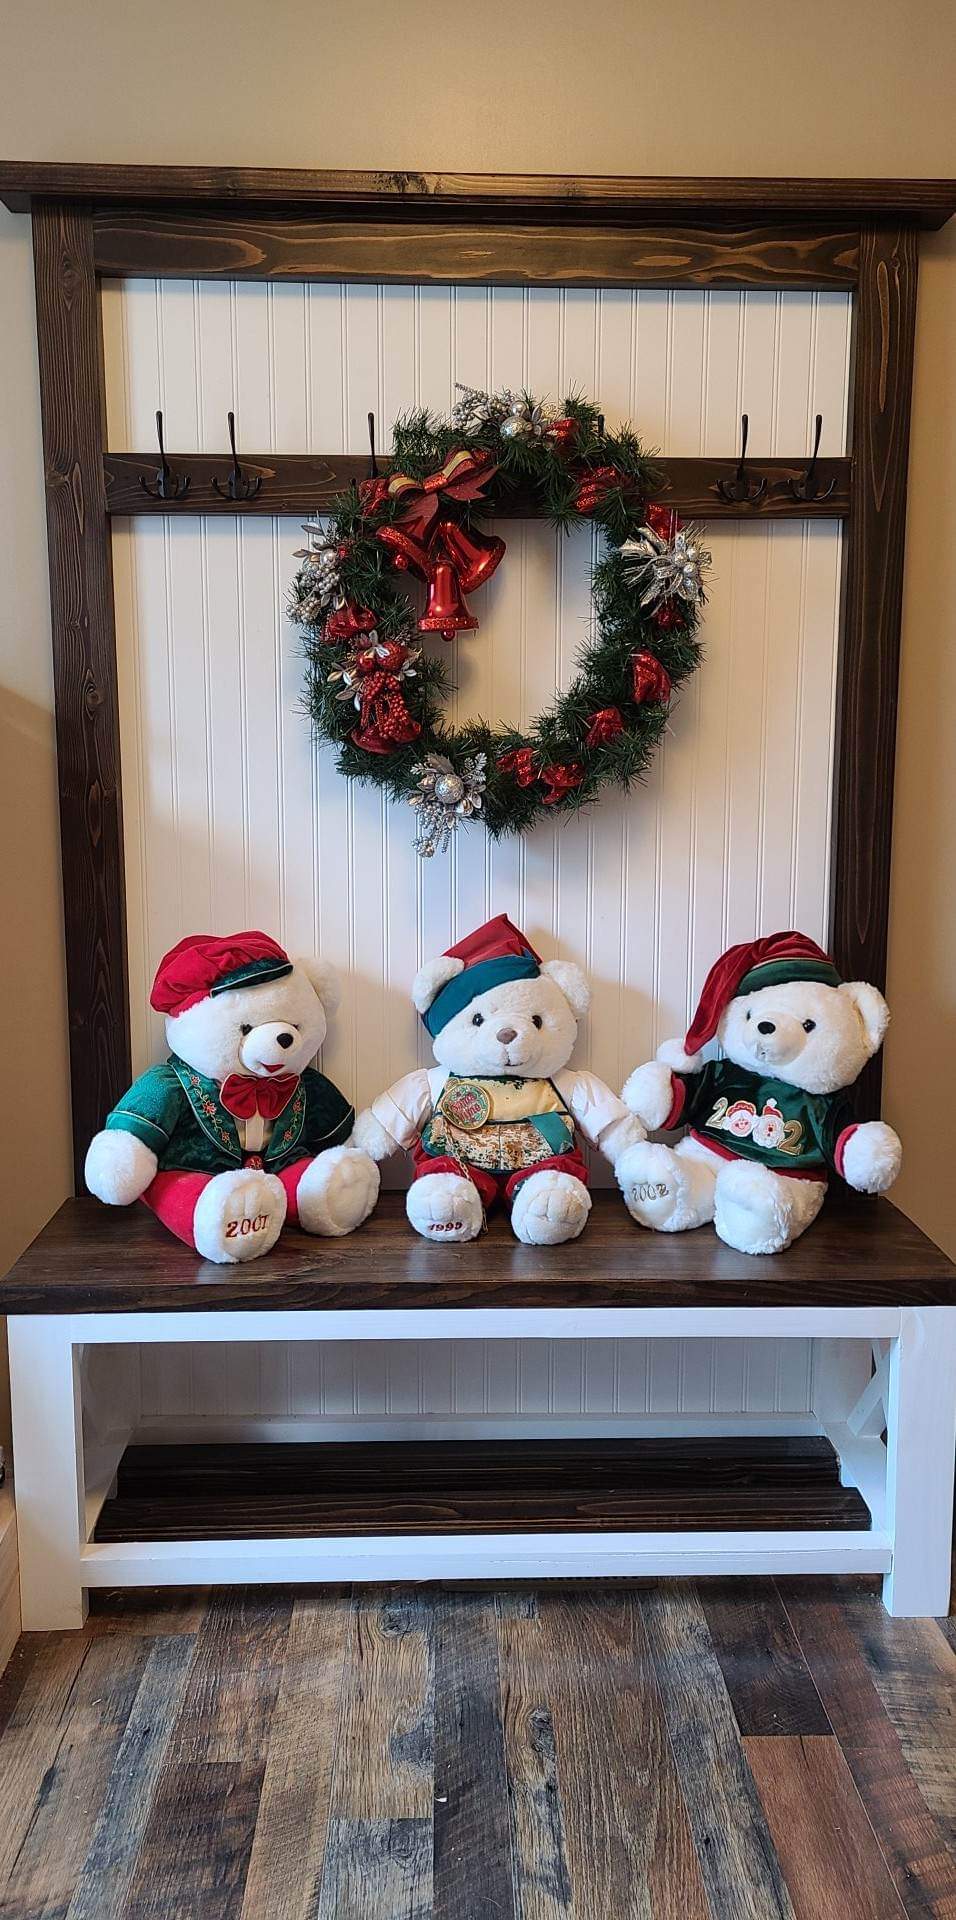
This was my first building project using plans from Ana's website. I love it in my entry way where it fits perfectly and fills up an otherwise blank wall.