Community Brag Posts
Entry Way Storage Hall Tree
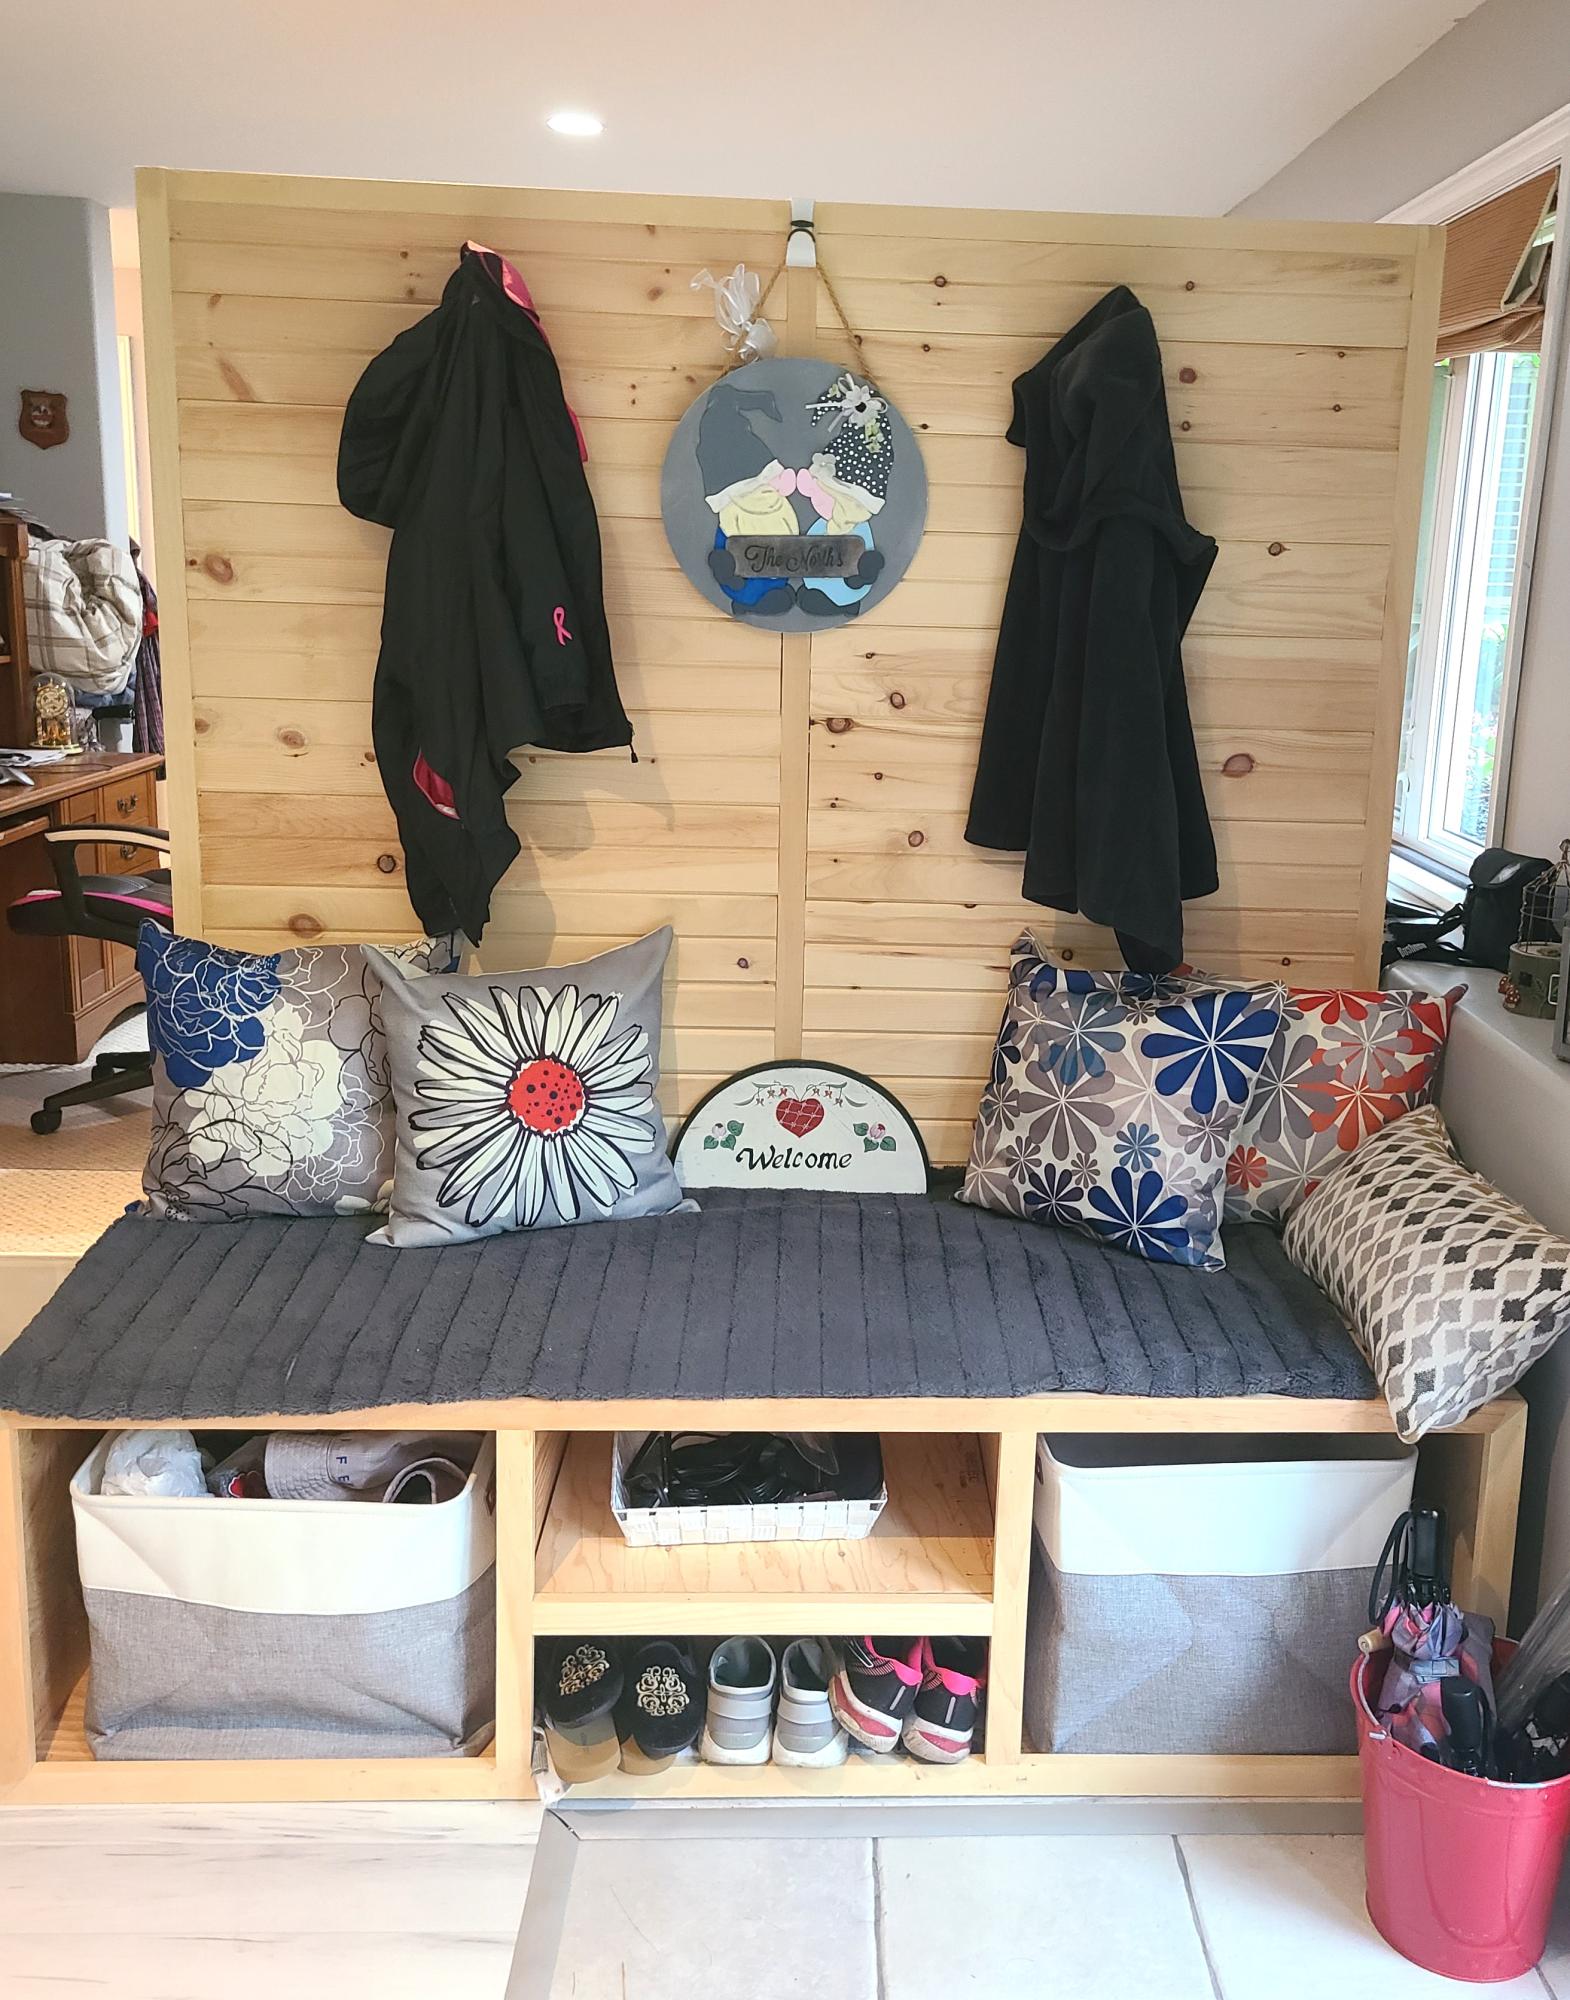
My first attempt at any furniture. My mother has been asking for one of these for a long time. I finally got to it
Todd North
Built from Plan(s)
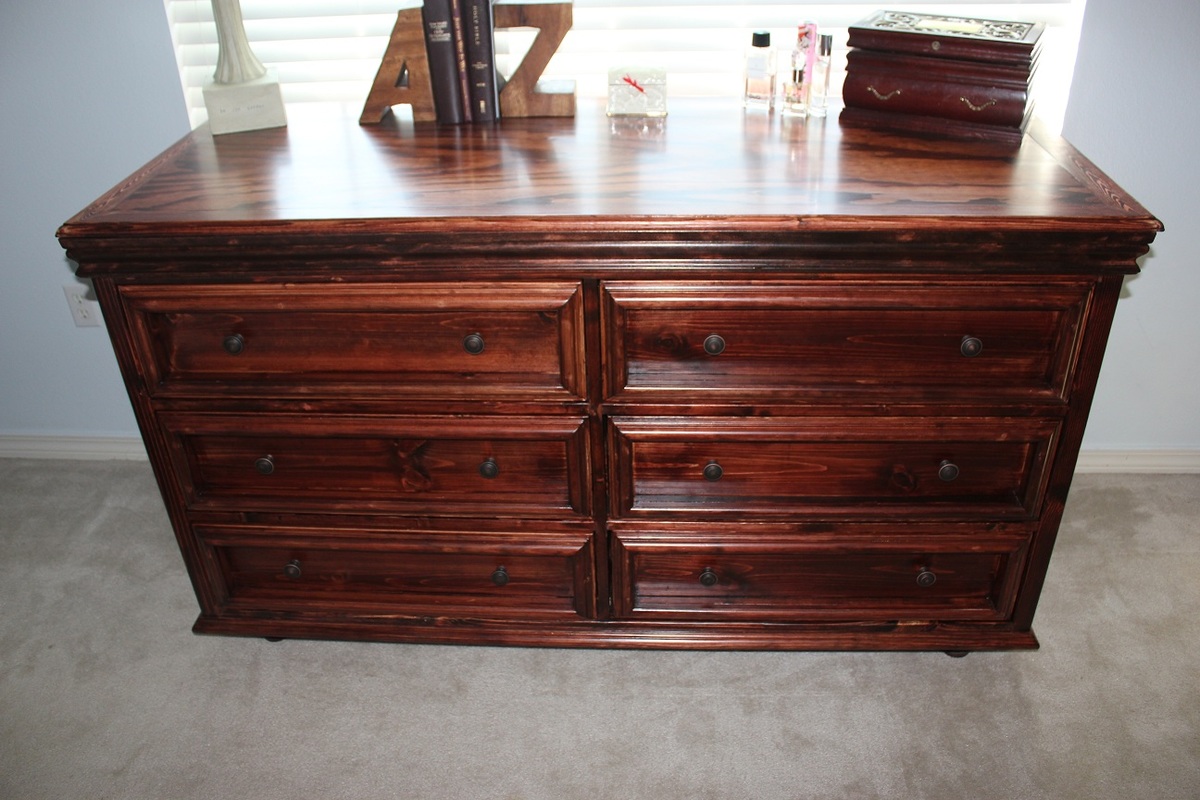
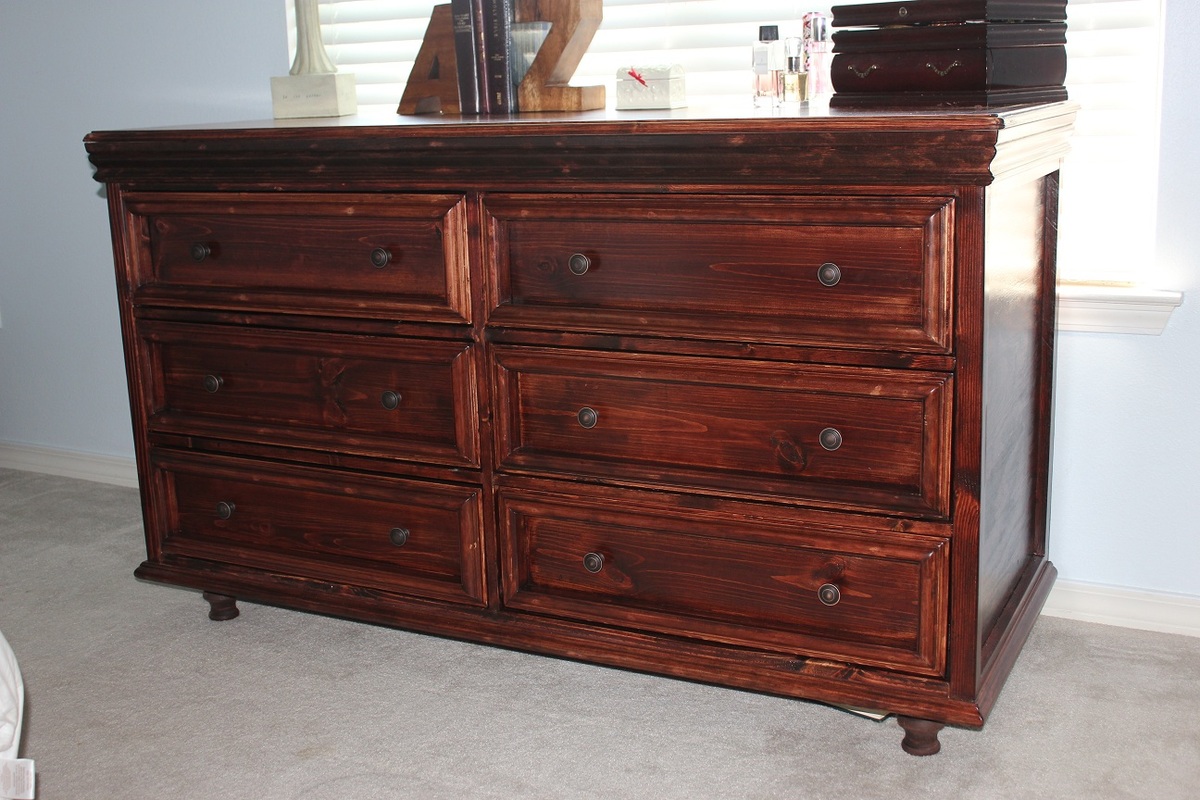
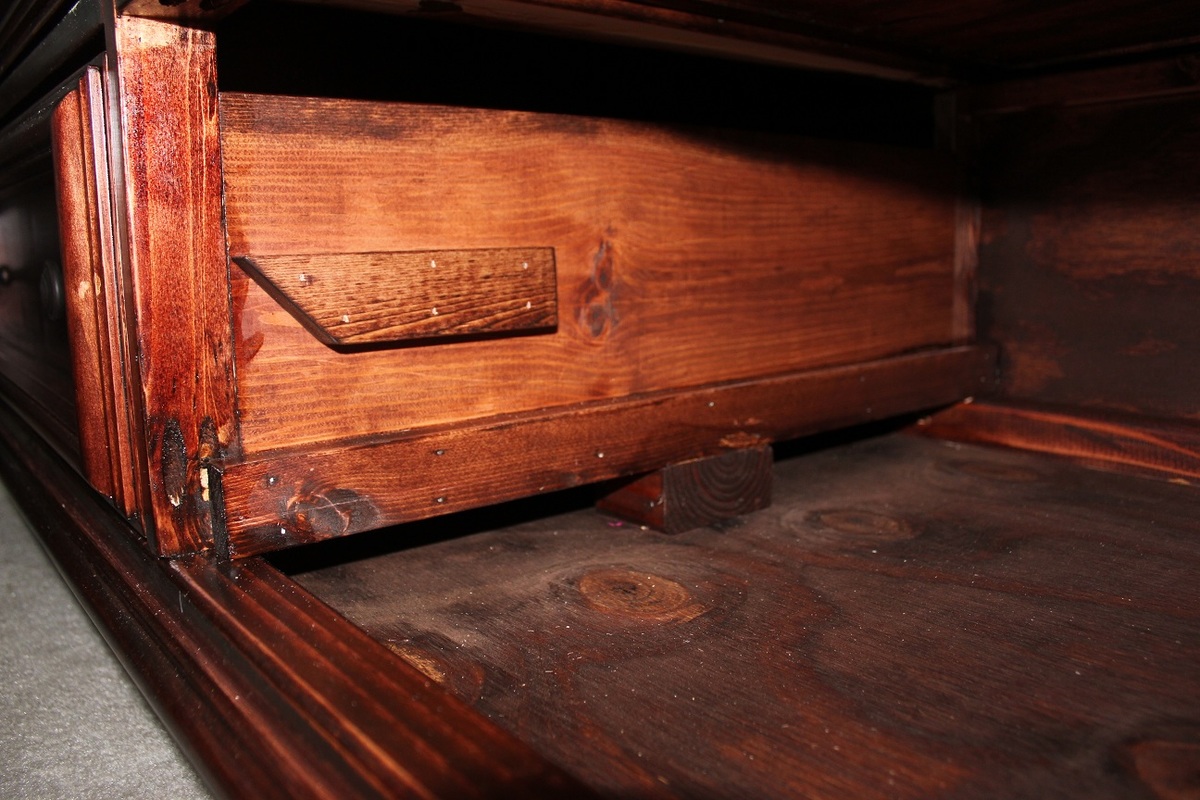
Madison Dresser *stained*

This was my 3rd project...and quite an undertaking. My first project was the dollhouse bookshelf (plans available on this site). Second project was custom designed under bed drawers, which now house many thousands of LEGOs. And then, the dresser. It was my first time using the Kreg pocket hole joinery. Once I learned the setup it went fairly quickly, though keeping boards square and flush was challenging and not always successful. But, that's why there are sanders.
The plans are awesome!! Loved the shopping list. Walking down the wood aisle selecting and checking. Sorry, no coupons or 2-4-1 specials. Being an amateur taking on an "advanced" project I am a bit hesitant in commenting on the plans or design changes. But, I feel it necessary so please don't hate me.
* add to cut list: 4 - 2x2@31" - Dresser Side (sides). Needed in Step 3.
* Step 9: (picture) to keep the drawers from tipping while opened I added a stop above each dresser drawer slide. These were made from 1x2s cut to 4" - 5" and beveled on the front. I used a 1x2 + 1/8" - 1/4" thick scrap strip together as a spacer for the drawer drawer slides and a little bit of wiggle room.
* Step 10: (picture) add a 2x4x2 block under the bottom center support and drawer slides. This will help distribute the weight to, and add a place for,
attaching the center leg in Step 11.
* Step 11: instead of screwing the feet directly into the dresser bottom use a table leg straight plate mount.
*Step 16: I mitered the drawer trim corners so it would match the mitered corners of the decorative cap moulding.
Instead of painting I stained. This was my first staining experience. We were trying to match the color of an existing chest of drawers. Overall, I think it turned out very well. Next time I might prestain the pieces prior to assembly as there are a few spots that glue prevented good absorption. And yes, I thought I was meticulous cleaning the drips with a damp rag.
Hope you enjoy this as much as I did building it and will using it.
Built from Plan(s)
Estimated Time Investment
Week Long Project (20 Hours or More)
Finish Used
* Prestain Conditioner on outward facing surfaces.
* Minwax Red Oak 215 stain, 2 coats
* Minwax Fast-Drying Polyurethane Satin, 3 coats on top, 2 coats outward facing surfaces and all surfaces of drawers. Of course, lightly sanding with 220 grit between coats.
* Minwax Red Oak 215 stain, 2 coats
* Minwax Fast-Drying Polyurethane Satin, 3 coats on top, 2 coats outward facing surfaces and all surfaces of drawers. Of course, lightly sanding with 220 grit between coats.
Recommended Skill Level
Advanced
Comments

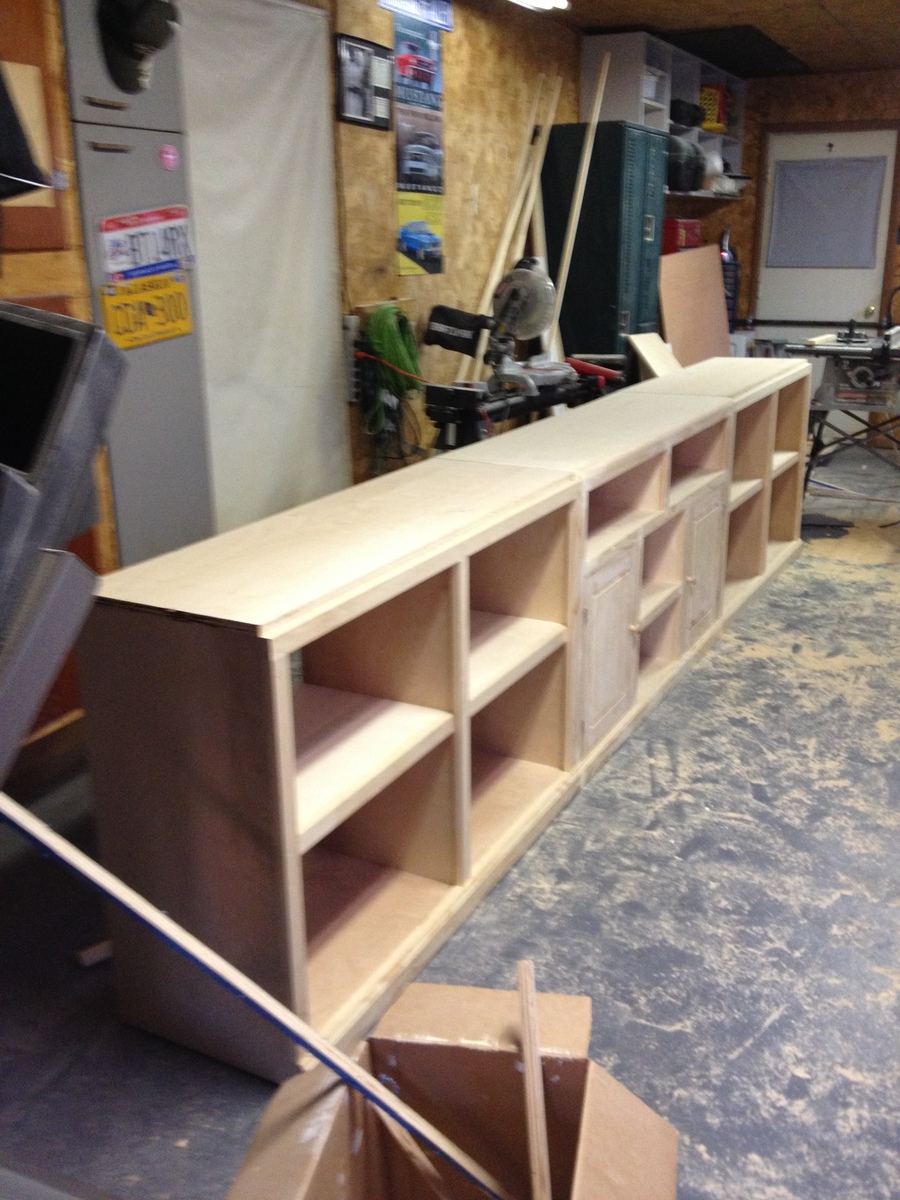
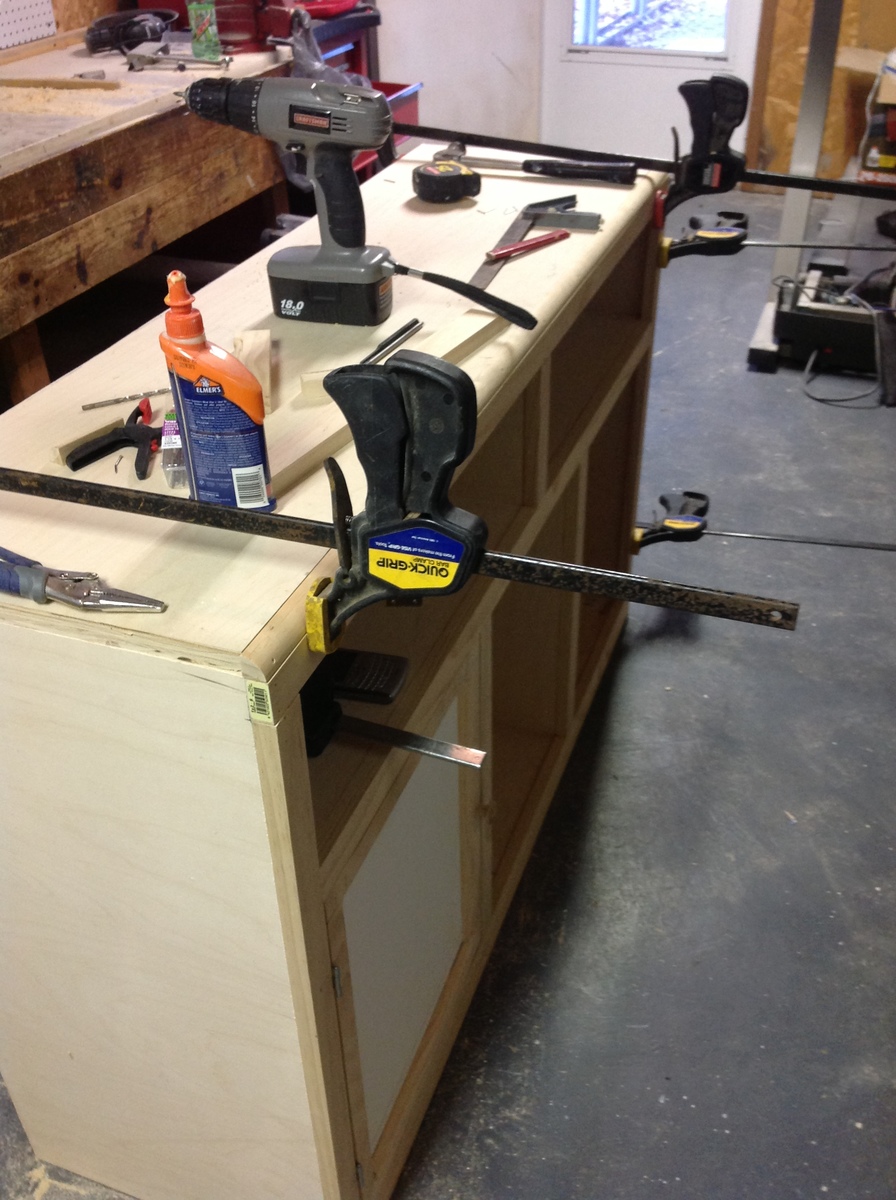
Entertainment Center

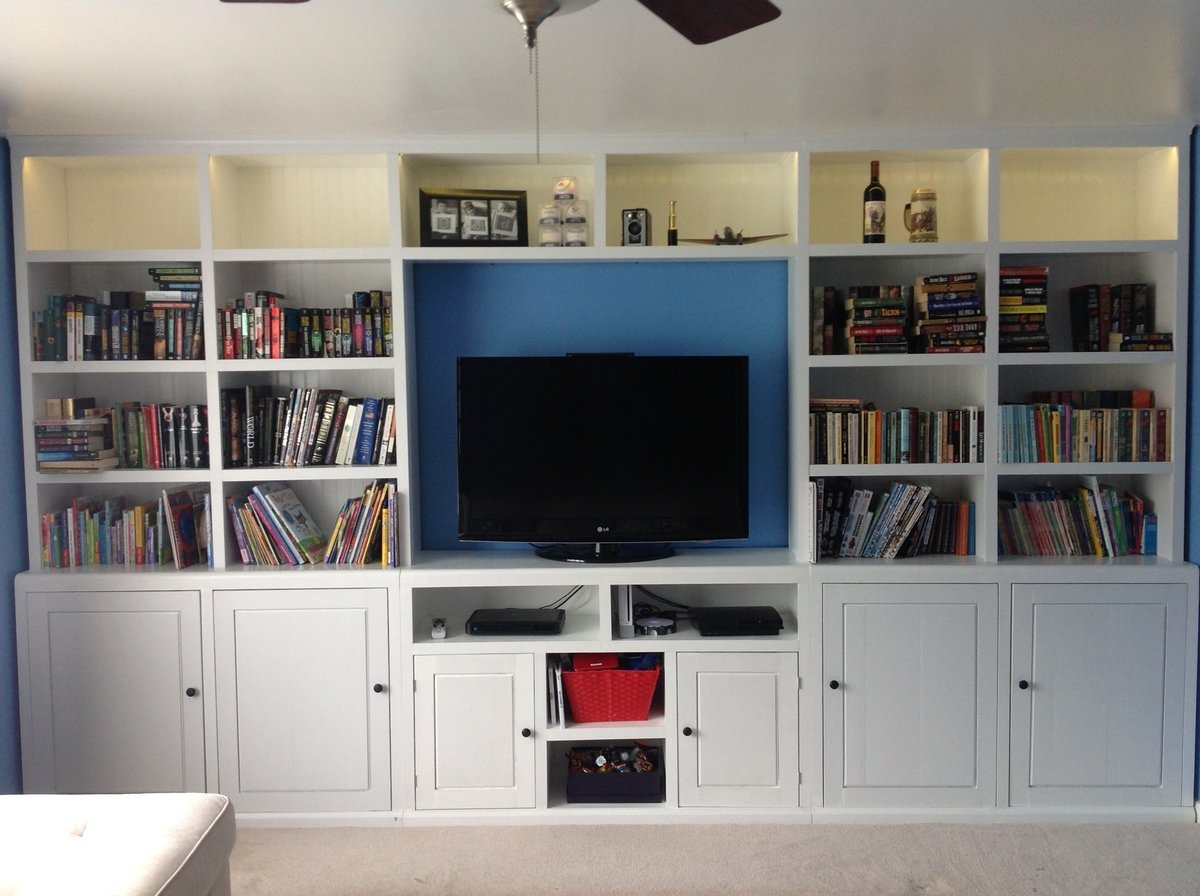
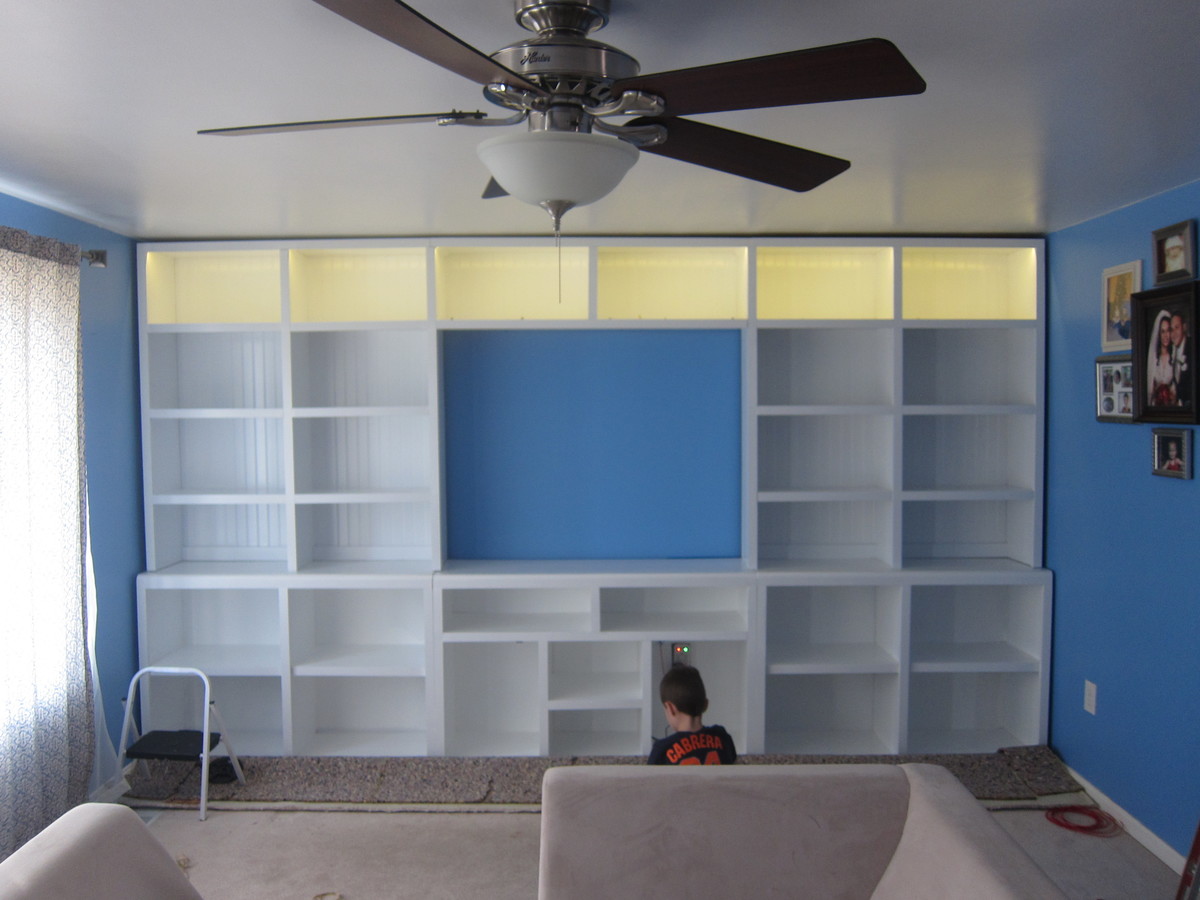
This is from the Rebecca Media Center project. With my wife being an avid book collector and my children being avid toy collectors, we were quicking running out of space for both. Being the amazing husband and father that I am, I made this project and solved both issues. I had a wall that was 13 feet wide and thought this would be a great place for some bookcases. The plans provided were almost perfect. I only had to change the sizes by a few inches to make it fit the wall and raise to the ceiling. I also added a string of led lights across the top. These were cheap, hid well, use little power and came with a dimmer to adjust the brightness. I really like them. I think they came from hit lights for around $30.

Built from Plan(s)
Estimated Cost
$500-$600
Estimated Time Investment
Week Long Project (20 Hours or More)
Finish Used
Valspar Signature
Recommended Skill Level
Intermediate
Comments
Sun, 05/24/2015 - 20:08
Entertainment center
Does anyone know if there is a step by step for this entertainment center

Mon, 05/25/2015 - 08:16
Media center plans
Hi Jason,
There are 3 plans for this media center: Side hutch piece, side base, and console piece. These are the links to the plans (also highlighted in the post above in orange -- clicking those will take you to the plan)
http://ana-white.com/2012/04/plans/rebecca-media-center-center-hutch-pi…
http://ana-white.com/2012/04/plans/rebecca-media-center-side-base
http://ana-white.com/2012/04/plans/rebecca-media-center-console-piece
To do a search, at the top of the screen under "search for something great!" if you type in "rebecca media center" it will show you all the plan posts and the brag posts.
Happy building!
Joanne
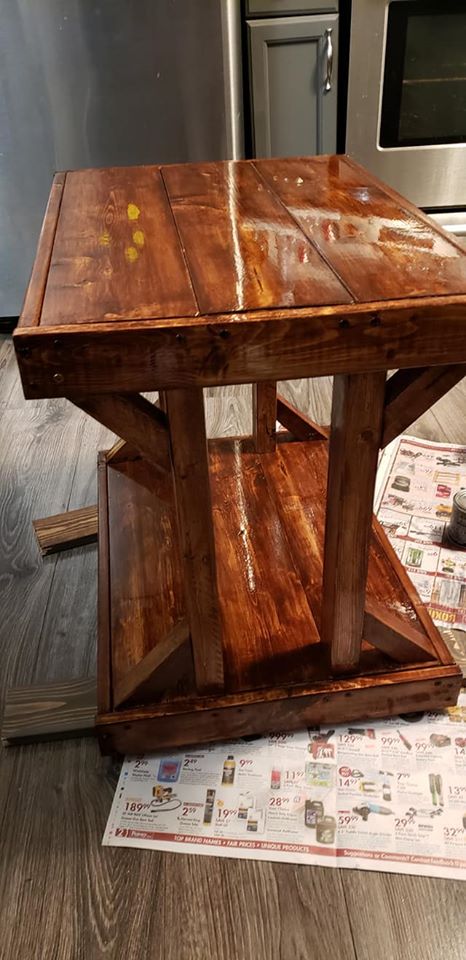
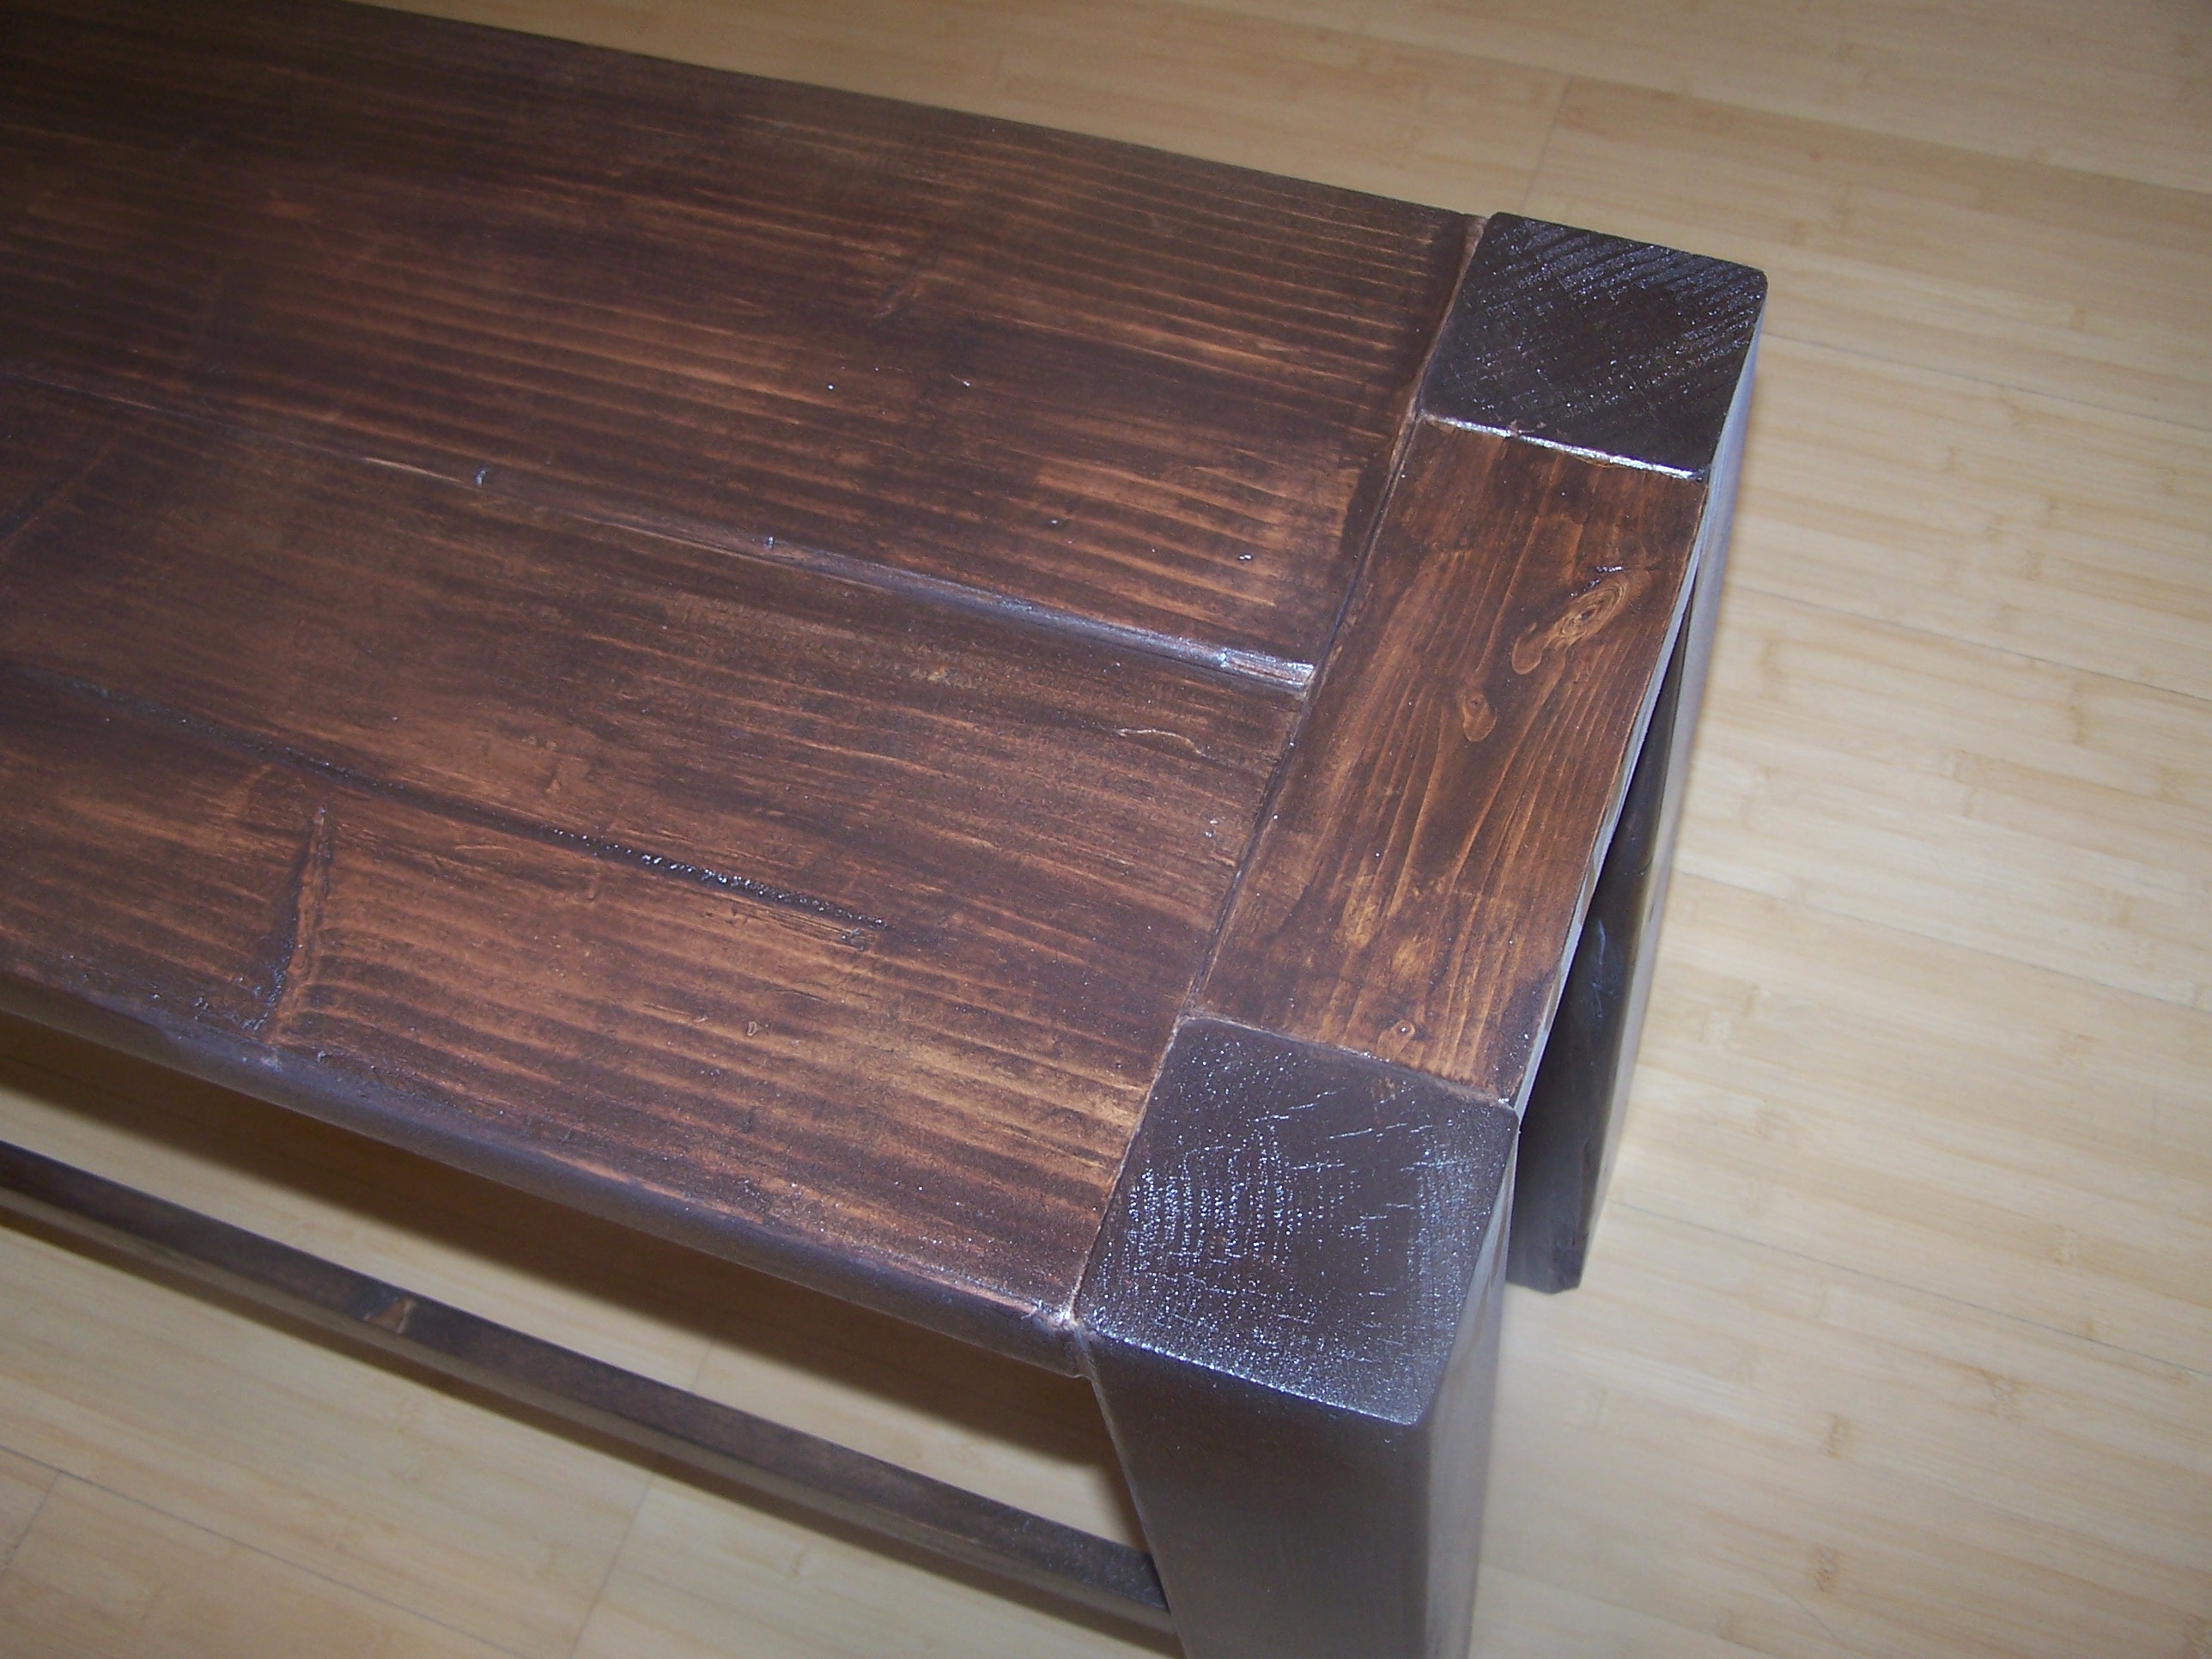
my end tables
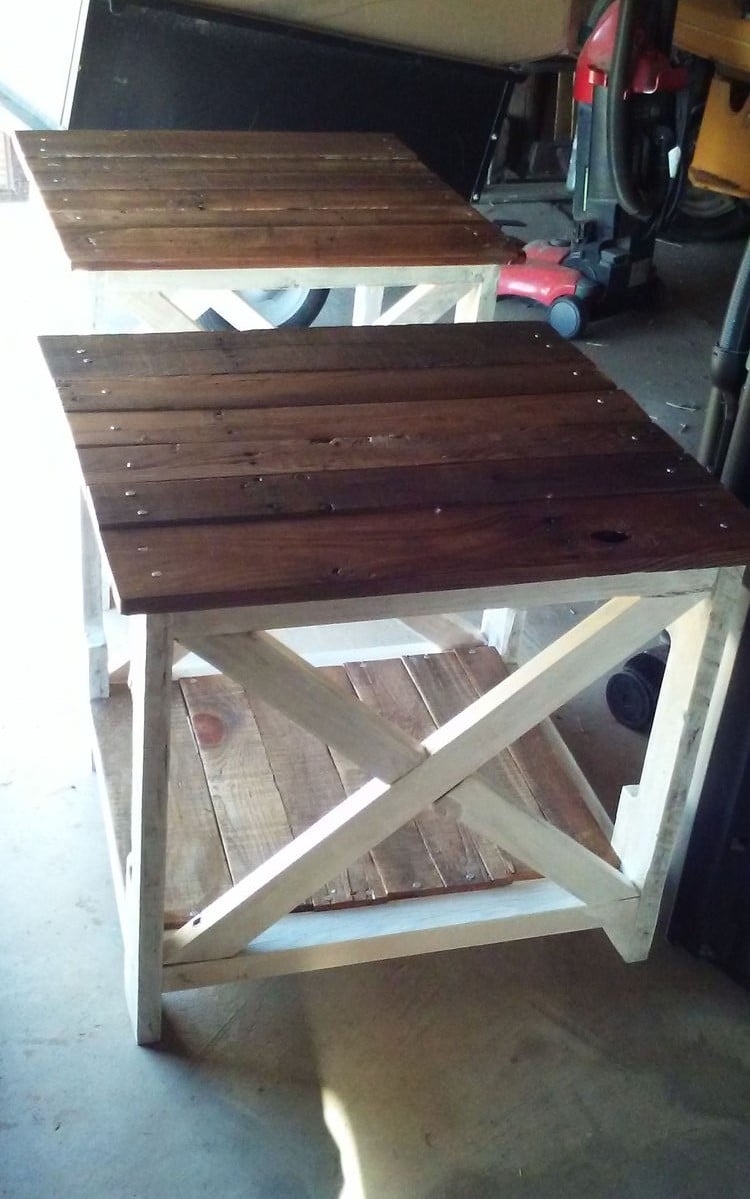
I used all reclaimed lumber and DIY stains for these. The brown came from chocolate coffee so the tables give off a faint chocolate smell :) The plans came from Ana mostly but I changed the bottom shelf so that it uses pallet slats to give it more of a rustic look and to also use what I had available.
Built from Plan(s)
Estimated Cost
with nails, screws and sealer about $20, maybe less.
Estimated Time Investment
Weekend Project (10-20 Hours)
Finish Used
chocolate flavored coffee, watered down white acrylic and tempera paint mix with a poly acrylic sealer.
I watered down the white to where it made it look like a white wash when applied and sanded down a little on the coffee stain to give it a bit of a weathered look before sealing.
I watered down the white to where it made it look like a white wash when applied and sanded down a little on the coffee stain to give it a bit of a weathered look before sealing.
Recommended Skill Level
Beginner
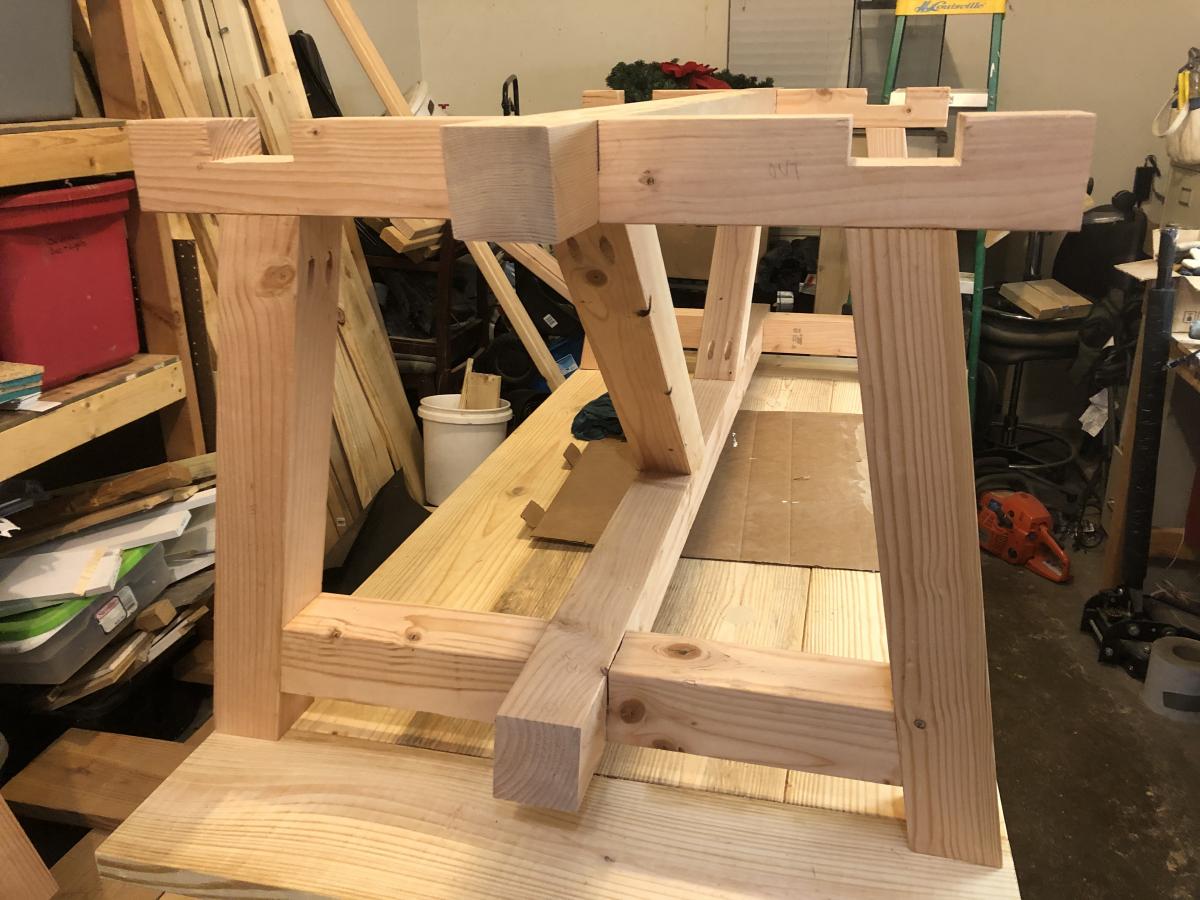
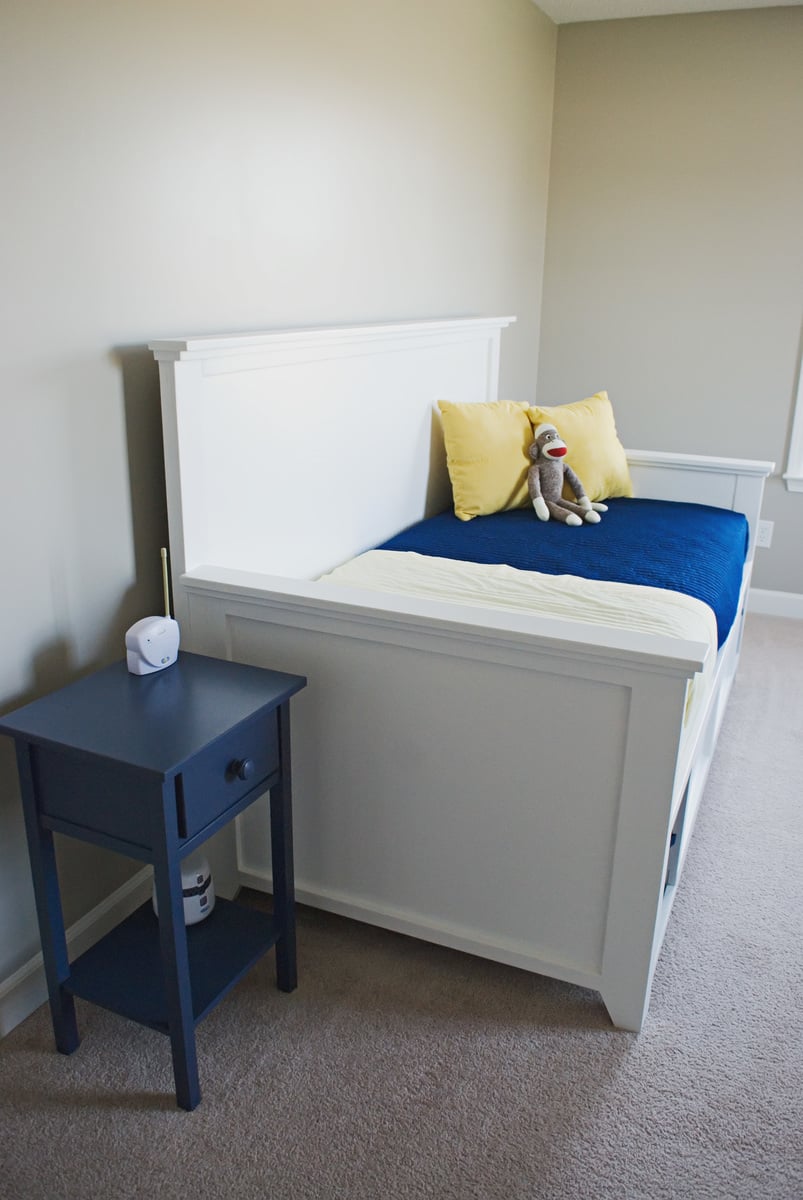
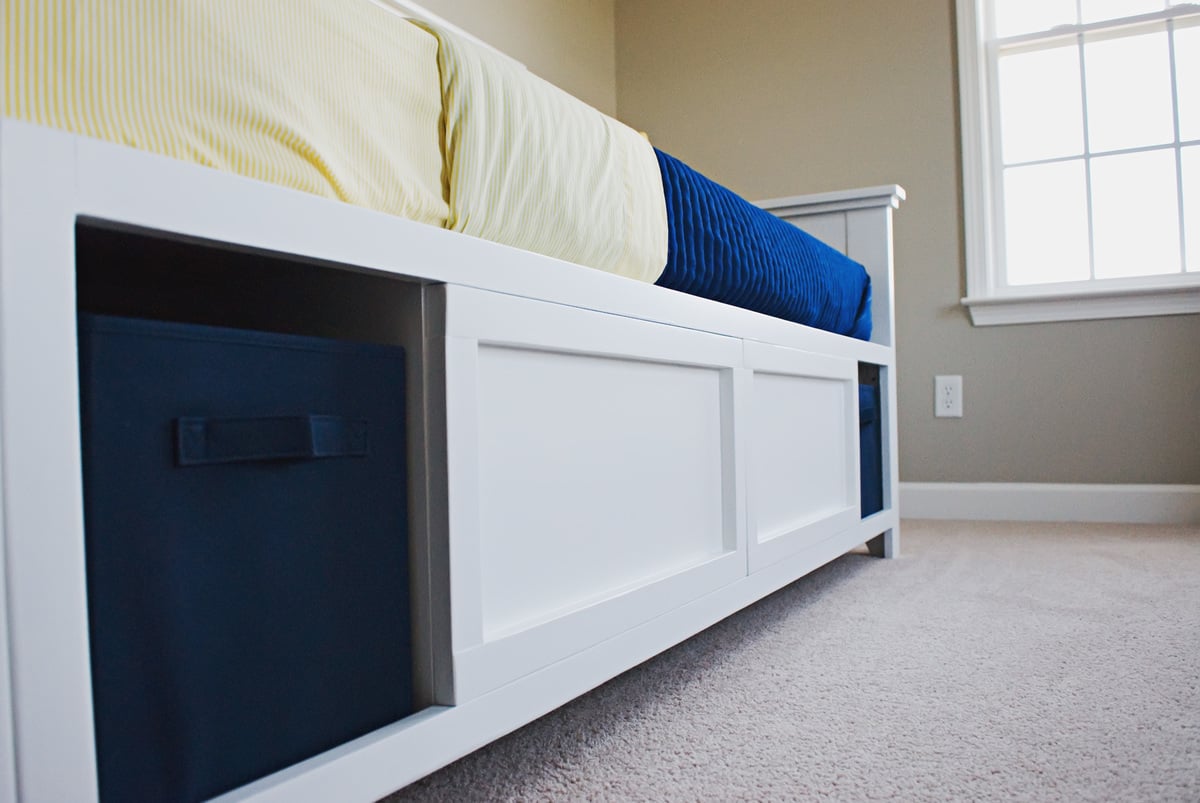
Hailey Storage Daybed
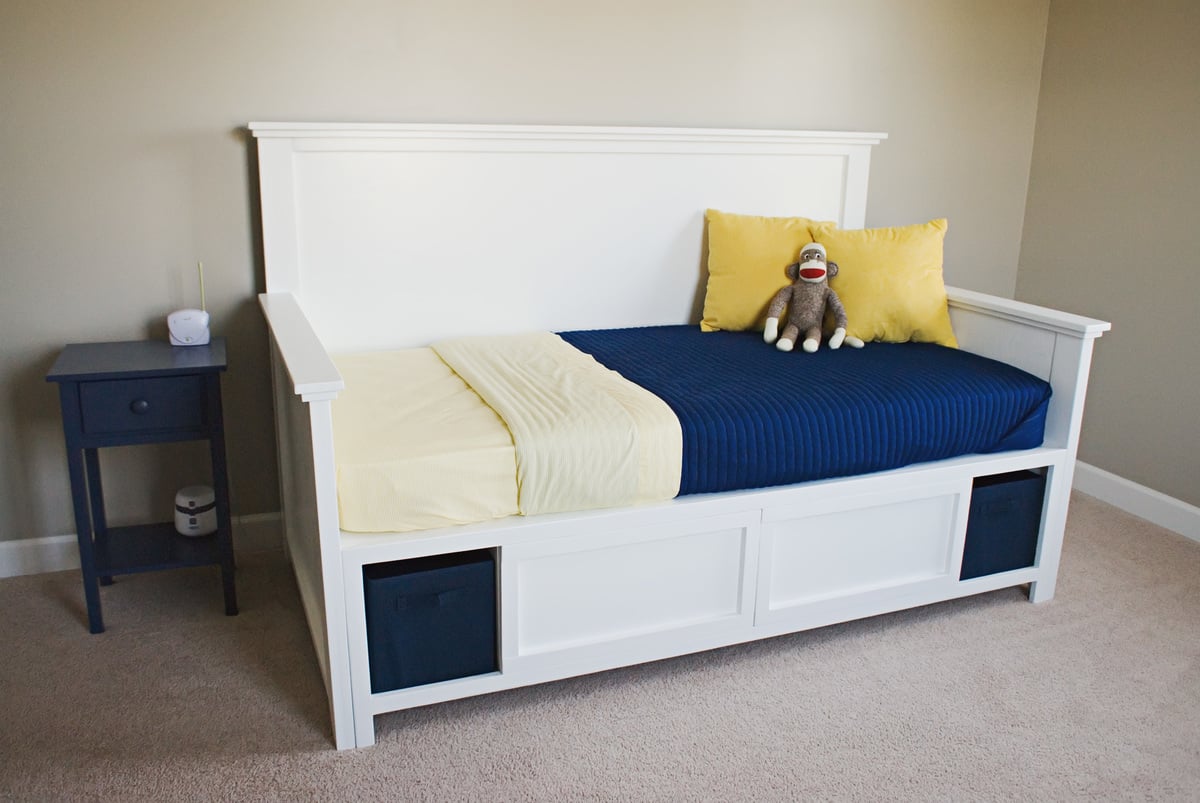
This is our second bed from Ana and definitely our favorite. This bed is one nice, sturdy piece of furniture. It went together easily and everything was right on. We did make a couple changes. Instead of putting two legs on the end of the bench in back, we put three - one where the center divider is and one on the dividers on each side of the center. We changed it so you wouldn't be able to see the bench legs from under the bed. It worked perfectly! Also, we added a 1x4 top trim to the back and arms instead of just stopping with the 1x3. Thank you so much for saving us hundreds of dollars!

Built from Plan(s)
Estimated Cost
$300
Estimated Time Investment
Weekend Project (10-20 Hours)
Finish Used
Benjamin Moore Advance Snowfall White in Satin
Recommended Skill Level
Beginner
Comments

Tue, 06/18/2019 - 13:47
What a beautiful room! …
What a beautiful room! Thank so much for taking photos and sharing!
Modified Michaela's kitchen island

The top was made with reclaimed wood and we used pine for the base. We decided to go for a "chunky look" so we used 2x4's for the sides and skirt. We used 1x3's for the shelf slats and also spaced them to give it an airy feel. We had to customize the size due to the limited space in the kitchen. This was finished with an antique white paint for the base, mahogony stain for the top and finished with a water based poly for durability,


Estimated Cost
$150
Estimated Time Investment
Week Long Project (20 Hours or More)
Finish Used
Minwax red mahogony for the top and antique white in satin for the base. Finished with a waterbased polyurethane.
Recommended Skill Level
Beginner
Comments
Wed, 01/22/2014 - 07:16
Hey, great job, I love the
Hey, great job, I love the hooks on the side, good idea.
Easy Shelving
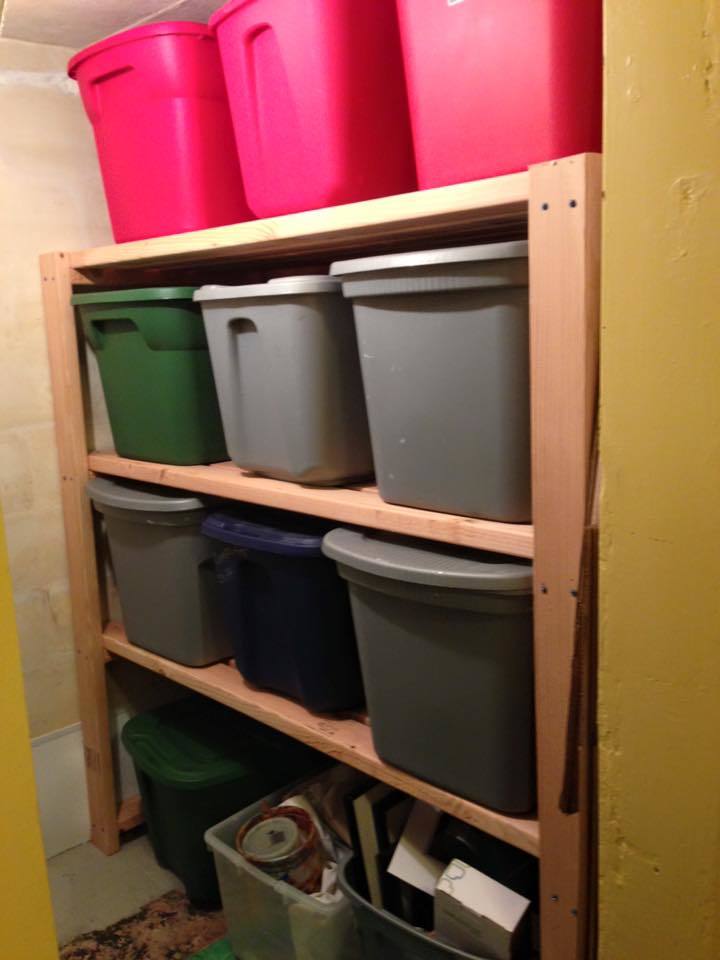
So easy. Being able to just use 2x4s was so convenient for transporting and cutting. This is a small room so the only hard part was figuring out the math to get 4 rows in this tight space. I made 2 changes: instead of 4-2x4s wide I did 5 so the bins fit better, and I didn't use a any 2x4s on the bottom shelf because they can just sit on the floor, so it saved me buying more wood. Super happy with this, now I just have to make another one for our garage so we can store more things!
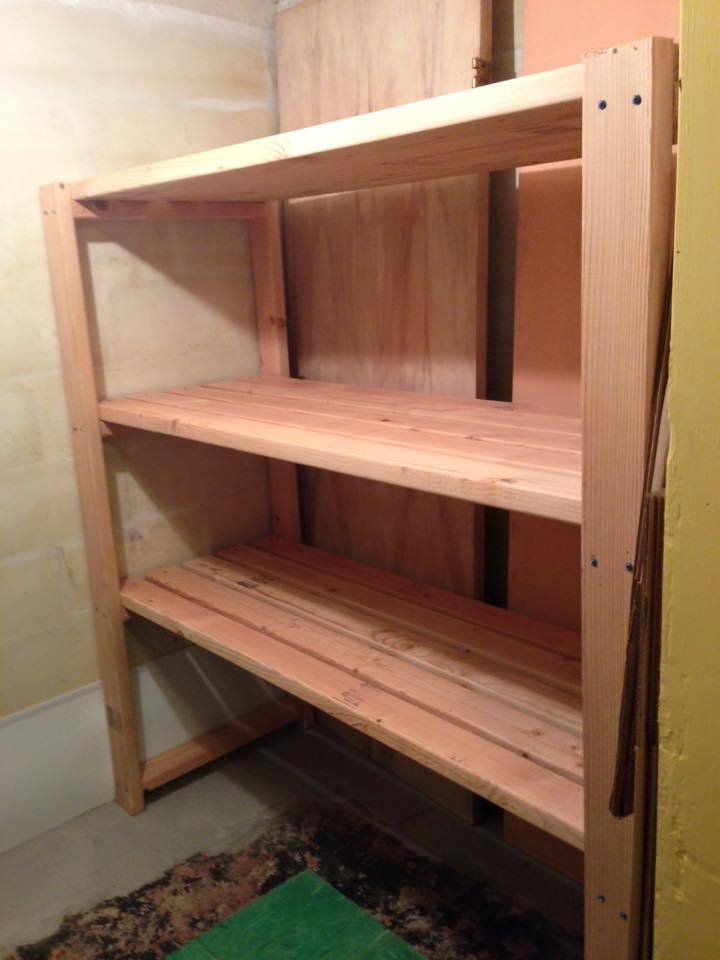
Built from Plan(s)
Estimated Time Investment
Afternoon Project (3-6 Hours)
Recommended Skill Level
Beginner
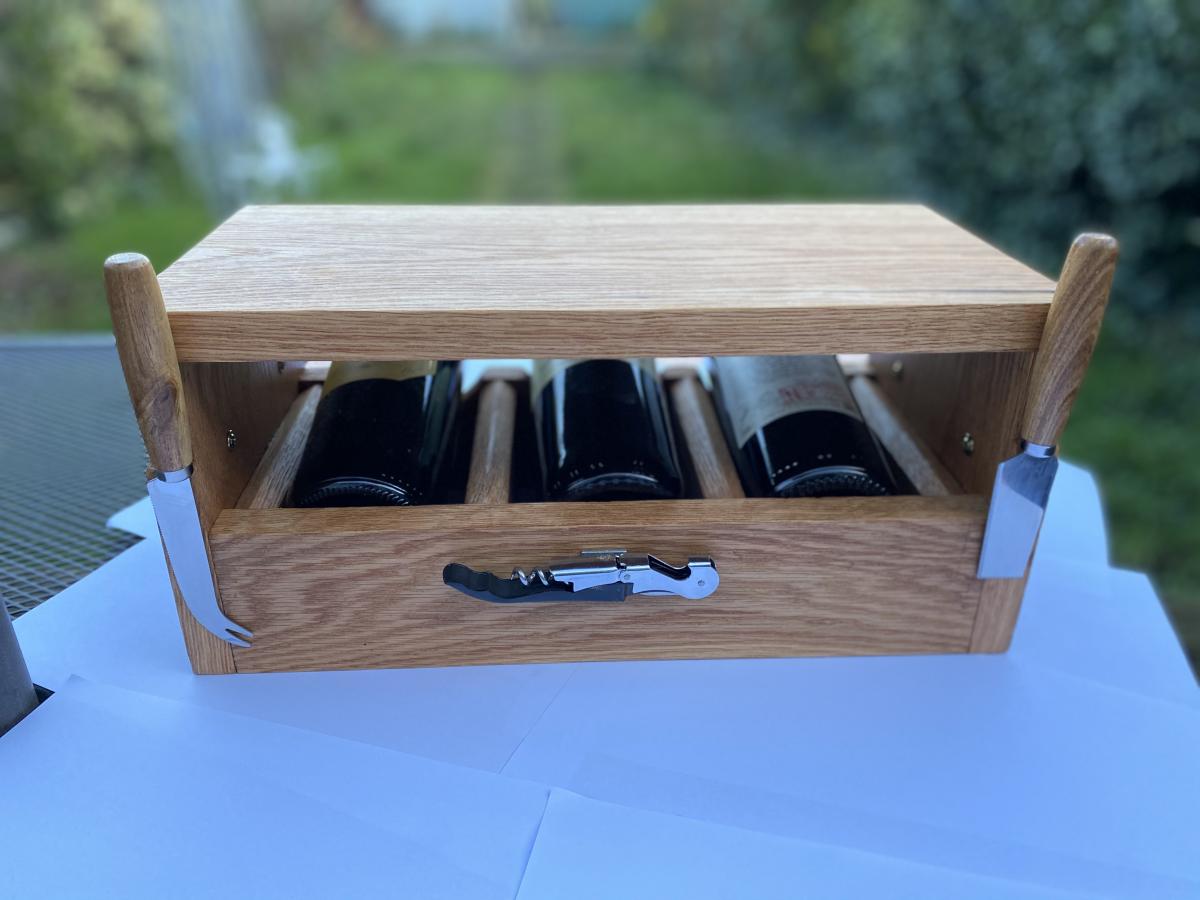
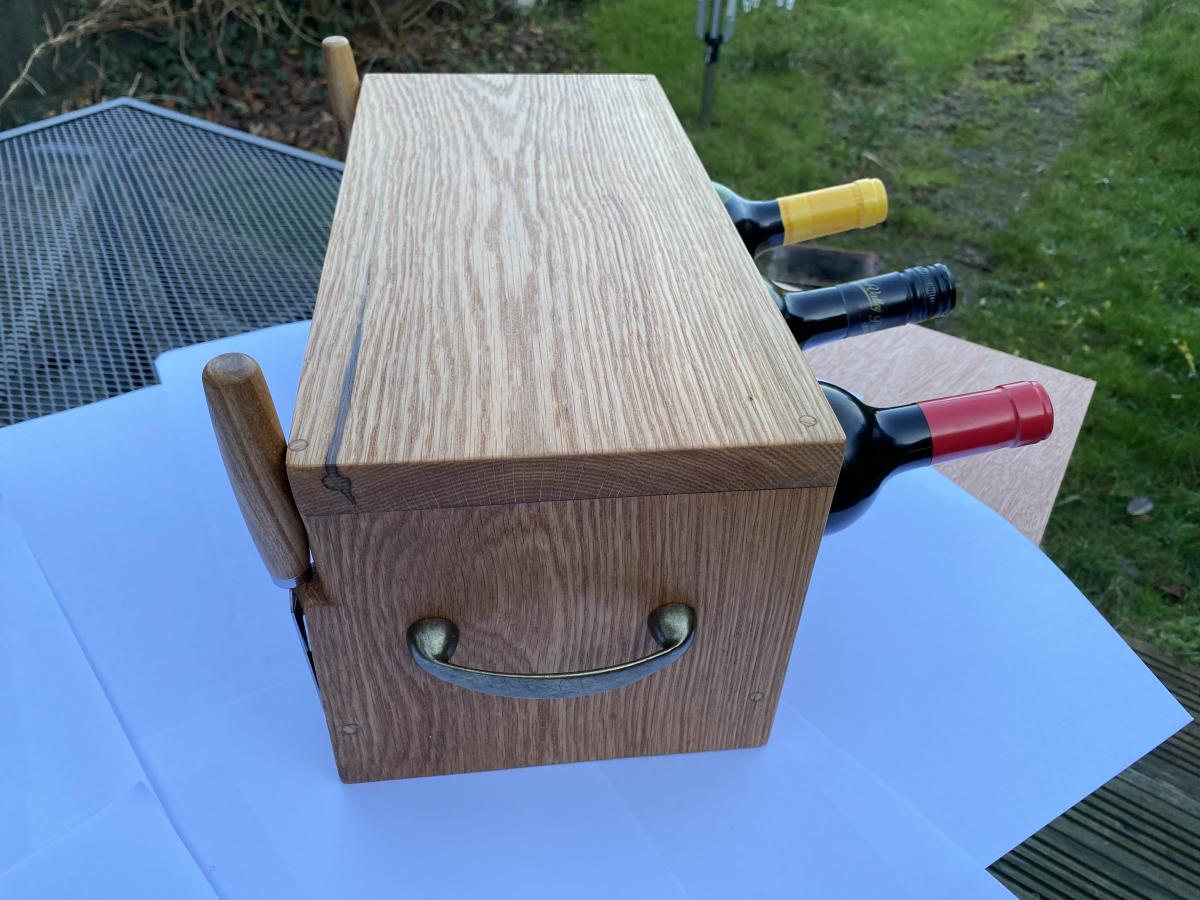
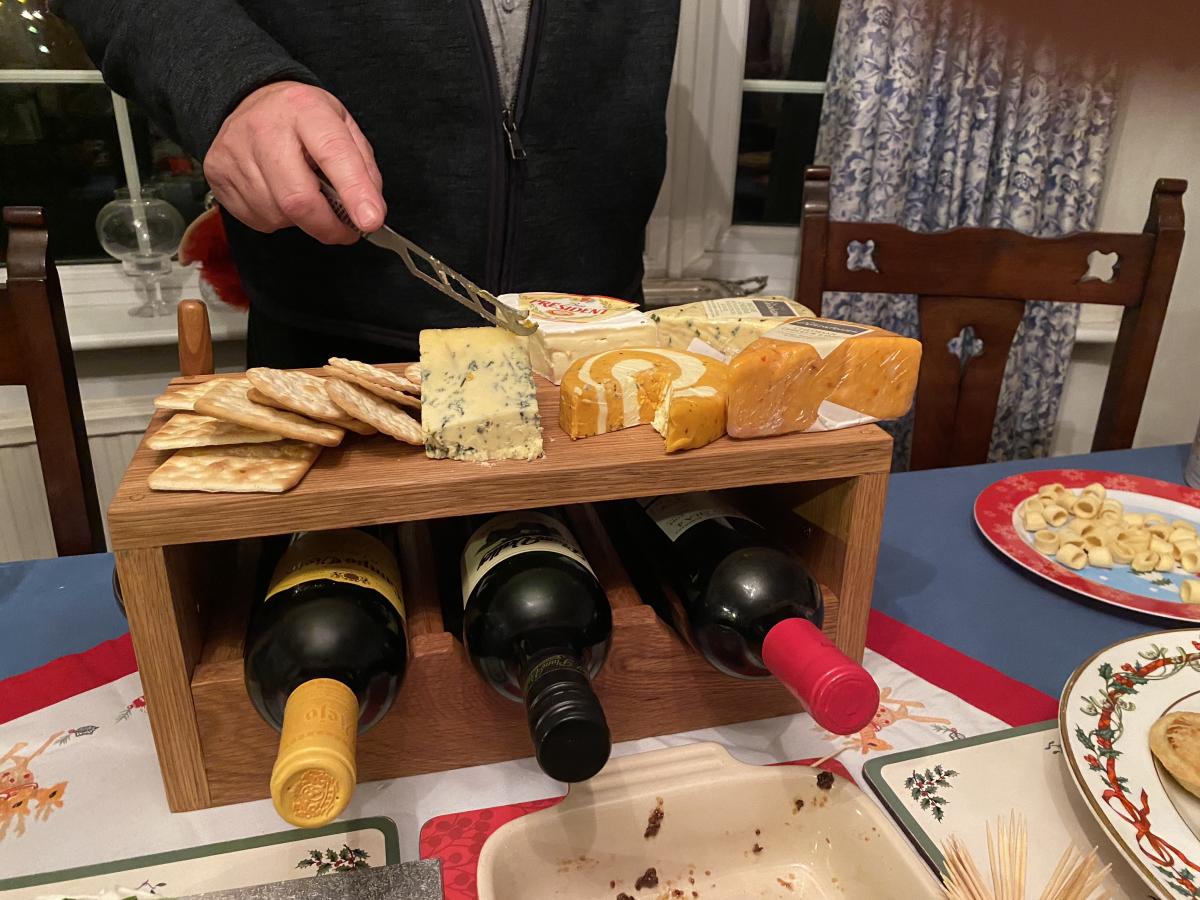
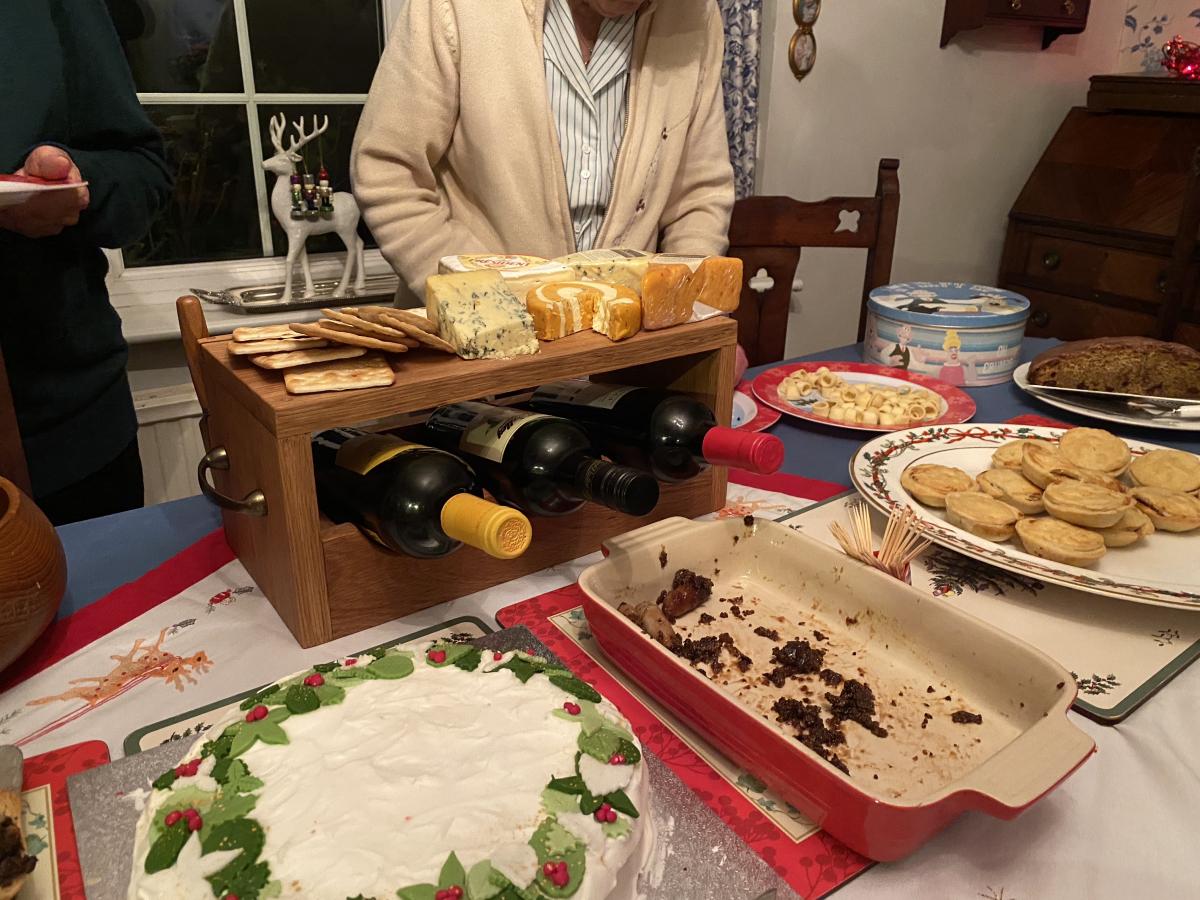
Wine Caddy & cheese Board
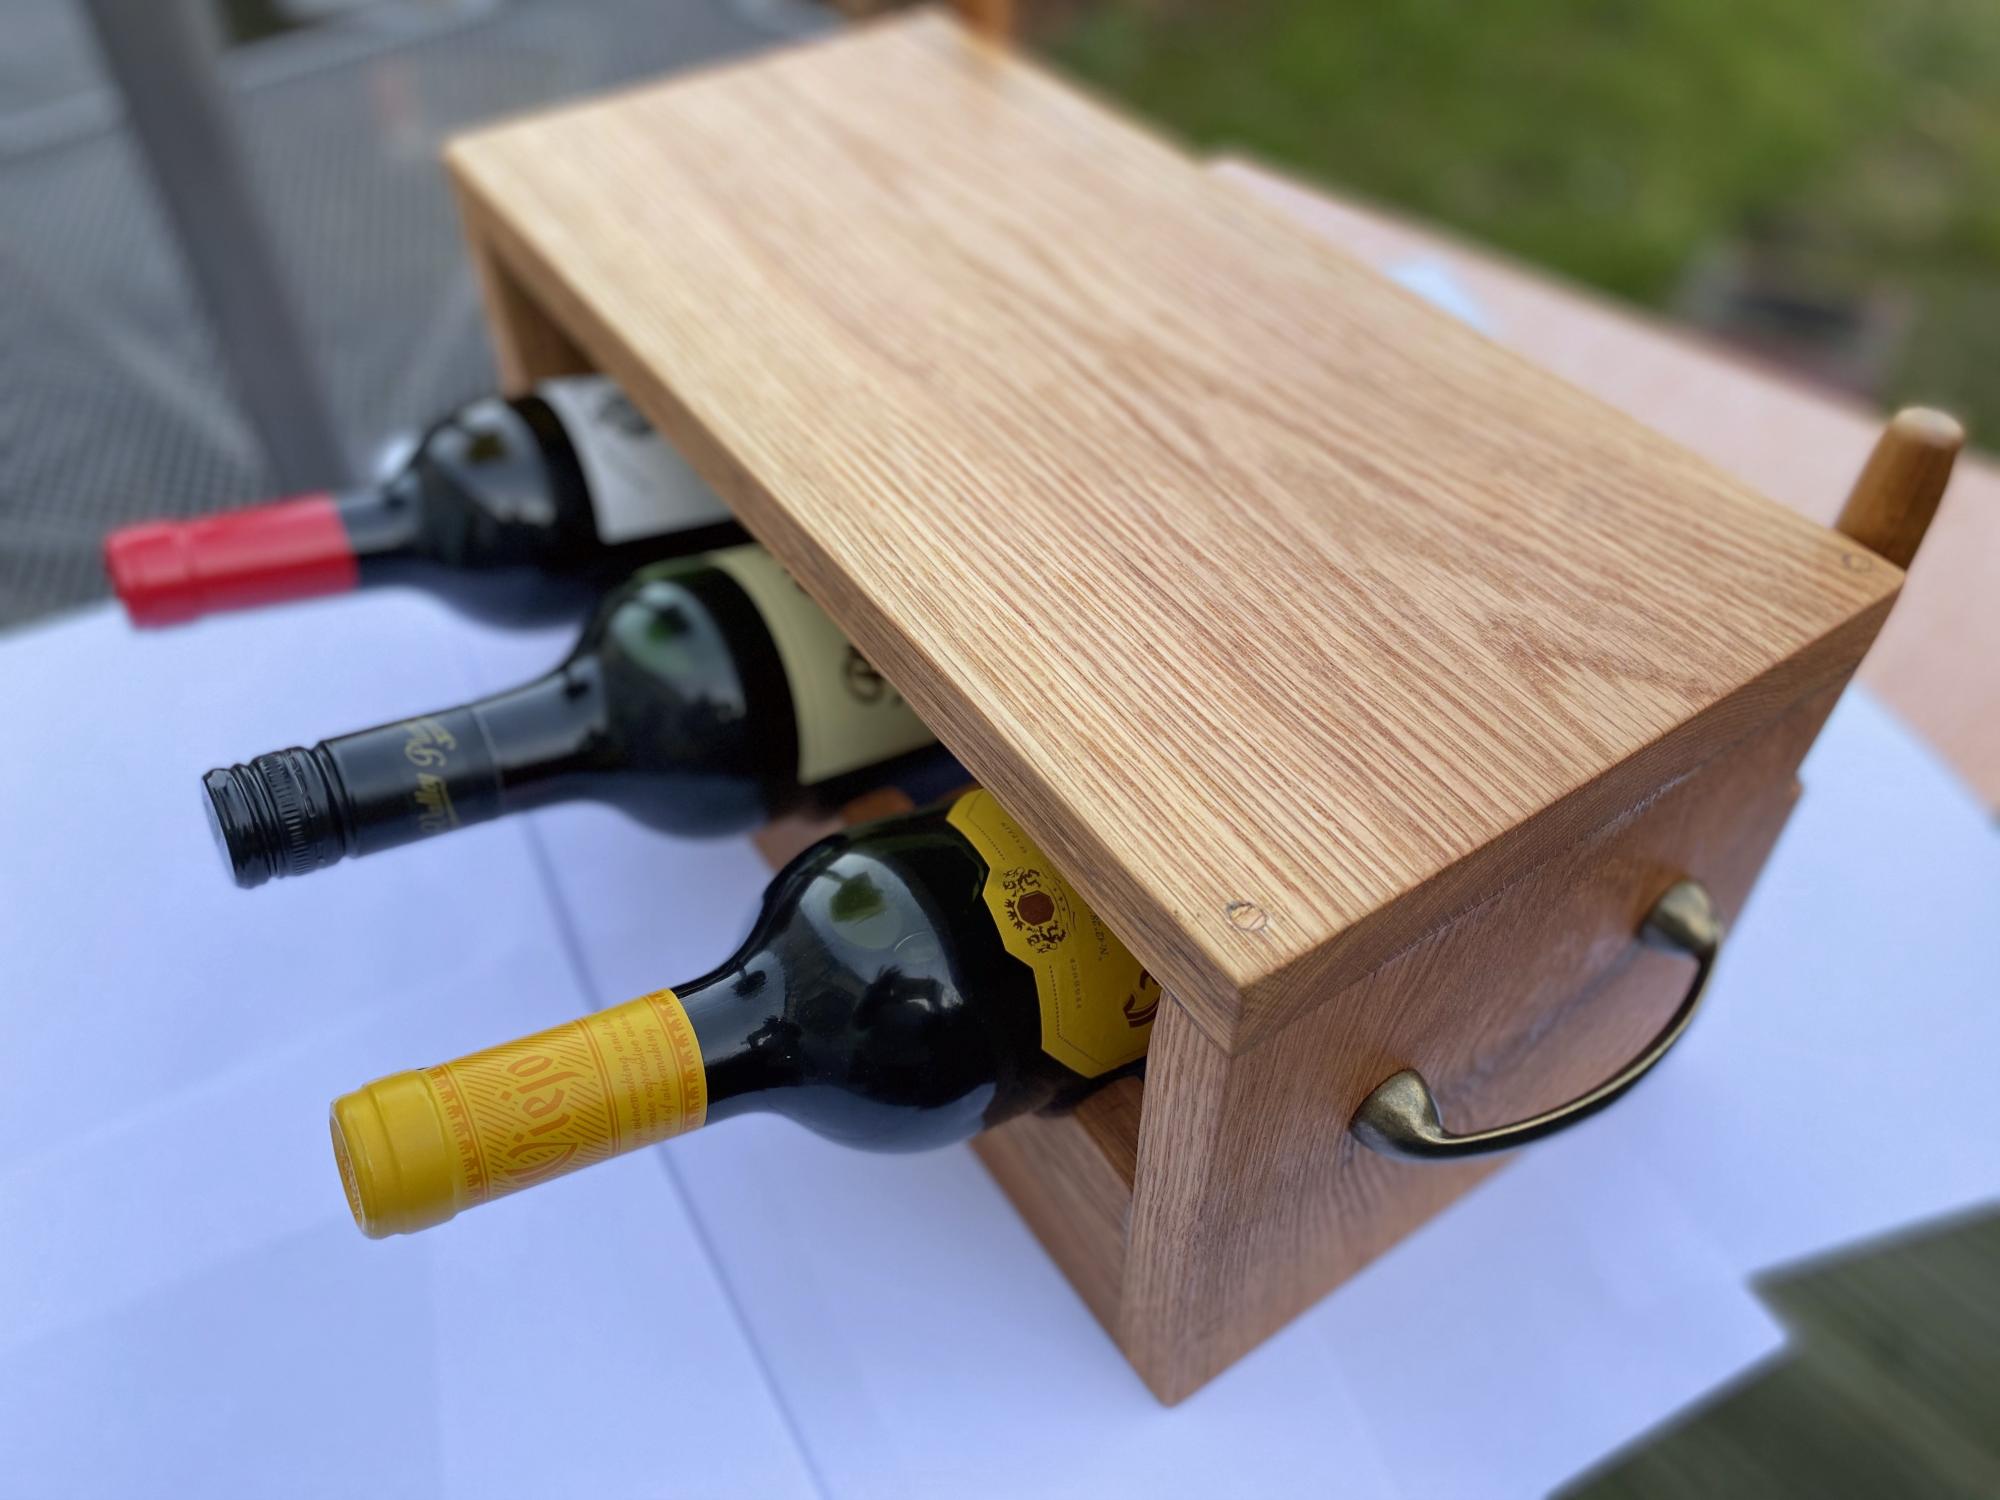
This was such a great idea for a gift, I used some Oak ( from a company that sells offcuts ) , added some magnets and grooved out the back corners for two cheese knifes and corkscrew.
I also added some pegs on the inside to seat the bottoms of the bottles on.
I used decking screws and oak plugs and glue to assemble.
Thanks Ana this went down a treat and I am told it will become a family heirloom.
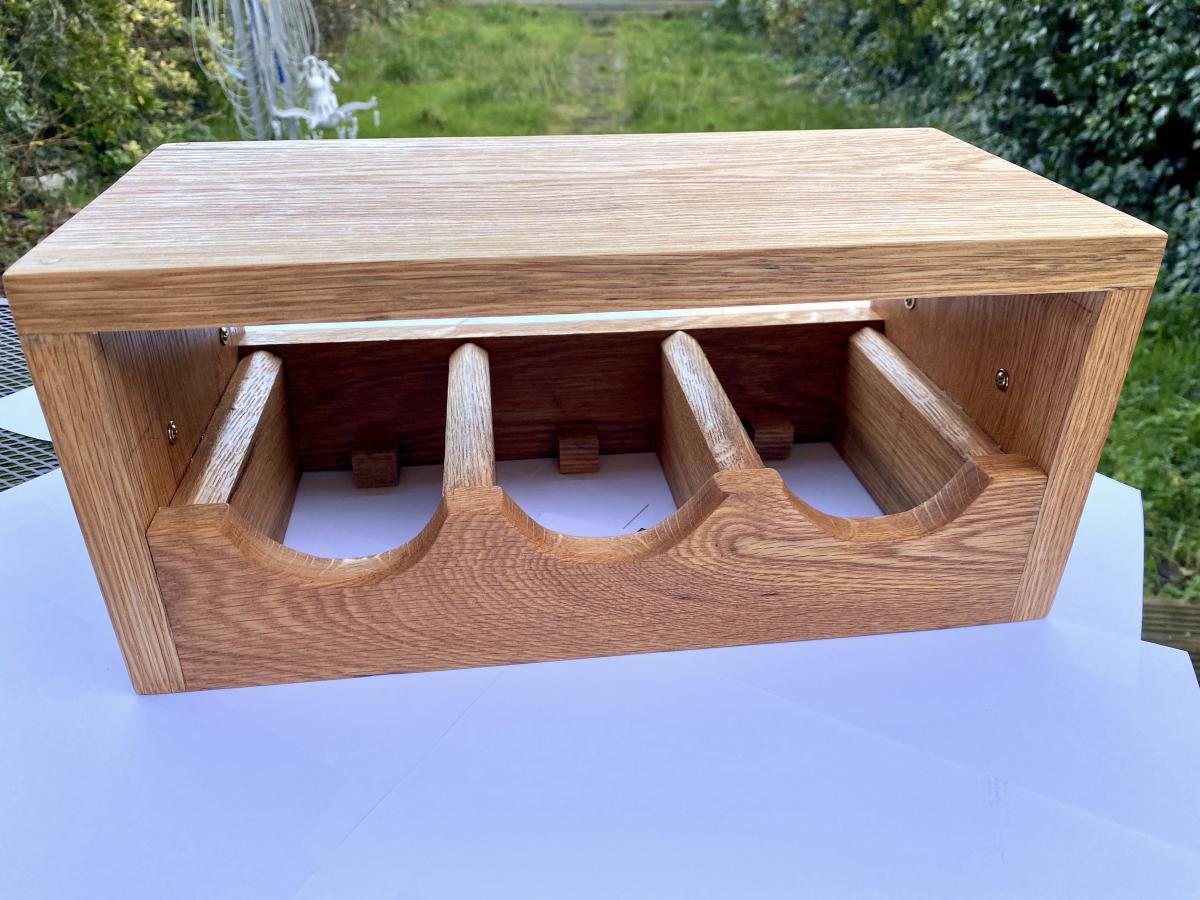
Built from Plan(s)
Estimated Cost
£19
Estimated Time Investment
Afternoon Project (3-6 Hours)
Finish Used
Tung oil.
Recommended Skill Level
Beginner

Media cabinet

I needed a tv stand that wasn't ugly. This was one of my first projects, and I learned a lot from it. It's not perfect (the drawers don't work well), but it looks nice :)
Built from Plan(s)
Estimated Cost
~ $100
Estimated Time Investment
Day Project (6-9 Hours)
Finish Used
I painted it BM Revere Pewter (flat) and applied a satin poly top coat.
Recommended Skill Level
Intermediate
Comments

Sun, 04/08/2012 - 22:29
I love this table! By any
I love this table! By any chance do you know the name of the paint color on the walls behind it? I have been looking for the perfect color for my living room and LOVE that color :) thanks and good work!
Mon, 04/09/2012 - 07:10
Thank you! The paint on the
Thank you! The paint on the wall is Ranchwood by Benjamin Moore (cc-500).
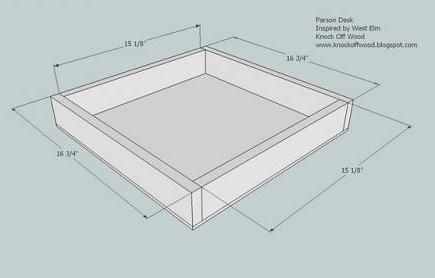
Rustic x console
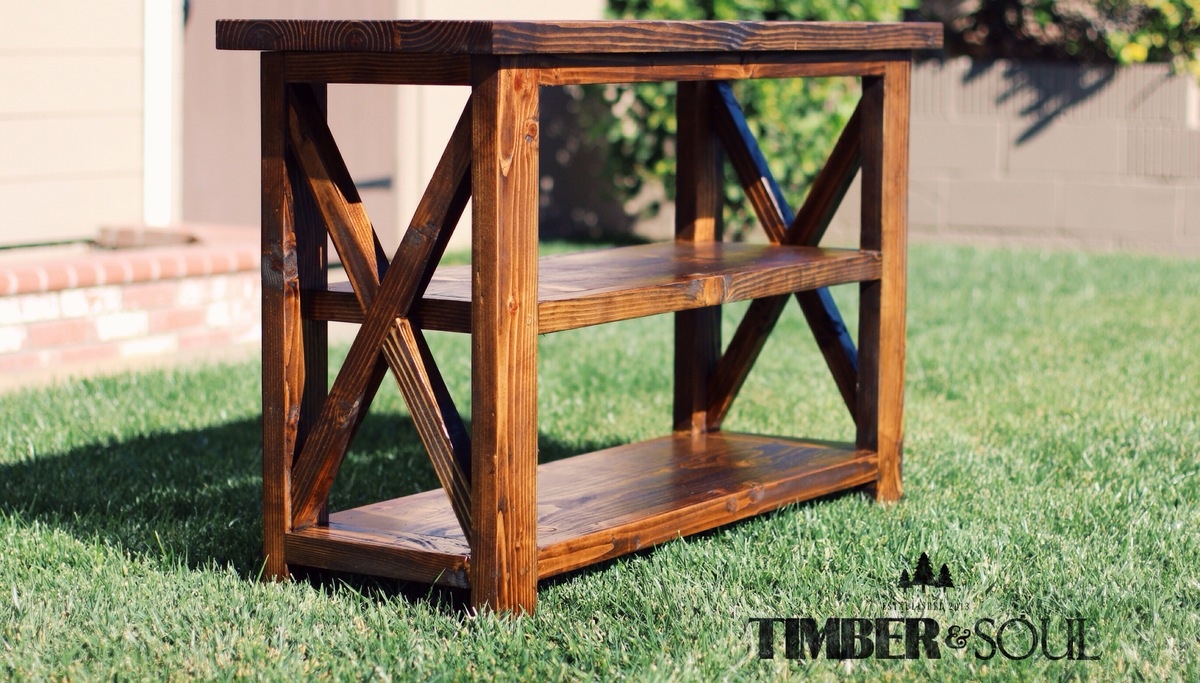
I modified ana white's plans to build a smaller x console.
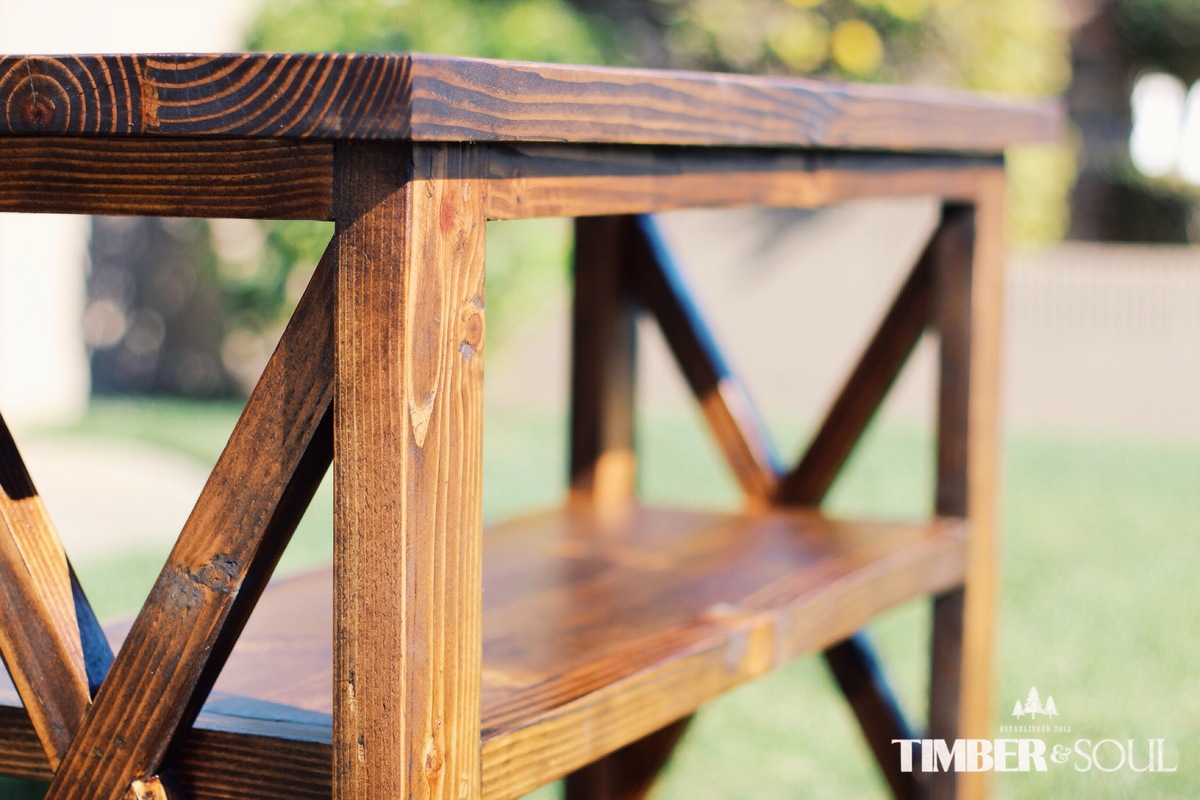
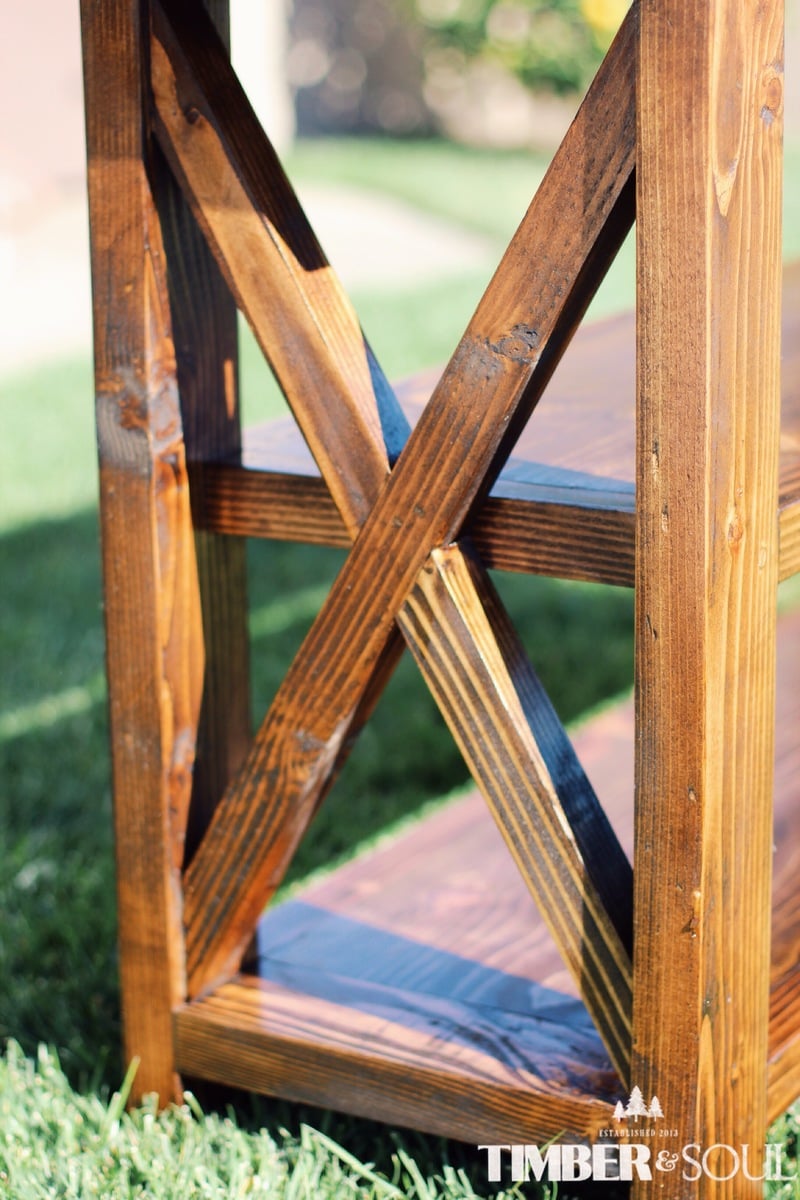

Built from Plan(s)
Estimated Time Investment
Weekend Project (10-20 Hours)
Finish Used
Dark walnut stain by minwax with an oil base varathane finish
Recommended Skill Level
Intermediate
Modified Square
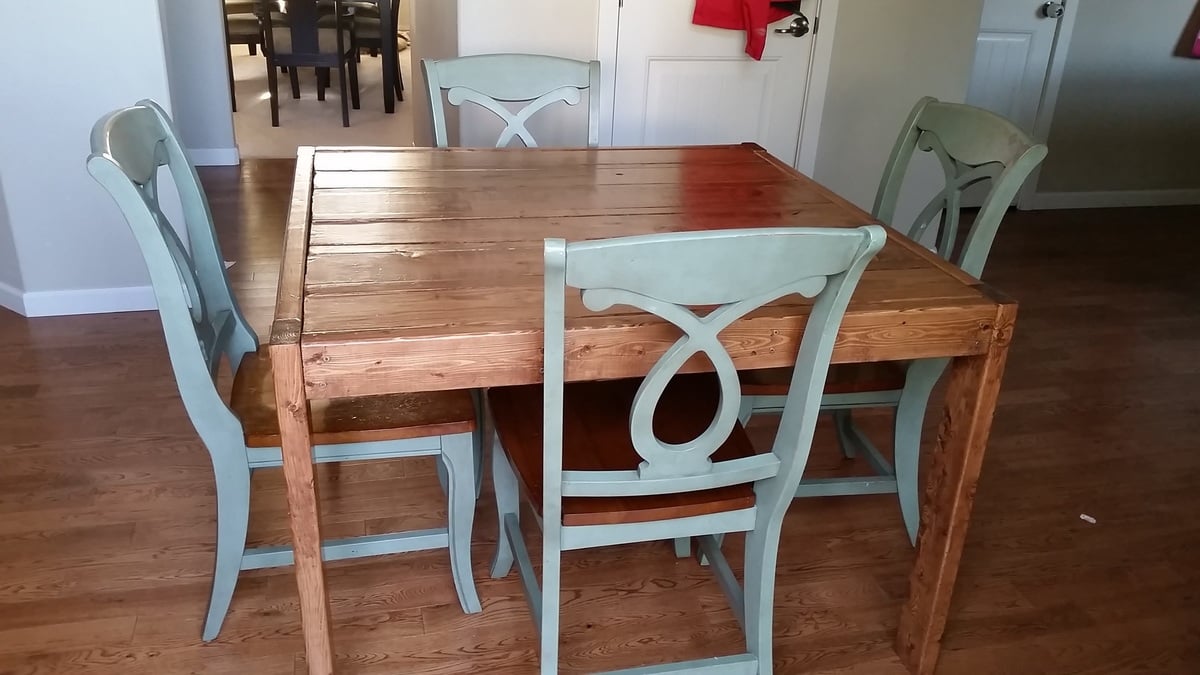
We modified this table to make it larger for our growing family. It measures 42" (10 inches larger than the original plan). We added 10 inches to the length of the 2X6's and added 5 2X2's to increase the width of the width of the table. We love the interest it added to the table. 3 coasts of minwax cherry and three coats of minwax helmsman poly.
Built from Plan(s)
Estimated Cost
$80
Estimated Time Investment
Day Project (6-9 Hours)
Finish Used
Mixwax Cherry Stain
Minwax Helmsman Polyurethane
Minwax Helmsman Polyurethane
Recommended Skill Level
Beginner
Farmhouse coffee table
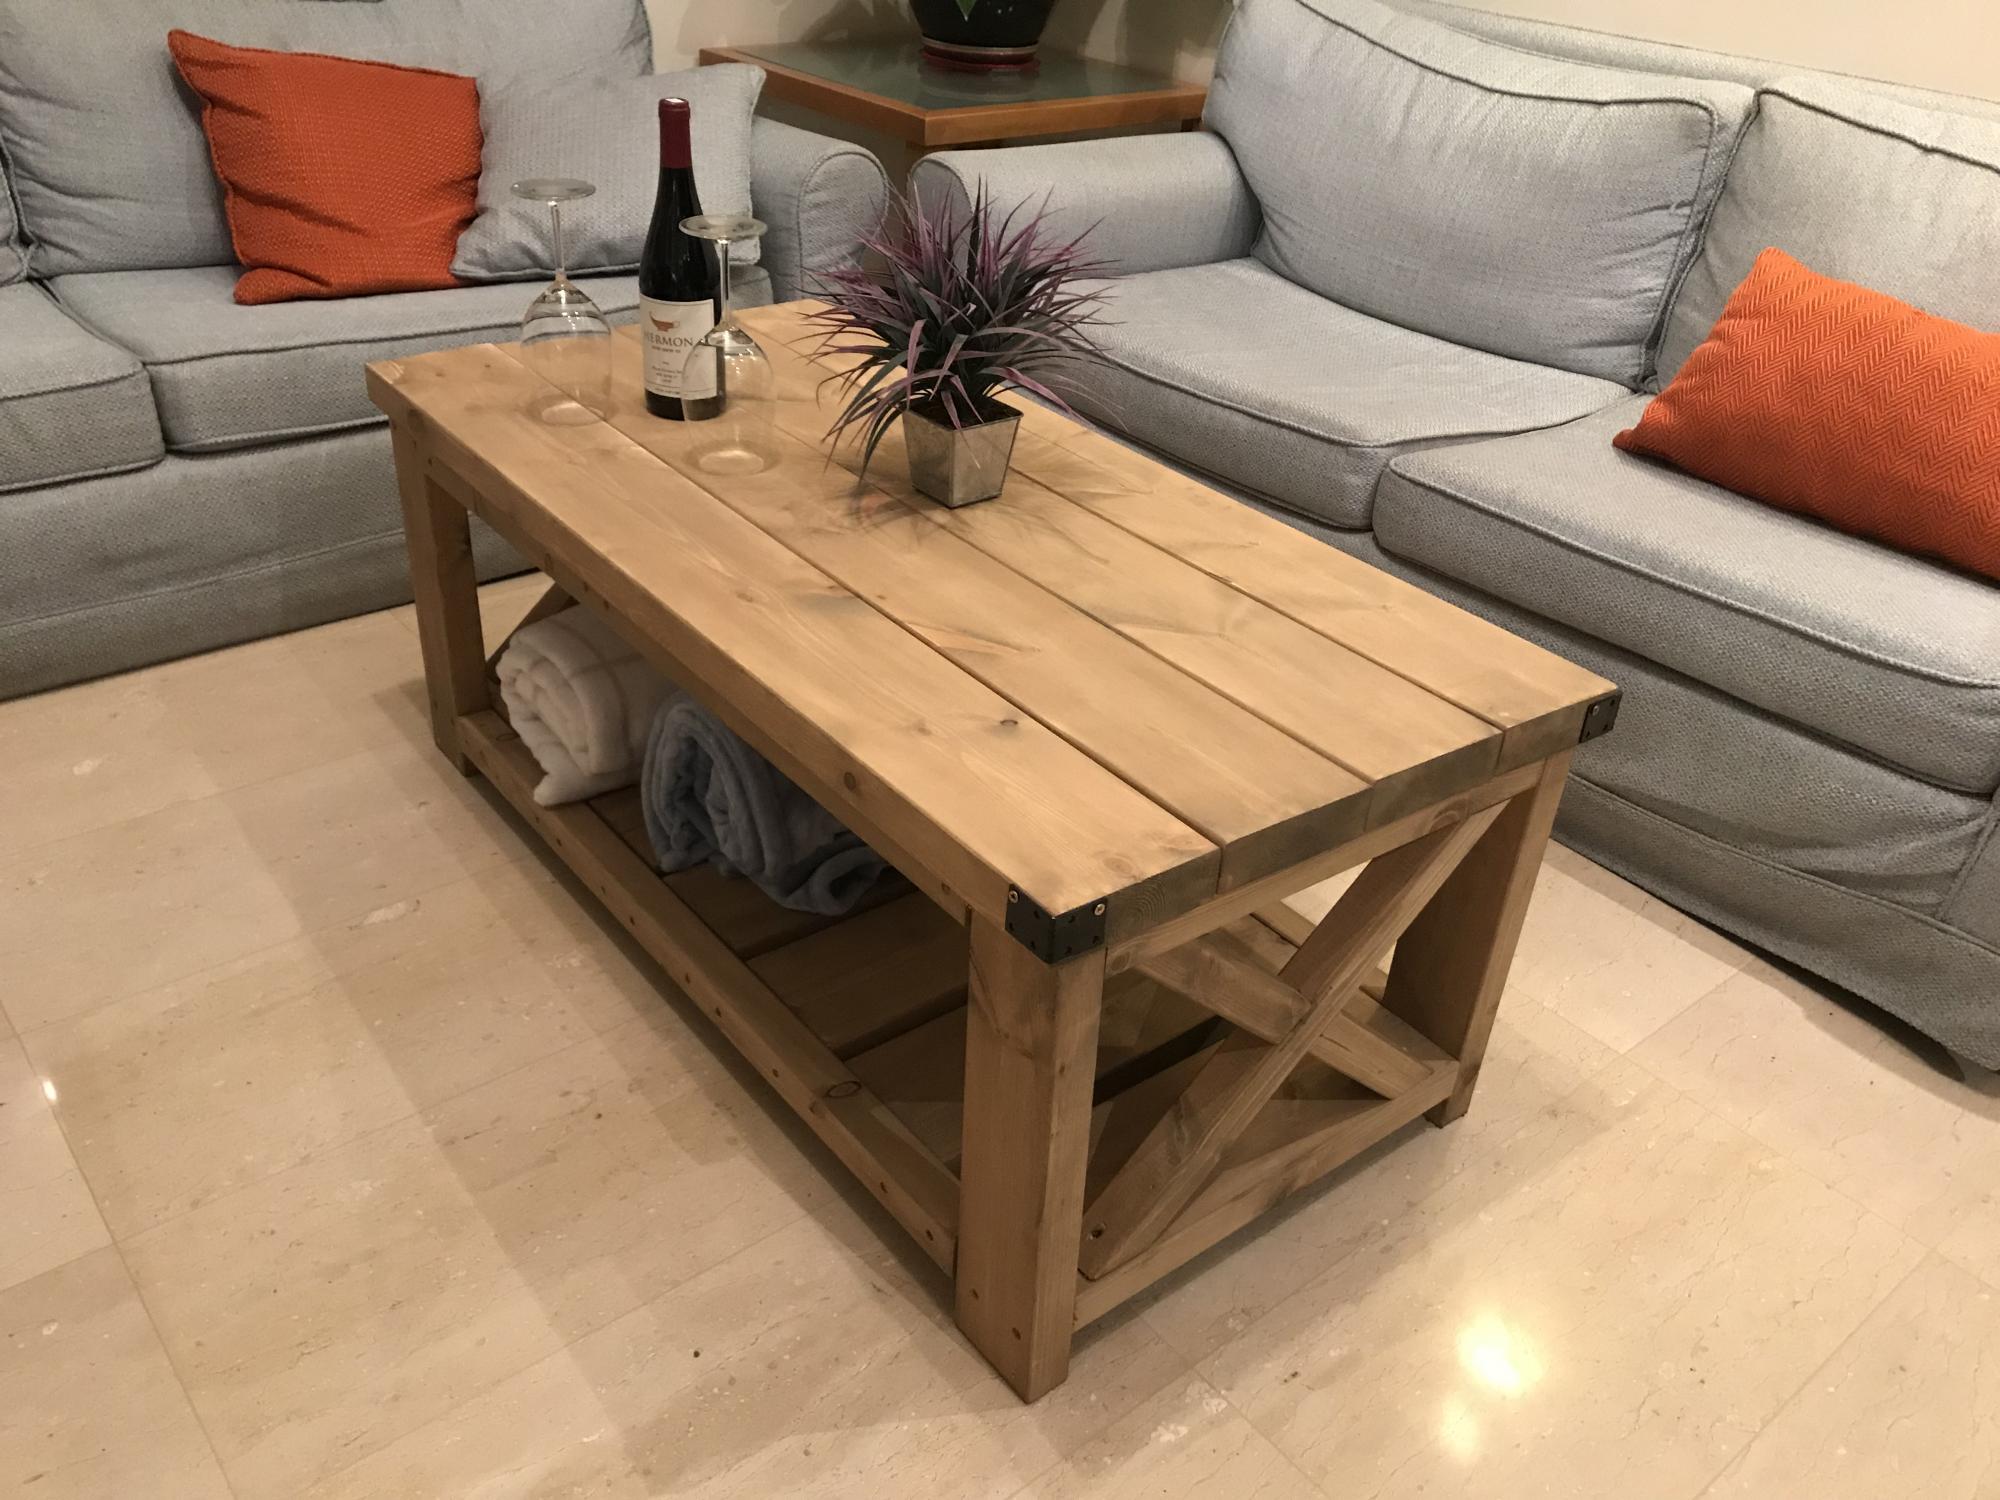
My first project from this websie! From the moment I saw this table I wanted to make it! Really loved it.
it was A little bit harder than I thought it will be, especially because the X’s, but also because the top plate, i had some trouble to figure that out, but After I figured that out it went well.
Built from Plan(s)
Estimated Time Investment
Day Project (6-9 Hours)
Finish Used
A Semi Transparent paint.
Recommended Skill Level
Intermediate
Scrap Wood Cart
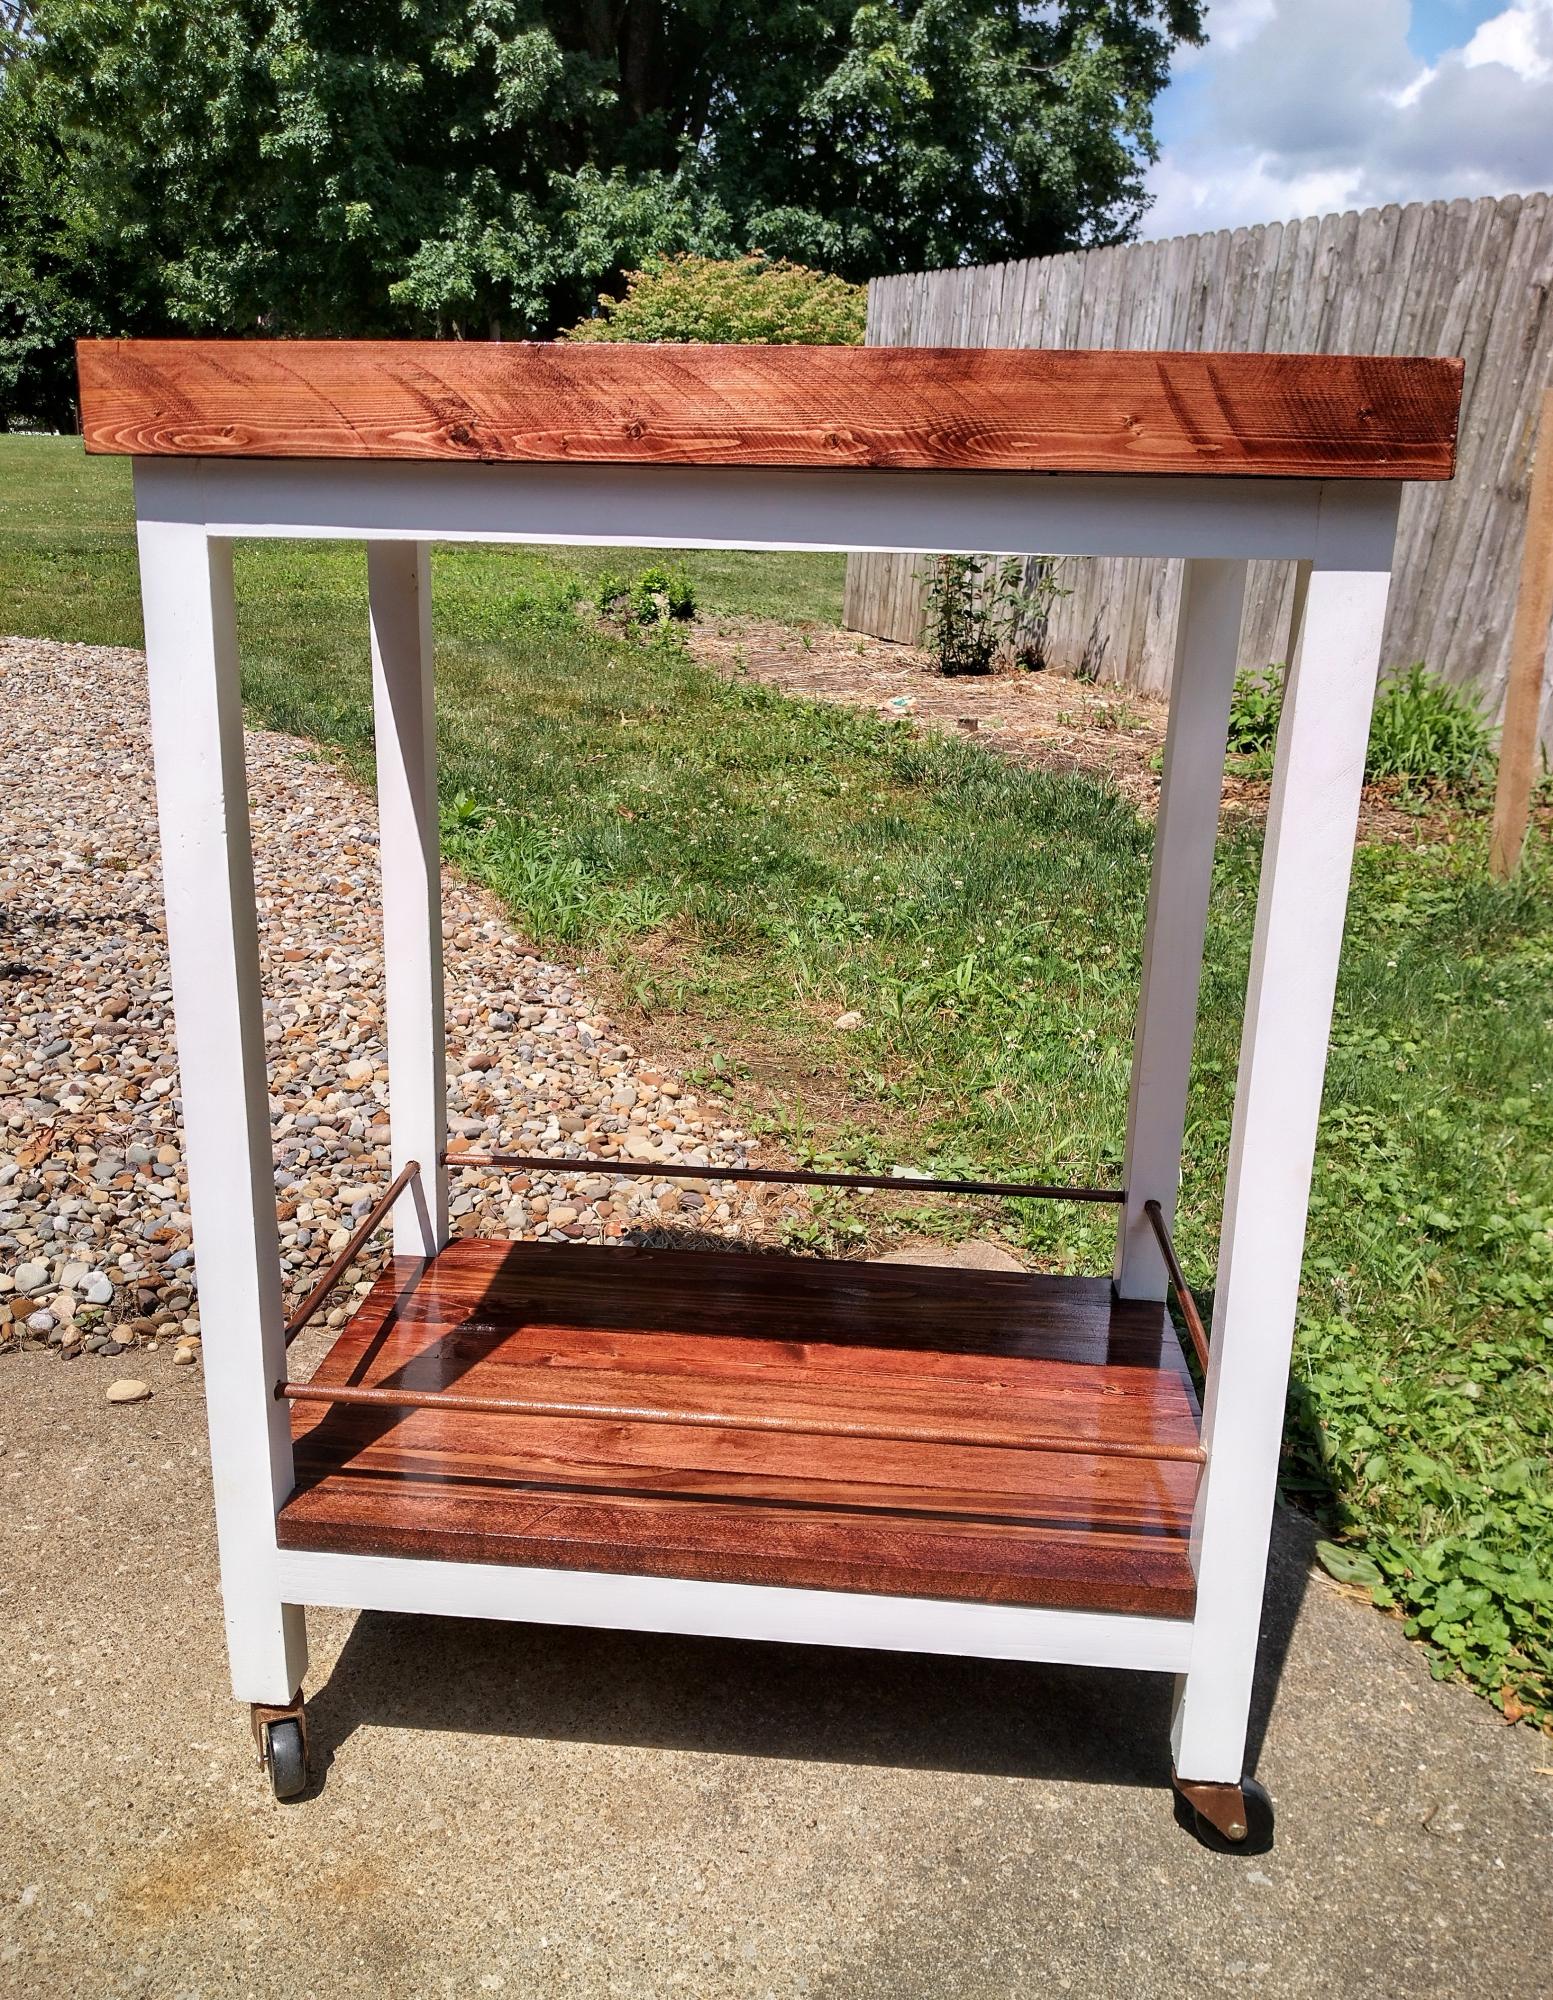
Only things I bought were the wheels and dowels. ALL of the wood came from Home Depots "dryer boards". Those are the boards that come under bunks of lumber. The Home Depot stacks them up out back and gives them away to any one that wants them. Easy to make 1x2's and sometimes 2 x 2's. Last night I made some 2 x 3's. I only need 2 more to make Ana White's Lift Top Coffee Table
Abell Woodworking from Angela Marie Made.
Cabin bed - with flower boxes!
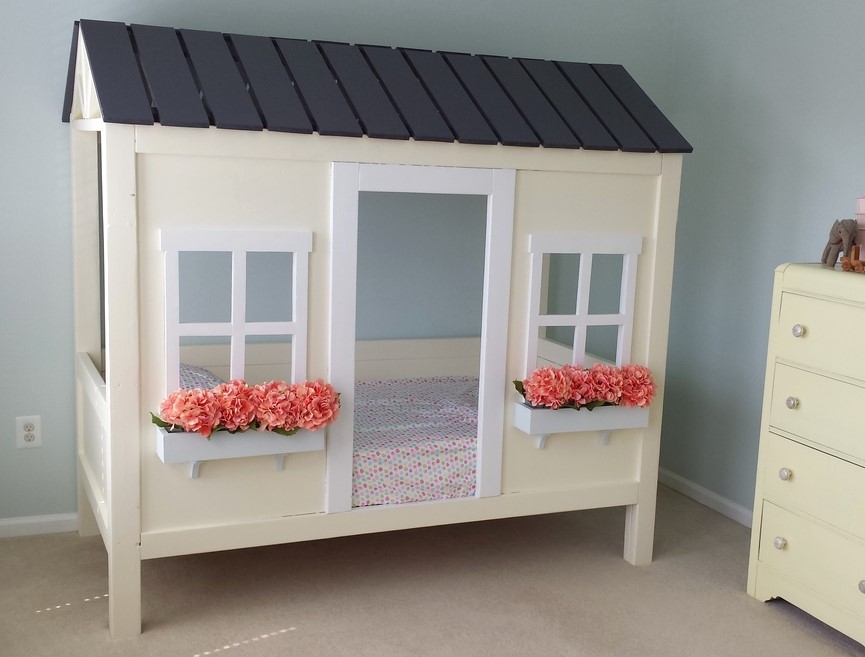
Great plans! This was a really easy build, but it is time consuming to paint. I did this over the course of about 2.5 weeks, working for a few hours after my daughter went to bed. So worth the time to see the smile on my daughters face!
Built from Plan(s)
Estimated Cost
~$300 (not including the mattress). Lumber was probably around $225, but I used expensive paint (Ben Moore RegalSelect).
Estimated Time Investment
Week Long Project (20 Hours or More)
Finish Used
Ben Moore Regal Select in eggshell (semi on white trim)
Recommended Skill Level
Beginner
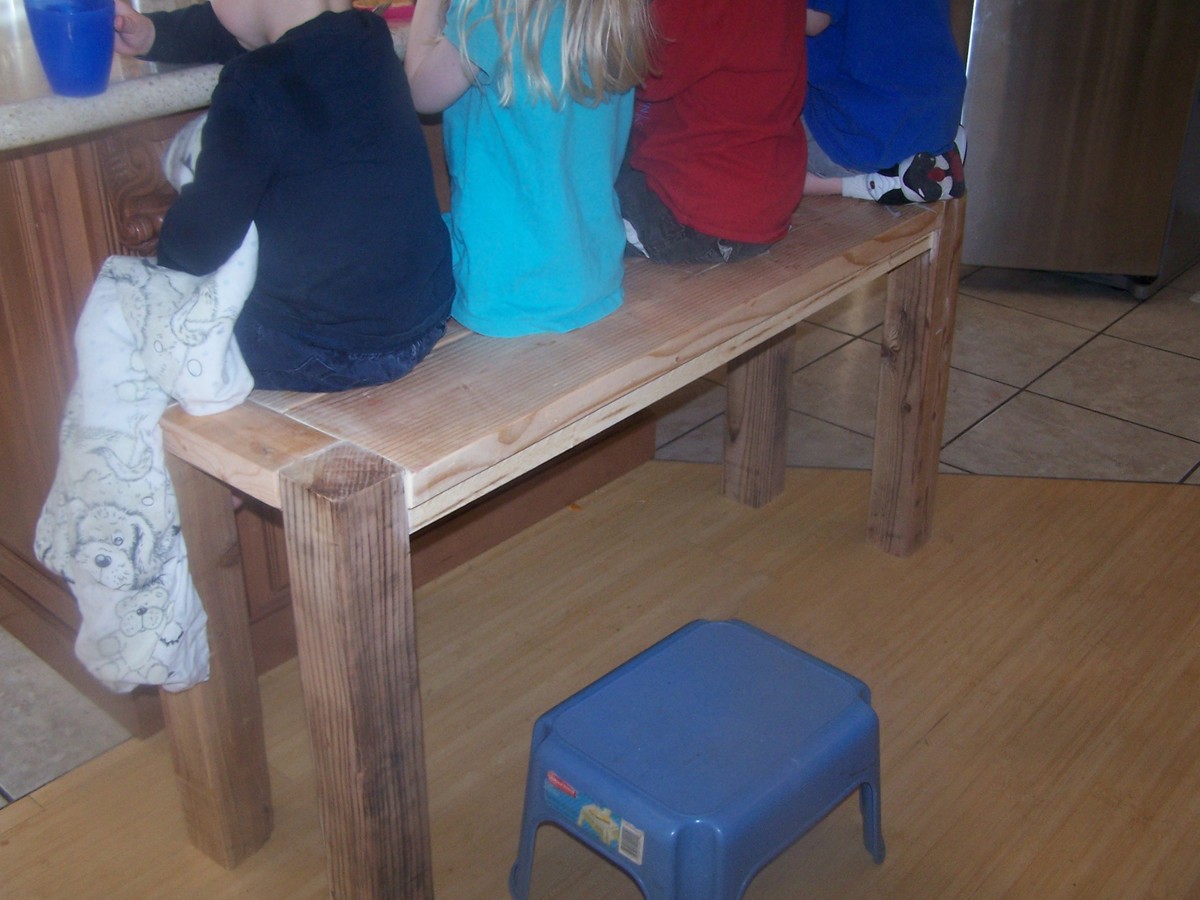
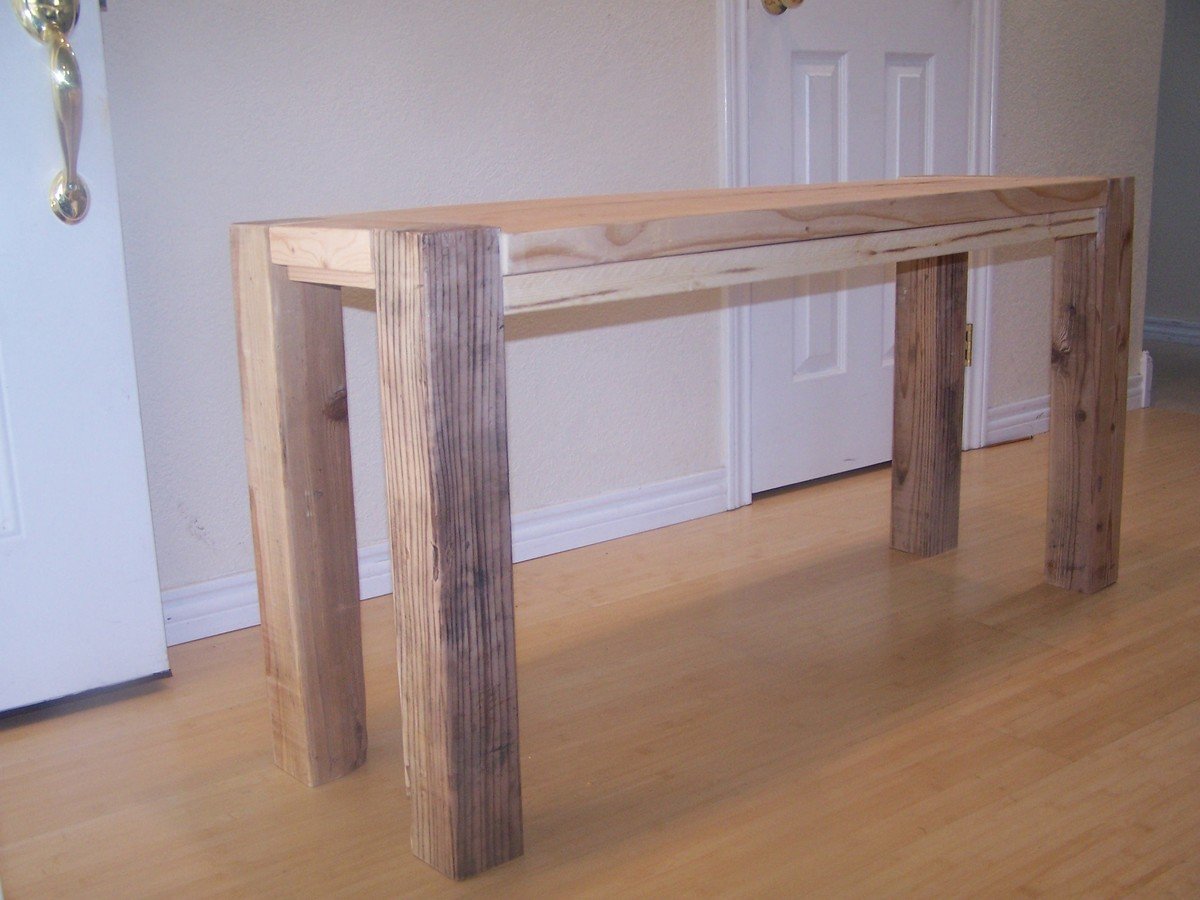
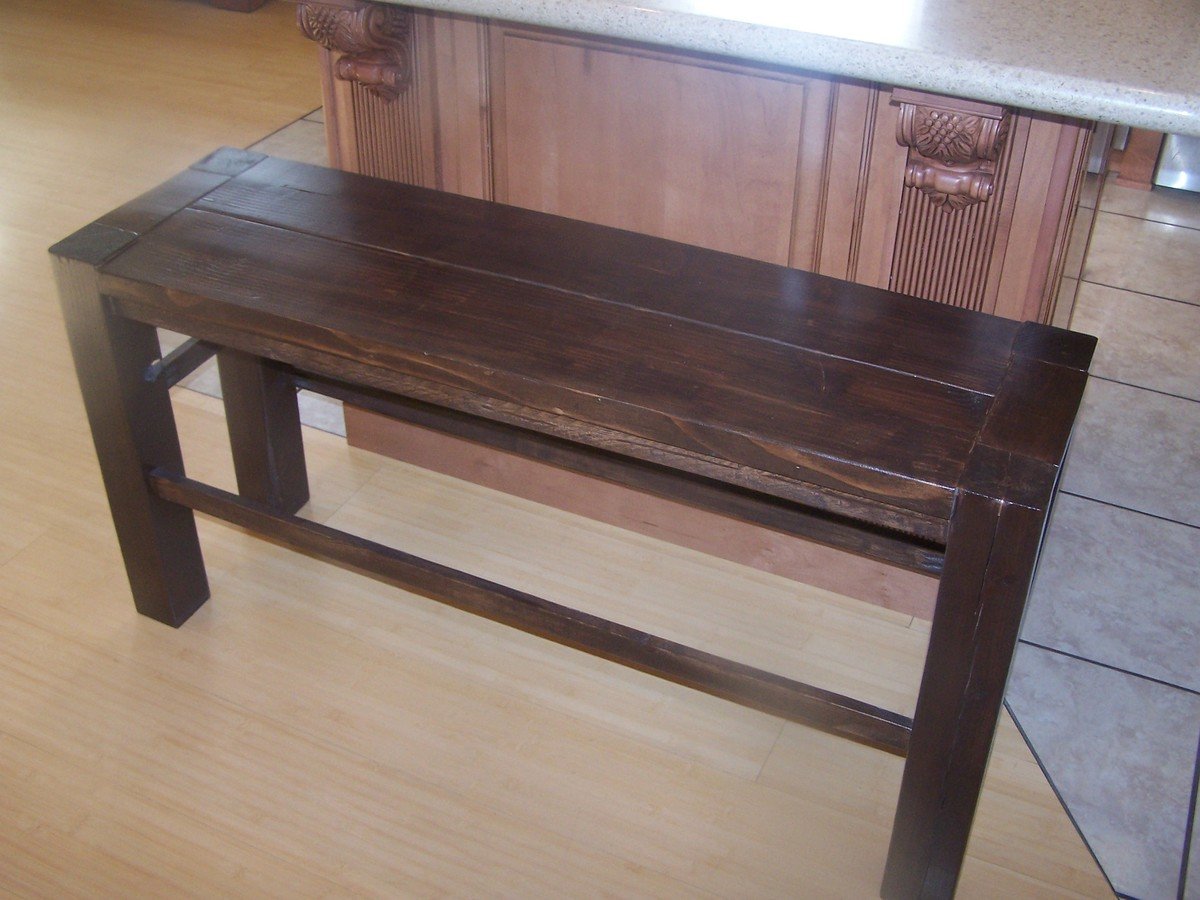
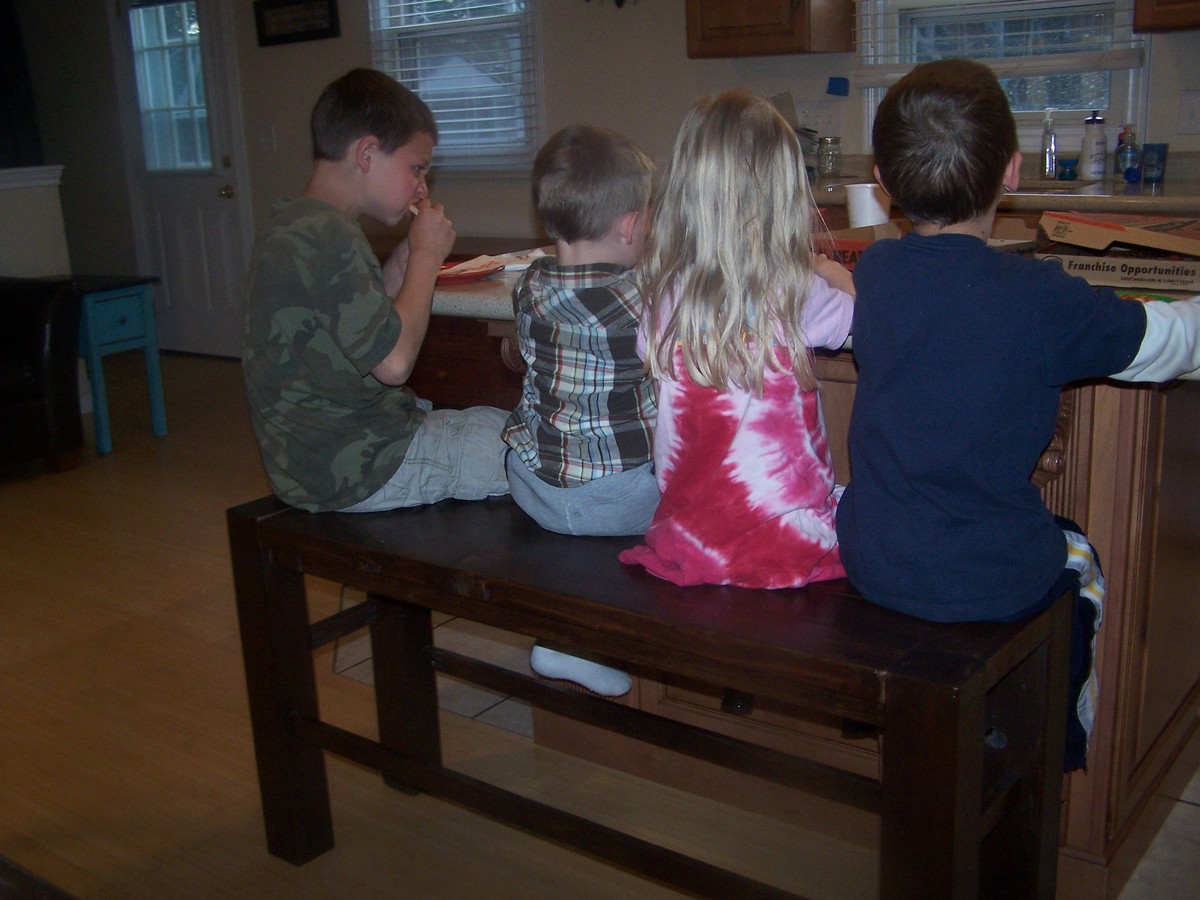
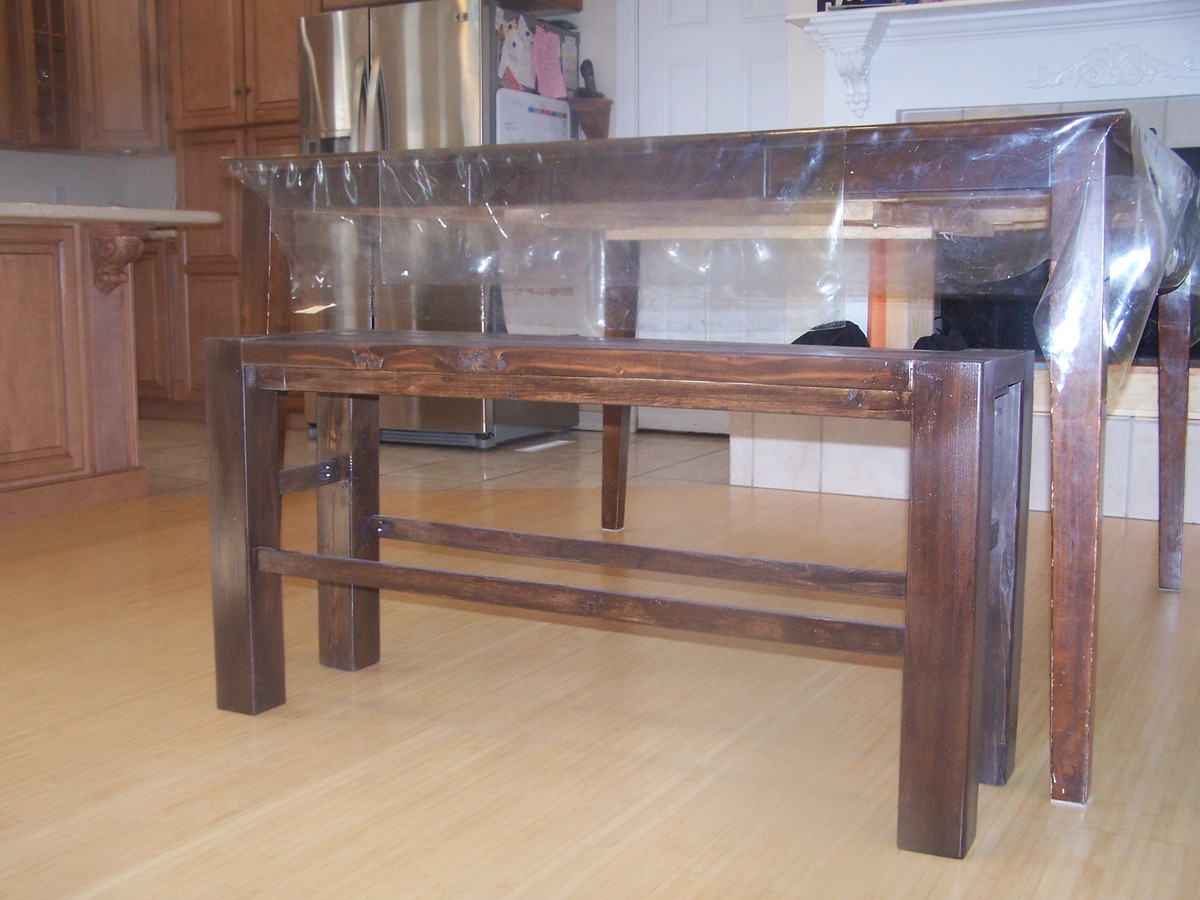
Big Ur Counter height bench
I have been wanting a bench for my counter for sooooo long! I loved the Big Ur bench and finally got up the nerve to adjust the plan to be a counter height bench.
Since I am so cheap, I like to collect wood from the free section on craigslist. And that is how this bench came about! I had these 4x4's (well actually they were a little small and had to adjust for that as well) And these great top boards, which were a little warped, I think it just adds a little character to the bench to not be totally perfect, like me! :) (that was a joke, I am FAR from perfect!)
I made it like the plan, and as you can see from the unfinished picture my little ones needed a stool to climb up on the bench. So I added some 1x2's to give them a ladder for climbing. I love how it turned out and the best part is that it fits at my table as well!
Now my husband thinks I should build a smaller one for the short side of the island. We have six kids and this bench only fits four....we'll see.....
Built from Plan(s)
Estimated Cost
Free! Scrap wood
Estimated Time Investment
Afternoon Project (3-6 Hours)
Finish Used
I used one coat of Rustoleum dark walnut. I gave a few coats of water based poly and and at least three or four on the top.
Recommended Skill Level
Beginner
Comments

In reply to Well.. by Bunnie1978
Thu, 04/12/2012 - 13:12
Ha ha!
Yeah, you could say I am crazy, in a good way! I do feel like a chicken with it's head cut off sometimes, but I am not sure I have a handle on things, does anyone? It's fun though! Thanks for the comment on the bench, and I am WAY impressed with your son's playhouse loft bed, I am still trying to find courage to tackle a project that impressive, great job!
Thu, 01/21/2016 - 09:44
Awesome Job!
You did an excellent job on this! I'd love to build something similar, but with upholstery on top.
BTW, I adore large families, and know that your six little ones must be a great blessing!
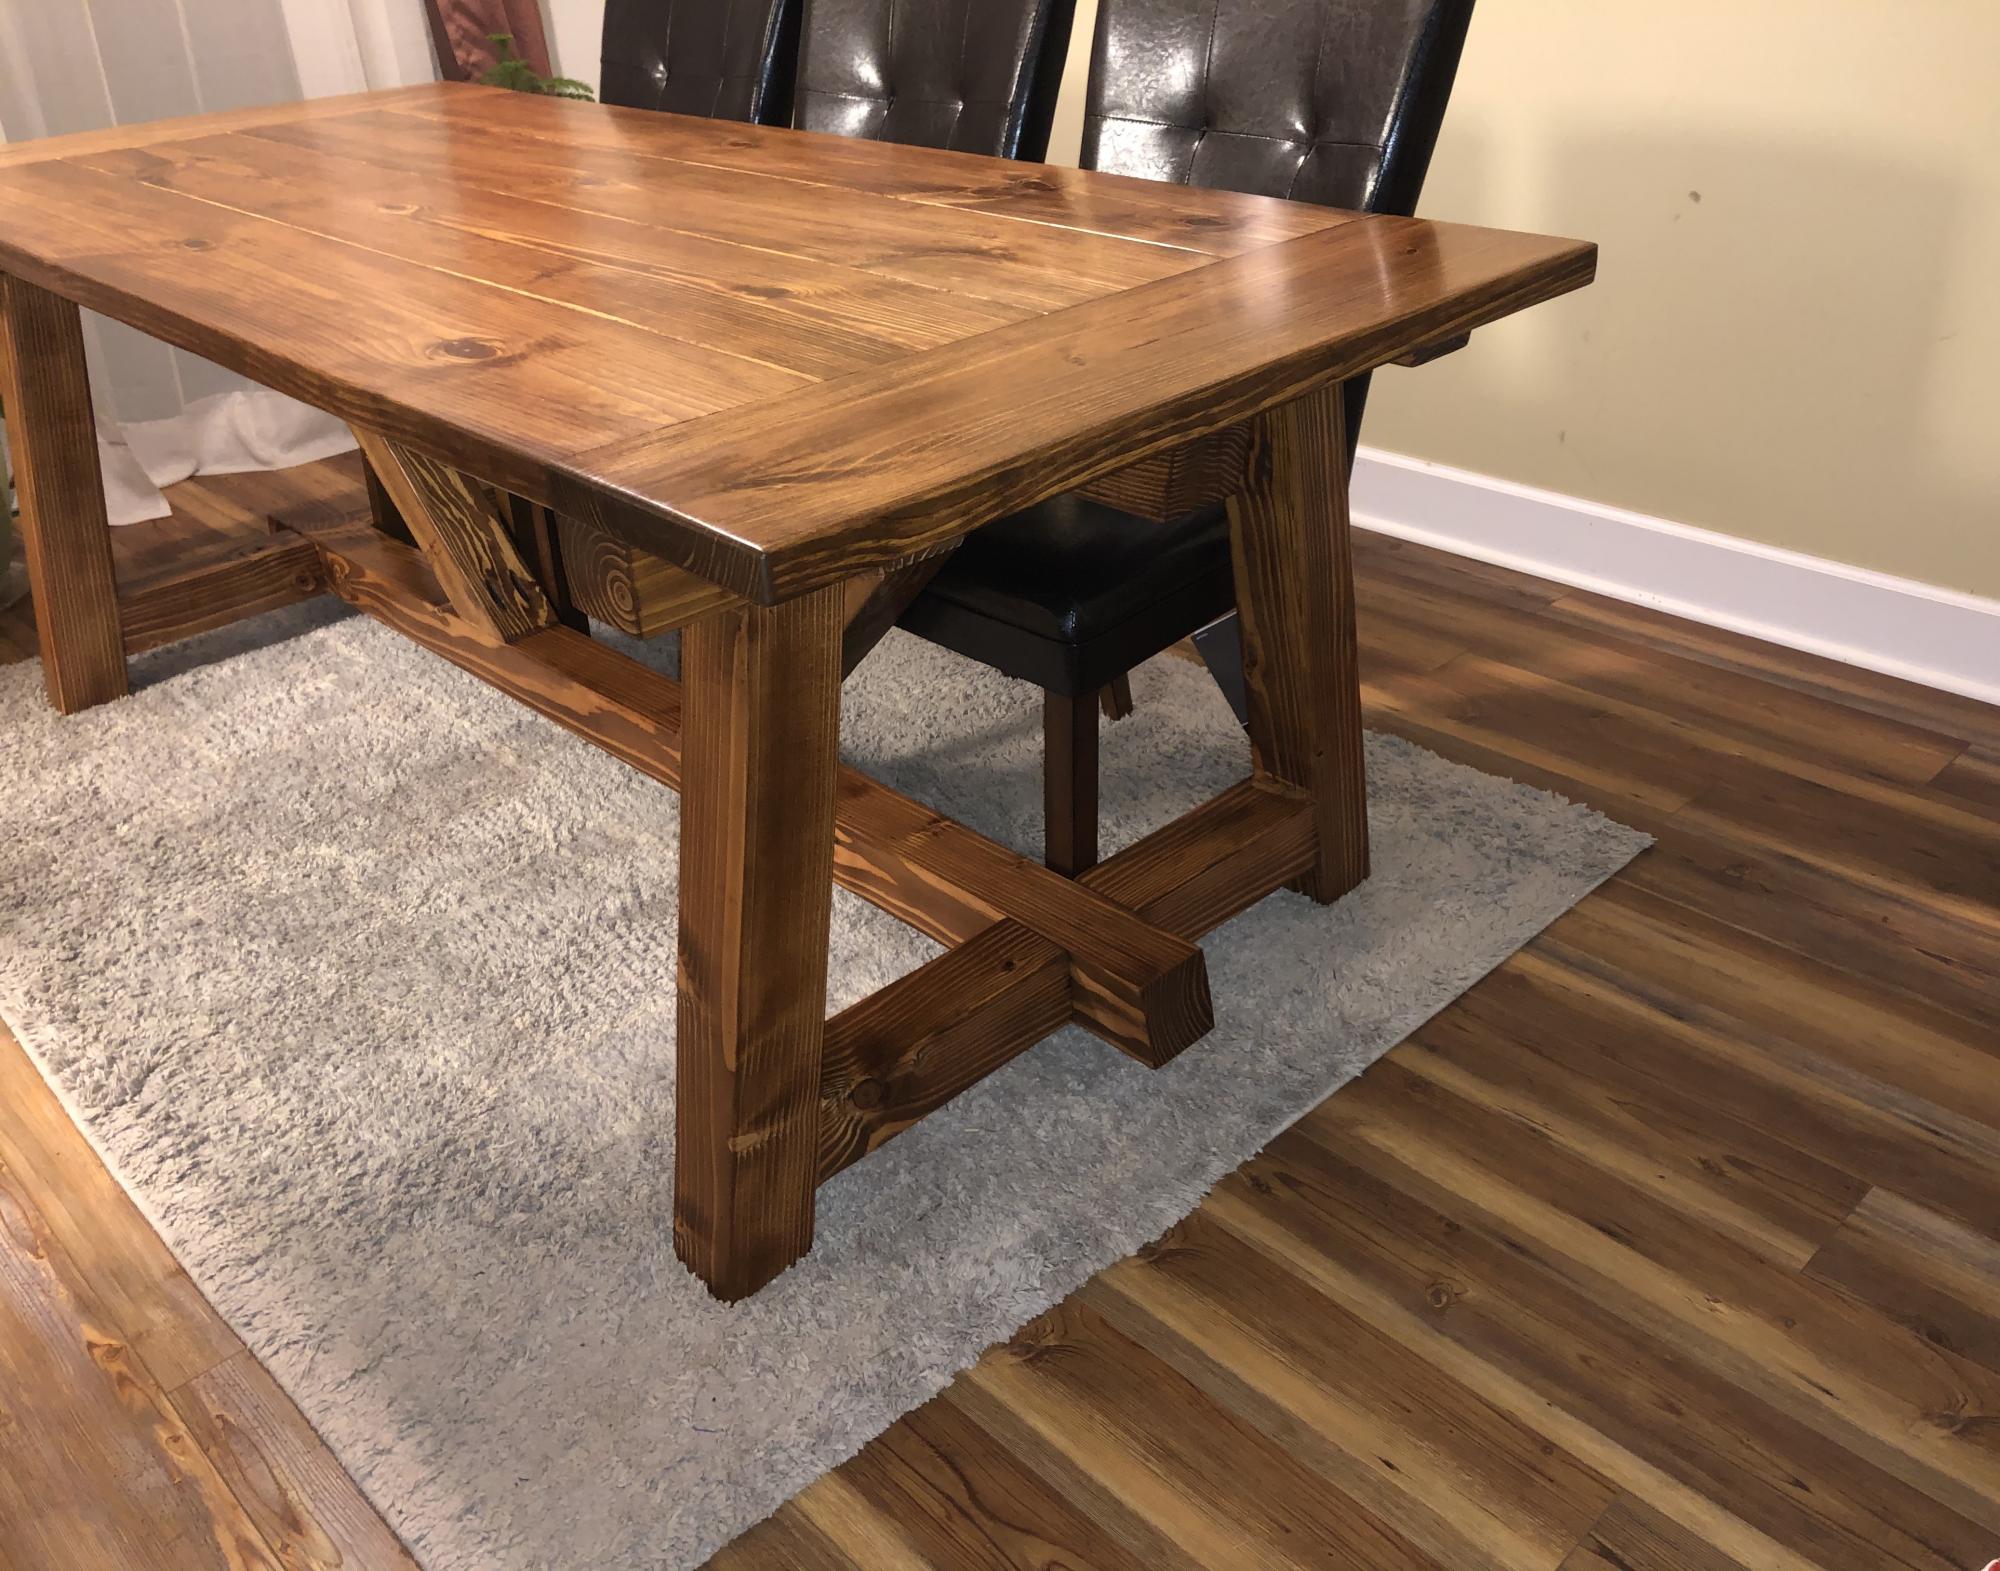
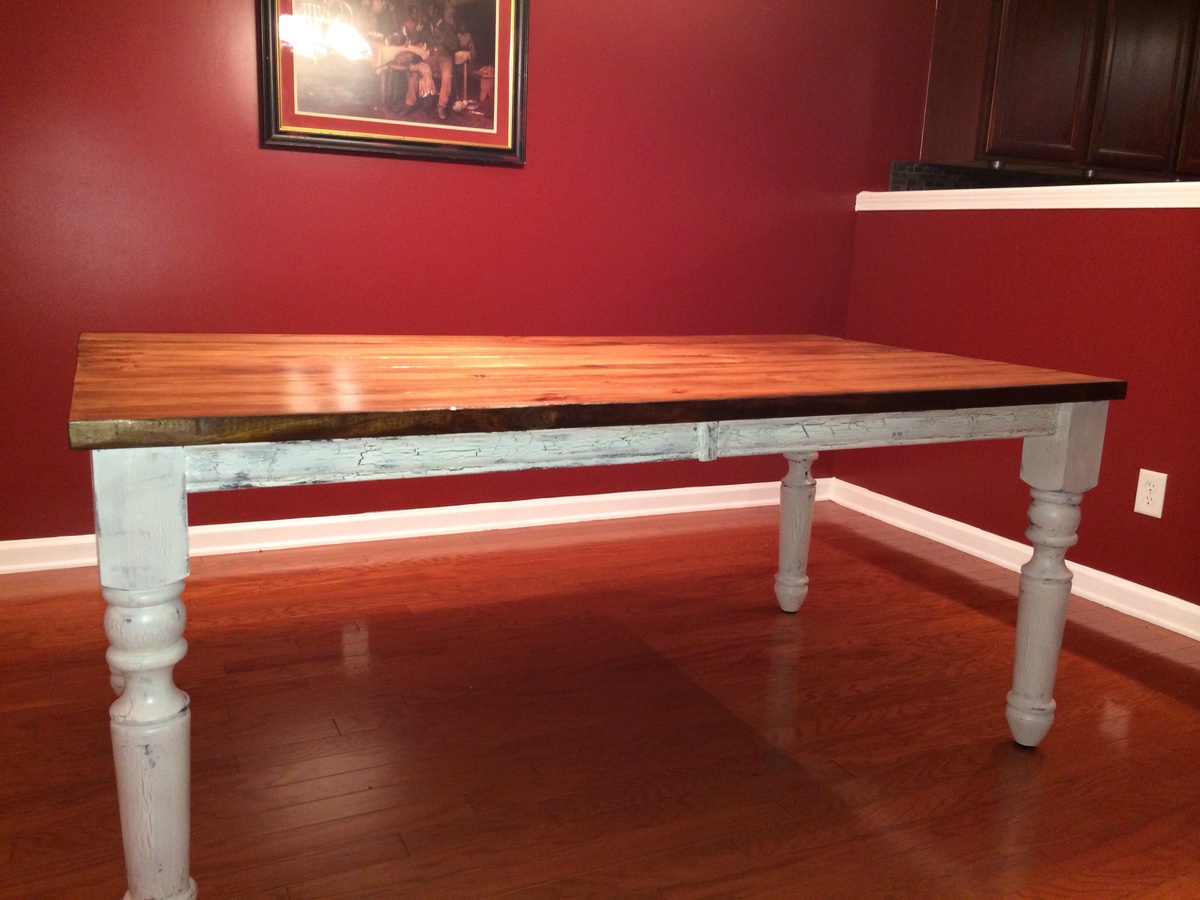
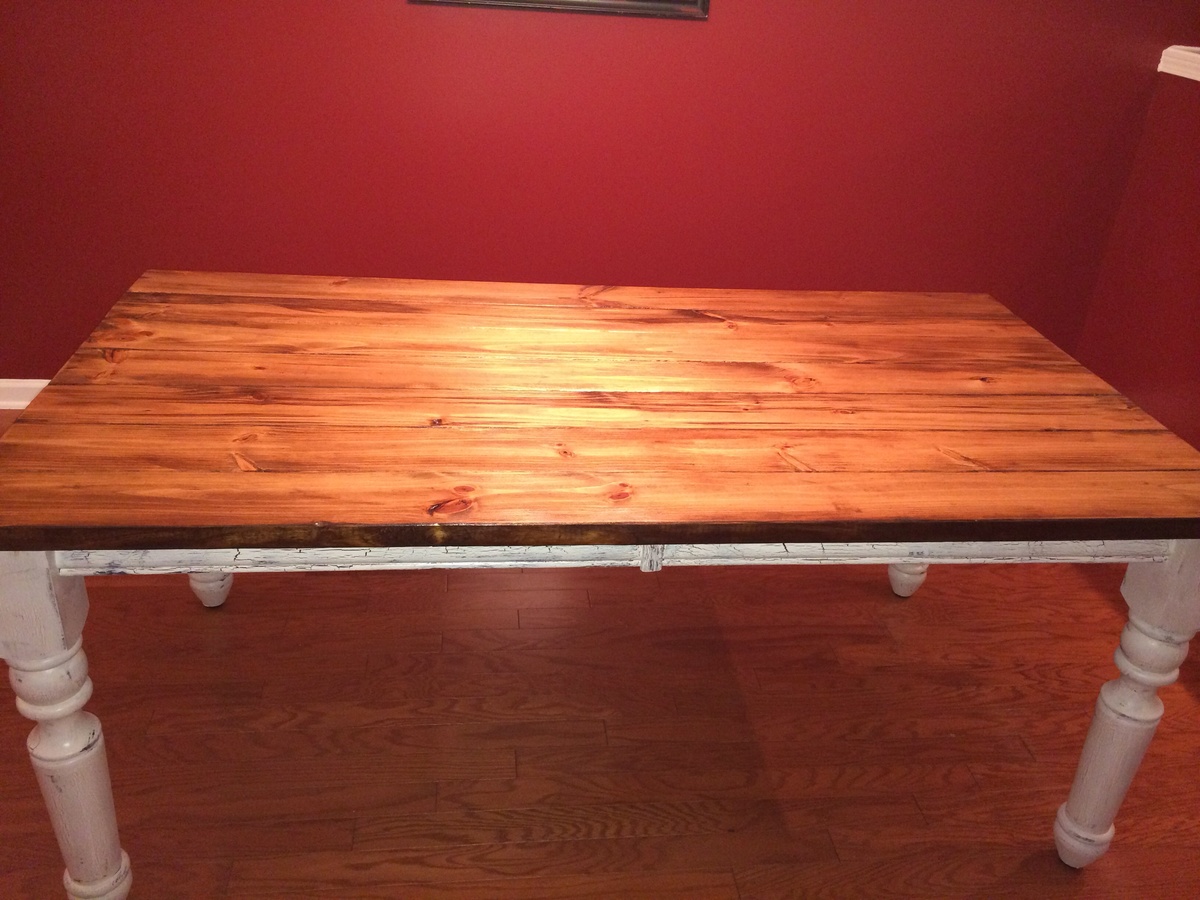
Family dining
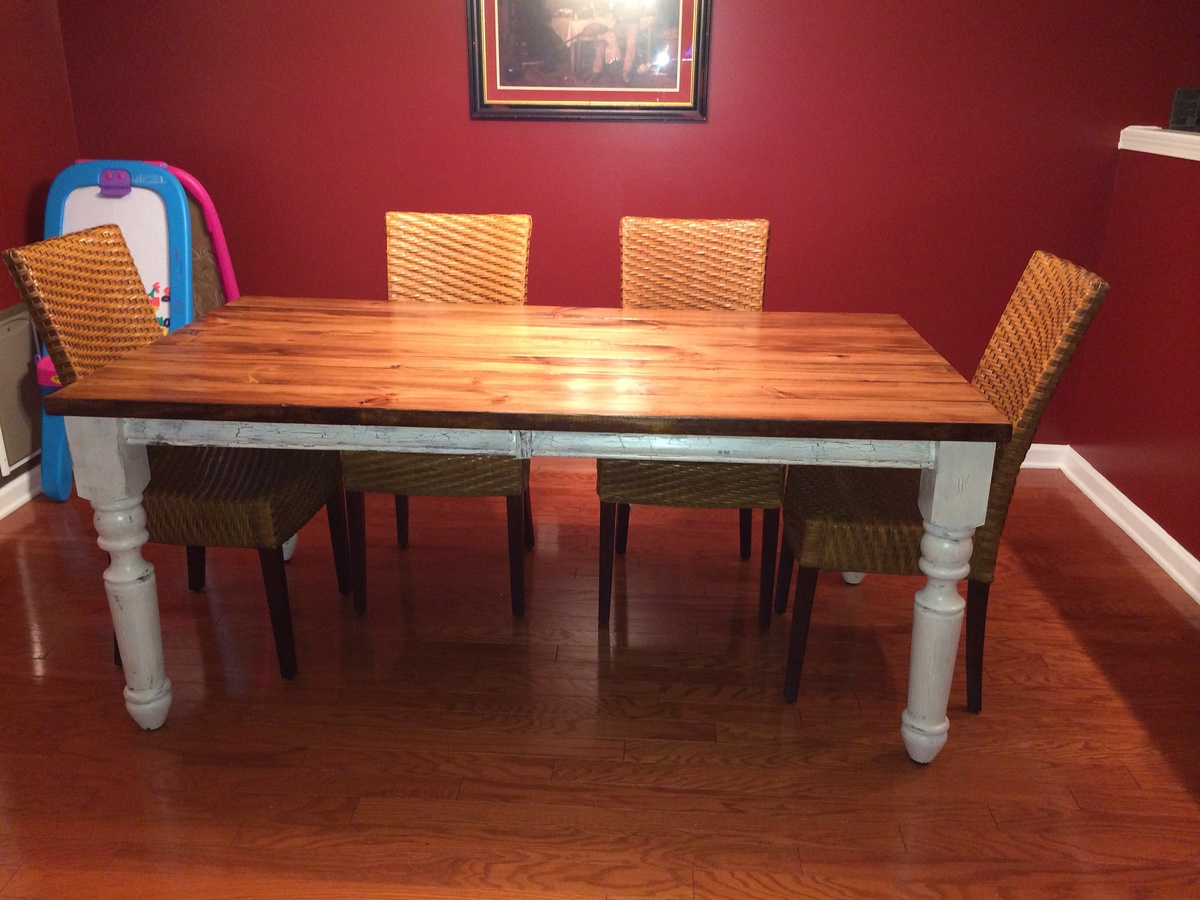
Largest project yet. Loved the variety of legs at Osborne.

Estimated Time Investment
Week Long Project (20 Hours or More)
Recommended Skill Level
Beginner
Comments

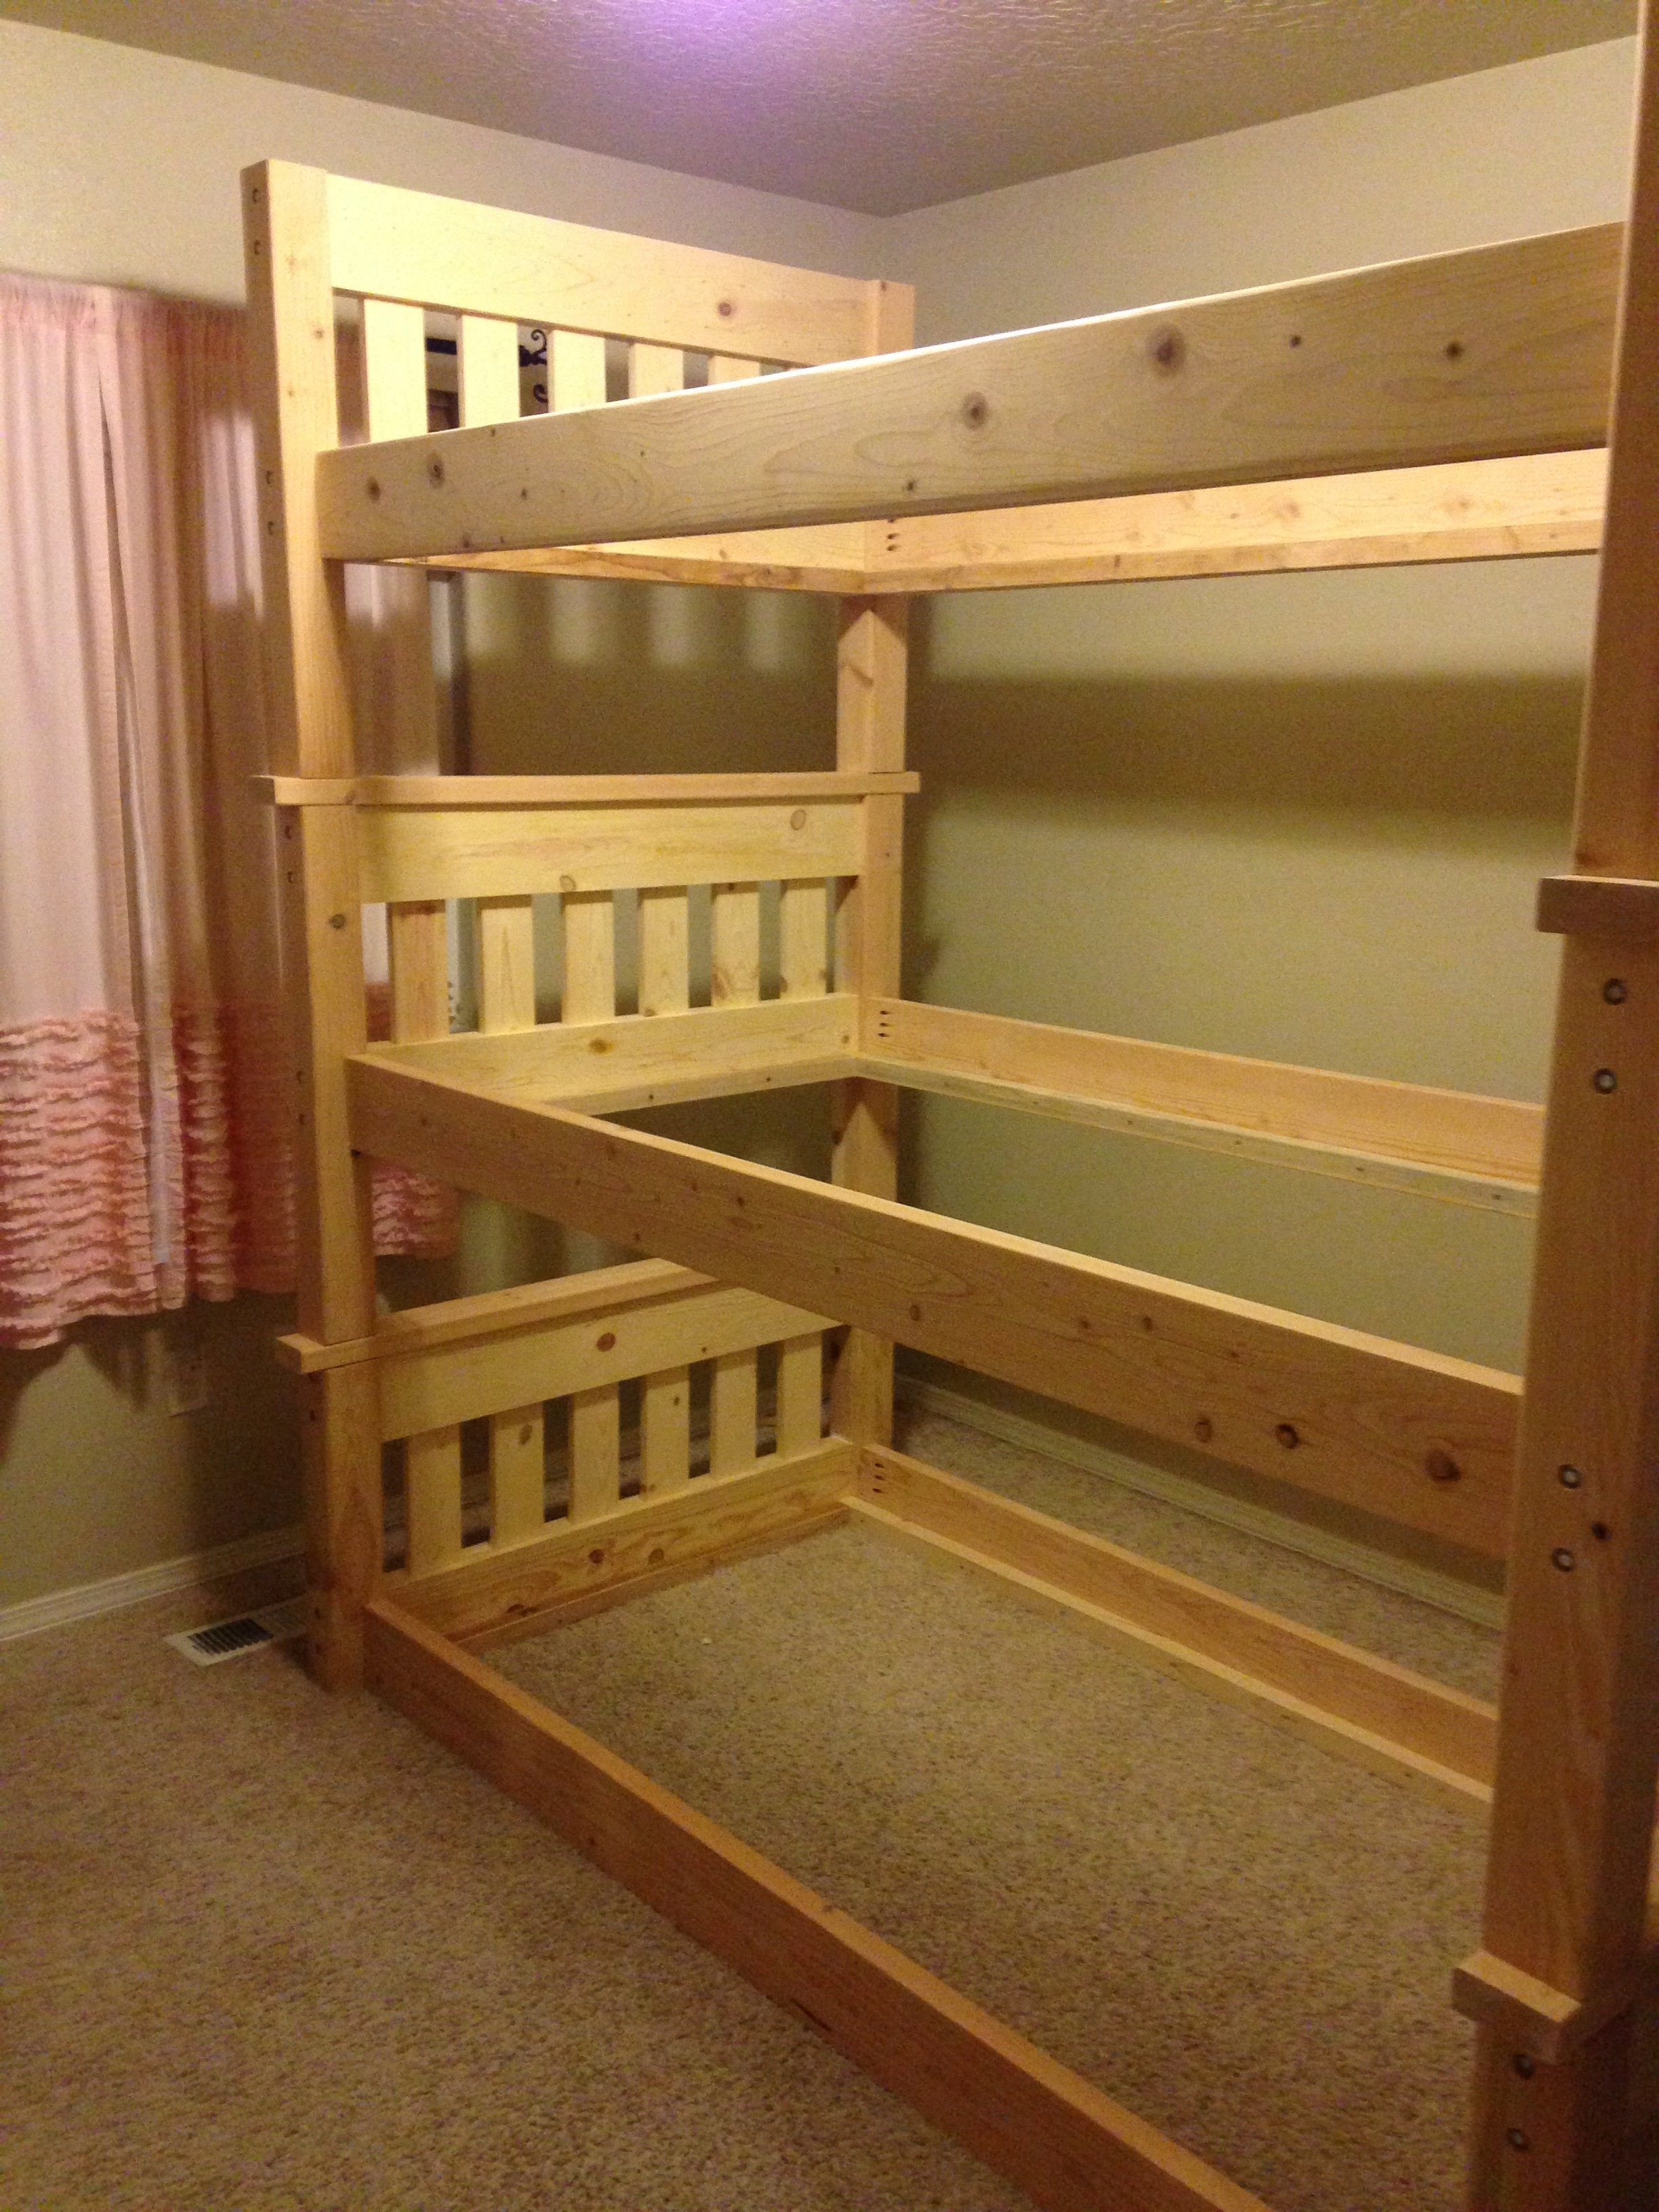
Simple Bunk Bed Triple Bunk
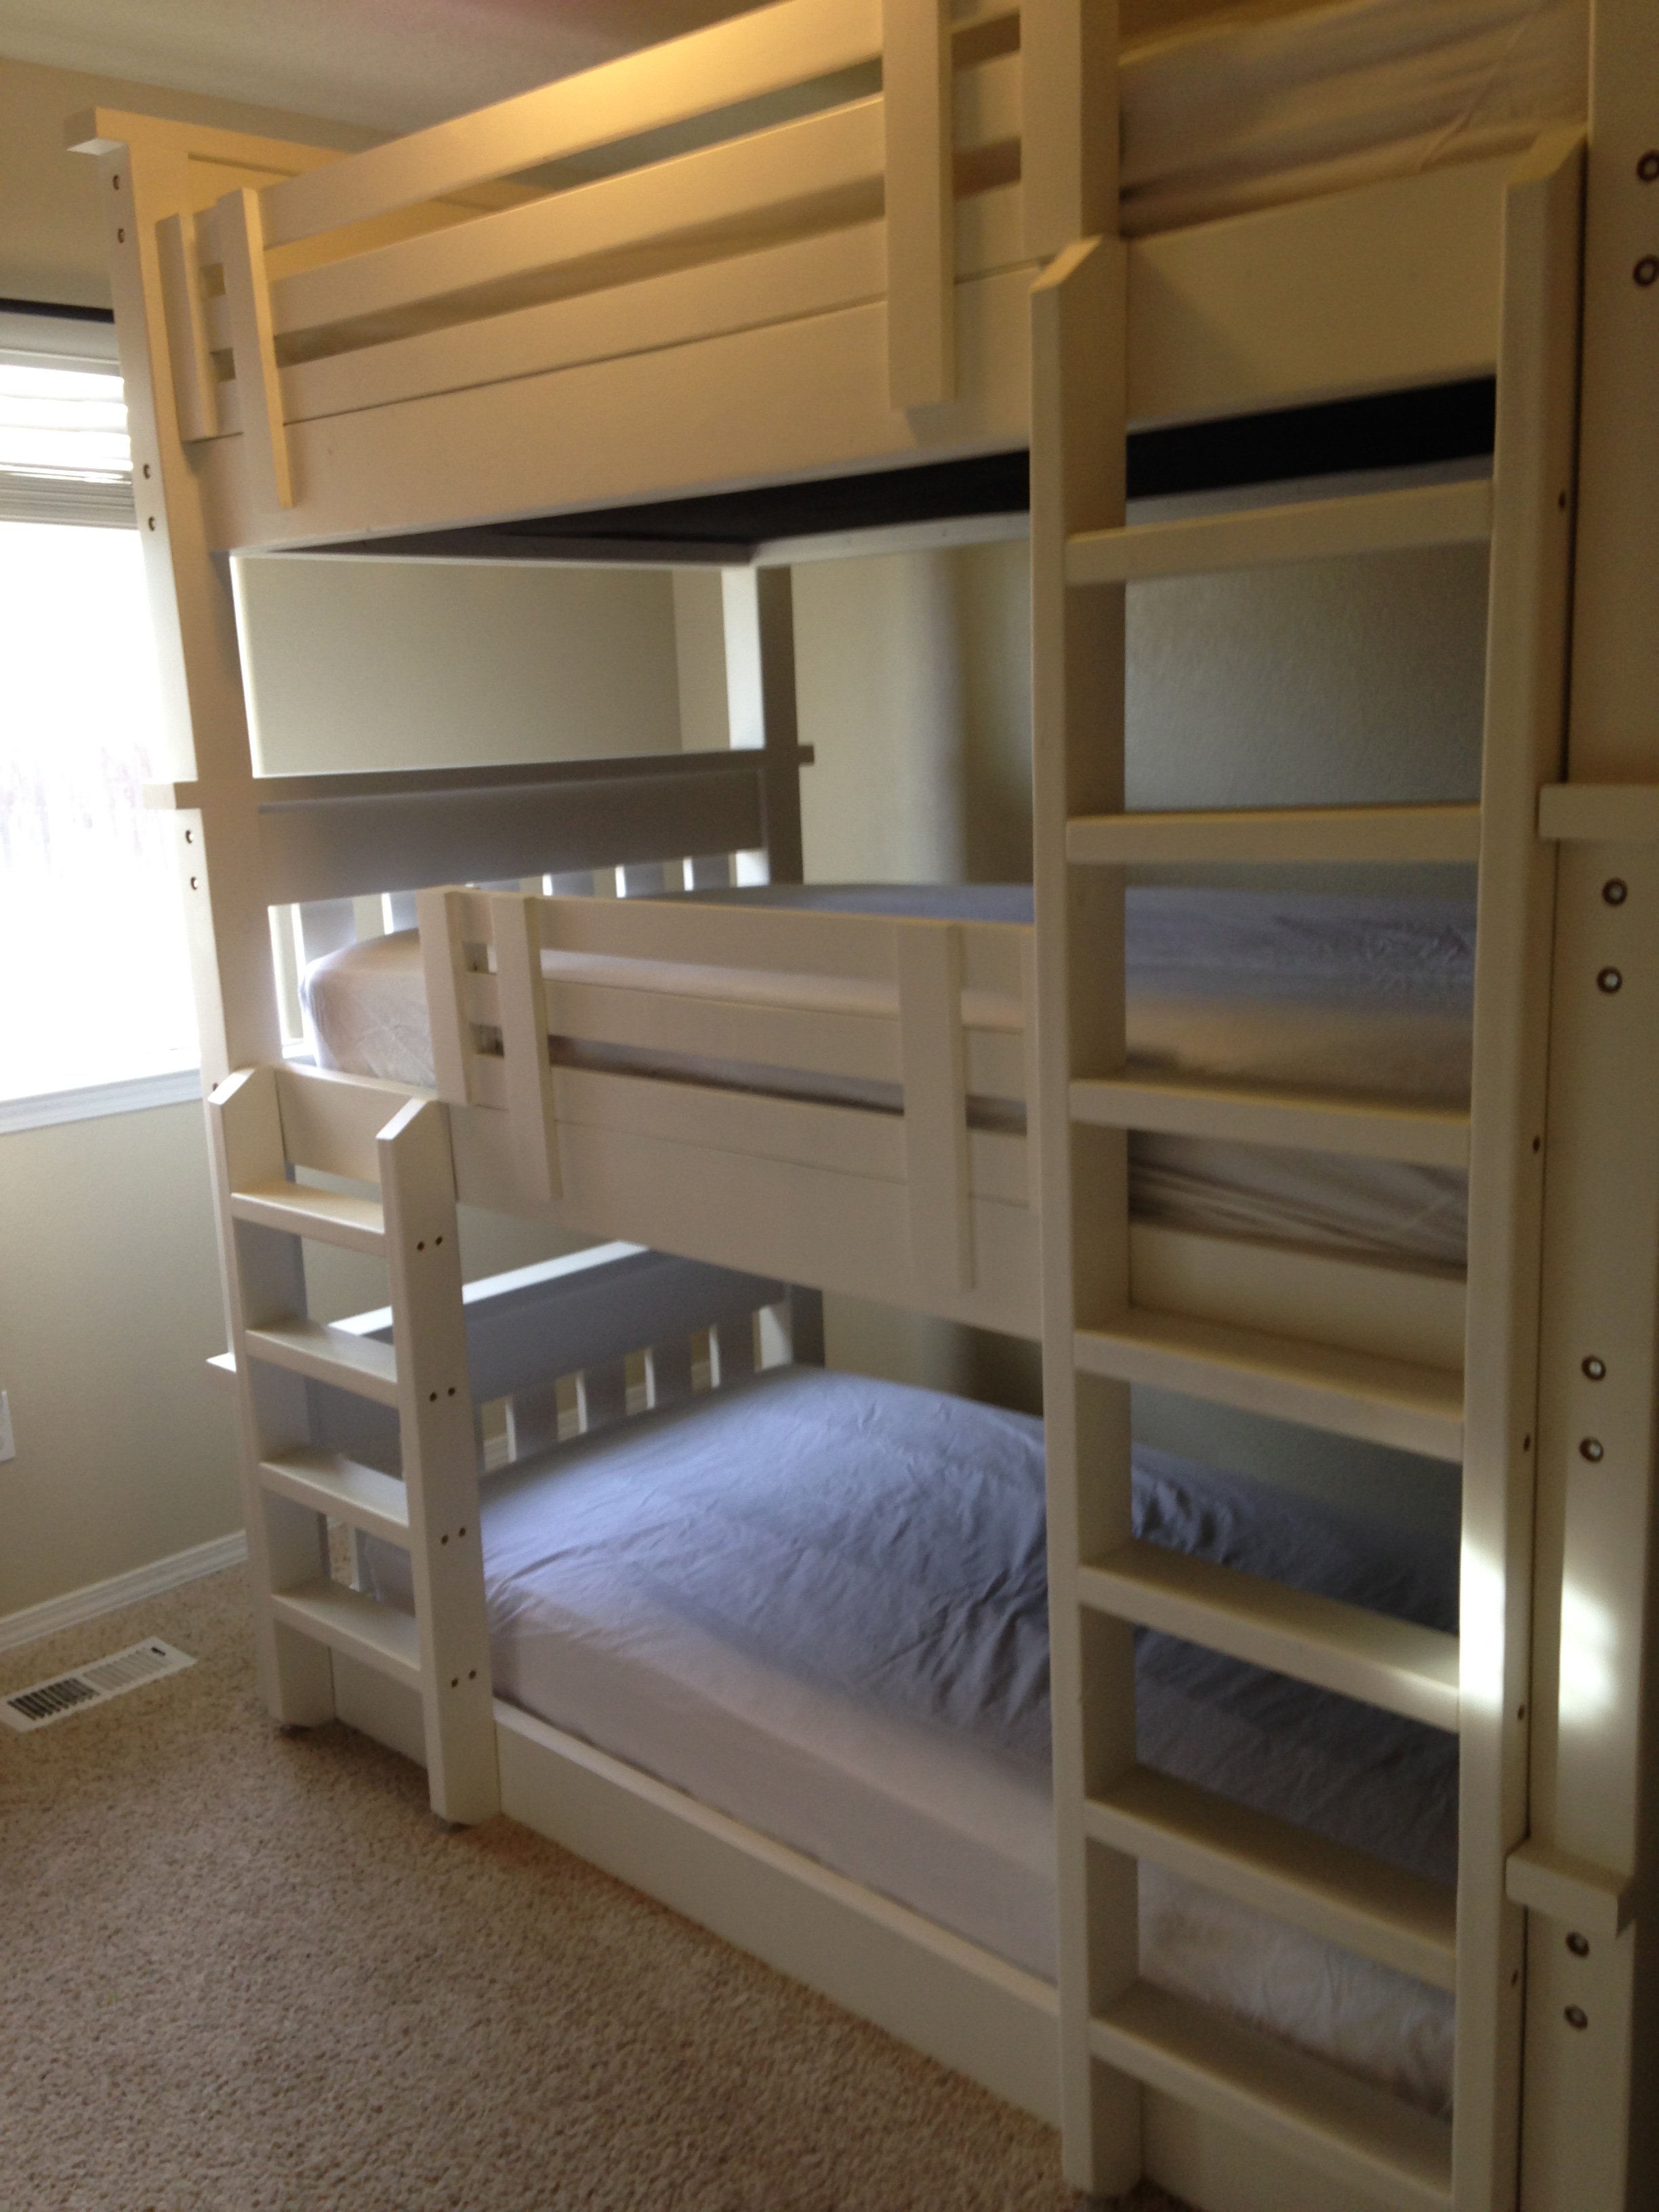
I loved the look and design of Ana's Simple Bunk Bed but due to limited space in our home, needed a triple bunk bed. I wasn't interested in the hassle of a trundle so I decided to modify the simple bunk bed plan and make it a triple. I have to say, I was a little worried about how sturdy it would be but this plan is so solid with the 4x4 posts that there is no need to even even think about that for another second!
I changed the ladder so that it was attached to the side rails of the bunk bed as someone had posted they did earlier and decided to add another little ladder for the middle bunk so my little one wouldn't have to leap from the ladder to get into her bed. ;D
In order to do a triple in our home (with 8 ft. ceilings), I needed to bring the height down so I made the bottom bunk sit on the floor with the legs only being as long as the height of the headboard. I also made all the headboards and footboards only as tall as the footboards in Ana's original Simple Bunk Bed plans.
This was my first build and there are definitely things I would do differently to make this work better if I had it to do all over again. I would make the legs a little shorter on the 2nd and 3rd bunk so that there is more head room for the person on the top bunk.
All in all though, I had a great time building this and can't wait to try some more of Ana's plans!!!
Estimated Cost
$450 including hardware
Estimated Time Investment
Week Long Project (20 Hours or More)
Finish Used
White paint, not sealed
Recommended Skill Level
Intermediate
Comments
Mon, 01/13/2020 - 09:09
Plans for stackable triple bunk bed
This is absolutely gorgeous. How has it held up? If Would you mind sharing the plans for this as I too have low ceilings and will have to tweak the dimensions a bit.
Thank you.
Mon, 11/01/2021 - 21:30
Written plans?
Do you happen to have the exact plans for this triple bunk? I saw that you modified the simple double bunk to fit your space but I'm wondering if you drew up plans wih measurements to make it easier for beginner folks.