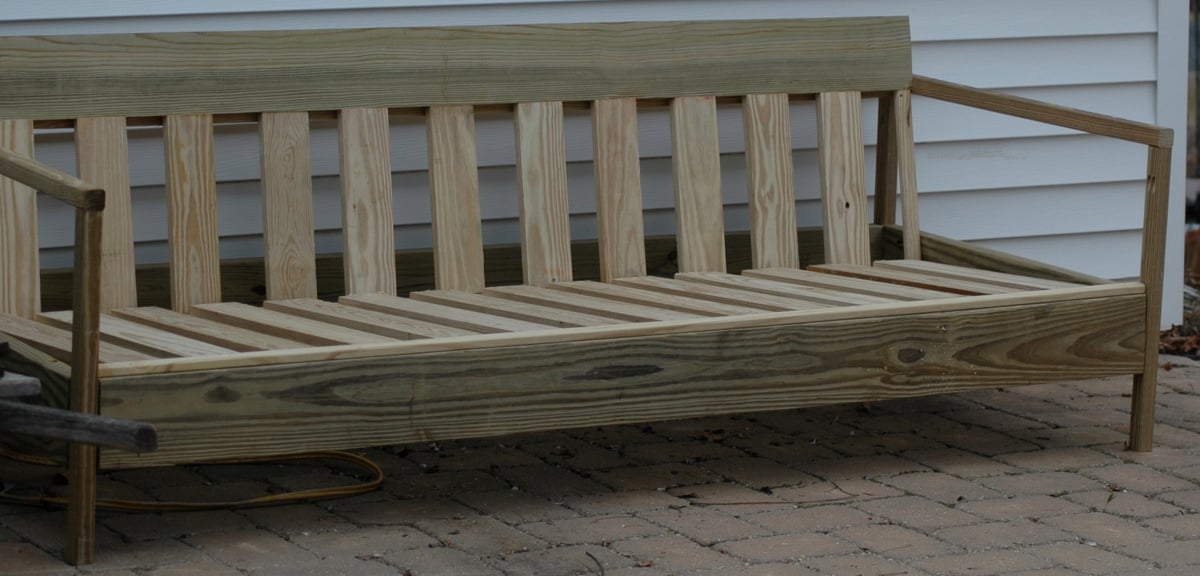
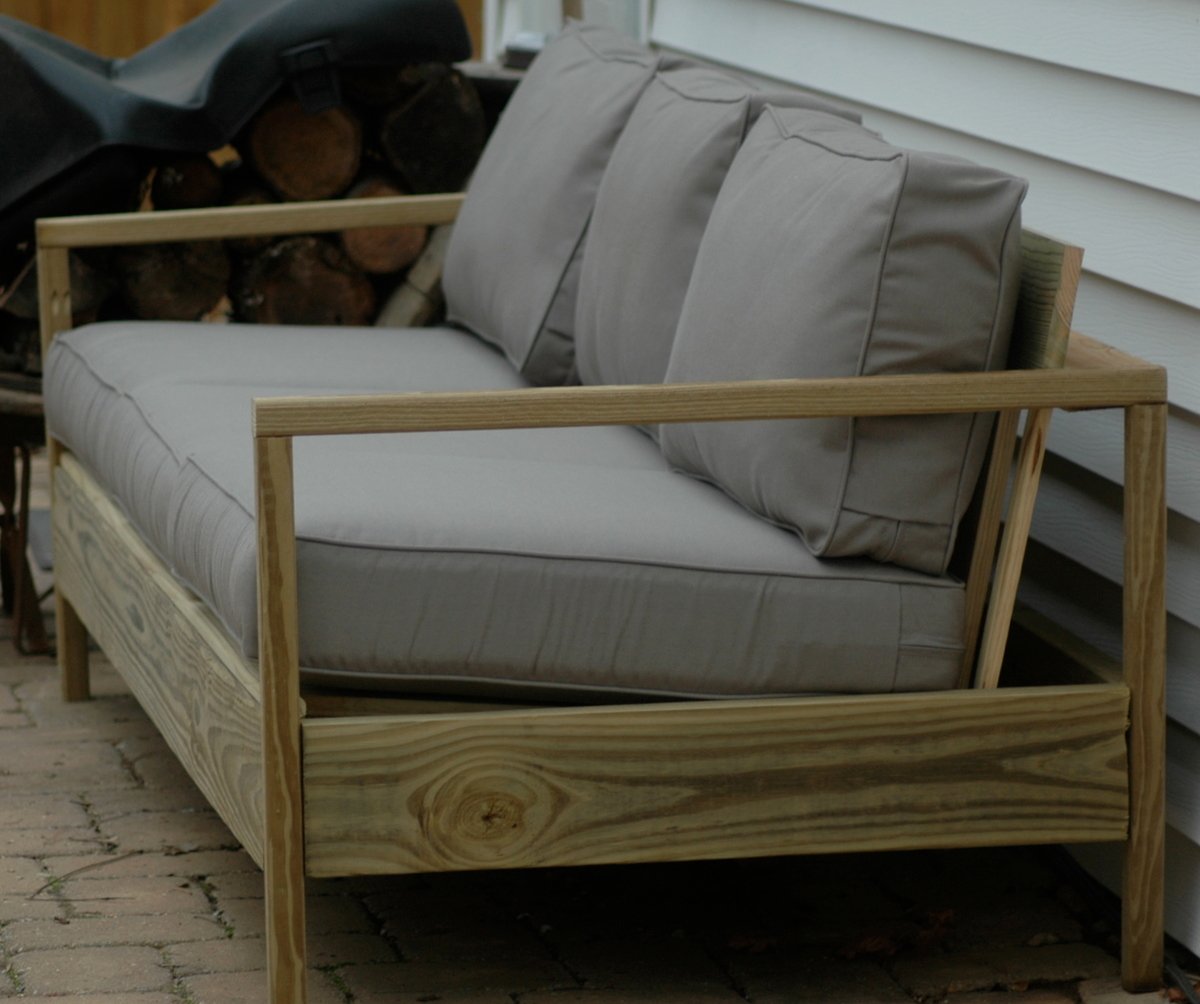
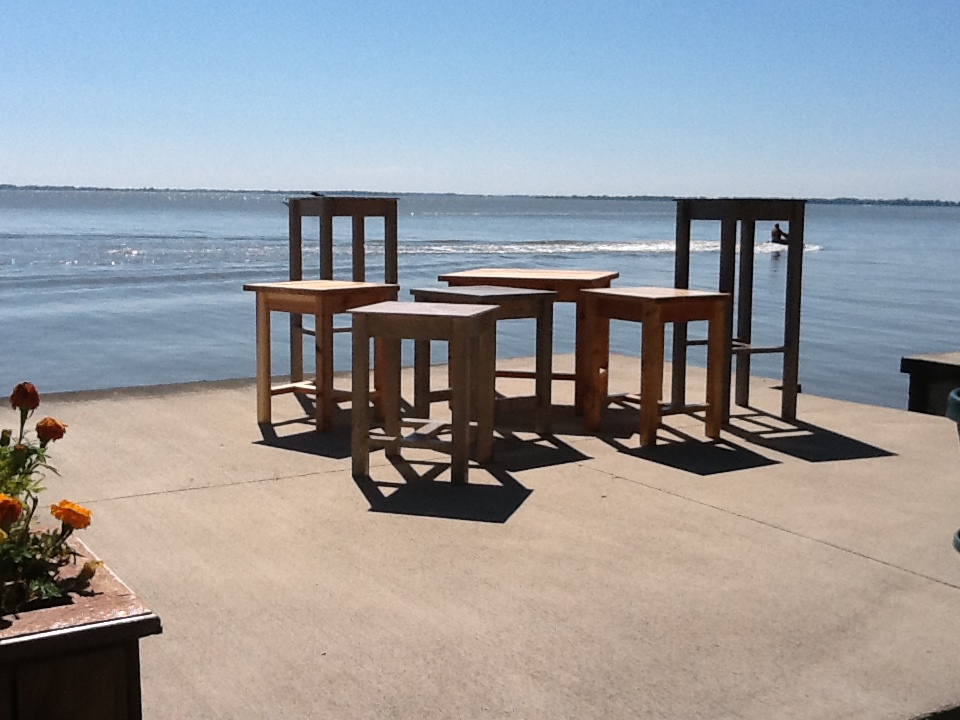
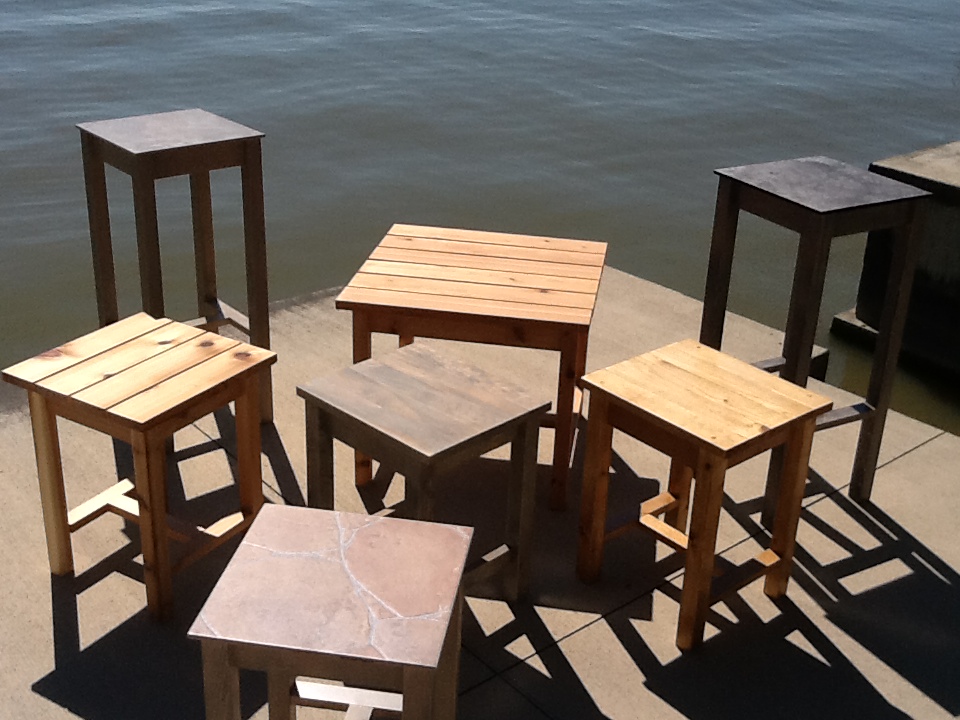
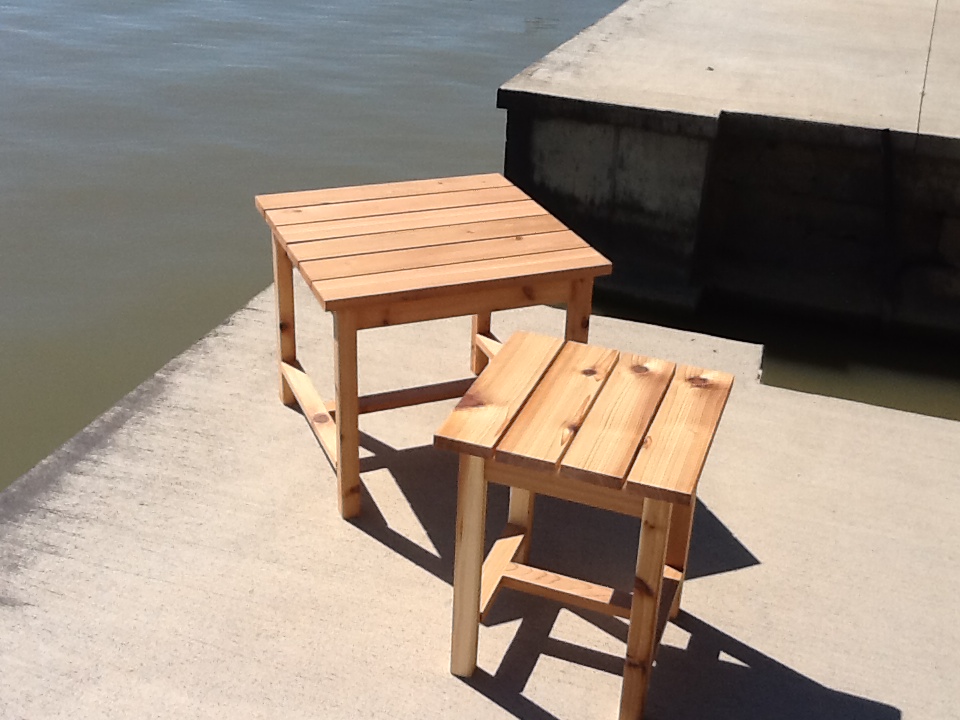
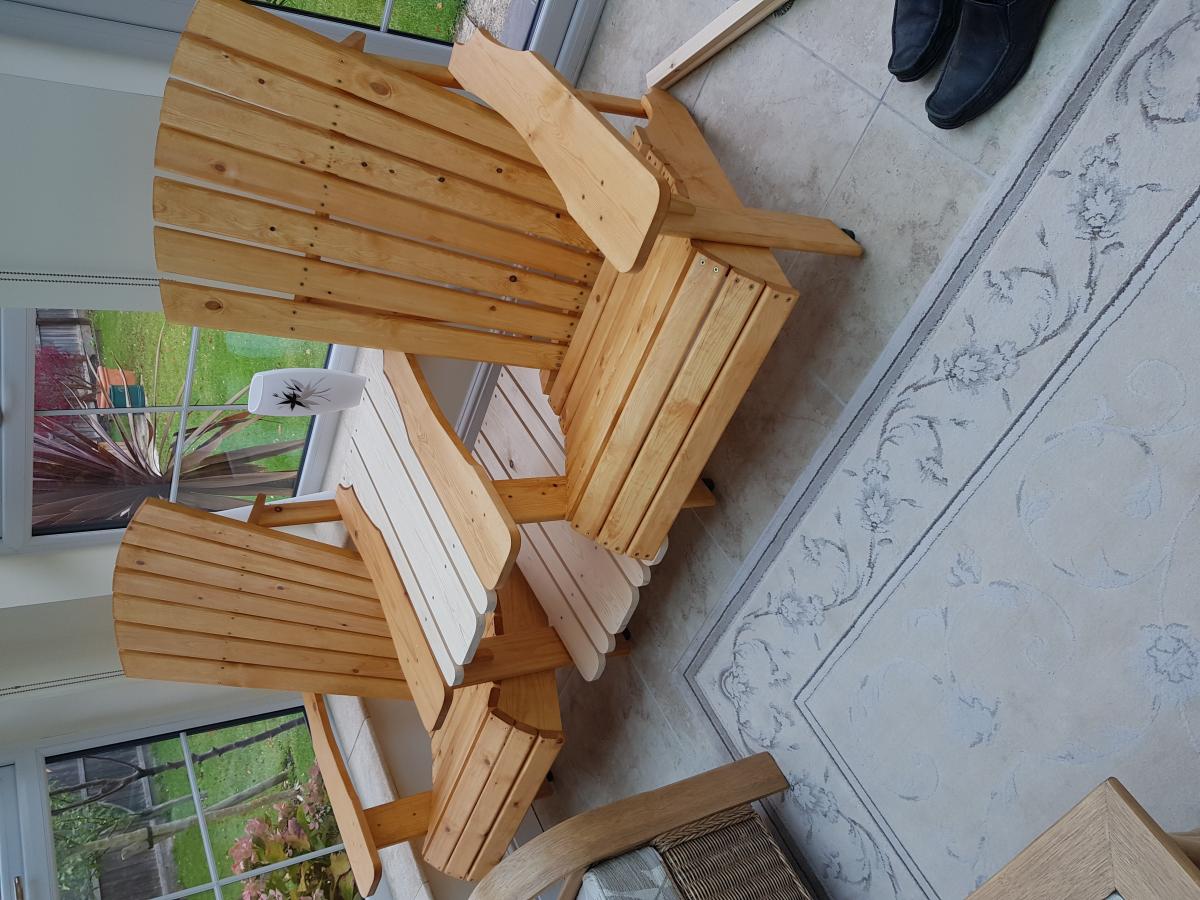
Community Brag Posts

84' patio sofa

Submitted by anrtist on Sun, 02/10/2013 - 08:28

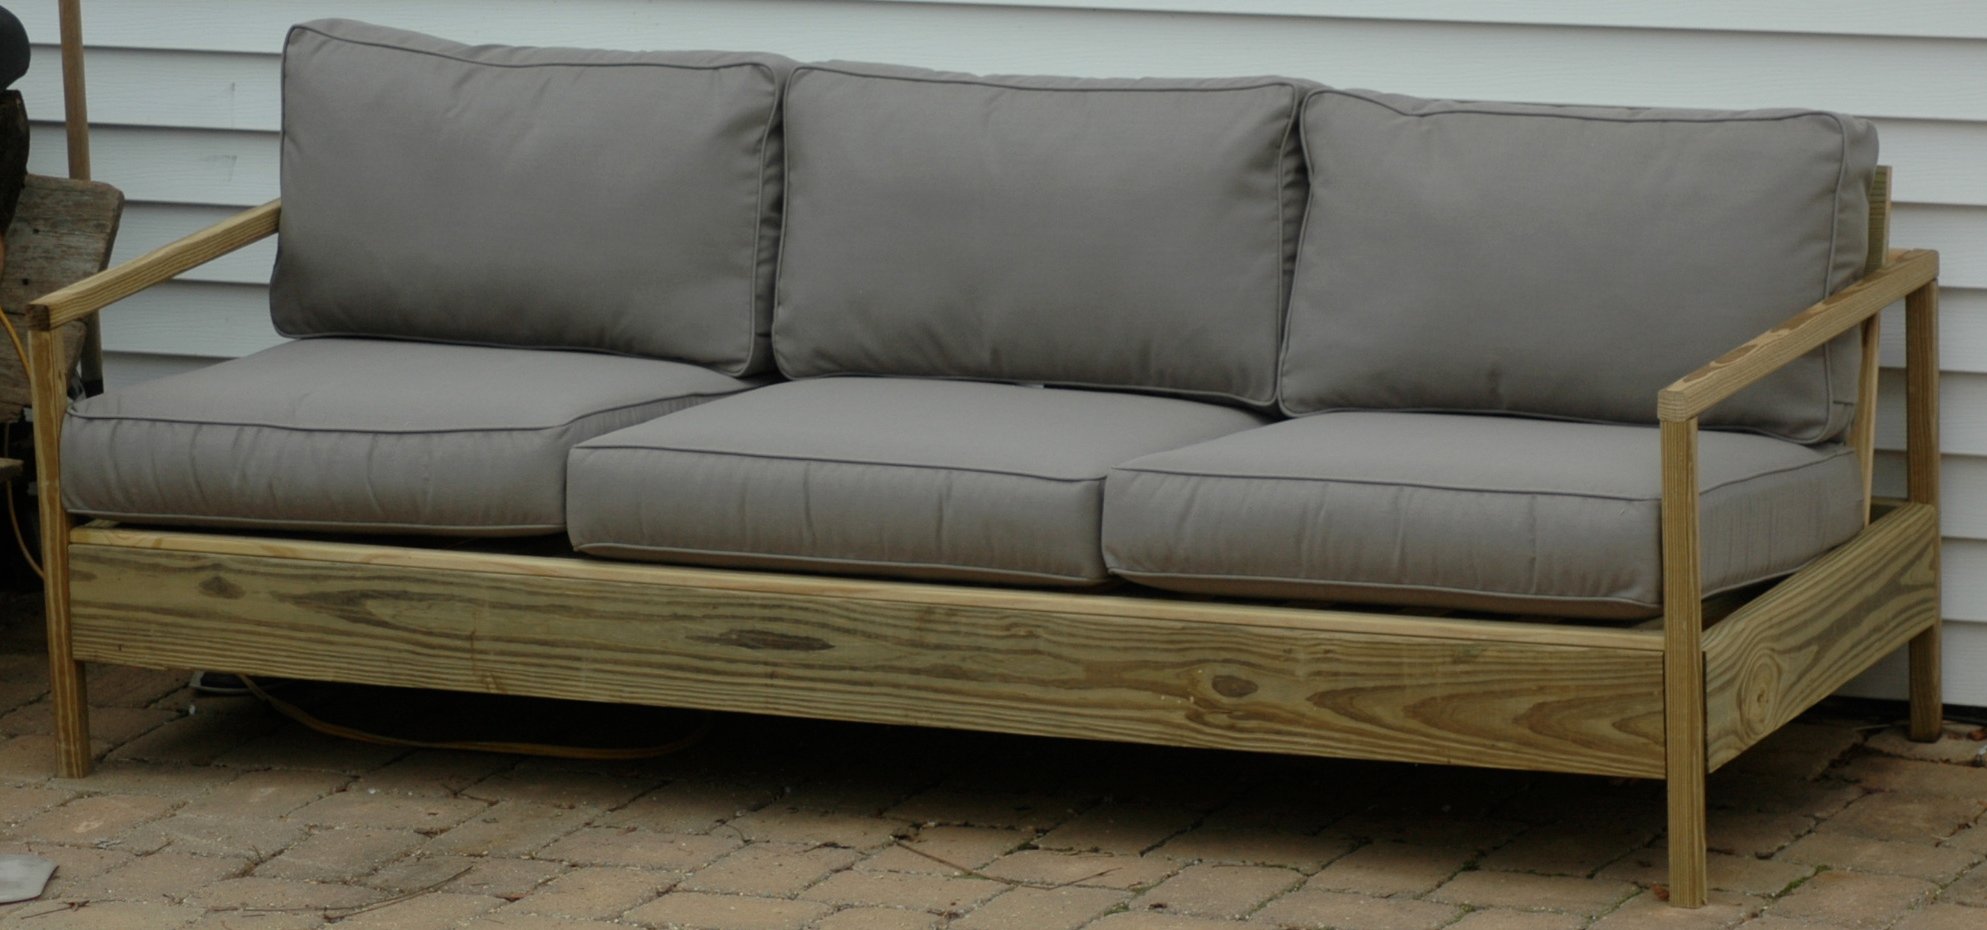
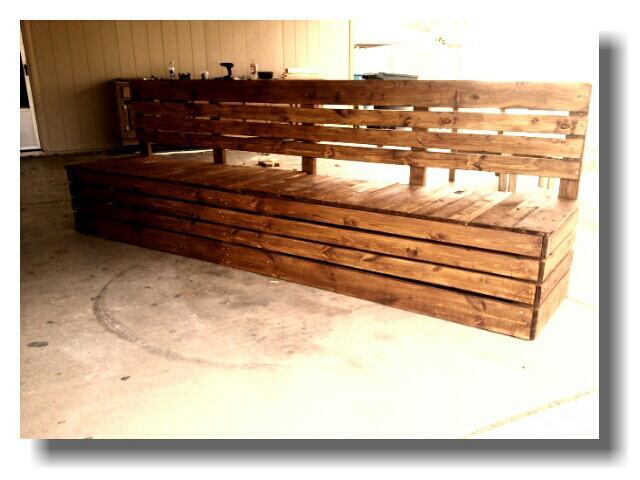
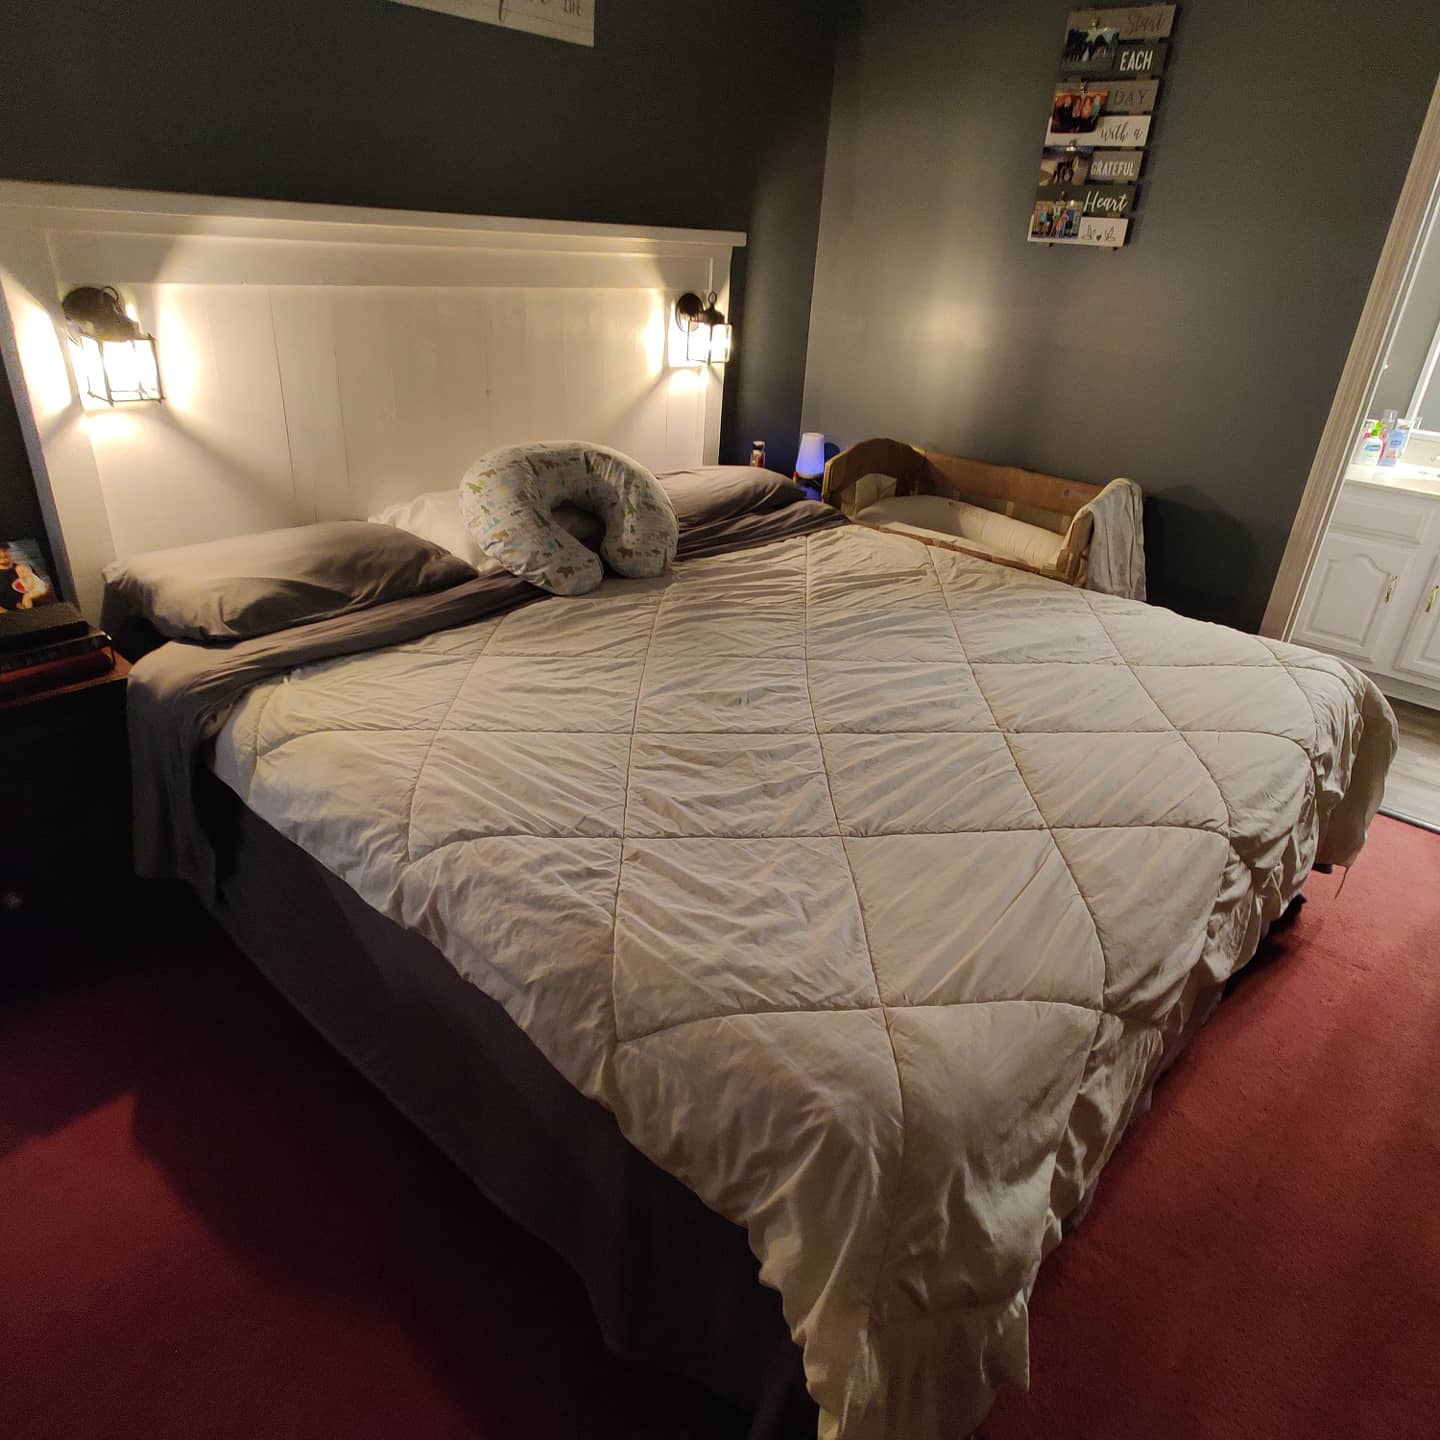
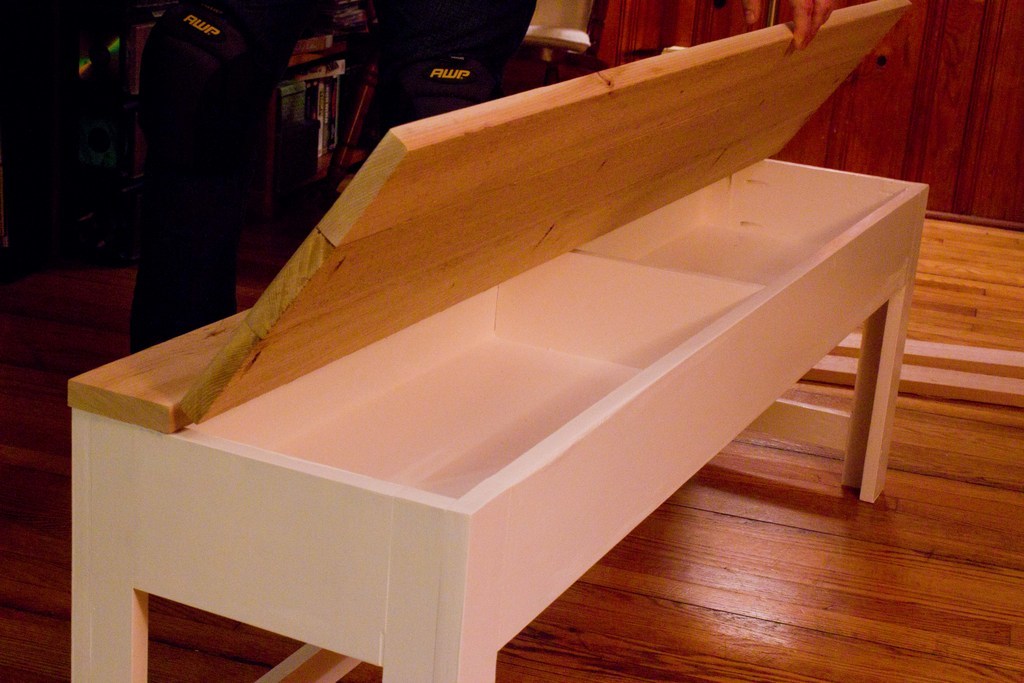
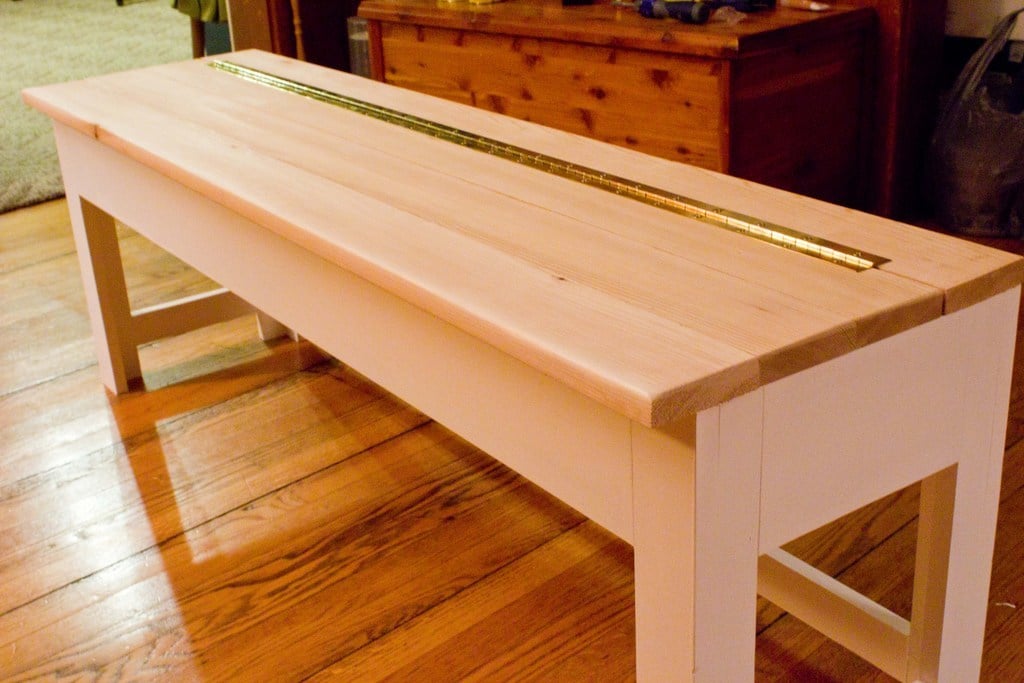
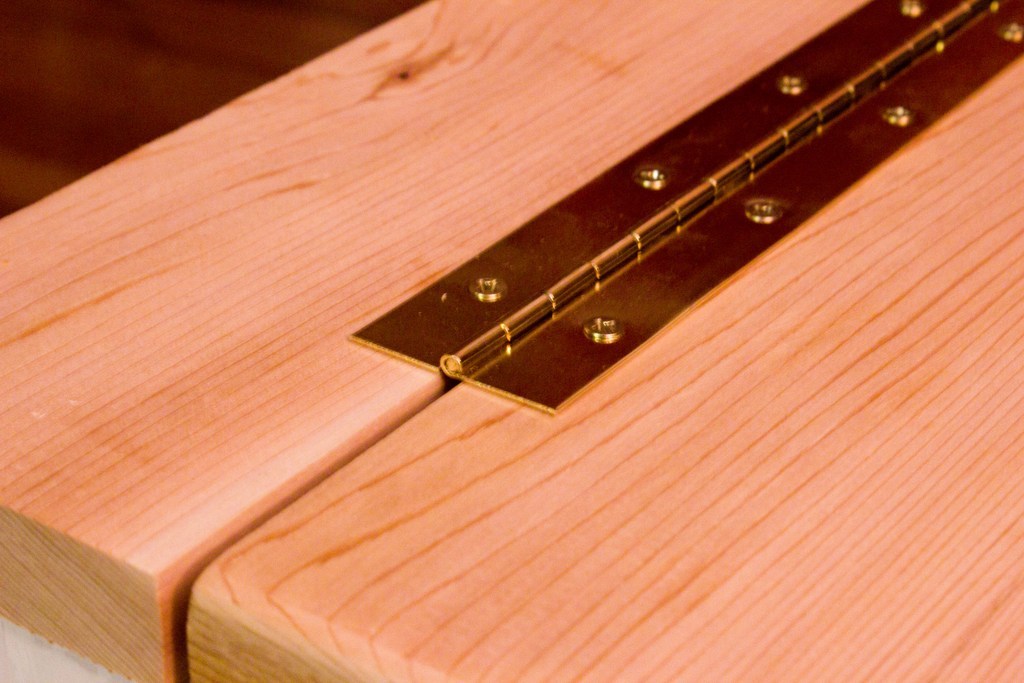
Wanting nice seating for the patio, I could not afford the sofa I wanted from Restoration Hardware. Since I have more interest and willingness than money, I looked on-line for a DIY design. Fortunately, I found Ana's site and her plan. I lengthened her sofa design to fit the RH cushions and went to work. Thank you Ana for easy to follow plans, especially thanks for the cutting & shopping lists! I had your plan by my side during the entire process. Now, I'm ready to build a footrest bench to place in front of it. (I did order the RH cushions... on sale, but still expensive!) I am 71 years old.... you never have to stop becoming, it is a choice!

Estimated Cost
$105 plus cushions.
Estimated Time Investment
Day Project (6-9 Hours)
Finish Used
sanding only, I want a weathered look.
Recommended Skill Level
Beginner

Comments

Rustic x coffee table (larger version)

Submitted by Srice20 on Tue, 12/16/2014 - 05:30

This table was a lot of fun to make! I love it with the dark top and white base!!!! 

Estimated Time Investment
Afternoon Project (3-6 Hours)
Recommended Skill Level
Intermediate

Comments

TwoCuteKids

Tue, 12/16/2014 - 05:46

Great job on your coffee table, it looks fantastic in your living room! Love the dark on light as well.

Farmhouse table

Submitted by Anonymous (not verified) on Fri, 03/17/2017 - 13:17

We were so excited to stumble across your plans on Pinterest for this farmhouse table. We literally seen the same table for 1600.00 on Wayfair's website. We can not wait to tackle another one for outdoors. Thank you. 

Built from Plan(s)
Estimated Cost
We only spent 115.00 on this table but it did help that we already had the stain and paint in our garage to finish the table with.
Estimated Time Investment
Afternoon Project (3-6 Hours)
Finish Used
Jacobean finish and white chalk paint.
Recommended Skill Level
Beginner

Patio Seating

Patio Seating I decided on.. Went with the same concept i did as before with the pallet storage table bench, just on a larger scale. Added the back and complete.. Probably should of done 6 supports for the back since its a solid 10 foot bench. Its completely stable but most defiantly would recommend 6 vs 5. I did do the lid in 5 foot sections to make easier for taking on and off.

Estimated Cost
80.00
Estimated Time Investment
Weekend Project (10-20 Hours)
Finish Used
stain
Recommended Skill Level
Starter Project

Loft bed with platform

Submitted by Radek on Thu, 12/18/2014 - 16:09

Modified a plan to fit 200x90cm mattress and added platform with steps from another Ana's plan.  Also added LED strip light under mattress base and under the platform. We leave that on at night so it's safer if he would wake up at night :)

In the future I'm planning to build a desk with drawers and a bookcase to fit under the bed.


Thank you Ana, my son loves it :)


2016 update :)

Finally added drawers (from Ana's plan) desk and shelfs. added four cool white LED lights over the desk.

Thank you again for your plans!

Estimated Cost
£150 for timber
Estimated Time Investment
Week Long Project (20 Hours or More)
Finish Used
I used General Finishes gel stain. It's a dye and a top coat in one. Done three coats of Candelite using old socks to wipe it on :)
Recommended Skill Level
Beginner

Comments

Cal King Farmhouse Bed

Submitted by Anonymous (not verified) on Sun, 03/19/2017 - 21:06

After multiple military moves, we were tired of factory made furniture with veneers that don't hold up to wear. So we were so happy to find the plans for this bed in a Cal King size.  Not only is it a classic design, but it's solid, sturdy, and we know exactly how to repair it if needed! We built everything to plan except that we used brackets to attach the side rails for ease of dissembling during moves. We love that it works with our freestanding, moveable base Tempurpedic mattress with no need for support slats. 

Estimated Cost
$220
Estimated Time Investment
Weekend Project (10-20 Hours)
Finish Used
Dark walnut stain for base. Rustoleum Painters Touch spray paint in Heirloom White.
Recommended Skill Level
Intermediate

King bed with matching night stands

Submitted by Anonymous (not verified) on Tue, 01/19/2021 - 13:55

Used one of Anna's plans here and modified for my height. Used 24In legs as I am 6'8" tall. Bed is perfect height for me and my 5'3" other half doesn't mind having to climb. (-: Also made the headboard slightly lower than the plan, but would opt to make it higher next time I build. Waiting to stain or paint...just haven't decided what to do yet. Also, because I am a big guy, I beefed up the center support which you can't see in this picture. Overall the buil dis amazing and sturdy and doesn't move at all. Love it. I made the night stands from the plans Ana had too but made the legs 24in to match the bed height.

Estimated Cost
$200 bed and stands
Finish Used
none yet
Recommended Skill Level
Beginner

Comments

Serving Tray

Submitted by moosmani on Fri, 02/15/2013 - 17:04

I wanted to try a high gloss finish on unstained pine and this seemed like a great project to try it out. I can’t believe how often I use this tray. Now I don’t know how I got by without it! Thanks for the plans!

Built from Plan(s)
Estimated Time Investment
Afternoon Project (3-6 Hours)
Finish Used
No stain. Hi gloss finish.
Recommended Skill Level
Beginner

Comments

American Girl Closet

Submitted by katecreate on Sun, 12/21/2014 - 20:54

Built this American Girl Wardrobe from Ana White's plans for two of my daughters and my niece.  They turned out absolutely adorable! I used scrapbook paper for the back of the wardrobe to mimic wallpaper and modge podged over for durability.  I built all three at once!  Put all three wardrobes together in one night, but took a few weeks for caulking and painting, filling and sanding.  Think I paid around $45 each for supplies when all was said and done.  I think they are going to love these and are built so well I am hopeful they pass them on to their kids some day.  Love the idea and plans, spot on!

Estimated Cost
$45
Estimated Time Investment
Weekend Project (10-20 Hours)
Finish Used
Had wood cut at Home Depot and measurements were perfect from plans.
Recommended Skill Level
Beginner

Coffee table

Submitted by Anonymous (not verified) on Thu, 03/23/2017 - 05:22

Coffee table 

Built from Plan(s)
Estimated Cost
$80
Estimated Time Investment
Weekend Project (10-20 Hours)
Finish Used
Sherwin Williams Sherwood Mission Oak
White stain
Minwax polyurethane
Recommended Skill Level
Beginner

Comments

Built in closet desk

This made over closet has become so well used during remote learning!

Built from Plan(s)

Comments

Trundle coffee table

Submitted by colsen on Sun, 02/17/2013 - 13:51

This project took me longer than most because I had to wait to borrow a circular saw for the ply wood base. This is my second completed project and the biggest challenge for me was getting the frame and drawer square.

It lives up to it's name as the "20 sec tidy up". My living room already looks a million times better. I'm going to build a few crates for playing cards.

Estimated Time Investment
Weekend Project (10-20 Hours)
Finish Used
Ipswich pine with semi gloss polyacrylic.
Recommended Skill Level
Beginner

Adirondack Stools / End Tables

Submitted by Lhamiel on Thu, 12/25/2014 - 06:18

Have made many of these as you can see.  The plan is easy to follow and easy to modify to suit your needs,  Wonderful site #anawhite


Built from Plan(s)
Estimated Cost
12.00
Estimated Time Investment
An Hour or Two (0-2 Hours)
Finish Used
polycrylic, polyurethane, rustoleum spar finish, minwax stain
Recommended Skill Level
Beginner
Seasonal And Holiday

Bed

Submitted by Anonymous (not verified) on Sun, 03/26/2017 - 07:58

I built this bed for my daughter. I used the Hailey Bed plans. It wasn't hard and got it done rather inexpensively.

Built from Plan(s)
Estimated Cost
$50
Estimated Time Investment
Afternoon Project (3-6 Hours)
Finish Used
N/a
Recommended Skill Level
Beginner

Adirondack chairs & centre piece

Submitted by Phil7979 on Tue, 01/26/2021 - 06:54

I started off making a single Adirondack chair, then made another and finally decided to join them together. Note that I've still to apply the staining to the connecting table.

Finish Used
As in my previus project: Sovereign Building, Brown, timber treatment x 2 coats.
Recommended Skill Level
Intermediate

My corner console

Submitted by smatcher on Tue, 02/19/2013 - 07:05

Needed a less massive entertainment center for my itsy bitsy living room.This plan was perfect we shrunk it down a bit width wise. Easy to build only took us a day to build and me a couple of weekends to paint! LOVE

Estimated Time Investment
Day Project (6-9 Hours)
Finish Used
White paint with brown glaze
Recommended Skill Level
Beginner

American girl stable

Followed instructions and became a fun day project using primarily 1x2's, Kregs jig and glue. Hardest part of this project was keeping our daughter out of Santa's workshop. Thanks to a previous brag post, I used wood shims as an idea for a roof and added the raffia to give Santa hero powers on Christmas morning.  Wood/shims were purchaed at HD; stain, hinges and clasps from a Re-store; raffia from a craft store.  All in probably cost around $40 total with wood and shims being $30 of that.  Note: if you decide to shingle using glue, plan for a LOT of shims and a full bottle of glue if not more. I cut the shims in half to give me double the amount for use. 

Stain/finish and shingles added 2 extra days to this project.

Estimated Cost
$40
Estimated Time Investment
Weekend Project (10-20 Hours)
Finish Used
Walnut on frame, honey maple on roof.
Recommended Skill Level
Beginner

Comments

Vintage Travel Themed Console Table

Submitted by Anonymous (not verified) on Mon, 03/27/2017 - 05:58

My IG Builders Challenge 2016 Piece

First piece I have ever build by myself.  I decided to go with a vintage travel theme.  Drawers were decoupaged with old map look wrapping paper and then distressed a bit.  Suitcase handles painted and distressed serve as the drawer pulls.  I even rusted up the metal on them...including the tiny screws!  For the top, I decided to beat up the wood with hammer, chains, etc. and then stain in dark walnut.  On each corner of the top I placed metal brackets which I also soaked in a vinegar rust solution to age them and then attached using some decorative upholstery tacks.  For the body, I decided to go with American Paint Company paint.  It's thick and easy to create lots of texture.  I layered two colors...Beach Glass as the base coat and Home Plate on top.  In order to achieve an aged, parchment paper type look, I used dark wax.  The dark wax sinks into all the yummy texture creating the look I wanted to get.  Additionally, I stenciled the words:  Explore Dream Discover across the bottom. 

Built from Plan(s)
Finish Used
American Paint Company Paint - Beach Glass & Homeplate
Minwax - Dark Walnut
Recommended Skill Level
Beginner

Fancy farmhouse headboard only

My first real woodworking project, made possible by Ana! Didn't really change much from the original fancy farmhouse bed design, just made it one plank narrower, added some lights and only utilized the headboard as my bed came with its own frame. Thanks so much for sharing your plans and I am getting ready to tackle the night stands to match.

Estimated Time Investment
Day Project (6-9 Hours)
Finish Used
Looking for a more rustic finish I just decided to use a whitewash and let a lot of the defects of the wood and the grain show through.
Recommended Skill Level
Intermediate

Comments

Storage Bench For the Mudroom

Submitted by romanweel on Fri, 02/22/2013 - 11:00

This was for our mudroom, obviously. I wanted to use up some ply that I had ill-advisedly had the store cut into quarters, so each of my storage compartments are 48" long, supported in the center by that divider piece you see in the second pic.

The beauty of DIY of course, is that you can modify everything. But if you do, you spend a week on a 4-hour project (but you do use up a lot of scraps). I cut nearly every piece out of plywood with the exception of the 1x3 front legs. It was time-consuming, but I think it was worth it as it allowed me to impulsively deepen the storage from 3.5" to 5". It also meant I only had to purchase the cedar, one pine 1x3, and a hinge.

The top is bare cedar boards which we'll allow to weather naturally. The hinge is the longest piano hinge they had at the blue store at about $7. The white is just a base Behr ultra with no tint because it's classic and we already had it.

Estimated Cost
$30
Estimated Time Investment
Weekend Project (10-20 Hours)
Recommended Skill Level
Starter Project

Comments

yurra-bazain

Mon, 03/18/2013 - 10:41

Now I may have to copy you on this one, some day in the distant future when I finally get to our garage entry renovation. :) Looks great!