Community Brag Posts

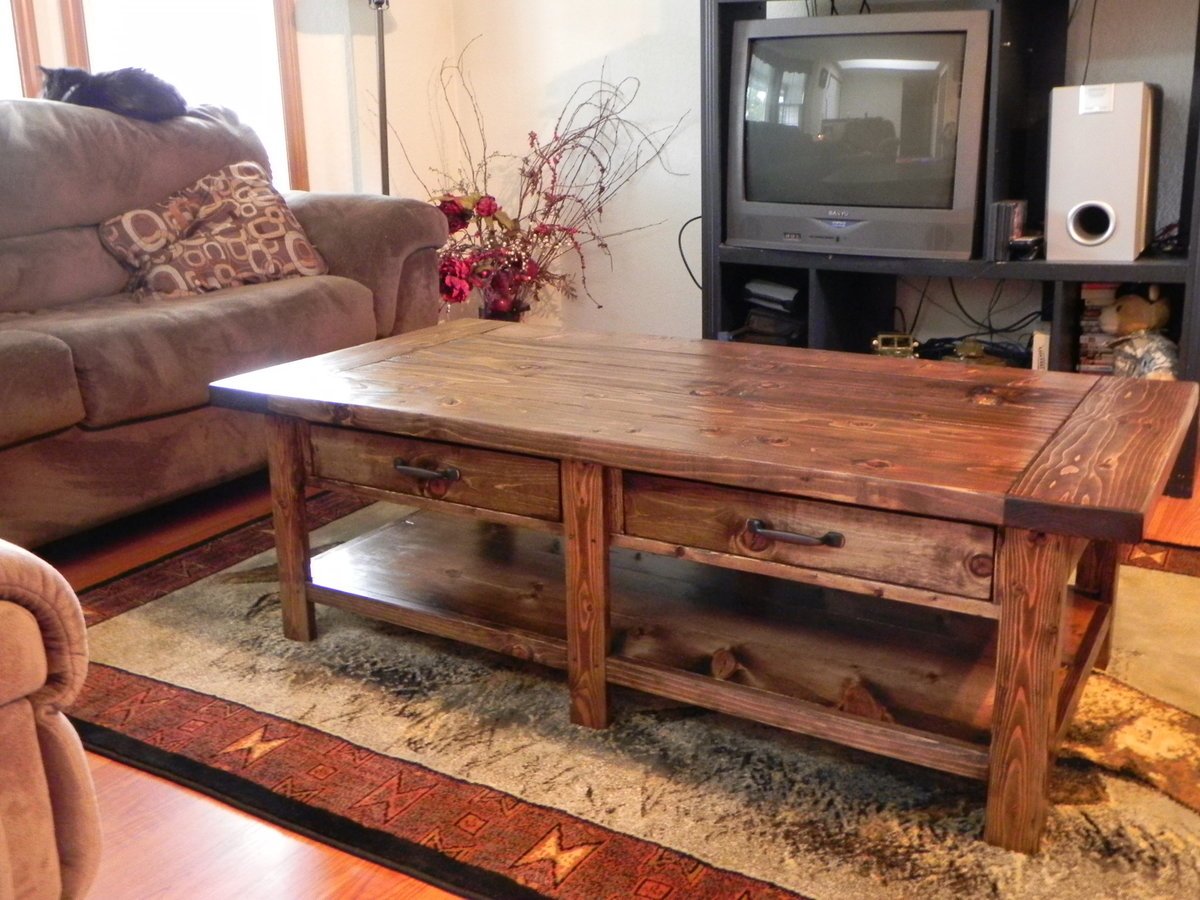
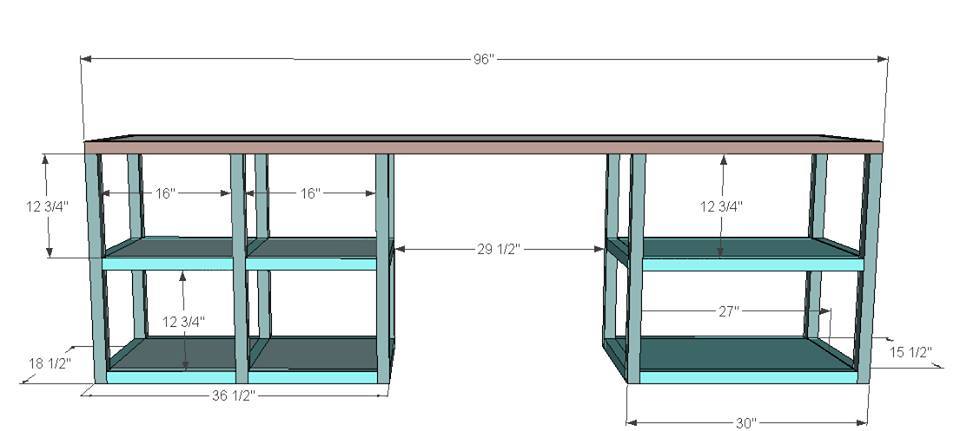
Big Ur Counter height bench

Submitted by dmcarwin on Wed, 04/11/2012 - 11:27

I have been wanting a bench for my counter for sooooo long! I loved the Big Ur bench and finally got up the nerve to adjust the plan to be a counter height bench.

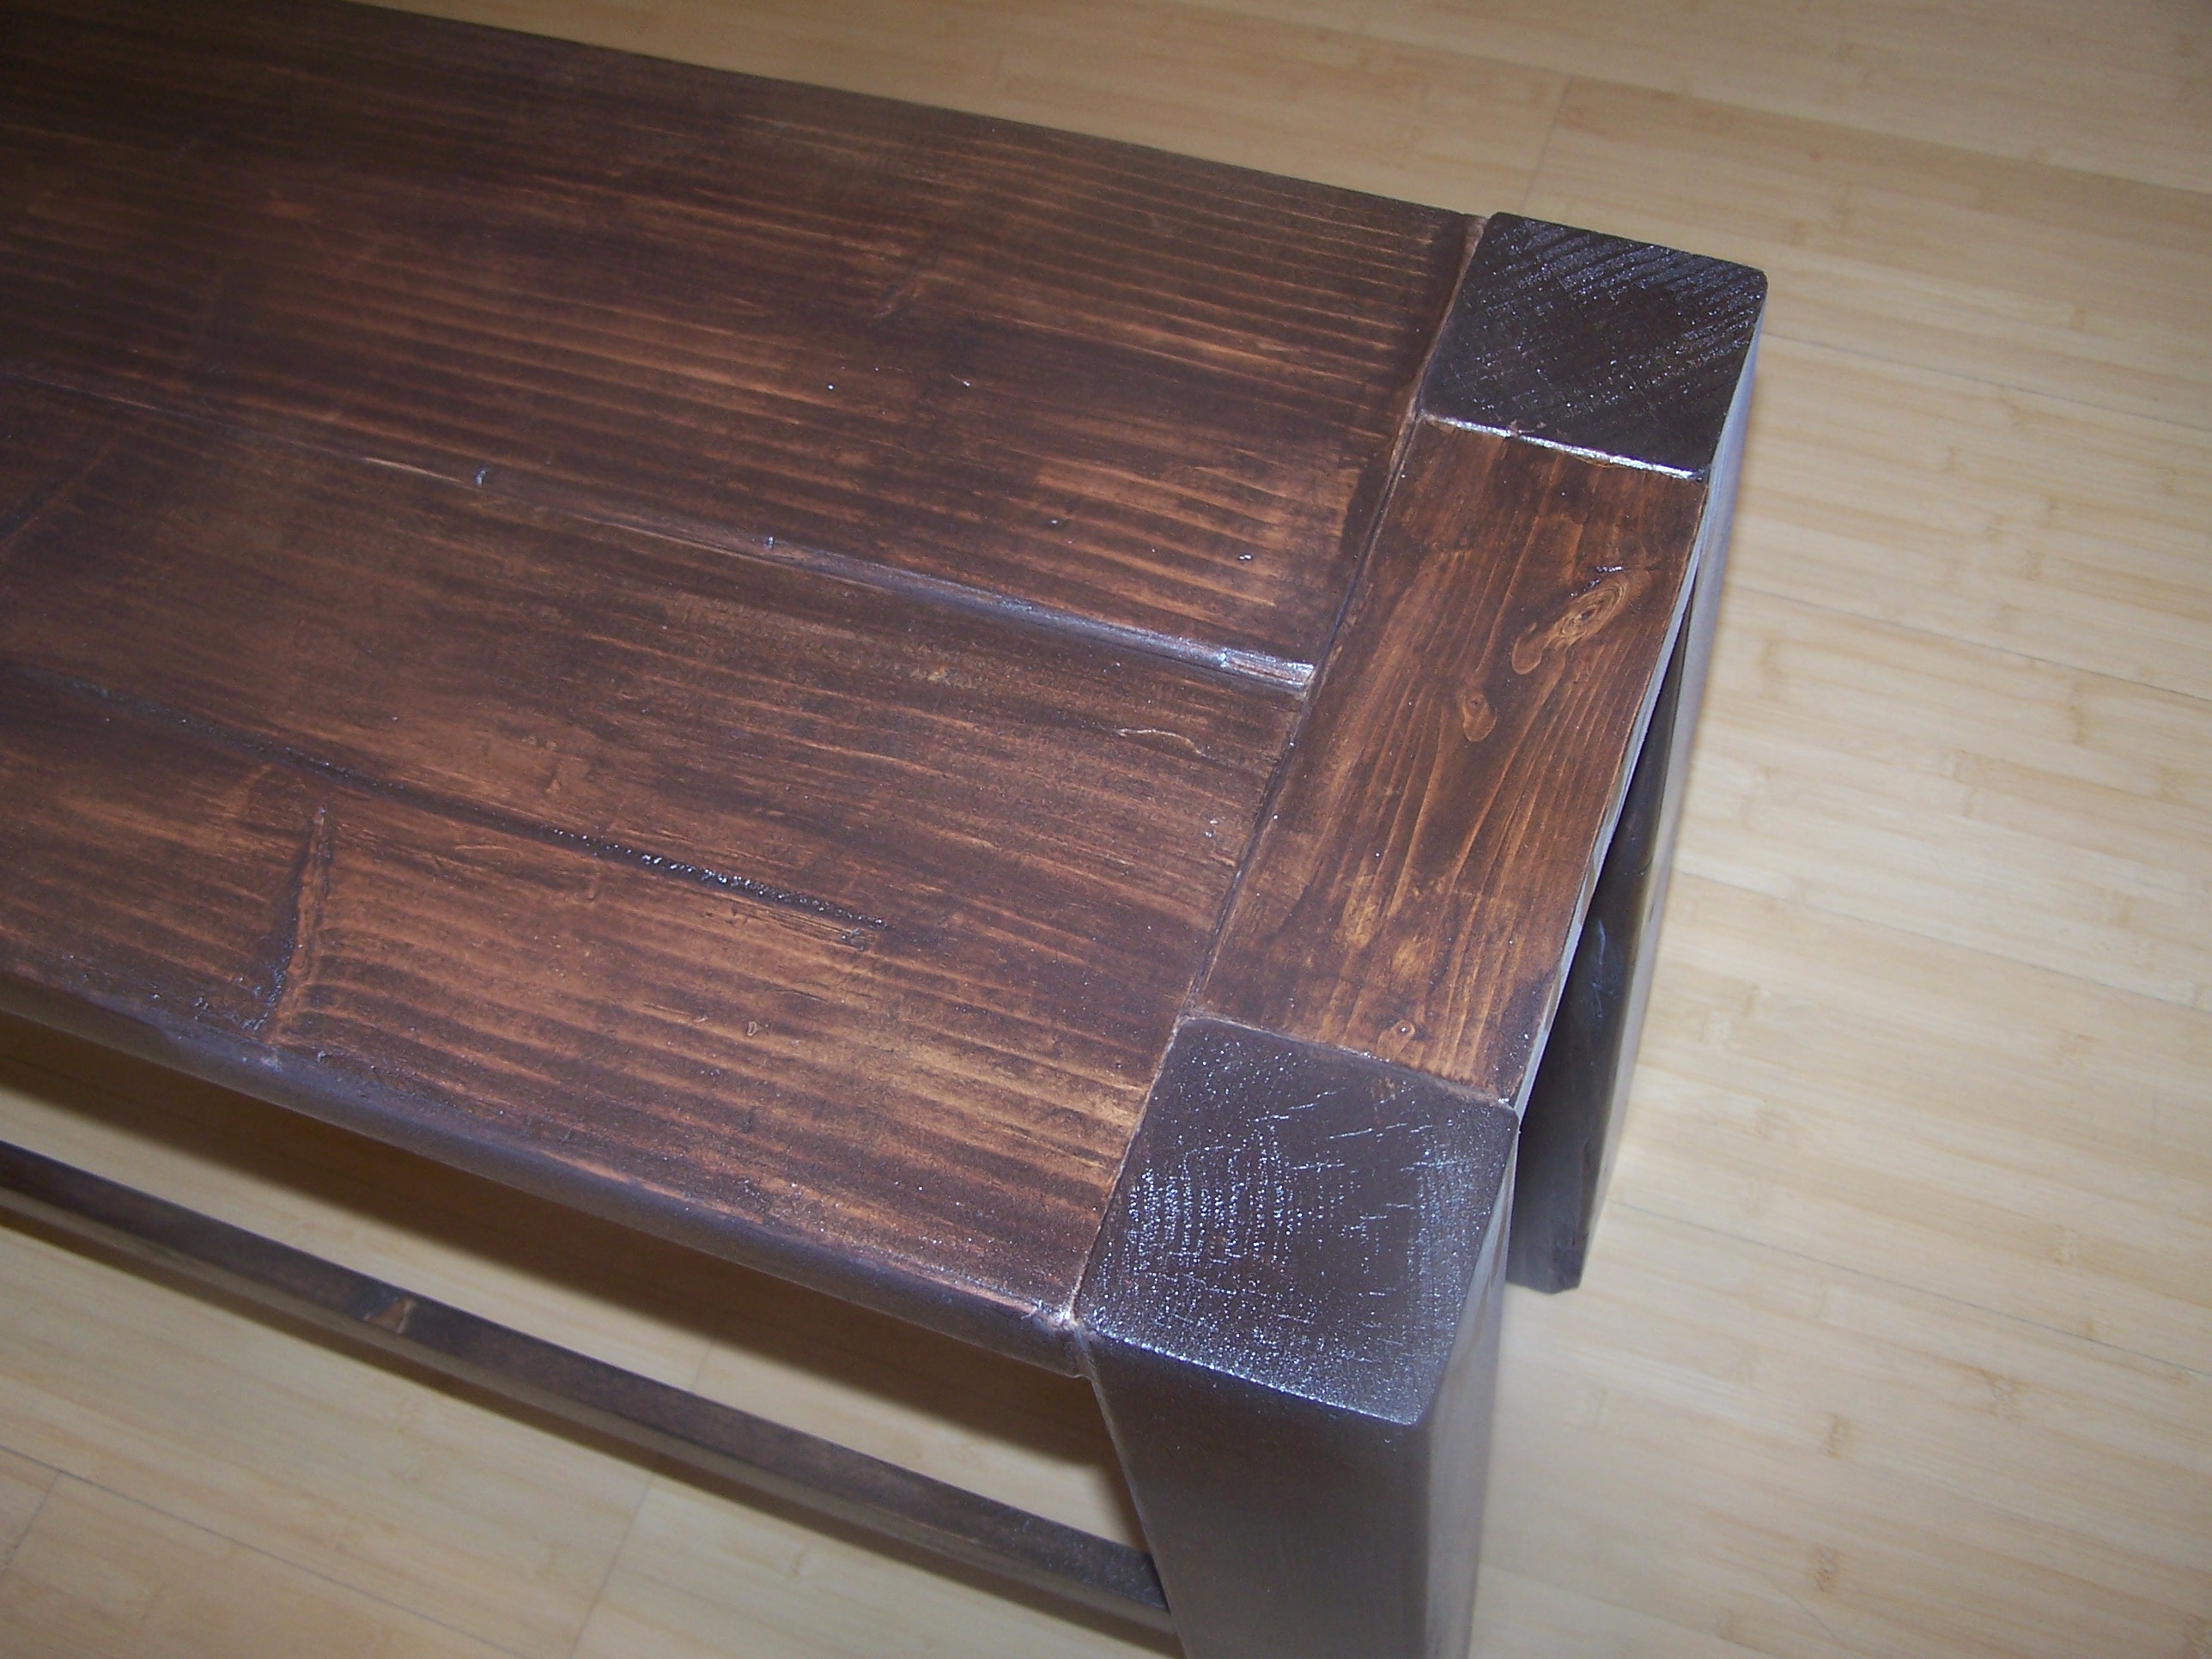
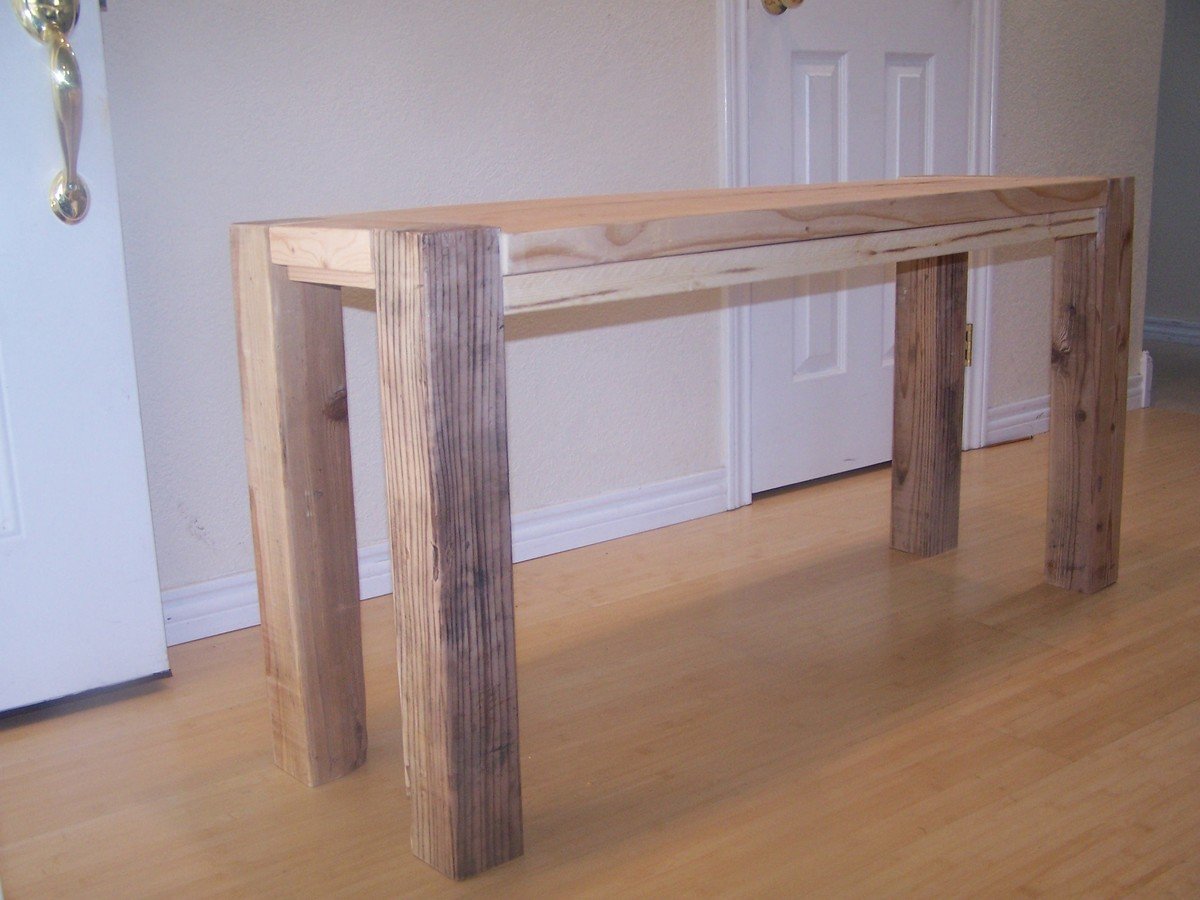
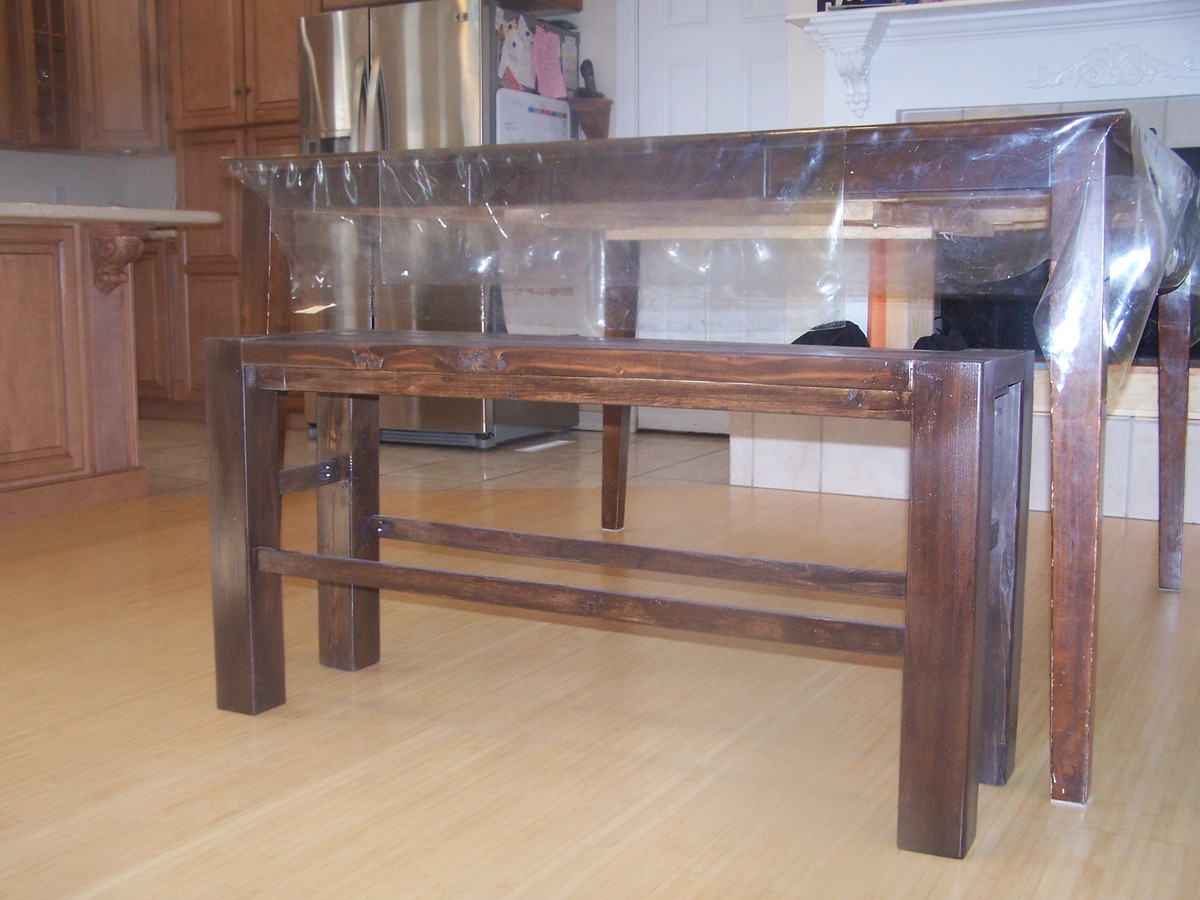
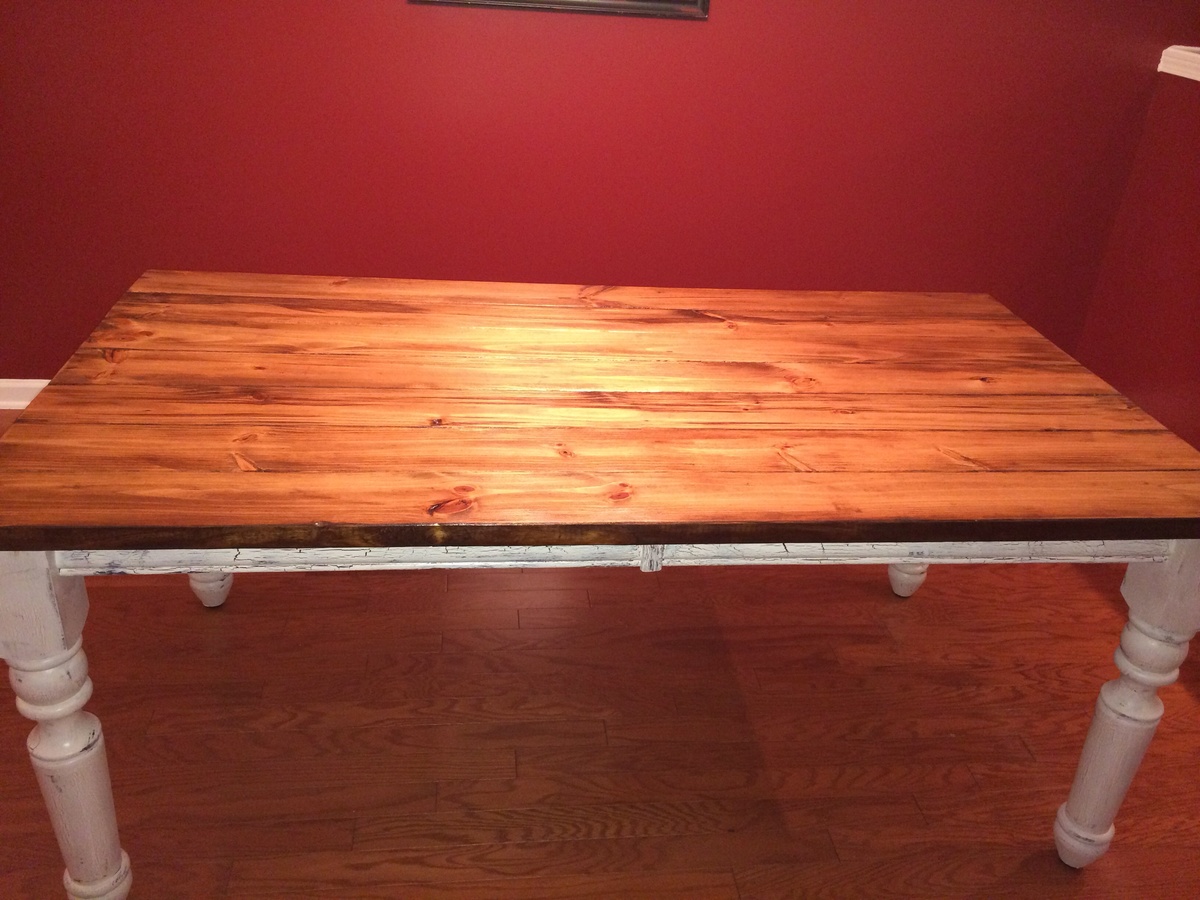
Since I am so cheap, I like to collect wood from the free section on craigslist. And that is how this bench came about! I had these 4x4's (well actually they were a little small and had to adjust for that as well) And these great top boards, which were a little warped, I think it just adds a little character to the bench to not be totally perfect, like me! :) (that was a joke, I am FAR from perfect!)

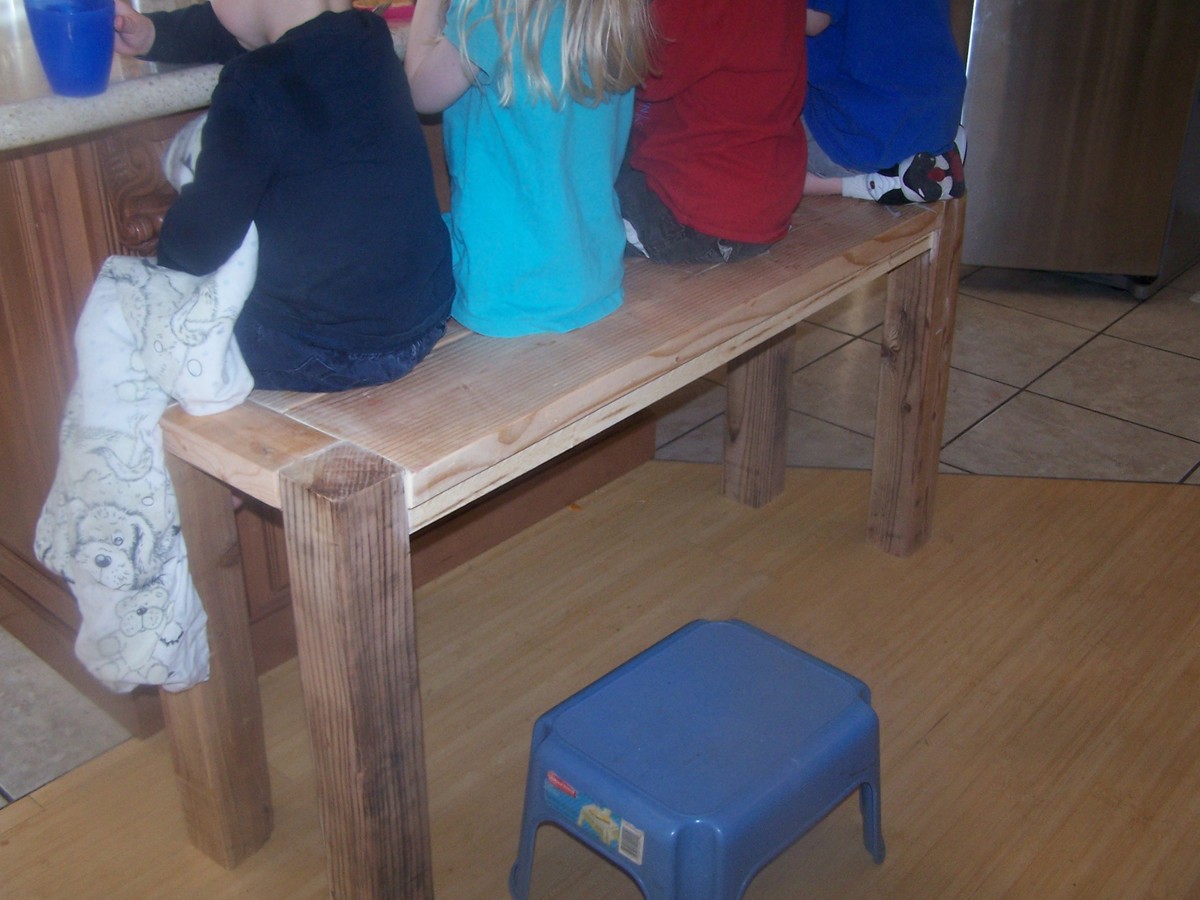
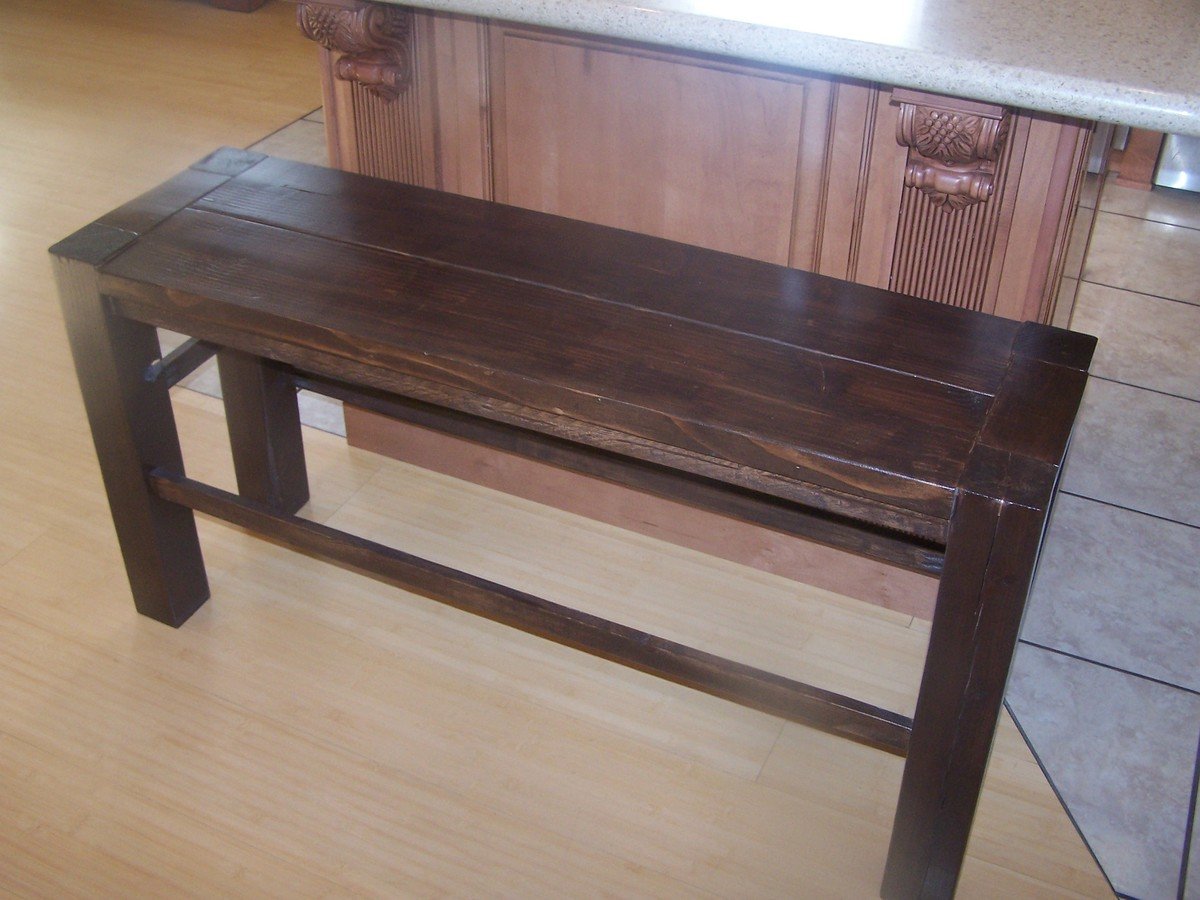
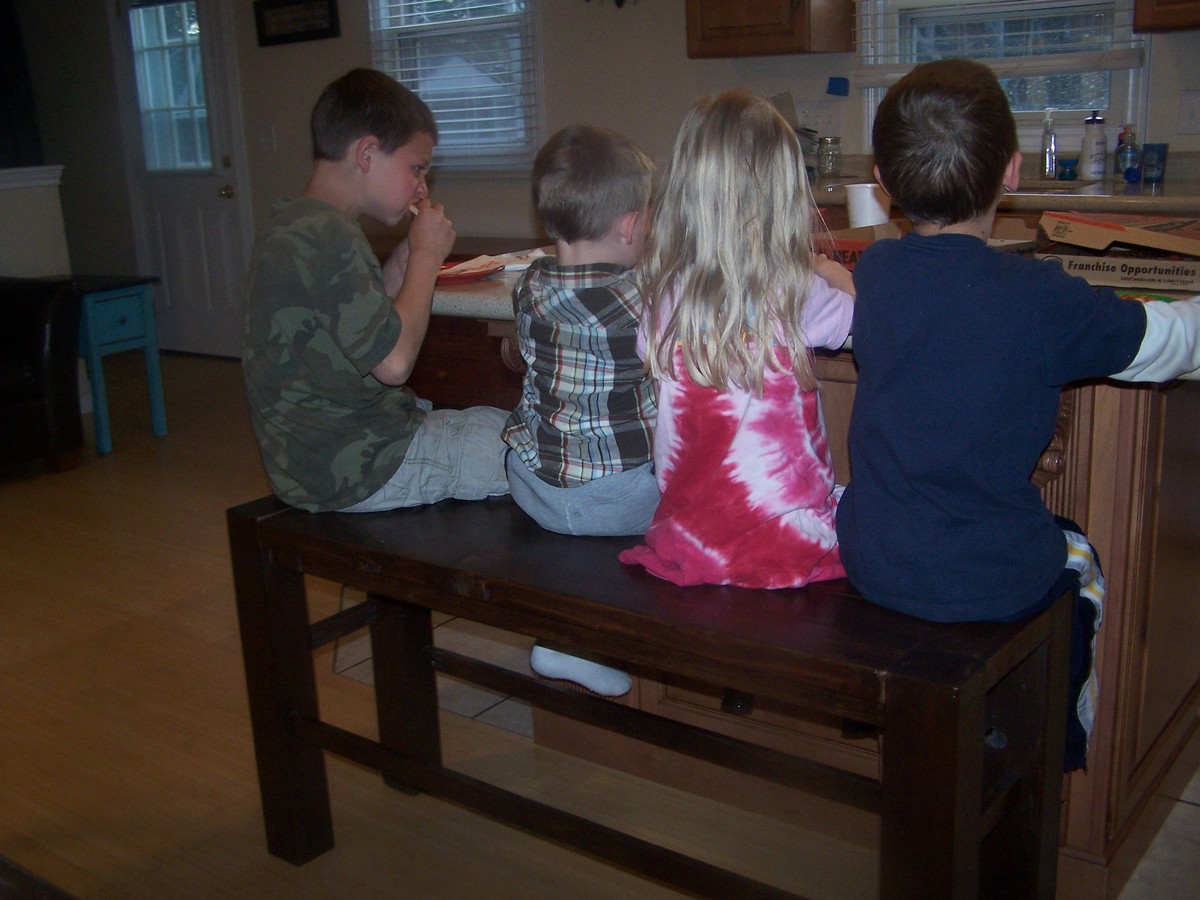
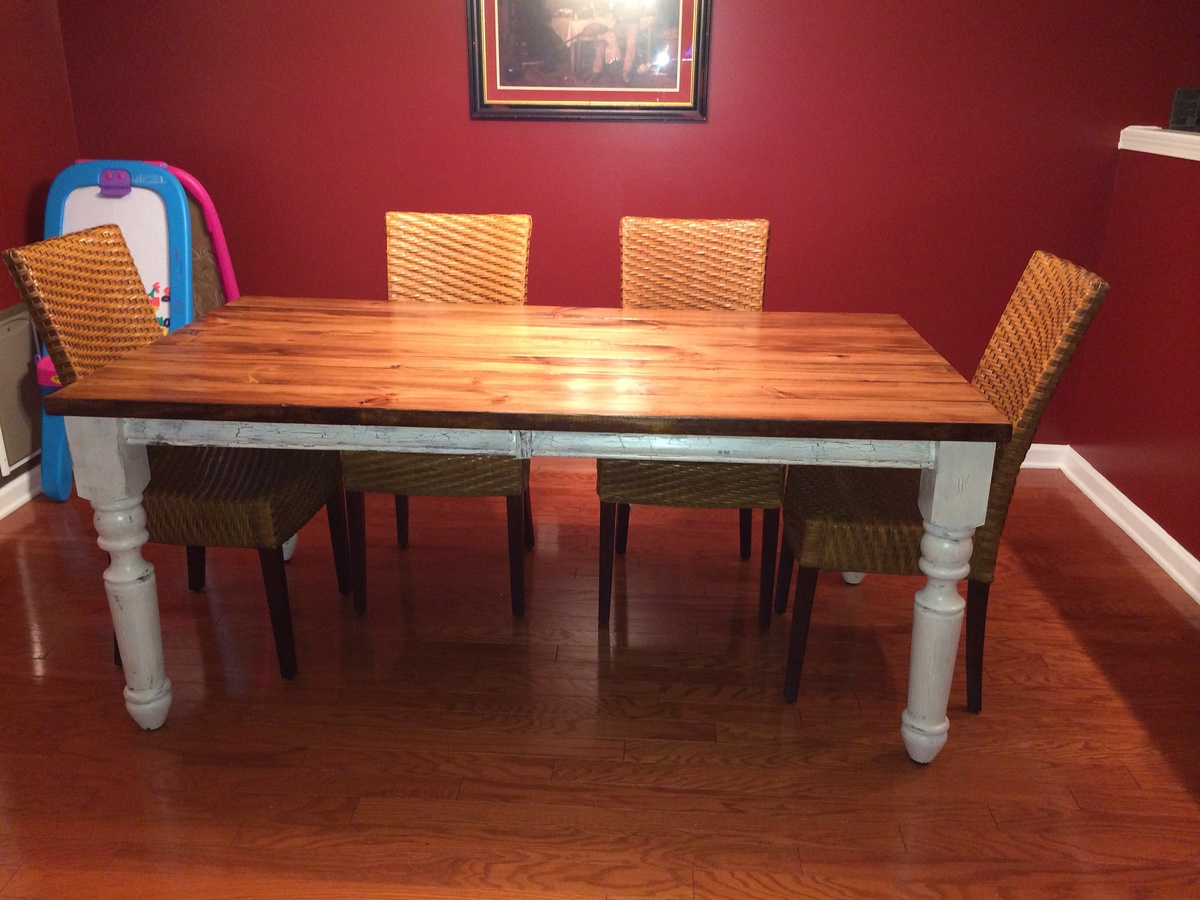
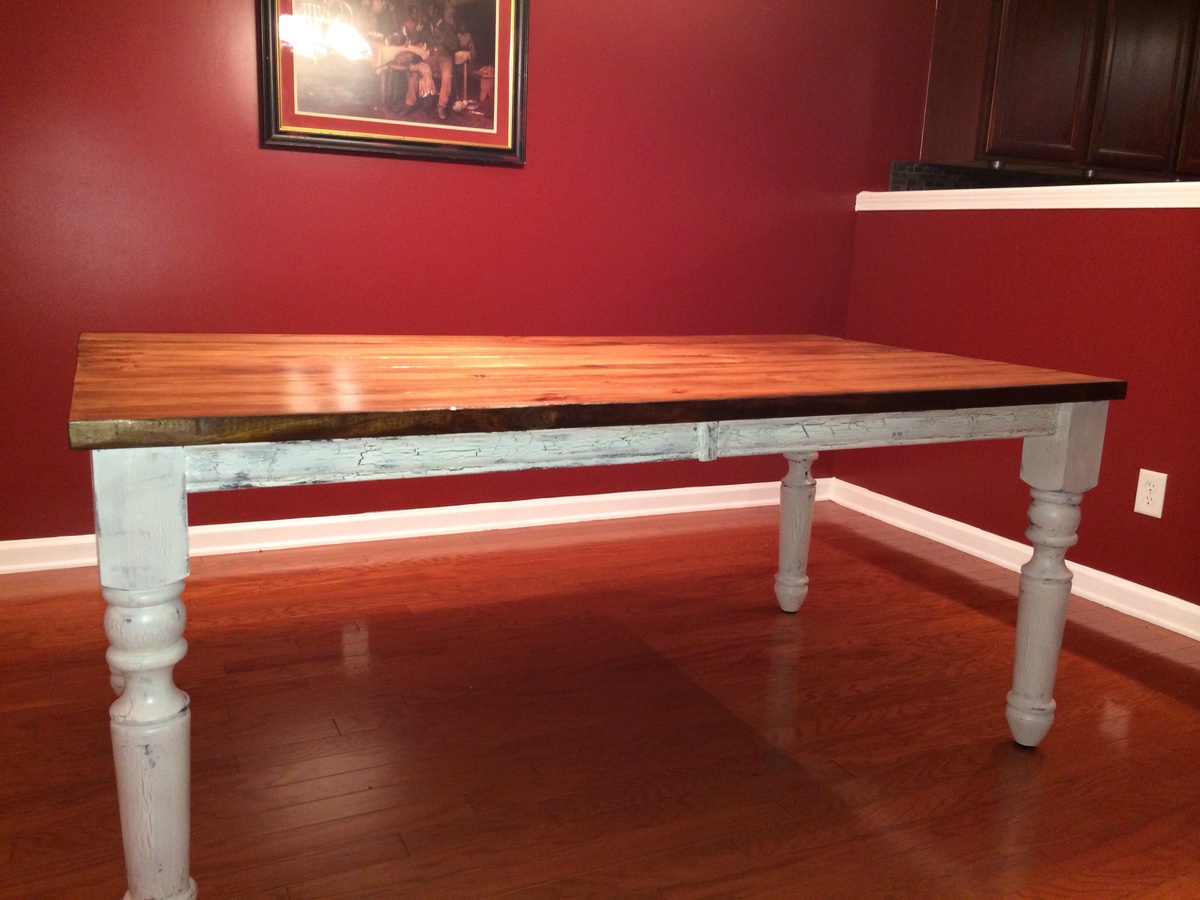
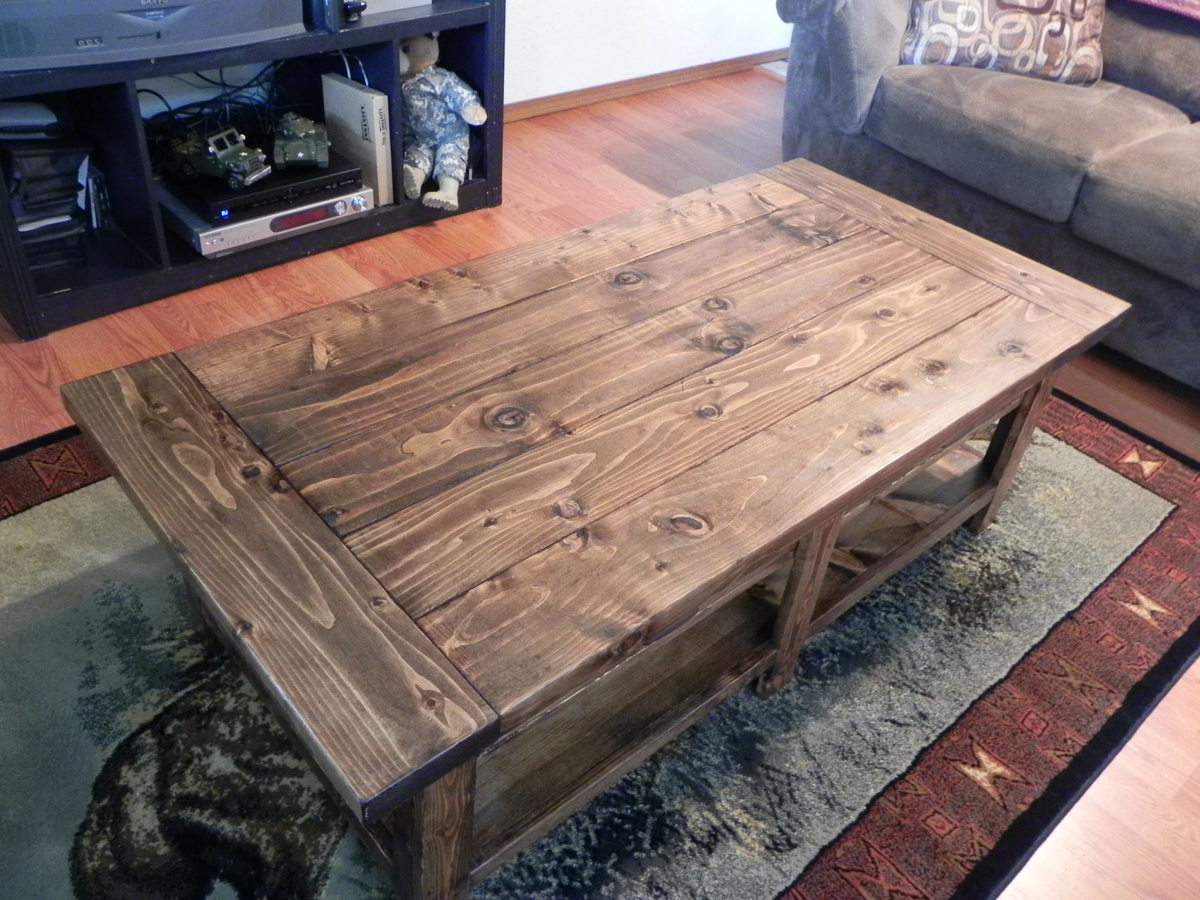
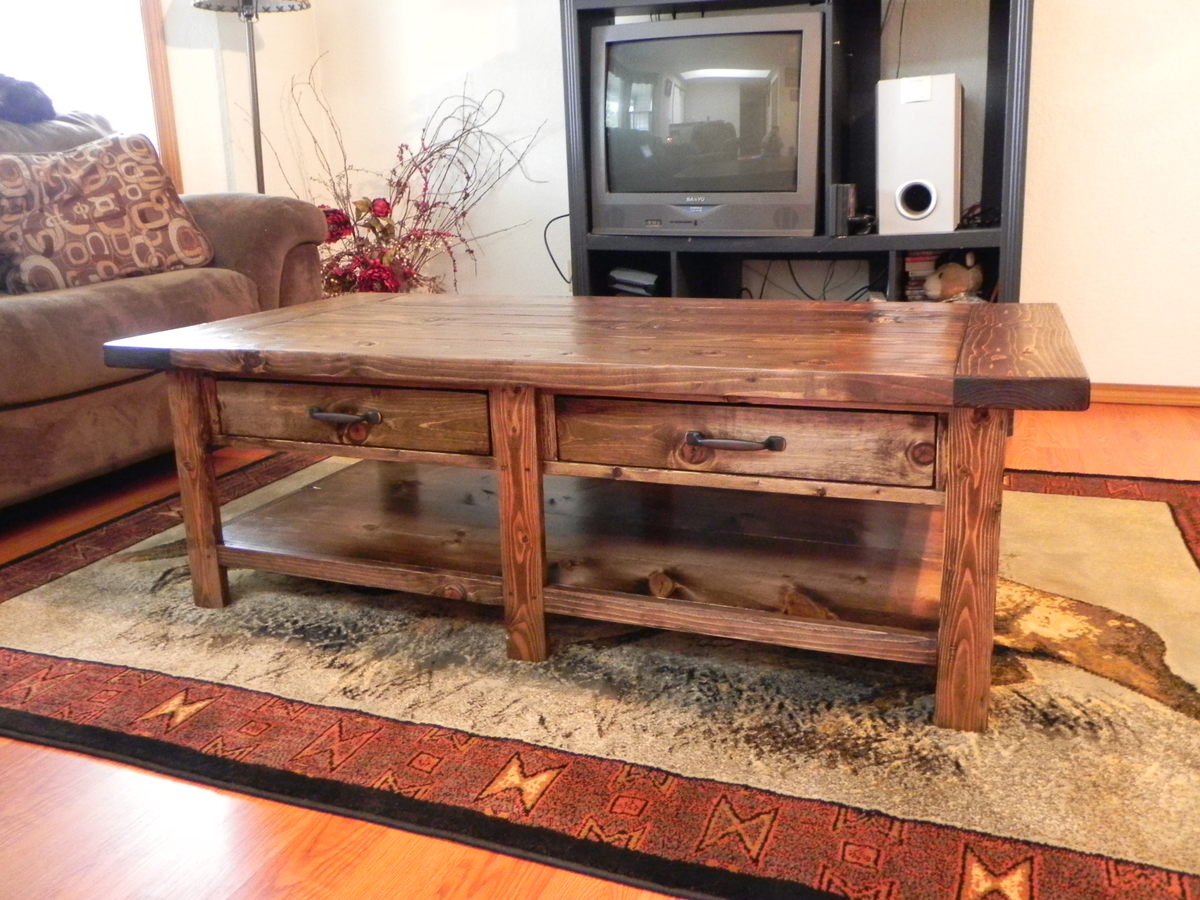
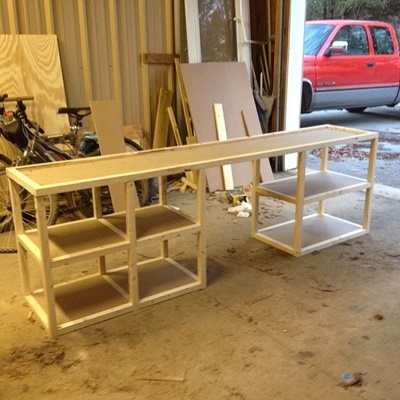
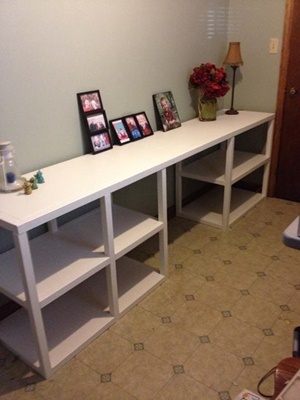
I made it like the plan, and as you can see from the unfinished picture my little ones needed a stool to climb up on the bench. So I added some 1x2's to give them a ladder for climbing. I love how it turned out and the best part is that it fits at my table as well!

Now my husband thinks I should build a smaller one for the short side of the island. We have six kids and this bench only fits four....we'll see.....

Built from Plan(s)
Estimated Cost
Free! Scrap wood
Estimated Time Investment
Afternoon Project (3-6 Hours)
Finish Used
I used one coat of Rustoleum dark walnut. I gave a few coats of water based poly and and at least three or four on the top.
Recommended Skill Level
Beginner

Comments

Bunnie1978

Thu, 04/12/2012 - 08:56

The bench looks great. But I think you must be crazy!! SIX kids??!?!? I can barely handle ONE!

In reply to by Bunnie1978

dmcarwin

Thu, 04/12/2012 - 13:12

Yeah, you could say I am crazy, in a good way! I do feel like a chicken with it's head cut off sometimes, but I am not sure I have a handle on things, does anyone? It's fun though! Thanks for the comment on the bench, and I am WAY impressed with your son's playhouse loft bed, I am still trying to find courage to tackle a project that impressive, great job!

Leslie Is Ready

Thu, 01/21/2016 - 09:44

You did an excellent job on this! I'd love to build something similar, but with upholstery on top.


BTW, I adore large families, and know that your six little ones must be a great blessing!

Family dining

Submitted by tnkrise2 on Sun, 01/26/2014 - 17:00

Largest project yet. Loved the variety of legs at Osborne.

Estimated Time Investment
Week Long Project (20 Hours or More)
Recommended Skill Level
Beginner

Comments

Simple Bunk Bed Triple Bunk

Submitted by Anonymous (not verified) on Wed, 04/20/2016 - 07:07

I loved the look and design of Ana's Simple Bunk Bed but due to limited space in our home, needed a triple bunk bed. I wasn't interested in the hassle of a trundle so I decided to modify the simple bunk bed plan and make it a triple. I have to say, I was a little worried about how sturdy it would be but this plan is so solid with the 4x4 posts that there is no need to even even think about that for another second!
I changed the ladder so that it was attached to the side rails of the bunk bed as someone had posted they did earlier and decided to add another little ladder for the middle bunk so my little one wouldn't have to leap from the ladder to get into her bed. ;D

In order to do a triple in our home (with 8 ft. ceilings), I needed to bring the height down so I made the bottom bunk sit on the floor with the legs only being as long as the height of the headboard. I also made all the headboards and footboards only as tall as the footboards in Ana's original Simple Bunk Bed plans.

This was my first build and there are definitely things I would do differently to make this work better if I had it to do all over again. I would make the legs a little shorter on the 2nd and 3rd bunk so that there is more head room for the person on the top bunk.

All in all though, I had a great time building this and can't wait to try some more of Ana's plans!!!

Estimated Cost
$450 including hardware
Estimated Time Investment
Week Long Project (20 Hours or More)
Finish Used
White paint, not sealed
Recommended Skill Level
Intermediate

Comments

wbmclaurin

Mon, 11/01/2021 - 21:30

Do you happen to have the exact plans for this triple bunk? I saw that you modified the simple double bunk to fit your space but I'm wondering if you drew up plans wih measurements to make it easier for beginner folks.

Painter's ladder entry system

Submitted by misshunnie on Fri, 01/10/2020 - 05:40

I built the outside shelves first for my husband's plants.  The coat rack section was added last after a modification of the original plan.  I did not paint or finish the shelves as we are still deciding, but I do sort of like the scandi look of it as it against our gray walls & the greenery of the plants.  Feel free to offer any finishing recommendations if you comment.  Once all parts were cut to size for our space, assembly took very little time.  Shelving in the plant sections were made from reclaimed IKEA shelving boards.  Thanks for the plans, Ana, as this solved a problem for us because we do not have a coat closet at the front door and these windows provide the best light in the house for my husband's growing plant collection!

Estimated Cost
$40 +/- as reclaimed wood was used as well as newly purchased and new hardware (hooks & boot tray under bottom shelf of coat rack portion)
Estimated Time Investment
Afternoon Project (3-6 Hours)
Finish Used
TBD - recommendations welcomed!
Recommended Skill Level
Intermediate

Comments

3 Cube Book shelf with back

I followed the plans for the '6 cube bookshelf' but wanted an open shelf on top as well as a back board. For the back I purchased a few feet of 1x5 pine and cut it to fit snug between the lower and upper 1x2s that were used as trim. I left out the middle 1x2 board on the back (from the original plans) so that everything fit flush. I secured the back boards with finishing nails across the middle shelf and some wood glue.

Built from Plan(s)
Estimated Cost
$120
Estimated Time Investment
Day Project (6-9 Hours)
Finish Used
Wood conditioner prior to using a Dark Walnut stain- one coat. We roughed up the boards with a rock so the pine would look a little beat up.
Recommended Skill Level
Beginner

Comments

Jim_and_Rachelle

Tue, 04/17/2012 - 17:20

I just followed the plans for the 6 Cube bookshelf already listed. The only modification was leaving out the backside middle horizontal 1x2 so that I could lay in the back boards vertically. The original plans don't have a back included in the cut list. I finished the project and stained it before adding the back just to make the finishing easier.

Apothecary-Style Media Console

Submitted by bhammond on Tue, 01/28/2014 - 20:52

This was more work than I thought! It was also much bigger than I thought and I couldn't move it on my own. My husband and I had to wrestle it onto a skate board to move it across the house. :)
I love it!! It is full of imperfections, but I think it adds character.

I built it out of old garage-shelves. The hardware was from ebay and was super cheap. I already had paint and stain lying around. That's why it didn't cost much!

Estimated Cost
100
Estimated Time Investment
Week Long Project (20 Hours or More)
Finish Used
Dark Walnut Minwax stain on top, and white paint I had lying around the house on the bottom.
I sanded all edges and used the stain to darken them. I also painted coffee onto the white painted parts, waited 20 minutes, then wiped it off with a damp cloth to antique the color a bit.
Recommended Skill Level
Intermediate

Product Display Case / Bookcase

Submitted by Anonymous (not verified) on Mon, 04/25/2016 - 14:40

Product display case for local salon.

Estimated Cost
$60
Estimated Time Investment
Weekend Project (10-20 Hours)
Finish Used
minwax ebony stain on all wood, and a white, gray, and blue chalk paint used to antique. Finished and protected with minwax wood finishing wax.
Recommended Skill Level
Beginner

Loft bed with desk and book case

Submitted by puffin_81 on Thu, 01/16/2020 - 05:14

My daughter's bedroom was getting a bit cramped so wanted to make a loft bed for her but I also wanted to incorporate a desk and some shelves for her books and toys. I started with the base plans from Camp Loft Bed with Stair, Junior Height posted on this site and kind of incorporated my own touch with the stairs, desk, book case. I also added a removable tray for when my daughter is eating a snack in her bed. It hooks on the top rail of the bed. Another addition I made was the wall shelf I mounted above the bed for storing her books, I-pad, etc.

Sorry but I do not have any plans for these modifications. I just made some simple drawings and winged it. This is my first ever build so hope you enjoy it

Estimated Cost
600
Estimated Time Investment
Week Long Project (20 Hours or More)
Finish Used
Minwax American Walnut for the dark finish and Natural for the light finish
Recommended Skill Level
Advanced

Laundry Basket Shelf

Submitted by Anonymous (not verified) on Wed, 09/13/2023 - 09:35

I didn’t want to have to paint or cut the metal angles - plus I wanted 4 basket tall so I used pre-drilled melamine for the sides making the unit 48” tall. Then cut top and bottom same as plans and bought 5mm L shelf pegs and had shelves cut 24 1/4”. Used white wainscot panel for back. Very easy - especially since I had big box store make all my cuts! Just have to make sure you have peg holes lined up at bottom or you won’t be level.

Deb D.

Built from Plan(s)

Comments

Benchright Coffee Table

Submitted by Felicka on Tue, 04/17/2012 - 20:35

Great fun Easy Project! I am in absolute love with this table and give it the rustic feel and look that we were going for. We tried to get the knottiest pine that we could find with also the different colors. We love that look of pine!

Estimated Cost
$65
Estimated Time Investment
Weekend Project (10-20 Hours)
Finish Used
Min-wax Dark Walnut, Min-wax wood conditioner, Min-wax Semi Gloss Polyurethane. We also wet/dry sandpapered the top of the table to give it the extra smooth feel without letting go of the rustic look.
Recommended Skill Level
Intermediate

Comments

Pam the Goatherd

Wed, 04/18/2012 - 13:26

It's good to know I'm not the only one who likes the knots and swirls and different shades in the pine boards! The last time I was at the lumberyard, when I told the lumberyard-guy that I was building furniture he tried to direct me to the clear pine. I had to explain to him that I like the character that the knots and such give to a piece. He thought I was nuts, but he still helped me find the straightest boards in the rack.

PPEKOSZ

Tue, 07/30/2013 - 08:17

Hi I love your piece and think it came out great. I noticed on the original plans that 2 x6 pieces were listed. Did you use them in your project?

Thanks

Birthday iTable

Submitted by goose on Fri, 01/31/2014 - 06:07

This was my first project and I wanted to surprise my fiance for her birthday. The hardest part was keeping her out of the garage! I used the plans for the iTable and it was really easy to follow even for a rookie like me. I adjusted the dimesions a bit because 40' would've been awkward for our living room. It ended up being about 34 1/2 or so and I also used 1x10's instead and made the legs 18' so it matched our couch's height. Fun fact: don't forget to factor in the width of your saw blade when cutting..I botched the first cut by about 1/8 BUT did that for the rest so it still ended up being square lol. Anyways, hope you like it and I'm looking for a new project already! Cheers!

Built from Plan(s)
Estimated Cost
$80
Estimated Time Investment
Weekend Project (10-20 Hours)
Finish Used
Varathane Stain and Poly Mix in Kona Semi-Gloss. This was my first time staining anything so I wanted something easy to use. I applied two coats all together, sanding a lot before and in between.
Recommended Skill Level
Beginner

Handmade by Jennifer

Submitted by Anonymous (not verified) on Fri, 04/29/2016 - 06:05

This was my first building project. It was fun and simple.

Built from Plan(s)
Estimated Time Investment
Day Project (6-9 Hours)
Recommended Skill Level
Beginner

Factory Cart Coffee Table

Submitted by Anonymous (not verified) on Tue, 01/21/2020 - 09:44

My first attempt at build anything.
I hand cutout a stencil to have my wifes family name on the sides and used her year of birth a the "Est year"
spray painted the stencil and before the paint completely dried I applied the stain to fade out the sharp stencil lines.

Estimated Cost
40.00
Estimated Time Investment
Weekend Project (10-20 Hours)
Recommended Skill Level
Starter Project

Apothecary Cabinet Console

Loved this plan, also! In fact, a male co-worker helped me pick out the color! I made the open shelves taller and left the back off so my media components could get lots of air flow!

Built from Plan(s)
Estimated Cost
Around $100
Estimated Time Investment
Week Long Project (20 Hours or More)
Finish Used
I used Kilz Colors in Amethyst Gem.
Recommended Skill Level
Intermediate

Supersized Parson's Tower Desk

I needed a desk that served not only as a space to work, but something that had good storage and didn't take up way to much floor space.I looked and looked and couldn't find anything I loved until I ran across the Parson's Tower Desk plans on Ana-white.com. The depth of the desk was perfect, but I needed more storage, so I decided to play in with sketchup and see if I couldn't make it more of what I needed.

I ended up with a supersized Parson's Tower Desk!

It has four smaller cubbies to the left side and 2 wider shelves to the right side.

You can see a front view and all the pictures at the blog post!

Built from Plan(s)
Estimated Cost
$75
Estimated Time Investment
Weekend Project (10-20 Hours)
Finish Used
Primed with Bullzeye primer and painted with valspar antique white
Recommended Skill Level
Beginner

Farmhouse table

Submitted by Anonymous (not verified) on Mon, 05/02/2016 - 09:12

table took one day and bench a few more hours. Sturdy beautiful table

Built from Plan(s)
Estimated Cost
$100
Estimated Time Investment
Day Project (6-9 Hours)
Finish Used
Min wax stain and dry brush paint
Recommended Skill Level
Intermediate

Rustic X Hall Tree

Submitted by Anonymous (not verified) on Mon, 01/27/2020 - 14:22

I built this scaled down version of Ana's Hall Tree to fit into a 3 foot wide space in my daughter's living room.

Built from Plan(s)
Estimated Cost
$55
Estimated Time Investment
Afternoon Project (3-6 Hours)
Finish Used
Whitewash
Recommended Skill Level
Starter Project

For the Military family on the constant move!

I was able to build the bed with the Rockler surface mount brackets and this allowed complete removal of the side rails without any screws. We are a military family that moves every 3 years and this makes it so much easier and less wear and tear on the beds. Any family that moves consistently can understand that the hardware can only take some much abuse before it compromises the integrity of the furniture.

Built from Plan(s)
Recommended Skill Level
Beginner

Camp Loft Bed Modified Height

My girls each had their own room that they never used! So, dad decided to combine their rooms which gave us an office. They have since spent more time in there then anywhere in the house but it was a mess! 2 beds in a tiny room was not working! So I made dad make this bed, and it is AMAZING! It has made my life so much easier getting them ready in the morning, not tripping around beds, and they spend time in it, and take pride in keeping it clean!!

We added about 6 inches, making it normal bunk bed height, but didn't change anything else. No finish yet, because I love the look and haven't decided what to do. We also, did not use a kreg jig. Hubby just drilled in sideways, and it worked fine.

Estimated Cost
$100
Estimated Time Investment
Weekend Project (10-20 Hours)
Finish Used
None
Recommended Skill Level
Starter Project