Kids Picnic Table
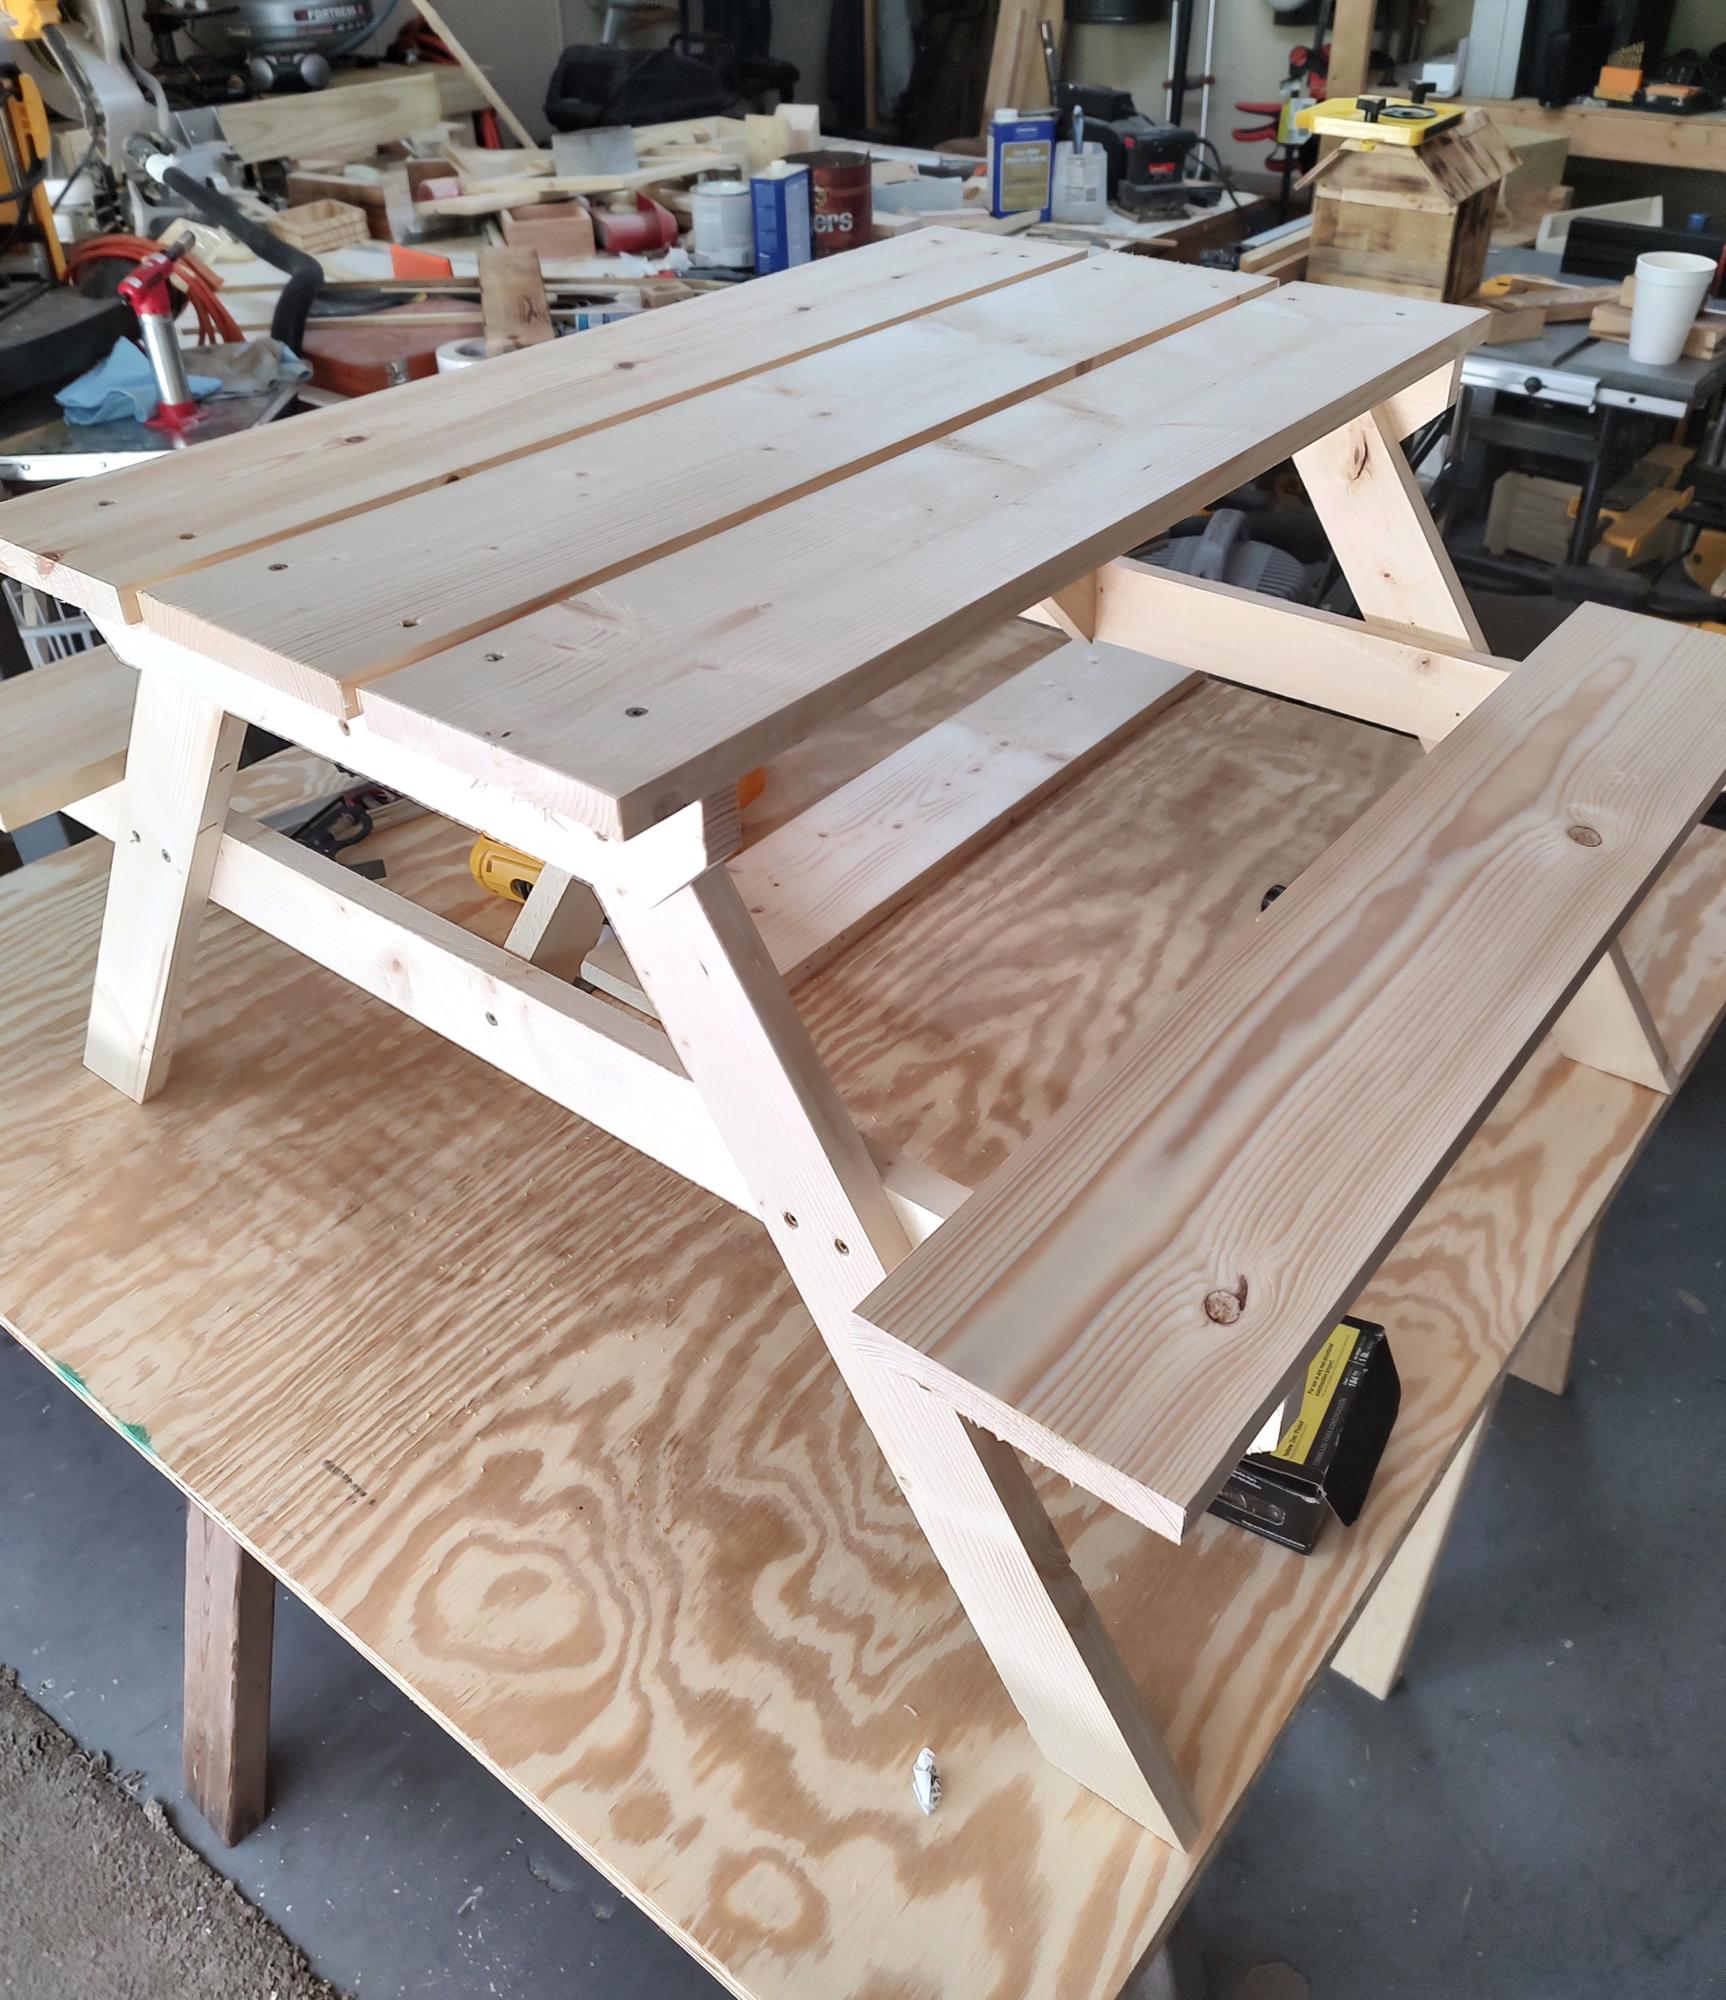
Made this for my grandson, didn't take to long. Now him and his dad are going to paint.
Joe the retired firefighter
Built from Plan(s)
Made this for my grandson, didn't take to long. Now him and his dad are going to paint.
Joe the retired firefighter

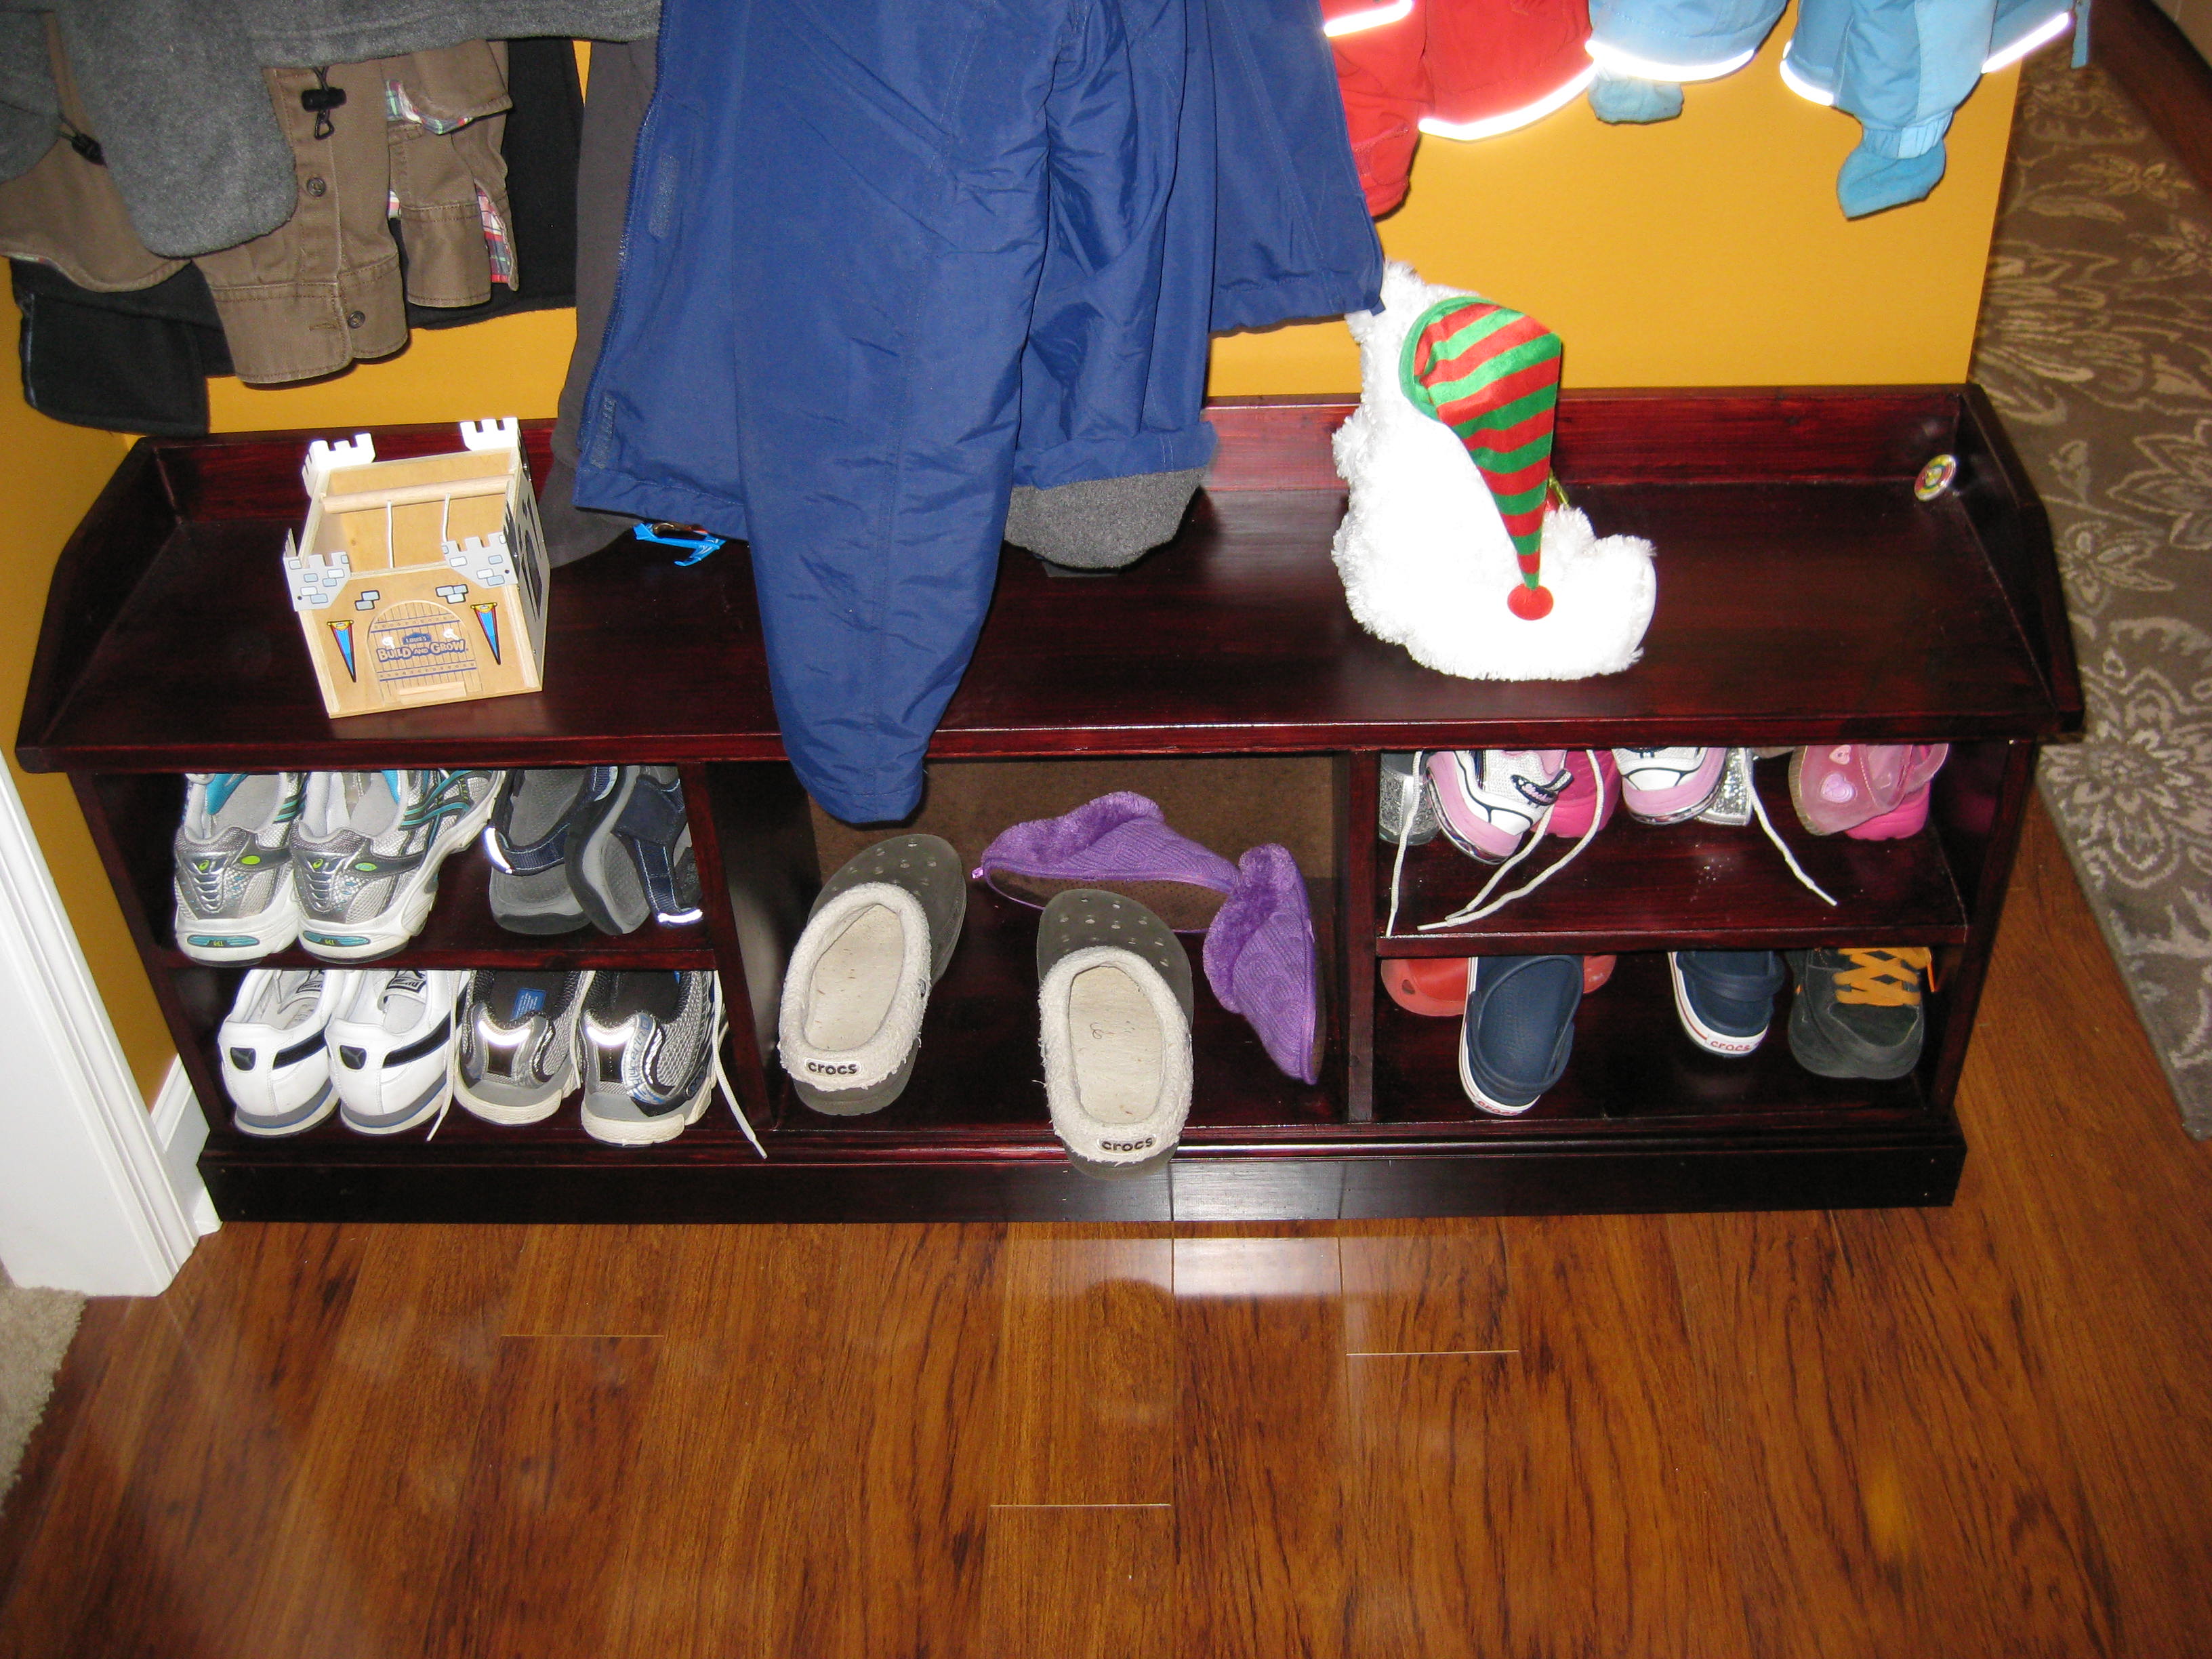
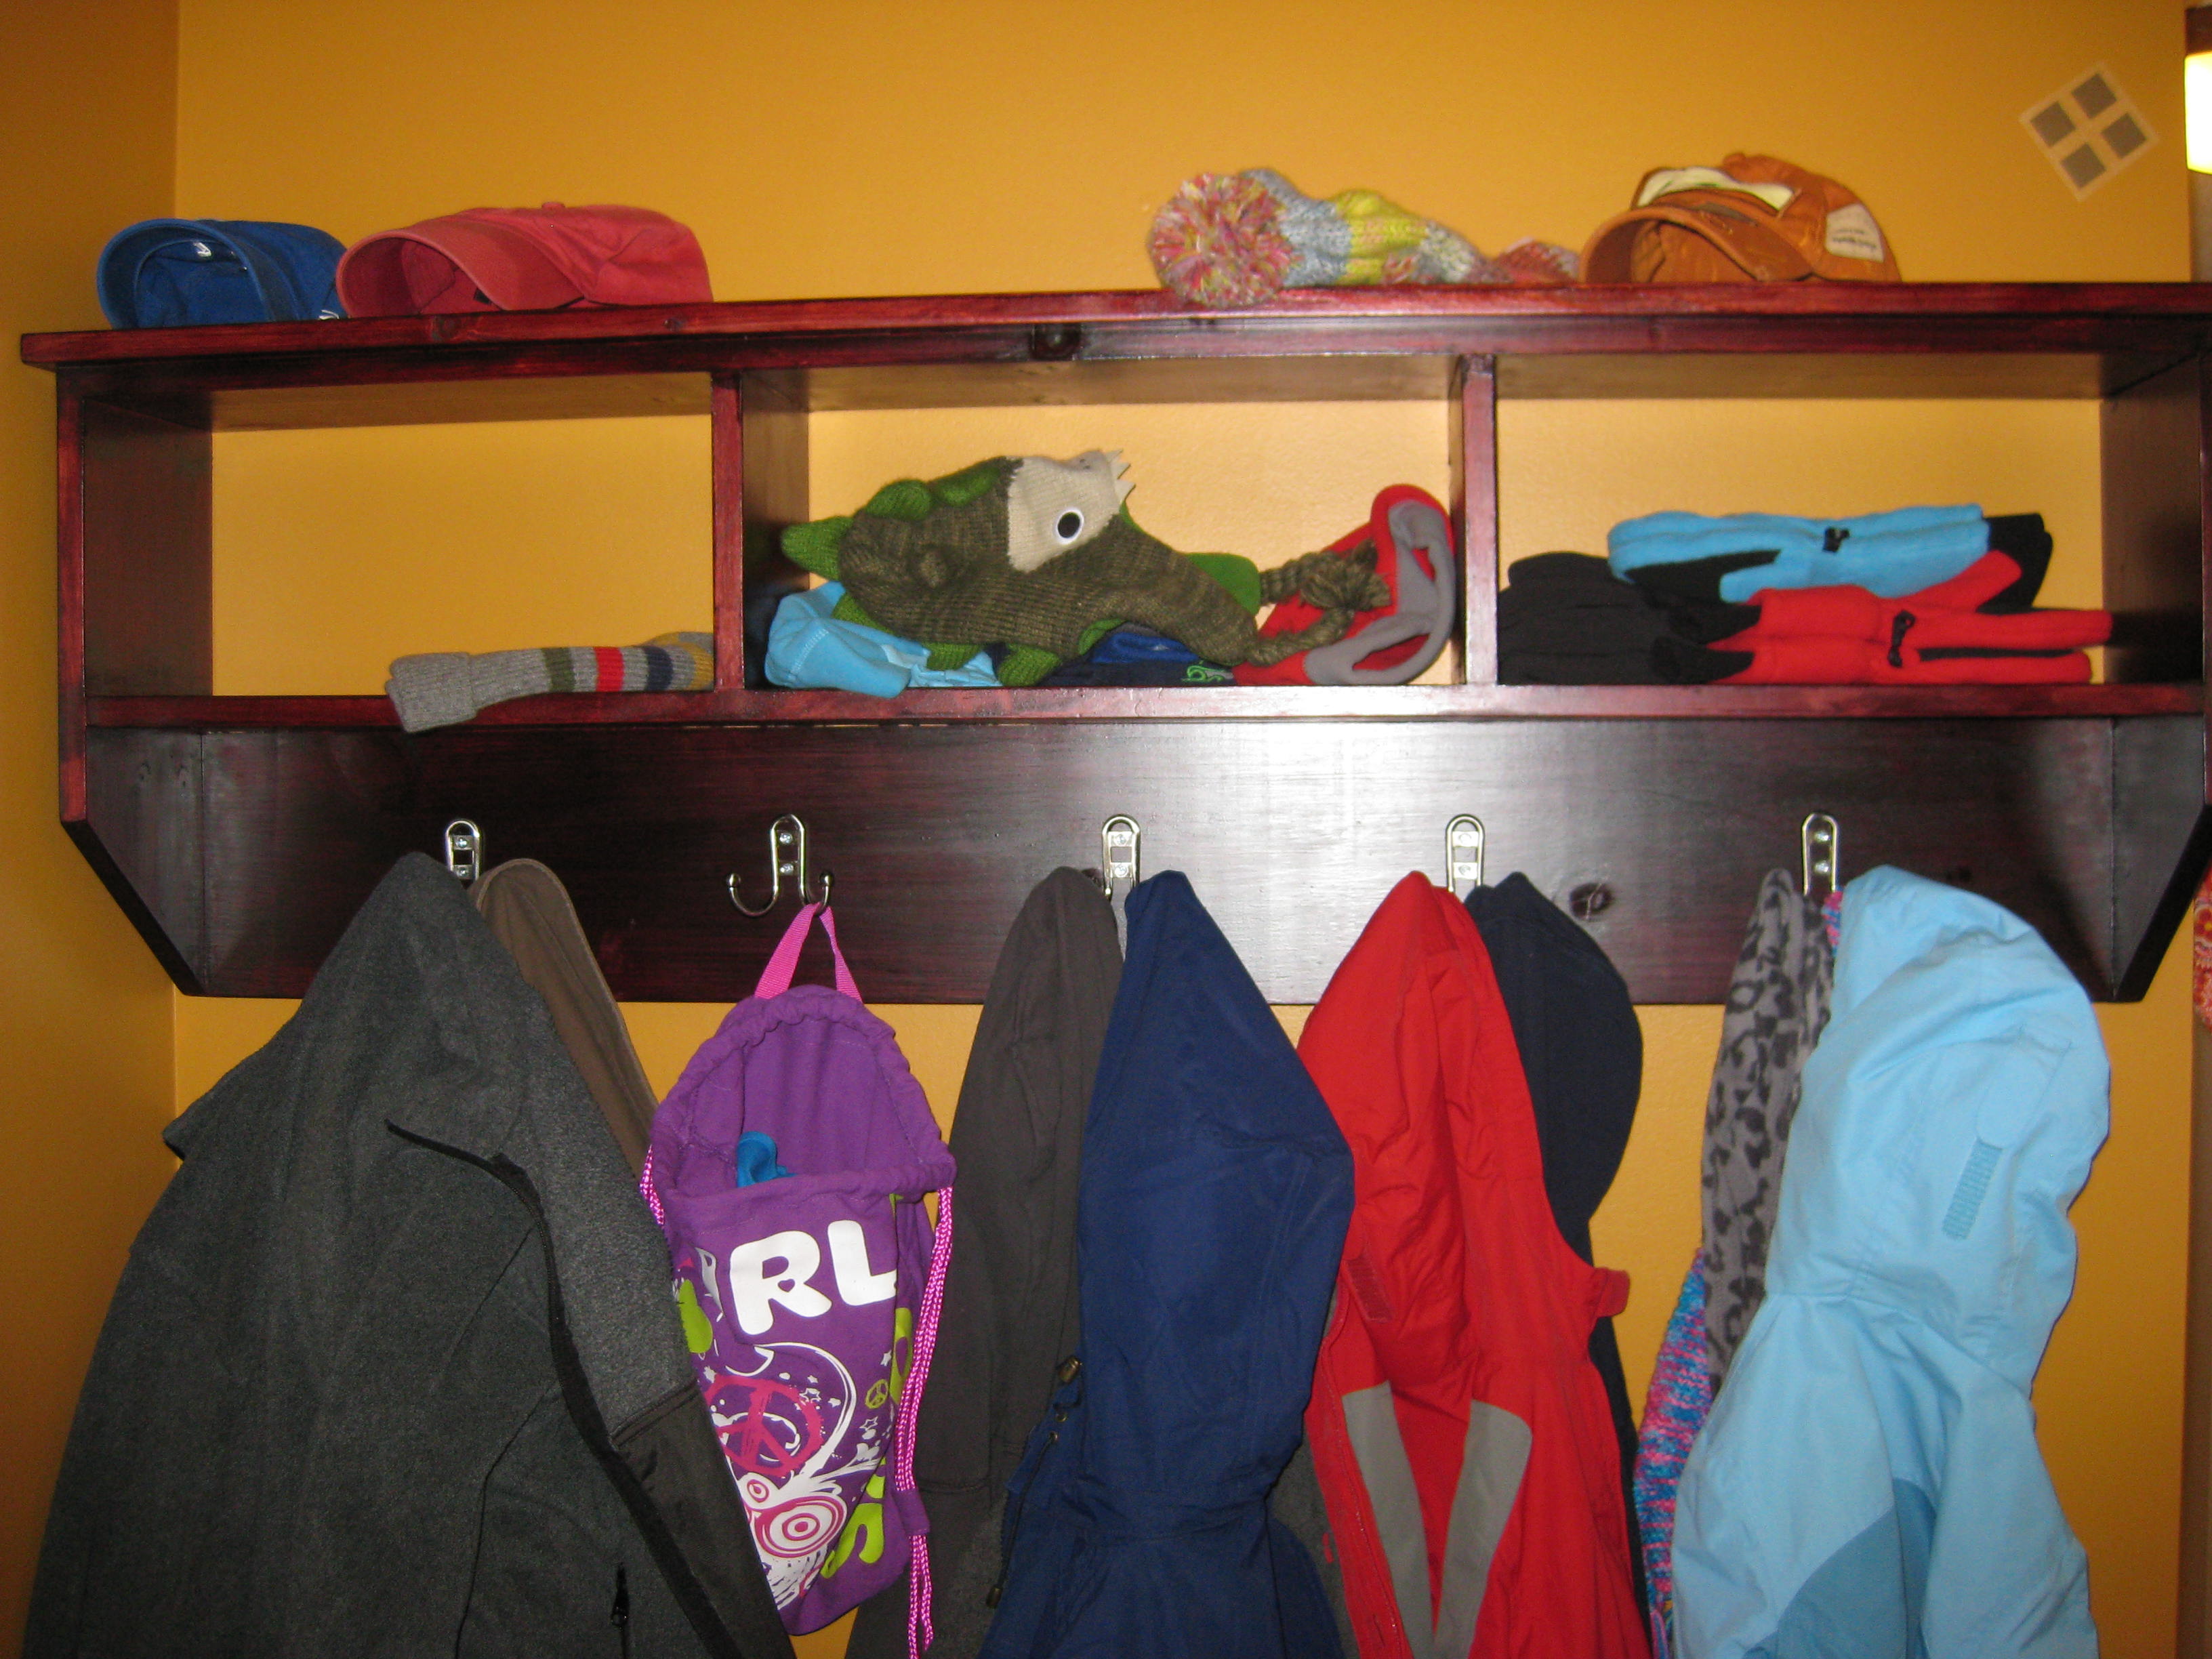
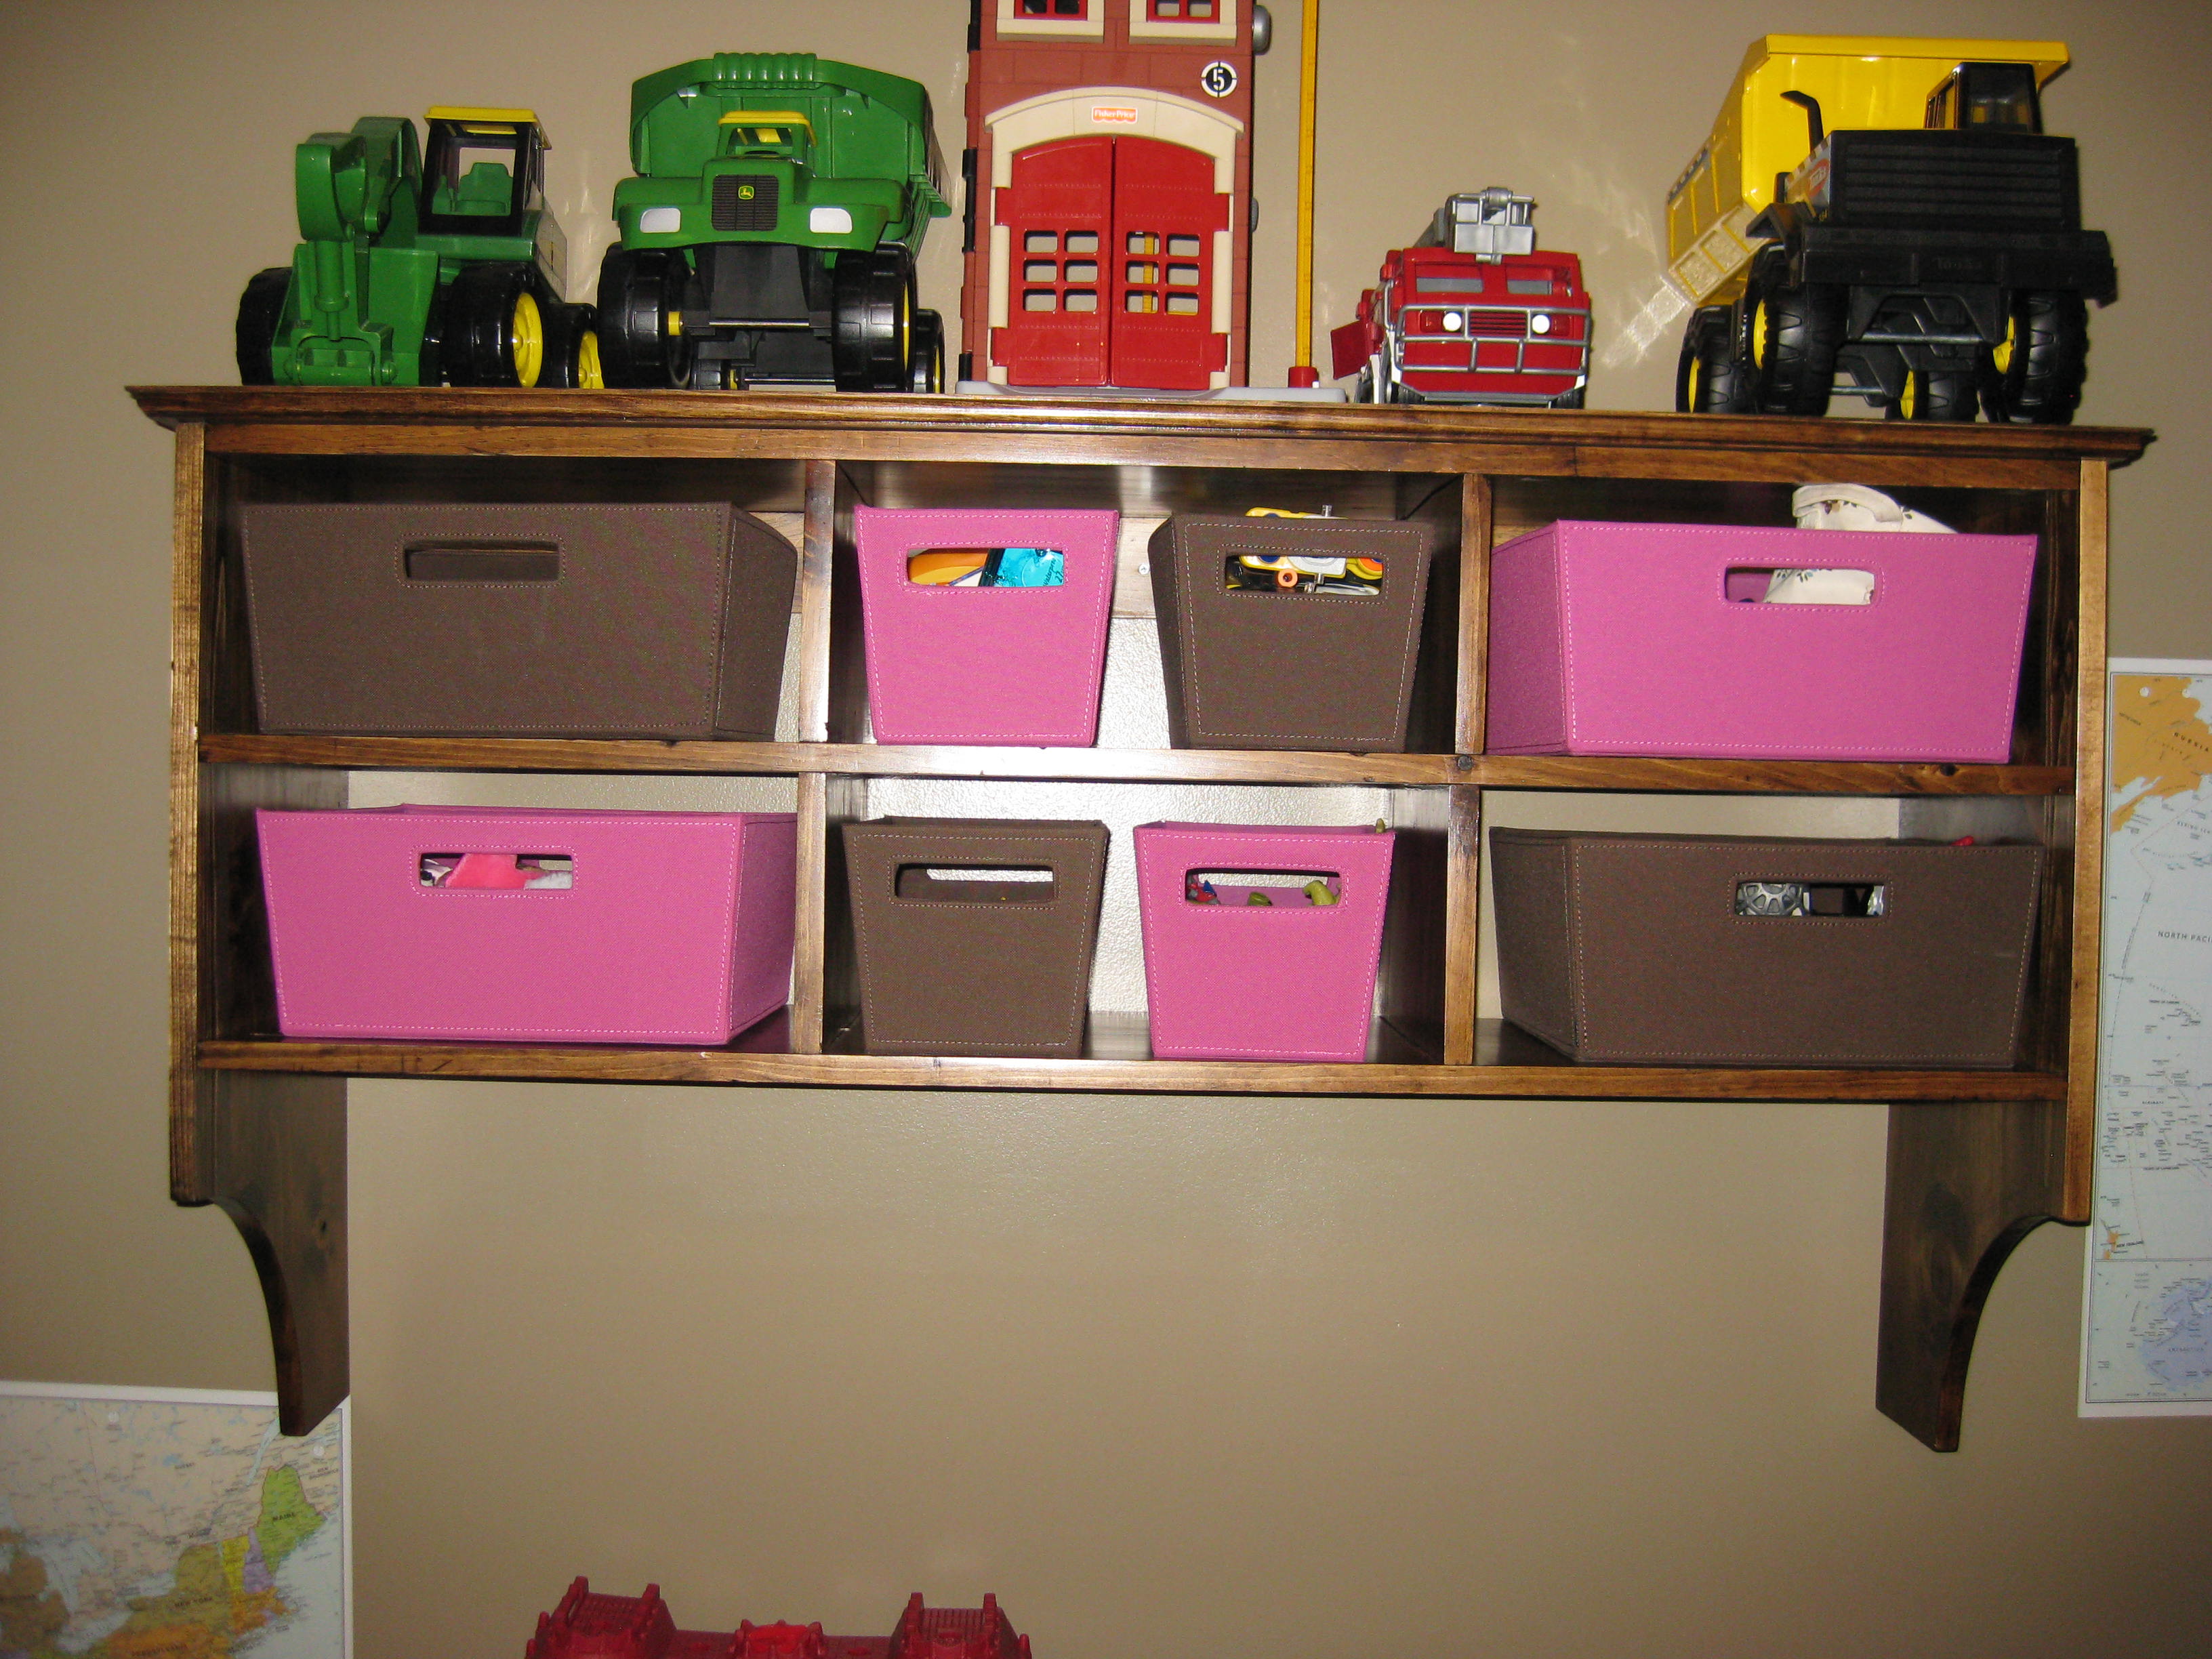
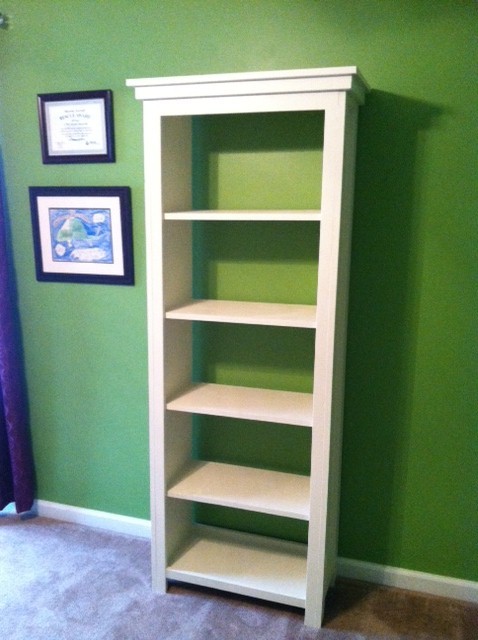
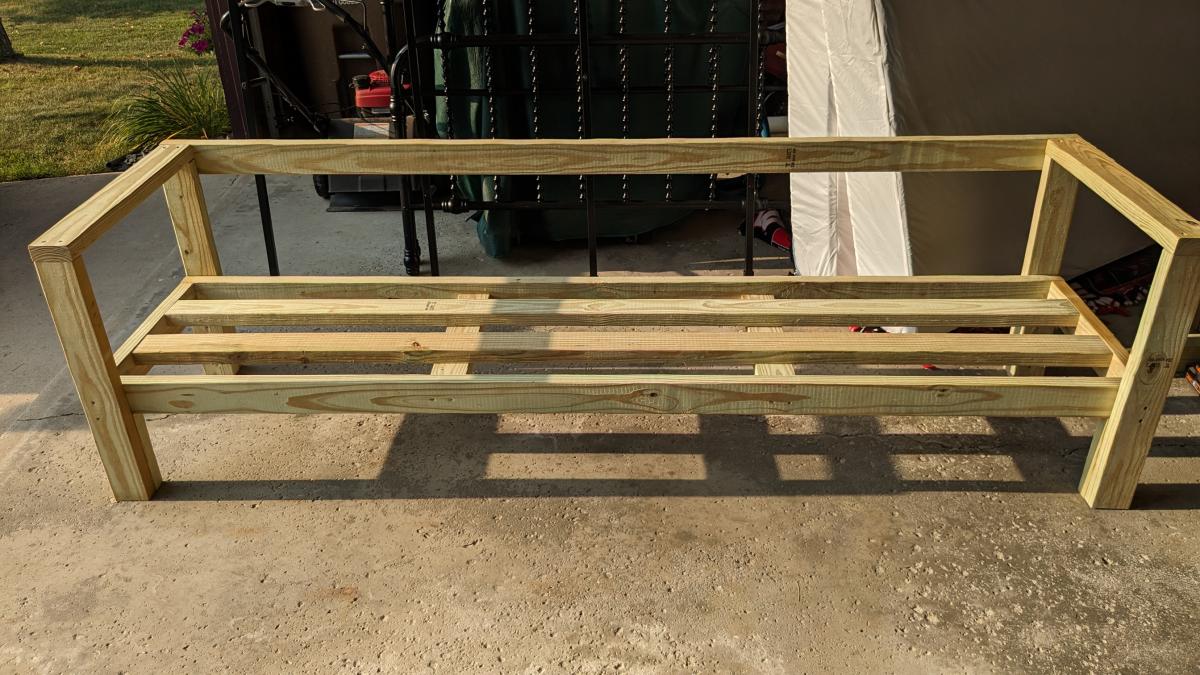
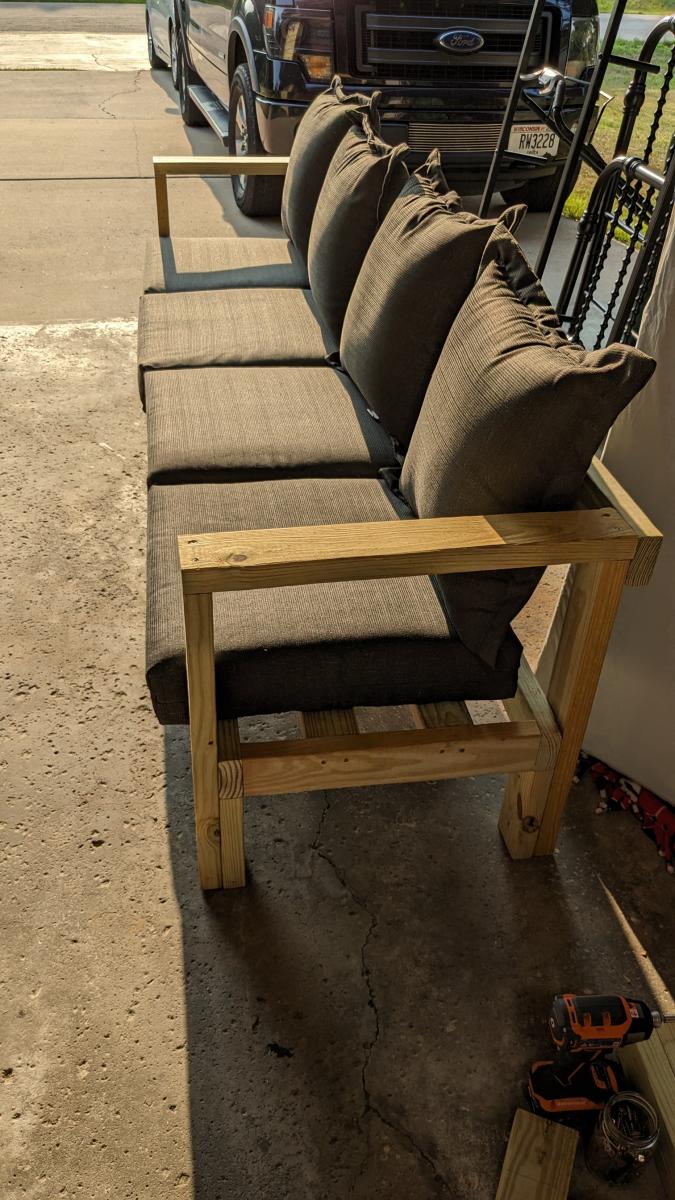
This was our finished product following the design from Anna that was exactly what we were looking for to fill out entry. We were able to design it to fit our space and our needs for a family of 4 and as you can see it gets used ALL DAY. We both like the stained finish rather than paint and the only regret I have is not using the Kreg on everything. On a side note we also liked the top piece so much we created off the design to build a storage area for the kids in their playroom. The only thing missing from the picture is the rod that we will be hanging baskets off underneath. Thanks Anna for the ideas.
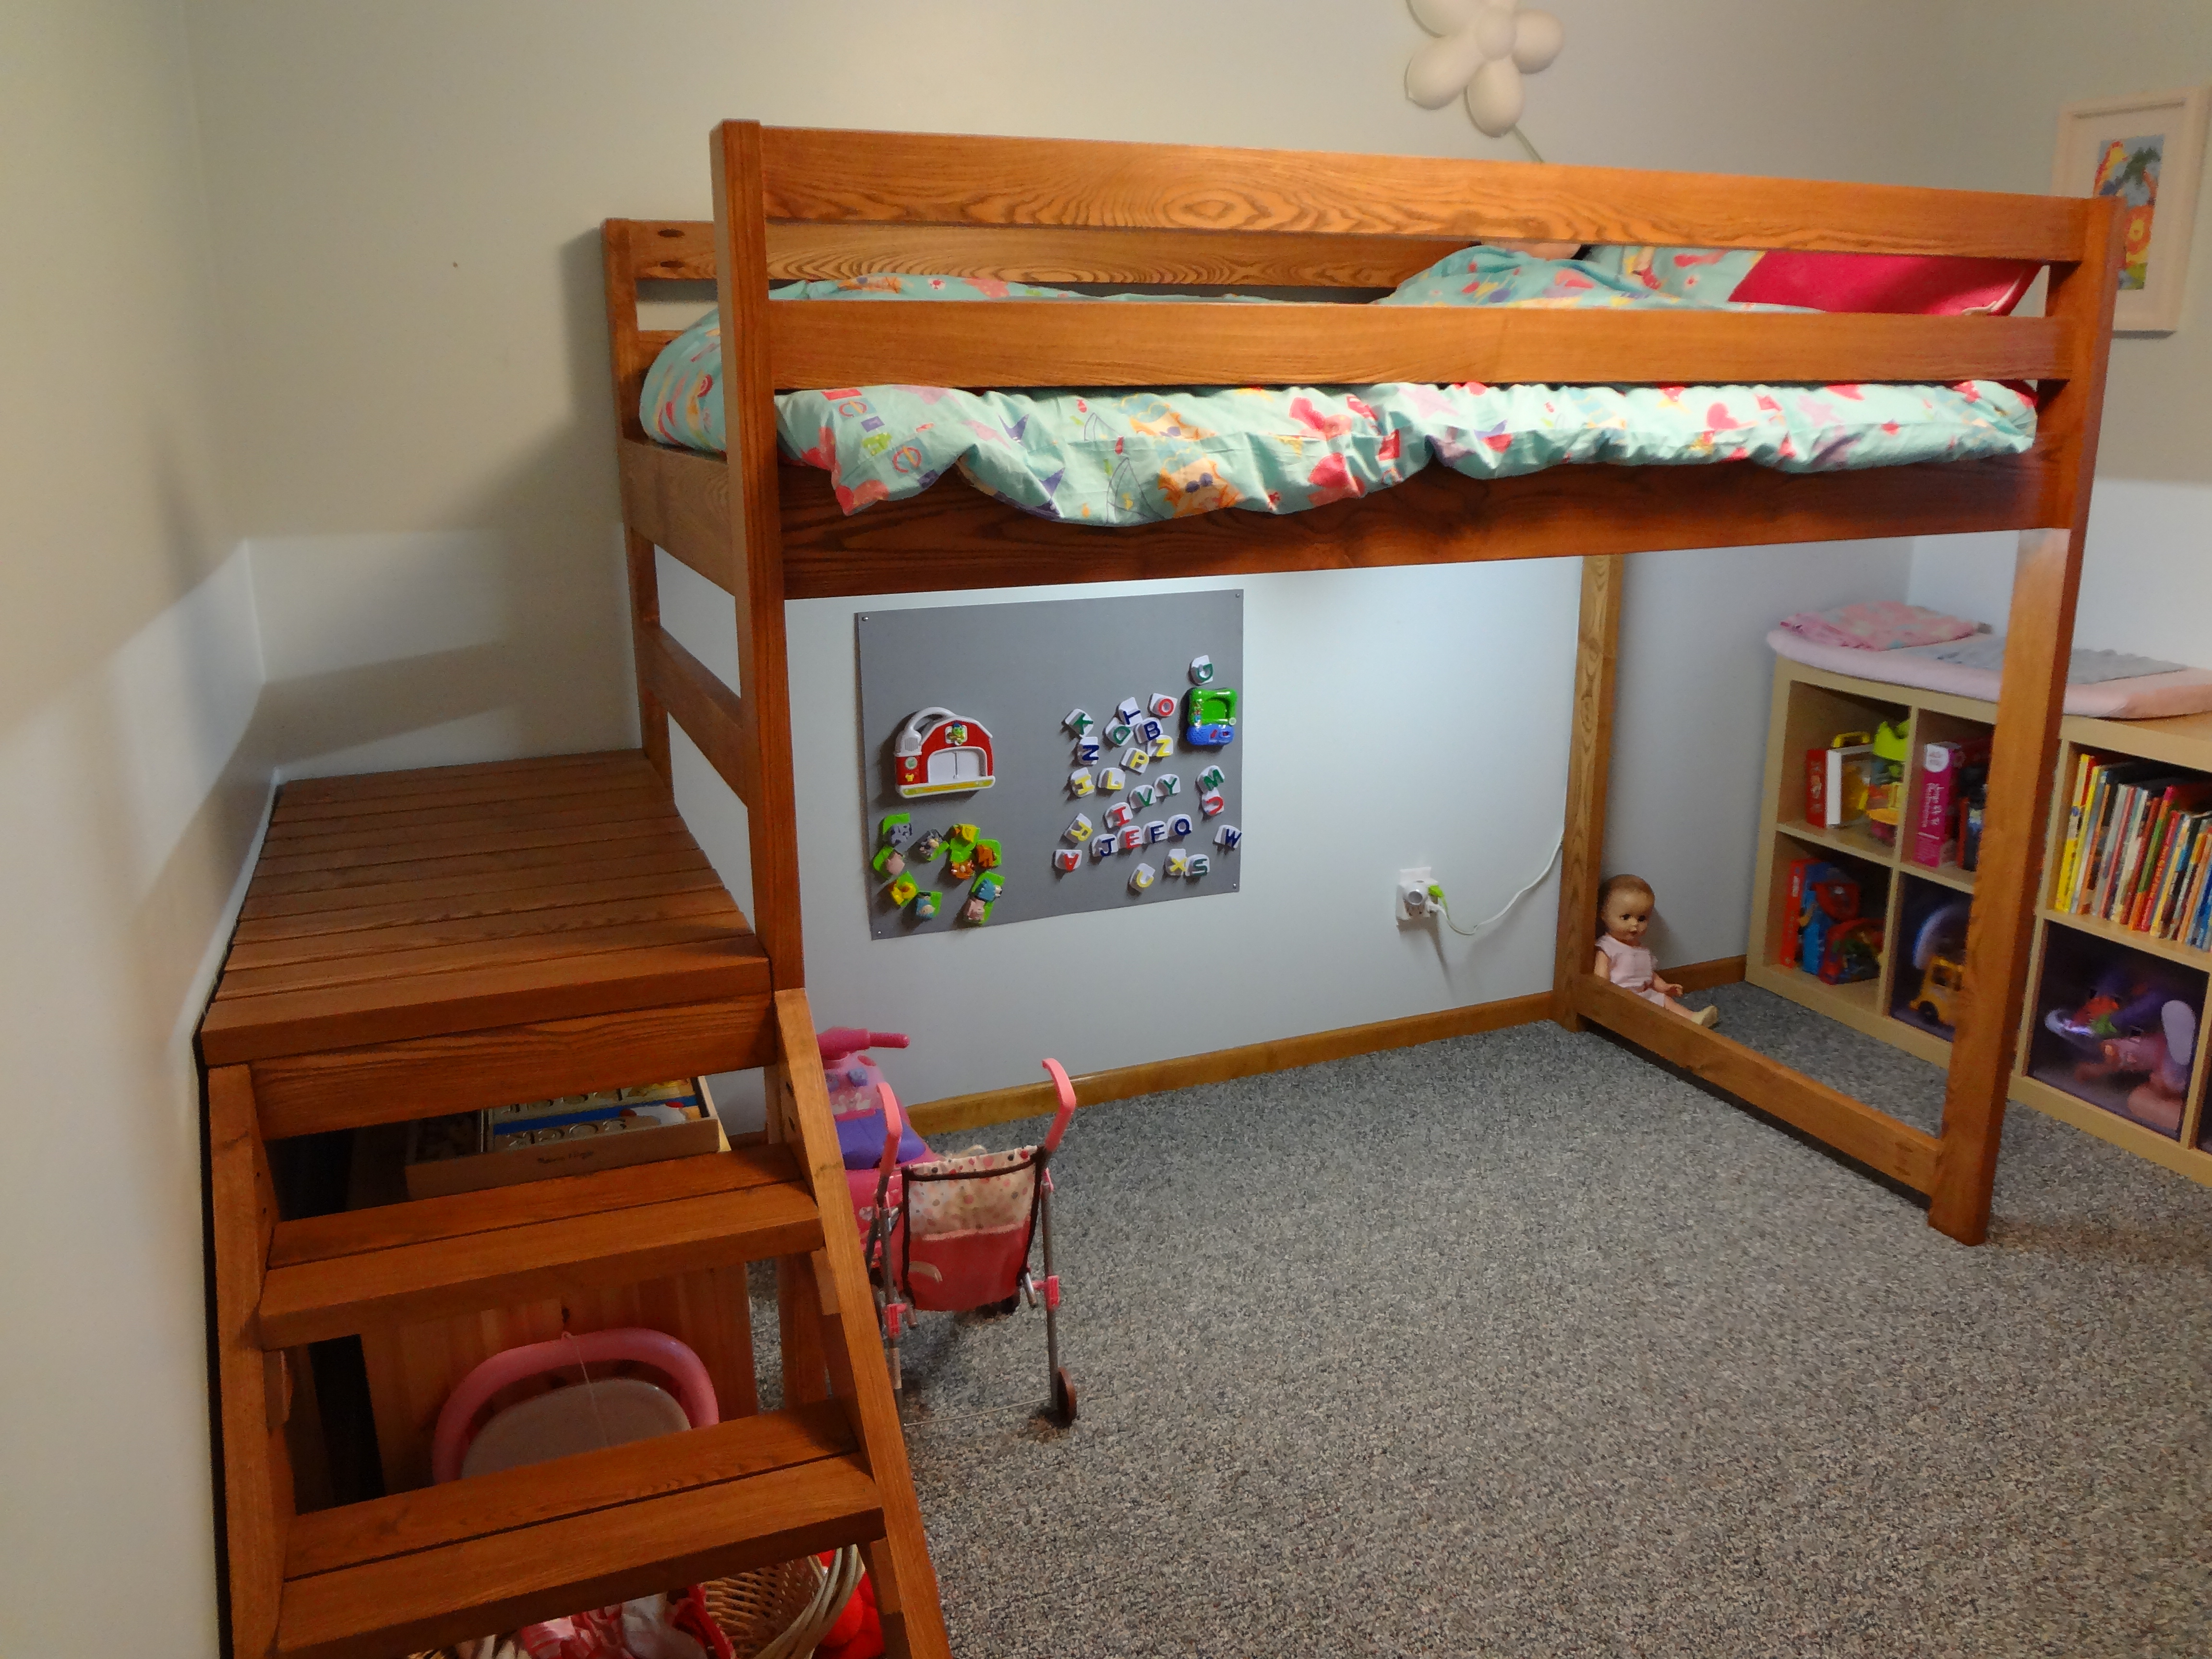
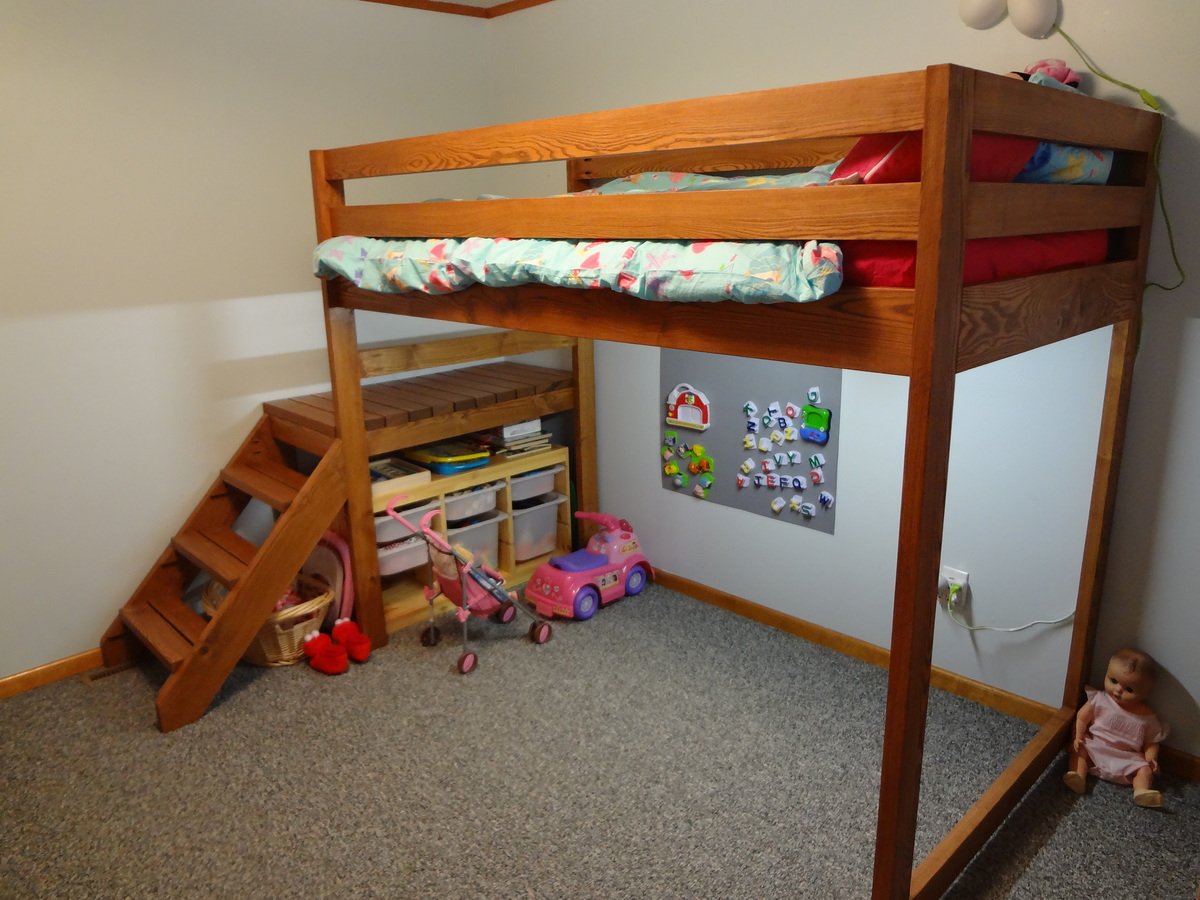
My dad and I built this project for my 3 year old daughter for Christmas. She was ready to move out of her crib and this bed seemed like a great fit for her. We followed the plans almost completely. We opted to use a piece of 3/4 in. plywood on the cleats for the mattress support instead of slats. We also added 4 cross cleats under the plywood for added support. I added a florescent light over the play area underneath because it was a little dark under there. I'm very happy with how this bed turned out and my daughter loves it as well!

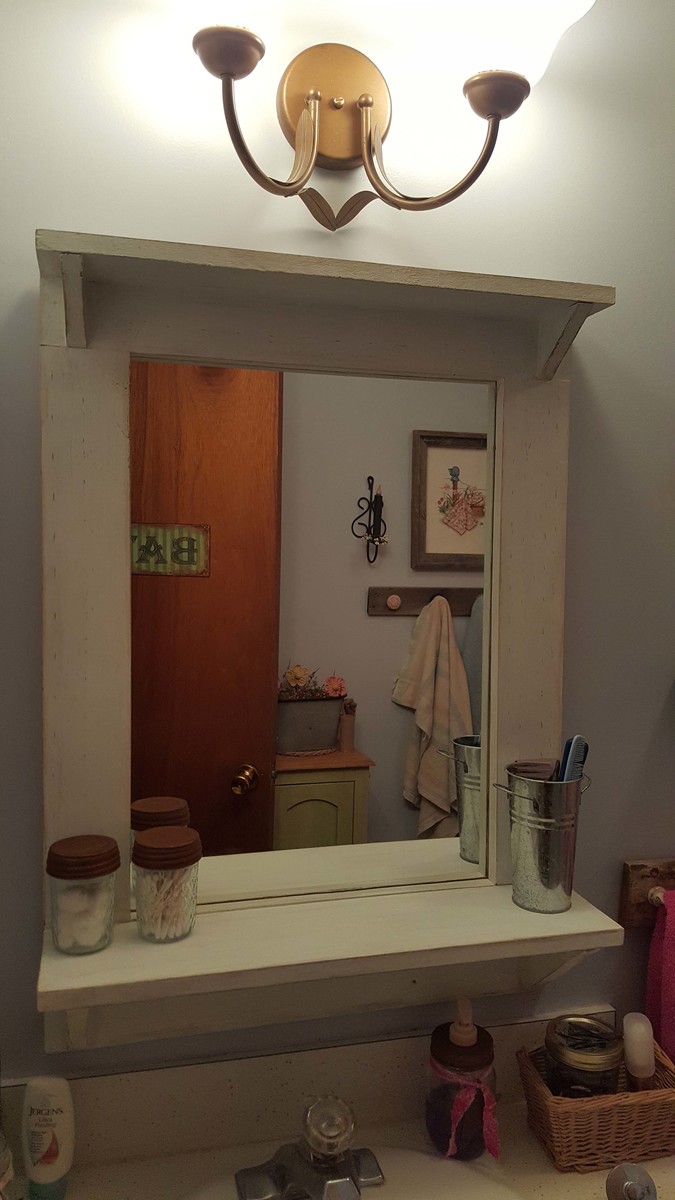
This project is the mirror from The Handbuilt Home and is the first project I made from the book. I changed the size since I wanted the mirror for my bathroom and adjustments were so easy to do. I used regular pine boards and a mirror I got from Lowes - Lowes cut the mirror to the size I needed at no charge. I painted the frame with two coats of a celery colored chalk paint, one coat of white chalk paint then sanded to distress. I attached the mirror using a glue and seal caulking and secured with mirror brackets so I could hang up right away without waiting for the glue to dry . This was a super fun project, easy to do. Love the book, and plan to build more projects from it!
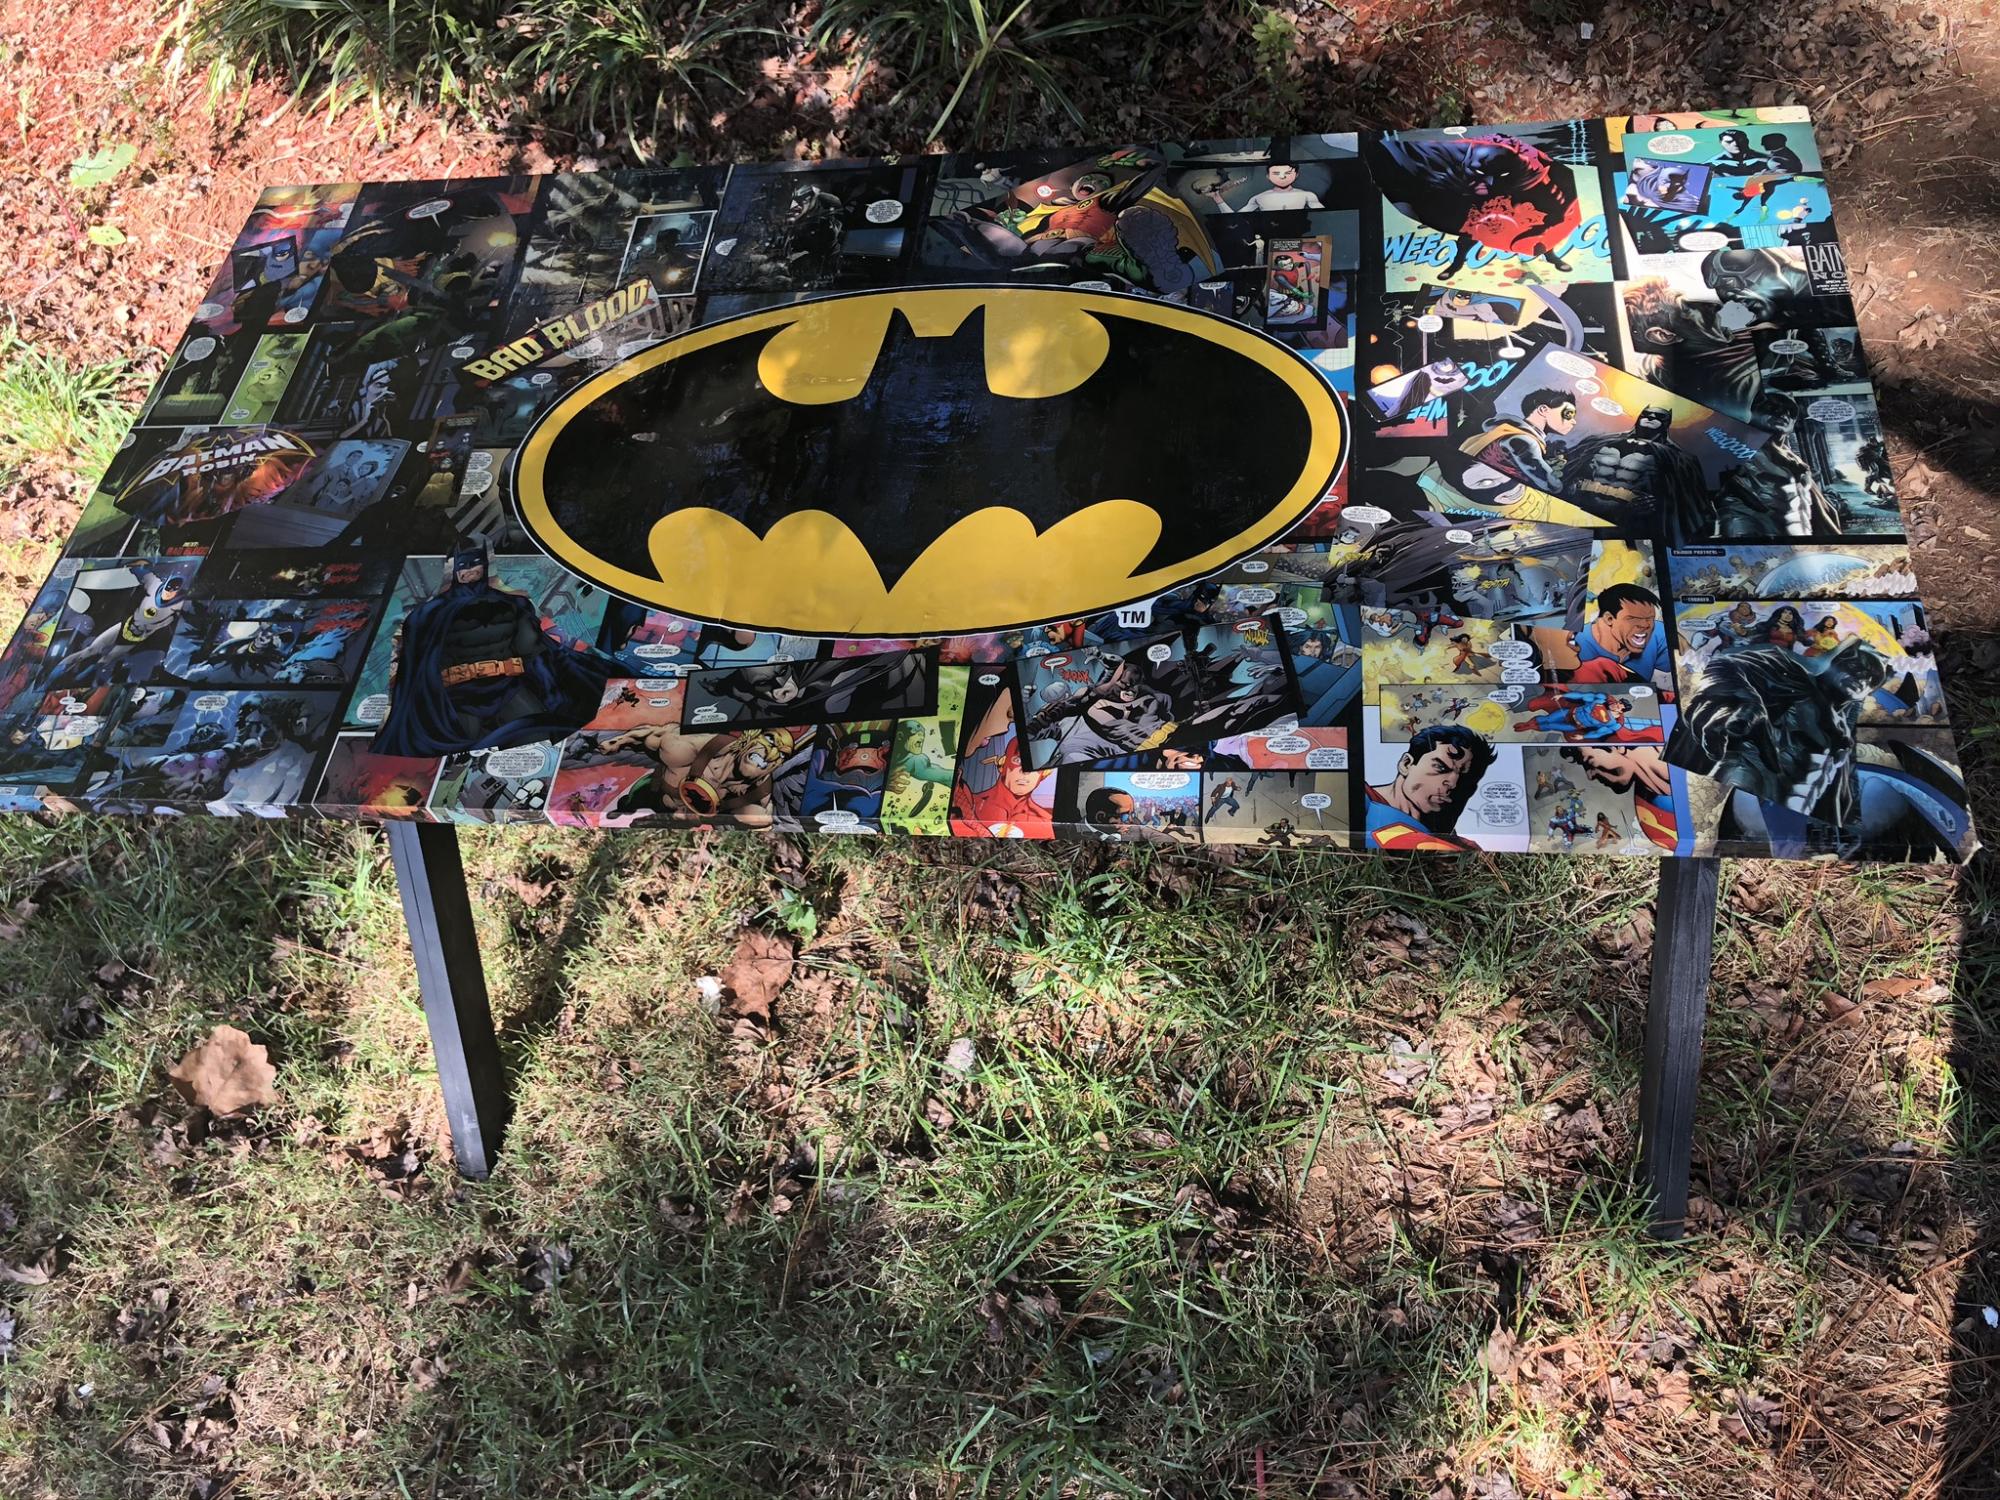
X Desk built without drawers and a Batman themed desktop
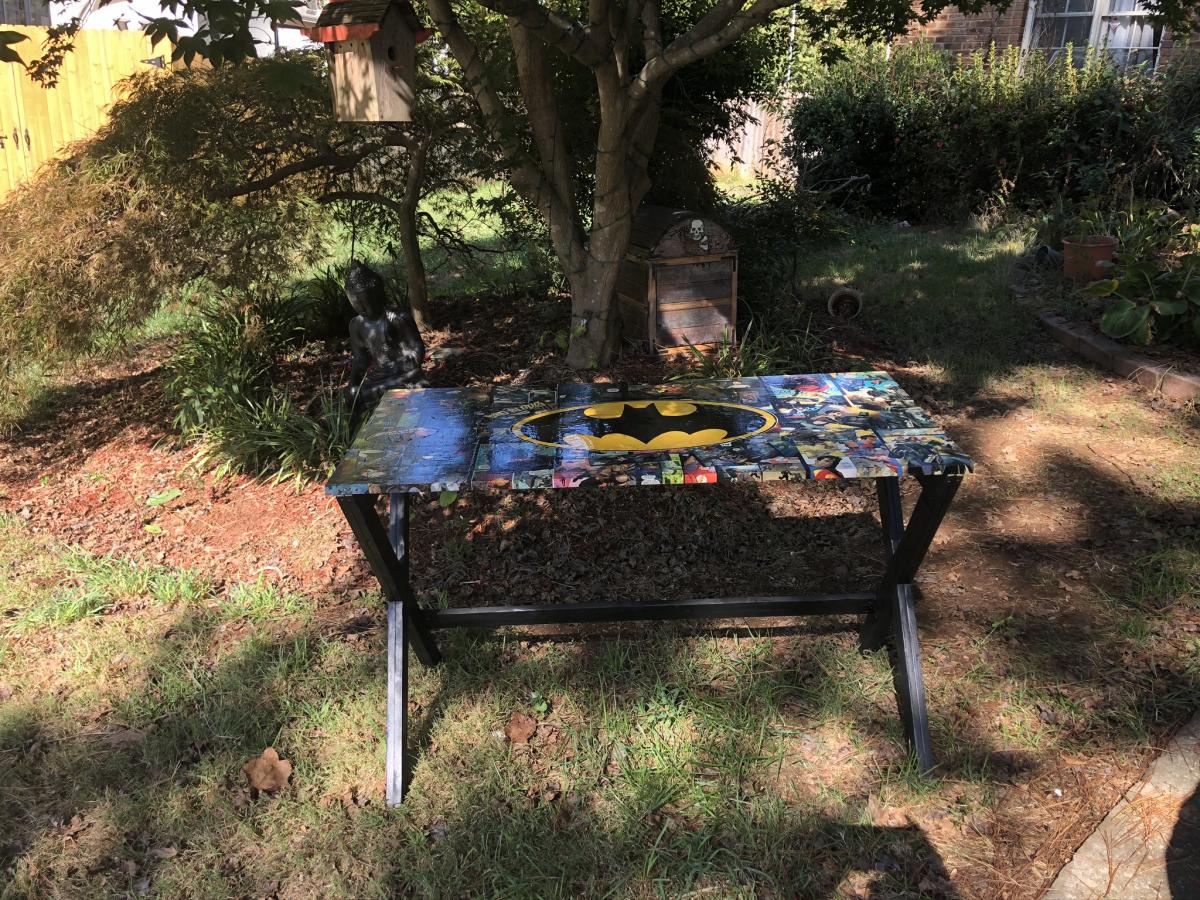
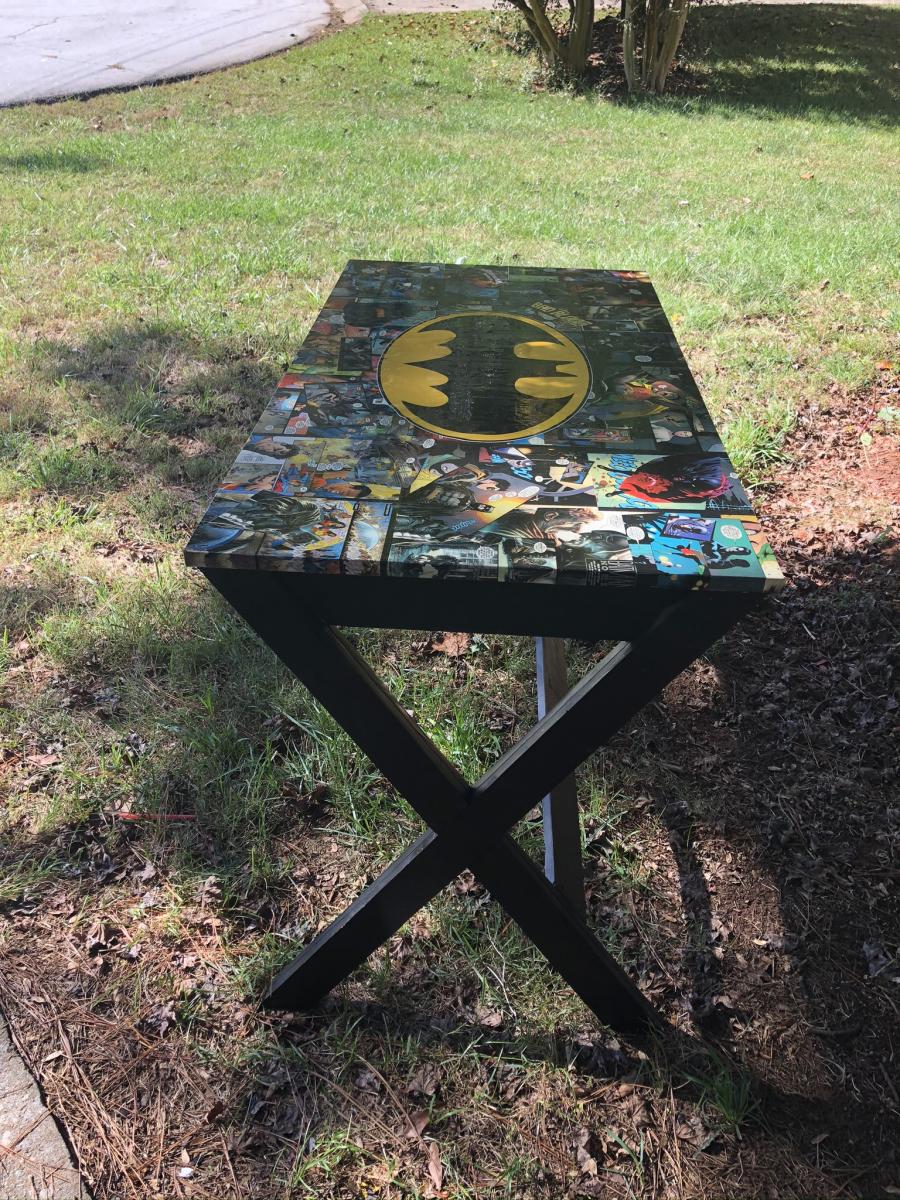
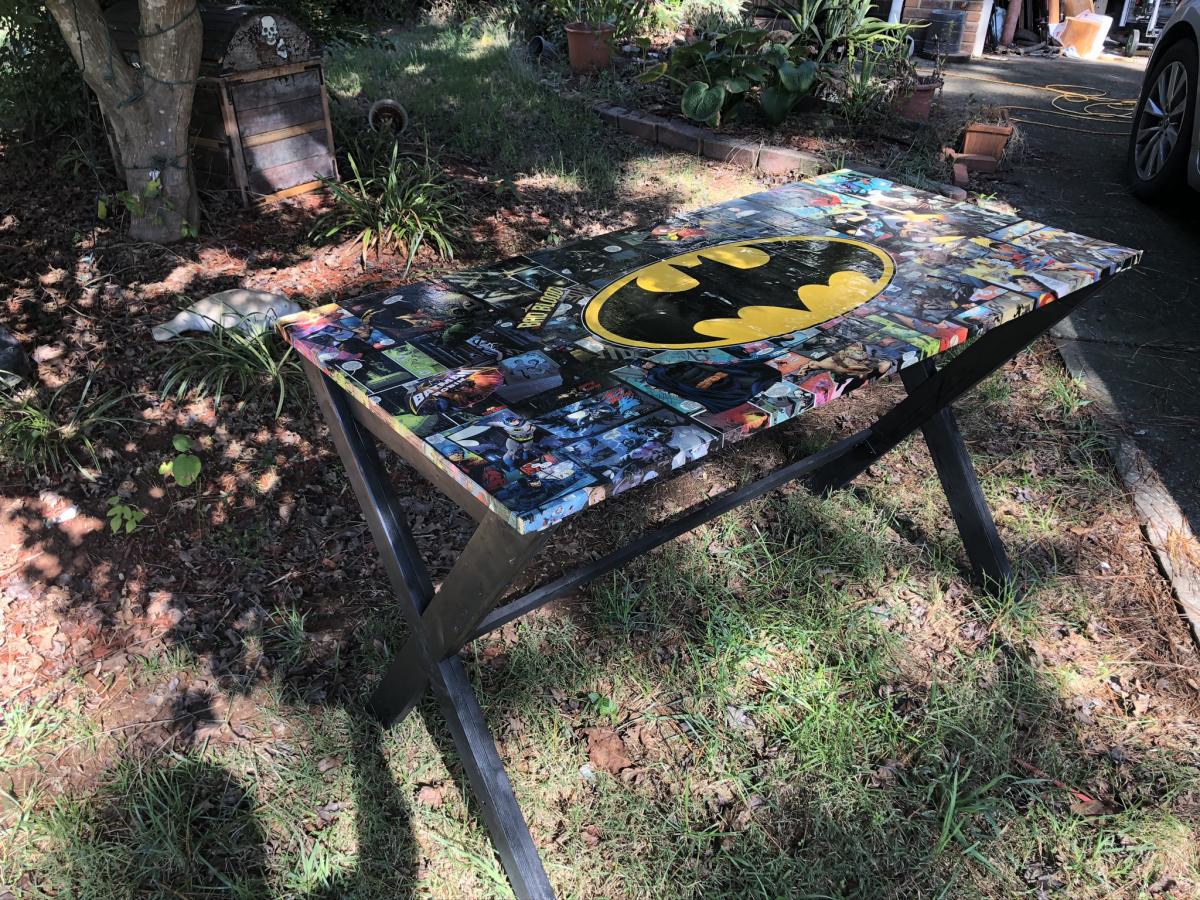
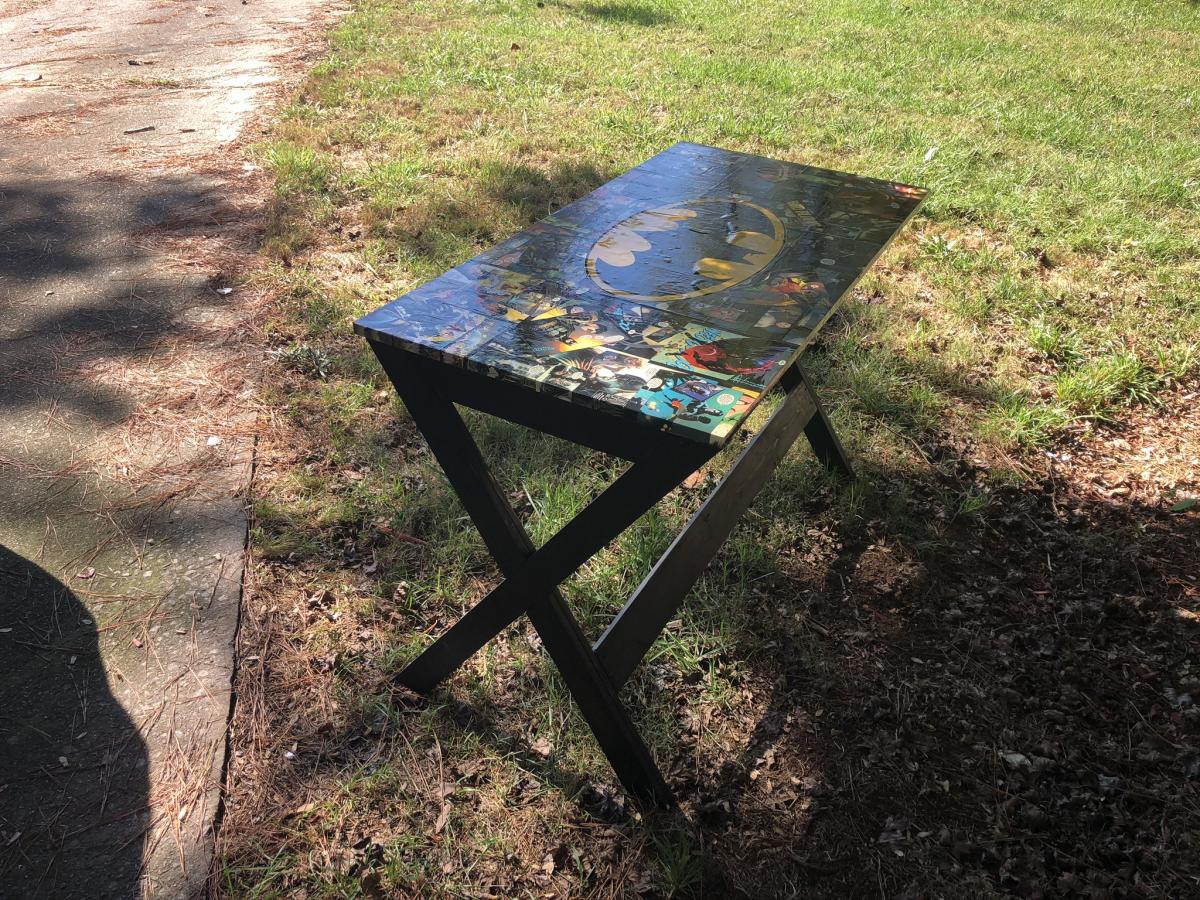
This is the first piece of furniture I have ever built. I'm super proud. It was fairly easy. I can't wait to fill my house with all of my future creations!
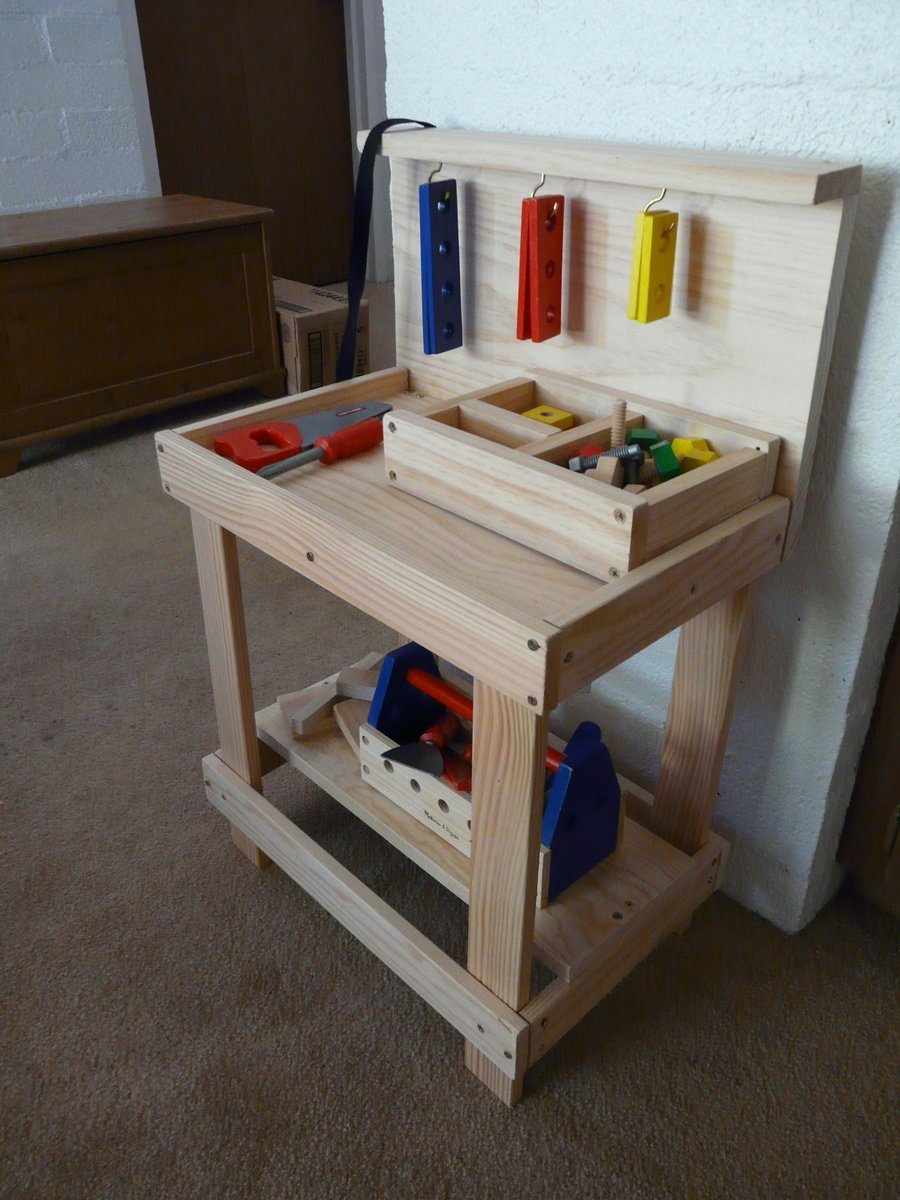
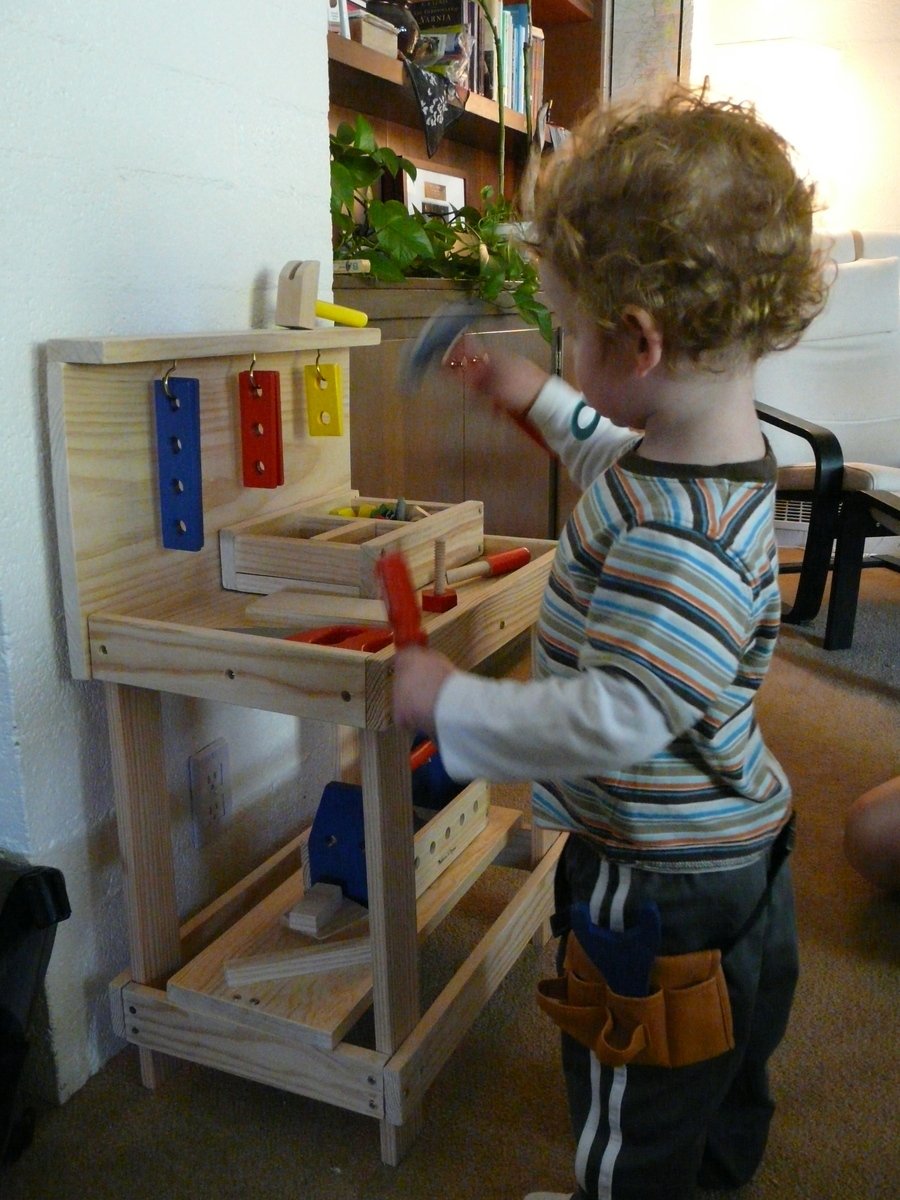
This was quite a straightforward project. I added a shelf along the bottom and a small overhang with scrap boards. Both add a lot in terms of play, especially because I screwed little hooks into the overhang which my son loves to hang things on. This toy workbench can be a lot of things - fun for tools, nature play, art, an outdoor kitchen, or so many other options.
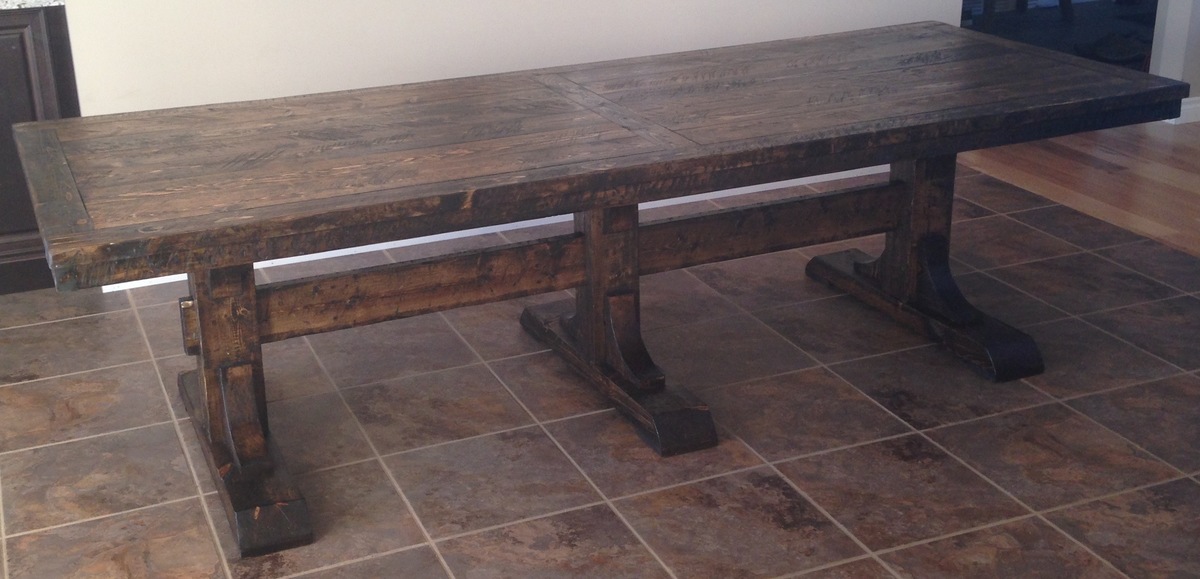
Made this table as a Christmas present for my wife. I modified a few details like the legs because I was able to use some old timbers from her dads farm. And for the apron, I just ripped a 2x6 in half. First time I've used plans from this site, thanks so much for making them available. -Matt M
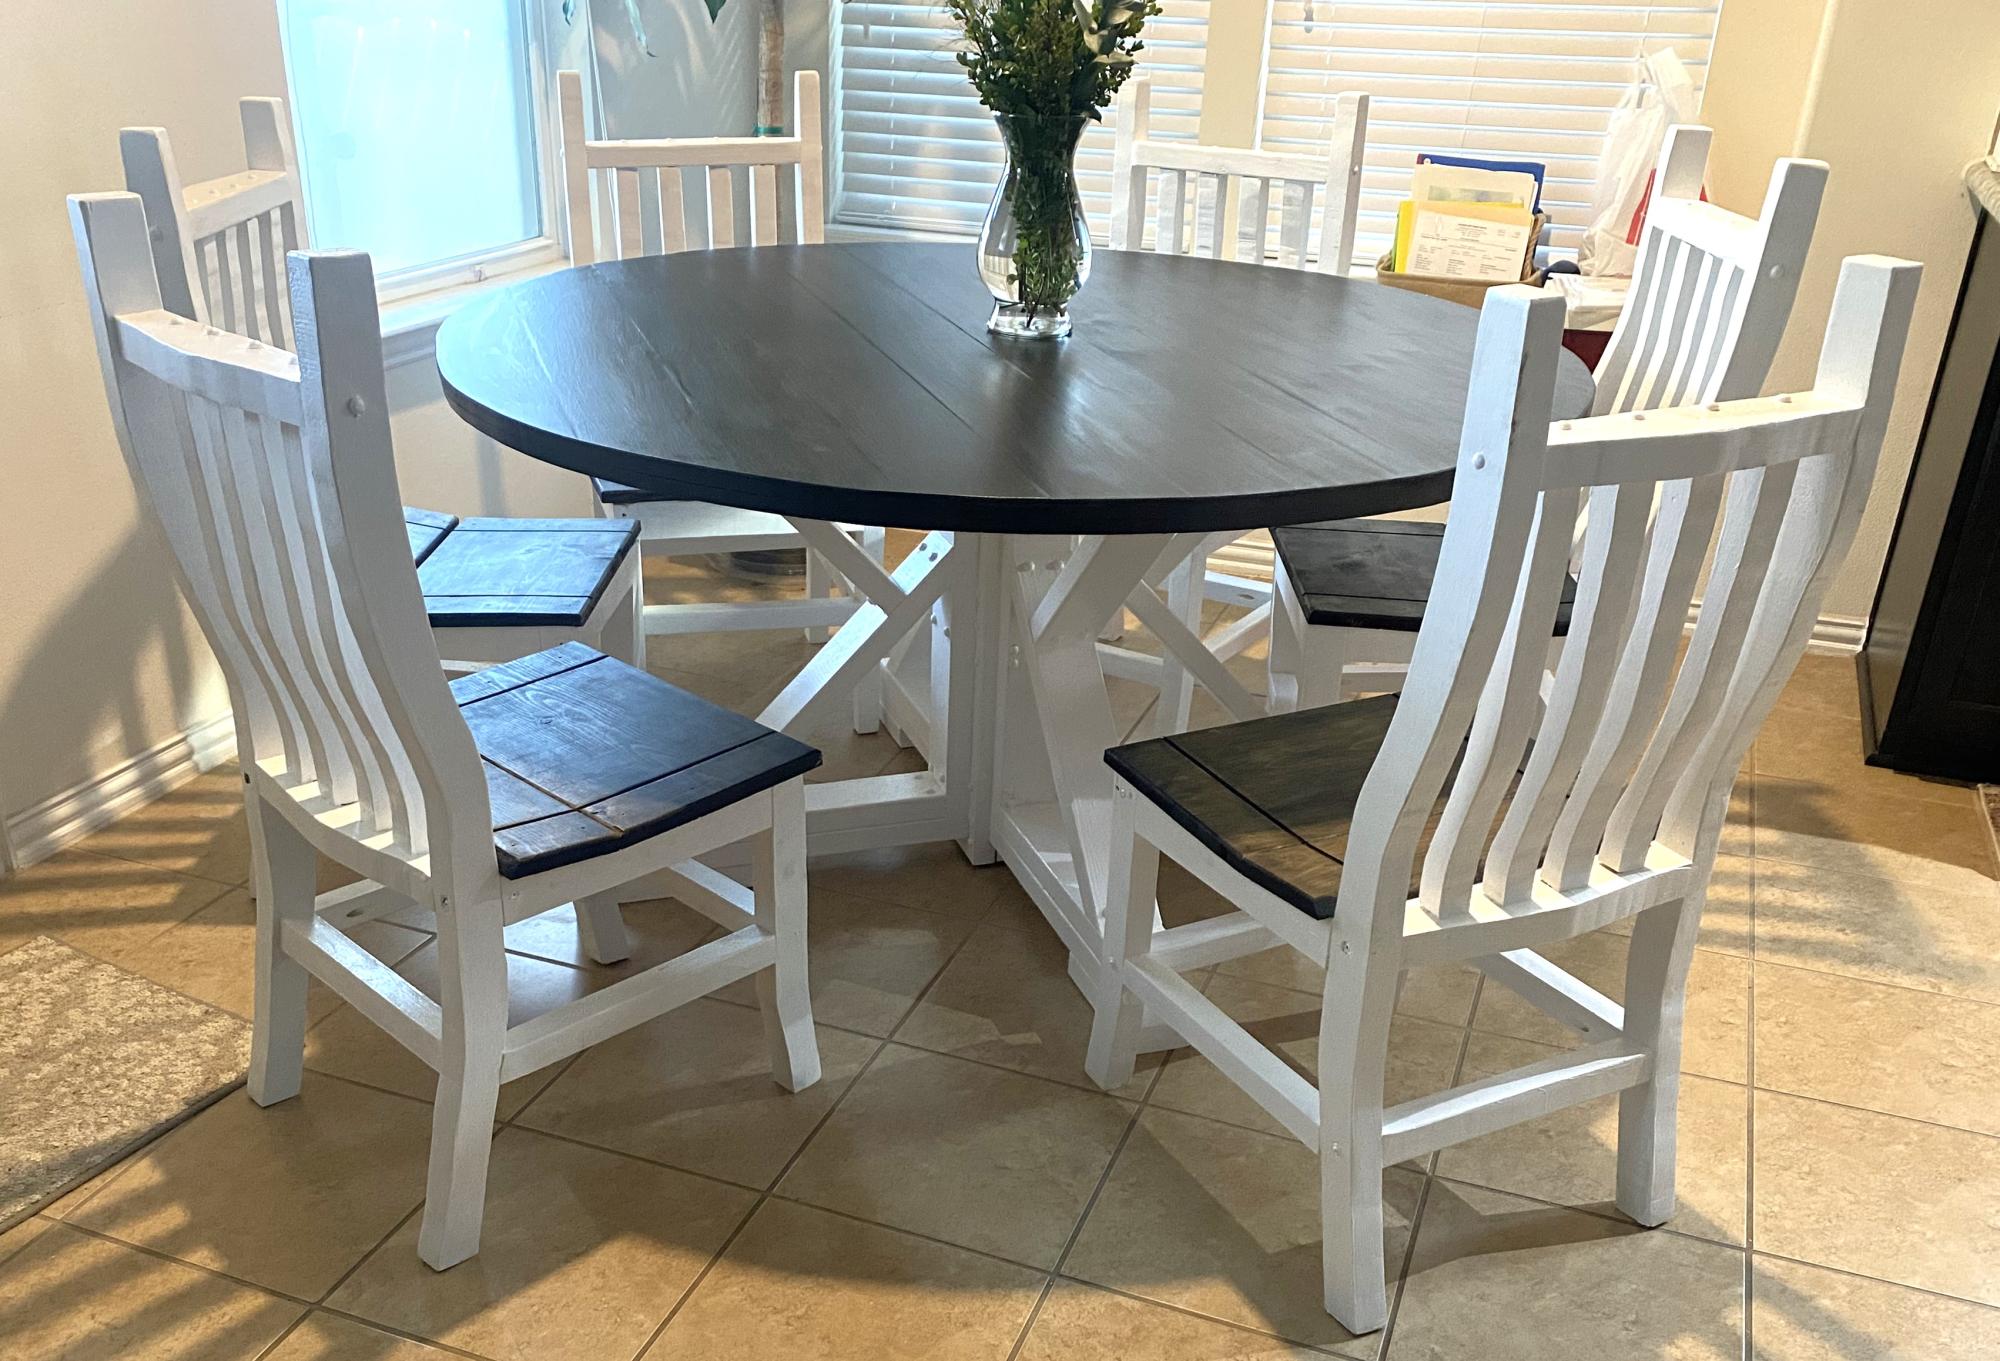
Built this for my wife for our anniversary. Plans for the table was easy to follow. Used poplar for the table top. I copied the chairs from our large dining room table that we purchased so the two sets would match. I’m an Ana White follower looking forward using more plans. I used a jig saw to cut the circular table top instead of the skill saw using a fence.
James / League City Texas

I still can't believe my husband and I built this. We have never built anything before. well unless assembling cheapo furniture from a box counts! It was scary at first but nothing you can't do trust me. It is not perfect but it looks awesome I think. It's about 2 inches too wide on each side of the mattress, not sure why but you can't really tell. I am super happy with it! Thank you so much Ana for this website!!


Mon, 03/12/2012 - 16:45
This looks great. I was wanting to make this (and paint it black) when we move soon. This was great inspiration.
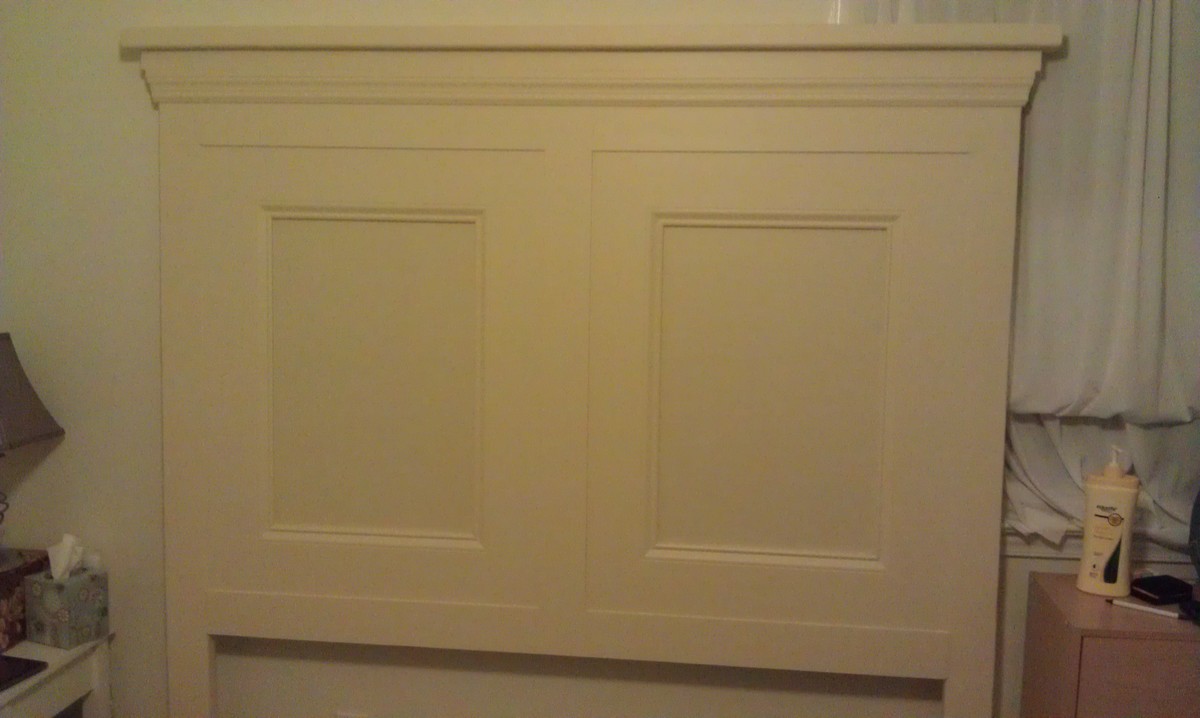
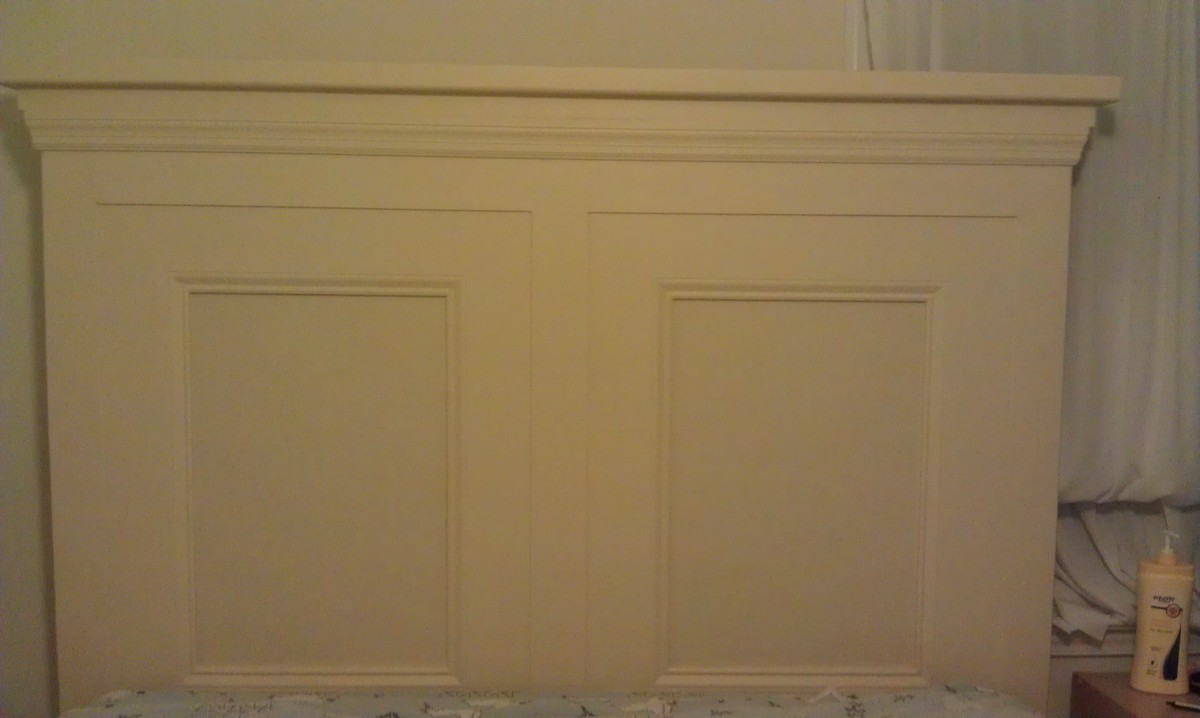
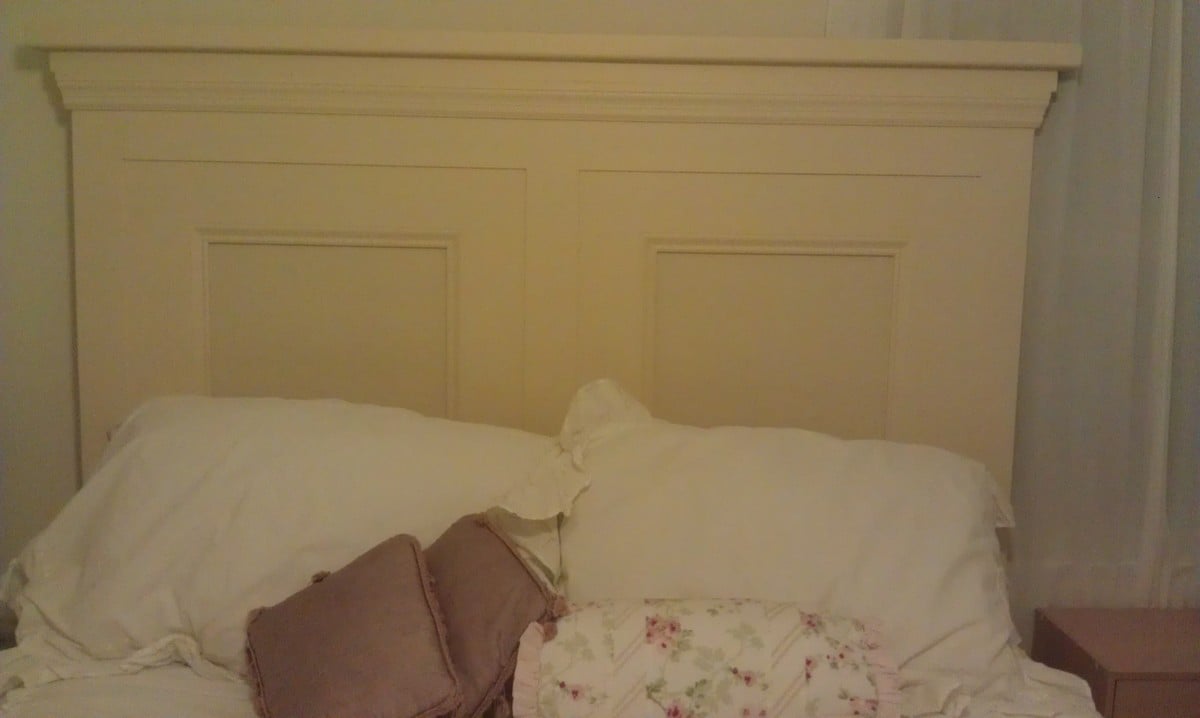
I took this and modified slightly. My wife wanted it a little lower since our room is smaller. I took the original plan then just drew out a rough sketch with the dimensions I wanted. I modified the cut list accordingly. I prepped all the wood for cutting and had all wood cut and headboard assembled in just over 4 hours. The finishing of puttying and sanding, puttying and sanding, puttying and sanding, then painting and painting and painting took about 2 weeks due to weather and other time constraints. But the patience paid off and we have a nice looking headboard. We had no scraps so the cost for us was about $150. Already have had friends ask how much to make one for them.
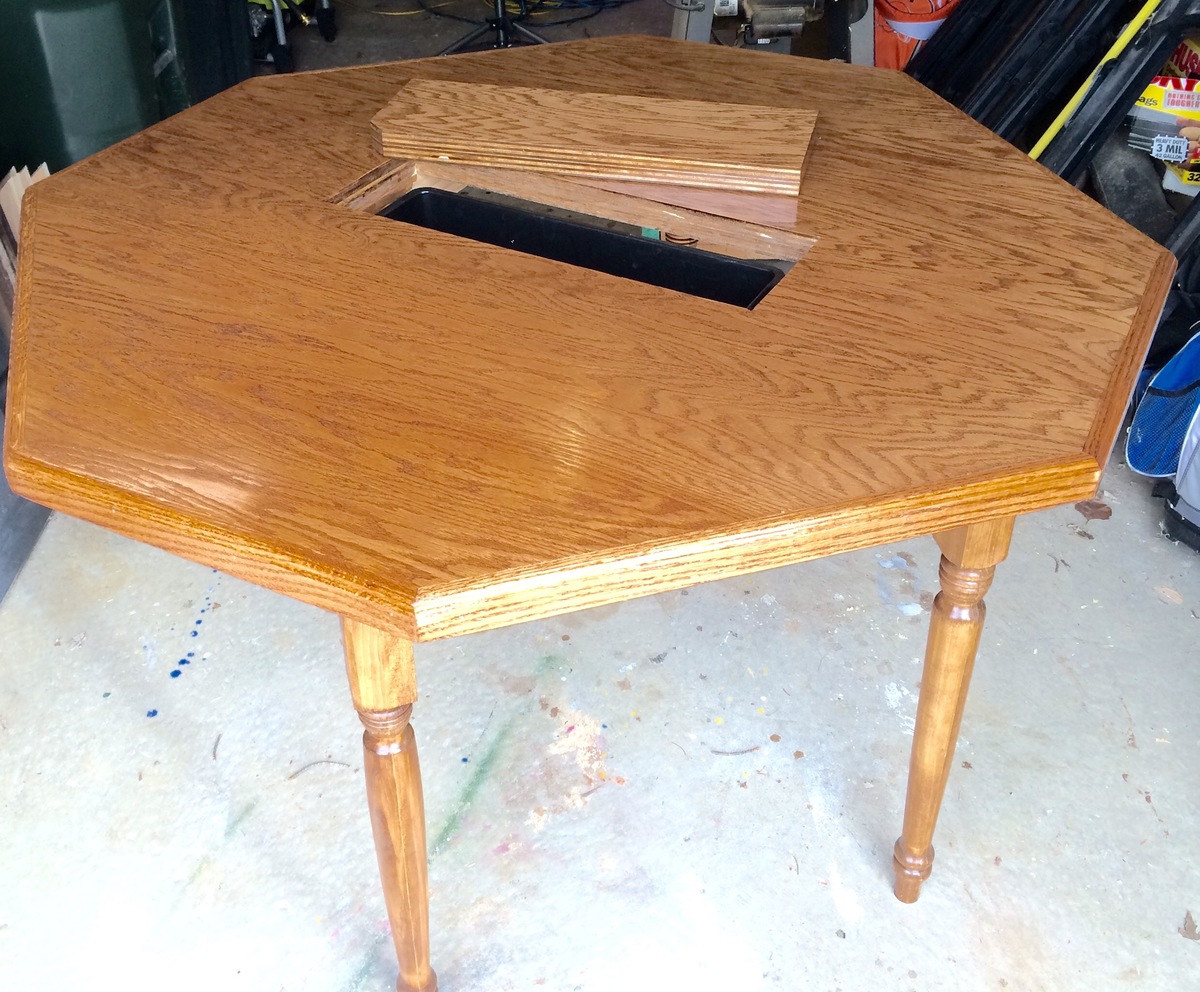
This table was made with already turned legs purchased at HD, one 4 x 8 sheet of oak plywood cut into two 4 x 4 sheets, pine for the cooler supports and edged with 1 x 3 oak routed with an ogee detail. Table supports were attached to the legs using pocket holes. Legs and supports were attached to the table bottom using pocket holes. The opening for the cooler was cut by plunging a circular saw from the top.
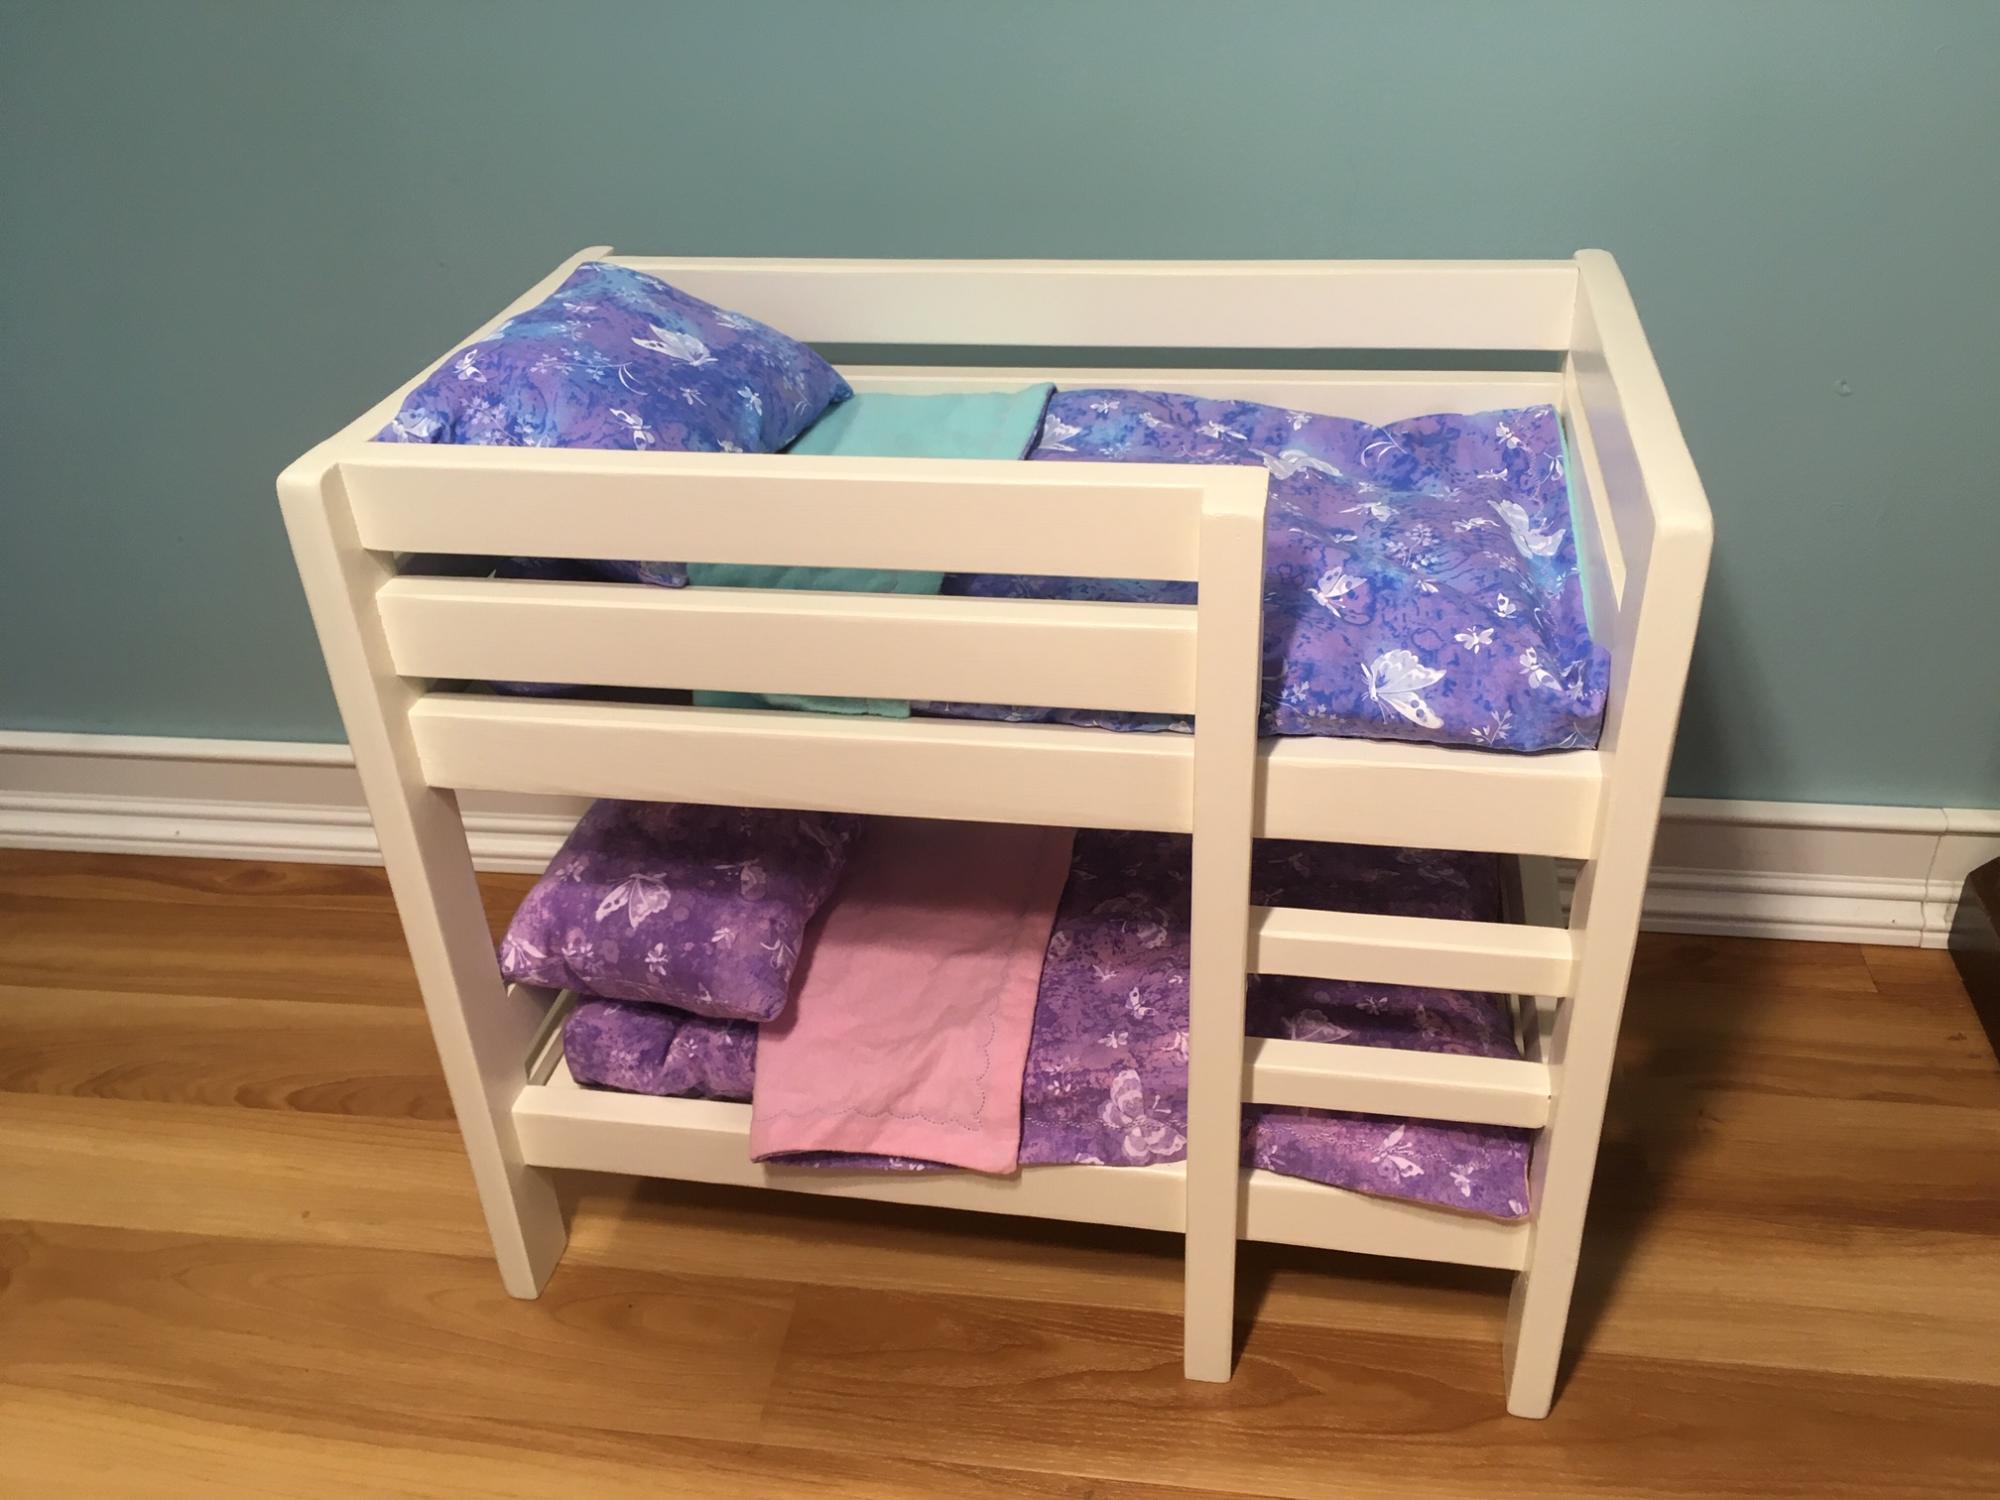
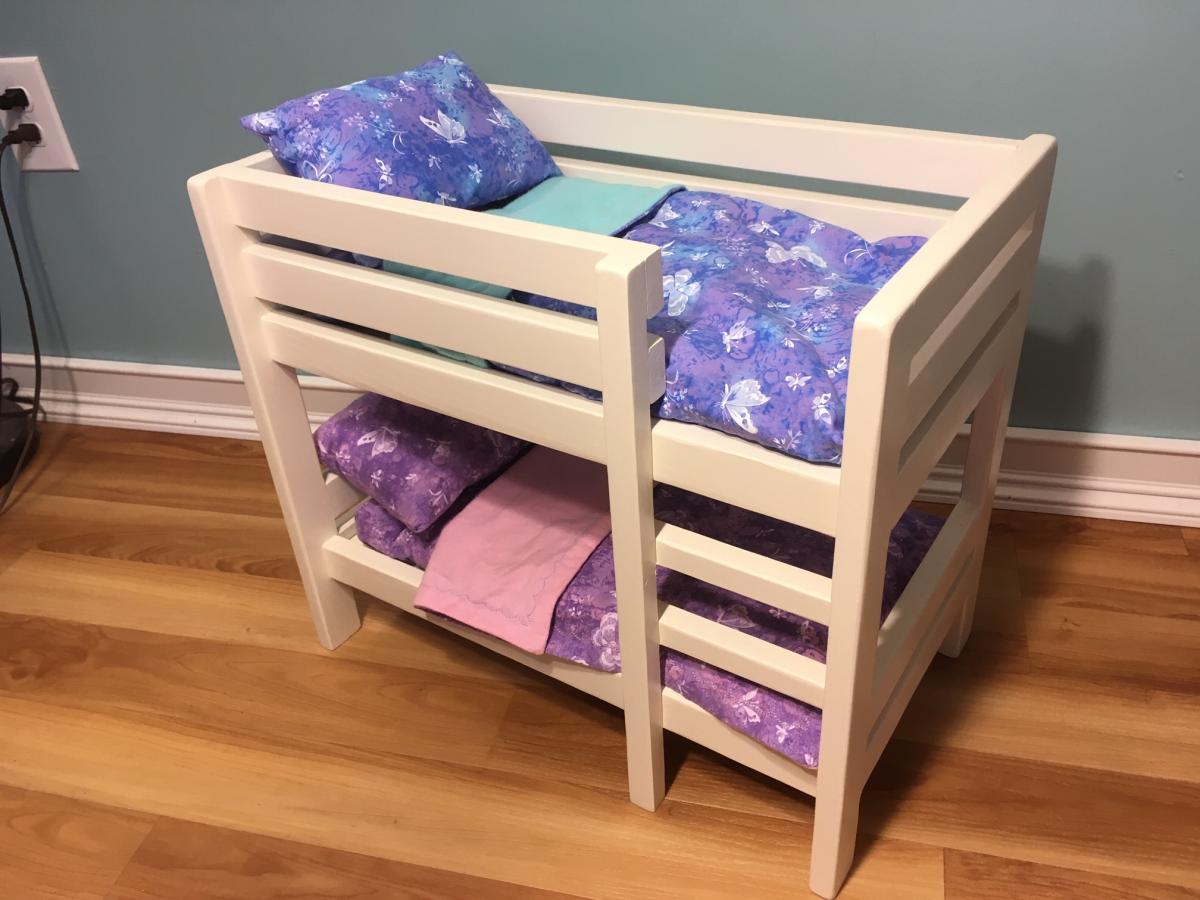
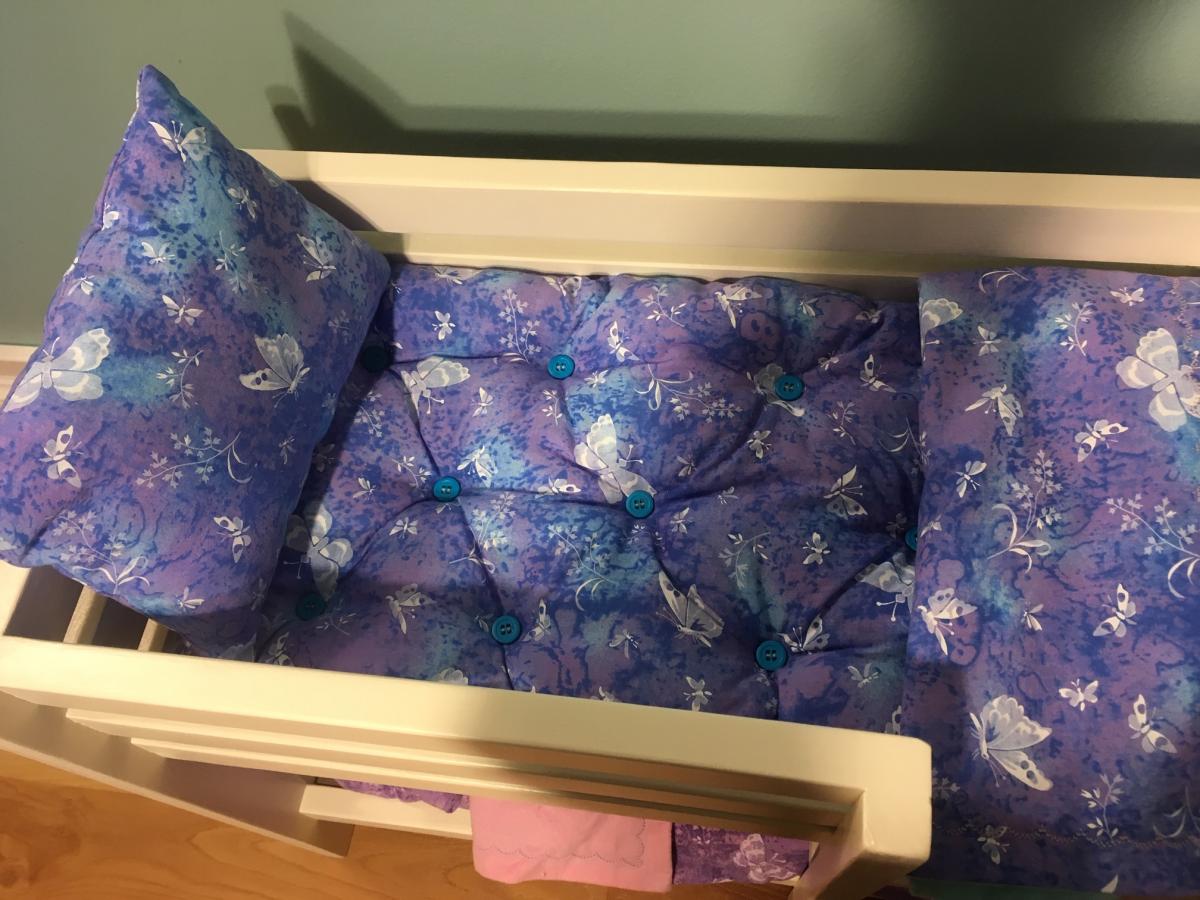
I built this doll bed to be raffled at a fundraiser. It came together pretty easily, and I really appreciated the mattress tutorial! Thank you!
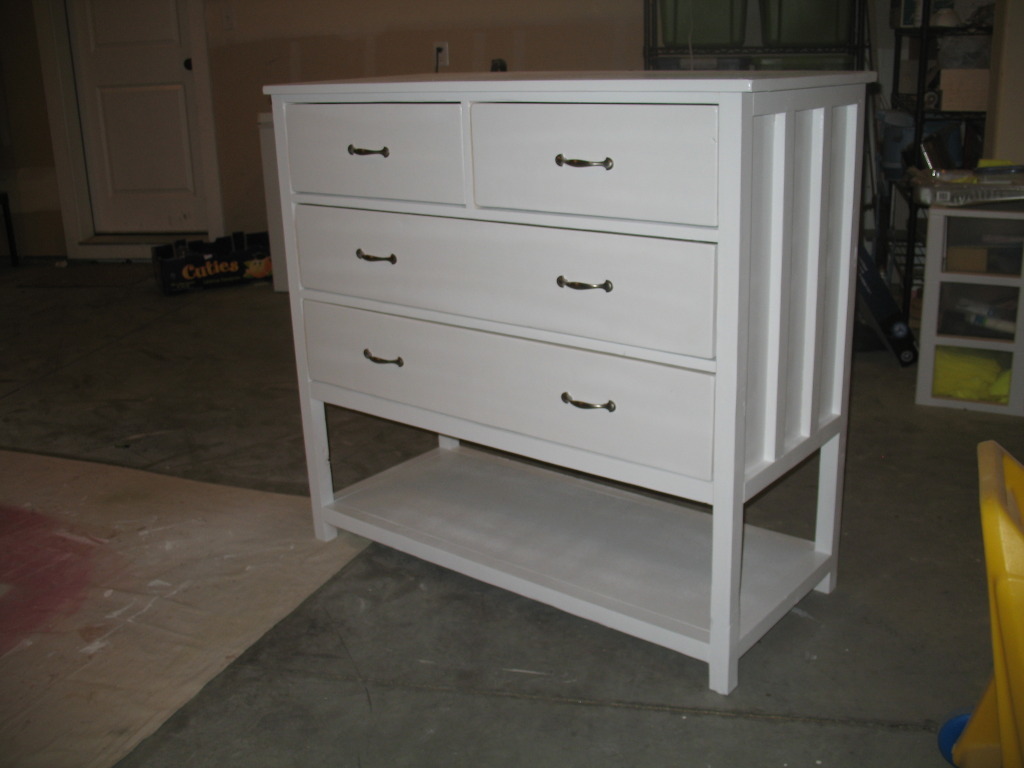
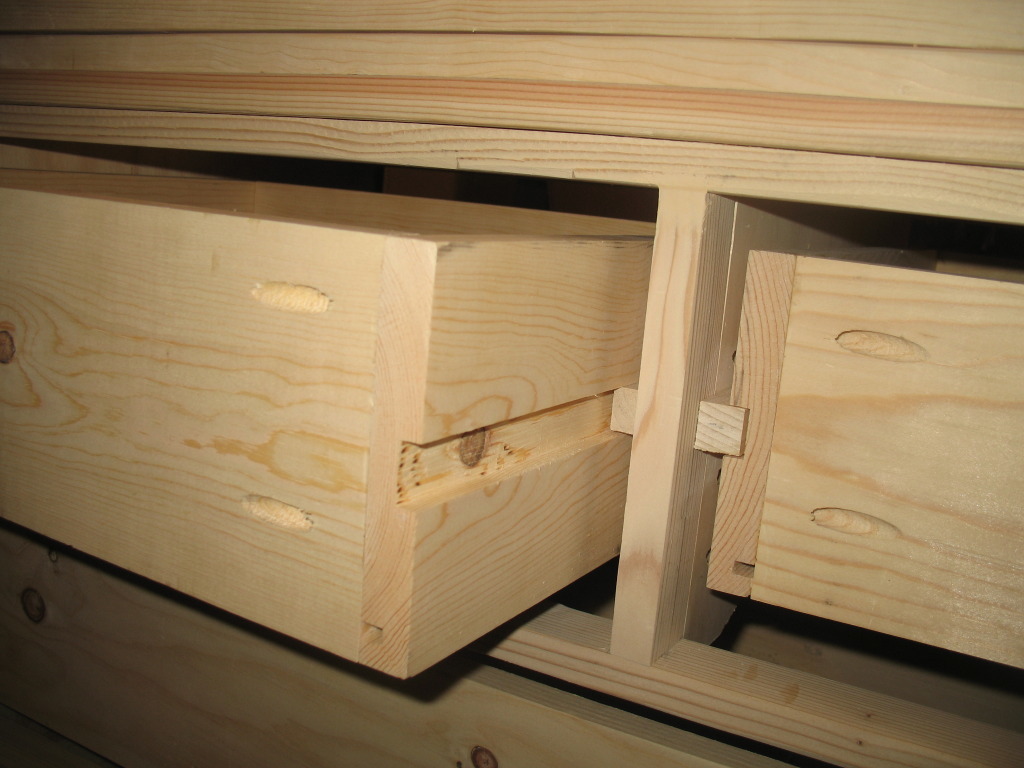
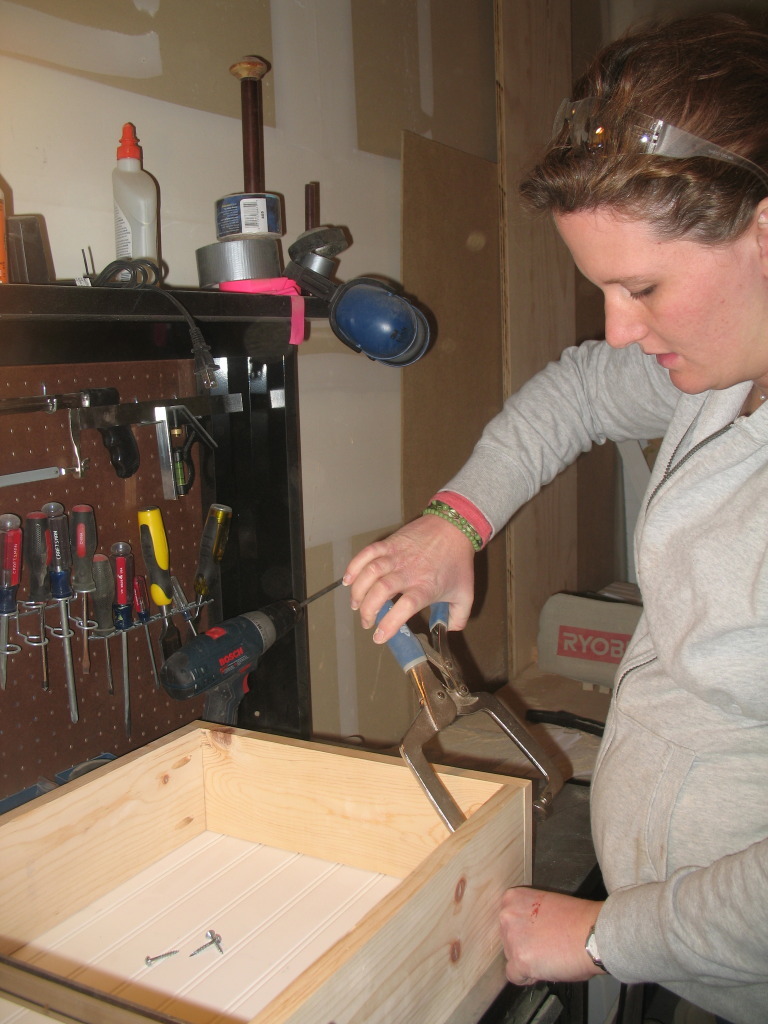
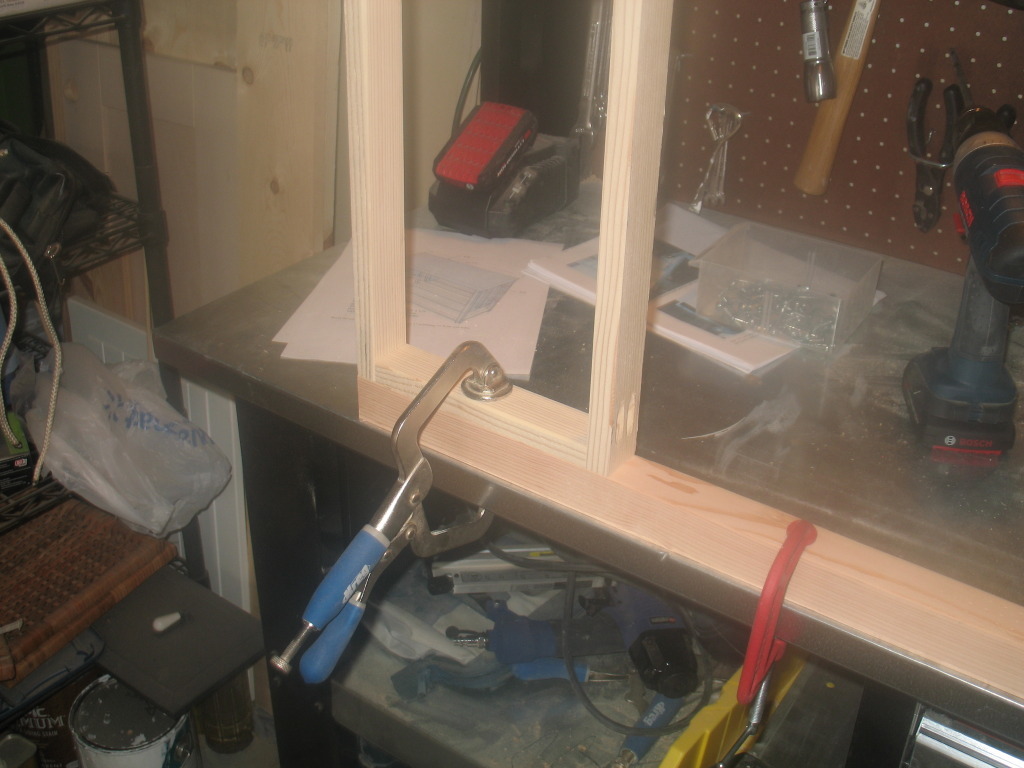
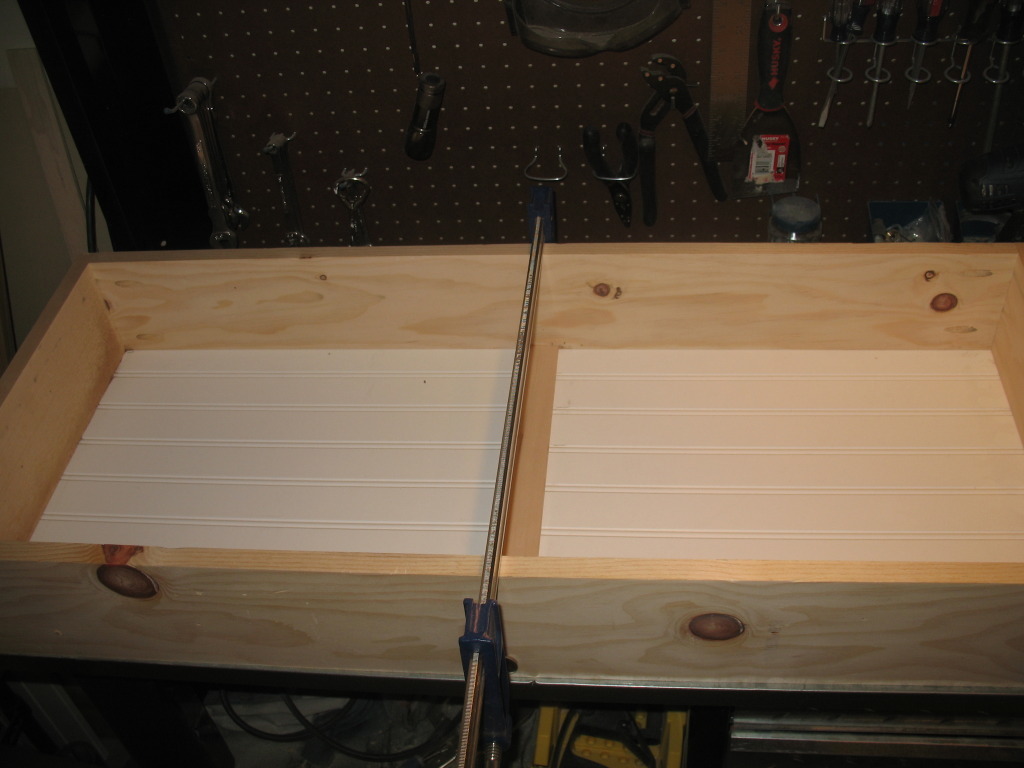
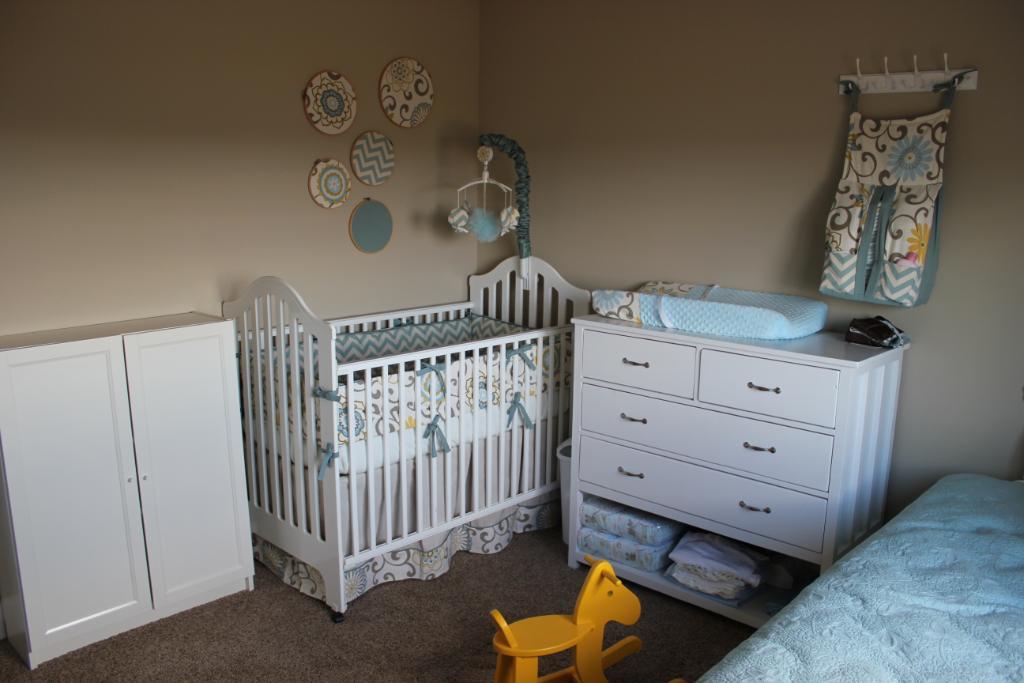
Saw this on Ana's site just in time to make it for a changing table for baby number 4. This was our most difficult plan to take on so far, but it turned out to be pretty straight forward. The details on the plan were a great help - using the spacers to make the drawer openings perfectly spaced, and attaching the drawer fronts on after attaching the rails were great tips. We also used dowel drawer slides for the top 2 drawers, which we really ended up liking.
Sat, 03/17/2012 - 01:15
Did you just use a router for the channels in the top drawers? If yes, what bit? If no, how did you do them?
Beautiful work! Your baby is very lucky! :)

Sat, 03/17/2012 - 03:04
Those grooves are probably made with a dado stack on a table saw, but your could easily do it with a router and a guide. Table saw is easier though.
If you don't own a dado set already, don't buy the cheapest one you can find. I made that mistake, and wasn't overly happy with the results of the cut. When I bought a better dado blade set, I was a lot happier with the quality of my cuts.
That turns out to be generally true: I'm always more happy with the result of a better blade. I also needed to tune up my saw to make sure the blade was properly aligned with the guide slots, and that my fence was parallel to the blade. If you don't do that then the best blade in the world won't help. Also, buy full-kerf blades, not the thin kerf blades they sell at the home improvement store. The full kerf blades wobble less and give you cleaner cuts.
Sat, 03/17/2012 - 05:04
clay,
kathy asked mollie a question, why don't you let her answer it?

In reply to clay, kathy asked mollie a by rob (not verified)
Sat, 03/17/2012 - 06:33
This is a community, there's no need to be rude. Sometimes the authors don't know there are comments, and it's nice to hear more than one solution to a problem. So let's please just appreciate the contribution from all the members, yes?
Sat, 03/17/2012 - 14:56
Brookifer86,
I can appreciate where you are coming from, and I appreciate your kind suggestions.
I can also identify with Rob's comment directed at Clay. Which I did not find rude.
Clay tends to comment on nearly almost every post on Ana's site with a dismissive and know-it-all attitude, giving outdated advice and rude corrections. It has gotten pretty old. Obviously I am not the only one who sees this.
Remember, one person's authoritarian advice on how to do things isn't the only way or even the best way to approach a project. It is simply their experience and their own personal way of doing things.

Sun, 03/18/2012 - 12:16
I'm grateful for all the help on this blog! When it comes to woodworking, there always seems to be more than one way to do things, and I want to hear EVERYBODY'S ideas; it makes me a more knowledgeable woodworker and helps me overcome planning obstacles I would otherwise not get passed.
Clay, I've read many of you posts and appreciate the wisdom you share. And to the complainers: sometimes our thoughts are not always conveyed on Internet discussions. Some personalities can come across as abrasive/arrogant unbeknownst to the author simply because of their writing style. I've seen it time and again on blogs and forums. I know what I want to say, but it doesn't always come across *quite right* when I'm typing it out.
Either way, I want to hear more about these drawer glides! Clay, you posted a great link on the original plan that suggest always using hardwood for drawer glides or at least a hard/softwood combo. Makes sense, any other want to chime in?
Sun, 03/18/2012 - 12:39
Just because I asked him to let Mollie answer the question doesn't mean I was calling him rude. I just think it's common courtesy to let someone who is asked a question to speak first. I definitely appreciate Clay's wisdom and I agree that there are many ways to do something.
What if it were in person though? What if someone kept asking you a question but someone standing off to the side kept answering it before you? Sure they answer correctly every time and give credible insight but after getting cut off over and over, don't you think it might get annoying?
Don't you think the teacher gets a little piffed when that one kid in the back raises his hand and belts out the answer every time and doesn't let any of the other kids answer the question? Sorry for the rant...
anyway the issue isn't about good or bad insight. The issue is just manners. I'm sorry if that comes off brash, but let the person who actually built it answer first.
Sun, 03/18/2012 - 13:18
Lucky for us, we're not in person and we can just "scroll down," lol. I remember recently, one of the blogs I regularly read posted about just this. Her article was spot-on and amusing at the same time...partly because she describes these notorious commenters, and because I know I've been guilty of "thread dumping " myself. There are personalities that clash online and in the real world too. It's worth a glance for a little perspective-and a laugh. http://www.homestoriesatoz.com/2012/02/how-deal-negative-comments.html
Sun, 03/18/2012 - 16:30
I seem to have stepped on some toes, and for that I'm sorry. I'll certainly take your points in mind in the future. I'm afraid that's distracted from the main point: this is a really amazing piece of furniture. Molly, your house must be pretty amazing if you're building furniture like this. I'll bet your children grow up to be pretty amazing if they've got a mom who builds their furniture.
Mon, 03/19/2012 - 12:44
Beautiful changing table! I have only been building a little over a year and I always appreciate the advice on this site. Thanks for sharing so much Clay:-)
Sun, 07/29/2012 - 21:13
I just saw there were comments here on my brag post. So, Clay, thanks for answering for me.
We used our table saw - although we don't have a fancy blade. We should probably get one. My husband just ran it through the table saw several times to get it the exact right width. The blade was lowered so that it would only cut 1/4 inch into the wood. And the slides were hardwood - square dowels you get get at a home improvement store.
Wed, 08/08/2012 - 08:08
I love the plans for this piece, to begin with. Great job on your build. I LOVE this in white! Especially for a baby room or a little girl's room. Thank you so much for sharing your pics and ideas!
Mon, 01/21/2013 - 20:45
Fantastic job on this piece! I think this would be perfect in an adult's bedroom also, with the bottom shelf for a blanket or quilt. I would love to make this.
Sun, 03/31/2013 - 16:01
Hi,
I was wanting to do the same thing...make this for using as a changing table. What are the dimensions of your dresser? Did you change the size of the drawers (did you use something different than a 1x8)? At what measurement did you place the lower shelf relative to the ground and how much space is there between the top of that lower shelf and the bottom of the 1x2 that frames the bottom drawer?
Any help / details that you can give would be so appreciated!
Thanks!
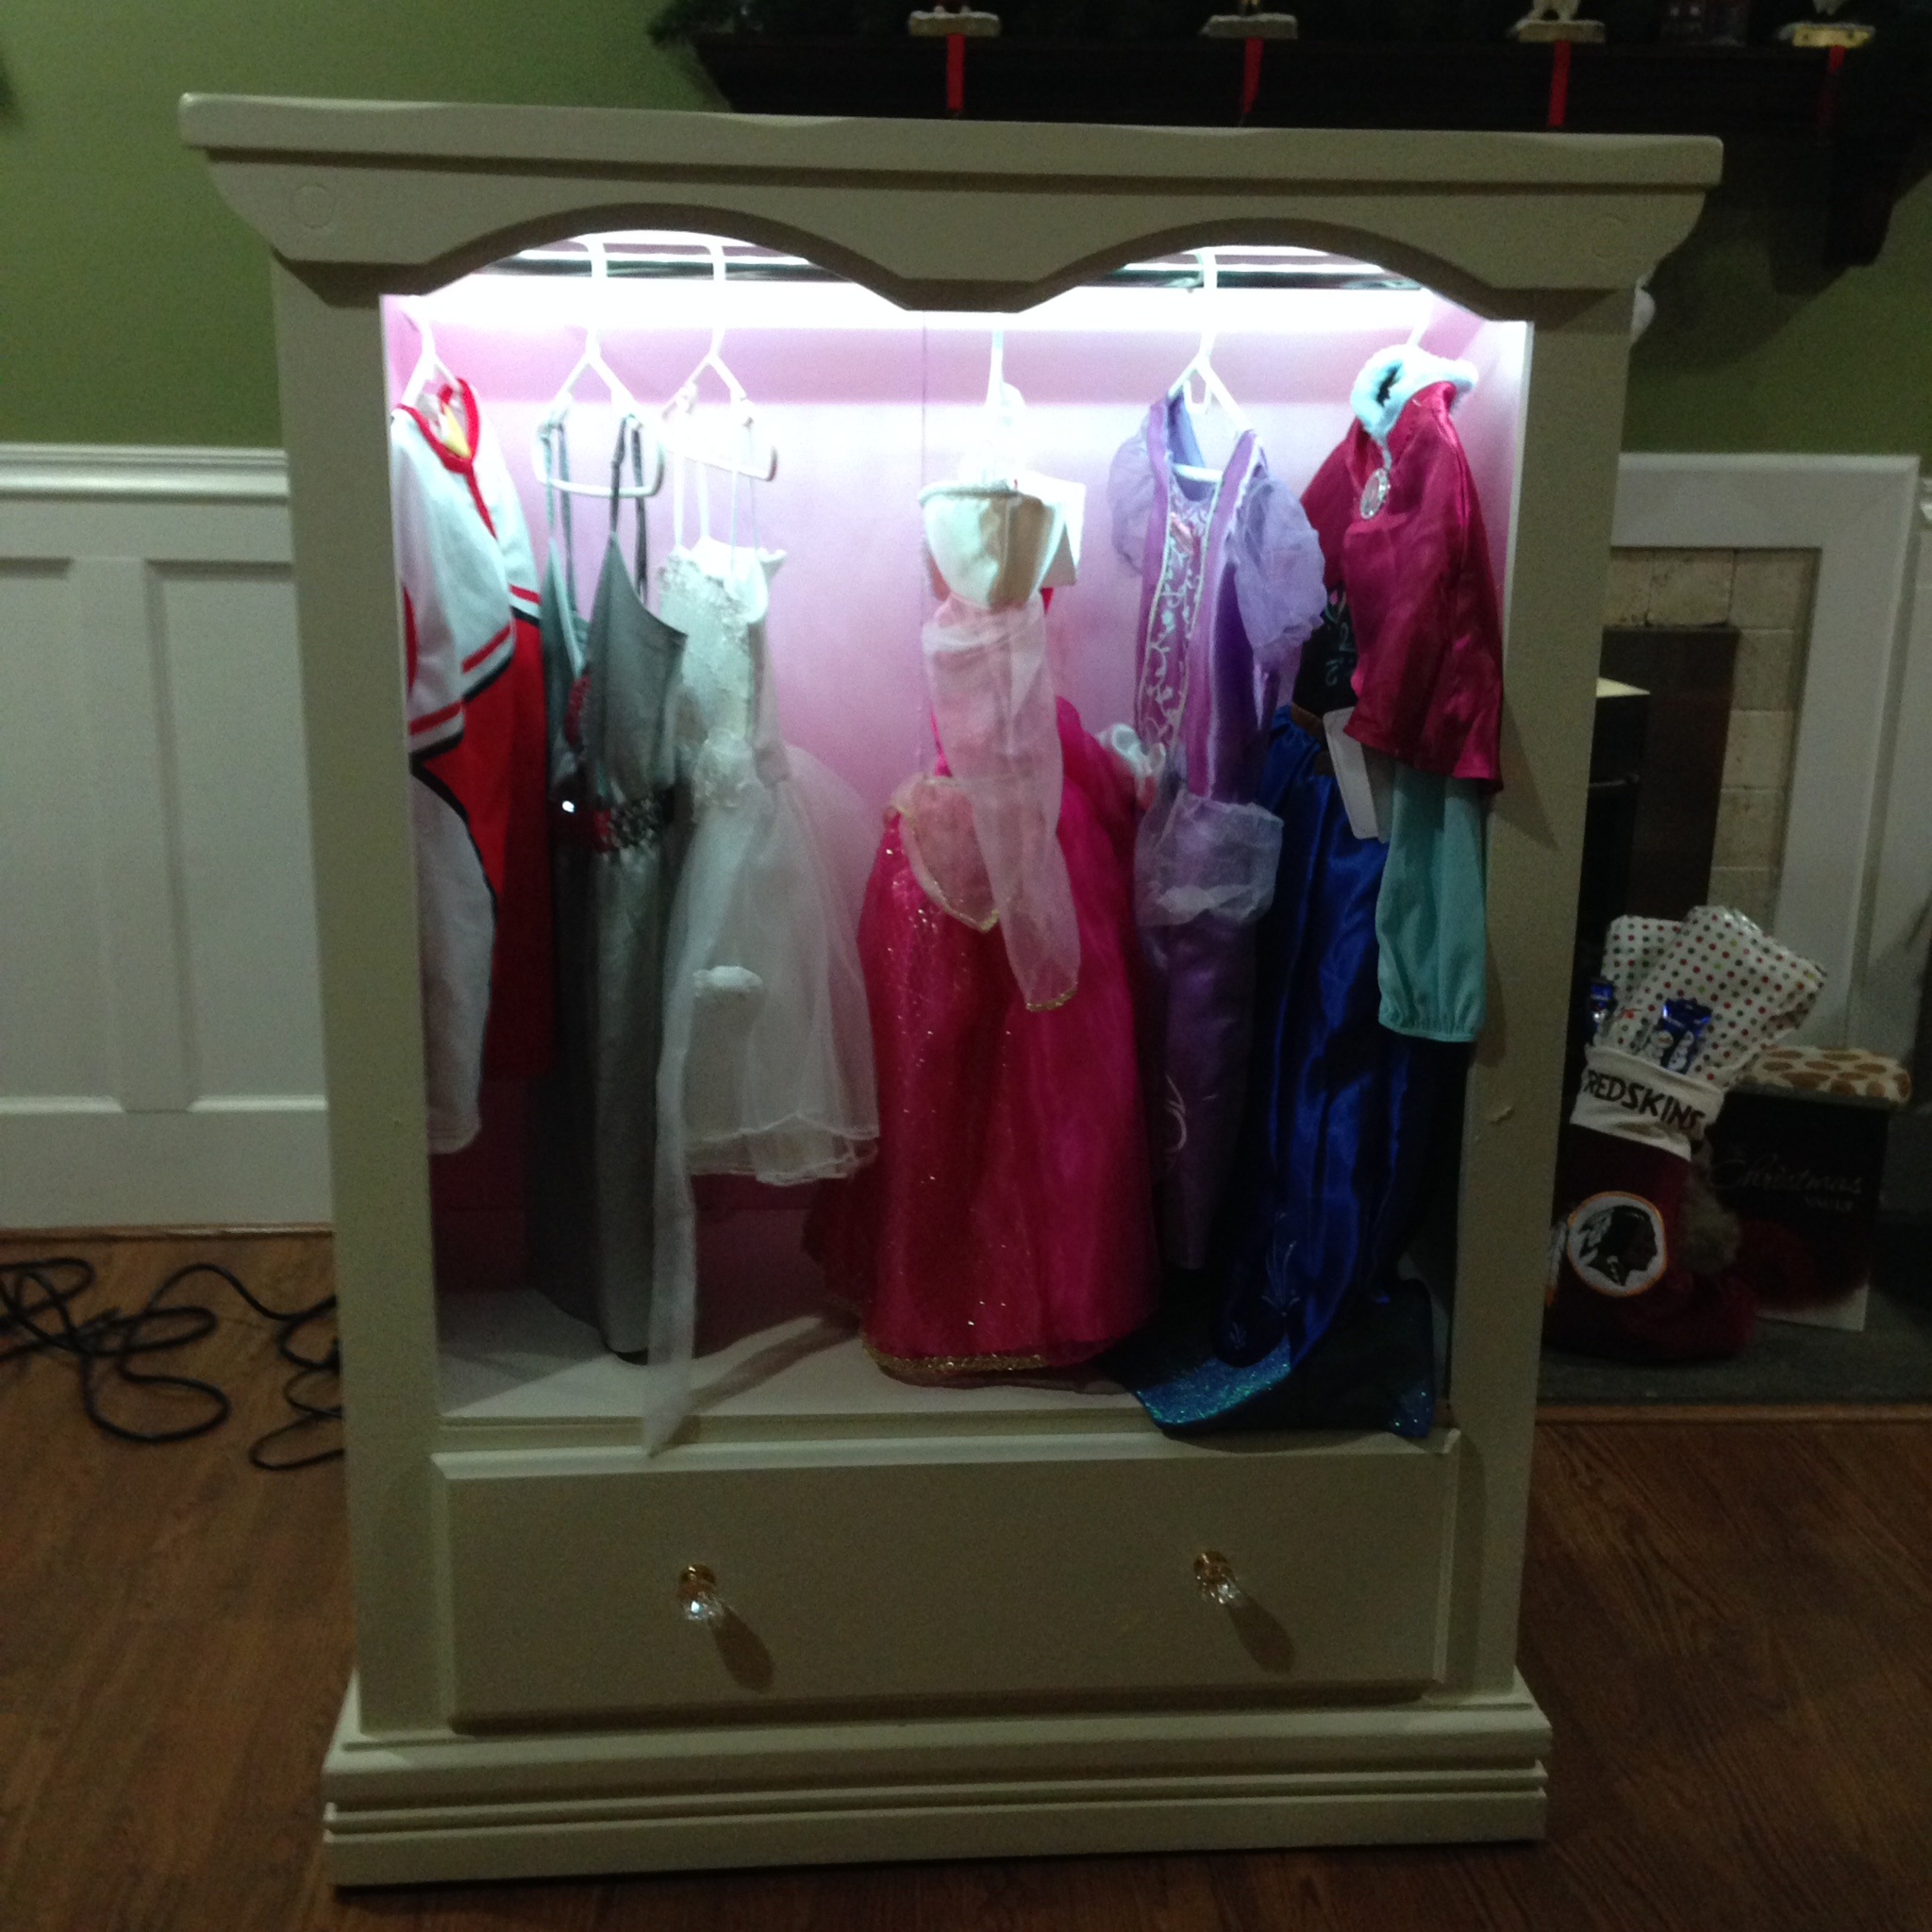
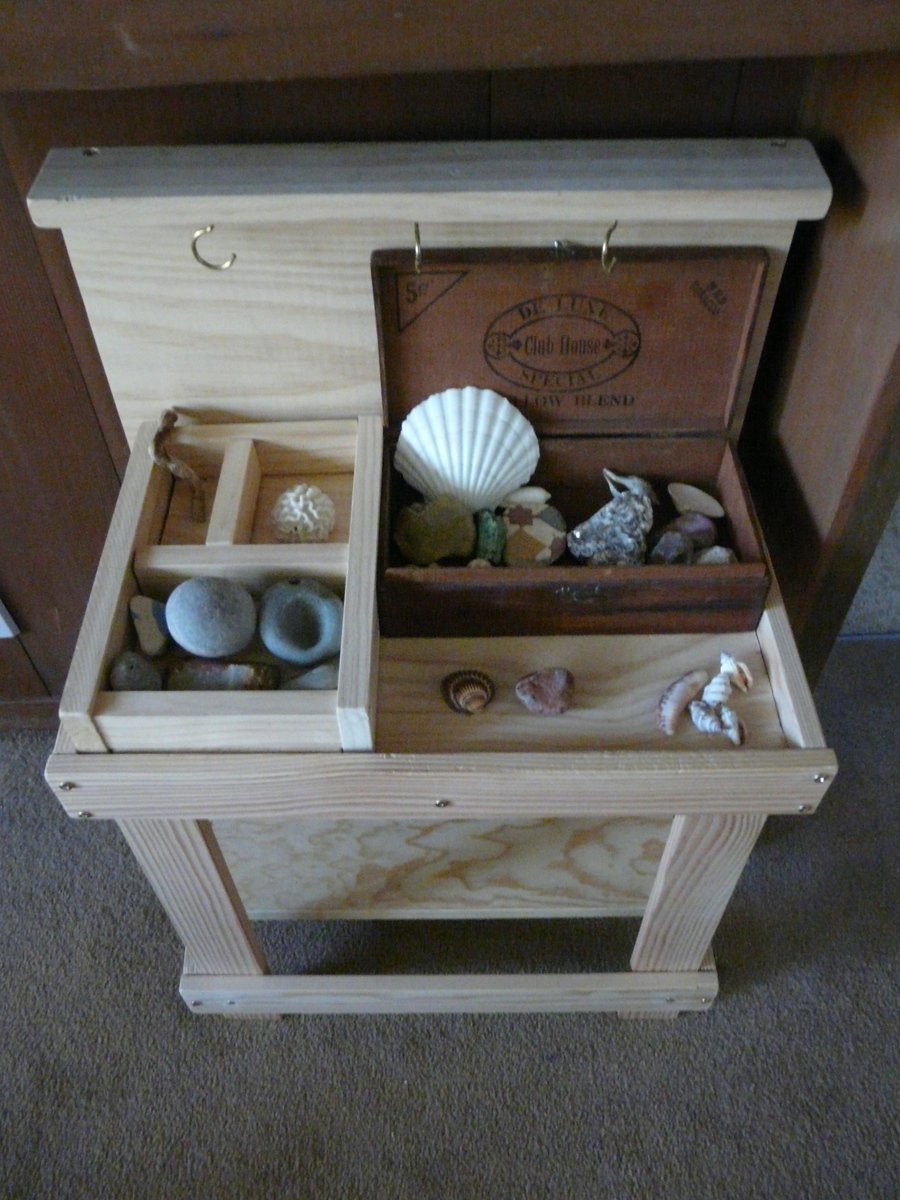
My daughter, like most other 2 & 3 year olds, love playing dress up. Over time we have collected a large selection of princess dresses and various other dress up clothes. Where do you put this stuff? My wife went to Pinterest for ideas. She came to me asking if I could make her a closet. A closet, what? She then showed me a picture. I said "that looks like a box. I can do better." the idea of repurposing a dresser sounded like a much better and time saving idea. So I set off to the second hand stores in search of a sterdy, decorative, not too expensive dresser.
Once the dresser had been procurred ($30 at Goodwill) and transported home, the project began. I first removed all but the bottom drawer and drawer supports. Next I removed the hardware from the remaining drawer and deglossed the entire dresser and drawer. Once deglossed, I put down a single coat of white primer. The next day I came back and put down two coats of paint. The outside I used a cream color to match the playroom where it would be housed. On the inside of the dresser I painted it bright Pink; Bear Paint calls this color "sexy Pink". We'll call it bright pink since its for my 3 year old.
After two coats of paint the project was pretty much complete. Then I had the bright idea to add lights. I went to the hardware store looking for under cabinet lighting. I was unimpressed with the lighting options and price points. To Amazon.com I go. I found 16 feet of LED Strip lighting for $4 and a power supply for a couple extra bucks. The lights came with a remote control. When UPS delivered the package of lights I couldnt wait to install them. This was going to put the closet over the top. I cut the strip to the size I needed and installed using the provided 3M tape. It could not have been easier to install. I was able to cut the strip into the size strips I needed (64 inches total).
The final product with the lights on can be found on my youtube page:
http://www.youtube.com/watch?v=gE1soeC2OaE
My daughter was THRILLED! She loves using the remote to turn the lights on and off as well as changing the colors of the lights.
This project was super easy!
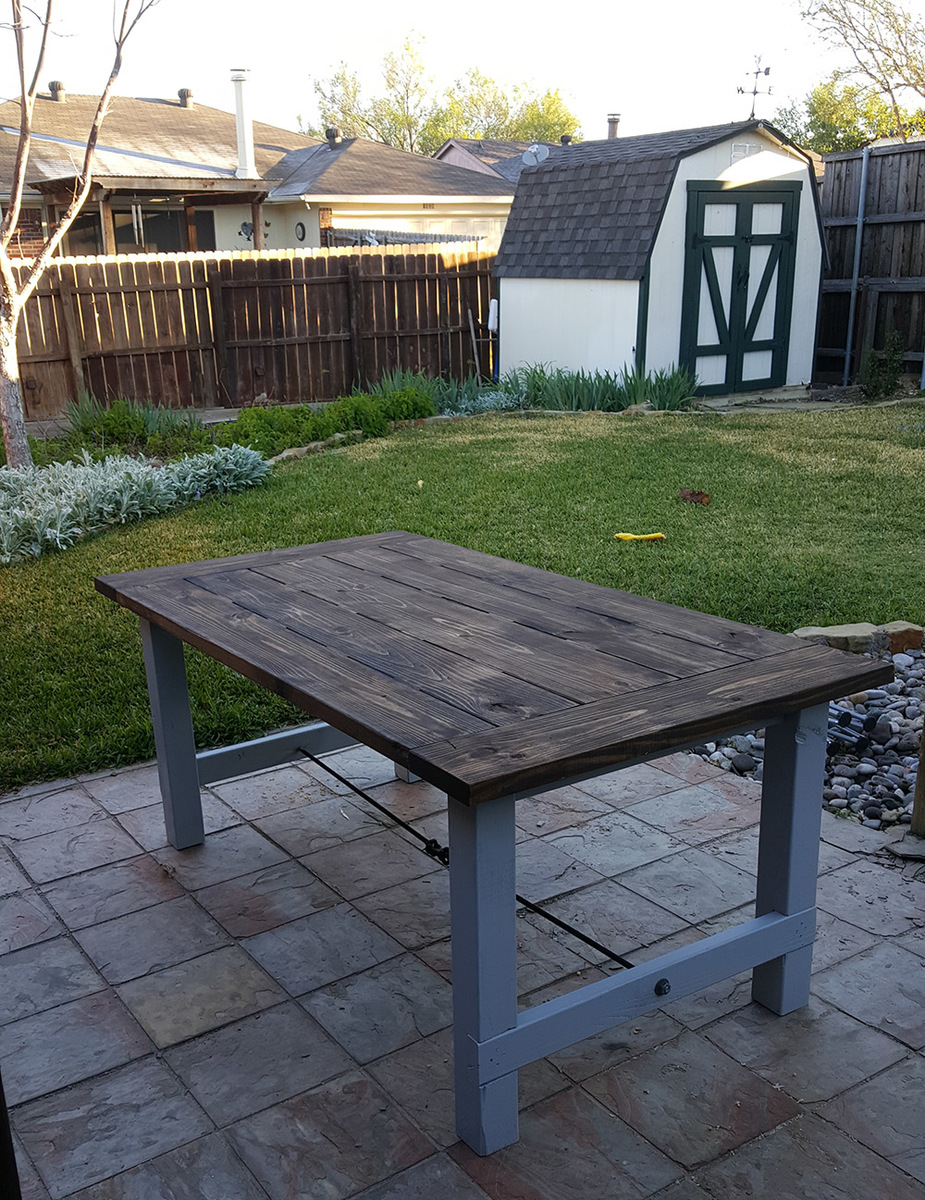
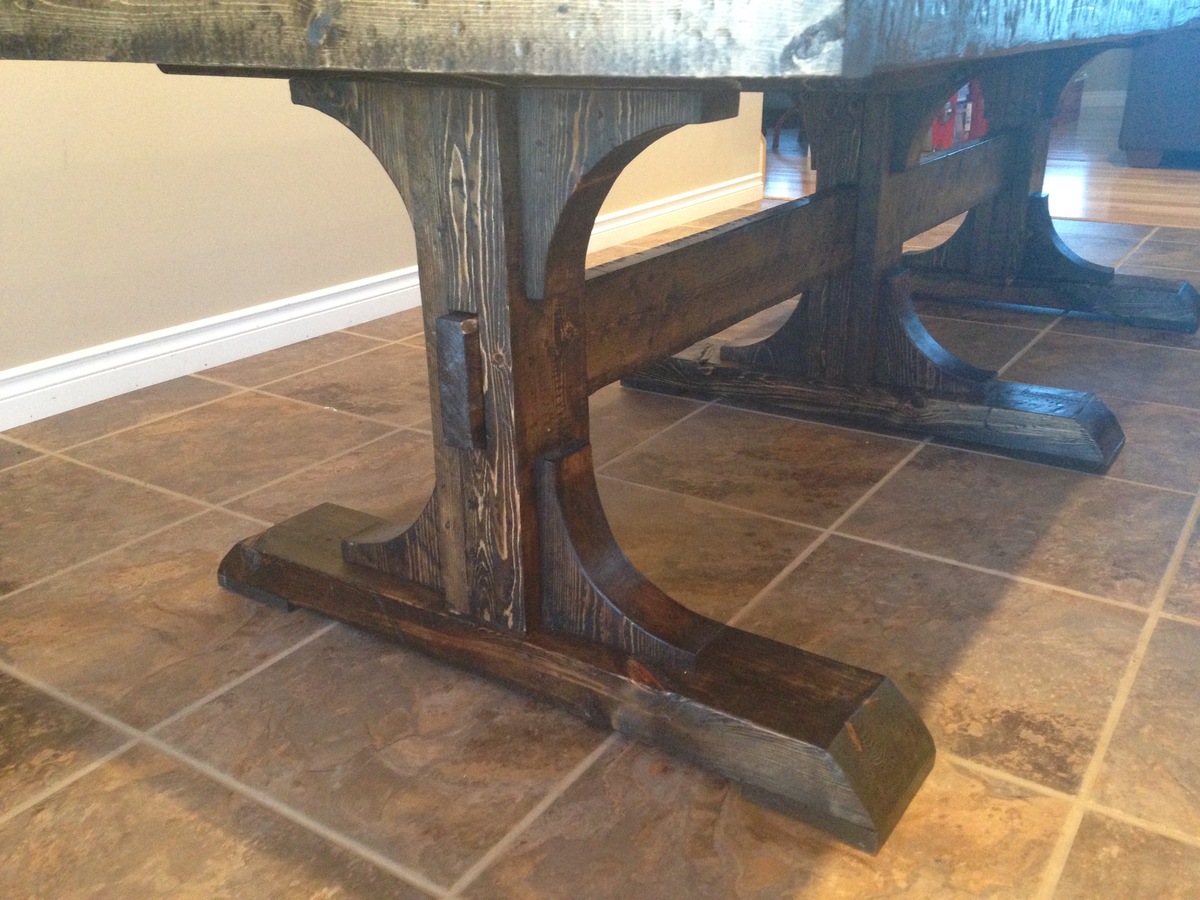
Made exactly to the plans with the exception of the middle 2x4 between the legs. I used 1/2" threaded rod, some steel rings welded to the rod, and a double sided clevis to make the connection in the middle.
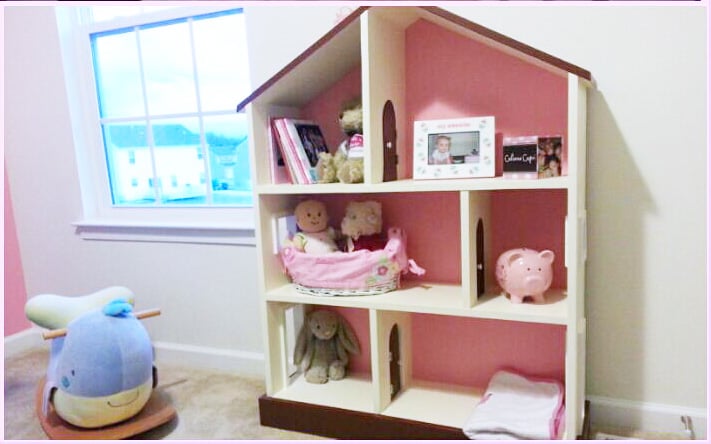
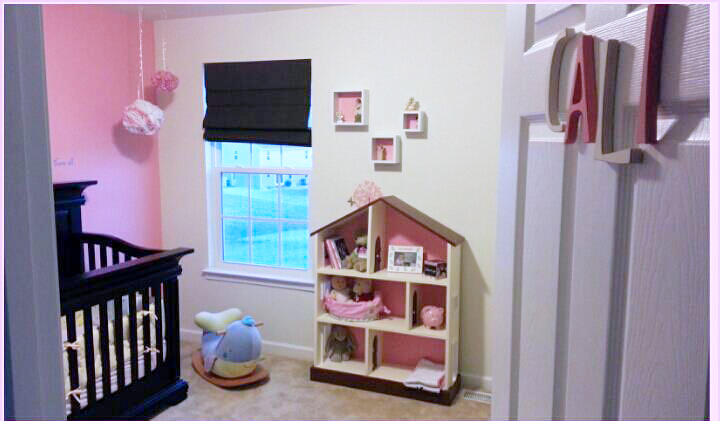
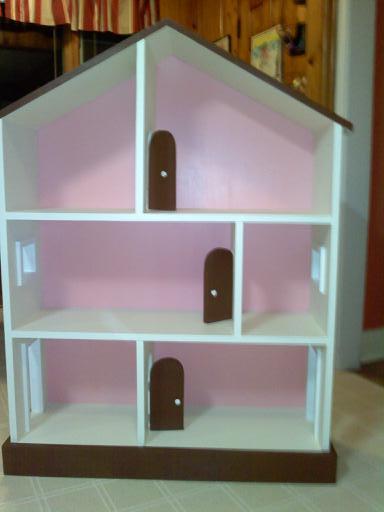
My first project using plans on this site - made for my grand daughter - her MOM loved it and she will too - she is only one and a half.... I used the plans on this site and decided to make some arch doorways in the room dividers. Came out so cute!
This was a relatively simple plan to do but it took me a while to get everything squared and right the first time around. I shortened the width of house to accommodate space in bedroom and also added arched doorways in the room dividers. They came out so good. Daughter-in-law loved this and we know my grand daughter will too. She is only one and half now! It was a fun project and gave me a great sense of accomplishment once it was finished!

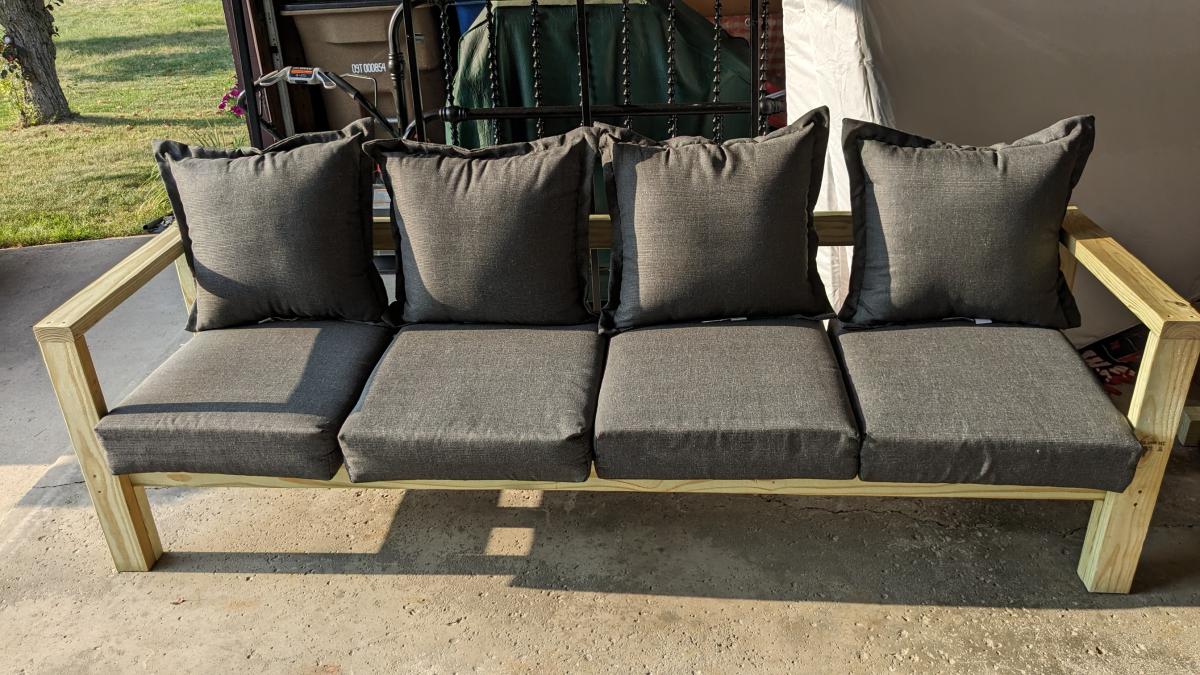
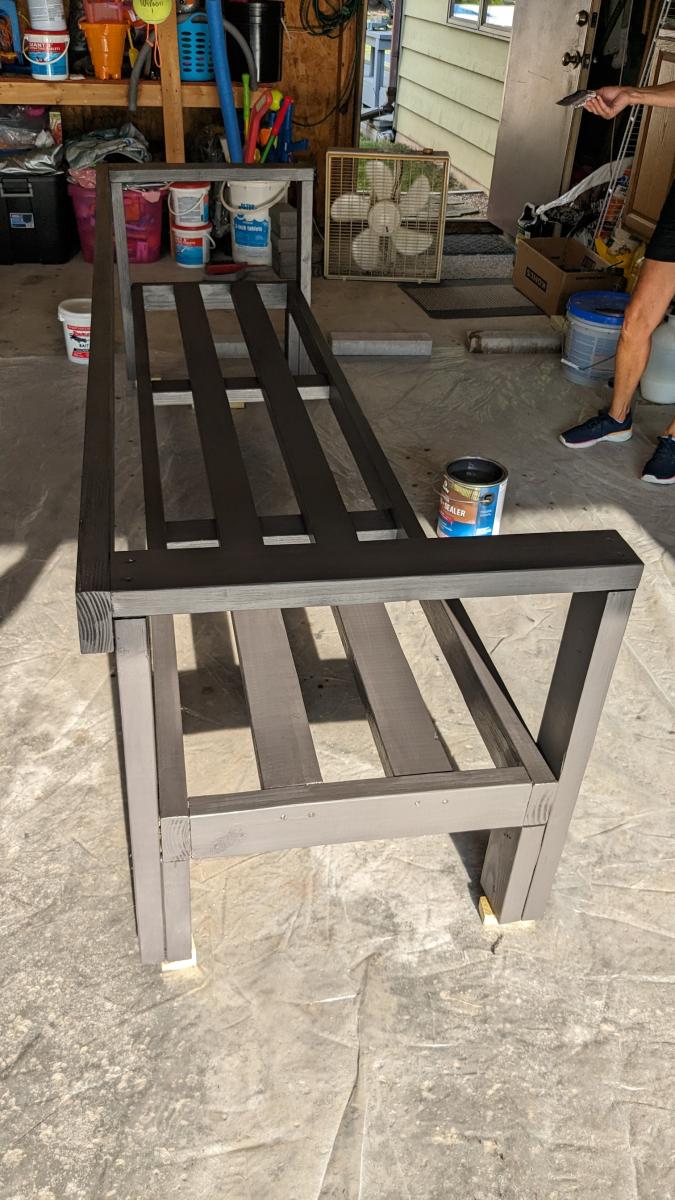
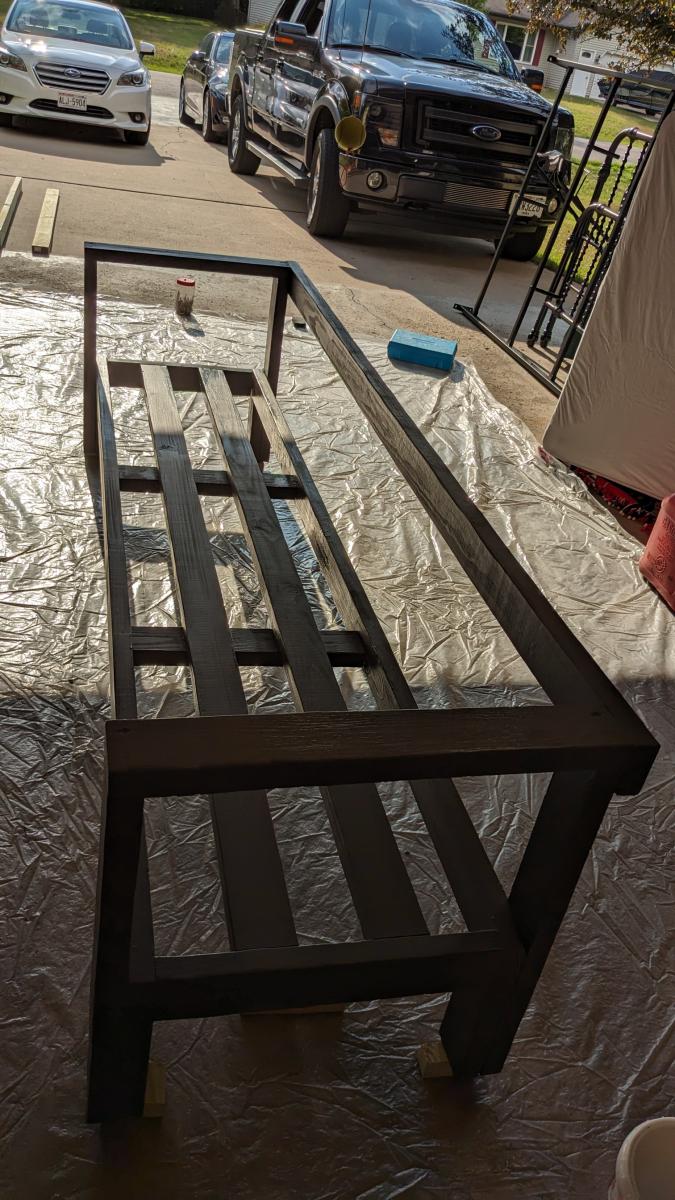
Changed it up to use less 2x4's for the seat and a few others. Grey stain from Dutch Boy turned out great.
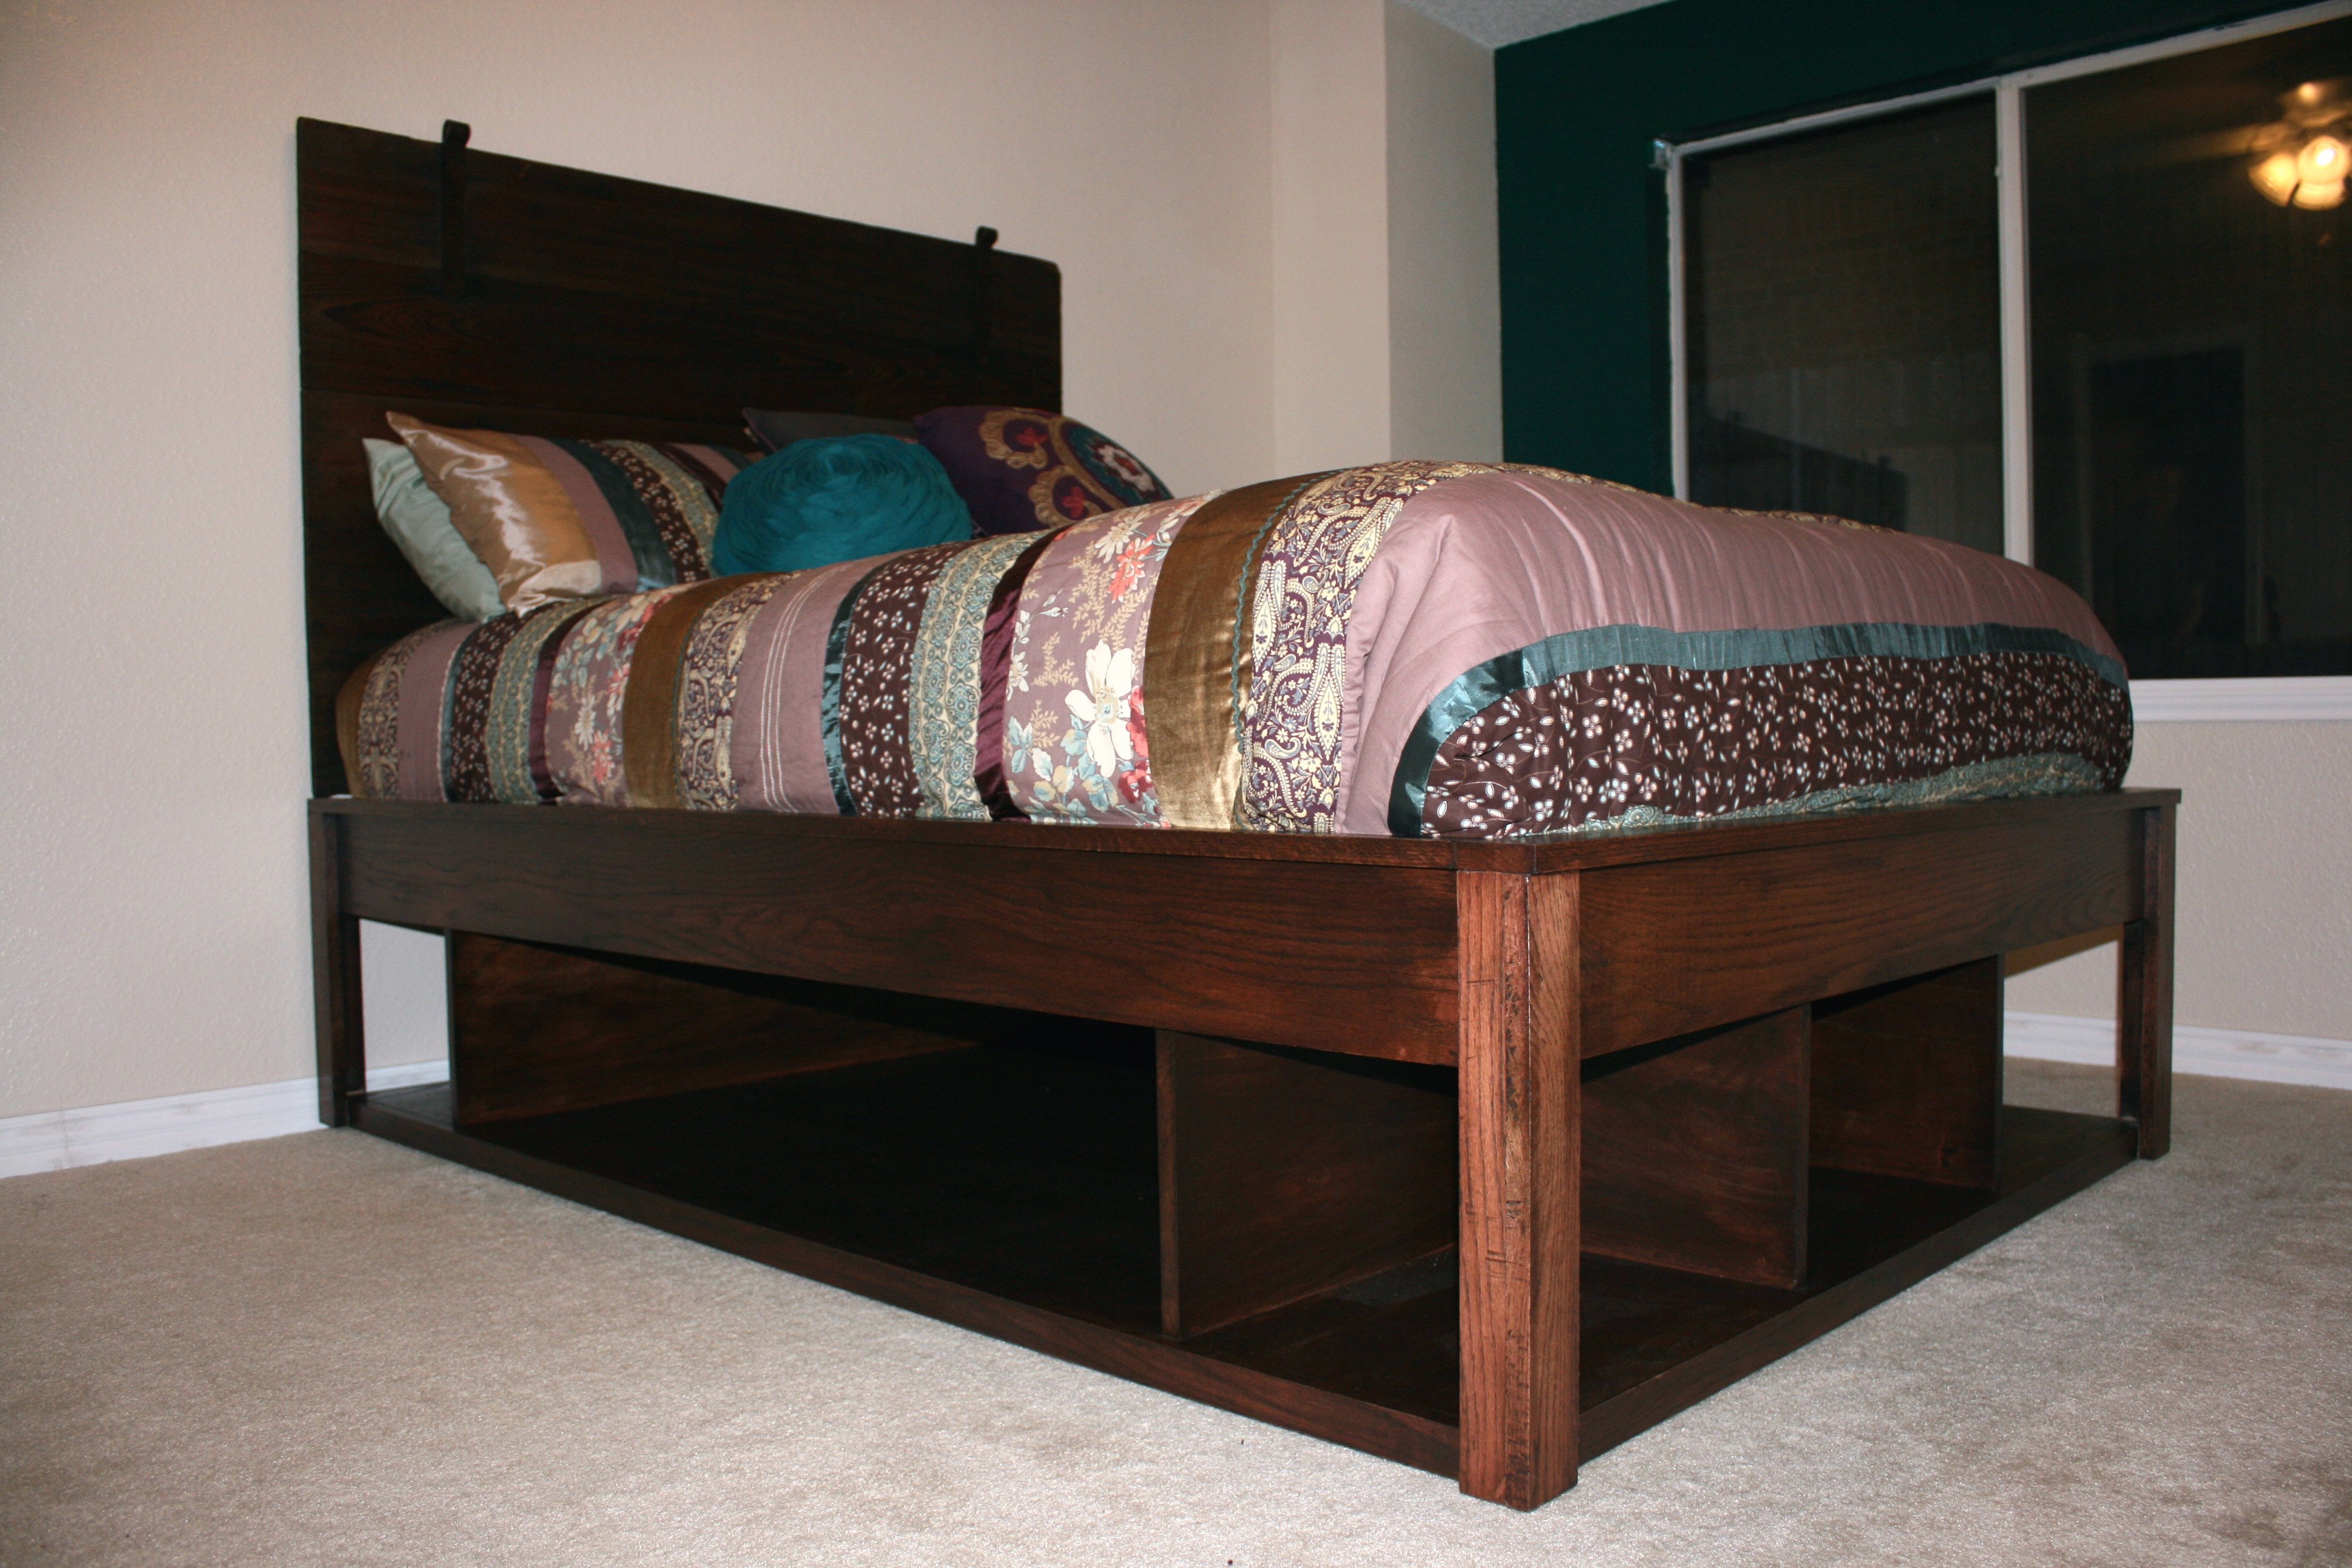
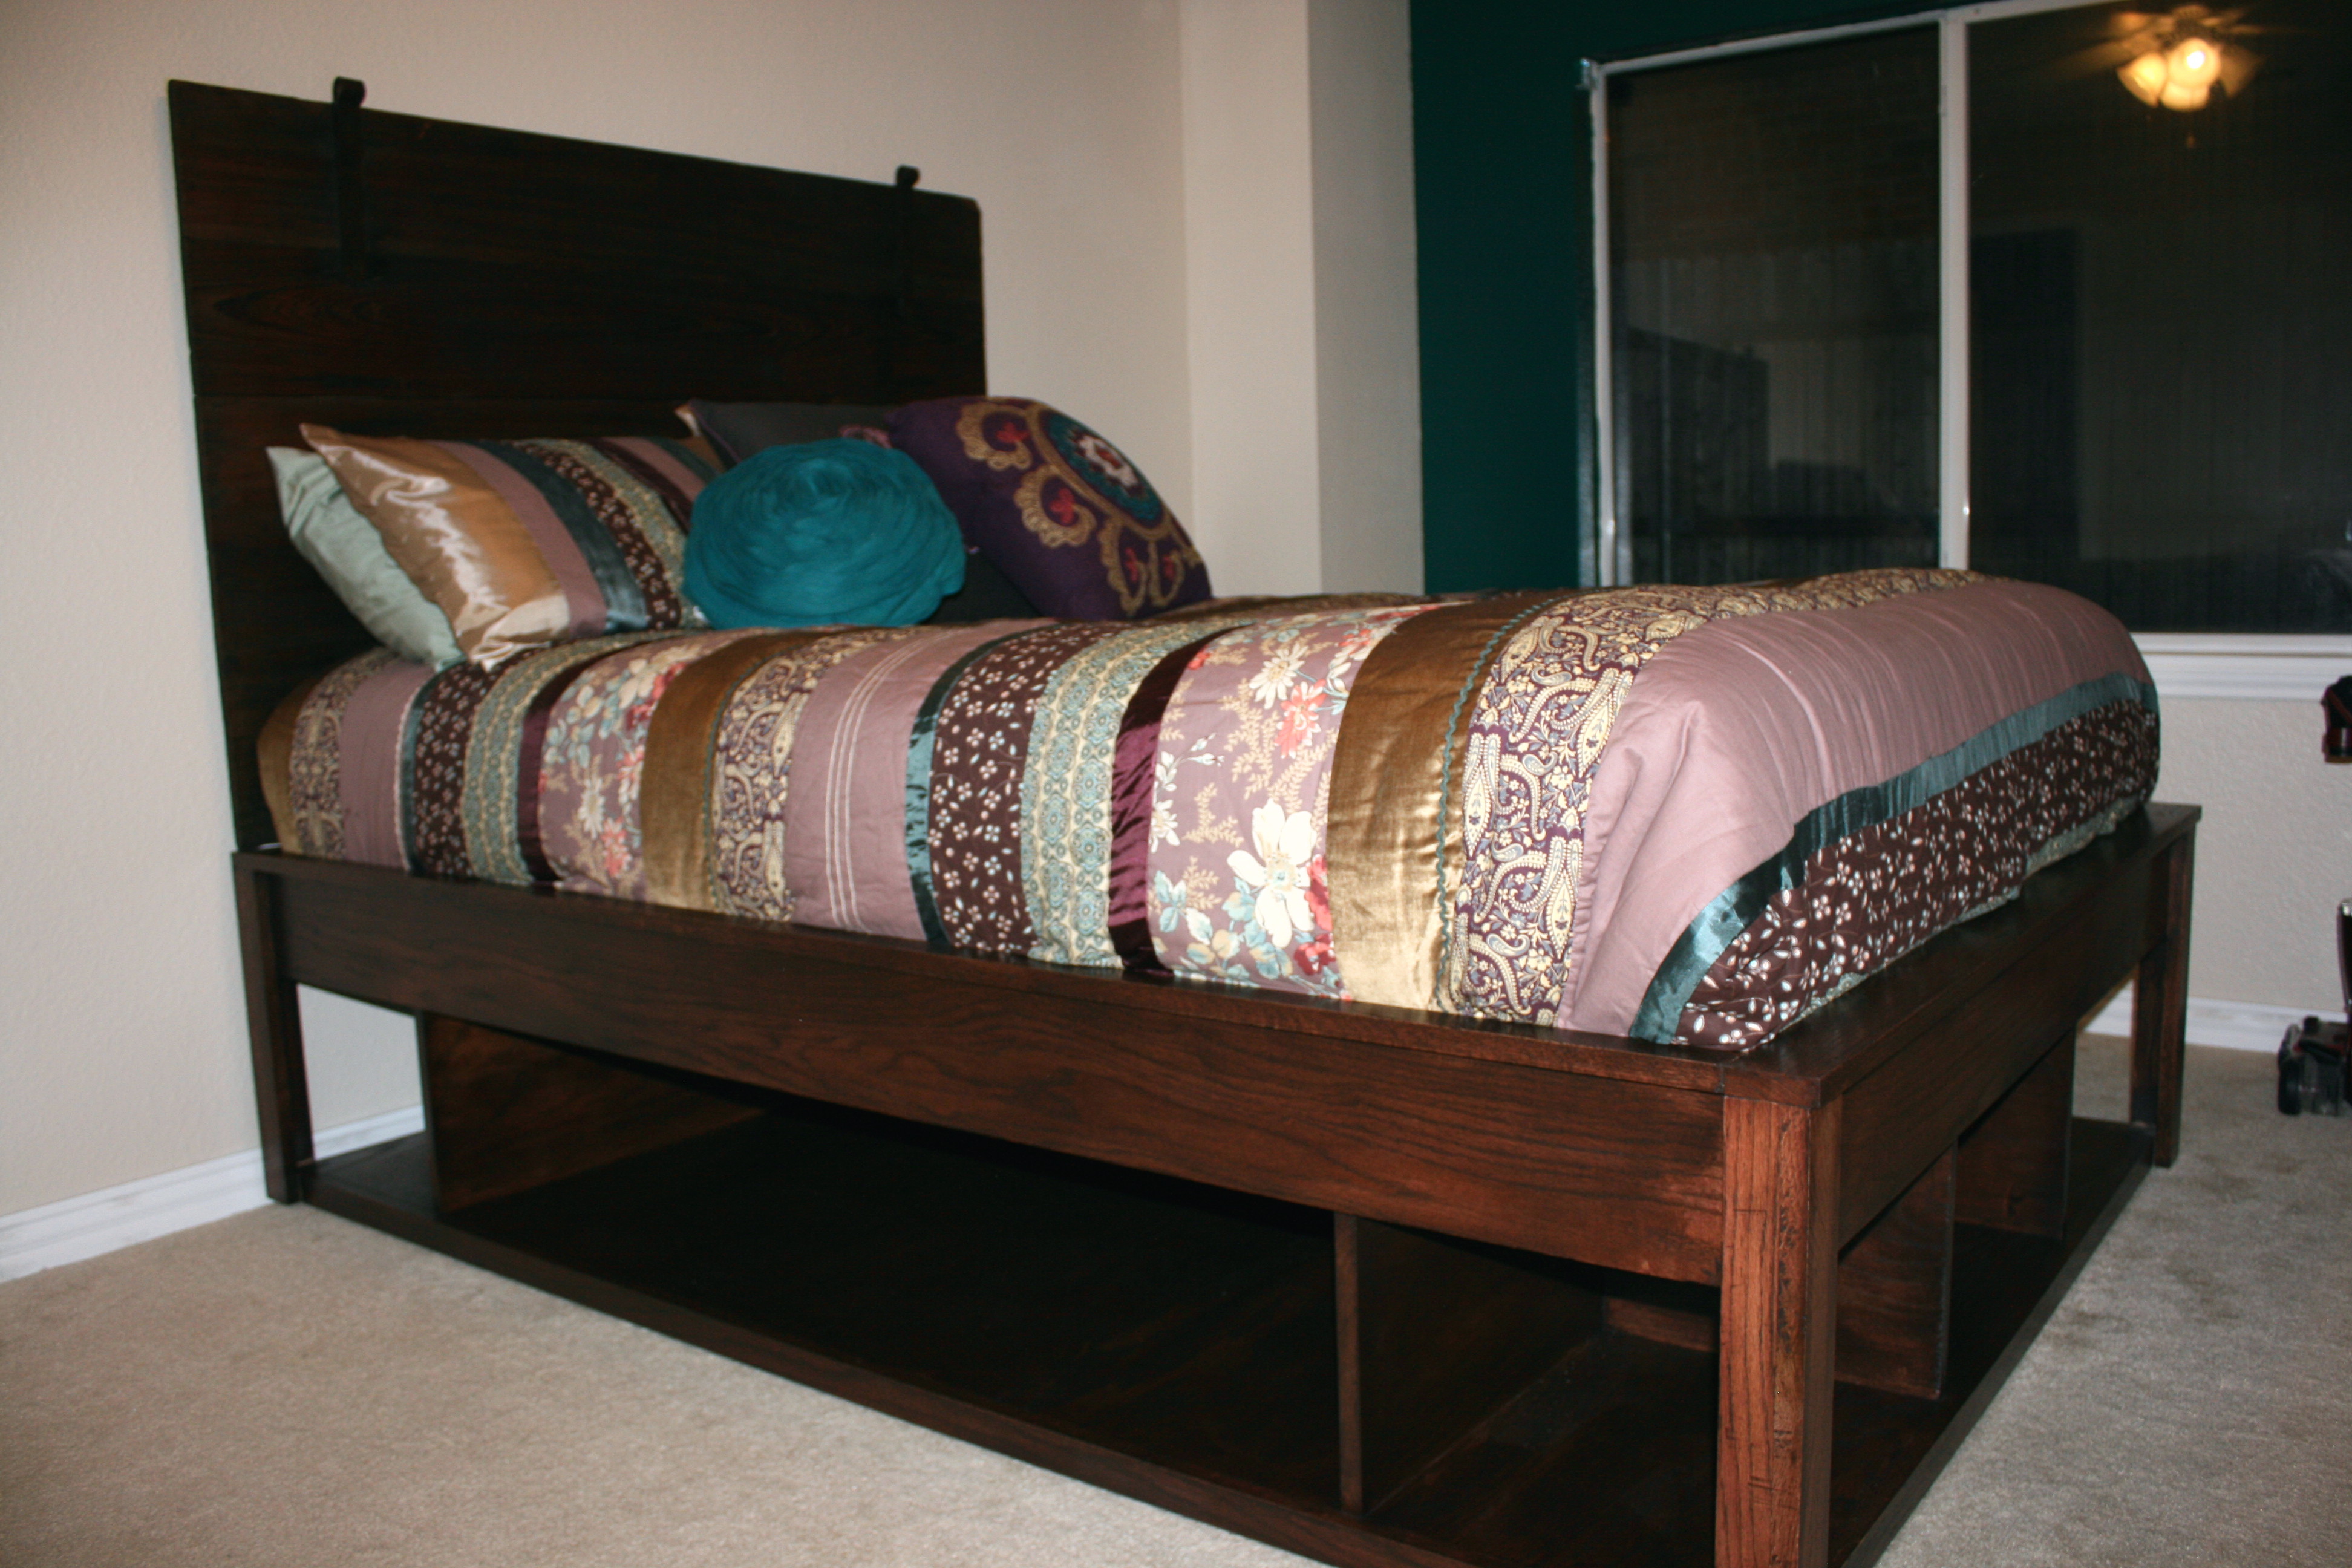
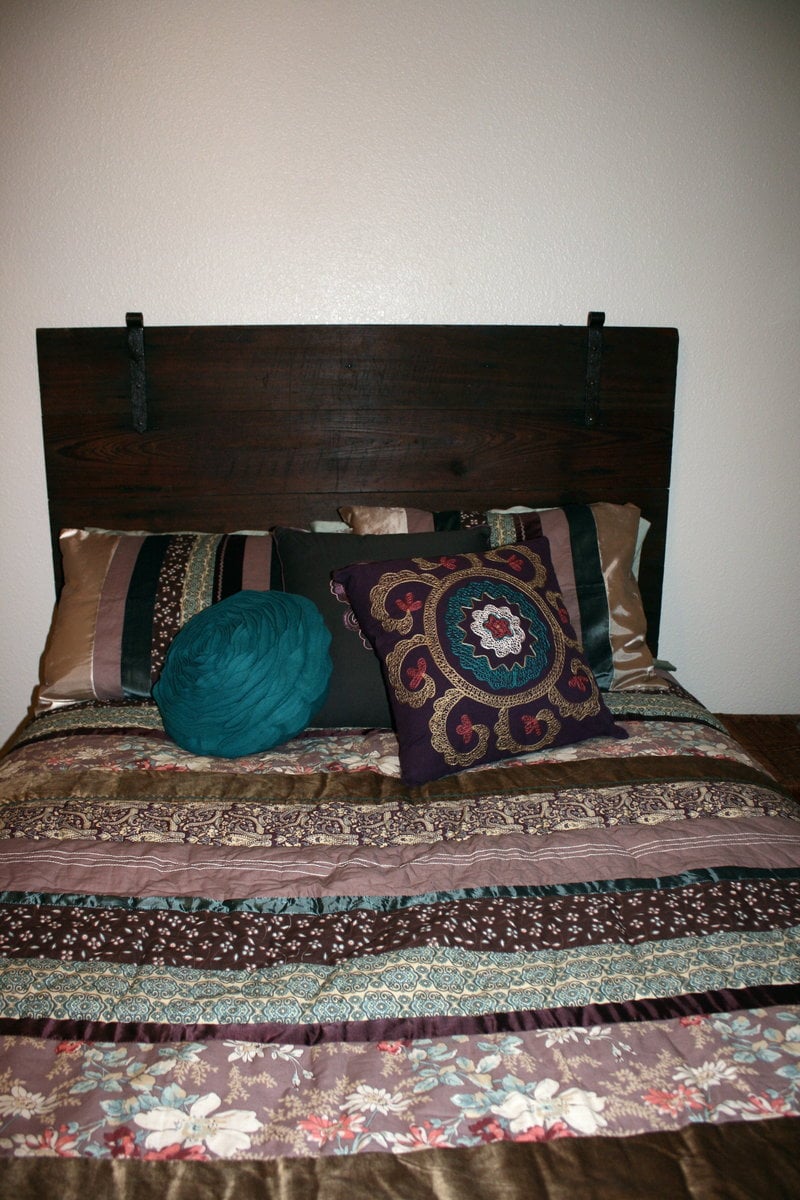
I made modified the plans to make the bed a full instead of a twin. This was a little tricky, because the full bed is bigger then a 4x8 sheet of plywood. If you are interested I can get pics of the extra support I had to build to suport the plywood seem. I also used redoak, which is why it cost so much. The extra money was well worth the cost when you use the finish. The headboard I used is from my wifes great grandmas' house in Southern Louisiana. It is 125 year old cypres storm shutter.

Sun, 03/18/2012 - 23:19
I especially love that headboard! It is just beautiful!
Sun, 05/06/2012 - 08:25
Do you have the measurements you used? I'm planning to build a full size next weekend for my son. Thanks!
Tue, 06/11/2013 - 19:38
Showed this bed to my daughter for her son and would also like the full size measurements. Pictures of how you supported the seam?
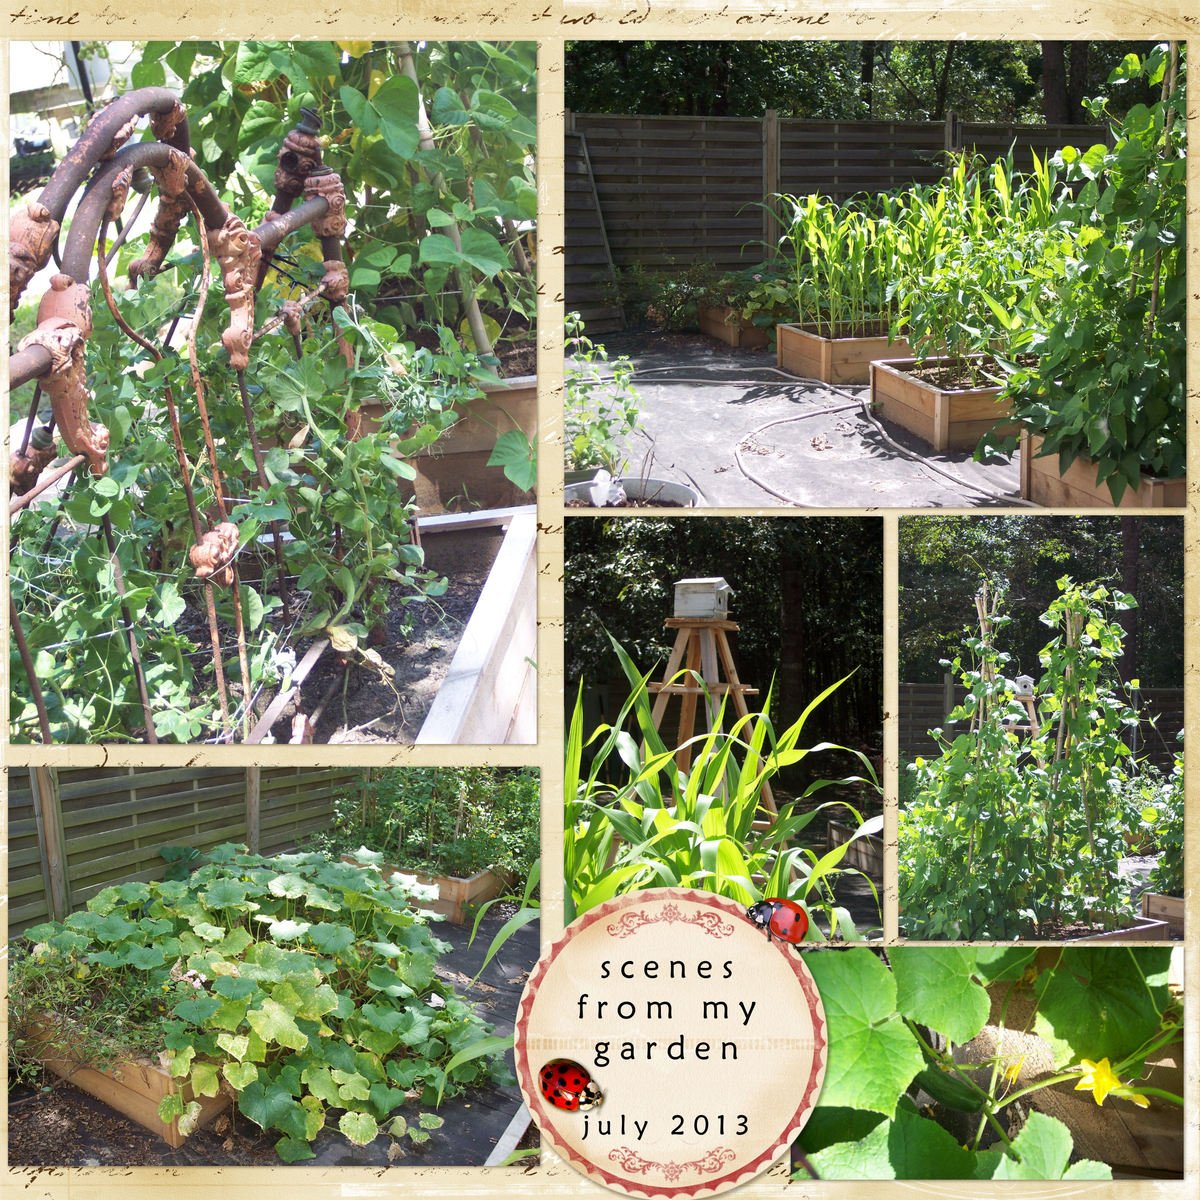
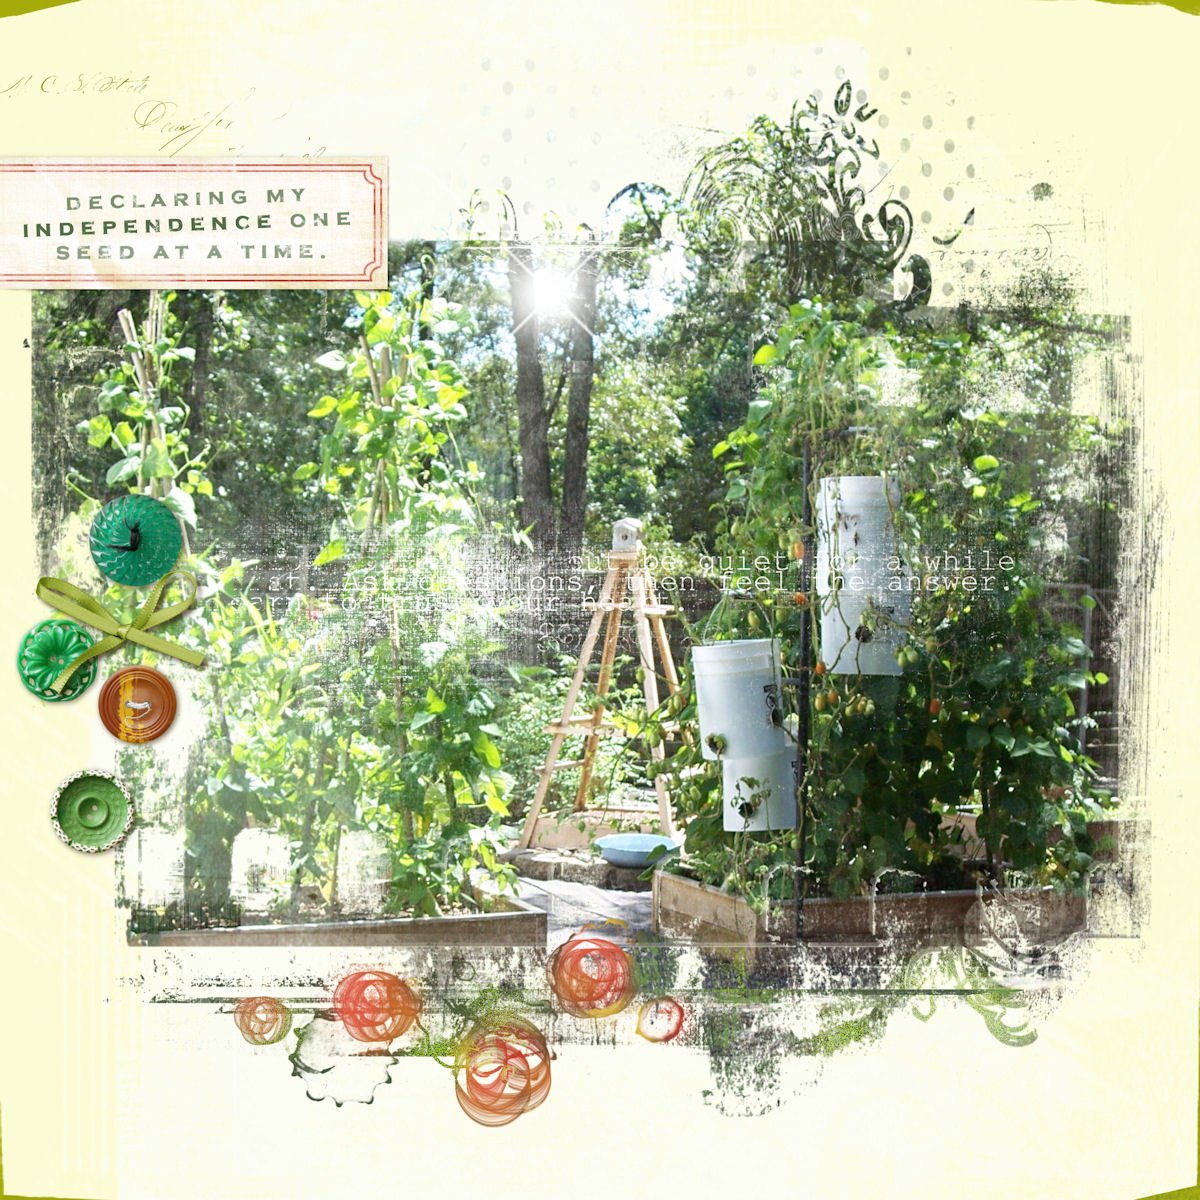
I really wanted to have a raised bed garden to grow organic veggies for my family but was so discouraged by the cost of ready-made planters that I almost gave up. While searching for options on Pinterest I came across these fabulous, affordable and untreated wood planters and after a trip to the home store, we built 10 according to the plans. I couldn't be happier with the results; thank you Ana!
Thu, 01/09/2014 - 08:00
I really wanted a raised bed veggie garden but was discouraged by the high cost of ready made planters - especially since my dream garden required 10! I was about to give up when I discovered Ana's amazing plans while browsing Pinterest!
Tue, 07/08/2014 - 00:24
Thank you Ana, I used your plans and ideas for a raised bed vegetable garden. I did change things a bit and it has worked out real well for me. I hate weeding and well I am a bit lazy. So mine are 6’x3’, I had a problem with the pickets splitting when I used screws to fasten them down. I ended up using a pneumatic brad/nail gun to fasten things together. I also used weed block under the bed and over the dirt and mulched over that. I have almost no weeding to do, about 10 minutes every three days or so. I also put in an irrigation system using ½ inch pvc pipe and 2 liter soda pop bottles. That way I water the roots and not the whole area, it cuts down on my water bill and it goes directly to the roots. The other thing I ended up doing is putting down 6 mil black plastic between the rows of raised beds and putting straw over that( I have 3’ walking/working paths between each bed). I have built 20 of them and plan to add another 20.


