Community Brag Posts

Camp Loft Bed twin XL w/ shelf

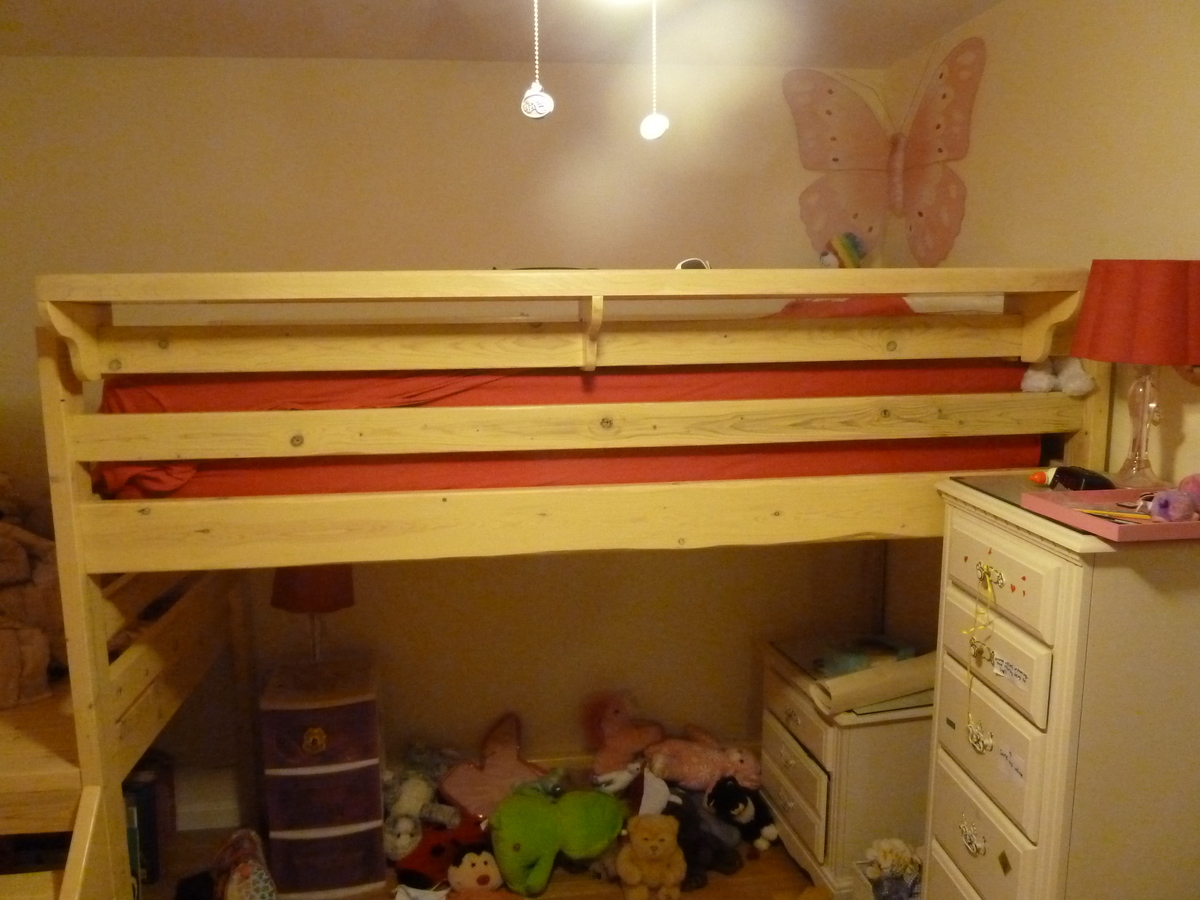
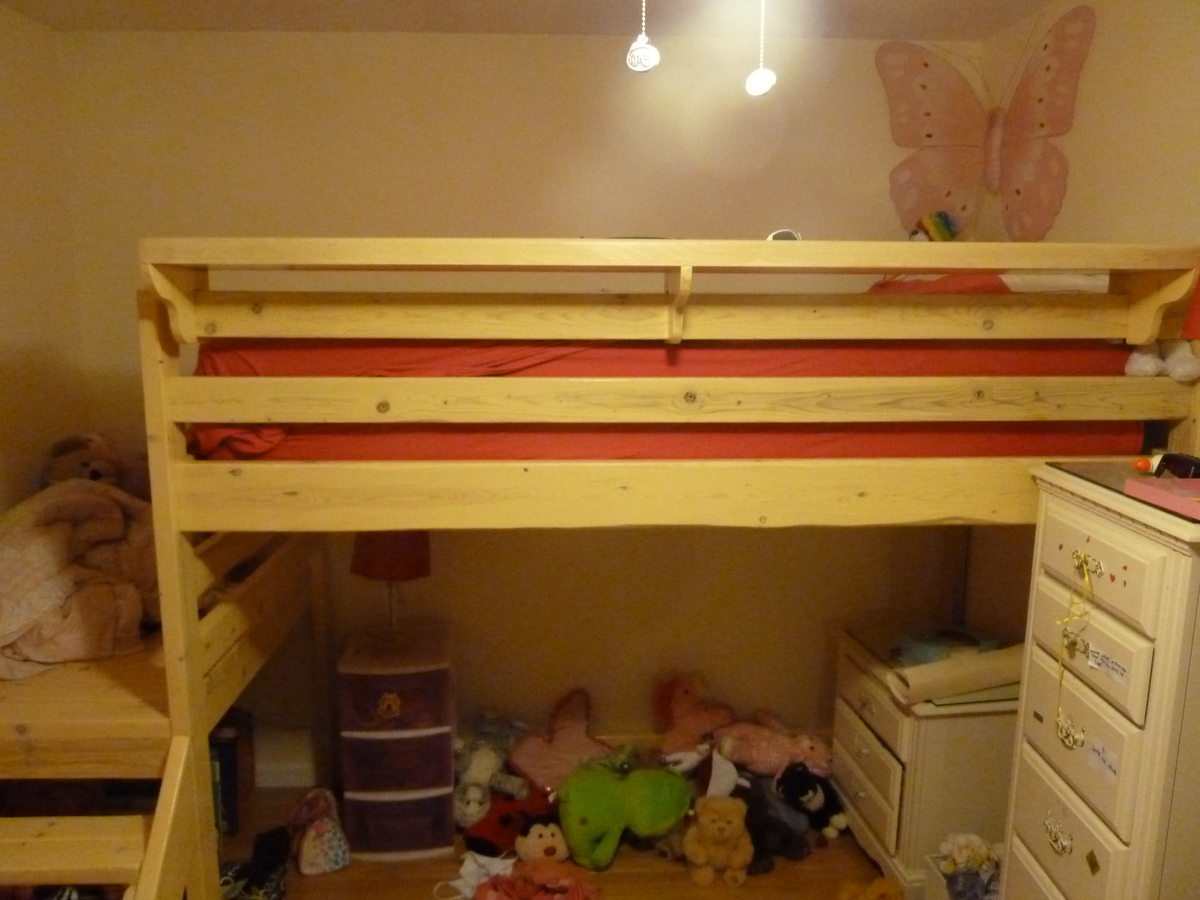
My daughter needed a loft bed to give her more floor and storage space in her bedroom. I modified the original plans to fit her twin XL bed, which is 5 inches longer than a regular bed. I also added an extra 2x6 across the back two posts for extra support.

Cutting and assembly was relatively easy; I glued every joint and used pocket holes per the instructions. I sanded using 80, 120 and 220 grit. The finish is a Minwax "parchment" water-based stain, with 3 coats of Polycrylic. All pocket holes were pre-drilled prior to finishing.

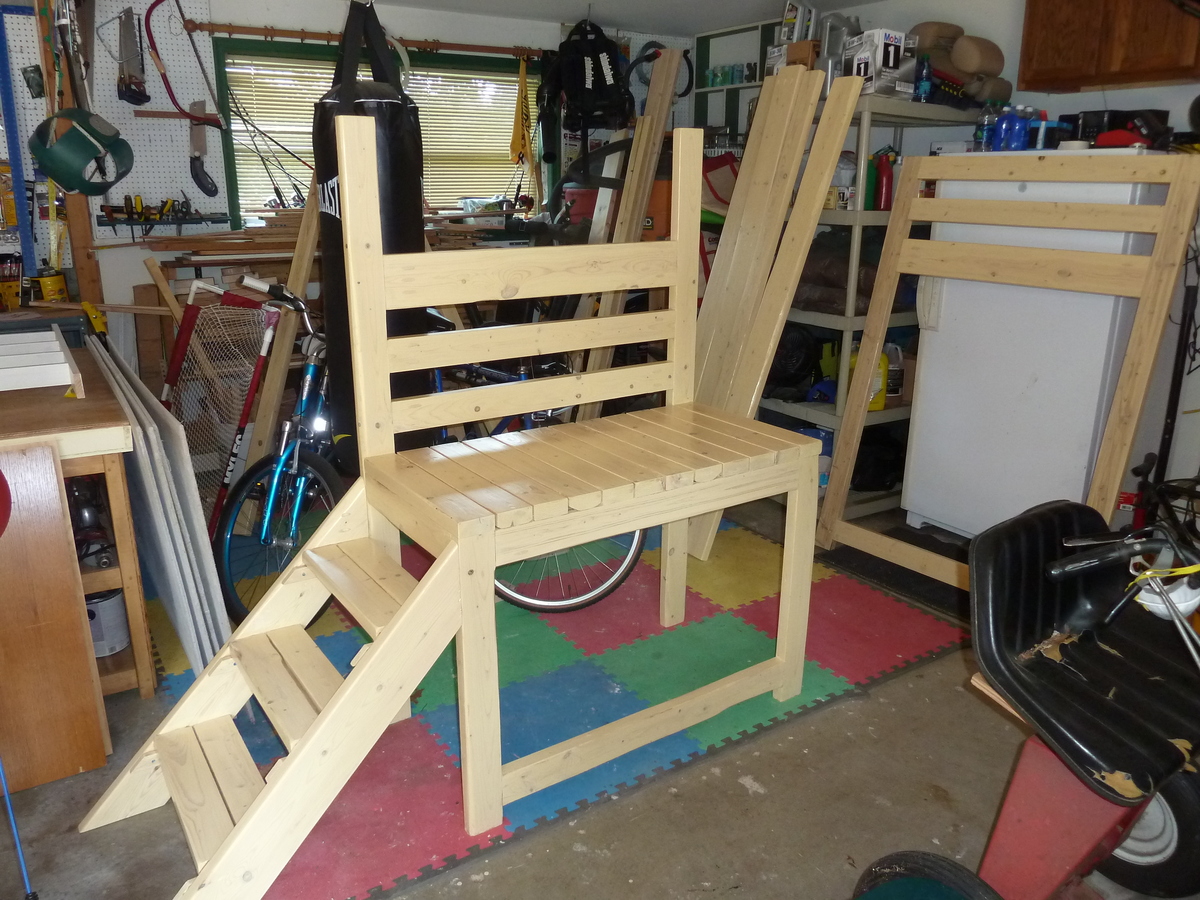
I assembled the platform and footboard in the garage and brought it into the house as a single unit; same with the headboard. I brought in the rails separately. To assemble, I marked 1 1/4 inches from the outside post edges, and used wood scraps/clamps to align and hold the rails while securing them with pocket hole screws.

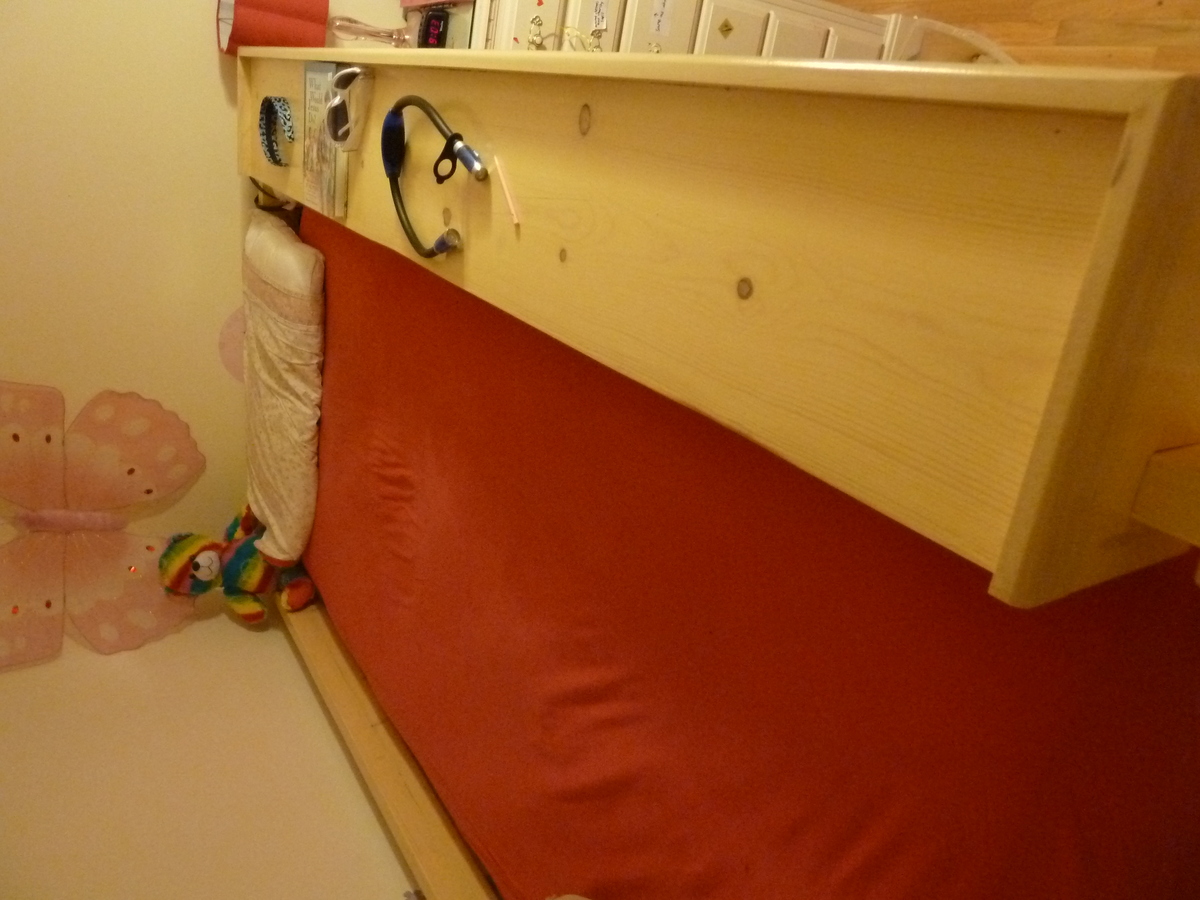
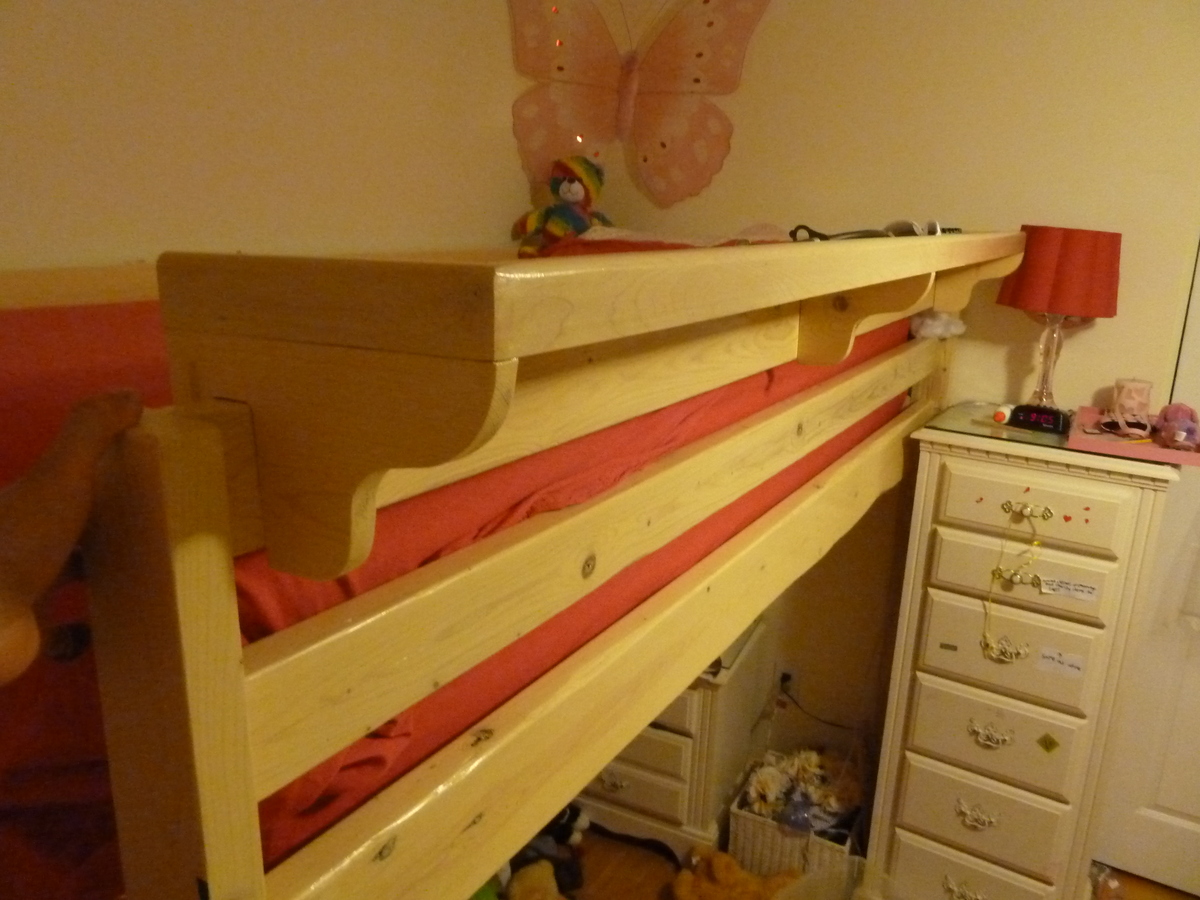
My daughter's mattress is very high; it rises only about an inch below the top of the top rail. So I build a bed-length shelf which also had the added benefit of providing a little more height/protection against her rolling out of bed in the middle of the night (see pics).

In all, I was surprised at how long this took me. Probably because I'm a novice and this was only my 2nd project. The totals are:
- Cut and assembly: 14 hours
- Sanding: 25 hours
- Finishing: 2 days

After finishing, I left all pieces in the garage for 5 days to air-out before bringing into the house.

Total cost the lumber was $125, 1 qt stain @ $13, 1/2 gal Polycrylic @ $50 per gal, and $20 hardware for a total of just over $200.
Estimated Cost
$210
Estimated Time Investment
Week Long Project (20 Hours or More)
Finish Used
Minwax water-based stain, "parchment" (single coat)
Minwax Polycrylic (three coates)
Recommended Skill Level
Beginner

Comments

mariad444

Tue, 03/15/2016 - 22:17

I am curious what your mattress size was here, please educate me as I think I will have a similar issue. I liked the shelf idea you did! 

Farmhouse Table and Matching Bench

Submitted by Anonymous (not verified) on Thu, 11/24/2016 - 06:35

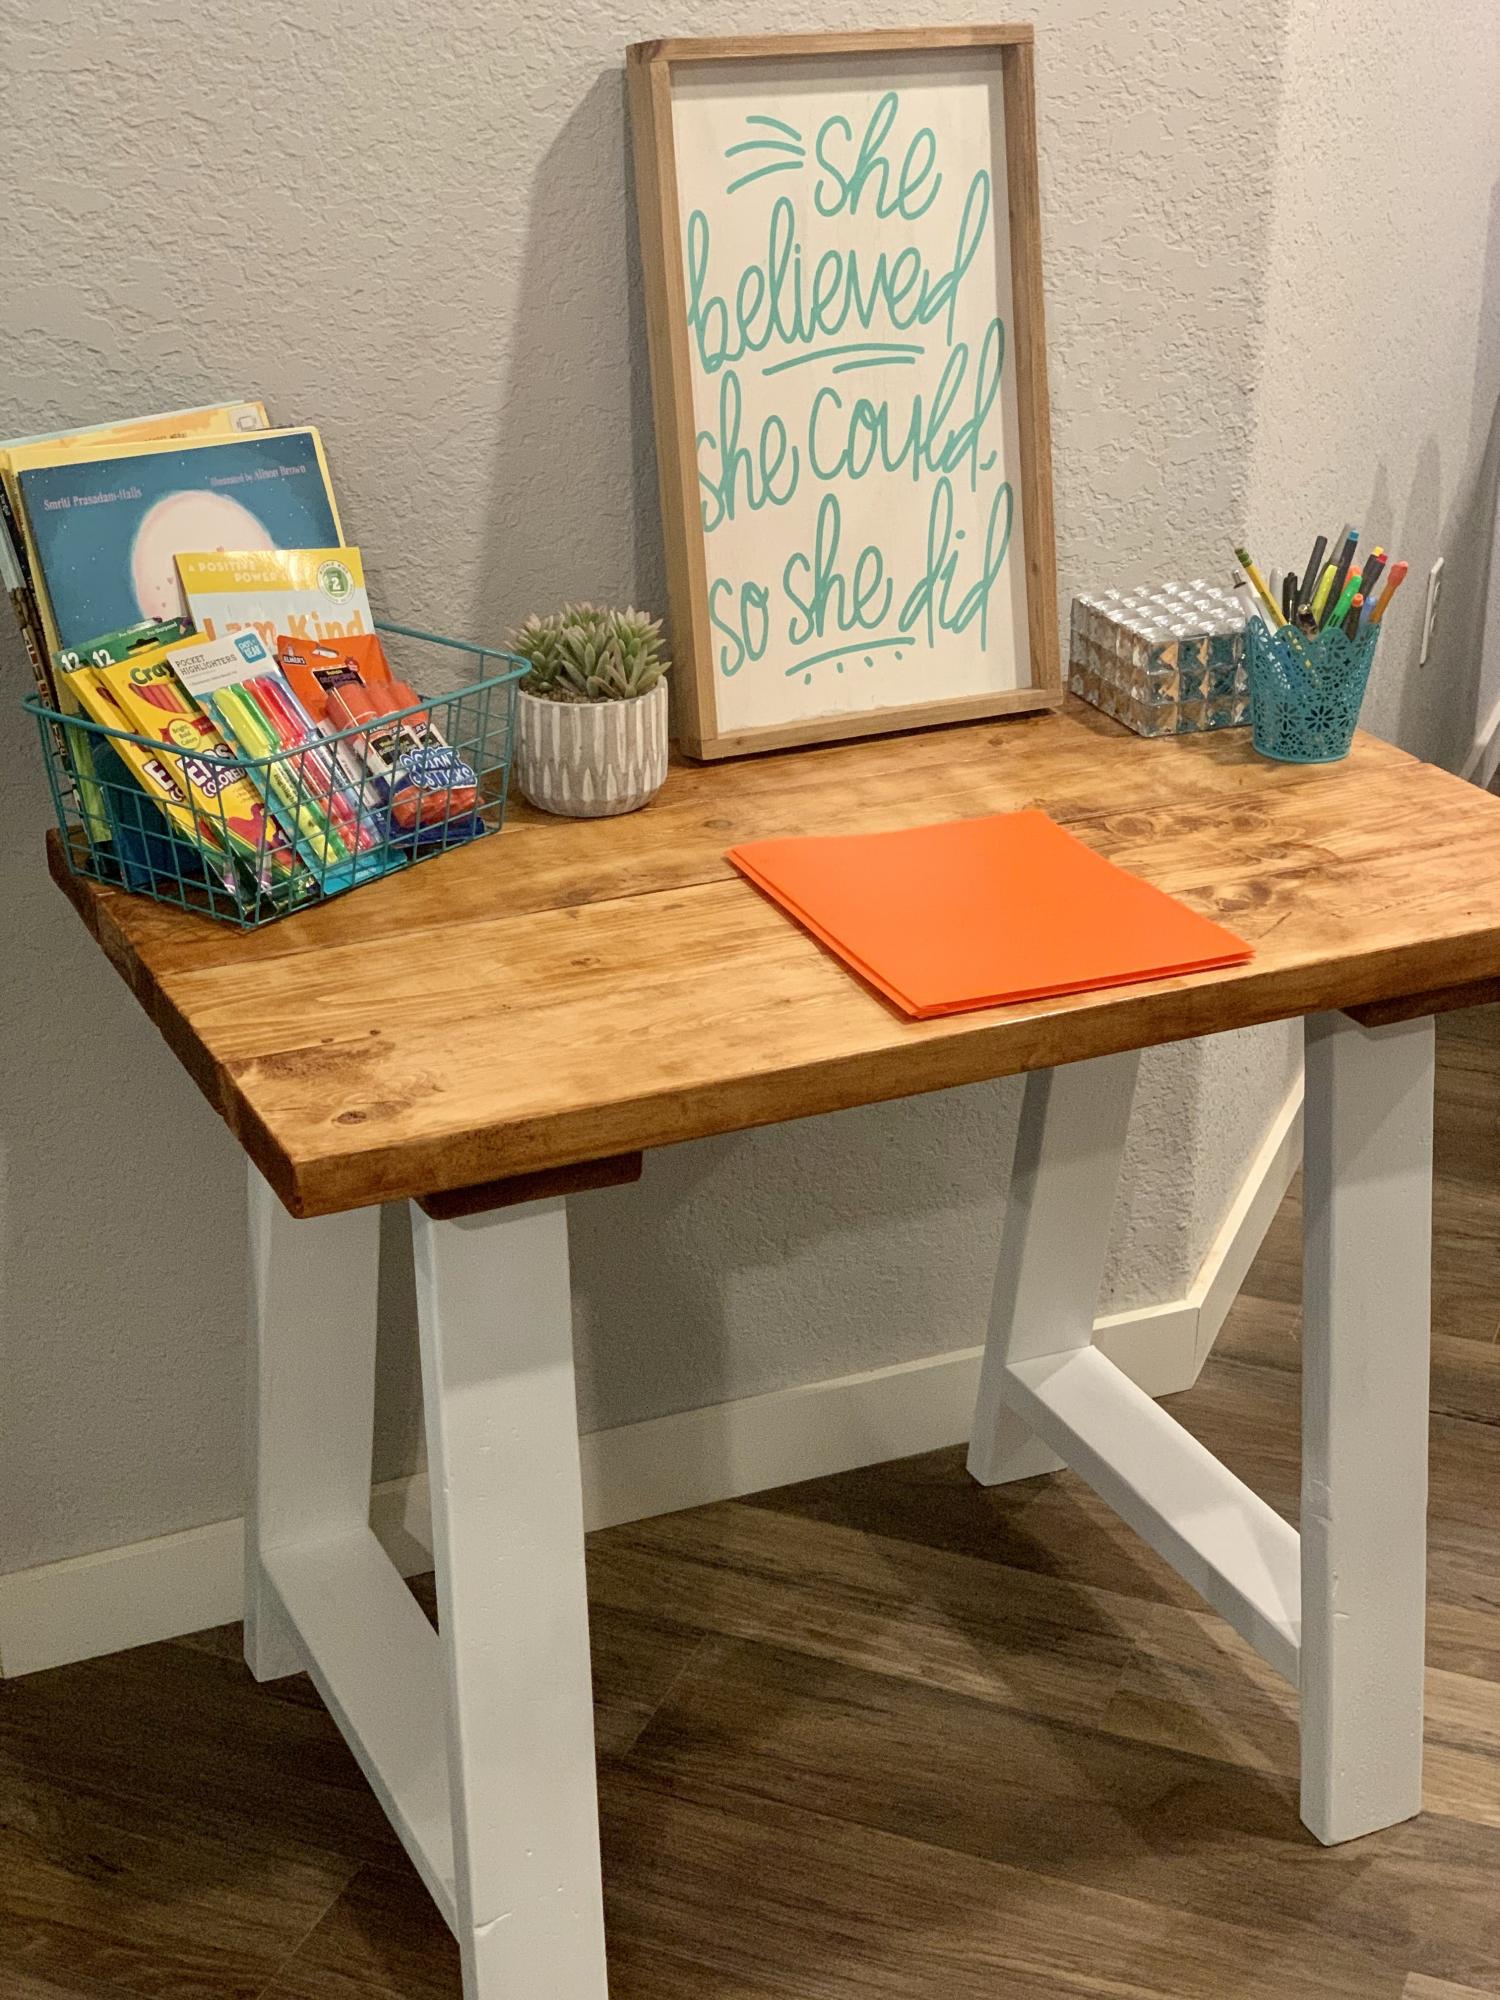
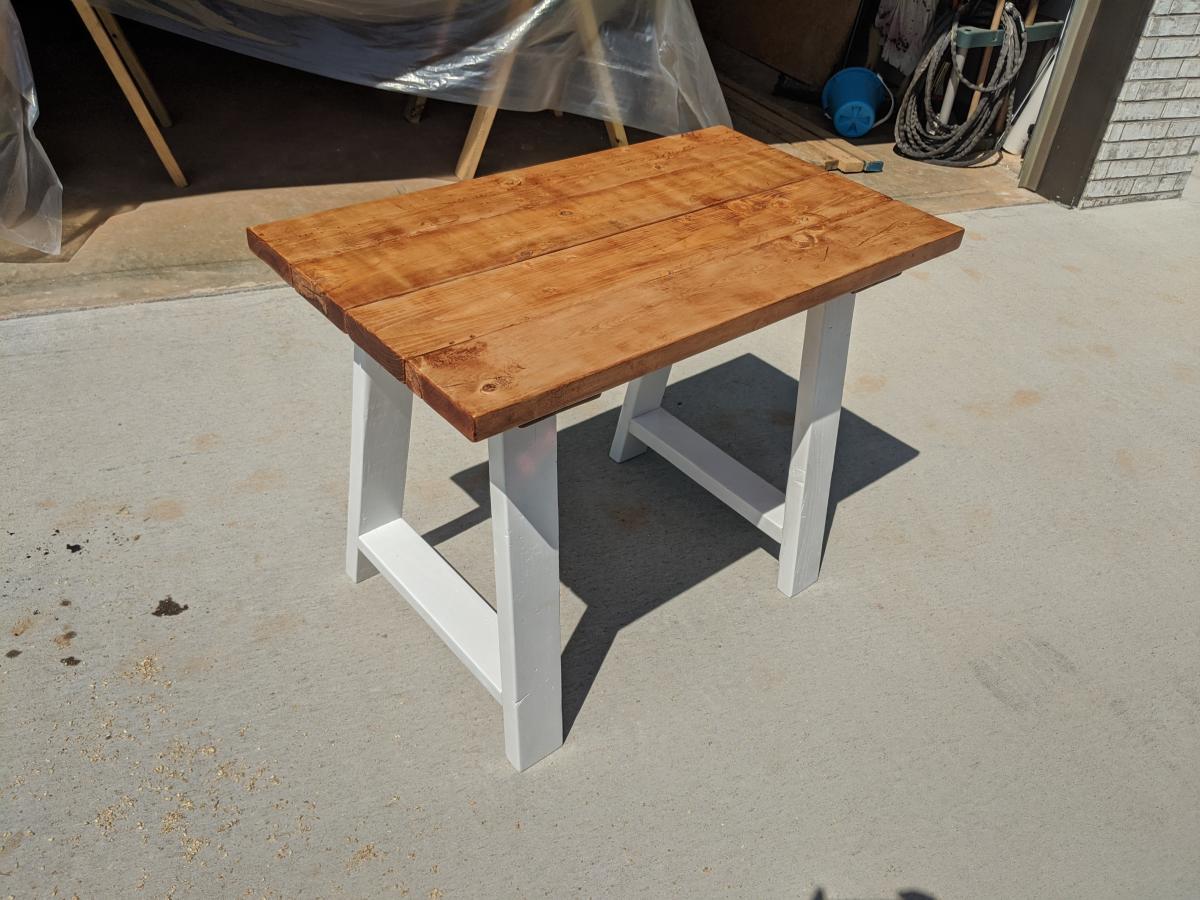
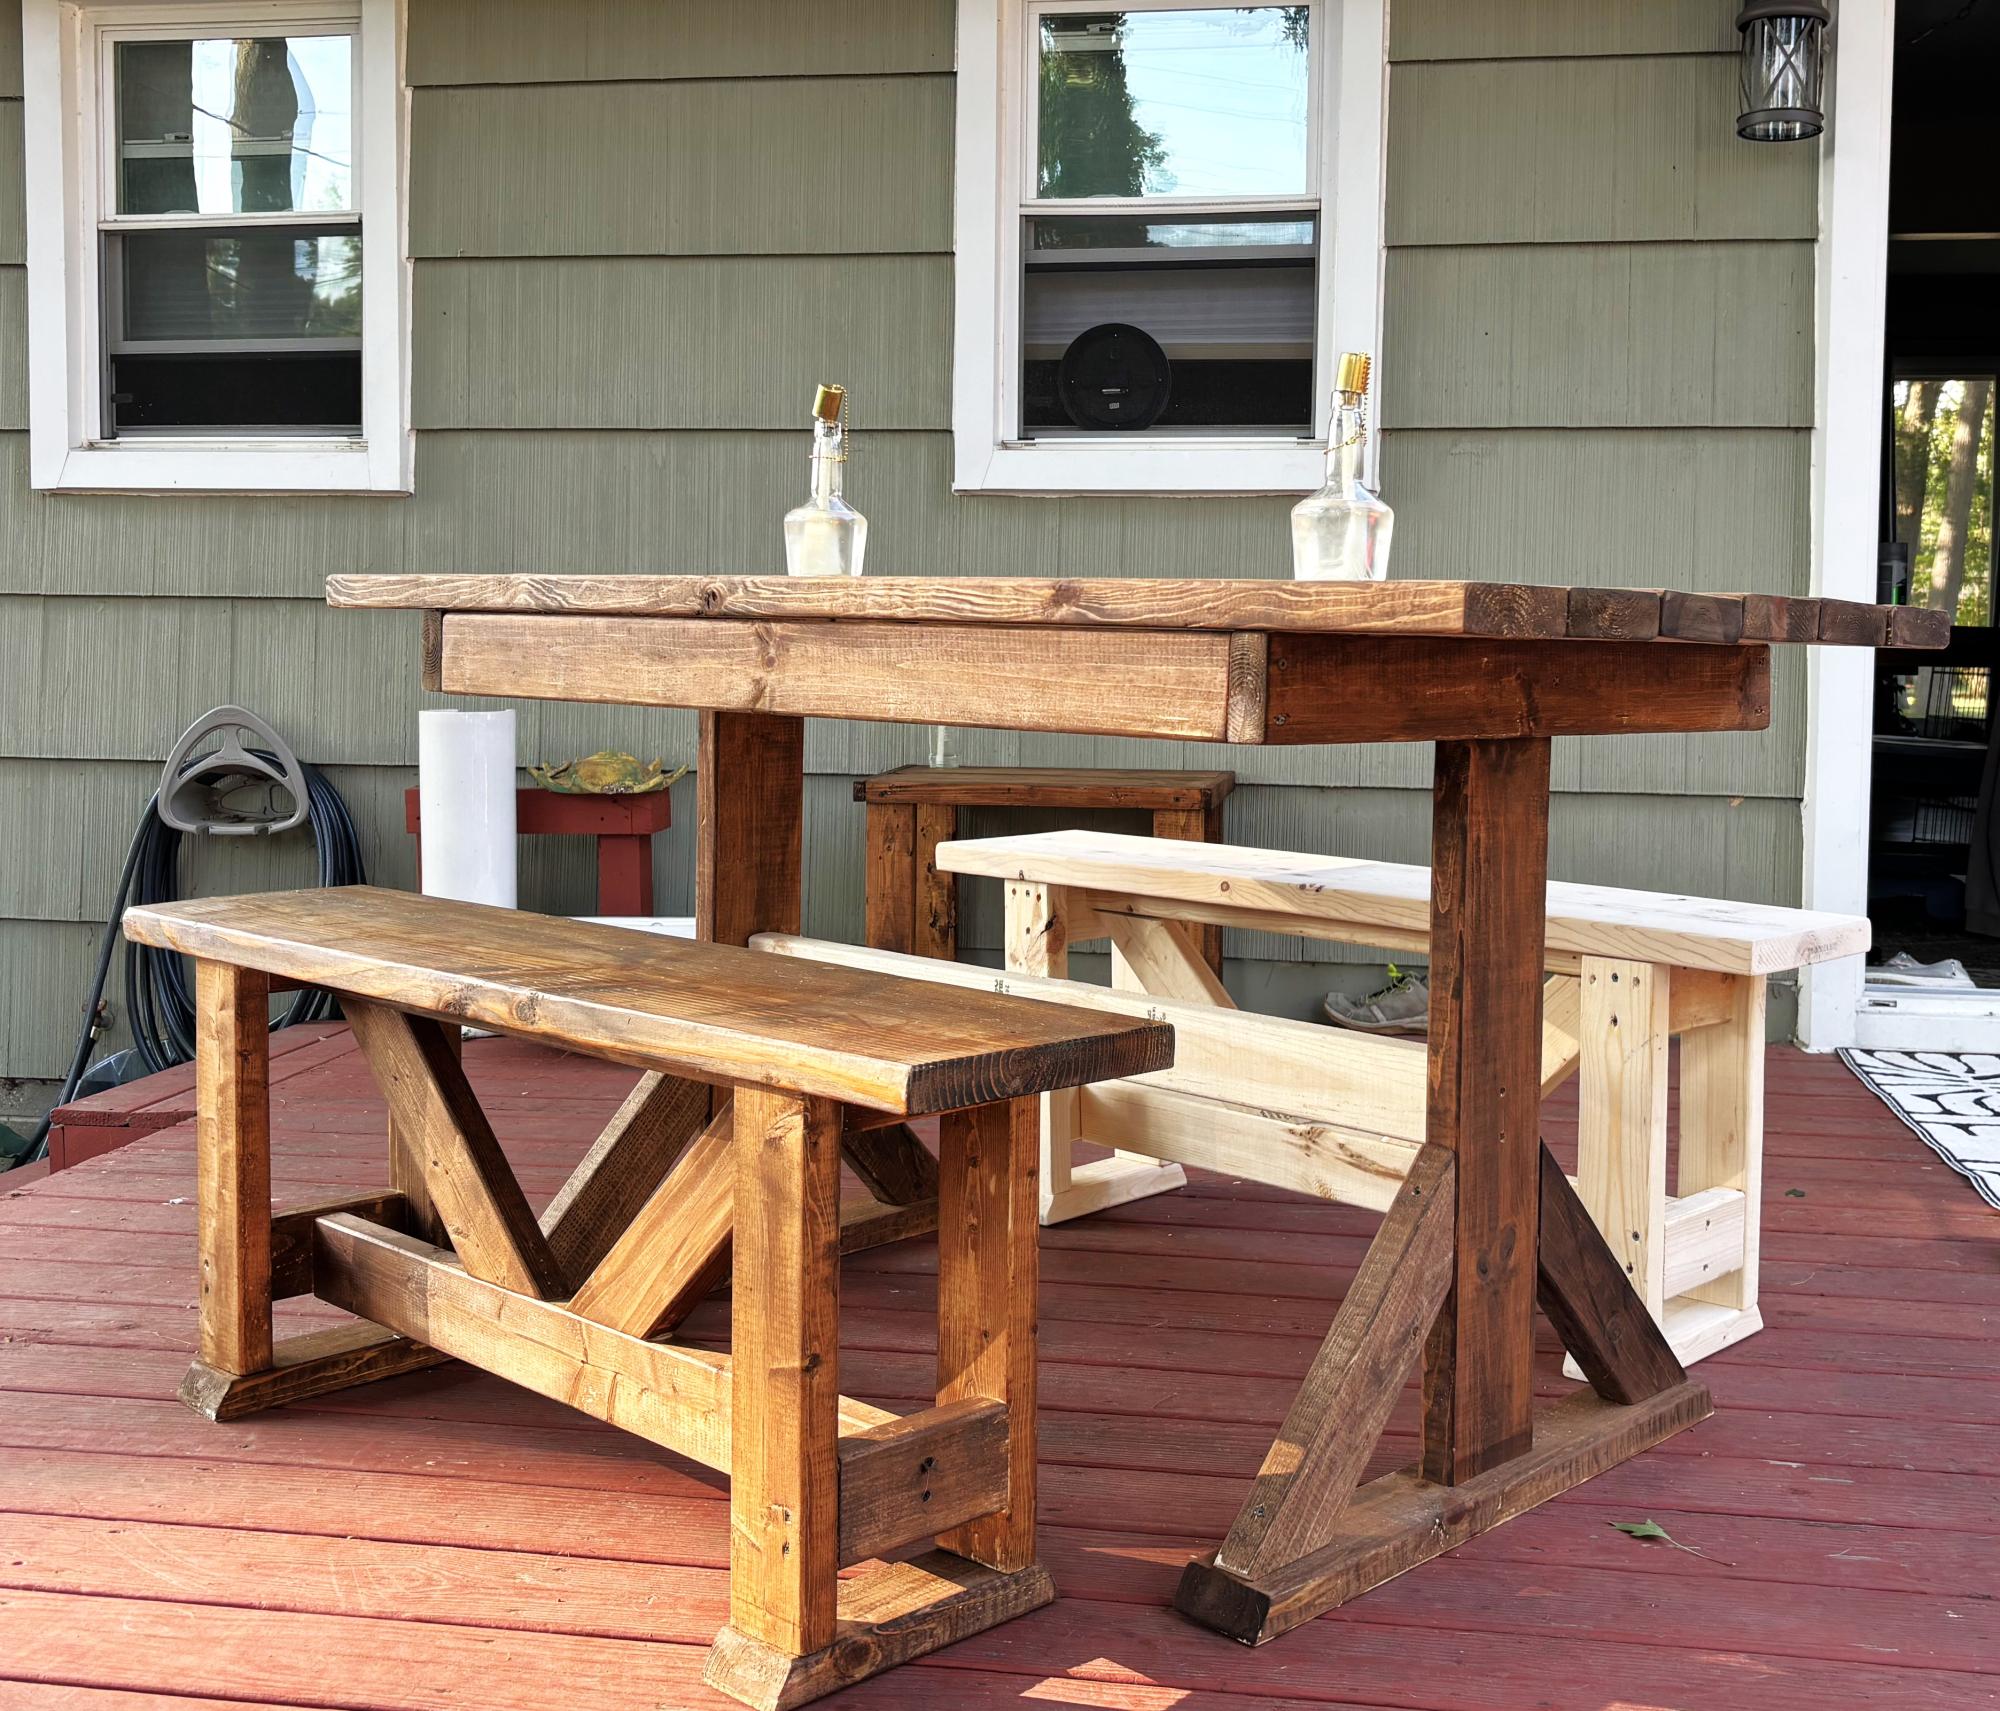
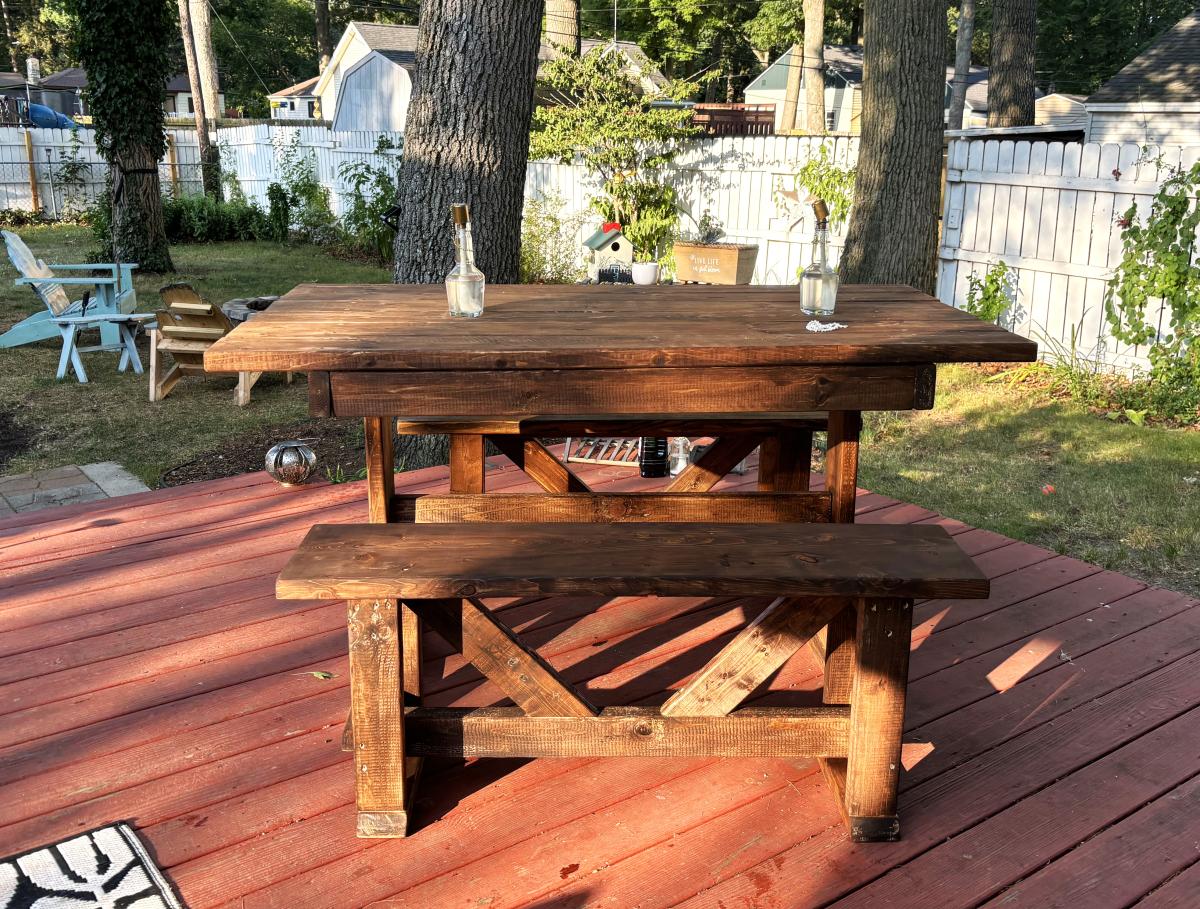
So we finished construction on a new house in September and my wife wanted to buy a $3000 table for our keeping/breakfast room. I bet her a new TV that I could do it for 10% of that. 

It's not perfect... there are some gaps between the boards and especially between the breadboard and those perpendicular to them... but it still looks amazing. And. Ow I have a new TV. 

Estimated Cost
$350
Estimated Time Investment
Week Long Project (20 Hours or More)
Finish Used
The table was built using pressure treated 2x8s (that's all that was available), and one 2x10 that wasn't pressure treated. (Again, that's all that was available, but it actually gave it a unique look with the lighter center board) so that's just Minwax Early American for the top and Satin White chalk paint for the legs. The bench was stud grade 2 and 1 Xs, so I used 2 coats of early American and then to try to match the darkness of the table I added 1 coat of Minwax Gel Hickory. The bench color turned out much better than I expected.
Recommended Skill Level
Intermediate

Stair Leg Flip Top Table

Submitted by JL Hurst on Wed, 10/24/2012 - 08:52

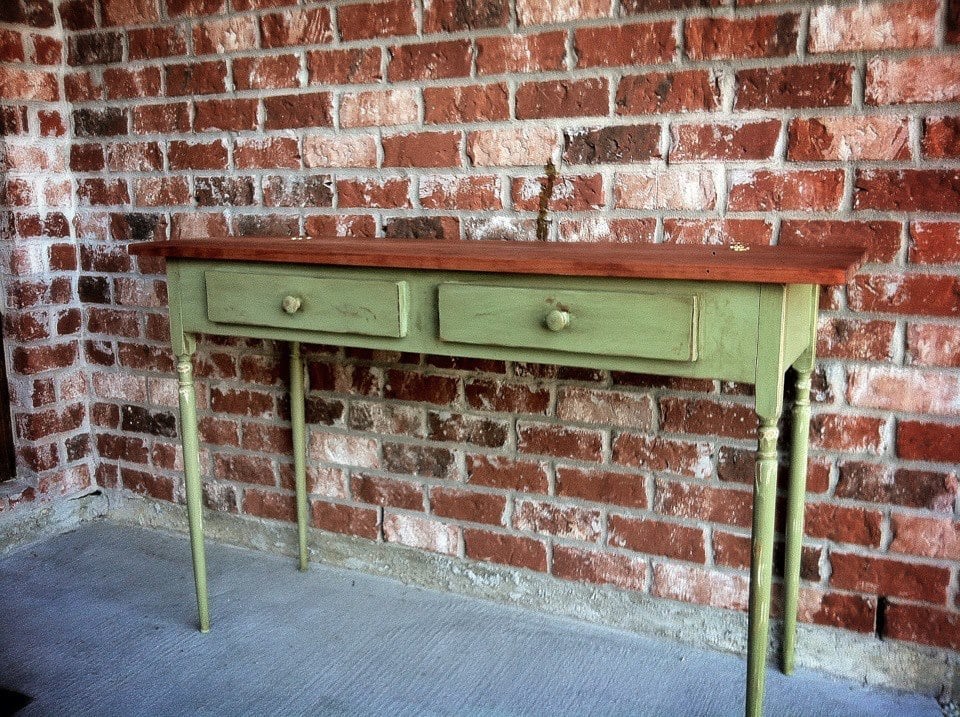
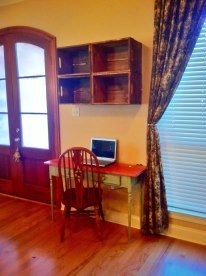
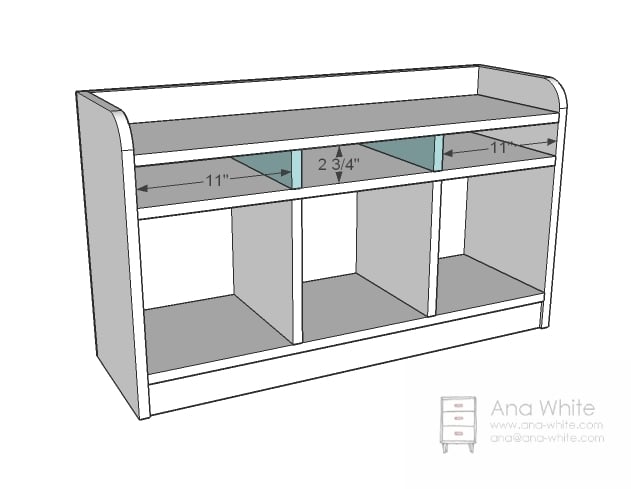
My wife had seen this post by Ana & thought it'd be great for a writing desk that had storage for her laptop so she'd be able to keep an eye out for the kiddo.

So I decided to use Ana's plans for the storage crates (without the casters) & mount those to the wall for cubbie storage.

I used "white wood" from the local Depot for this piece. However using the common boards will prove to be more cost effective for when you leave your Kreg Jig set at 1/2 inch like myself. :-(

The directions are straight forward, but. clamping & placing screws for the pocket holes were a bit more tricky. Make sure you have ample clamps on hand before attempting this.

Now, you can make the legs as Ana suggests, but if you want "fancy" turned legs are another option. $16.00 per at my local Depot., but. I found stair balusters at $3.00 per & used my miter saw to get them to the proper length per the plans & the same method used to knock off the dowel at the top of them in order to keep it flat.

Finially had it cut, assembled & sanded in 3 hours time. Hence me overlooking the Kreg Jig depth. ( nail gun saved me). You may also want to dry fit everything together. I found out I cut my side aprons too long (3/4 inch) & my inner base was off. Easily solved with scrap wood, glue, nail gun & LOTS of wood filler. Which was sanded & I can't even see the mess up.

Finishing was fun & easy. My color had already been decided via my boss (wife) as it was a fun green color from a Hoosier Cabinet & Matching cupboard I repair & refinished for my daughter's room 2 years ago. As well as the balusters came with a coat of white paint on them already. I sanded the whole project (sans the legs) with 120 then 220 grit paper on my mouse sander & my random orbit. The mouse is able to get the interrior as to where my 5 inch random orbit can't fit. But you could hand sand as well, I'm just lazy.

Once it was all sanded I rubbed down with some denaturated alcohol & old t-shirts I cut up long ago & stored in soft drink fridge packs. You can never have enough of either! I like to use the denaturated alcohol because it evaporates quickly. . .and I like the smell.
I painted the aprons down & let dry. Meanwhile I started staining the portions I could as to not mess up the paint. Once It dried I stained the remaining portions & got the sandpaper out again.

I wouldn't recommend using the power sanders but I did only on the legs due to the prefinished paint that was on them. I wanted to get the wood showing but around the edge of that I wanted to see the white paint & then the green. Careful not to hit the stained the areas!
Once that's done I used my same wipe down technique as after sanding & prepair to glaze. USE GLOVES FOR THE NEXT STEP!

Now you can get latex free or latex medical looking gloves. Just stop that. GO GET MEDICAL GLOVES. I've worked in my profession for 16 years, medical exam gloves & the gloves you get at the hardware store tear up. Grab some BarrierMax brand if you can. You'll be able to rebuild a car engine without tearing.

Now you're ready to glaze & Brooke at KillerB was dead on in her posts on the glaze. Must read!

All in all I think it came out perfect & can't wait to do this again.

Estimated Cost
$100.00 using the "spensive" wood & stair balusters for legs.
Estimated Time Investment
Day Project (6-9 Hours)
Finish Used
On hand custom green latex used from an old project.
Rustoleum Choc. Glaze
Recommended Skill Level
Beginner

Comments

brookifer86

Wed, 10/24/2012 - 16:32

It looks awesome! And thanks for the shout out on glazing. I'm glad the tutorial helped! Love the color you picked. I also put mine together with nails, mostly because I'm lazy and it's less work ;)

Kentwood Nightstands

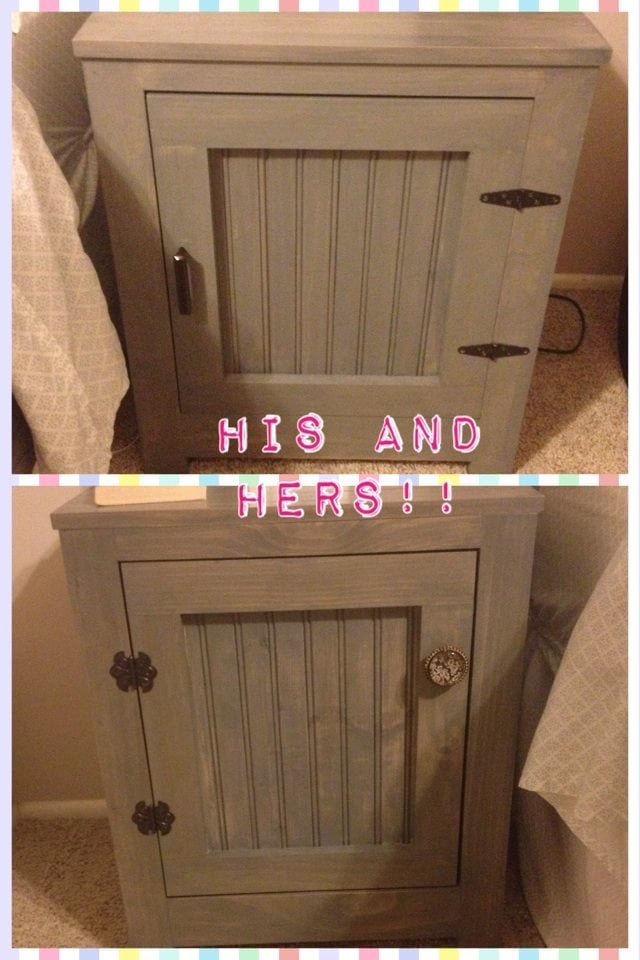
My wife and I made his and hers nightstands based on the Kentwood Nightstand plans. Pretty easy. This was our first project and all I can say is that we've learned alot from the builds. The kreg jig, which we purchased at Lowes, is amazing. We live in Southern California and wood seems to be pretty pricey here. Still with wood being expensive I find piece of mind knowing that the furniture is solid and custom. Thanks Ana!

Estimated Cost
$100
Estimated Time Investment
Weekend Project (10-20 Hours)
Finish Used
Rustoleum Weathered Grey stain with 3 coats of Rustoleum Polyurethane Semi-Gloss
Recommended Skill Level
Beginner

Cabin Daybed

Submitted by Anonymous (not verified) on Mon, 11/28/2016 - 10:59

I'd never done hinges before, and decided to go with surface-mounted hinges because I was pretty sure I could get those right. I wanted to leave the wood its natural color, both because I thought it would look good in this room, and because I think it makes the hardware pop. Accordingly, I used iron-on edge banding on the plywood so the edges don't show.


I used a simple, homemade finish of mineral oil and beeswax, and the hardware is just from Home Depot. I'm not positive how much time it took -- I did it in bits and pieces over several weeks. In any case, I'm really happy with how it turned out! The new owner of the bed likes it immensely, too.

Estimated Cost
$60
Estimated Time Investment
Weekend Project (10-20 Hours)
Finish Used
Homemade mineral oil and beeswax melted together, using this recipe: http://www.instructables.com/id/Simply-Gorgeous-and-Food-Safe-Beeswax-Wood-Finish/
Recommended Skill Level
Beginner

Charlie's One Piece Play Kitchen

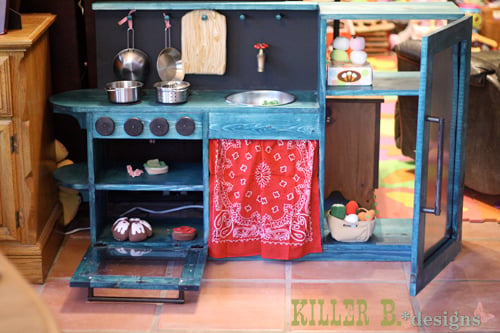
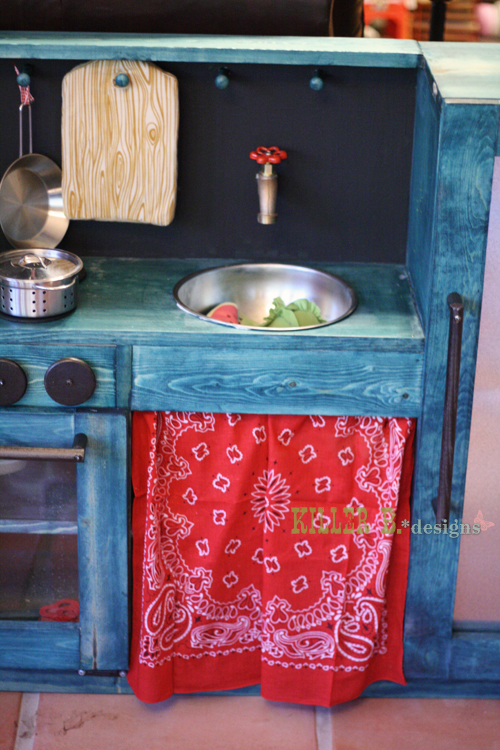
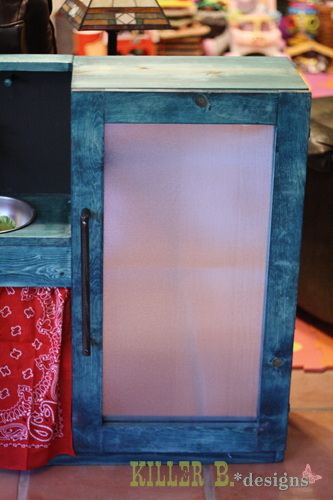
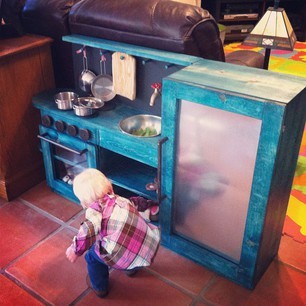
After a trip to IKEA my daughter fell in love with play food and pots/pans. My mom encouraged me that 14 months isn't too little for a play kitchen so I took the plunge! I adapted the plans slightly - making a single door for the refrigerator, measuring both doors so they overlay and aren't inset, putting one shelf in the oven instead of both beneath the sink, and raising the shelf to add room for pegs. I also decided to nix the backing to save on costs since this will eventually be placed up against a wall.

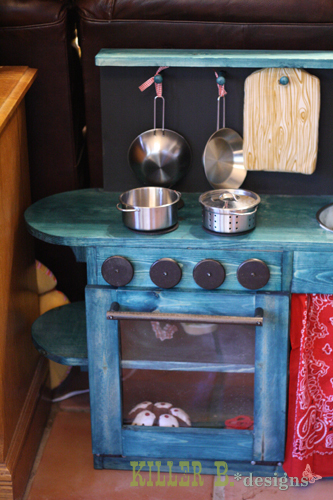
I really wanted to keep the kitchen as chemical free as possible. Paint chips and scratches, and stain has a ton of fumes. So what to do? Take a leaf from the Shanty Sister's book and dye it with RIT dye! I used one liquid bottle of teal and diluted it with a 1/2 cup of water. There was more than enough to do the kitchen, and the wood took the dye so beautifully. For the top coat, I used non-toxic Mod Podge. The backsplash and knobs/handles/burners are painted with chalk board paint.

For all the little details:
- oven knobs are closet dowel rod holders
- shaker pegs are cheap at hobby lobby $1.47 for 5!
- burners are painted cork coasters
- oven "glass" is replacement frame glazing (plexi) from Hobby Lobby
- sink from goodwill
- "wall mounted" faucet is a spigot with a fun red replacement handle since the handles on the spigots were incredibly boring
- fridge backing is roof flashing for a shiny metallic (and magnetic!) look
- curtain is a 99 cent bandana

I totally adore this little kitchen, and my daughter does too! It's a bit on the taller side but she has time to grow into it. Considering the cheap plastic ones are $100+, I was so happy that my cost was just under $97. Not bad for solid wood with a lot of extras!

Estimated Cost
$100
Estimated Time Investment
Weekend Project (10-20 Hours)
Finish Used
2 coats RIT teal dye, sealed with one generous coat of Mod Podge. Chalkboard paint on backsplash and knobs/handles.
Recommended Skill Level
Intermediate

Comments

Linda7

Mon, 10/29/2012 - 13:34

Your play kitchen is adorable. Charlie is growing...I remember her from the scooter! :-) I somehow missed the idea from Shanty Sisters regarding the RIT dye. Thanks for mentioning that. Since I can't find the Express Color stain from Minwax in my town, this will be a great alternative for colored stain. Can't wait to read more posts from your future builds.

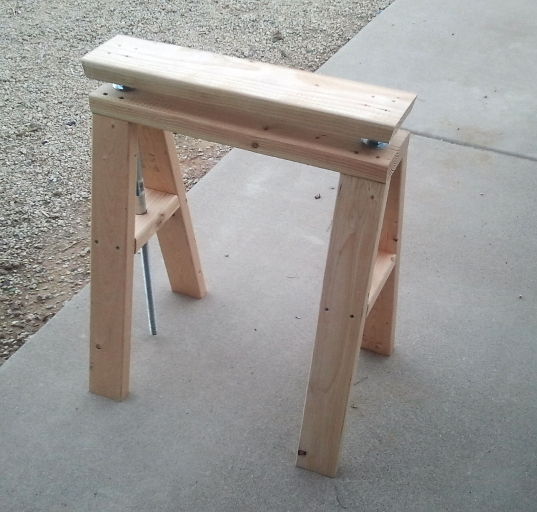
Modern Industrial Adjustable Work Stand

$120 for 2 bases, one top ... less if you have scrap lumber and pipe

The hard part of some woodworking is what to do with the stuff BEFORE and AFTER it goes through the tools.

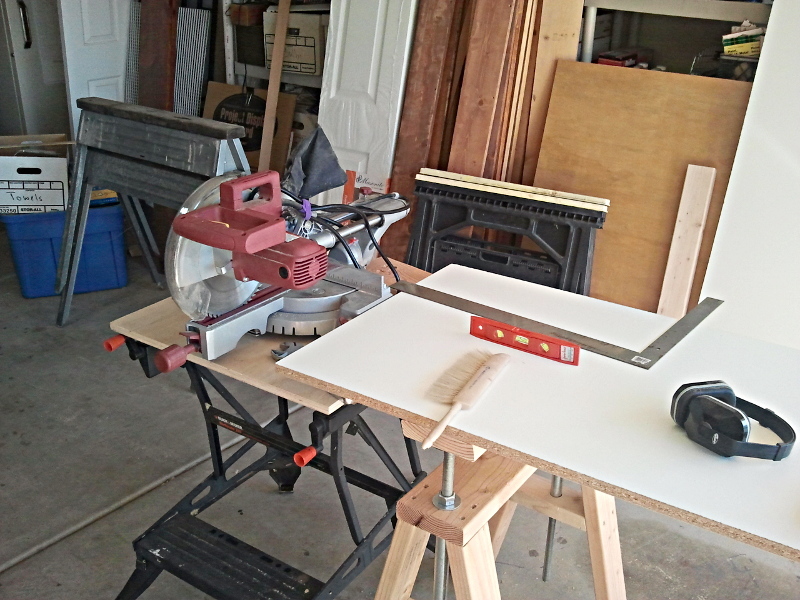
We need an infeed and outfeed table for routers, drill press, and saws but have no room to install a permanent workbench with an adjustable tool lifter.

We saw the coffee table to desk height adjustment mechanism and lightbulbs went off! This adjusts! We can take the top off! It stores!

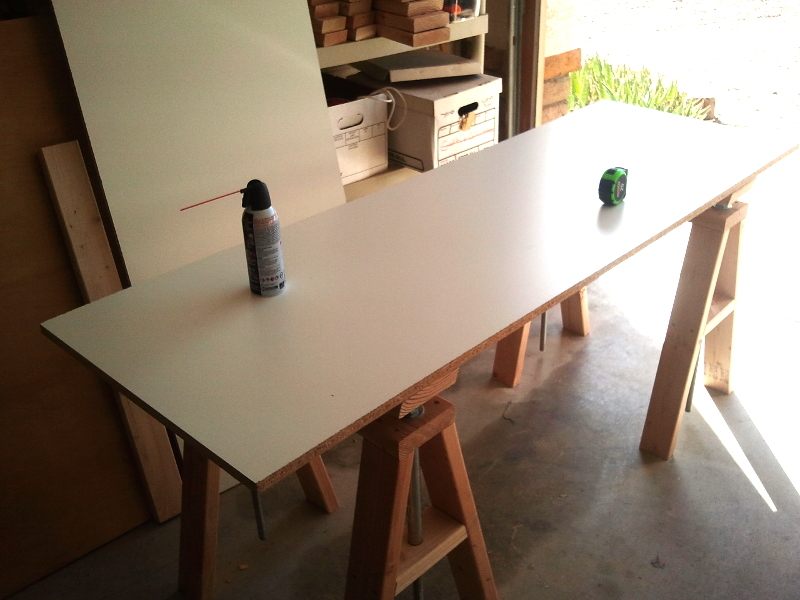
The first photo shows it adjusted to align with the miter saw's cutting area.

As built, there are a couple of changes:

1 - It's taller. Lowest table height is about 30" ... add 8 inches to each leg.

2 - We only used 1 leg brace, about half way down the leg. Cut it to fit after you get the legs screwed to the top.

3 - the wobble of the adjustable bar on the threaded rod is not good for precision woodworking ... the second picture shows the guide pipe that keeps the threaded rod straight up and down.

4 - No pocketholes (sorry Anna) because this is a workbench, not fine furniture.

5 - The tops are cut from one sheet of 4x8 3/4 in melamine coated MDF ... 2 are 2x6 and one is 2x4.

This could also make an adjustable craft table. Raise or lower it to handle fabric for your sewing machine.

Estimated Cost
$120 for 2 bases, one top ... less if you have scrap lumber and pipe
Estimated Time Investment
Day Project (6-9 Hours)
Finish Used
None
Recommended Skill Level
Intermediate

Comments

GreatBookshelfPlans

Submitted by Anonymous (not verified) on Fri, 12/02/2016 - 12:53

Thanks for the great free plans, this is a solid bookshelf with nice deep shelves. Used two coats of pickling white. Can't wait to build more from this site!!

Estimated Cost
$70 Cdn
Estimated Time Investment
Weekend Project (10-20 Hours)
Finish Used
Pickling White
Recommended Skill Level
Beginner

Custom Flag Shelf

Submitted by Anonymous (not verified) on Mon, 08/05/2024 - 10:57

Wooden flag stained, with shell casing inserted into the middle of each star. Three hooks to hang hats or coats on.

Doug Cutts

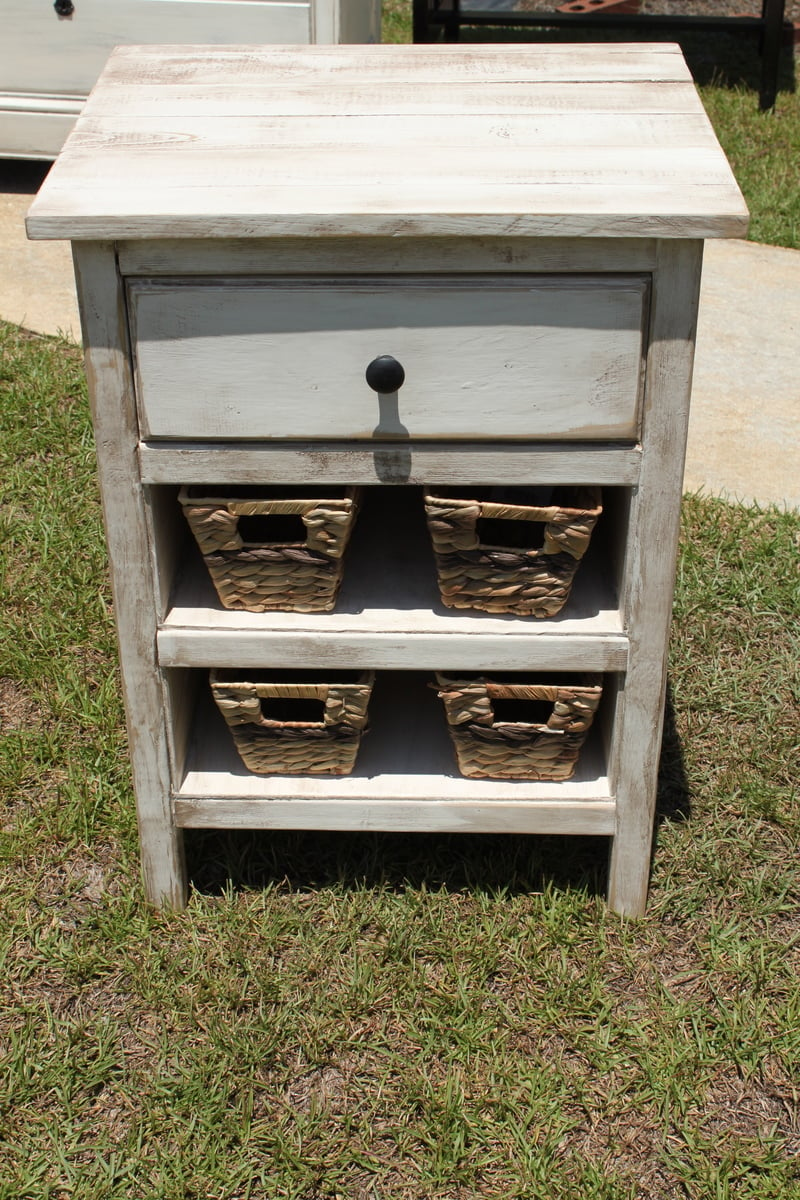
Modified Rustic pottery barn inspired Mason bedside table

I had made this bedside table before, but this time the bottom two drawers just wouldn't work out. I fiddled with them and cut out and made 6 box drawers before I finally just decided on shelves. I used 1/4 inch plywood and 18 gauge brad nails to secure it. Once all this was done ,I found 2 basket "drawers."

Estimated Cost
$35
Estimated Time Investment
Weekend Project (10-20 Hours)
Finish Used
primer, antique white acrylic latex from sherman williams, sanded, glazed with burnt umber acrylic paint added to Martha Stewart glaze and wiped off, Matte finsih Rustolem
Recommended Skill Level
Beginner

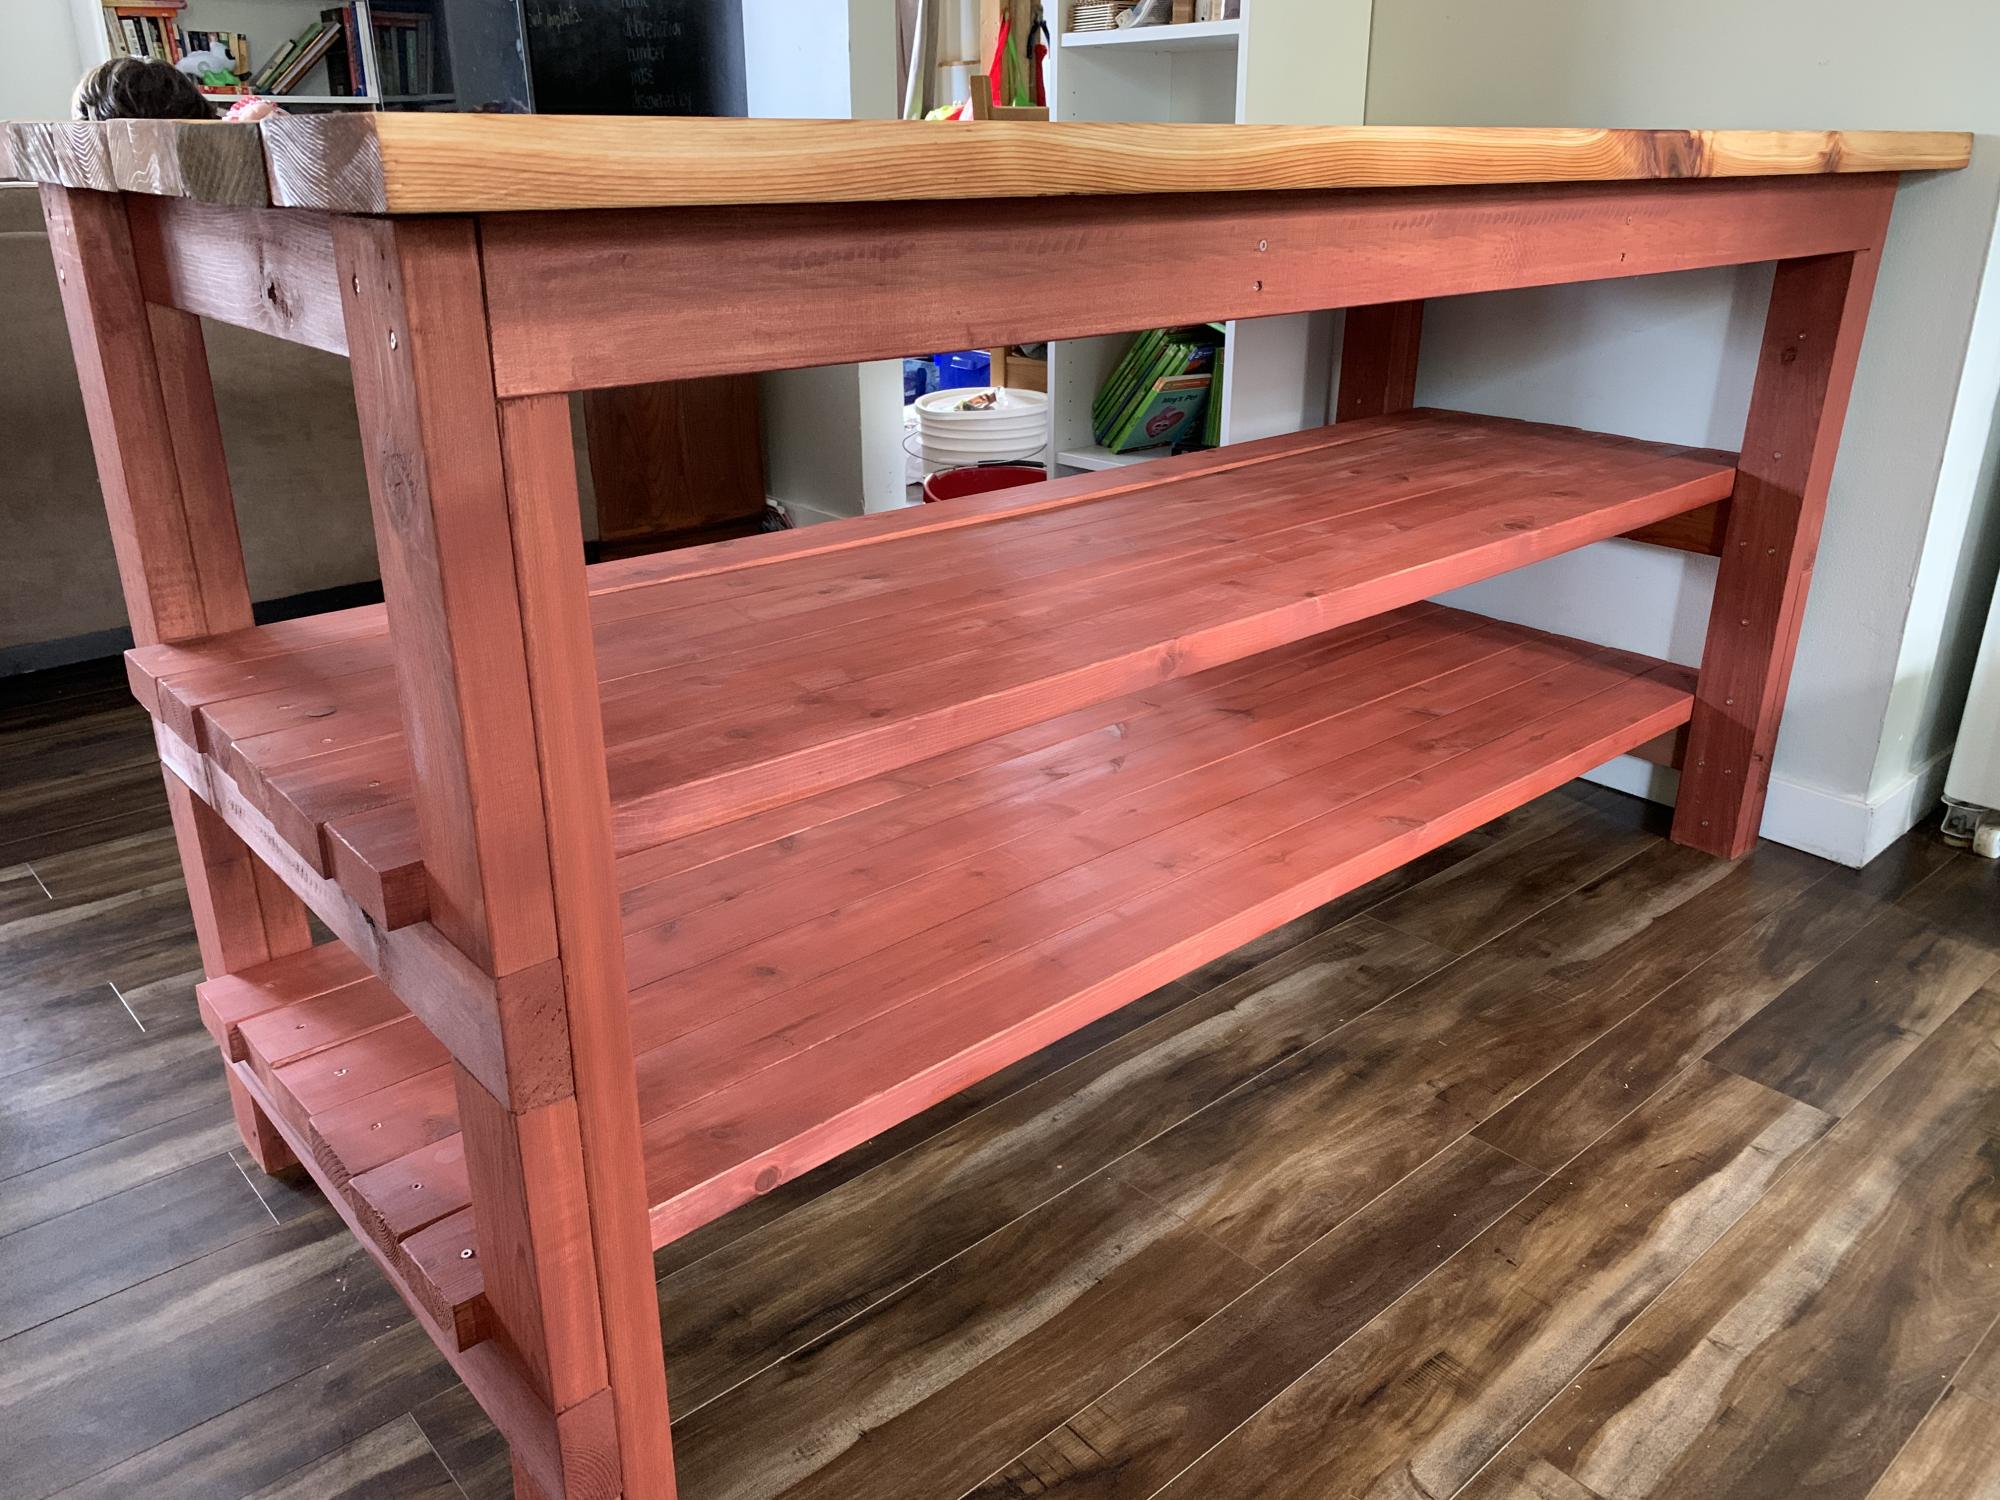
Rustic Kitchen Island

Submitted by meggeh on Wed, 08/19/2020 - 17:19

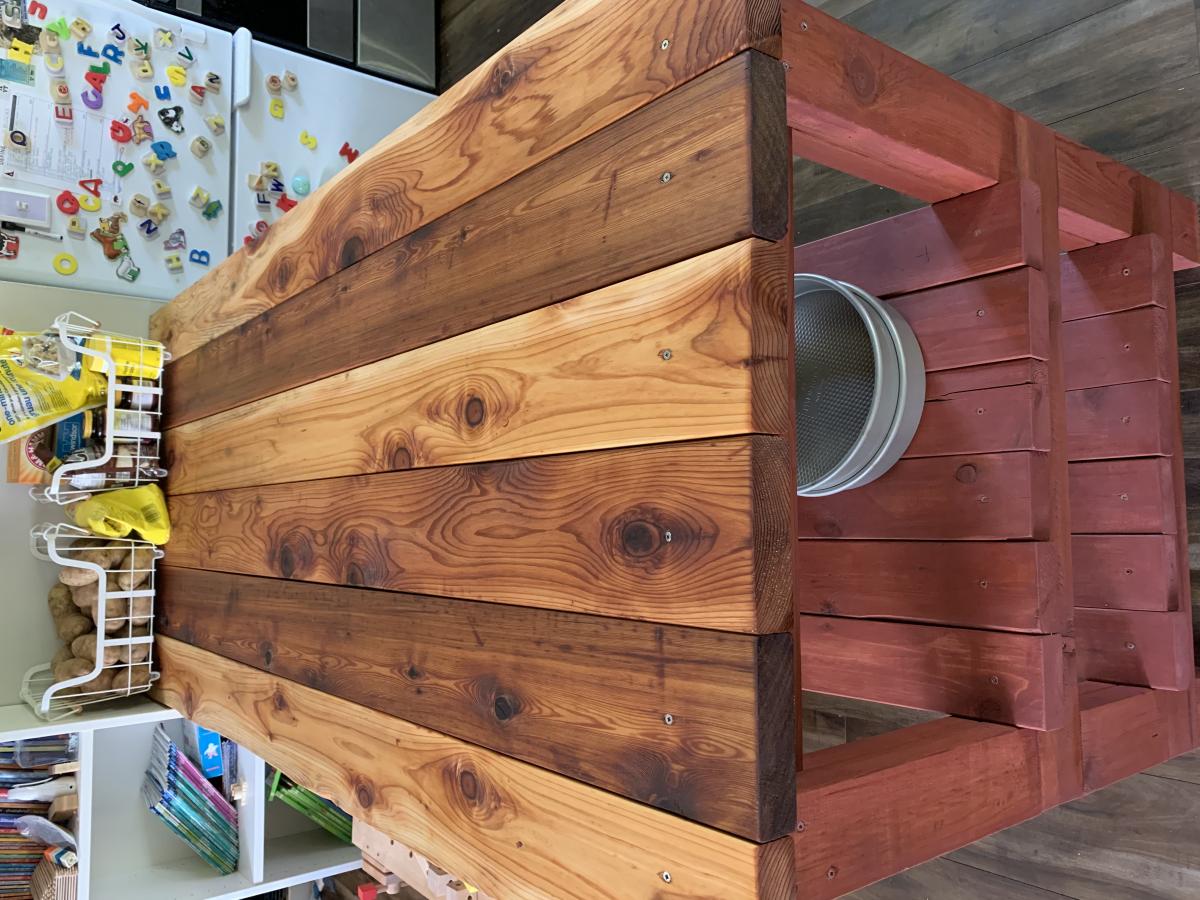
5 8’ 2x4s were not enough. I could not figure out how to get the needed cuts from 5 boards. We had to go back and get more (a 3 hour round trip) which didn’t help with keeping costs down.

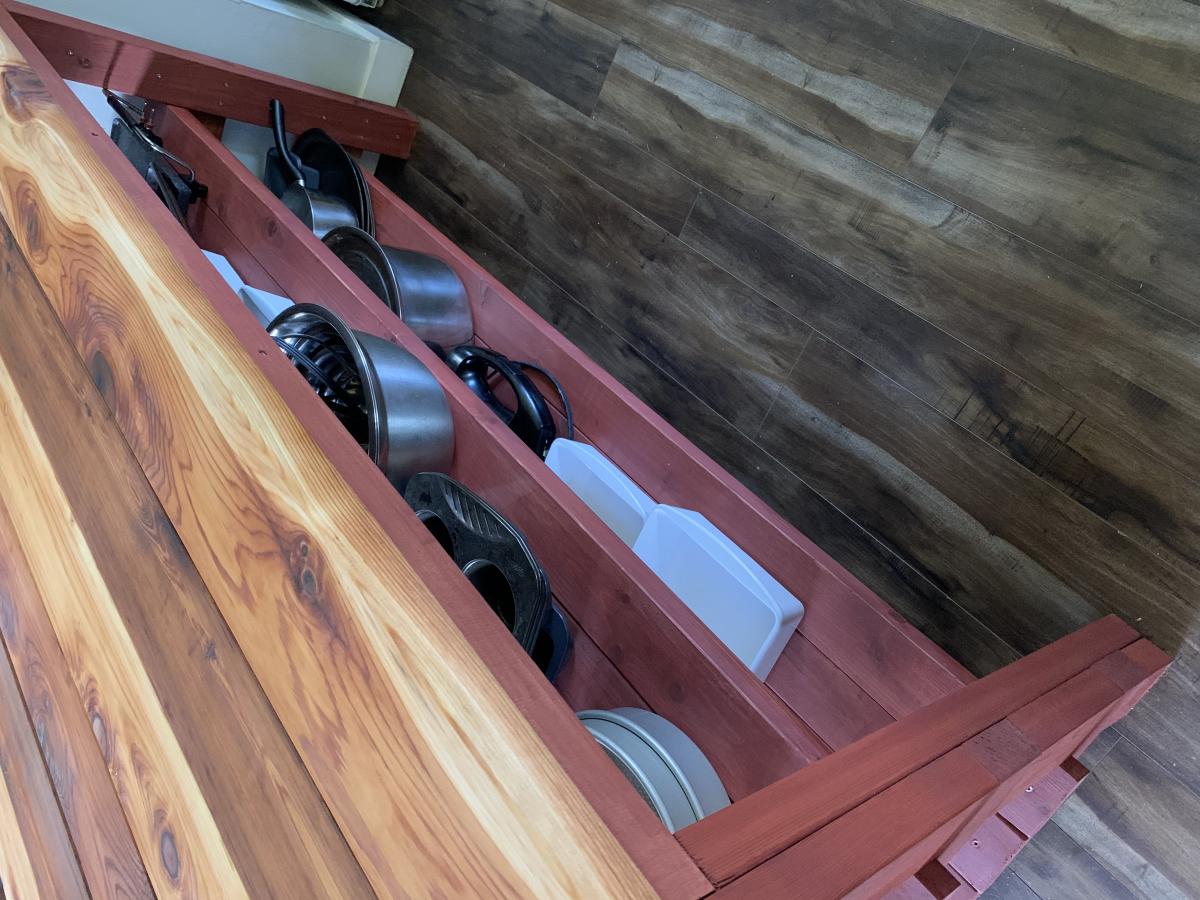
I’ve wanted this built for a looong time and finally roped my husband into building it for me. We used cedar. 2x8s weren’t available so we substituted for 2x6s. We have 6 of those boards across the top, making a few inches of overhang on either side. I liked it just as it was so I didn’t trim the ends of the shelf boards.

The top is stained with pure tung oil for waterproofing. The frame and shelves are painted with milk paint stain. 2 coats of this left it pink until a light coat of tung oil brought out the nice darker colour. Waiting for the tung oil to dry killed me because I wanted to be able to use it right away.

Estimated Cost
About $340 CAD in lumber
Estimated Time Investment
An Hour or Two (0-2 Hours)
Finish Used
Tung oil & milk paint stain
Recommended Skill Level
Beginner

Bed side table

Submitted by asmith1856 on Sun, 11/04/2012 - 13:32

Modifed bed side tabe

Estimated Time Investment
Weekend Project (10-20 Hours)
Recommended Skill Level
Beginner

Comments

Simple Armoire

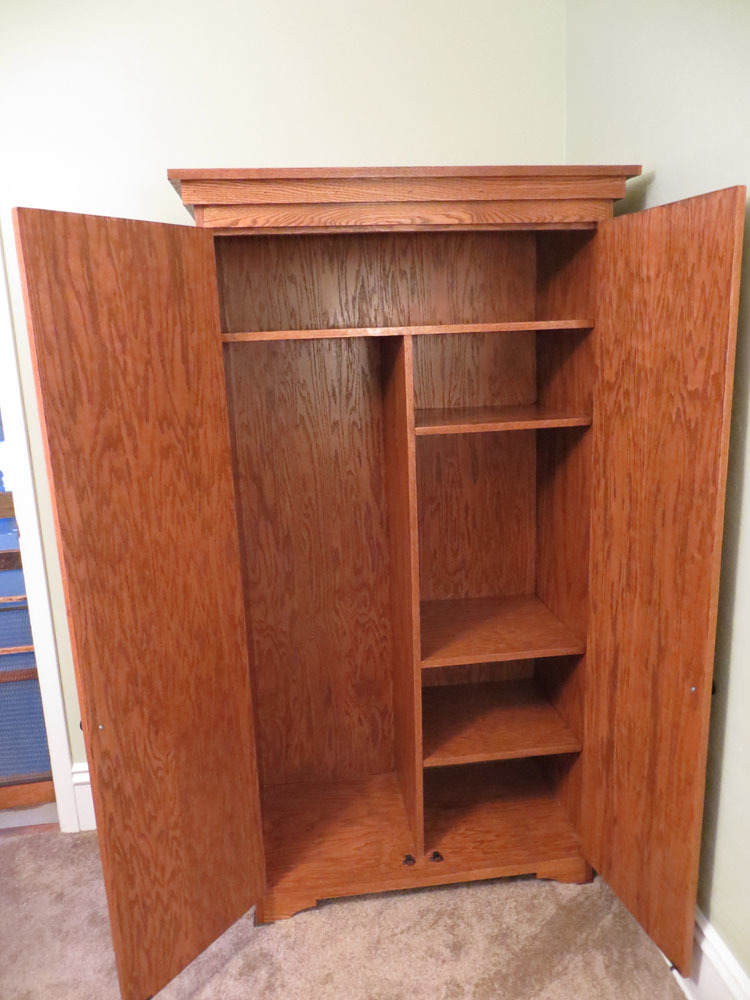
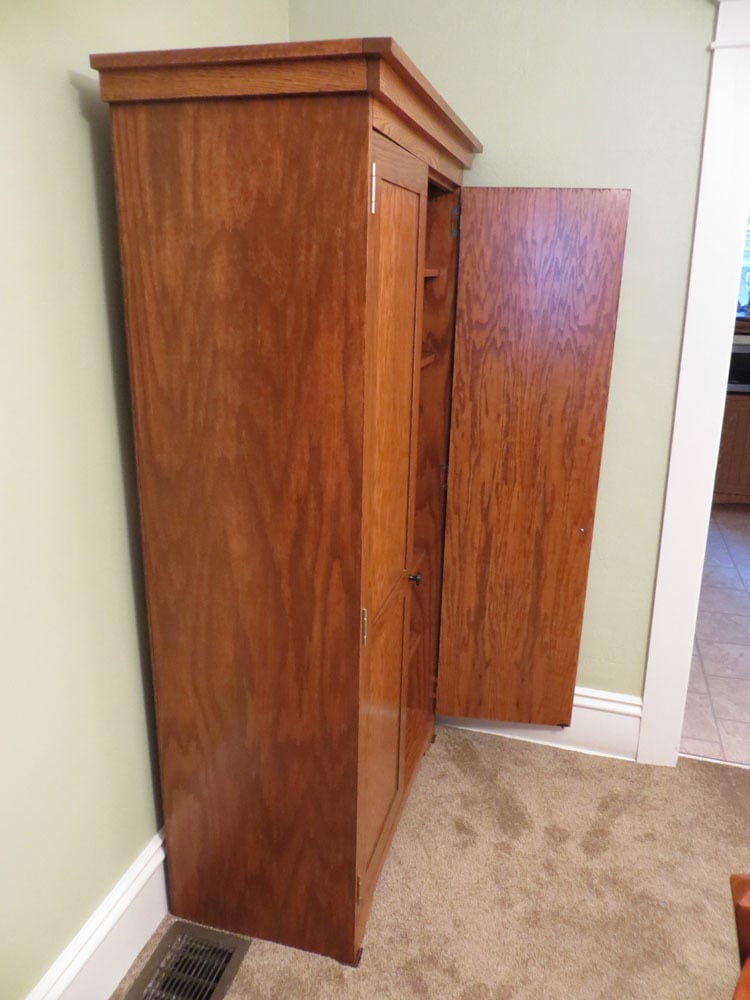
This project actually was a lot bigger than we thought it would be. Hubby and I are almost newbies, and we thought we could knock this off in a week or two! It actually ended up taking us 6 months to finish, although to be honest we didn't work on it consistently.

We needed a replacement for an old coat closet that was falling apart, and decided to tweak the design for the simple armoire to fit what we need, which is basically coats, table cloths, shoes, and just about anything else we want to hide away in our dining room. It's 18 inches deep by 36 inches wide. Since we couldn't find 18 inch wide wood planks, and aren't skilled enough to make them yet, we went with a hardwood plywood and covered the edges of the plywood with iron on veneer. It turned out very well; you can't really tell that it's plywood unless you know what you're looking for.

I will say that I couldn't find the kind of hinges called for in the plans, not even on the internet. So hubby and I went with 1 inch non-mortise hinges. They worked well, though they were a bit hard to hang for a couple of novices.

Built from Plan(s)
Estimated Cost
$300-$400
Estimated Time Investment
Week Long Project (20 Hours or More)
Finish Used
I brushed on Zar Provincial oil stain and finished with two coats of Minwax satin poly (three coats on the doors).
Recommended Skill Level
Intermediate

See-Saw

Submitted by Anonymous (not verified) on Sat, 12/10/2016 - 15:27

The see-saw was the hit of my nephew's two year old birthday party. Multiple kids played on it at once.

Estimated Cost
$75 in California
Estimated Time Investment
Afternoon Project (3-6 Hours)
Finish Used
Spray Paint
Recommended Skill Level
Beginner

Big Kids Picnic Table

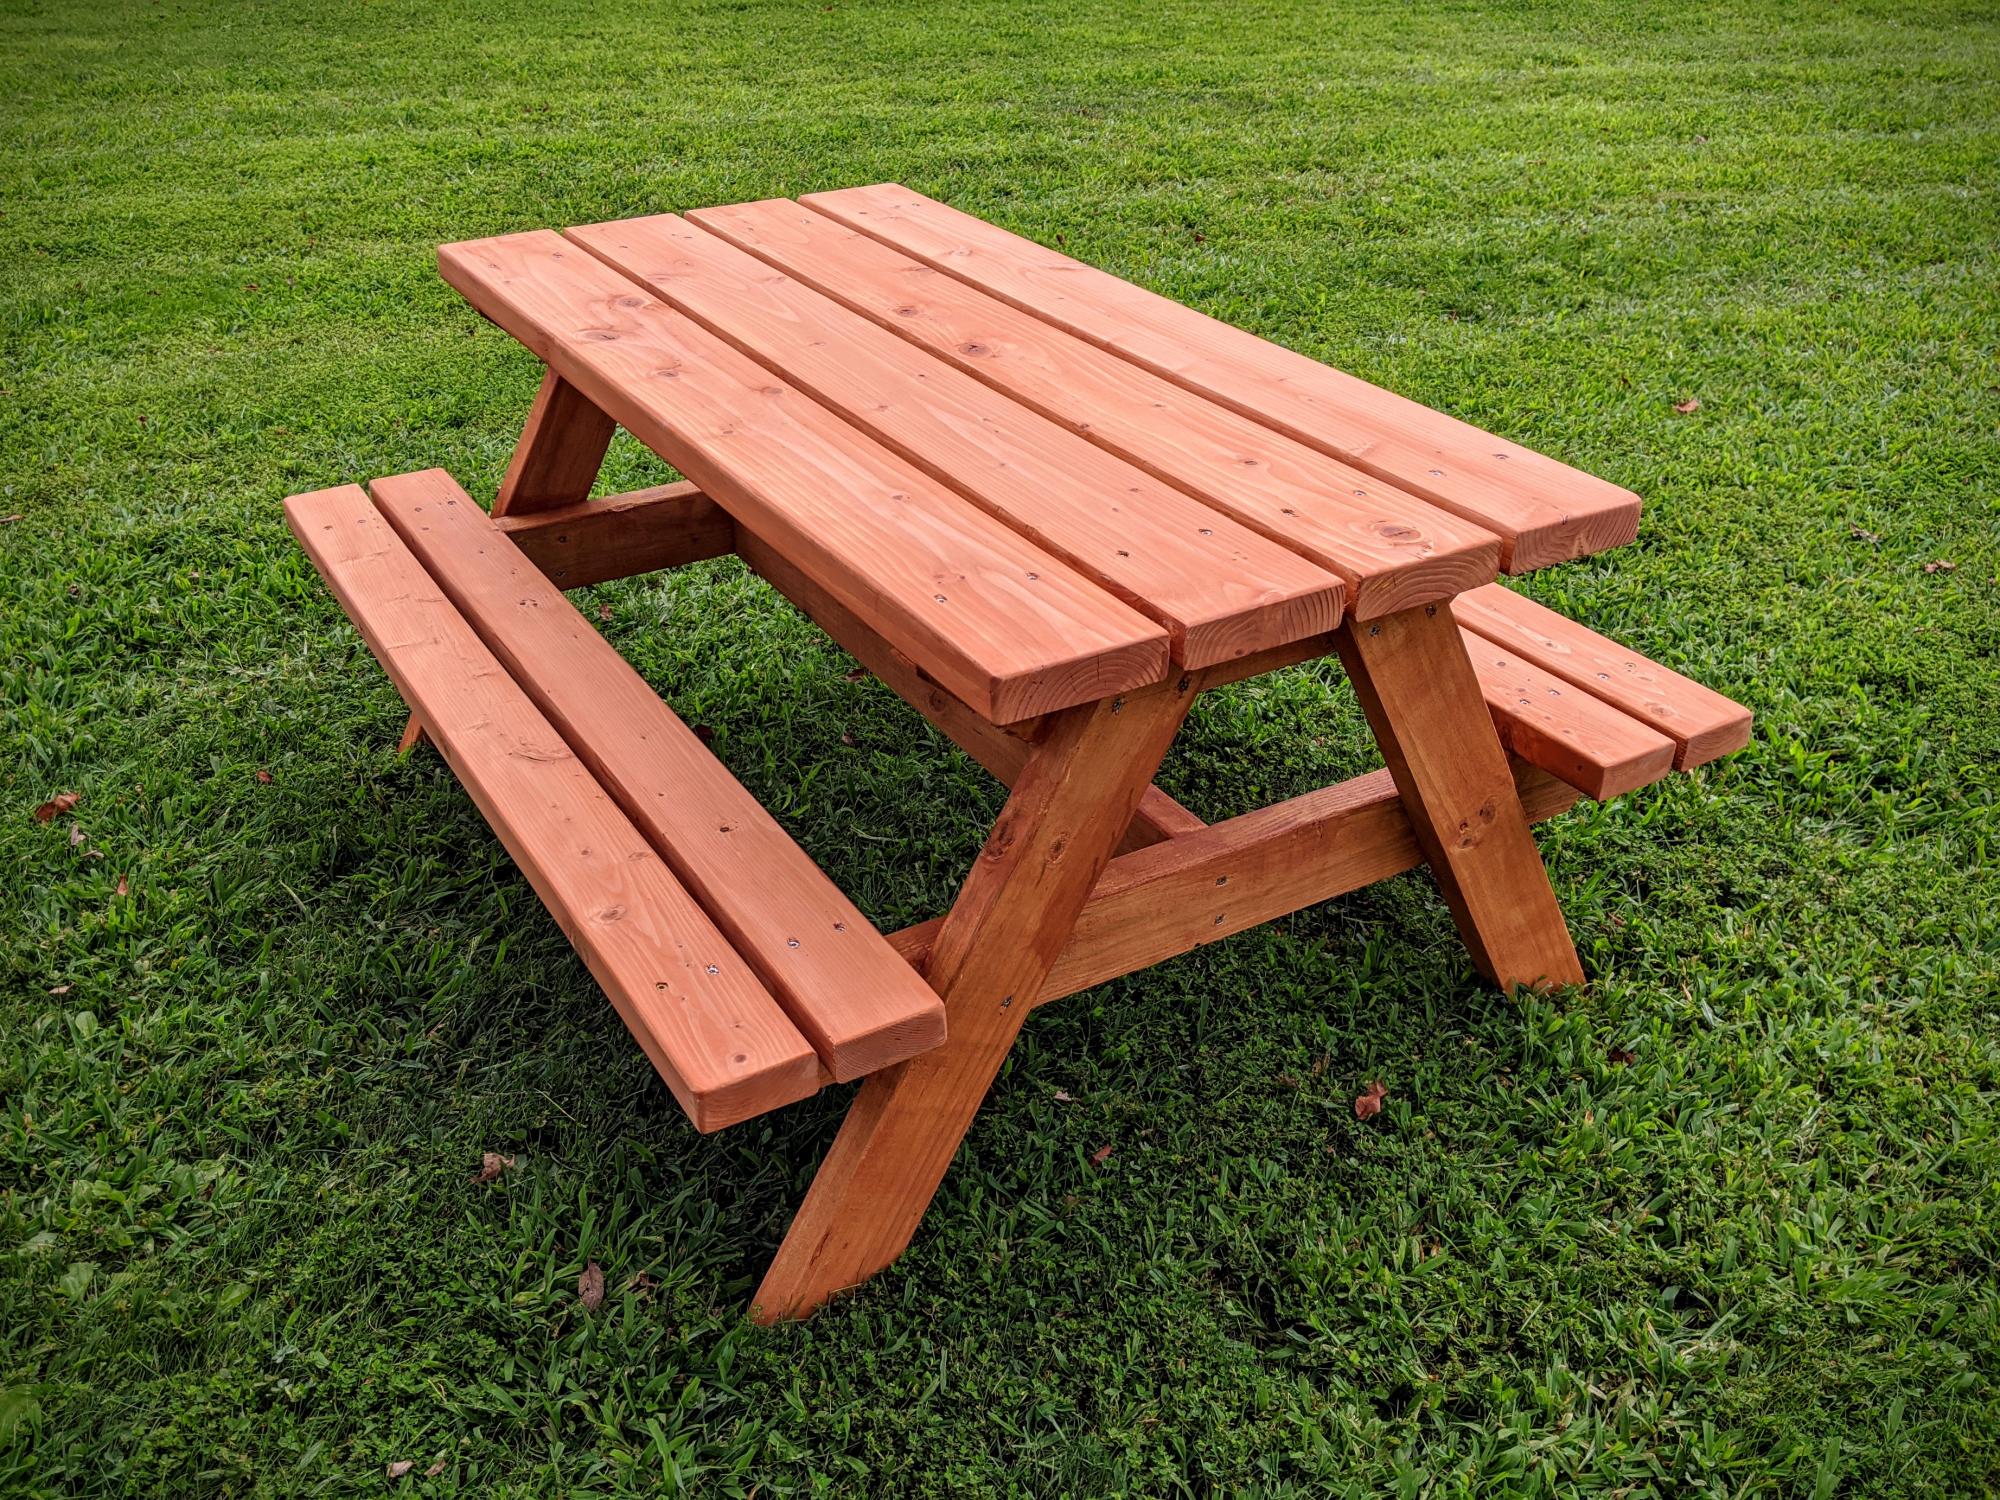
Built using Ana Whites plans for a Bigger Kids Picnic Table. Used pressure treated 2x4 for frame (legs and supports), 2x4 and 2x6 pine (fir) for table top and bench. Finished with Cabot's semi-transparent redwood stain and sealer.

Built from Plan(s)
Estimated Cost
$50.00 plus screws and finish
Estimated Time Investment
Afternoon Project (3-6 Hours)
Finish Used
Cabot's semi-transparent redwood stain and sealer
Recommended Skill Level
Beginner
Seasonal And Holiday
Back