Live Edge Coffee Table
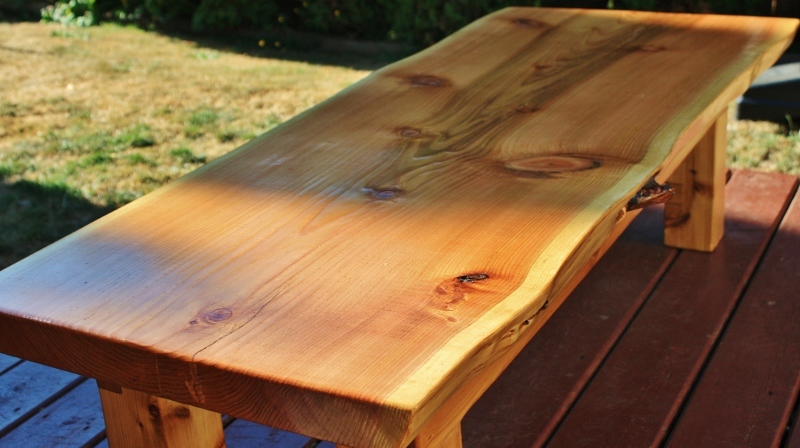
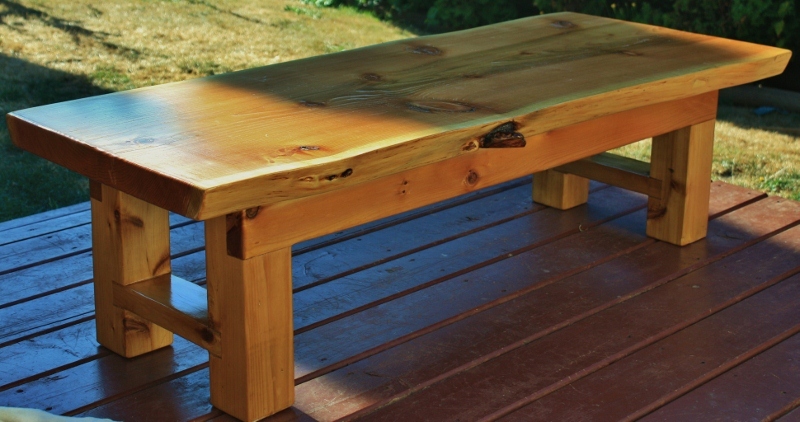
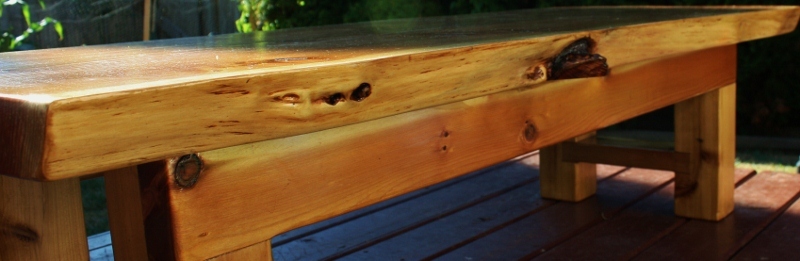
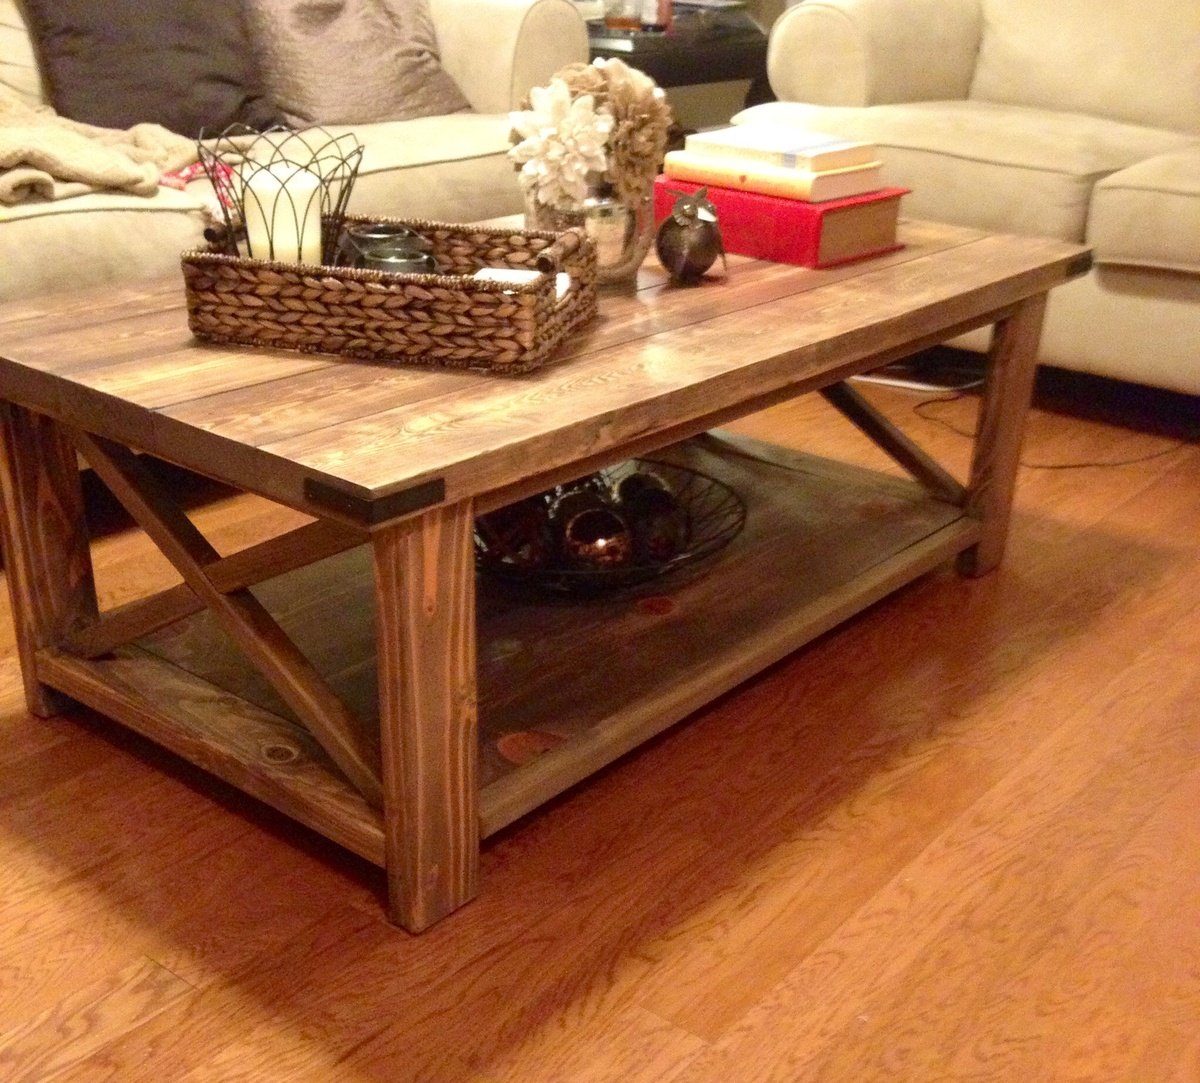
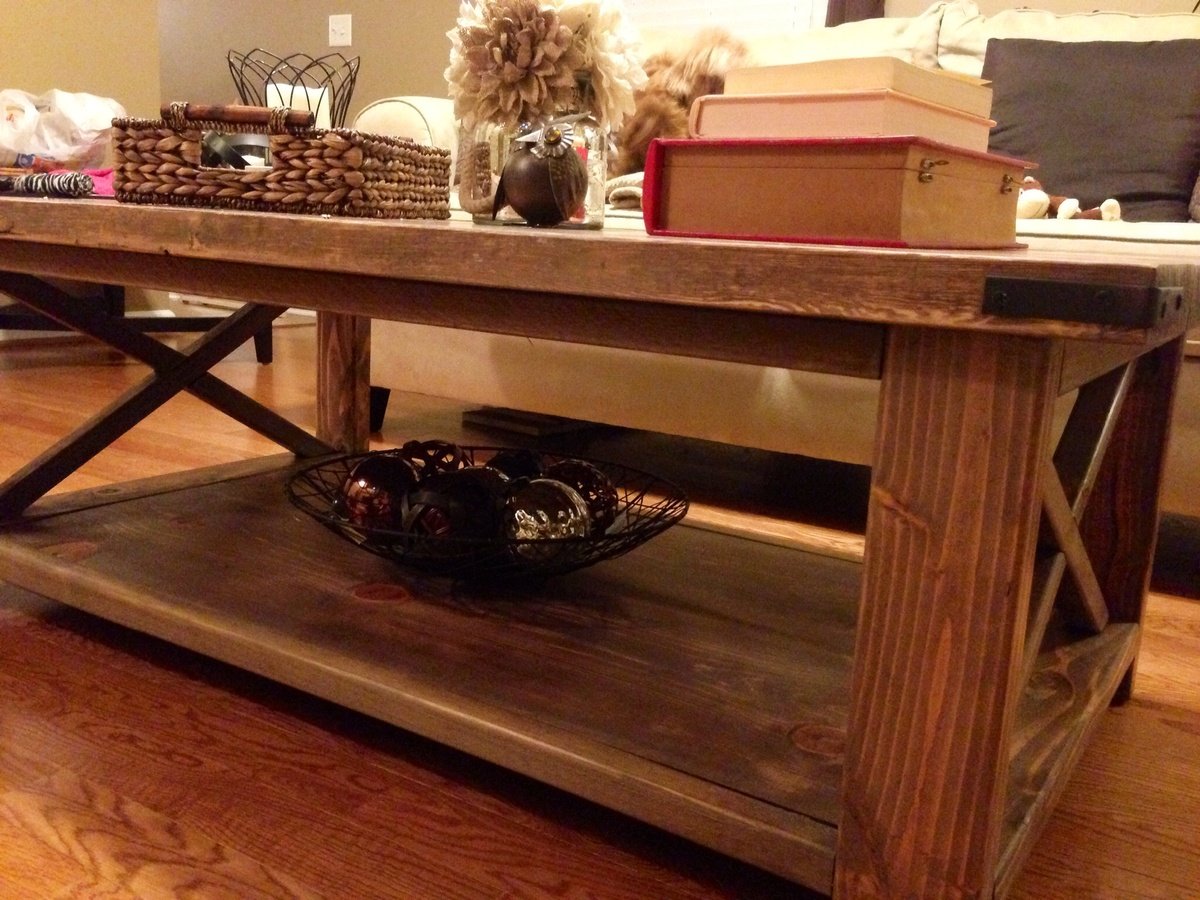
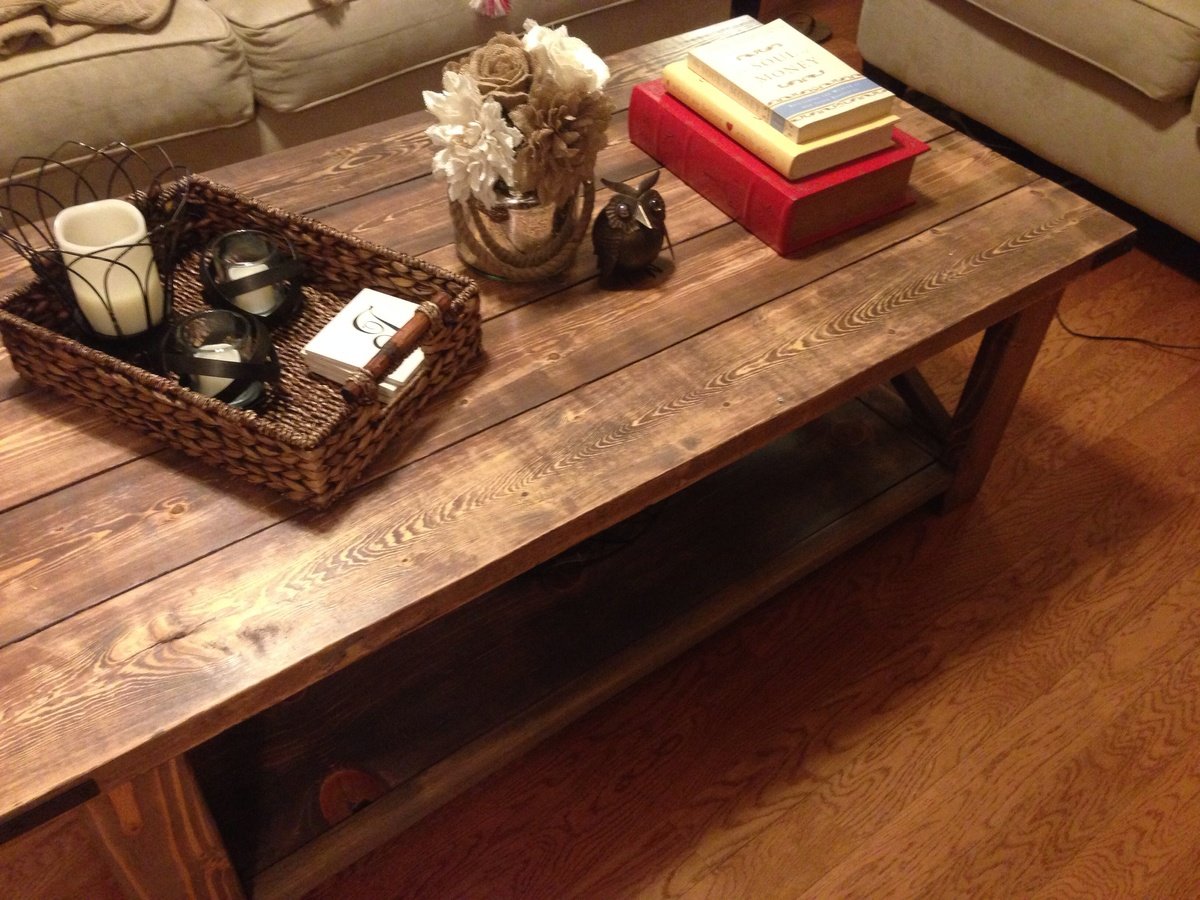
I located an 11ft piece of cedar 5 inches thick and 21 inches wide. The first thing I thought was to splice it and make an outdoor dining table....but realised i could get some distance out of this and decided to start with a coffee table. The tryde coffee table was the inspiration to get this made. It was a weekend project that was done while my 2 year old took his afternoon naps. My wife loves it, so managed to score some brownie points with this one. It didn't take too much to sand, a quick skim with 60 grit to get rid of the major splinters and saw scars, then an hour or so of 120 grit. The legs are s4s cedar 4x4 posts with s4s cedar 2x4 supports. I don't have too many tools so used a band saw at my neighbours workshop to quickly rough out the joints. once all pieces were cut and sanded, it was assembled with glue and held in place with multiple bar clamps and cured overnight. The top was assembled the next day with glue, sanded in place and stained / urethaned on day 2. A fun project for a novice like me.


Comments
Ging (not verified)
Wed, 09/19/2012 - 04:16
That's beautiful. Nothing
That's beautiful. Nothing compares to a beautiful piece of furniture made from eye catching wood..and cedar is just that. Great job!
spiceylg
Wed, 09/19/2012 - 05:21
Nice
What a beautiful piece. Great job!
Joni
Fri, 02/01/2013 - 17:21
Wow!
Wow! This is so nice! With the 2x4s inset into the 4x4s -- it really changed the design into something unique. The top is fantastic. The finish looks very professional too.