Corn hole
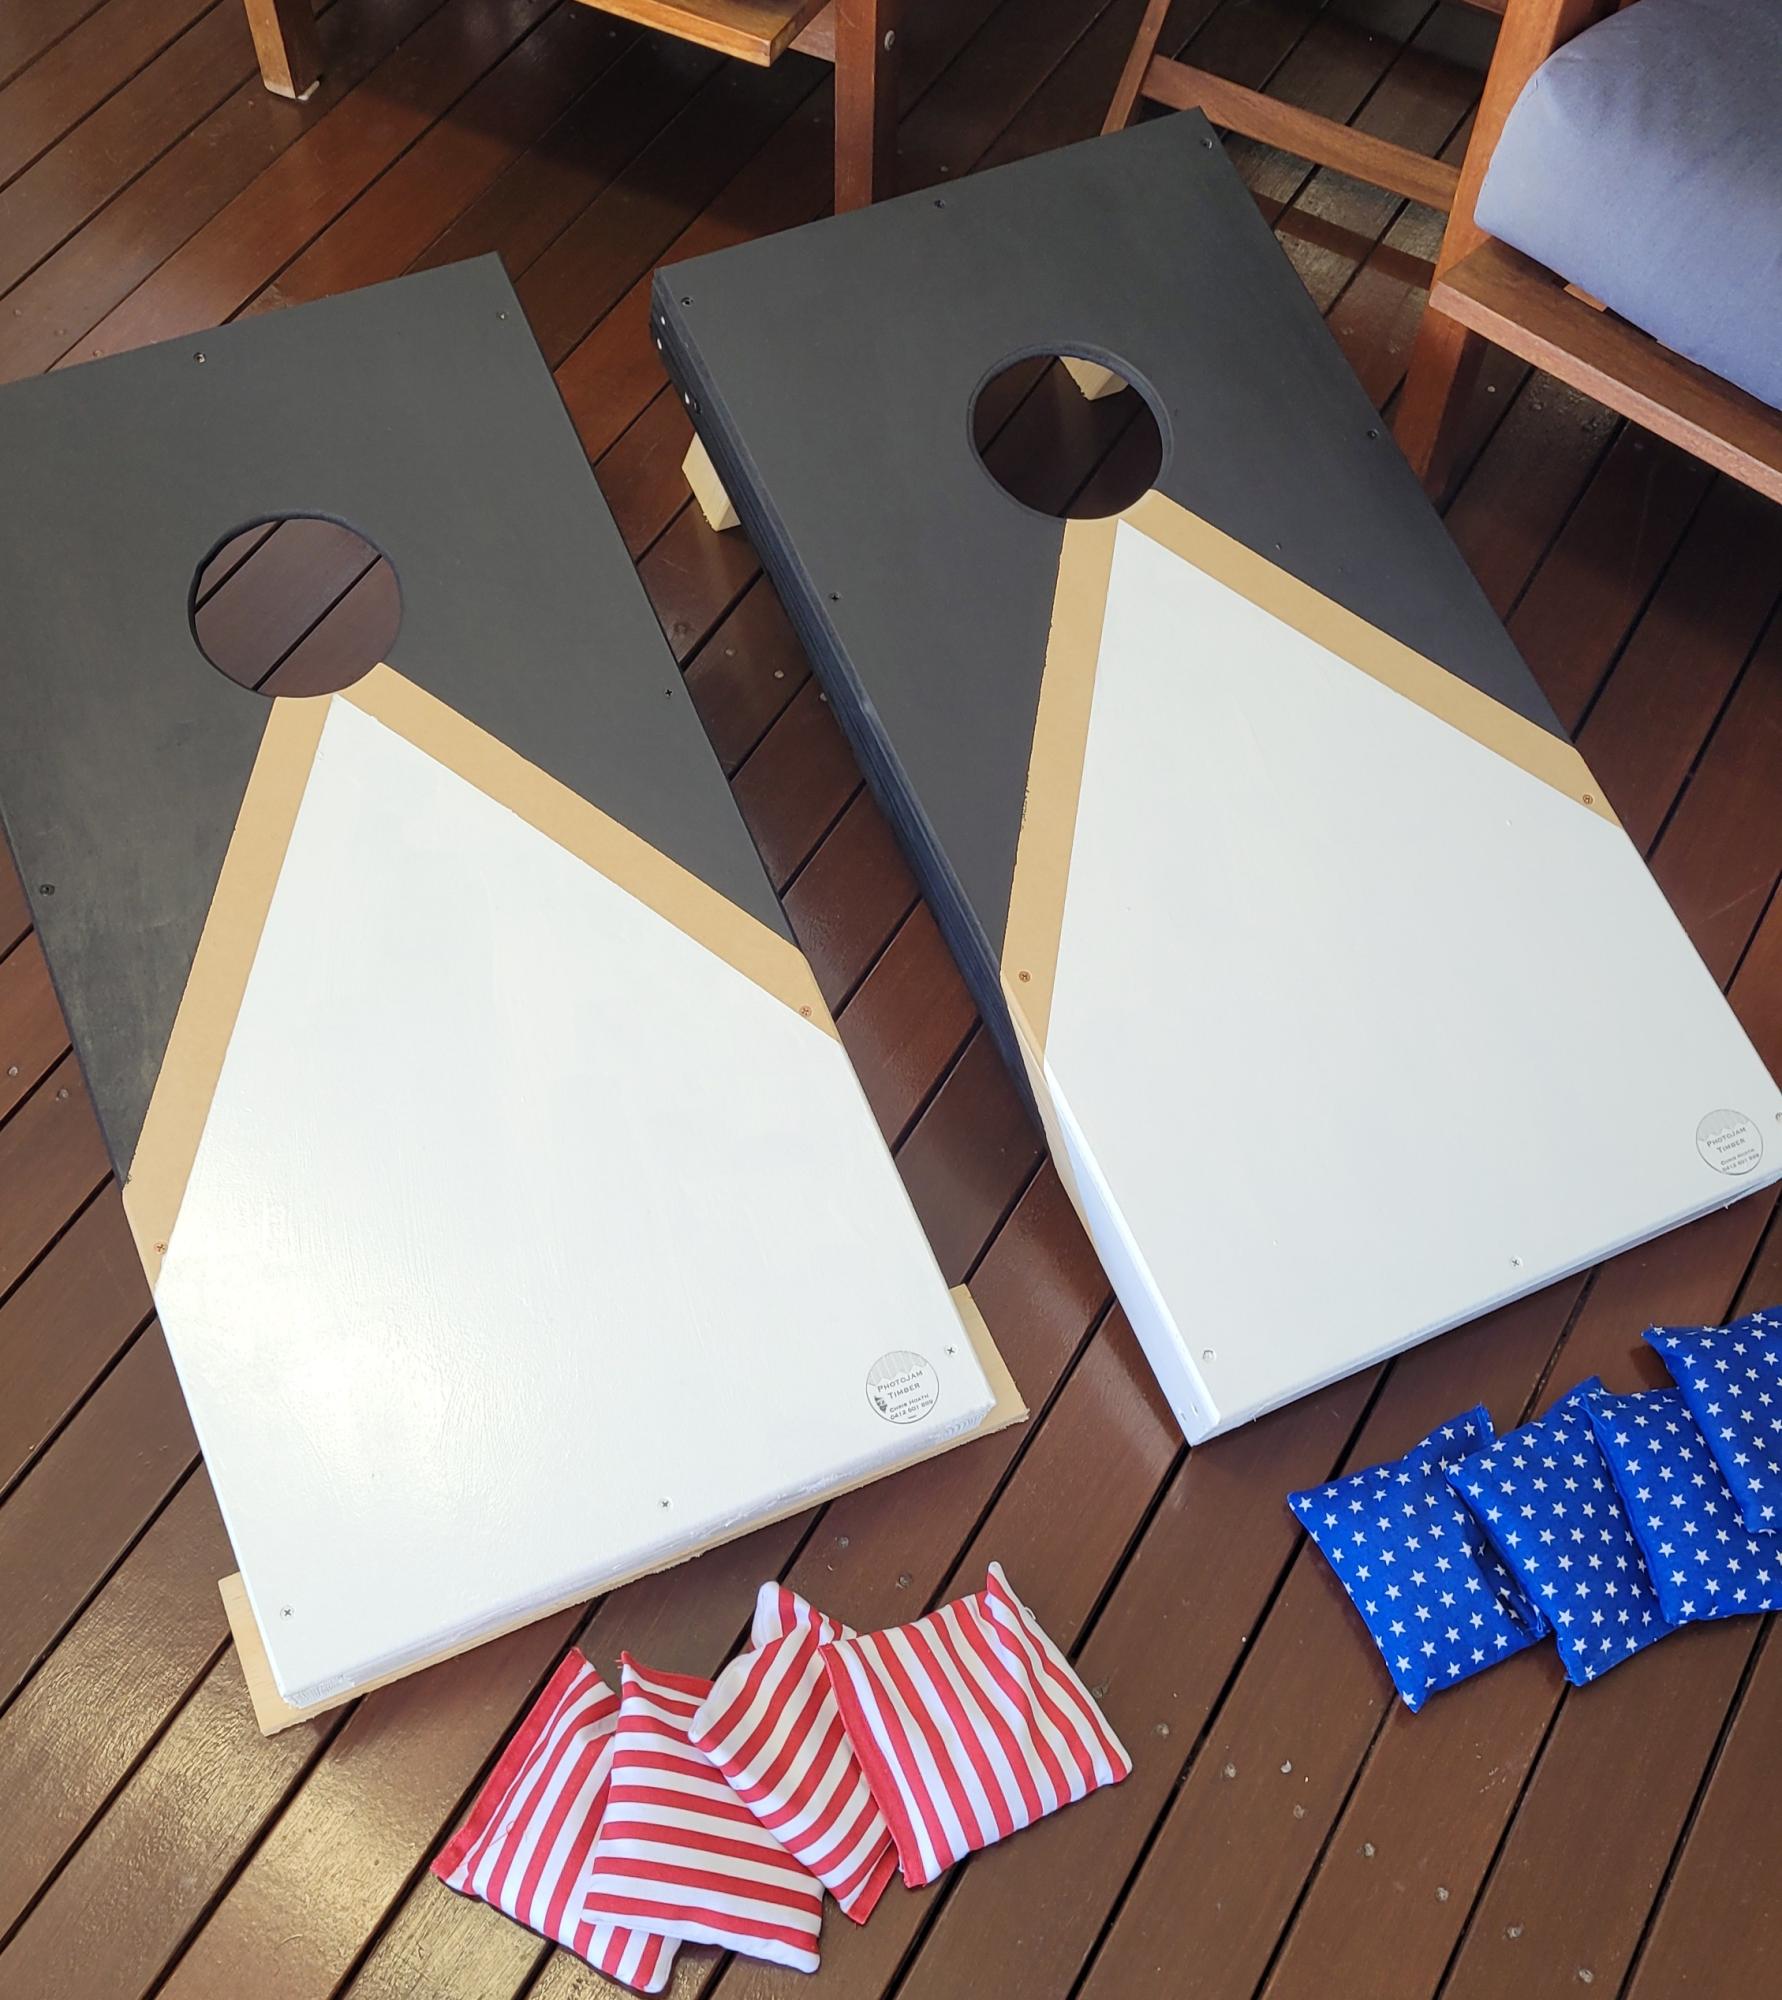
Another great tutorial and project done. Thanks Ana
Built from Plan(s)
Another great tutorial and project done. Thanks Ana
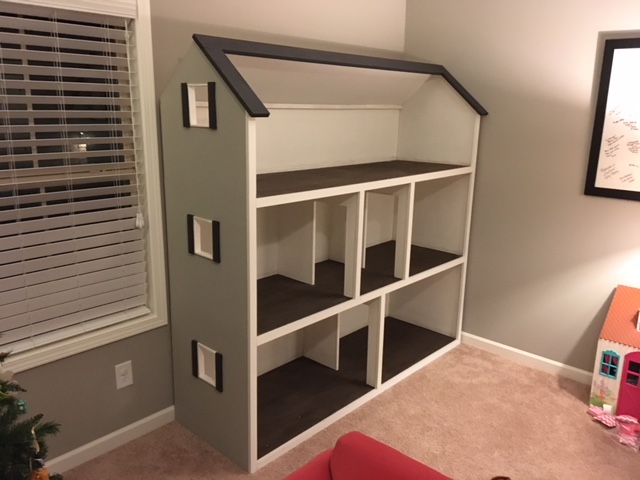
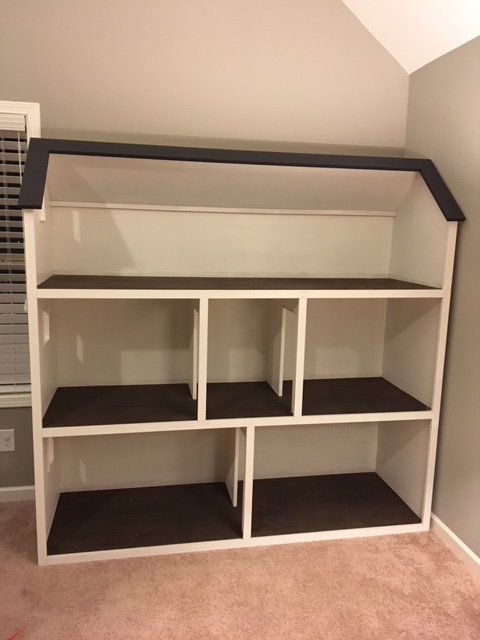
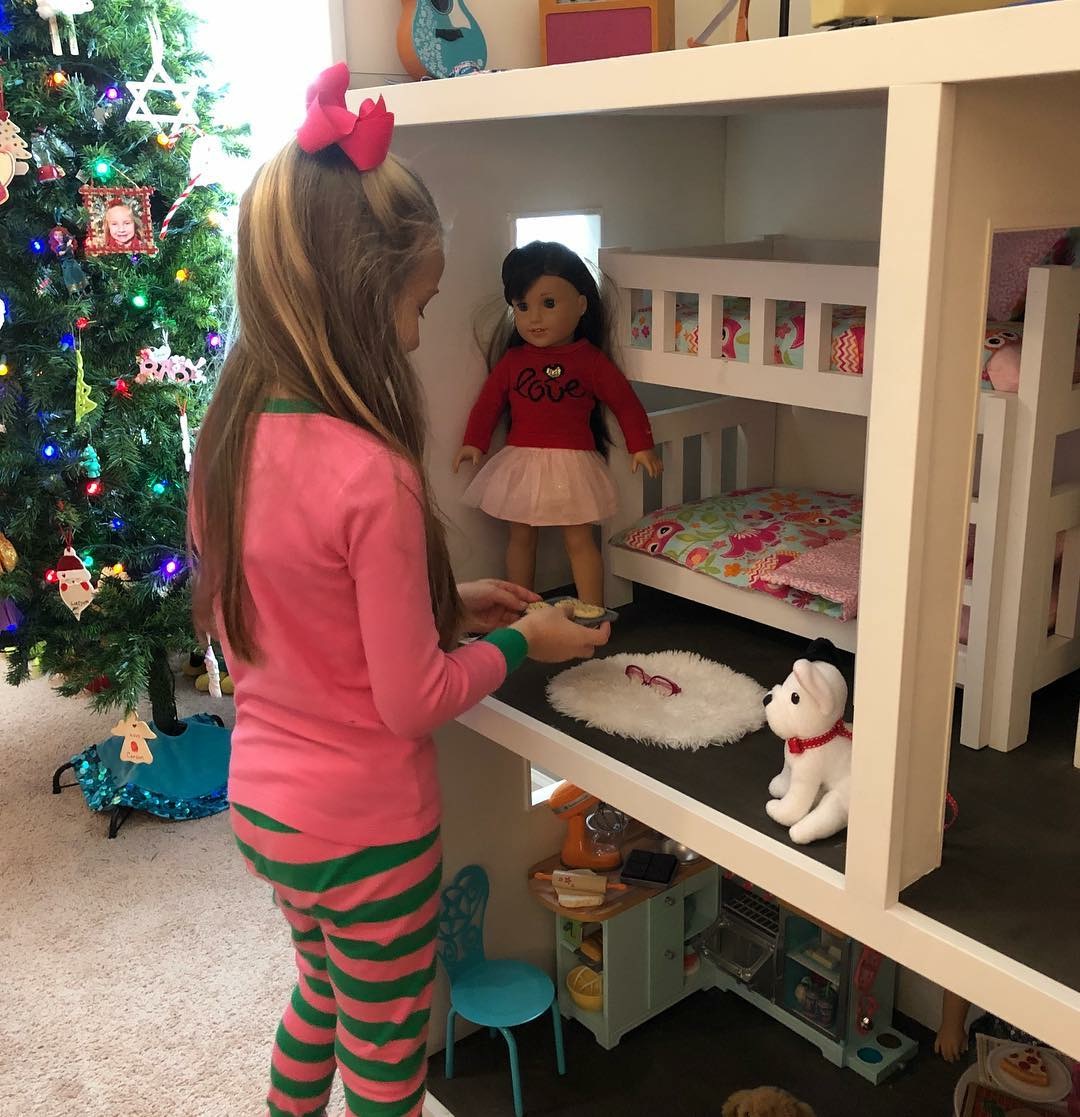
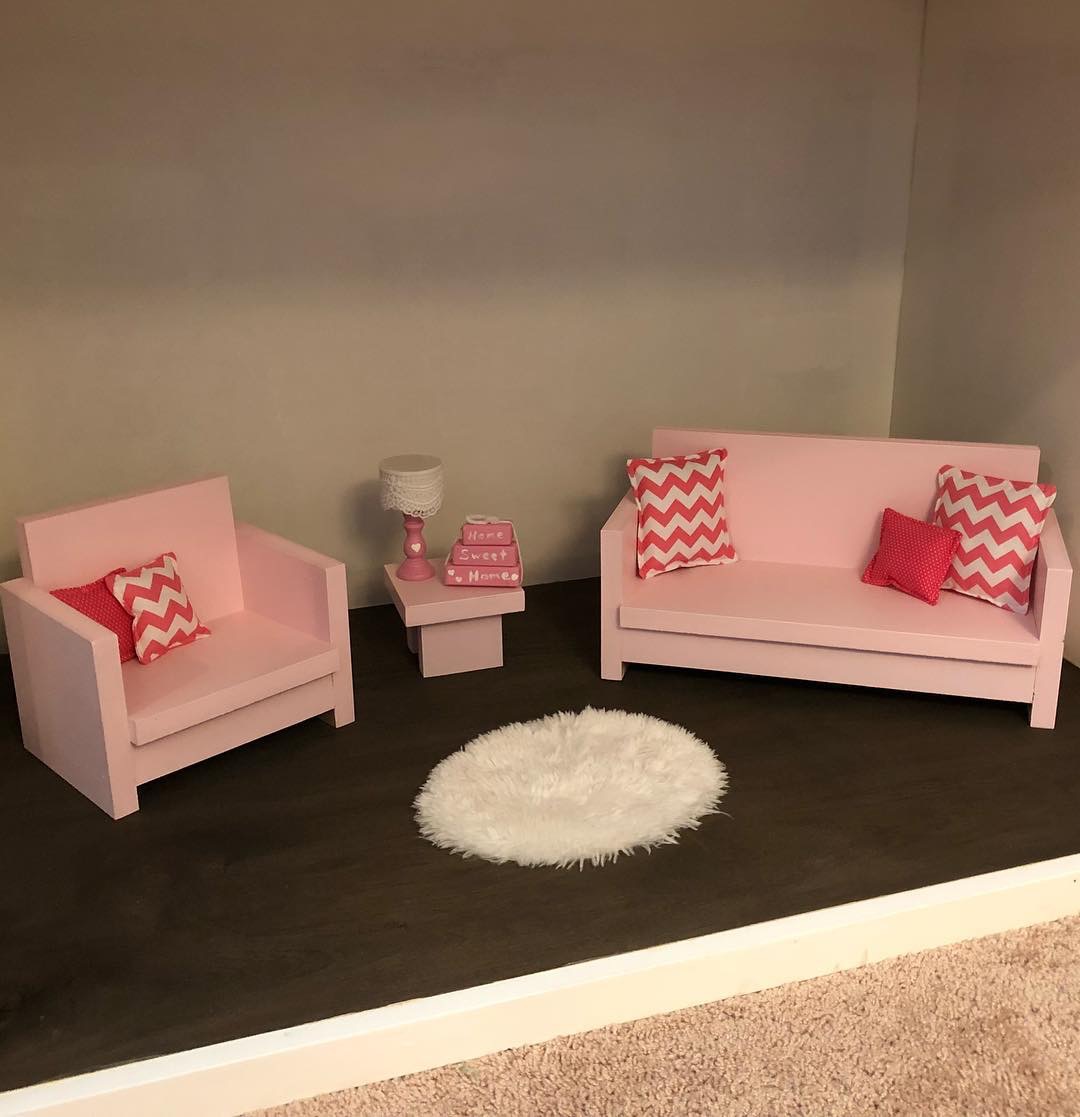
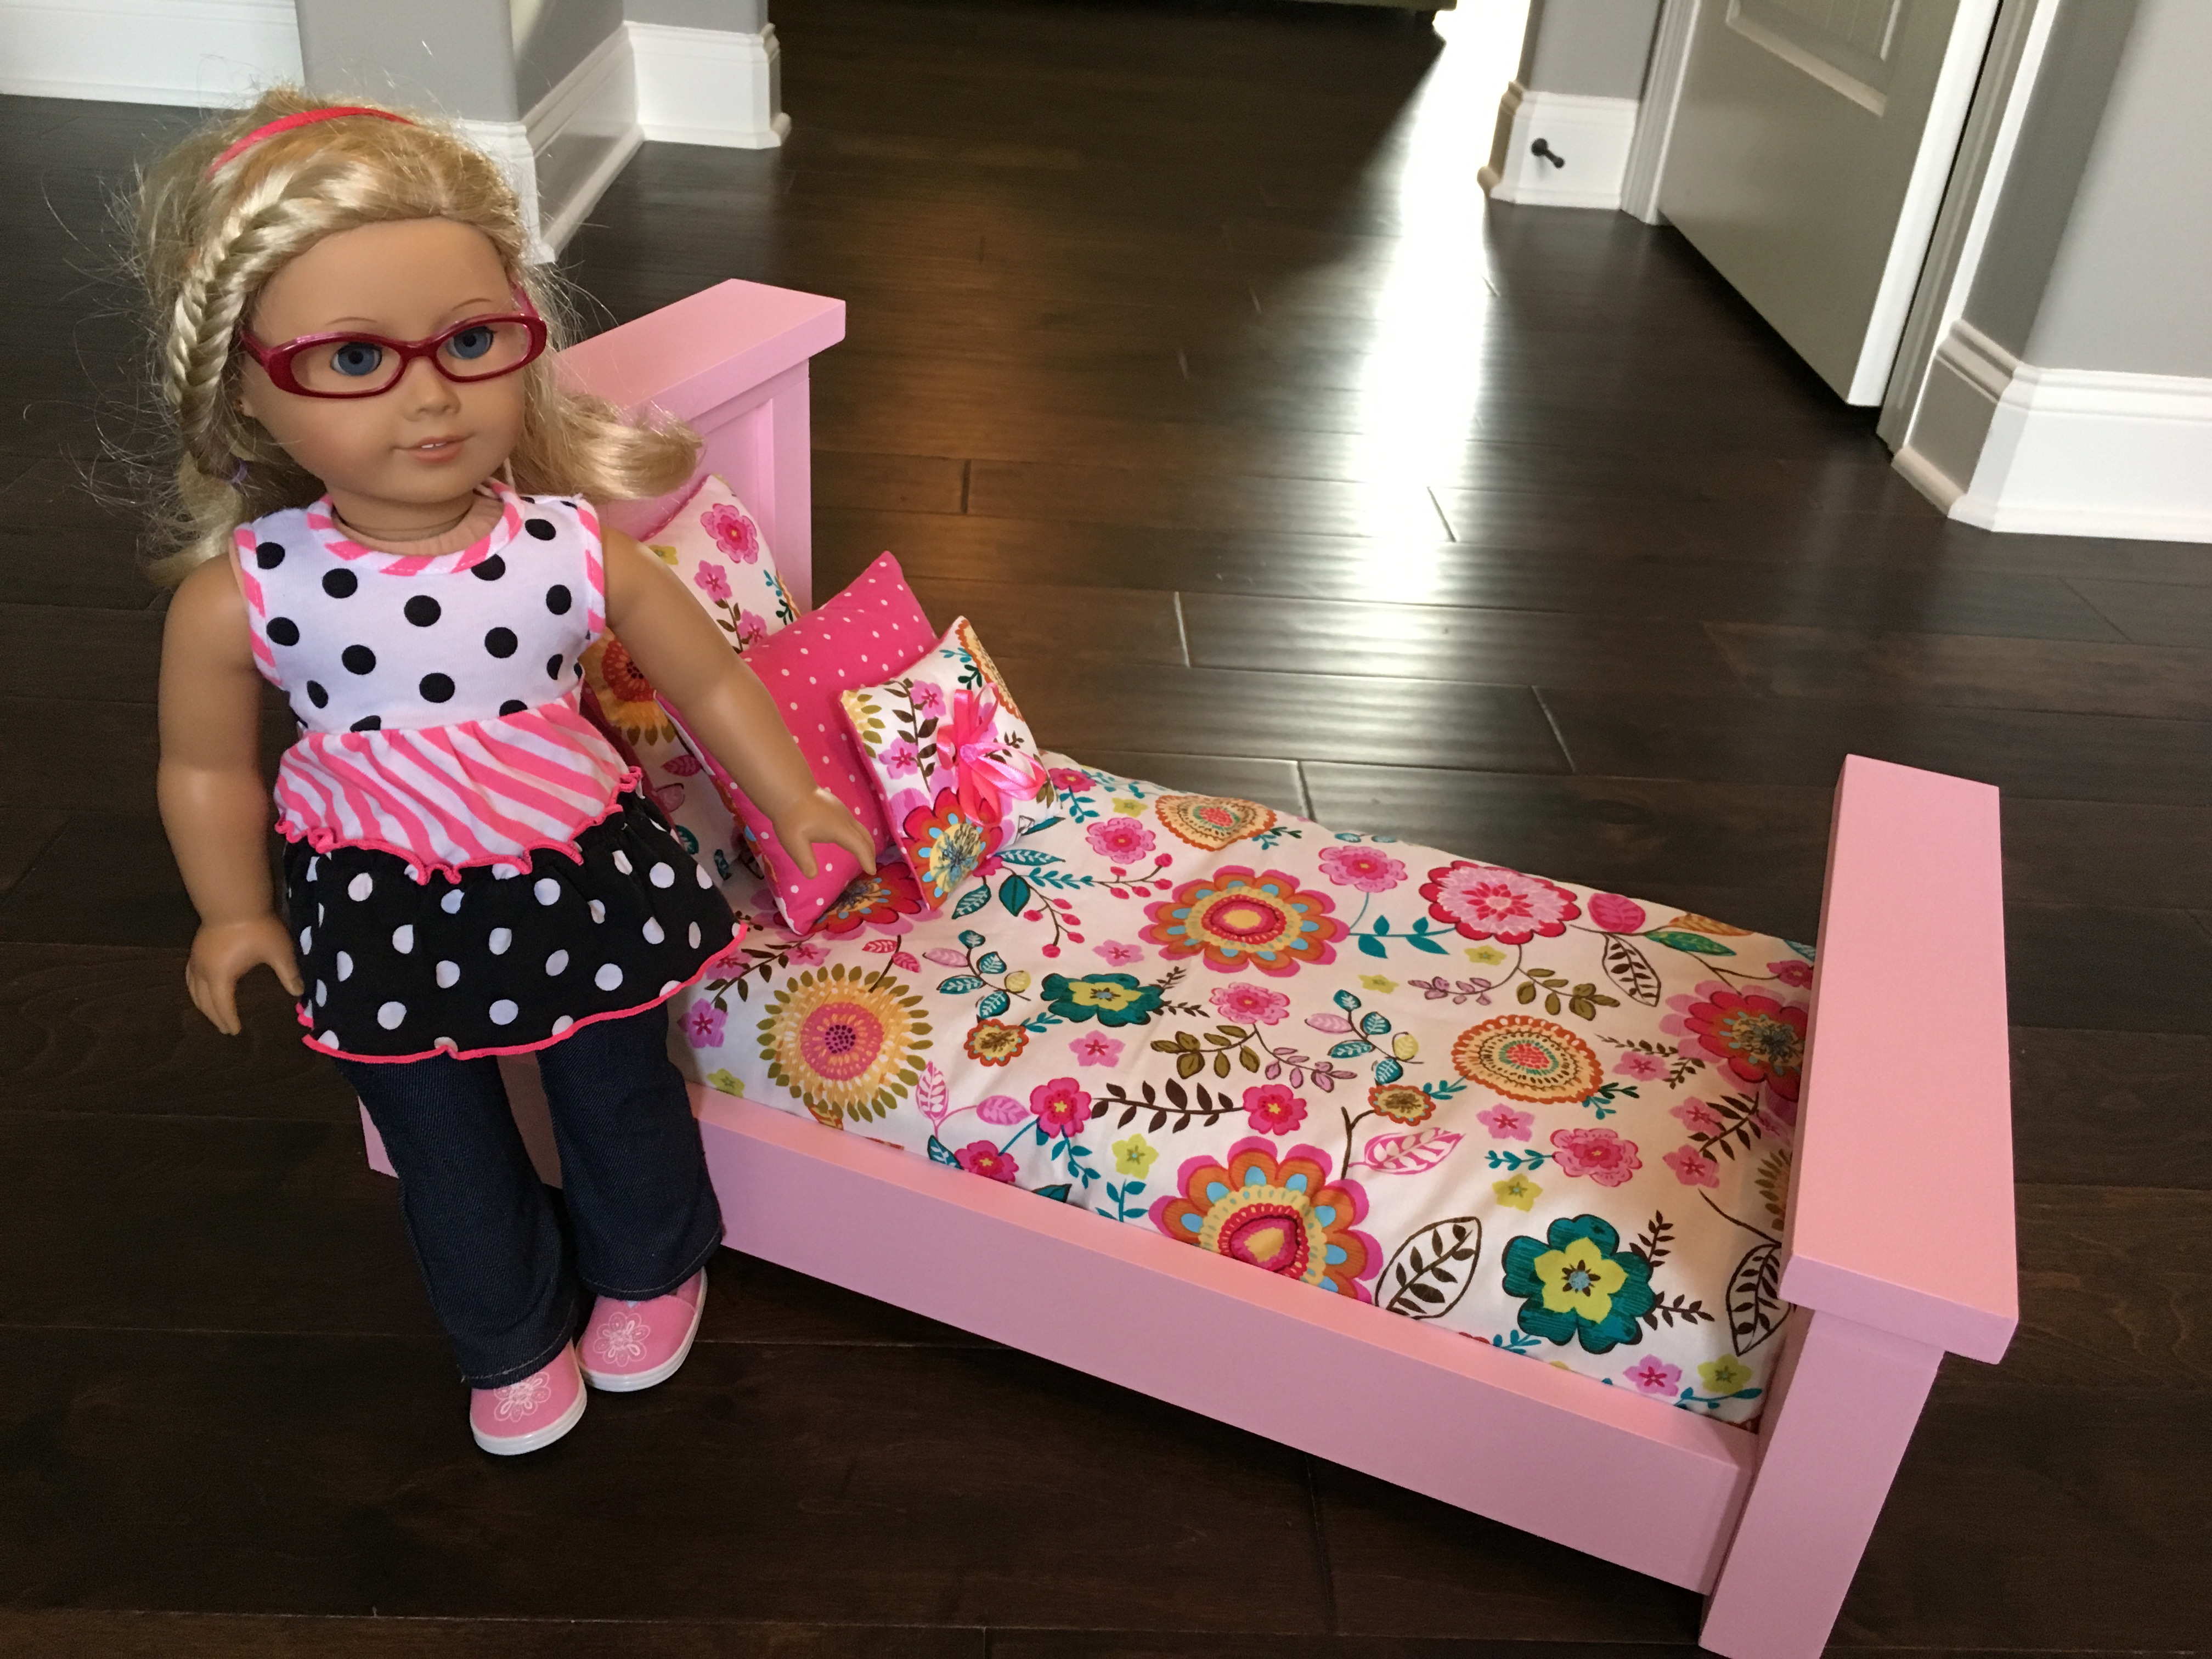
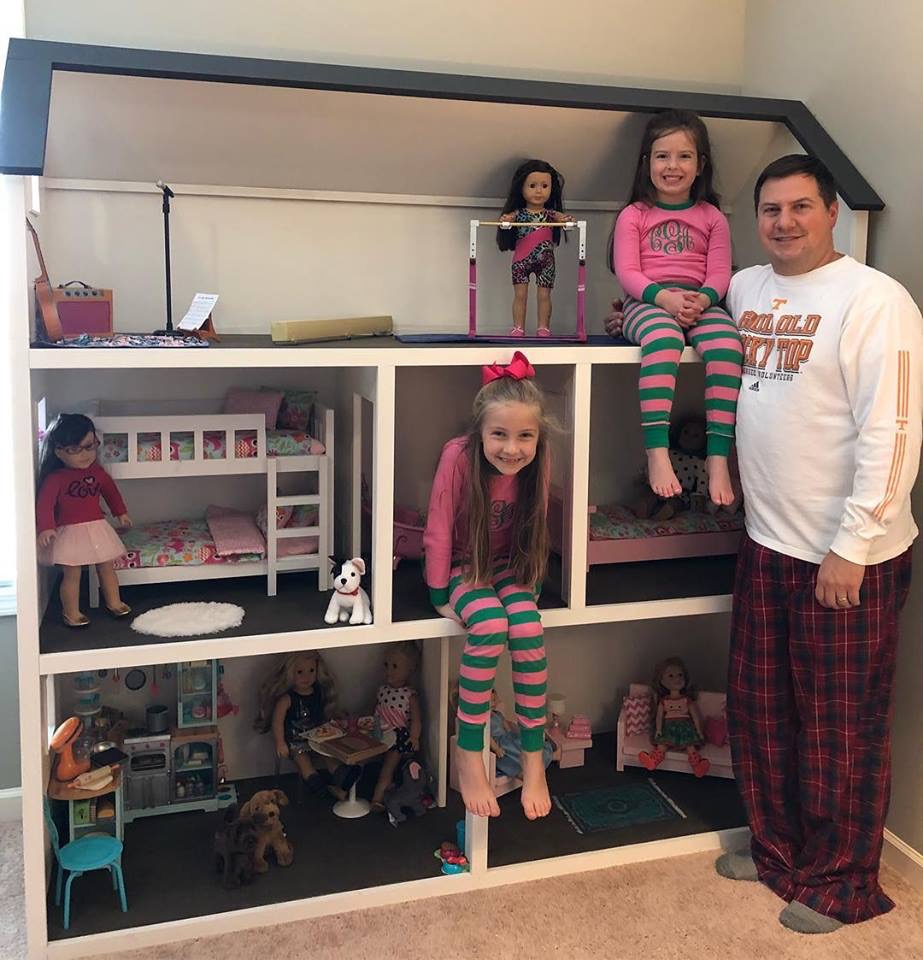
I've been building Ana White American Girl doll furniture for my two daughters for the last three years, culminating with my biggest build of all - a modified version of Ana's dollhouse.
My wife kept telling me it would end up being huge, and she was right. The great news is that it doubles as storage when the girls aren't playing! 2 Bedrooms, kitchen, living room, bathroom, and upstairs bonus room for dance and gymnastics. 78" tall x 76" wide, mounted to the wall studs for safety. Lots of joy in our home on Christmas day. Thanks Ana!
Found this on the website and had to build it. Turned out perfectly.
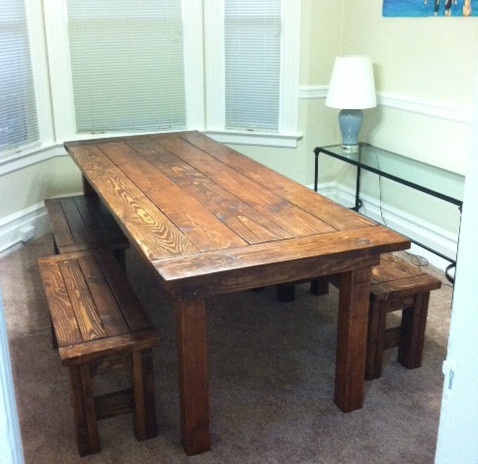
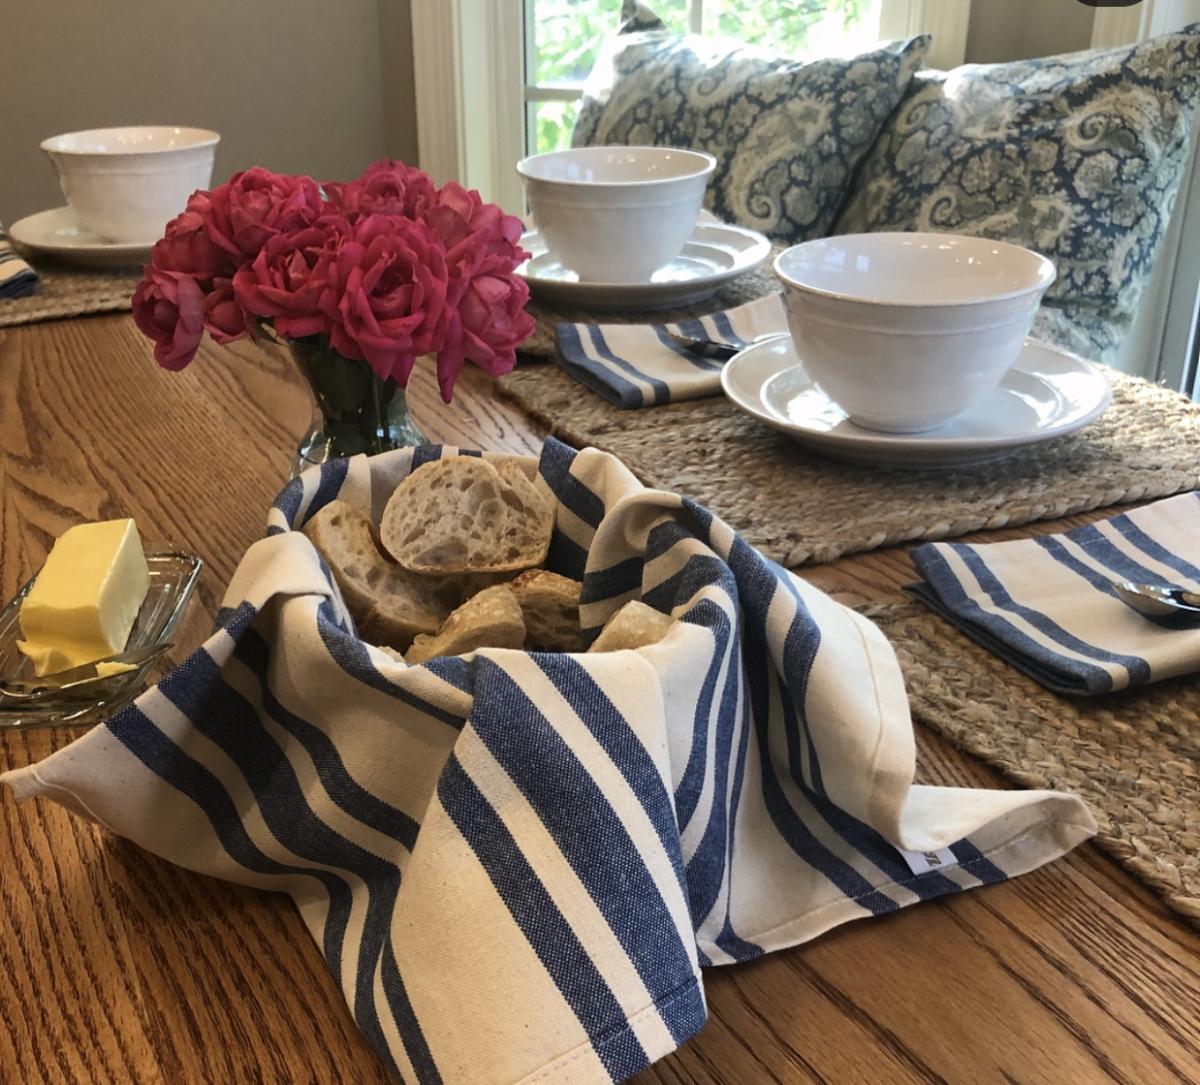
I wanted a big rustic farm table, didn't want to drop thousands on one from a store, so I decided to make my own!
I built it in the (formerly empty) dining room, with tarp on the floor and plastic to seal the doorways.
Was a big project and my first project so I started with the benches as this site and users recommended.
I used the farm house bench plan - just shortened the dimensions so that I could have two benches on either side of the table. Then I merged the two table plans so that I could have the top with the bread boards but legs that attached underneath (like the rustic table) so that they could be removed when we move. I'll work to upload my plans too.
Used Minwax Wood Stain in "english chestnut" and Deft Satin Wood Brushing Lacquer (instead of a Polyurethane).

Sun, 09/25/2011 - 12:18
Your use of short benches makes the set more family and guest friendly. I usually hand rub my finish, I think i want to build this and probably use 0ak 2X12's (know it will be heavy).
Suggestions?
I will use it on a Florida roofed concrete deck for an outdoor dining area. Typically more formal dinners. Deck overlooks beautiful cove.
Thu, 10/13/2011 - 11:00
Can you explain how you merged the plans to add the bread boards? I would love to do the same!
Tue, 03/06/2012 - 01:30
Would love to see the plans for this!
Looks amazing!!
Are the table legs 4"x4"?
Fri, 06/01/2012 - 09:09
This is exactly what I am looking for in a table to build. We want bread boards on the end and we don't want stretchers on the bottom. How did you combine the two to do this. Can you send me a copy of your plan? [email protected]
Fri, 06/08/2012 - 12:59
i would the plans for that table my daughter loves and wants me to build her one
send to [email protected]
Mon, 06/11/2012 - 13:19
We love this table! Could you please send plans to [email protected]
Thanks so much!
Mon, 06/11/2012 - 13:21
We love this table. Please send plans to [email protected]
Thanks!
Fri, 06/15/2012 - 10:00
Your table turned out awesome!
I already have old boards waiting on plans to be turned into a table. Any chance you could send the plans for your table to [email protected]?
Sat, 08/04/2012 - 13:35
Could you please send me the plans for this table? I love it and would love to attempy making it. Thanks so much!
Sun, 09/23/2012 - 14:37
Hi, Can you please send me the plans to make this table?
Thanks!!
Alex ([email protected])
Sun, 09/30/2012 - 18:34
I love this table. Can you please send the plans to [email protected]
Sun, 11/04/2012 - 11:07
I would love to attempt this!Would you please share your plans?
[email protected]
Thanks so much
Sun, 11/04/2012 - 17:17
This table is exactly what I've been looking for!! Could you please share your plans? [email protected] Thank you.
Sun, 11/04/2012 - 17:25
This table is exactly what I have been looking for! Could you please share your plans? [email protected]
Tue, 01/01/2013 - 06:09
Can you send plans for this table build to [email protected] thanks.
Wed, 01/02/2013 - 15:53
Your farm table and benches were exactly what I was looking for. Please send me the plans if they are available. Thanks
Wed, 01/02/2013 - 19:18
I would love your table plan. This is absolutely gorgeous!! Please forward table plans to [email protected]
Wed, 01/02/2013 - 19:23
I would love a copy of the plans for this gorgeous table you made. I am inspired.
Fri, 01/18/2013 - 18:01
Could you please send plans? I love the look of your table!
[email protected]
Sat, 03/16/2013 - 20:12
Can I please please please have the plans? I have a very narrow dining area and this table is PERFECT. Thanks
Sun, 05/12/2013 - 14:30
I would REALLY like the plans for his version as well. I am going to combine them. Can someone ask him to post or his he sending via email? If so, [email protected]
Thank you SO much!!!
Wed, 06/26/2013 - 13:09
Thu, 06/27/2013 - 13:34
Fri, 06/28/2013 - 10:49
Great table! I too would like plans - please send to [email protected]
Thanks!!
Mon, 07/15/2013 - 09:48
just bought a cabin and need all sorts of furniture. I love what you did and would sure love to have your plans and how you merged the two----both for the table and especially for the benches. Trying to do a 10' table for huge family gatherings. Thanks so much! You rock!
Tue, 07/23/2013 - 14:28
This table and bench set is exactly what I am looking for. You did such a great job!
Do you have plans that you wouldnt mind sending to my email? [email protected]
Mon, 08/26/2013 - 13:09
Hi! I noticed MANY requests for the merged plans. Did you post them somewhere or can you please email the plans to me at [email protected]?
BIG THANK YOU! Tina
Fri, 09/06/2013 - 13:49
I would love the plans for this table... could you please email them to [email protected]?
Thank you so much!
Beth :D
Fri, 01/09/2015 - 19:54
Hi everyone,
Well I didn't see all these comments! Sorry to have ignored your requests for plans!
This is the bench I made (I did four of these, and adjusted the measurements so they were each about 40" long)
http://ana-white.com/2011/01/farmhouse-bench
I was going to do this table, because it matches the benches, but decided I wanted a table with removable legs so it would be more maneuverable when we move!
http://ana-white.com/2009/12/plans-farmhouse-table-knock-off-of.html
I ended up using more of this plan in terms of how I assembled it, but adjusted the plans to have the tabletop include breadboards (the plank on top perpendicular to the long tabletop planks) and I used 4x4s for legs, plus the top was from 2x8s not 1x10s. I put in the optional cross supports too, and additional supports under the breadboard to connect it to the table frame and table top slats.. this is more info than you need, all to say, plans are flexible and you can do what you want!
http://ana-white.com/2010/03/plans-very-rustic-table-and-cool.html
Sorry I don't have detailed notes. I was very picky about the dimensions (based on space) and how high I wanted the table (about 1.5" taller than a normal table). I also measure the distance between the underside of the table and the tops of the benches so I could cross my legs under the table (an odd requirement).
Happy Building!
Sat, 03/21/2015 - 17:34
could you send me the plan for this rustic table that was made from the farm house and rustic table if they are available? Email to [email protected]
Sat, 03/28/2015 - 12:45
can you please send me the plans [email protected]
i love it!!!
Wed, 04/01/2015 - 15:10
I like the english chestnut stain. That works so well with this type of lumber. Great job. I plan to use the same stain on the Tryde coffee table I am building. Thanks for sharing your work!!!
Sat, 08/08/2015 - 12:30
Thu, 08/13/2015 - 19:17
Sorry! I accidentally hit the spam button but I really would like the plans for the table. Sorry for the confusion!
Thu, 08/13/2015 - 19:23
Ok, now I feel really silly. Obviously, this is my first time leaving a comment. I love the table. It is exactly what I've been looking for. Could you email the plans to [email protected]?
Thanks!
Fri, 01/08/2016 - 17:38
Fri, 01/08/2016 - 17:40
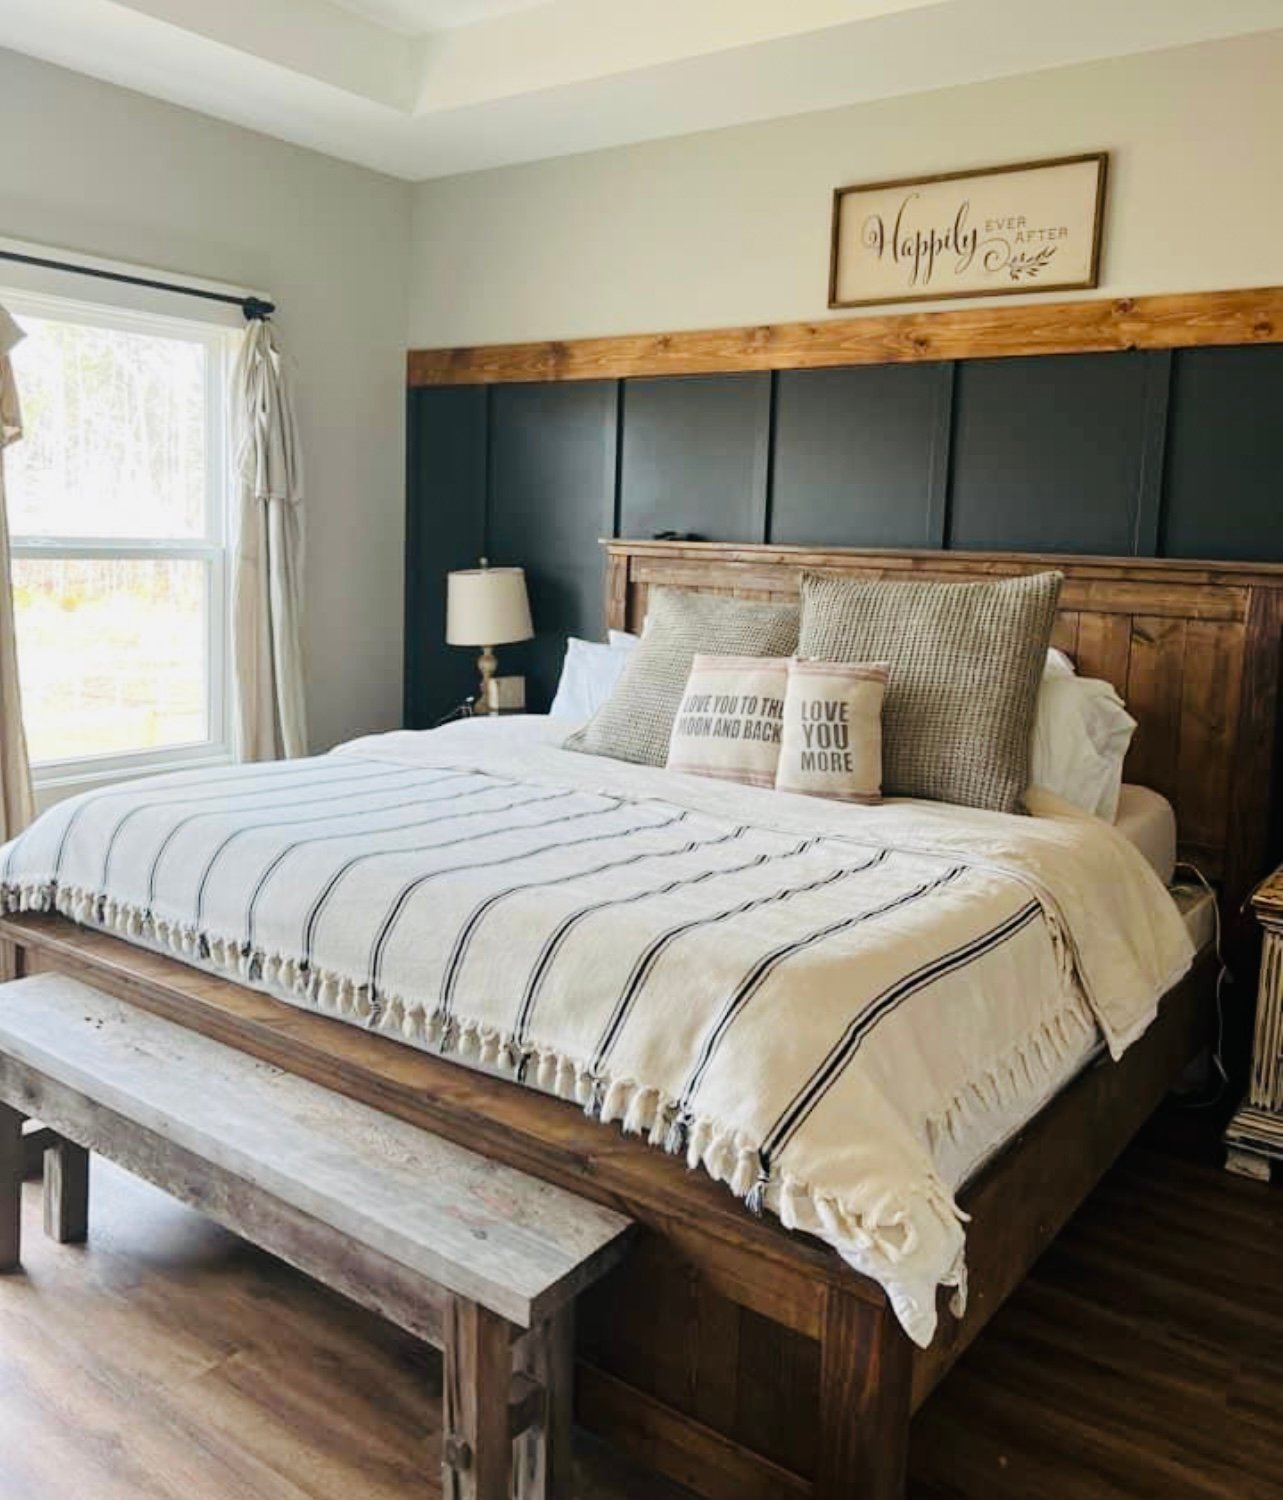
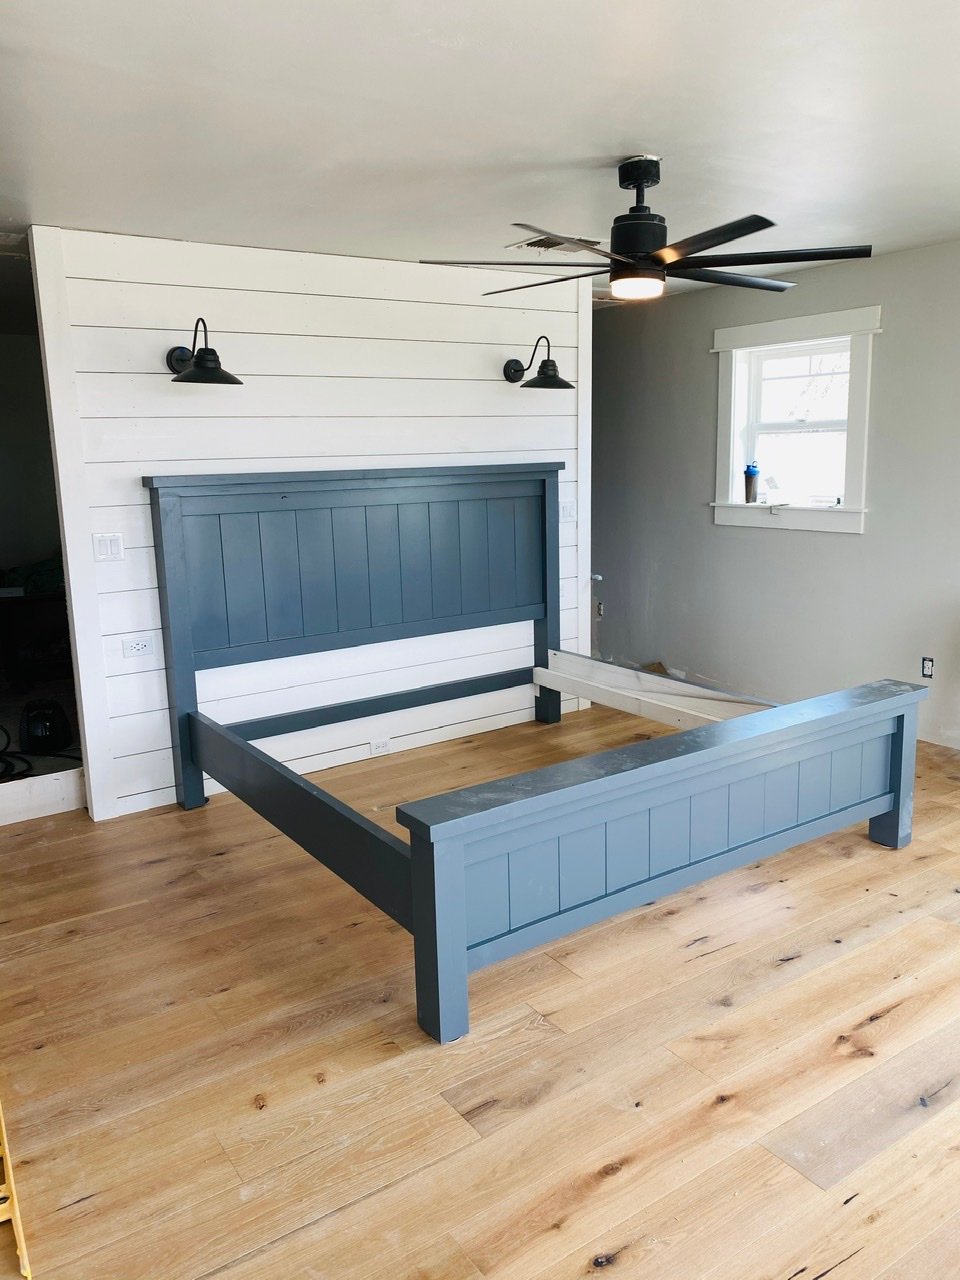
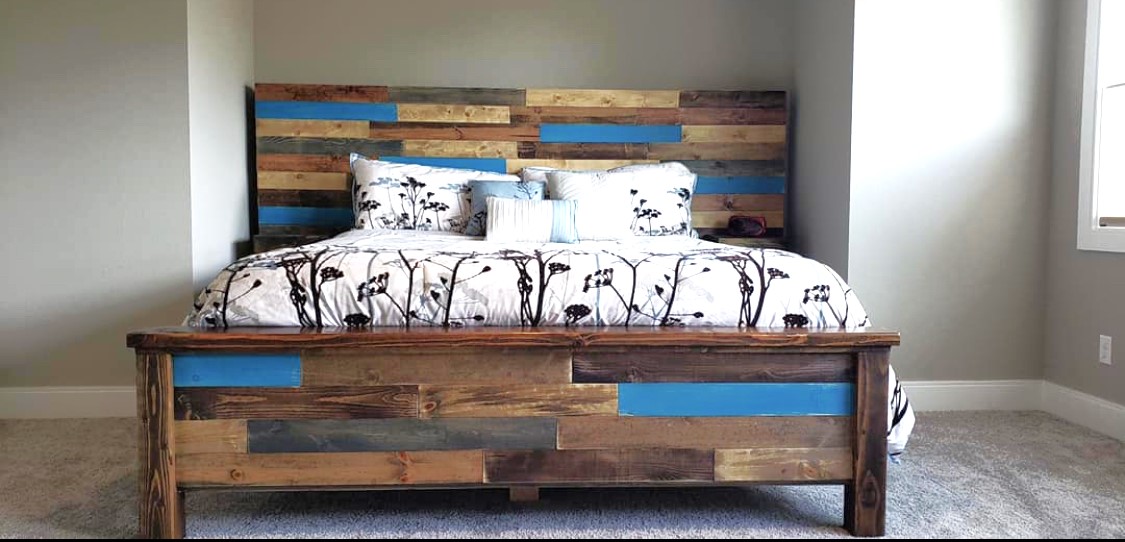
Beautiful bed build. shared by Leslie.
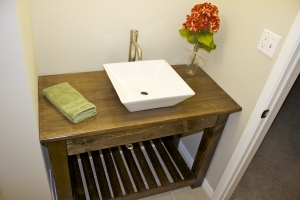
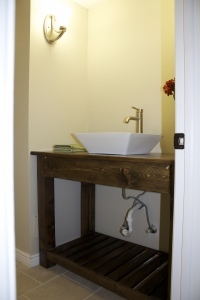
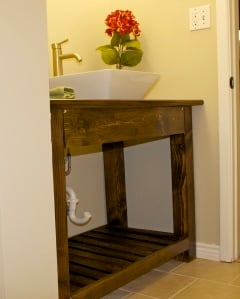
I decided to take on the third bathroom renovation all by myself. No help from the husband. I knew that I wanted a rustic open faced vanity - so I modified some plans that I found here on Ana's site. I used the basic design of the Farmhouse Vanity and added in the spa splatting for the bottom shelf so I could add baskets to hold extra tp and towels, etc.
This was one of the easiest projects I've done and I'm so happy with how it turned out! Total time was an afternoon - and that included the staining and poly!

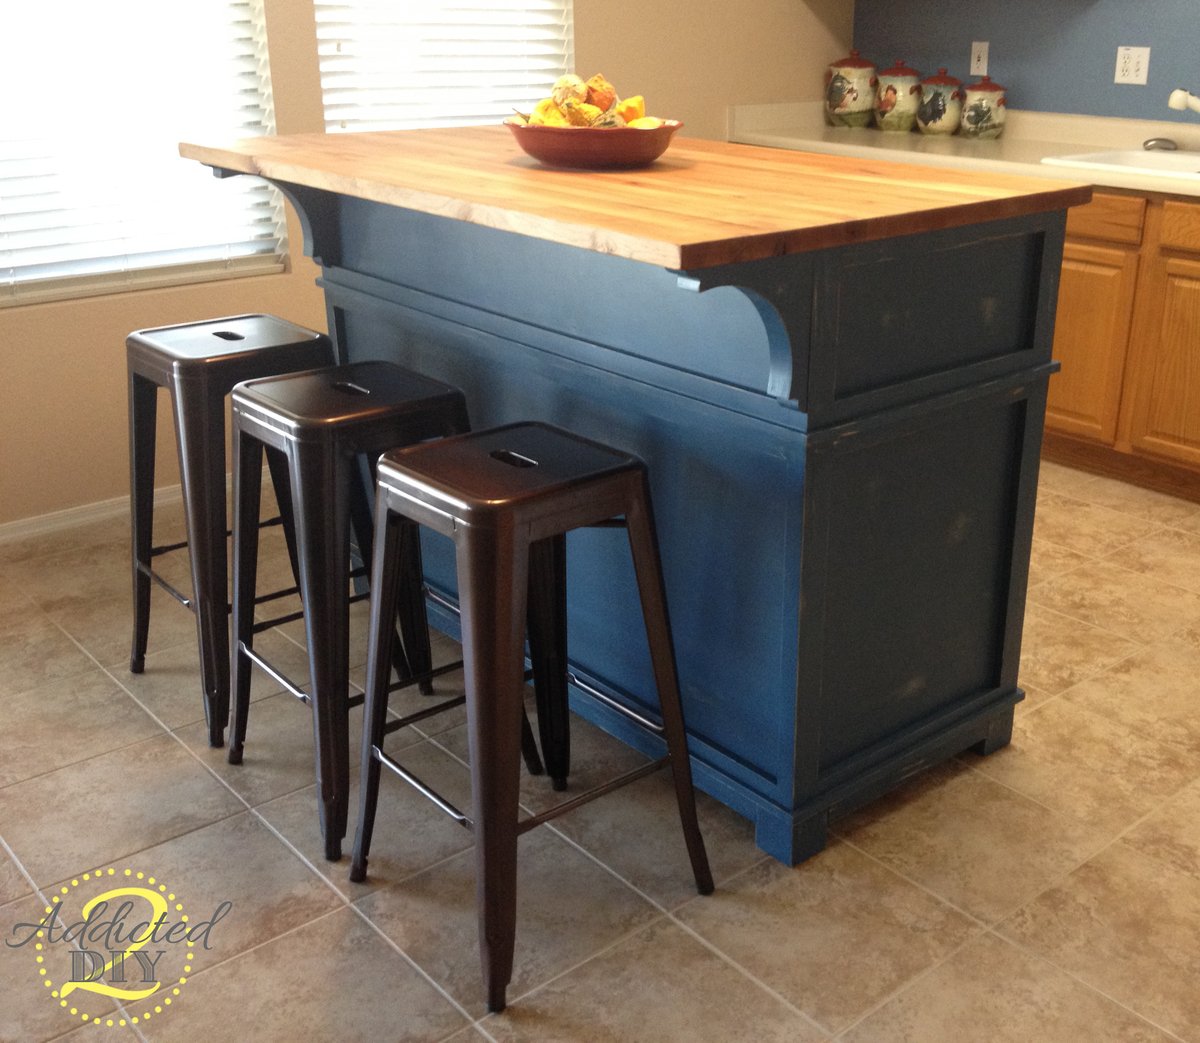
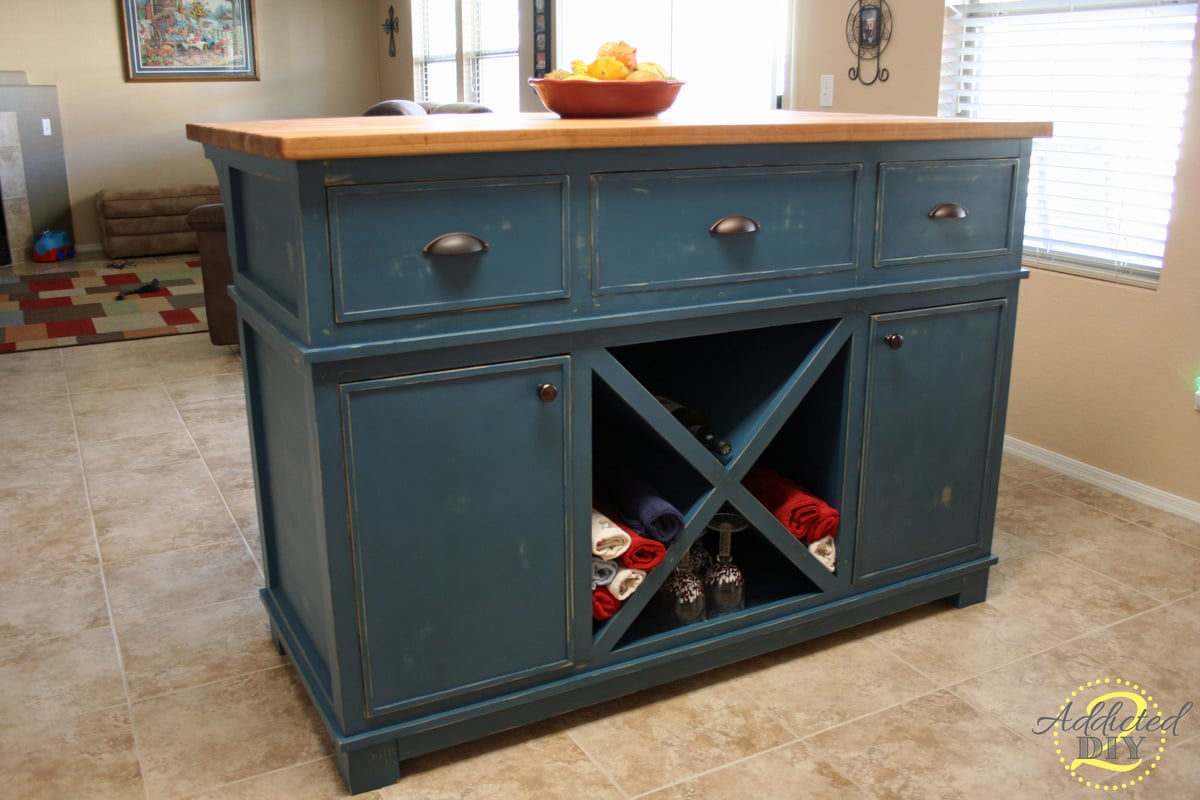
This was my second solo project. I built it for my mom's kitchen to replace her old kitchen table. I absolutely love how it turned out. It is big and functional. Come see how I built it on my blog.
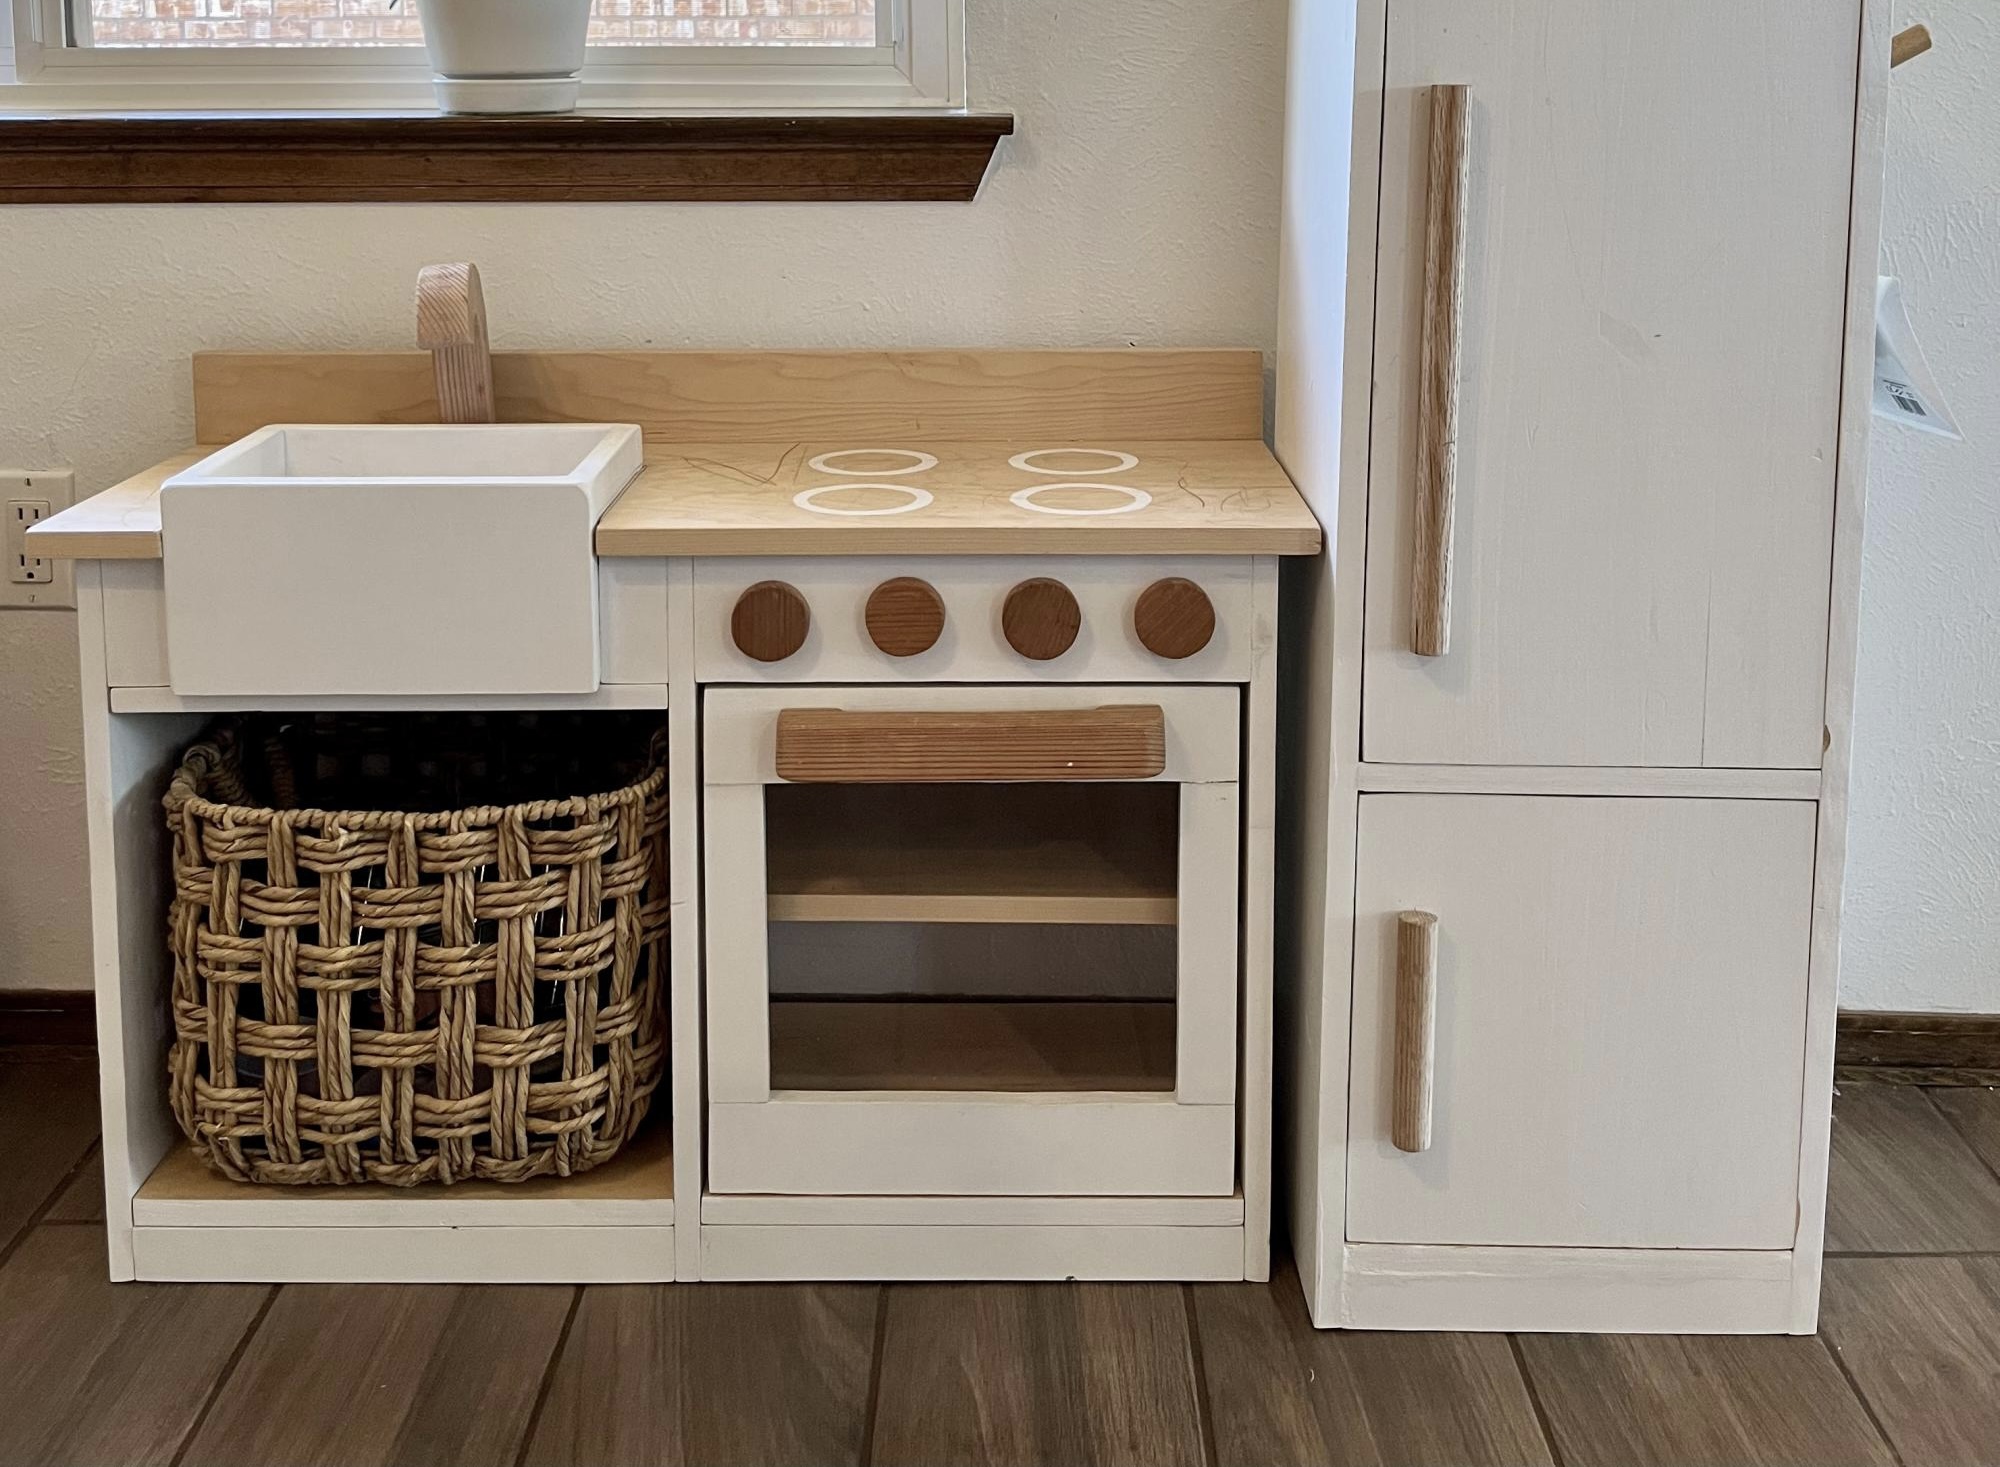
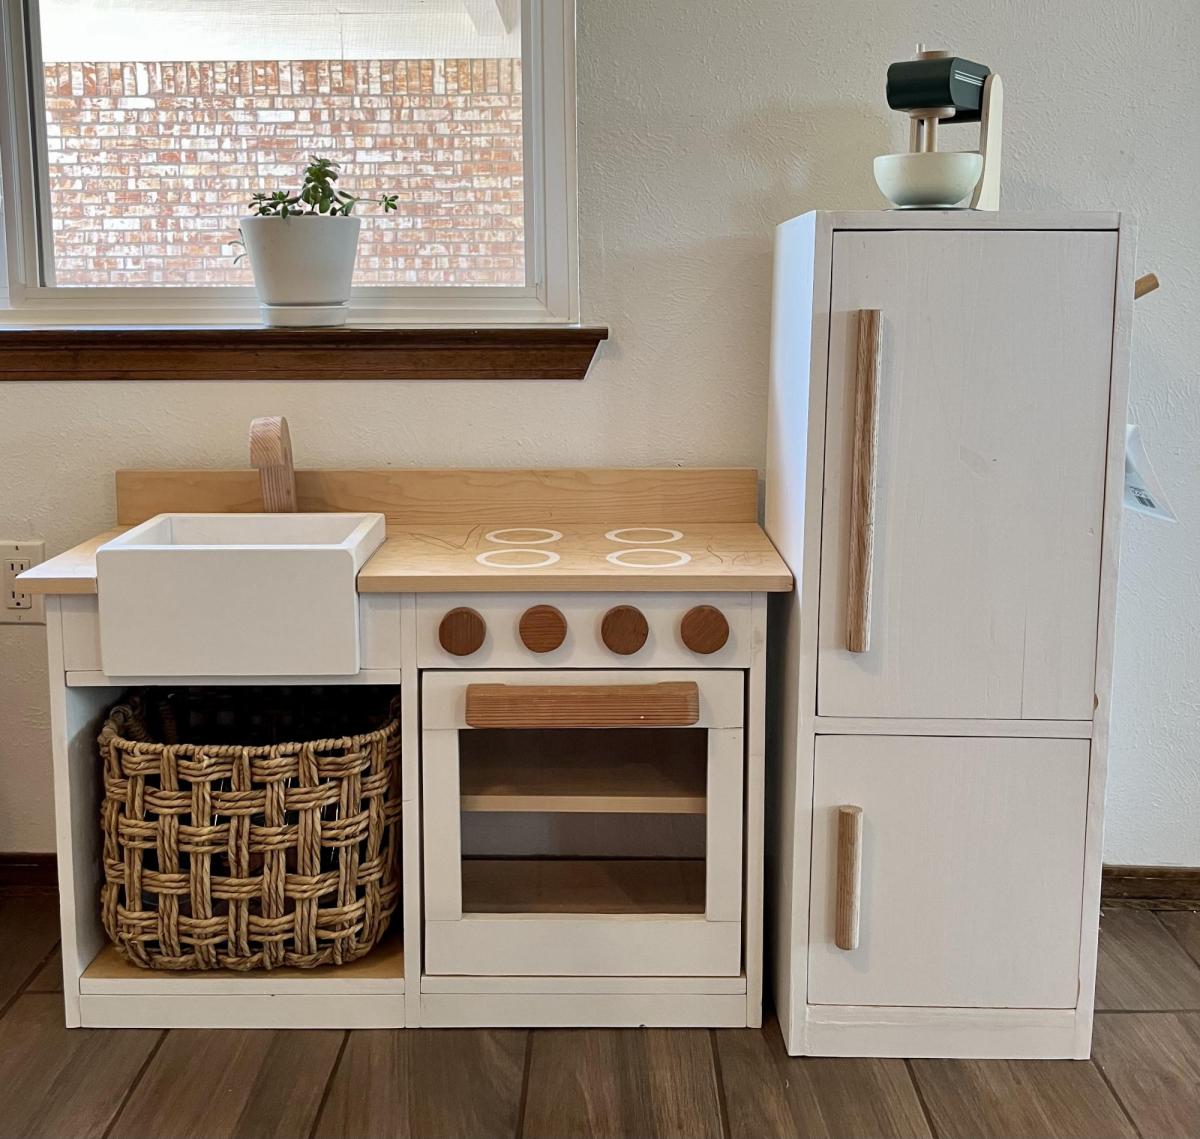
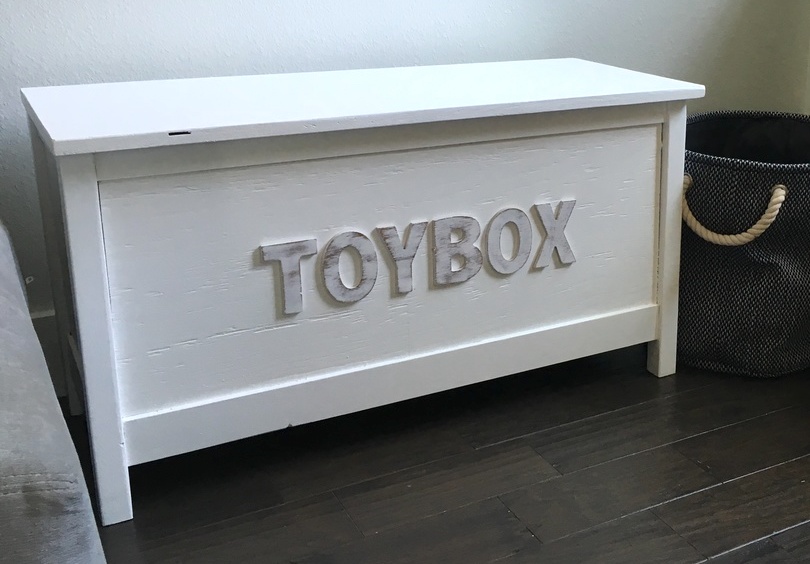
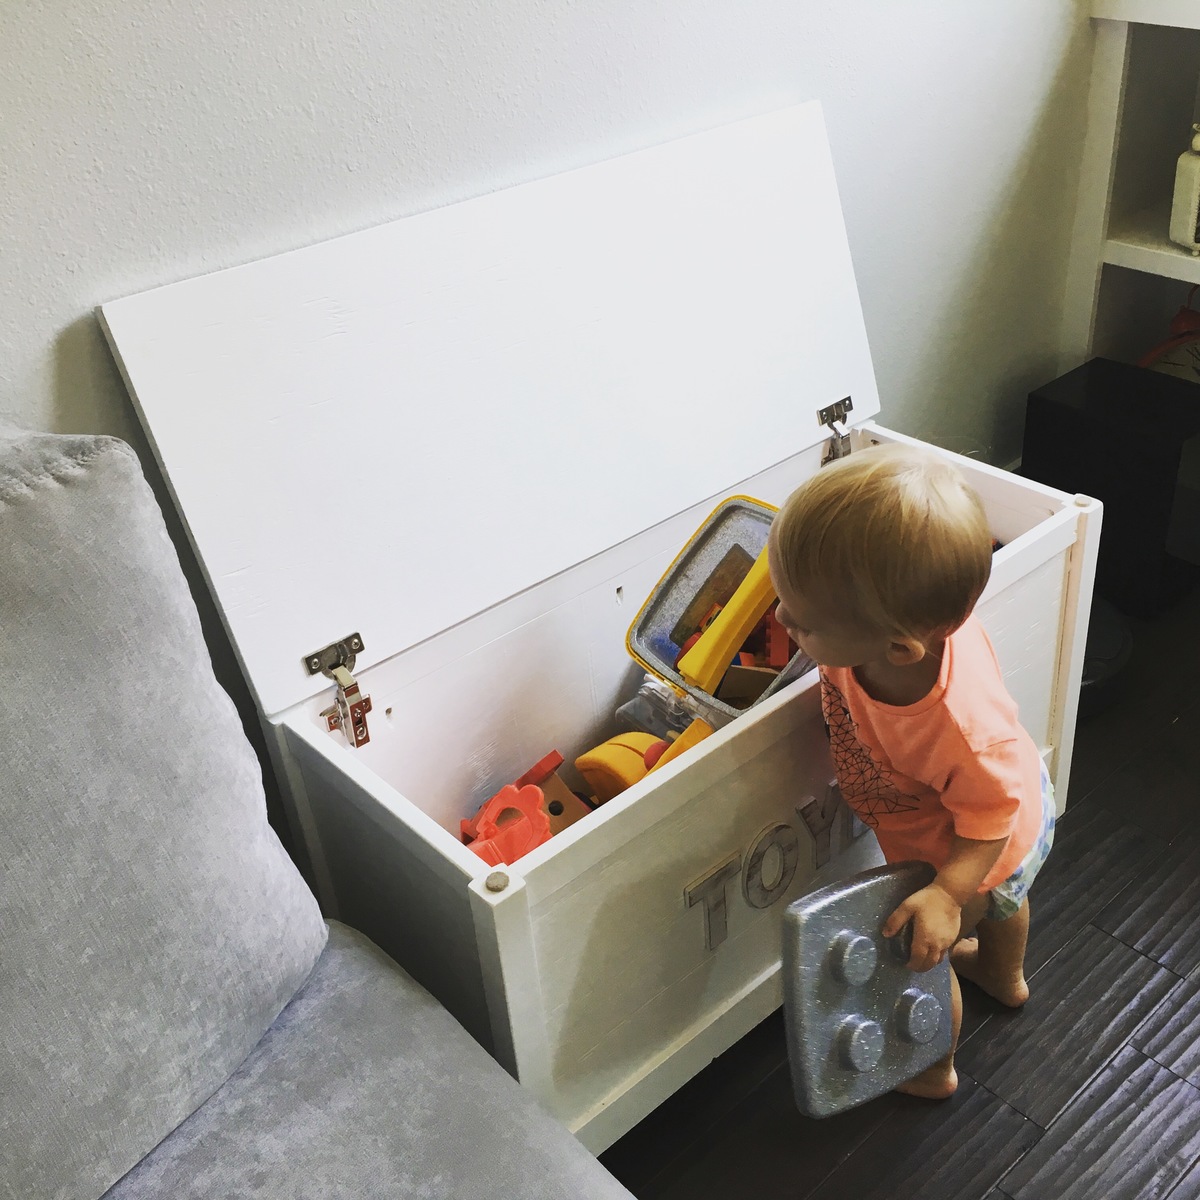
I made this play kitchen as a Christmas present for my kids, and it’s been a big hit! It’s built mostly from leftover hardwood plywood, and a couple of 1x12 pine boards. The oven knobs and faucet were cut from redwood scraps and attached with 1/2” dowels to freely rotate. The vertical surfaces were painted with leftover house paint and sealed with water-based polycrylic. It was a fun build, and I learned some new skills (like installing hinges)! Thanks for the plans!
Mon, 06/05/2023 - 07:50
WOW, this is just too cute, can I get one in my size please! Thank you so much for sharing, love your finish choices.
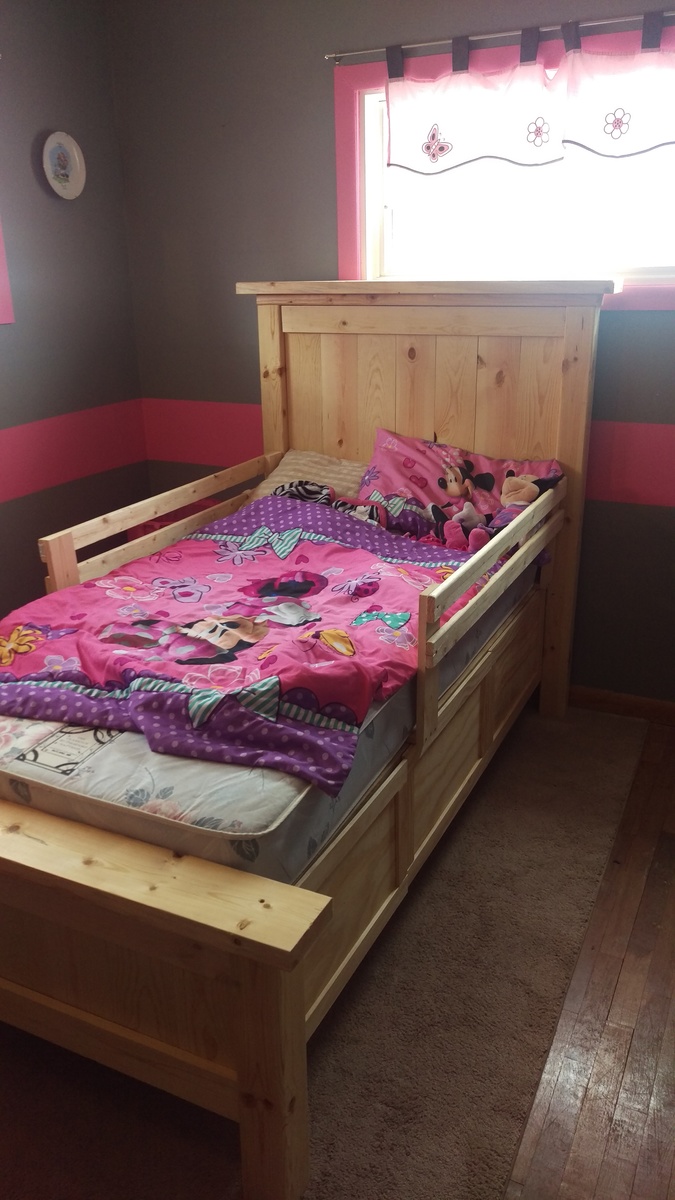
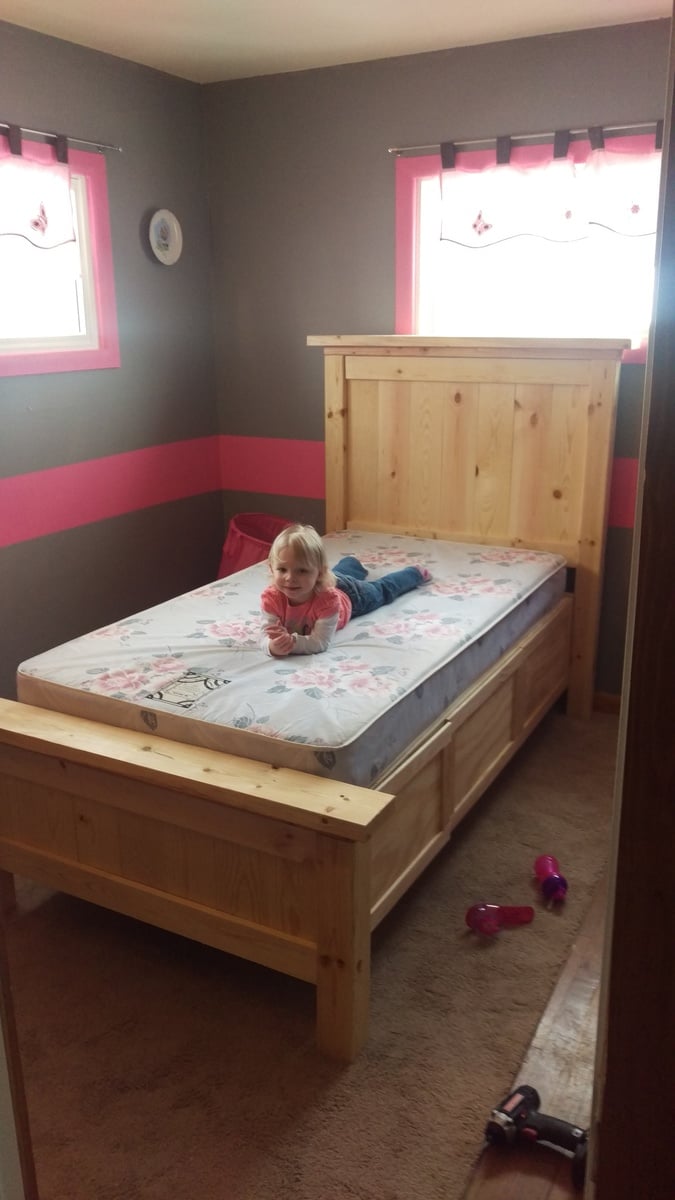
I was looking for a bed for my daughters room. She does not have much storage or room so this plan worked perfect. Took about two days so a great weekend project. Built with love unlike from a store.
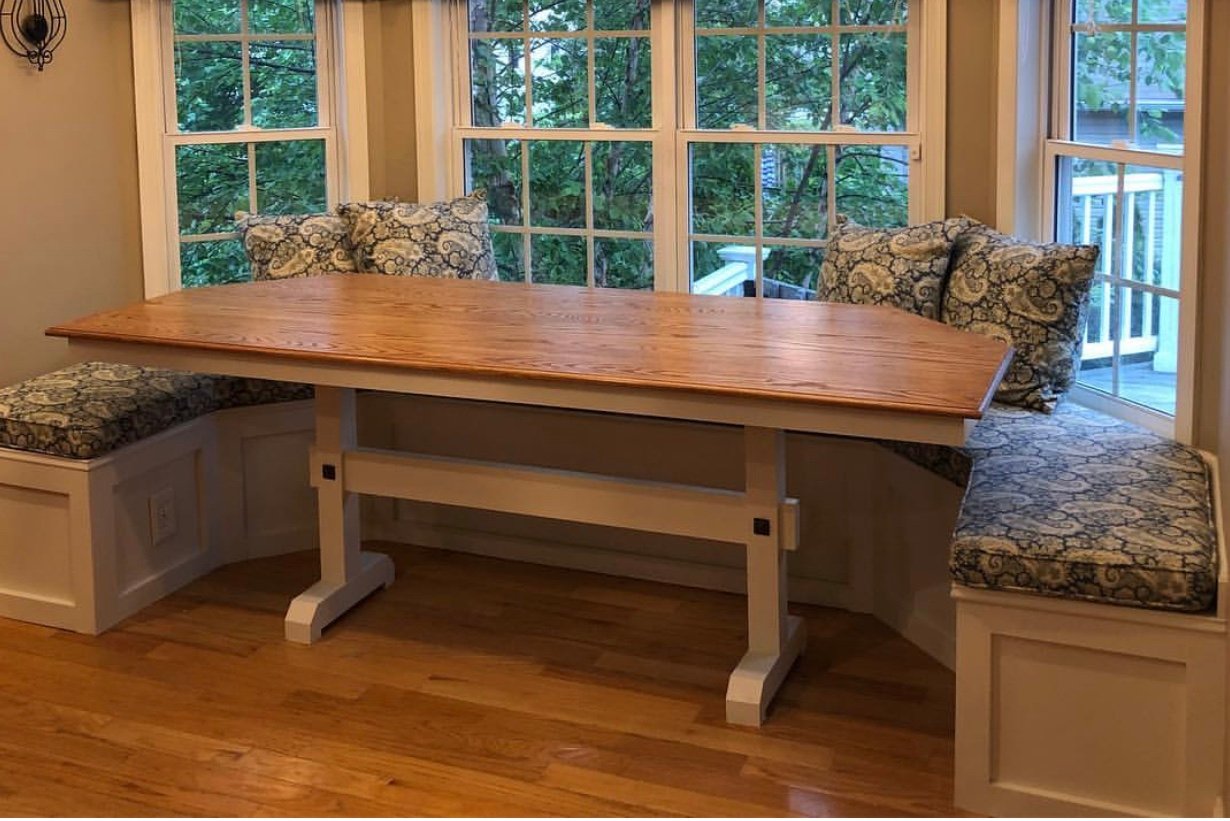
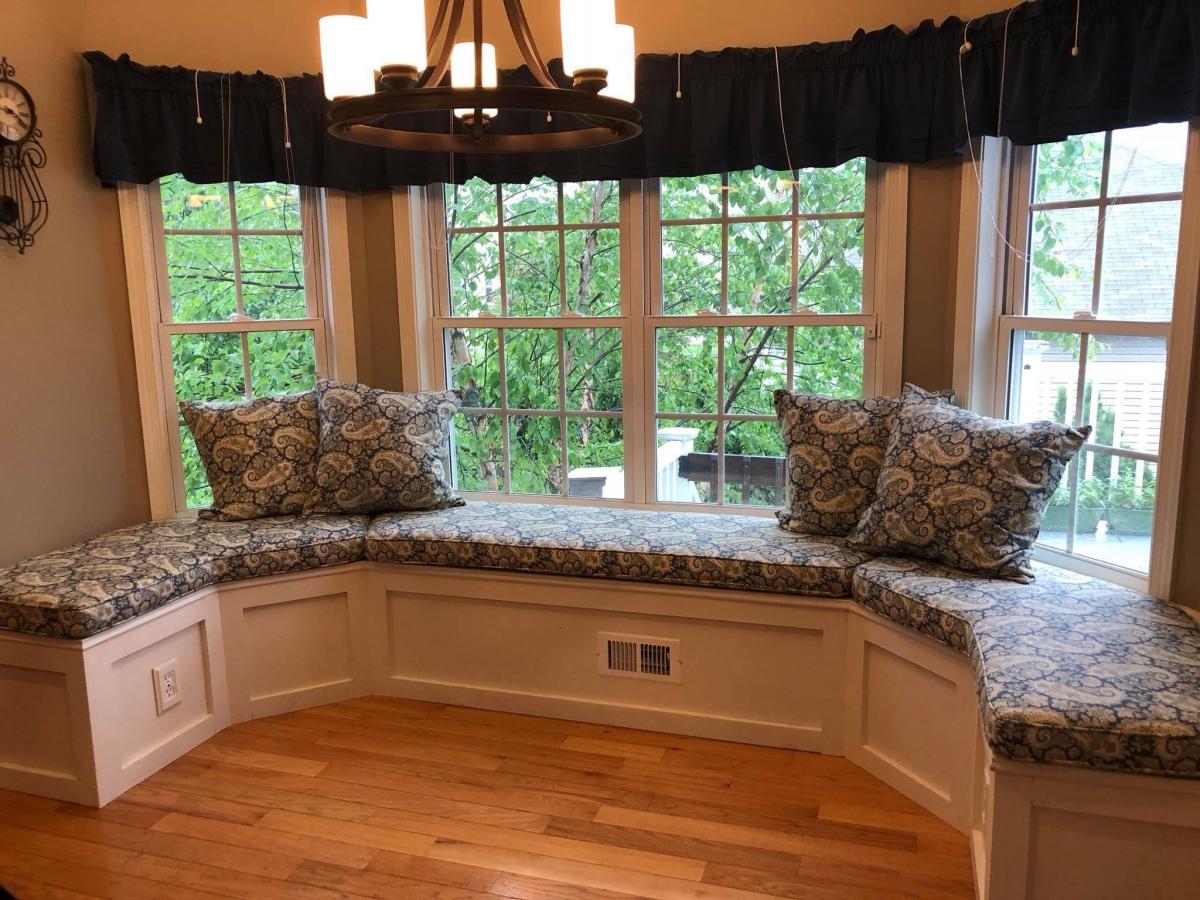
When we moved into our house, there was an empty breakfast nook. I built in the banquette seating, and then built the table out of oak. This was inspired by the Triple Pedestal Table (http://ana-white.com/woodworking-projects/triple-pedestal-farmhouse-tab…)
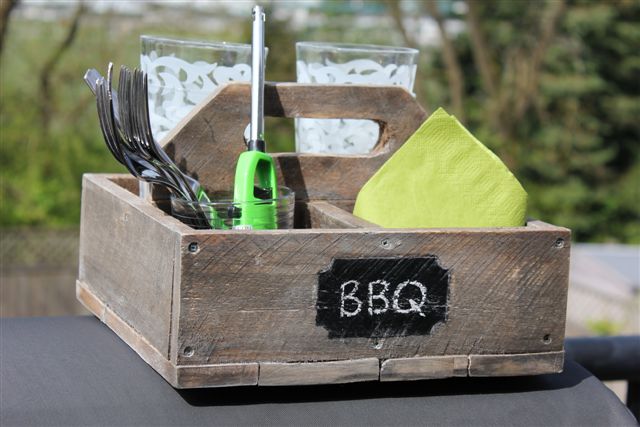
I had some pallet wood laying around and felt like taking on a small project. The boards were warped, but after fighting with them a bit, it turned out well. I was going for the reclaimed, rustic look anyhow :) I find it a little heavy to actually use as a caddy, so it's more for decoration. I think I might plant a few herbs in it, for a little portable herb garden.
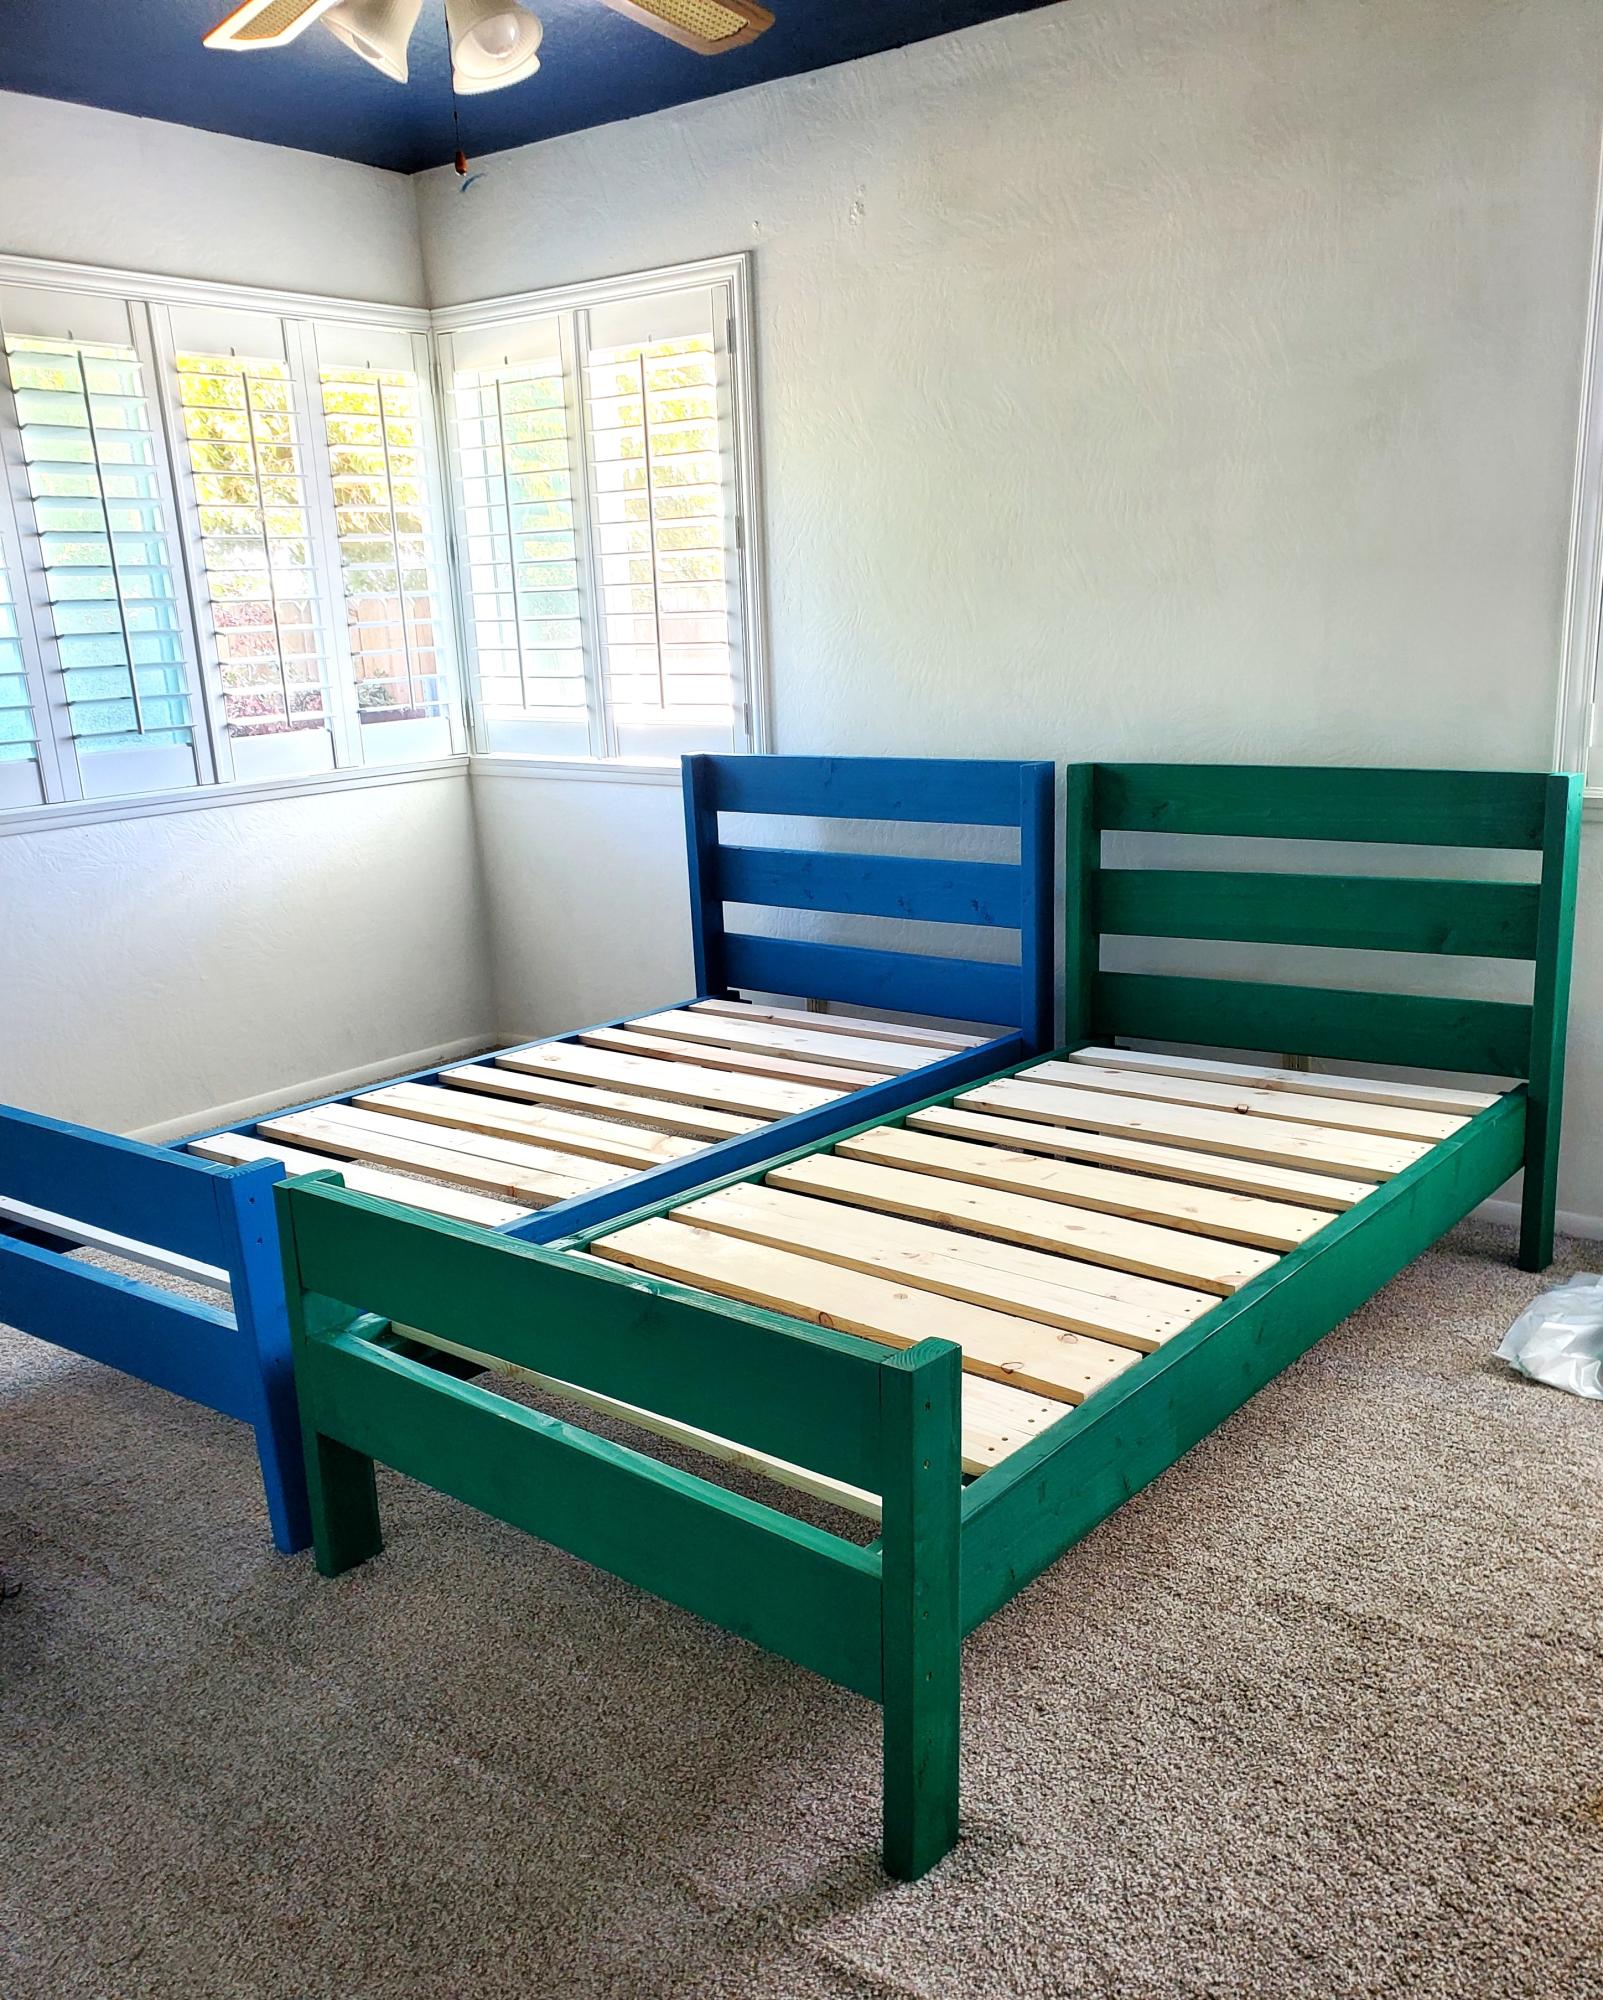
I have twins and they were fastly growing out of their toddler beds, so when I found Ana's plan for the easy twin bed (I made XL twin beds) I was ecstatic. In less than 4 days, both beds were built, painted, and ready for bedding!
BonjourTwinMama
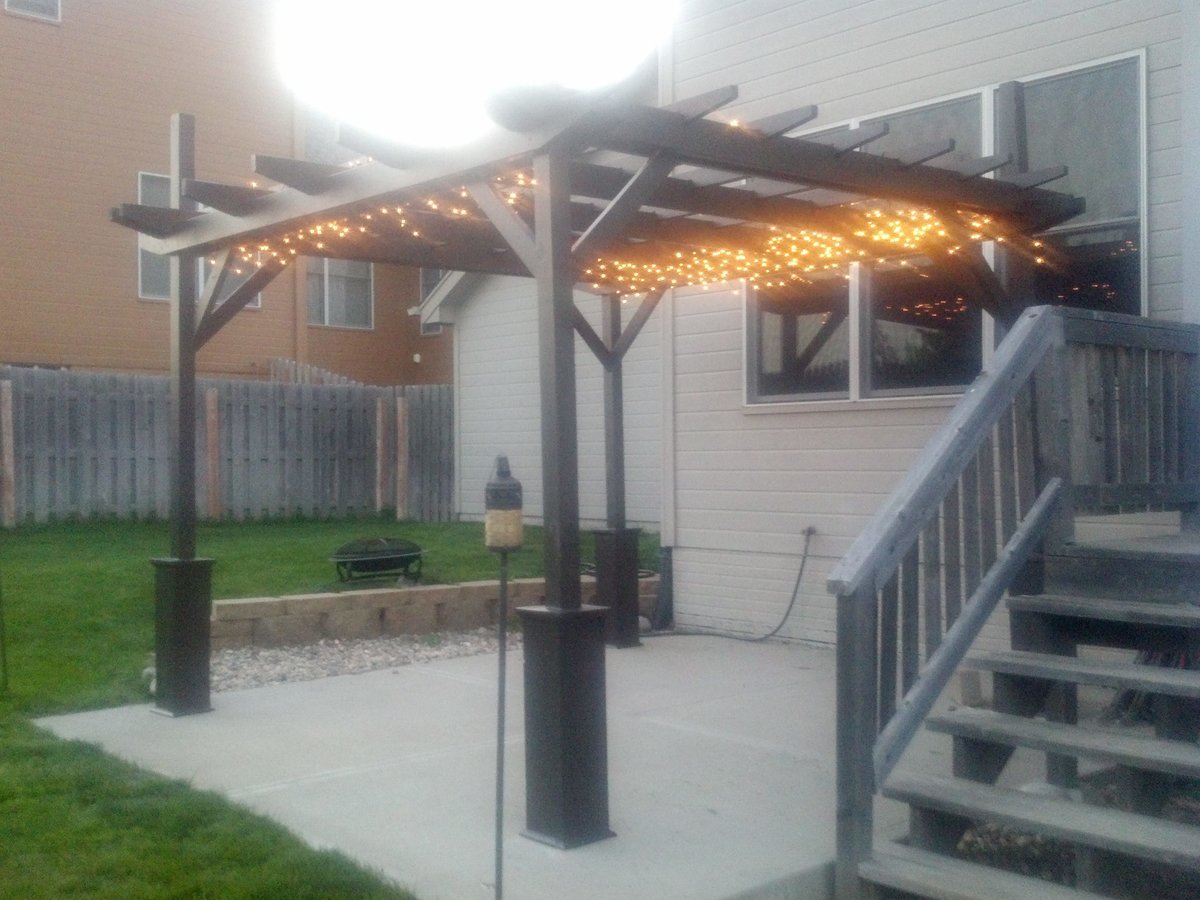
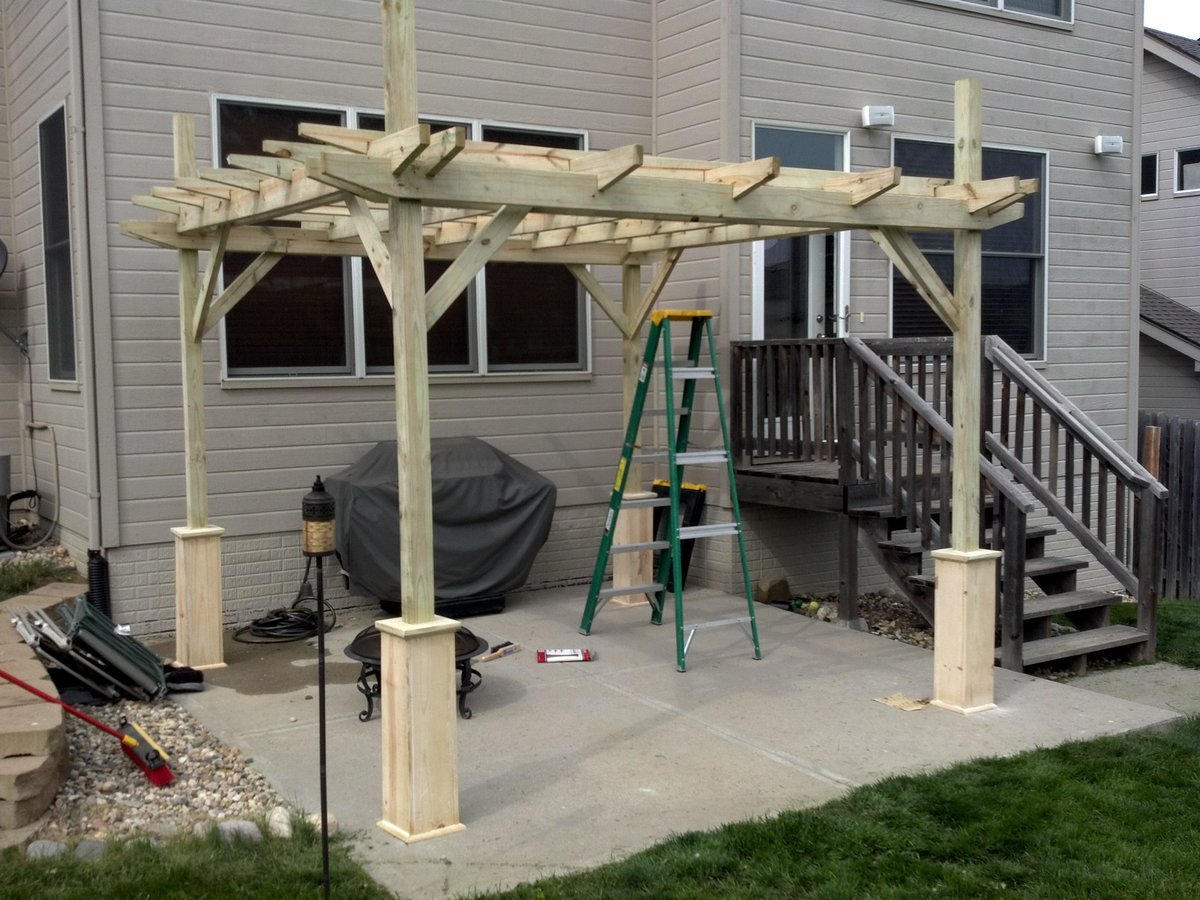
Thank you for the plans! They were easy to follow and my girlfriend and I are very happy how the pergola turned out. I used the 2x6's and 2x4's due to being in Nebraska with heavy snow and high winds often to give it more durability. I can't wait to start on the sectional. Total cost was about 350 dollars...so cheap in comparison to what they sell for.

Fri, 05/11/2012 - 10:16
Beautiful, I love the color you choose too!
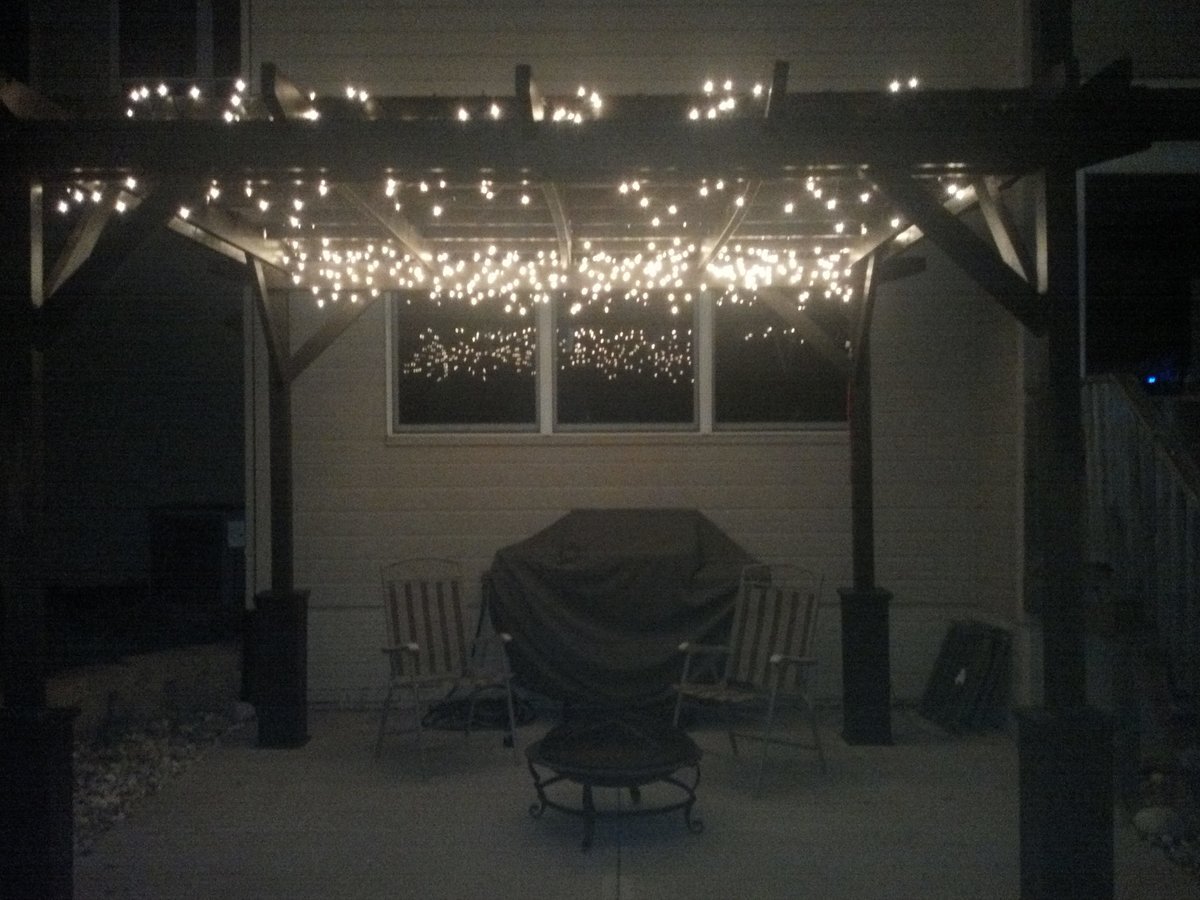
PS - for a second, I thought the pergola was on fire! haha! Glad it's just beautiful lights!
Sat, 05/12/2012 - 05:22
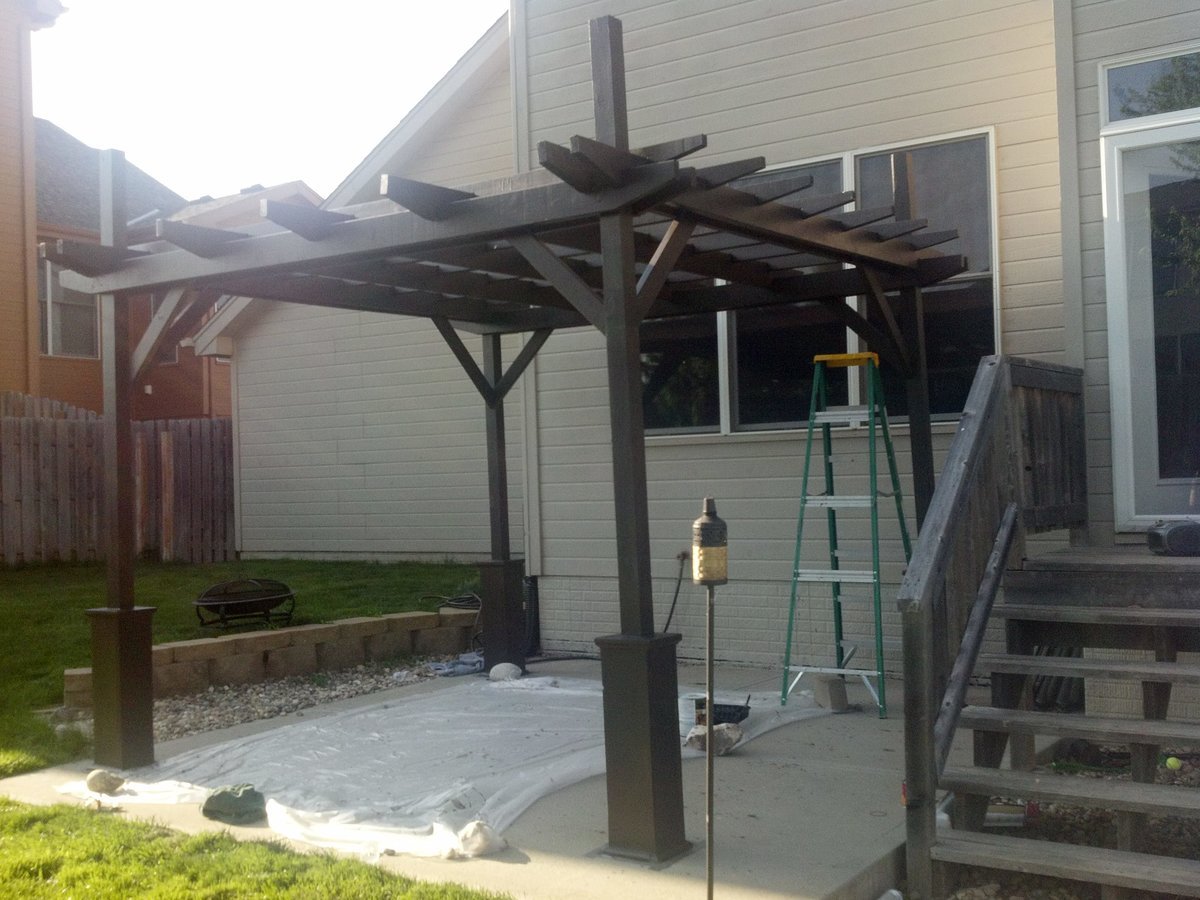
Thank you Ana, I have had multiple people say it looks like it is on fire...hilarious :) We will be adding outdoor fabric over the top for shade and gathering outdoor curtains on the posts. Will take another pic when that is complete. This site is awesome and I will continue to support you as much as I am able.
Thanks for the comment Jade!
Thu, 05/17/2012 - 11:45
My husband is DYING to have a pergola. I showed him the plans and he is down to build and is really excited for it! That's our next project as soon as I finish our bed (haha!). Did you paint or stain this?

Fri, 05/25/2012 - 18:54
Great job! I want to build one too! The original plans say advanced, but on this post it says beginner.....watcha think? Can I do it? (so far I've made a picture frame and framed out some trimwork). Thanks for posting....btw, I love the twinkle lights!
Wed, 06/27/2012 - 17:00
You did an awesome job! I'll be showing my husband these pics and hopefully they will inspire him to make us one too! I'd love your modifications to the plans also since we have heavy snow etc.. up here in Quebec too. Thanks for sharing!
Thu, 09/20/2012 - 06:47
Im trying to build a 10x10 just like this but im trying to figure out exactly what wood dimensions I should order before i do. Im going to use cedar and I know i want to use 6x6 posts and I want to use 2x6 on top like yours but i cant figure out what exactgly I need to order. My wife wants me to do the decorative around the posts as well.
Please help!
Sun, 04/28/2013 - 11:27
Hi I was hoping you would share your plans with me I live in oregon I wanna make one of these but I plan on using 12 ft 4x4 posts putting them 3 ft in the ground and I like the way you used 2x4's and 2x6's id like to know the dimensions you used if you modified anas plan what was your spacing and what degree did you cut the outside piece's on the 2x4's and 2x6's I love the design you created from anas plan
Sun, 04/28/2013 - 11:29
oh I would also like to know how you did the cut out notches if you dont mind
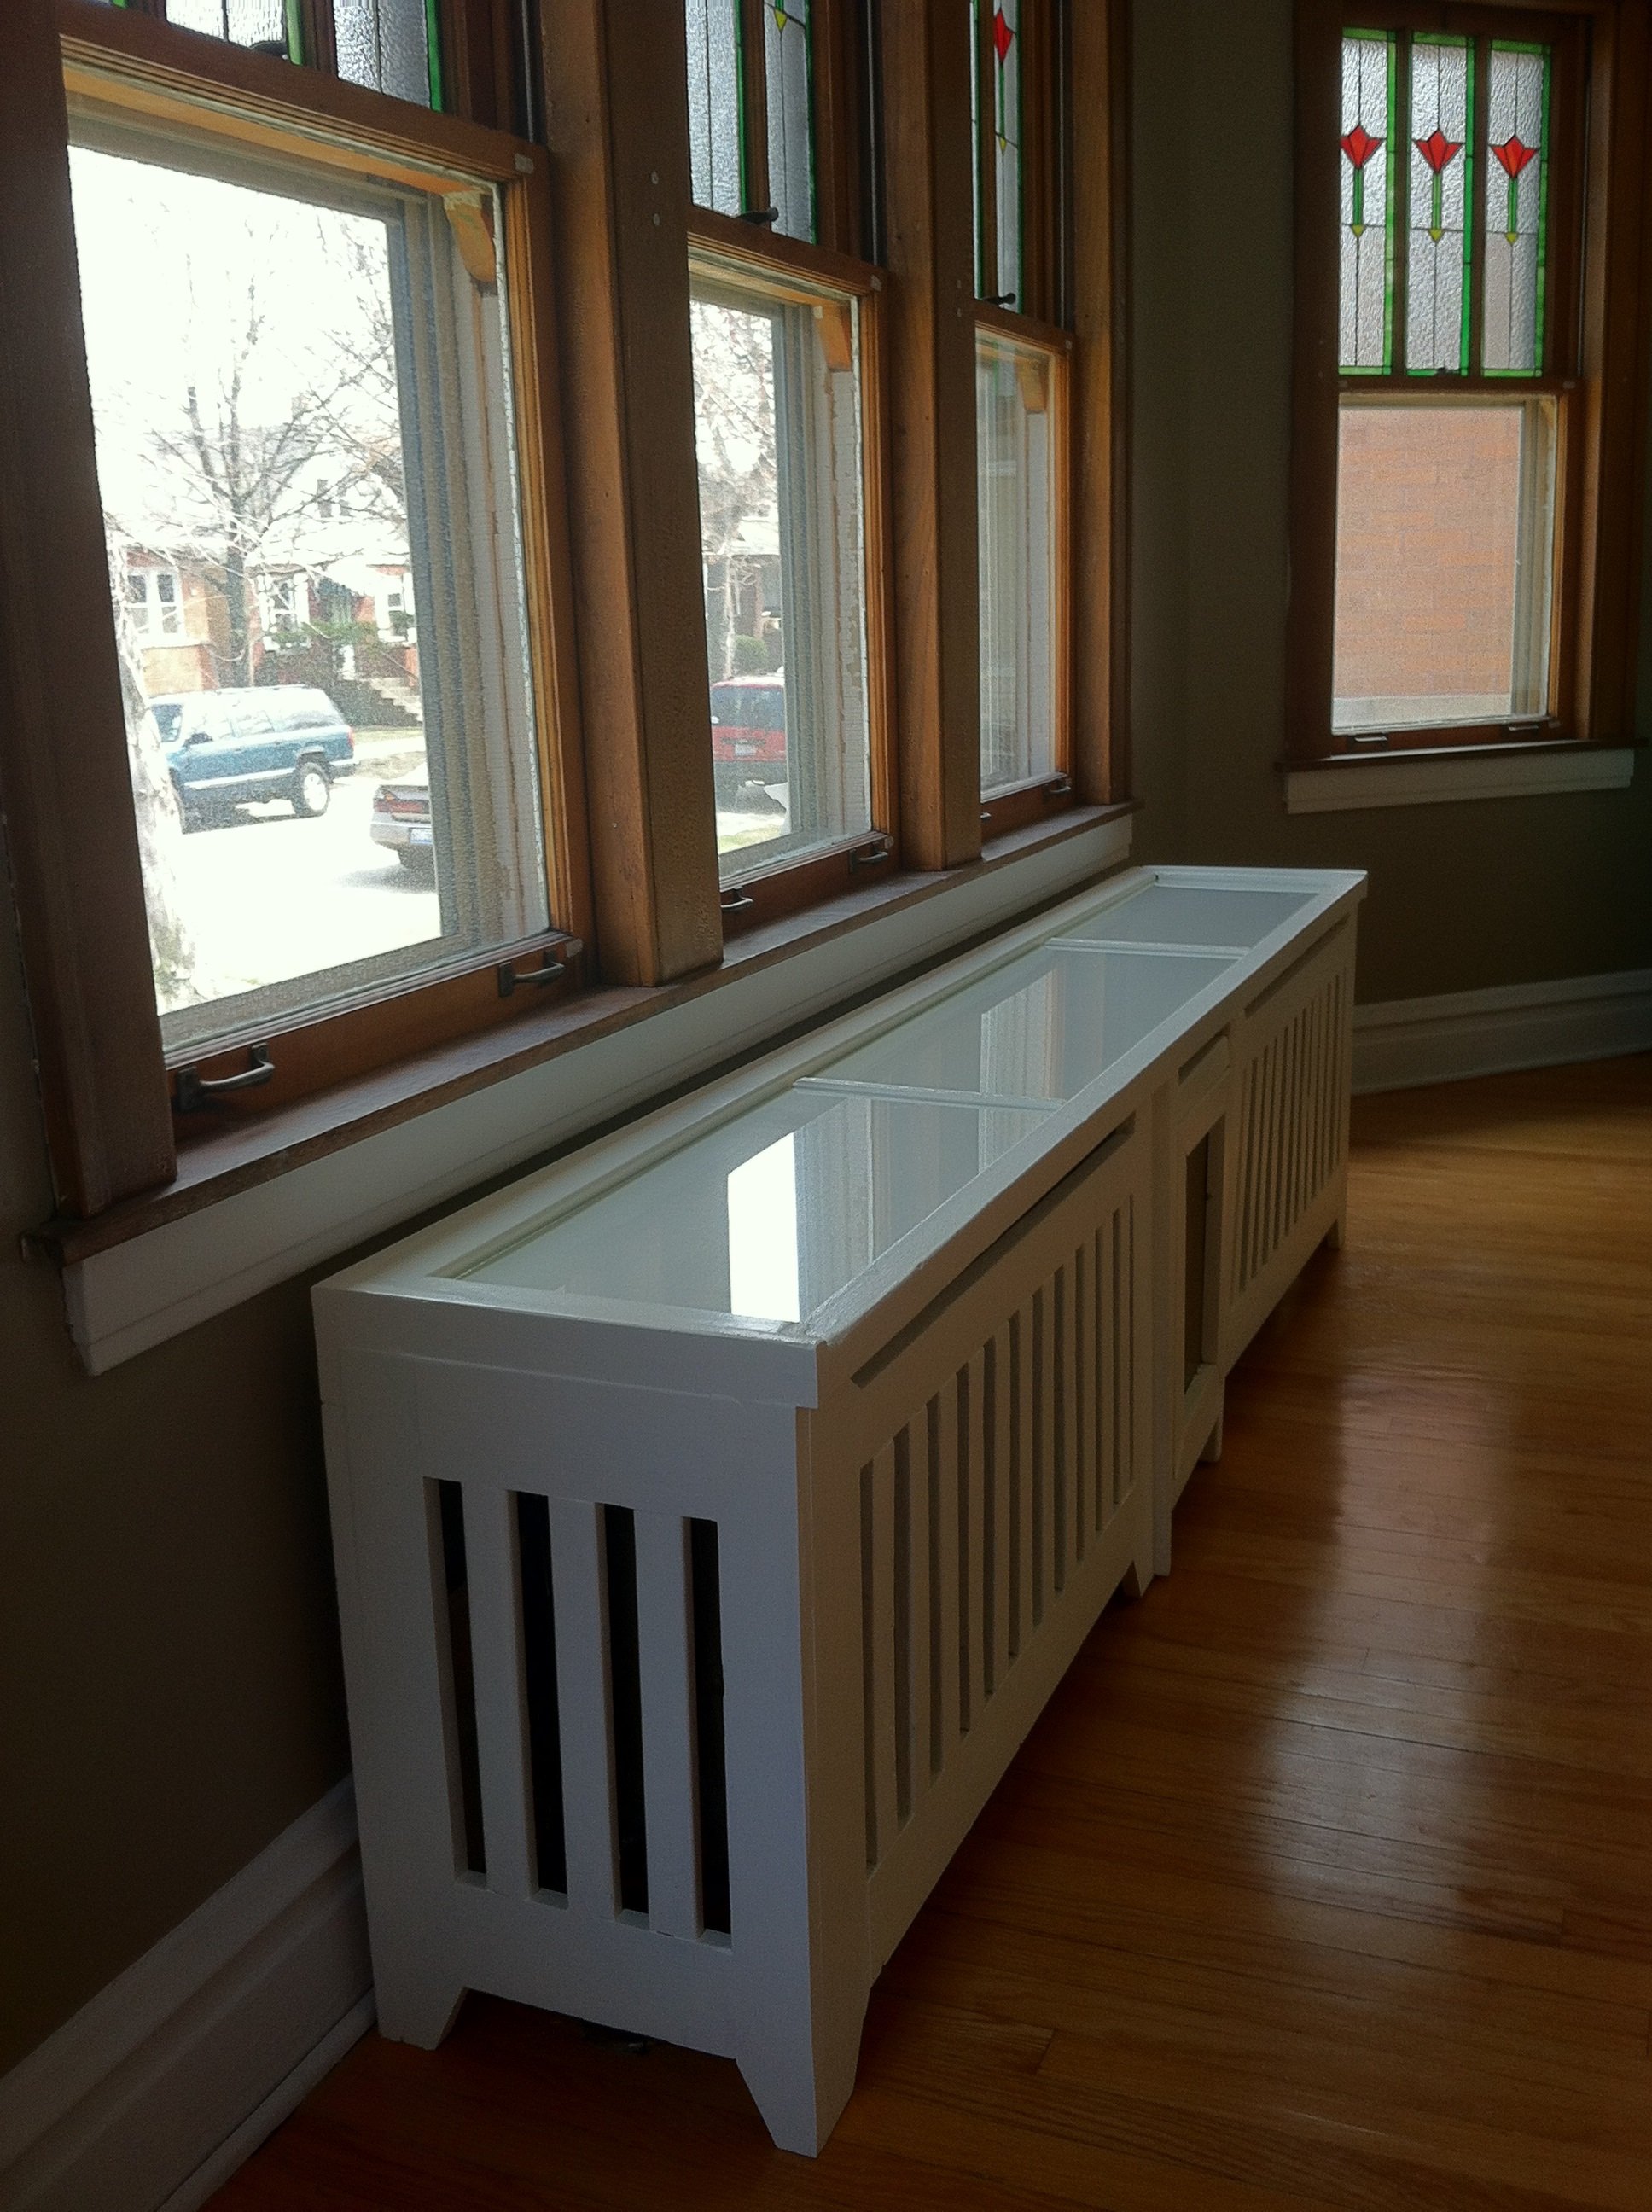
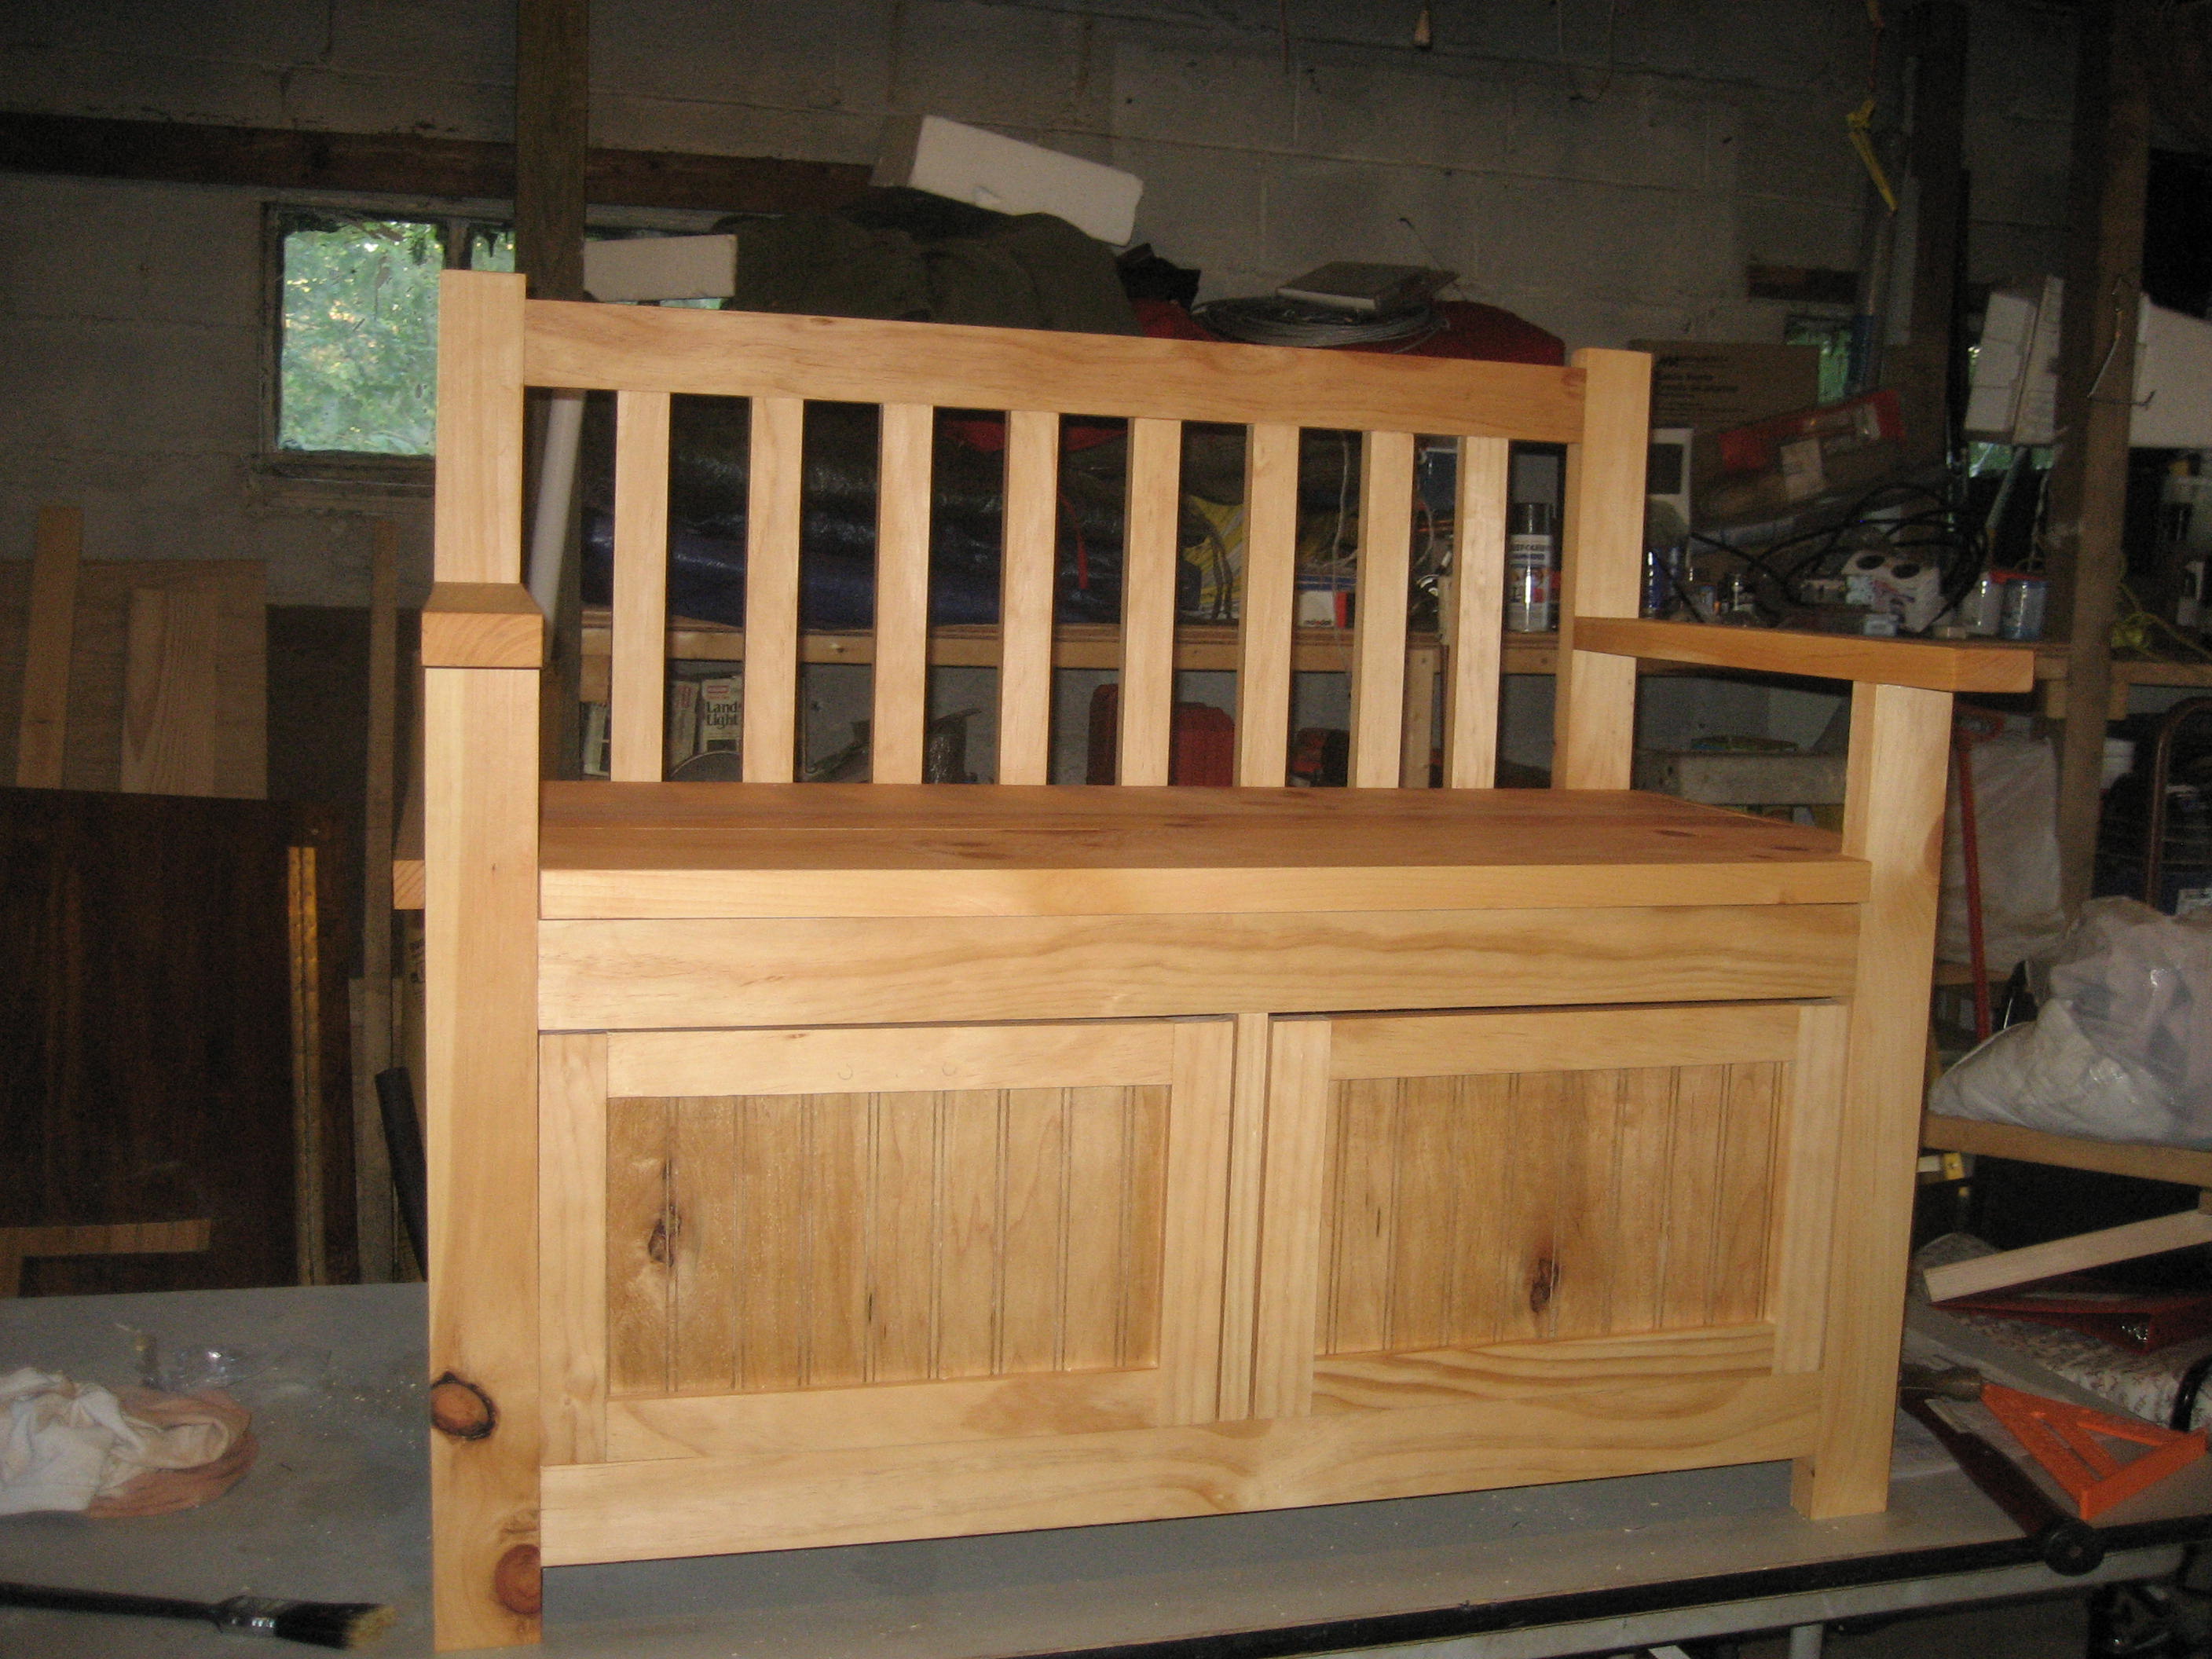
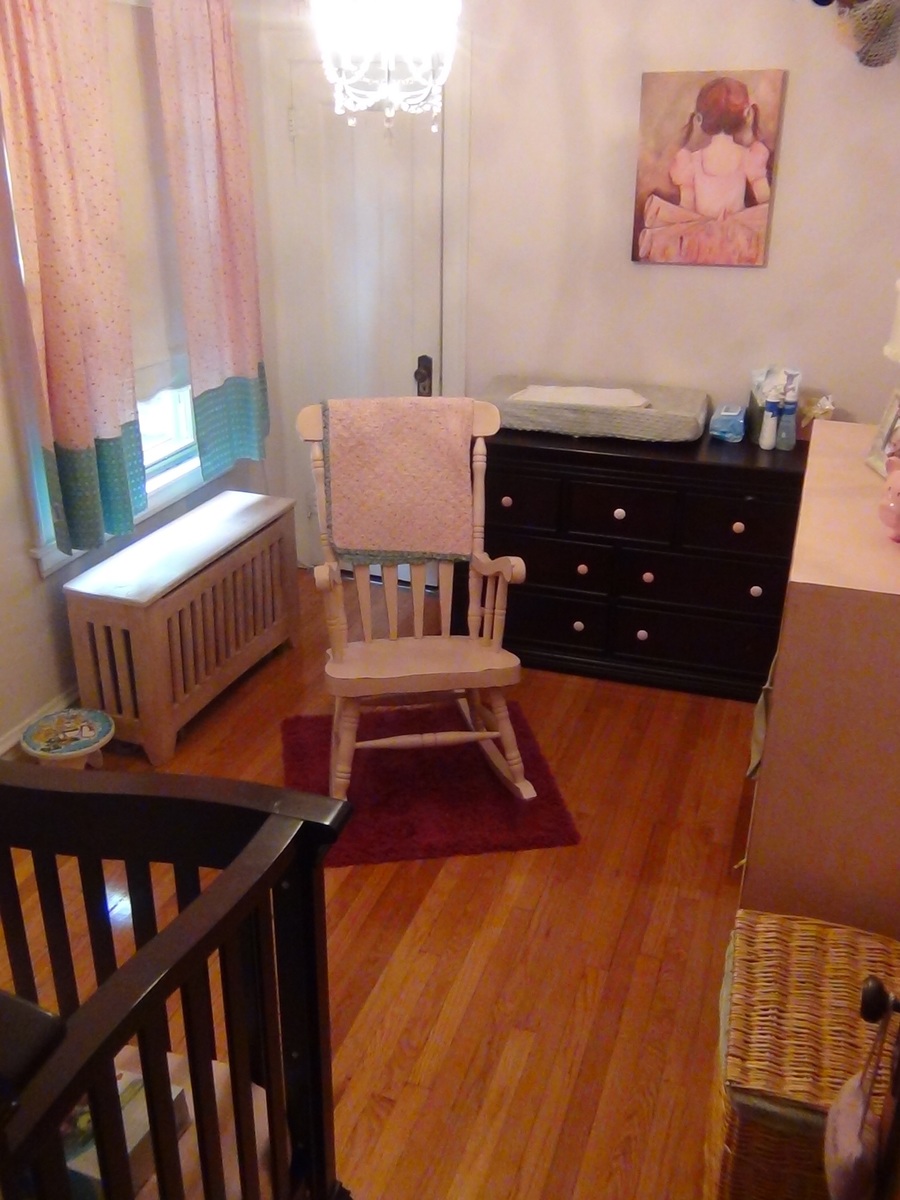
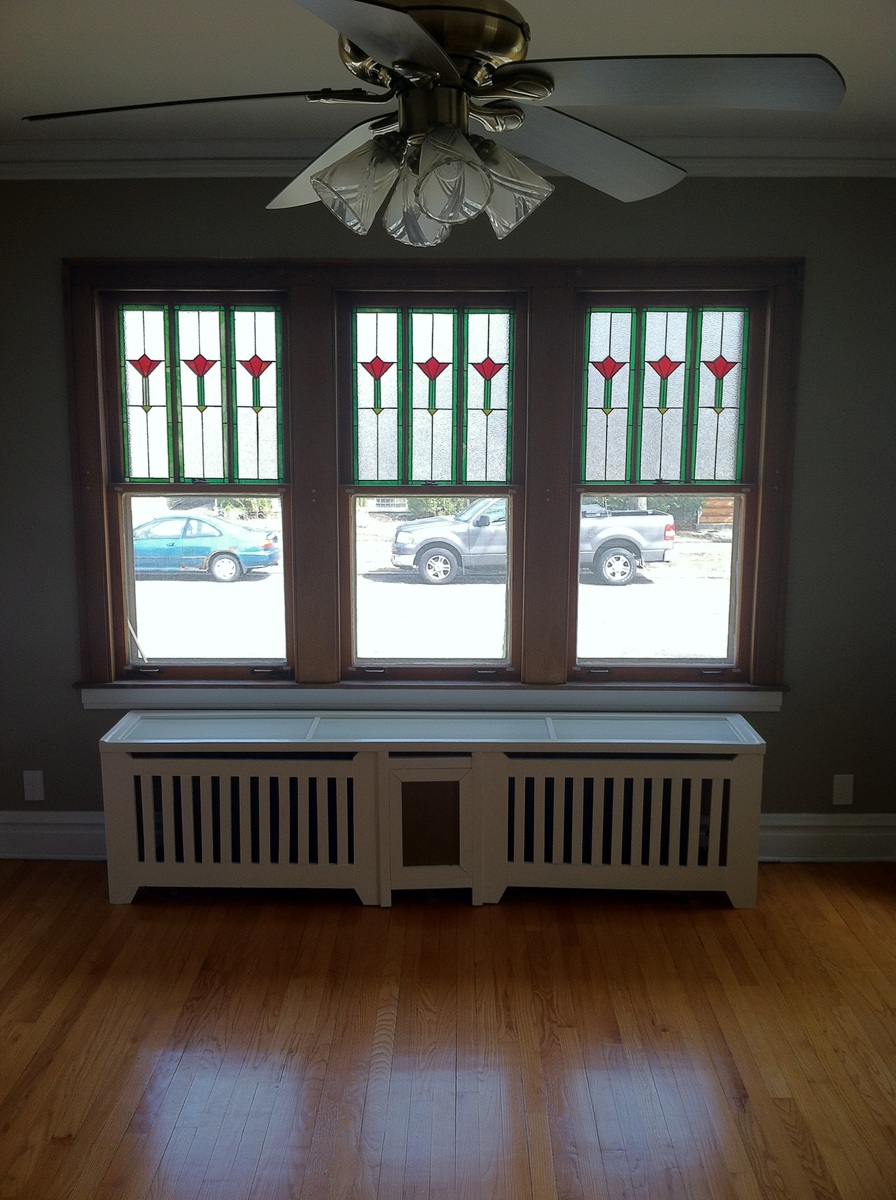
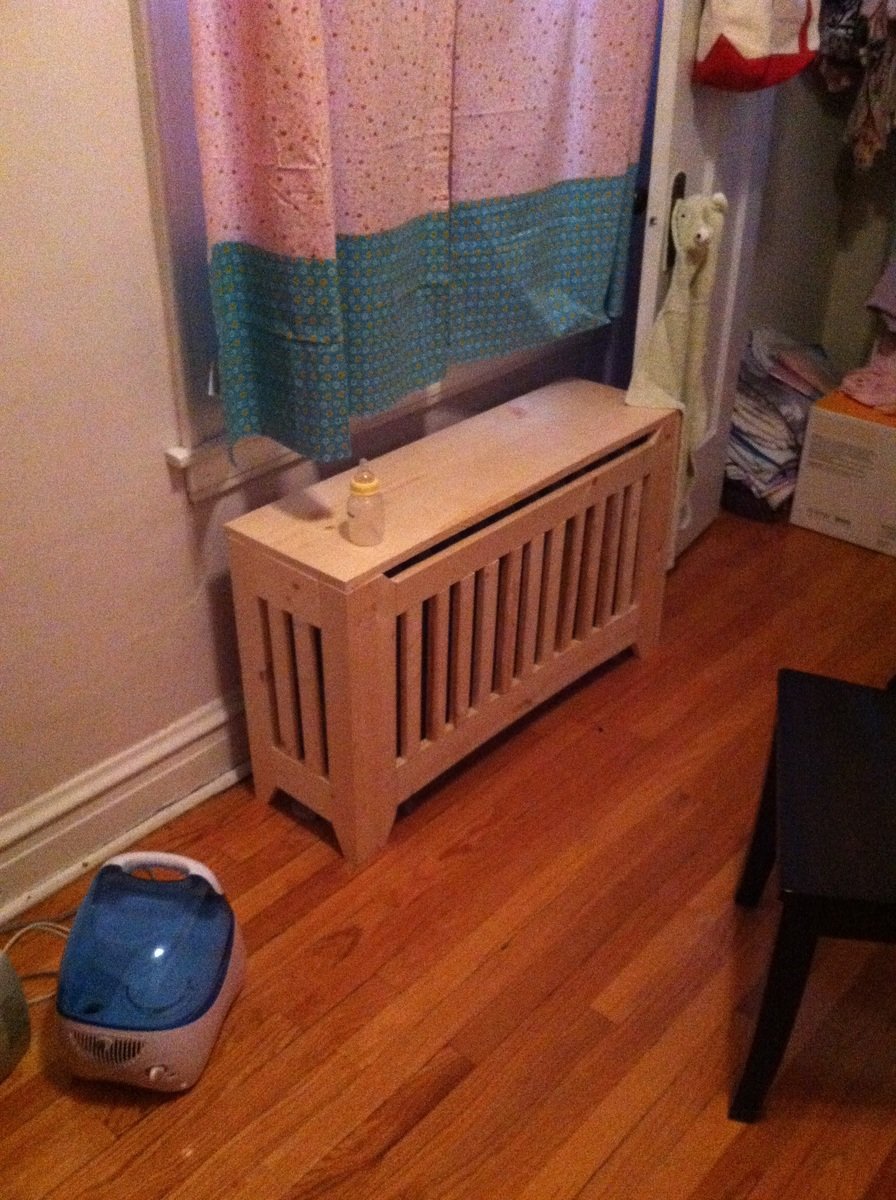
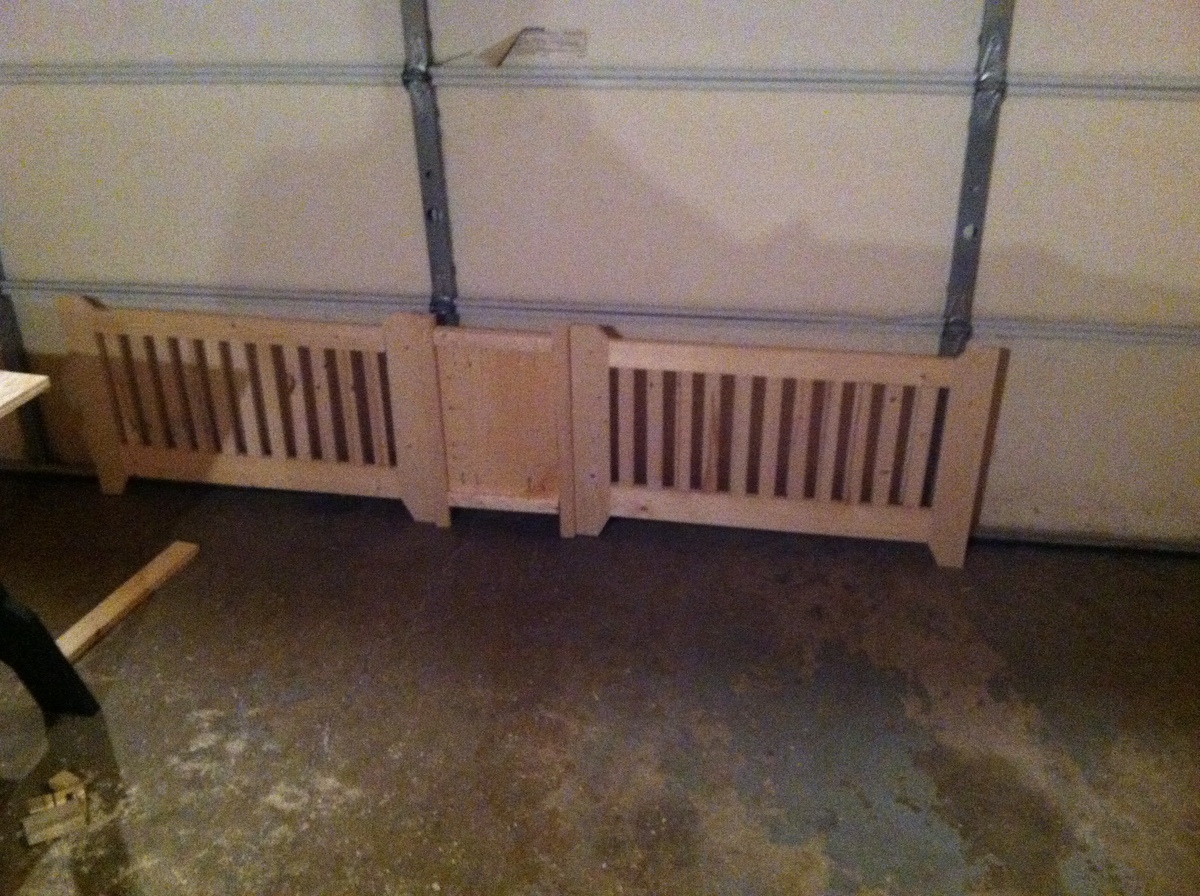
We loved the radiant air in our new early 20th century house, but as our daughter learned to crawl, we needed to prevent her little fingers from touching the two radiators that were still uncovered. After I finished my first few builds, I custom designed these radiator covers with 1x2s, 1x3s 2x2s and 1x12s. Needless to say, I got a ton of use out of my Kreg Jig. On the middle panel of the larger cover, I used a bit of decorative metal that they sell at the Big Box stores (of course, it would have been easier to use more of it, but I am a bit paranoid about little fingers touching a metal cover). For a final touch, I covered the top of the larger cover with decorative glass. For the smaller cover, I matched the distressed pink throughout the rest of my daughter's nursery.
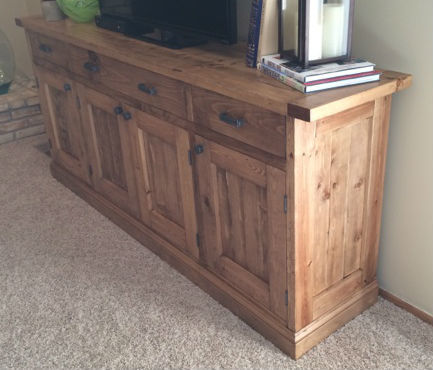
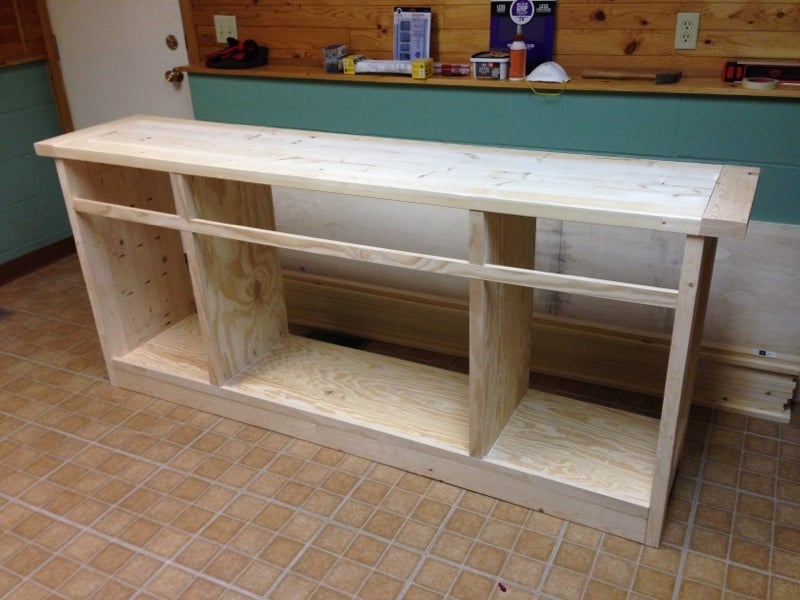
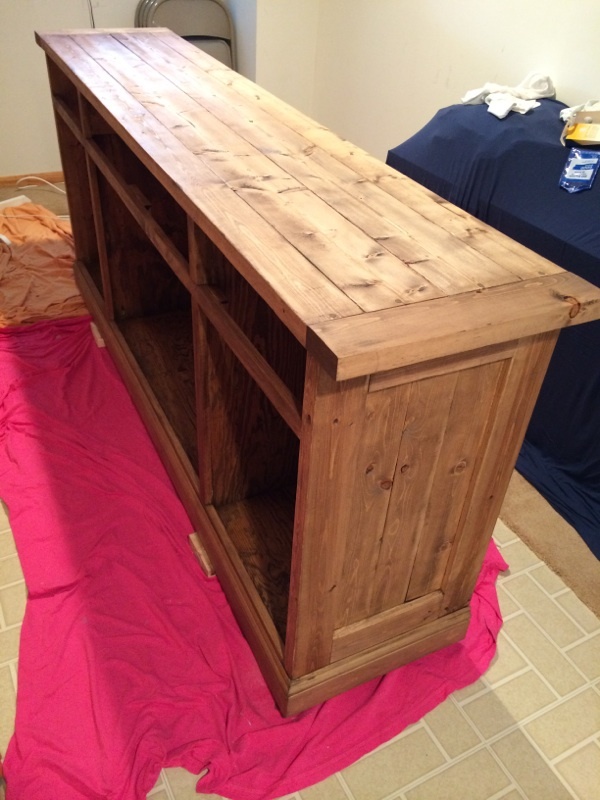
This was my first finished project using plans from Ana's site, and I am very pleased with the finished product. Every aspect of the finished sideboard is based on something from the site. I started with the plans for the Planked Wood Sideboard, and made no modifications as the dimensions were perfect for our basement family room. I decided to inset the back (http://www.friendly-home.net/2012/02/gigantic-rustic-sideboard.html) as Ana explained that Hillary had done, and love the final result. This will allow us to use this to potentially divide a room in an open concept space at some point in the future.
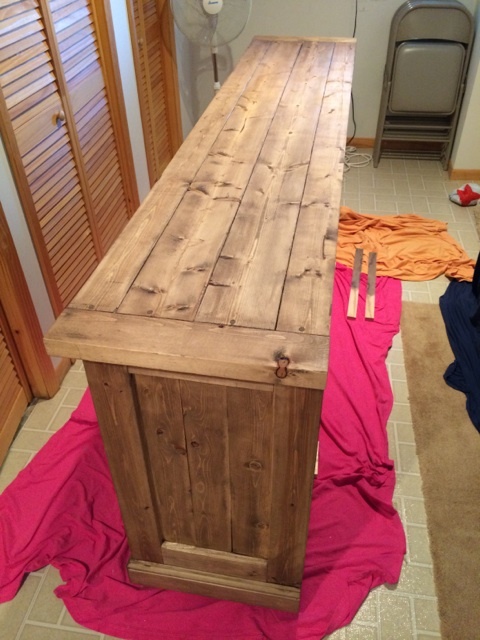
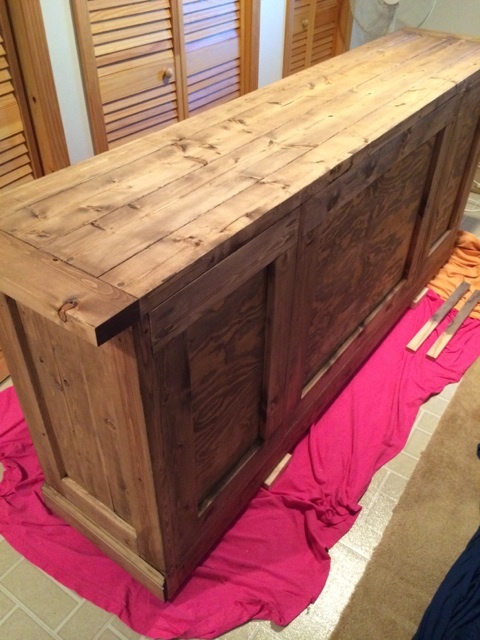
For the finishing process, I decided to follow the "Rustic Yet Refined" finish tutorial highlighted on both the Ana-White site (http://ana-white.com/2013/08/rustic-yet-refined-wood-finish) and Jen Woodhouse House of Wood (http://jenwoodhouse.com/blog/2013/06/07/diy-dining-table/). I fully intended to complete the 9 step process, but found that after we applied the Minwax pre-stain wood conditioner, followed by Minwax special walnut stain and wiped it off within 15-30 seconds, the finish mirrored the restoration hardware finish that we were going for. We decided not to proceed with layering on the weathered oak or applying the whitewash, and went straight to the spar urethane satin coats.
Overall, the project was a success, but was difficult to finish during the Minnesota winter as it was unbelievably cold and was forced to complete the finishing process in our basement/laundry room, which extended the length of the project. I am very excited to begin building other pieces from Ana's plans.

Mon, 03/03/2014 - 10:01
Absolutely beautiful! Thank you for all the details on how you did this!
In reply to Absolutely beautiful! Thank by moosmani
Thu, 03/13/2014 - 07:09
Thank you so much for your kind words. I am extremely impressed with your brag posts as well, and you may have been inspired to take on the picket storage shed project as soon as the snow melts.
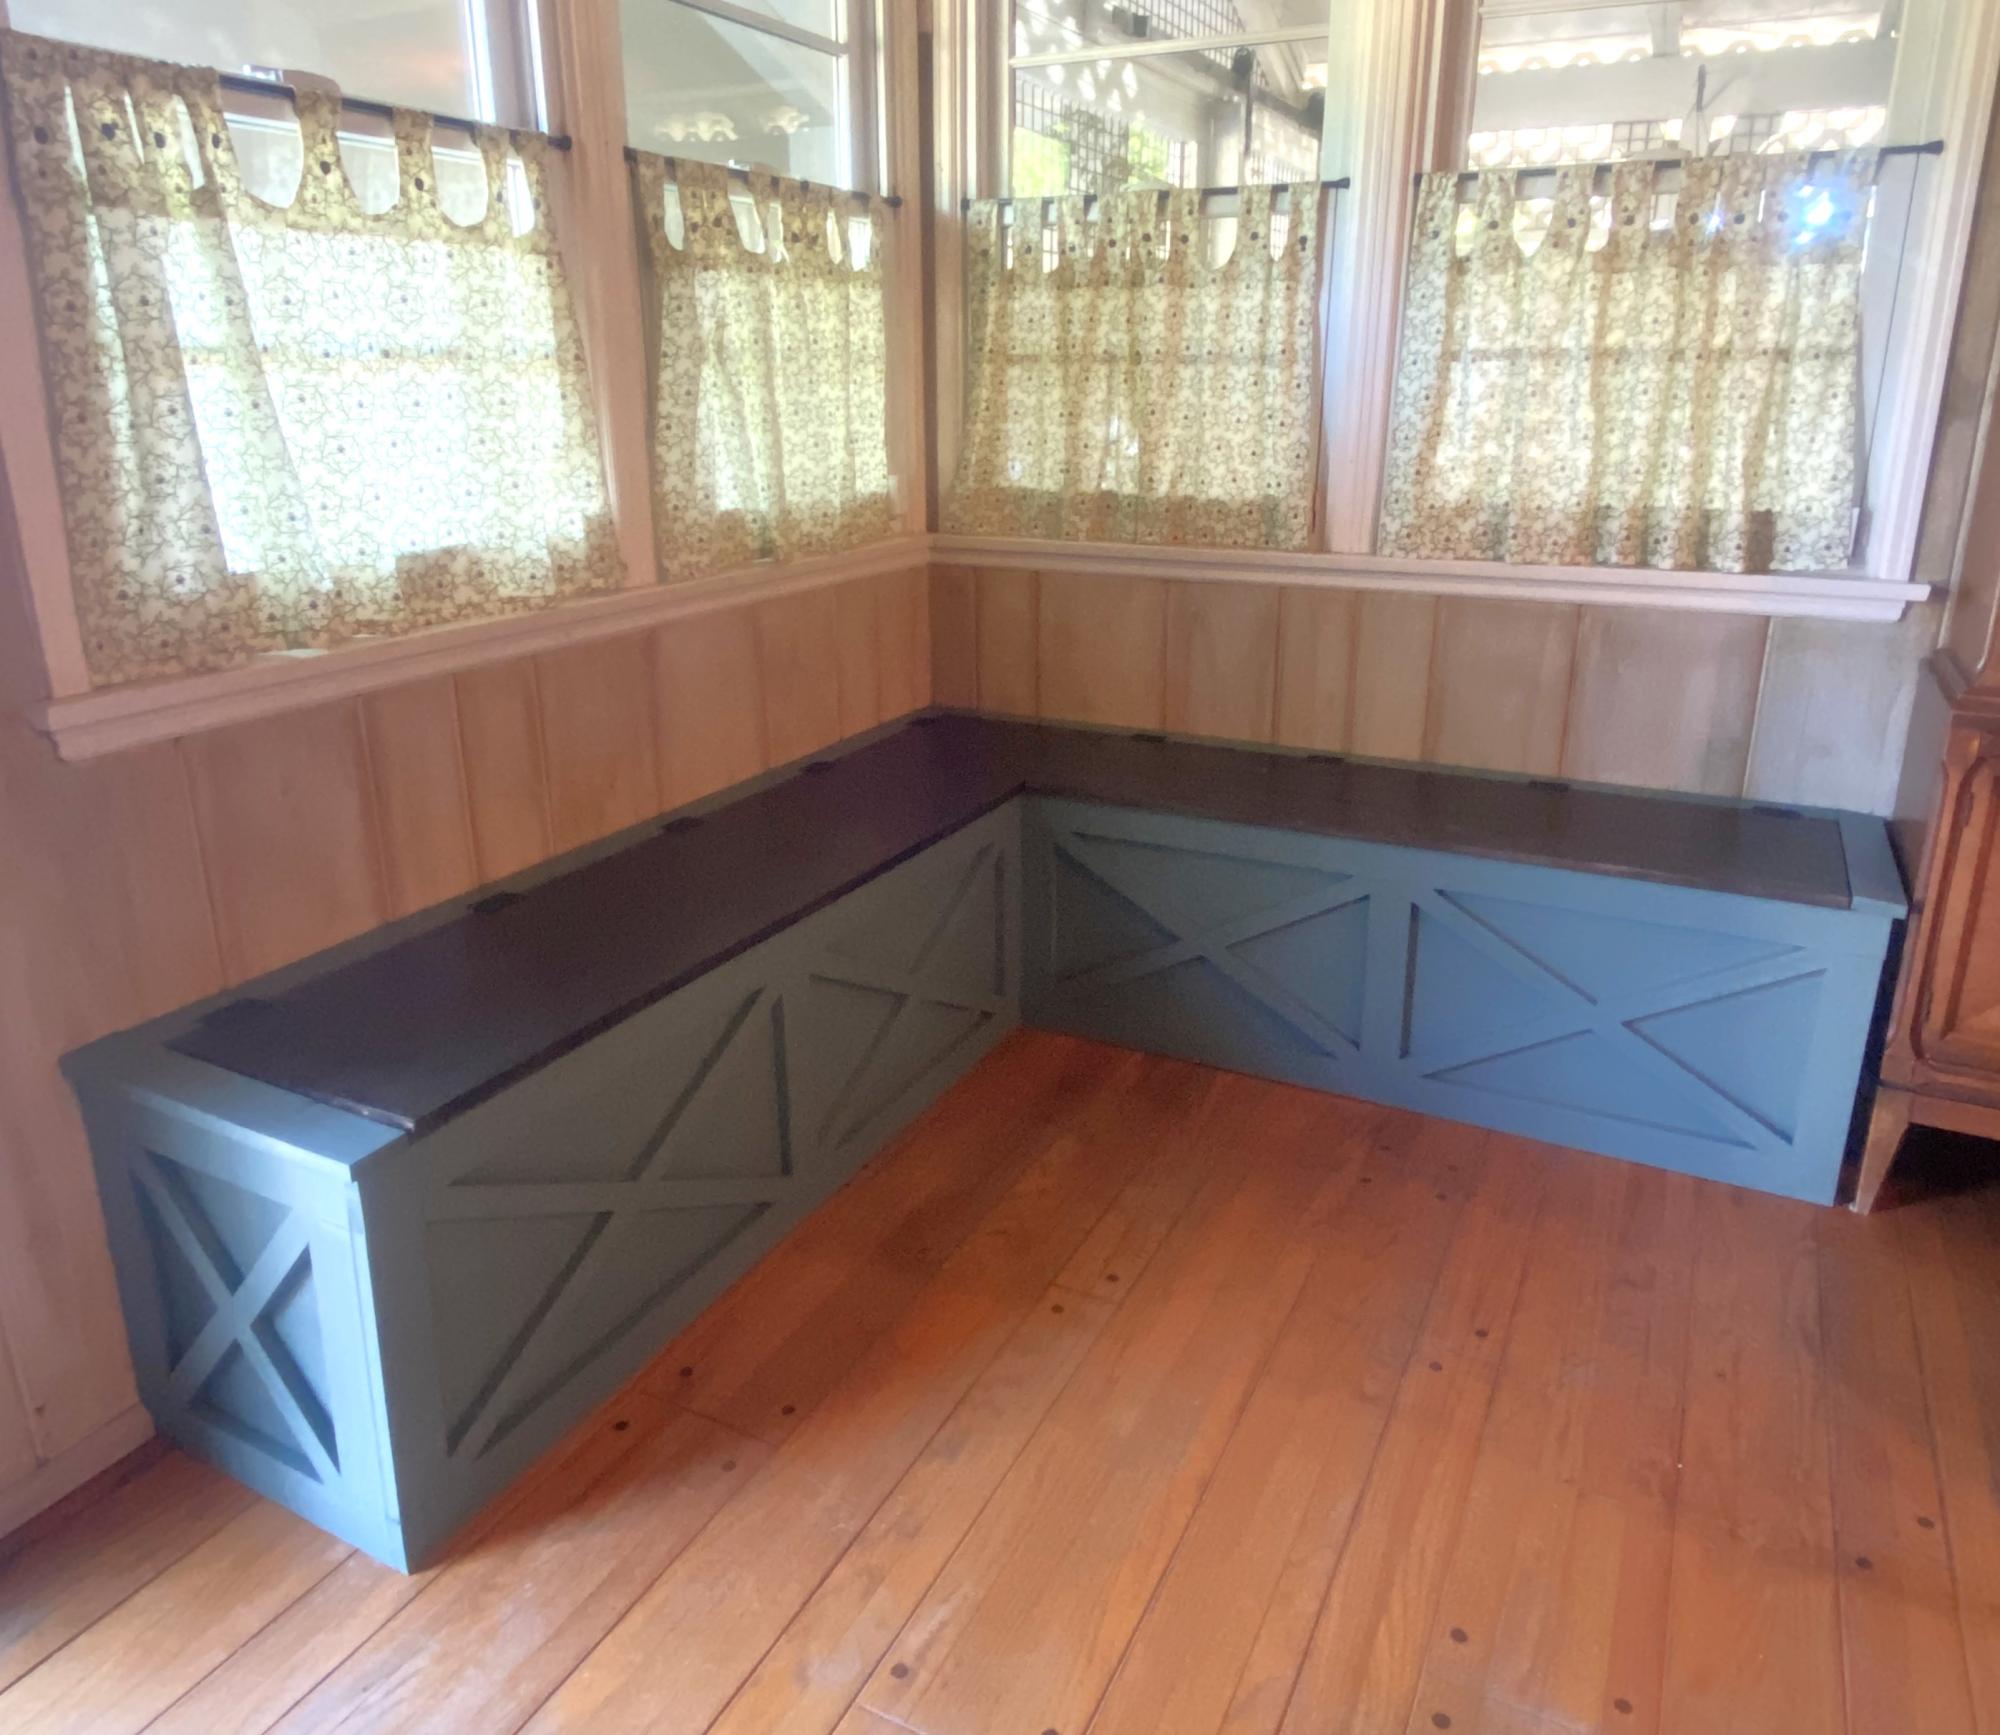
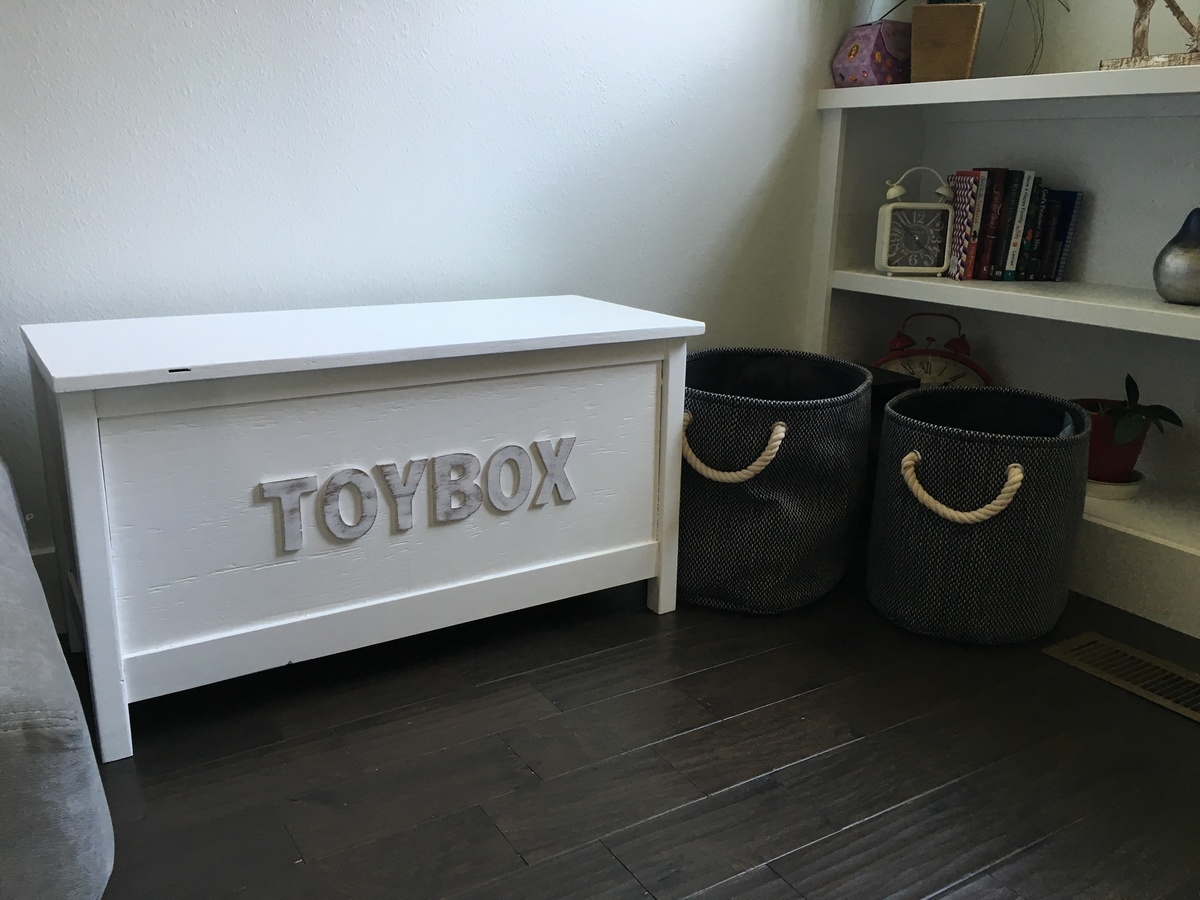
I needed some extra storage space and have always wanted a storage bench in this corner of my dining room. It took me a week to build from start to finish. I’ve never done any woodworking before, so this plan was good for me, as it was easy to follow with the color coding. The only thing that was “off plan” were the X’s on the face of the bench. I had some leftover 1x1 trim, from a handyman project a few years back, that I was happy to use up. It fit perfectly and I had just enough for all X’s. My biggest challenge with this project were the lids. They have a very minor bow, so one of the corners isn’t flush. But, it’s not enough to bother me or need to re-do the lid. All-in-all, I’m super happy with this banquette and may have caught the woodworking bug!

8’ by 12’ shed with extra 15” of height. Thanks for the plans!
This is a plan that My 16 year old son chose to do for a project to fulfill a goal to learn some woodworking skills during our unexpected downtime from School.
Mom is thrilled with the new space.
He adjusted different sizes based on what lumber we already had. He used 1x7’s and routed a 45deg on the edges to give the tongue and groove look. Posts are 4x5 and top railing is 2x7.
Sun, 04/19/2020 - 17:42
Amazing, what a fine young man you are raising!!
Thanks for the step by step! That Kreg jig was amazing I didn't even know that existed.


Comments
Ana White Admin
Wed, 02/23/2022 - 05:37
Those look fantastic!
Thank you for sharing, way to go!