DIY Greenhouse
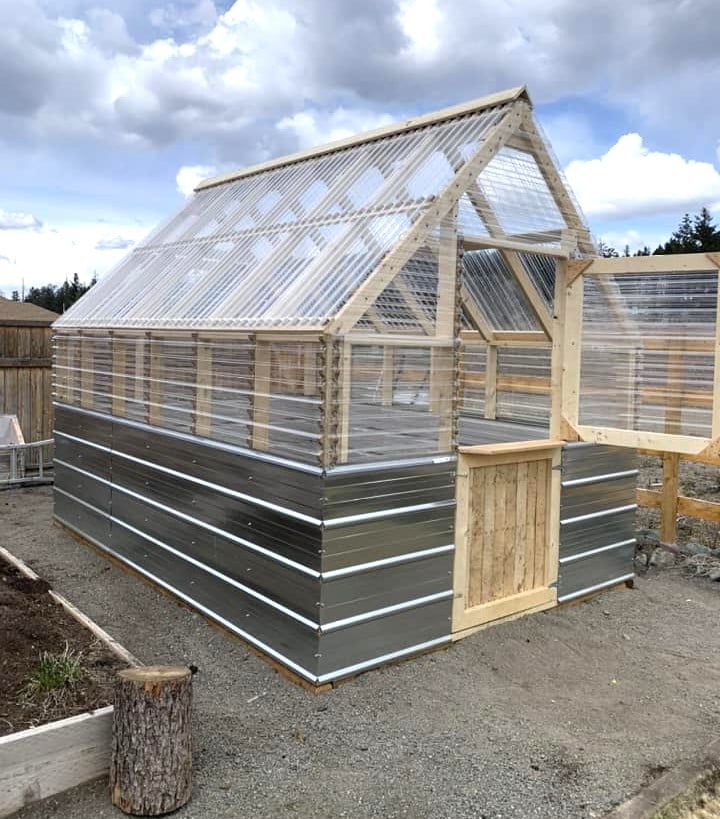
DIY Greenhouse by Trenton Kirby on Facebook!
Built from Plan(s)
DIY Greenhouse by Trenton Kirby on Facebook!

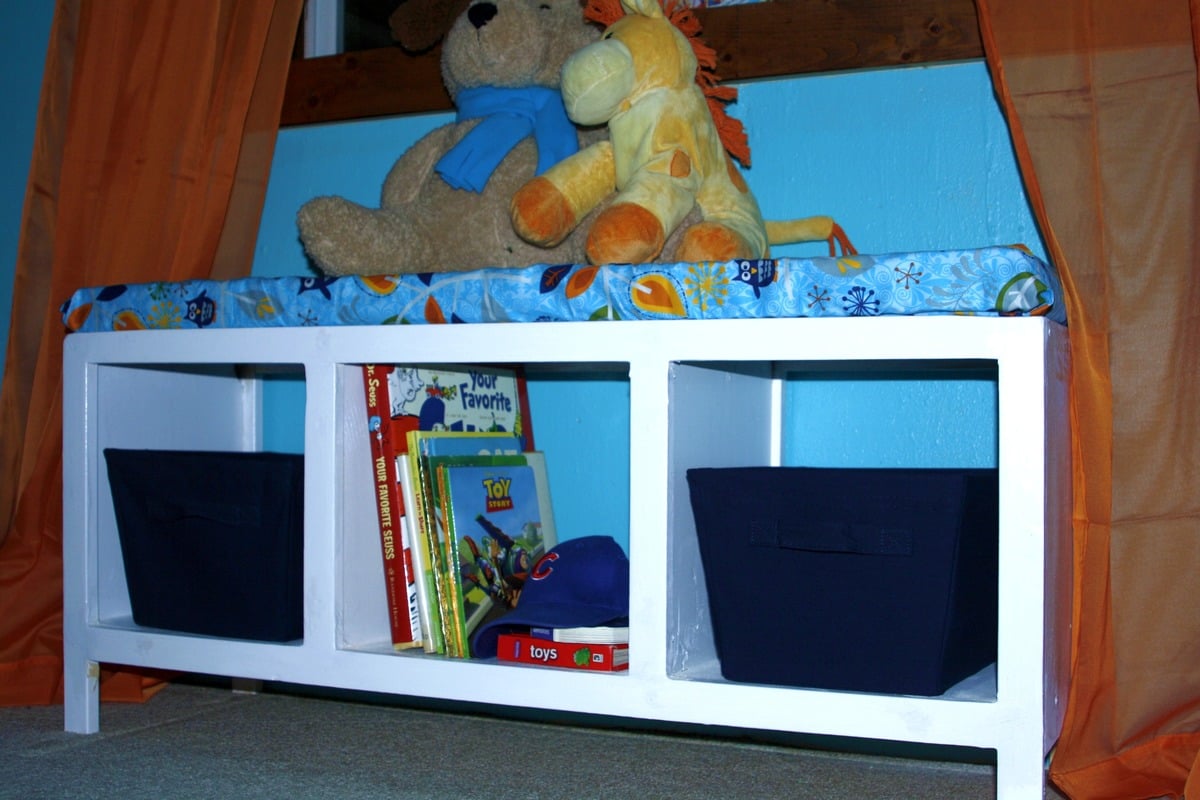
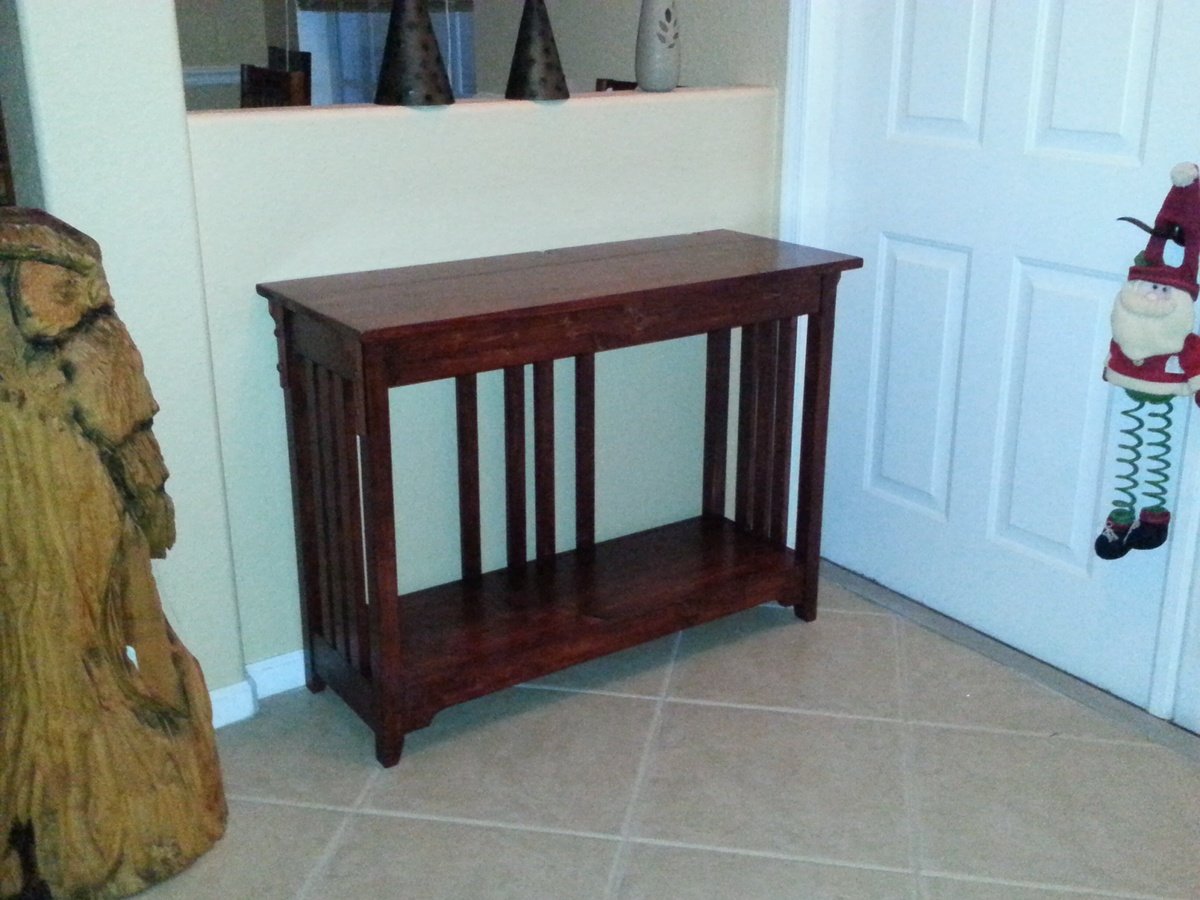
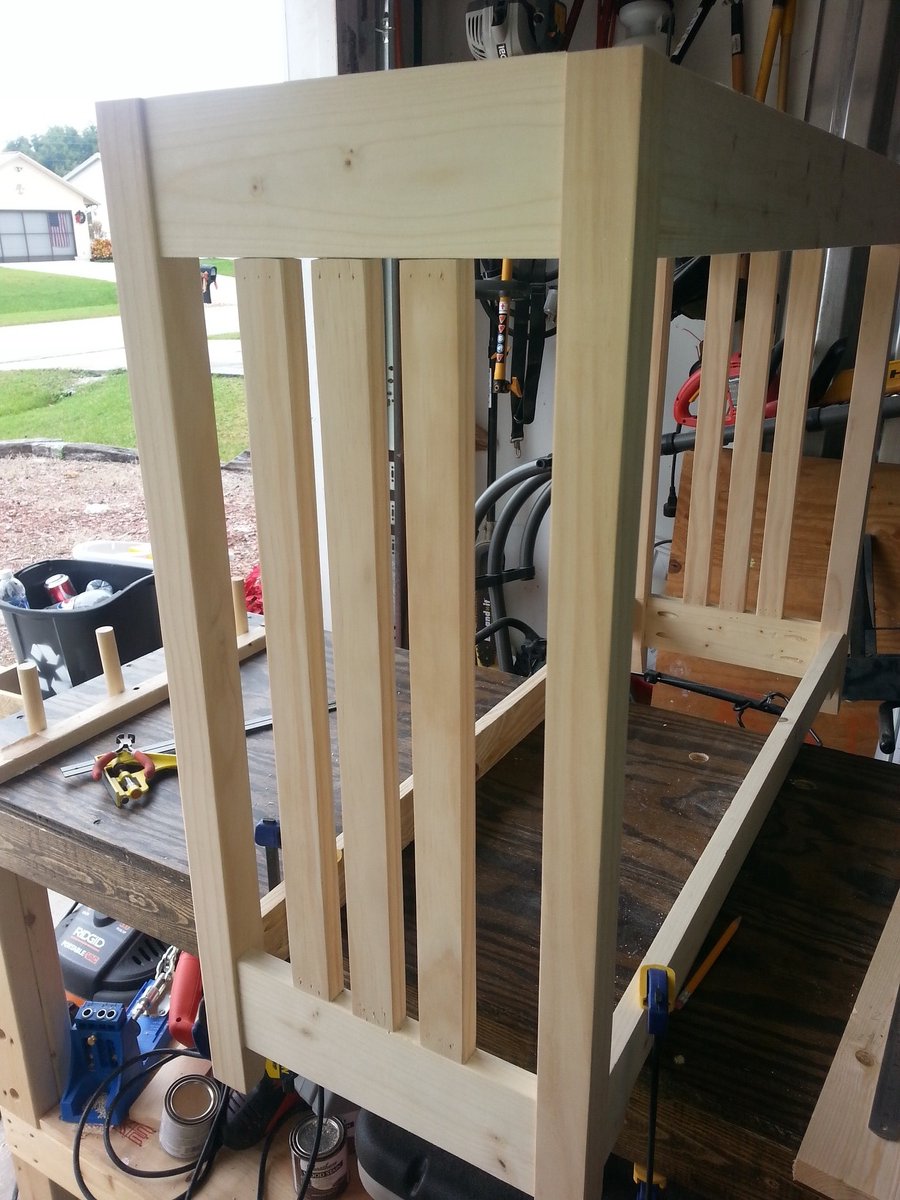
I built this for a friend of mine - also a client - built it to her needs and come out with a really cool bookshelf/tv console!
Tue, 07/16/2013 - 08:36
I did actually add two supports to the bottom with scrap 2x2's. I knew that this piece would house lots of books, a tv and possibly have a couple of little girls climbing on it. :-)
Thu, 07/18/2013 - 09:27
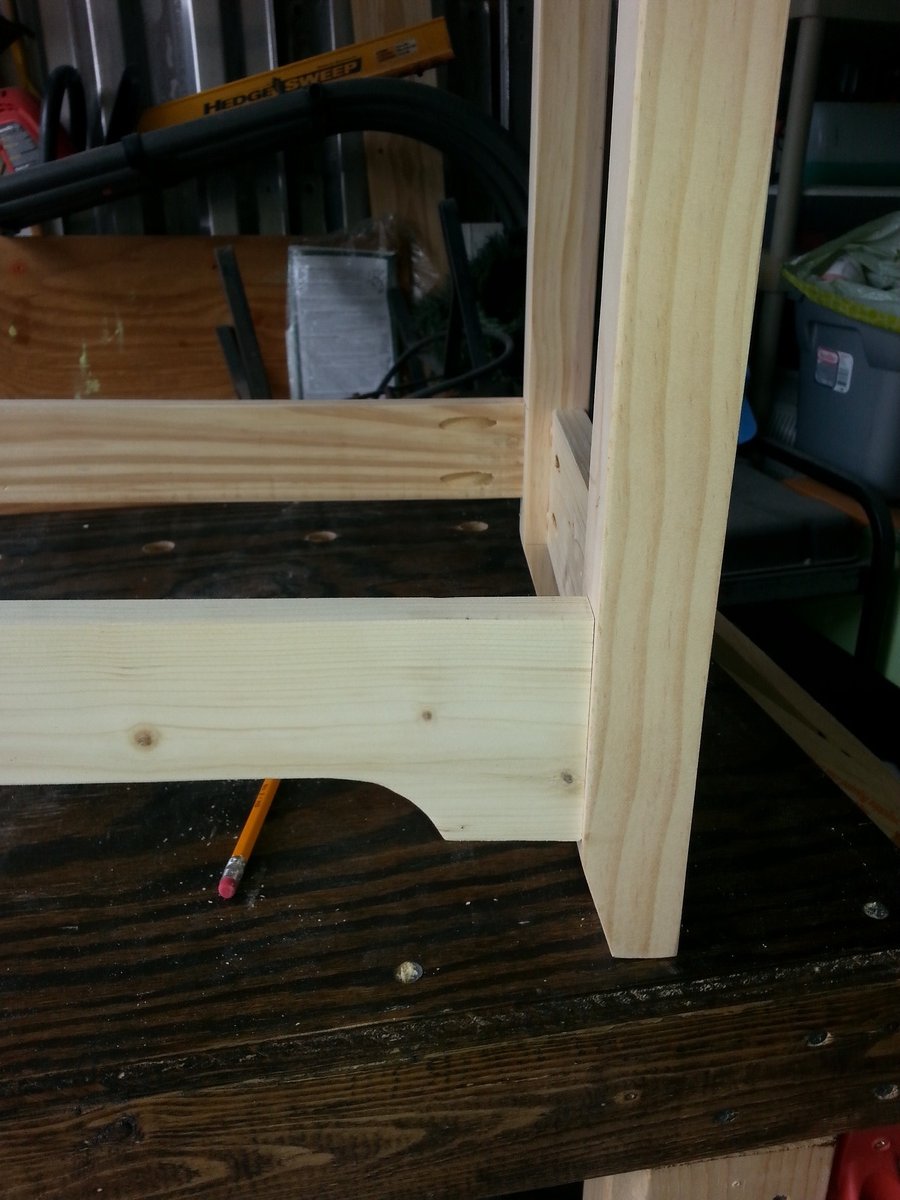
Sorry it's me again, my husband and I have decided to use your model for our cube shevles and I just want to verify to get the new dimensions you just doubled the legths for the top, the shelves and and the side shelf trim correct? We are new builders and just want to get everything as close to right as we can! Thanks!

Thu, 07/18/2013 - 14:04
Not a problem at all, I don't mind answering questions. Yes, I just doubled the length of the original plan. If you click on my picture, my user info should come up and you can email me and I'd be happy to talk to you in a more direct fashion about this project and if I still have it on my computer in the form of a sketch up file, I will share more details with you. Maybe even a cut list and shopping list. I build everything in sketch up first. :-)
If you have any troubles contacting me, let me know and I will just get you my email on here. :-)
Fri, 07/19/2013 - 07:13
This is exactly what ive been looking for toy storage in my living room! Is it possible to take off the tiny legs, and just keep the entire thing on the floor? I was looking to add some cushions on the top for seating as well. Will it be able to support the weight?
Fri, 07/19/2013 - 07:13
This is exactly what ive been looking for toy storage in my living room! Is it possible to take off the tiny legs, and just keep the entire thing on the floor? I was looking to add some cushions on the top for seating as well. Will it be able to support the weight?
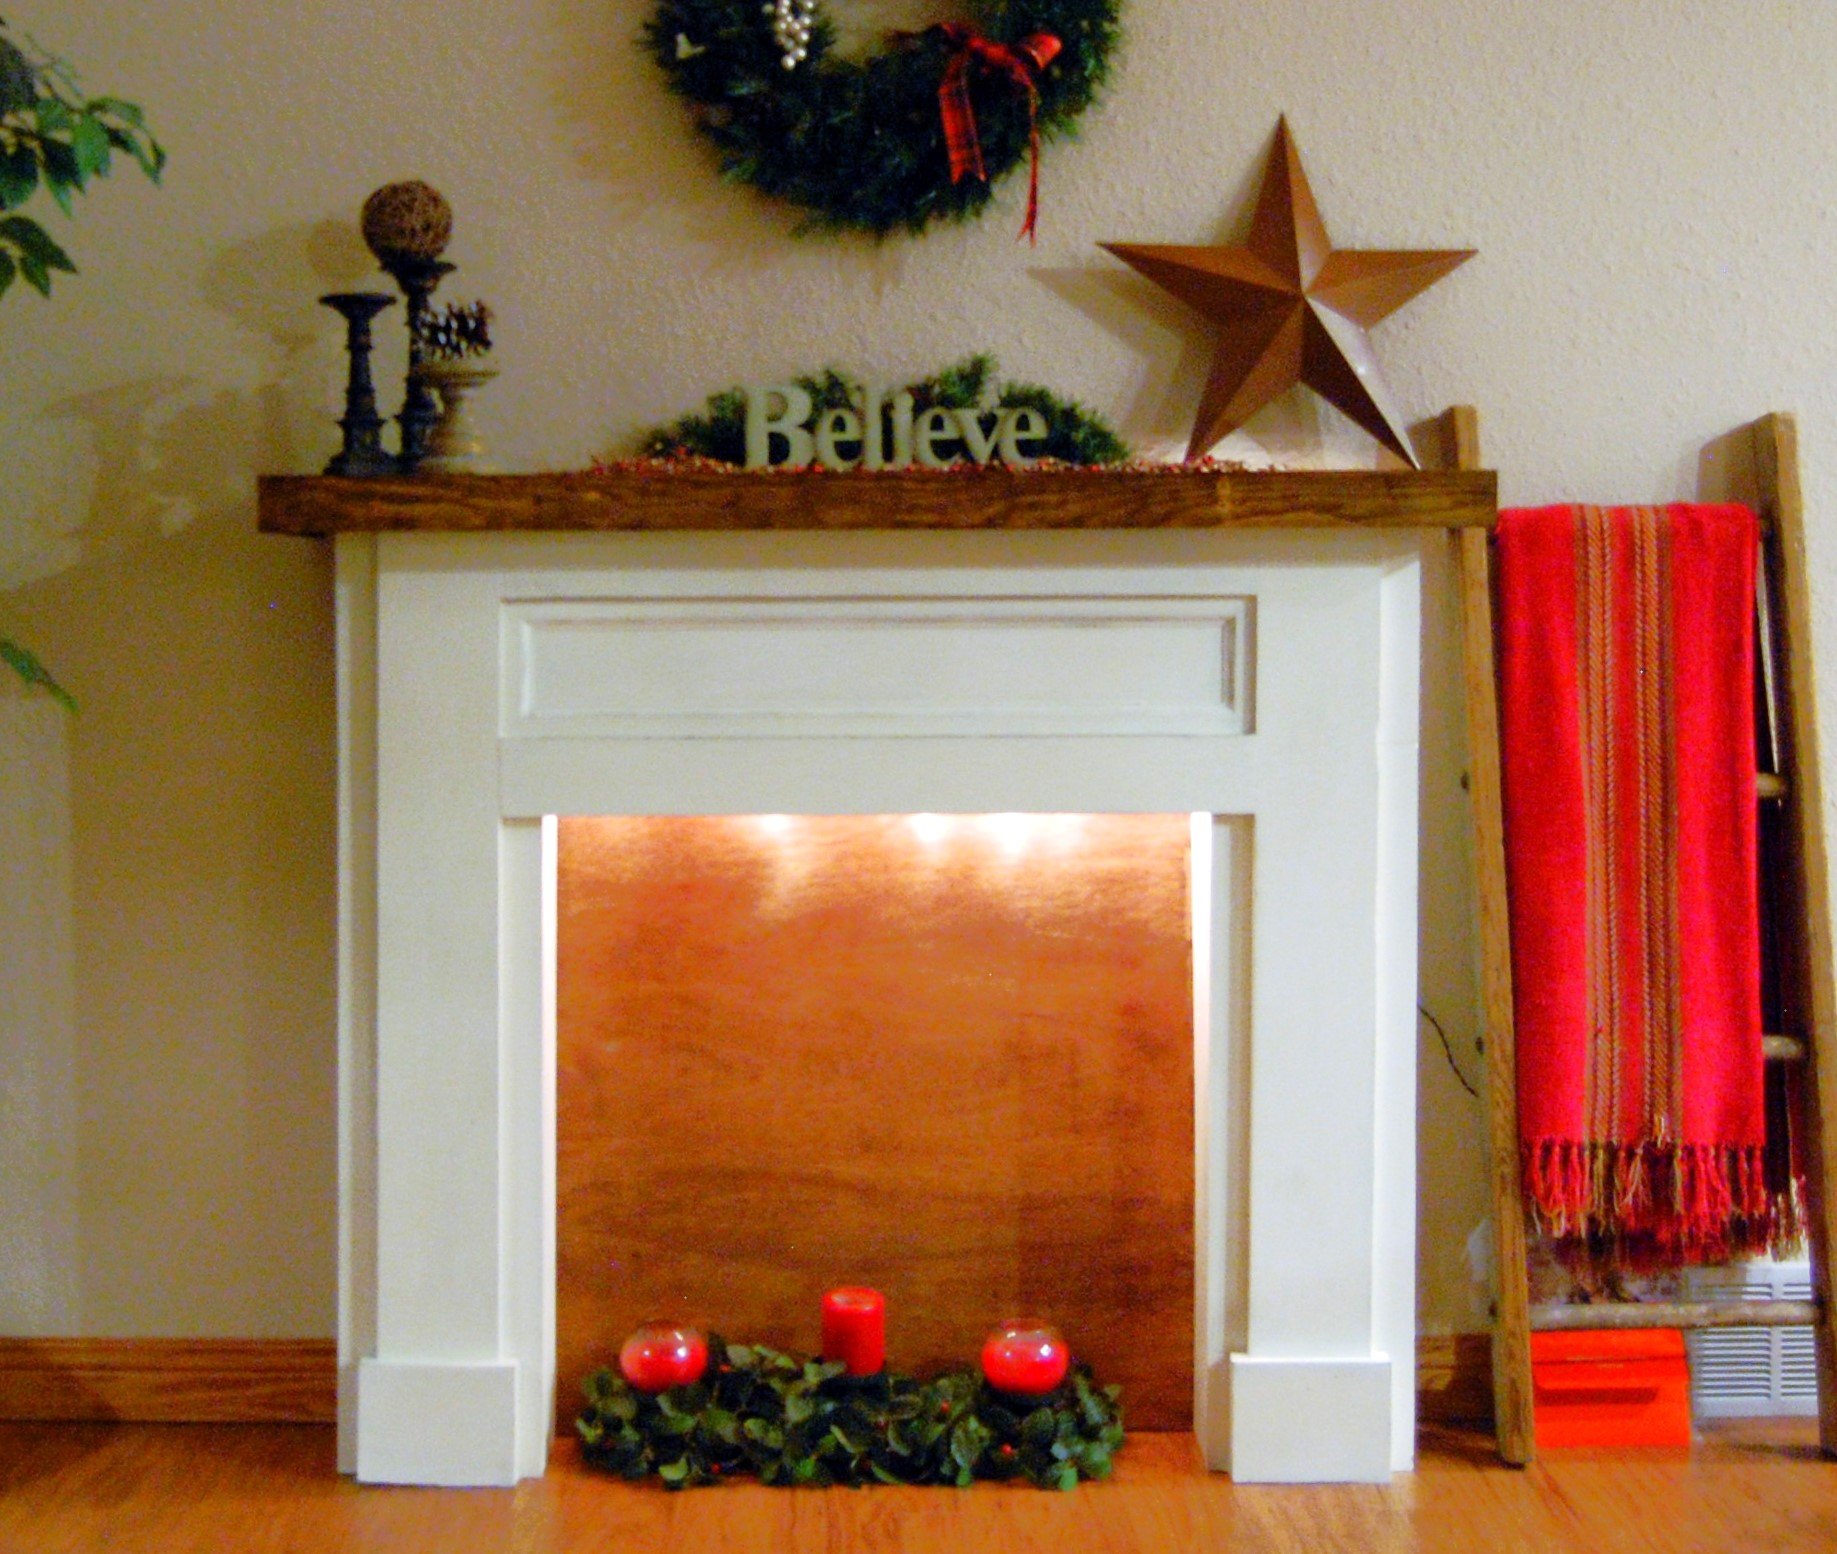
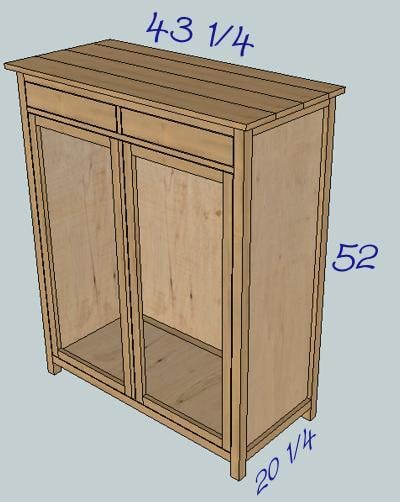
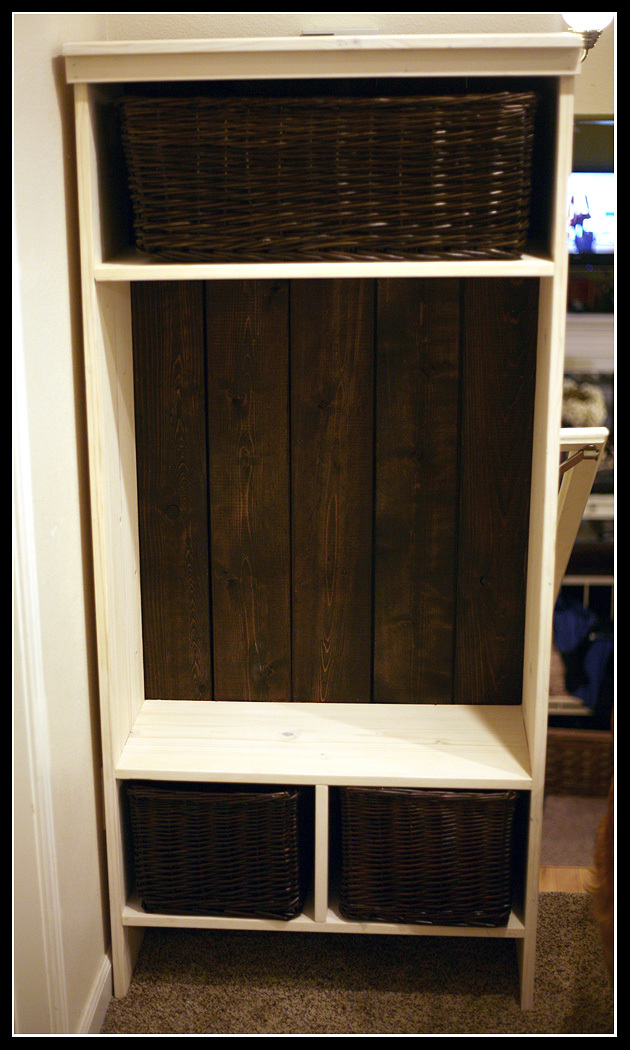
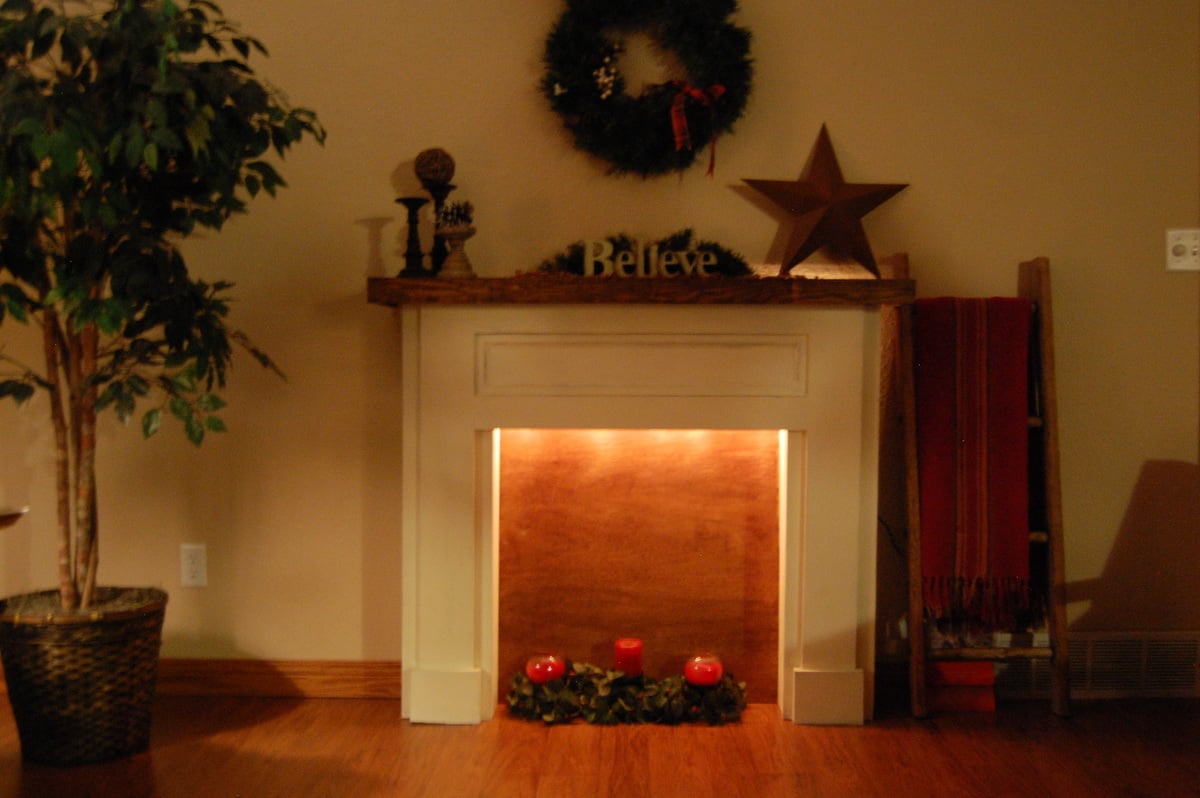
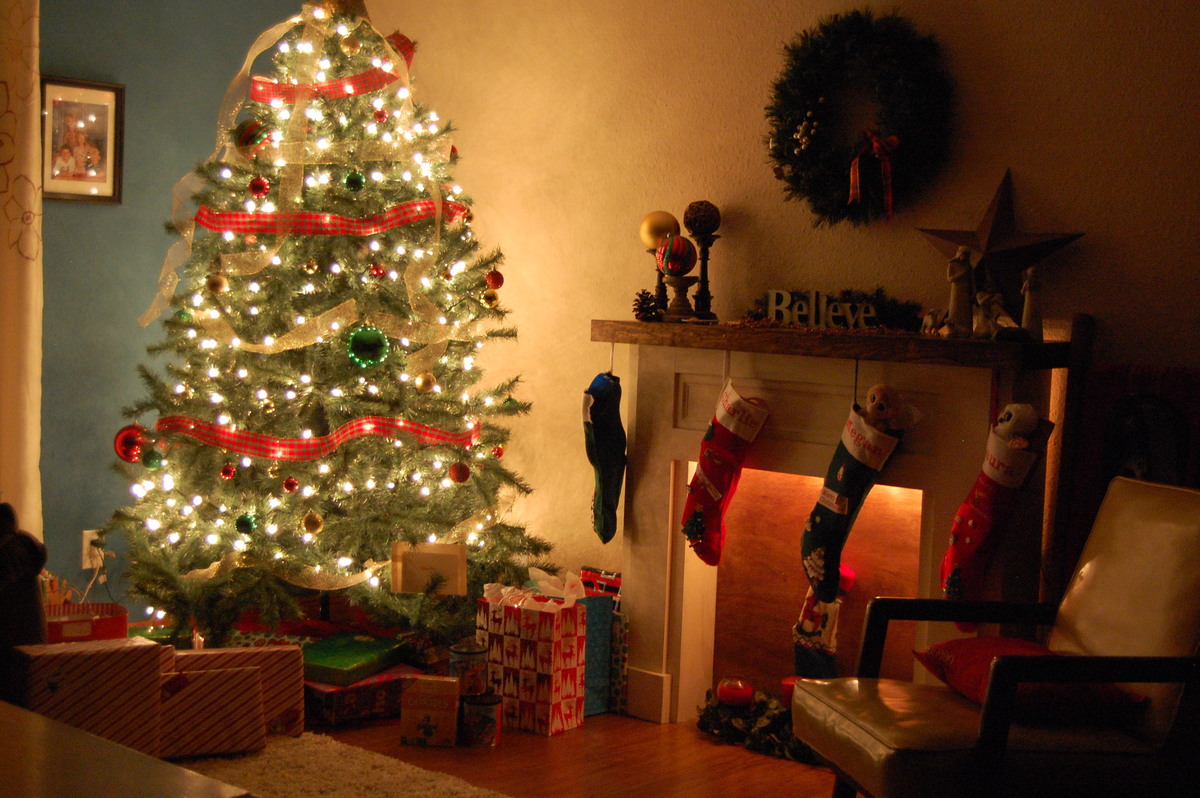
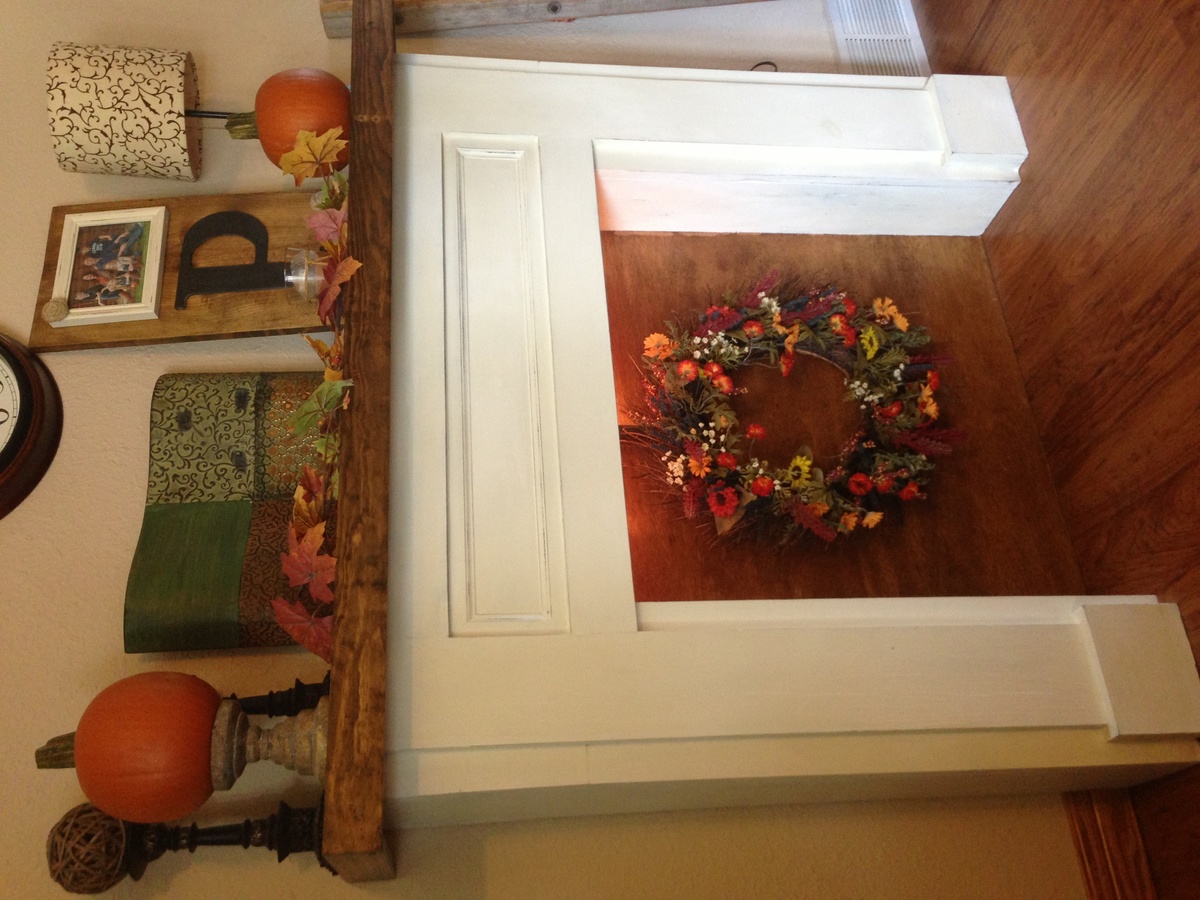
I searched hundreds of faux mantles online for just the right one to build! I ended up coming back to the very first one that inspired me...Mimi's! I revised it to make it deeper by using 1x8's for the depth. I used 1x6's for the inside box depth so that I would have some space behind for extension cords, etc. I also decided to insert wood ledges above the box (on the inside) so that I could put Christmas lights in for a soft glow, which I love. After building the top trim as shown in the plan, I decided that I wanted to "beef up" the mantle portion so I screwed 1x3's along the front and sides of the mantle top. I love how it turned out! I even ended up building a duplicate one for a friend that saw it and loved it! I am pretty new to woodworking and have 4 kids, so it took me much longer than it should have, but it was well worth it!
Thu, 03/26/2015 - 13:00
What are building plans and everything I need to have this made

Built from the Balin Console Table plan. I needed more storage for my entryway table, so I added the extra drawers. First, I had it stained but found this chalk paint in the mistints at Lowe's. Perfect color!

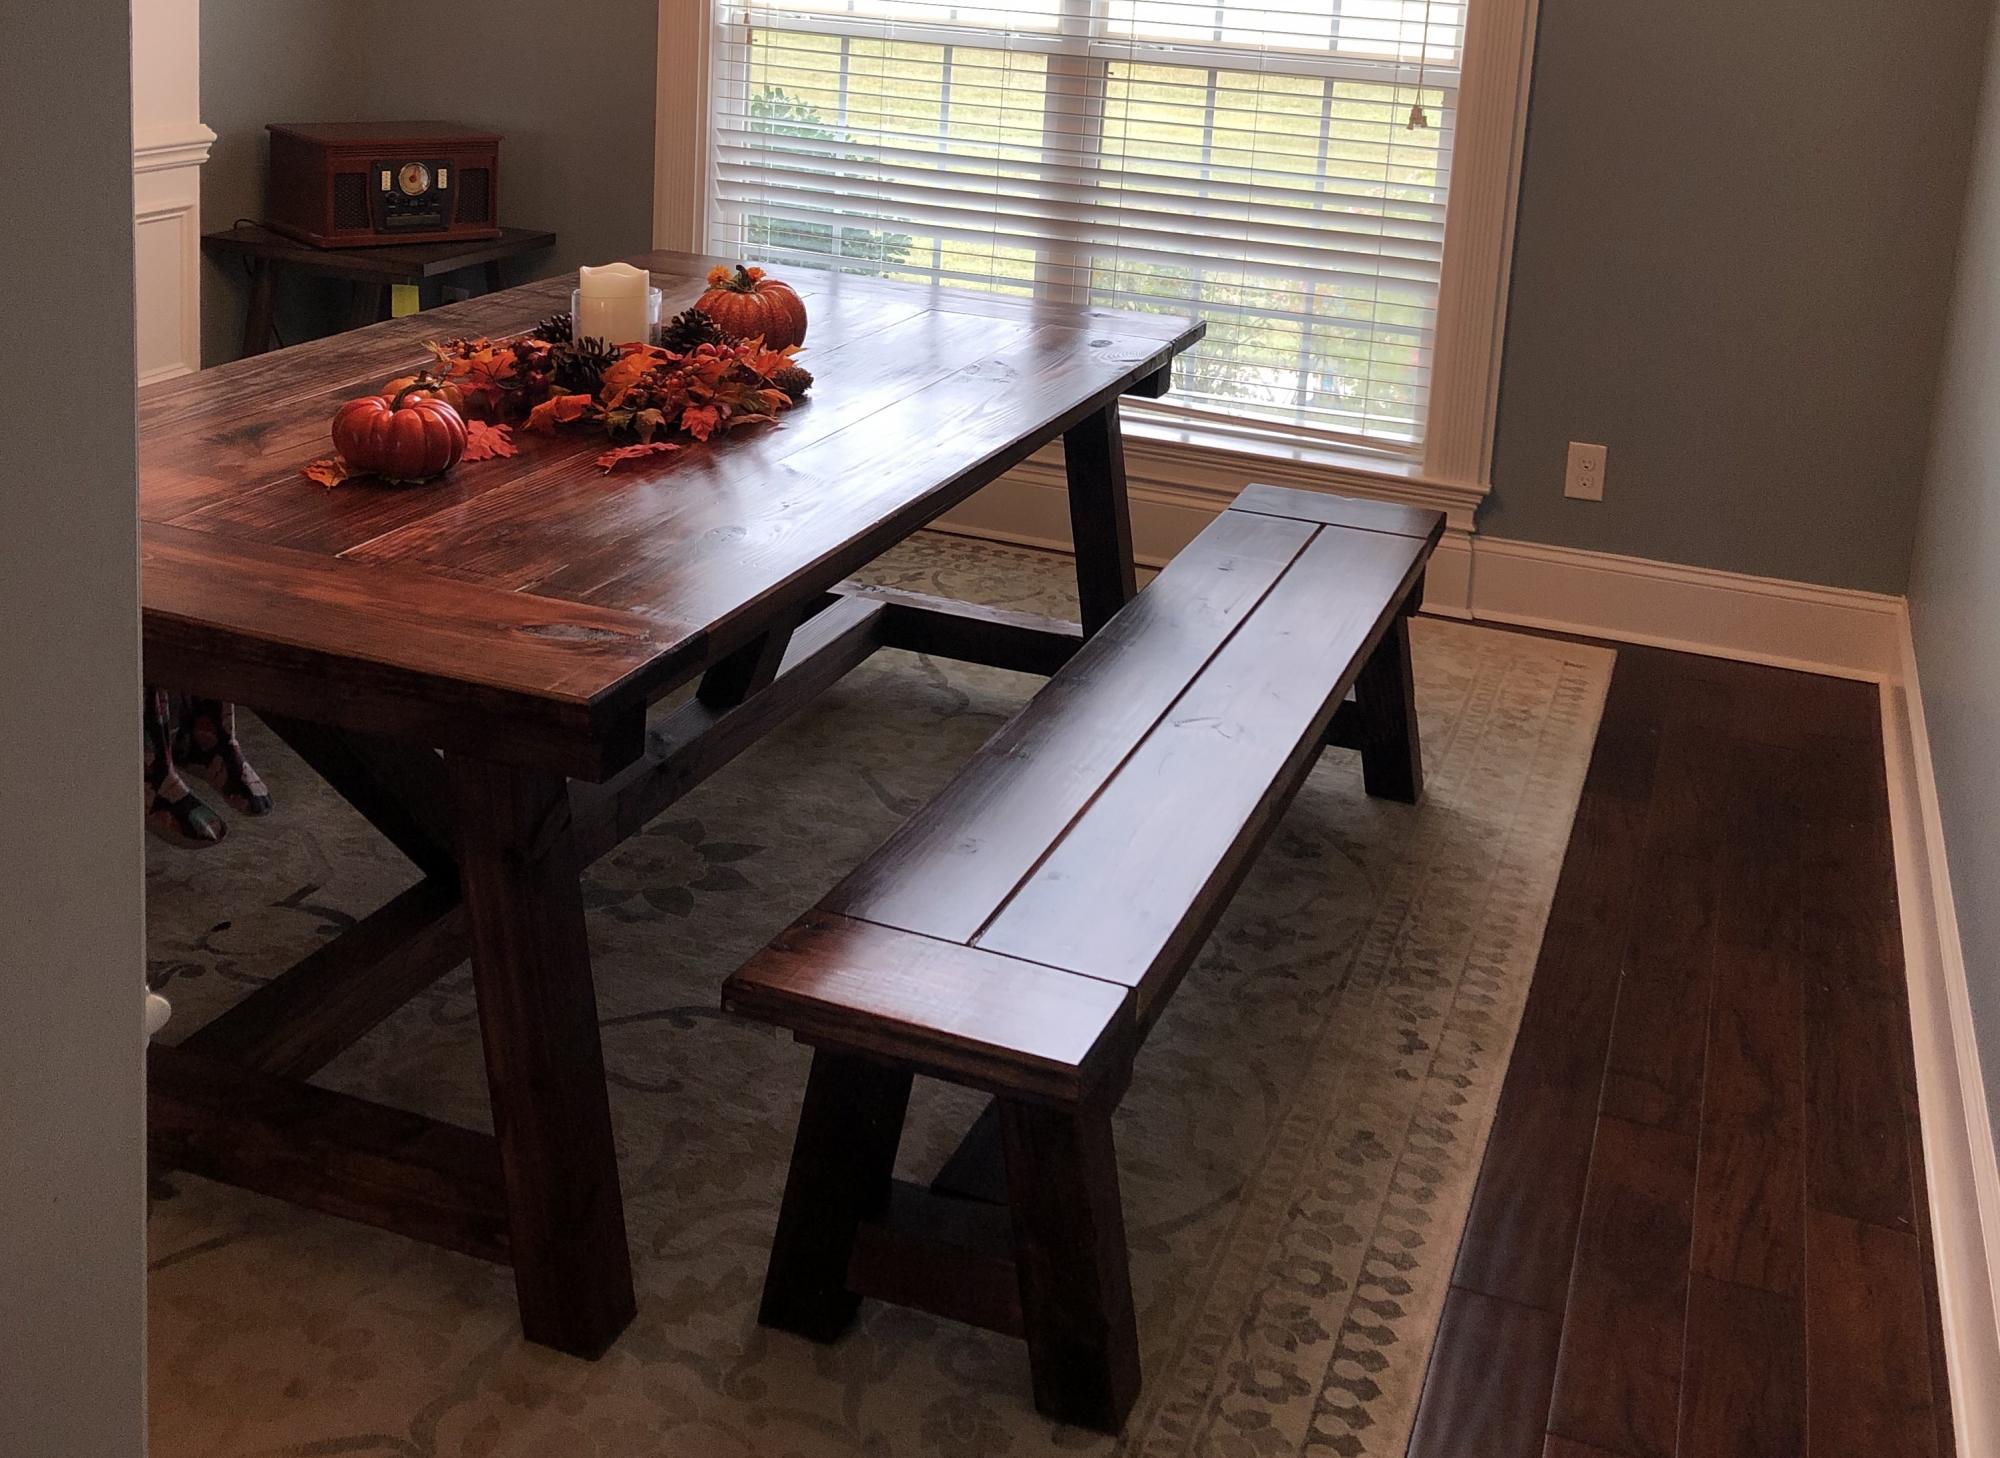
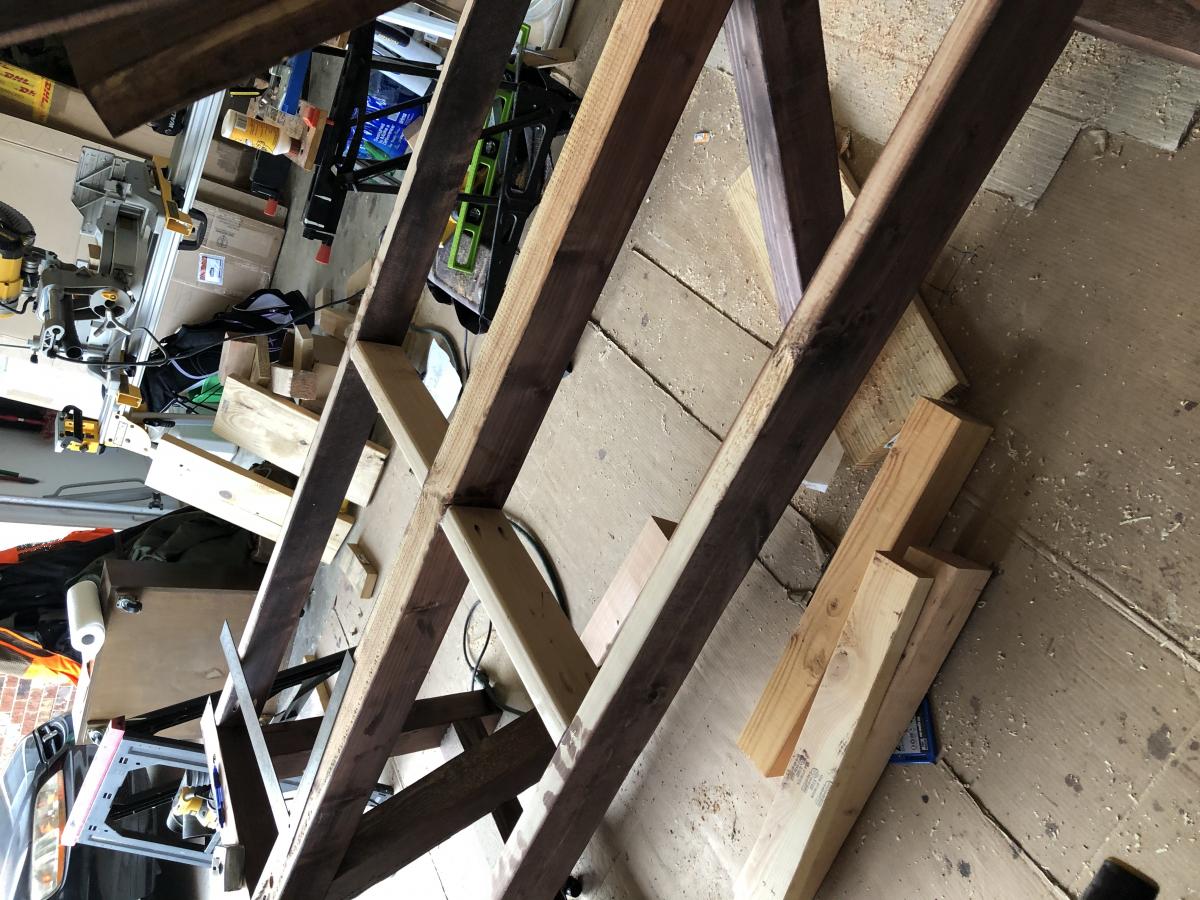
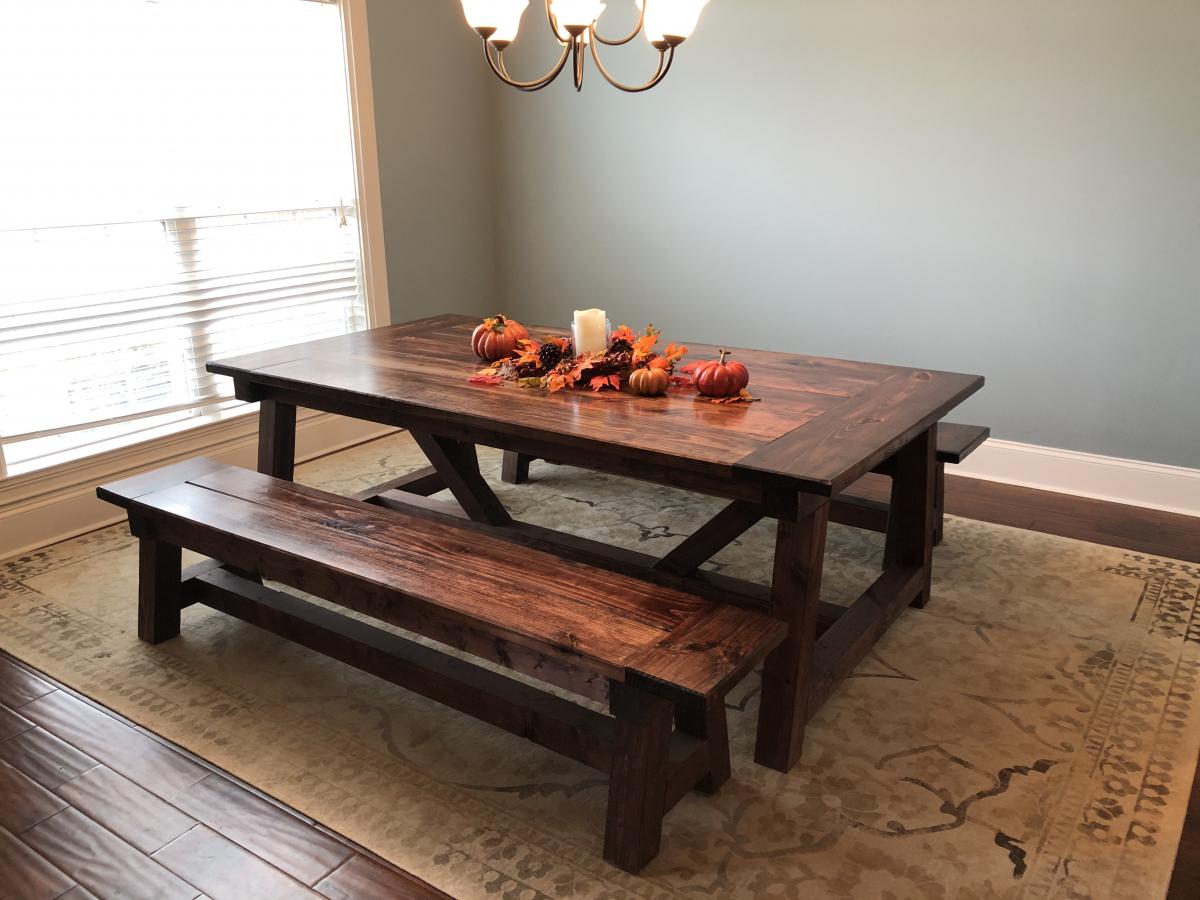
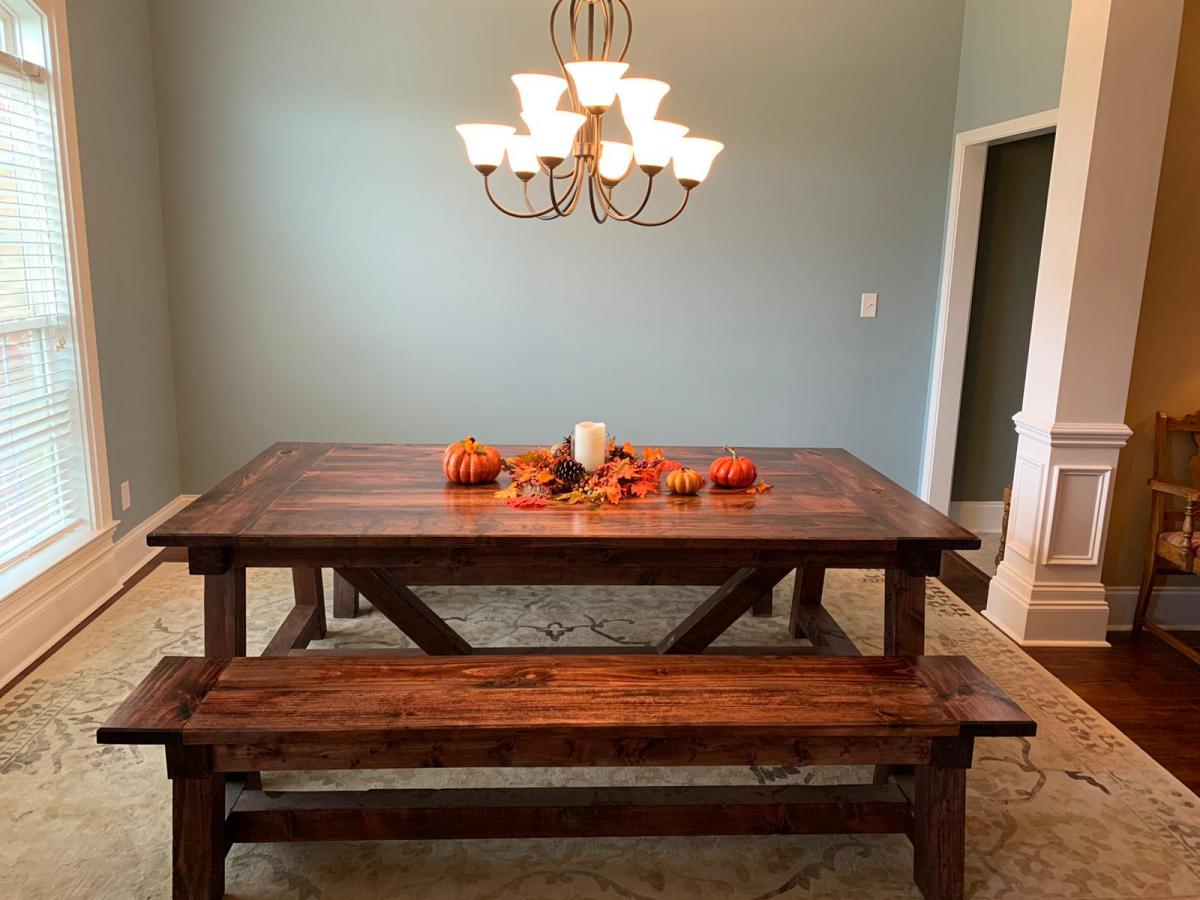
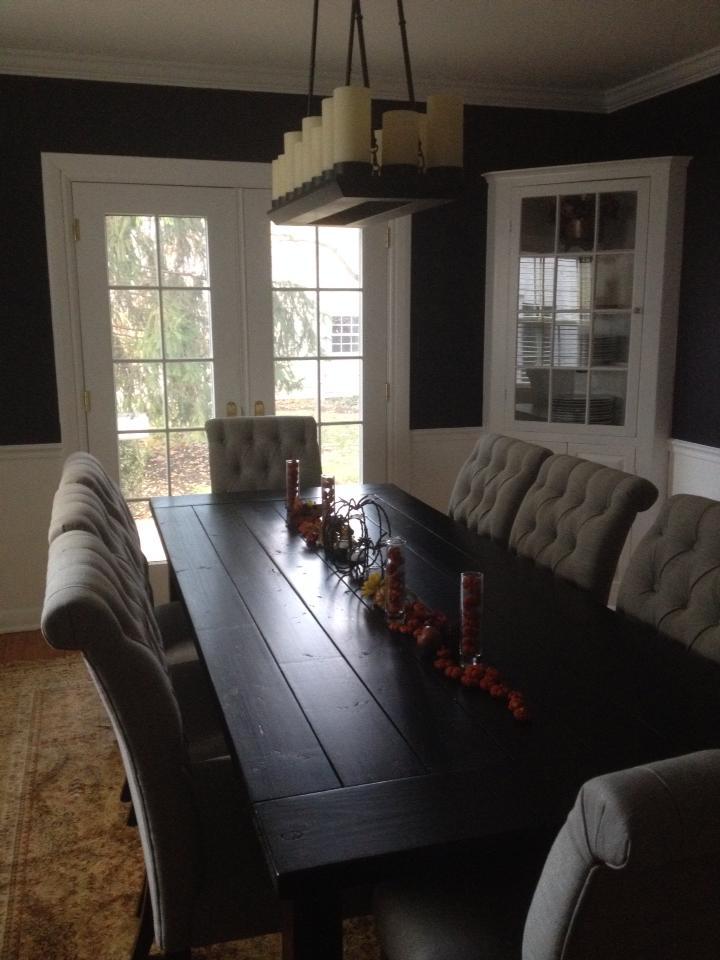
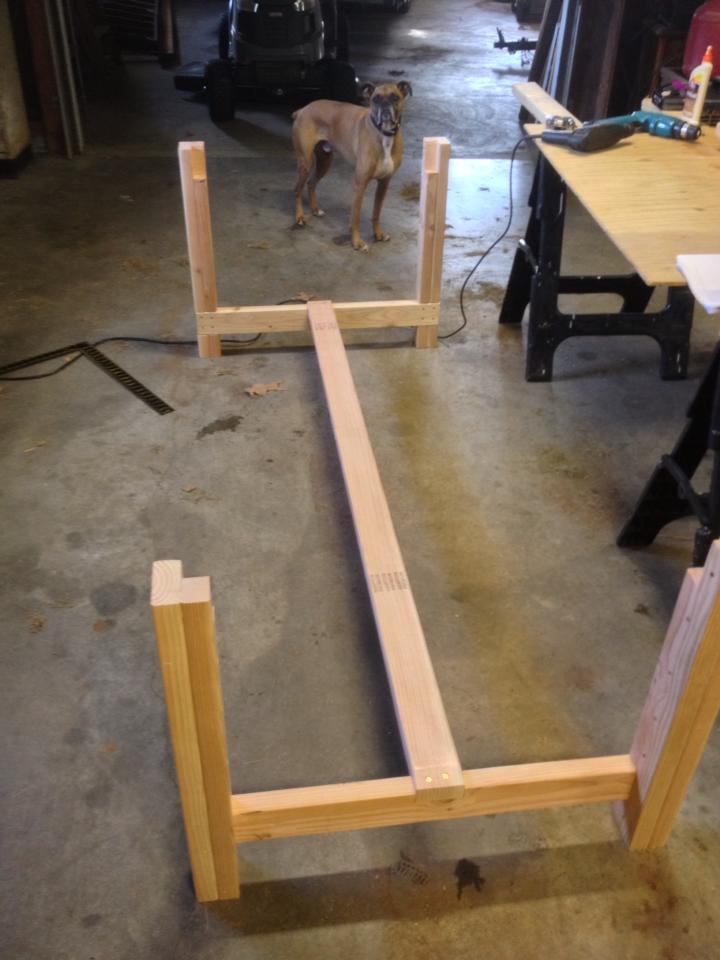
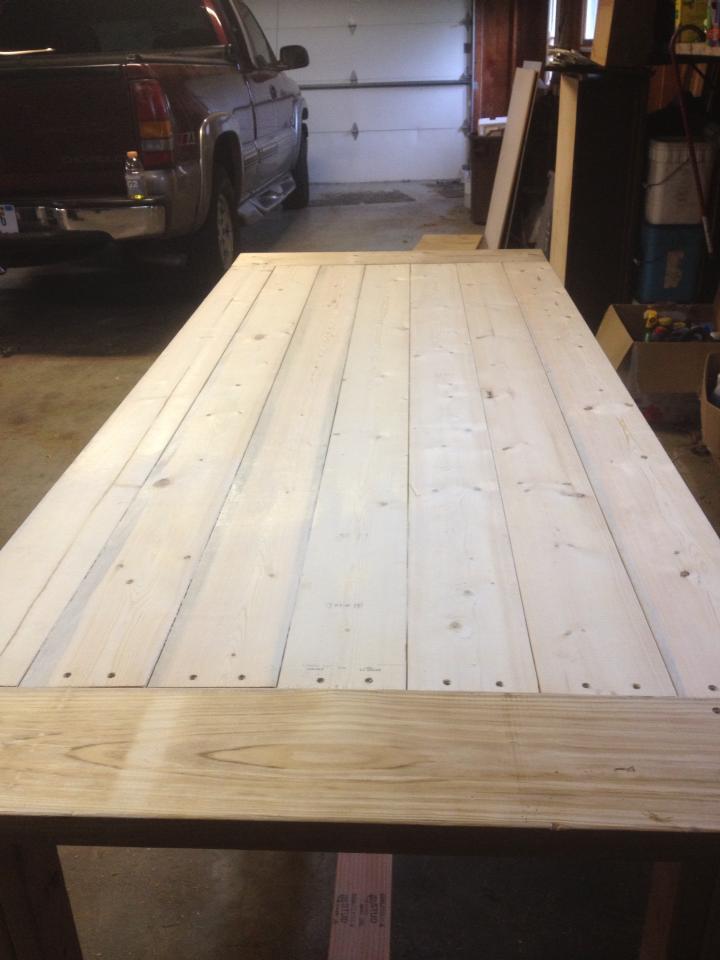
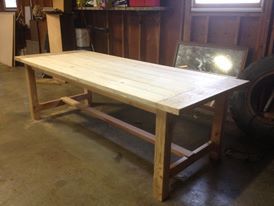
This is the third time I've used Ana White's plans--and while each has been solid and doable, I think I'm getting better. This project was based on Ana's amazing 4x4 Truss Table, and enlarged according to DIY Pete's 2x10 version. The final tabletop dimension is 87"x46" using 5-wide 2x10s. I added cross struts centered under the tabletop so that boards 2 and 4 are screwed to their neighbors as well as braced from beneath.
Pocket screws throughout, except the diagonal braces which are held together with 1/4"x6" countersunk wood screws.
Solid, tasteful, and built to last--my family wants to spend time around the table in ways they did not before. Ana's awesome!


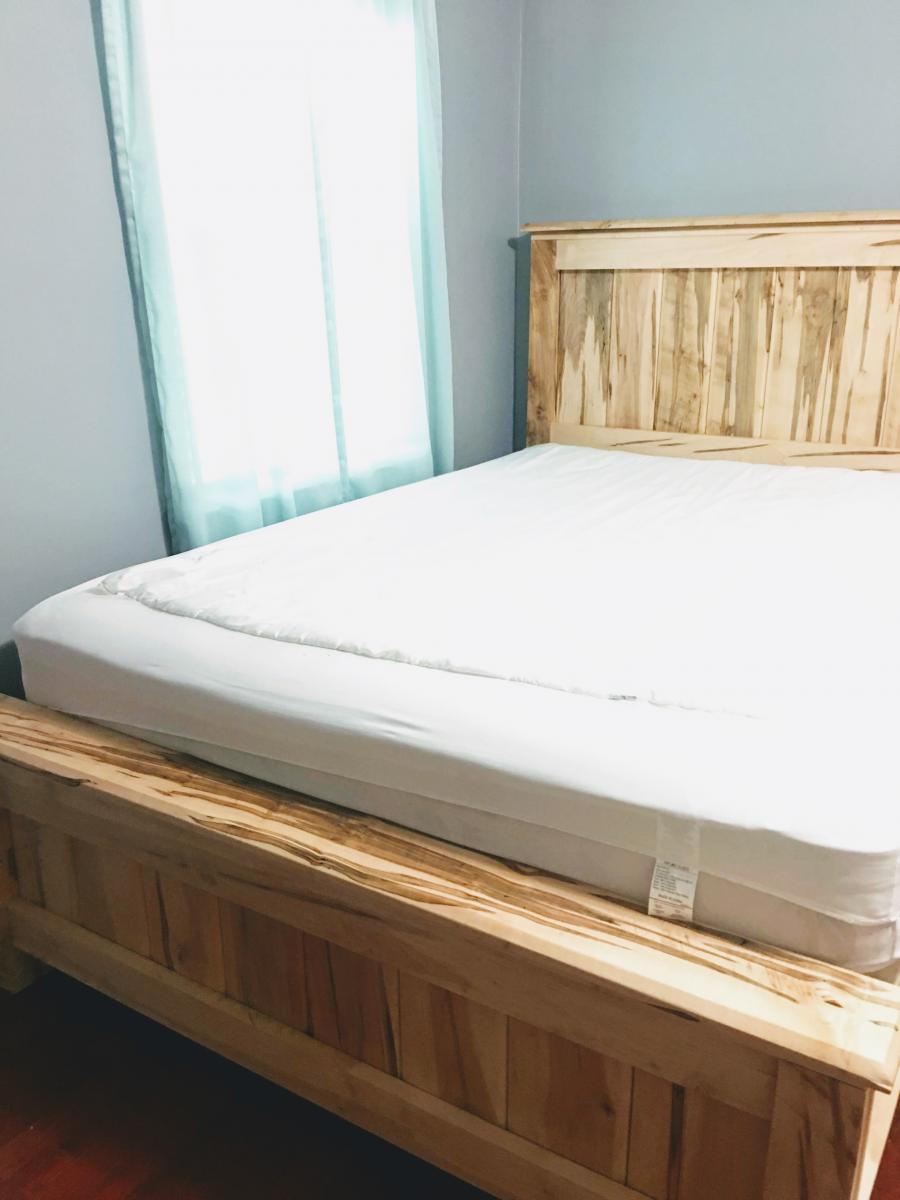
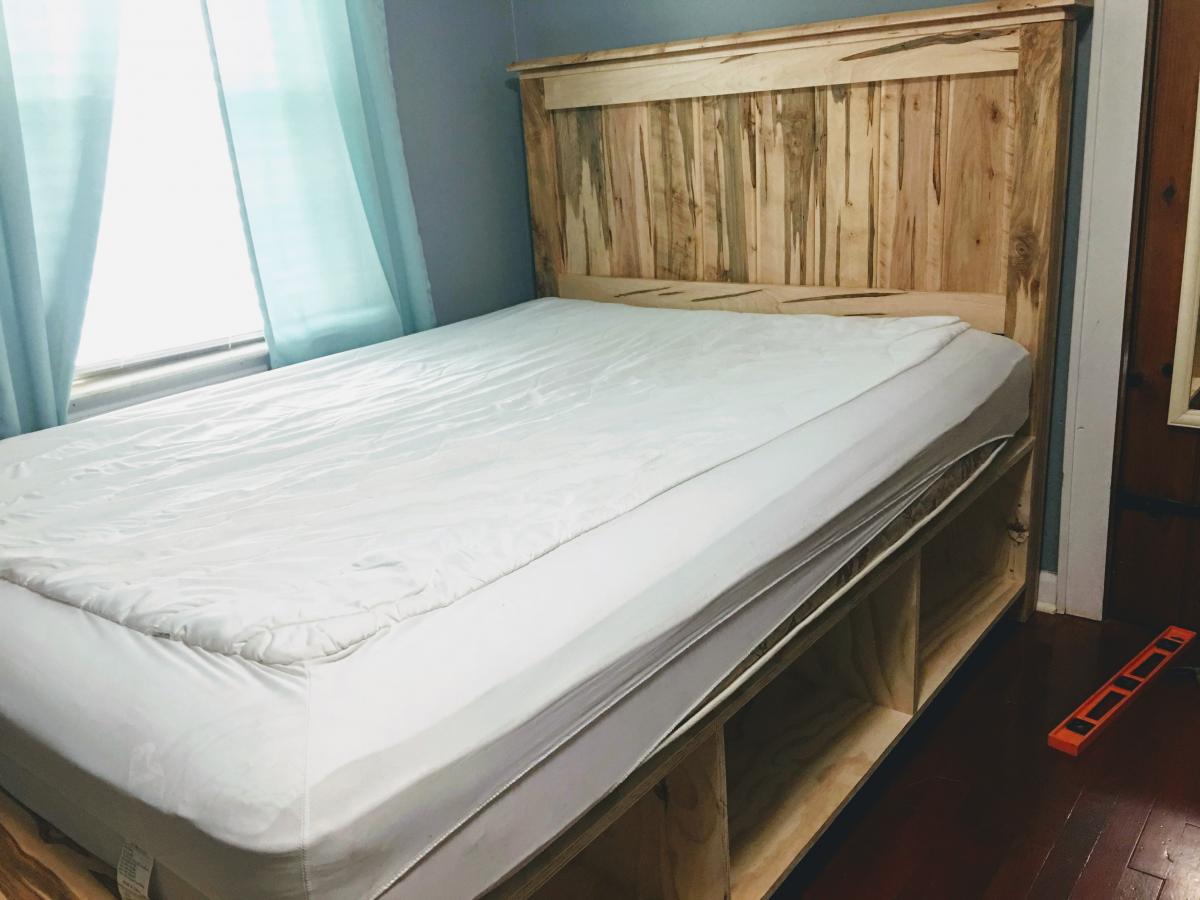
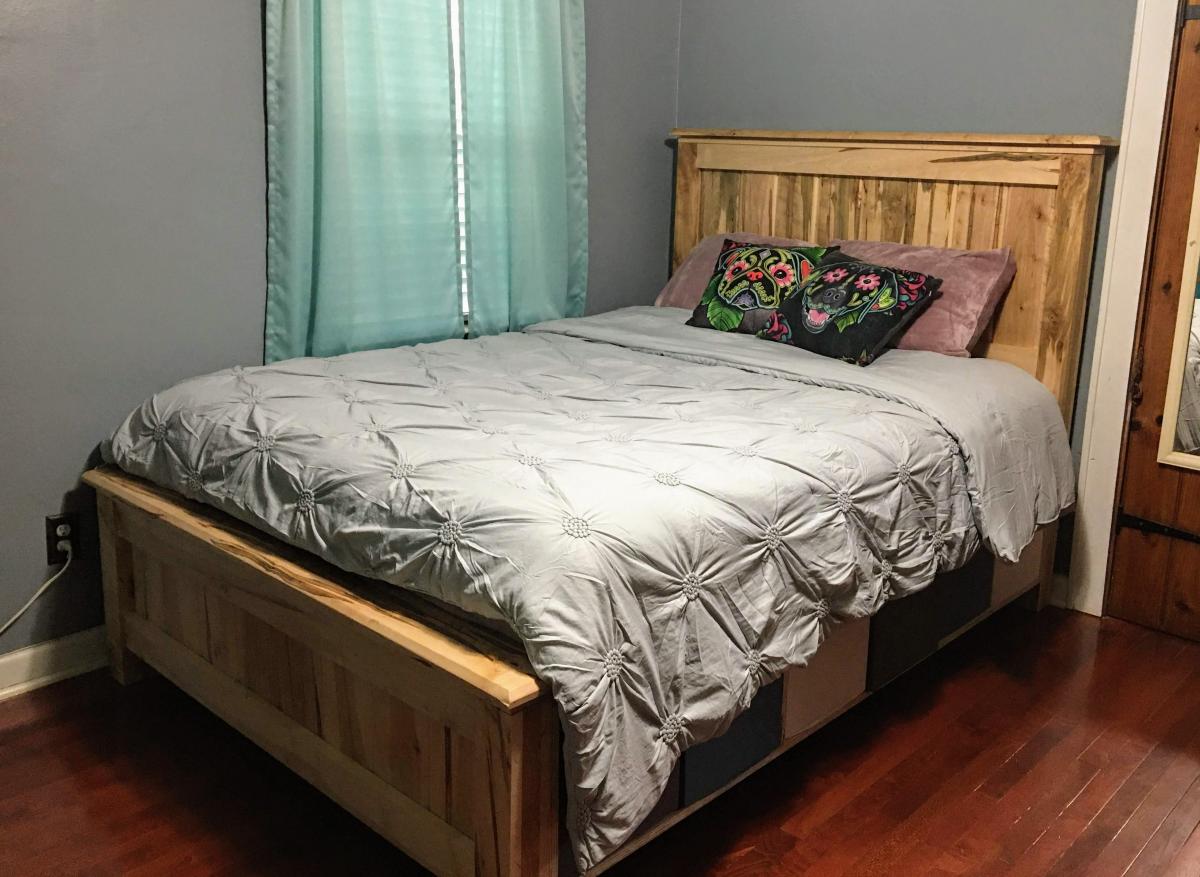
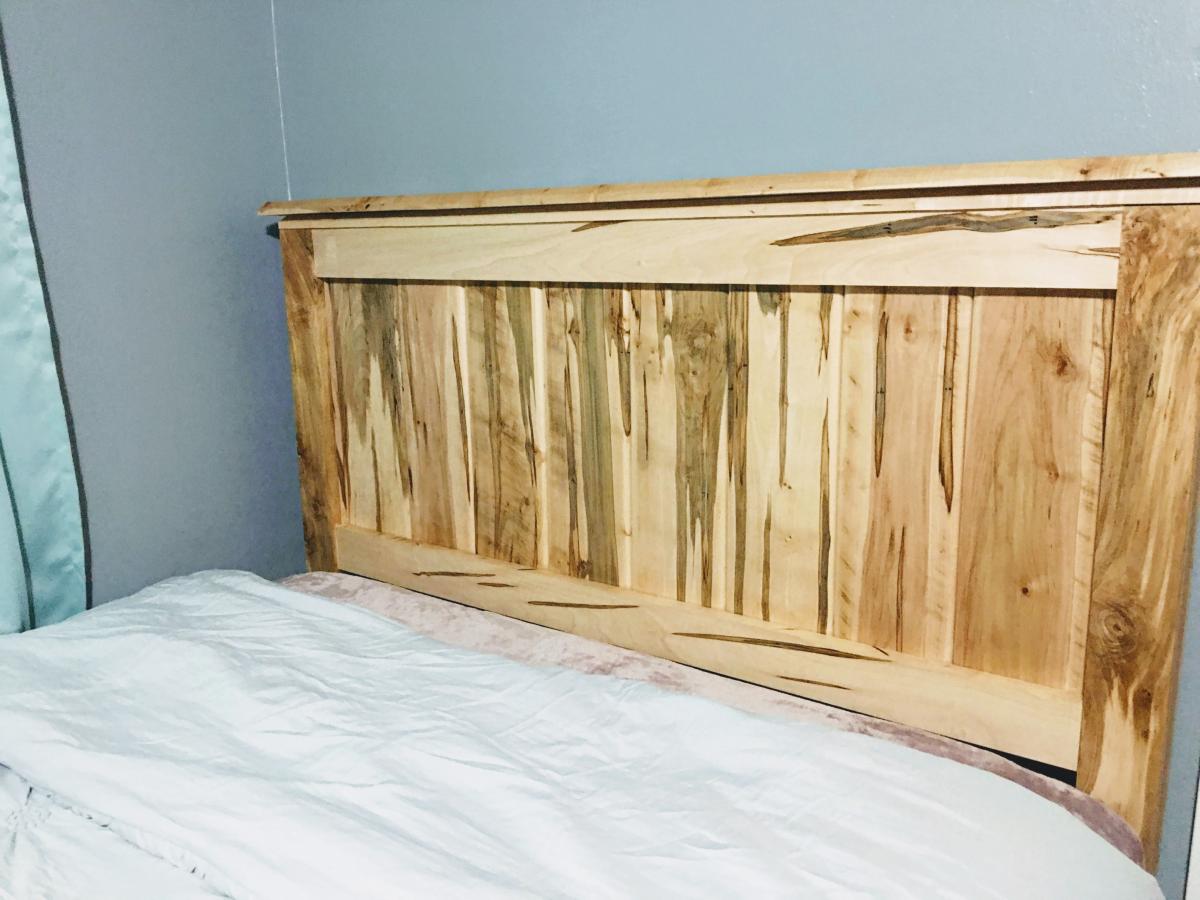
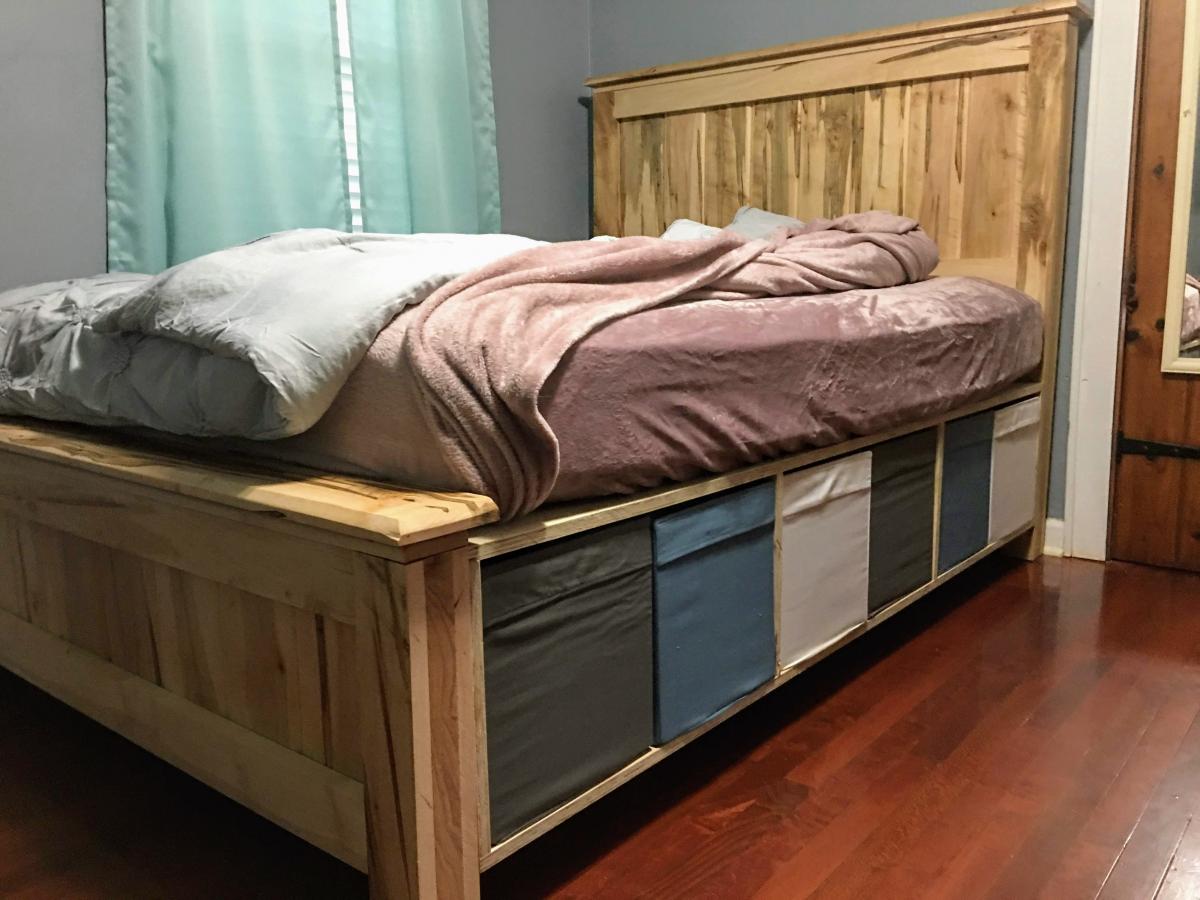
Ana's King Farmhouse Bed inspired me. I built this and added some decorative molding and tin tiles I purchased from Wayfair. I am very happy with the way it turned out. Thank you Ana White
Cathy B
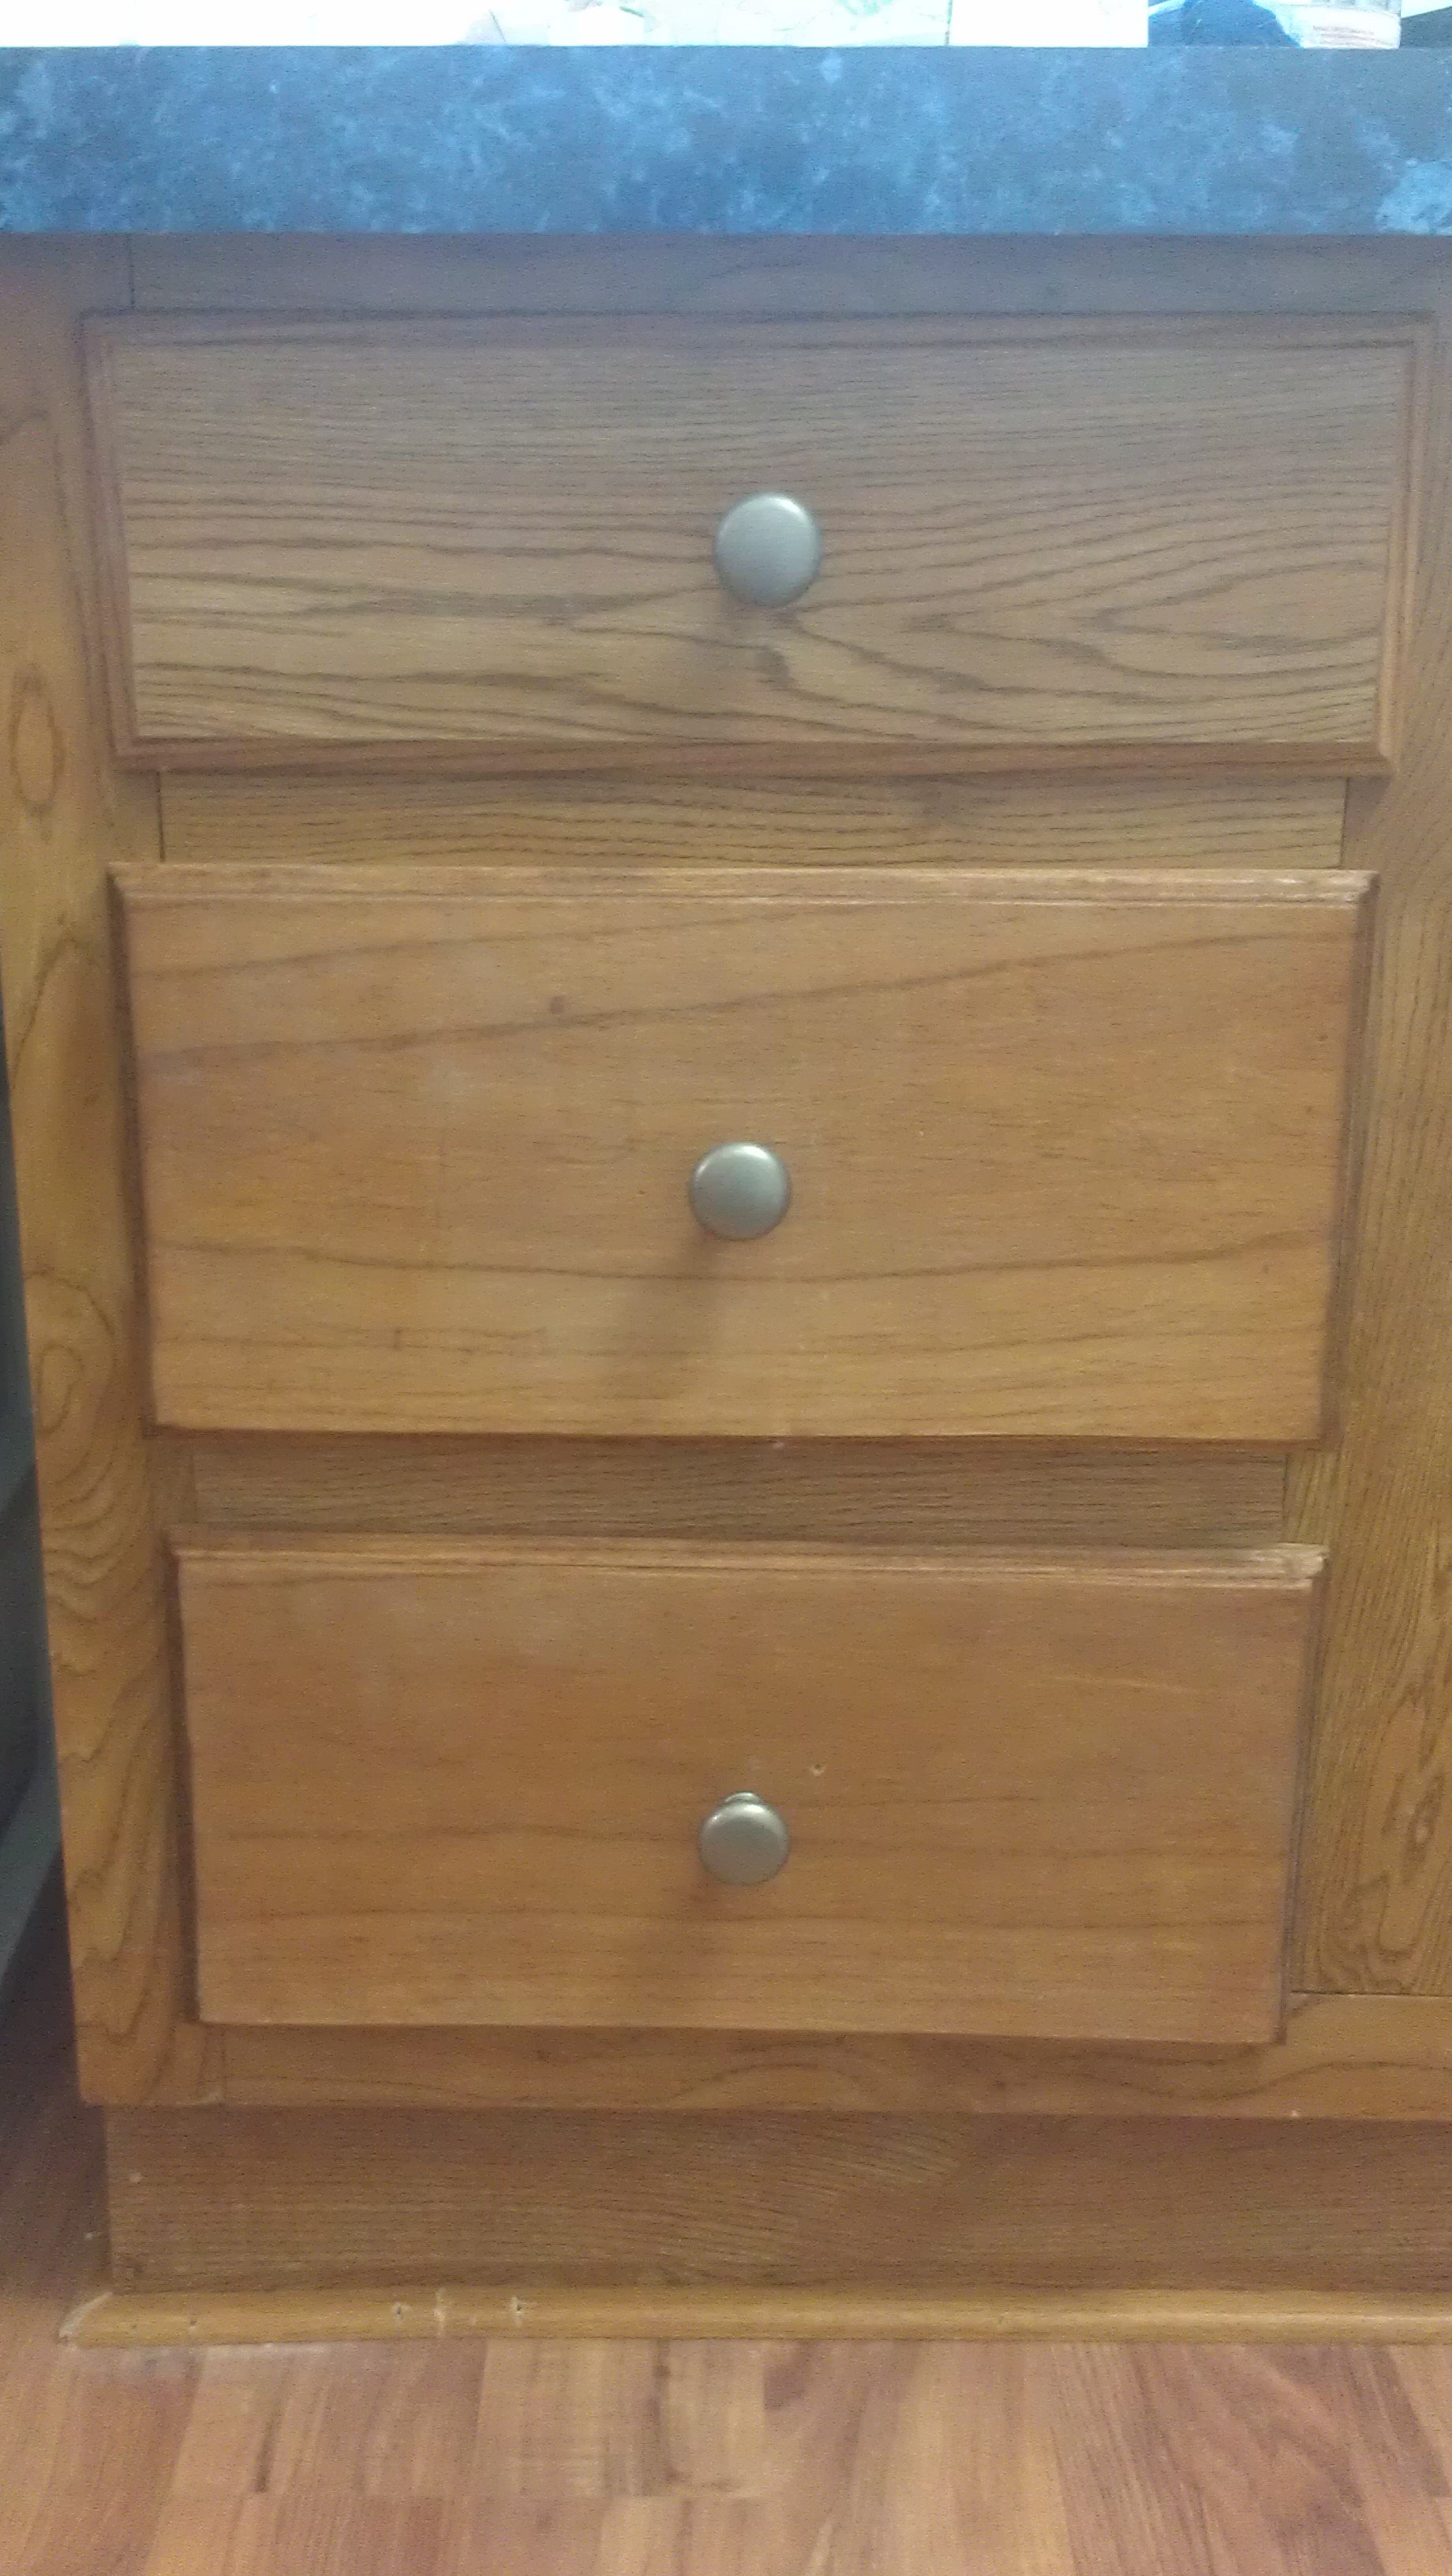
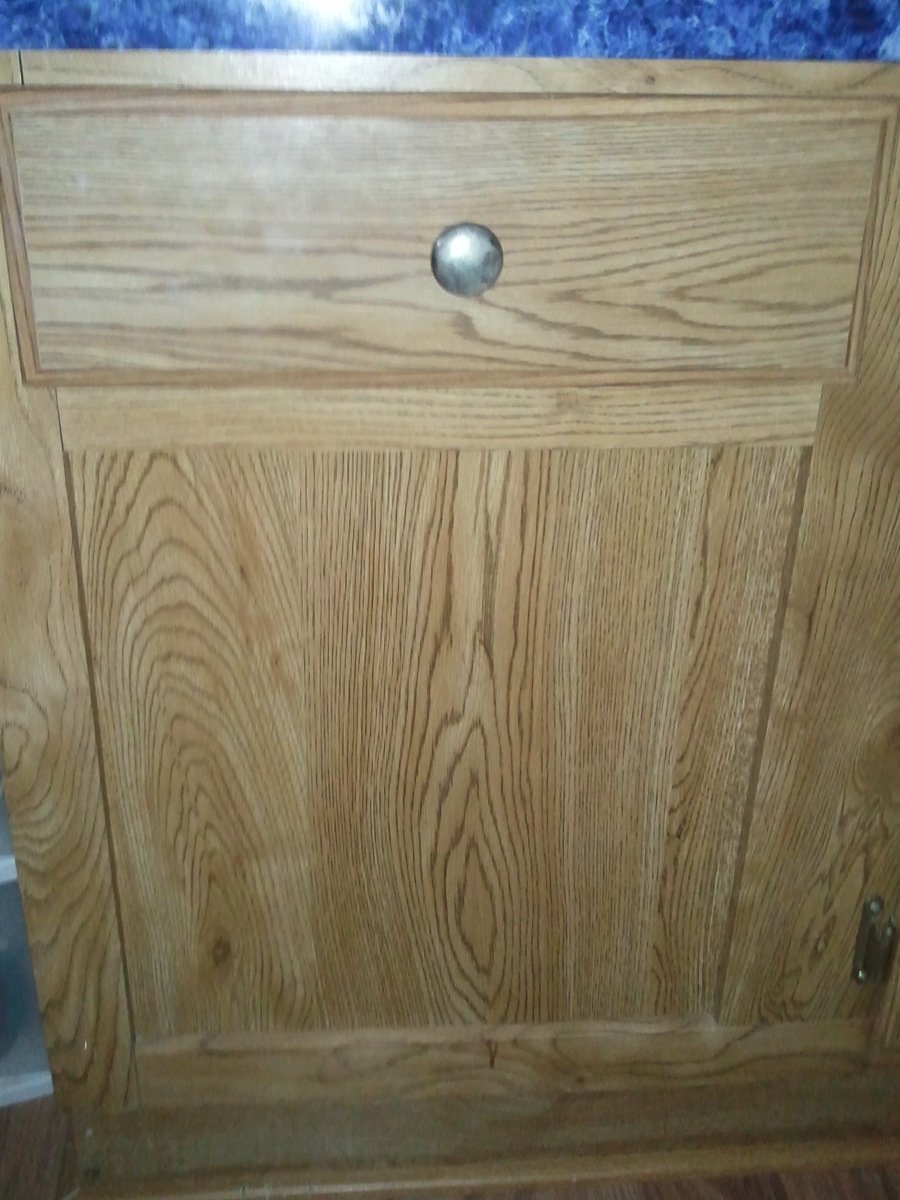
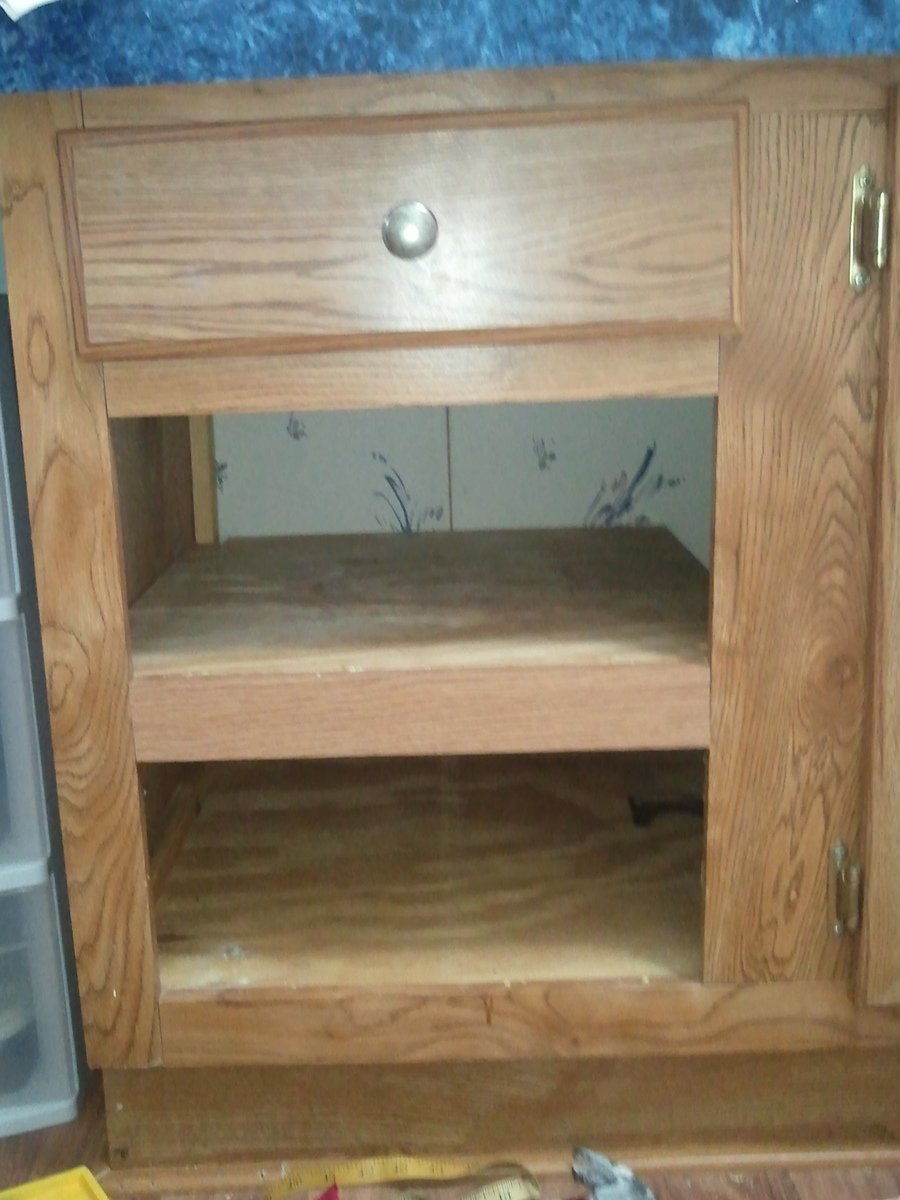
I bought my home a few years ago. The only thing about my bathroom I didn't like was the lack of storage. The cabinet only had one drawer with a panel below covering a large empty wasted space. I was told by 2 cabinet makers that I would need to replace my bathroom cabinets, but when I saw Ana's success, I thought "I can do this".
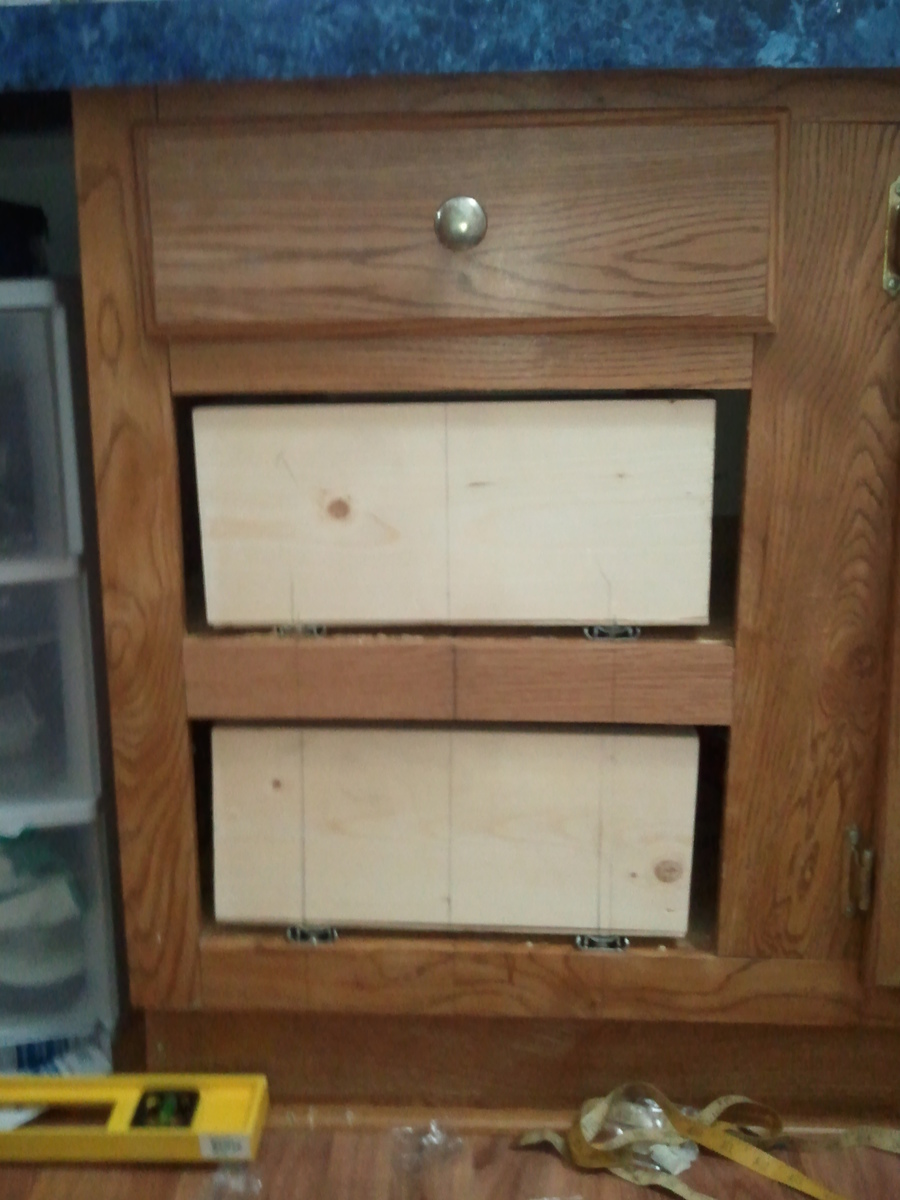
My woodworking experience is pretty limited, so things took a little longer than I would have preferred. The first weekend was spent popping the panel and building the shelf out of plywood & luan for the drawer bottom (thank you Home Depot cull section). The second weekend was spent making the drawers using a pocket jig and installing them into the cabinet. You WILL need a 90 degree clamp to assemble drawers, trust me. Third weekend was spent making the drawer fronts and staining them. I had never used a router so I practiced on every piece of scrap I could lay hands on. Since the cabinets were older and not made of solid wood, I had to play with the stains to ge the formula right; remember the scrap wood? It's baaack. The fourth weekend was spent pulling everything together.
When I show my family what I did, they look at me in disbelief. I know they're just drawers, but this is proof that I can make real changes to my home that has long lasting benefits. The bathroom still has a long way to go, but I know now that I don't have to hire someone to do it all.
Wed, 03/14/2012 - 19:14
Love the routed edges! It gives it a very polished finishing touch!
We must have had the same bathroom builder because I have that same single drawer with empty space underneath.
Thu, 03/15/2012 - 10:50
Thanks! I had never used a router before so I must have gone through every piece of scrap wood I could find. I even cut down the scrap wood so I could get a new straight edge.
Thu, 03/15/2012 - 10:57
I took pictures and showed them to the men I bought the lumber from when I finally finished, to show them how the project turned out. It may have freaked them out a little to have a crazy woman run up with her cell phone, but they were happy for me.
When I showed one of the people who recommended the cabinet makers (the one's who told me what I wanted was impossible) what I had done, they just rolled their eyes at me. Pssh, experts. Deep down, he was impressed. Really deep down;)
Thu, 03/15/2012 - 09:51
Just a question. Did you consider/try to use the wood from the panel you removed for the drawer fronts instead of using something new and having to try and finish it?
Thu, 03/15/2012 - 10:48
I thought about that, but it was basically luan with a "wood like" veneer attached to it, so it was about 1/4" thick, and the original drawer front was made from 1" stock.
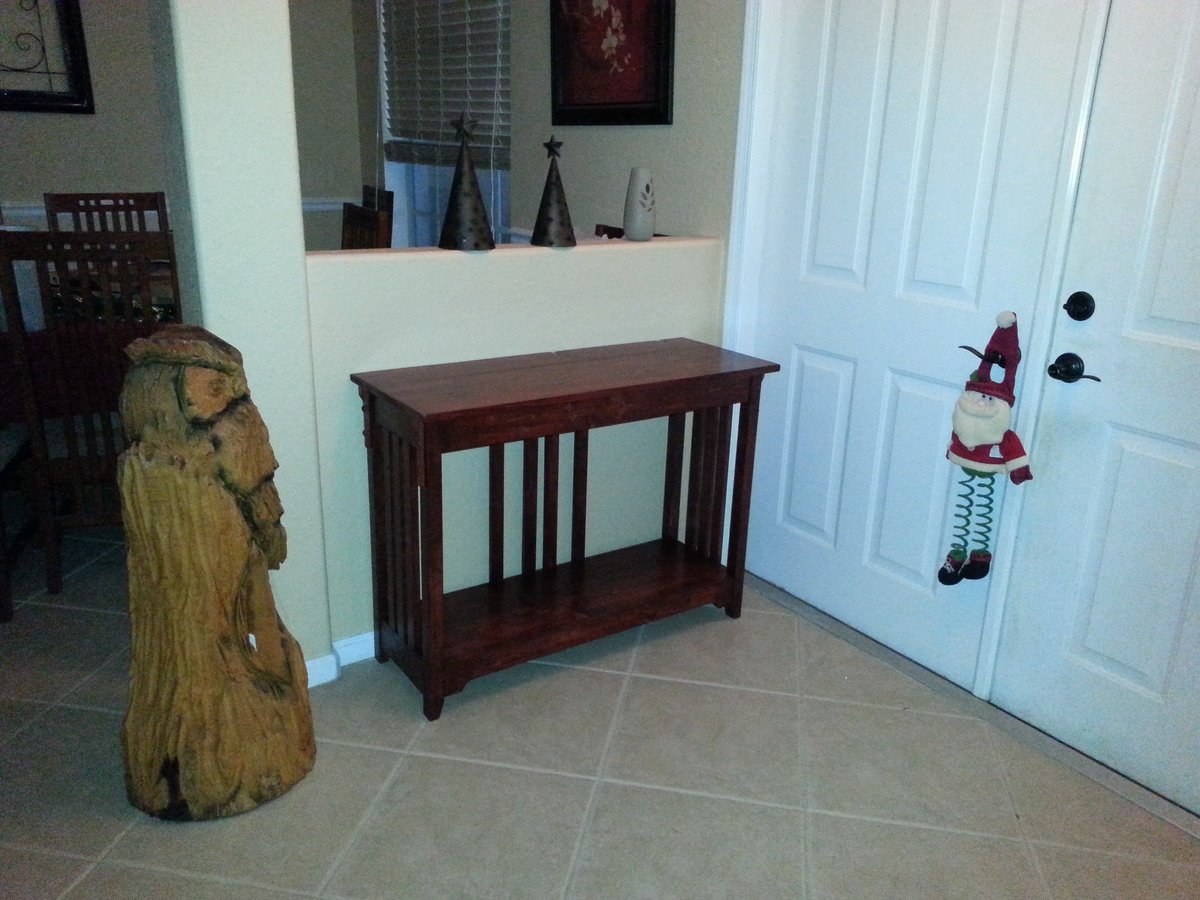
Built for my sisters house. I pulled a pic of a mission style table from the internet and then matched the details to her existing hutch. Color match took some work!
Just a tip for Florida folks. If it is humid and raining...stop and wait for another day to stain and poly. Trust me.
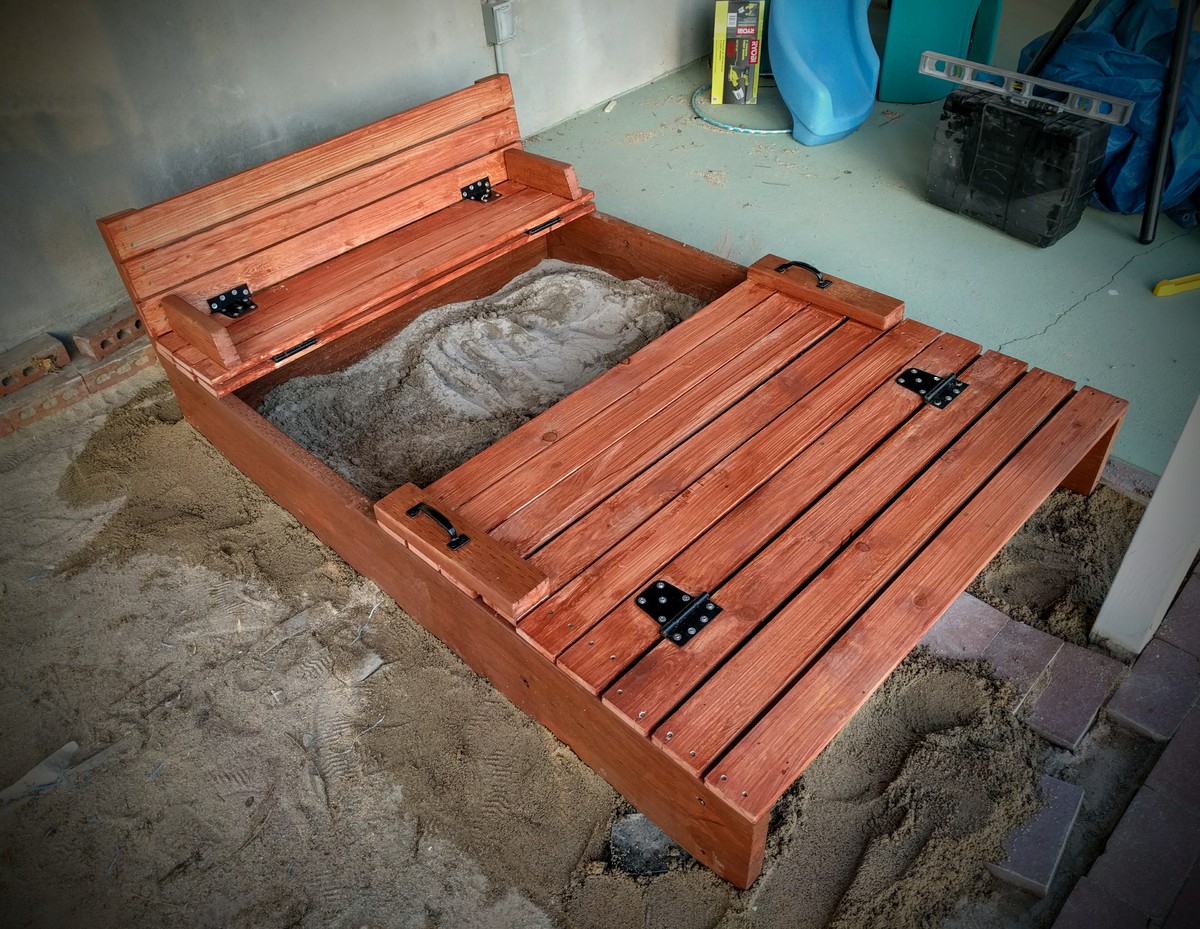
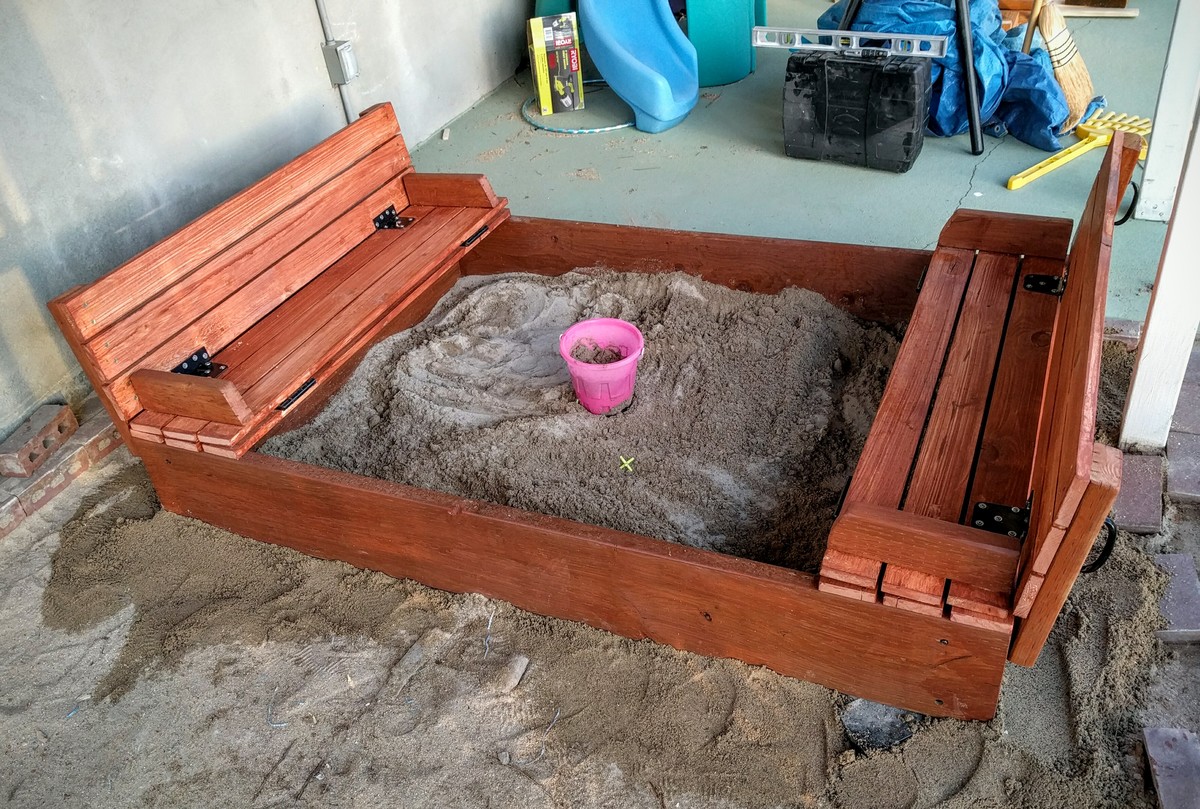
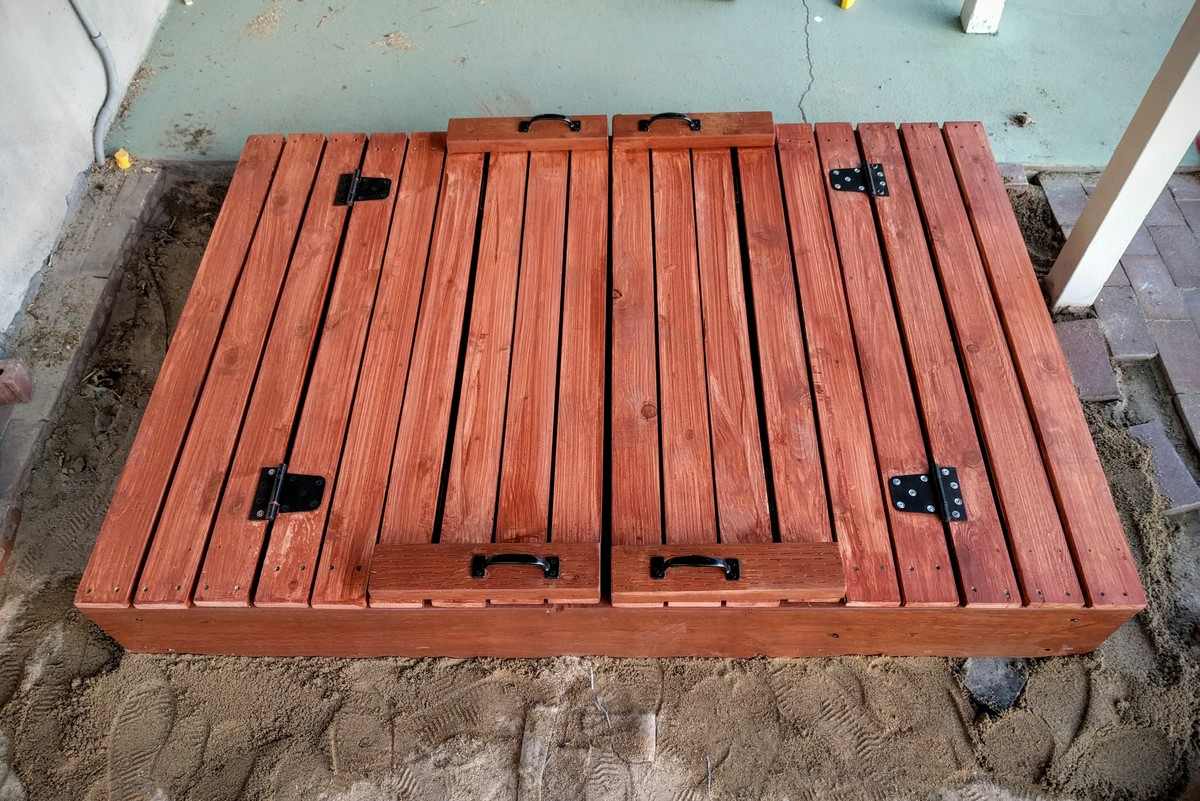
I made a few modifications that I think people starting this project may want to know. 1. 4x4 box gets a little tight for more than one kid. I chose 4x6 so that the bench dimensions would scale up to 3 slats per section correctly, but the length of 1x4 boards would not have to be lengthened, which would required additional support. 2. As a rule of thumb, any outdoor lumber that may have prolonged exposure to water (IE. Touching the ground) should be pressure treated. I couldn't find 1" thick treated boards, so the box uses 2x10 boards. 3. Used a redwood semi-transparent stain.
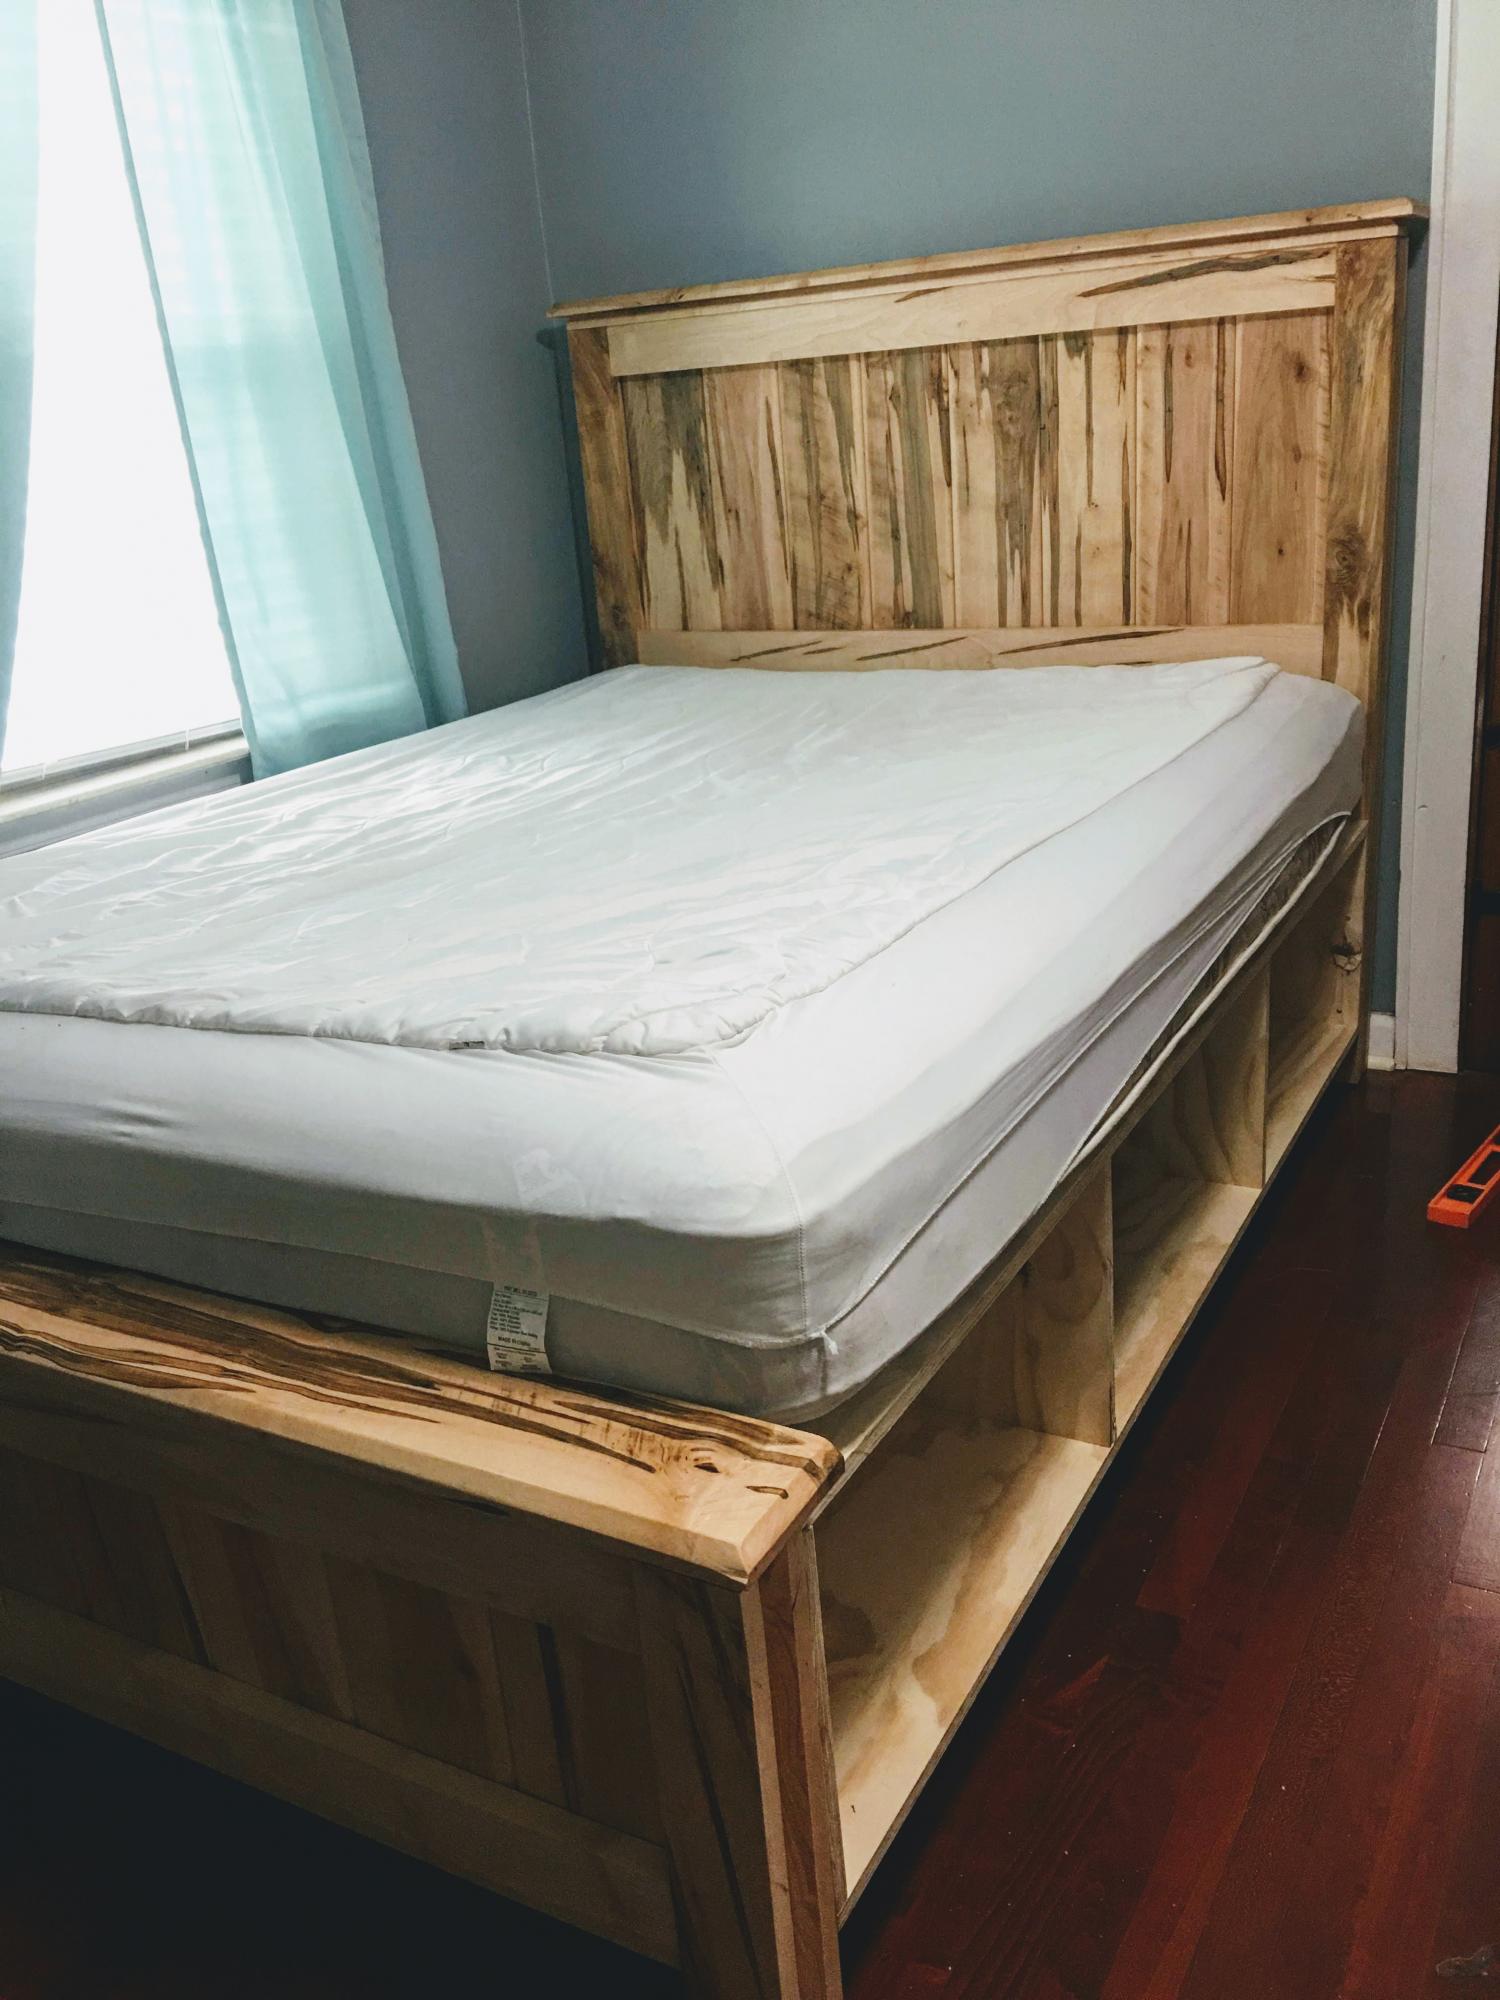
Beautiful showcase of maple wood. Love the storage
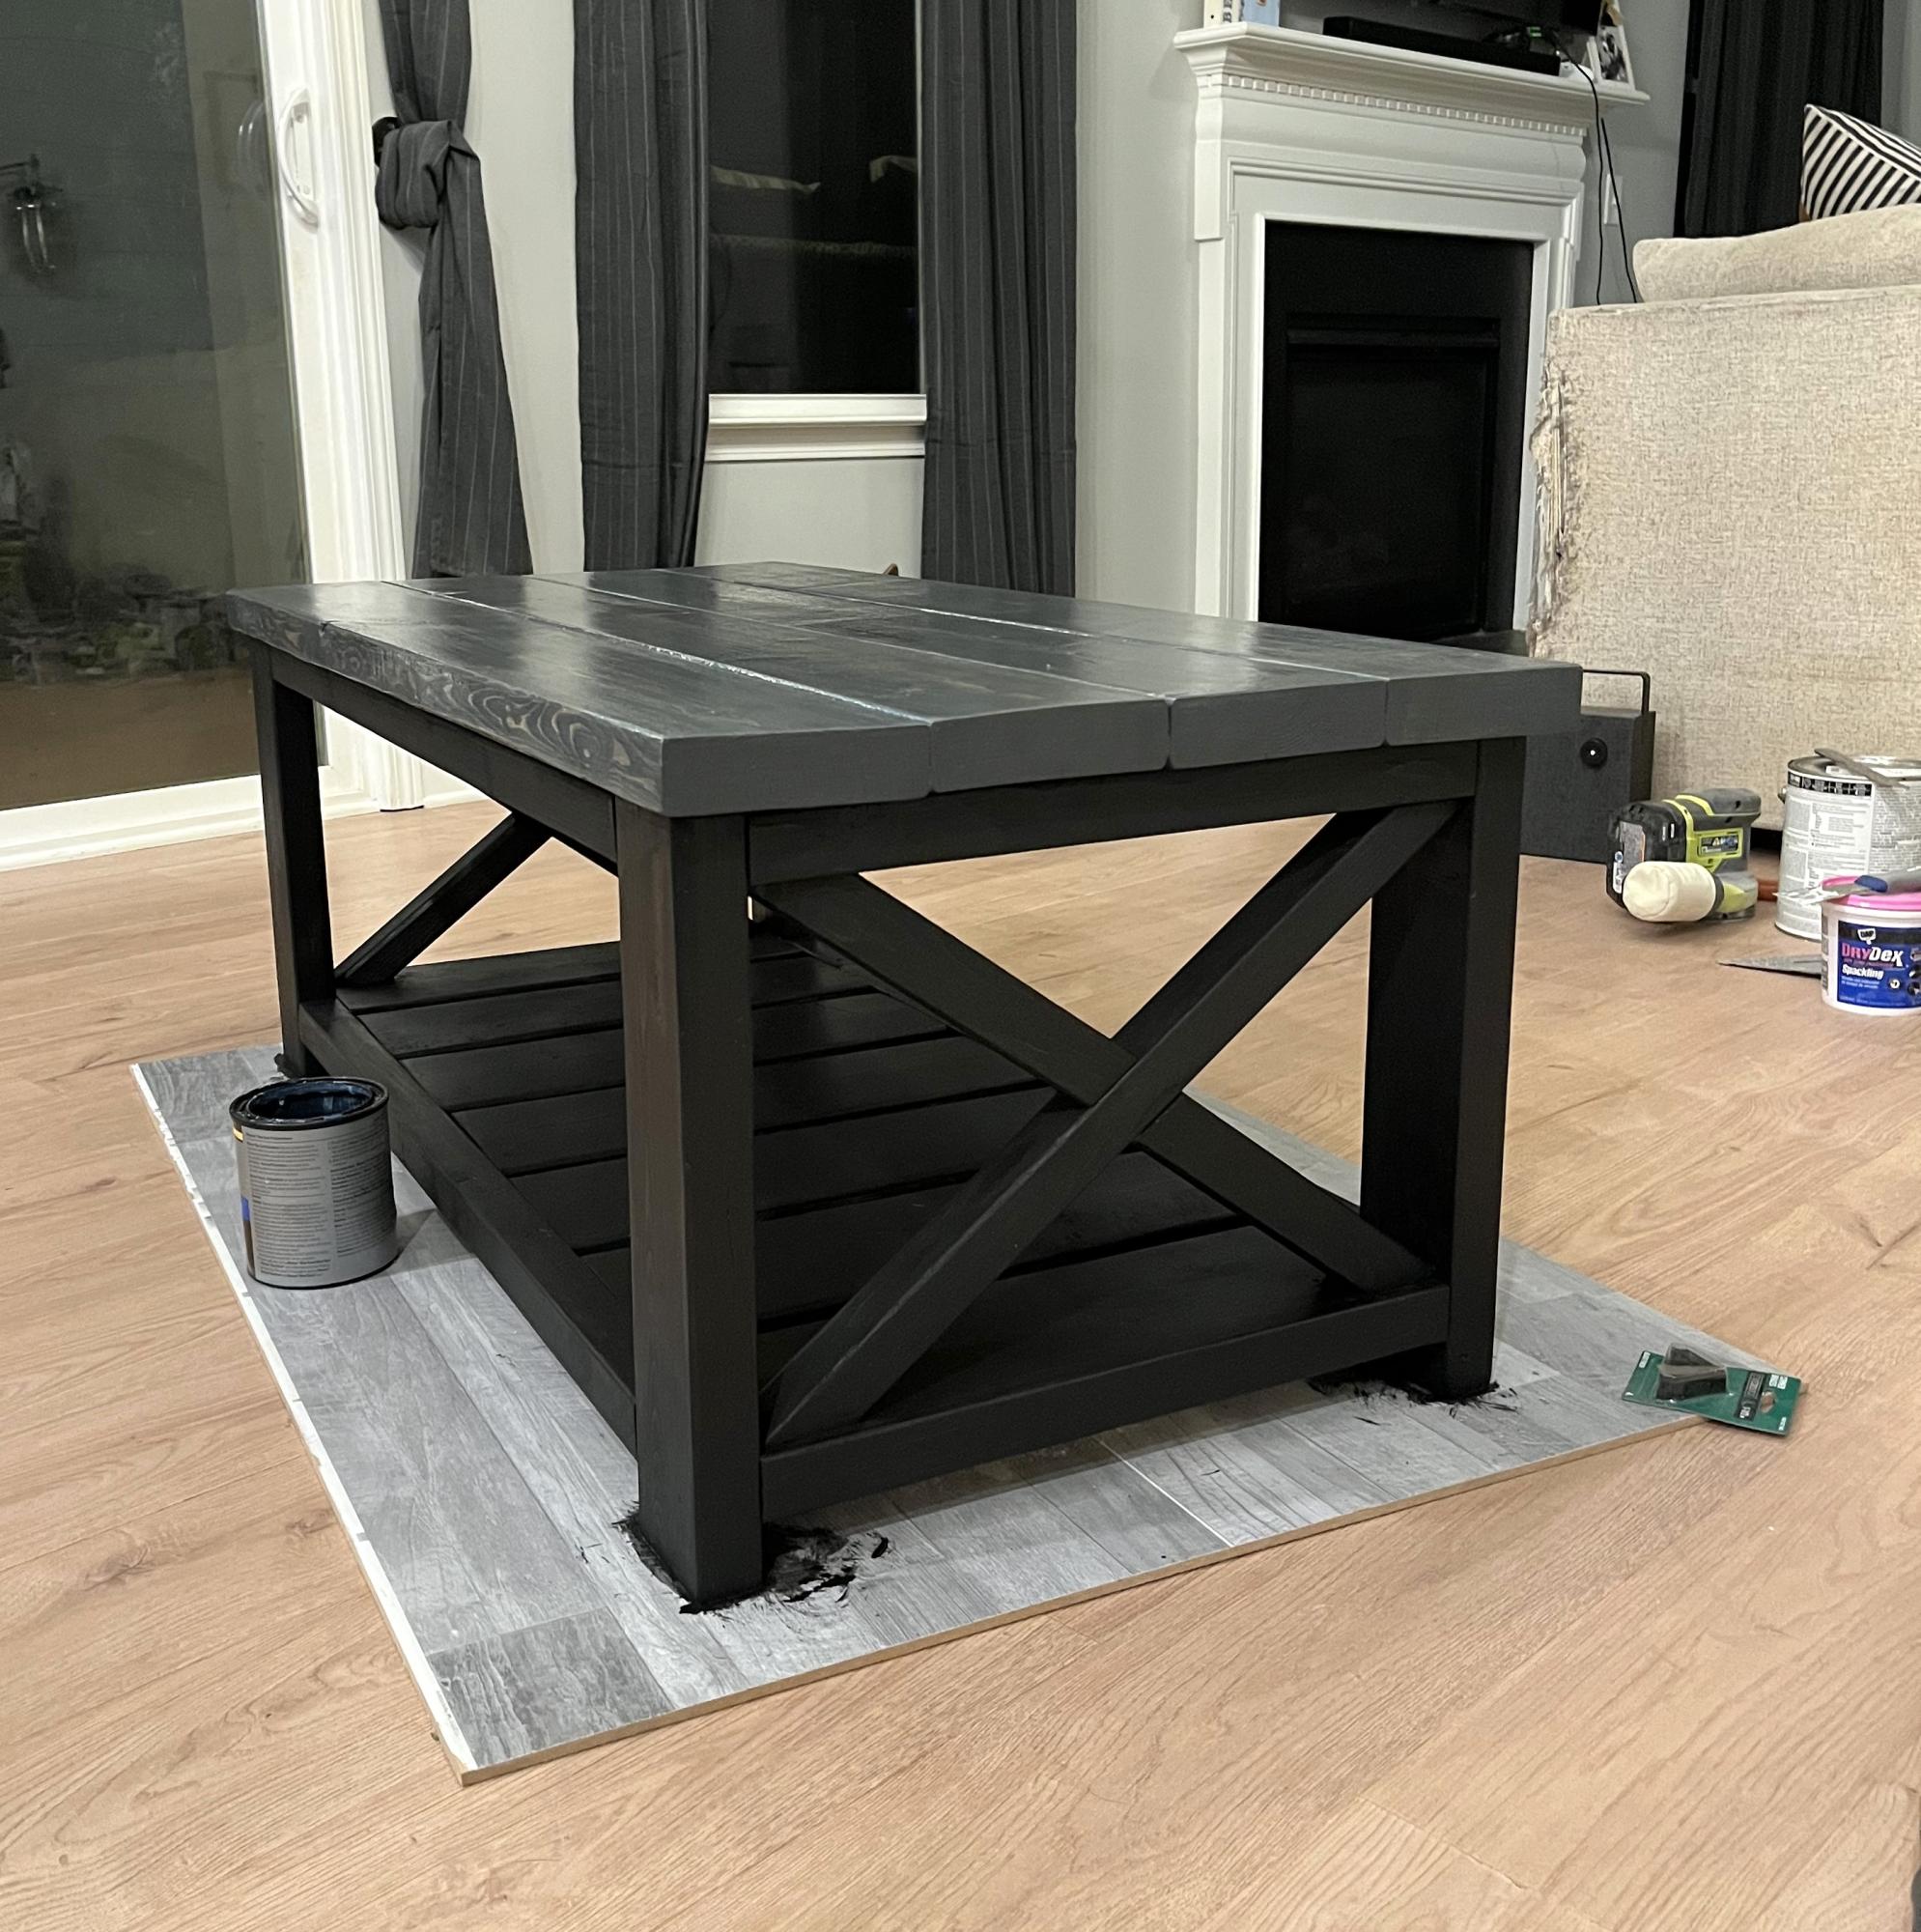
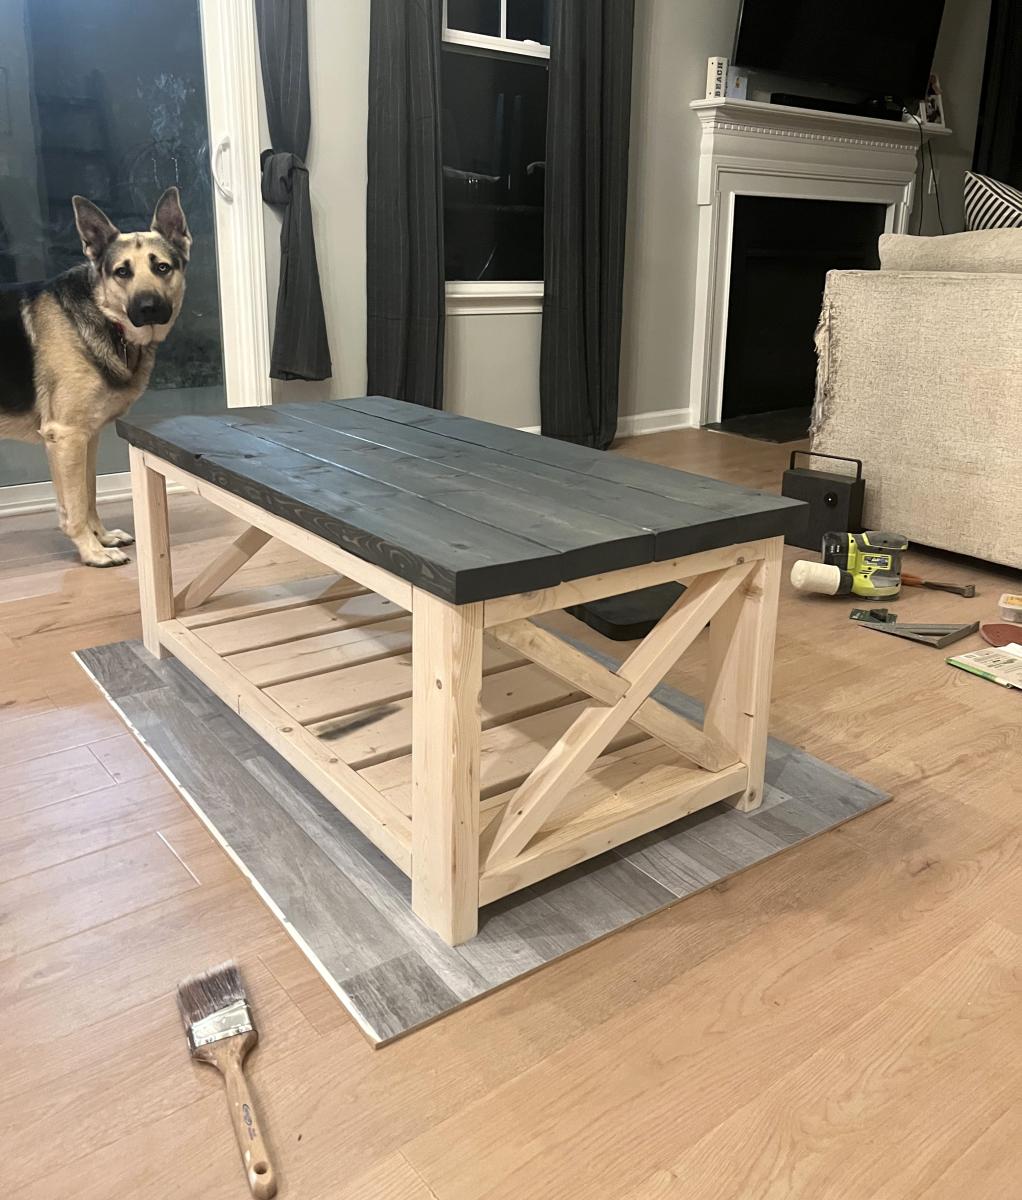
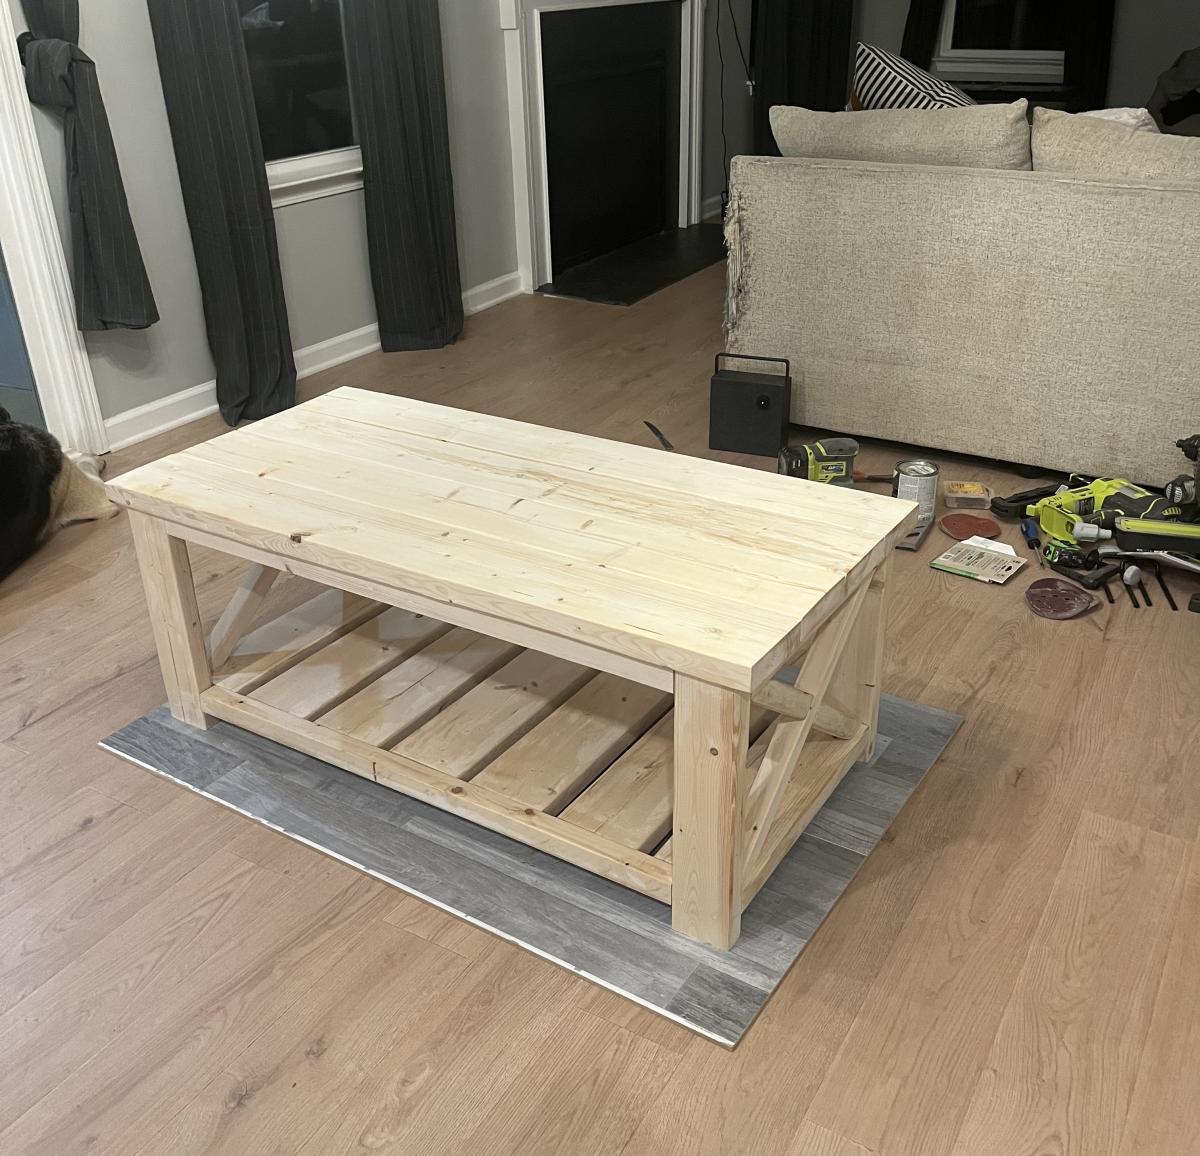
Farm house coffee table. I painted the bottom black and stained the top a dark gray color. I don’t ask happily surprised on how easy it was to build this table and how strong and sturdy it is! From start to finish it took me 9 hours, paint and all. Highly recommend this plan.
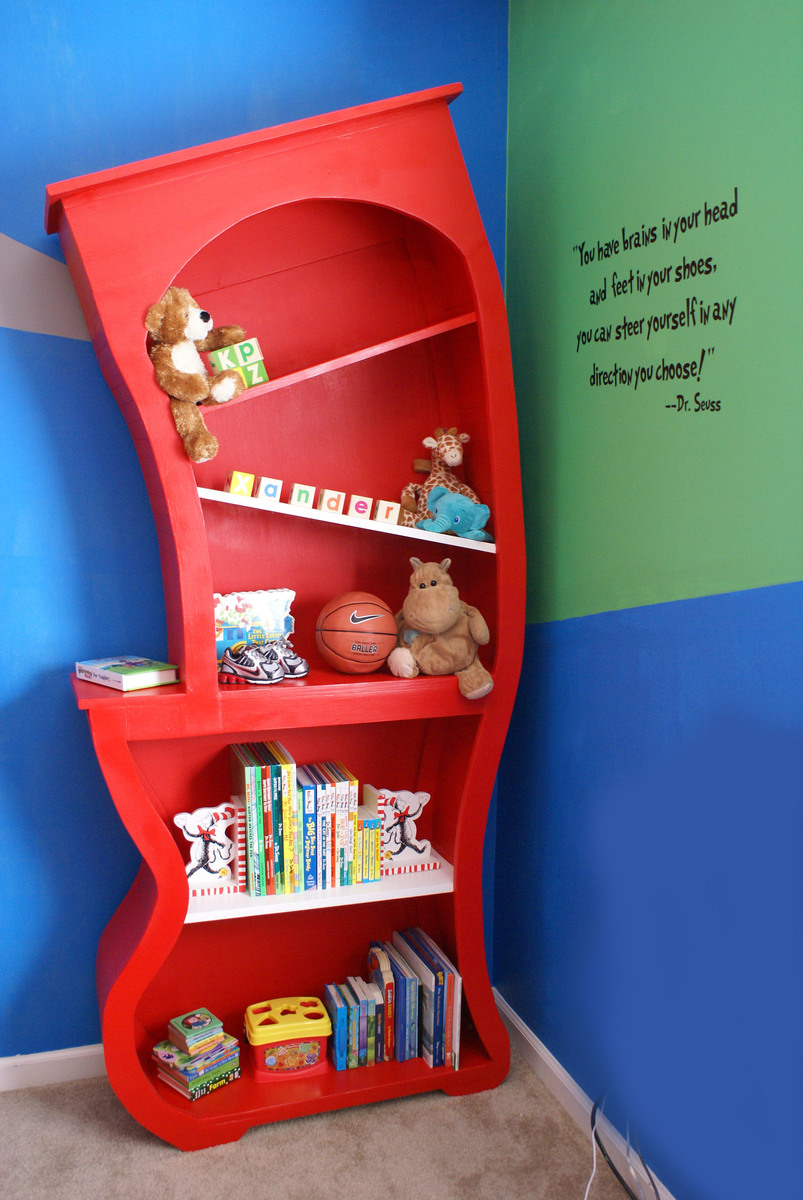
This was a Baby Gift for my sister and her little boy, Xander who was born just a couple weeks ago. I wanted to do something special that would last for my sweet nephew. She found a bookshelf similar to this on cool-rooms.com and we decided to try to make our own version. I've posted about it on my blog if you're interested in the process.
Sun, 03/18/2012 - 16:03
The best 'plans' I could come up for this are described here on my blog post for this... not too specific, but hopefully gives you a good idea of the process: http://alabahamians.blogspot.com/2012/03/dr-seuss-bookshelf-for-sweet-b…
Thanks for the sweet comments!!!
Mon, 01/22/2018 - 17:52
I would love to see the instructions you have in your blog, but it says you must be invited to see the blog. May I have access? Thanks! Brooke
Mon, 01/22/2018 - 17:52
I would love to see the instructions you have in your blog, but it says you must be invited to see the blog. May I have access? Thanks! Brooke
Sun, 03/18/2012 - 19:22
Clever cute creative. Cant stop looking at it. I love it. Thank you so much for posting.
Sun, 03/18/2012 - 19:52
Thank you so much for posting .You did a beautiful job. Your a good sister and a Terrific aunt.
Sun, 03/18/2012 - 22:16
WOW!!!!!! Wow wow wow wow!!! This is just beyond cool.
Sun, 03/18/2012 - 23:30
I love how you have taken a typical shelf and gave it a spark that is SO ONE of a KIND! WOW! This gives me ideas! There is just not enough time in the day thought.
Thank you for sharing your Awesome creativity. Your Family is SO lucky to have someone as talented as you! Keep up the good JOB!!!
Again AMAZING!!!
This is our first project from the site and we are in LOVE with our table. We spent a few weekends building it and another weekend staining. We always wanted a table large enough to seat a big group for holidays or events. We can seat 10 comfortably (4 on each side with smaller chairs and 1 on each end.) Not only was this inexpensive (around $100 total), but it is a great sense of pride in our house. Knowing we built this with our own hands and telling others that we did so is amazing.
http://ana-white.com/2009/12/plans-farmhouse-table-knock-off-of.html

My daughter loves her new couch! This was such an easy project and a great way to reuse an outgrown crib mattress.
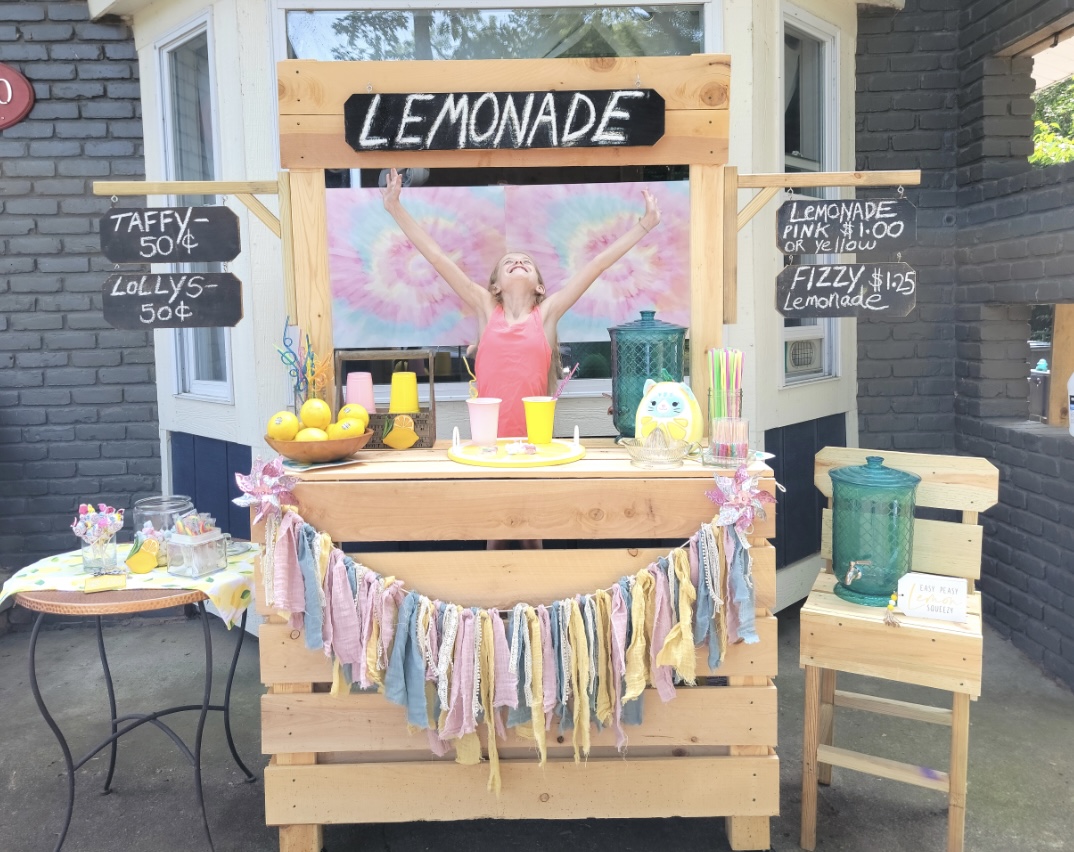
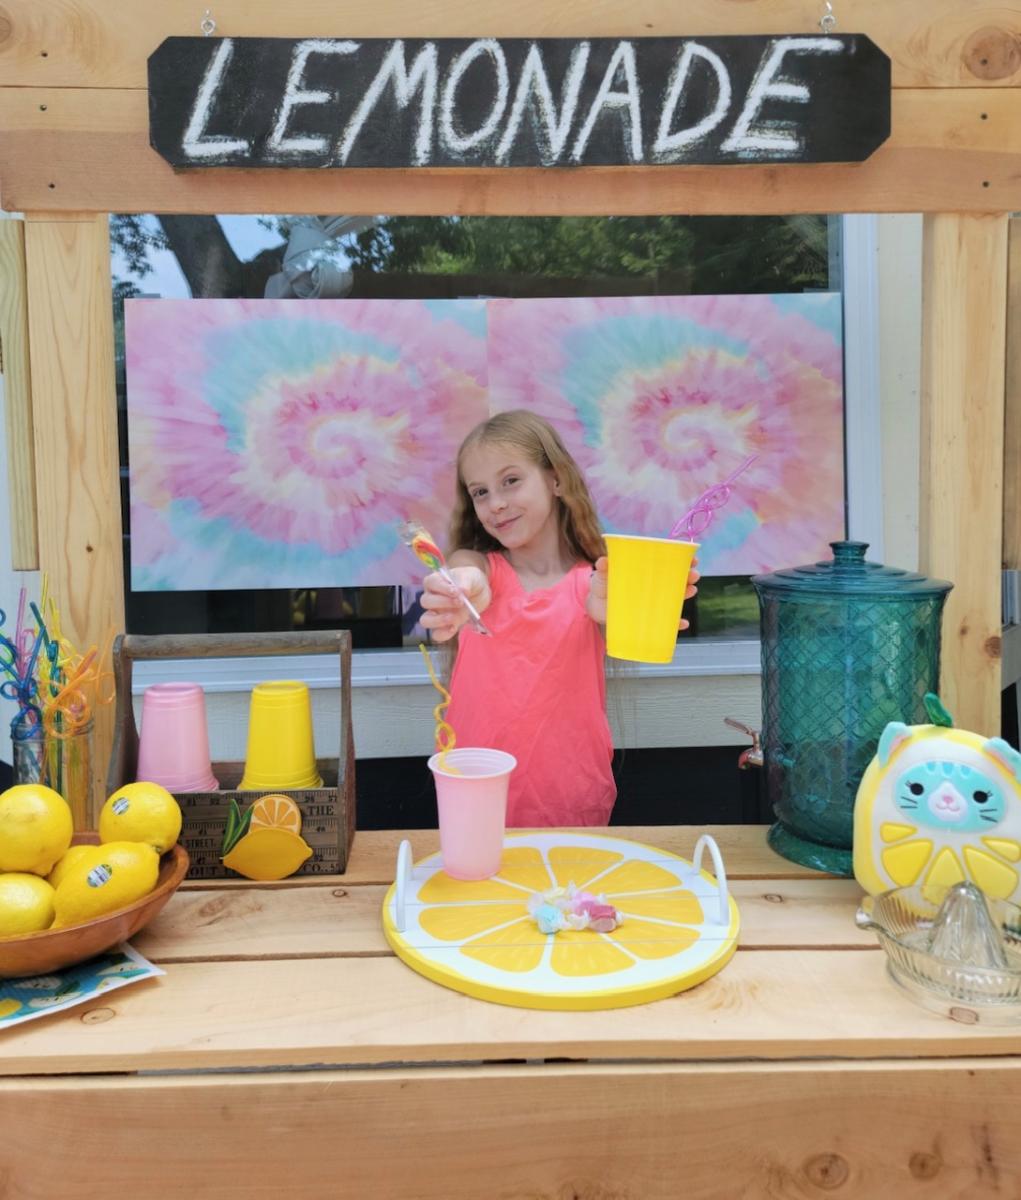
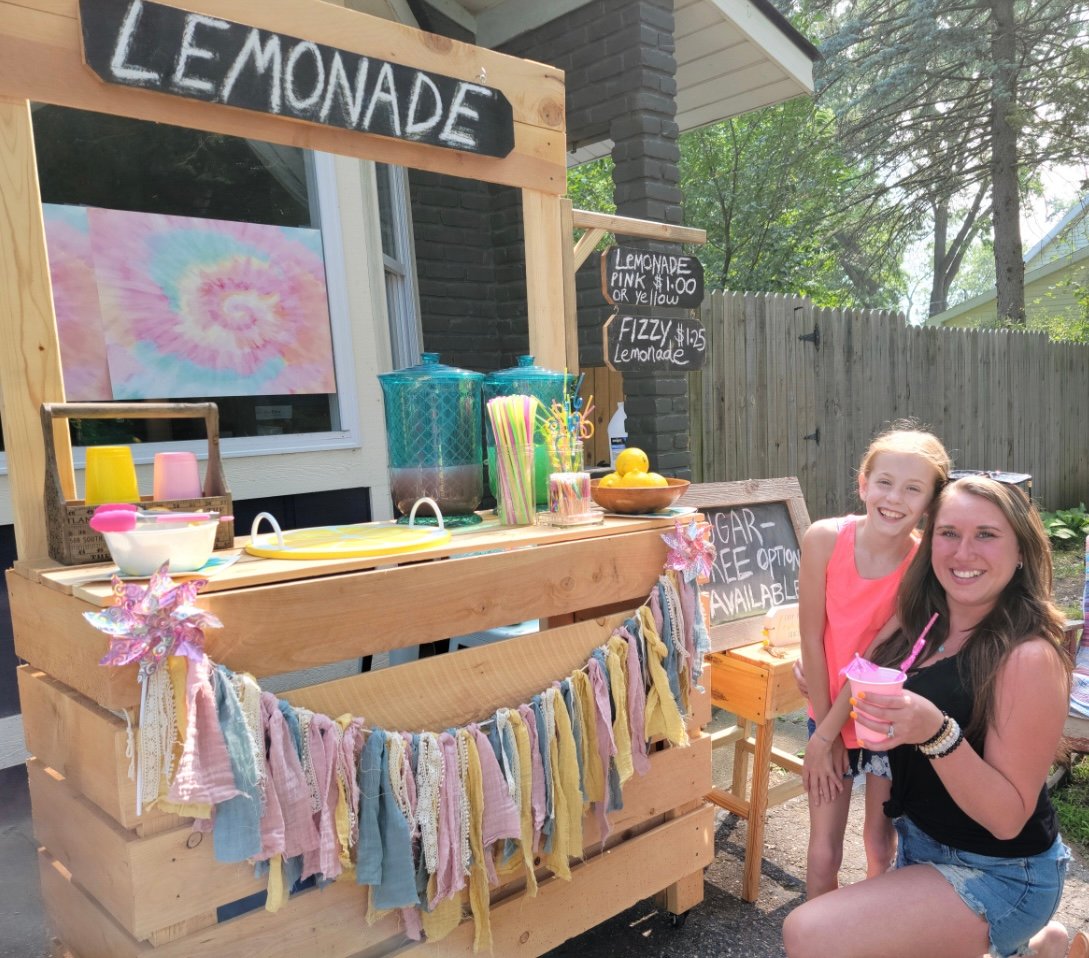
This is based on Ana's Lemonade Stand project- I made it taller and wider, added casters. It was a hit with the birthday girl and the customers!
Amy of The Navy House Goods Co. @thenavyhousegoodsco
Sun, 07/30/2023 - 15:47
Love your mods and the outcome is fantastic, thanks so much for sharing!
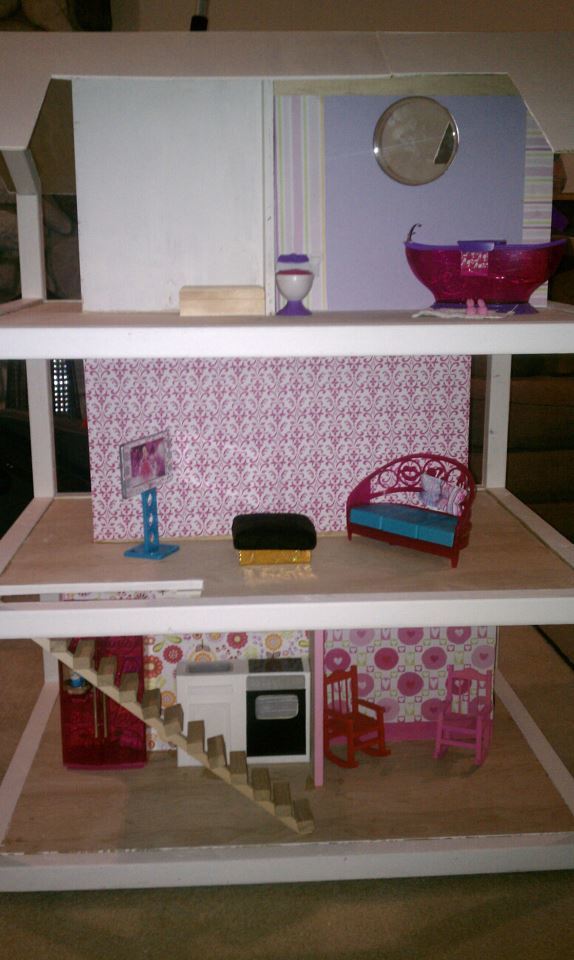
I built this dollhouse for my daughter's sixth birthday. It was a great experience and my first time using a KregJig. I ventured from the plans a bit and built cantilevered staircase with dollar store Jenga-type blocks.
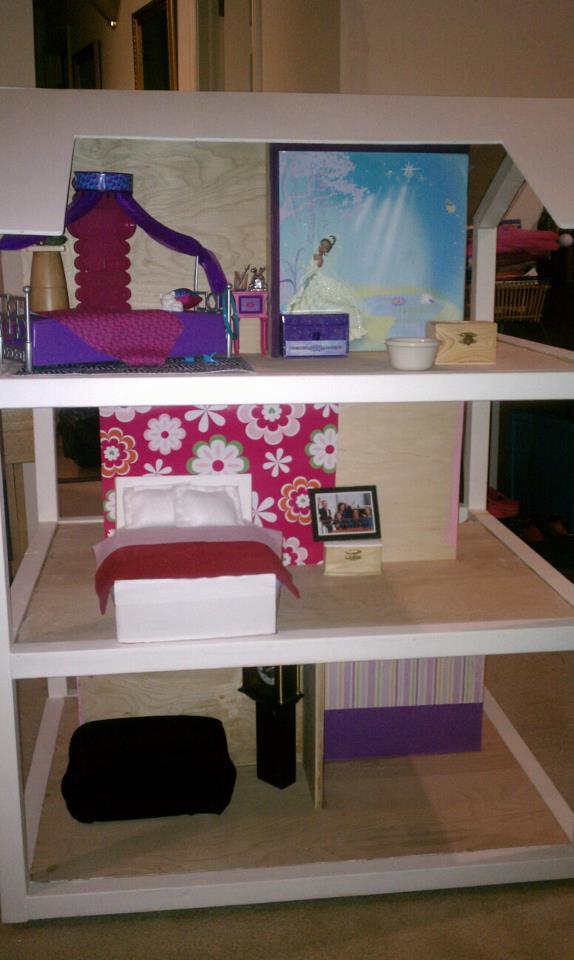
I got so inspired by Ana White I just assumed I can make anything just like her :D
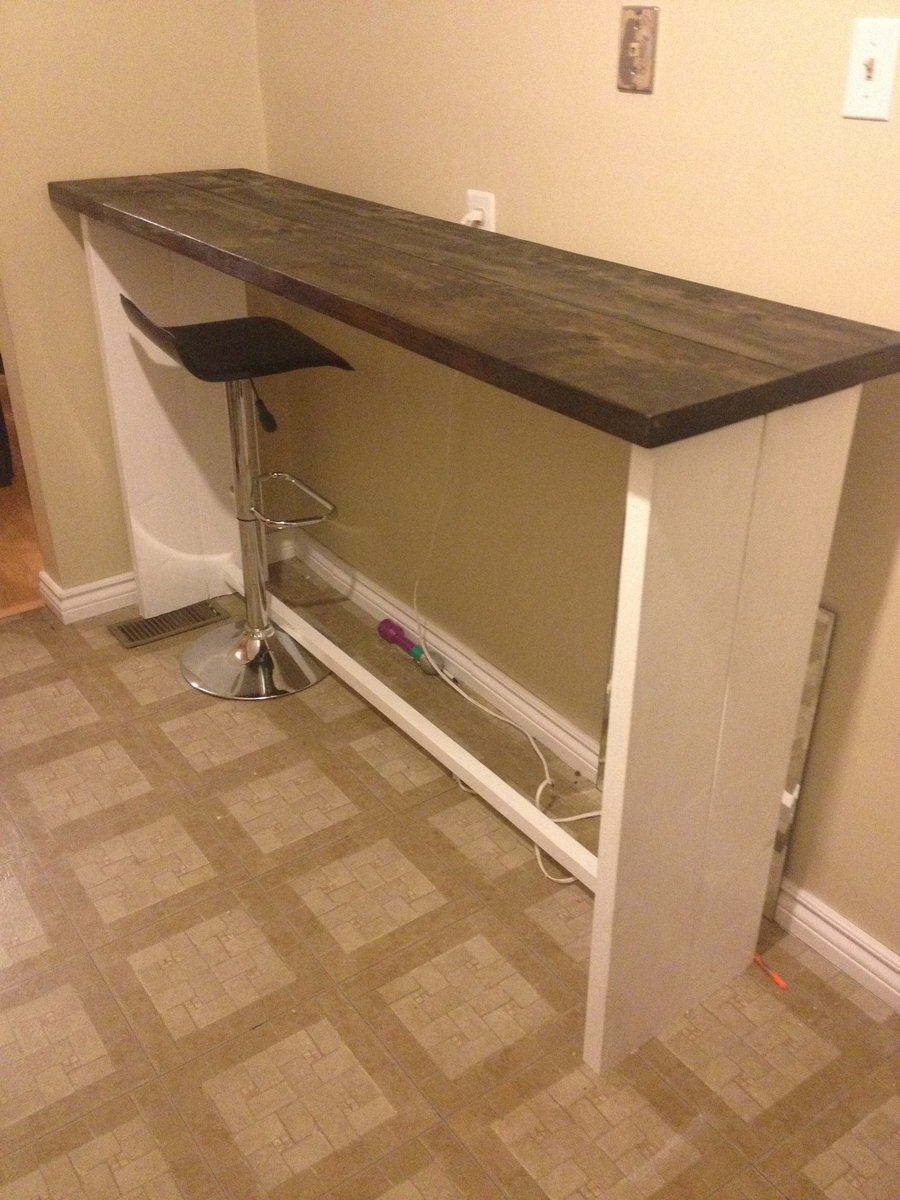
But deep inside I knew, I wasn't nearly as good as her :(
So when we needed a bar table of definite length and height and type and color and way out of our budget, I thought to myself "hey girl! you can do this ;)"
So I came up with this super easy plan.
You can read all about it from the link below

Sat, 02/13/2021 - 06:51
Hi Anna I have enjoyed coming to your page and have made many things from your plans but your page is so over run with pop up adds that it is jumping all over the place and give me a headace from all the movement sorry to say I must leave
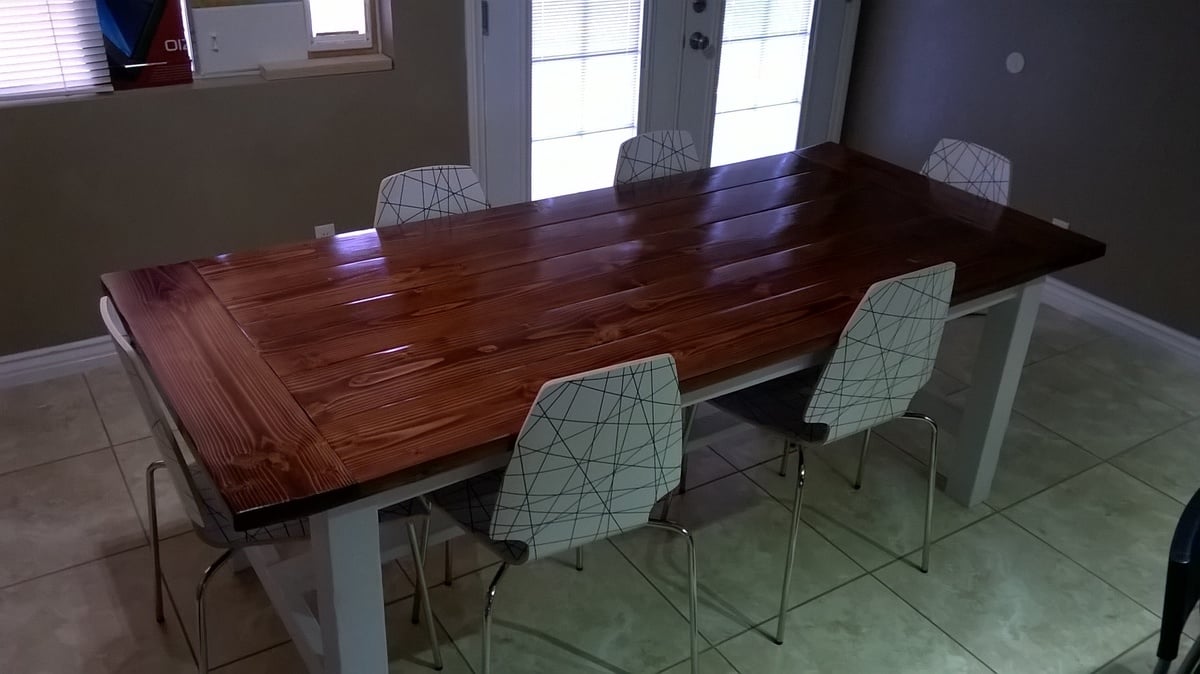
Built from the
Farmhouse Table - Updated Pocket Hole Plans. I used pine for all the wood, painted the bottom with white
Valspar Storm Coat, and table top with Miniwax Red Mahogany stain.
It's not purfect but, it turned out great.
Lessons learned
I need is a planer to make the boards straight, Belt sanding took a long time.
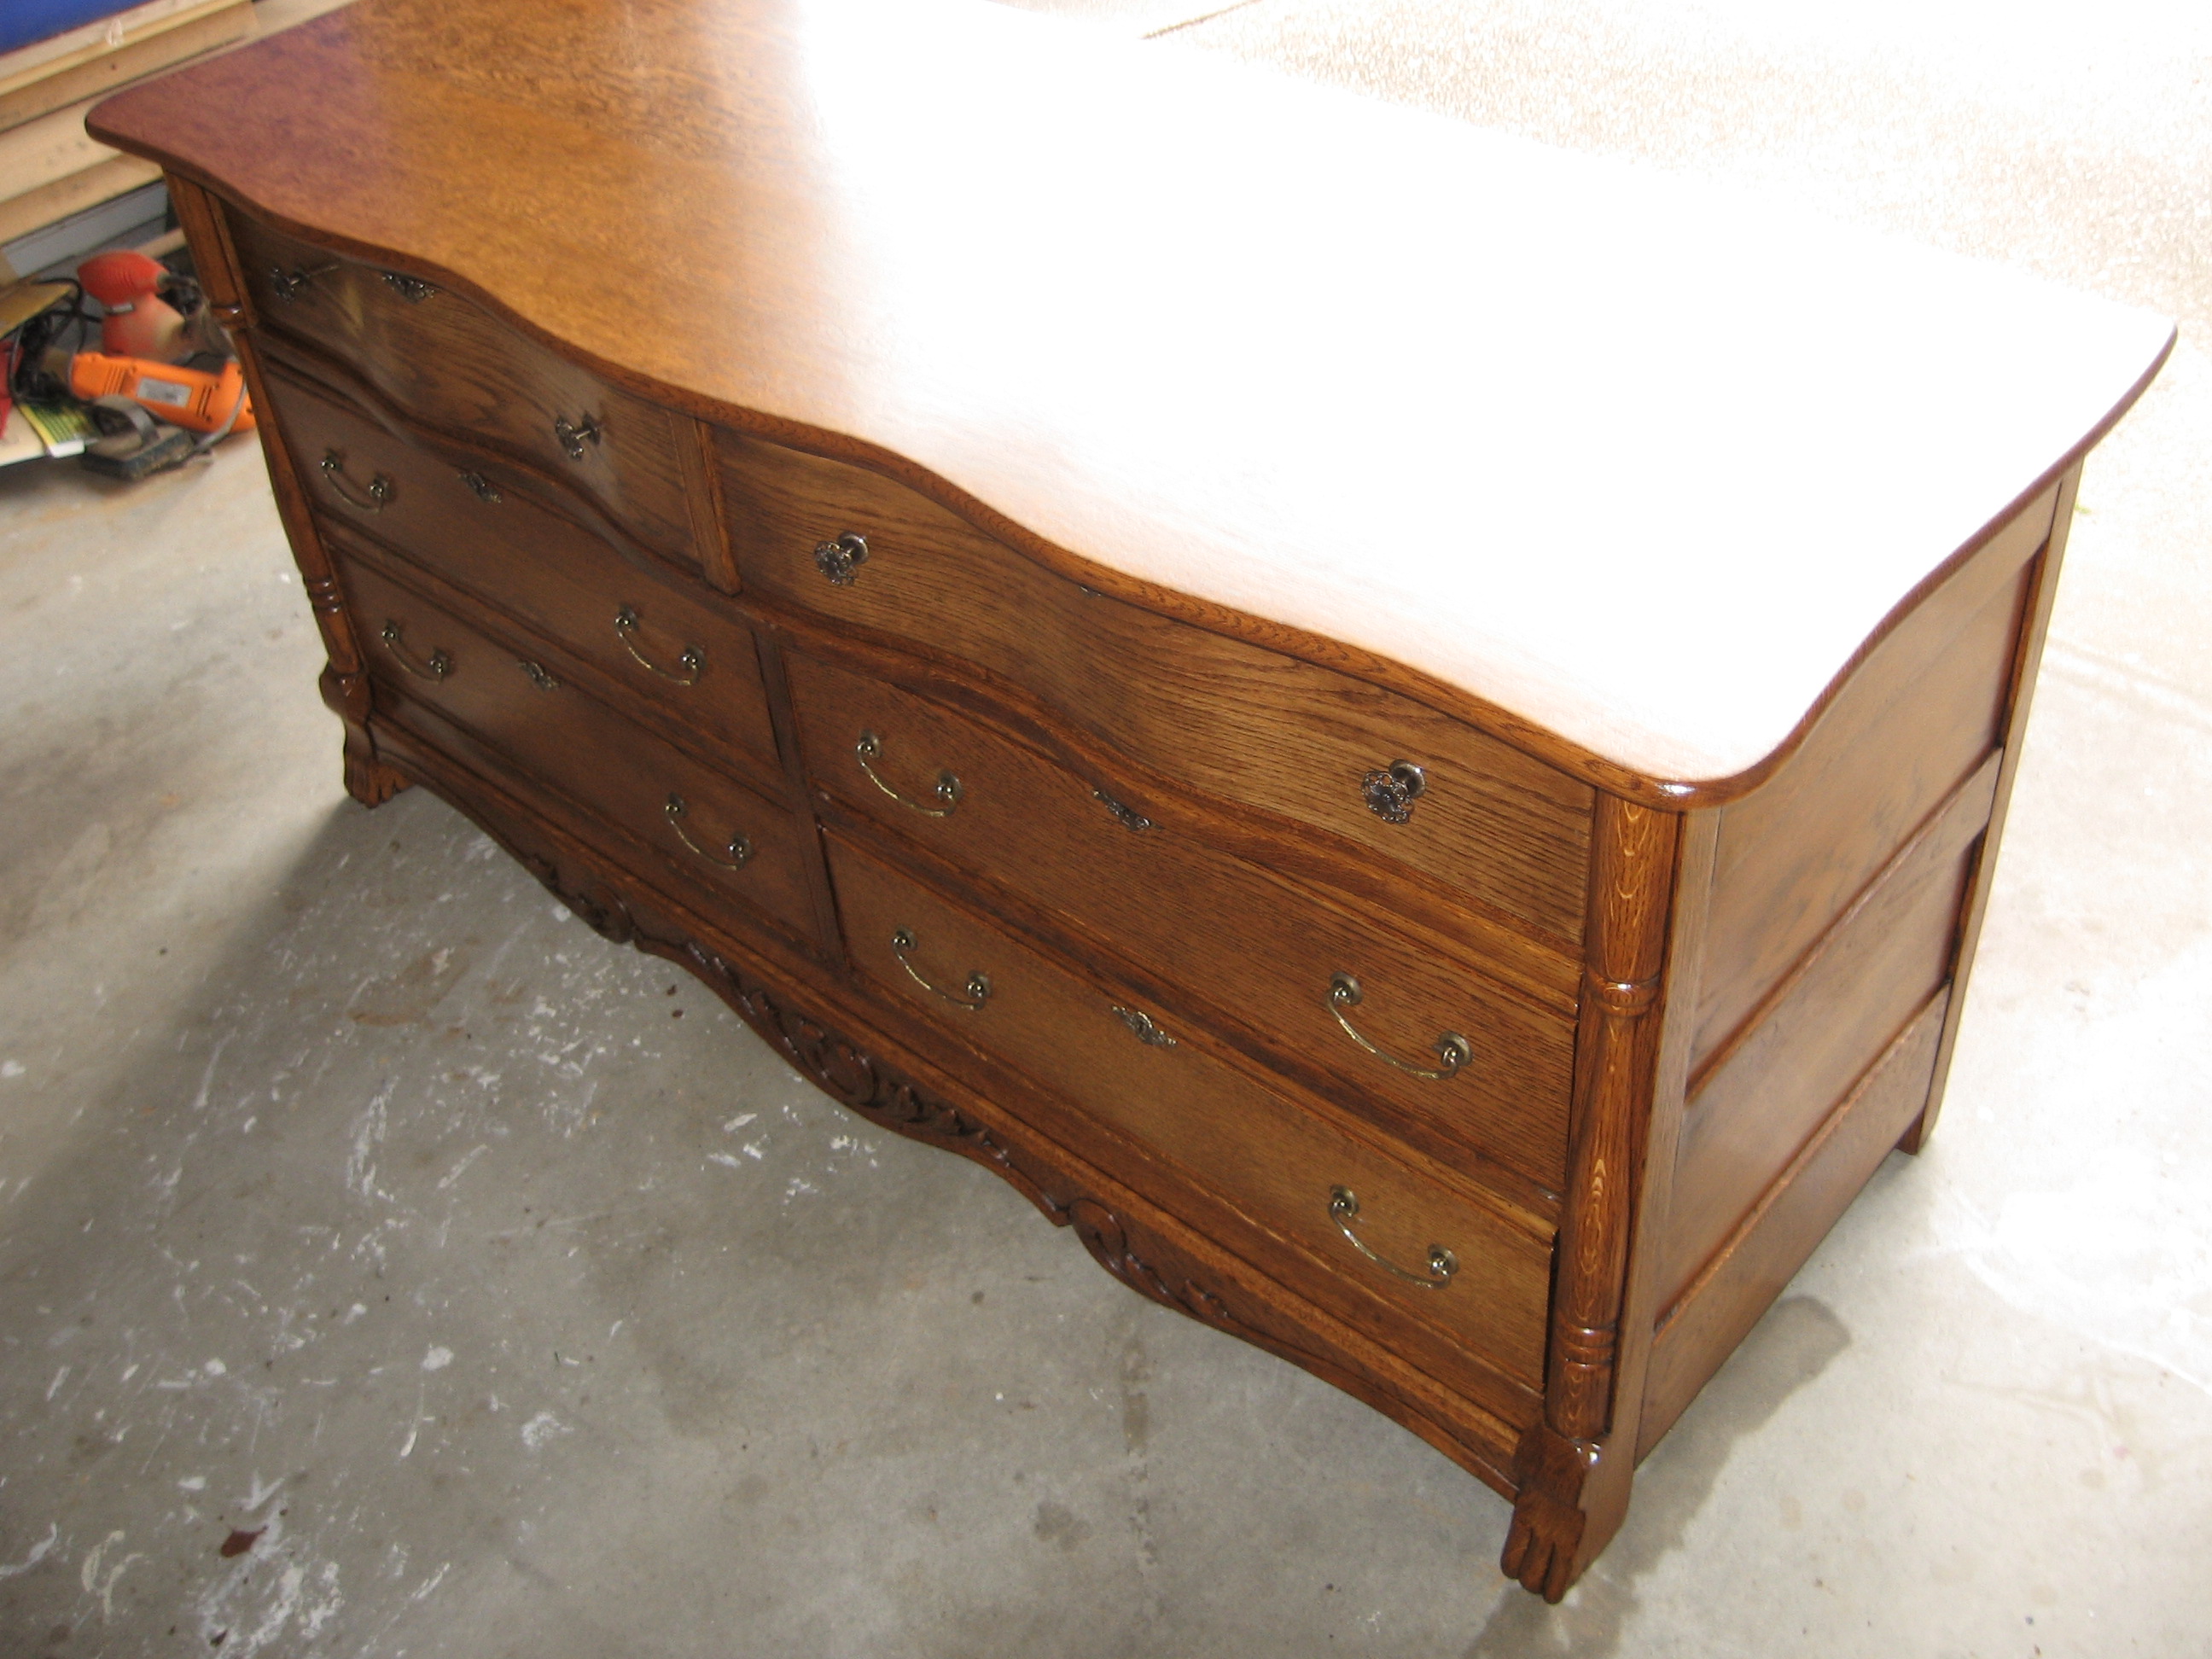
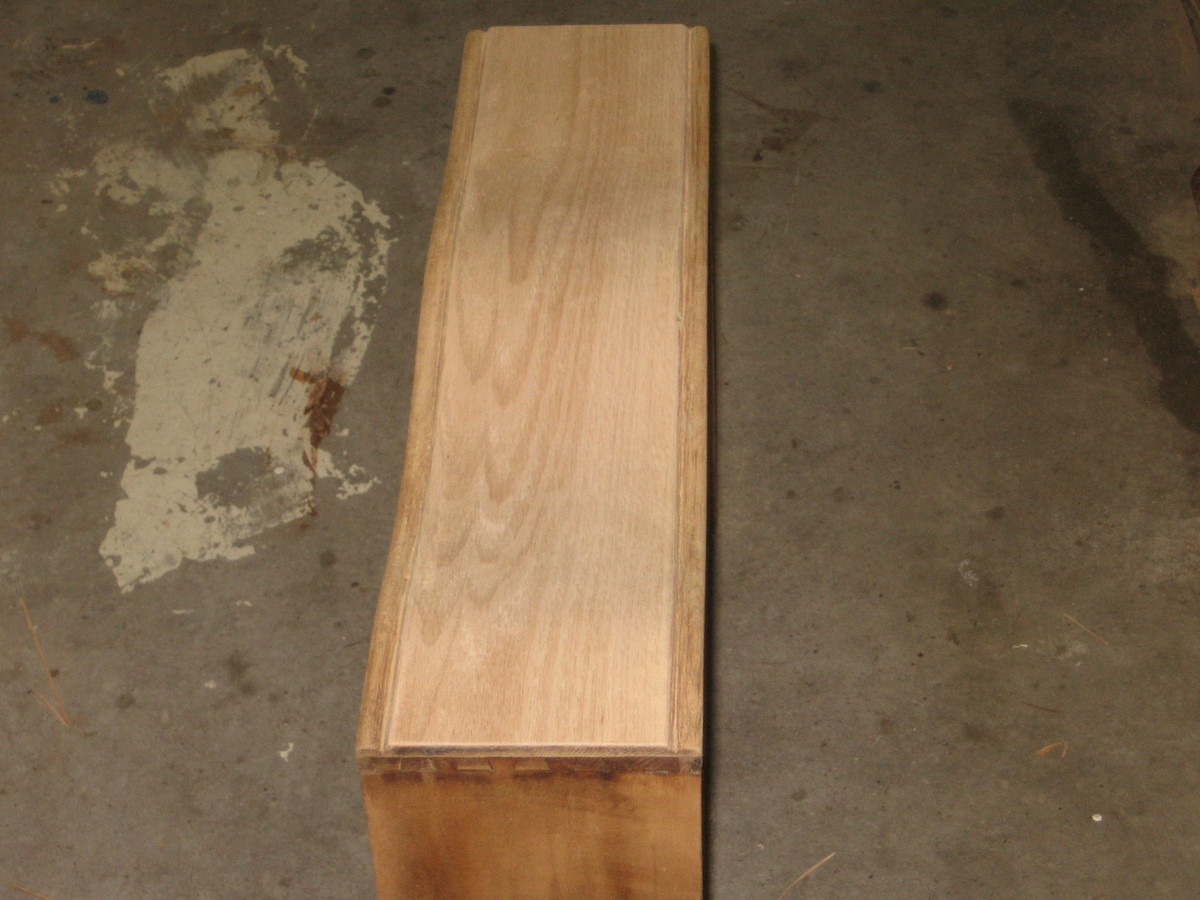
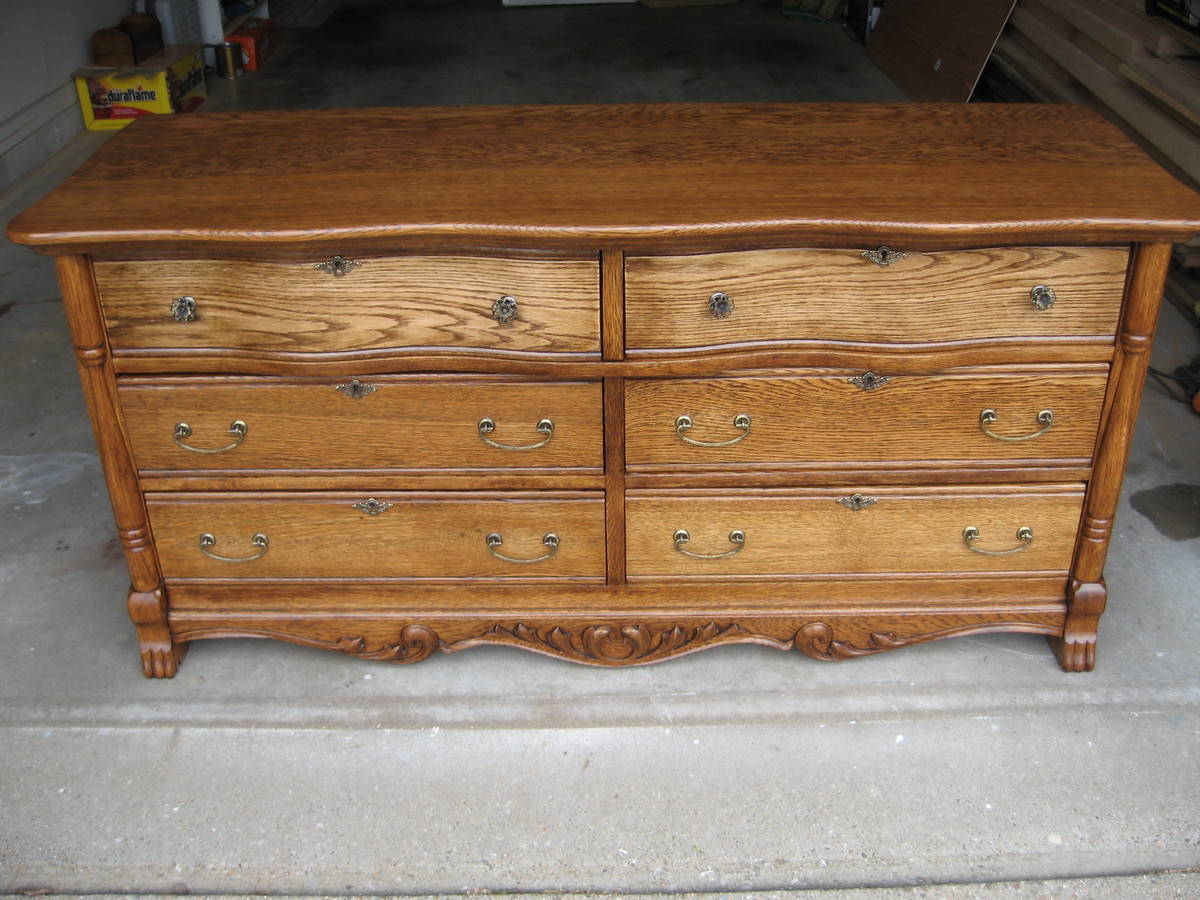
This is an antique oak dresser I recently purchased. I had some rebuilding to do. I replaced the bottom and fixed/rebuilt the dovetail drawers. I did replace the veneer on the top two drawers. It isn't a difficult task. Just ask and I will explain the process. I do wish though that I had gone online and purchased some quarter sawn oak veneer. It would have matched better than what I purchased from a local home improvement store. I replaced all of the hardware. I purchased it from Kennedy's online. The hardware finish is called aged brass. If you have solid brass hardware you can purchase a "brass ager" quite cheaply. There was a mirror attached to the dresser at some time. I am going to build a mirror to match that I will hang on the wall above. I am also looking to build a back splash for the back of the dresser. I think I may purchase an antique oak pediment (decorative door header) to make the back splash from.