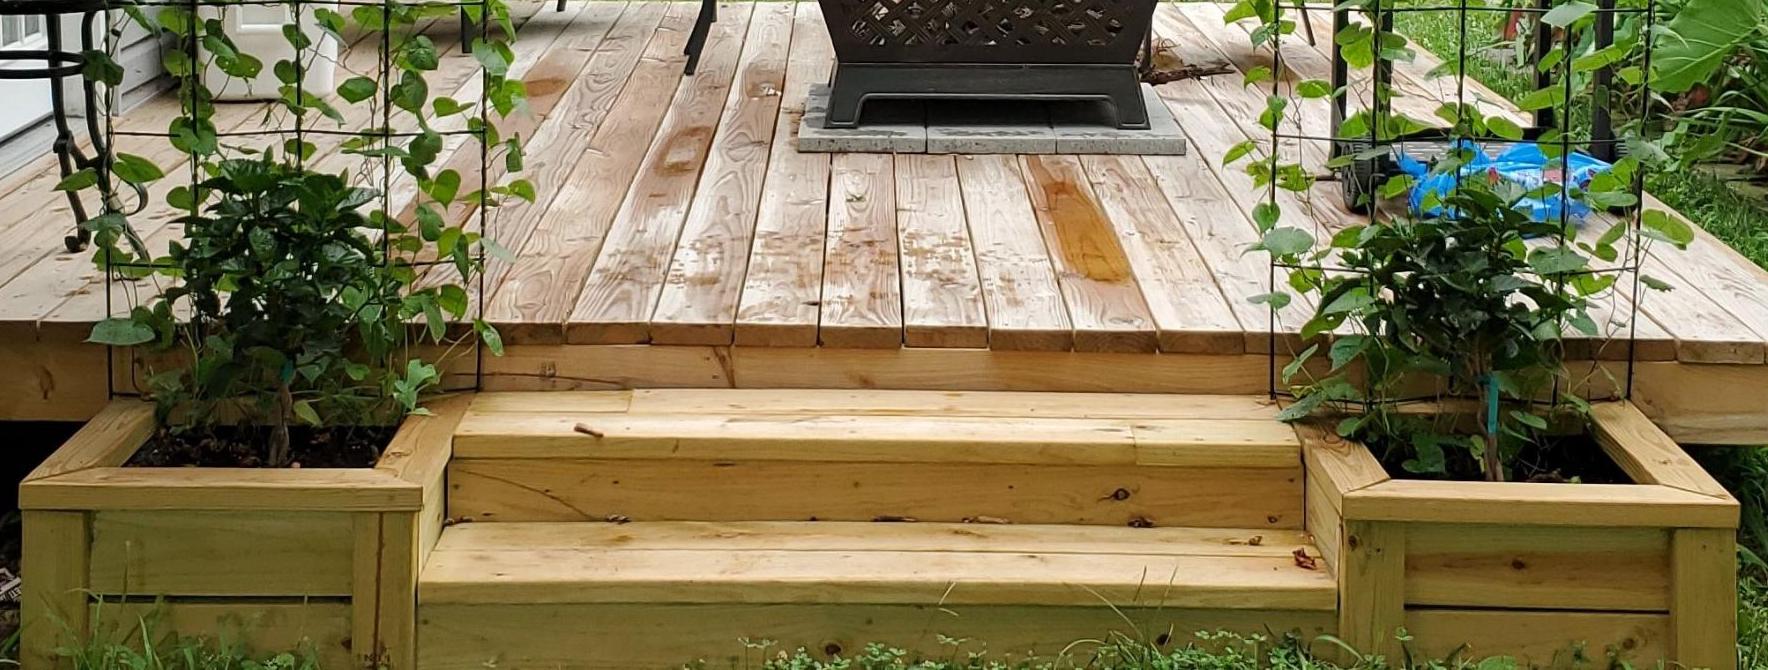
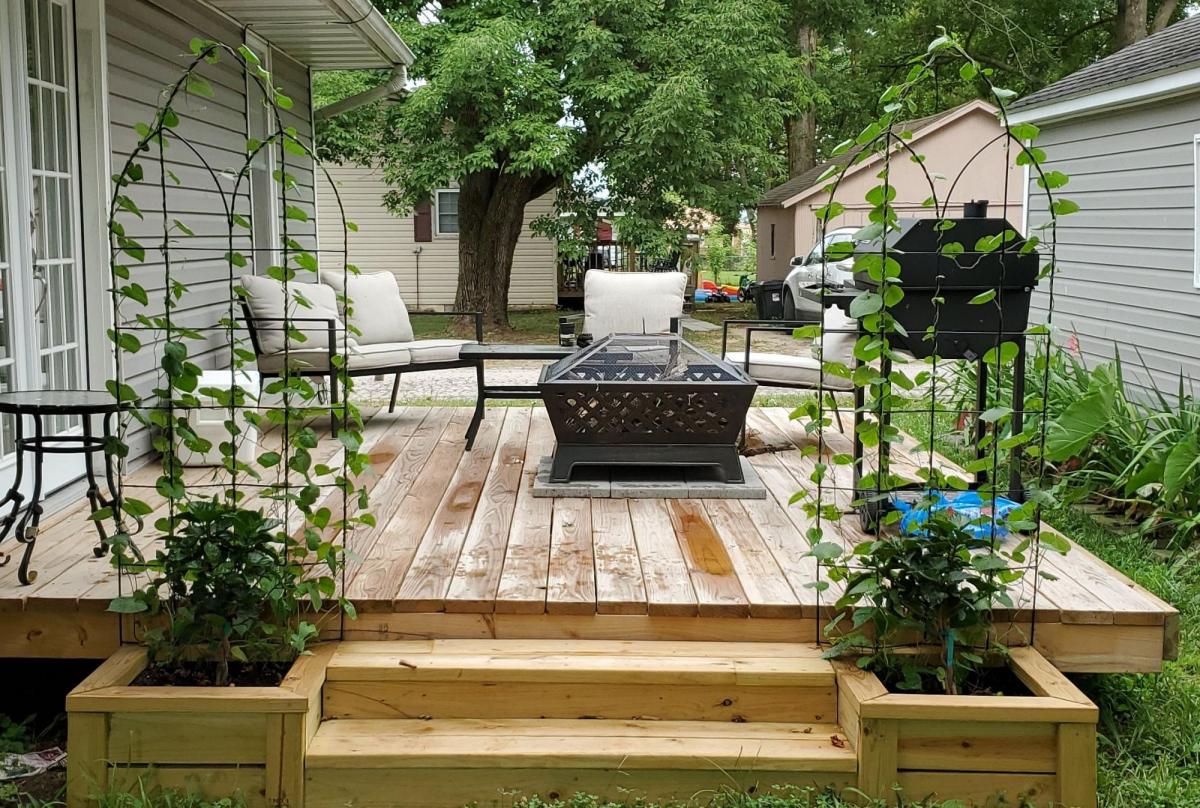
Beautiful steps
Directions worked like a charm, thank you, Ana for what you do!
Built from Plan(s)
Directions worked like a charm, thank you, Ana for what you do!
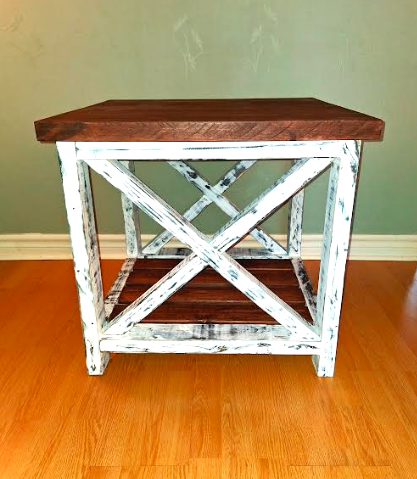
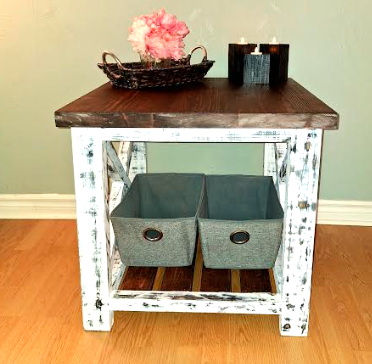
I made 2 side/end tables, farmhouse style with X braces and distressed. Dark walnut water based stain on the top and slats.Coat of black paint on the frame and a coat of white on top of it. Had fun with my sander and gave it an awesome look.
Thank you Ana!
Picard Woodworking

We are in so in love with this finished piece! We made some modifications to the original plan to fit our needs. We made the top wider - 24" wide like the Pottery Barn original. We also used 4X4's for the legs and widened the distance between the legs to sit the shelves inside the legs.
We also built the second shelf. We created the second shelf to hold wine, so we modified the front of the shelf to allow for the wine bottle necks to rest. The handle was made from plumbing hardware. We got this wonderful idea from one of the posters on this site, I need to find their name to give proper credit, but it worked beautifully.
For the hutch, we also made modifications for our needs. We made it taller by 4" (so 40" tall). We used 1 X 12's for the shelves for a deeper shelf. We also raised the bottom shelf up to accommodate our Keurig coffee maker. We did not divide the middle shelf to leave a tall opening for some items we wanted to display. We also left a gap at the bottom of the hutch for cords.
Once built we distressed the entire piece, then stained with Provencial stain, and finished off with a semi-gloss poly.
The best thing, it cost about 10% of the price of the original!!

Fri, 09/21/2012 - 06:43
This is so awesome, and nobody will have one anything like it! I love how you totally modified it for your space. The gap for the cords was brilliant-that would be something I would of thought of after I was completely done! This is very inspiring. Thank you for sharing.

Child's chalkboard as a birthday present. "Frozen" inspired color theme. Received feedback that it would also work very well as a boutique store sidewalk sign.
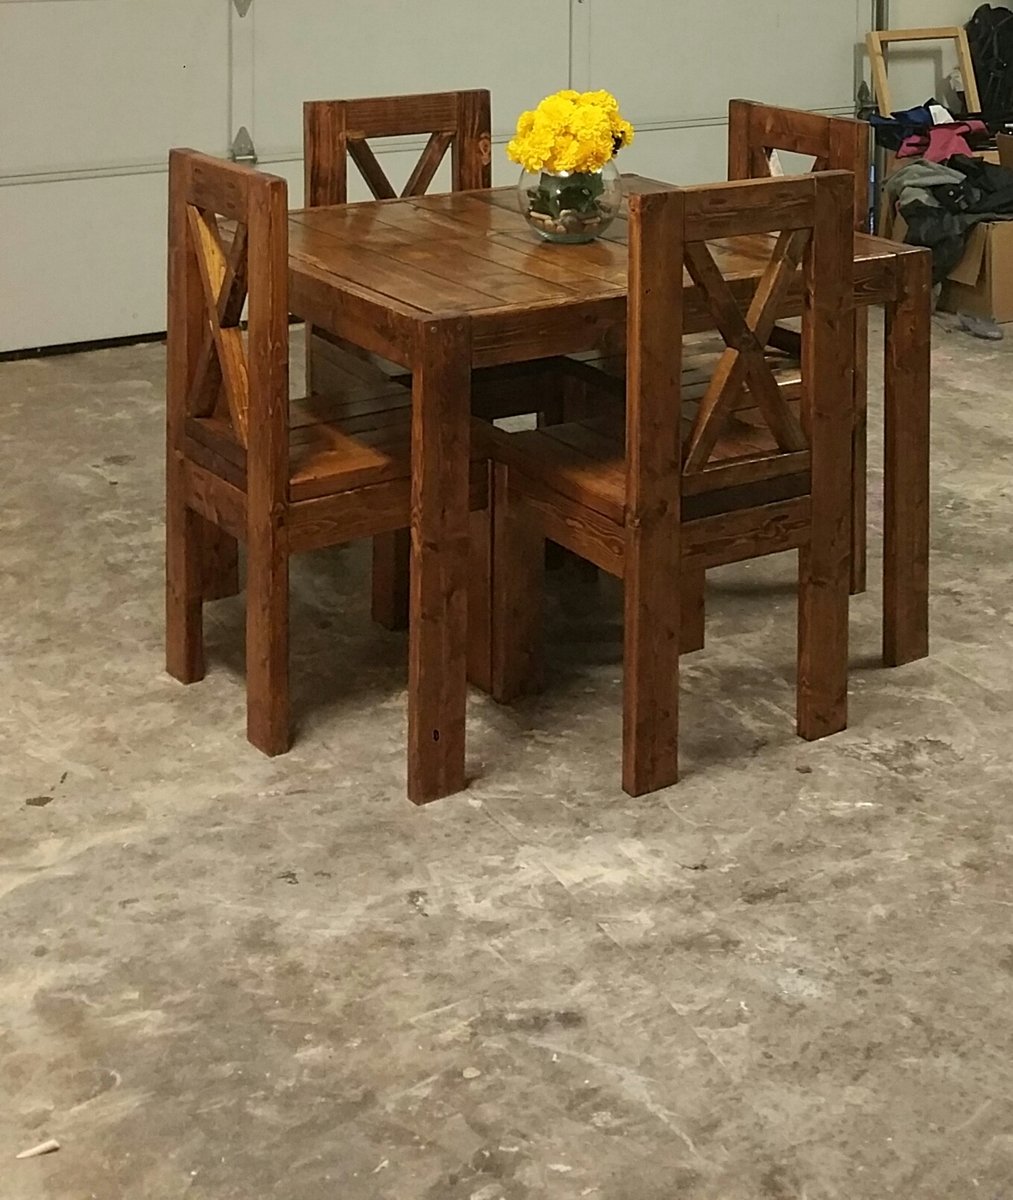
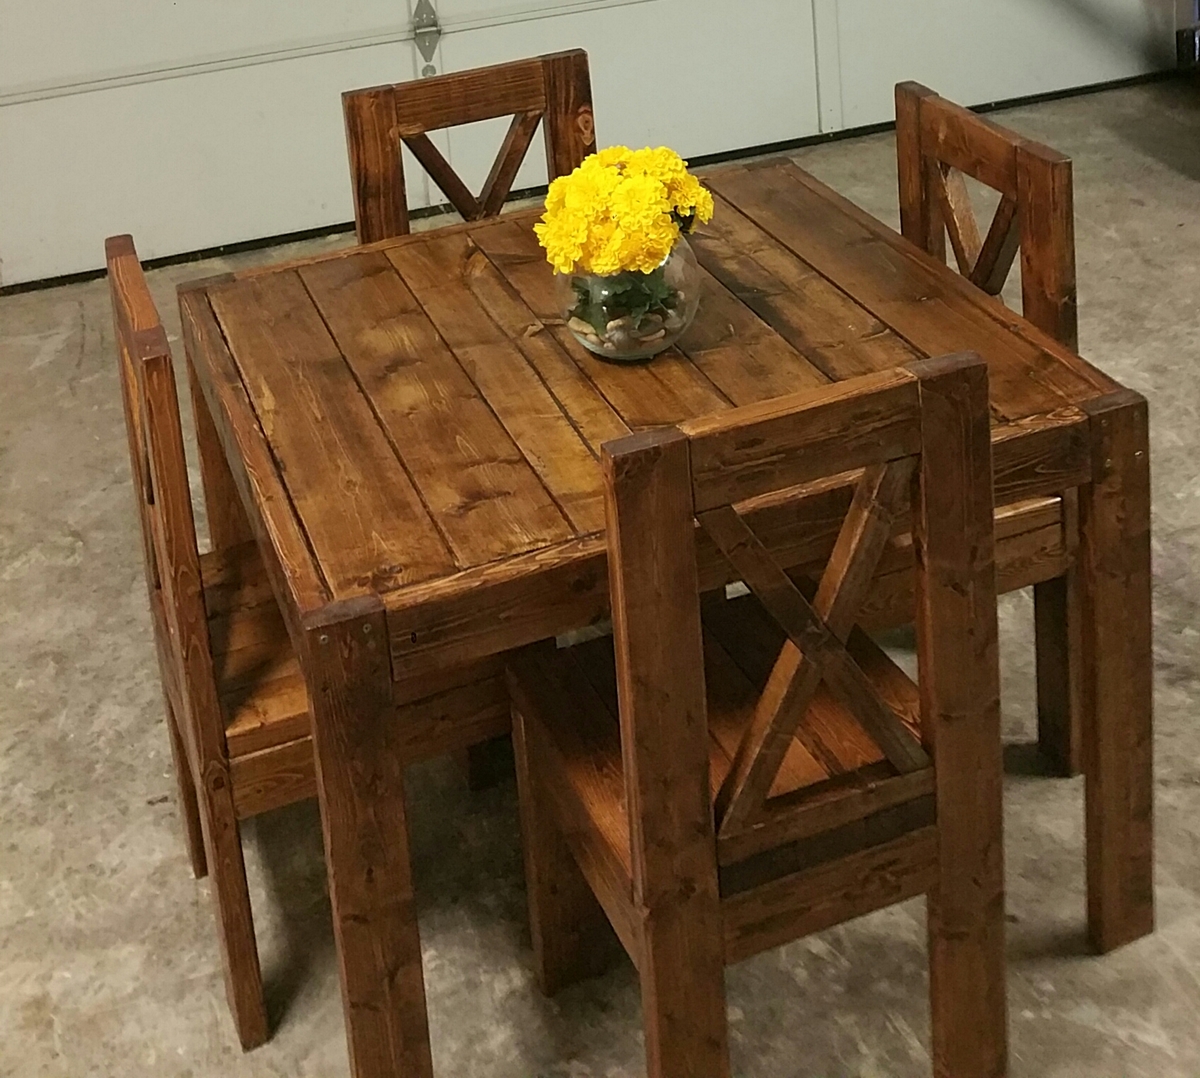
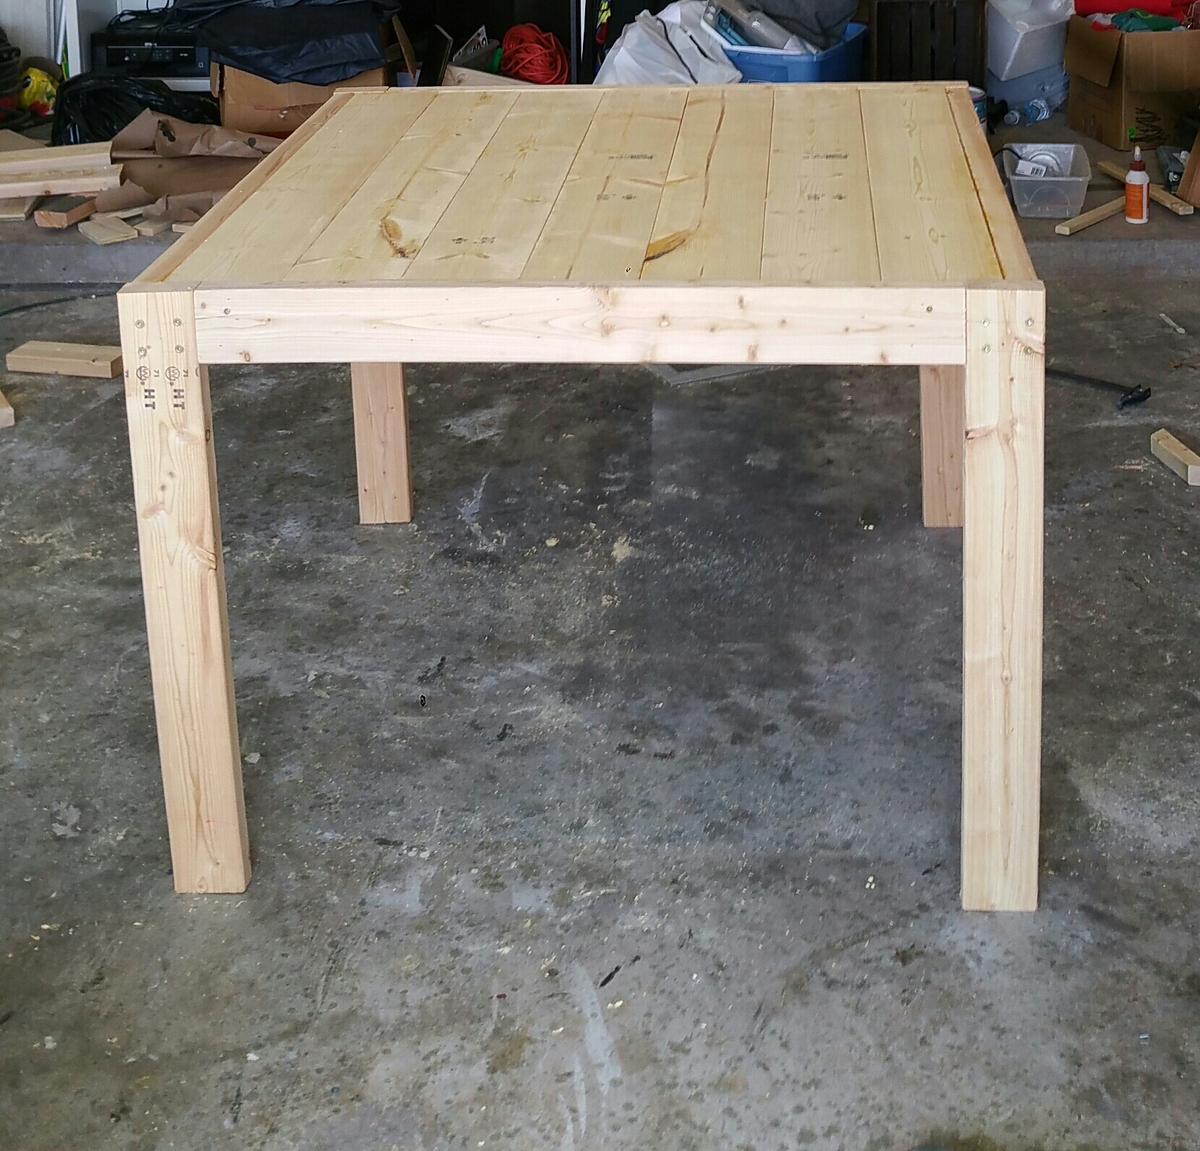
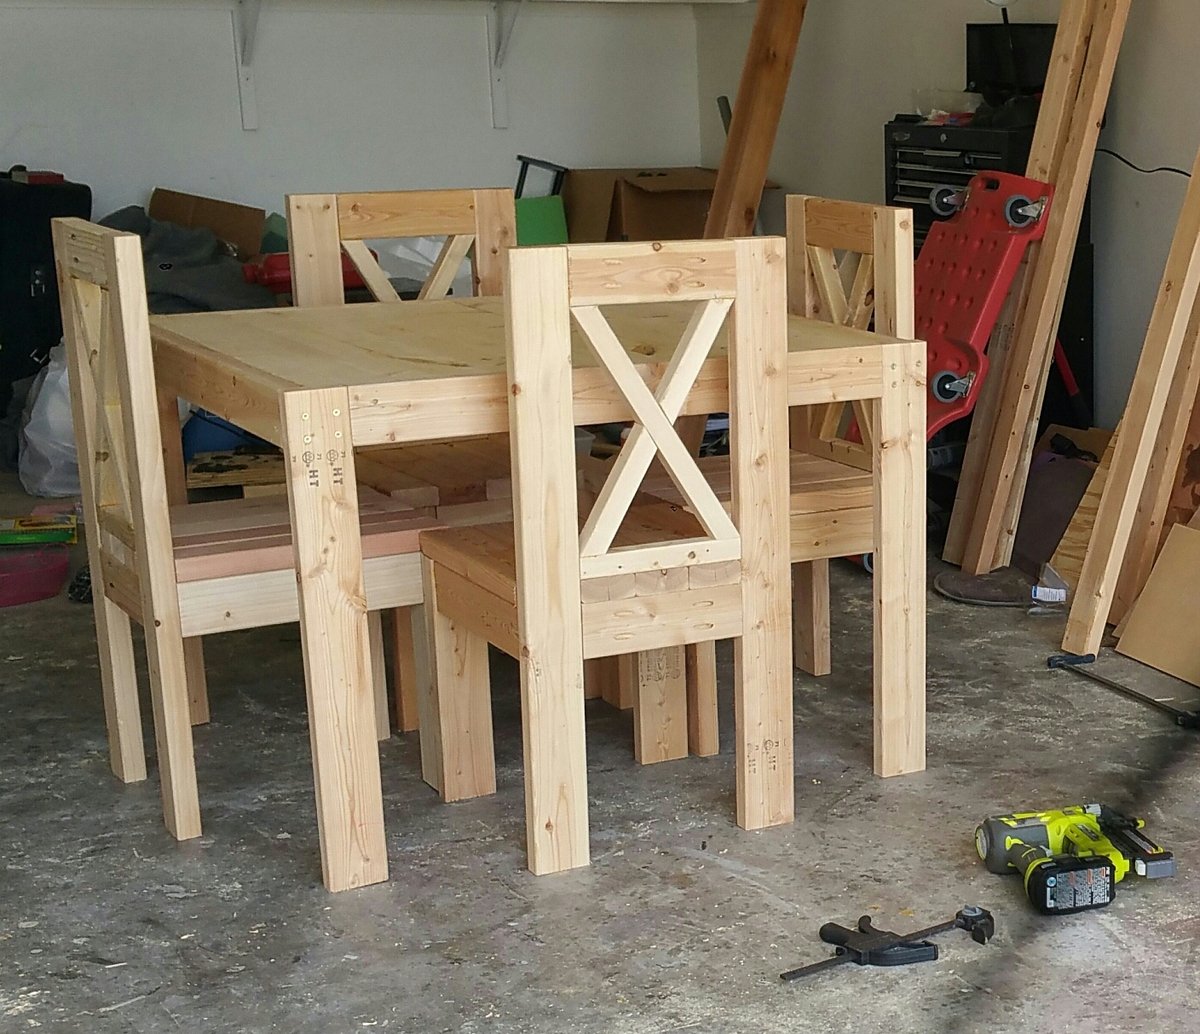
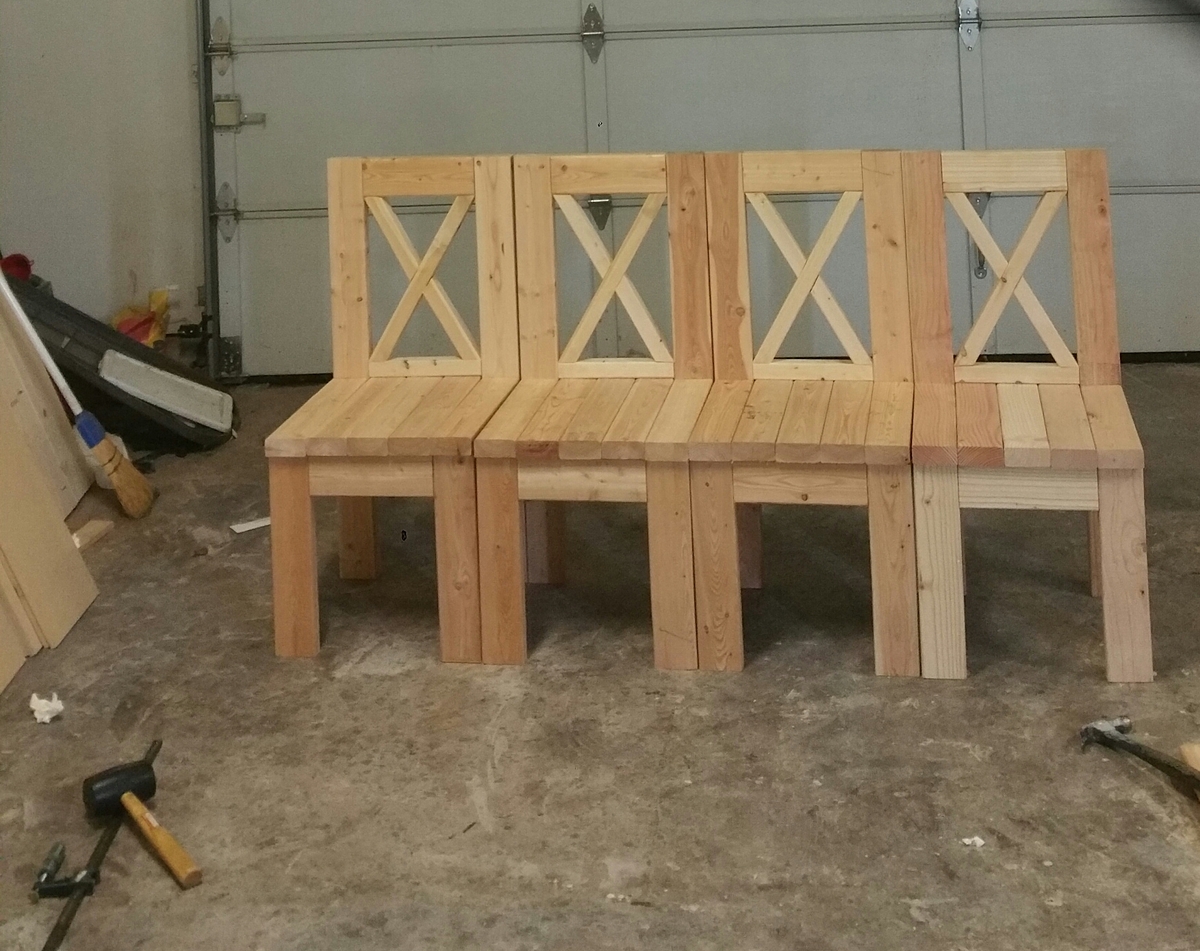
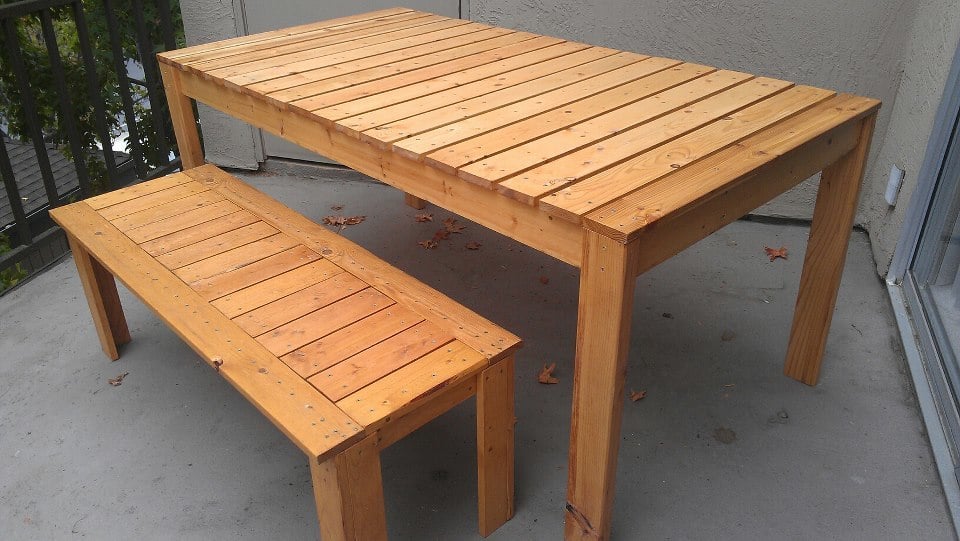
I built this square table and 4 chairs. It was a really fun build!! It measures 41Lx41Wx30H.
Thu, 10/14/2021 - 14:49
Awesome job! It looks great as a set, very nice. :) I love the chairs, did you find the plans for these or did you just figure it out yourself? I want to make this table and the chairs you made would be perfect..if I can find the plans. I'd appreciate any help for the chairs. Have a great day.
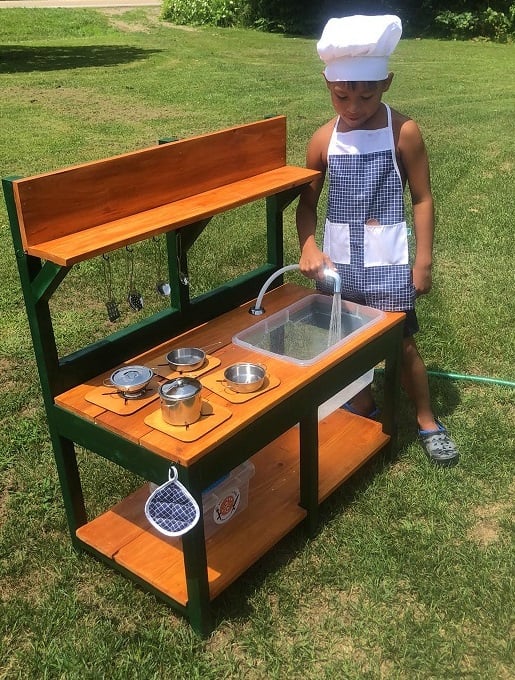
This was my first build, like ever. I am very proud! Props given to my hubby who is a carpenter by trade. I went back and forth on stains and paint colors at home depot. He didn't rush me and was awesome the entire time! He actually picked up the supplies, and is now a fan of the self tap screws! He thought he knew where everything in home depot was, but he had to ask to find those LOL. He wanted to use his new nail gun, but I wanted to follow the plans. The plans are awesome! We decided not to add an oven door just yet. Likely will soon. (Avoiding pinched fingers for now) I also have the knobs for the front, but it was hot and since I had only just stained them, they needed time to dry and second coat yet. (I kind of forgot about them once I finished them with my new dremel) We purchased the hose kit from the kitchen section at home depot. It came with everything, I searched market place and even posted asking if anyone had a used one for sale. No luck. This was $20 and came with everything, the guys at home depot showed me what adapters to get to ensure that it would hook up to our garden hose, and we grabbed those too and they worked perfectly! I messed up cutting one of the angles for the shelf the wrong way, but there was enough scraps for my husband to help me fix it. It was a fun build, and so rewarding to see our kids playing with it! I used my dremel 4300 and it wasn't powerful enough for the thicker wood, so my stove tops are thinner, but he actually enjoys setting them up and spraying them off the table with his hose! I painted the brass hooks green when we were painting the kitchen so they would match. The pots and pans came with the little tote and the apron chef hat and pot holder. It was a perfect finishing touch. *Edit to add photos kitchen hose kit from home depot, reading comments, others had a hard time finding adapters. I suggest taking what you have with you to home depot so they can show you what adapters you need. We needed three because we have a quick attachment on the end of our garden hose, (for our sprayer) now little mans mud kitchen can be connected and disconnected easily!
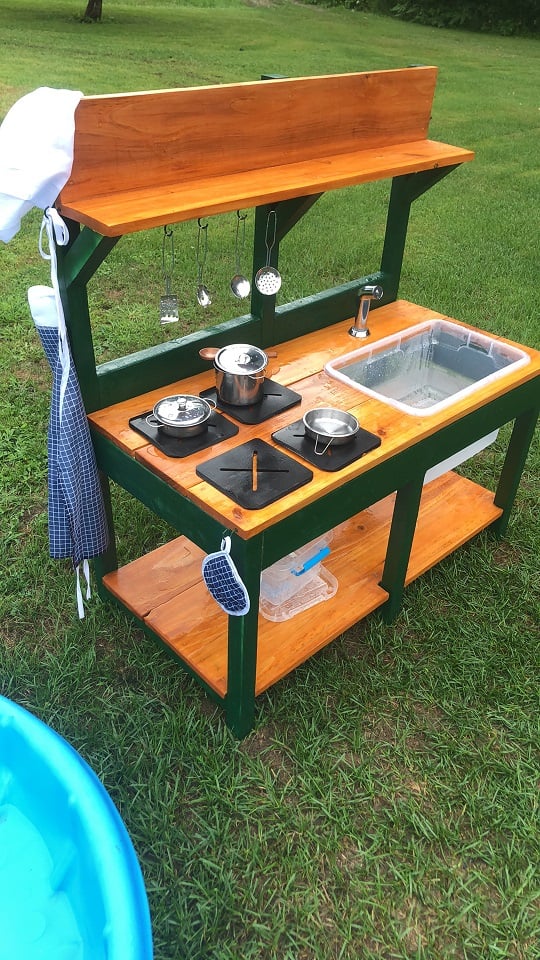
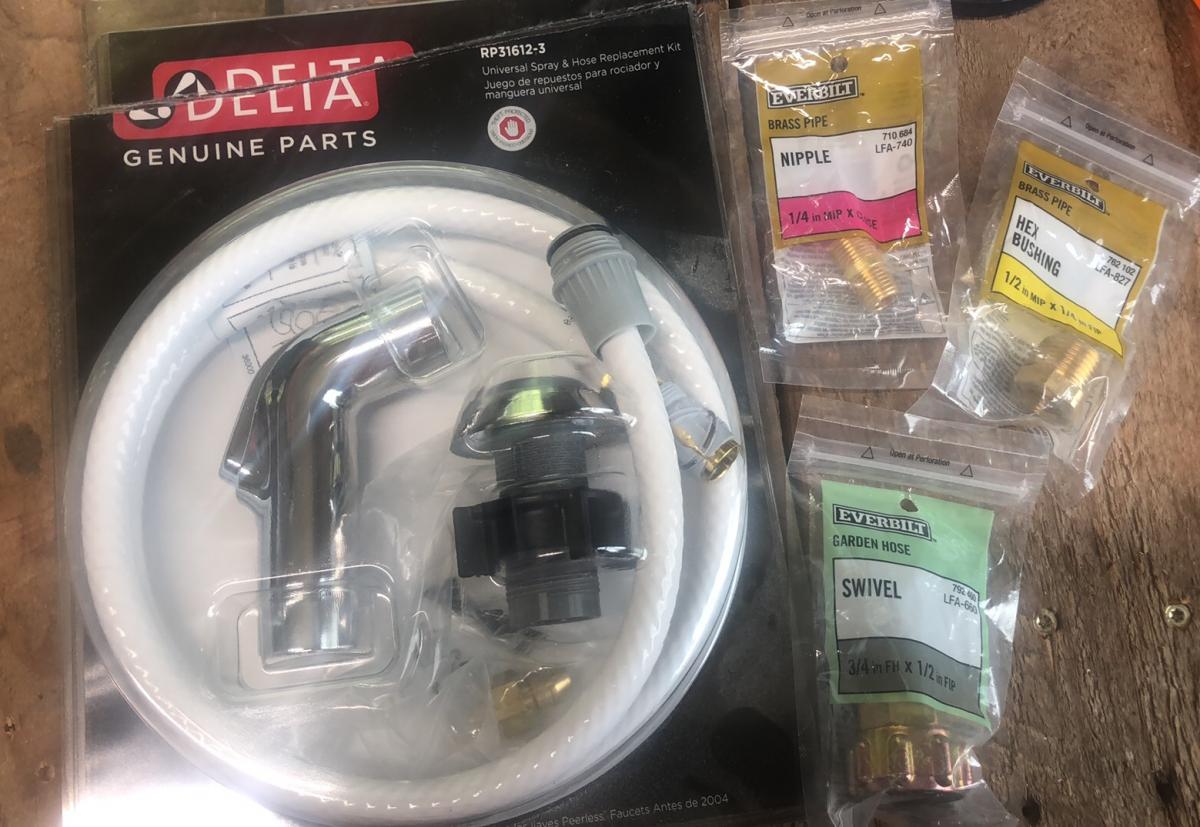

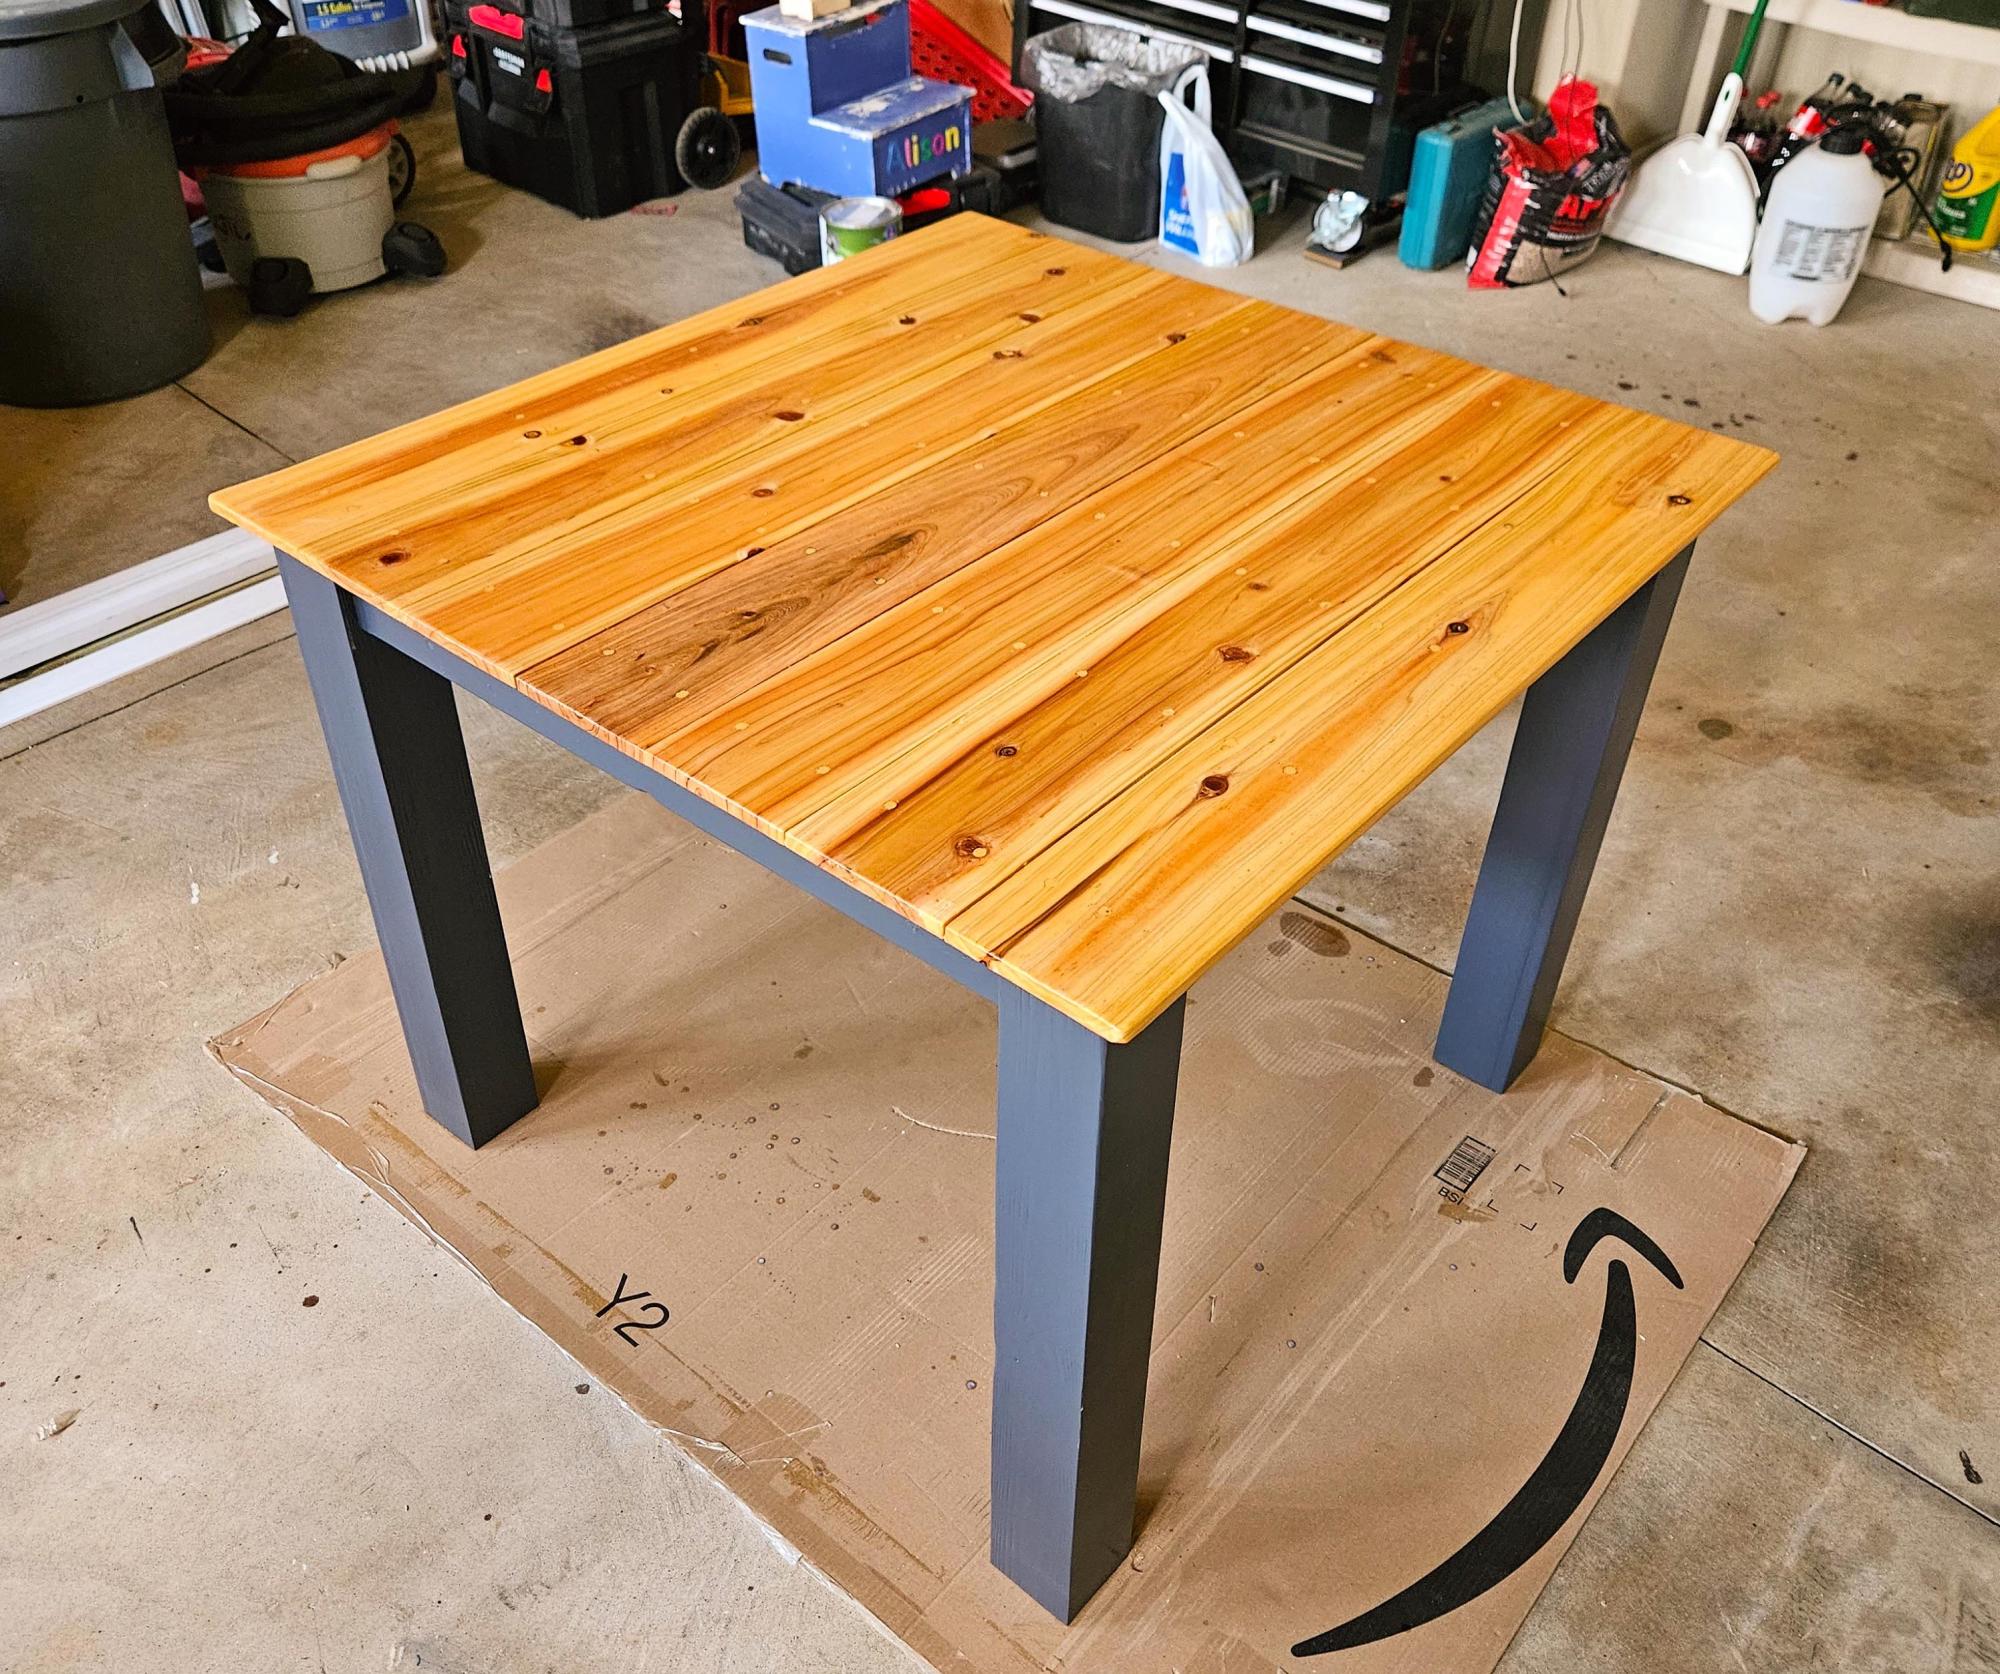
Table for 4 based off plans. I love the way this turned out! Really pleased with the finished piece.
Jenn
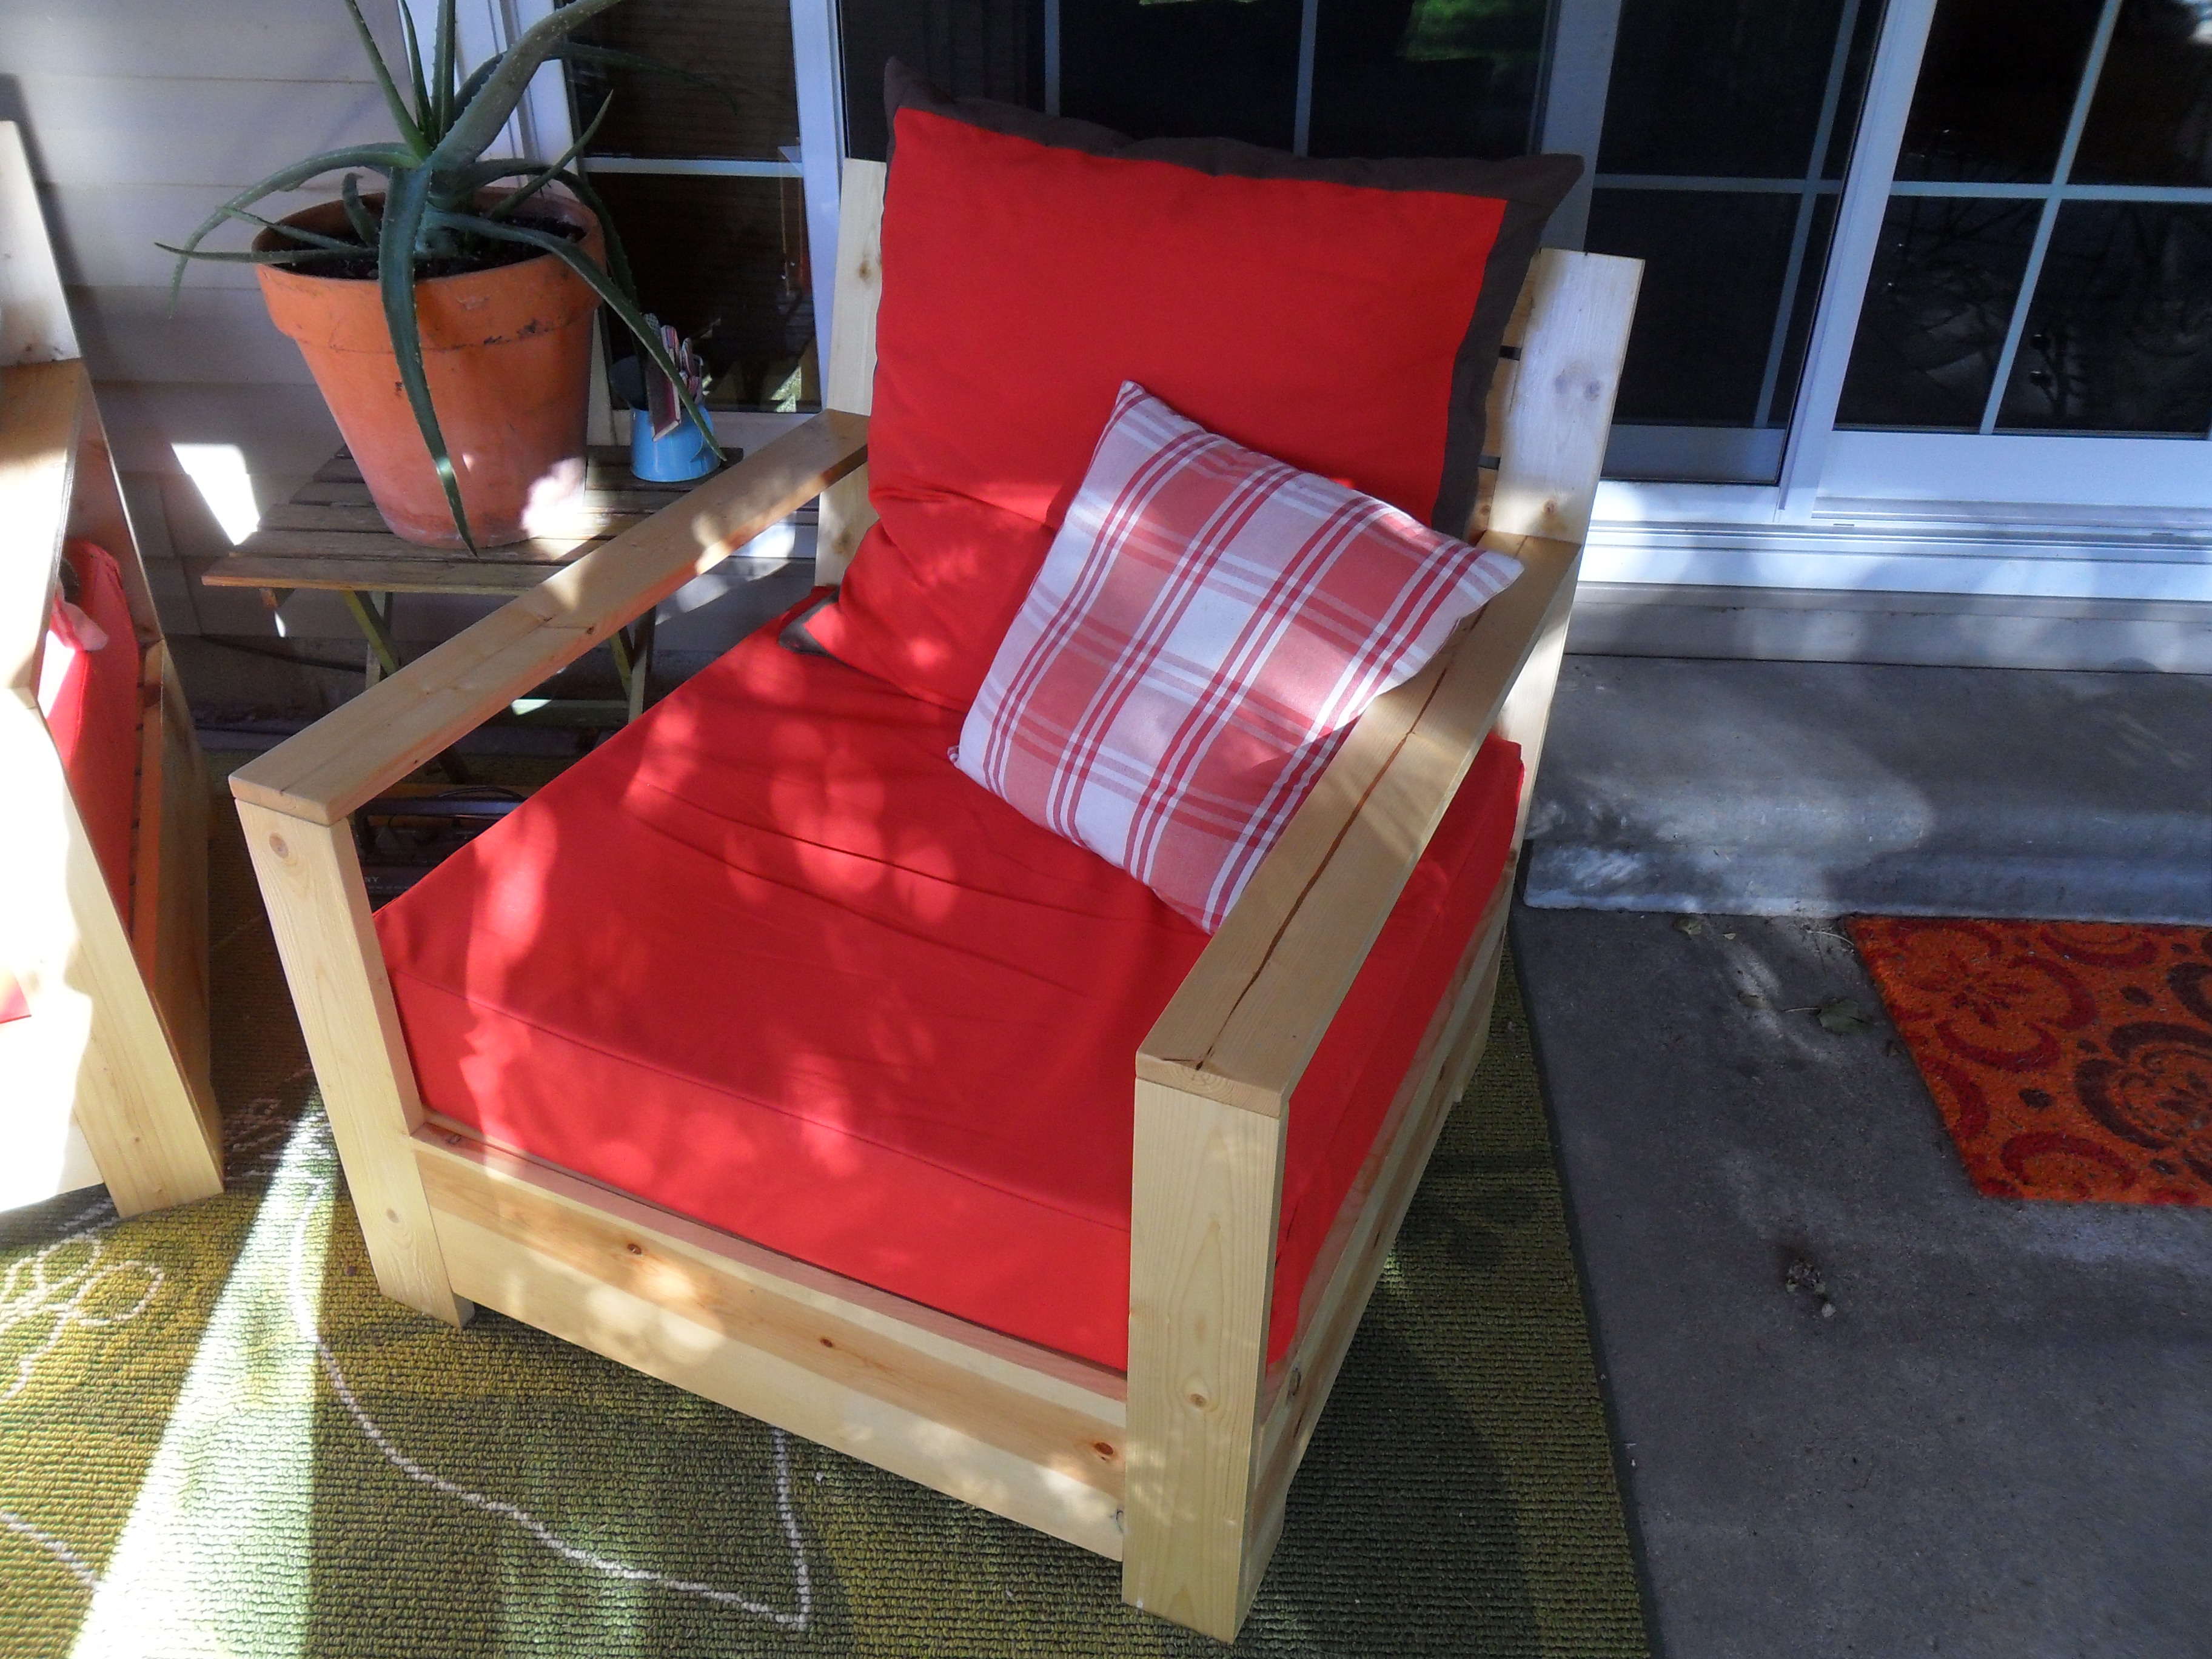
This was my very first project. I cut the wood during the week, to have it ready for the weekend. I intended this to be my summer project. I had so much fun, i completed building both chairs in a day and a half!!!!! I then ordered the foam which took a couple weeks. I ordered the fabric online. I had two large pillows which I covered and used them for the back cushion. The total cost for BOTH chairs was under $250.00. Looking forward to my next project. :)
Mon, 09/24/2012 - 18:05
Where did you order the foam from and did you have to cut it or did it come in two pieces?
Very easy project!
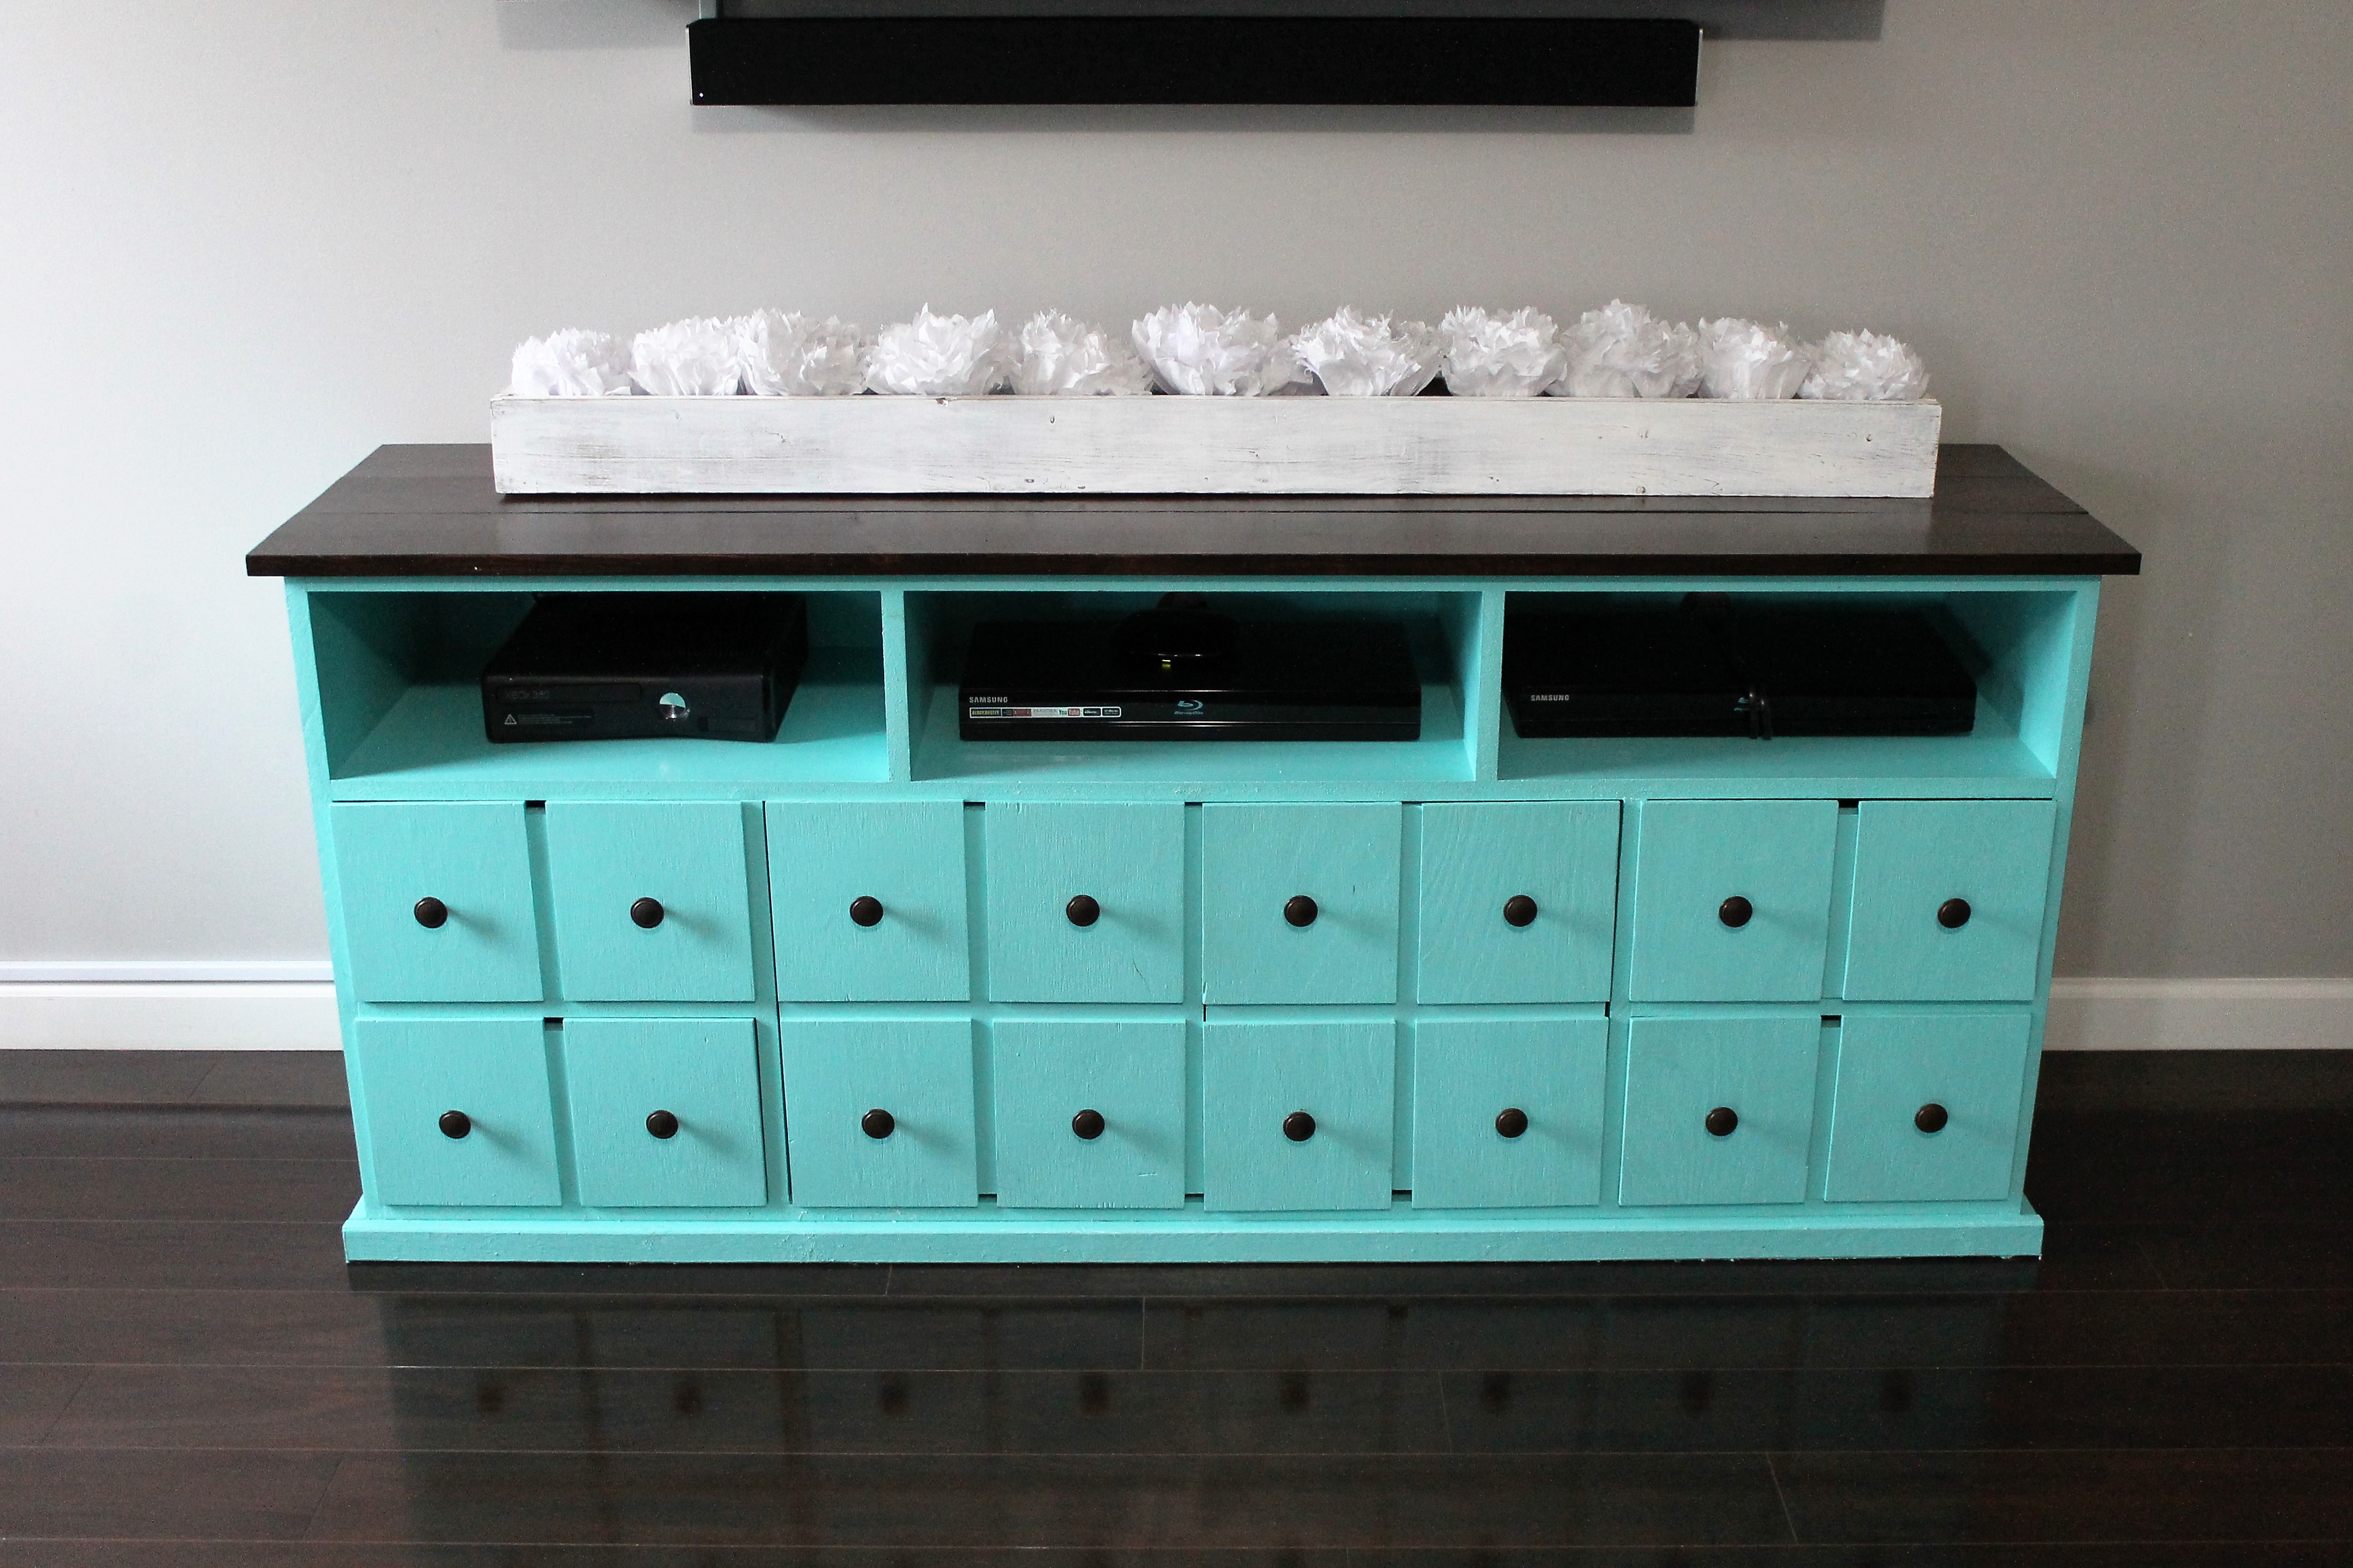
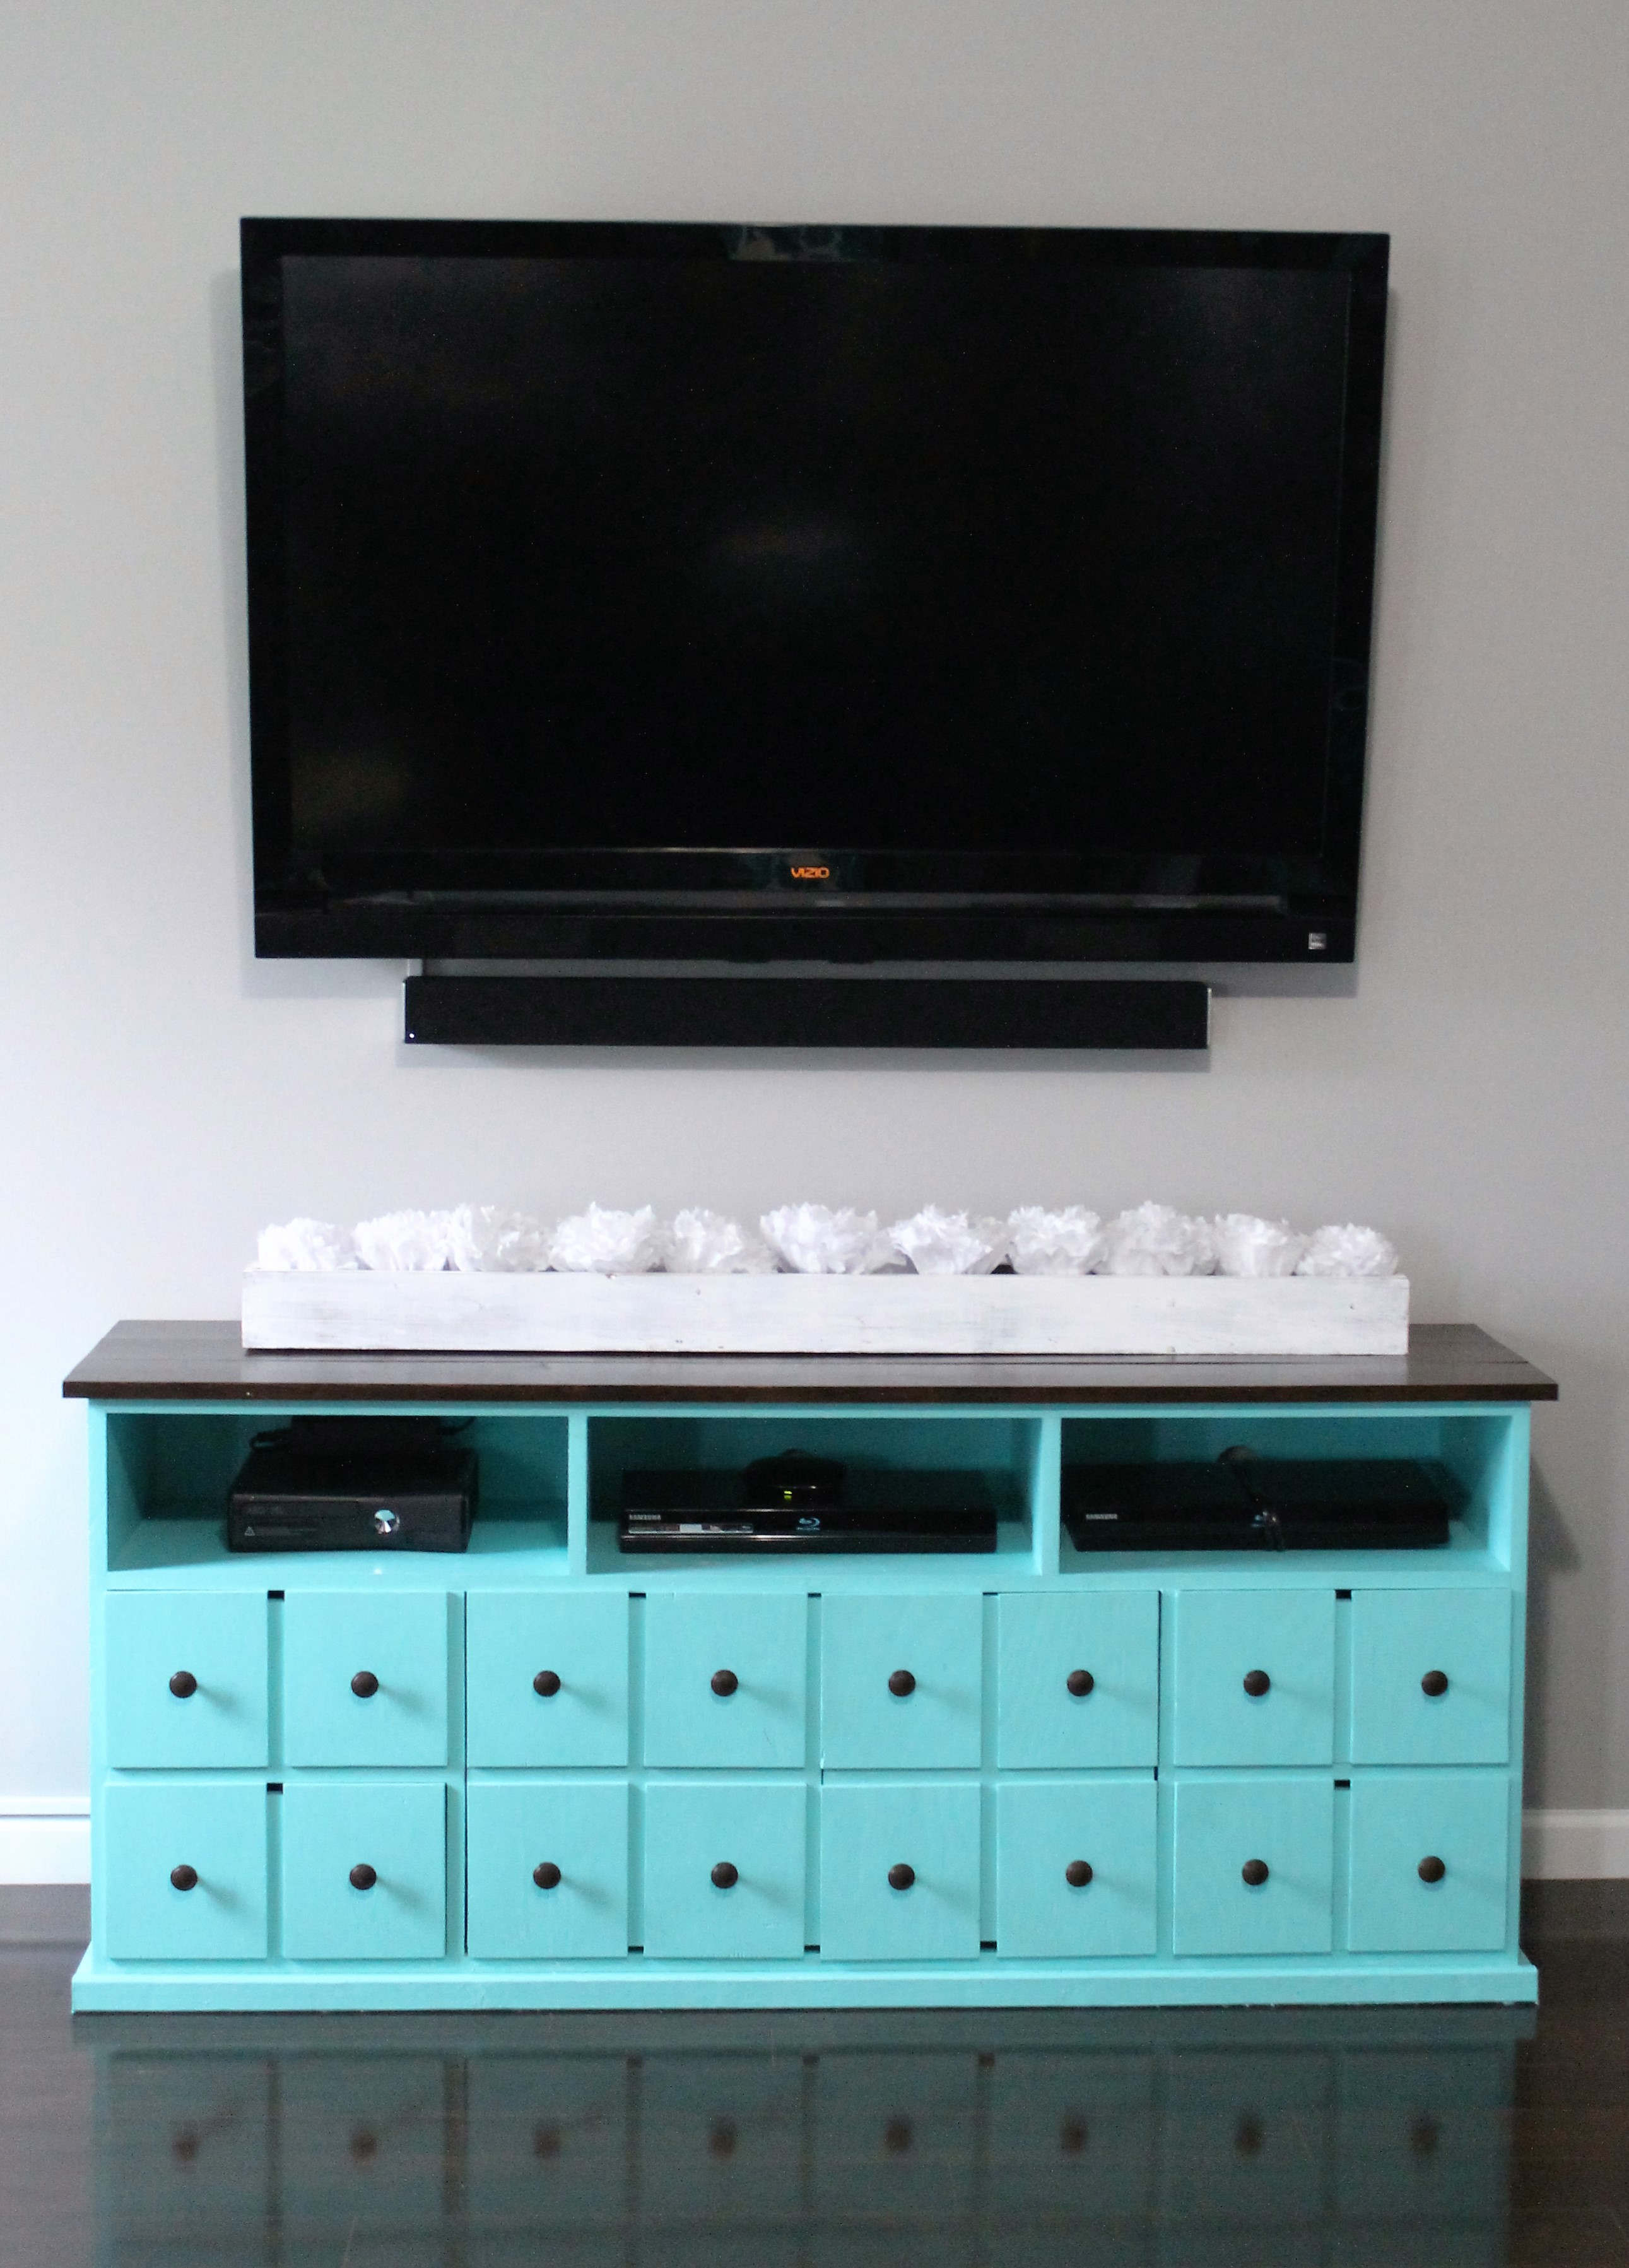
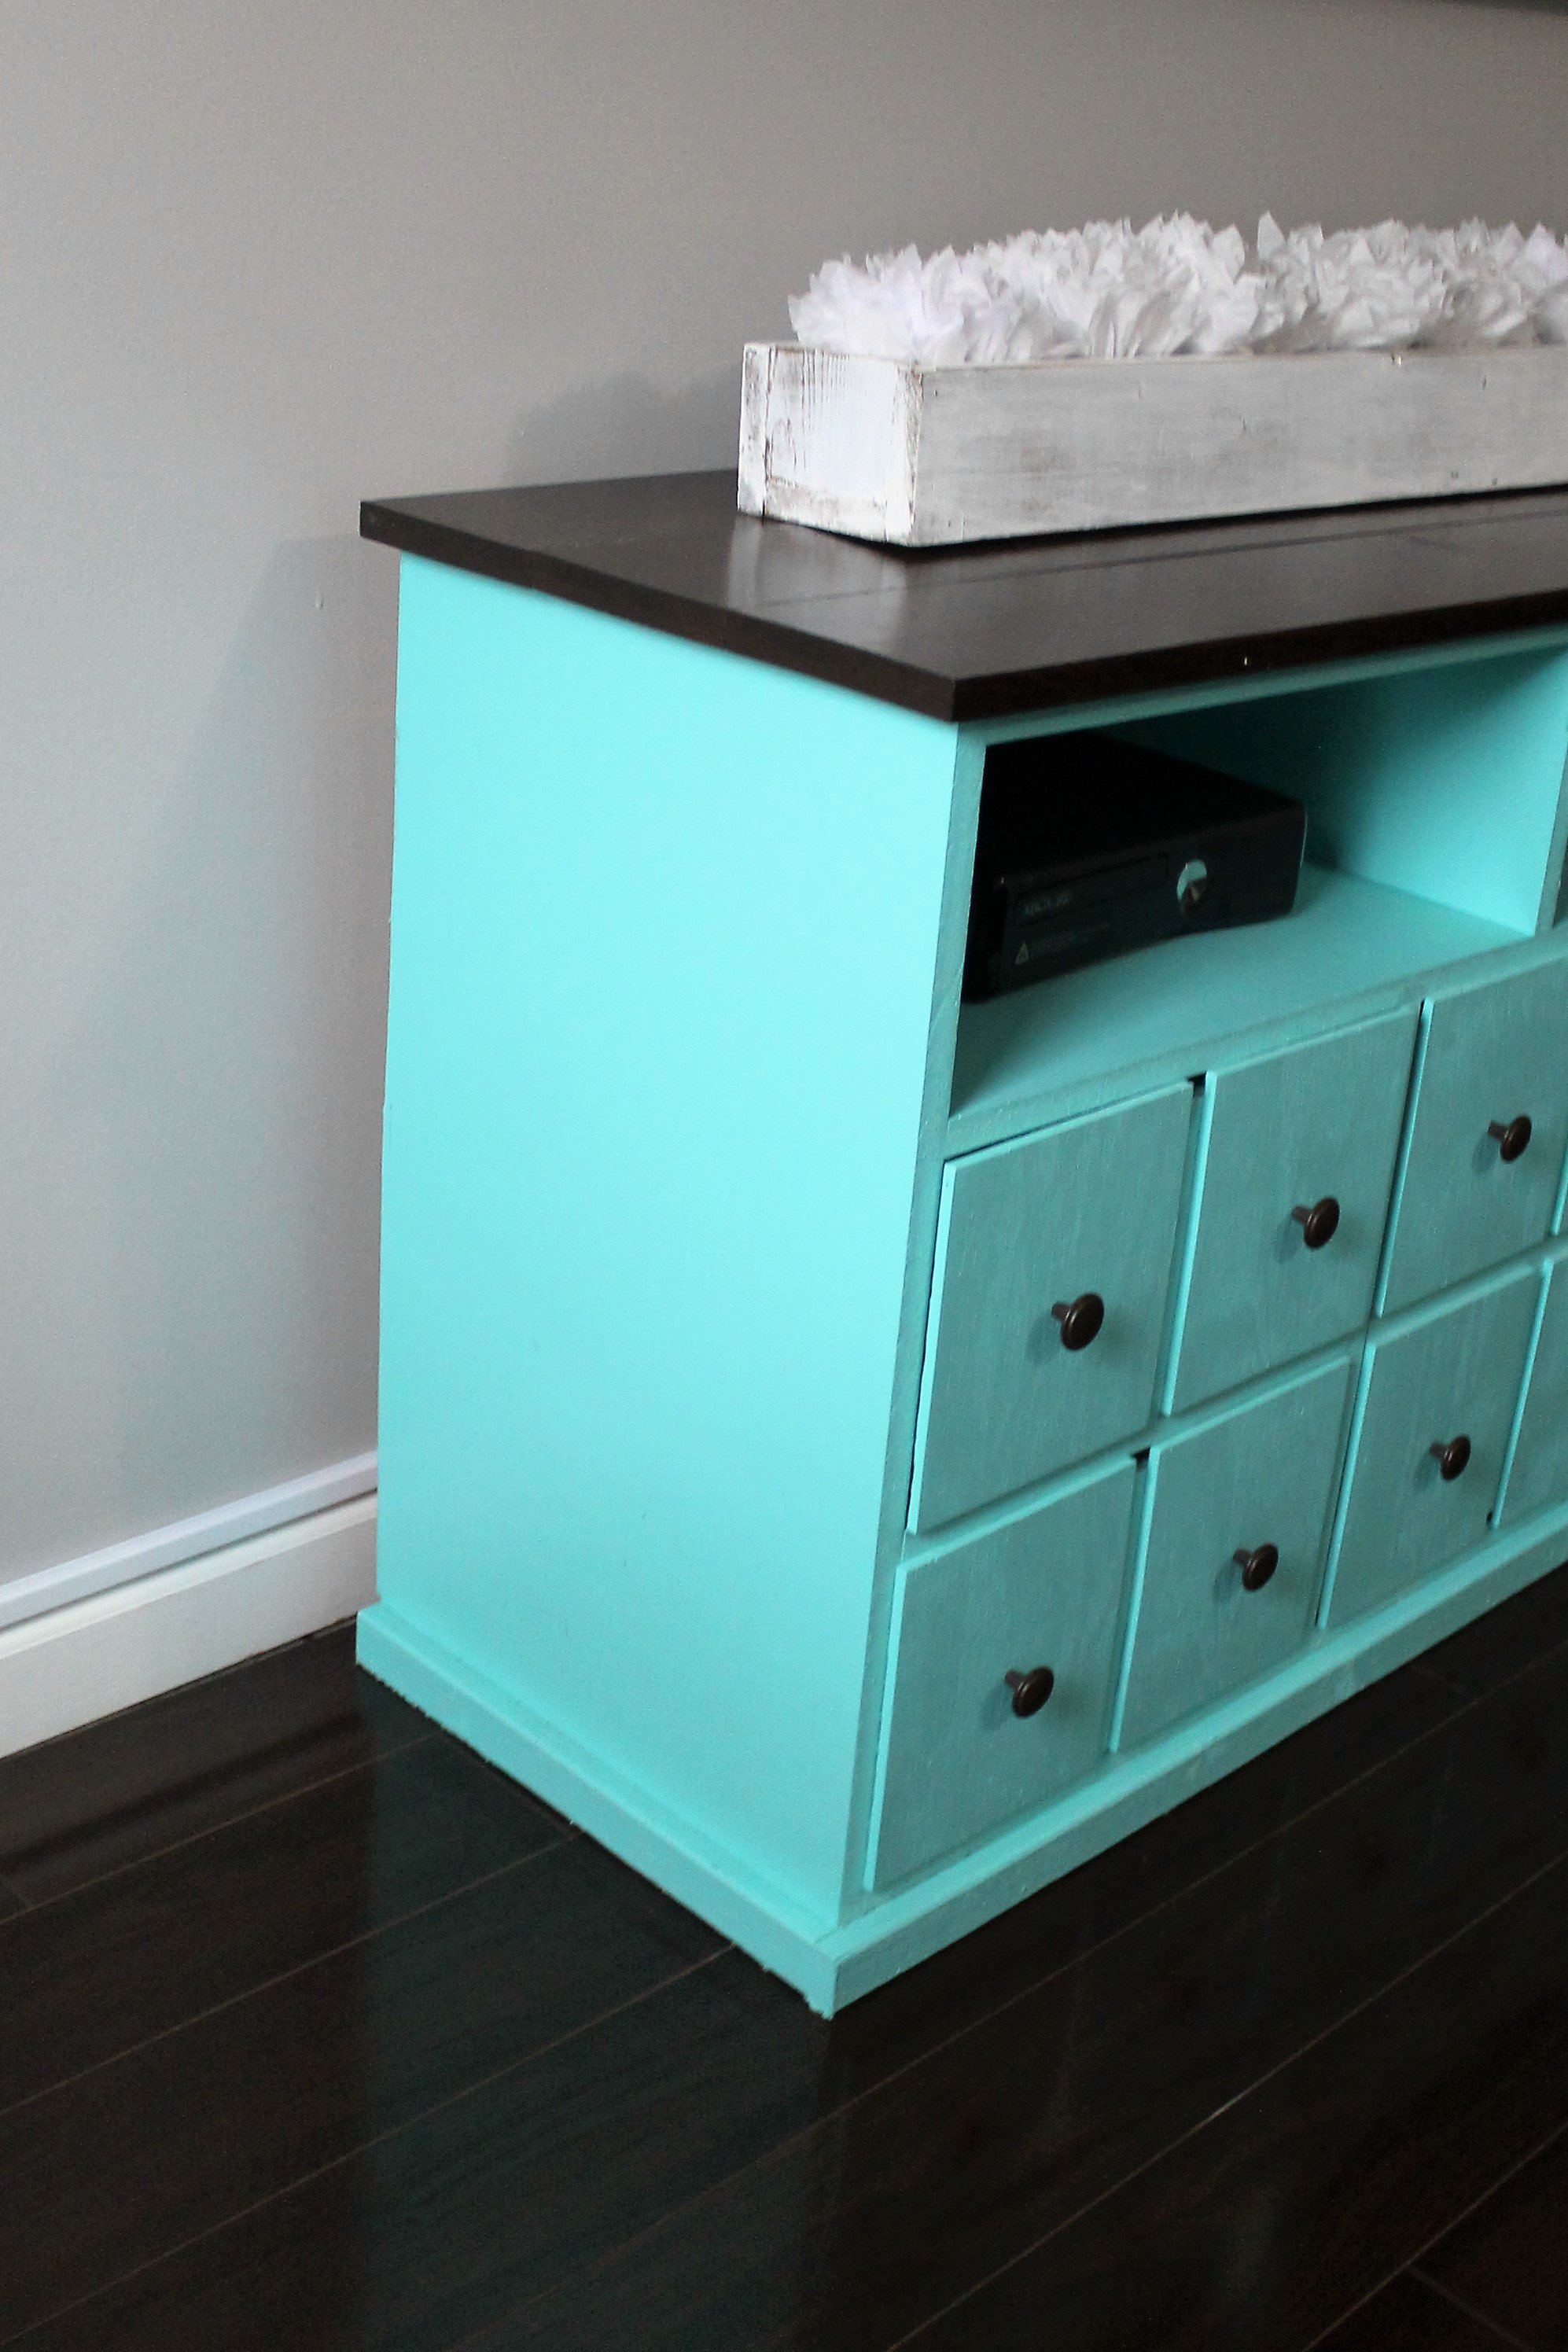
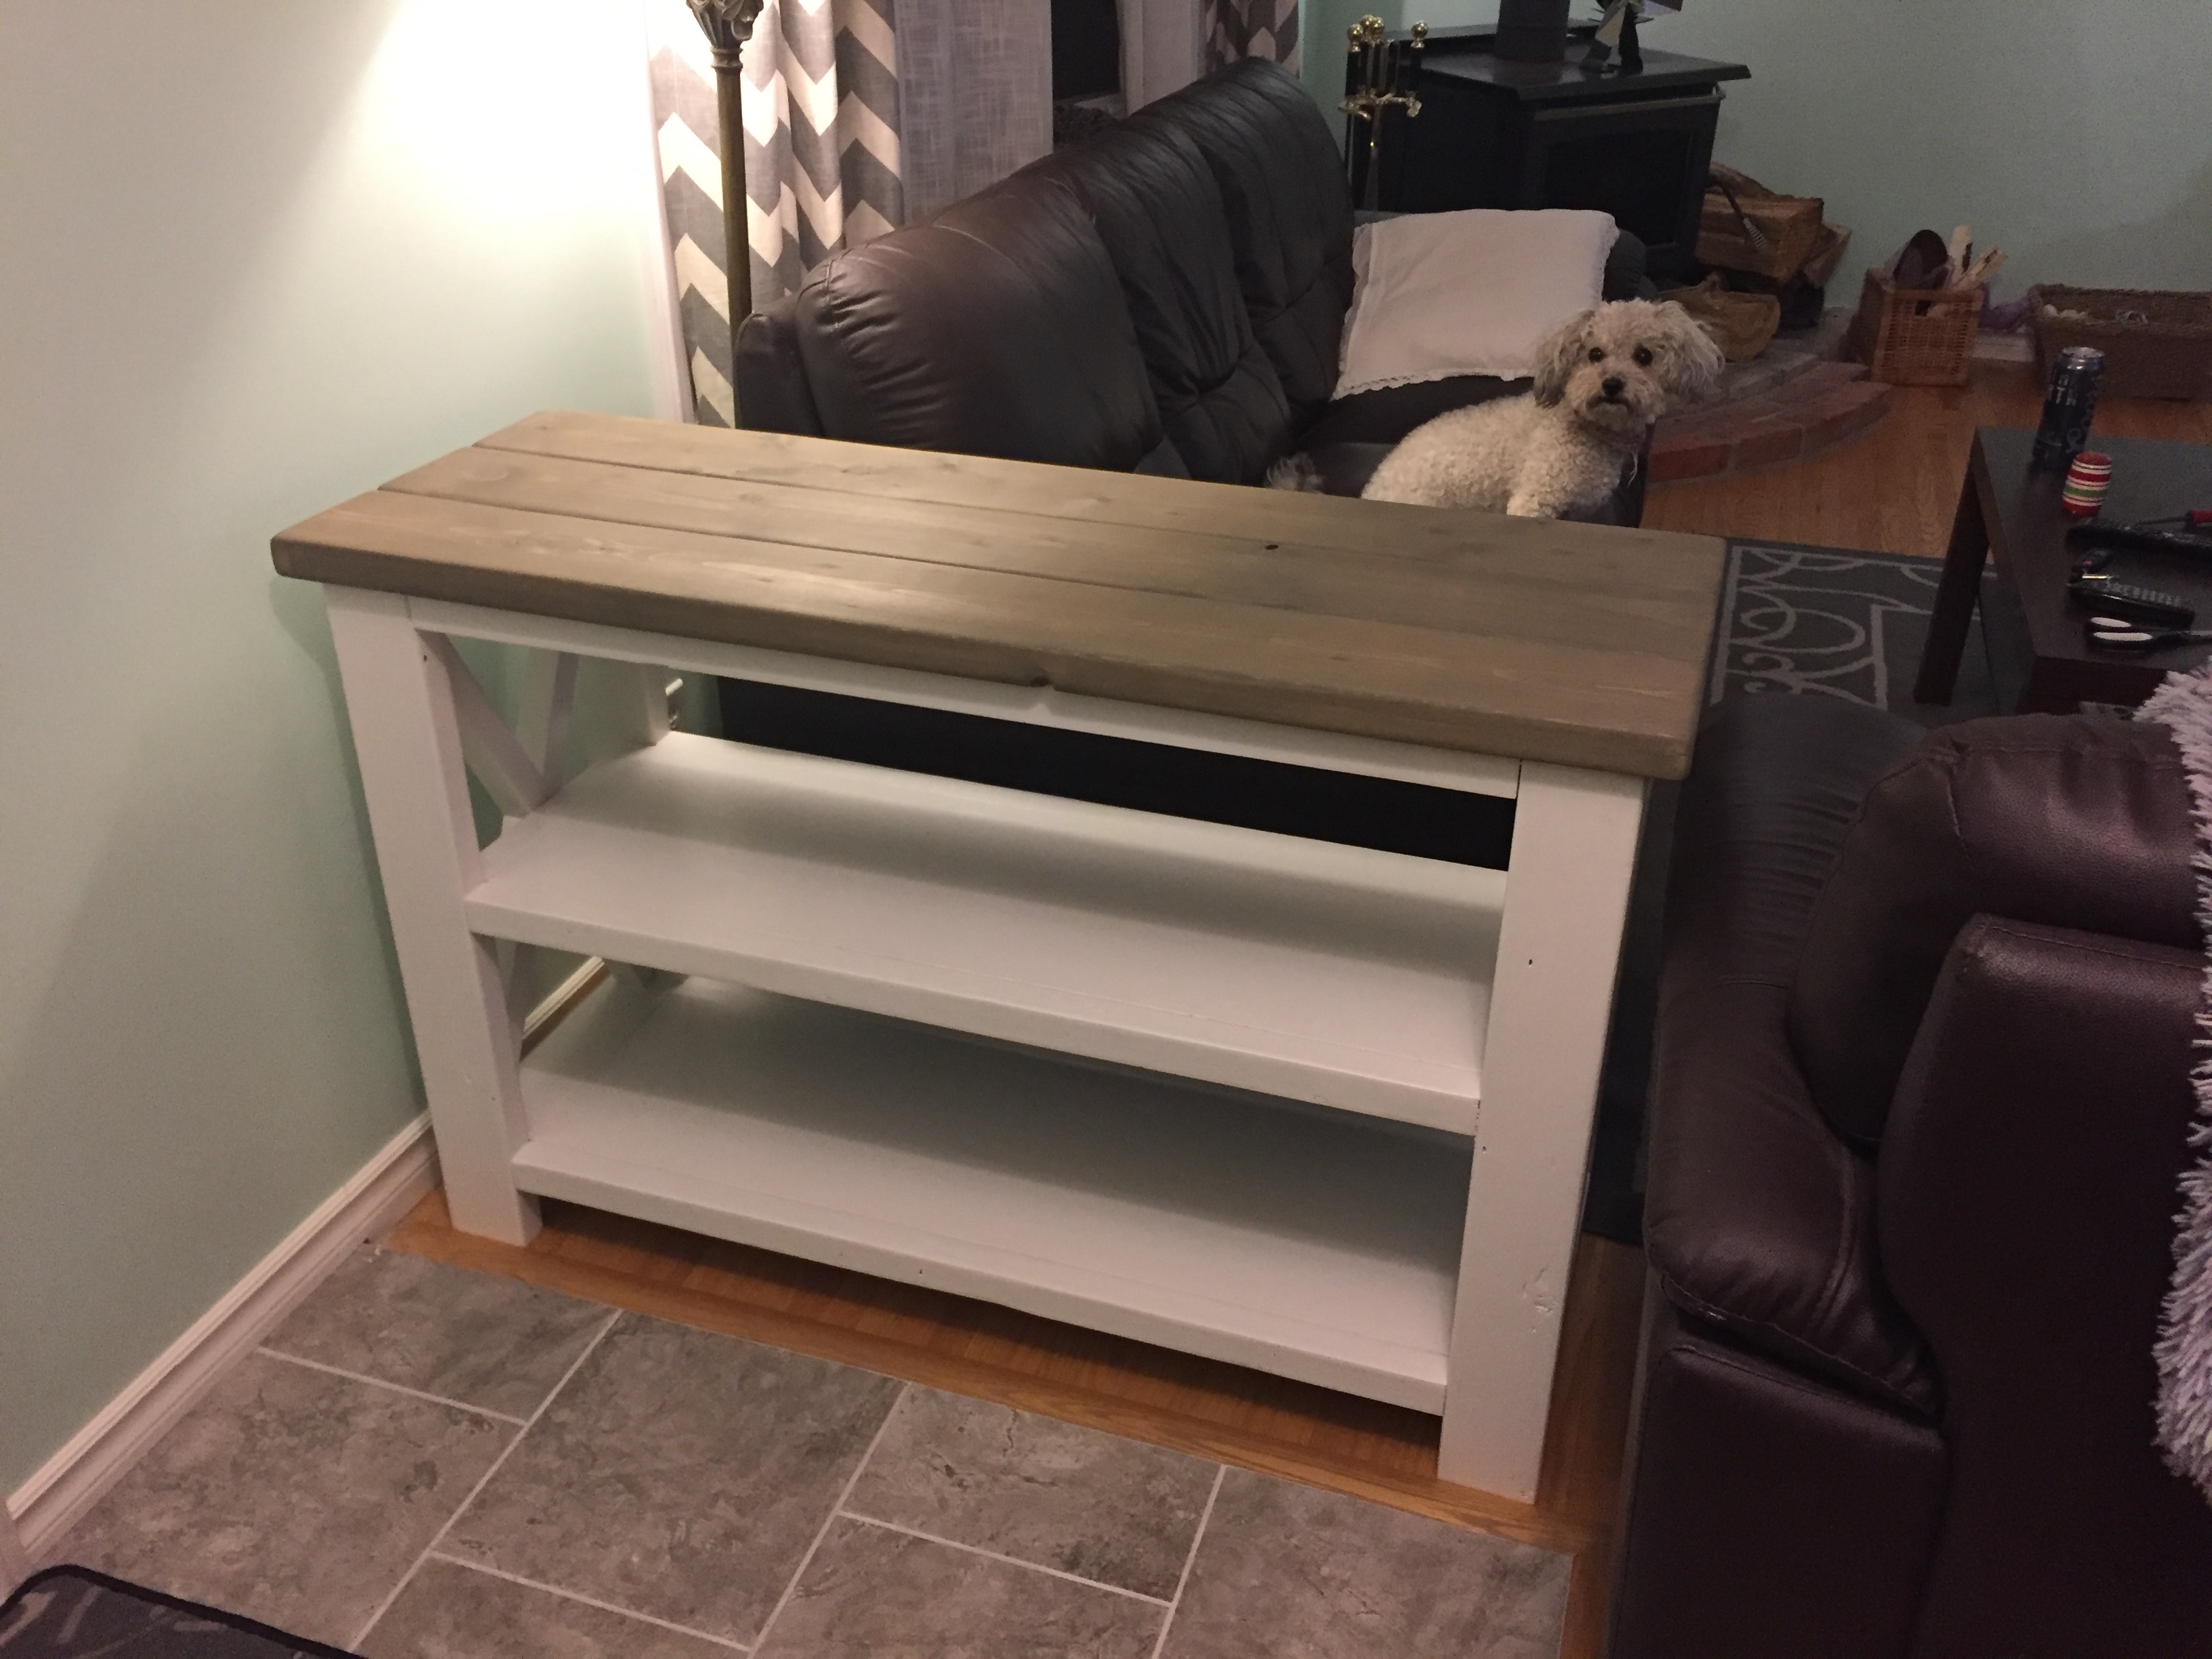
I am a huge fan of apothecary cabinets and fell in insta-love with this cabinet. The open shelves on top are a great size for lots of entertainment equipment and consoles and the storage below is fantastic for everything else!
I built this for my daughter. I had to alter the plans just a little, but all of Ana's plans are so well done, that it is easy to change them a little and make them personal. Thank you Ana.
One of the adriondack chairs you have shared...made with wood scraps so it cost nothing only the time to make. It's comfortable and sturdy.....and I loved making it
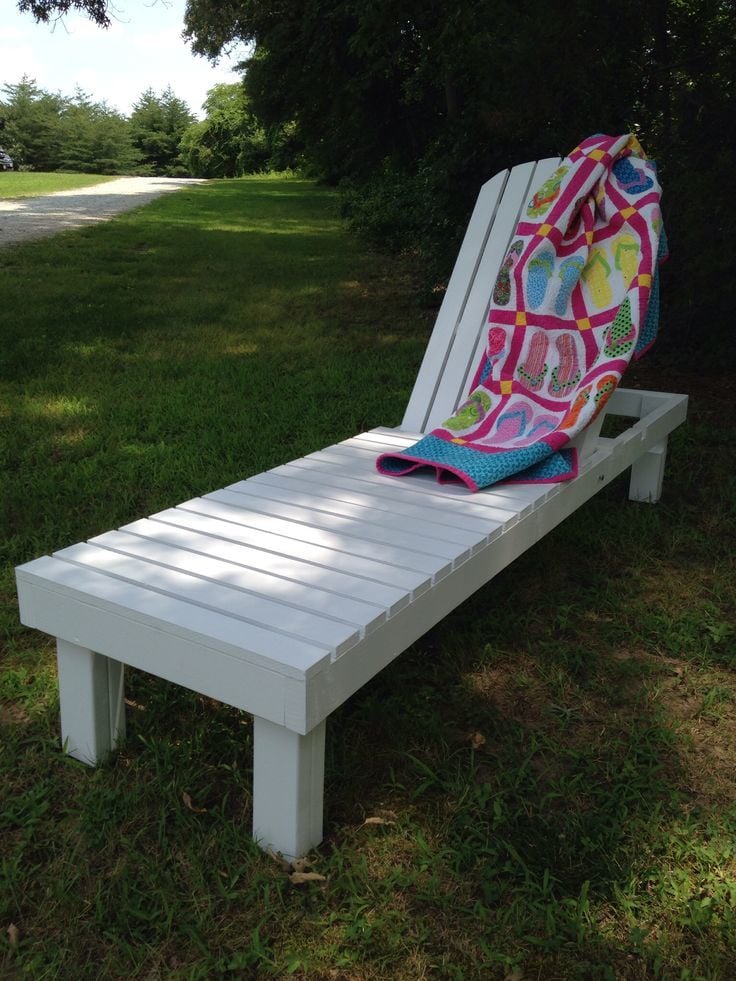
I'm slowly working on building the whole Simple Outdoor Dining Collection.
When my Mom and I moved into our new apartment, we spent all our money on new indoor furniture, and we have this really huge porch with a nice view and nothing to put on it. So as a surprise after we moved in, I made her the bench. She loved it so much that I decided to make the matching table for her birthday. The stack-able chairs will be her Christmas present, so stay tuned for that if you'd like to see how they turn out.
-The bench was about $20 for lumber, a total of $40 or so with stain and screws and everything.
-Table was about $60 for lumber since I couldn't fit the the 12-footers in my car. I probably spent a good amount extra on a bunch of 8 footers instead. Also wasted a lot of wood that way, but I will find a use for it. Definitely get the 12 footers if at all possible. No need to buy the rest of the materials again if you have left-overs from the bench.
I didn't modify anything on this set at all, it was pretty much perfect the way it was designed. Although I did add some 1x3's to the legs on the bench to make them sturdier- notice the corner leg rather than just a 1x4 by itself. Thanks for these plans Ana, you make me look good!

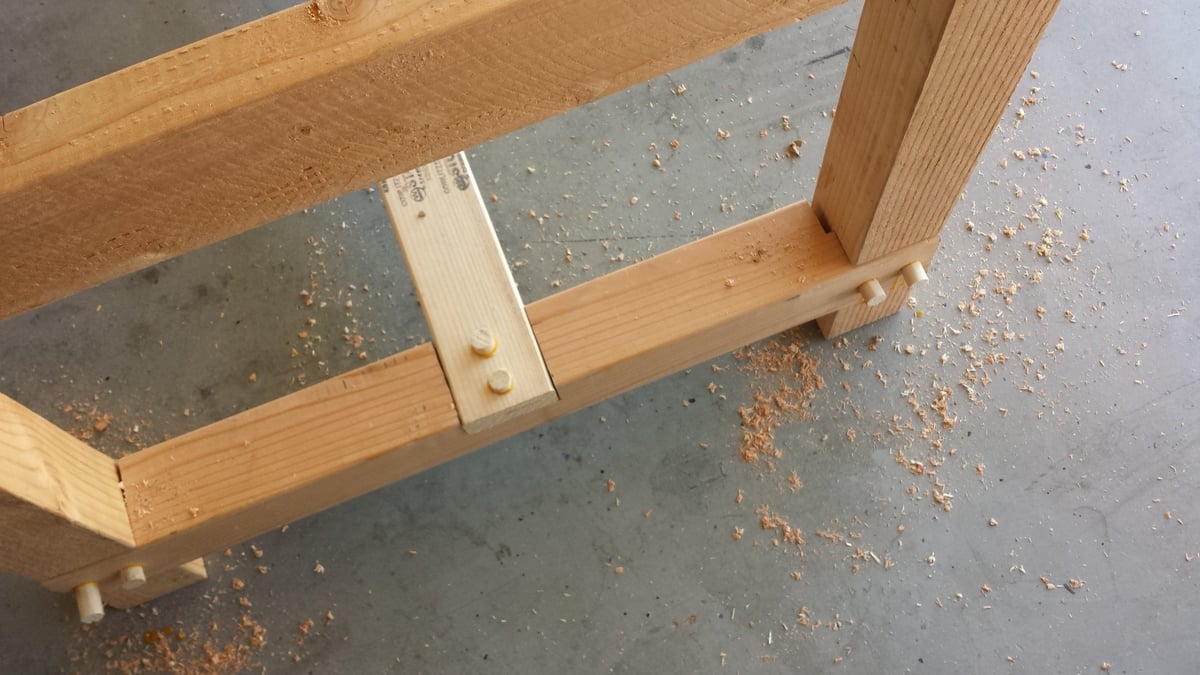
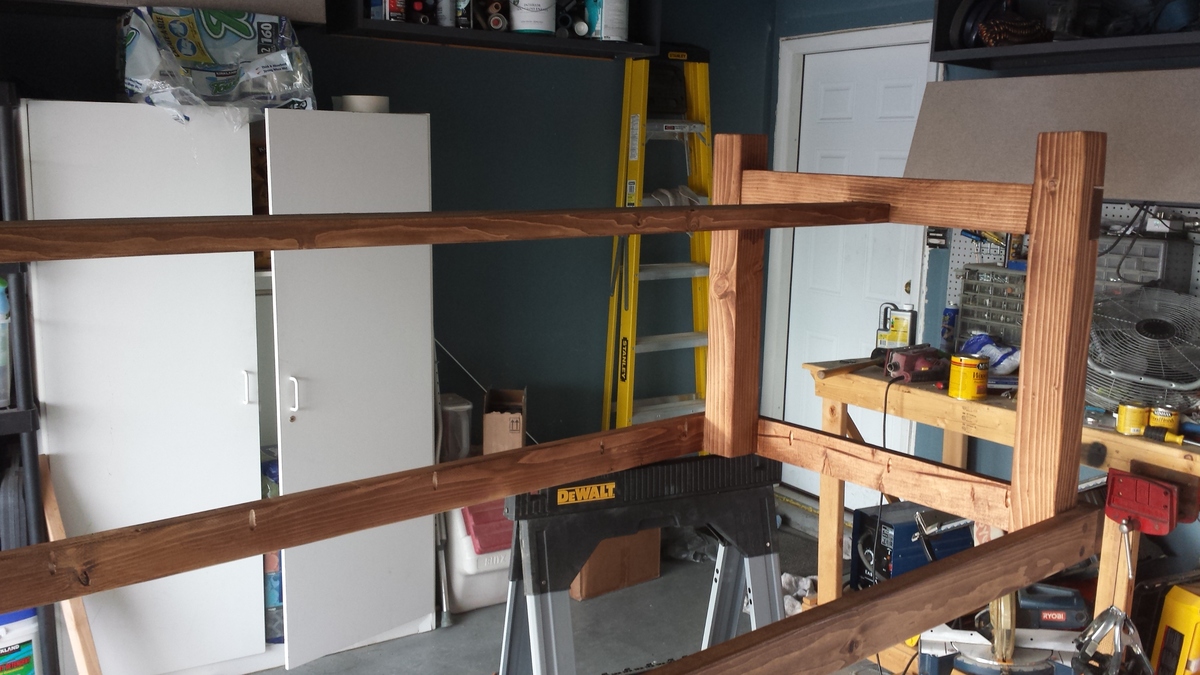
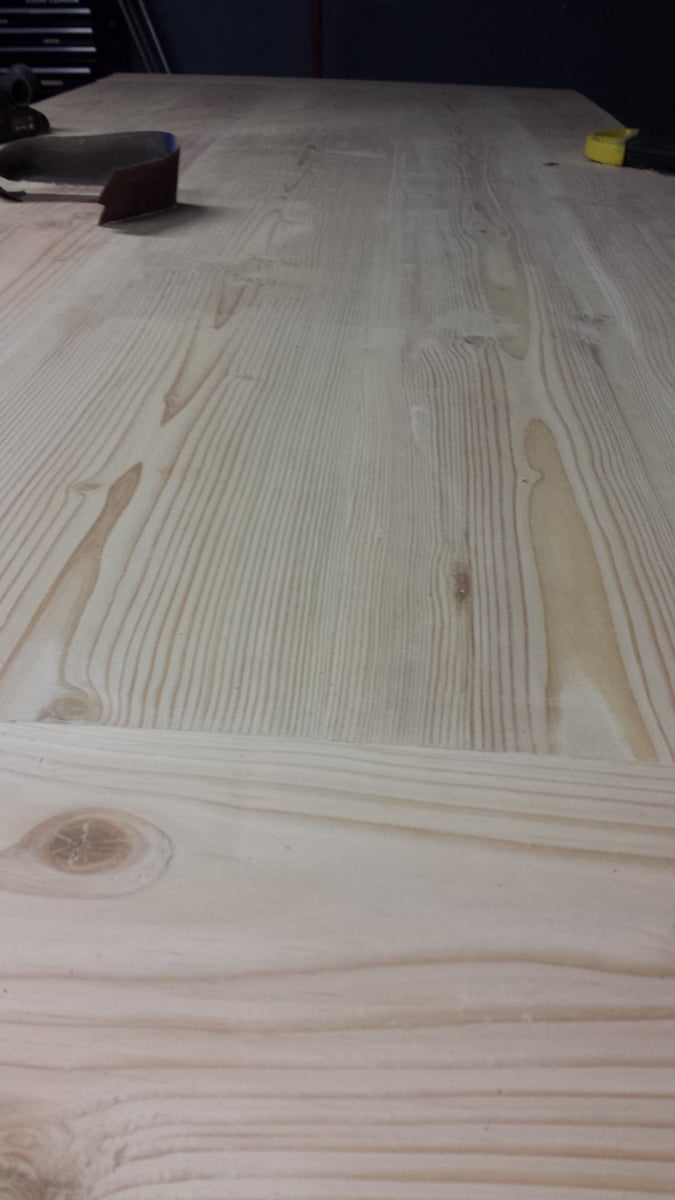
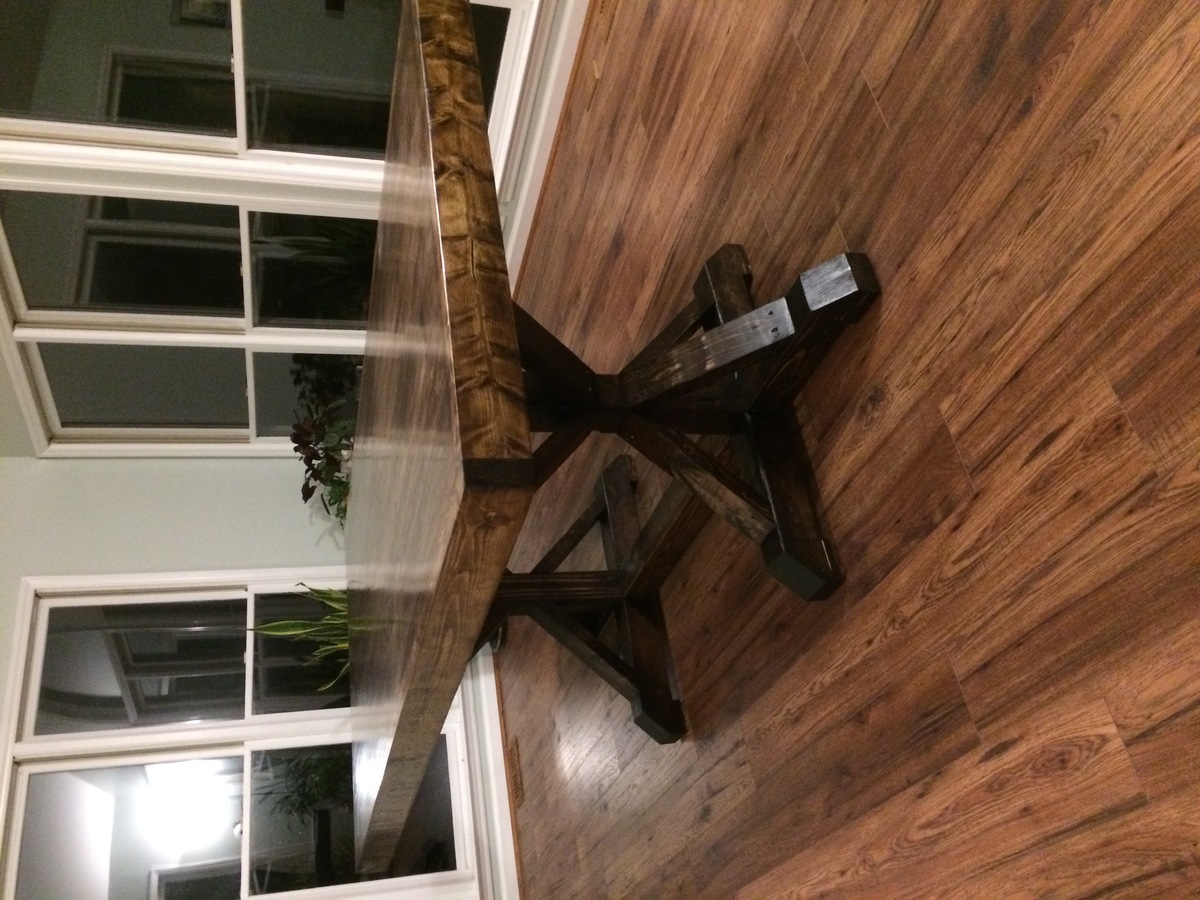
So I was inspired by the Ana-While posted Farmhouse Table a few months back.. Honestly I was a little concerned about building such a large piece as my first project but I decided to invest into some common pine lumber to give it a shot. I could have bought better woodworking stock, but I was concerned I was going to mess it up anyway so I chose to stick with Home Depot / Lowes grade stock to keep the cost down.
I made a few changes from the published design:
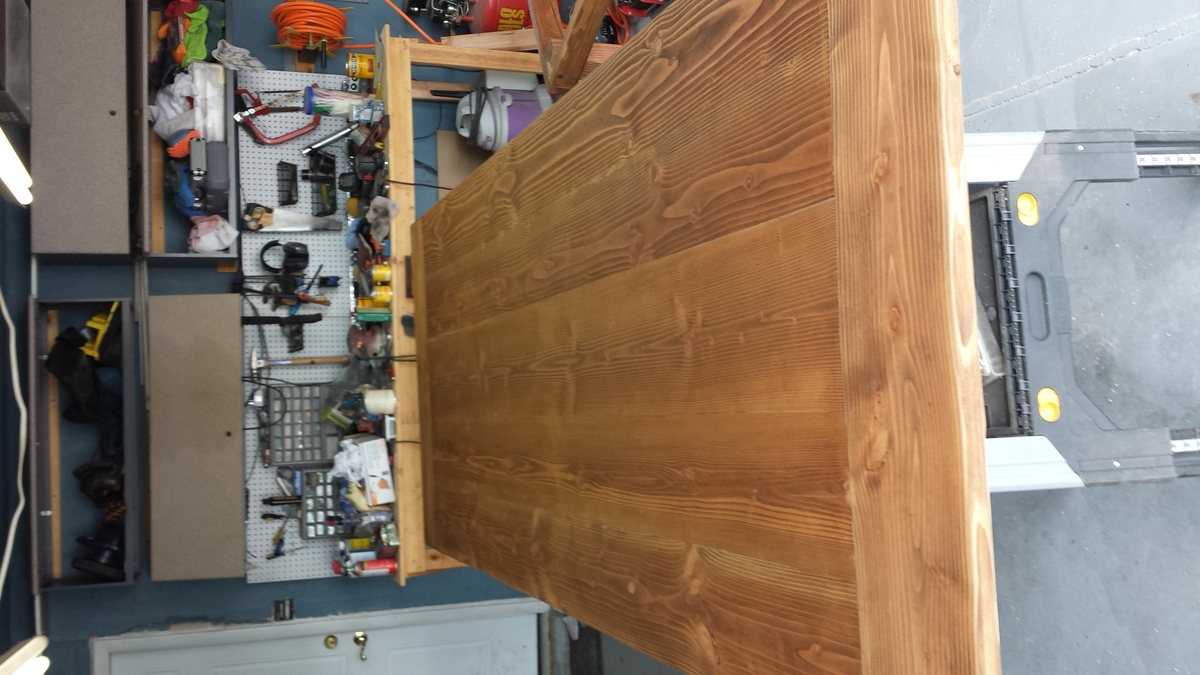
I wanted a very large table for entertaining during the holidays. I extended the design to about 10 feet long by almost 4 feet wide.
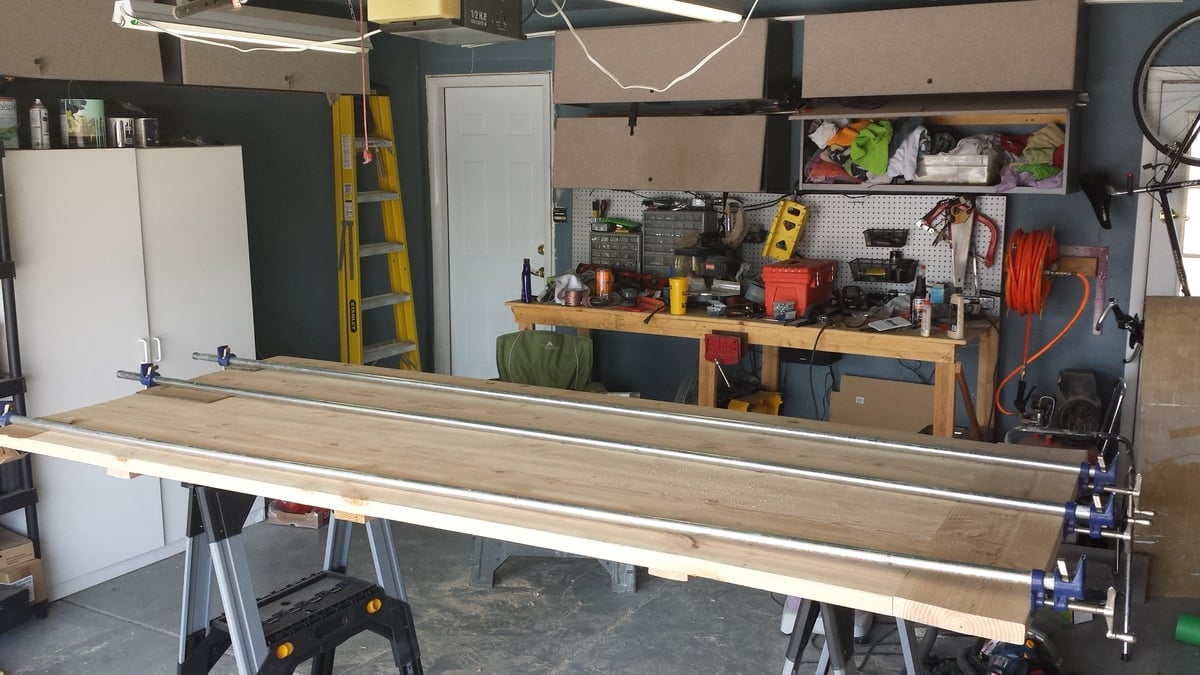
I also am not a big fan of the seams that are left between the boards when doing butt joints using common lumber. It was a bit of work, but I trimmed off about 1/4" of material from the side of each board to make their corners square instead of the normal slightly rounded profile. With enough planing and sanding, I was able to get a reasonably tight seam with just normal garage tools.
The third design element I added was pre-drilling each of the exposed screws with a 3/4" bit about 1" deep and filling those holes with a wooden dowel. This dresses up any screws used and in my mine makes the table look a bit more traditional. Im sure some people would say just use the dowel to secure the joints, but I just wasnt that brave for an inexperienced builder.
The finish was intentionally left uneven. THere are raises and small grooves in the surface that I sanded down with 80 grit, but then only lightly went over with 150 and 220. The effect I was looking for was a surface that looked hand sawn / worked but that was still smooth to the touch and not 'dangerous' to use daily. There are some visible sanding and planing marks, but they are all soft and smooth, and help add depth and character in my opinion.
More pics available on my public facebook album: https://www.facebook.com/media/set/?set=a.10152583224649571.1073741829…
Supplies cost about $300 for lumber and finish materials.
The face is made from 4 2x10's and 1 2x12 in the middle.
The legs are 4x4, all other pieces are 2x4.
Tools needed to finish the table this way:
Circular saw
Table saw (to trim edges if you want tight seams)
Kreg Jig (essential for pocket holes!)
Very big clamps! I did not have these and spent $90 or so on the 3
Hand saw
Chisel
Drill
Sander (or a LOT of patience!)
Planer (I used a cheap power planer to help level out the cheap big box lumber and to even out the joints)
STRONG sawhorses. I broke a set of 600# rated horses re-positioning the face. A 10ft table face is very heavy! get help!
Finishing the table this way took a long time. Im going to guess 60 - 80 hours went into it. A ton of time is used getting the joining work right. The rest of it goes together pretty quickly.
Wed, 07/23/2014 - 08:10
Beautiful! I love the smooth seams. You can tell you spent a long time on it.
Wed, 07/23/2014 - 12:30
Love it! and is just your firts project!!! Wooooowww Im just getting the tools to start my own projects and by seeing this I feel so encouraged. Thanks for sharing :)
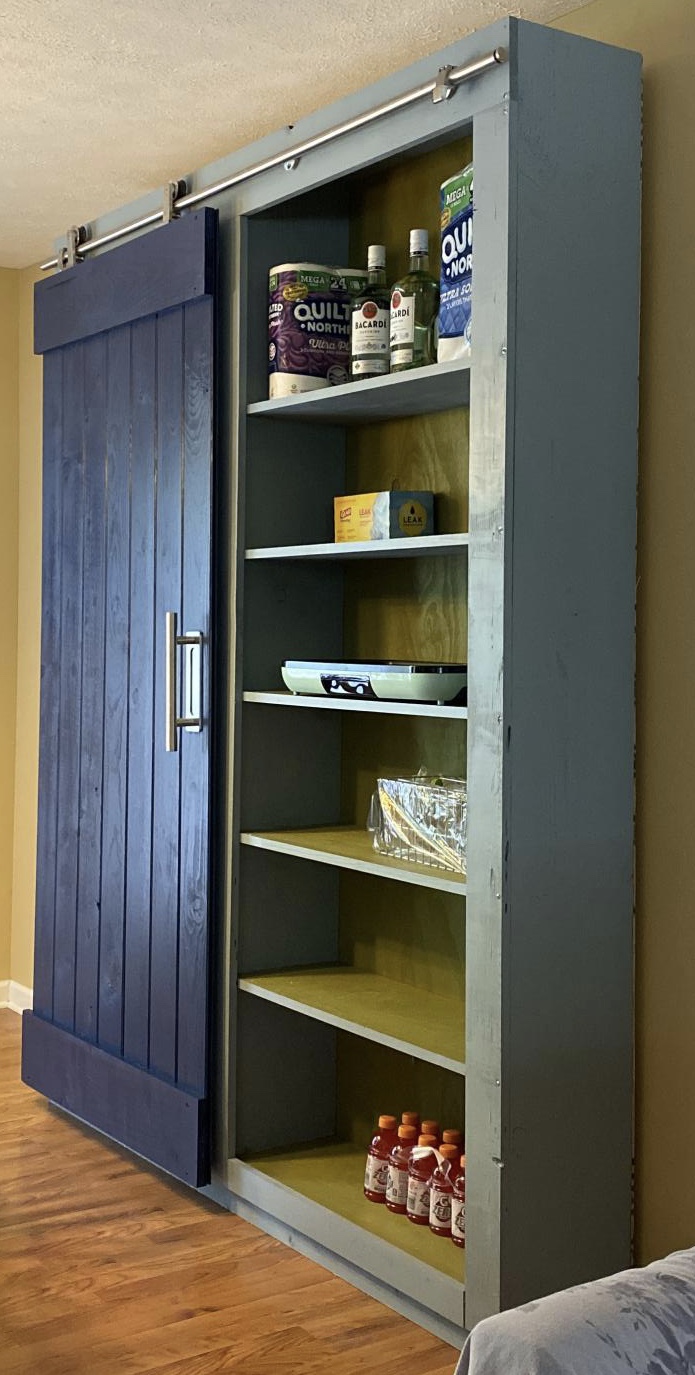
We didn’t have much storage space in our little galley kitchen. Imagine how excited I was to find this plan on my favorite site.
This was my first build using my new circular saw. For previous projects, I’d take both the shopping list and cut list to Lowe’s and have them cut the wood. This time, I made all my cuts. I was nervous but love how it turned out.
I anchored it to the wall because with the barn door and the hardware weight, it felt a little front heavy.
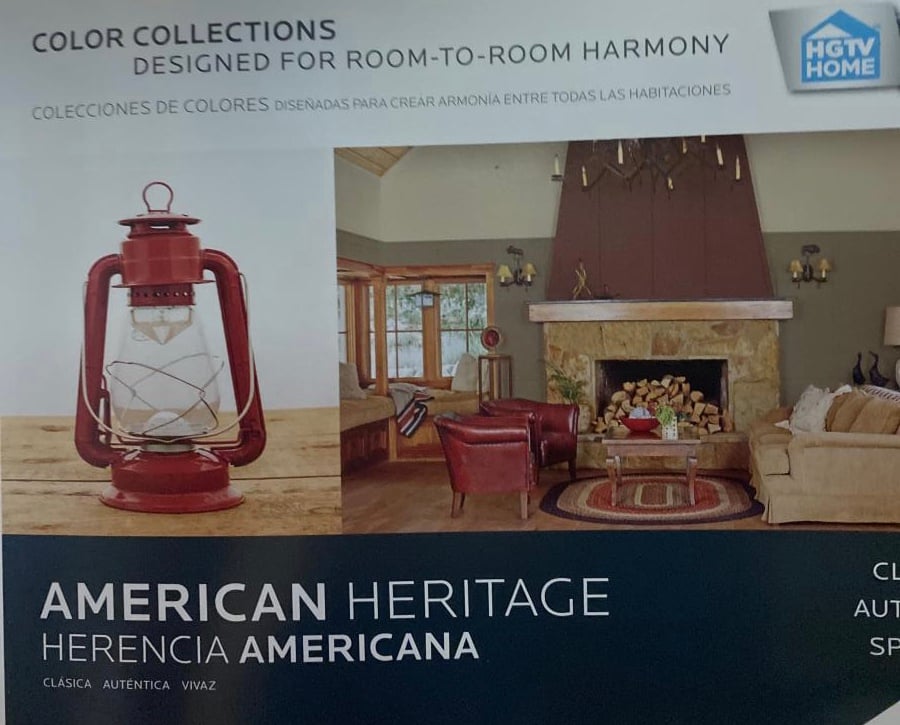
We used the same color as our kitchen cabinets (AH13 Salty Dog) and then selected coordinated colors for the body (AH18 Debonair) and shelves (AH15 Rural Green).
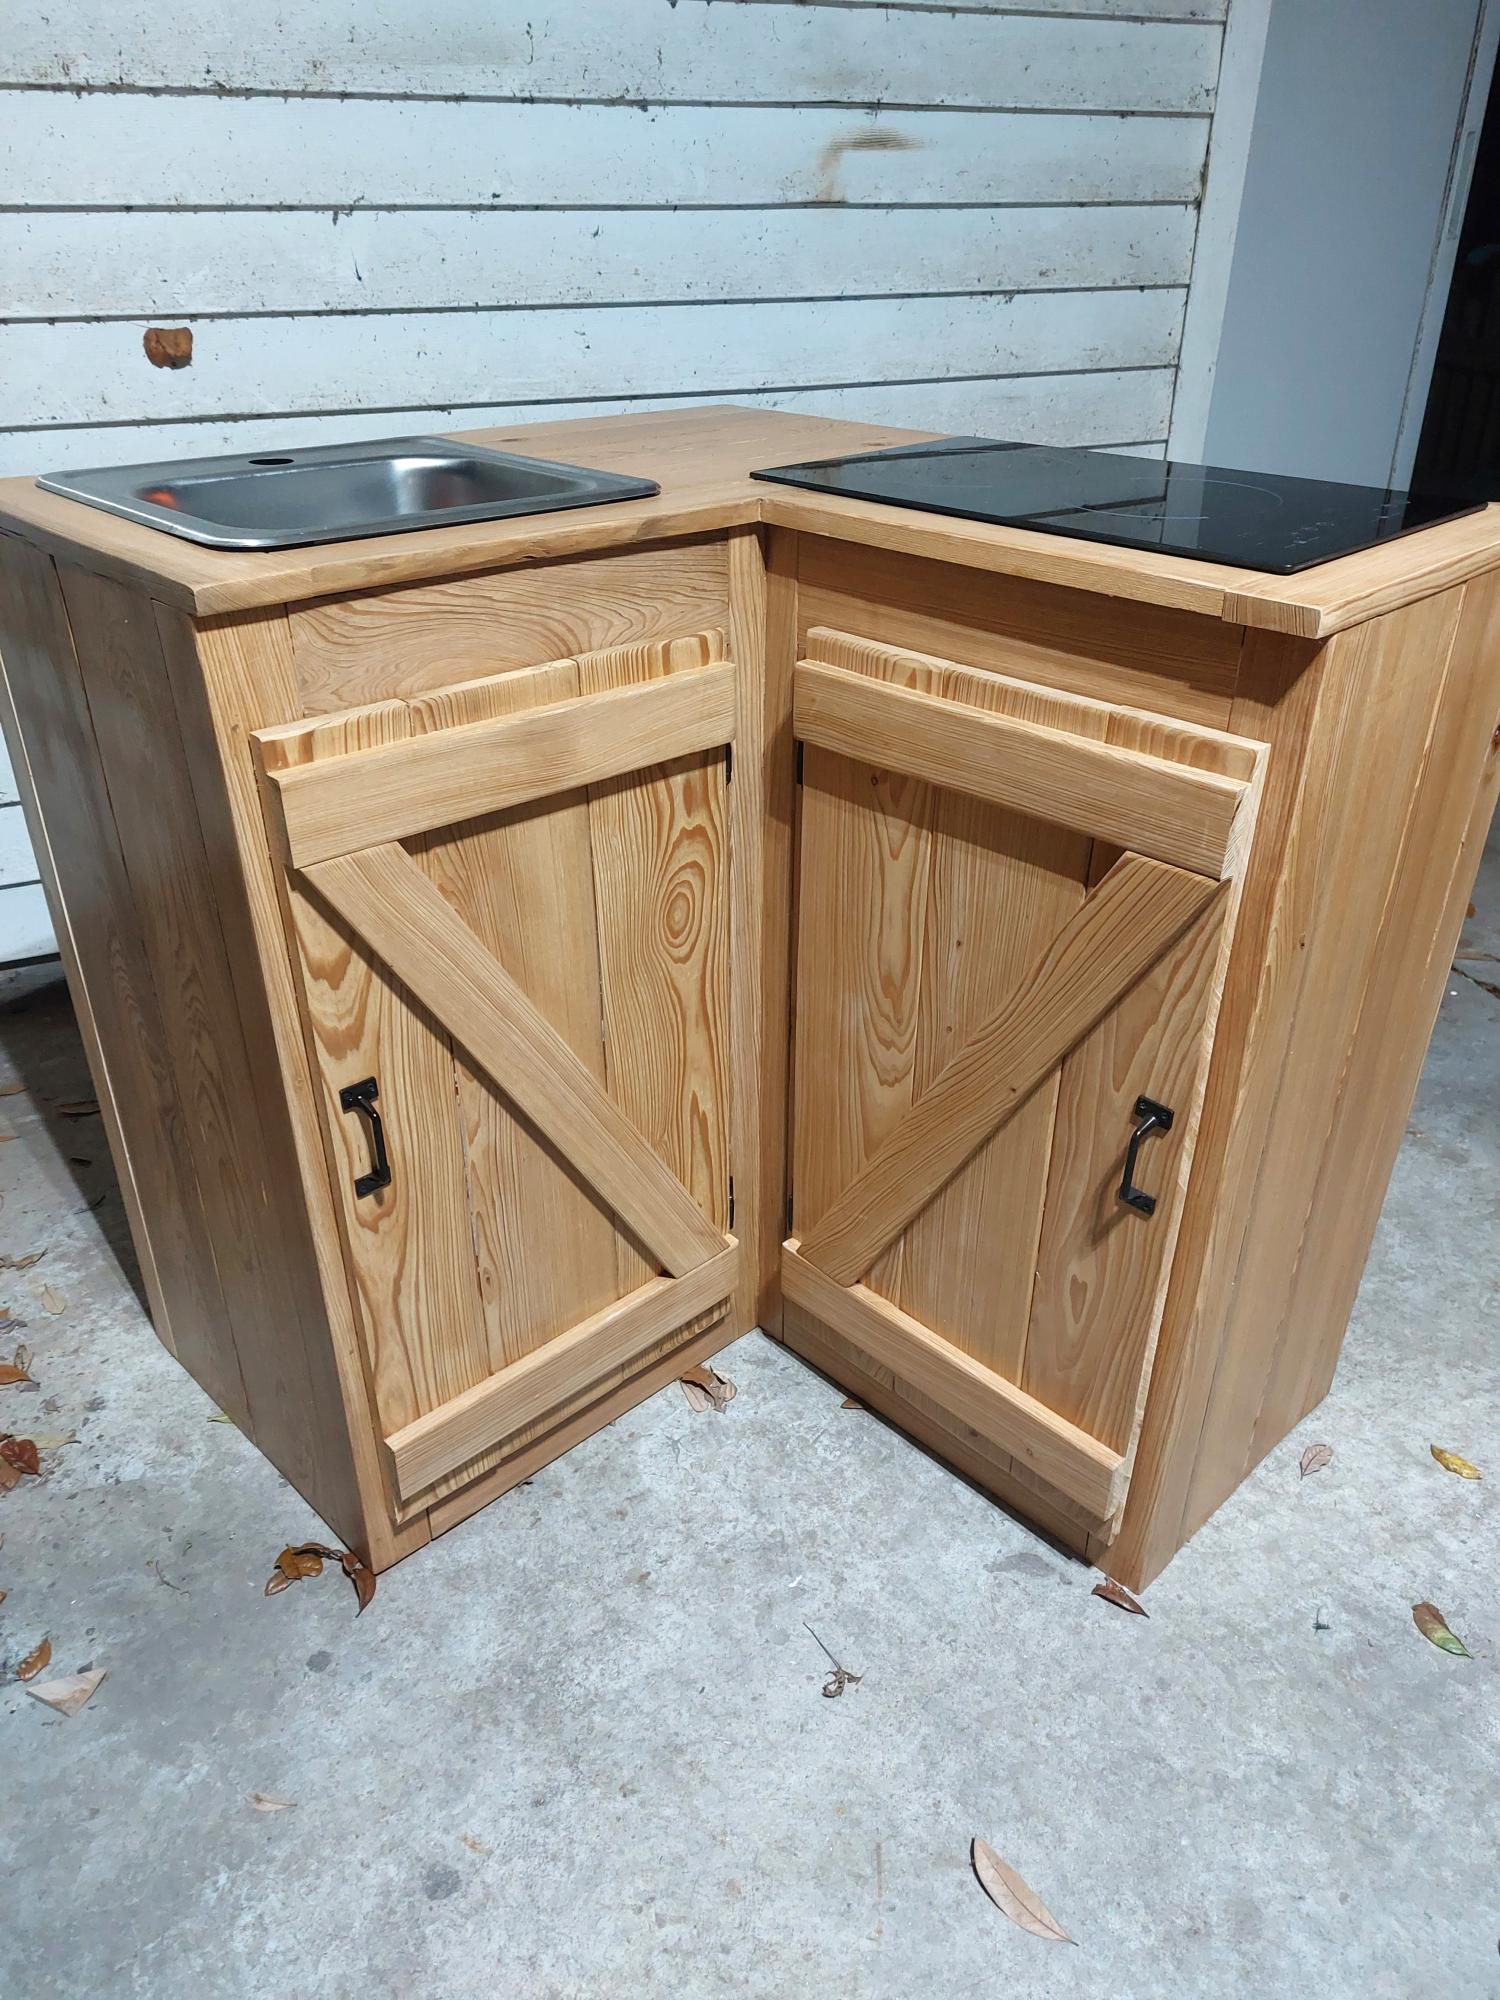
A friend asked for a corner sink\stovetop cabinet for his tiny home . Made from sinker cypress.
Cypress Past
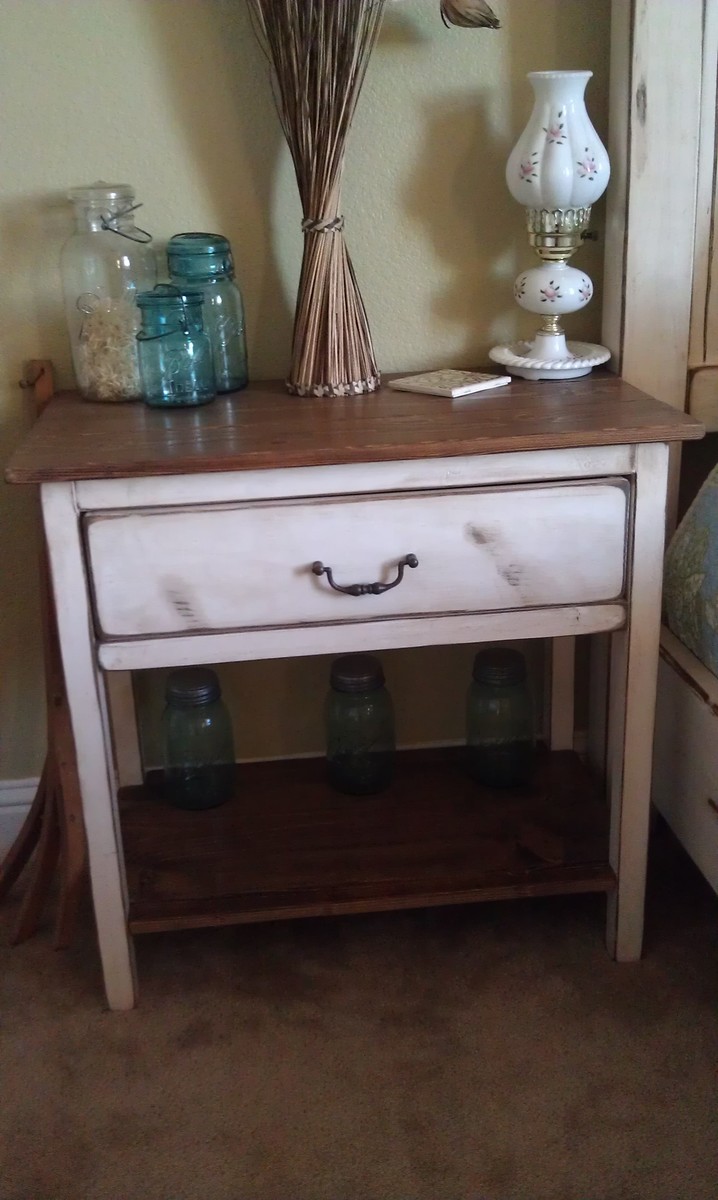
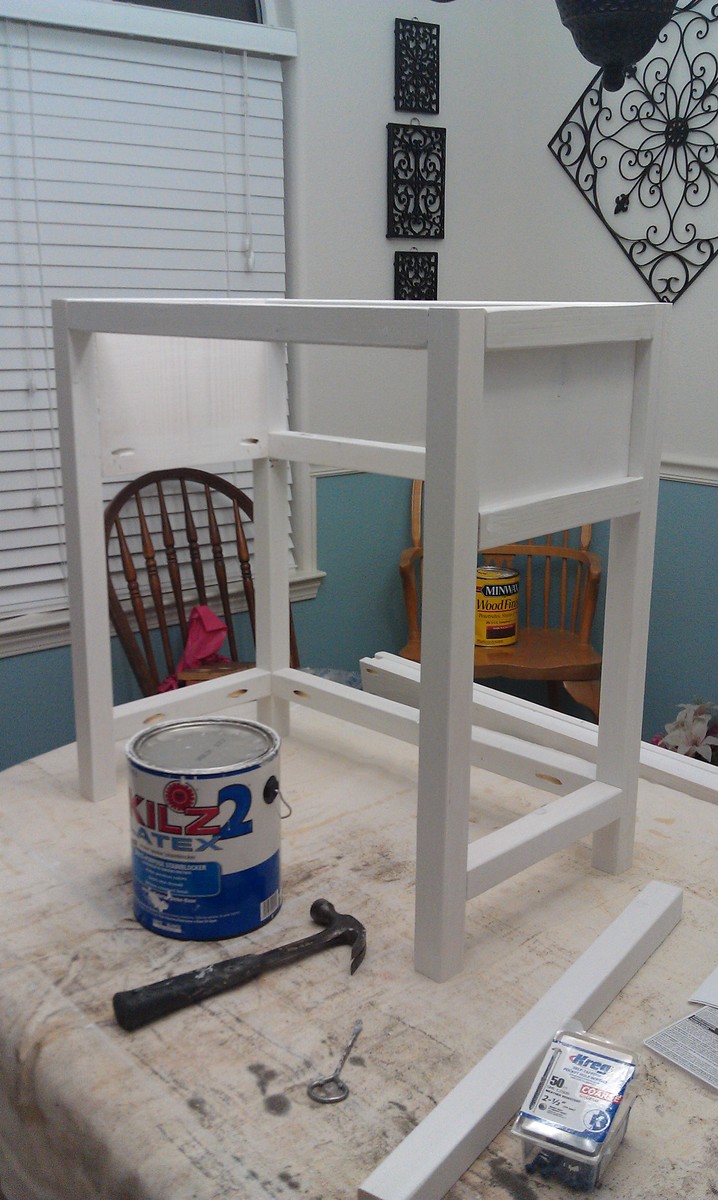
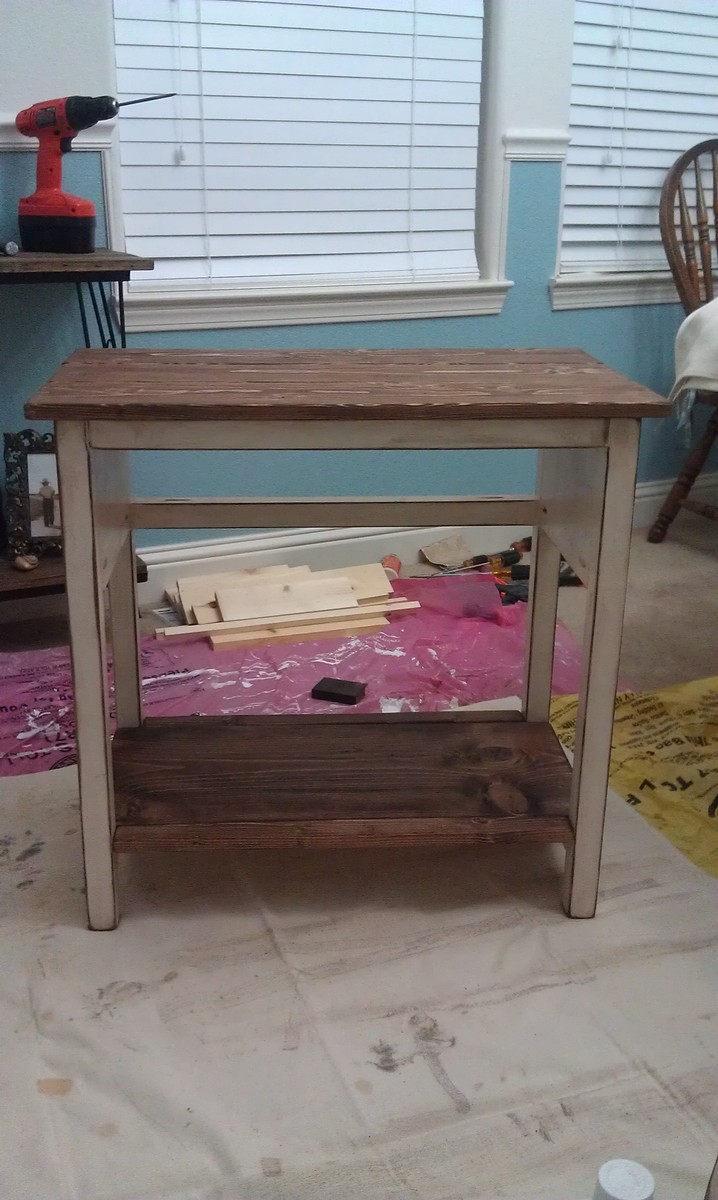
I wanted a nightstand to match my farmhouse bed. I used the cheapest pine boards I could find to build this and it turned out great!
When I first built it I just used a scrap of fabric tied in a knot for the handle but added a real drawer pull when I built the matching dresser.
(sorry the pictures are crappy cell phone shots)

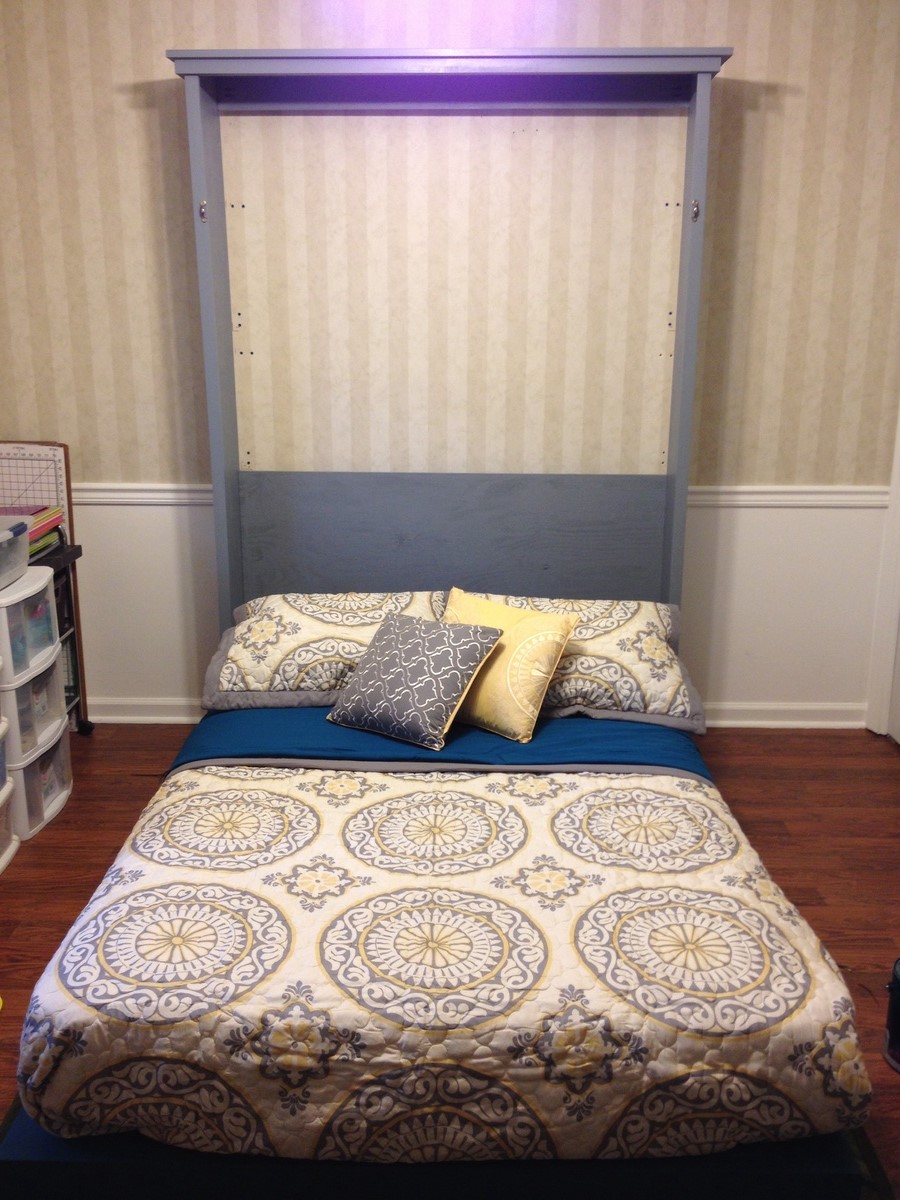
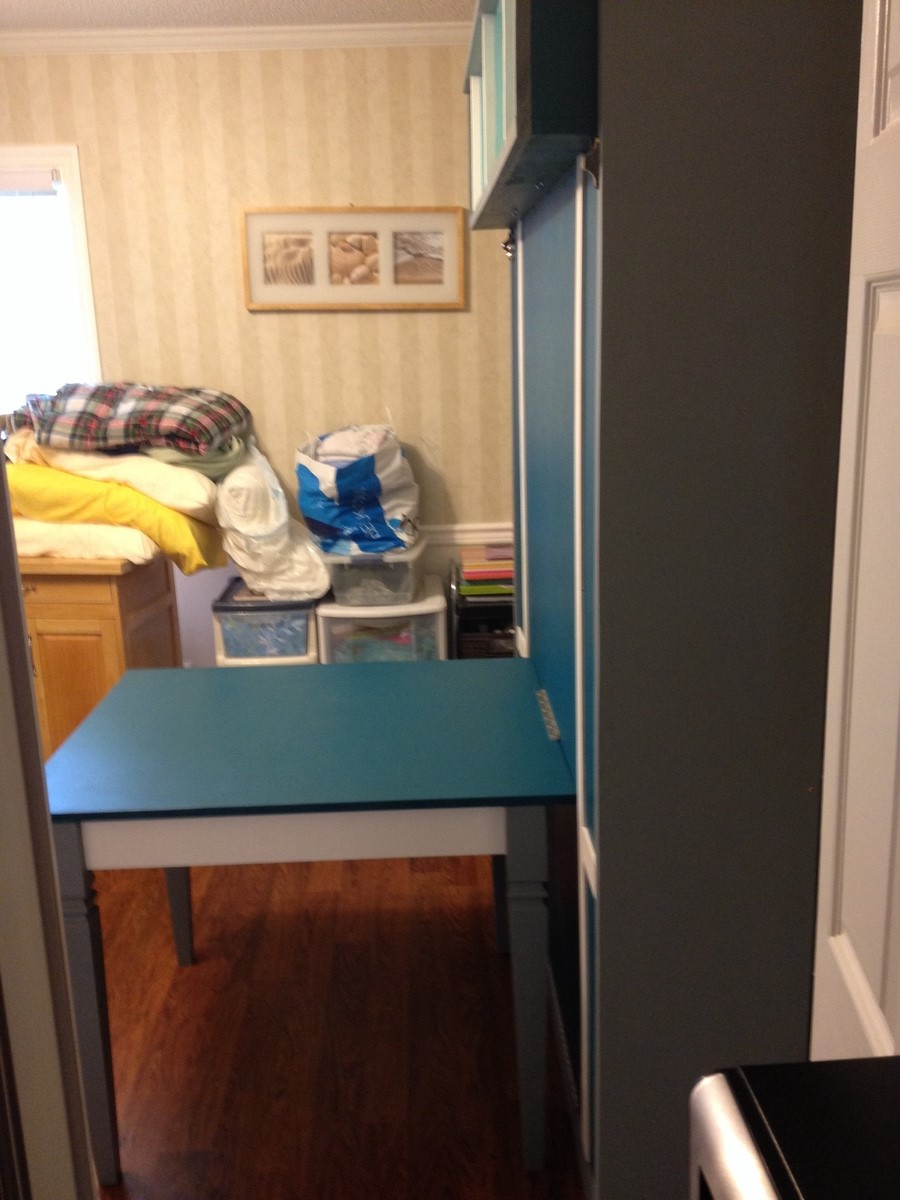
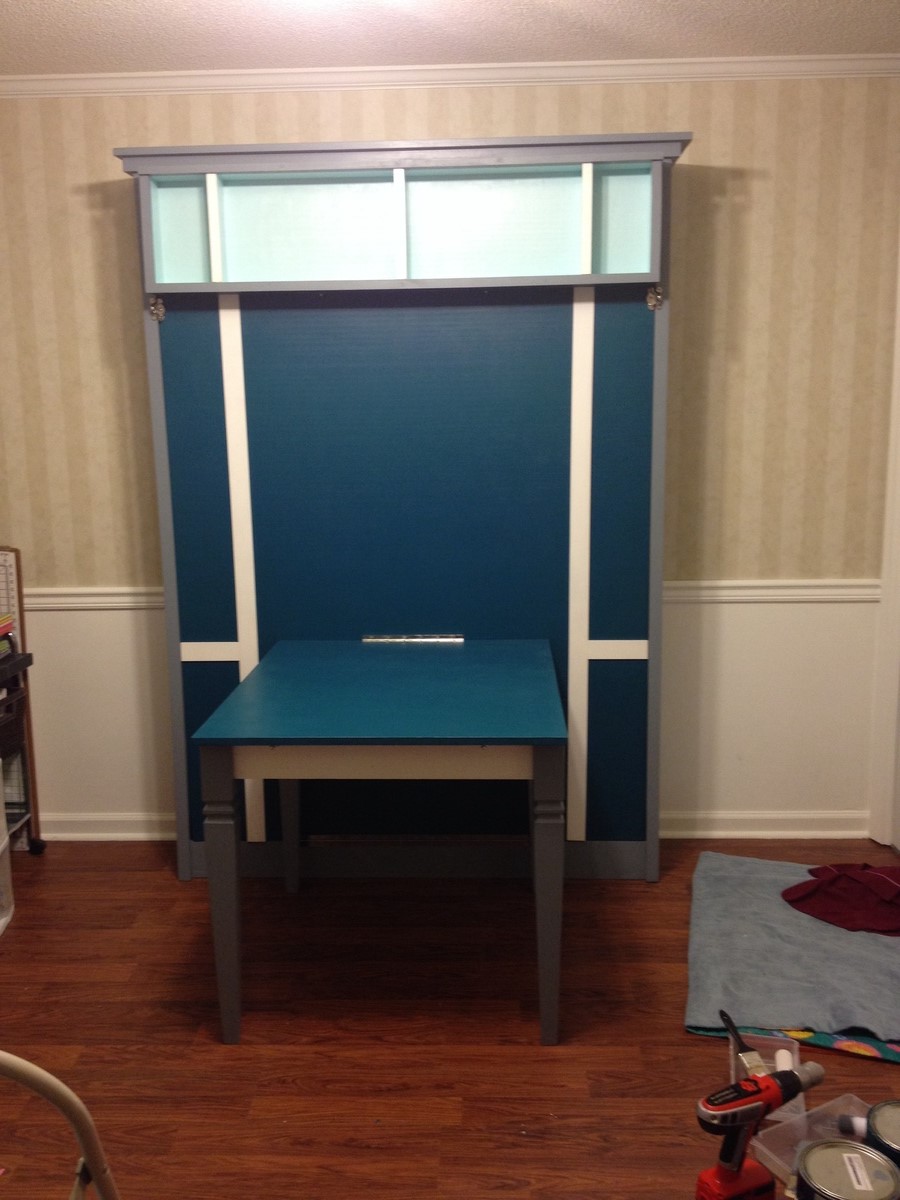
I followed most of the measurements with the Murphy bed with added dimensions for a full sized bed. I also added a shelf to provide support while the bed is down since I brought the platform off the floor. The table is also hinged to the bed platform so that it folds up and locks in place for a center support for the bed.
Fri, 07/25/2014 - 16:06
This is awesome! This is just what I need. I can't see how the table provides center support. Do the table legs come off?

Fri, 07/25/2014 - 16:52
What an awesome project! Love how the added shelf at the top creates the "legs" at the end of the bed when it is lowered (looks like it keeps the bed about 4" off the floor?). Are those window sash locks for closure? Those will keep it in place nice and tight when it's closed. The fold down desk is brilliant also, and love the legs and the colors!
Fri, 01/23/2015 - 14:13
Super job! Can you provide plan details for the table and feet for the off floor design?
My first big project and my kids couldn't be happier. I'm pretty proud too, just don't take a square or level anywhere near it :)

Mon, 07/27/2020 - 12:41
This is too cute! Thanks so much for sharing a photo, love all the additions!

Comments
mickeymonkey2017
Sun, 07/19/2020 - 18:43
These step turned out amazing
These step turned out amazing
Ana White Admin
Fri, 02/26/2021 - 11:18
Wonderful job!
Looks great, beautiful and functional!