Community Brag Posts

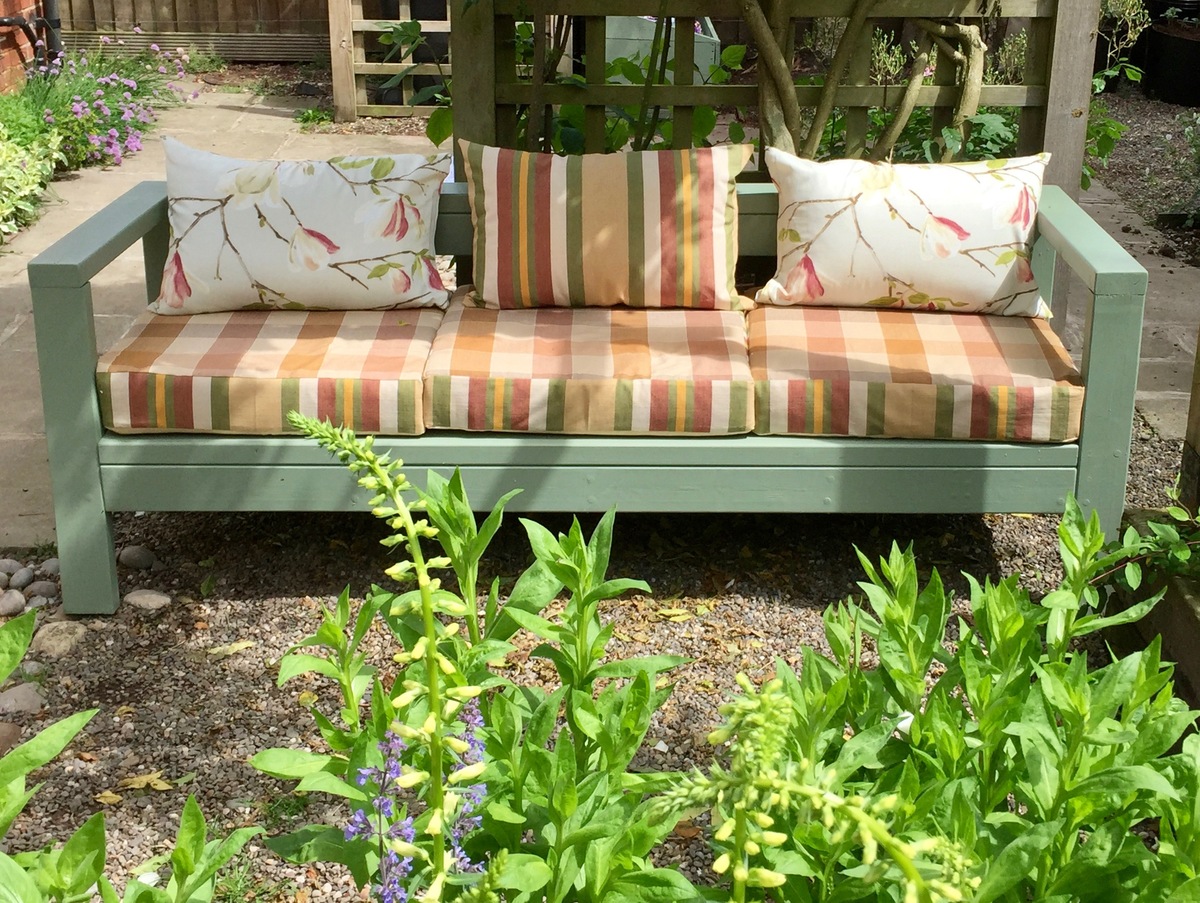
Outdoor Sofa

Submitted by Anonymous (not verified) on Tue, 05/30/2017 - 08:54

The instructions were easy to follow and although 4x2s are not readily available in the UK, it easily translated into 95mm x 45mm treated timber.  Instead of the screws suggested in the video I used Miller Dowels so there are no screws in the build at all.  It was challenging to fit the back section but this was solved by drilling half-way through, fitting the dowel and then filling with a glue and sawdust mix.  Fortunately my wife has massive stock of upholstery material and she knocked up these cushion covers in an afternoon, which was less than the build time.  I have two English Springer spaniels and they think this is the best seat ever for a sunny day in Shropshire.

Built from Plan(s)
Estimated Cost
(GBP) £110.00 including timber, glue, dowels and wood colour.
Estimated Time Investment
Weekend Project (10-20 Hours)
Finish Used
Cuprinol weatherproof paint (Willow)
Recommended Skill Level
Starter Project

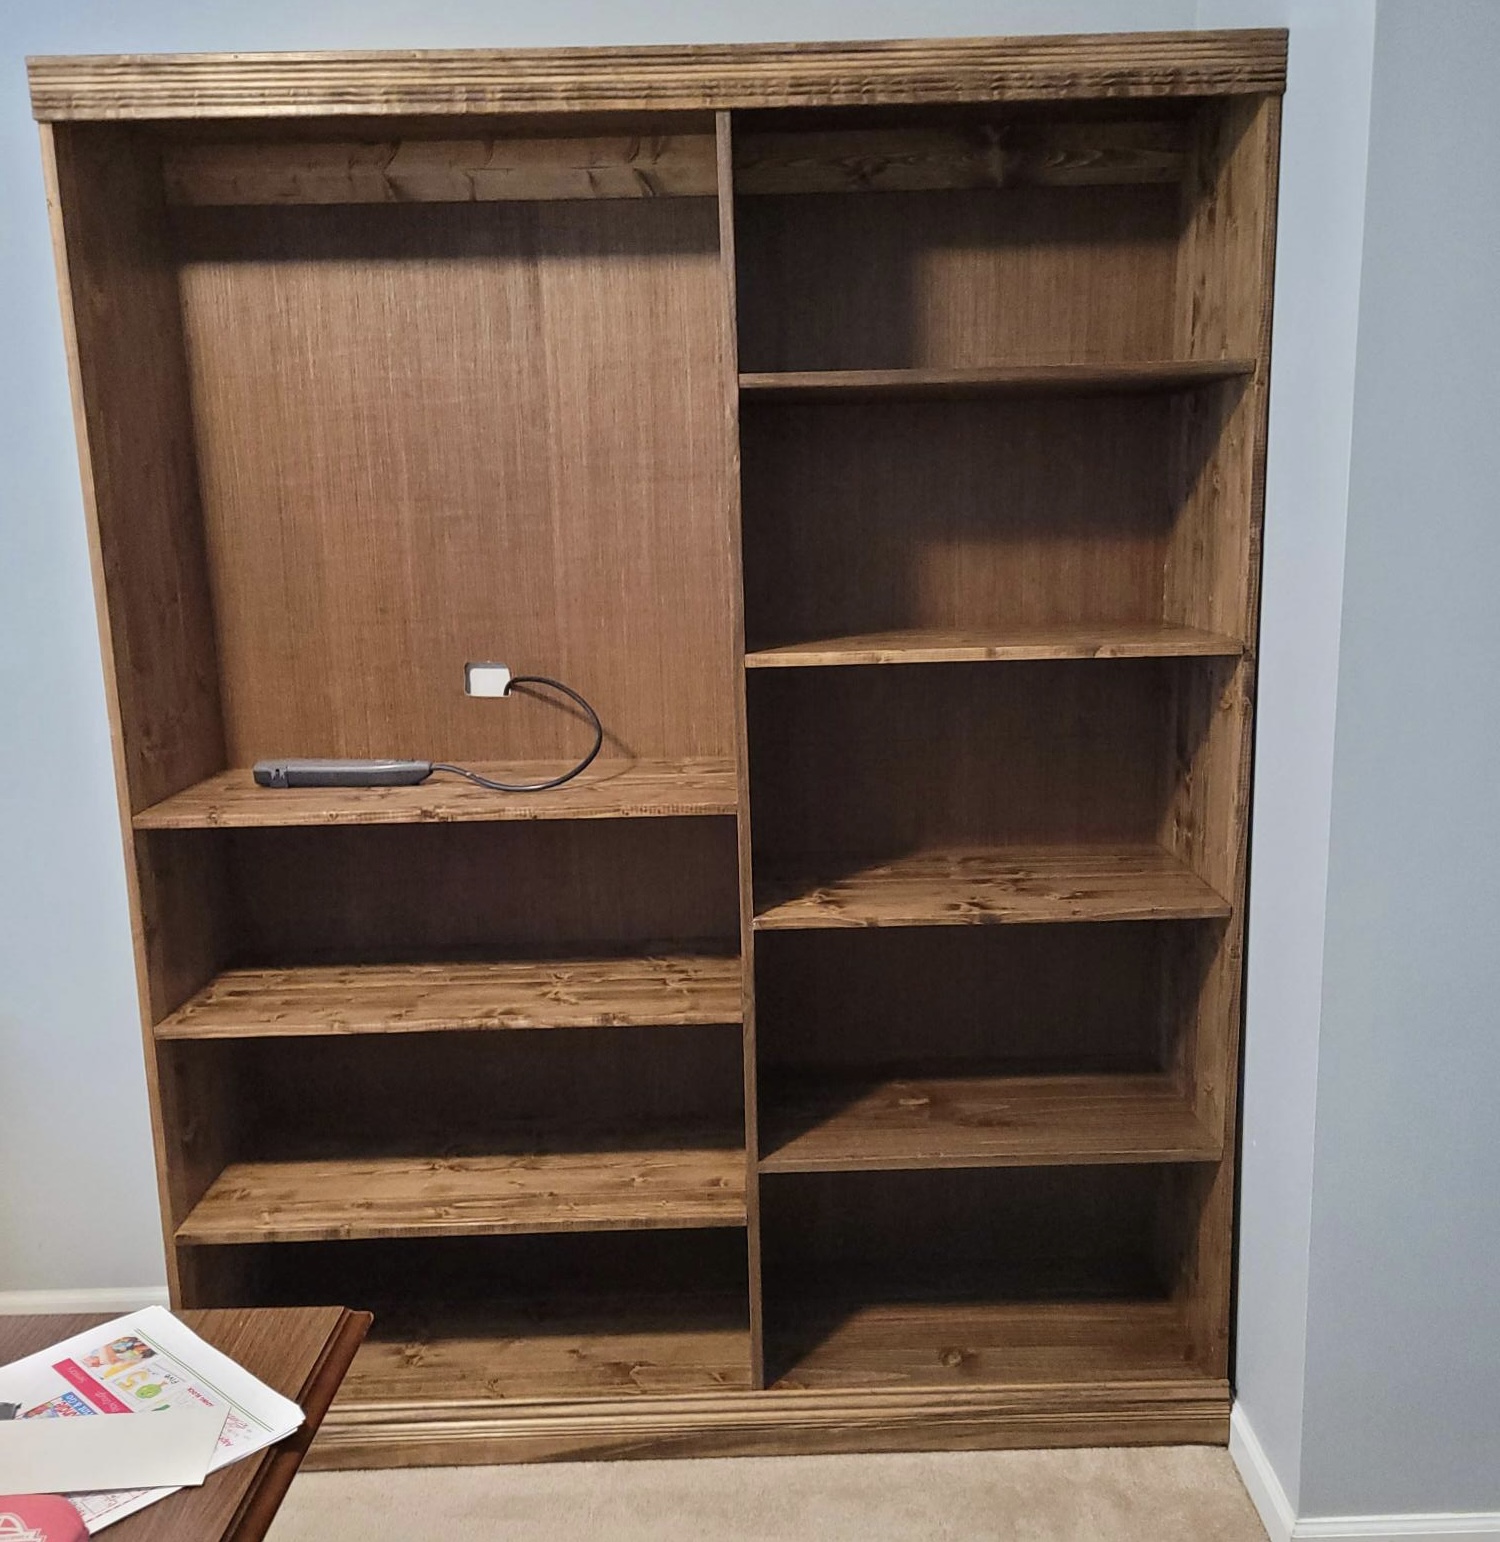
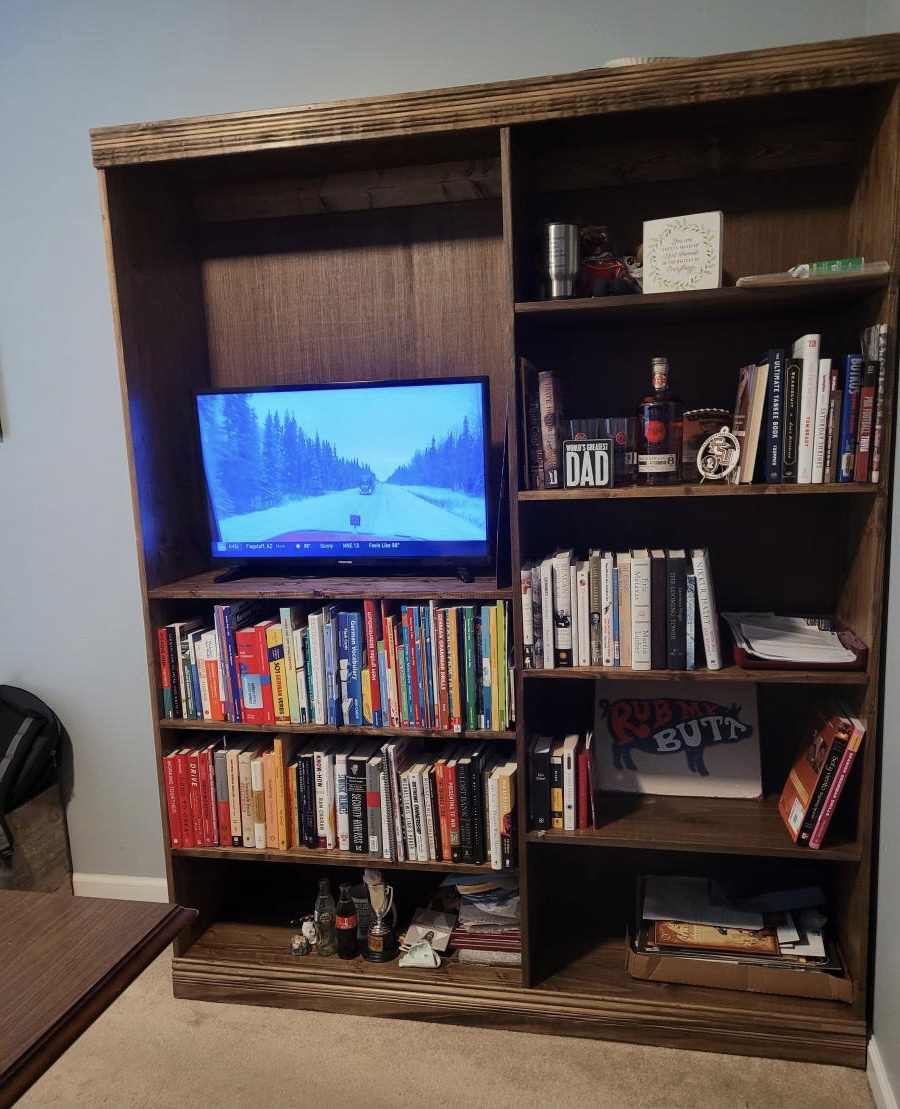
Shelf help bookcase

Submitted by Anonymous (not verified) on Tue, 06/22/2021 - 08:51

My husband wanted a bigger book shelf to hold all his books and gifts from our daughters. I used the Shelf Help app to make the plans. It holds all his things and he loved it! Thanks for developing the Shelf Help app!

Estimated Time Investment
Weekend Project (10-20 Hours)
Finish Used
I used MinWax Special Walnut to stain the boards.
Recommended Skill Level
Intermediate

Comments

Storage Table

Submitted by Yesi on Sun, 04/14/2013 - 20:05

This was my first Ana White Project and I think it came out well. I already had the chairs and needed a table to match the whimsy. The chairs are counter-height so I changed the dimensions of the table to match the height. I re-used an old oak table top to save some money. The top is painted all by hand and the messages on the apron read: "life is too short to drink bad wine", "sit, relax, and accept the crazy", "eat, drink, and be merry", and "frolic". To help the top from wear, I found a perfect-sized glass on craigslist.

Thank you, Ana, for the inspiration. I just finished the Kids Storage Leg Desk. Off to paint it now. :-)

Built from Plan(s)
Estimated Time Investment
Weekend Project (10-20 Hours)
Finish Used
I used a high quality primer, 2 coats of flat paint for main color, acrylic paint for checkerboard and apron, latex paint for feet. I used 2 coats of satin finish polyurethane to protect it.
Recommended Skill Level
Beginner

Comments

Triple Pedestal Bench

Submitted by pde00311 on Wed, 03/04/2015 - 07:39

If you build the triple pedestal table, you also have to build the triple pedestal bench.

Estimated Cost
$50
Estimated Time Investment
Weekend Project (10-20 Hours)
Finish Used
Custom stain from Sherwin Williams to match chairs with gloss Minwax Polyurethane
Recommended Skill Level
Advanced

Comments

kgauthi

Sat, 03/07/2015 - 06:19

We are going to try builiding the triple pedestal table. Thank you so much for the detailed plans. Are there similar plans for the accompanying bench? I see pictures, but no measurements or instructions. I've looked in the pdf and printer friendly versions as well.

Fancy X Farmhouse Table tweaked

Submitted by Anonymous (not verified) on Fri, 06/02/2017 - 12:01

Thank you for your plans on the Fancy X Farmhouse Table. Those where the foundation from which I built this new table for my family. Although tweaked a little my inspiration was a direct result of the beautiful table you built. 

Built from Plan(s)
Estimated Time Investment
Week Long Project (20 Hours or More)
Finish Used
Ebony for base and too framing. Espresso used for top.
Recommended Skill Level
Intermediate

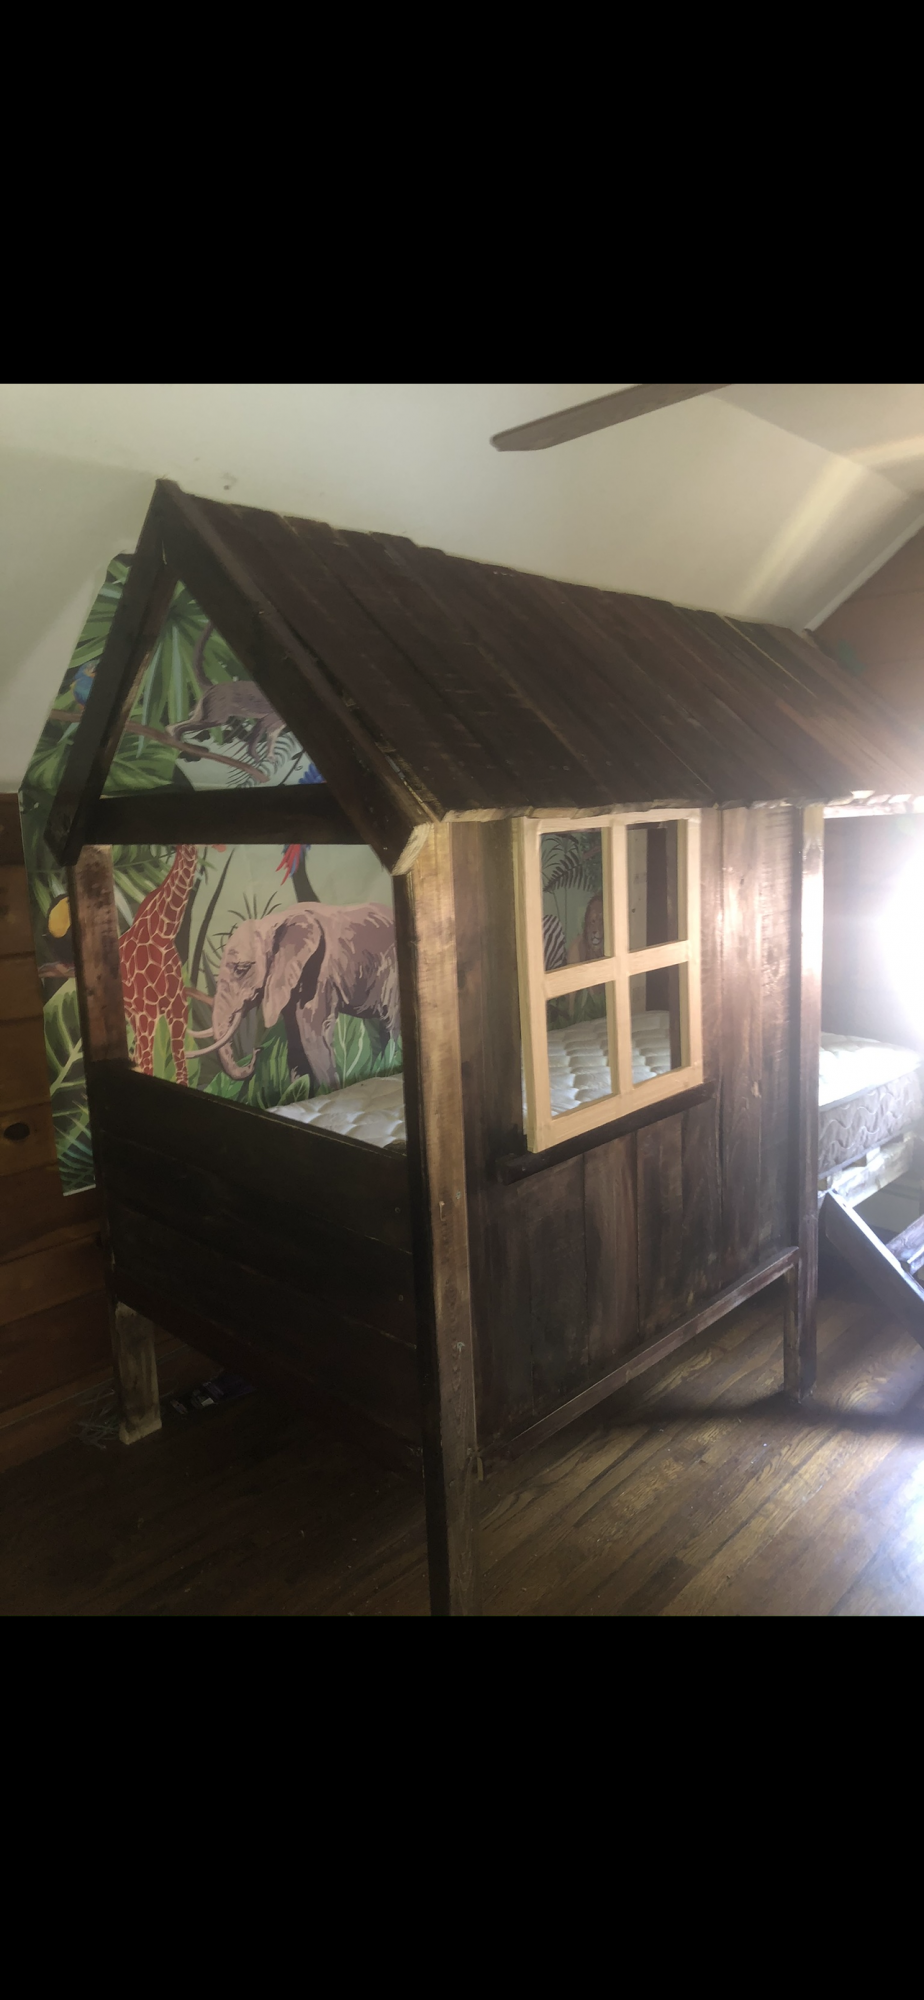
Tree house bed

Submitted by Anonymous (not verified) on Sat, 07/10/2021 - 07:51

I wanted to post my sons tree house bed I made inspired by you I changed a few things to make it my own but I couldn’t have done this without following your framing and measurements :) thanks so much

Comments

Spa Bench.... Tara's First Project!

Submitted by taradactel on Wed, 04/17/2013 - 09:23

I am so so so proud of myself for building this great bench. I can' t wait to do the next project. I wanted something bright and fun to put in my entry way to put shoes on. I thought this was a great first project. I opted for orange, ( ) I wish it had been a different shade, it's pretty bright. When I ruffed up the edges with brown (with a toothbrush) that helped take the brightness down a bit. I chevroned the top to make it funner. Chevroning is a pain in the behind, it takes forever to tape it off but it's cute in the end. I noticed a few people said they did this in a couple hours, I don't know how. It took me two days! It doesn't take more than two or three hours to cut the wood and put it together but then you have to fill the holes, sand it, prime it, paint it, touch it up....

If you have all the tools already... Then the cost is low.
I spent:
$28 lumber @ Home Depot
$20 paint & primer @ Walmart

Now the only problem is I don't have ANY other orange things in the house. I'm going to have to rethink my decorating, or build another bench ;)

Thanks Ana!

Estimated Cost
$40-$60
Estimated Time Investment
Weekend Project (10-20 Hours)
Recommended Skill Level
Starter Project

Comments

dmcarwin

Wed, 04/17/2013 - 14:20

Great job! I agree with Pam, use the same orange paint and paint a few things in your house to pull the colors together!

Assembly Workstation with Storage and lockable wheels

Submitted by AndyH on Sat, 03/07/2015 - 15:00

Assembly Workstation with small drawers for tools and hardware supplies and large drawers for scrap wood storage.

Has lockable wheels so can be stored against wall when not in use and pulled out to allow easy access to move around the piece I am working on.

Drawers have 3/4 inch ply bottoms for strength and the big ones have full extension drawers.

Top is 66 inches wide by 34 inches deep to give plenty of work surface.

Total cost was about $300.


Estimated Cost
Total cost was about $300.
Estimated Time Investment
Week Long Project (20 Hours or More)
Finish Used
Minwax Classic Gray (2 costs). Varathane Satin Poly (3 coats)
Recommended Skill Level
Beginner

TV Console

Submitted by Anonymous (not verified) on Mon, 06/05/2017 - 16:39

I built this for my younger brother and his wife for their new home.

Built from Plan(s)
Estimated Cost
$80
Estimated Time Investment
Weekend Project (10-20 Hours)
Finish Used
Paint, stain, and polycrylic protective finish
Recommended Skill Level
Intermediate

All Season Stand

Followed the plans pretty much to the letter, made the sign reversible so it works for summer or winter.
3d printed the words instead of cutting out or purchasing wooden letters

Estimated Cost
20
Estimated Time Investment
Afternoon Project (3-6 Hours)
Recommended Skill Level
Beginner

Comments

Wheelbarrow

Submitted by Sebastien on Sat, 04/20/2013 - 01:33

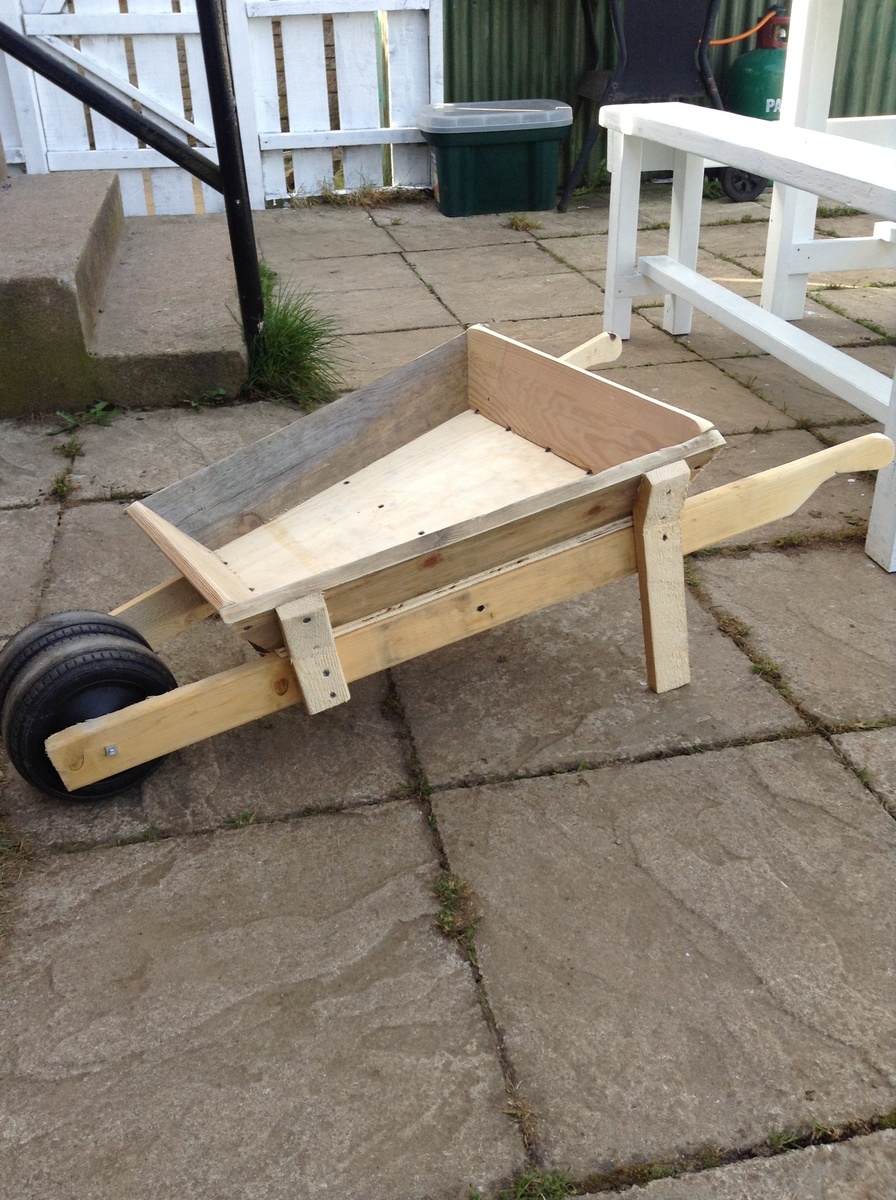
My neighbour Bryan challenged me to make it. It was indeed a challenge as there is no strait bit to a wheelbarrow and I had no plans so I kind of made it up as I went along. From far the hardest thing I made so far.

Estimated Time Investment
Day Project (6-9 Hours)
Recommended Skill Level
Advanced

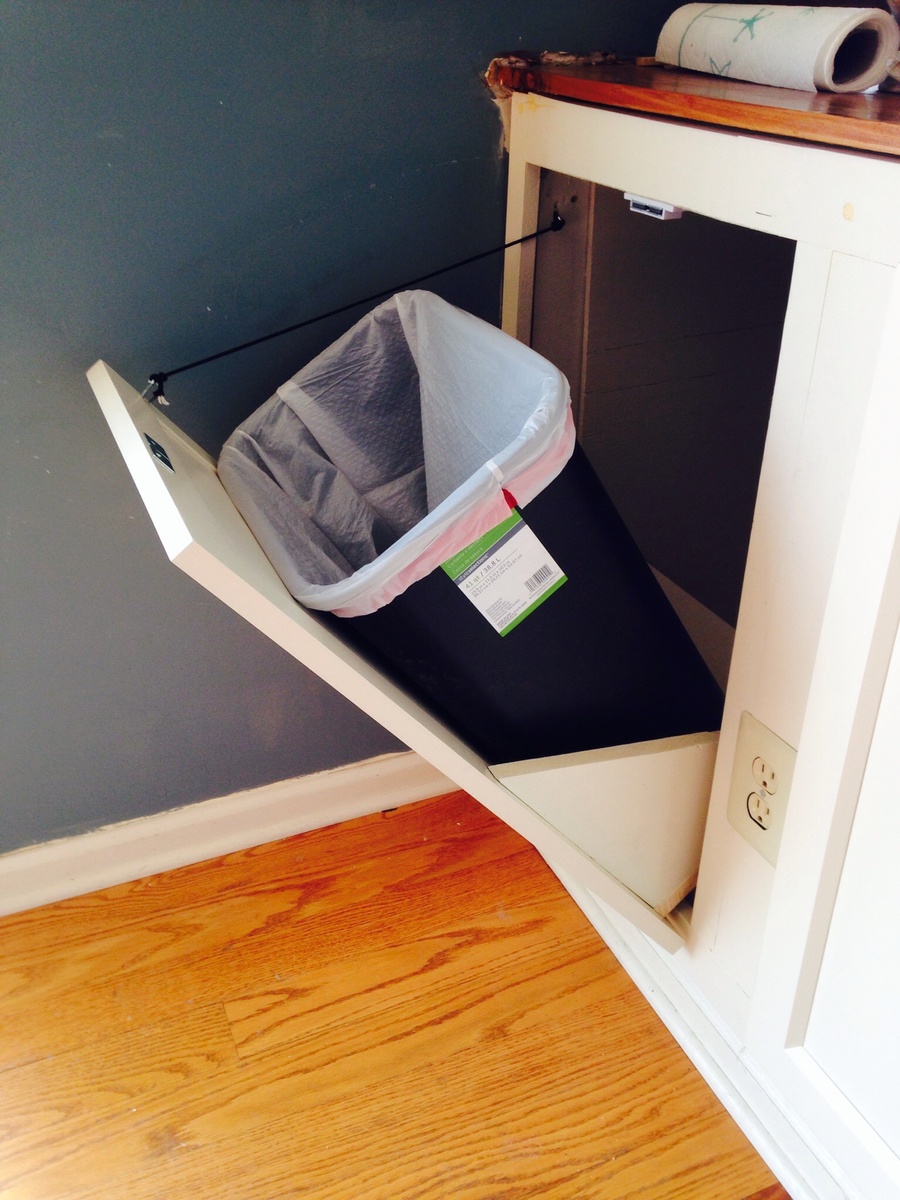
New kitchen storage including trash can, made from hollow half wall

Submitted by Tjkelly on Wed, 03/11/2015 - 12:22

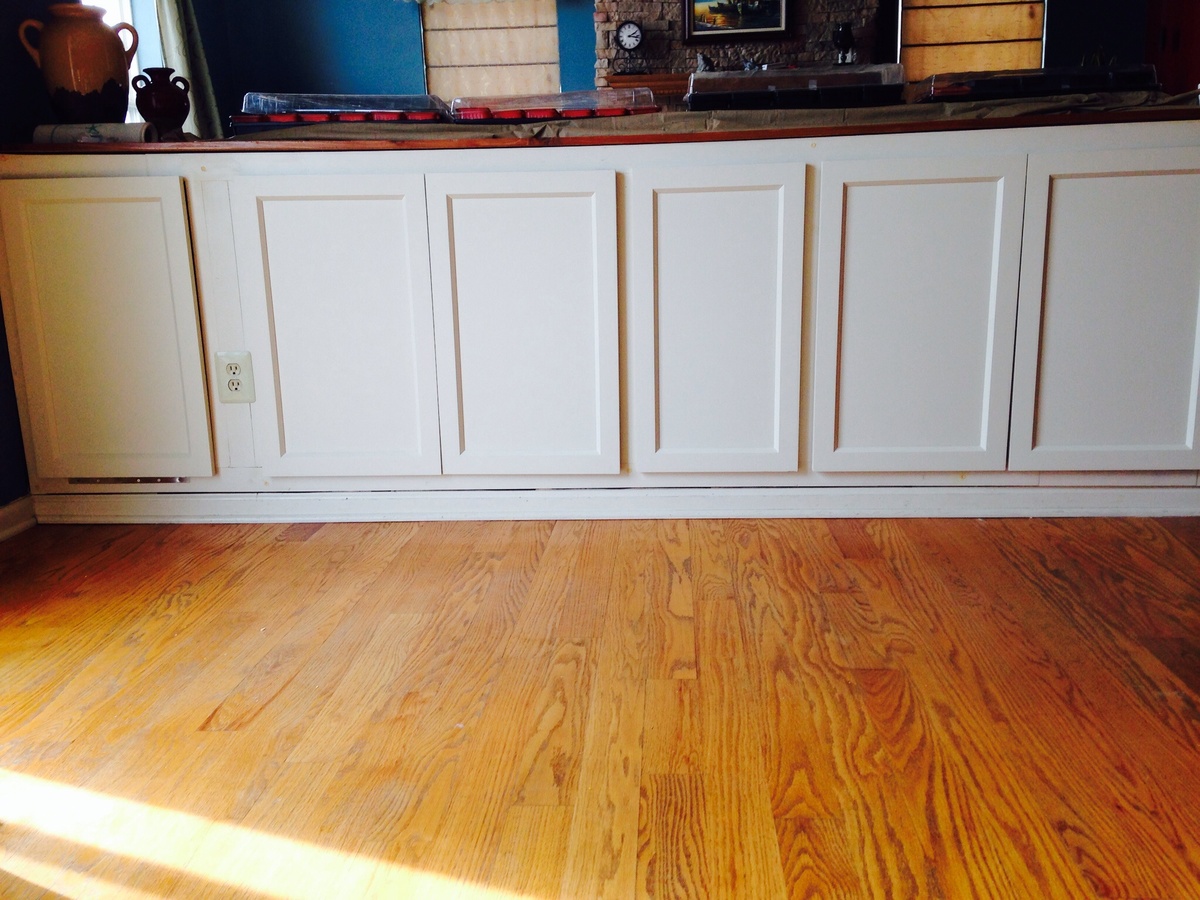
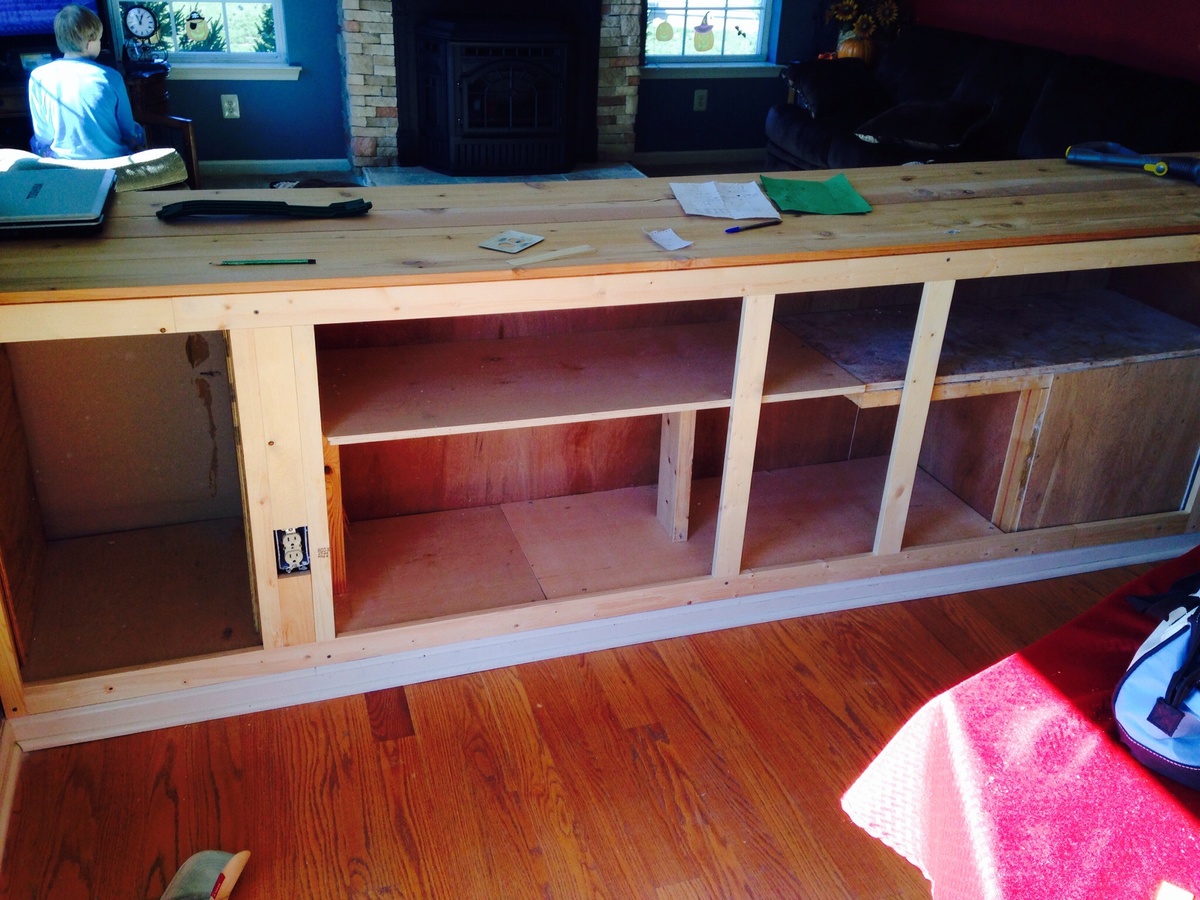
My wife and I made loads of additional storage space by using a hollow half wall 

Built from Plan(s)
Estimated Cost
$400
Estimated Time Investment
Week Long Project (20 Hours or More)
Finish Used
Sherwin Williams white satin paint
Recommended Skill Level
Intermediate

Comments

Love your site!

Submitted by Anonymous (not verified) on Fri, 06/09/2017 - 15:55

I'm so glad I found your blog/website. It is exactly what I was looking for. I'm going to tackle the farm table & benches next and then adjust the porch swing plan to make a bed swing for a friend. Thanks for the great ideas!

Built from Plan(s)
Estimated Cost
$30
Estimated Time Investment
Afternoon Project (3-6 Hours)
Finish Used
Stain/Sealer
Recommended Skill Level
Beginner

Modern Slat Top Outdoor Wood Bench

Submitted by Anonymous (not verified) on Tue, 08/03/2021 - 06:31

Love your easy instructions! I used all 2x4's because it was made with left over wood from another project. I burned the top pieces to get the grain to stand out and painted the legs. I think they turned out beautiful. I also used your 2x4 Adirondack Chair Plan to match the bench.
Thanks,
Yvette

Recommended Skill Level
Beginner

Comments

Awesome Bed

Submitted by brant on Mon, 04/22/2013 - 13:18

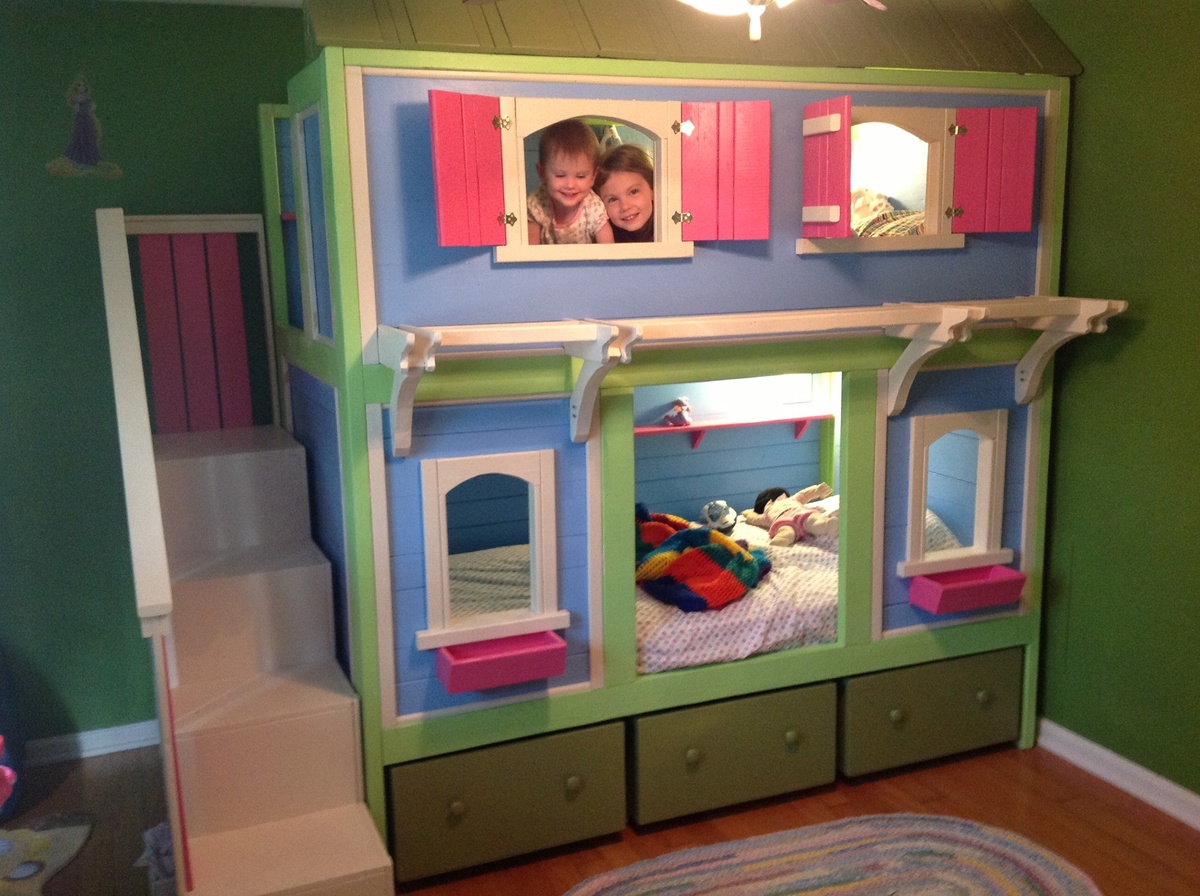
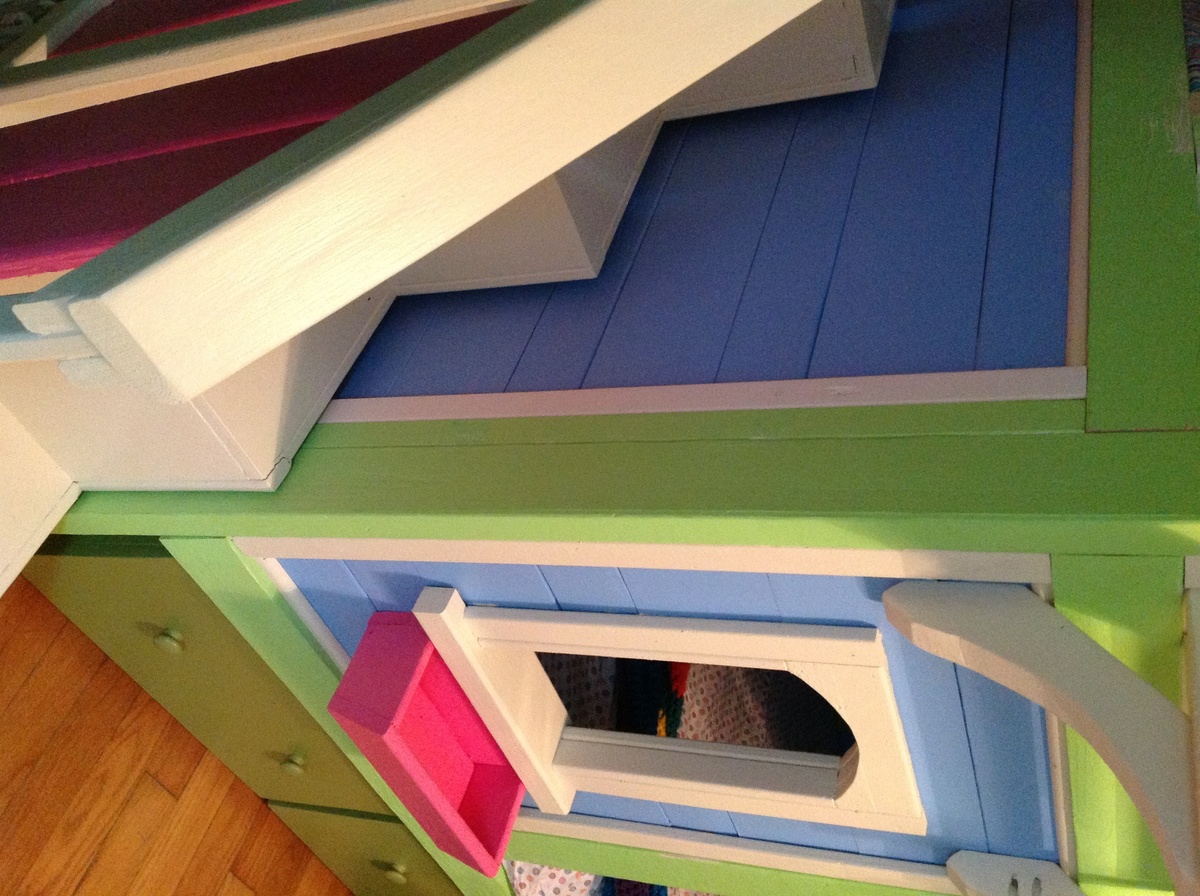
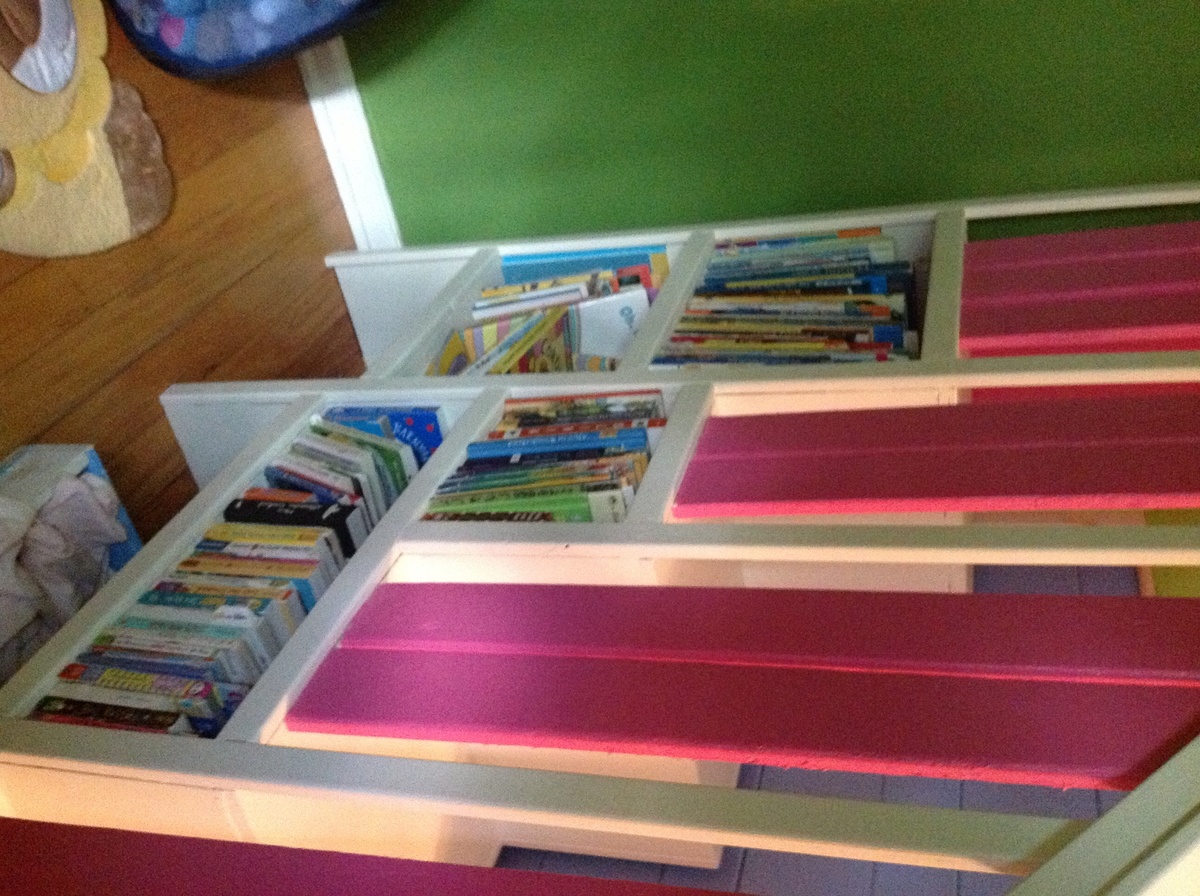
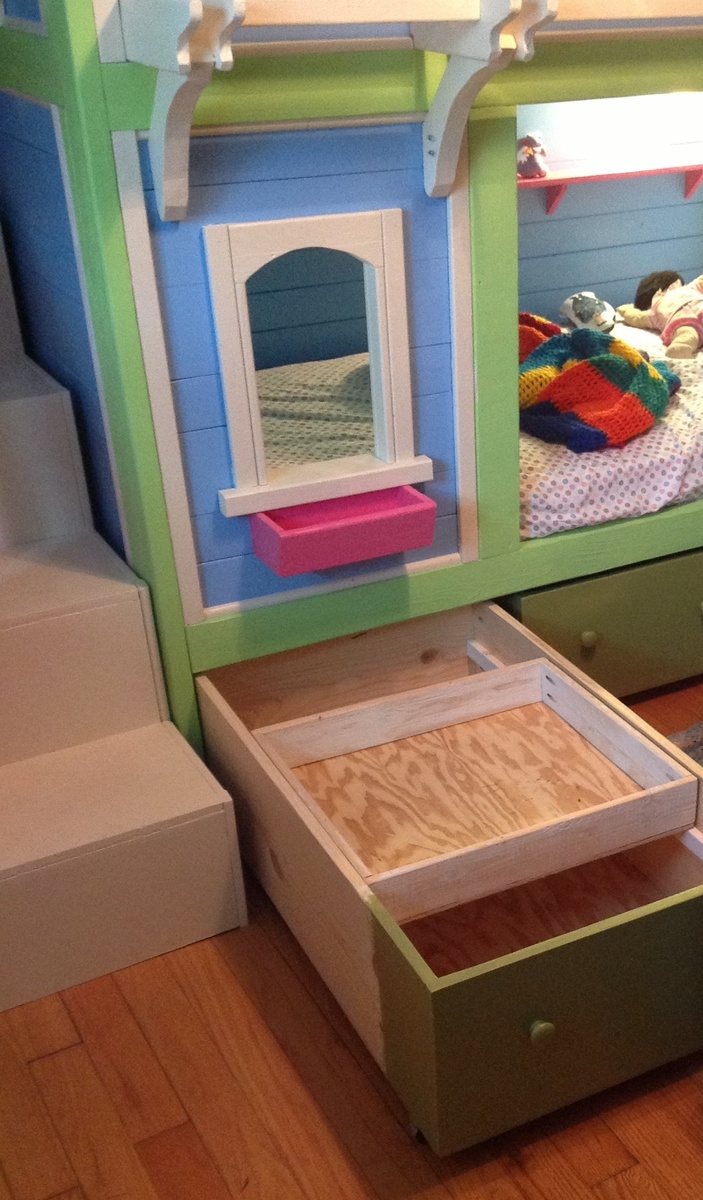
Thank you Ana and Jenny for this project. After many searches for the perfect bunk bed for our 4 and 2 year old daughters I was ready to spend more than $1500 in a store on something that was not nearly as cool as this. The plans were easy to follow and it took my dad and me about a week to make the bed. My girls love it and have spent the last two days in their room.

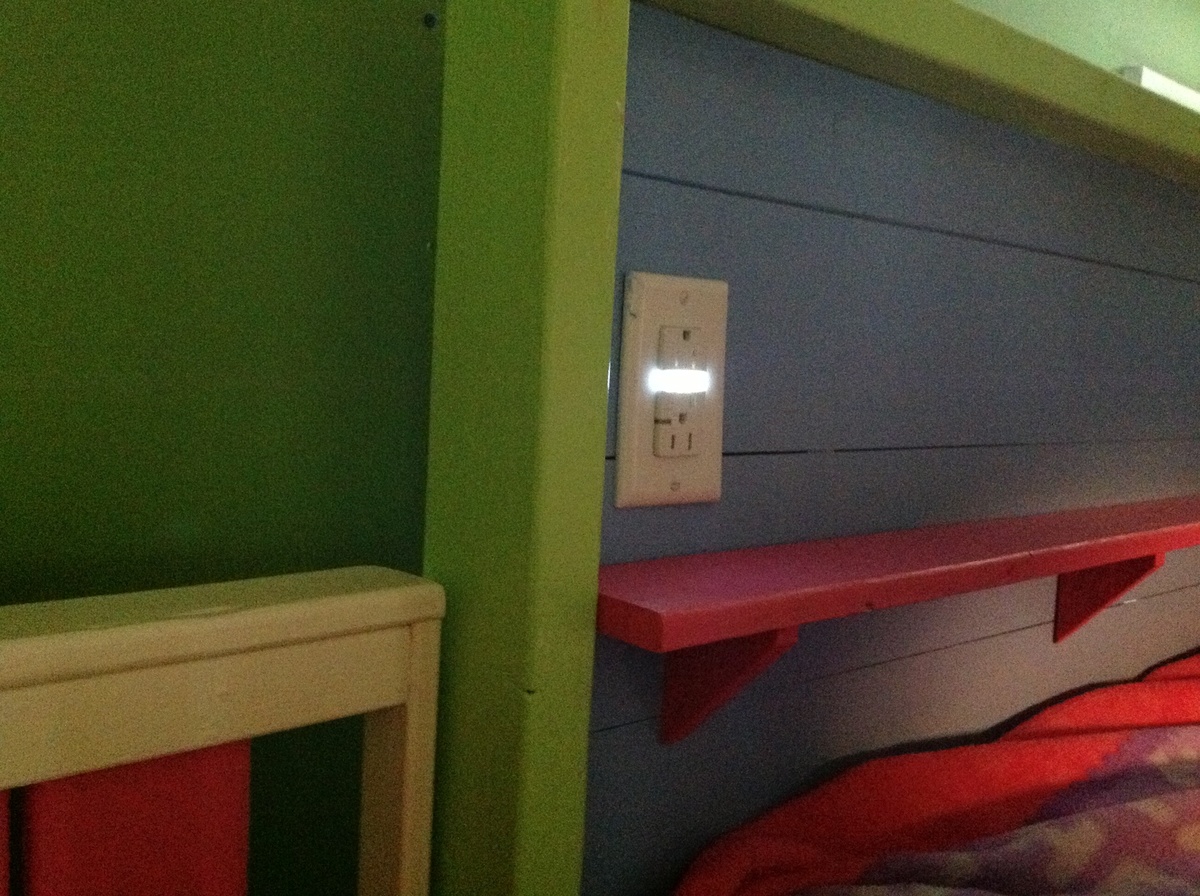
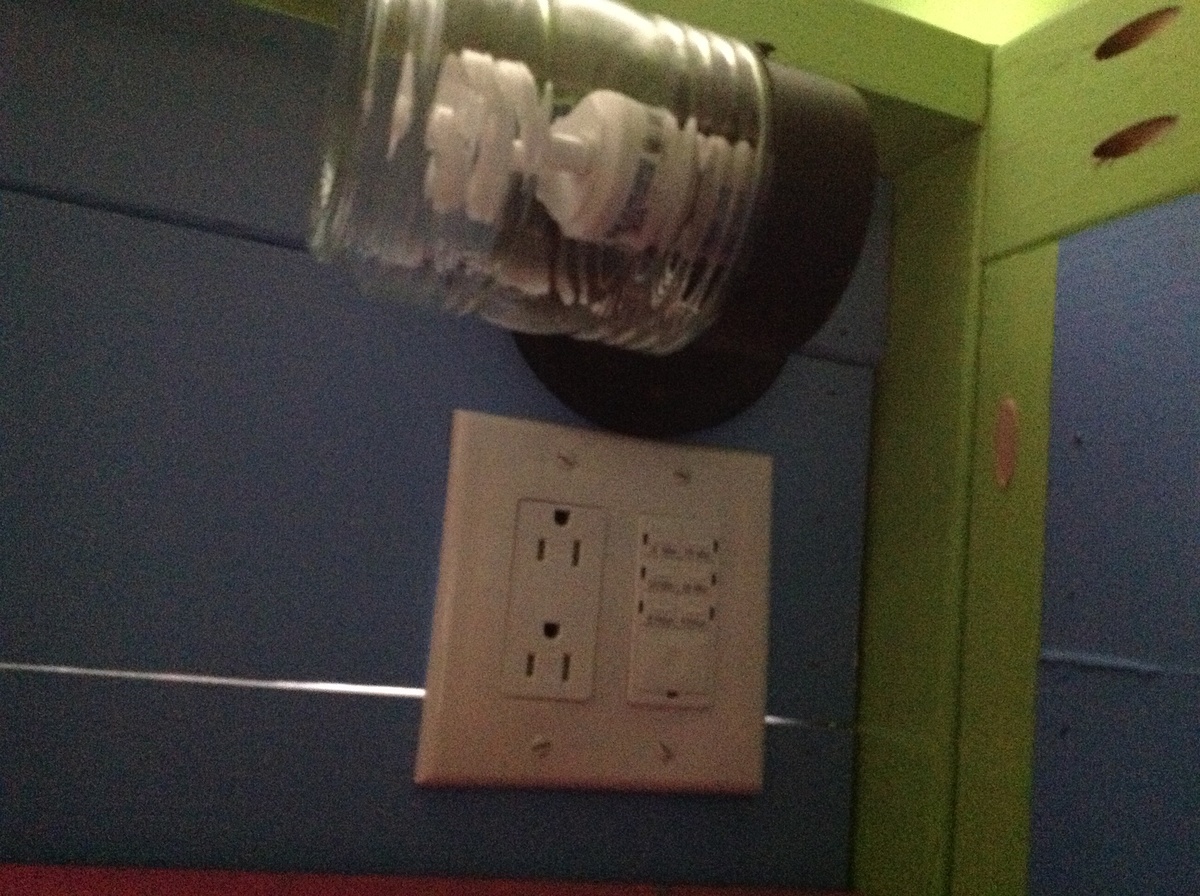
We made a few modifications to the design that I highlighted in the pictures. We wired the back of the bed with electricity to include some outlets, a light that is on a timer switch, and an outlet with a built in night light. We also added 2x2s to support the sides to make them stronger when the bed is apart. We move a lot (4 times in the last 5 years) and the design was great for taking apart and putting back together. The light on the timer is great for telling my oldest she can read books for 5 minutes and then go to sleep when the light goes out.

Thank you so much for these great plans!

Estimated Cost
$850
Estimated Time Investment
Week Long Project (20 Hours or More)
Finish Used
Behr paint. They have an app for ipad for choosing colors that is great.
Fiesta pink PPH-63
Antique White 1023
Tart apple 420B-4
Scotland isle 410D-5
Costa Rica blue 550B-4
Satin finish
Recommended Skill Level
Intermediate

Comments

brant

Mon, 04/22/2013 - 15:19

Thanks. The storage drawers were per Jenny's design. The inner drawers are a little smaller than the plans say because I don't think there is enough quarter inch plywood for all of the bottoms if you only buy one sheet.

spiceylg

Tue, 04/23/2013 - 05:59

This came out fantastic! If I were their age, I'd never want to leave my room either! Wonderful build and love the fun colors!

birdsandsoap

Tue, 05/07/2013 - 23:37

Your bed looks superb!I LOVE that you wired the backside. I think that is a great idea. Glad your kiddos are enjoying their bed!

SARmomEMT

Wed, 03/26/2014 - 13:57

I love all of these fantasy bunk/loft beds but as I look at them i wonder how hard it is to take the sheets off, put on new ones & tuck in blankets etc. I love these beds but I have physical limitations because of chronic health problems & I am afraid that if I had a bed like this for my kids that I would have to hurt myself to strip or make the bed... Can someone who has one tell me how hard it is - or isn't???? Thank you... A newbie to Ana-white.com but it's now my new #1 favorite website!!

DIY Vintage Step Stool

Several years ago, the first woodworking project I finished was the Vintage Step Stool built with plans by Ana White.  I use the step stool just about every day.  I had some scrap lumber taking up space in my garage, so I decided to use it to build another step stool.  Check out the blog link for more project details.

Built from Plan(s)
Estimated Time Investment
Day Project (6-9 Hours)
Finish Used
Miss Mustard Seed's Milk Paint in Boxwood and Ironstone, ECOS Paints WoodShield in Special Walnut and their Satin Varnish
Recommended Skill Level
Beginner

Comments

Lemonade Stand

Submitted by Anonymous (not verified) on Mon, 06/12/2017 - 07:42

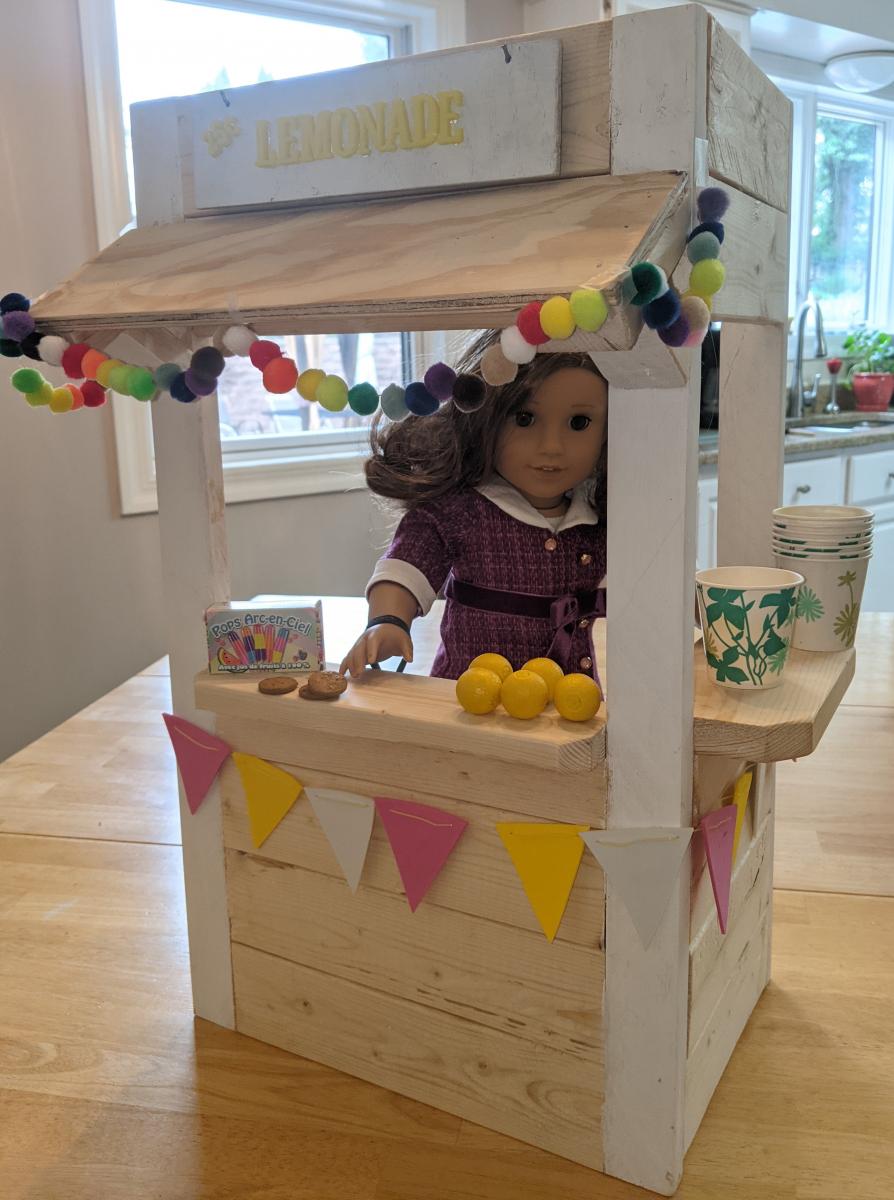
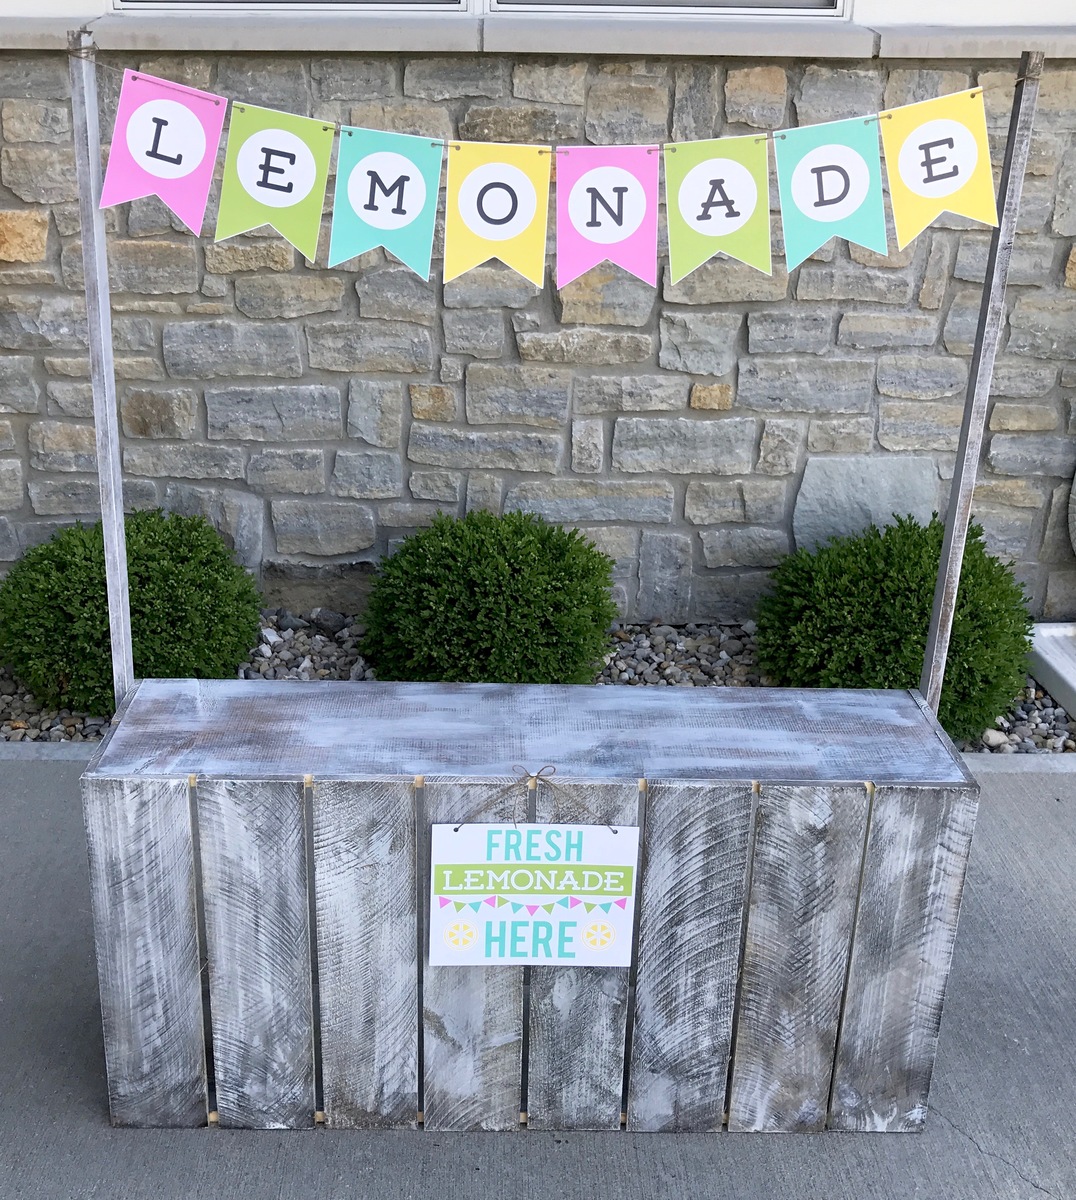
My daughters decided they wanted to do a lemonade stand at their Nana's yard sale.  I'm a beginner when it comes to woodworking projects so when I came across Ana's plans for the fence picket lemonade stand, I just HAD to give it a try!  This was a fun project and the plans were extremely helpful and straight-forward.  I would definitely recommend if anyone is looking for a cute lemonade stand for their kiddos!  Side note - my girls raised $75 for the Alex's Lemonade Stand Foundation to help fight childhood cancer! So proud! 

Built from Plan(s)
Estimated Cost
$30
Estimated Time Investment
An Hour or Two (0-2 Hours)
Finish Used
Minwax Dark Walnut stain with Sherwin Williams Alabaster dry brushed over the top once stain dried.
Recommended Skill Level
Starter Project

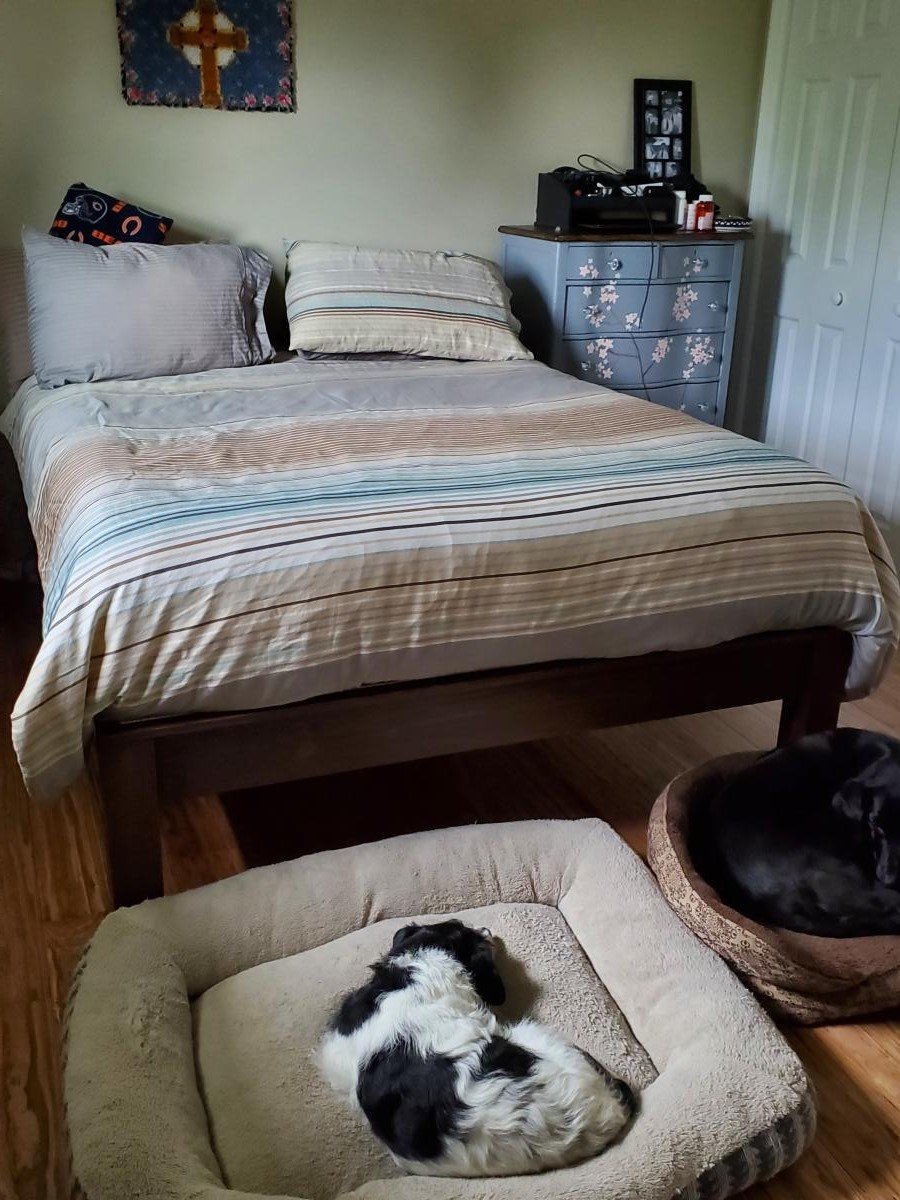
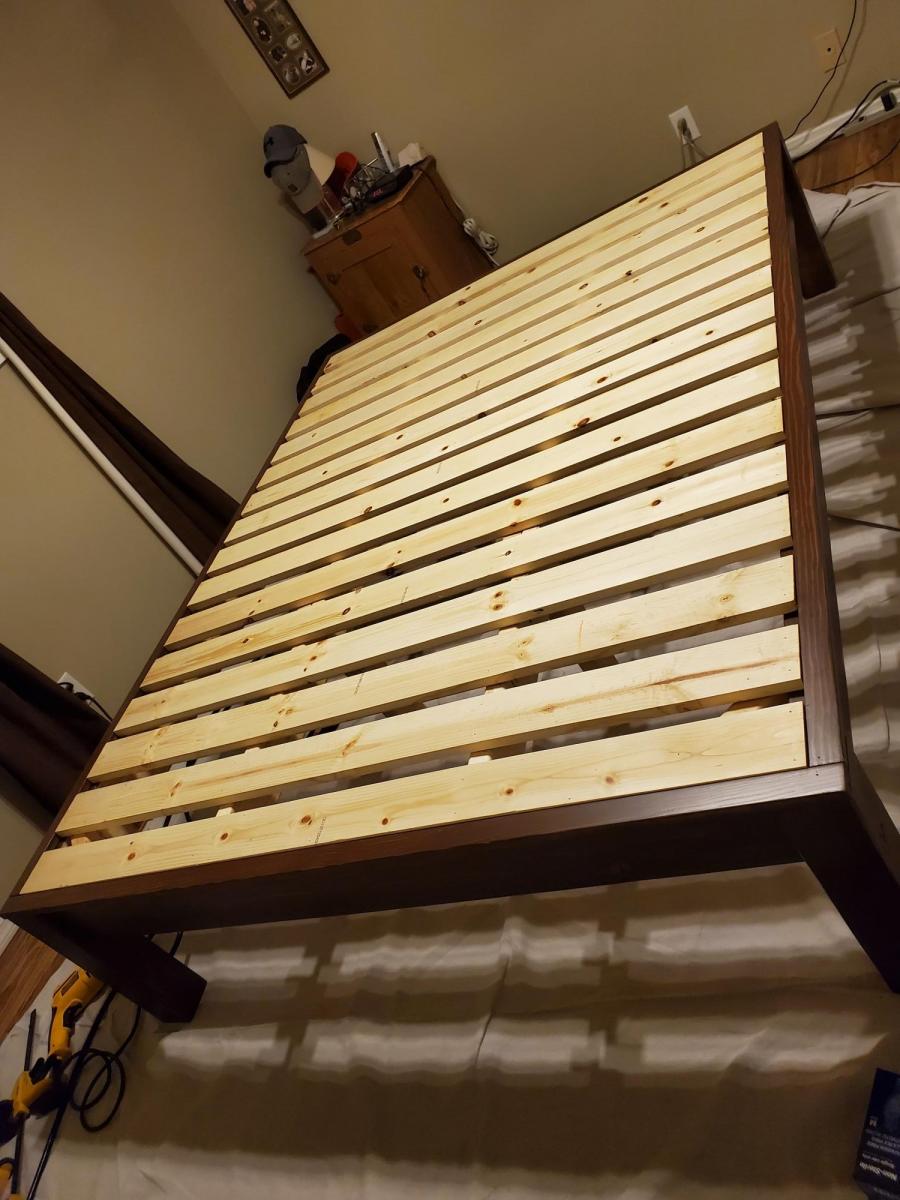
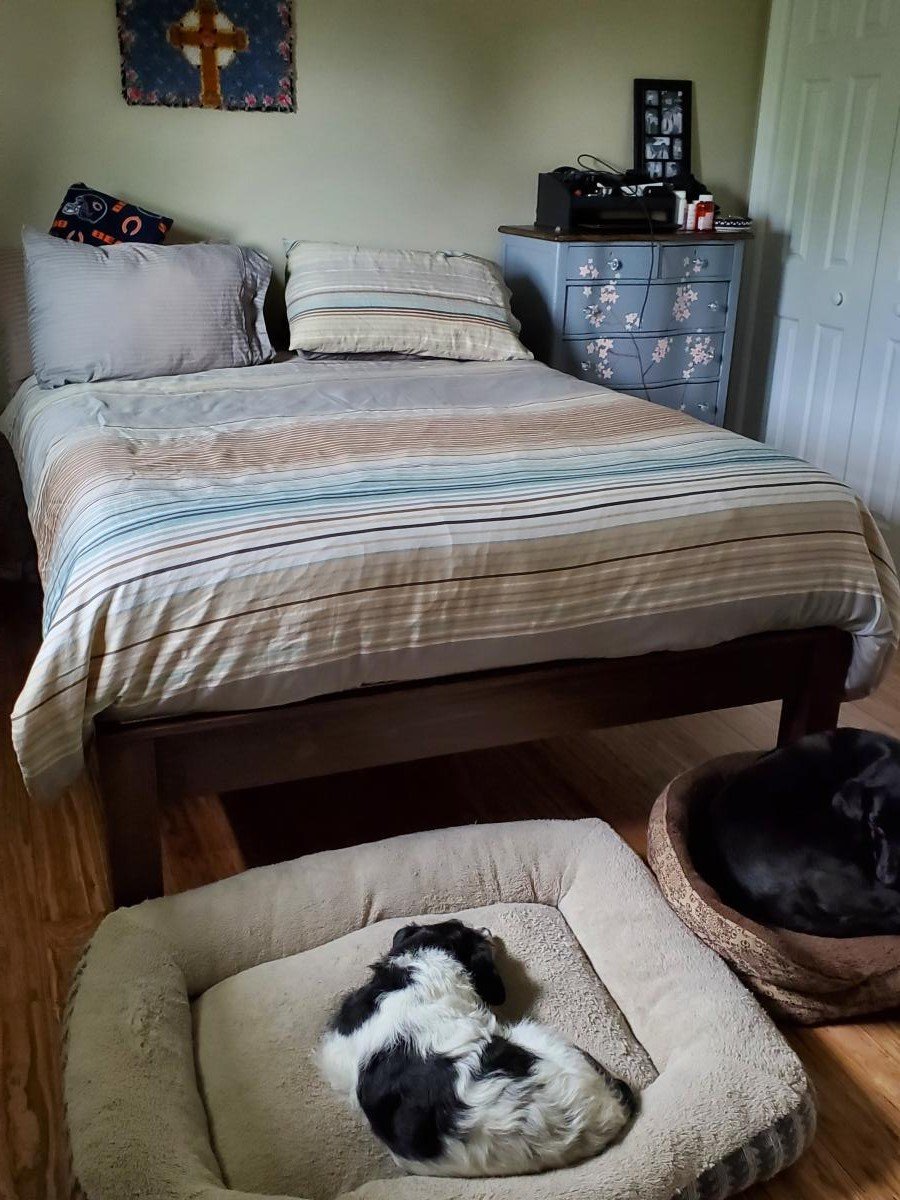
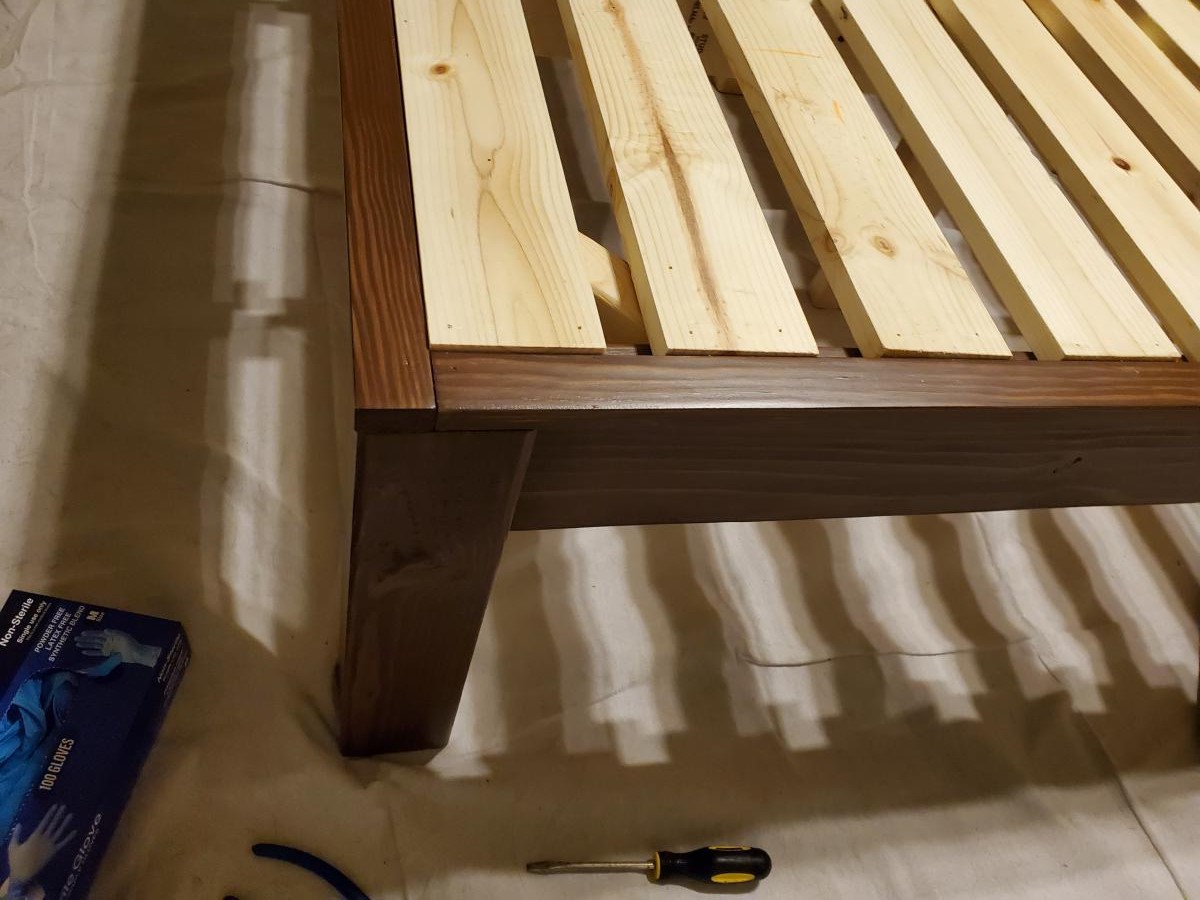
Essential platform bed - Queen

Submitted by kimsteps on Tue, 08/10/2021 - 17:52

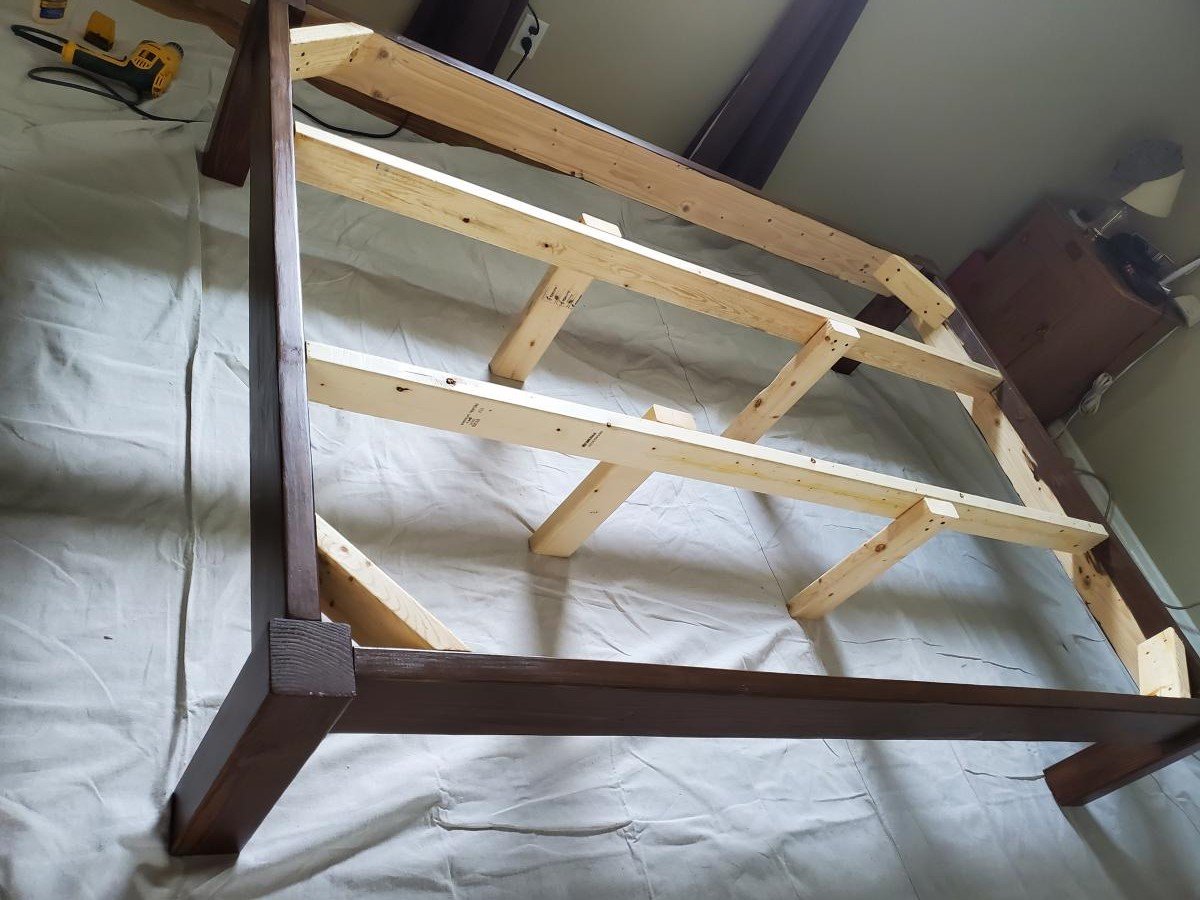
I can't thank you enough for these easy to follow plans. I'm not an experienced builder at all, but was able to build this queen size platform bed. I used Douglas Fir for all visible parts, and finished with minwax semi-transparent stain in walnut. I followed this with three coats of poly-acrylic. No one can believe I was able to build this myself, and frankly I can't either. What a confidence boost!

Estimated Cost
$175
Estimated Time Investment
Weekend Project (10-20 Hours)
Finish Used
Minwax semi-transparent water based wood finish in walnut followed by 3 layers satin poly acrylic.
Recommended Skill Level
Beginner

Comments

Industrial Numbered Crate

Submitted by efmolly on Thu, 04/25/2013 - 22:51

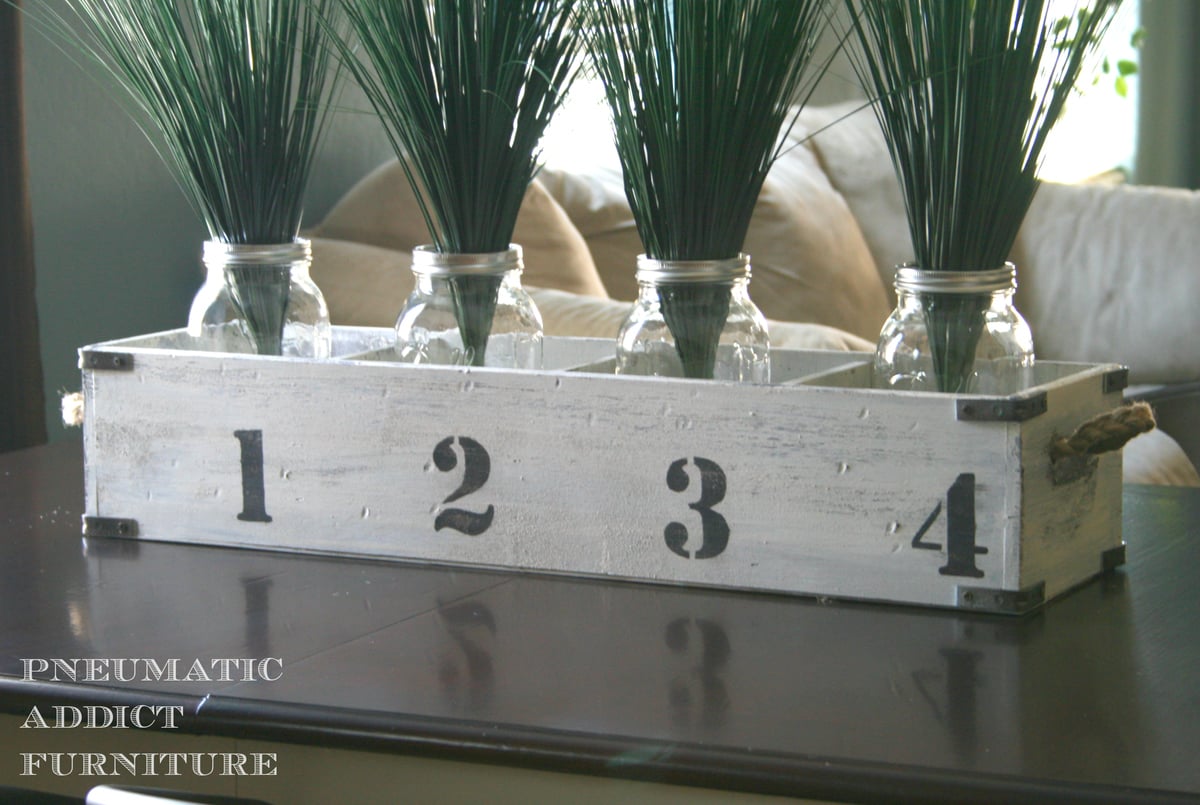
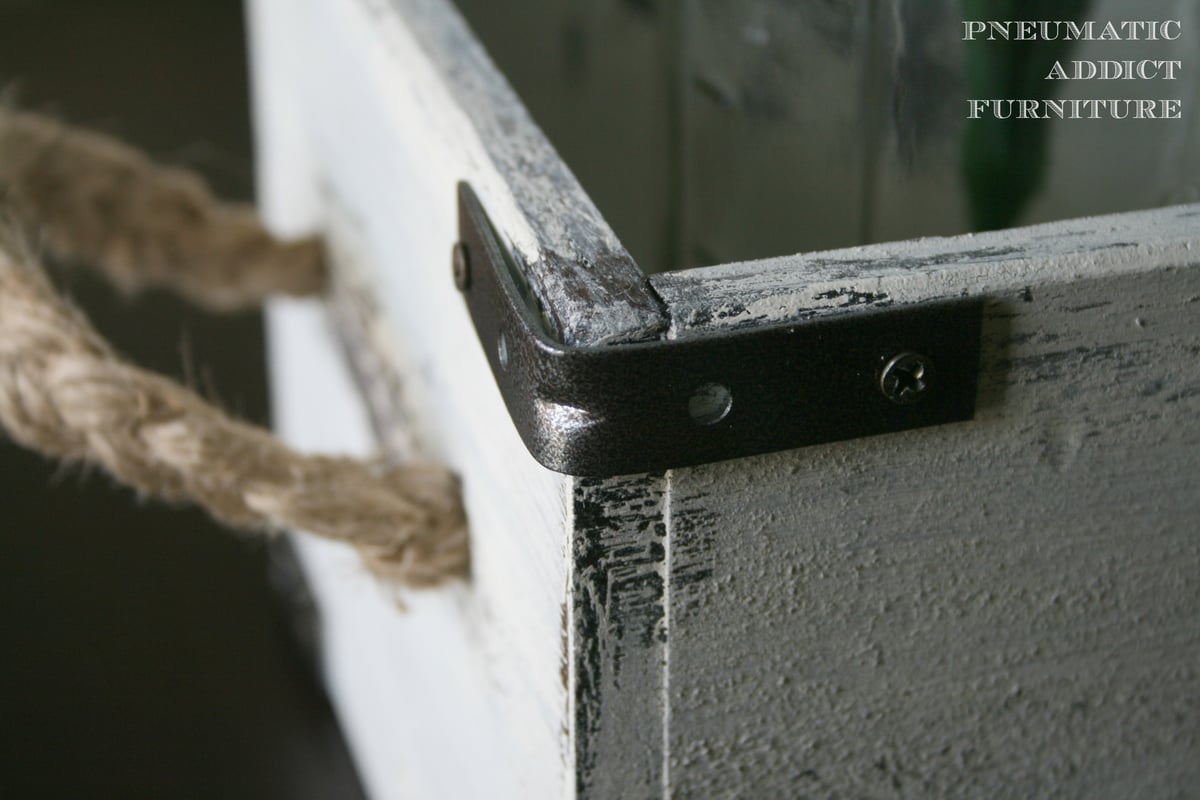
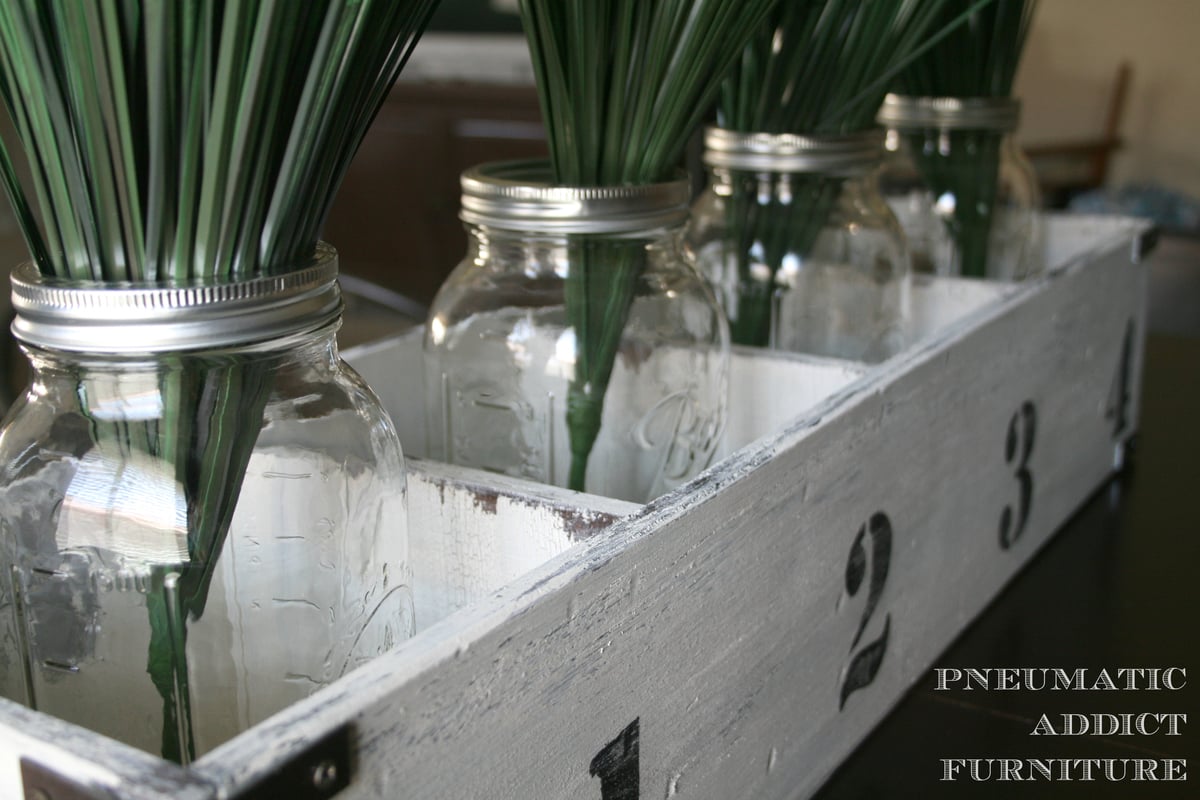
I built this storage crate to fill out space on top of my kitchen table. On my table saw, I ripped 1/2in birch plywood down to 6in widths for the outside frame and 5 3/4in for the dividers. The dividers are 6in wide and so I cut the outside ends to 7in. I attached the whole thing with 1 1/2 finish nails and glue. After finishing, I attached some L-brackets on the corners and drilled 2 holes on either end for handles. For handles, I simply braided 6 strands of jute together and tied knots on the inside of the box. I have more details and photos on my blog link.

Estimated Cost
$20
Estimated Time Investment
An Hour or Two (0-2 Hours)
Finish Used
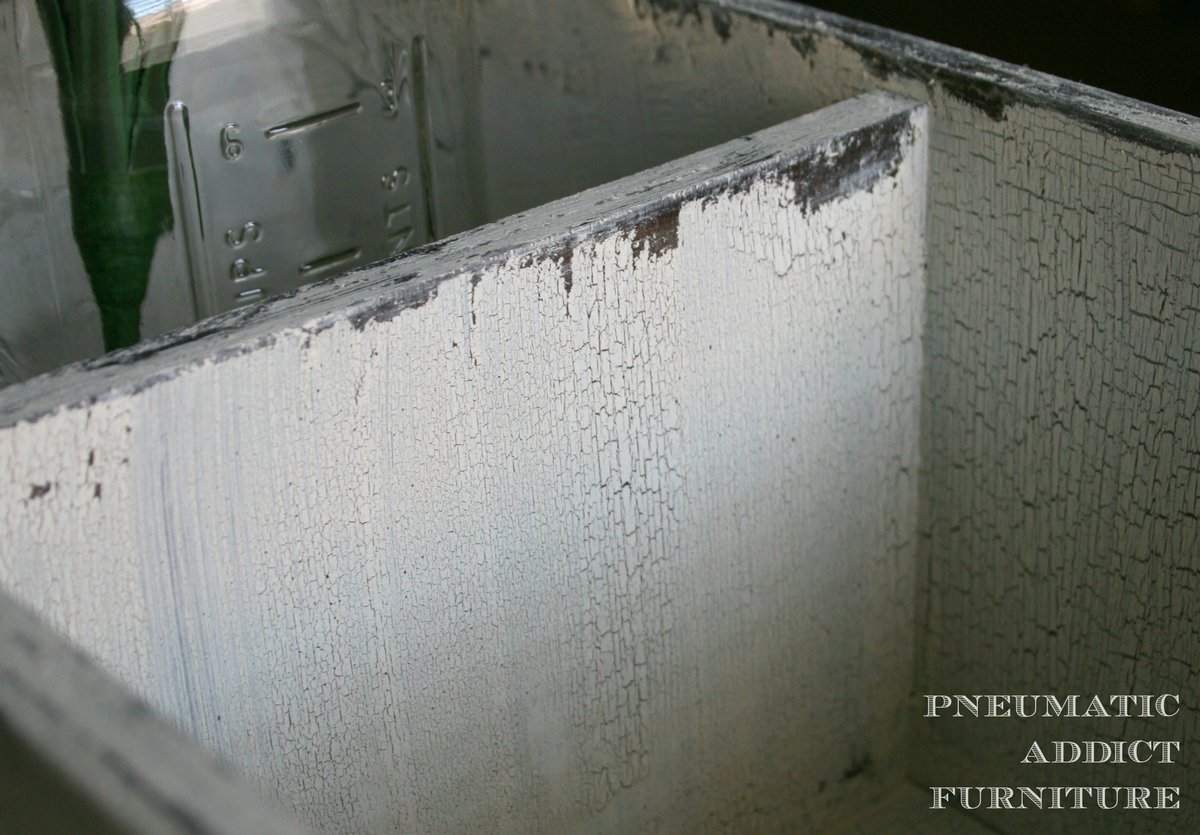
I started by staining the whole thing with Antique Walnut by Minwax. I then used Antique Crackle medium by Old Fashioned Milk Paint, and used some Vaseline for paint resistance on the edges. I then applied one coat of a creamy white, latex paint. After stenciling the numbers, I sealed the entire piece with Crystal Clear by Krylon in matte.
Recommended Skill Level
Beginner

Comments

First Thing I've Built

Submitted by Aninn1199 on Tue, 03/17/2015 - 10:18


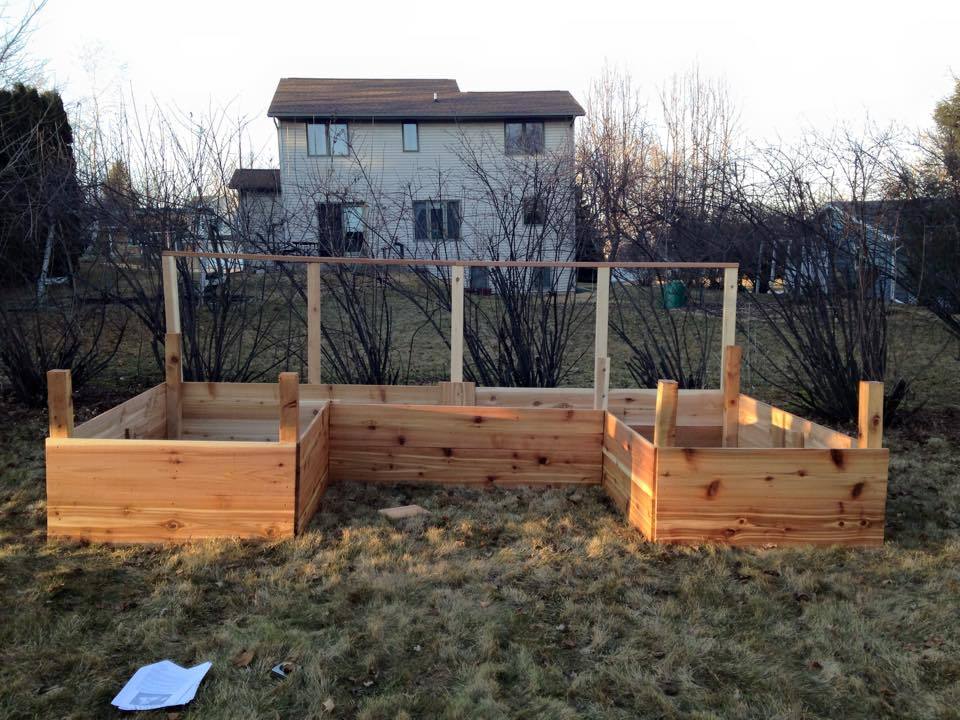
Keep in mind I am a novice at best and this took me a total of 12 hours over 2 days to construct and stain and line.  Filling will be a separate project all together!

I opted to remove the top row of lumber all around to have something to attach bird netting to to keep the critters out and make it easier to reach in, also a cost consideration. The posts are still the recommended 3 ft I also changed to 12ft X1in boards instead of 12ft x2in also in the interest of cost. 


Built from Plan(s)
Estimated Cost
$600
Estimated Time Investment
Weekend Project (10-20 Hours)
Finish Used
Used Clear Deck Stain from Thompson's, deck nails. Added a clear plastic lining (not shown) to bottom 1/2 of inside of bed.
Recommended Skill Level
Starter Project

Comments

Half furniture/half art farmhouse table

Submitted by Anonymous (not verified) on Wed, 06/14/2017 - 12:29

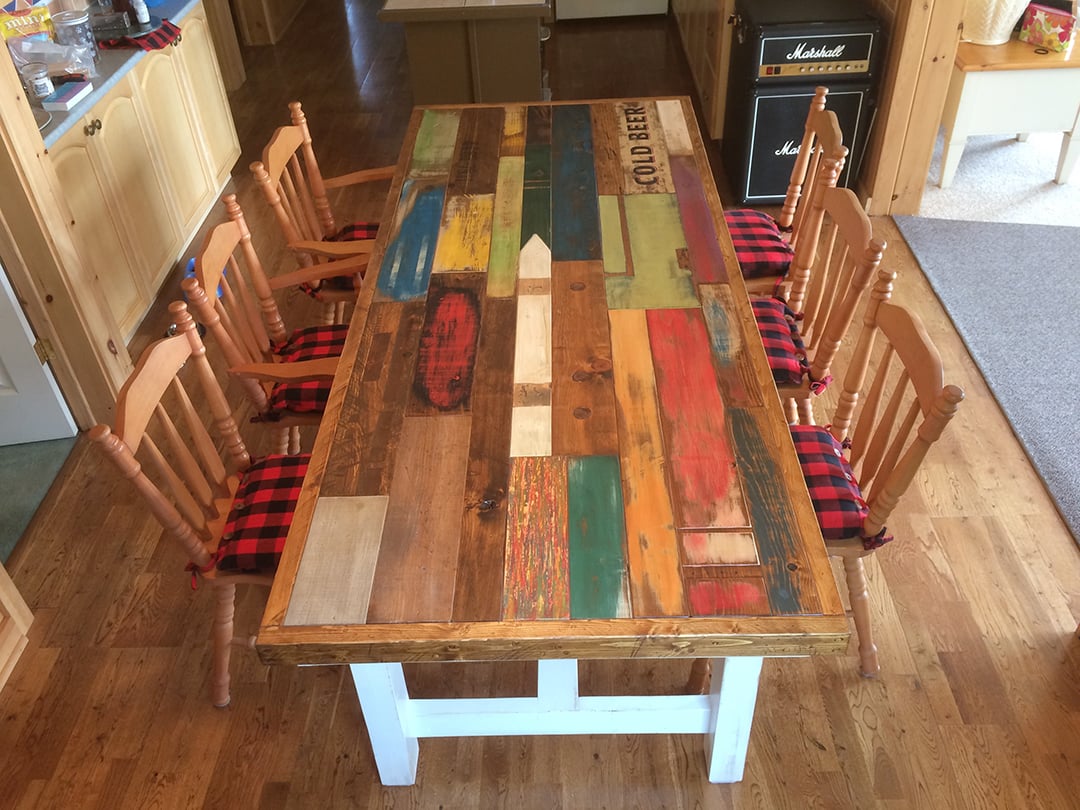
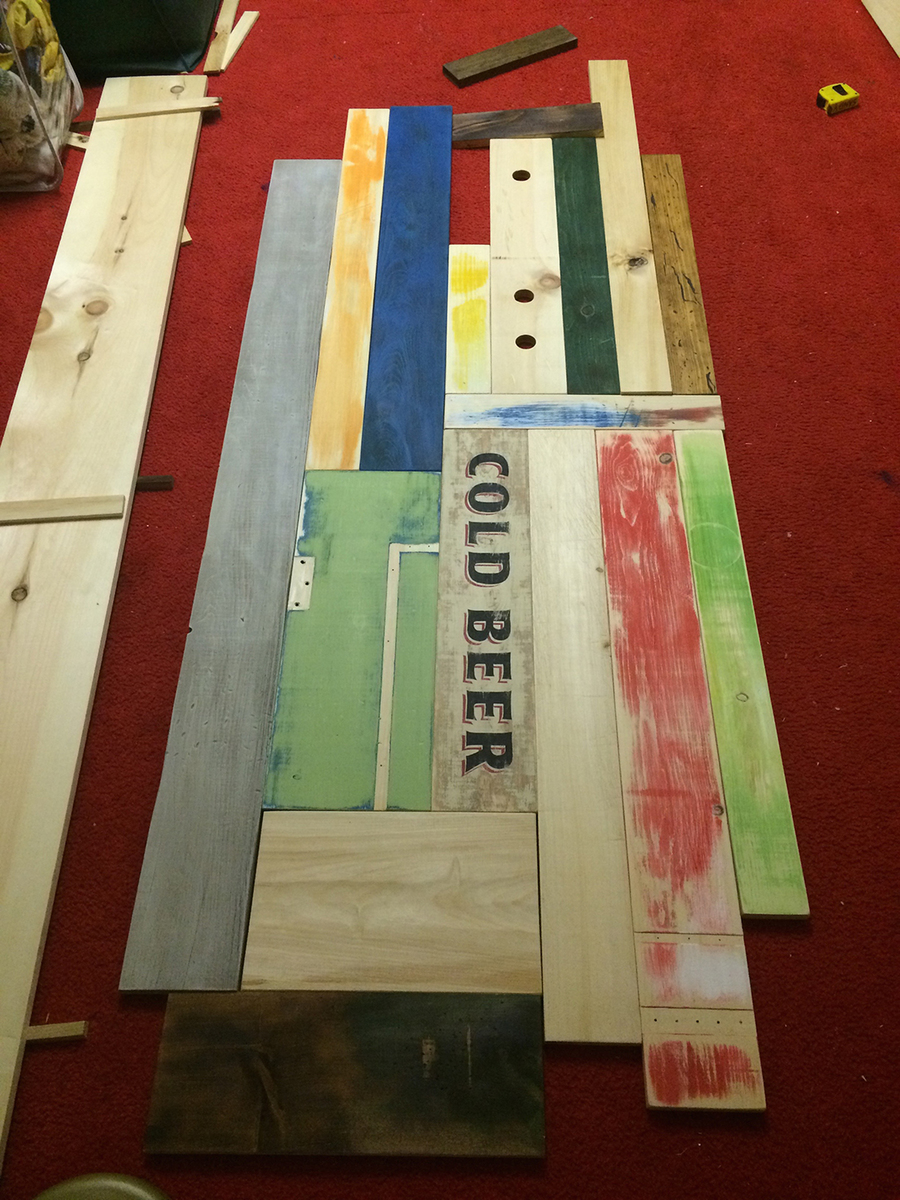
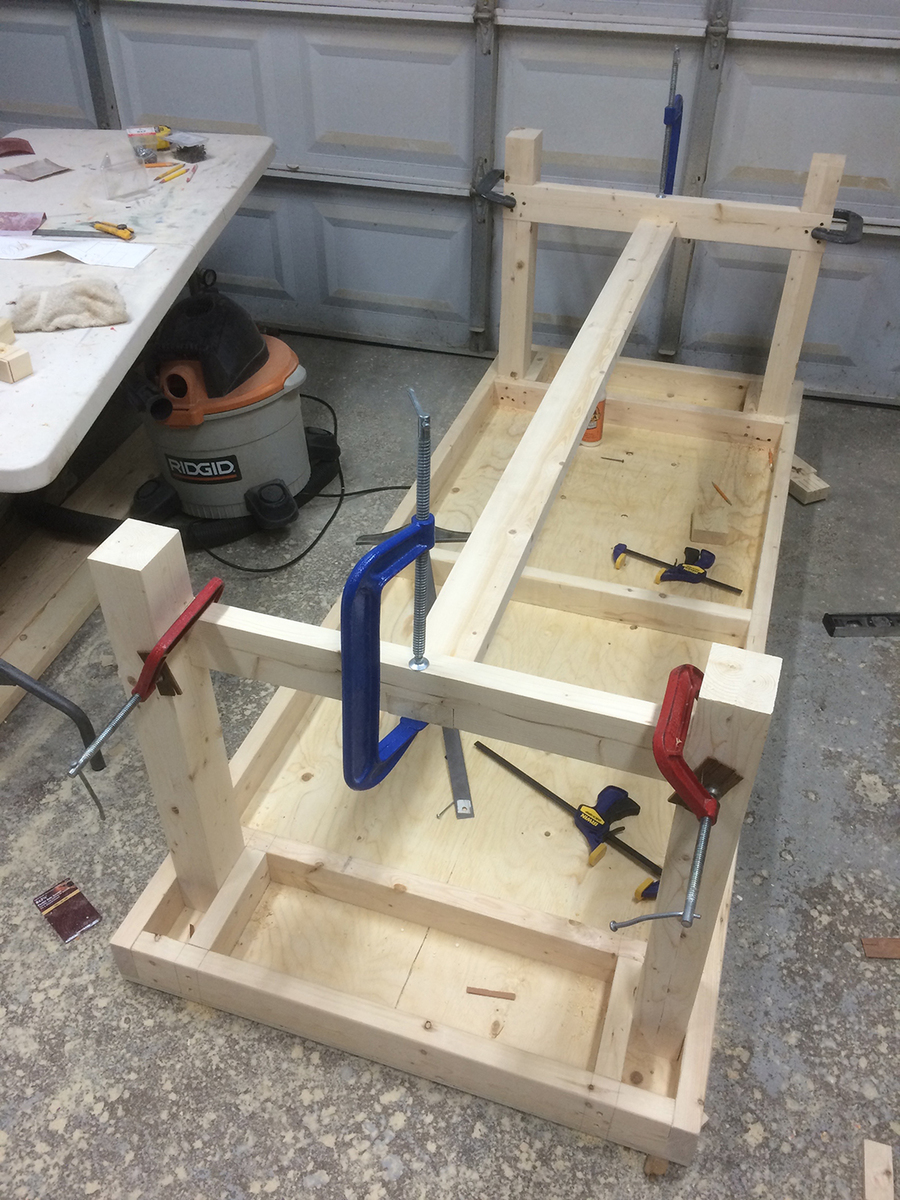
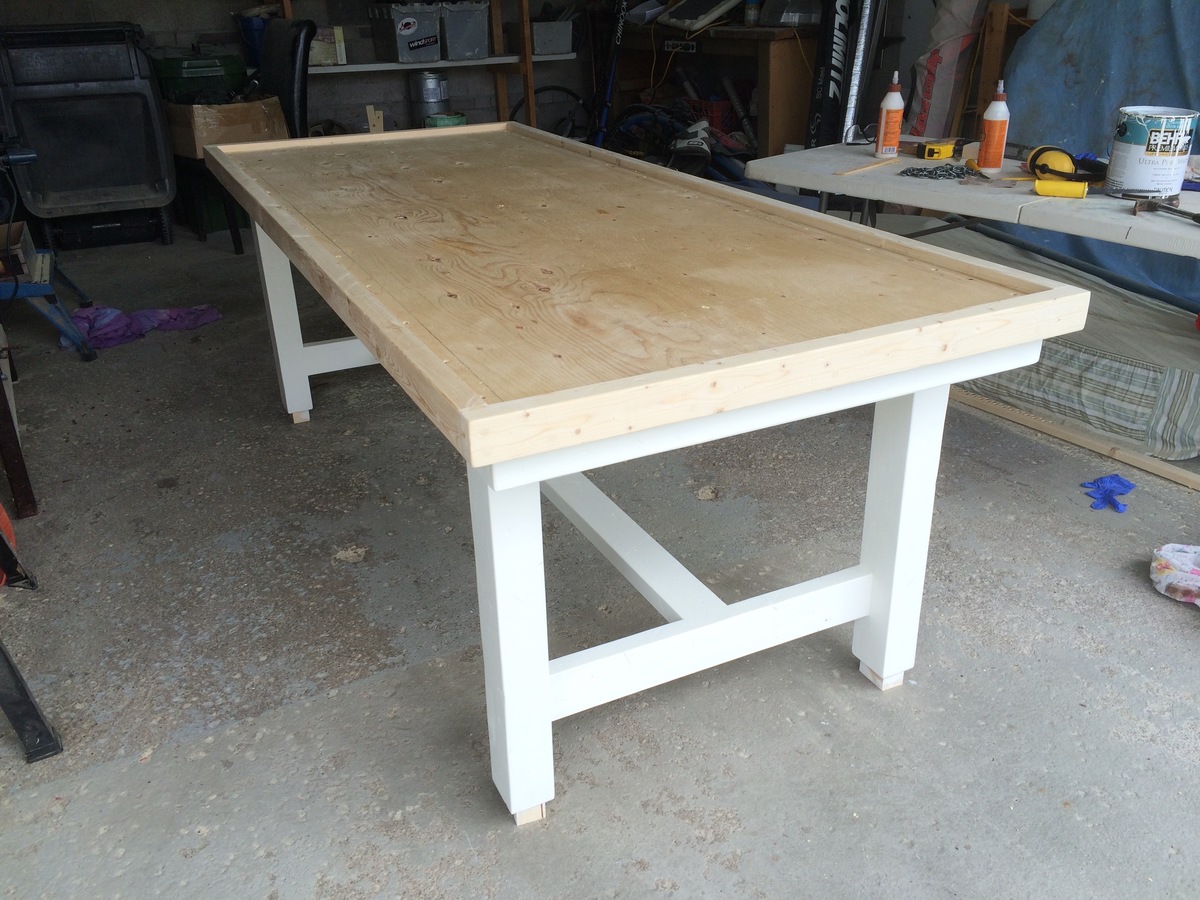
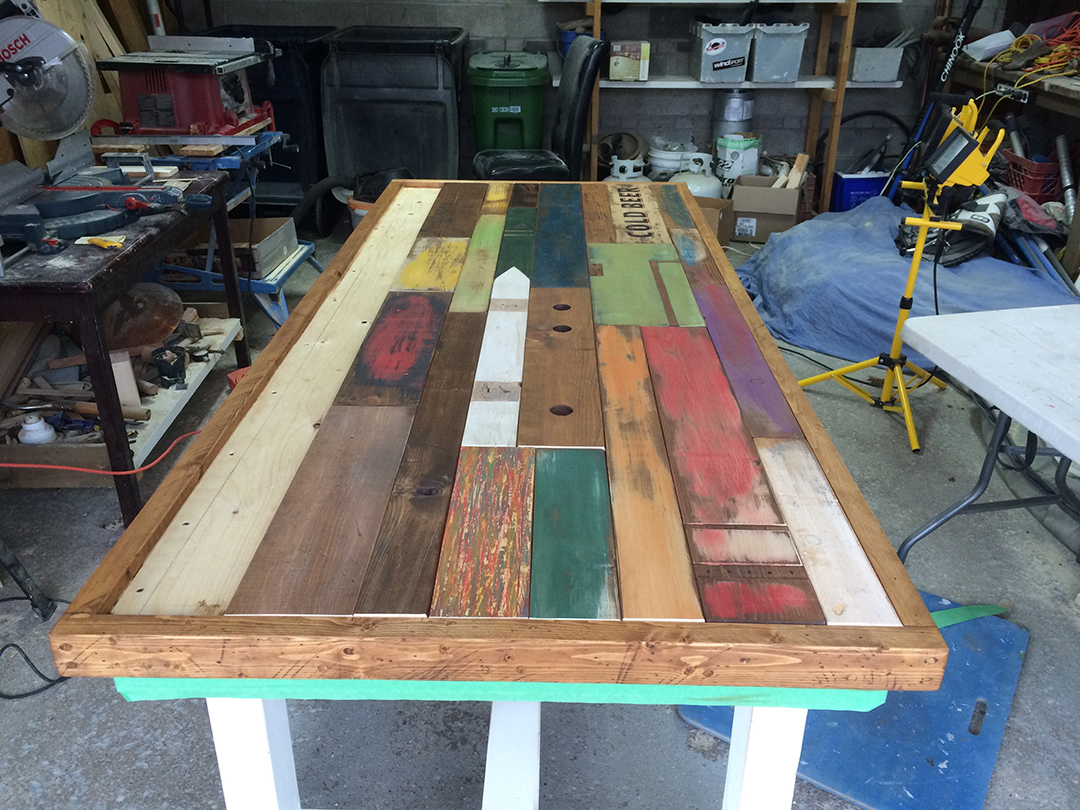
For the most part I followed the plans for the legs and base structure as suggested. In our area the 2x4s are sold with rounded corners. To avoid a very obvious seam on the legs, I used 2x6s which I screwed and glued together then cut back to 3x4 (1.5x2) x 4 to make the legs and cross beams a little beefier with little or no seem on the legs. As I decided to build the top from reclaimed wood I framed in the top with 2x4 ripped down to approx.. 2x3 with a sheet of plywood to support top boards. As I don’t have a planner to level any reclaimed top boards I could find, I decided to make my own faux reclaimed boards out of ¾’ x 9’ – 8’ planks. I distress the wood using a chain, rocks my table saw, hammer, nails, blowtorch and bow saw. In hindsight, I wish I had distressed a little more vigorously but everyday use will augment it over time. I continued to paint, distress and sand on the fly, using paints I had left from previous projects. In some cases, I mixed paints to get additional colour varierty. All boards were stained at the to colour bare areas which as a bonus added a slight yellow hue making the paint look older. I did some scraping and blowtorching of semi-dry paint and stain to get a variety of looks and textures. I dry fit the boards and reorganized the puzzle pieces to get a random but organized look – controlled chaos. Once I was close I glued and screwed the board down clamping as I went to keep the boards tight. This paid-off later as the tighter seams allow less food to fall in-between. I cut down the last row from over sized pieces to get a tight fit in the last row. I finished with 11 coats of poly to toughen up the pine and again to seal the seams from food. My wife suggested painting the legs off-white as our cottage already is max-ed out on natural wood. We will follow by painting the existing chairs the same off-white and adding a little distress for age. Cost was approx. $175 to 200. The plywood alone was $45, paint I had. Time was easily 50 hours as the artistic on the top, time although fun, was time consuming.

Anna’s website is great I have had many compliments on my table. I have pointed many people to the site for direction on their own projects. Thanks for the great plans.

Sandy
Estimated Cost
$175-200
Estimated Time Investment
Week Long Project (20 Hours or More)
Finish Used
Latex paint
Varathane Premium woodstain – Tuscan
Minwax® Polycrylic® Protective Finish – Satin
Recommended Skill Level
Intermediate