Community Brag Posts

Spa Bench.... Tara's First Project!

Submitted by taradactel on Wed, 04/17/2013 - 09:23

I am so so so proud of myself for building this great bench. I can' t wait to do the next project. I wanted something bright and fun to put in my entry way to put shoes on. I thought this was a great first project. I opted for orange, ( ) I wish it had been a different shade, it's pretty bright. When I ruffed up the edges with brown (with a toothbrush) that helped take the brightness down a bit. I chevroned the top to make it funner. Chevroning is a pain in the behind, it takes forever to tape it off but it's cute in the end. I noticed a few people said they did this in a couple hours, I don't know how. It took me two days! It doesn't take more than two or three hours to cut the wood and put it together but then you have to fill the holes, sand it, prime it, paint it, touch it up....

If you have all the tools already... Then the cost is low.
I spent:
$28 lumber @ Home Depot
$20 paint & primer @ Walmart

Now the only problem is I don't have ANY other orange things in the house. I'm going to have to rethink my decorating, or build another bench ;)

Thanks Ana!

Estimated Cost
$40-$60
Estimated Time Investment
Weekend Project (10-20 Hours)
Recommended Skill Level
Starter Project

Comments

dmcarwin

Wed, 04/17/2013 - 14:20

Great job! I agree with Pam, use the same orange paint and paint a few things in your house to pull the colors together!
Assembly Workstation with Storage and lockable wheels

Submitted by AndyH on Sat, 03/07/2015 - 15:00

Assembly Workstation with small drawers for tools and hardware supplies and large drawers for scrap wood storage.

Has lockable wheels so can be stored against wall when not in use and pulled out to allow easy access to move around the piece I am working on.

Drawers have 3/4 inch ply bottoms for strength and the big ones have full extension drawers.

Top is 66 inches wide by 34 inches deep to give plenty of work surface.

Total cost was about $300.


Estimated Cost
Total cost was about $300.
Estimated Time Investment
Week Long Project (20 Hours or More)
Finish Used
Minwax Classic Gray (2 costs). Varathane Satin Poly (3 coats)
Recommended Skill Level
Beginner

TV Console

Submitted by Anonymous (not verified) on Mon, 06/05/2017 - 16:39

I built this for my younger brother and his wife for their new home.

Built from Plan(s)
Estimated Cost
$80
Estimated Time Investment
Weekend Project (10-20 Hours)
Finish Used
Paint, stain, and polycrylic protective finish
Recommended Skill Level
Intermediate

All Season Stand

Followed the plans pretty much to the letter, made the sign reversible so it works for summer or winter.
3d printed the words instead of cutting out or purchasing wooden letters

Estimated Cost
20
Estimated Time Investment
Afternoon Project (3-6 Hours)
Recommended Skill Level
Beginner

Comments

Wheelbarrow

Submitted by Sebastien on Sat, 04/20/2013 - 01:33

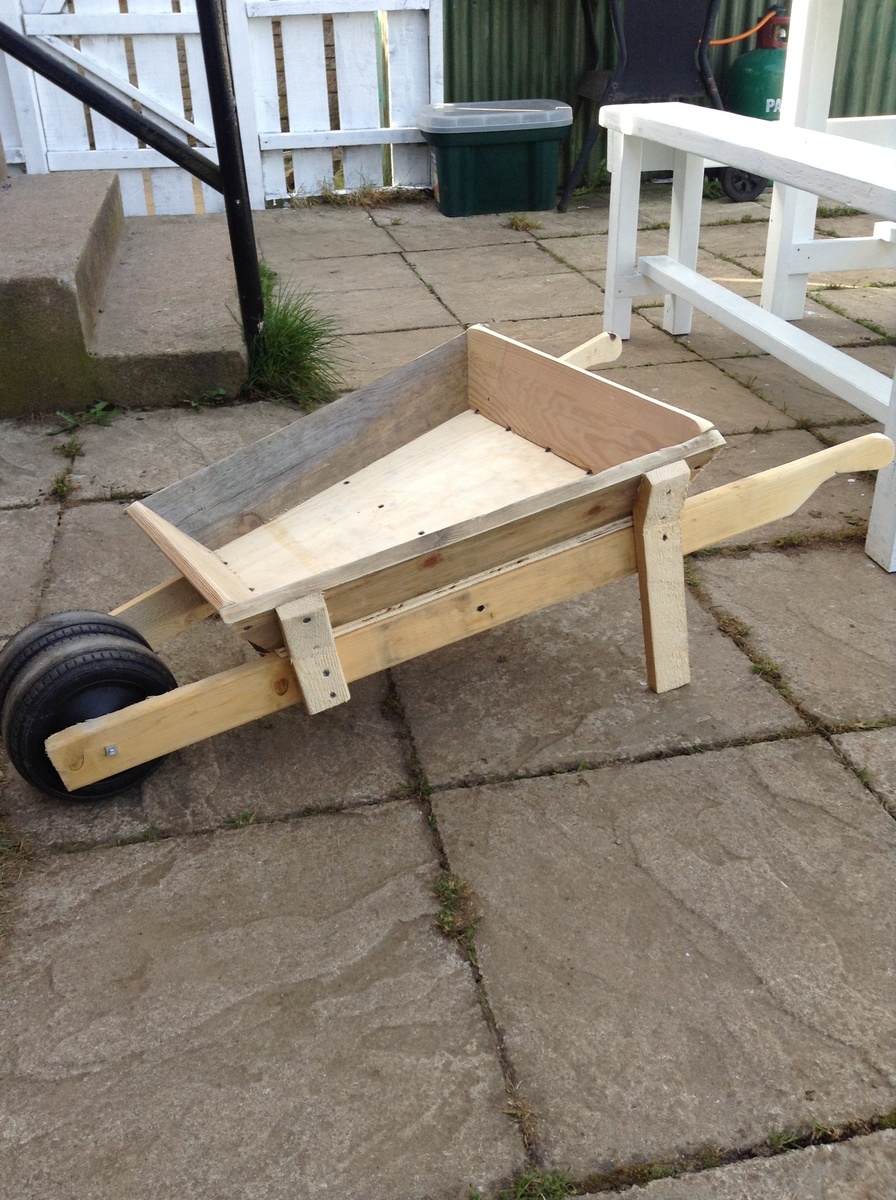
My neighbour Bryan challenged me to make it. It was indeed a challenge as there is no strait bit to a wheelbarrow and I had no plans so I kind of made it up as I went along. From far the hardest thing I made so far.

Estimated Time Investment
Day Project (6-9 Hours)
Recommended Skill Level
Advanced

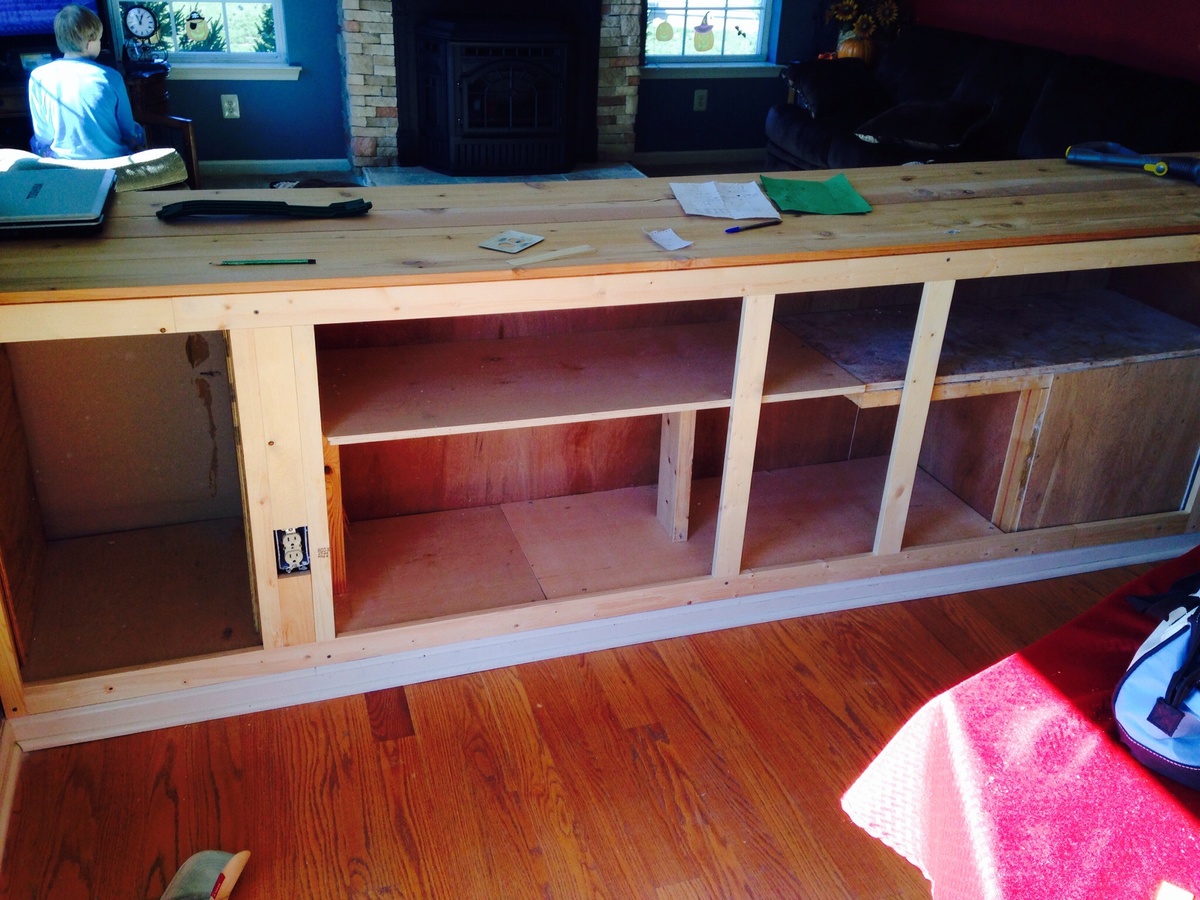
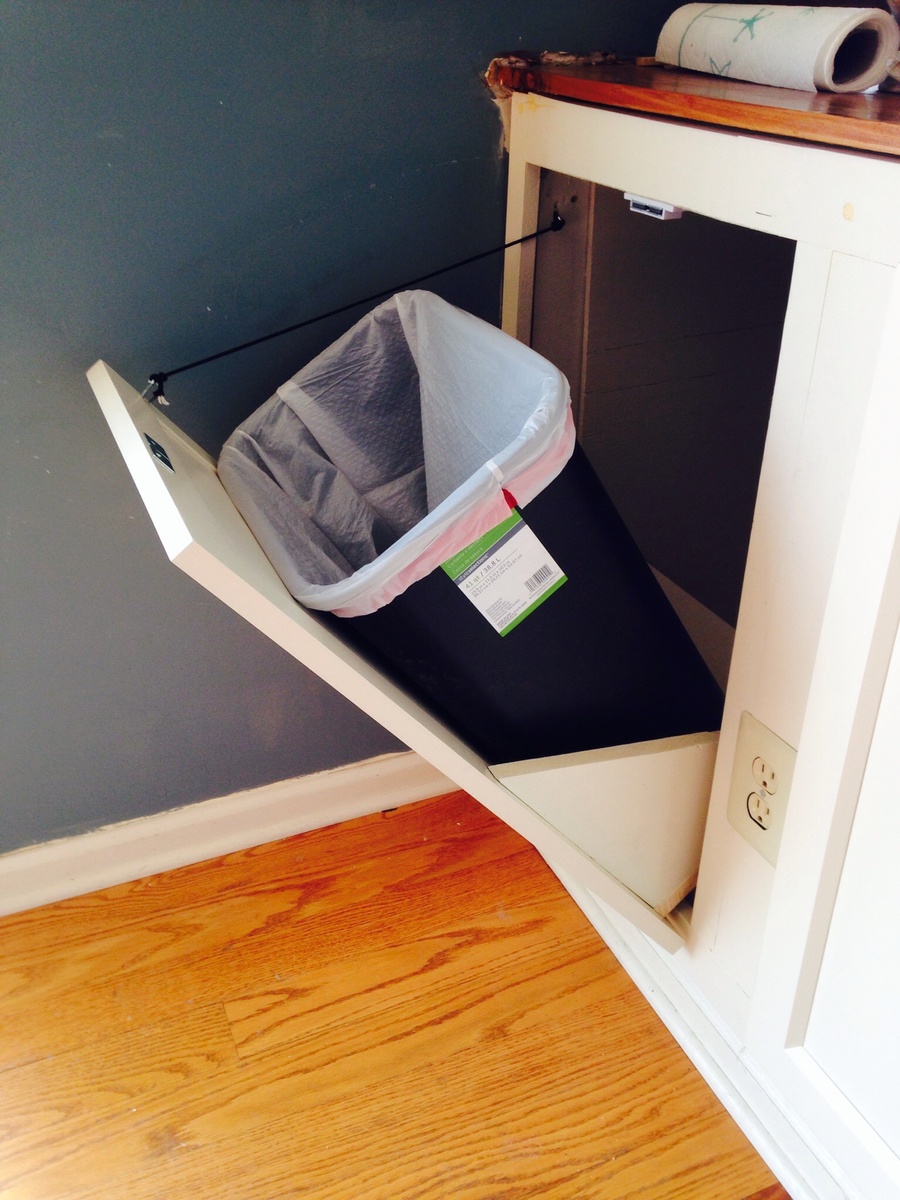
New kitchen storage including trash can, made from hollow half wall

Submitted by Tjkelly on Wed, 03/11/2015 - 12:22

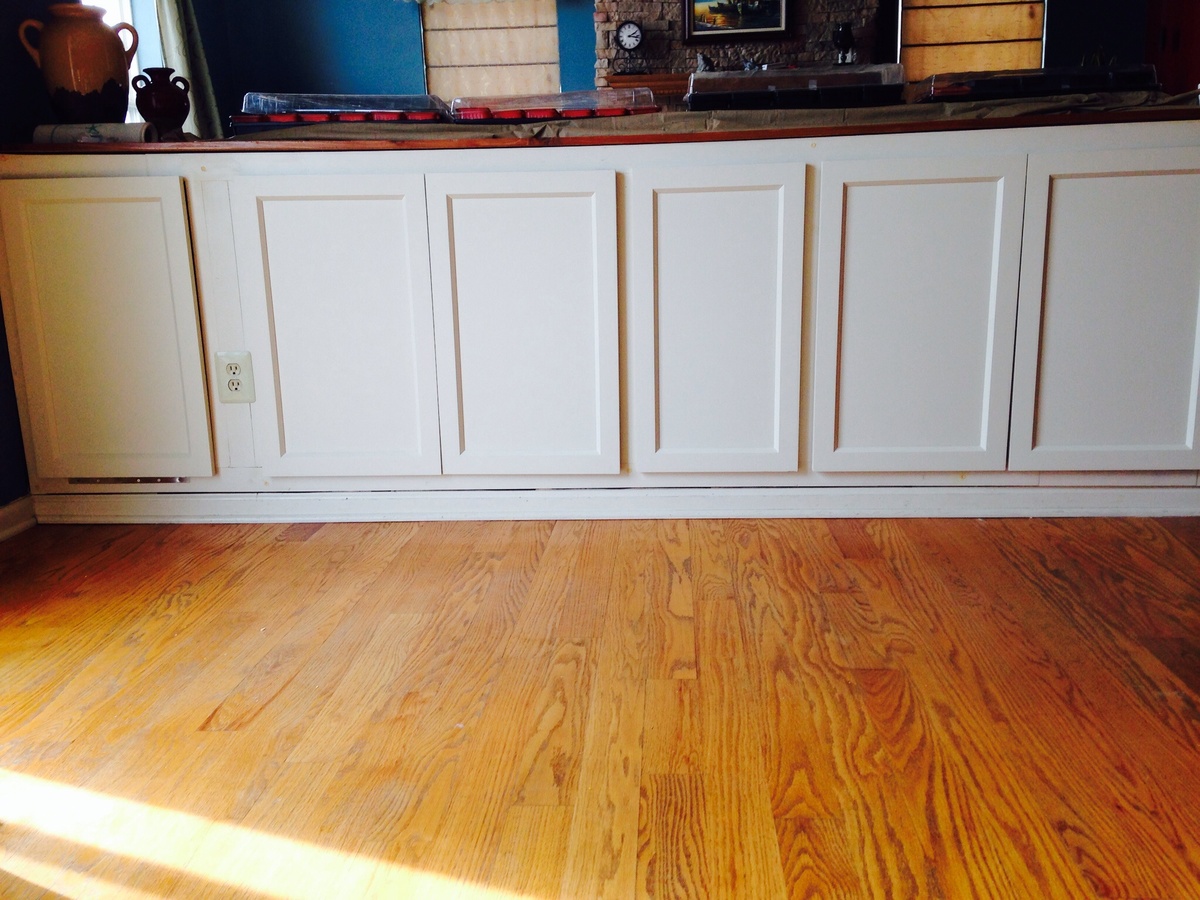
My wife and I made loads of additional storage space by using a hollow half wall 

Built from Plan(s)
Estimated Cost
$400
Estimated Time Investment
Week Long Project (20 Hours or More)
Finish Used
Sherwin Williams white satin paint
Recommended Skill Level
Intermediate

Comments

Love your site!

Submitted by Anonymous (not verified) on Fri, 06/09/2017 - 15:55

I'm so glad I found your blog/website. It is exactly what I was looking for. I'm going to tackle the farm table & benches next and then adjust the porch swing plan to make a bed swing for a friend. Thanks for the great ideas!

Built from Plan(s)
Estimated Cost
$30
Estimated Time Investment
Afternoon Project (3-6 Hours)
Finish Used
Stain/Sealer
Recommended Skill Level
Beginner

Modern Slat Top Outdoor Wood Bench

Submitted by Anonymous (not verified) on Tue, 08/03/2021 - 06:31

Love your easy instructions! I used all 2x4's because it was made with left over wood from another project. I burned the top pieces to get the grain to stand out and painted the legs. I think they turned out beautiful. I also used your 2x4 Adirondack Chair Plan to match the bench.
Thanks,
Yvette

Recommended Skill Level
Beginner

Comments

Awesome Bed

Submitted by brant on Mon, 04/22/2013 - 13:18

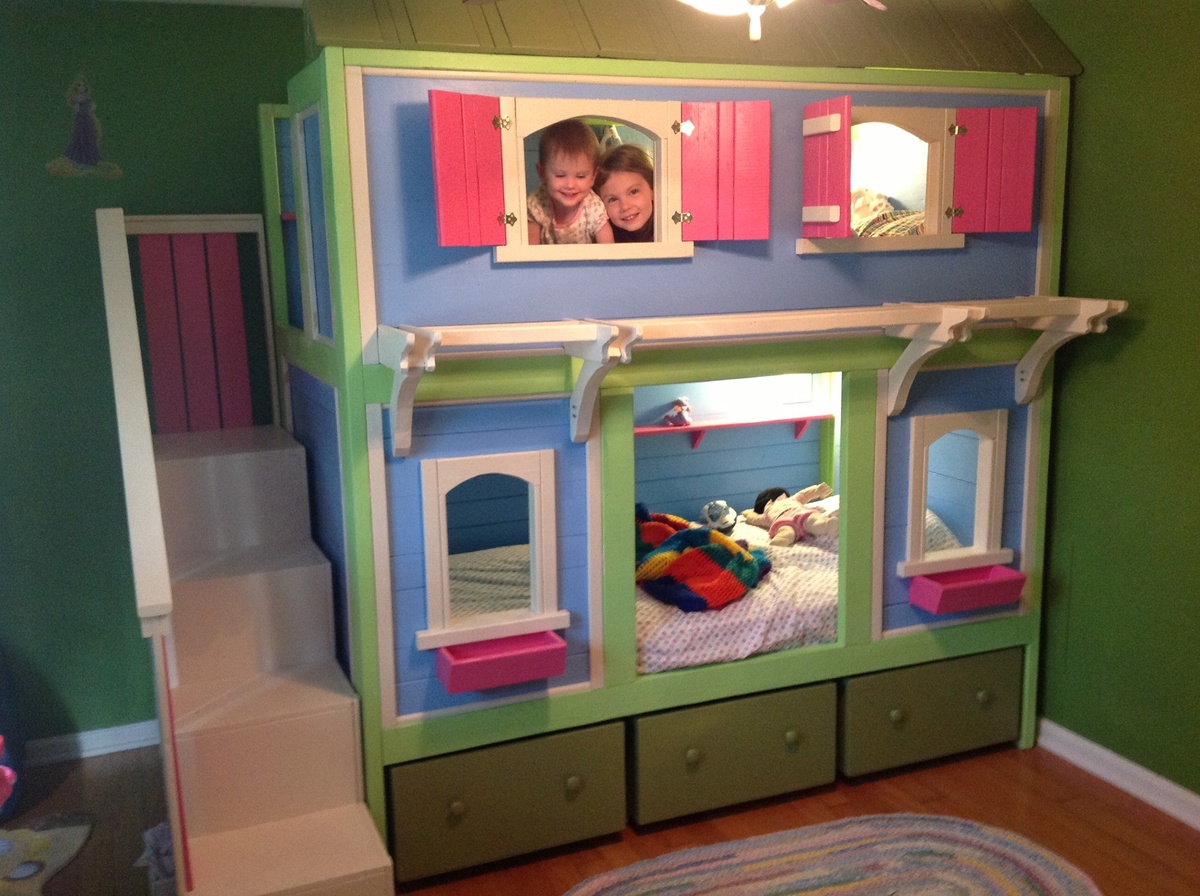
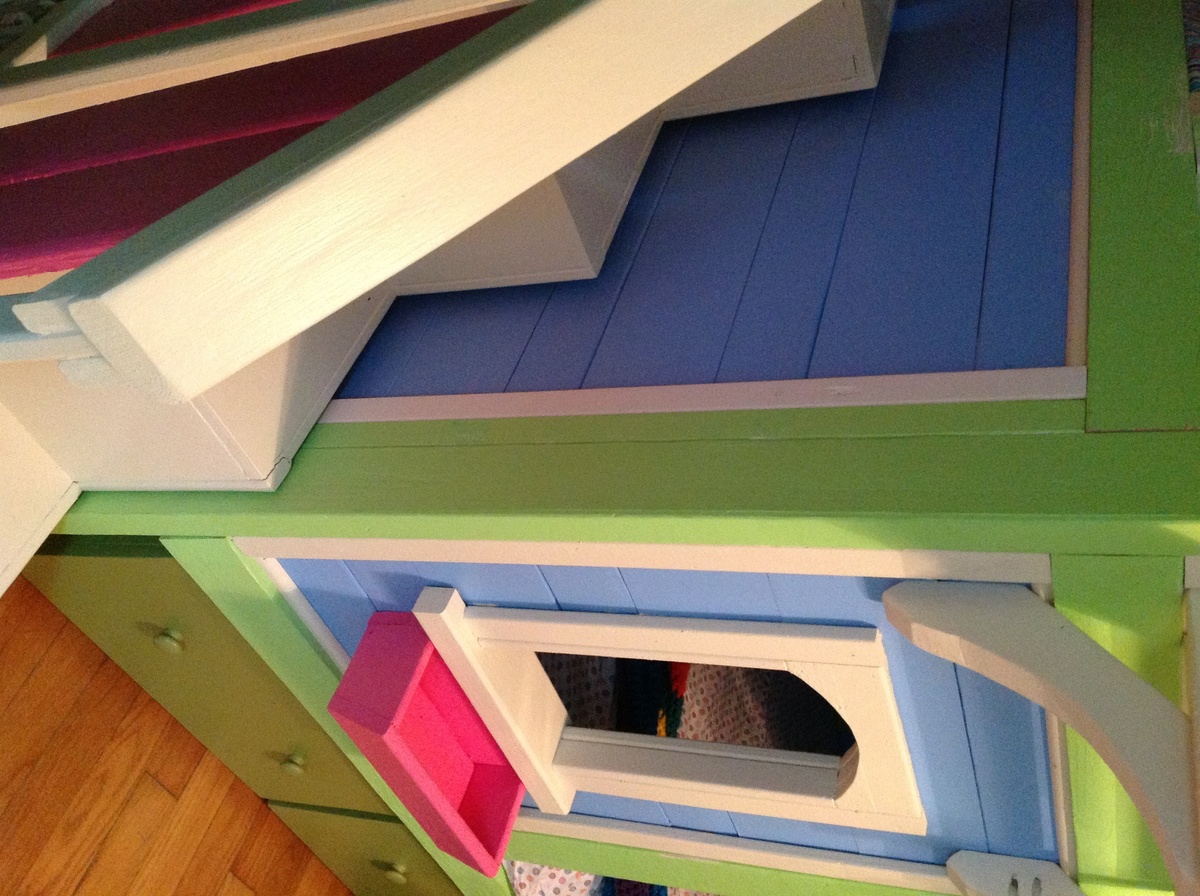
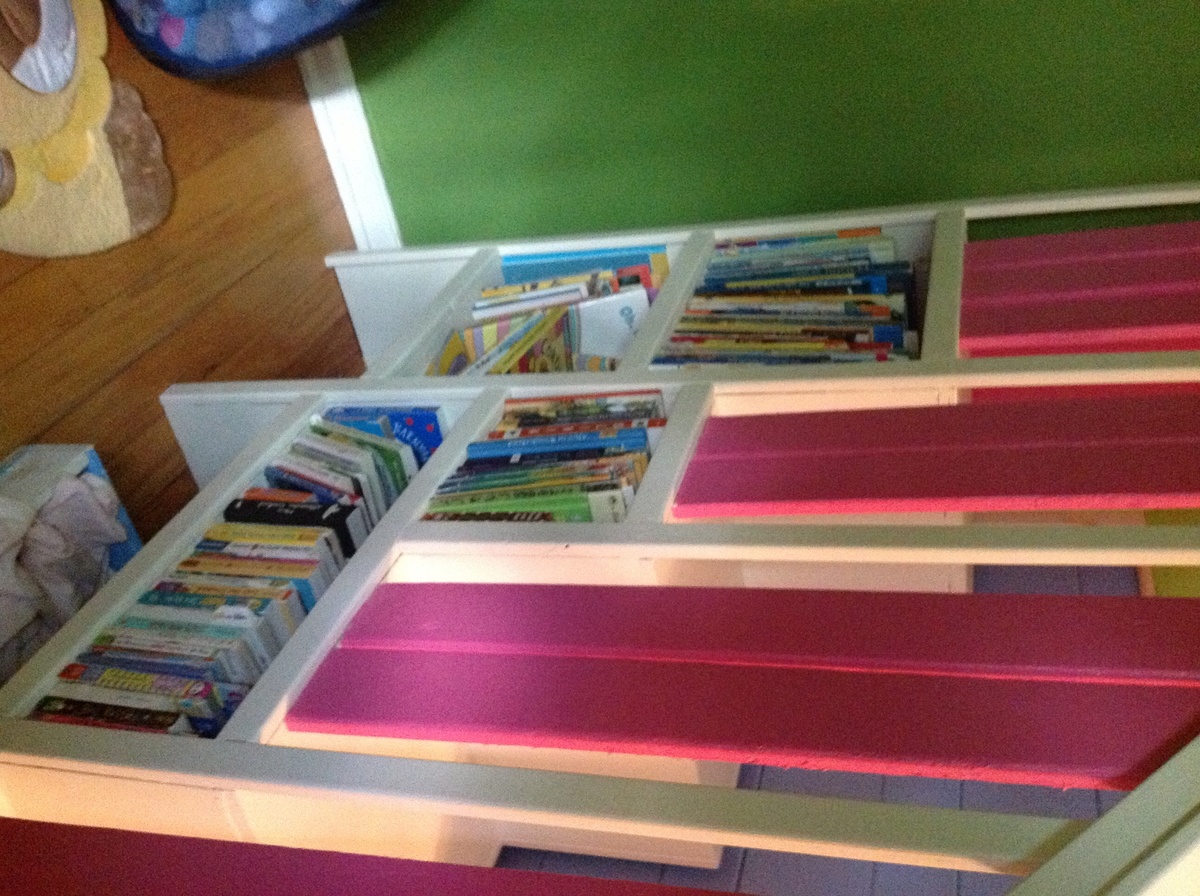
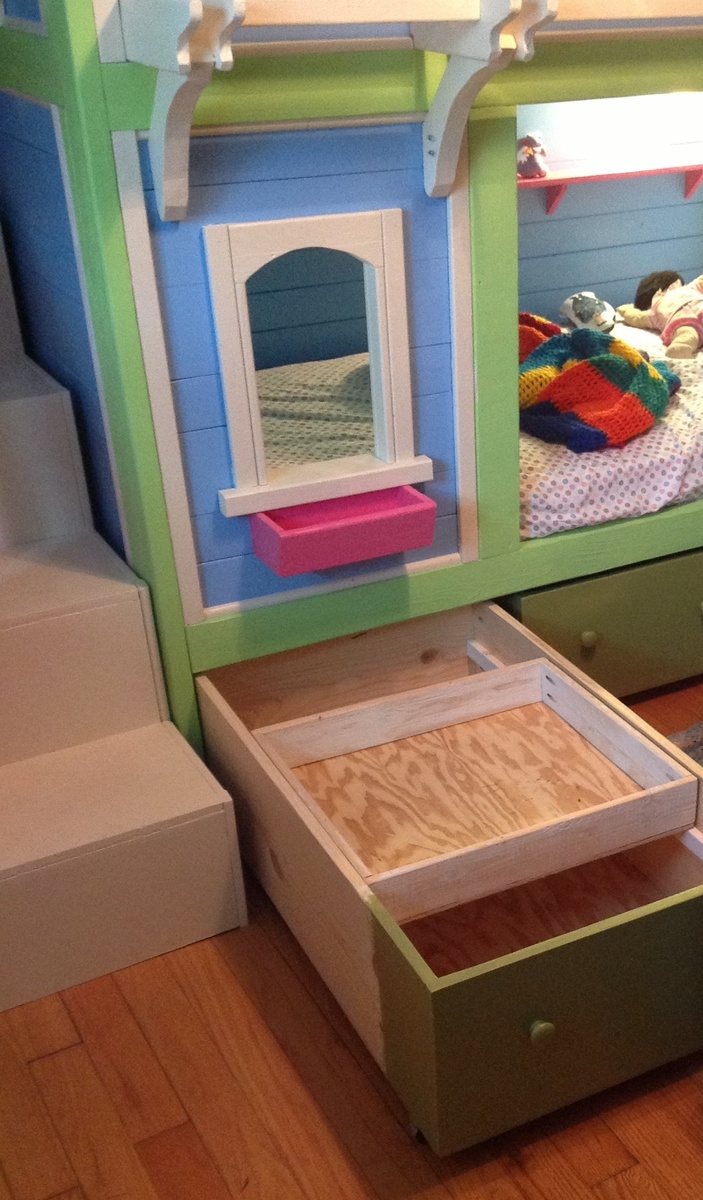
Thank you Ana and Jenny for this project. After many searches for the perfect bunk bed for our 4 and 2 year old daughters I was ready to spend more than $1500 in a store on something that was not nearly as cool as this. The plans were easy to follow and it took my dad and me about a week to make the bed. My girls love it and have spent the last two days in their room.

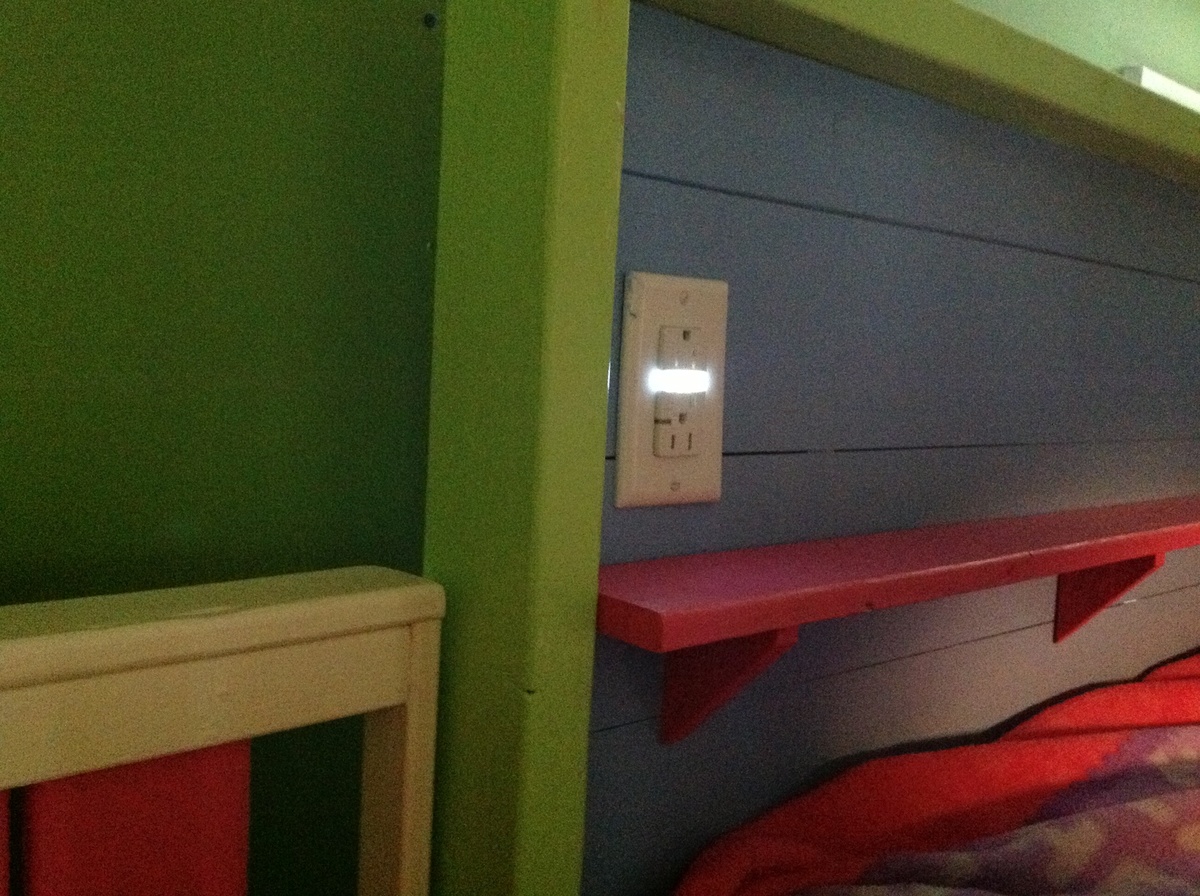
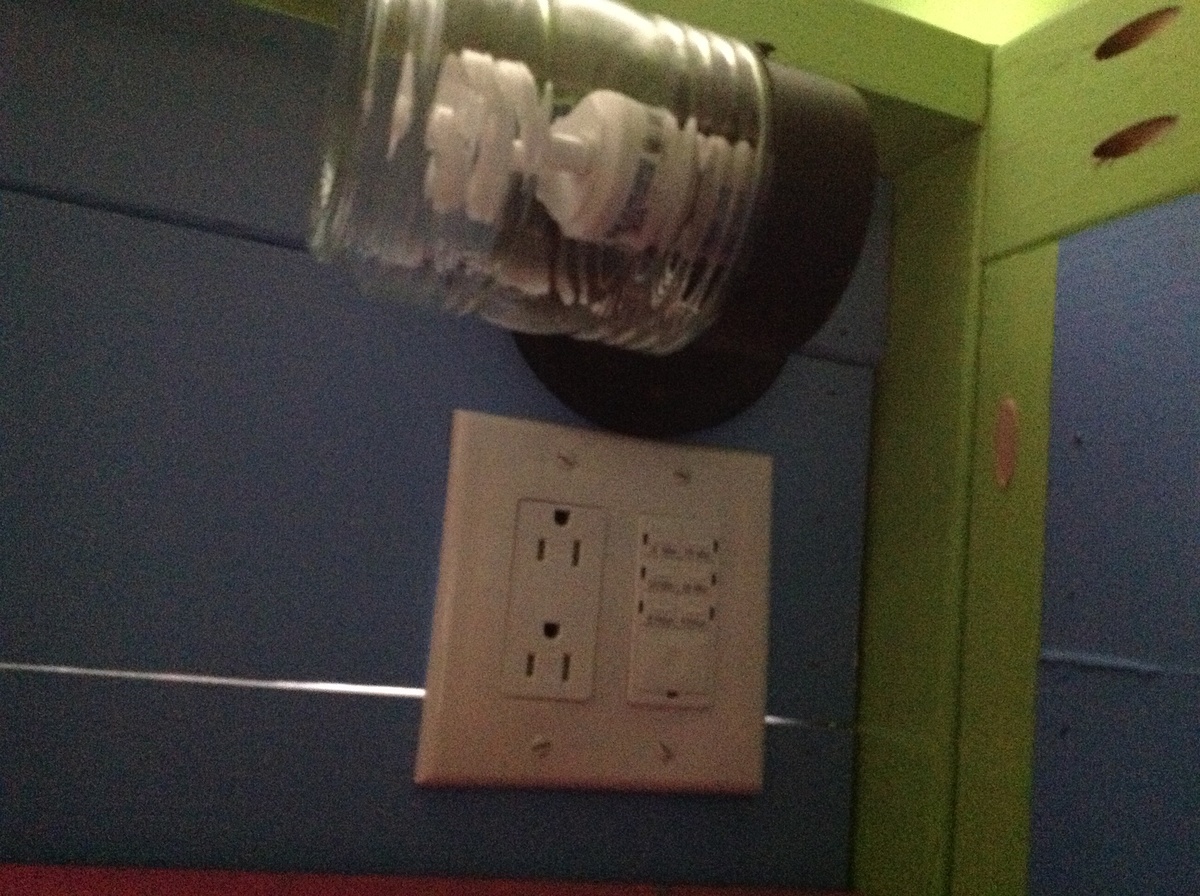
We made a few modifications to the design that I highlighted in the pictures. We wired the back of the bed with electricity to include some outlets, a light that is on a timer switch, and an outlet with a built in night light. We also added 2x2s to support the sides to make them stronger when the bed is apart. We move a lot (4 times in the last 5 years) and the design was great for taking apart and putting back together. The light on the timer is great for telling my oldest she can read books for 5 minutes and then go to sleep when the light goes out.

Thank you so much for these great plans!

Estimated Cost
$850
Estimated Time Investment
Week Long Project (20 Hours or More)
Finish Used
Behr paint. They have an app for ipad for choosing colors that is great.
Fiesta pink PPH-63
Antique White 1023
Tart apple 420B-4
Scotland isle 410D-5
Costa Rica blue 550B-4
Satin finish
Recommended Skill Level
Intermediate

Comments

brant

Mon, 04/22/2013 - 15:19

Thanks. The storage drawers were per Jenny's design. The inner drawers are a little smaller than the plans say because I don't think there is enough quarter inch plywood for all of the bottoms if you only buy one sheet.

spiceylg

Tue, 04/23/2013 - 05:59

This came out fantastic! If I were their age, I'd never want to leave my room either! Wonderful build and love the fun colors!

birdsandsoap

Tue, 05/07/2013 - 23:37

Your bed looks superb!I LOVE that you wired the backside. I think that is a great idea. Glad your kiddos are enjoying their bed!

SARmomEMT

Wed, 03/26/2014 - 13:57

I love all of these fantasy bunk/loft beds but as I look at them i wonder how hard it is to take the sheets off, put on new ones & tuck in blankets etc. I love these beds but I have physical limitations because of chronic health problems & I am afraid that if I had a bed like this for my kids that I would have to hurt myself to strip or make the bed... Can someone who has one tell me how hard it is - or isn't???? Thank you... A newbie to Ana-white.com but it's now my new #1 favorite website!!

Lemonade Stand

Submitted by Anonymous (not verified) on Mon, 06/12/2017 - 07:42

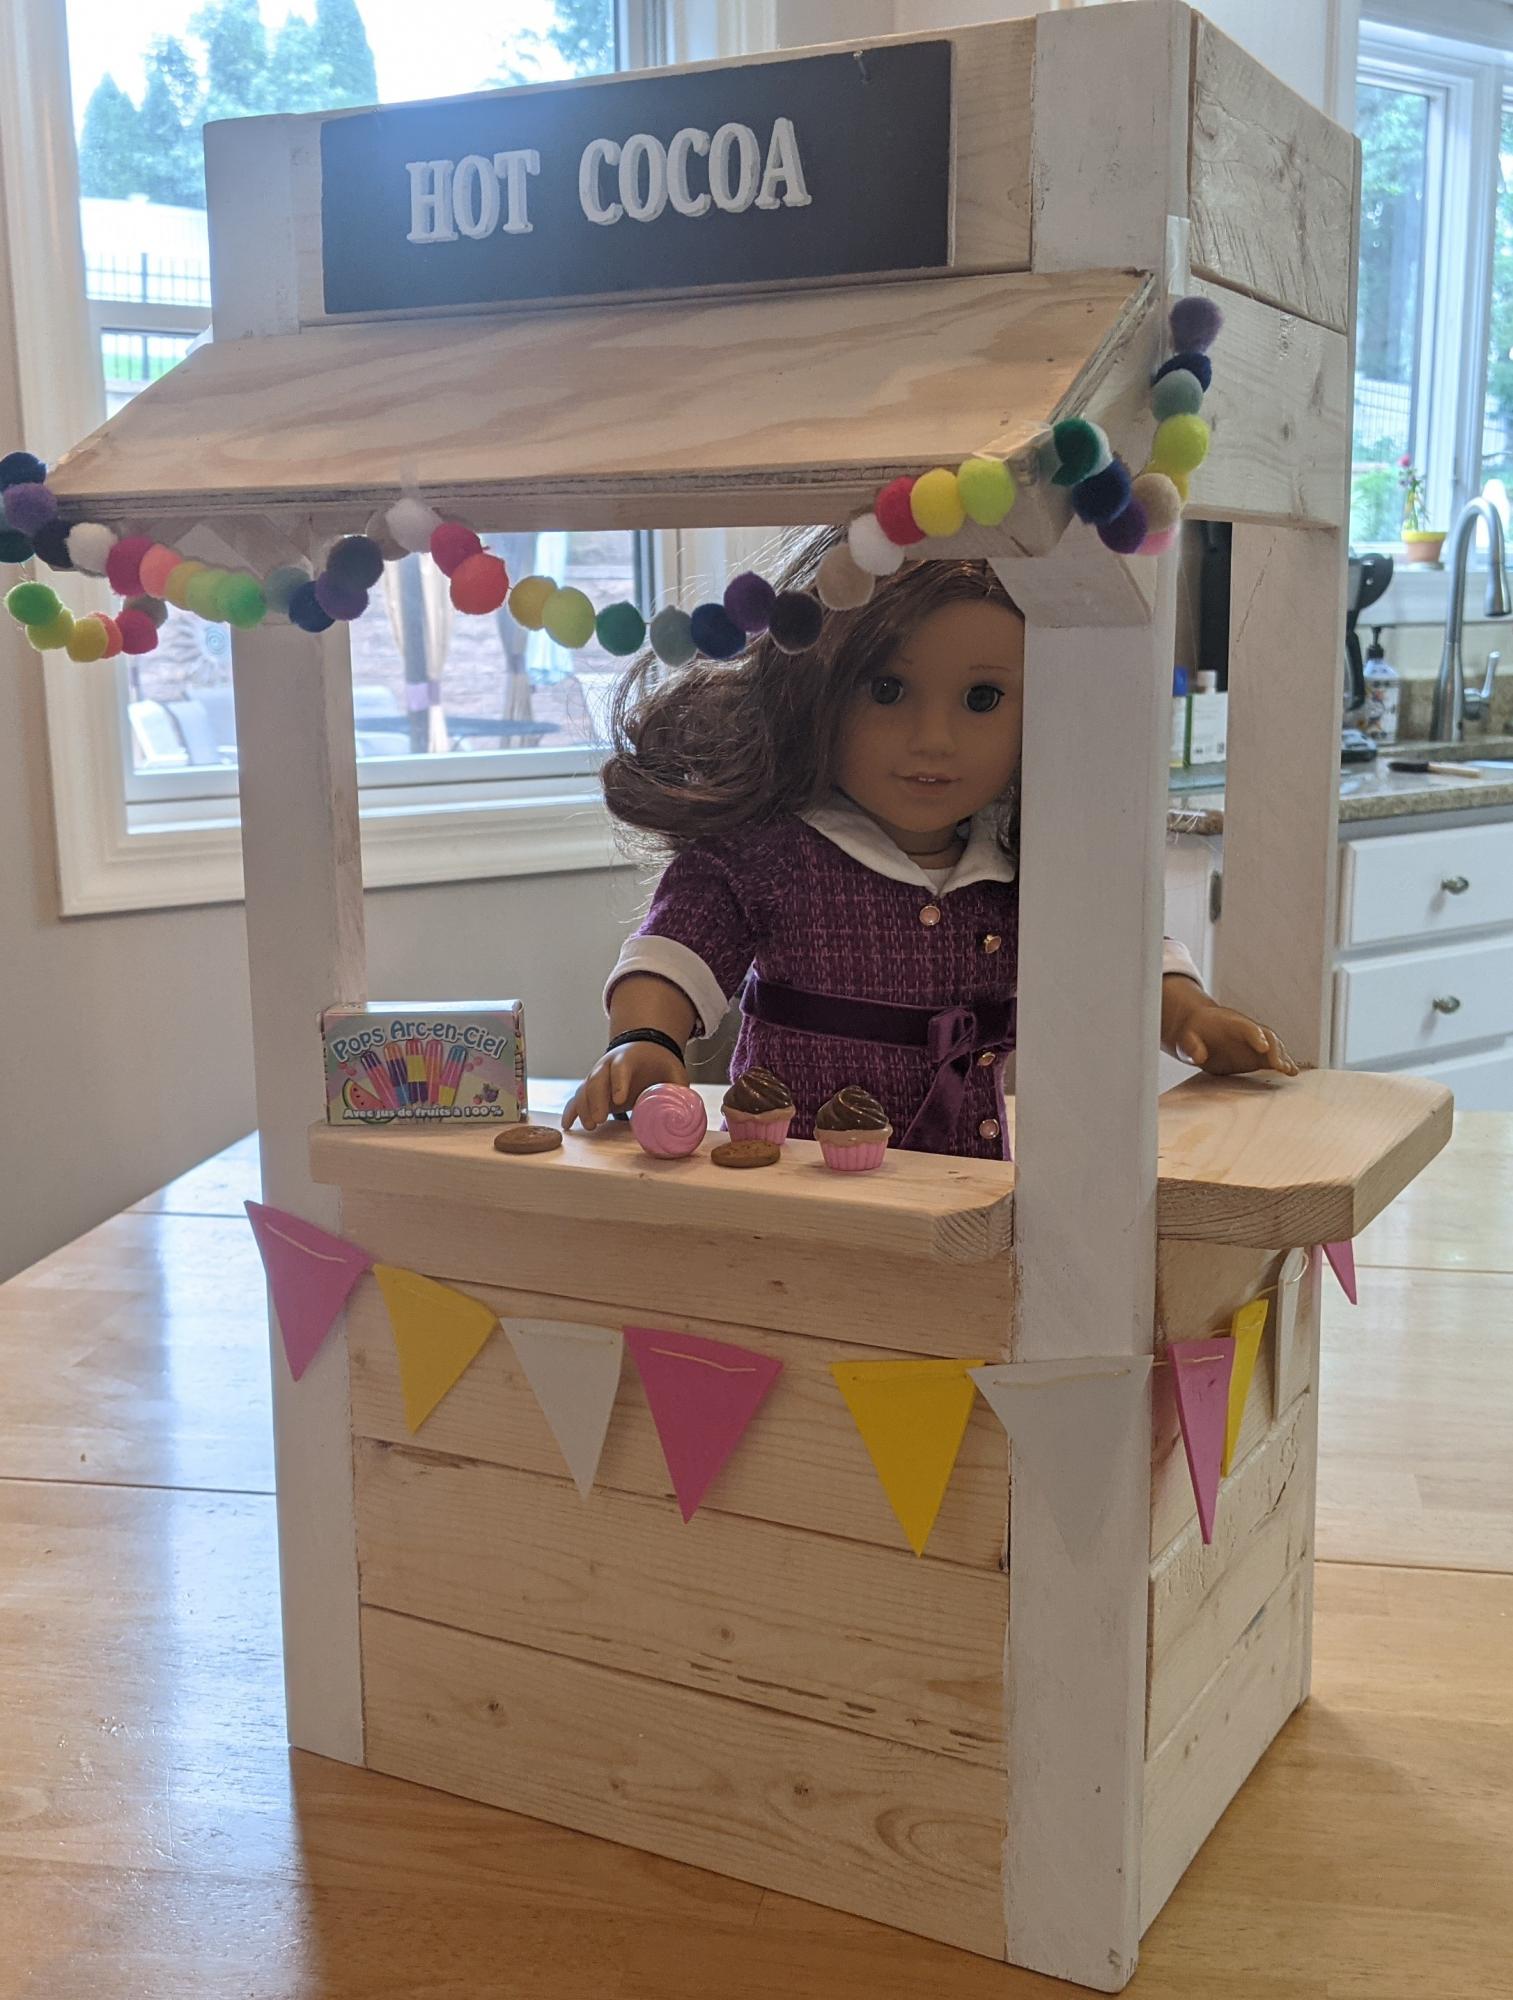
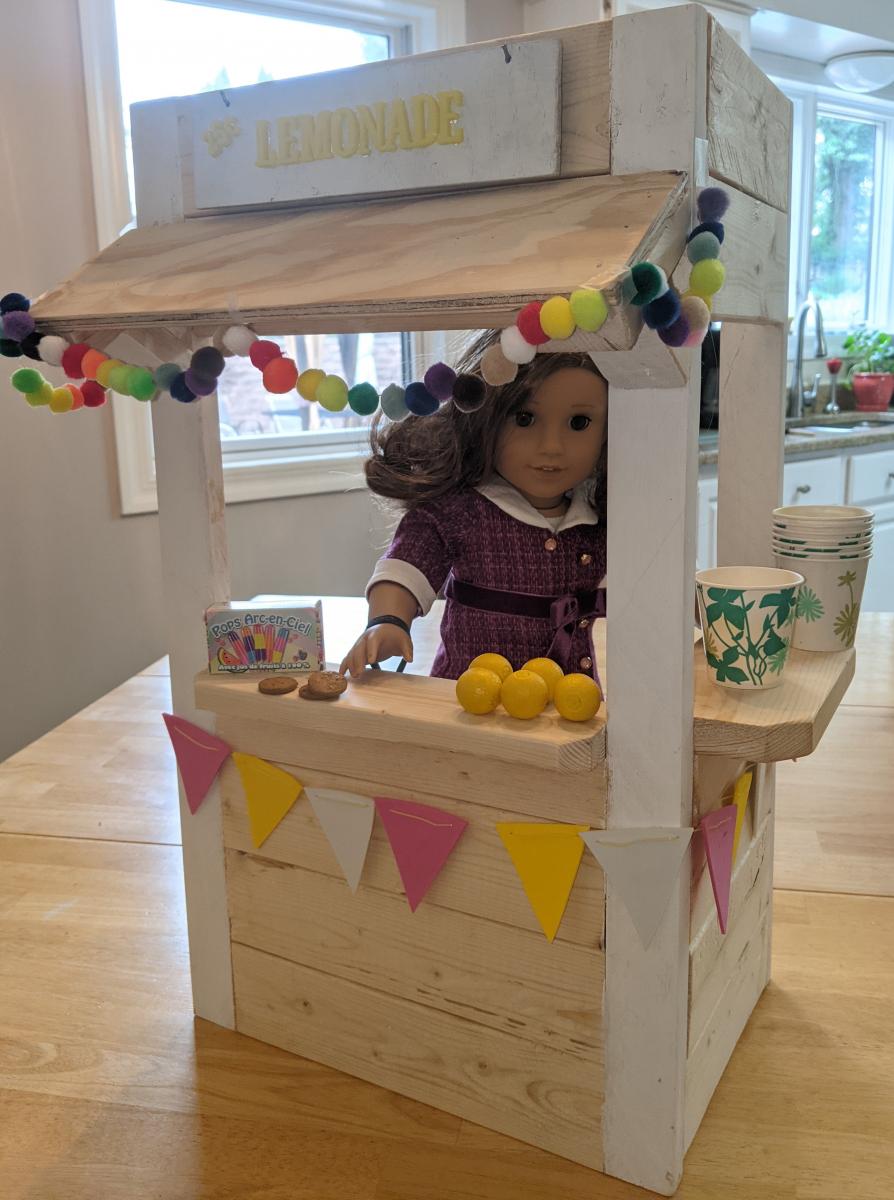
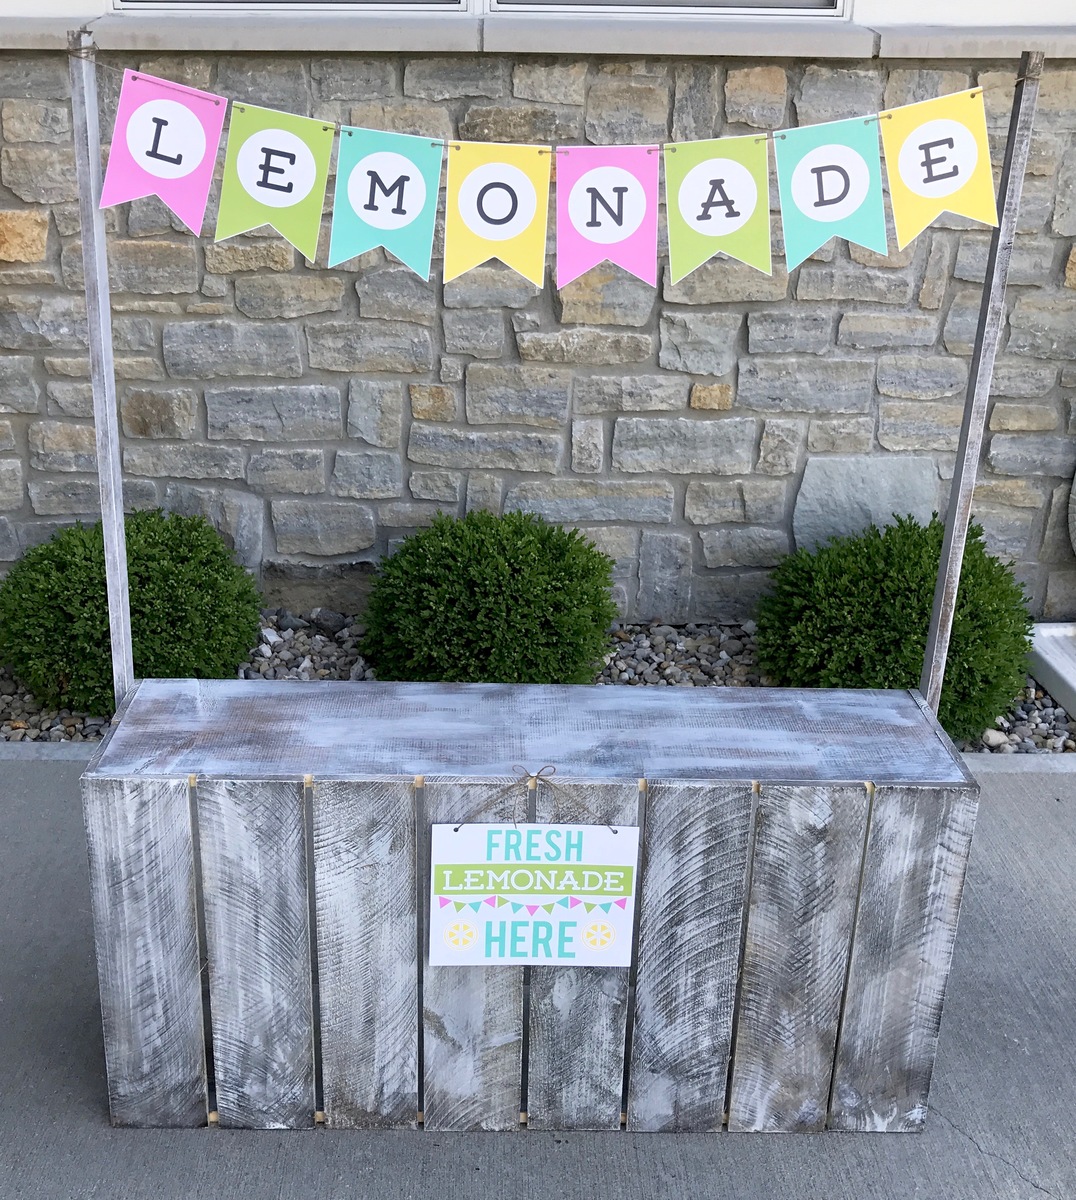
My daughters decided they wanted to do a lemonade stand at their Nana's yard sale.  I'm a beginner when it comes to woodworking projects so when I came across Ana's plans for the fence picket lemonade stand, I just HAD to give it a try!  This was a fun project and the plans were extremely helpful and straight-forward.  I would definitely recommend if anyone is looking for a cute lemonade stand for their kiddos!  Side note - my girls raised $75 for the Alex's Lemonade Stand Foundation to help fight childhood cancer! So proud! 

Built from Plan(s)
Estimated Cost
$30
Estimated Time Investment
An Hour or Two (0-2 Hours)
Finish Used
Minwax Dark Walnut stain with Sherwin Williams Alabaster dry brushed over the top once stain dried.
Recommended Skill Level
Starter Project

Essential platform bed - Queen

Submitted by kimsteps on Tue, 08/10/2021 - 17:52

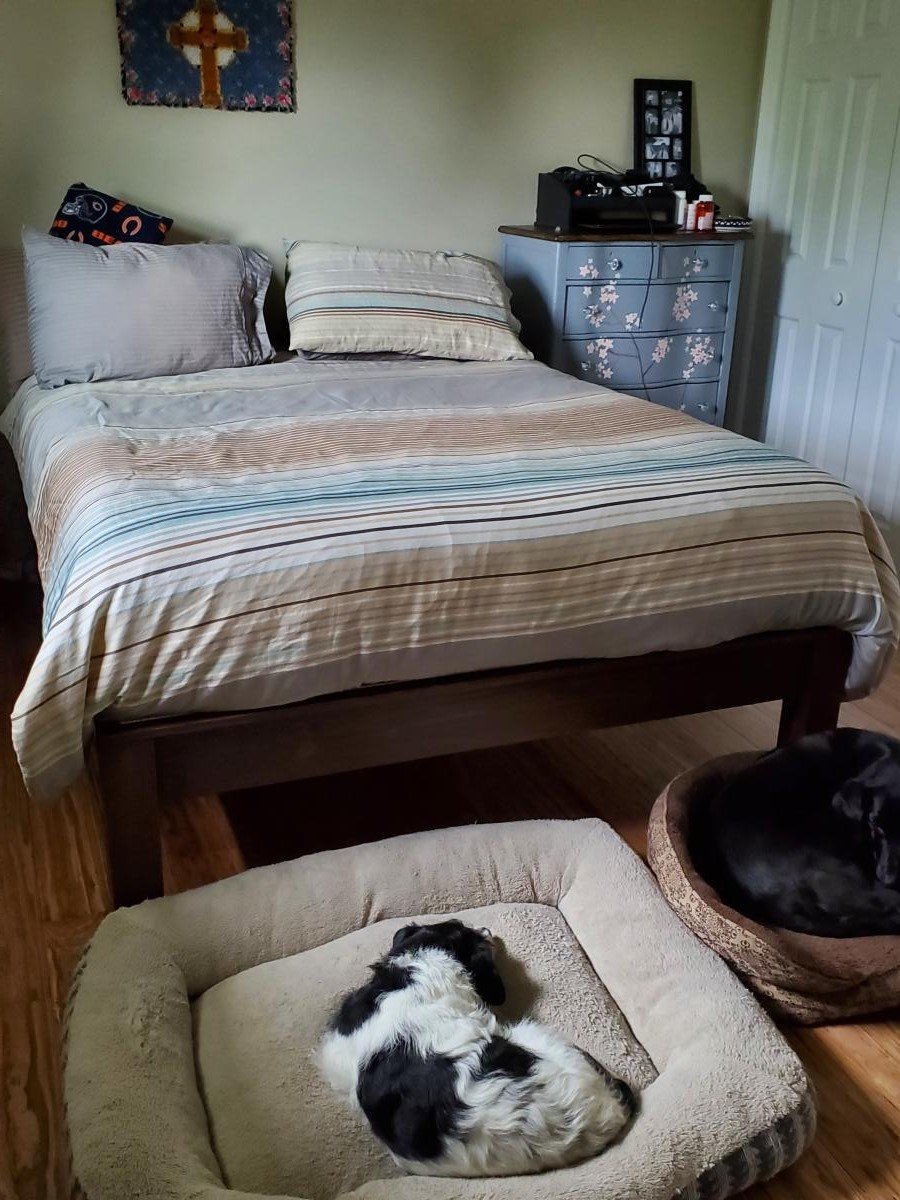
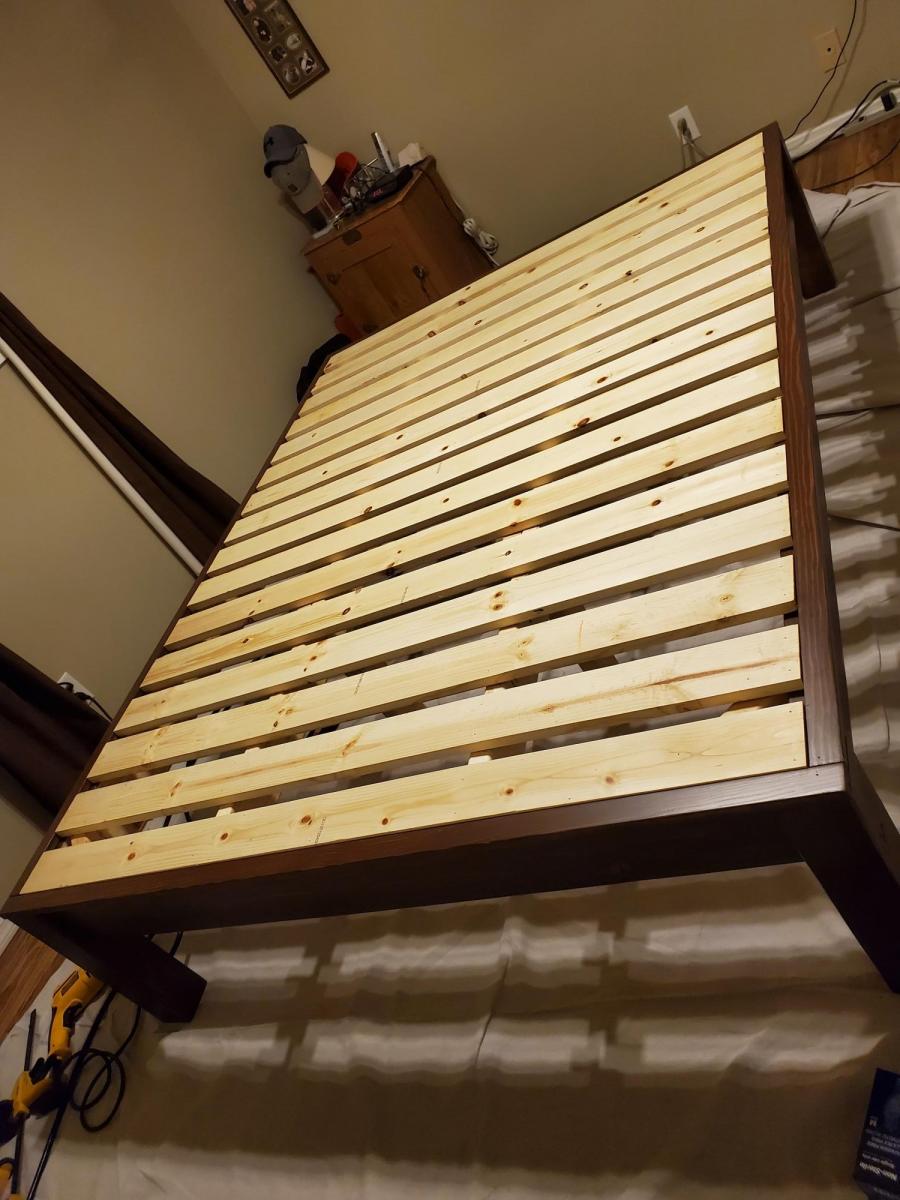
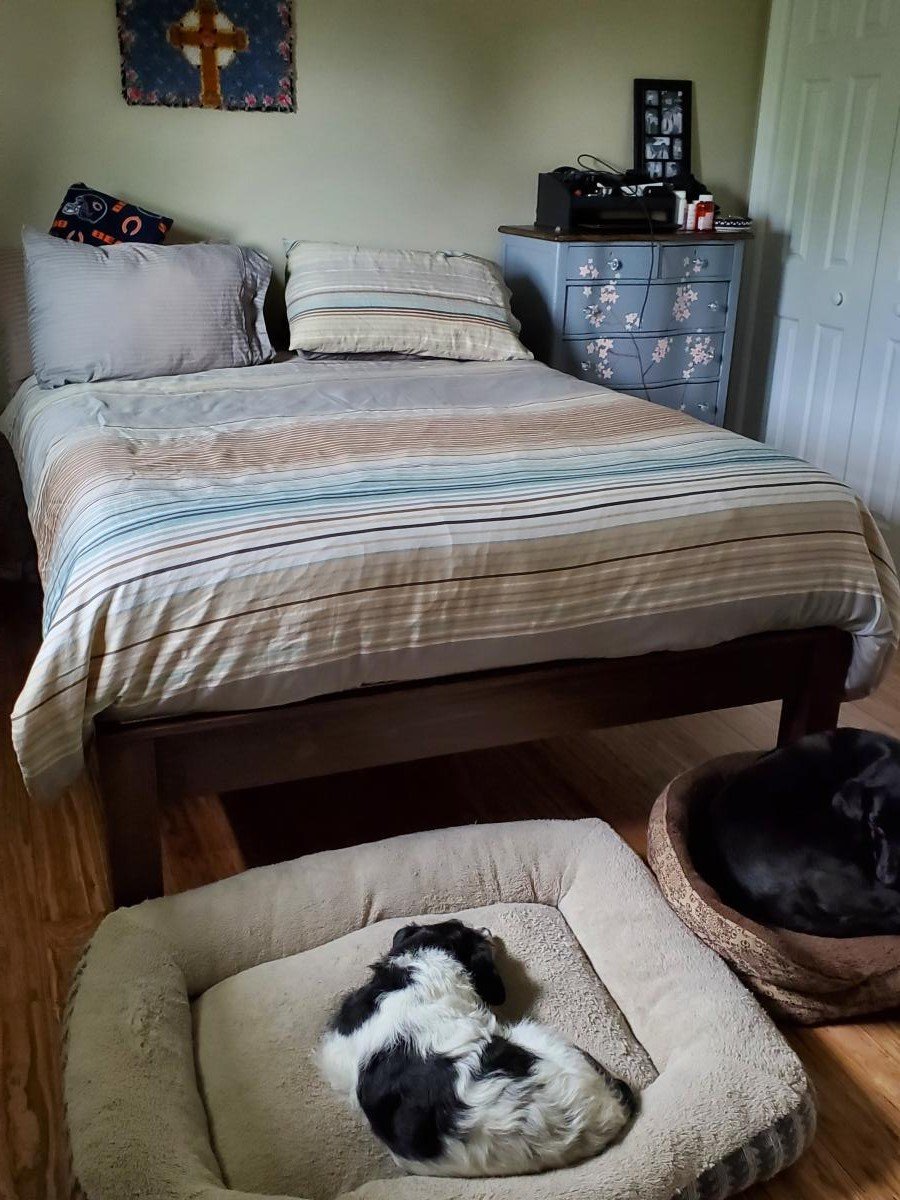
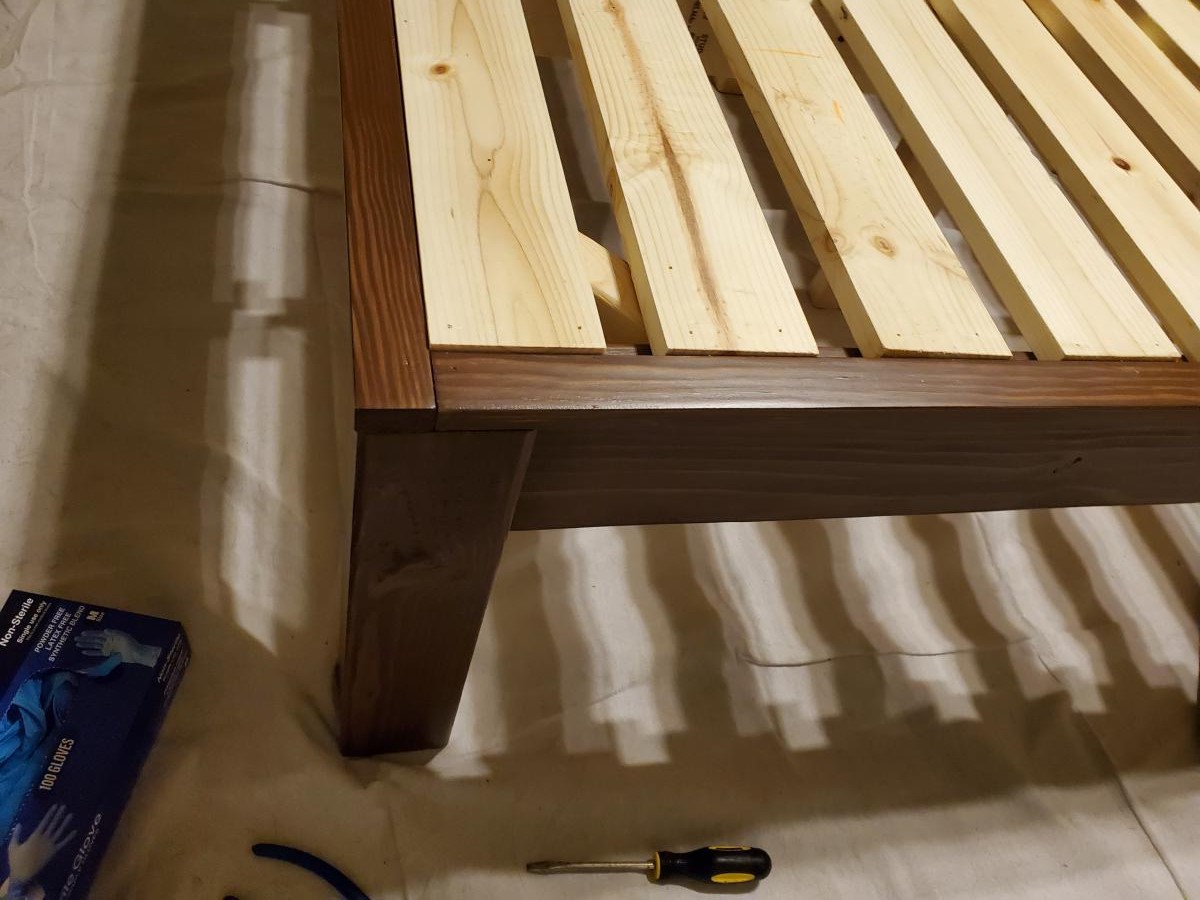
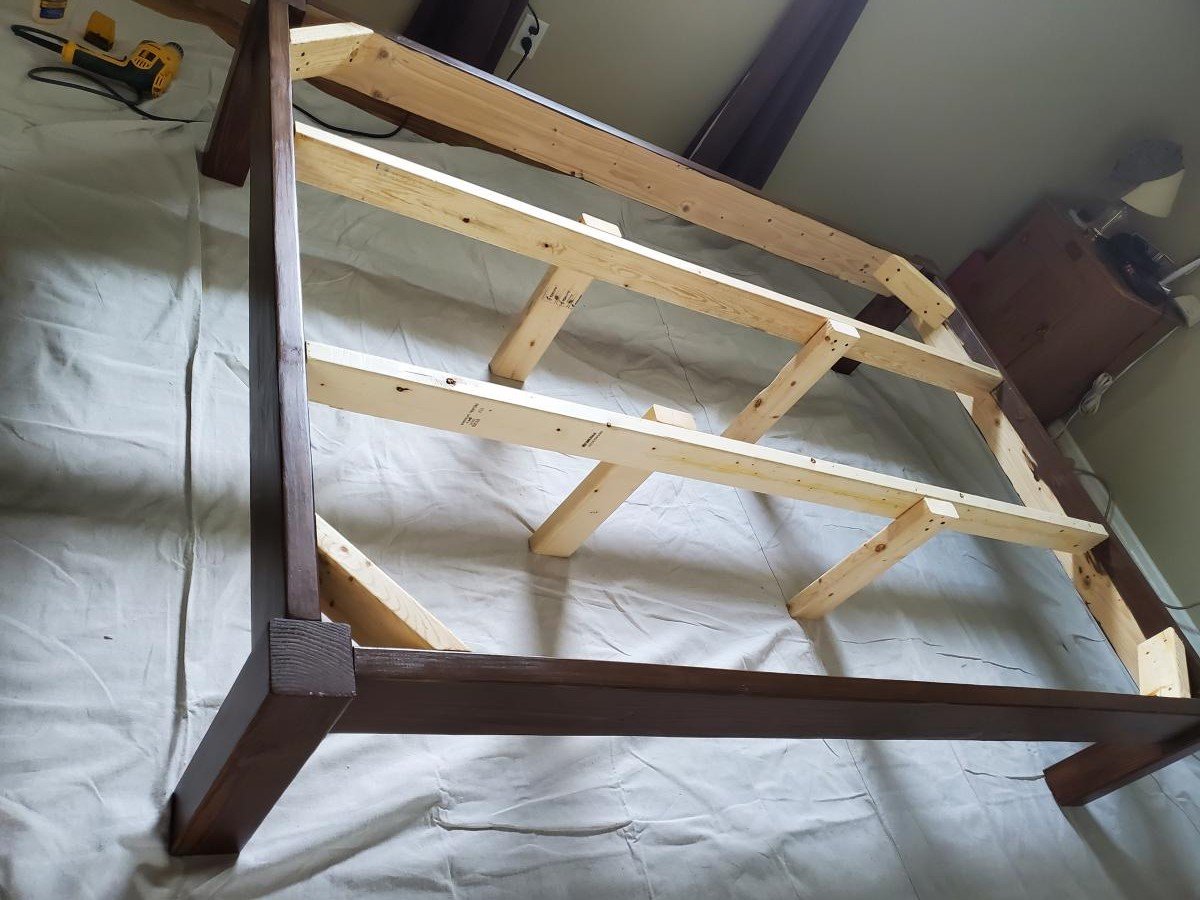
I can't thank you enough for these easy to follow plans. I'm not an experienced builder at all, but was able to build this queen size platform bed. I used Douglas Fir for all visible parts, and finished with minwax semi-transparent stain in walnut. I followed this with three coats of poly-acrylic. No one can believe I was able to build this myself, and frankly I can't either. What a confidence boost!

Estimated Cost
$175
Estimated Time Investment
Weekend Project (10-20 Hours)
Finish Used
Minwax semi-transparent water based wood finish in walnut followed by 3 layers satin poly acrylic.
Recommended Skill Level
Beginner

Comments

Industrial Numbered Crate

Submitted by efmolly on Thu, 04/25/2013 - 22:51

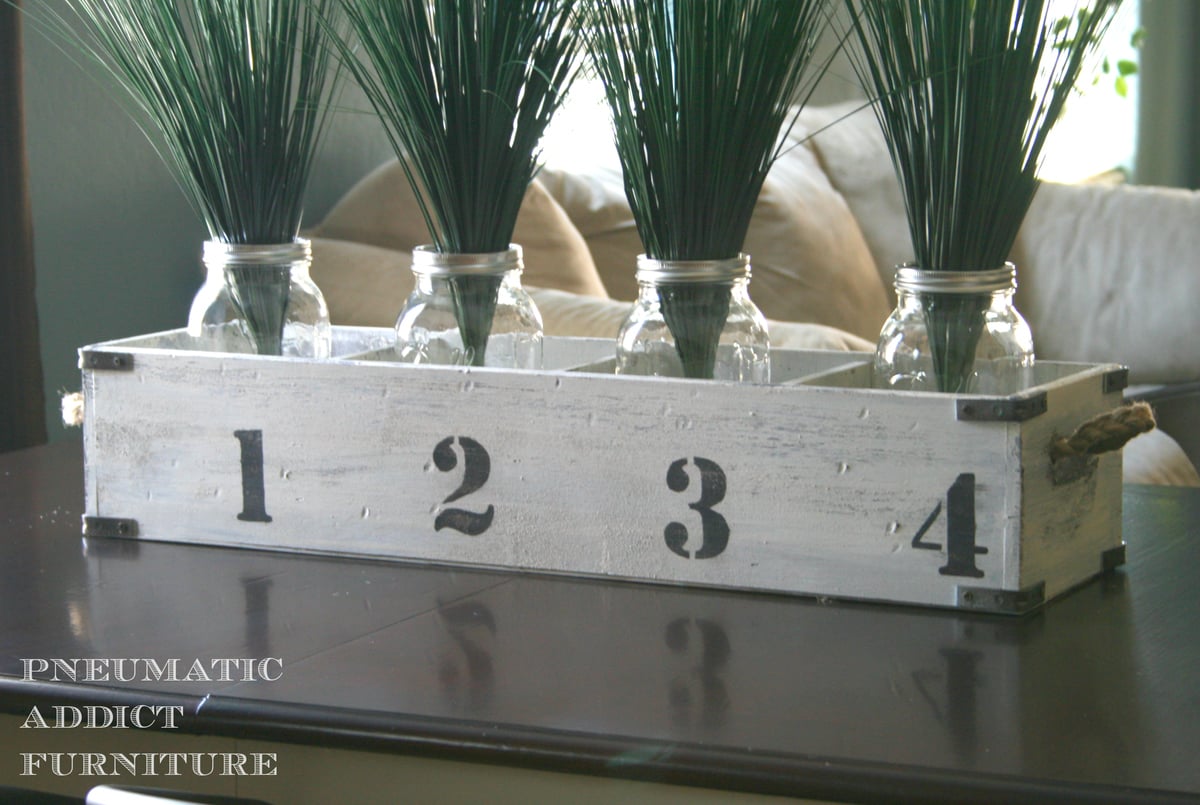
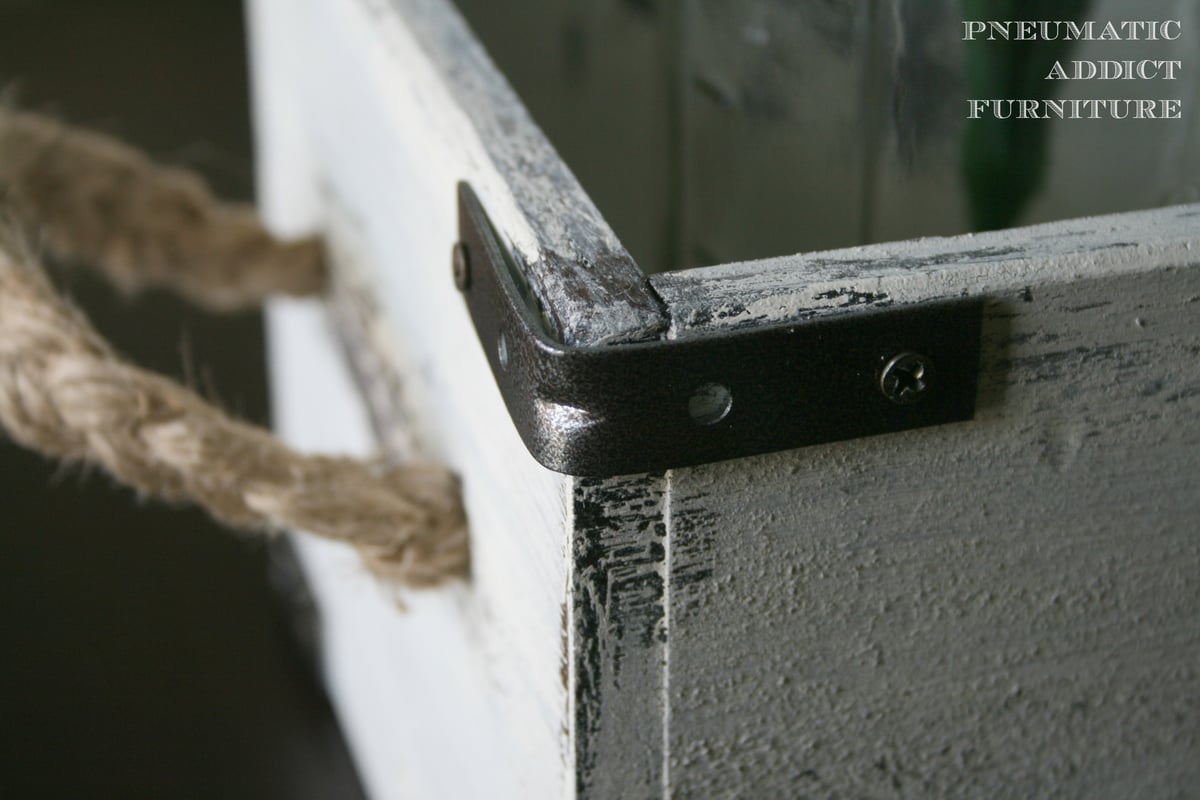
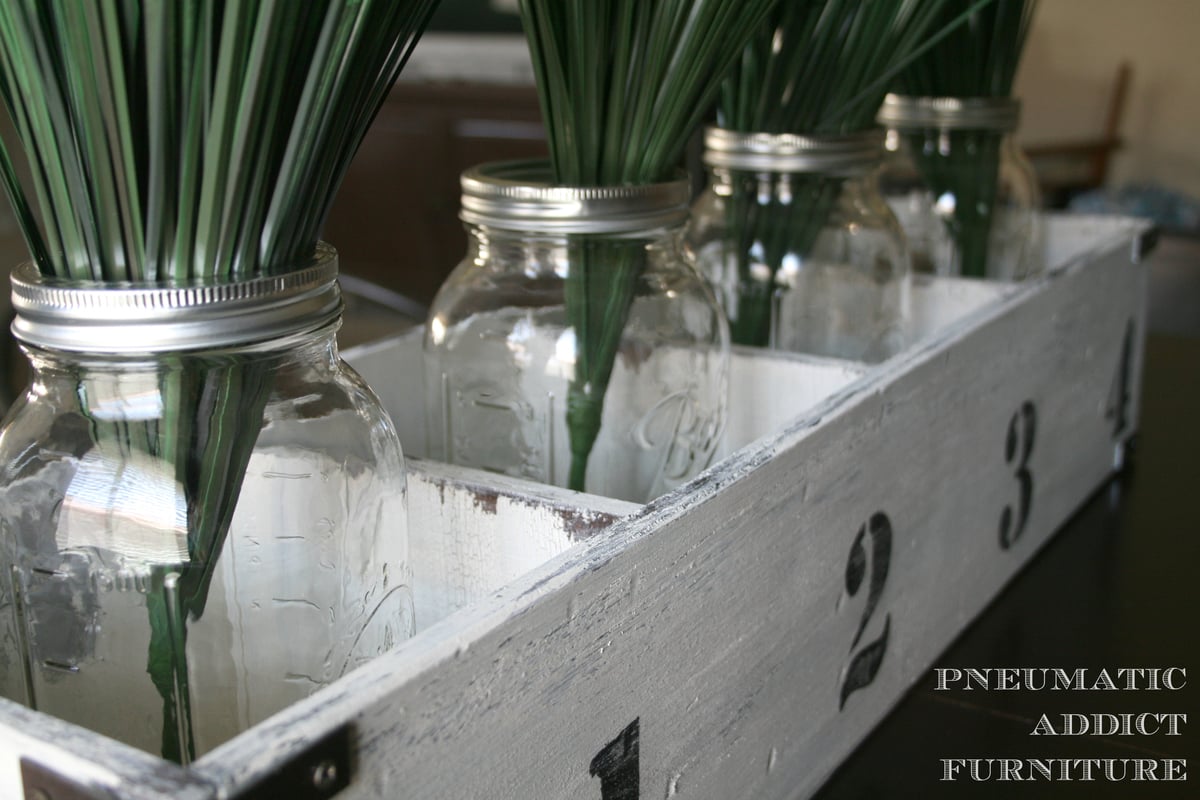
I built this storage crate to fill out space on top of my kitchen table. On my table saw, I ripped 1/2in birch plywood down to 6in widths for the outside frame and 5 3/4in for the dividers. The dividers are 6in wide and so I cut the outside ends to 7in. I attached the whole thing with 1 1/2 finish nails and glue. After finishing, I attached some L-brackets on the corners and drilled 2 holes on either end for handles. For handles, I simply braided 6 strands of jute together and tied knots on the inside of the box. I have more details and photos on my blog link.

Estimated Cost
$20
Estimated Time Investment
An Hour or Two (0-2 Hours)
Finish Used
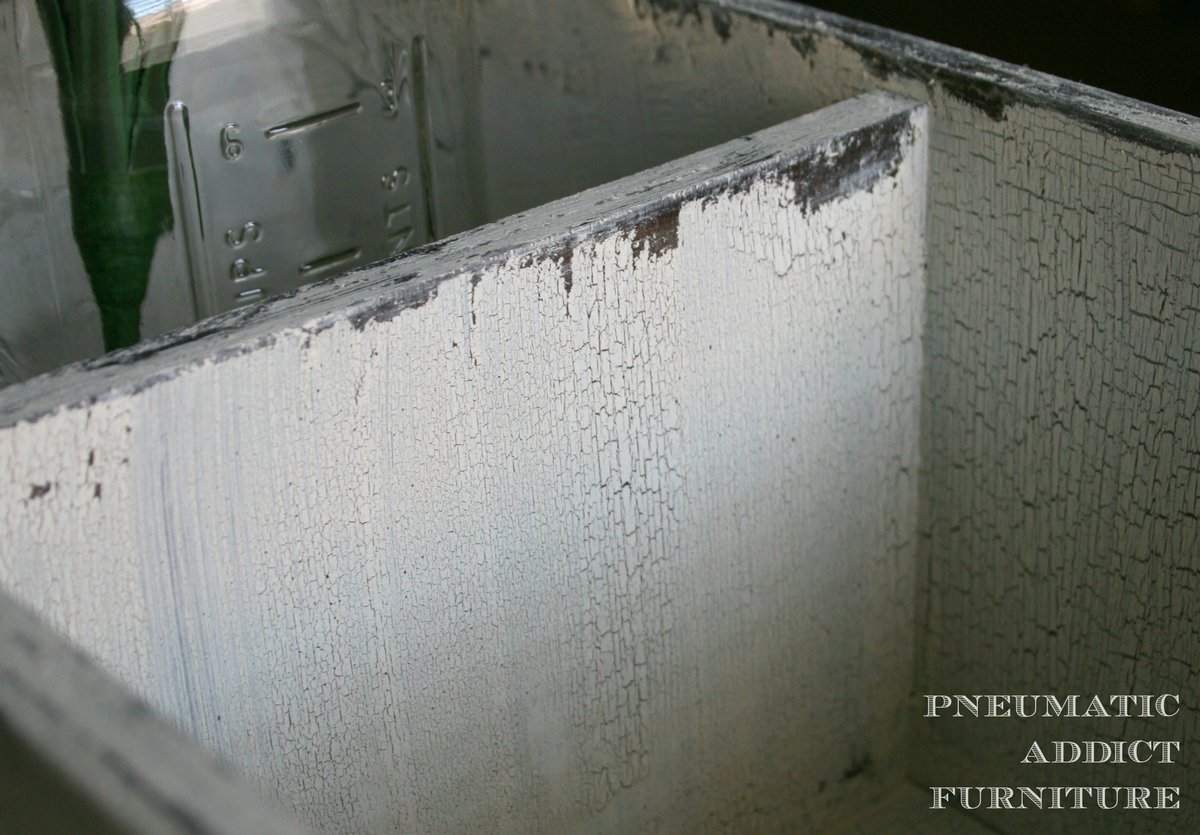
I started by staining the whole thing with Antique Walnut by Minwax. I then used Antique Crackle medium by Old Fashioned Milk Paint, and used some Vaseline for paint resistance on the edges. I then applied one coat of a creamy white, latex paint. After stenciling the numbers, I sealed the entire piece with Crystal Clear by Krylon in matte.
Recommended Skill Level
Beginner

Comments

First Thing I've Built

Submitted by Aninn1199 on Tue, 03/17/2015 - 10:18


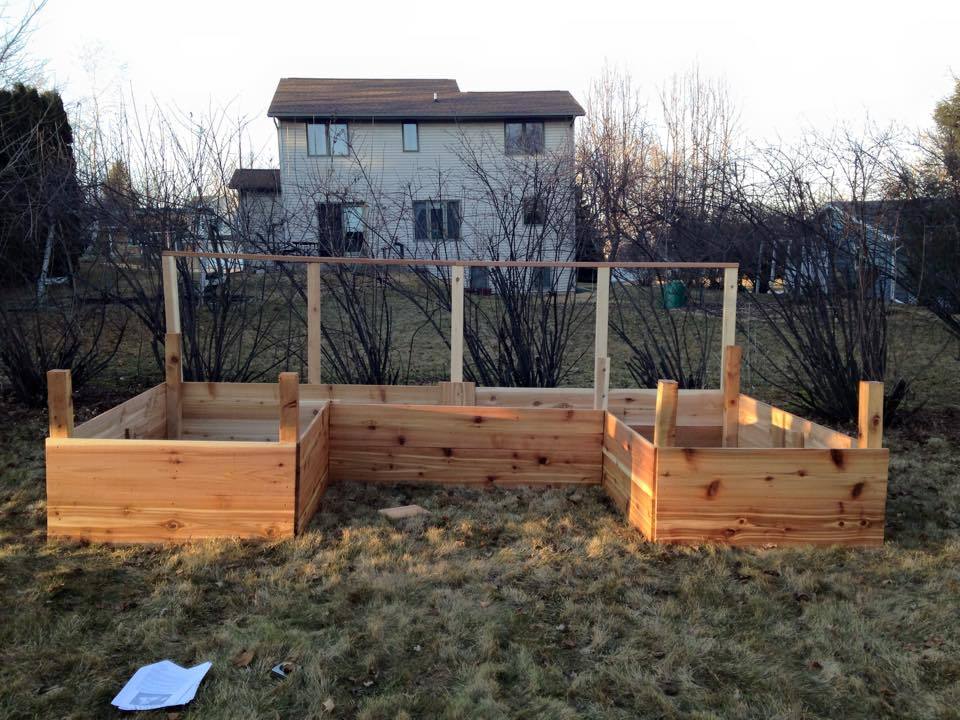
Keep in mind I am a novice at best and this took me a total of 12 hours over 2 days to construct and stain and line.  Filling will be a separate project all together!

I opted to remove the top row of lumber all around to have something to attach bird netting to to keep the critters out and make it easier to reach in, also a cost consideration. The posts are still the recommended 3 ft I also changed to 12ft X1in boards instead of 12ft x2in also in the interest of cost. 


Built from Plan(s)
Estimated Cost
$600
Estimated Time Investment
Weekend Project (10-20 Hours)
Finish Used
Used Clear Deck Stain from Thompson's, deck nails. Added a clear plastic lining (not shown) to bottom 1/2 of inside of bed.
Recommended Skill Level
Starter Project

Comments

Half furniture/half art farmhouse table

Submitted by Anonymous (not verified) on Wed, 06/14/2017 - 12:29

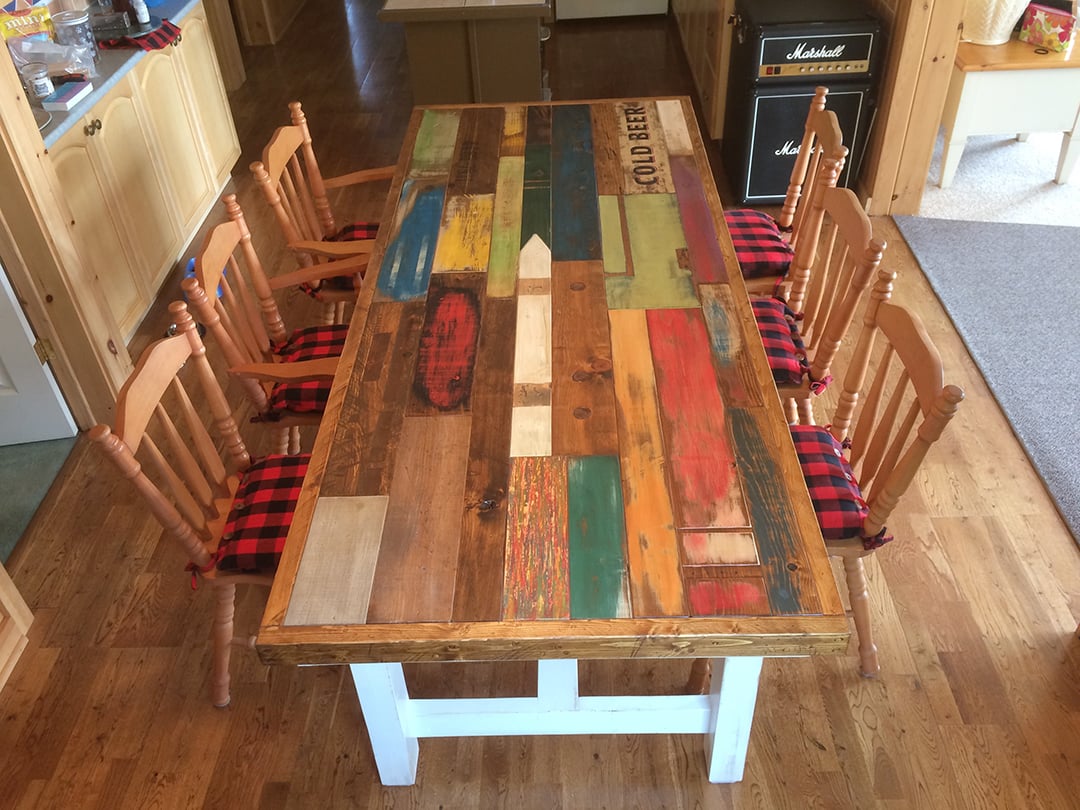
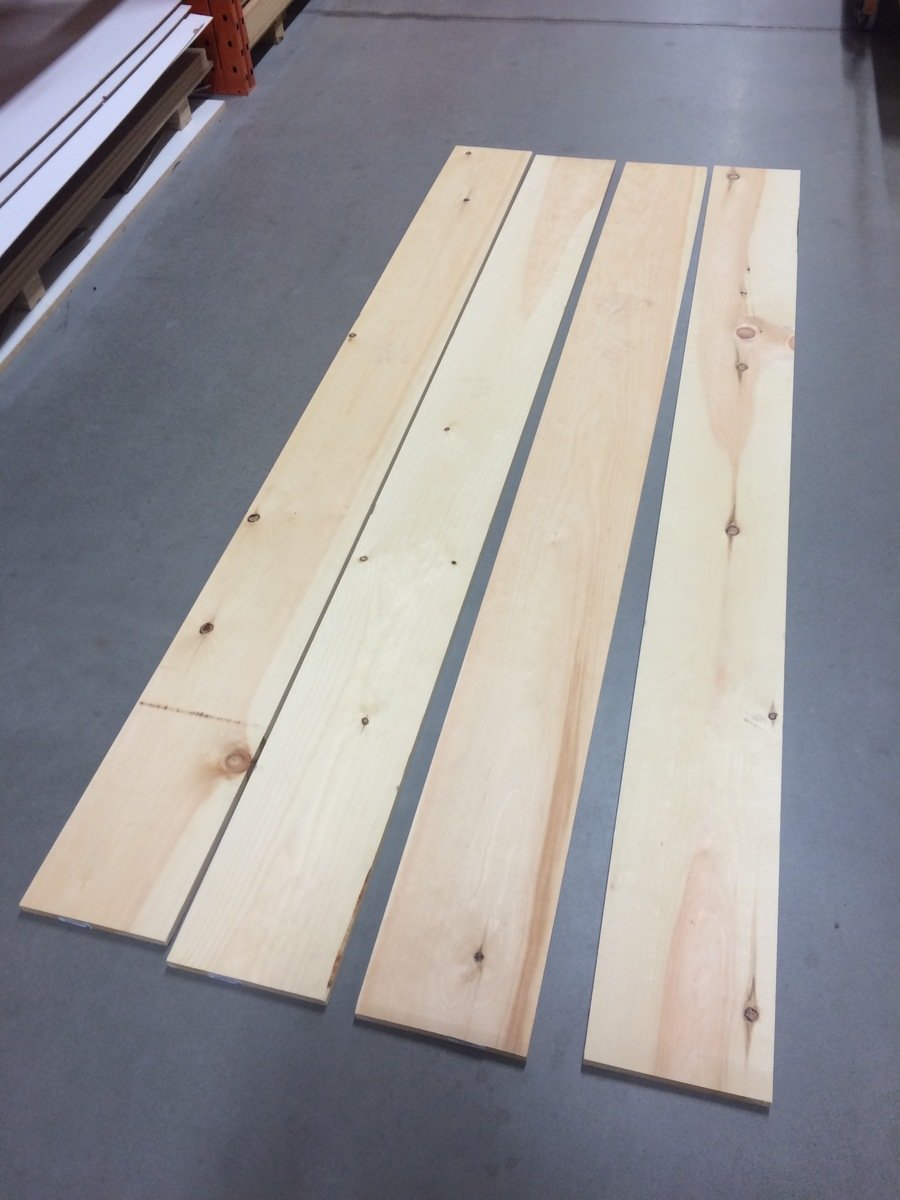
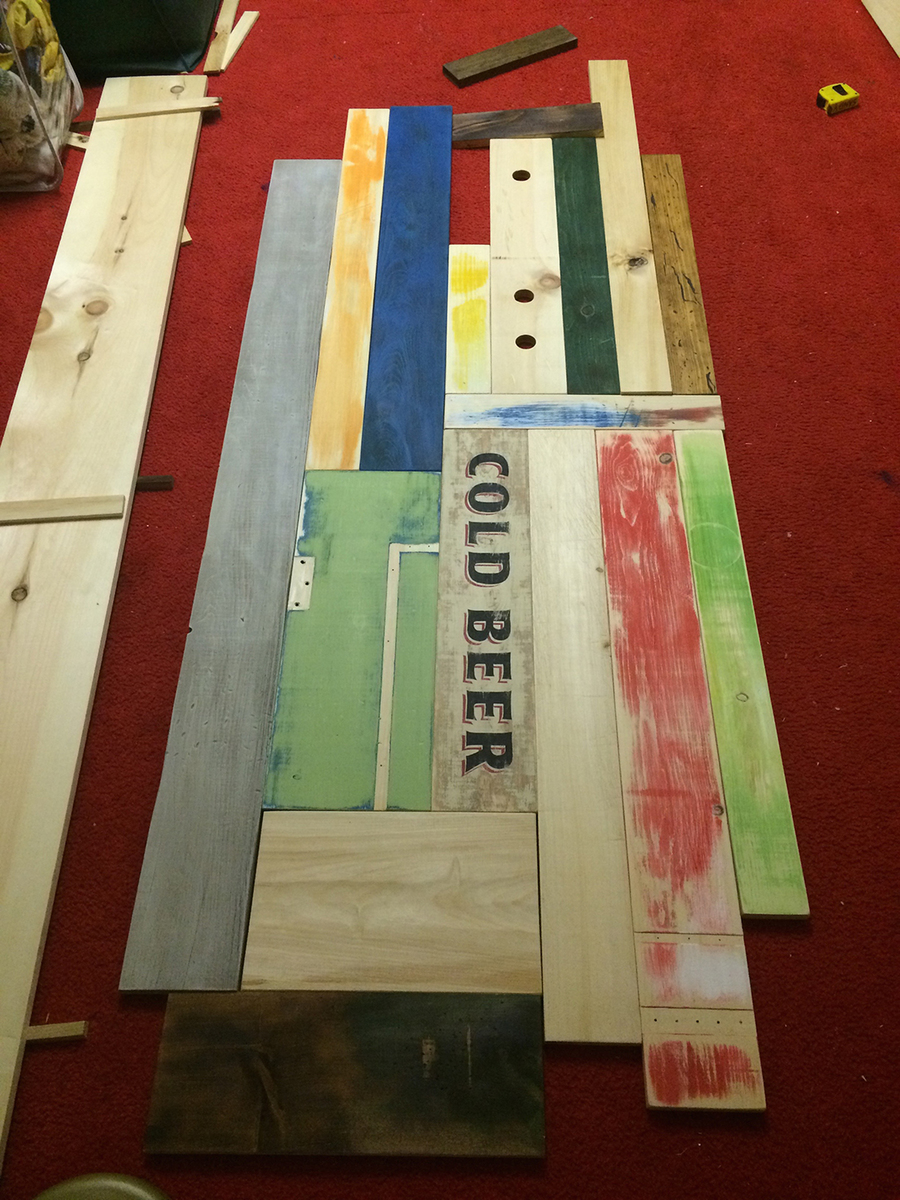
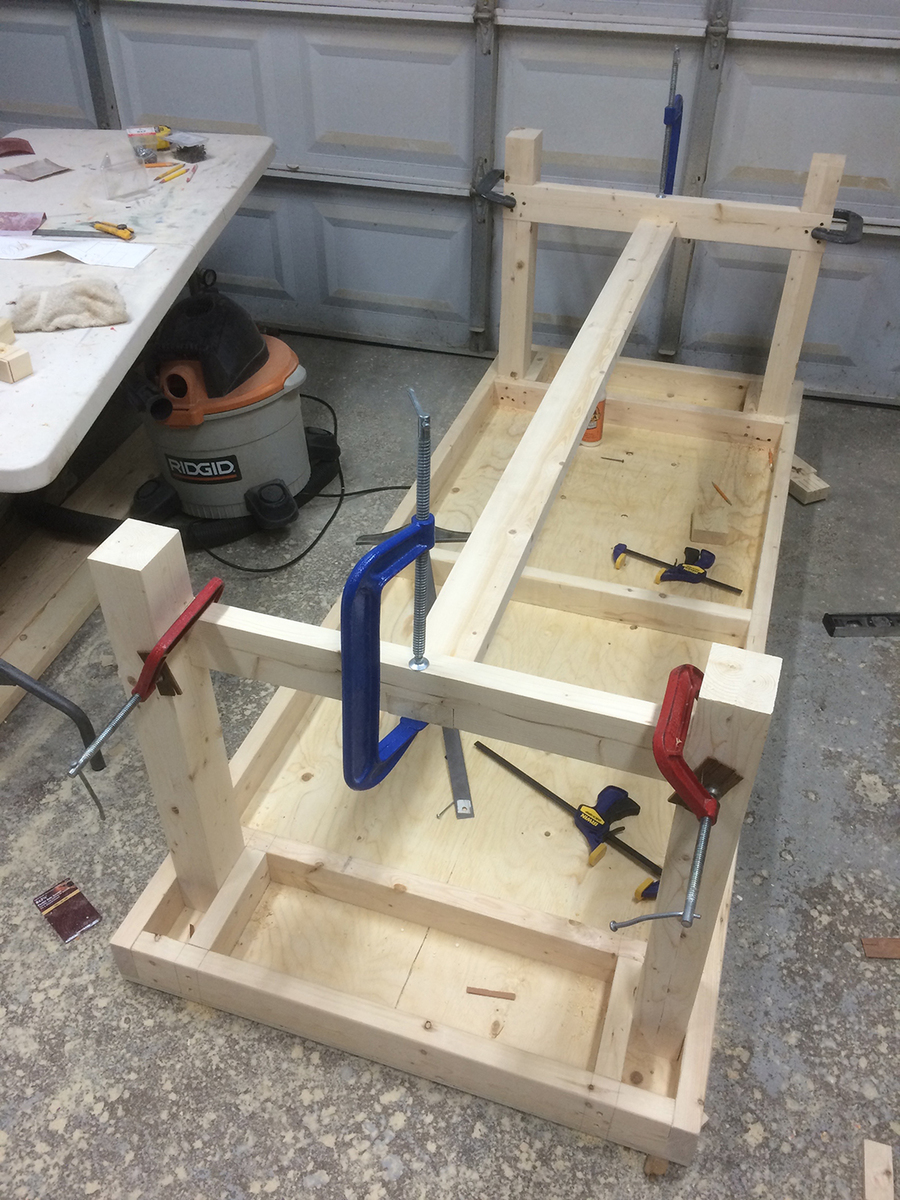
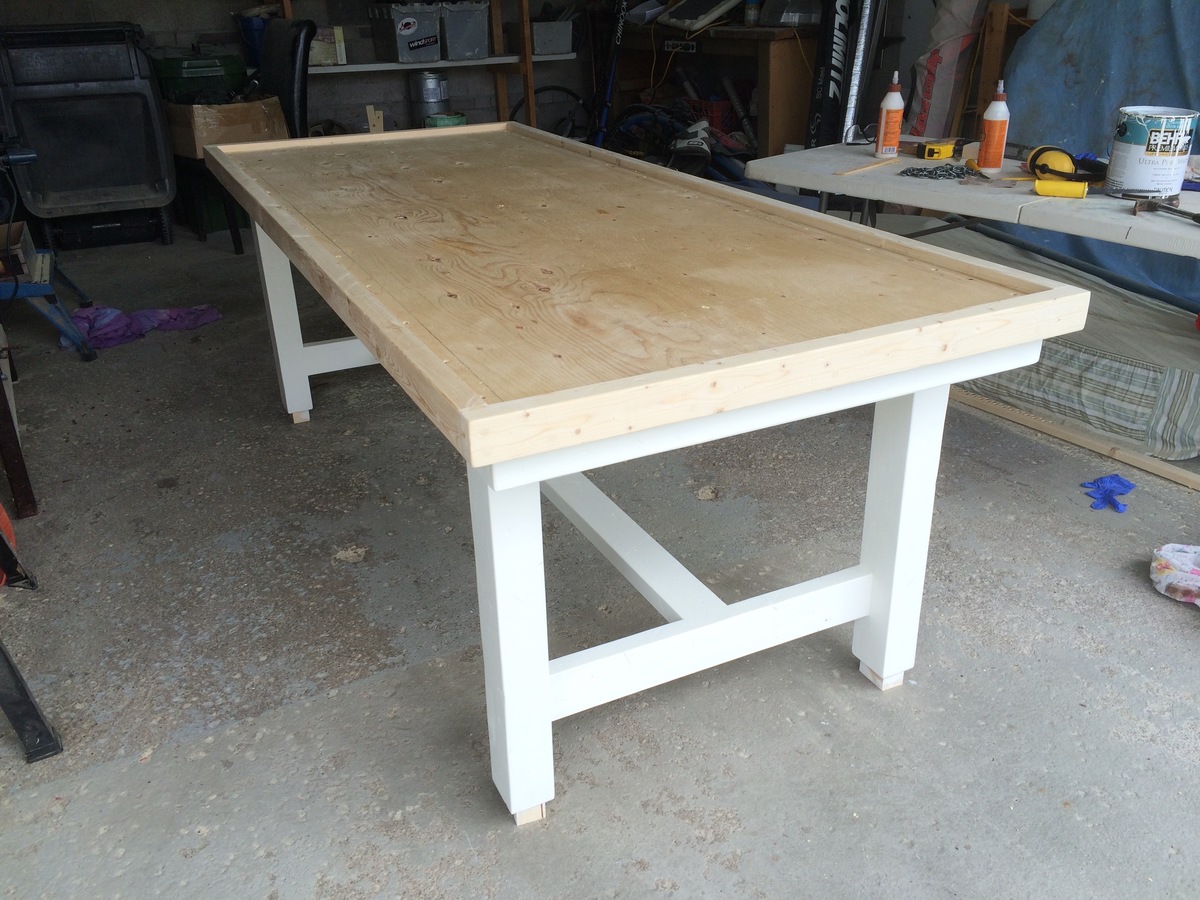
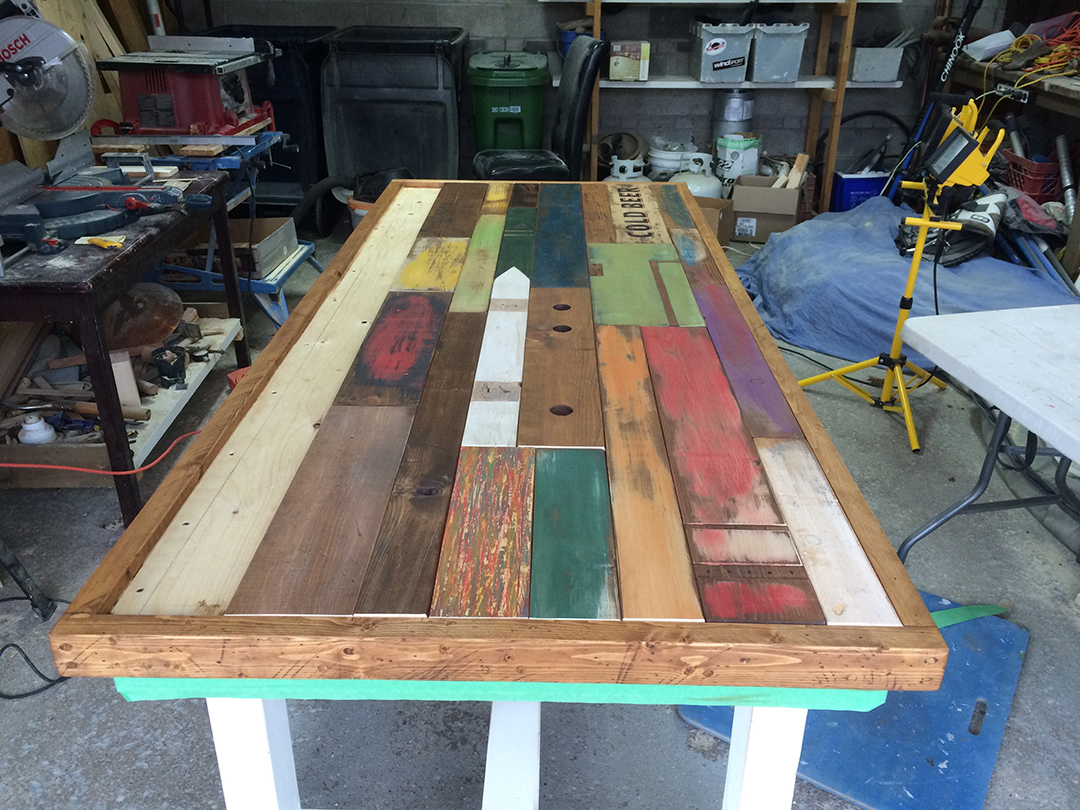
For the most part I followed the plans for the legs and base structure as suggested. In our area the 2x4s are sold with rounded corners. To avoid a very obvious seam on the legs, I used 2x6s which I screwed and glued together then cut back to 3x4 (1.5x2) x 4 to make the legs and cross beams a little beefier with little or no seem on the legs. As I decided to build the top from reclaimed wood I framed in the top with 2x4 ripped down to approx.. 2x3 with a sheet of plywood to support top boards. As I don’t have a planner to level any reclaimed top boards I could find, I decided to make my own faux reclaimed boards out of ¾’ x 9’ – 8’ planks. I distress the wood using a chain, rocks my table saw, hammer, nails, blowtorch and bow saw. In hindsight, I wish I had distressed a little more vigorously but everyday use will augment it over time. I continued to paint, distress and sand on the fly, using paints I had left from previous projects. In some cases, I mixed paints to get additional colour varierty. All boards were stained at the to colour bare areas which as a bonus added a slight yellow hue making the paint look older. I did some scraping and blowtorching of semi-dry paint and stain to get a variety of looks and textures. I dry fit the boards and reorganized the puzzle pieces to get a random but organized look – controlled chaos. Once I was close I glued and screwed the board down clamping as I went to keep the boards tight. This paid-off later as the tighter seams allow less food to fall in-between. I cut down the last row from over sized pieces to get a tight fit in the last row. I finished with 11 coats of poly to toughen up the pine and again to seal the seams from food. My wife suggested painting the legs off-white as our cottage already is max-ed out on natural wood. We will follow by painting the existing chairs the same off-white and adding a little distress for age. Cost was approx. $175 to 200. The plywood alone was $45, paint I had. Time was easily 50 hours as the artistic on the top, time although fun, was time consuming.

Anna’s website is great I have had many compliments on my table. I have pointed many people to the site for direction on their own projects. Thanks for the great plans.

Sandy

Estimated Cost
$175-200
Estimated Time Investment
Week Long Project (20 Hours or More)
Finish Used
Latex paint
Varathane Premium woodstain – Tuscan
Minwax® Polycrylic® Protective Finish – Satin
Recommended Skill Level
Intermediate

Face frame cabinets with shaker doors and metabox drawers, swedish drying cabinet

Submitted by sylvialh on Fri, 08/27/2021 - 05:37

My first projec twith drawers! the metabox drawers were definetly easy to make and use and work beautifully.

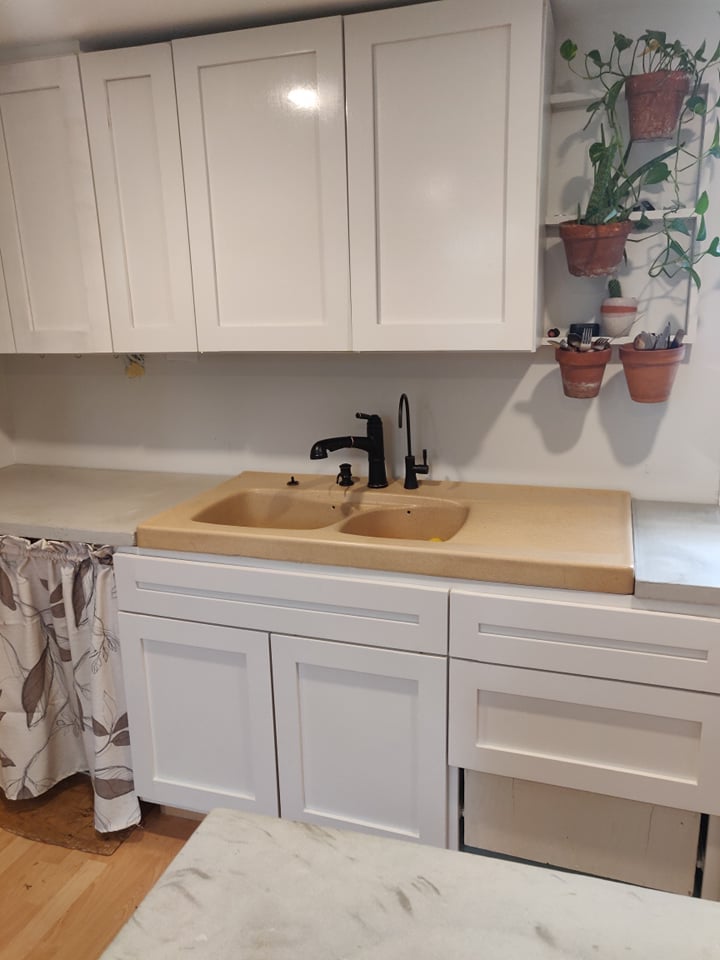
I made the carcase using plywood and did 1x2 poplar for the face frame. Shaker doors are 1x3 poplar and sureply underlayment for the inserts.

cabinet doors were finished using BIN primer (2 coats with sanding) and then Benjamin Moore Advance cabinet paint in High gloss silver satin. Interiors were finished using leftover / mistints, and I still need to do some filling and sanding on the insides of the doors (I have to take them down to do a final coat but am waiting until I have finished the other set of doors)

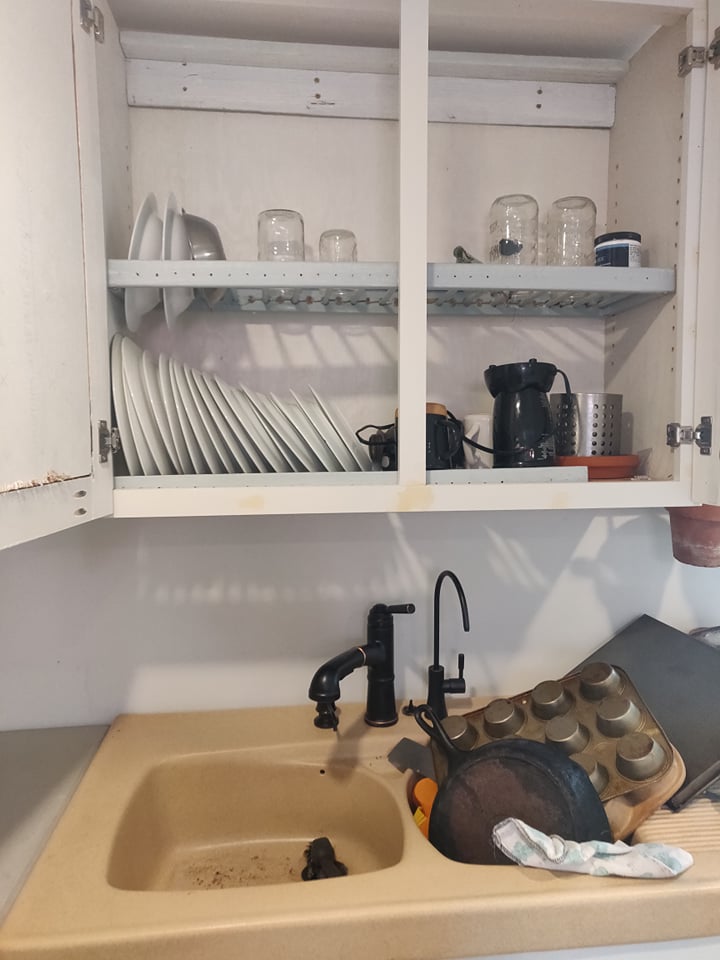
the upper cabinet is a dish drying cupboard so I omitted the bottom plywood piece and instead used 1x3 on the front and back so the bottom would be open. then I made the shelves using 1x2 and dowel (paint the dowel first before cutting!!). This thing is a dream to do dishes in!

Used Kreg pocket screws, Kreg jig for the euro hinges (1 1/4 and 1/3" overlay), and also a kreg jig for the shelf pins. Metabox hinges for the drawers. Still trying to decide on handle hardware so I'm using painters tape at the moment.

Countertops are concrete using Rapidset mortar mix and the michael builds method (linked below).

Planters are just a small poplar shelf using leftover 1x3 with metal terra cotta pot hooks attached to the front. I lined the pots at the bottom with plastic yogourt tubs with holes in the bottom so the cutlery doesn't chip the pots. Those also drain onto the drain rack below. everything is painted the same colour although I used high gloss for the door fronts, so the shelvings behind the pots matches the wall perfectly and sort of dissappears into the walls to highlight the terracotta.

sink is a "new" vintage ceramic sink that I found on FB marketplace for 50$!!! had never been installed and didn't even have the holes bored out. unfortunately the drain holes were very deep and requied some macgyvering but luckily my husband had a great attitude about it and managed to make it work with a lot of googling for odd sized drain bins. Props to husband for doing all the plumbing on this bad boy, including moving over our RO system from the other side of the kitchen and installing a new hose bib under the sink for the other side of the house (why not?!).

I learned so much from this project! Including to store your poplar inside and on the flat surface or it will warp and your doors will not be flush. luckily it only affected one door but it is still super annoying.

thank you ana for everythign! loved the comment "Get on board with these euro hinges!" you are so right they are so forgiving!!

Comments

Ana White Admin

Fri, 08/27/2021 - 08:31

Love the integrated flower pots and the dish rack is so cool! Thank you for sharing, I can tell a lot of work went into it!

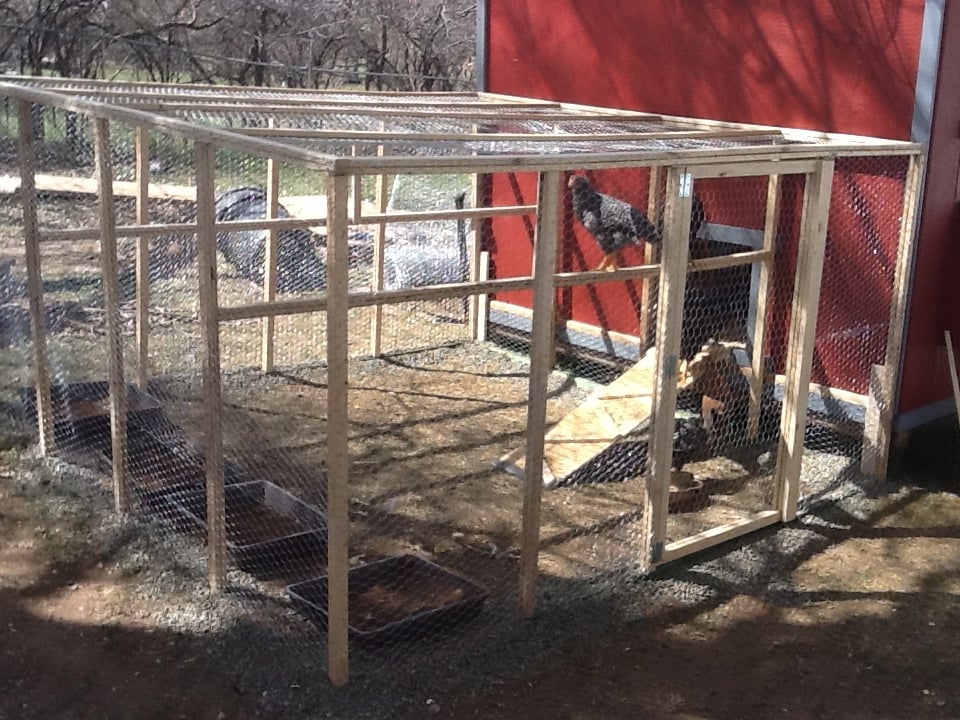
Chicken Shed

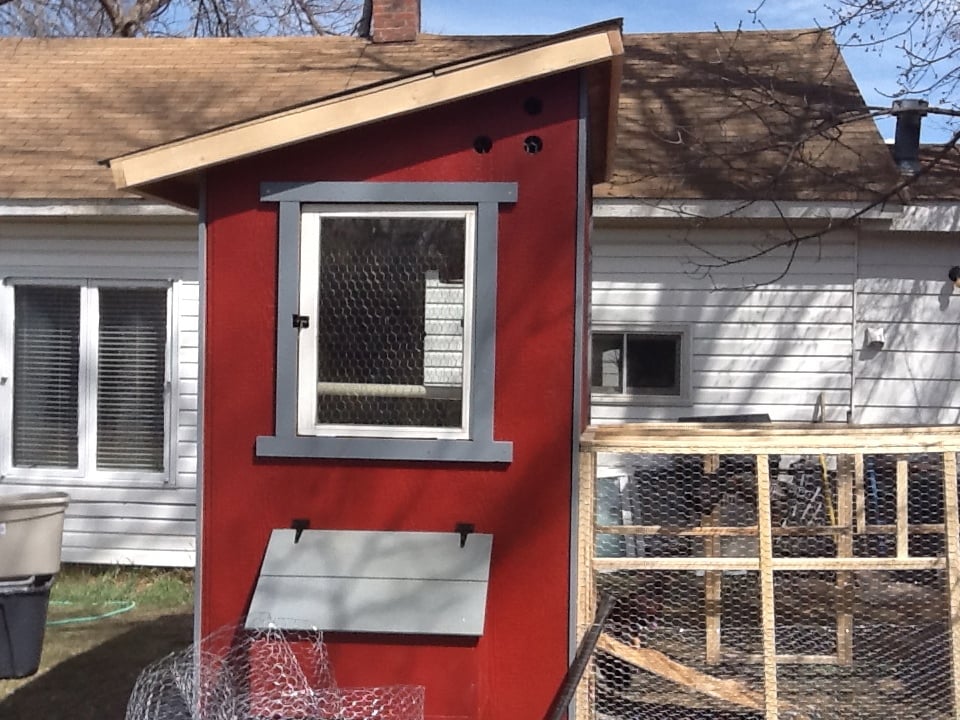
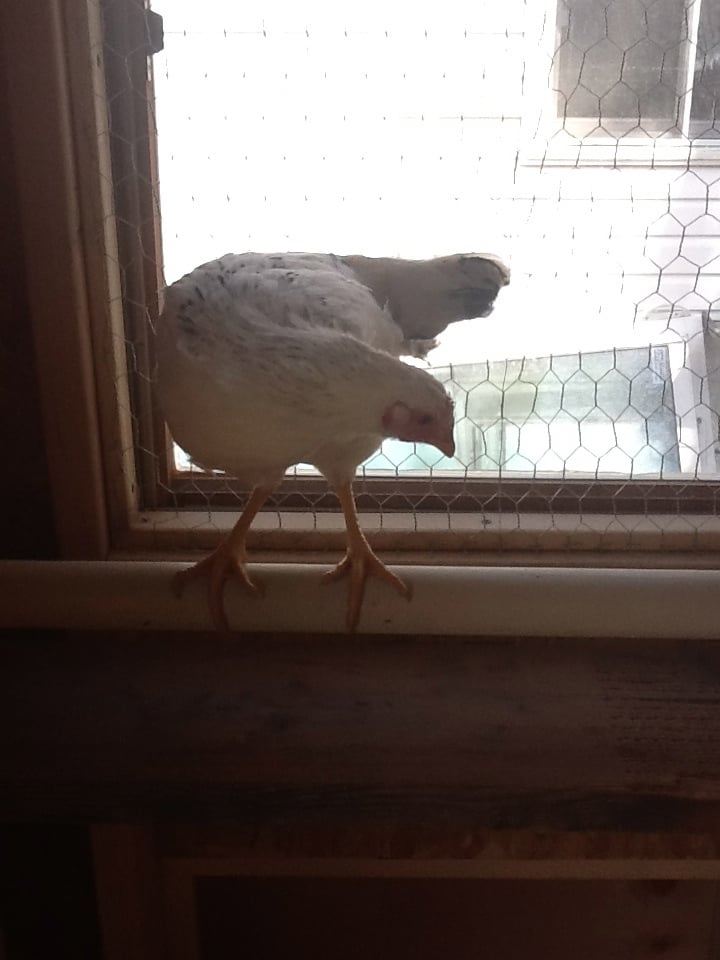
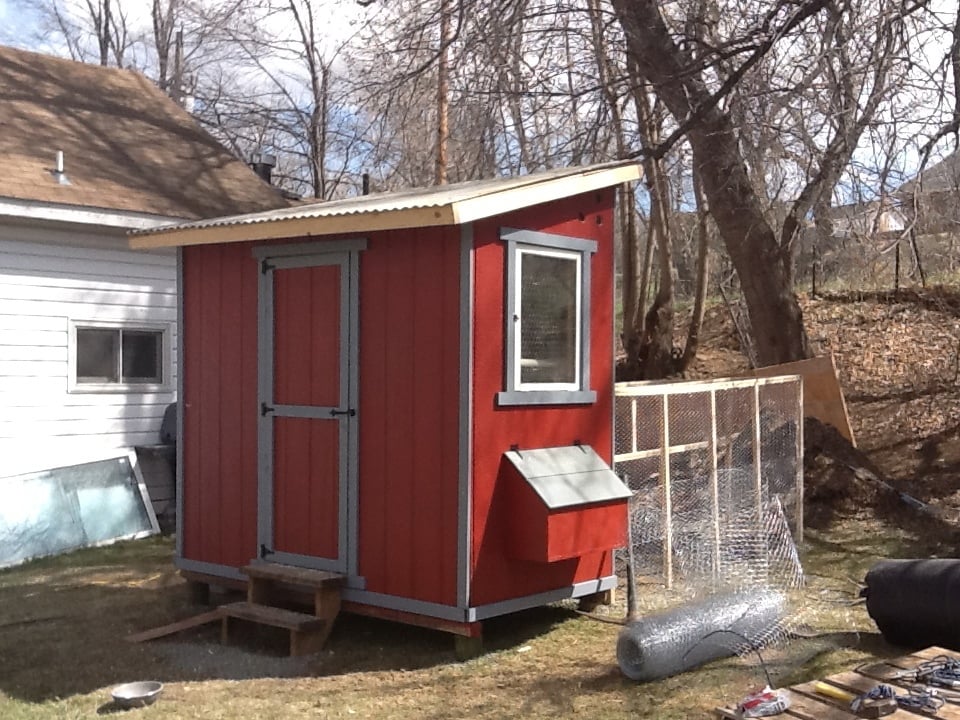
I used the chicken shed plans to create the coop, with a modification to include two nesting boxes, one on each side.

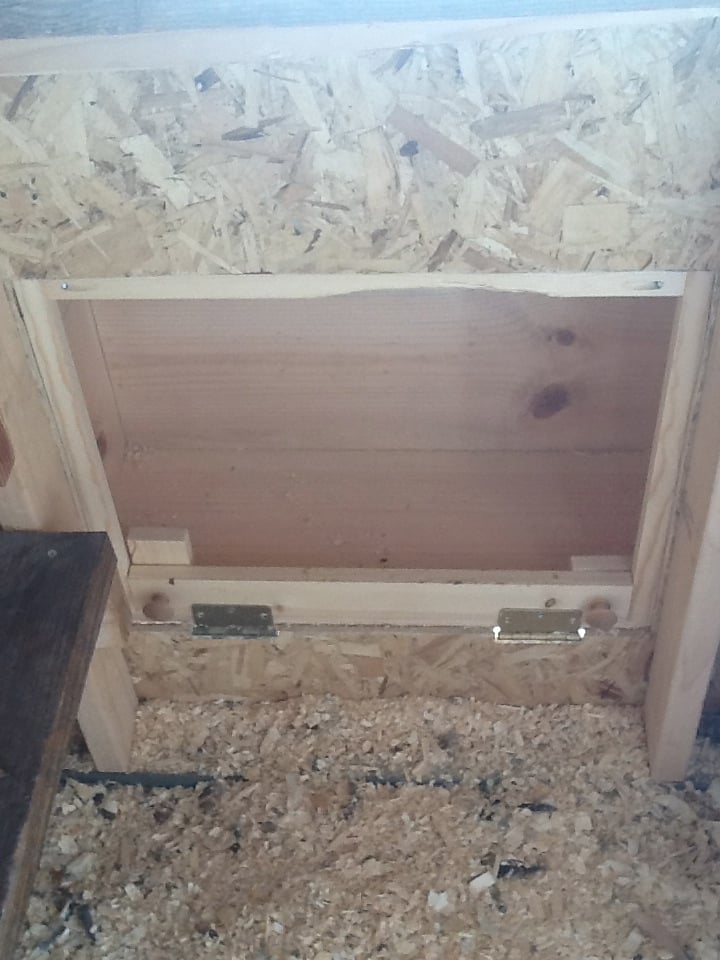
I slightly modified the nesting boxes, using a U shaped frame and added hinges for the front to swing down and the pine shavings to be swept out.

For the siding, we found it easiest to do the tack and trace method. We tacked each full sheet of siding in place and traced the cuts for the window, roof line, doors, and nesting boxes. We then took them down, darkened the lines, cut 'em, and re-hung them. It made it a million times easier, IMHO.

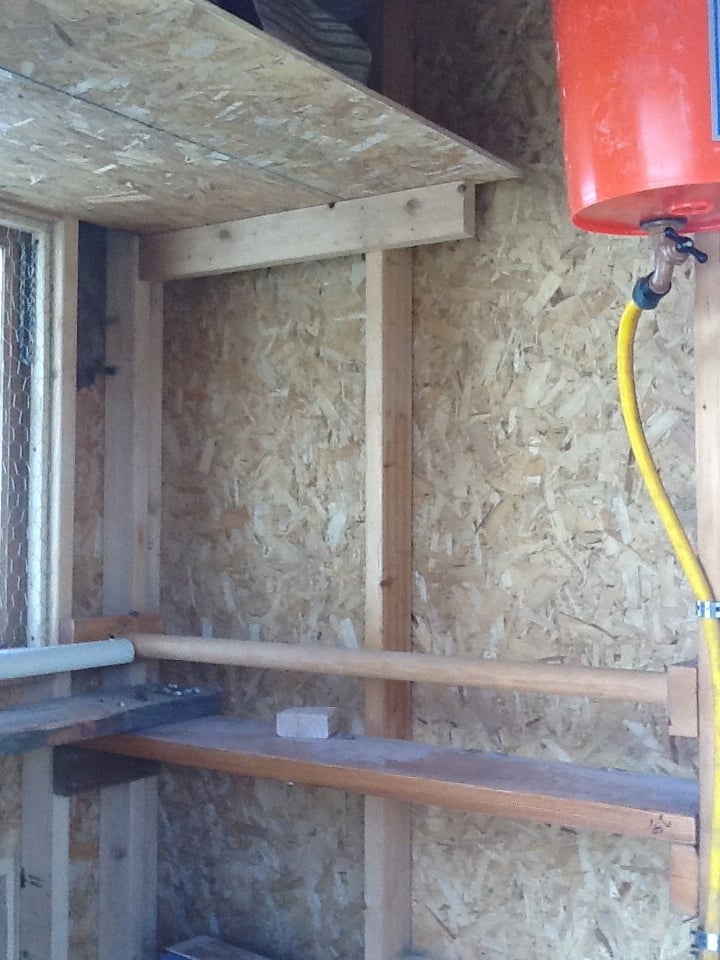
For the inside, I designed several roosting bars with poop platforms. The water is a gravity fed chicken nipple/pvc setup, which I found online.

The food stations, also gravity fed, are (new) sewer pipes with wye connectors.

I used the roof and siding scraps to make shelves for storage inside.

By sourcing reclaimed materials, I built the coop, run, interior, feeding stations (5), and waterer for $550. I only bought 27 pieces of new lumber (15 2x4's and the 12 8 foot long 1x3's)

Even the paint was free! (We have a drop and swap at the haz mat recycling center run by the county. We have gotten 100's of dollars of free paint, stain, and varnish there. I even used a can of free spar varnish to seal the inside of the coop)

There are still a few pieces of trim to be cut and painted, but the girls are inside eating, drinking, and merry!

I did find that at the Home Depot, if you buy chicken wire, it costs way more then 150 feet x 36 inch "stucco netting". The stucco netting was $54 for 150 feet, and chicken wire is $76 for the same amount. It is the exact same wire.

I built the run out of resourced 1x2 furring strips. They were a pain to work with, very prone to breaking when not supported, but with the entire run costing $25 for wood and $54 (with half a roll left over) for chicken wire, I can handle some extra time and effort.

If anyone has any questions for me, feel free to contact me! I'd love to help!

Built from Plan(s)
Estimated Cost
550
Estimated Time Investment
Week Long Project (20 Hours or More)
Finish Used
Free paint !

I know several counties in CO have drop and swap places. Maybe your county does, too!

We got three cans of exterior rust colored paint and mixed them all together to make one color. This only works if the colors are pretty similar. It prevents one side from looking different then another.

The trim was a full gallon of blue-grey. Free and never even used.
Recommended Skill Level
Intermediate

Comments

xman1x

Mon, 02/06/2023 - 08:12

Hi! Do you still have this coop? It's been about a decade now and wondering how it has held up, if you have any suggestions, or additional pictures of the inside. Thank you!

Outdoor Sectional

Submitted by tedgray86 on Wed, 03/18/2015 - 21:58

Made from only 2x4's!  Much much cheaper than buying an outdoor sectional!

Estimated Time Investment
Day Project (6-9 Hours)
Recommended Skill Level
Intermediate

Comments

Weekend Project King Bed

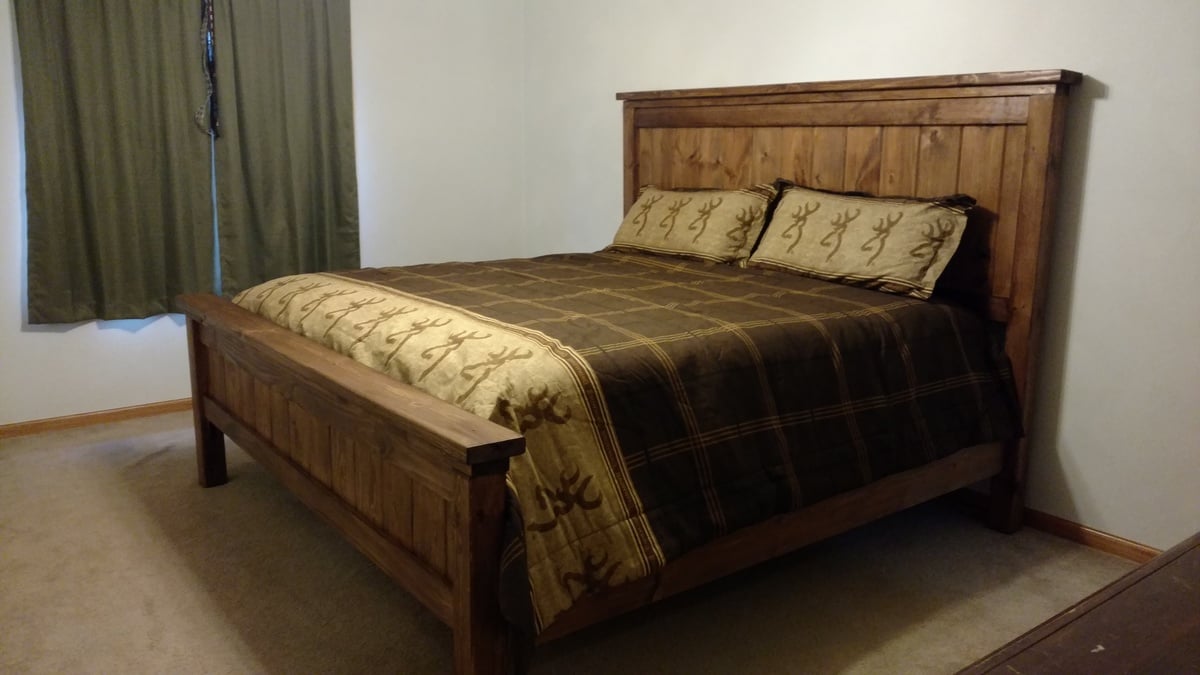
Submitted by Anonymous (not verified) on Sun, 06/18/2017 - 10:26

First ever wood project. Under $200 in materials! Less than a weekend of work (for two people). Beautiful results!!!!! Built from plans on Ana-White.com The only change we made to the build was adding some additional support legs in the middle of the bed. 

Built from Plan(s)
Estimated Cost
$200
Estimated Time Investment
Weekend Project (10-20 Hours)
Finish Used
Satin Medium Walnut
Minwax water based poly stain combo
Recommended Skill Level
Beginner

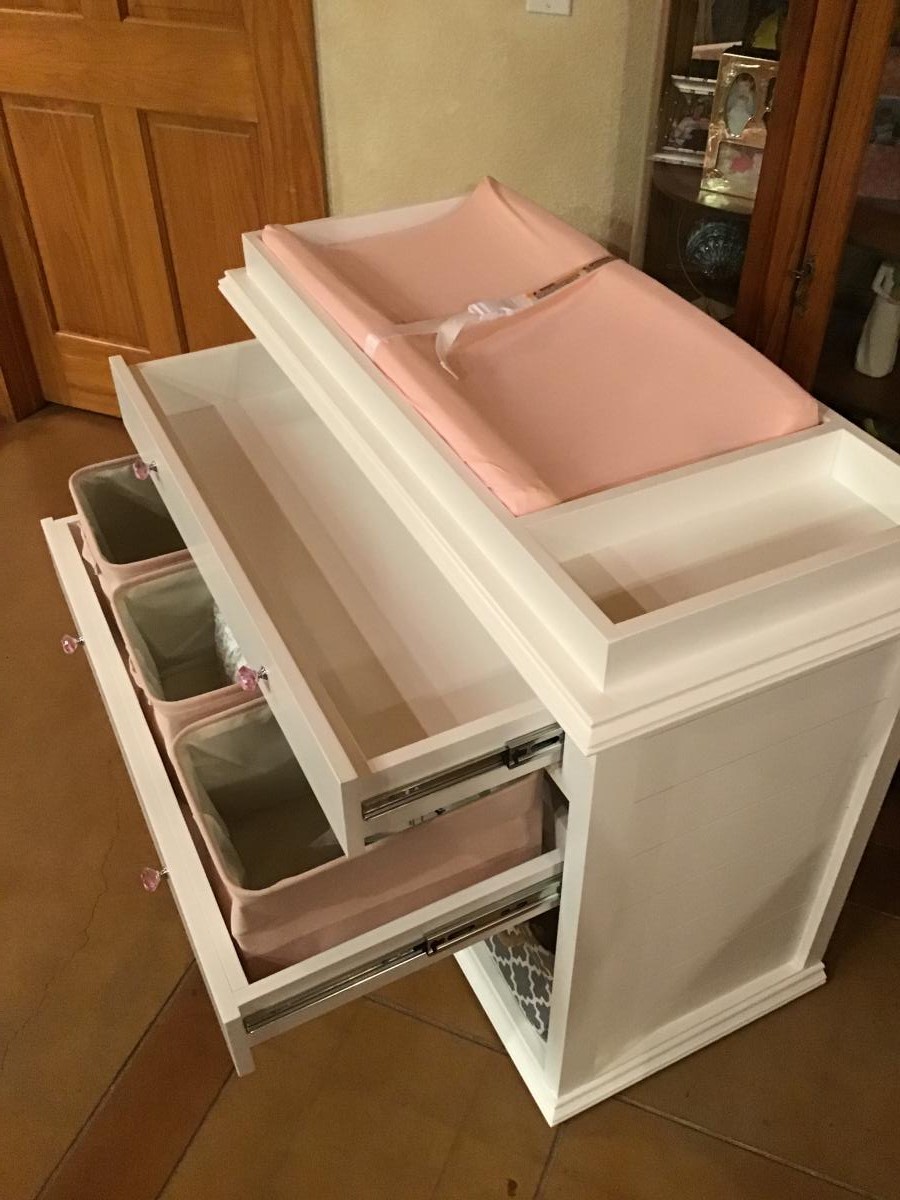
Baby Changing Table for First Granddaughter

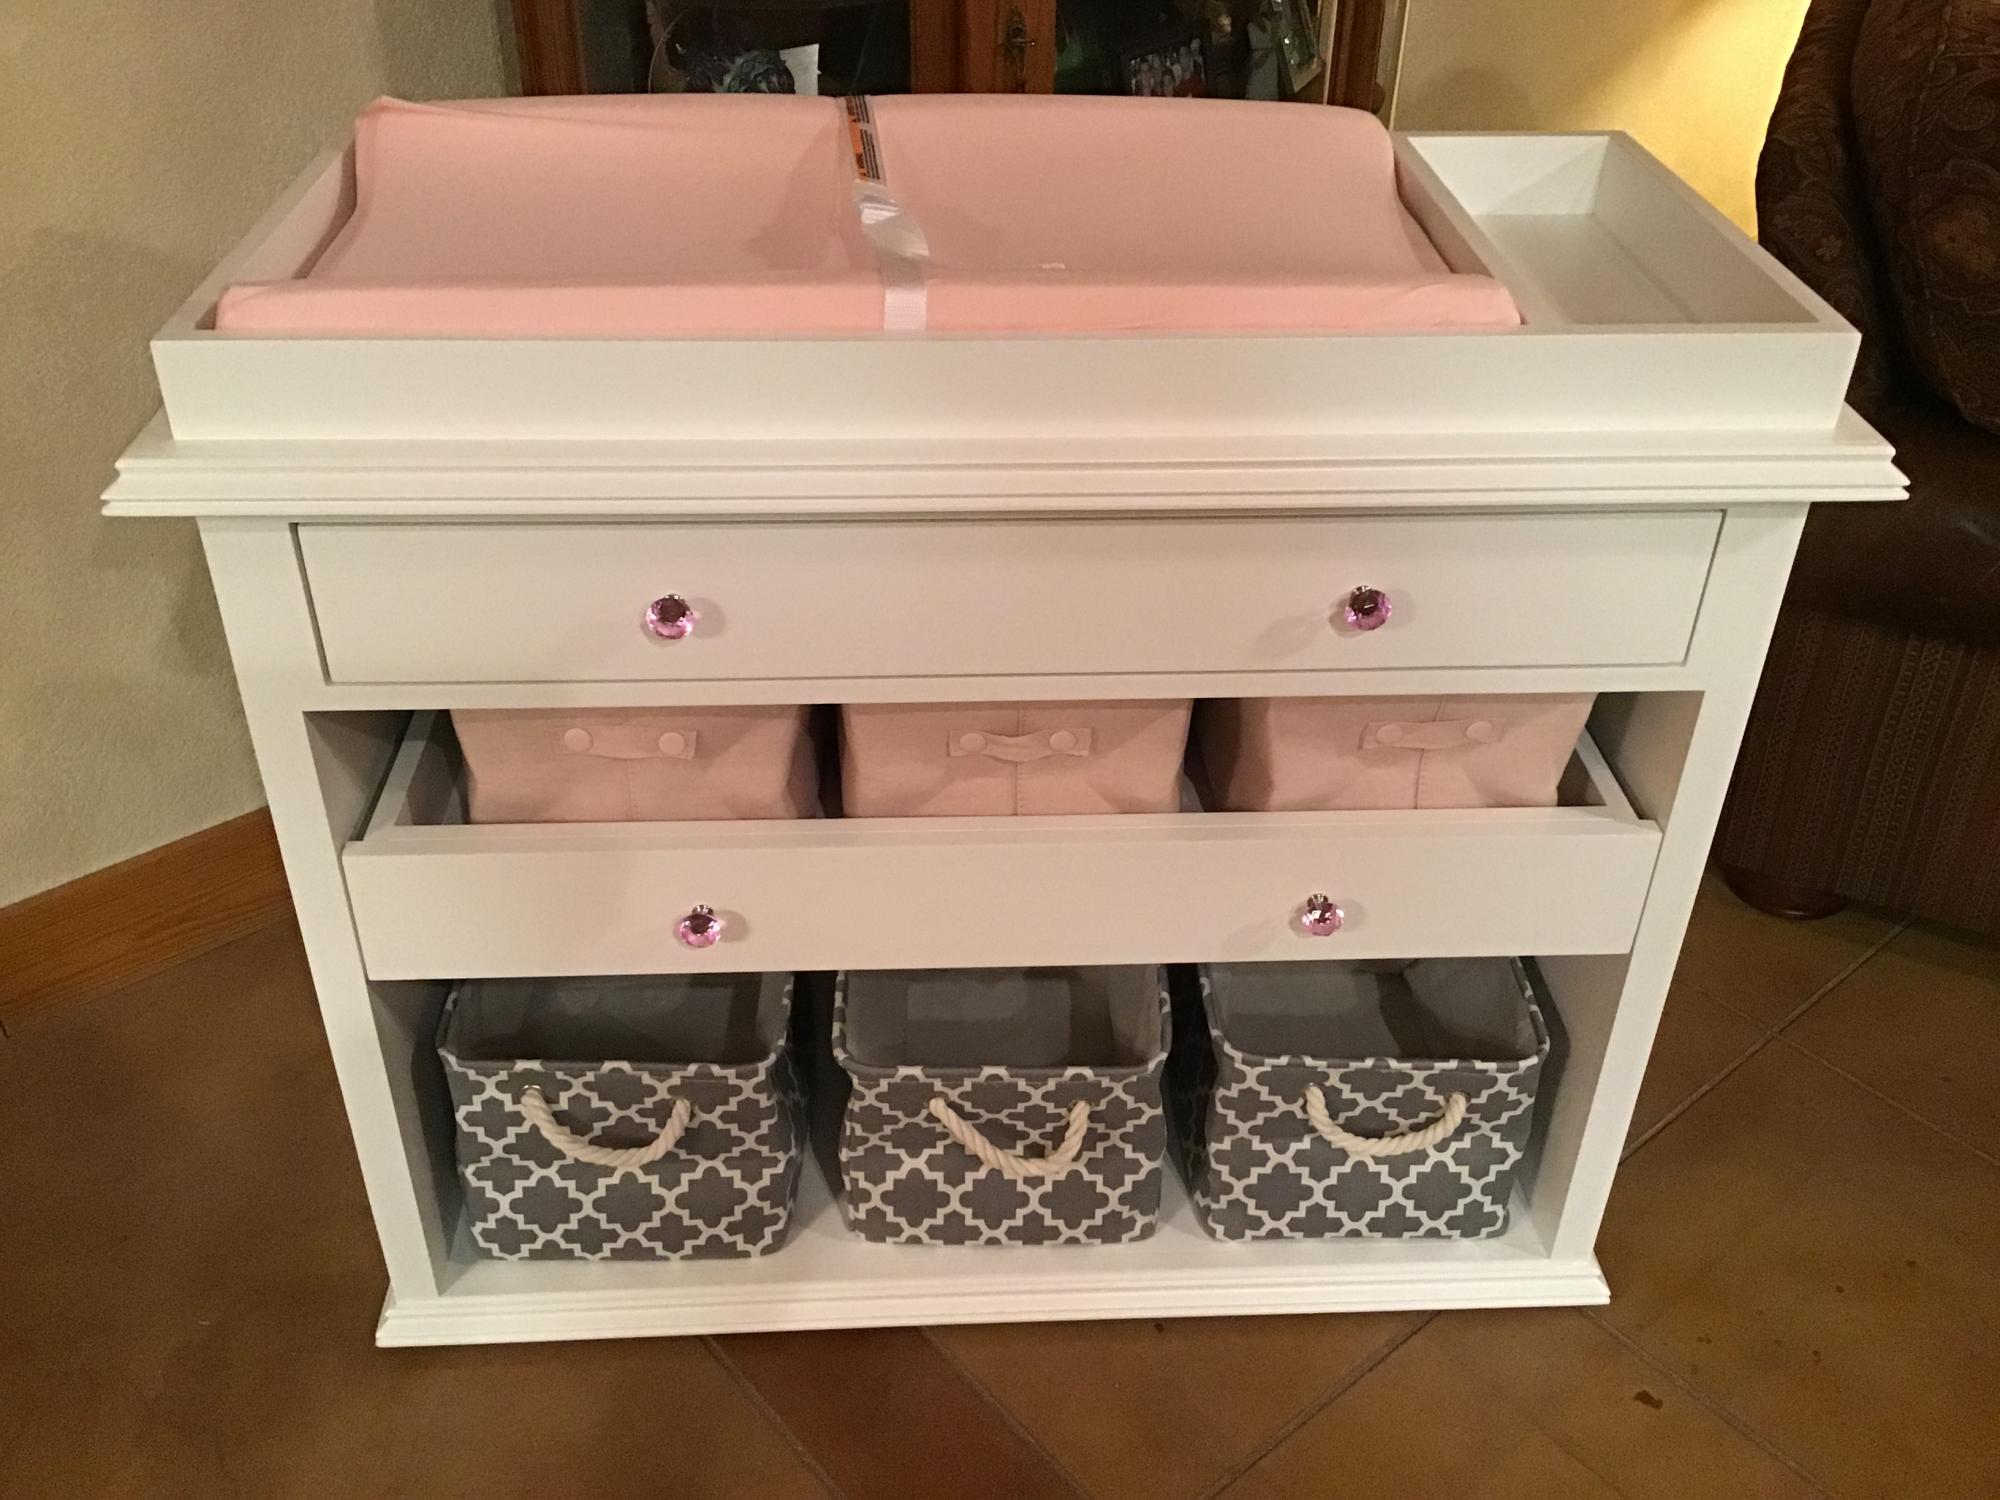
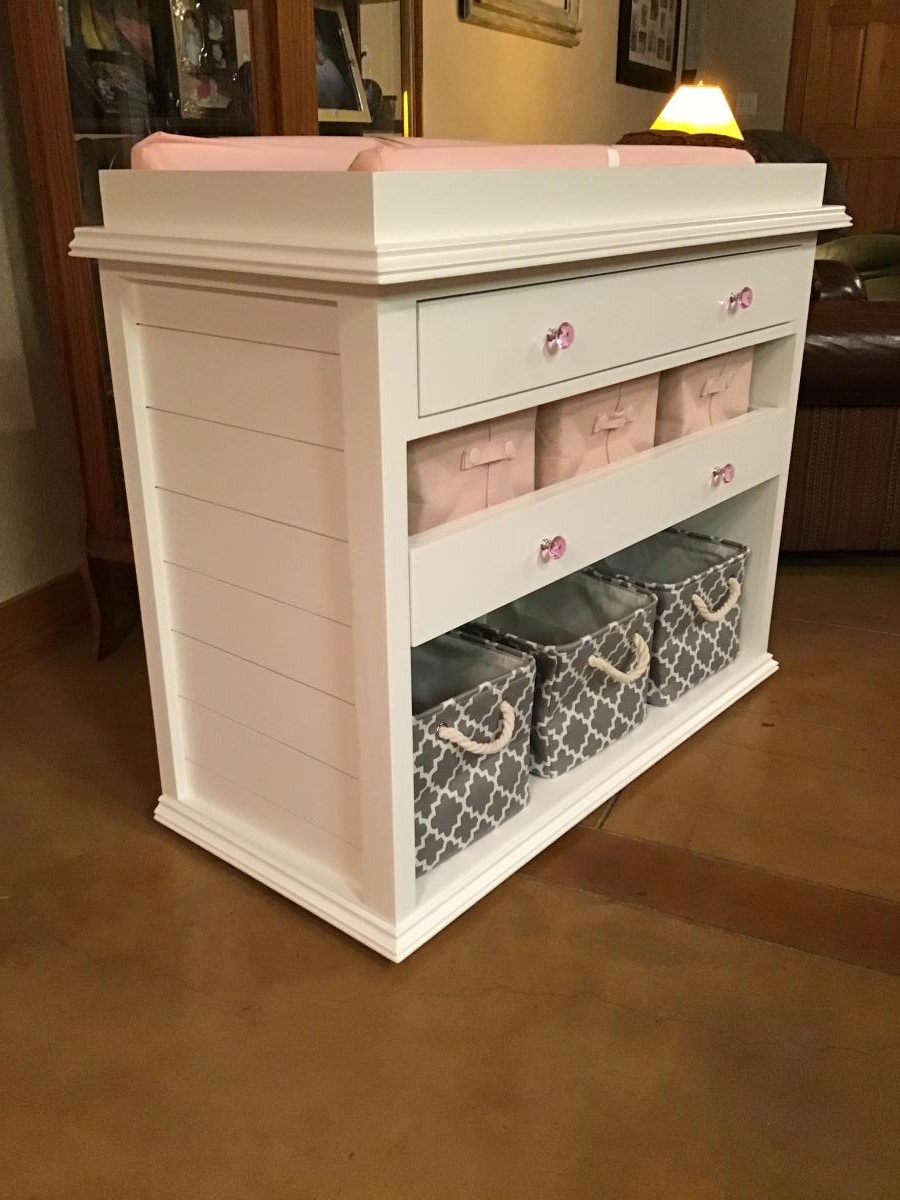
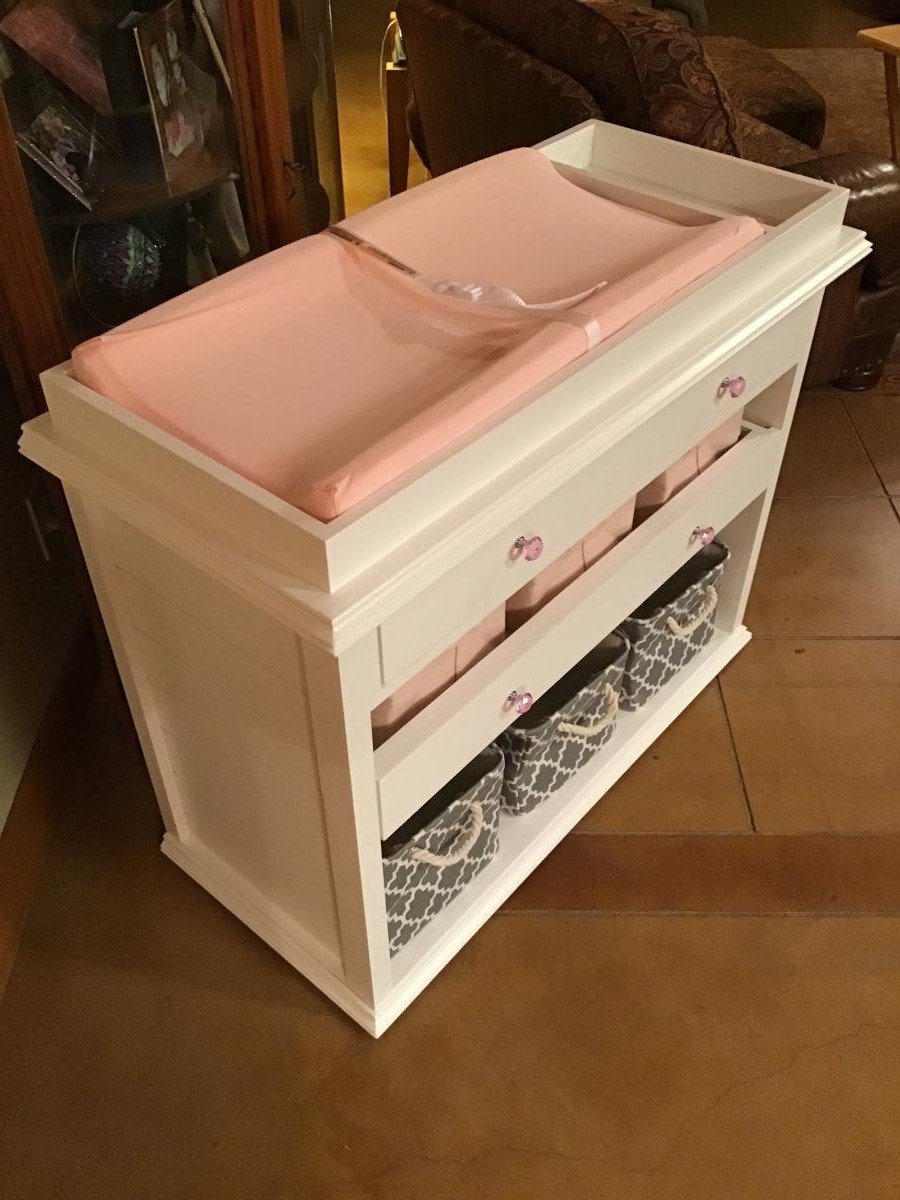
Submitted by Anonymous (not verified) on Sun, 09/05/2021 - 19:09

We are expecting our first granddaughter in October 2021. We used Ana White’s plans for a baby changing table as our inspiration and this design was the outcome of our efforts. We surprised our son and daughter-in-law and they were elated!

Built from Plan(s)

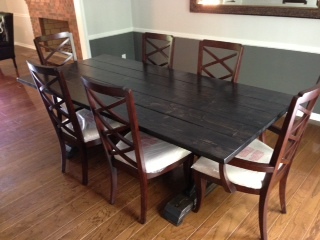
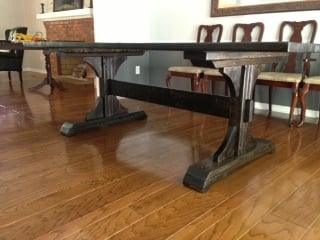
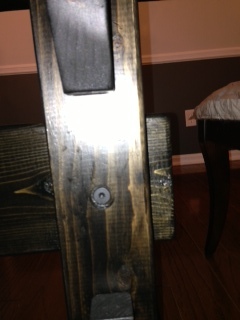
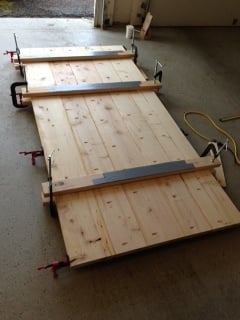
Double Pedestal Table (Modified from Triple Pedestal and Farmhouse Table Plans)

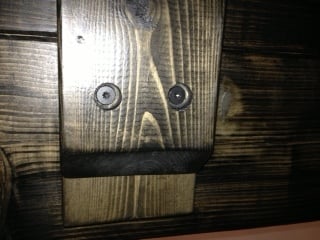
This was my first build and I had a blast! Let me say at the outset that if I can build this table with limited tools and expertise, then so can you! What I lack in know-how, I made up for by not being afraid to try something new. If you do the same, you can sure build this table. This table combines Ana's Triple Pedestal Dining Room Table (pedestals from this plan) and her Farmhouse Table (tabletop modified from this plan). Because Ana's plans are so great and thorough, I will only make note of a few key areas where I either tried something different or where I recommend paying extra close attention. First, on the tabletop, I reduced the length to 90 inches to accommodate our space, and therefore eliminated the center pedestal. As you can see, I alternated 2x10's and 2x8's. I also eliminated the breadboards simply because my wife and I preferred the rustic plank style. I also moved the pedestals in to allow a full 15 inches for a chair to slide underneath. When constructing the tabletop, I used both glue (clamped) and pocket holes on the underside. Don't overdo the glue, as it will tend to drip down (which is the top of the table...I had some drip issues). I also strongly recommend buying/borrowing clamps to keep the top flush or making them from 2x4's as I did. I worked hard on this part, and I'm glad that I did. It was still hard to keep it flush. On the pedestals, I used slightly bulkier decorative pieces (I started the arcs 1.25" from the edge on both ends of the arc). I also attached the top plank directly to the underside of the tabletop rather than to the top of the pedestal in order to both bolster the tabletop and to more easily attach the pedestals precisely where I wanted them. Finally, I drilled shallow flat-bottom holes and used wood bolts to fasten both the pedestals and the crossbeam. This created a nice-looking, low-profile fastener that still enables disassembly should we ever need to move the table (it is HEAVY fully assembled!). The finish is two coats of Minwax Ebony Wood Finish (pre-treated with Minwax Wood Conditioner) and three coats of Minwax Fast-Drying Polyurethane (two coats on pedestals). Thank you, Ana, for the inspiration! Our family has a new table because of it! Thanks to all of you for sharing in our excitement, and I'm happy to share dimensions/details/etc should it be helpful to anyone.

Built from Plan(s)
Estimated Cost
$200
Estimated Time Investment
Week Long Project (20 Hours or More)
Finish Used
Minwax Ebony Wood Finish - 2 coats (pre-treated with Minwax Wood Conditioner); Minwax Polyurethane Satin Clear Coat - 3 coats on tabletop, 2 coats elsewhere
Recommended Skill Level
Intermediate

Comments

Lady Goats

Wed, 05/01/2013 - 12:56

I love what you did with the "arcs" (gotta be careful with words synonymous with this - the word "arches" makes me cringe since I had to rip arches out of nearly all the doorways in my house ;-))! Not sure that I'll ever get around to using this idea, but I must say that I love it!

Pabs

Thu, 07/18/2013 - 05:17

Beautifully done, I like the modifications. Could you please share the dimensions and any detail info please…much appreciated.

NoviceBuilder

Mon, 08/19/2013 - 10:41

Thanks for the kind words. I think I included all of the measurements that differed from the two plans used, but is there a specific measurement(s) that you are looking for? If so, I'd be happy to provide it. Good luck!

Price0909

Sun, 03/09/2014 - 17:23

Could you give me some sizes on the bottom posts? Cuts of 2x4's for the posts etc..
How far apart did you mount the 2 pedestals? We will be putting it in front of a corner bench.
Thanks

NoviceBuilder

Sun, 03/09/2014 - 18:47

The uprights for the pedestals are 22". When you add in the tabletop, the four lateral pieces, and the feet, the table is 30 1/4" tall. As for the spacing of the pedestals, I chose to allow 15" from each end for the chairs to slide all the way under. But it's plenty stable and you really have plenty of freedom here, depending on how many chairs you want to use and how long your table will be.

Coffee Table

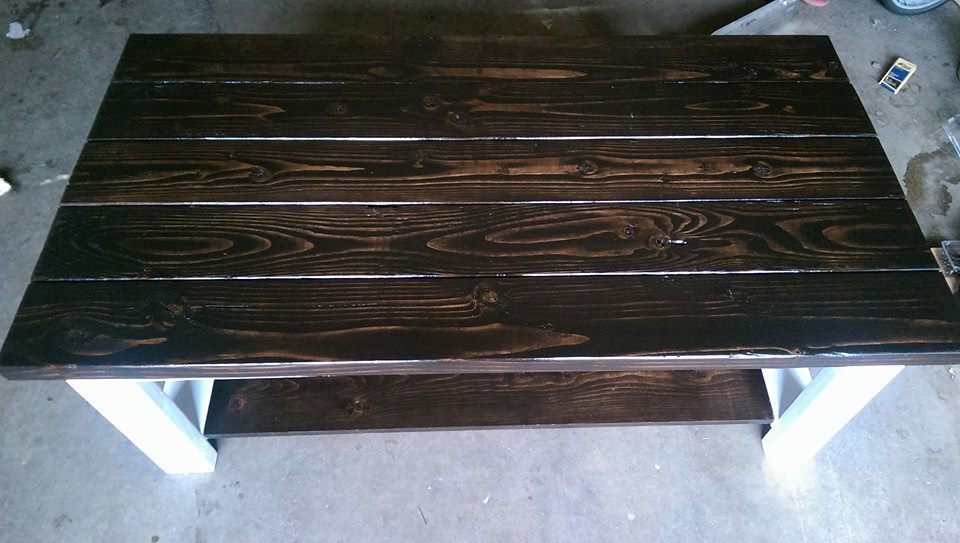
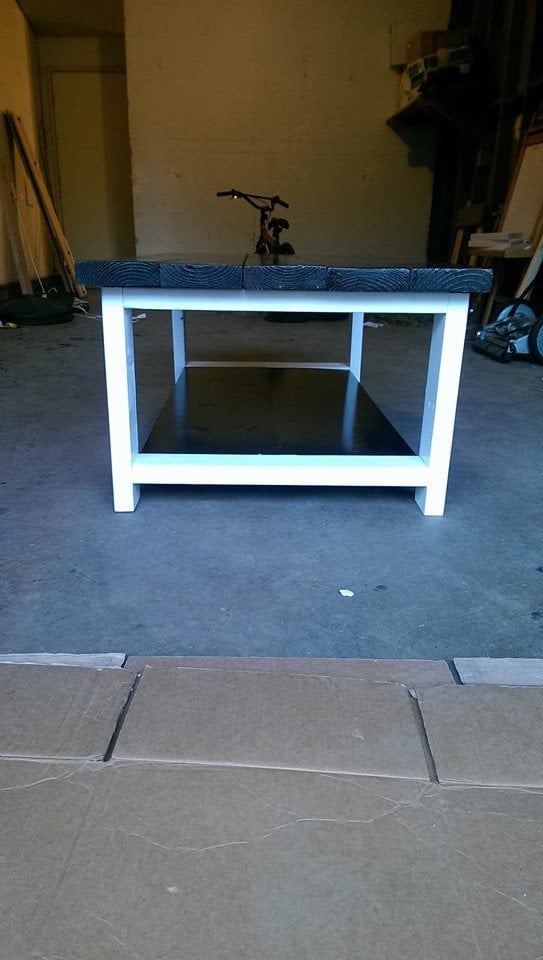
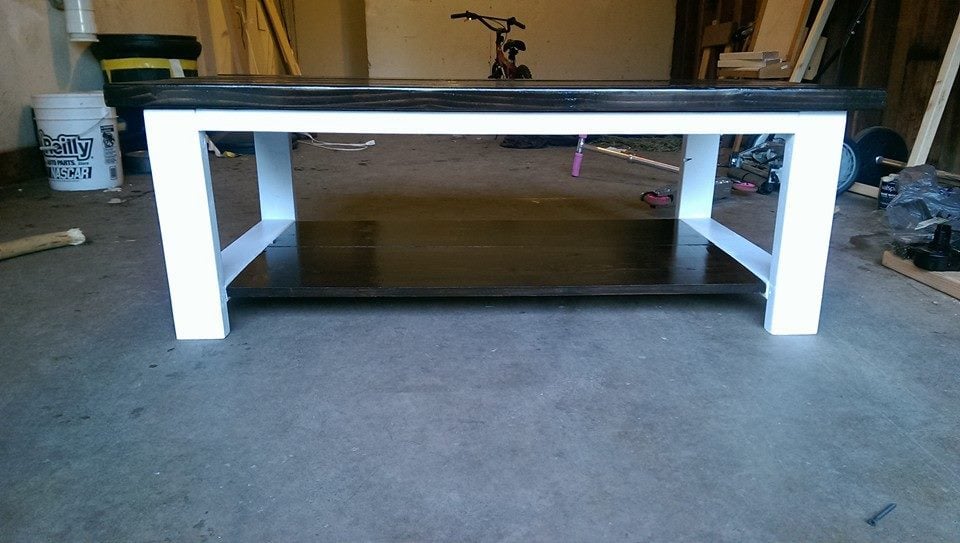
Second coffee table I made following these plans. Took me a while to complete only because I was on 12 hour shifts at work, but I tracked the time it took me to finish it and it was 5 hours. 

Built from Plan(s)
Estimated Cost
$65-$75
Estimated Time Investment
Afternoon Project (3-6 Hours)
Finish Used
The base is painted with a white semigloss paint and the tabletop and bottom shelf is stained kona with polyurethane. I did multiple coats of each product.
Recommended Skill Level
Beginner

Comments