Community Brag Posts
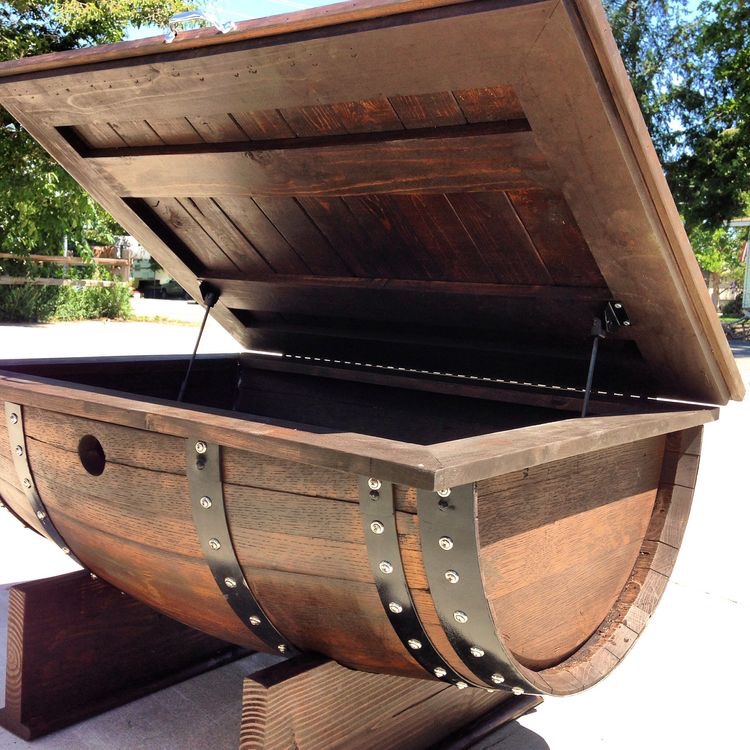

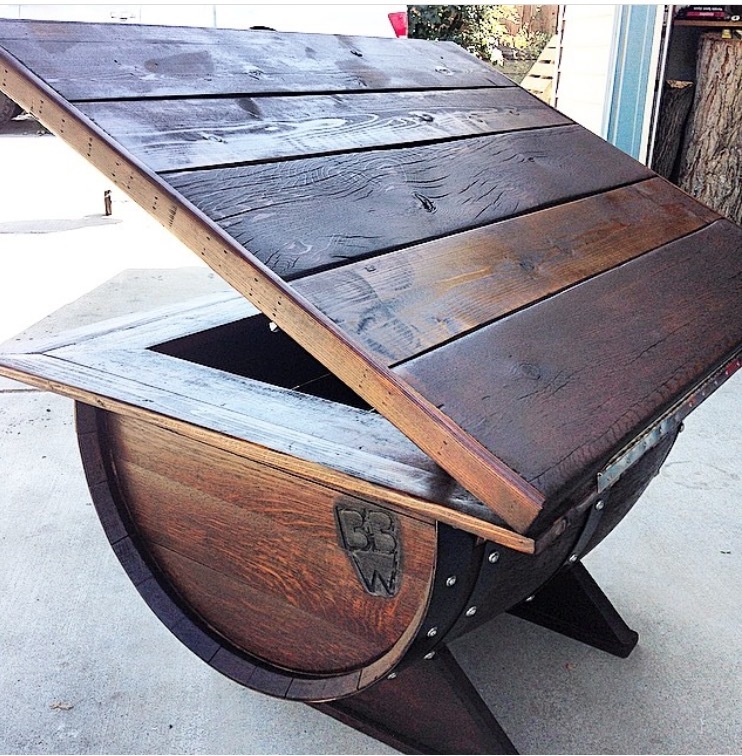
Rustic Toy box

I used tongue and groove pine for this. I just ripped the top board down so the ridge wasn't there.

Built from Plan(s)
Estimated Cost
130$
Estimated Time Investment
Weekend Project (10-20 Hours)
Finish Used
I used strong tea, then once dried I used a vinegar and steel wool mixture. Once that dried and finished the chemistry i sealed with clear varathane. The edge pieces i used a jacobean stain for contrast.
Recommended Skill Level
Beginner
Comments
Mon, 12/21/2020 - 11:28
The hardest part was putting…
The hardest part was putting the lid struts on.
Other than that it was all straight cuts, glue and brad nails.
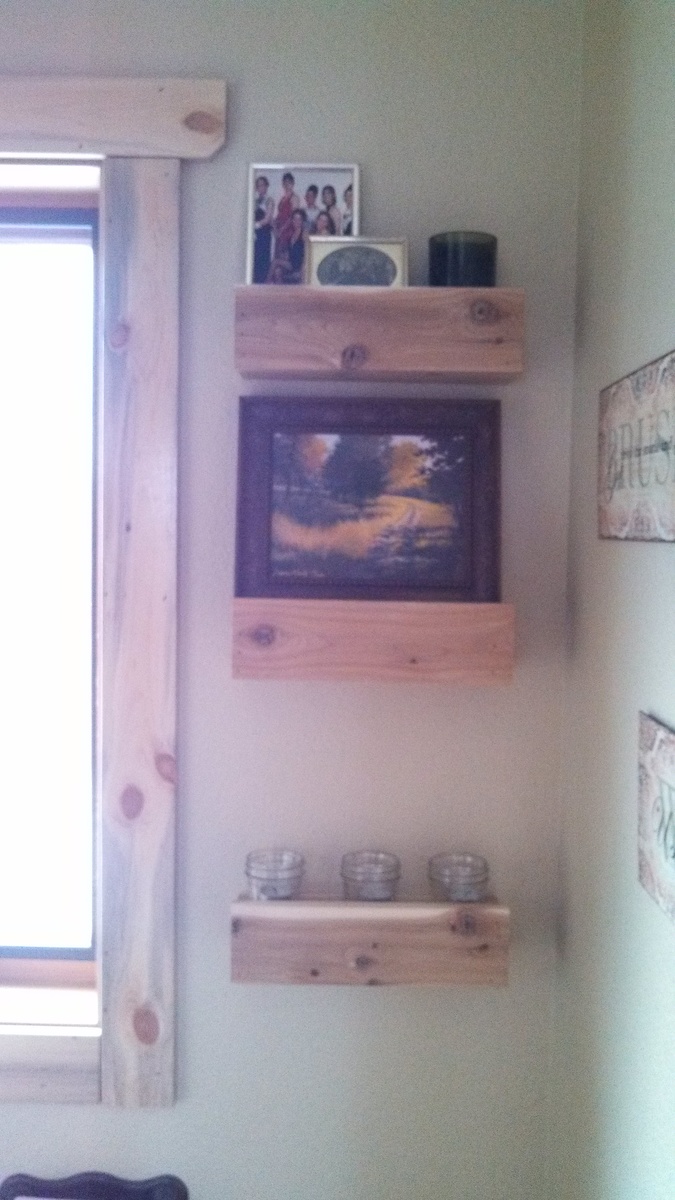
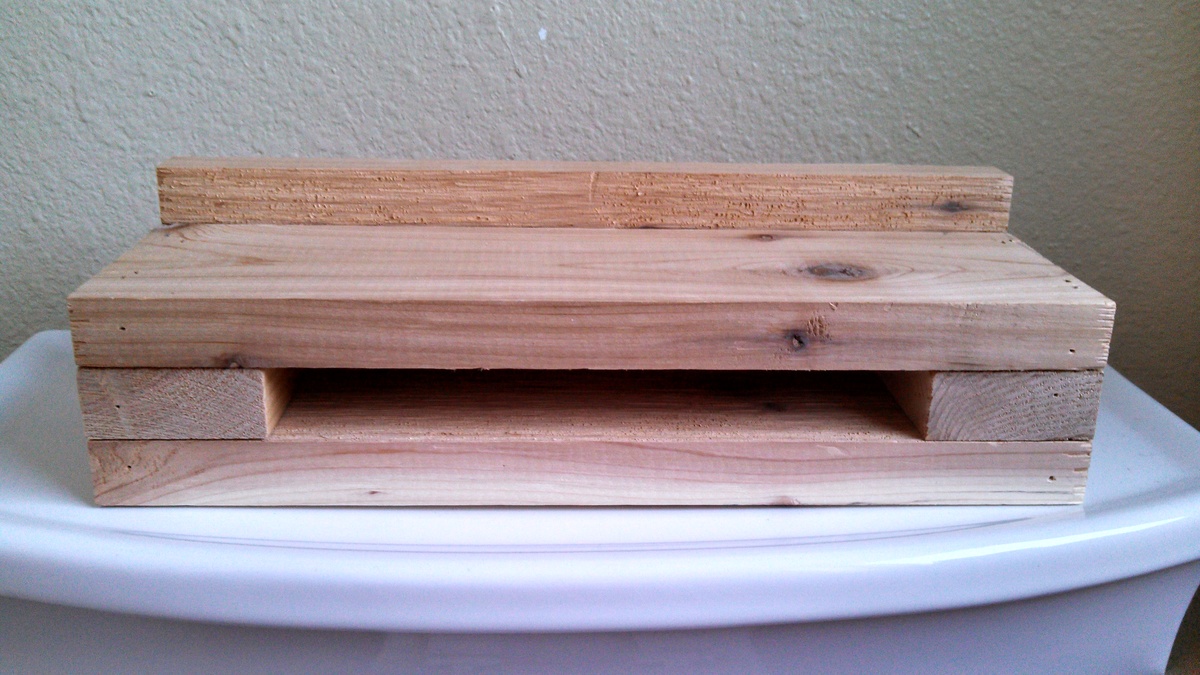
Bathroom Barn Beam Shelves
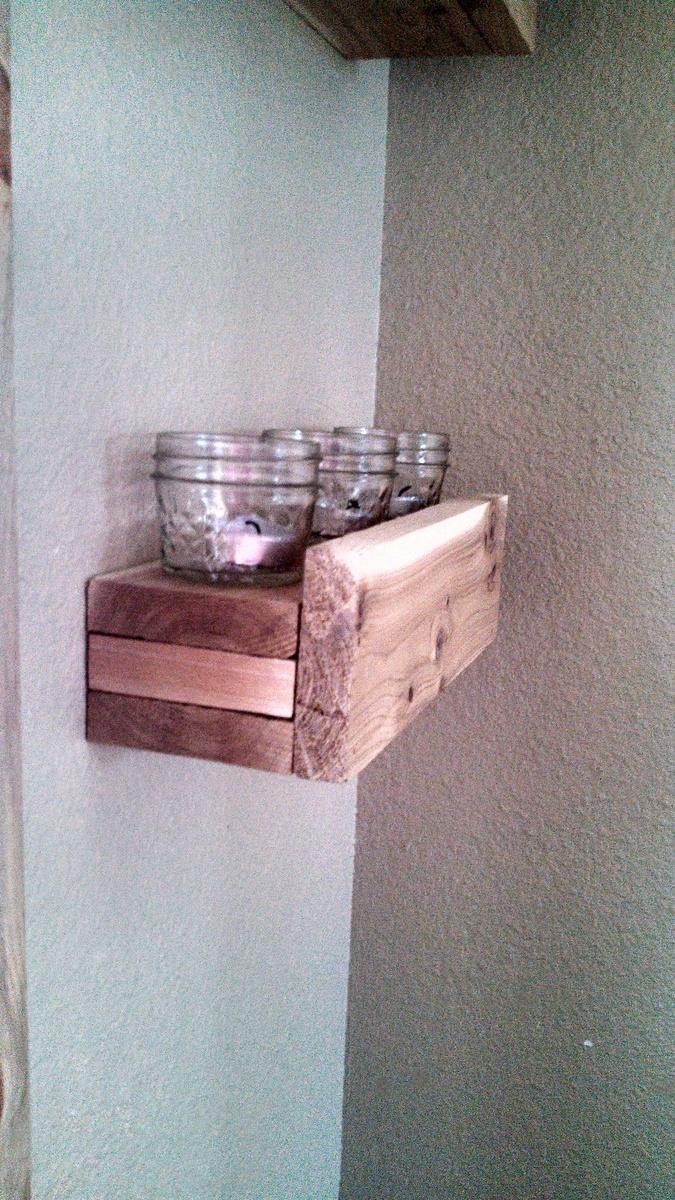
I used cedar left over from a bar my husband made in our kitchen. I didn't have to purchase any materials as I used his left over pieces.
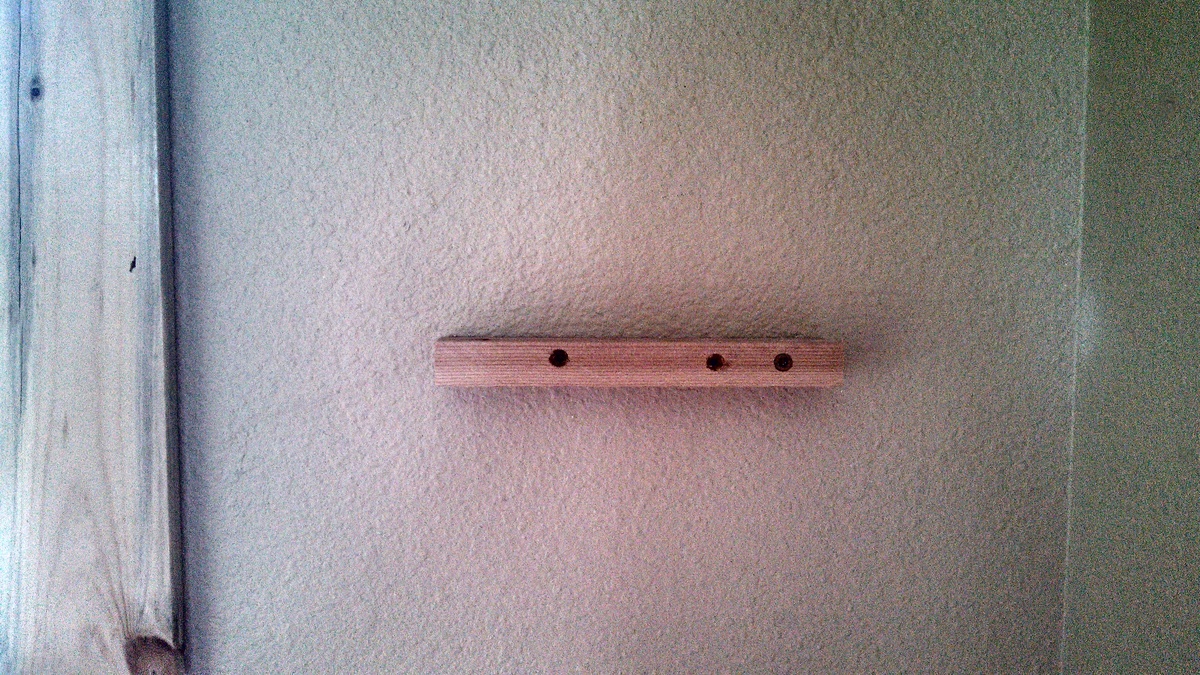
I didn't like my ledges with the back board, and I wasn't too keen on making the key holes. Instead of 24 inches I made my shleves 1 ft. long. I also laid the spacers so that the distance between the top and bottom of the ledge was less than the plan called for. This allowed me to attach a wooden strip (7.5 x 1.5 cut from the cedar 1x4 that I ripped on the table saw) to the wall that the barn beam shelf slips onto and anchors the ledges instead of using the key hole hanger.
Built from Plan(s)
Estimated Cost
Free
Estimated Time Investment
An Hour or Two (0-2 Hours)
Finish Used
None at this time
Recommended Skill Level
Starter Project
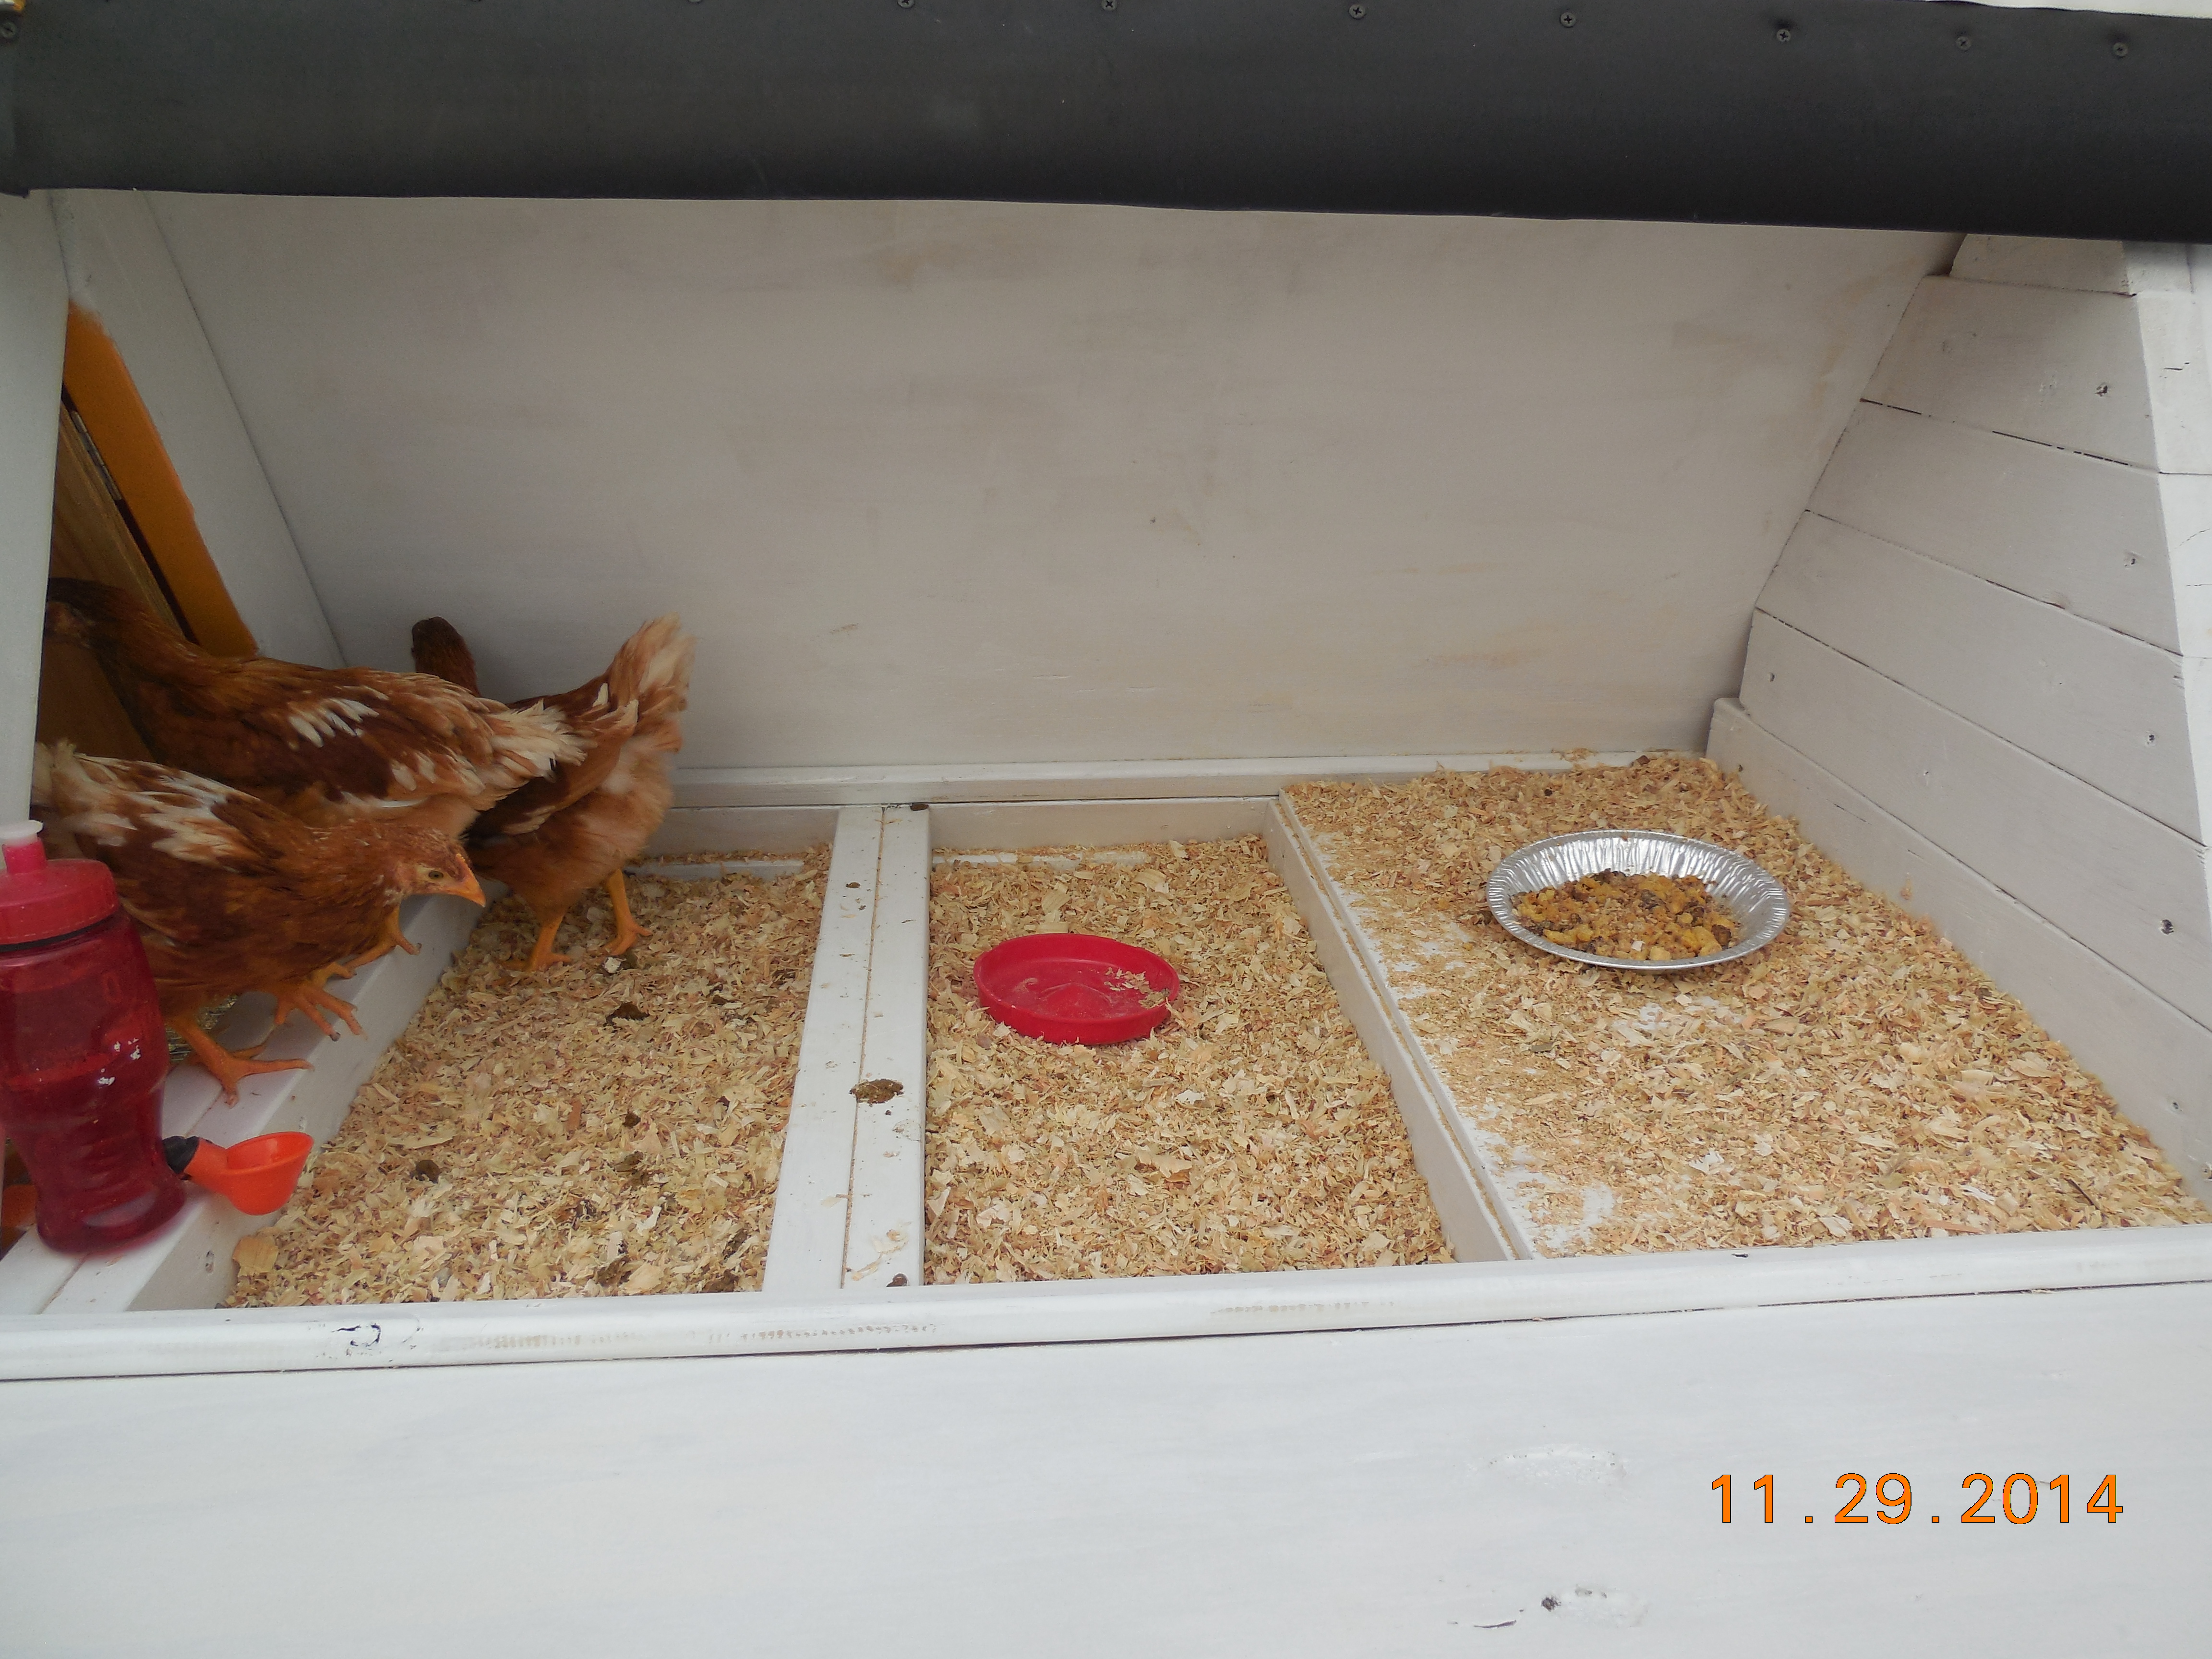
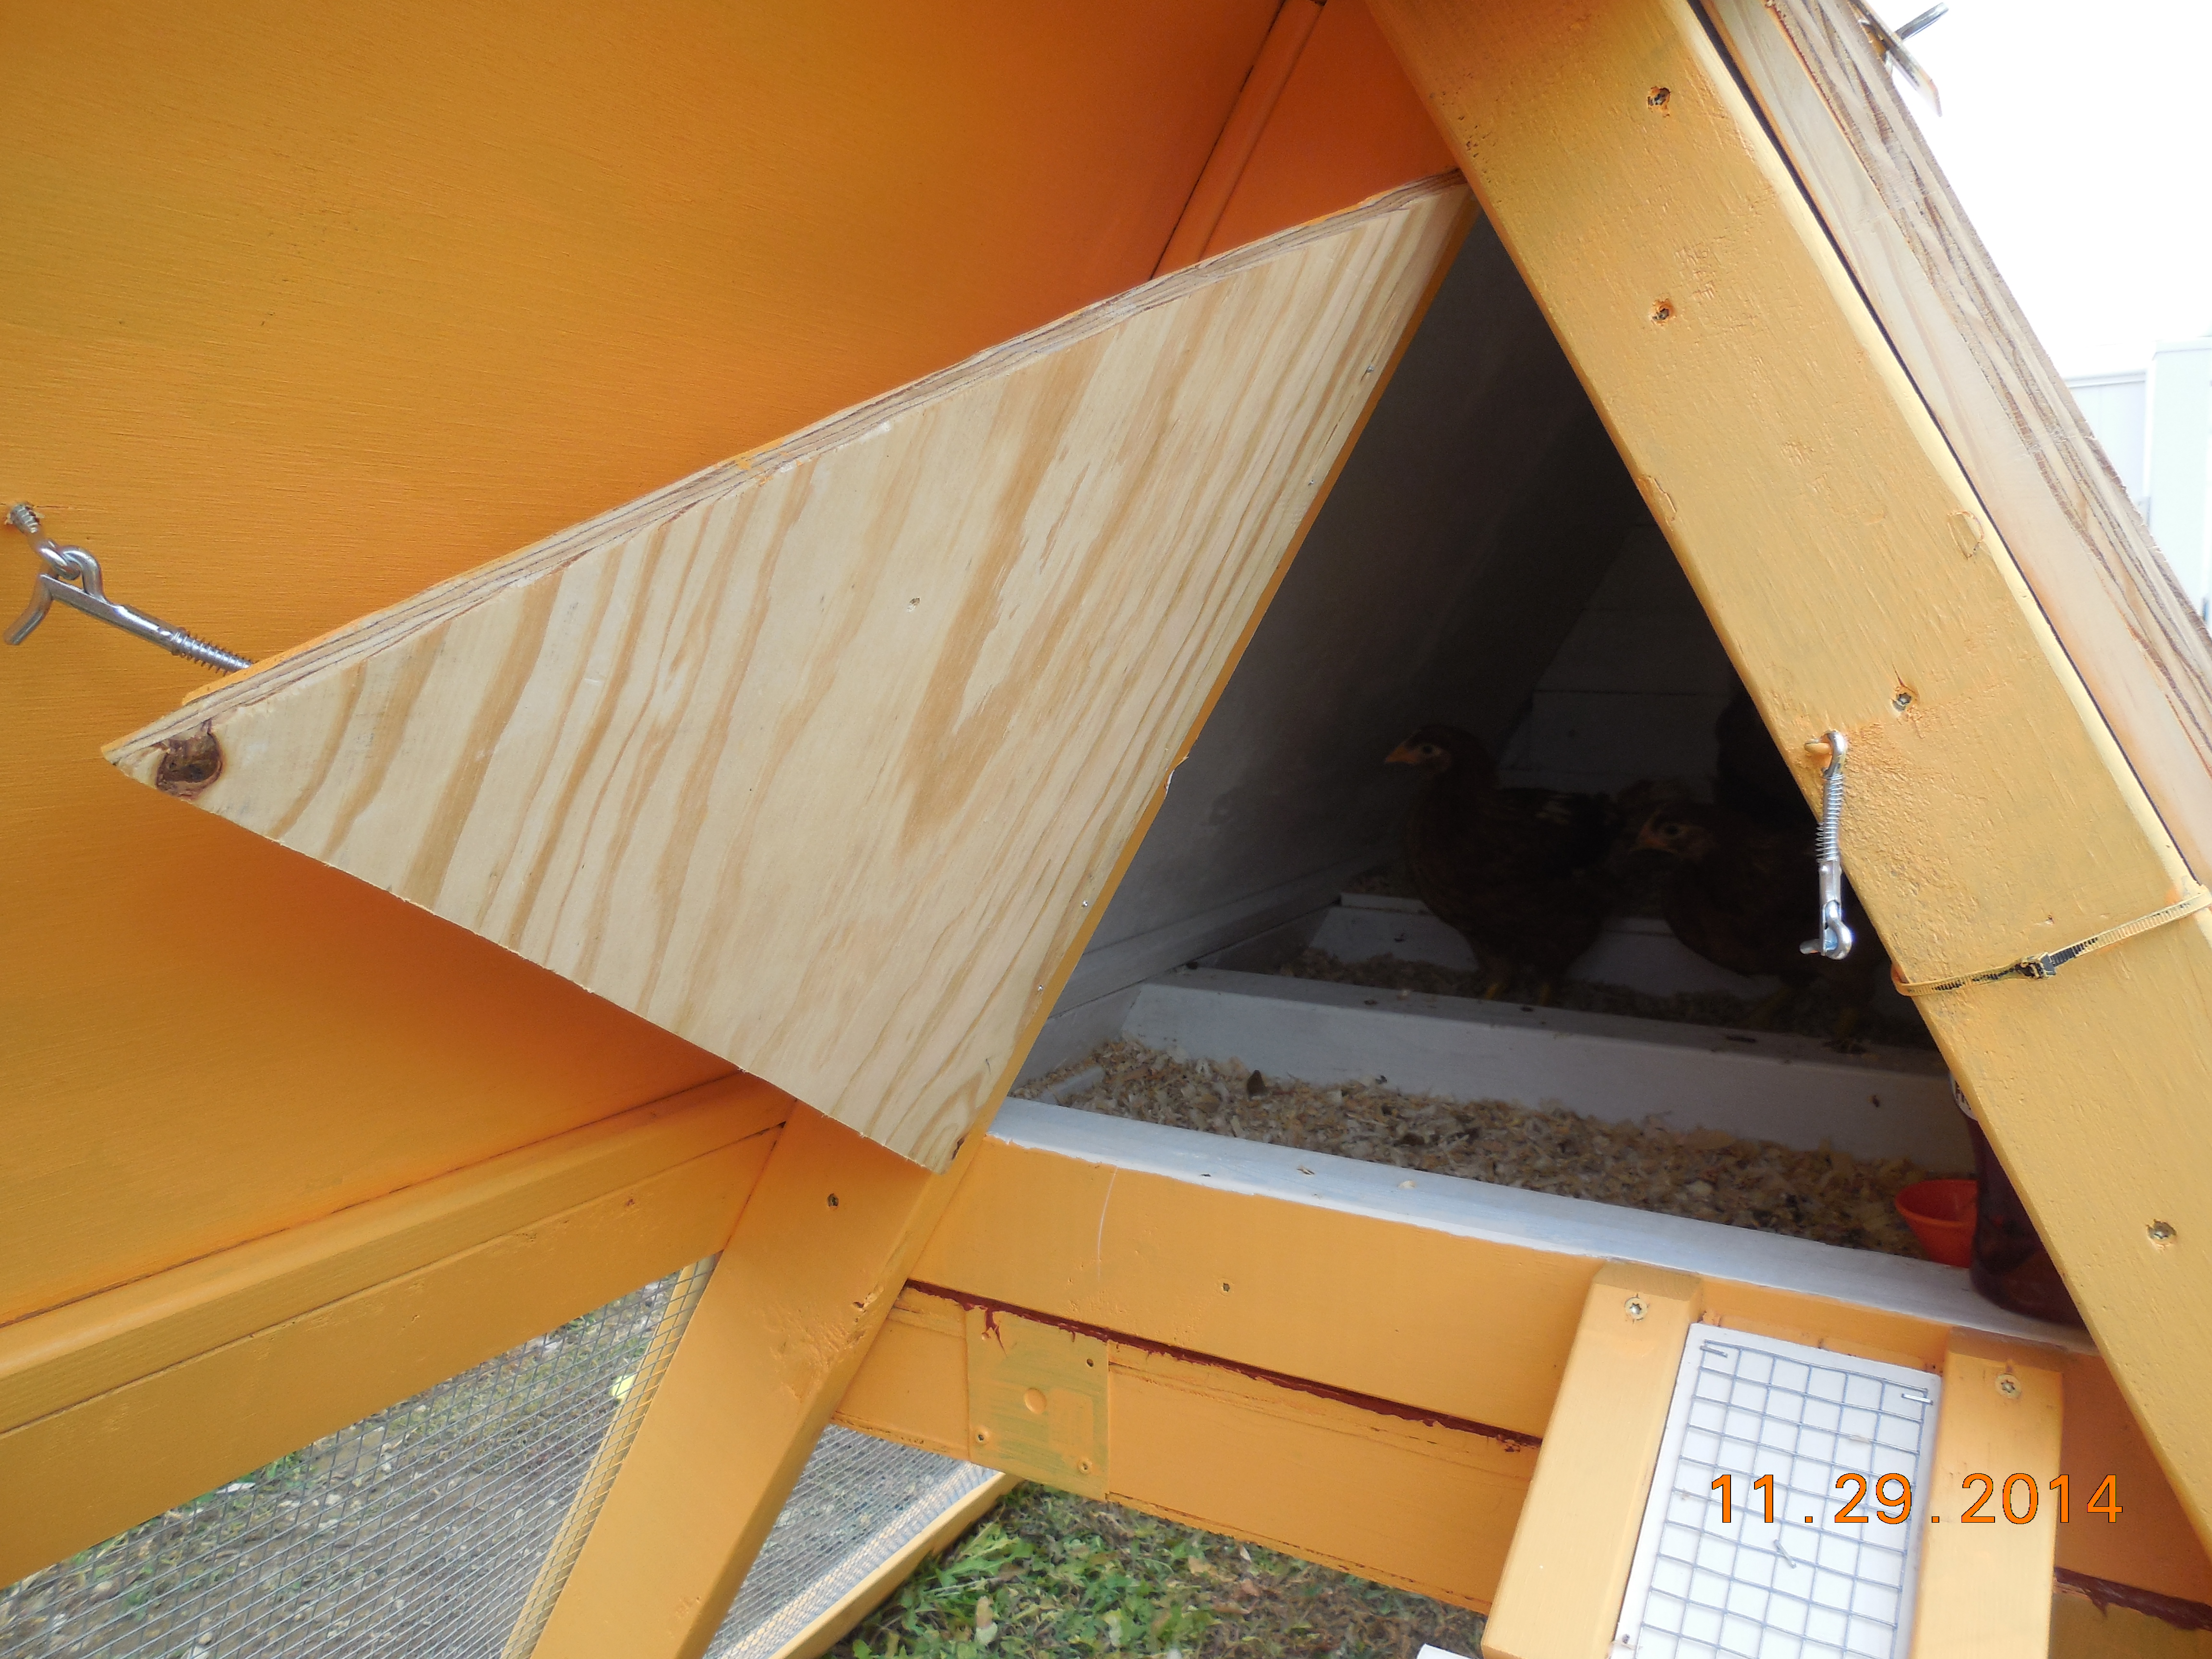
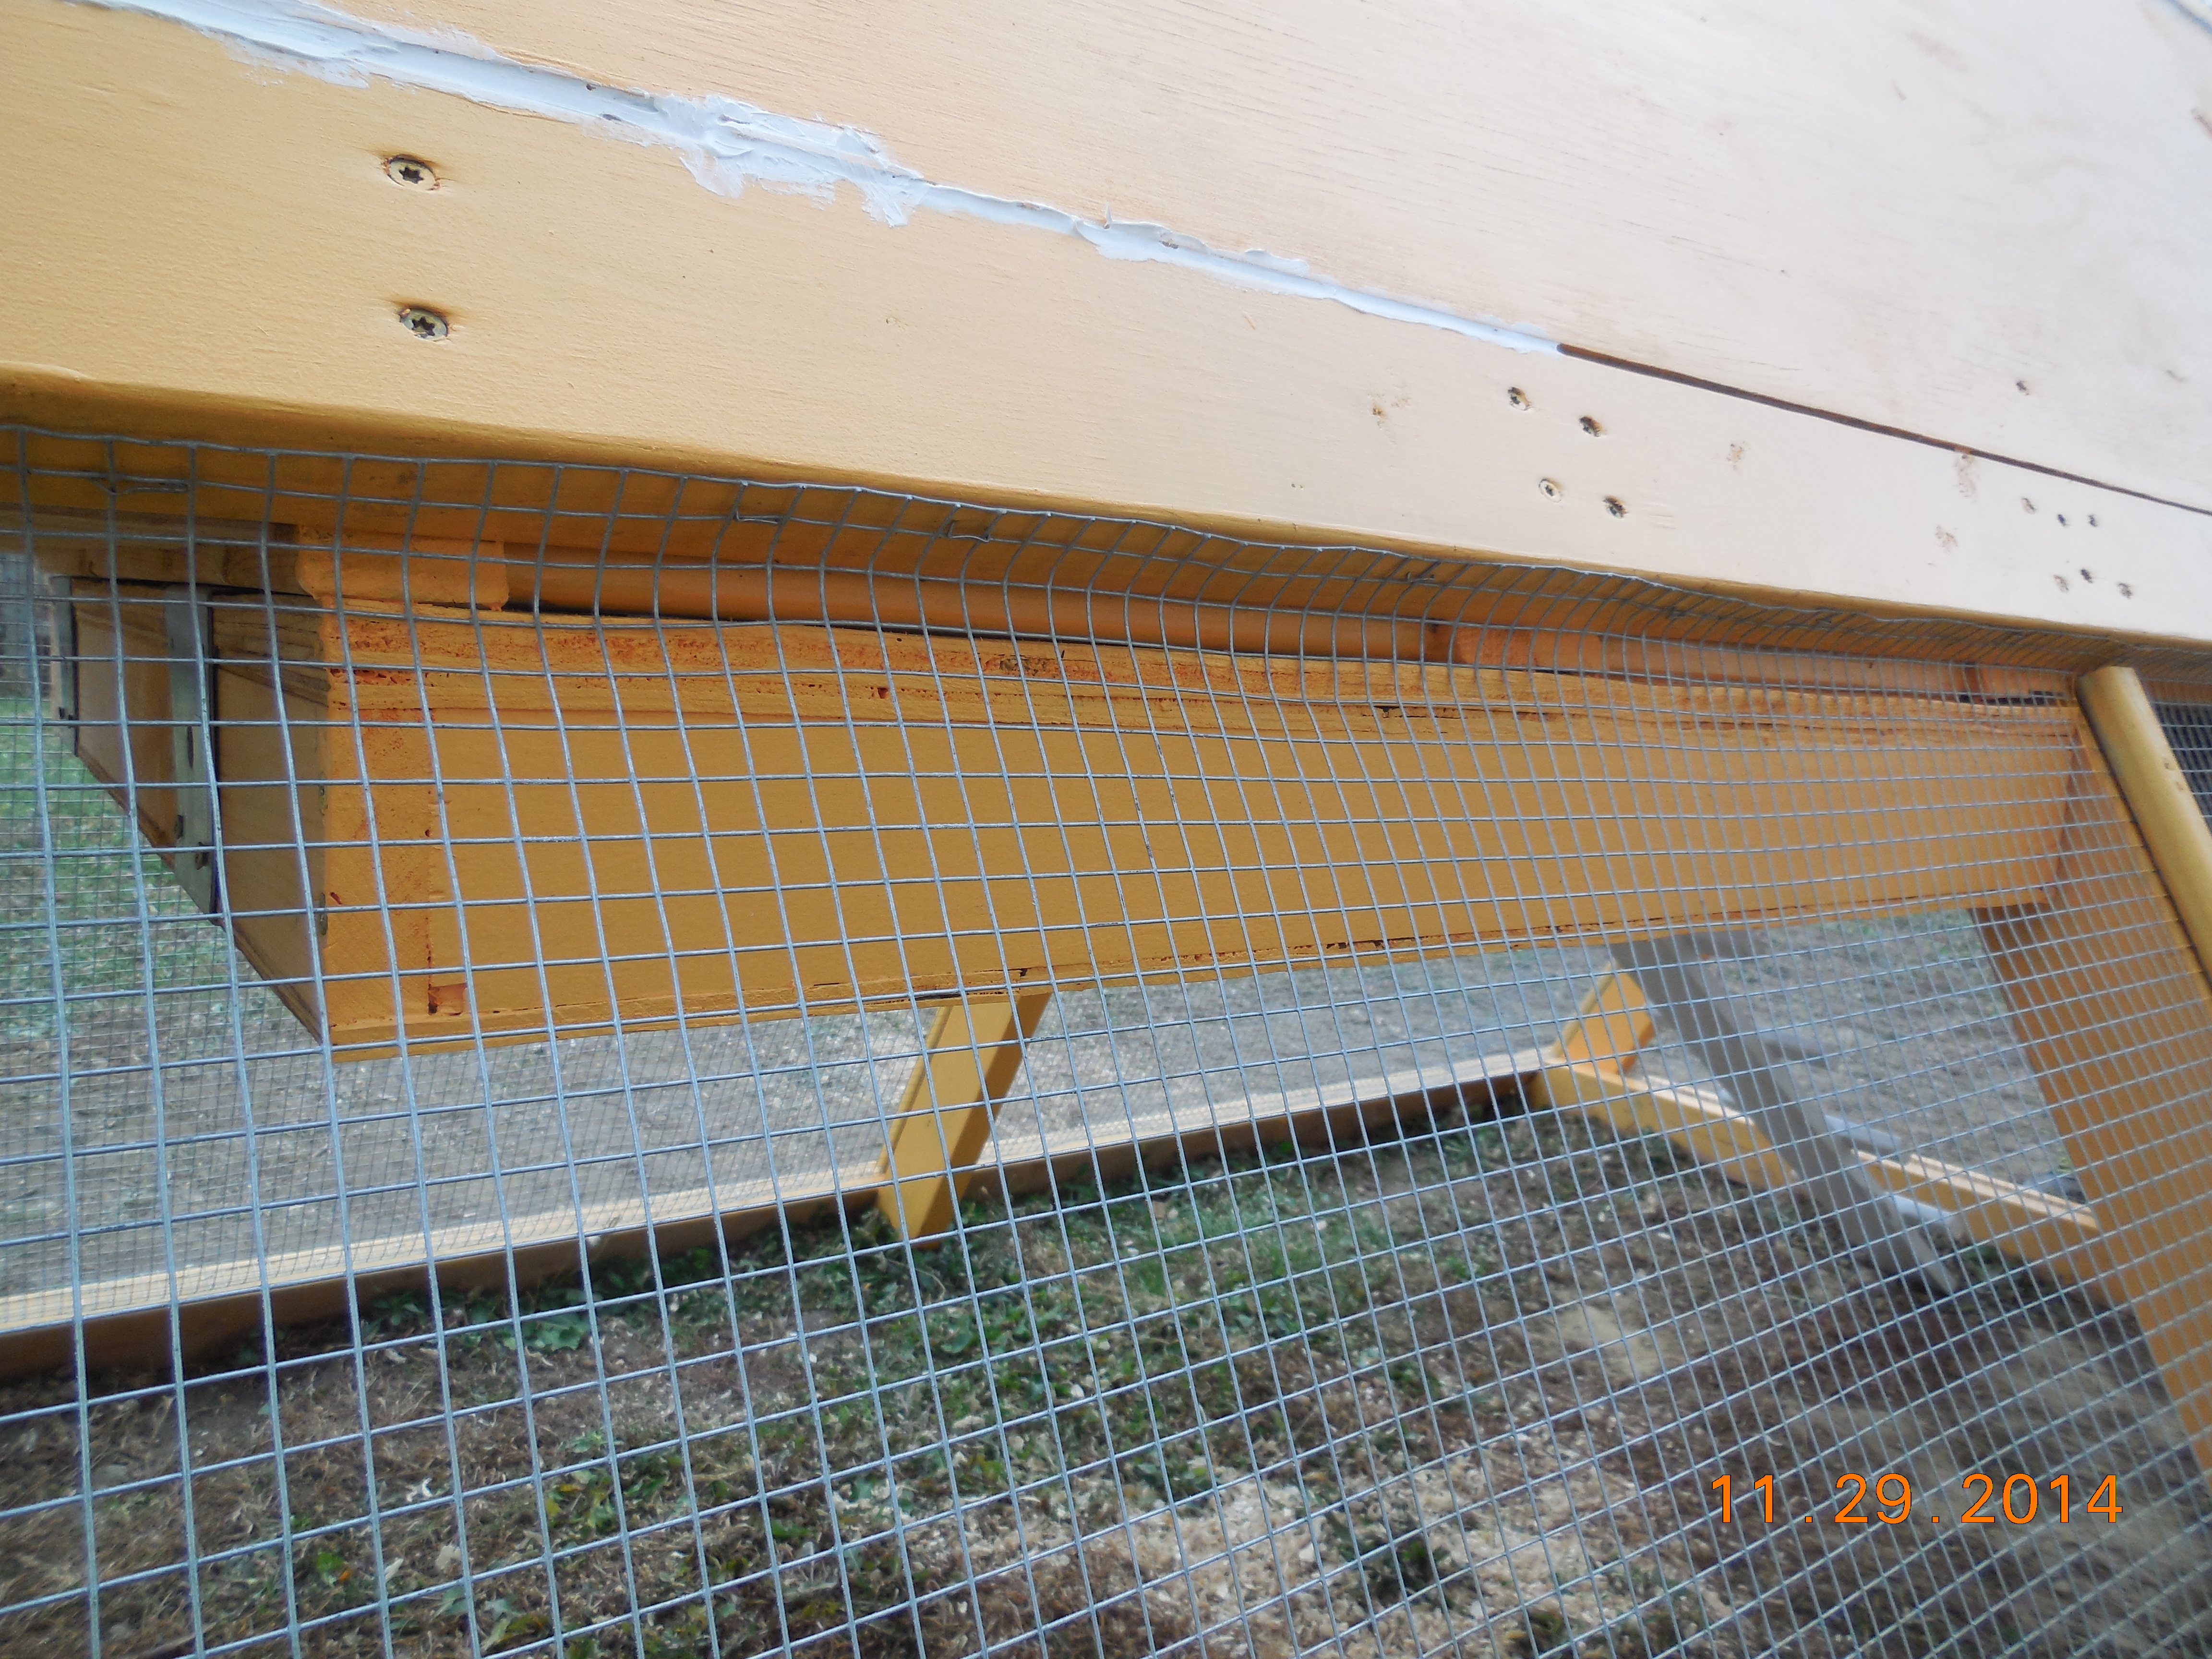
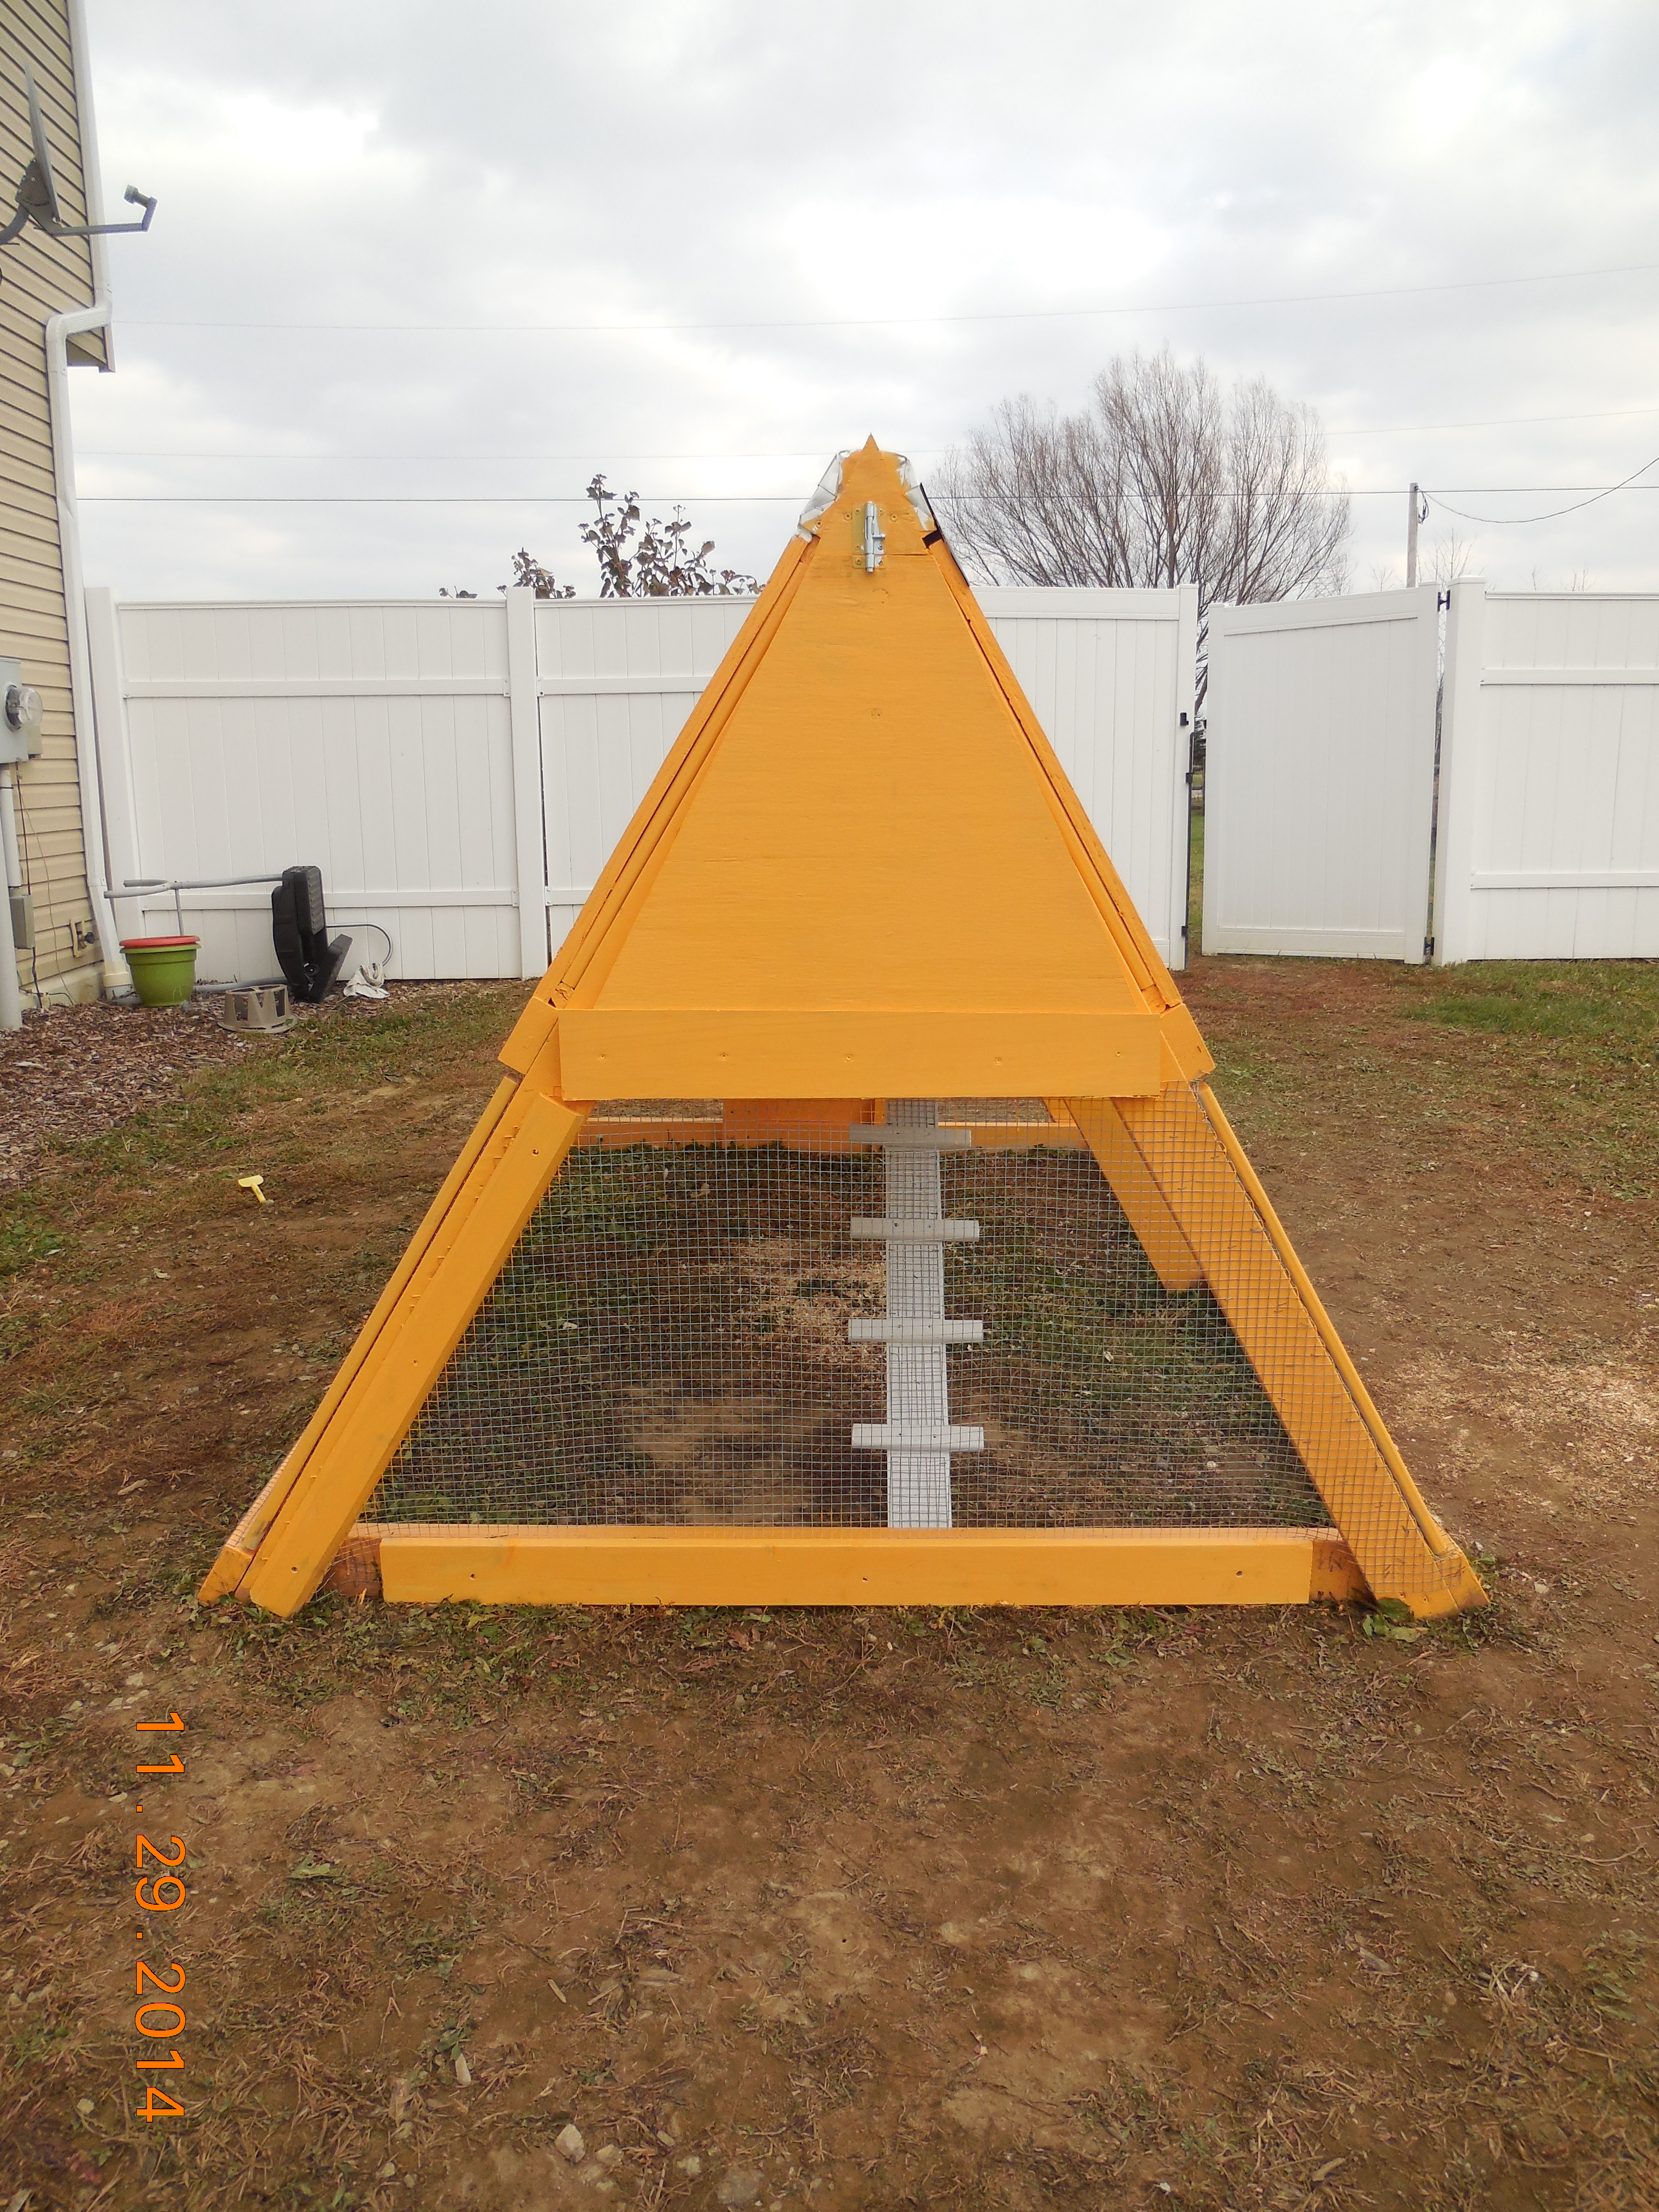
Love this coop!
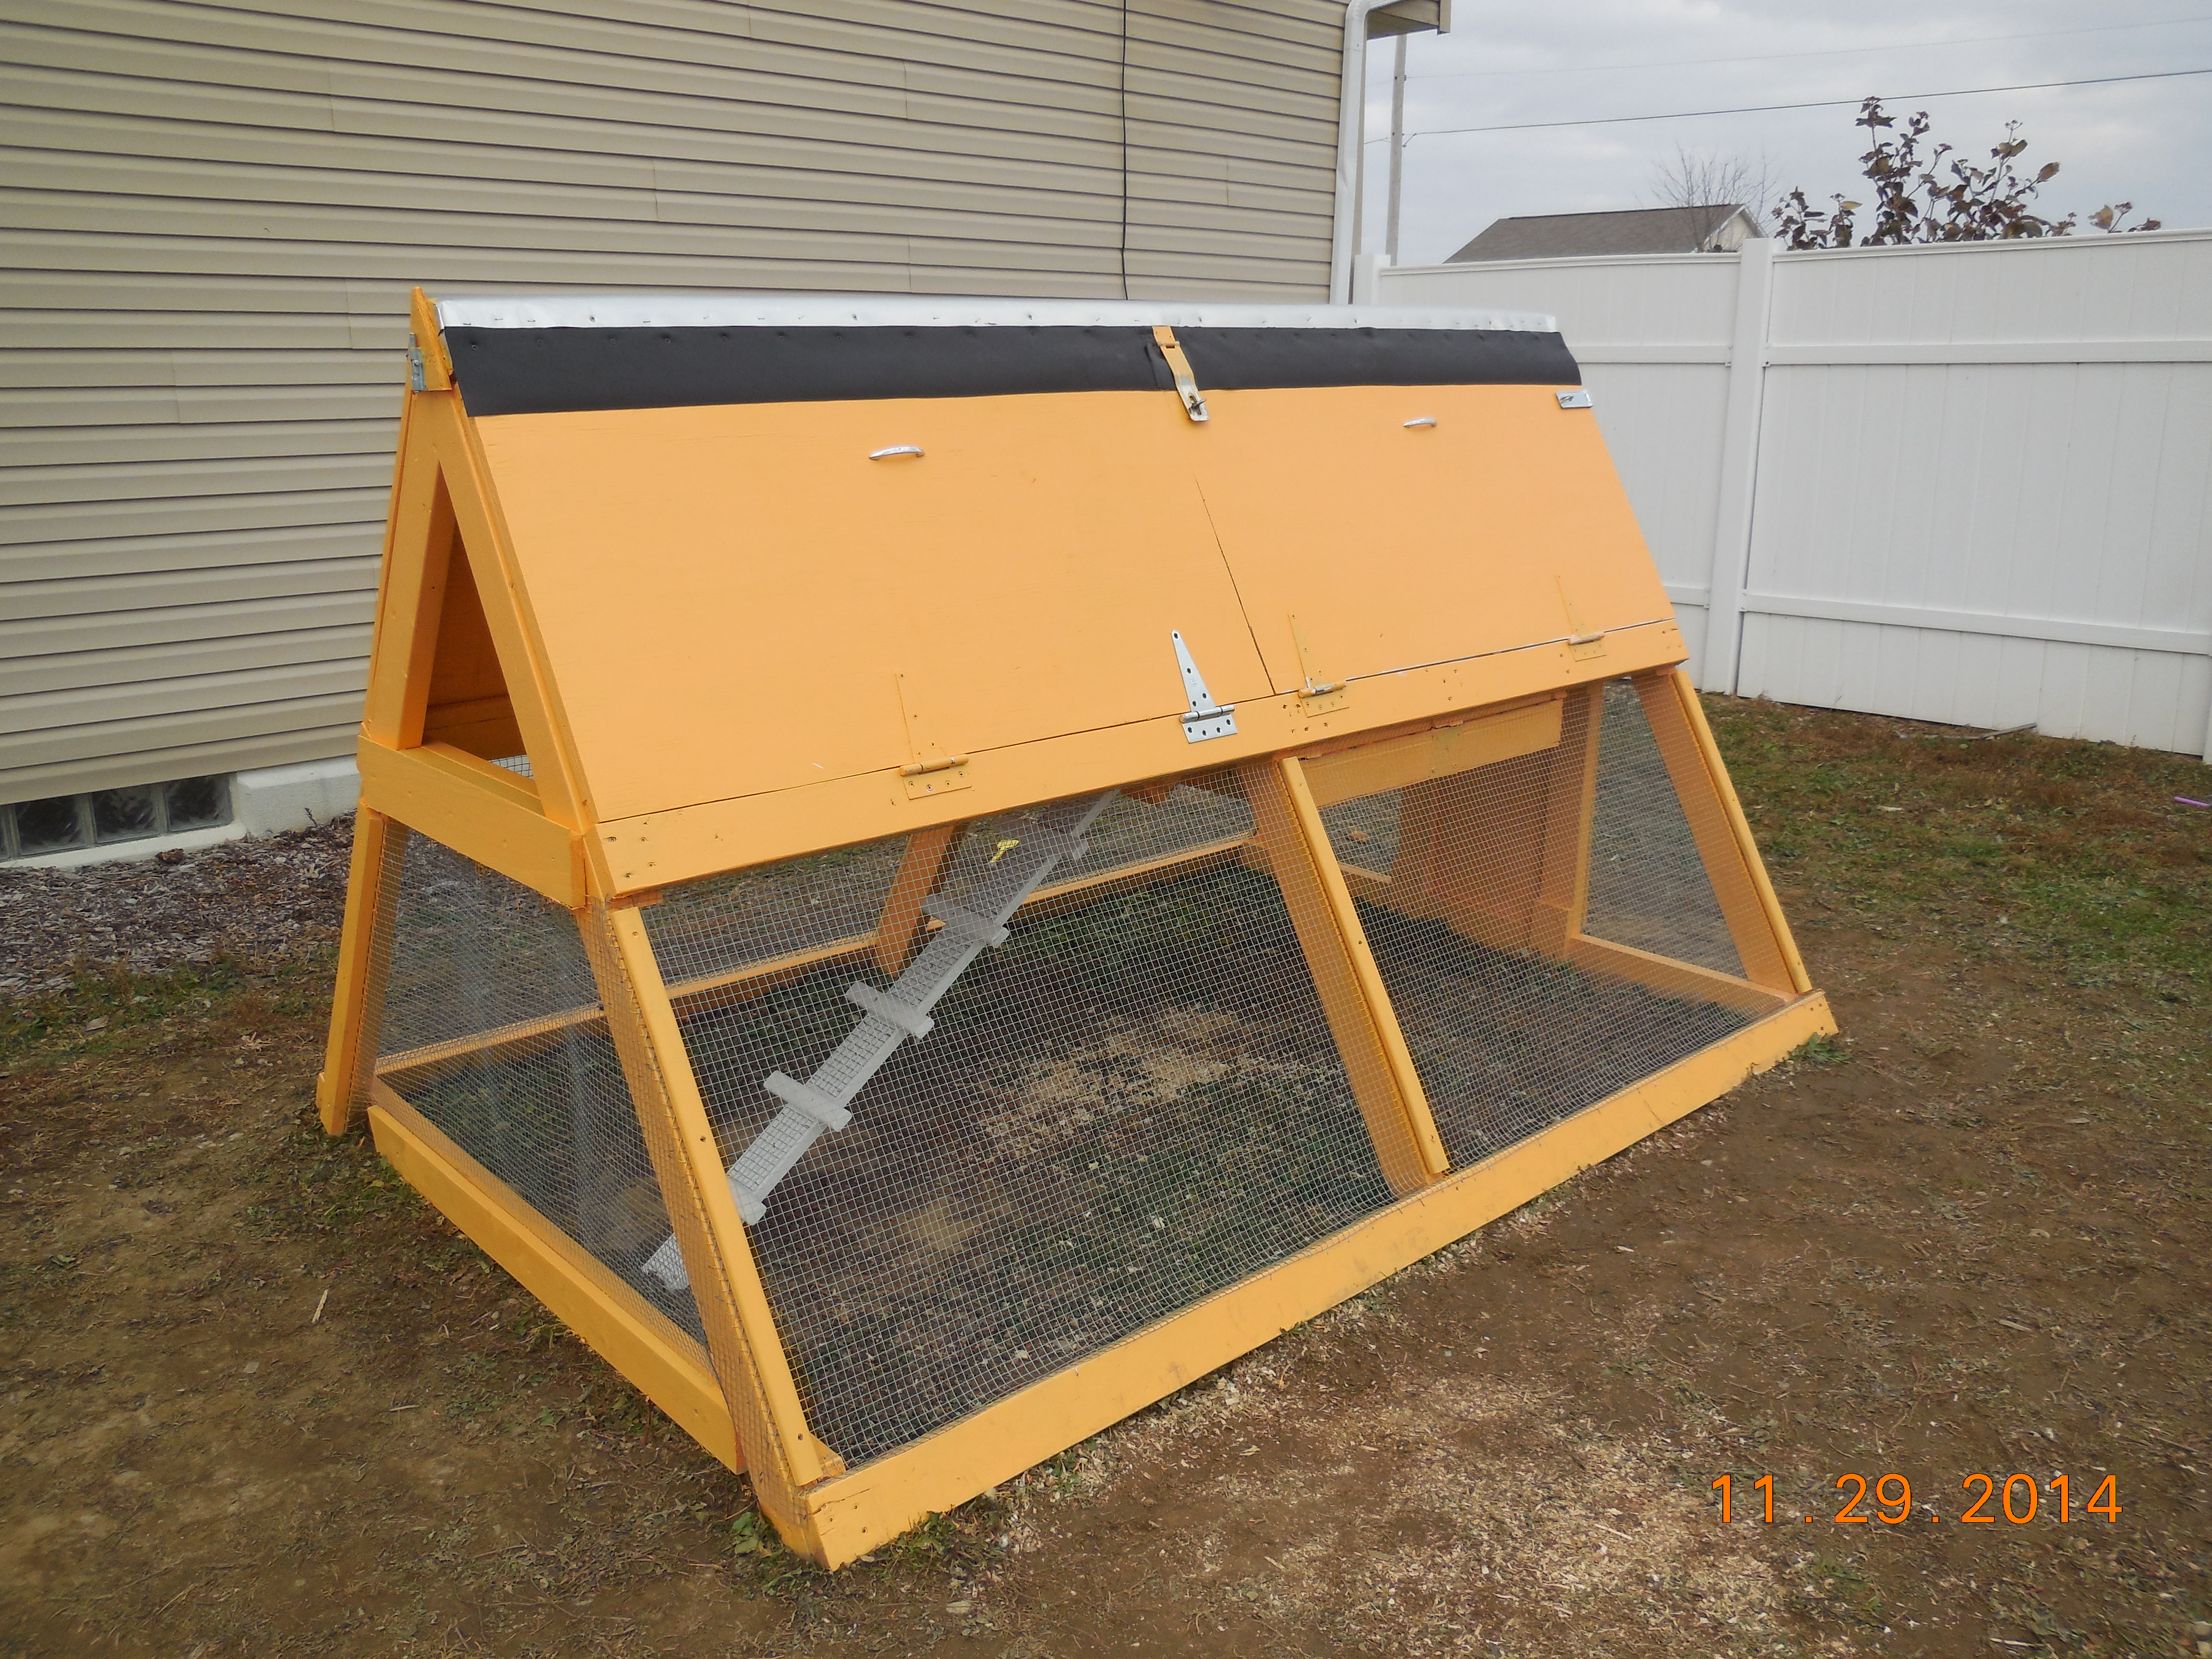
The plans are so easy to follow! They are a great jumping off point for customizing the coop for your own needs! We added a run door, ladder support, insulated floor and wall, removable window, and a loft door. The girls LOVE it!

Built from Plan(s)
Estimated Cost
After modifications, $250
Estimated Time Investment
Week Long Project (20 Hours or More)
Recommended Skill Level
Beginner
Comments

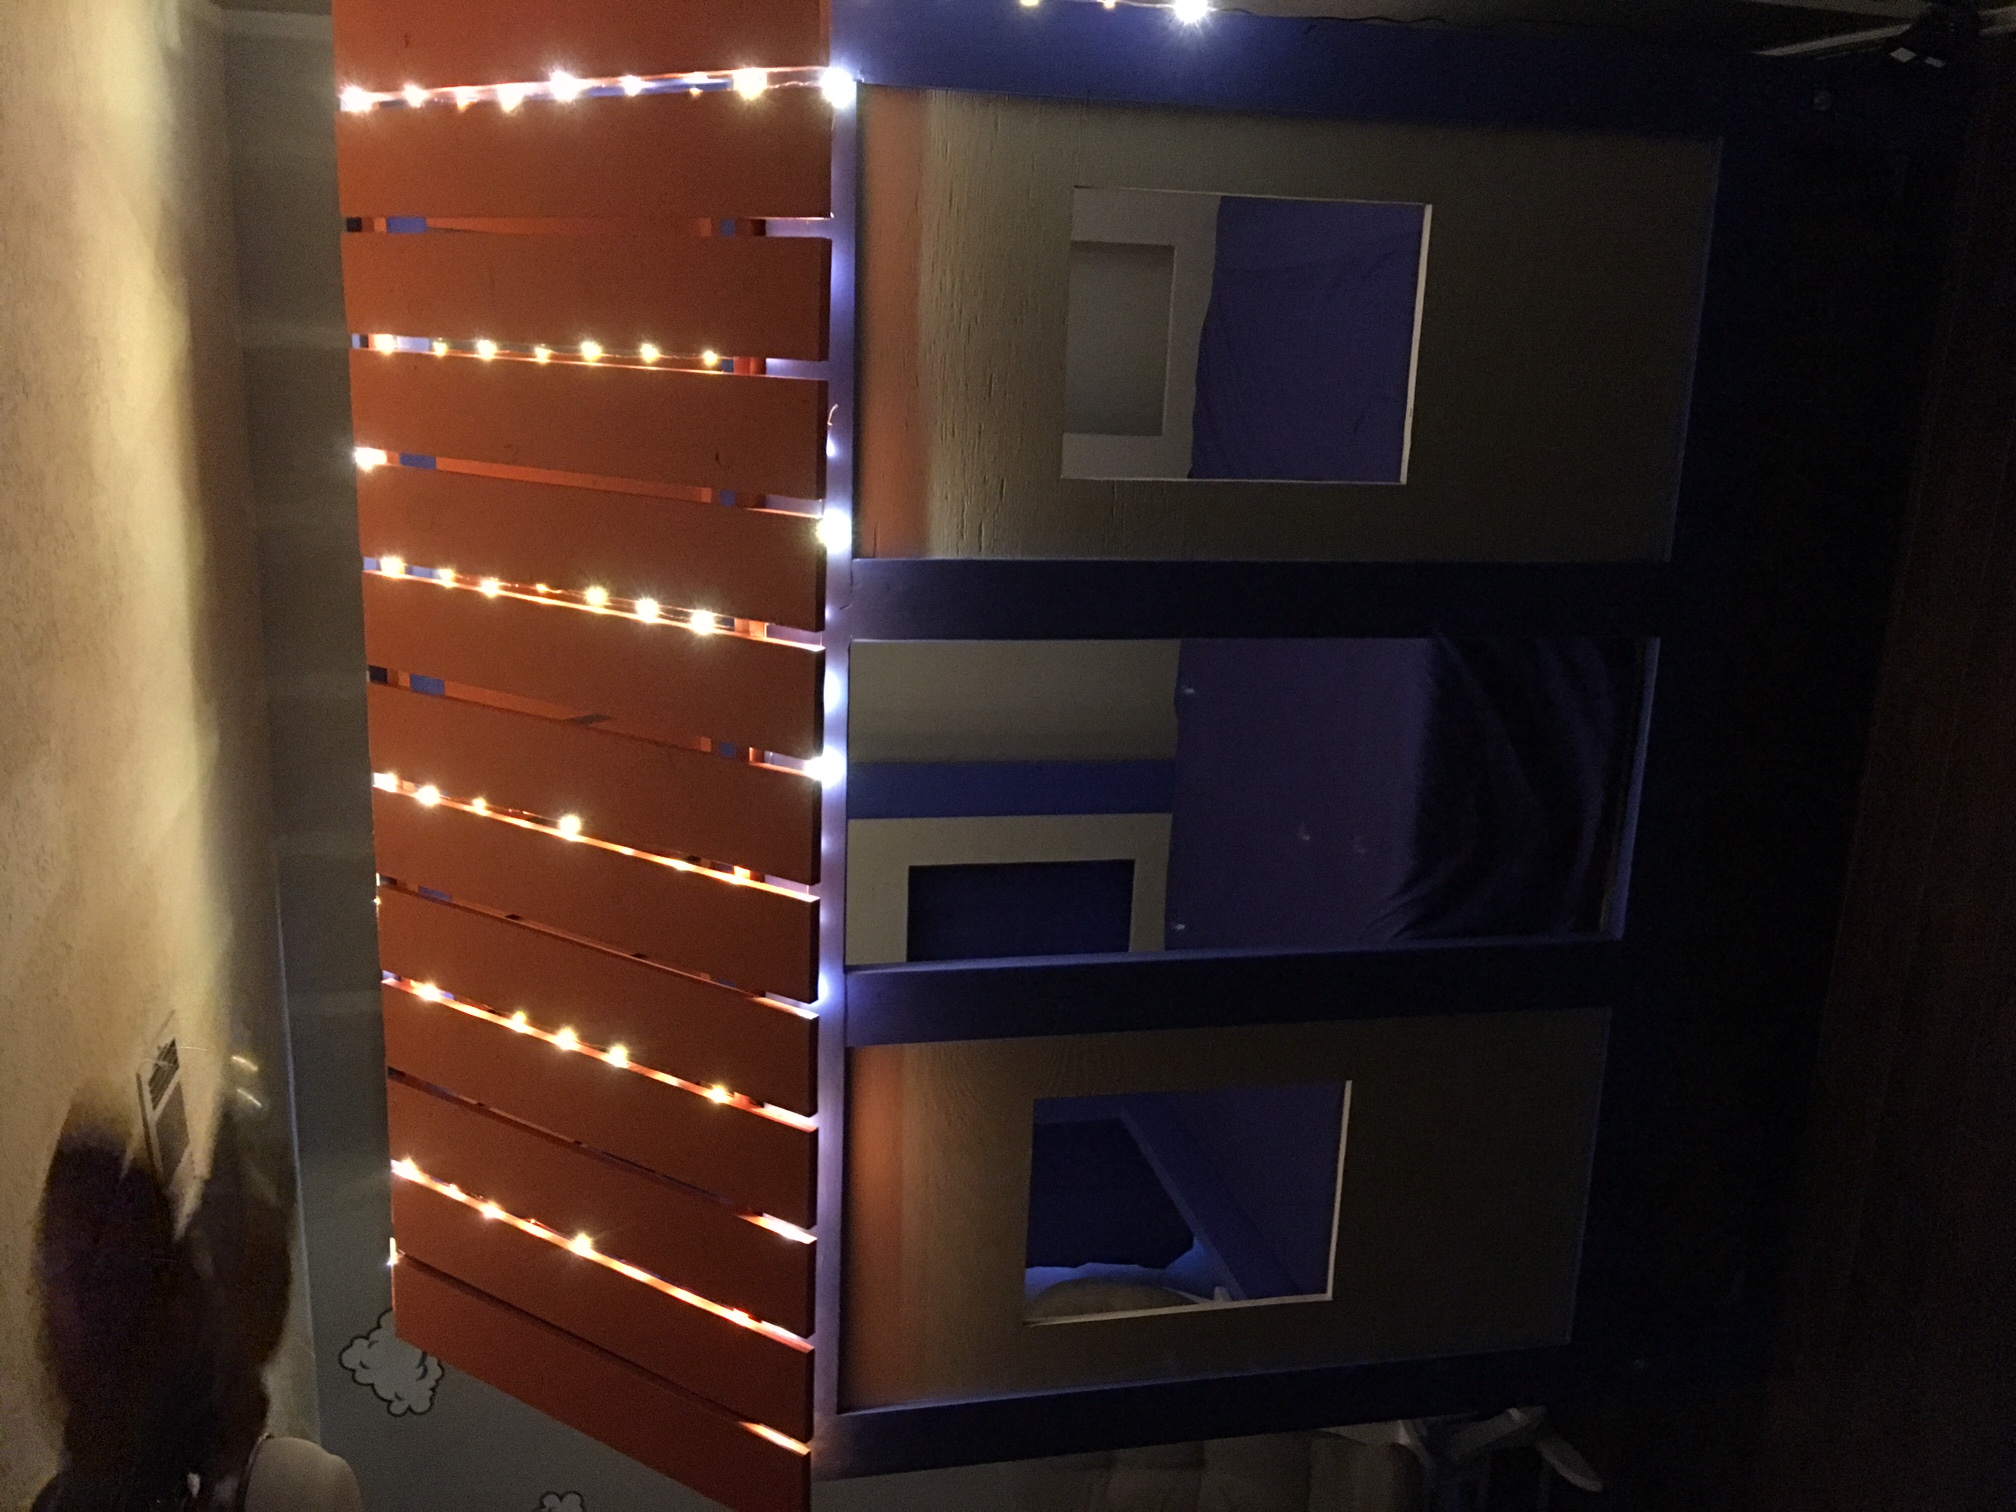
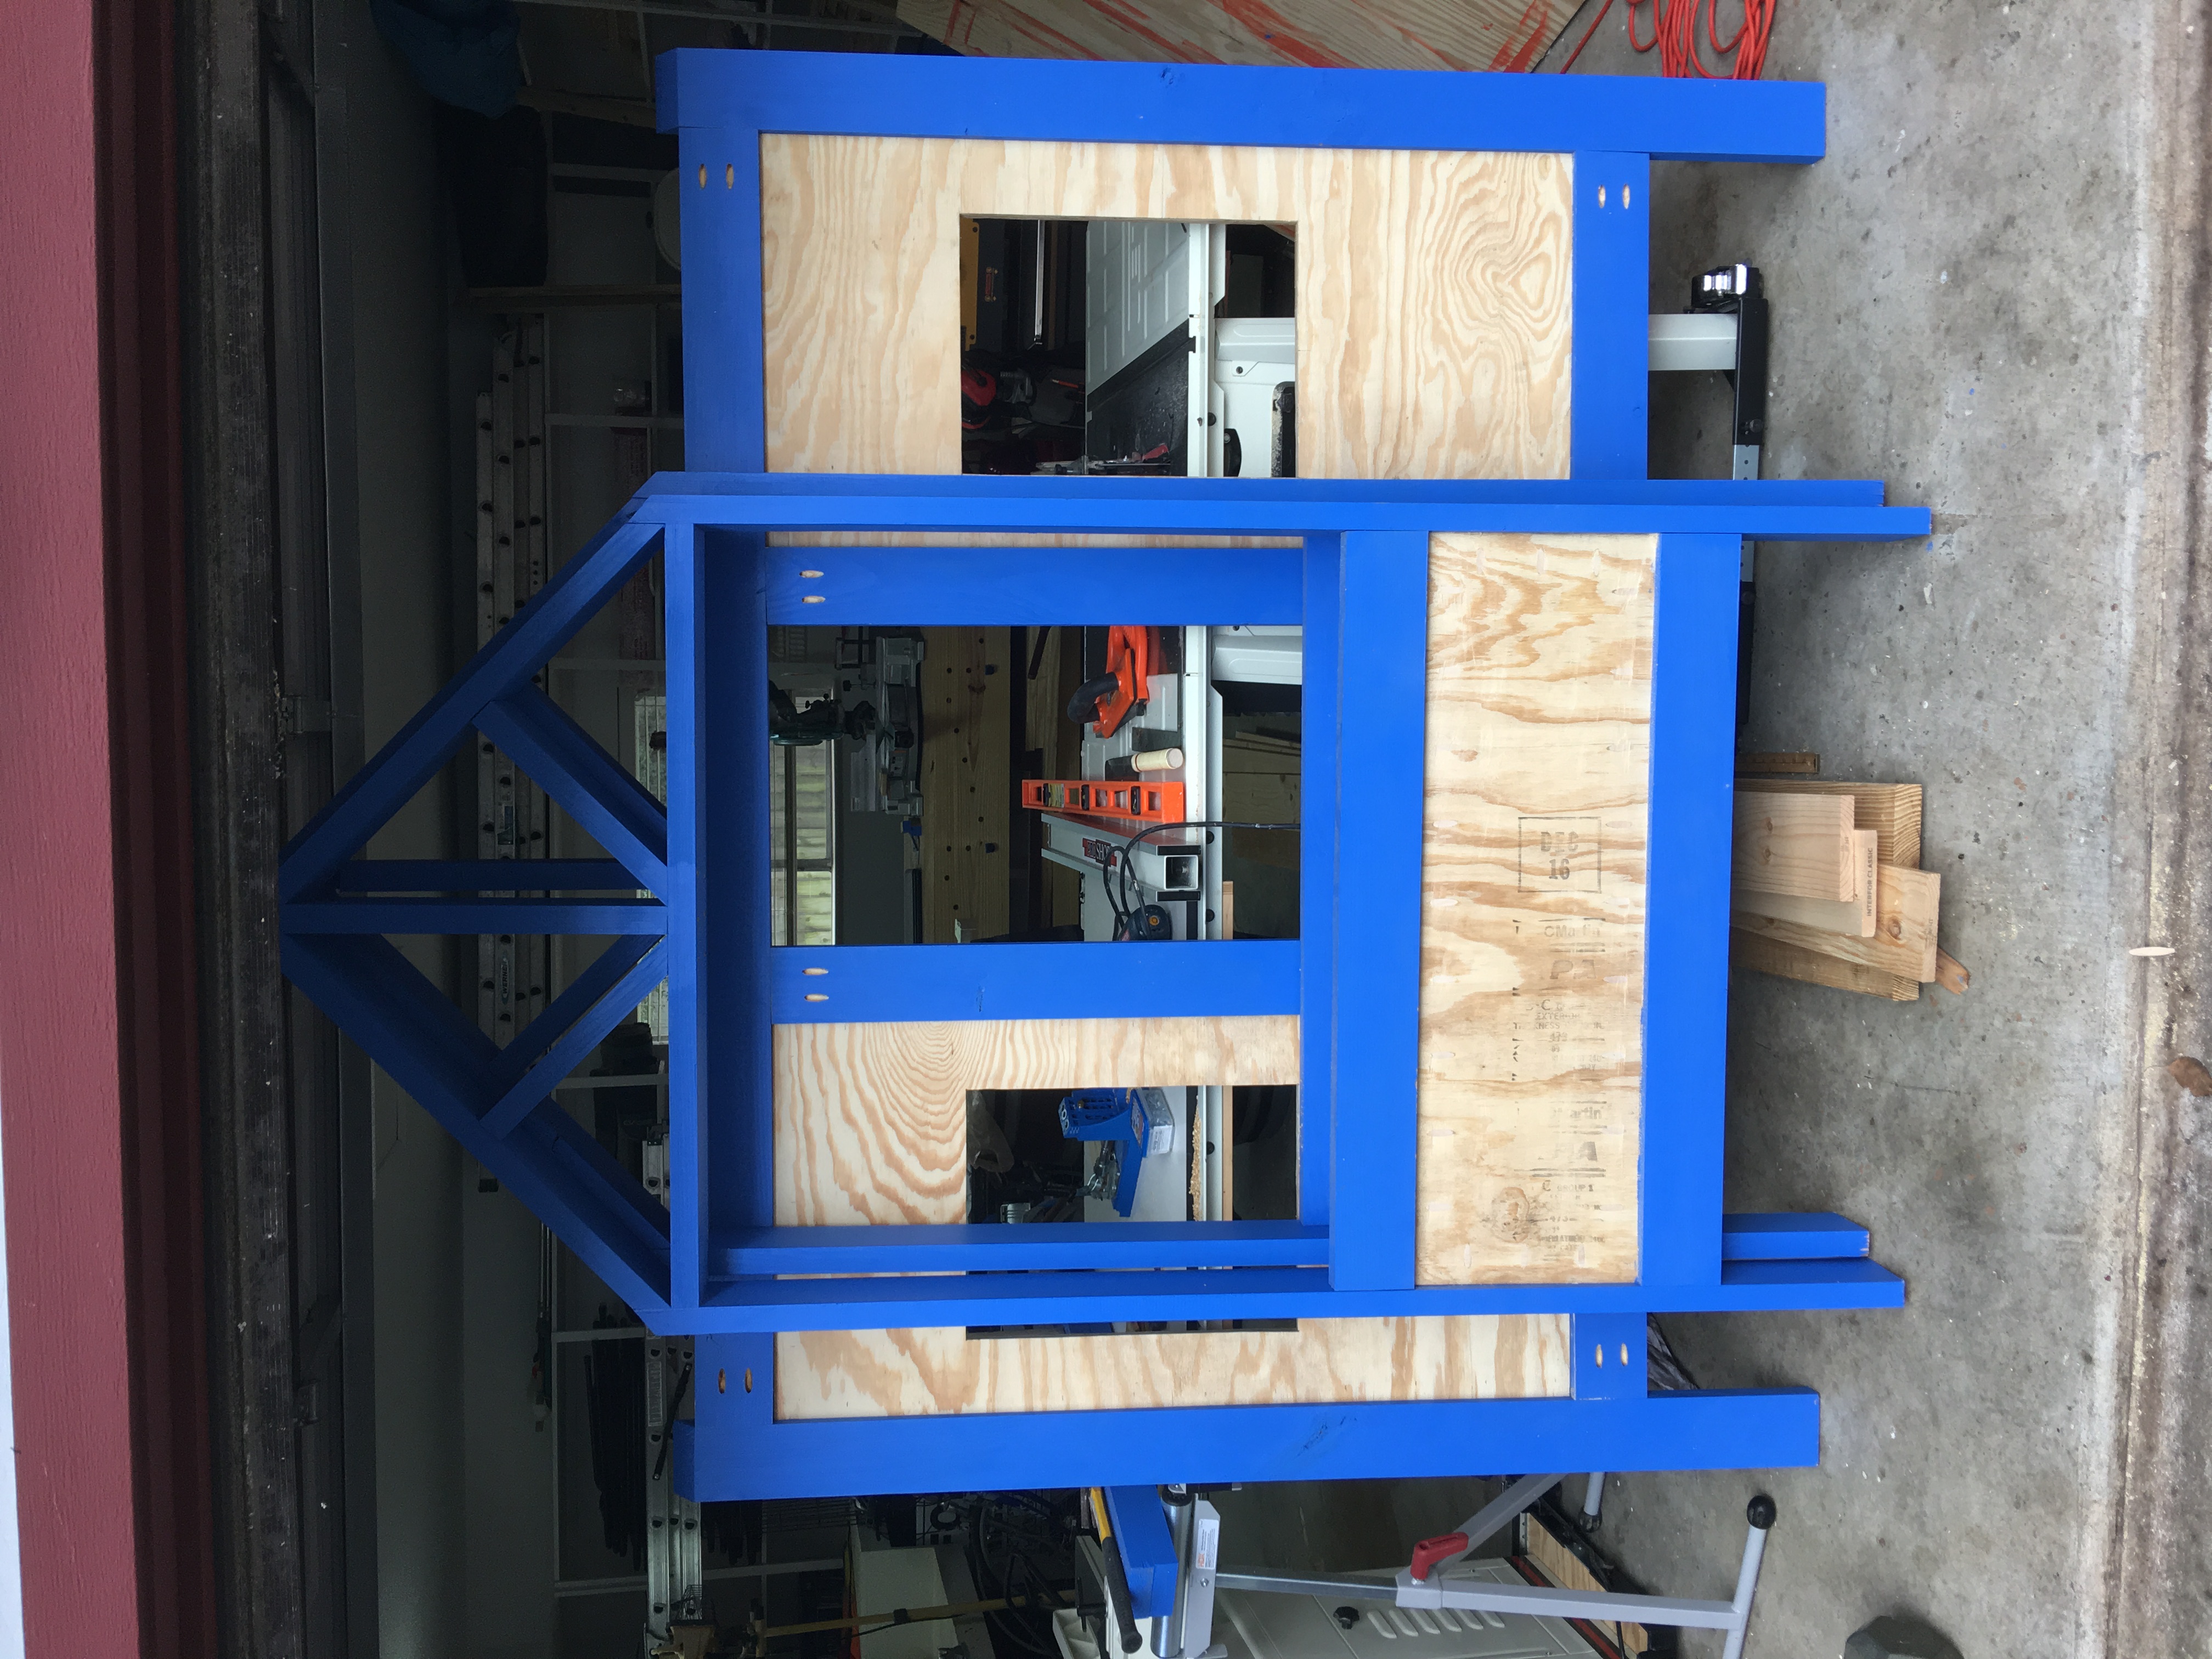
Mario inspired cabin bed
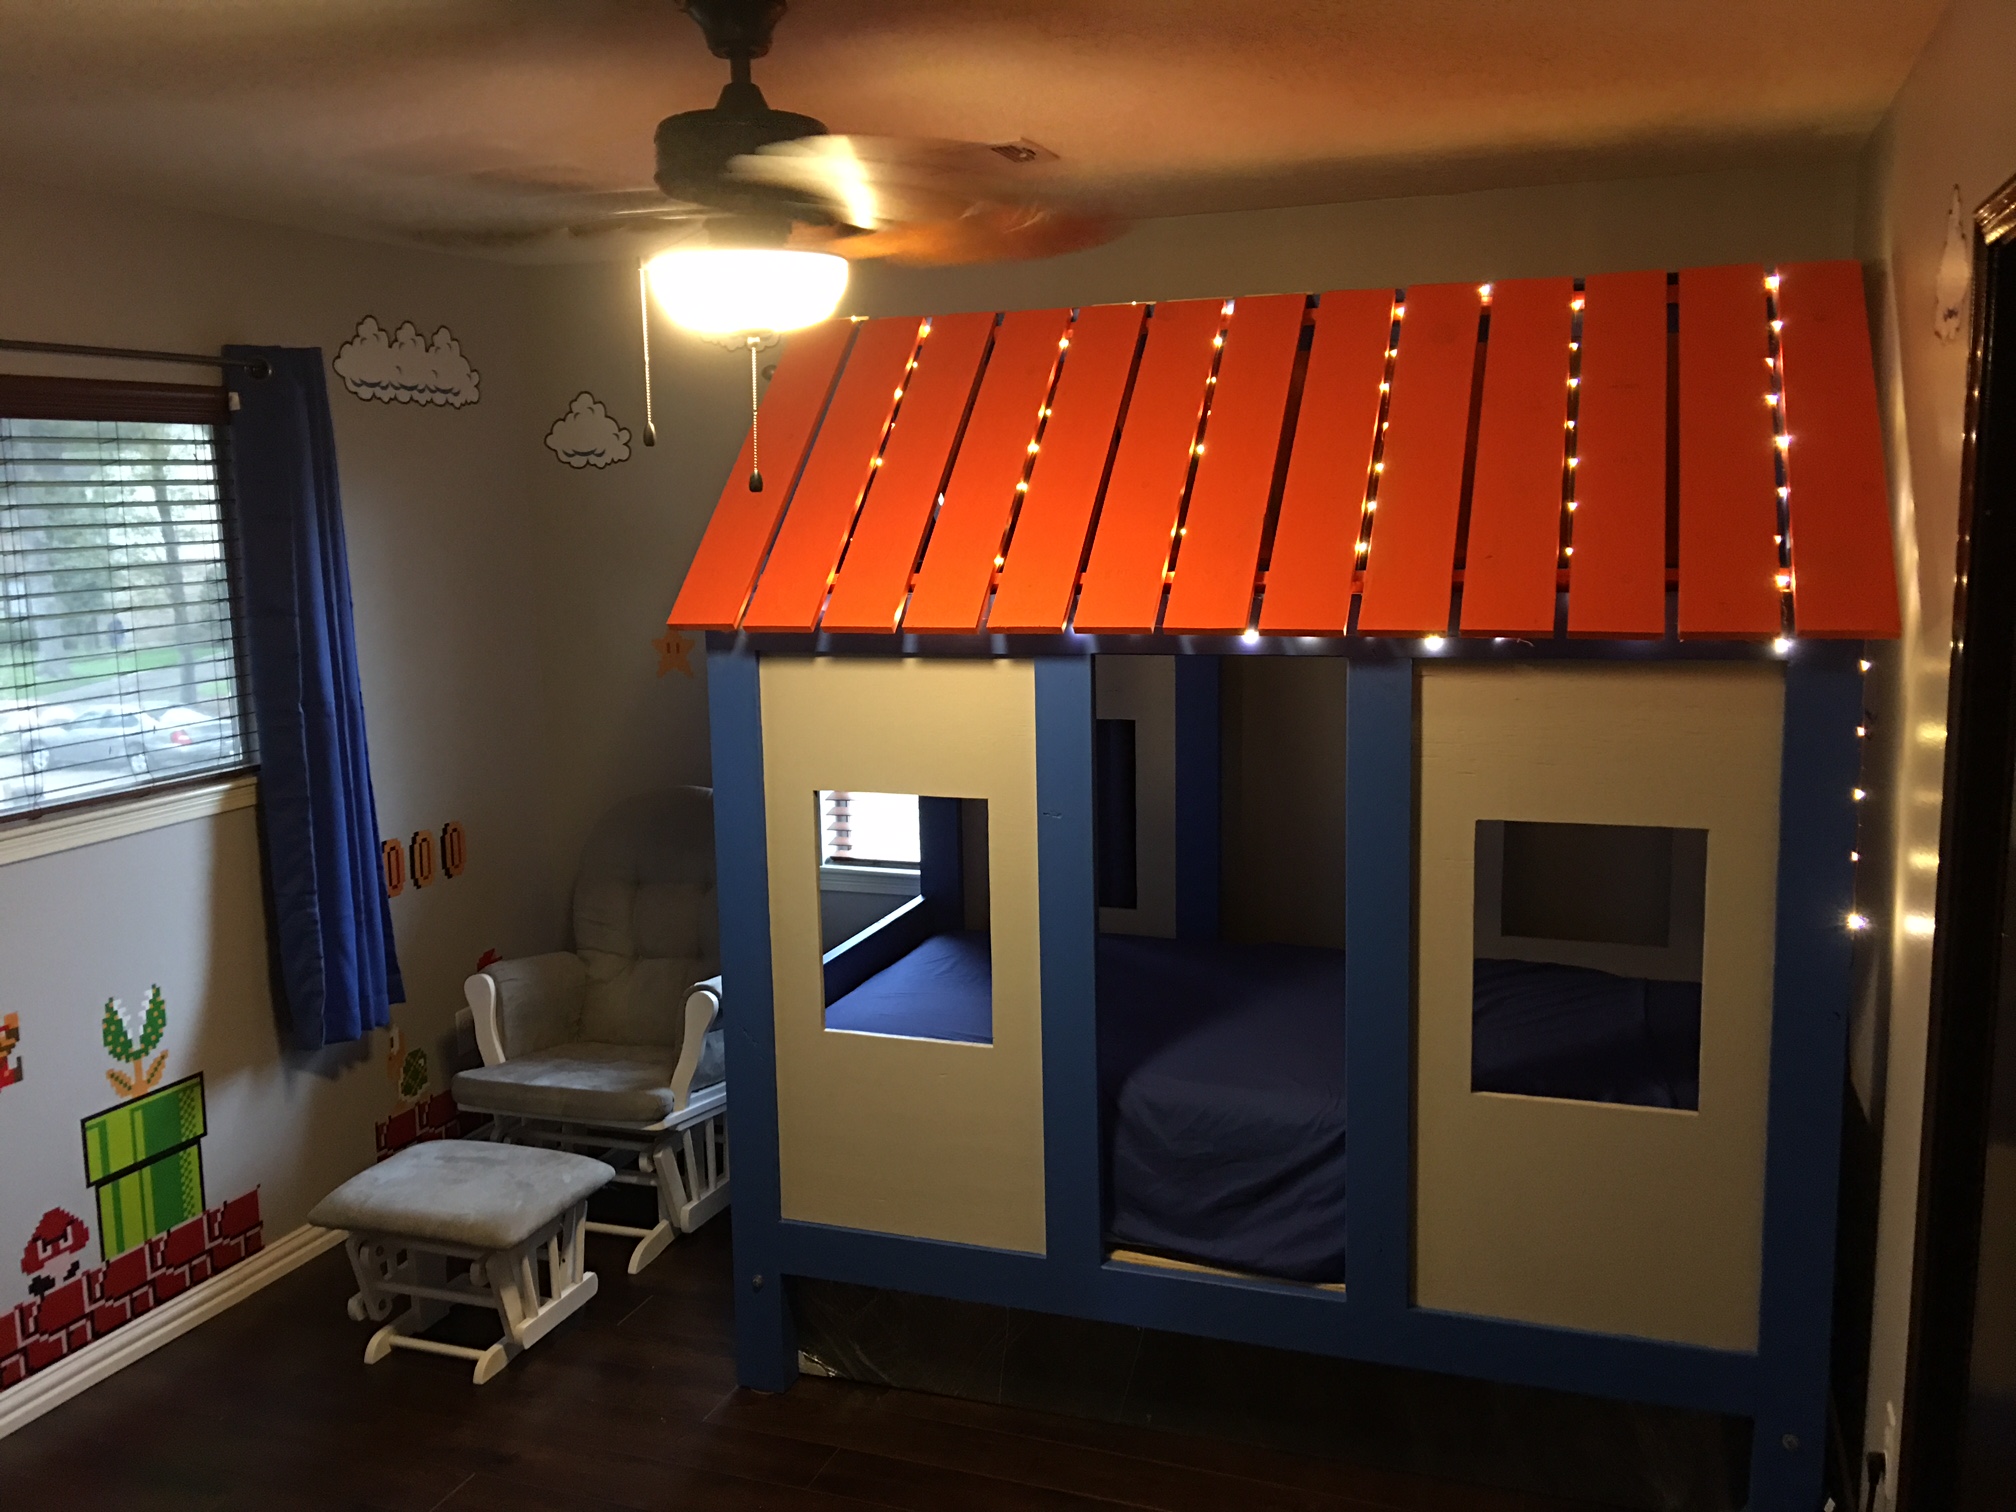
Thank you for all the diagrams on this website, this project could not have been completed without these. The entire project took a month worth of weekends. I used 2 sheets of 3/4" Birch plywood, 2x12x10 Southern Yellow Pine (rip to 4" strips), and 1x8x10 Ponderosa Pine for the roof and slats. Our 3 year old loves the bed and could not wait to use it. All month he has been asking about his new room, normally he does not like change but he loved this bed.
Estimated Time Investment
Week Long Project (20 Hours or More)
Finish Used
Behr Marquee paint. 4 Quarts; 2 for the main color, 1 for the roof, and 1 for the plywood.
Recommended Skill Level
Intermediate
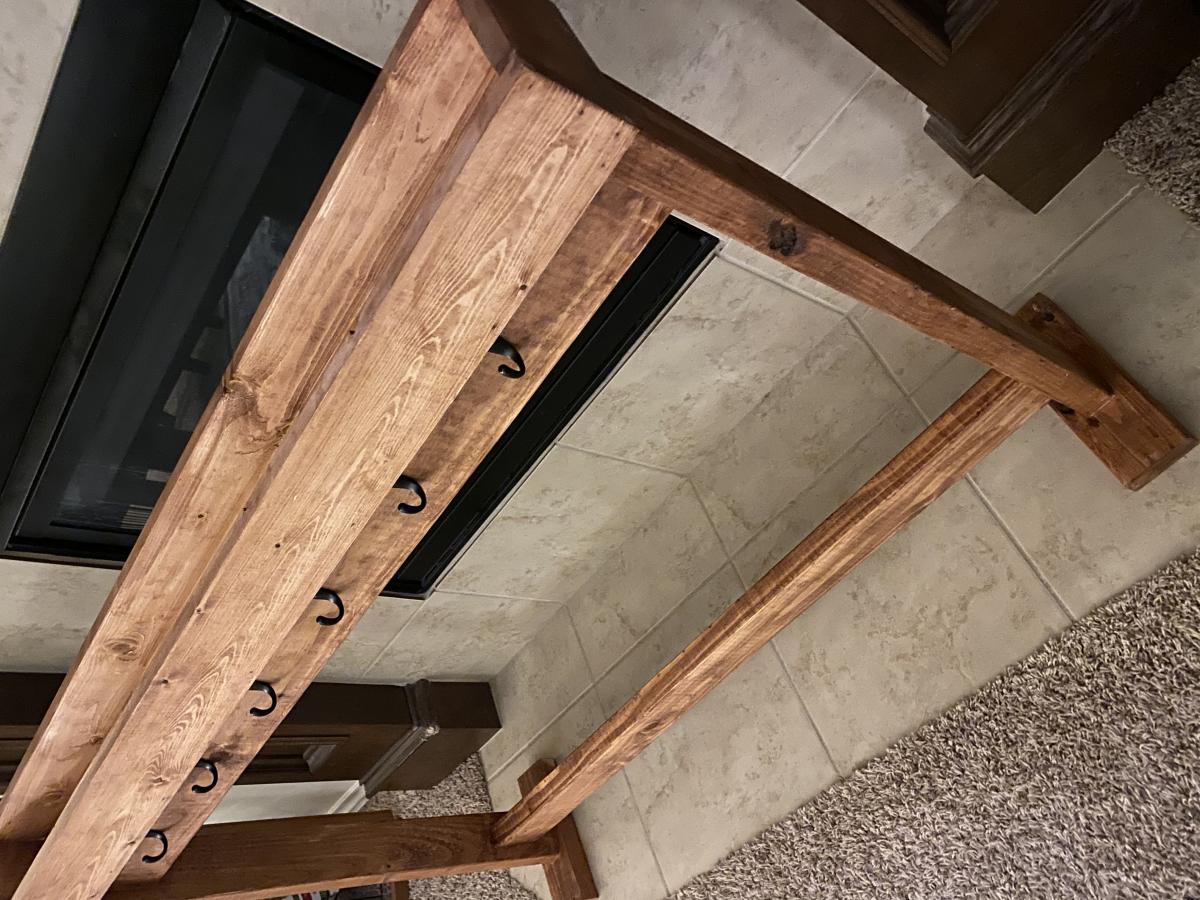
Ana White Stocking Stand & Shanty2Chic Stocking Box
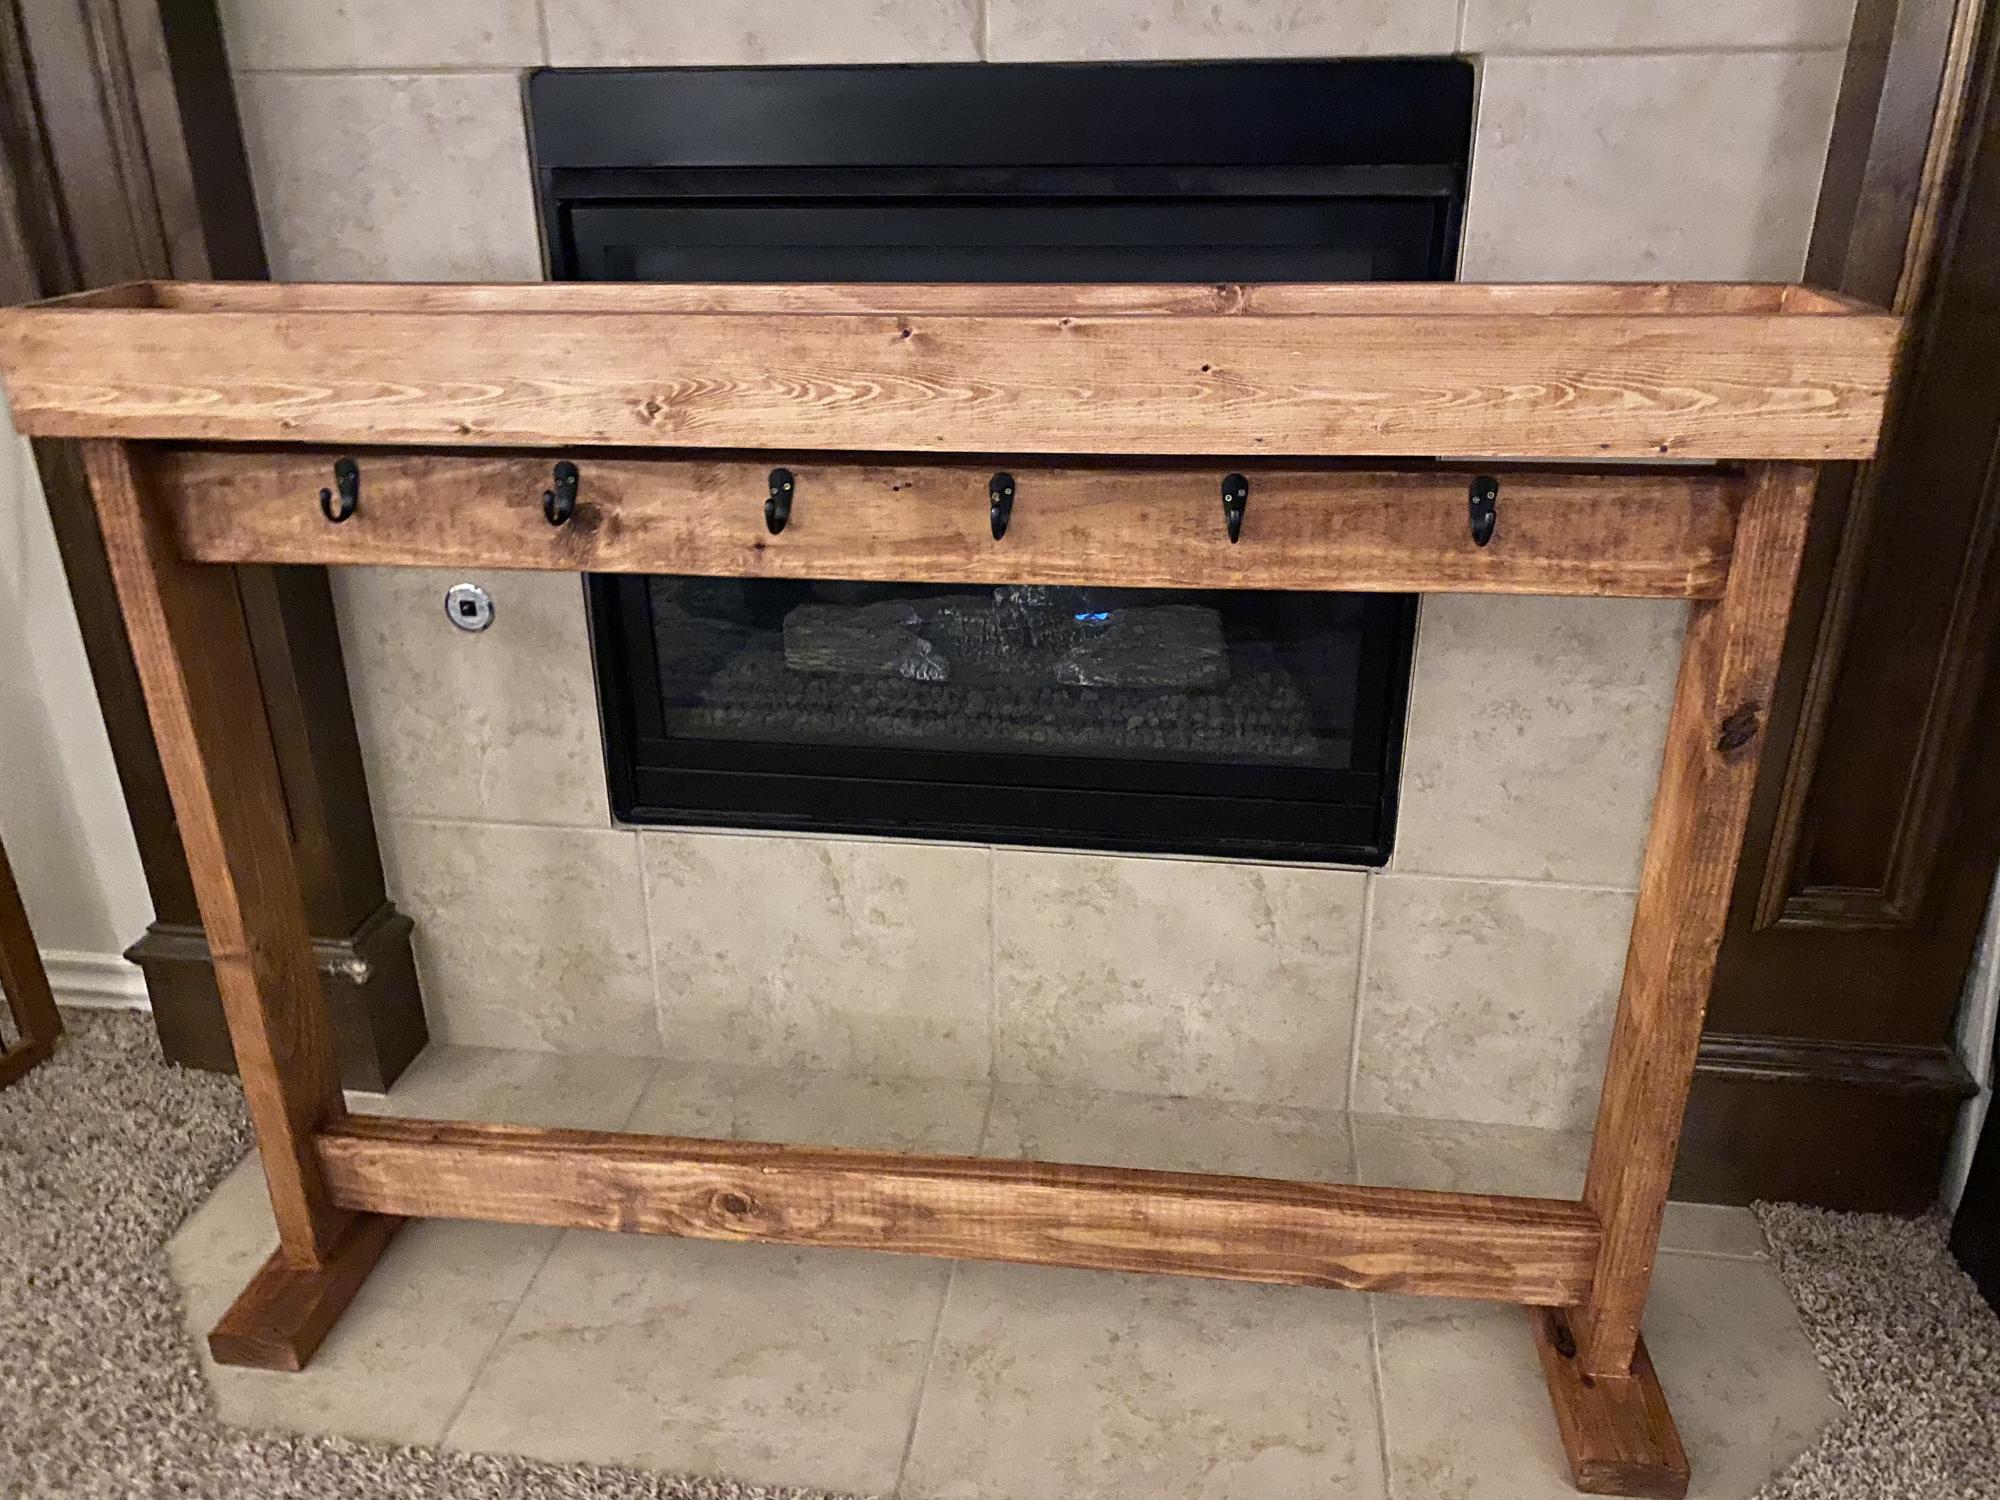
Built this today per request of my daughter because she wanted our stockings hung! I loved the stand Ana made but wanted to be able to use it after Christmas. I saw Shant2Chic built a stocking box and decided to combine my two favorite inspirational builders and came up with this! I hope you like it!
I added a 50” box (monitors Shanty2Chic’s measurements) and screwed it to the top of Ana’s Stocking stand!
Built from Plan(s)
Estimated Cost
$15
Estimated Time Investment
An Hour or Two (0-2 Hours)
Recommended Skill Level
Beginner
Comments
Sat, 12/26/2020 - 19:09
Great addition
Love the combo of the plans and so happy to hear you were able to hang the stockings!
Benchright Table

Built the benchright table with a few modifications. Finding straight or even somewhat straight 2x2's is near impossible so I used top choice 2x4s. I used a chain and a turnbuckle instead of the black iron pipe. I painted the hardware with copper spray paint. The stain is ebony miniwax water based stain. Let me know what you think, I'm open to suggestions.


Built from Plan(s)
Estimated Time Investment
Weekend Project (10-20 Hours)
Finish Used
Miniwax ebony water based stain
Recommended Skill Level
Beginner
Comments
Fri, 02/01/2013 - 19:44
Farmhouse Table
The ends drop slightly, it's agrivating me to no end. I'll fix it.
Fri, 02/01/2013 - 23:37
Looks great. I love the
Looks great. I love the copper, wouldn't match my wifes decor/color scheme but it looks awesome. Amazing job
Farmhouse Doll Bed
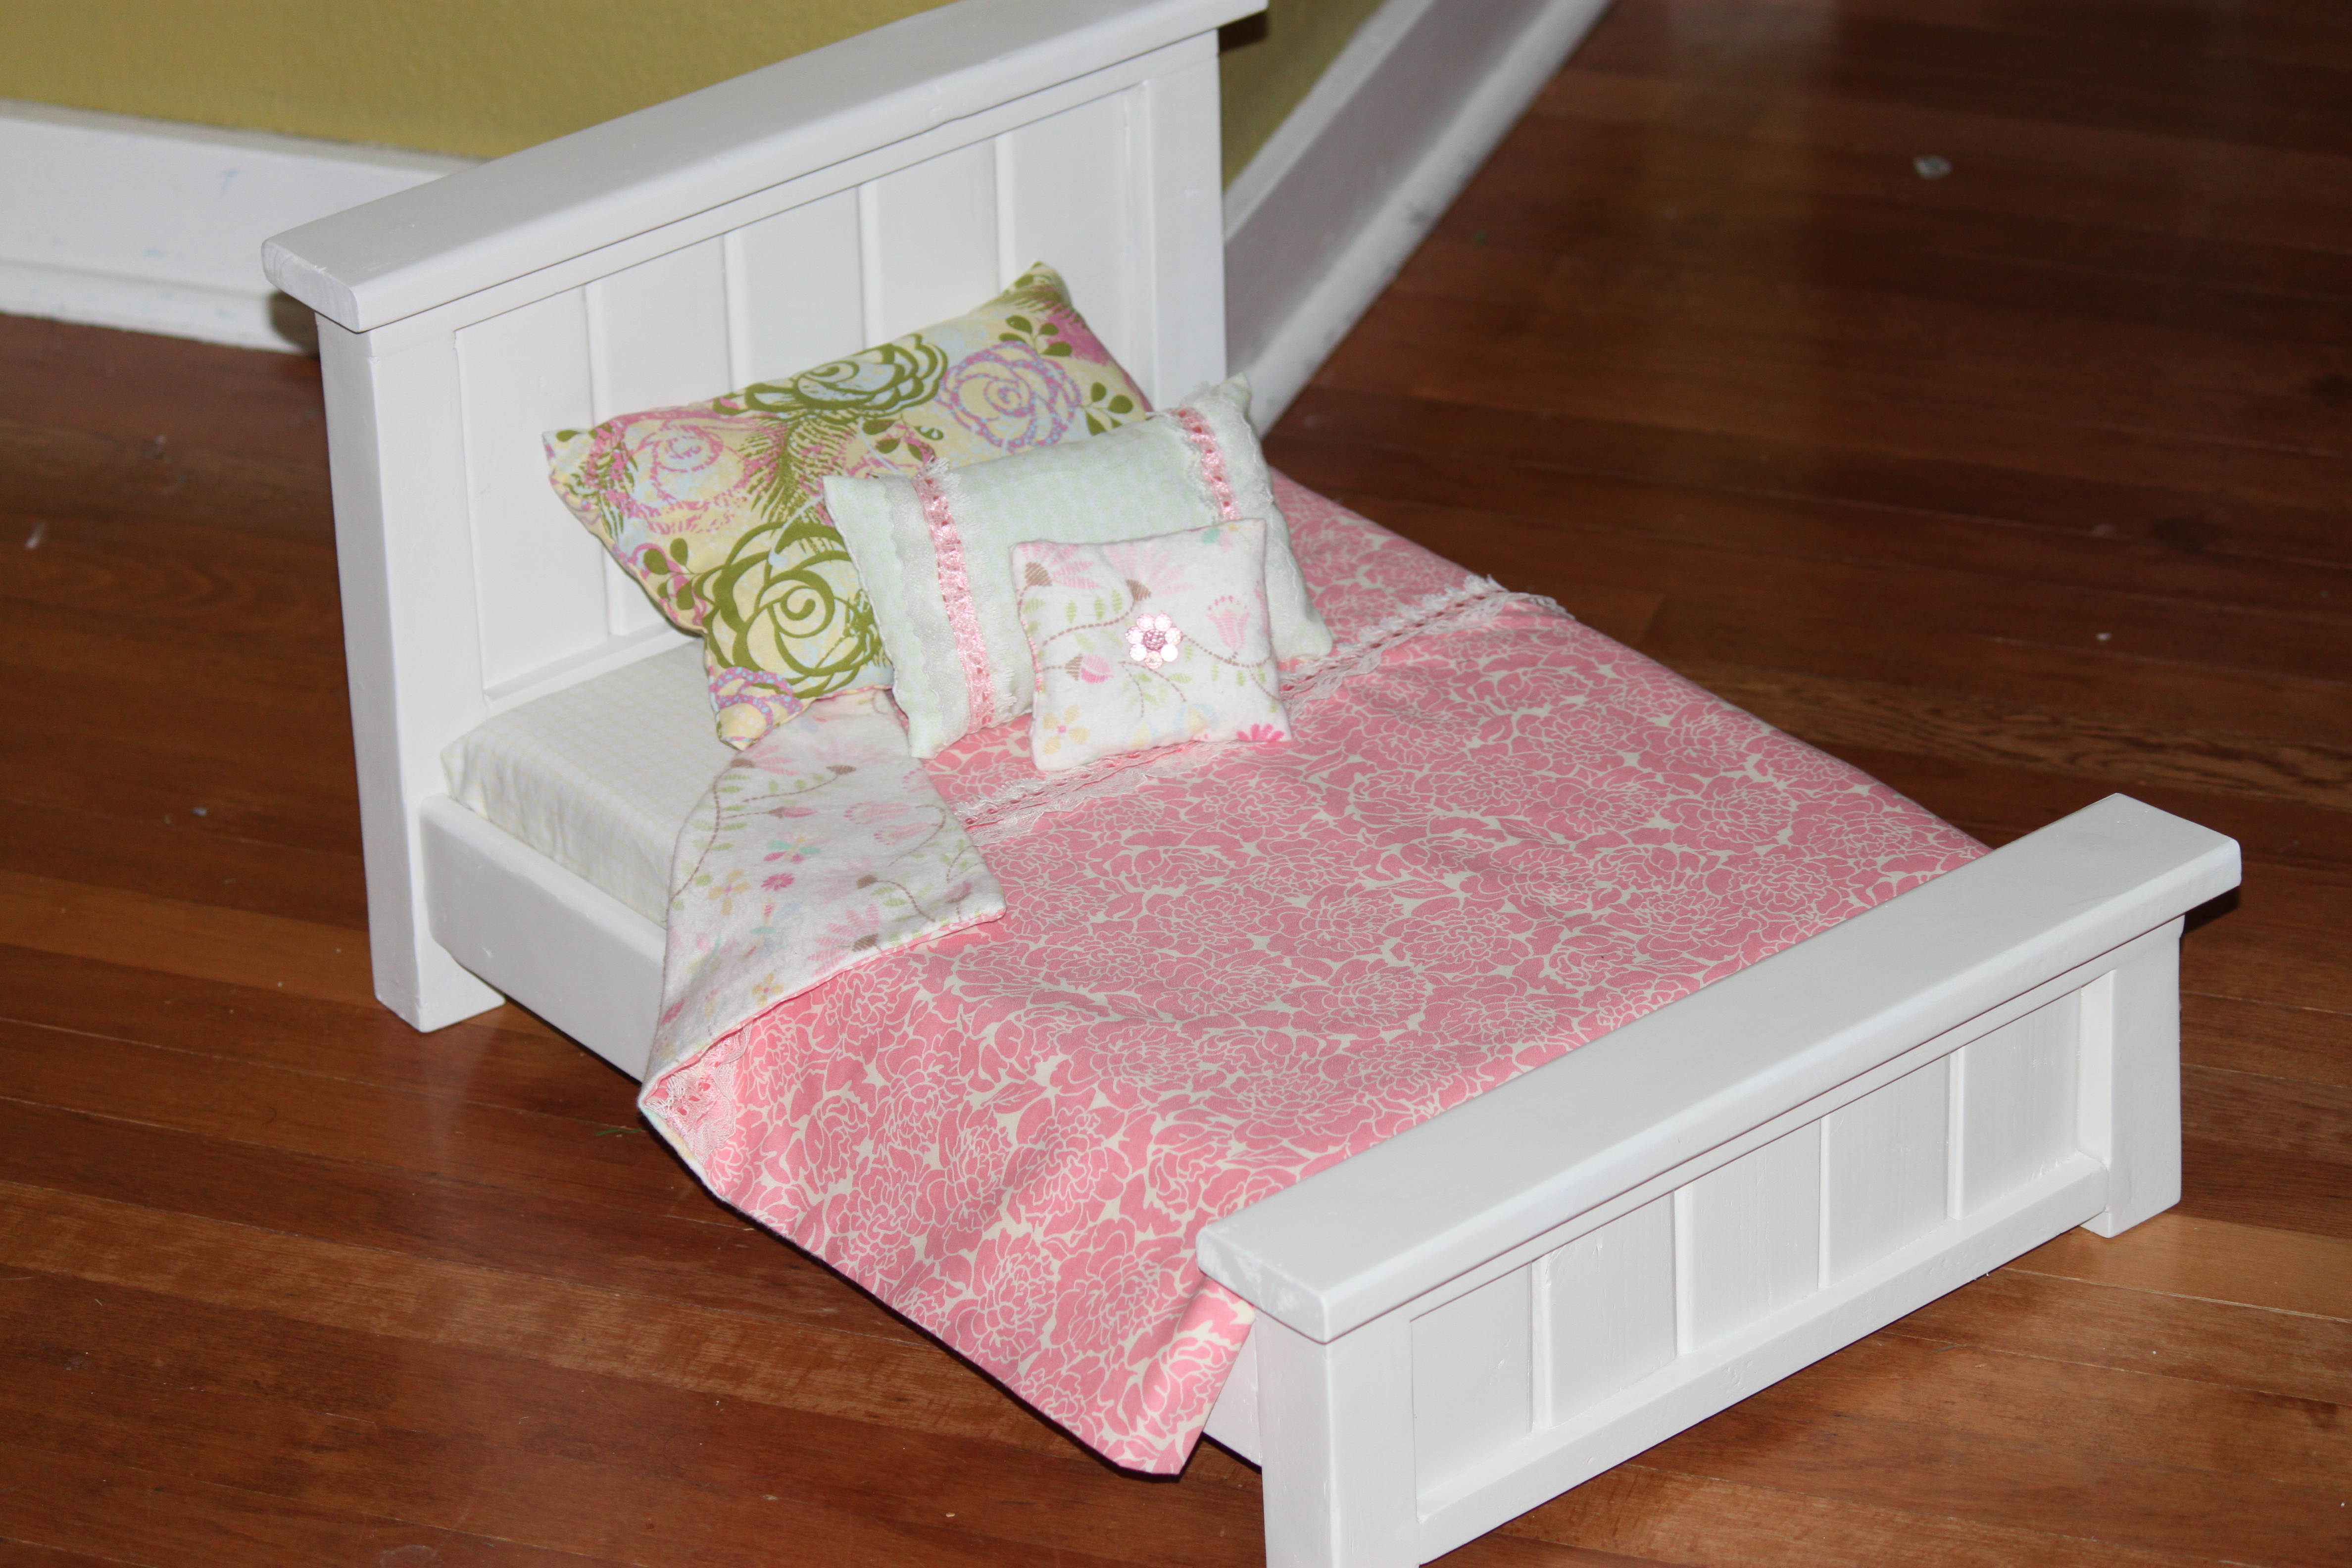
American Girl Farmhouse Doll Bed.
Built from Plan(s)
Estimated Cost
$20.00 Wood supplies $20 fabric supplies
Estimated Time Investment
Weekend Project (10-20 Hours)
Recommended Skill Level
Beginner
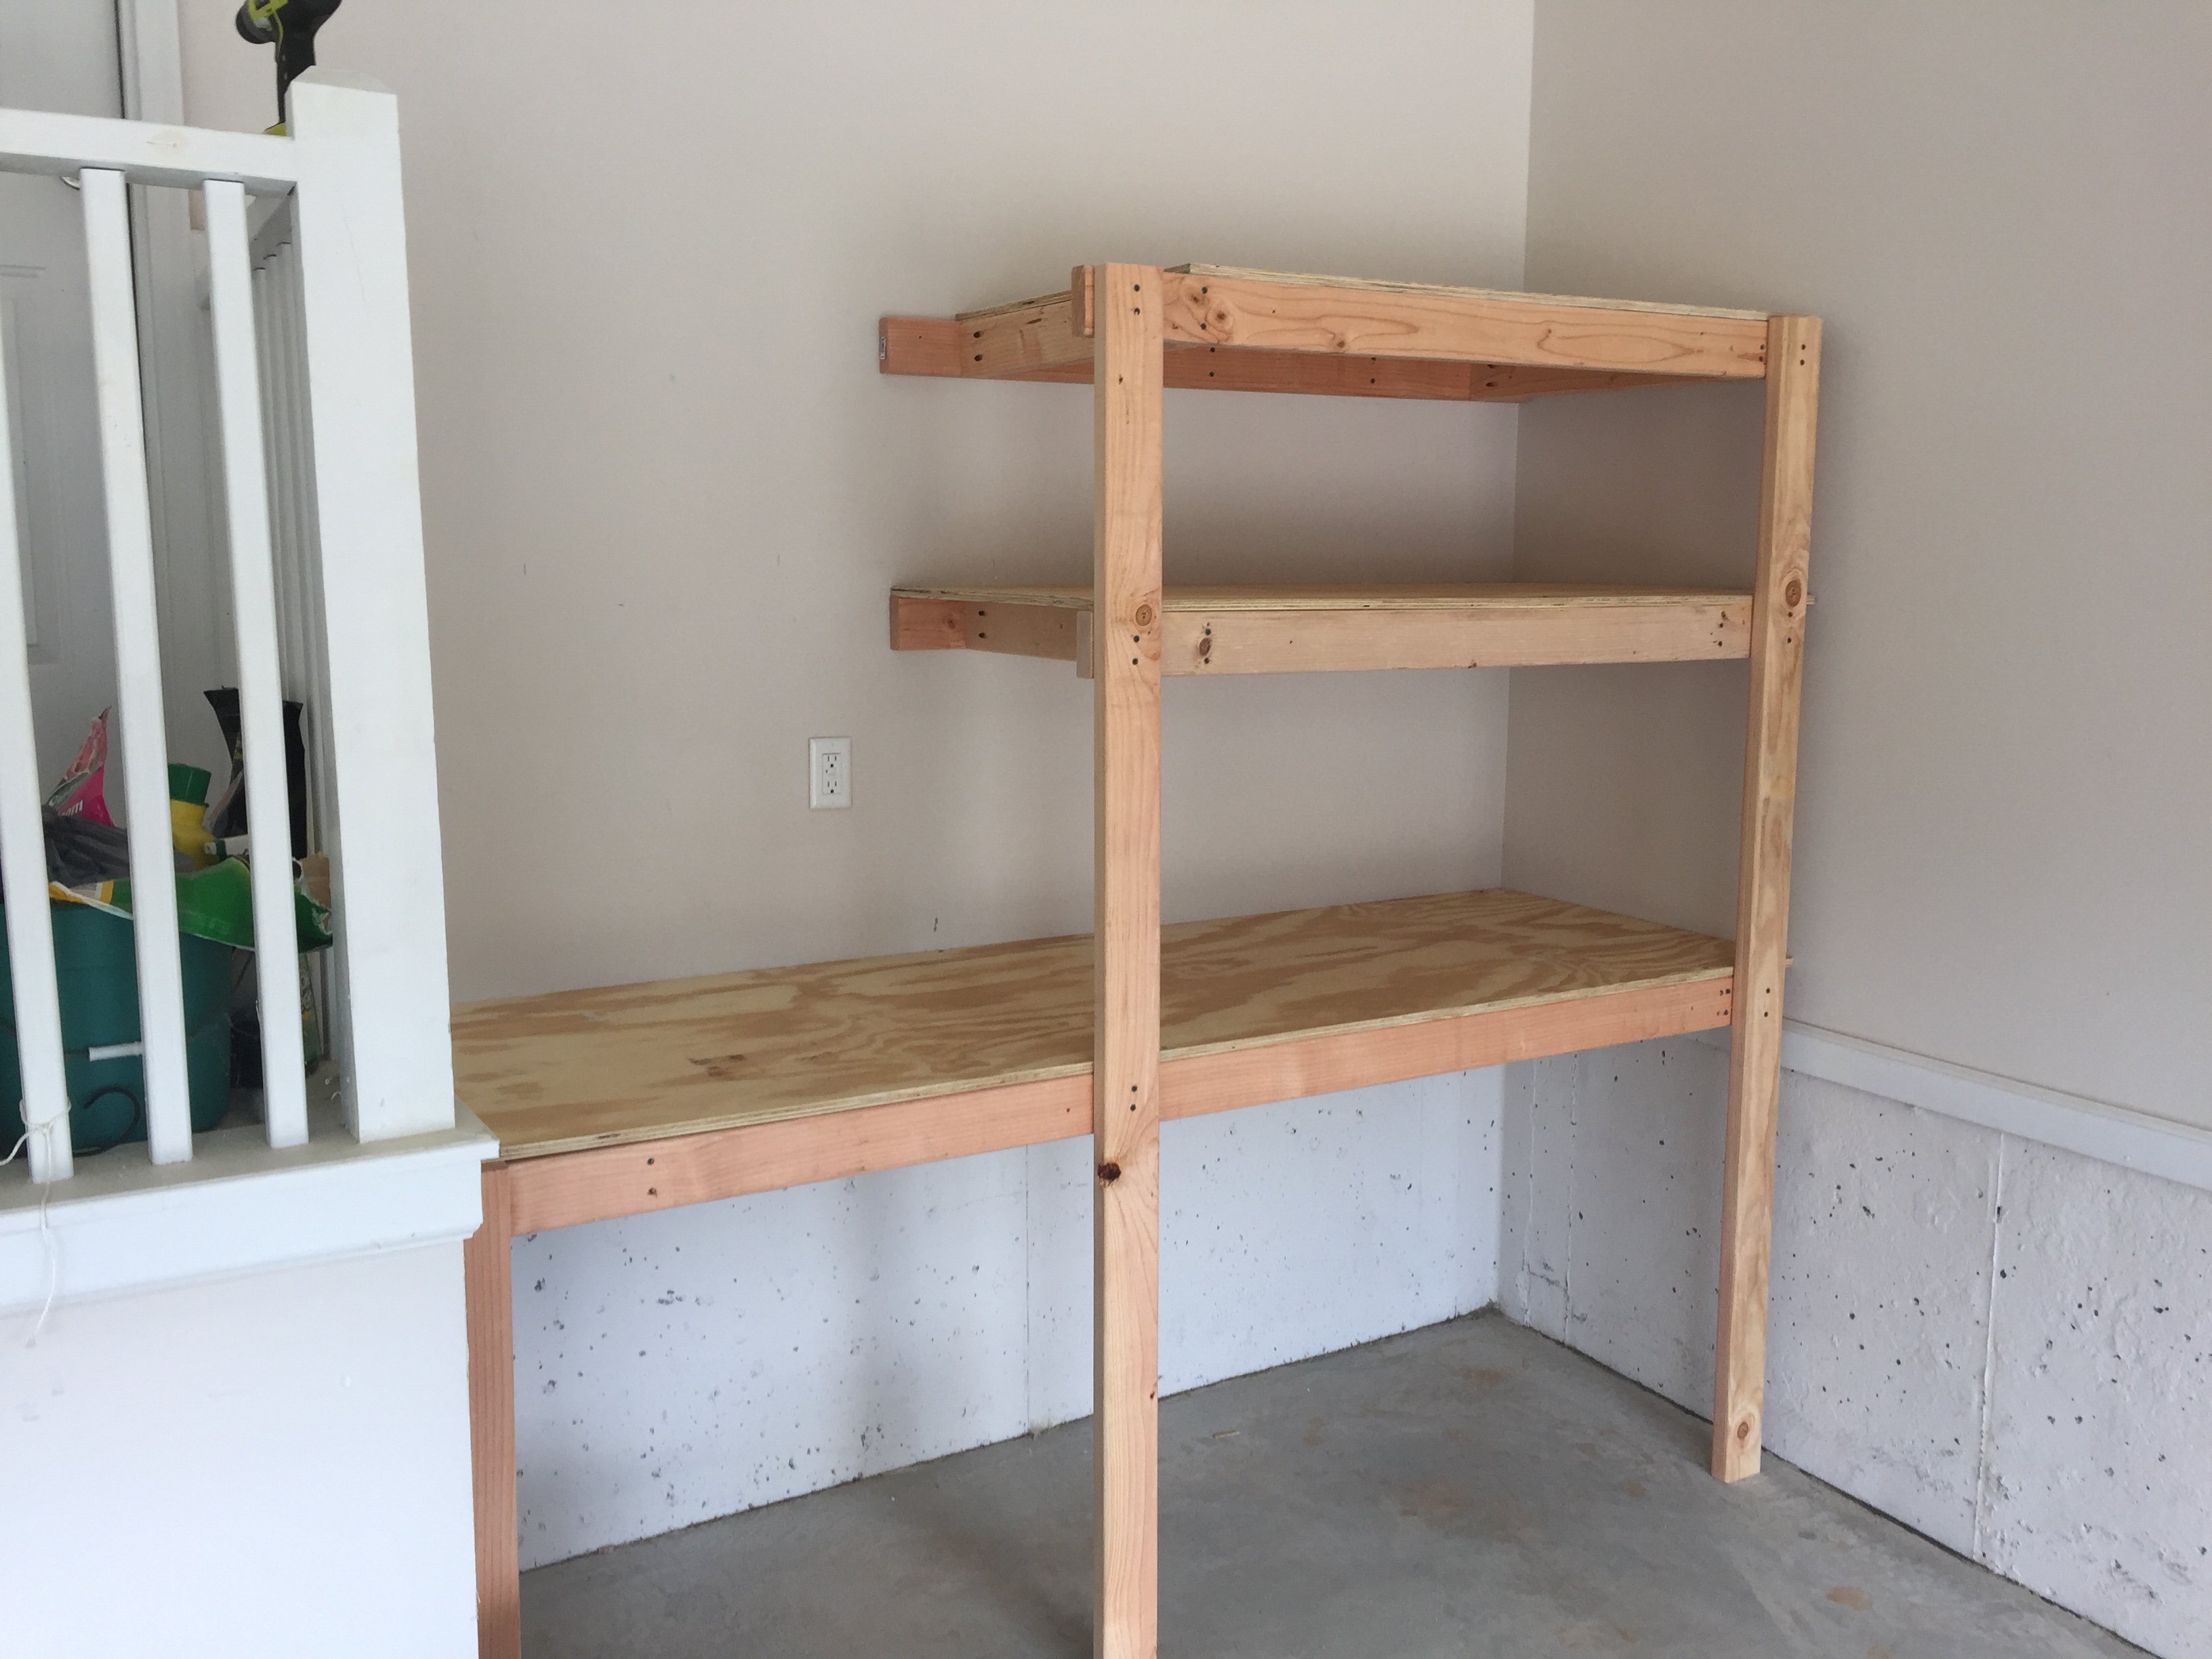
Garage shelving
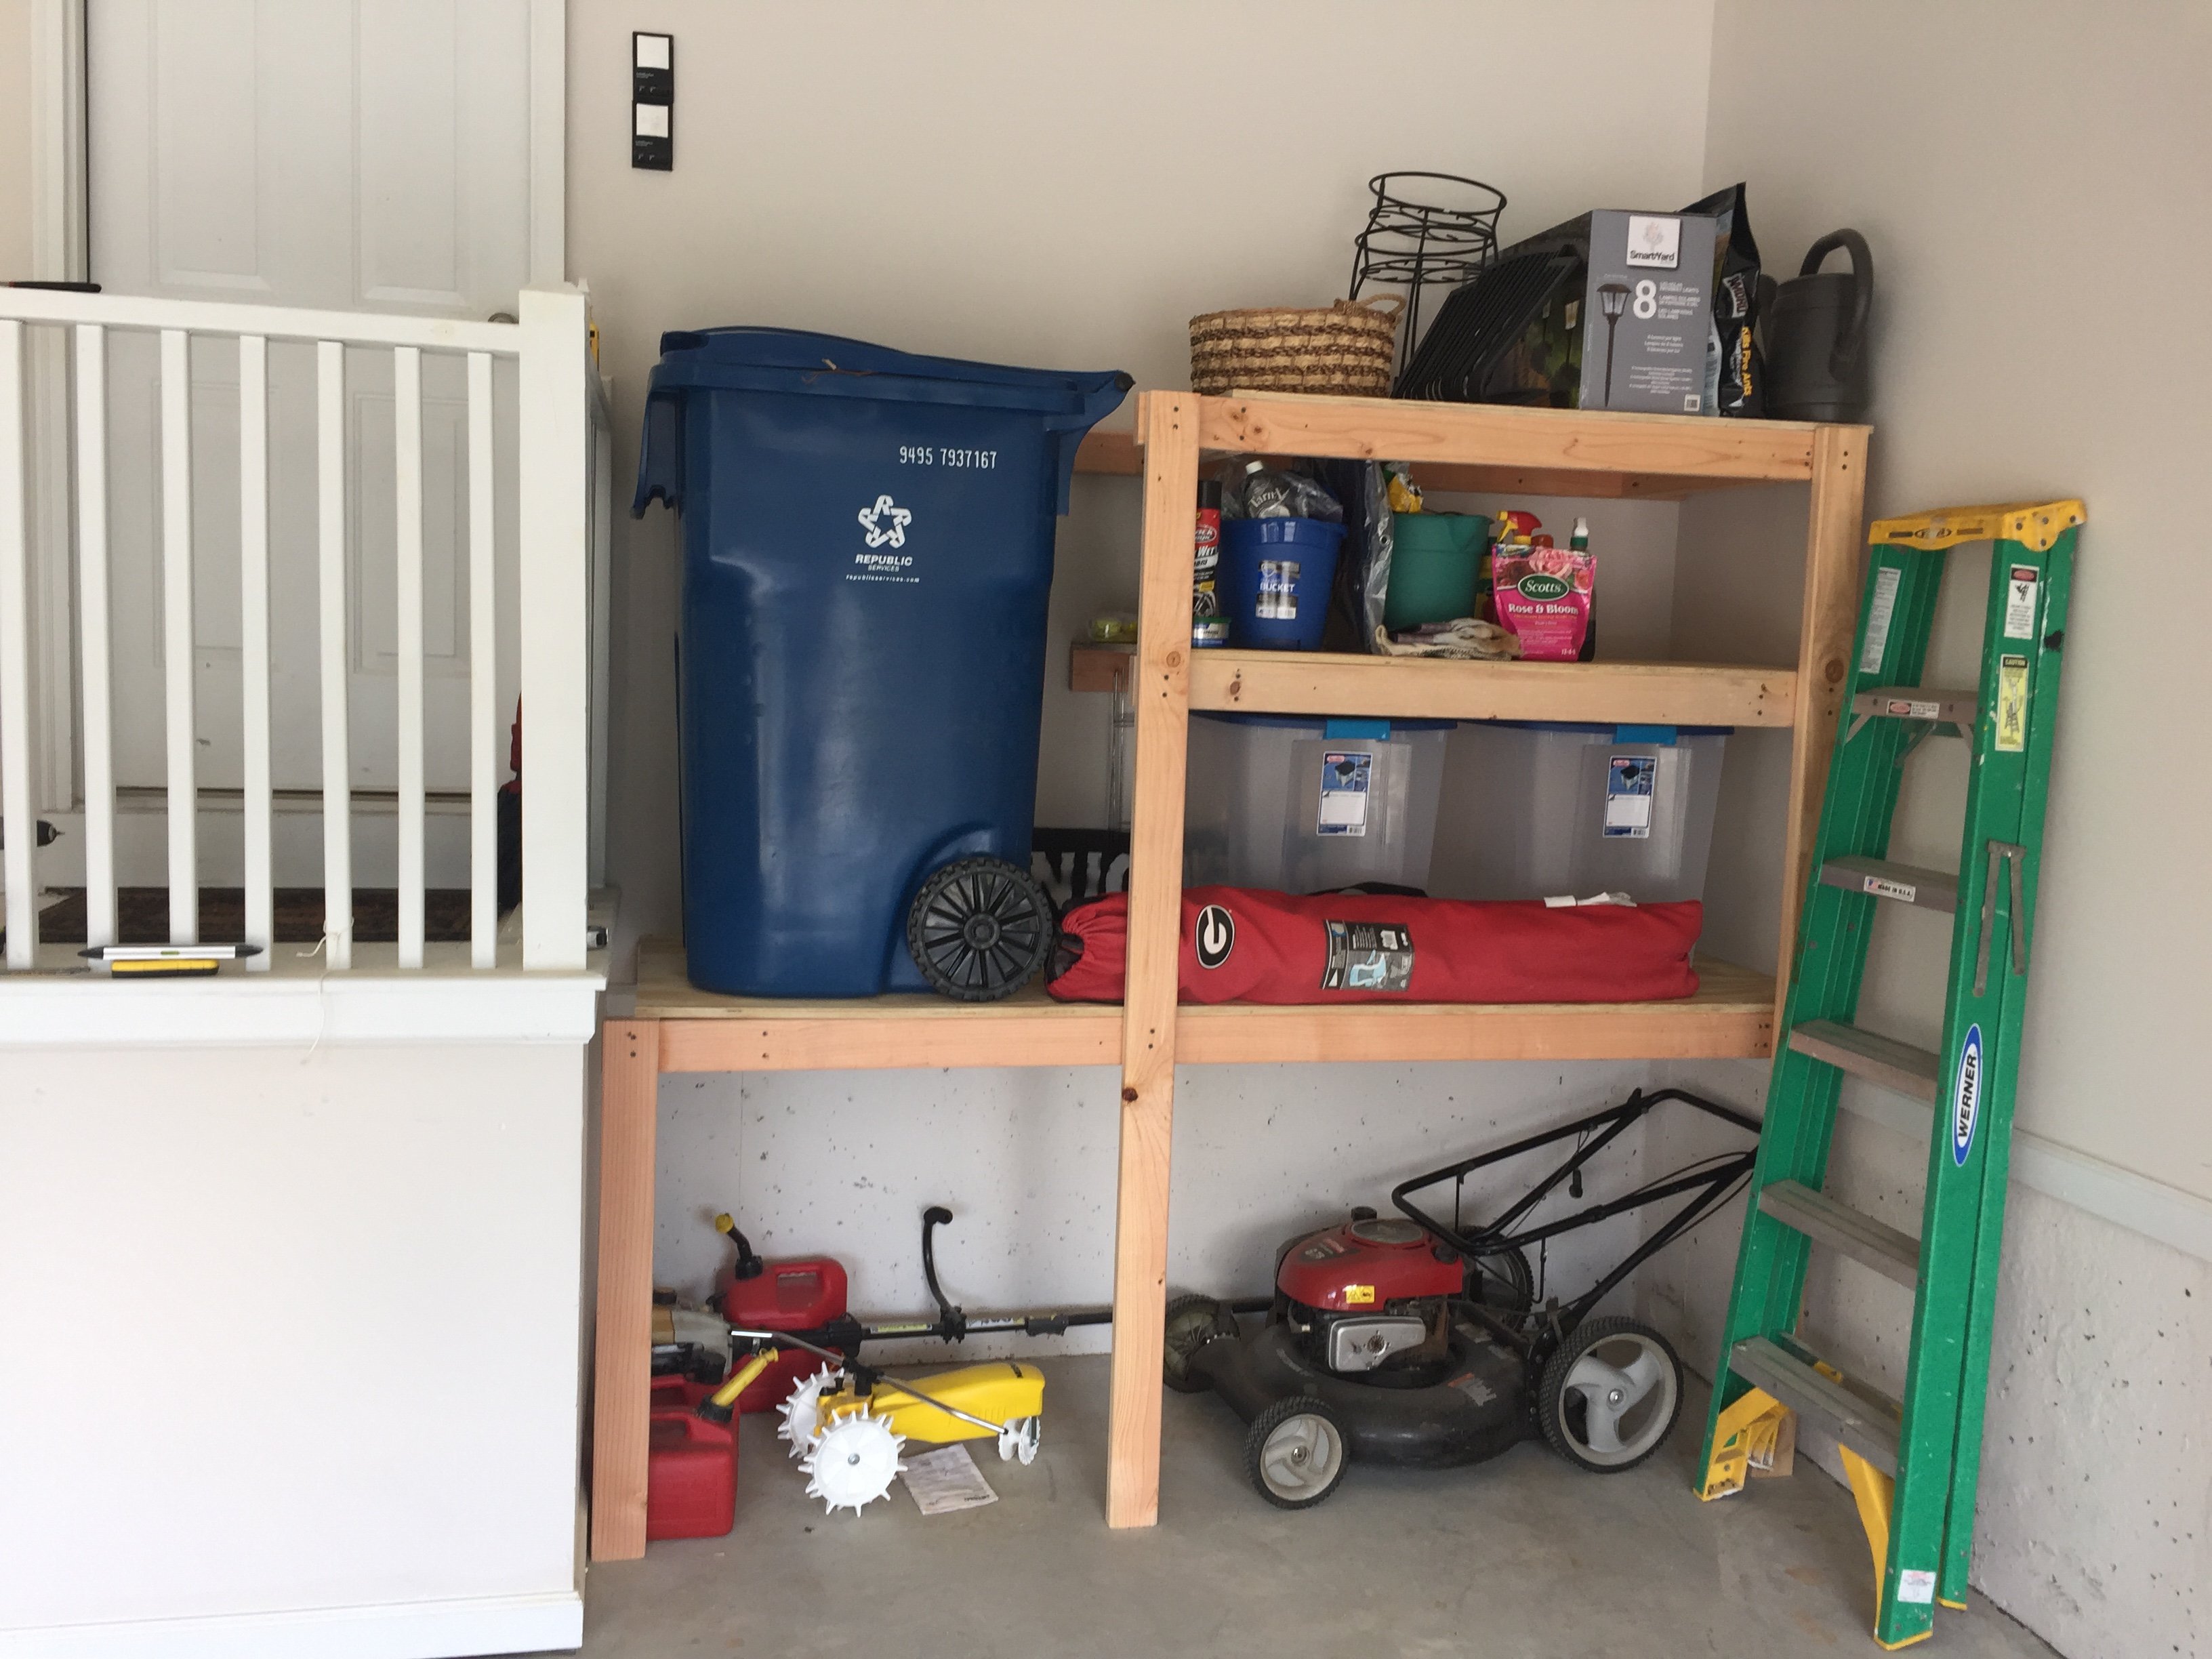
Modification:
Customized a space for our trash bin, to lift it up to the main floor level. Now we can toss trash without leaving the kitchen. Fantastic!
Built from Plan(s)
Estimated Cost
$100
Estimated Time Investment
Afternoon Project (3-6 Hours)
Finish Used
None
Recommended Skill Level
Beginner
Comments
Mud room Bench
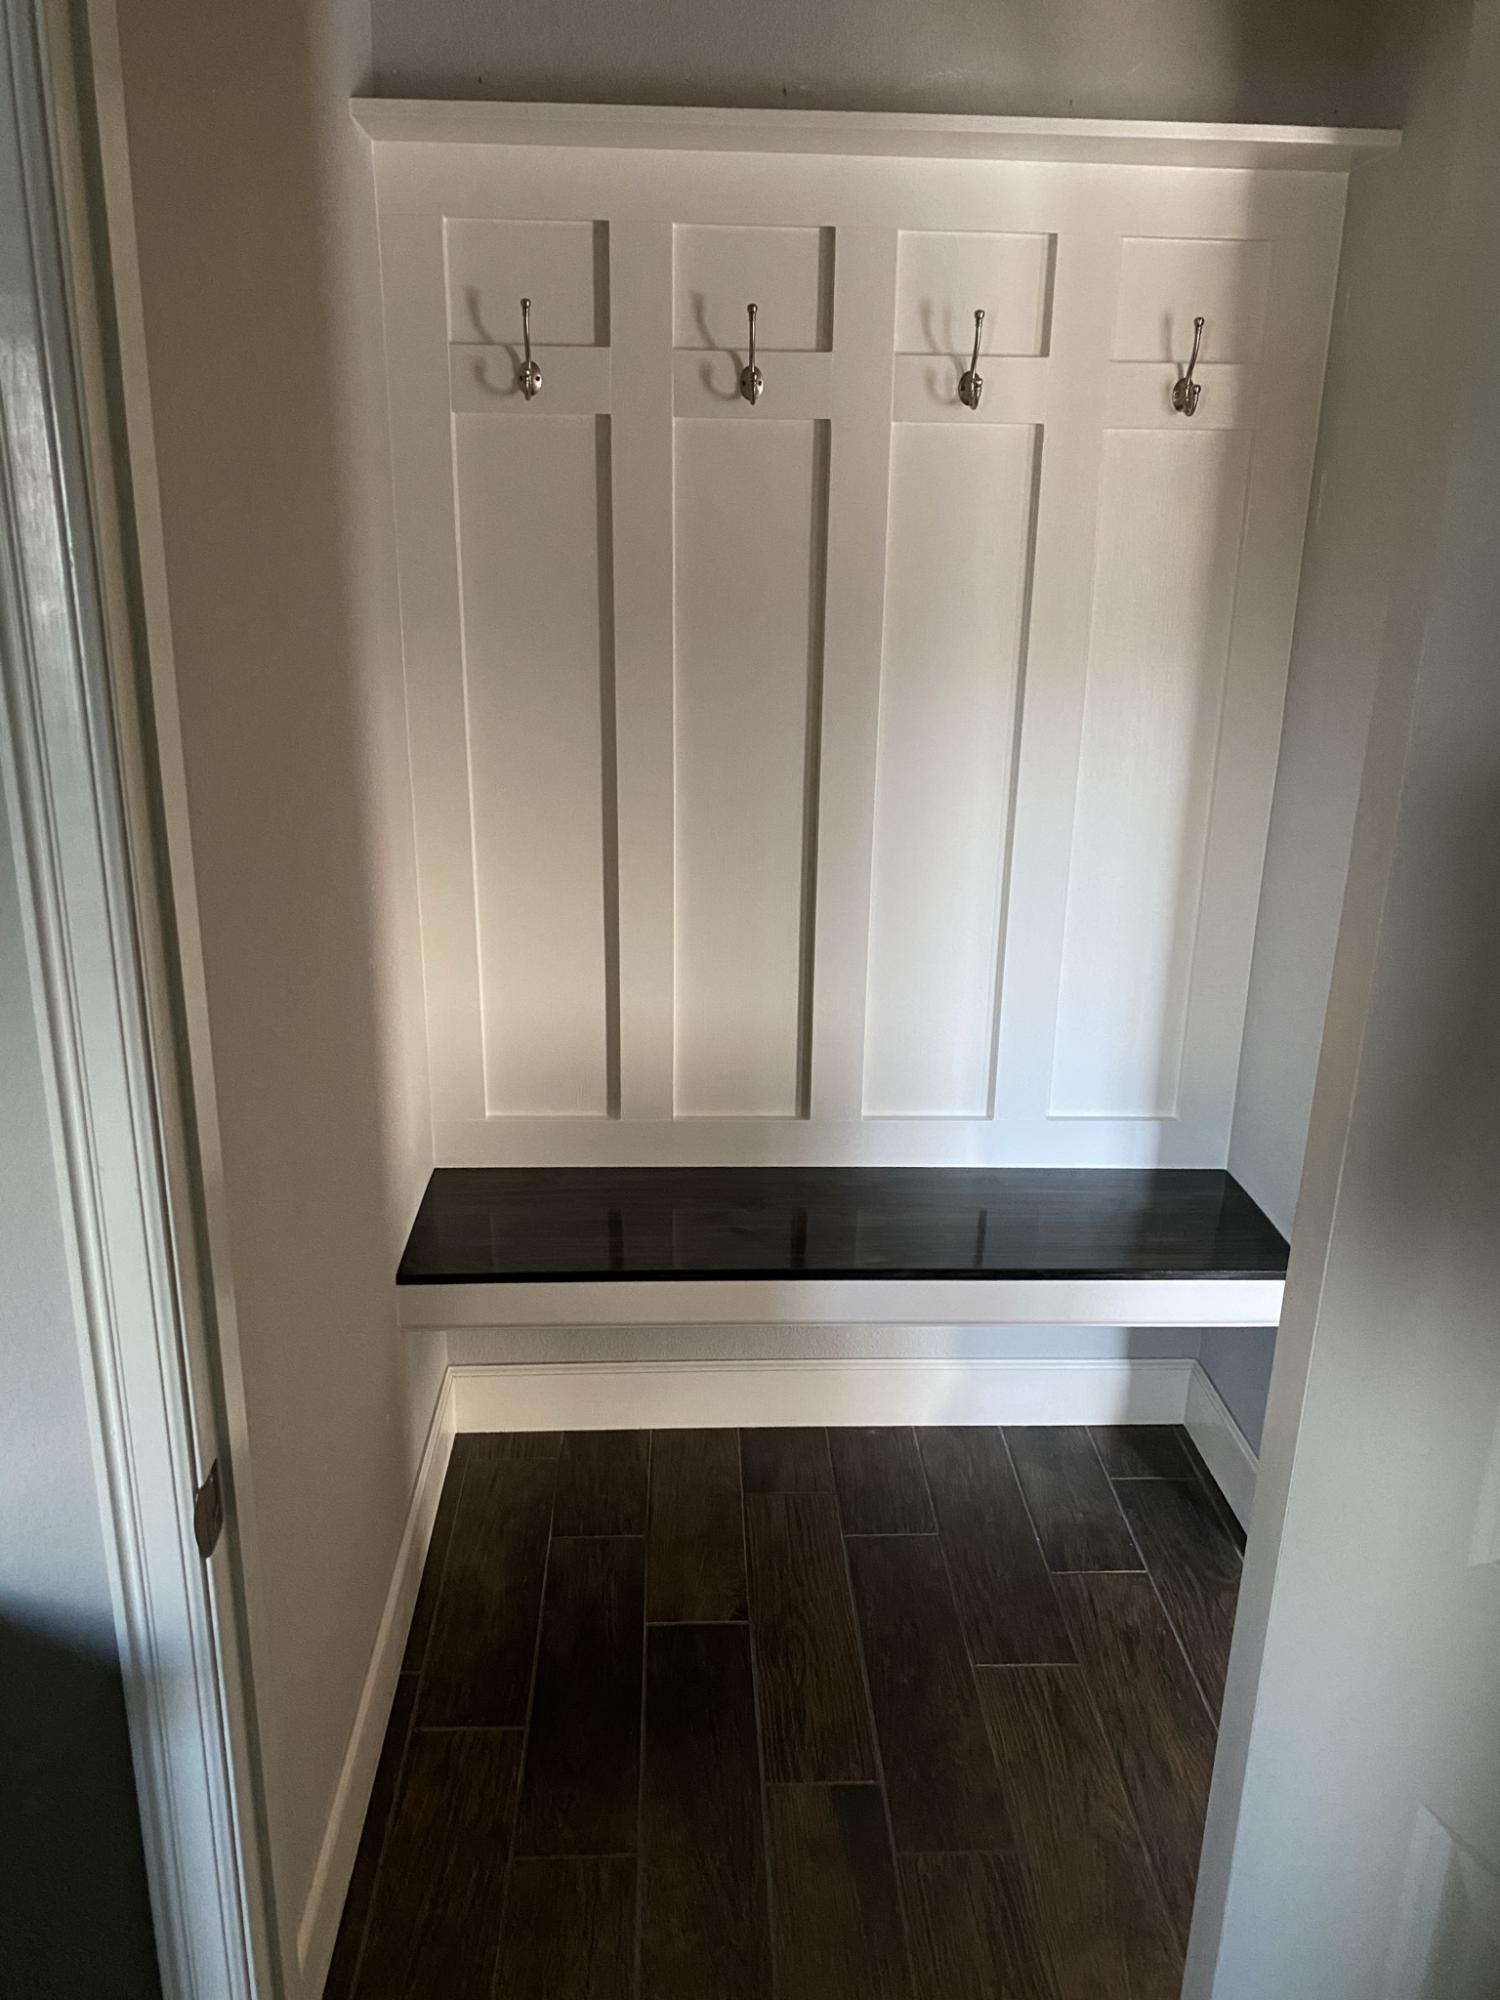
I mimicked one of the brag post on this webpage. I used 1x4s and luan for my back. The seat is 2x4s with a project panel stained and polyurethaned. I am grateful for people sharing their wonderful projects on this site for inspiration.

Built from Plan(s)
Estimated Cost
140
Estimated Time Investment
Weekend Project (10-20 Hours)
Recommended Skill Level
Intermediate
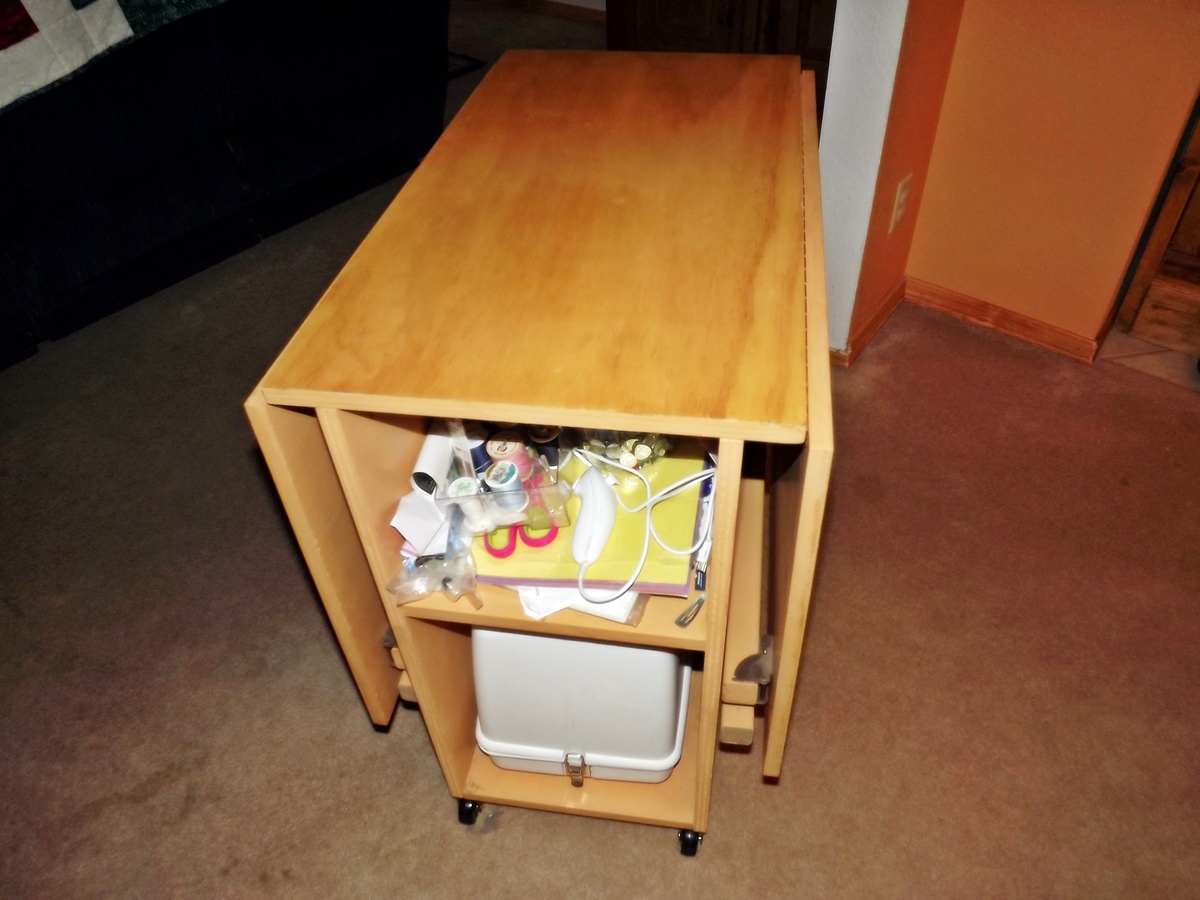
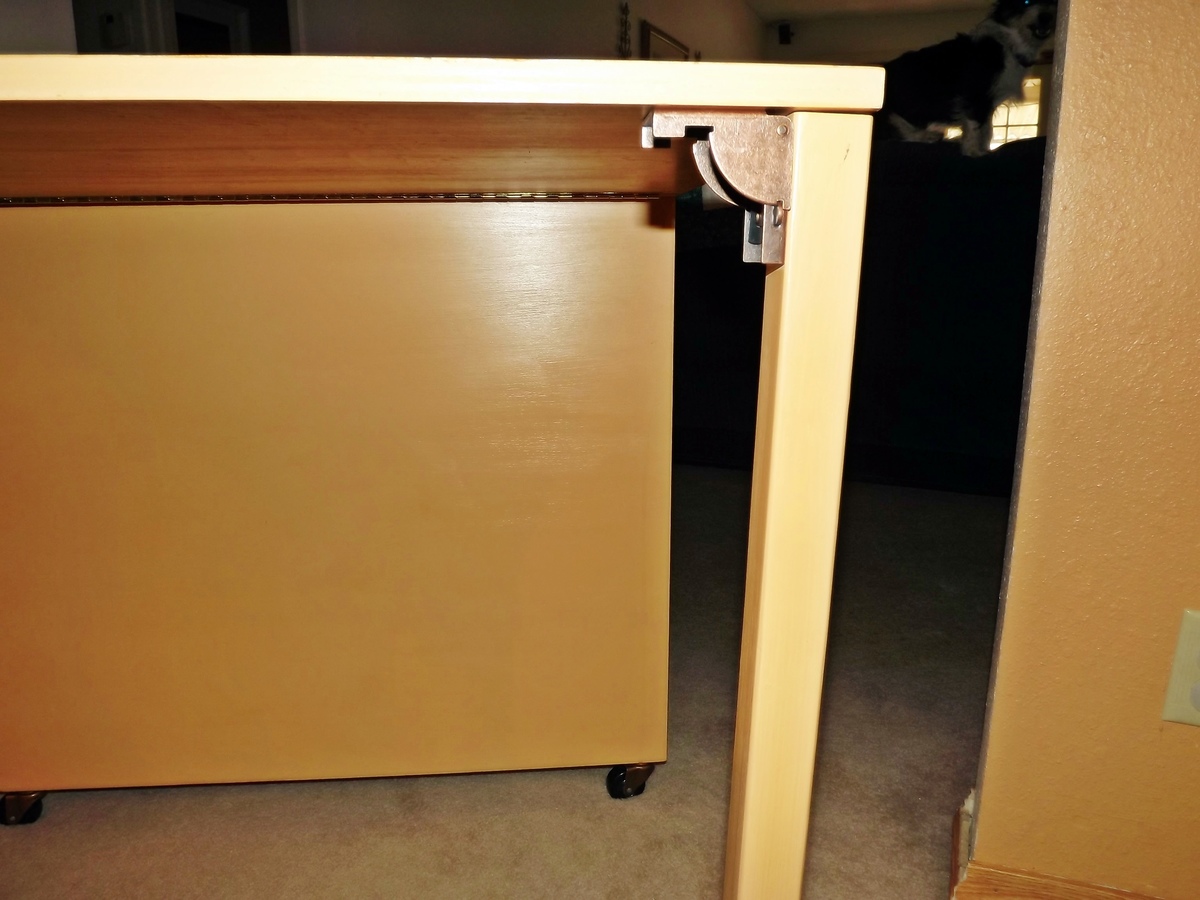
Sewing Table for Small Spaces

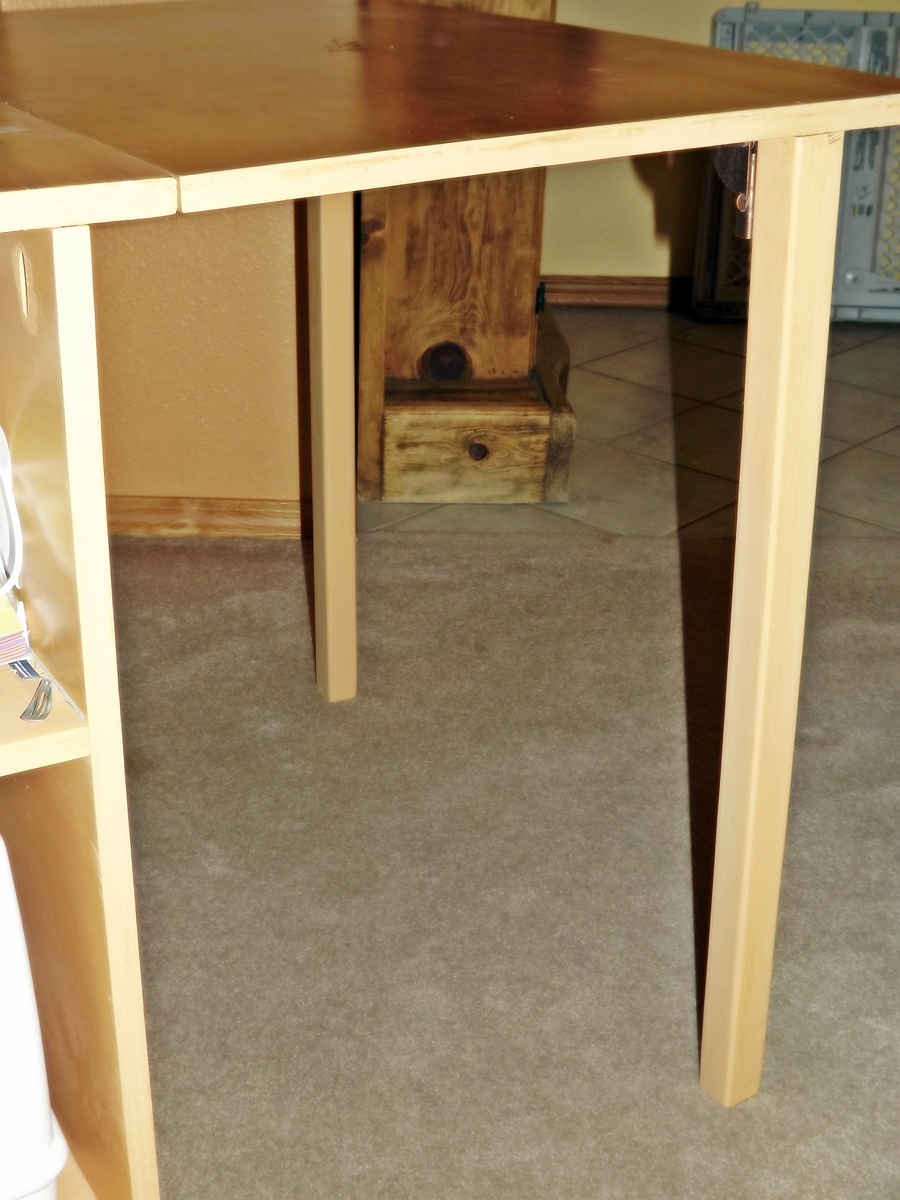
My daughter-in-law needed a compact sewing table, and this plan fit the bill perfectly! I did use 2 x 2 legs instead of 1 x 2s. This makes the table considerably more stable if you plan to use this table with your machine. If you do use the 2 x 2s for legs, you will need to widen your table top dimensions from 15 1/2" to 17" to accommodate the larger diameter of the legs. I also used a piano hinge for each drop leaf. They weren't much more expensive than the hinges listed in the plans, but again, they provide more stability (imho).
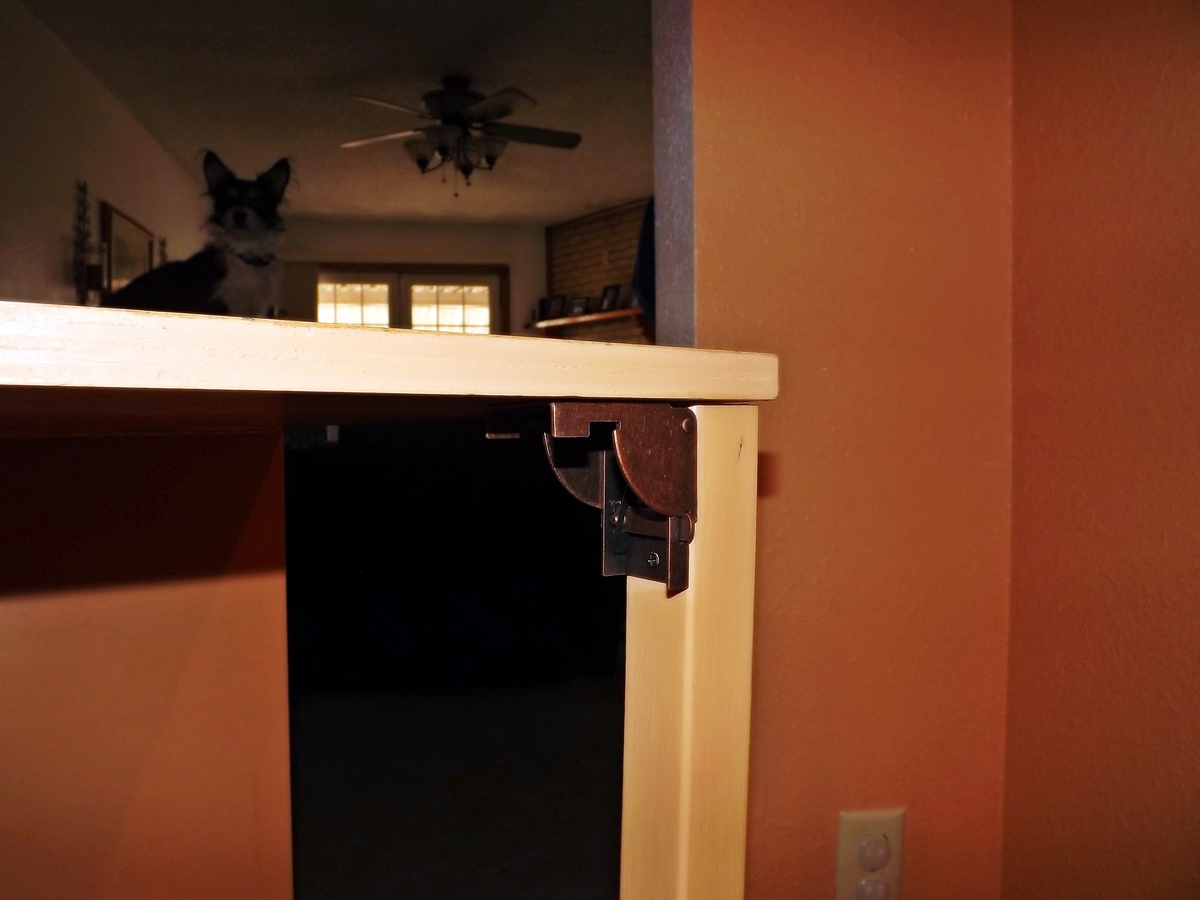
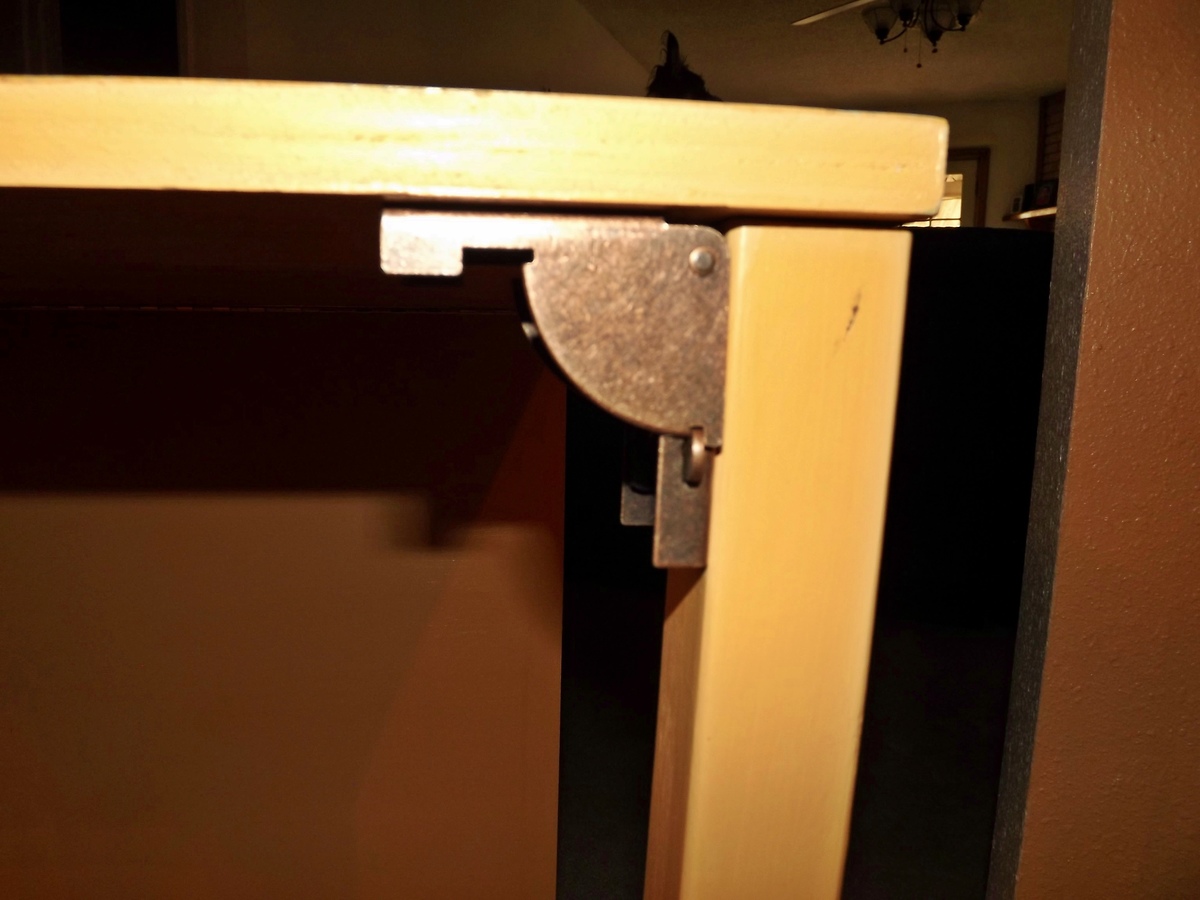
I wanted to show the locking mechanism for the legs in detail. I love these as they hold the legs in place when the drop leaf is down, and they pop into place when the leaf is in use. Called "folding leg fitting" it is part S-149L at $3.65 each at the following link:
http://www.hardwaretree.com/proddetail.php?prod=S-149L
When my daughter-in-law received her gift on Christmas Eve, she wouldn't even let me keep it for another day or two so I could touch-uppaint some spots...she loves it.
Thank you, Ana, for the wonderful plans!!
Built from Plan(s)
Estimated Cost
Around $75.00 not including stain and paint, which I had on hand.
Estimated Time Investment
Weekend Project (10-20 Hours)
Finish Used
Top and leaves stained with pine; box and legs painted w/ semi-gloss wall paint from my daughter-in-law's house (can't tell you the color, but it's from the terracotta color family). Three coats of poly on stained top.
Recommended Skill Level
Beginner
Comments

Sun, 02/03/2013 - 17:45
Great job! I can understand
Great job! I can understand your DIL's unwillingness to part with it even for a short amount of time!

Mon, 02/04/2013 - 07:49
Inspiration!
The table for my sewing machine costs almost as much as the machine did! This is a wonderful build. You have a very luck daughter-in-law.
First Project
This was my first project (ever). There were a few times that I wanted to throw the whole thing on the floor and start over but I persisted and it actually turned out very nice. Way better than I had anticipated. Thank you for the plans!
Built from Plan(s)
Estimated Time Investment
Week Long Project (20 Hours or More)
Finish Used
Minwax Jacobean stain followed by three coats of Polyurethane.
Recommended Skill Level
Advanced
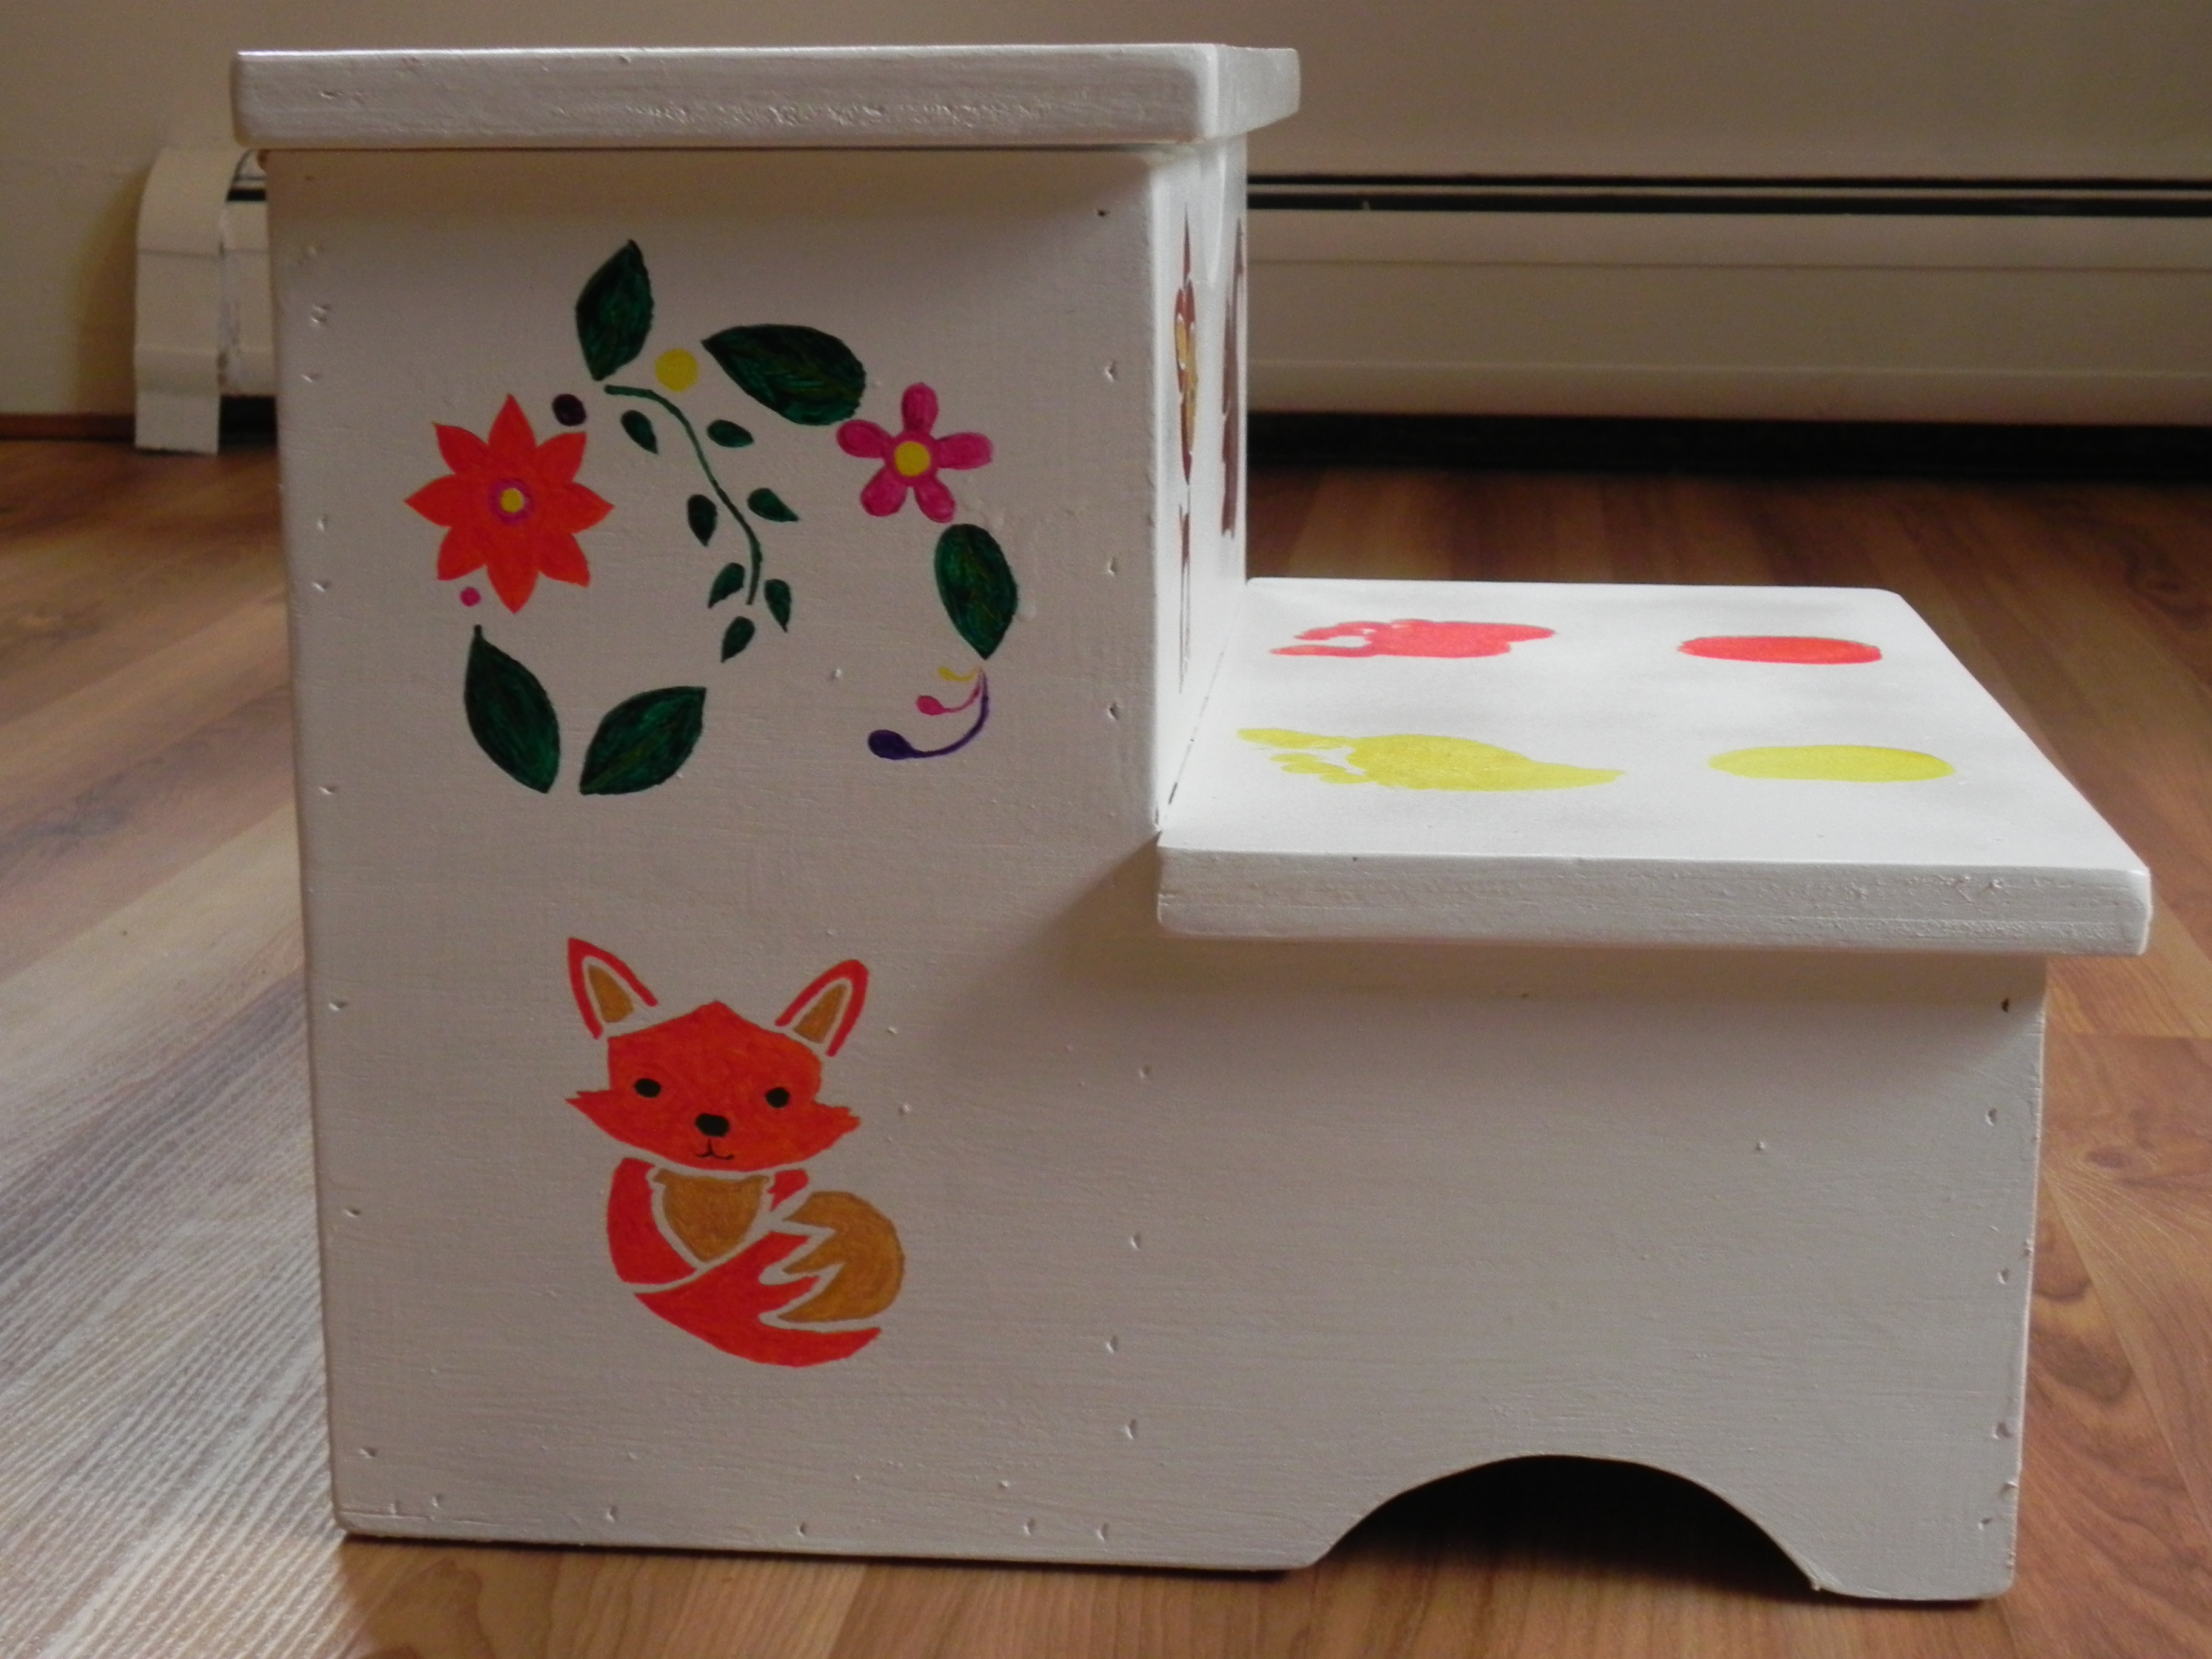
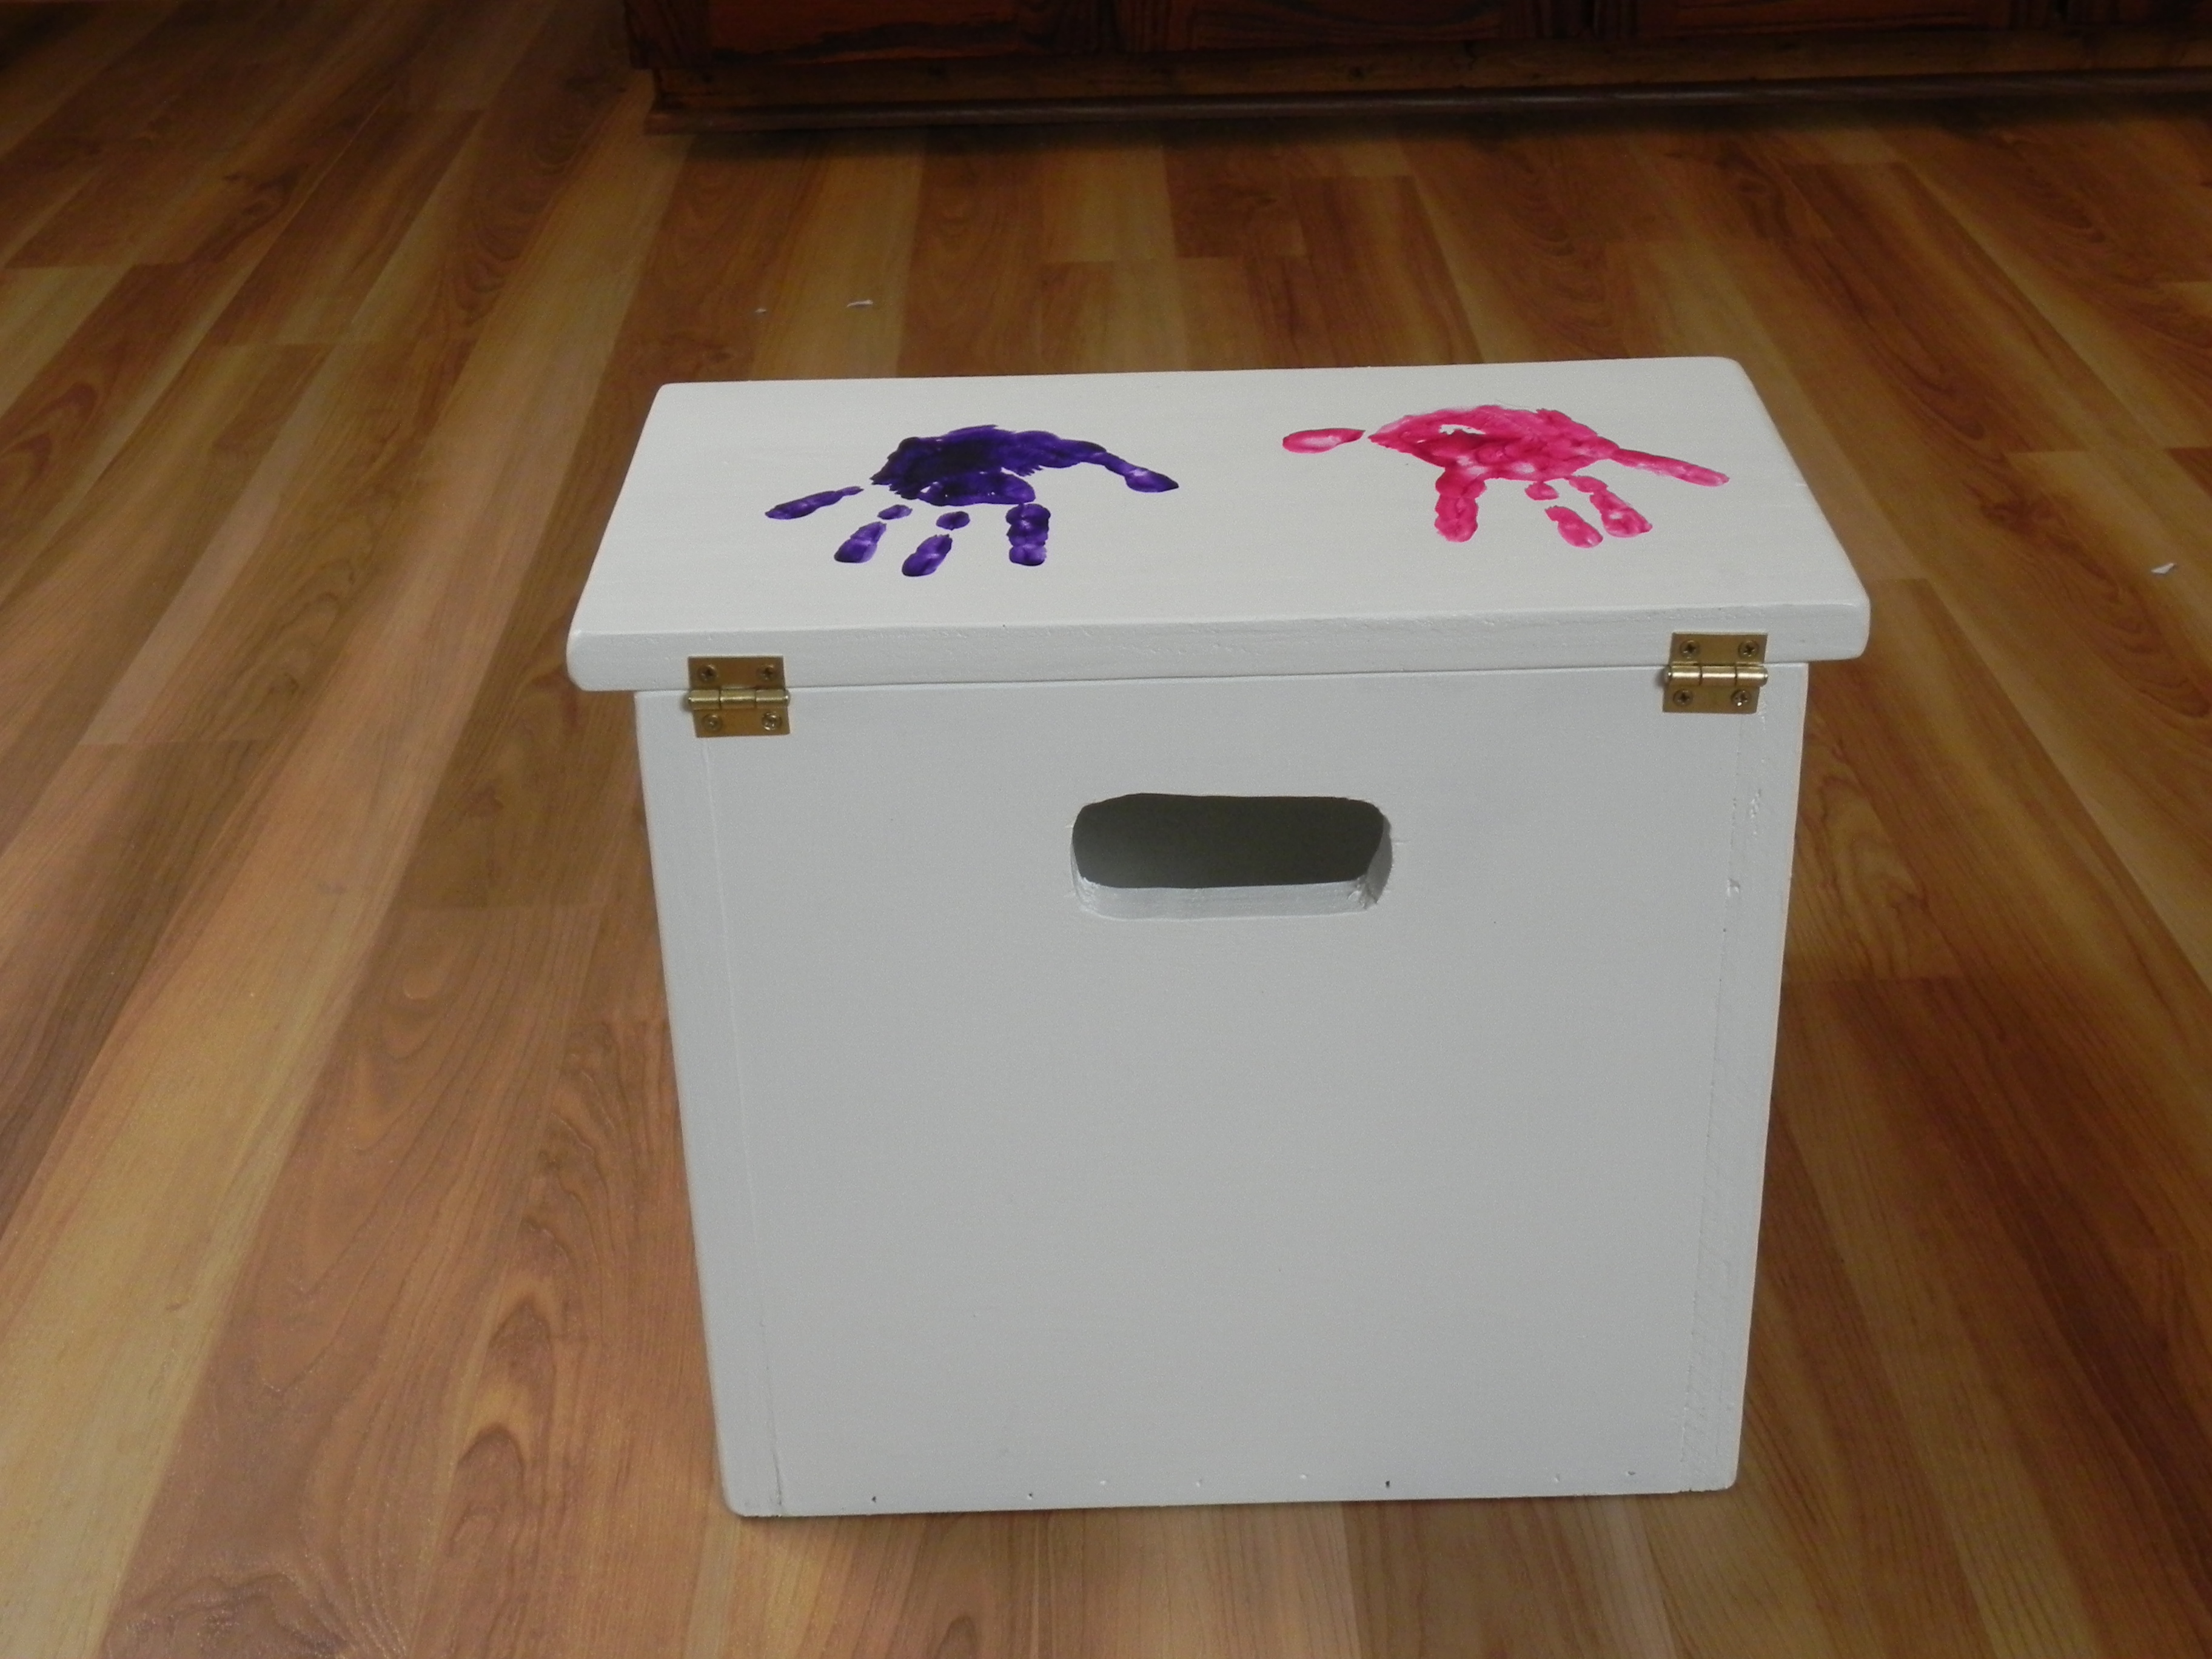
storage step stool
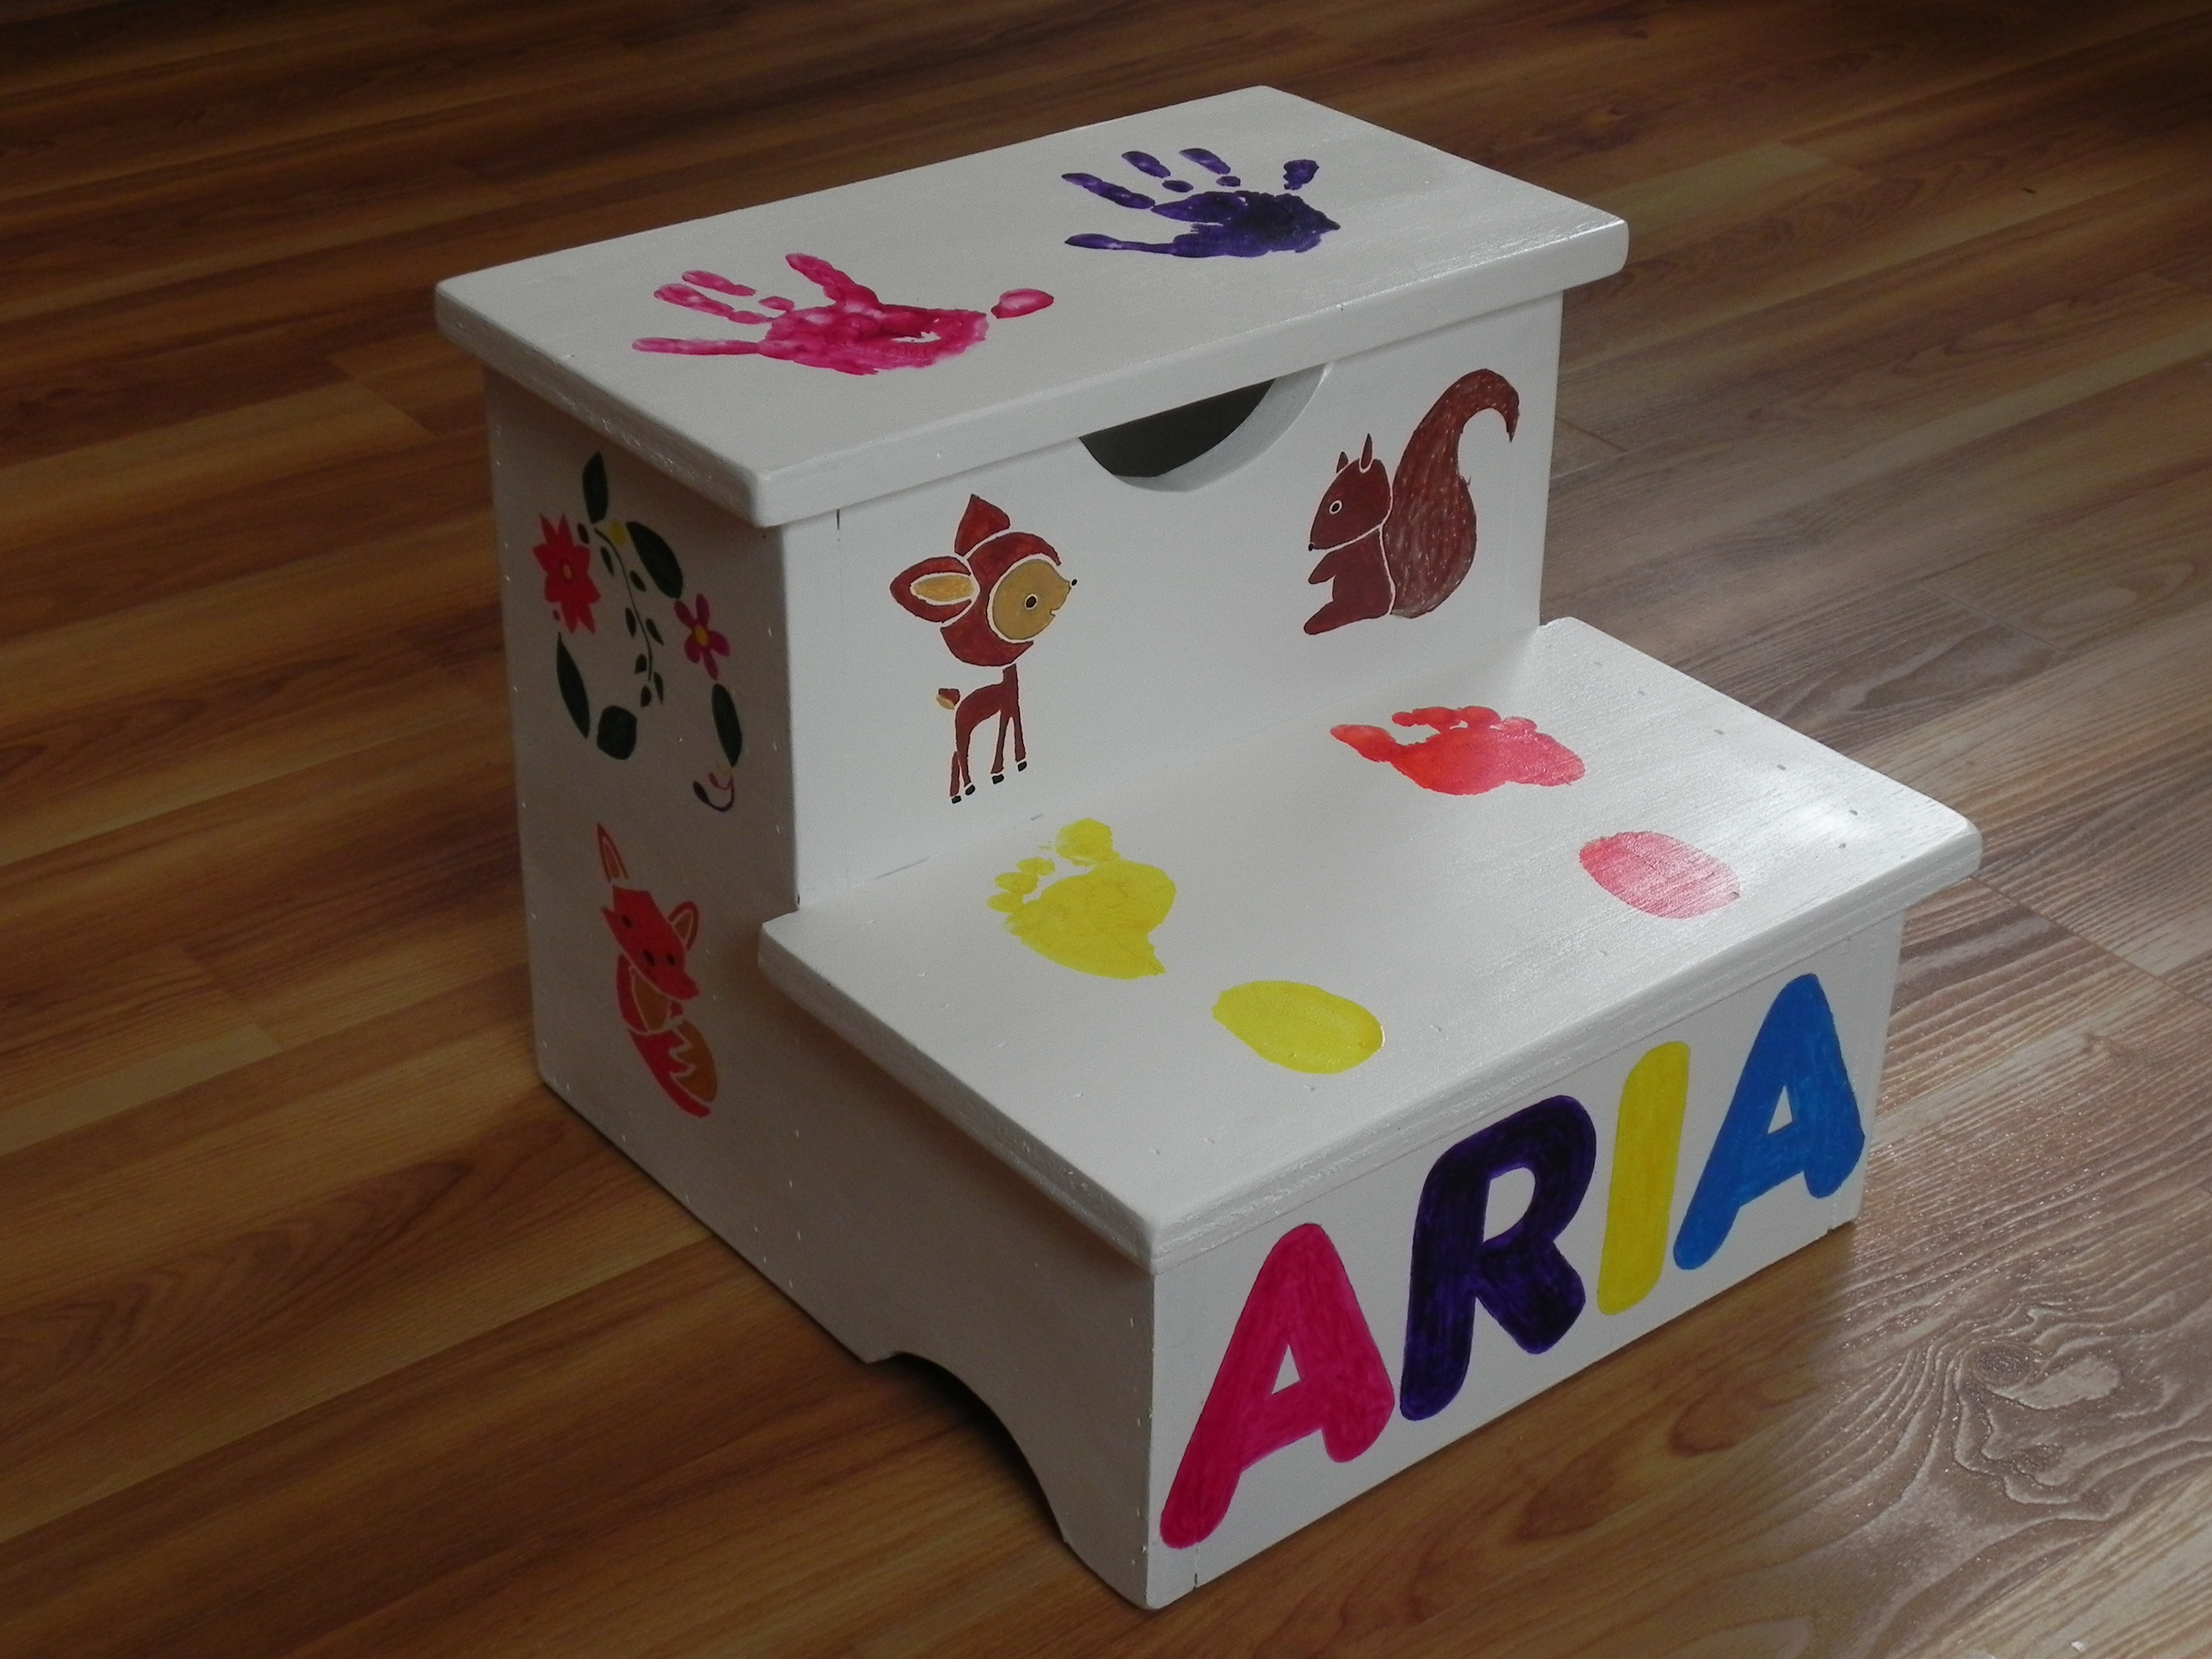
My little girl needed a step stool after building a modern height bathroom vanity. She was so excited to help with the painting. This was a very fast build. I spent more time painting than building. I used scrap 3/4" purebond plywood and had the paint on hand. I also used a spray lacquer to seal the paint. I used glue and my brad nailer, but will also add screws for extra support now that it is painted. I used a CD to trace the curves and the edge of a 2x4 to trace the handle. Thank you for another great plan!
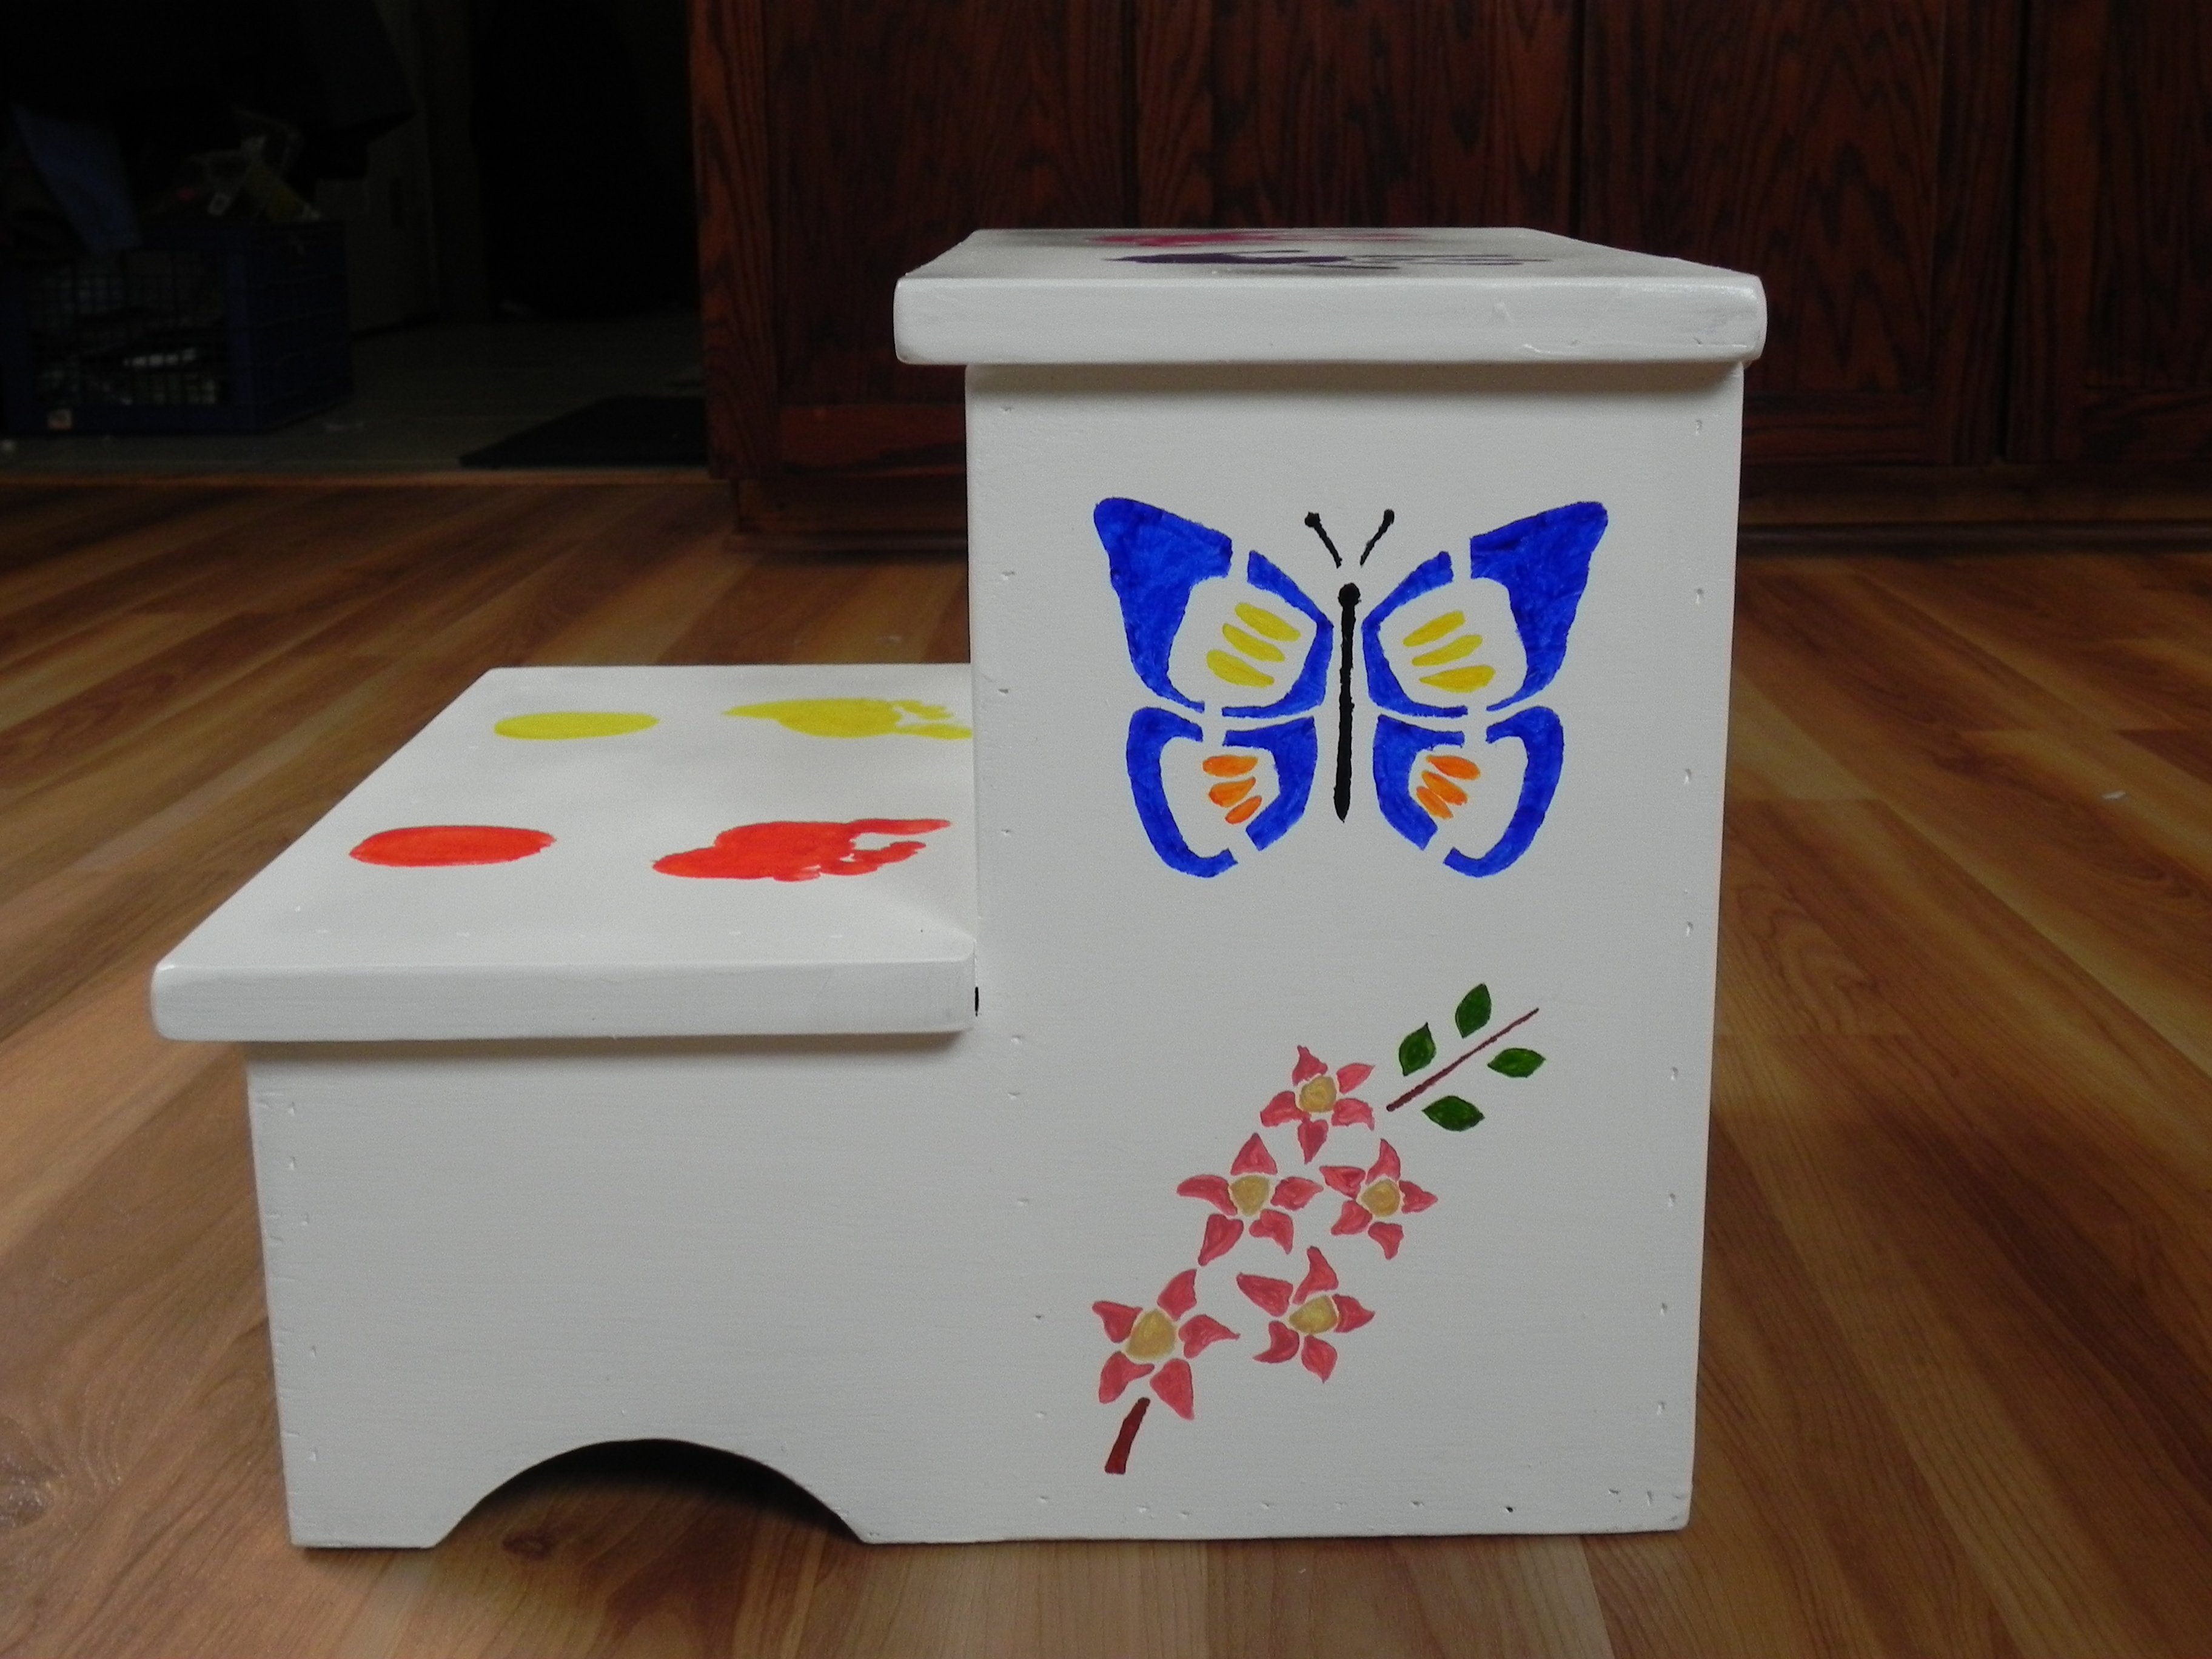
Built from Plan(s)
Estimated Cost
$0 for me as I used scrap wood and leftover paint. I even had the small hinges from a previous project.
Estimated Time Investment
Day Project (6-9 Hours)
Finish Used
Behr semi gloss white, acrylic paint, gloss lacquer spray
Recommended Skill Level
Beginner
Princess play house bunk beds
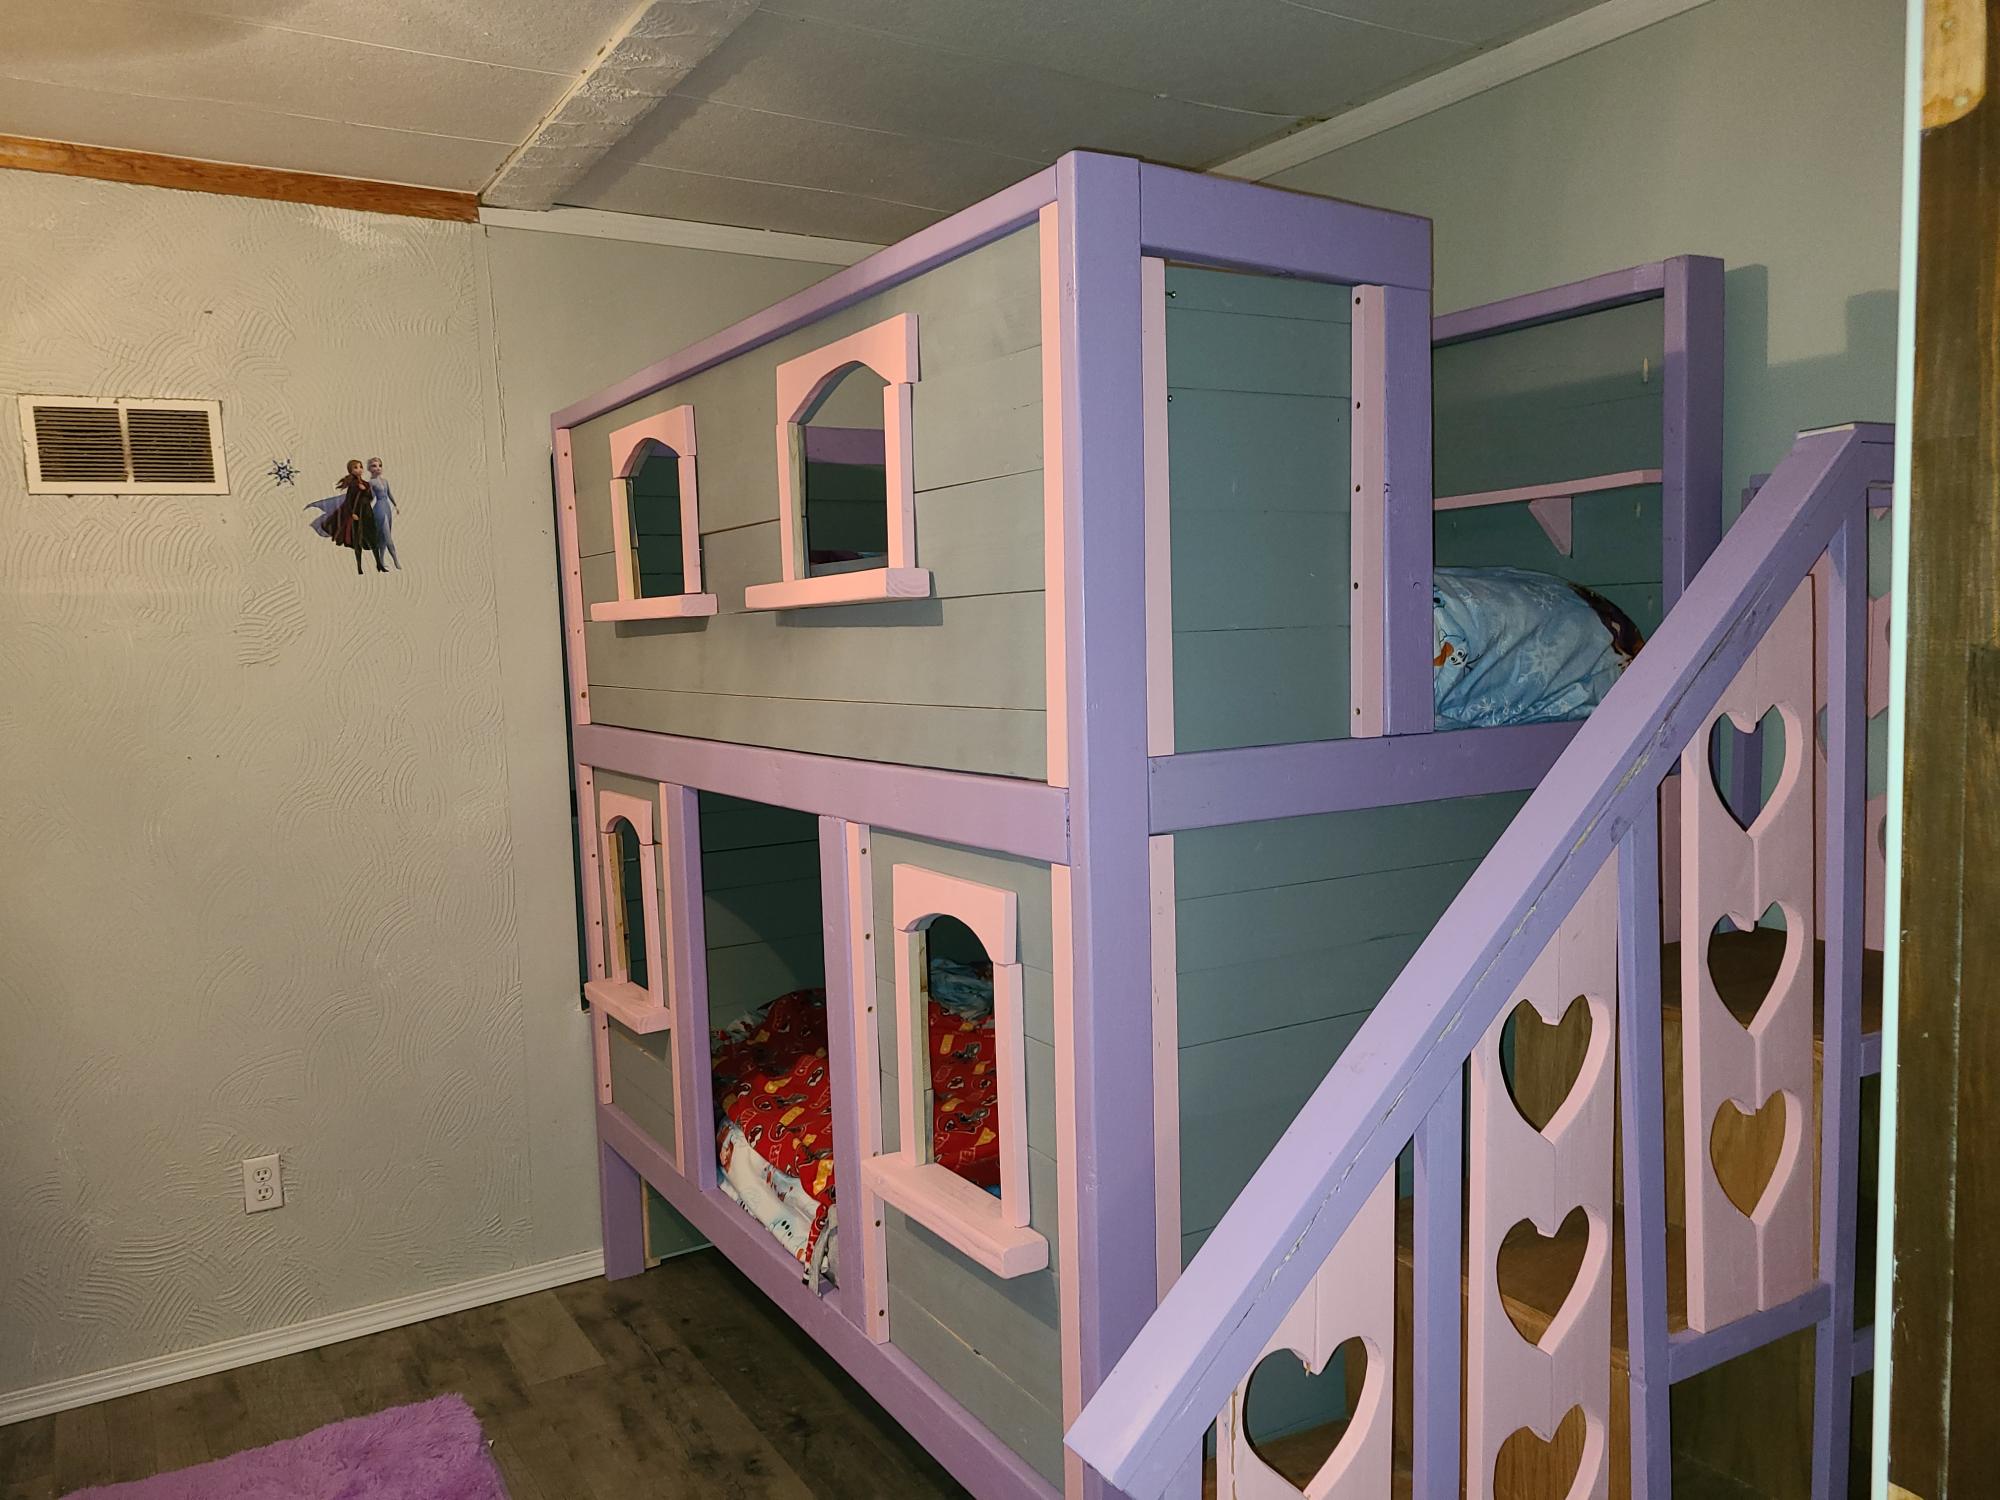
found plans for the "sweet pea garden bunk beds" on this site. Here is our take on them they came out so awesome.
Built from Plan(s)
Fancy X Farmhouse Table modification
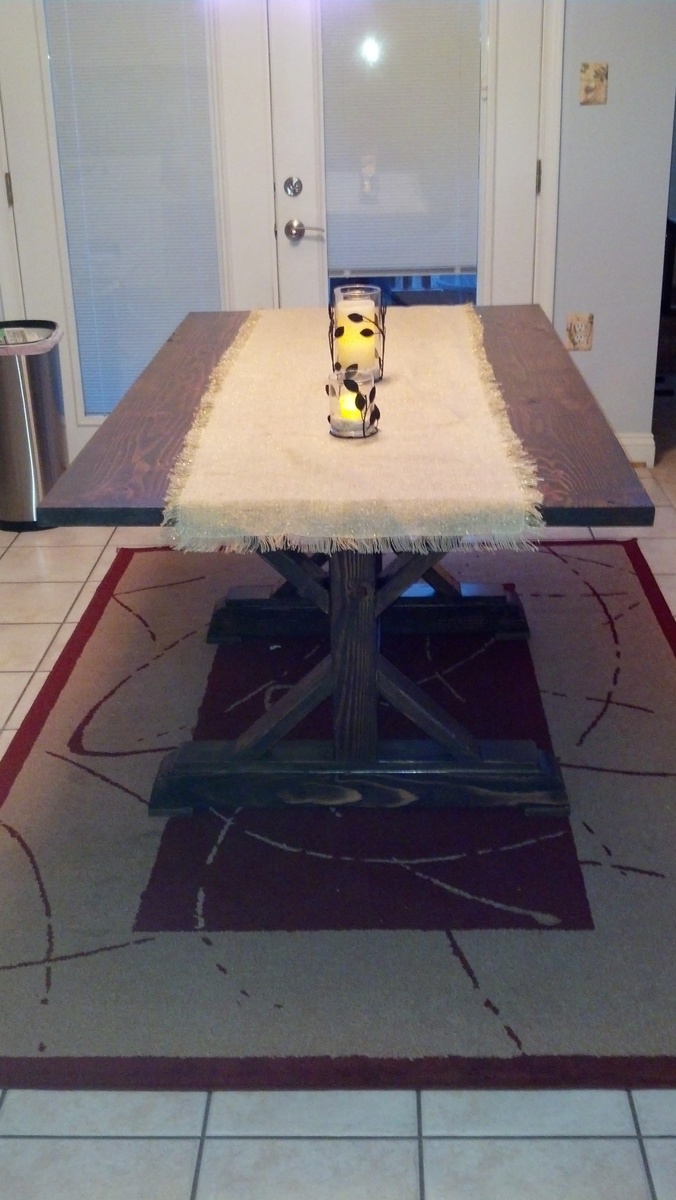
We used the plans for the Fancy X Farmhouse Table and made some modifications to fit our space. Our first mod was to make it only 65 in long ... which meant the angled pieces in the middle aren't there any longer as it would have been too busy. The second mod we made was anywhere it stated to put 2 2x4s together we replaced it with Douglas Fir 4x4 (found at our Orange store).
Built from Plan(s)
Estimated Cost
$90 - $100
Estimated Time Investment
Weekend Project (10-20 Hours)
Finish Used
I stained it with an equal part classic grey and Dark walnut by MinWax (got color and 4x4 idea from another lady on here who did a mod on this same table) and finished it with 4 coats of Satin polyurethane.
Recommended Skill Level
Beginner
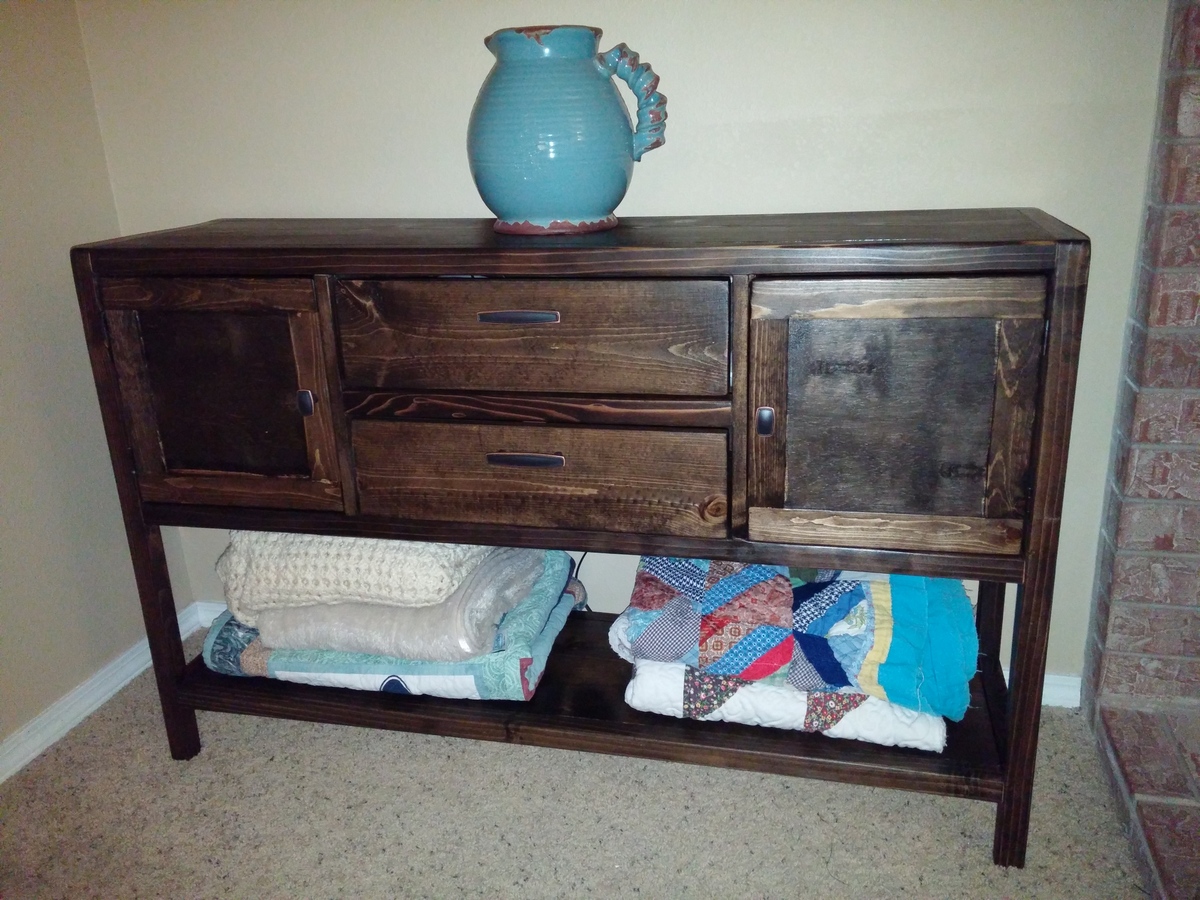
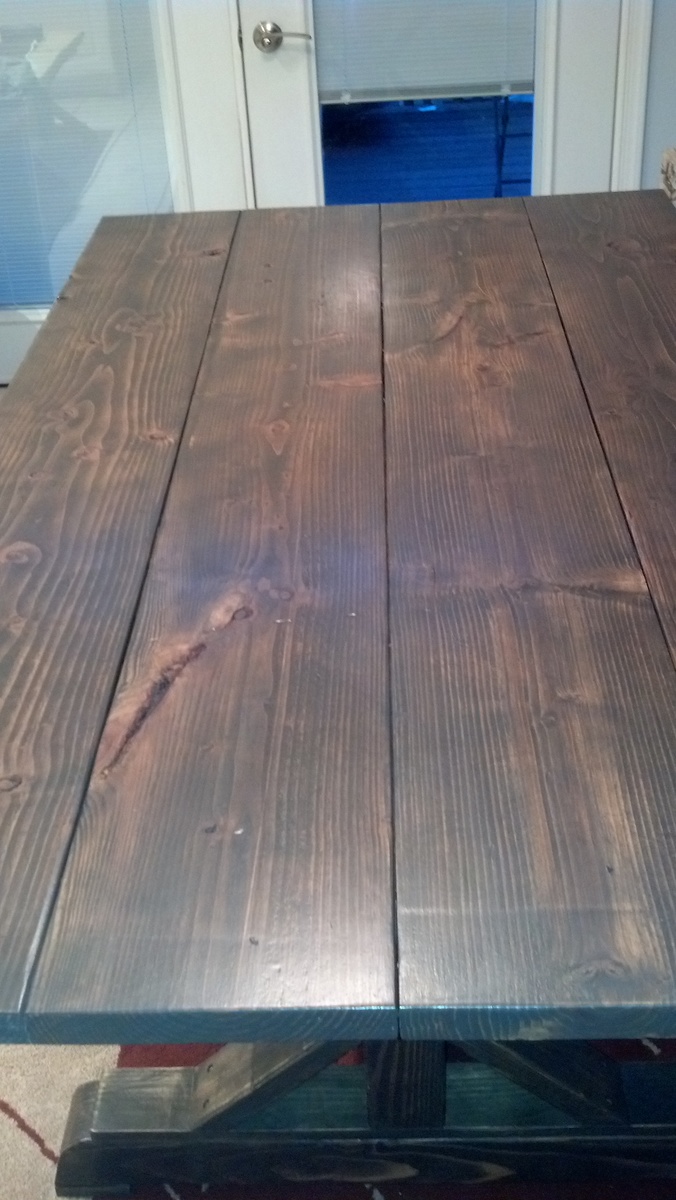
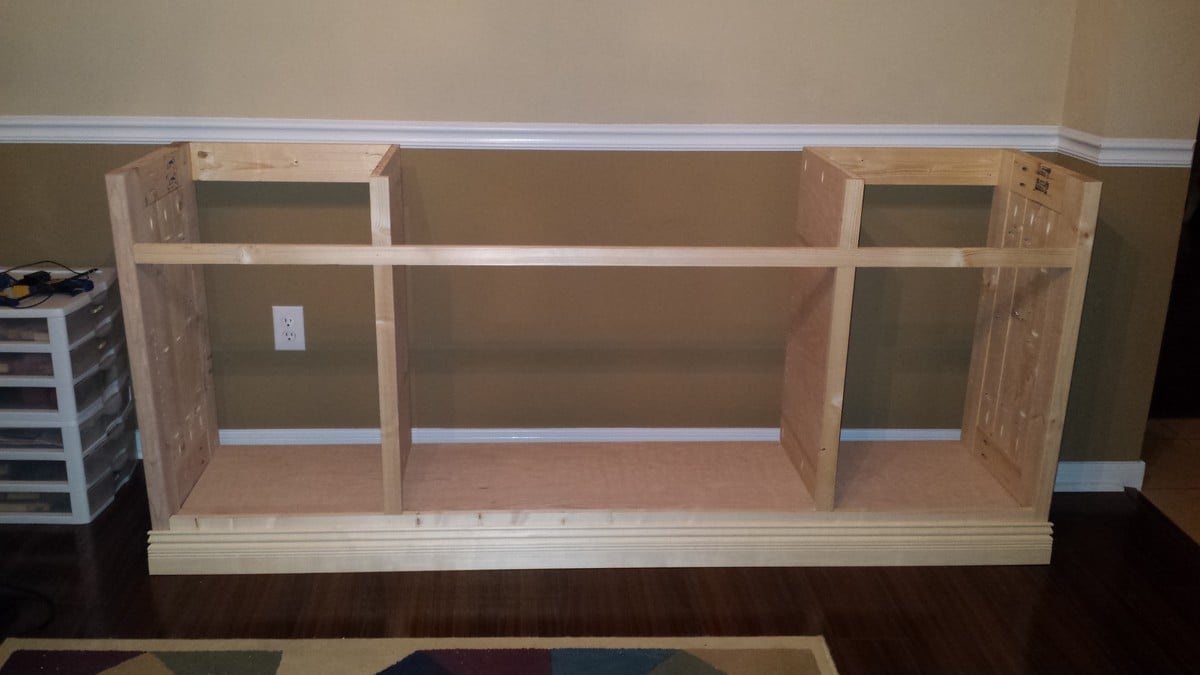
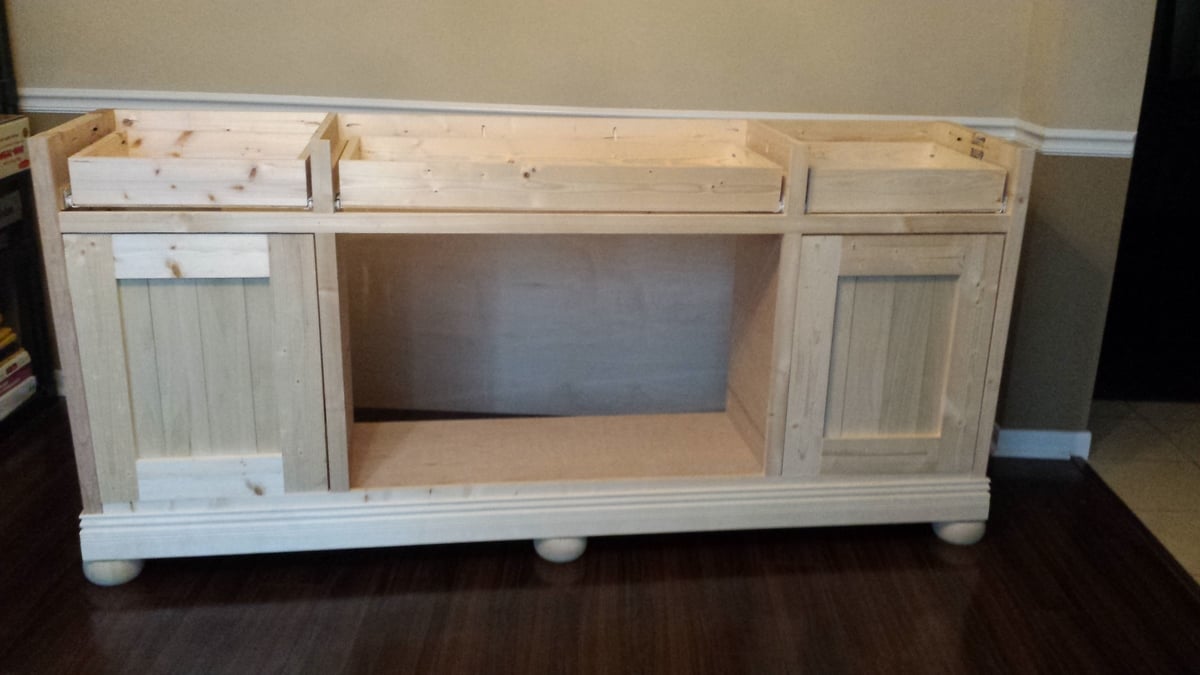
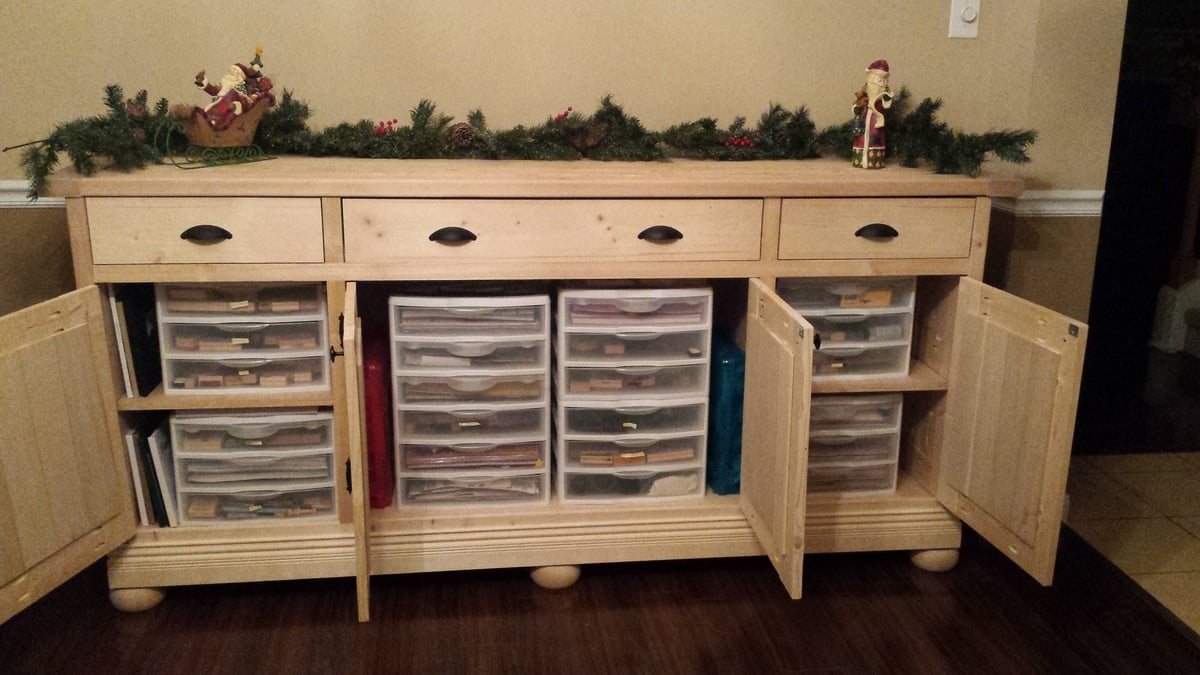
Planked Wood Sideboard
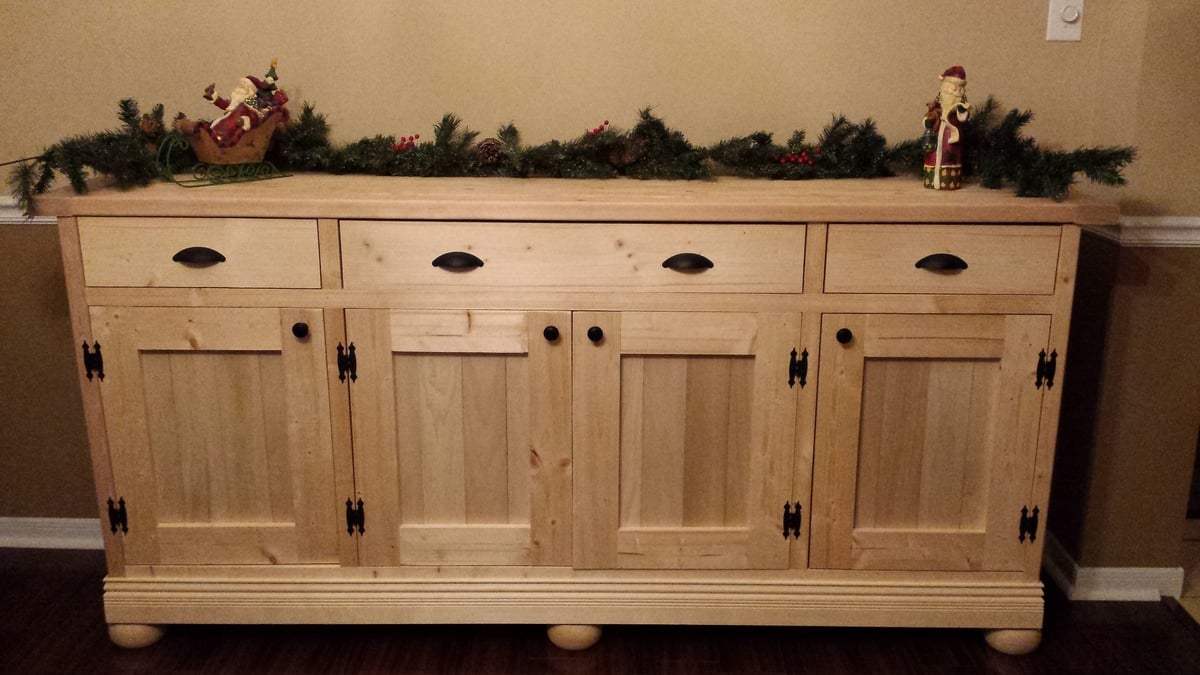
I was looking for something to hold my scrapbooking supplies. I want to use my formal dining room as my craft room but have the illusion it's still a dining room. This plan was perfect. This was my first time building anything from Ana's site. I added feet to the bottom to change up the look just a little. I also used a more detailed base molding. I also added some support to the bottom to have somewhere to attach the feet and distribute the weight of all my scrapbooking supplies. The best advice was to leave the top off until the end. I also waited to attach the back till the very end also. I thought I'd have the most trouble with the drawers but the doors ended up being the hardest part for me. Overall I'm very happy with the buffet! I haven't decided how I'd like to satin it yet. I'll eventually get that done! On to the next project. :)

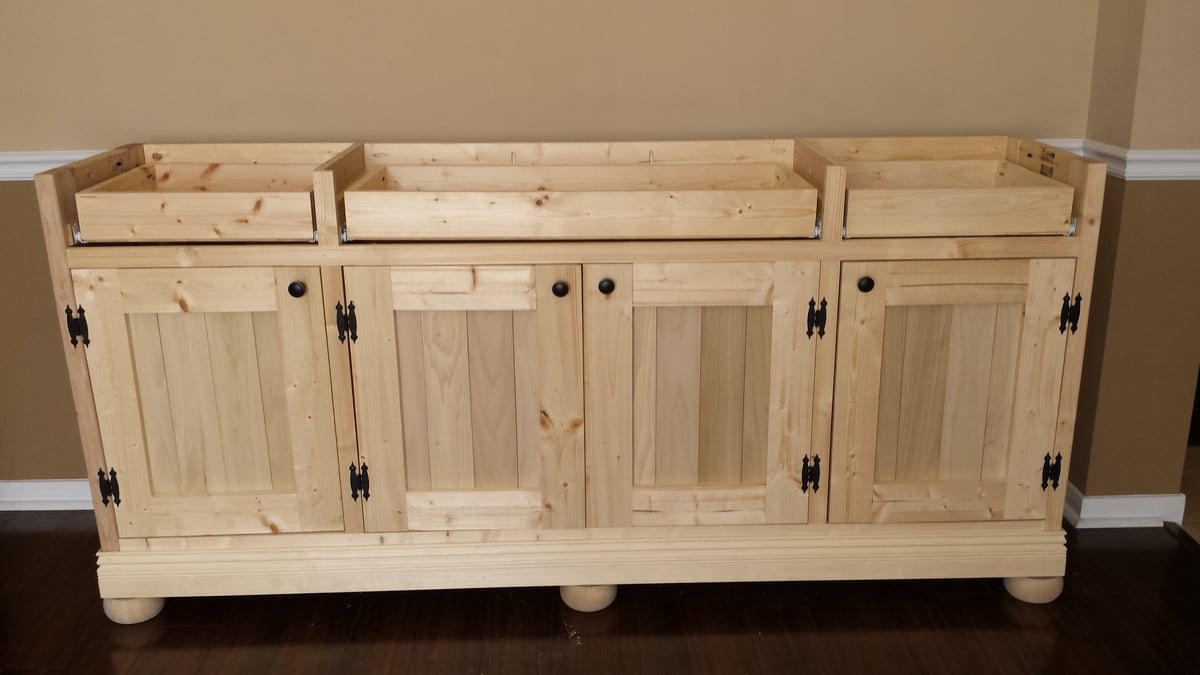
Built from Plan(s)
Estimated Time Investment
Weekend Project (10-20 Hours)
Finish Used
none yet
Recommended Skill Level
Beginner
Comments

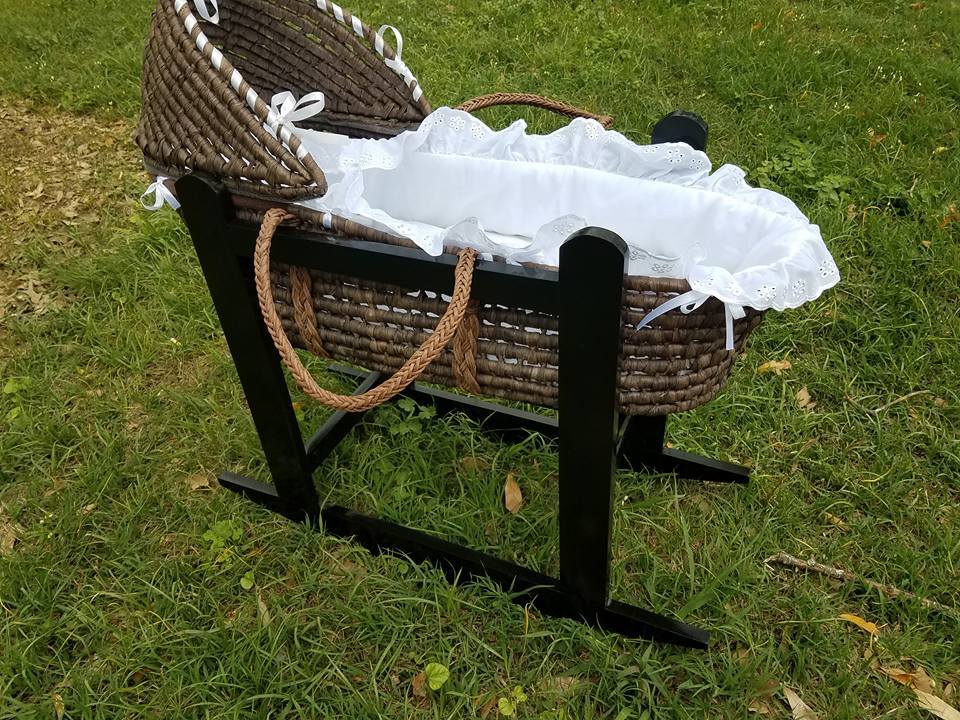
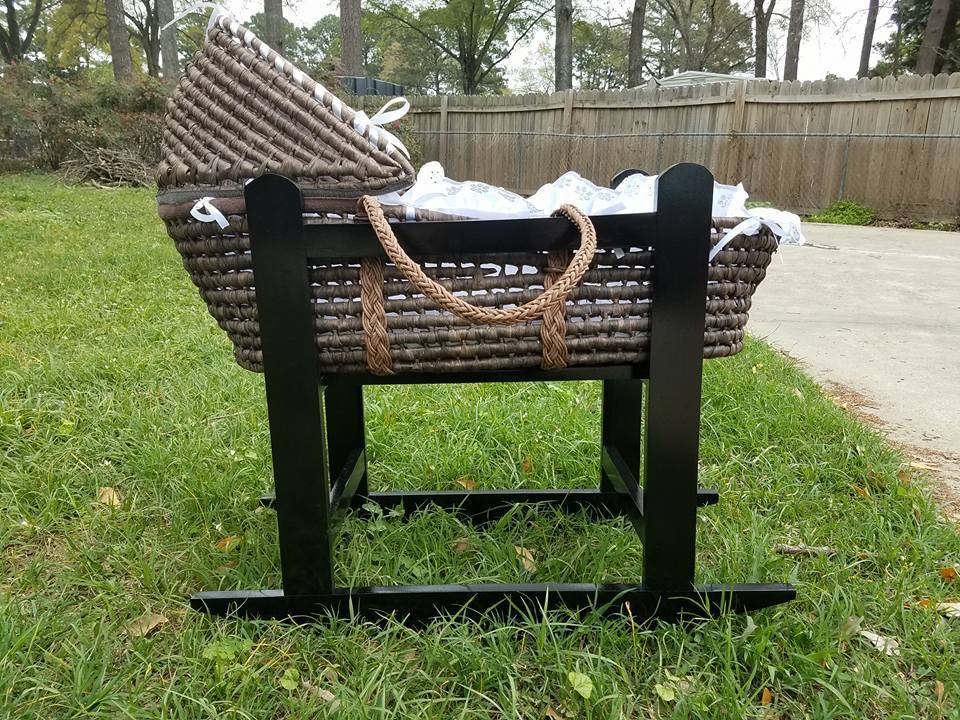
Moses Cradle
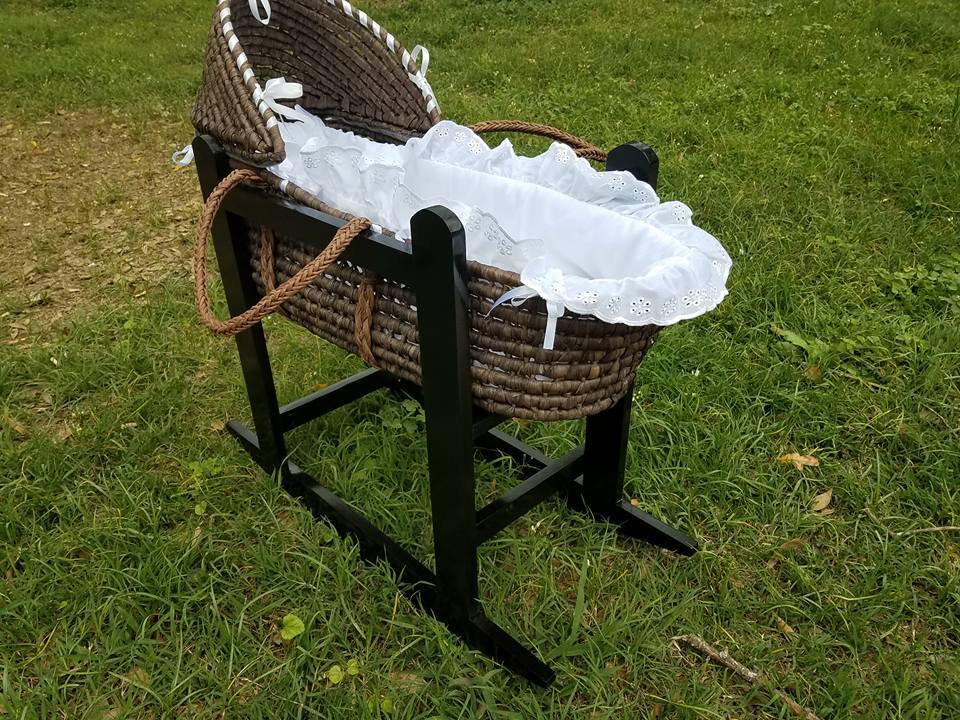
Moses Cradle, easy project. Used a rocker from an old rocking chair and traced it. Finish is Minwax Polyshade in Espresso. Sprayed using my $12 Harbor Freight sprayer.
Made as a baby shower gift. It was well received!
Built from Plan(s)
Estimated Cost
About $15
Estimated Time Investment
Afternoon Project (3-6 Hours)
Finish Used
Minwax Polyshade in Espresso
Recommended Skill Level
Starter Project
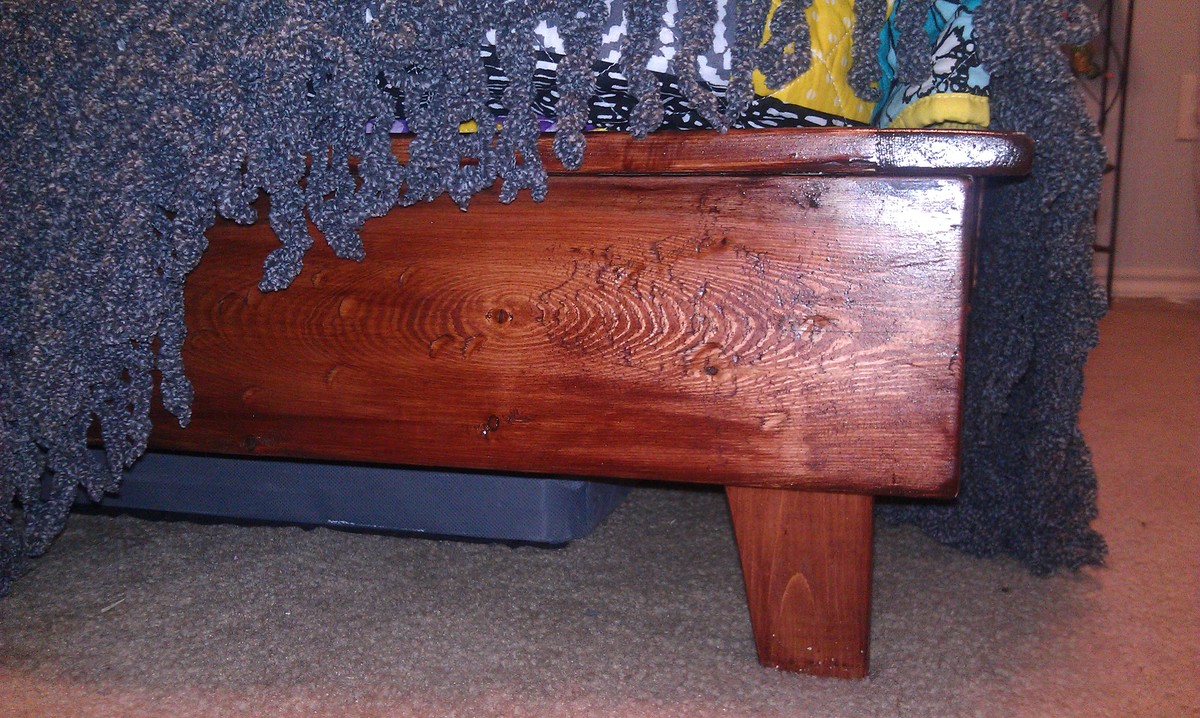
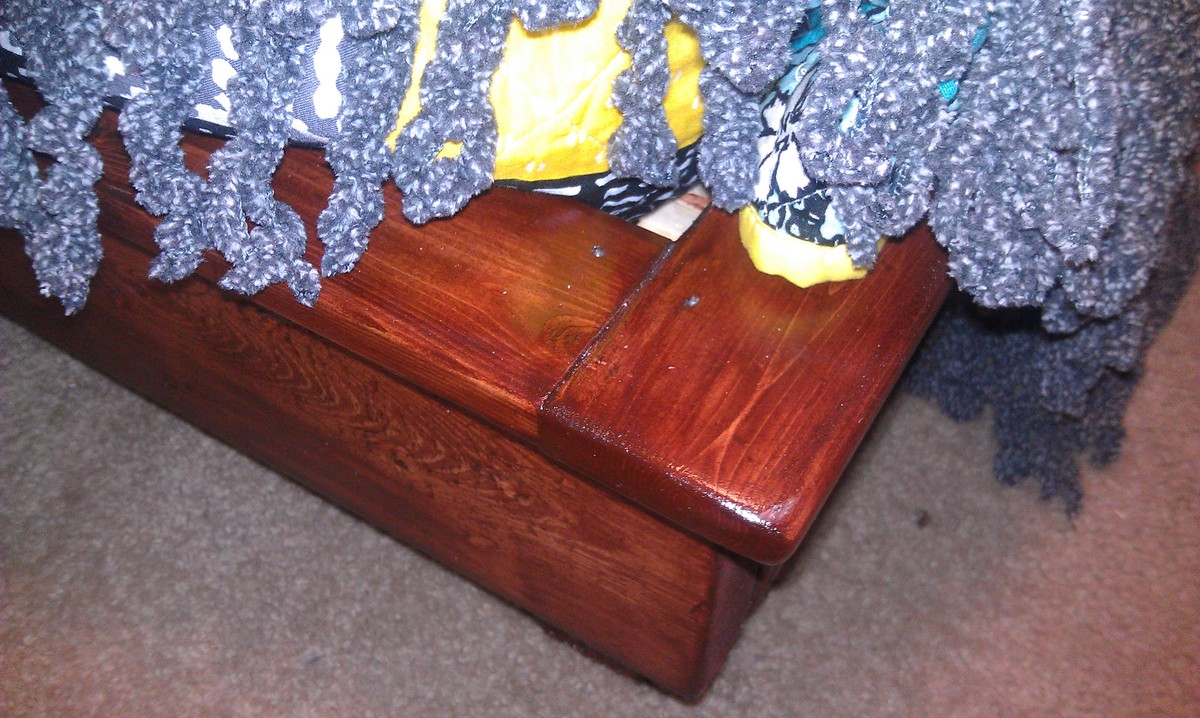
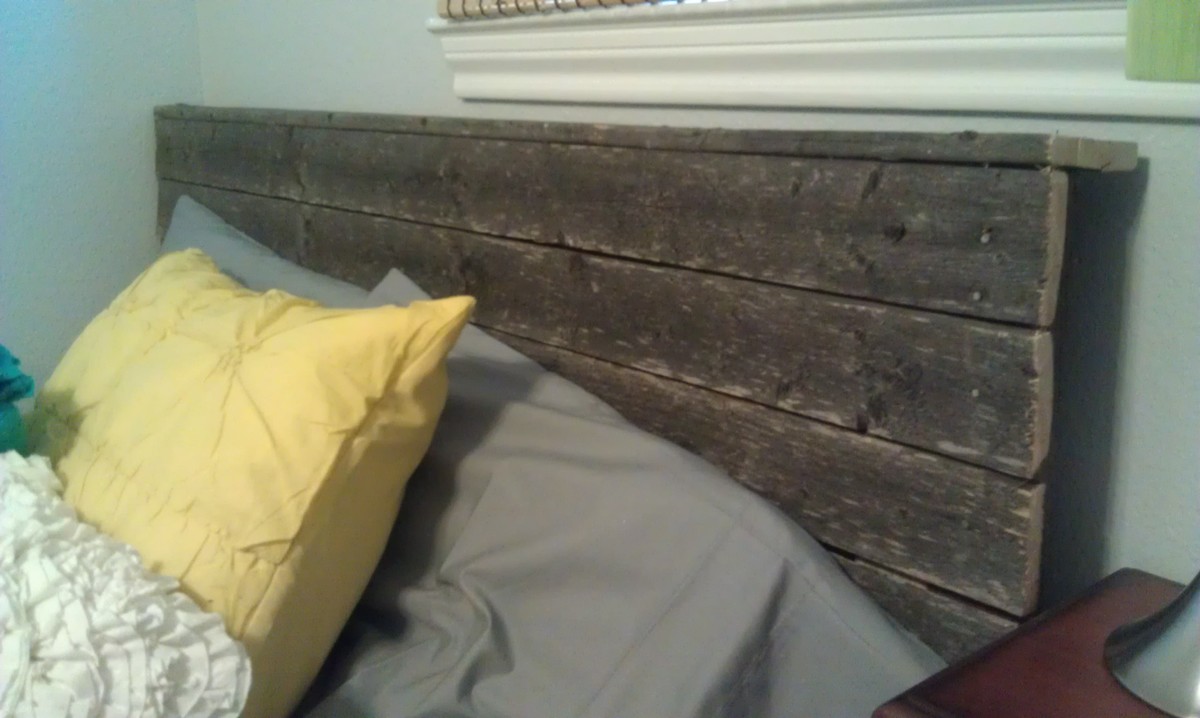
Hailey Bed with Reclaimed Fence Headboard
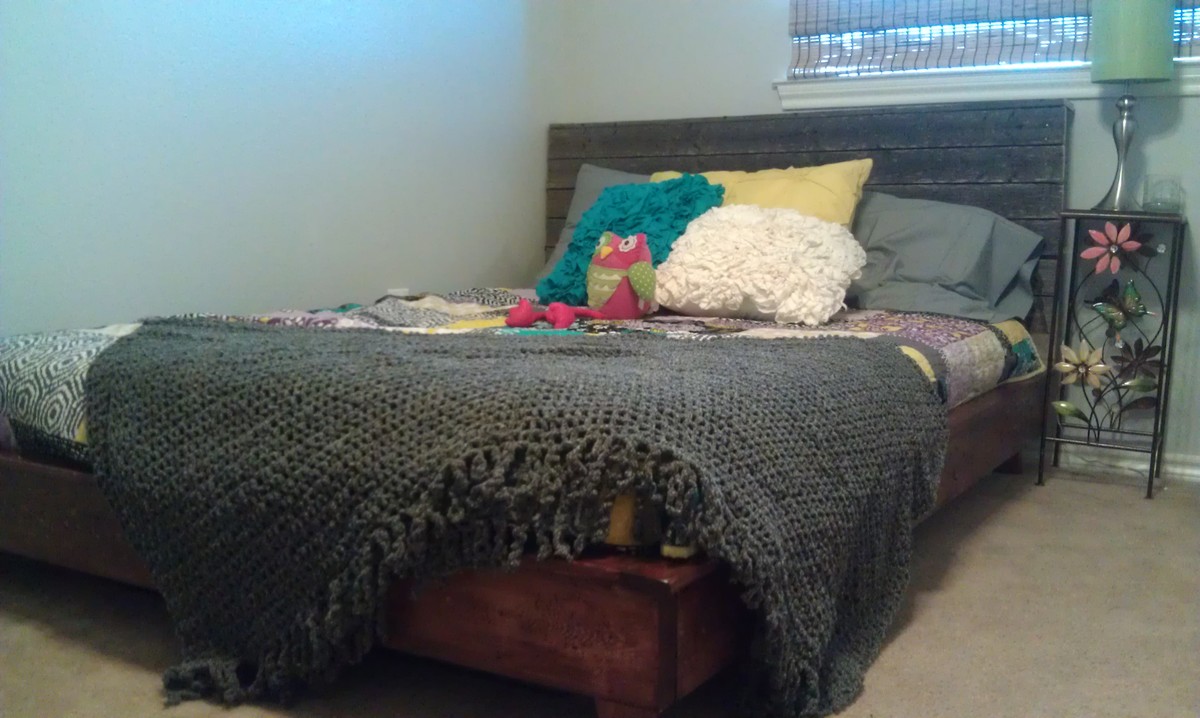
I followed the plans exactly, and added the headboard at my daughter's request. My brother recently tore down an old fence, and I pulled this gate out from under a brush pile. I strengthened it with lots of screws and cut each side to bring it down to the same width as the bed. The whole project cost me somewhere around $150-160 because I literally had nothing but a drill. I had to buy everything from screws to nails to wood conditioner, etc. Not bad for a truly "from-scratch" project.

Built from Plan(s)
Estimated Cost
$160
Estimated Time Investment
Day Project (6-9 Hours)
Finish Used
Satin poly
Recommended Skill Level
Starter Project
Comments
Thu, 02/07/2013 - 22:23
Beautifully done! And a real
Beautifully done! And a real bargain at that price, even if you did have to buy just about everything.
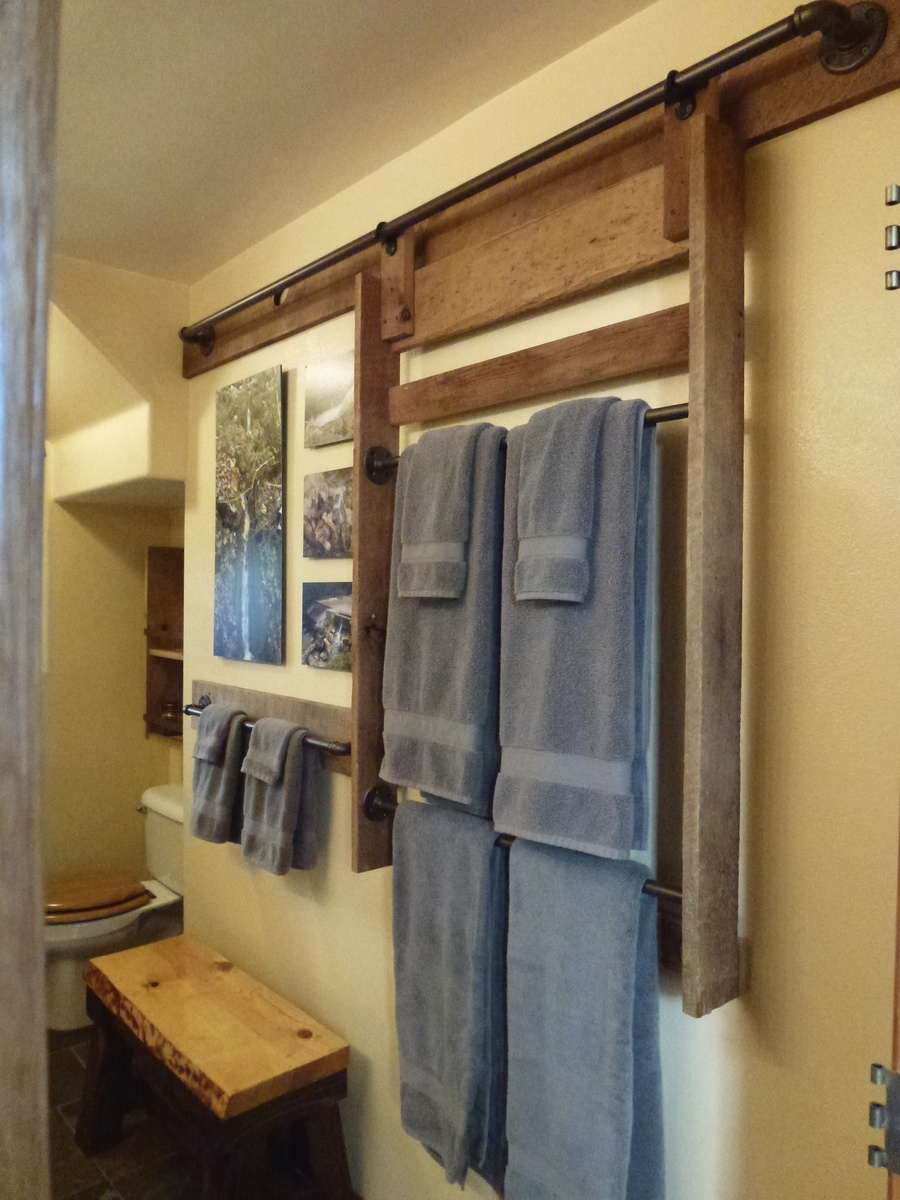
Bathroom Hanging Towel Racks
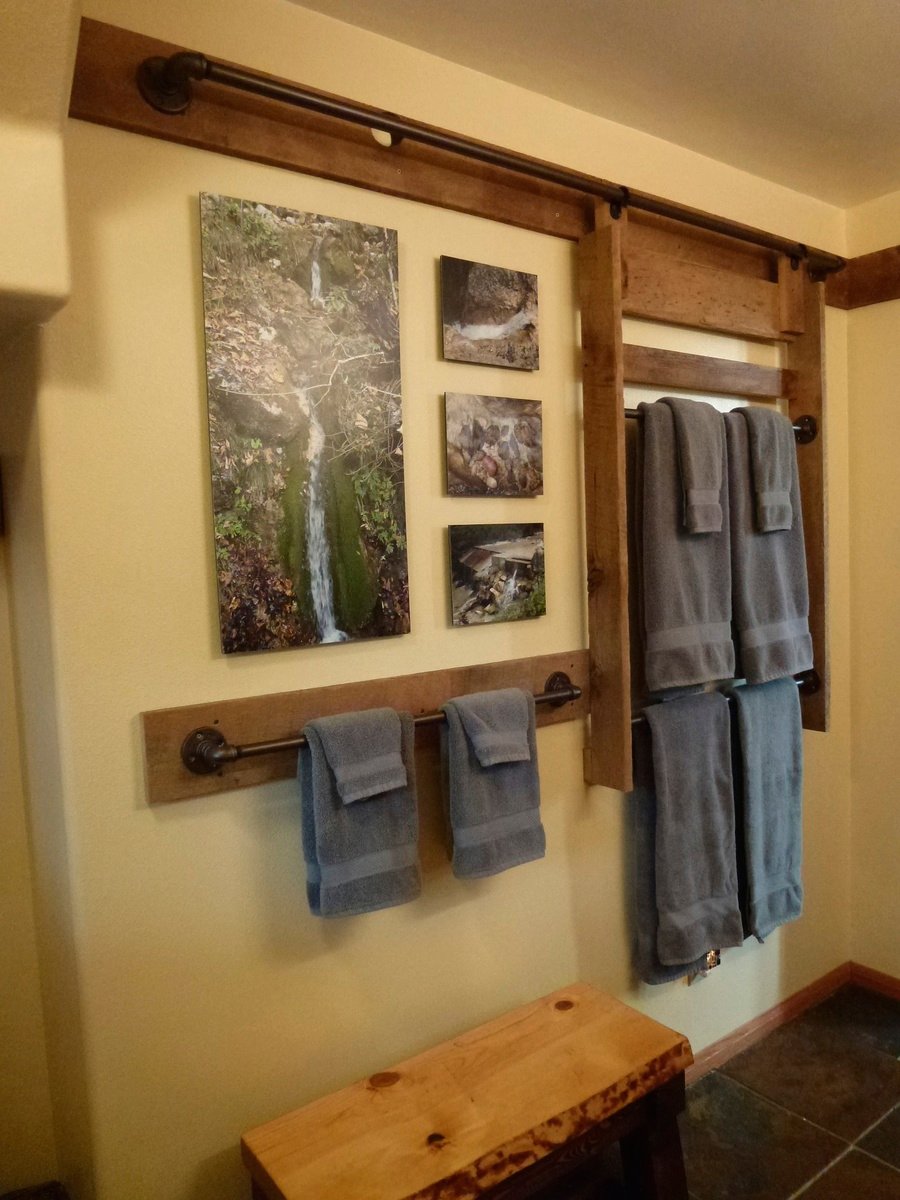
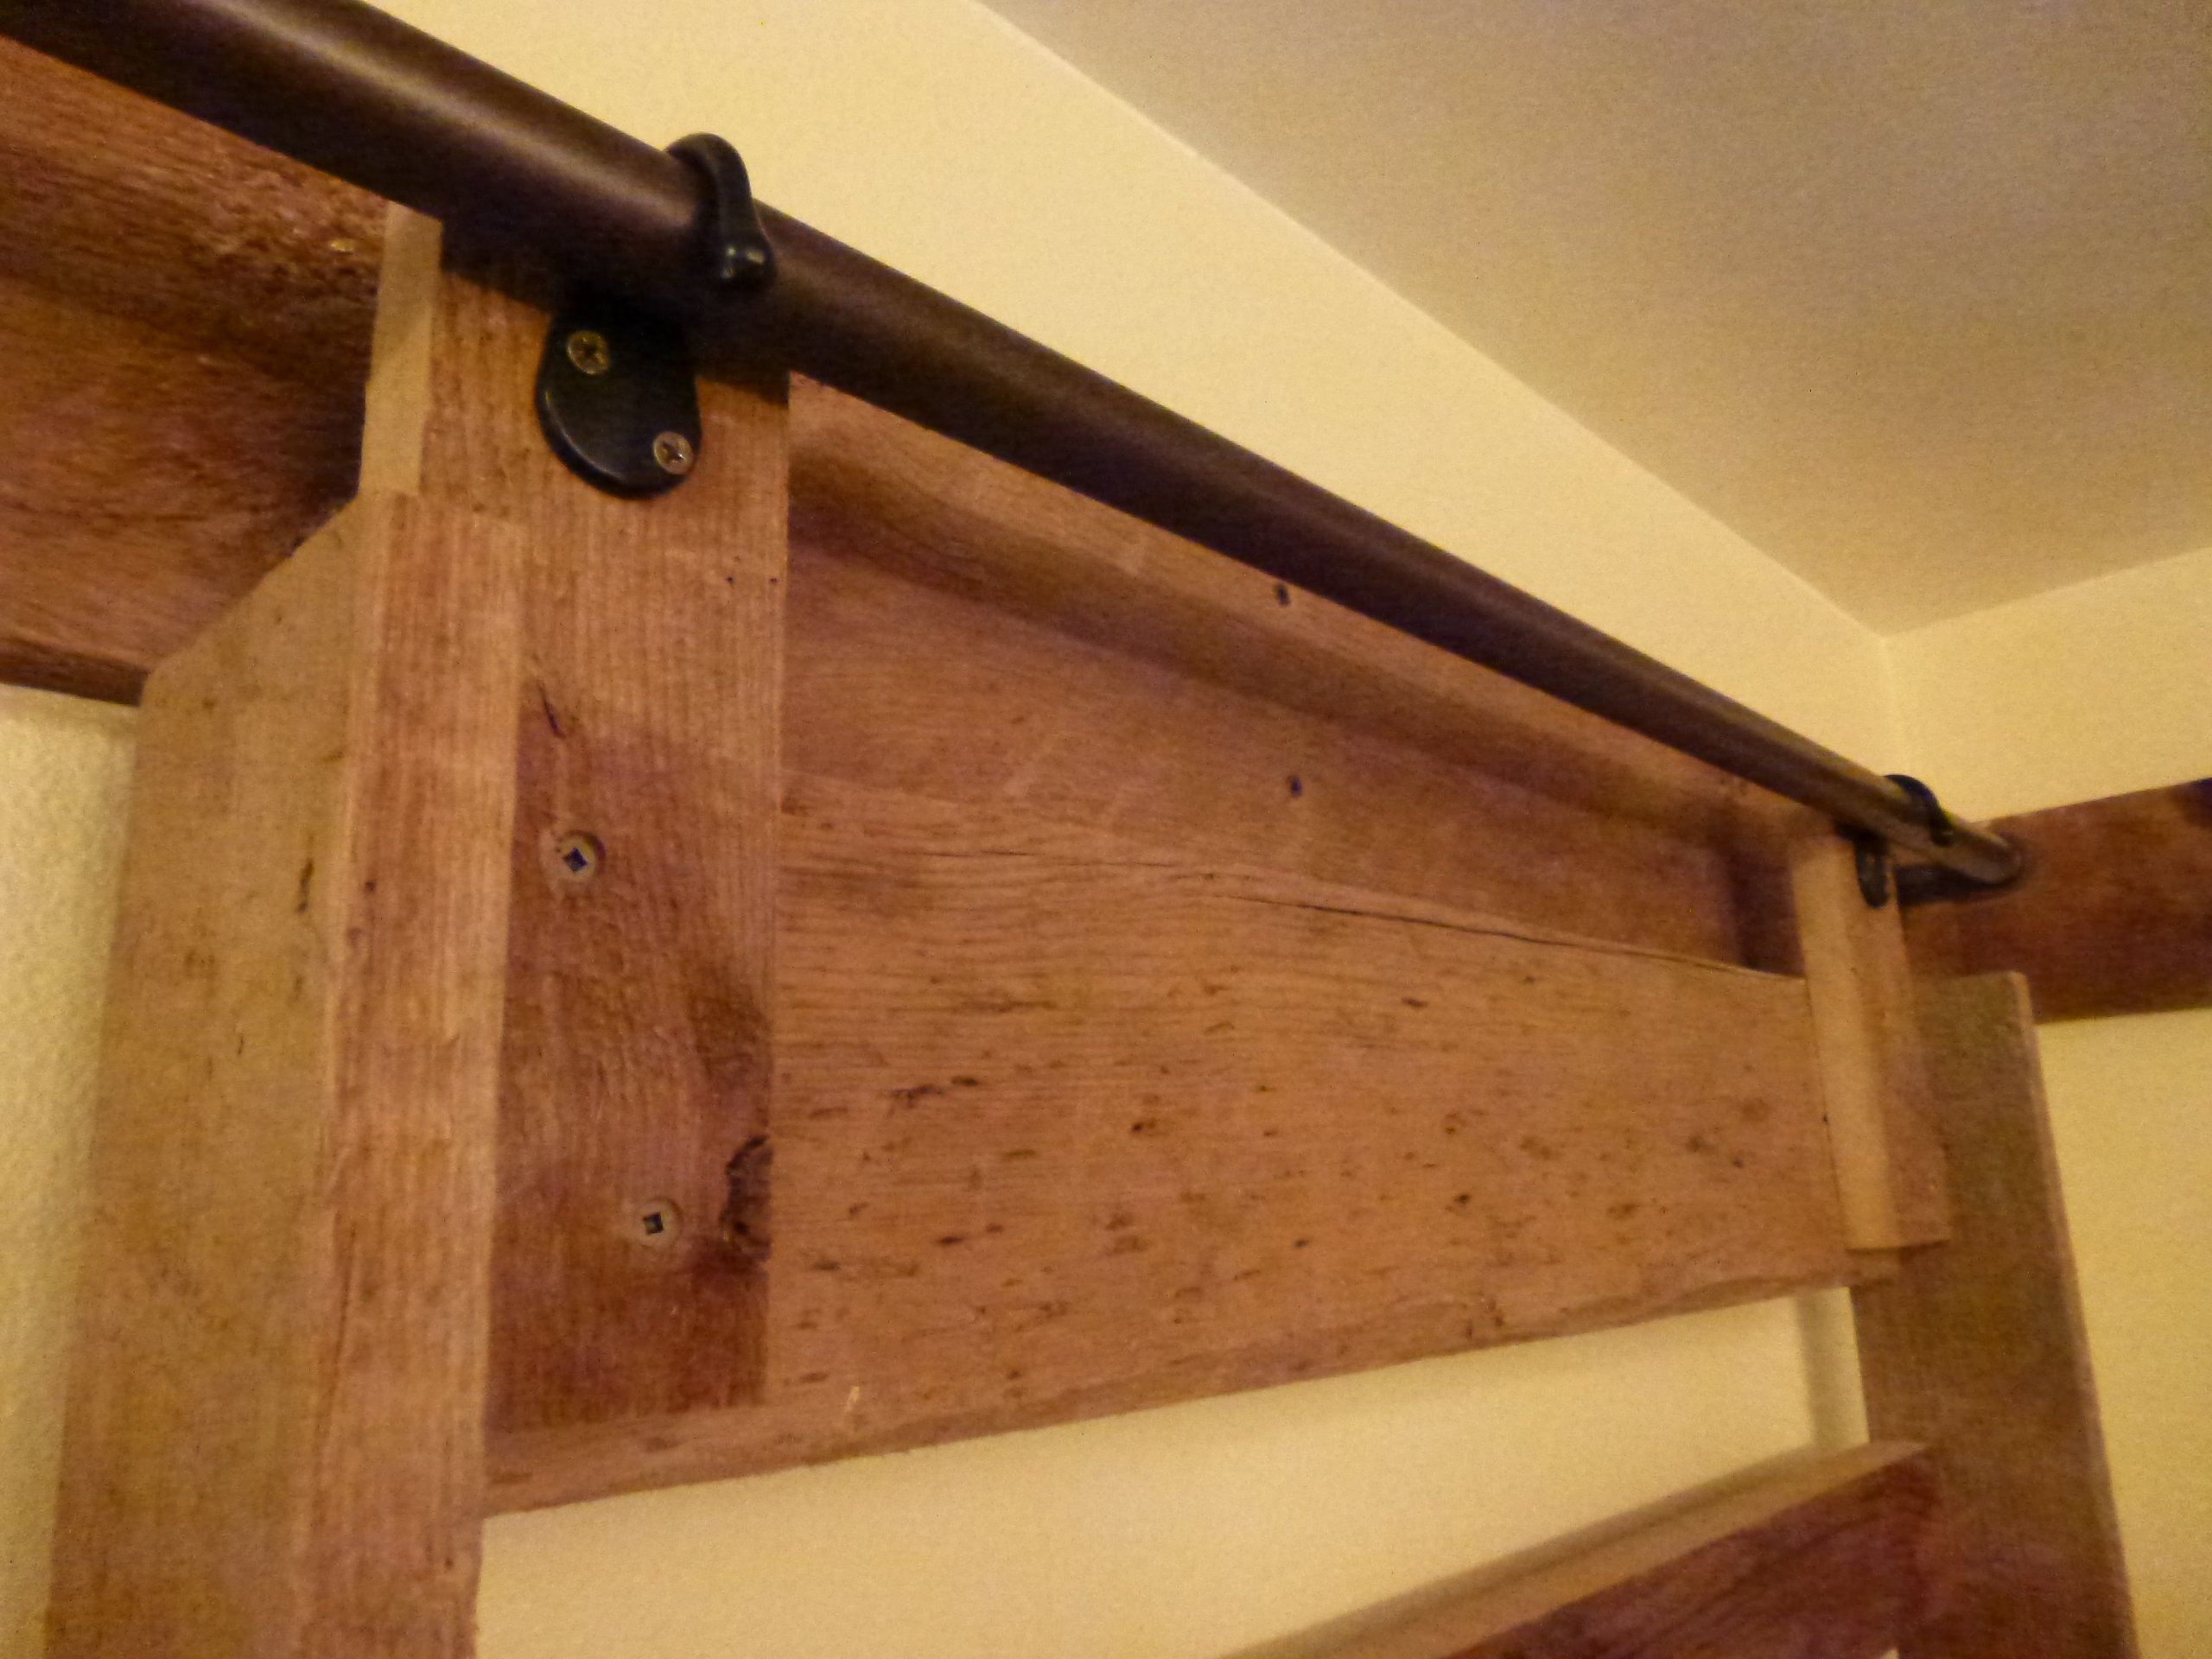
This was really a simple and fun project! My wife saw this on Ana White and knew immediately that this was a “must do now” endeavor. The industrial look of the pipes really fit the decorating motif of our guest bath.
We used reclaimed barn wood purchased at a local hardwood store. The wood was, presumably, some type of cedar and was very user friendly; no cracking from screws and cut / glued very well. We did have to run the stock through the joiner first, however, as the edges were weathered, warped & gouged. We didn’t sand or finish the wood in any manner and it looks exactly as it did when it was part of a standing barn.
We used 3 – ¾” 30 inch pipes for the towel racks and 1- ¾” six foot pipe for the top rail. The pipes were assembled & painted with Rust-Oleum Universal Metallic Paint & Primer in One – Flat Burnished Amber. Instead of eye hooks to hold the ladder to the top rail, we decided on pre-painted bronze robe hooks.
After stock was squared, pieces were cut for the border and ladder. The ladder is 32” wide (x) 48” long with 4” boards. We chose that length so as to accommodate 2 towel racks with enough space for 4 sets of towels. The assembly was made very simple by first attaching the 30 inch ¾ ” pipes as they really brought the construct into square.
The only significant challenge to this project was selecting & cutting stock so all of the exposed edges were weathered facades.
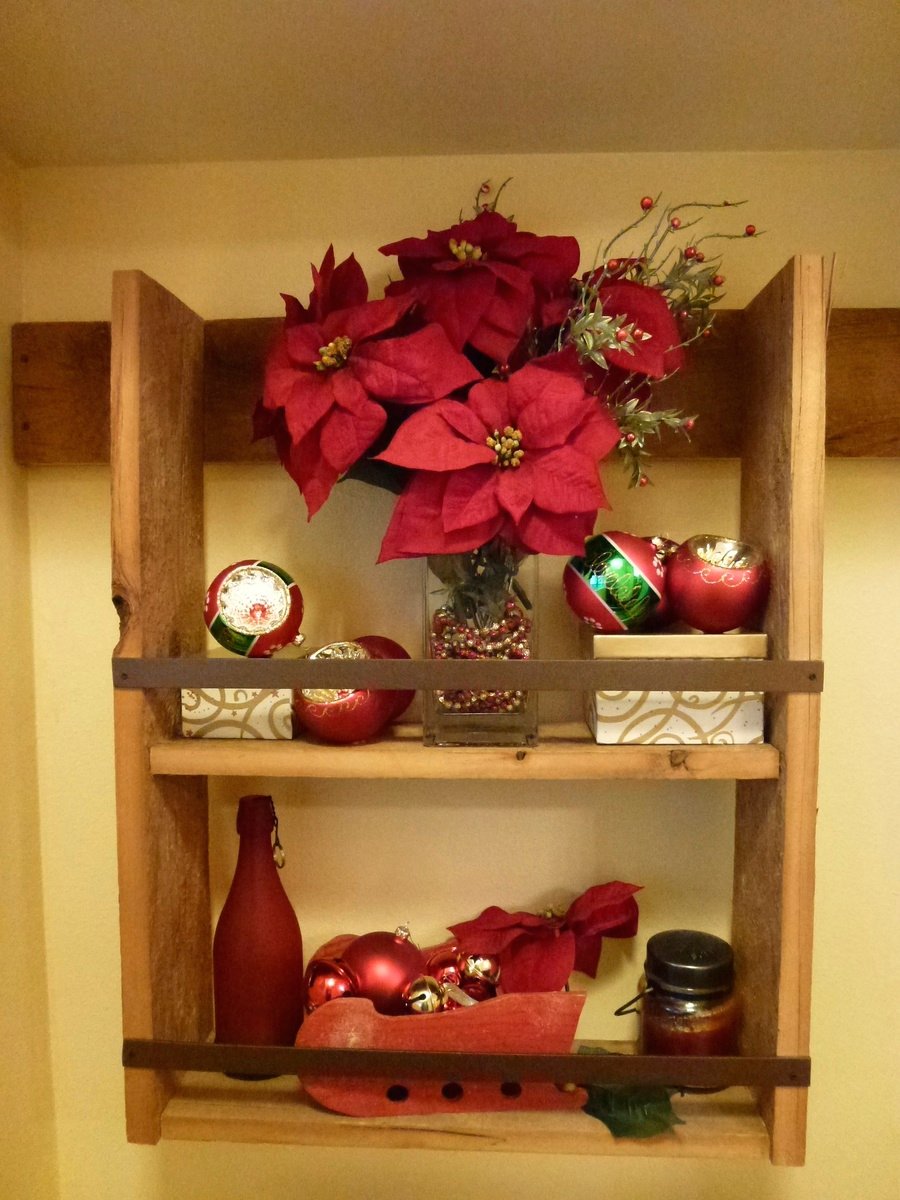
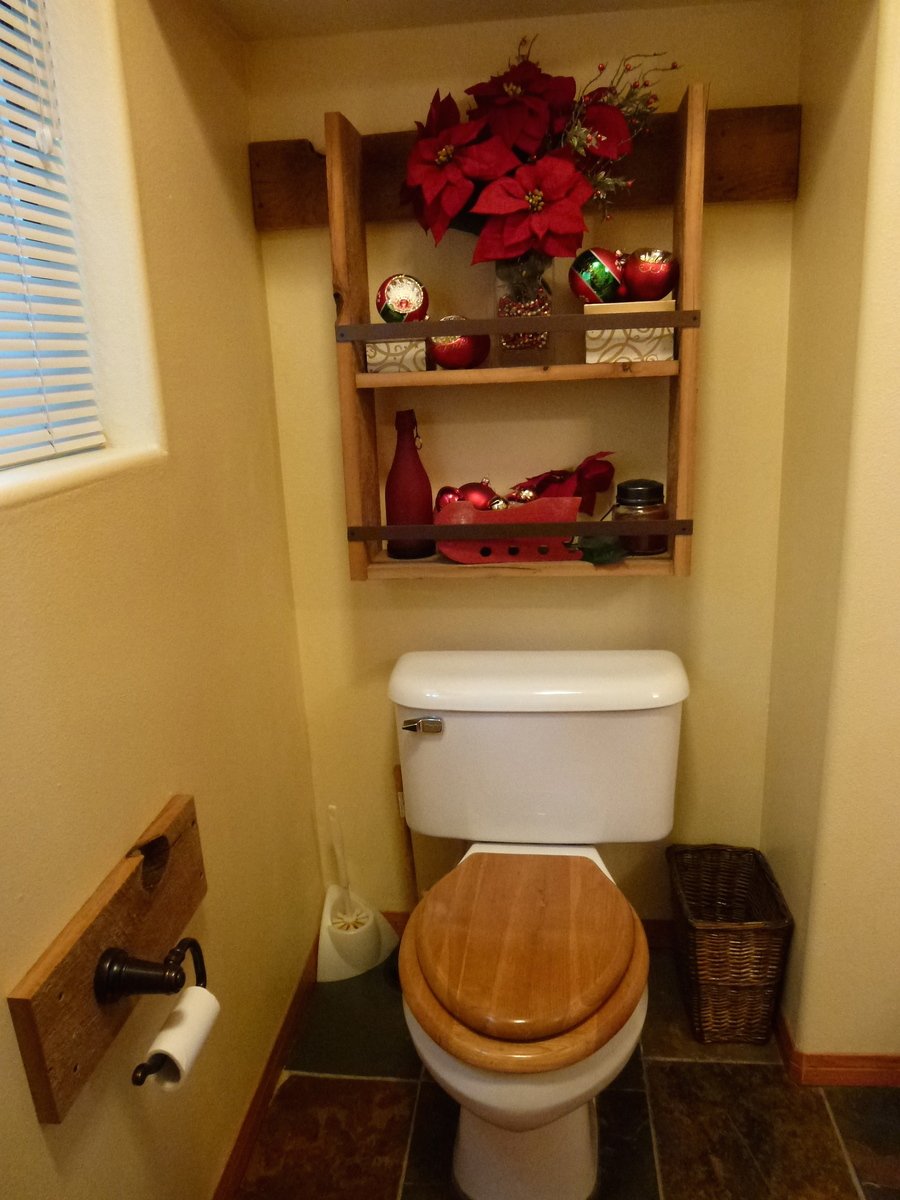
The project was finished off w/ a small shelf 23 “ wide (x) 30” long w/ shelf depth of 7” hung behind the toilet and a toilet paper holder base.
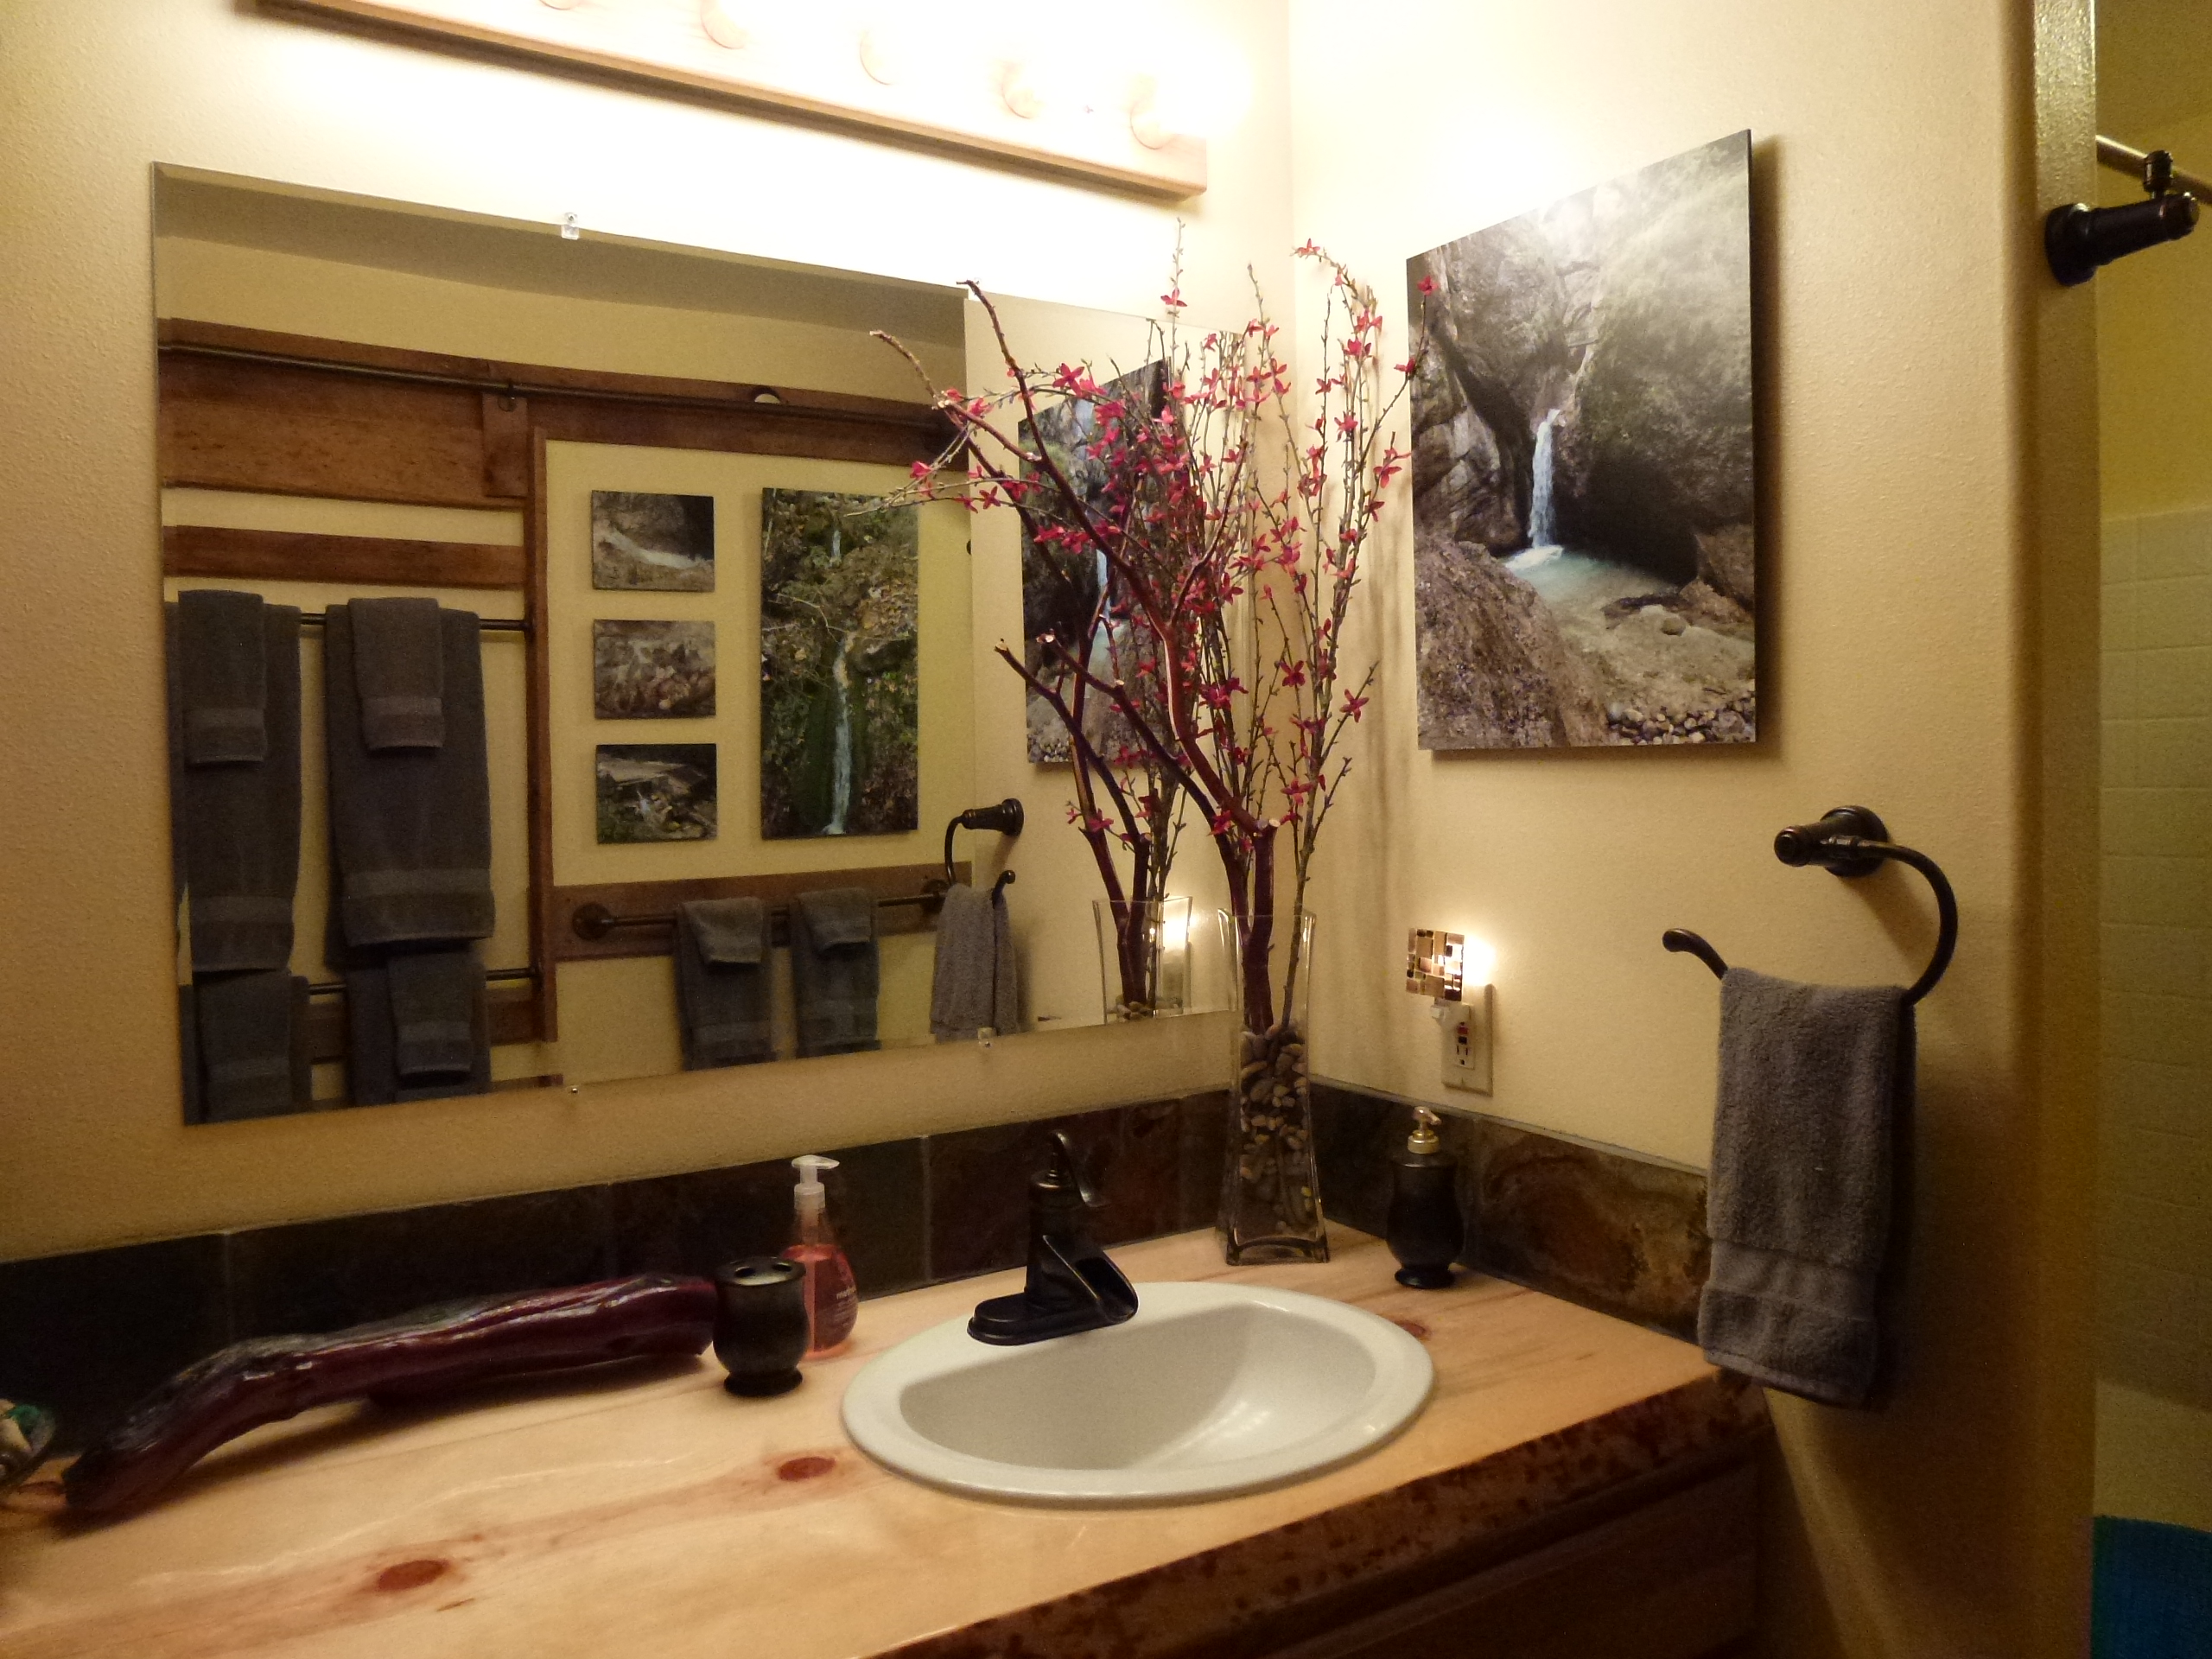
The bard wood was expensive (approximately) $200 for the project) and we spent about 20 hours building it. It was well worth the effort. And, to our amazement, all components finished level to the ceiling and square to each other … better “lucky” than “good”.
This was a simple and rewarding Fall project and is recognized by our guests as both a unique and utilitarian augment to our guest bath.
Built from Plan(s)
Estimated Cost
$200.00
Estimated Time Investment
Week Long Project (20 Hours or More)
Finish Used
None.
Recommended Skill Level
Beginner
Comments
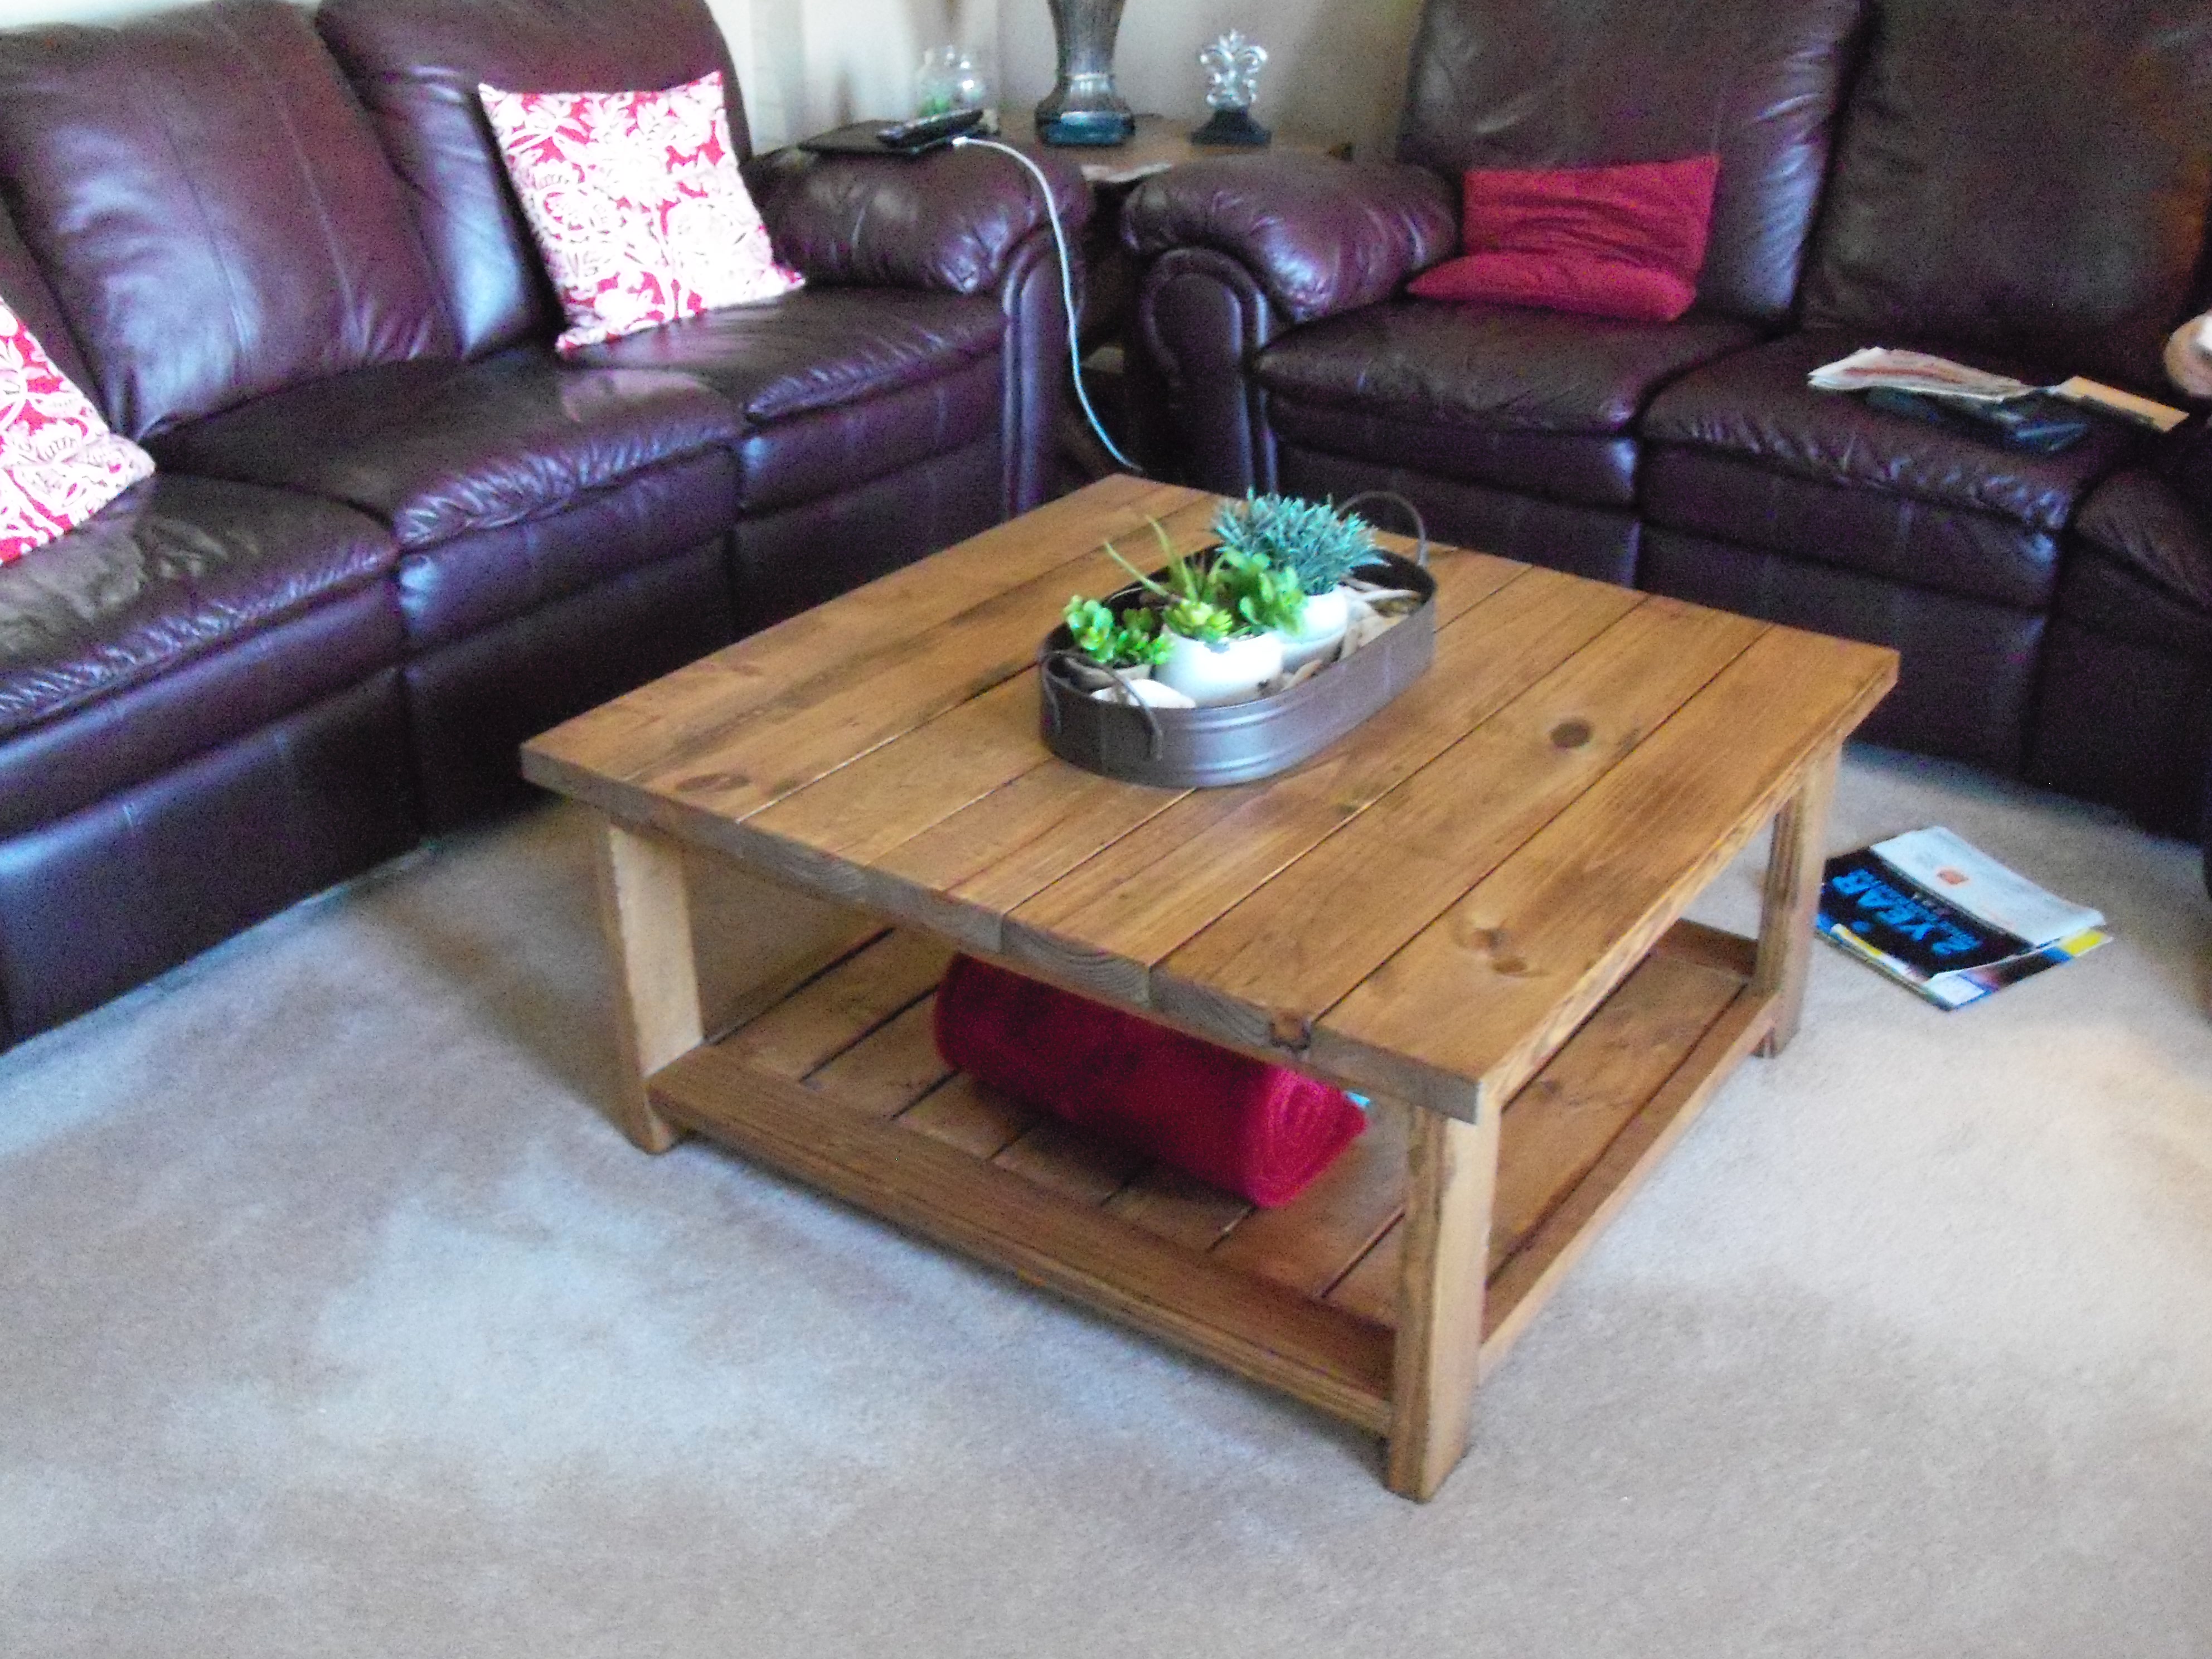
coffee table
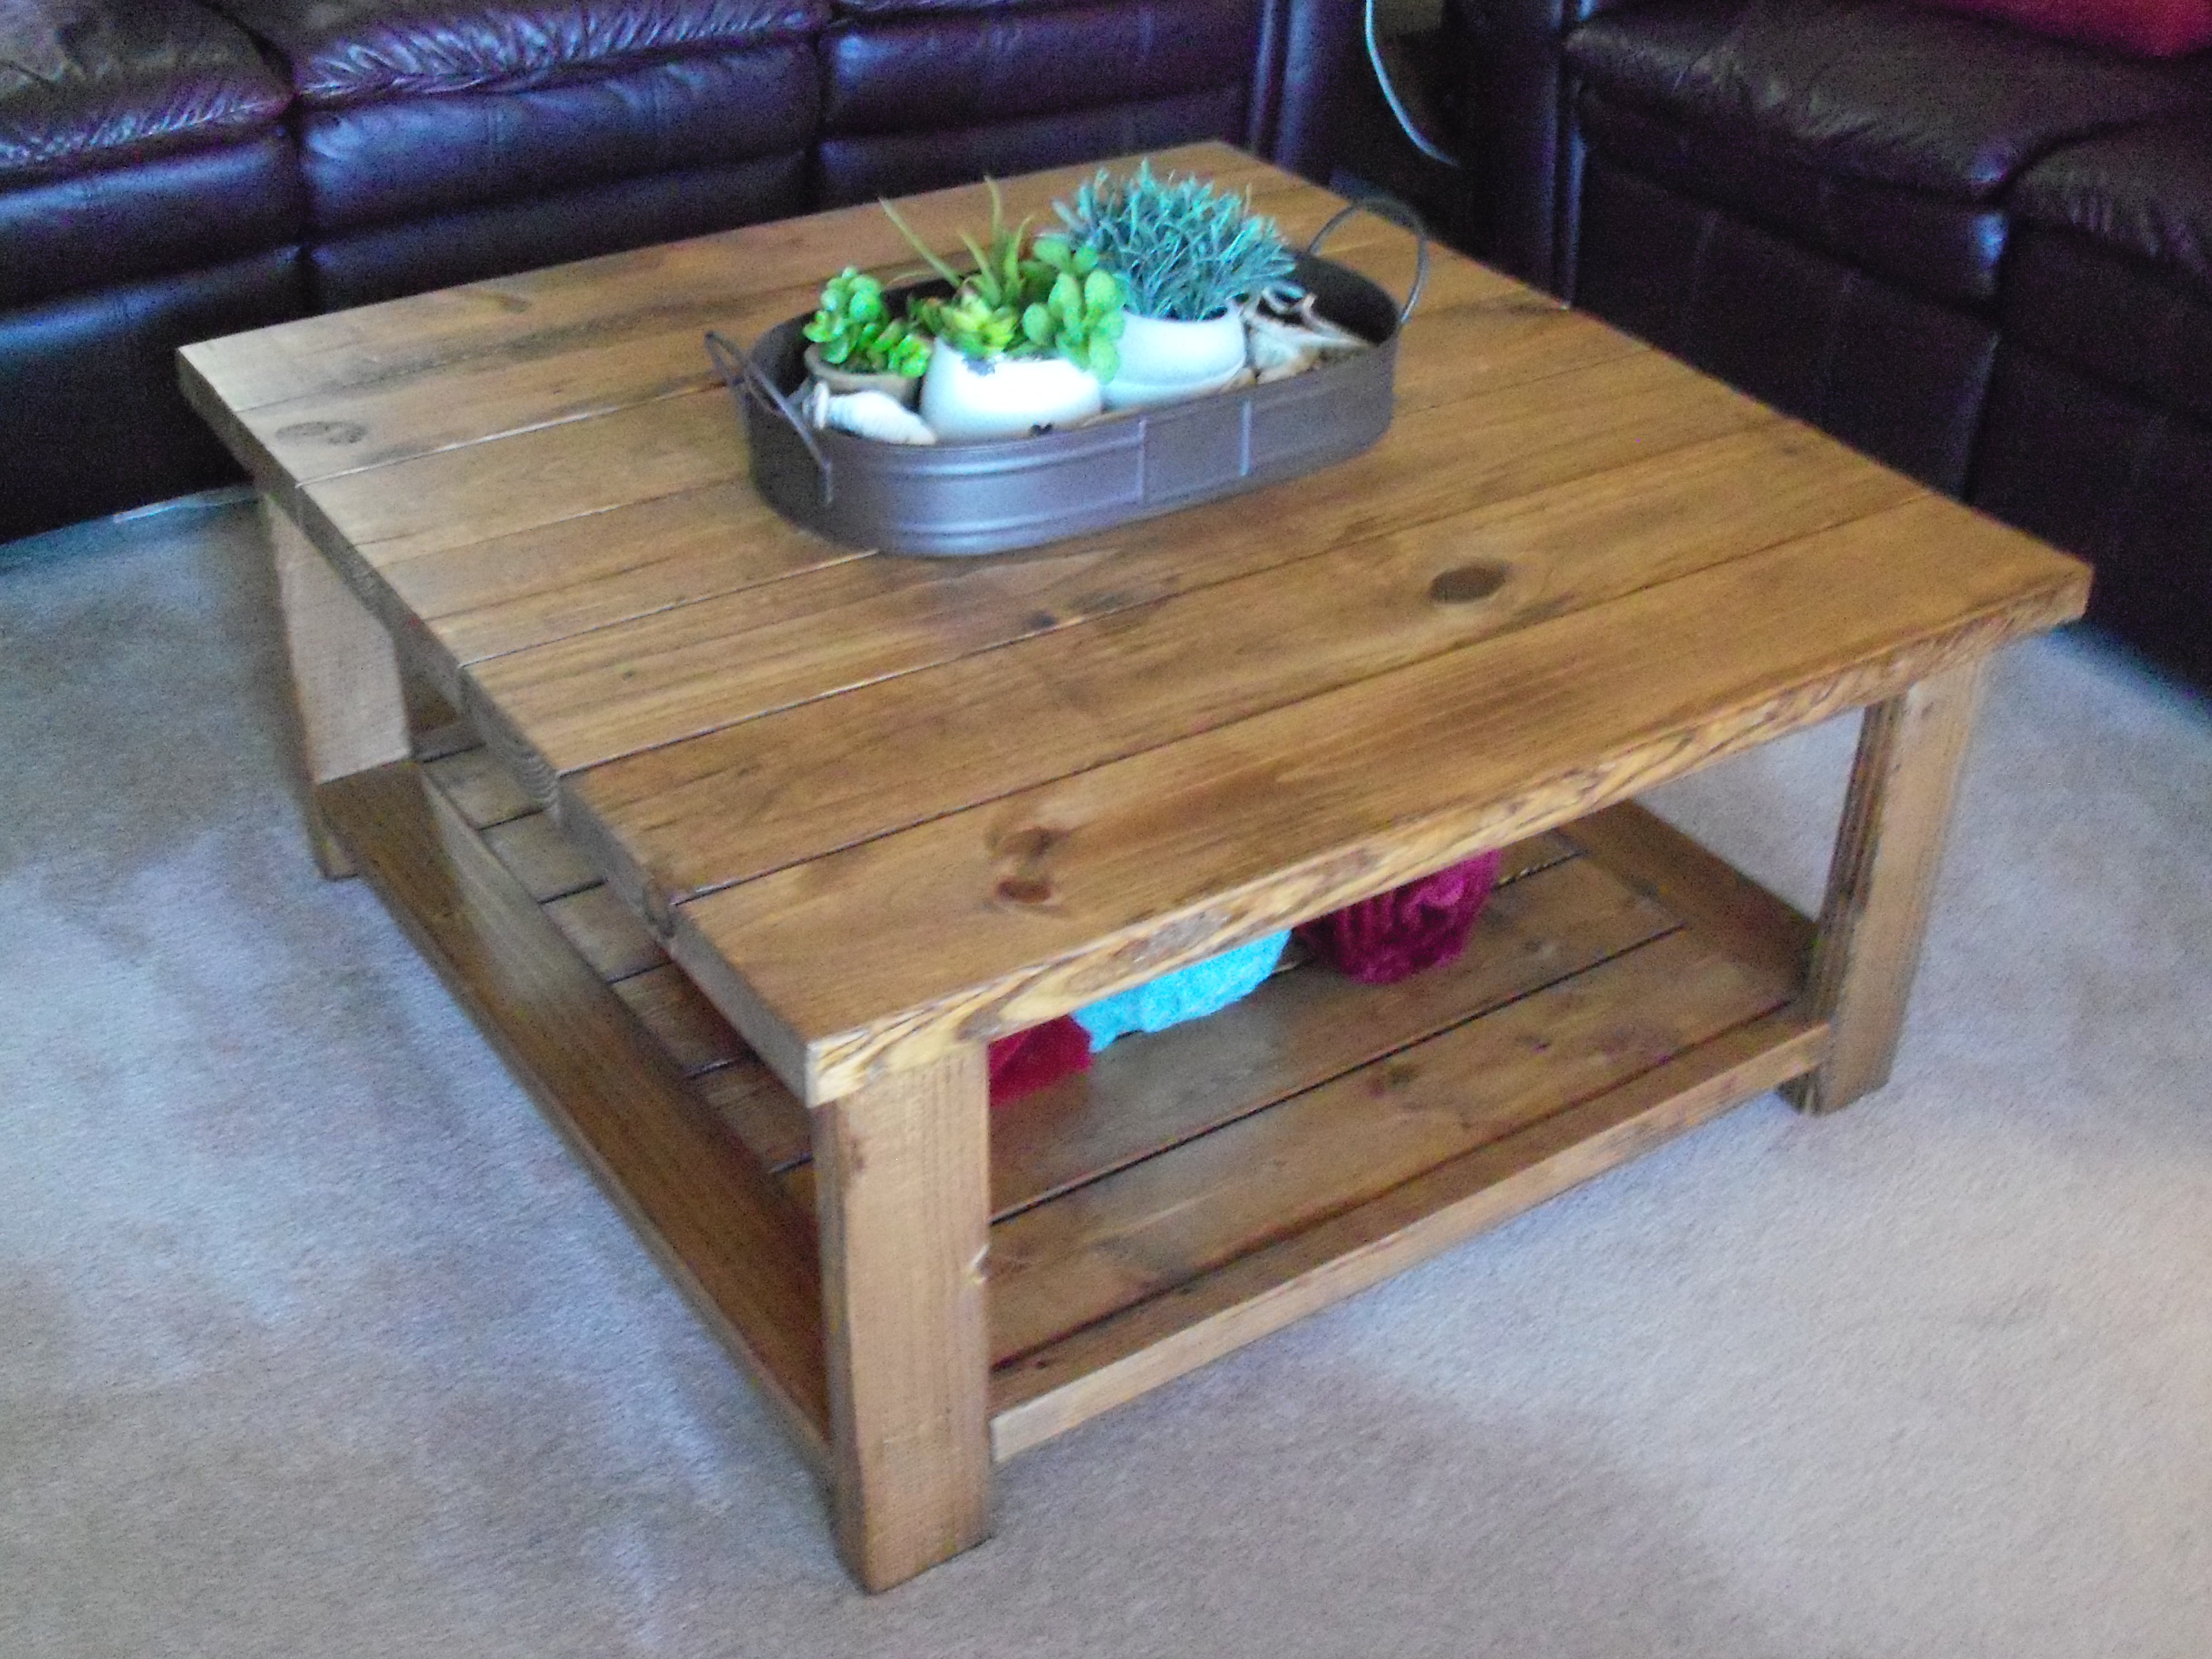
I built this table in one day and modified the plans to my wife's specs. It is 36"x36" and instead of using the two 1x12s on the bottom I used seven 1x4s cut down to fit and for the top used seven 2x6s which gave it the look she wanted.
Great plans!!!!
Estimated Cost
$40.00
Estimated Time Investment
Day Project (6-9 Hours)
Finish Used
stain and semi gloss sealer
Recommended Skill Level
Intermediate
Kitchen Spa Bench
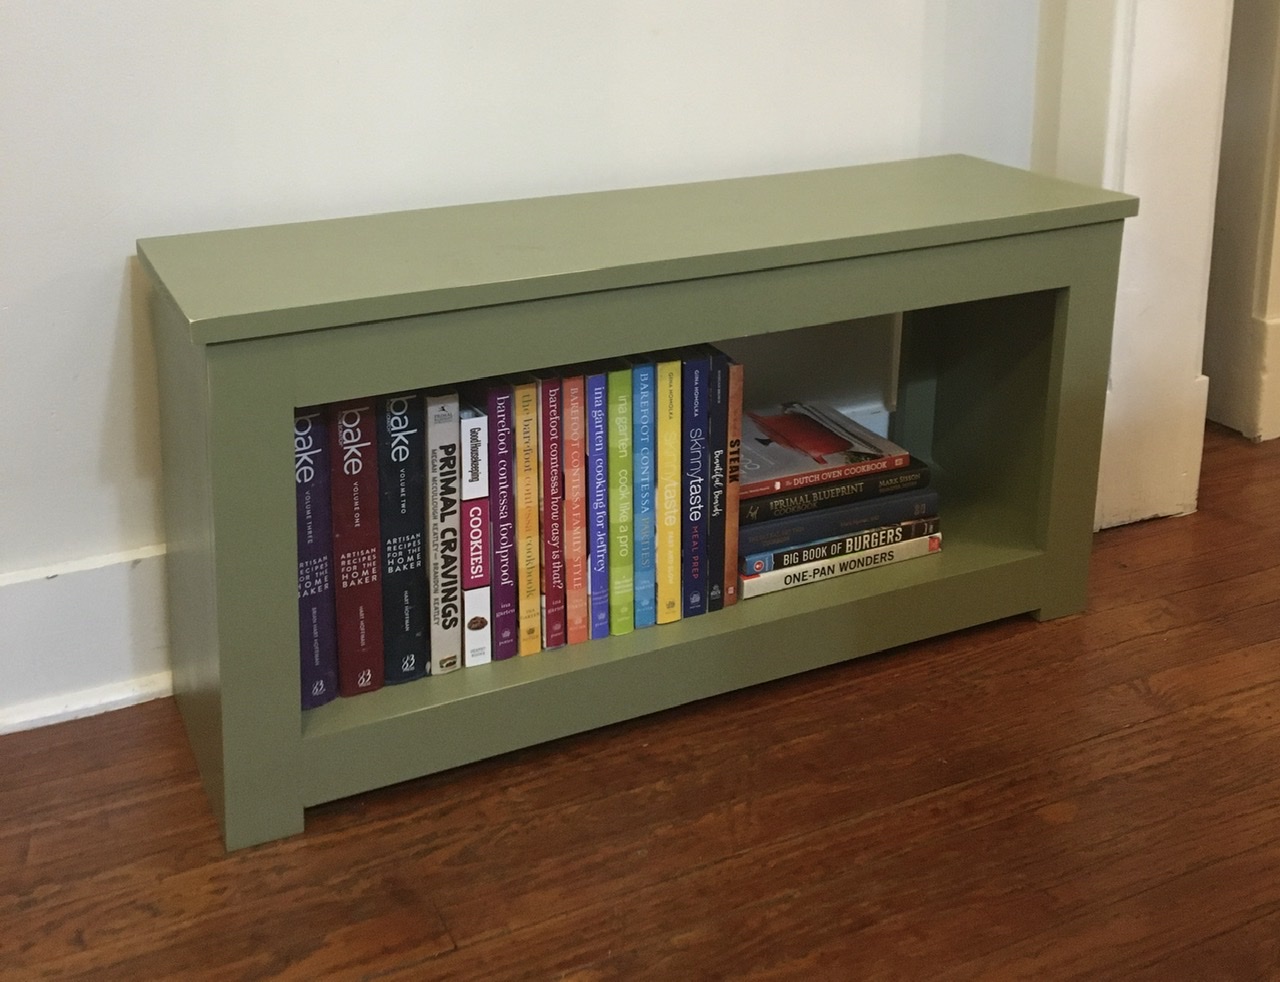
There is no seating in our small kitchen and this spa bench was the perfect solution. Adds just the right amount of space for someone to keep a chef company while cooking or baking.
Estimated Time Investment
Afternoon Project (3-6 Hours)
Finish Used
I used Sherwin Williams’ “Sheraton Sage” in a semi-gloss. Also sanded the edges a bit to create a distressed look.
Recommended Skill Level
Beginner