Modern farmhouse table
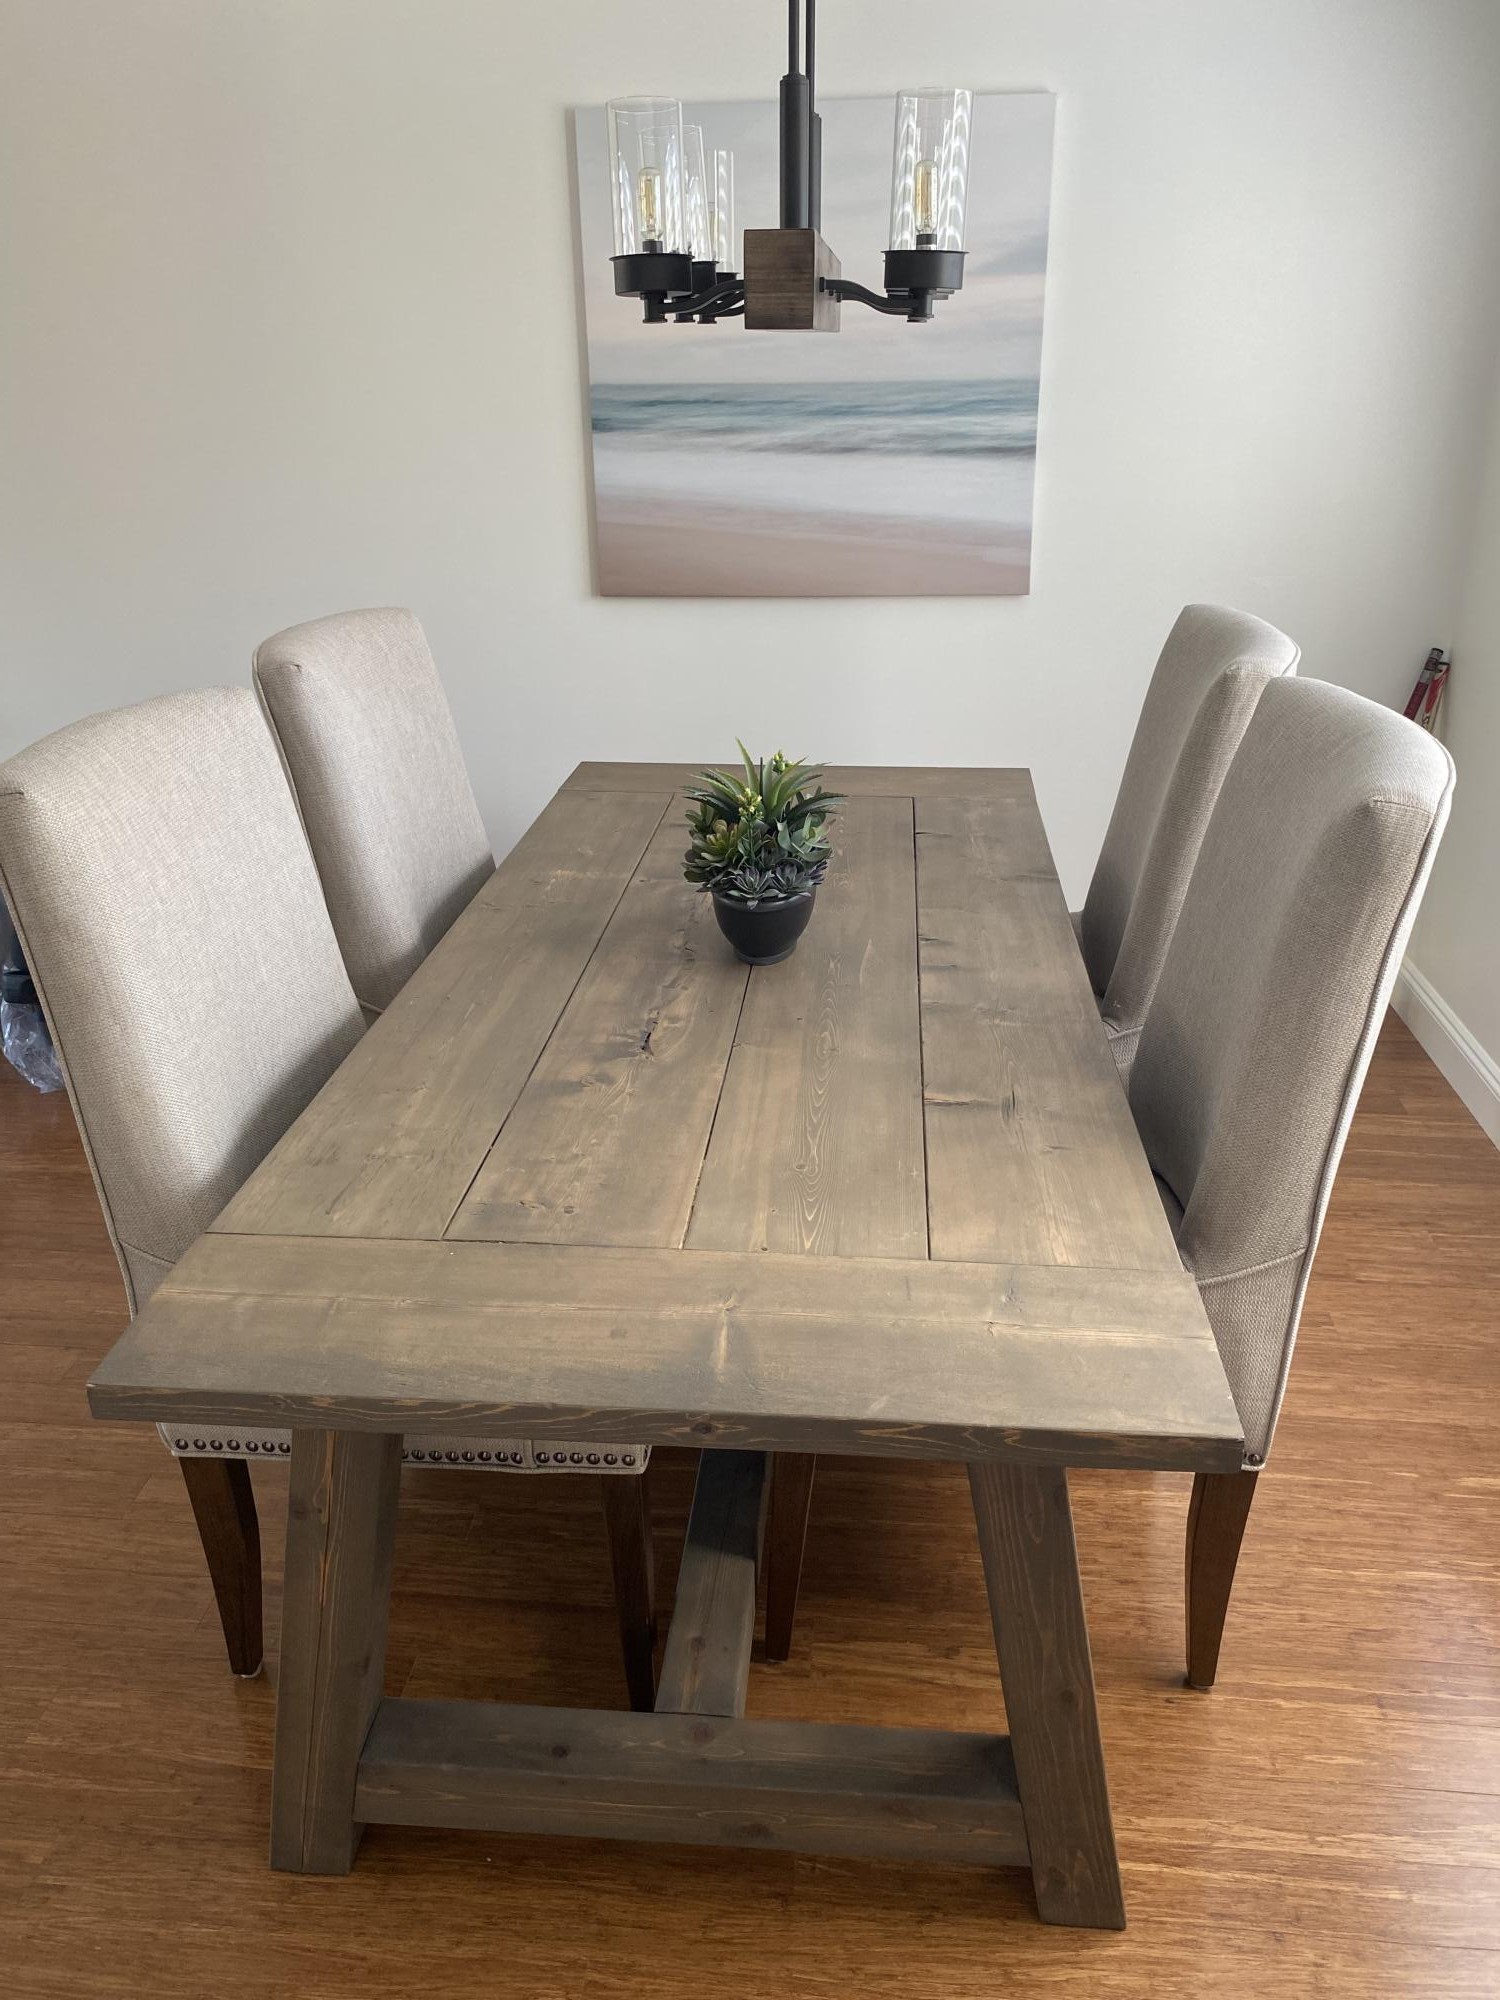
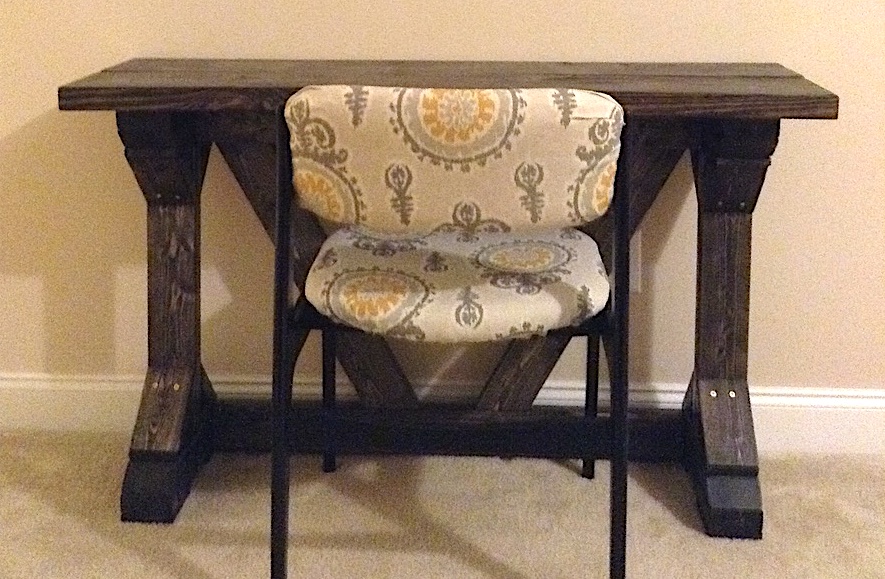
Post and beam farm house table.
Completed 4 years ago by myself while using the Ana-whites plans.
Matching baby change table and crib are also finished for our newborn arriving Jan 3rd.
Built from Plan(s)
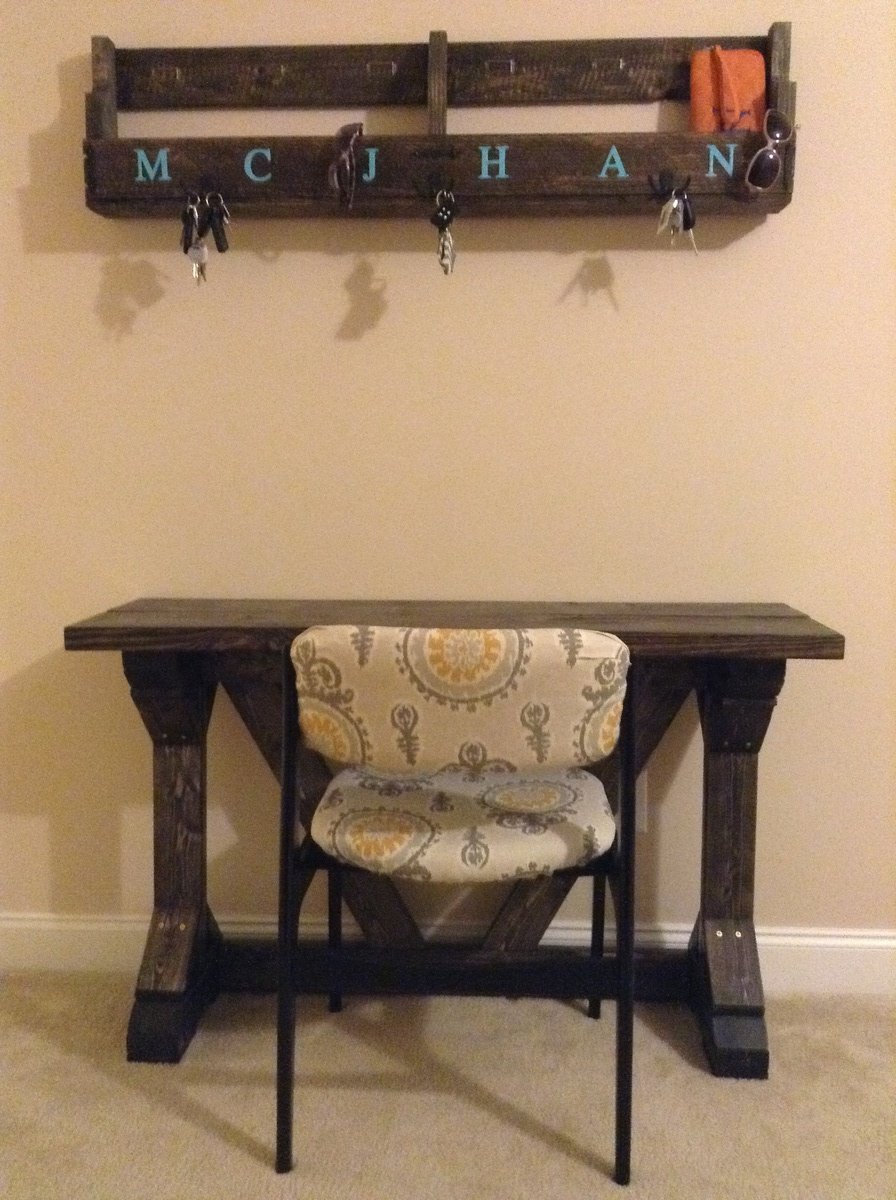
Post and beam farm house table.
Completed 4 years ago by myself while using the Ana-whites plans.
Matching baby change table and crib are also finished for our newborn arriving Jan 3rd.
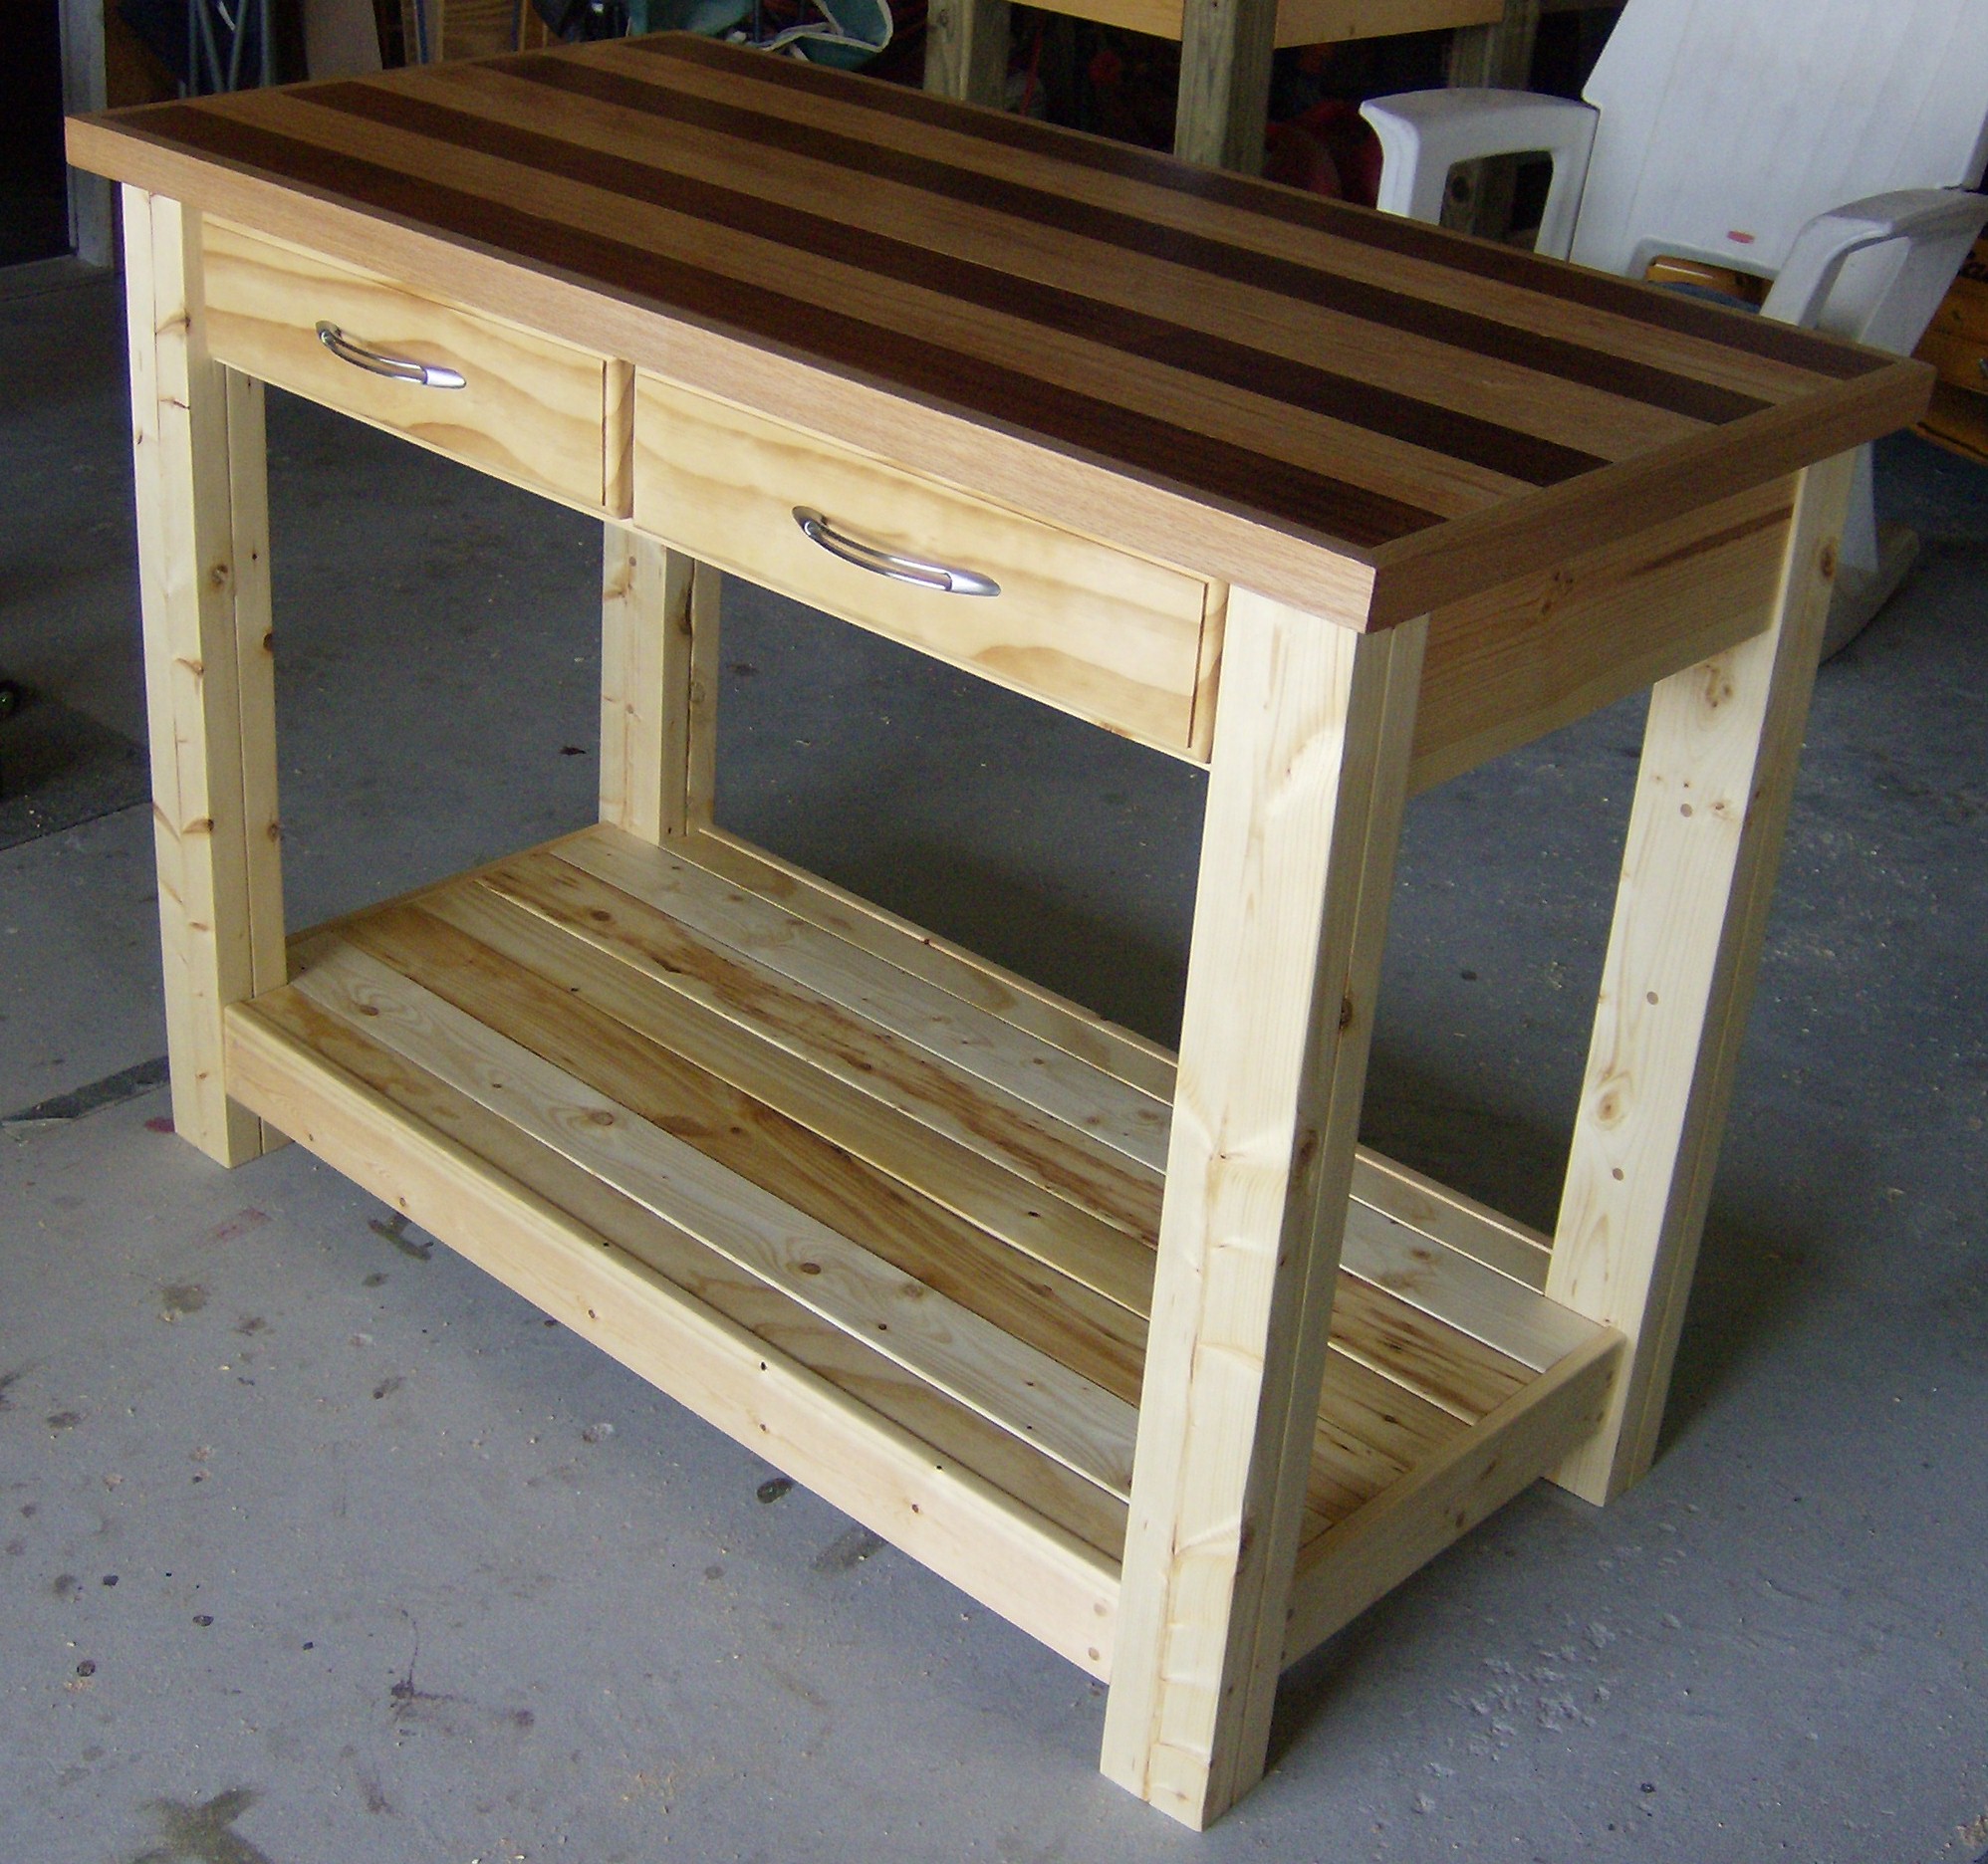
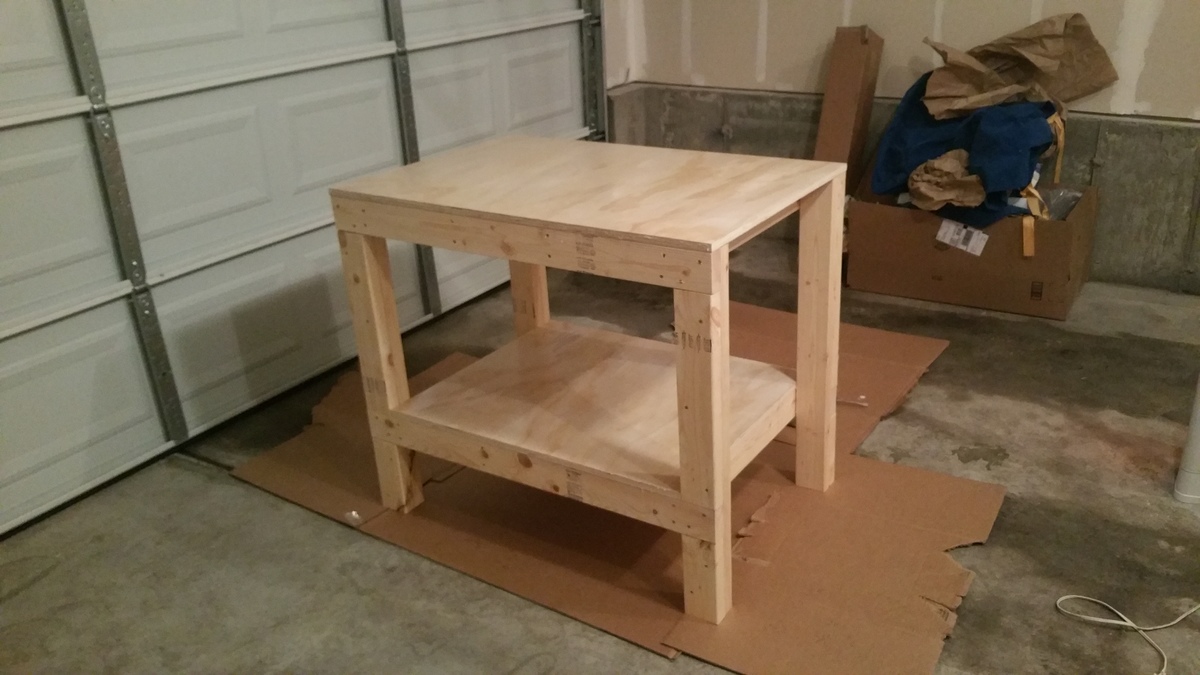
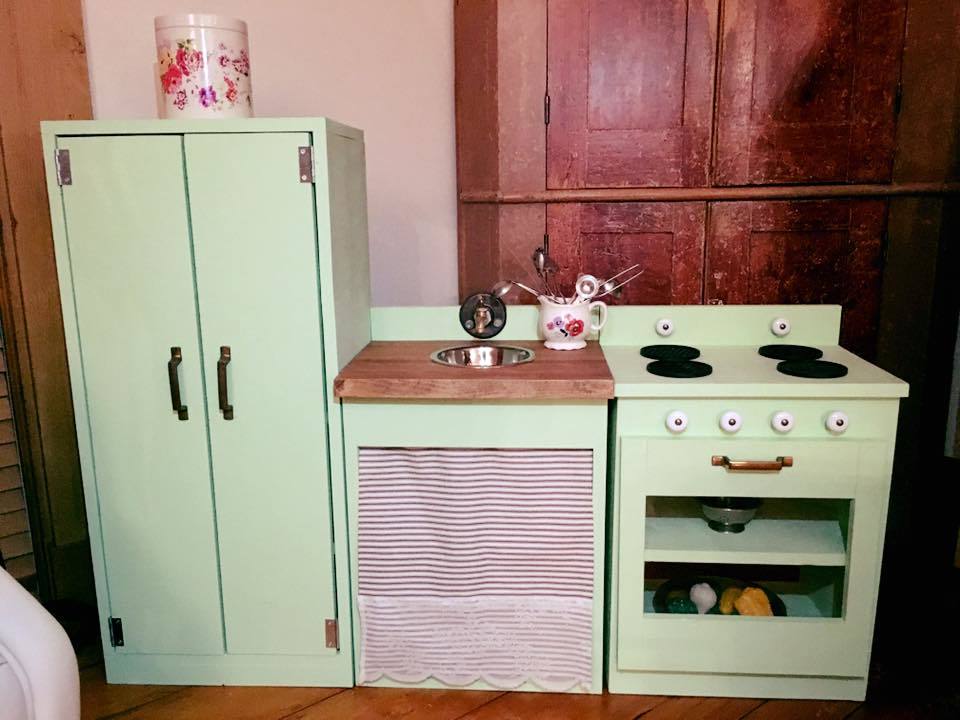
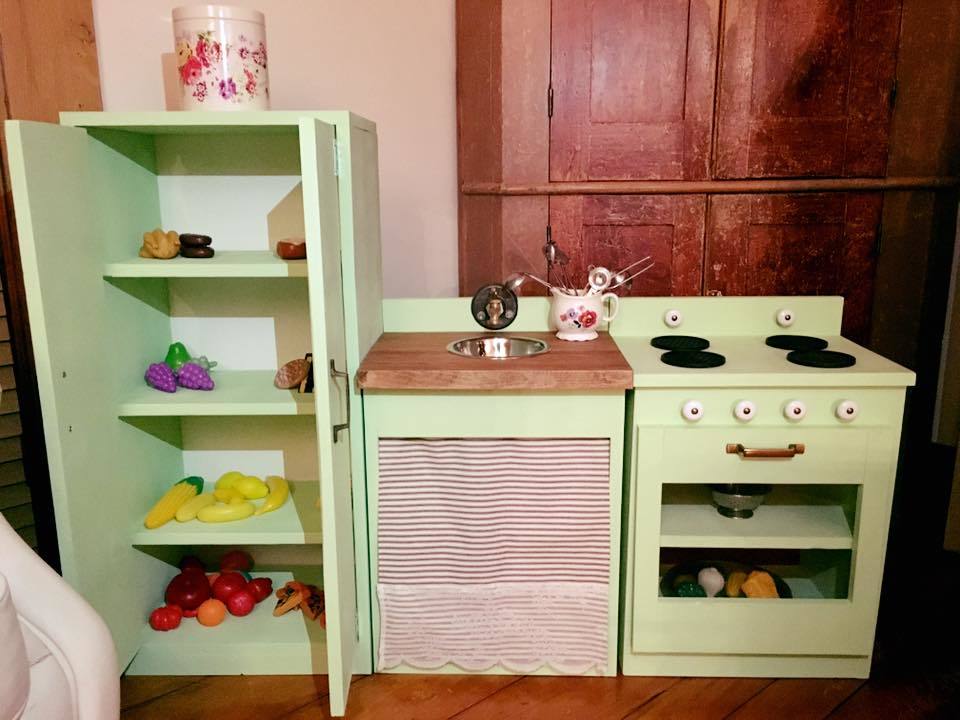
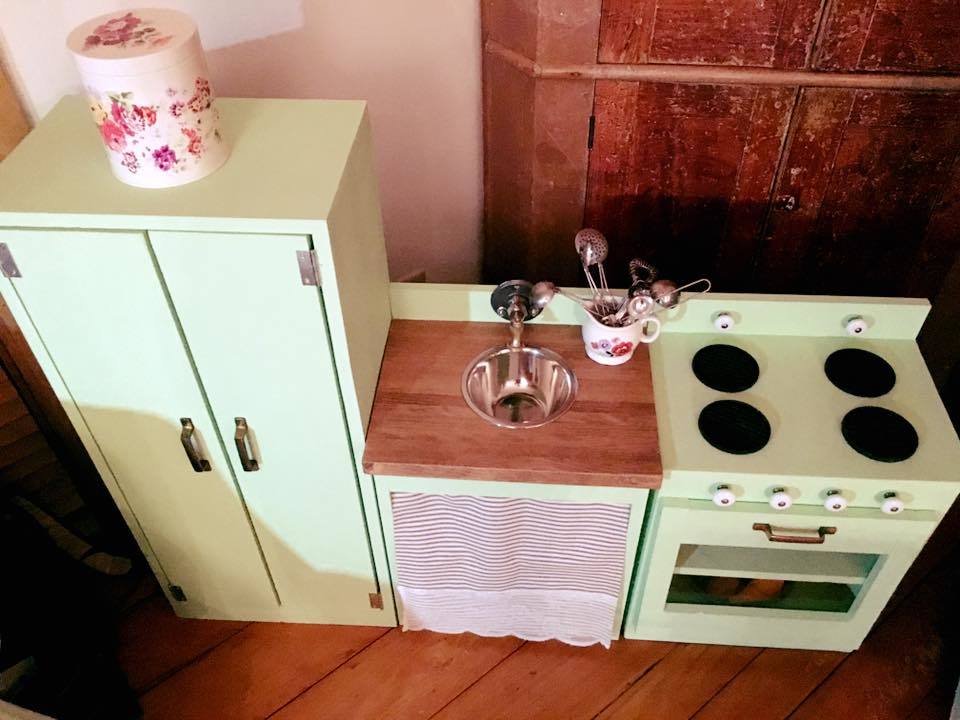
Our daughter asked for a kitchen island so my first stop was Ana's website to see what plans I could find. I built the base while my husband was out of town one week. This was a zero trip to Lowe's project as I raided our wood rack and scrap bins. My husband came home and built the countertop.
Mon, 09/19/2011 - 20:48
I have to say I'm so jealous. Absolutely beautiful! Words can't even say. Great job!
Tue, 11/01/2011 - 09:10
How did you build the butcher block top? Any recommendations, additional resources or anyting?
The bolt I got was too short so...was about to go out and exchange it when my husband said to be like the amish. So he helped me put a dowel I had in my stash in a 1inch hole that I made...added some grease to it and it works great! Also used ends of staircase spindles that I had leftover from other projects for the handles. Would have gotten done a lot faster if it weren't for the paint and stain. Haven't bothered with the cushions yet. Kids love it!
Easy project. I needed this bench a bit smaller due to space constraints so this is 28" x 42". I kept the height the same and finished the surfaces with some thick polyurethane. It should be noted my cost was a bit higher due to buying a sanded plywood, coated self-tapping screws and a more expensive polyurethane. I also went a bit slow on this project and it took about 2.5 hours including application of the single coat of poly.

Sat, 12/19/2015 - 09:10
Very nice job and great looking workbench! Thanks so much for taking the time to share!
Really enjoyed the build.
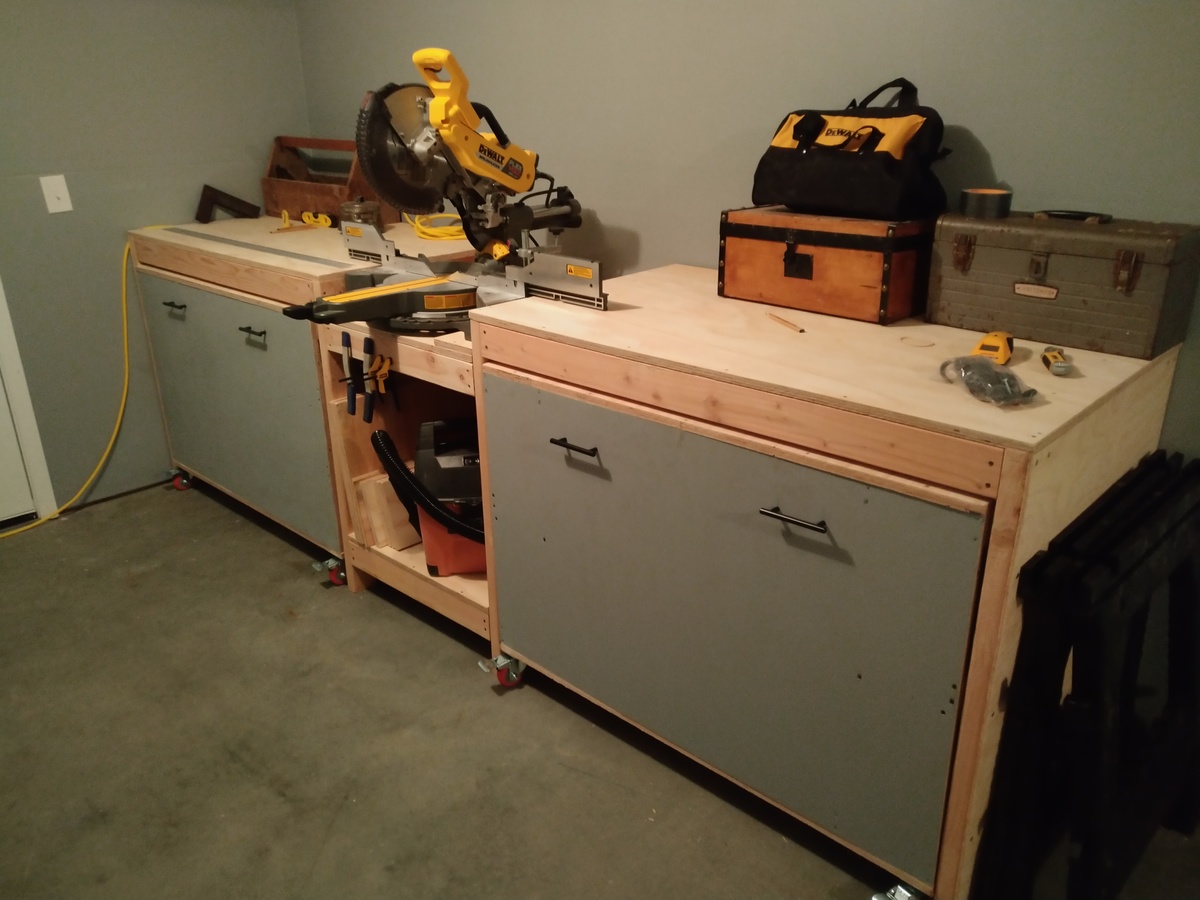
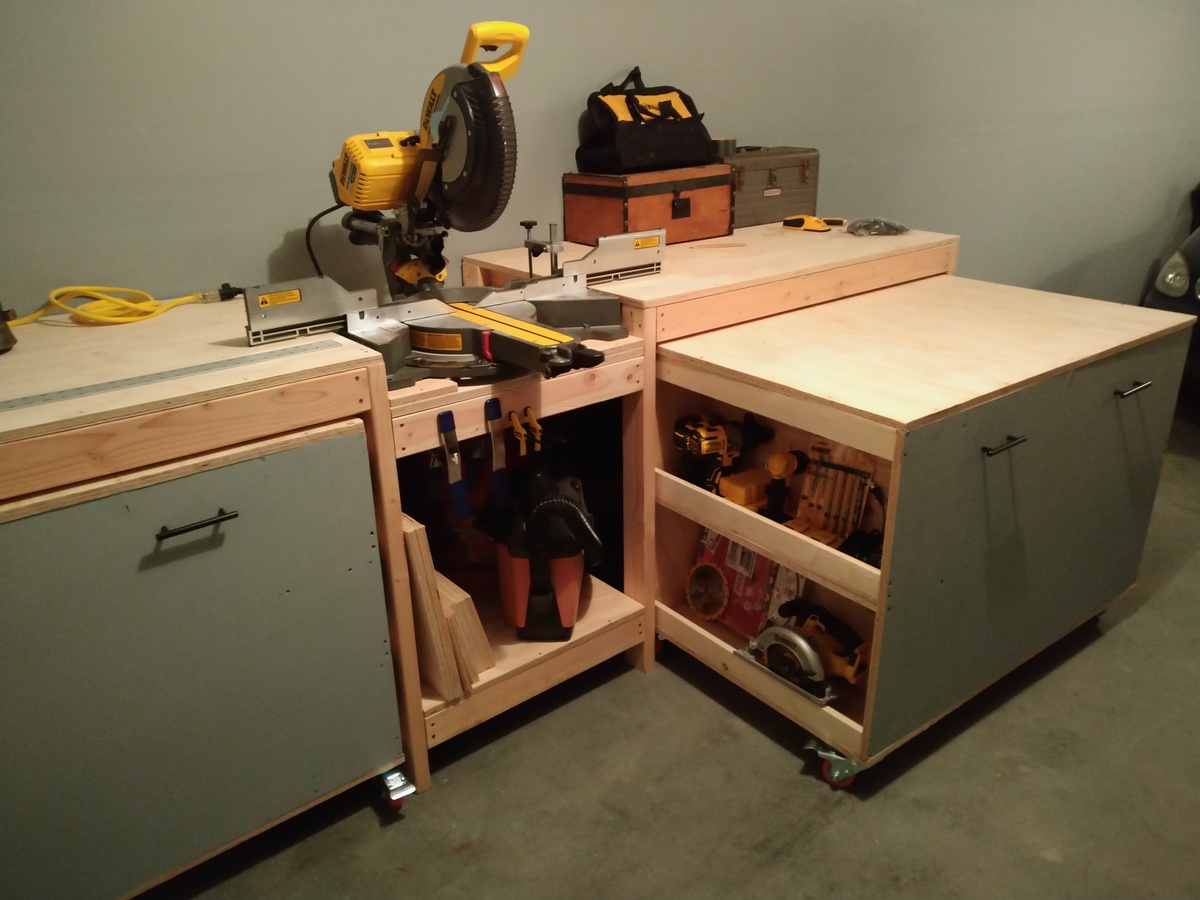
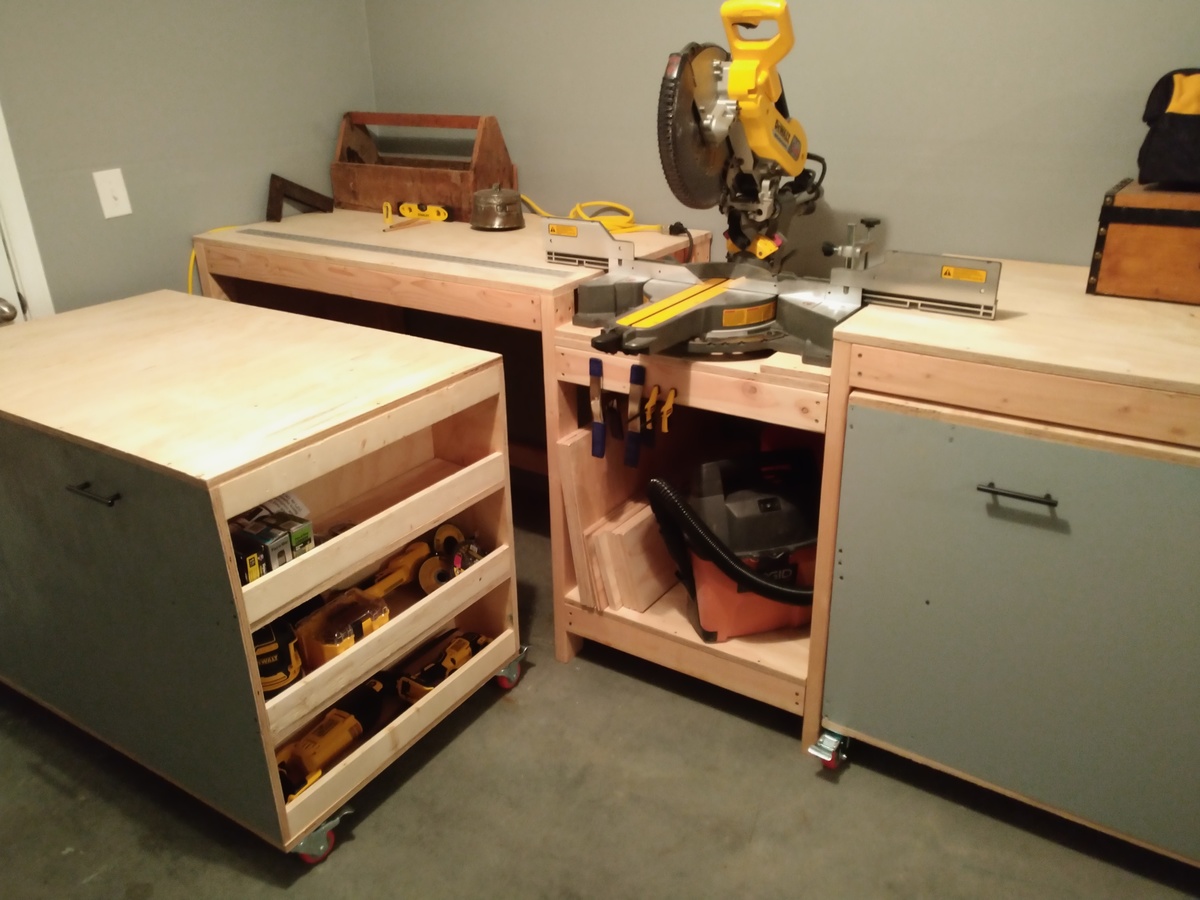
You don't really need a Brad nailer or stapler, I did it with good old hammer and nails. Just brace it well when nailing into unsupported beams. You also don't need a tablesaw, I did all the plywood cuts with a circle saw. The shelves in the original plan are deceptively small. After building one side with the shelves how the plan has them, I decided to build the other cart with only one shelf for two on each side instead of four, gives a lot more space. I didn't add any shelves to the other side of the left cart, planning on adding hooks to hang extension cords and such in there. Make sure you predrill, I still had cracking issues even with the self drilling screws. I would recommend splurging on quality plywood especially for the tops and front.
I plan on adding a dust hood and shelves above each side. Also going to do the tablesaw and bench tool mods to the carts when I get those tools.

This was my first project that involved making a drawer...not for the faint of heart. I am in love with this bedside table. It's exactly what I needed and it was a fun build. I enjoyed looking for hardware too.

Easy project and so cheap. I love the way it turned out! We tweeted the measurements to fit in the small space we had for the desk. It looks an d works great.
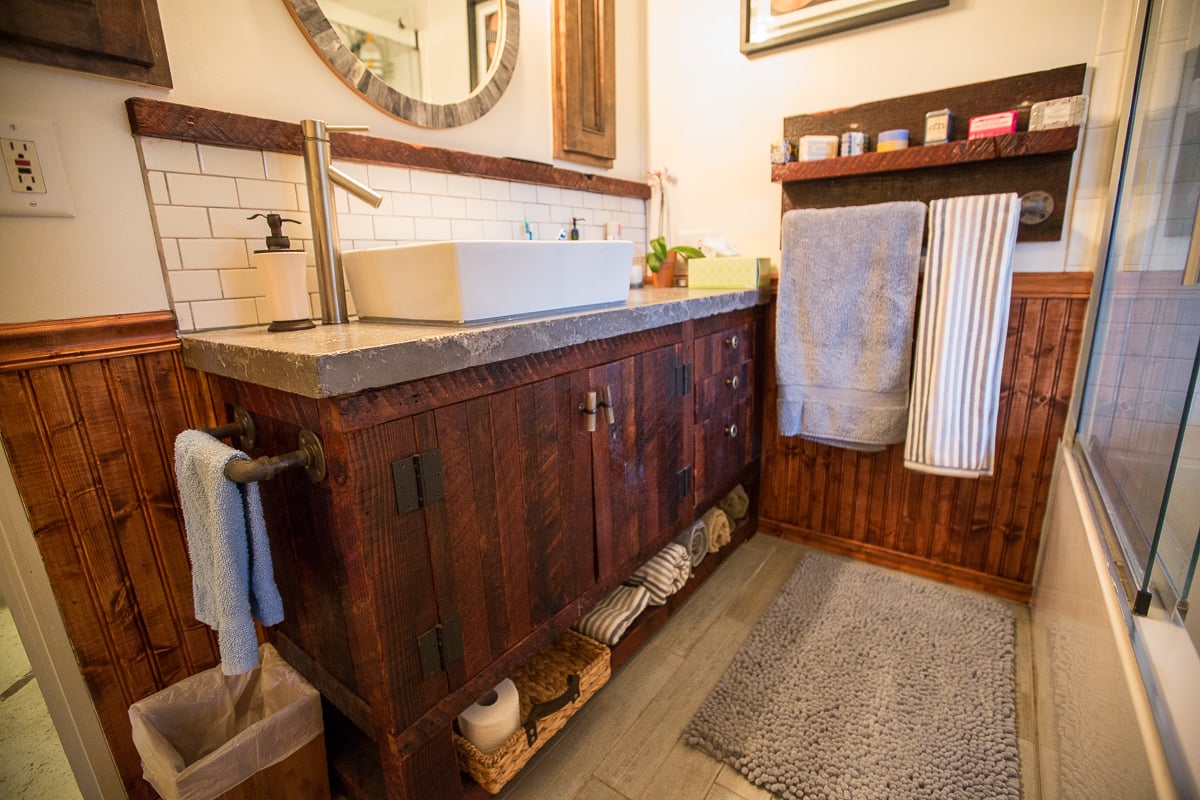
I made this vanity from reclaimed barnwood purchased at a local salvage lumber yard. Counter top was made from concrete. When doing research for the look and feel of my bathroom remodel, I got a lot of inspiration from this site, so I wanted to share the end result. Thanks Ana!
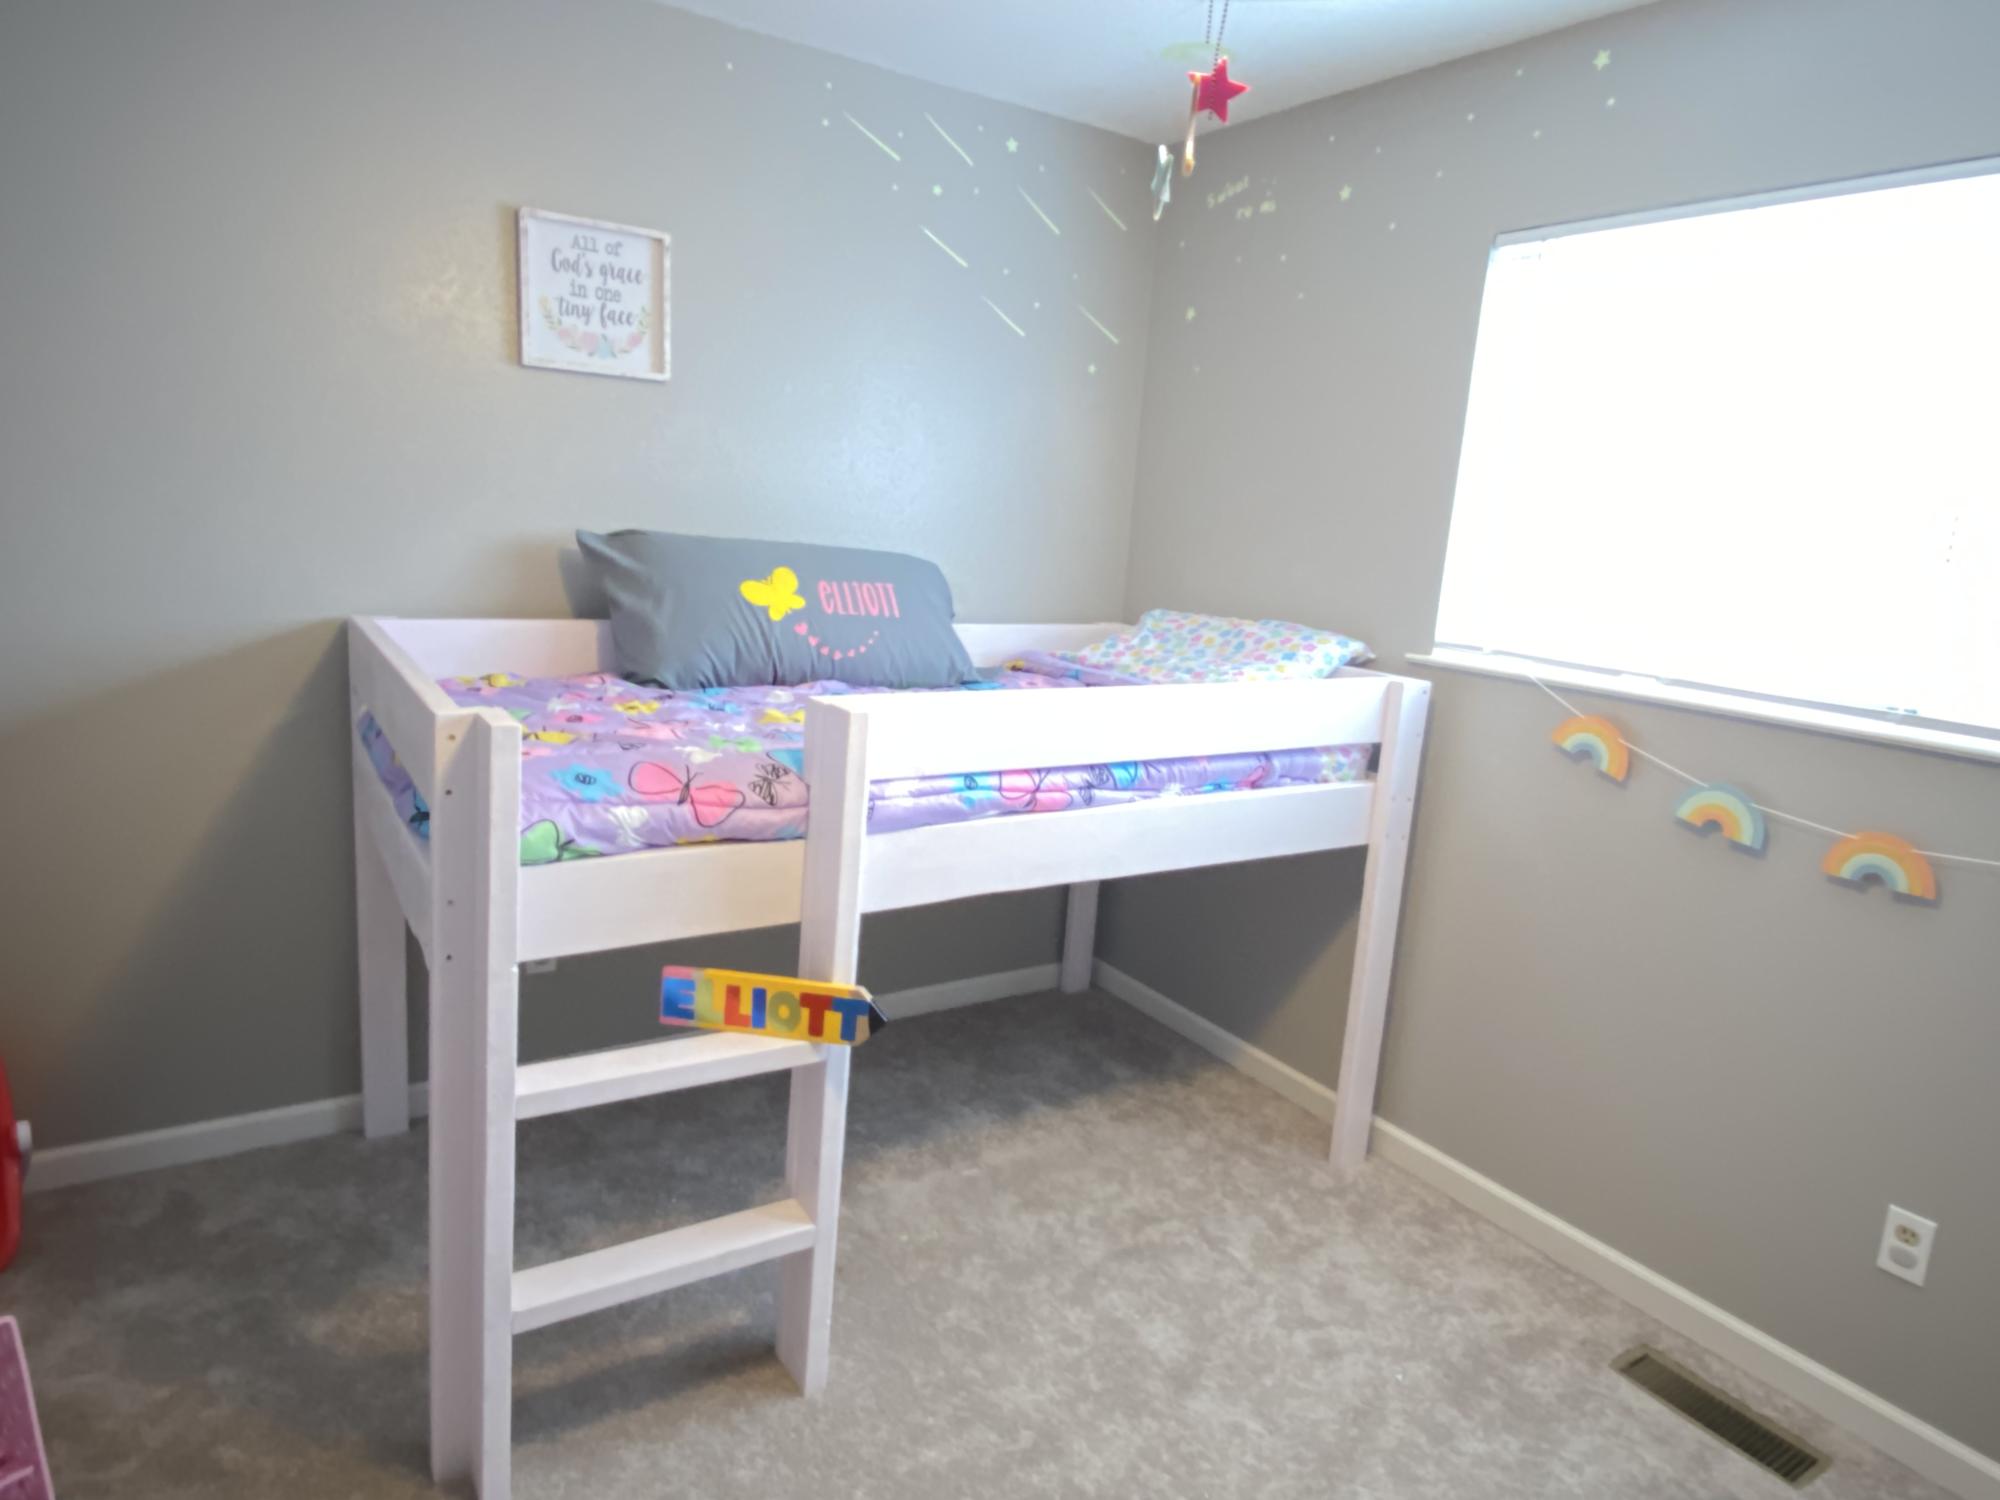
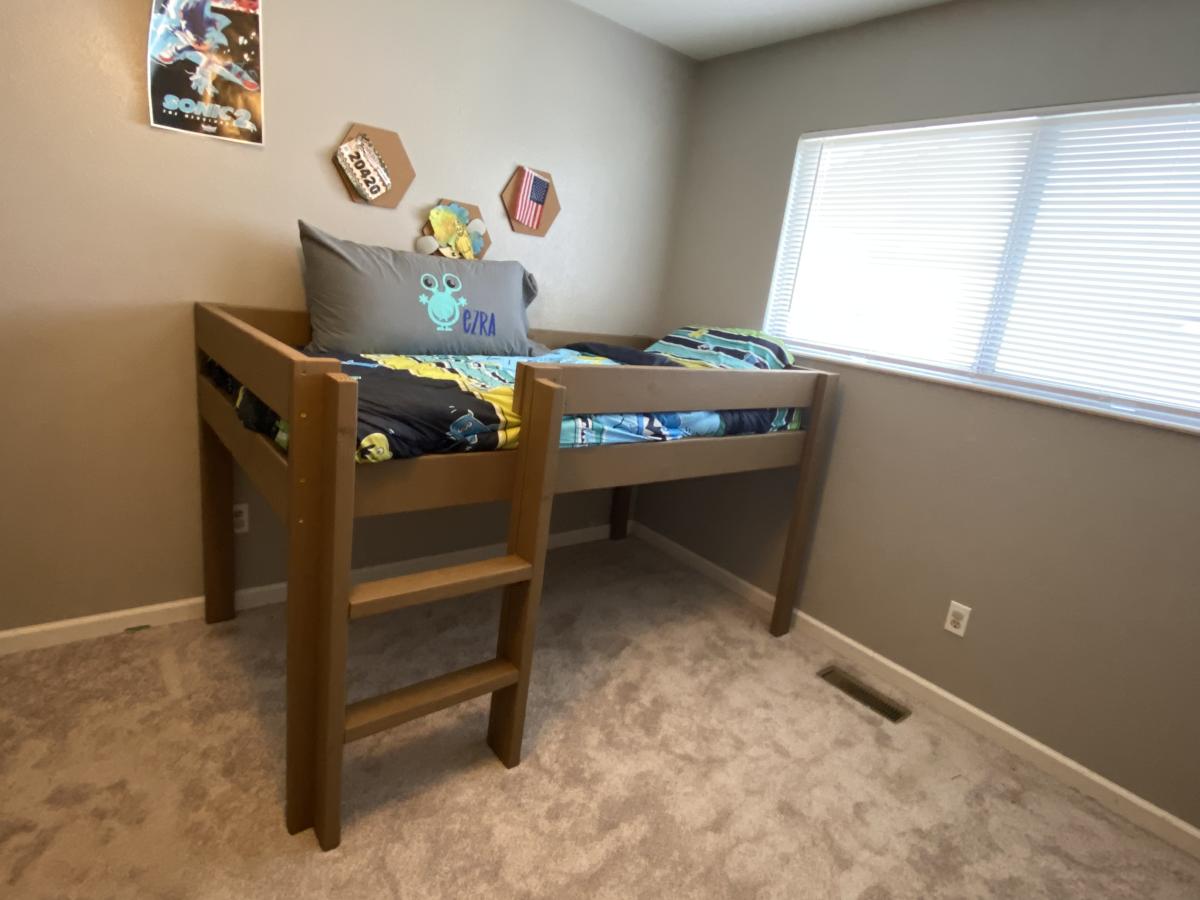
These loft beds were made for Christmas for my grand daughter and grand son !! They now sleep in their own beds!! It was fun to build!

The plans for this table were easy to follow (thanks Ana!!!) We used pine for our project and it turned out so pretty. We have not built the benches yet but I will update when we do. The project took about us about 6 hrs. to assemble...however you should keep in mid that applying the stain and polyurethane might be the most time consuming part of the project. We used 4 coats of stain and 6 of the poly. We let the final coat cure for about 48 hrs. I added drawer handles to the ends and sides for decoration and functionality (to move the table). The hubby insisted on using extra bolts on the legs for reinforcement...so I indulged him. He is still getting used to my love of anything rustic or distressed.

Fri, 10/07/2011 - 10:39
Great Job Cookie and Carl! Looks like it belongs in Country Magazine!

I purchased these nightstands at a garage sale for $15 each. They were in dreadful shape needing repair and too many hours of sanding to count! I was inspired by this project and decided to try the finishing techniques out myself. I made the hardware myself out of angle aluminum and used the aluminum posts used to bind corporate booklets. Since I wanted to use the existing holes for the original hardware, the shorter nightstand has 2" pulls/handles and the taller has 4.5" pulls/handles. I really like how they turned out!

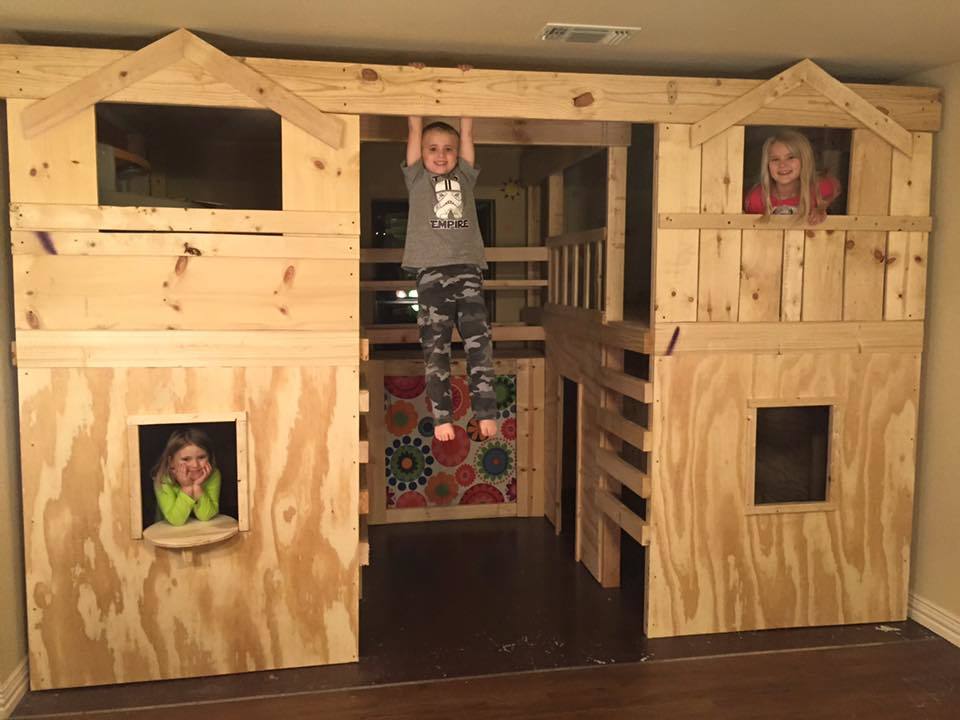
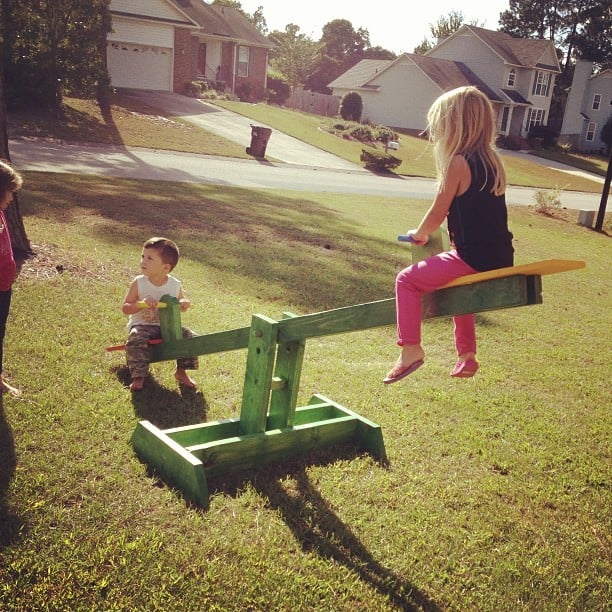
Modified to fit a smaller space by Tracy Brannum. Took 2-1/2 days to build, the kids love it! Shared on Facebook. https://www.facebook.com/photo.php?fbid=10207847978933419&set=o.1921239…
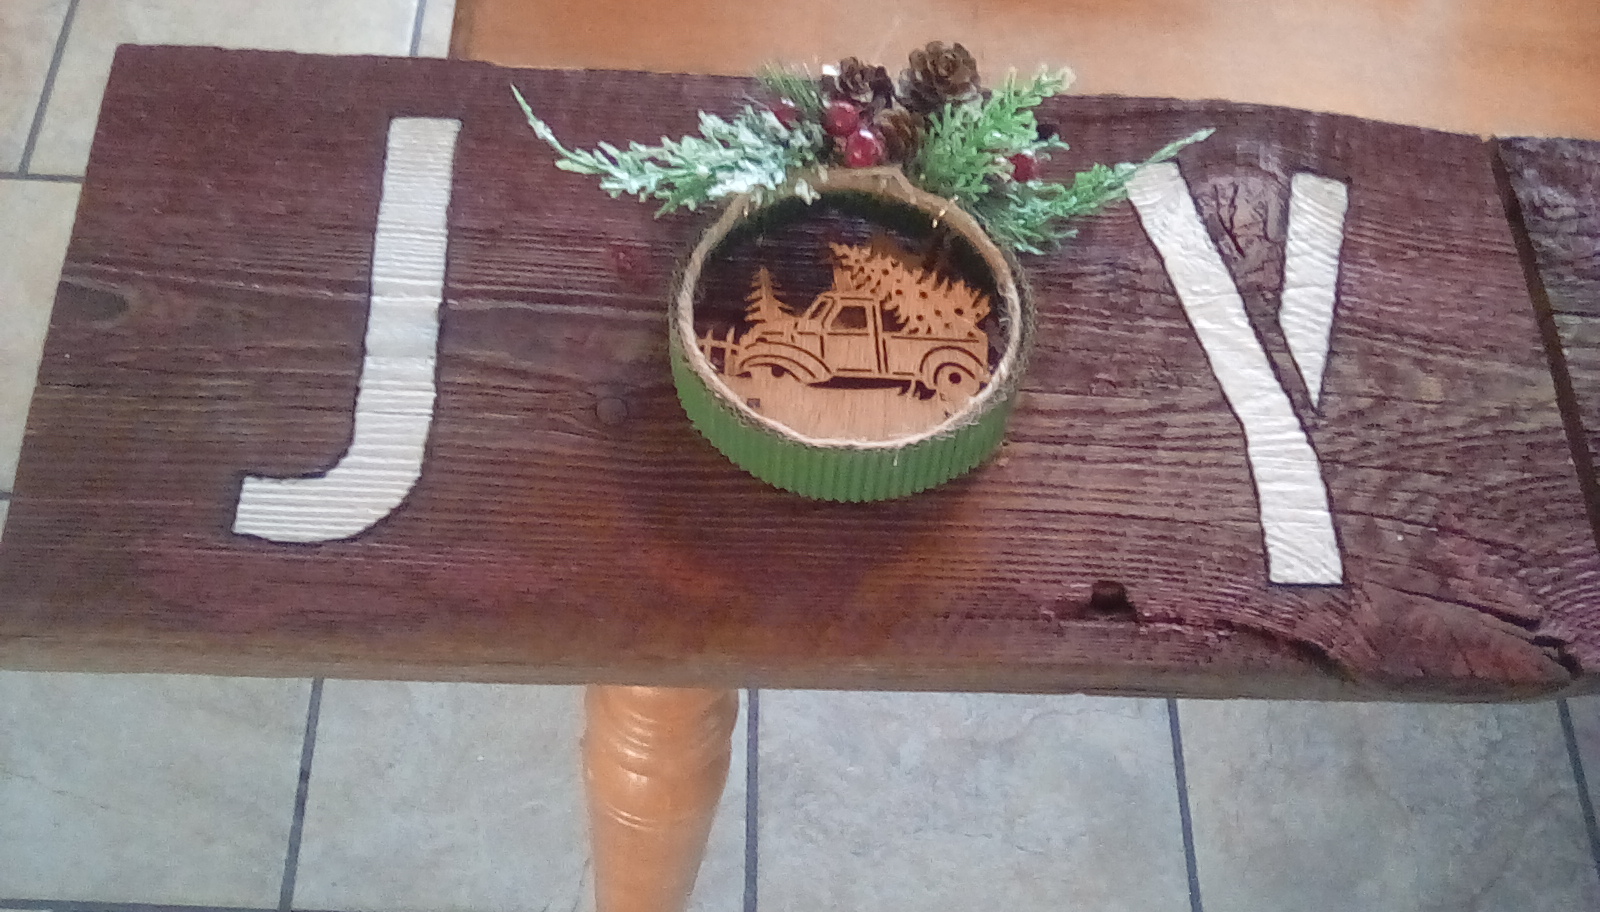
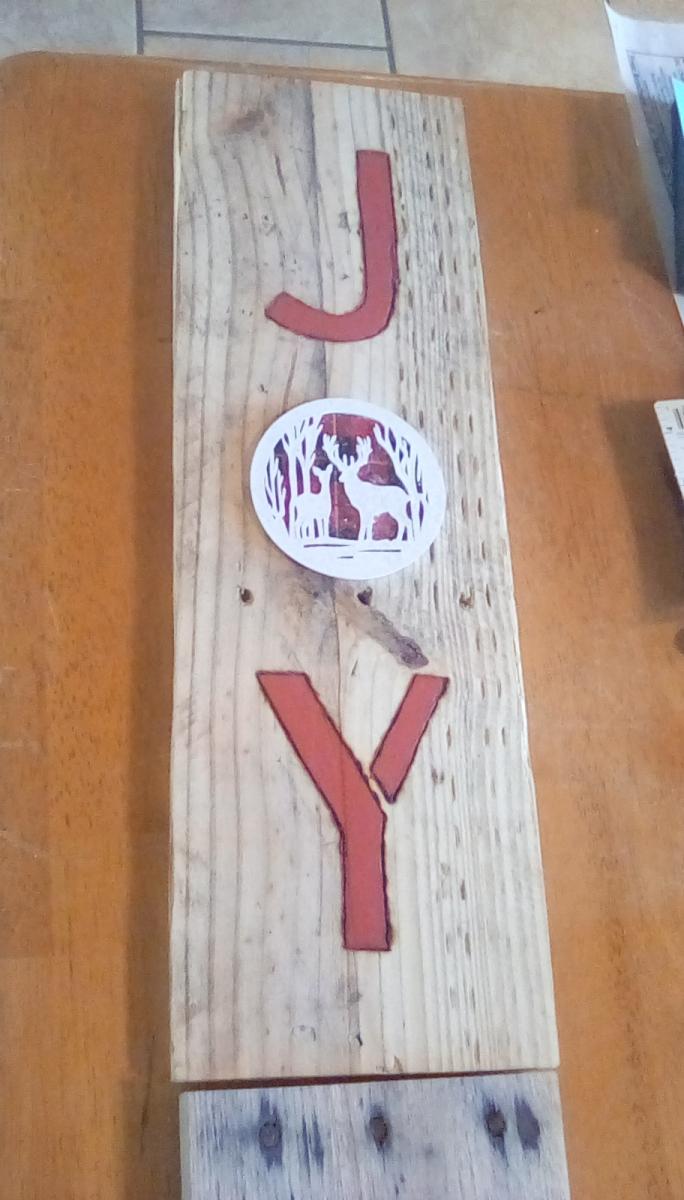
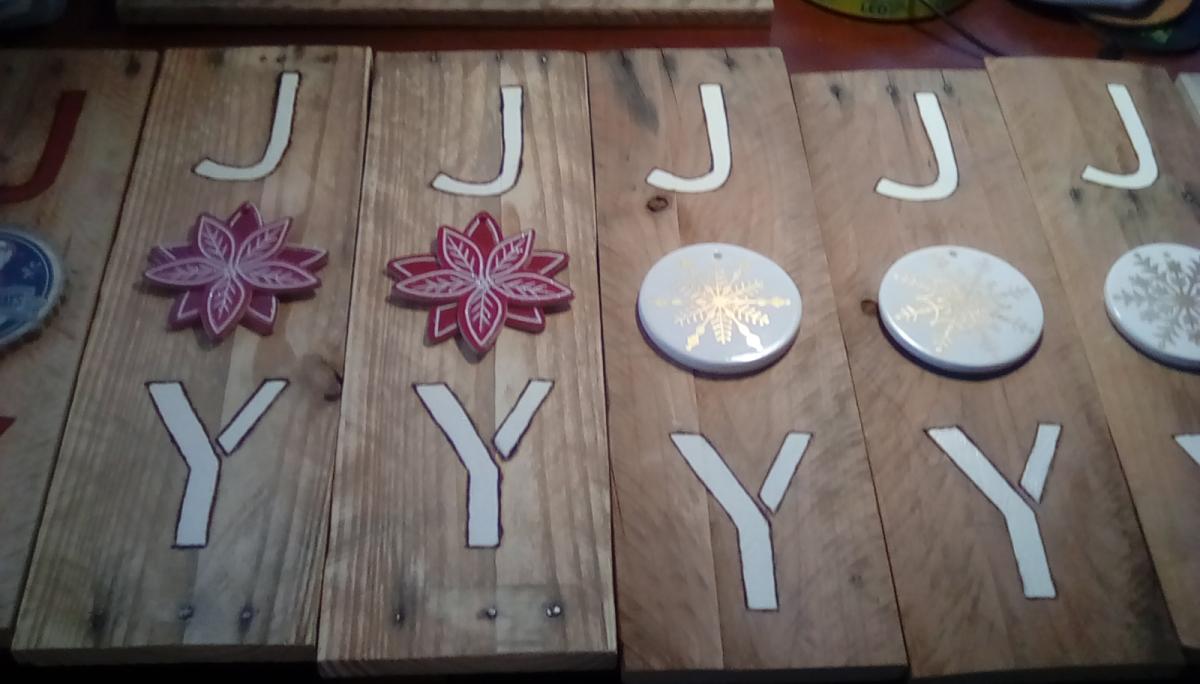
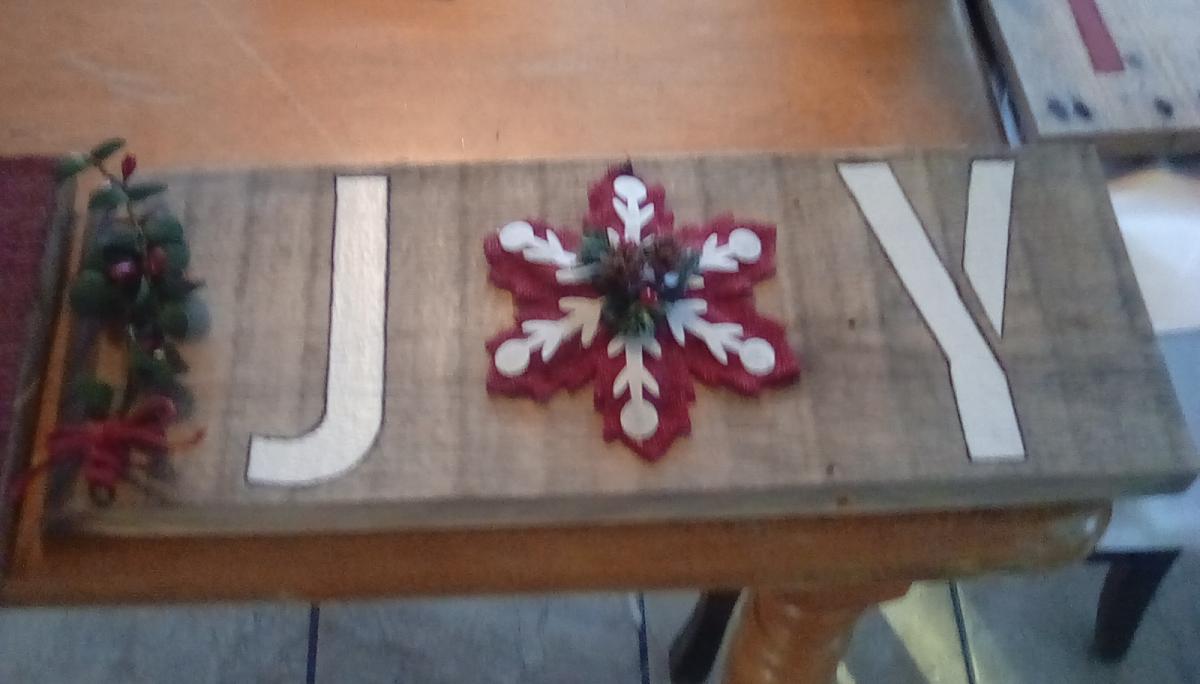
Loved your "JOY" wall art, but after I built the prototype, realized it was way too large for my idea of gifts for the family. Since I had already cut and sanded pallet boards to size, I downsized the idea and used individual boards and 4" and 6" stencils to paint the letters. I wanted a darker border around the letters, so I woodburned around them. Some of that turned out uneven since the wood wasn't smooth but it adds to the rustic look. I used roundish tree ornaments to use for the "O" letter. Popped on sawtooth hangers on the back and left them unfinished. I did finish off the larger red barn boards and the grey one with spray Clear Coat, since I thought the wood looked dried out.
Thanks for all your great ideas and look forward to your new ones!

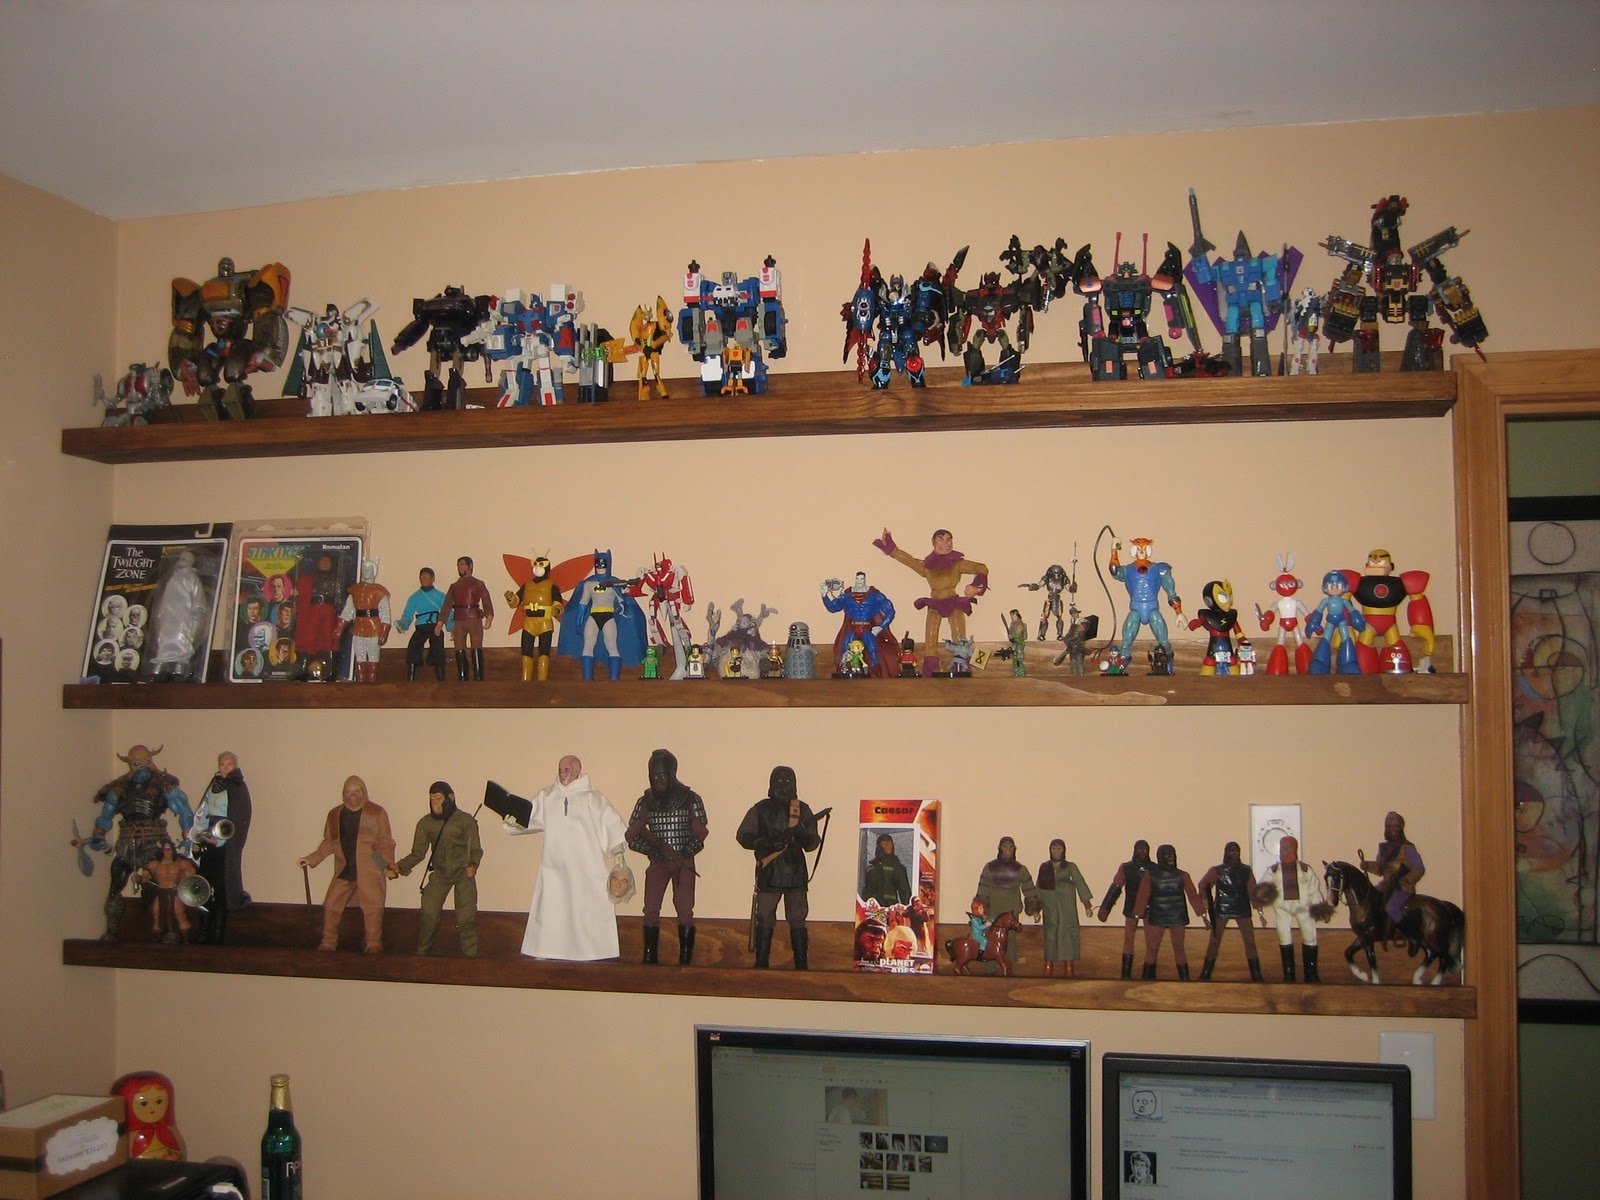
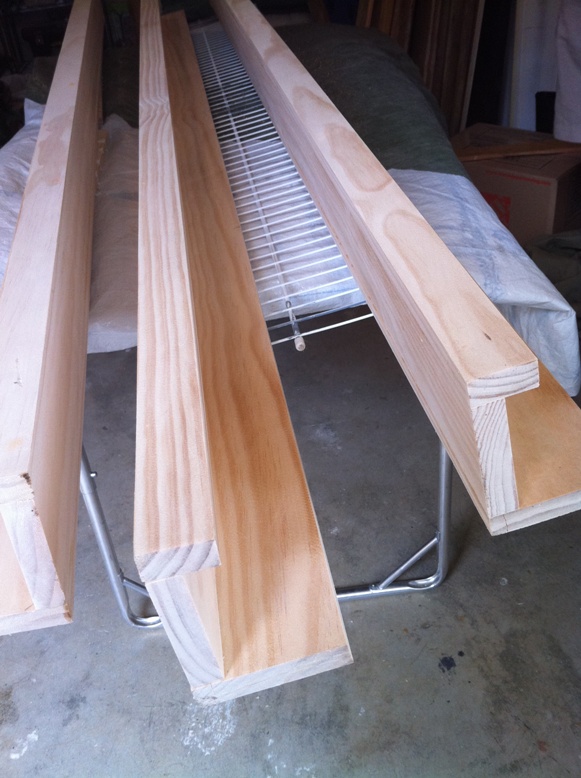
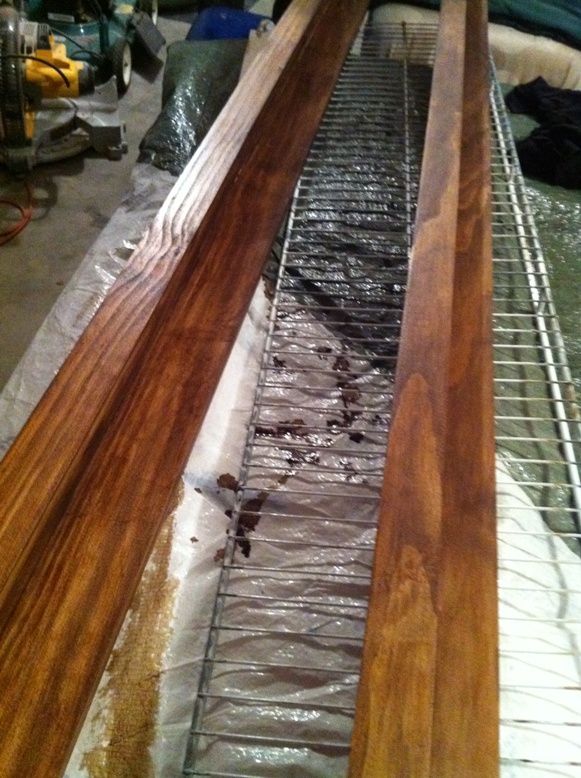
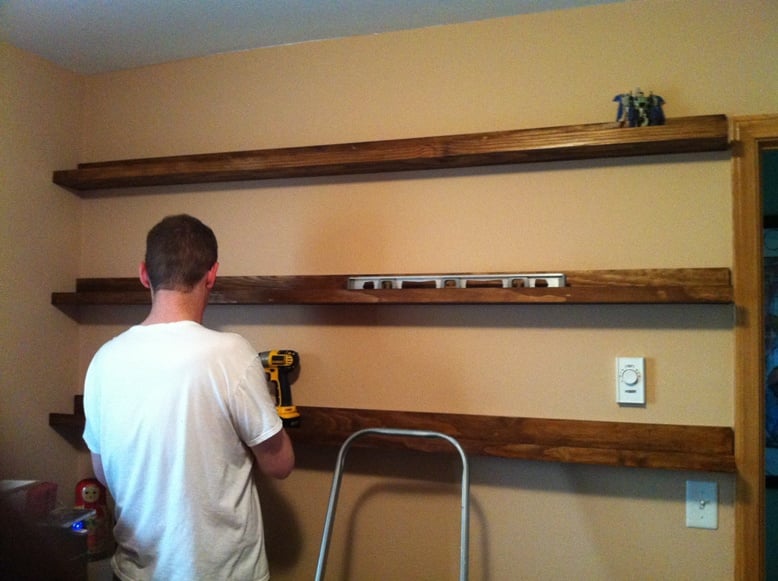
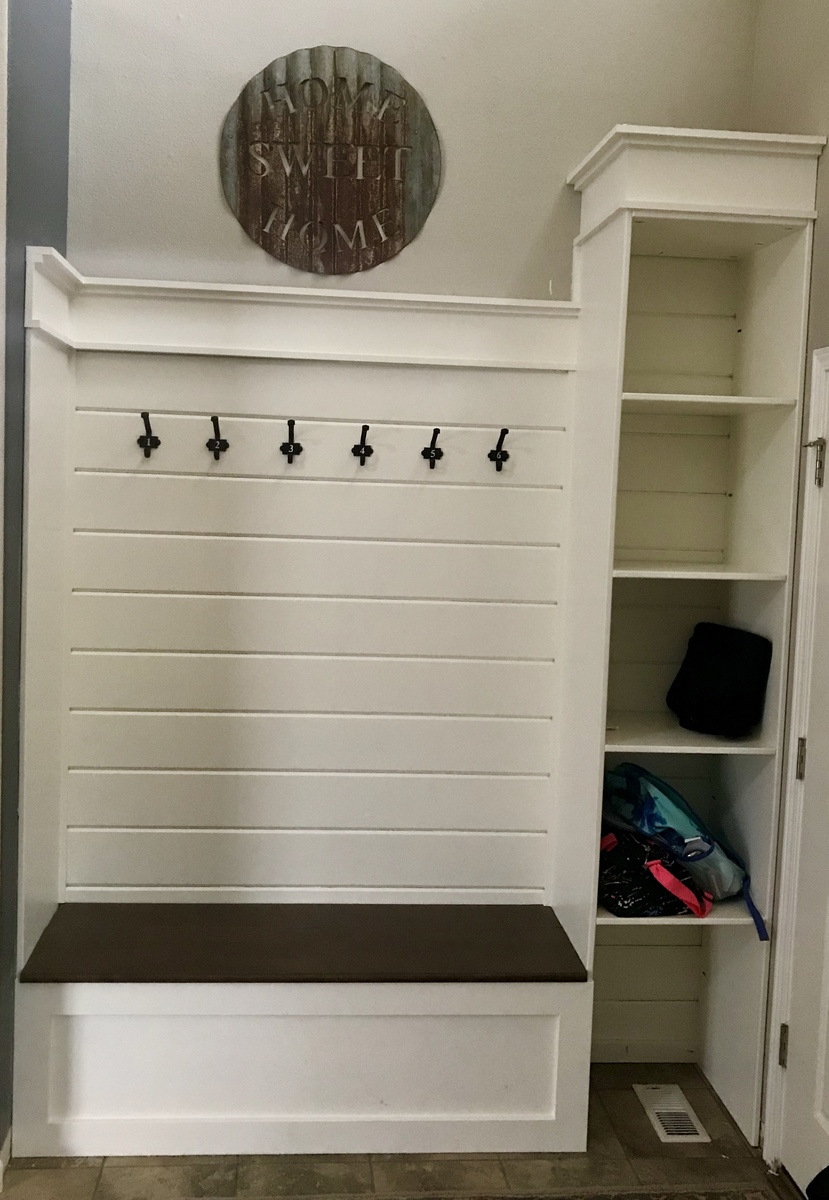
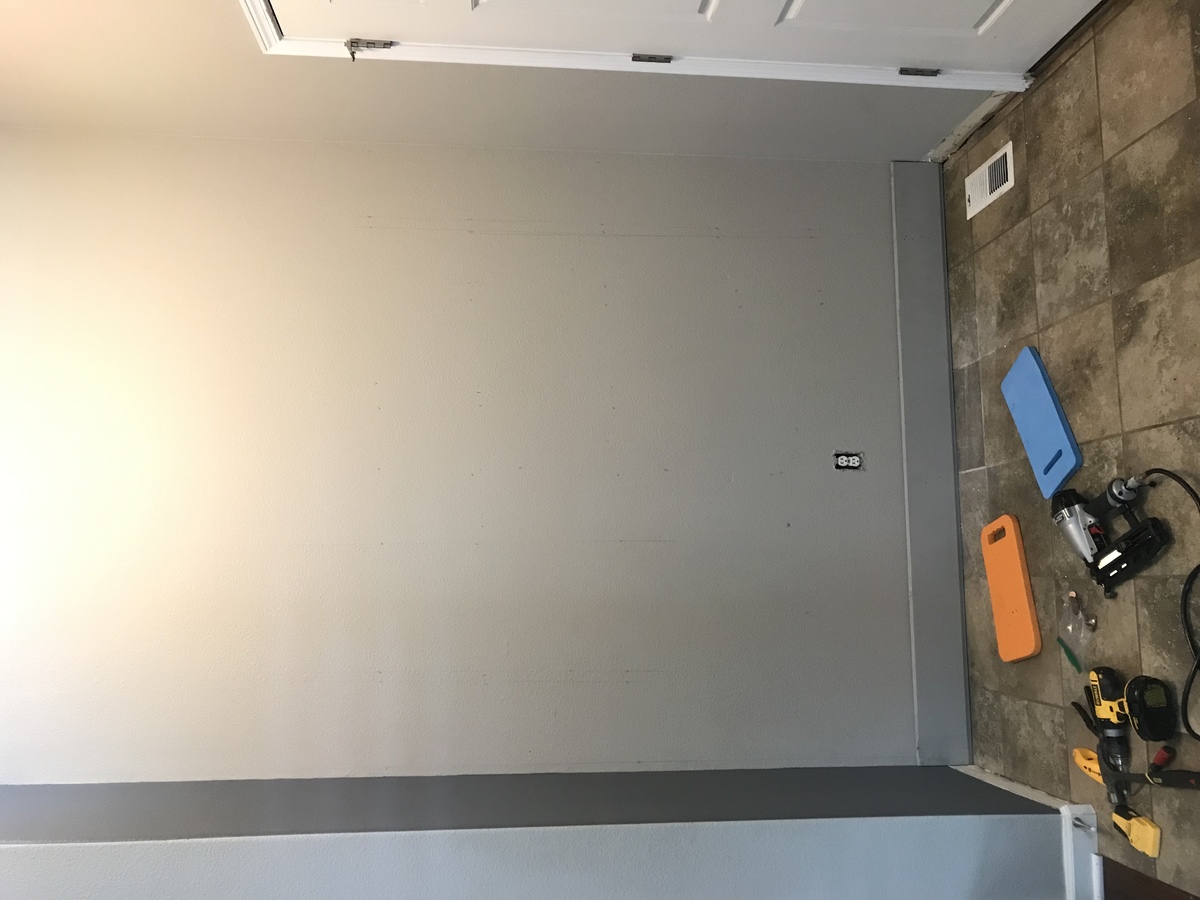
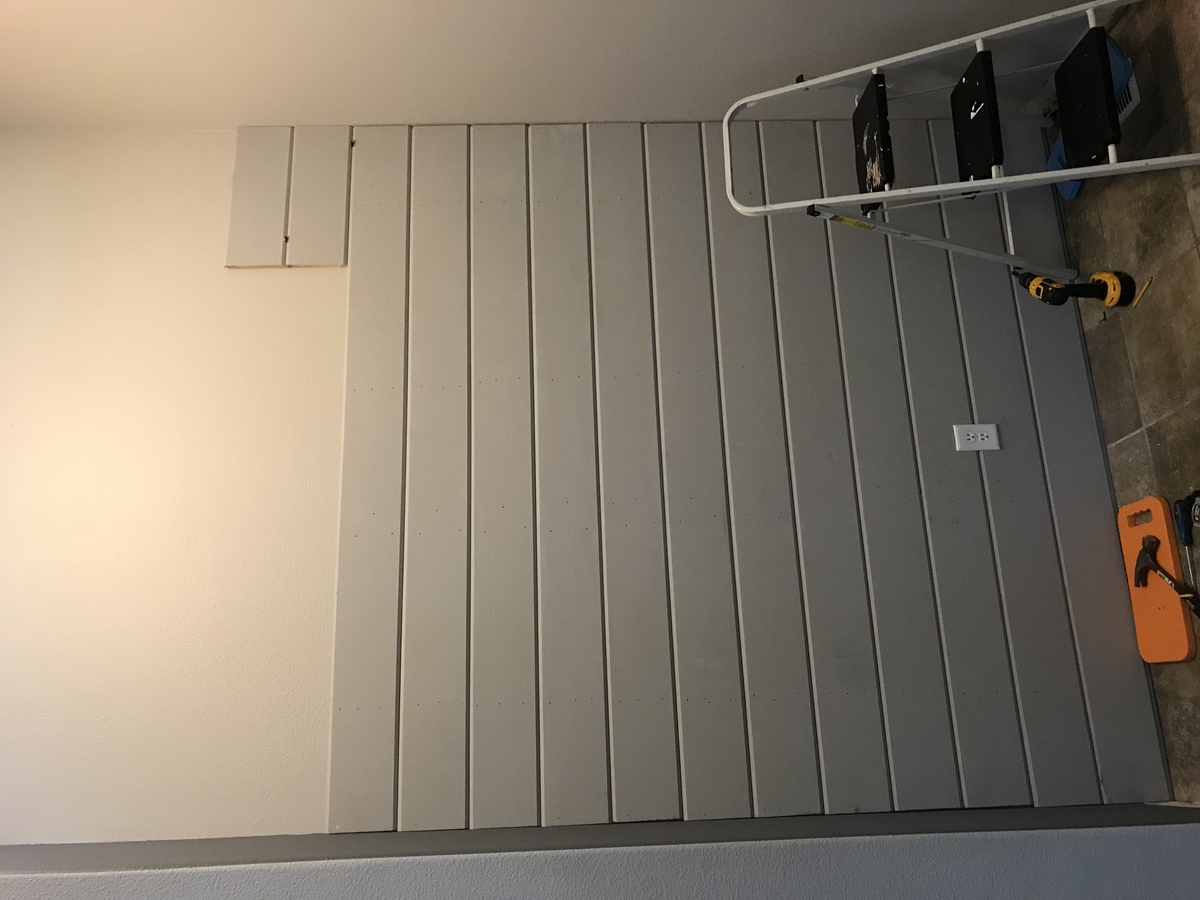
As we begin to convert a small room to an office, first priority is creating display shelves for my husbands toy collection. These shelves do a great job! They are easy to create plus very sturdy. No toys will be falling on their own.
This was a pretty easy project and I woul recommend it to any beginner. My only tip is to make sure that everything is clamped before you nail or screw. You don't want to see light through the seams.
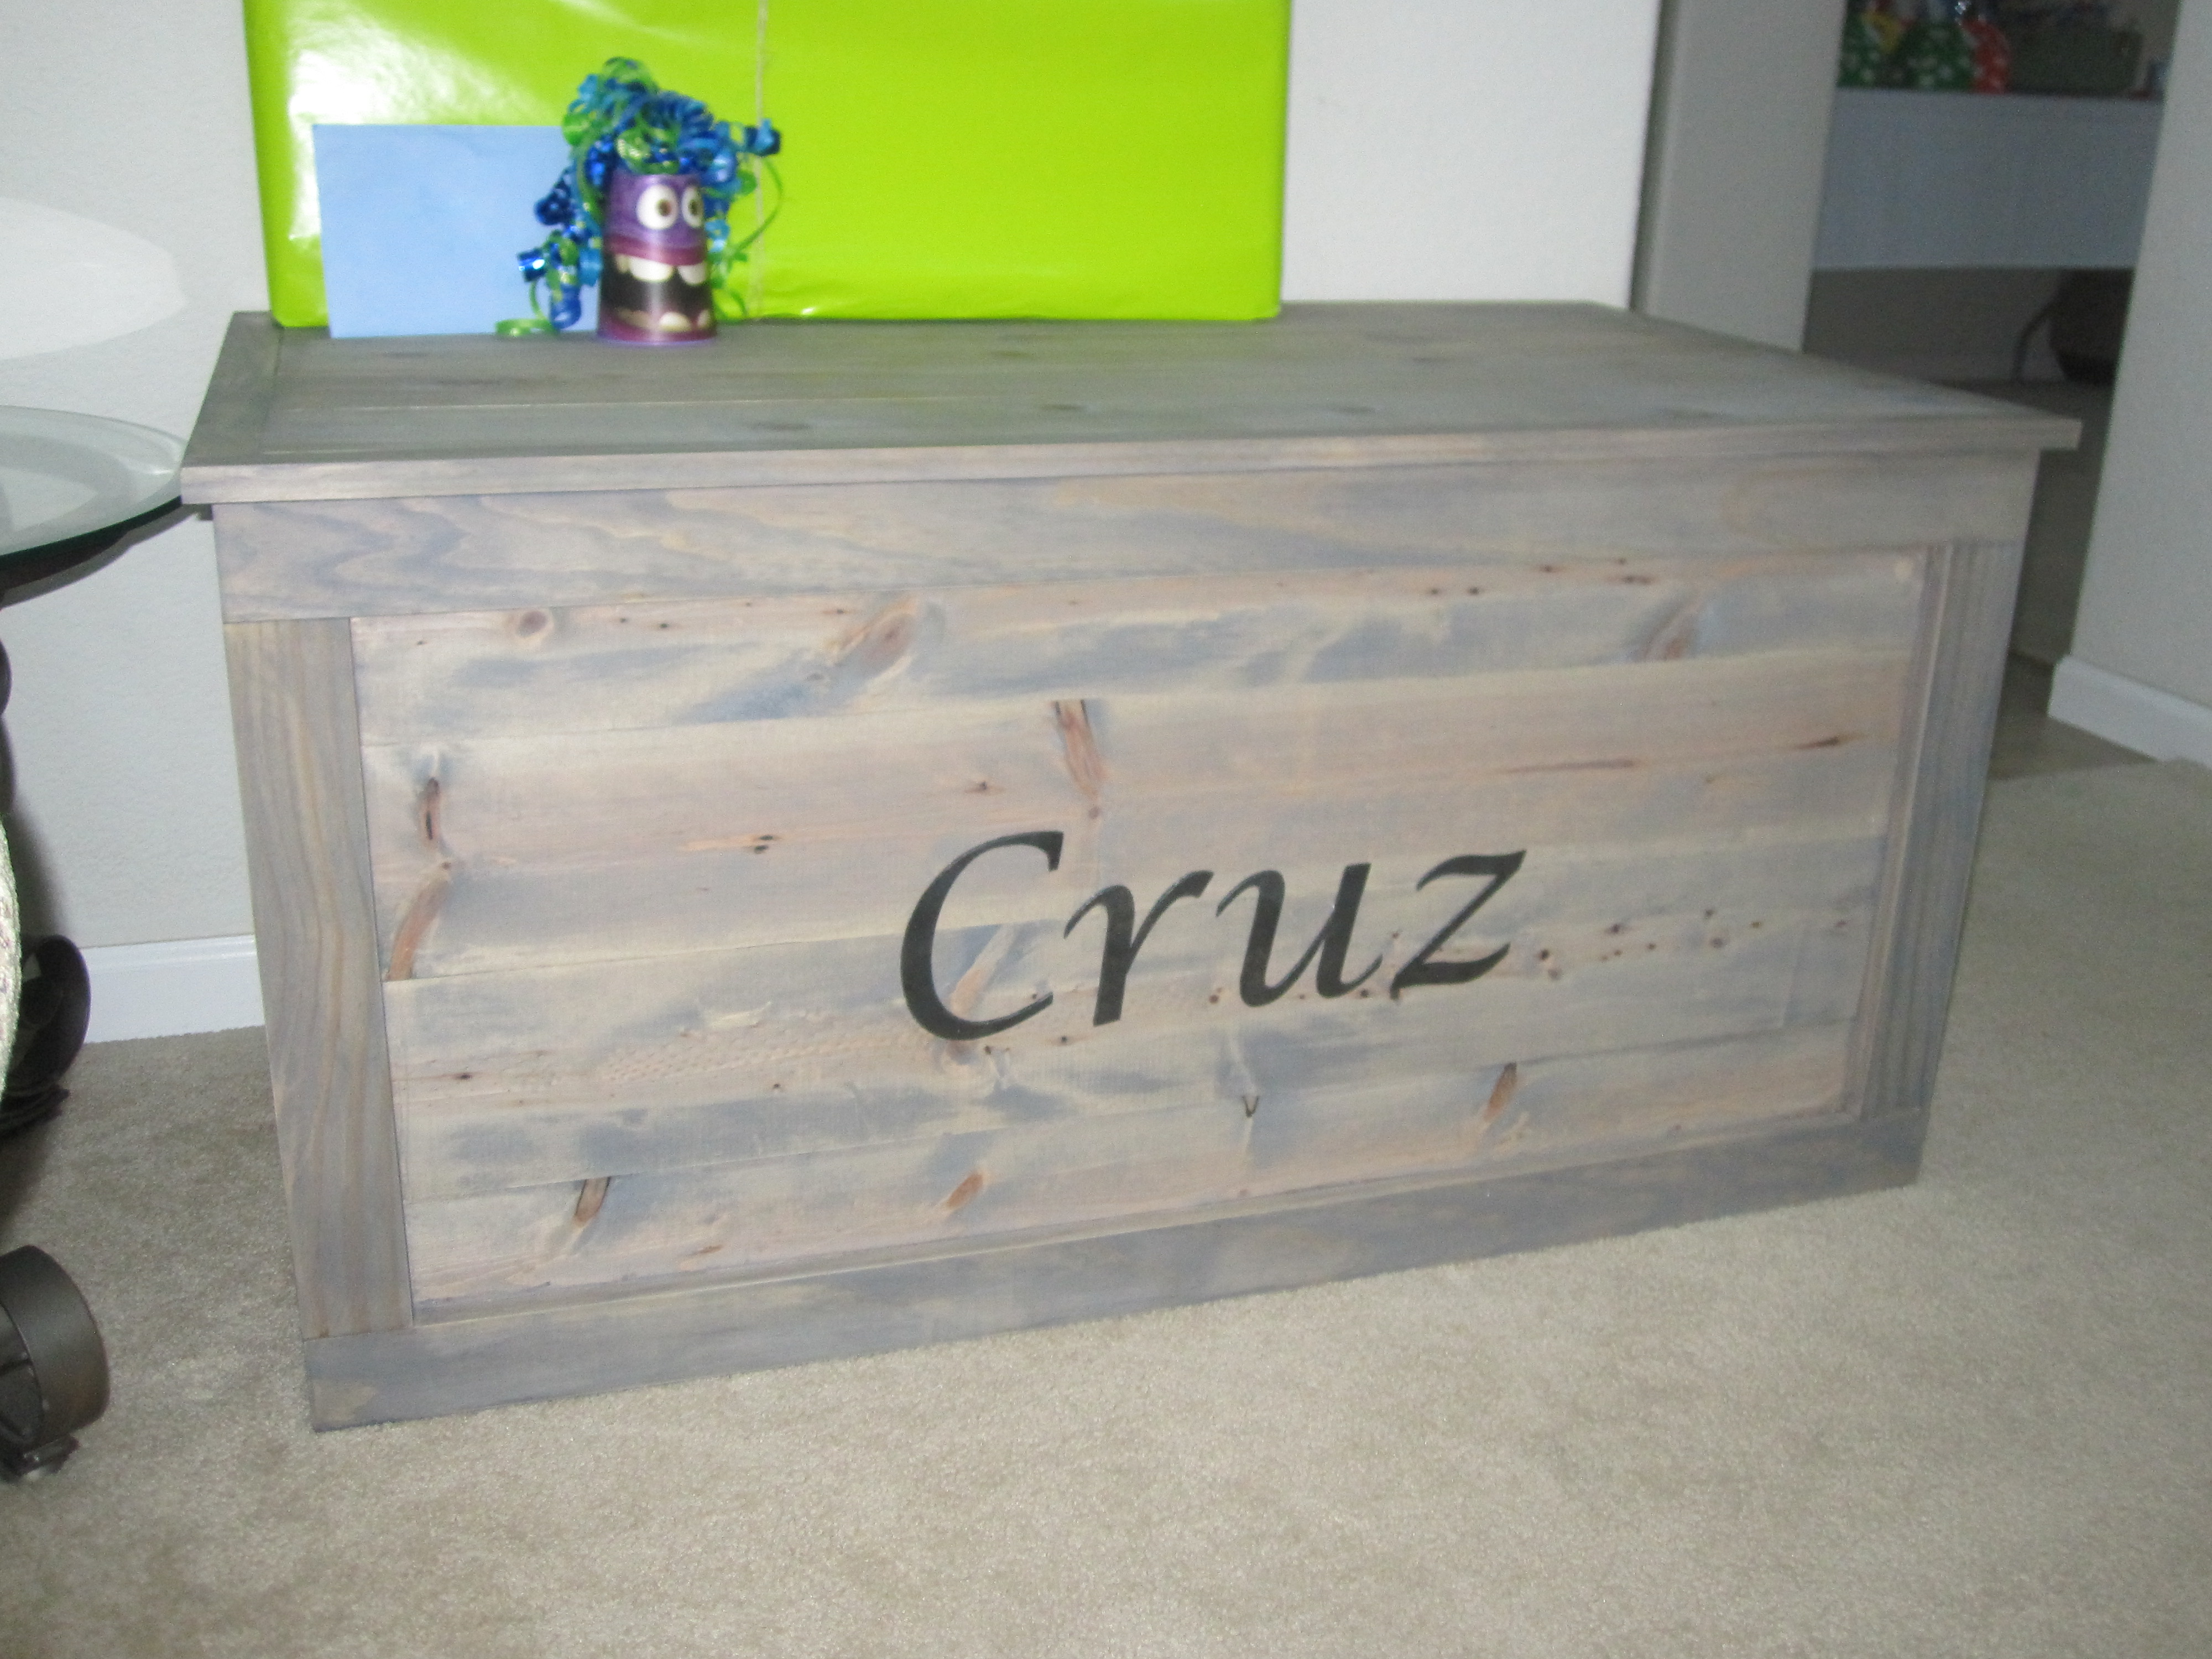
I made this toy box for my nephew for his first birthday.


Sun, 06/29/2014 - 08:57
I'm a new member and I would like the plans to this toy box but they are not here and I don't know how to go about getting them?
Plans were fantastic for this build and our kids love it! Thanks!

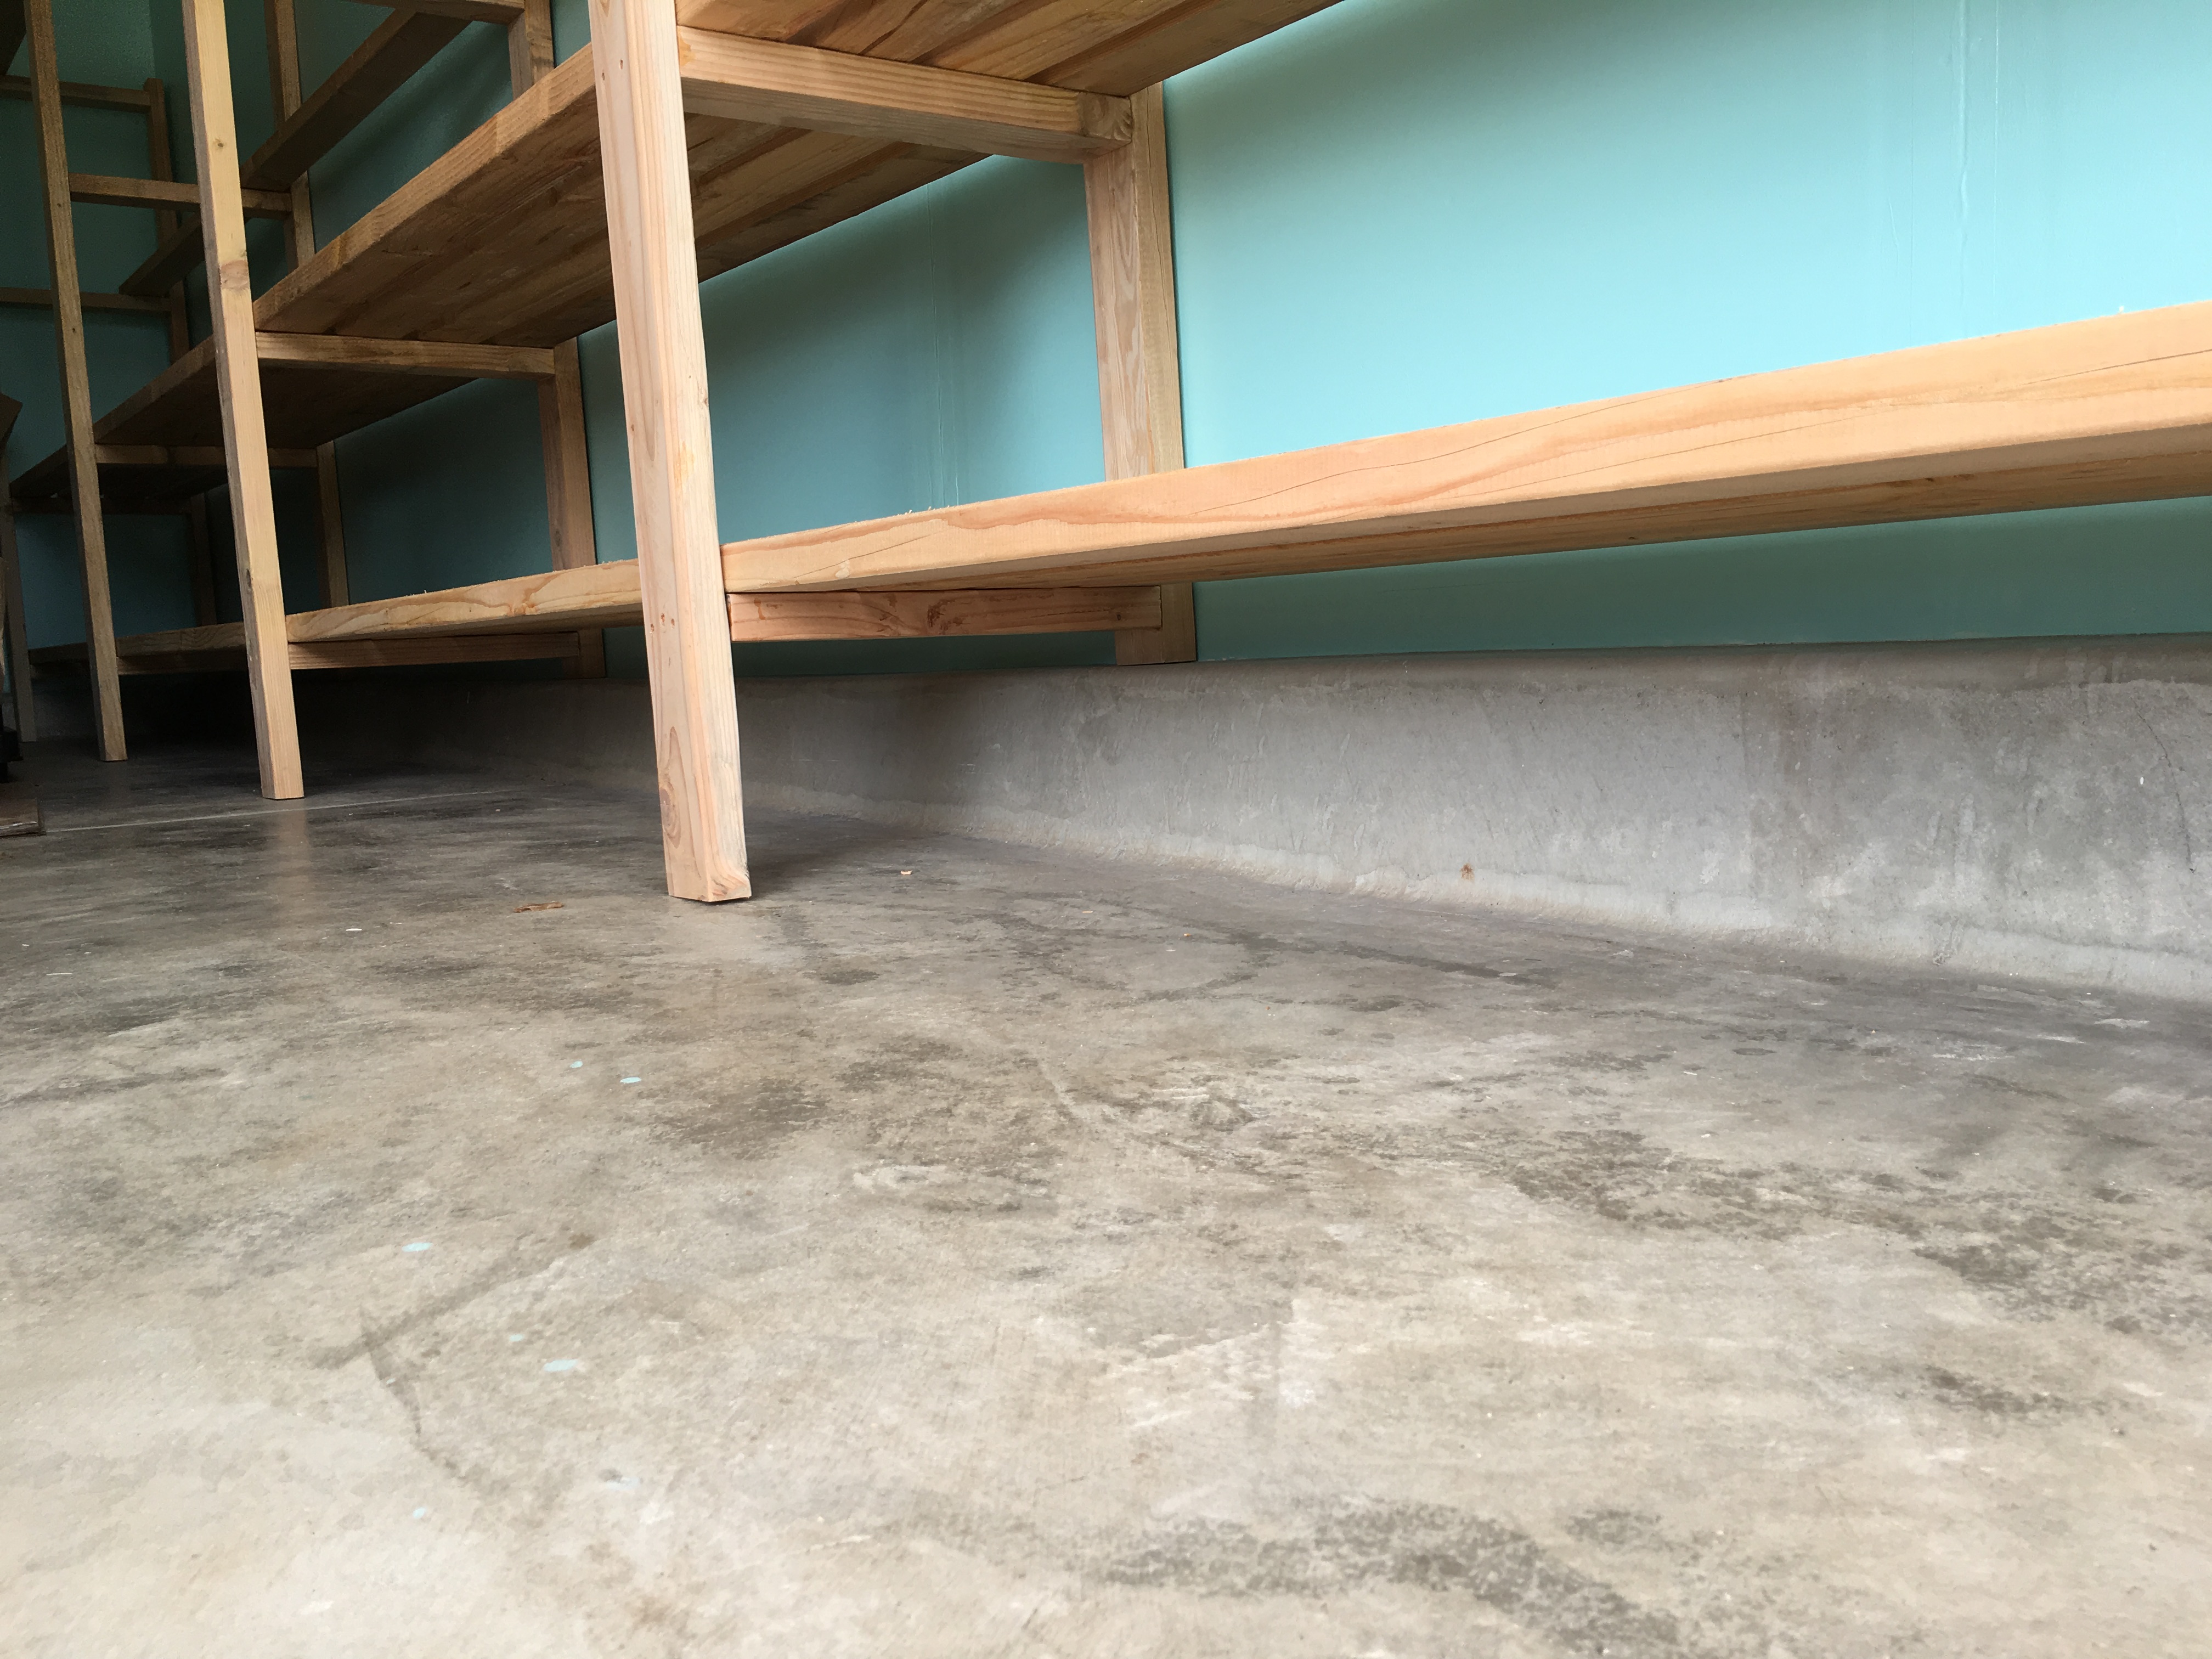
My garage has the concret lip so I chopped the legs running along the wall to sit on top of the lip. Additionally, the garage floor is at a slight incline so I took more time to cut each leg to ensure the shelf was level and didn't slant with the floor incline.
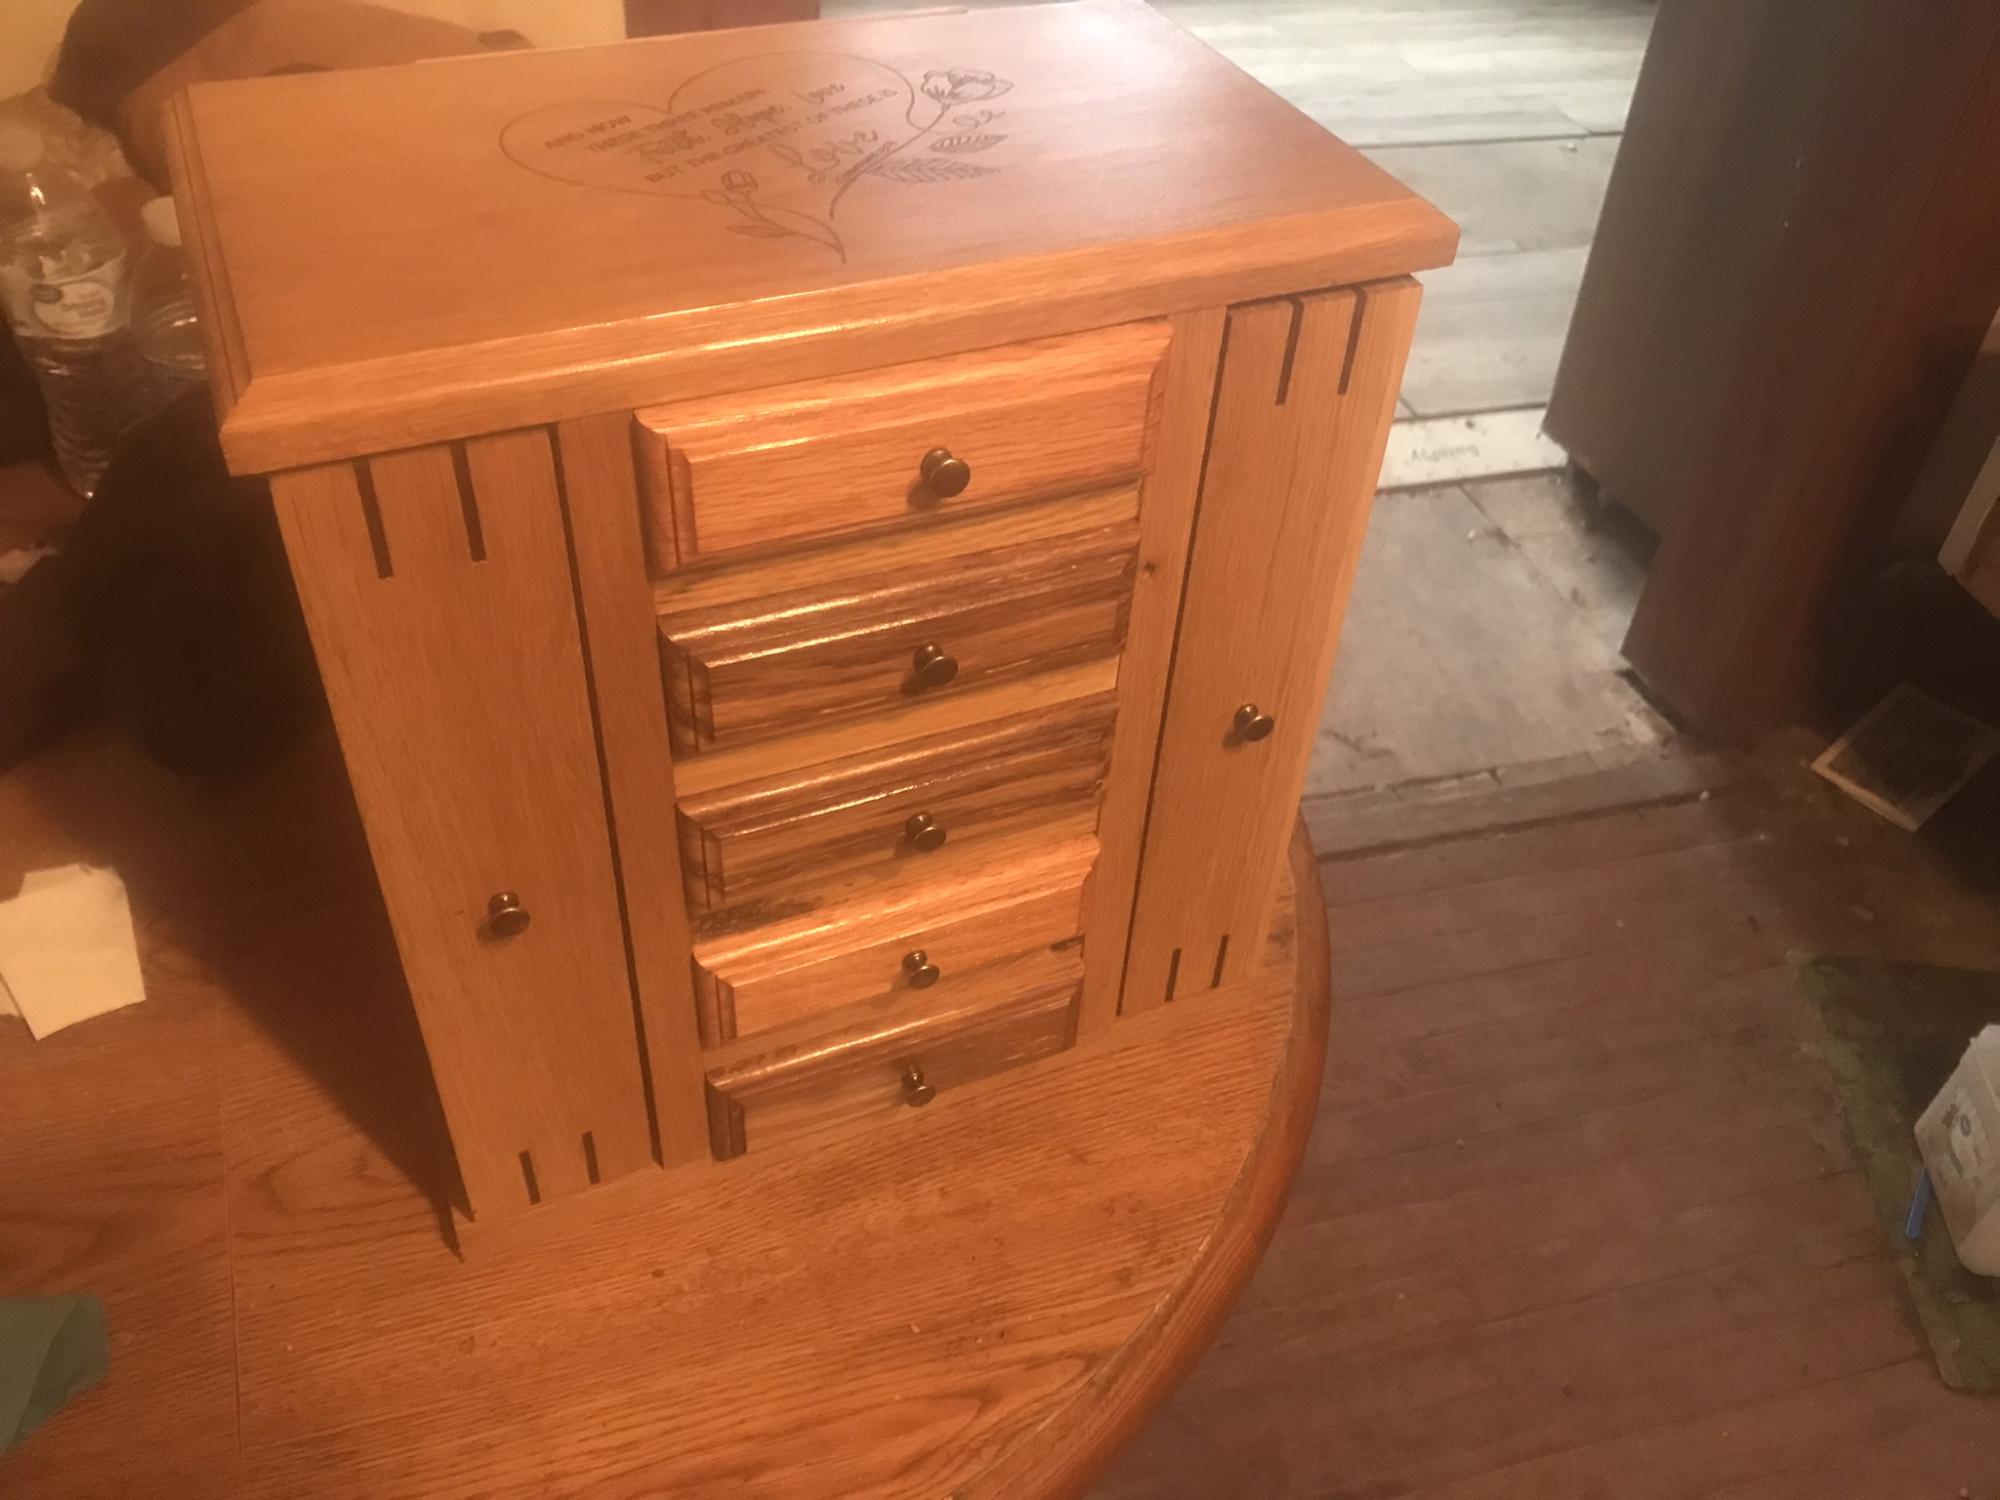
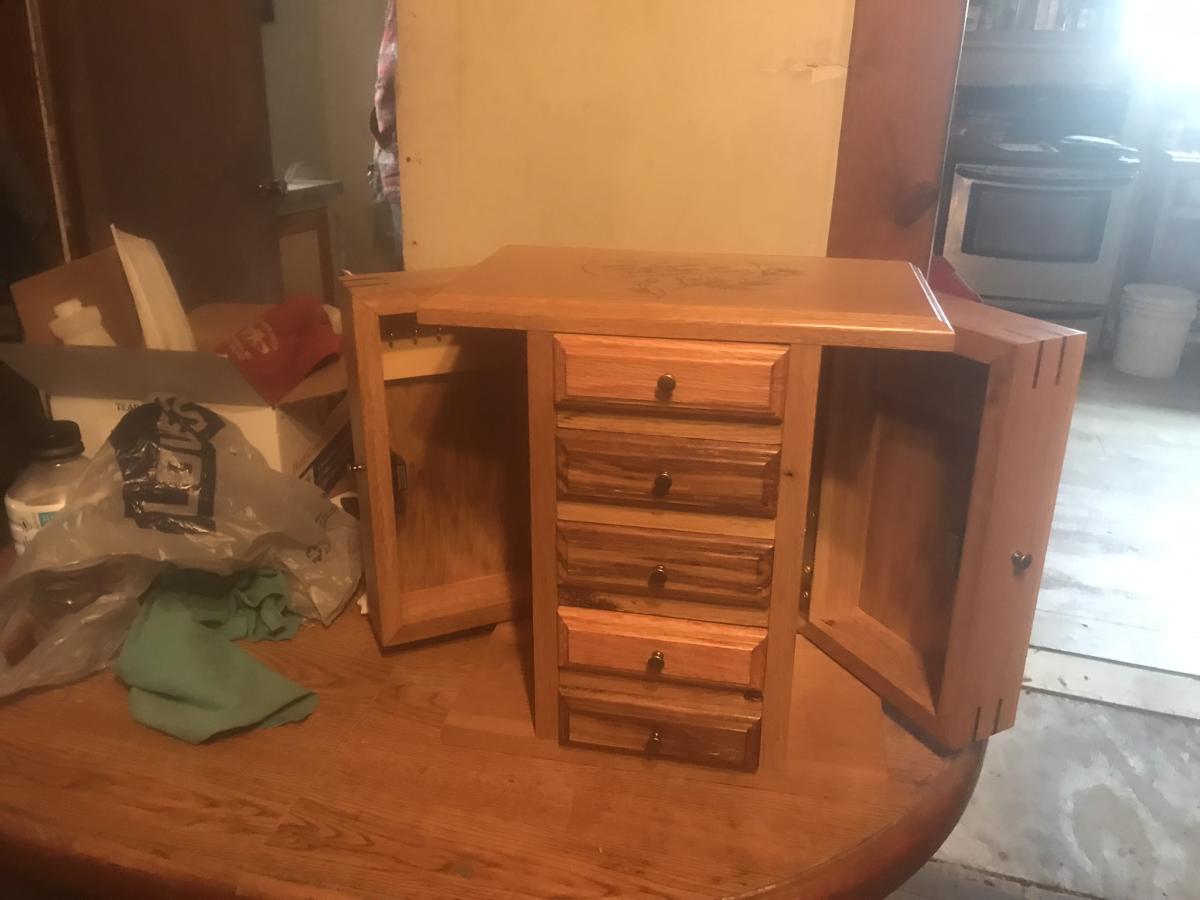
Made from white and red oak with laser engraved top
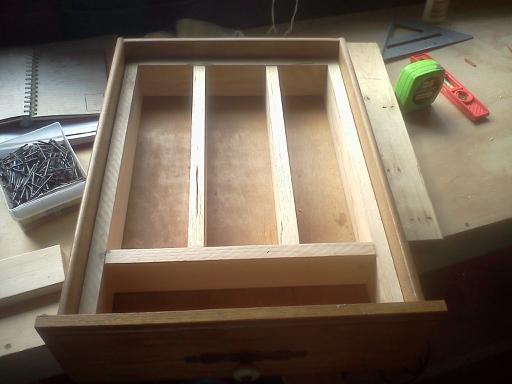
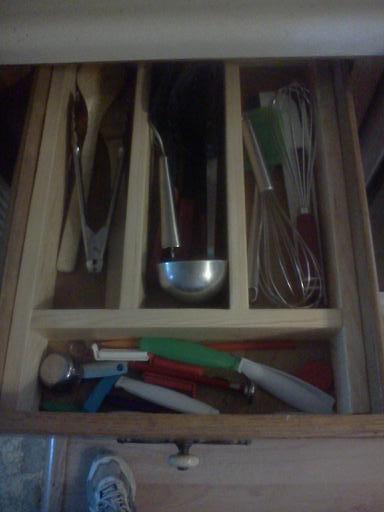
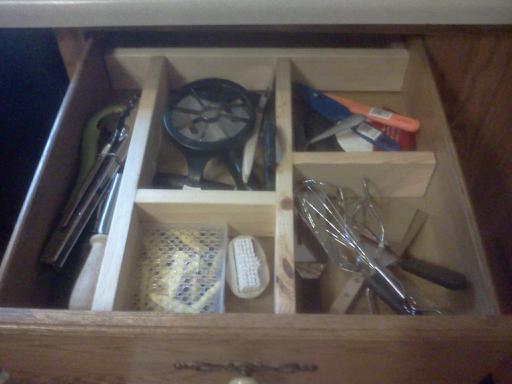
I got this idea from another poster. I already have a custom built silverware drawer divider, but decided that this would be a very nice thing to have for my two messy utensil drawers. I built for both drawers yesterday. Love them! I made one for my brother's tiny silverware drawer this morning and now my mom has requested them for 3 of her drawers. :-) It is so nice to be able to do something like this for them.


Comments
Ana White Admin
Thu, 12/29/2022 - 11:19
Stunning table!
Very pretty, love the finish! Thank you so much for uploading a brag post.