Community Brag Posts
Fancy Turned Leg Table
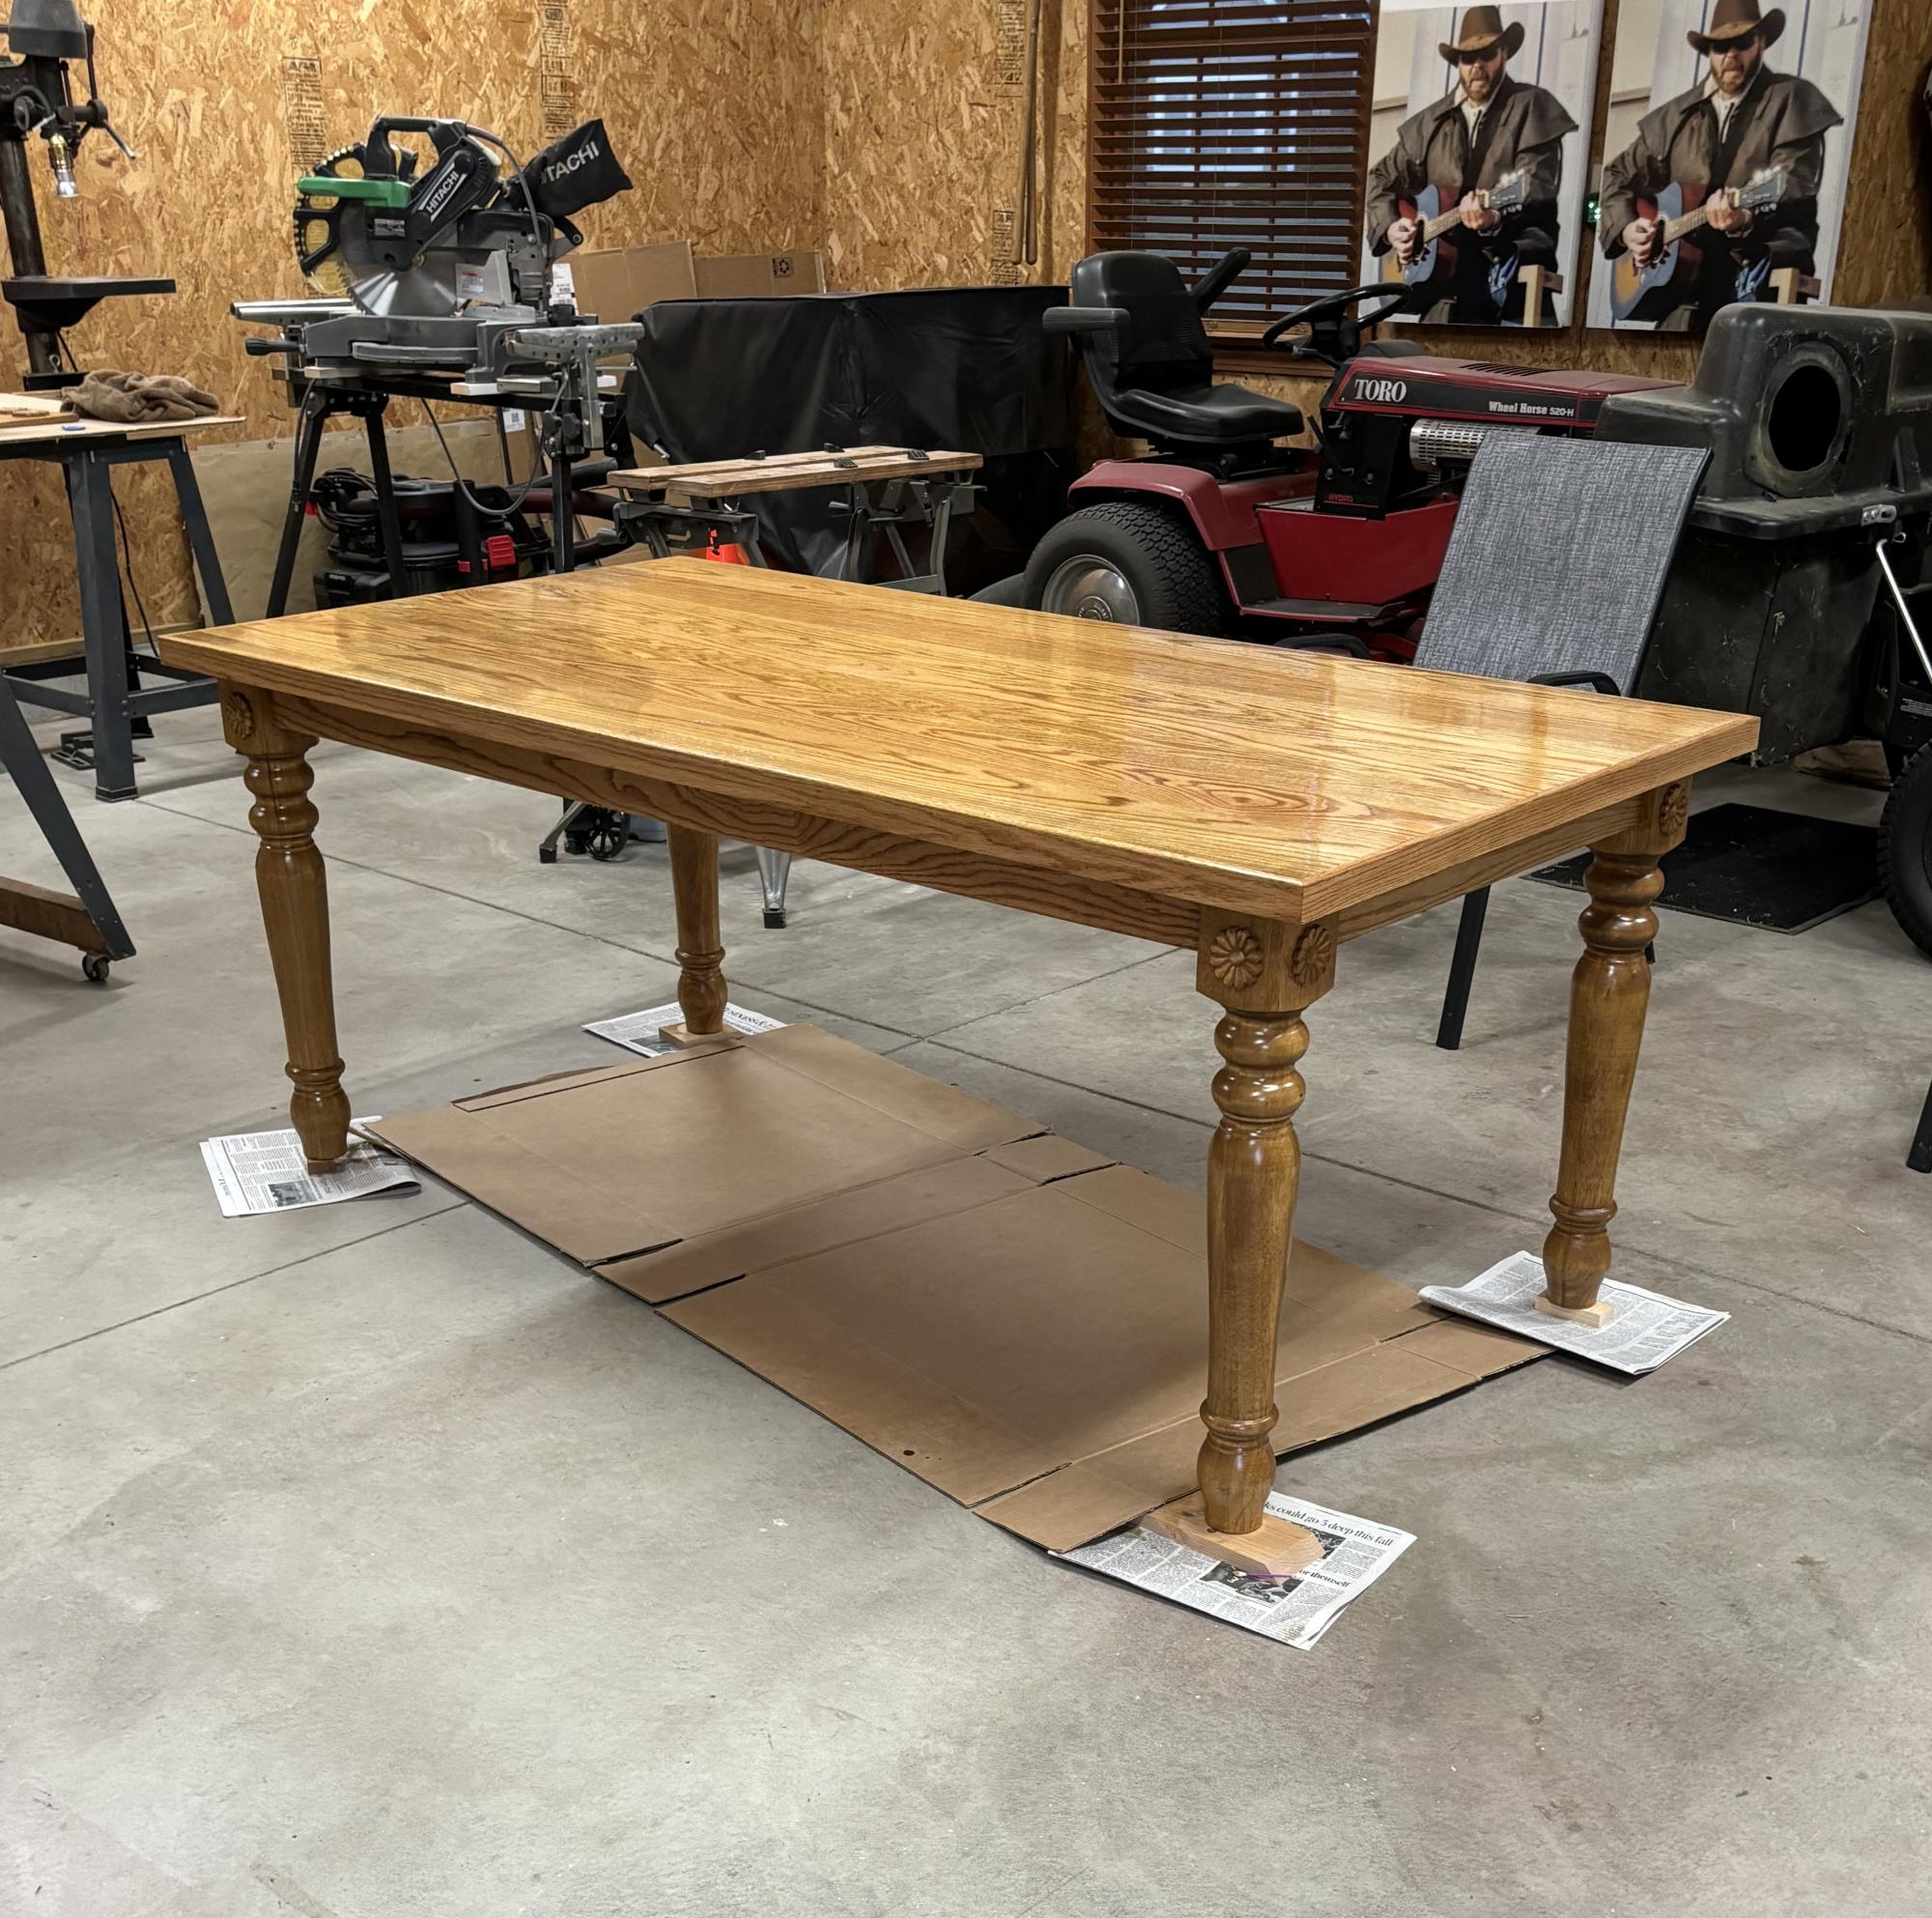
Red oak 38x72 farmhouse dining table - The board professor
Built from Plan(s)
Queen Farmhouse Bed (Rough-cut lumber)
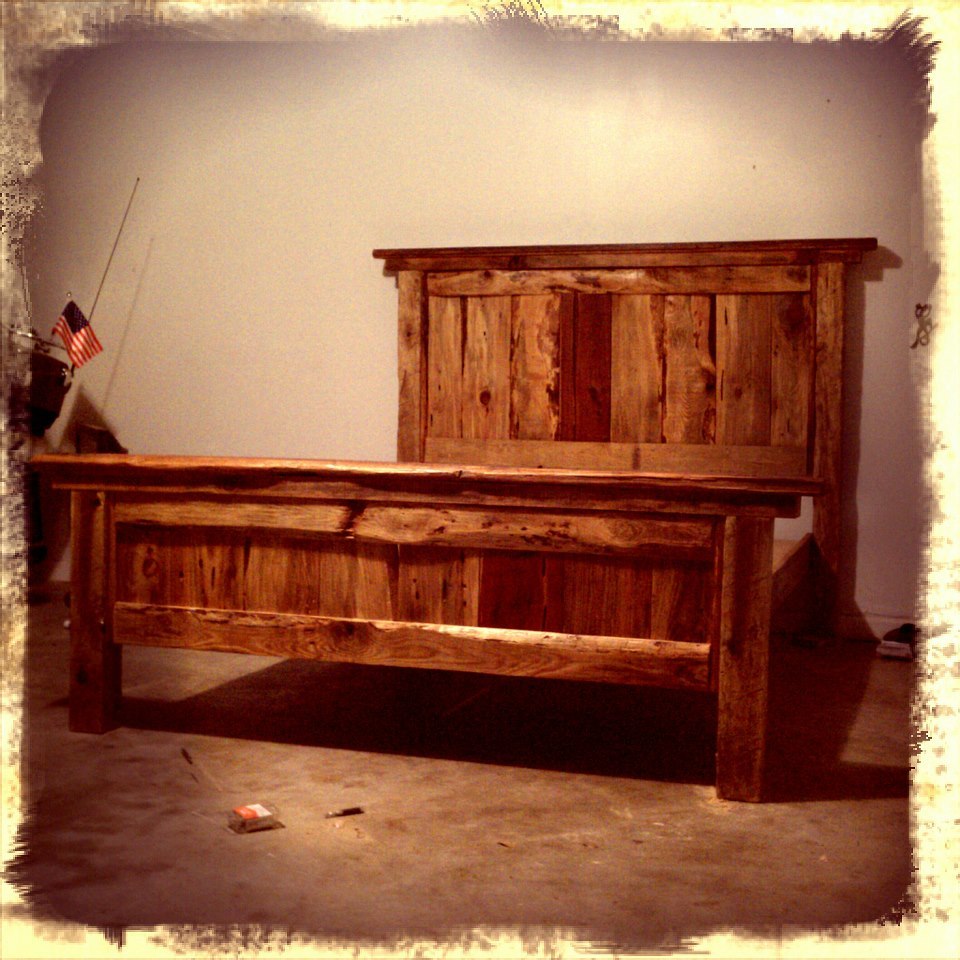
We constructed our farmhouse bed from rough-cut lumber (mostly pine with a few eastern red cedar panels). However, the top rails of the headboard and footboard were reclaimed from an old railraod depot and maintain their faded red color. I will admit, using rough-cut lumber practically tripled our efforts because nothing was square or even, but all in all, I think it was worth it!
Built from Plan(s)
Estimated Cost
$200
Estimated Time Investment
Week Long Project (20 Hours or More)
Finish Used
Clear Satin Lacquer
Recommended Skill Level
Advanced
Comments
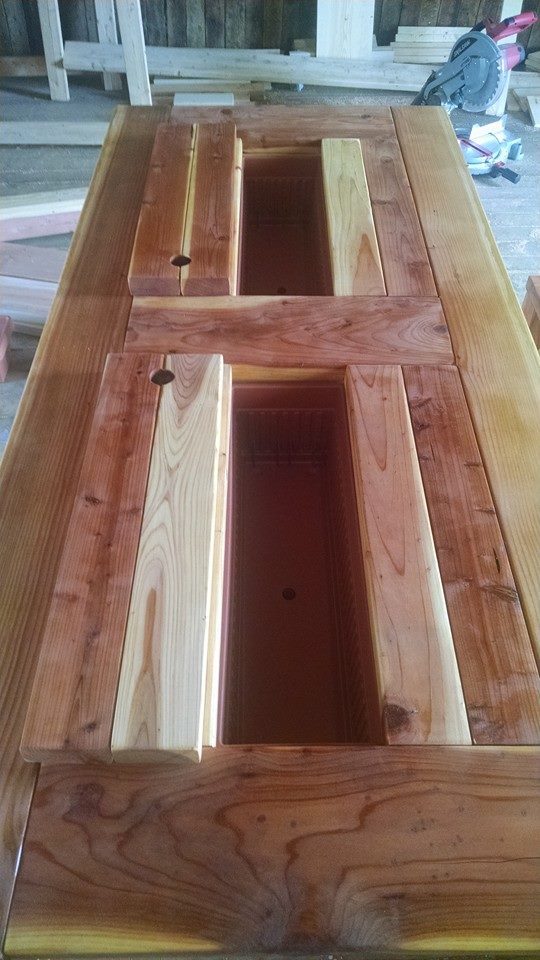
Patio Table w/ Built in Coolers
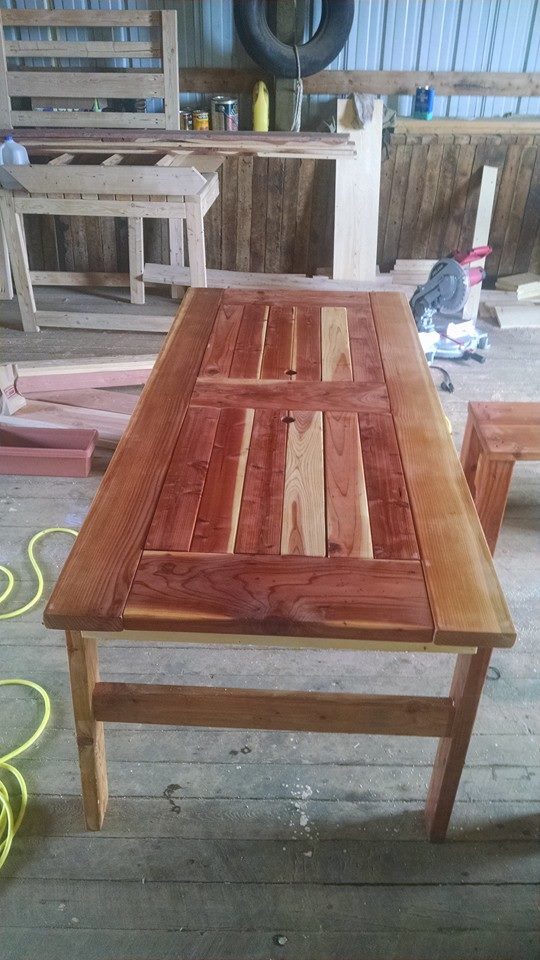
Fairly easy table to built, just be careful measuring for coolers.
Built from Plan(s)
Estimated Cost
$160
Estimated Time Investment
Weekend Project (10-20 Hours)
Finish Used
Spar Urethane
Recommended Skill Level
Intermediate
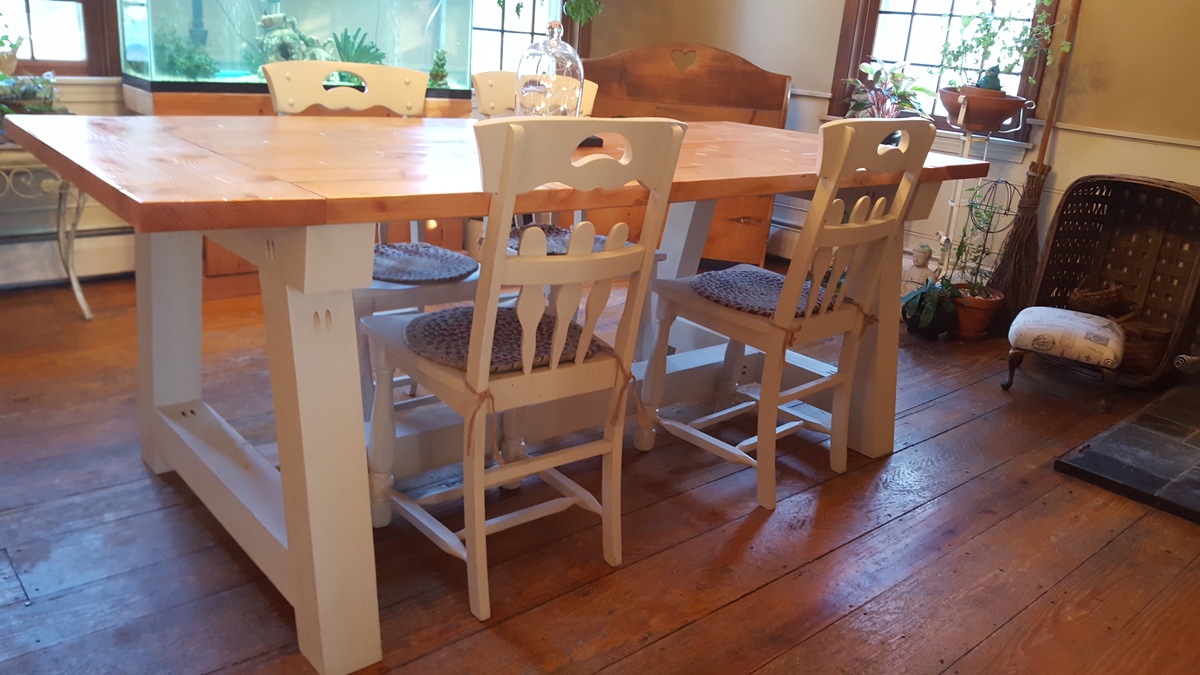
Truss table
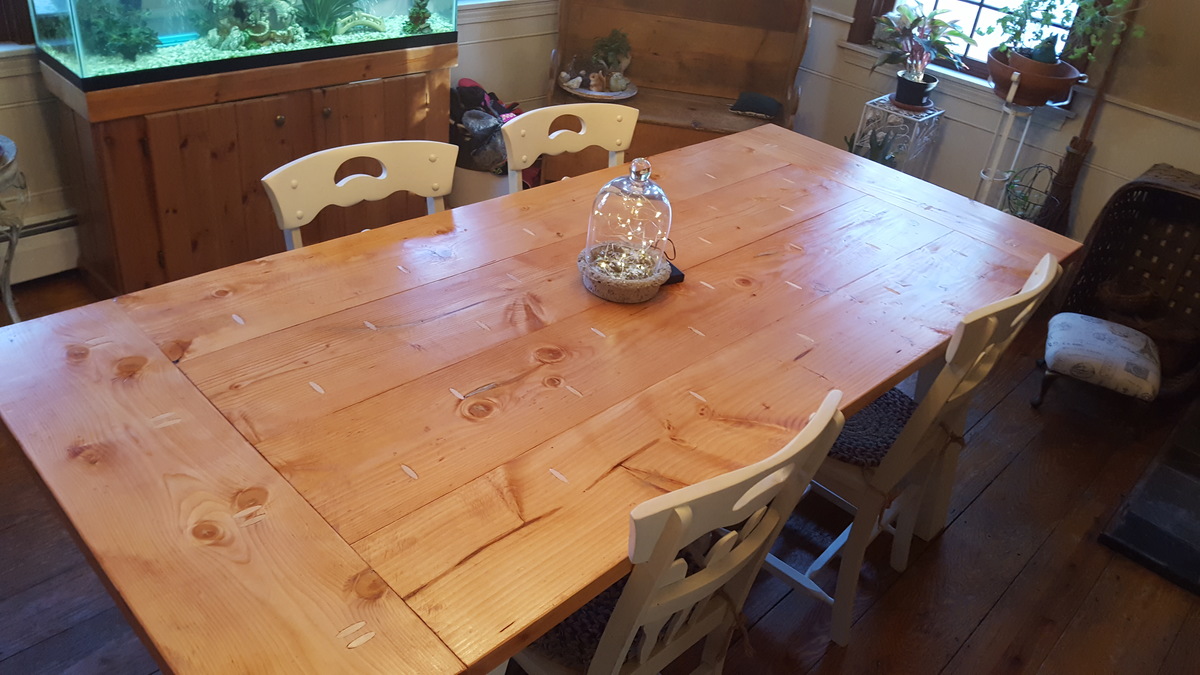
My husband built this table for me as an 8th Anniversary present. It came out absolutely beautiful! For the first time, we can host family and friends with plenty of room. I paired it with some chairs that we already owned. He will be building the matching bench soon.
He left out the 45 degree diagonals, may add them later. It is so sturdy, they are basically decorative.
Built from Plan(s)
Estimated Cost
$200
Estimated Time Investment
Weekend Project (10-20 Hours)
Finish Used
Min wax golden pecan for top
Behrman Roman plaster paint, satin finish
Satin poly on top.
Behrman Roman plaster paint, satin finish
Satin poly on top.
Recommended Skill Level
Intermediate
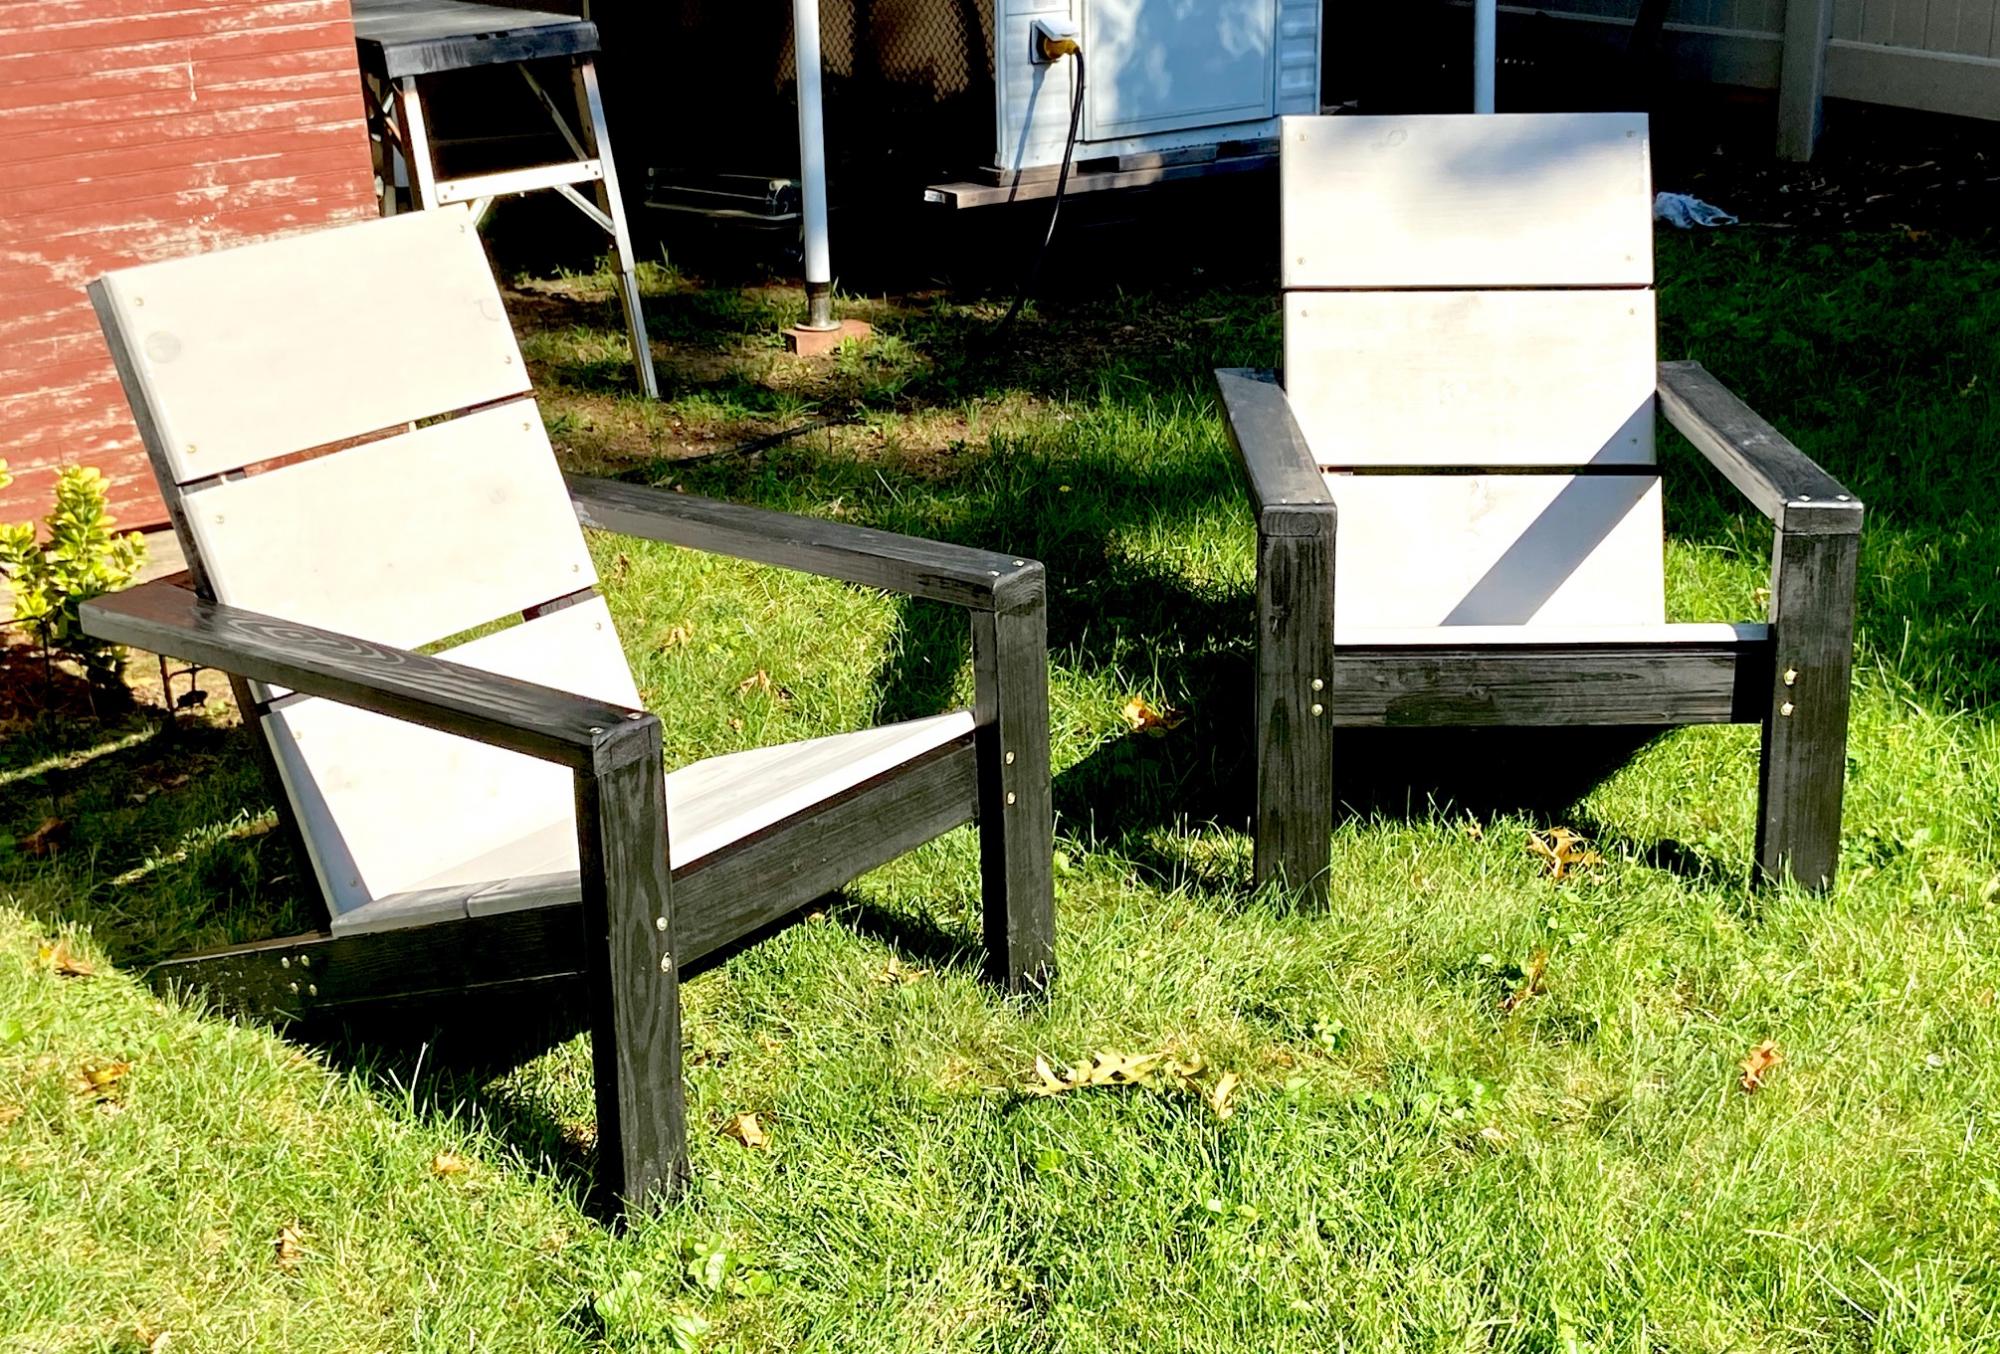
Nightstand with RFID Locking Storage
I adapted a plan to create concealment nightstands with three hidden compartments. A quick access space on each side and RFID locking storage under the top. - Julie J
Built from Plan(s)
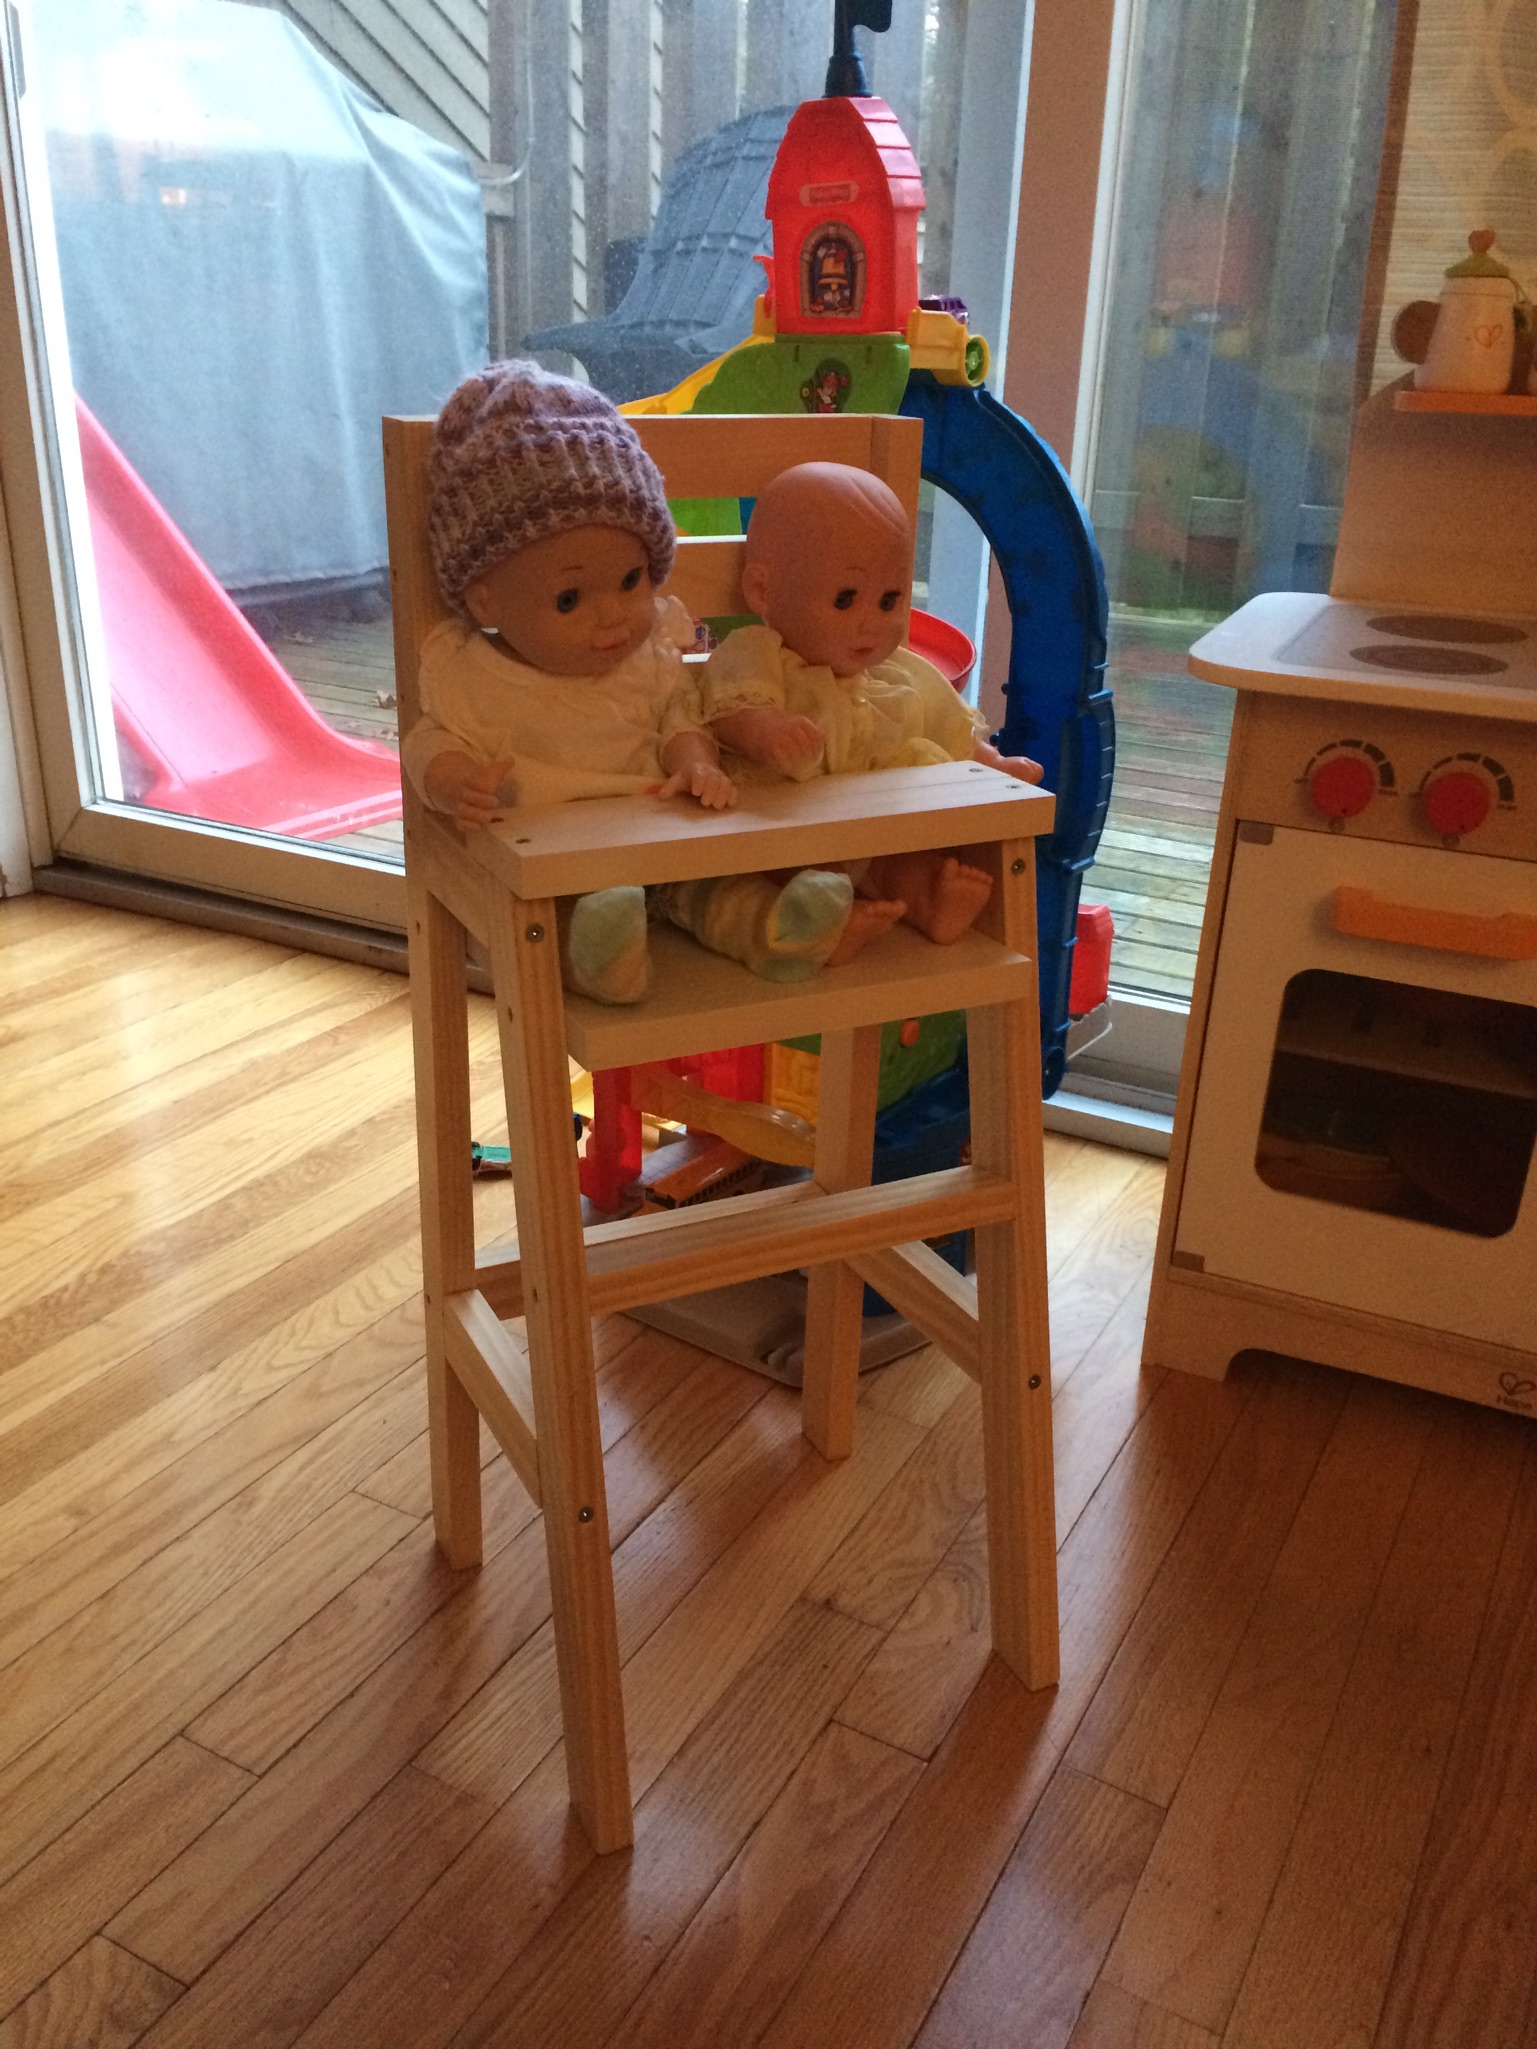
Doll Bunk Beds

I was looking for something to make for my niece for Christmas that could be treated as an heirloom to hand down to future generations...thus, it had to be sturdy. My mother made the mattress, pillow, and blanket sets. I loved the way this turned out and my niece was pleasantly surprised!
Built from Plan(s)
Estimated Time Investment
An Hour or Two (0-2 Hours)
Finish Used
White paint and primer, with additional sanding to soften the sharp edges and create an aged effect.
Recommended Skill Level
Starter Project
Love this table
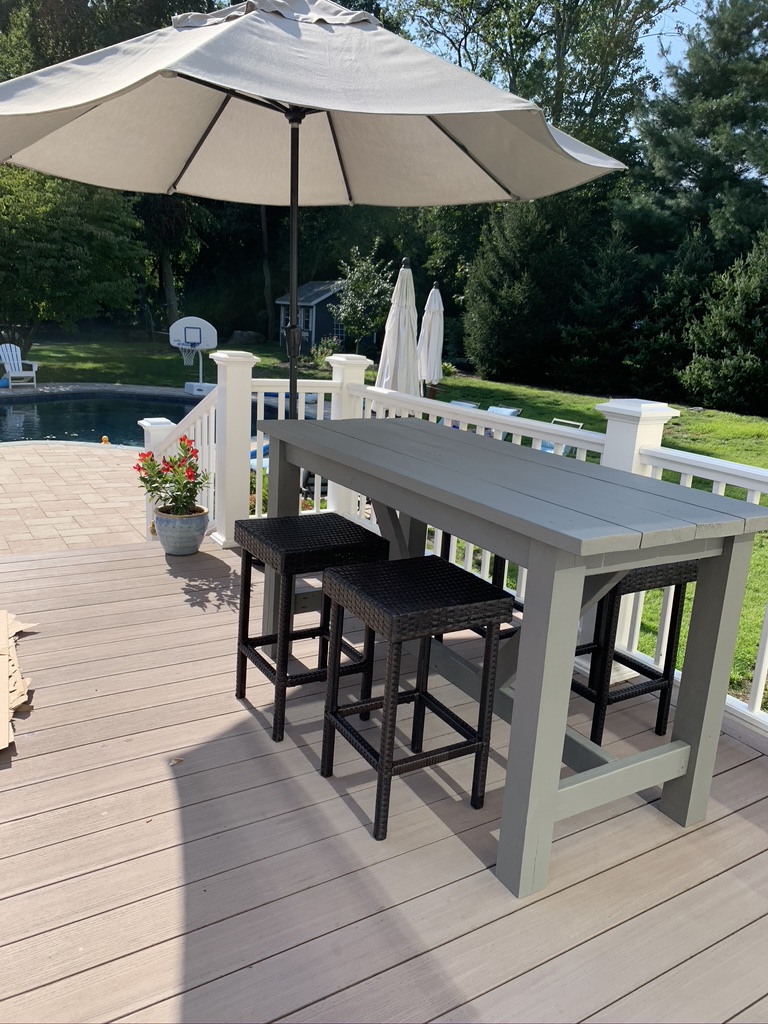
This was my first big project. I made one of Ana's planters to get my feet wet. I changed the dimensions a bit. I made it counter height and shorter in length. I accidentally bought larger wood for the top, so it's a bit heavy. I built the top on the deck after I put the base together to save time and my back. I went with a Behr solid color stain. I had some frustrating moments but I am thrilled with the results. You can't buy a solid wood table for $150!
I absolutely love it. I can't wait to make more furniture.
Estimated Cost
$150
Estimated Time Investment
Weekend Project (10-20 Hours)
Finish Used
Behr solid color stain - pewter
Recommended Skill Level
Beginner
Comments
Lego Table Plan from Ana's Book
Built this table using plans from Anna's amazing book. It was a much easier build than I anticipated. The actual finishing took longer than the construction. I did a slight modification by attaching beadboard to the top of the table. I had some leftover from a headboard my daughter and I made so I put it to use! Anyway, LOVE the table! Thanks, Ana! I would never have ever attempted building furniture without your virtual encouragement! Blessings!

Built from Plan(s)
Estimated Cost
$75
Estimated Time Investment
Day Project (6-9 Hours)
Finish Used
Rustoleum Espresso Satin spray paint. I sanded, sprayed, sanded, and then a second coat of paint. Waited a full day and then applied Minwax Fast Drying Poly. Put on 2 coats with a light sanding in between.
Recommended Skill Level
Beginner
Robins egg blue console table
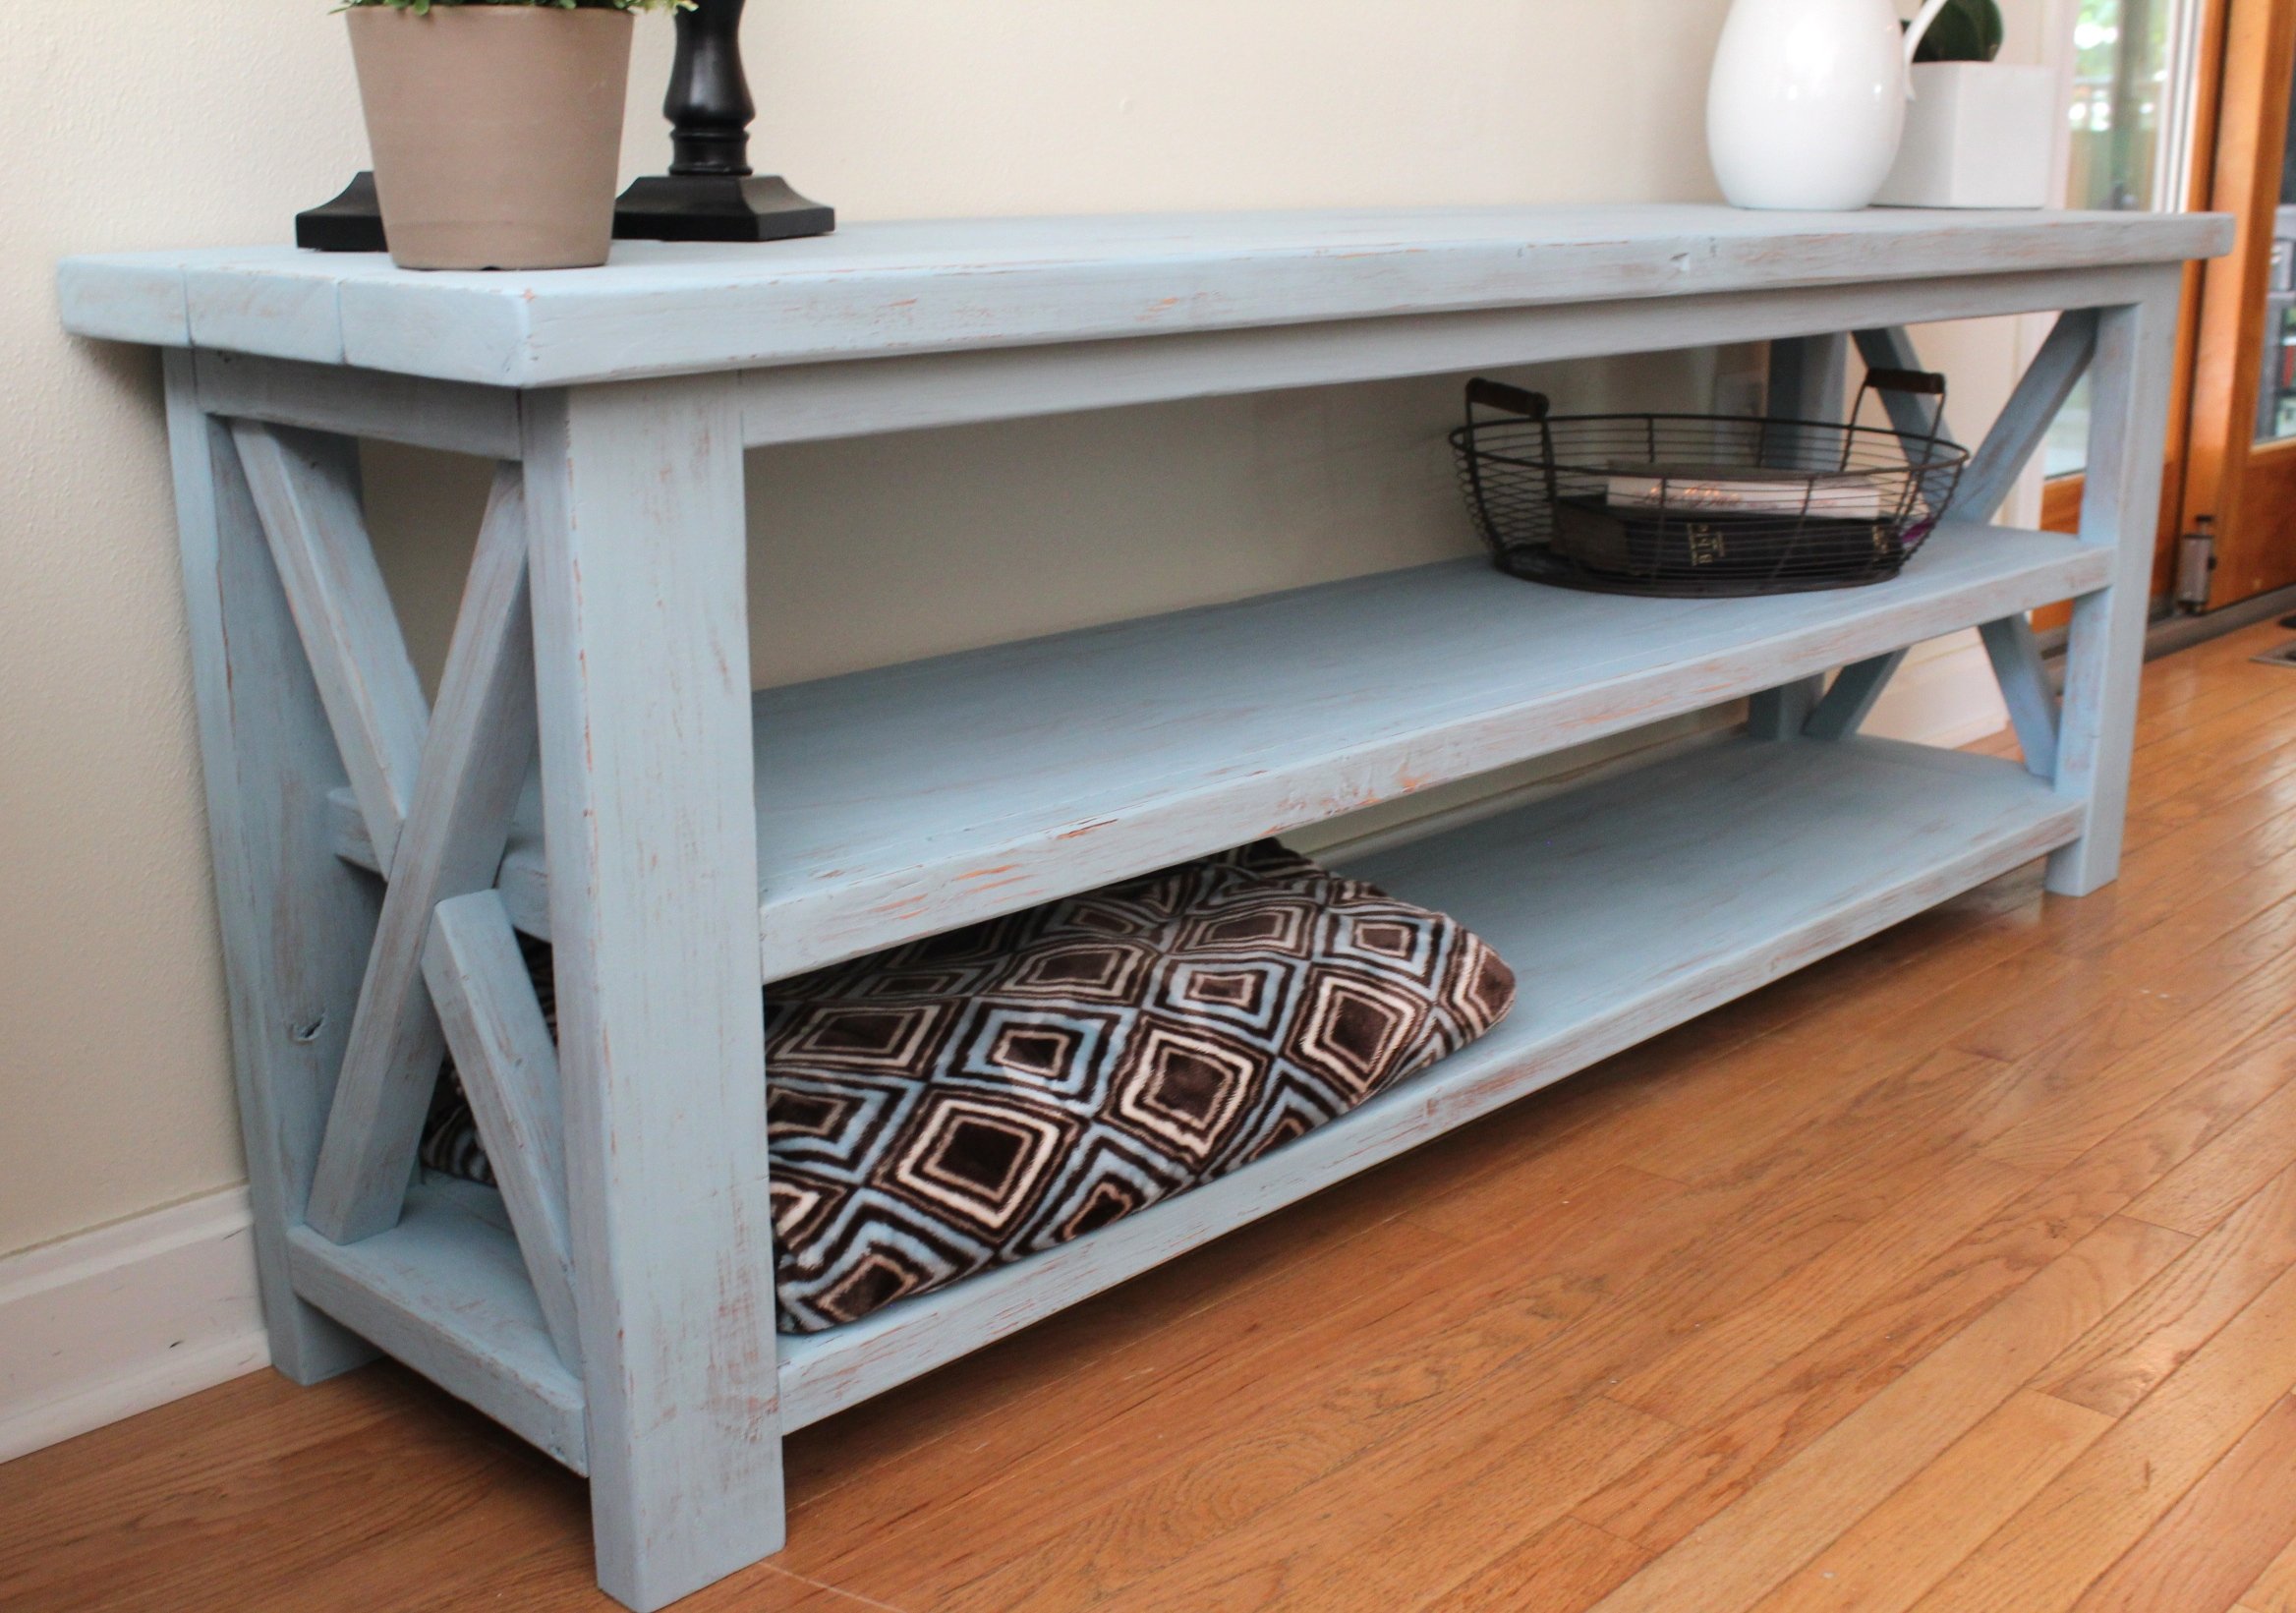
Made this beautiful TV stand from the "Rustic X Console table plans". I shortened it to 2 ft high to fit the space for a TV. Love how it turned out!!
Built from Plan(s)
Estimated Time Investment
Weekend Project (10-20 Hours)
Recommended Skill Level
Beginner
Comments

Mon, 01/19/2015 - 15:11
No Mid support
To you have any trouble with sagging without the 2x4 in the middle? Looks great like this!
Toddler Book Shelf
I needed a book display rack for my boys so I built this one from the plate rack plans and modified it to suit the size I needed. I actually used all scrap lumber from previous projects, so the cost was minimal.
Built from Plan(s)
Estimated Cost
$40 worth of leftovers maybe.
Estimated Time Investment
Afternoon Project (3-6 Hours)
Finish Used
Grey Paint and Walnut Stain that matches a dresser in their room.
Recommended Skill Level
Starter Project
Sturdy Workbench
Did a couple builds for my family out of state and quickly realized that working without a station is CRAZY. Addedd wheels for mobility as I left it there.
Built from Plan(s)
Estimated Cost
60 to 75
Estimated Time Investment
An Hour or Two (0-2 Hours)
Finish Used
Raw
Recommended Skill Level
Starter Project
Outdoor Play Mud Kitchens
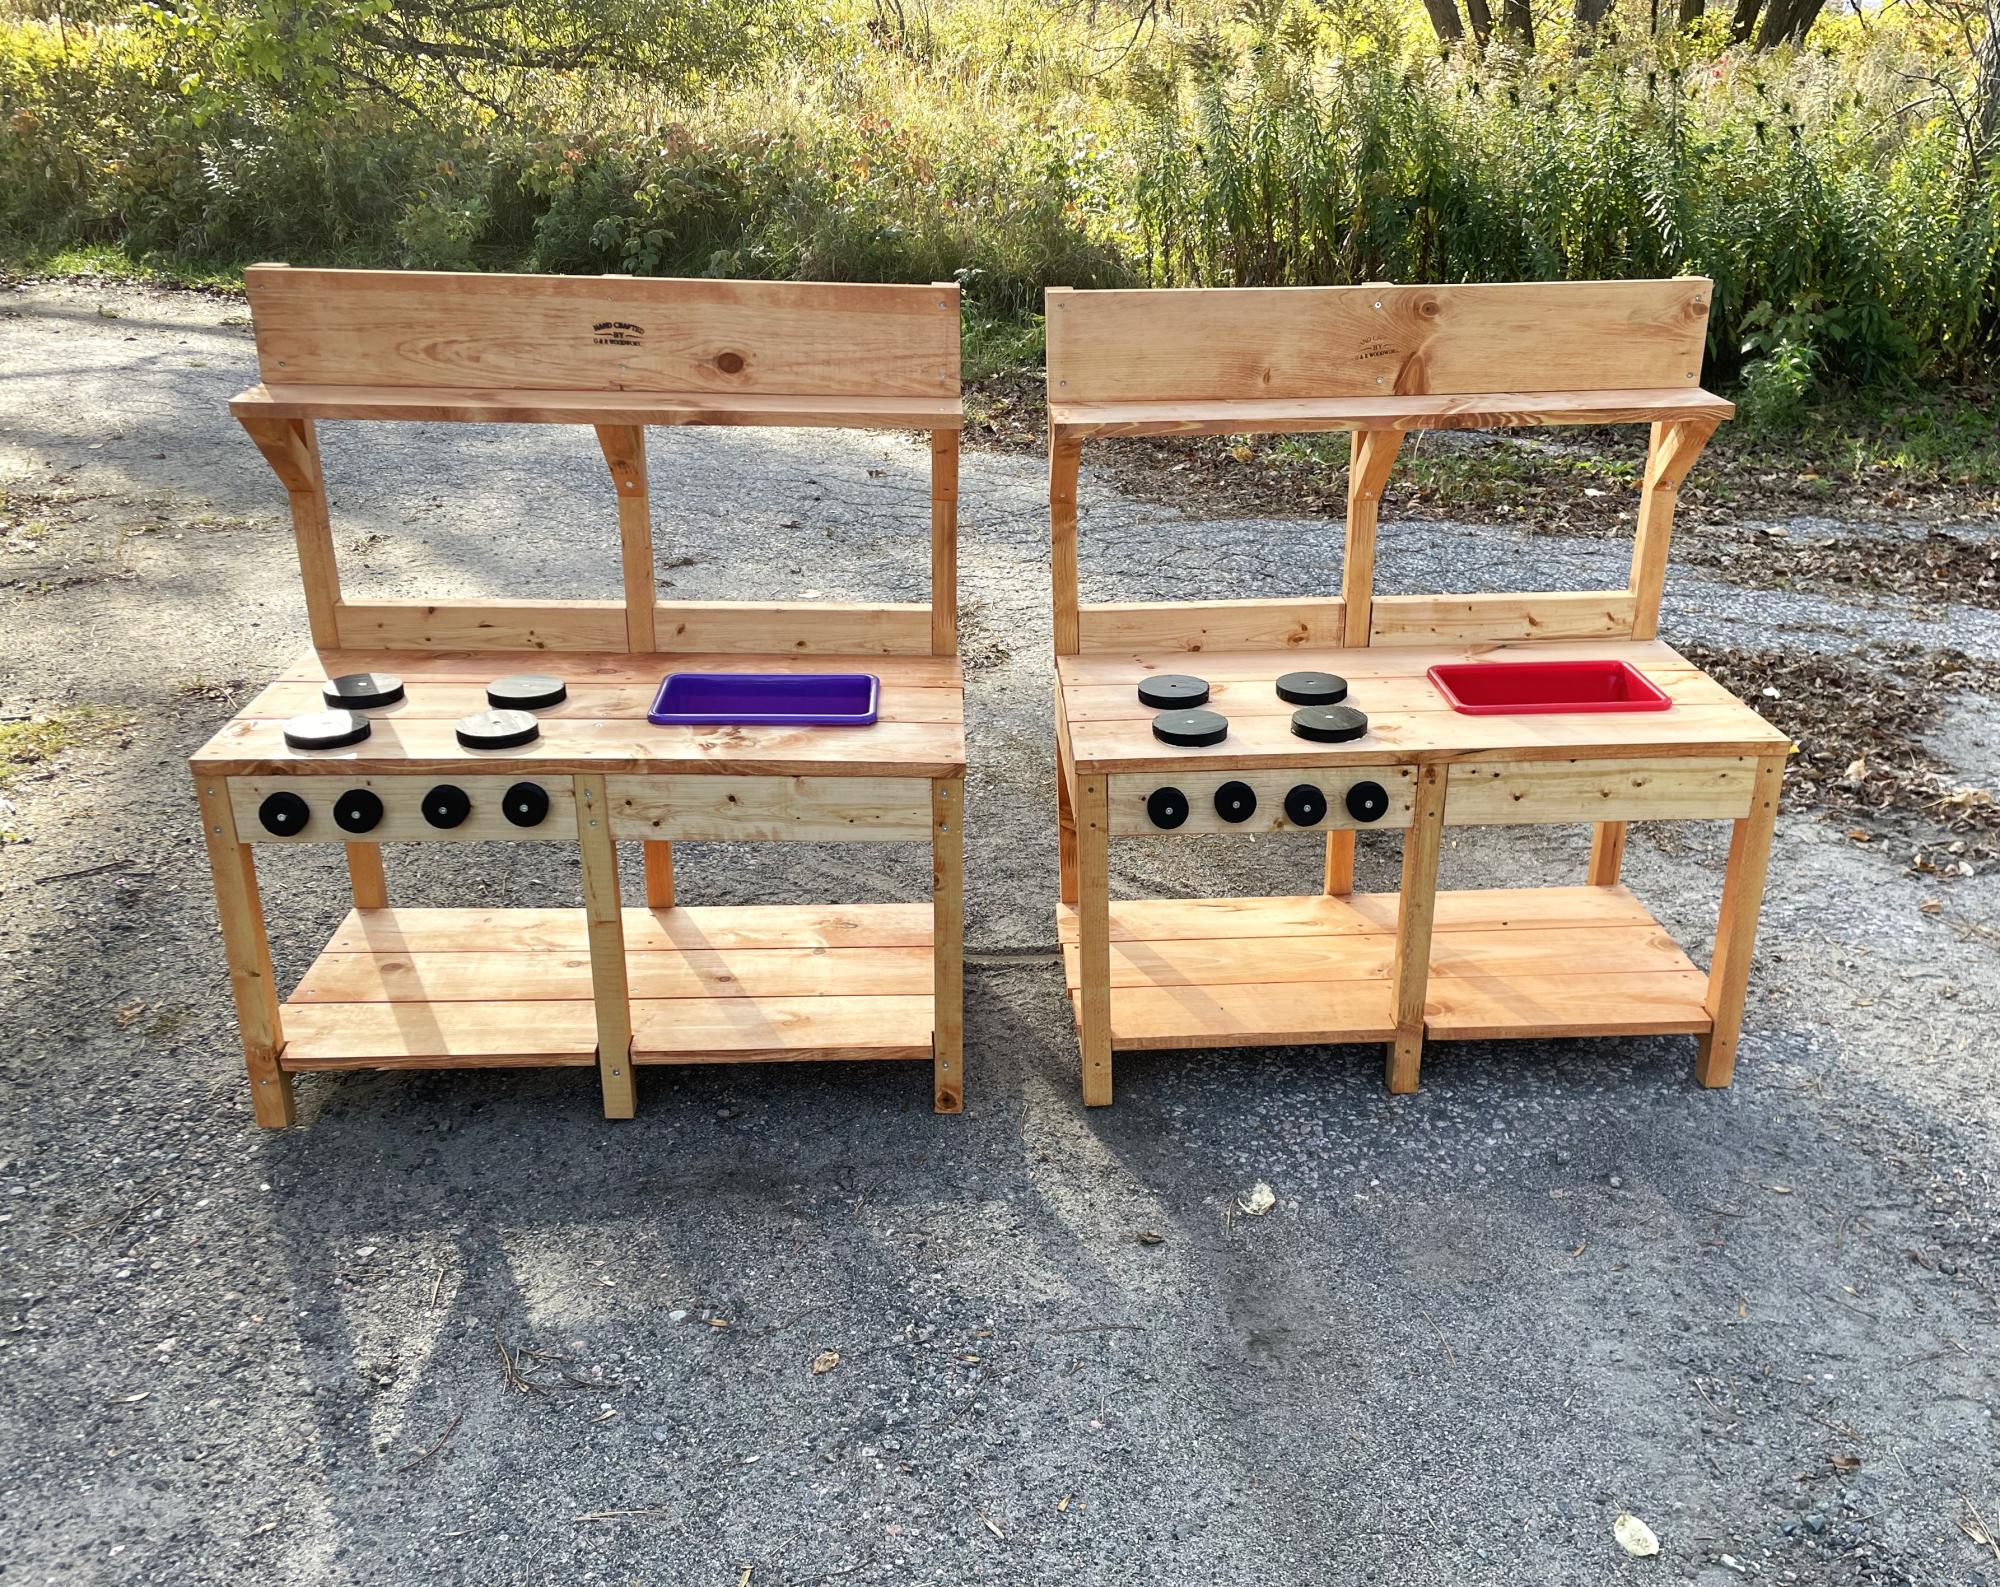
Super fun project to do. Easy to build multiple units at once. I built one for personal use and one to donate to a fundraising auction. - Andrew H.
Built from Plan(s)
Dress Up Closet

Dress up closet made from craftiness Is Not Optional's Dress Up Storage plans.
Built from Plan(s)
Estimated Time Investment
Day Project (6-9 Hours)
Recommended Skill Level
Beginner
Comments
Sat, 09/20/2014 - 10:28
Very easy to make. Looks
Very easy to make. Looks adorable in our play room. If I built this again, I would add a few inches to the height to accomodate some of the longer costumes.
Antiqued Hall Tree
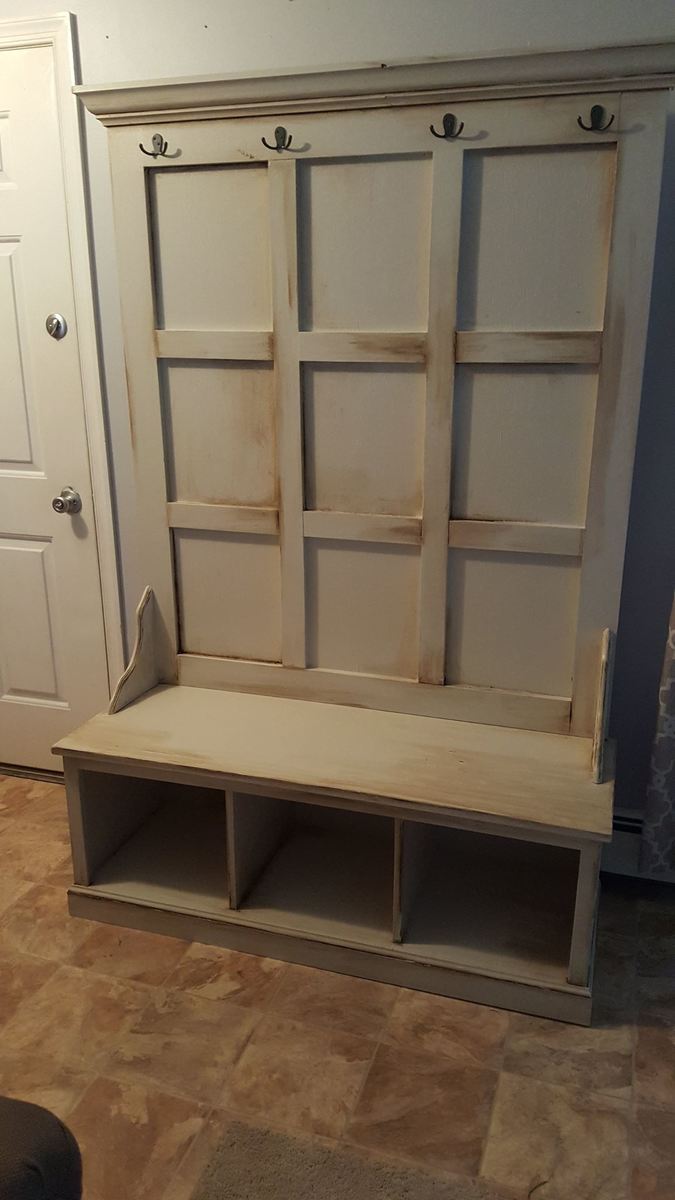
Antiqued Hall tree
Built from Plan(s)
Estimated Cost
150 dollars
Estimated Time Investment
Weekend Project (10-20 Hours)
Finish Used
Valspar Chalky finish paint, and Antiquing wax
Recommended Skill Level
Beginner
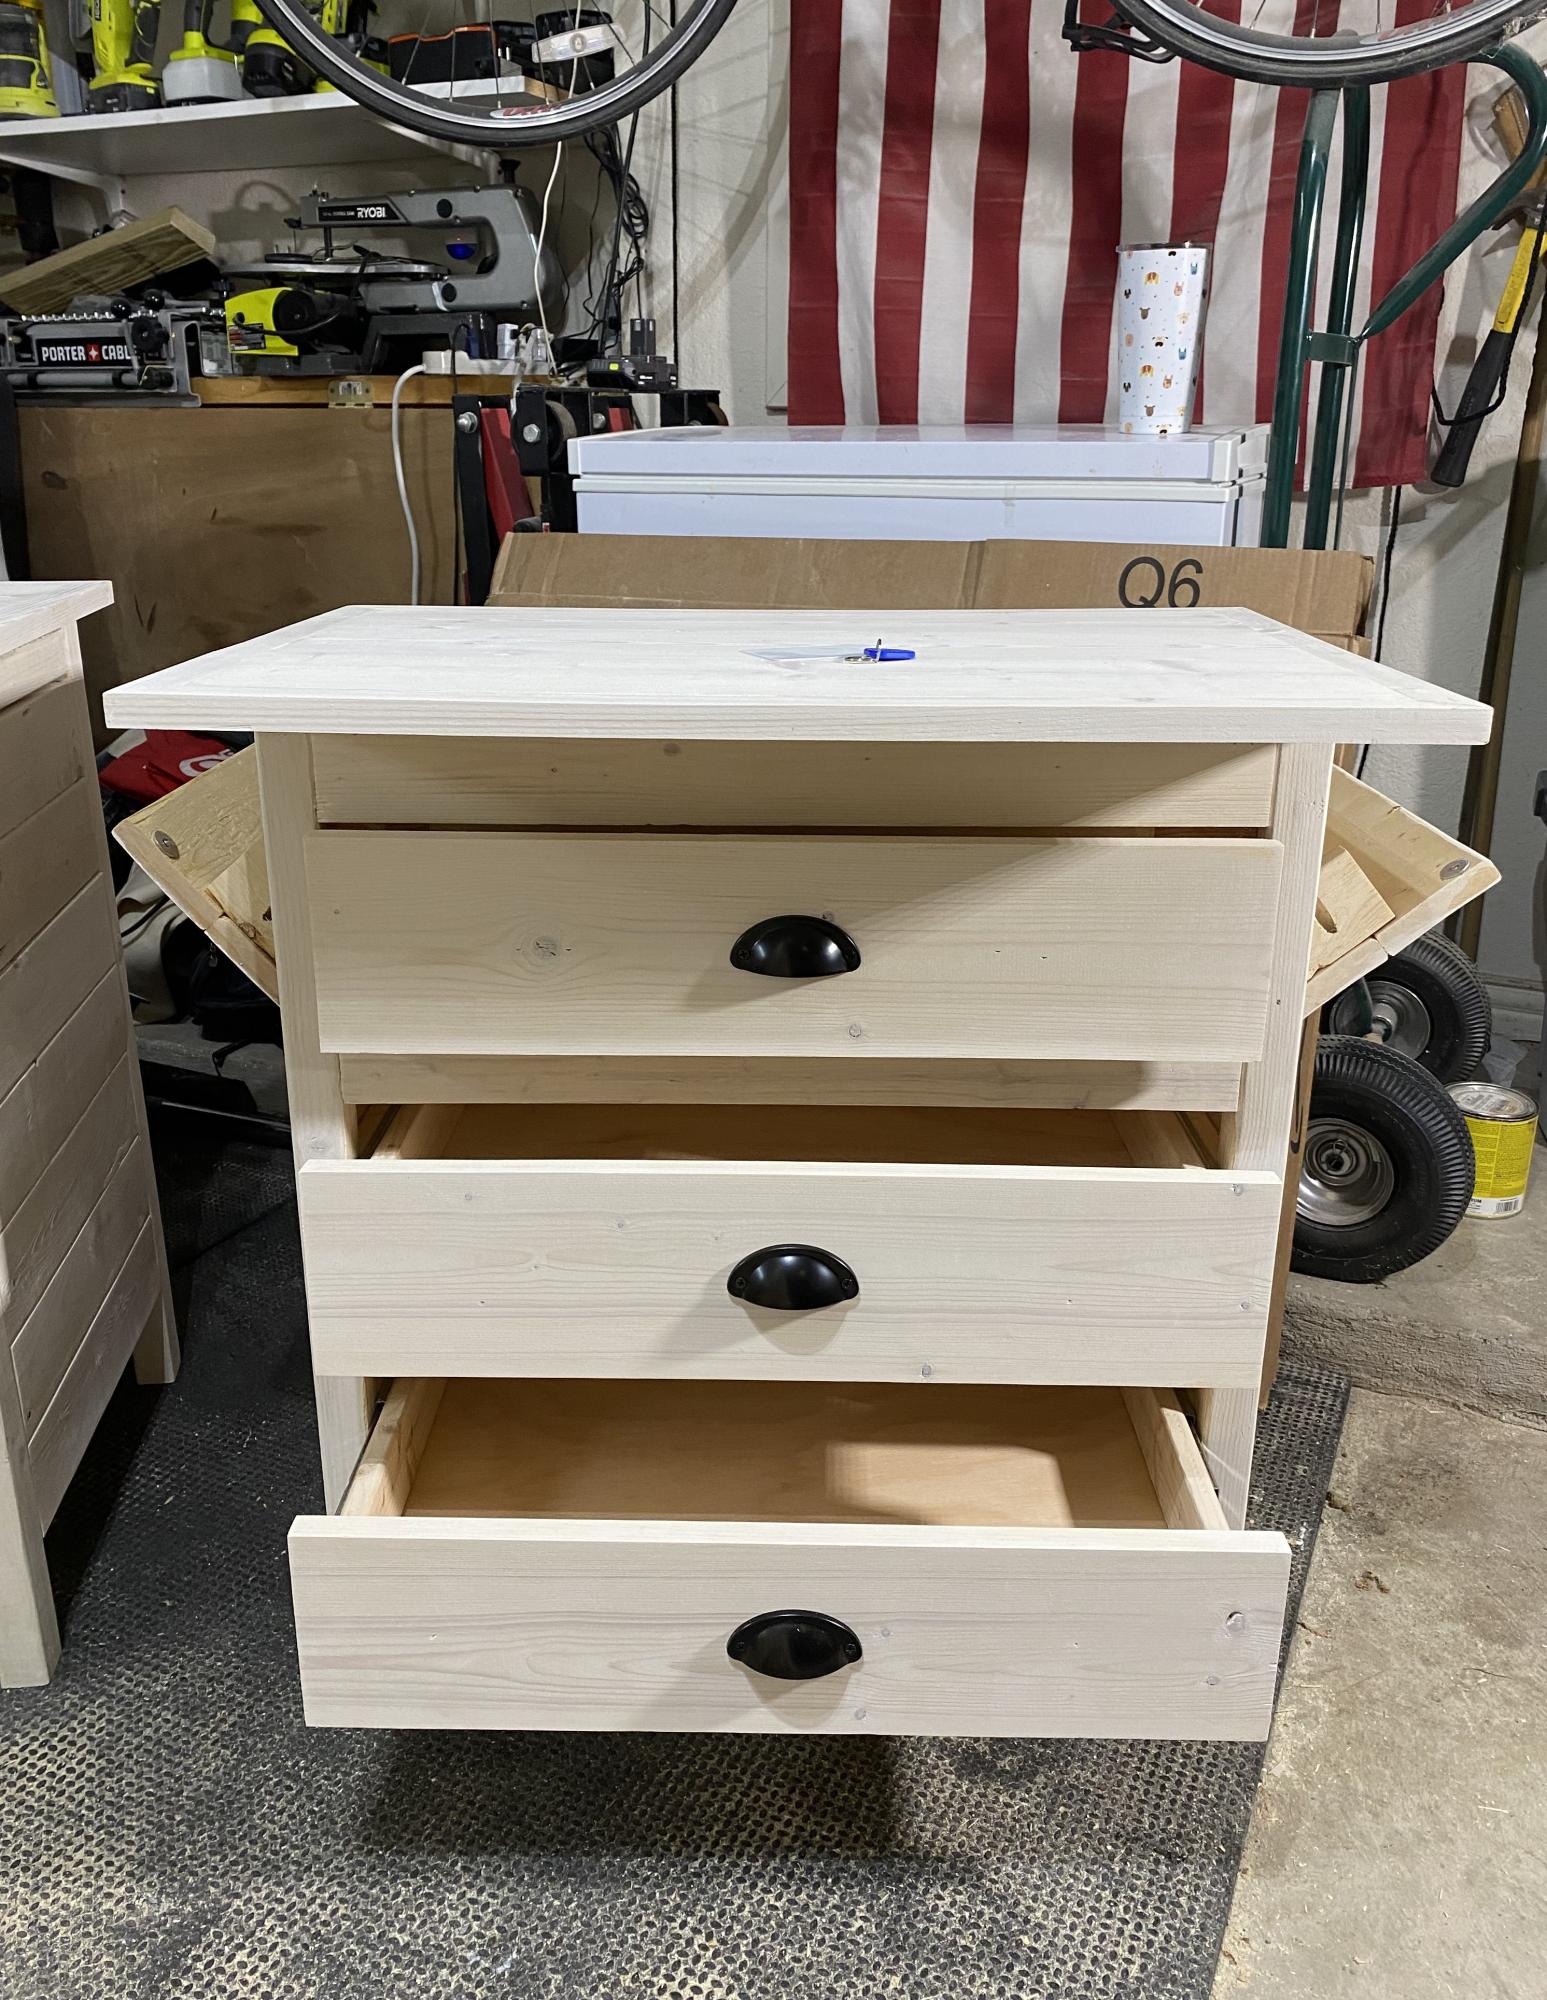
Emersen-Inspired Nightstand
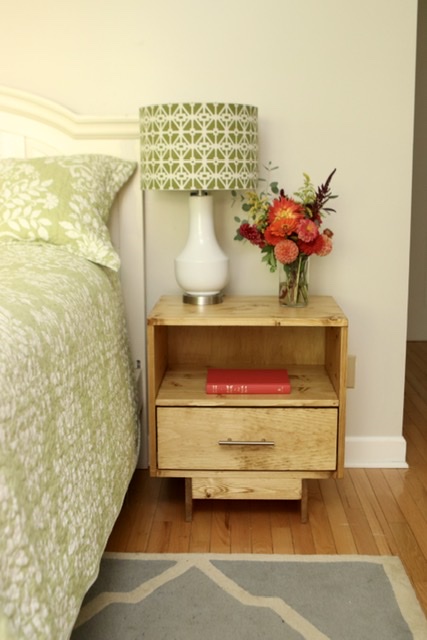
I modified the Emersen nightstand plans to use edge-joined 1x6s instead of 3/4” plywood since I didn’t have a great way to cut 15 1/2” widths of plywood. I eliminated the face frame, used a 1x8 for the drawer face, and used 14” euro slides for the drawer. This was my first time making anything with a drawer and I was a little nervous about it but it works perfectly! One nightstand down, one to go!
Built from Plan(s)
Estimated Cost
$70
Estimated Time Investment
Day Project (6-9 Hours)
Finish Used
Minwax in Golden Oak
Recommended Skill Level
Intermediate
Comments
Large Farmhouse Island
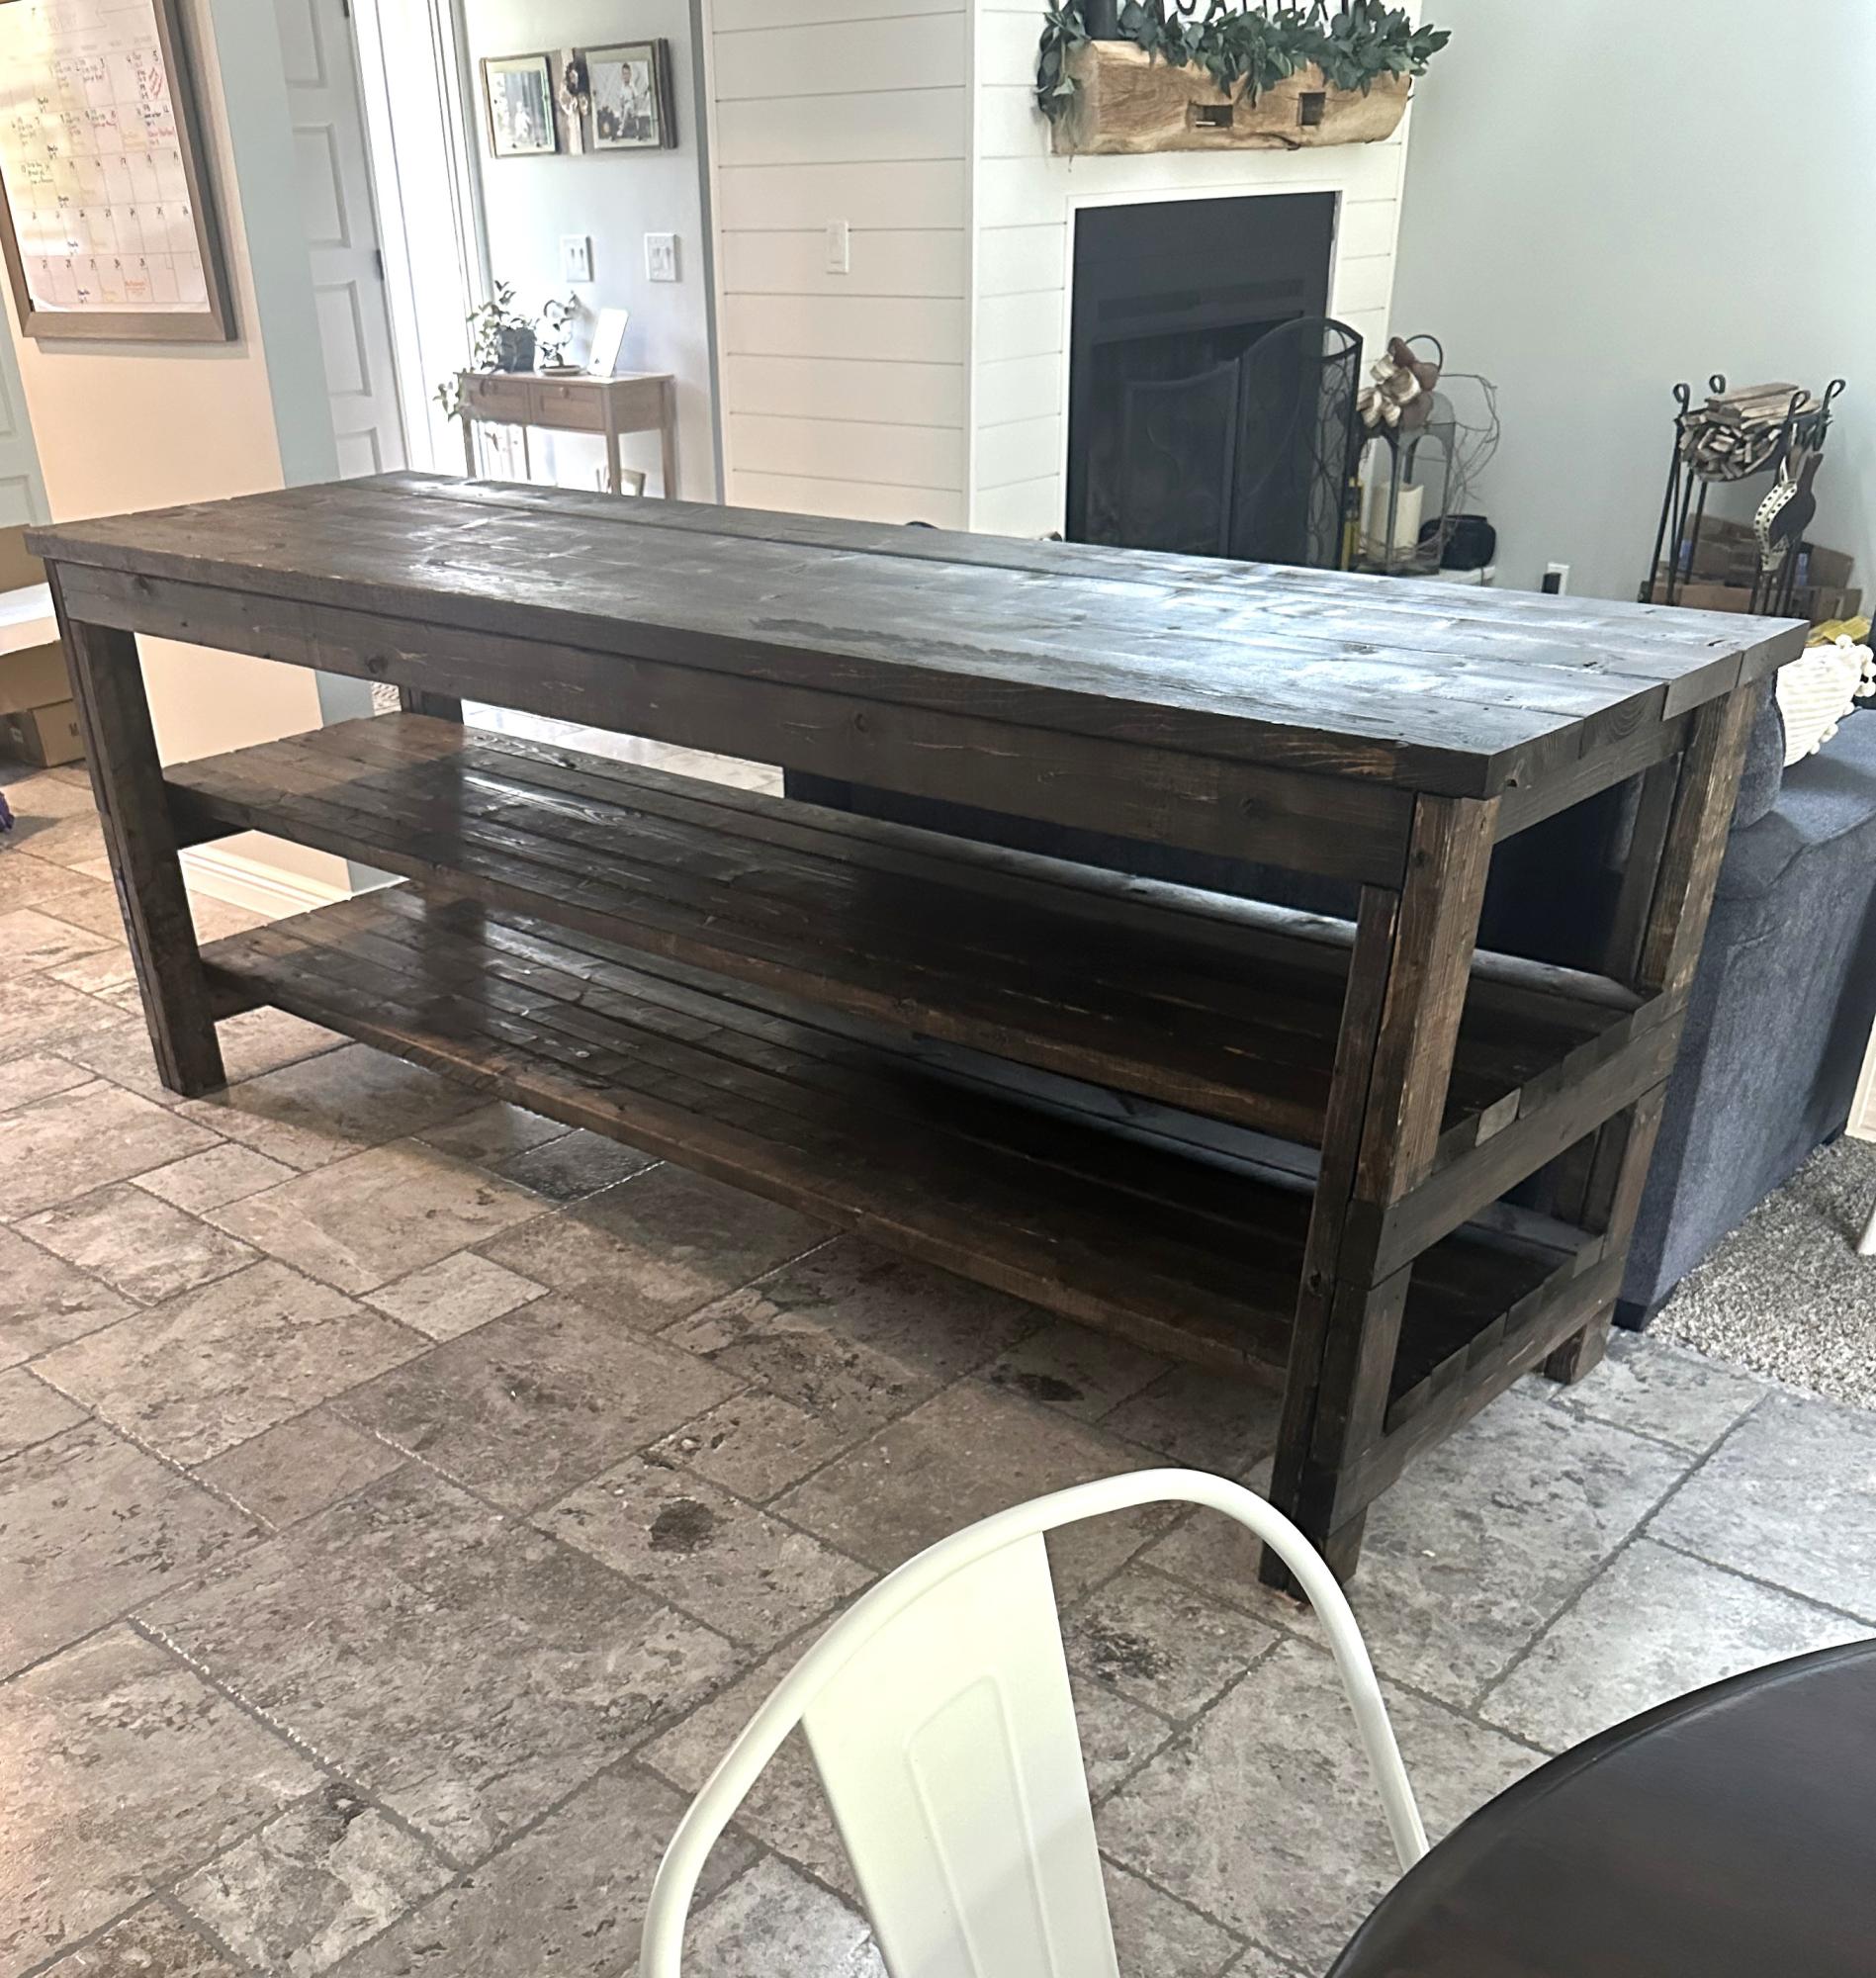
Rustic farm house table. I used your plans, only longer. - Doug Adler
Built from Plan(s)
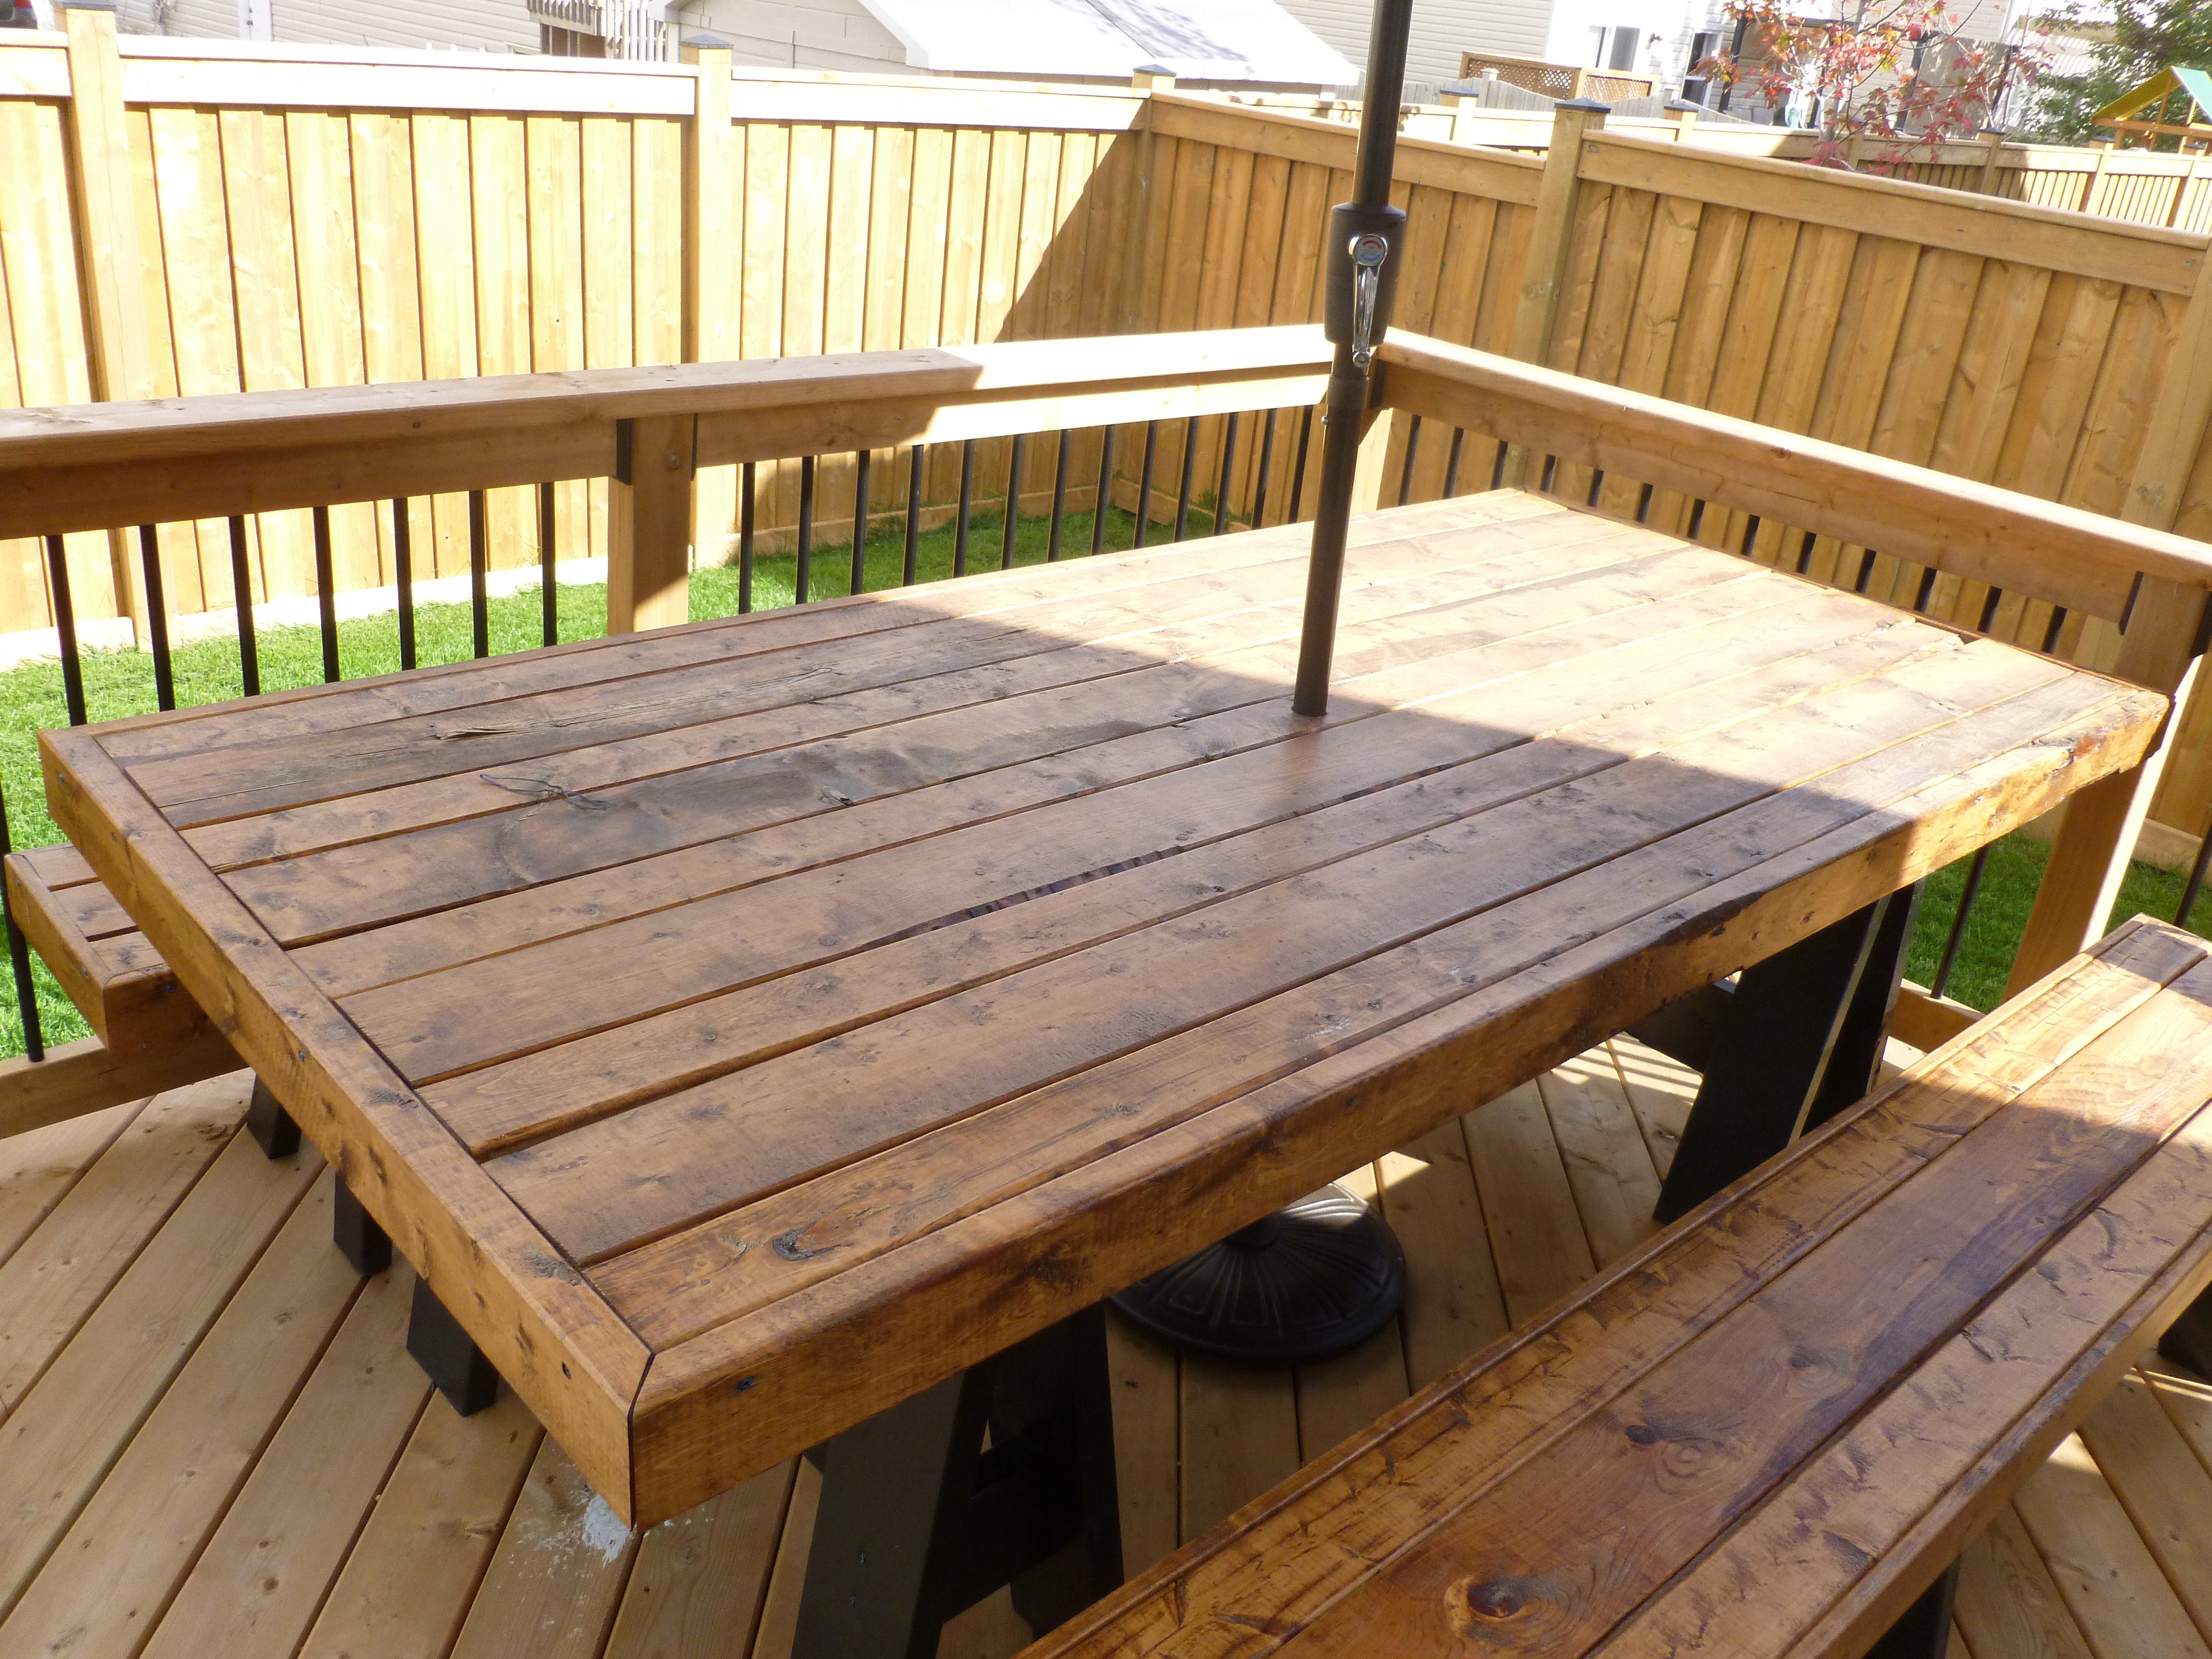
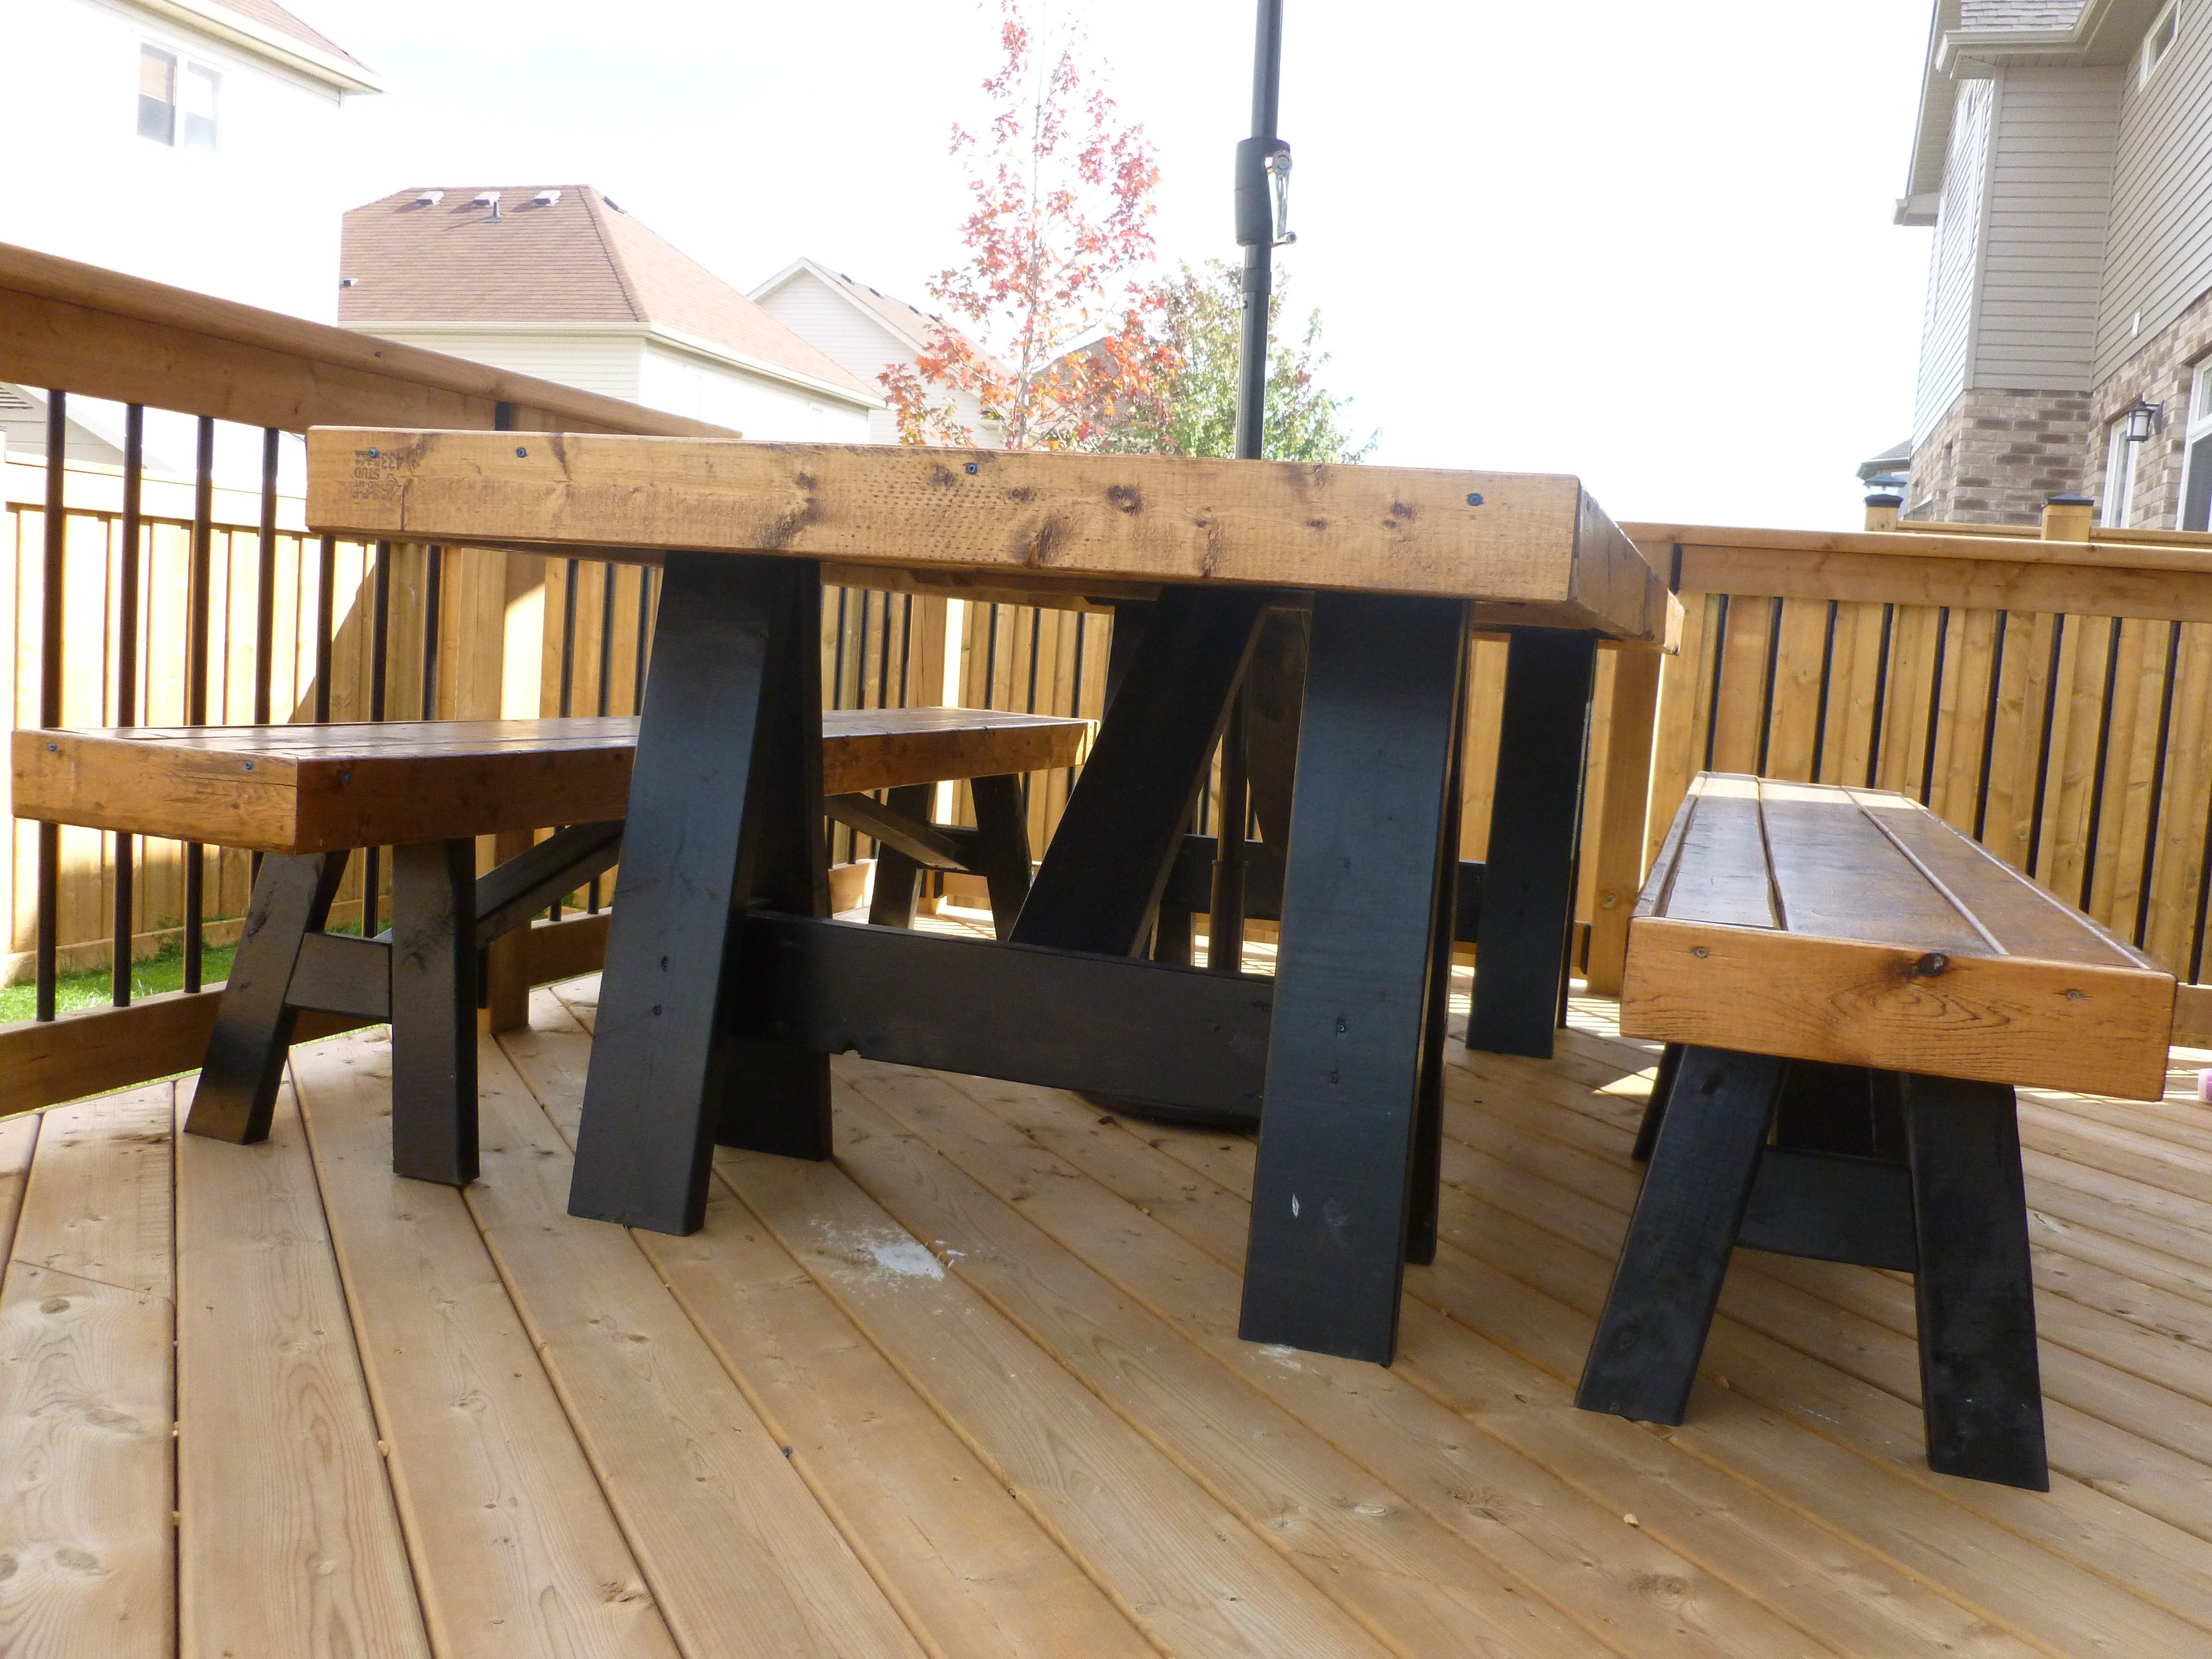
Lovely Outdoor Dinner Table and Benches
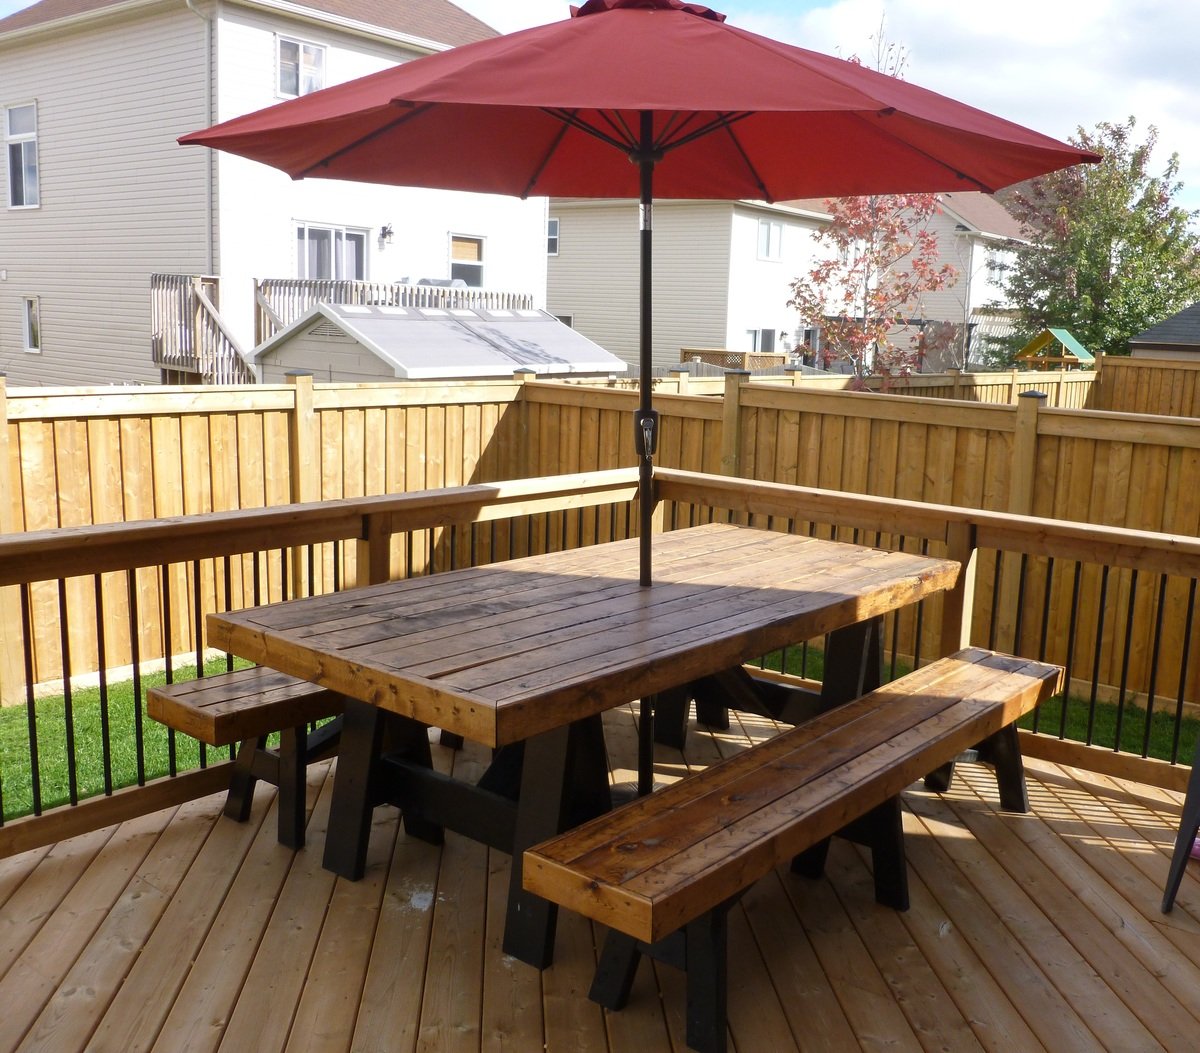
I fell in love with this set from the moment I saw it on Shanty-2-Chic's website. I knew I had to have it for the deck I just built in my backyard. It's pretty straightforward, the only difficulty I ran into was assembling the legs. I copied the angles provided in the instructions to a "T" but there are still some gaps where the angled pieces join. After spray painting it they are not very noticeable. It is a heavy beast of a table and took everything in me to help my husband heave it up on to the deck, but it's absolutely lovely. It is so large we can easily have people over for a BBQ and everyone fits around the table. I'm so thrilled with the results. Thanks, Ana!

Built from Plan(s)
Estimated Cost
$120 for the lumber (in southern Ontario)
$30 for spray paint and I already had stain on hand
$30 for spray paint and I already had stain on hand
Estimated Time Investment
Weekend Project (10-20 Hours)
Finish Used
I used Rustoleum Black in a Semi-gloss finish spray paint for the legs and Minwax Early Emerican for the table and bench tops. Two coats of an outdoor Polyurethane was used to finish with a light sanding after the first coat.
Recommended Skill Level
Intermediate
Comments
Mon, 03/30/2015 - 16:34
Umbrella opening in the table
What adjustments did you made to the plans for creating an umbrella hole?

In reply to Umbrella opening in the table by liamtoh1
Tue, 06/13/2017 - 15:41
Hole Saw Bit
So sorry, I just saw this question now! Wish I had received an email to let me know you asked a question. You need to use a hole saw bit. It's just a bit that you can use with any drill. You need to determine the diameter of the umbrella pole first and then use the appropriate bit. Hope this helps. :)
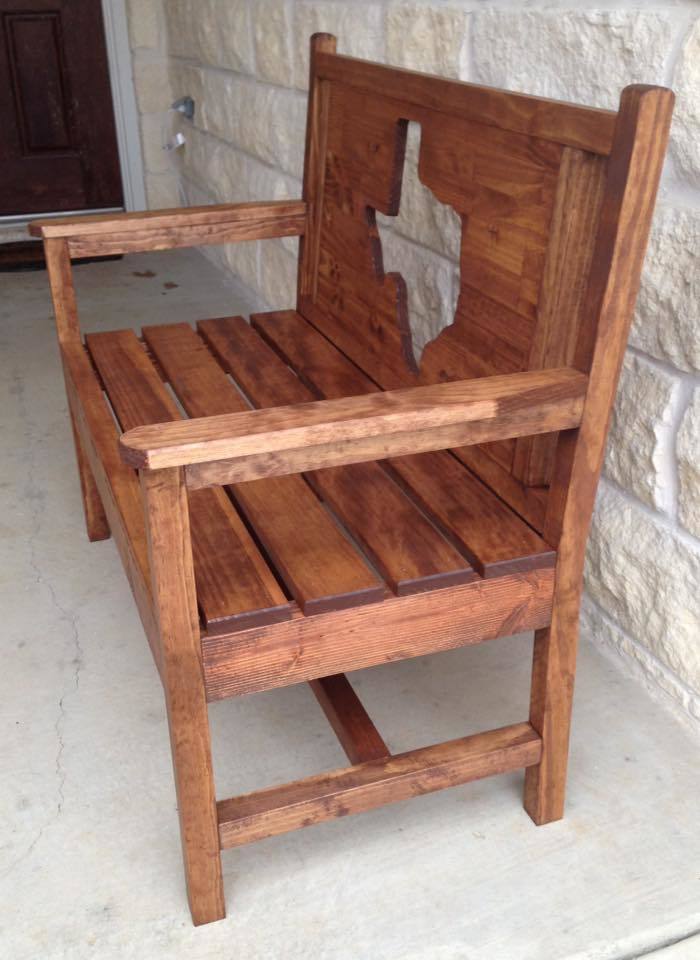
Texas Themed Bench
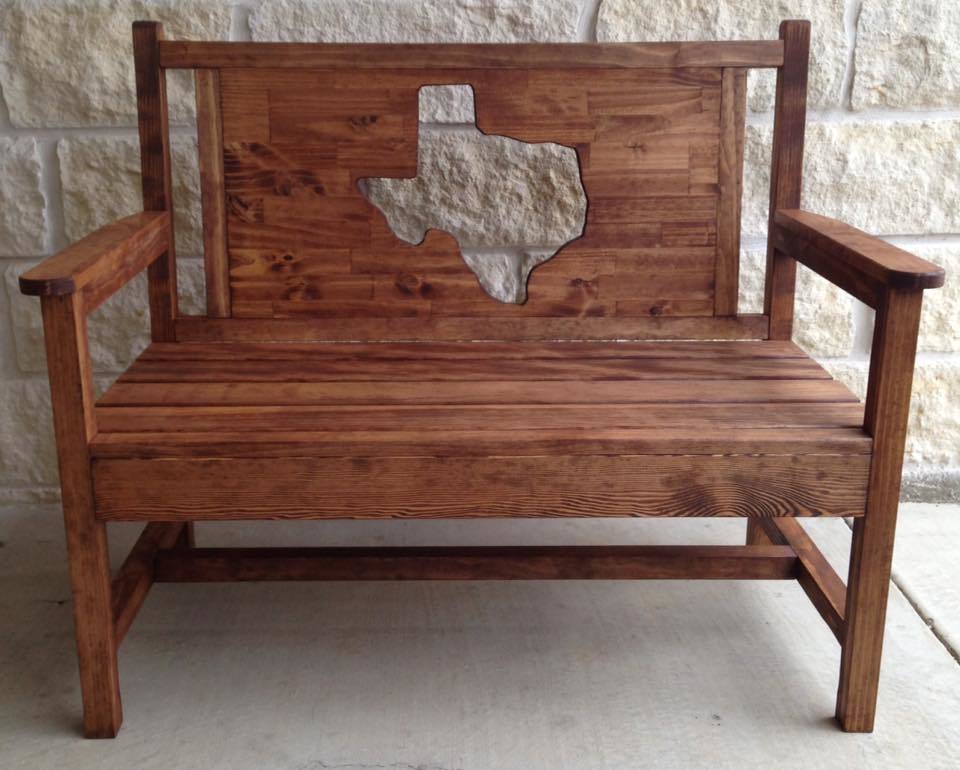
I modified this bench to incorporate a Texas theme. I traced a Texas shaped cutting board onto a 1x16 piece of edge-glued board, and then cut it out with my jigsaw.
Built from Plan(s)
Estimated Cost
$100
Estimated Time Investment
Day Project (6-9 Hours)
Finish Used
Minwax English Chestnut
Recommended Skill Level
Intermediate
Comments
Wed, 01/11/2017 - 08:21
Woven Back Bench
This is AWESOME!!!! We Texans are so proud of our state! :-)
Dress Up Storage

My dad and I made this by following your plans for the Craftiness is not Optional Dress Up Storage - we ended up skipping the wheels because I have carpet in the playroom. We used a countersink drill bit to be able to place wood plugs on top of the screws, and sanded the whole thing with a power sander after finishing.
Estimated Cost
$80
Estimated Time Investment
An Hour or Two (0-2 Hours)
Finish Used
Valspar Semi-Gloss paint + primer in Bright Red
Recommended Skill Level
Beginner