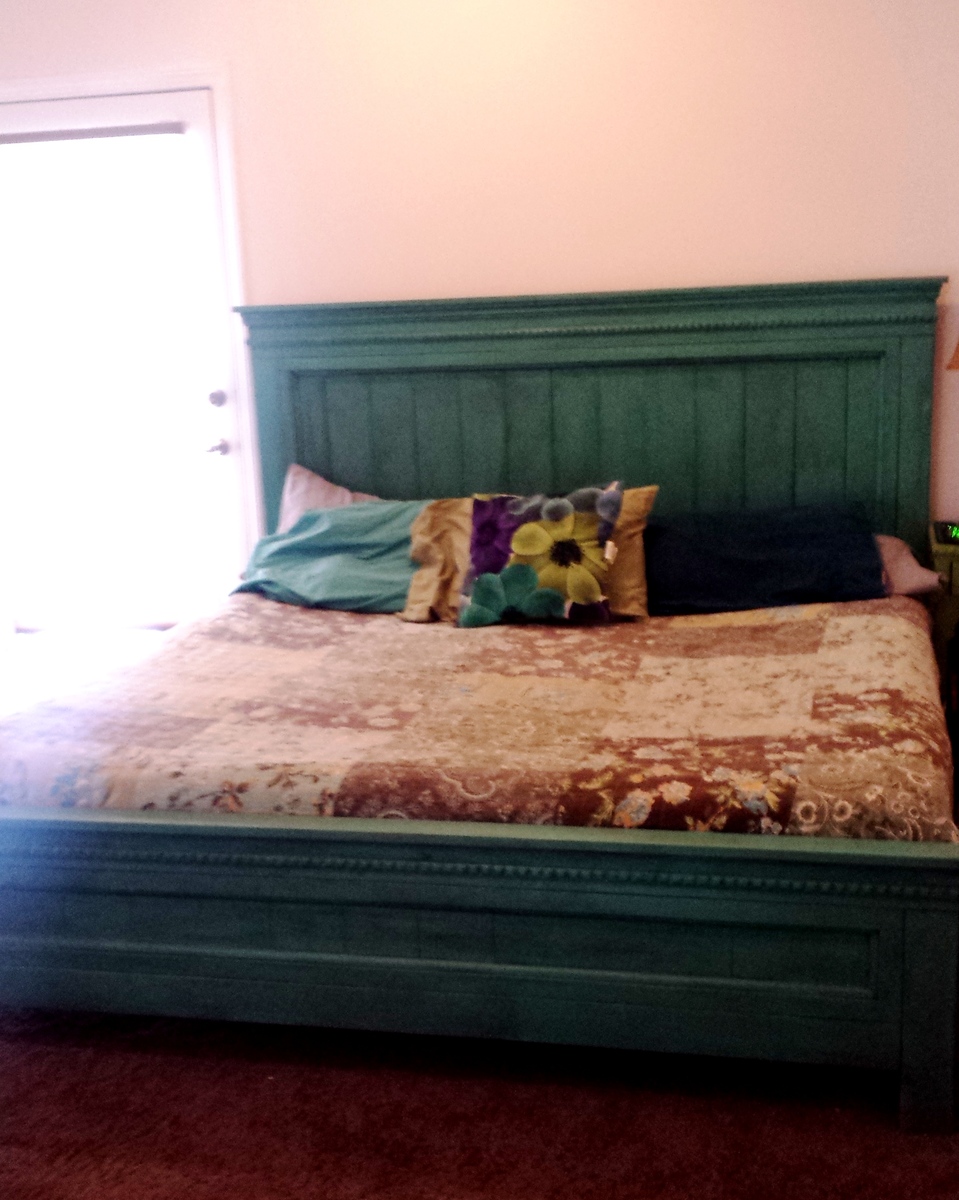
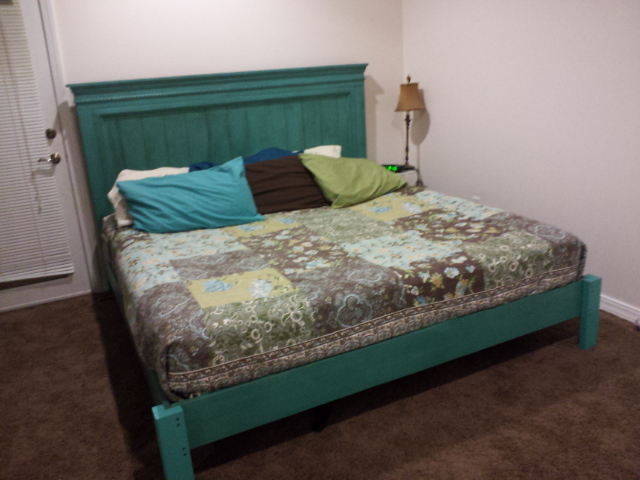
I built this!
![](/sites/default/files/diy-platform-bed.png)
I have no idea how much time I spent on this, but it was worth it!
This was a simple coat rack I decided to make with some random scraps of wood I had from previous projects. The only out of pocket costs for me was the hooks!
***update****
I decided to make a kid friendly version as my kids were creating quit the pile of courts and backpacks when they got home from school, mostly because they couldn't reach the adult one! With some left overs, problem solved!!
Tue, 05/07/2013 - 08:16
Exactly what I was looking to make without getting a router involved! What kind of moulding is that?
I took the original plans from the Farmhouse Table - Updated Pocket Hole Plans - and I modified it so that my table could be countertop height and join up to my counter - like a modified breakfast bar, so this table it countertop high, and is also more narrow and alittle longer. I can easily pull it away from the wall and sit 6 people around it. It is now my favorite place in the house!
I was looking for something for my son's room that would last him until college, so I adapted your plans and added hooks and a bench and stained it. Bookends are all we are missing to make it perfect. He loves it, and I don't think he will be able to break it. I could use a suggestion for anchoring it to the wall, though. Thank you for the great, easy-to-follow plan!
Tue, 06/27/2017 - 18:30
Your bookshelf and bench look really nice and sturdy! I'm sure it will hold up for many years. As far as anchoring it to a wall, I have had luck with anti-tip furniture straps. I would use several and anchor them right to the studs. I also use long, self tapping construction screws instead of the screws that come in the package.
Used scrap material from a new development near me. (Was given permission by developer). Liquid nails and Brad nailer used to assemble the 1x12’s. 1x2 and shoe moldings to clean up edges. Chalk and white paint to finish it up. I already had the coat rack so it literally cost me nothing to assemble.
I am completely redecorating my home, Out is the furniture that no one was allowed to sit on or go near. I wanted furniture that we could use. I have 2 boys so I wanted it casual, fun and durable. Loved the farmhouse style and loved this table. It is made from pine, sanded and stained on top. I used Minwax provincial stain. Bottom is painted with black furniture paint then distressed. We purchased the legs from Osborne Wood Products.
I had a lot of fun with this project! It was quick, and I already had everything I needed on hand. I have been wanting to get more practice with my jigsaw and this project was perfect for that. I used one cedar picket for the whole box and still had some left over. I added a burlap bow and made the tail with some extra pieces of rope and my glue gun. It was a breeze!
Tue, 03/31/2015 - 06:47
Excellent! I doubt that I will make it in 2 hours, but I'll try. I really like this kind of product, especially given the fact that my wife loves in flowering :). By the way, if someone need help in writing of any type of works, you can visit my website http://www.trusteddissertations.com/ and get a decent discount.
Have a nice day!
I needed something to organize our hockey gear so I customized this mudroom idea. It turned out great and makes me feel better when I walk in the garage. Everything must have a place!
I wanted sturdy seating for my patio. Ana White had the perfect plans for my L shaped seating and coffee table. It was simple to put together and we love it!
With a new baby on the way, my husband, Steve and I had to move our 2yr old son out of the nursery and into his big boy bedroom. After casually looking at storage beds and falling over in shock at the prices, I came across Ana’s plans for the storage bed. Knowing that Steve is extremely handy but had not attempted to build furniture before, I started talking him into building this bed. He was sold the moment I told him that we would save close to $2400 by building it ourselves. This was a longer than anticipated project mainly due to Steve’s full time work schedule, my inablility to handle stain fumes, allowing a toddler to “help” build his bed and working around said toddler’s nap schedule. We modified Ana’s plans by adding some trim to the cubby hutch, omitting the doors on the small hutch and sizing everything to a full size bed. We also omitted the shelves on the storage headboard since we weren’t going to use them with the side towers. I am absolutely in LOVE with the final result and have a long list of other projects that we will be building in the near future.
This table was so easy and so much fun, even for a beginner. In fact, it's so easy I've built it three times. The latest one is my favorite. I think it's the beautiful blue color...
Sat, 05/11/2013 - 15:05
The finish looks really simple but effective, reminds me that I really should finish my other halfs kitchen island I made in February!
Started with the classic bunk bed plan. Changed most of the 1x4s to 1x3 except the boards at the mattress level. Added an additional rail up top to make safer for my young children. Also added 1x3s on both ends of the head/foot board to make the legs a litter sturdier and to widen the frame as our mattresses turned out to be a little wider than standard. Took out the built in ladder and matched the rest of the rails. Then added detachable stairs to be able to remove during the day and make it easier for my girls to get up and down. Made a few mistakes along the way (when you write 57.5 inches and transfer 52.5 inches to your cut list you eventually have a really bad/sad day), but had a ton of fun!
This great plan!! Thx Ana!
This locker cabinet was my first build and I learned a ton. For example:
1. Use the Kreg face clamps while drilling into the Kreg Jr.
2. Buy straight wood.
3. Buy wood that is not warped.
4. Do not try to buy wood with grouchy kids in tow.
Are you seeing a theme? Yep, your project will only be as square and perfect as the wood you buy.
I modified the locker plan to include apothecary-style drawers for our cell phones, sunglasses and chapstick. I also drilled through the back of one of the drawers to turn it into a charging station for our cell phones.
The locker has been super useful so far and is such a great way to keep my kids' backpacks and lunchboxes organized. The baskets are designated for my purse, stuff I need to return to stores, the dog's leashes, and library books. It's so nice to have all this stuff near the front door and never wonder where any of it is!
Grandpa modified the simple changing table to match the rest of our nursery furniture.
1/2" oak ply, cedar fence post, 1/4 inch oak ply
First brag! I had a little time to play in the garage and decided to join the scrap wood bandwagon. The wife loves the bunny box and now the mother-in-law NEEDS one. Back to the garage I go...
Taken from the Modern Outdoor chair project and added a back. Then decided that I love the andorak style chair arms and thus the Andrmodern chair was born..
Mon, 08/03/2020 - 09:02
I’d love to know how you made the changes, love it!
Thu, 03/18/2021 - 09:20
Could you please share how you added the back and arms to the modern chair plans.
Built for my daughter but it came out so well, kept it.
I redid this whole room for less than $600! Make sure you take your time with cuts and fitting. I did this with my father in law (my daughter even got to help out!), and it's less than perfect due to some rushing! More details on my blog.
I also couldn't find any 4x4's. Instead of doubling up on 2x4's, I just used one. That allowed me to change the tops of the head/foot boards to only 48" instead of 50 1/2. You can get enough for a head and foot board out of one board this way.
After looking at a TON of bunk bed ladders online, I designed my own. Just some leftover 2x4's. The sides are 47 1/2 inches long, and the rungs are 13 1/2 inches long. It's screwed to the bunk bed from the back so you don't see the screws.
I'm turning my messy sewing room into an organized craft/guest room, so I made a murphy bed to conserve space. I used corrugated tin on the the face of the bed so that I can use it as a magnet board while not in use as a bed.
Fri, 05/17/2013 - 09:54
The estimated cost is $100, but the hardware linked from the original plan was over $300. Do you have an alternate method of mounting this?
Fri, 05/17/2013 - 11:23
I think that link was a suggestion if you want an assisted lift/lowering system, and that hardware is part of what makes regular Murphy beds so expensive. I just used door hinges--3 for $8. It's not that heavy to lift and lower the bed, in my opinion.
Fri, 05/17/2013 - 11:40
Thank you for your reply! If I make this project, I think I'll try the door hinges. It won't be frequently used (a few times a year) and I'm pretty sure we can handle the minimal weight for those few occasions.
P.S. I really like the styling with the wood and corrugated metal, it looks sharp!
Fri, 06/28/2013 - 20:02
thanks for sharing the murphy bed. have been looking for a space solution for my daughter's bedroom. the corrugated tin look sharp in this project--my daughter would like the corrugatged tin as well--except for hot pink stain on the cabinet.
anyone know where to get hot pink stain?
Sun, 09/08/2013 - 20:58
Does anyone have any suggestions on how to bring it up off the floor some?
Wed, 02/10/2016 - 04:24
Paint tin with dry erase or chalkboard on one side for daily notes?
Comments
Ana White Admin
Tue, 10/05/2021 - 12:02
WOOHOO!
That is gorgeous, you did it! Thank you for sharing:)