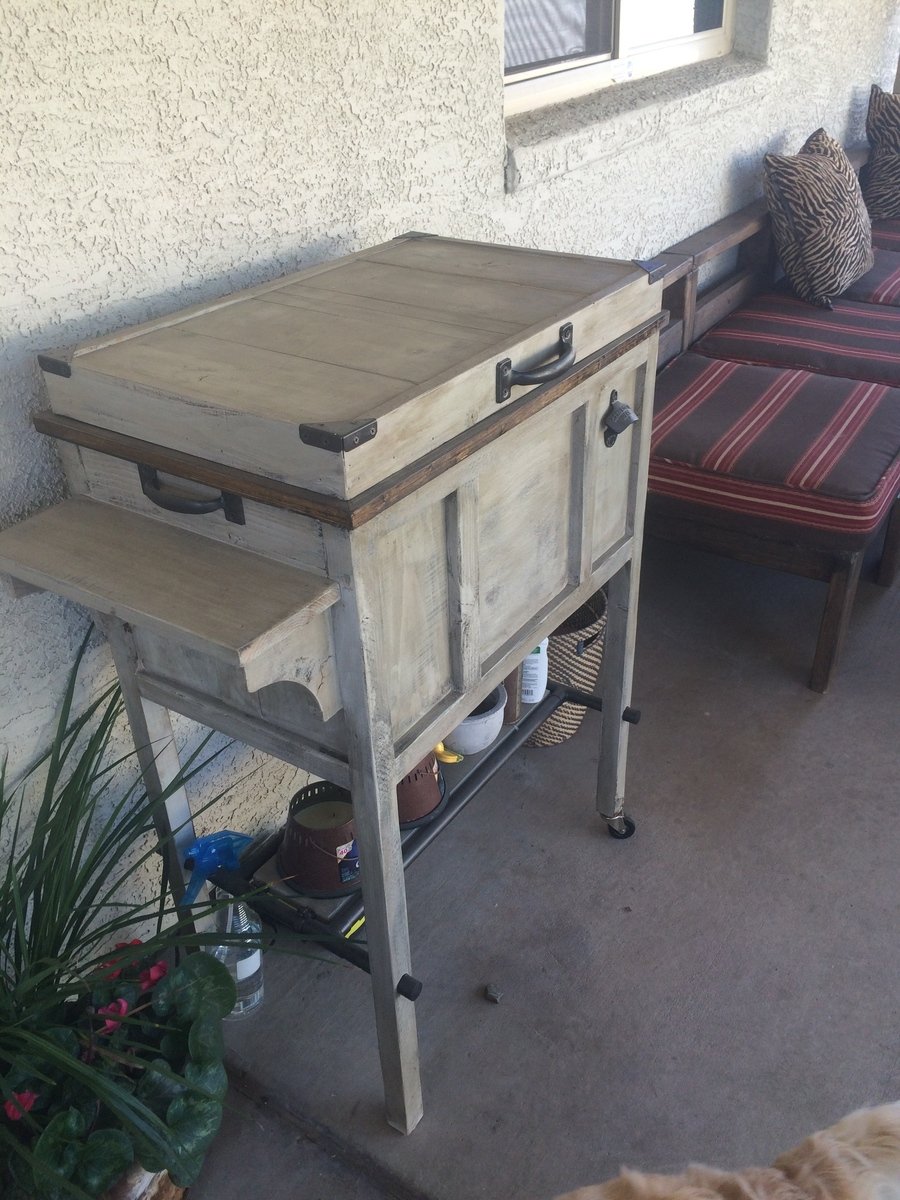
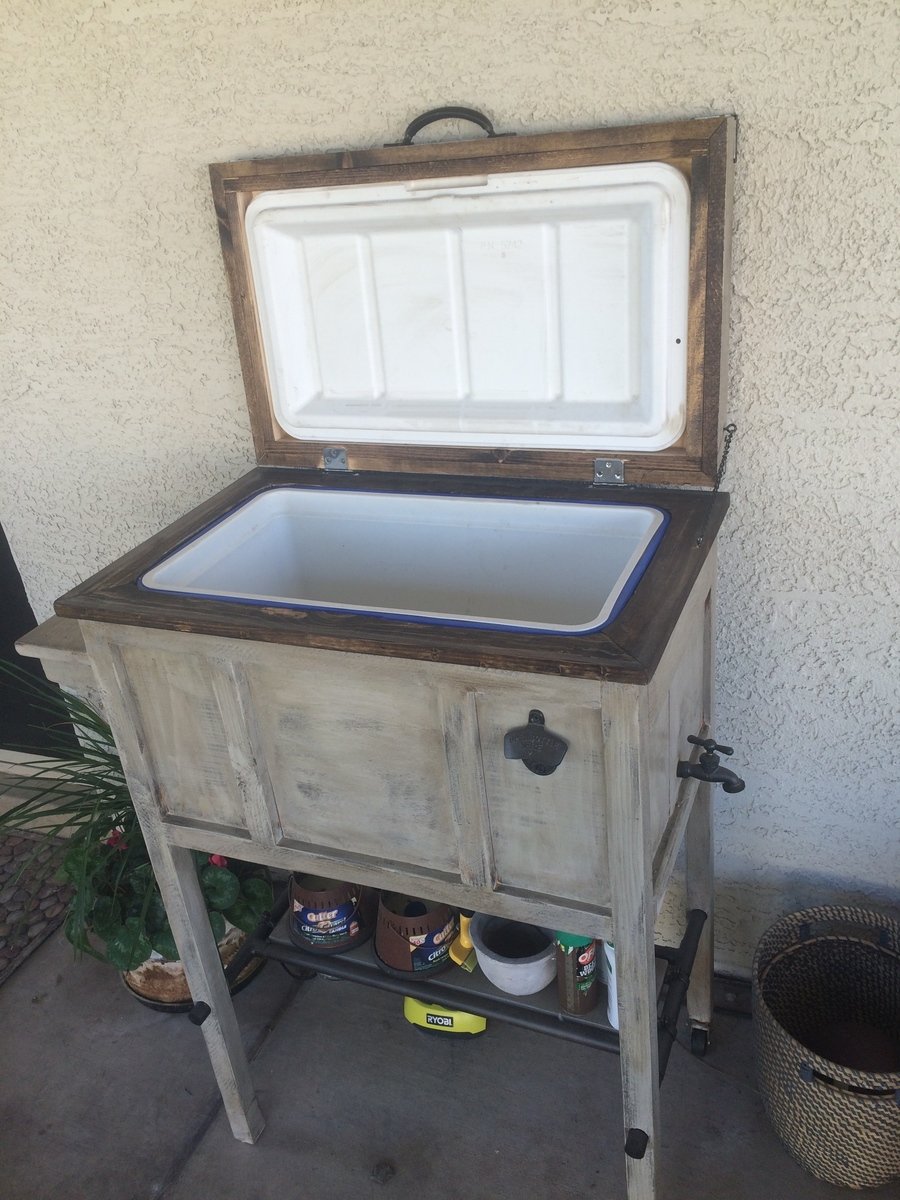
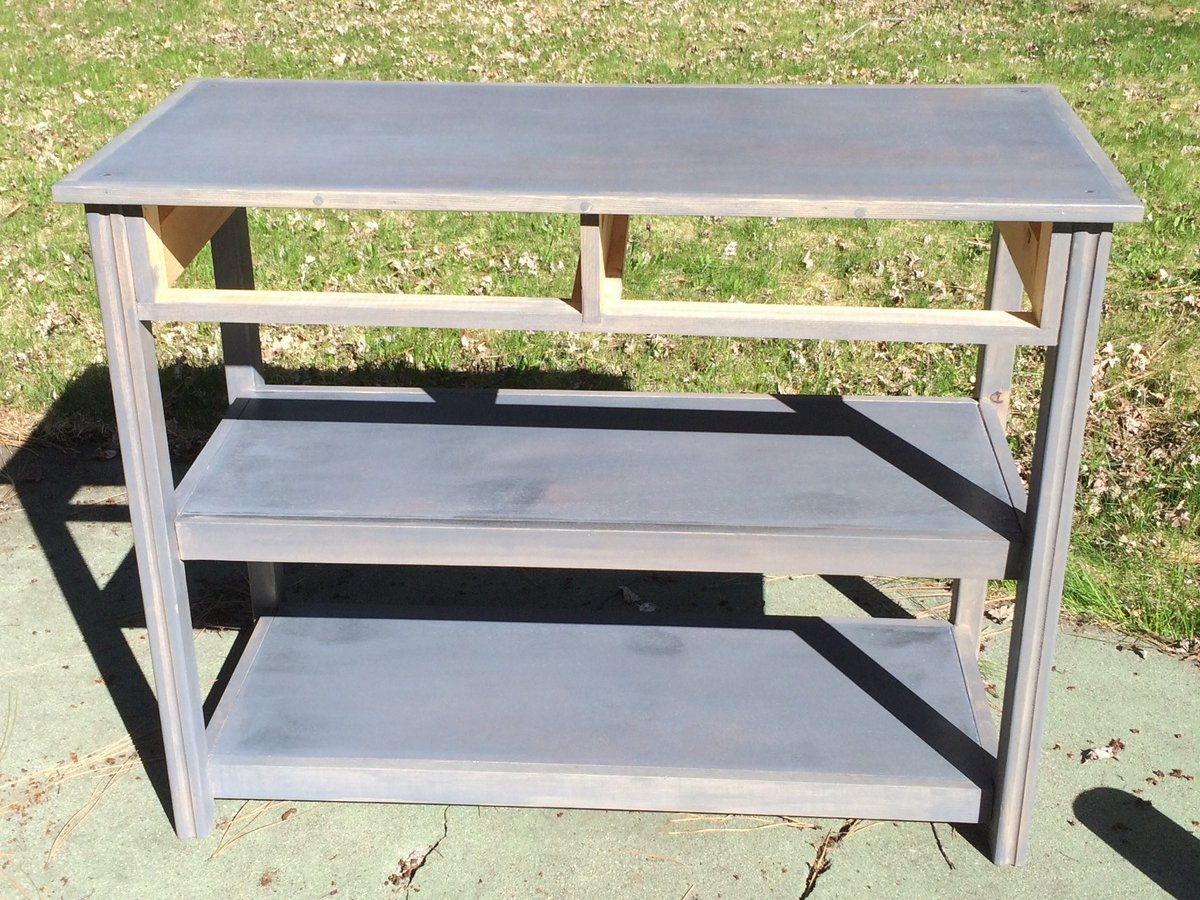
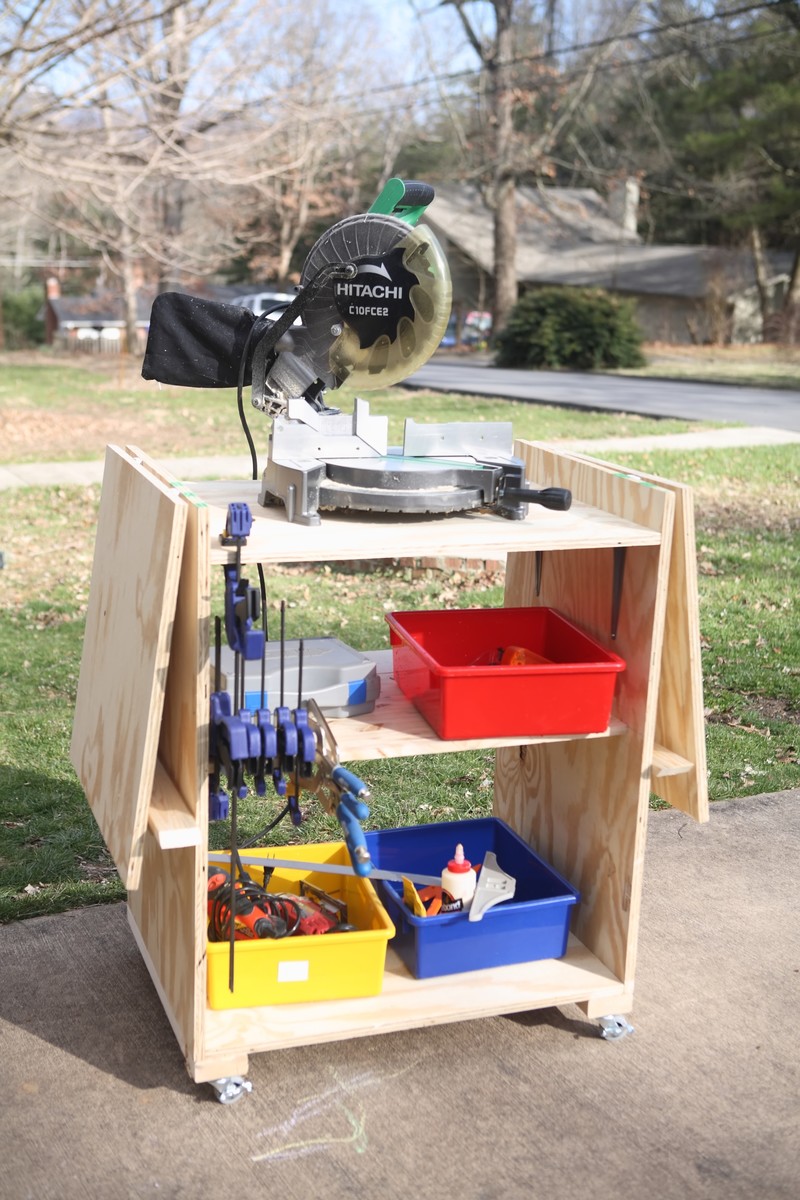
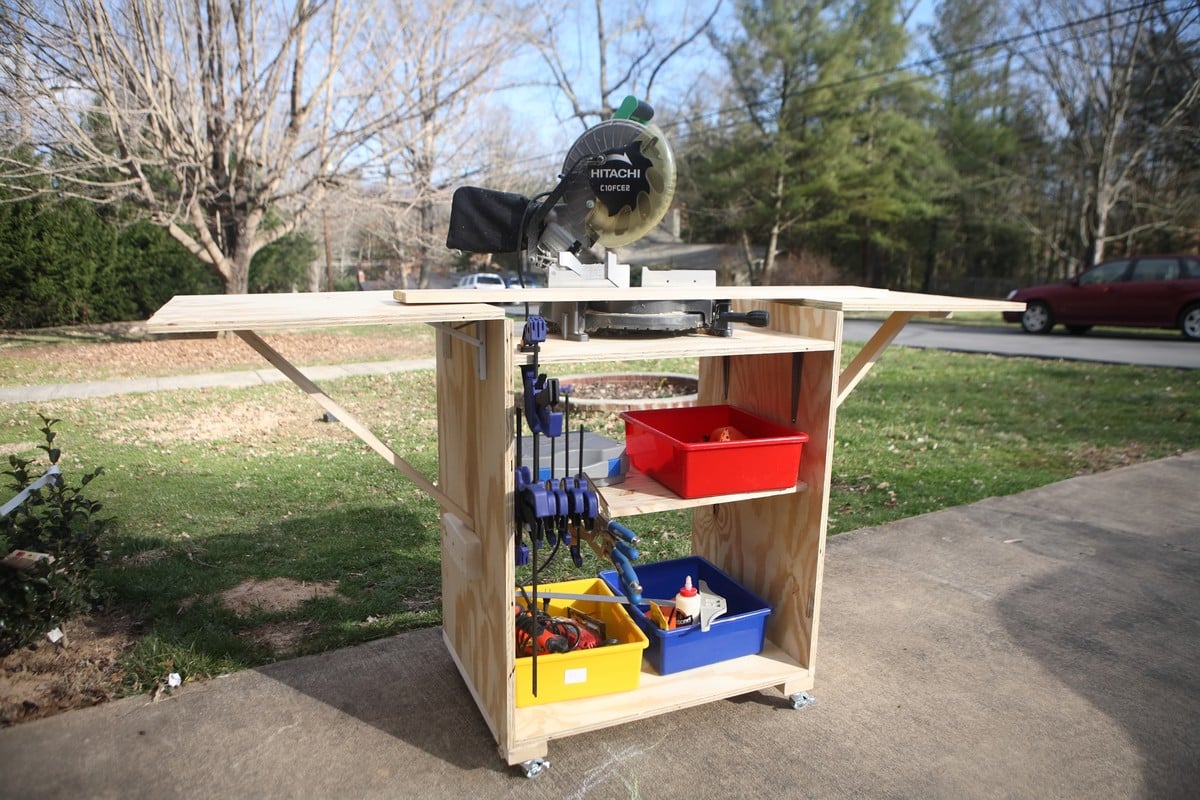
Community Brag Posts

Rebecca Media Center Console

Submitted by shastacoke on Wed, 07/18/2012 - 10:18

I have been needing an entertainment center for so long. When this plan popped up, my husband and I went into action. We designed this piece a little differently though. For one, the plan is too narrow for us and our tv-so our console is wider but shorter-to save on costs. Another note-we needed a place to put our computer so it can charge without our twin boys getting ahold of the cord. You can see that feature on the lower left hand corner. I also used a picture in a very well known catalog and I used the picture to get the stain just right. This might just be my favorite piece so far. I will be adding the bookcases and hutch to this. I am also in the process of adding 2 doors to this console. They needed to be stained before I could add them though.

Estimated Cost
$150
Estimated Time Investment
Weekend Project (10-20 Hours)
Finish Used
I used Minwax Ebony Stain. Then I used 240 Grit sandpaper and sanded just a tiny bit-it seemed to give the piece a more matted look and it exposed the grain more. After that, I used Martha Stewart's Copper Penny Metallic Glaze. I brushed the glaze over the parts where I wanted to make it look aged. I'm not a fan of painting hard woods or you could just paint it, then wax it and then use a copper paint. I wanted to be able to see the wood grain through the stain-so I used stain and did it this way. After the glaze dried, I used 1 coat of semi-gloss polyurethane.
Recommended Skill Level
Intermediate

Comments

shastacoke

Wed, 07/18/2012 - 10:22

I also wanted to note-we will be adding bead board behind the middle part of this console. We are leaving the other 2 backs exposed because I don't have a router to notch out holes in bead board. :)

redhead_61

Fri, 10/19/2012 - 12:14

Yours looks so great. Glad that our plan could inspire something for your needs. Looks great. I love the design.

shastacoke

Fri, 10/19/2012 - 12:43

Thank you!! I saw the stain at EA and since I don't like to paint furniture I stained it black and took some copper paint from Martha Stewart and 'aged' it. I love the outcome much better than painting and waxing.

Dog Crate

Submitted by mdgervais on Thu, 05/08/2014 - 08:44

Recently I added a family member and his name is Myles. He needed a home so before we picked him up I built him one of these for him to grow into. The one pictured is actually the second one I built that was built for a friend. I followed the original instructions. I used a couple different bits of material. My table top is 1x4's and for the sides i used bead-board. I painted it an off white with eggshell finish. The table top is stained with Minwax Ebony stain. I love how it turned out and most of all my puppy enjoys it as well.

I left the bottom open. The dimensions in the plans make it so you can set the crate right on top of a crate replacement trey series 700 from PetCo. This makes it very easily to clean by just lifting the crate off the trey and hosing it off and also prevents the wood from absorbing any liquids.

Built from Plan(s)
Estimated Cost
$125
Estimated Time Investment
Day Project (6-9 Hours)
Recommended Skill Level
Intermediate

Old pallet wood, wine holders

Submitted by Anonymous (not verified) on Mon, 08/08/2016 - 16:39

I had to make the back legs longer, since I used all pallet planks for this, threw me off a bit. And I made the arms an extra 5" long to notch in wine glass holders. If I do it again, I'll angle the back a bit more, but as is its pretty great. Guess who picked pink?

Estimated Cost
Free pallet planks and screws, $27 gallon of paint.
Estimated Time Investment
Weekend Project (10-20 Hours)
Finish Used
Satin latex outdoor paint.
Recommended Skill Level
Beginner

Farmhouse Potting Bench

Submitted by jhunch on Mon, 05/25/2020 - 10:58

We had a pile of old wood and an old fence in the backyard that I wanted to repurpose. I had a spot along my house in the back yard that was empty, that really needed something. Thanks to Ana's "Farmhouse Potting Bench" tutorial and plans, we got inspired. We changed the measurements to make sure we could incorporate an old stained glass window that I've had, just waiting for a purpose. We also changed the measurements to accommodate the different sizes of wood that we had on hand. Our project took a much longer time, because of all the measurement changes and wrapping our head around how to mount the window, but it was worth it. We're really happy with how it turned out.

Built from Plan(s)
Estimated Cost
very little. All material on hand
Estimated Time Investment
Day Project (6-9 Hours)
Finish Used
special walnut
Recommended Skill Level
Intermediate

Rustic X Console without the X

Submitted by HR Dad on Thu, 07/19/2012 - 14:22

My wife wanted a sofa table near our sliding door going outside to backyard / pool. She was looking online and found some cheapo "made in China" types at some of the big box store sites; yuck.

I had to come home from our family vacation sooner than the wife and kids which meant I had 12 days at home alone to make some sawdust. The wife got her sofa table which she really digs. My boy got a bed (different post) and daughter got her room painted.

I didn't add the "X" feature at the ends as I like the console better without them. Also spray painted some corner hardware; L brackets and lag bolts a textured black / copper spray, but didn't add them; wife liked the table without the added decor so it stays as is.

Built from Plan(s)
Estimated Time Investment
Day Project (6-9 Hours)
Finish Used
Minwax Grey & Polyurethene
Recommended Skill Level
Beginner

Comments

MichelleC

Sun, 09/30/2012 - 09:59

I love this console because it looks good either with the x's or without! Yours turned out great and I'm sure your wife was ecstatic at your accomplishment in her absence!!

Herb Garden Planter, easy to build, I can't believe how little it costs to make!

Submitted by Sue Hill on Sat, 05/10/2014 - 15:26

I'm just in love with all the Ana White projects. I tackled the faux fireplace mantel, made quite a few toolbox planters so this little box was easy. My biggest mistake was not verifying the thickness of the wood pickets I used. I couldn't find the cedar ones at Home Depot or Lowes so I used pressure treated pine pickets, on sale for $1.16 each! What I didn't realize until I was putting the first box together is that they were 5/8" thick instead of 1/2". I questioned my woodworking skills when everything didn't fit together correctly, but soon figured out the problem. Since I had cut out two of them together, I finagled the design slightly to be able to use the cut pieces. You'll notice the end pieces are on top of the bottom piece of wood on certain ones. I continued to build a third box and it went together smoothly. Wow, I wish that I had a nail gun! I used 1 1/4" exterior screws and pre-drilled the holes. I have three more pickets left and I'm going to run to Home Depot to find some galvanized nails for them. I wish I could find some cedar pickets, the pressure treated pine is rough to work with. I also printed out "HERB GARDEN" on my ink jet printer, then traced the letters using carbon paper. I outlined, then filled in the letters with a Sharpie paint pen. It came out rustic looking because the wood was rough. I was hesitant to sand the wood because I didn't want to breathe in the sawdust. I put a white wash finish on the stenciled box. The other ones are still unfinished. Looking through my stash of hardware, I found the cutest fork and spoon handles, saved from an old birdhouse. I put the picture on my Facebook timeline and a friend sent me a message asking to buy it for her daughter's birthday. I'd better get busy making the next three.

Estimated Cost
$2 or more depending on the handles used.
Estimated Time Investment
An Hour or Two (0-2 Hours)
Finish Used
White washed with white DecoArt Patio paint.
Recommended Skill Level
Beginner
Seasonal And Holiday

Outdoor Sectional

Submitted by Anonymous (not verified) on Fri, 08/12/2016 - 14:24

We were inspired when we saw Ana's Outdoor Sectional on Pinterest and after checking out the site we decided to build ours using the modified plans with 2 x 4s as it was much more cost effective. It was a really fun weekend project for my husband and I and not difficult at all. 

Double Kayak Rack

Submitted by JamieLynn on Tue, 05/26/2020 - 09:44

I couldn't find a plan for this but found a picture of what I was looking for. It's a little too big but works. Took about 3 hours to make. Used mostly scrap wood.

Estimated Time Investment
Afternoon Project (3-6 Hours)
Recommended Skill Level
Beginner

Clara Play Table

This table was super easy to build... it took me only 3 hours! I opted to use hardwood poplar 2x2s for the legs because furring strips frustrate me to no end (bowing boards, splitting wood, etc.) and the poplar also made it sturdier. Had I used furring strips, this table would have only cost me $15, but I opted for the more expensive route... but still, $35 ain't bad!

Also, I used the Kreg Jig for this project, set on 3/4" with 1 1/4" pocket hole screws - EXCEPT when I drilled the base frame onto the table top. I used 1" pocket hole screws for that, just in case the 1 1/4" screws were too long and came poking out the top of the table.

Click my blog link for the complete play-by-play!

Built from Plan(s)
Estimated Cost
$35.00
Estimated Time Investment
Afternoon Project (3-6 Hours)
Finish Used
Primed with Zinsser 3-in-1 Primer, then painted with 2 coats of glossy white.
Recommended Skill Level
Starter Project

DIY Stuffed Animal Zoo Tower

This is my second stuffed animal zoo tower.  This time around I used cheap 2x2 furring strips.  Not the best pick of lumber, but it gets the job done well. :)

Built from Plan(s)
Estimated Cost
$30
Estimated Time Investment
Afternoon Project (3-6 Hours)
Finish Used
Watco Danish Oil (Medium Walnut)
Recommended Skill Level
Beginner

COVID 19 end of year home school project success

Submitted by Anonymous (not verified) on Sun, 05/31/2020 - 07:10

Great build. Hubbie extended to couch one seat and added legs for additional support. We painted after assembly and the x’s were a PITA to paint. Love the end result. Now to pick coffee table plans!

Estimated Cost
300 not including cushions
Estimated Time Investment
Weekend Project (10-20 Hours)
Finish Used
Sherwin Williams Caviar exterior paint and spray poly
Recommended Skill Level
Intermediate

Custom Floating Shelves

Submitted by Anonymous (not verified) on Tue, 02/20/2024 - 08:29

Small shelving unit for a home office also used as a guest bedroom. Made by my husband.

American Girl Doll Trundle Day Bed

My neice wanted a bed just like hers for her American Girl Doll. I did manage to find one, but I also found plans here! Thank you!! :) So I modified the plans a little bit to add the back of the daybed. She loves it!

Estimated Time Investment
Afternoon Project (3-6 Hours)
Recommended Skill Level
Beginner

Double Pedestal 6' Farmhouse Table

Submitted by g82martin on Sat, 05/17/2014 - 20:38

Farmhouse table made from distressed (worm hole) maple.

My neighbor was able to get me the 5/4 distressed maple for about $2/bd ft - I ended up buying 100 board feet and had plenty leftover. The finished board feet for this project was about 60 if I remember correctly. So the $200 was the bulk of the expense. The only other costs were sand paper, I bought a Kreg Jig, screws, Minwax Marker, paint, stain and urethane (much of which I already had).

It came out better than I anticipated. The antique white finish was not difficult at all.

Tip - When following the instructions for the finish here, I applied the first coat of urethane with a brush almost immediately after applying the Minwax marker to all of the sanded edges. I did this in haste, but ended up with some unexpected results that really added a nice touch. The stain from the marker incorporated a bit into the urethane as I brushed it giving it an antique, yellow hue. At first I thought I made a big mistake, but it turned out to add a really nice look.

Built from Plan(s)
Estimated Cost
$250
Estimated Time Investment
Week Long Project (20 Hours or More)
Finish Used
Antique White using Minwax Stain Marker - http://ana-white.com/2012/09/antique-white-using-minwax-stain-marker
Recommended Skill Level
Intermediate

Comments

g82martin

Mon, 05/19/2014 - 07:29

CSaintD - The top can be removed as I did not glue it. I set 3 dowels on top of each of the 2 legs so that the top would always lign up correctly if disassembled and reasembled. The stretcher could be removed, but would probably cause some damage to the finish as it was a tight fight when I finished it. The stretcher would be removed by removing the dowel pegs that I fabricated on each leg.

g82martin

Mon, 05/19/2014 - 08:26

I cheated a bit on the top. My neighbor who got me the wood works in a furniture reupholsery shop. He planed and joined the boards for me, which saved me a good amount of time. I'm confident I could have done this at home with my table saw, miter saw and hand plane, but what he did in 2 hours probably would have taken me 10.

bclute

Mon, 05/19/2014 - 08:06

Table looks great! Great antique finish on the base and your table top looks nice a smooth.

bclute

Mon, 05/19/2014 - 08:06

Table looks great! Great antique finish on the base and your table top looks nice a smooth.

KathrynK13

Fri, 01/01/2016 - 12:00

I love the table...but I wanted to ask about the booth?  Is that a church pew?  Did you make it?  Any tips for recreating it?

Lenaluv87

Fri, 08/05/2016 - 20:35

Love the dowels you added! Planning on building this exact table pretty close to your dimensions and have a very long church pew as well! Trying to decide between L-ing my pew and cutting to straigjy 6'. Do you mind sharing the dimensions of your pew? And how did you miter the pew?

Cottage Loft bed playhouse with stairs, lights and desk

Submitted by kadnetop on Fri, 08/19/2016 - 10:18

We took the loft bed plans and modified a bit for our daughters bed. We made it a little taller including the doorway. Instead of a ladder we did a set of carpeted stairs with entry to the underneath space through a door on the inside and added a light for a 'secret' hideout. Everything else were just some added features. We built flower boxes and added foam blocks with silk flowers. For the gable we used bead board. For the shutter we used small wood strips and the horizontal pieces are just the free paint sticks from lowes cut down. We then added wired in lights hooked up to her light switch. (she loves this part) Then he built a fold down desk that can be opened or closed for when they want to play in there. The school supplies we used the rod and tin buckets from Ikea kitchen area. Over it took about 6 weeks to do everything between watching the kids and working. Cost for materials and the extras came to a little over $600. 

Built from Plan(s)
Estimated Cost
$600-$700
Estimated Time Investment
Week Long Project (20 Hours or More)
Finish Used
White color= Behr -Polished Pearl (we matched it to annie sloans Old White)
Green trim color- Valspar- green trellis
Recommended Skill Level
Intermediate

Modern Adirondack

Submitted by Anonymous (not verified) on Mon, 06/01/2020 - 14:55

Lots of room for improvement but I'm pretty excited for my first time following plans.

Thanks, I love your videos and have learned a lot.

Estimated Time Investment
An Hour or Two (0-2 Hours)
Recommended Skill Level
Beginner

Modern Farm Bed

Submitted by Anonymous (not verified) on Mon, 02/26/2024 - 10:20

Only medication - cut 8” off the headboard to fit in our Maverick for transportation to Dallas. Stain is half minwax special walnut and half early American with dark minwax paste wax finish.

Built from Plan(s)

Daughters Desk

This was one of my first, bigger projects. It was so easy! I still need to finish the trim, but my daughter loves it as is!

Estimated Cost
20.00
Estimated Time Investment
Afternoon Project (3-6 Hours)
Finish Used
paint
Recommended Skill Level
Starter Project

Comments

Back