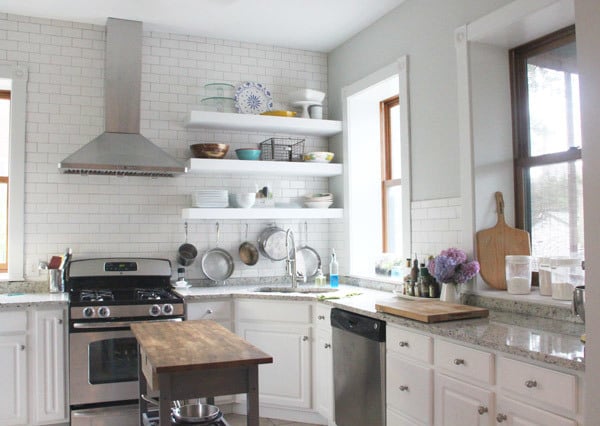
When we recently bought our 150+ year old house, we were pretty happy with just about everything (not stopping us from coming up with projects!) except the kitchen. This kitchen hadn't been updated in about 15 years, had dark brown walls, boring square white tiles with white grout, and TONS of cabinets. Everywhere. I felt like the walls were closing in!
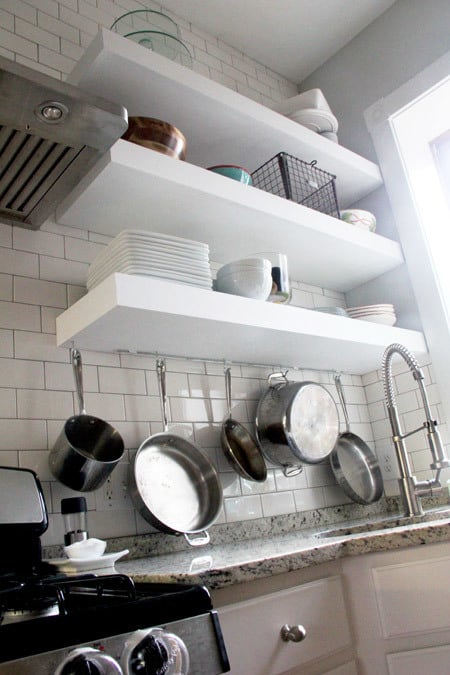
So before we ever signed a piece of paper I had a vision of open shelving. Wide, white floating shelves to put our every day items at arms reach and display the few items we rarely use but think are beautiful.
I loved Ana's plans, but I needed these shelves to hold 12 dinner plates, 12 bowls, 12 salad plates, 4 pasta bowls, and...well, right there that about 40 pounds of stuff. And the basic plans just didn't seem heavy-duty enough.
Enter our contractor, John, who I asked for help because, while they were my vision, they were his handy-work. My husband and I didn’t even attempt to build them on our own. John is a perfectionist and we knew he’d make this plan work…perfectly.
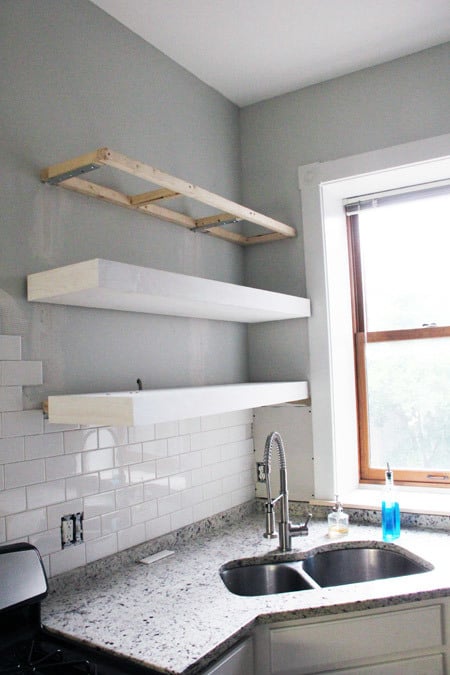
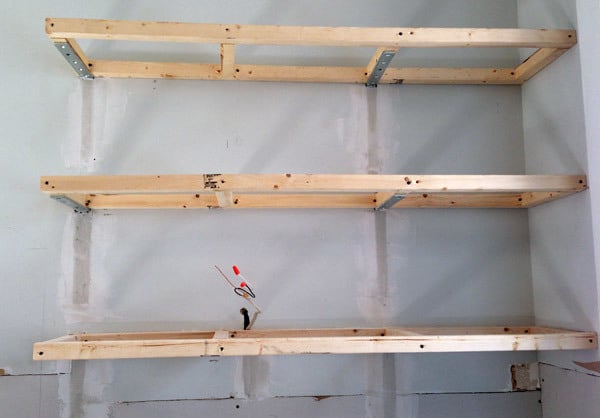
As usual, this was no sweat for John. To build the frames he used 2 x 2′s and secured them with 10 x 1 1/4″ angle brackets. During assembly, John made sure to position the center supports to match the wall studs in front of which the frame would hang. Once assembled, he removed some dry wall and attached the brackets directly to the studs.
We could store baby elephants on these shelfs, they wouldn’t budge.
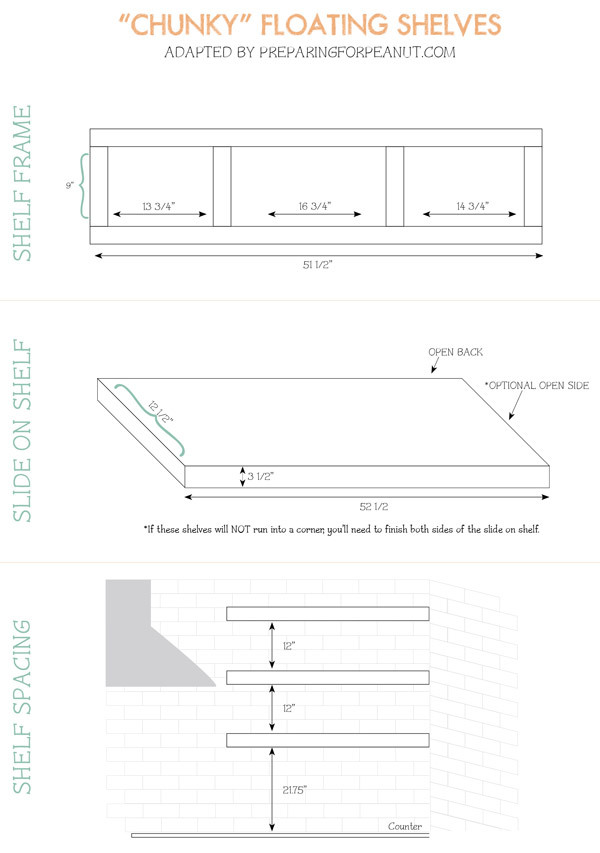
Since I knew what needed to be stored on that first shelf (our every day items), we used the measurements to equally distance the three shelves (not including the first shelf of course—it needed more space above the counter top). Then we sealed up the dry wall. Another help with support was butting the shelves right up to the corner, putting another screw in another stud.
We moved the lighting electric up for new under cabinet lighting—so easy pre-tiling.
For the actual shelves—I like to think of them as “sleeves”—John used 3/4″ sanded plywood for the tops and bottoms of each shelf, then 1 x 6 clear pine ripped down to desired thickness for the fronts and one side (the other side is against the wall, so was left open). The primed sleeves spent a few days on the screened in porch while I tiled around the frames, they were pretty heavy and very solid.
I’ve made an attempt to lay out the measurements involving our floating shelf project. These are to scale and give a good idea of how our plans differed from Ana’s.
We LOVE our shelves and get so so many compliments. The seemingly small and simple changes (tile, shelves, new window trim, paint, and soon flooring) made a HUGE impact and not that huge of a cost. And we don't miss the upper cabinets at all.
Thanks for the head-start and inspiration Ana!
