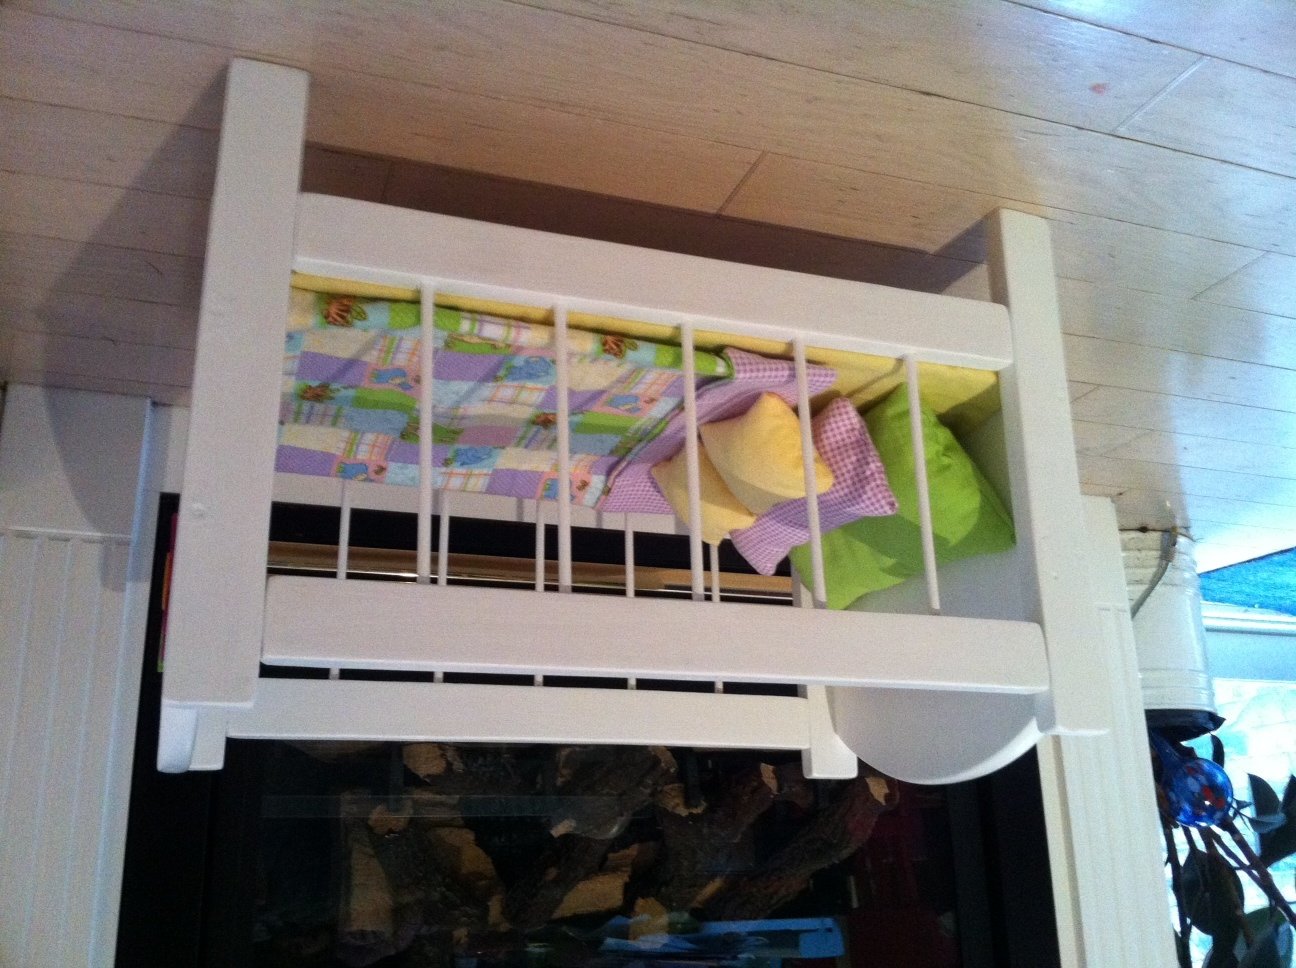
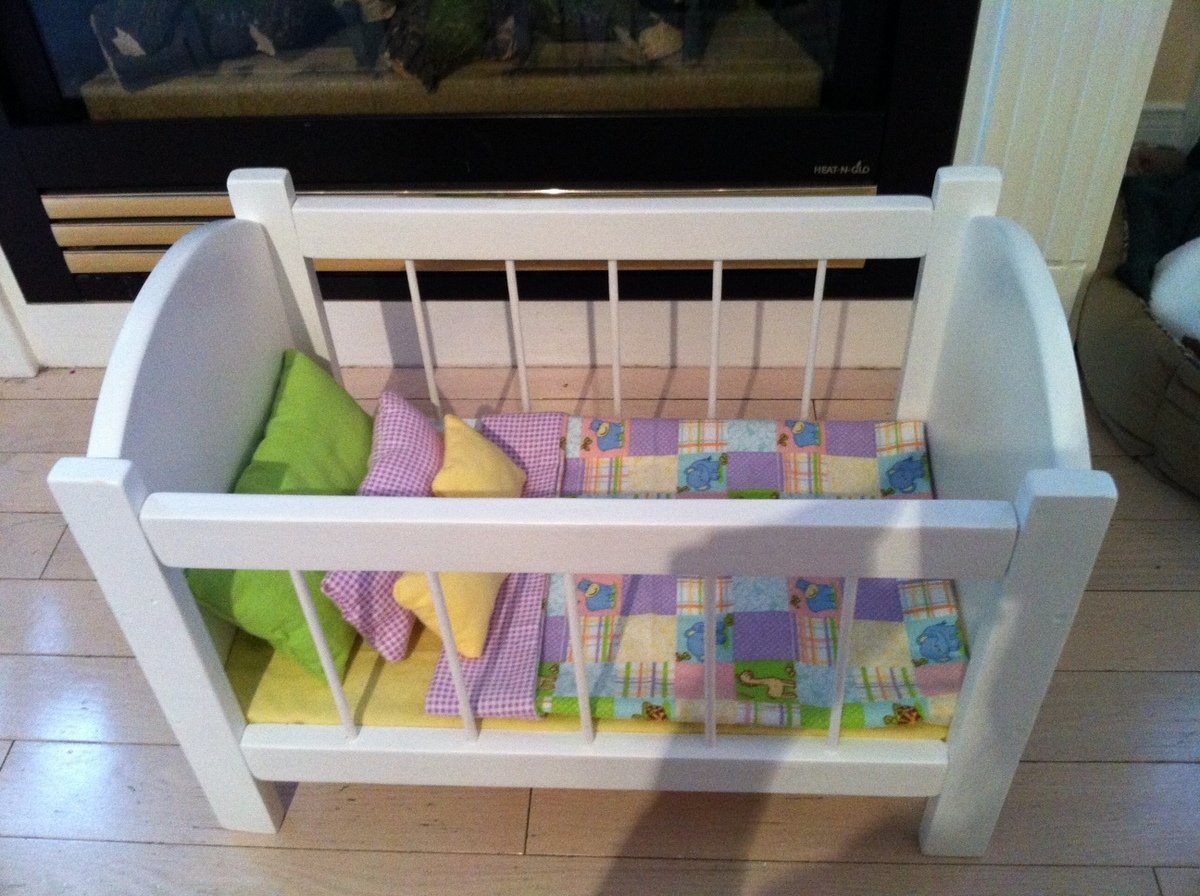
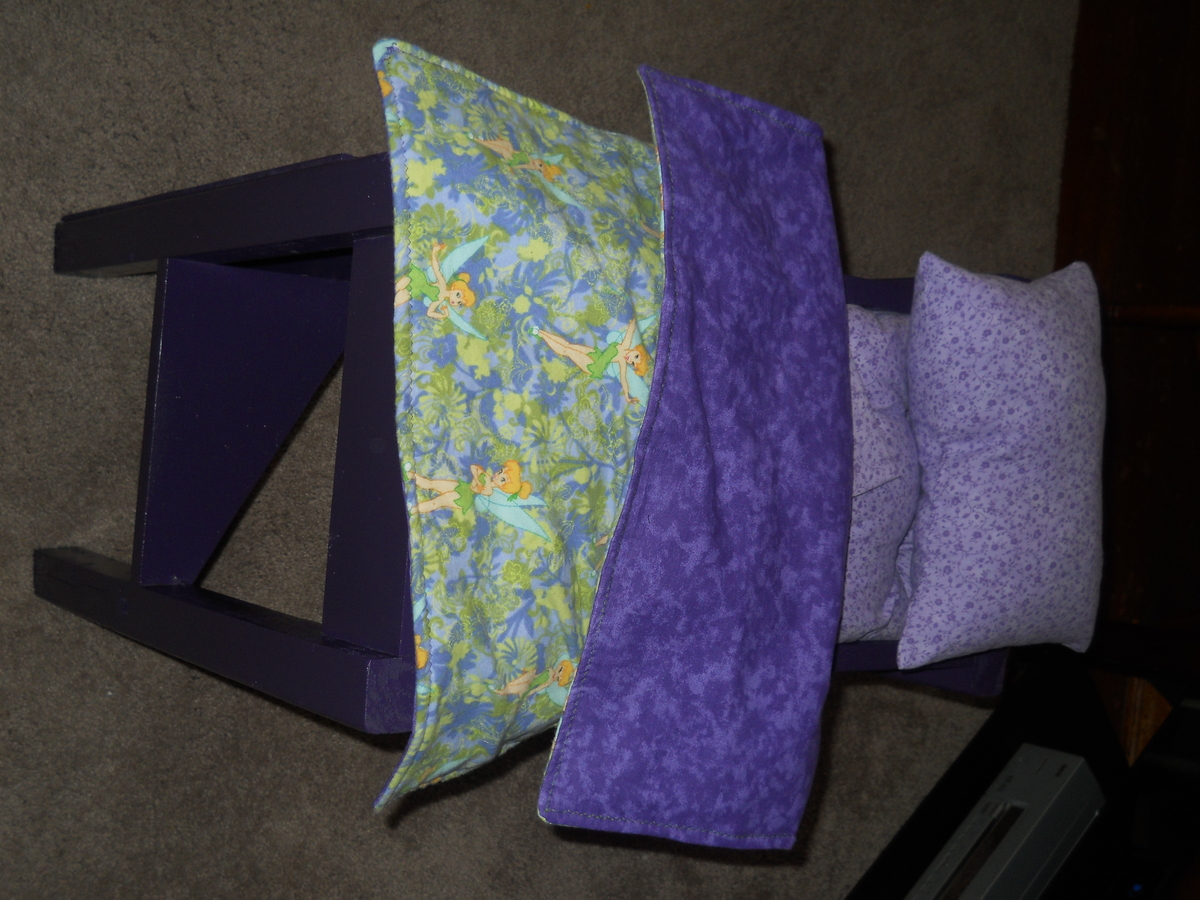
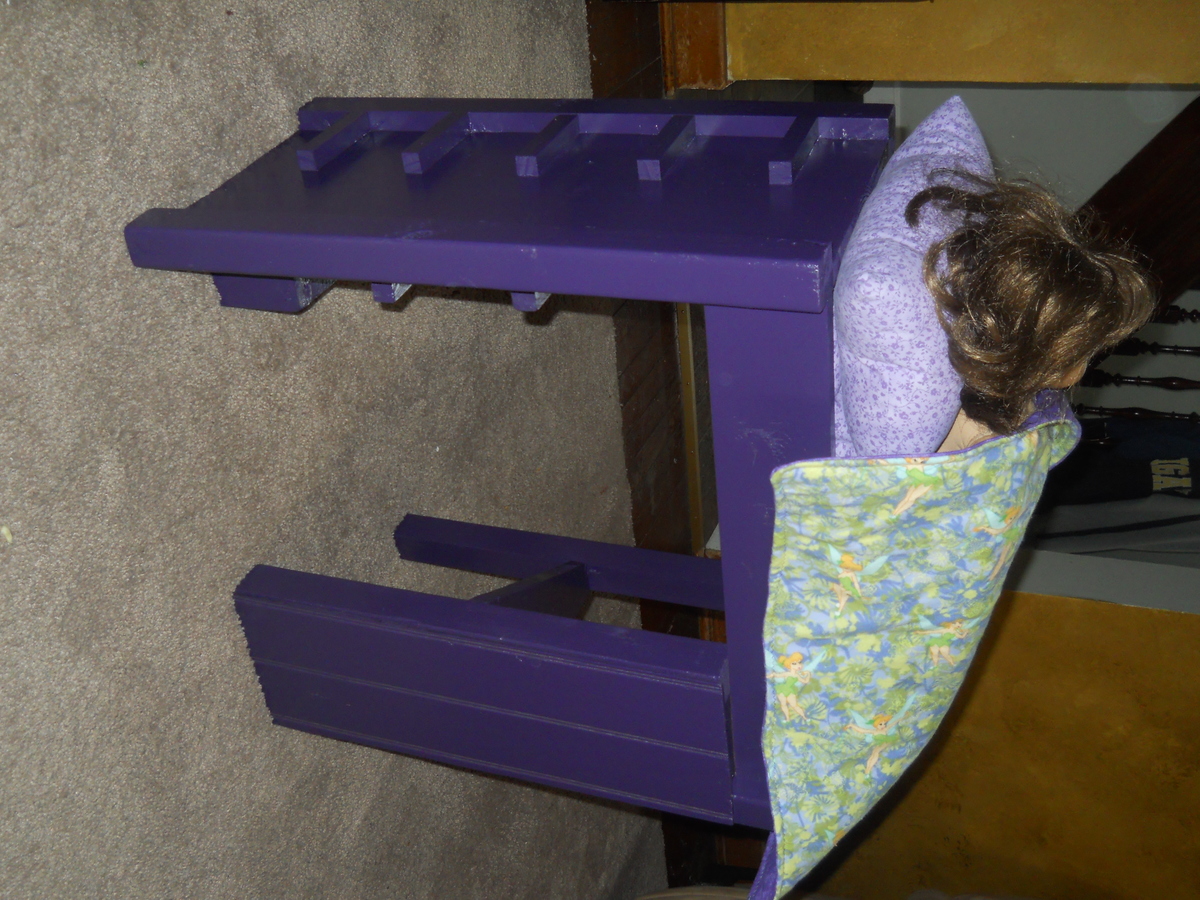
Diy fireplace reface and mantel
It's decorated now, but looks amazing without as well. The build plan was easy, definitely need to have some knowledge about woodworking. Just have fun and be creative.
Thanks for great Farmhouse bed plans. Easy to follow material list, cut list and instructions.
Followed your plans and it was so much cheaper than buying one online for over $300!!
Thank you!
Annie & Tony
My husband built this toddler bed for our 18-month old son, who decided very recently to become a proficient crib climber! He built it over the course of a about a month, just working on it on the weekends. He made a few changes to Ana White's plans. He followed the measurements on this blog as our toddler mattress was wider than her plans allowed for: http://janaebeth.blogspot.com/2010/05/pictures-of-bed-and-pictures-of-w….
Other changes to Ana White's plans? He bought 2x2's for the legs, and chiseled out spaces as large as what Ana had you attach a second smaller piece of wood to create. This made the legs more sturdy and attractive.
He also doweled all the headboard and footer vertical boards together to keep them from warping.
He used small nails, and made sure to tap them in with a nail setter, and then puttied them so you can't see any nails in his work. He puttied all other visible cracks and spaces in the wood, and then sanded it all down.
He sanded the corners of the footer down a bit so that they would be a bit more forgiving if our son ran into one of them.
My husband did make the arch for the bed. He did this marking dots on the highest and lowest points of the arch on the piece of wood we were going to cut. I held a piece of thin rope attached to a pencil a foot away, while my husband pulled it taught and drew an arch that followed his dots. He then just cut along the line very carefully, and sanded well.
He put all the slats that Ana recommended on the bed, contrary to some advice given in the comments section, as he wanted it to be as sturdy as possible. This was a good choice as they moment we brought the finished bed into our son's room, he started to jump on his new bed.
We are very happy with the finished product. We could have bought a cheap Wal-mart plastic ugly thing for the amount we spent on our beautiful solid wood toddler bed. So glad we went the DIY route. Thank you, Ana White!
I used reclaimed pallets for the top and sides of the table. I made a mistake though when making the trundle and ended up having to buy some tongue and groove pine. It ended up working out very well though. Inside the trundle I nailed a small rail and created a drawer for remotes and small items. This is only my second piece of furniture and I'm very happy with how it turned out!
My favorite build so far! This table is so unique and adds such a great touch to a chic space. This project is pretty inexpensive to build, as the biggest cost is the caster wheels on the bottom. They typically go on sale at Northern Tool though!
First time woodworker so it’s not the prettiest thing but looks good!
Gabe
It was time for my daughter to leave her toddler bed and get in to a real big girl bed... made with paint grade pine and finished in a white melamine finish. Likely the most solid piece of furniture in our entire house.
This was my first build. I obviously started small!
Please note due to the dimensions of the wood I used, I had to make slight changes.
The 1x2 measured 3/4"x1.5" so I had to add a 6th board on the stepping surface. Also, there is slightly more than 1/4" gap between the boards due to the width differences. Due to the dimensions of the boards, the height is only 3" instead of the original 3.75". The final dimensions are 17.5x 11x 3.
This step flexes when it is stepped on by an adult so if it is used by heavy people, adding a center support would be a good idea. Otherwise, it's perfect for kids or occasional adult use. The flexing may be due to the use of pine instead of a hard wood.
I don't like the look of the wood-filler filled holes, so next time I will try using wood plugs. I really wanted to stain this but it looked awful with all of the little wood filled patches glaring at me through the stain even though i sanded them and they took the stain okay.
All in all, it was fun and I learned a lot. I watched videos about how to perform different techniques such as using a circular saw and countersinking screws. I read our circular saw manual and used the saw successfully. I also turned a one hour project into an 8 hour project!
Wed, 07/09/2014 - 20:57
I think it looks great. :) I like that crisp white even if you weren't able to stain. I just completed my first project, too, and I'm ashamed to admit how long it REALLY took me. lol
Loved making this potting bench for myself. My hubby guided me on using the power tools & I thoroughly enjoyed getting my hands on those!! Such a sense of satisfaction & the beautiful pop of yellow brightens up that corner of my garden even when not in use. Great plans Ana, Thank you!!
This was a modified version of the Rustic Farmhouse console table. I didn’t want something quite as long, but half the length would’ve been too short. Wanted to use it as a buffet. So I made it a little longer than half the original design and it came out perfect. If I were to do it all over again, I would make the top an inch longer for more of an overhang.
Dark walnut stain on top and the rest was painted with Magnolia paint in Shiplap. Finished with clear satin protective finish. Absolutely loved how it turned out and can’t wait to start on my next project!
Made a few subtle changes. Excellent plans. Clear and easy to follow. Thank you.
Cynthia Dinardi (Oregon)
We painted the doll house with paint samples from Lowe's. For the stairs we cut 1 inch by 2 inch boards at a 45 degree angle. Then we glued and nailed each step on each side. The carpet was bath mats that we cut into shape. The chair rails are my favorite! We painted square dowel rods white and cut them to fit the rooms. We used scrap book paper for the wall paper. Thank you Ana for these amazing plans!!!
My husband recently constructed a coffee table and 4 end tables using the rustic x plans. We think they turned out great!
I did a mixture of 2 stain colors to get the weathered grey finish on the one set of end tables.
I did a stained top and creamy white bottom with glaze for the base of the coffee table and additional set of end tables.
2X4 Simple Potting Bench.
My Dad just recently retired and since he is very handy, I had him make this desk for me. He did an amazing job! He used very nice wood and took his time. This could have been a quick weekend project for anyone who isn't retired and has time on their hands :) He did need a little more wood than was called for so you may have to make a second trip to the hardware store, which wasn't a problem. Another note he would give you is to NOT pre-cut the trim pieces before you build the desk. Cut the trim pieces after it is made so you won't be off. (It was only off by 1/8 of a inch, but for a perfectionist that was 1/8 inch too much!)
After it was made we did two coats of paint on the desk followed by several coats of poly on the top. The final project looks amazing and all of my friends now want my Dad to make one for them :)
Mon, 09/17/2012 - 19:57
Great job Dad!!! Absolutely beautiful craft table, the finish looks amazing too!
This is the second project I attempted and it was a huge undertaking for me, but it was fun and went well! I had planned to sew a cushion for it, but by the time I completed the project, I was DONE! So I bought some for now.
The only modifications I made were larger arm rests so I could put cup holders in them. The cup holders I made out of PVC 3" Male end and a 3" drain, which I glued together. I then scuffed the entire thing and painted them with acrylic paint (trying to get them to match the blue and green in the cushions) before spraying them with gloss sealant.
My family LOVES the new "swing bed". It weighs ALOT so I had to make sure to get proper hanging gear. It's obviously not hung yet when I took the pics tho.
Thank you for another beautiful project!
Double wide trash can unit, Fall of 2015.
Another super easy plan to follow! I was even able to make adjustments really easily! This table is 6ft by 33in, because I needed it a bit smaller for the space. The table went together in about half a day. My new paint sprayer and orbital sander made my life a little easier but the heat has been obnoxious so it took a couple of extra days to get the finishes done! I did end up changing my mind and decided to stain the table top to match the sofa & sectional which were done in Olympic Maximum stain and sealant semi transparent in cinder.