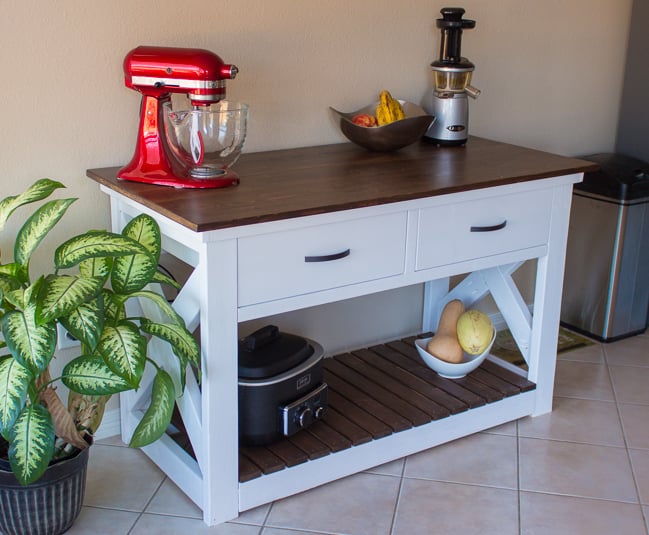
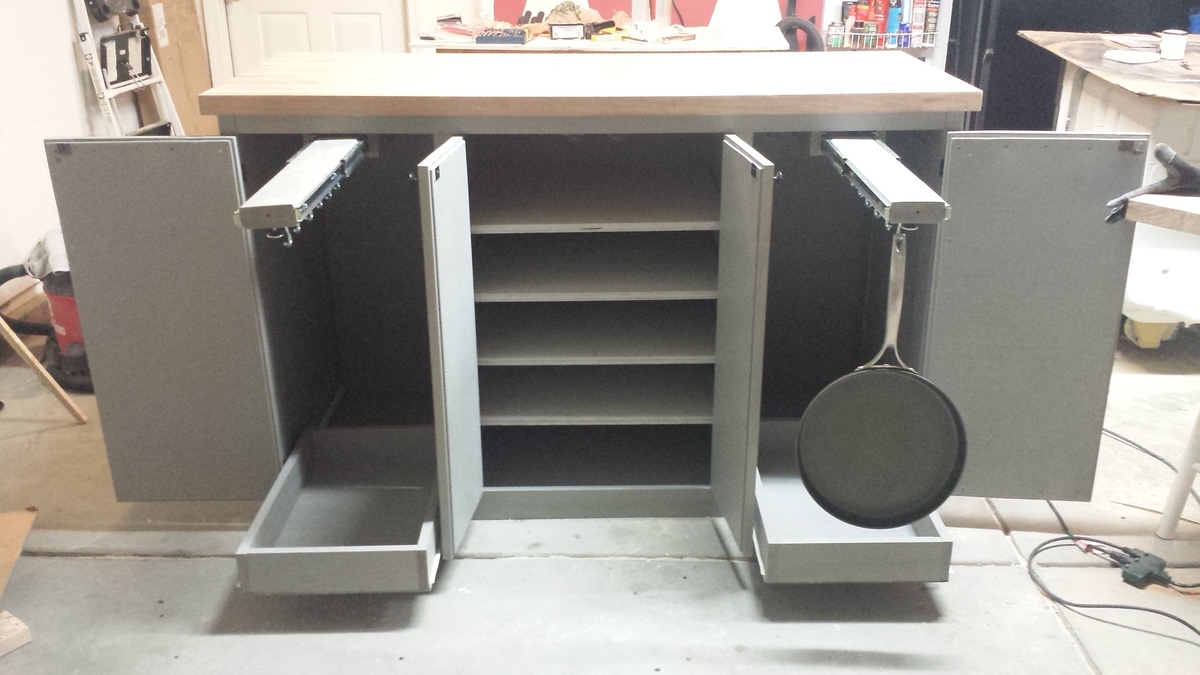
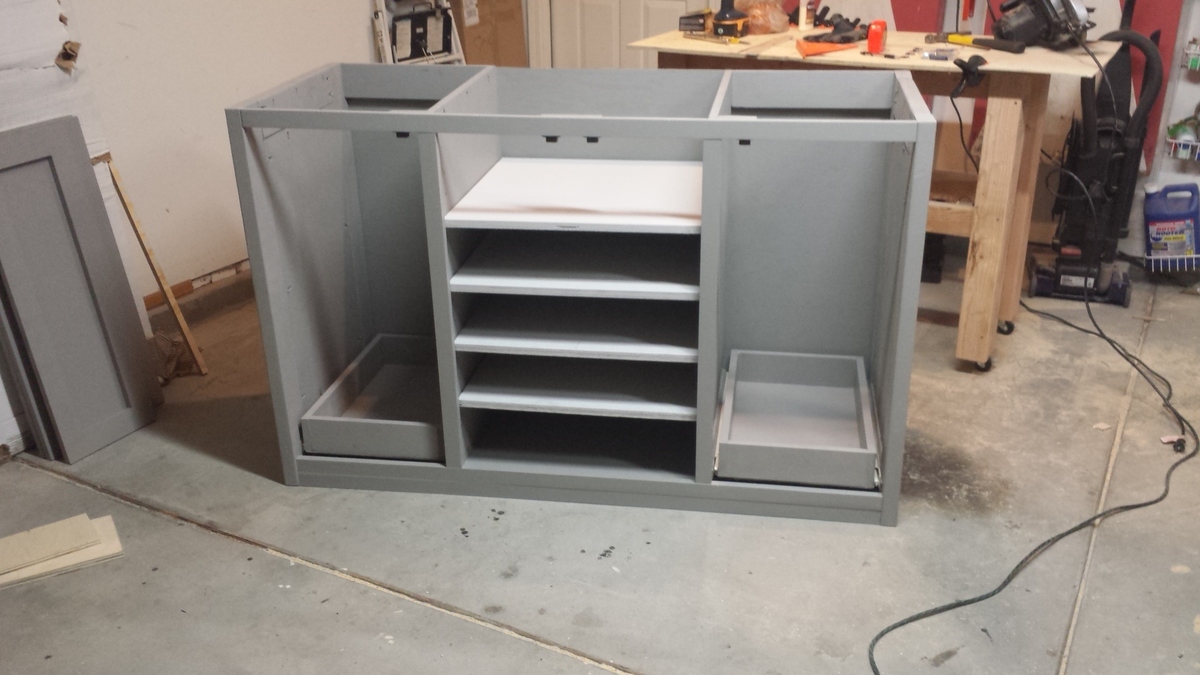
We changed the plans for this kitchen island a bit to best suit our needs. We removed the middle shelf and the bottom half of the center divider in order to create a large, open area for storage. We also extended the bottom slats to the full depth of the island, or 21".
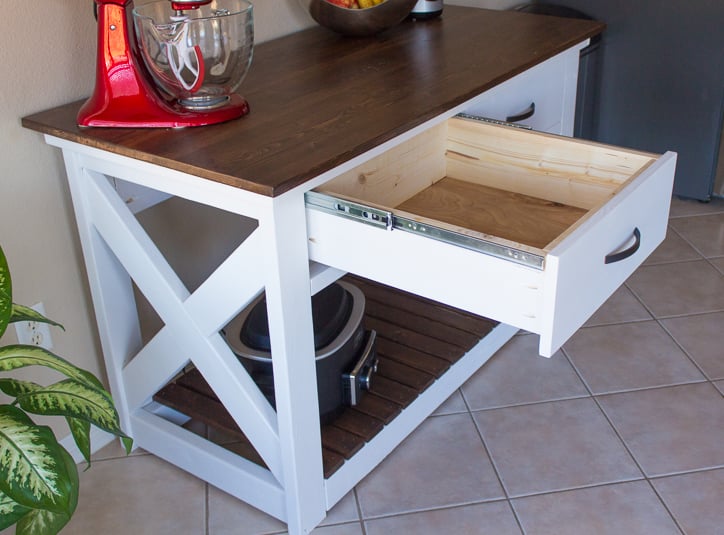
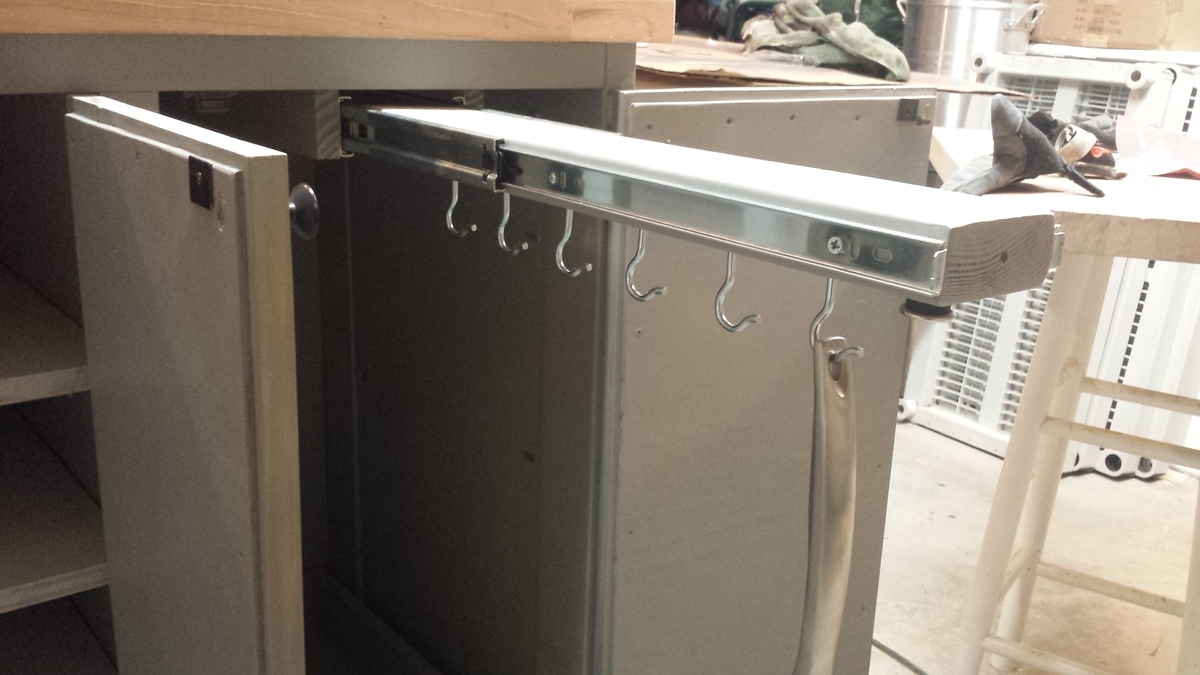
The drawer depth was also increased to the full depth, or approximately 20". Instead of using 2x2 cleats for the drawers, we installed 20" self-closing drawer slides from Lowe's. This allows the drawers to be fully extended as well as have a soft-close feature.
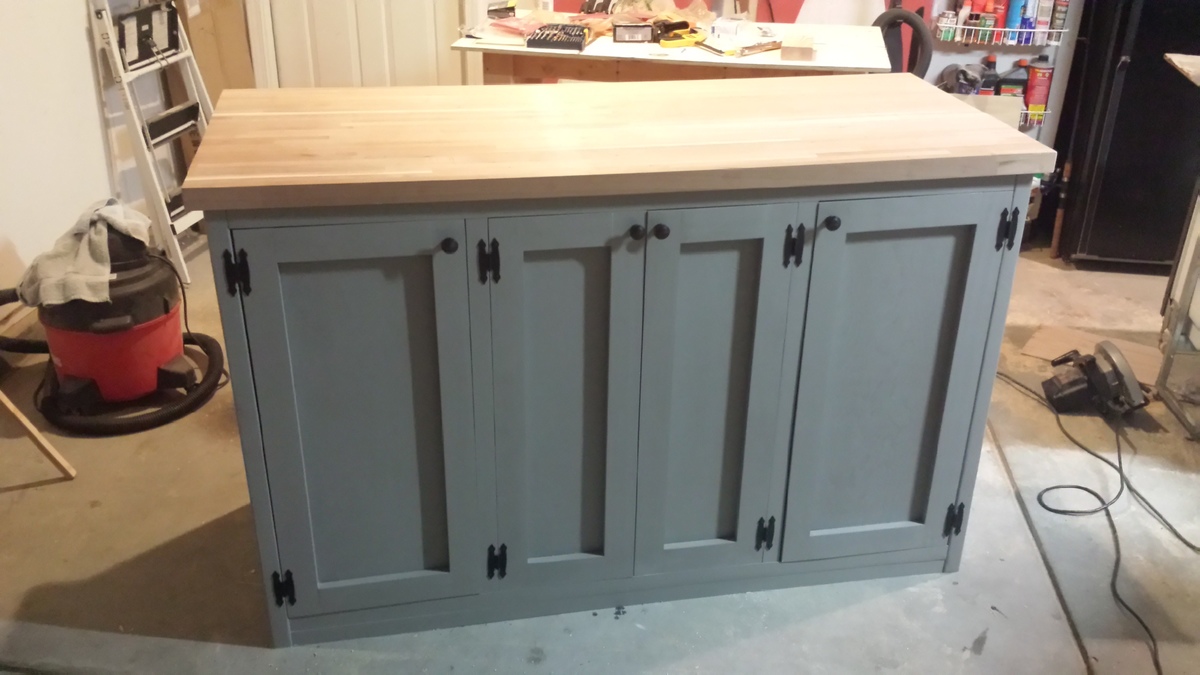
The top measures 26 1/4" x 56 1/4" and was made by securing two pine panels together using pocket holes. We couldn't find an appropriate size at Lowe's, so we purched two panels instead. After sanding and staining, it is impossible to tell where the boards are joined together.
In the future, we might distress or add an antique finish the white base. Overall, we are very happy with the kitchen island. It's wonderful to have a little extra storage in the kichen!
Thanks Ana!
-Anna