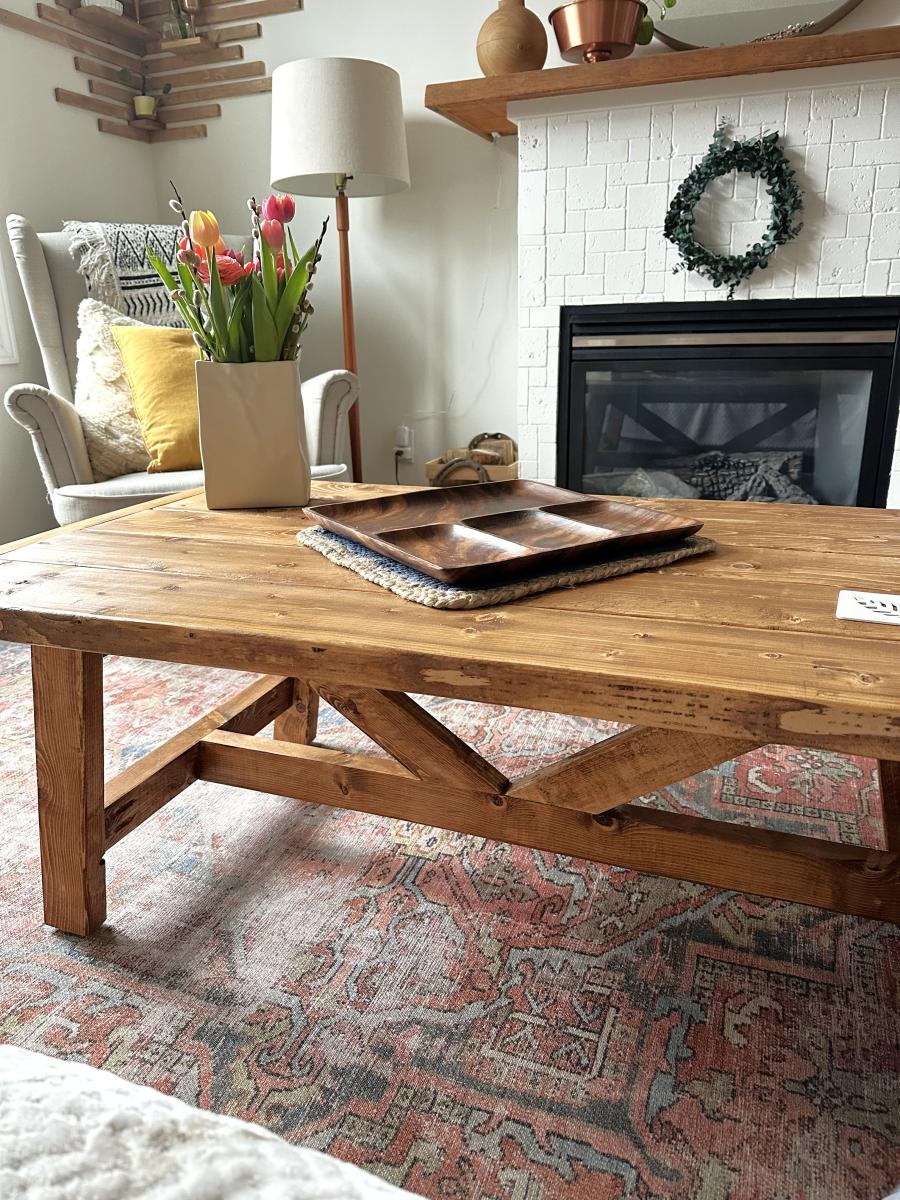
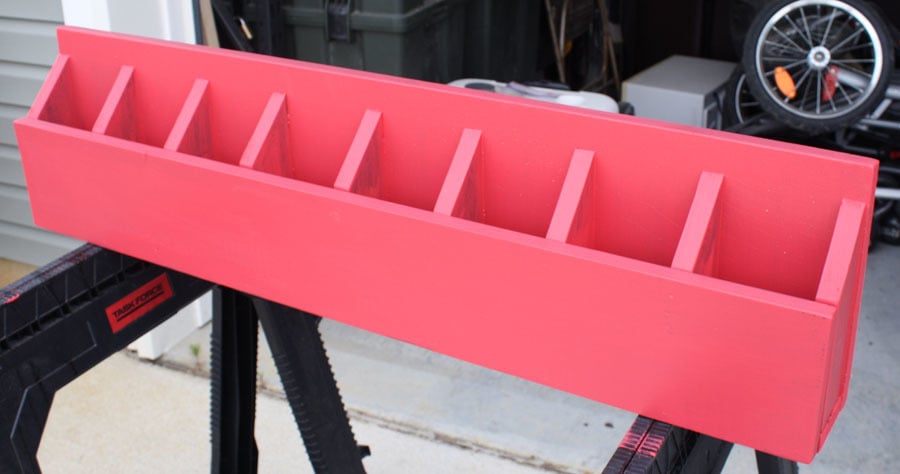
Single Vase Wood Centerpiece
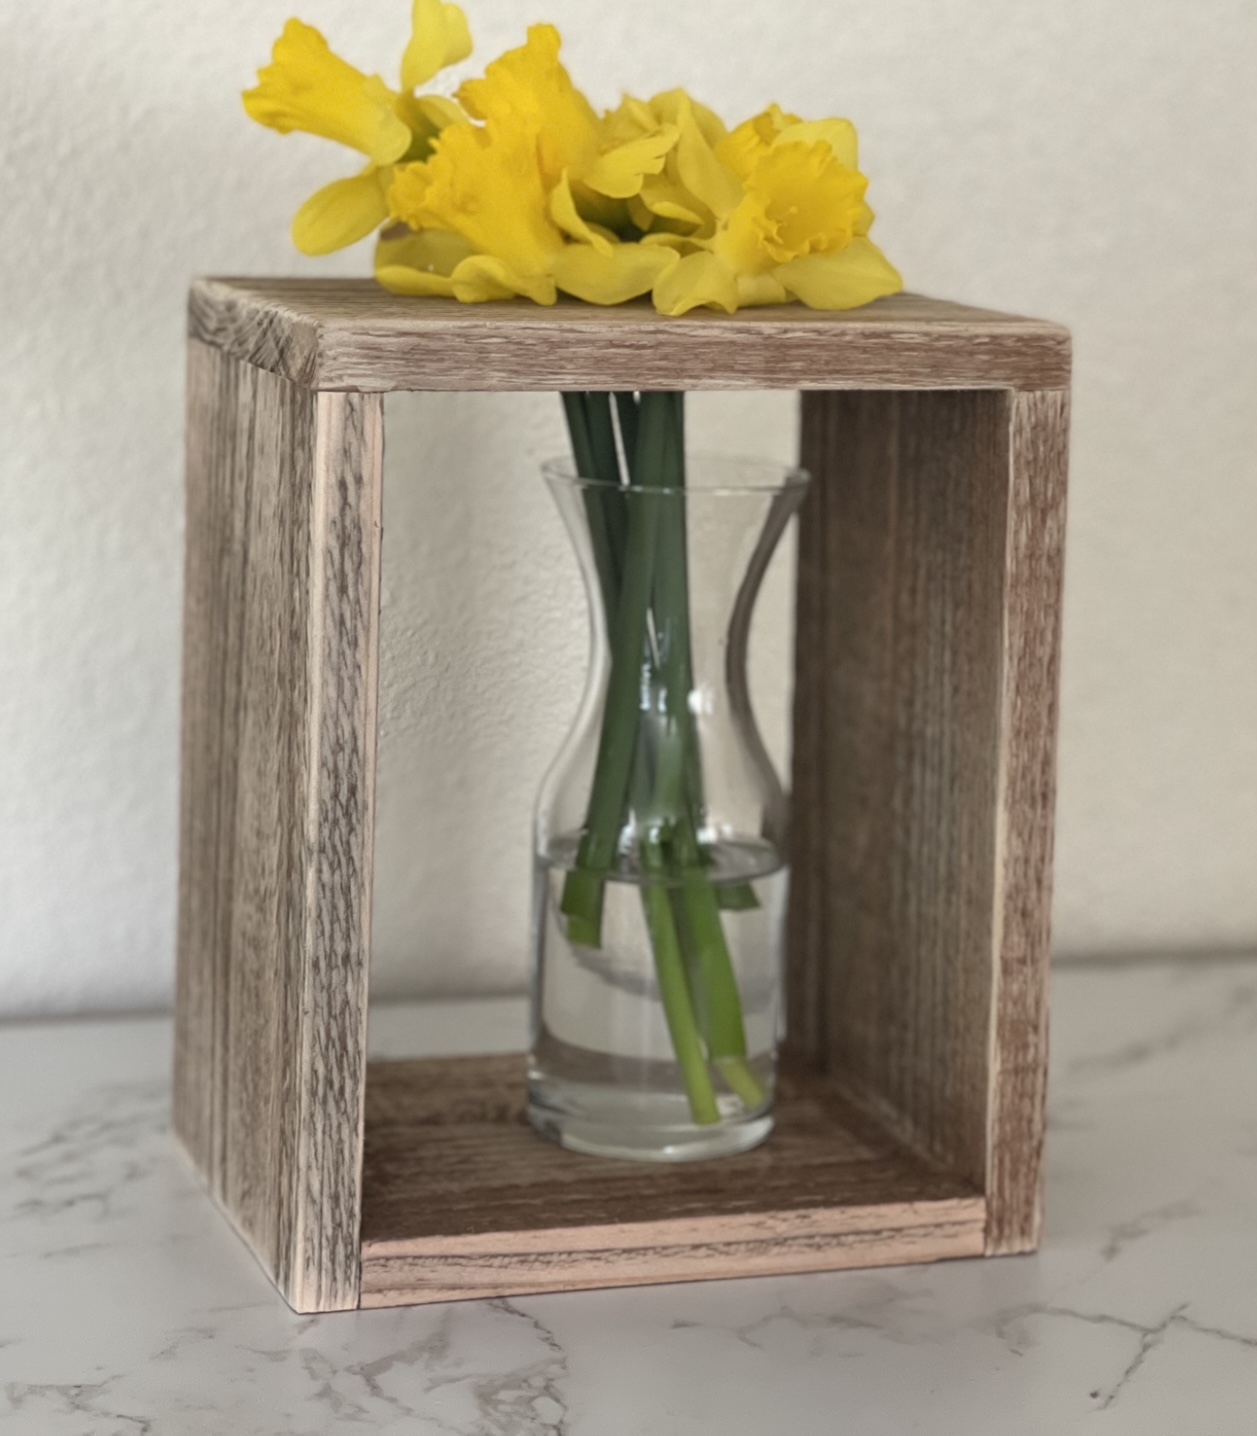
Super easy vase holder adds a fun element!
Built from Plan(s)
Super easy vase holder adds a fun element!
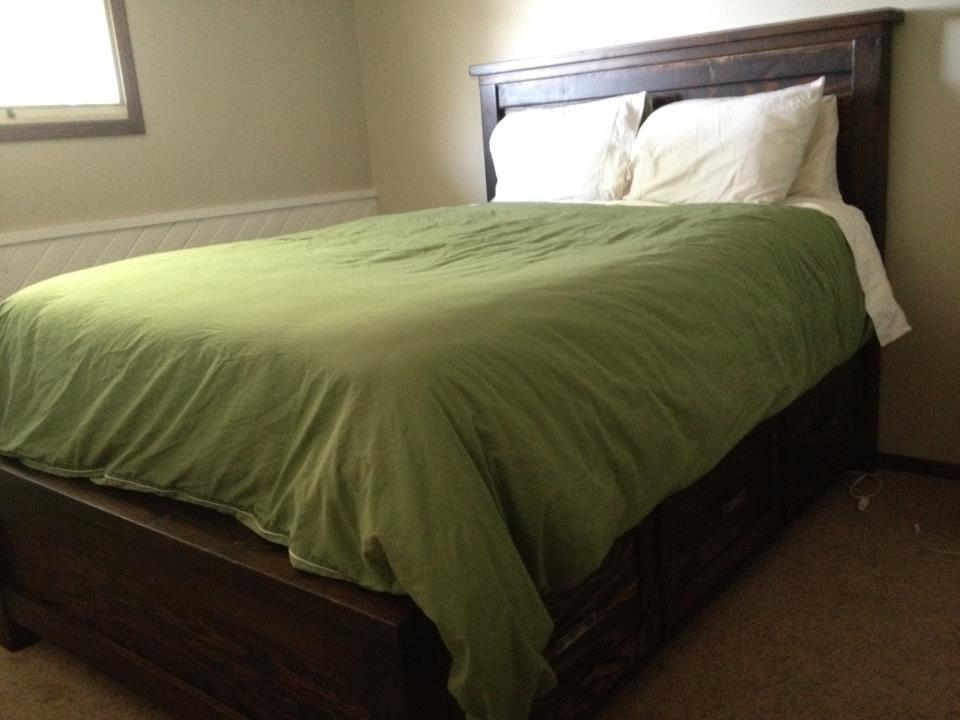
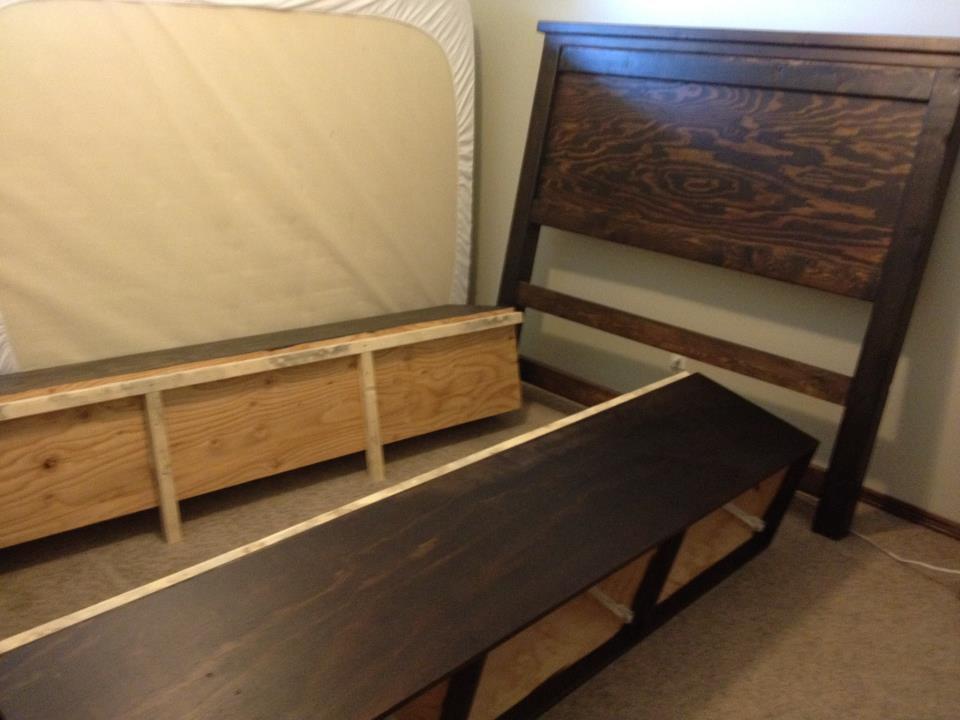
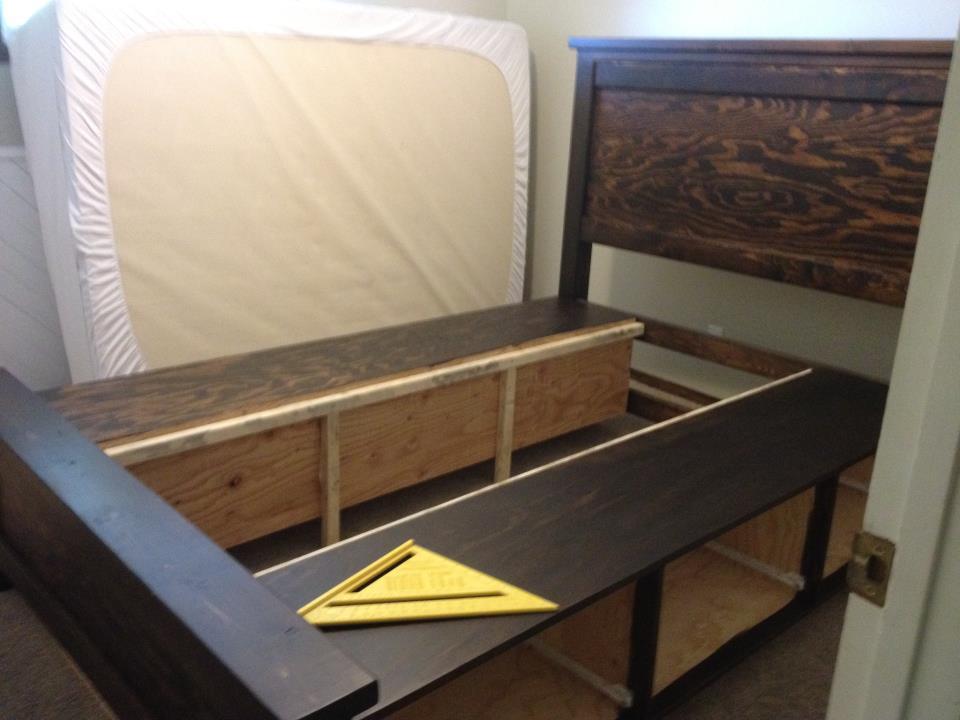
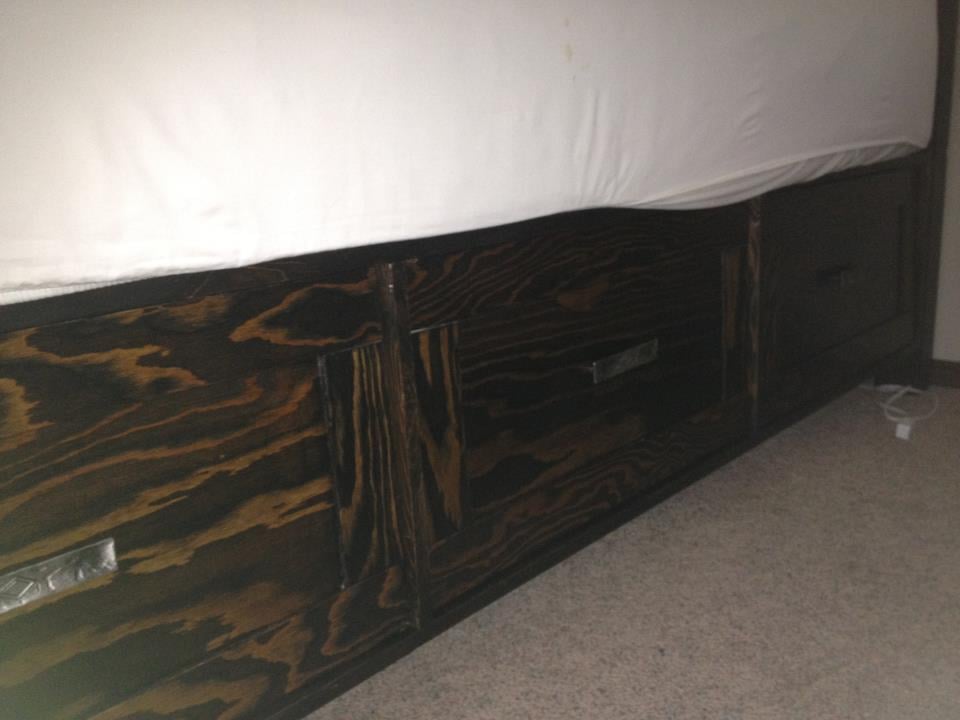
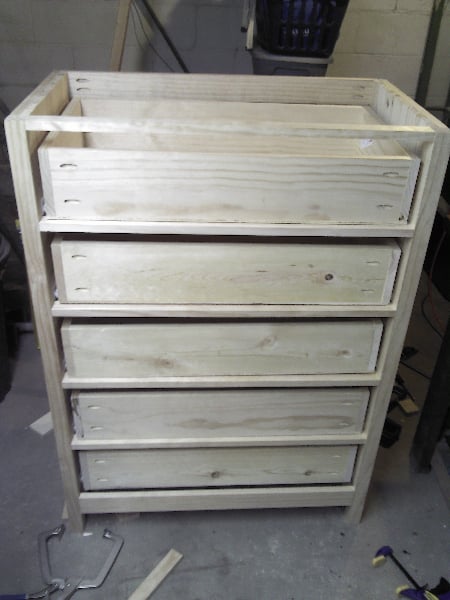
I used pine for the 2x6's and 2x4's (and 1x3's) and fir plywood for the headboard, footboard and drawers. I also modified the drawers and used a square piece of 3/4" plywood for the bottom - made it way easier to build the drawers square so they slide nicely!
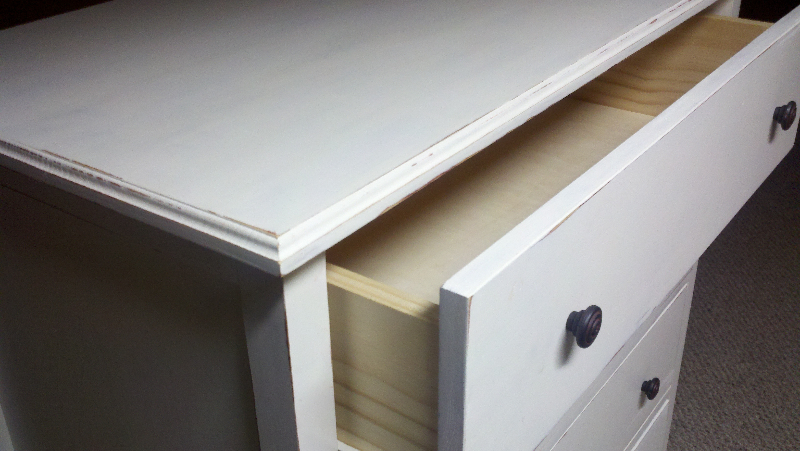
The pulls are from Lee Valley.


Sun, 08/12/2012 - 17:36
I love how the storage drawers are off the floor. The finish looks great and the "in process" photos help a lot. Great Job!
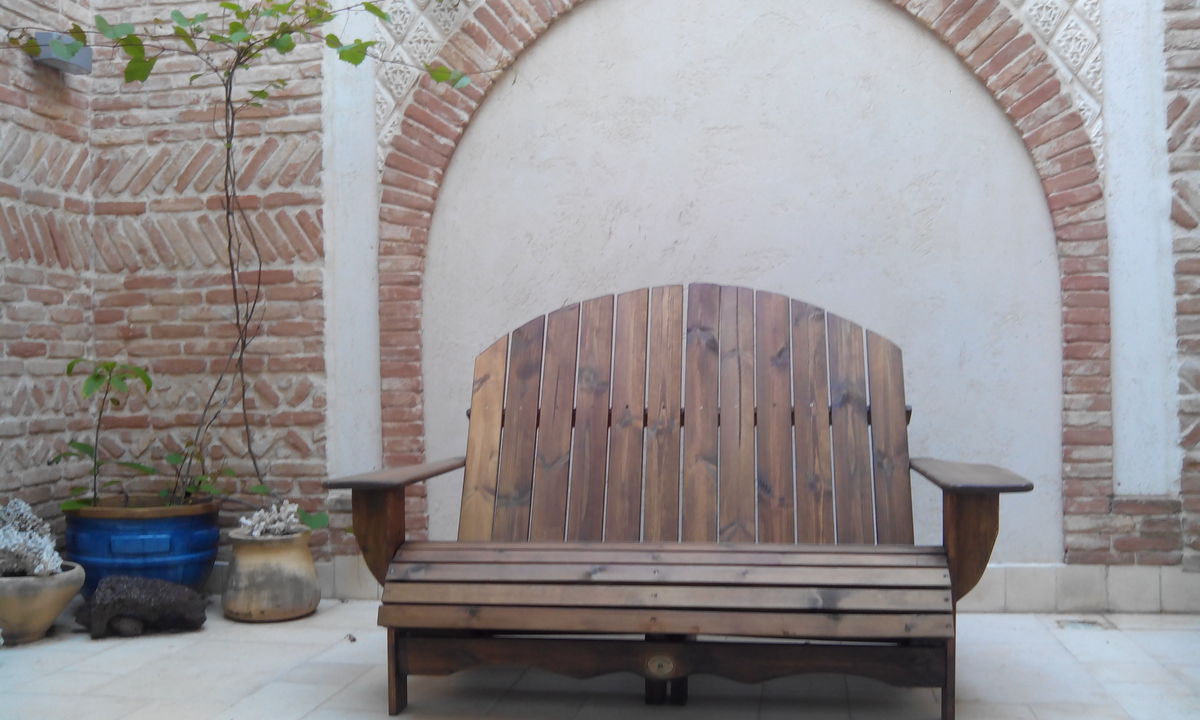
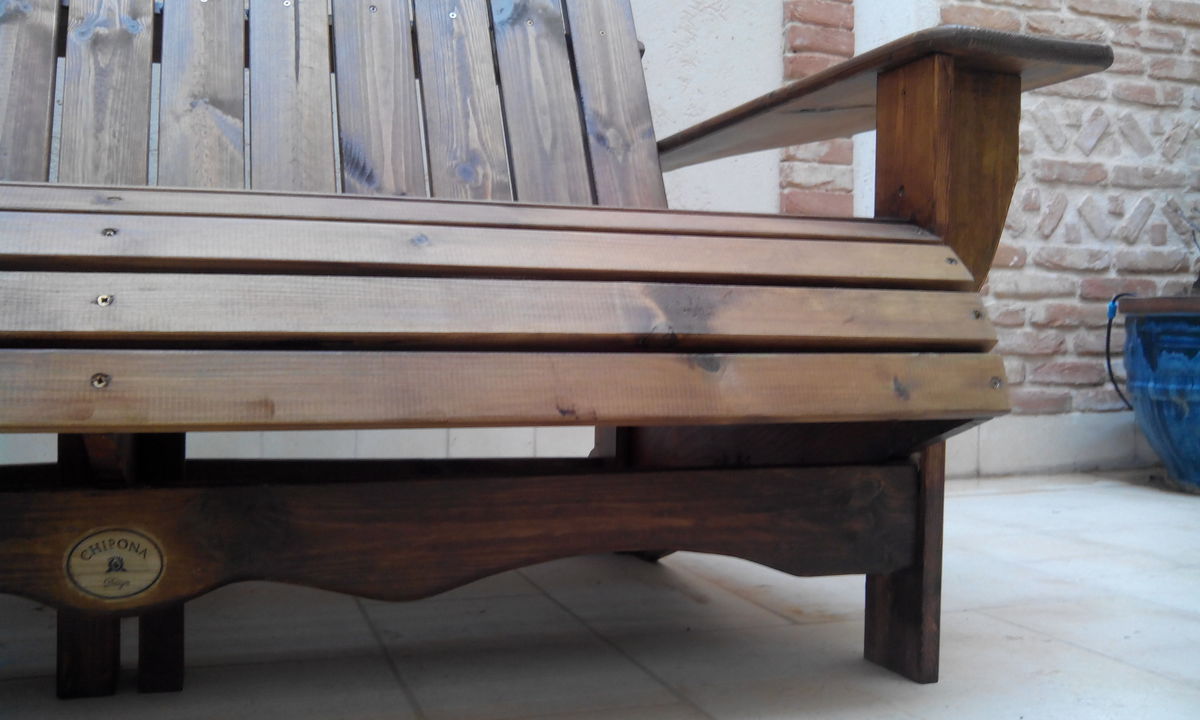
This bench for 2 was made of leftover pine wood planks I had in my cellar. I used different saws and a router to make sure the ends where smooth and give the overall project a elegant touch. Since I love to see the texture of wood I chose a walnut stain.

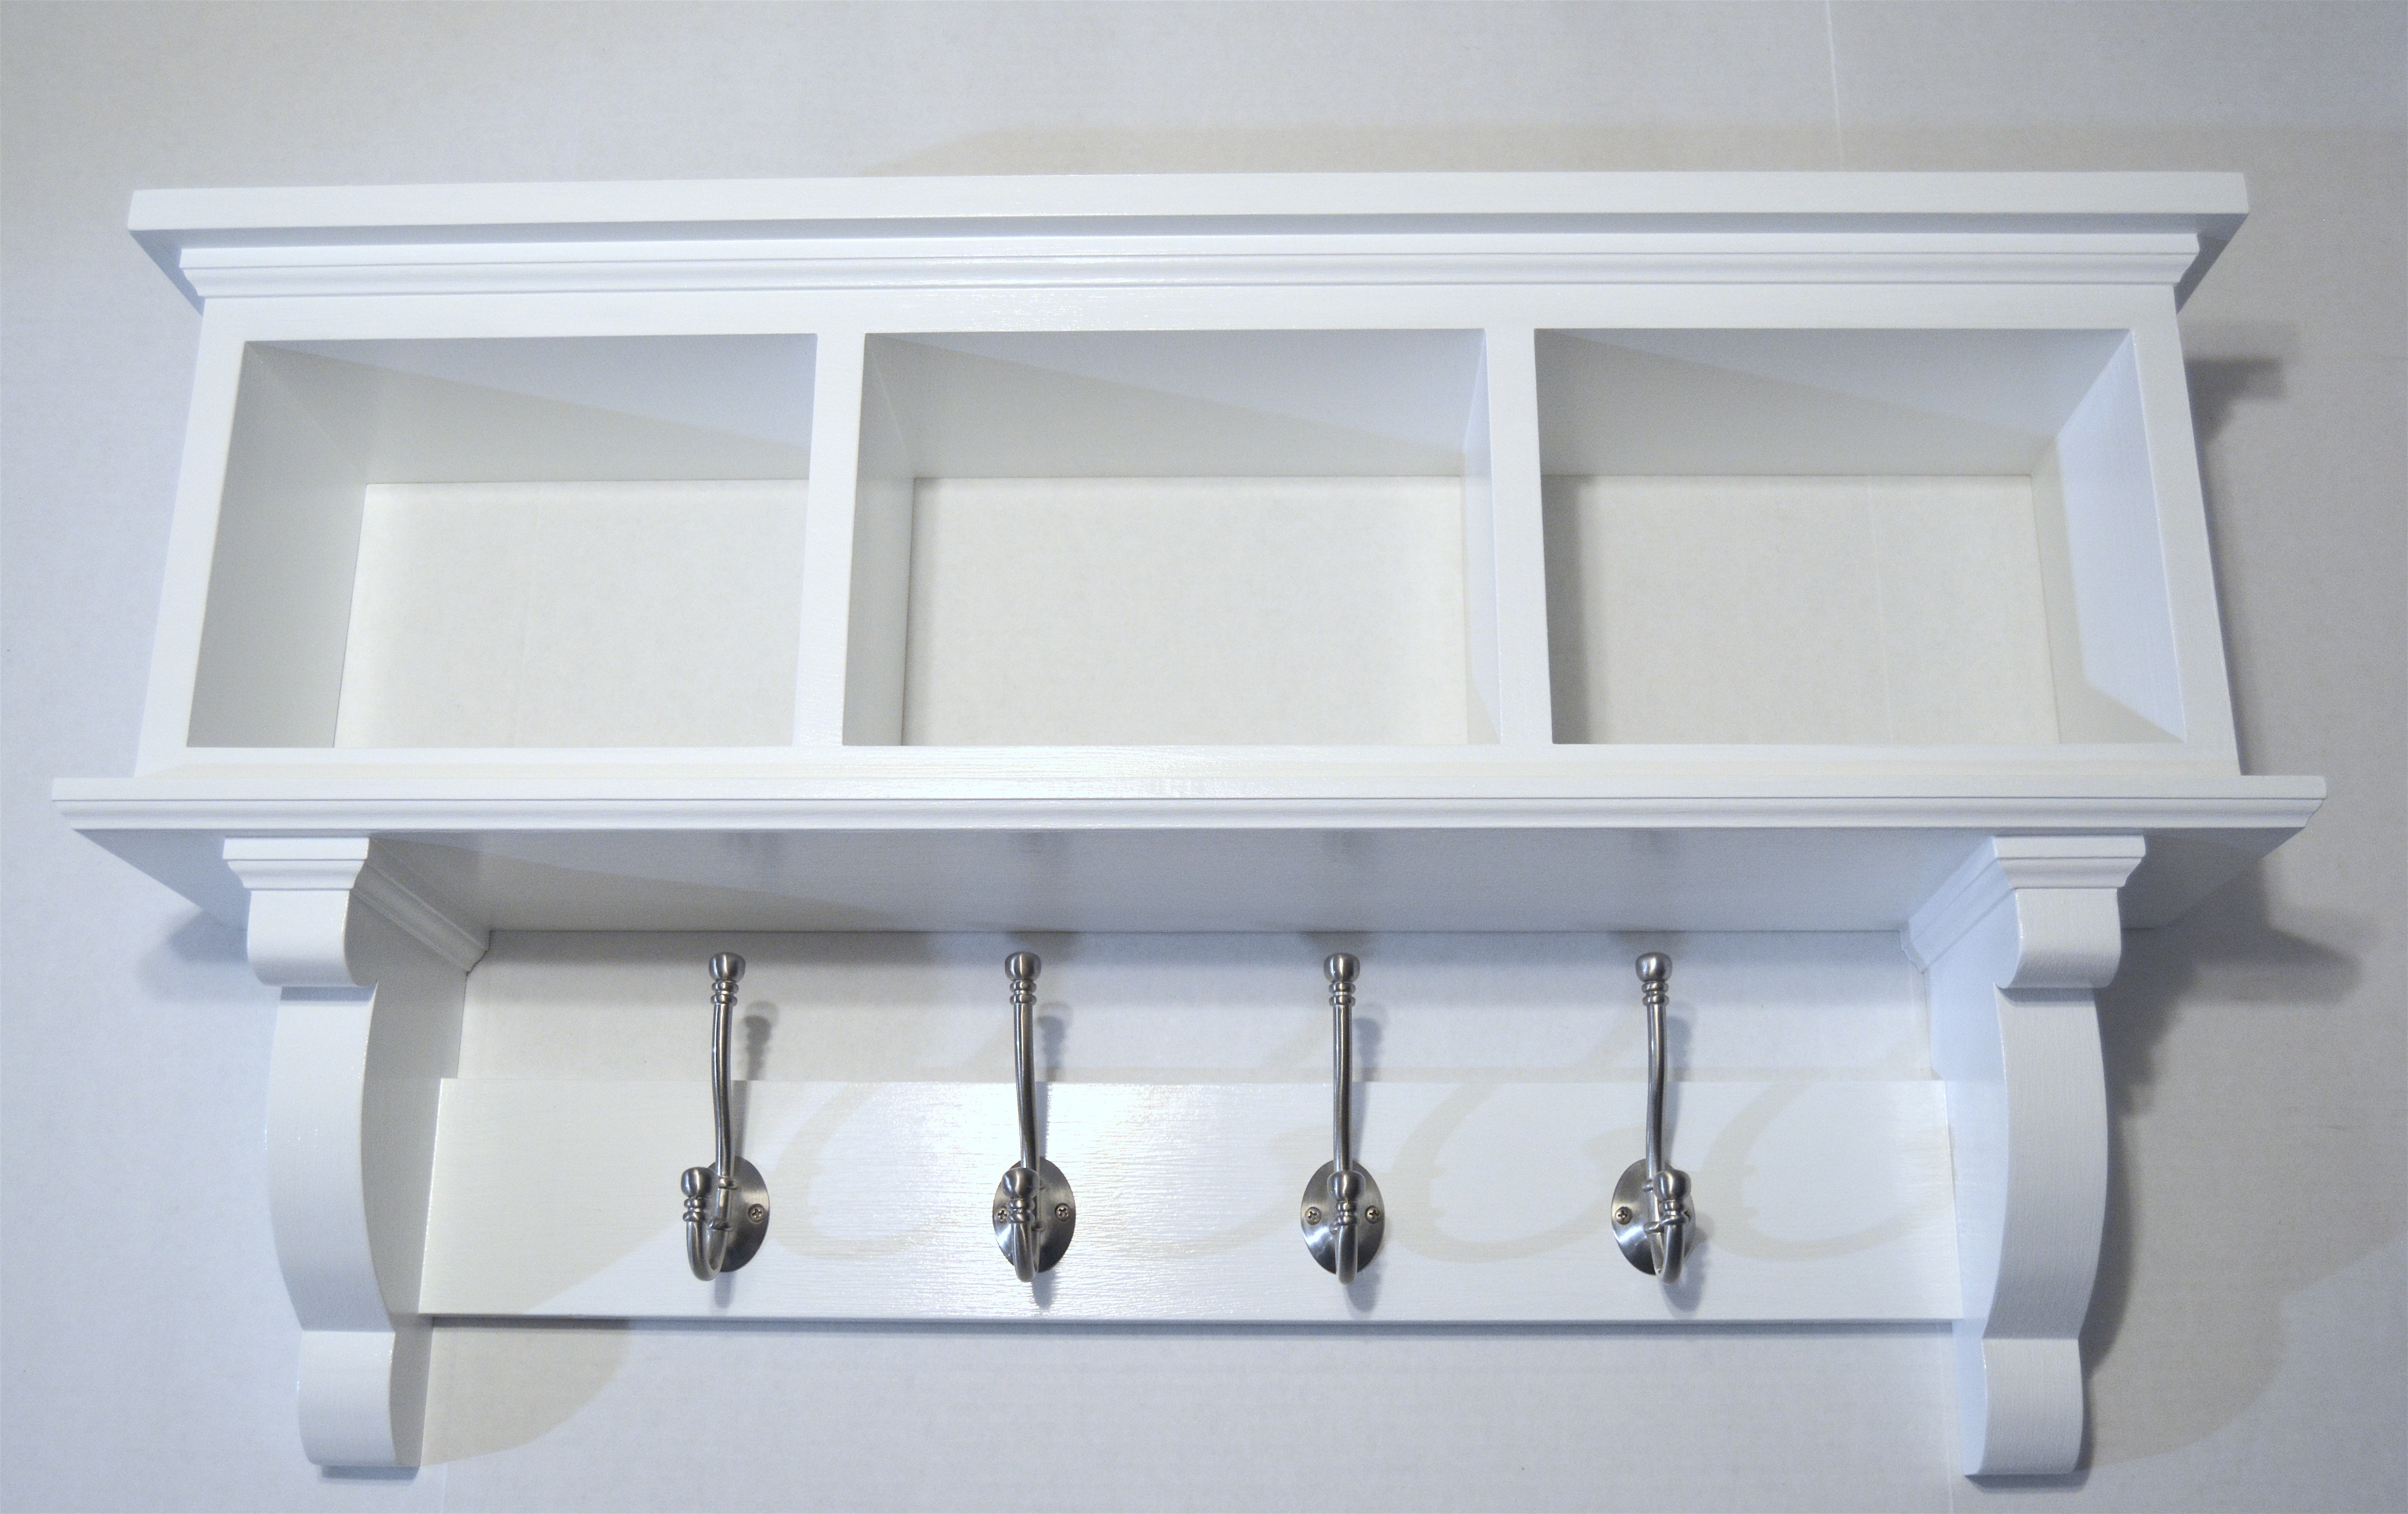
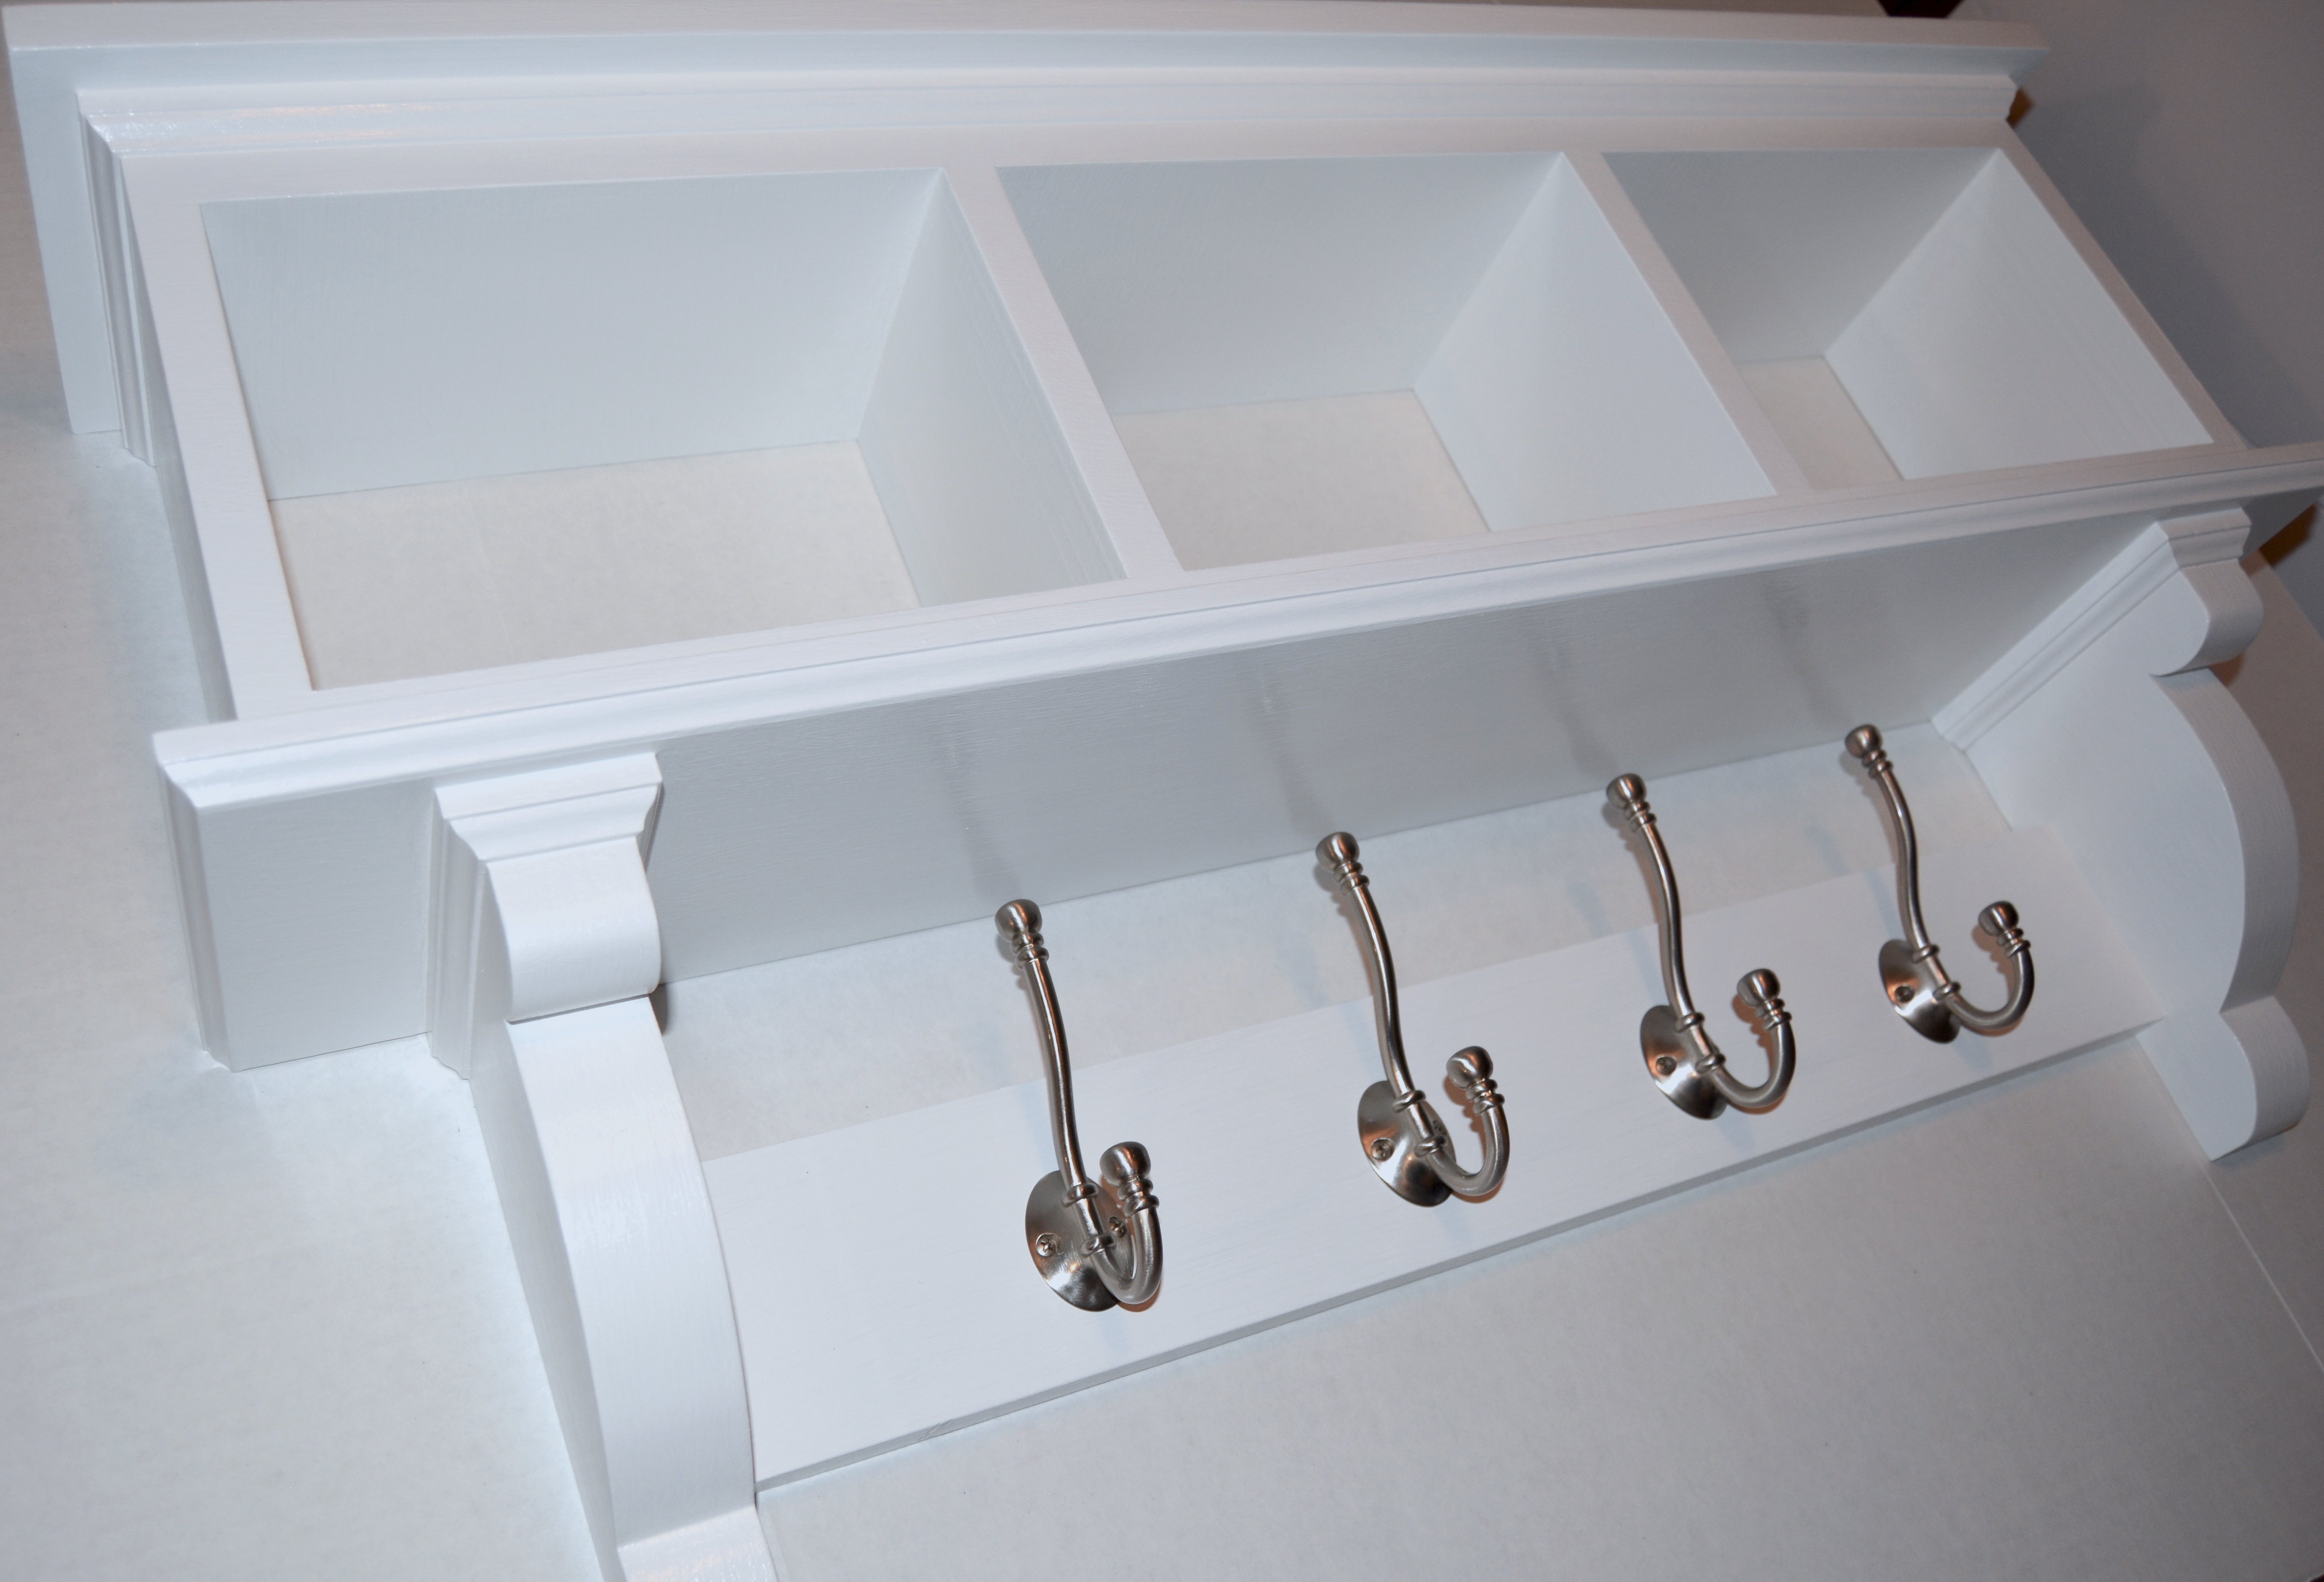
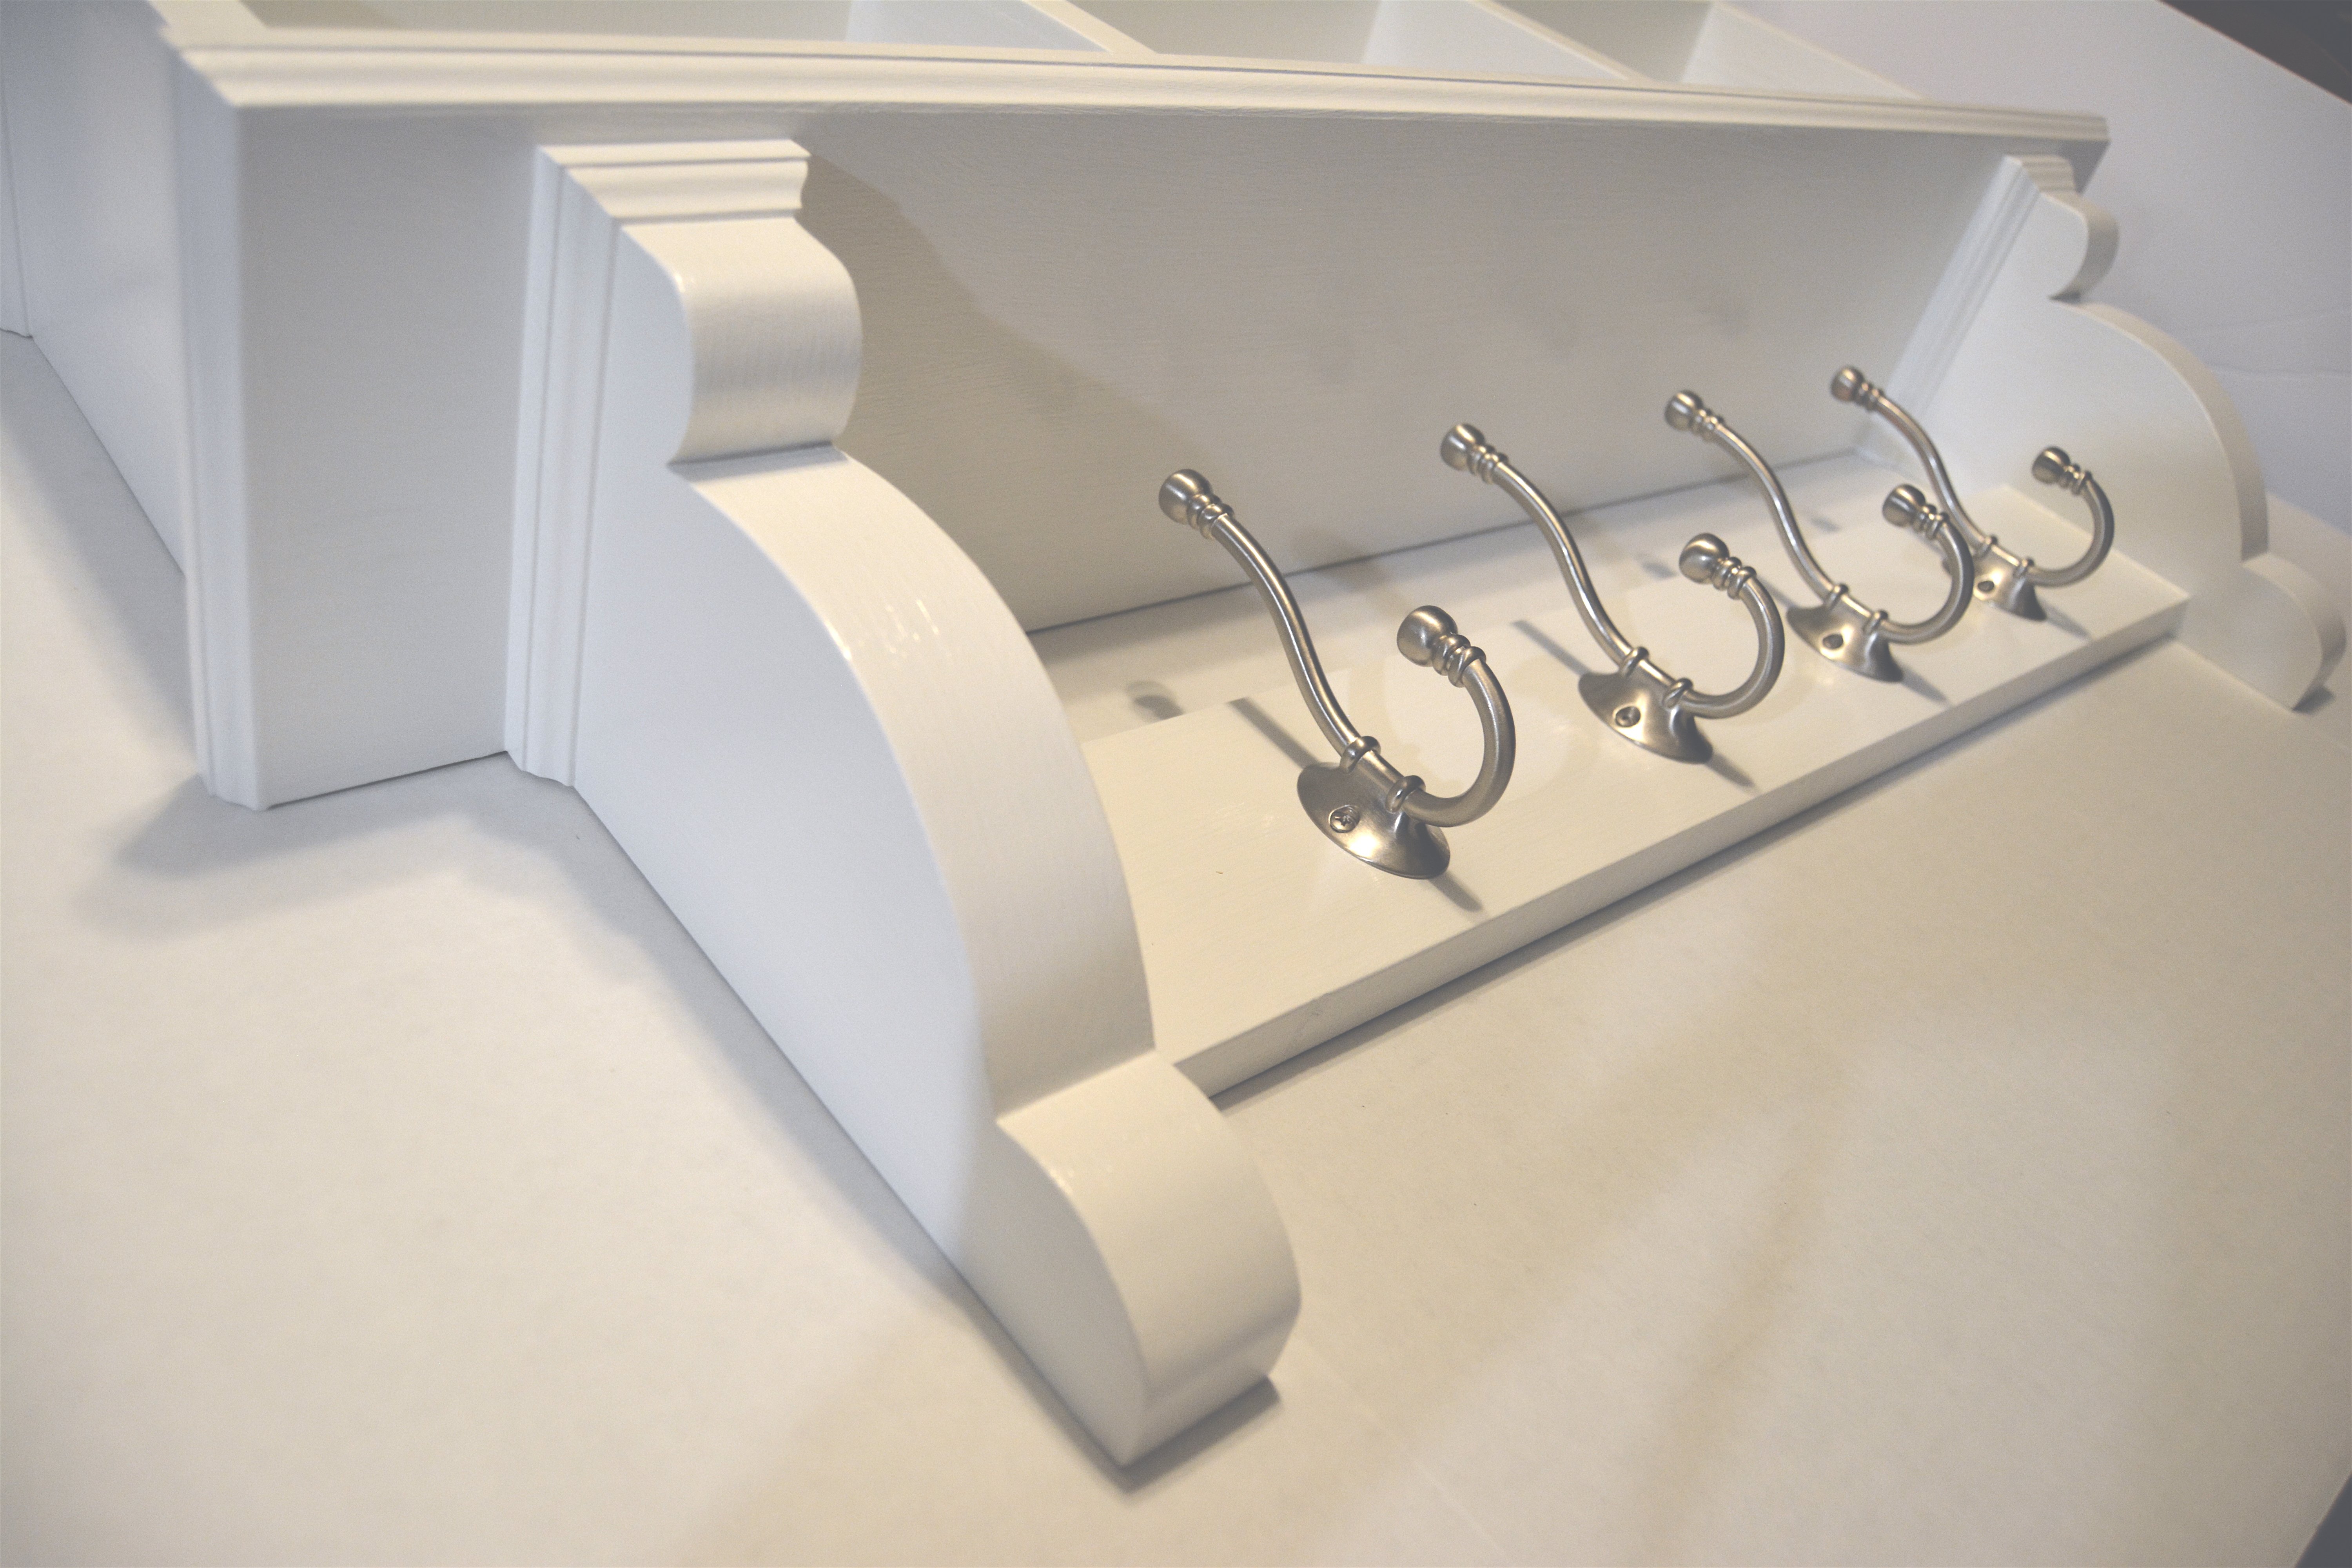
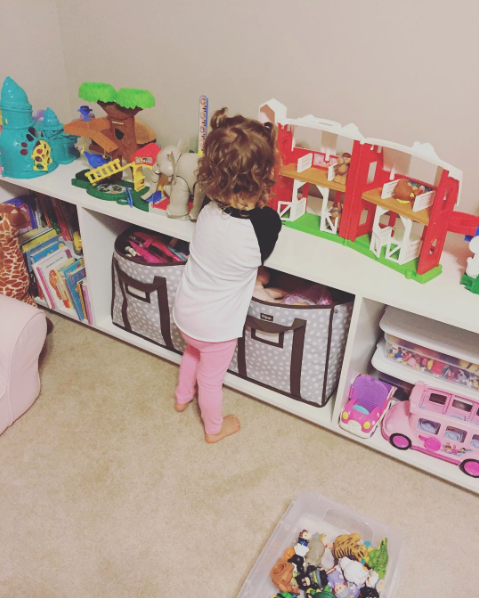
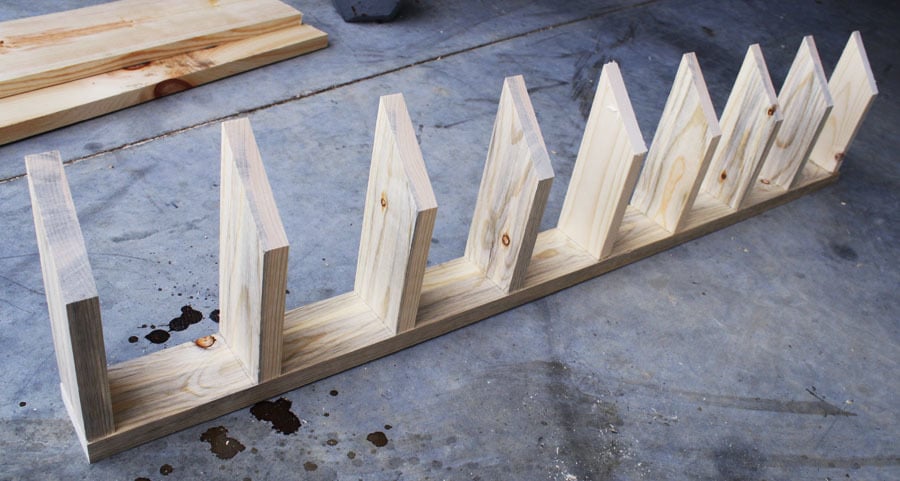
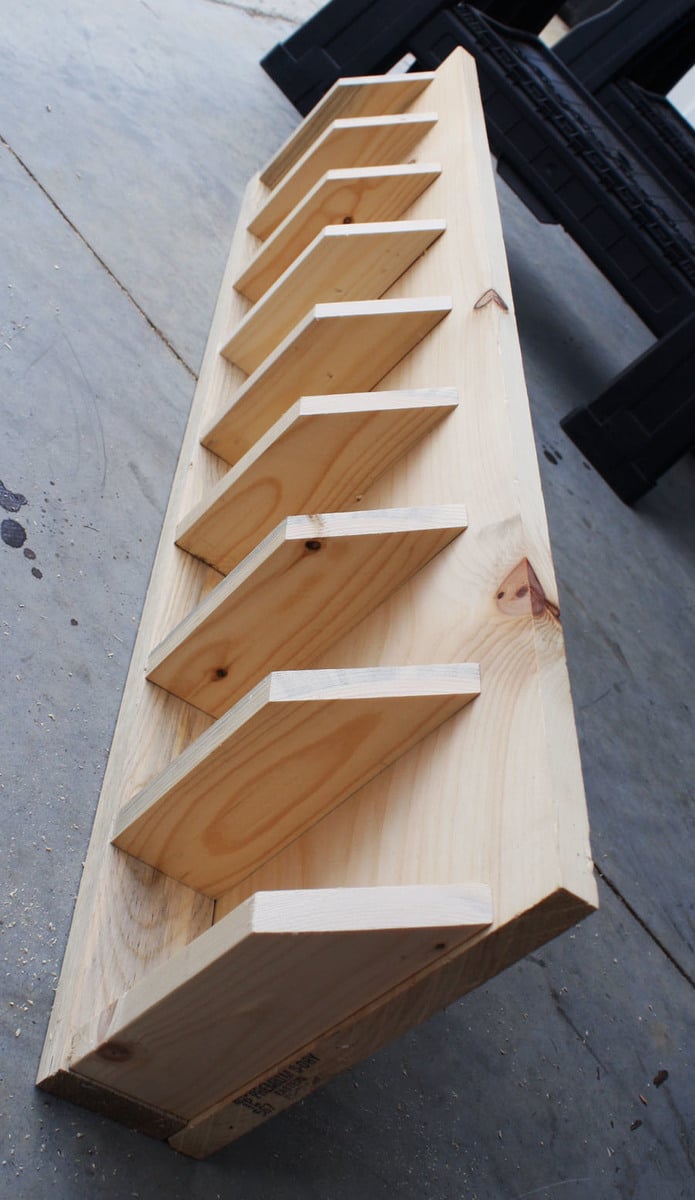
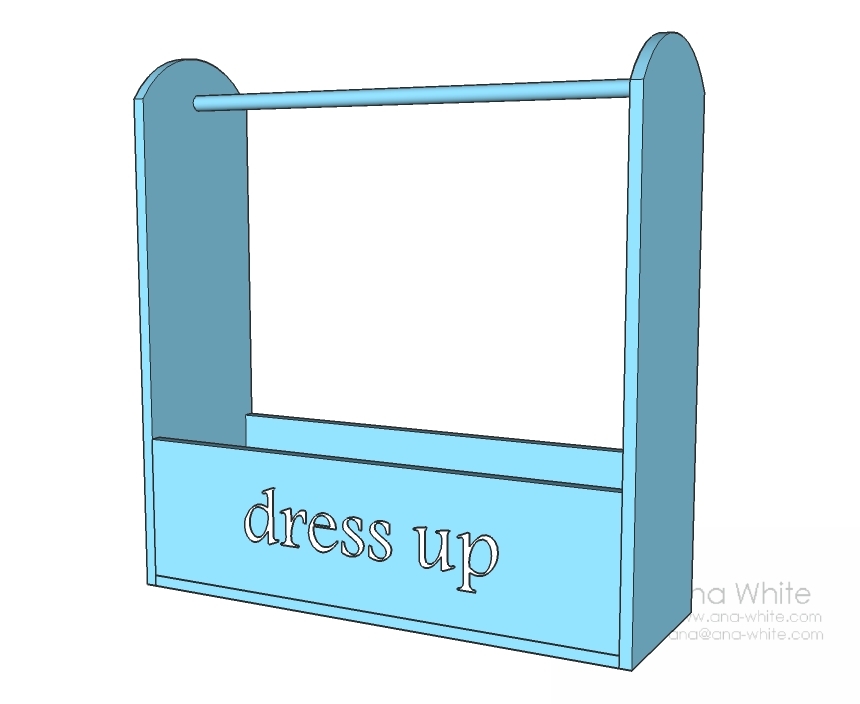
I built this coat rack a couple of years ago for our house when our little girl ripped the one we had out of the wall trying to get her coat off the hook lol. I was actually able to reuse the hooks from the cheap little coat rack that we had bought from the home store. It attached into the wall using drywall anchors so it wasn’t all that secure to begin with. I set out to make one that would look a lot nicer and have some room for storage. The design I came up with works great for storing all our coats and hats, but also the cubby storage at the top is great for storing keys and gloves and whatever else you may need to store.
Like any good DIY project, I started with plans and then changed pretty much everything.
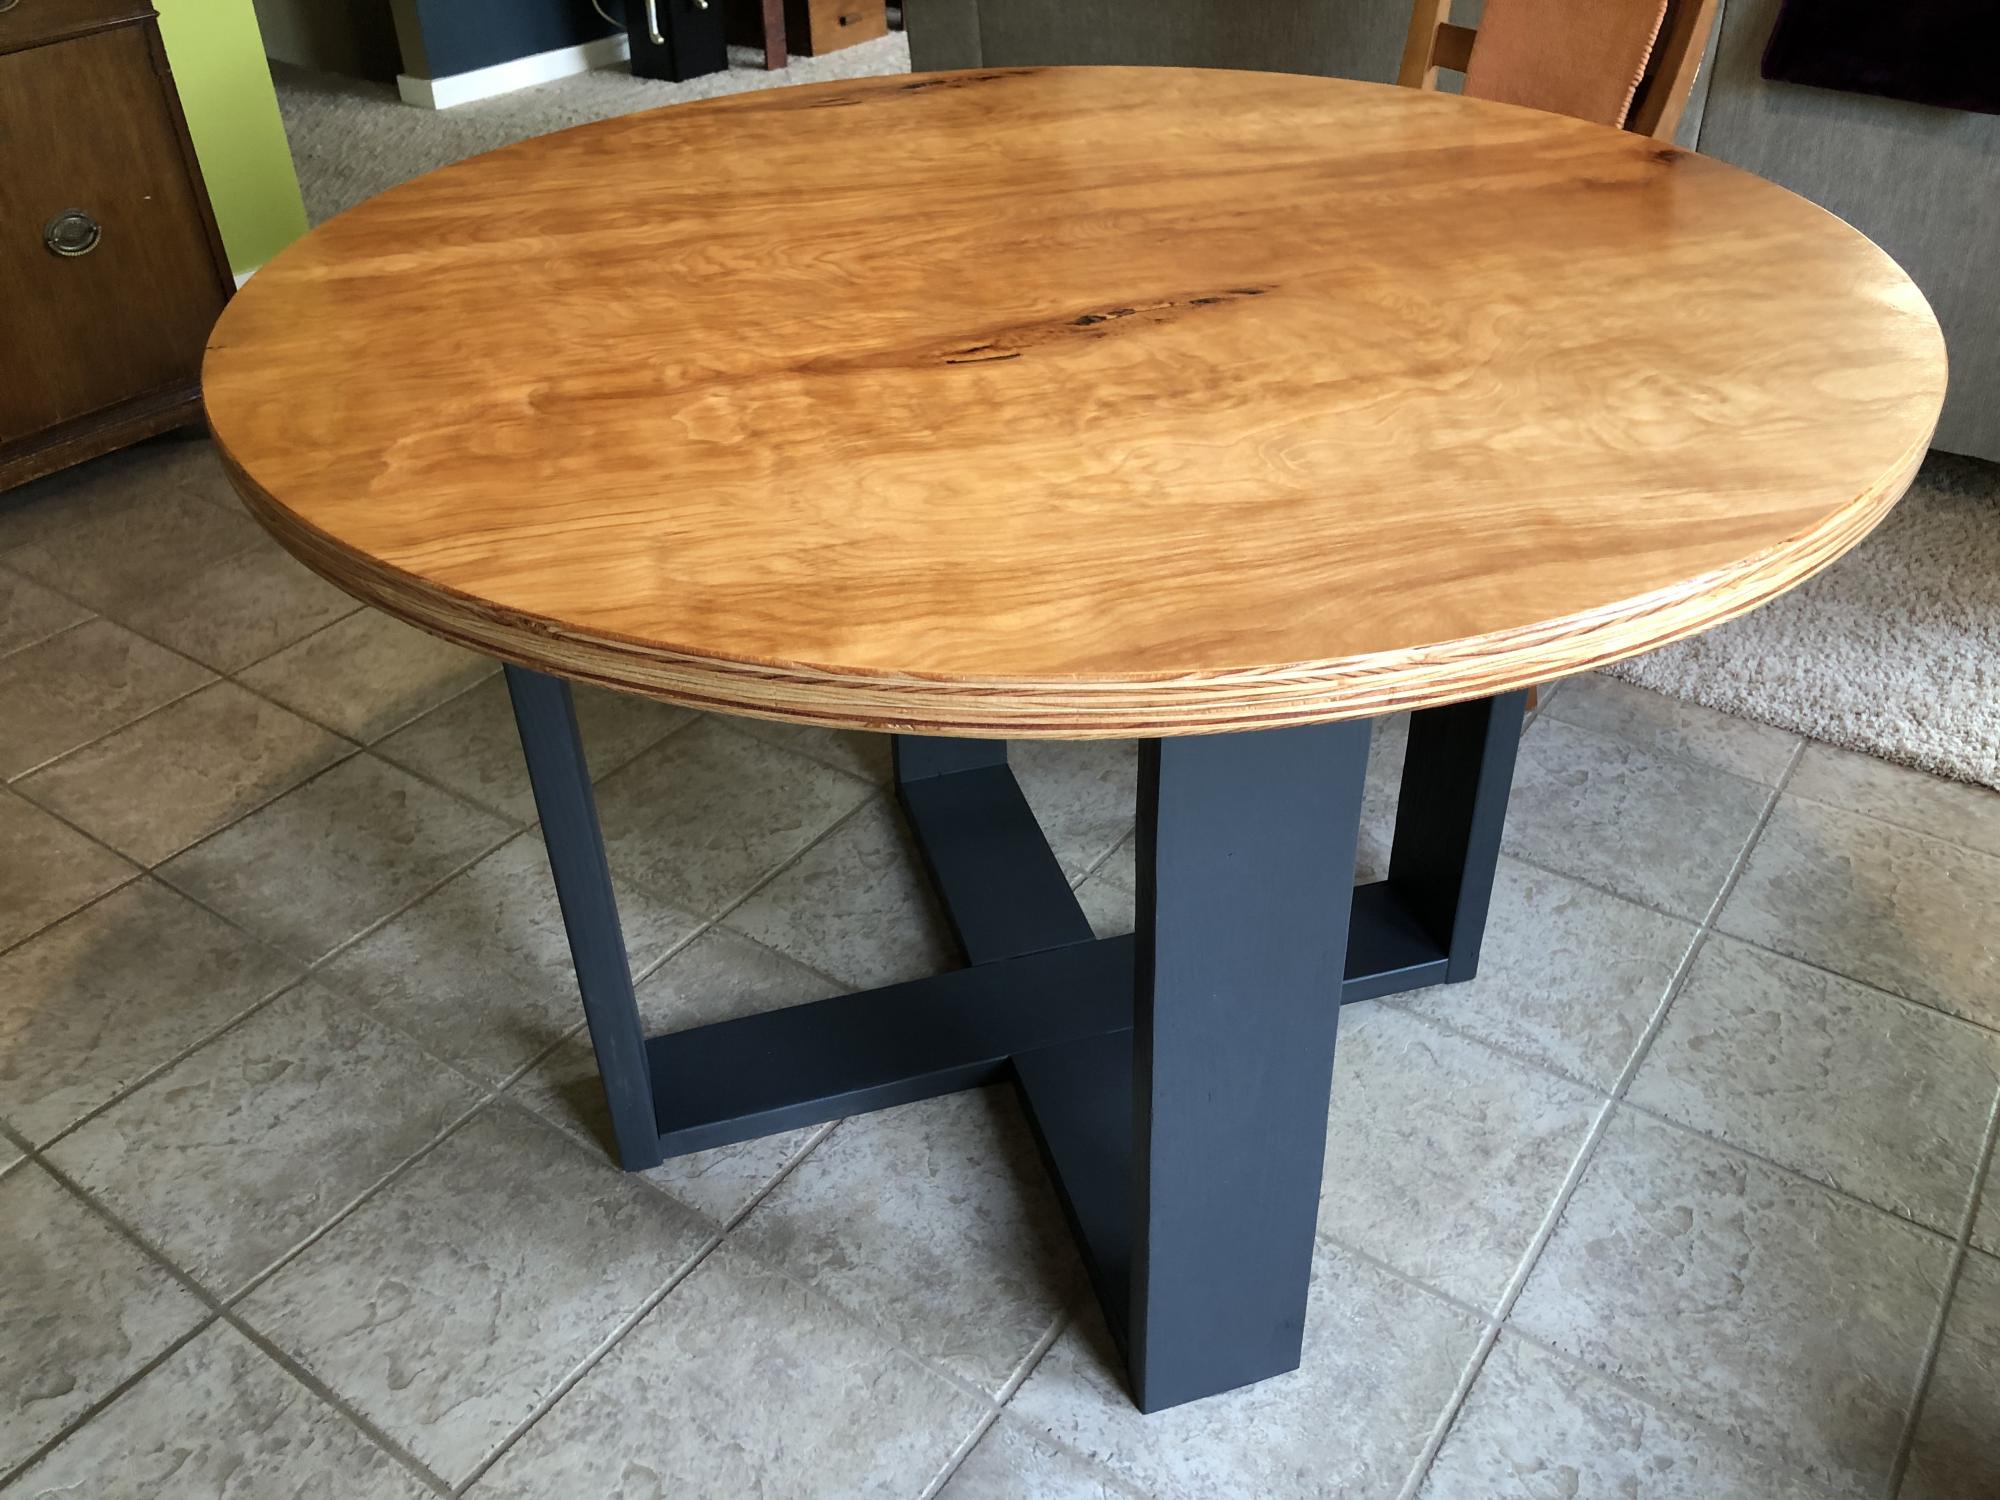
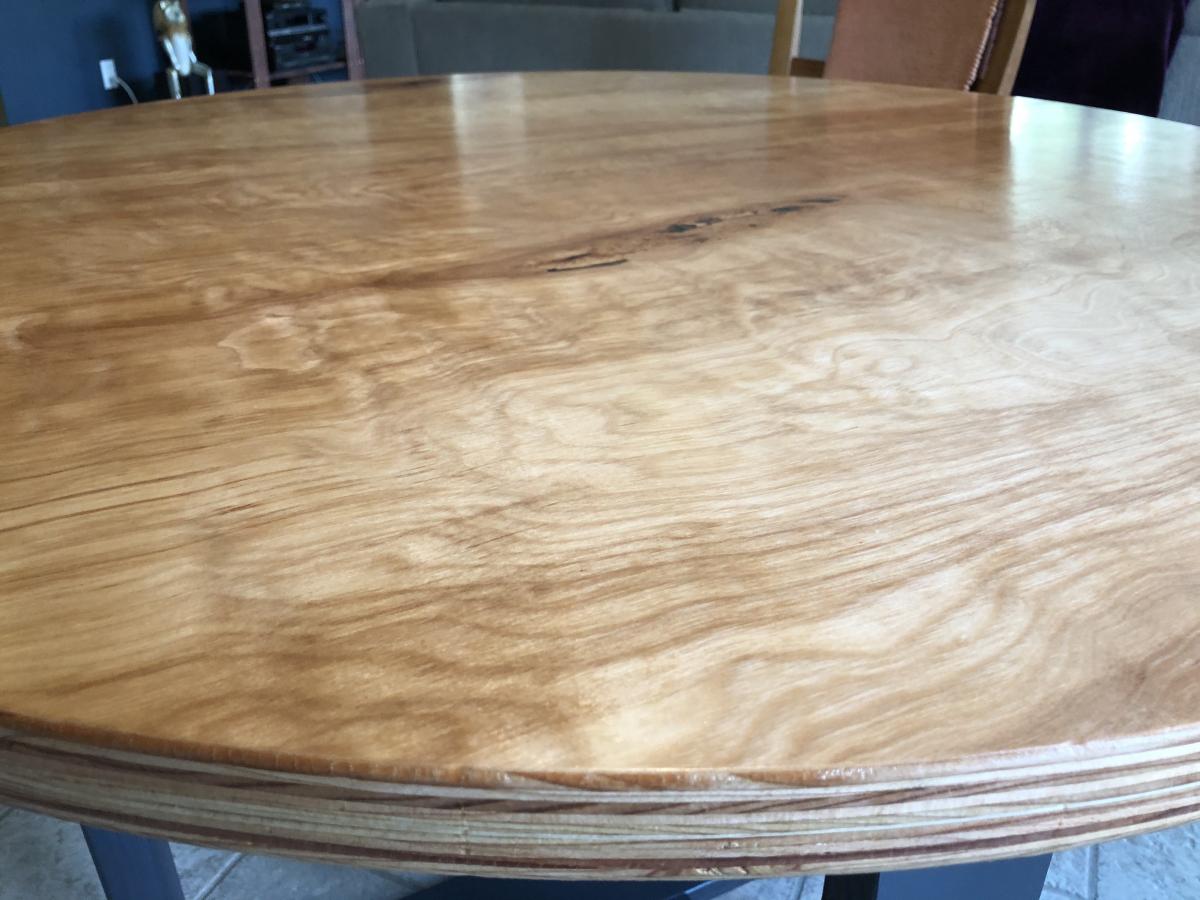
We wanted a modern but sort of rustic table for our dining area. The Modern Round Table plans almost fit the bill but not quite. The local Lowe’s had the perfect answer—Birch plywood. It also fit our Alaska setting.
I laminated two half sheets of 3/4” together, then cut out a 48” round top with a router.

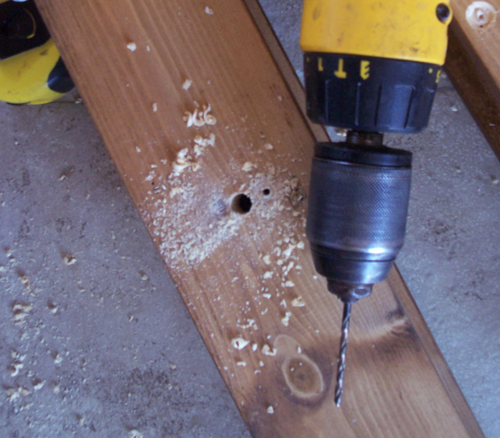
This was my first woodworking project and I absolutely love it. I think it turned out amazing and was actually very simple to do. I just got some construction grade lumber from Home Depot and borrowed some tools and got started. I did have to buy a Kreg Jig, which is an amazing tool by the way. I am not complaining about having to buy it since I have used it on many projects since!
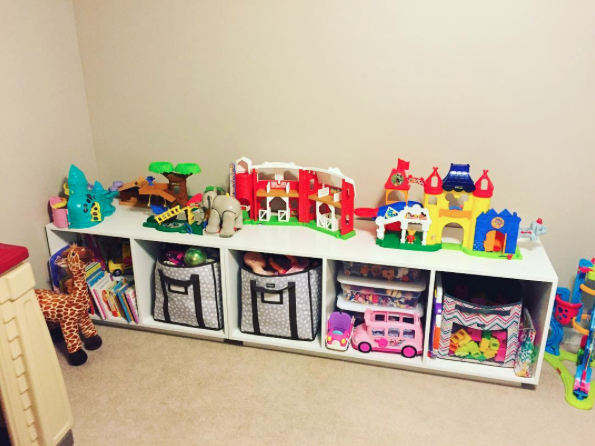
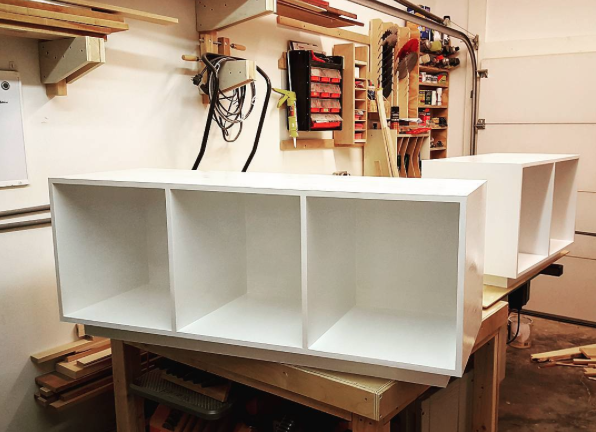
I built these modern storage benches for some friends of ours. They needed some space to store their little girls toys. They planned to use some wicker baskets they had. I took the measurements for the baskets and built the storage spaces around it.
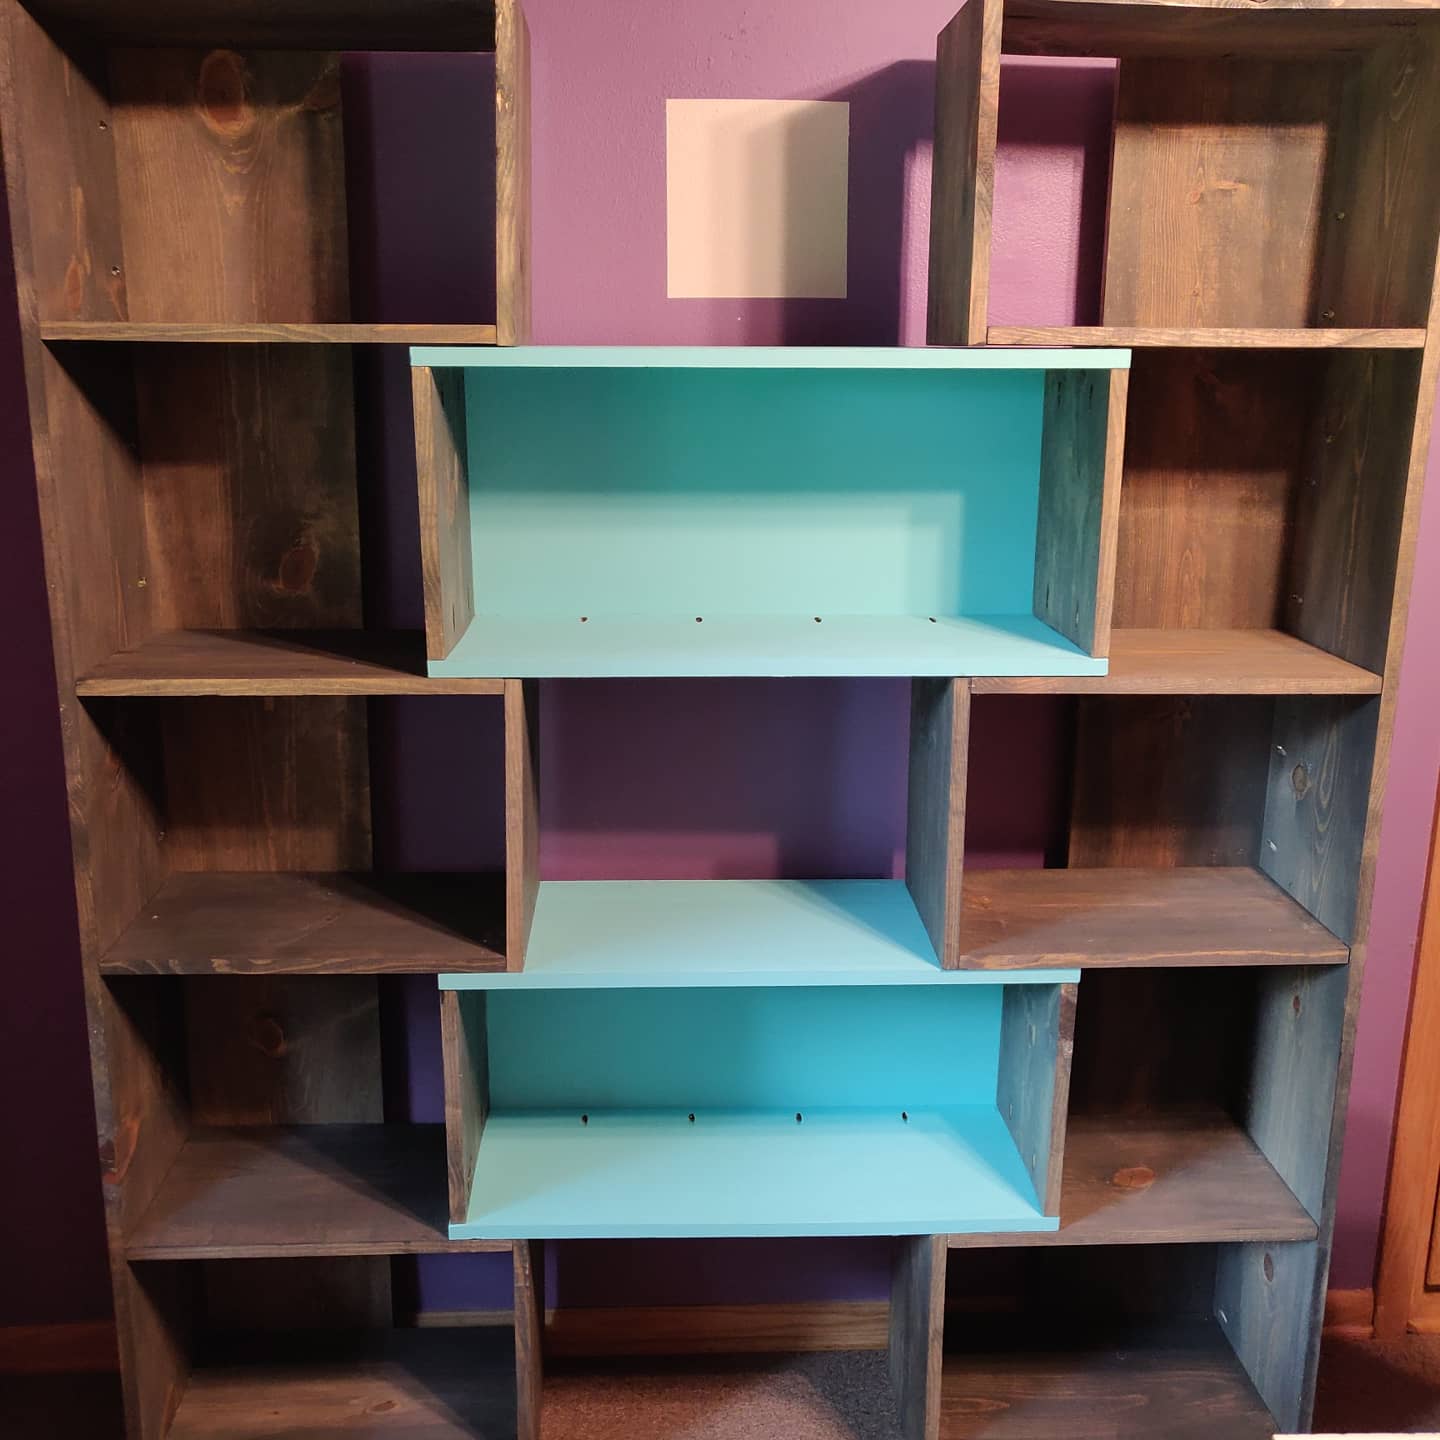
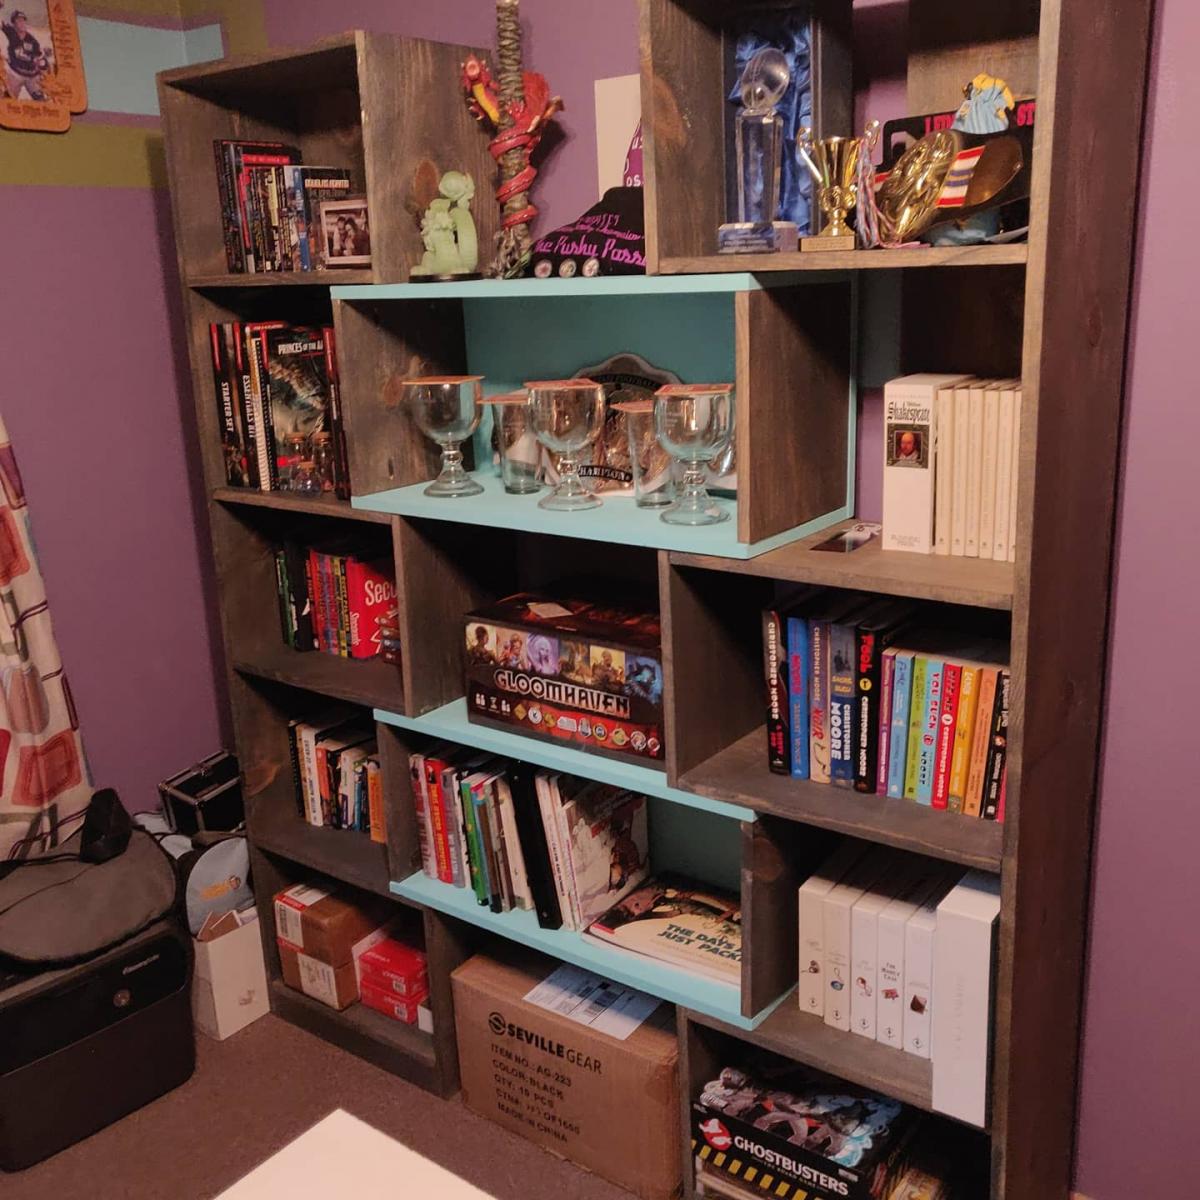
Made over two weekends - used pocket holes - stain is charcoal grey and the paint is rainwater by Behr - had some issues with warped wood but it still turned out great - I did not secure the cubbies to the bookcases; my hubby likes the idea of being able to change the size - overall very happy! Plans are so easy to follow
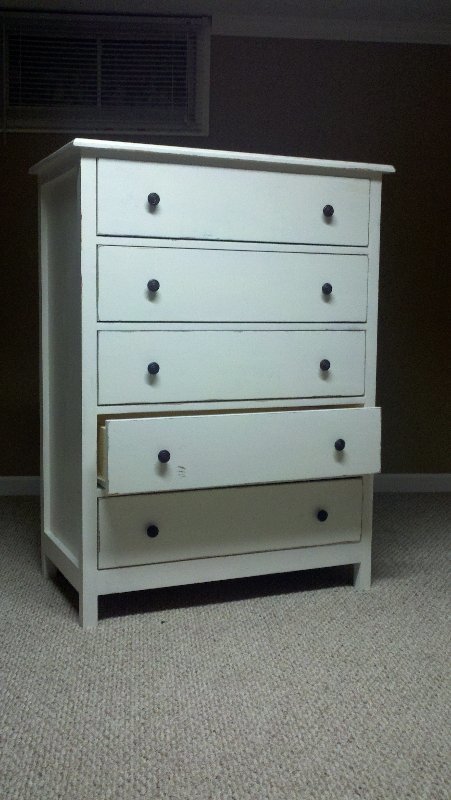
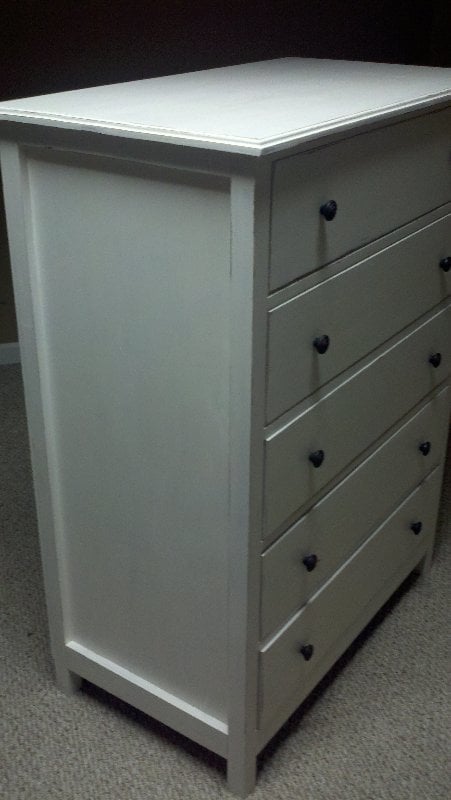
I took Patrick's design and expanded it. The dresser is deeper and has one more drawer than the original. The finish is only slightly distressed because that's how my 'client' wanted it. The drawer slides were the toughest part. The carcass MUST be square or at least very close. I built the whole thing, then tore the carcass apart and rebuilt it because my first attempt was not square enough. Obviously the drawers won't slide smoothly if it isn't square.
Edit: I get a lot of requests for the plans and/or cut list for my modifications. I do not feel comfortable re-posting the plans on my website and can not do it here either (only pictures can be uploaded). Please feel free to e-mail me (bbomerATgrvland.com) or request the plans in the comment section of my blog (linked below) and I will send you a .pdf that shows my modifications at each step.
Edit 2015-01-26: I do not believe that I am getting notifications for all the comments here, so please use one of the methods above.
Edit 2015-01-28: I have posted my alterations here: http://grvland.com/wordpress/2015/01/28/dresser-plan/. Please comment there with any questions, because I can not guarantee that I will get notified if you comment here.

Sun, 03/16/2014 - 19:08
I would love to receive a copy of your modified plans. My email is [email protected]. It looks great and is just what I need for my daughter's room!
Wed, 04/02/2014 - 20:24
Please send me the modified plans to [email protected]. This piece looks amazing, and I can not wait to try it out!
Thanks,
Sara Mitchell
Mon, 09/15/2014 - 07:36
Please send a copy of your modified plans! This dresser is beautiful, and I would love to try and recreate it. Please send the plans to [email protected].
thanks!
Lauren

Tue, 11/04/2014 - 12:13
Please send me a copy of your modified plans. The dresser looks great! You can send it to me at [email protected]. Thank you very much!
Ana
Sat, 12/13/2014 - 20:24
Please send me a copy of your modified plans! Its just what I'm looking for. [email protected]
Sat, 12/27/2014 - 17:17
I would love your modified plans for this dresser! my email is [email protected]
Thanks

Sun, 12/28/2014 - 09:07
If possible I would also love to use your expanded plans. My email is [email protected].
Thanks and happy holidays.
Steve
Sun, 12/28/2014 - 17:07
I would love o get the updated plan for the larger dresser. Please email to [email protected]. Thanks!
Sun, 12/28/2014 - 21:58
I would love to have a copy of your plan as well. My email is [email protected]. Thank you in advance.
Sat, 01/03/2015 - 14:35
Hello,
I would also love a copy of your plans. My email is [email protected]. Thanks in advance :)
Tue, 01/05/2016 - 10:32
Hi .. I was just wondering if I could get the free plan for a three drawer dresser ? Nothing fancy , just wat to make one for my wife for her b-day , comin up soon ,, any help would be great ,, Thanks , and hope you have a happy new year/ Bye for now , Claude.
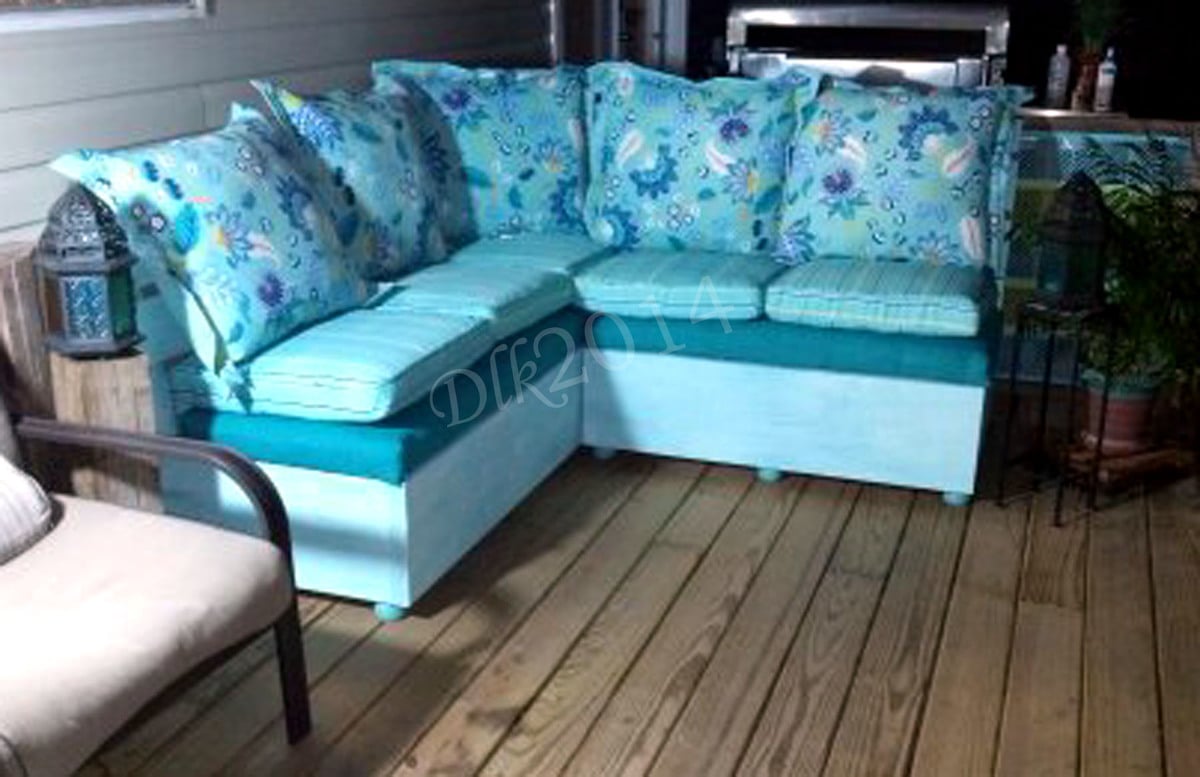
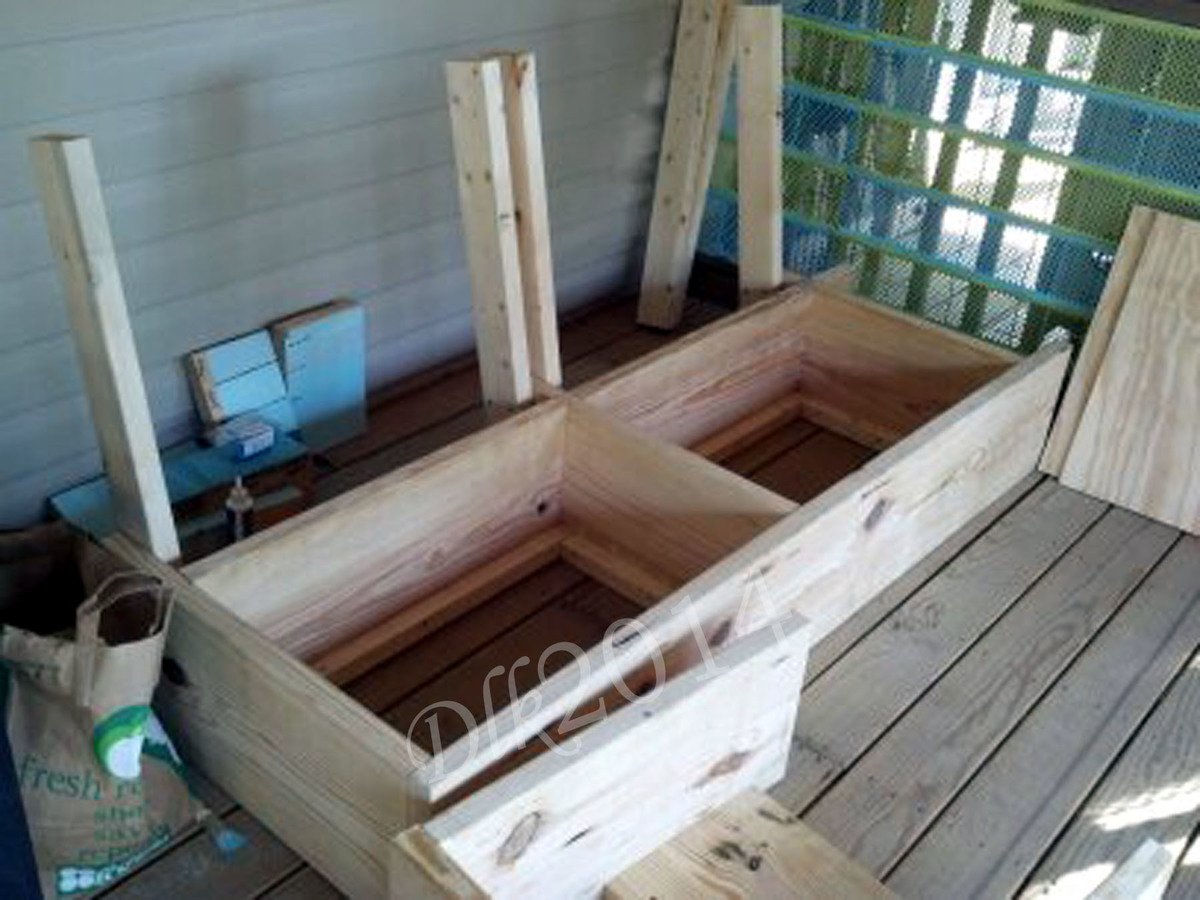
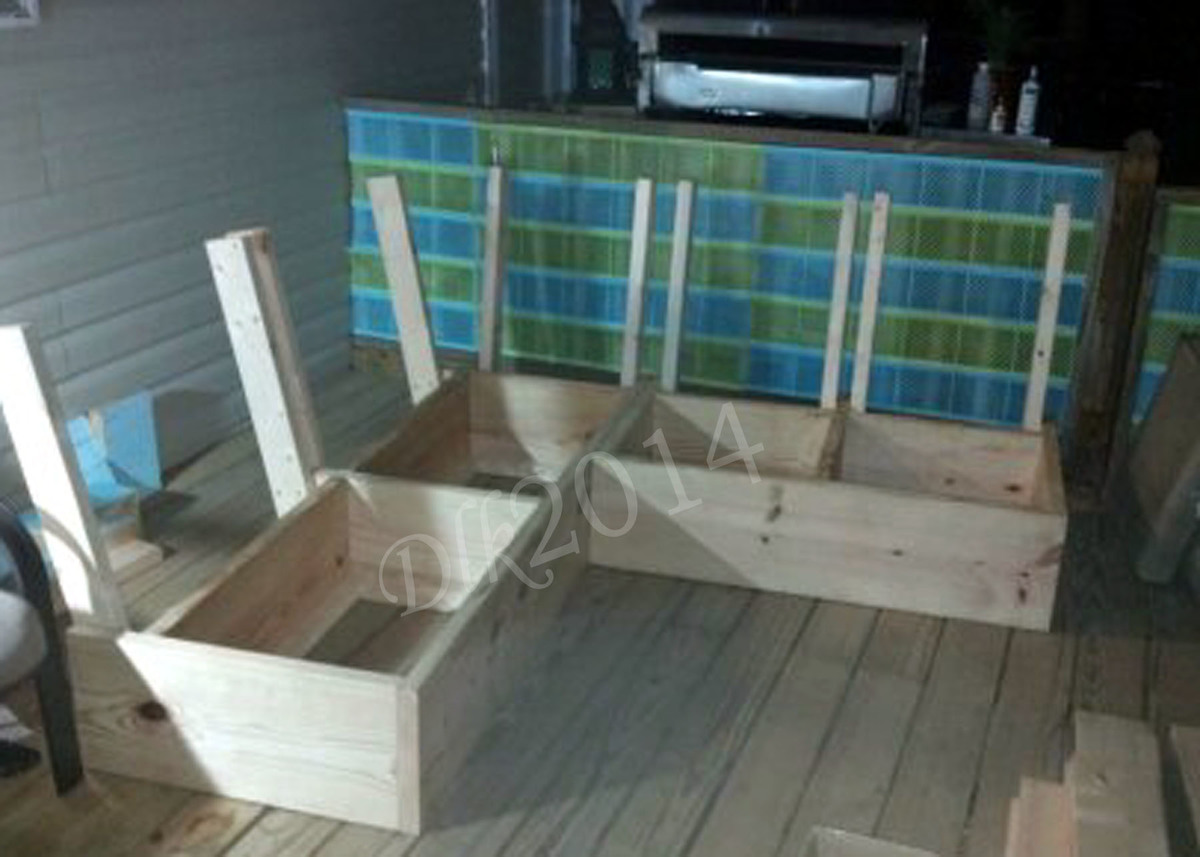
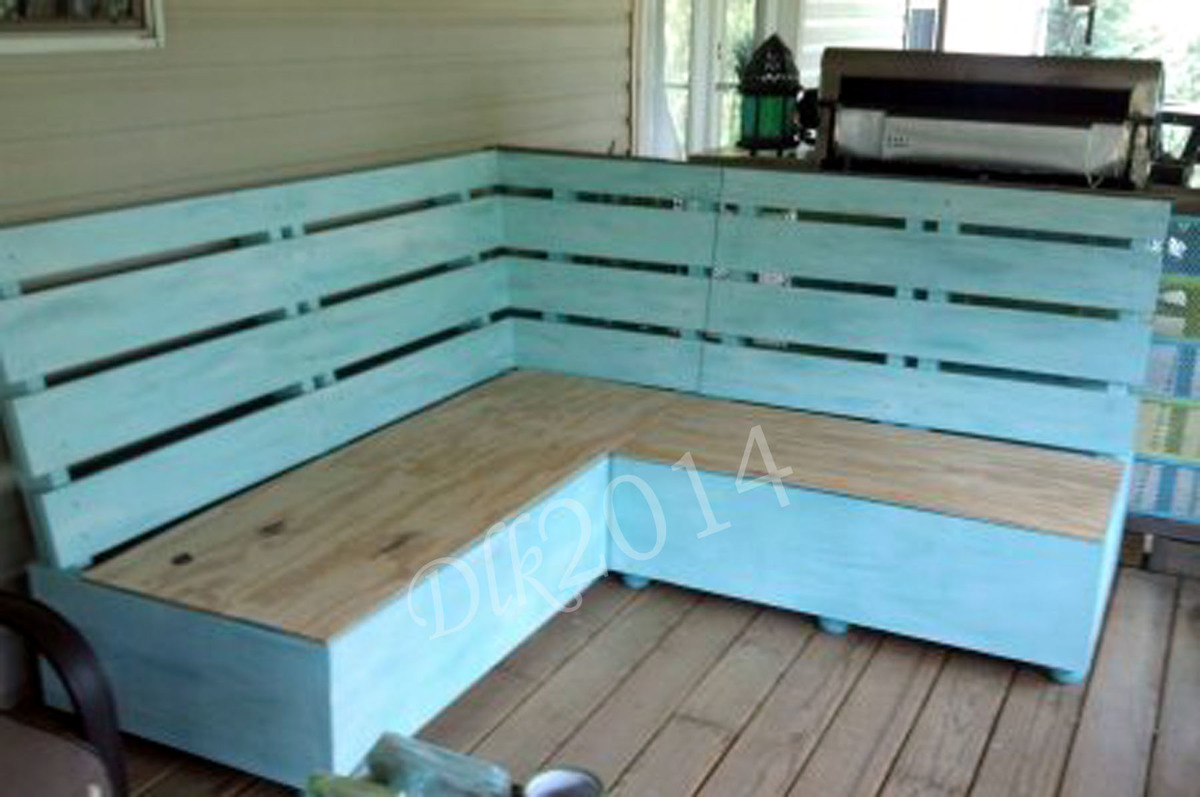
This is a project I completed last summer. I made some revisions to the original plan. First off, I wanted a corner sofa, so I had to figure out how the corner would work. This was my first ever wood working project and I'm not an architect or engineer, so it was quite challenging. I made a mini model out of foam core to give me a visual of how it would all work together. That was a tremendous help and I recommend doing this to anyone just starting out.
I did not use the part of the plan that included the foot pedestal. Instead, I built the sofa flat on the ground and in the end added store bought feet mainly because I liked the looks of them.
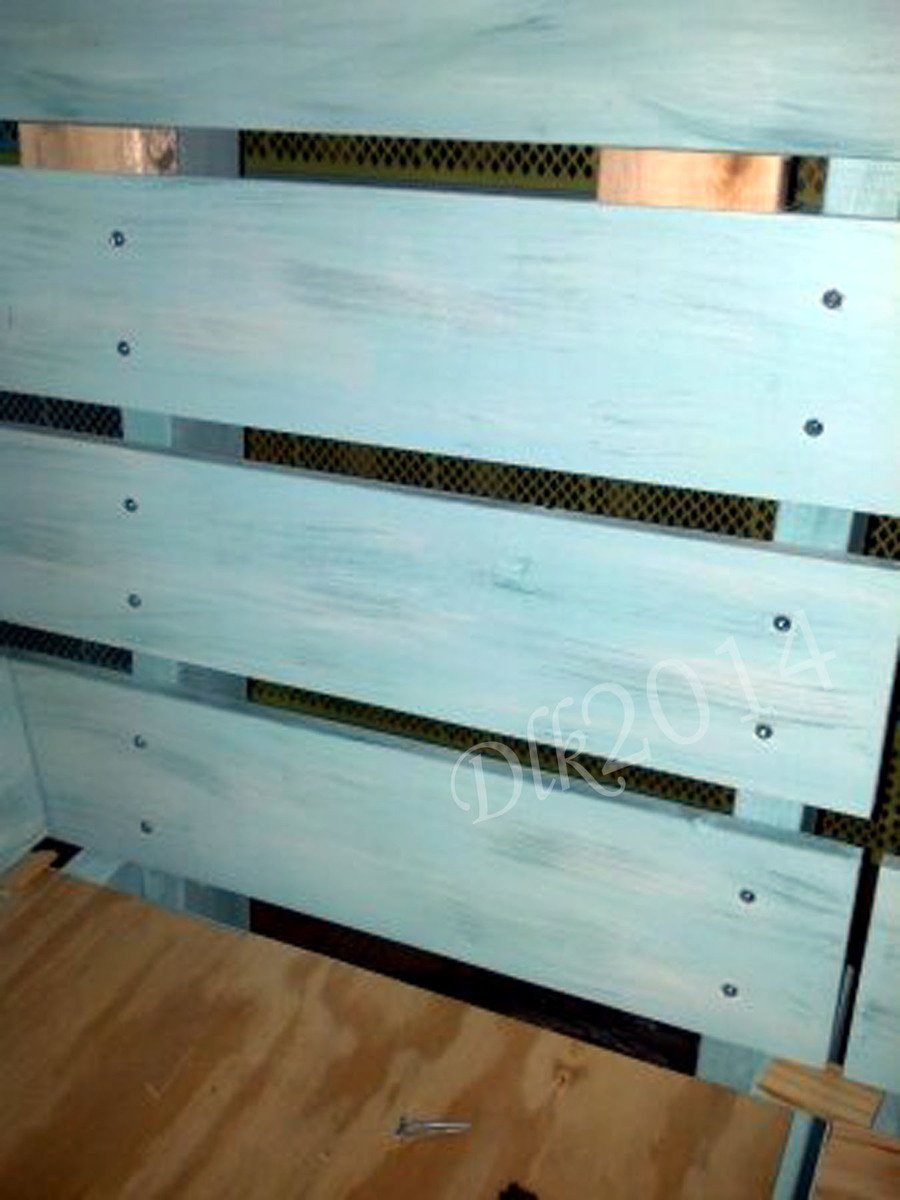
The sofa was built exclusively with the Kreg Jig, except for attaching the horizontal back pieces. I could have use the jig for that part as well, but liked the rustic look that screwing them in to the back braces provided.
I didn't want a padded back because the sofa sits outside on a covered, screened in patio year round. I wanted the ability to take off and wash all the cushions, or to use the bench without the back cushions sometimes.
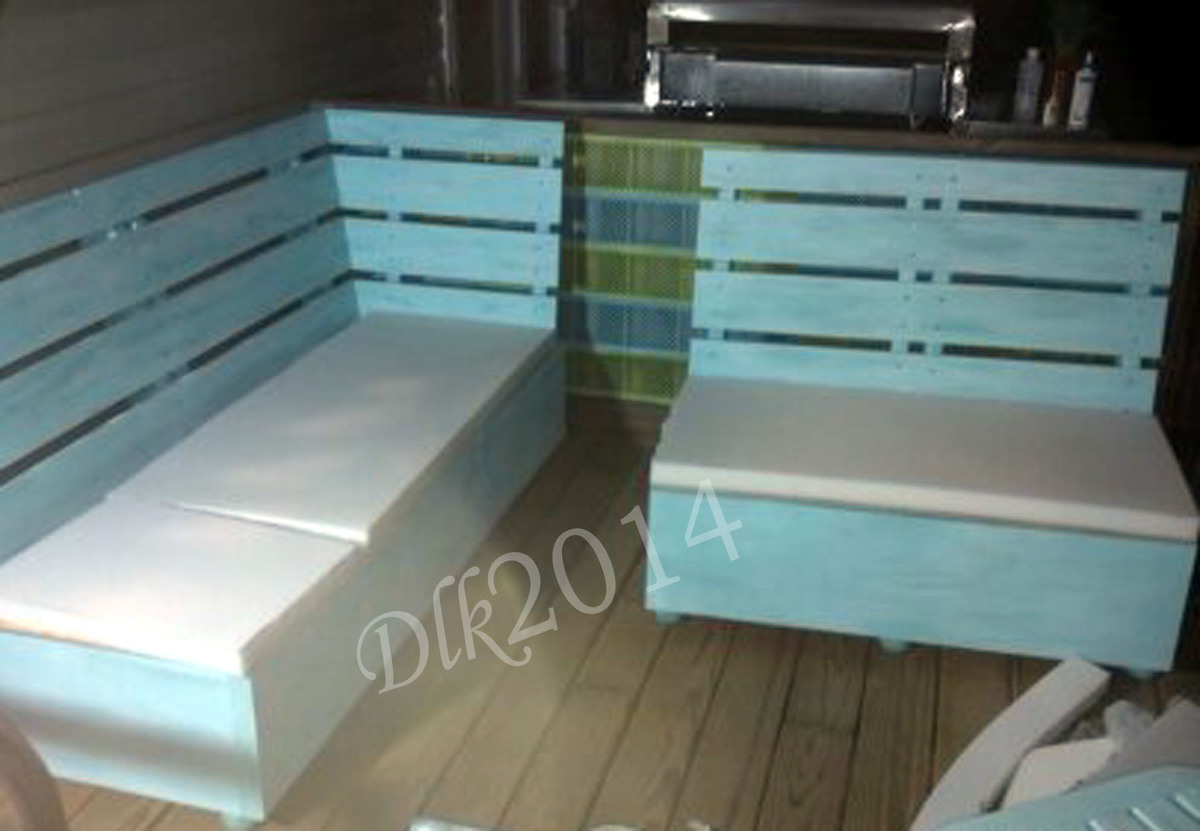
The 2 sections of the couch were built as independent units and are movable, so one can sit across from each other. Both sections have ample storage.
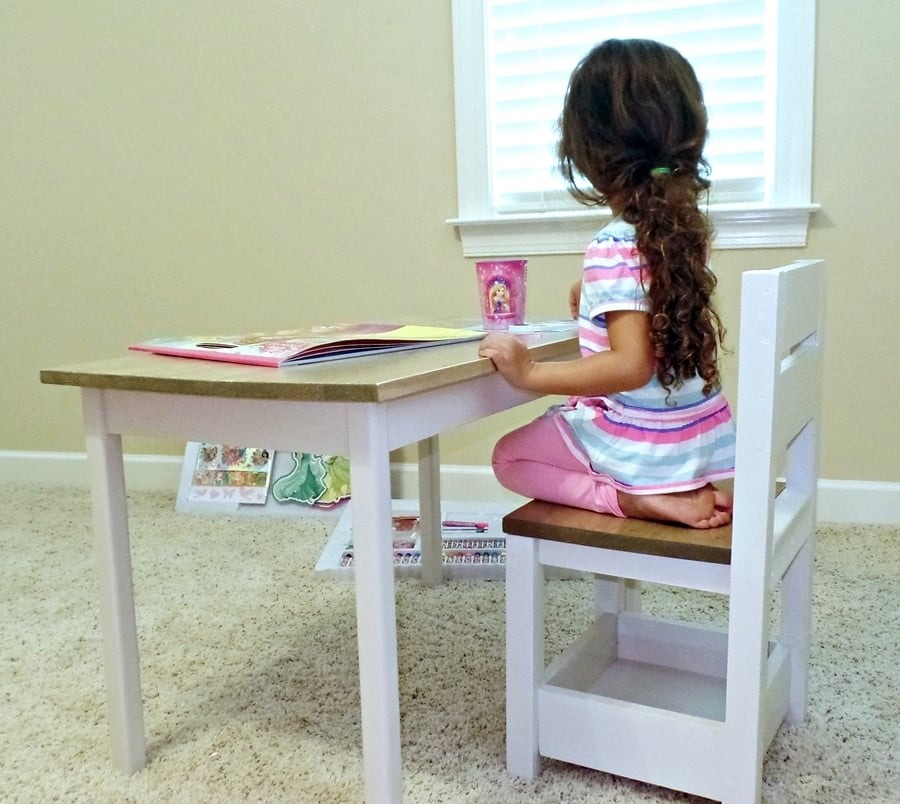
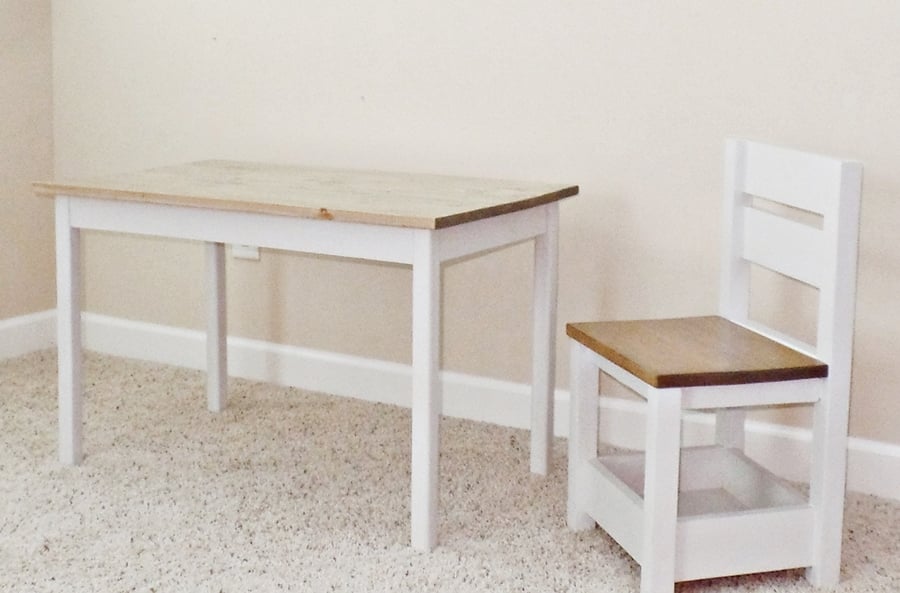
This was my first venture in building furniture. My granddaughter needed a new table and chair and insisted I could make it myself since I built her a playhouse (from a kit.) That's when I googled and found Ana White's amazing site and all the easy to follow plans.
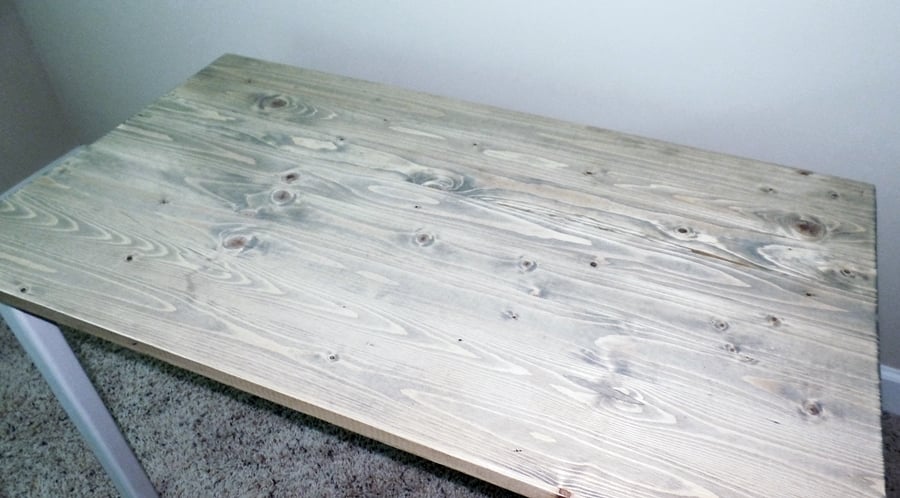
I chose the Clara Table and Childrens Storage Chair. They reminded me of school - and my granddaughter who was 3 at the time loved playing school. Plus, since her parents plan to homeschool, I thought this would be a great starter setup.
I started with the chair. I did struggle with screwing it together, so it's not perfect. But it is sturdy; the storage box helped with stability too. After struggling with the chair, I decided to buy a kreg jig like Ana suggests - and boy did that make a difference! The table went together so fast and easily, I was literally in shock. And it's so strong I can sit on it. I'm sure if I had tried building it with just screwing the regular way, it would have been wobbly.
I bought a 24"x36" tabletop instead of using the 3 boards joined together and so had to adjust the measurements of the apron pieces accordingly. I thought it would make a smoother writing surface. I originally intended to paint it all white, but the grain on the top was so gorgeous, I decided to stain it - and I stained the chair seat to match.
This project was so much fun and came out so nice, I decided to build a toddler bed from Ana's plans. You can see that project here: Toddler Bed

This was a birthday present for my husband. I made a few adjustments because we didn't want that big of a table. To make it decorative, I added 45-degree angles for the outside edge and then added the planks on the inside. I found the planter size that I wanted and then I built it to fit around the planter that I used for the ice cooler. I liked the hole in the middle for the lid so if I wanted to I could take out the planter/cooler and put a table umbrella in its place for shade if we wanted. We have a family of four so I wanted to make a bench for each person and enough room for more if desired. I mostly used the same plans for the table I just shrunk the size and made sure that they would push in under the table. My husband loved it.

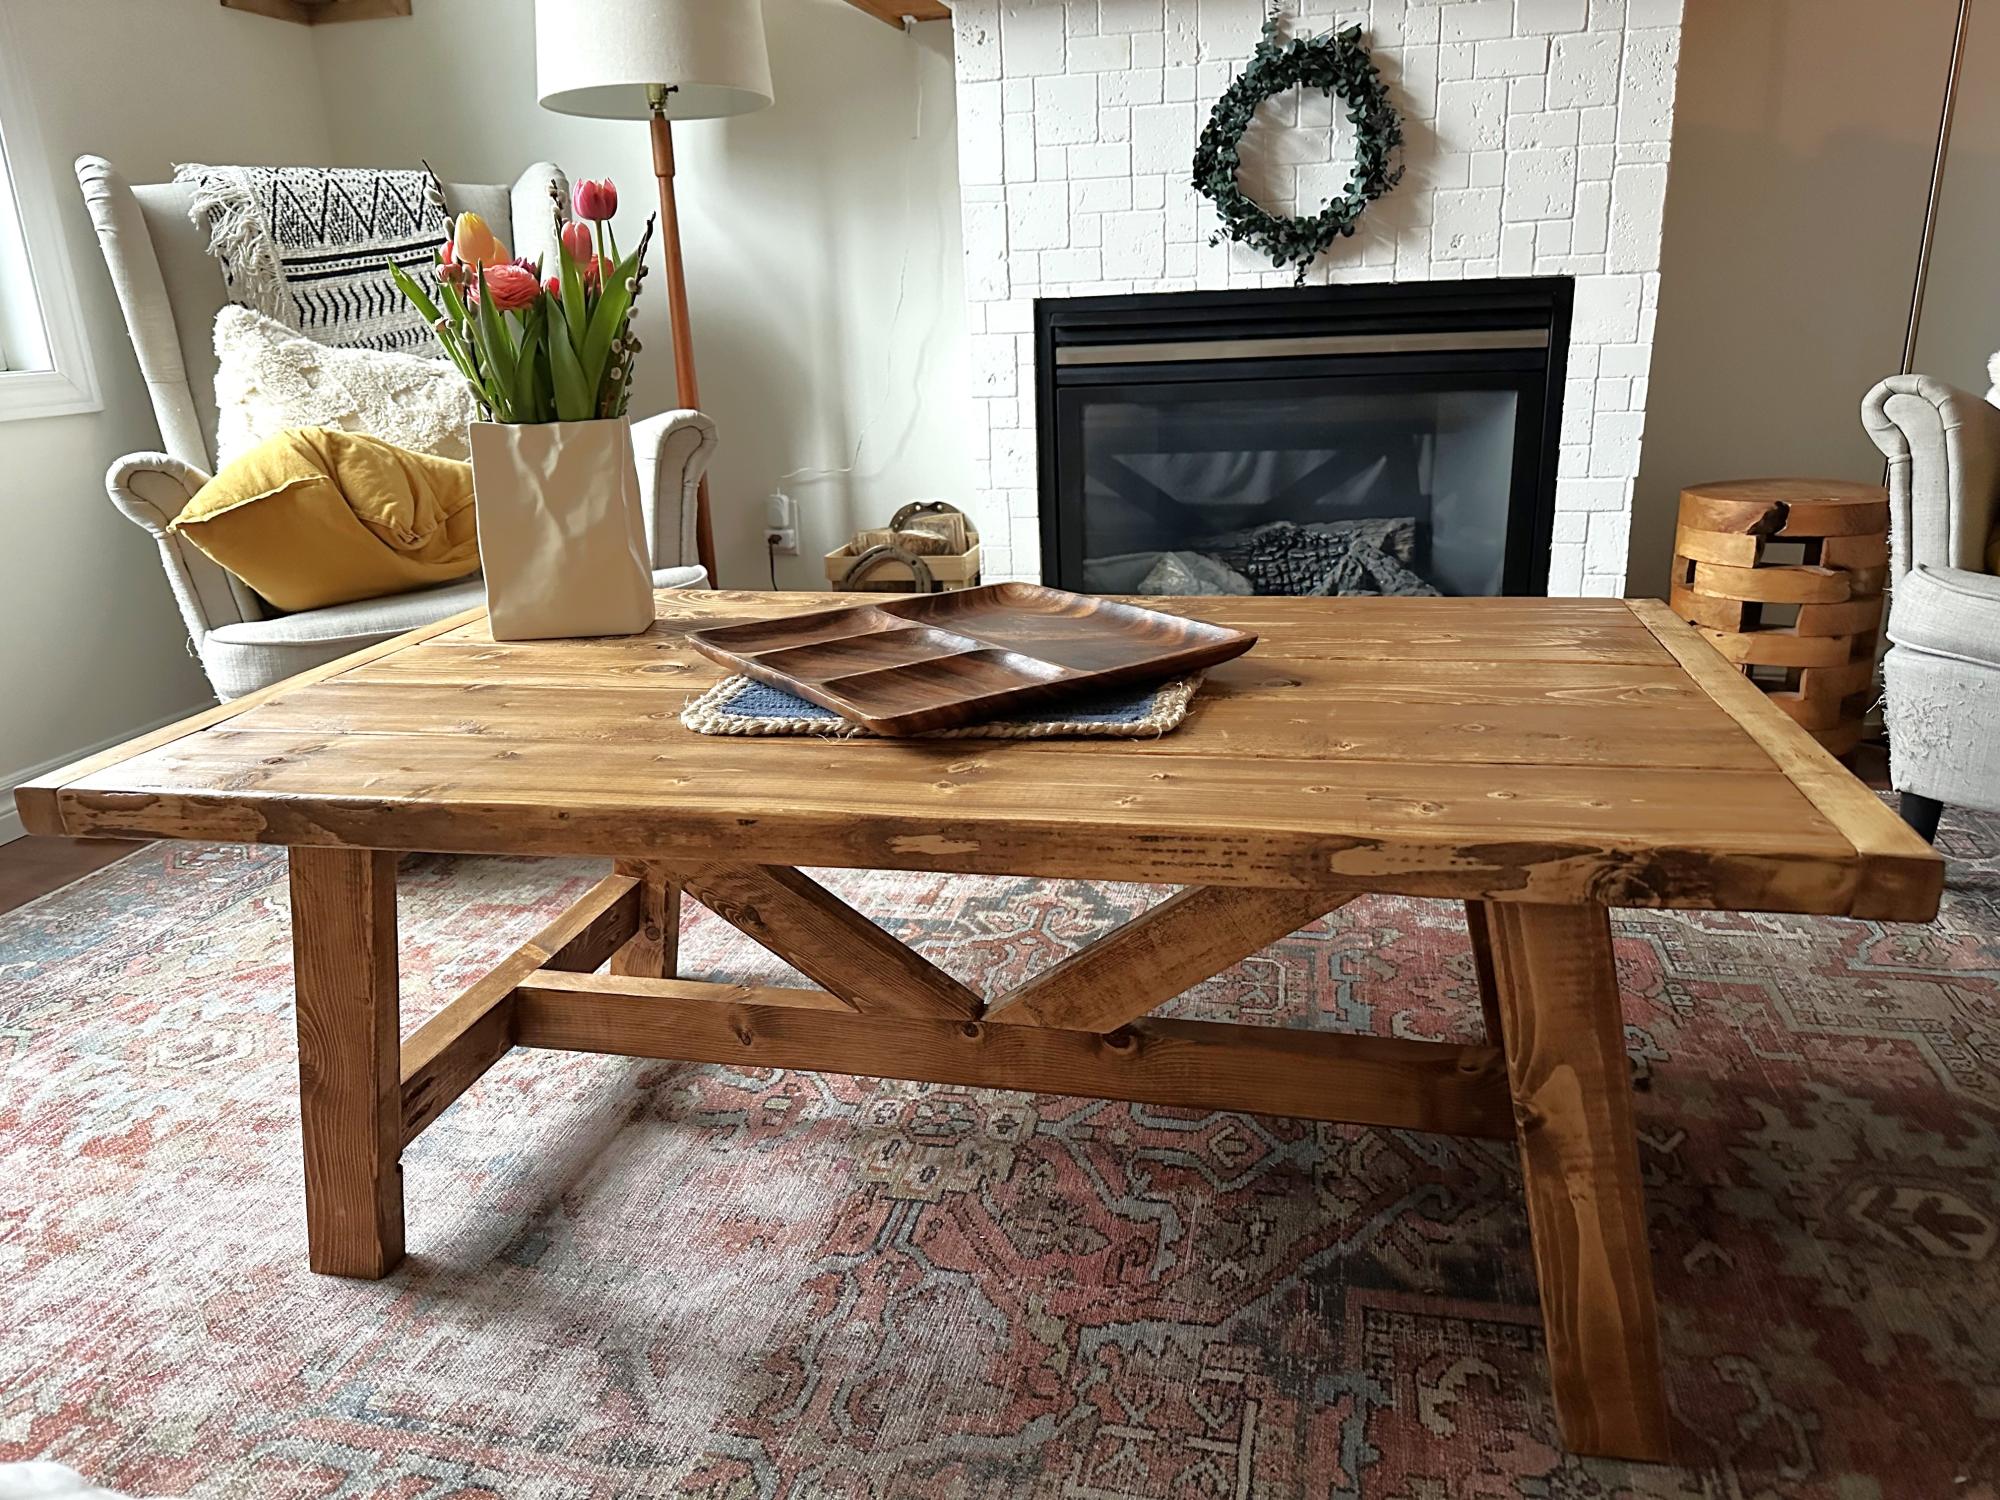
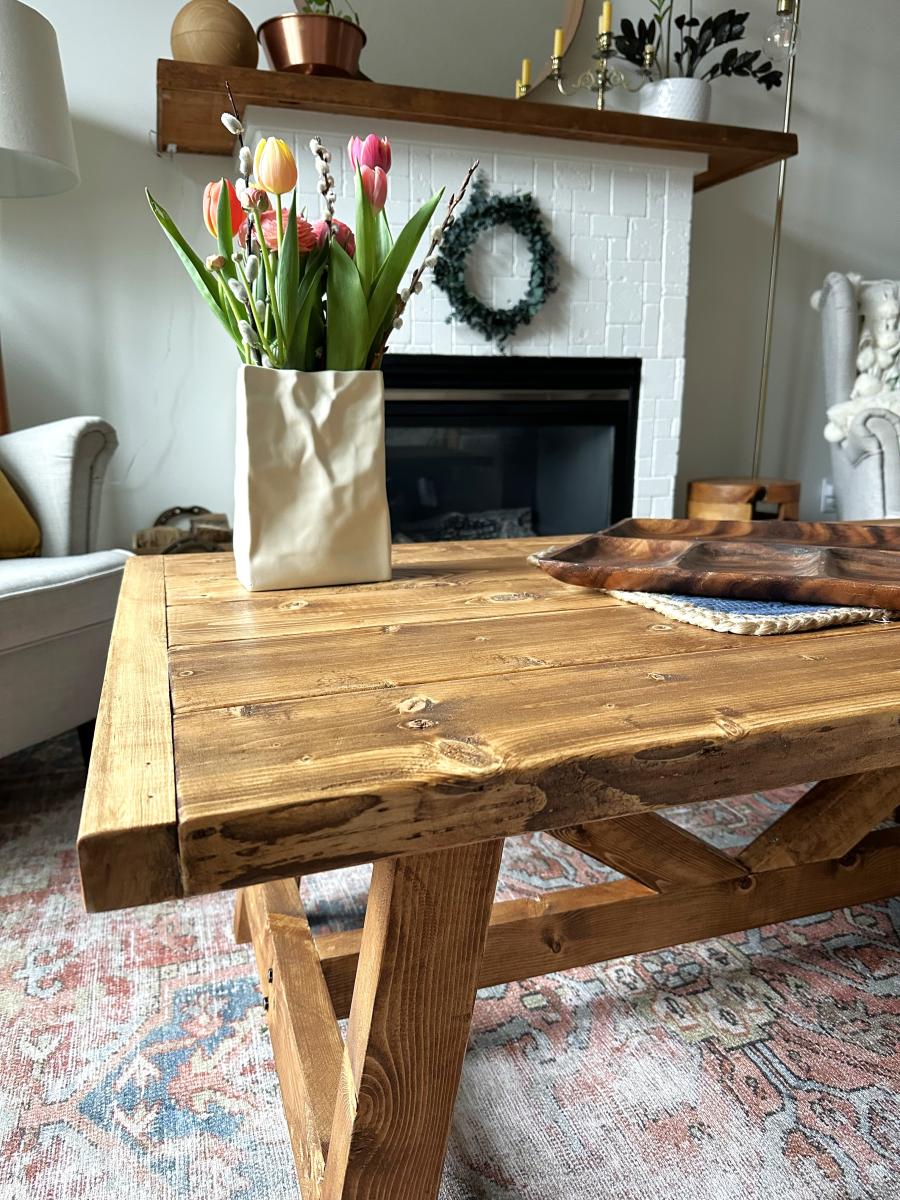
I saw the Truss Coffee table and HAD to make it!
I couldn’t find 2x3 at my hardware store so I ripped 2x6’s for the base. I also ripped 2x4 for the top end pieces. I used the color Provincial to stain and covered it in Polyurethane. I just love it.
Mélanie S.
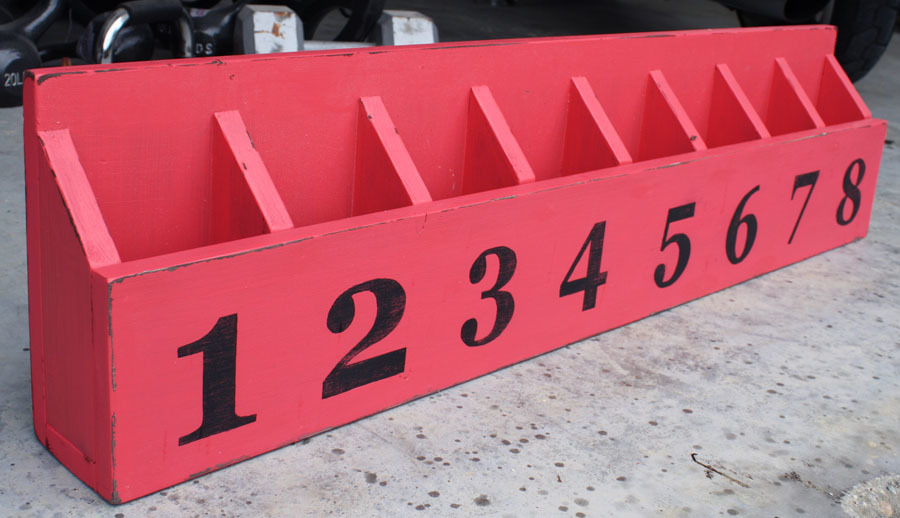
This project was super easy and free! I just used some scrap wood I had, along with stains and finishes already on-hand and built this Pottery Barn Kids knockoff shelf while the baby napped! For the complete play-by-play, click my blog link!

Tue, 08/21/2012 - 21:24
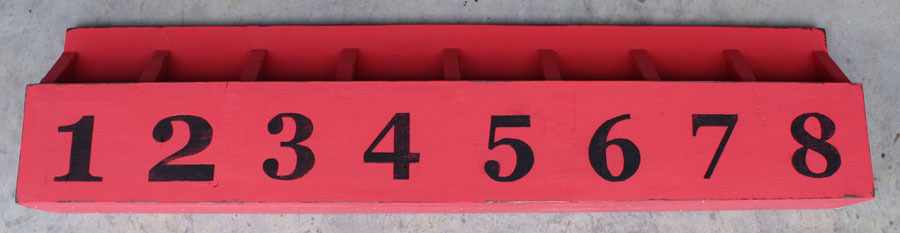
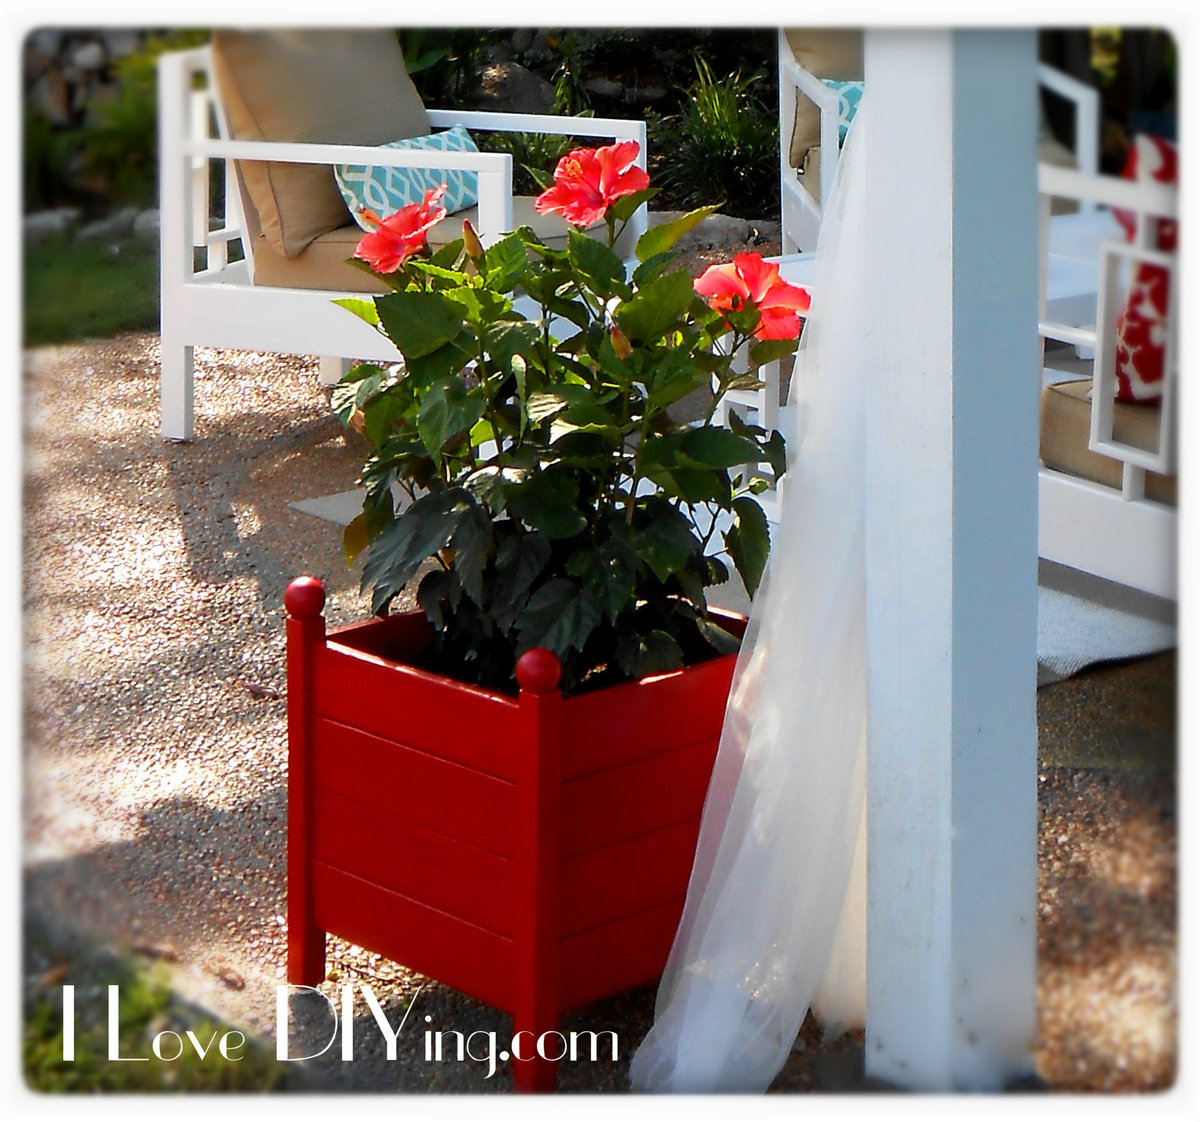
This looks great! I just finished the wood part of this project, and was looking to see what everyone used for a finish. Yours looks pink in the photo, but you say it is red paint. Is the picture true to color?

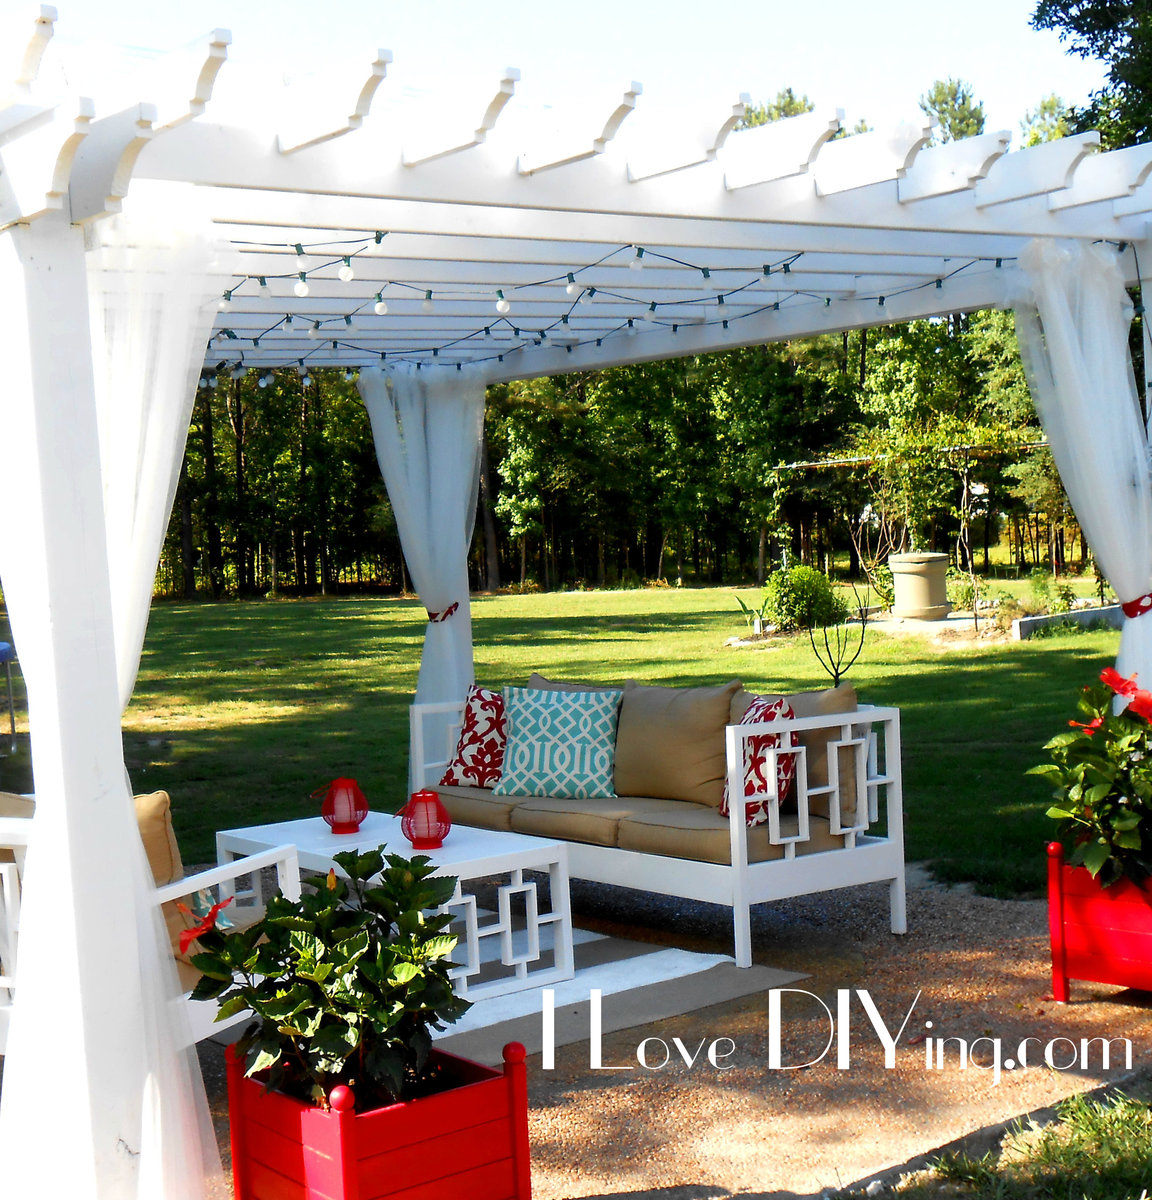
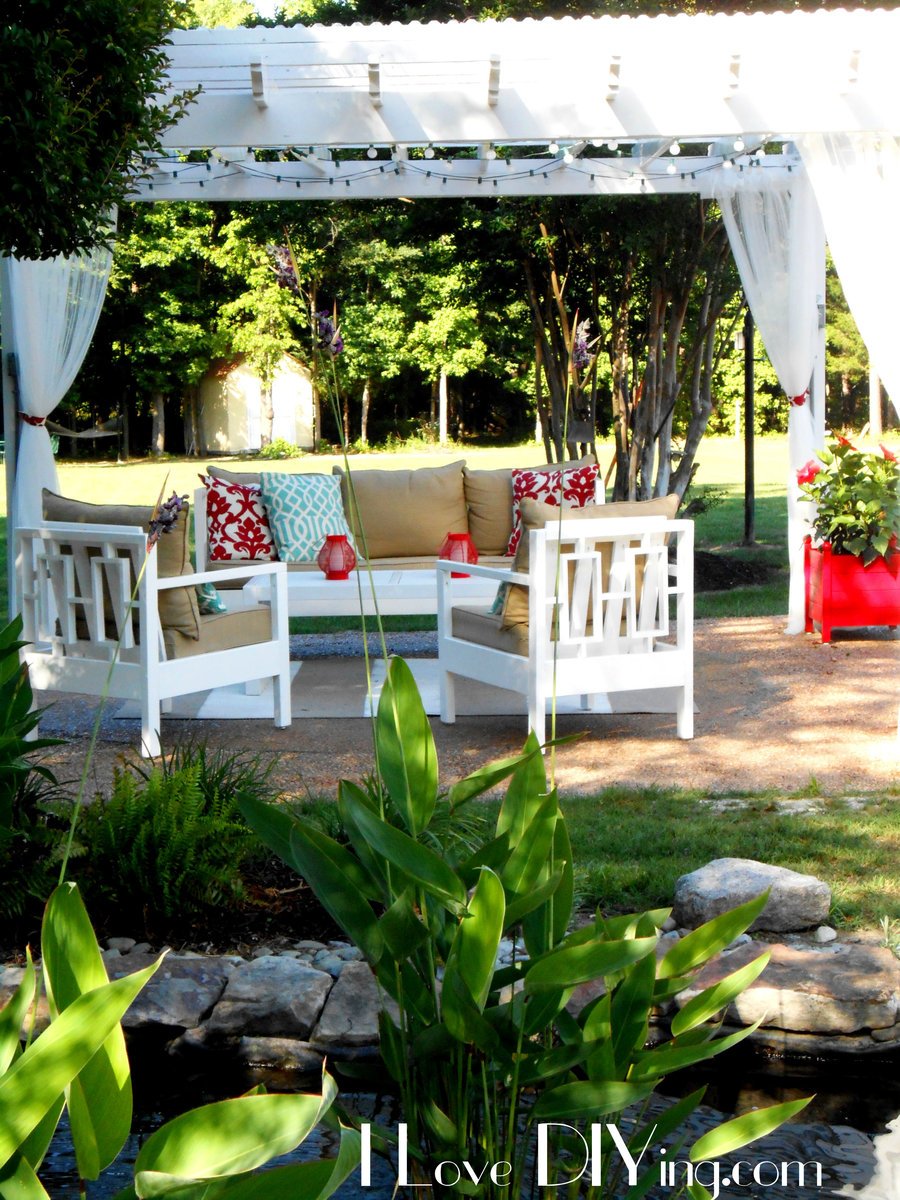
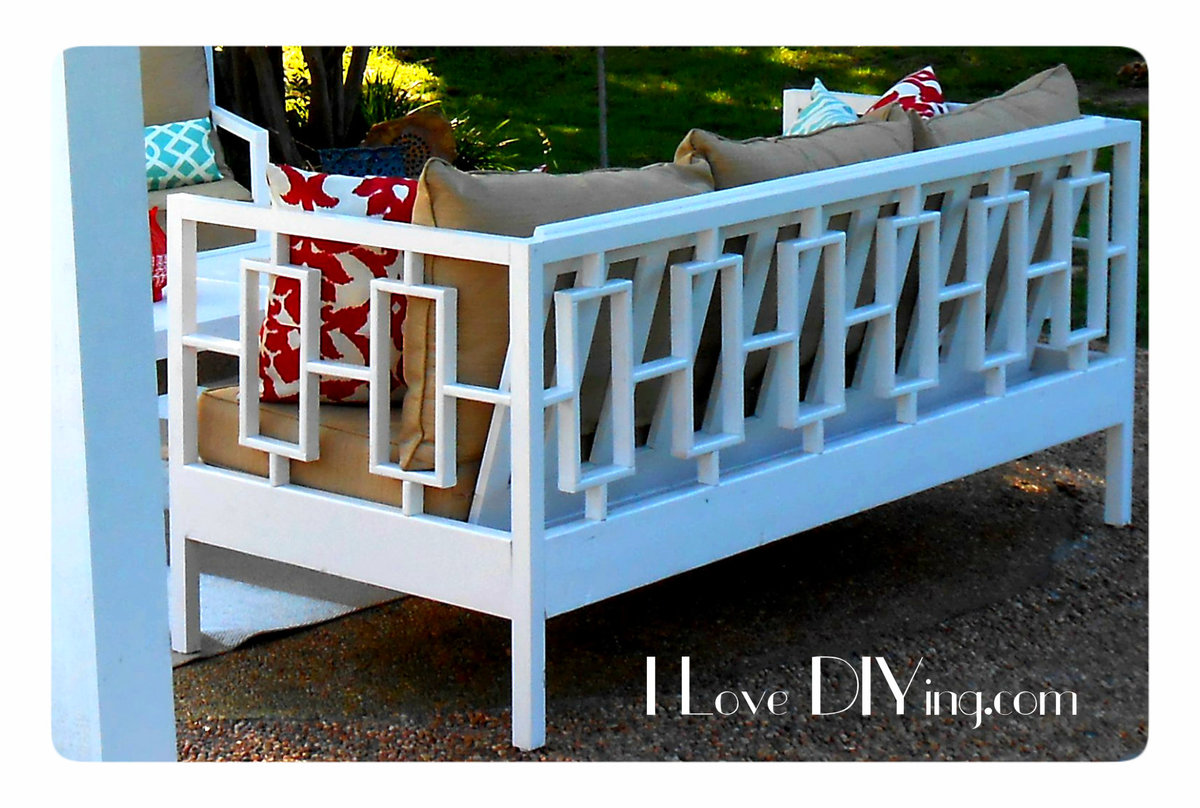
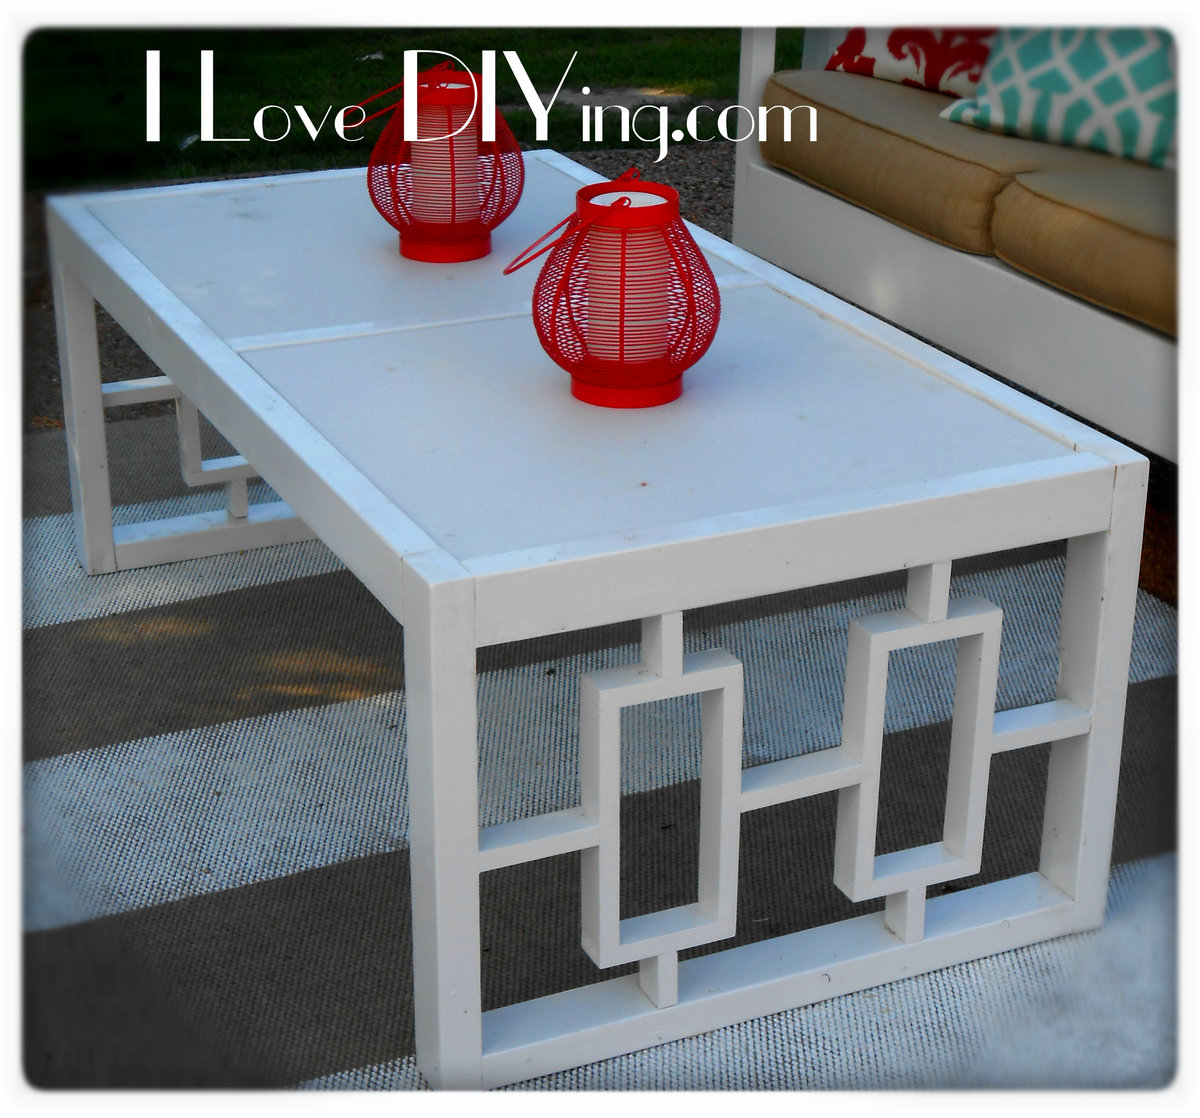
The pergola is finally complete! I'm sure I'll be adding some more things, but for now....I'm happy. I can not take credit for the Pergola, my husband built that, but there are lots of projects inside to tell you about. I built the sofa, coffee table, 2 chairs and 2 planters. It's a great spot for entertaining or just sitting with glass of wine. I really loved the Rectangles Daybed , but I really had no use for a Daybed, so with a few modifications, I came up with the sofa version. To make it more comfortable I used the slanted back idea from the simple outdoor sofa plan.I love how it turned out and it was fairly inexpensive too. Lumber cost was around $50. I used 2x 6′s, 2×2 furring strips, 1×2 furring strips and 1×4 furring strips. You really have to pick through the furring strips, with some patience I was able to find pieces that would work well for my project. Using the more expensive would would make things much easier, because there would be much less sanding and filling involved…but I love a bargain!! When I first built the sofa for this collection, it was for our covered porch. I was not intending to build any matching pieces. When we moved it to the pergola, I decided to build these 2 chairs. I used plan from the simple outdoor chair and modified the back to match the sofa. The lumber for the chairs cost about $25 per chair. I bought some 2X2 quartz tiles from the Habitat ReStore for $3 each! I thought they would work perfectly for the tabletop. I sketched up a quick design to match the other pieces and came up with this. I used 2×3′s and 1×2′s. The lumber cost was about $15. I also used the Square Planters with Finials plan. I love these planters do much and they were so simple! Thanks for all the fantastic plans and inspiration!!
Tue, 06/10/2014 - 11:05
Thank you so much Ana! I really love your work and can't thank you enough for all the fantastic plans!!
Thu, 05/12/2016 - 21:30
What a lovely space! Including the water feature behind the pergola. I'd love to pull it straight from your photos and drop it into my yard! (I'd better get to work!!) Thanks for sharing.
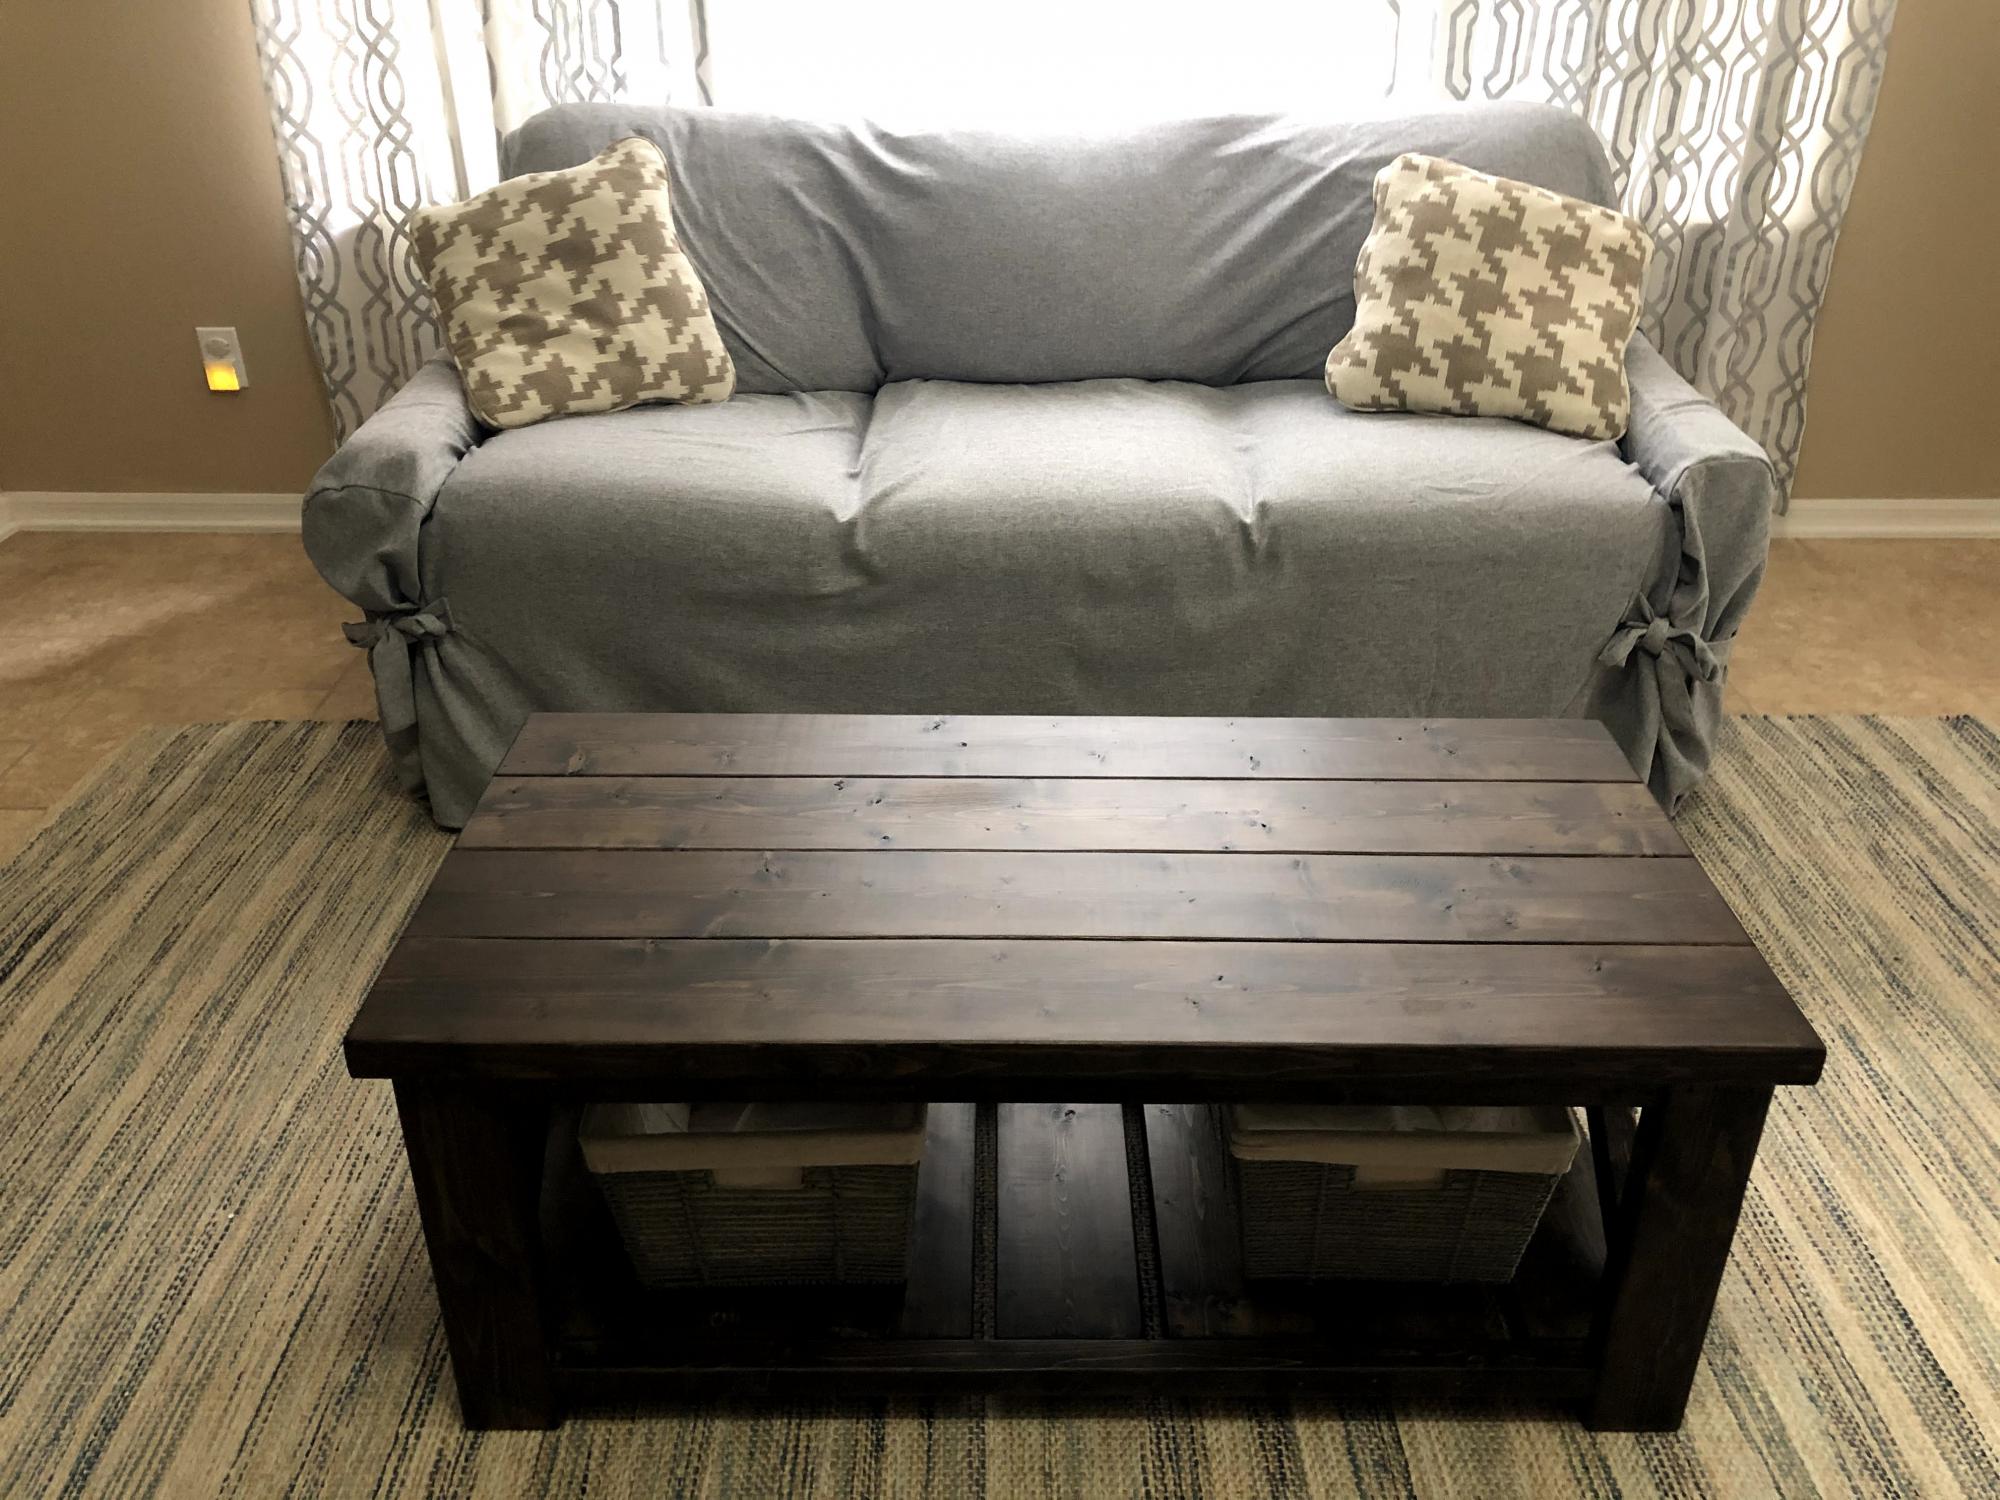
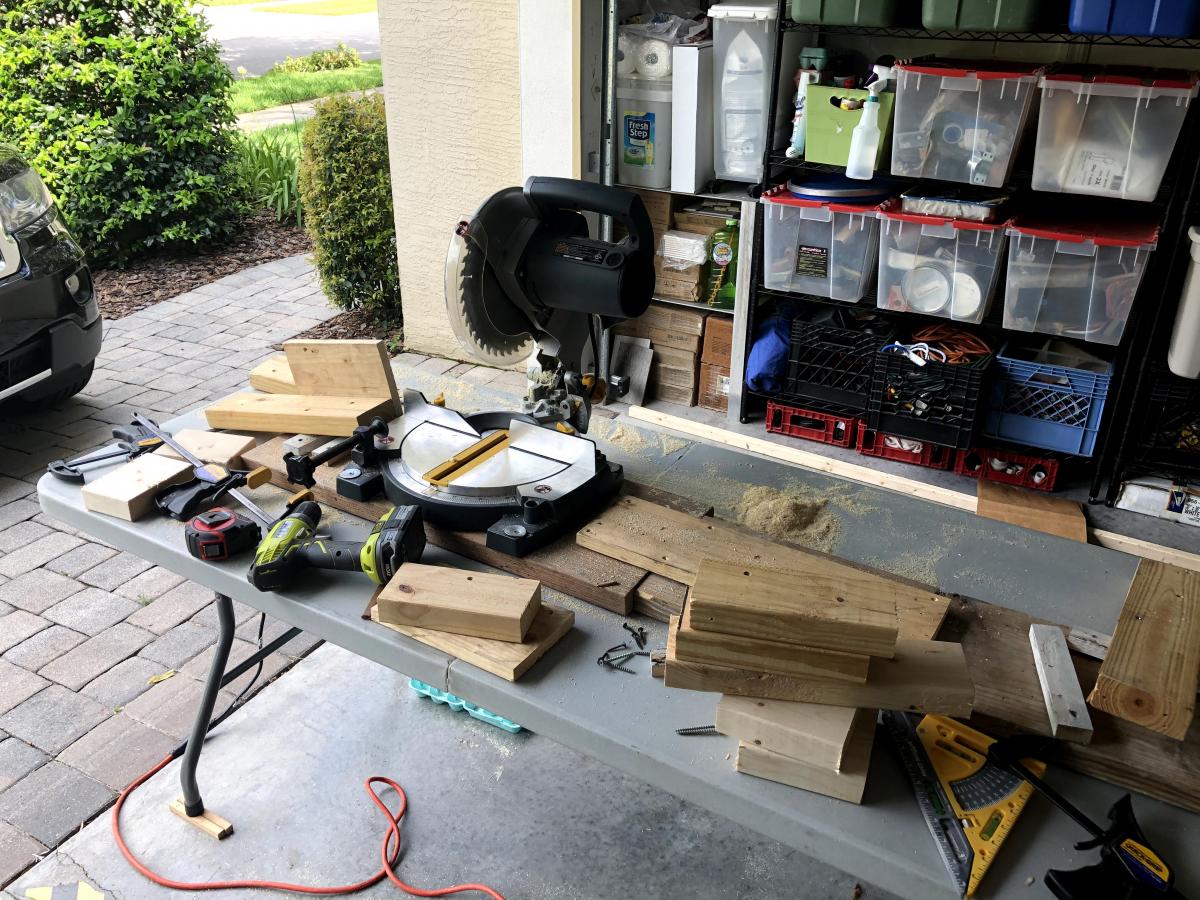
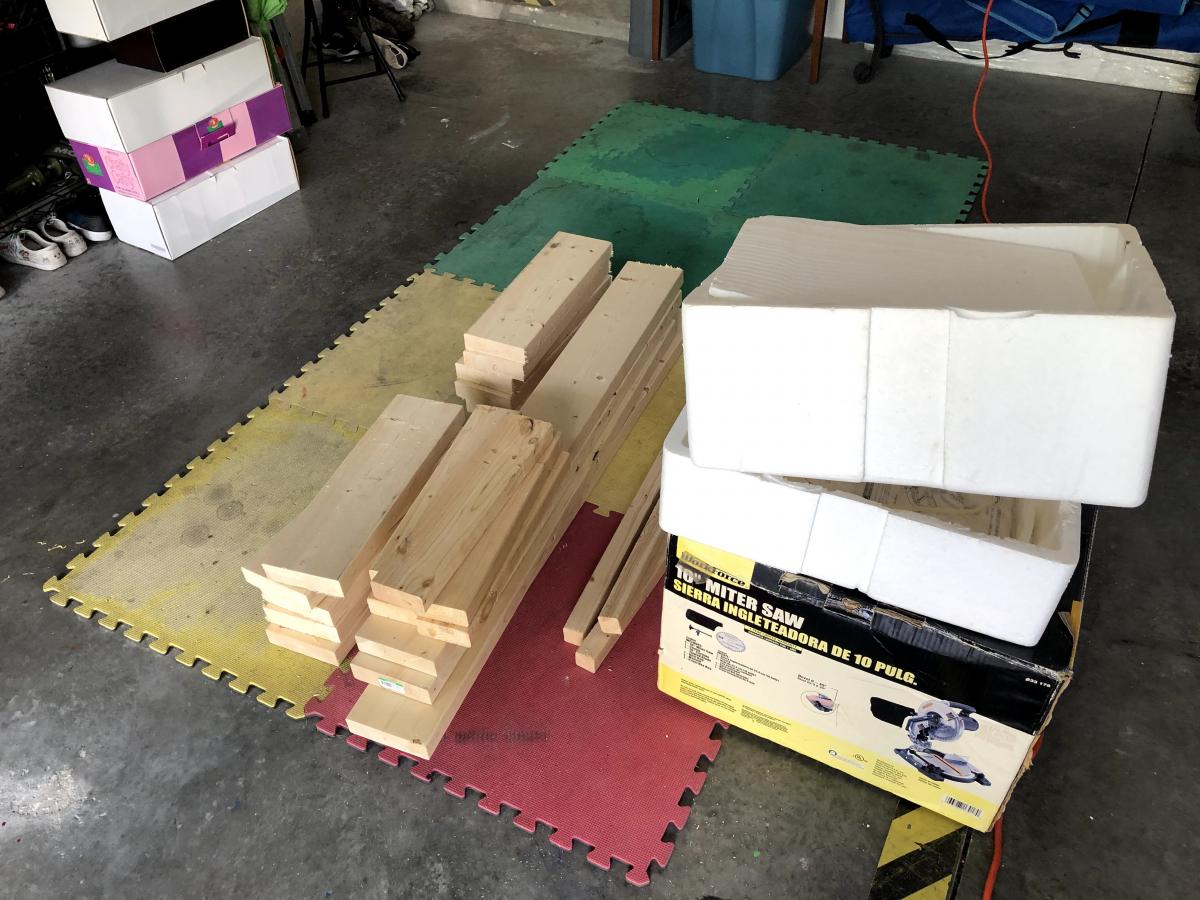
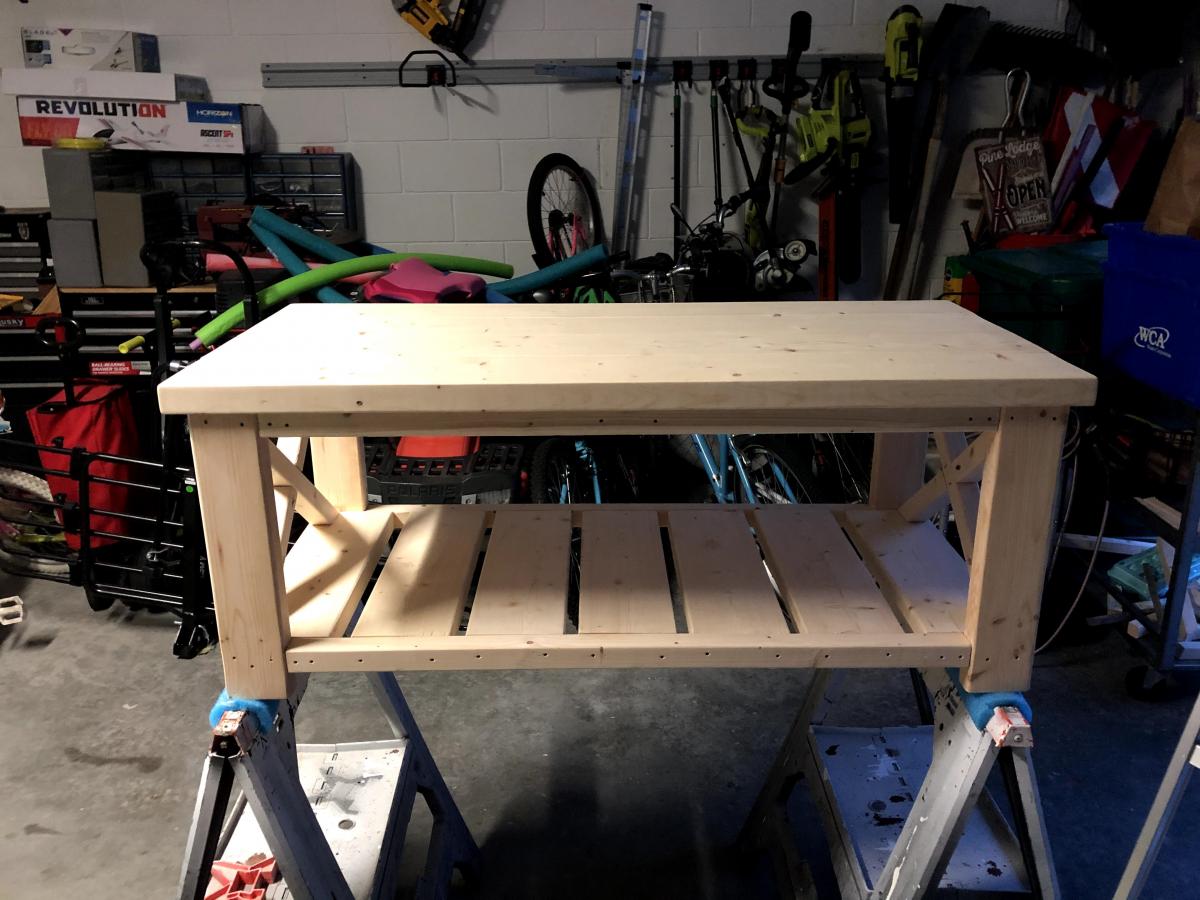
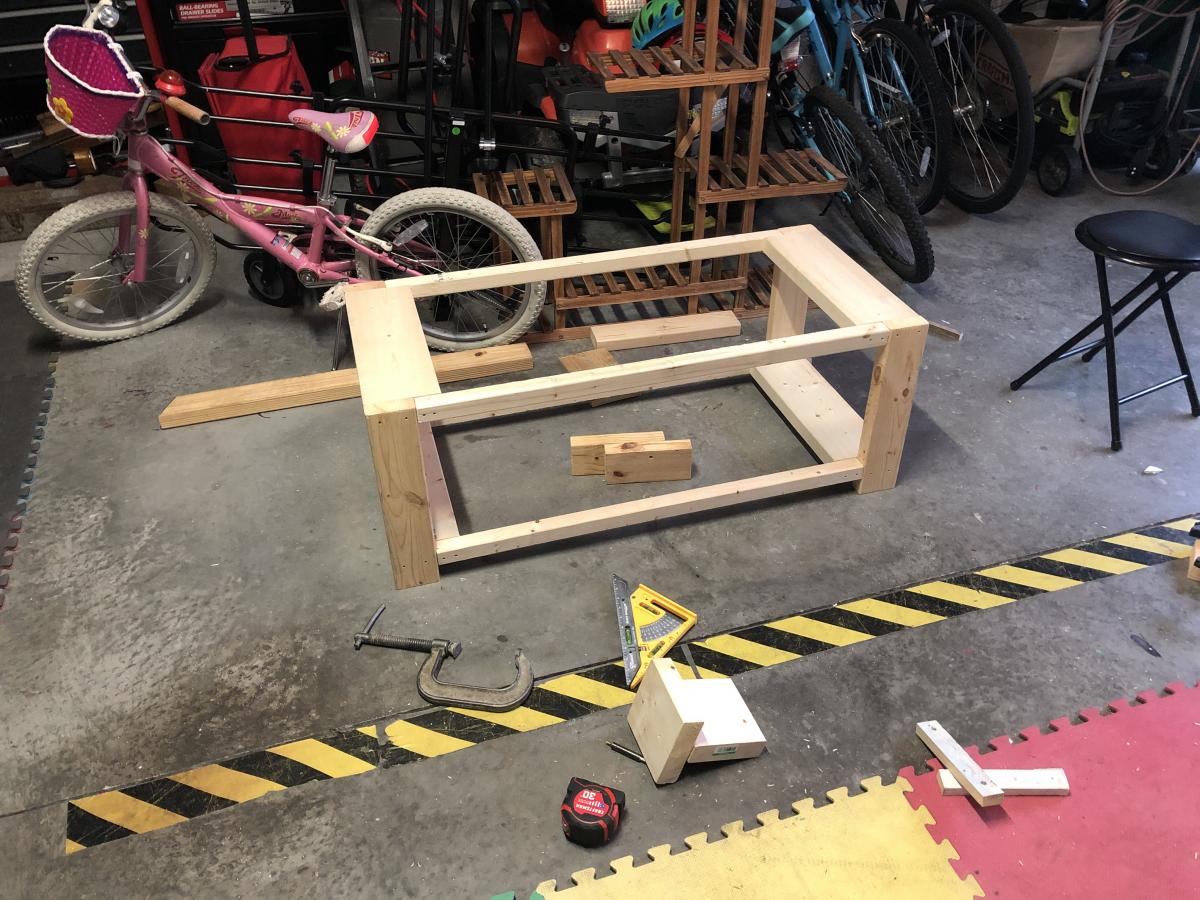
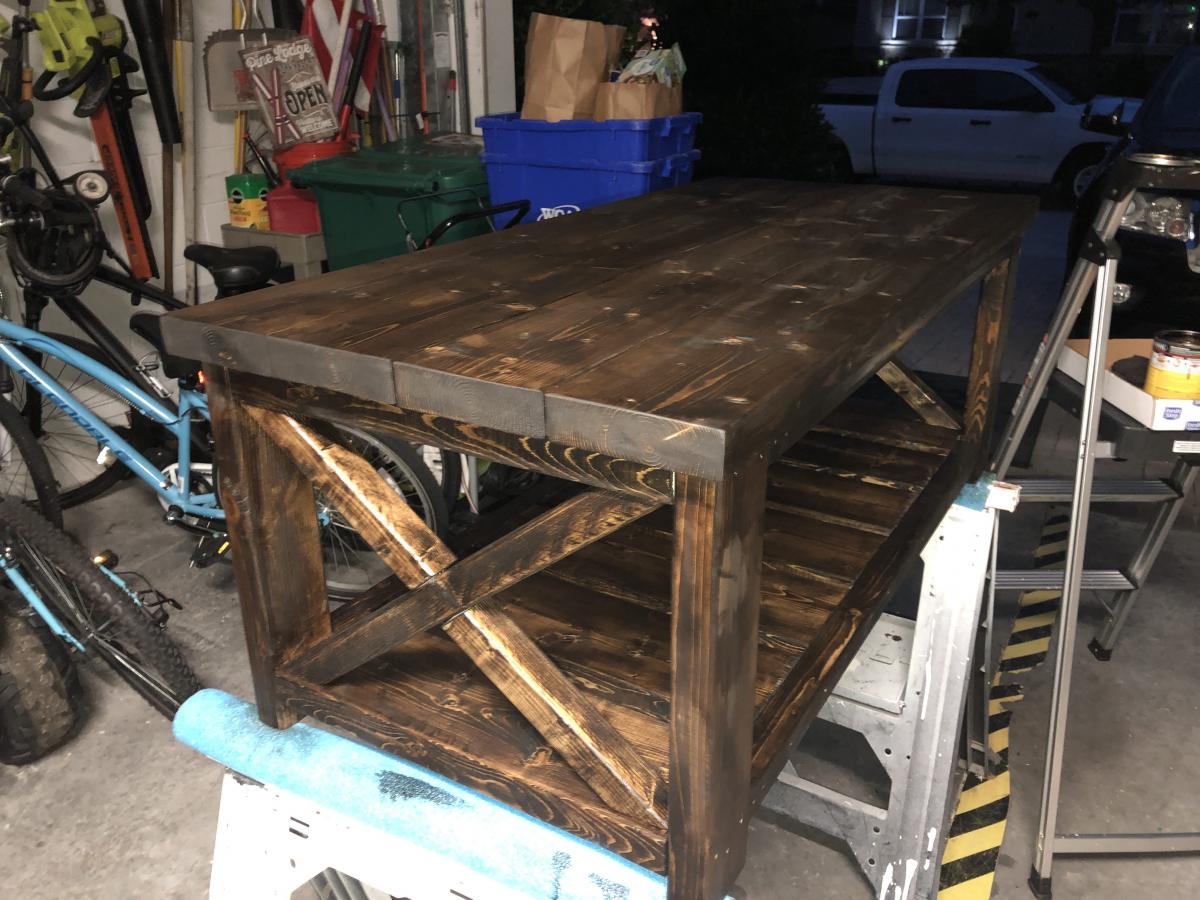
Started down this road on May 30th 2020. First it was the $40 Coffee Table (Which cost me $47 in wood from Lowes) Highly recommend a Miter-saw with a long enough fence to make identical cuts, I learned my lesson. Cut and built the table over the weekend. Had some trouble with the X's on each end, do not use the dimensions in the plans for the X's they were 3 inches to small. (Watch the video and follow Ana's technique.) Sanded all the wood stained with Jacobean 2750 tint Minwax and sealed with Satin Polycrylic. After it was finished my wife asked for the matching side tables see the other Brag Post. See Photos for Details.
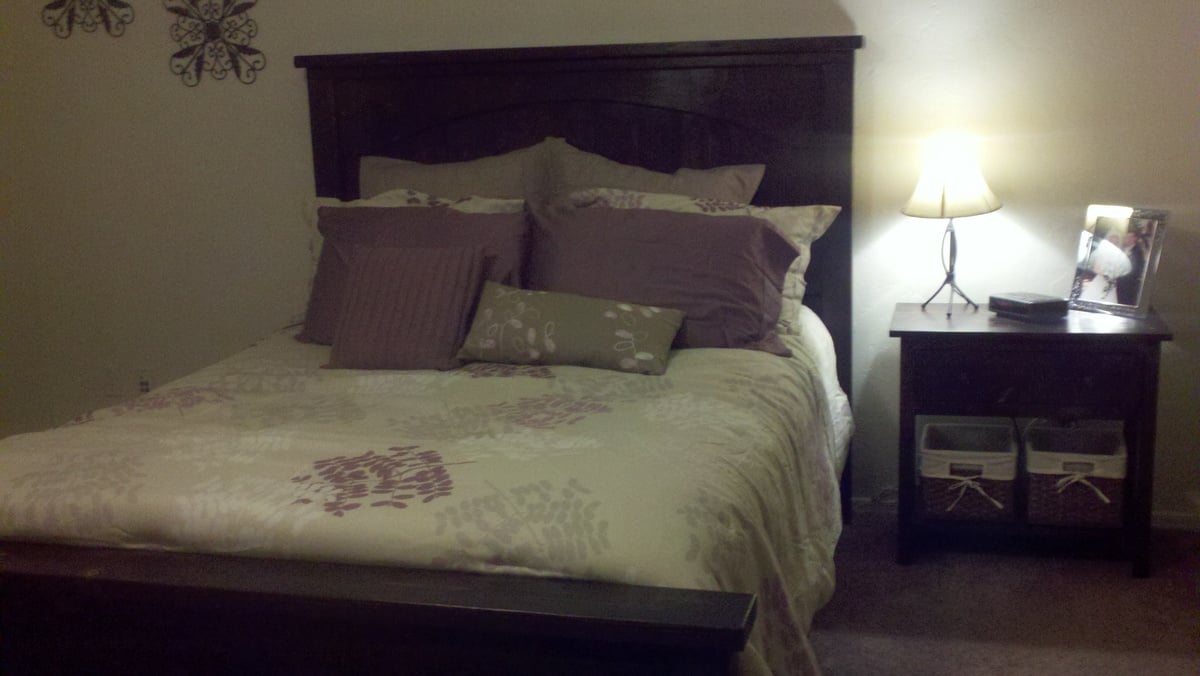
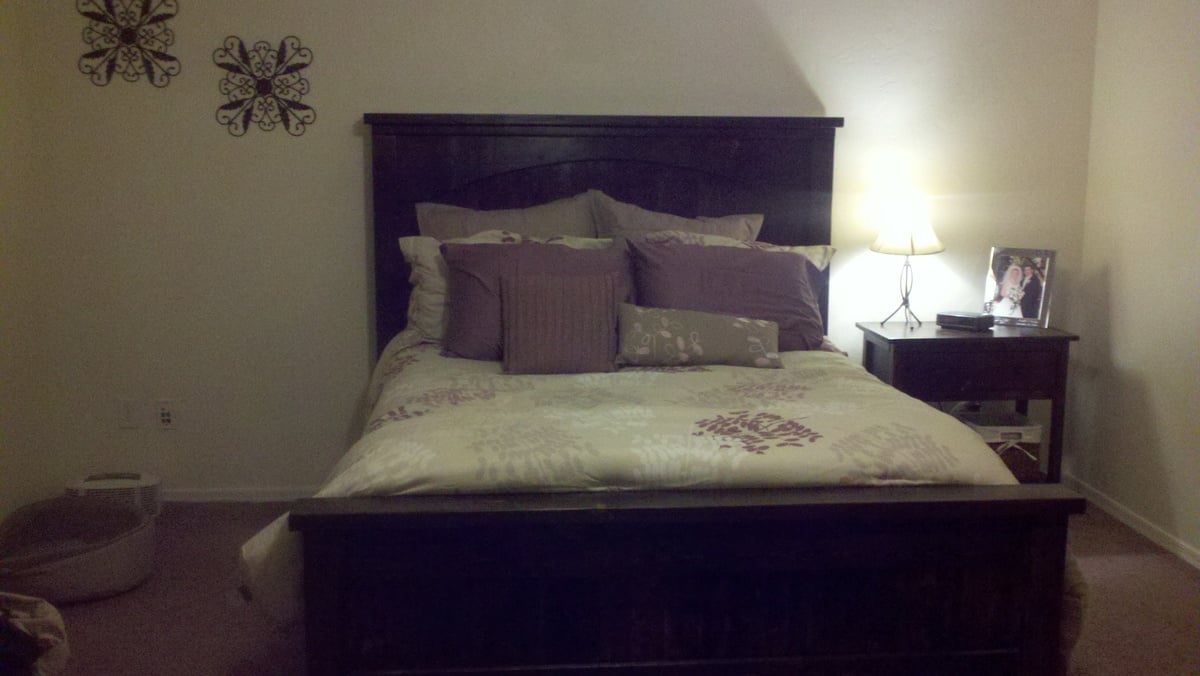
We saw this bed and decided to make it after getting tired of the sad state of our bedroom furniture. My husband built this as a weekend project. We also built the Farmhouse Nightstand, and plan to build the Wide Cabin Dresser stained to match. The bed is very sturdy, even with three kids horsing around.
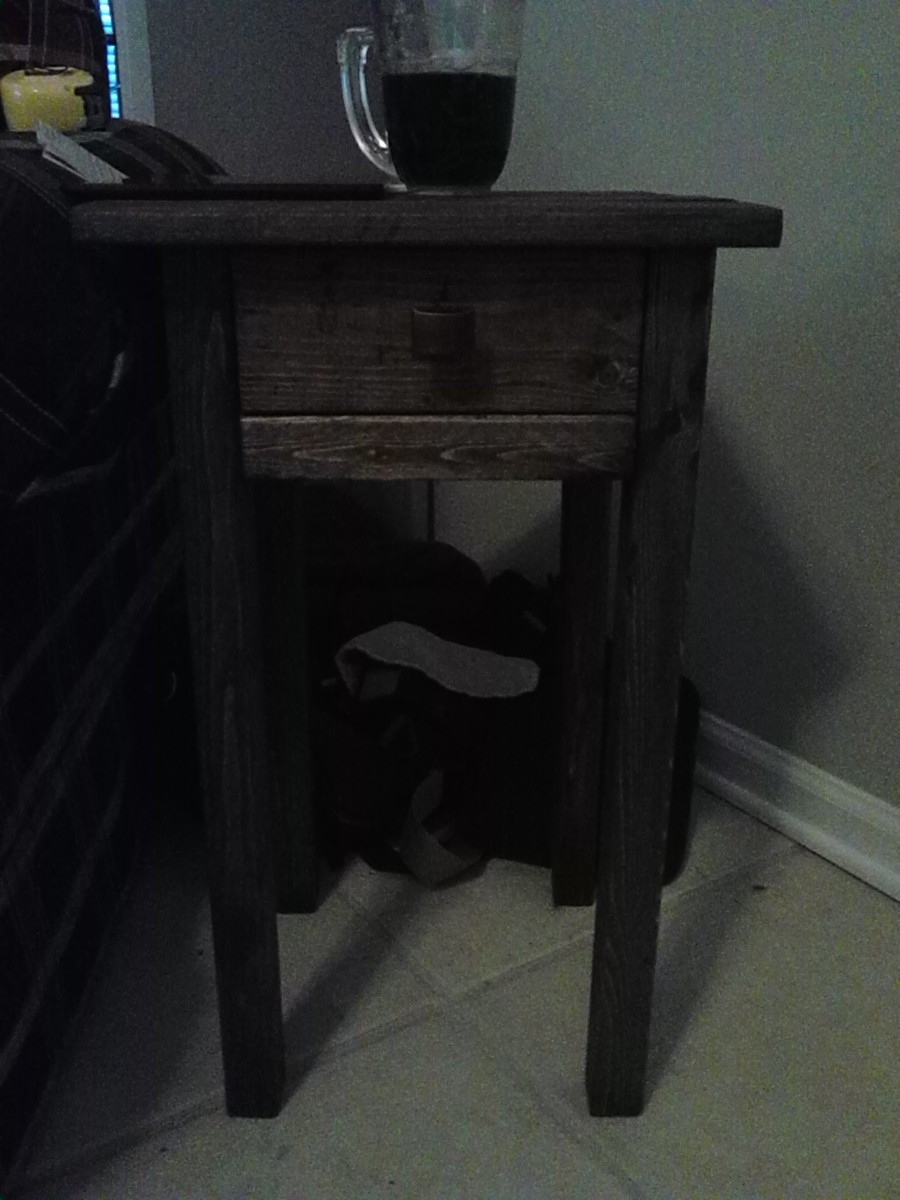
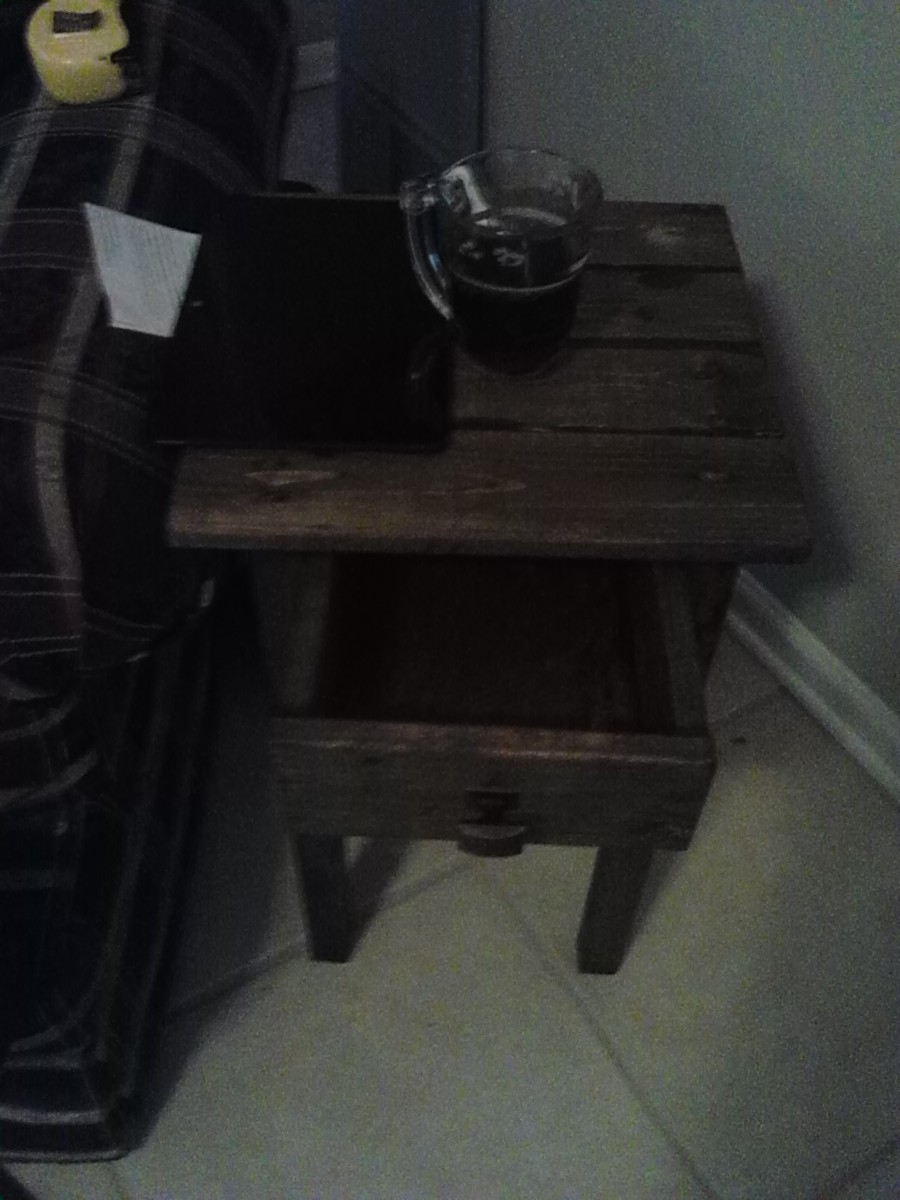
We've moved into a new house and I have lots of furniture I want to build. The side table was a pretty easy build, I did it in a couple hours in the afternoon. This is my first project with a drawer. The tricky part to it was putting the bottom in. I think i need to get a router so I can cut some grooves to slide it in. Trying to put brads into a 1/4 inch thick piece of plywood was really tricky. I didn't really use a plan, I just put it together based on the wood that I had available. I built it pretty much from scraps from other projects I've done.
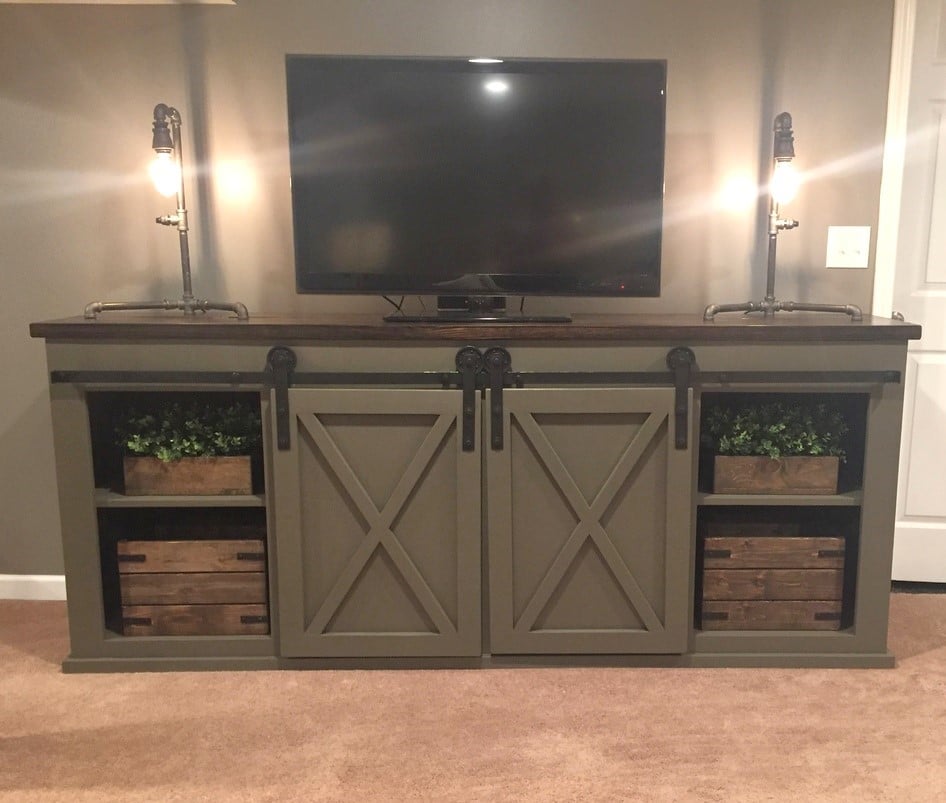
We needed a new TV stand, so me and my boyfriend picked out this plan. We worked on it together. It took us about a week. Barn door hardware is pricey, so we made our own hardware with steel stock and garage door pulleys.
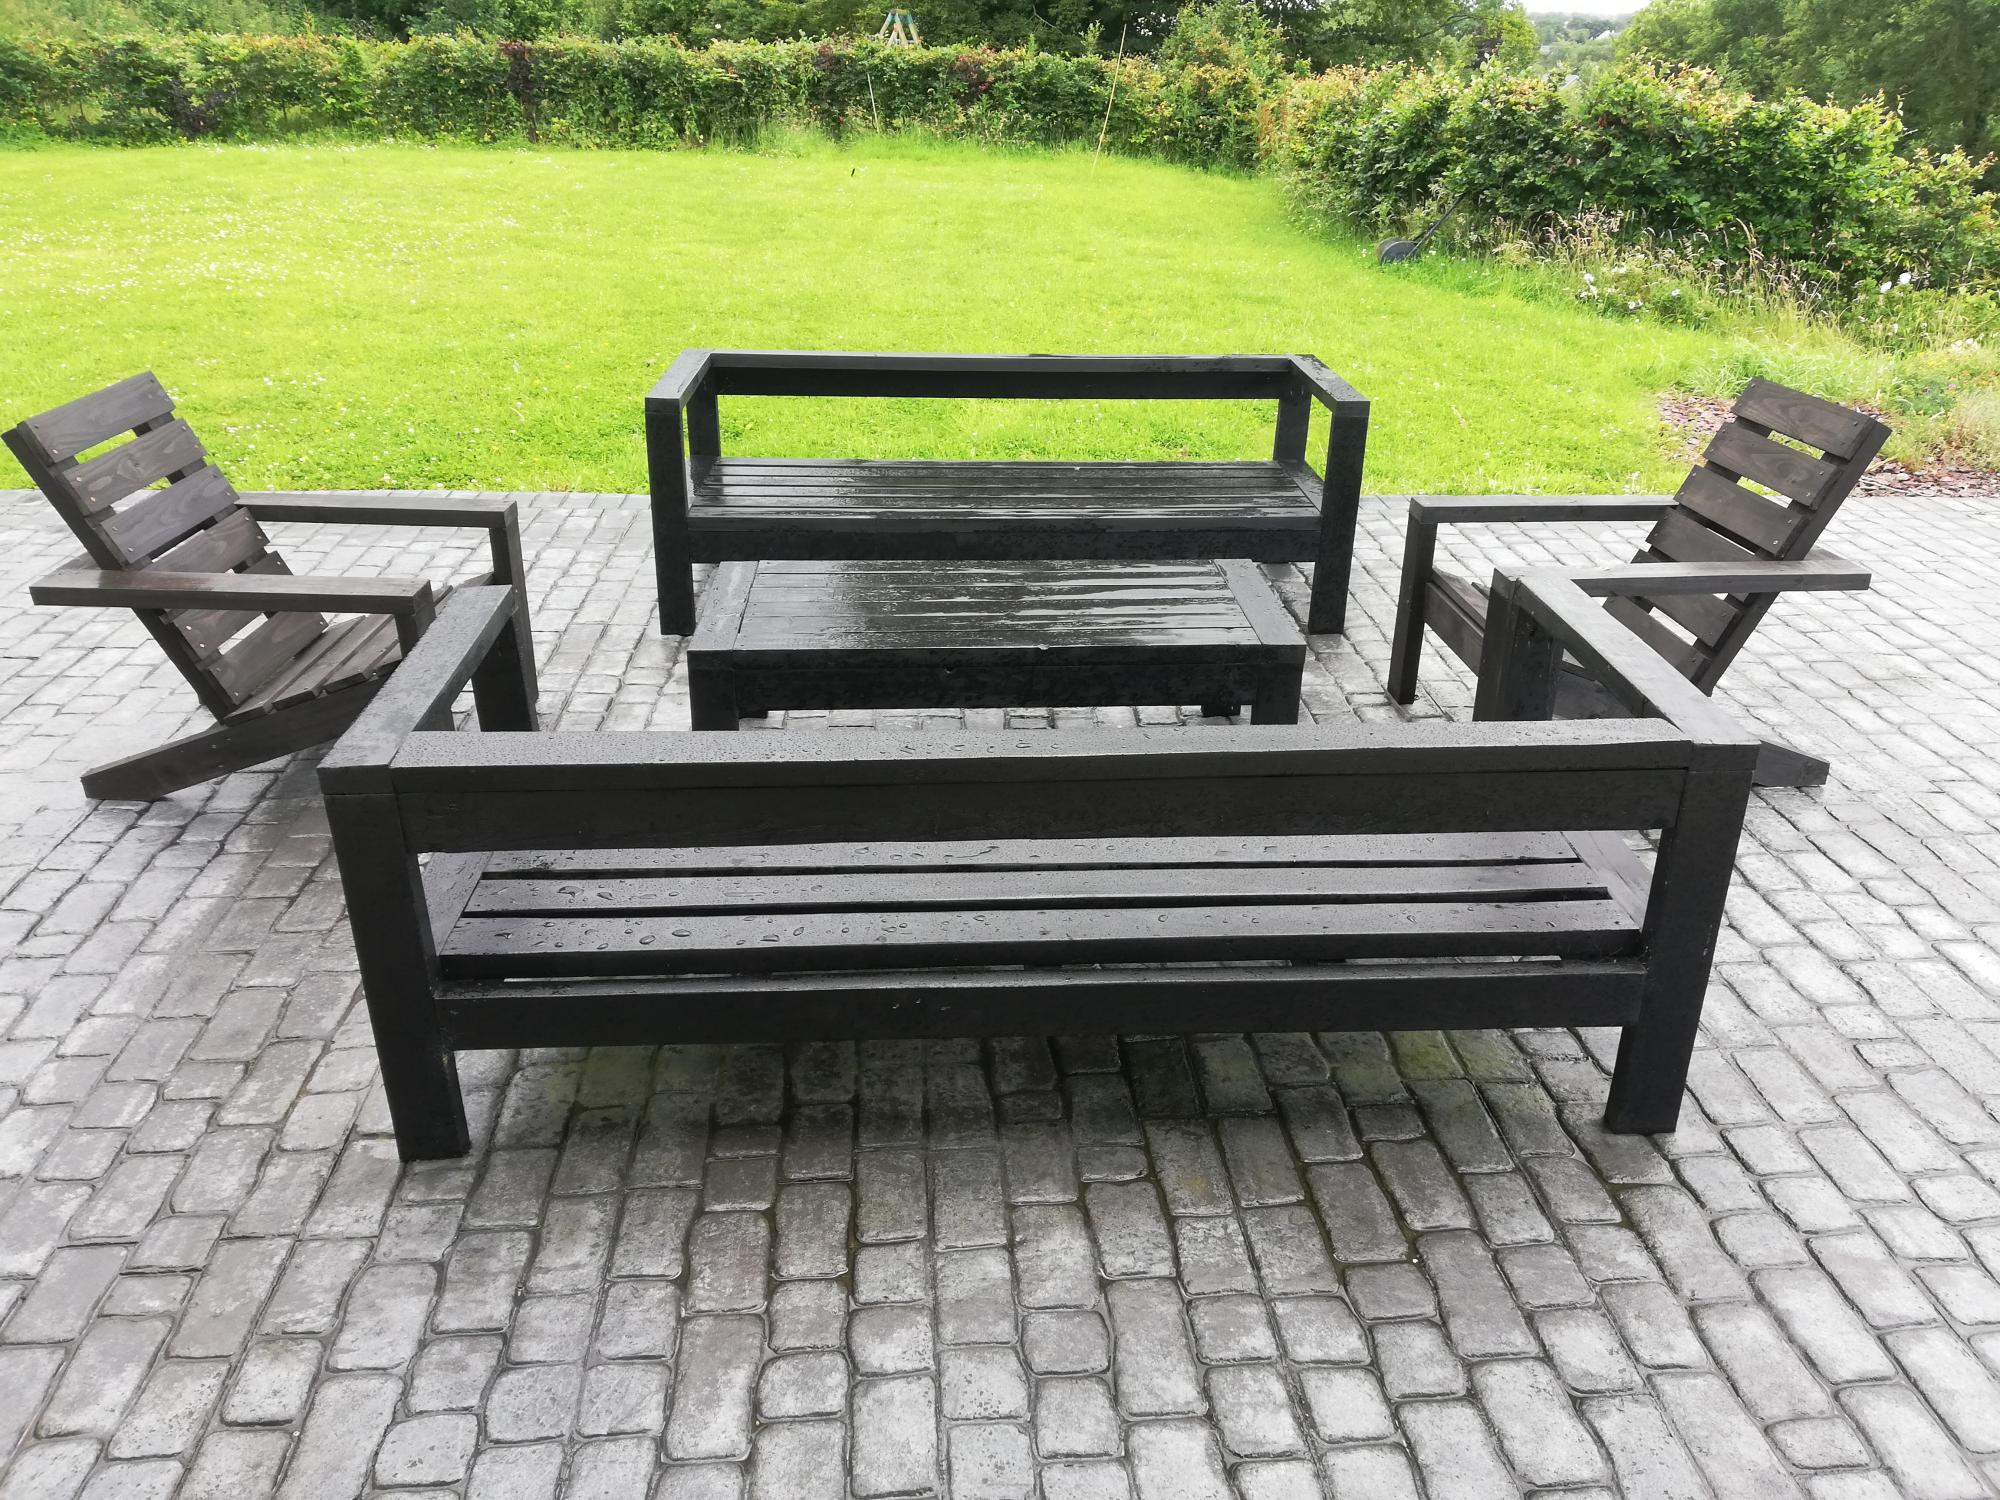
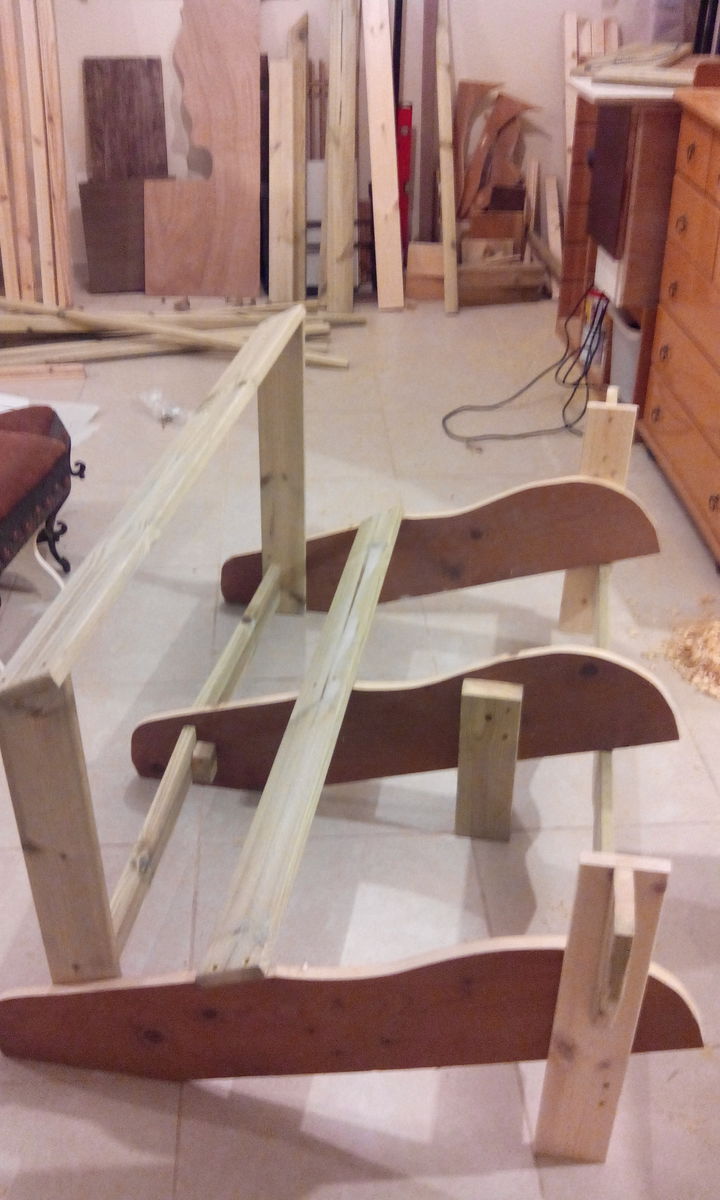
Thanks Ana for your great plans... Unfortunately it hasn't stopped raining since we finished the armchairs! All we need now is the sun :)
We used 4x1 for the seats to match the outdoor sofas.