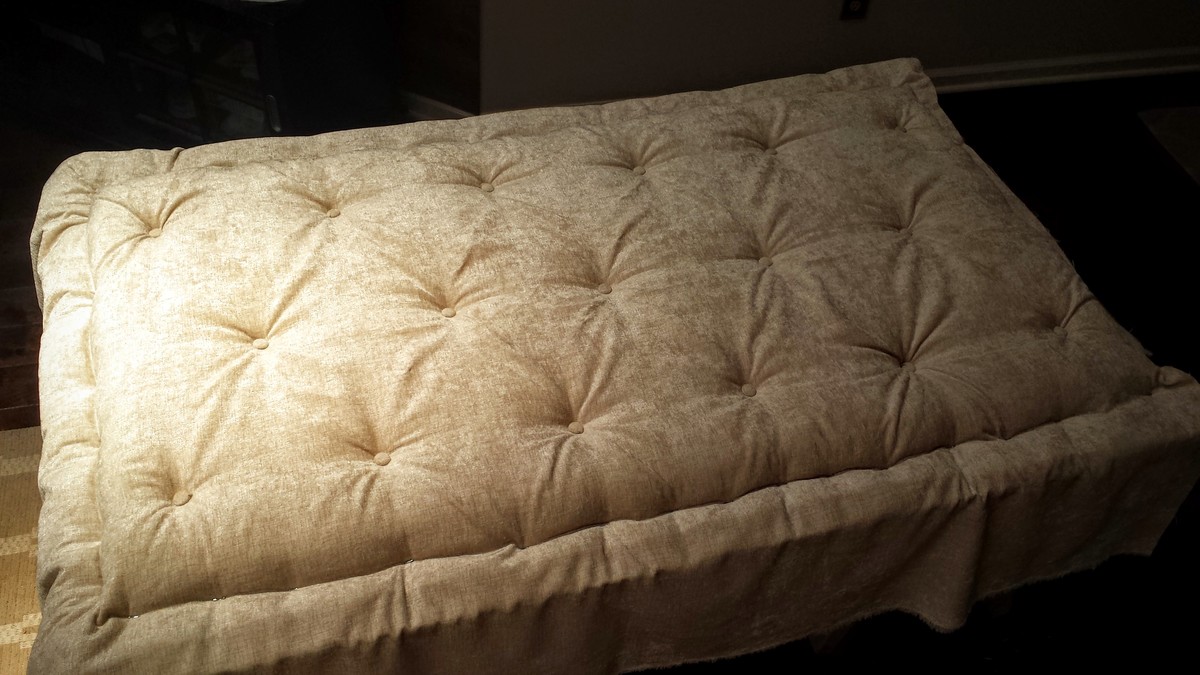
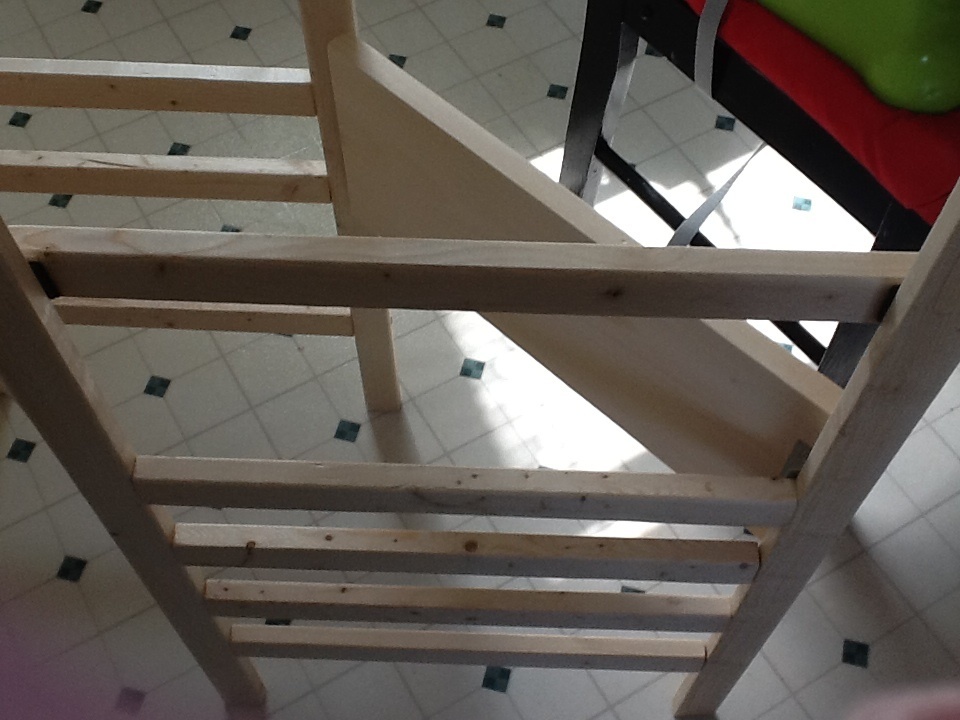
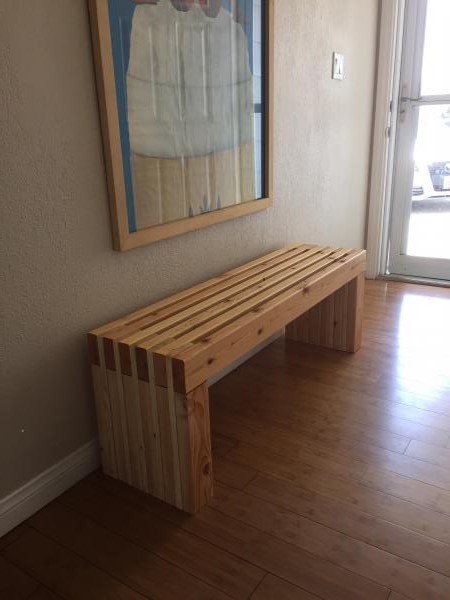
1st Porch Bench I made
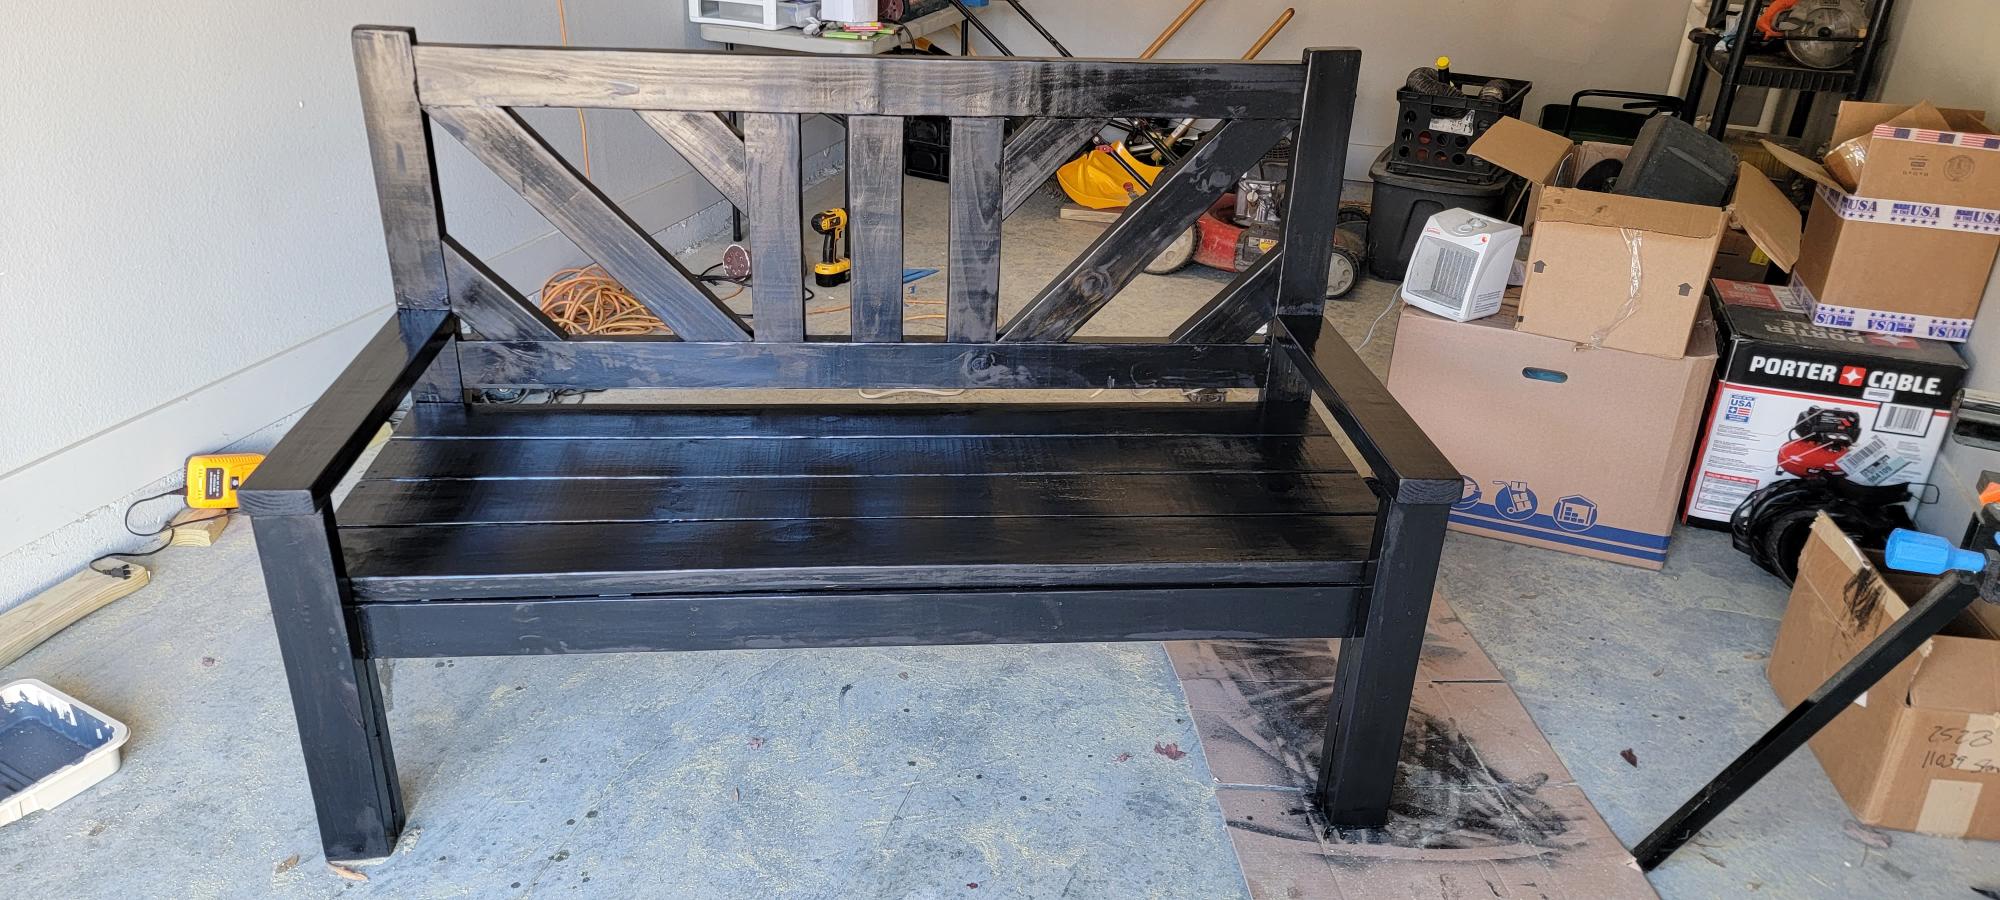
This is the first bench I have ever made.
Built from Plan(s)
This is the first bench I have ever made.
This was our third major building project (I've built some frames and small shelves in my free time but our other two big projects were the bunk beds and the tryde coffee table).
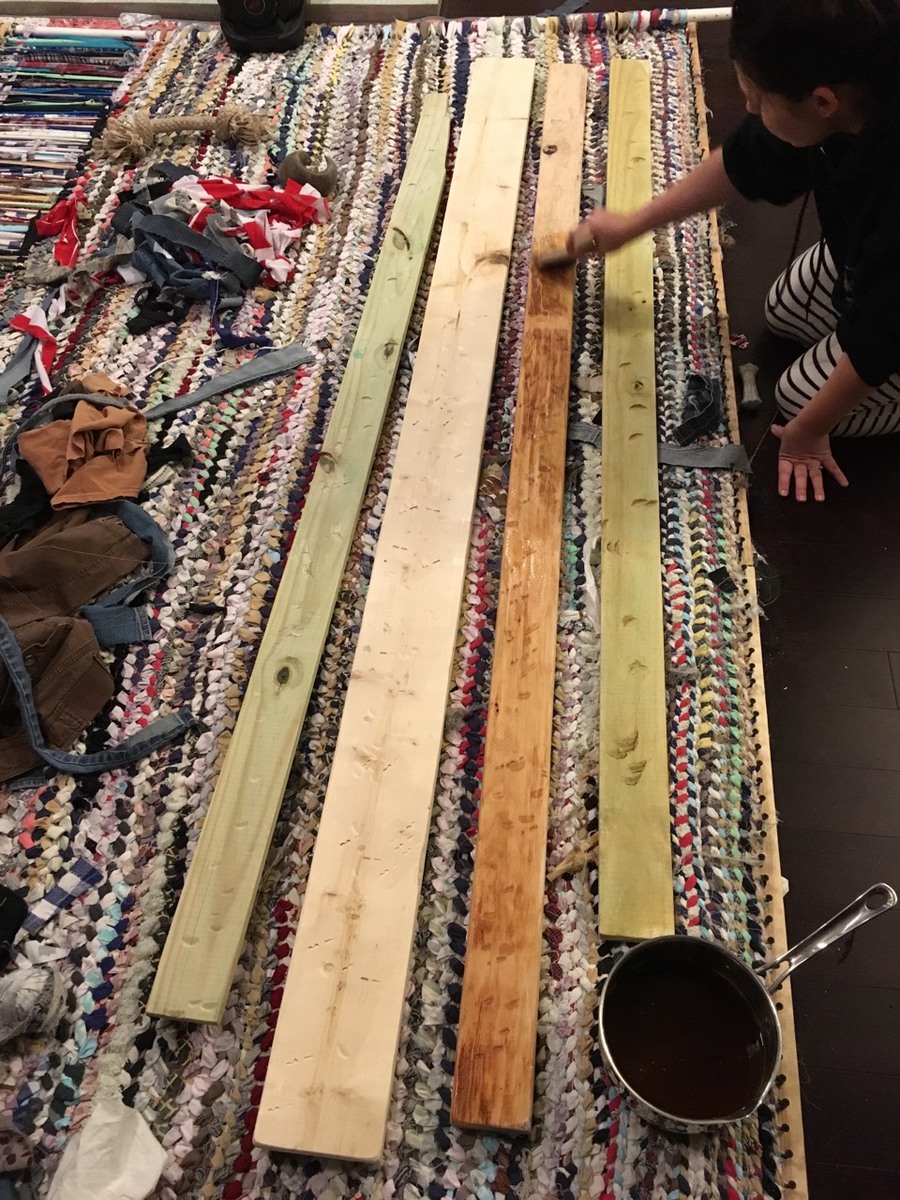
This was our first time cutting plywood boards and it was a huge chore at first, until we got the hang of it and built a good circular saw guide that cut our cutting time by more than half.
We couldn't find the type of drawer slides we needed so we decided to forget them and built our own wood slides. They basically are just L-shaped brackets made of 1x3 (on the bottom) and 1x2 (on the top), adjusted to the right spot to hold the drawers in place. A little candle wax (a trick learned from my husband's grandfather) is all you need to make them slide nicely. All in all, we built drawer slides out of wood for the about $20 total. Huge savings and honestly I think I like it better that way.
Things I learned during this project:
Plywood is a lot heavier than I ever imagined.
Cutting plywood is not fun.
I will never complain again about cutting boards with the miter saw!
Stainable wood putty is a joke. You can clearly see every spot I puttied. From now on we buy the colored stuff that already matches the stain!
Building drawers isn't scary--I thought it would be. I actually built all the drawers by myself in one morning, when hubby wasn't even around to help.
90-degree gripper things are a must have. And the more you have, the better.
Elmer's wood glue is really stronger than nails. We glued something and didn't like it and were unable to break it off so we had to nail it as it was!
This project took us nearly a month, but to be fair, I was out of town for two weeks of that time and this is definitely a project for four hands, not two.
Overall, it was a great experience and I'm so excited for the extra storage--our house is small but we don't want to move so we are trying to make use of every inch of space, without the house LOOKING like we are making use of every inch of space.
Next up: new bedside tables to match the bed.
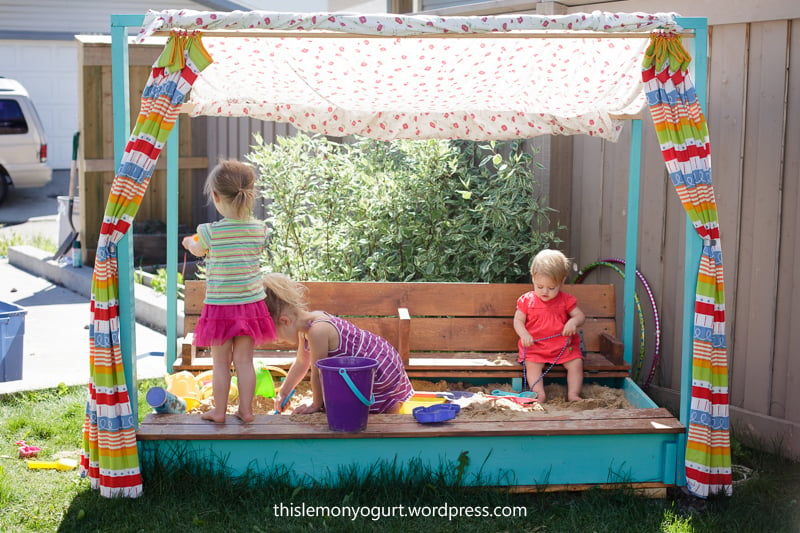
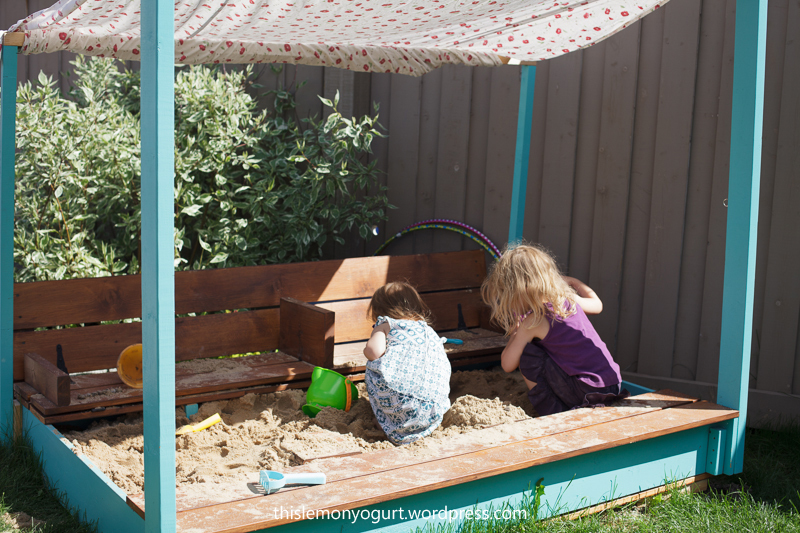
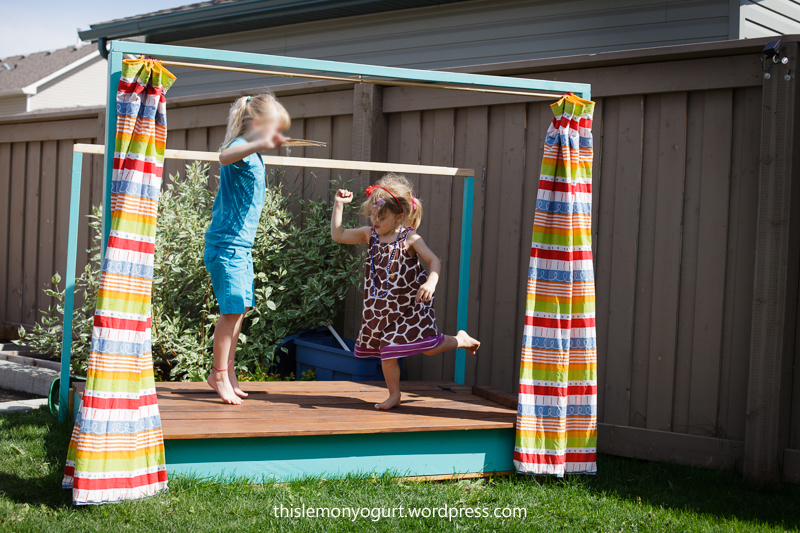
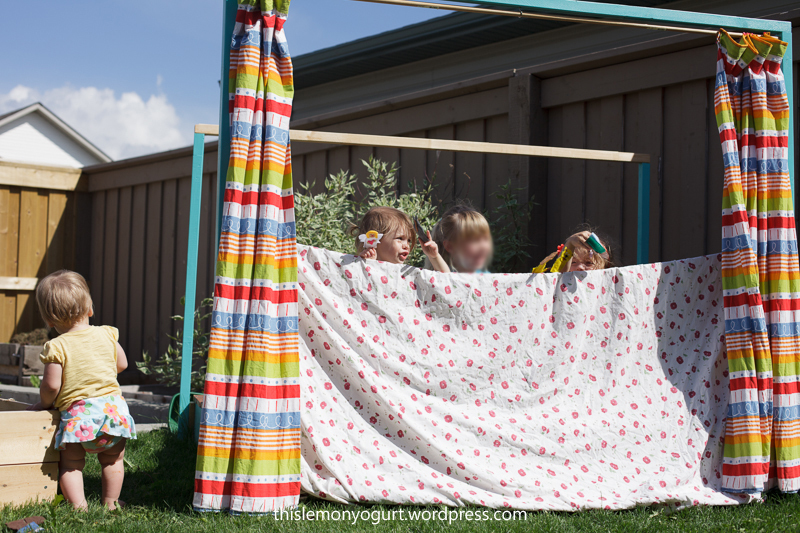
I started with the original plans for the sandbox with the benches, and then just sort of took off with the modifications.
When it's open, it's a 4'x6' sandbox with a bench on one side and a canopy overhead. When it's closed, it's a stage complete with curtains, or can also convert into a puppet theatre.
I had to make several adjustments to the original plan to allow for enough support for the stage to be walked (and danced) on, including an extra armrest in the bench, and a few blocks built up from the base of the sand area. I also used 1x6 boards for the top instead of 1x4, to cover the entire 4' with only the one bench.
Thanks so much for the plans, my girls love it! (and thanks to KnittingEmily for posting the plans for the 6' sandbox, which gave me a jumping off point for the sizing I used.)
The story of how I built it can be found here:
http://www.thislemonyogurt.com/a-box-of-sand/

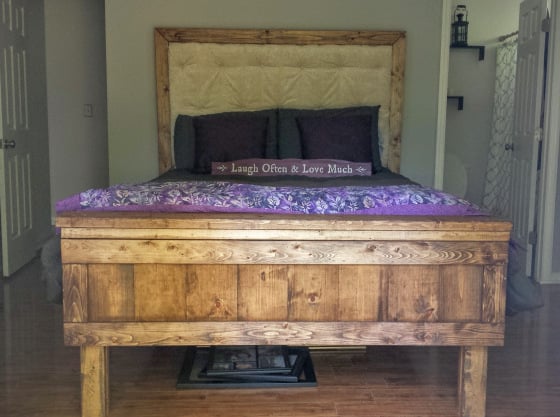
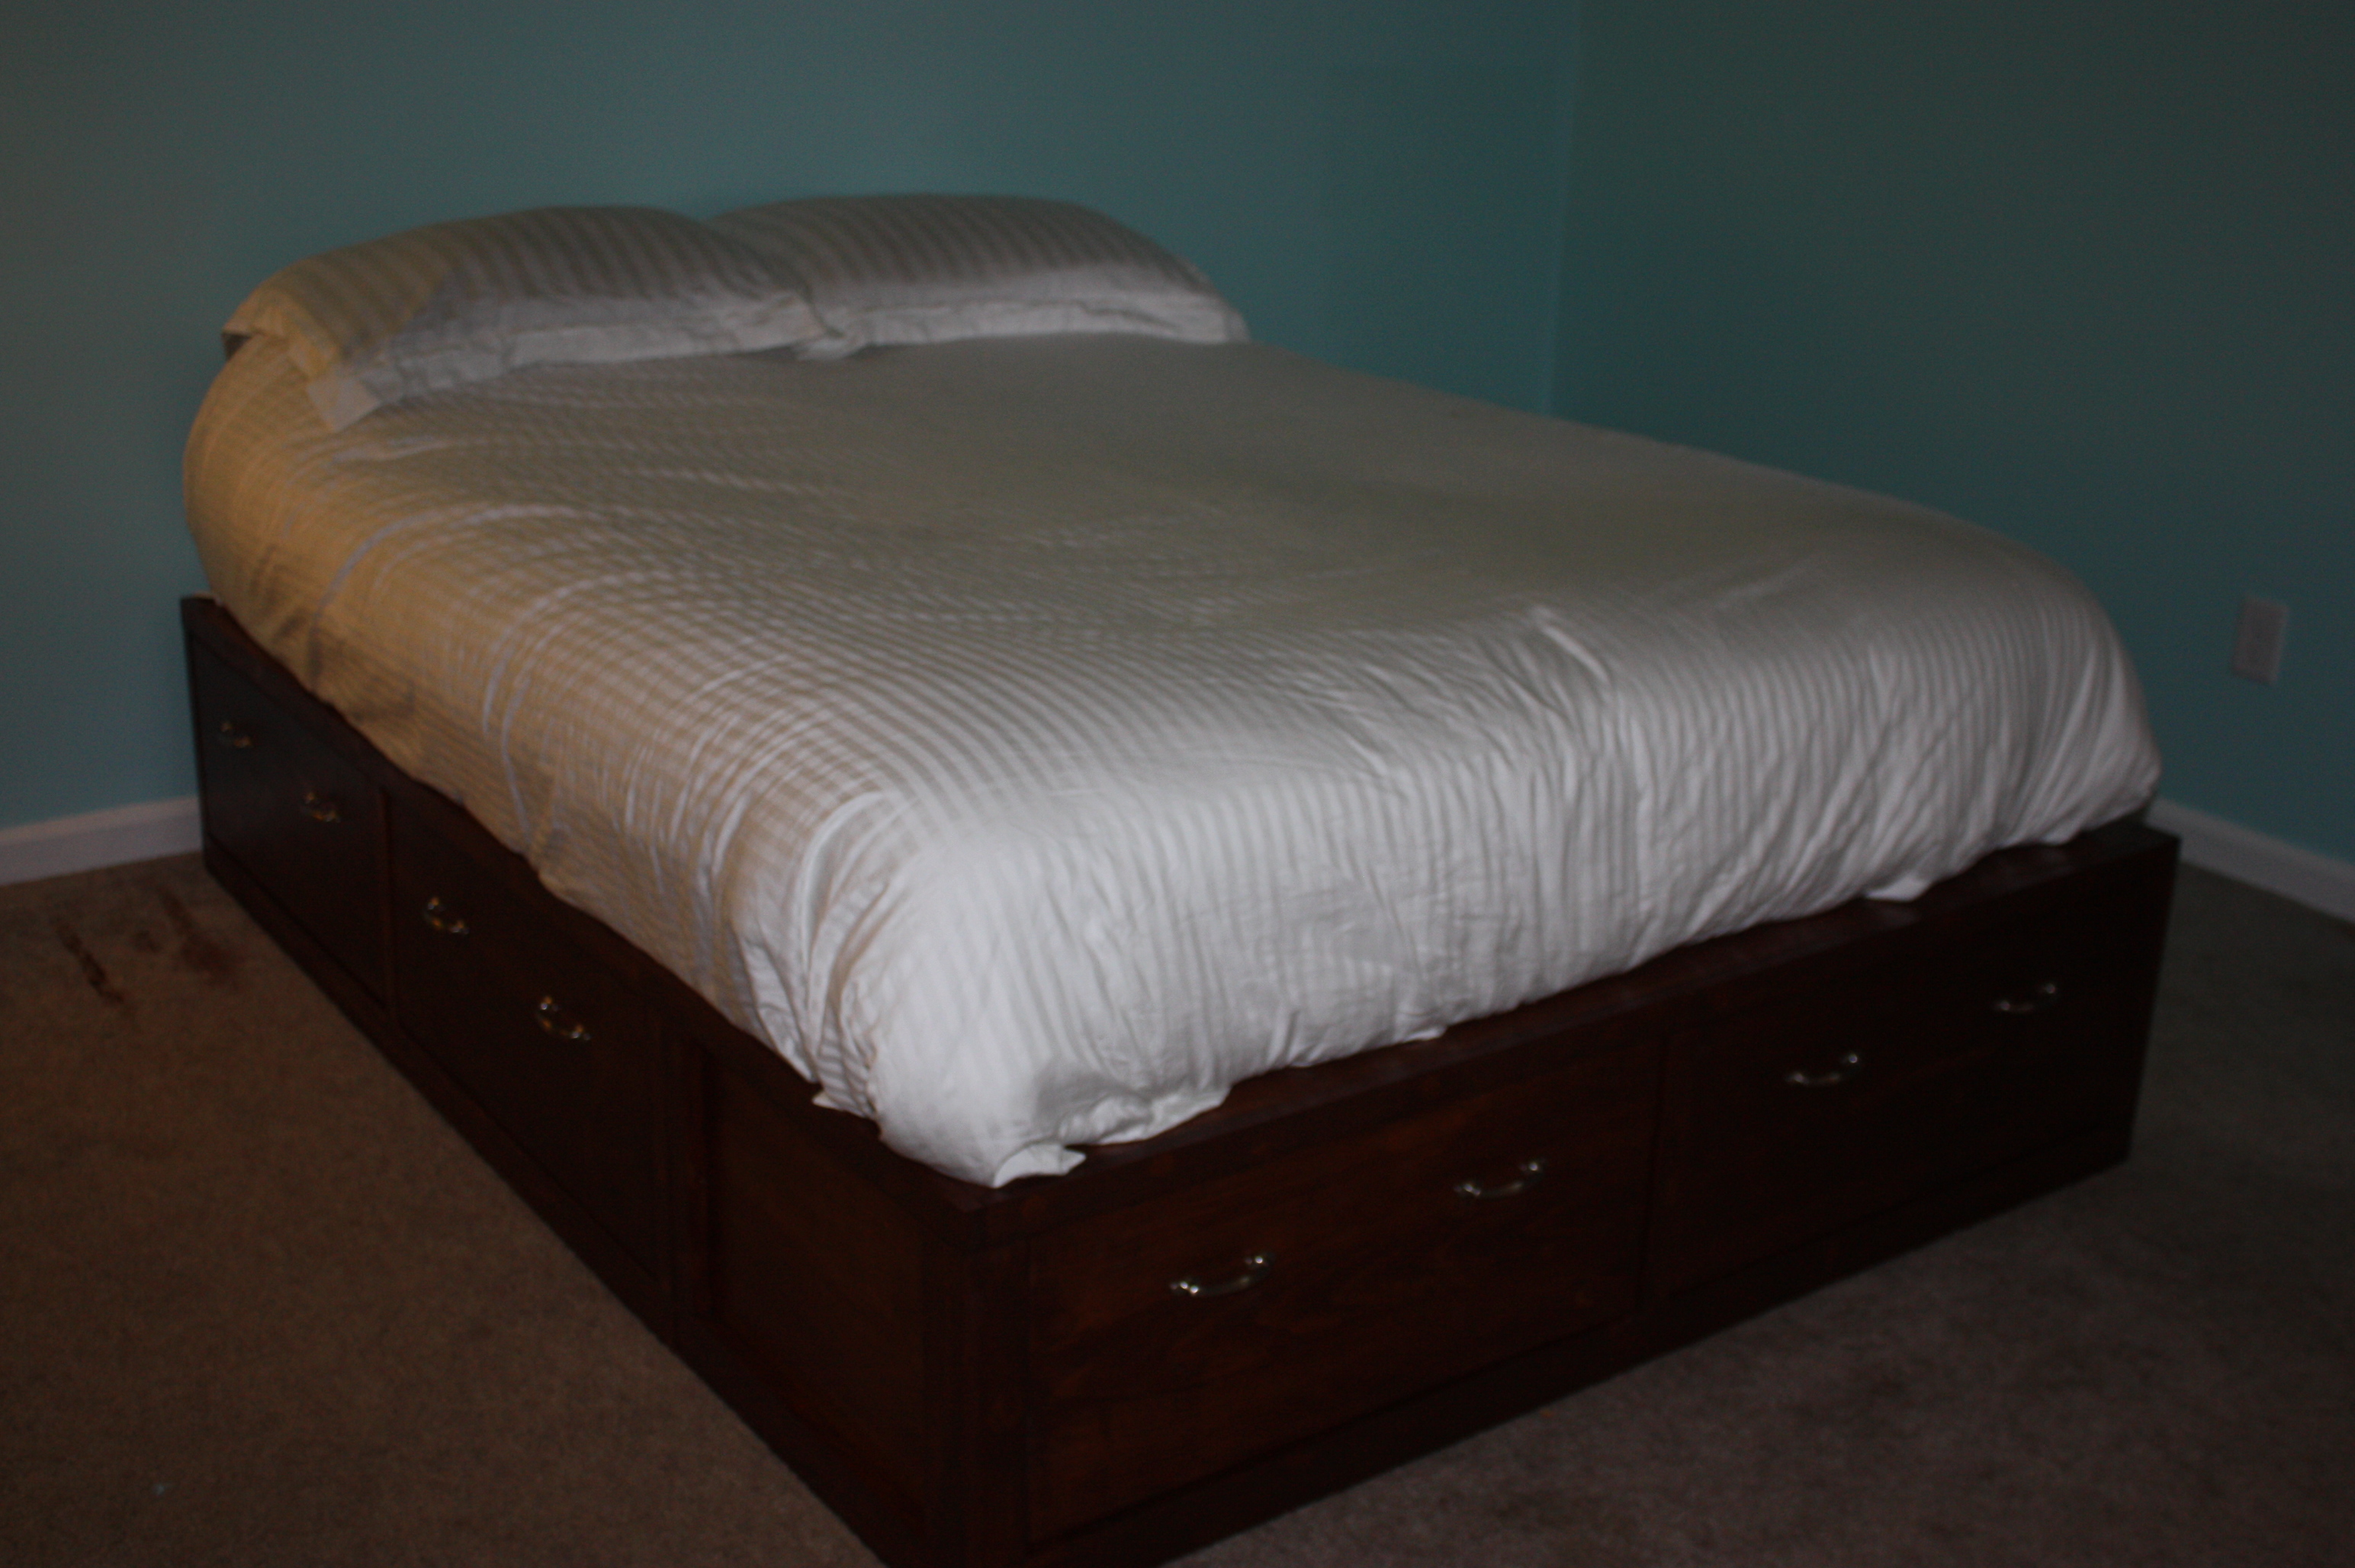
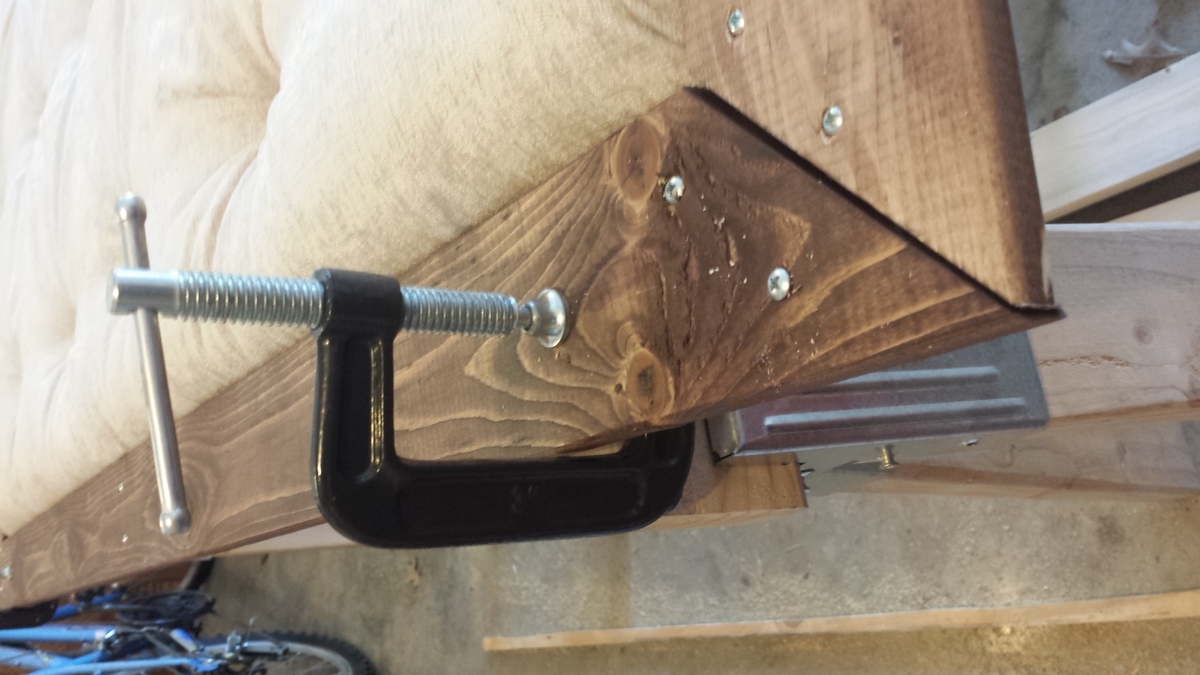
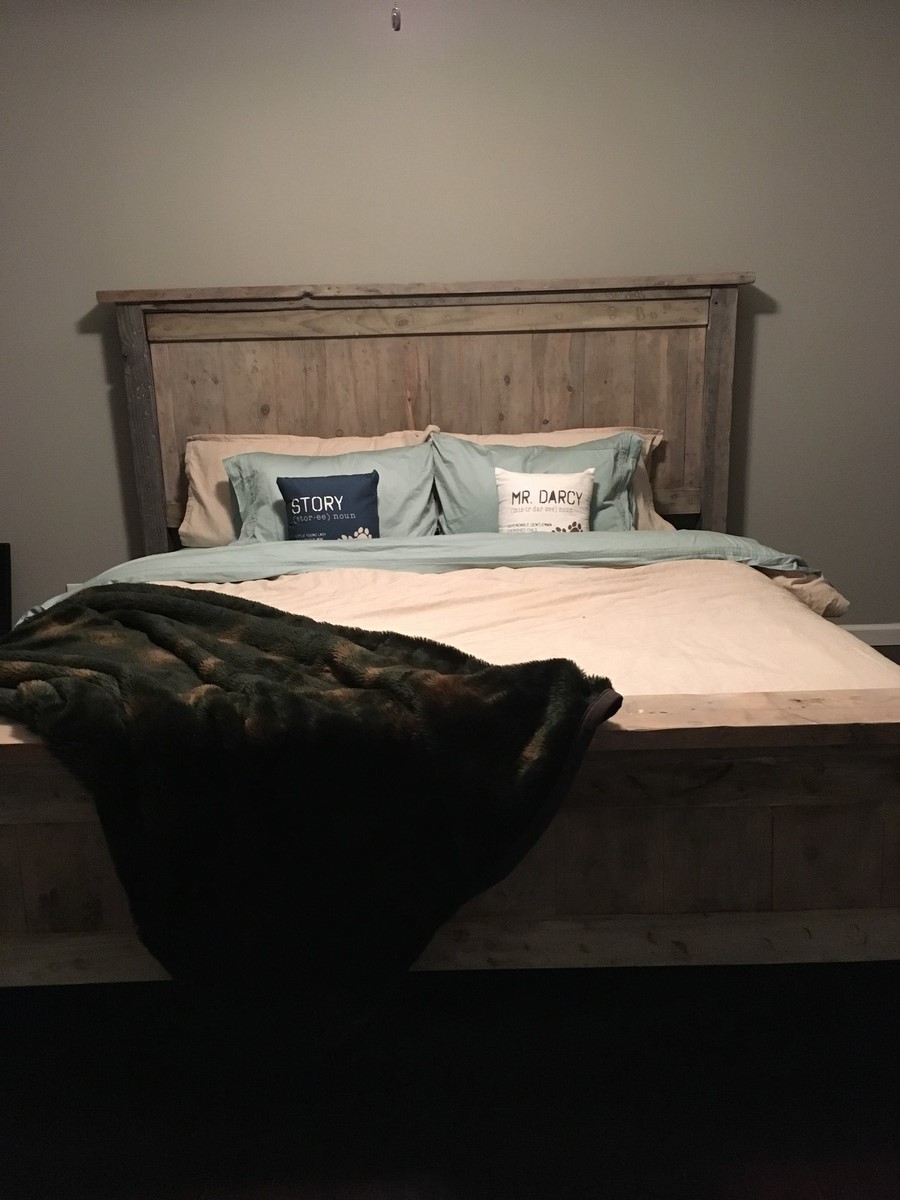
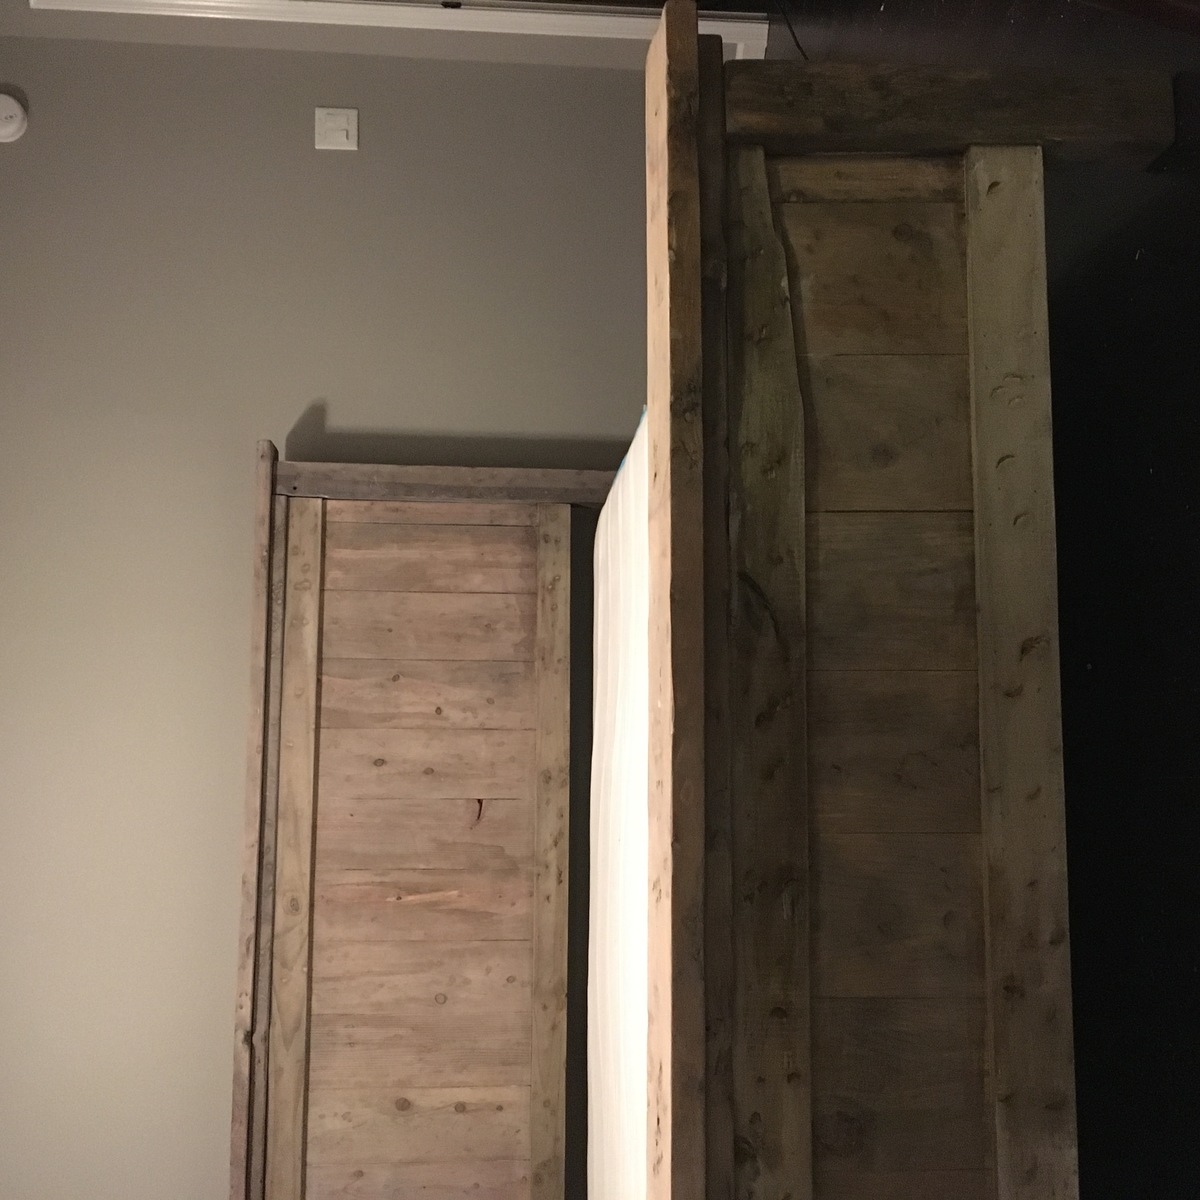
This bed frame was born from a compromise of Will’s desire for something soft to lean on, my desire for something rustic, and both of our desires to have a bed that doesn’t slowly inch away from the wall. What happened was an amazing Restoration Hardware meets Pottery Barn DIY masterpiece.
This thing is sturdy! No wiggling or anything. And that headboard is ultra comfy and plush!
We used 2 – 2×4’s instead of 4×4’s for the posts because the 4×4’s are pressure treated.
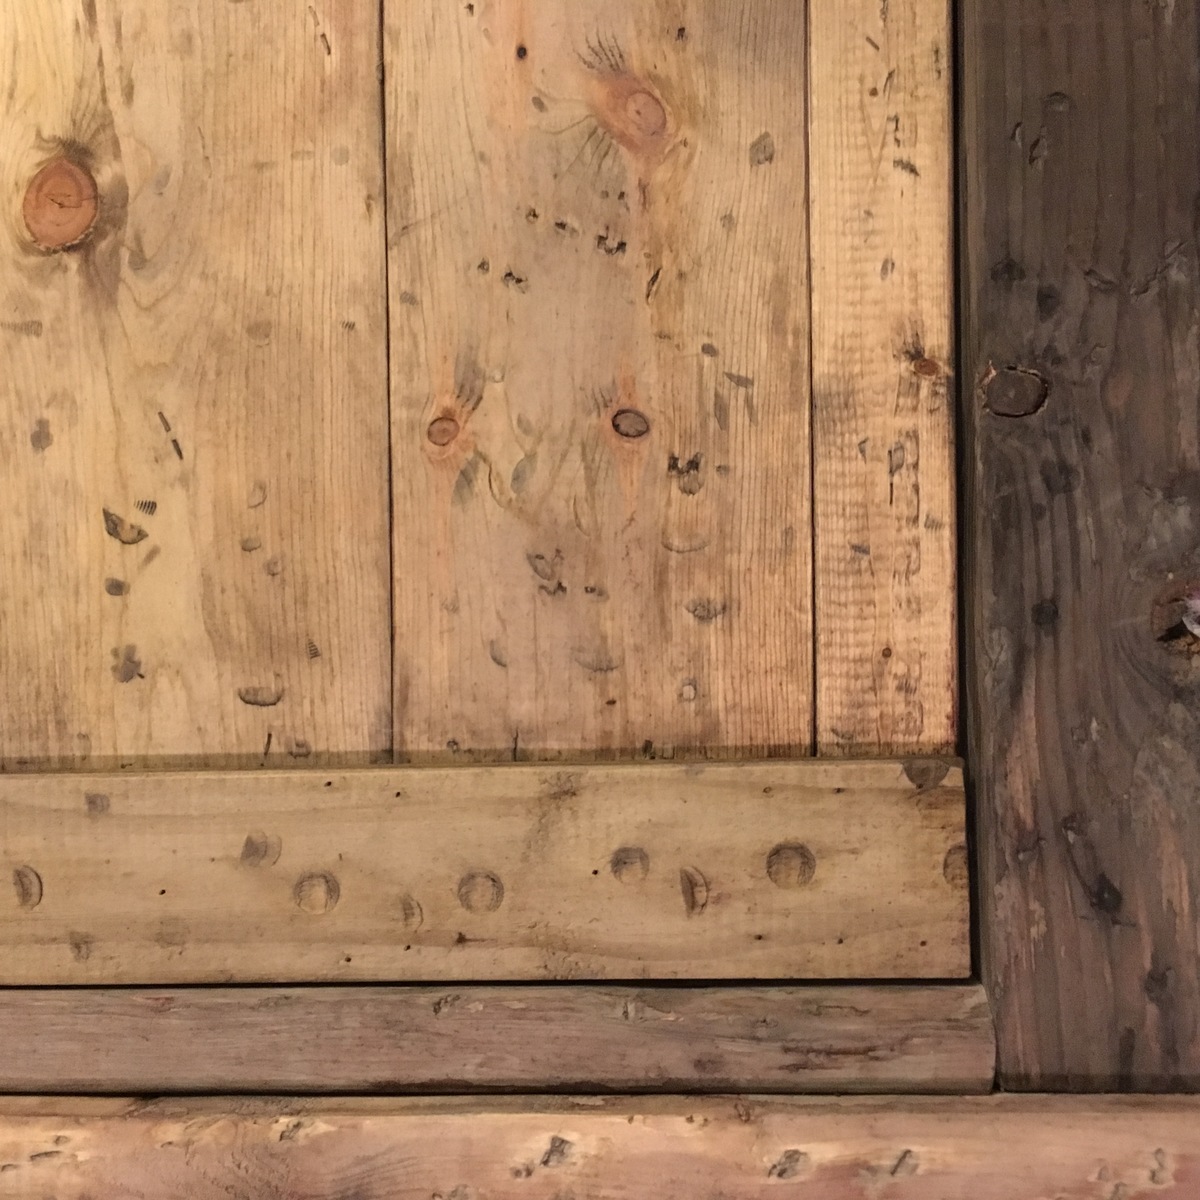
We put in an upholstered headboard instead of planks and “sandwhiched” it on all sides rather than only top and bottom. It was at this point that we realized that we liked the way the simple, framed upholstered portion looked so much that we didn’t want the posts on the outside and the trim pieces on top. So we left those off.
Another change here is that the head board became a little wider than the Anna White plans… that would be because I did not measure along the edge of the upholstery… Also, it was taller than the Anna White plans because I wanted plenty of the upholstered section to lean on/show up above our pillows.
The foot board then needed to be a little wider as well, and there was no clean way of doing that. We figured it out, and I built it pretty easily. However, I did not take into consideration the fact that, although the headboard was wider…. The posts were not. This created problems during assembly.
One last change, was we made it about 6″ taller than the plans to give us room for under the bed storage.

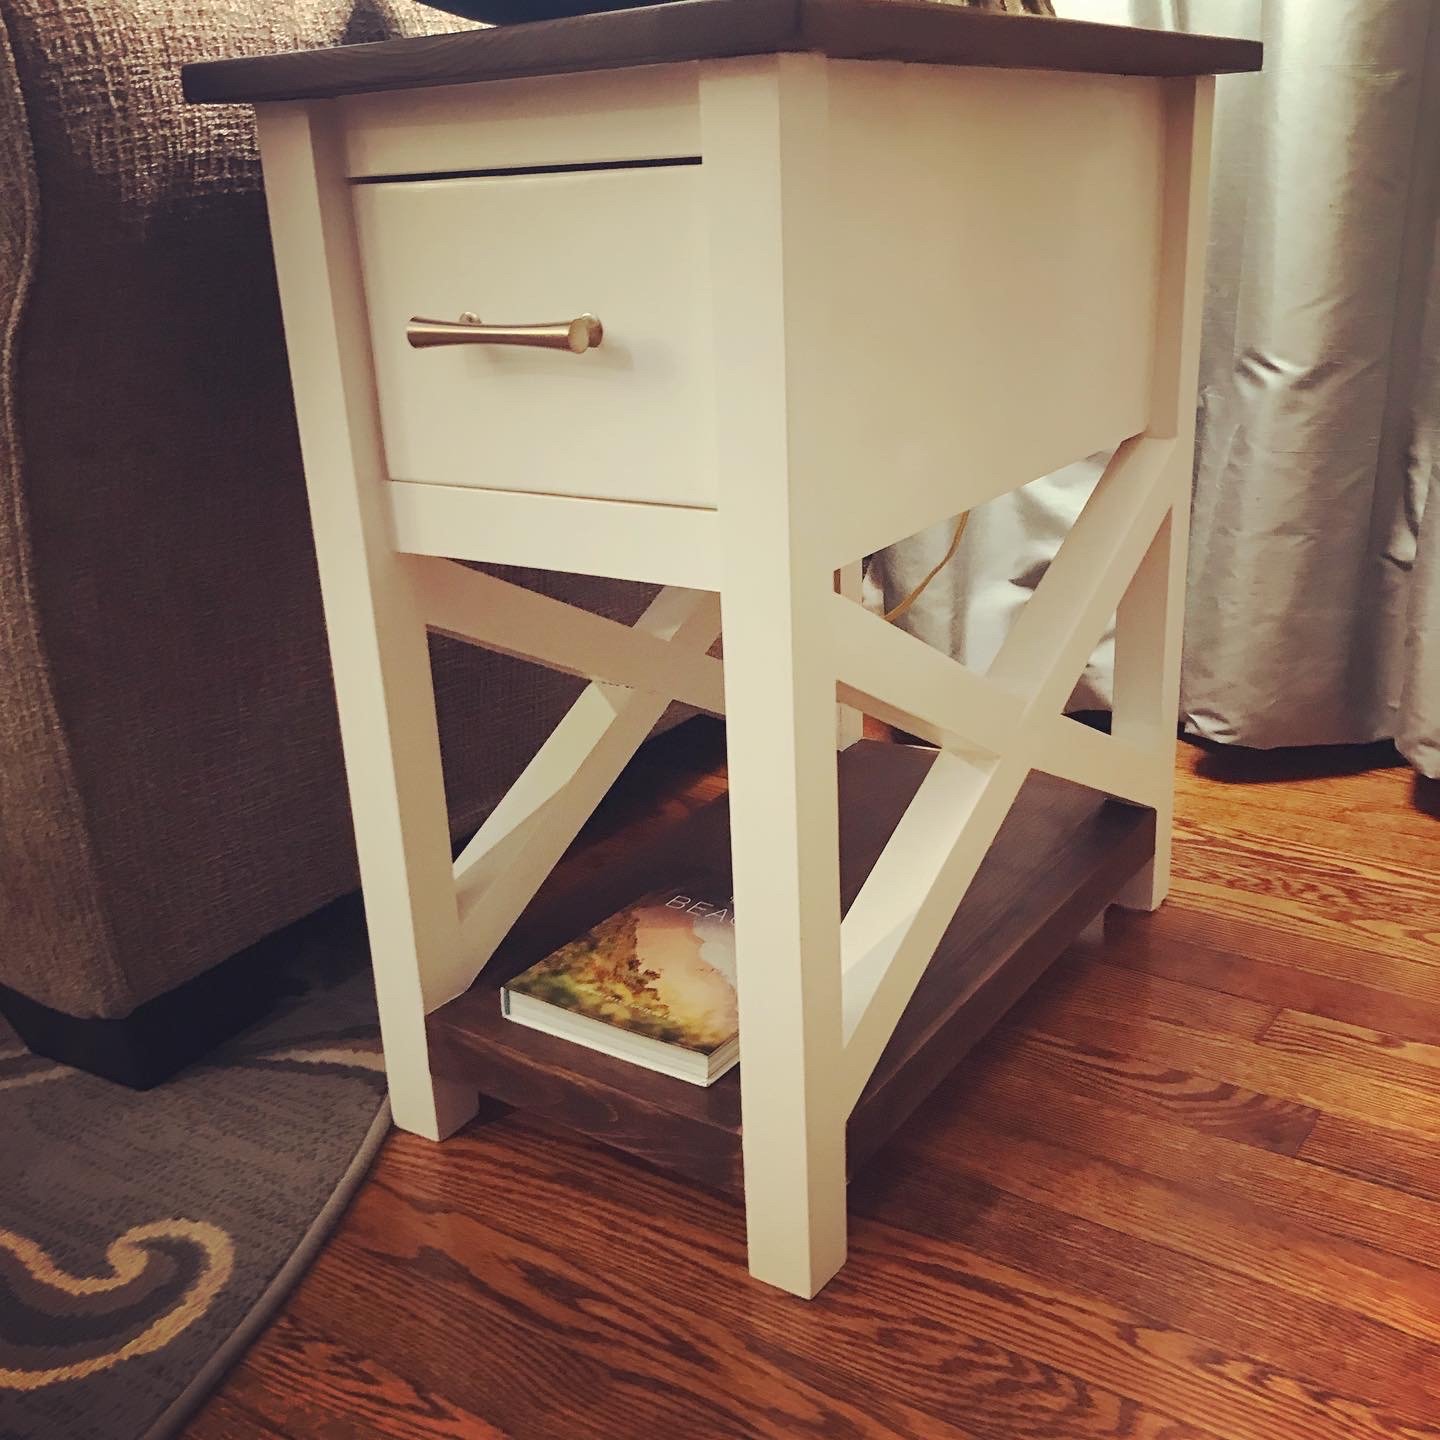
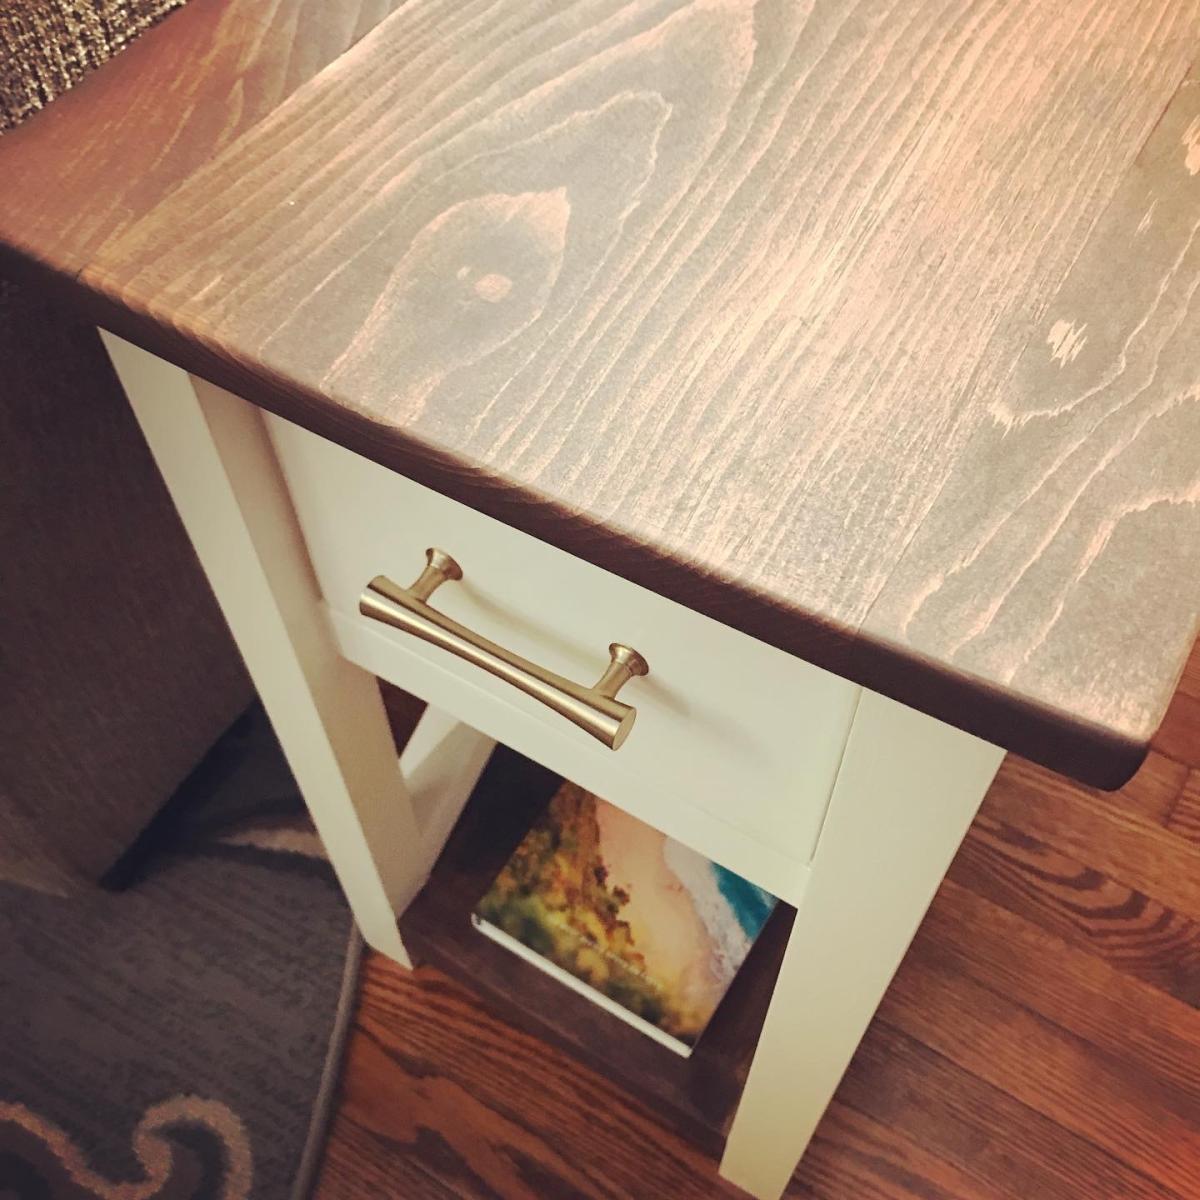
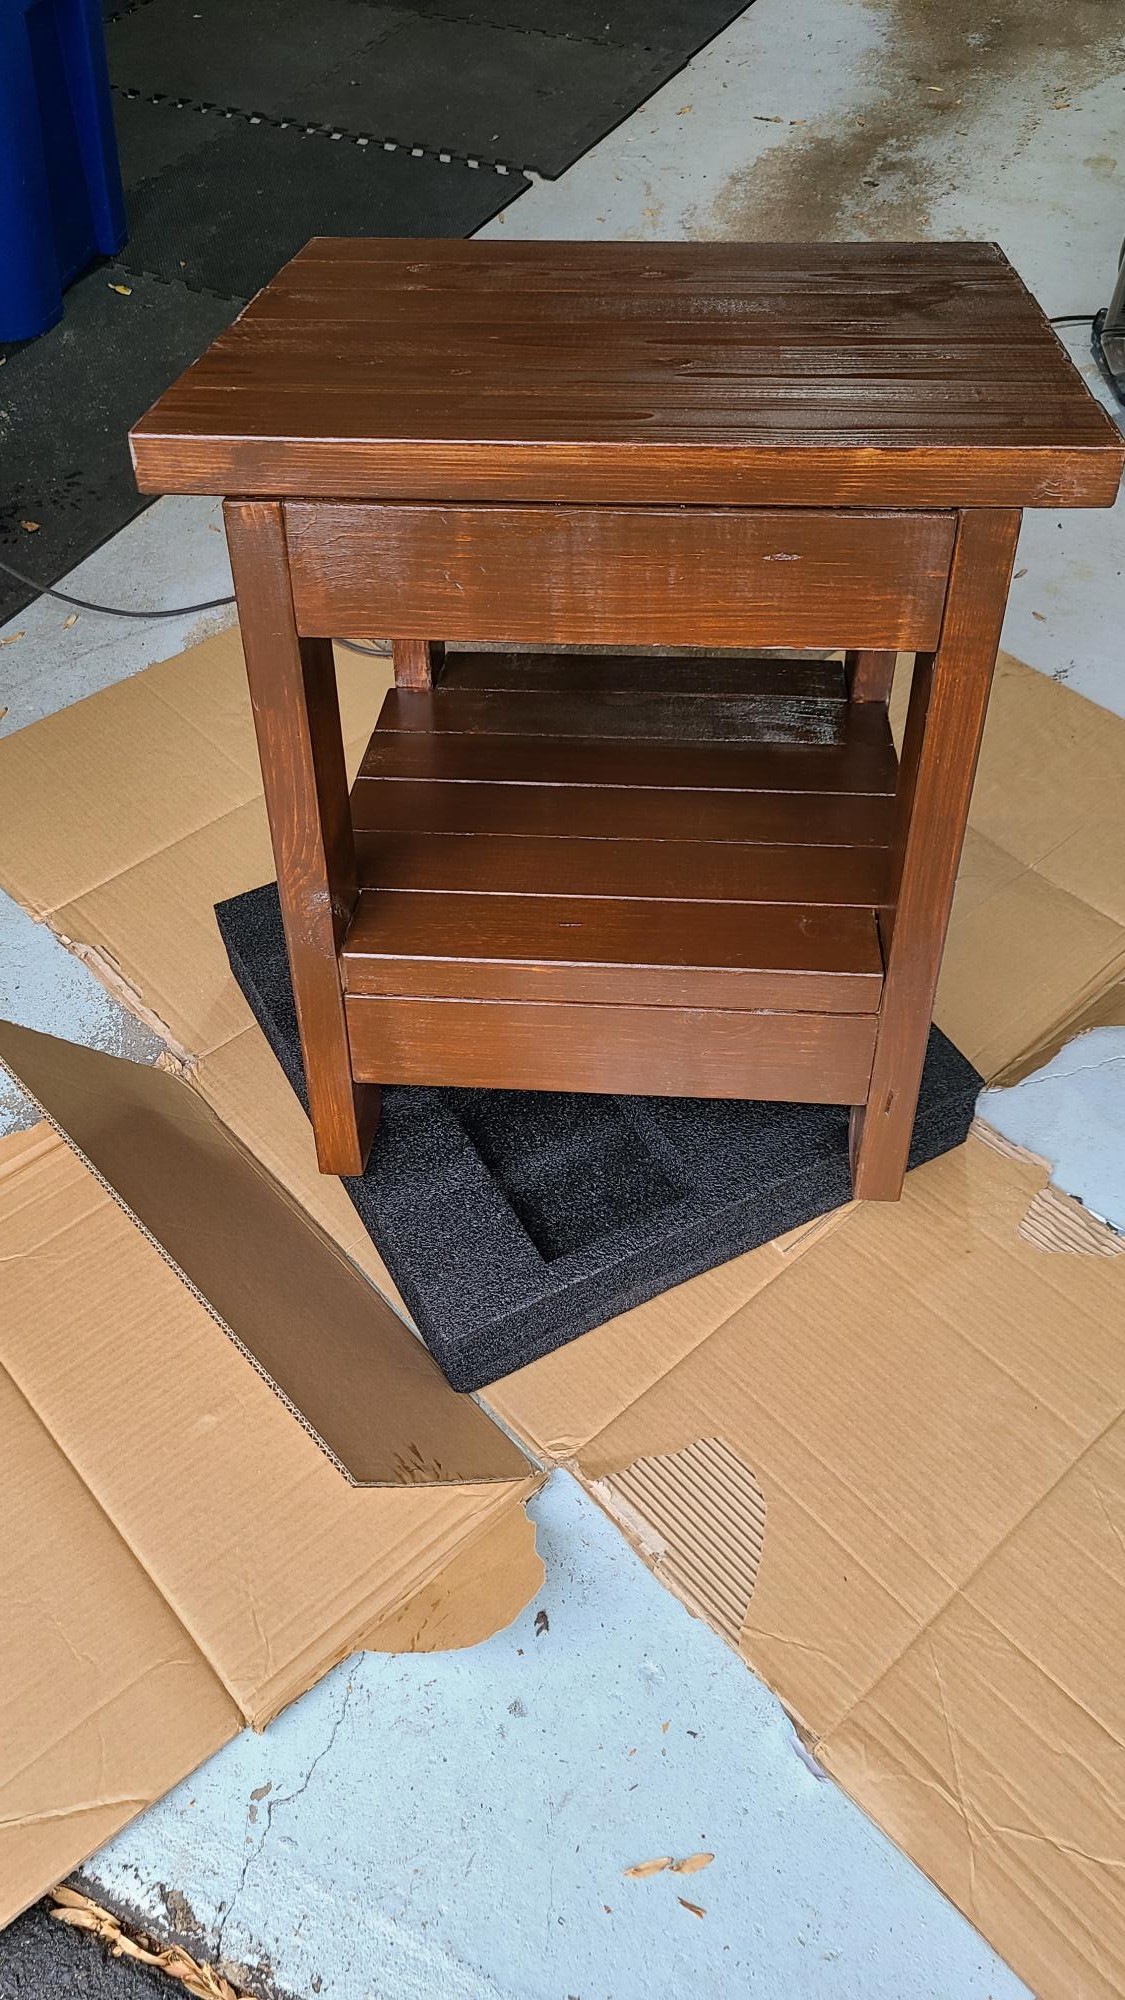
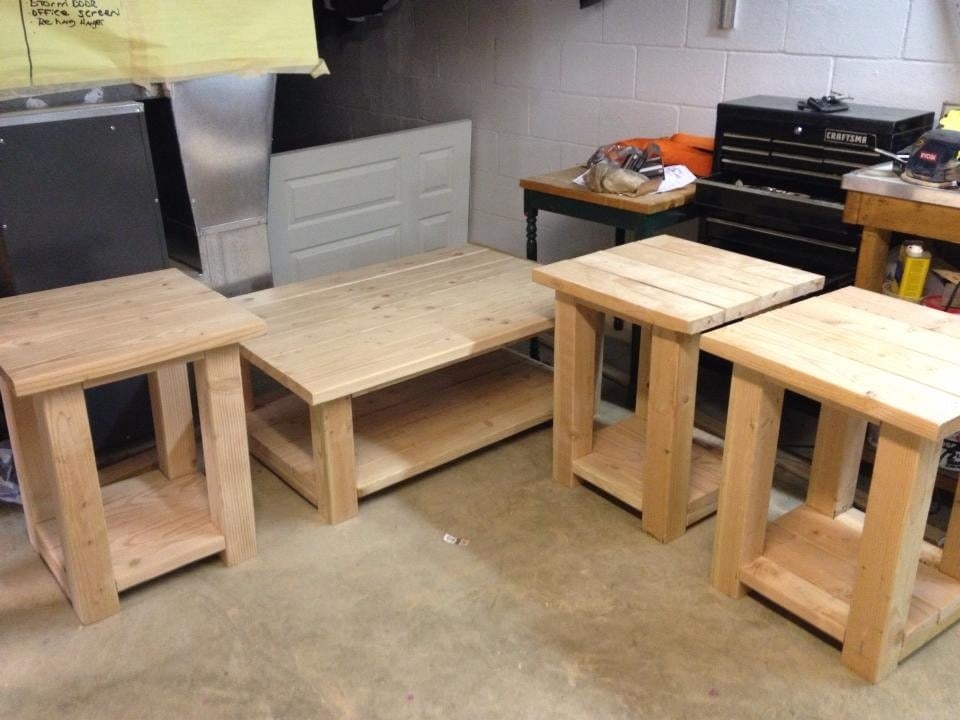
Made the cottage end table, but through in the rustic x style. I really needed a narrow end table. Oh and I threw a shelf on the bottom. First time making a drawer! Loved it!
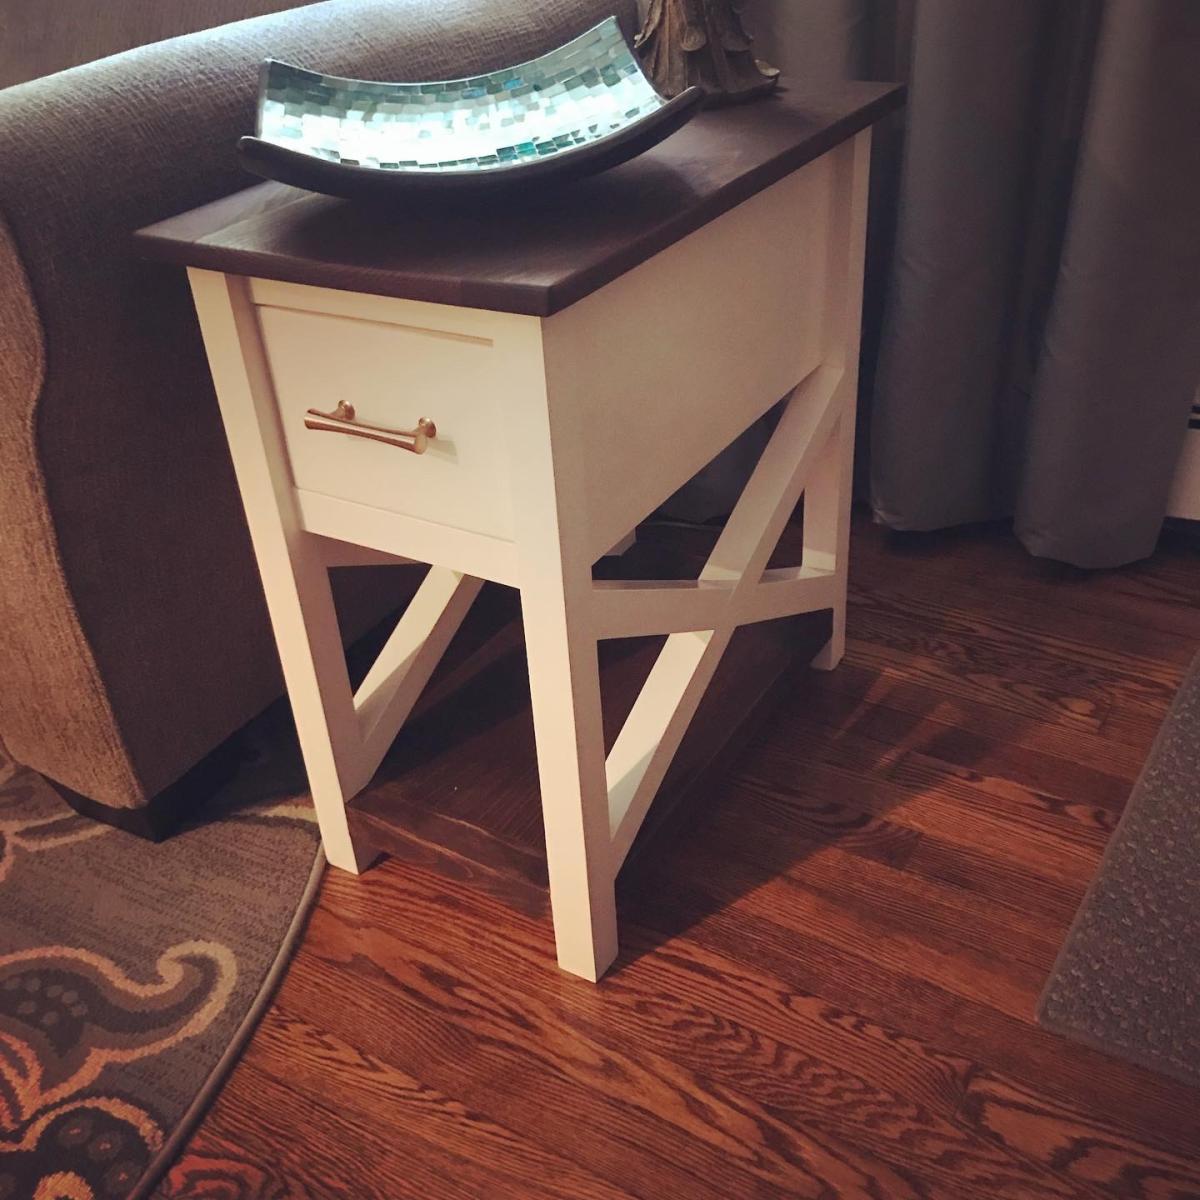
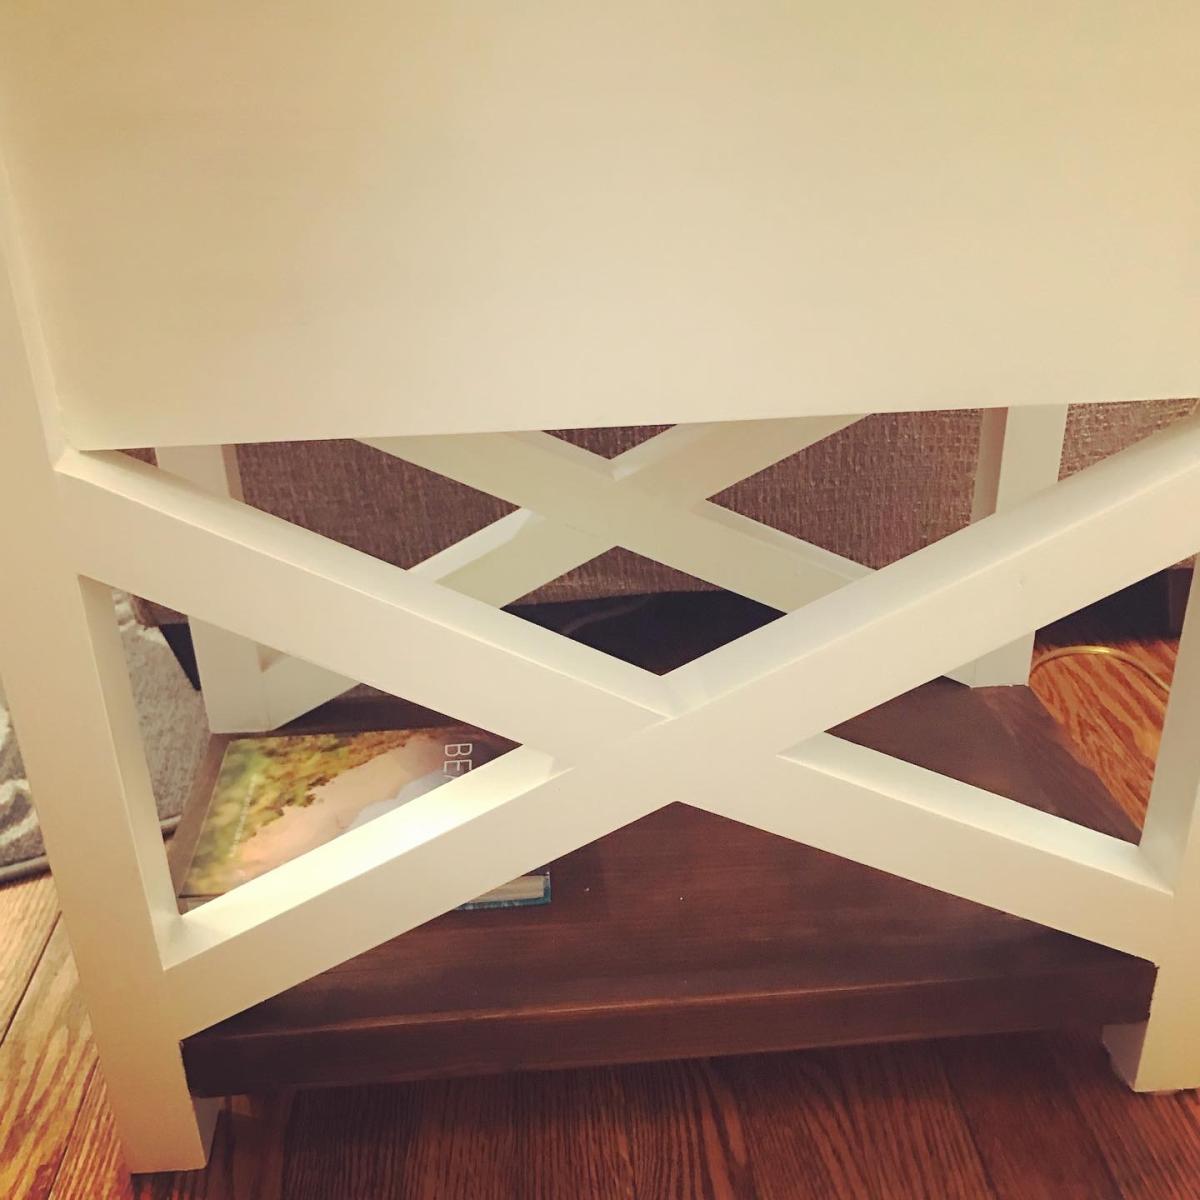
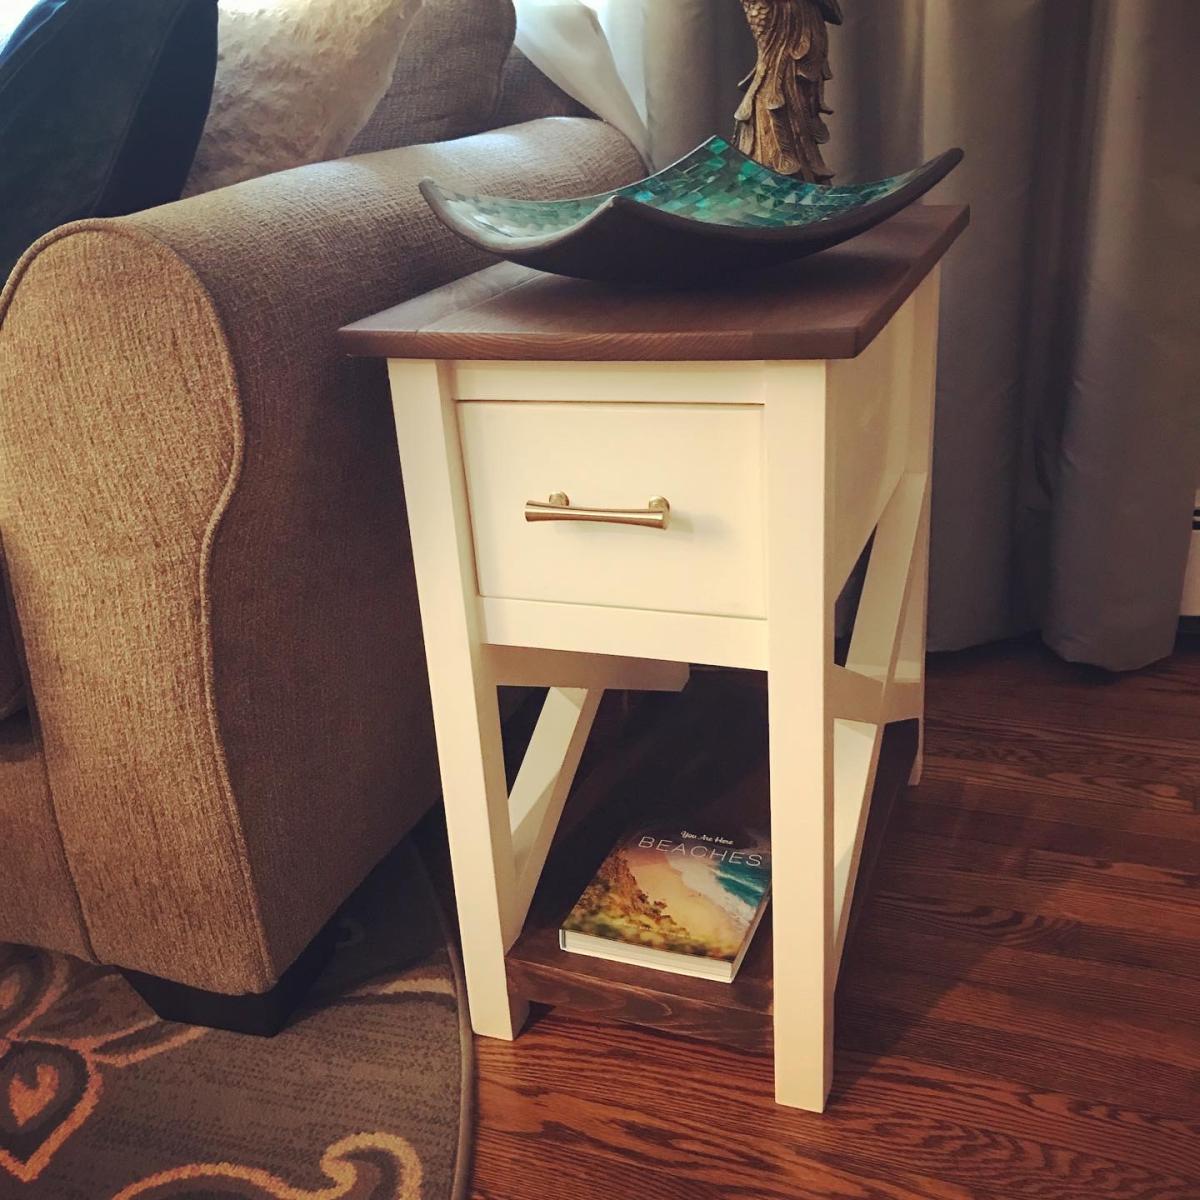
2nd project, but learning quickly! :)
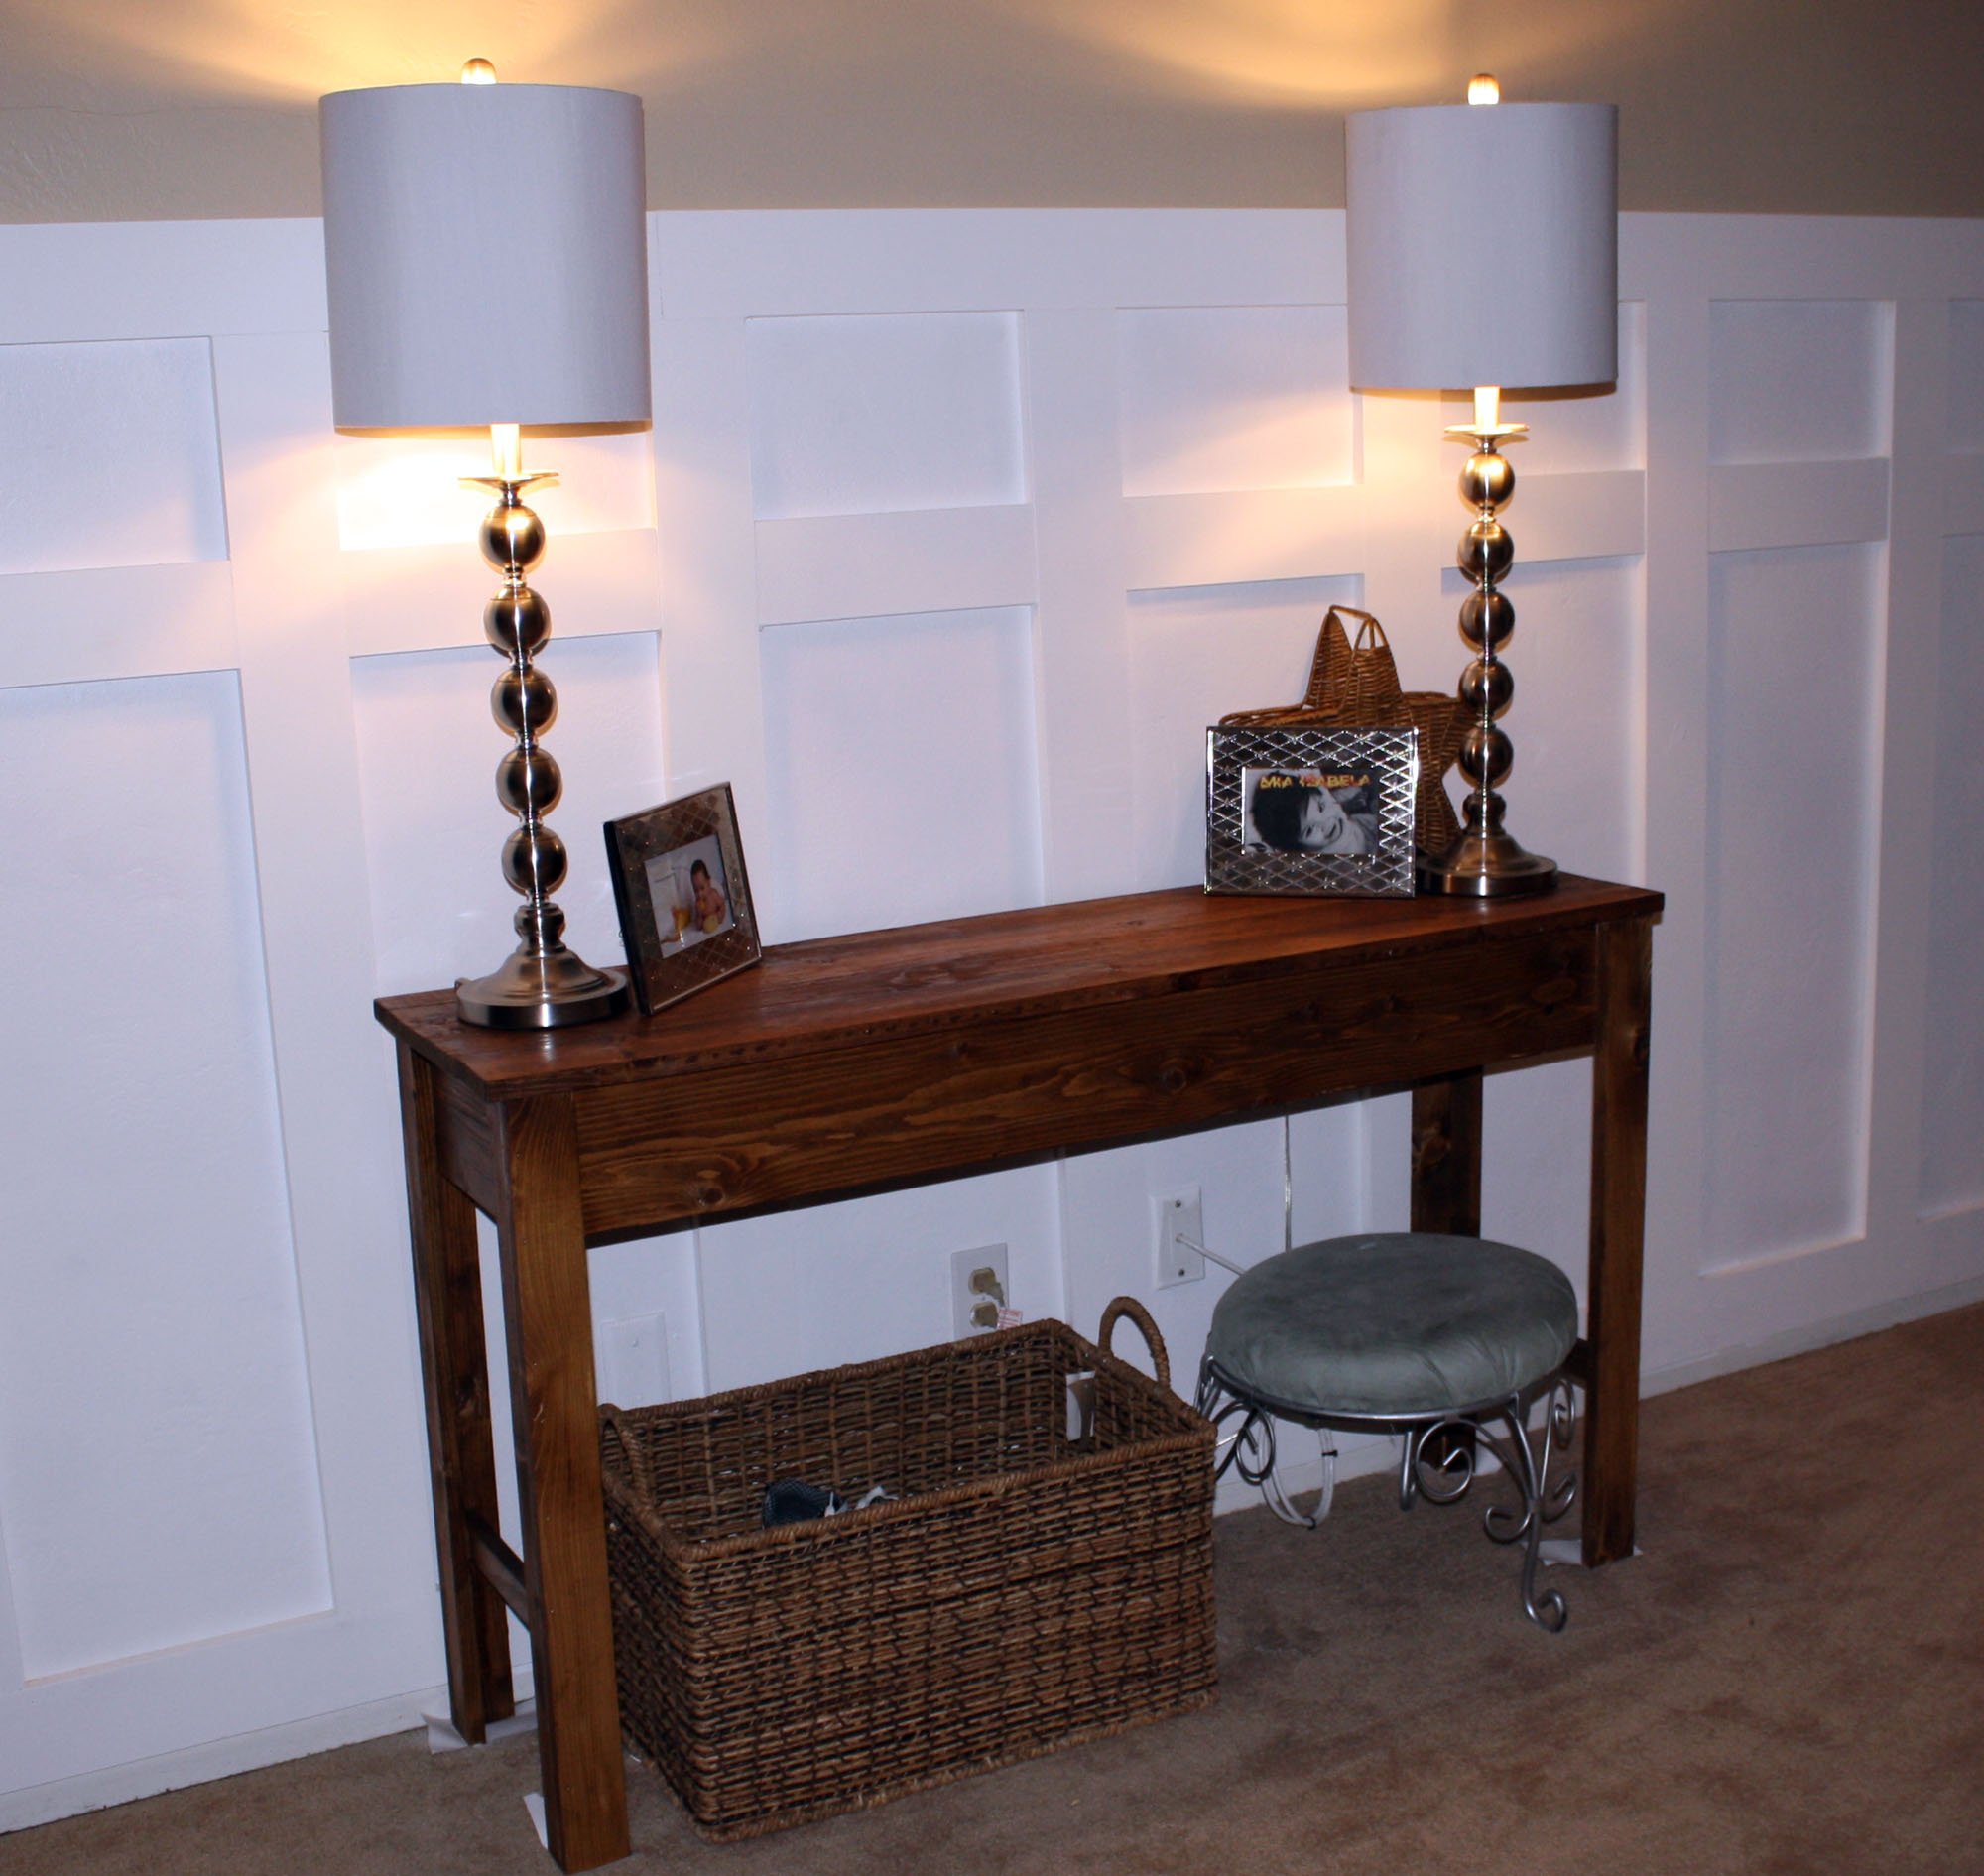
I first started with the wall treatment, love board and batten walls, they add such a crisp look and tons of character, but then the entry way was a little bare. So I needed a table for our keys and some lighting...so this table was perfect, narrow and Pottery Barn looking...
It took about 1 hour to build, including cuts and everything....the staining was the task...my God was I impatient!
I started with the wood conditioner, which only gives you a 2 hour window to add the stain, but do need to wait 15 minutes to start...then I did 2 coats of dark walnut stain and after 8 hours of drying time came in the top coat...which takes 4 hours to dry and then a 2nd coat needed to be added (which I skipped) but I love the color, love the turn out.
So light, I carried it ALL by myself. :)

We used ana's plans and they were great!
We did not do the curved pieces we made it square all the way around. We did the modification and used hinges.
We have all the pieces for the anti-tip and will be adding that later.
We added on extra side pieces for safety using industrial strength velcro so they can be removed in the future when our 15 mo old gets big.
We do not own a kreg jig....so we just did screws and wood glue...making sure to pre-drill holes since the wood is thin and could split...
Such an amazing and easy project with a big impact in a home or outside. A few 2x4's and 1 bys. I wanted to keep the original look of the wood but want to enhance the gain and add a little richness to it. I applied a natural stain and 3 coats of brush on poly. I started with spray on and that stuff sucks!!! More of it gets wasted in the air then on your material. Finished the bottoms with some felt rounders and voila!!!
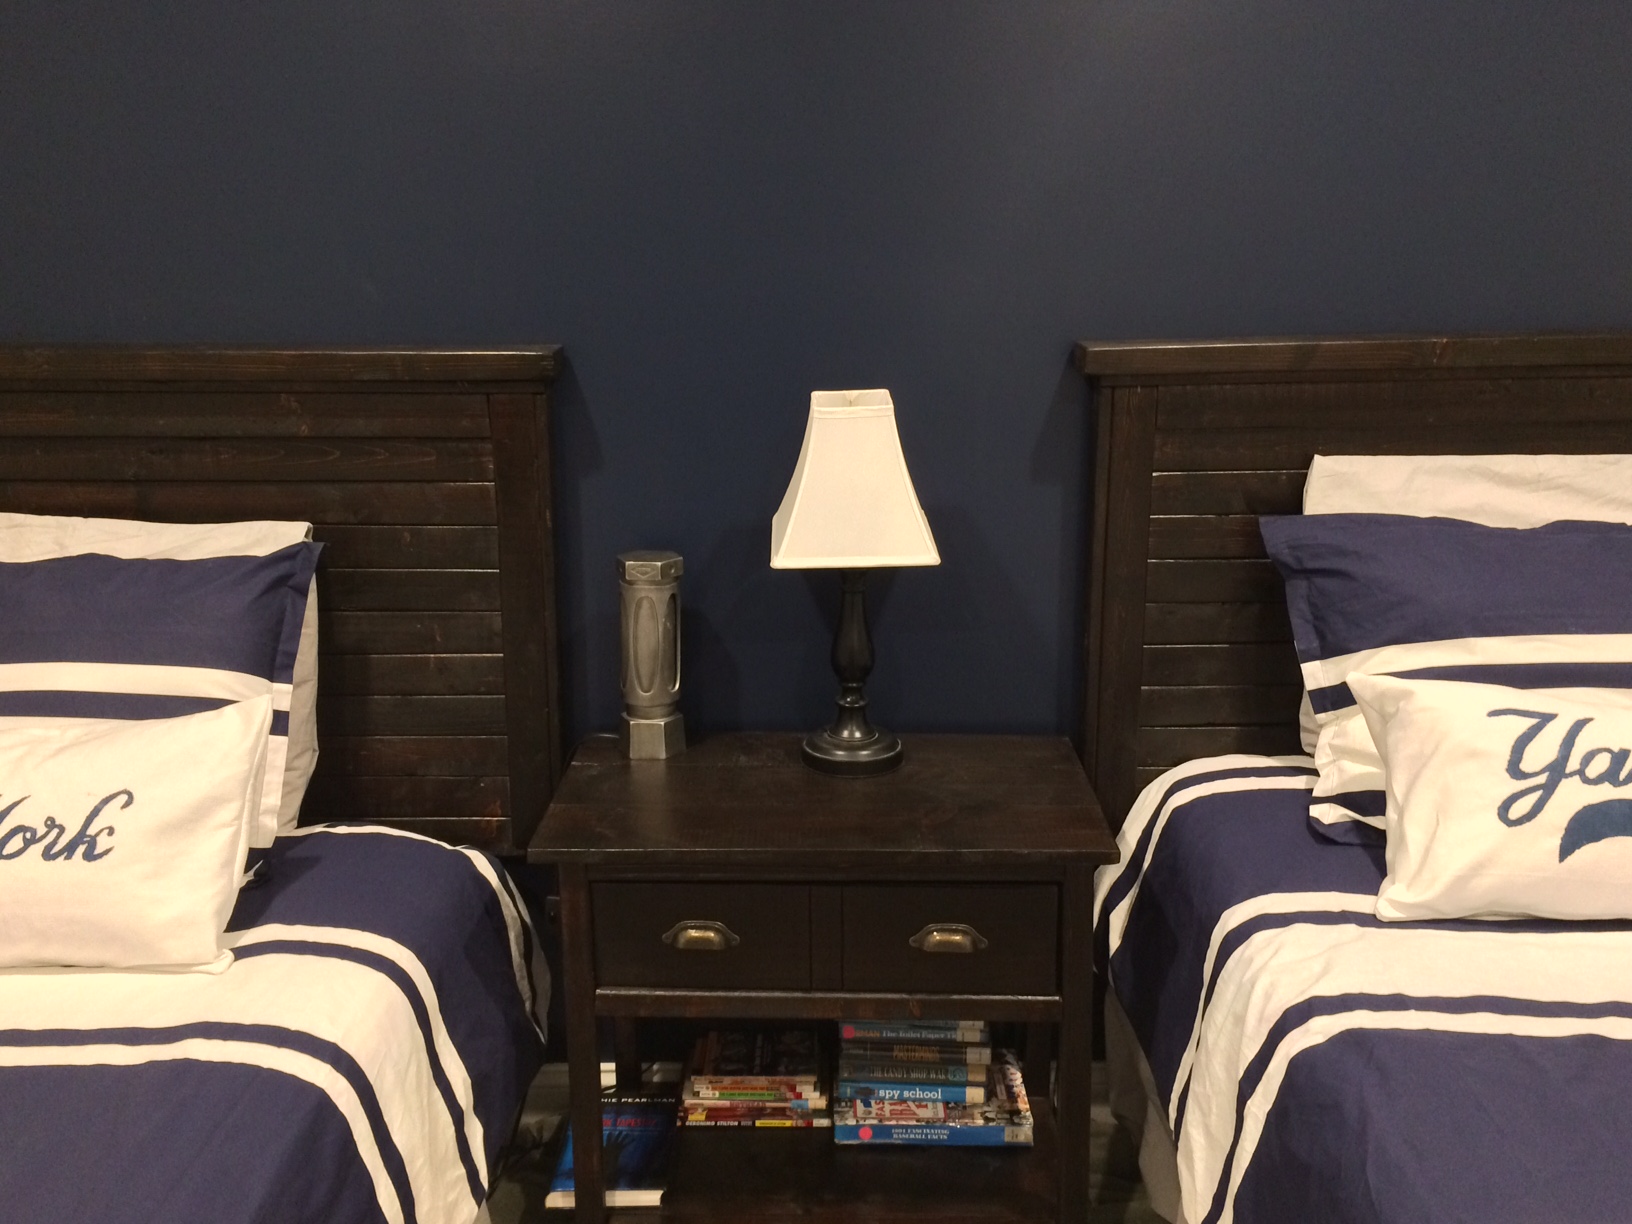
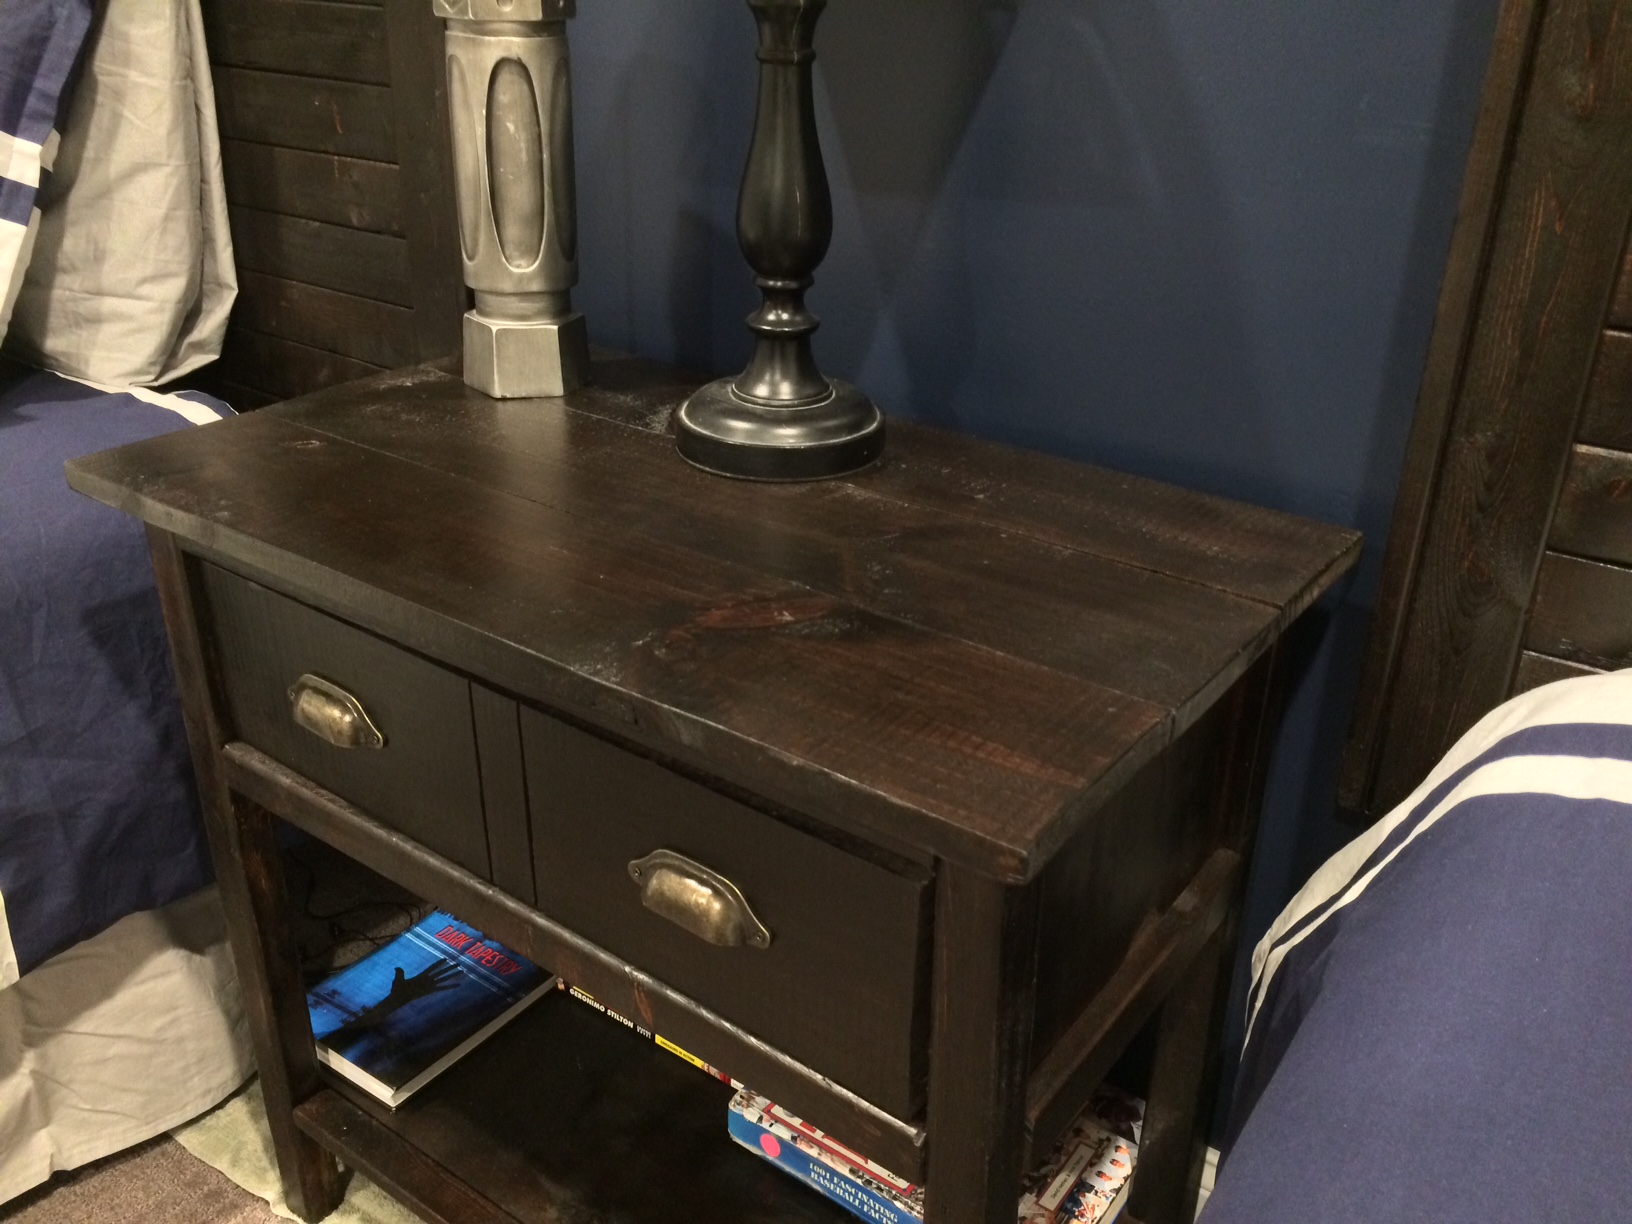
Built this nightstand for my boy's bedroom- built the farmhouse headboards to match. Was a straightforward project. I actually bought a circular saw instead of having the store make the cuts- best decision ever. Much better to cut as I go along.
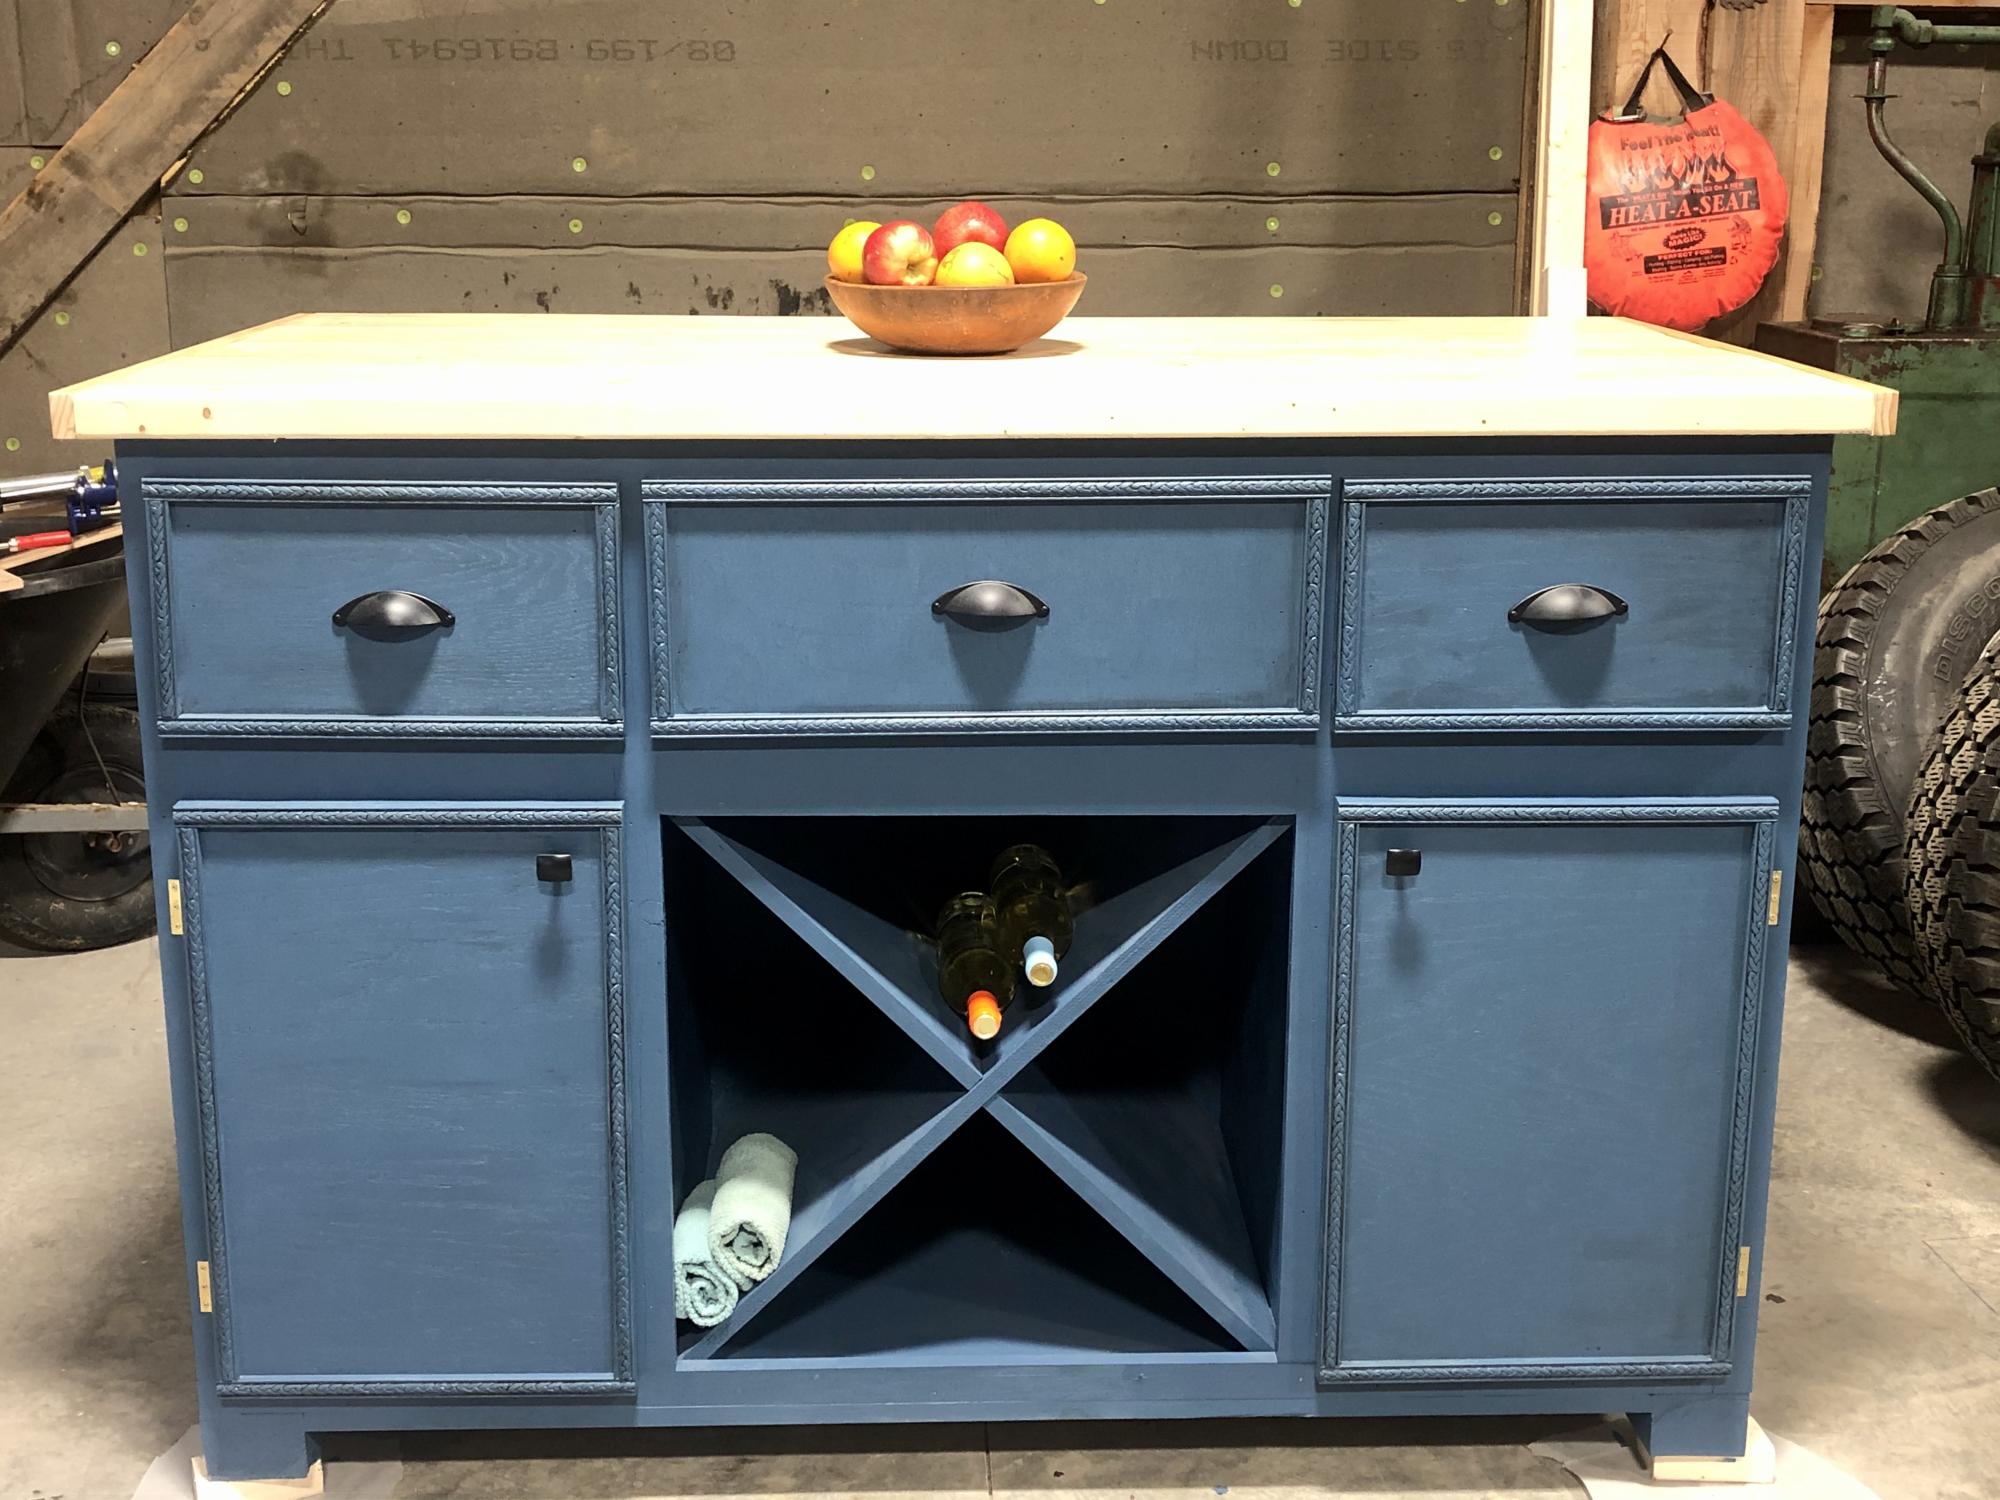
My first real project, which you gave me the courage to try!!! The kitchen island!
Made one error that I had to spend a bit of money to correct but in the long run the finished product is beautiful, I even used the same color you used.
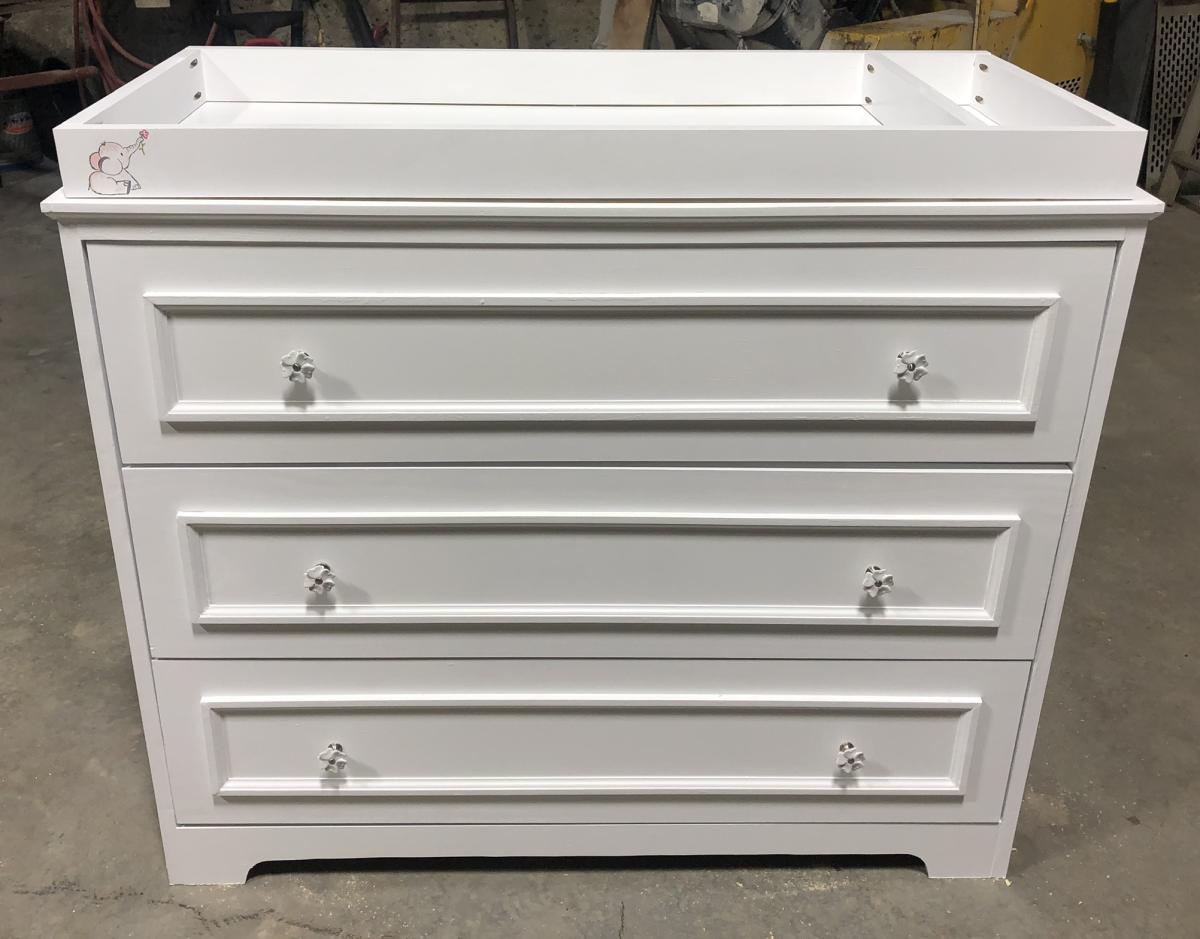
After that success my daughter-in-law asked me to build the changing table for my expected granddaughter, I went into that with a little more confidence. Thank you for the inspiration that you give so many!
Mon, 12/27/2021 - 15:54
WOW, WOW, WOW, you did a brilliant job! Thank you for sharing:)
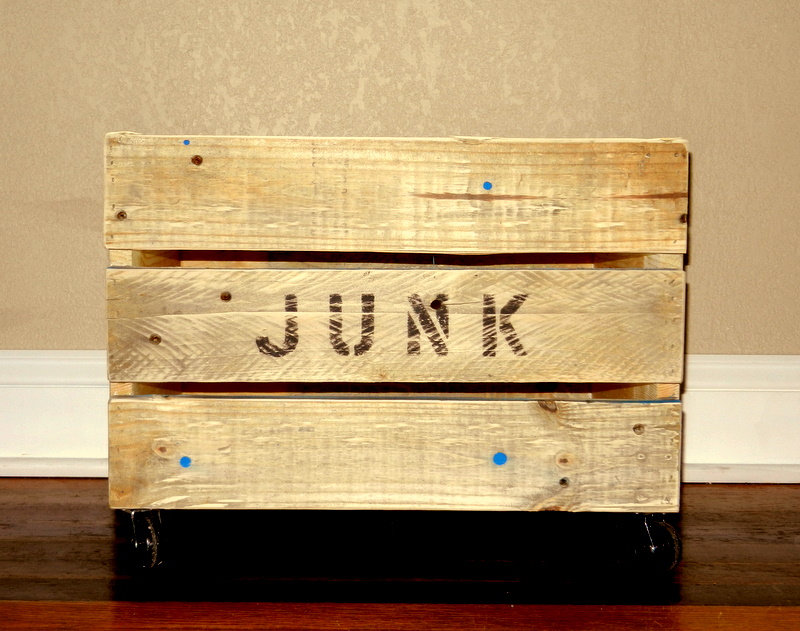
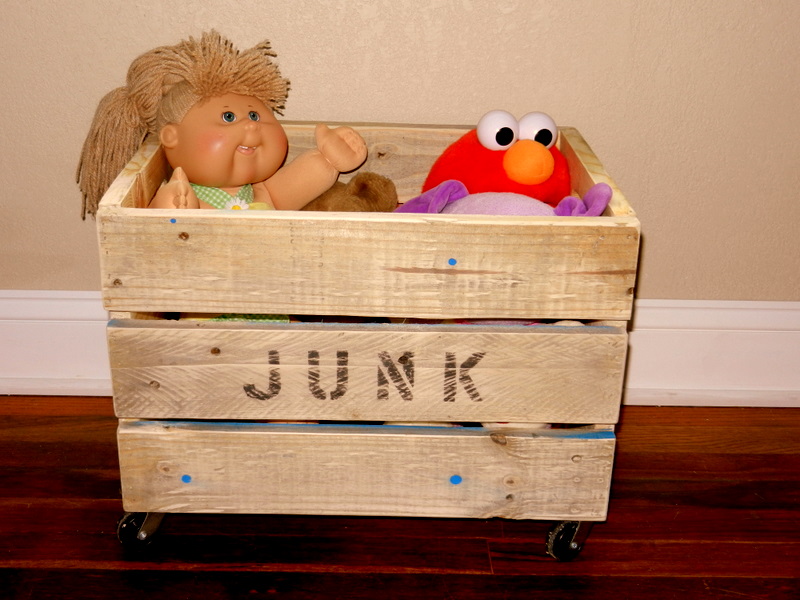
You would think I would build this first because it was EXTREMLY easy. This was so fun to make and it's perfect for my daughters toys (junk). I used all reclaimed pallets except for the sides. The only reason it cost $8 is because the wheels were $5.
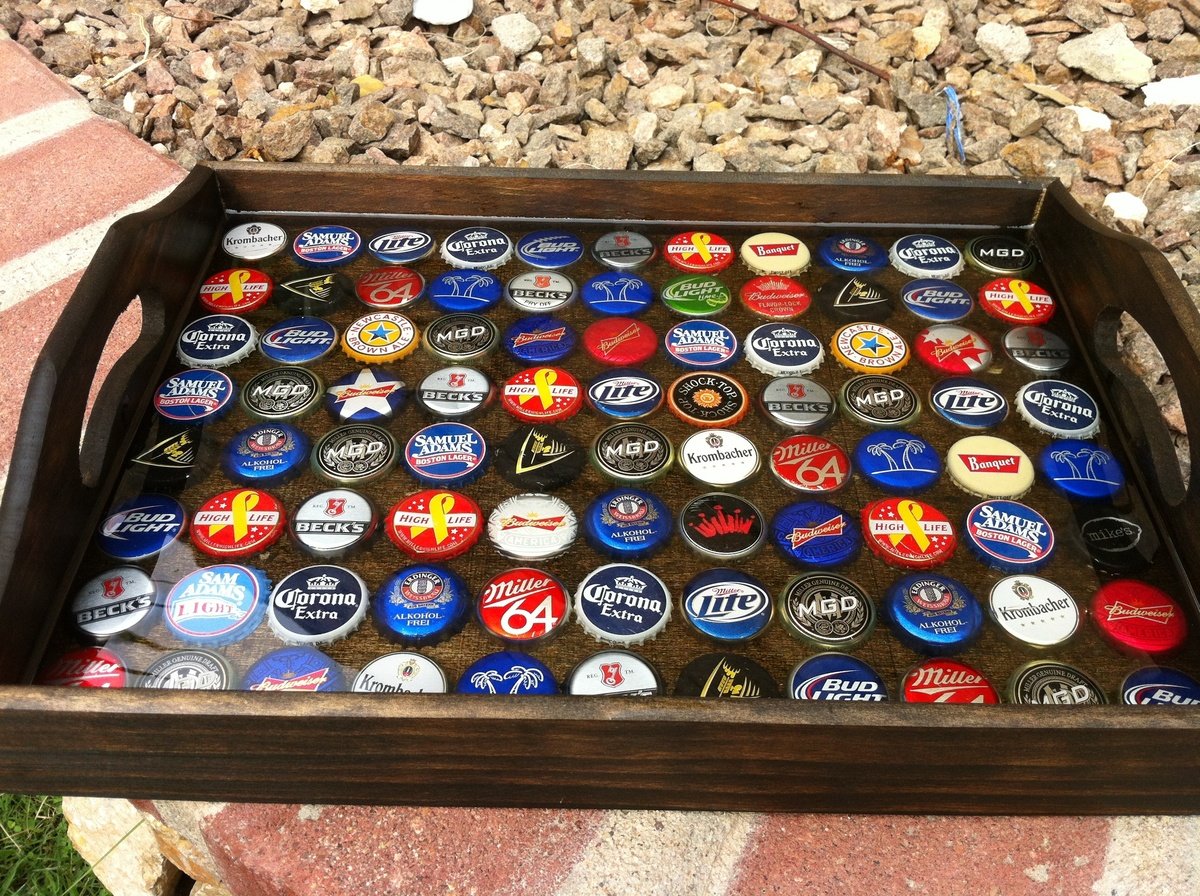
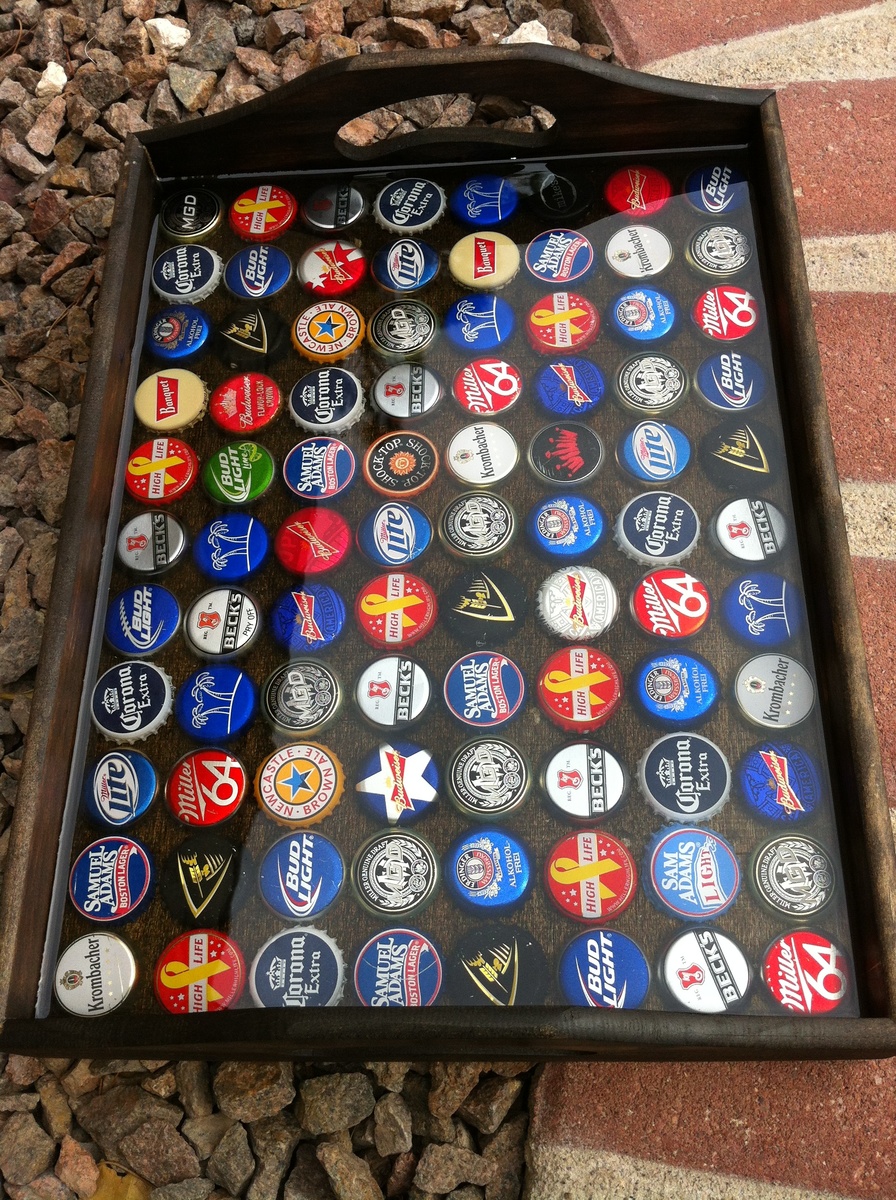
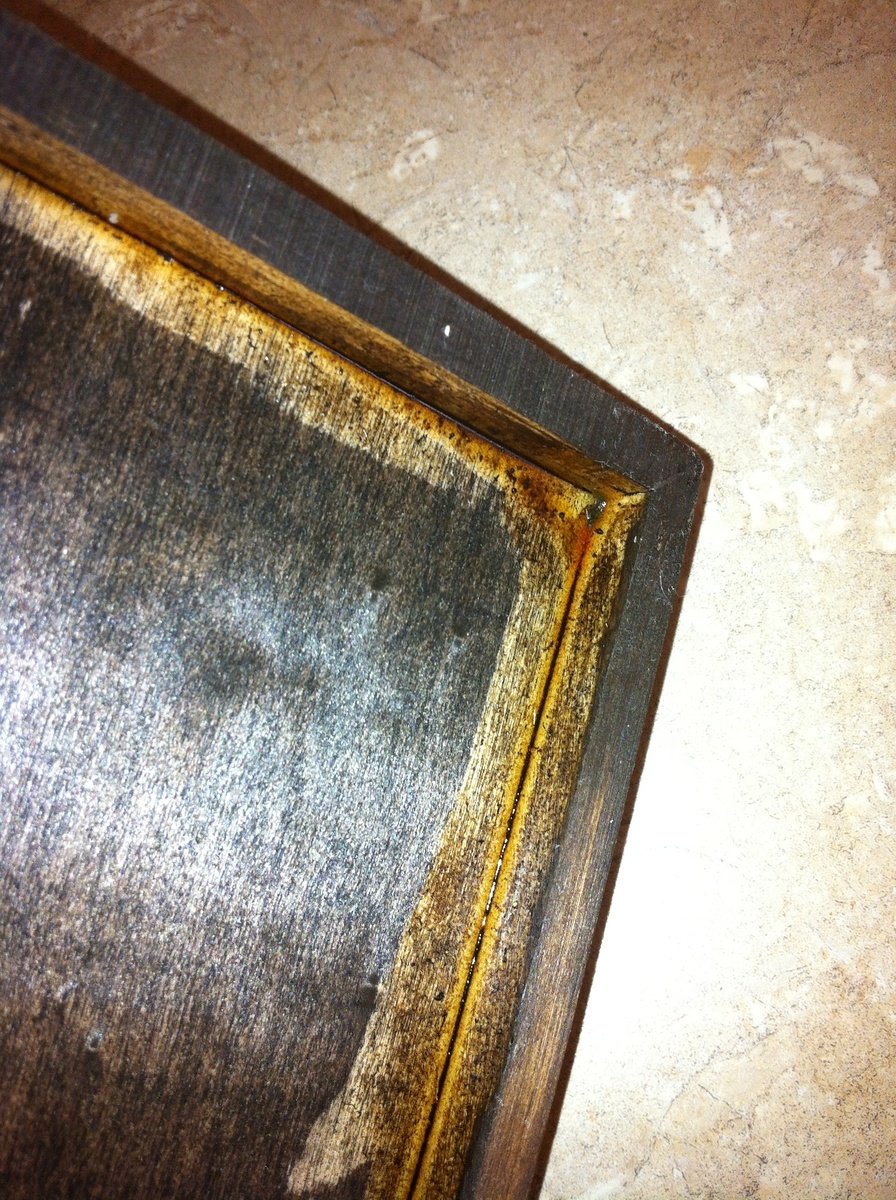
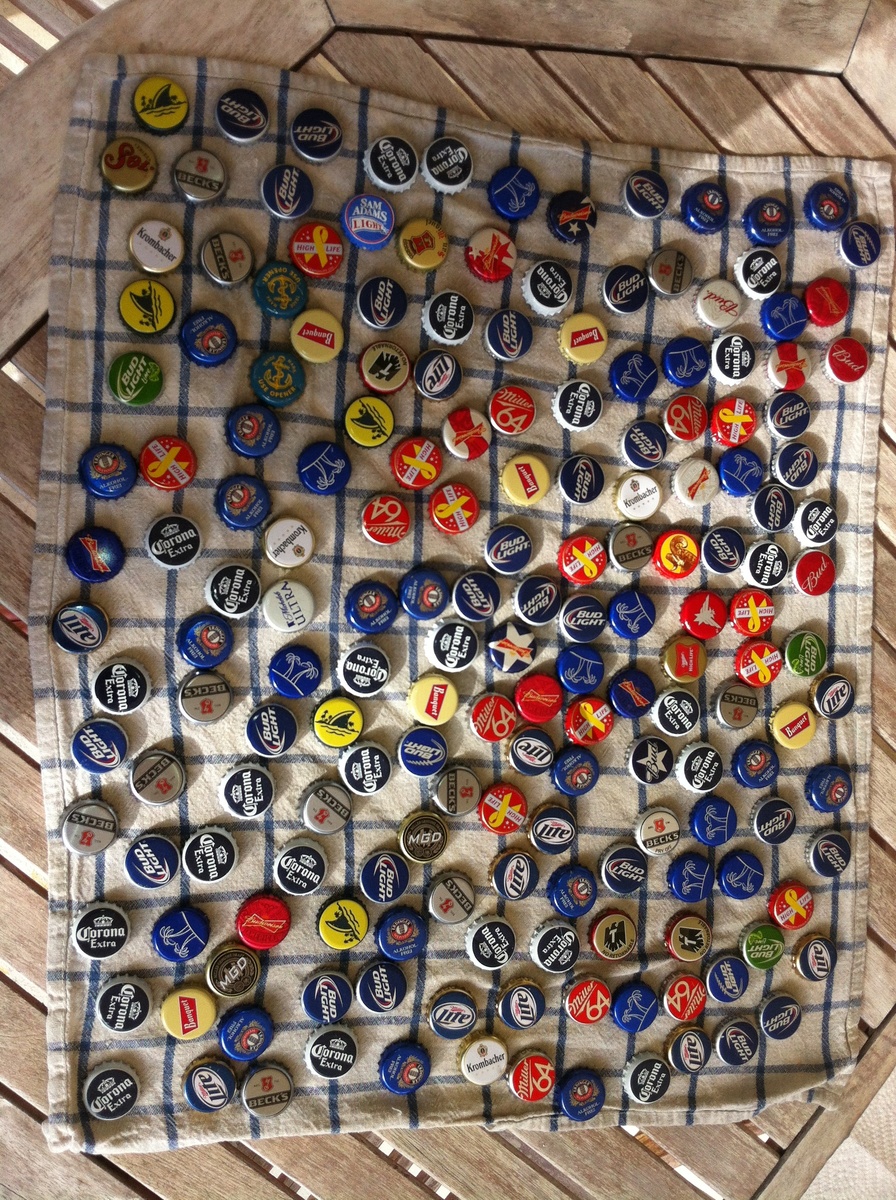
How to build a Bottle Cap Tray AND what NOT to do.
These Bottle Cap Trays are sold for 45+ Bucks online. I spend maybe 15$ on it.
You need a lot of Friends drinking a lot of different Beers... For this tray i needed 88 Caps. I also asked Bartenders and Co-Workers to collect Caps. As more colorfull you get as better. Twist off Caps are the best behause they do not have dents.
I bought the Tray at Hobby Lobby for 3.99$ (you can also build one from a Plan from this Side) and after sanding with 220Grid i stained it to fit my Home Bar. After lay out the "Design" i removed them all and lay them in the back of the now empty tray.
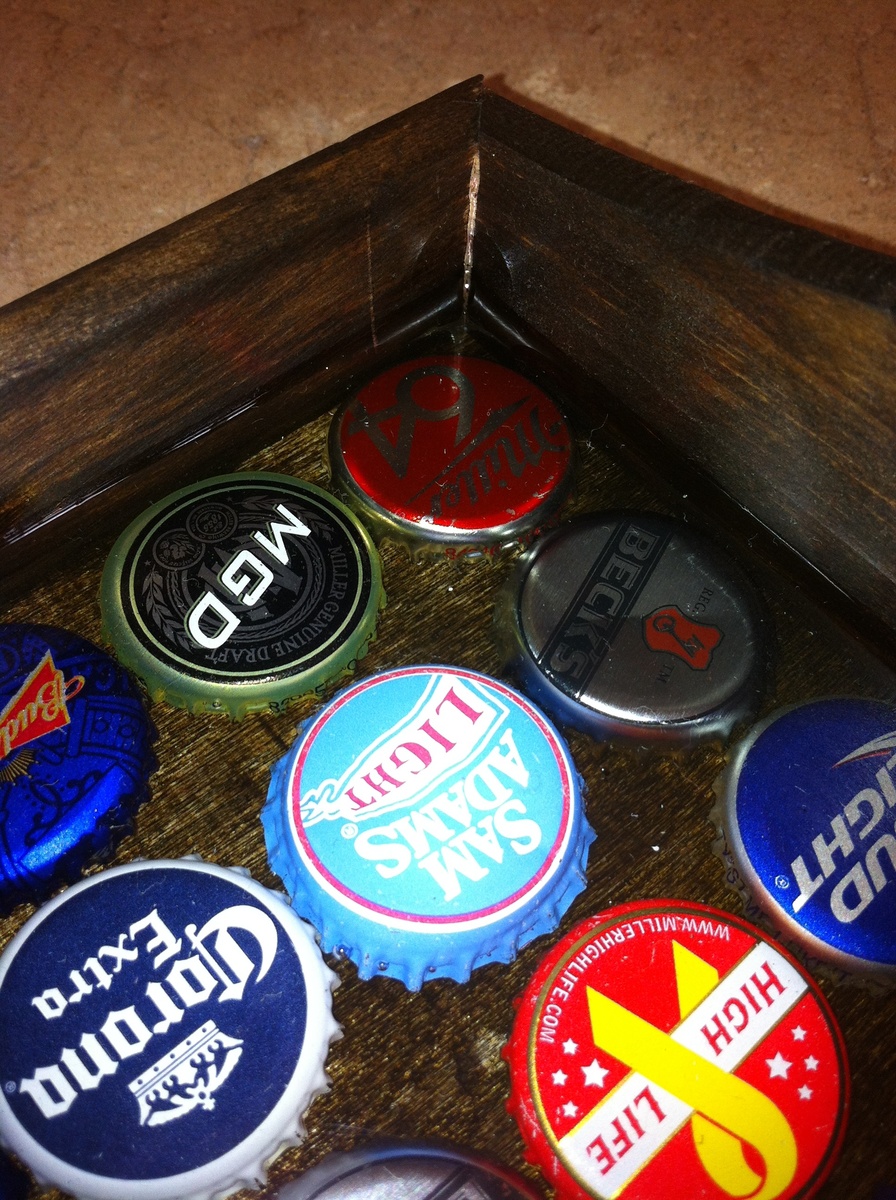
2 Ways to glue the Caps to the Board:
1. Hot Glue (be carefull the Caps get very Hot)
2. I poured just a small amount of the Epoxy in there and pushed the Caps into the Ressin...
How to mix Ressin...
Read the Manuall!!! The first 2 Trays i poured to much and then it gets very very hot and ruin everything (see second last Picture). 2nd Glue the board to the Walls, if the Ressin runs out of the Tablet it is also a great mess!
I Used 2 small cups messured it and Mixed it in the Red Solo Cup...
Put the Tablet on an even surface (protect it) and pour a small amount into the tray... Level it and then put the Caps in there and use a torch to get rid of the Air Bubbles. I needed 3 layers to Cover all Caps. Keep it Dustfree during curing - very important .
I let it cure for 12 Hours bevor the next layer was applied. Total Curie after 72 Hours...
Sorry for Bad English - i am German...
Hope that helps to build your own Bottle Cap Tray...
And made it as colorfull as possible. I aranged them to face One Side but you also can turn them happy around.
Thanks for comments and Reading
Jann

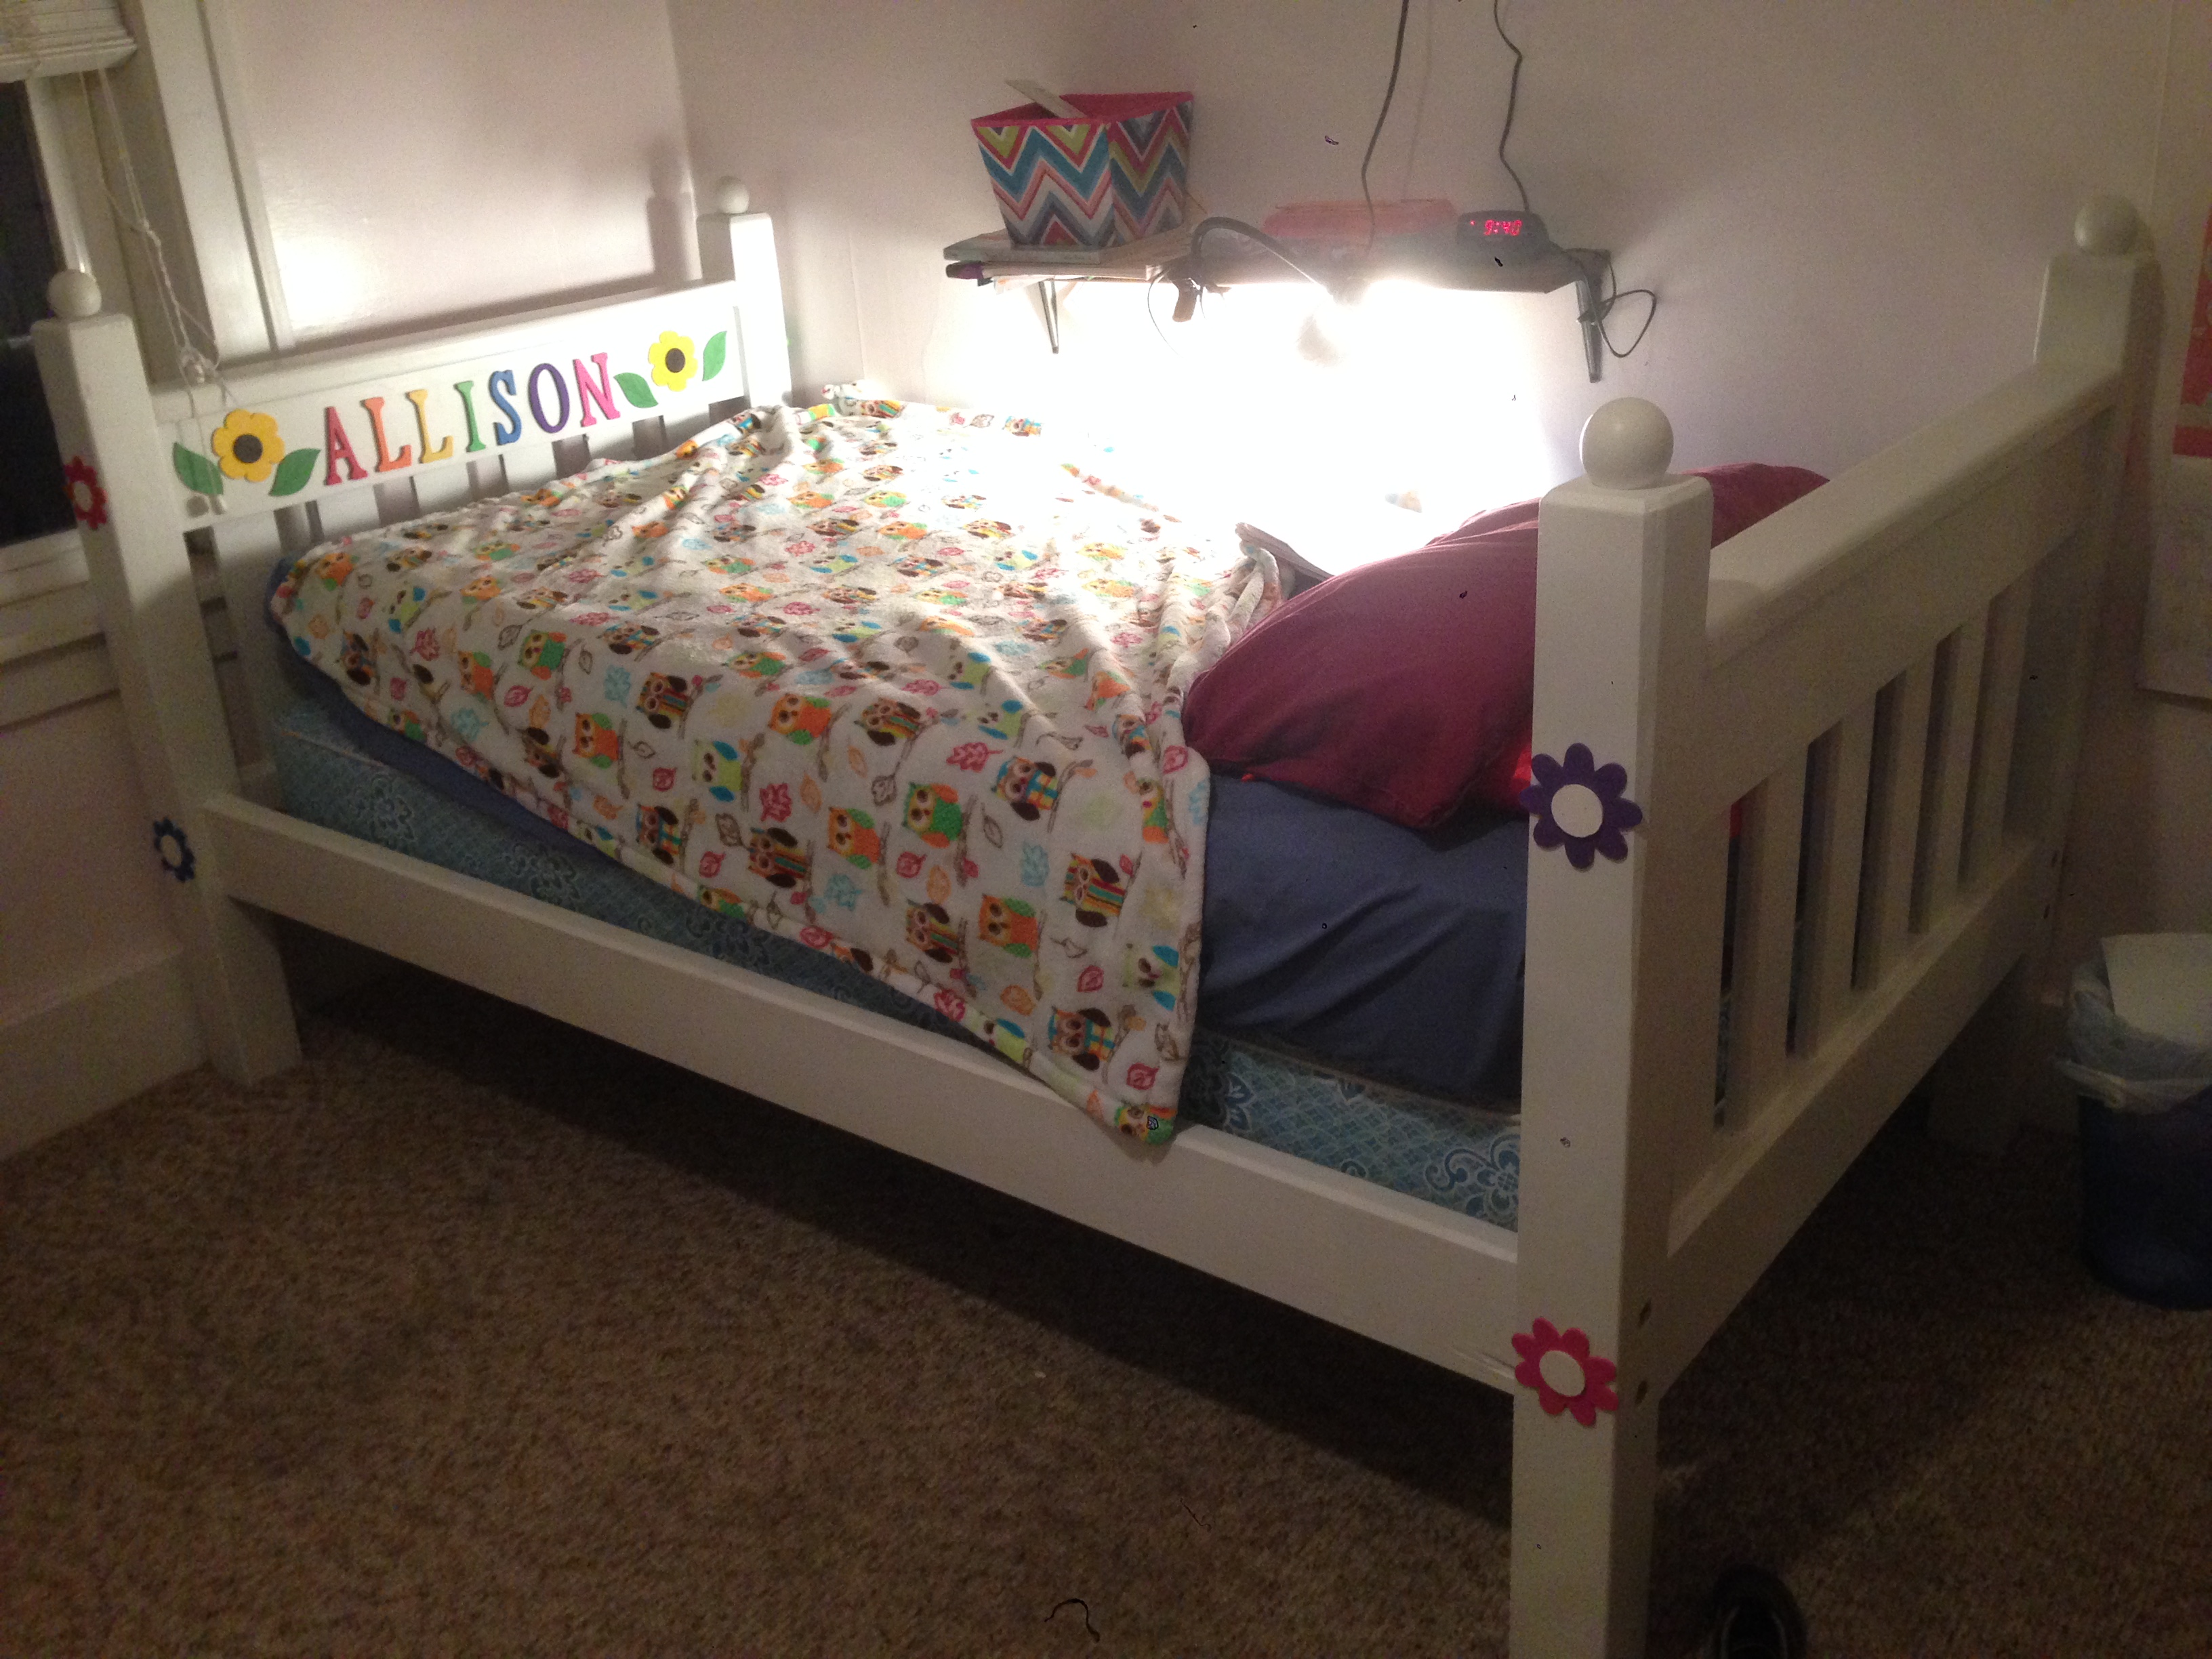
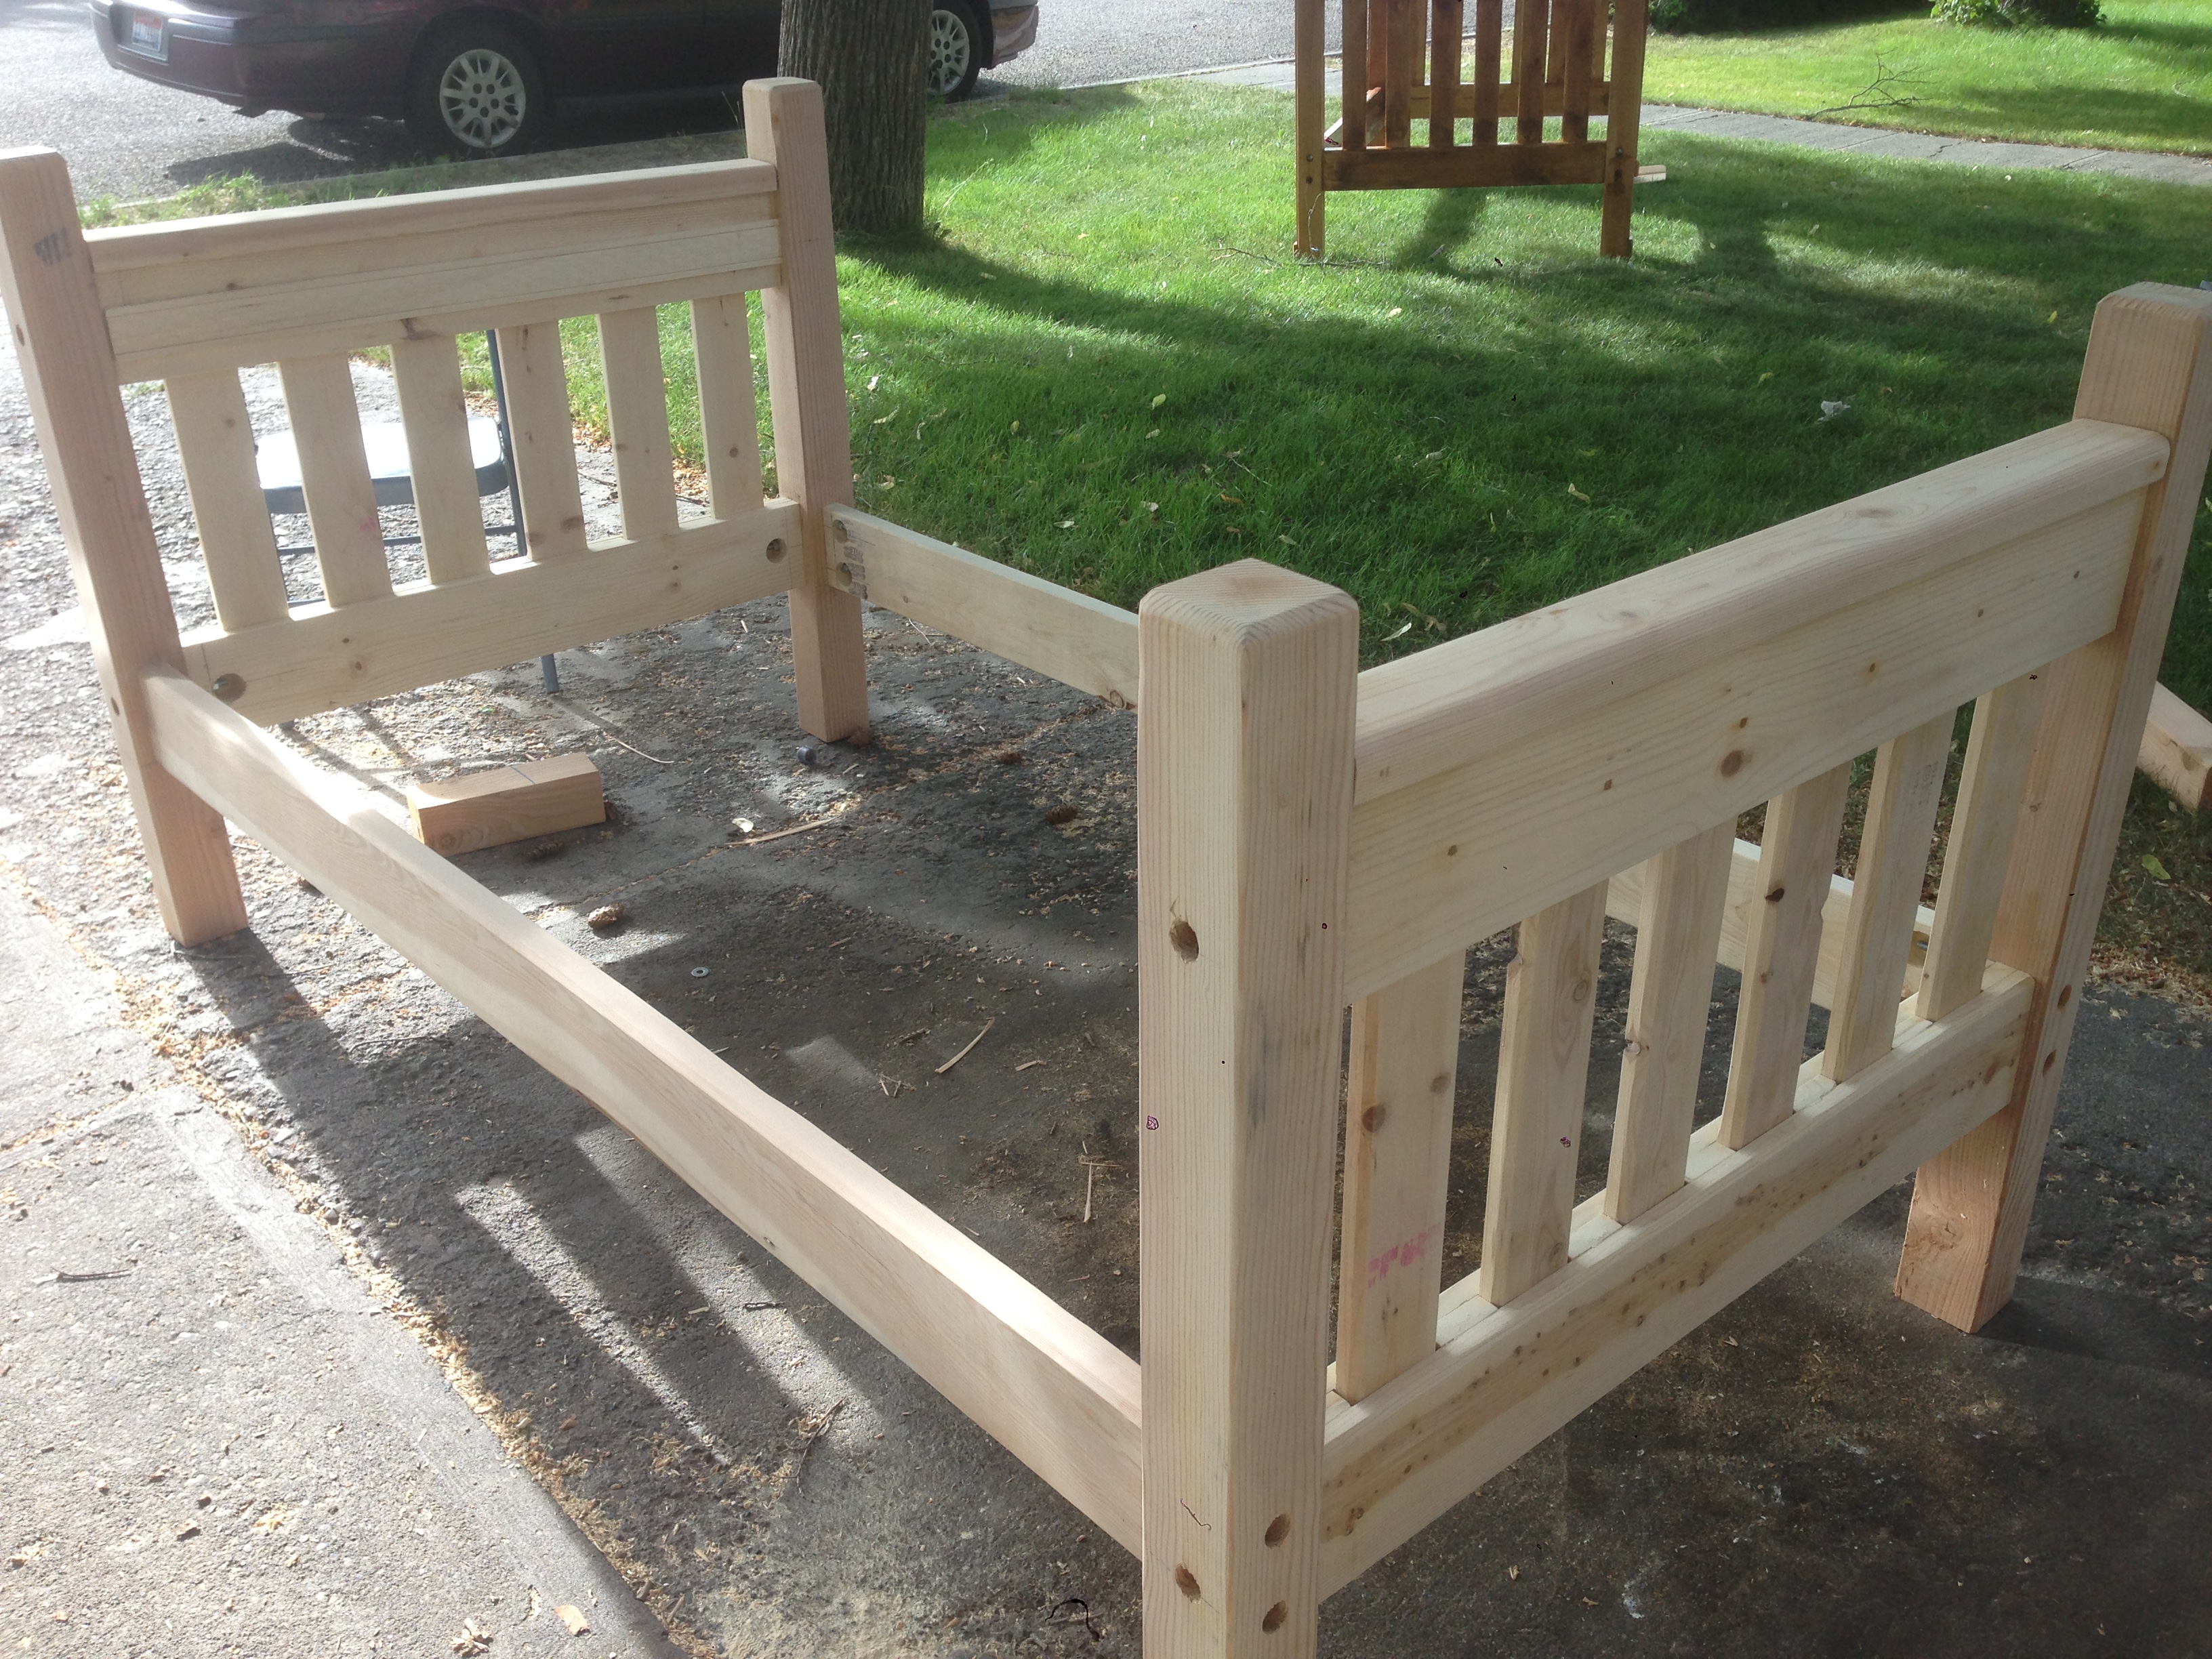
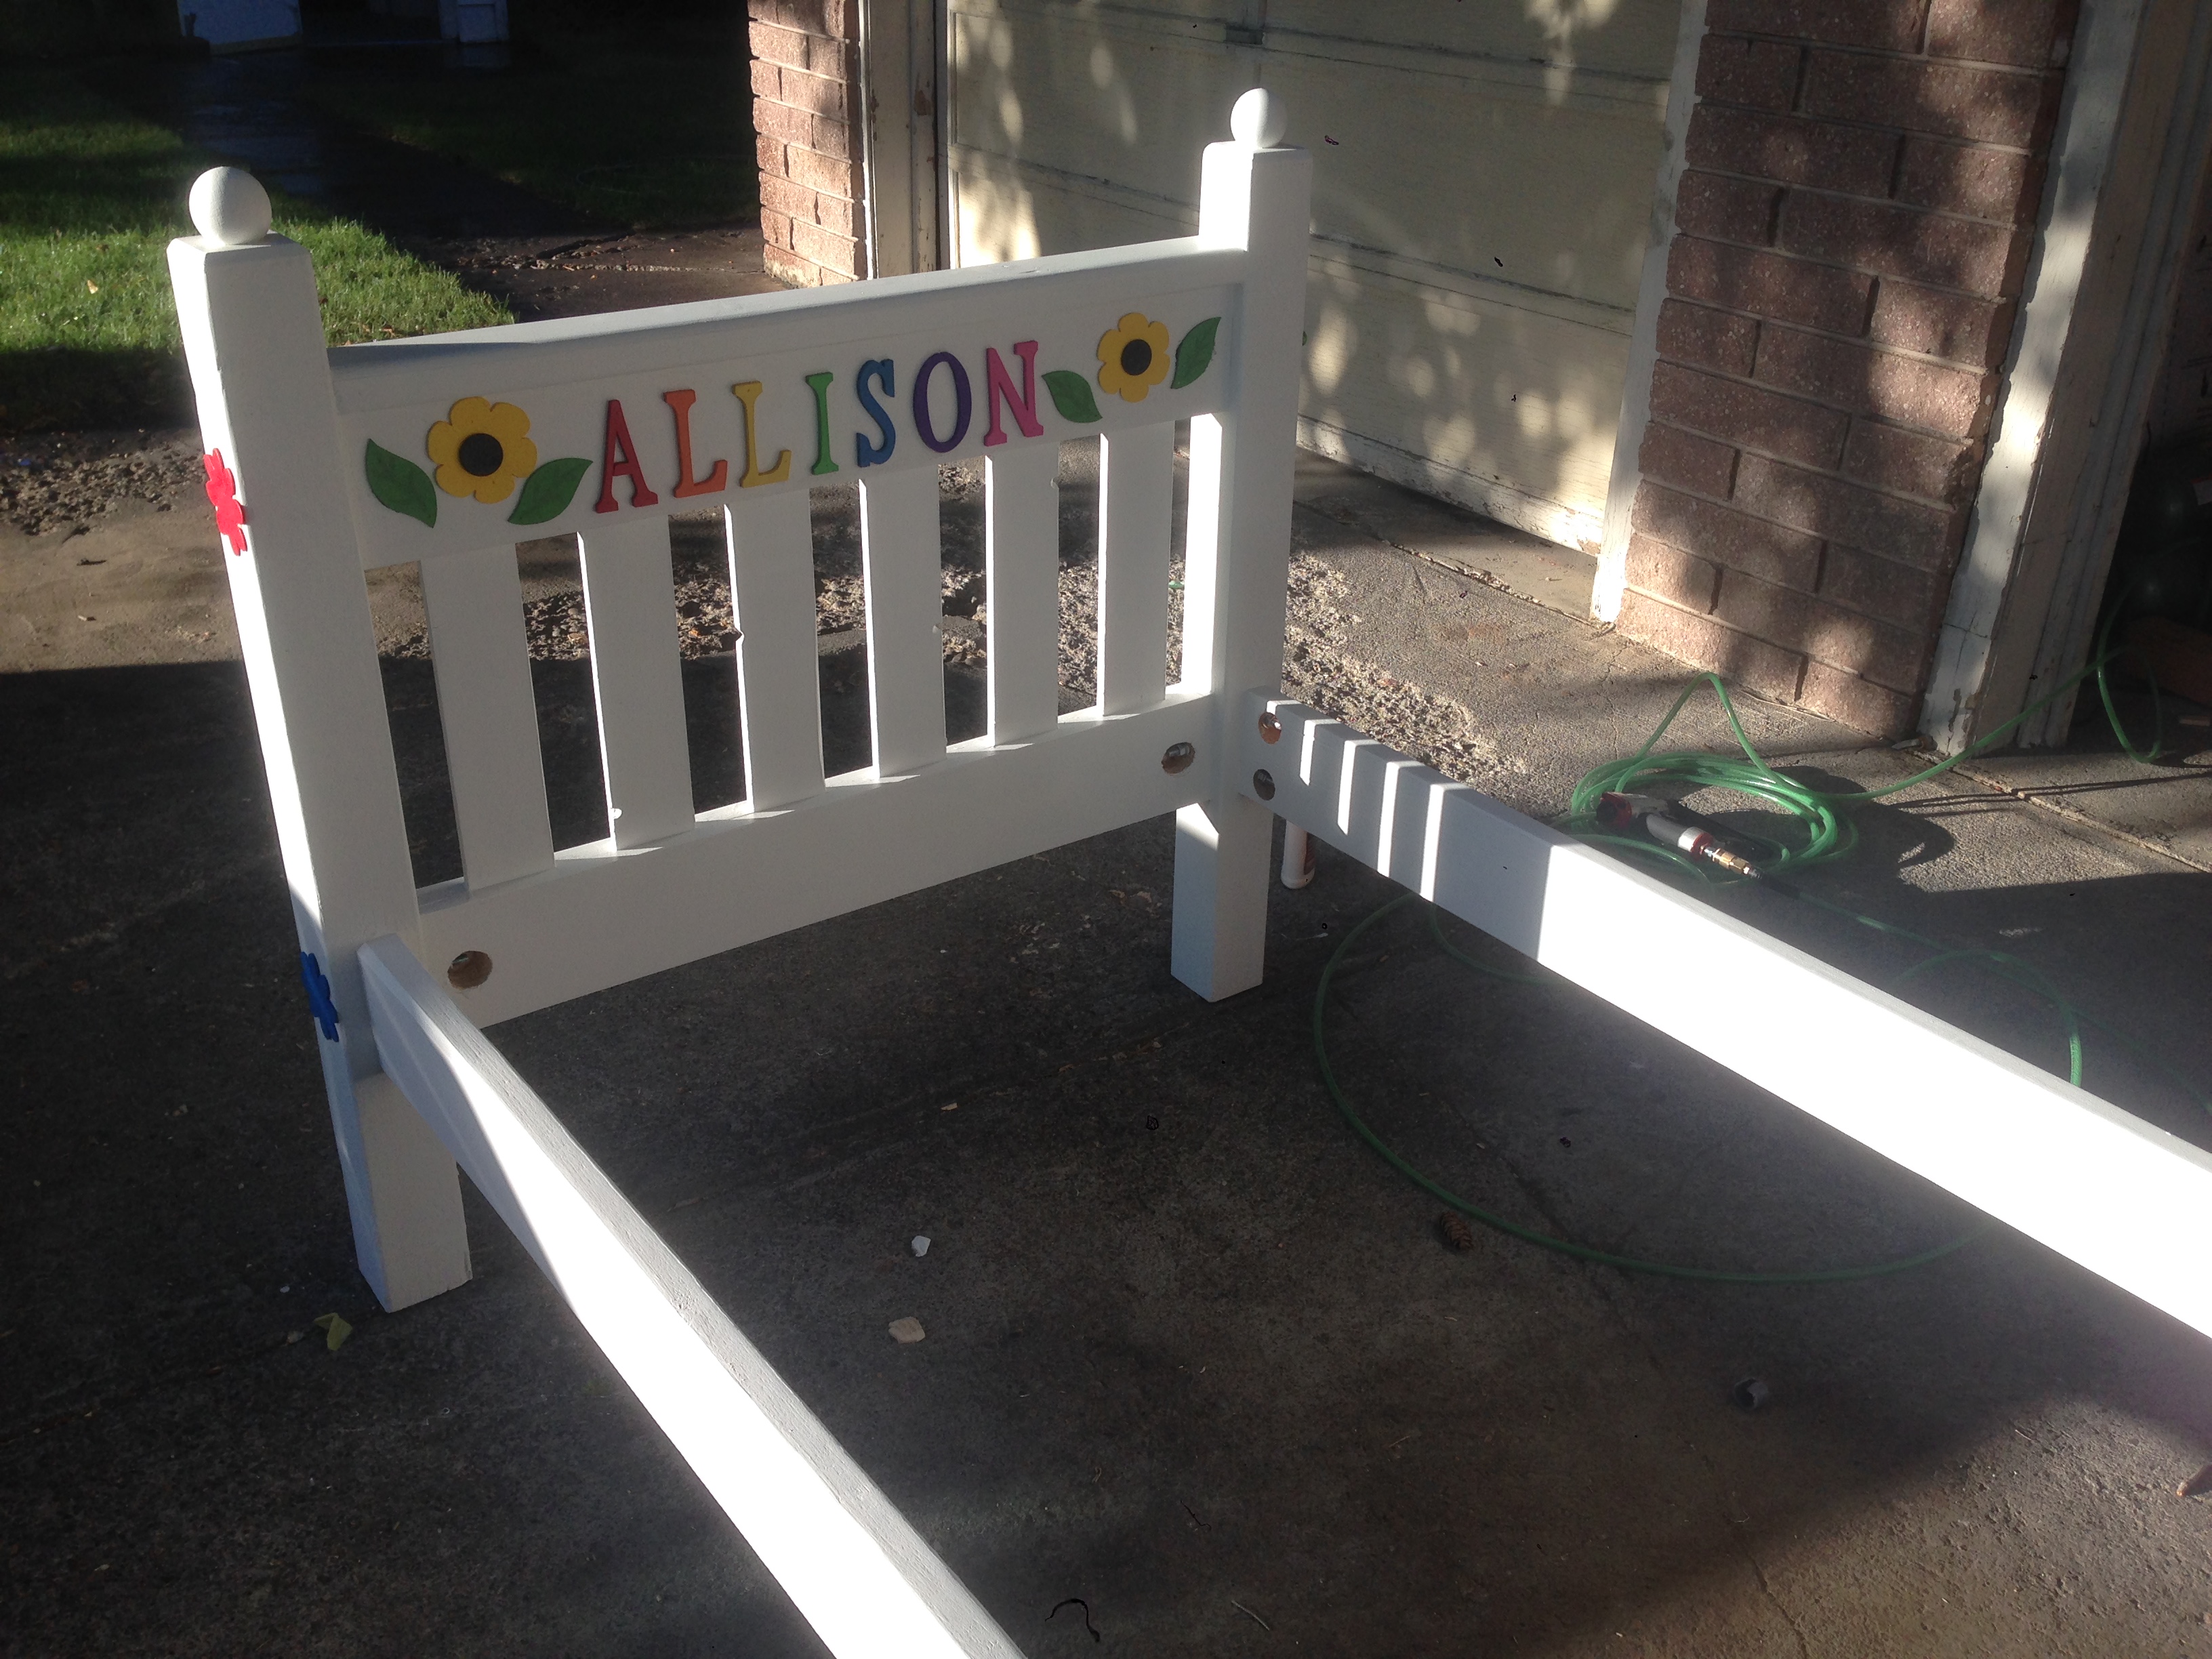
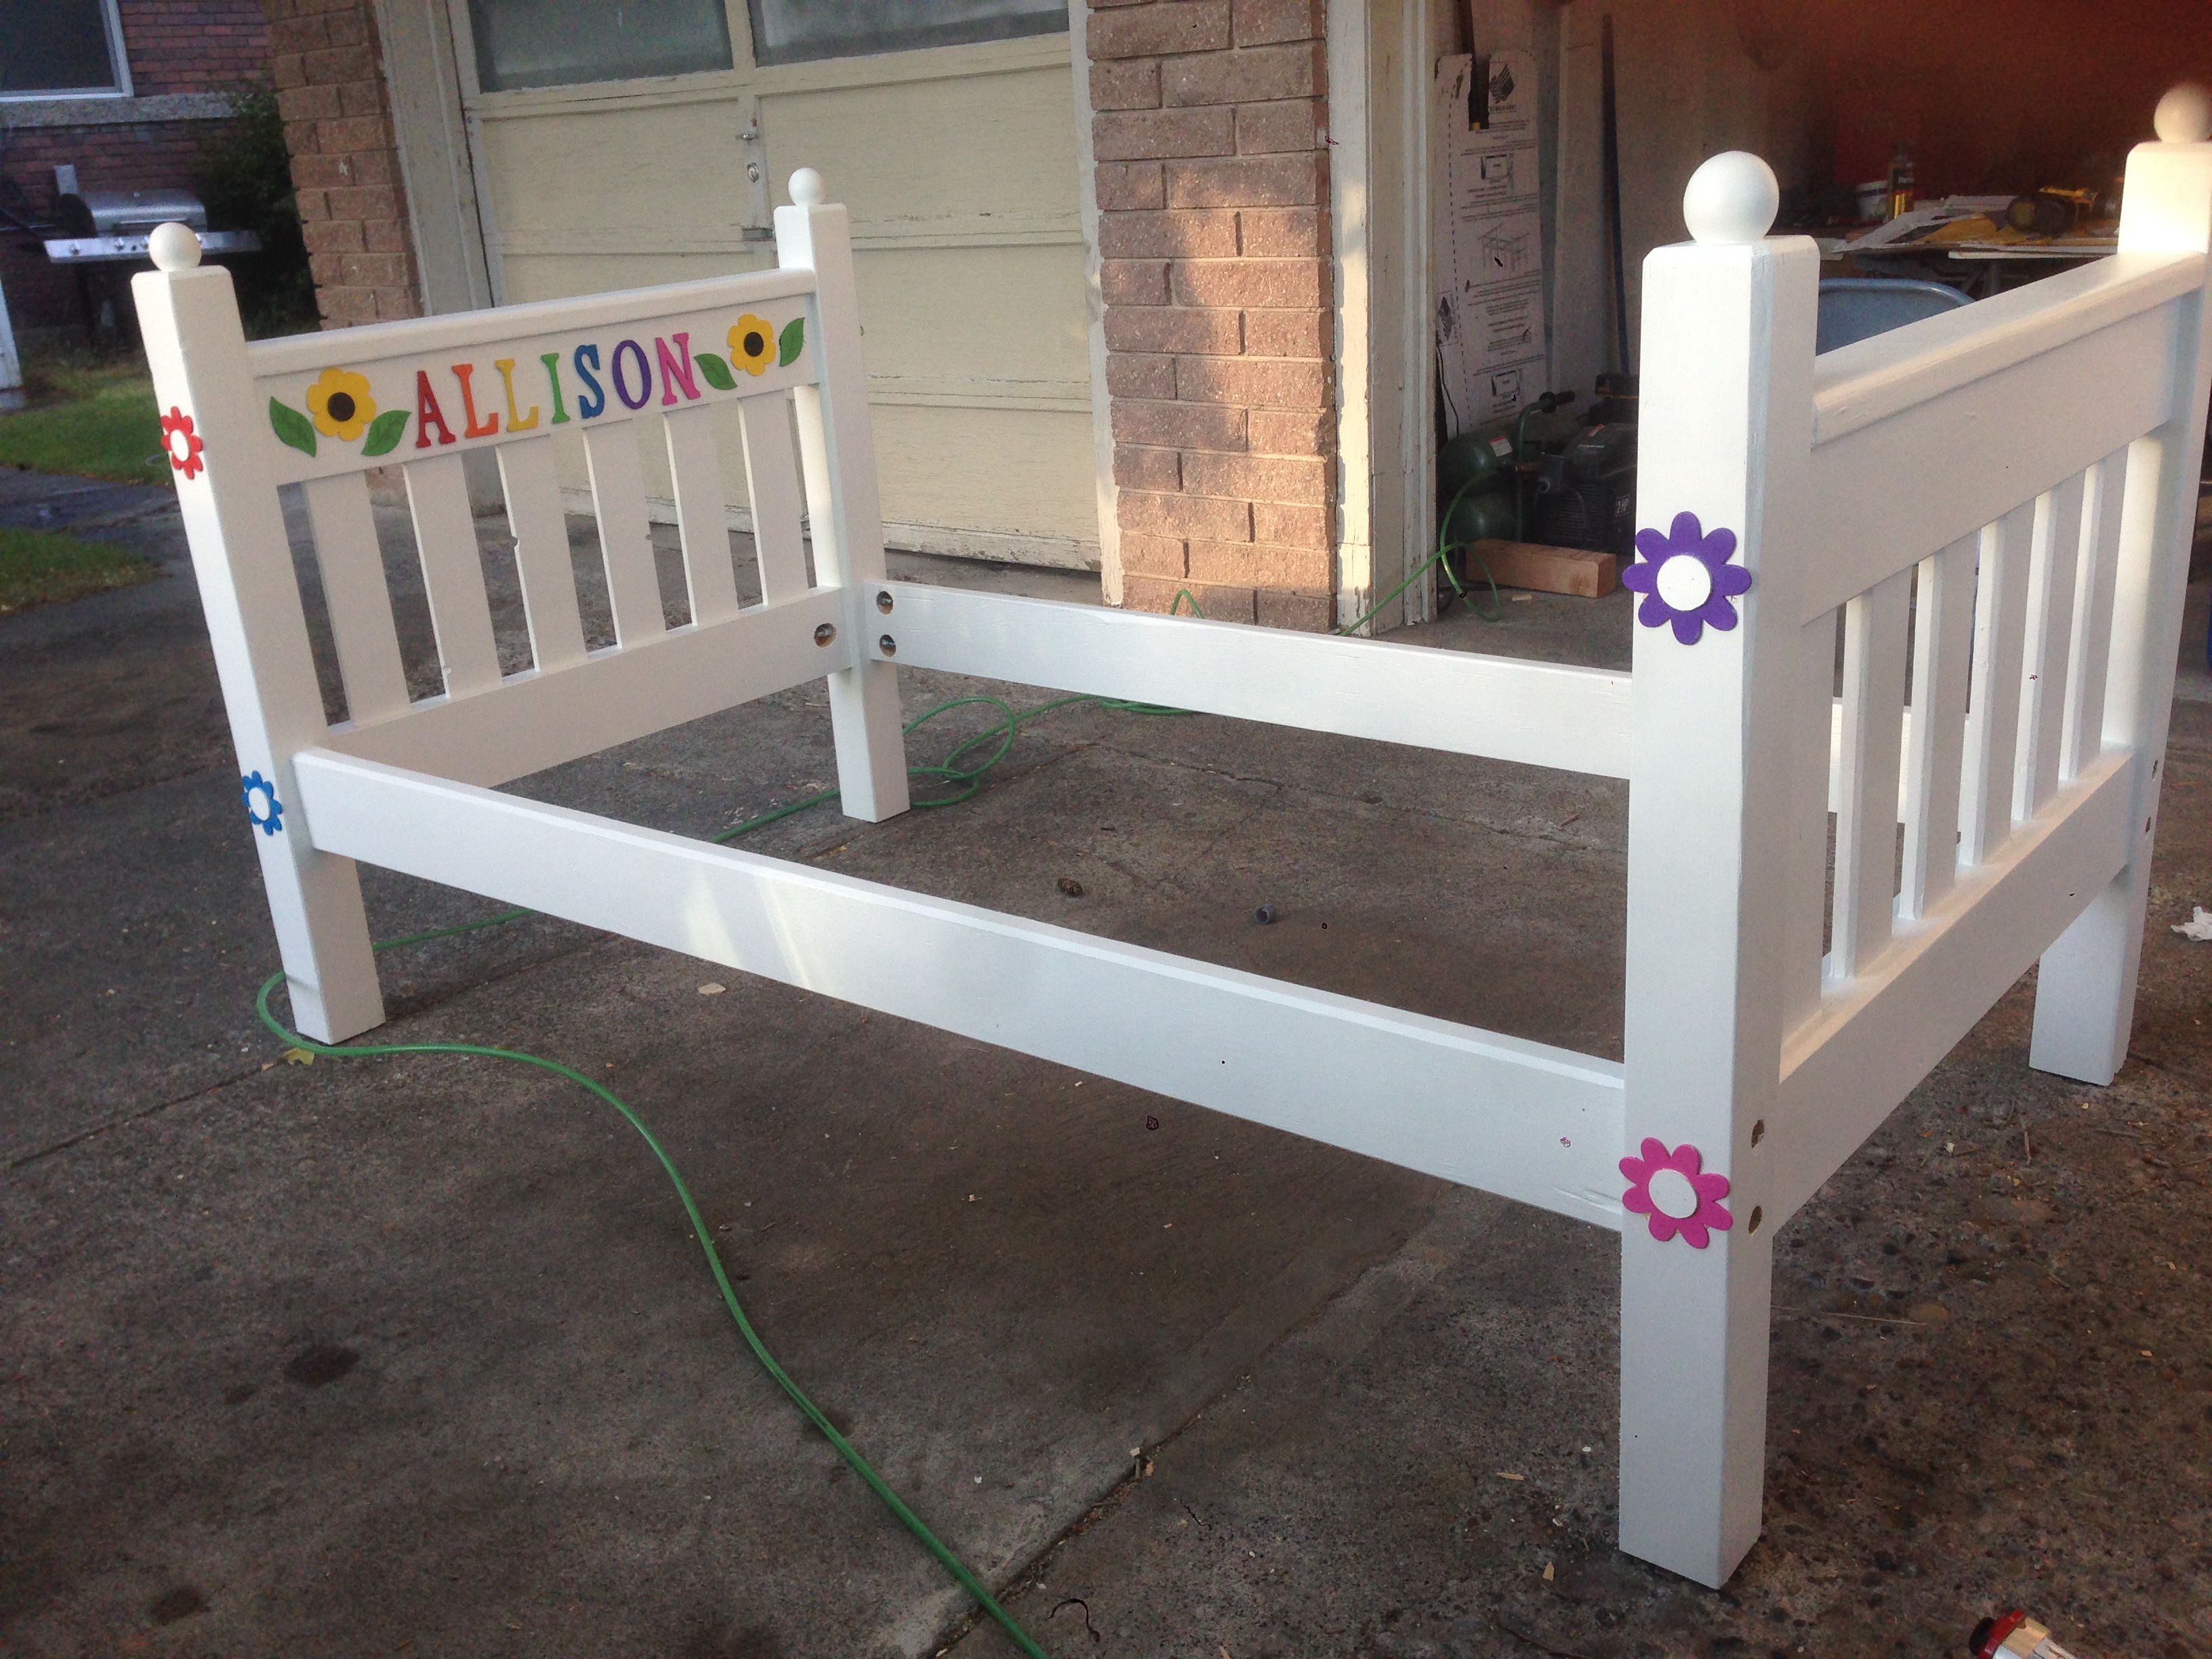
This is bed #2! Bed #1 can be found here: http://ana-white.com/2015/06/DIY_furniture/1st-time-project.
The original plan was to make our daughters bunk beds but during the construction of bed #1 we decided to put the oldest into her own room. This move prompted me to find a way to differentiate bed #2 from bed #1.
The headboard and foot board were again kept equal sizes although I did not make them as tall. They are taller than the footboard of the original plans. I used the headboard measurement of the headboard for the posts to make the post stand taller than the rest of the head and foot board giving it a slight 4-poster look.
I would also like to point out that I made the entire head and footboard an inch narrower. When I made the first bed, because of the way I attached the side rails to the 4x4 posts, it created a bed frame 3 inches wider than the plans called for. Because of this, the mattress on bed #1 has about an inch or so gap on either side when it sits in the frame. It's not a huge deal, but it was something I wanted to try and correct. So I loped an inch off the total width. I compensated by making the end filler pieces of the slat portion narrower. I would even go so far as to cut an even 3 inches off the entire width and the mattress would sit tight in the frame.
As with bed #1 I decided to use bolts instead of screws to hold the bed together. It makes for a much sturdier bed and it can be dis-assembled in a matter of minutes moved and reassembled without losing any structural integrity. The flowers on this bed hide the holes I had to drill to counter sink the bolts and the holes I drilled to access the bolts to attache the washer and nut. I was able to get just deep enough on the 2x6 side rail that I didn't need to drill all the way through as I had on bed #1. This was something I learned as I began to assemble bed #2 to get it ready for paint.

Using old barn wood, too short for anything else. Love that four regular Mason jars can fit in it, and it is ideal for taking silverware outside for the BBQ's.
Cost was zero, all wood was from the scrap pile. Put together with a brad nailer, the is no finish on the wood. Actually build time was less then a hour. "Including clean up"

I made this entry table to go by our front door. It's a spin off from the "console table" posted by Anna. I read some of the comments from people who had problems with her plans as a result of different standards in lumber and decided to alter this some!
I cut the side braces short enough so when I included the measurements of the legs the actual table top extended approx. 3/4" further past the legs and apron of the table. I also went with one sheet of wood on the table top and finished it up with some trim around the edge of the table top.
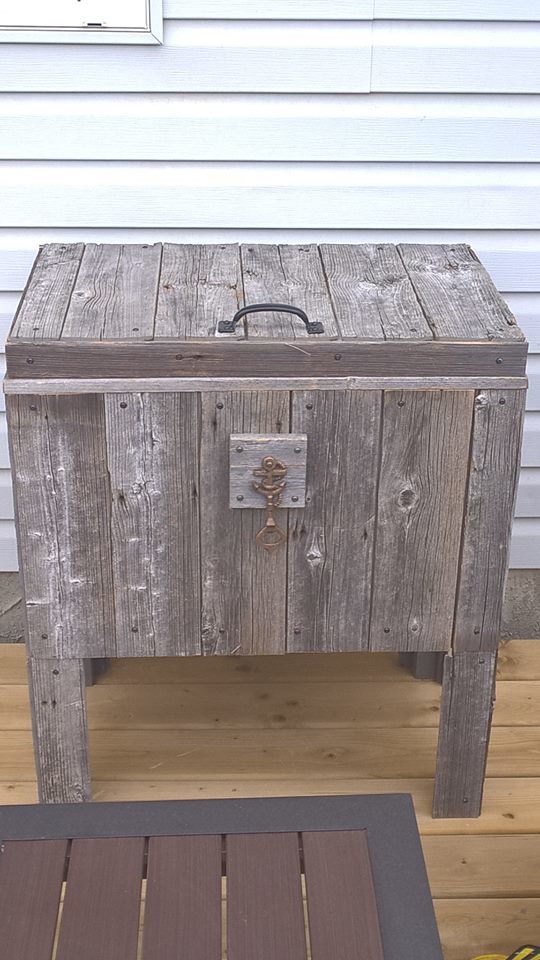
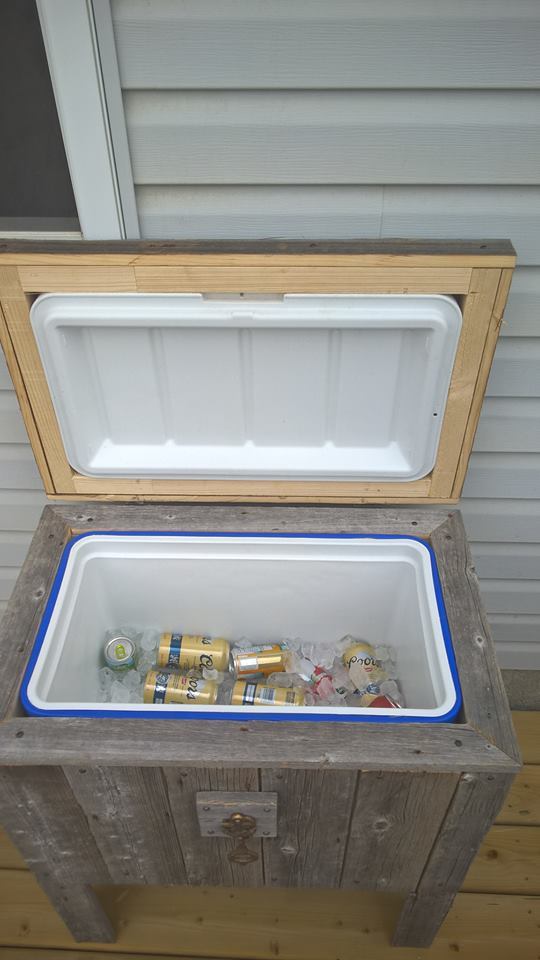
I followed a killer bee plan for a rustic cooler that I found on your site. tweaked it a little and I'm still adding to the décor on the outside
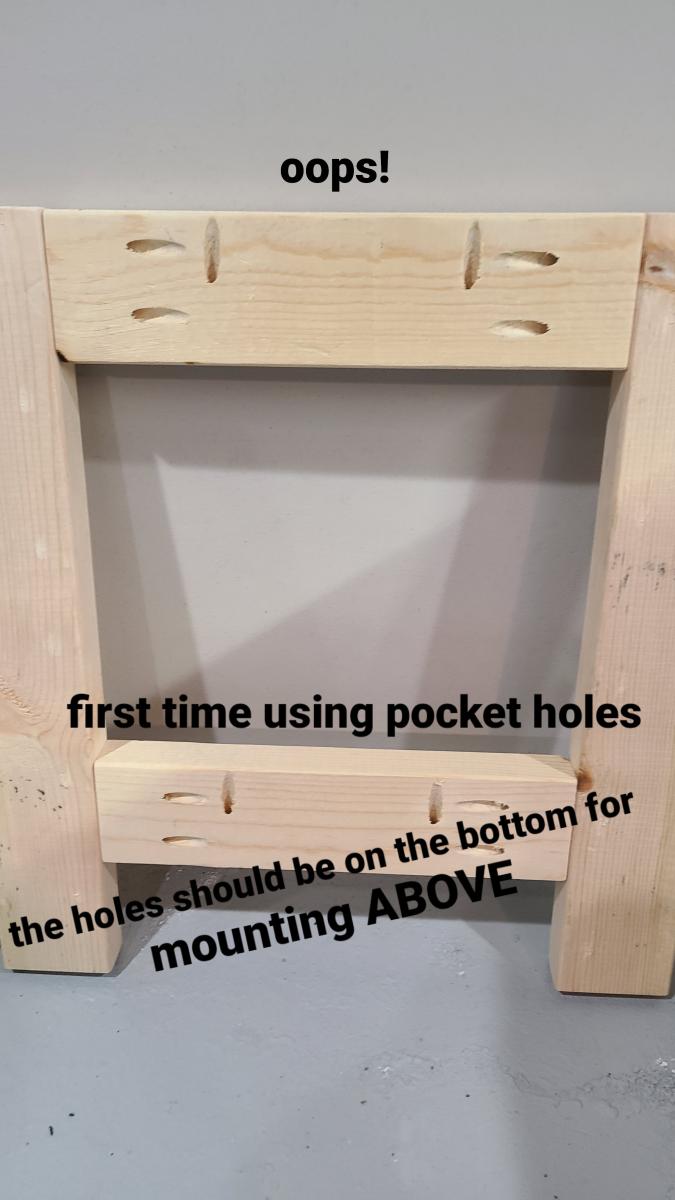
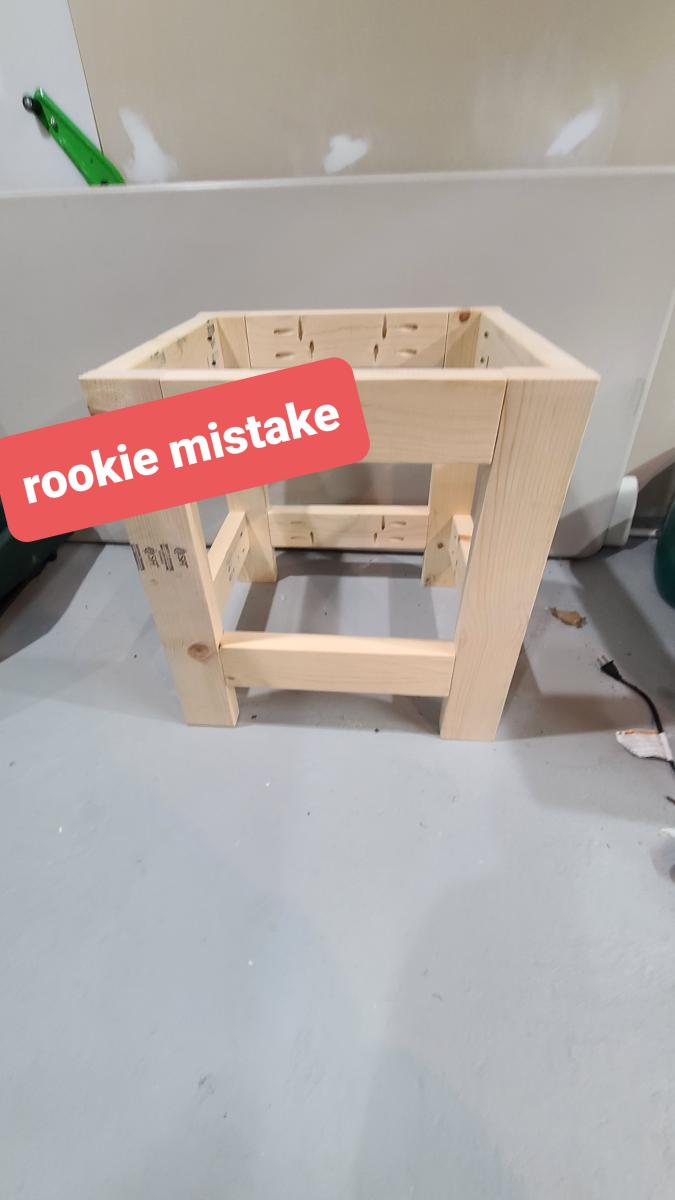
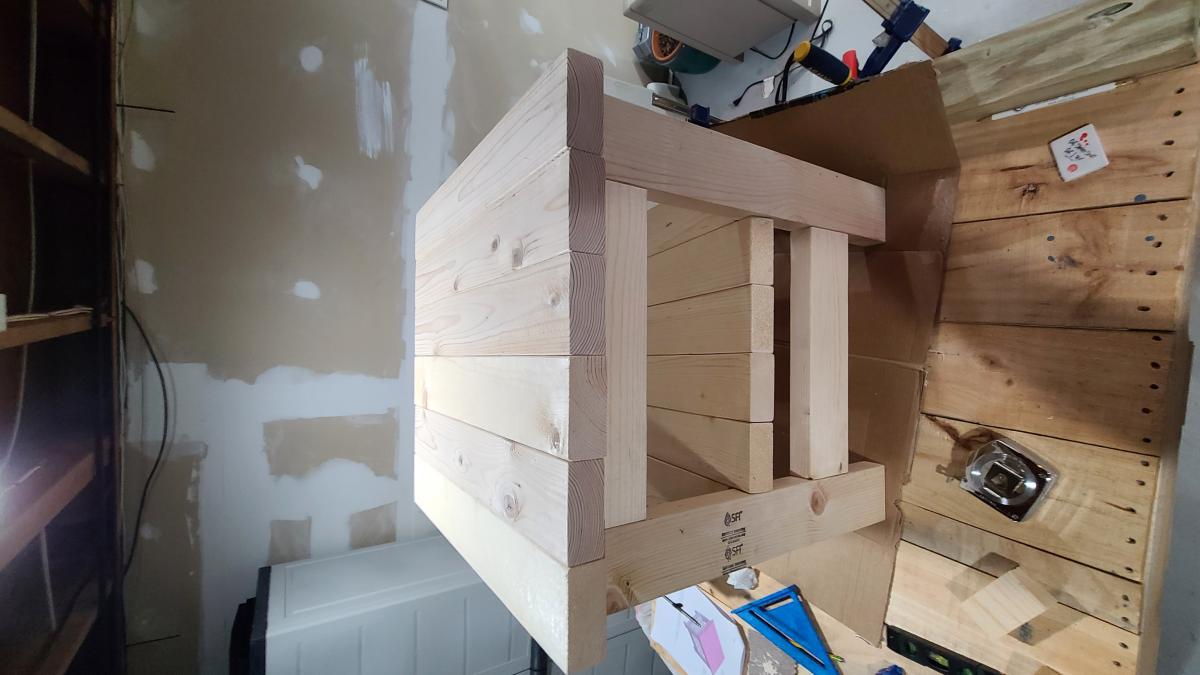
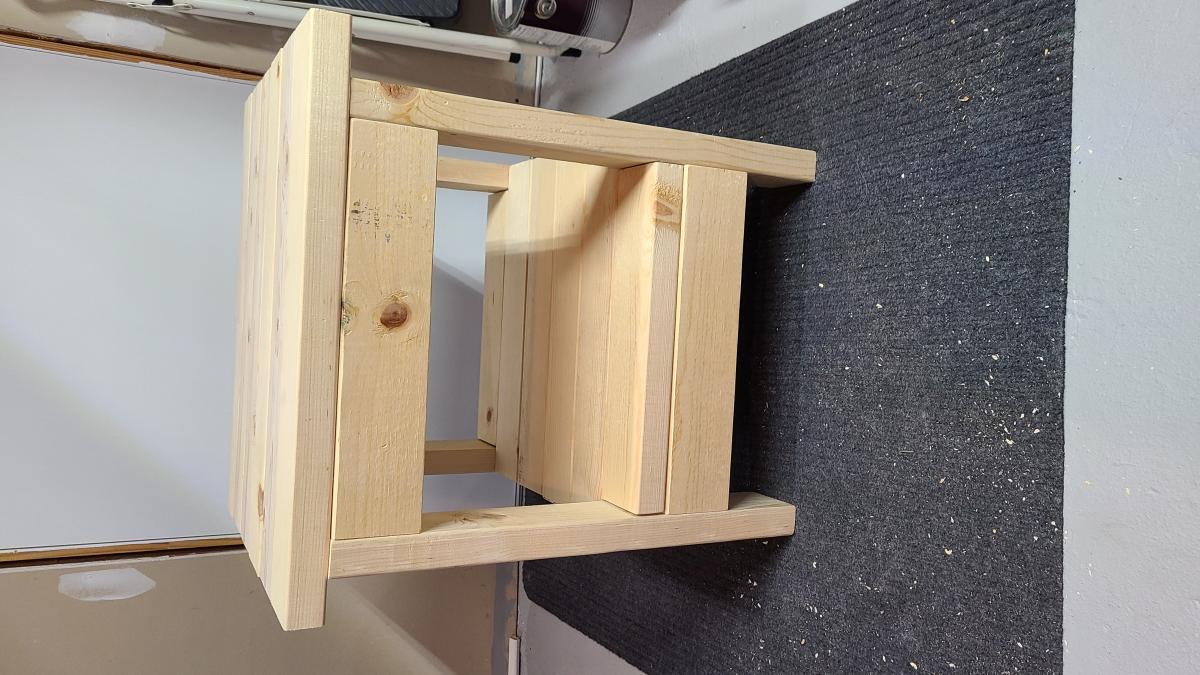
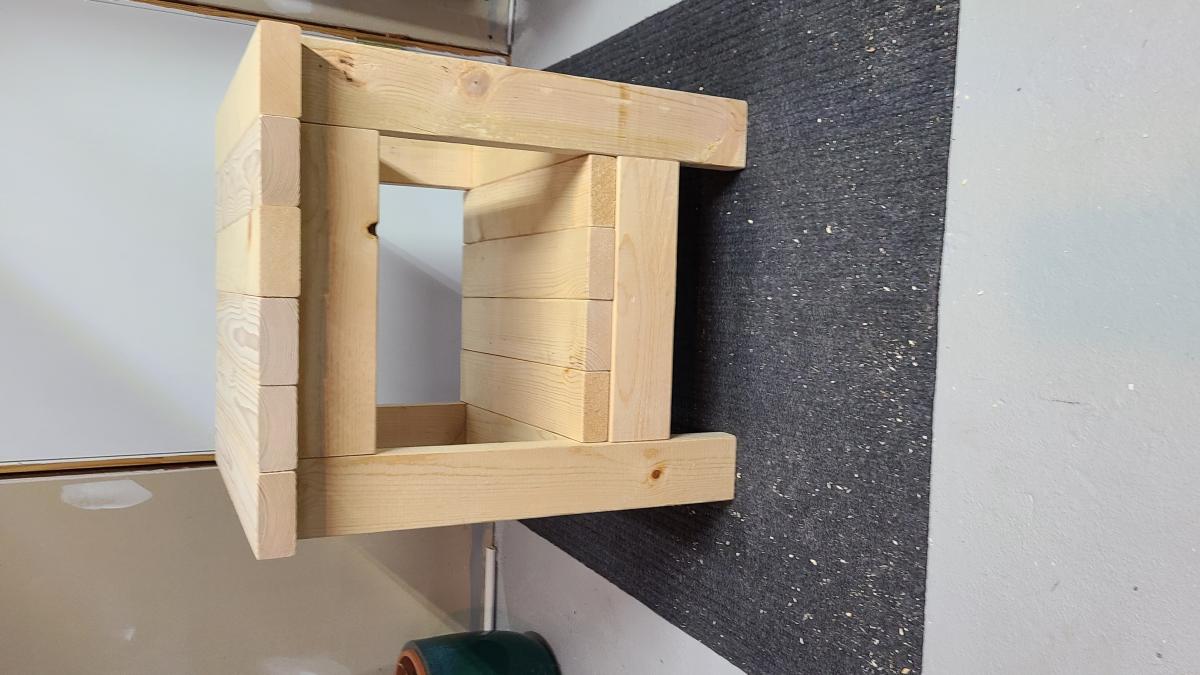
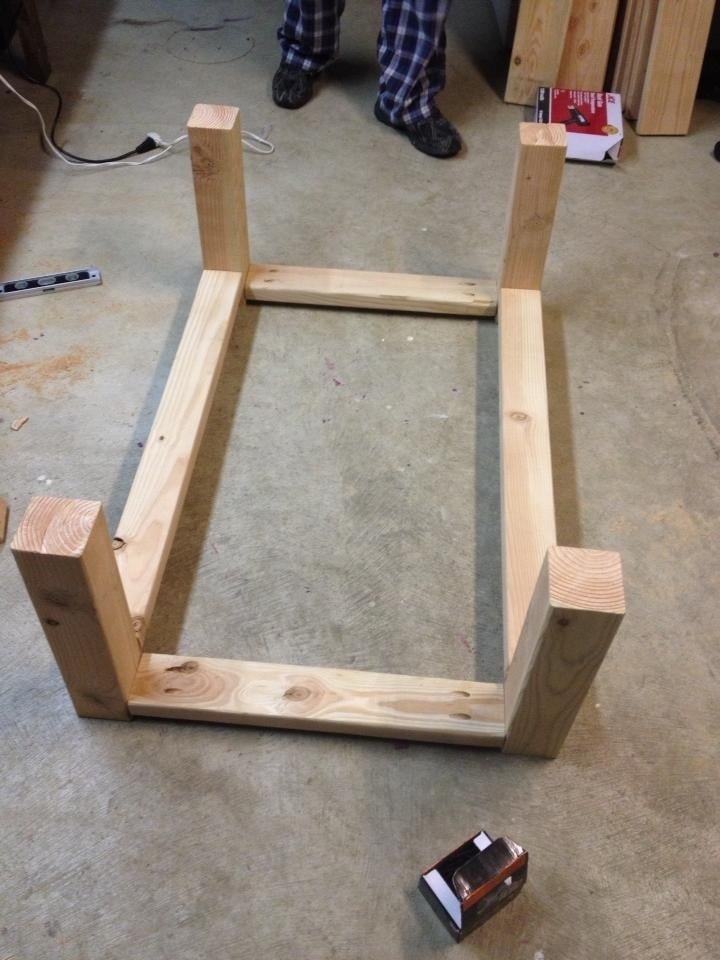
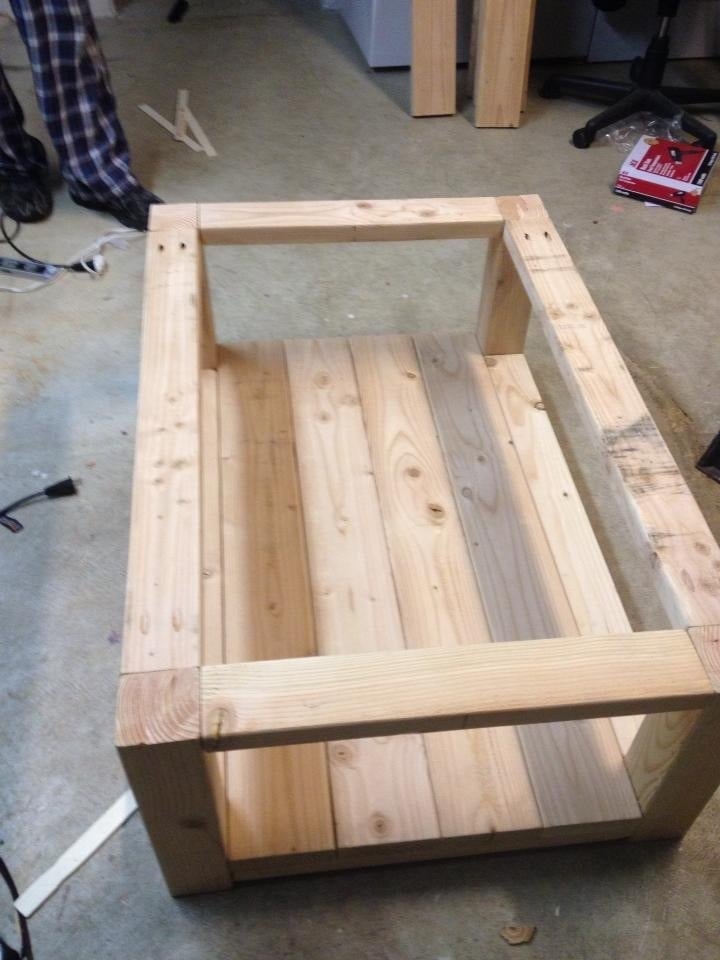
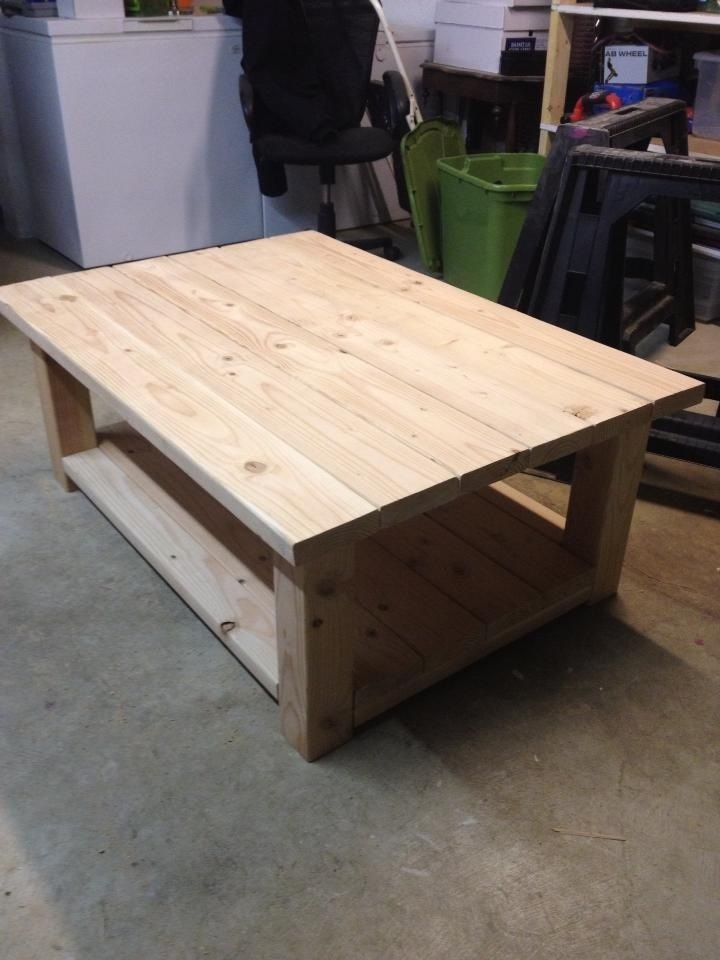
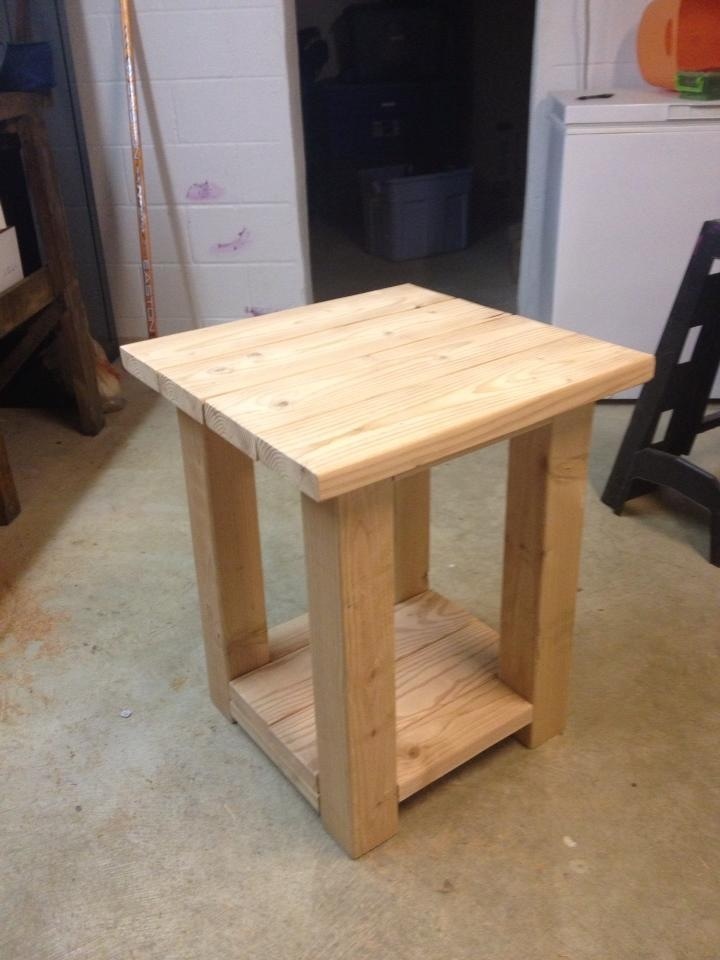
This end table was the second woodworking project I have completed. The first was a doghouse that came out pretty well but was definitely not "furniture grade," so this time I knew I needed to up my game. For the most part, I think I did do that. It was not a completely seamless process, but considering my newness and the number of new skills involved (e.g., pocket holes, staining and polyurethaning) I like how it came out. It also showed me how I can continue to improve my skills so that the next projects will be even better still. The pine 2x4's were very easy to work with and dried out nicely once I got them home to reveal a nice grain. Clearly I have to learn how to cut boards to the same length, but that's part of what gives the project it's character (If you believe it then it's not a lie.). I also need to figure out how to sand polyurethane without scraping it and the stain all off. Thanks to Ana for developing this great page and for all the really nice plans on here. It made the whole process far less intimidating. (sorry for the sideways pics)
Sat, 01/01/2022 - 18:22
Way to go, lots of great learning here and it looks pretty and functional! Thanks for sharing!
I found these amazing tables that i fell in love with! so i decided to take matters into my own hands! i adjusted the measurements to fit my needs and style, and after we purchased the wood, i got to cutting! with a little help from my daddy the project came to life in no time! now i have furniture for my living room that i can completely appreciate and adore forever! i was amazed at how easy this was and how beautiful! and for the price?! theres simply not a store to beat it! and i love all the compliments i get on them and the surprised reaction when i tell people i made them myself! i still plan on building the console table to match!
We made the farmhouse bed with a few modifications. We distressed the wood and did a whitewash finish. Absolutely love how this turned out!


Comments
Ana White Admin
Sun, 12/26/2021 - 17:49
Sweet Bench!
WOW, that looks great, thank you for sharing!