Flip Down Wall Art Desk
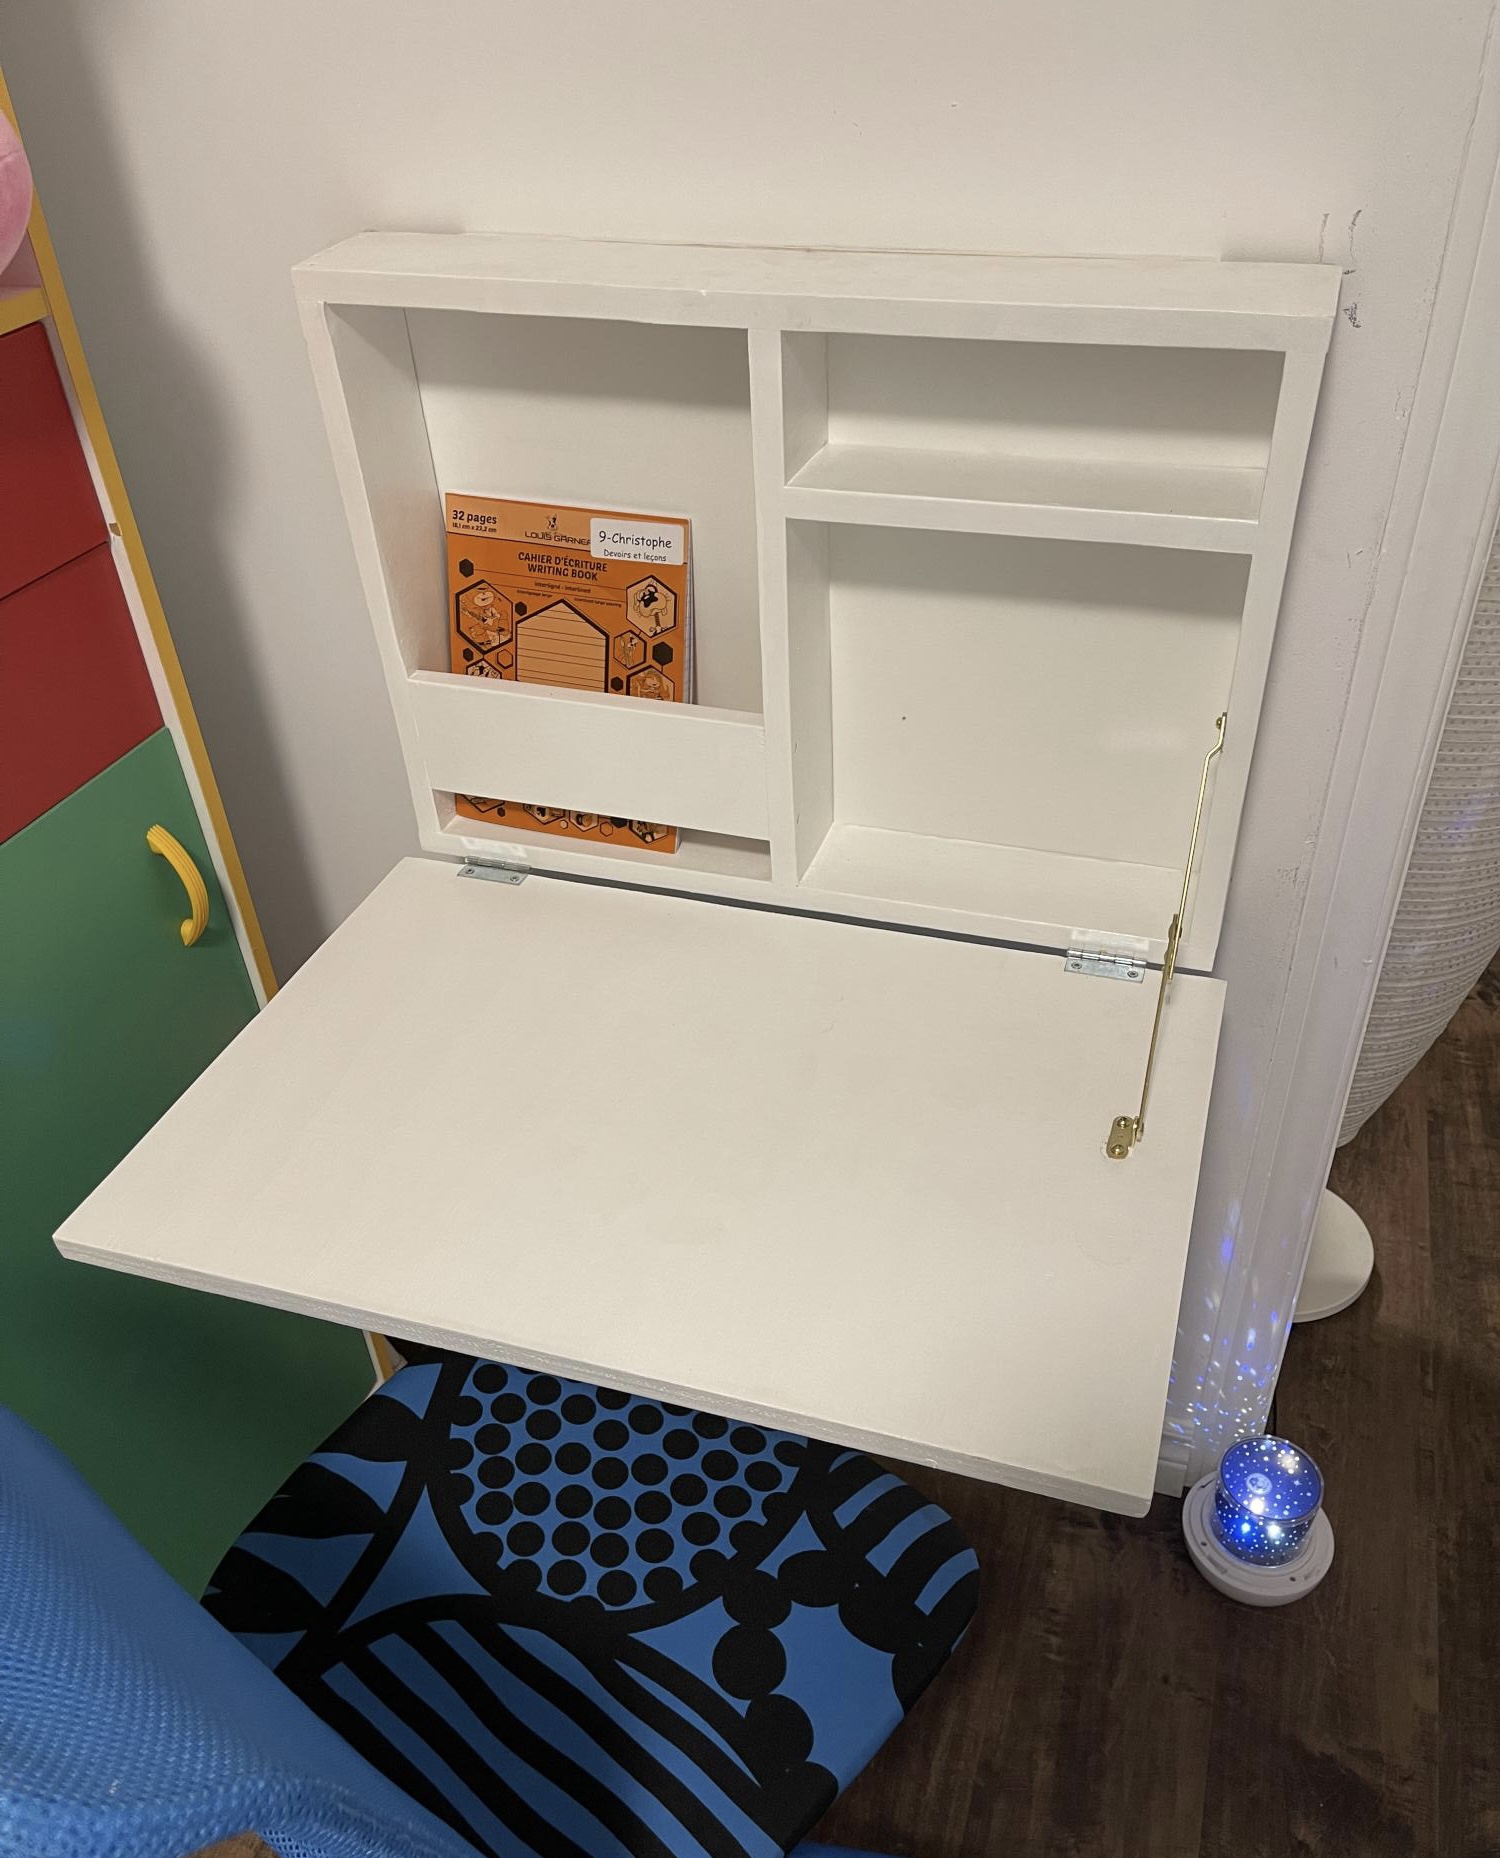
Followed the plans, made a few mistakes but my son and I like the overall result. Thanks Ana :)
Built from Plan(s)
Followed the plans, made a few mistakes but my son and I like the overall result. Thanks Ana :)
My husband, step father and I built these Thanksgiving weekend (2010) and my mom got us a half bushel of oysters to snack on and made awesome steamed mussels with bread for dinner. This was a very fun family weekend.
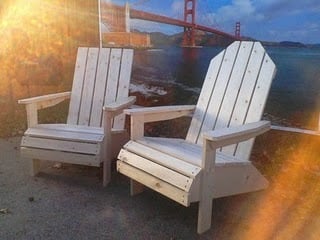
I modifyed the plans a little to make the arms angle in a bit instead of being straight boards and also created the curved front. Then after building the first chair, Pat decided to make the second chair's back rest taller and cut angles to match the arms.
I picked intermediate because of needing a miter saw for all the different angles needed for getting the front right.
Also, It took one day for each chair
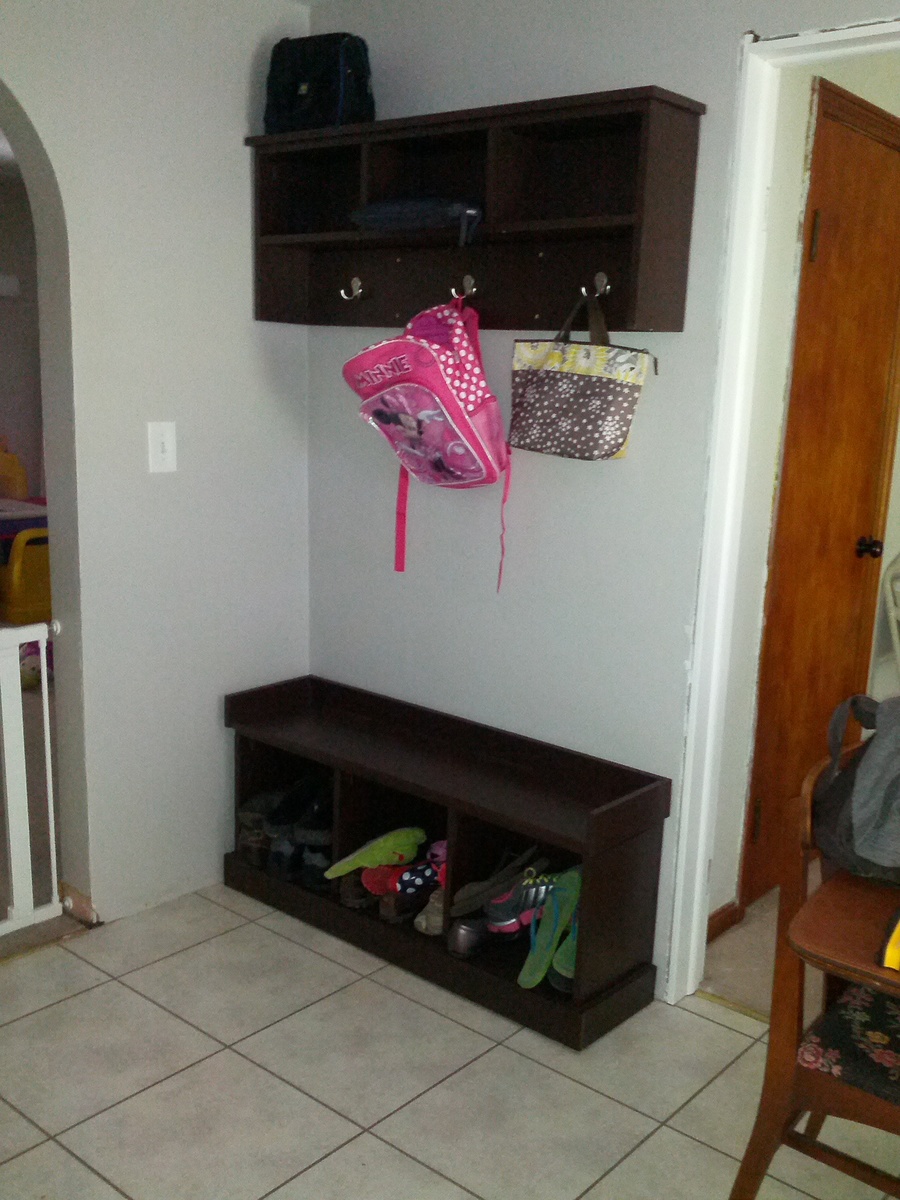
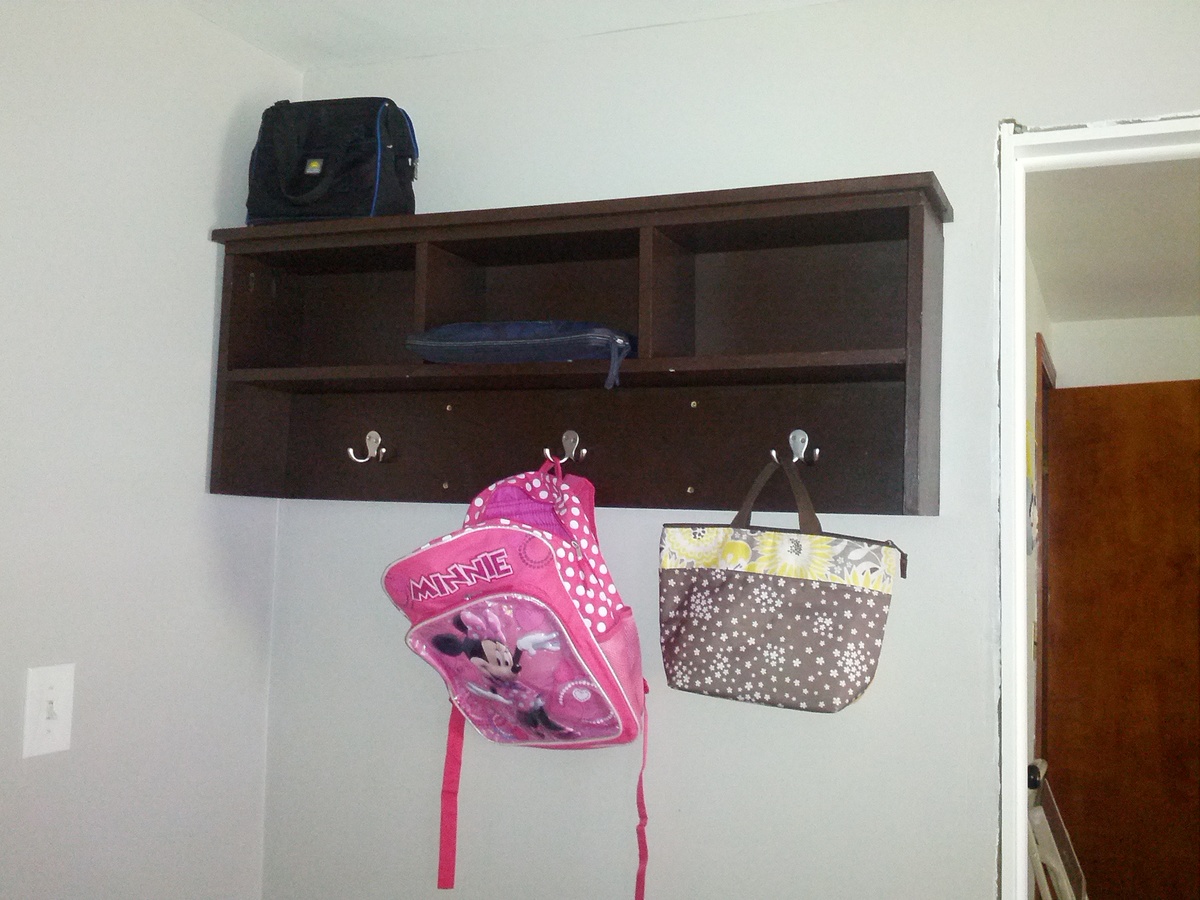
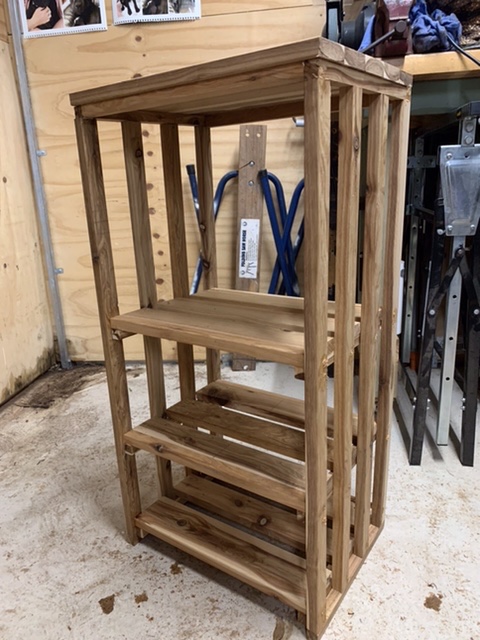
This was a little more difficult than we anticipated but totally worth it. We shortened the width to fit our space, and kept the sides straight instead of angled, just for simplicity's sake. The Kreg jig really came in handy here. We anchored the shelf with cabinet screws and will be adding small L brackets at the top into the studs. With a tall toddler at home we are being extra careful.
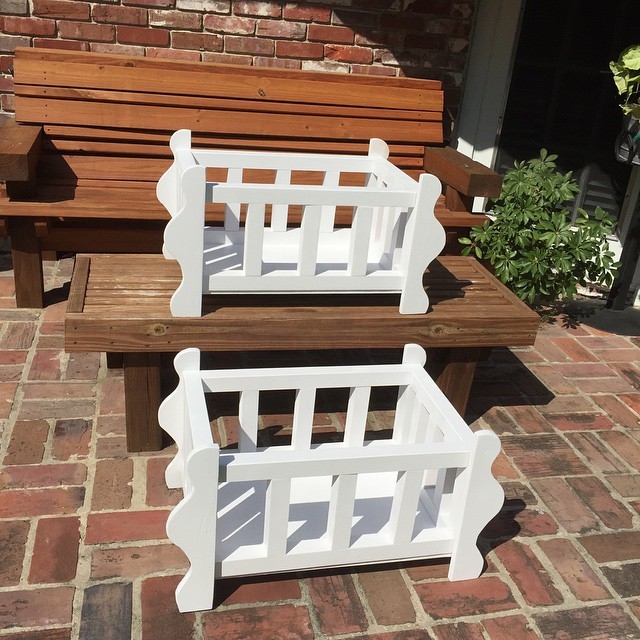
My Grandaughter wanted a Baby Bed for her dolls. I made one for her. and one for a little friend of hers. I just used 2x2's and plywood, then used rattle can spray paint to finish.
I love it when I can combine woodworking and geeky things. The classic Super Mario Bros was my introduction to video games, and thus 8-bit Mario will always have a special place in heart. <3
I have a tutorial on my blog on how to make the pixel Mario. I also made a video tutorial. WATCH IT HERE.
We made smaller versions of your 8 foot shelf. The plans were perfect. Thank you very much
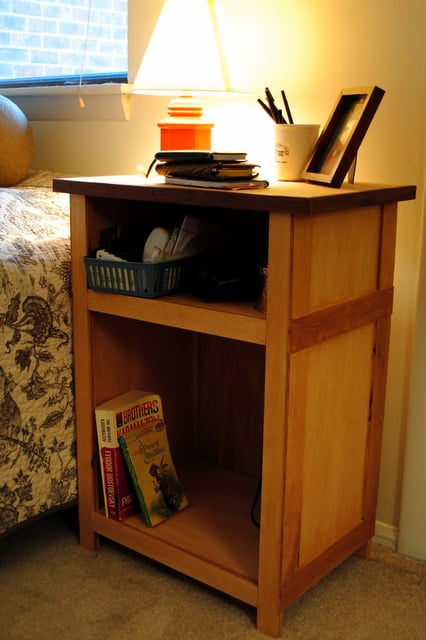
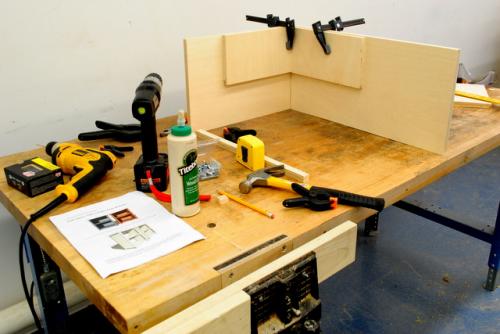
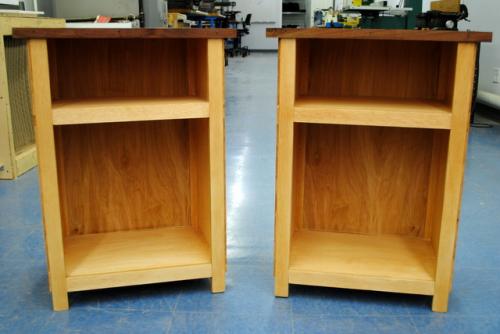
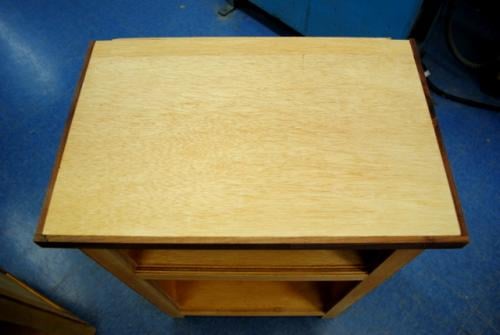
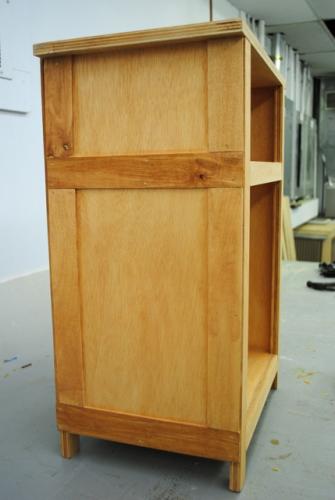
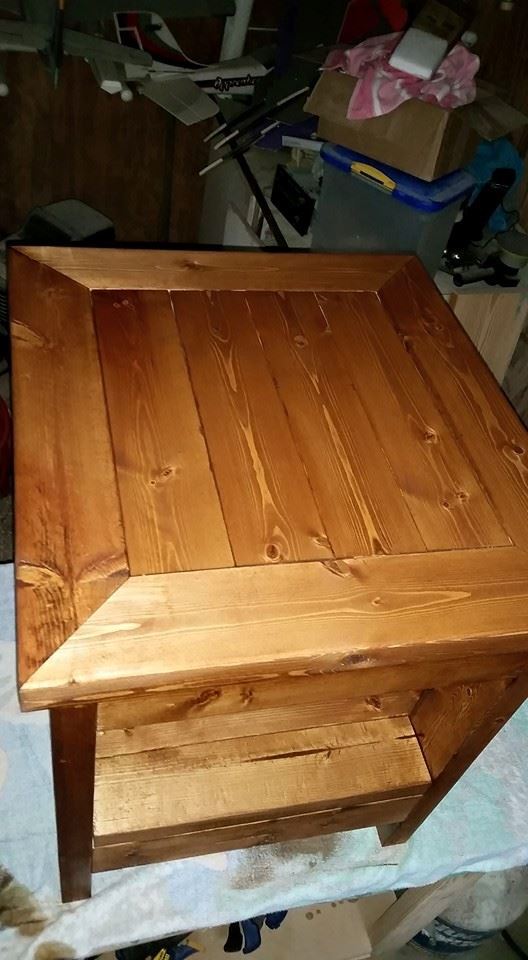
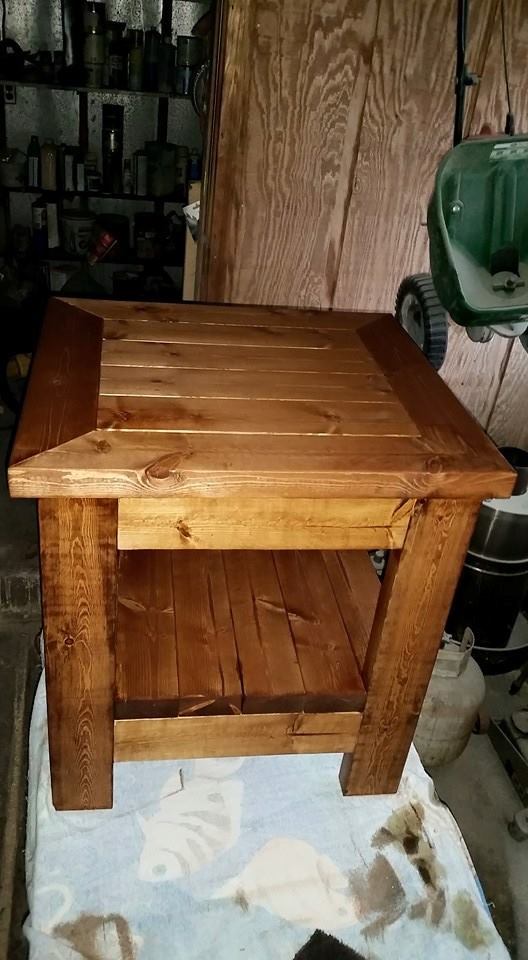
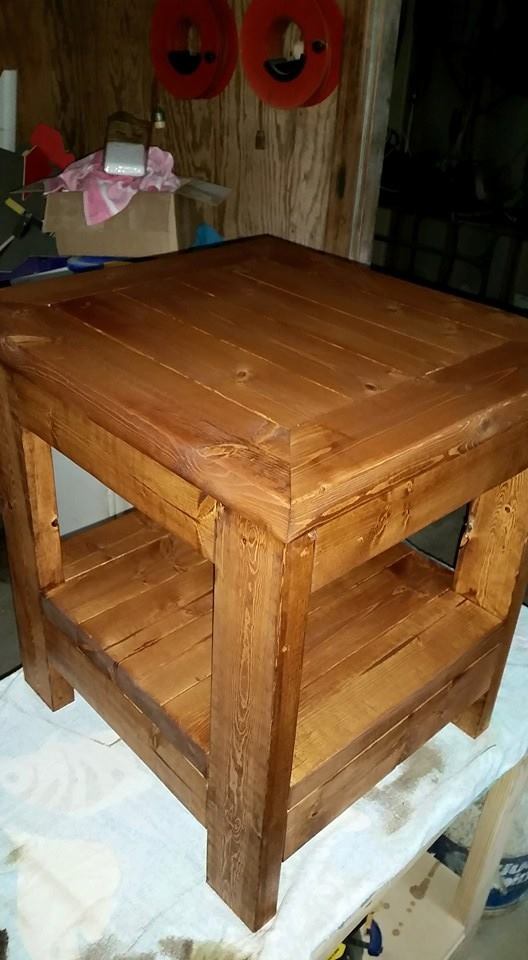
I made this pair of nightstands as Christmas gifts for my husband in 2010. They were my first project and I'm pleased with how they turned out!
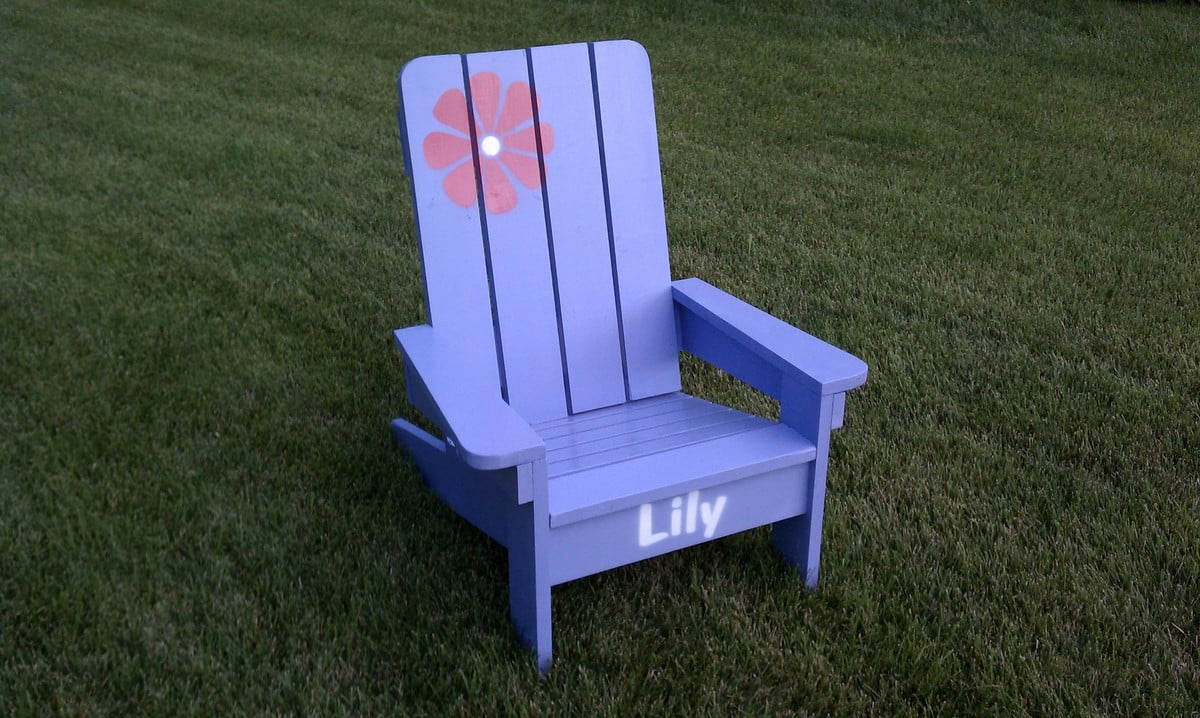
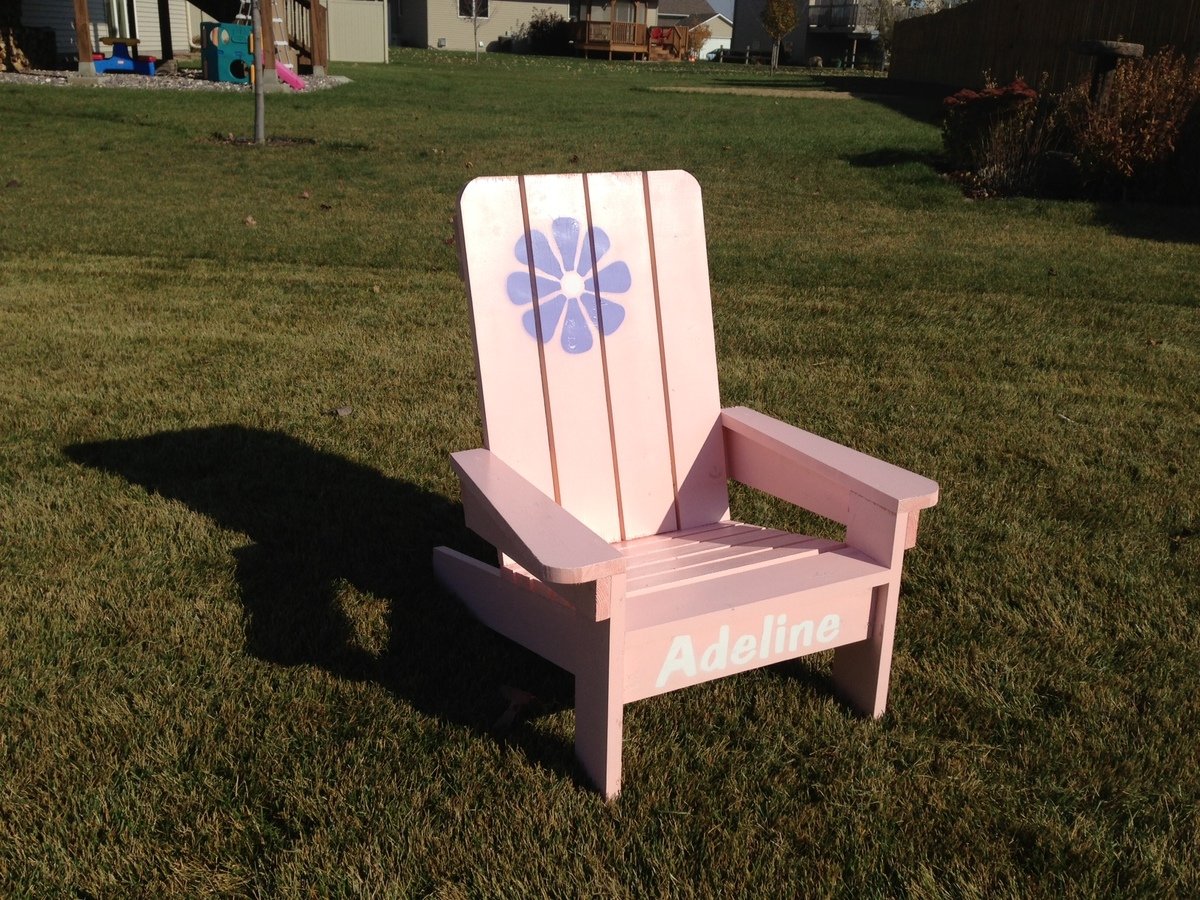
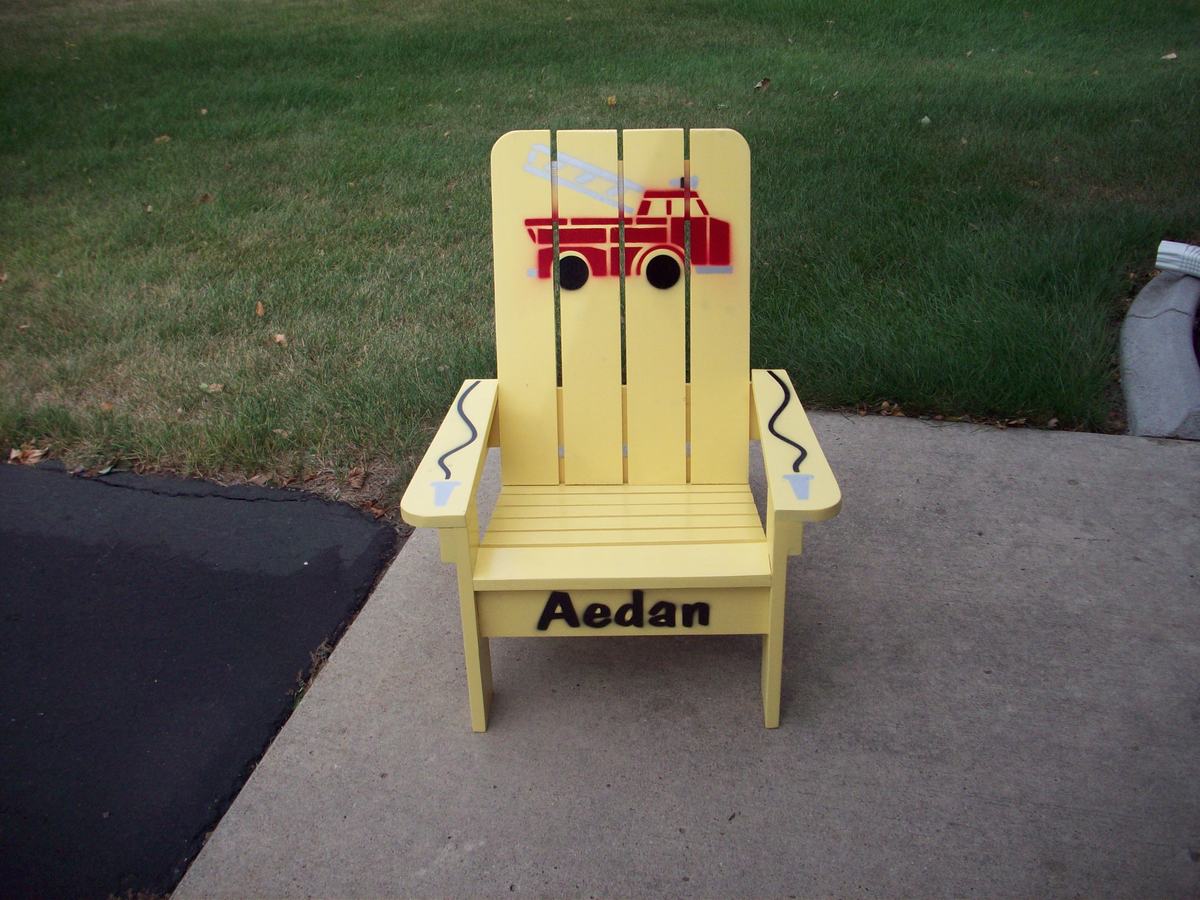
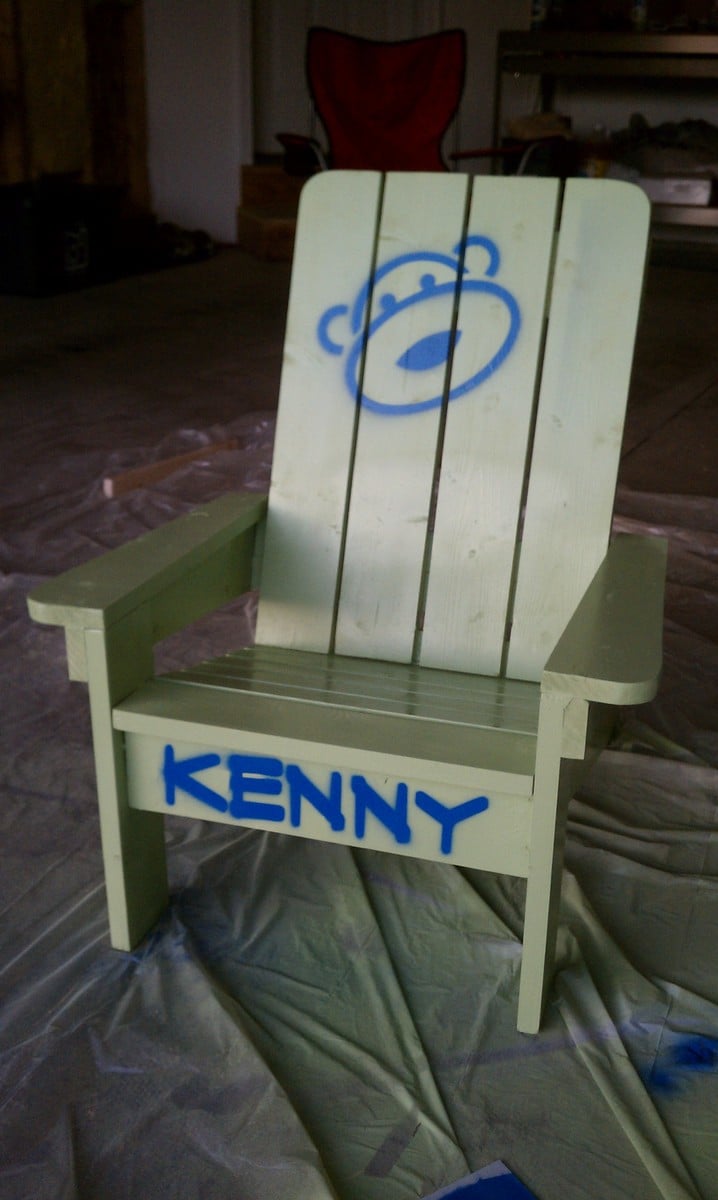
Over the last couple of summers I was attending a lot of my friend’s kid’s birthday parties. As a way to make something more personal I started making these chairs that I found on Ana’s website. They were a huge hit and pretty soon people were asking me to make more.
I built this table in about 3 hours with 5 2x4s yellow pine for the total cost of around $17 total...thats not including the kreg jig screws or stain. I deviated from the original plans for the top to try something different with the 45 degree mitre cuts. It came out great but I had to review a youtube video on making the kreg pilot holes at the 45 degree angles to attach the corners together. I then cut the (4) 2x4s to fill out the top and used kreg jig screws to attach. Very nice instructions by Ana and after posting to my FACEBOOK page, I'm getting orders! :)

So the GF at the time was not happy I was still living out of landry hampers. I promised here I would do something about it. This is what I did. The top hamper is used for soiled clothes, once it's full you simply remove it and bring it to the landry room. The rest just store clean clothes. Simple and effective.
The hinges and latches are just outdoor gate hardware found at any of the big home improvement stores. The wood is just construction lumber. 4X4 for the frame, 1X6 strapping for the panels, and I think there are some 2X4s and 2X2s for the rails. Overall it took me a weekend and then some. I had to build it in two pieces to get it out of the basement, it is really heavy. I used higher quality hampers that had the regidity needed to be able to slide partially out and not buckle.
Hardest part was figuring out the dimensions. How many 1X6s would be used vs how wide the hampers are.
It's still being used over a year later.


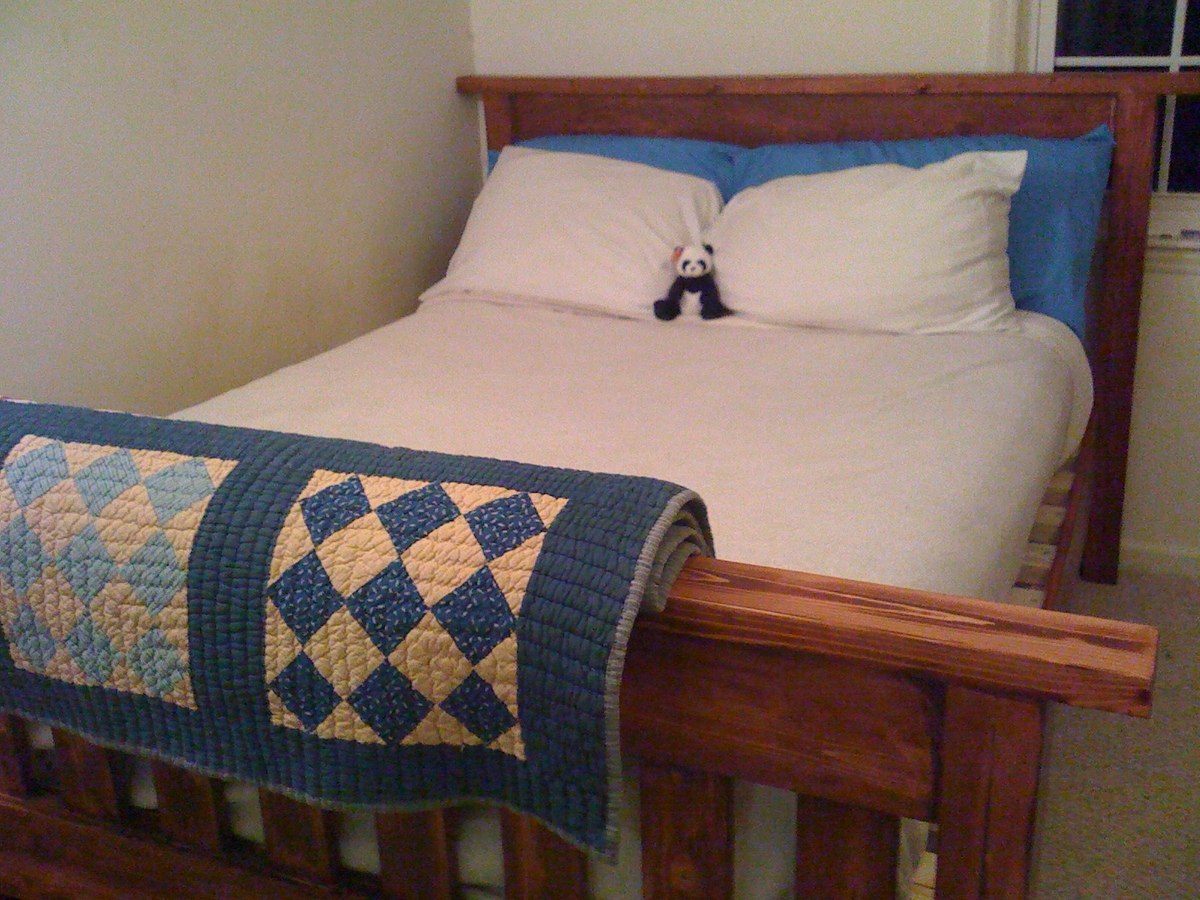
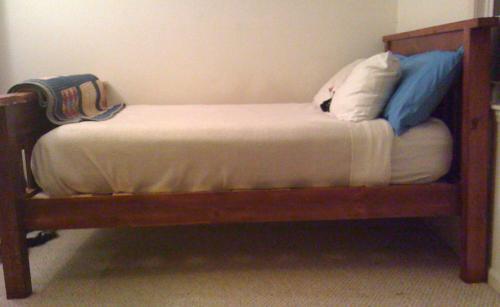
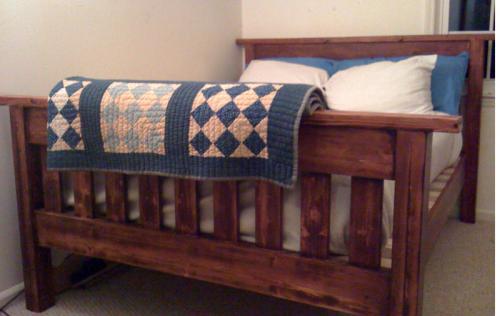
Building Ana’s farmhouse doll bed went so well that I felt ready to take on a full-sized bed.
Each project seems to come with its own set of lessons. I learned the hard way about the “Measure twice, cut once” rule with a couple of “oops” cuts that sent me back on another trip to the Blue store.
Sourcing untreated 4×4′s was also an issue. I ended up gluing and screwing 2×4′s together to use as the headboard and footboard legs.
The biggest issue, though, was my own fear. Sure I hit some stumbling blocks during the build, but resolved them and got the headboard and footboard all put together… and then choked. Who the heck makes her own bed? Is this really going to work? I delayed and delayed the final steps of screwing the siderails to the legs and attaching slats until I finally had to give myself a stern talking-to and a self-imposed deadline! Has anyone else ever been scared to push through to the final steps?
OK, here goes! I wasn’t sure that I understood the step about toenailing lagbolts through the end of the cleats into the legs until I got out the drill and tried it. Yup, it worked just fine! Next came the slats, and then when I hoisted the mattress on and saw that I had built a bed…. Well, I don’t even know how to describe that feeling of success and empowerment. Wow!
Ana, I wish I could thank you for all that you do.
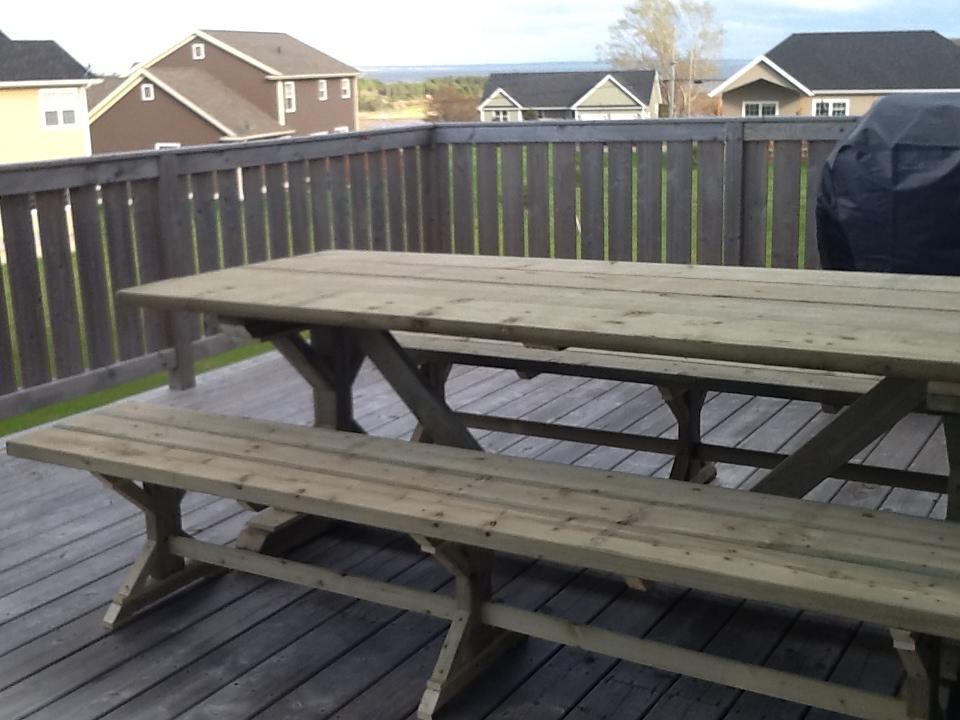
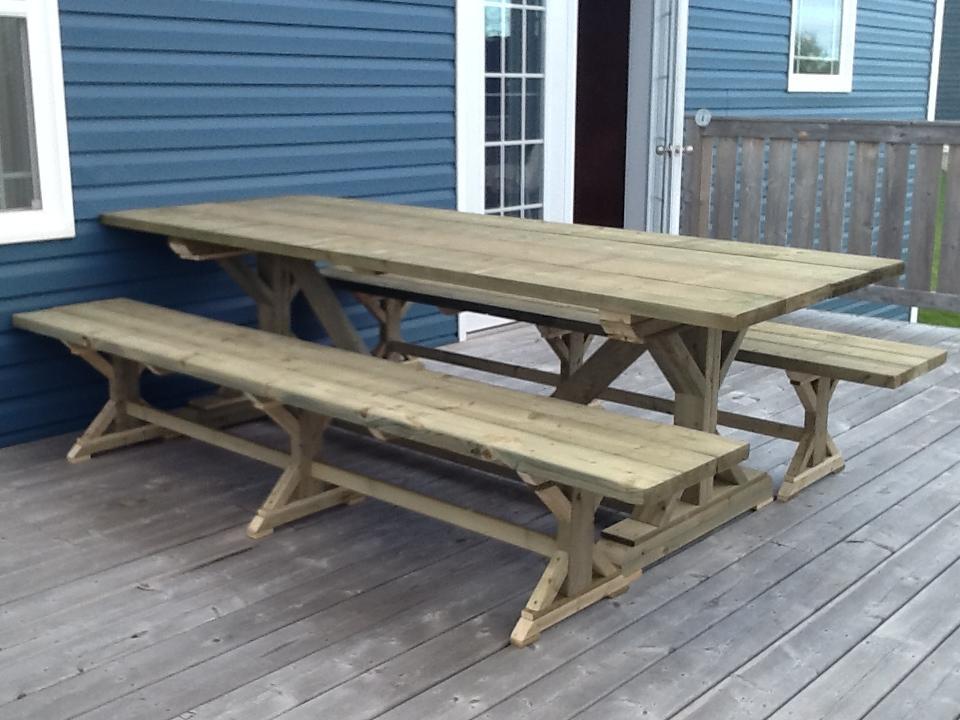
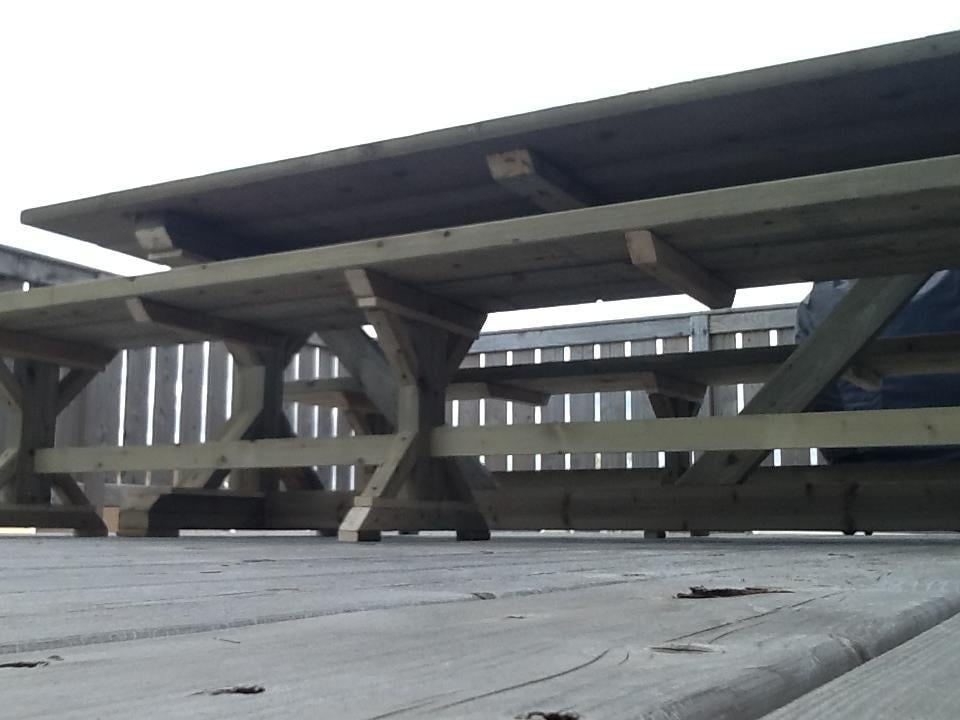
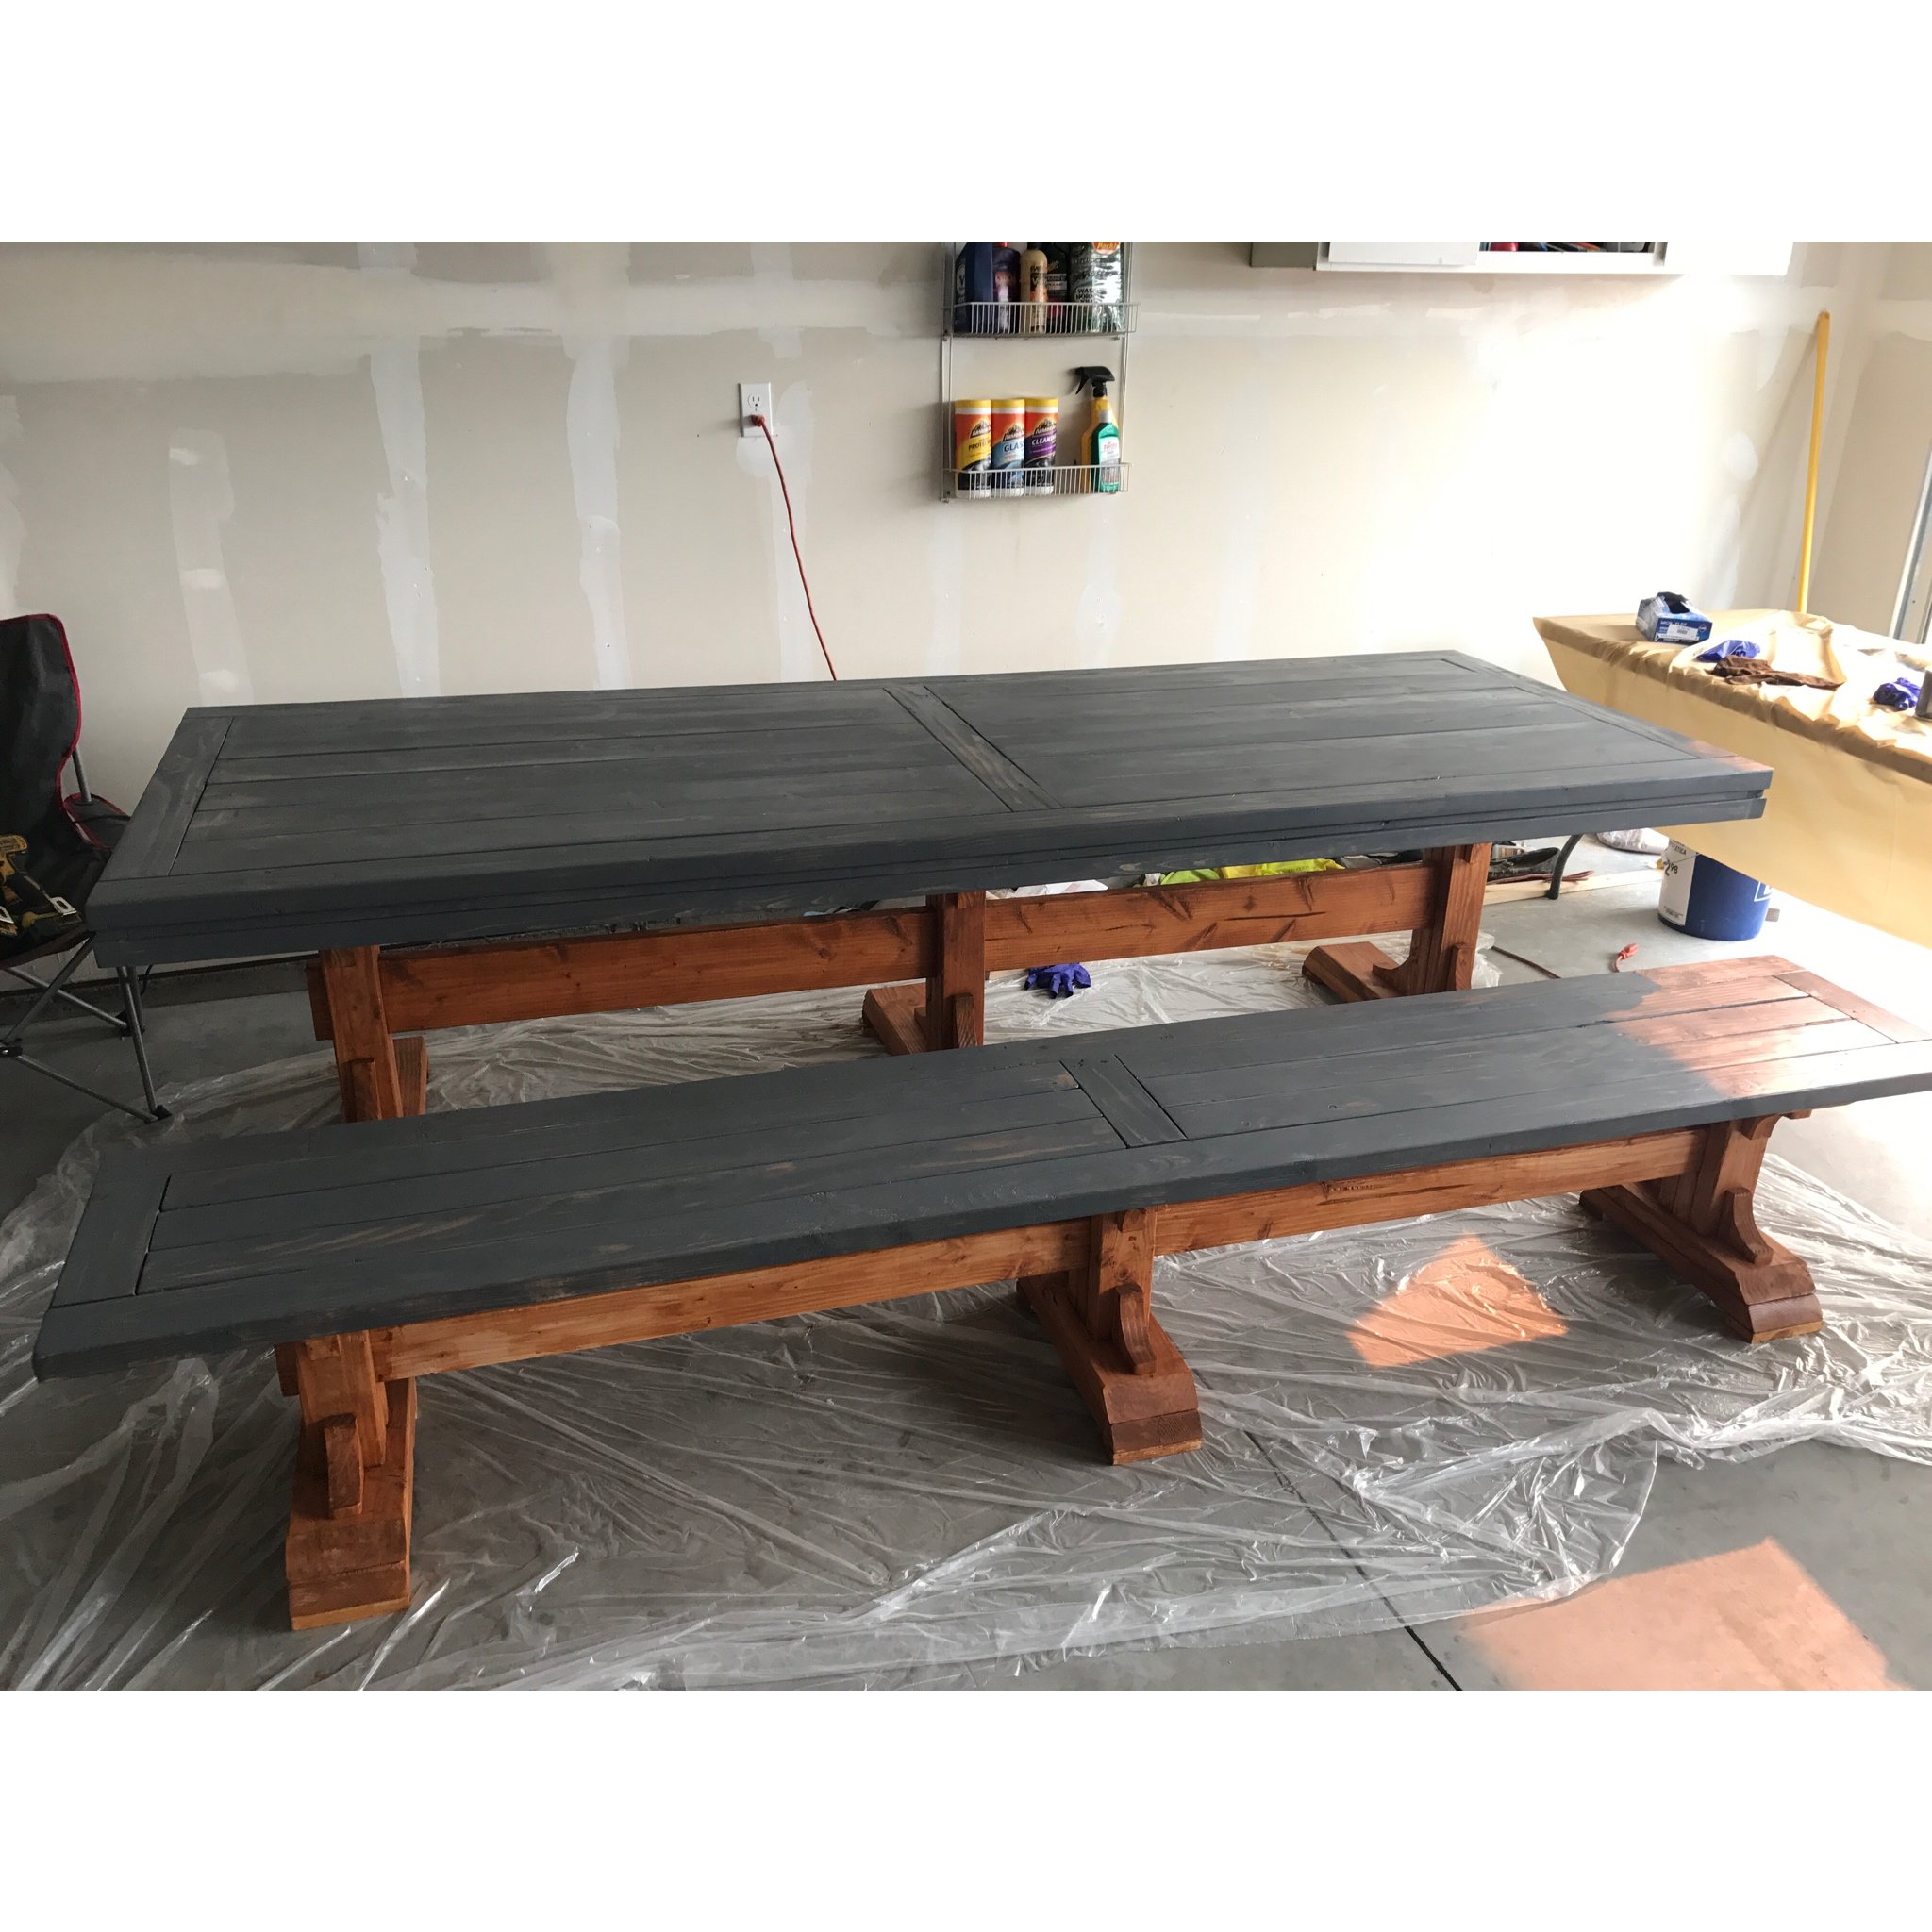
Used pressure treated (copper) and will allow to fade to grey with sun and sea air. Built to enjoy PEI mussels, lobster and beer in the open air and not too worried about the finish or surface. The table took 3 hours, start to finish - benches x 2 took longer at about 7 hours. Am getting a little lateral movement with the benches so will replace the 1 x 3 spacer with 2 x 4 and may add a diagonal 2 x 2 support as well (to match the table). I don't have/didn't use a Kreg so that may be the issue...?
Plans on Ana White are fantastic - I made the see-saw this weekend too in about an hour....thanks!
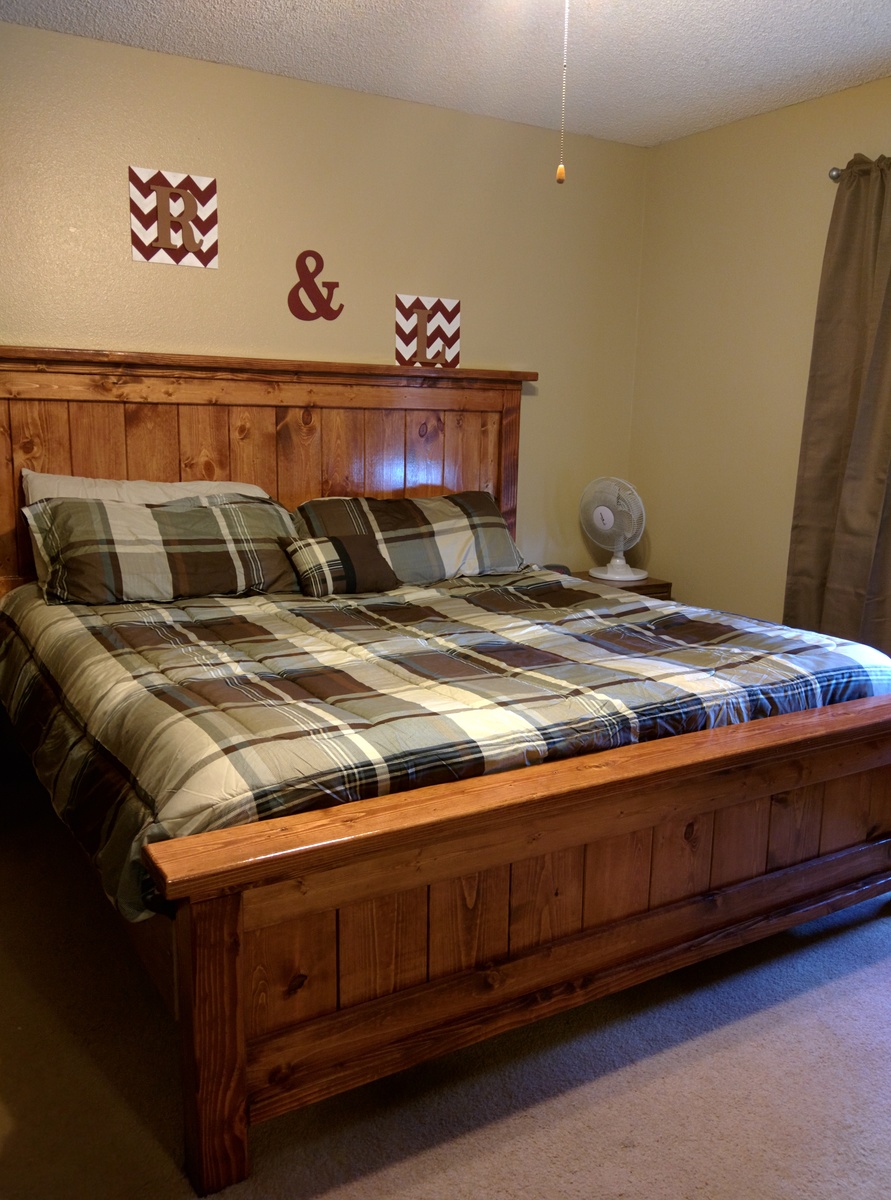
Built from the King Farmhouse bed plans
Tue, 11/08/2016 - 10:48
do you have a boxspring on your bed as well? I am curious how high a mattress and boxspring will sit if i make the side rails and frame
Tue, 11/08/2016 - 10:49
Did you use a metal bed frame or did you make the side rails and frame? i am curious how high my mattress will sit above the footboard because I want to make the side rails and use slats. I have a boxspring that I will be using.
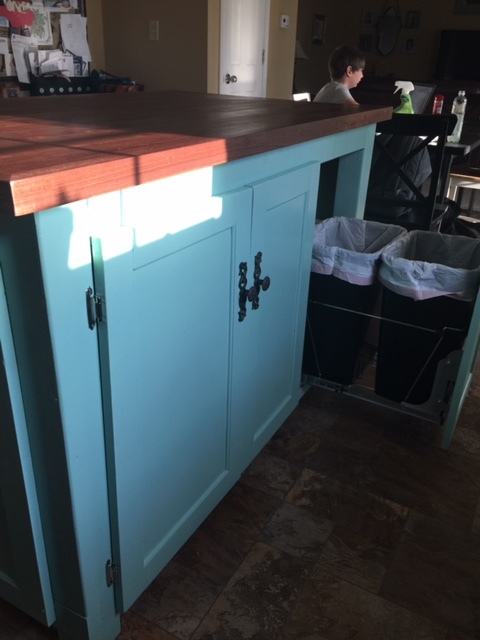
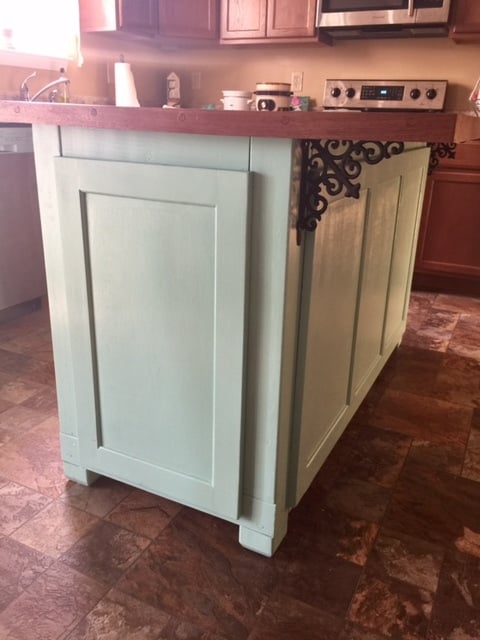
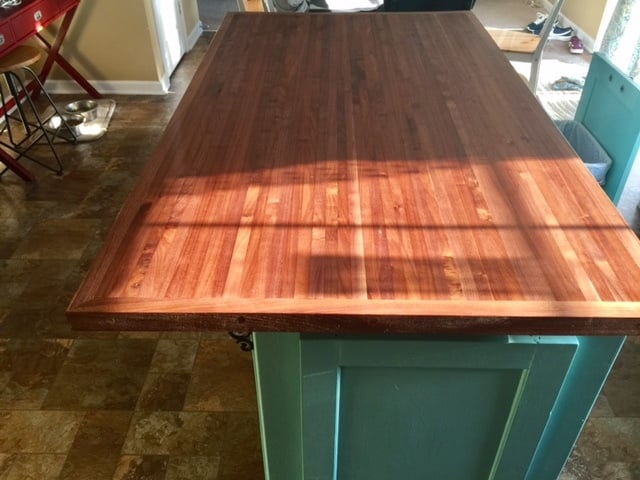
Island dimensions Bar 36" deep x 50" wide, counter top height and base has 24 inch depth. I was lucky enough to have the walnut donated for the project which I cut into 1" stips and glued together butcher block style. Also put a 1 1/4" band of walnut around countertop for appearances and to help strengthen the top. The base was made with pine and painted turqoise. The double waste basket was another touch I added. Thanks for looking.
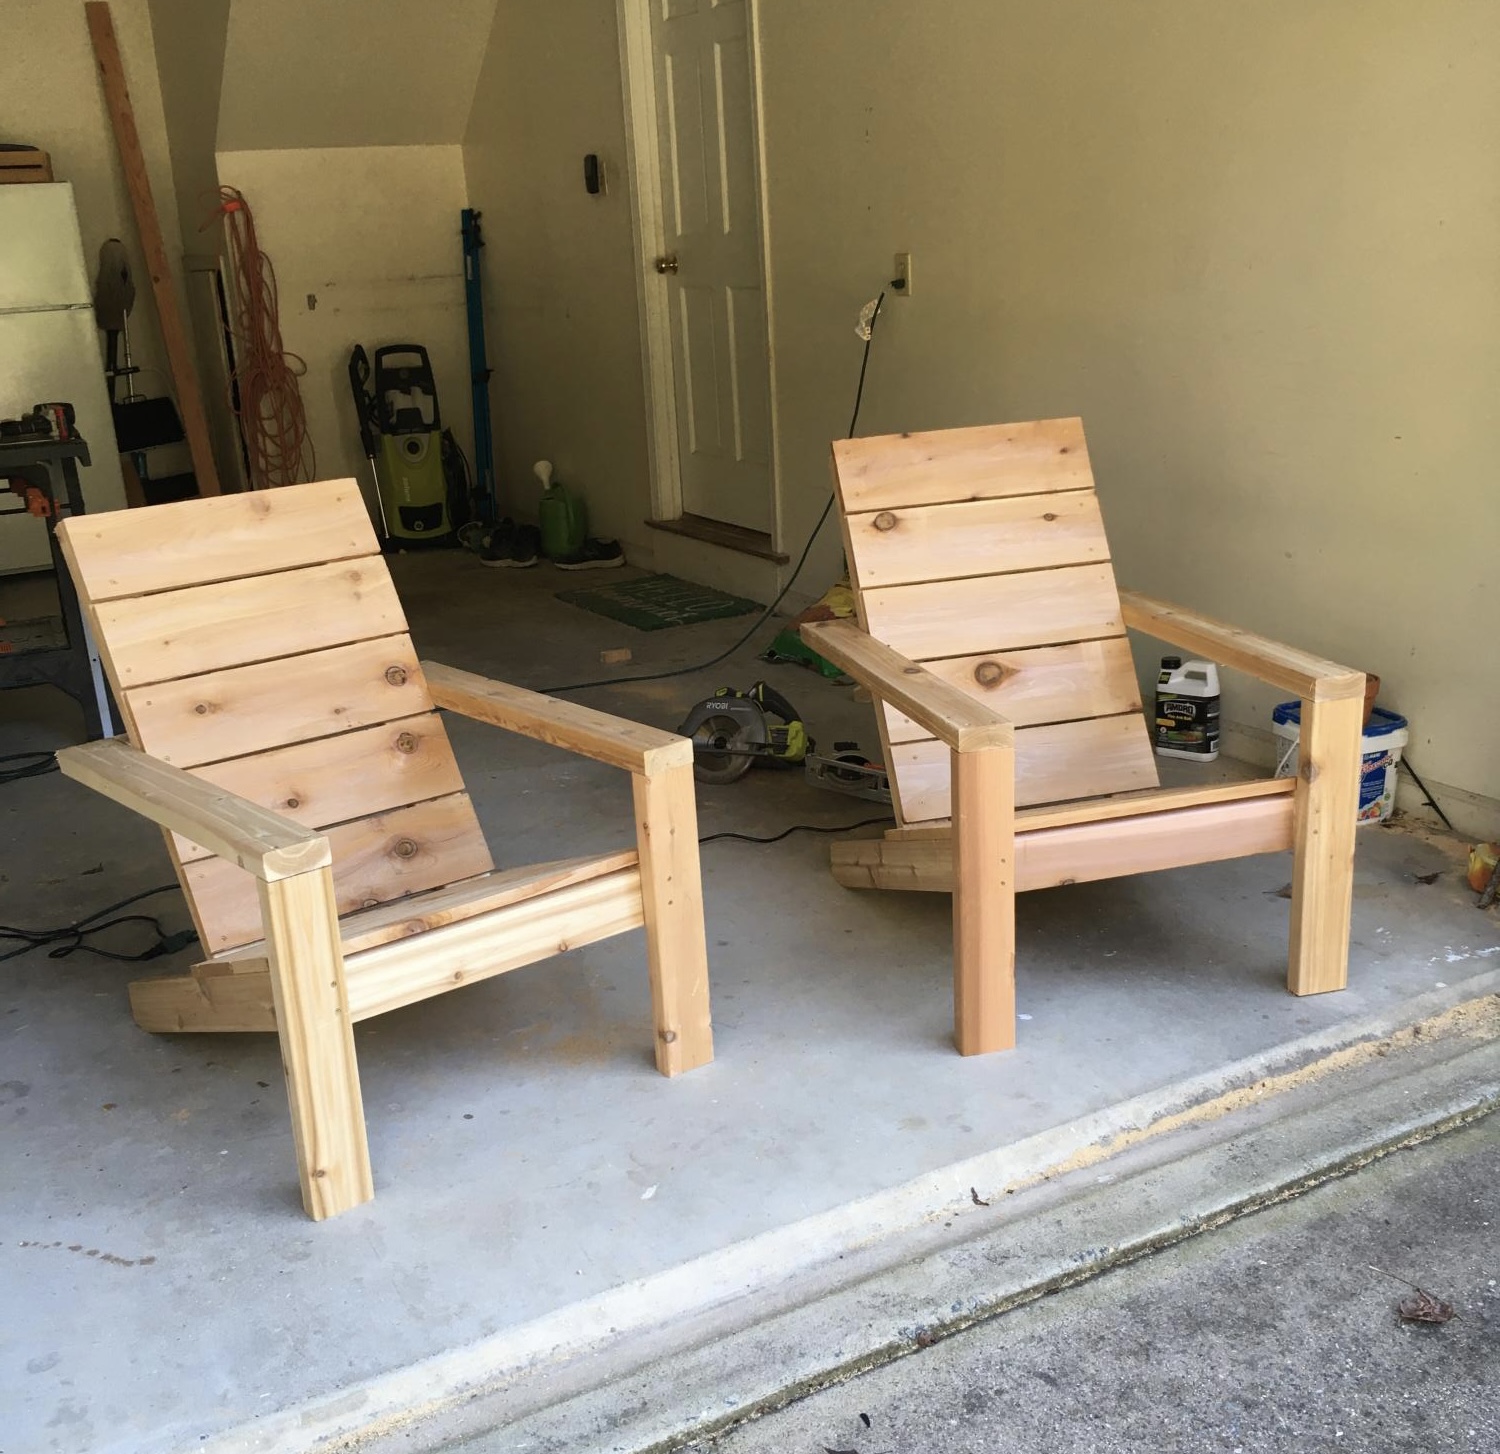
This was a fun and simple project. One of my first attempts at making outside furniture and it was nearly perfect the first time....why?... the plans were so easy to follow, the techniques used were not demanding, and the tool selection was ideal for my workshop. I put them outside and I have had good reviews, and requests, for these chairs.
Hello Builders!
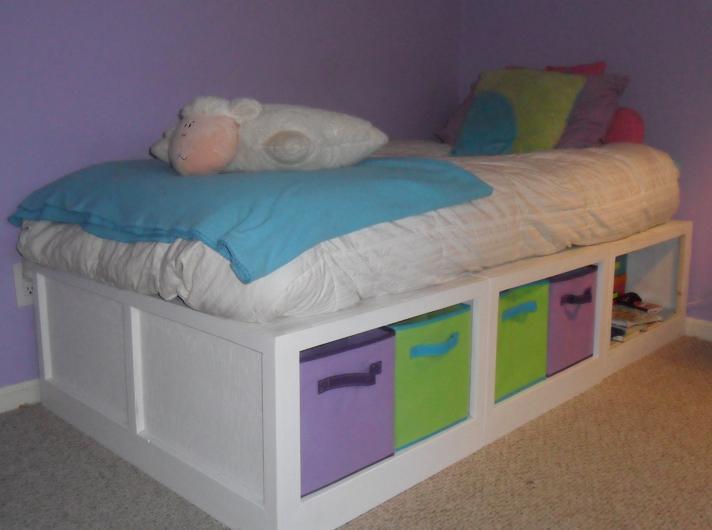
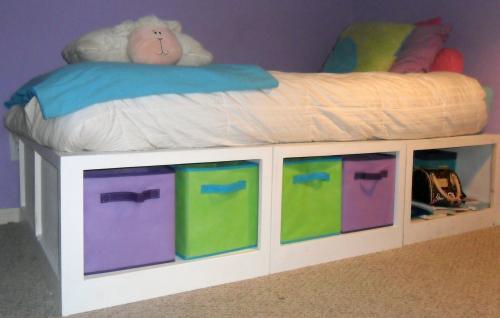
I made this bed for my daughter right after finishing Ana’s Simple Bed for myself. This bed is great because it is cool-looking (the most important factor for my middle-schooler) and because it adds tons of storage space (the most important factor for me, the mom!). Ana has this bed marked as easy, and it was easy. After working on the Simple Bed with lots and lots of cutting and gluing and nailing, I was amazed at how quickly this bed started looking like itself.
As a newbie builder, I read and read and re-read Ana’s plans and the comments on the plans and any similar plans until I feel comfortable. The Storage Daybed is just three separate benches that sit side-by-side and the mattress just lies on top. Somehow, when digesting the plans, I was really confused about the divider in the middle of each bench, but eventually the light bulb went on (the divider is necessary to support and strengthen the top, but the end result is that there are three cubbies in the front of the bed and three cubbies in the back – perfect for storing off-season clothes).
So I went to the Blue home improvement store and decided on birch plywood. Special thanks to Jen for working up the plywood cutting layout that Ana included in the plan. I don’t think I could have figured out how to get the pieces cut without you. The associates at the large home improvement store were very nice, and they offered to make the cuts for me even though they said that they really weren’t supposed to make “project cuts”. The problem was that their cuts were oh, so bad! They marked out all of the cuts at once, which doesn’t account for the sliver that the blade takes out, and when measuring they didn’t even have the tape measure blade flush against the top in the first place.
On my other projects, I made plenty of mistakes. But they were my mistakes, you know what I mean? On this build, I spent so much time trying to fix bad cuts. But it’s my fault. I was concerned, but I second guessed myself and didn’t speak up while they were cutting. I ended up having to cut a thin strip of plywood to lengthen the side of one of the benches, and had to sand and sand and sand. Also ended up having to re-cut the dividers.
Oh, well. I got a little life lesson in assertiveness, and I got to add a circular saw to my toolkit! After all was said and done, this really is a great bed, and it made my heart glow to hear my daughter going around telling folks: “My mom is making my bed!
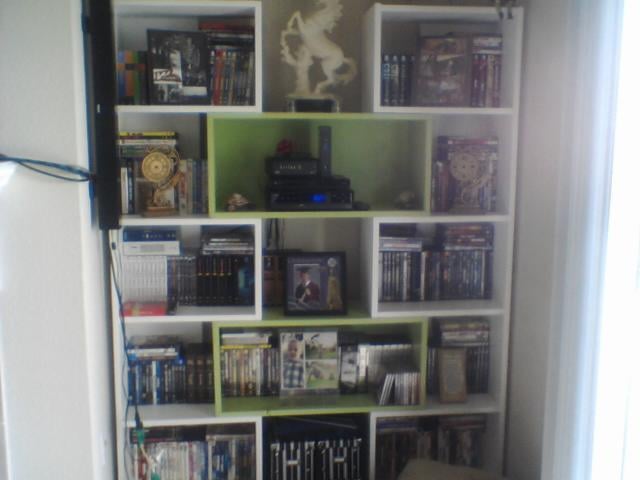
My Hubby and I built this bookcase on the livingroom floor on mothers day morning! It was so simple and fun. I had all the wood cut at Lowes and we just had to put it together and paint it!
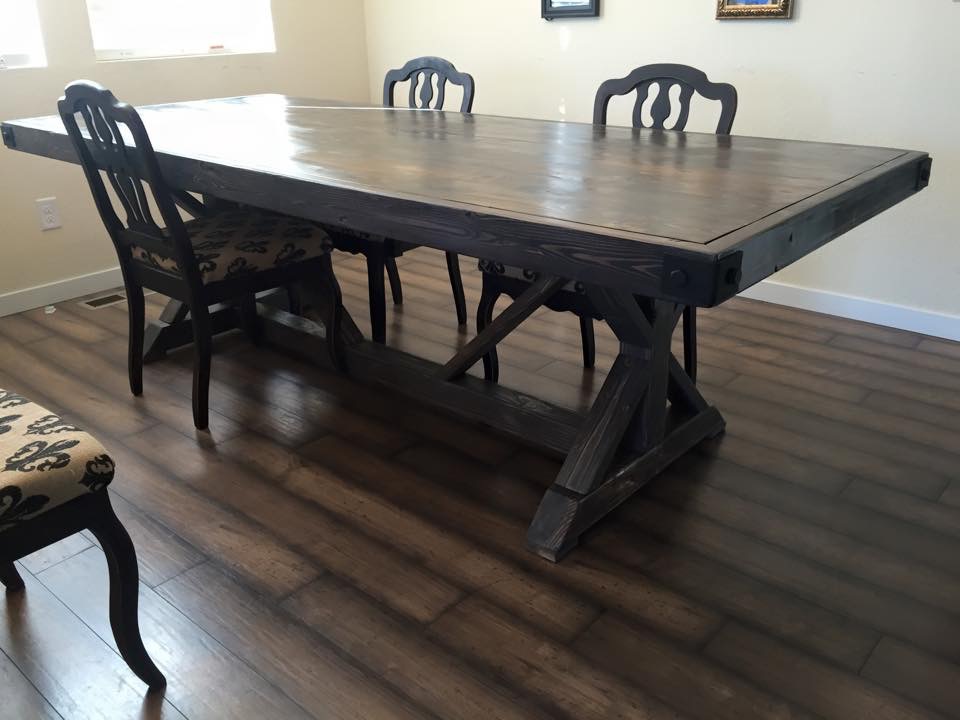
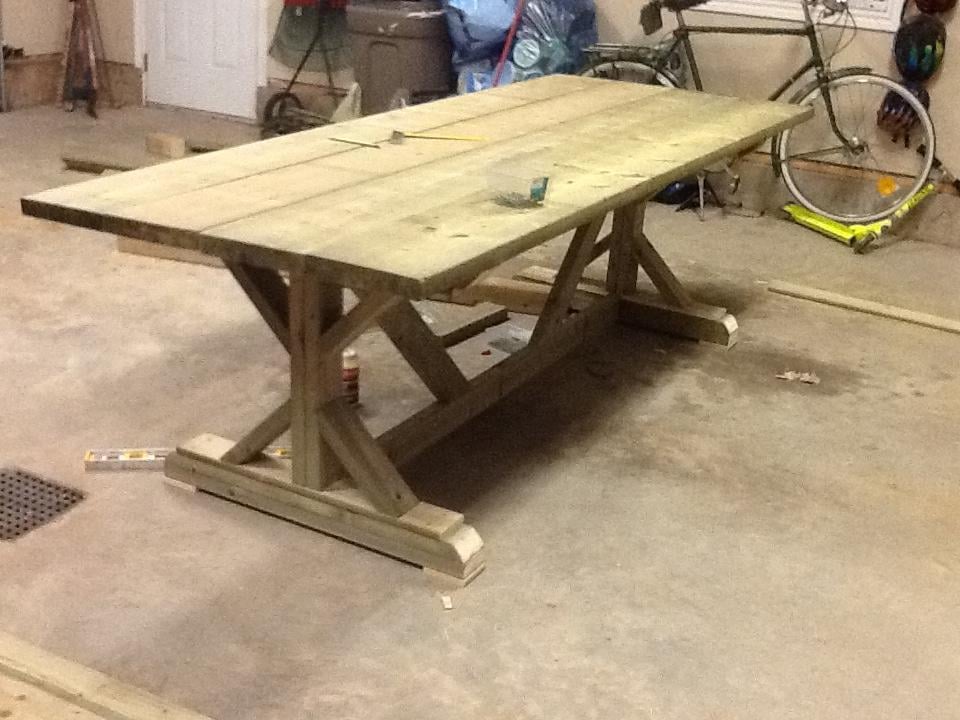
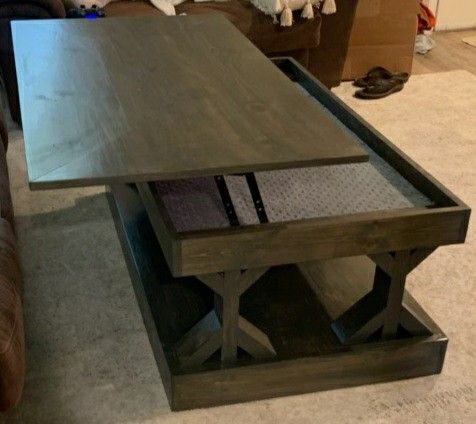
This is a customized version of a farmtable that my wife found here!

Sun, 04/12/2020 - 10:51
how do I get plans for this table? it is the customized farm table, thank you
It's turned out way more beautiful then I had thought. It was all the mini details that took the longest but made the look worth it


Comments
Ana White Admin
Tue, 10/05/2021 - 09:28
Sweet!
Looks great and functional, wonderful place to do homework and put up when done!