Community Brag Posts
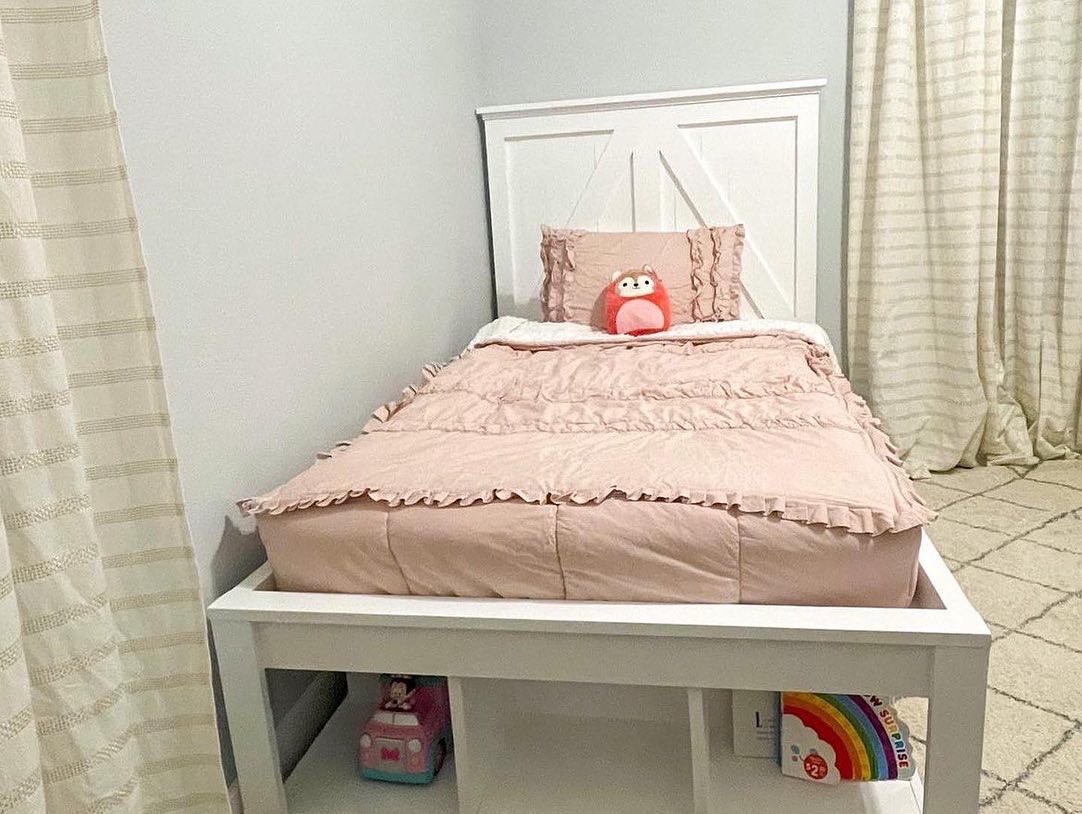
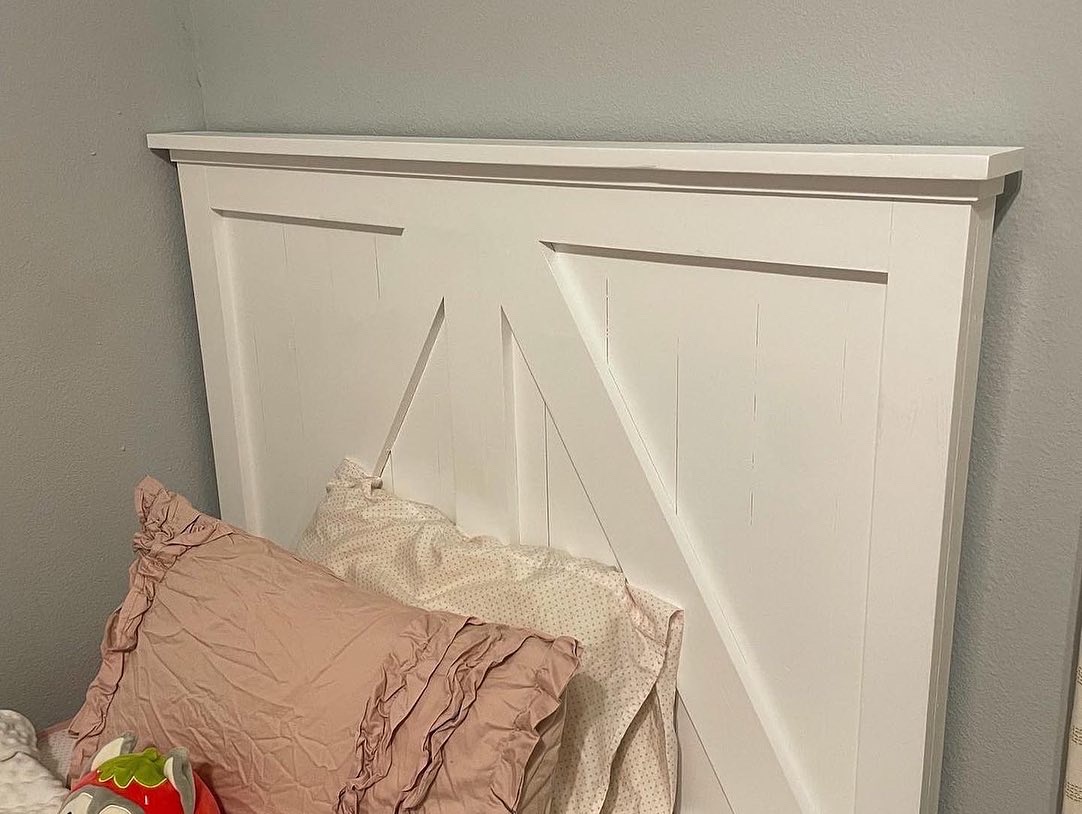
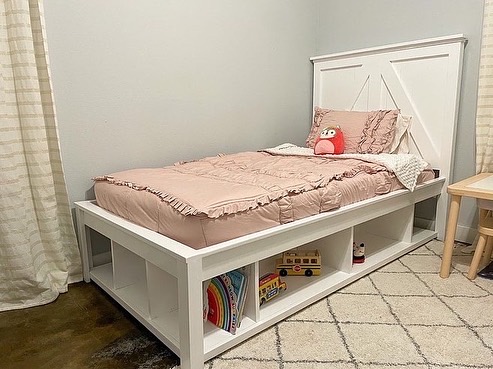
Twin Storage Bed
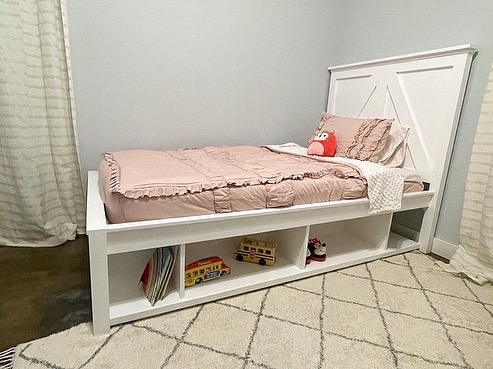
Built and shared by Romona Haney
Built from Plan(s)
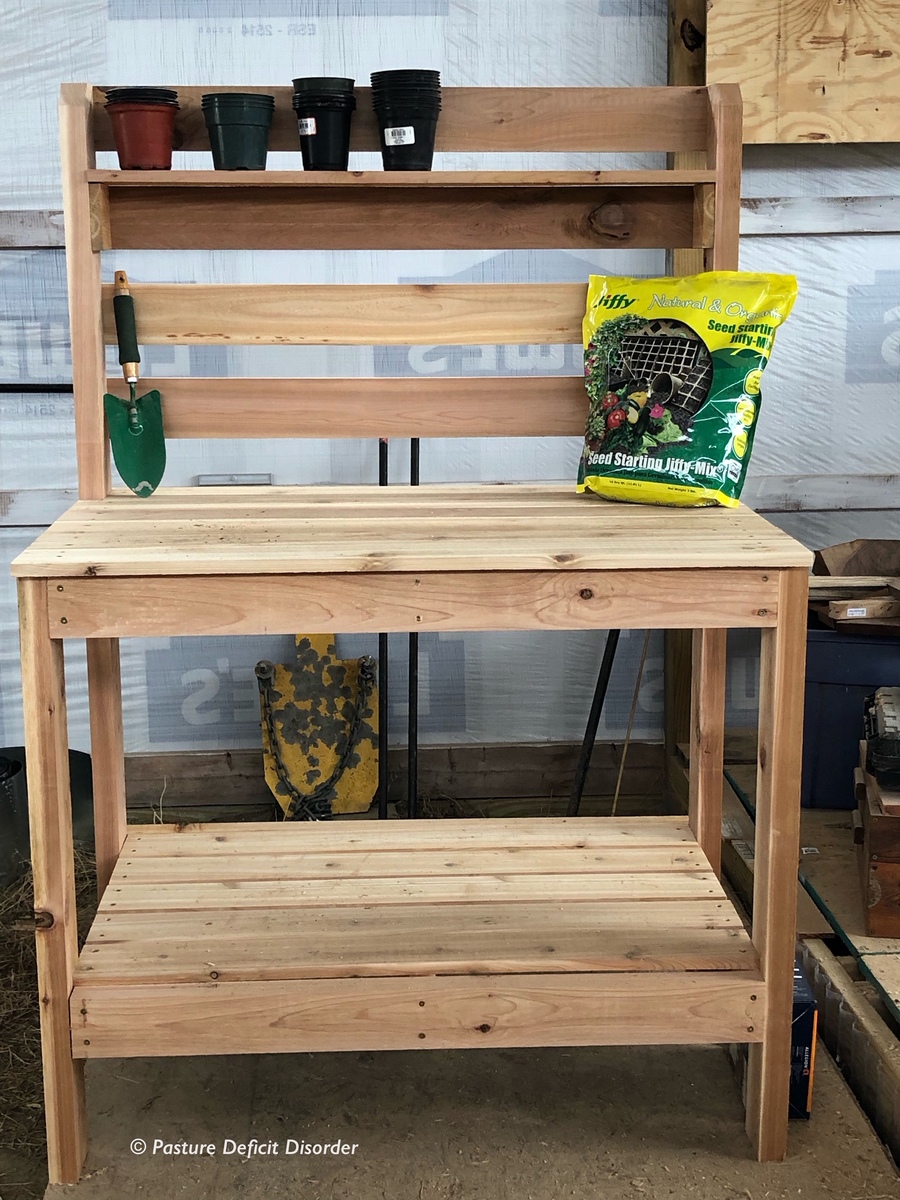
Markham Workbench Console and Rustic Hutch
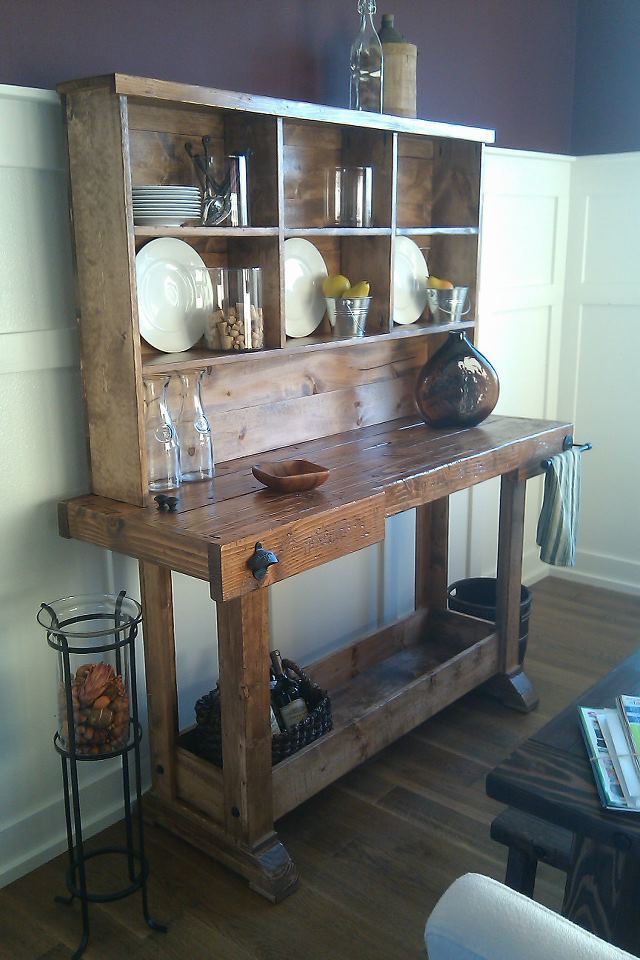
I first saw this workbench and hutch on Ana's website, but didn't commit to the project until I saw them in person, as part of a model home that had been decorated by local Pottery Barn design services. I was sold. I built this for roughly $1900.00 less than PB charges. It was an easy weekend build for a guy with less than one years' experience in this arena.

Built from Plan(s)
Estimated Cost
150.00
Estimated Time Investment
Weekend Project (10-20 Hours)
Finish Used
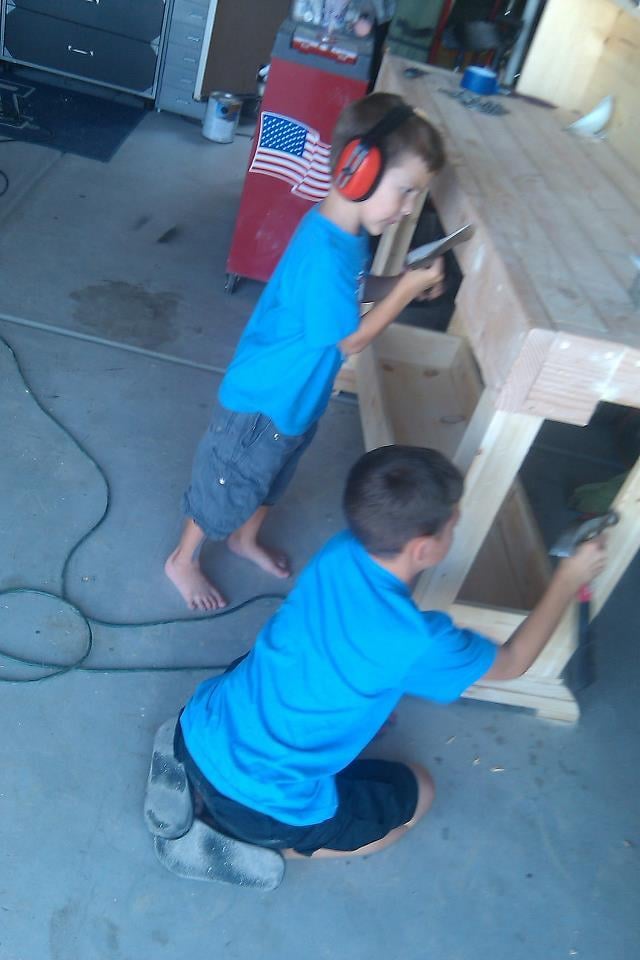
Before I applied stain, I had my two youngest sons whack away (under my supervision, of course) at the piece with a hammer, hatchet, and chain to give it a distressed look. I took a page from Ana's playbook and used Minwax Early American with a Minwax oil-modifed water-based gloss polyeurethane topcoat. I moved the towel bar to the other end of the facade in order to reduce the depth of the piece and added a stationary bottle opener to the other side. Also, I added four lag screws toward the juncture of the legs and feet (a la PB's version), but these were purely cosmetic. All visible hardware was spray-painted with Rustoleum's textured black spray paint. Finally, I carved a heart with "A+A" inside one of the hutch cubbies to add a truly personalized element to the piece. I plan to build another for my father to use as a functional workbench. By far my favorite build (my wife kind of loves it, too). One last thing - if you don't have a Kreg jig, get one. Now. This was my first build using one and I cannot overstate its worth. Trust me.
Recommended Skill Level
Beginner
Comments

Thu, 09/15/2011 - 16:20
Nice dude! I just finished
Nice dude! I just finished my console last weekend. Was it worth it making the matching hutch? I haven't decided if I'll do it yet.....Great job though.
Thu, 09/22/2011 - 11:23
Absolutely. It's minimal time
Absolutely. It's minimal time investment, and it really seems to finish the piece off. I went with seven 1x6's (instead of a plywood backing) to give the hutch a planked look.
Sat, 09/17/2011 - 15:19
Very very nice. This has
Very very nice. This has been on my build list for way toooo long. It is beautiful and inspiring! Thanks!!!
Fri, 02/24/2012 - 05:43
legs and the kreg jig
Great job! I'm starting this same project and just purchased the kreg jig system but I'm stuck on assembling the table legs using pocket holes. I don't want to have visible pocket holes, could you give a quick description on how you assembled the legs and attached them to the feet using pocket holes? Thanks!
Harvest Table Love
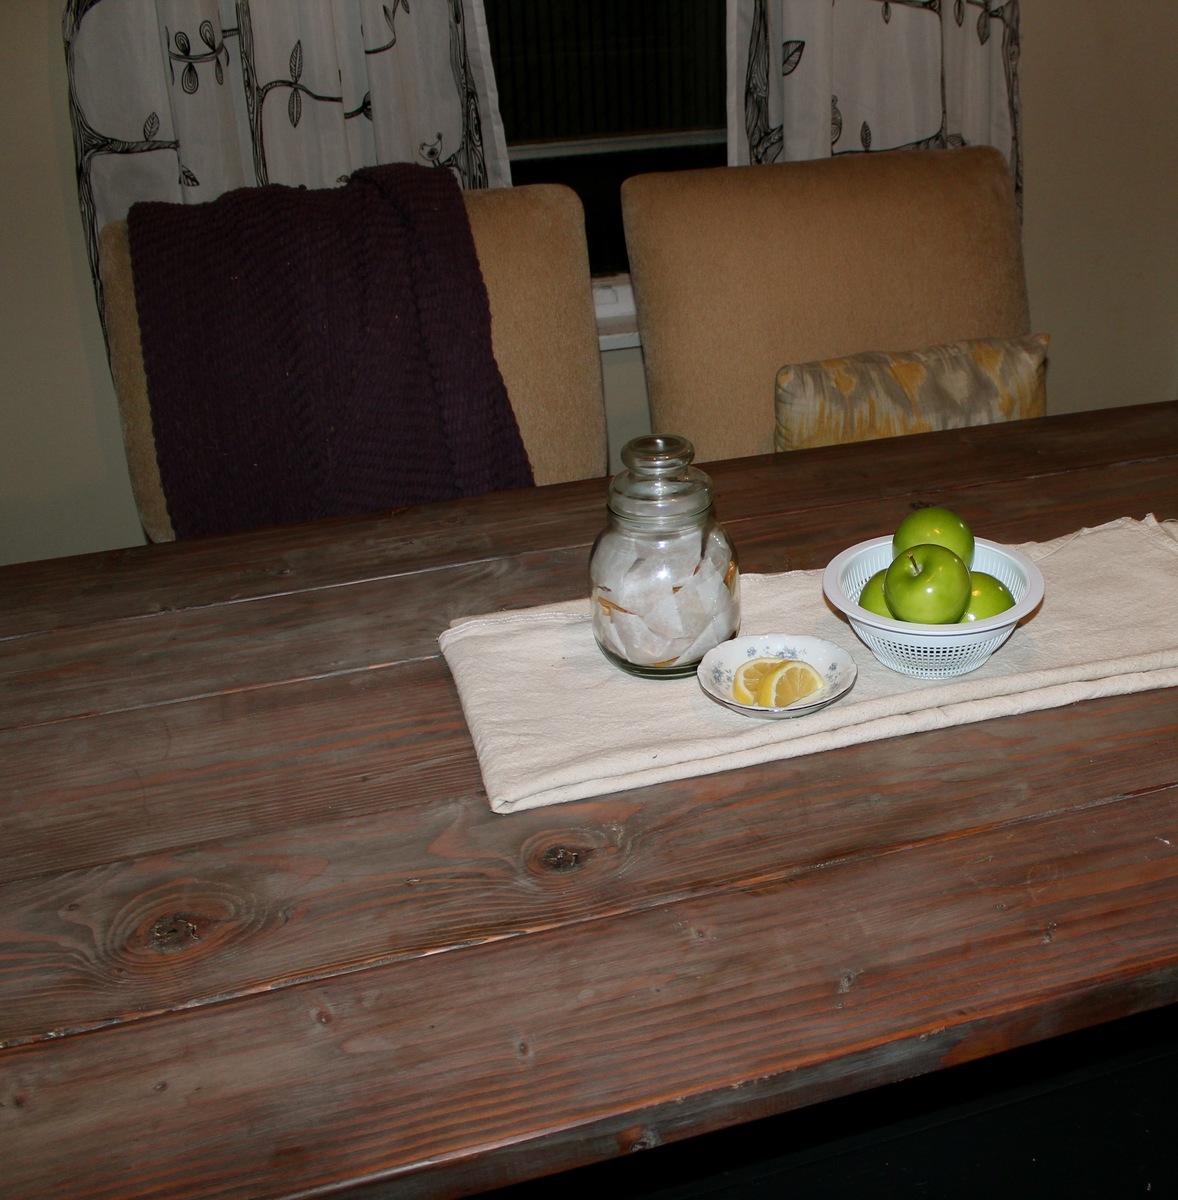
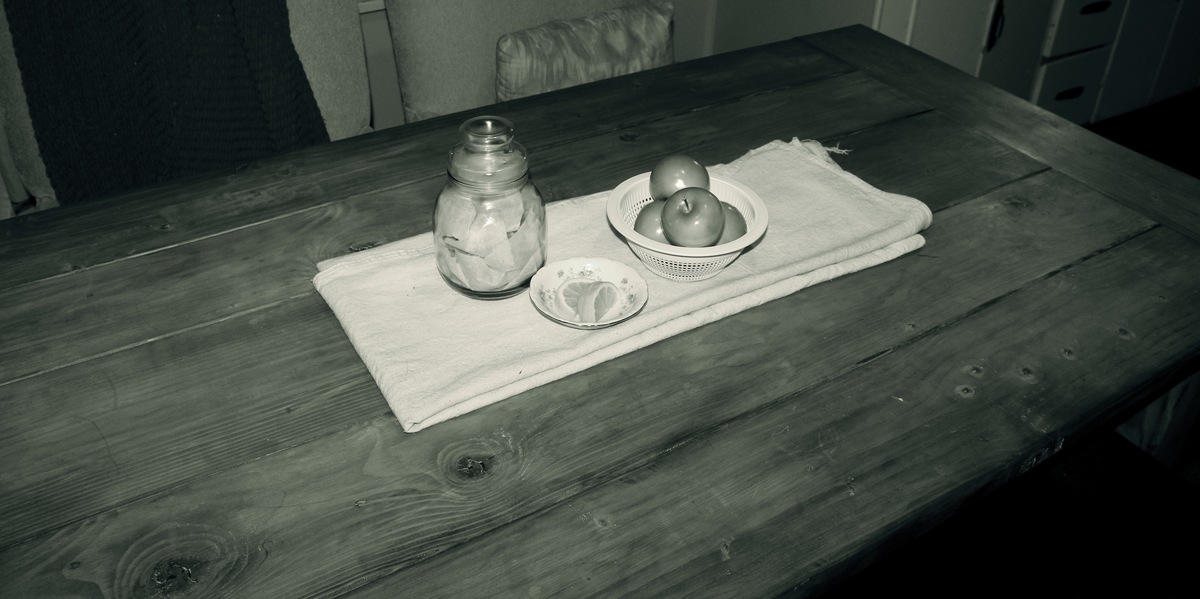
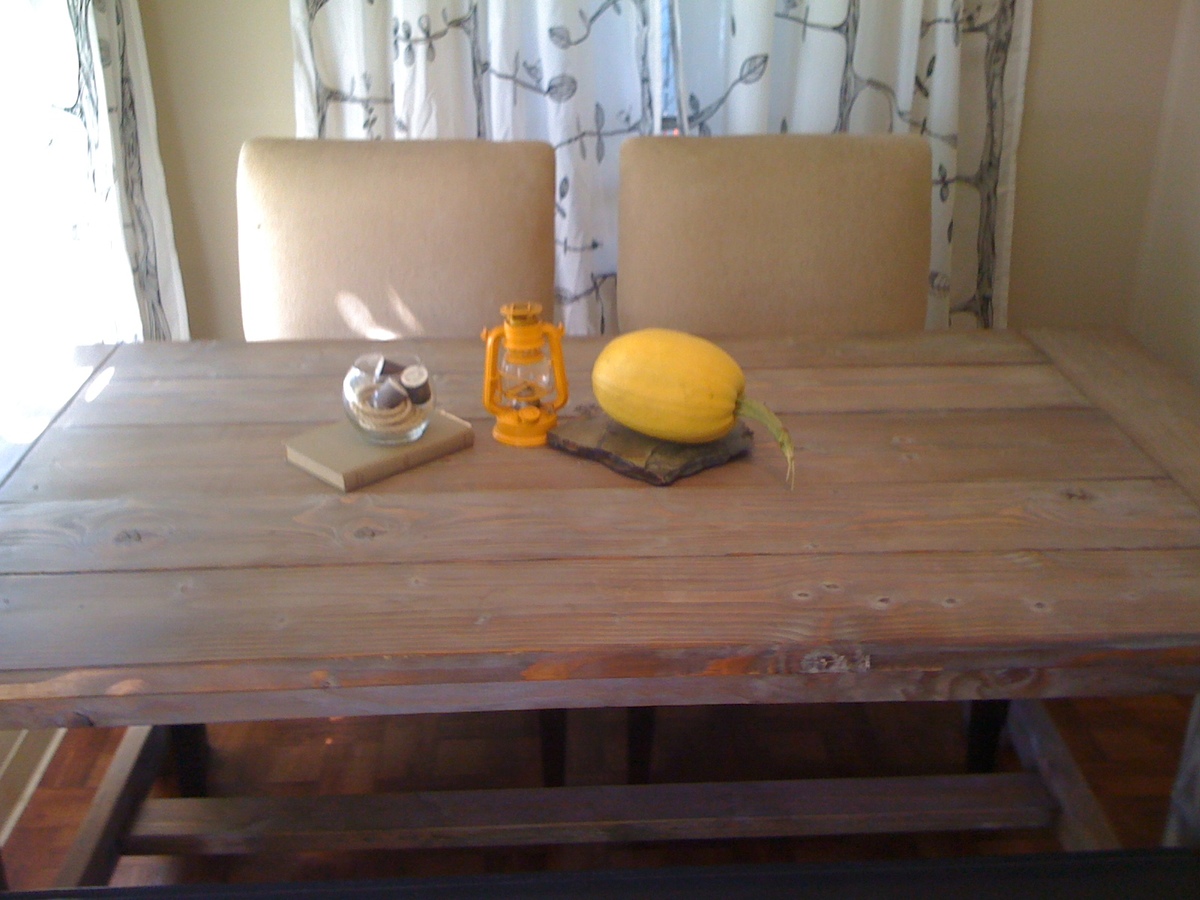
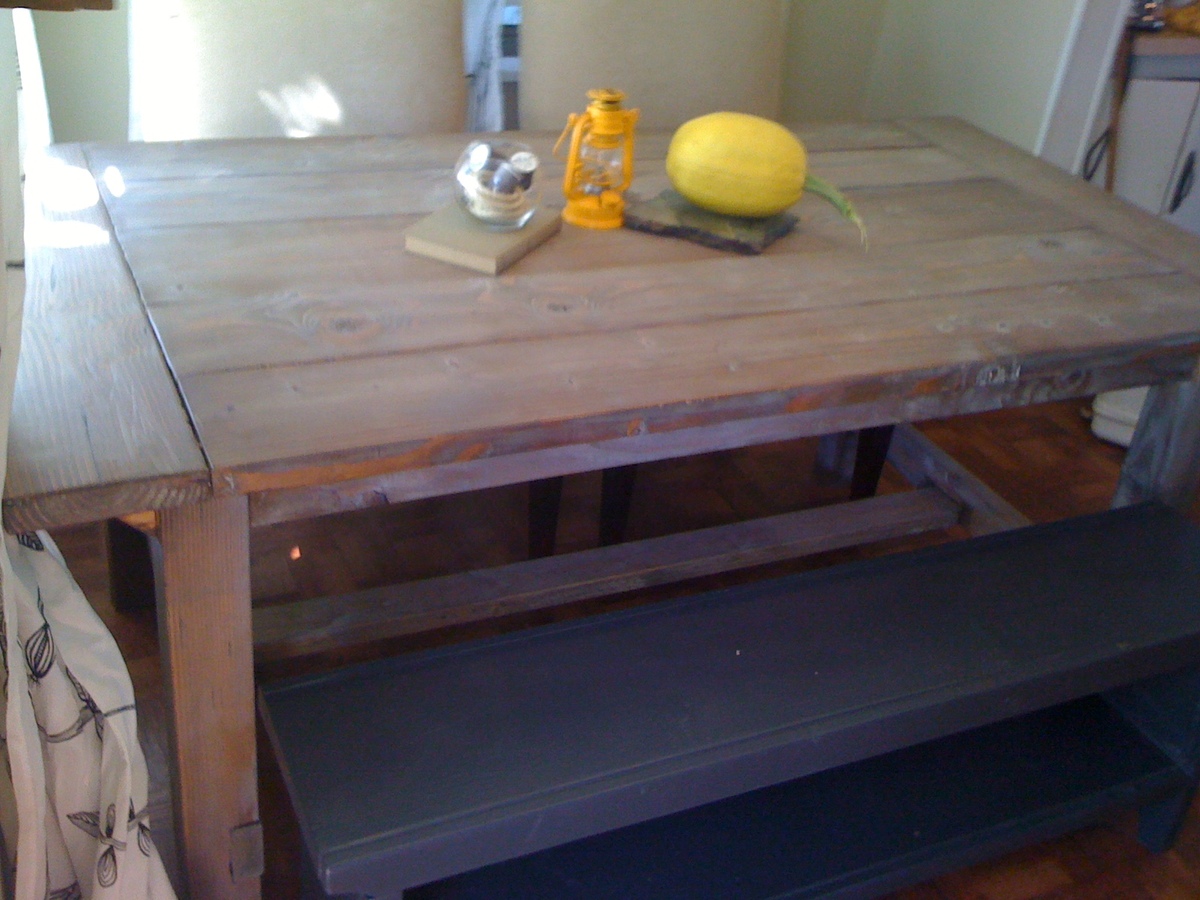
This Harvest table is the heart of our home. It was one of the first furniture projects we ever completed and my favorite finish to date. The night we spontaneously decided to buy lumber and build this table we had a lot of unexected visitors. We were out in the driveway working and a bunch of friends dropped by randomly so we all took a hand in building this table. It was so much fun. Spontaneous building party.
When I finished it it was my first time using a belt sander which wound up gouging some of the wood. The table top is super smooth but very rustic and I LOVE IT. I started with pre-stain conditioner, then cherry stain which I hated, then early american mixed with dark walnut. At this point it looked pretty lovely but I wanted it to look aged and gray so I lime waxed, dark waxed and buffed the whole surface of this piece. It turned out so special and you can see some red notes from the cherry stain and those are my favorite moments on this table.
Thanks again Ana.
** updated with a few better photos on 11/21
Built from Plan(s)
Estimated Time Investment
Afternoon Project (3-6 Hours)
Finish Used
See summary.
Recommended Skill Level
Starter Project
Outdoor Bench
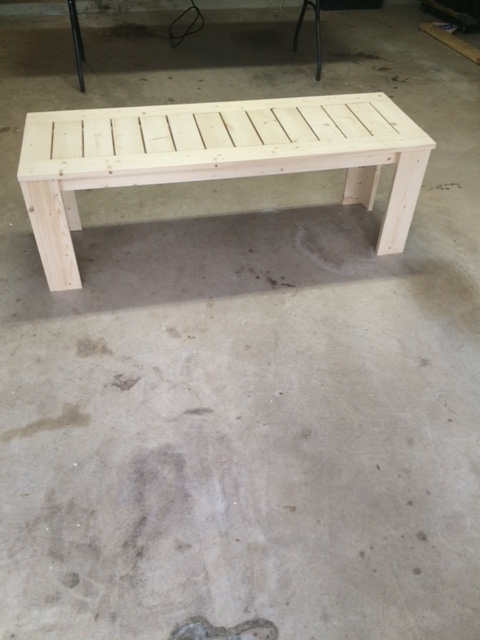
What a beautiful bench to build. Will build the matching table soon.
Built from Plan(s)
Estimated Time Investment
Afternoon Project (3-6 Hours)
Recommended Skill Level
Beginner
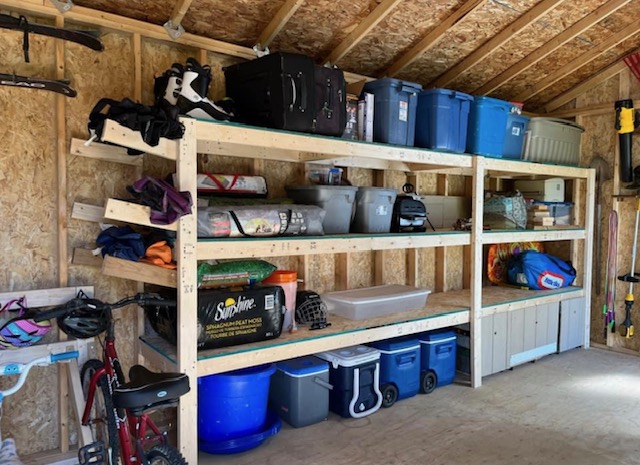
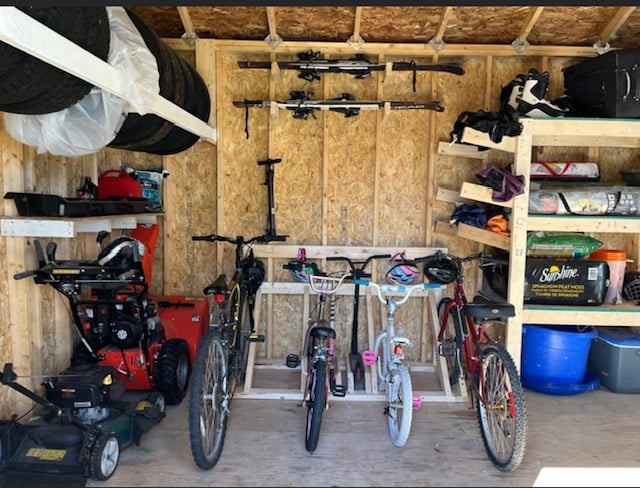
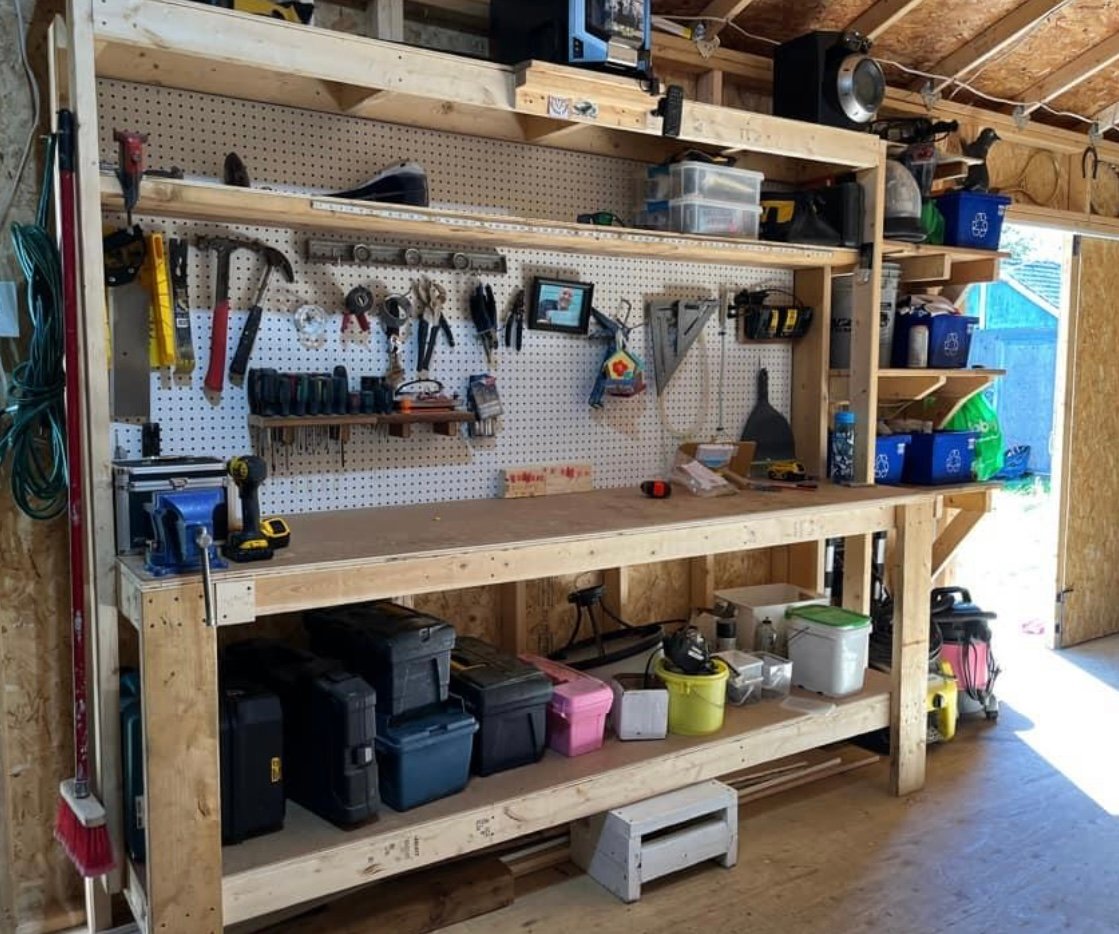
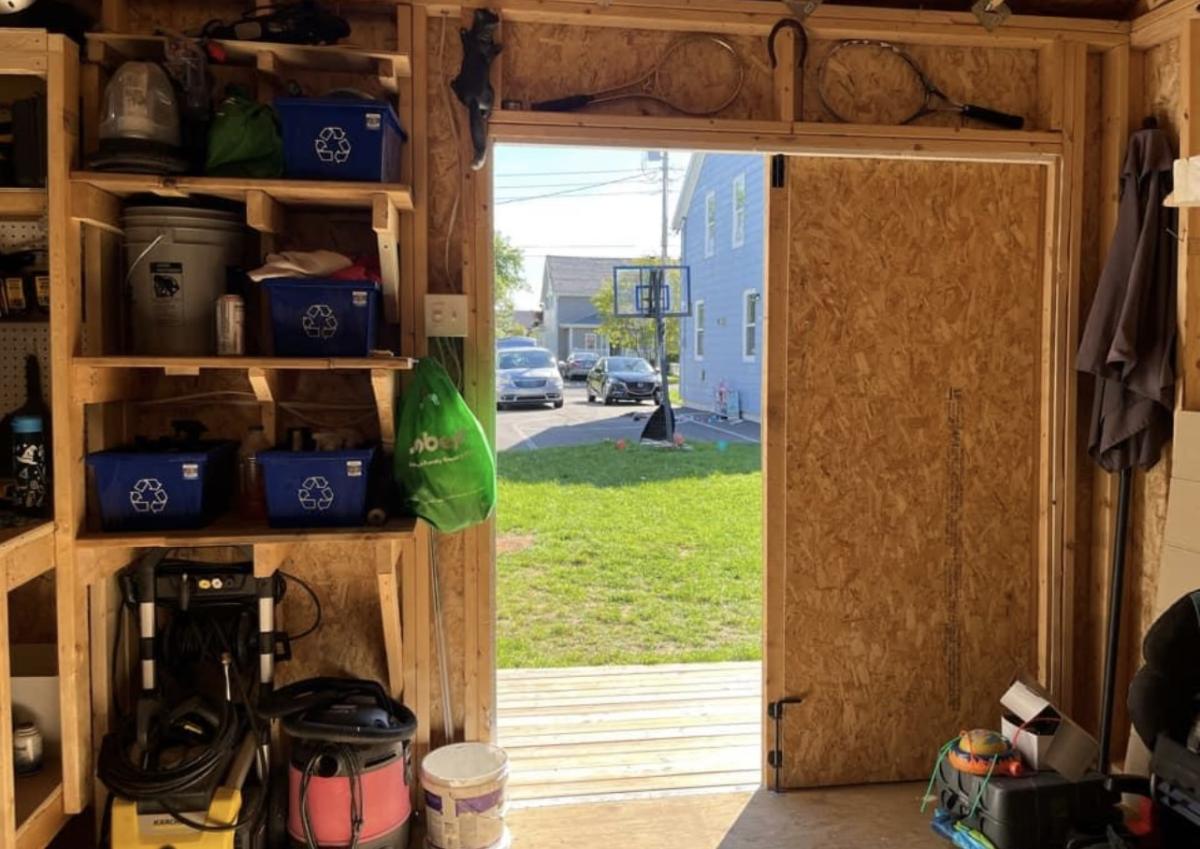
Shed Organization Projects - by Kelly Campbell
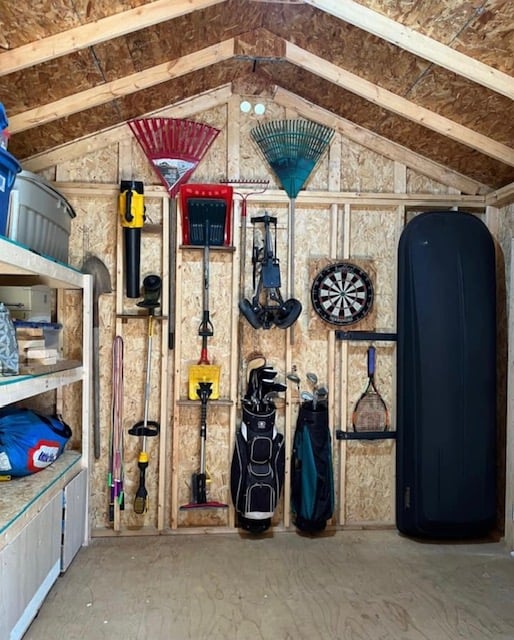
Awesome shed storage and organization shared by Kelly Campbell
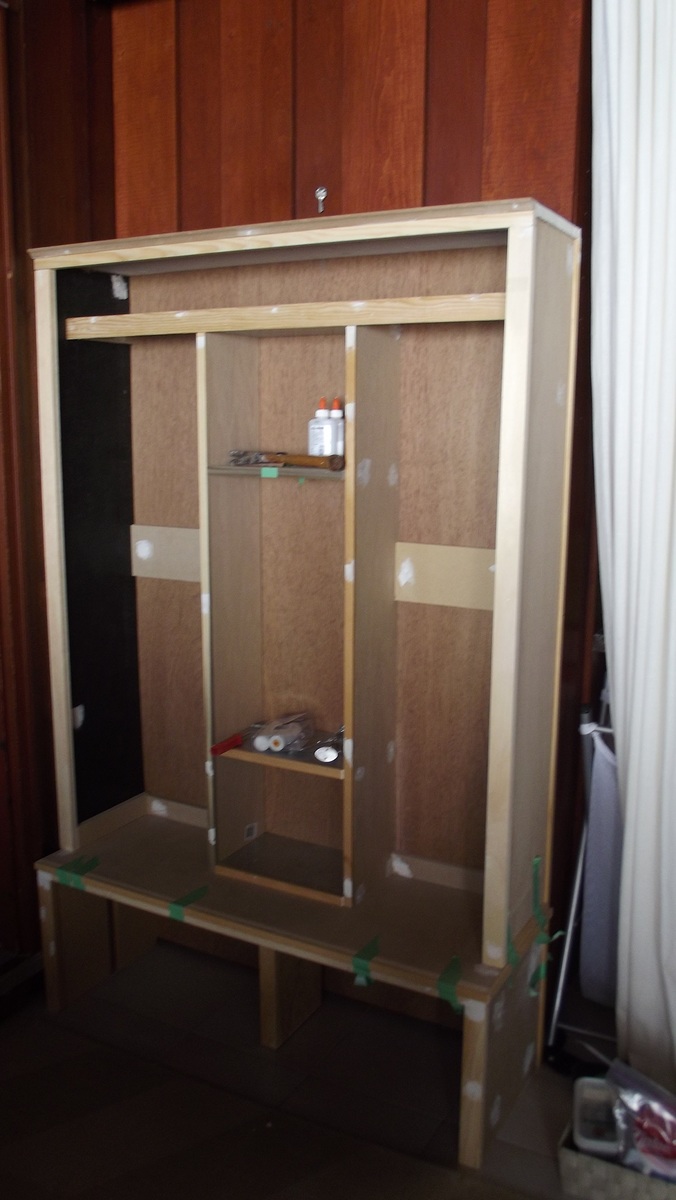
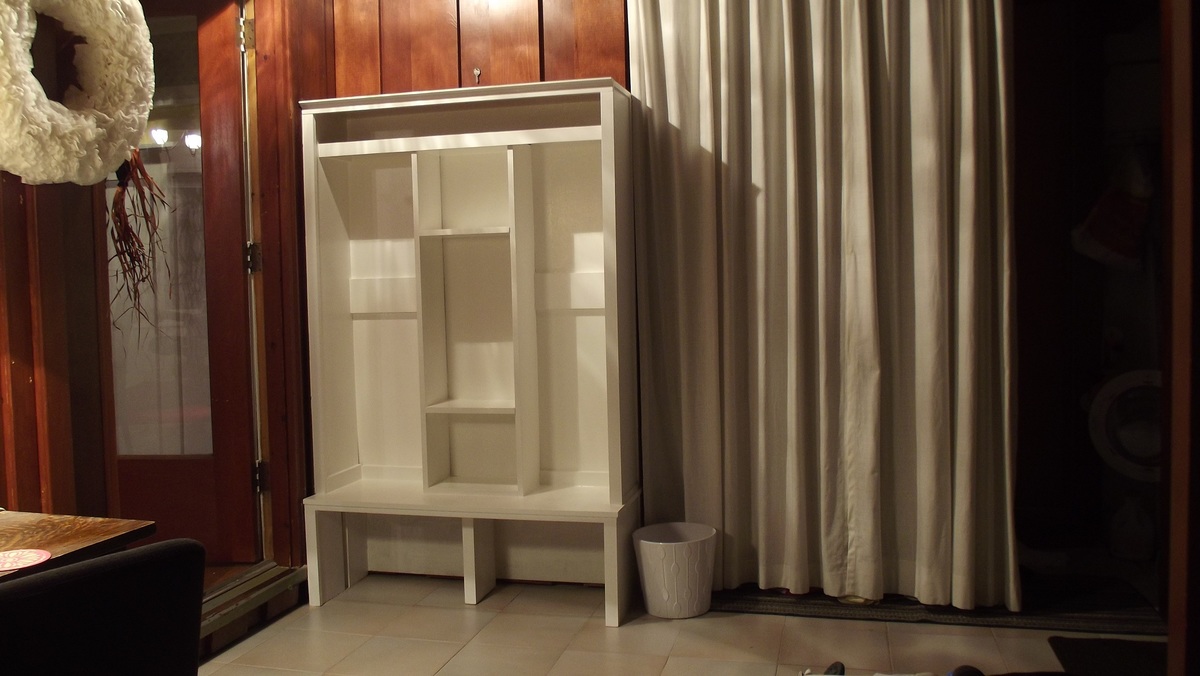
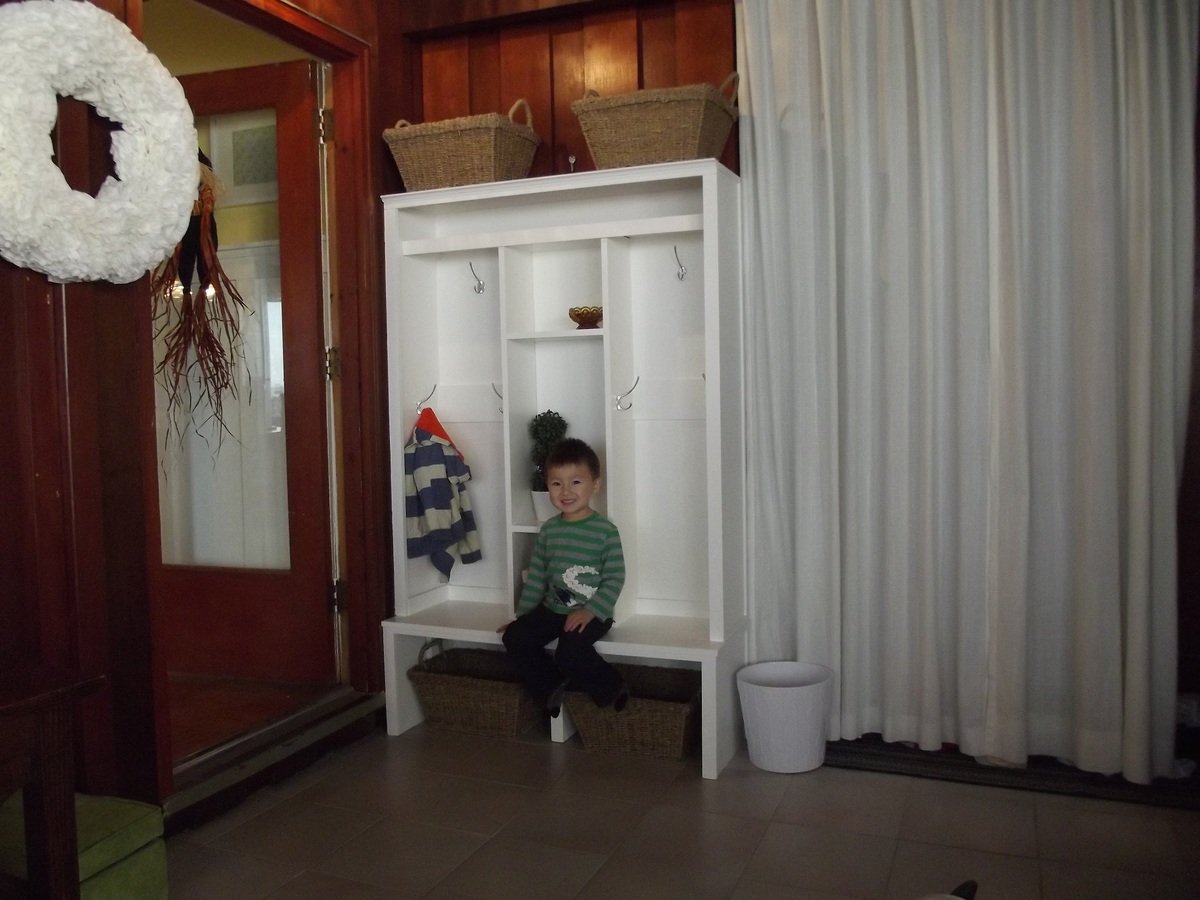
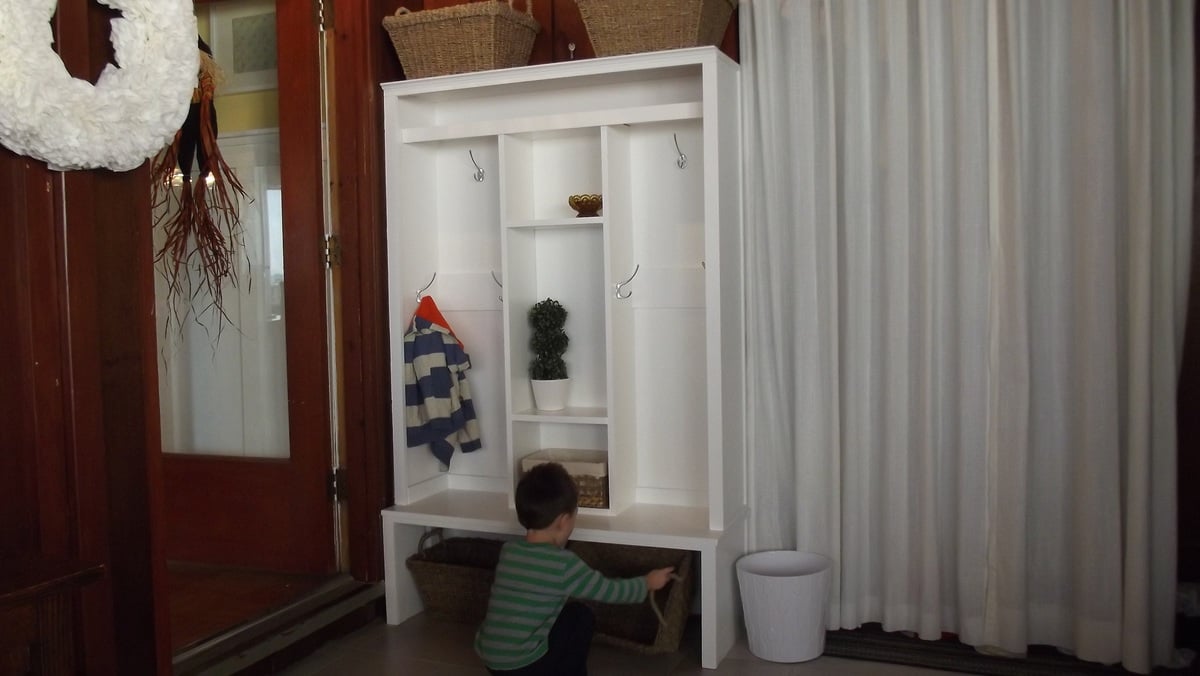
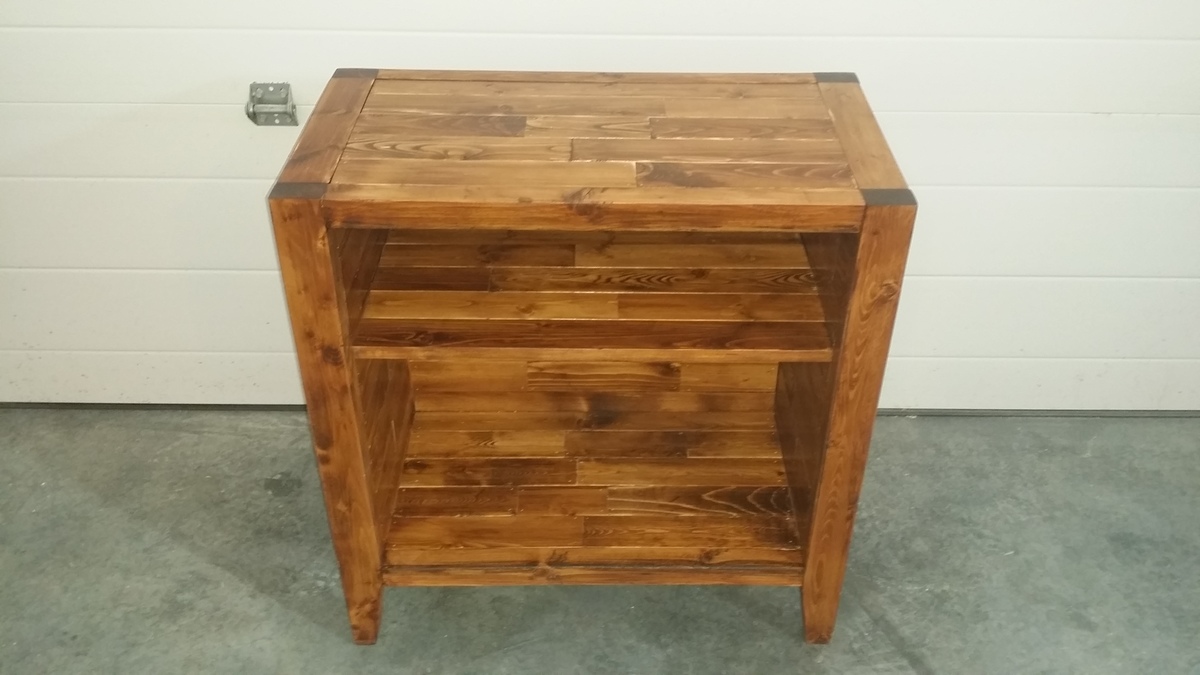
Entryway/Mudroom Cabinet
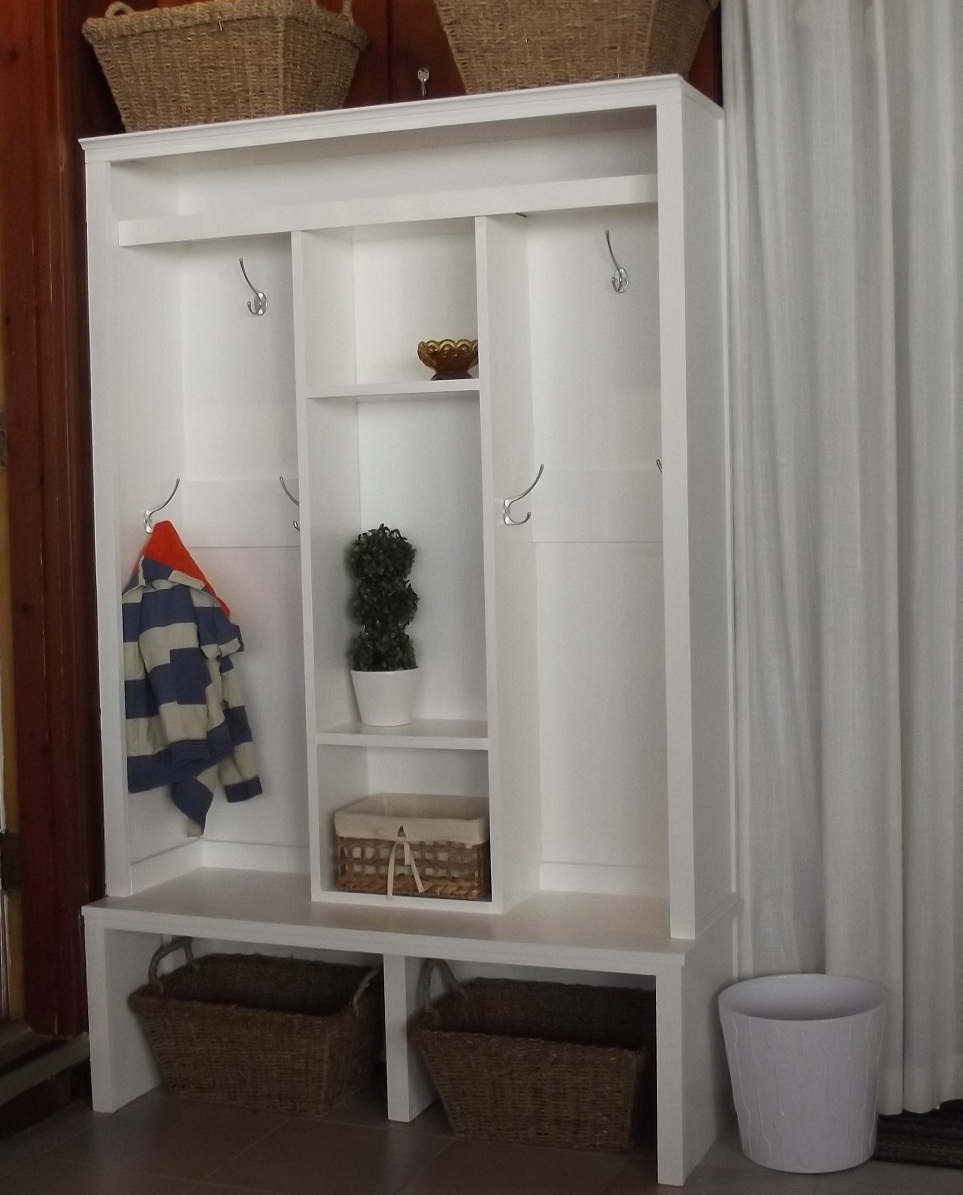
My most *favoritest* project ever. I modified the Braden plans like crazy to fit my family's needs for the sunroom/mudroom. I kept the bottom open so the it woould allow for baskets to slide it easily (which makes sweeping inside a snap). Also, I added some braces about midway down to hold the coat hooks for my 3 and 5 year-old. I had them show me how high they could reach and I just placed the braces there.
I literally used up whatever I could find in my garage for this project. We had a TON of scrap wood in varying thicknesses and lengths so I just used that. The only thing that I had to buy for this project was some 1x2 to finish off the trim.
Can't wait to get hardware on and style her up pretty! Will post final pics as soon as I do. :) I've been DYING to get something up on Ana's brag board and I can't wait to keep 'em coming.

Built from Plan(s)
Estimated Cost
$30+
Estimated Time Investment
Weekend Project (10-20 Hours)
Finish Used
Kilz oil-based primer and 3 coats of Valspar Swiss Coffee in semi gloss.
Recommended Skill Level
Intermediate
Comments
Stained pressure treated Folding Plant Stand
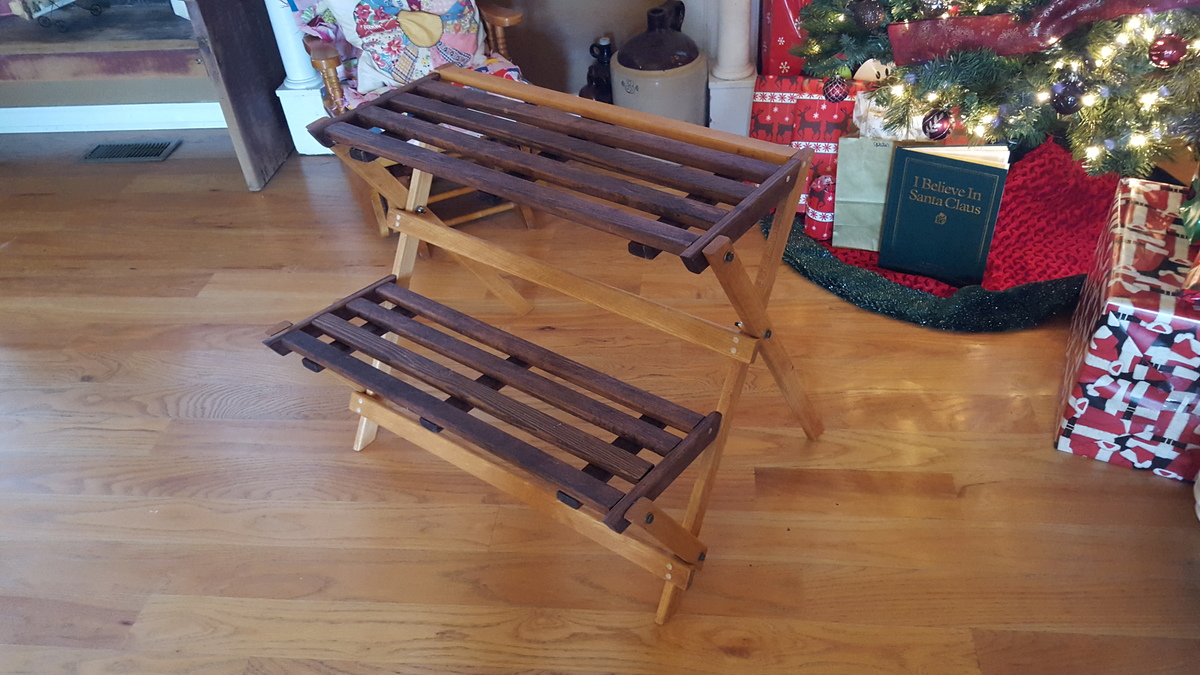
Lesson learned....... Drilling straight holes is critical.
Built from Plan(s)
Estimated Cost
Used treated lumber....... about $12 for lumber, $16 for bolts, $5 for exterior screws, $2 for button plugs, $10 for stain ( plenty left for additional projects).
Estimated Time Investment
Afternoon Project (3-6 Hours)
Finish Used
Min wax
Recommended Skill Level
Beginner
Abstract geometric feature wall!
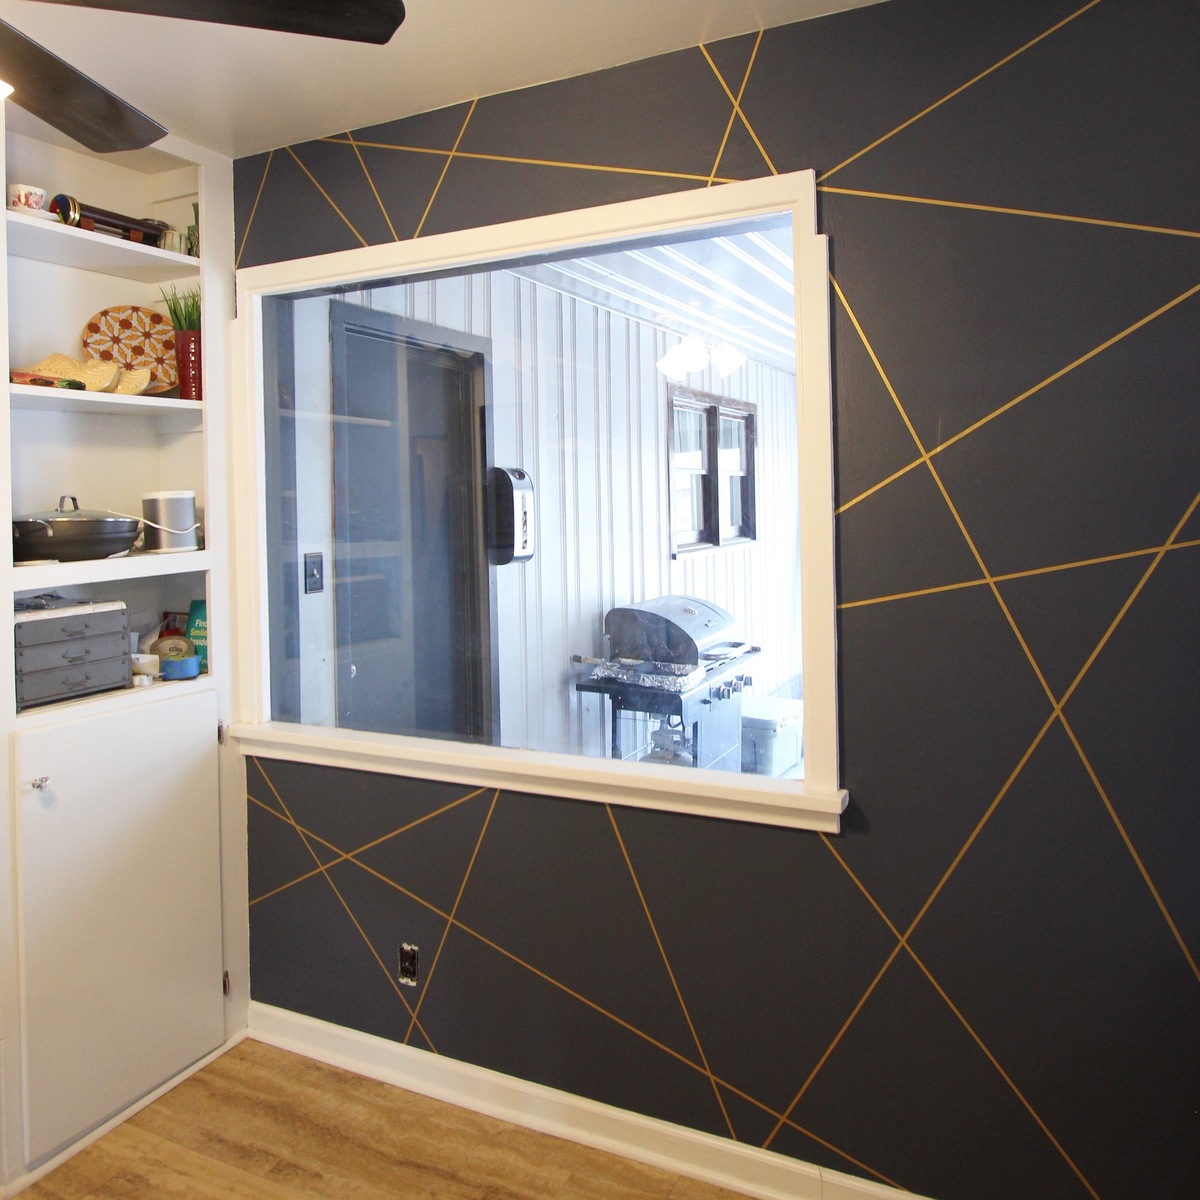
Super easy weekend project!
I Decided to paint a feature wall in my kitchen! I’m really into geometric shapes right now and the next few projects I have planned will reflect this.
I used some skinny tape to mark my lines and then put yellow frog tape on each side of the skinny tape and then removed the thin tape in the middle that was marking my straight line, this way my lines were all the same thickness and it was a really easy way to make sure I liked my line placement. I tried to make sure i had no two lines parallel with each other so that my pattern looked random and abstract. To limit the gold paint from bleeding and make certain my lines would be as crisp as possible I did a first coat with navy (same as wall color) over the taped lines- this kinda seals up the edges of the tape with the wall. Taping my lines was the most tedious part of this project but once they were on, it was as easy as waiting for coats of paint to dry. And I love the finished product! Really adds a POP to our kitchen!
Check out the project on my Instagram, I will be posting some process photos and videos soon. @halfwayhandy
Estimated Cost
$40 ( depends on wall size, my wall was very small)
Estimated Time Investment
Weekend Project (10-20 Hours)
Finish Used
Gold- metallic tones/ guilded gold
Navy - blue-grey slate
From Home Depot
Navy - blue-grey slate
From Home Depot
Recommended Skill Level
Beginner
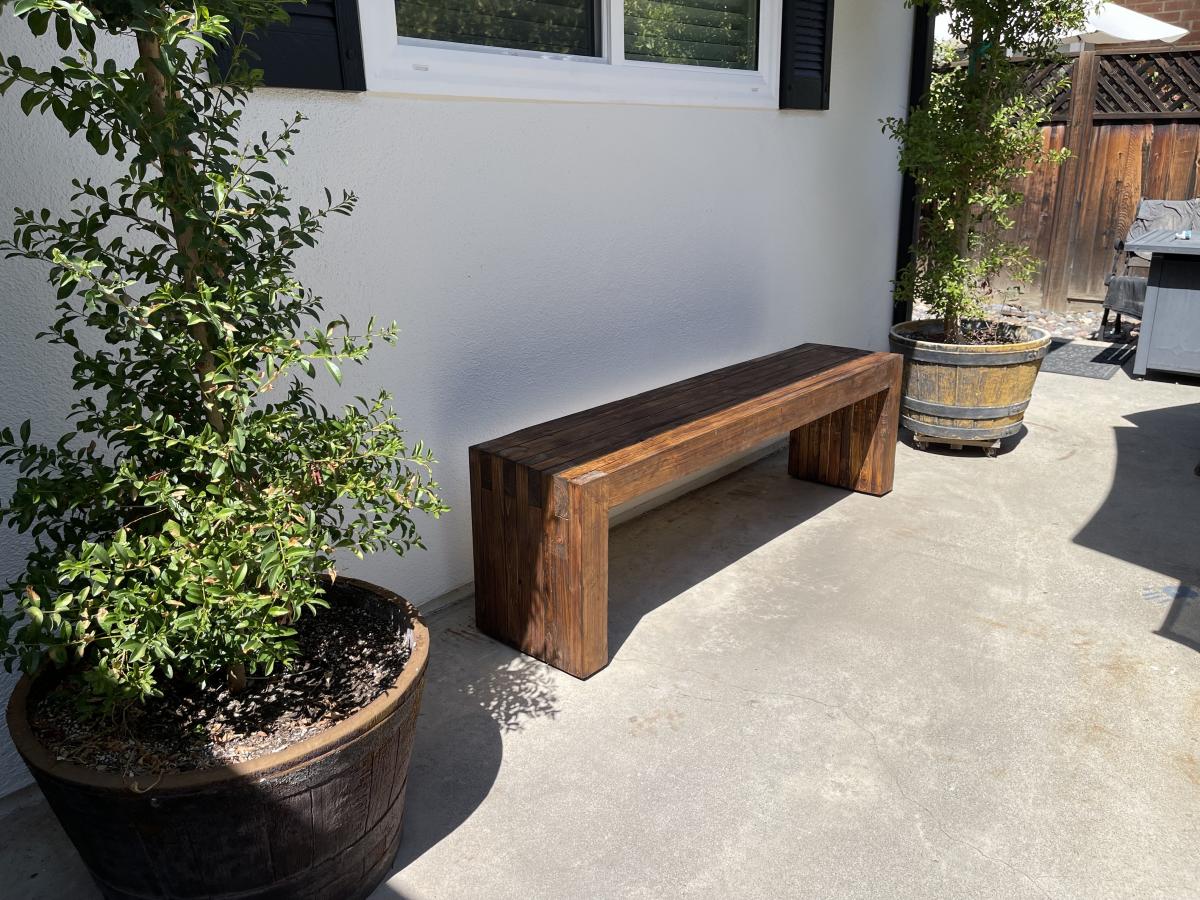
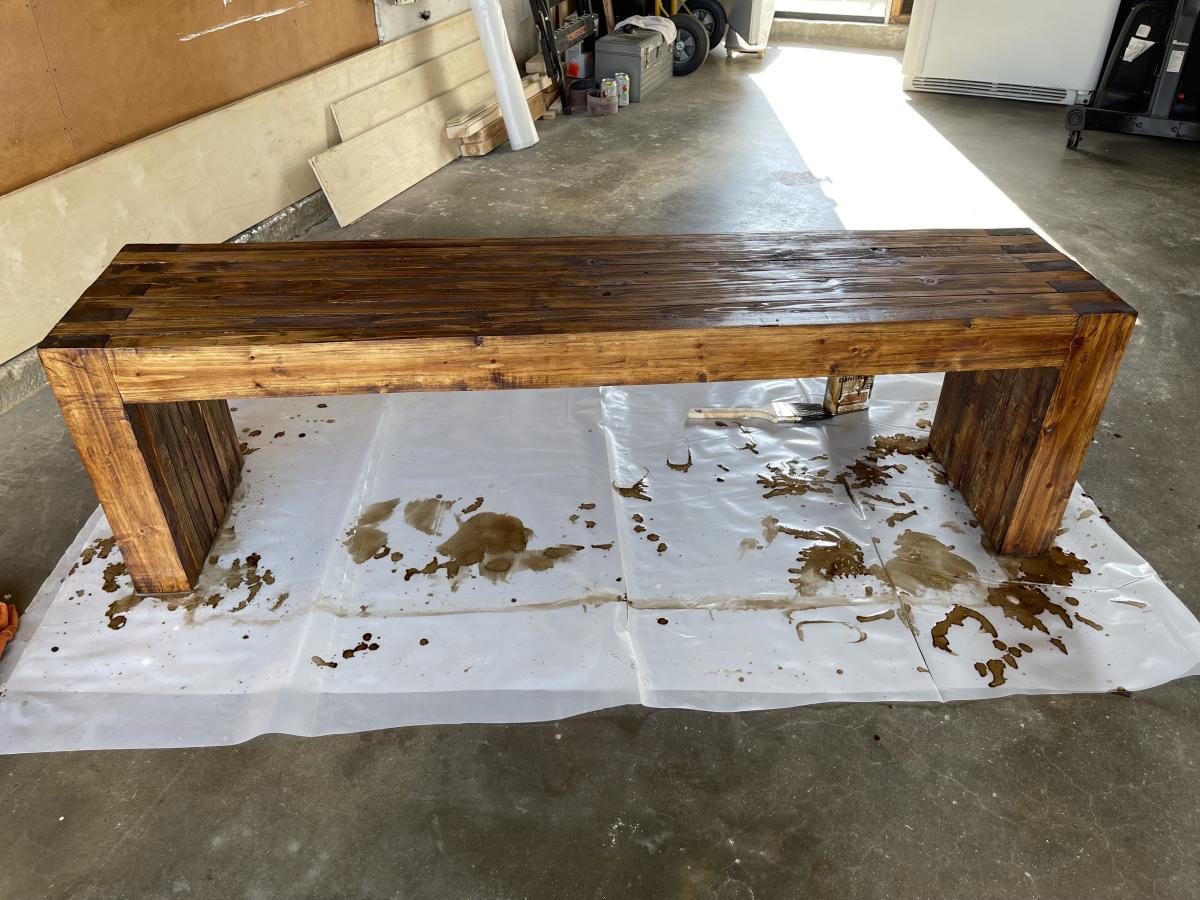
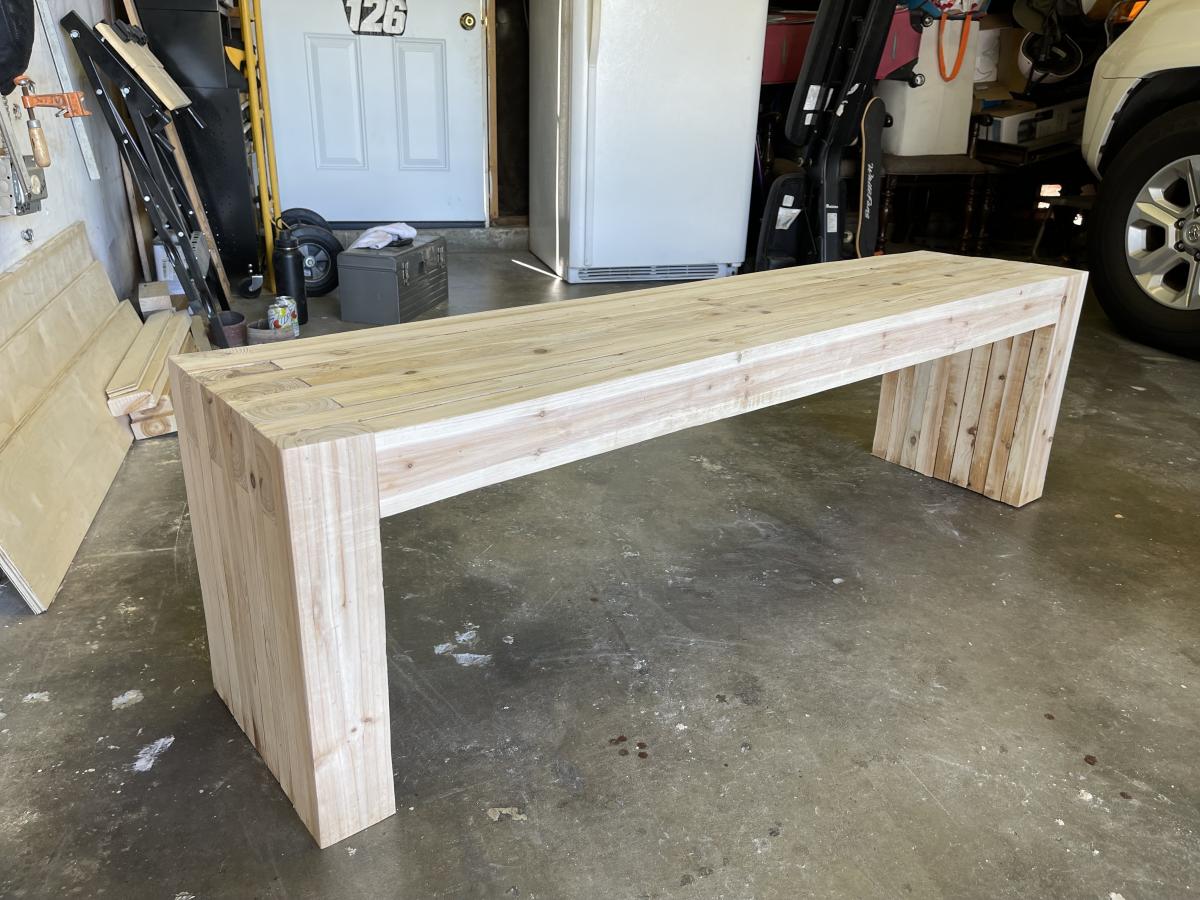
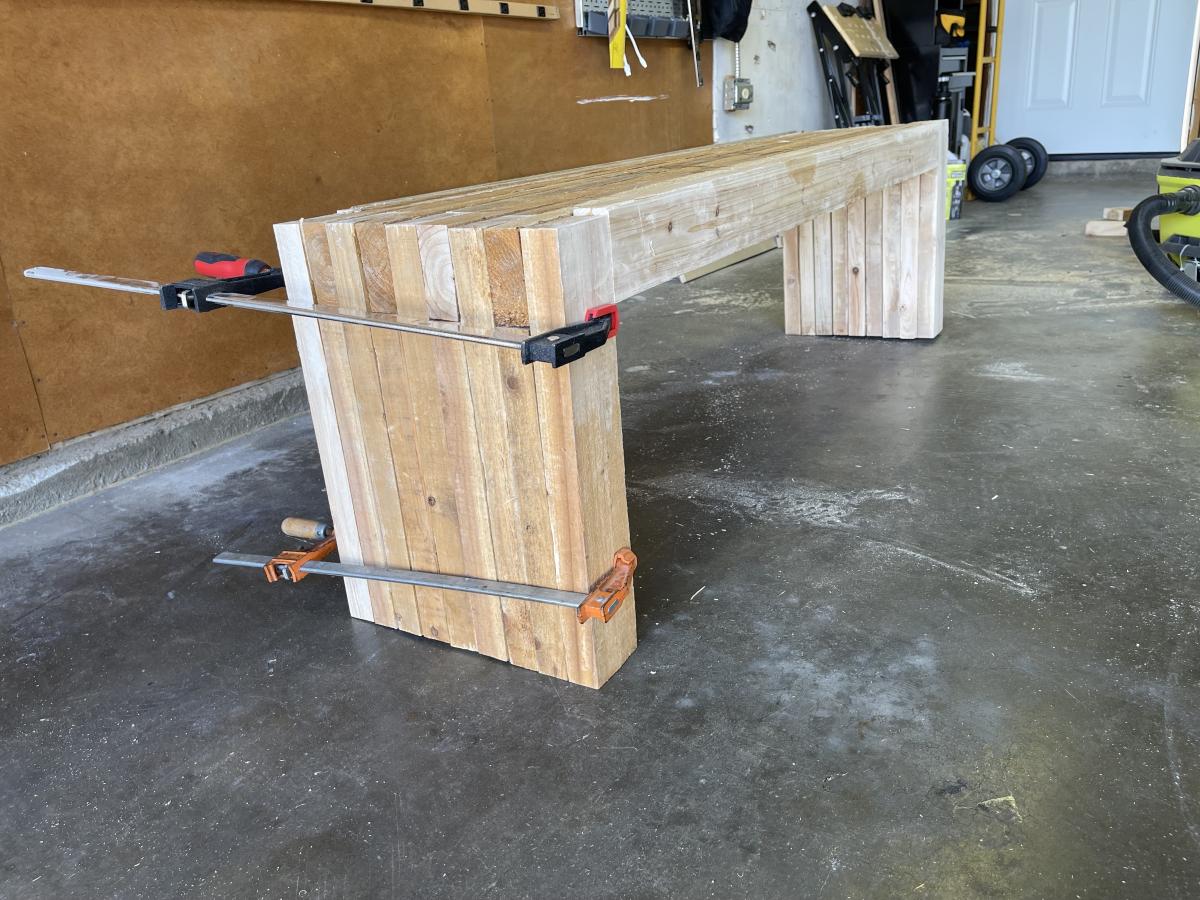
William Sonoma inspire outdoor bench

This was one first project and I am very proud of it. It was challenging but I think it turned out beautiful and everyone who visits loves it. I built it out of cedar wood for better durability and protection against rain and the elements.
Built from Plan(s)
Comments

In reply to Beautiful Bench! by Ana White Admin
Wed, 02/01/2023 - 10:39
OMG! Ana liked it. You…
OMG! Ana liked it. You made my day. Thank you for responding.
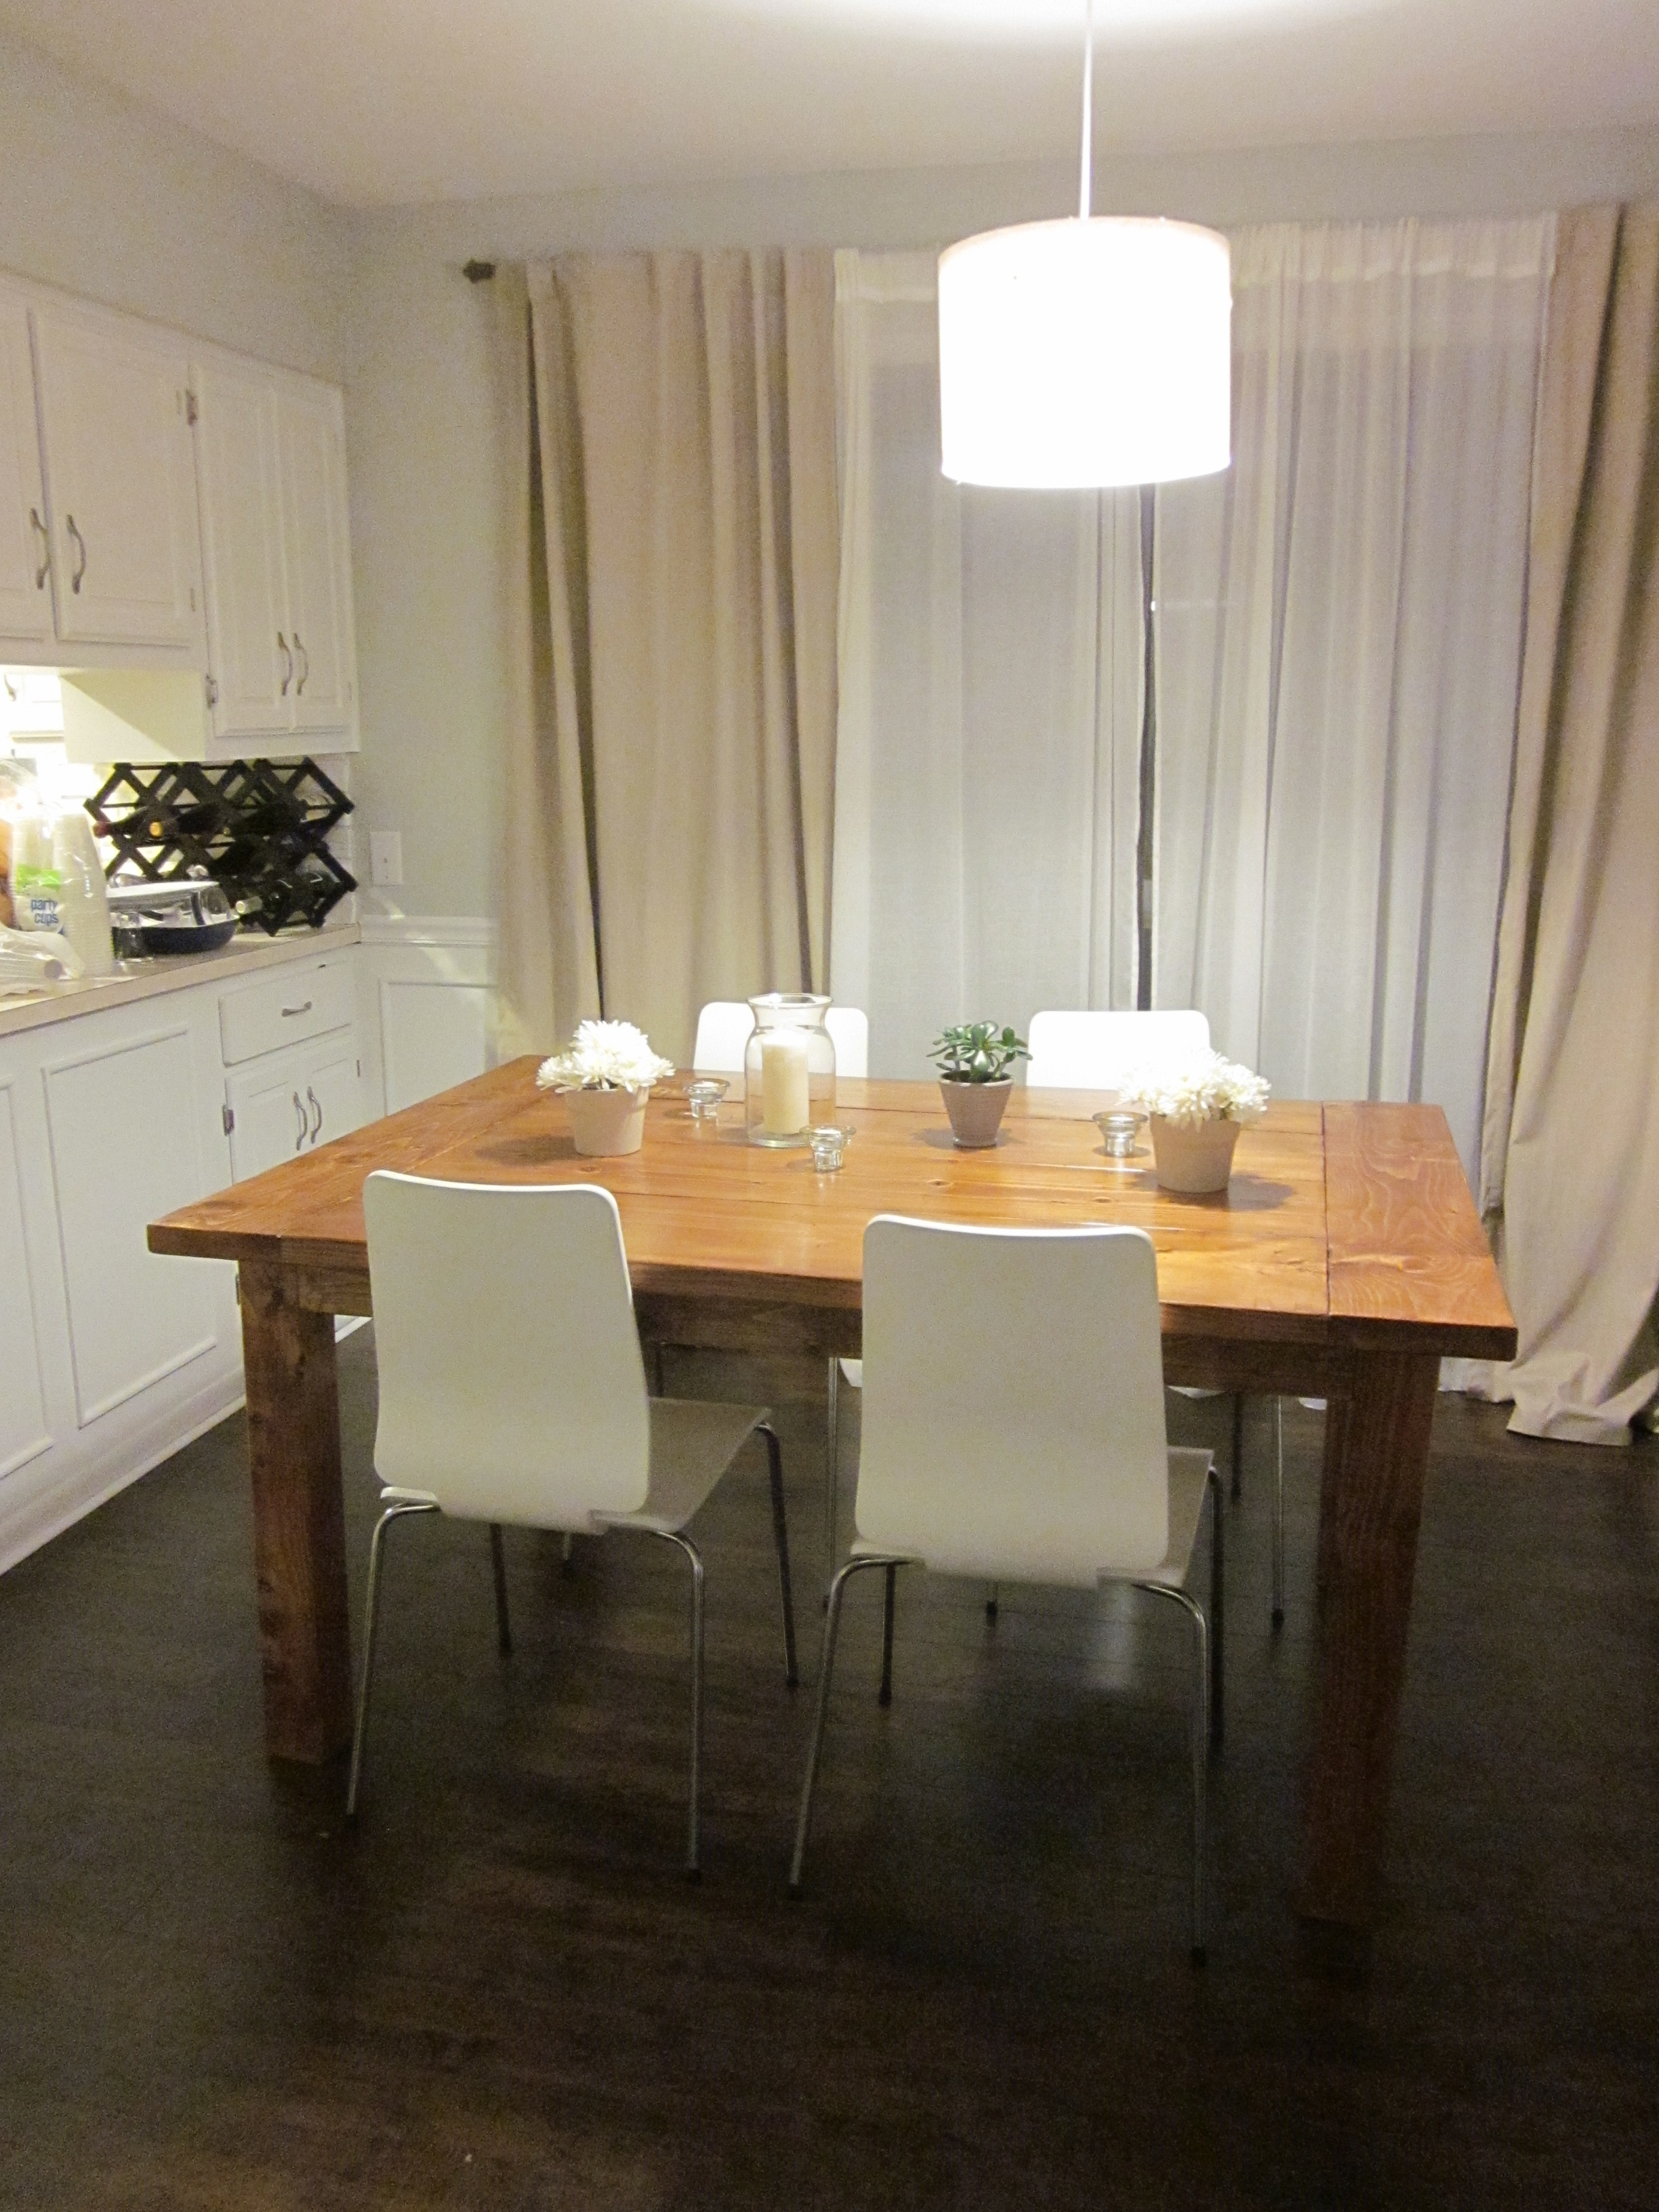
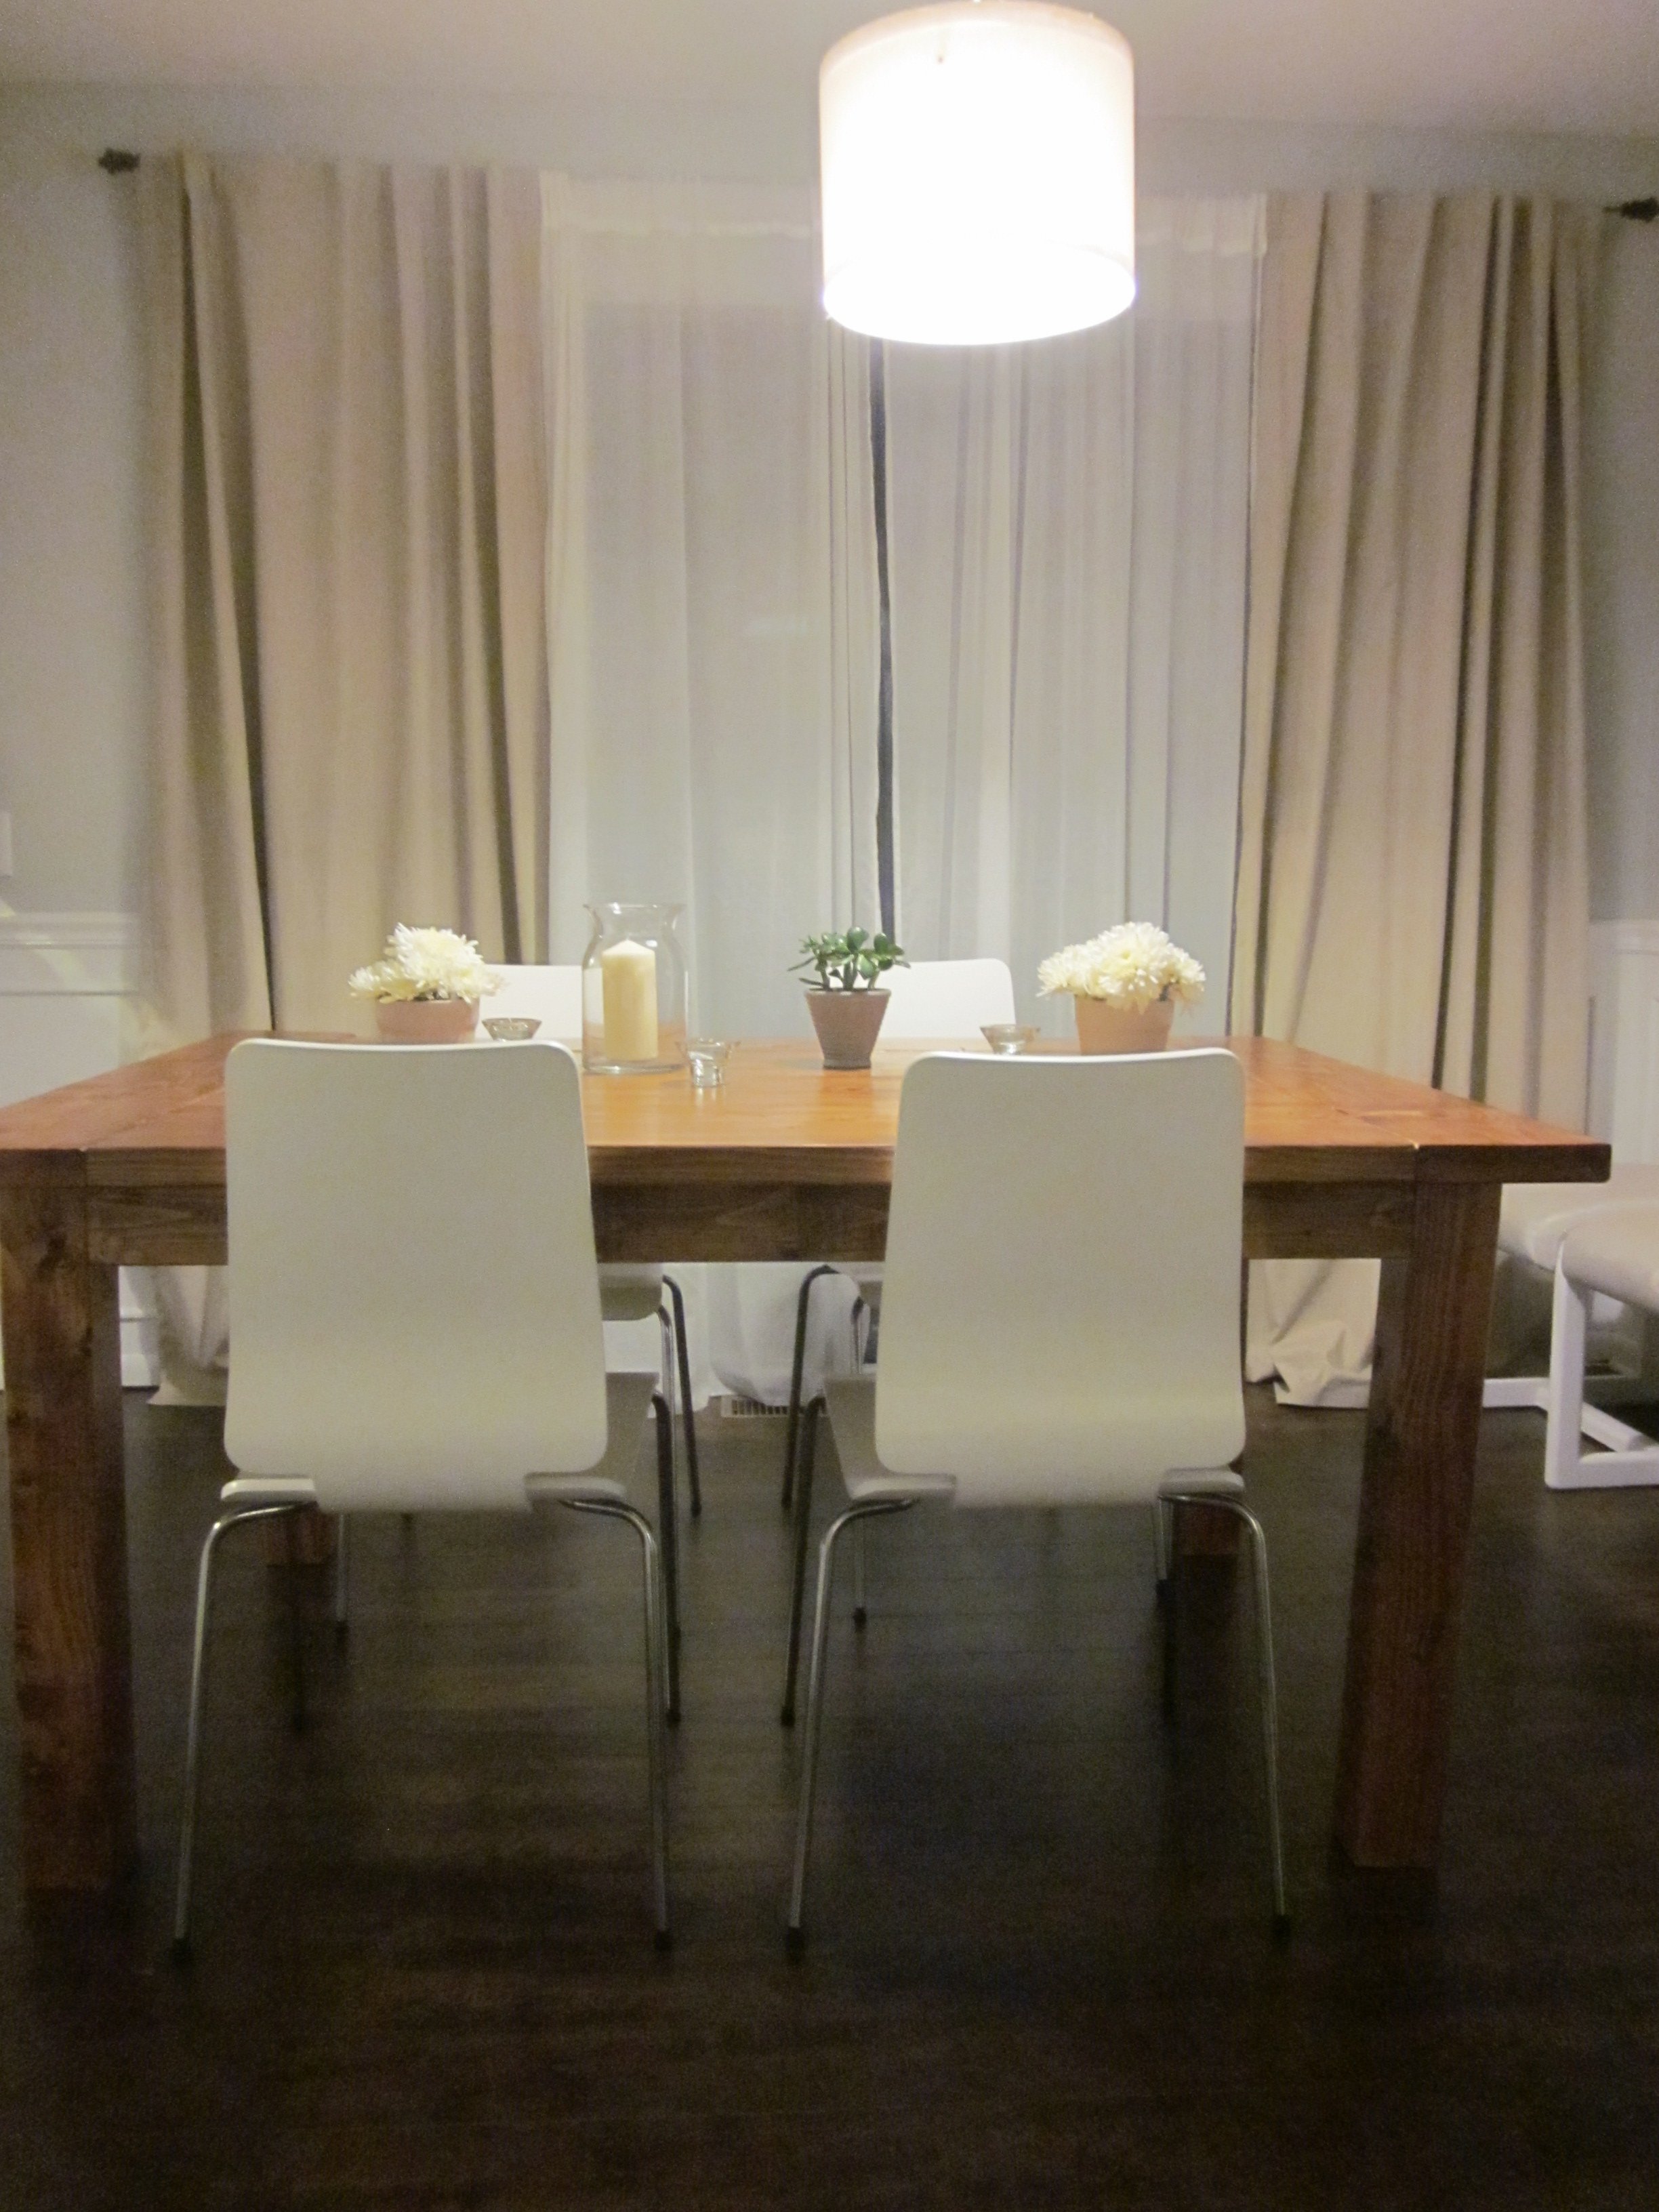
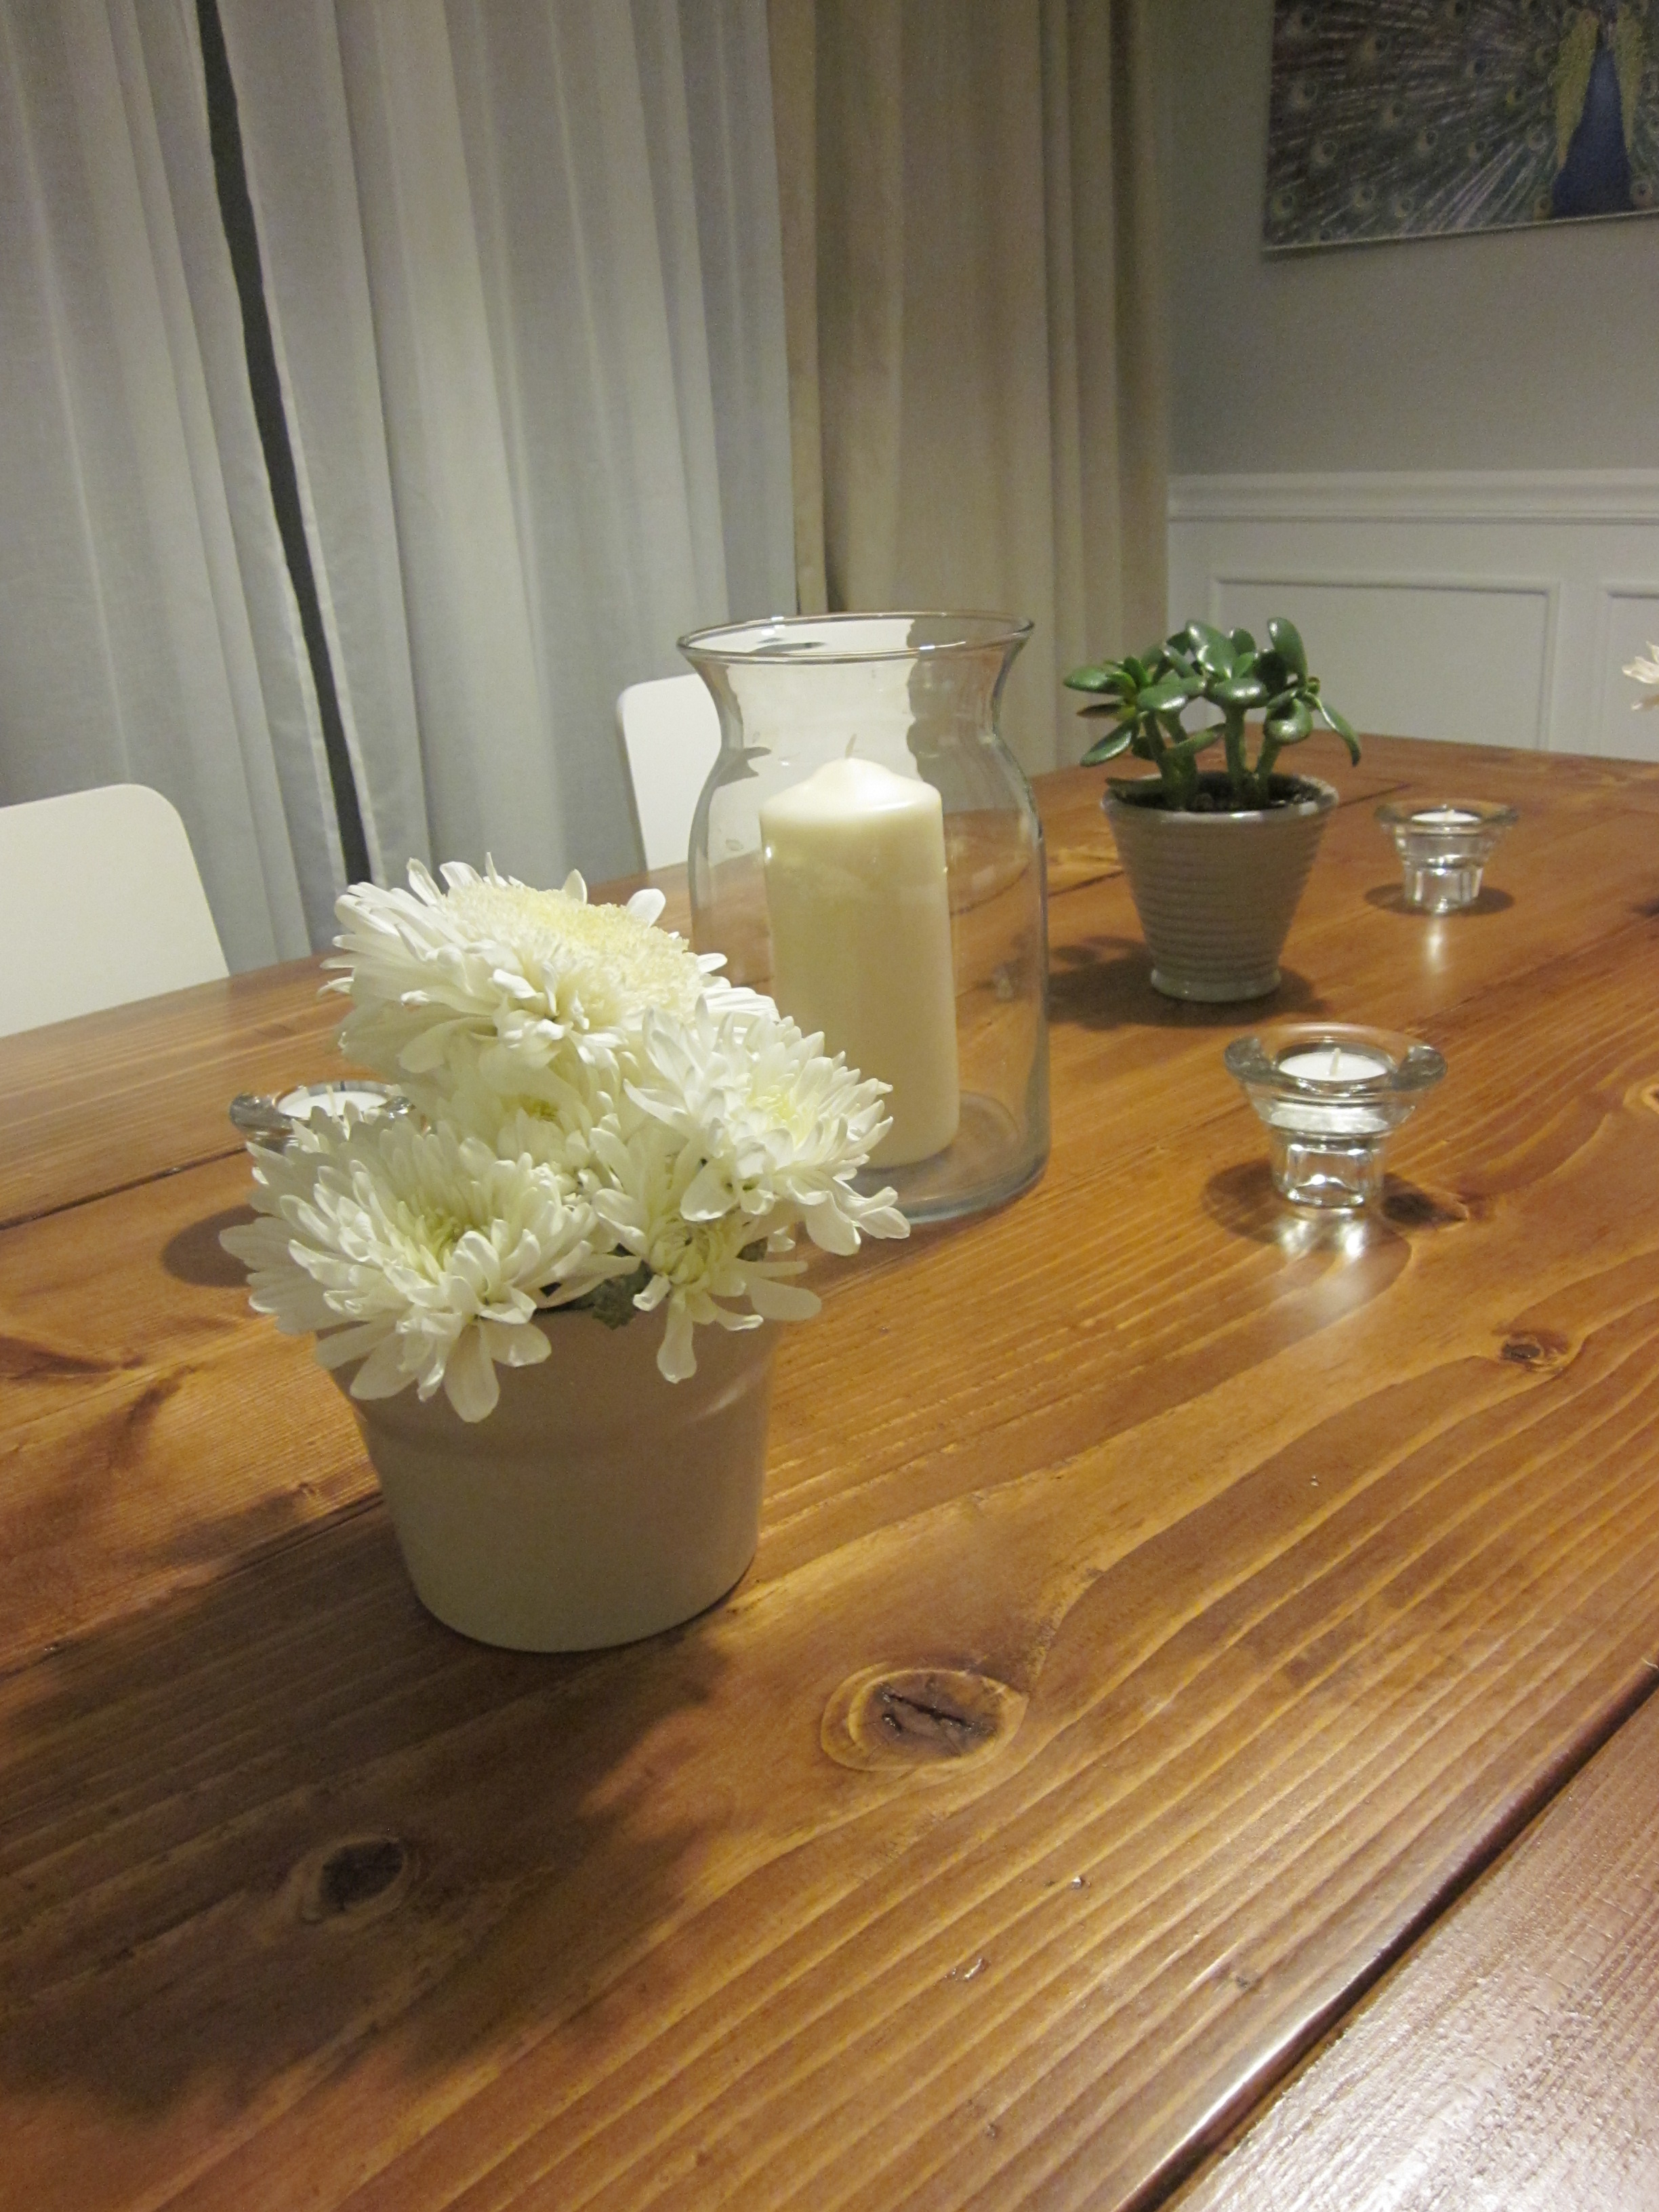
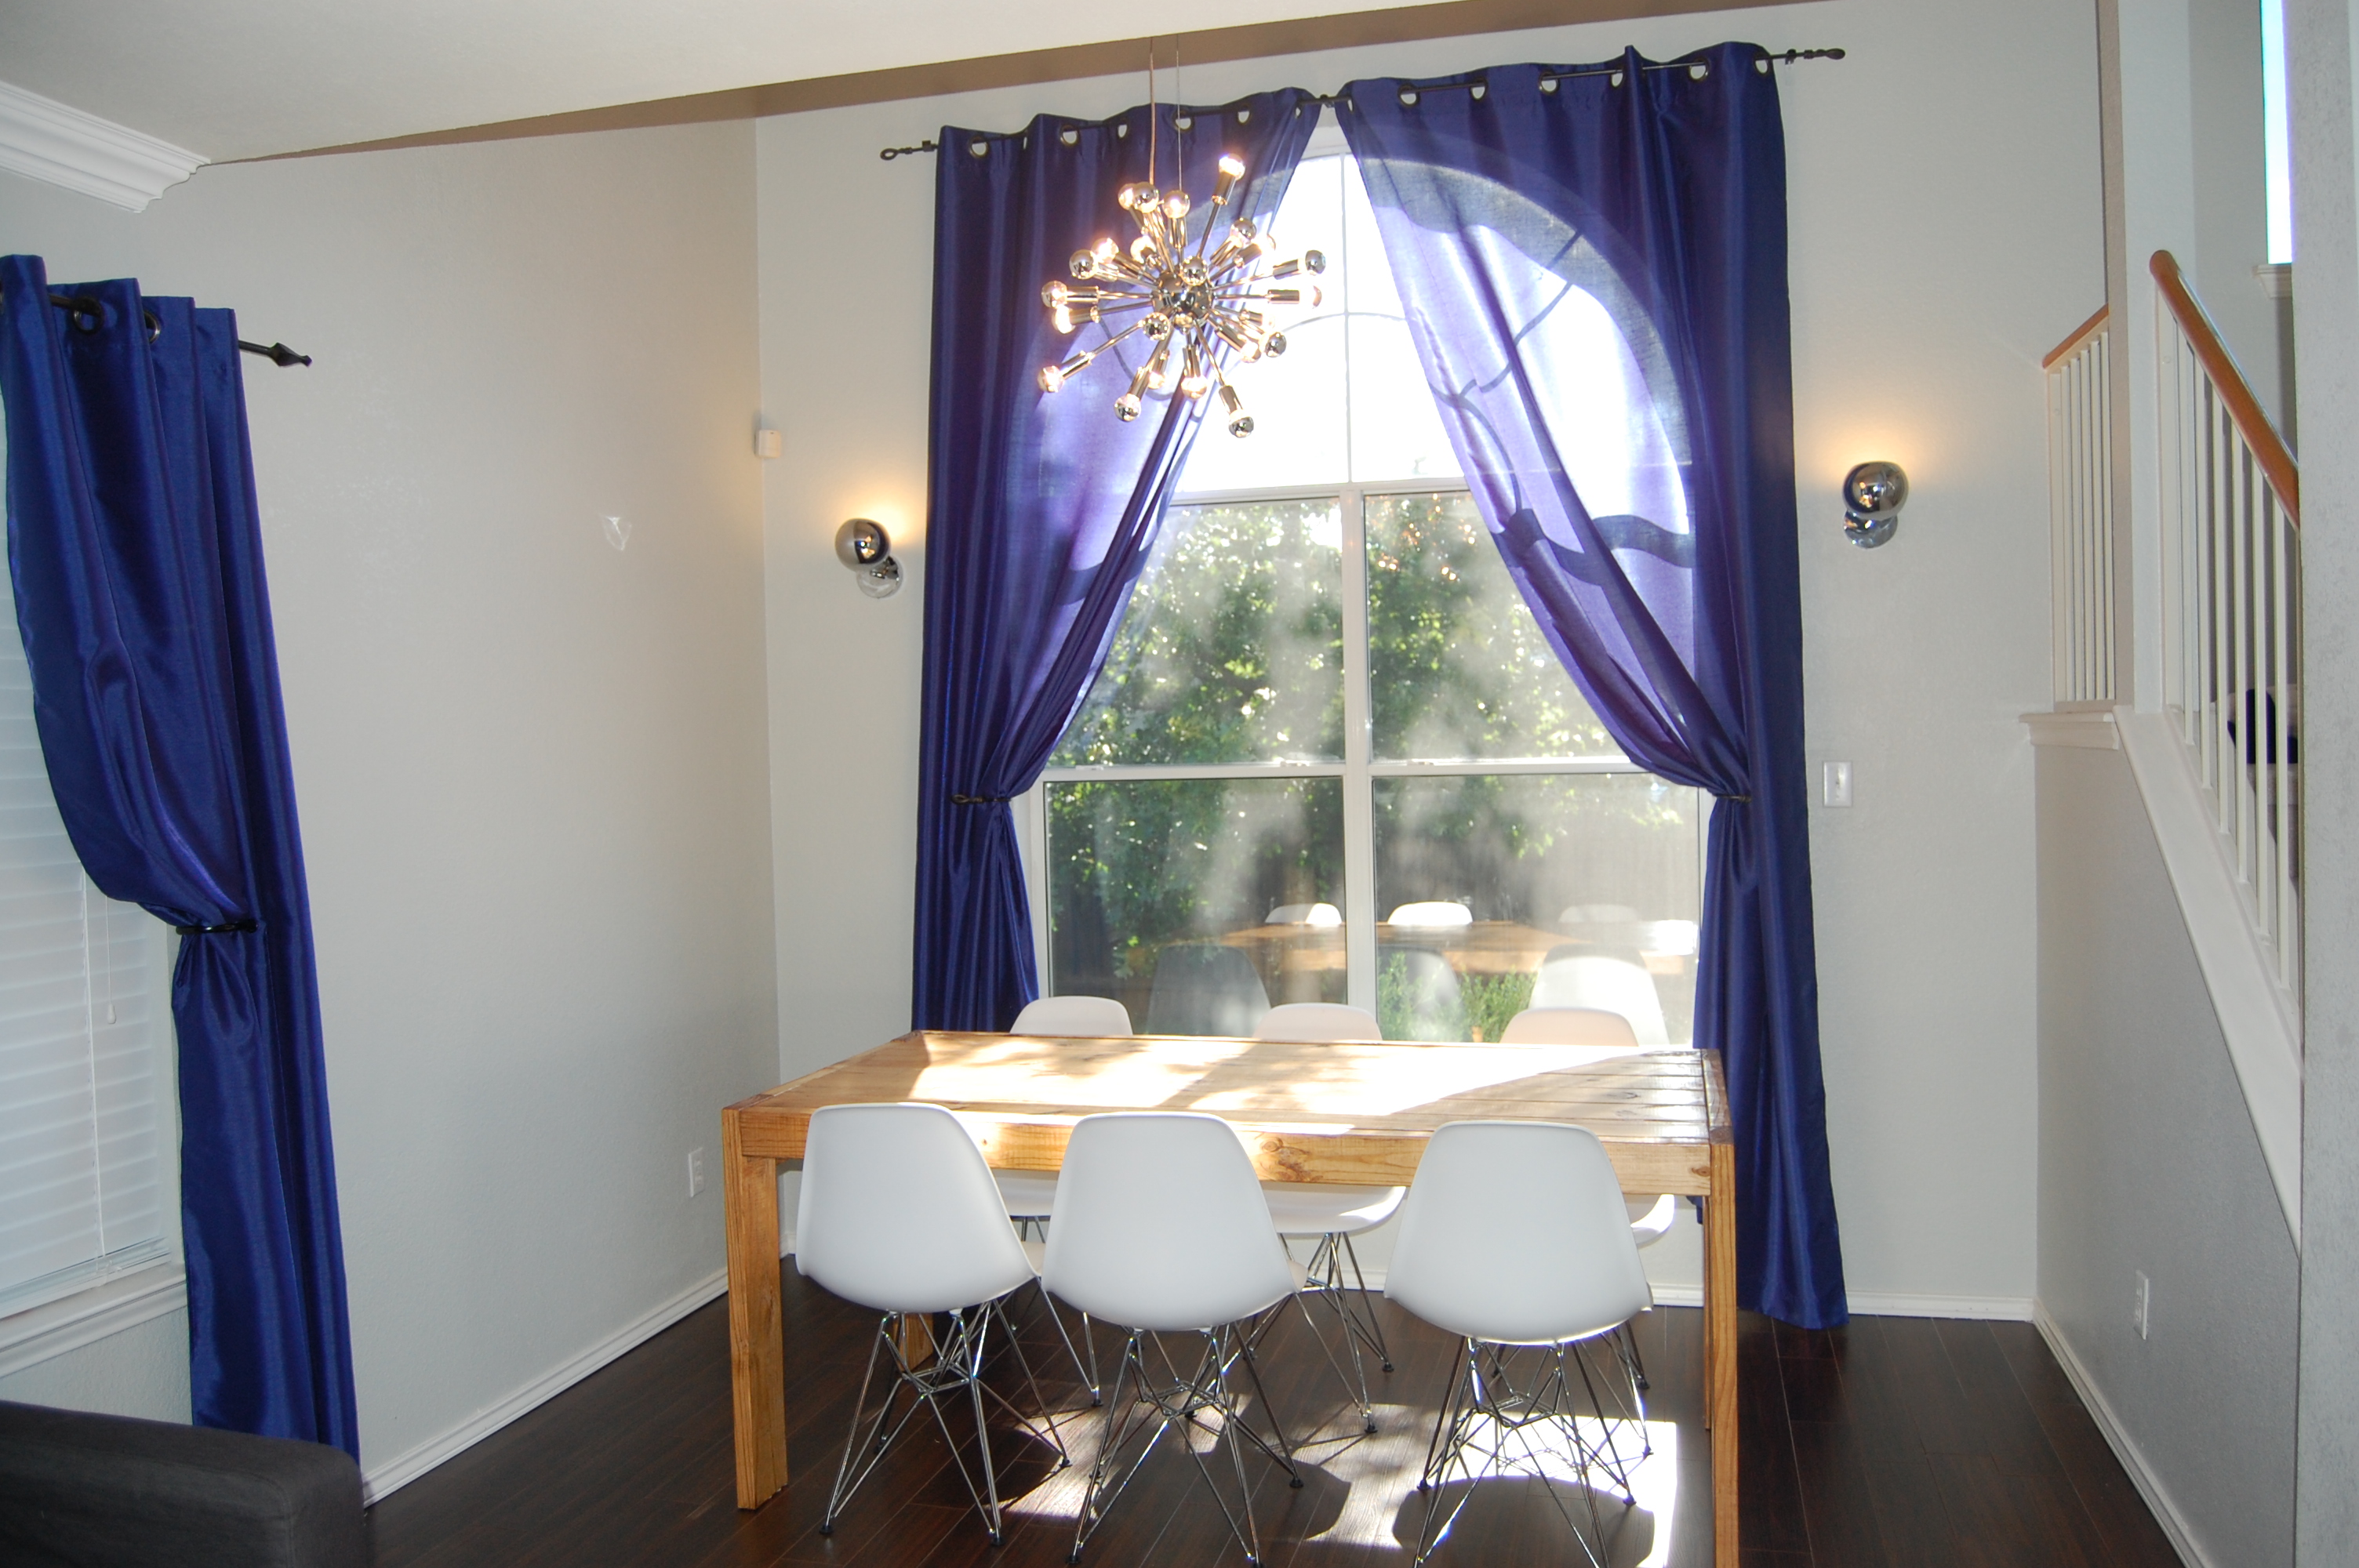
Modified Farmhouse Table

For this project, we combined plans from the Farmhouse table and also the Tryde coffee table. We have a smaller dining room so we had to modify the plans to fit our ideal size (44"wide x 62"long). I did not want the stretcher underneath as it would take up leg room and it is very sturdy without it. We used 2x12s for the tabletop & 2x8s for the breadboards. We used 4x4 posts for the legs and 2x4 for all the other support pieces. We constructed the table in 2 pieces: the frame and then the table top so it would easier to move into place then do the final assembly. This was our first time building furniture and first time using the Kreg Jig. I think the Kreg was easy to use and worth the investment. Overall, we were surprised at how well it turned out and will look to Ana for more plans in the future!

Built from Plan(s)
Estimated Cost
$120
Estimated Time Investment
Weekend Project (10-20 Hours)
Finish Used
Wood conditioner- Rust-Oleum
American Walnut, 1 light coat, applied with a rag- Rust-Oleum
Polyurethane, 4 coats, applied with a foam brush- Min Wax
American Walnut, 1 light coat, applied with a rag- Rust-Oleum
Polyurethane, 4 coats, applied with a foam brush- Min Wax
Recommended Skill Level
Beginner
Comments
Mon, 09/26/2011 - 09:29
This looks so cute with the
This looks so cute with the wood contrasting the white! :) I wish I could do a white pallette in my home. Good work on the table, I love it :)


Thu, 11/17/2011 - 10:04
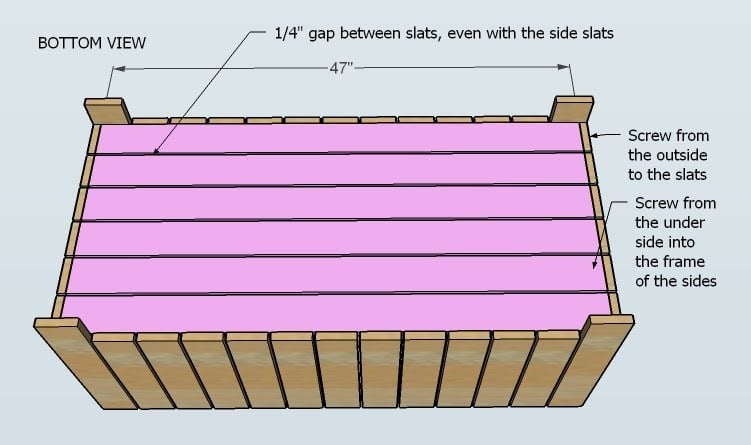
Can you tell me more about your table top?
I'm doing this exact project right now. Just bought the wood and am about to start the cuts today. I'm using the Tryde plan, but making it kitchen table size. I love that you were able to find 2x pine! My store doesn't carry that, only 1x pine. So I had to go with the UBER cheap 2x hemlock. It's ok, but I would have preferred pine.
ANYWAY, I'm wanting to build this in two pieces too. I'm assuming you Kreg Jigged the tabletop pieces together. How did that go? That's what I was planning to do... I bought 2 1/2" pocket screws for this part of the job. Is that what you used? My tabletop is all 2x8 boards. Just curious how it "felt" edge joining boards this size together. Did you use extra screws or just follow Kreg Jig recommendations (2" from ends, then every 6")?
Thanks for your thoughts! My table is going to be so similar to yours! LOVE seeing your picures!!! :) Great job!
Jennifer
Wed, 02/29/2012 - 13:14
oops!
Sorry, I wasn't notified there were more comments!
Yes, we used the Kreg Jig, it was our first time and pretty easy to use. We did not drill from the top down on the tabletop, only used the Kreg Jig on the underside and this table is STURDY. On the table boards-Yes, we did the 2" from the ends and every 6" or where we thought they should go. Hope your's turned out well and thank you for the nice comments!
The chairs are Ikea's Gilbert. We've been happy with them. They support some of the 6'4" men in my family, no problem.
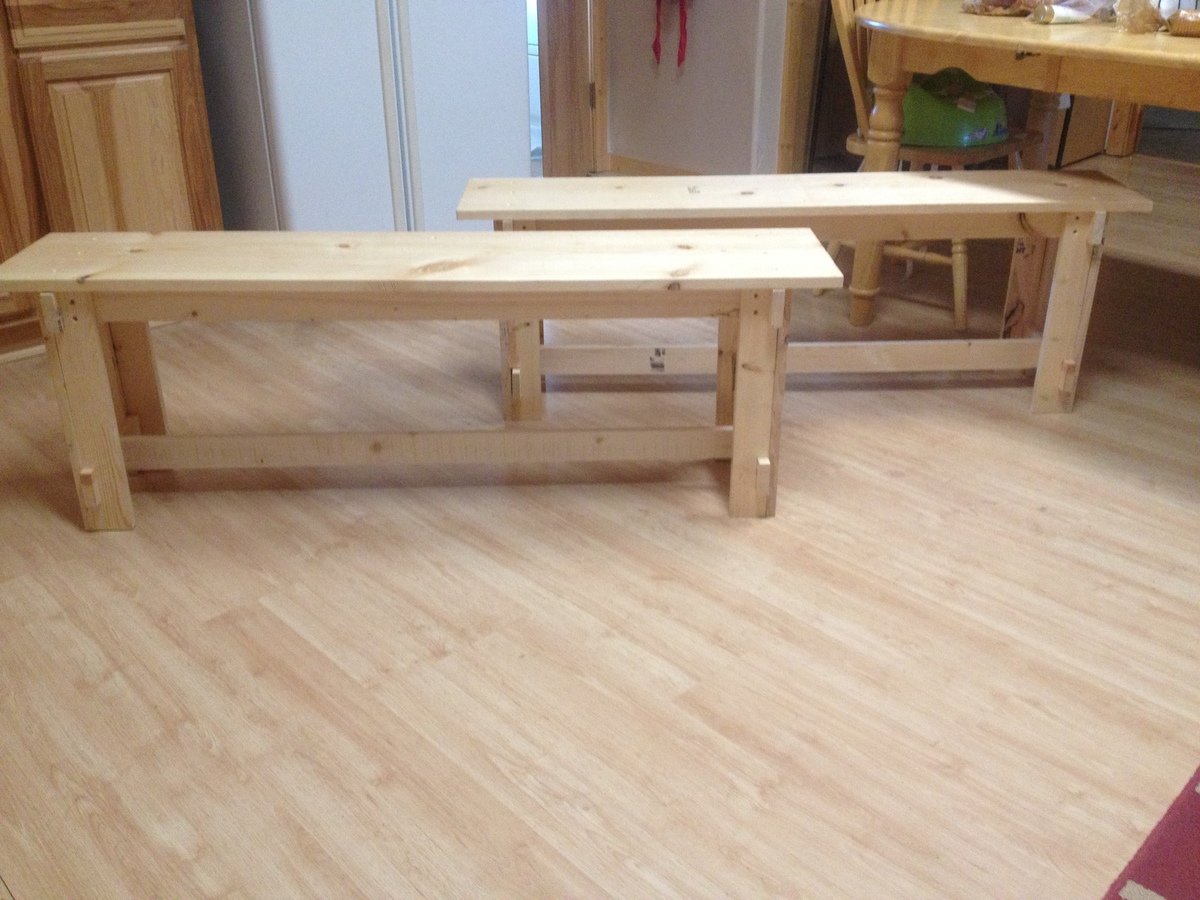
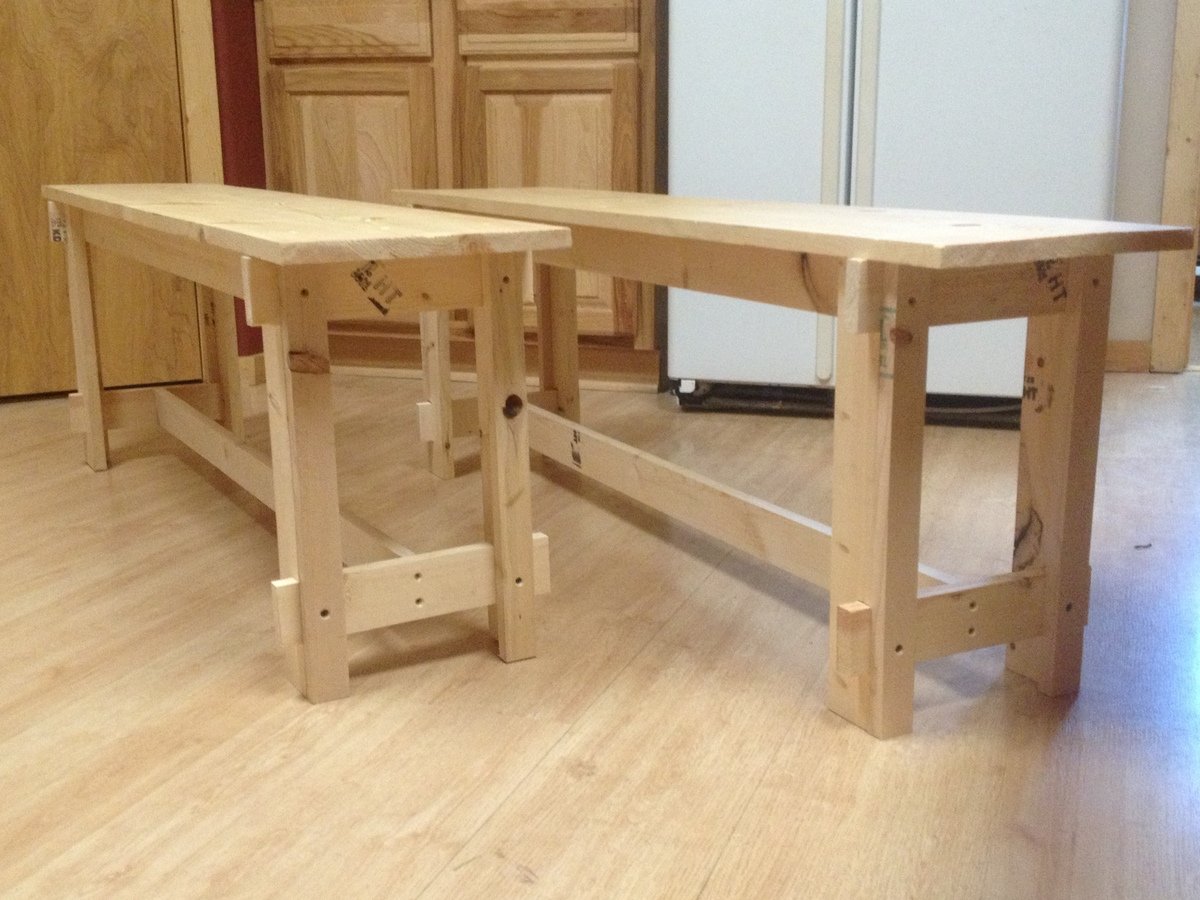
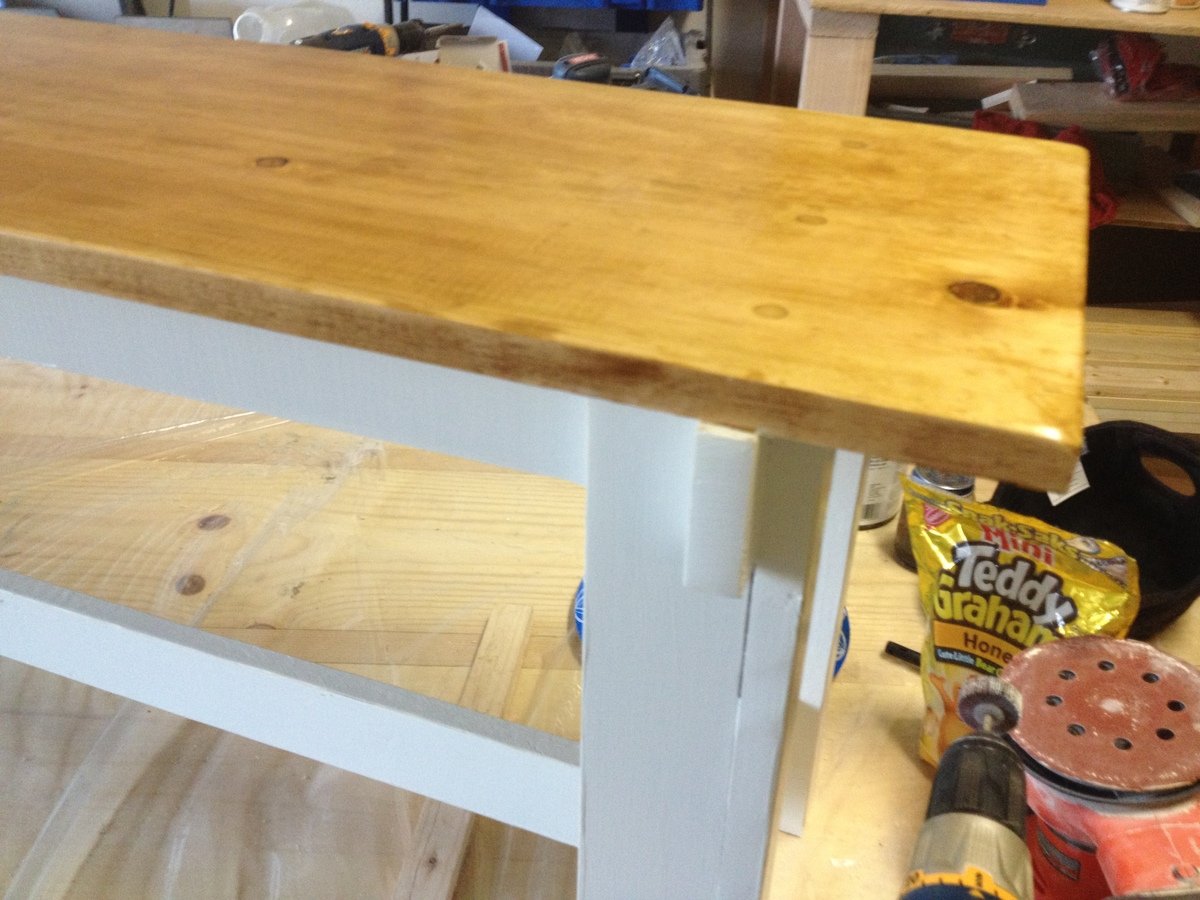
Rustic Bench
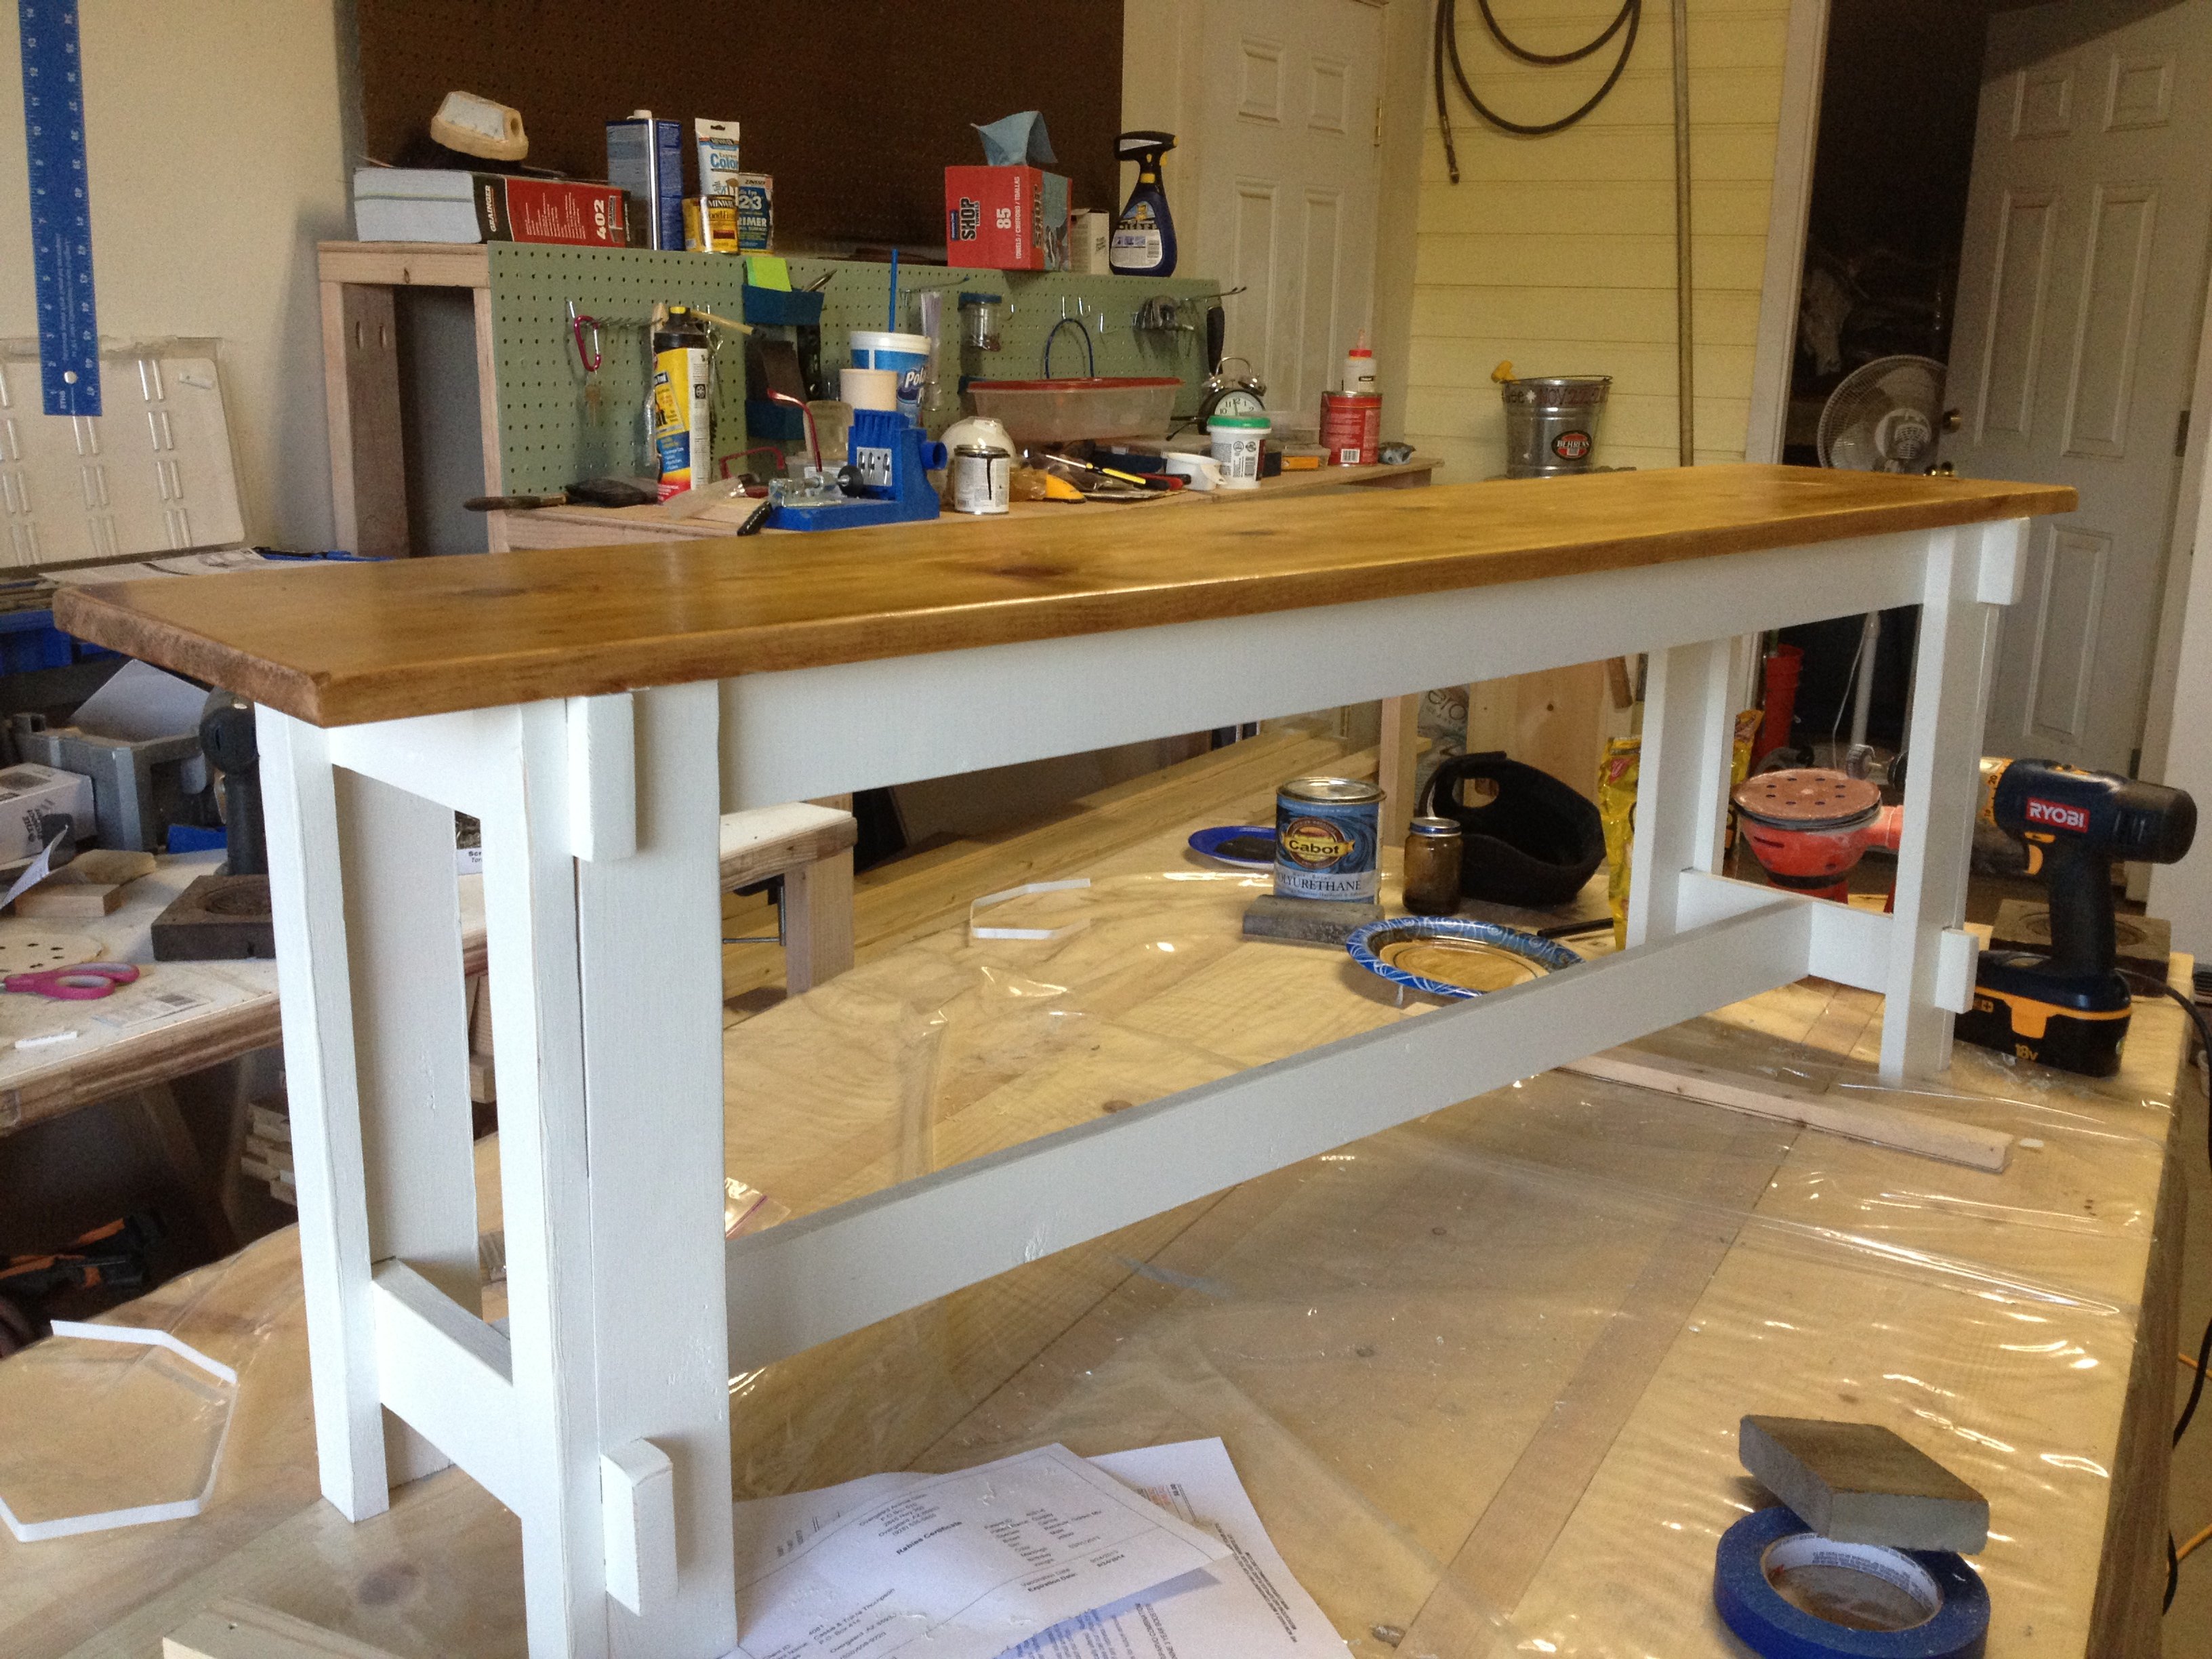
I have always loved benches at the dining table. They are so practical for cleaning, kids, and for cramming extra people at a table! We are (mostly) happy with our current table, but I was so sick of 6 clunky chairs floating around my kitchen, and these benches were the perfect solution. They were very simple to make and are exactly what I wanted!
I mixed my own color of stain for the top board from two Cabot colors (Golden Oak and Walnut) to create a color that break up all the oak in the room, while still fitting in. I painted the bases of the benches a creamy ivory for the same reason, to break up all the oak, and distressed the edges lightly.
I omitted the "x" feature in the plans because I was happy with the look of just the board along the bottom.
Built from Plan(s)
Estimated Cost
about $40 for 2, plus left over paint and stain
Estimated Time Investment
Day Project (6-9 Hours)
Finish Used
Cabot wood stain in Golden Oak and Walnut (mixed), and Valspar latex paint in Crisp Linen
Recommended Skill Level
Intermediate
Pottery Barn knock off
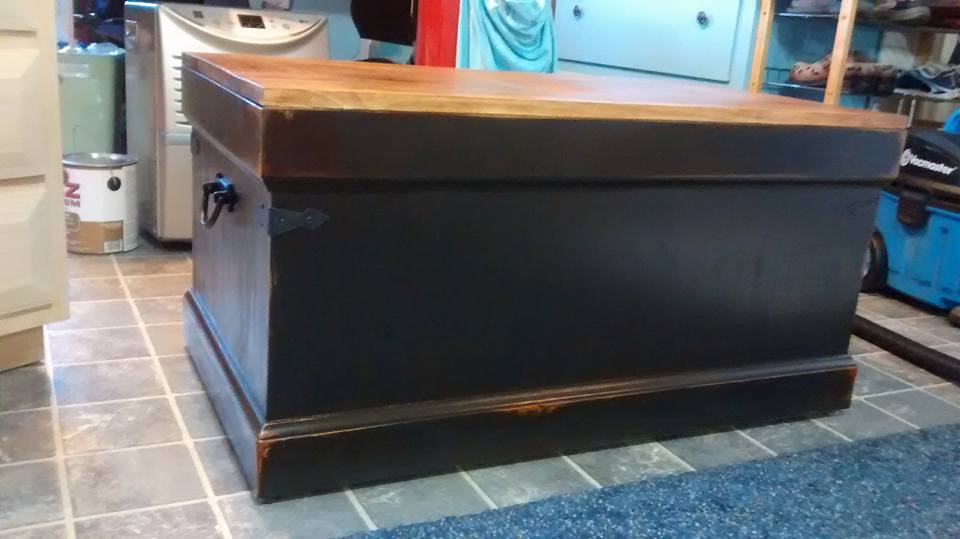
I painted mine black and distressed it. Stained the top and distressed parts with MinWax American Walnut poly stain. Hardware from Van Dykes Restores. Used piano spring loaded lid supports for lid.
Built from Plan(s)
Estimated Cost
$110
Estimated Time Investment
Weekend Project (10-20 Hours)
Finish Used
Minwax poly
Recommended Skill Level
Intermediate
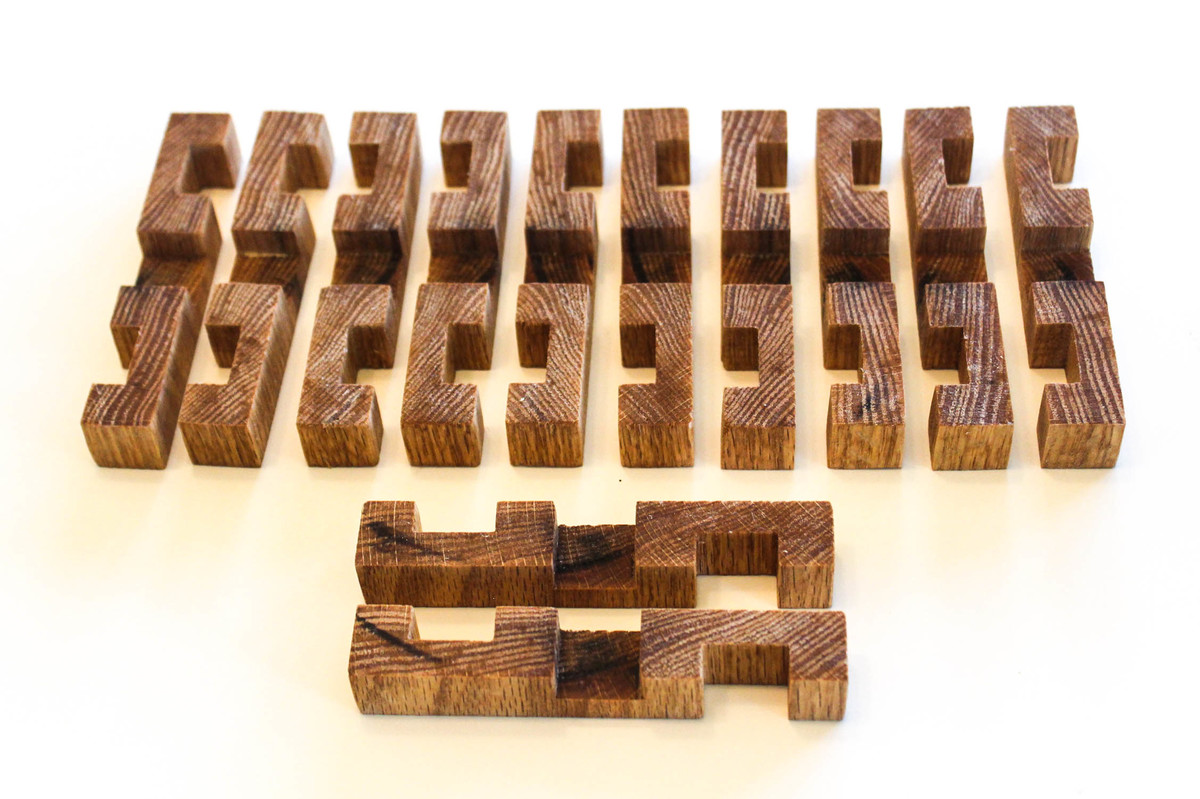
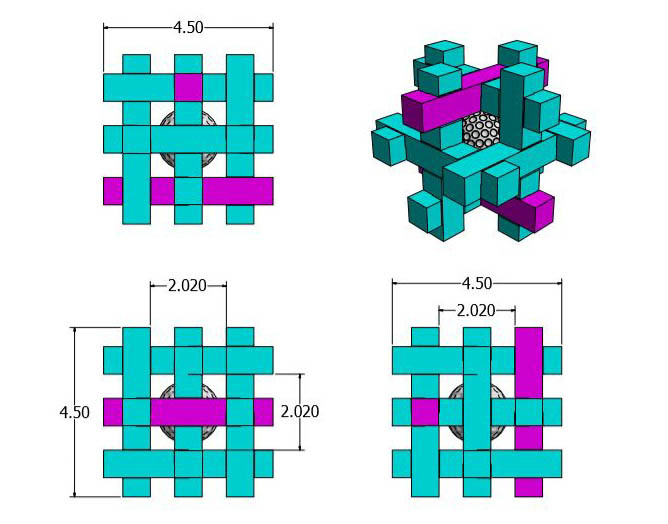
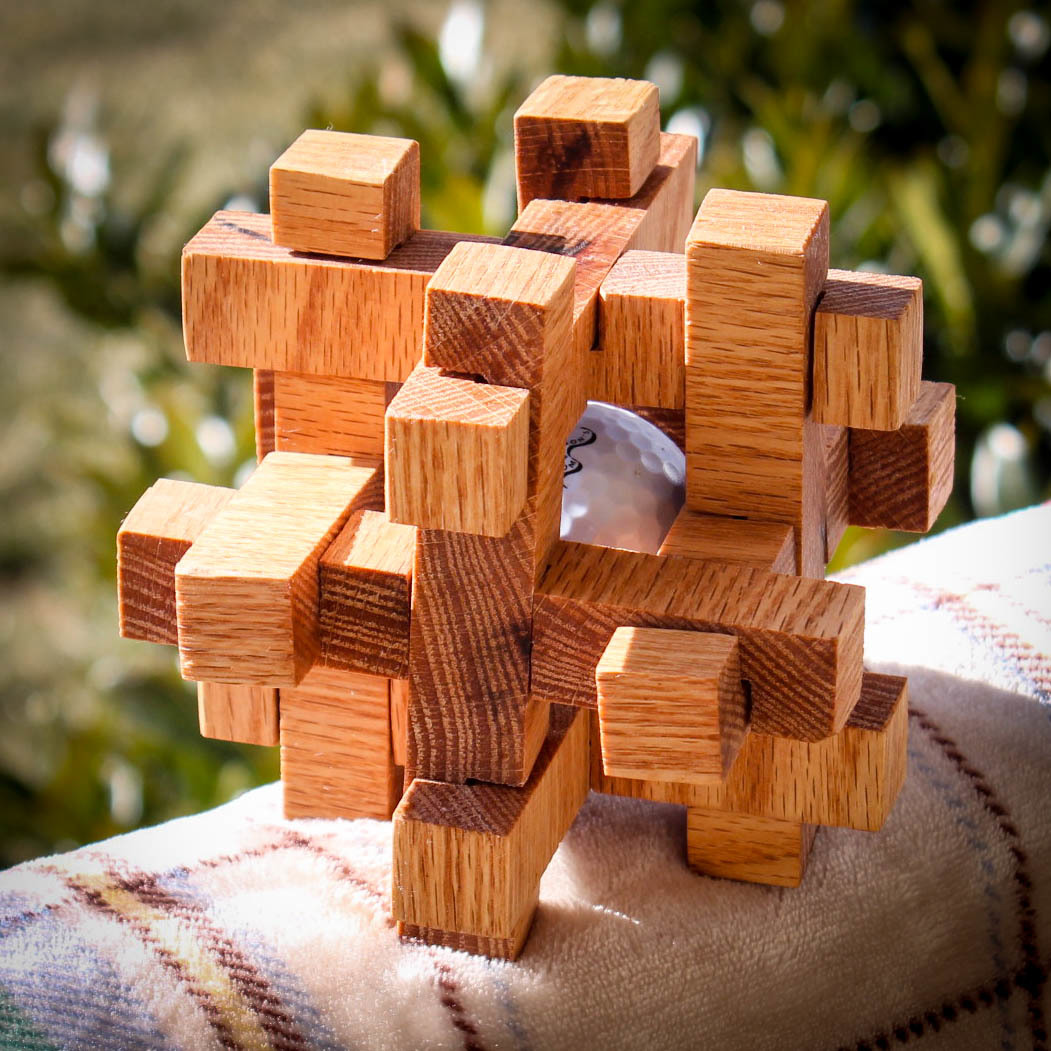
Caged Golf Ball Puzzle
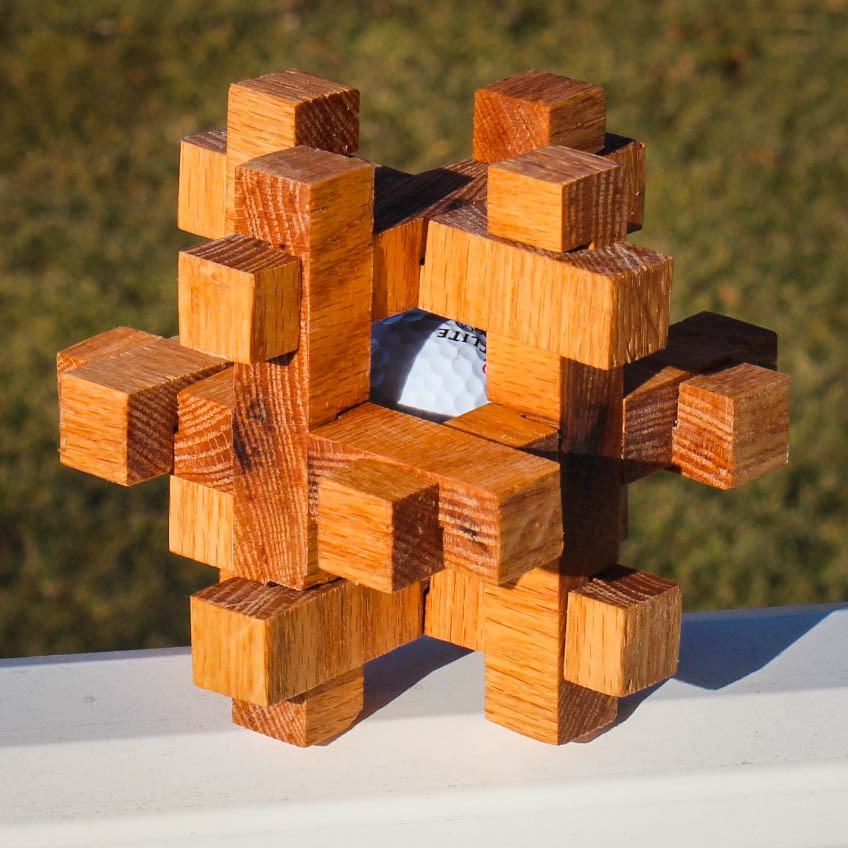
This was a fun little project to make. The golf ball is trapped inside the 12 piece burr puzzle. As with all burr puzzles, there is a trick to solving it.
Build Instructions/Dimensions: https://www.instructables.com/id/Caged-Golf-Ball-Puzzle/
Video of Build: https://youtu.be/gcdd7ZAYNTo
Solution: https://youtu.be/IjHByz2_xMk
Estimated Cost
$5
Estimated Time Investment
An Hour or Two (0-2 Hours)
Finish Used
Danish Oil
Recommended Skill Level
Beginner
Floating Shelves
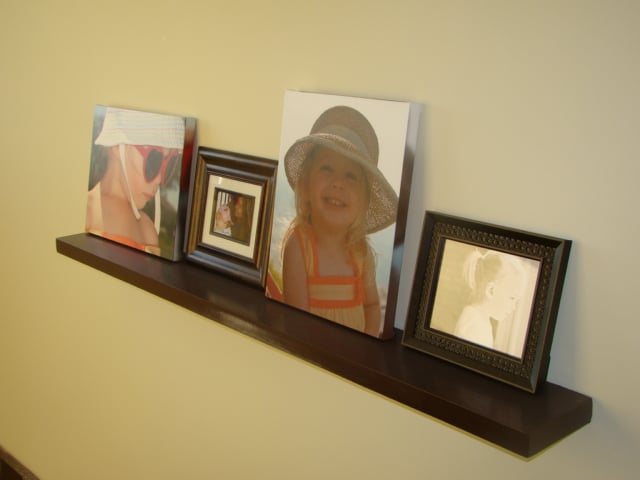
When I saw Ana's post within Young House Love's blog, I thought this would be great for pictures. We have a large wall that spans two stories in our entry way. This shelf helped make a dramatic impact when we have visitors over.
Built from Plan(s)
Estimated Time Investment
Afternoon Project (3-6 Hours)
Finish Used
I used a high gloss finish of Espresso Beans by Behr from Home Depot. After sanding and sanding, I primed the entire shelf and then used 4 coats to give it a really smooth finish.
Recommended Skill Level
Beginner
Comments
Tue, 11/29/2011 - 06:07
I know this is going to sound
I know this is going to sound stupid but what did you use to mount the shelf?
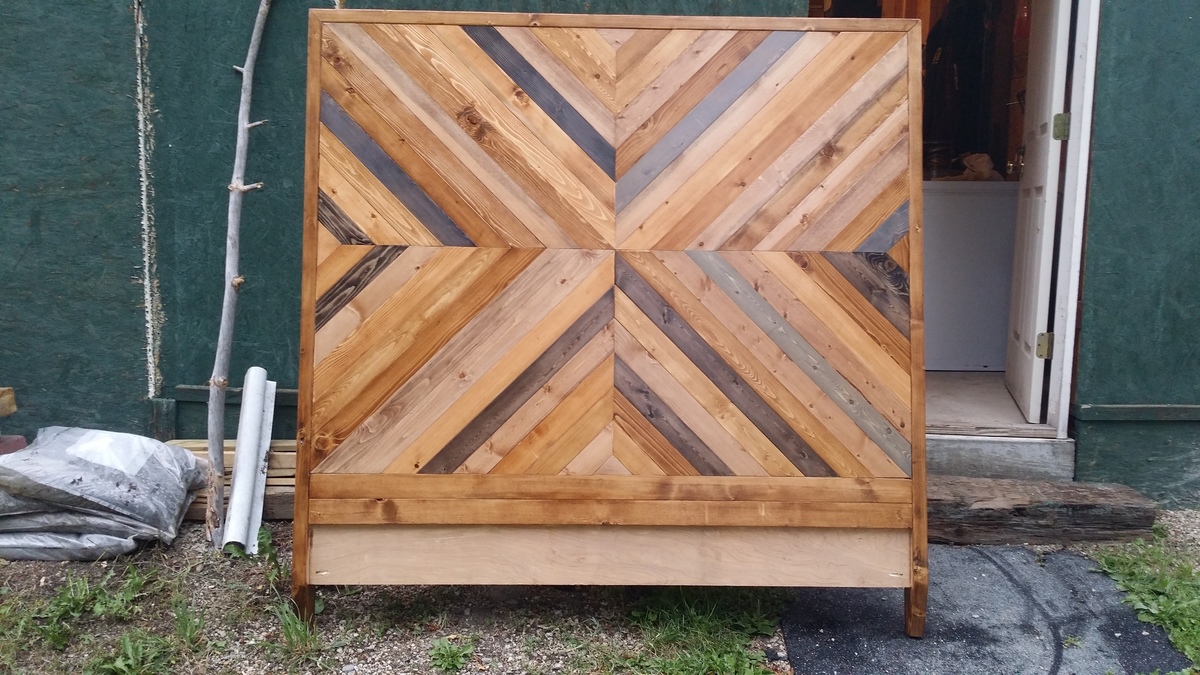
West Elm Knockof Chevron Queen Bed
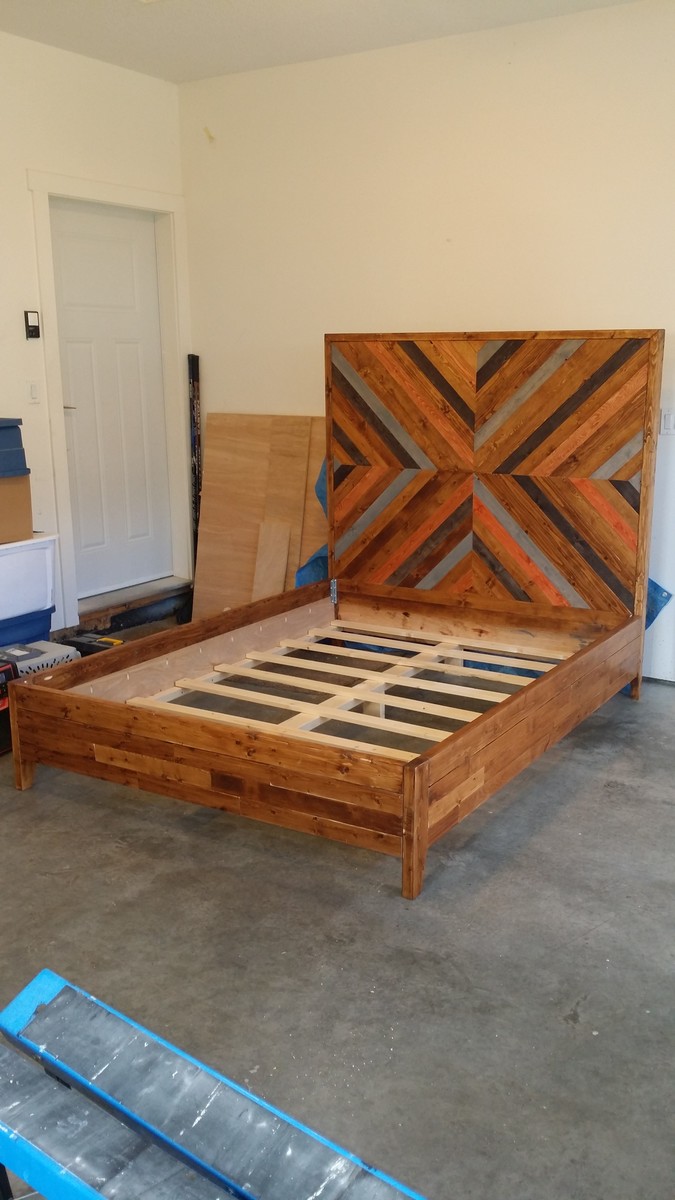
I pretty much just followed the plans. It turned out a bit more colourful that I expected but I've already sold it so I guess its okay. I'm going to make another one with a bit more toned down colours. I also created a matching night stand. I didn't follow any plan. Just used the ideas from the bed build.
Built from Plan(s)
Estimated Time Investment
Week Long Project (20 Hours or More)
Finish Used
Old Masters Wiping stain in Provincial, Cherry, Cedar, Weathered gray, Ebony
Recommended Skill Level
Intermediate
Farmhouse Queen Bed

Farmhouse bed. Makes a pretty universal styled bed
Built from Plan(s)
Estimated Cost
$250
Estimated Time Investment
Weekend Project (10-20 Hours)
Recommended Skill Level
Intermediate
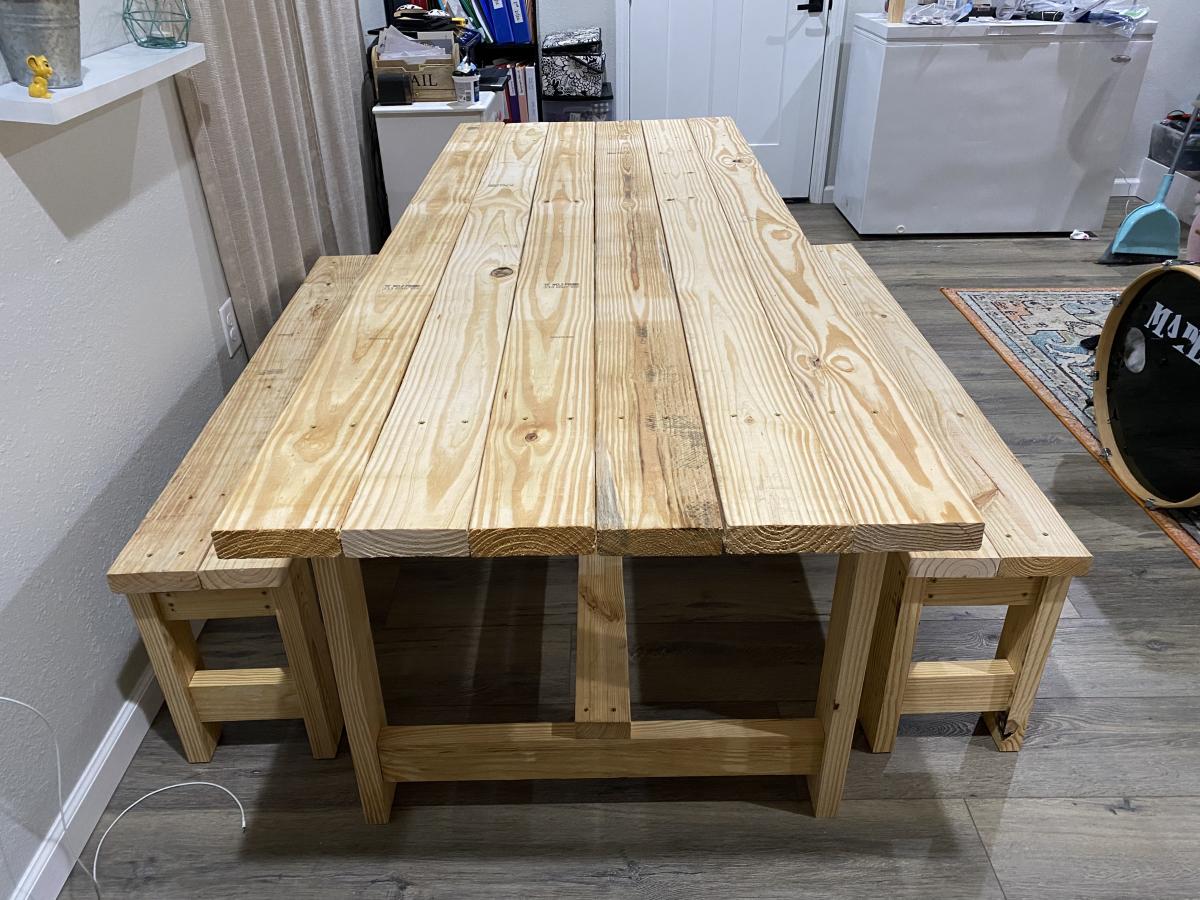
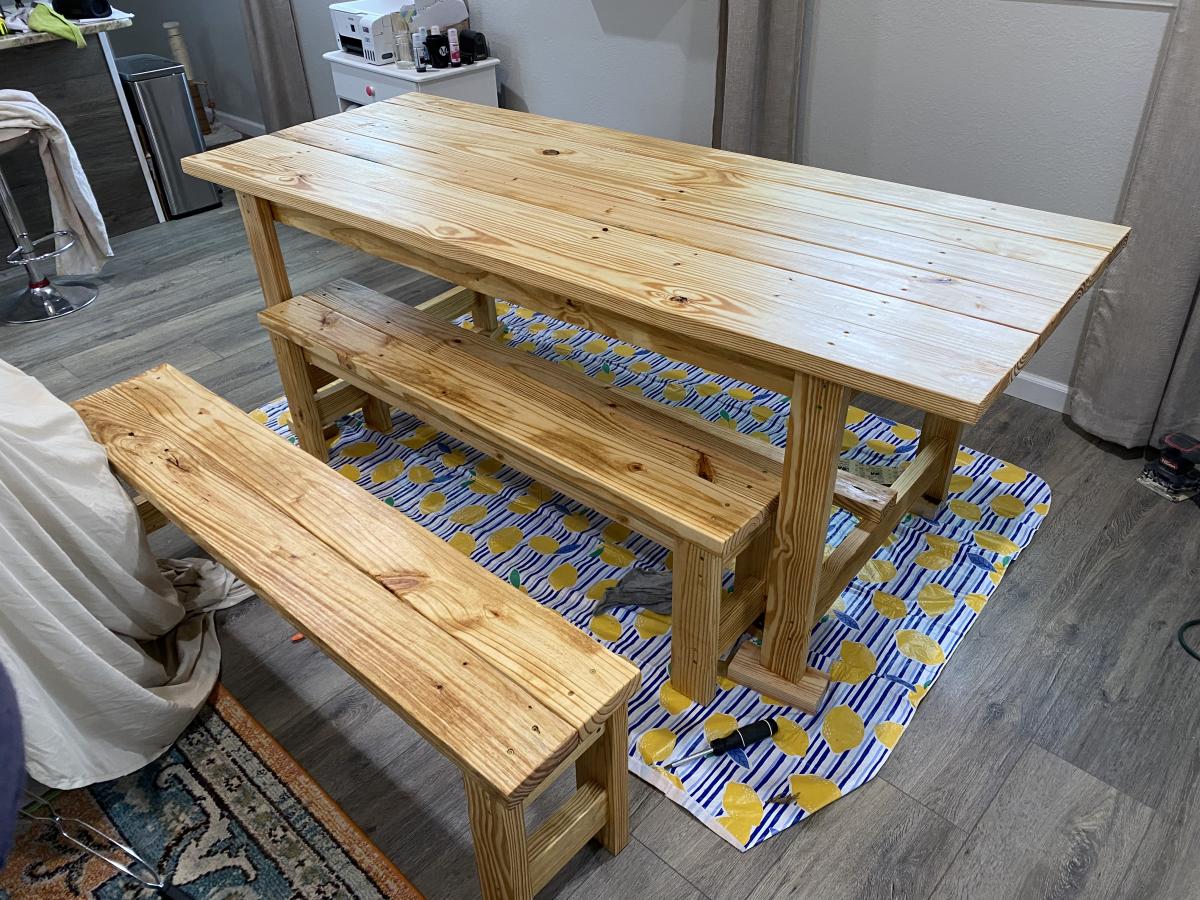
Simple Farm Table
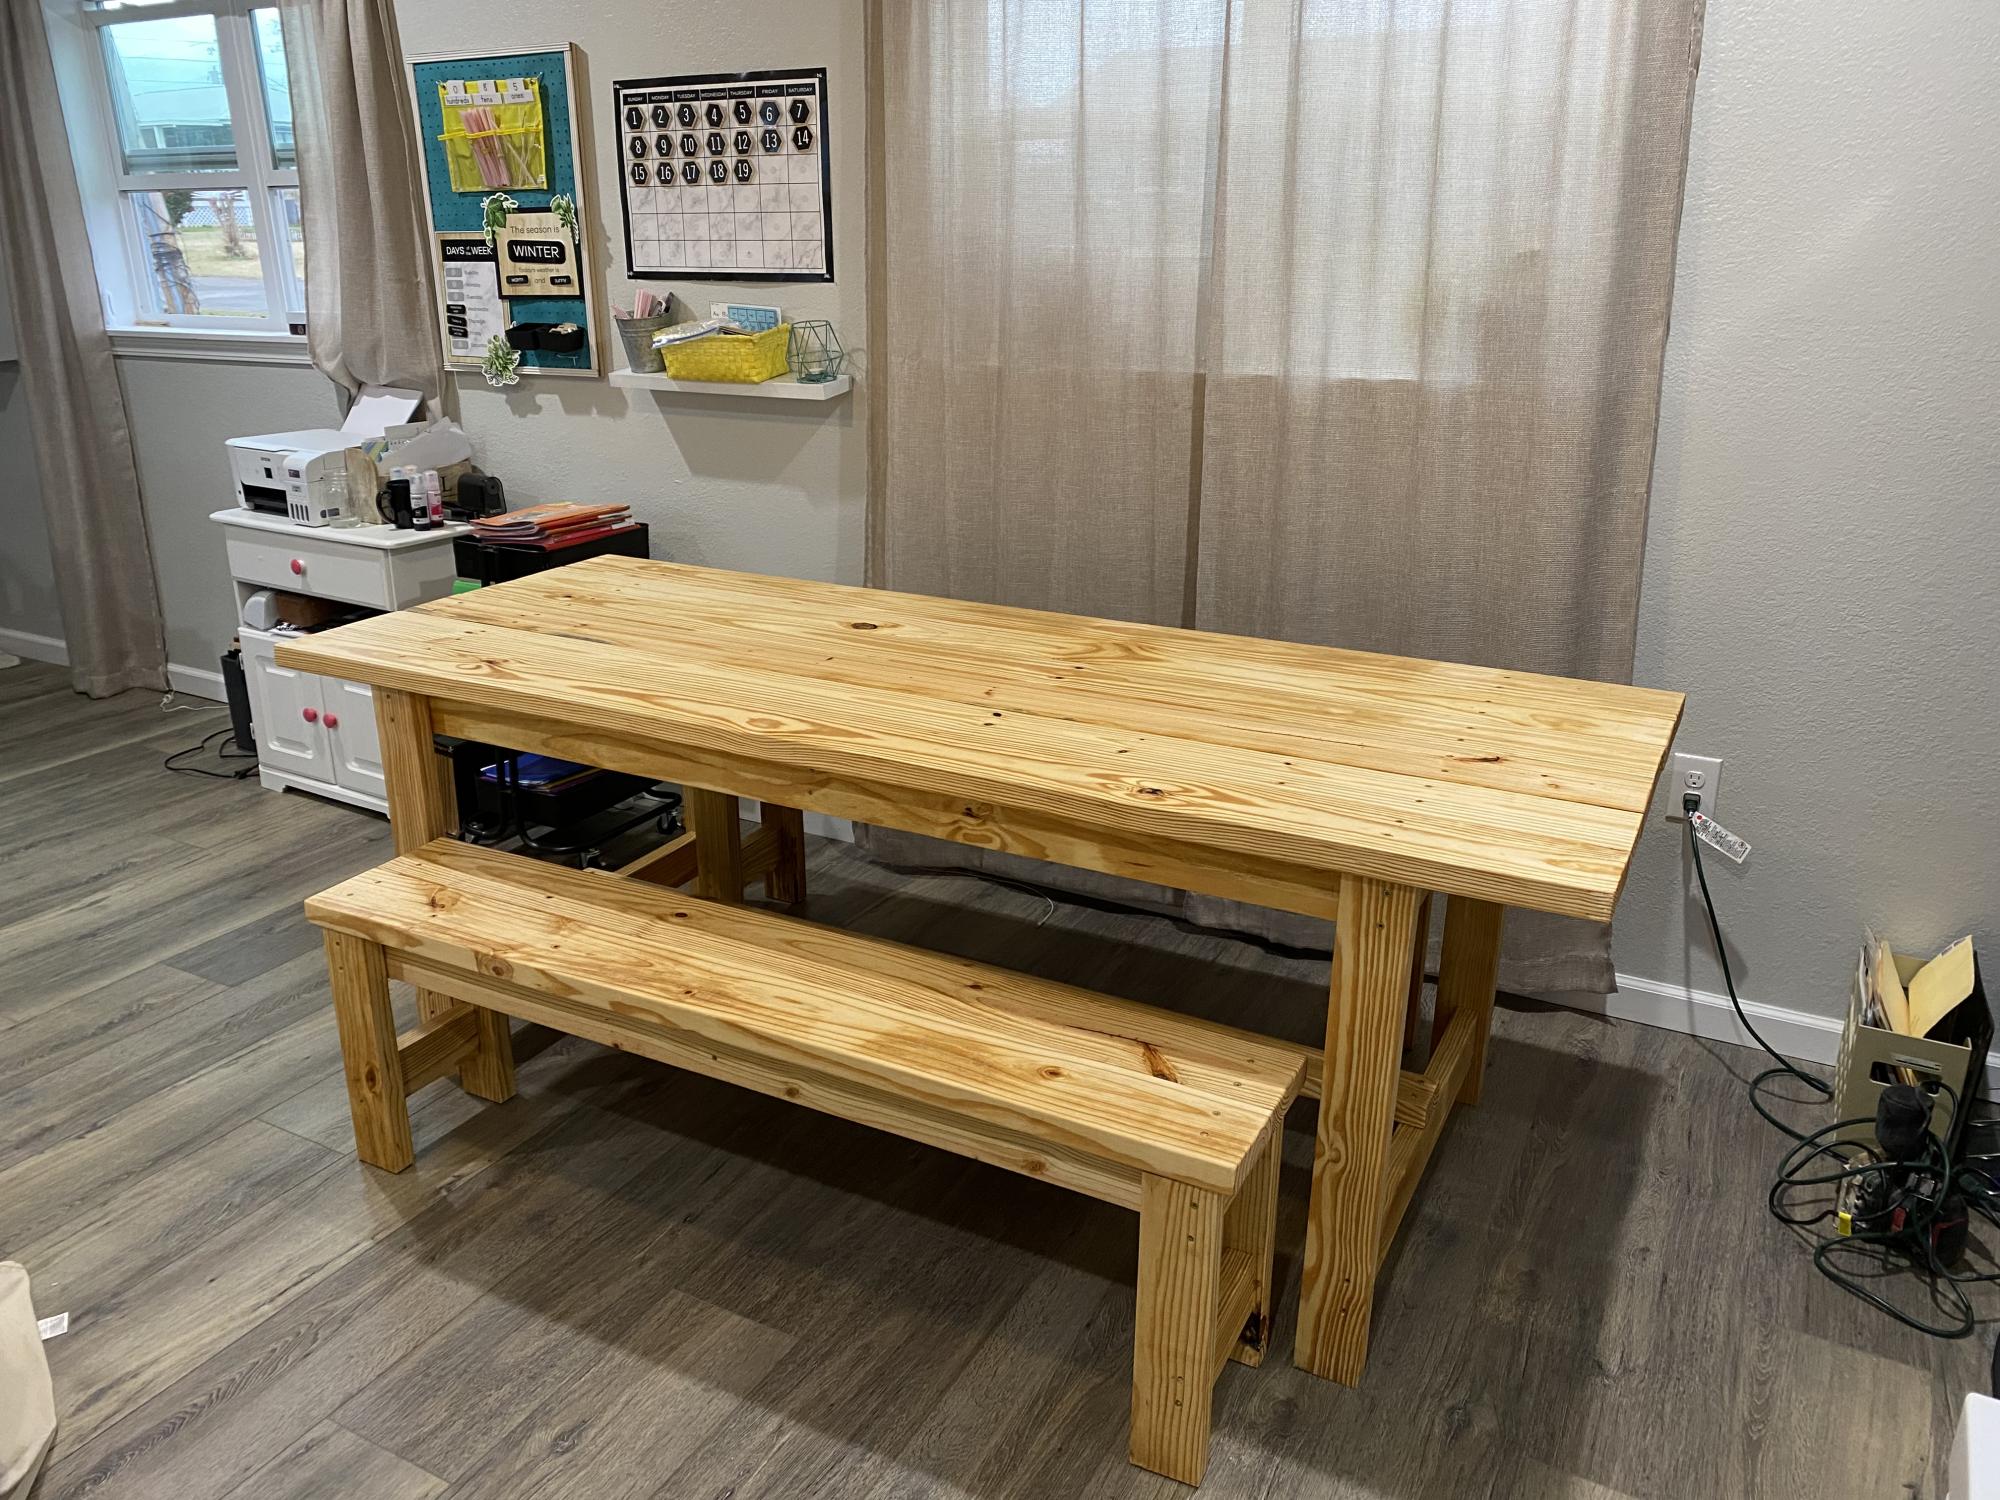
My mom and o completed this weekend project together! It was so fun to complete! The table is customized to 7ft and the benches made smaller than the original plans so they slide under the table when we’re not using it. We made it for our homeschool room. The kids are excited for this space already and we all have the room we need to get our work done! Under $200 start to finish! I used a prestain to prep the wood and then stained with watco danish oil in a natural finish.

Comments
Tower
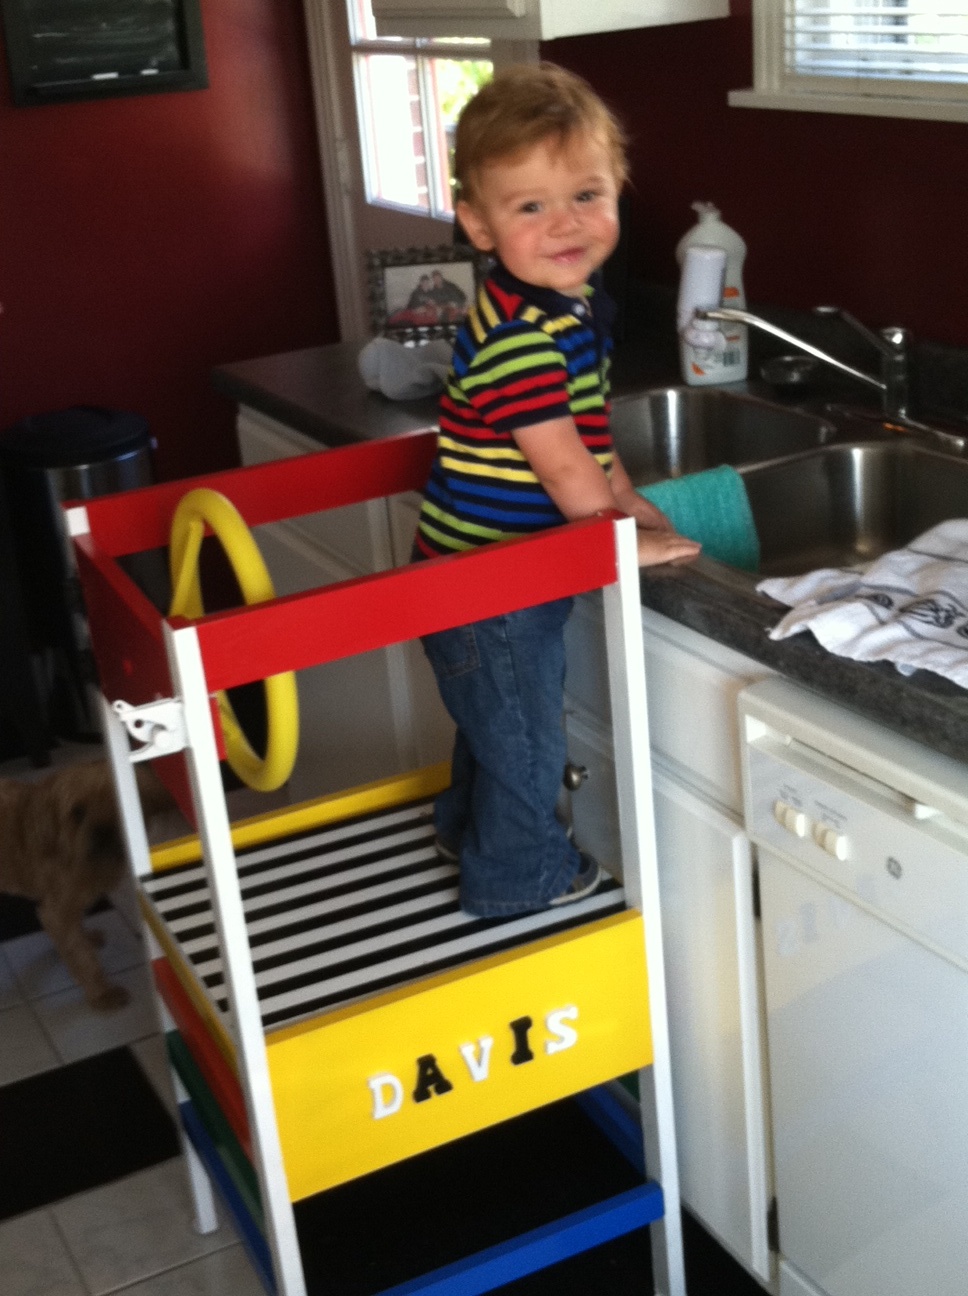
My son loves his tower! We didn't attempt the curved sides, but made it work by adding a door with a toy steering wheel instead :)
Built from Plan(s)
Recommended Skill Level
Intermediate
Comments

Fri, 10/07/2011 - 06:24
So Cute! I wish my guys were
So Cute! I wish my guys were this little again - enjoy him!
Fri, 10/14/2011 - 19:16
I think the added steering
I think the added steering wheel is a great idea!

Wed, 12/05/2012 - 18:58
I love the paint and steering
I love the paint and steering wheel! I'm making this now and, first time using a jigsaw, my arches look awful! I think I'll just go with them but this was a good innovation.
Sun, 02/10/2013 - 17:57
Dropping the arches was a good idea
We're actually going to drop the arches so ours will fit underneath our counter when not in use. :)
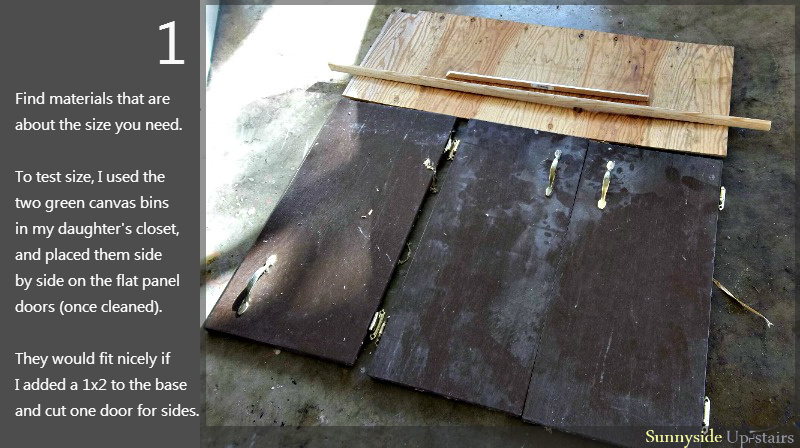
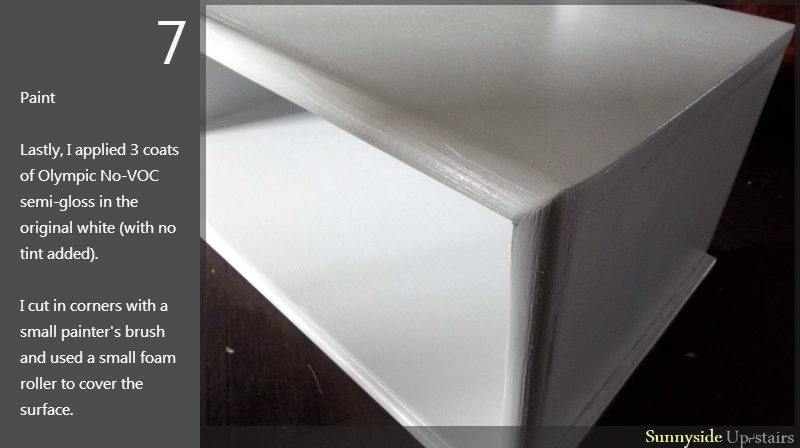
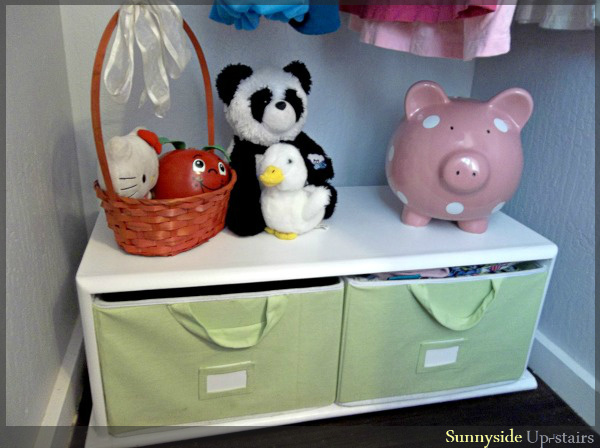
Toddler Closet Cubby
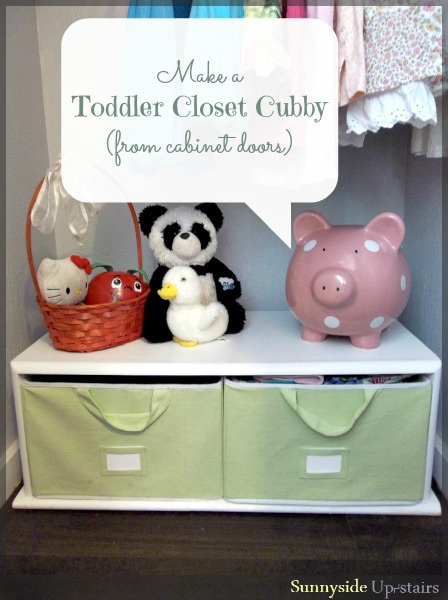
Solid wood is an amazing material because it can be cut, re-shaped, extended, filled, sanded, stained, painted, and essentially re-used almost endlessly.
Last week, I took old cabinet doors (from when we gutted the mouse-hole kitchen cabinets that used to be in our apartment before we moved in) and turn them into a free cubby for my daughter's closet. :)

Estimated Cost
$0, with new purchases, $20 estimate
Estimated Time Investment
Afternoon Project (3-6 Hours)
Finish Used
3 coats Olympic No-VOC semi-glass straight from the paint can.
Small paint brush for cut-ins, foam roller for surface coverage. Allow recommended dry time between re-coats.
Small paint brush for cut-ins, foam roller for surface coverage. Allow recommended dry time between re-coats.
Recommended Skill Level
Beginner
Comments

Mon, 10/07/2013 - 19:43
Great project!
Beautiful Cubby from old doors! The trim adds elegance with the white color and it fits perfectly. Looks adorable! :)

In reply to Great project! by JoanneS
Tue, 10/08/2013 - 19:30
Mahalo, Joanne! :) I'm
Mahalo, Joanne! :) I'm looking forward to your great builds coming up! =D