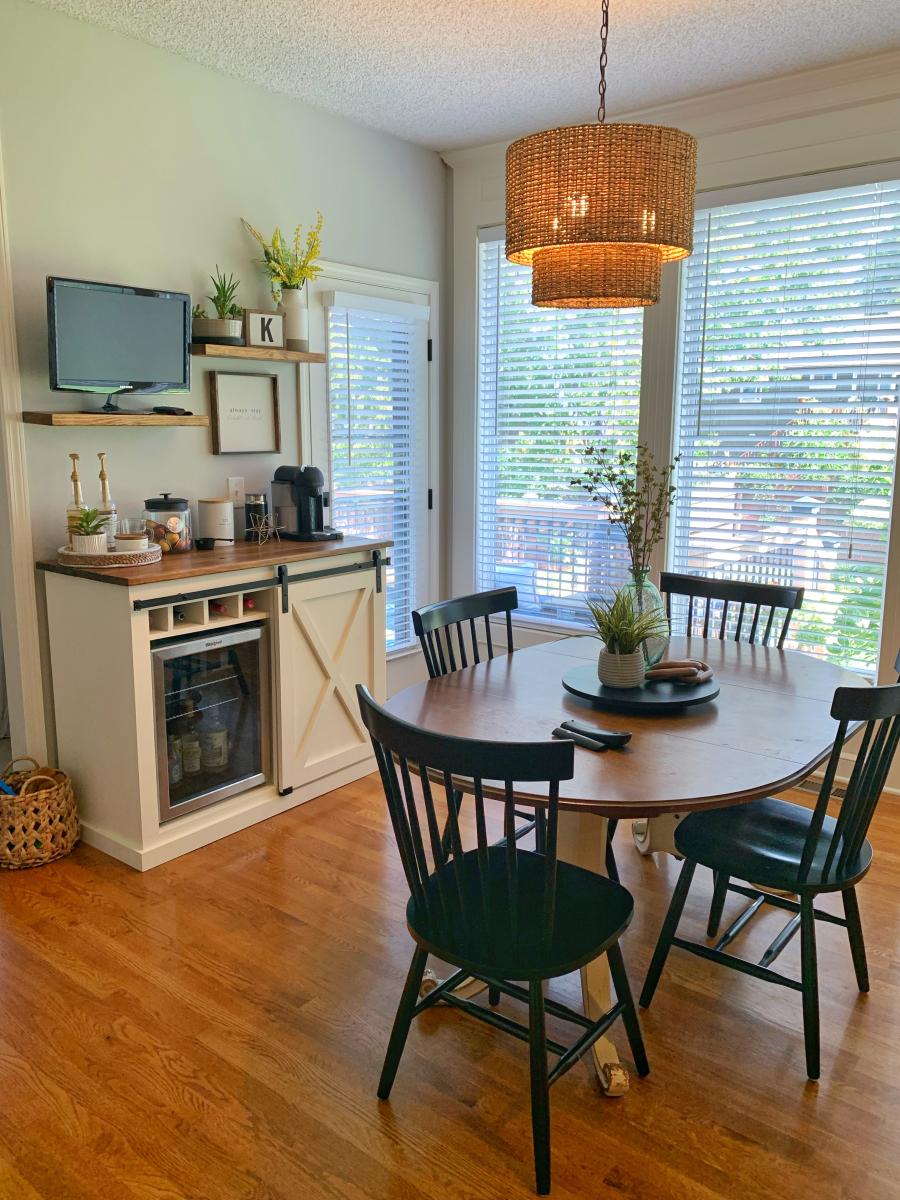
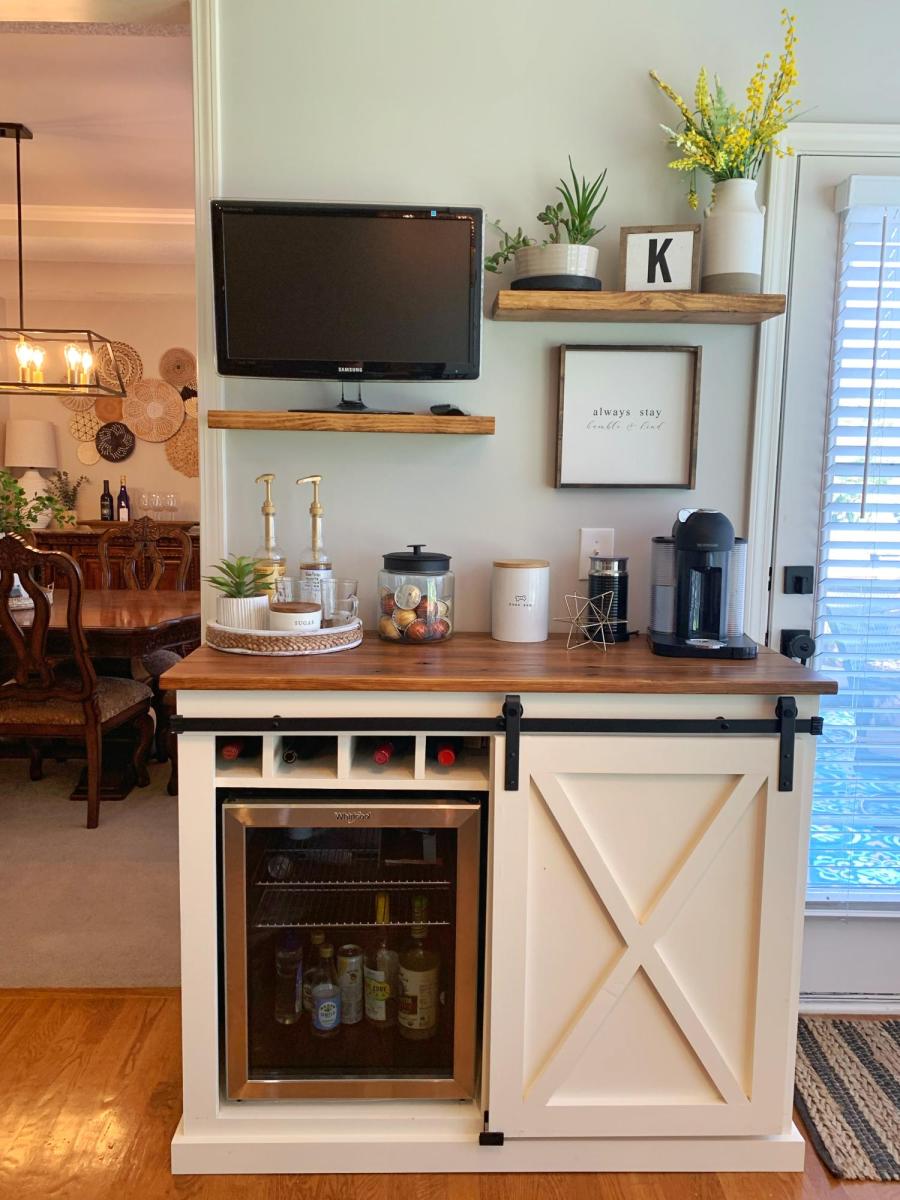
Coffee Bar
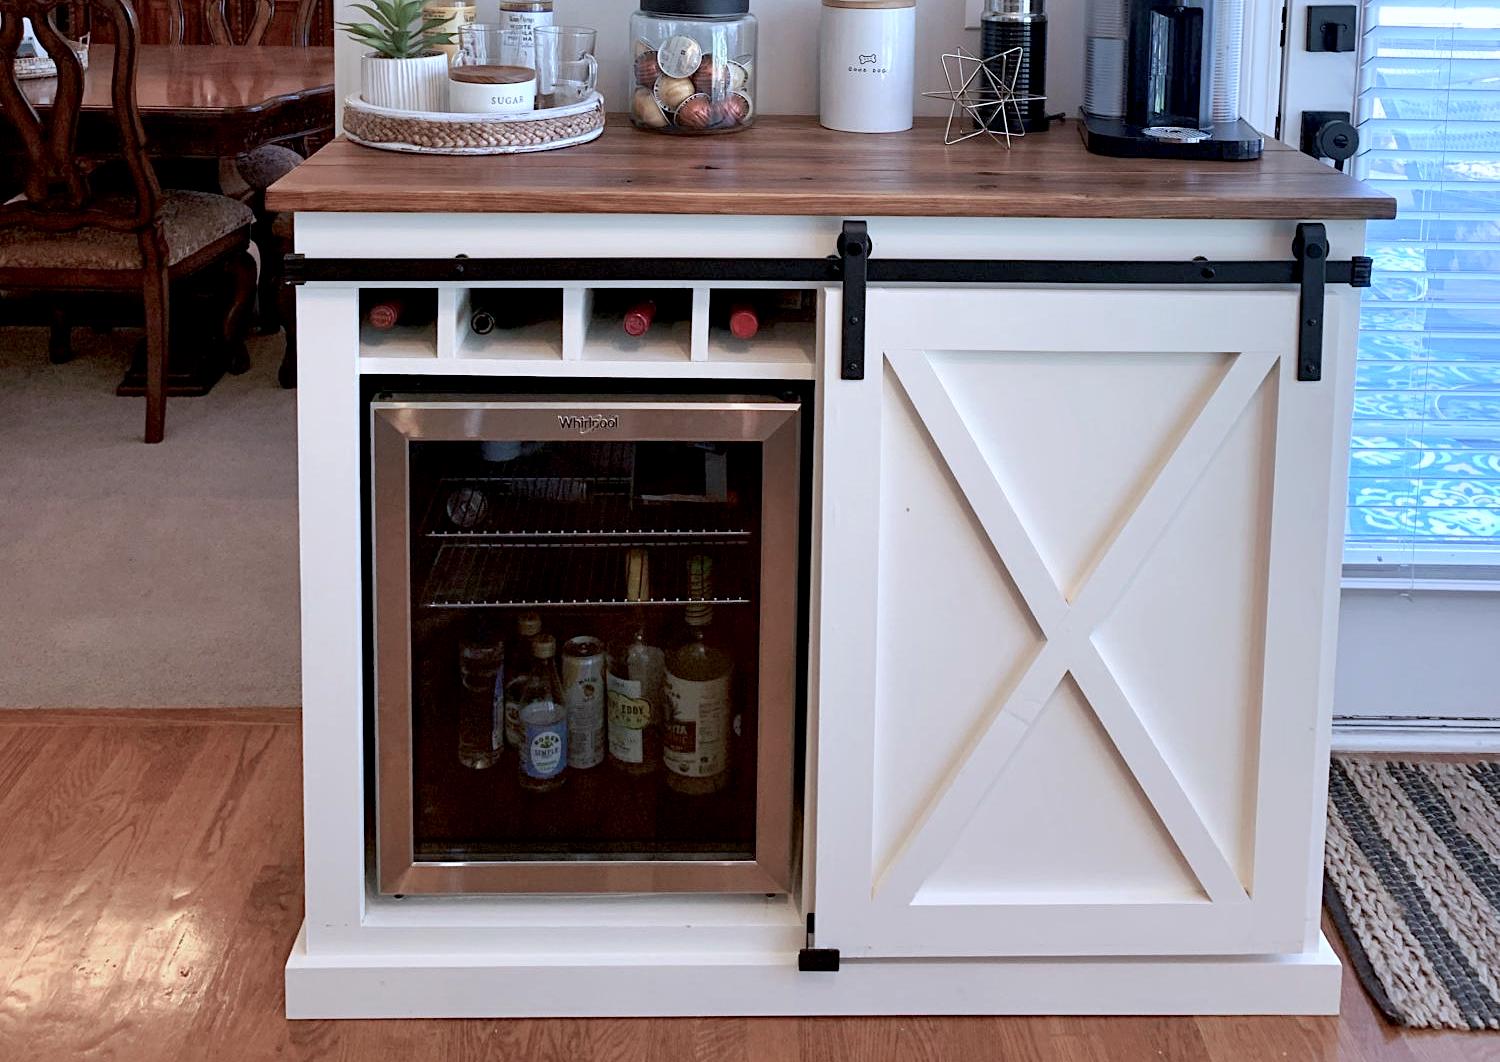
My wife wanted a coffee bar and I wanted a fridge for wine and beer. So we compromised on this.
Built from Plan(s)
My wife wanted a coffee bar and I wanted a fridge for wine and beer. So we compromised on this.
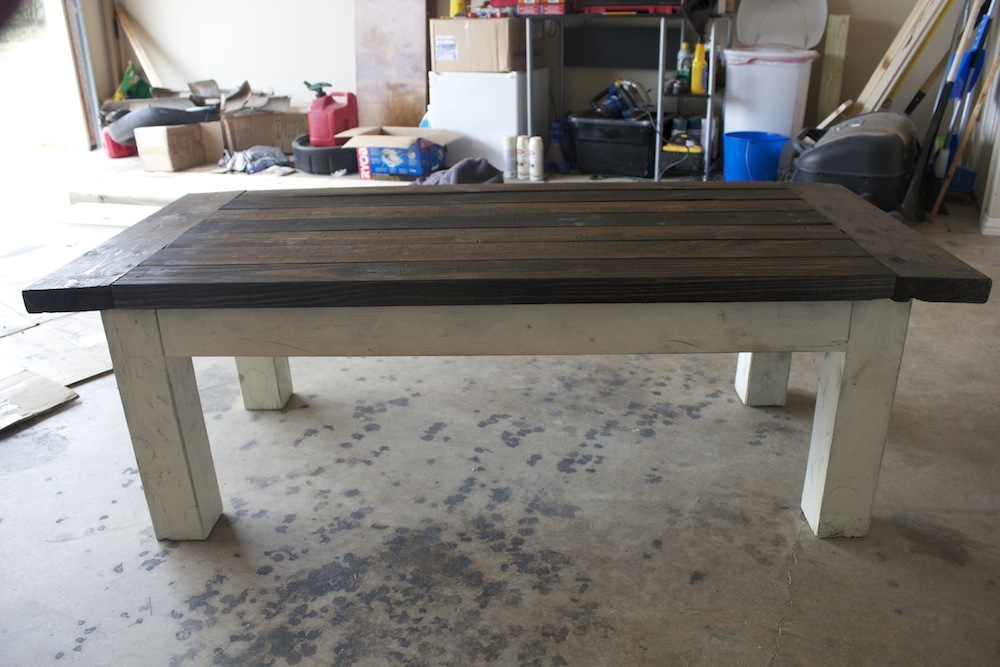
My Tryde coffe table. Fun to build and looks great! Thanks Ana!

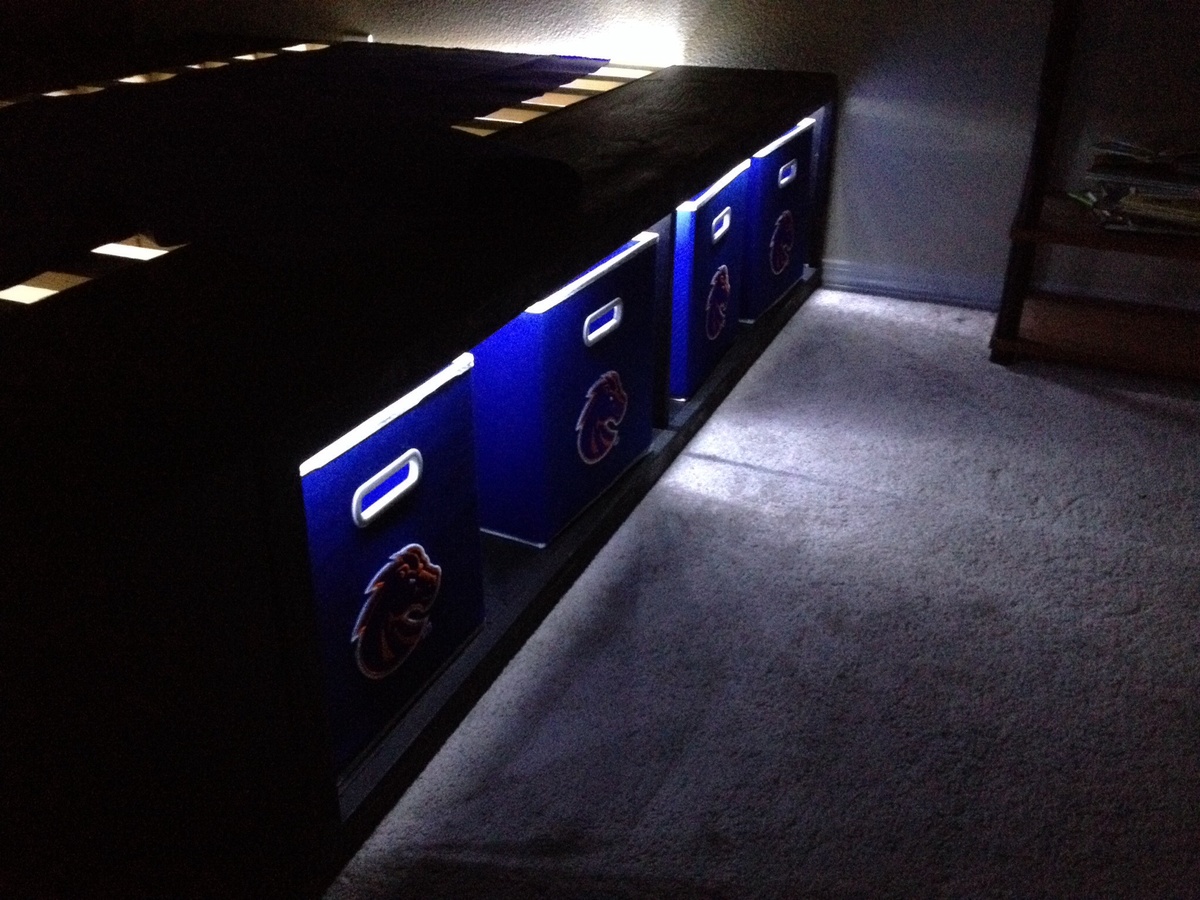
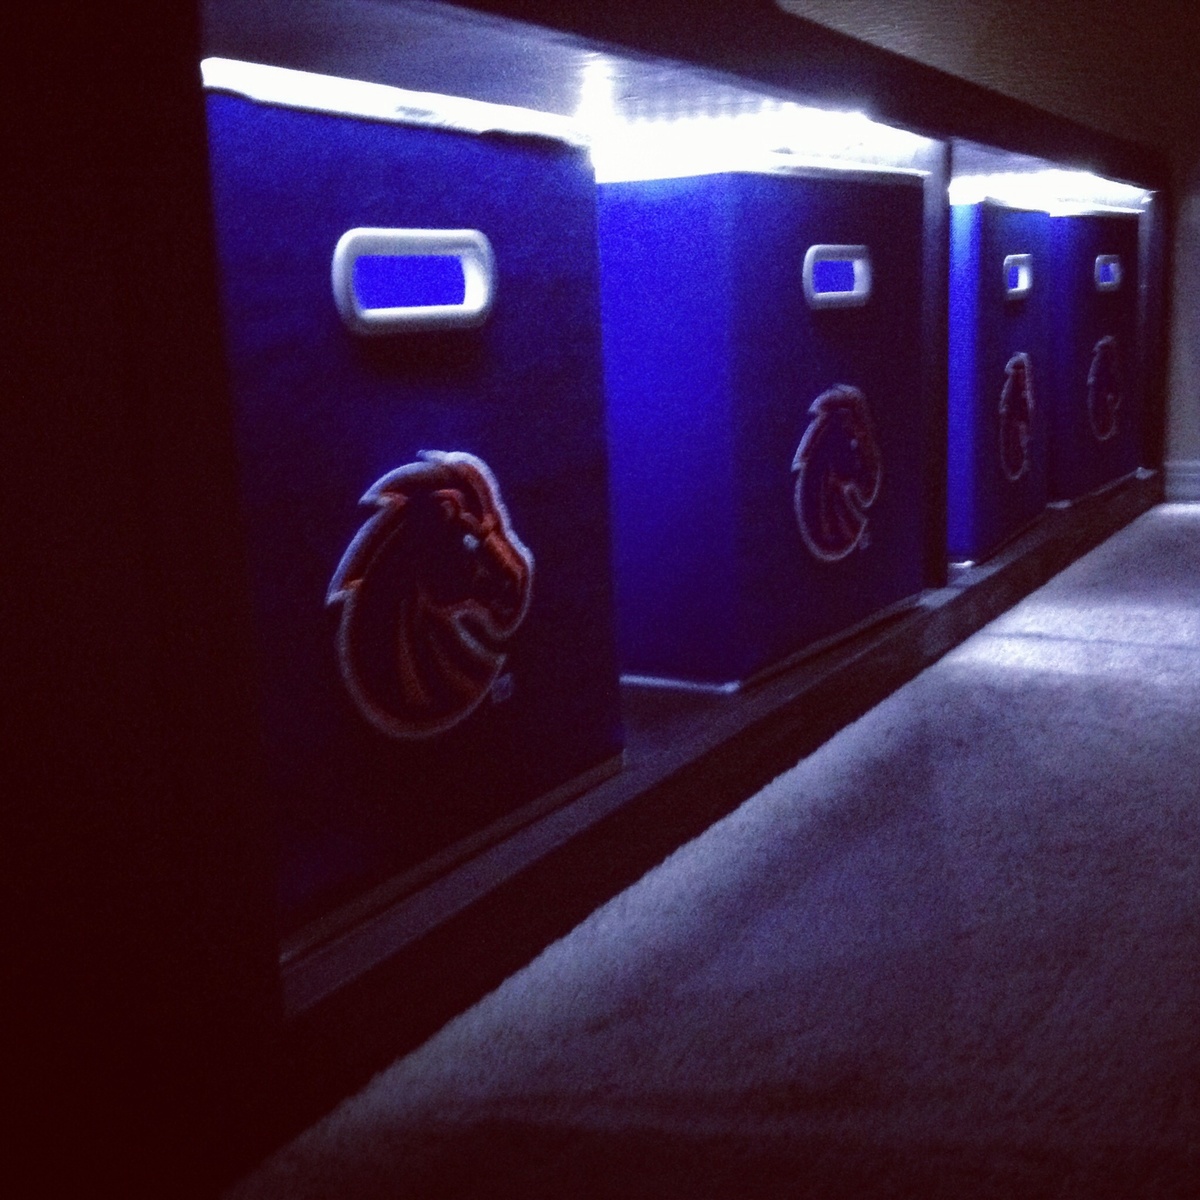
I started this project and wasn't sure what I was doing. This is the first project I've ever built and I look forward to the bigger and better projects I will be doing. As a spent several weeks online looking for the perfect bed to build for my son, I found this web page and truly found it to be easy to follow and easy to customize.
I built the bed and bought the fabric storage boxes at a local store and decided that the lights would be a great addition. I found some LED lights on Amazon.com which were extremely easy to install. The lights added only an additional $28, total, which added a cool new look to my sons room. He uses the lights as his nightlight and I love the way it turned out.
My next project will be the king farmhouse frame.
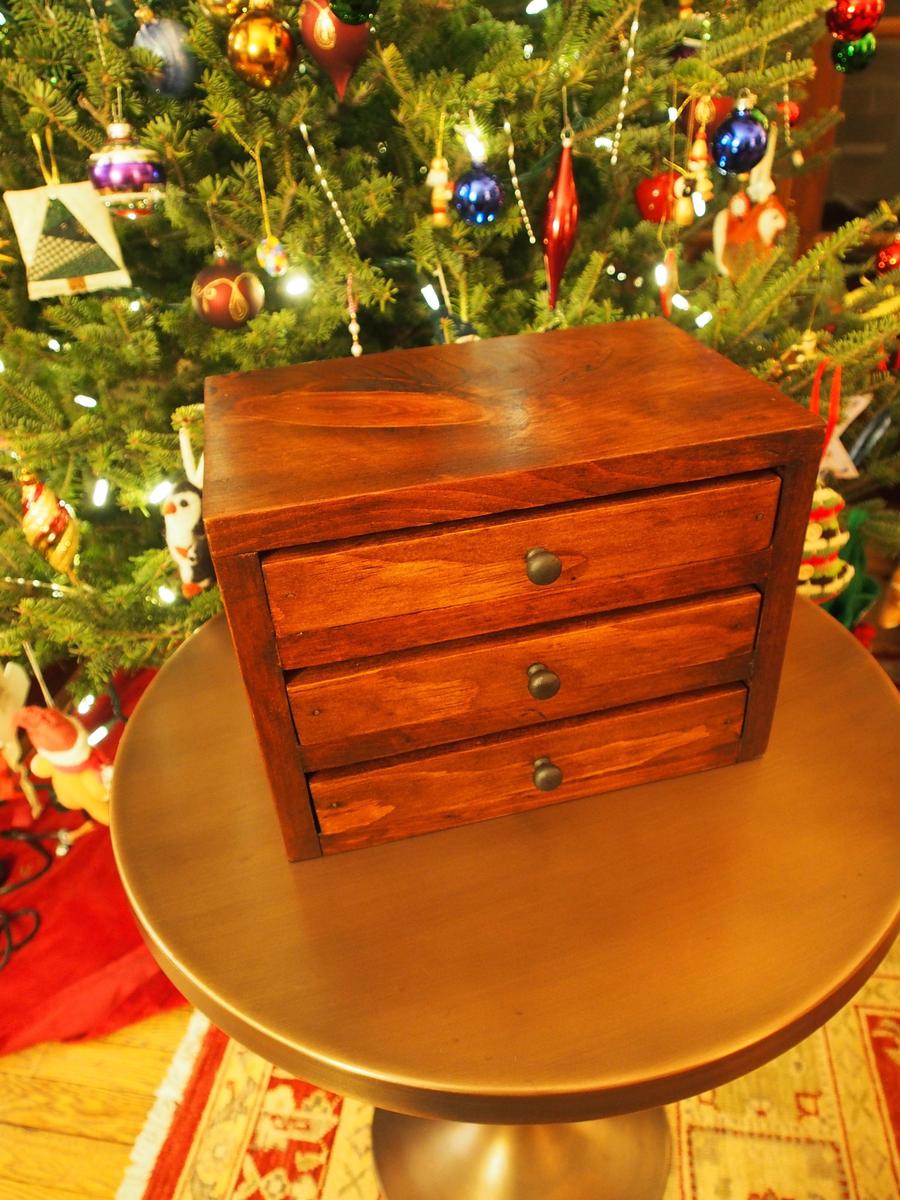
I built this as a Christmas gift for my office partner/best friend.

Sun, 01/03/2016 - 14:53
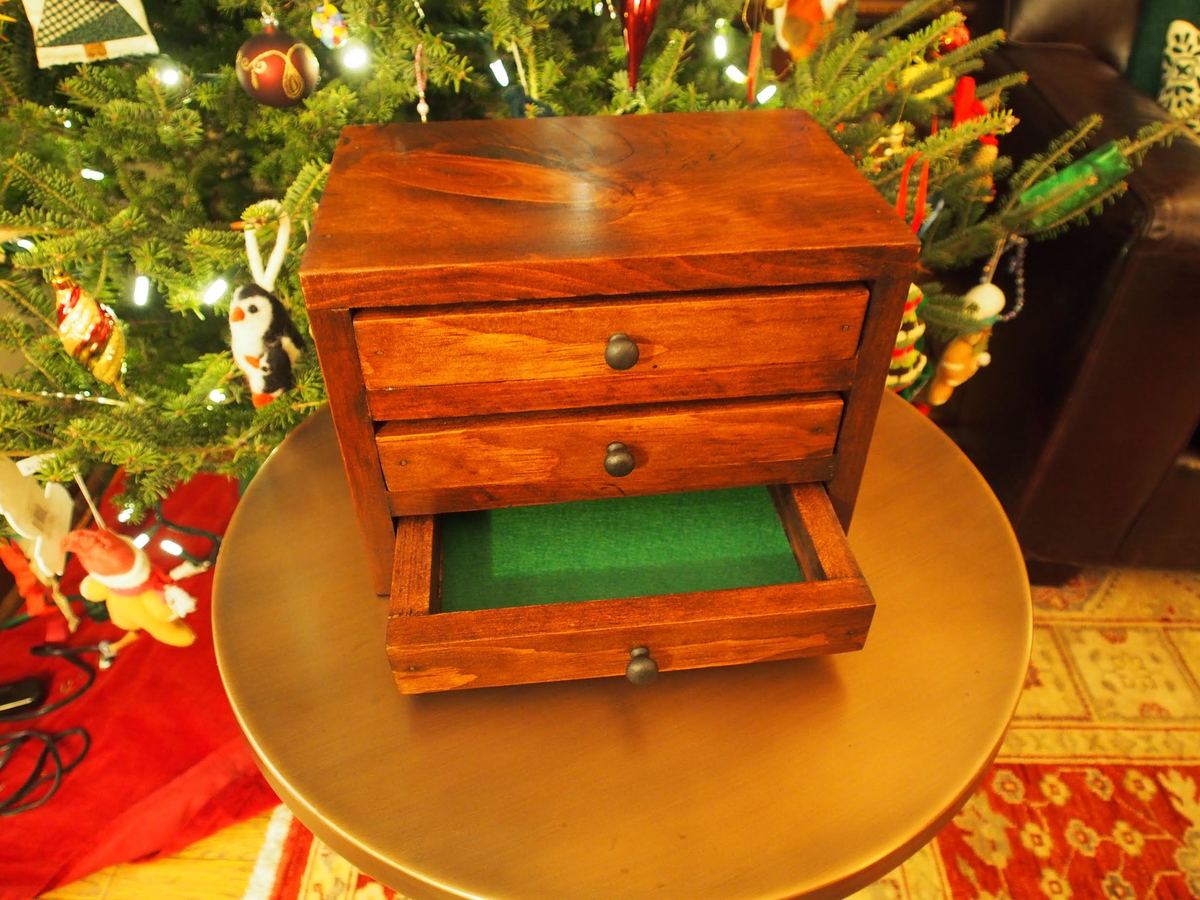
Gorgeous jewelry box! You did a fantastic job on this build! And your finish is amazing!

My daughter moved into her first apartment and asked me to make her a dining room table. I used the plans found on Ana's website and made a slight modifcations. I used 5/4" pine boards to build the tops and regular douglas fir 4x4s and 2x4s for the bases. All screws are hidden exept the lag bolts I painted black and used to bolt the end trusses to the center truss which gives it kind of a industrial type accent. Thanks to Ana White and Shanty 2 CHIC for the great plans. My daughter loved the table and bench and she is going to find chair for the other side of the table.


Turned out okay, still have some learning to do!
Sun, 01/08/2023 - 10:43
Thank you for sharing, there is always learning to be done, you did it!
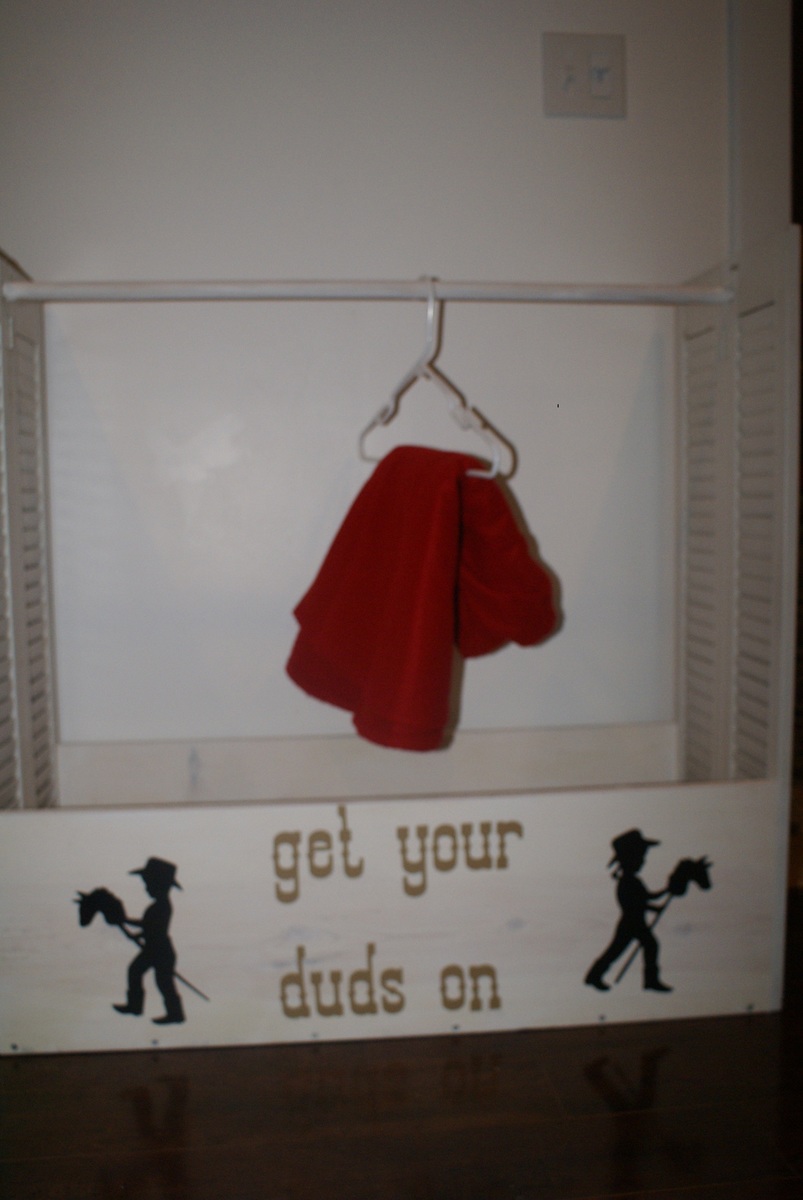
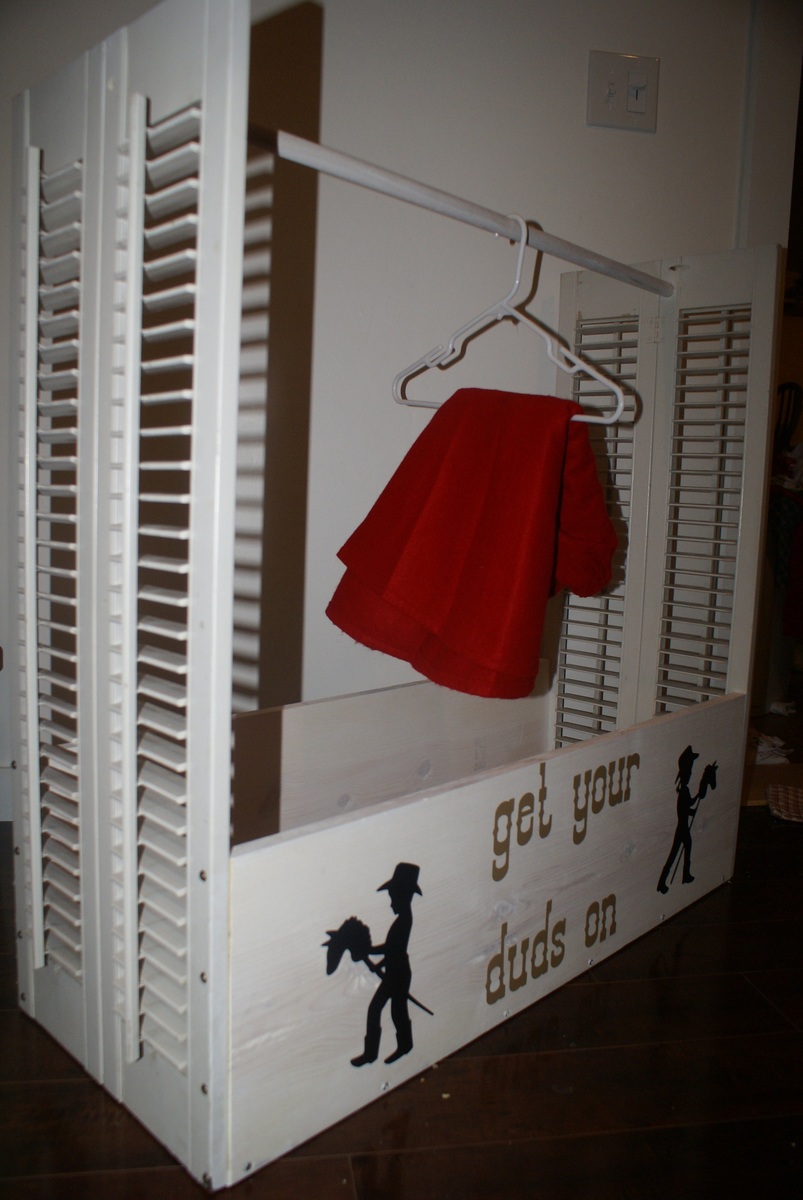
This dress up center was made by me & my hubby for our daughter's first classroom. We used old shutters for the ends and added a couple inches to the bottom & front/back boards to make them all match up. We used the "get your duds on" & Cricut vinyl to make it work for all the cowboys & cowgirls in her class! The shutters open & close giving them an added interest and a teaching moment to bring in recycling!
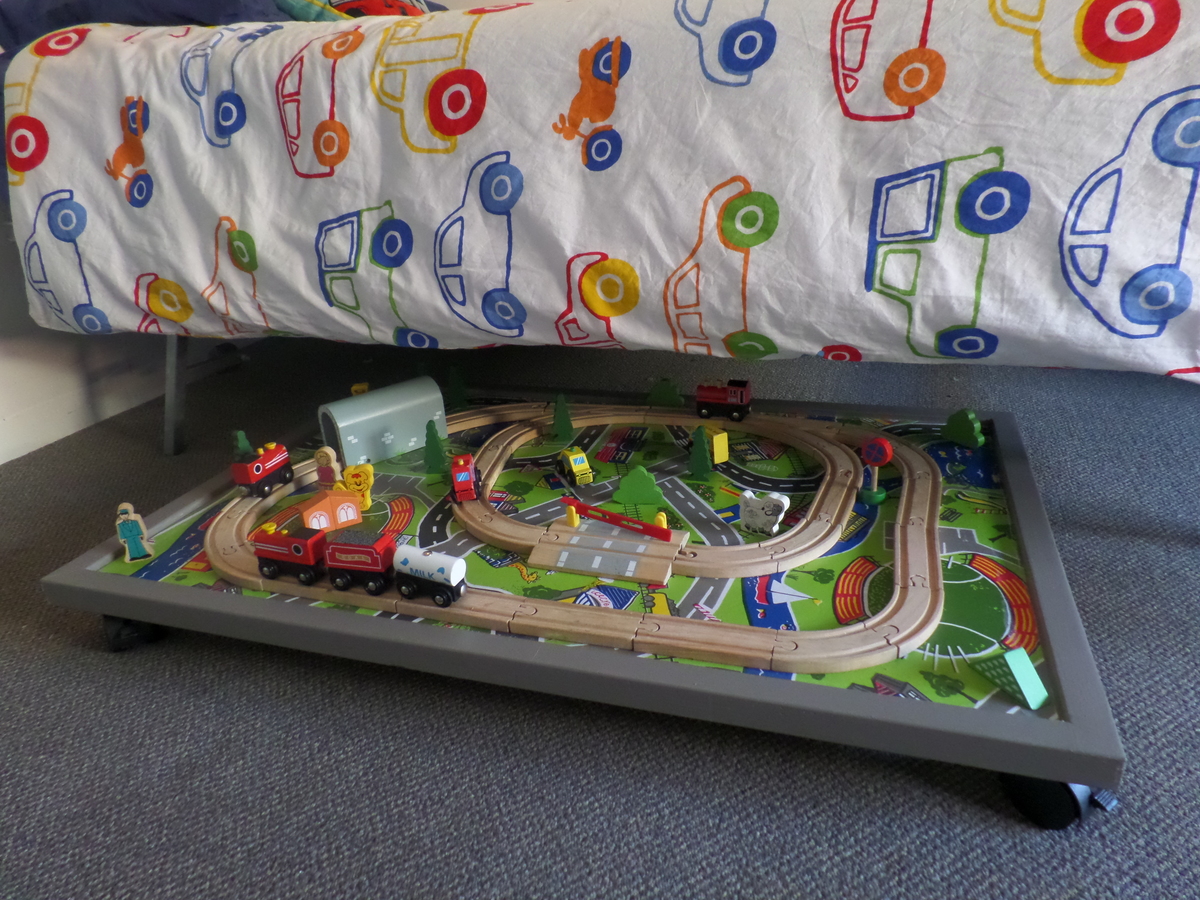
I actually made this before I came across your plans! My son loves it and i love that he can 'play and roll away!'

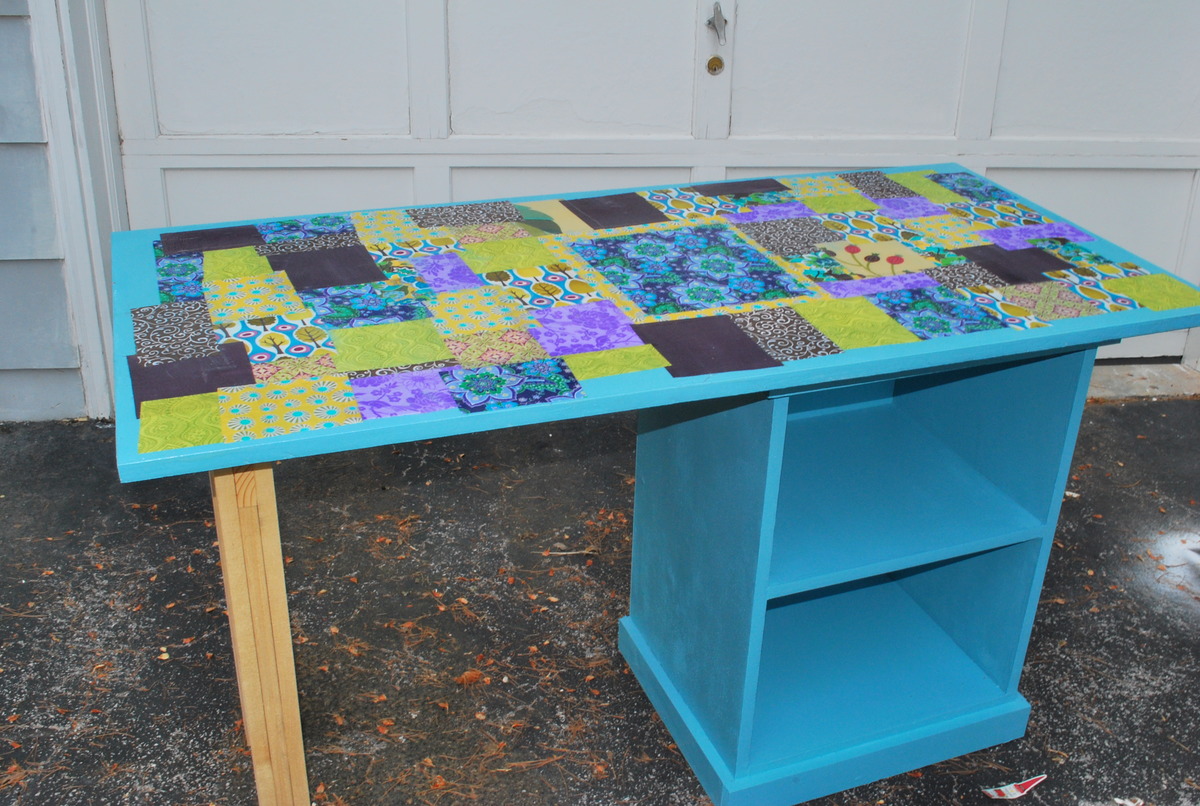
I needed a new sturdy sewing table so my husband built it for me. I painted it turquoise and then mod podged my fabric fabric squares in a crazy quilt design on the top. It is sealed with spray acrylic. I love it.
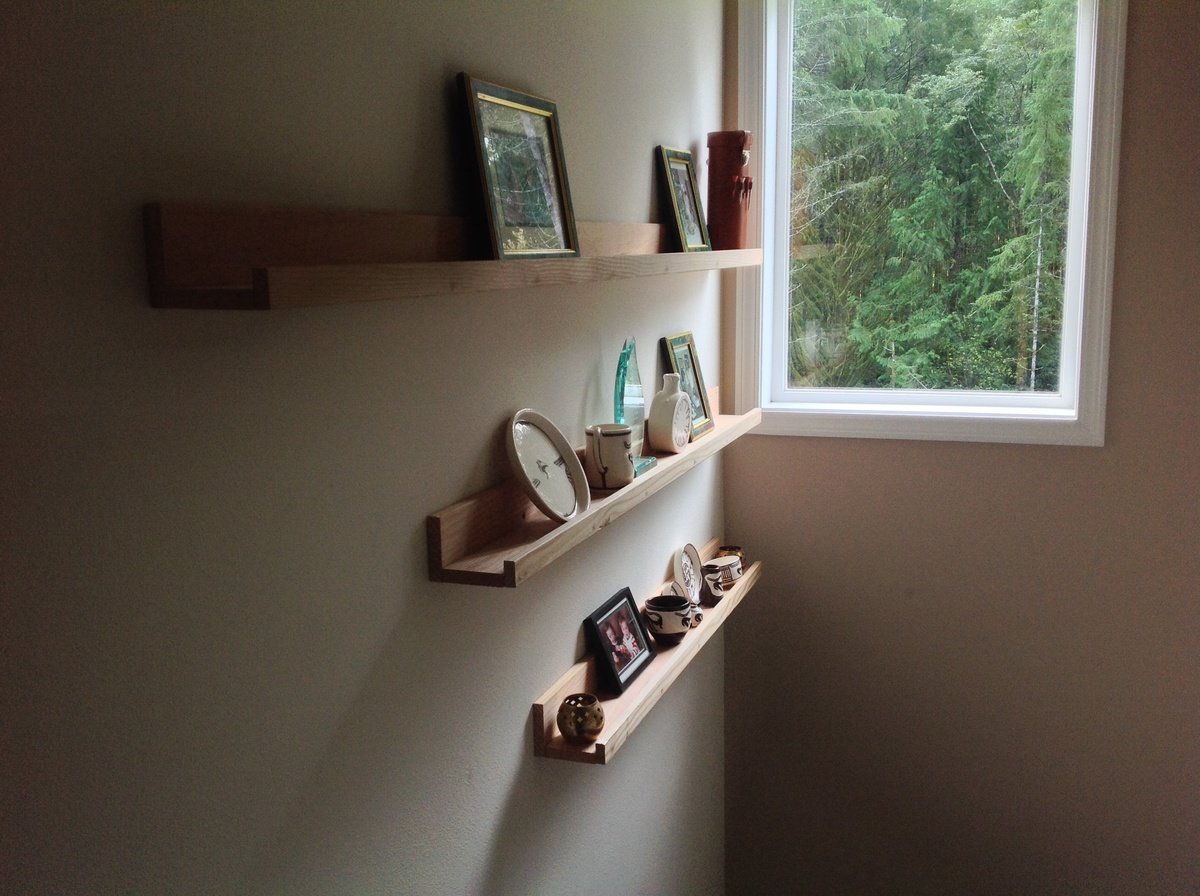
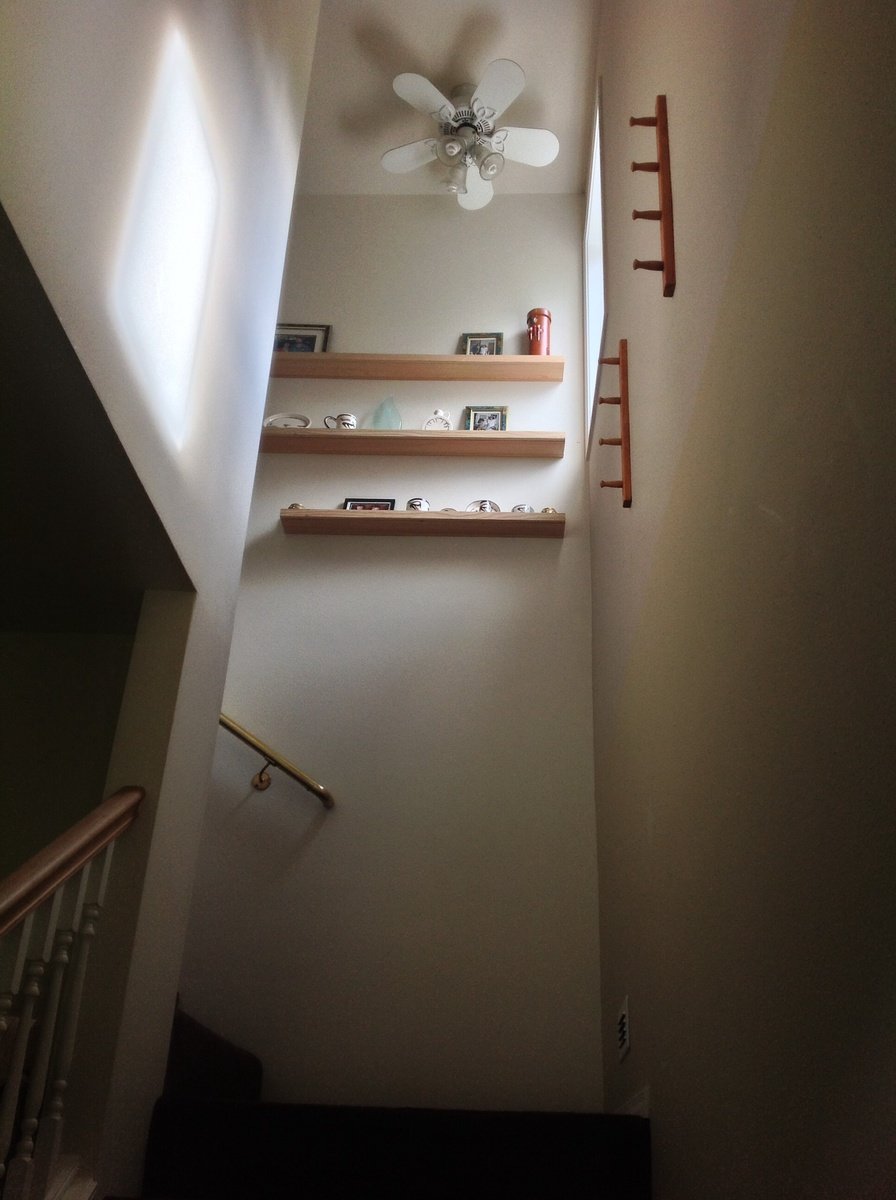
Built three 10 dollar ledges of fir for a tall, awkward area over our stairs. 3.5, 4.5, and 6 feet long. Looks great and finally can make use of that space. I initially bought red oak but decided it was too heavy (and too expensive at $90). Still need to putty the screw holes.

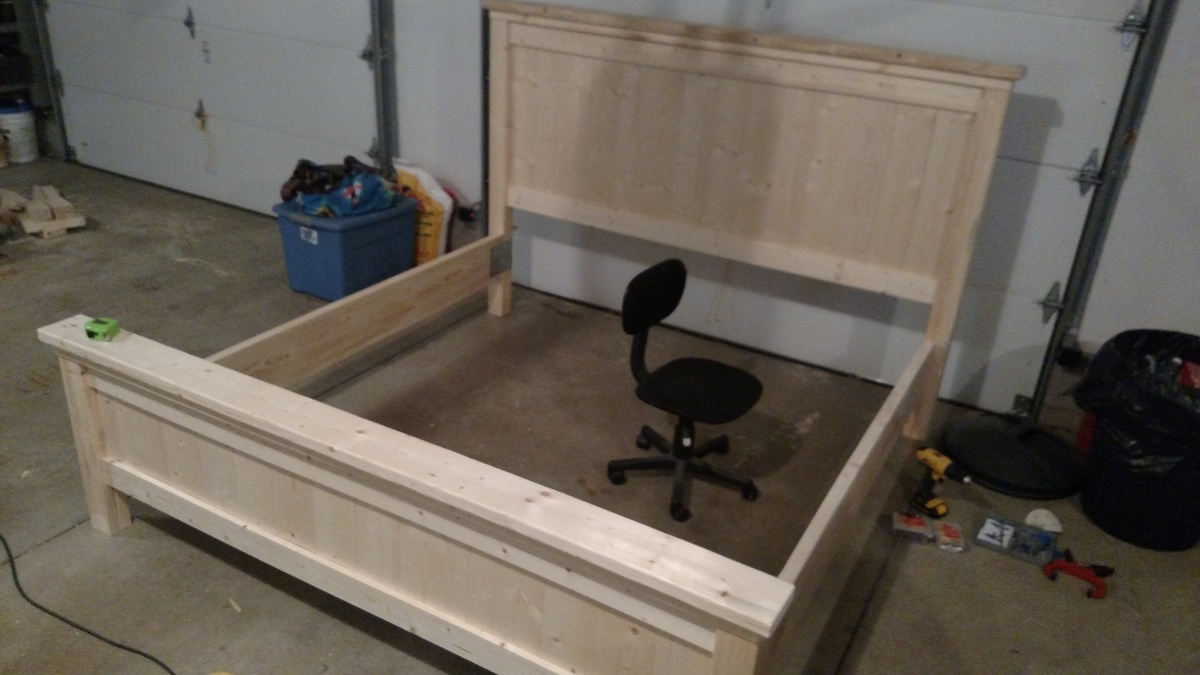
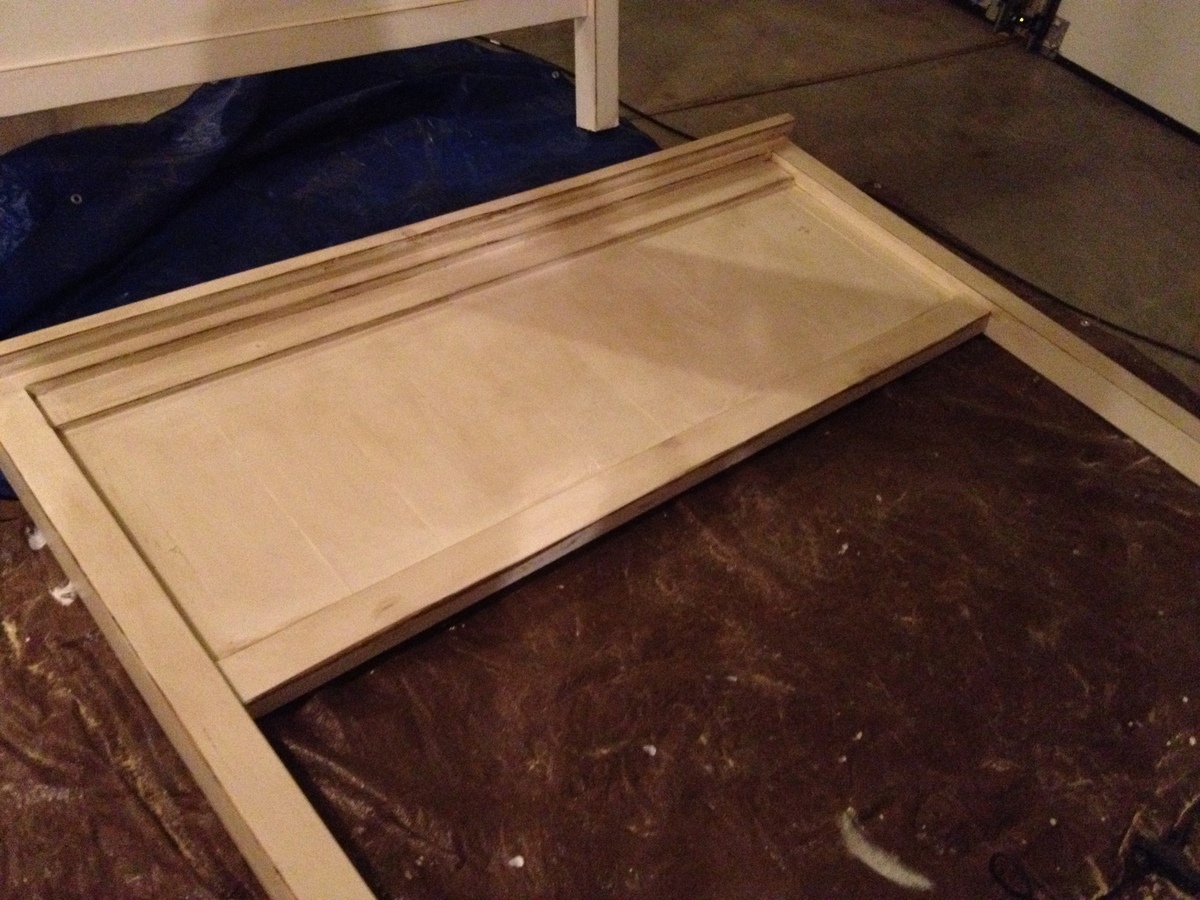
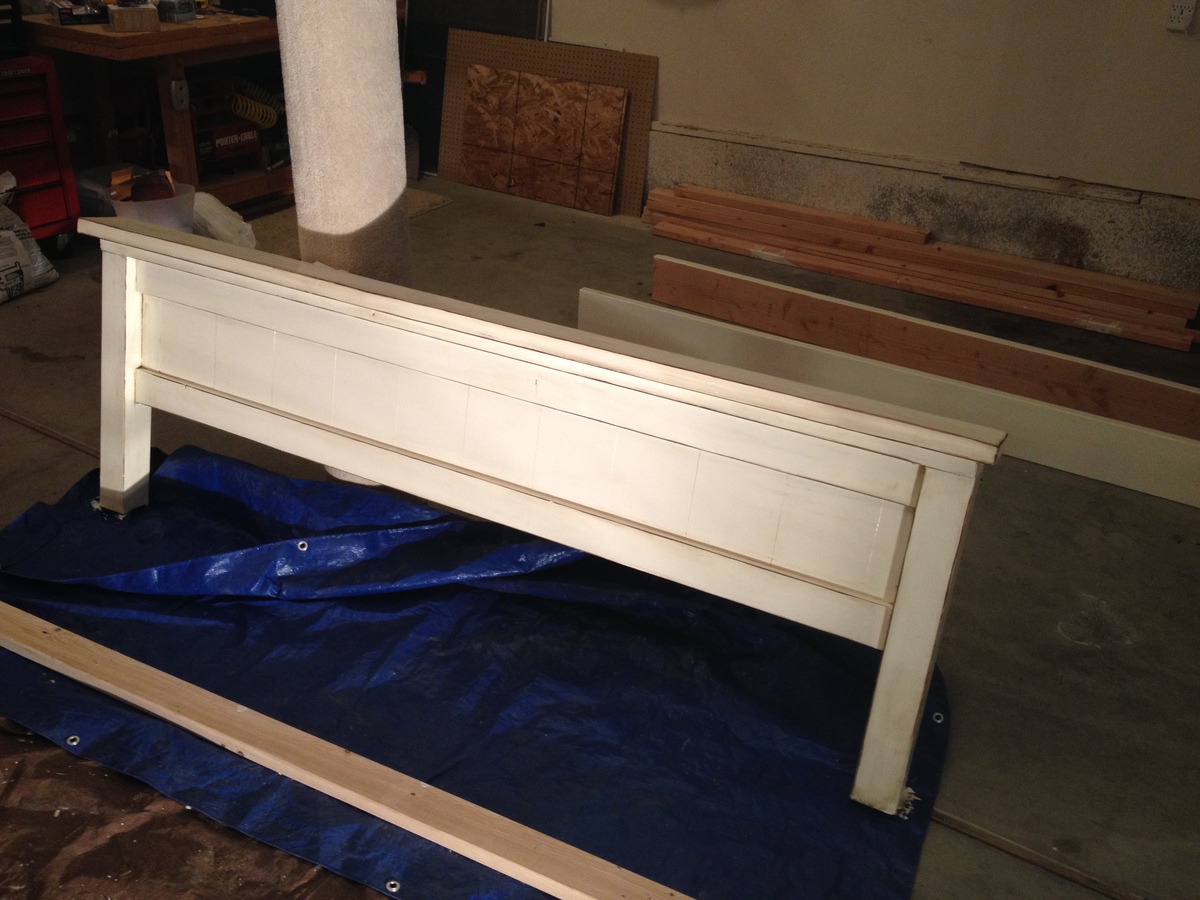
My bed frame dimensions were 76 wide by 80 length. So that is the inside demension after assembly. My headboard posts were cut to 54" and footboard posts were cut to 24". Headboard panels are 31.5" (14- 6" boards) and footboard panels are 15.5" (14- 6" boards). My posts were made from combining two 2x4s together. I plan on mounting the metal bed frame to the inside of the bed rails. I enjoyed this project greatly.
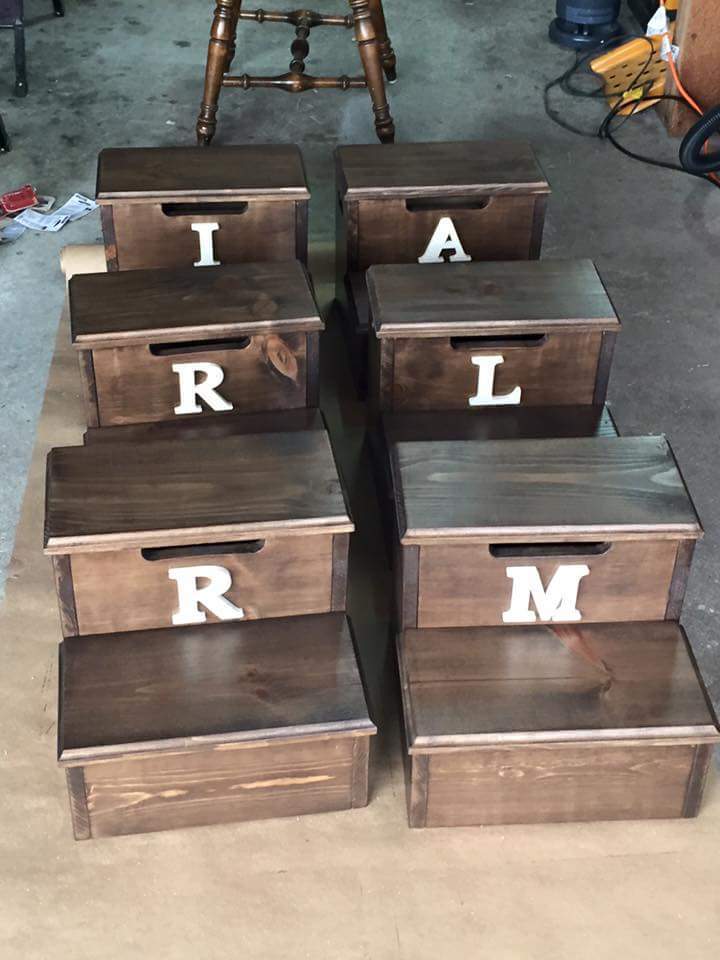
Made legs 16 inches to bring to height suitable for the mattress I had. My first project ever using Kreg K5.
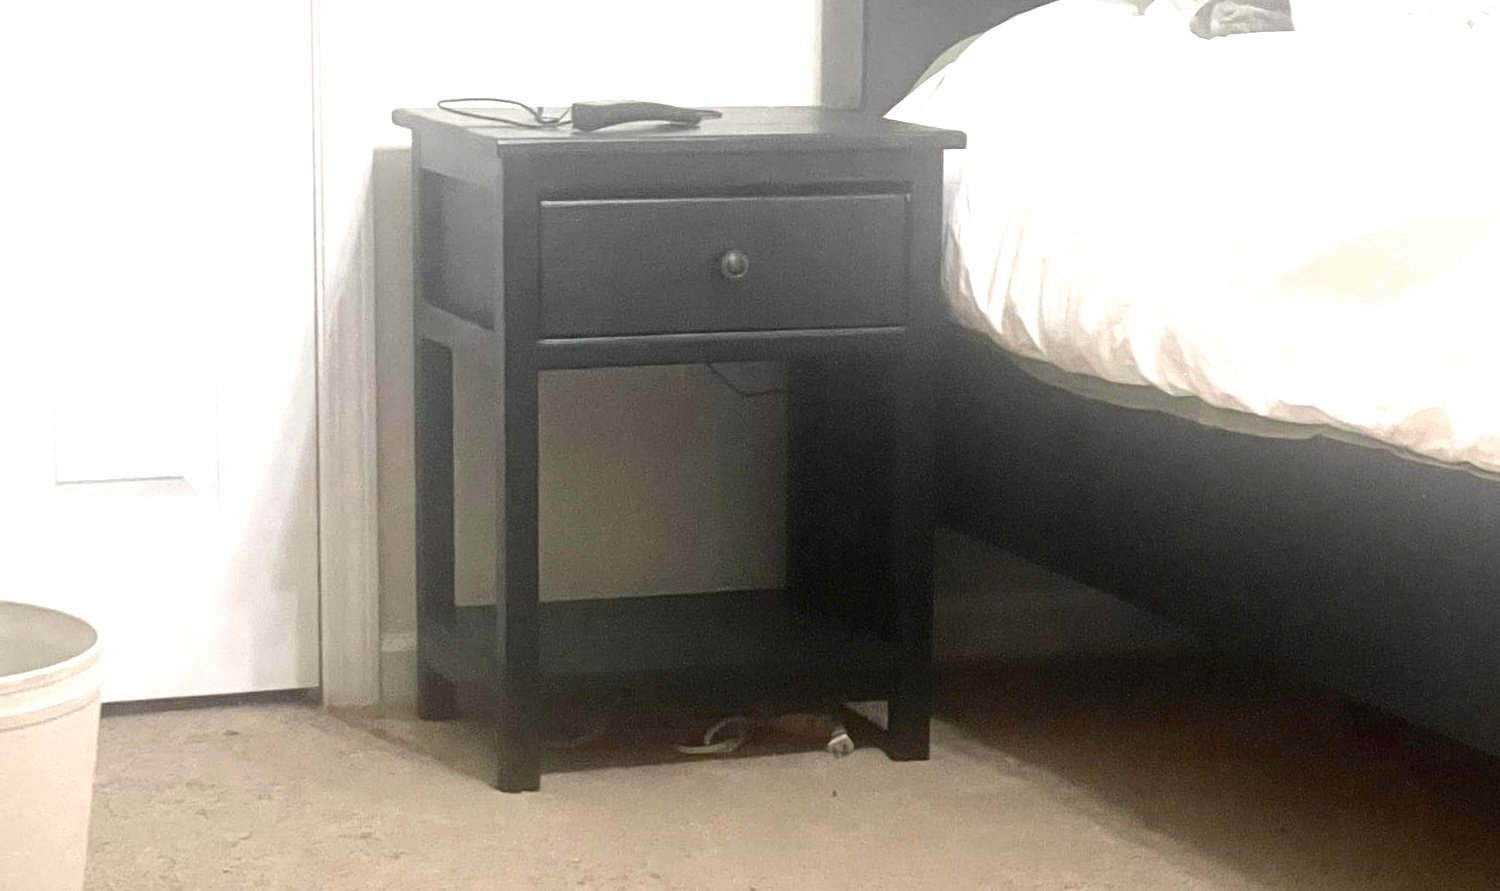
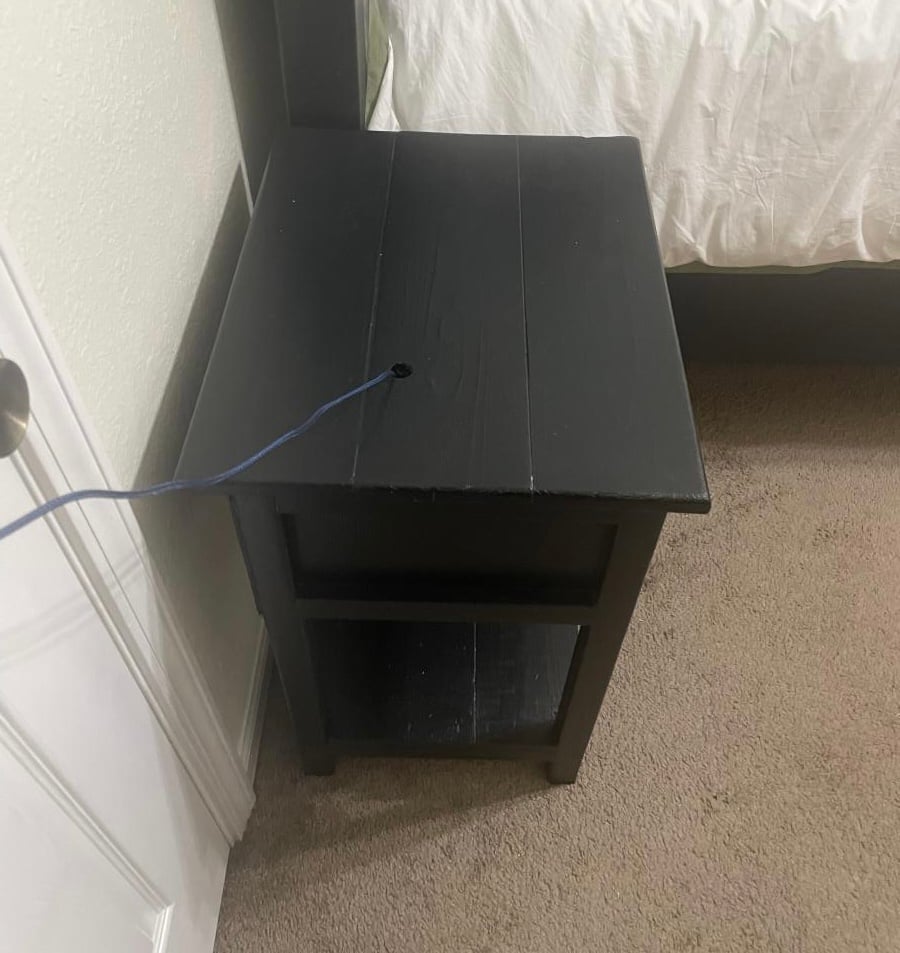
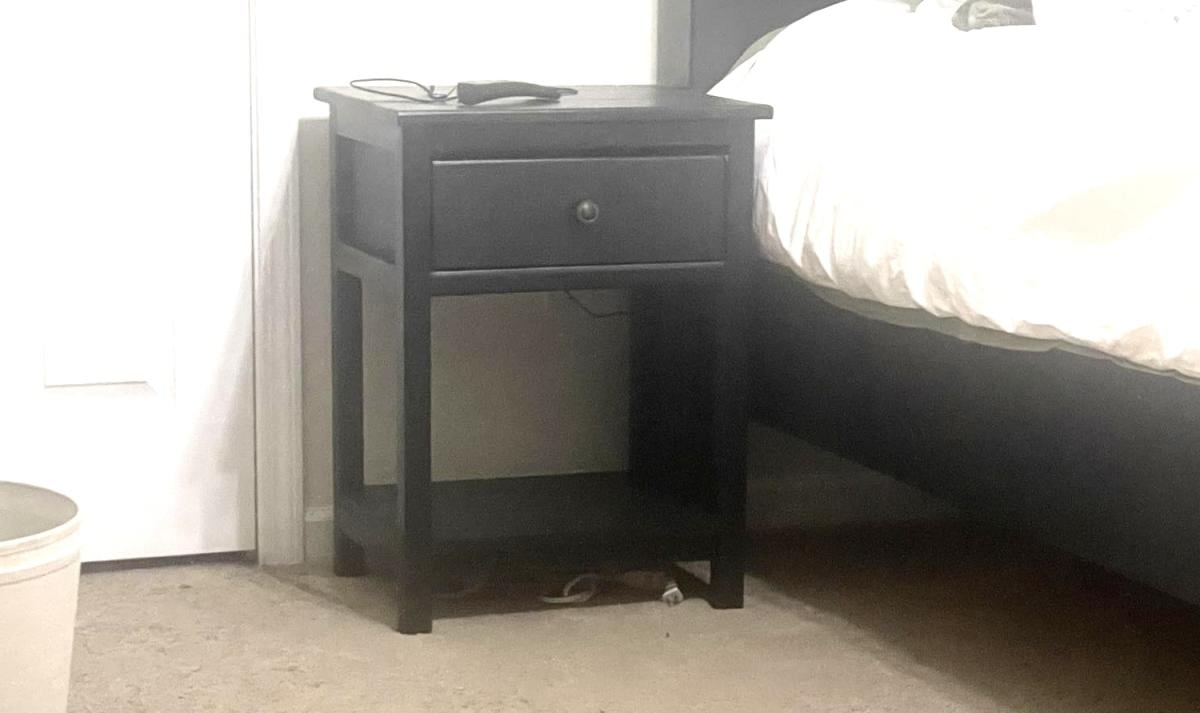
I built the farmhouse bed and needed side tables. These worked out great. Very easy to manipulate sizes to make larger
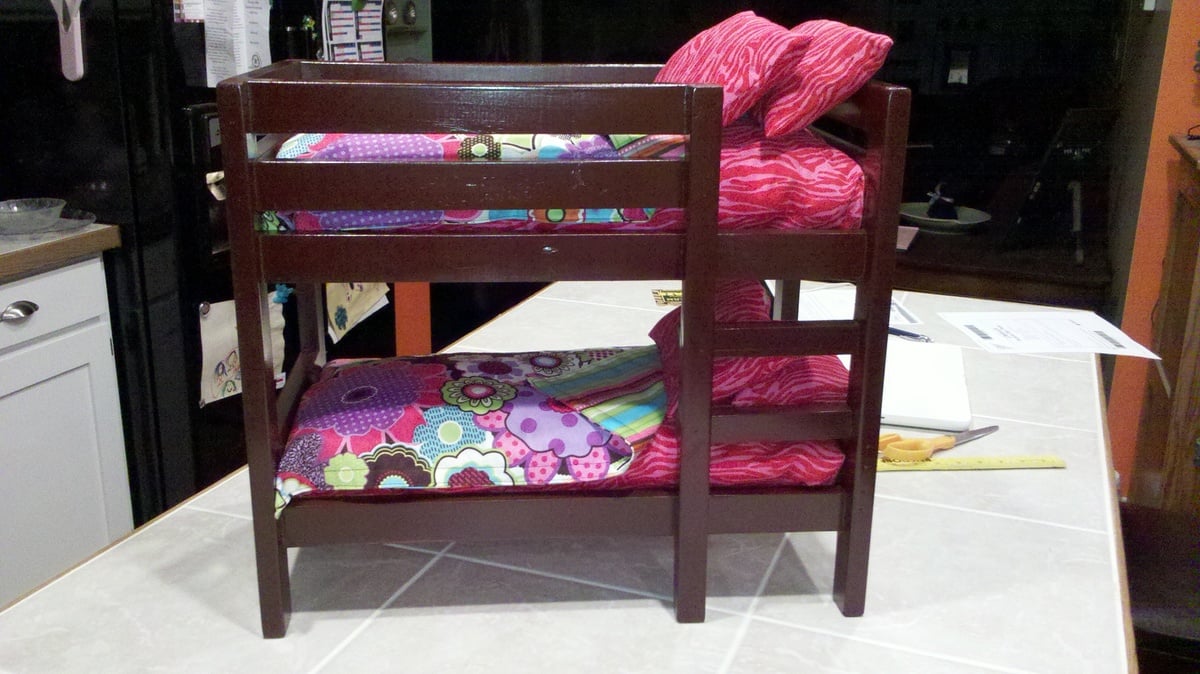
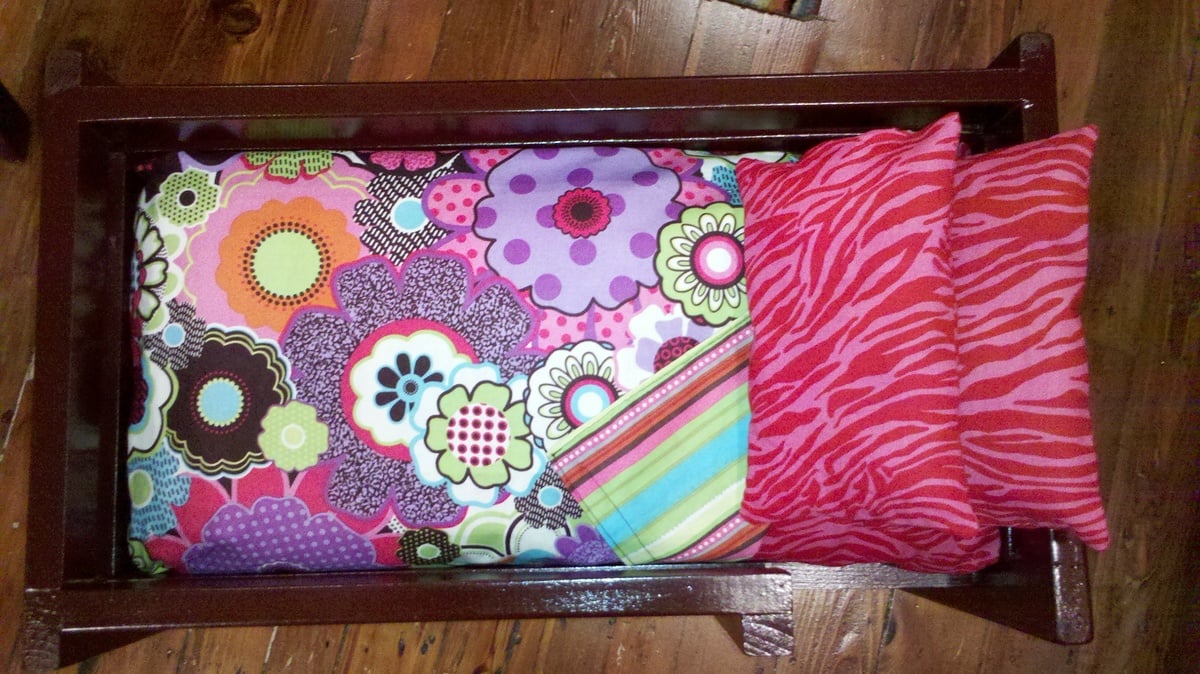
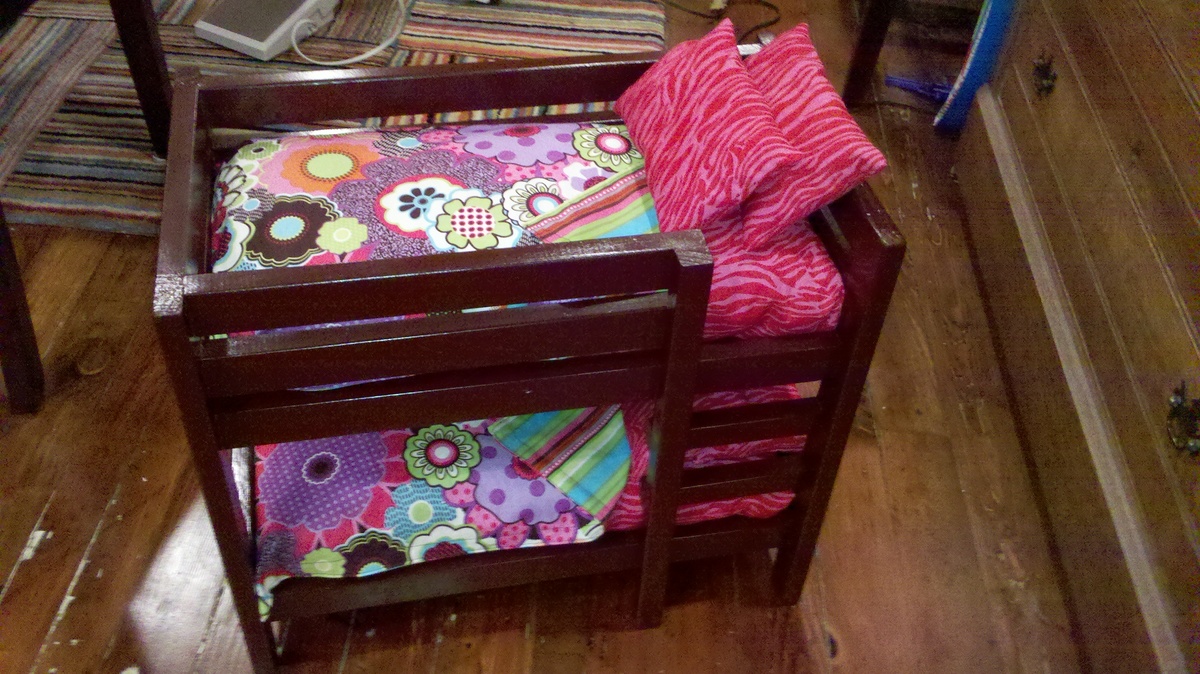
My daughter has really been getting into American Girl Dolls so I went on the official website to see if I could find some accessories for them for her birthday and YIKES - that stuff is expensive! So I went on Ana's site and found plans to make bunk beds. My daughter has four dolls so I figured we could build two sets at a fraction of the cost we could buy them at.
This was our first furniture project so we had to buy everything, which makes the project more expensive than if you have scraps laying around, but still totally worth it. My husband and I built two of these in about 3 hours. Sewing four of everything probably took another 2-3 hours.
I made the blankets reversable - flowers on one side, strips on the other so she could mix and match as she liked. I think I am going to make a reversable pillow for each bed with the blanket fabric, but I haven't gotten that far yet. I totally misunderstood how much fabric to buy - I thought it was 1/2 yard for mattress and then another 1/2 yard for the blanket, but it's not, it's 1/2 yard for both so needless to say I have a TON of fabric left over. Since this project went so well we are going to build a doll table and chairs for Christmas so I figure I can use the left overs for placemats, etc. and carry the theme through the set.
I love the way they turned out and I can't wait to give them to her for her birthday!!!
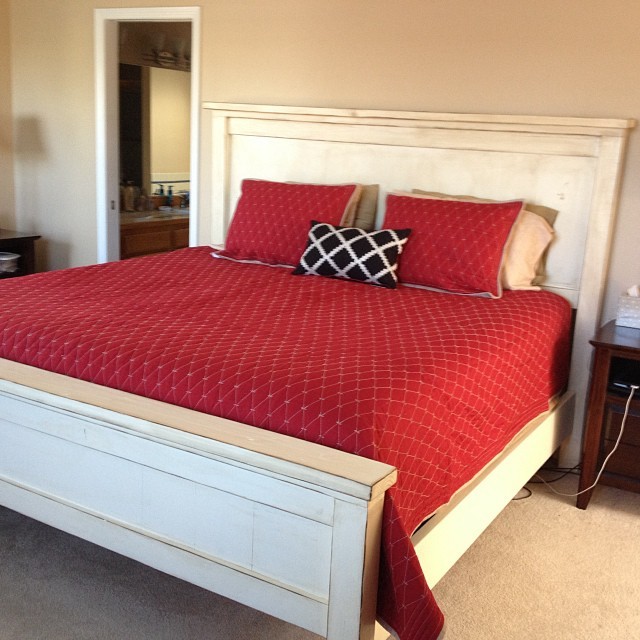
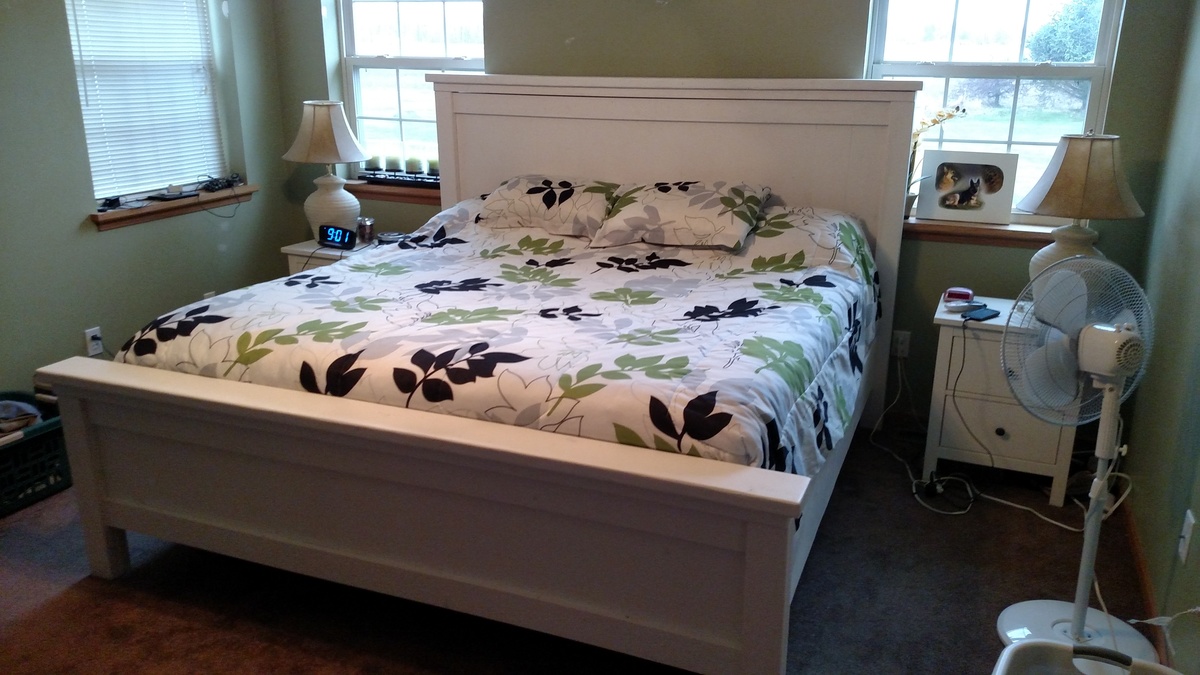
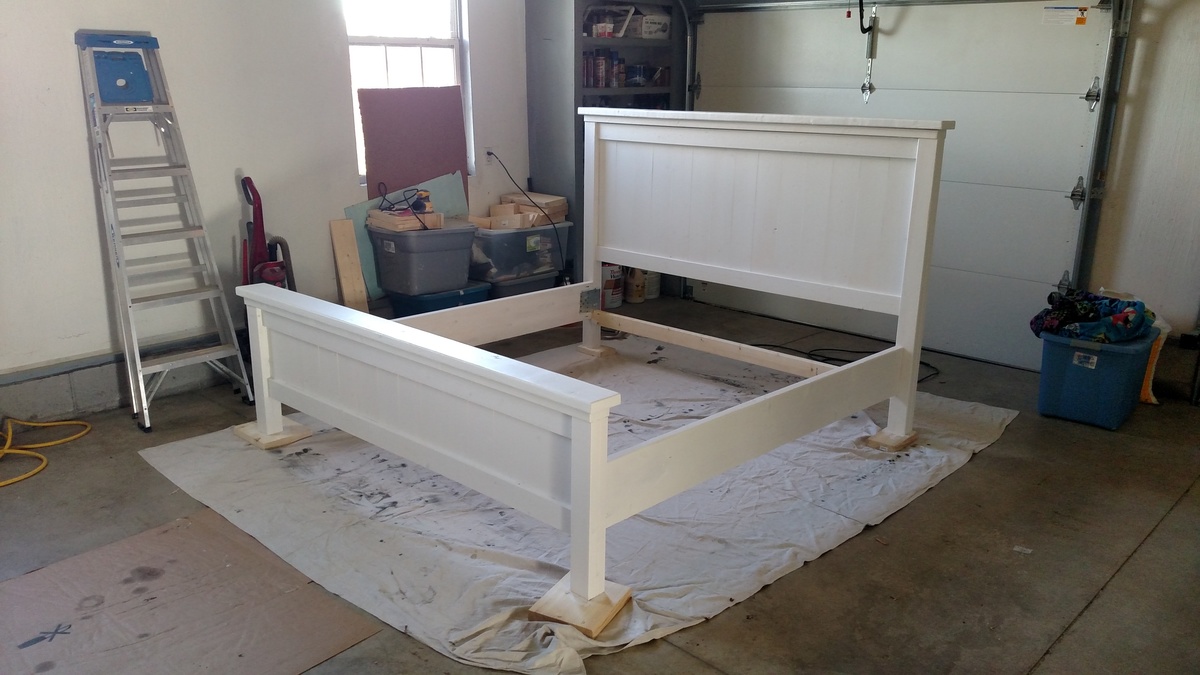
After searching for several months for bed frames in stores and seeing the garbage that costs way too much, we found this site and built the King Farmhouse Bed.
Primered with Kilz paint. Finished with two coats of Behr White Linen. Then we distressed the edges with a palm sander, and knocked down some of the paint in areas, and applied a brown glaze. After we achieved the look we liked we did two coats of polycrylic.

I built this for my daughter's Christmas present this year. It was a fun project that you can do in a weekend if you hustle. The size a girth of this dollhouse is surprising. Do yourself a favor and take measurements of doorways and hallways to make sure it will fit. It is nearly the size of a Lazyboy chair when finished. The best part of this project is the unlimited number of ways it can be customized. Scrapbookpaper for walls , painted walls, carpet for floors, tile flooring, stained flooring and so on. My daughter loves it and yours will too.
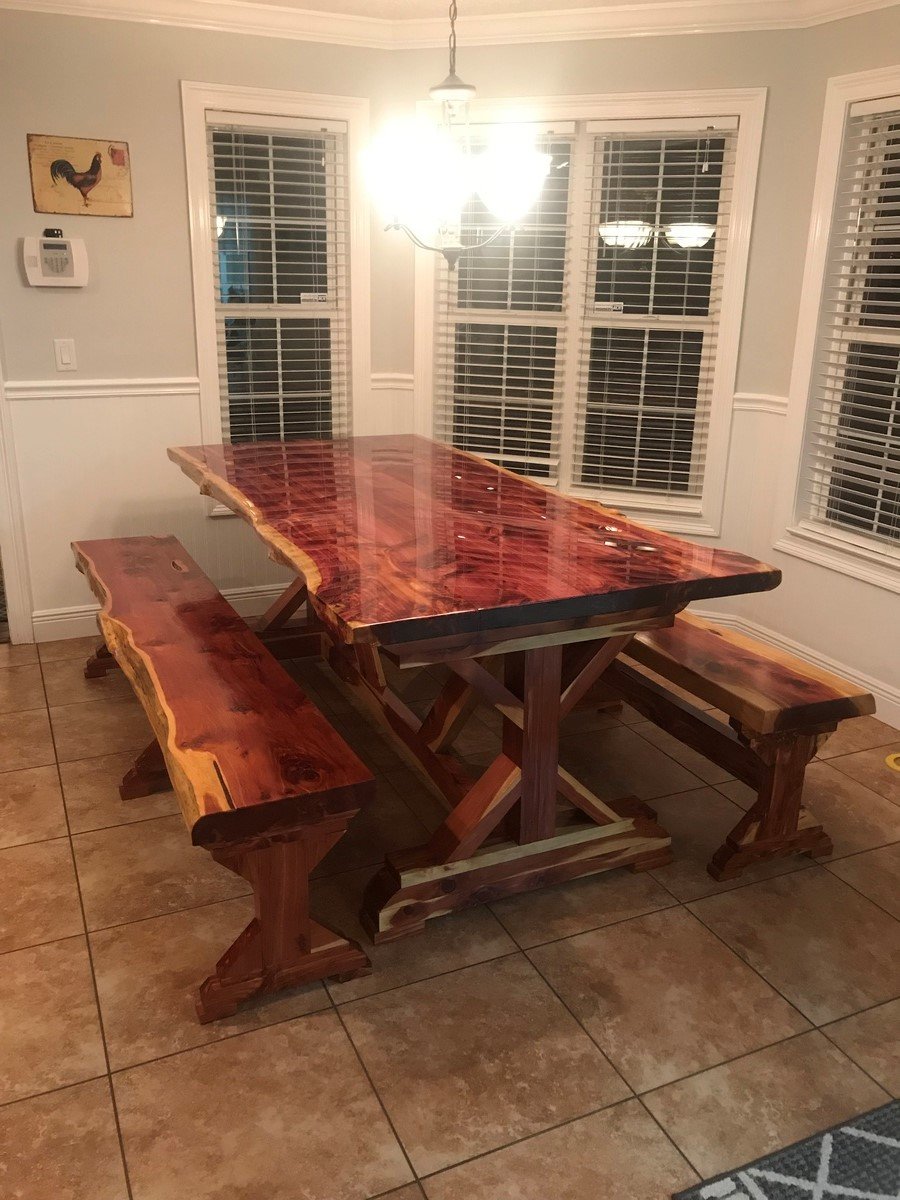
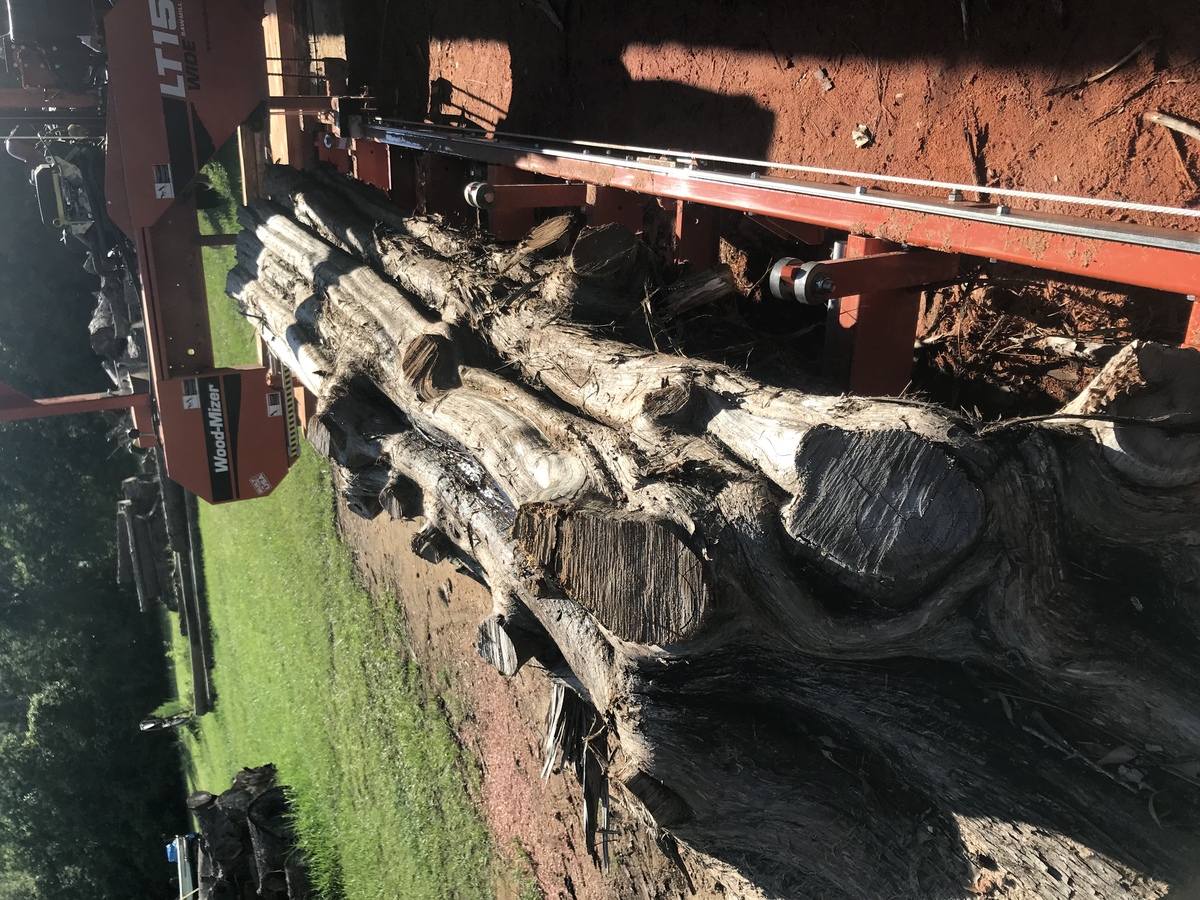
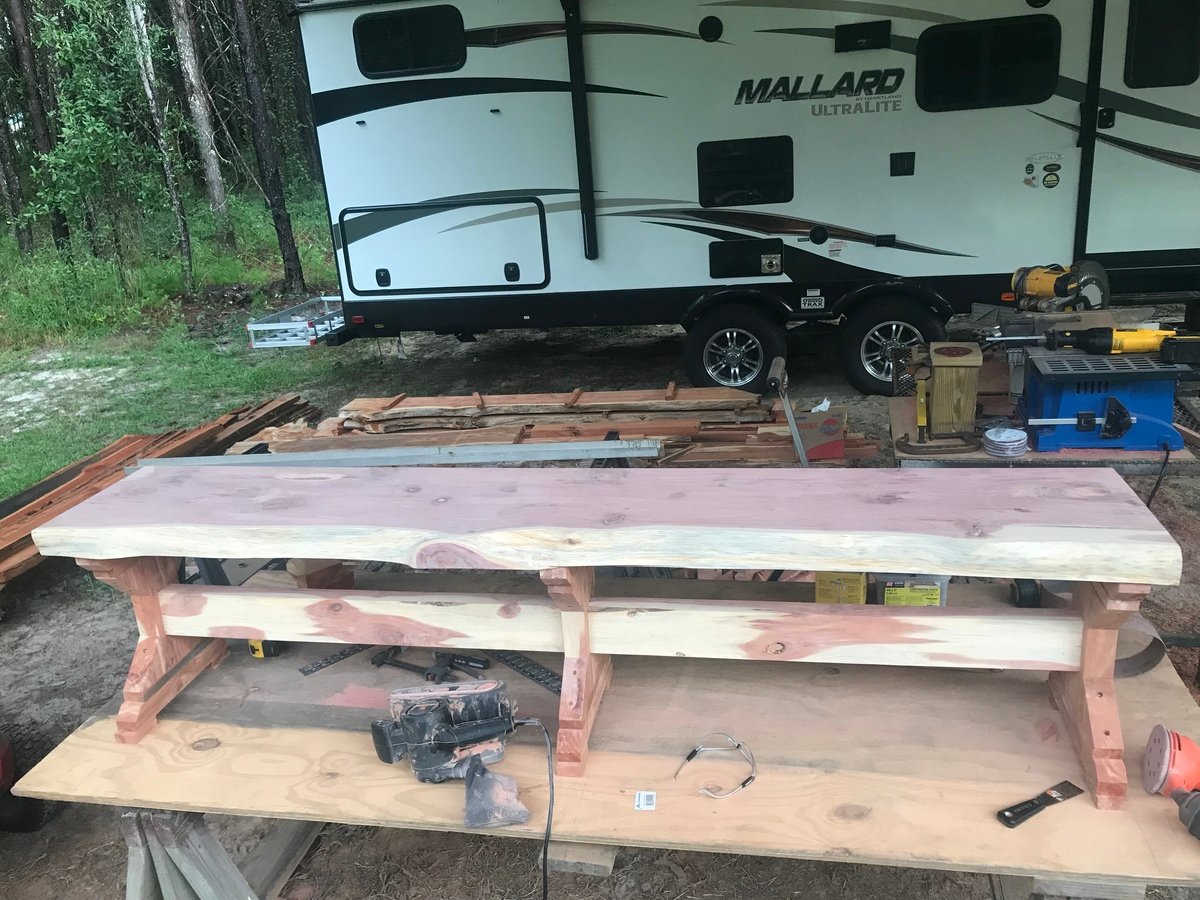
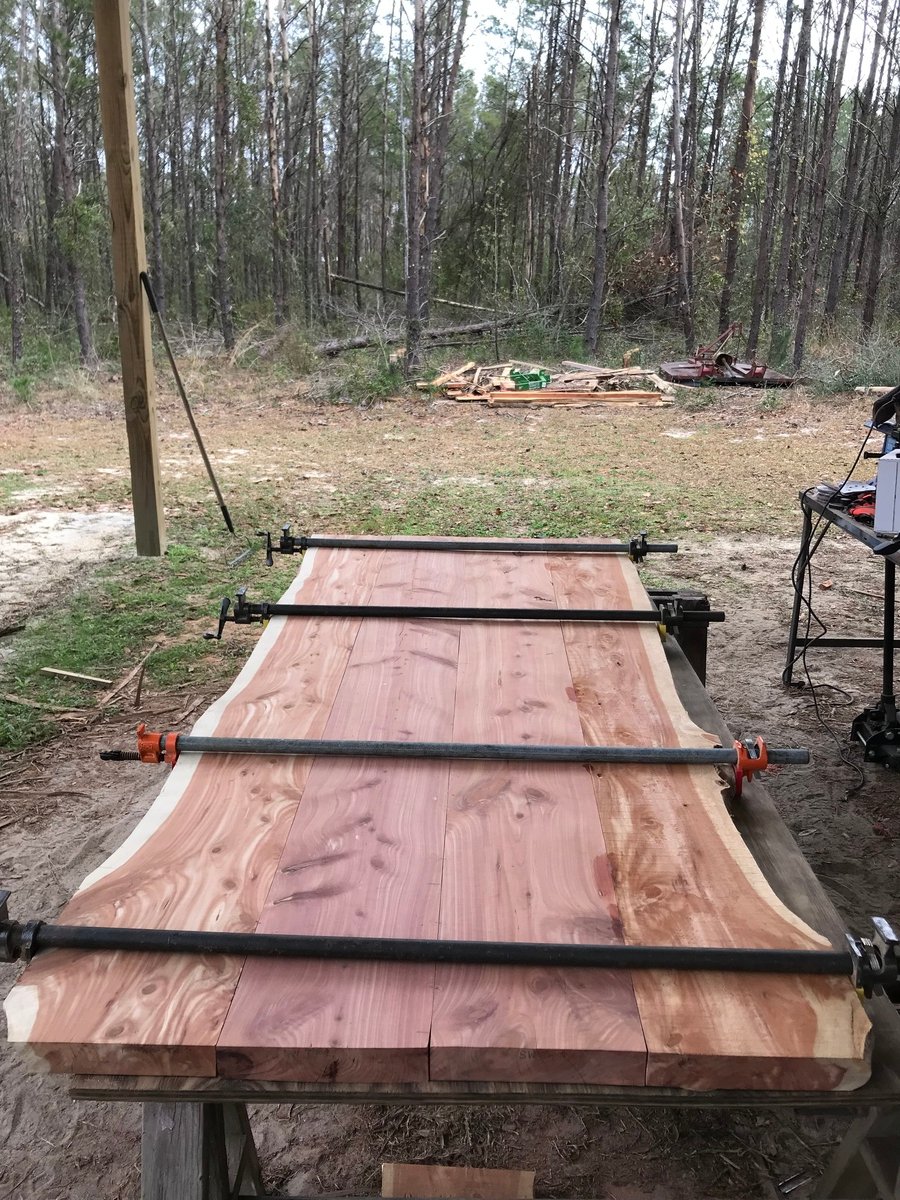
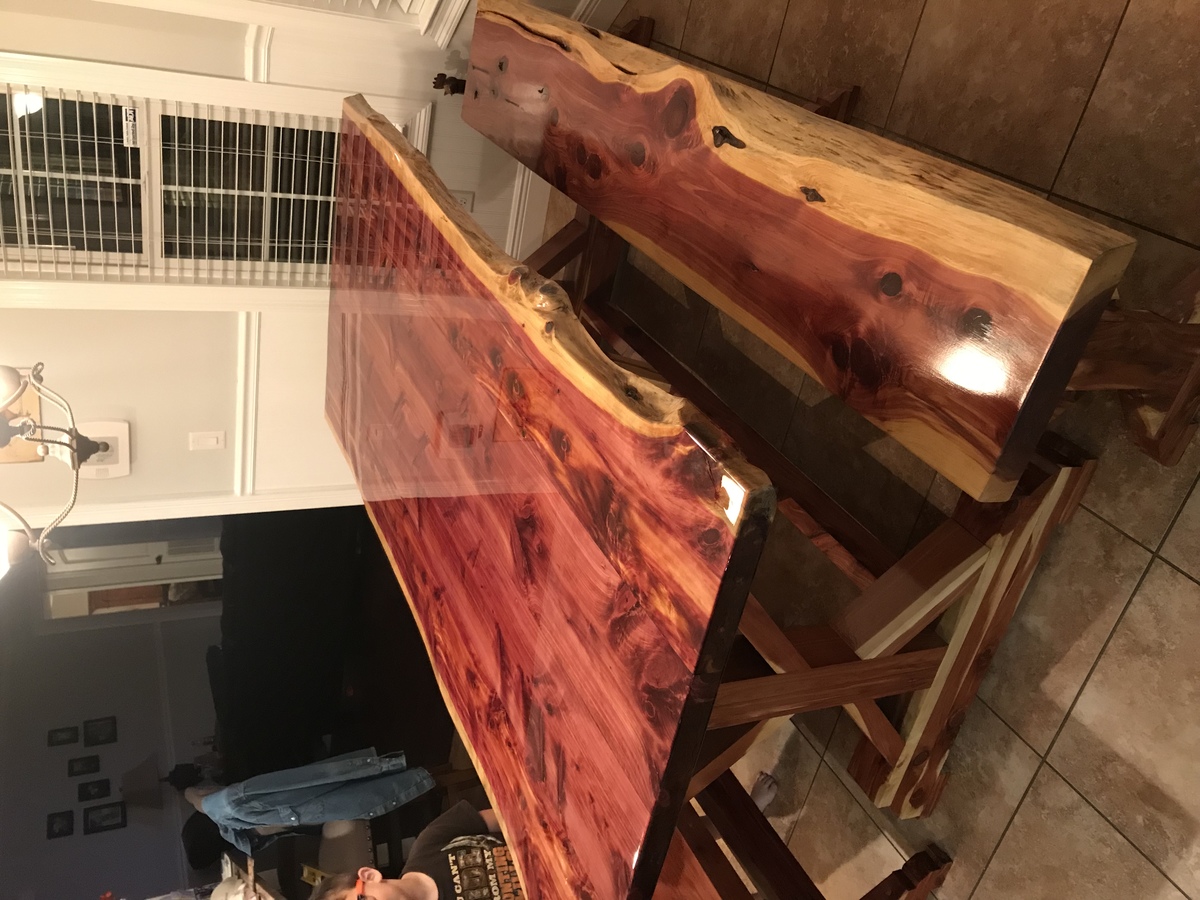
Really enjoyed this project, every piece was made from slabs cut from cedar. Thanks for the plans.


Version of your laundry room make-over !


Fri, 01/27/2023 - 09:43
This looks fabulous, thank you so much for sharing!

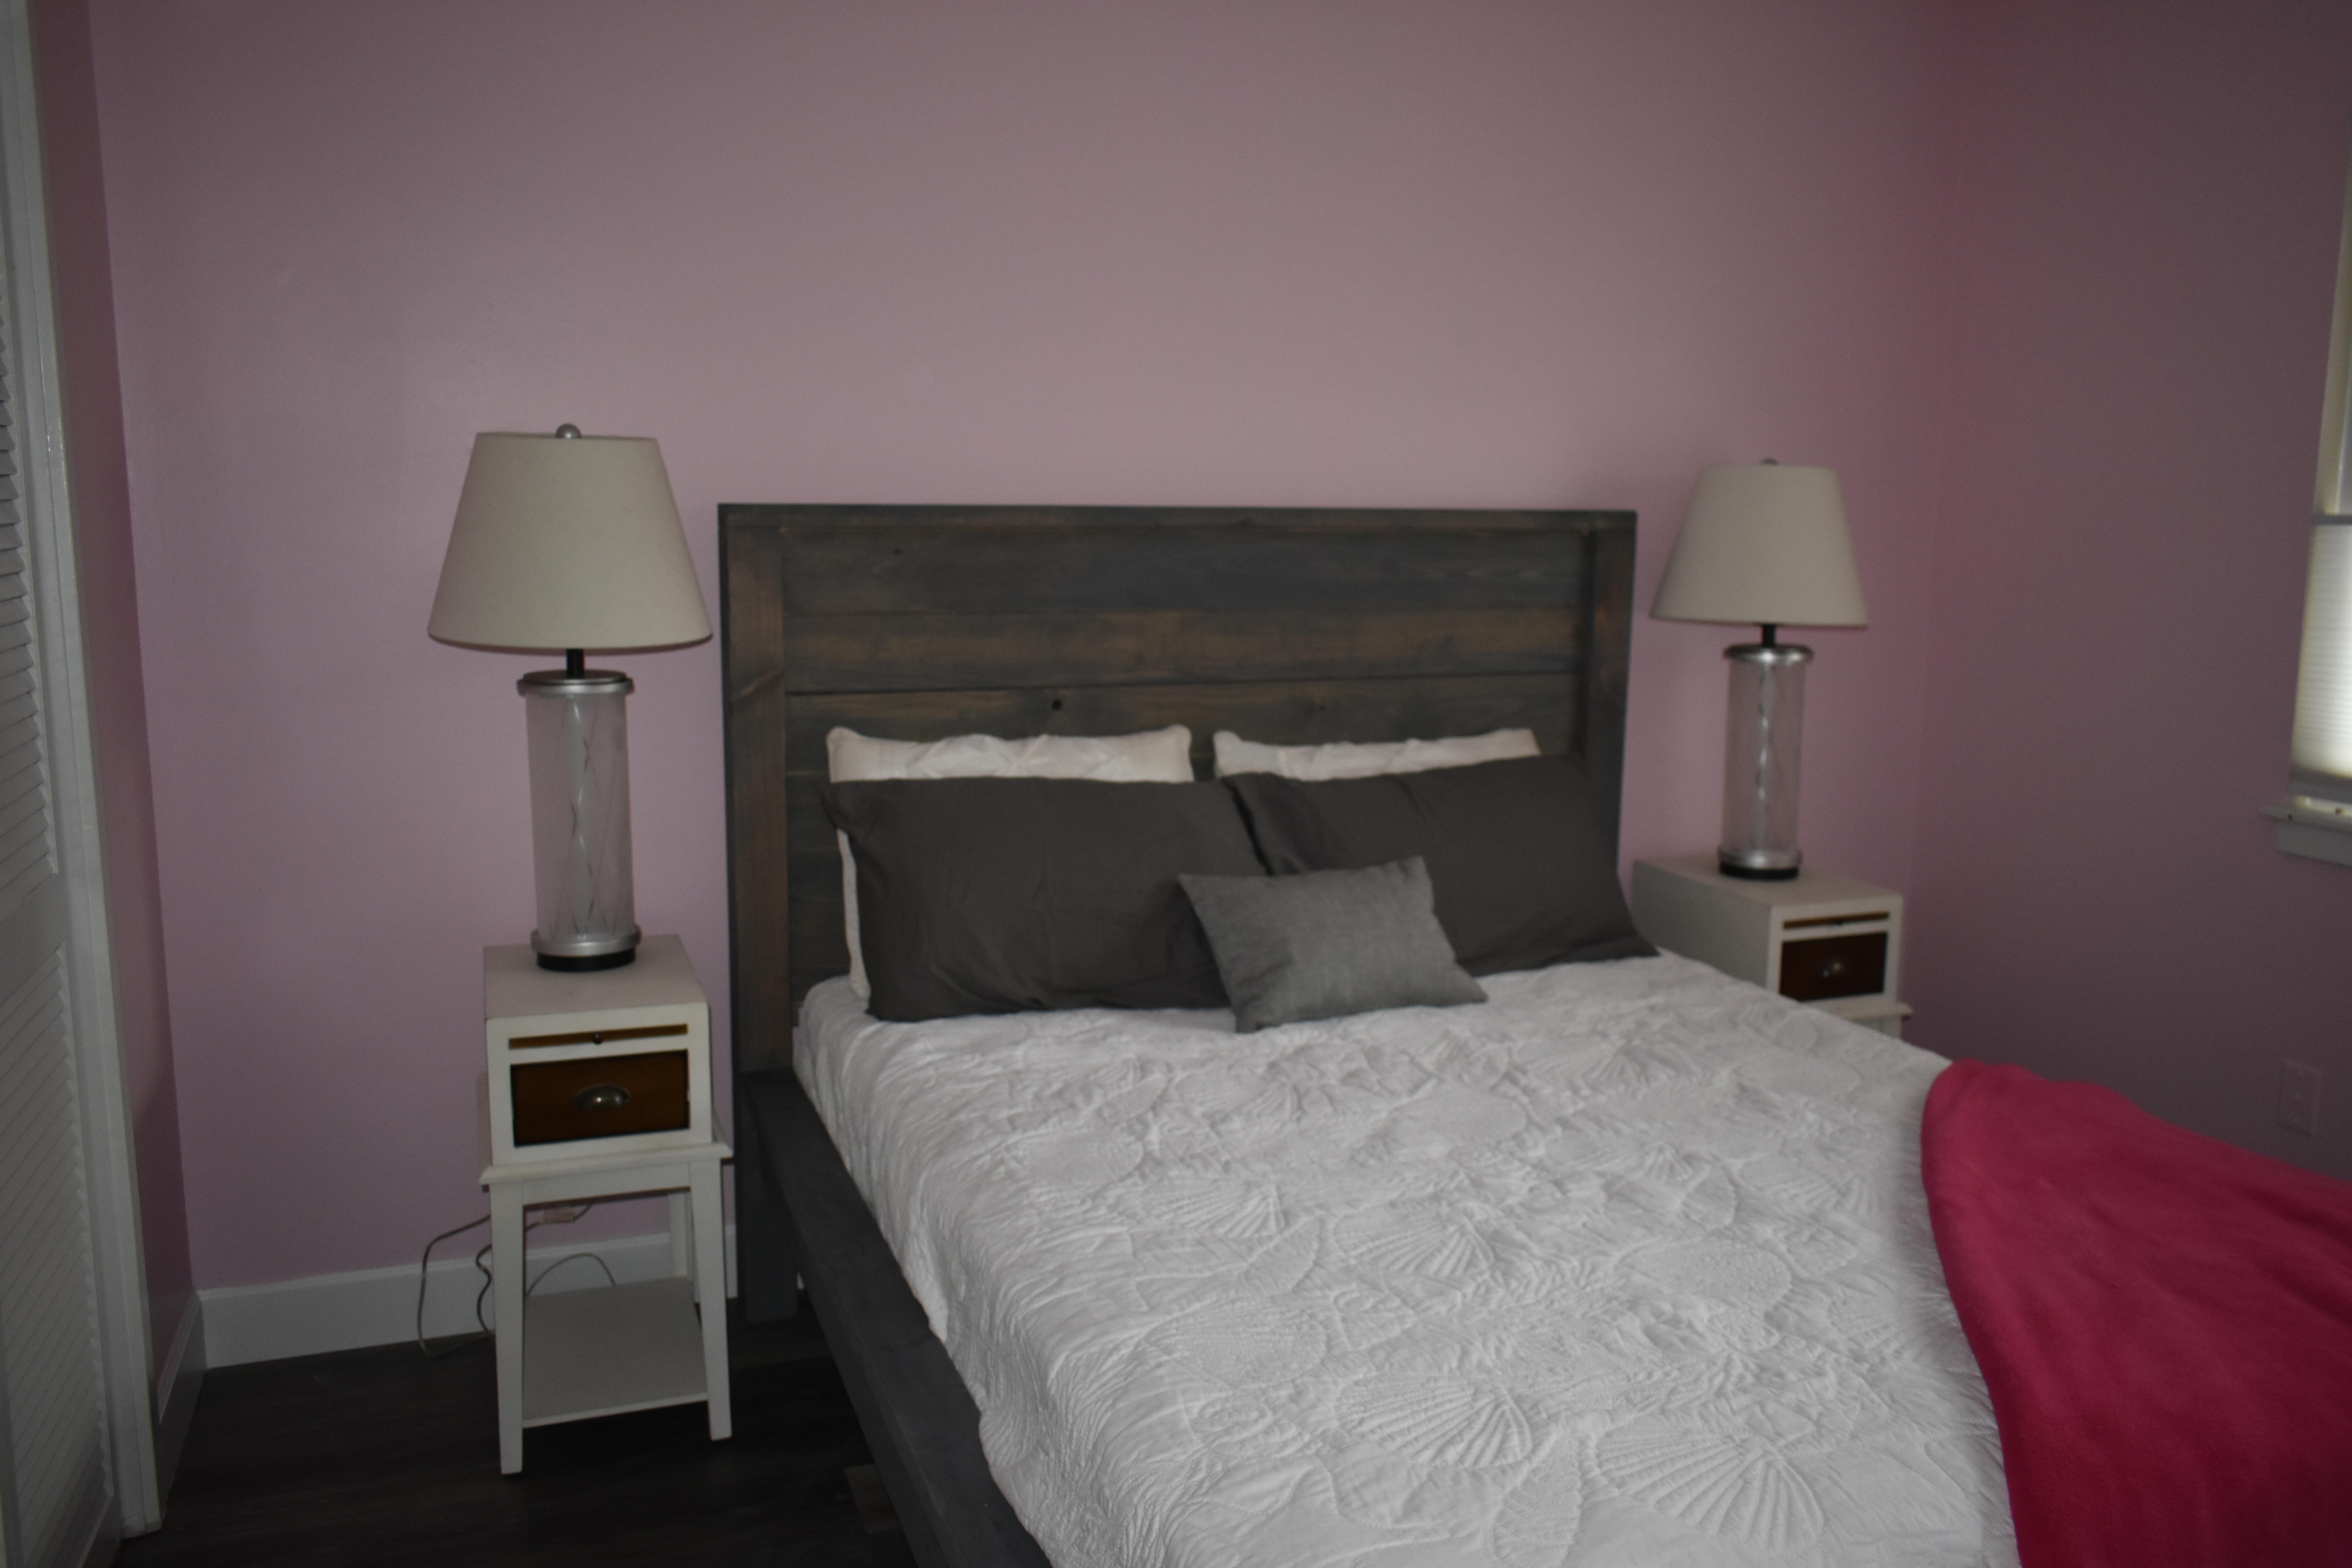
Finished Ana White's farmhouse bedside table. I used antique drawer pulls from old furniture. I used table top clips to attached the top to give the wood room to breathe as seasons change. I also put in two blocks as drawer stoppers so the drawer didn't go too far in.
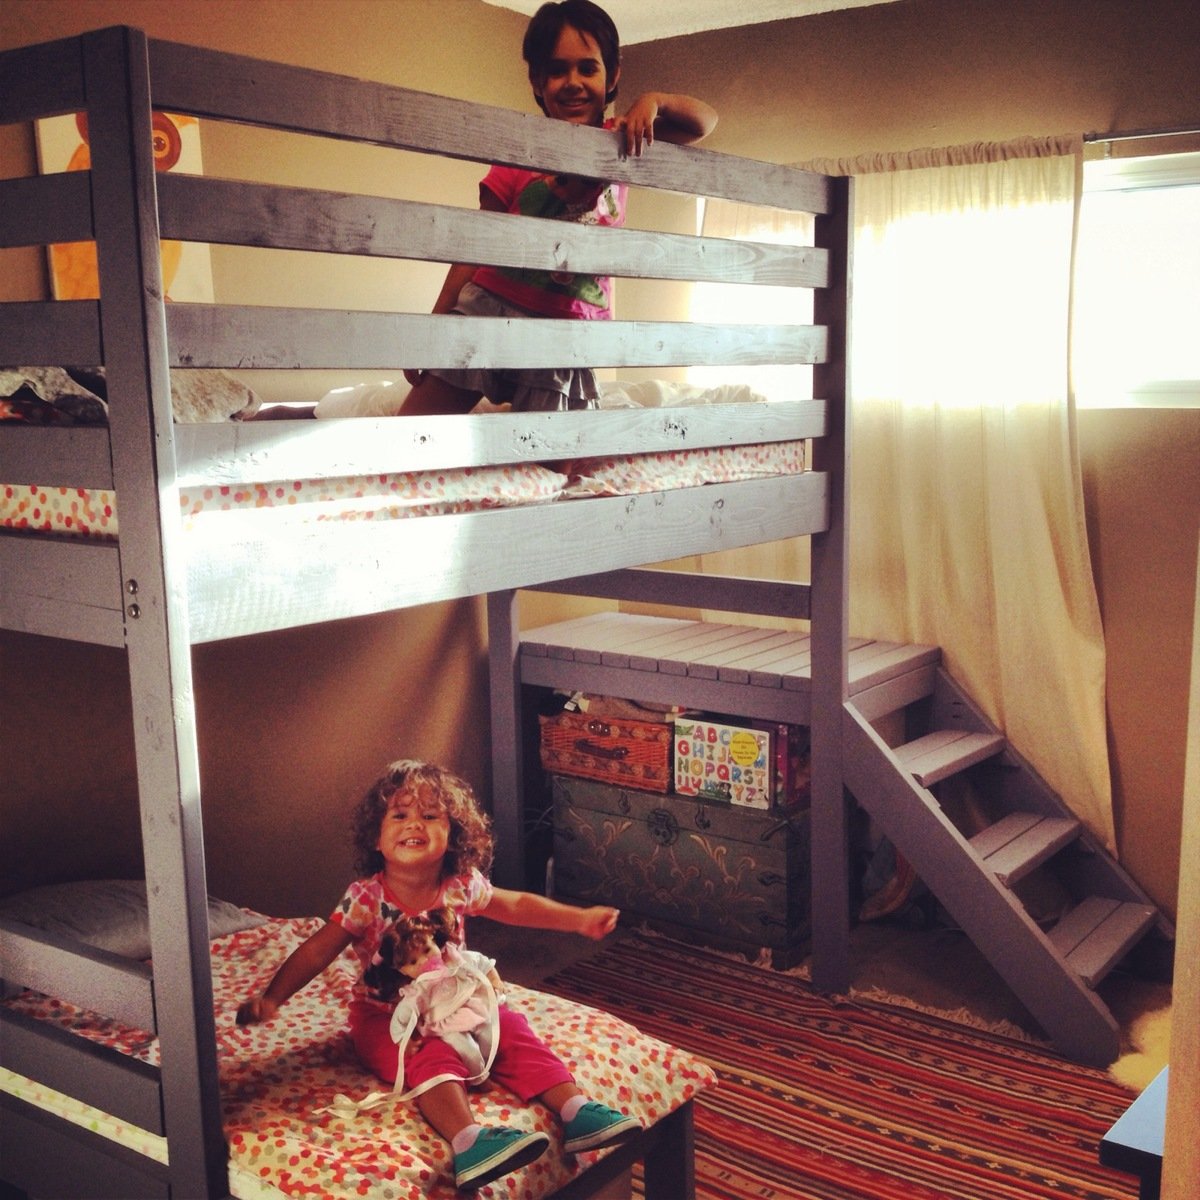
As our youngest daughter's 2nd birthday was fast approaching, we were looking for options to eliminate the crib + twin setup we had in the girls room. I had always been a fan of the L-Shaped Bunks Arnold and Willis shared in "Diff'rent Strokes." The problem was that all the comparable beds at furniture stores were pushing $1000 for that sort of set-up, we didn't really need a twin bed for the 2 year old, and were a little worried with the two year old on ladders and falling off the top bunk while playing/sleeping with her 7 year old sister.
And so in doing my search I came across the junior loft plan from this site. At first, I disregarded it, since I had never taken on a project like this before, plus with only one bed and short railings, it didn't fit our needs. I kept going back because i loved the design. Then I recalled my father and I doing something similar when I was a young teen building a loft bed around a bookshelf/desk combo that my uncle had made. I figured if he could do it, so could I.
So I started tweaking with the plans. Flipping the stairs to the other side... easy. Increasing the rail height to double... no problem. Adding a toddler bed frame based on some mattress sizes I got off amazon... just some simple math...
Then $150 in wood, fasteners, paint, etc. another investment of about $250 in tools, and I was good to go. Over the next 3 nights, I slaved in the garage by myself, measuring, cutting, measuring again, PH drilling, then started sanding and assembly on Sat. By Sunday, I was ready to move the pieces up to the room for final assembly and paint, and about 20 man hours later, we had this beautiful beast and just in time for her birthday.
We had dropped our daughters off with their aunt for a few hours to get it set up, and when they came home the look on their face was priceless. Sure I could have spent less time and a little more money, but I have to tell you the feeling of accomplishment and our daughter's collective excitement made the whole thing worth it.
I'm super grateful to Ann White and her amazing site, and I'm looking forward to my next project, since my wife is now working on a list of stuff for me to make...
-JG
NOTE: The assembled bed came out incredibly sturdy with 2.5" PH screws & glue, however since it's carrying precious cargo, I added two 4" lag bolts (3/8) into each of the posts for a little added stability.

Wed, 10/09/2013 - 12:16
Those happy faces say it all! Great job, can't wait to see your next project!


Comments
Ana White Admin
Thu, 12/29/2022 - 10:02
Stunning Coffee Bar!
Pretty much everything you ned in one place! Thank you for sharing, amazing build! Sharing to social media, please email [email protected] if you'd like us to tag you!