Community Brag Posts
Customized TV table

I started with the Farmhouse Bedside Table stand to get the general dimensions and materials list. I adjusted the plan to get the height I wanted for a TV stand and left out the drawer where I could place the cable box or other AV equipment. It worked out really well. I used a router on the top to approximate the other furniture in the room. I finished it off with some adjustable height screw in feet for carpeting.
I added a lazy susan TV stand to allow the TV to adjust to different viewing angles.
Cutting and assembly was only a weekend's work. The painting and finish - to make it suitable for indoor furniture - required more time with multiple coats of paint, sanding, and polyurethane.
Thank you for sharing your plan!

Estimated Cost
$100
Estimated Time Investment
Week Long Project (20 Hours or More)
Finish Used
Rustoleum 2X spray paint and water-based polyurethane semi-gloss finish.
Recommended Skill Level
Beginner
Coffee Sack Lampshade

Several years ago I found a lamp in the Restoration Hardware trash in the parking lot of the shopping mall. It was in great shape. The price tag was still on…$200! Huge score. They had cut the plug off, but that was an easy fix. Four years later it was in need of a new look.


Estimated Cost
$15
Estimated Time Investment
An Hour or Two (0-2 Hours)
Finish Used
Rustoleum Dark Walnut
3M Spray Adhesive
3M Spray Adhesive
Recommended Skill Level
Starter Project
Coffee Table

Coffee Table made from own plan. Finished in Minwax English Chestnut and sanded back to show some wood through. Satin Poly and two coats of finishing wax to hopefully protect it from knocks!


Estimated Cost
$200 total. Most expensive part was the legs from OsborneWood.com which cost $135 total inc shipping.
Estimated Time Investment
Weekend Project (10-20 Hours)
Finish Used
Minwax English Chestnut (sanded back), Minwax Satin Poly, Minwa Finishing Wax.
Recommended Skill Level
Beginner
Comments
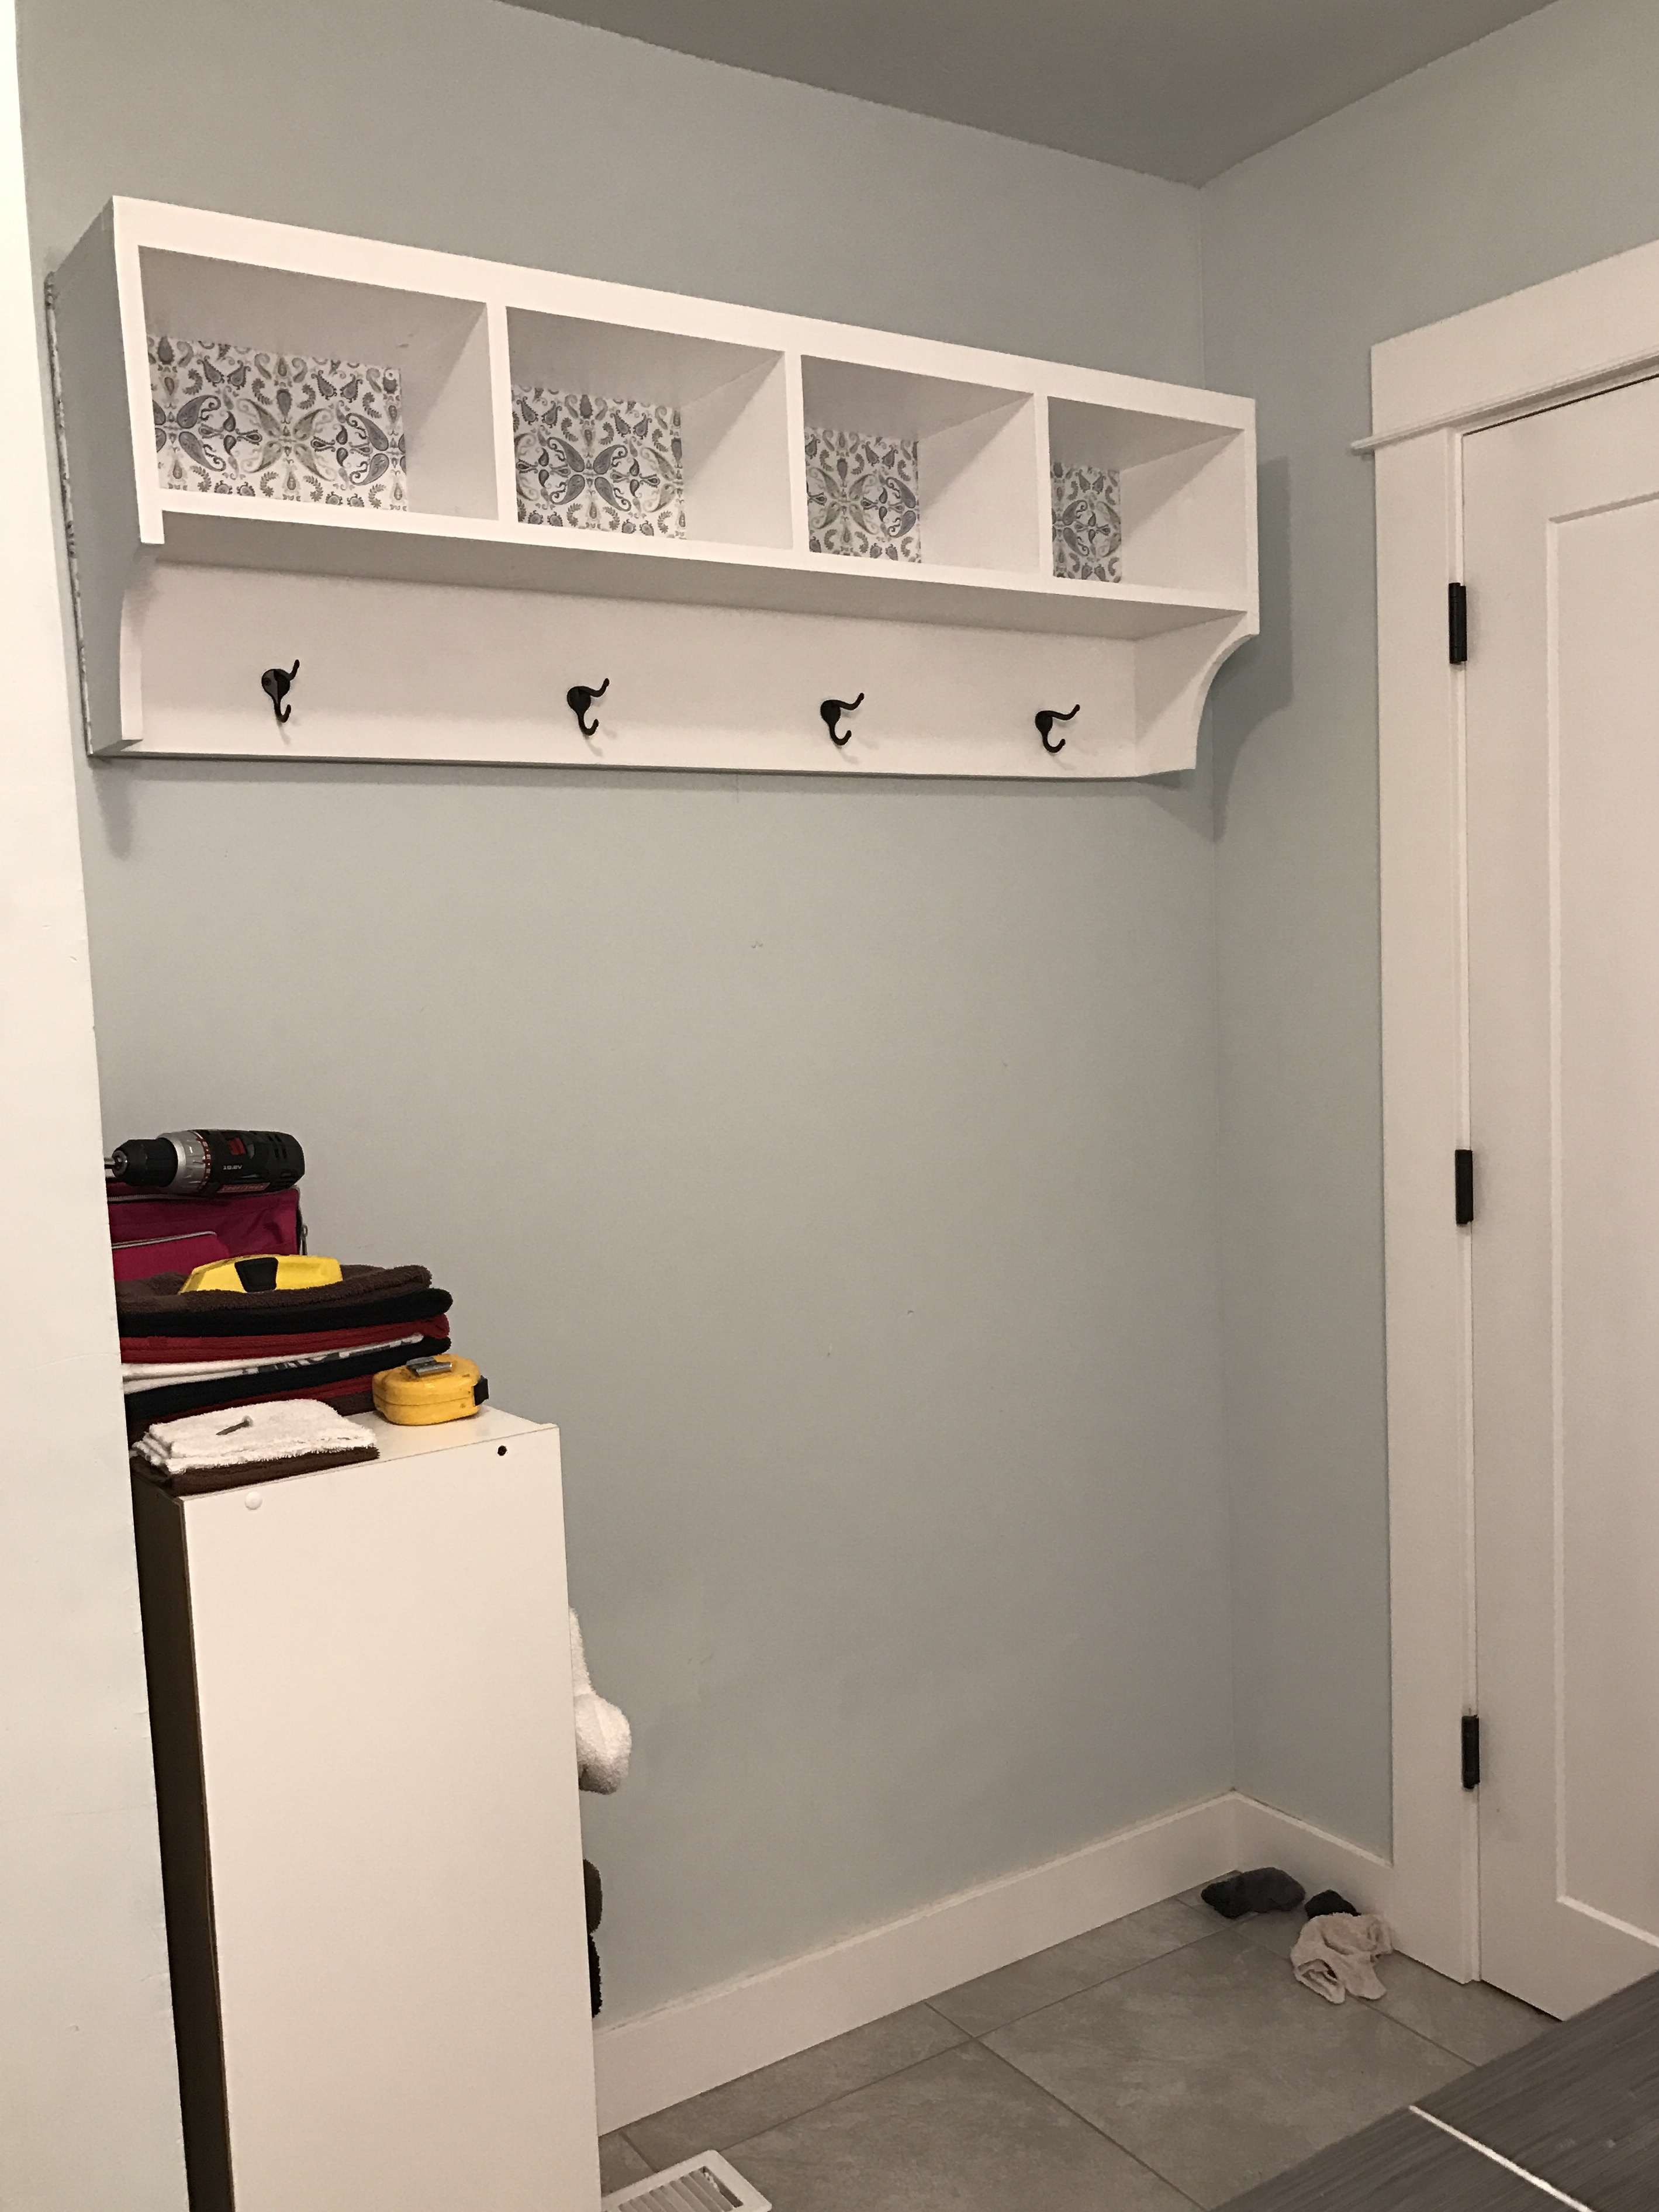
Entry shelf modified to a bathroom shelf
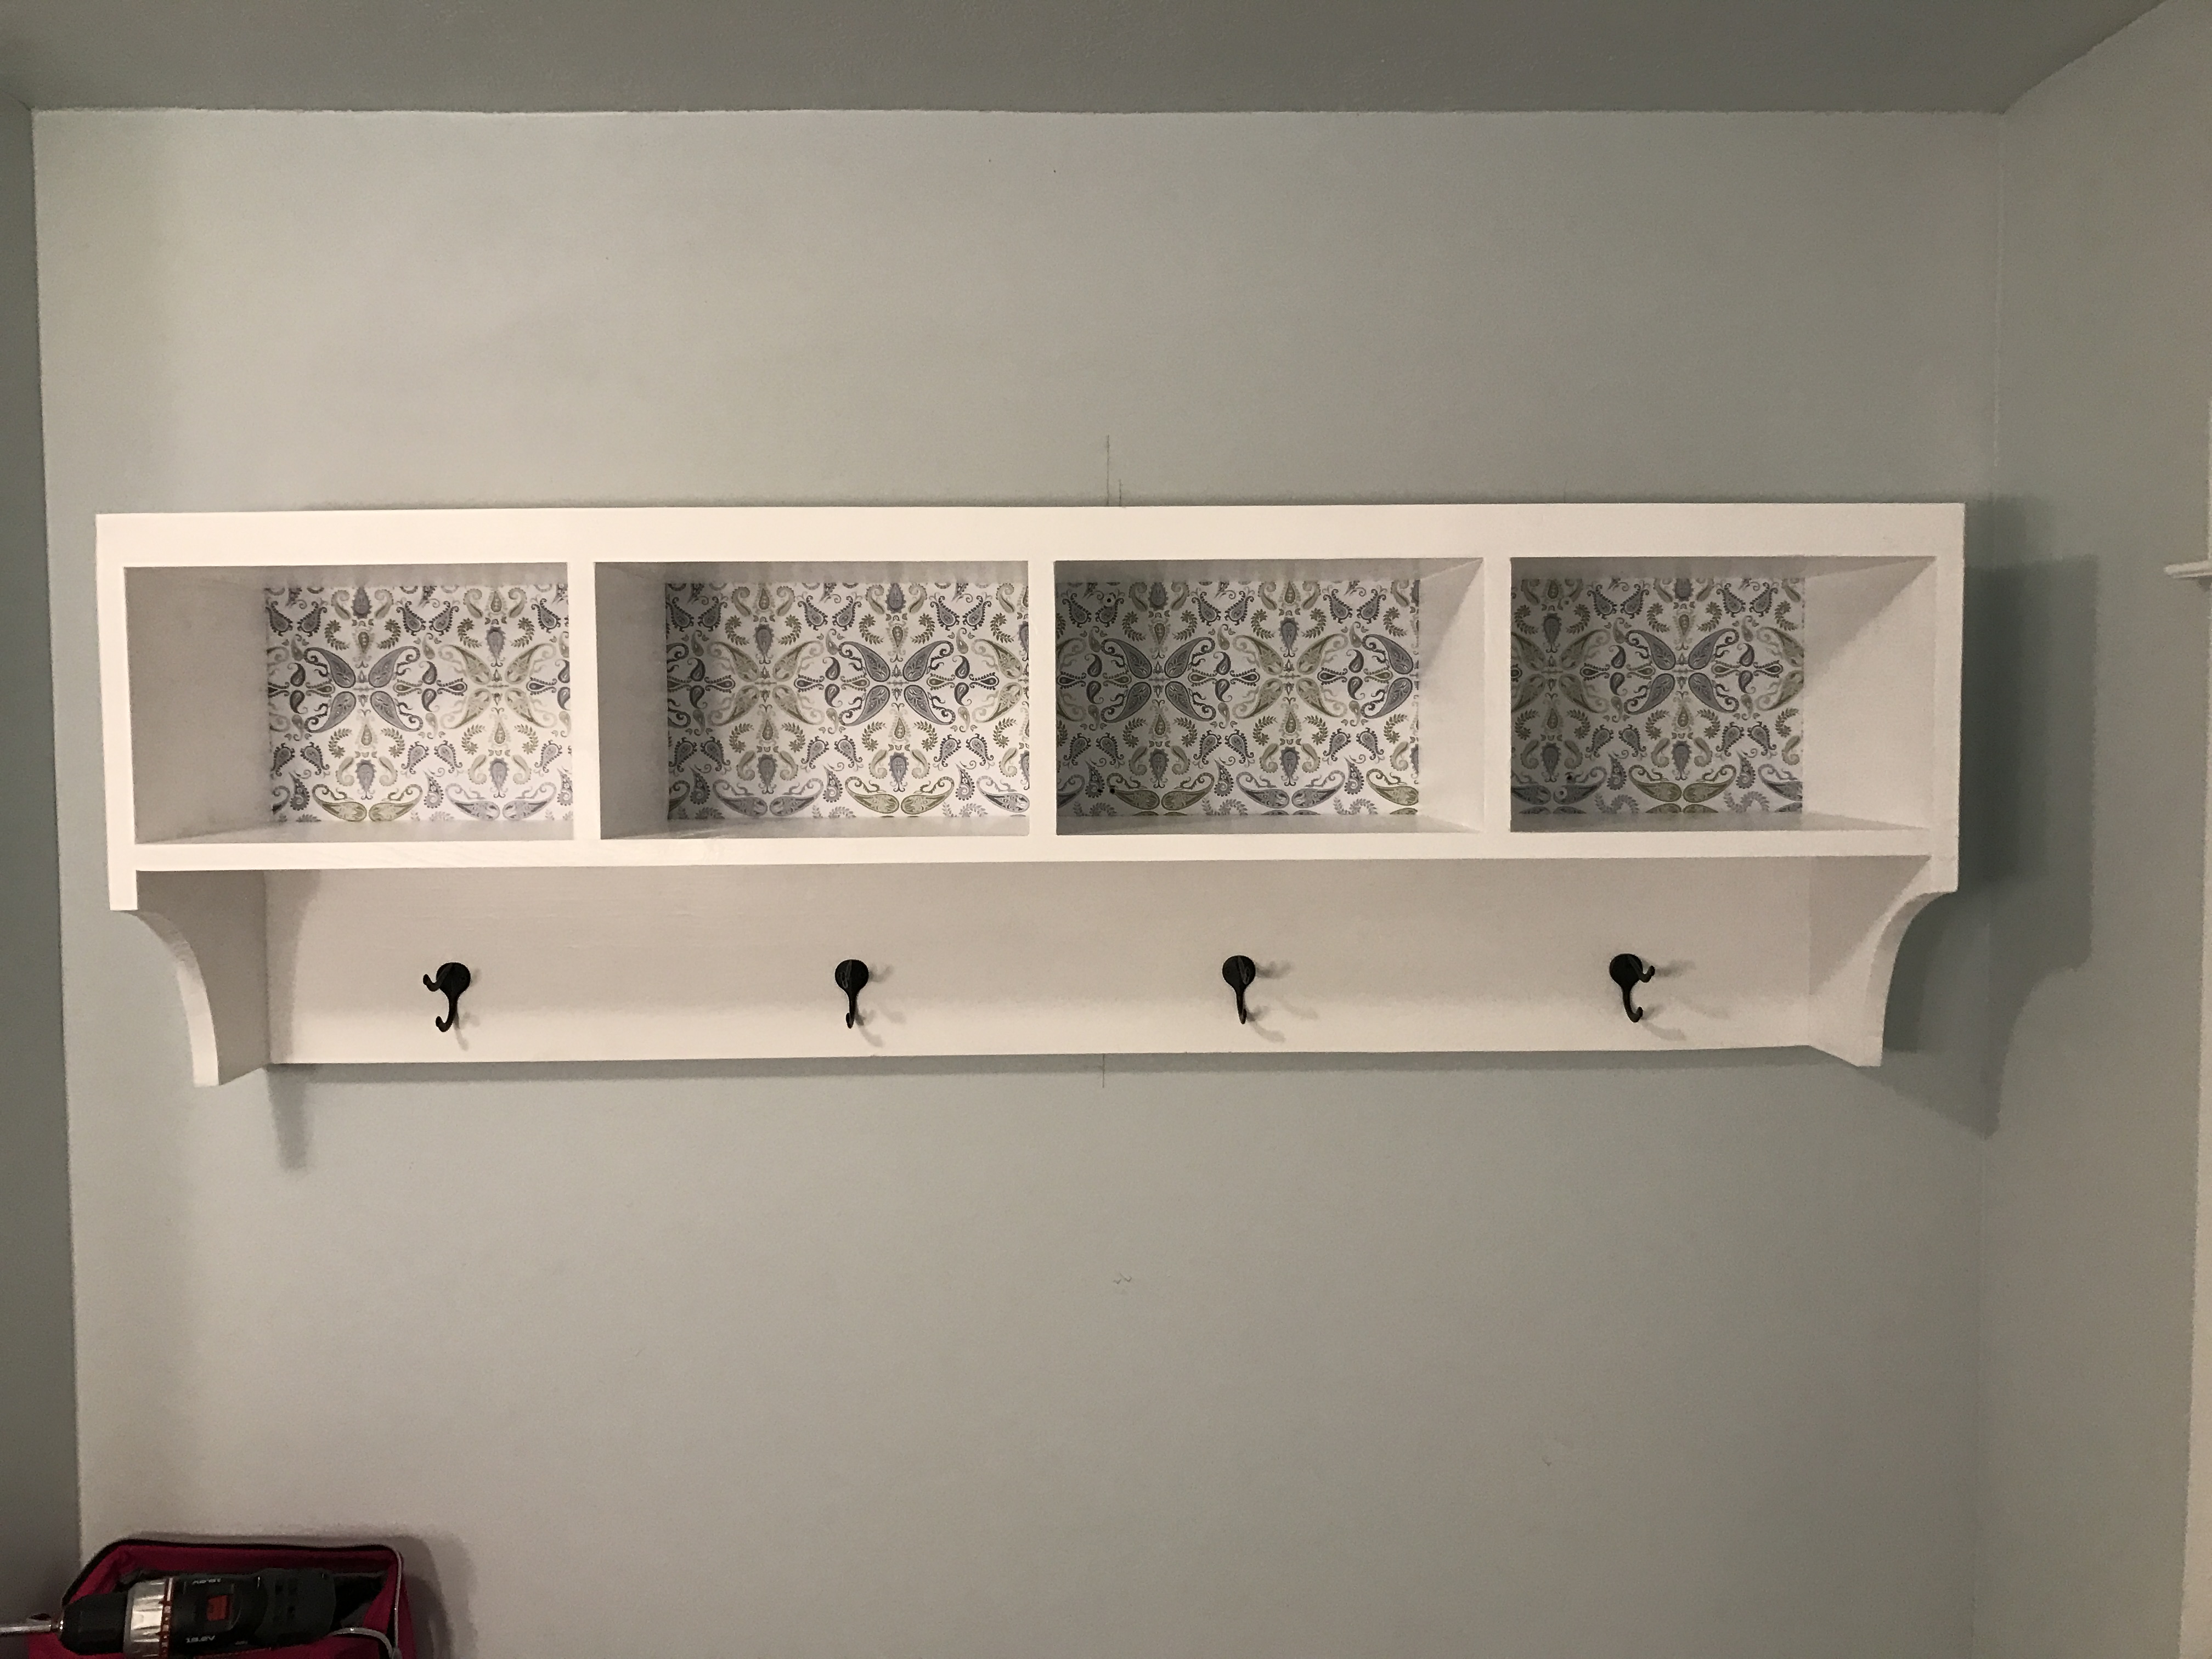
This was so fun, used contact paper on the back plywood and it turned out really well.
Built from Plan(s)
Estimated Cost
Less than $75
Estimated Time Investment
Weekend Project (10-20 Hours)
Finish Used
White satin paint from behr
I sanded between coats and used a fine bristle brush.
I sanded between coats and used a fine bristle brush.
Recommended Skill Level
Beginner
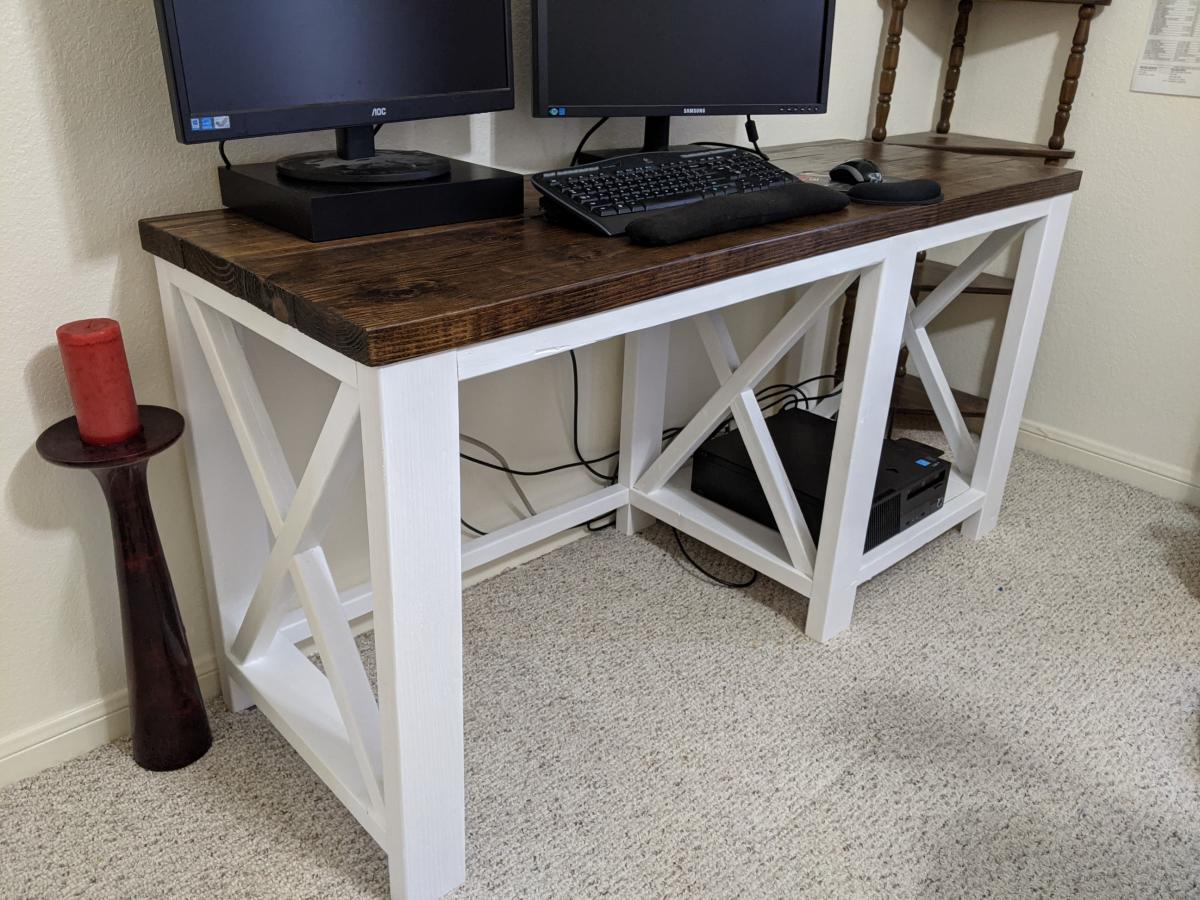
Rustic X Desk
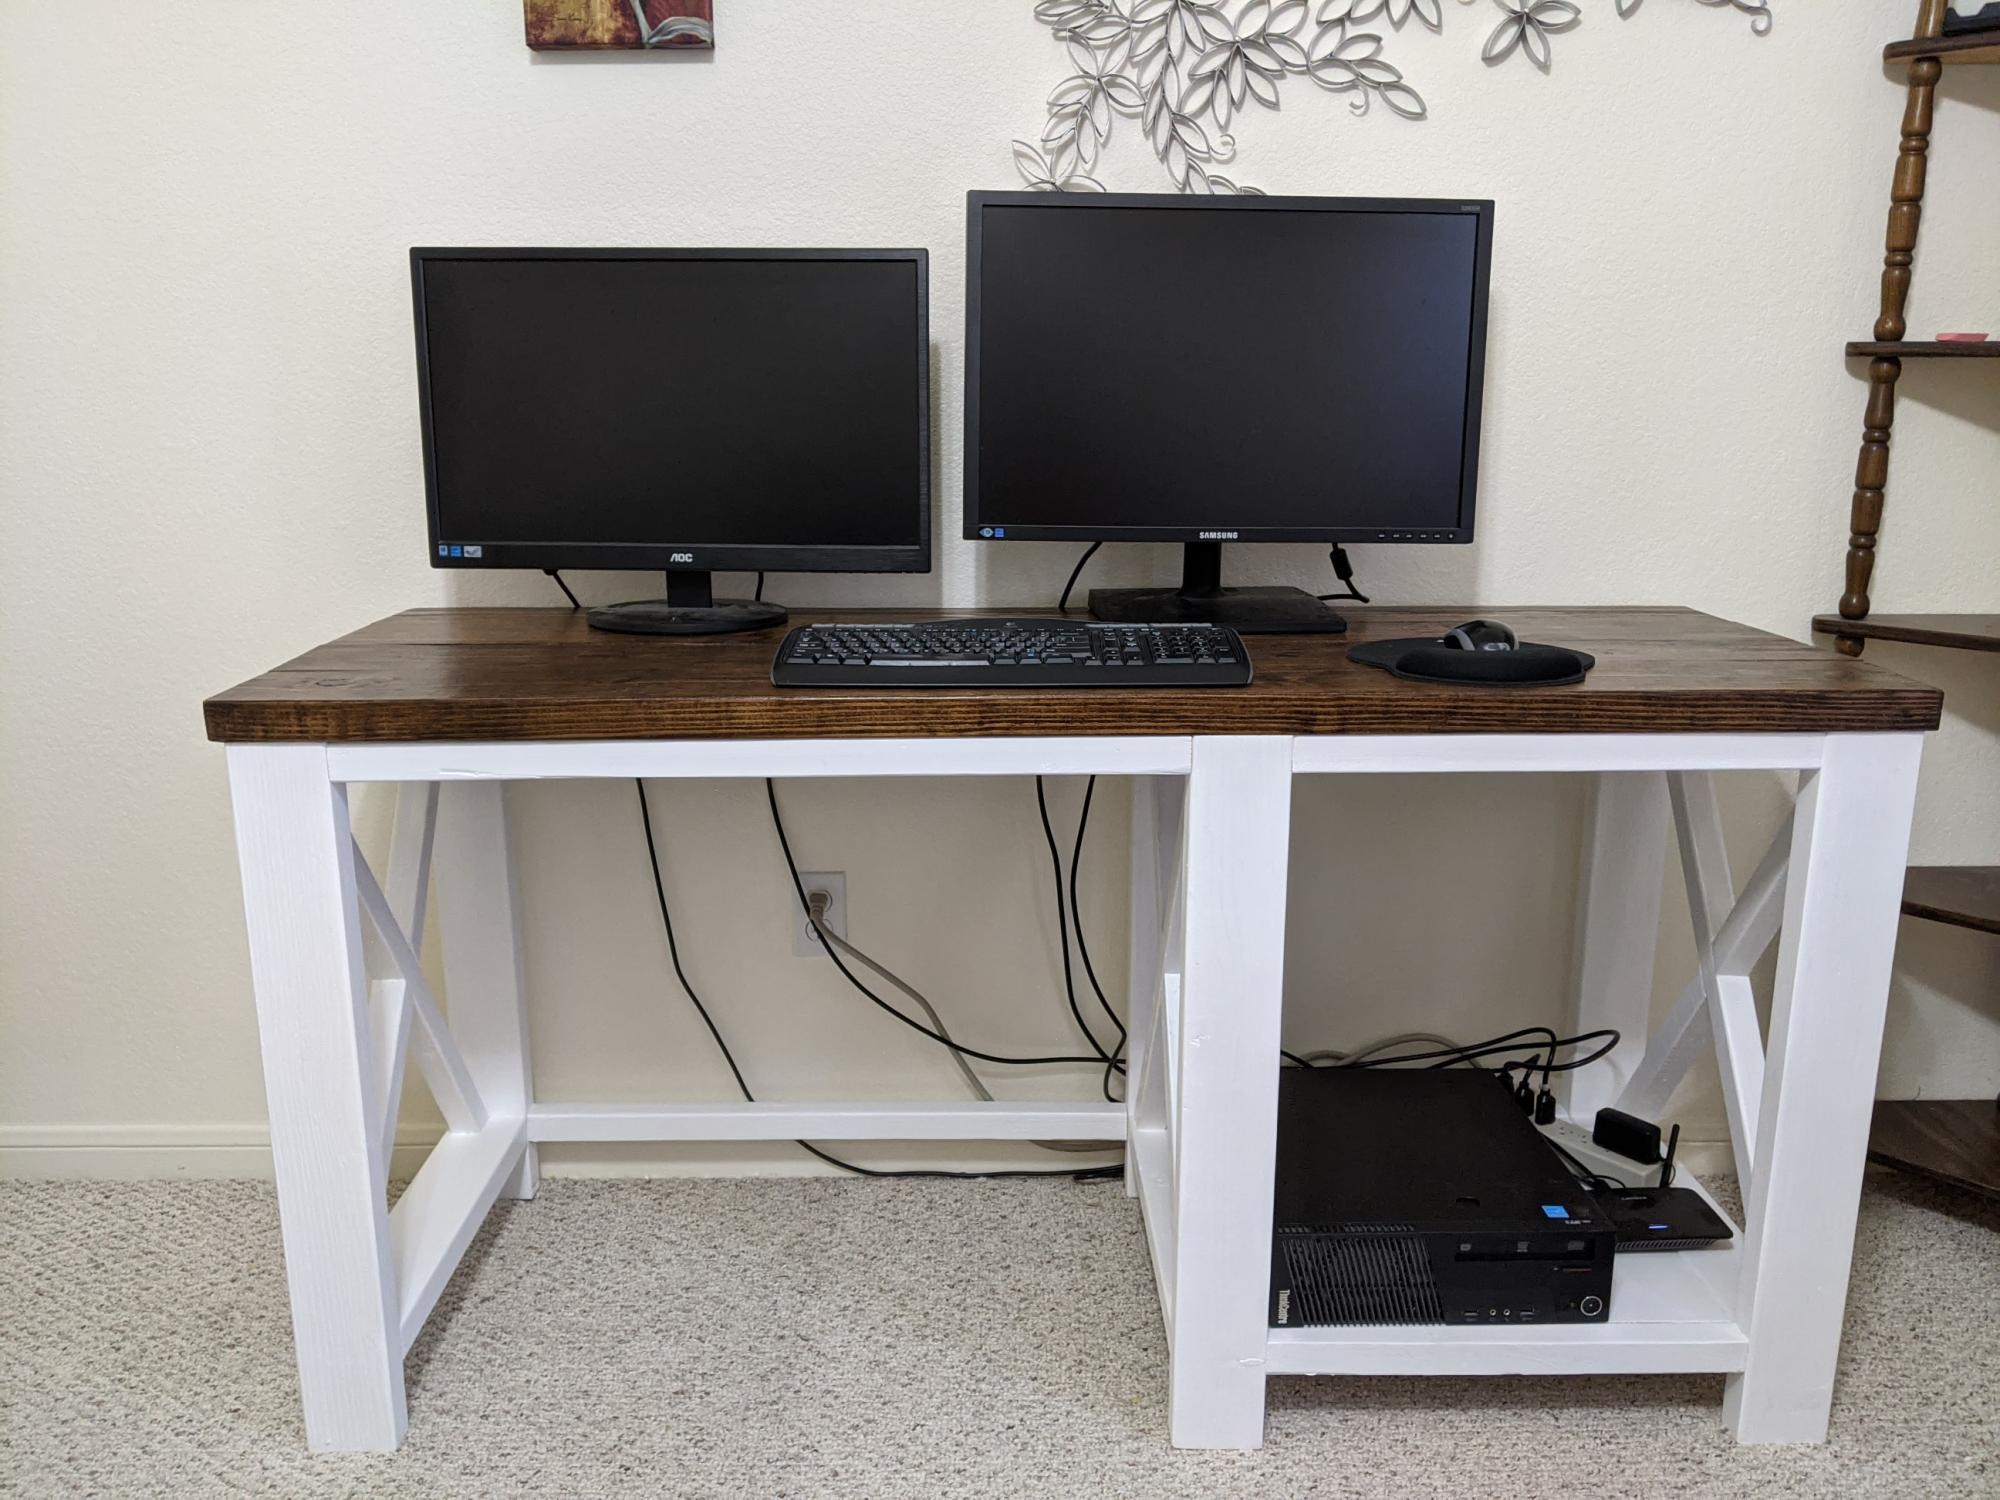
I finally got tired of my computer set up being on my sewing table. I will be working from home for quite some time and I'm so glad I finally have a designated desk for work.
This desk came out perfect. It's not too difficult but the X did take some time to get right. Used Ana's video instructions.
Built from Plan(s)
Estimated Cost
$60
Estimated Time Investment
Weekend Project (10-20 Hours)
Finish Used
Minwax Provincial for the top
White satin paint for the base.
White satin paint for the base.
Recommended Skill Level
Intermediate
Comments
Thu, 11/19/2020 - 11:10
You did great!
Thanks for sharing your project, it's nice to have a designated work area!
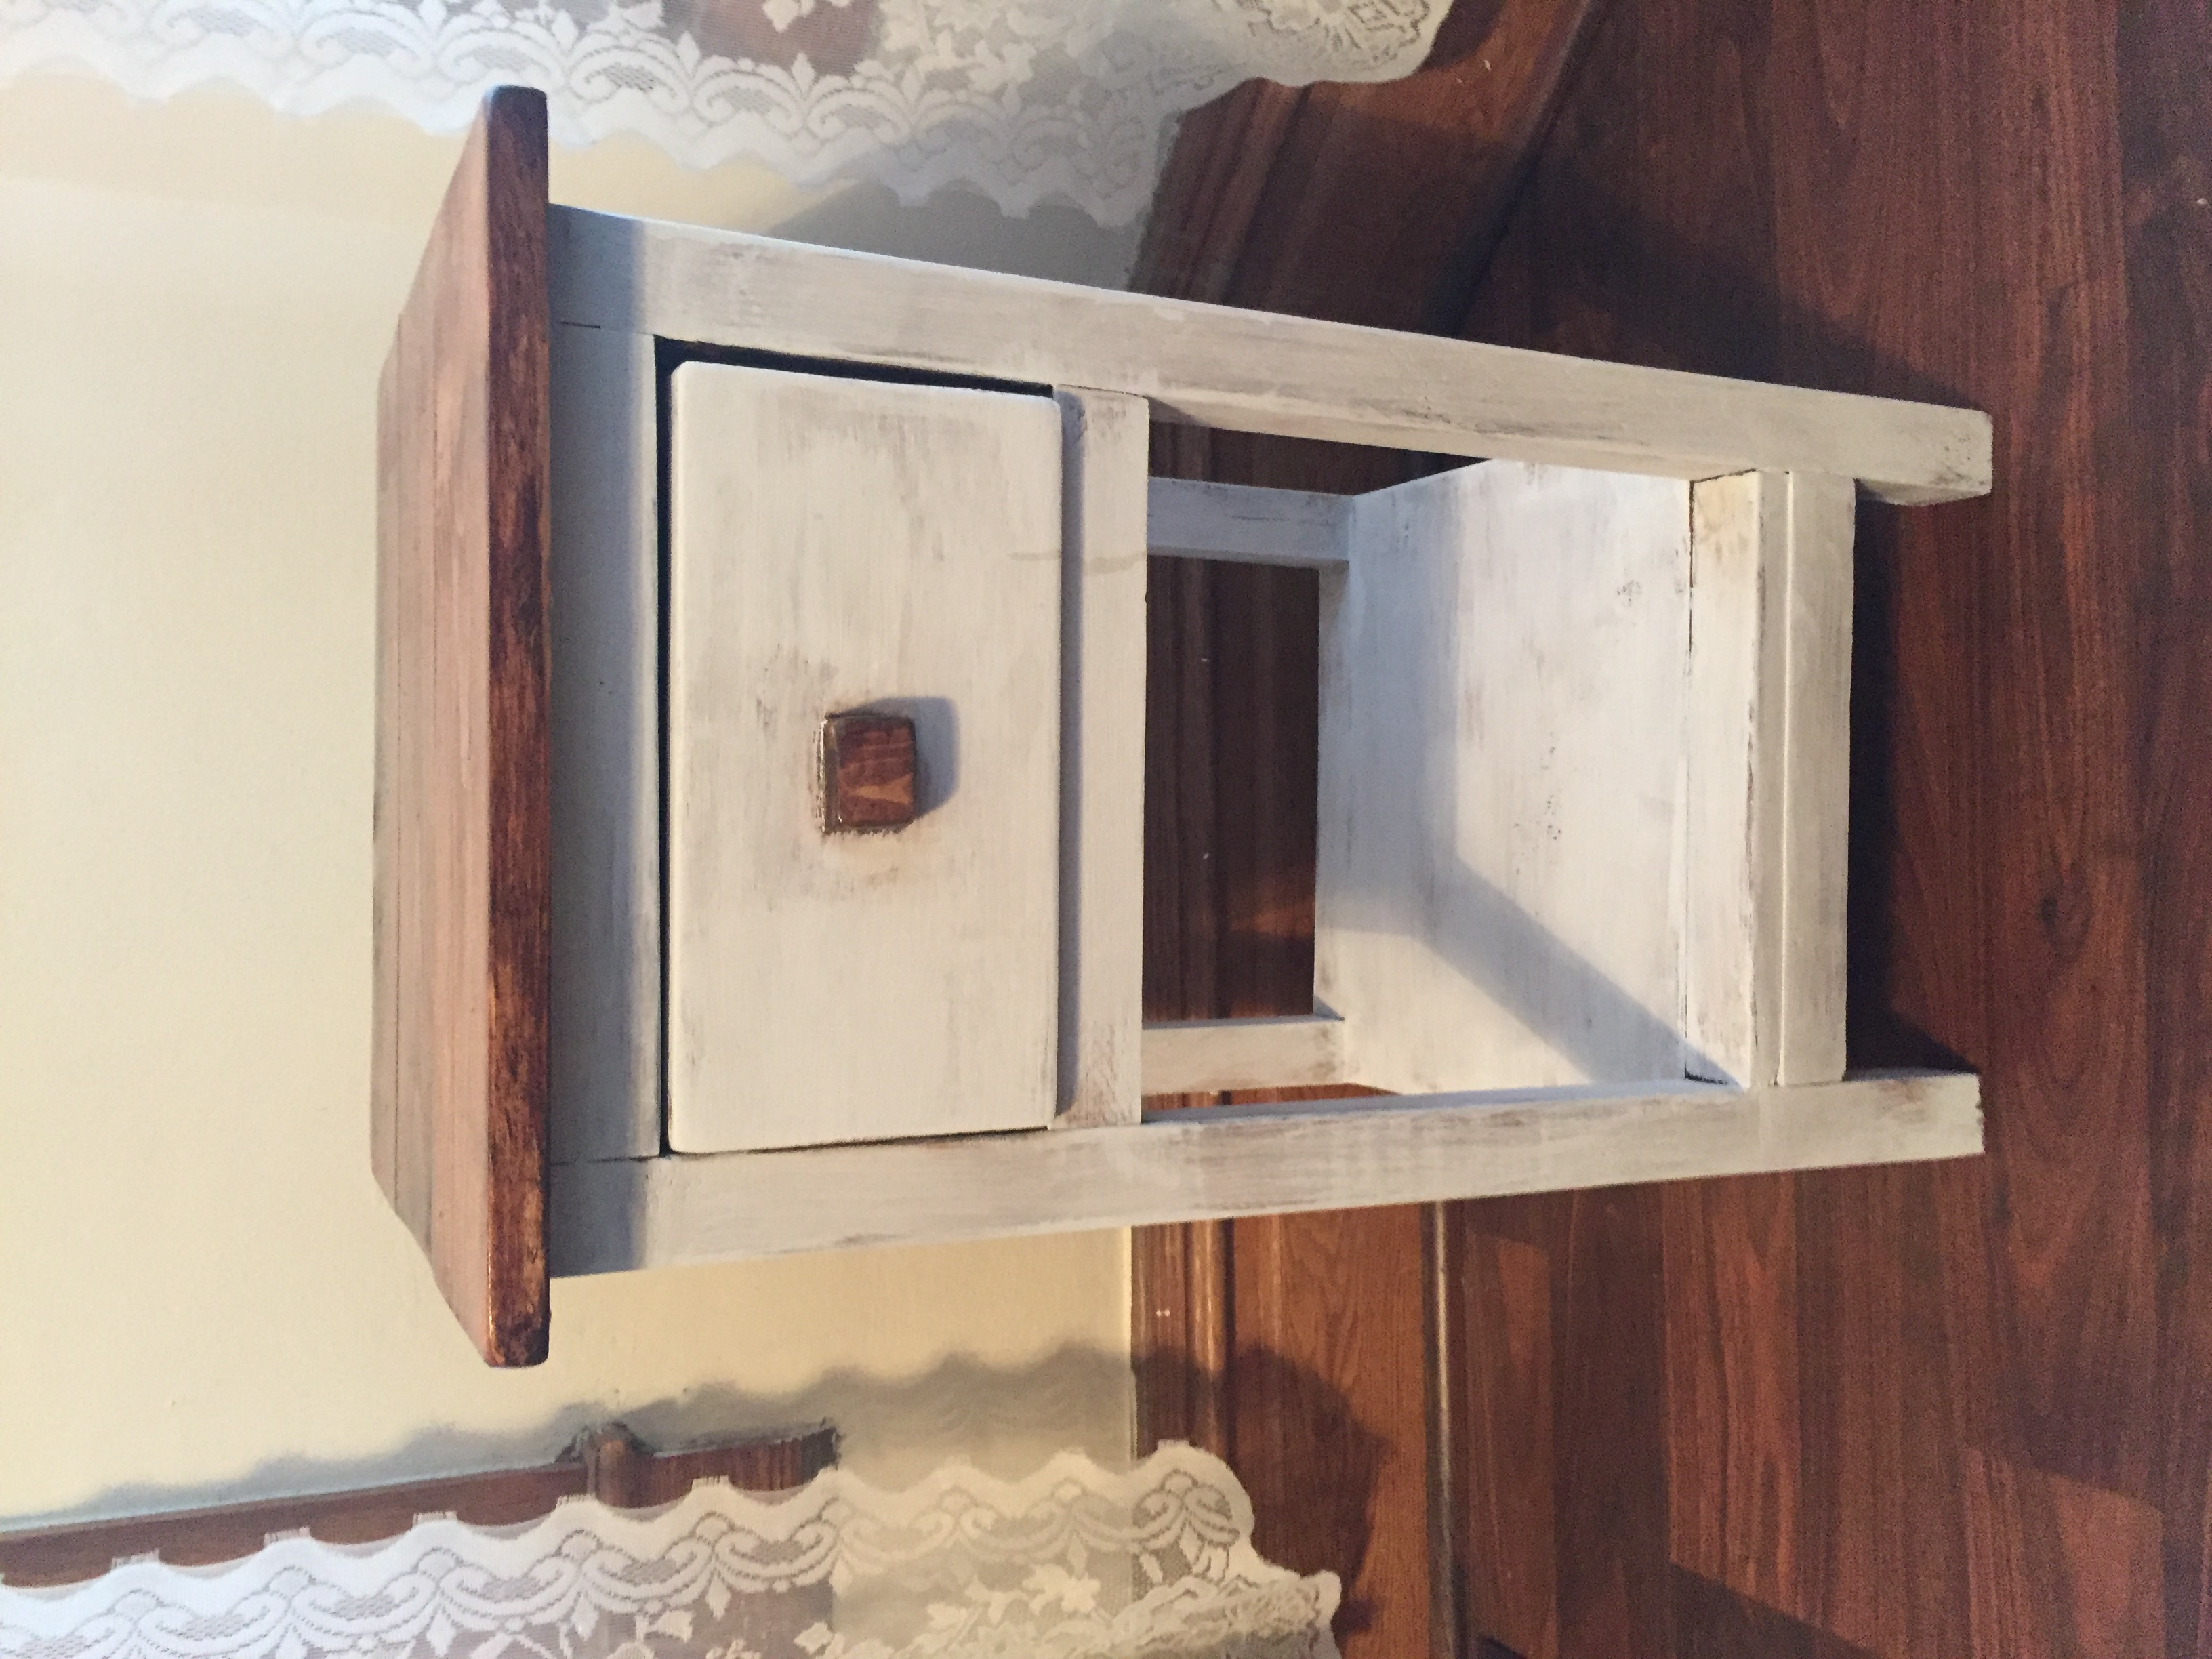
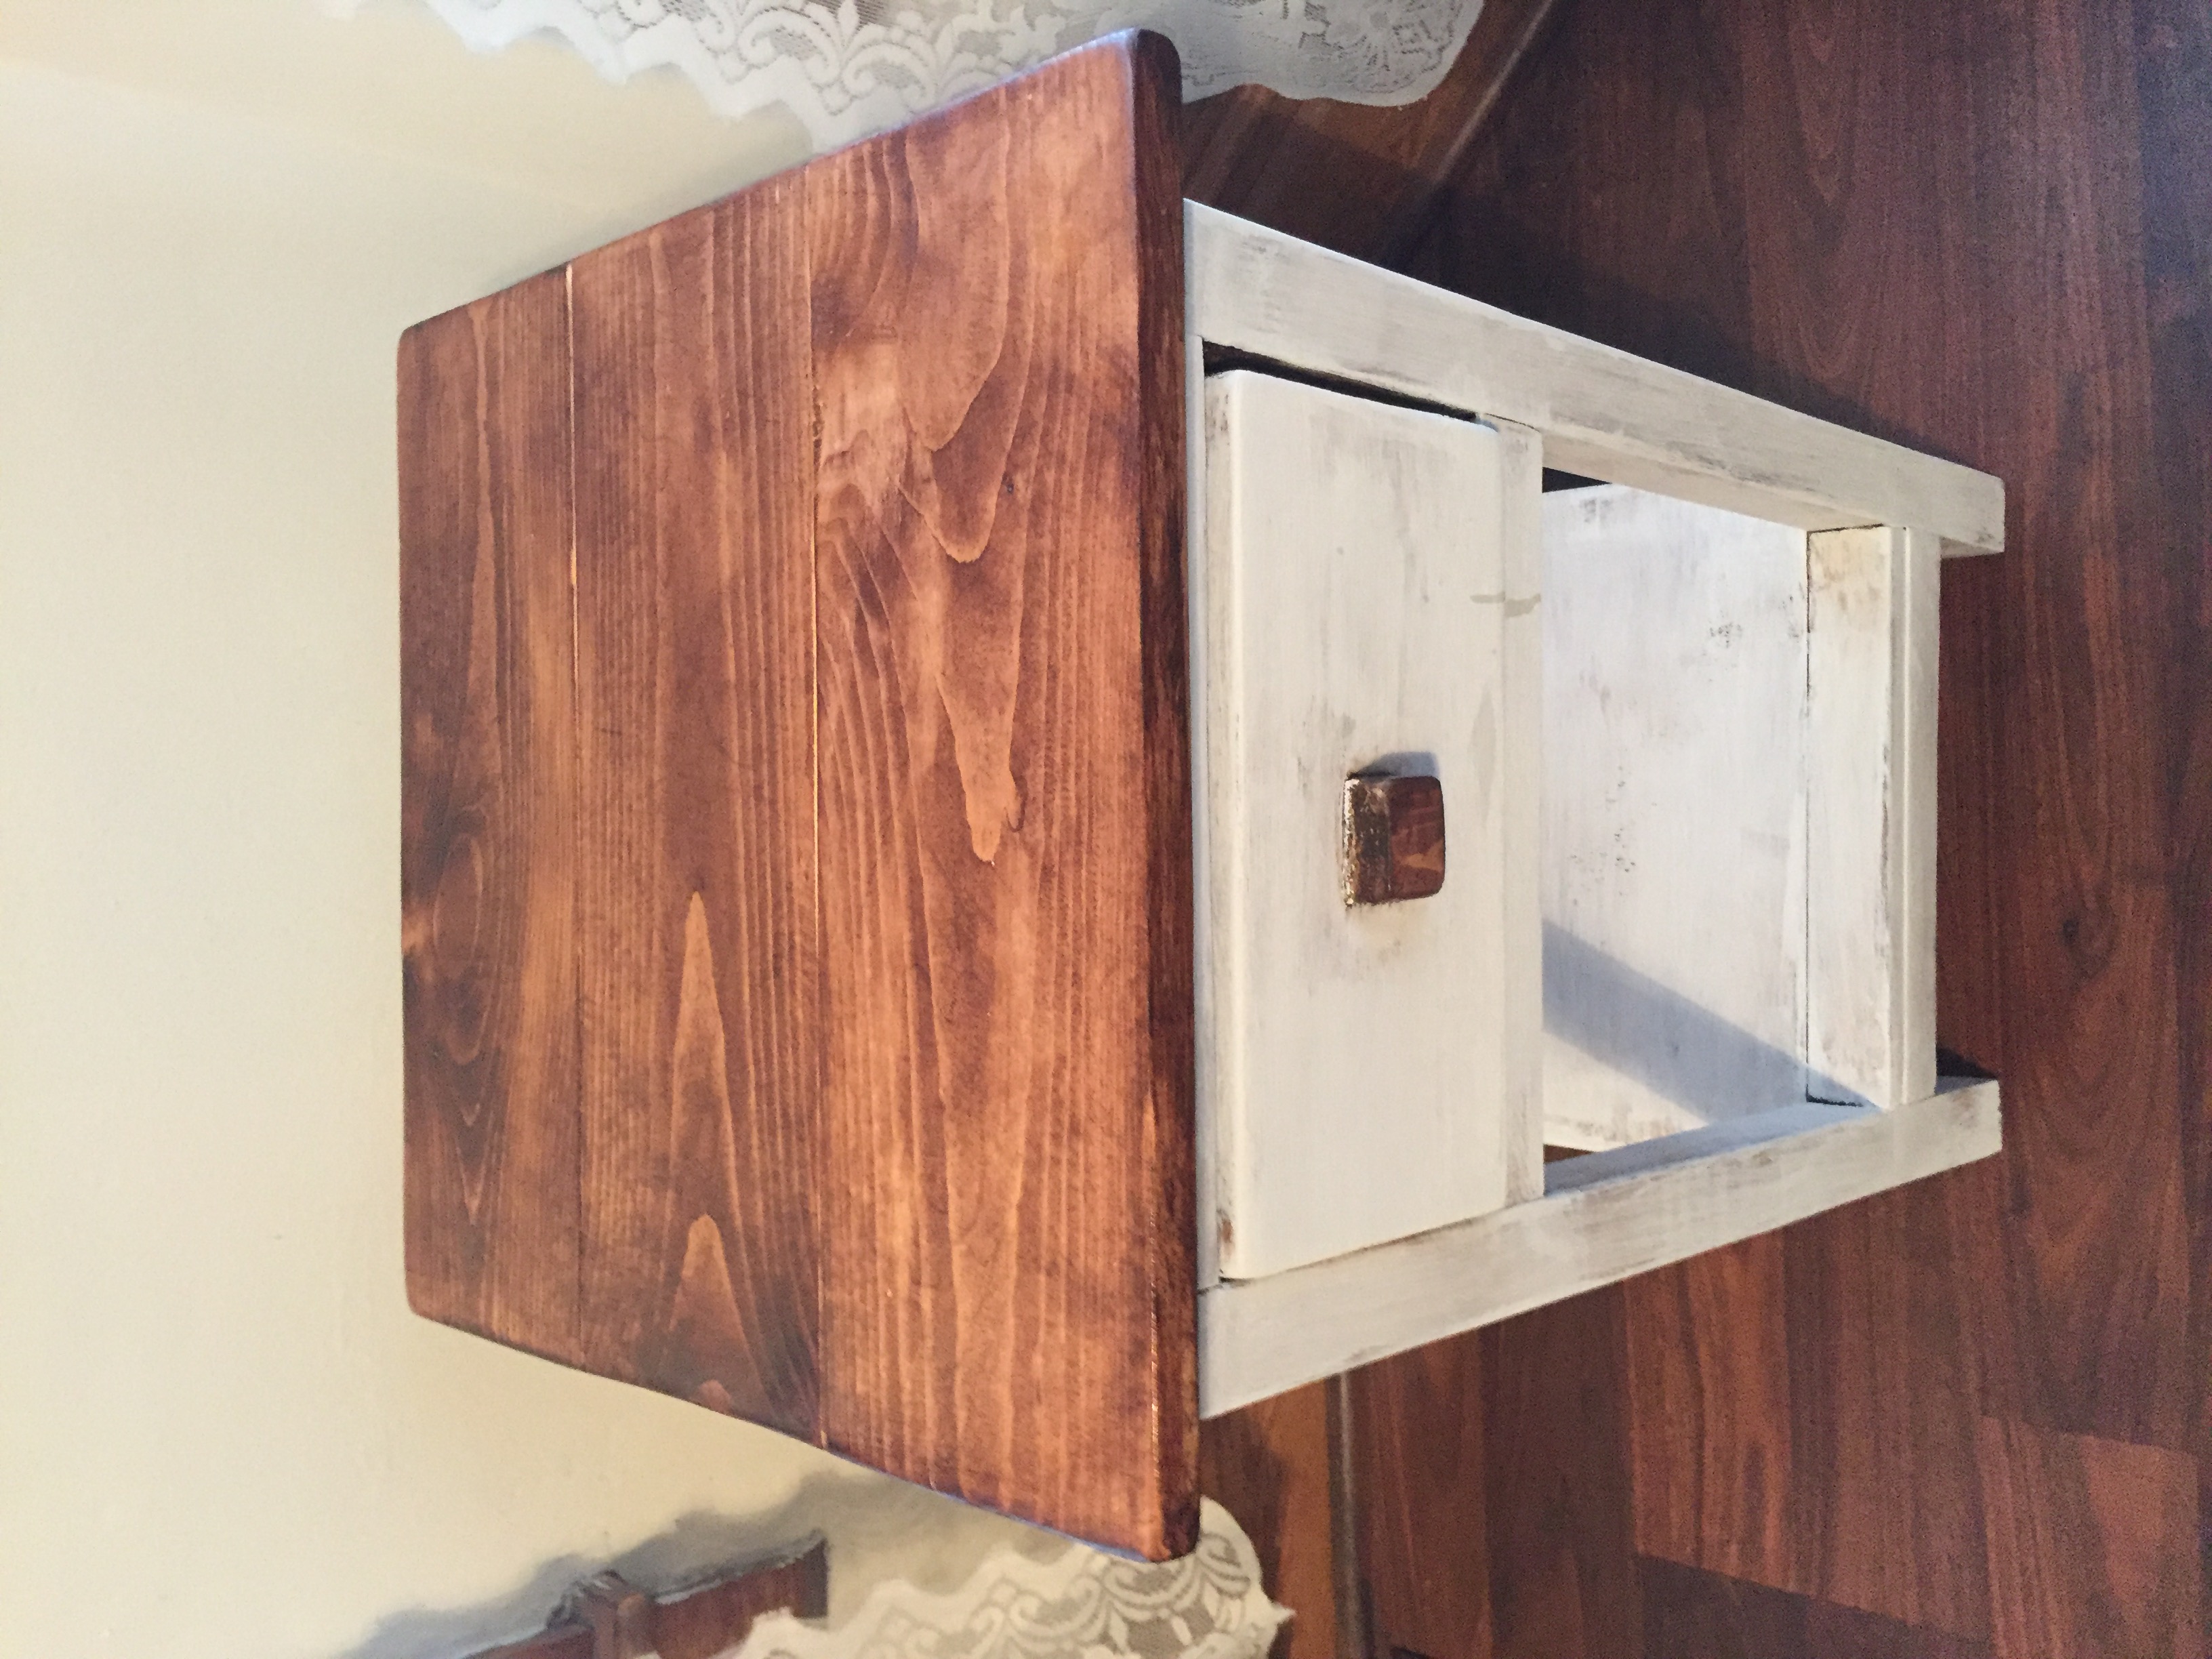
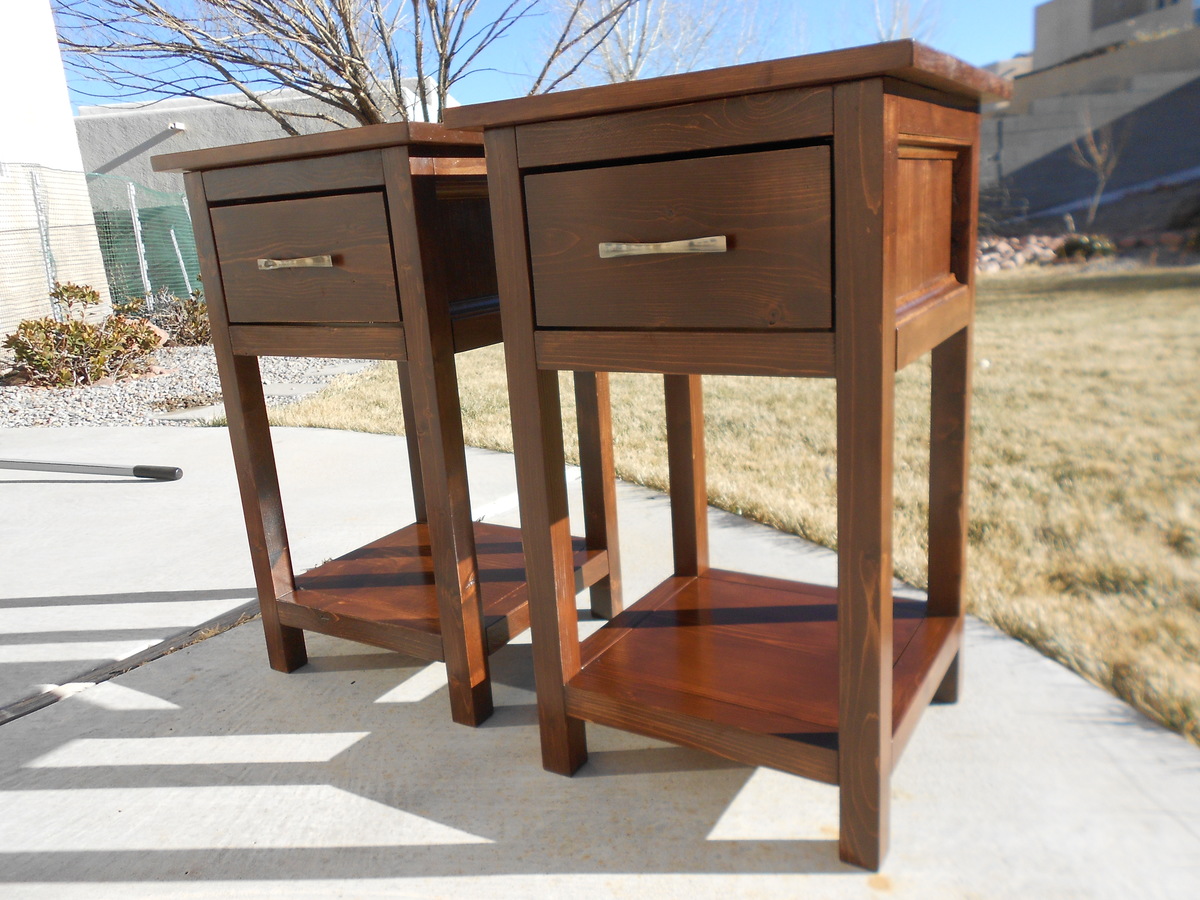
Mini Farmhouse Bedside Tables
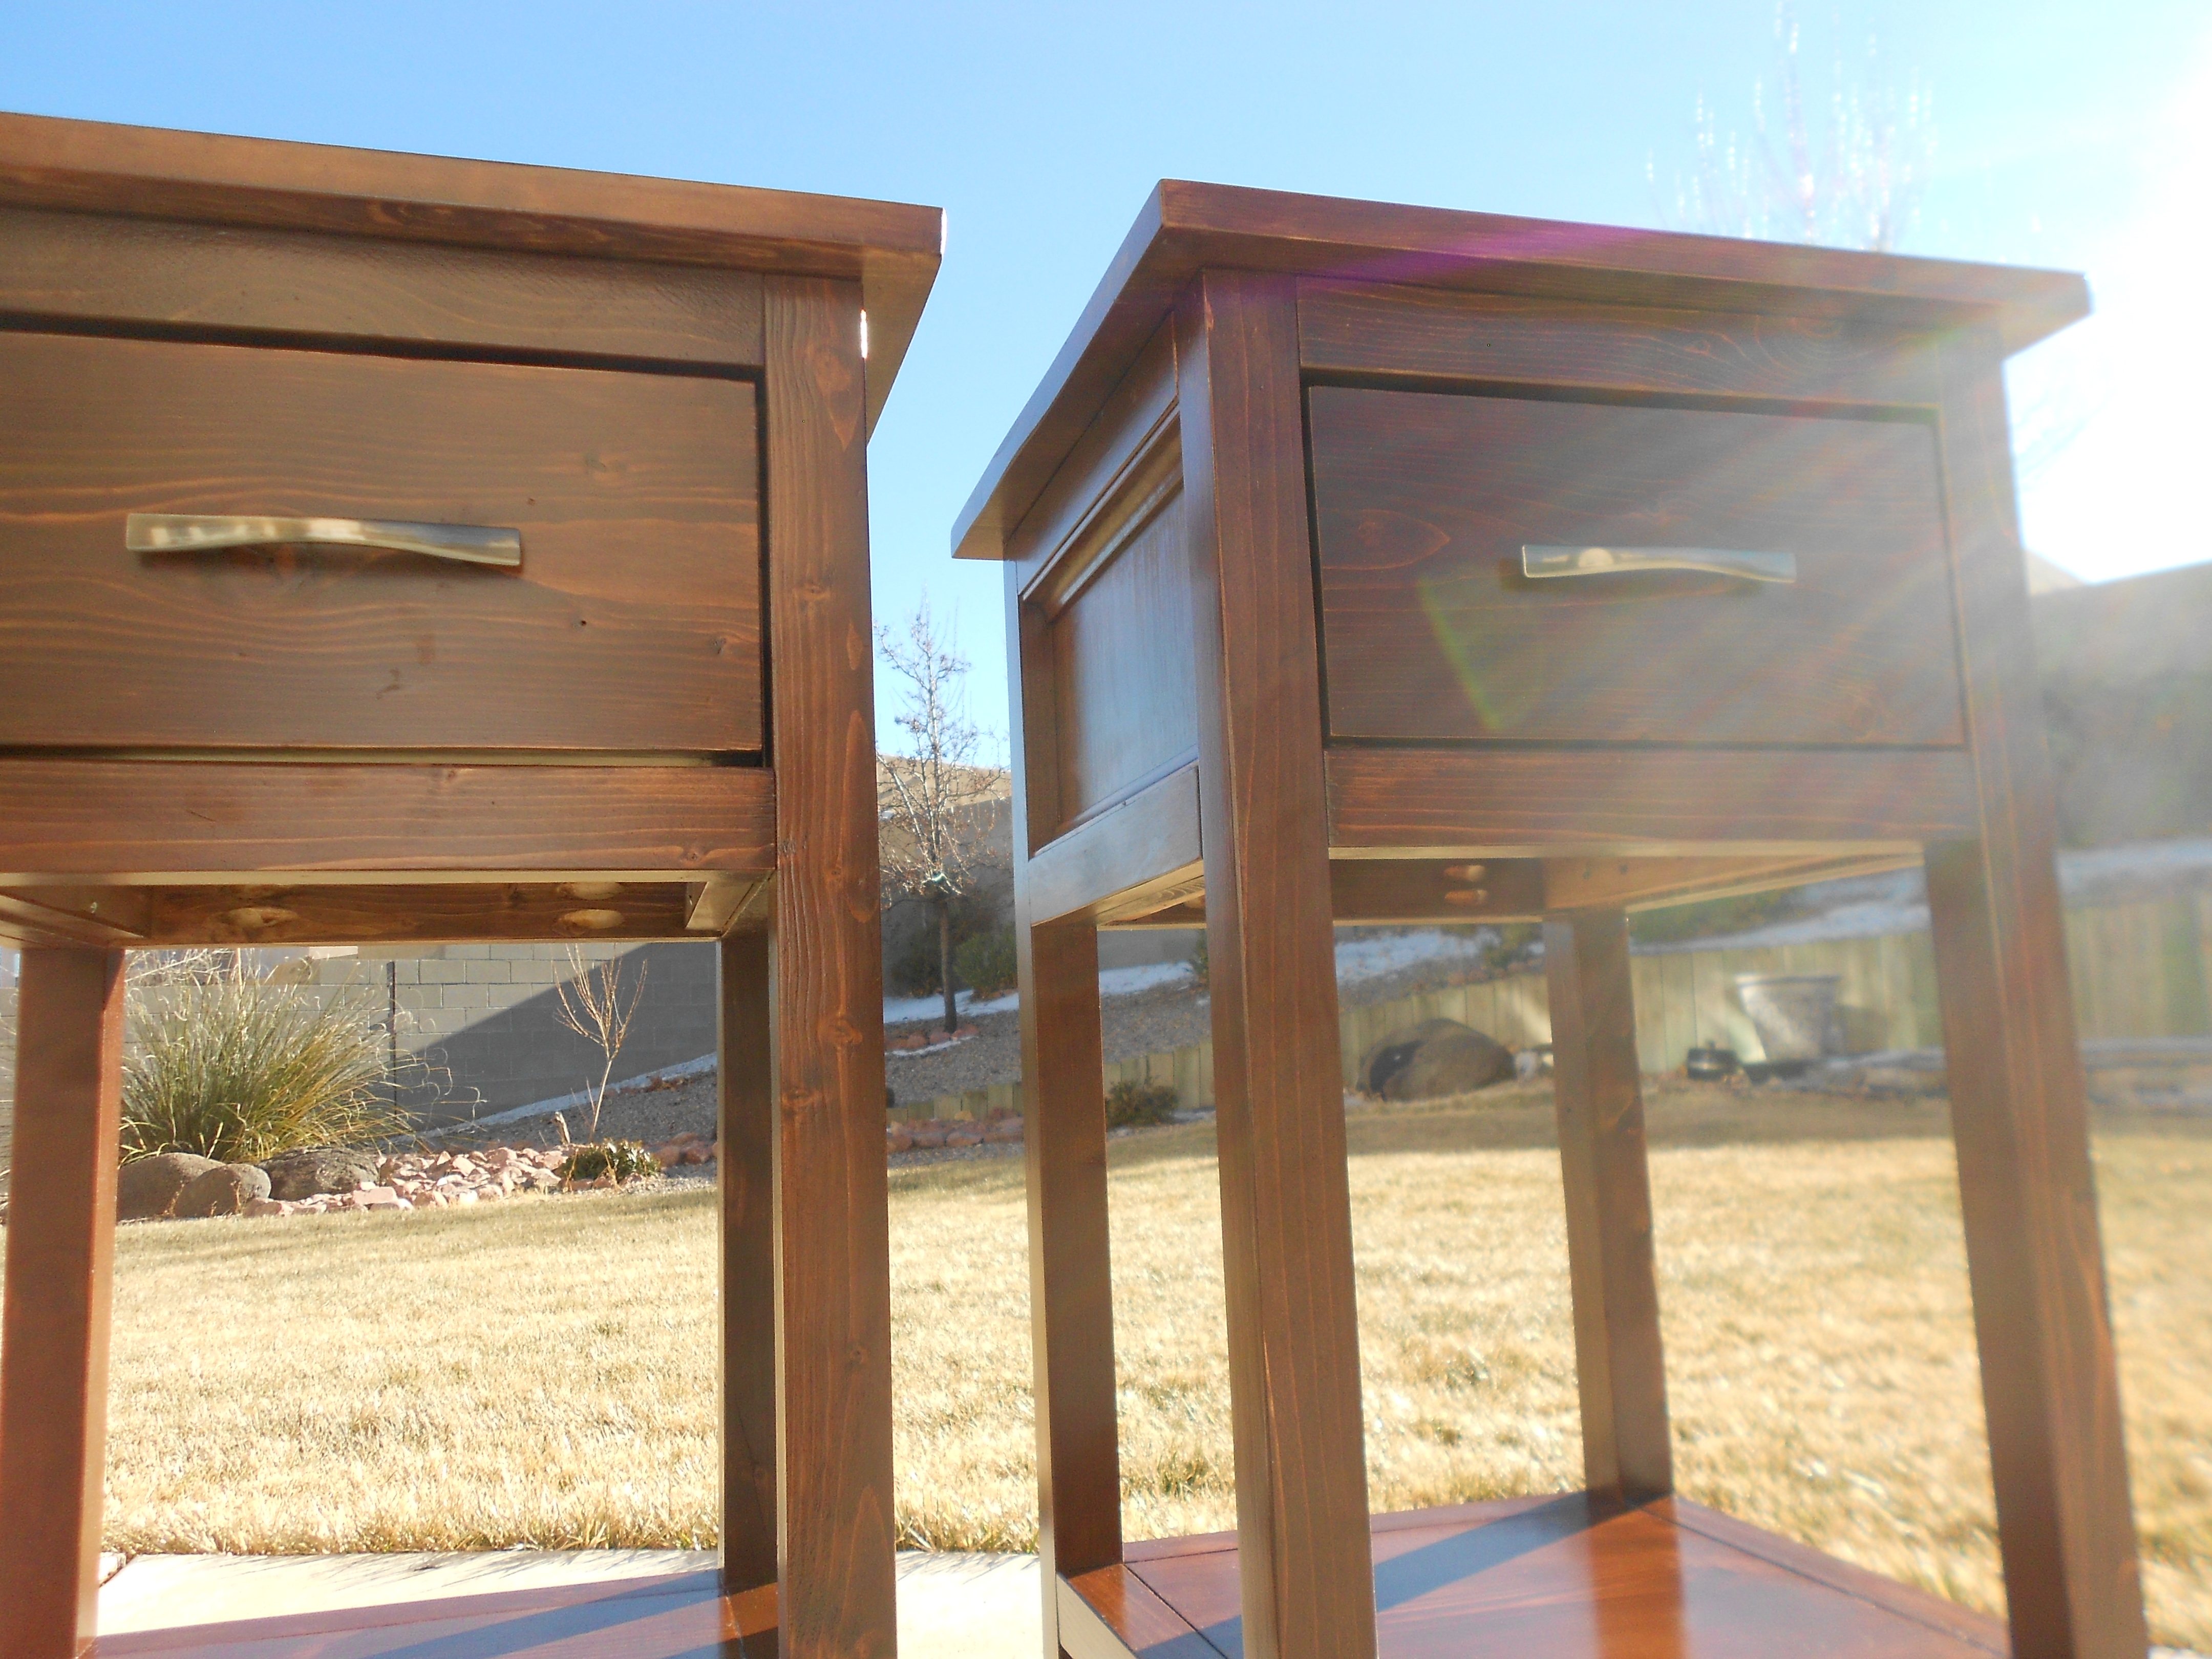
My first time making drawers! It wasn't as hard as I thought it would be!
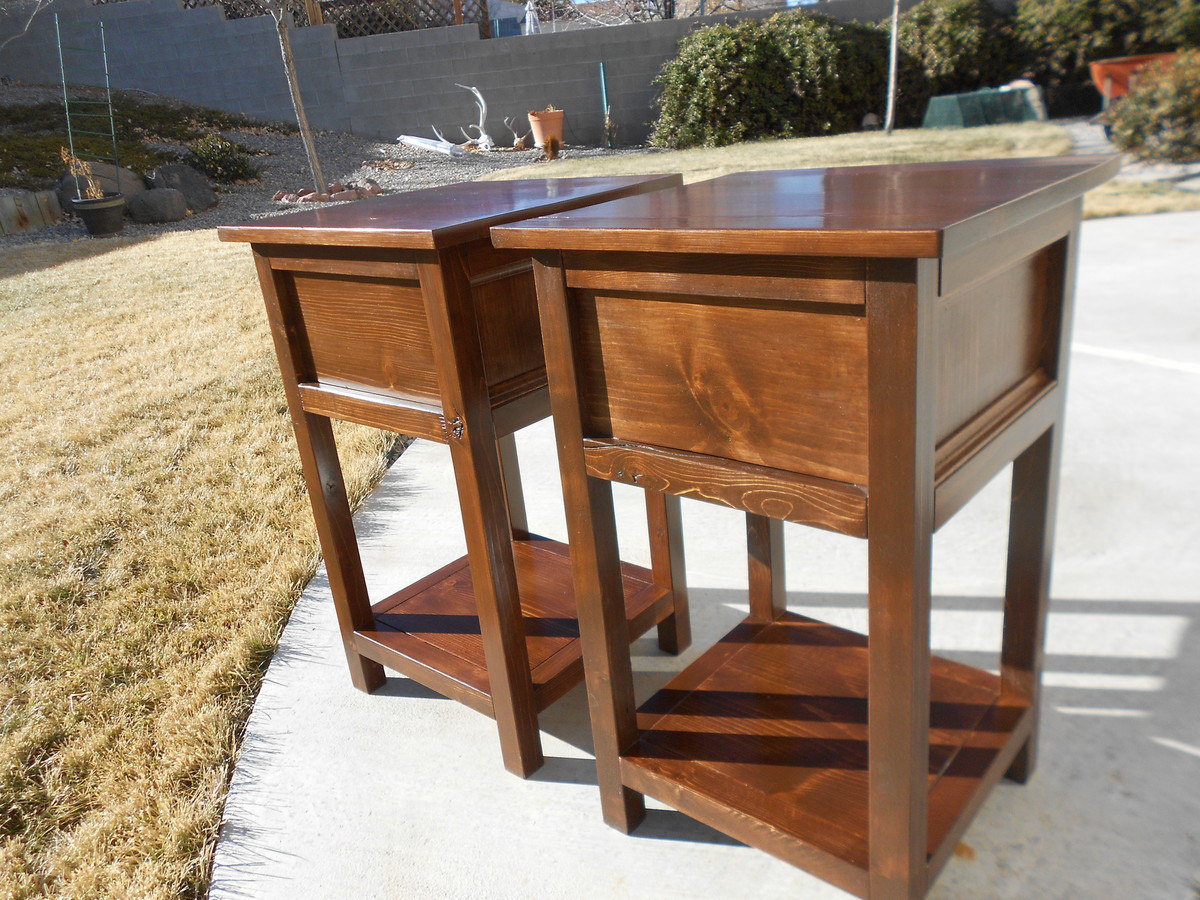
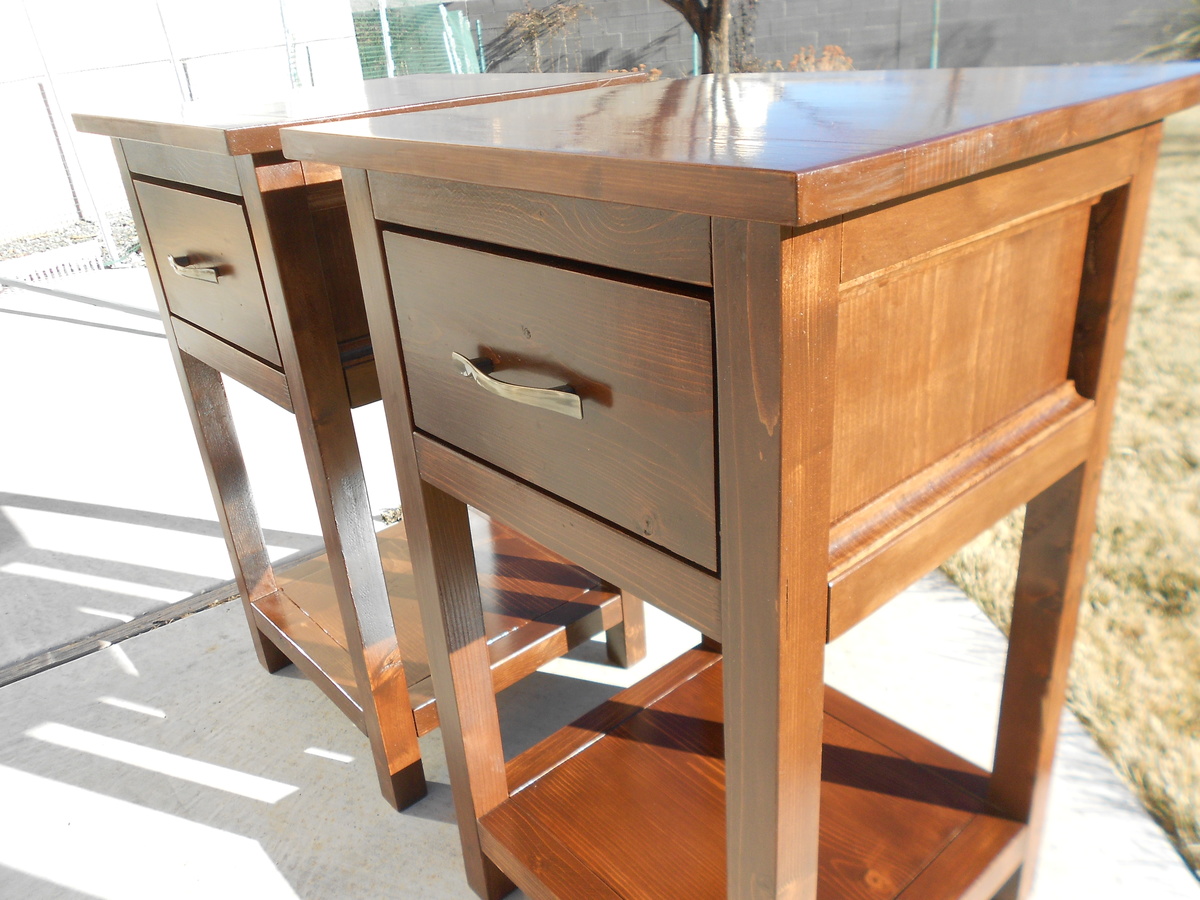
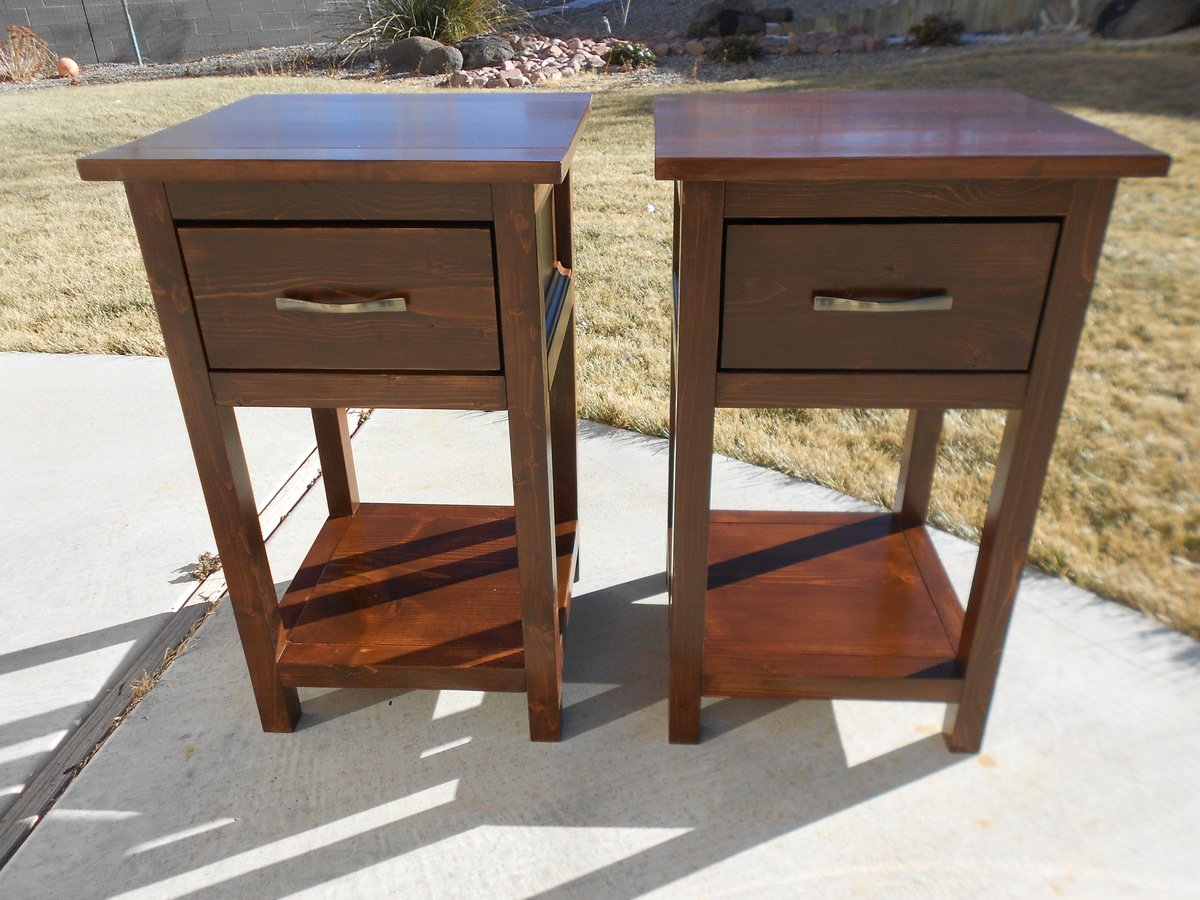
Built from Plan(s)
Estimated Time Investment
Week Long Project (20 Hours or More)
Recommended Skill Level
Beginner
Comments
Fri, 01/18/2013 - 07:04
Great Job! I just finished
Great Job! I just finished building two of the same to go with custom bed and headboard. Really like the small changes you made like the extra trim pieces and the back!
Cupboard

My second build. :) I made my own chalk paint and waxed it with a clear wax. It turned out awesome, thanks for a fun plan!

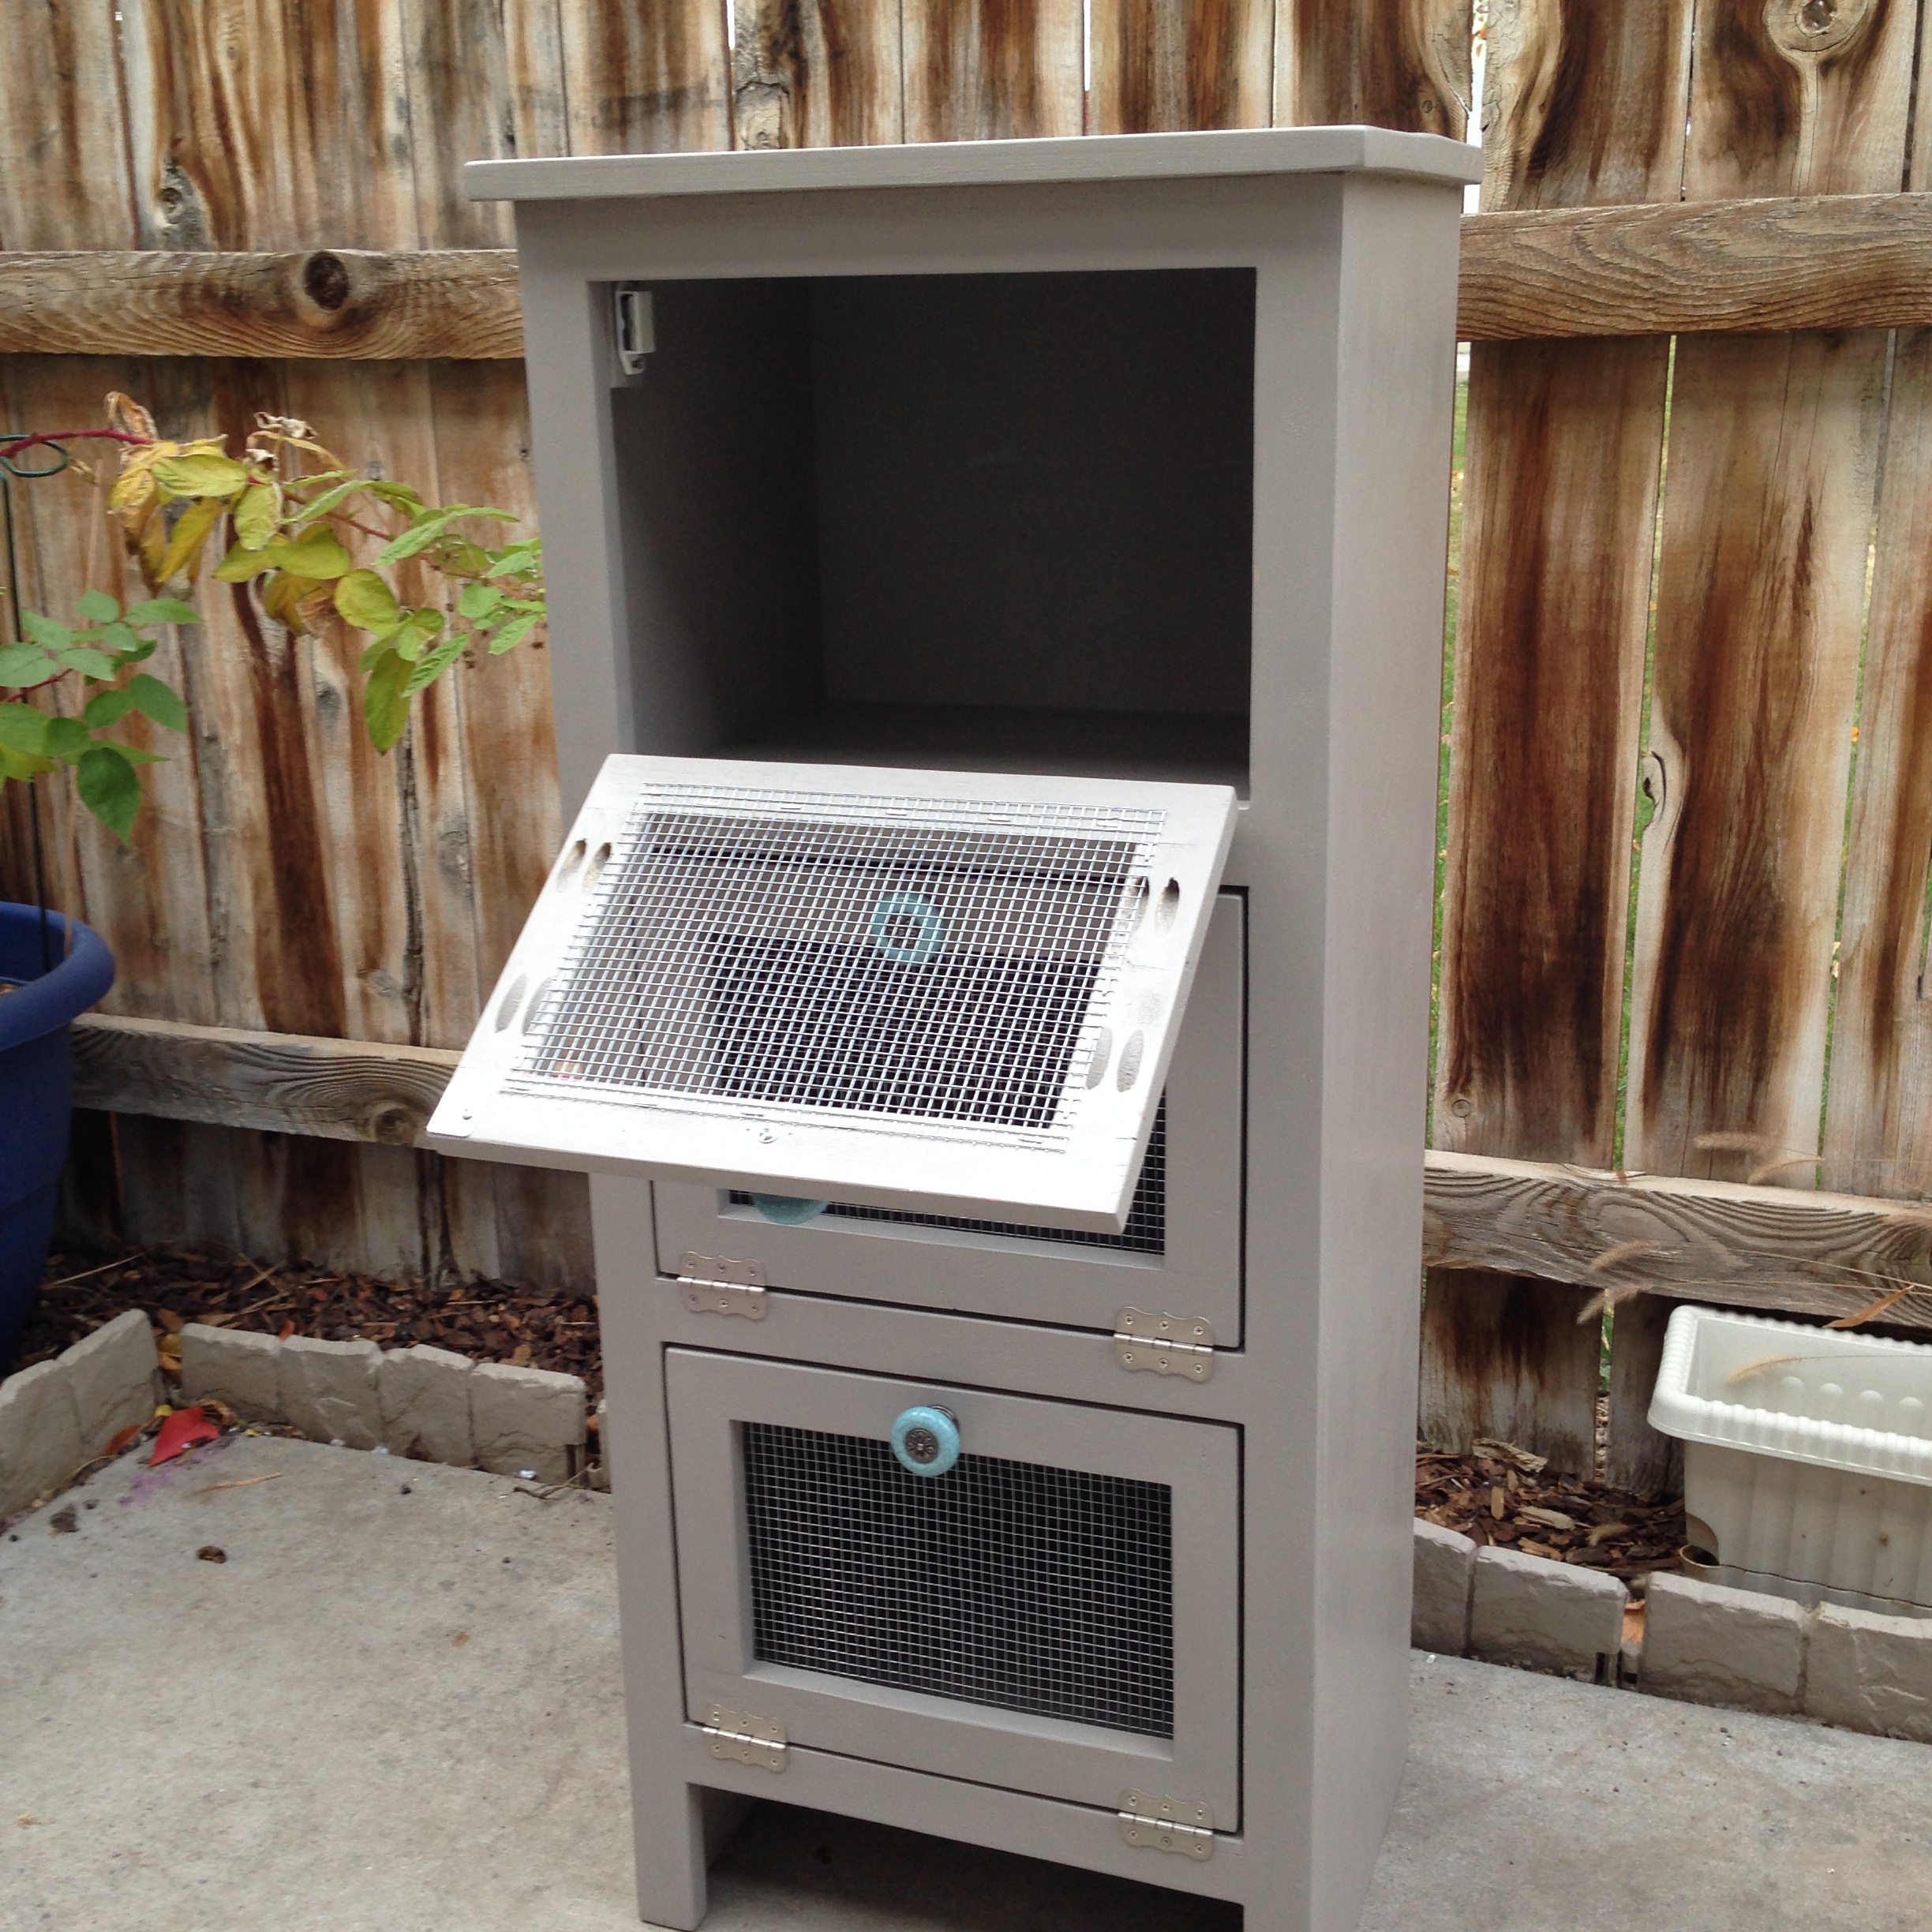
Built from Plan(s)
Estimated Time Investment
Weekend Project (10-20 Hours)
Finish Used
I made my own chalk paint using a flat latex and food grade, powdered chalk and then I waxed it with a clear wax.
Recommended Skill Level
Beginner
Narrow Cottage End Tables
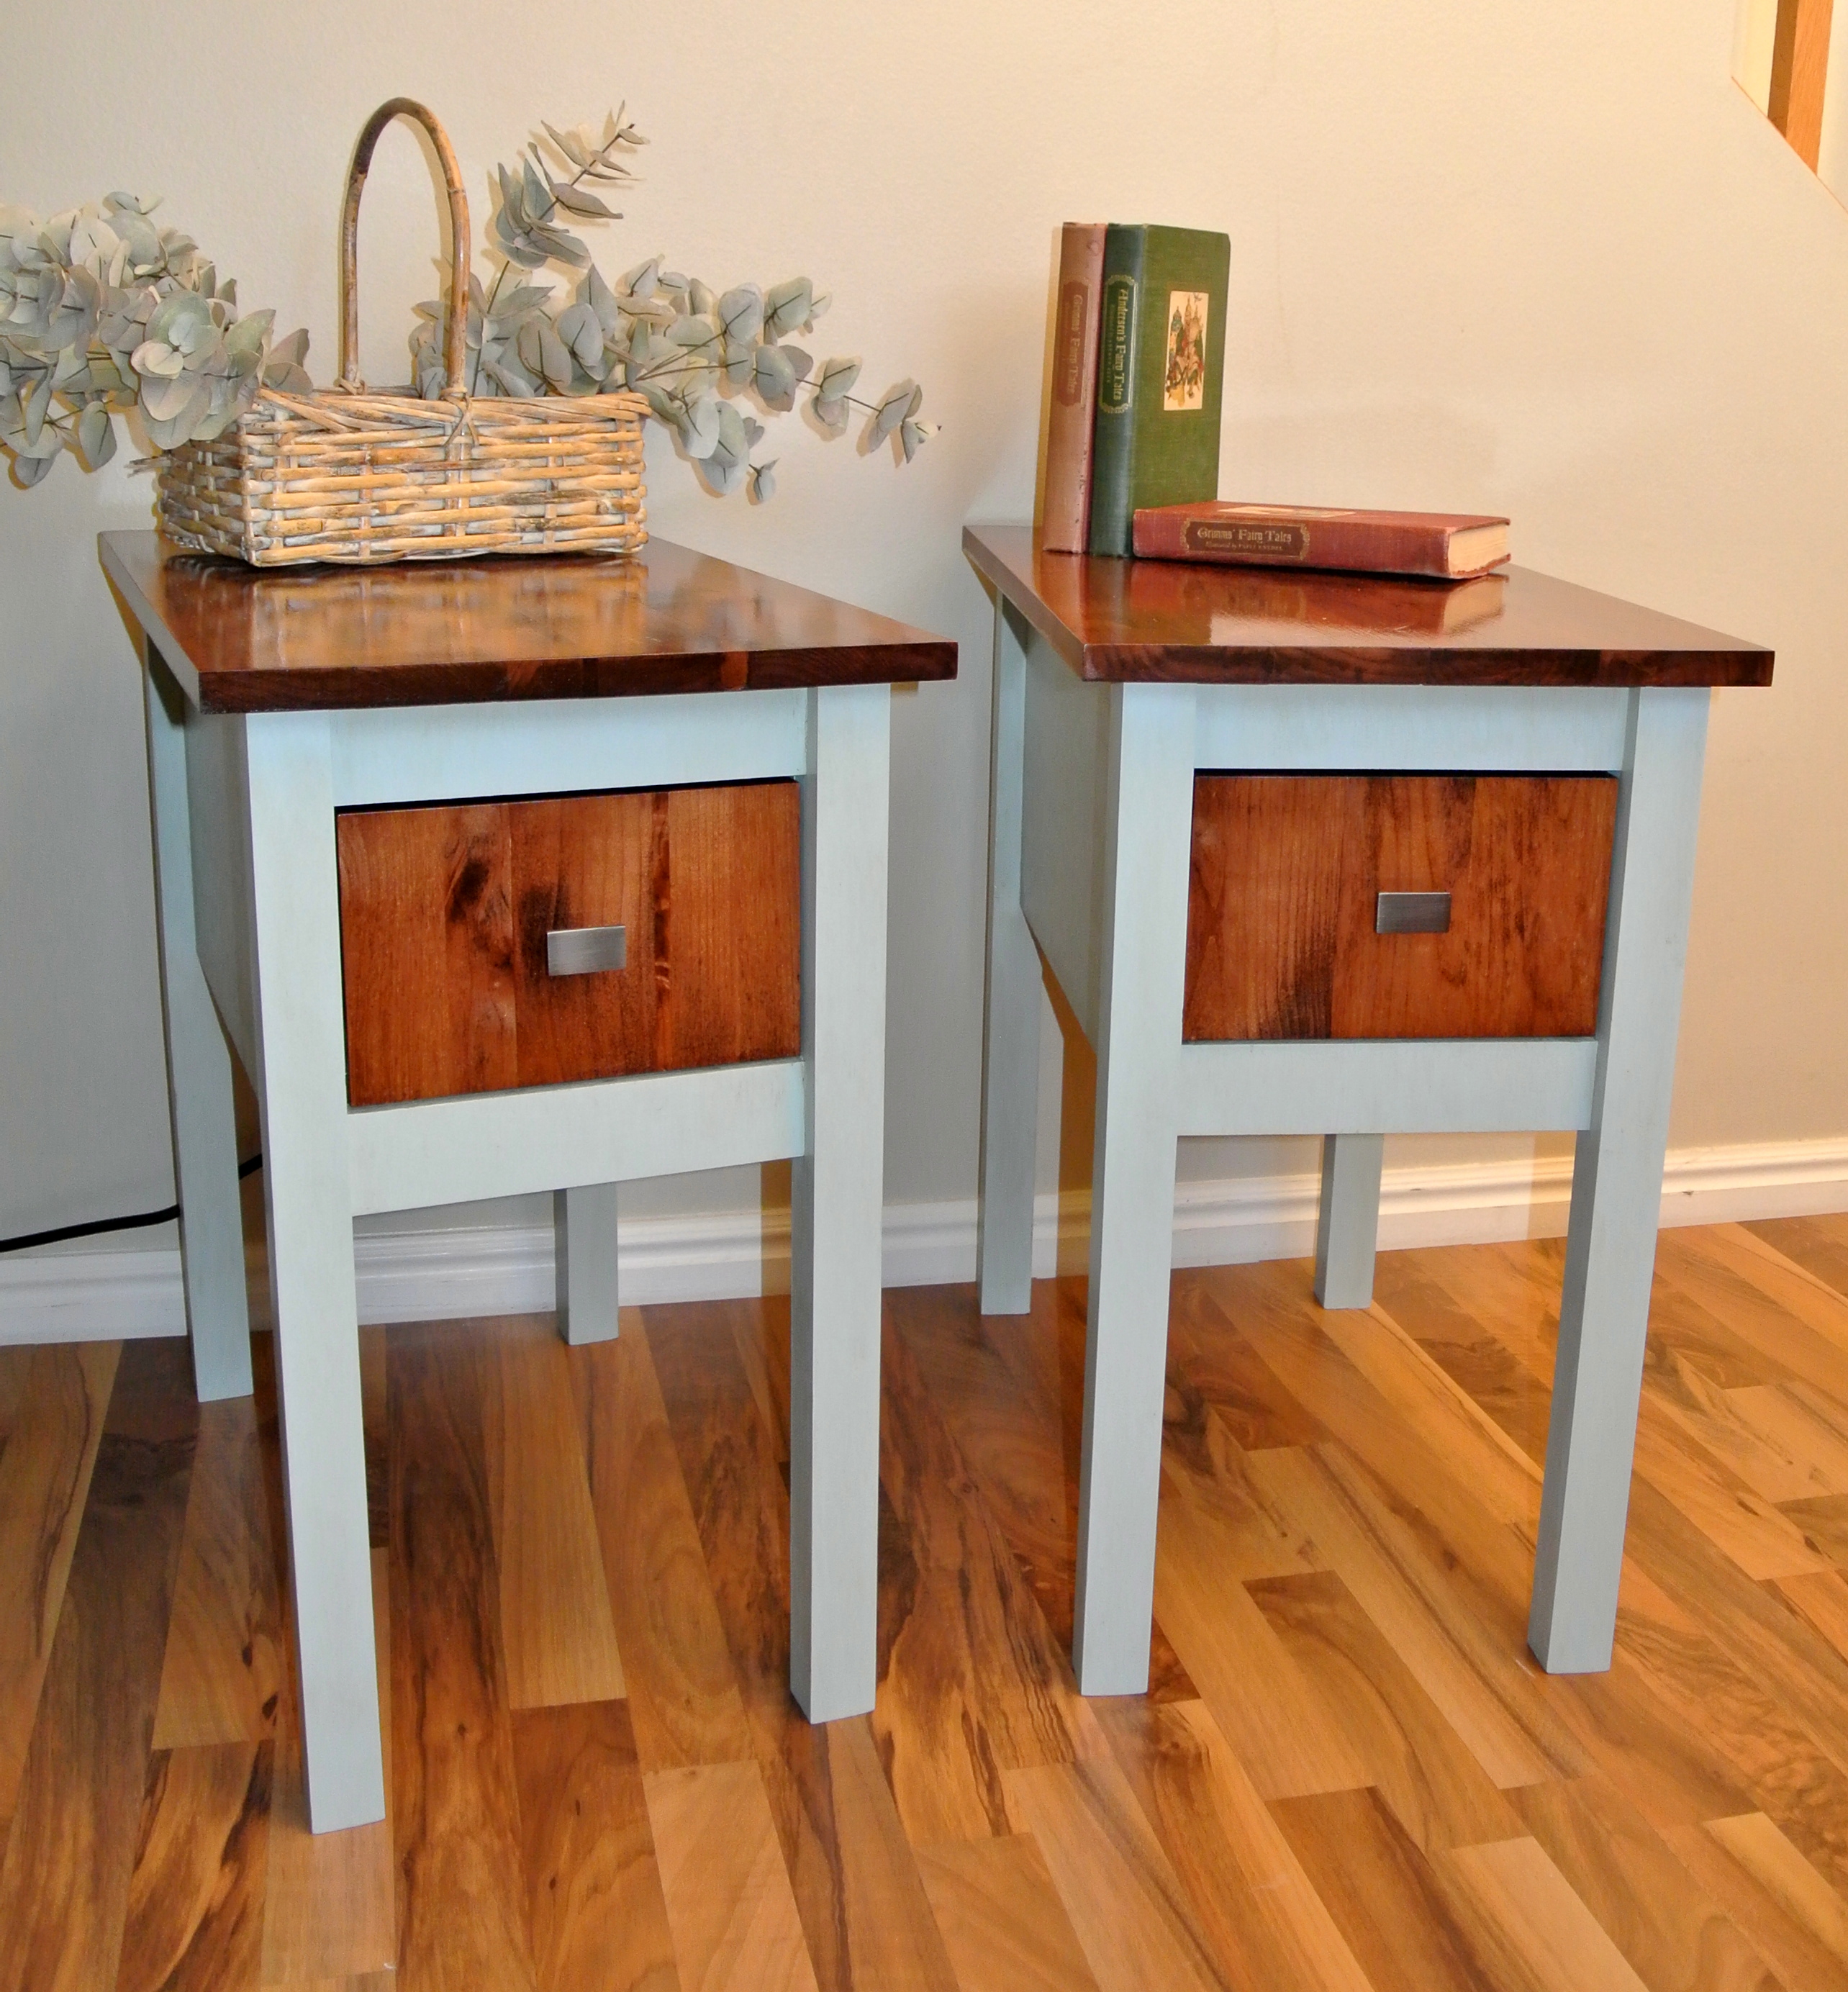
Just finished with the Narrow Cottage End Tables! Thank you so much for this plan! Our living room needed two of these and this was perfect! I had fabric from JoAnn's that served as the inspiration color to recover our little trunk! Painted a warm blue green, dark waxed. The drawer front and top was cut from some Hickory lumber we had and used our bisquit maker to make the tops which was then Shellac'd.
Again, thank you so much for the plan!
Built from Plan(s)
Estimated Cost
6$ as we had most of the required lumber, stain, paint and shellac on hand.
Estimated Time Investment
Day Project (6-9 Hours)
Finish Used
Red mahogany stain, shellac, paint, wax clear and dark.
Recommended Skill Level
Beginner
Beginner Farmhouse Table
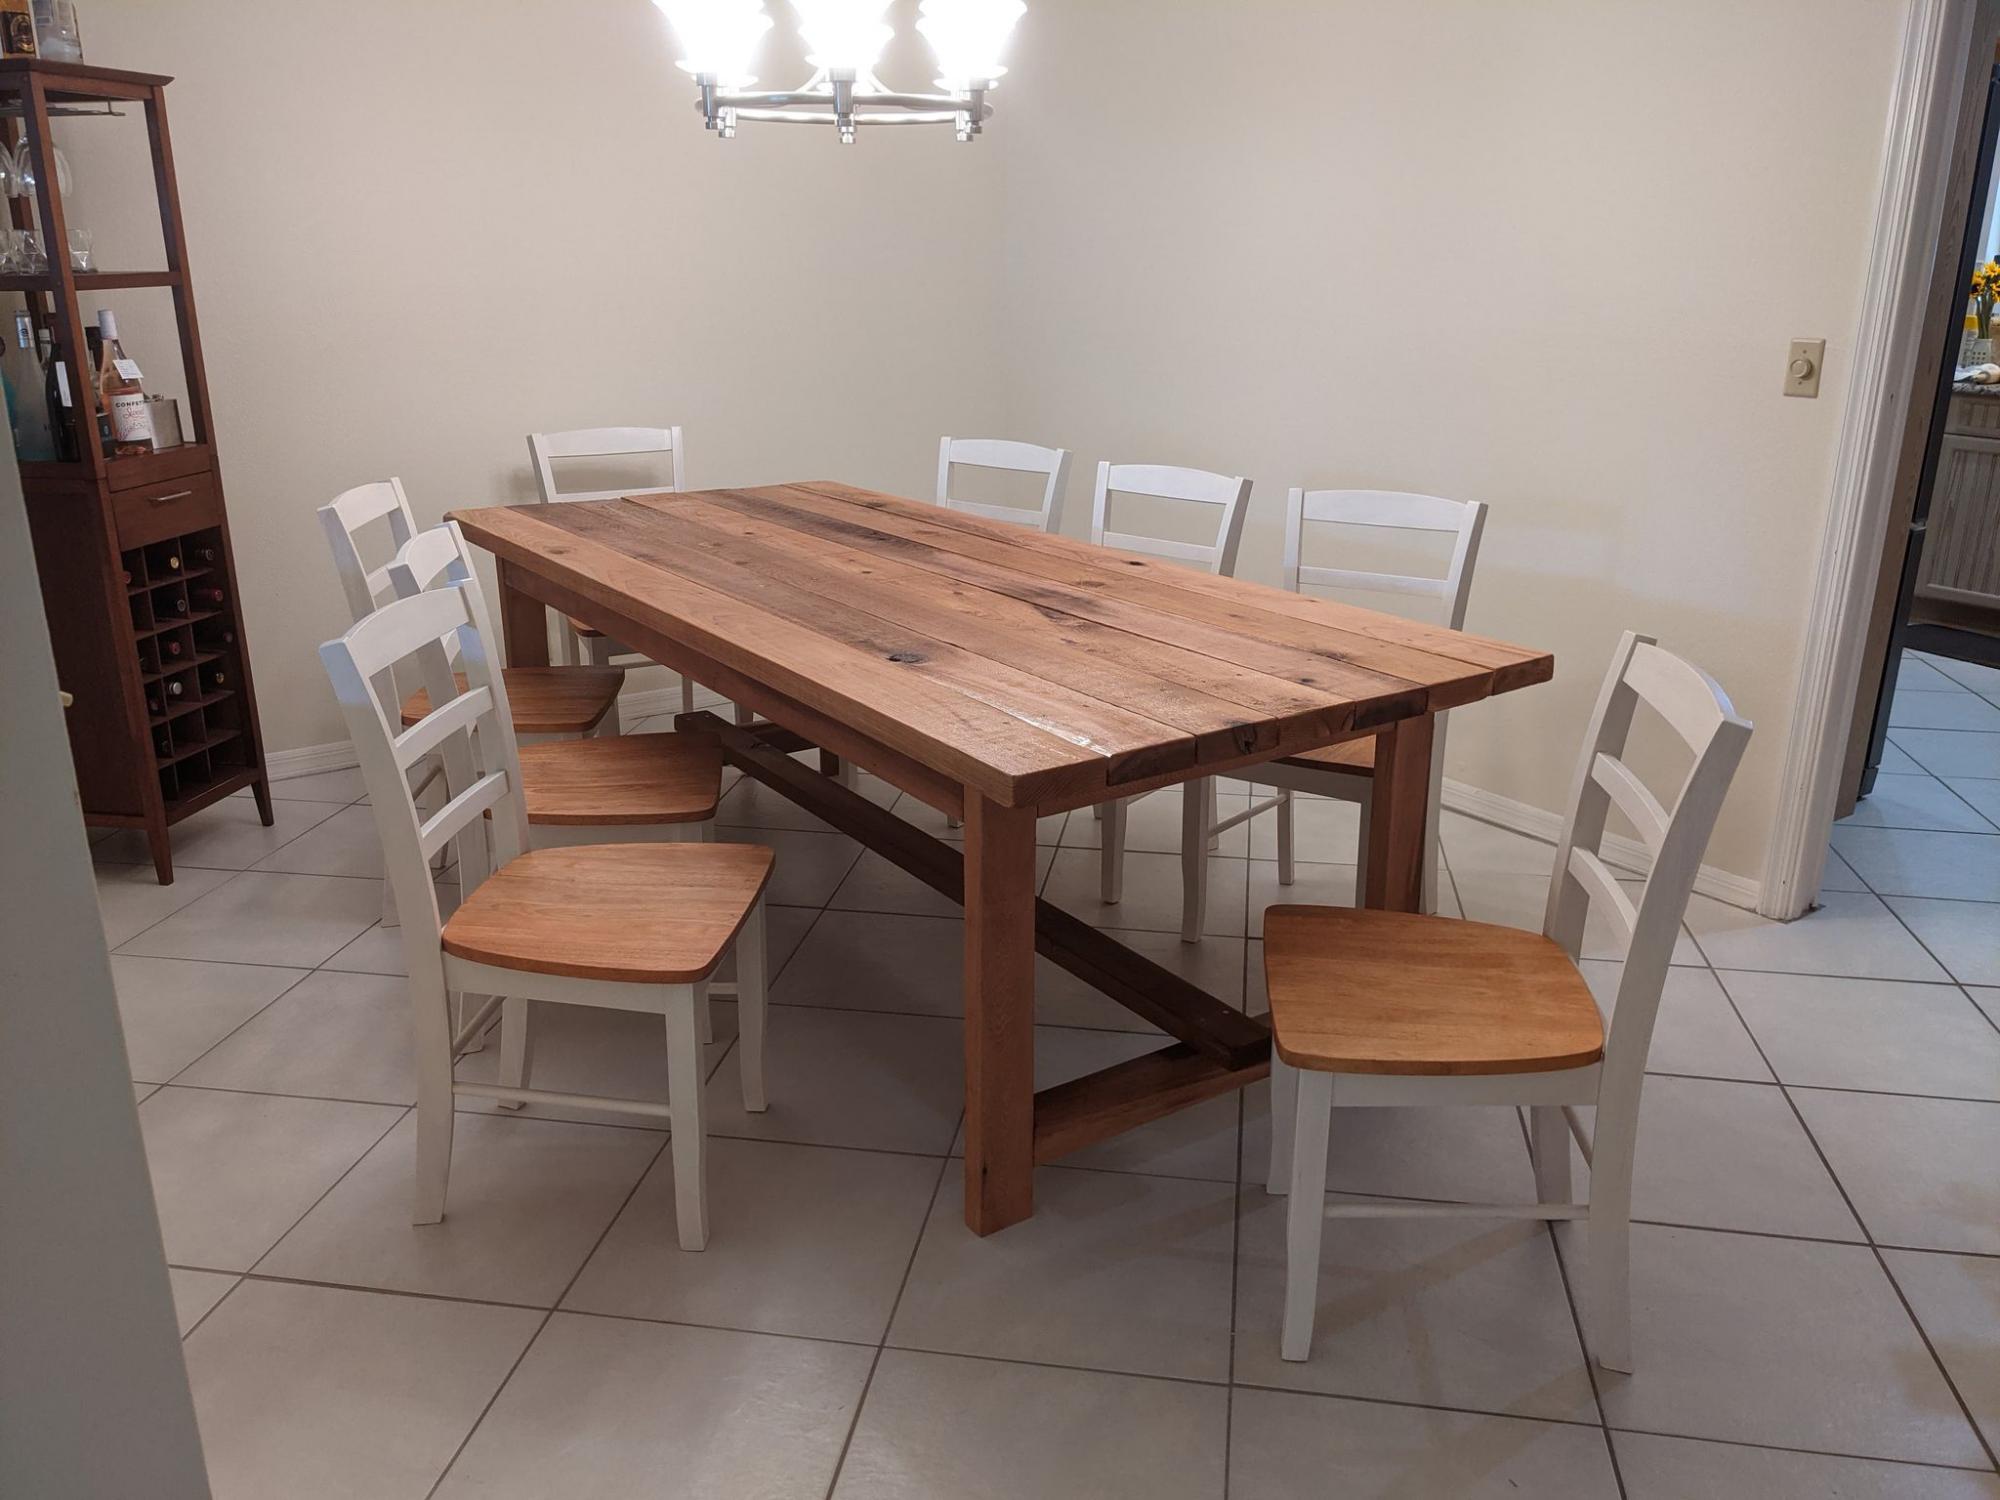
I found Ana's book at Barnes & Nobel and as they say the rest is history.
This was my very first ever wood working project. I made the tables and found the pre-cut lumber for the chairs online.
The table is made out of Cedar and the table cost me roughly $500 in lumber and hardware.
I am in love with woodworking now and plan to decorate our newly purchased Farmhouse.
Thank you Ana for empowering us to expand our skills and find value and pride in our work.
Built from Plan(s)
Estimated Cost
500
Estimated Time Investment
Weekend Project (10-20 Hours)
Finish Used
Minwax - Colonial Maple
Recommended Skill Level
Starter Project
Comments
Thu, 11/26/2020 - 10:42
Absolutely fabulous!
Welcome to the community, there is no better feeling than furnishing your home with exactly what you want!
The Perfect Fit for our Little Girls Closet
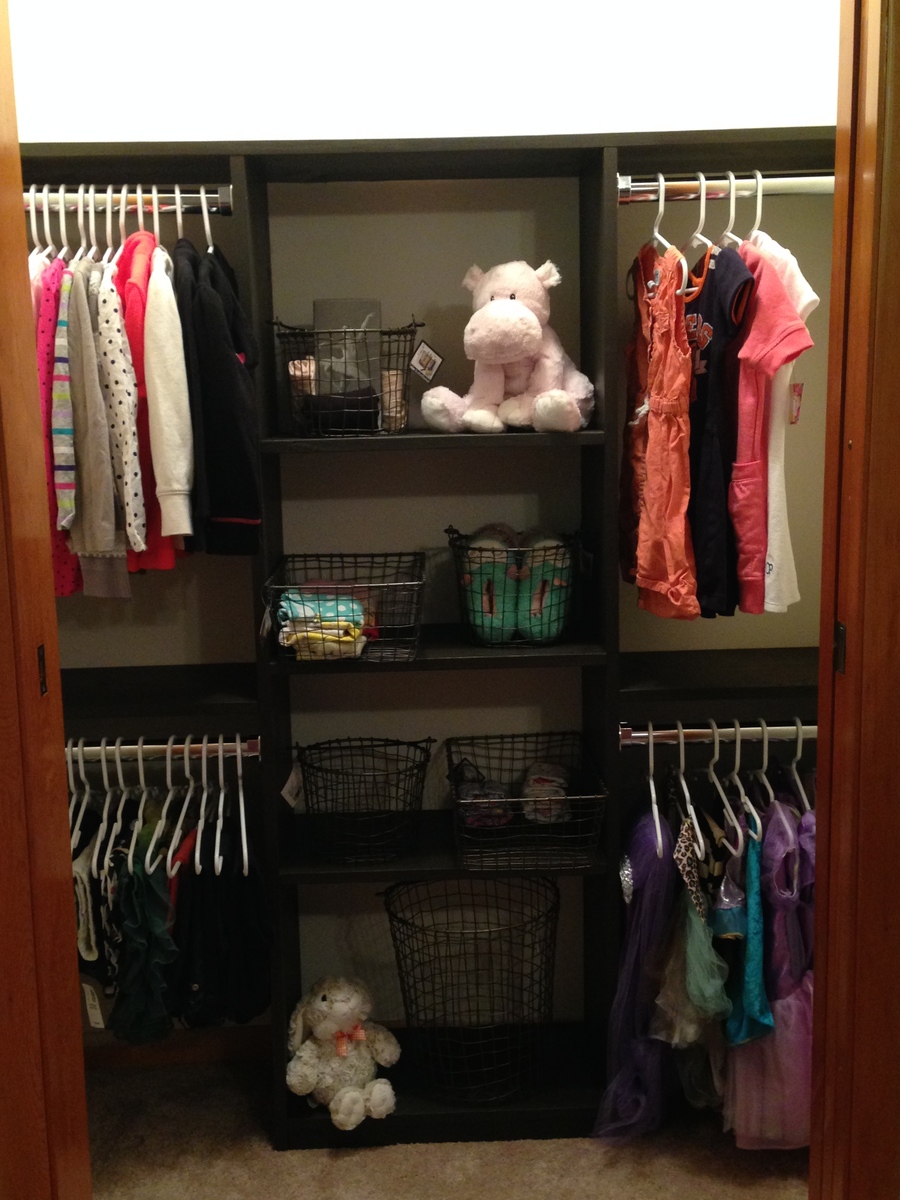
Thank you Ana! The Just My Size Closet was the perfect solution to my little girl's closet. I had recently found myself in a daily battle with my three year old. She wanted to be independant and dress her self. I desperately wanted her to stop getting a step stool and yanking her clothing off of the hangers. The yanking resulted in a dozen or so half handing shirts, a pile of broken hangers, and a mother daughter show down first thing in the morning and last thing at night. Enter the Just My Size Closet !!! The plans were super easy to follow, WAY less expensive than the ready made customizable units at the hardware store, and hubby had it whipped up in half an afternoon! The design is thoughtful and will grown as her needs change. :) We are all very pleased with the result. Instead of melt downs (both her's and mine), my little girl is taking pride in being able to hang up her clothing and dress herself. She makes everyone who visits come in her room to see her new closet. It is adorable :) Thanks Again!!
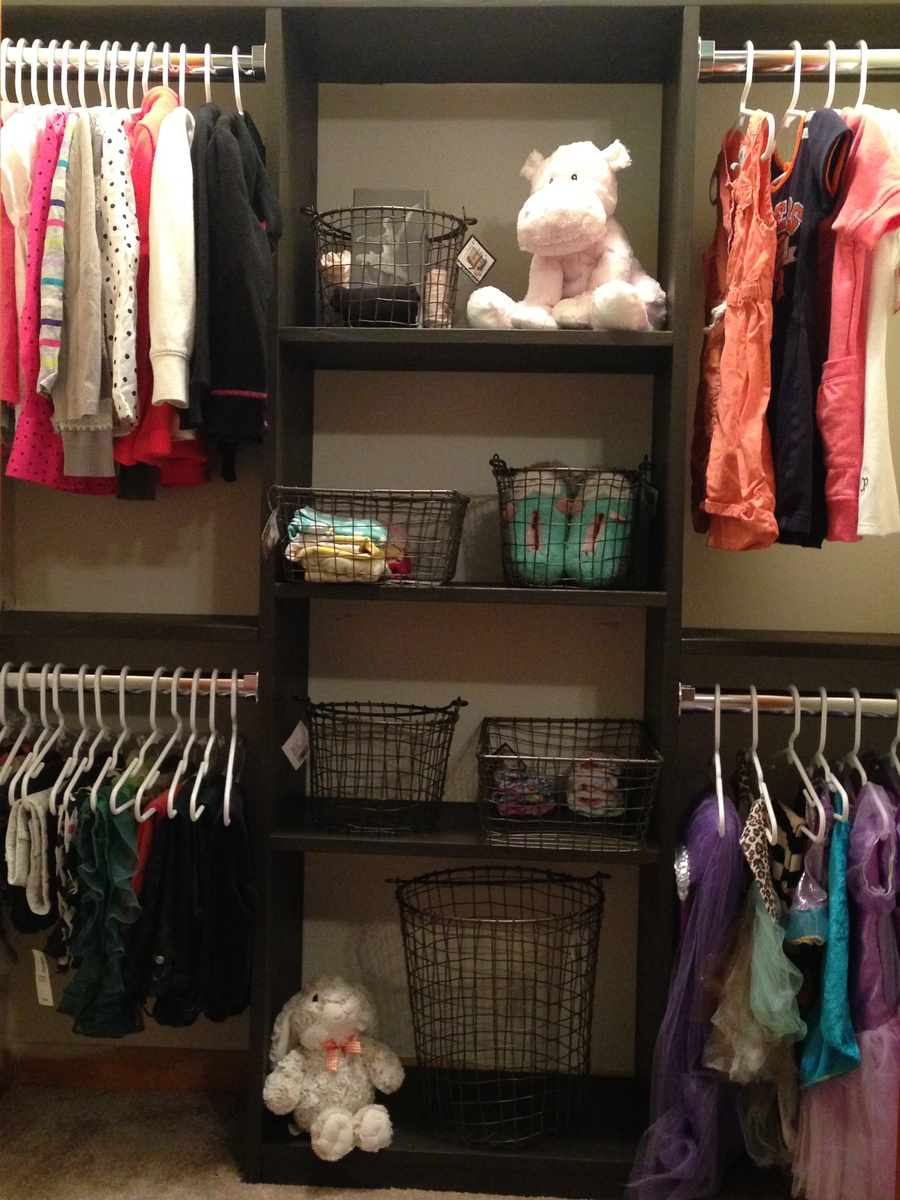
Built from Plan(s)
Estimated Cost
<$100
Estimated Time Investment
Afternoon Project (3-6 Hours)
Recommended Skill Level
Beginner
Farmhouse Bed - Queen Sized
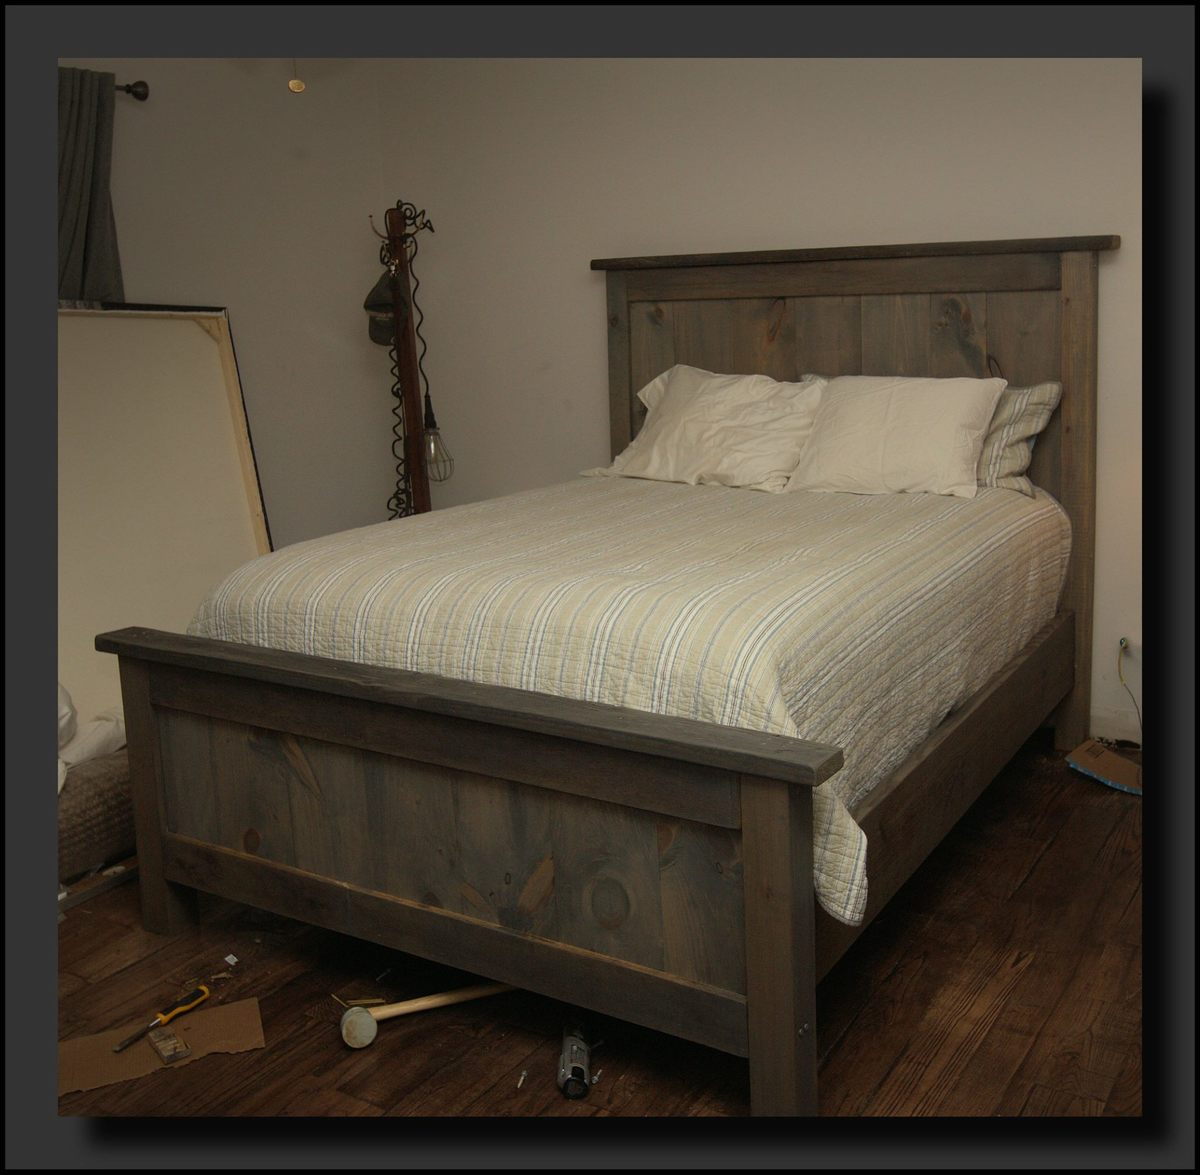
This was super easy to build and cost me about $150. I made both my headboard and footboard 6" taller than the plans specified, and used Minwax classic grey stain for the finish color. I used 1x10 pine boards from home depot in the untreated premium wood section. They were about $12 for 10ft boards. I spent some time carefully choosing the ones I liked the best. I went to the local lumber mill to find untreated 4x4 posts... not easy to find. Fortunately they sold them to me for $10 a 10ft piece - Only $20 total for those.
The bed is solid and amazing looking. I couldn't be happier with it.
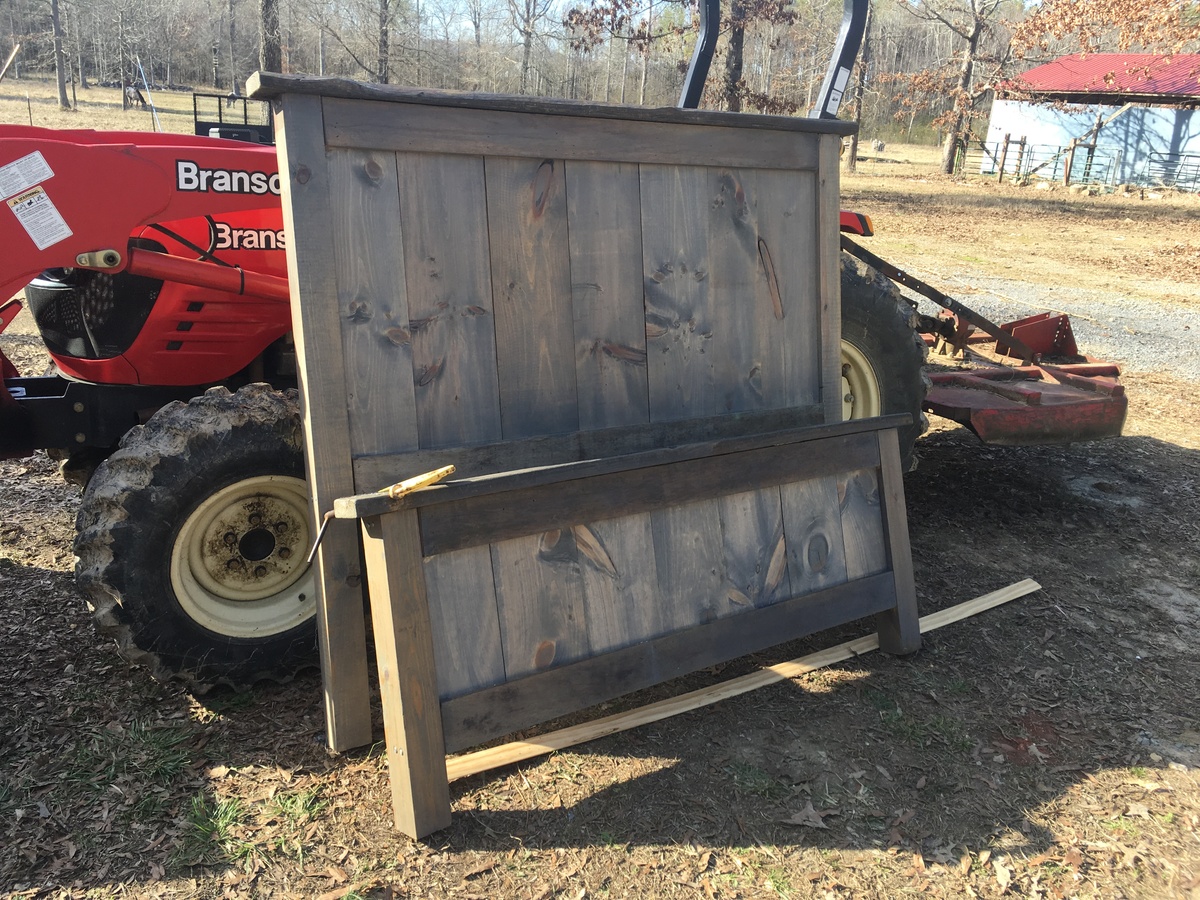
Estimated Cost
$150
Estimated Time Investment
Day Project (6-9 Hours)
Finish Used
Minwax classic grey
Recommended Skill Level
Beginner
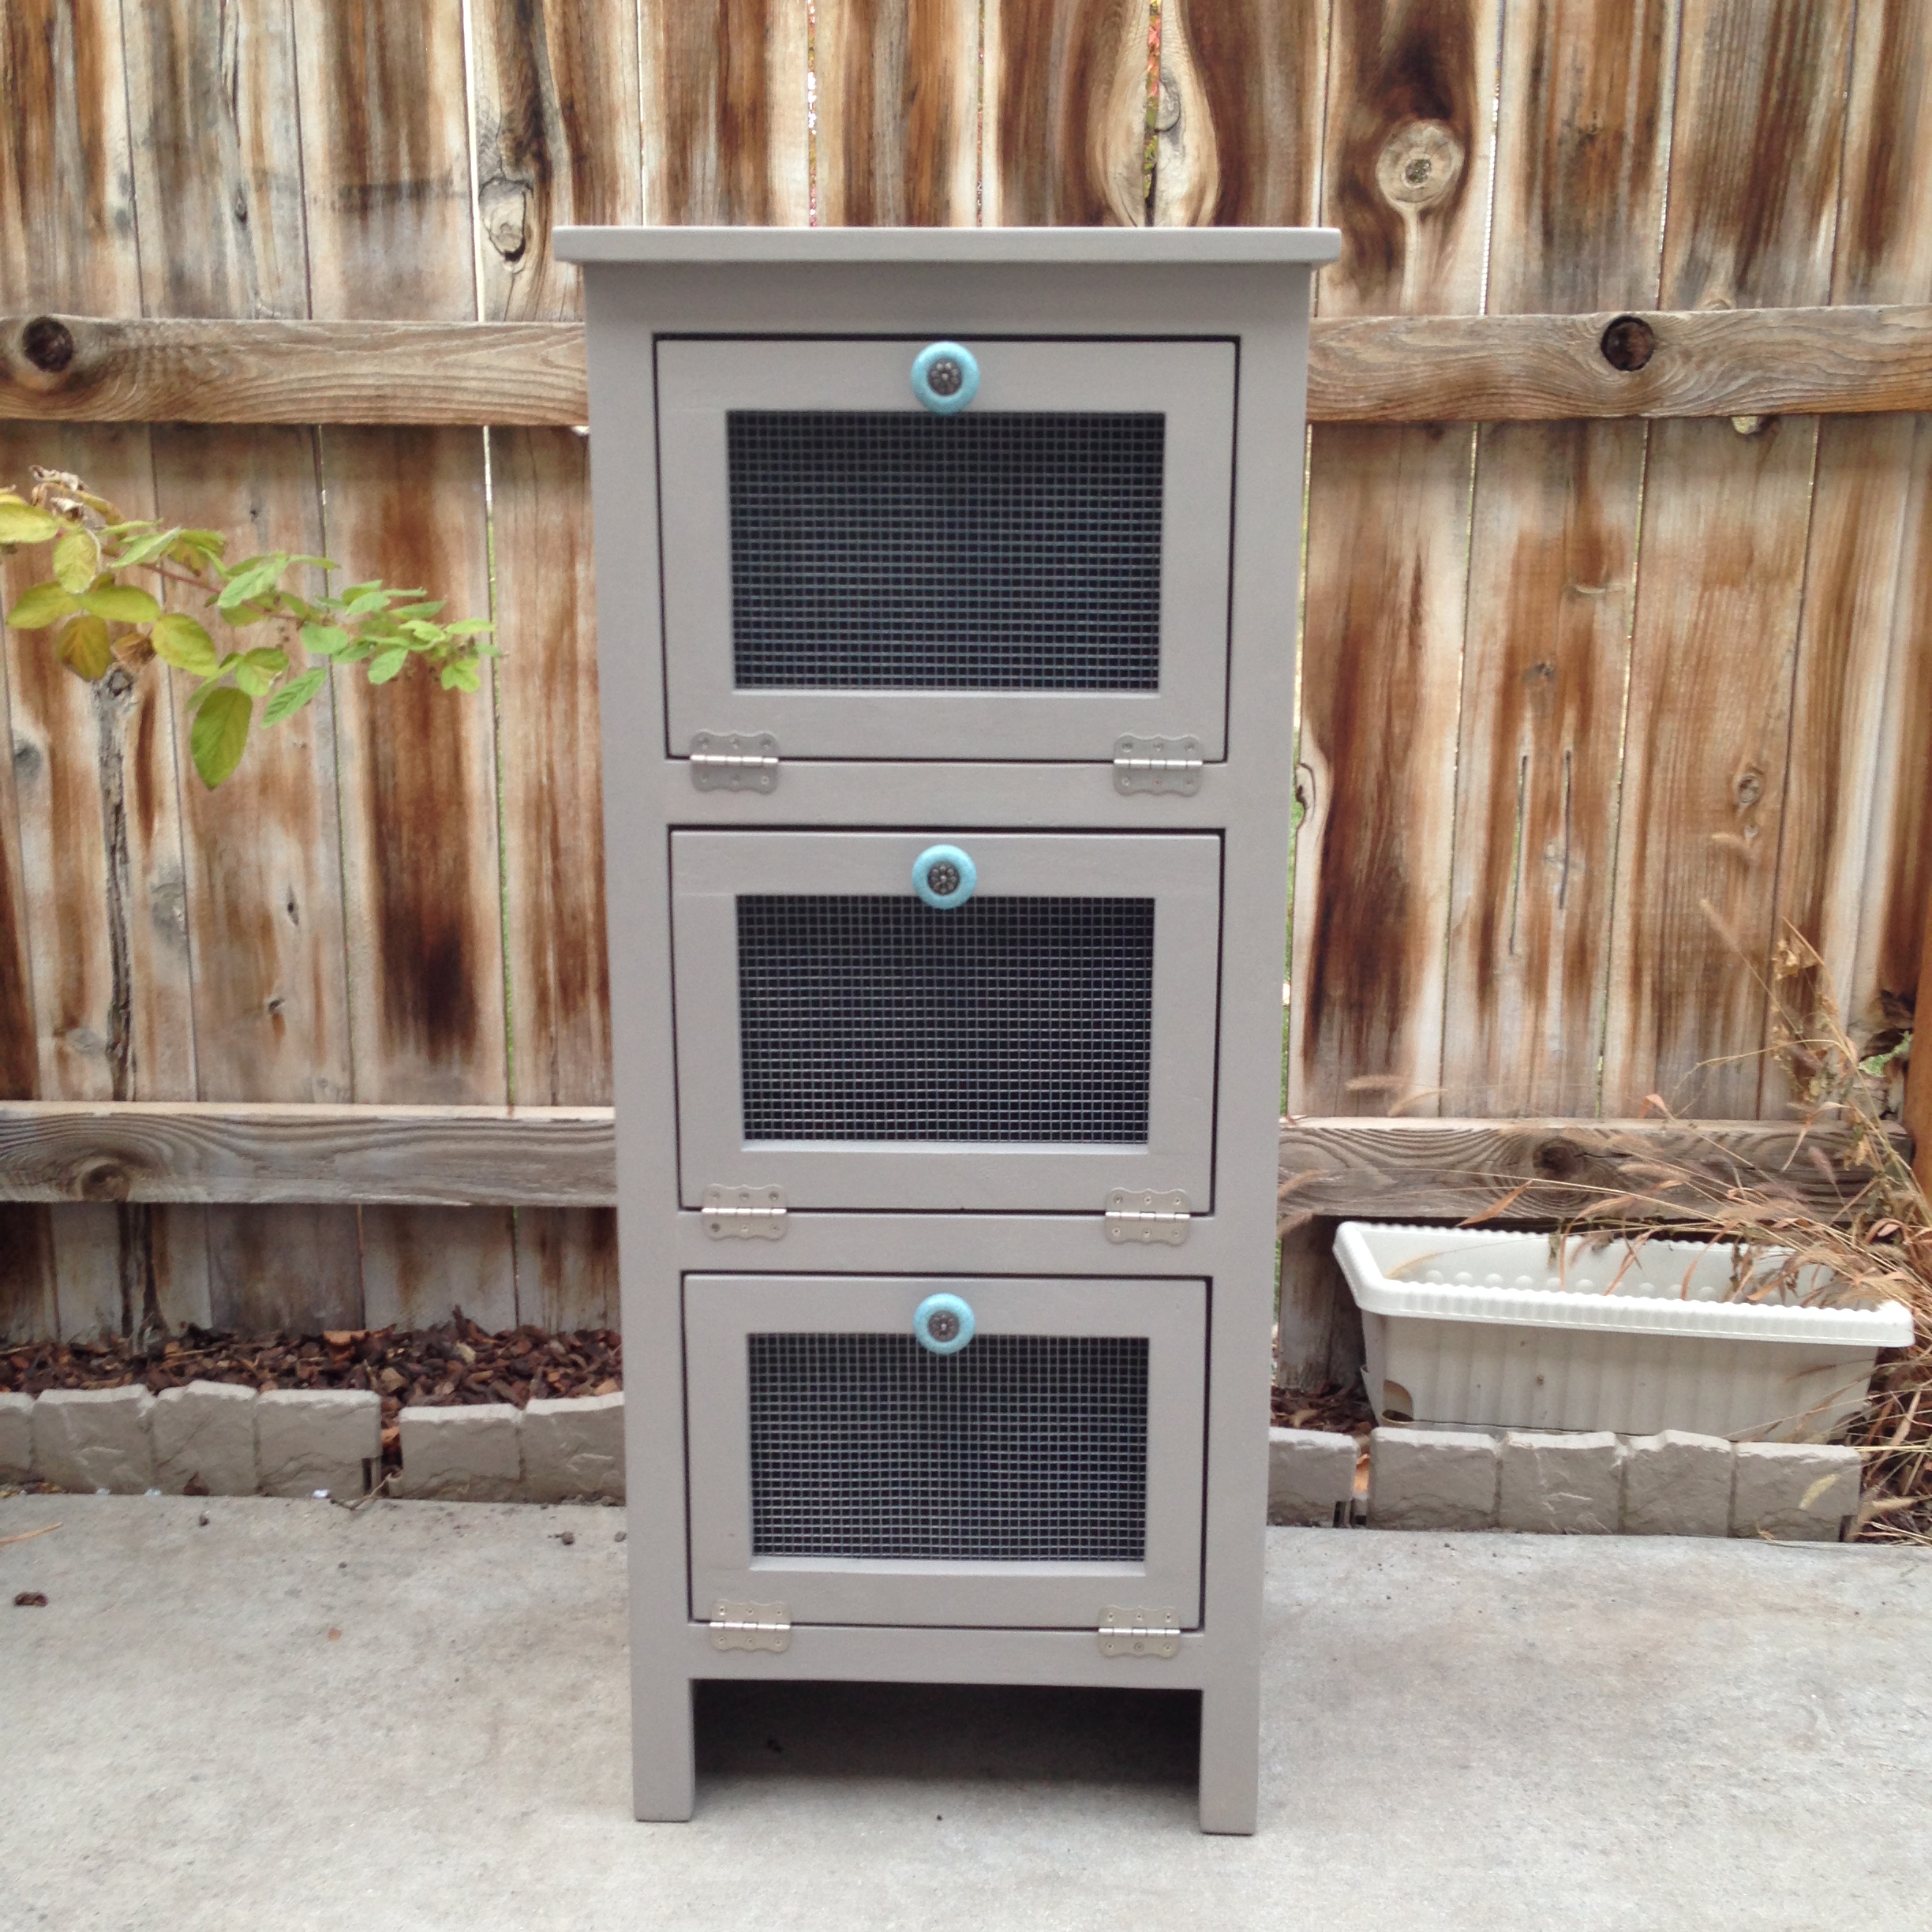
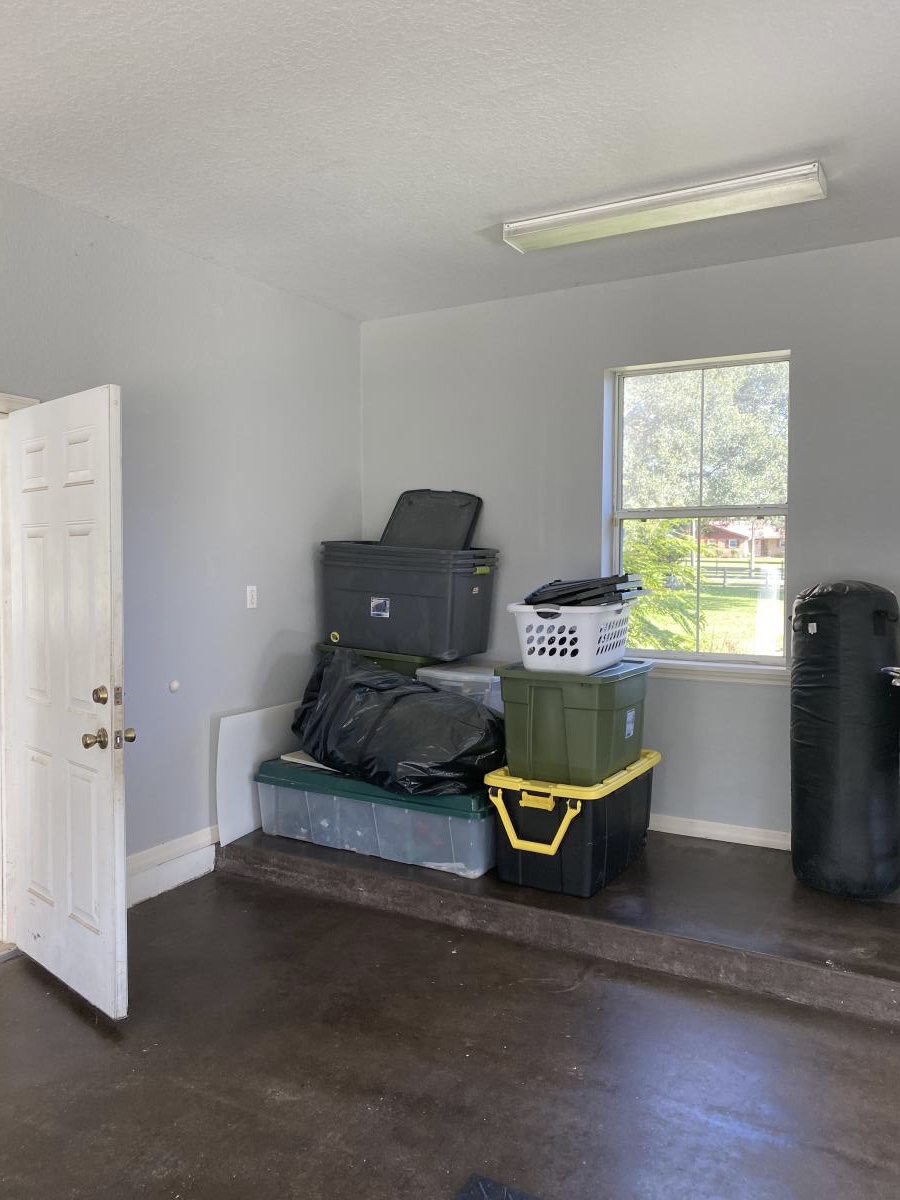
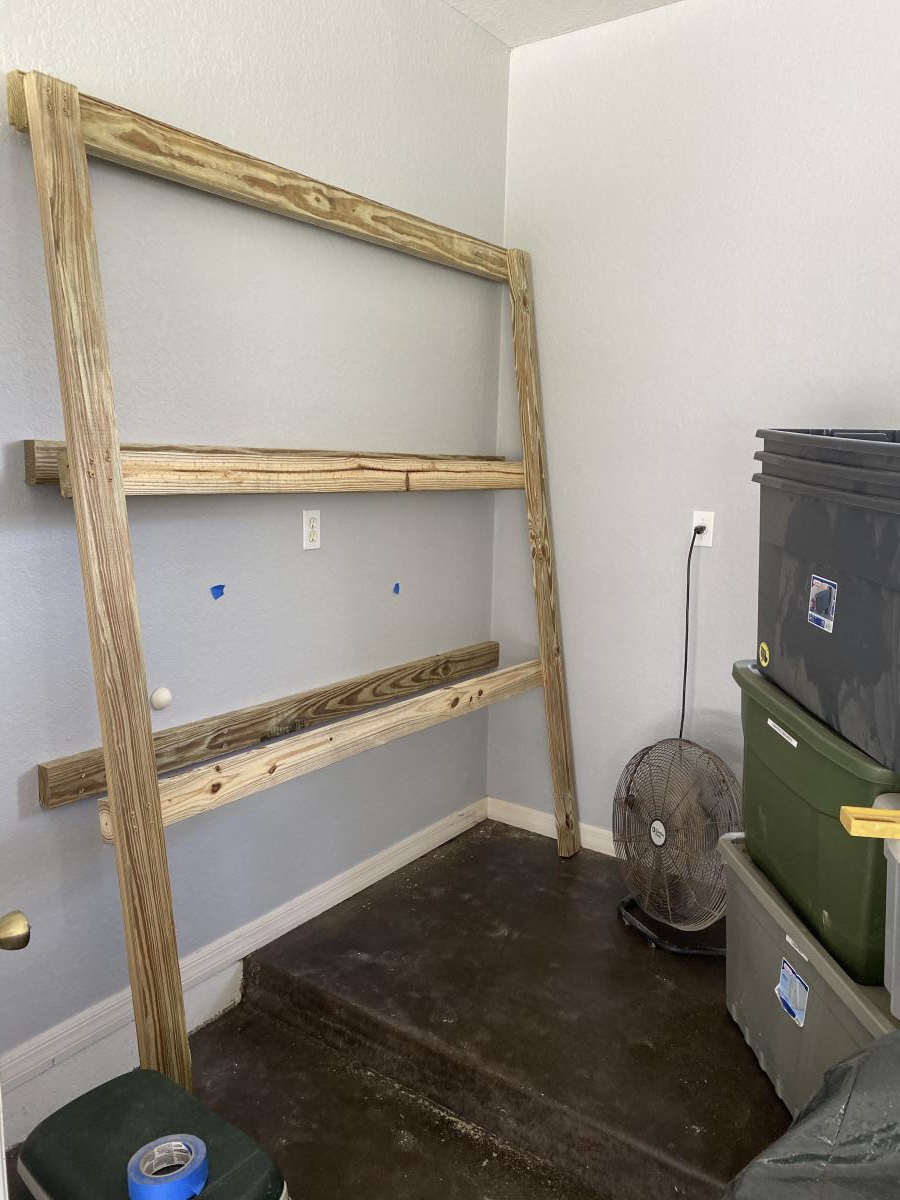
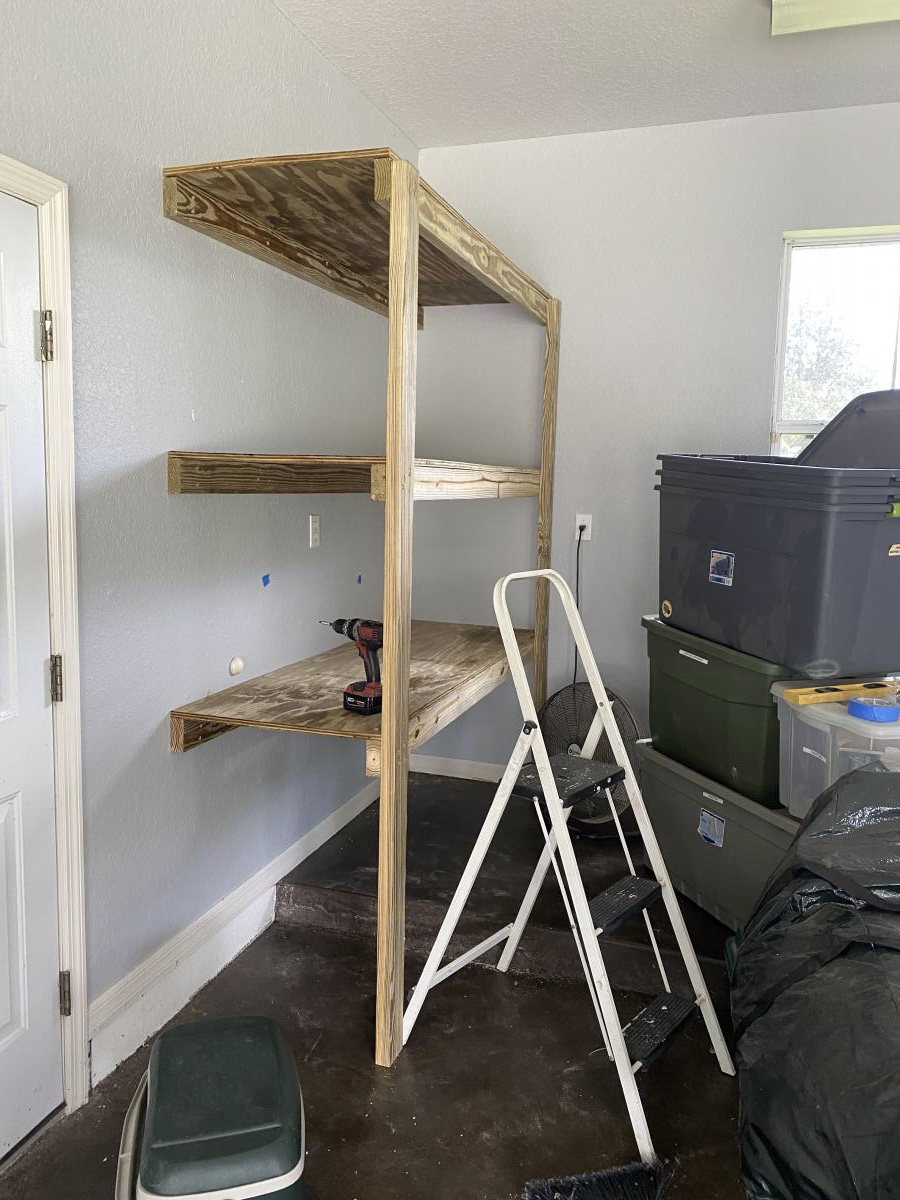
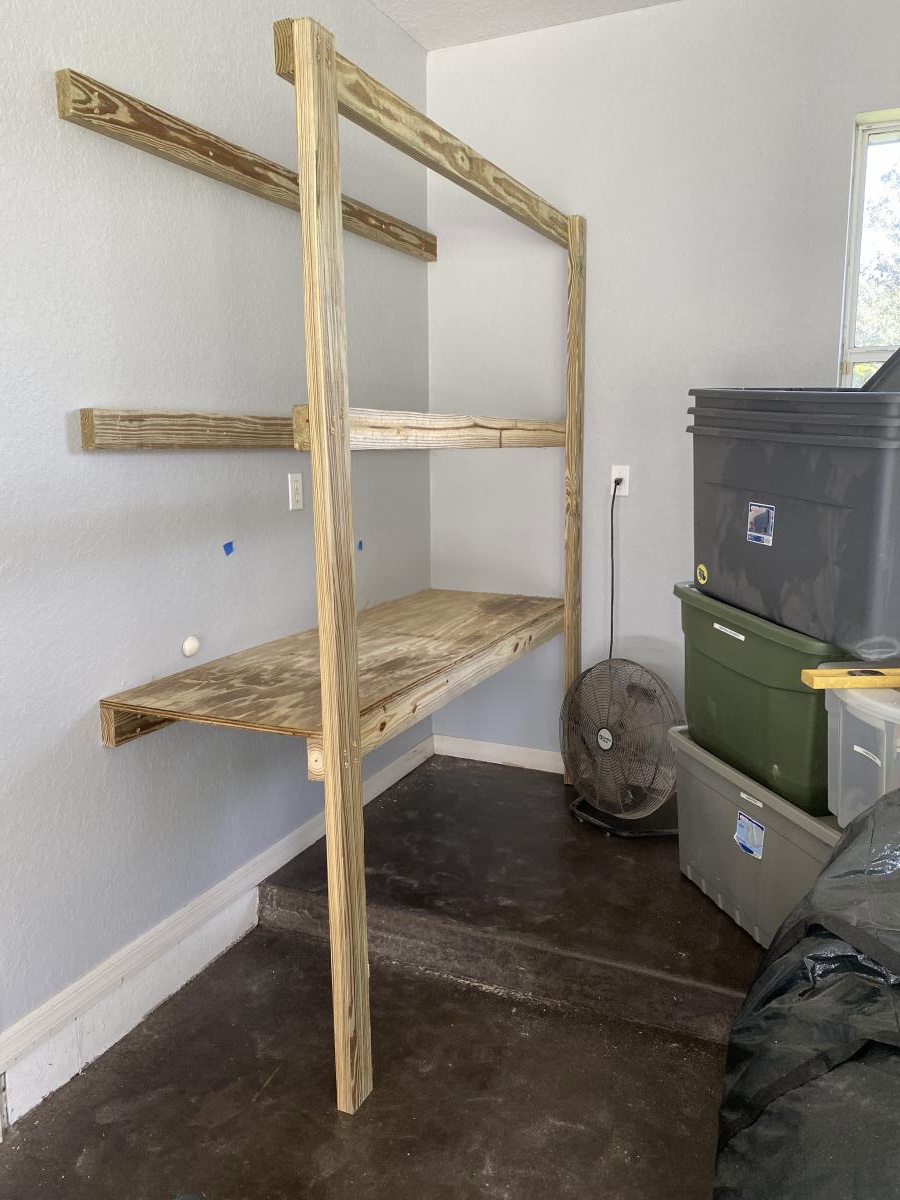
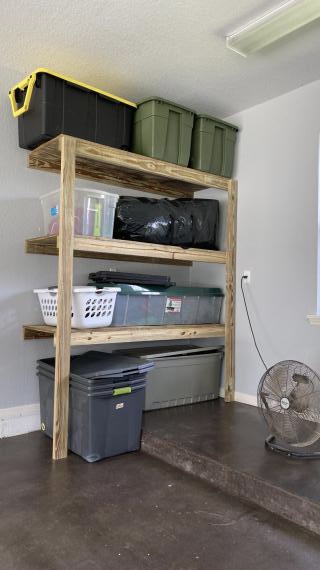
Garage shelves

Since piles of anything in garages just ends up being a hard to clean home for spiders, We decided to get some space between totes and open some space to stick the shop vac to clear out critters. This was made of pressure treated wood and plywood bc we are in FL. I used 4 inch decking screws to attach to the wall studs. Ana’s advice of measuring your totes before was very helpful so everything fit where we needed it to.
Built from Plan(s)
Estimated Cost
Under 100
Estimated Time Investment
An Hour or Two (0-2 Hours)
Finish Used
None
Recommended Skill Level
Starter Project
Comments
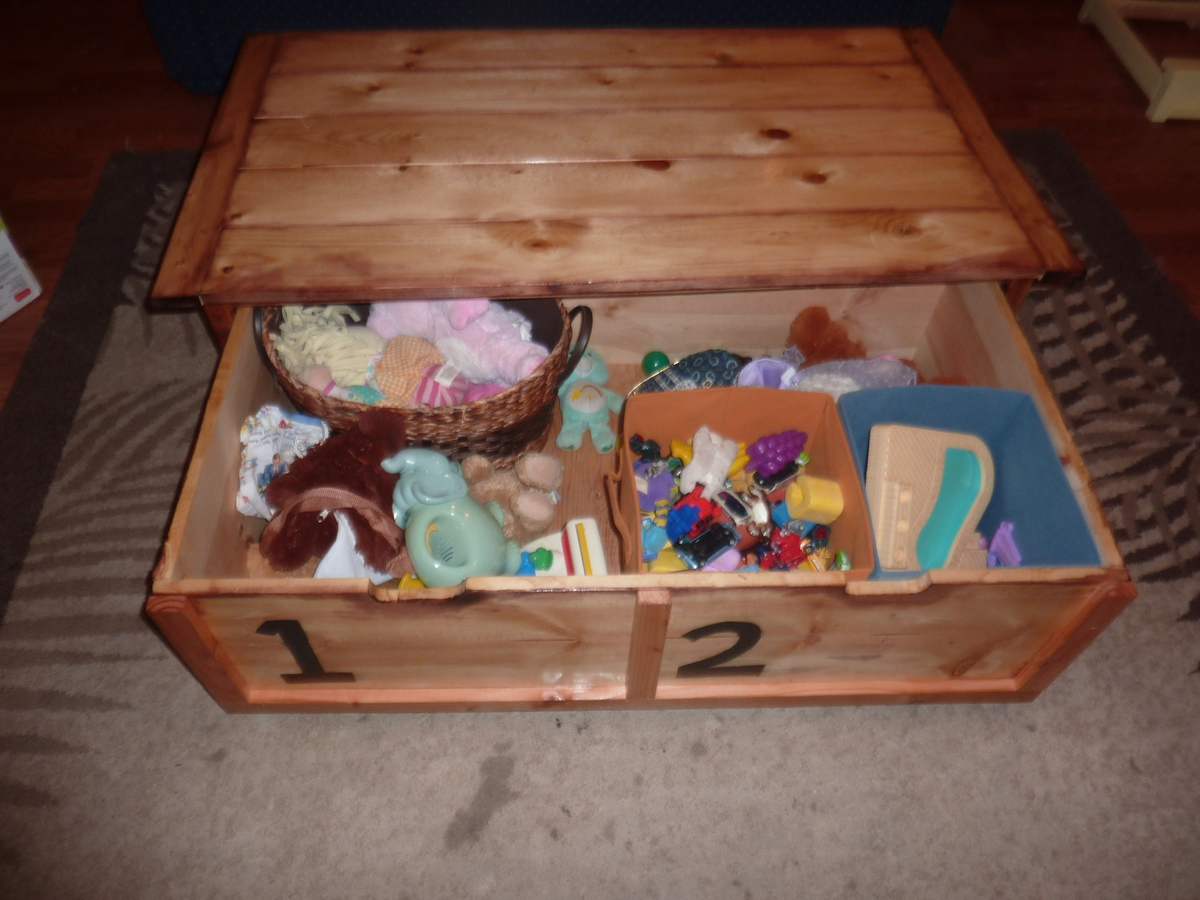
20 second tidy up coffee table
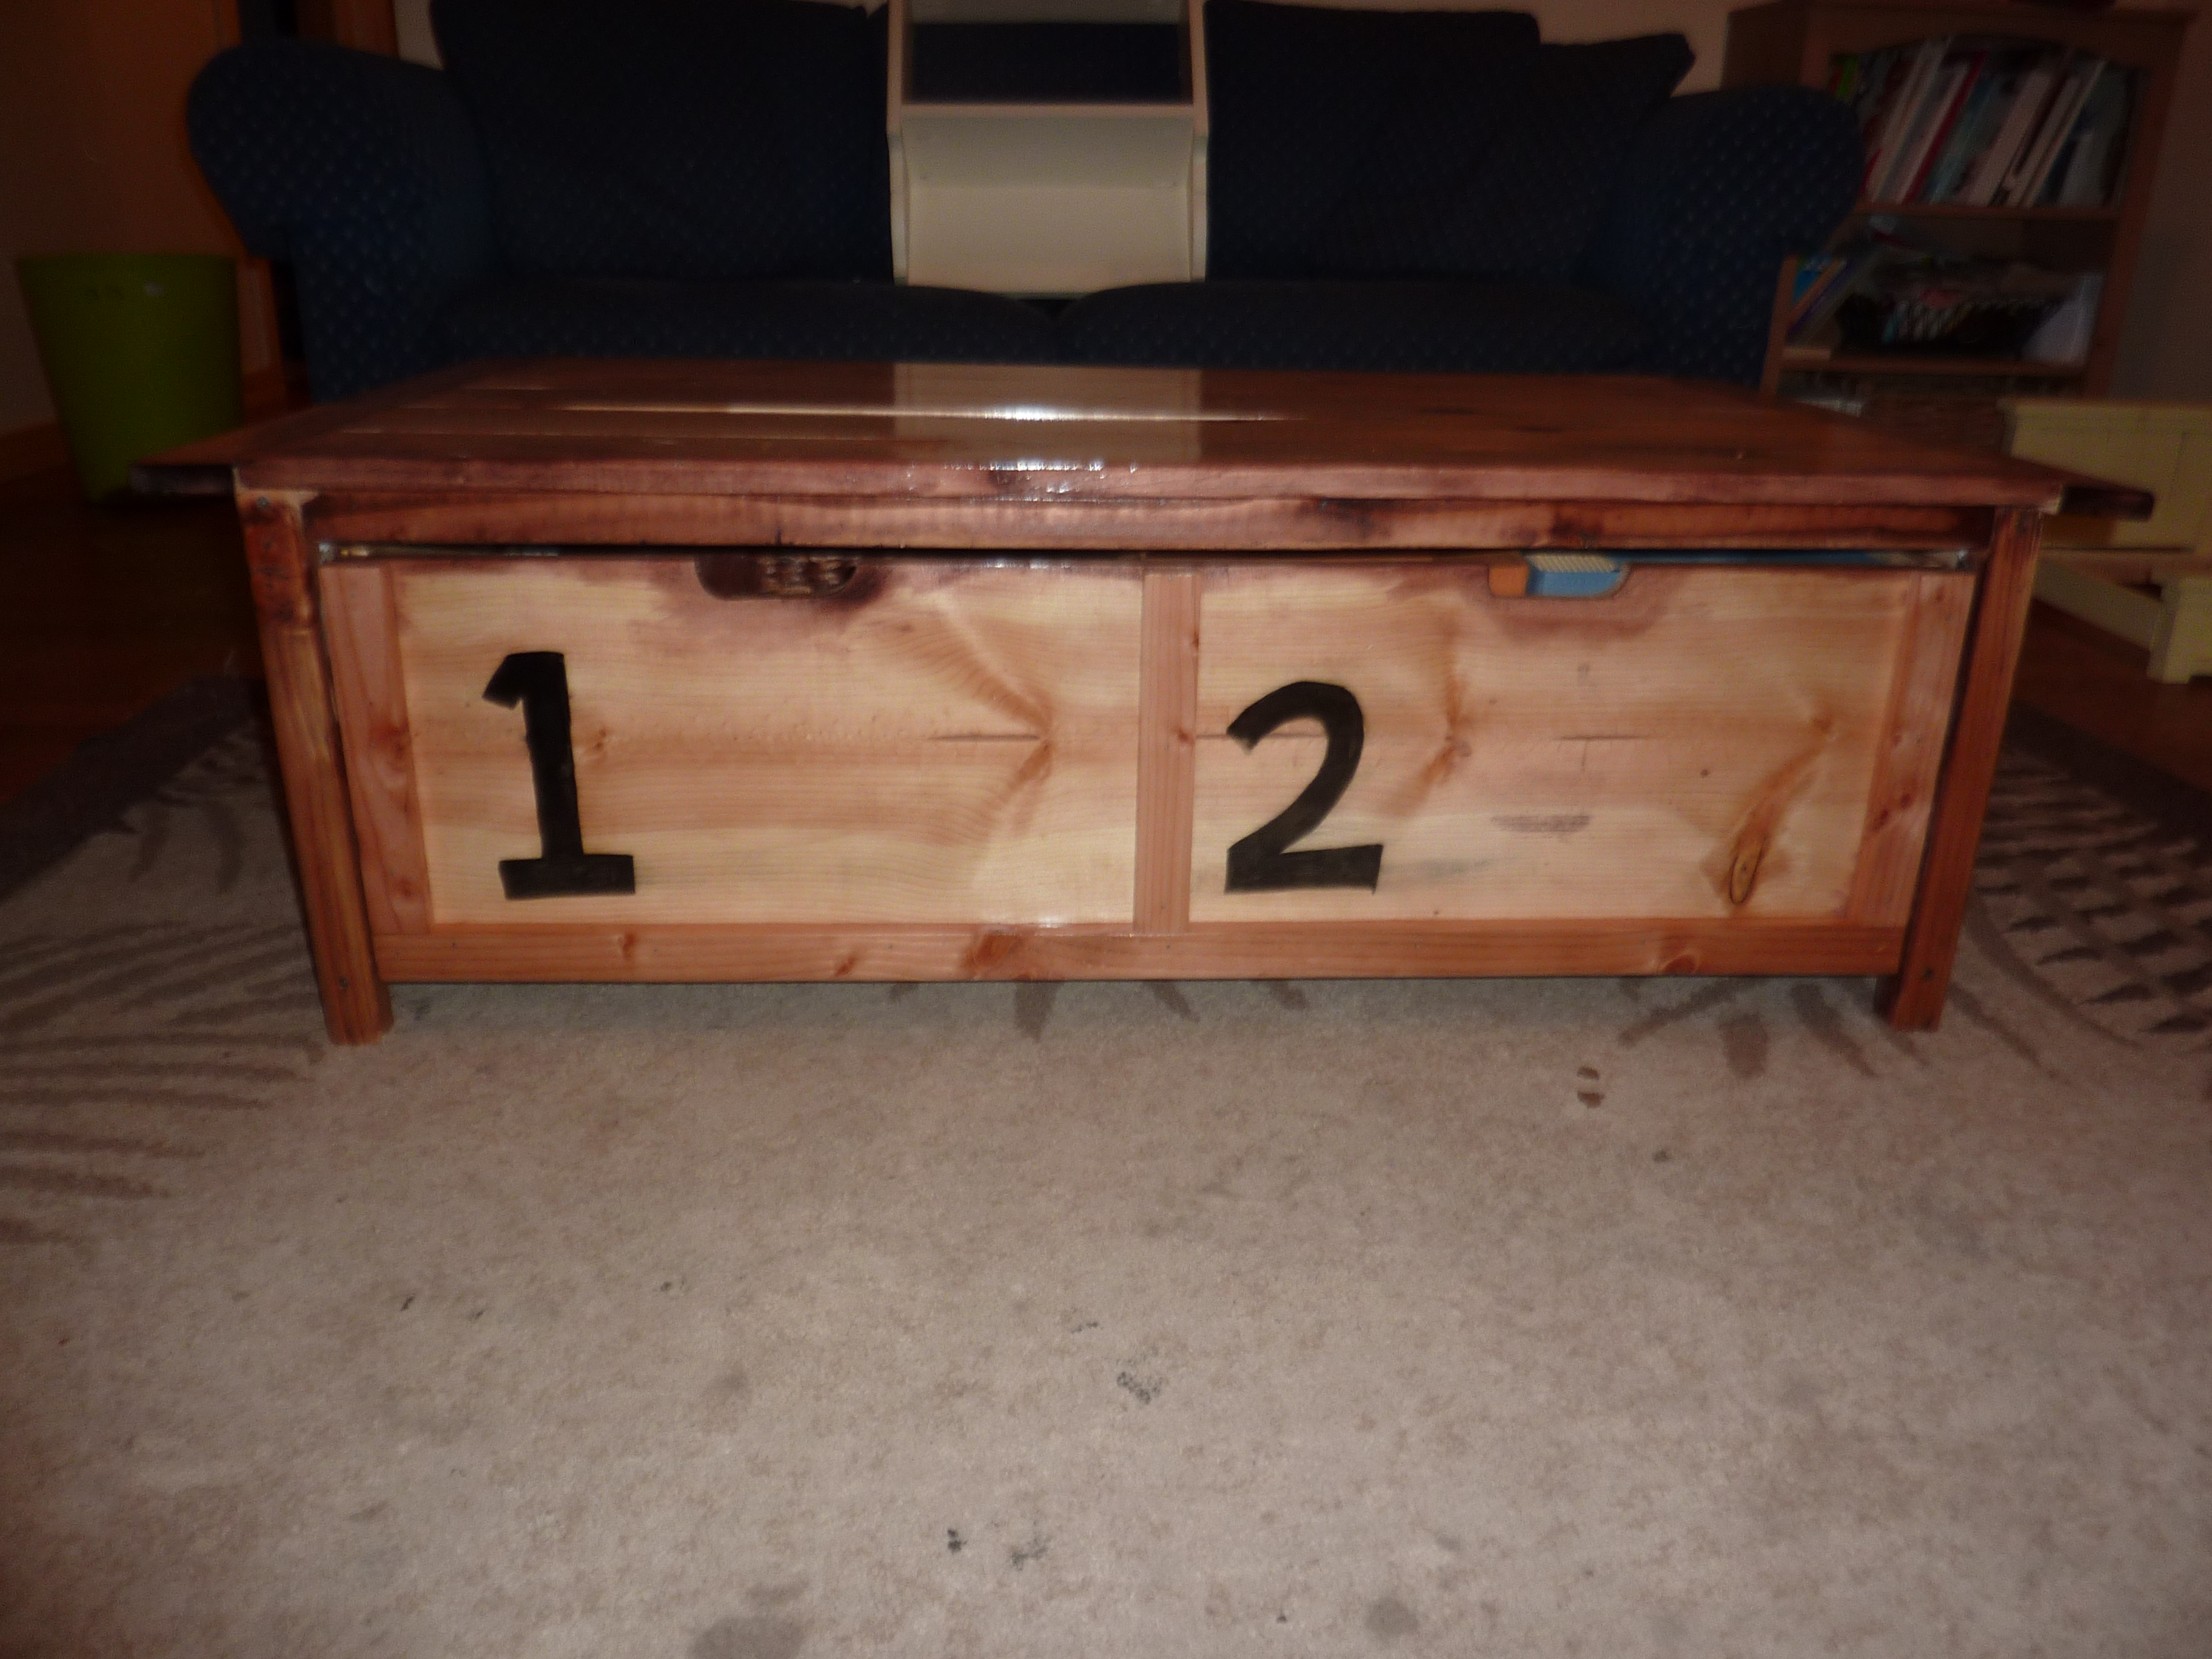
Loved making this coffee table and having somewhere to hide all the toys! Was my second project to tackle alone and I probably took longer than most. Only thing was it was a little wobbly for my husband and I so we took it apart and put in metal supports on legs. Sturdy enough that all 5 of my kids have been on there spinning around and it didn't budge. Much larger than you think!
Built from Plan(s)
Estimated Time Investment
Weekend Project (10-20 Hours)
Finish Used
Minwax puritan pine and red mahogany. Permanent marker for numbers.
Recommended Skill Level
Beginner
Comments

Wed, 01/23/2013 - 14:51
Amazing job!
Especially for a second-alone-project! I'm usually partial to darker stains, but I kinda dig the medium stain you used, too... Maybe I'll have to start lookin' into those!
Kentwood Bookshelf
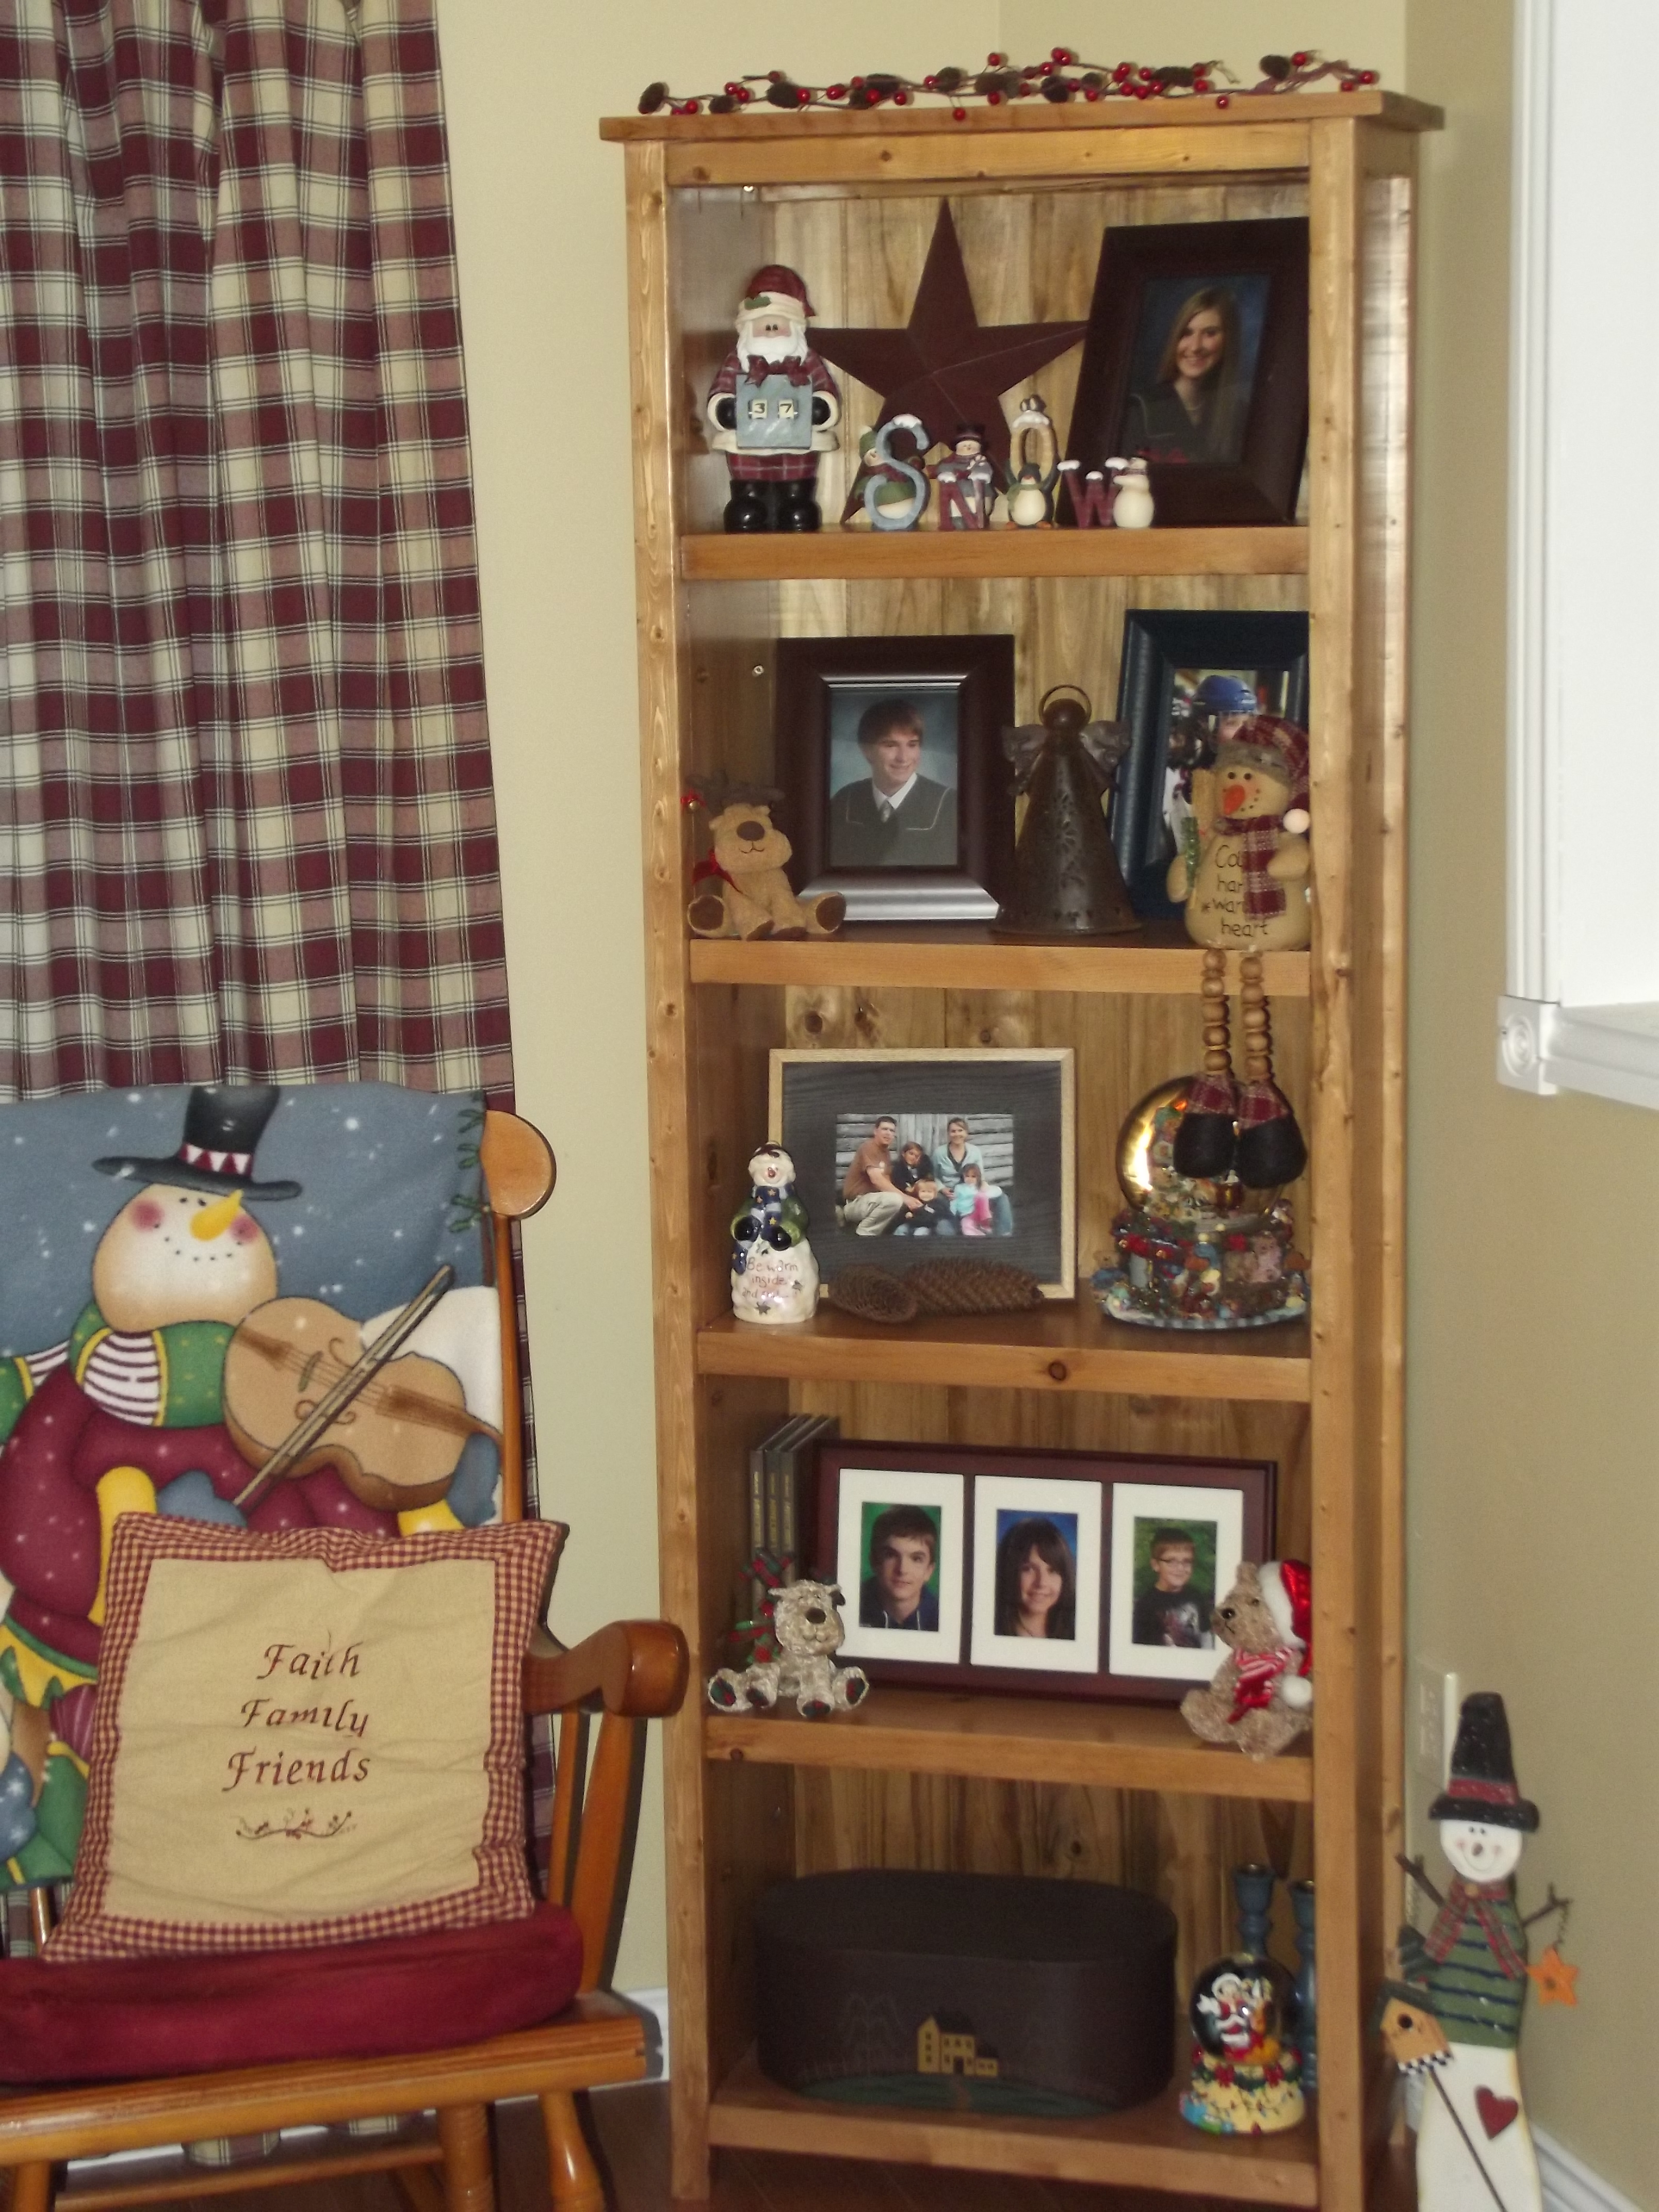
I followed the plans for the Kentwood Bookshelf but added an extra shelf. I stained it with Minwax Early American stain & 3 coats of Minwax clear satin polyurethane.
Built from Plan(s)
Estimated Cost
$60.00
Estimated Time Investment
Afternoon Project (3-6 Hours)
Finish Used
Minwax Early American stain & 3 coats of Minwax water based, oil modified poly.
Recommended Skill Level
Beginner
Comments
Loft Bed

This was a pretty easy build and super cost efficient! I decided to paint mine instead of staining it and only used stain on the steps for the platform. After it was put together and the mattress was put in I decided to add an extension to the top (not a lot of room between the top of my son's mattress and the upper edge after an 11" mattress was put in) that could be put on and taken off by just un-clasping it!
Love that the footprint on this loft bed is so small and allowed for SOOOO much more room in my son's room to play and store things! Couldn't be happier with this build.... Only downside: Your friends may ask you to build one for their children, haha.
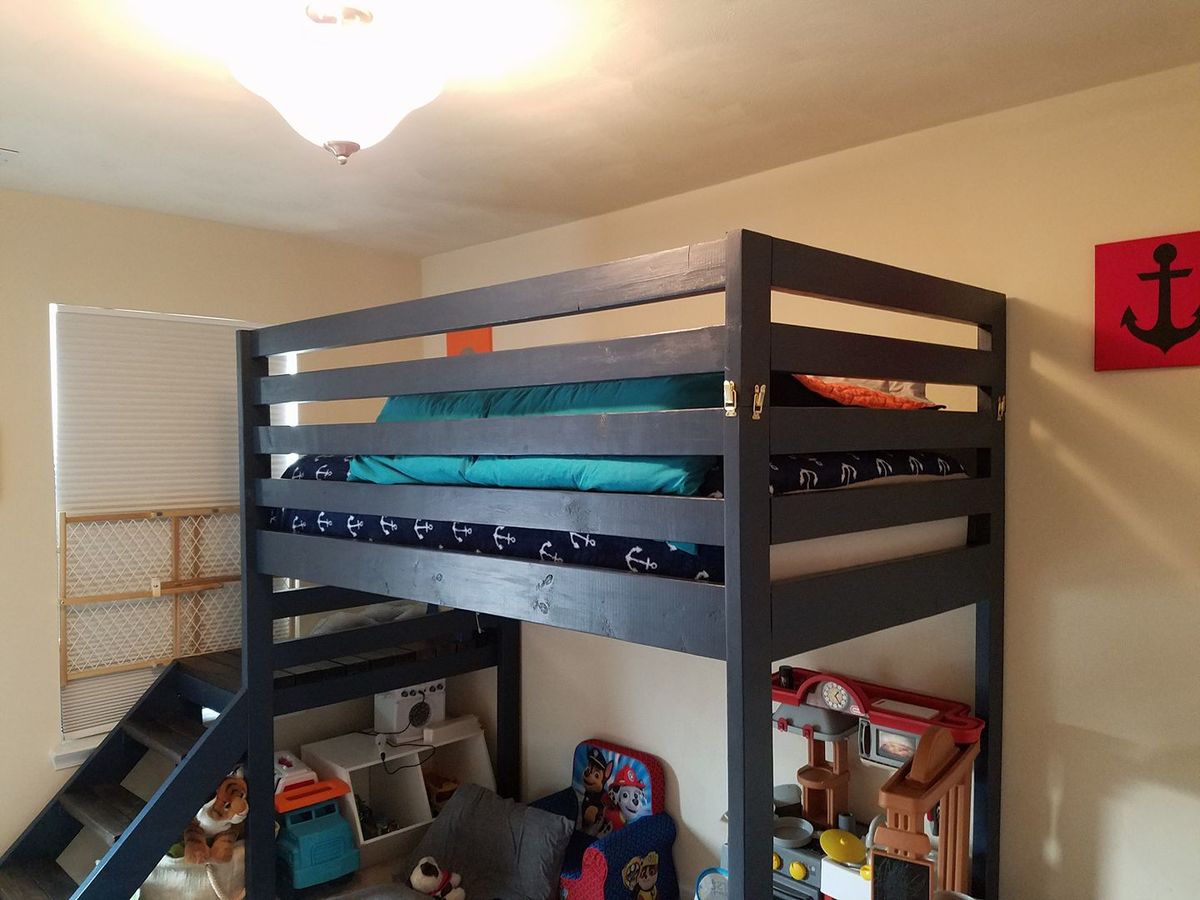
Estimated Cost
$120 after costs of lumber, pocket hole screws, and paint.
Estimated Time Investment
Day Project (6-9 Hours)
Finish Used
Polycrilic coat over paint
Recommended Skill Level
Intermediate
Kids Chair with Storage
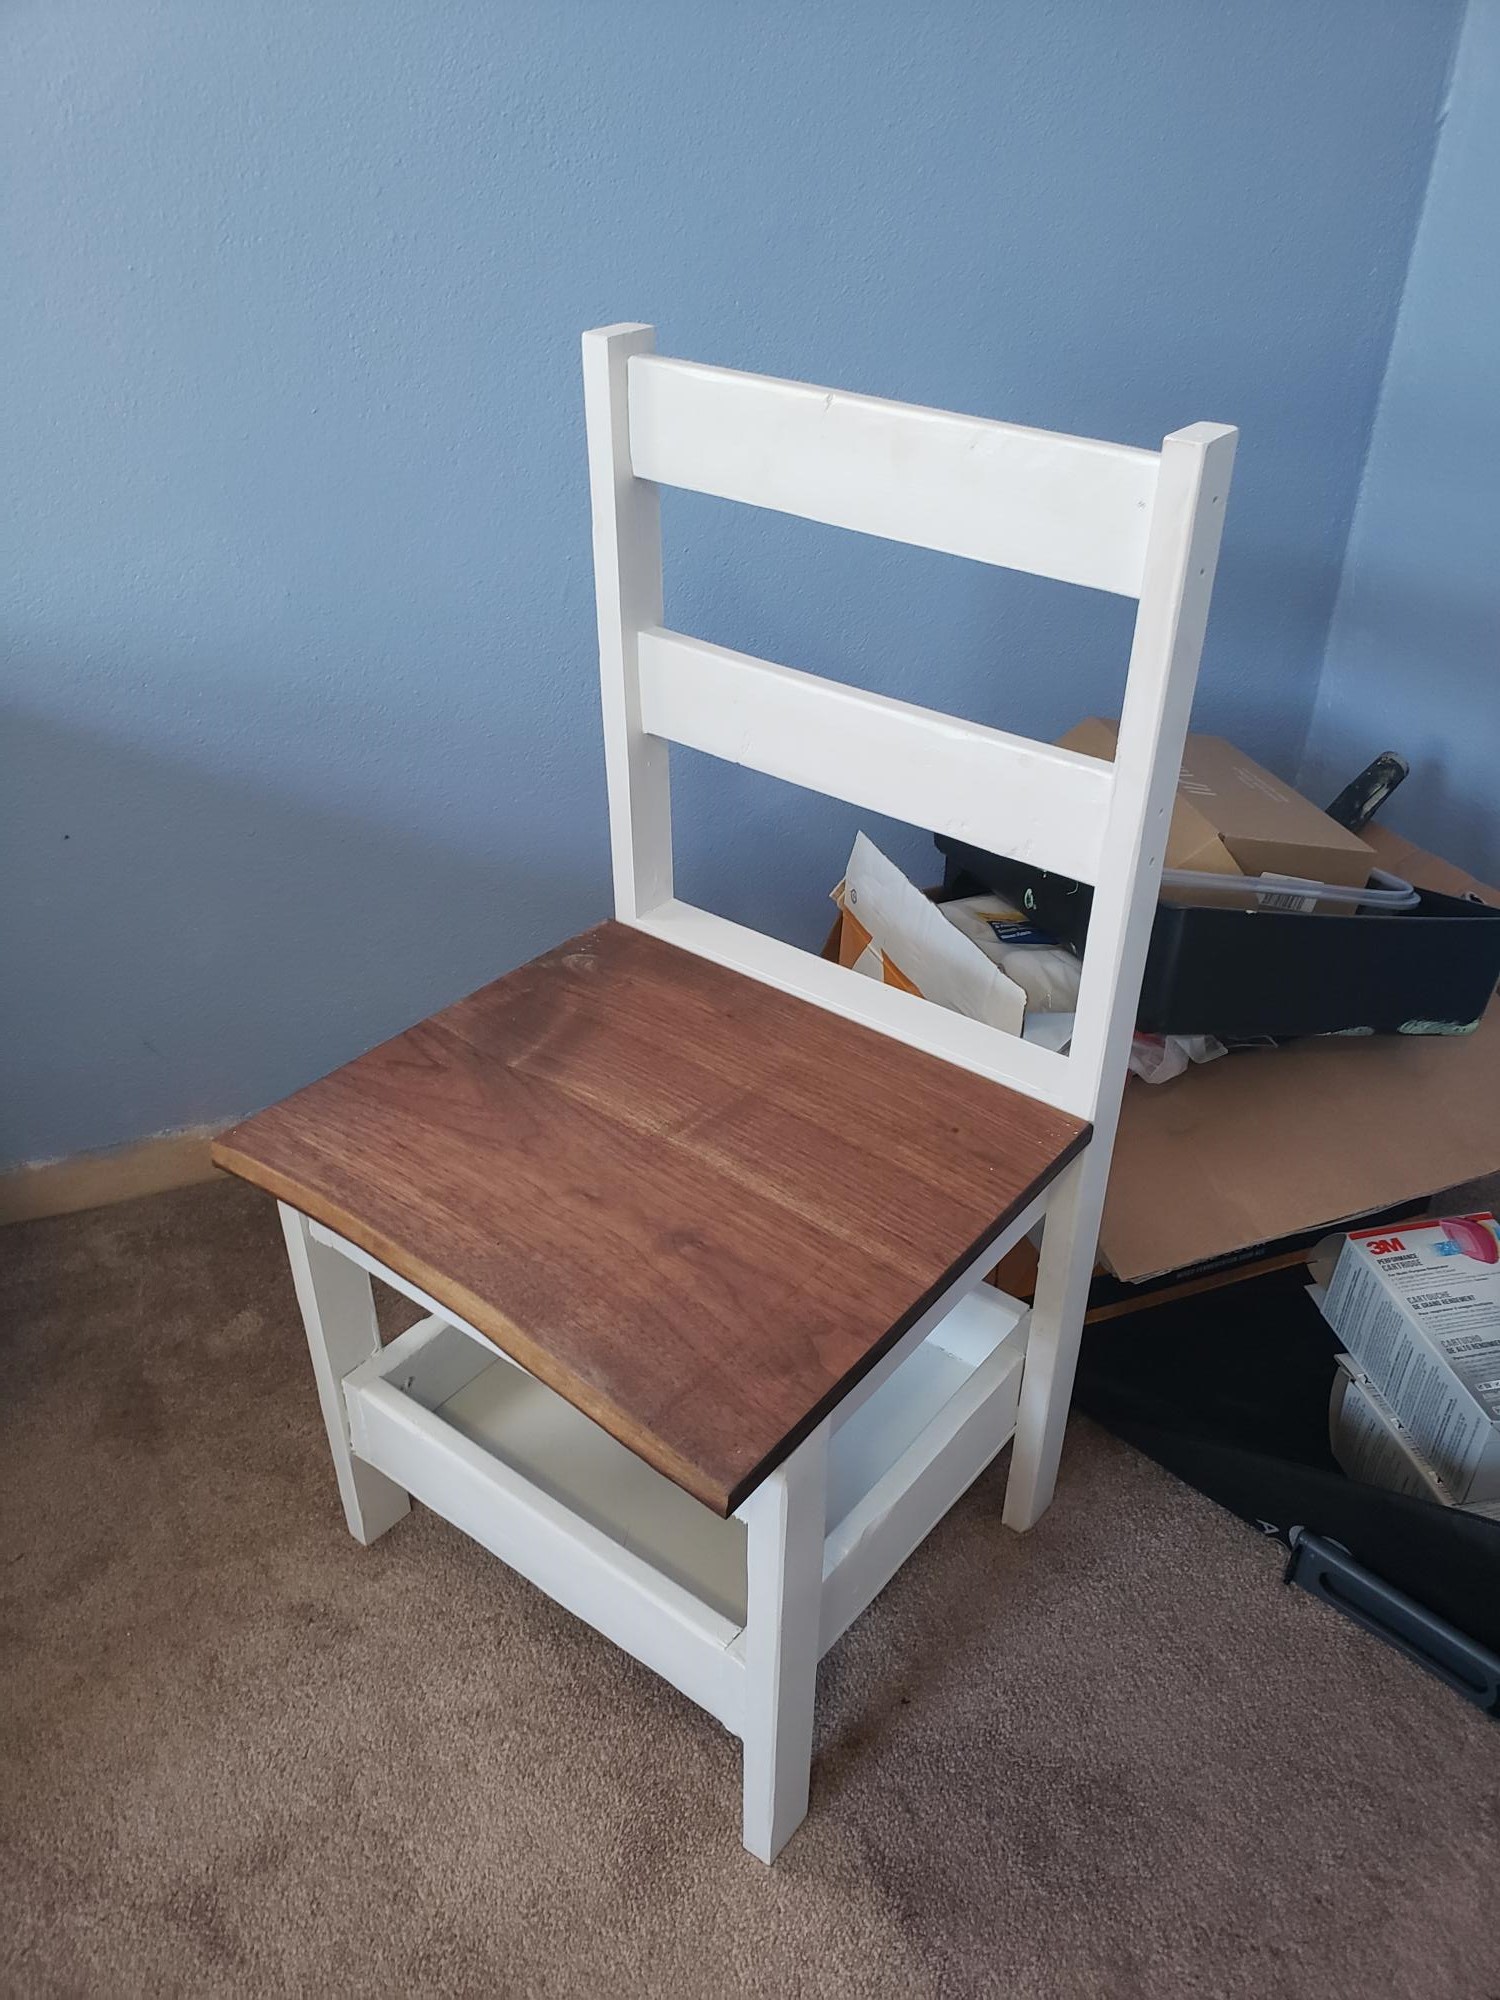
I made 4 of these and made seats out of walnut.
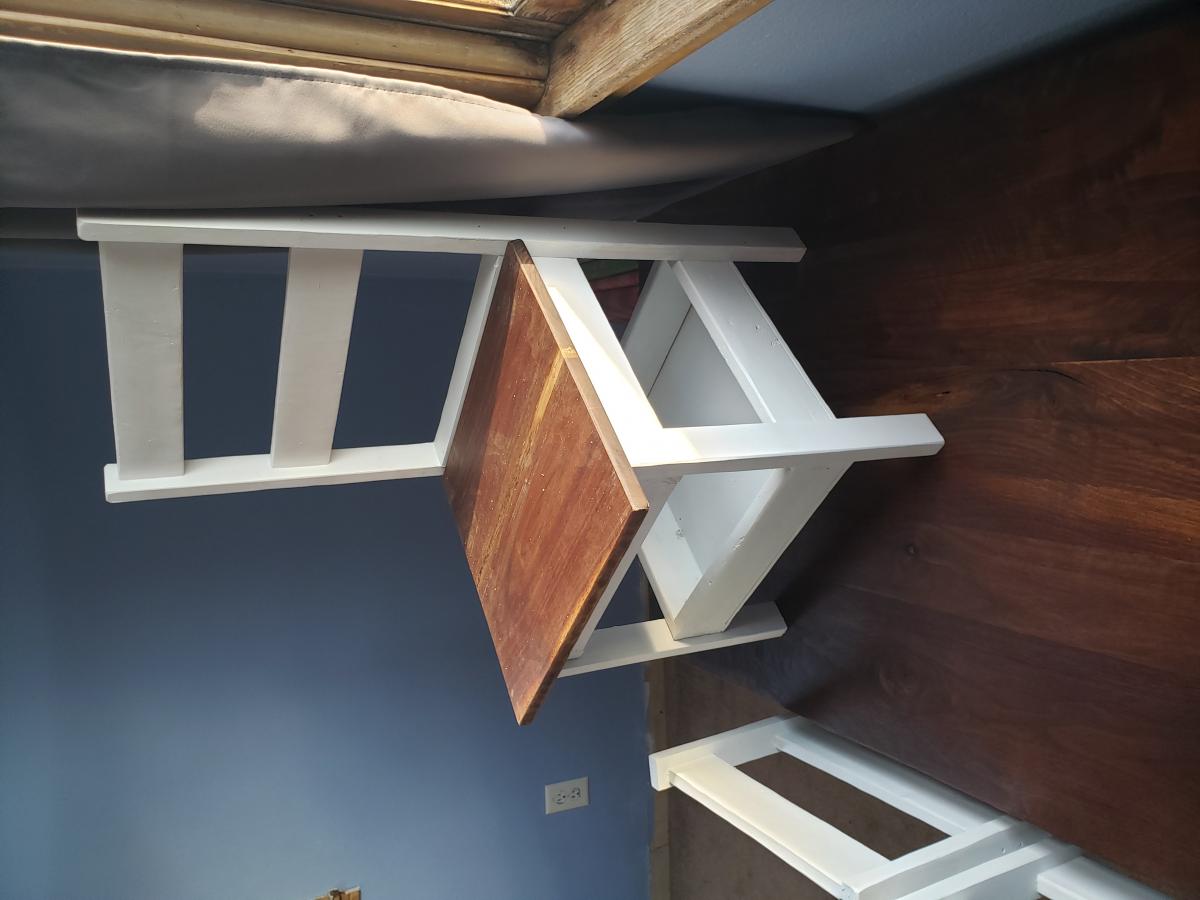
Built from Plan(s)
Entryway Bench
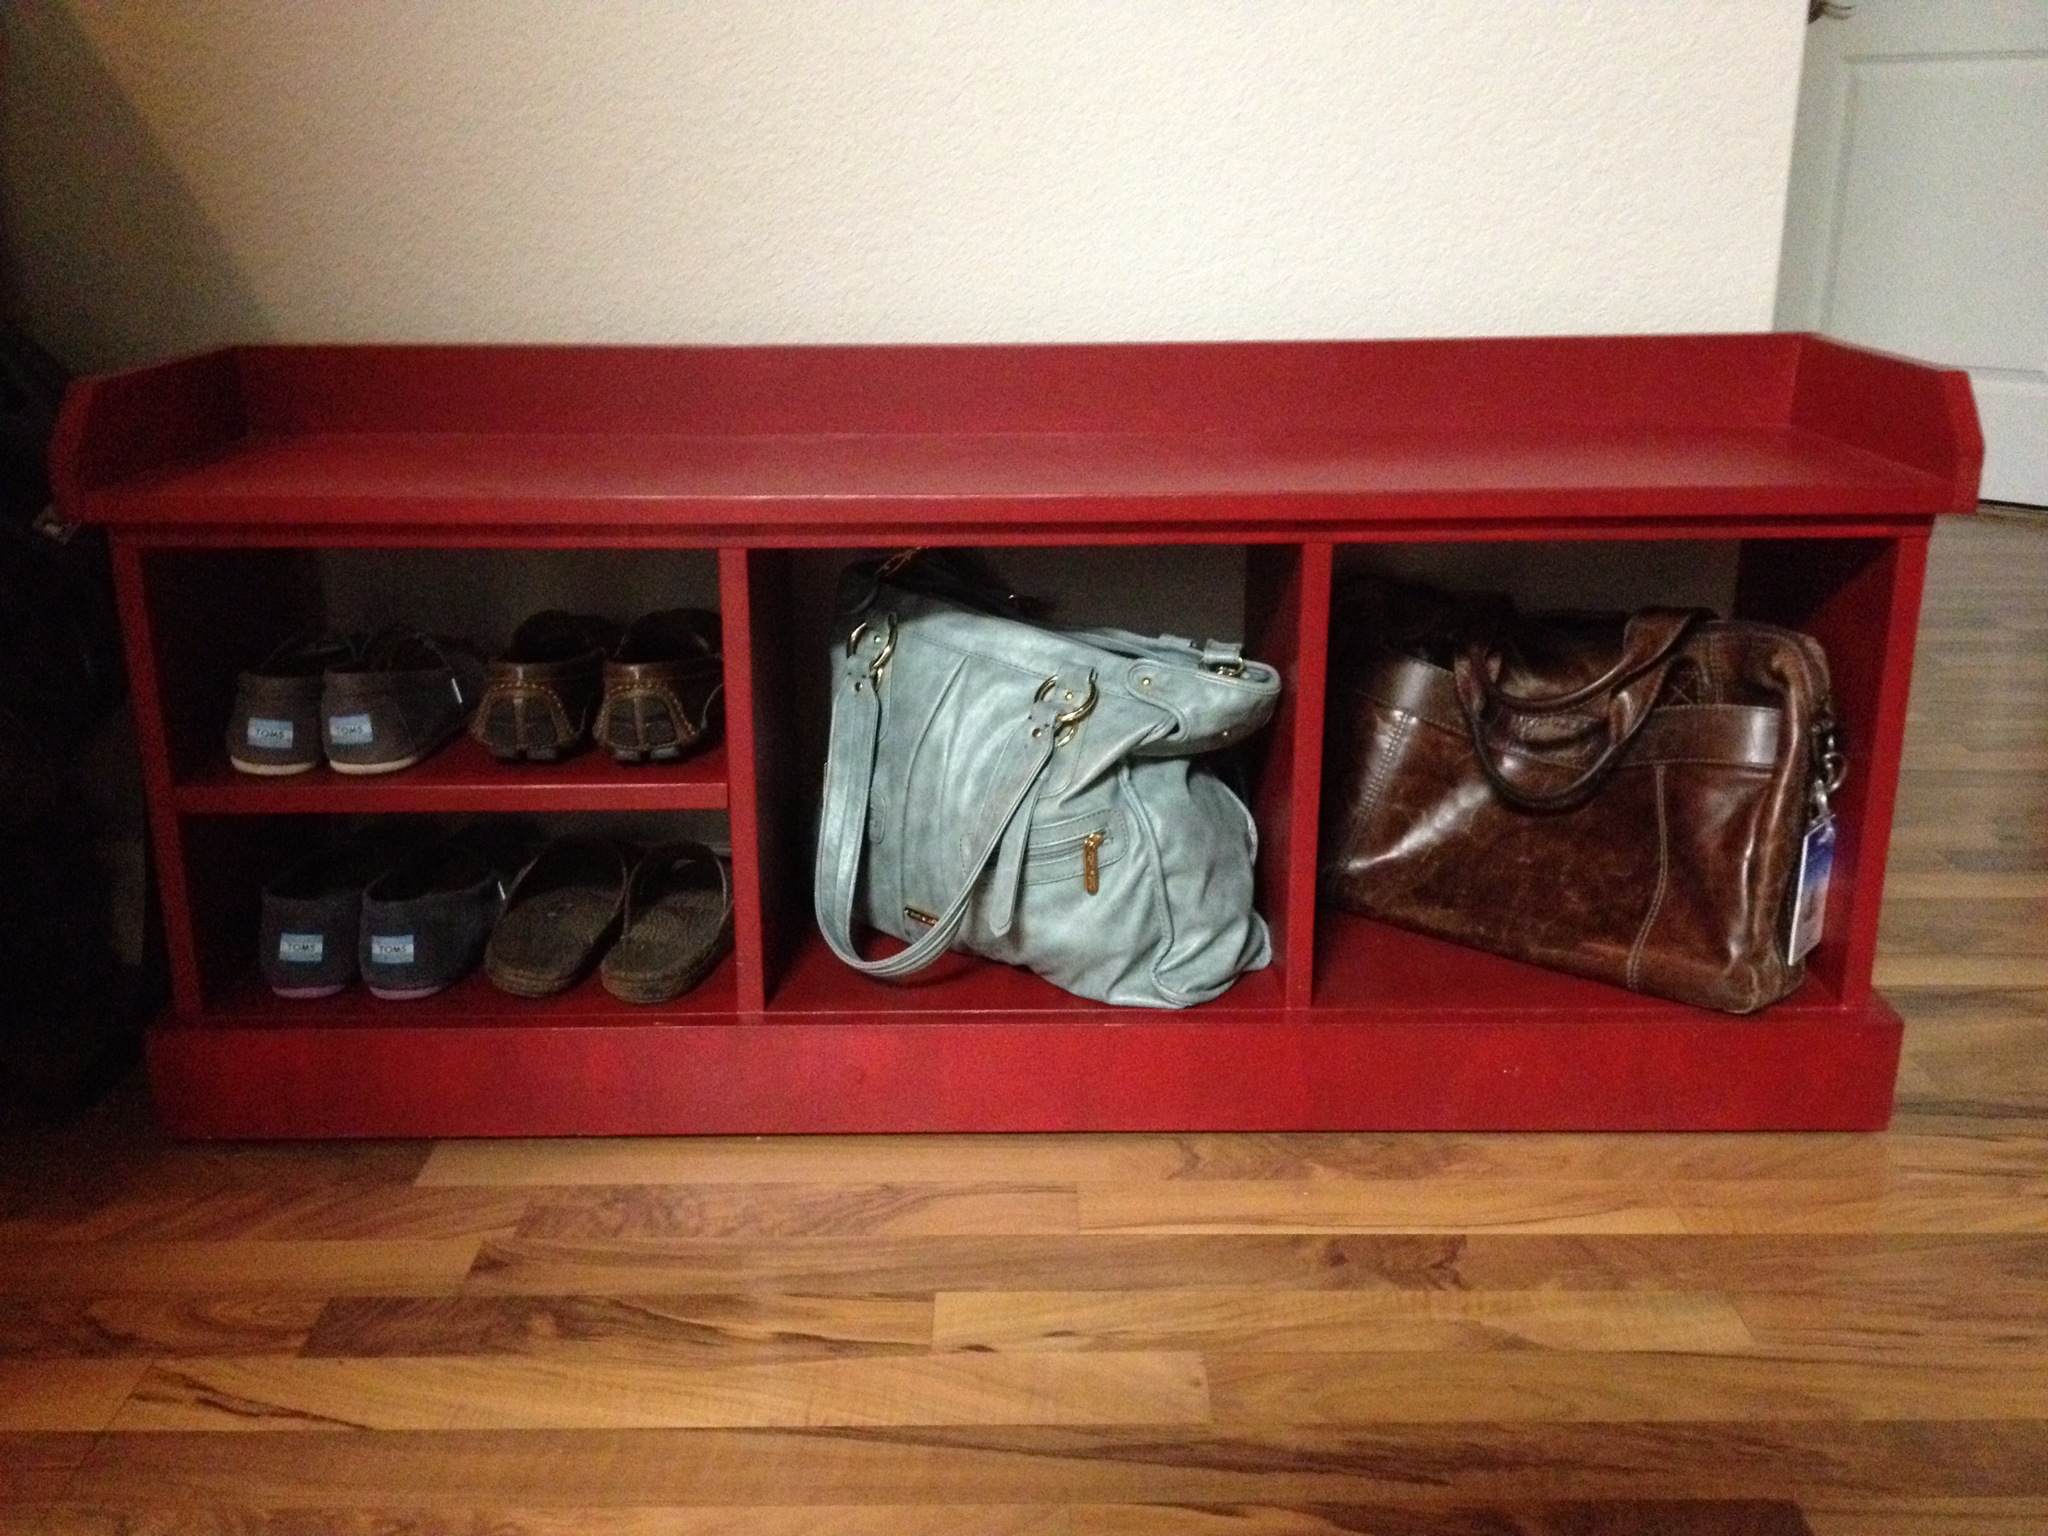
We already had a coat rack (which we painted to match the red of the bench) and so we simply made the bench portion of this plan. This was my first non-shelf project since acquiring my Kreg Jig for Christmas and now that it is done I am very pleased with it. I learned a lot about the importance of straight boards here. Those final pieces went on with a certain amount of force! Also, I asked the folks at HD to cut my boards for me to save time (which it certainly did), but their blade caused a lot of splintering on the edges which I spent a lot of time trying to remedy. In the future I will take care of cuts (assuming the boards will fit in my vehicle). Lots of learning, lots of fun.
Built from Plan(s)
Estimated Cost
$50
Estimated Time Investment
Afternoon Project (3-6 Hours)
Finish Used
Paint, Clear Coat
Recommended Skill Level
Starter Project
Fancy Farmhouse King Bed with footboard

I loved the look of the Mom's Fancy Farmhouse Bed...but we wanted a footboard. Made this to fit a traditionally sized King mattress (76x80) and it fits perfectly. Left the 3rd 1x6 off the frame of the support and instead connected a footboard which I made exactly like the headboard, but with shorter legs. I also added height to the headboard legs in order to accomodate both our mattress AND box spring. I didn't have room to bolt the headboard or footboard to the frame/support so instead I screwed 3" screwes through the legs into the frame from the footboard, and then screwed the headboard legs directly into the studs/wall in our bedroom. Very sturdy seeming and not wobbly. It worked perfectly for size/look in our new master bedroom. Spent several weekends on this project. Could've finished it faster if you have a full day and an extra set of hands to help move/turn the headboard/footboard as they get heavy once assembled.
Built from Plan(s)
Estimated Cost
$200 after cutting the moulding incorrectly/needing to repurchase that.
Estimated Time Investment
Week Long Project (20 Hours or More)
Finish Used
Rustoleum Kona (2 coats), Rustoleum Polyurethane Satin finish. Could've gotten away with one coat but did not wipe off soon enough/was a bit uneven so the 2nd coat helped even everything out.
Recommended Skill Level
Beginner
Comments

Fri, 11/21/2014 - 09:29
This is really awesome and
This is really awesome and for only $200!! I really love the dark color!
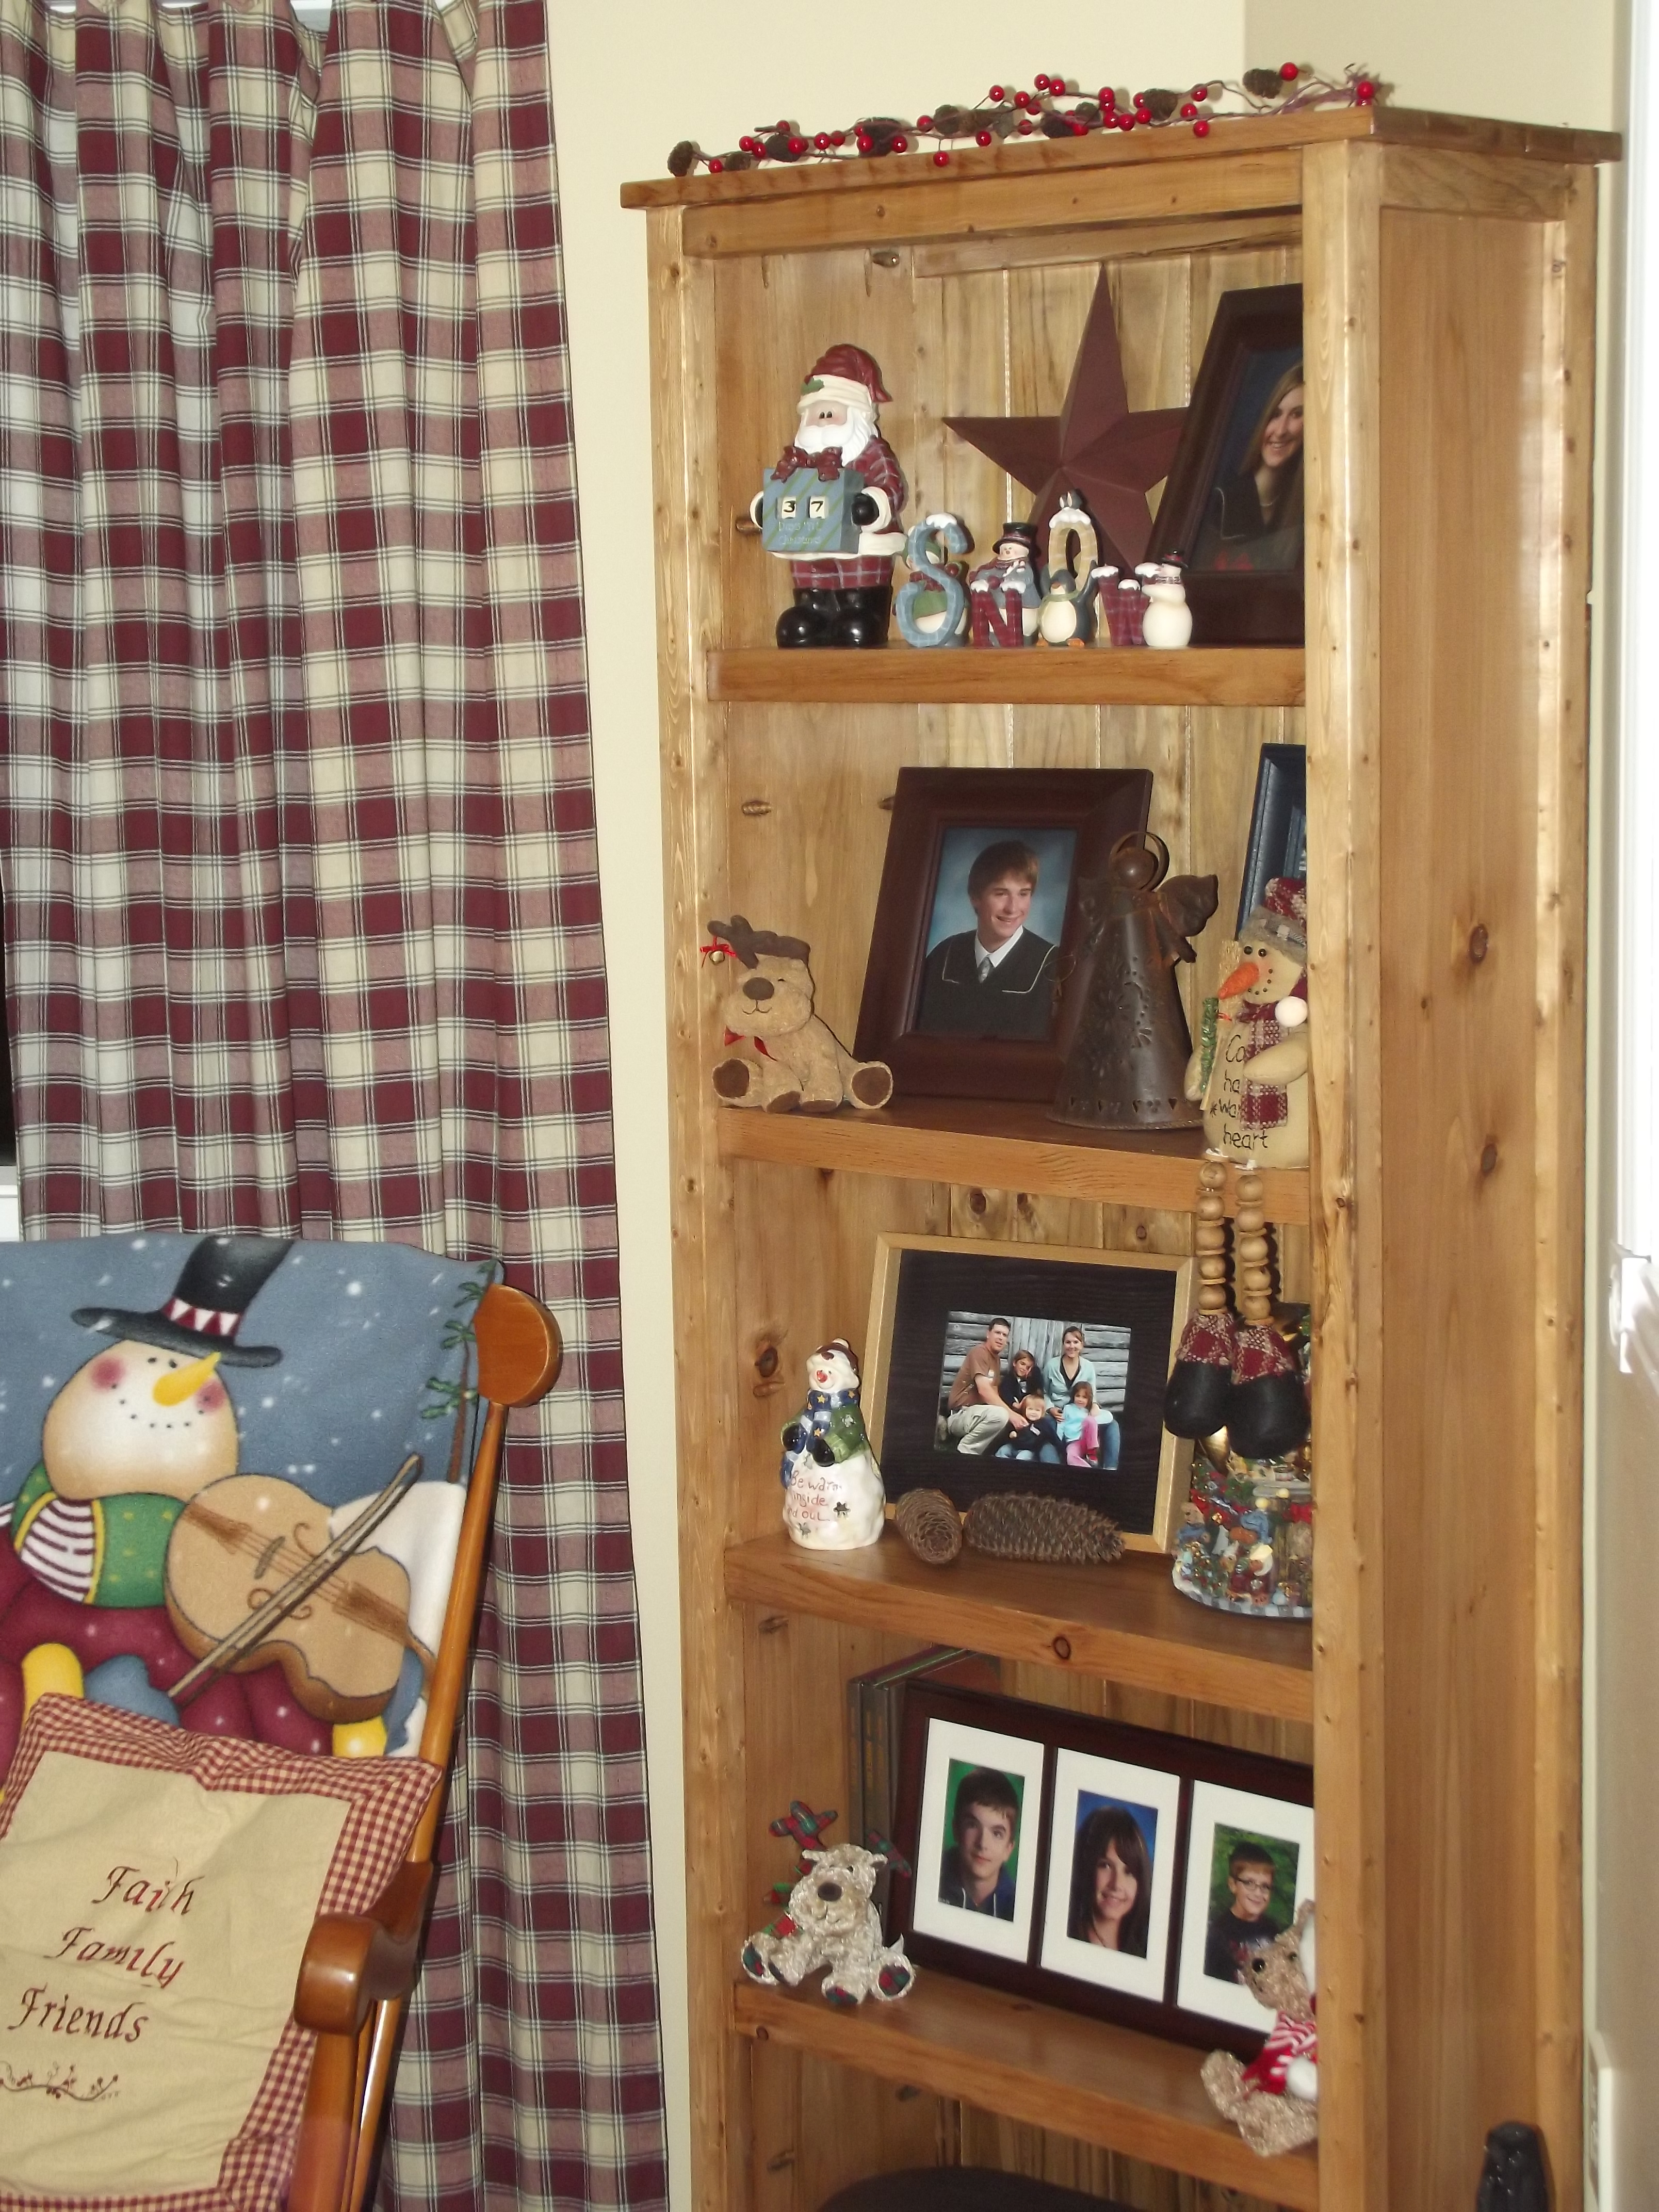
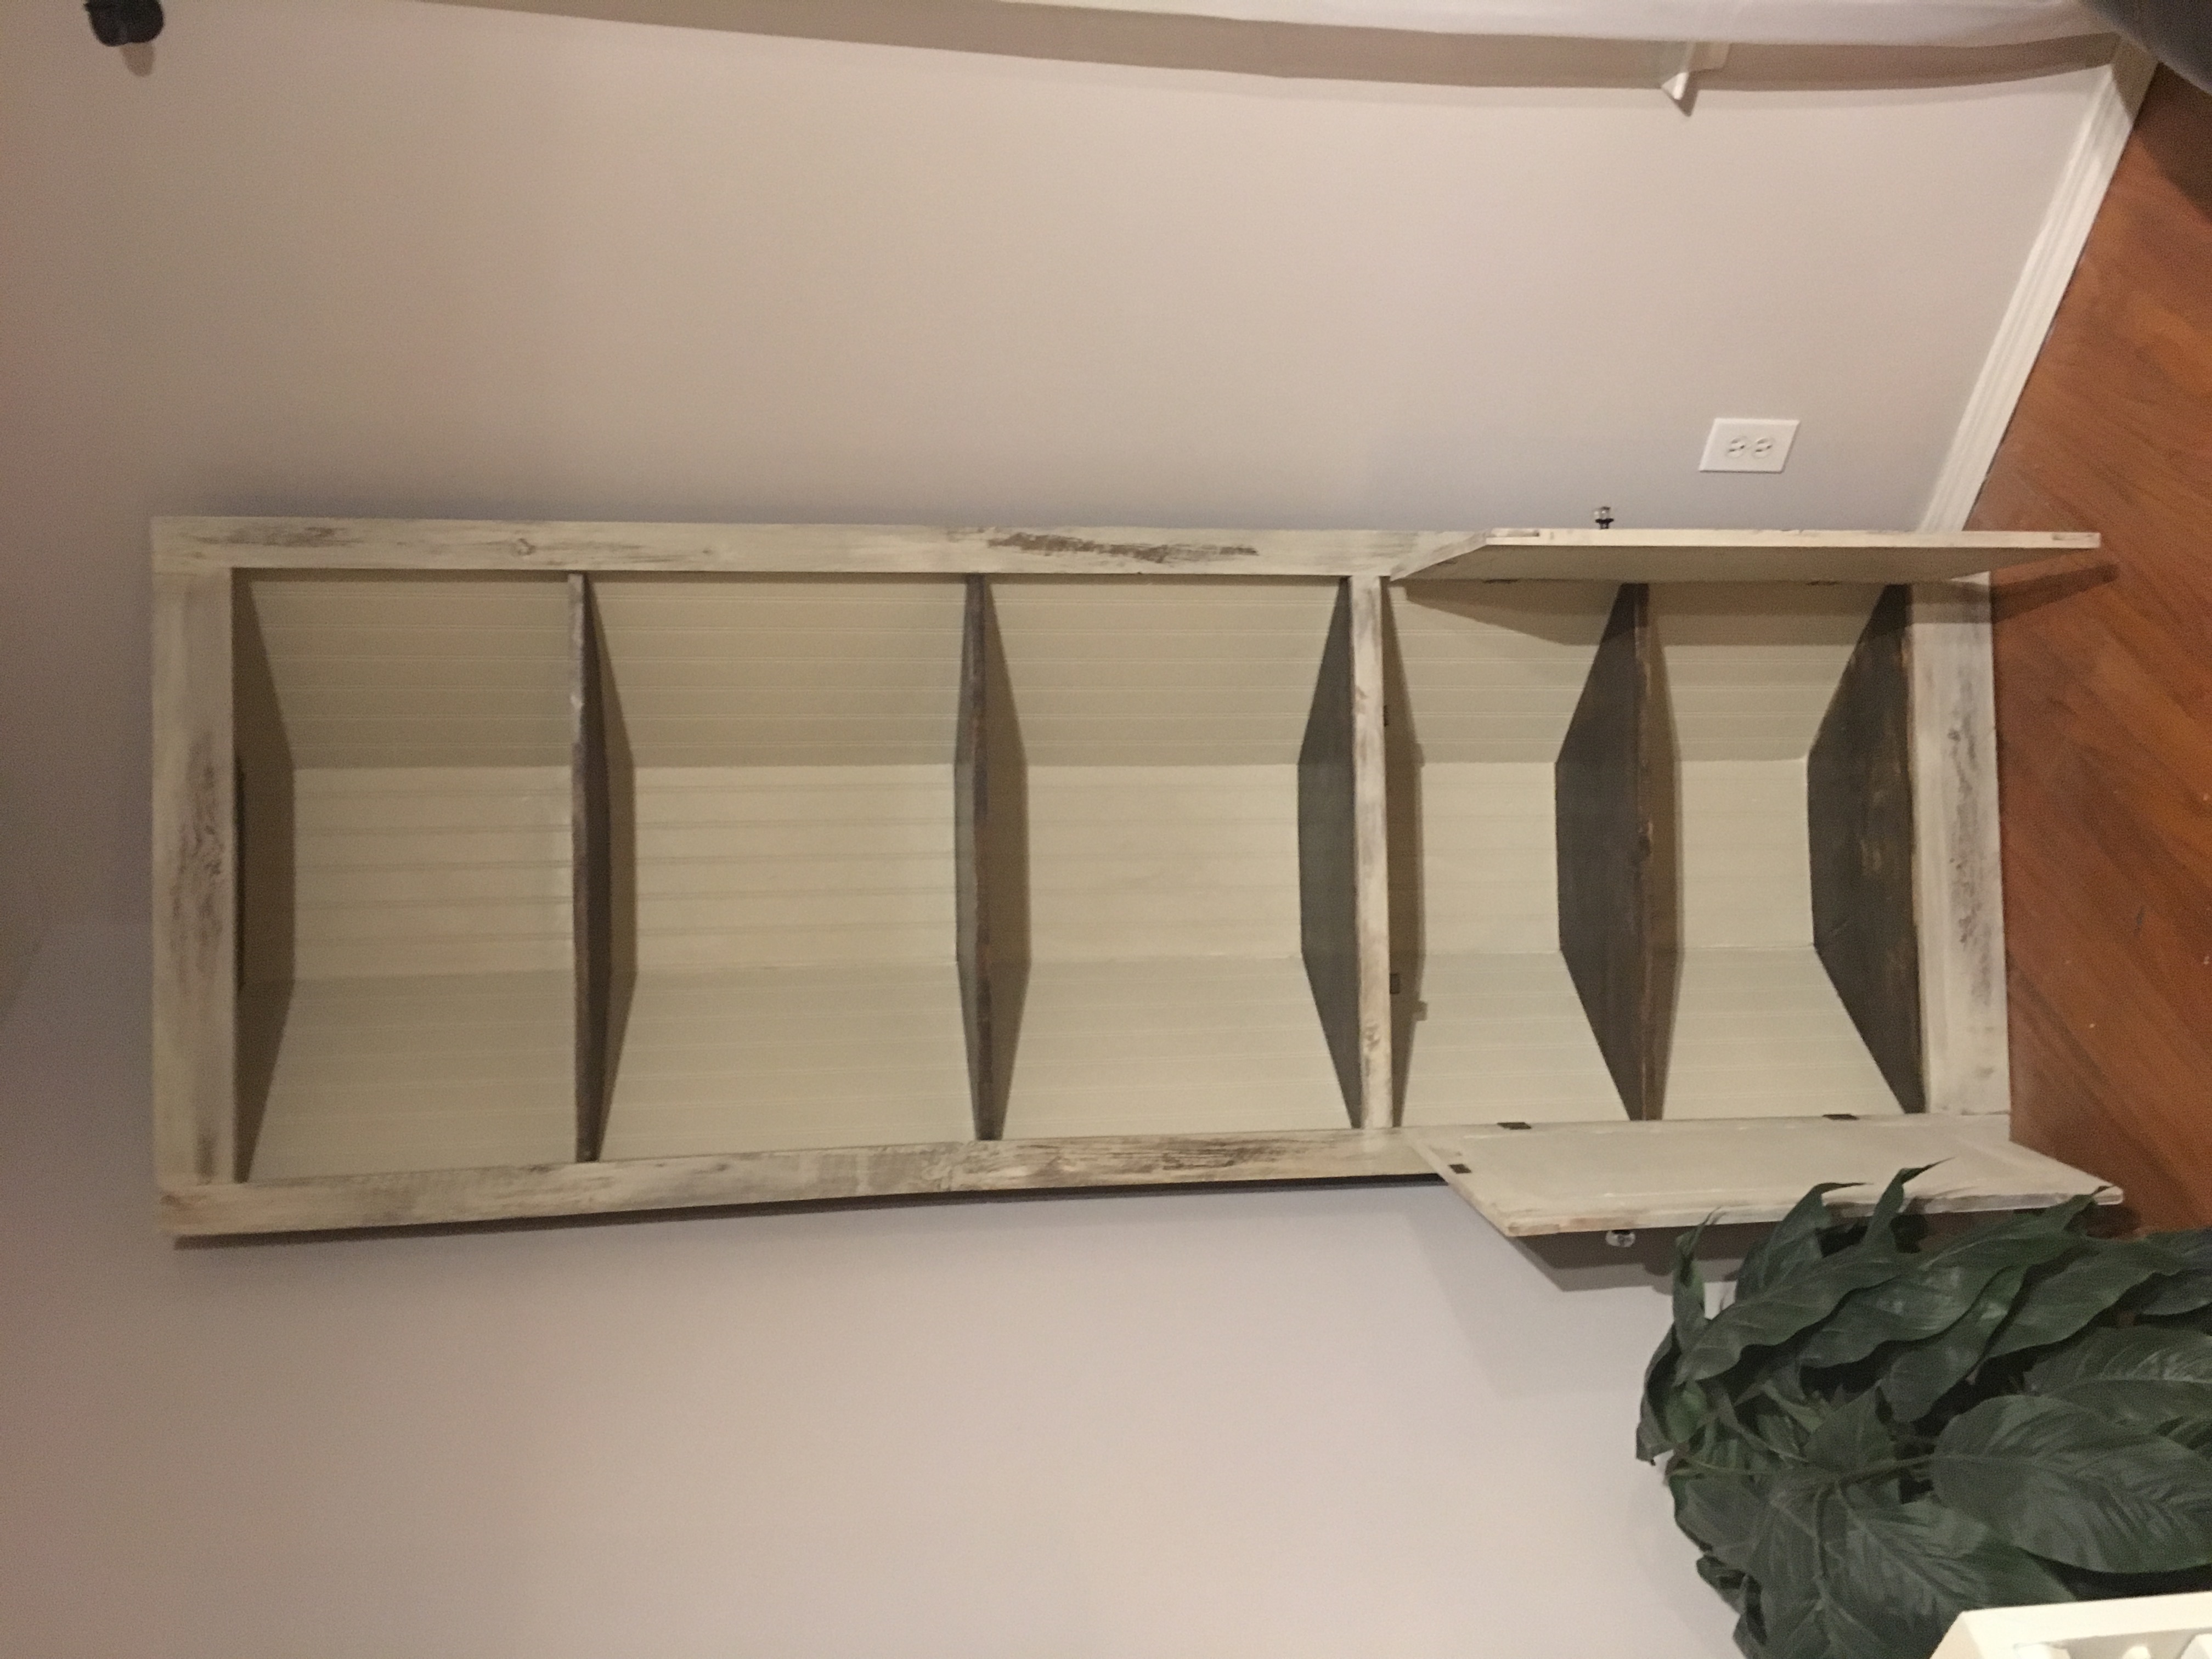
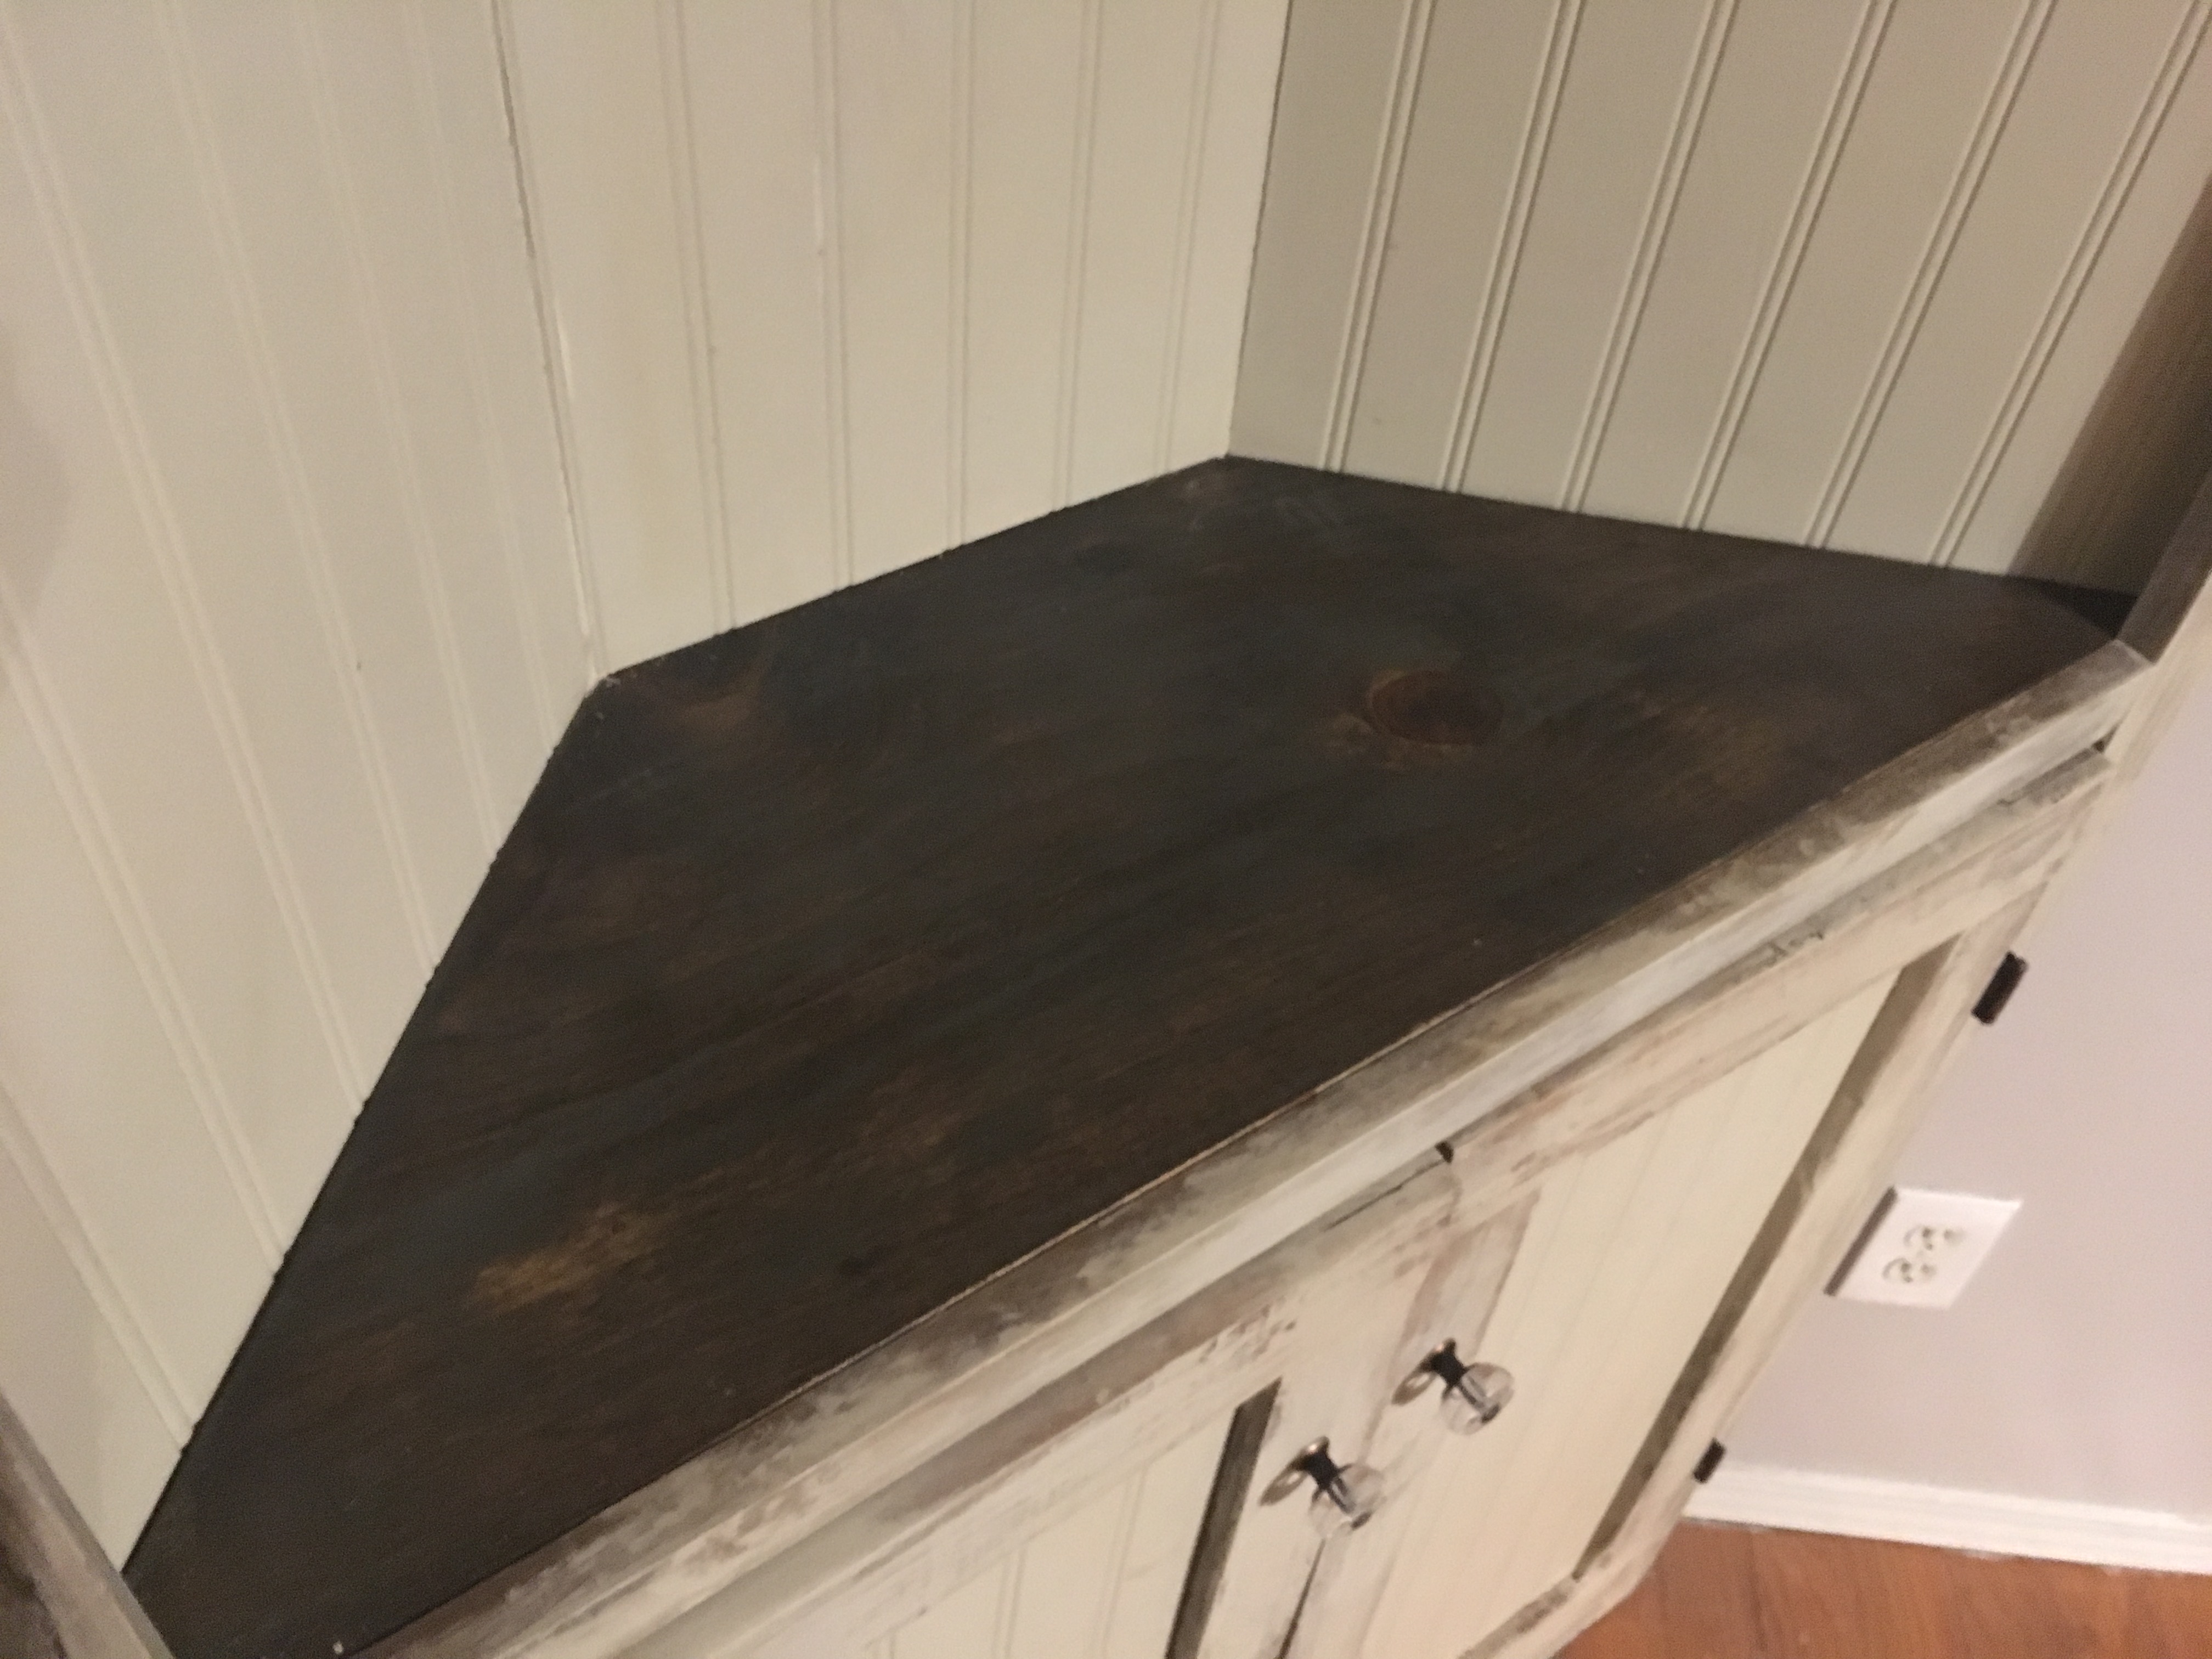
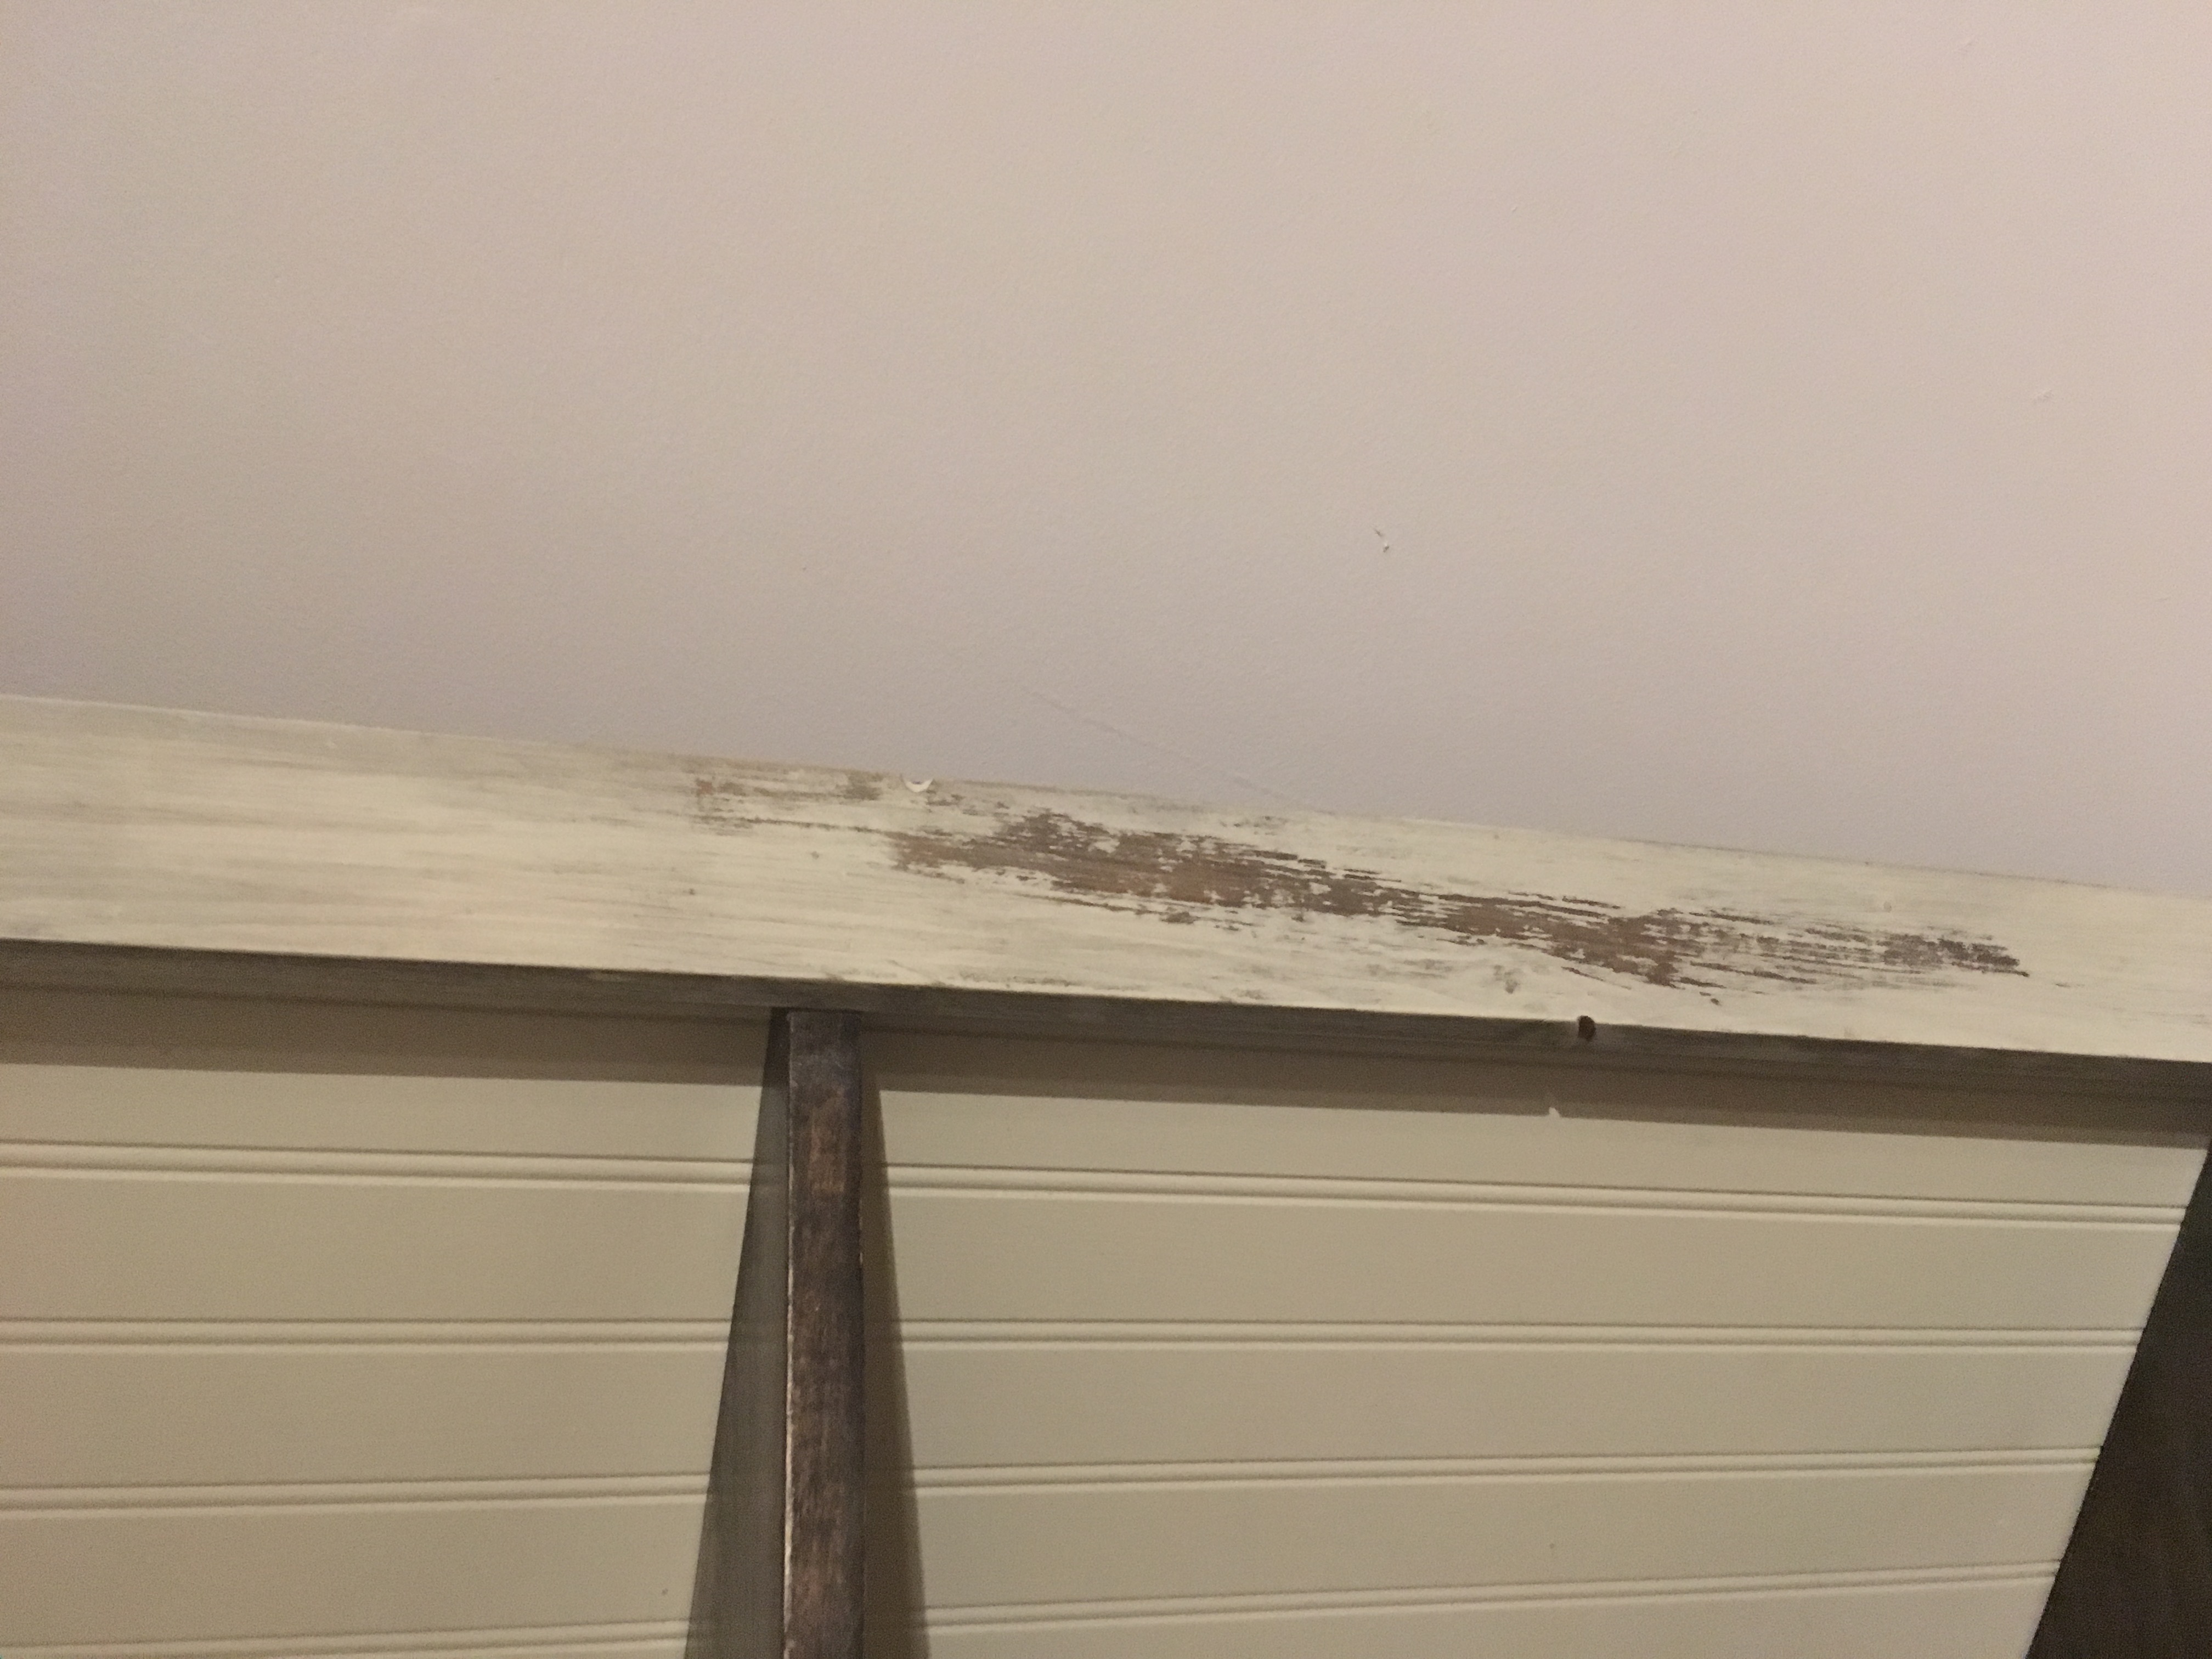
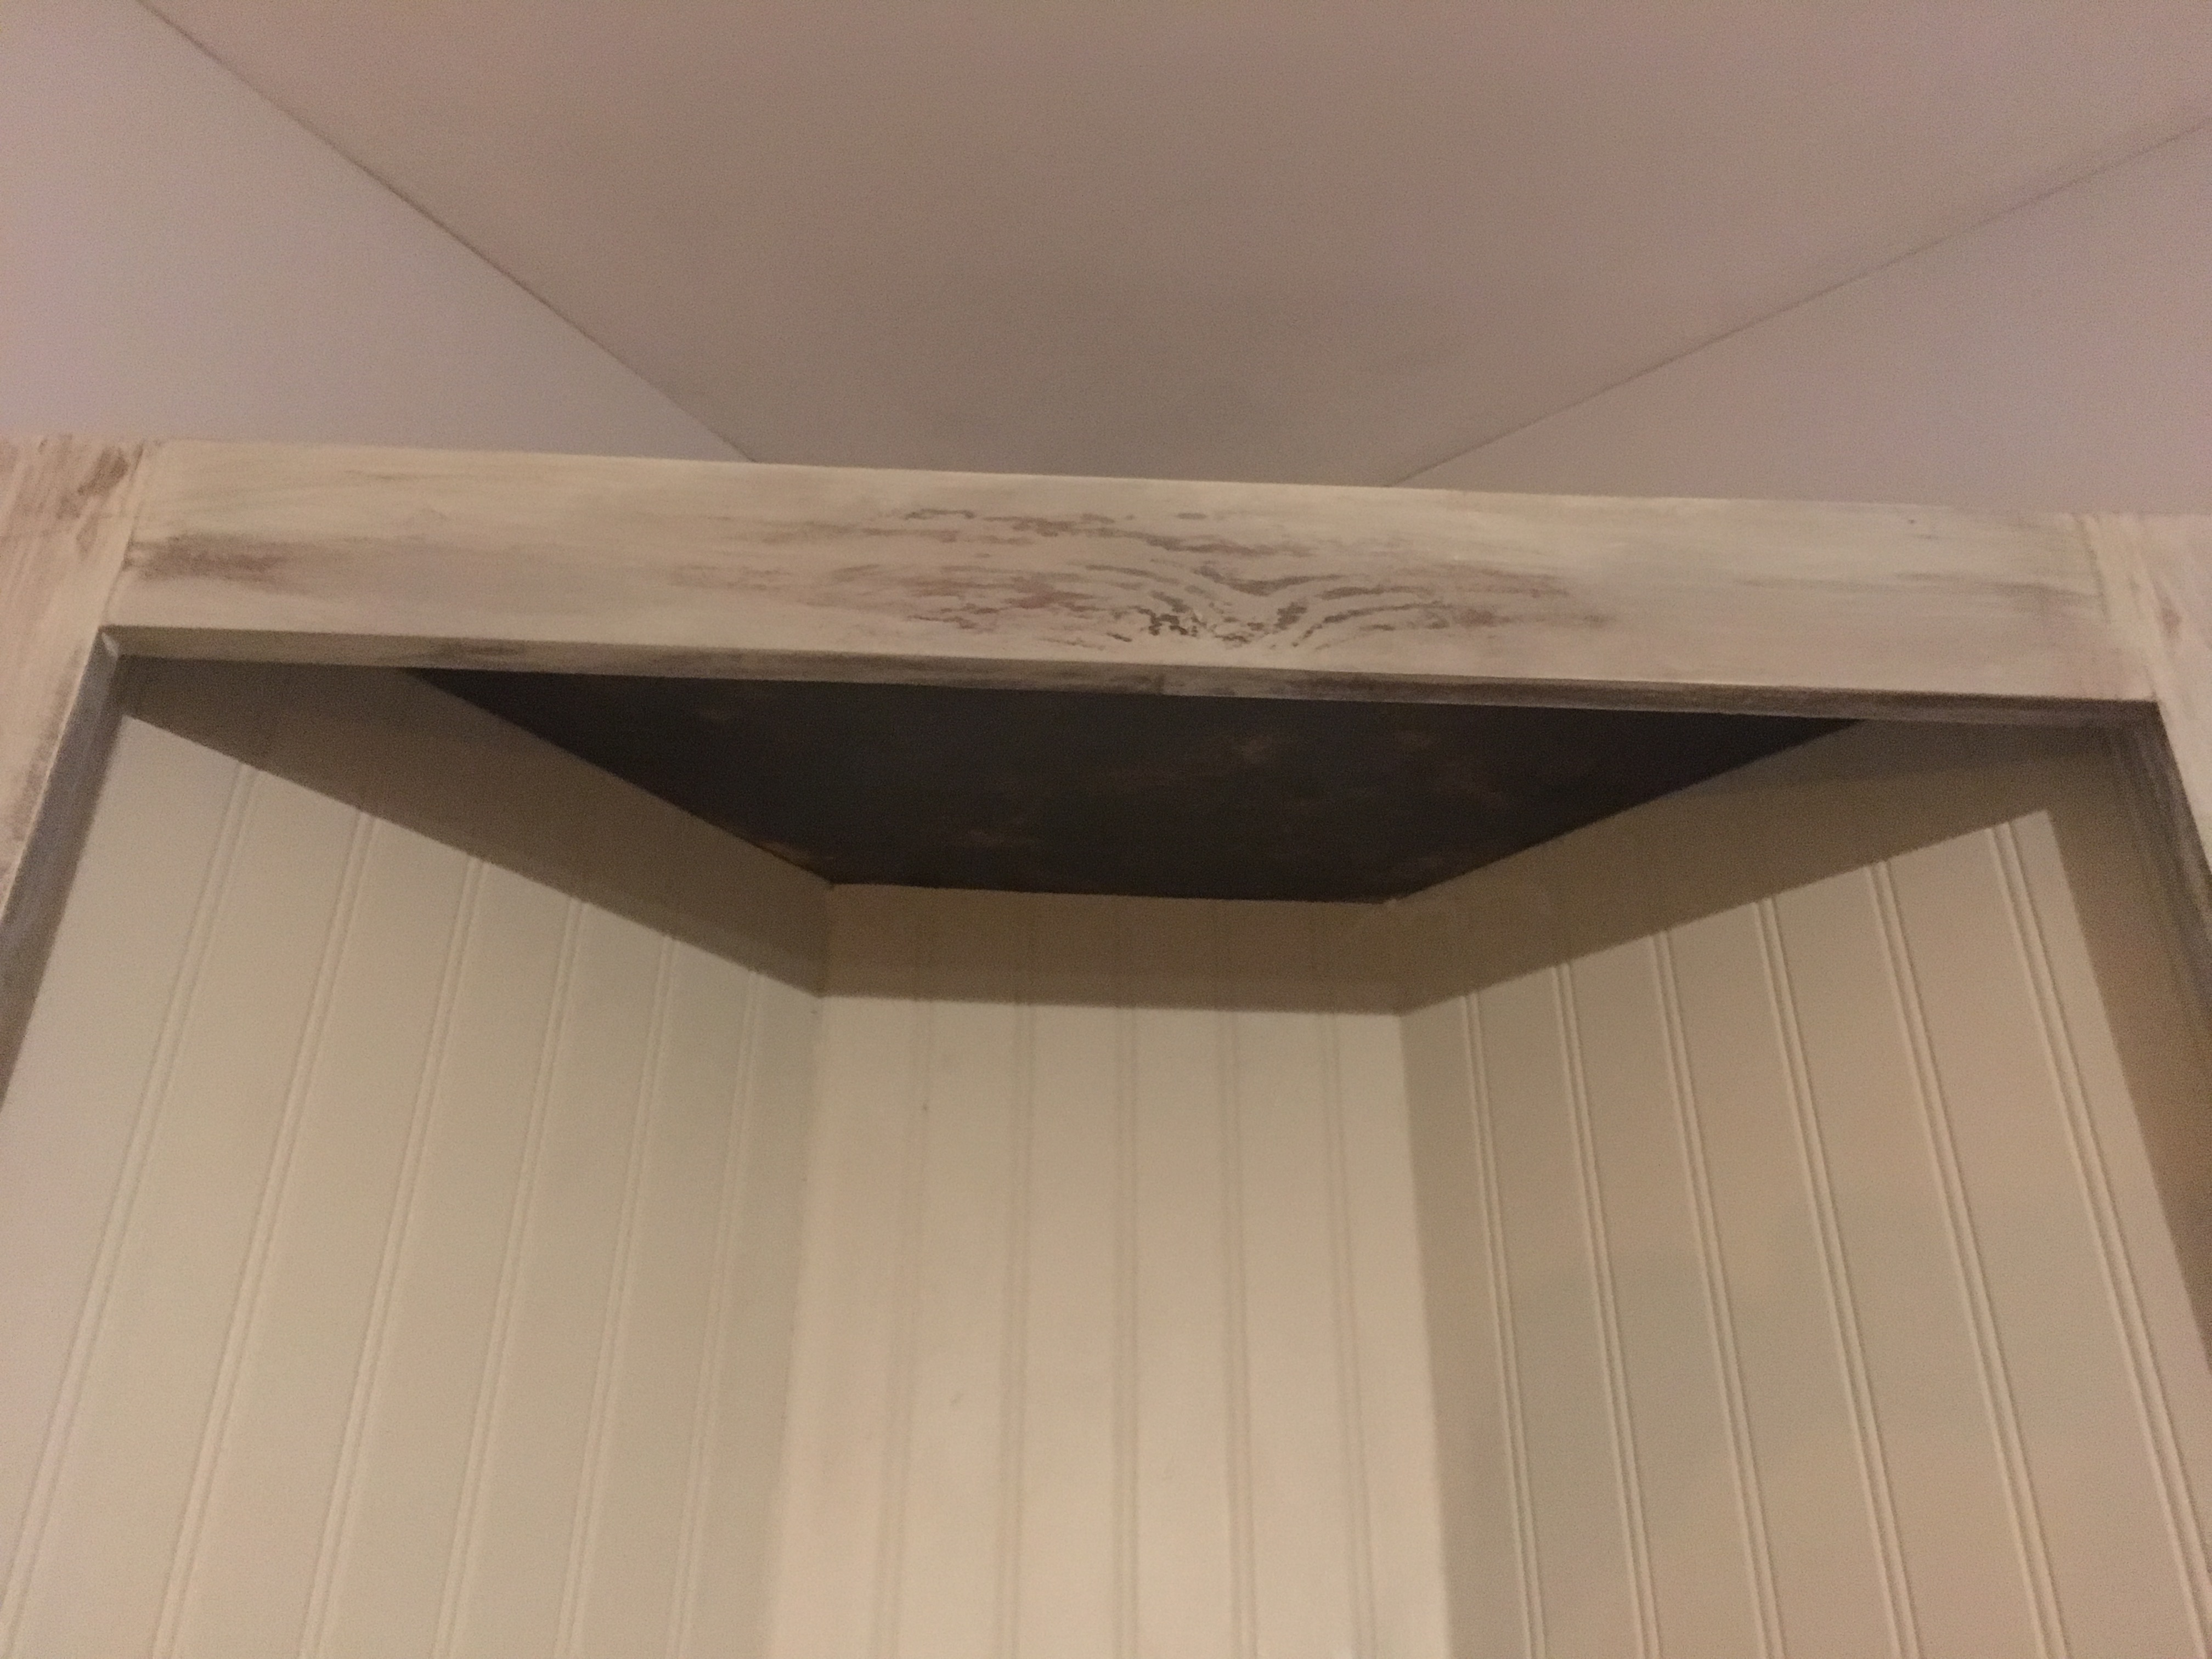
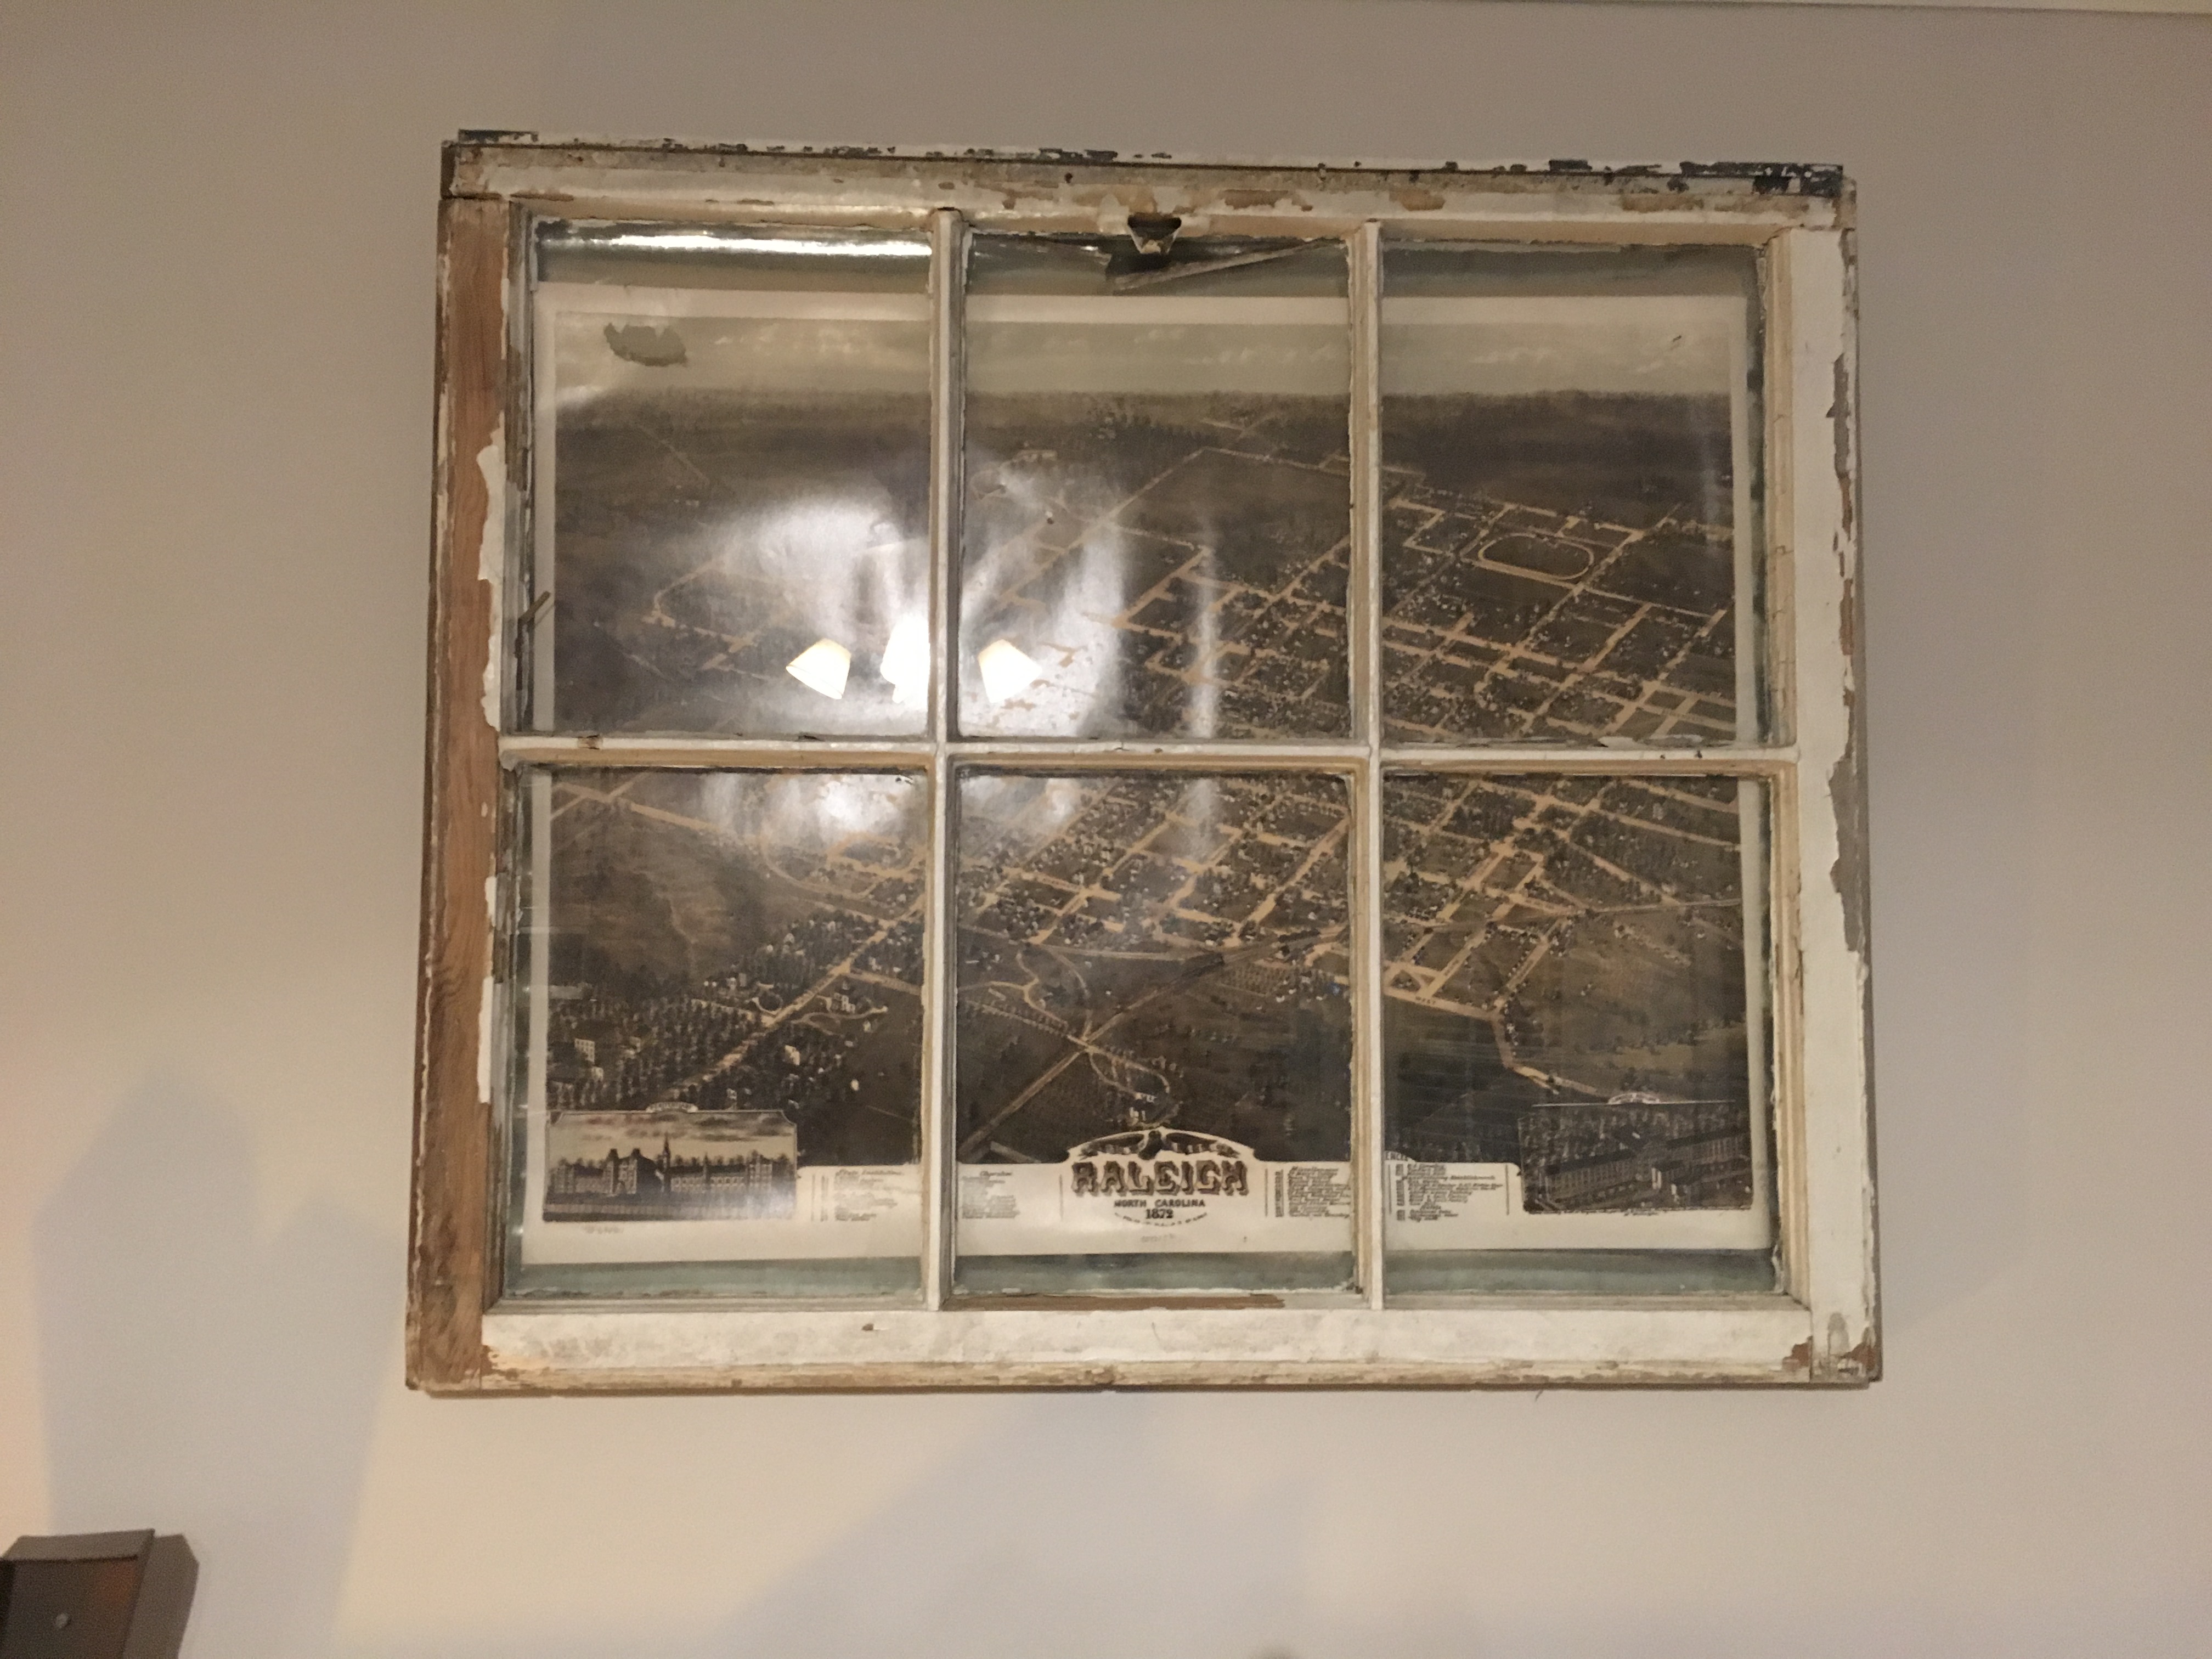
Distressed antique white corner cabinet

I used Anna's design to create an 8' tall cabinet with a weathered finish. The inspiration was a reclaimed window frame.
Built from Plan(s)
Estimated Cost
$200
Estimated Time Investment
Week Long Project (20 Hours or More)
Finish Used
Minwax Mocha stain on shelves with grey paint dry brushed over a few areas to look weathered. I finished the shelves with a satin poly.
For the rest of the project I used DIY vinegar and steel wool stain on everything else. I then rubbed a candle of over parts of the stain where I wanted the wood to show thru. I painted over the stain and wax with antique white paint. I then used a heat gun to melt the wax and scraped it off with a chisel.
For the rest of the project I used DIY vinegar and steel wool stain on everything else. I then rubbed a candle of over parts of the stain where I wanted the wood to show thru. I painted over the stain and wax with antique white paint. I then used a heat gun to melt the wax and scraped it off with a chisel.
Recommended Skill Level
Intermediate
Christmas Stocking Stand

My wife was upset that we didn’t have a mantle in the living room of our new home a d I said, “no problem!”
Built from Plan(s)
Finish Used
Minwax Dark Walnut and Dark Walnut Danish Oil