Community Brag Posts

Miter Saw Cart

Submitted by Nermell on Wed, 07/31/2013 - 16:51

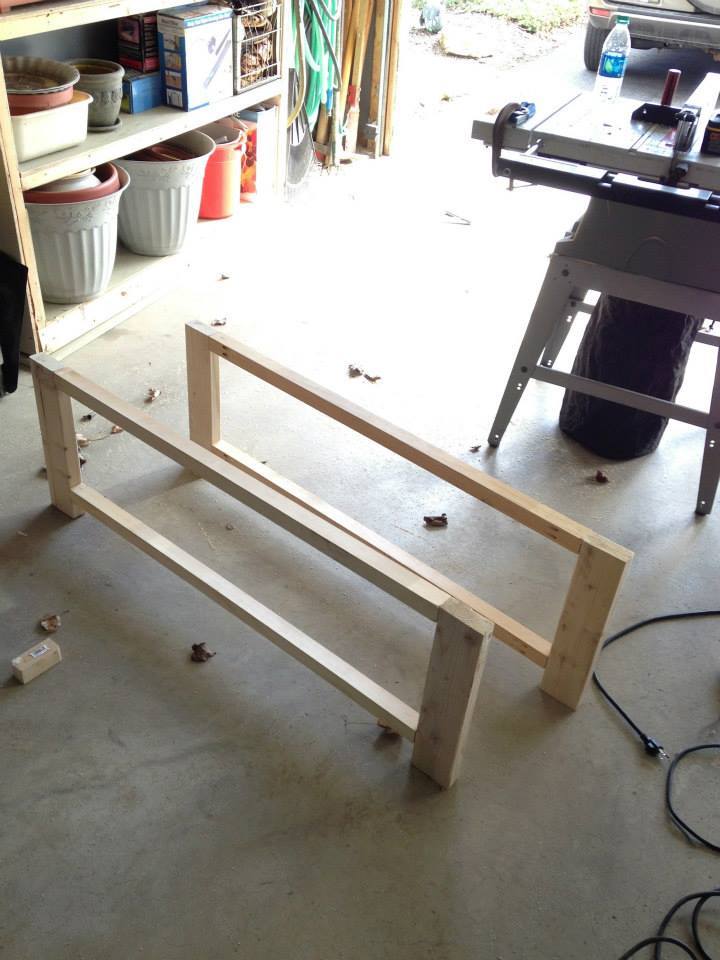
As a complete beginner in wood working (unless you count a year of woodshop over a decade ago), I decided that building a cart for the miter saw I just bought would be a great first project. So what did I do with that brand new miter saw? I left it in the box and made all of the cuts with a circular saw. Not sure what I was thinking there...

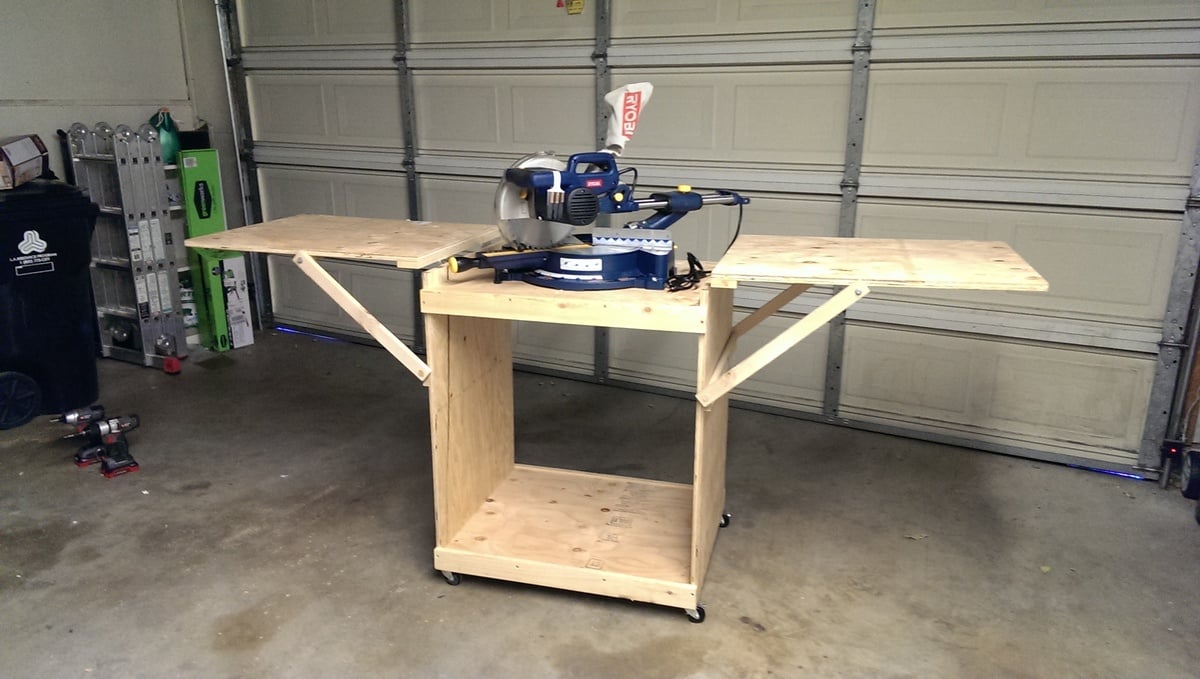
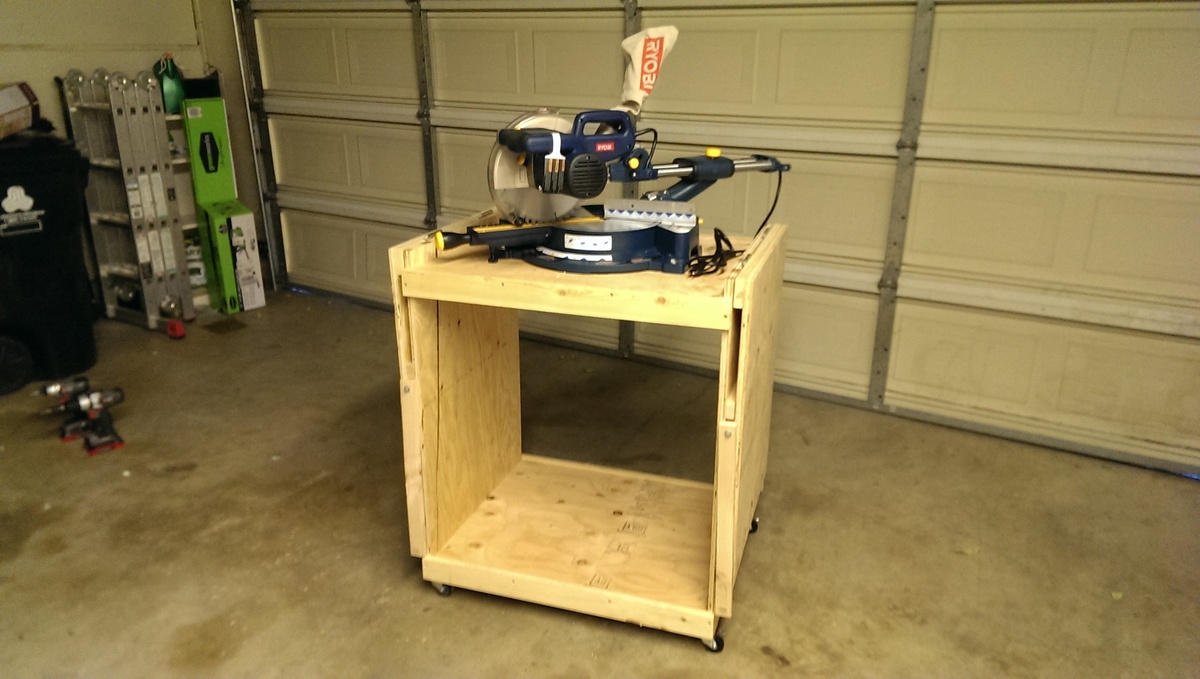
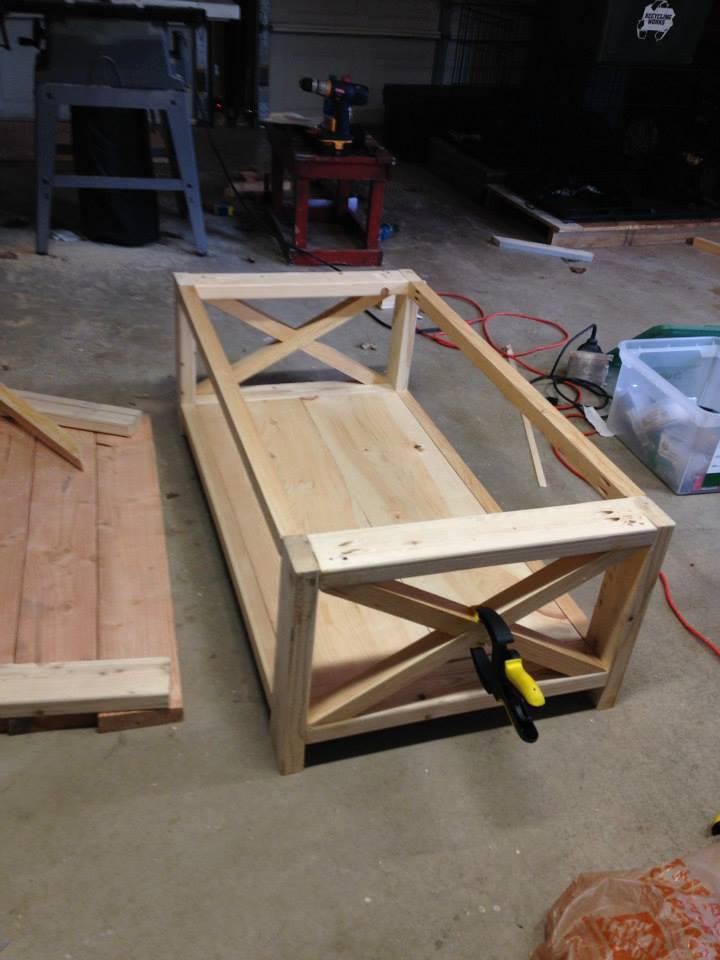
I mostly followed the excellent plan provided here but used wooden arms to prop up the wings in order to save on cost. I got the idea from the folding sling chair plan. It took quite a few screw ups and adjustments of the lower support bar before getting one of the wings level but I got it eventually.

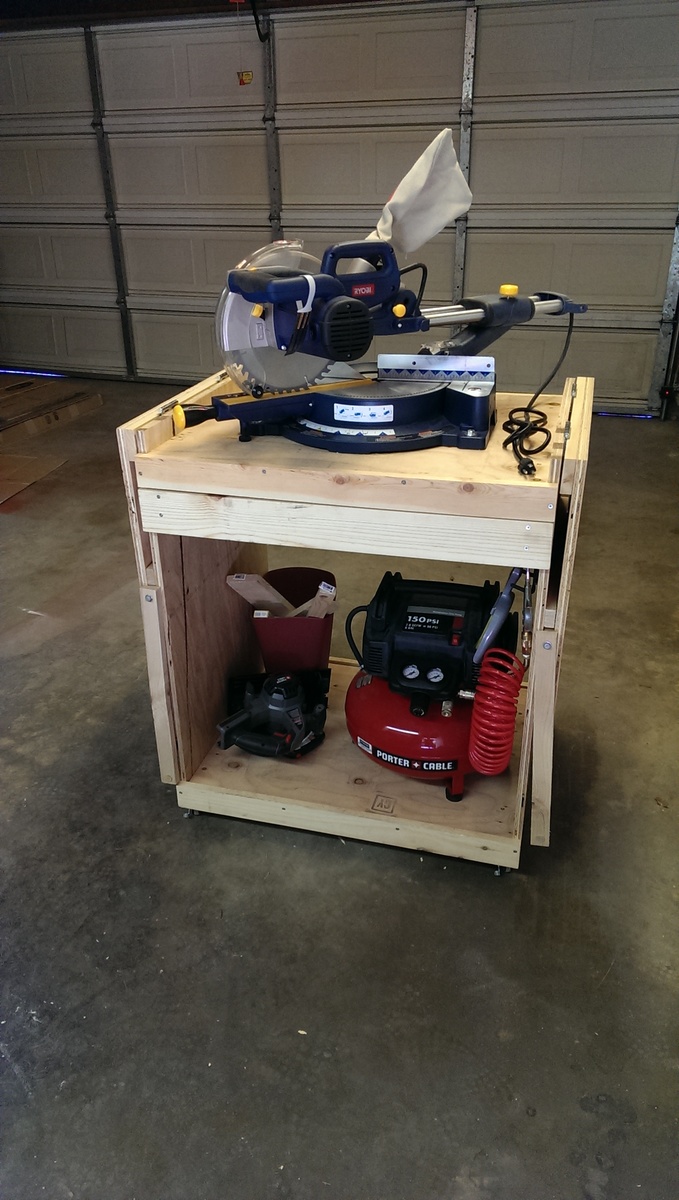
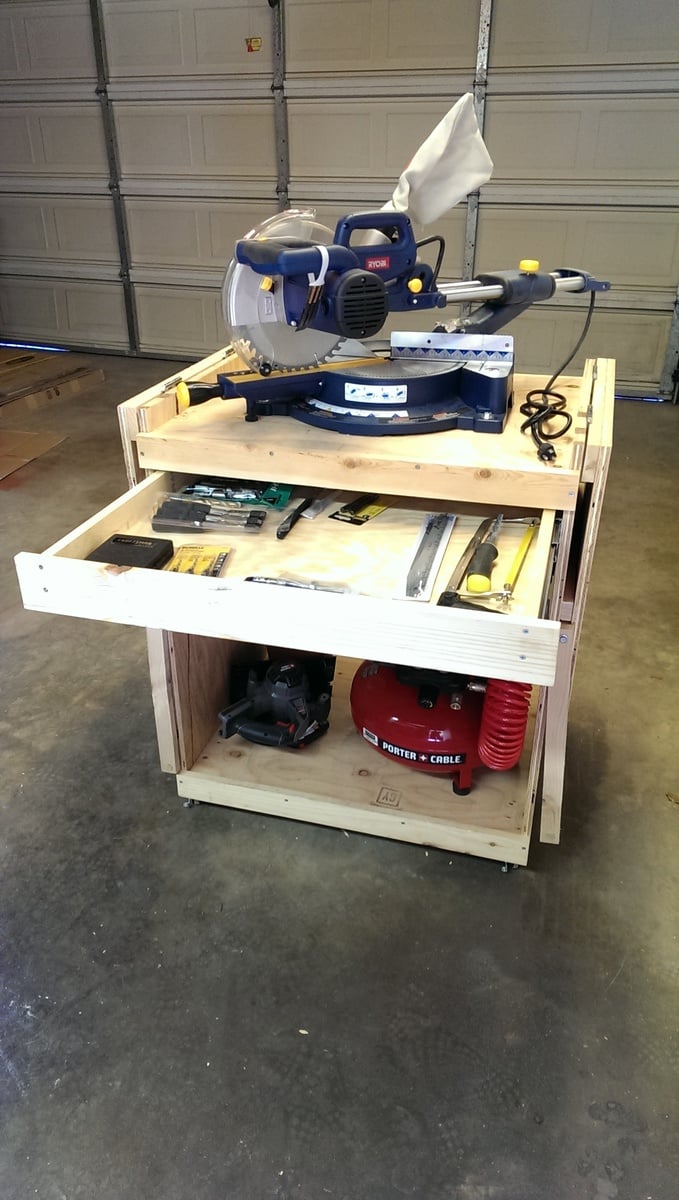
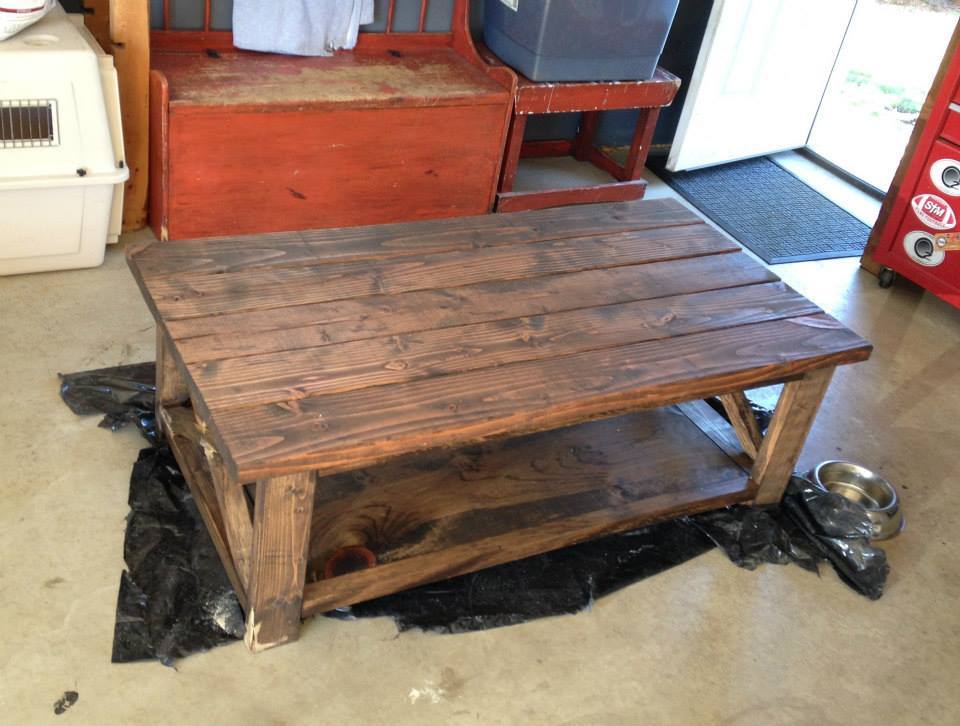
Update 8/20/13: The miter saw has been a joy to use with the cart and the big flip up wings provide a ton of really convenient work space in addition to stabilizing 8 ft boards for cutting. I added a sliding drawer and some utility hooks for additional storage.

Built from Plan(s)
Estimated Cost
$70-80
Estimated Time Investment
Weekend Project (10-20 Hours)
Finish Used
none
Recommended Skill Level
Starter Project

Comments

davidmauer15

Thu, 08/01/2013 - 08:10

I originally just had a 2x2 and two blocks to hold up the wings on the cart. They kept falling out, so I replaced them with hinged arms, which were a pain to fit and install, but they work well. Your approach has the same advantage of hinging the support arms: the wood can't fall out and it looks way simpler to install than my system.

One hint if you try Nermell's approach: Flip the cart upside down when you fit and install the support arms. I did all kinds of complex sketches and measurements, then realized it was just faster to lean the support bracket at roughly 45 degrees, then I installed the two block (one on the side, one on the wing) to hold the bracket in place. Flip the cart over, and your wing will sit at a perfect 90 degrees to the sides of the miter saw cart.

DIY Rustic "X" Coffee Table

Submitted by juliedrev on Mon, 08/17/2015 - 14:12

This was such a fun project and only took 1 day to complete! It was a lot more fulfilling to build my own coffee table than go out and spend $400 on one. It looks beautiful in my living room and is a perfect accent to my rustic, earthy decor.

Built from Plan(s)
Estimated Cost
$150
Estimated Time Investment
Day Project (6-9 Hours)
Finish Used
Dark Walnut
Recommended Skill Level
Beginner

Patio Planter

Submitted by Anonymous (not verified) on Sat, 04/23/2022 - 11:34

This was built using waste from polycarbonate hurricane shutter project as well as free steel bed frames a neighbor had put out for trash pick -up. Only other materials required were 2 X 4 lumber , caster wheels and paint.

Pretty Wood Boxes!

Submitted by cassiet717 on Fri, 08/02/2013 - 18:42

My brother and his fiancee just bought their first house, and these sweet little boxes were the perfect housewarming gift! I used the recommended cedar picket, and found some old reins at a flea market for the handles. Piece of cake to build, super inexpensive, but absolutely adorable!

Estimated Cost
$3 per box (including handles)
Estimated Time Investment
An Hour or Two (0-2 Hours)
Finish Used
Minwax Pre-Stain Wood Conditioner, Minwax Stain in Walnut
Recommended Skill Level
Starter Project

Entryway Table

This project was super easy! It only took three hours to build and another 24 hours to stain and paint. Third project that I've made using Ana White plans, and was BY FAR the easiest!

Estimated Cost
$80
Estimated Time Investment
Afternoon Project (3-6 Hours)
Finish Used
Minwax Special Walnut for the top and Behr Off White for the bottom.
Recommended Skill Level
Starter Project

Wine cabinet

Submitted by Nick72 on Sat, 03/31/2018 - 06:54

Wine cabinet made from grandy sliding door console plans.

Built from Plan(s)
Estimated Cost
$250
Finish Used
Kona stain with satin poly
Recommended Skill Level
Intermediate

Comments

Tryde Coffee Table

Submitted by florabora on Sat, 06/25/2011 - 19:25

We made the Tryde Coffe table using 100% reclaimed wood

Built from Plan(s)
Estimated Time Investment
An Hour or Two (0-2 Hours)
Finish Used
Ebony stain
Recommended Skill Level
Starter Project

Comments

Vivila (not verified)

Sun, 06/26/2011 - 13:38

Also wanted to say I LOVE YURTS!!!! I want one! :) Fantastic idea for accomodation.

Film Adapted Greenhouse

Submitted by justok on Sun, 08/04/2013 - 18:40

Thanks for this design. I've used it and adapted it for my very hot weather location. http://imgur.com/a/dsVlc#18

I am using film instead of plastic sheets, which reduces the price and allows for easy swapping to shade cloth.

Estimated Time Investment
Week Long Project (20 Hours or More)
Recommended Skill Level
Beginner

Seattle Seahawks Kids Chair

Submitted by jshull123 on Tue, 08/25/2015 - 09:08

I built this kids-sized chair using the "Classic Chairs Made Simple" plans on this website (http://ana-white.com/2011/01/classic-chairs-made-simple.html). I had to change the dimensions accordingly but it turned out just about right. I ordered the paint from Home Depot, getting the true Seahawk colors, then I used vinyl to create custom stencils to paint the designs on, the "12" number is a sticker I ordered online. This was for a friend's son and he really love it, especially with football season almost here. The painting and stenciling took the longest part, much longer than I anticipated but it was worth it.

Built from Plan(s)
Estimated Time Investment
Weekend Project (10-20 Hours)
Recommended Skill Level
Intermediate

Comments

Making a wooden game board

I made a wooden game board for The Duke from Catalyst Game Labs. The Duke is a 2 player abstract strategy game. In some ways, it is similar to chess. For more details about The Duke visit the official website for the game where you can find the rules and files for a Print & Play version of the game. (Unfortunately, at the time of writing this tutorial the physical copy of The Duke is out of print.)

The game board for The Duke is similar to a chess board. It uses a 6×6 grid instead of the 8×8 grid in chess.


Estimated Time Investment
Weekend Project (10-20 Hours)
Finish Used
Watco Danish Oil (Natural)
Recommended Skill Level
Intermediate

Small Hall Tree

Submitted by Anonymous (not verified) on Sun, 04/24/2022 - 11:26

I am new to woodworking. I made this hall tree, for my aunt, to fit between her 2 broom closets in her entryway. 

by Kimberly

$10 Ledges Reading Nook

Submitted by kelli224 on Wed, 06/29/2011 - 15:22

We needed something to help with our book storage problem - something easier for the kiddos to get to and also clean up. We've made the ten dollar ledges before for our kitchen, but this project was way more fun!

Built from Plan(s)
Estimated Cost
$10
Estimated Time Investment
An Hour or Two (0-2 Hours)
Recommended Skill Level
Starter Project

Comments

Stacked 4

Submitted by Allid on Fri, 08/28/2015 - 16:18

My husband built this is a weekend. We wanted each of our boys to have 2 rows for storage so we went with 4 total. Anchored to the wall and already in use 

Estimated Time Investment
Weekend Project (10-20 Hours)
Recommended Skill Level
Beginner

Easy Kids Indoor Playhouse

Hi friends!
 

Jen here from Jenwoodhouse.com, sharing some exciting, free plans! How adorable is this Easy Kids Indoor Playhouse

Is that not the most adorable thing you ever did see?

The tongue-and-groove planks!
The transom window!
The flower box!

Seriously. I can’t even. I am dying over here.

Your kids will love it. OR maybe just build yourself an adult sized one for when you need some me-time. No judgements here! 

If you want more details for this build, you can grab them on JenWoodhouse.com!

Be sure to tag me @jenwoodhouse if you share photos of your build on social media.

Estimated Cost
$250
Estimated Time Investment
Weekend Project (10-20 Hours)
Recommended Skill Level
Intermediate

Toddler's Green Step Stool

Submitted by amccoid on Sun, 07/03/2011 - 09:35

The Vintage Step Stool in green. I made this for my 2 year old so she can climb into her big girl bed :-) The color is the same as her walls and her name sign above the bed.

Built from Plan(s)
Estimated Cost
Free using scraps on hand
Estimated Time Investment
An Hour or Two (0-2 Hours)
Recommended Skill Level
Starter Project

Rekourt dinning table

Submitted by Fancynancy on Thu, 08/08/2013 - 07:35

So for the finish I did this super easy no mess no fuss. I used water based min wax in walnut but here's the trick I dilute the stain with some more water until I find the finish I'm looking for. It gives it a very subtle brown with just a little grayish undertones giving it a more aged look but not much. I absolutely love the results pictures don't really do it justice.

Built from Plan(s)
Estimated Cost
150
Estimated Time Investment
Weekend Project (10-20 Hours)
Finish Used
Water based Minwax walnut
Recommended Skill Level
Beginner

My new home office

Submitted by kedgar on Tue, 09/01/2015 - 07:09

My Wife took a position where she will be working from home.  I also work from home 3 days a week.  We needed a nice office area, but didn't have the space.  I saw an article on LifeHacker and decided this would be the best fit for adding an office space to our bedroom.  I have just begun woodworking and have no experience.  This was a fun project... made a few mistakes, but they are not noticeable.  I am not fully complete (haven't attached the shelves to the desk yet) as I want to do some other room renovations before everything is all set.

Finishing: Grey stain and furniture wax to make it less "blue/grey".  Then a couple coats of polyurethane in a spray can.


This is my first day working at the desk... the only thing I would change so far is maybe to lower the keyboard/monitor shelf by a couple of inches, but this completely depends on your size.

Built from Plan(s)
Estimated Cost
Approximate:
Wood: $50
Finish: $30
Estimated Time Investment
Weekend Project (10-20 Hours)
Finish Used
Minwax Pre-Stain, Minwax Classic Grey, Watco Stain Wax Dark
Recommended Skill Level
Beginner

Comments