Community Brag Posts

Kentwood Night Stands

Submitted by Anonymous (not verified) on Mon, 03/28/2016 - 16:35

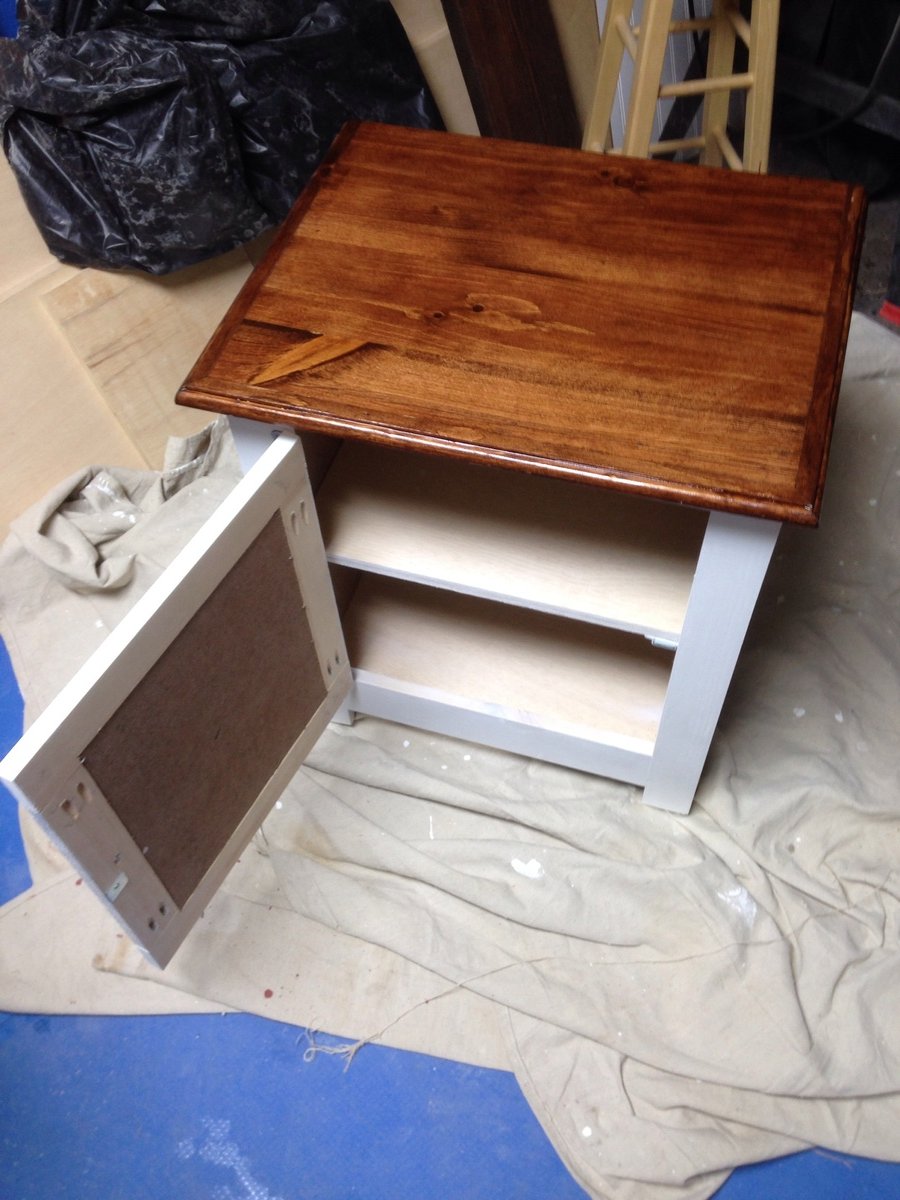
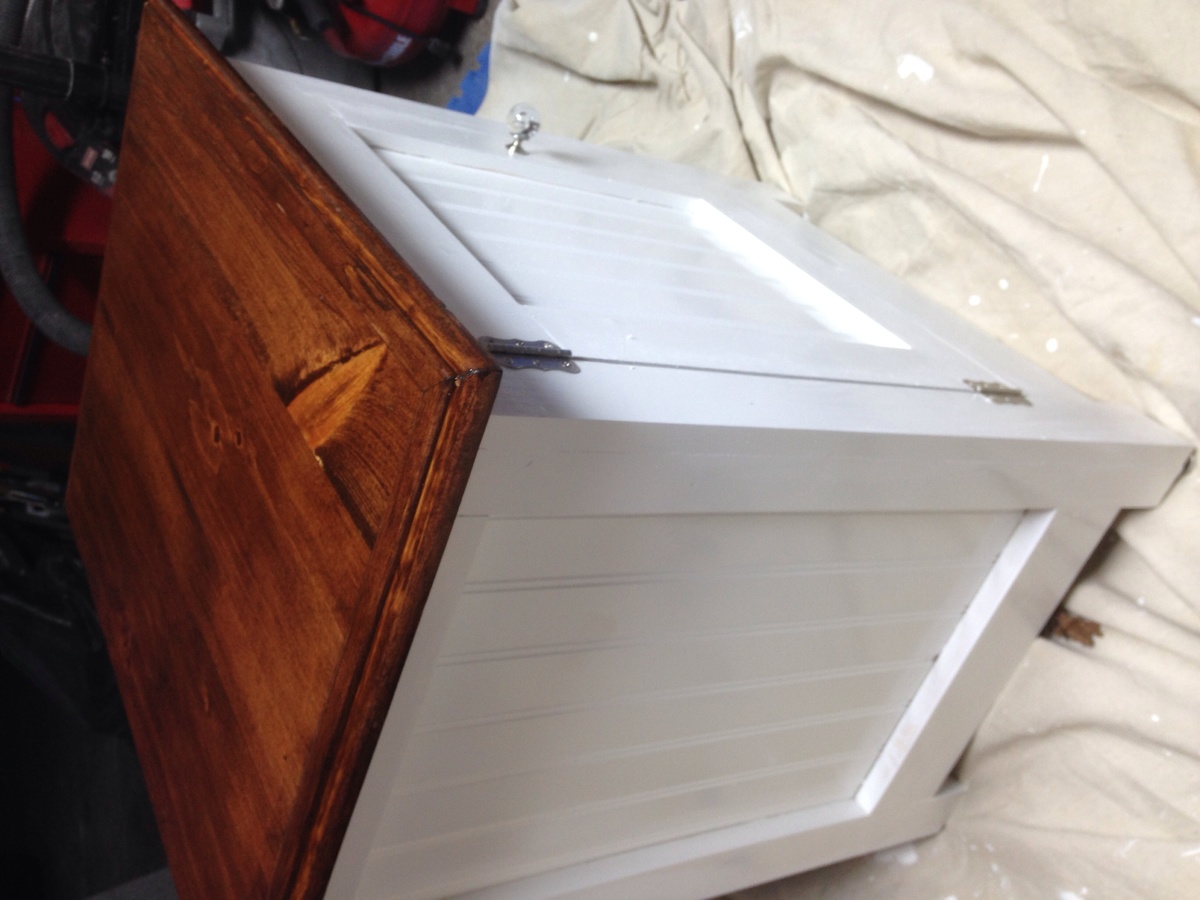
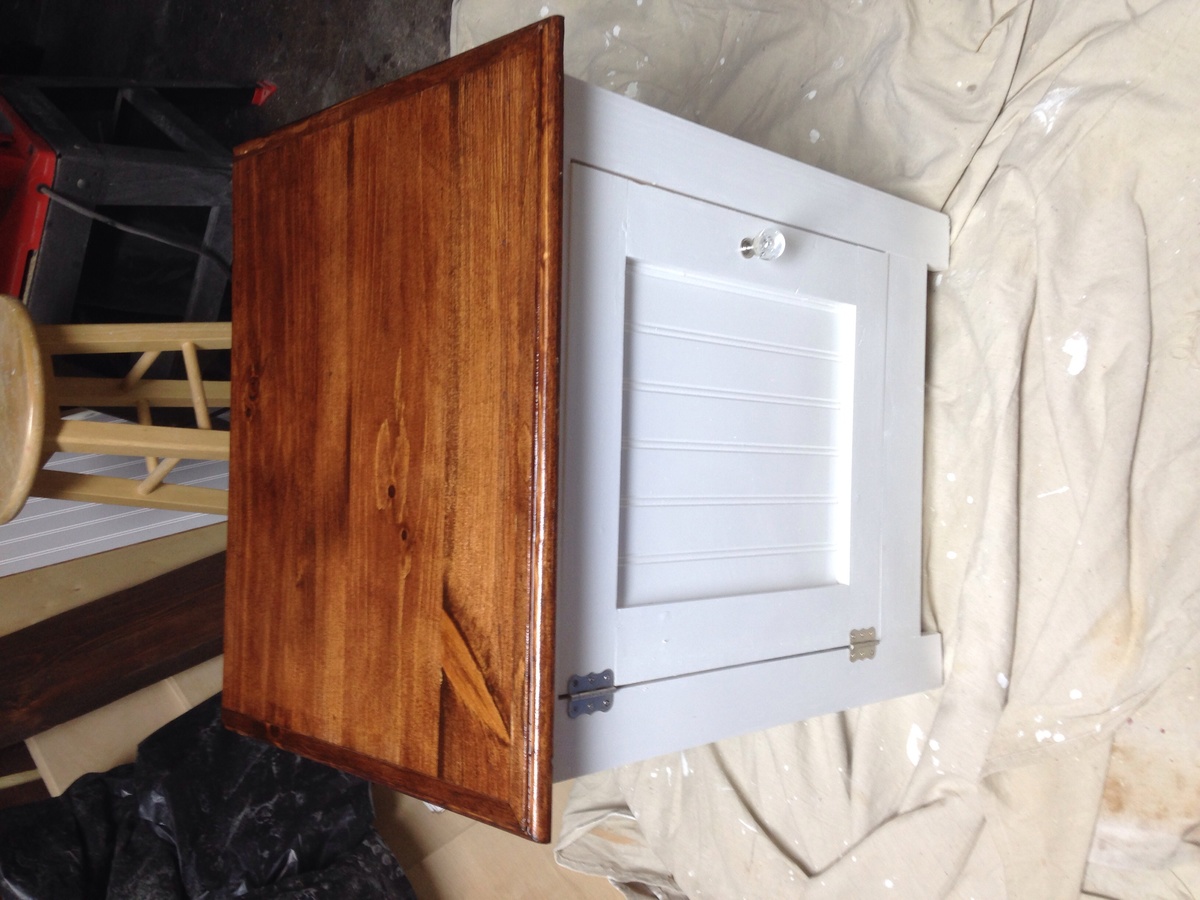
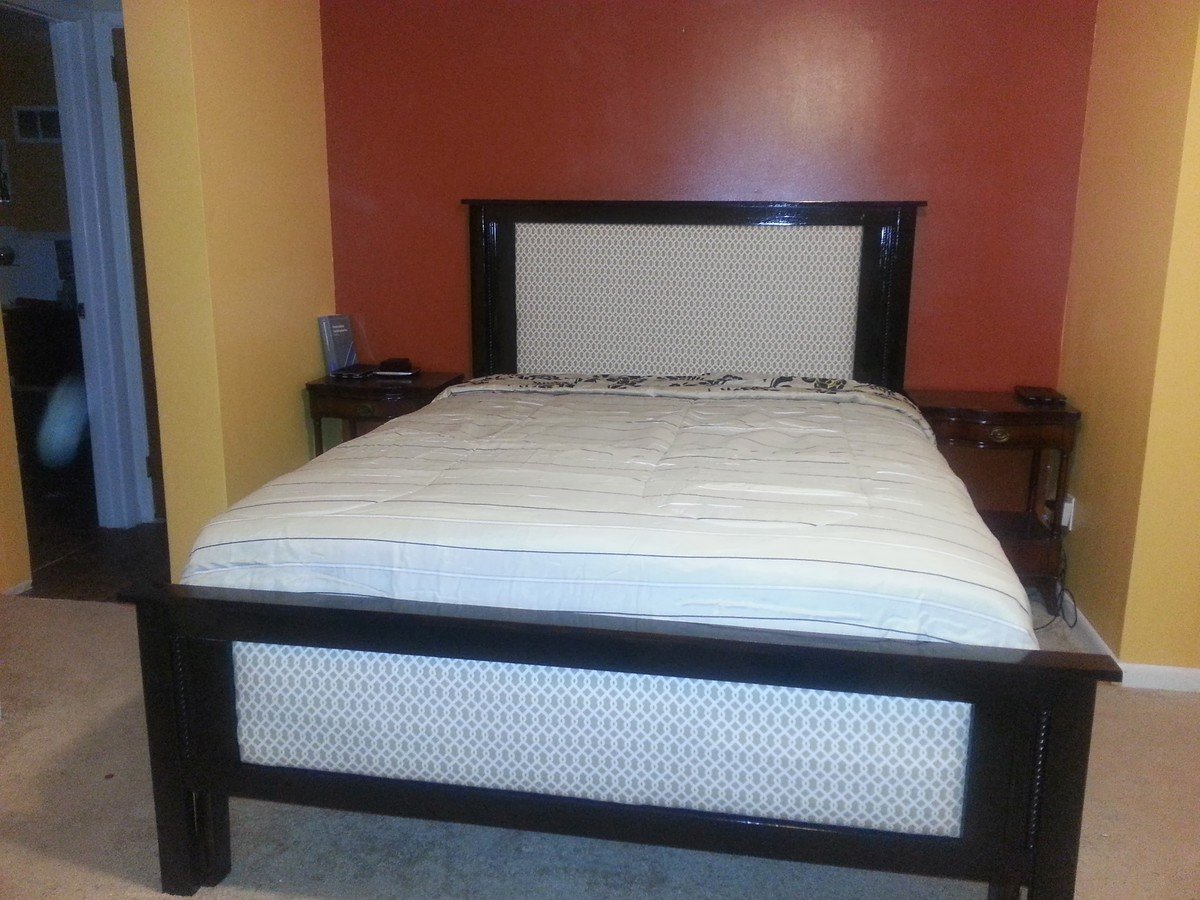
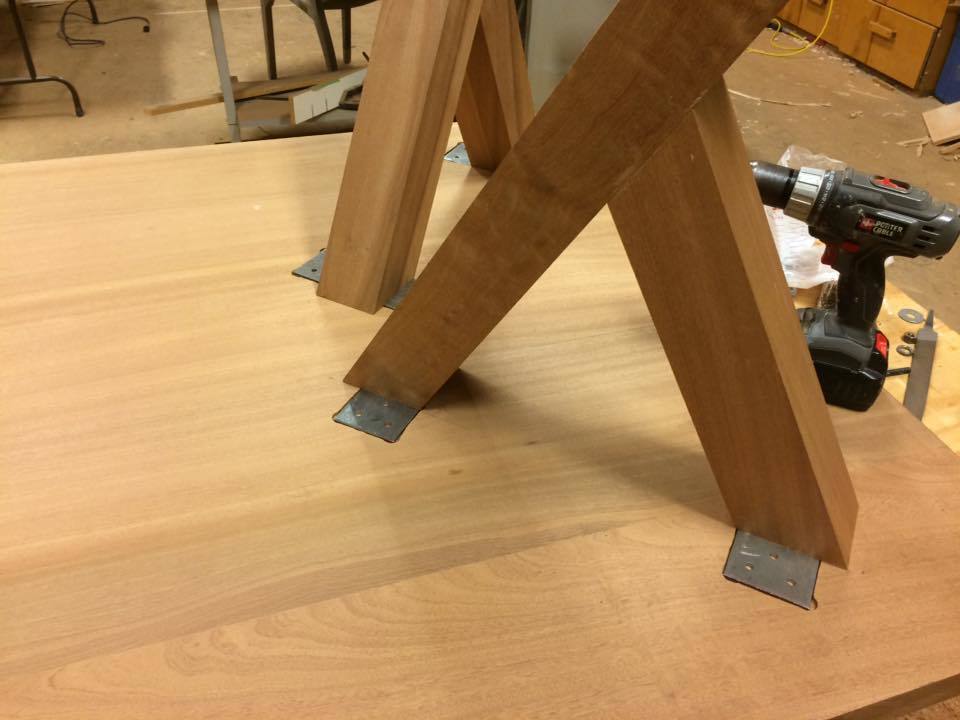
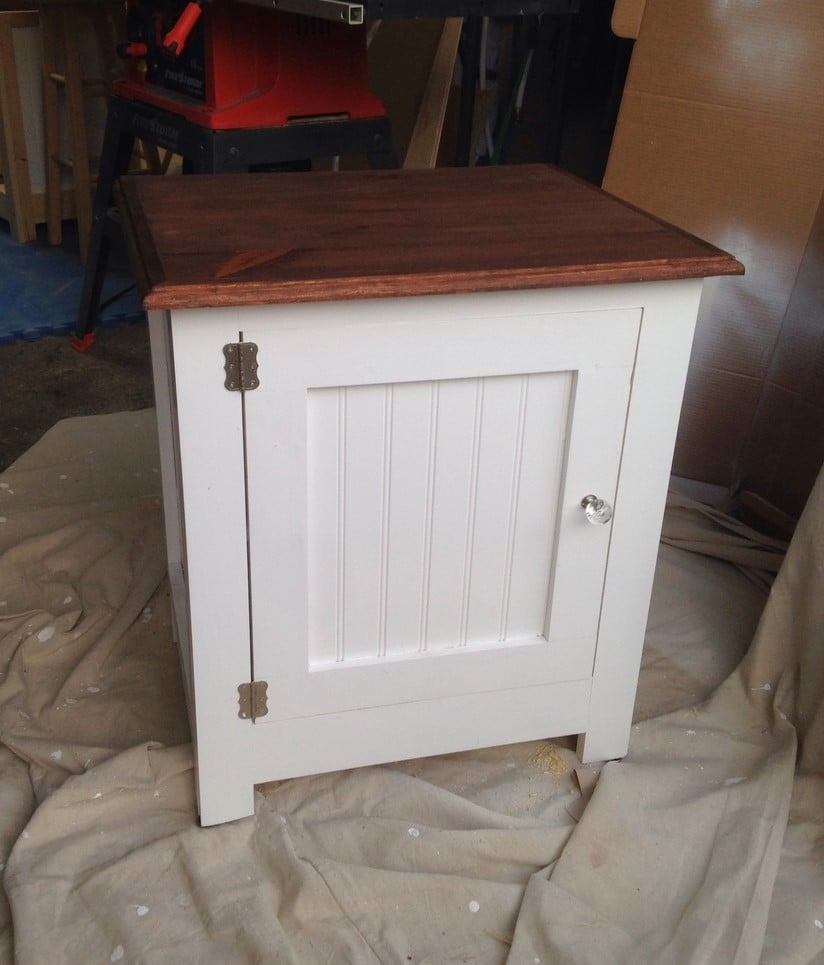
 Made these for my both my daughters and they love them. I think I may make some to sell as so many people seem to like them. I used a routered edge on my tops which deviates from plans a bit. I also used a biscuit jointer and glued in some biscuits to create my top made from 1x6 and 1x4 boards. Great plans and thanks for doing what you on this amazing website.

Estimated Cost
50$ with paint and hardware.
Estimated Time Investment
Weekend Project (10-20 Hours)
Finish Used
Min Wax Honey, white semi gloss gloss and primer from Rustoleum
Recommended Skill Level
Beginner

Comments

lsieu

Fri, 10/21/2022 - 05:44

These are really beautiful. I love the white wainscot (?) in contrast with the natural wood top. I wonder if this design can be stretched upward and elongated into a cat little box cabinet enclosure? My mom could use one that's easy to open up to clean tall enough for a bit of enclosed storage, and a table top height for a place the cat can relax away from the dogs.

Brookstone Storage Bed

Submitted by etbuogie on Sun, 03/18/2012 - 19:41

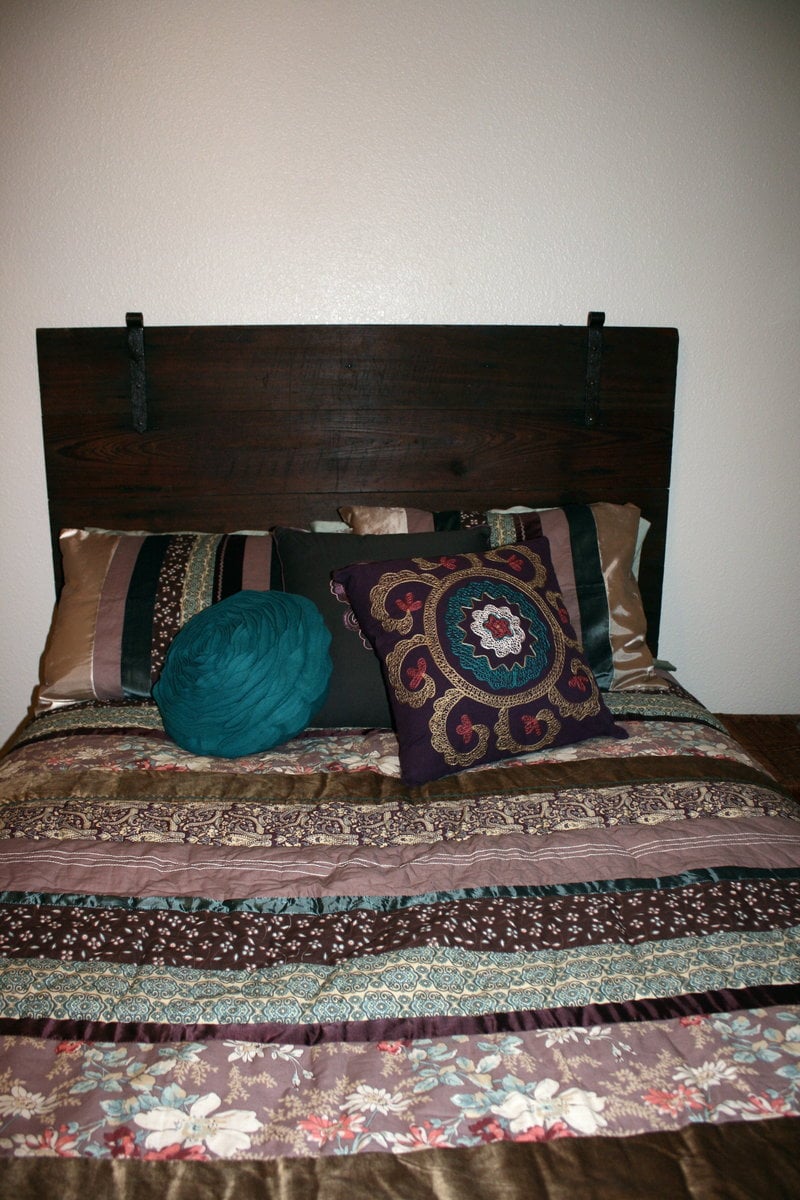
I made modified the plans to make the bed a full instead of a twin. This was a little tricky, because the full bed is bigger then a 4x8 sheet of plywood. If you are interested I can get pics of the extra support I had to build to suport the plywood seem. I also used redoak, which is why it cost so much. The extra money was well worth the cost when you use the finish. The headboard I used is from my wifes great grandmas' house in Southern Louisiana. It is 125 year old cypres storm shutter.

Built from Plan(s)
Estimated Cost
400.00
Estimated Time Investment
Weekend Project (10-20 Hours)
Finish Used
General Finishes Oil Based Gel Stain in Java. With three coats of General Finishes Arm-R-Seal Oil and Urithane Topcoat Satin. I was worried about staining, because I have not had good luck in the past with getting an even stain. This stuff was very easy to use. In the photo the stain looks a little uneven, but that was from the flash. I have tried using Minwax before, and had a horrible experiance with it. This stuff though I would recomend to anyone. Only downside is that it is more expensive, about 20 bucks for a quart of stain, and 15 for a quart of topcoat. Well worth the money for the finish. On the Headboard I used Watco Teak Oil. They just happened to be almost the same color.
Recommended Skill Level
Intermediate

Comments

Raised bed garden planters

Submitted by 4peas on Thu, 01/09/2014 - 07:55

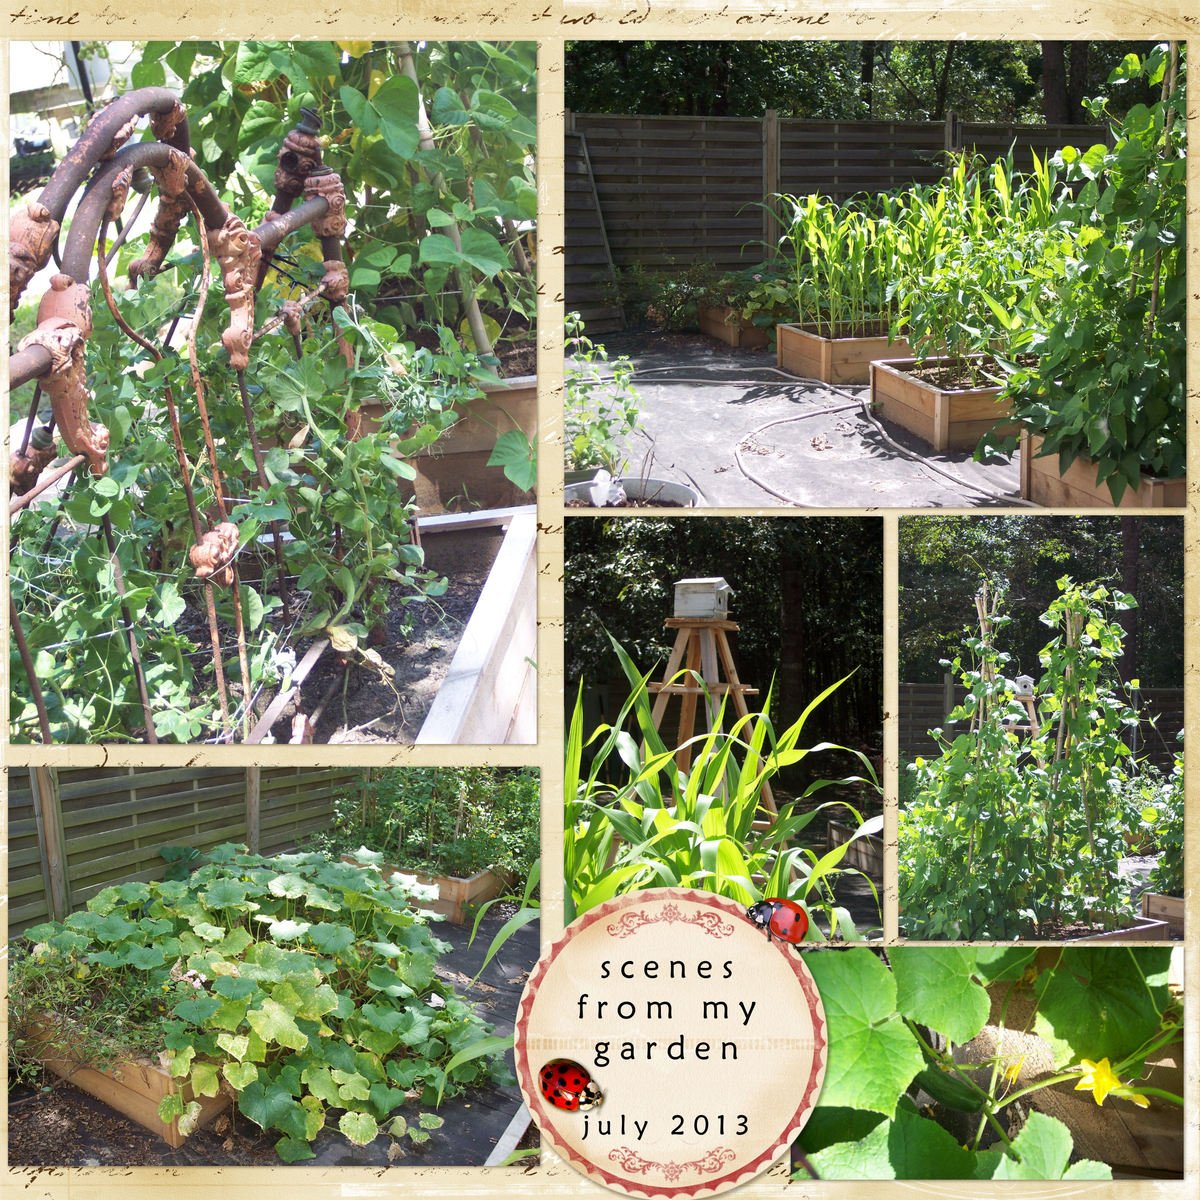
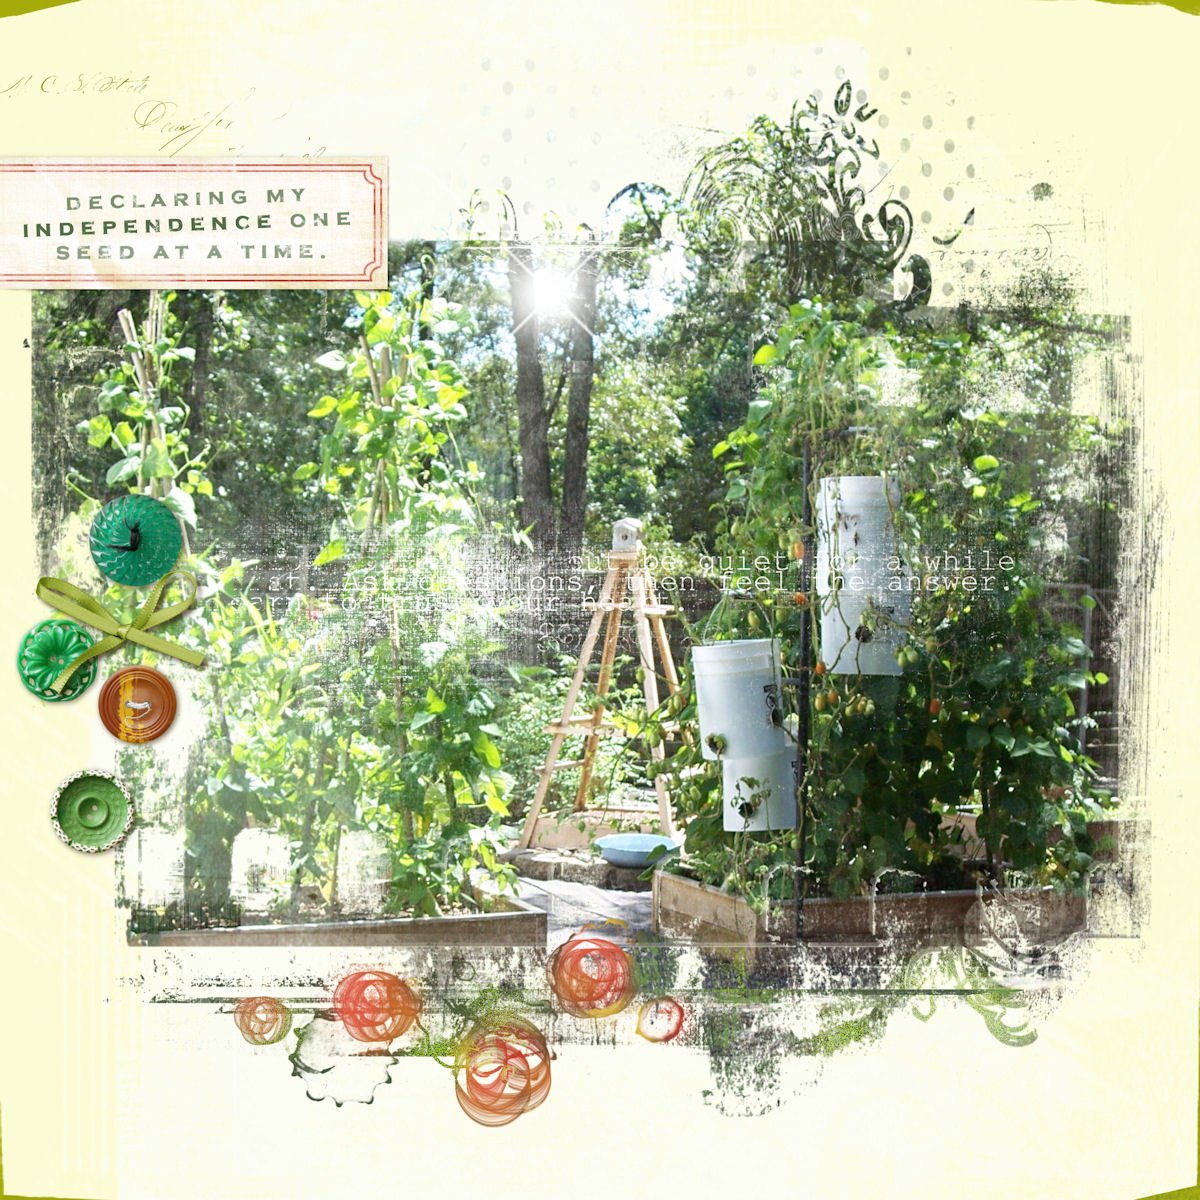
I really wanted to have a raised bed garden to grow organic veggies for my family but was so discouraged by the cost of ready-made planters that I almost gave up. While searching for options on Pinterest I came across these fabulous, affordable and untreated wood planters and after a trip to the home store, we built 10 according to the plans. I couldn't be happier with the results; thank you Ana!

Estimated Time Investment
Weekend Project (10-20 Hours)
Finish Used
none
Recommended Skill Level
Beginner

Comments

4peas

Thu, 01/09/2014 - 08:00

I really wanted a raised bed veggie garden but was discouraged by the high cost of ready made planters - especially since my dream garden required 10! I was about to give up when I discovered Ana's amazing plans while browsing Pinterest!

Mark555

Tue, 07/08/2014 - 00:24

Thank you Ana, I used your plans and ideas for a raised bed vegetable garden. I did change things a bit and it has worked out real well for me. I hate weeding and well I am a bit lazy. So mine are 6’x3’, I had a problem with the pickets splitting when I used screws to fasten them down. I ended up using a pneumatic brad/nail gun to fasten things together. I also used weed block under the bed and over the dirt and mulched over that. I have almost no weeding to do, about 10 minutes every three days or so. I also put in an irrigation system using ½ inch pvc pipe and 2 liter soda pop bottles. That way I water the roots and not the whole area, it cuts down on my water bill and it goes directly to the roots. The other thing I ended up doing is putting down 6 mil black plastic between the rows of raised beds and putting straw over that( I have 3’ walking/working paths between each bed). I have built 20 of them and plan to add another 20.

Mya's Dollhouse

Submitted by Kiwilisa on Thu, 03/31/2016 - 03:40

I eliminated the bottom floor and created a shorter storage area instead. To make the project more manageable for one person, I chose 1/2" birch plywood, however, I think 5/8" would have been a bit more sturdy for this project. I love the plans and found them very easy to customize to fit my project.

Estimated Cost
$150-$200
Estimated Time Investment
Weekend Project (10-20 Hours)
Finish Used
Benjamin Moore Advance in Winter Grey (Exterior)
Benjamin Moore Advance in Decorator White (Interior and trim)
Minwax Dark Walnut wood stain (Floors)
Varathane interior polyurethane in Gloss to finish entire project.

I used the HomeRight HVLP sprayer to finish all the pieces (Except the stain) prior to assembly.
I also stained the floors prior to assembly simply using a wipe on stain. All the plywood edges were finished off with a white melamine iron on edge band.
The BM advance paints and Homeright sprayer are my absolute favorite combination for any furniture project.
Recommended Skill Level
Beginner

Modified and Expanded Loft Bed, Shelves, and Desk

Submitted by mickelsn on Mon, 11/25/2019 - 20:09

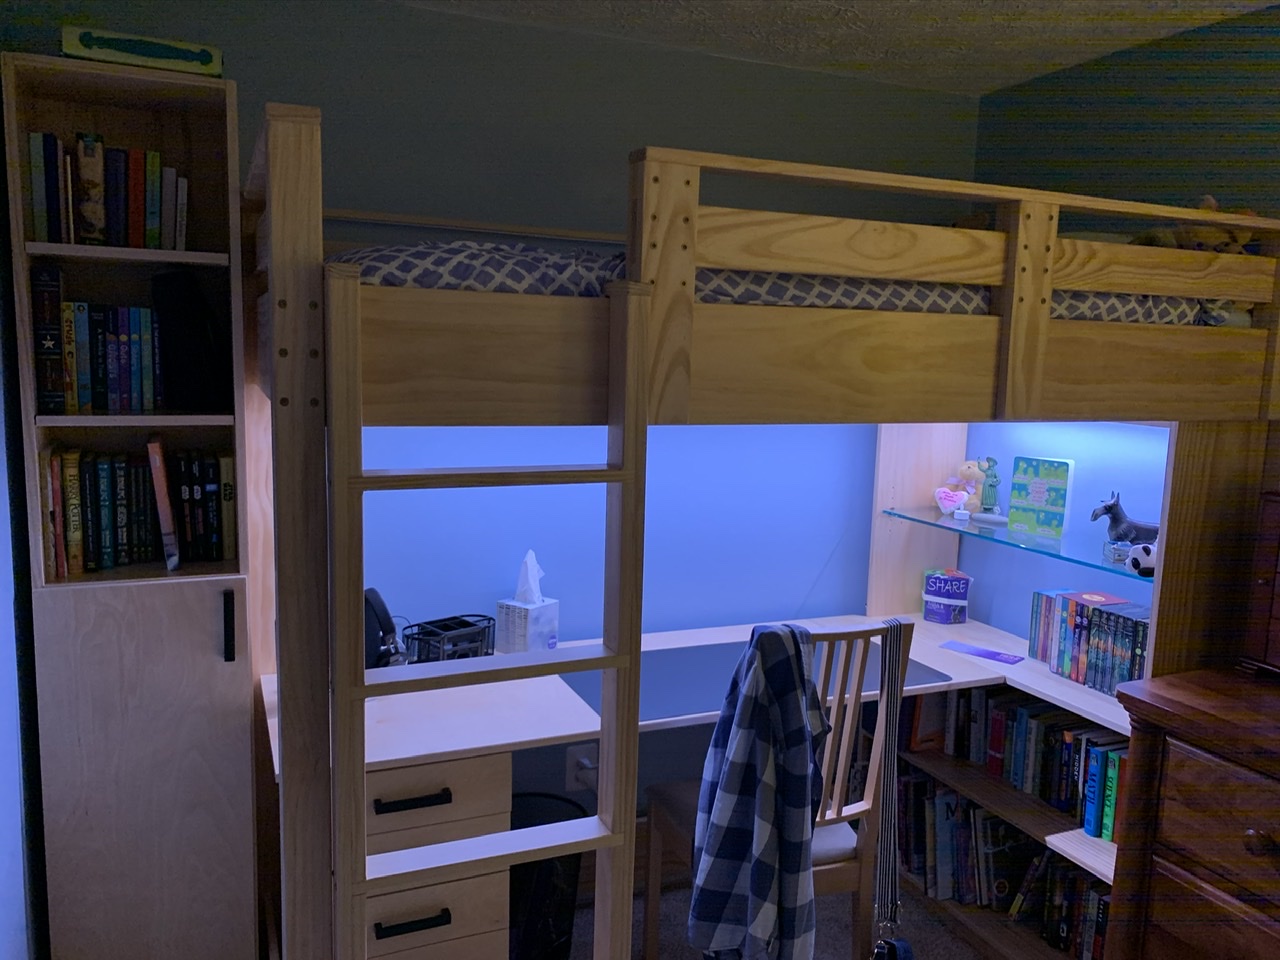
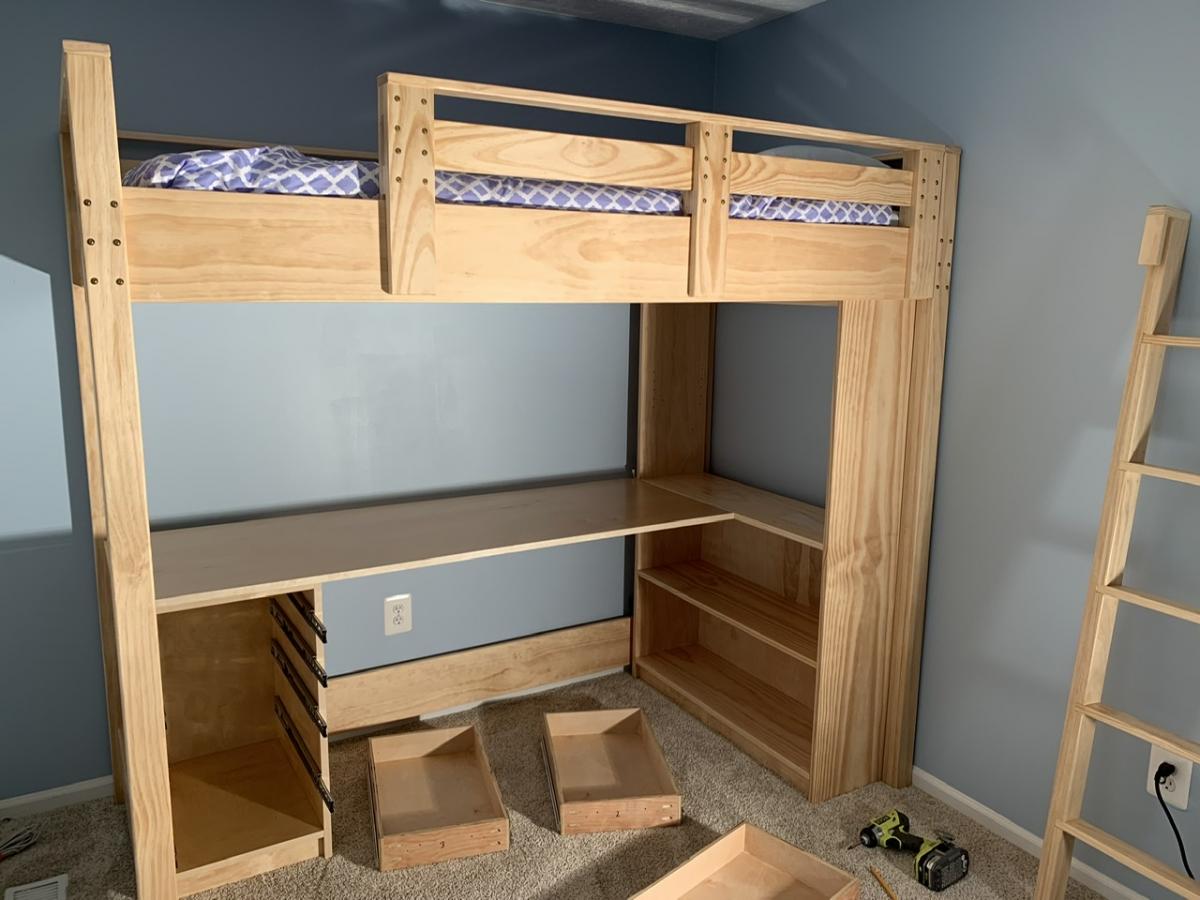
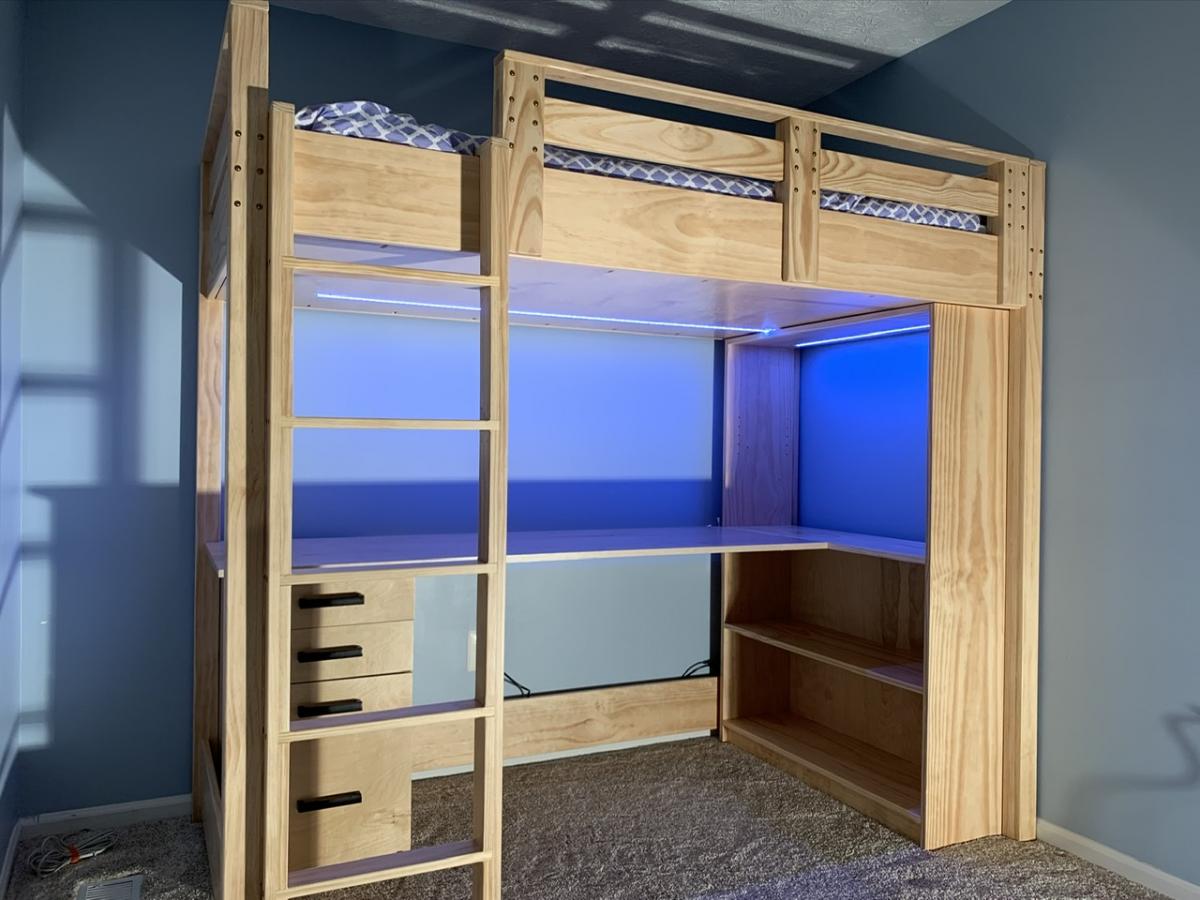
My daughter desperately needed a new loft bed for her small bedroom as she became a teenager. After looking a long time, I finally decided to   take the plunge and make something custom after we couldn’t find a bed that met her needs (she’s VERY tall for her age). Thank you for posting the loft bed and bookshelf plans to this site, as they were great to work from and customize! This is my first woodworking project of any kind, and it came out great with these plans.

We followed the Loft Bed and Loft Bed Bookshelf plans pretty closely, but we did make some changes as we went...

First, we tweaked the guard rail design to make it removable by adding back vertical posts. This way, the front and back posts slide over the front rail and it no longer needs to be screwed in place. This is a nice tight grip for safety, but it’s much easier to make the bed by removing the guard rail and dealing with the mattress. If you do this, just make sure the back vertical posts are shorter than the front ones to make room for the cleats and slats on the inside of the rail! This also means the top of the rail is made with a 1x3 instead of the 1x2 in the instructions.

We also decided to use a vertical ladder design rather than an angled ladder. We did this for space considerations in the room; it’s a bit harder to get up the ladder, but not that much. This also helped avoid any weird angle cuts with my basic tools. We also made the ladder about 3” wider than the one called for in the plans.

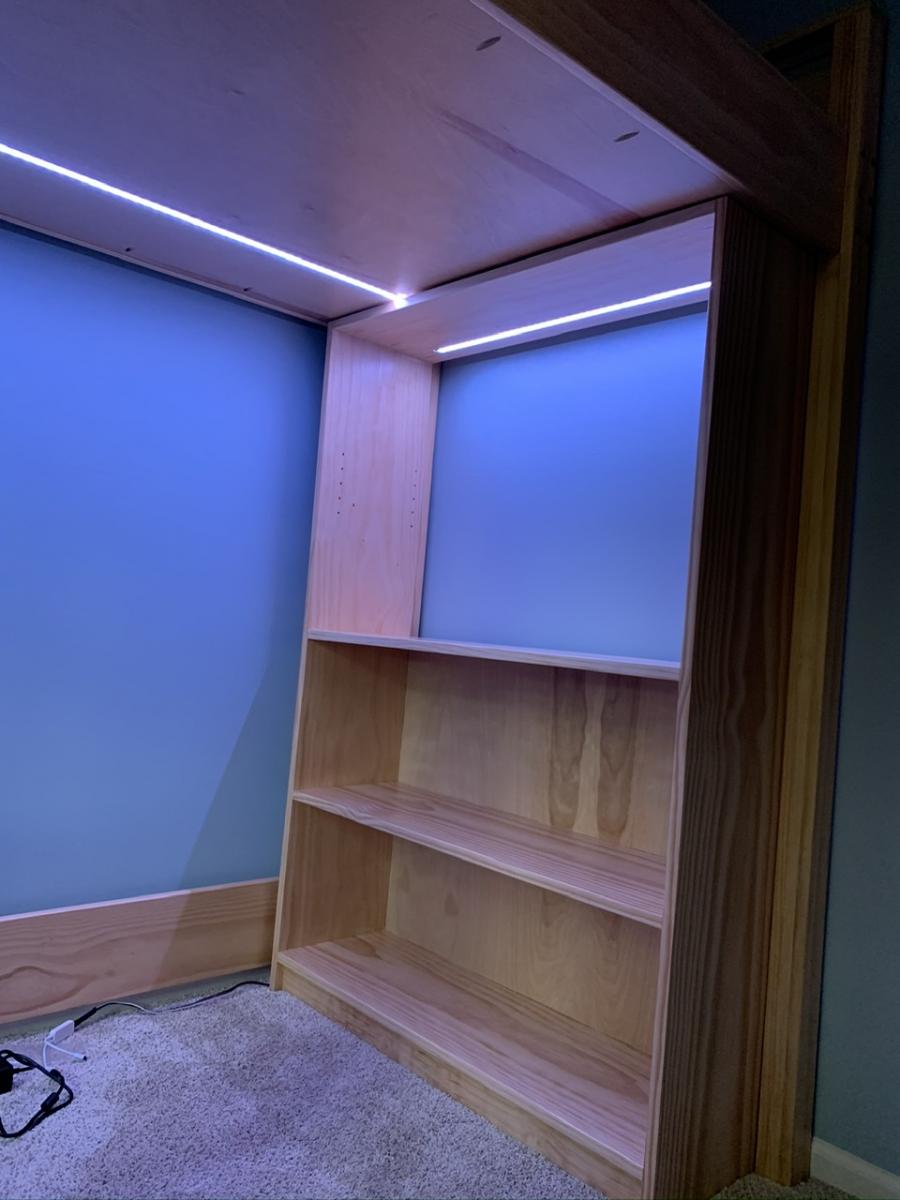
One of my favorite features was adding a 3/4” plywood “ceiling” above the desk. We did this by moving the long side cleats upward by 3/4” of an inch in the plans, and using pocket holes roughly every 10 inches around the perimeter of the plywood. We used this to hide the bottom of the mattress and all the bedding from view when sitting at the desk. It also provides for LED strip lighting above the desk, which is installed by routing out a pathway in the board and installing the lights within an aluminum channel for heat dissipation and to allow installation of a plastic diffuser over the lights. The wiring for the lights lives in the ~1.5” gap between the board and the slats thanks to the 1 x 2 cleats.

In the shelving, we made the upper shelf in the wide bookcase adjustable with the help of a Kreg shelf pin jig. We also ordered a 3/8” tempered glass shelf for this area to let more of the LED light strip we installed in the top of this shelf shine down as well. Again, this was installed in a routed-out pathway that holds an aluminum channel, and the wiring goes up through both the bookcase top and the plywood bed “ceiling” panel to join into the power. We got the strip lights, aluminum channel with diffusers, power supply, and controller from Amazon.

To get power to the LED lights, I routed out a channel for 5-conductor wire in the middle board of a rear leg assembly. Before gluing up the leg, I coated the wire with silicone spray to avoid the glue adhering to it so I could slide the wire around as needed. With a little bit of chiseling, this wire is able to come out of the slide-in joints for the upper and lower wide rails on the back of the bed. On the top, these wires go into a splitter and then to the two sets of LED light strips. On the bottom, the wires to into the LED controller which is mounted to a scrap board along with the power supply that stands on end in the 3/4” gap between the back side wall of the bookshelf and the bottom bed rail.

We created a custom-designed file drawer unit as the pedestal for the desk opposite the wide bookshelf. This was modeled roughly after Ikea Alex drawers with three narrow drawers and one file drawer. The carcass is about 14 1/2” wide by 21 3/4” deep by 29 1/4” tall and made of 3/4” plywood. The drawer boxes are approximately 12” wide by 20” long made of 1/2” plywood with 3/4” plywood fronts. We used full-extension soft-close drawer slides and positioned the cabinet so they have nearly full extension behind the ladder. Four wooden dowels are used on the top corners to align and secure this end of the desk surface.

Speaking of the desk, it is a piece of 3/4” plywood approximately 24” deep by 64” long. One end rests on the file drawer cabinet, and the other end is flush with the middle shelf of the bookcase and attached using two 6” by 5” 14-gauge galvanized T-straps usually used in framing applications. These are screwed upwards into the bottom of the desk and shelf from below, and are holding up quite well. This avoids the need for desk legs by the bookshelf.

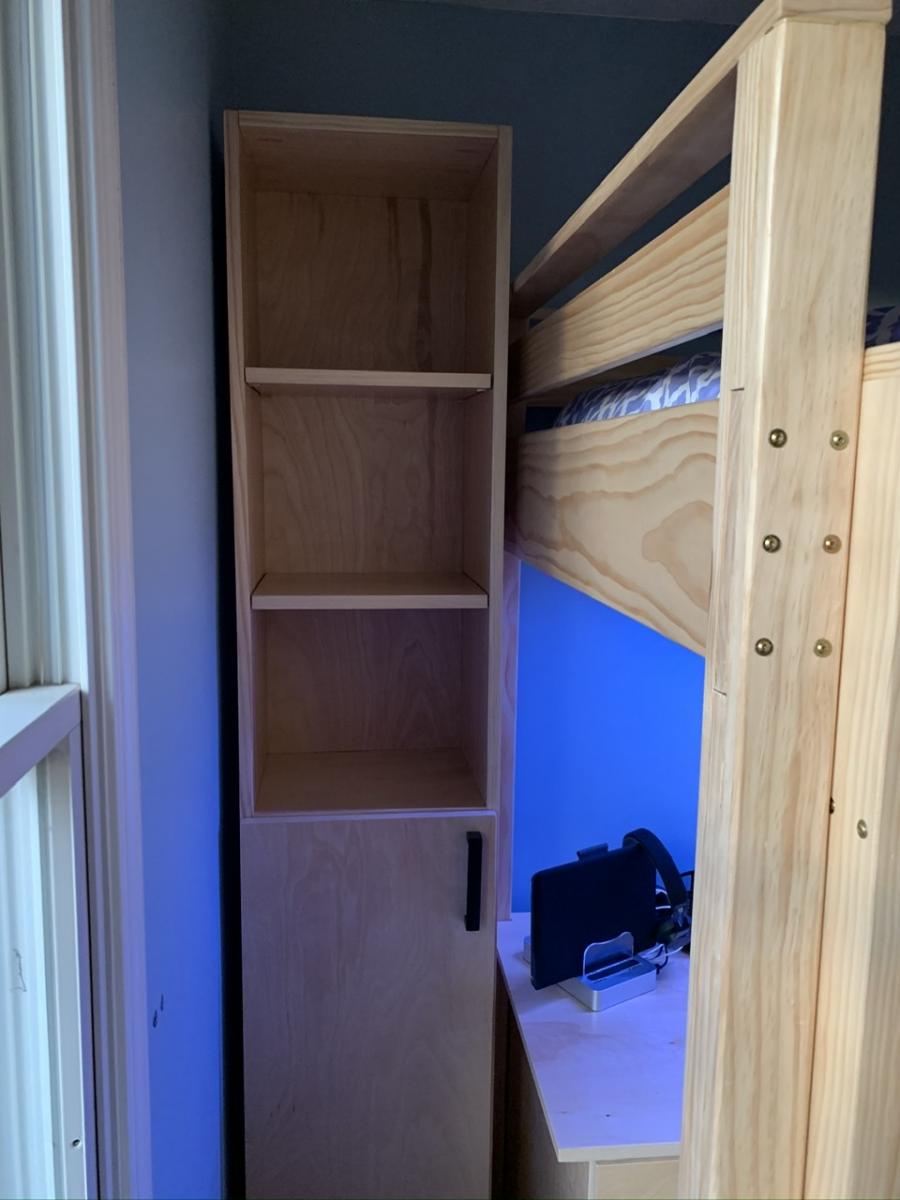
We then adapted the techniques used for the wide bookshelf to build a narrow bookcase (79” tall, 14 1/2” wide) out of two more 10-foot long 1x12 boards. This bookcase sits between the end of the bed and the corner of the room to finish out the look and provide more storage. The top, middle, and bottom shelves are fixed and there are a total of four adjustable shelves (two in the top half, two in the bottom half). We also cut a door and installed it using a pair of full-overlay euro hinges. With these dimensions, the tall bookcase is also capable of working with 11” x 11” x 11” storage cubes just like the wide bookshelf.

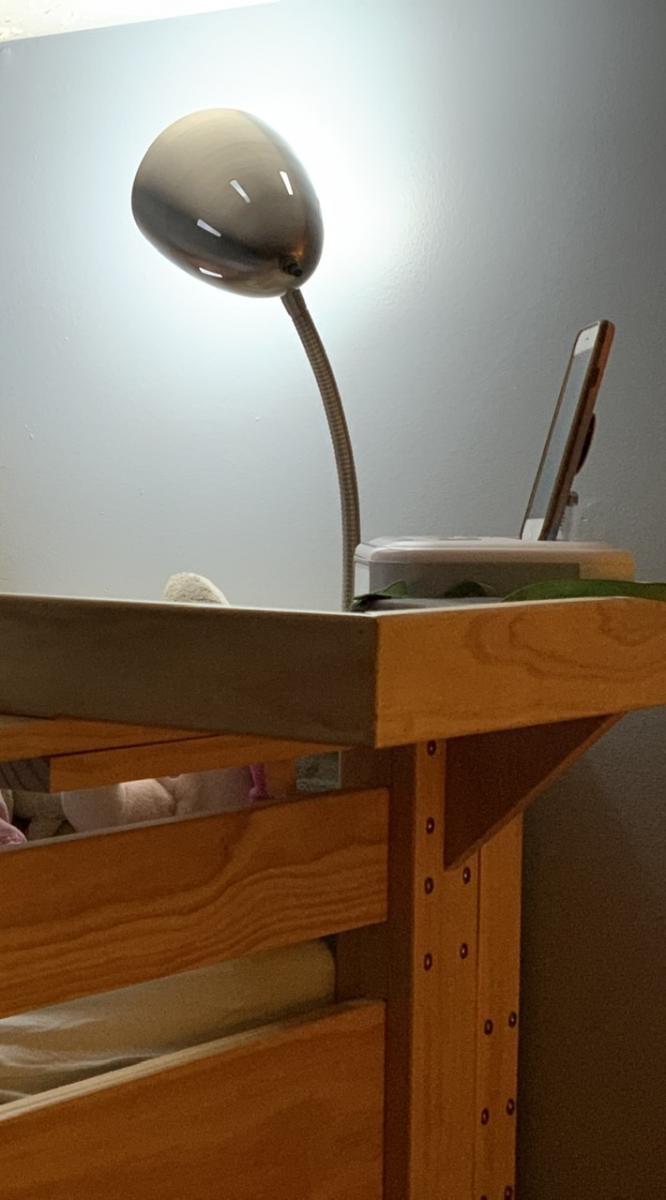
The finishing touch was to create a shelf that attaches to the guard rail and provides a place for my daughter’s alarm clock to sit and be within easy reach. This shelf is made around a piece of the scrap 3/4” plywood that is approximately 21” long and 9” deep. I used leftover 1x3 pine that I glued and nailed to the outside perimeter of the plywood flush with the bottom to hide the layers in the plywood while providing walls around the shelf. I also glued and screwed another 1x3 piece to the front of the plywood, this time flush with the top, as the first piece of a U-shaped grip to slide over the top of the guard rail. Another 1x3 scrap was then positioned, glued, and brad nailed to this front piece to finish the grip. I then cut a triangular piece of wood from a 1x6 to provide additional support under the shelf against one of the vertical pieces of the guard rail. This piece is held in place with counter-sunk screws that go through the top of the plywood shelf down into E-Z Lok threaded inserts in the top of the triangular wood support. The whole shelf assembly is only attached to the guard rail so that I can still easily remove the rail to change bedding on the mattress.

The whole project is constructed out of Home Depot select pine boards and birch plywood. Throughout construction, I used a 3/16” round-over bit in a router to eliminate sharp corners pretty much everywhere on the bed itself (legs, rails, ladder, etc.). I didn’t use this on the bookshelves, the file drawers, or the desk. Edge banding was used to hide any exposed plywood edges. I used 200-grit sanding discs and an orbital sander to sand the various pieces during construction and before finishing. The entire thing is finished with two or three coats of Minwax Polycrylic water-based polyurethane, sanding between coats, which gives this a nice smooth finish and lets the richness of the wood grain come through.

Hopefully the pictures I’ve posted can help understand the write-up on modifications to the project. I enjoyed building this a lot, and my daughter really loves what this did to her room to make it much more usable! That was worth all the effort and time right there.

Ana, thanks a million for the plans!!
Estimated Cost
$750 in materials for wood, LED lighting, tempered glass shelf, etc.
Estimated Time Investment
Week Long Project (20 Hours or More)
Finish Used
Minwax Polycrylic, Satin finish. Used Shur-Line 3.5” x 7” White Fiber pads to apply on most flat surfaces, with foam brushes to get into corners and apply to edges. For complex pieces like the ladder and guard rail, used Minwax Polycrylic Satin spray. Sanded between coats with 320-grit sandpaper in all cases. Used two coats when doing pad application; four coats when doing spray application.
Recommended Skill Level
Beginner

First Ever Furniture Build - Outdoor Sofa

Submitted by Anonymous (not verified) on Wed, 08/02/2023 - 10:30

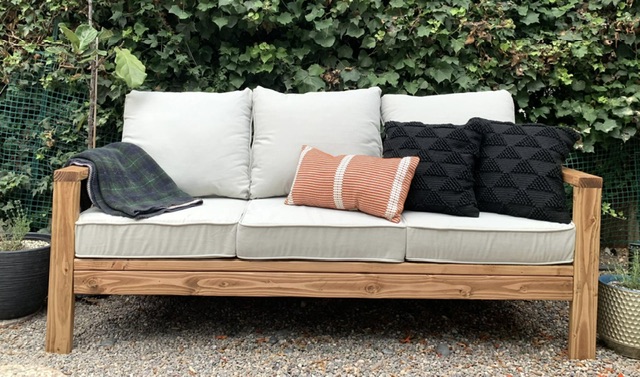
This was my first ever piece of furniture that I made and it was so much fun! I’ve got the furniture making bug now!

Melissa Pilcher

Built from Plan(s)

Comments

Easy Upholstered Bench

Submitted by saracrow on Wed, 03/21/2012 - 11:21

After discovering Ana White, my husband and I have been slowly creating our dream guest room. I had the vision of a modern striped bench at the end of the bed and using the Easiest Upholstered Bench plans, Ana made it easy! I love how this turned out. It was actually my first sewing project ever and I love how it turned out.

The foam is what spiked the price in this project.

Built from Plan(s)
Estimated Cost
$70
Estimated Time Investment
Afternoon Project (3-6 Hours)
Finish Used
Mixwax wood conditioner, Minwax Dark Walnut, Minwax Polyacrylic
Recommended Skill Level
Beginner

Comments

saracrow

Wed, 03/21/2012 - 14:48

Thank you very much! Although building this piece was easy, the small touches definitely took some time. But it was worth it!

Farm house queen bed modified for box spring

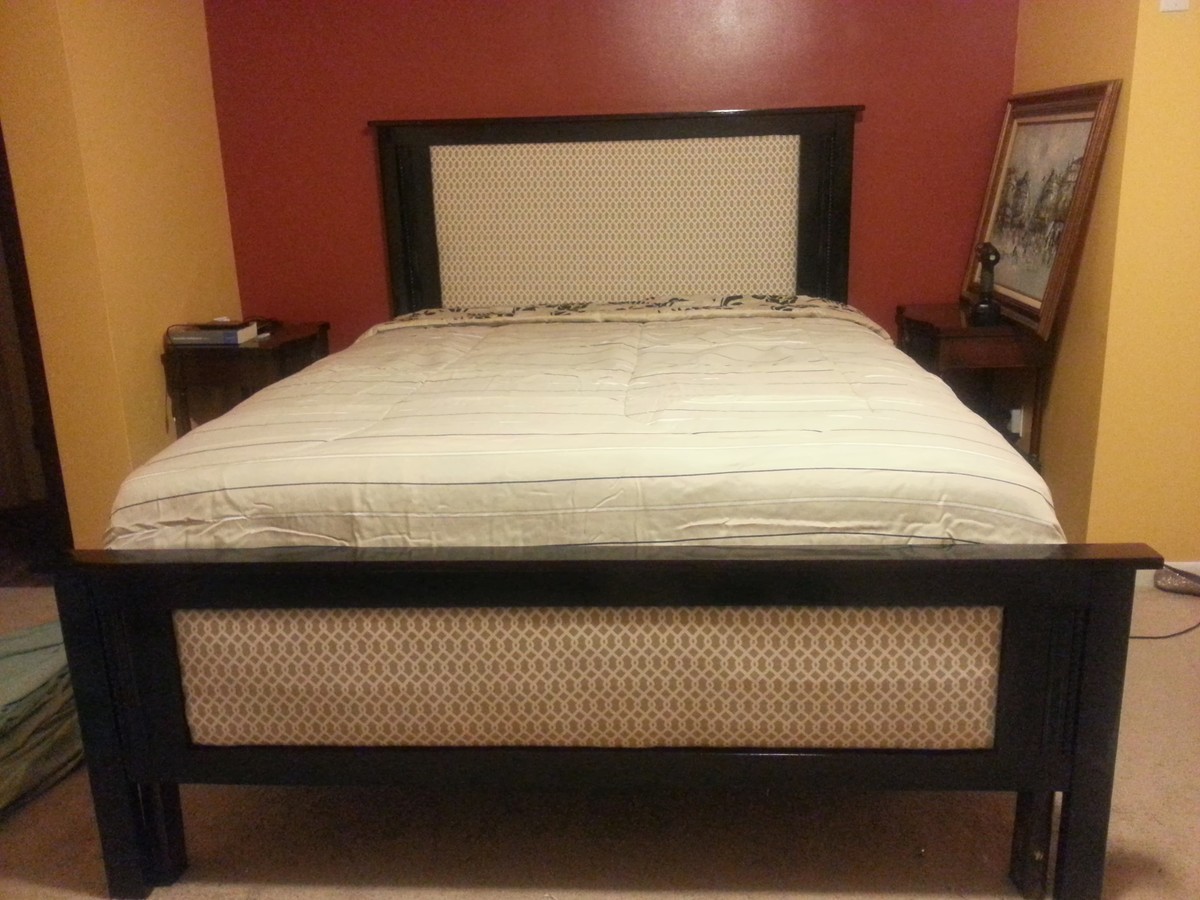
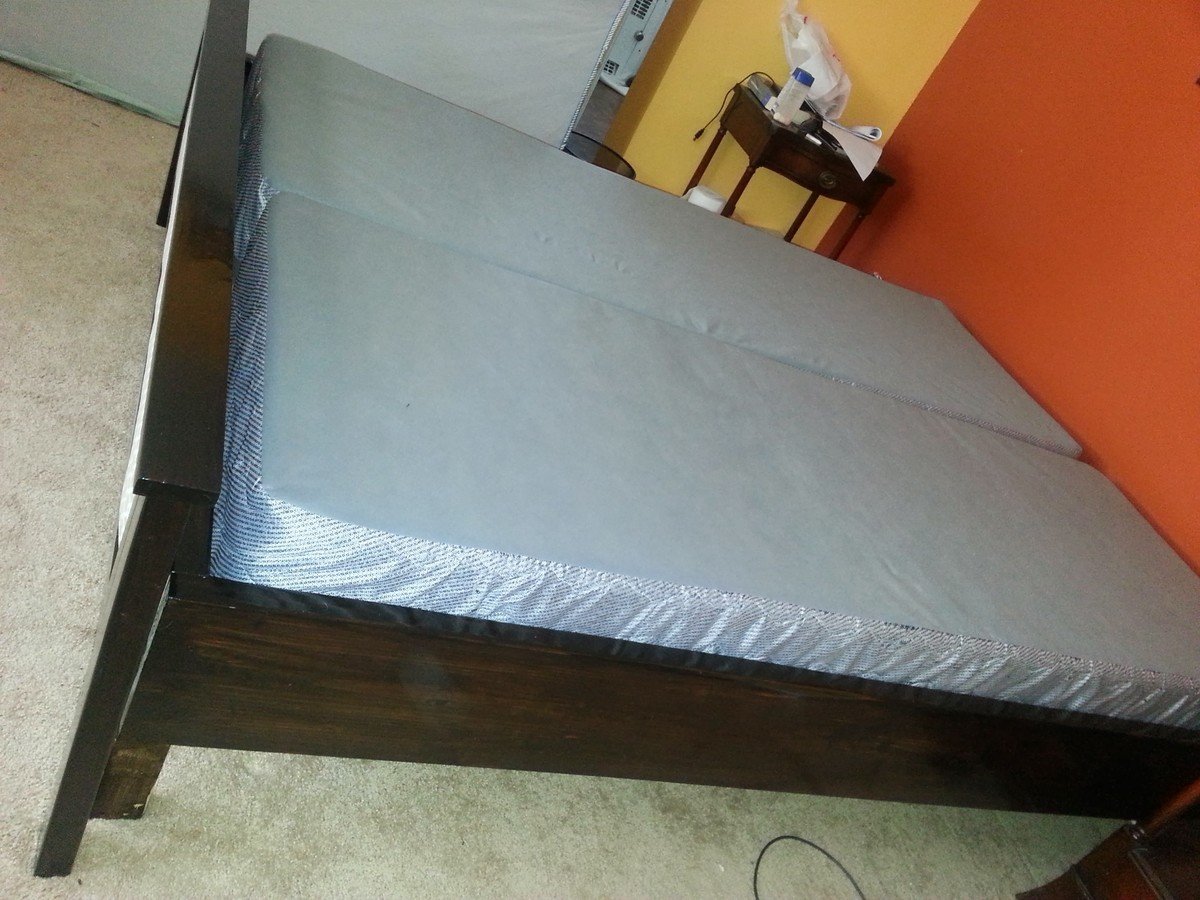
This bed was built completely out of necessity. Our old 30 year old bed (including mattress) had given me my last backache. A new bed and mattress set was too expensive so I decided to build the bed and spend the saved money on a mid class mattress. So glad I did! What I built seems waaaay better than what we could have afforded. And it only took me a long weekend plus a few days waiting for stain and polyurethane to dry. Plus the return trips to HD to purchase new lumber after making wrong cuts and the cheap furring strip I bought at first continuously split on me.o t

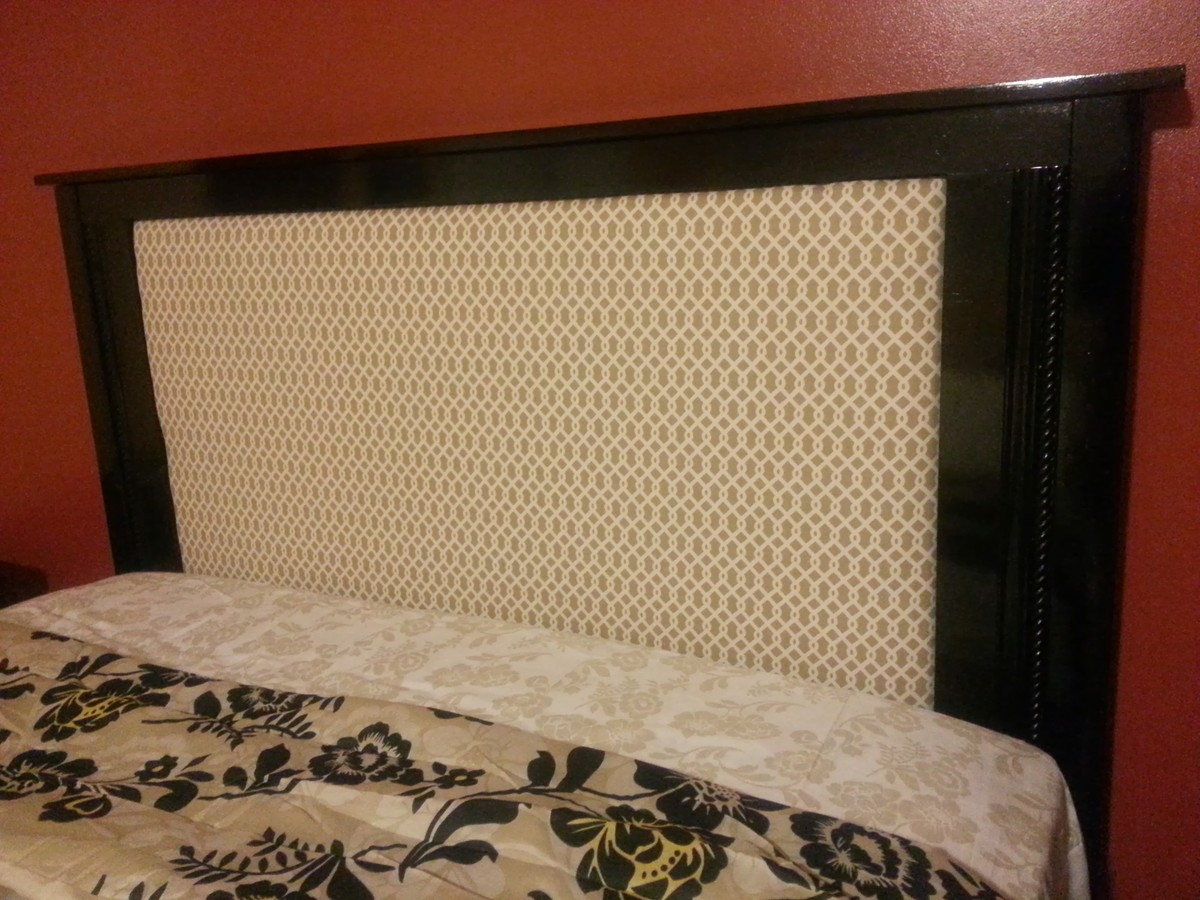
I wanted the box spring to fit inside of the frame as much as possible. I realized the farm house queen bed plan plus the platform bed plan that I was using did not do that a bit late. By then I had already glued and screwed on the side rails. So I just flipped the frame around and decided to go with that side. Later I realized that the inside width of the bed was 57!! (60 - 3 for the frame) so I needed to return to the store to get new wood for the frame since what I cut already was 3 inches too short. My already built headboard and foot board also would not fit like the plan suggested so I needed to improvise. What you see is mainly my improvisations as a result of many, many mistakes.
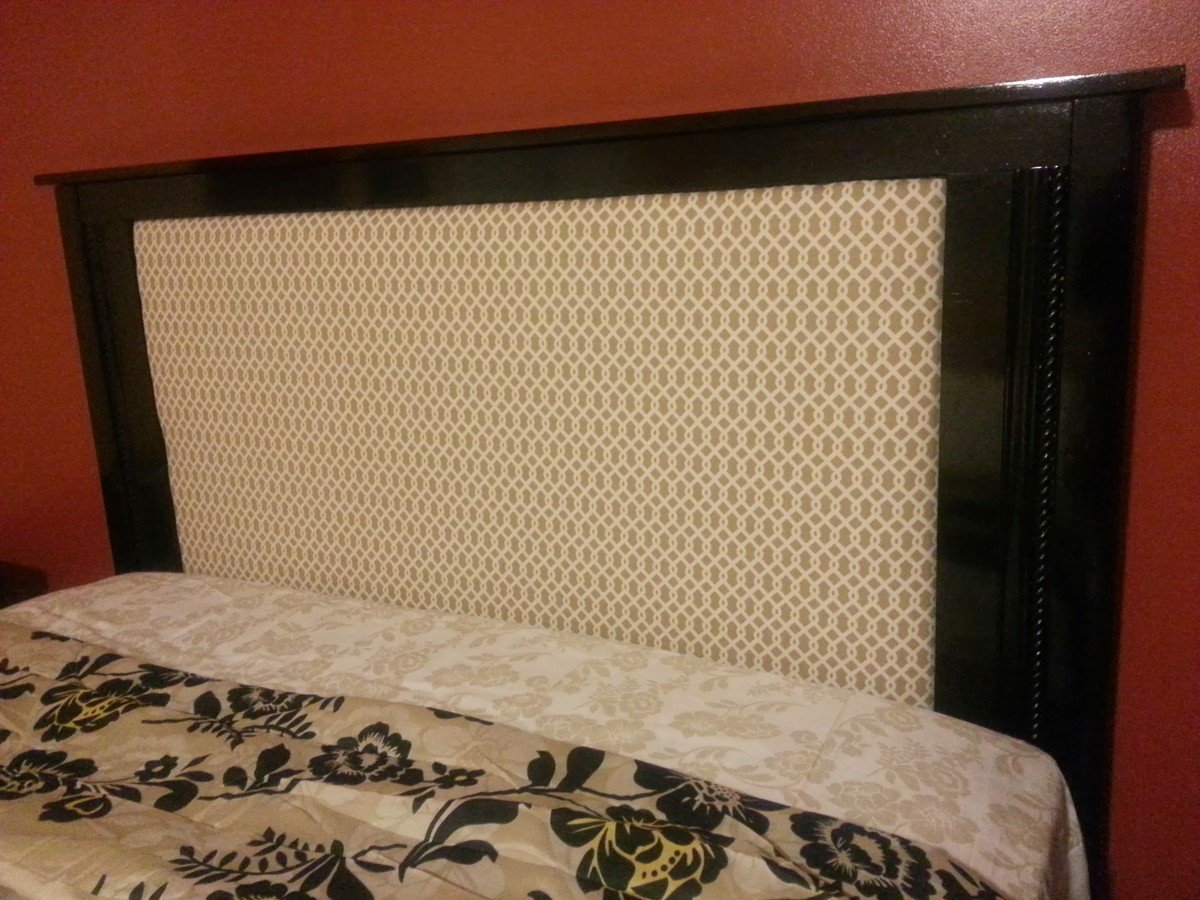
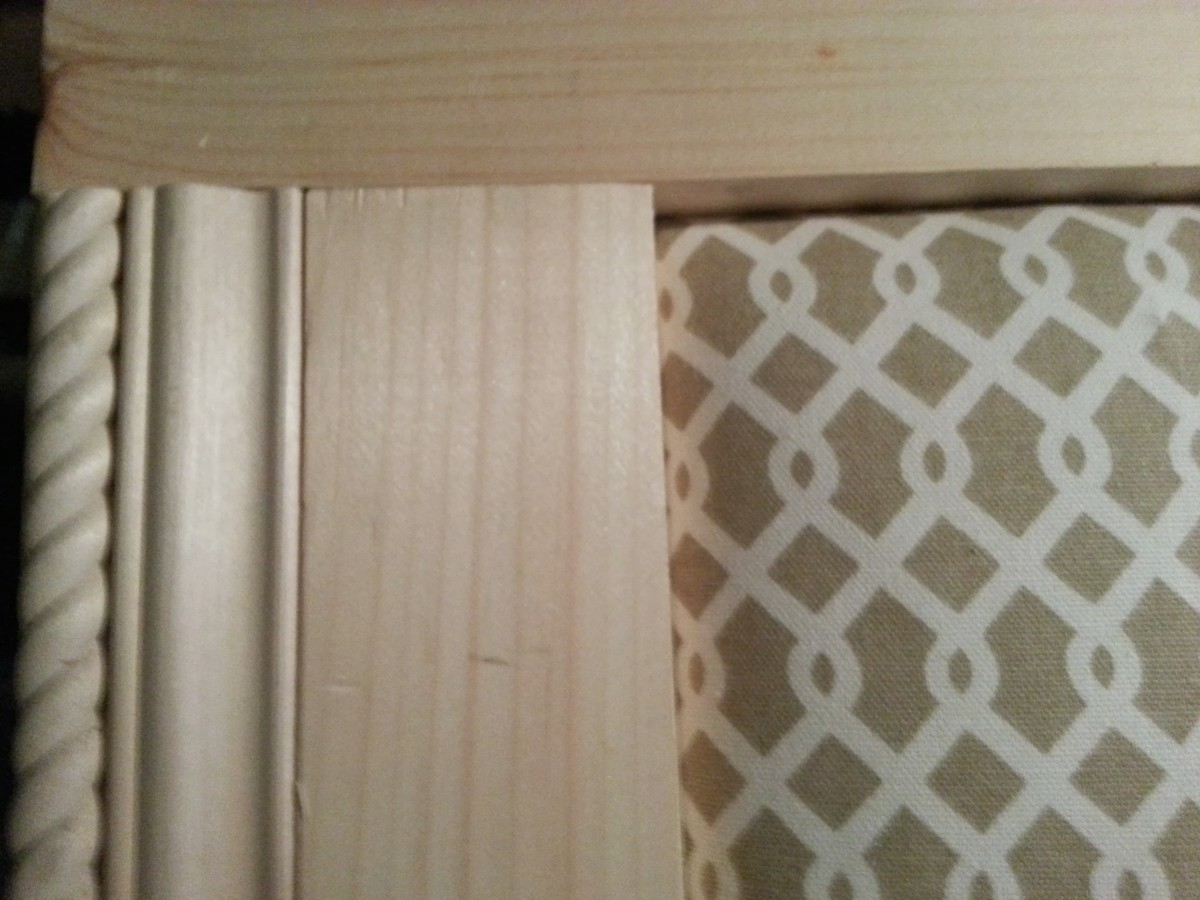
My bed has two sets of legs. I did not trust the headboard and footboard legs as I could not attach them as described so I added a set to the frame itself. I also made the upholstery so that I could easily change it by unscrewing it from the head and footboards.

Estimated Cost
$90. Less than $70 initially but went up with the addition of trims and mistakes. Already had fabric and foam.
Estimated Time Investment
Week Long Project (20 Hours or More)
Finish Used
3 coats of Minwax polyshades in satin followed by Minwax gloss polyurethane. I applied it using foam brushes.
I would have liked it to be lighter. Just as I thought the color was good - after 2 coats - I spilled half the can of stain onto the foot board. Was forced to brush that in and add another coat to the headboard.
Recommended Skill Level
Beginner

Comments

moosmani

Fri, 01/10/2014 - 20:10

Oh my! I had to giggle about your experience, especially the last part when you were forced to put on another coat after spilling half the can! Been there, done that. You did a great job at improvising and I'm impressed you could keep the cost so low. I really like the dark color. Great job!
moosmani

Fri, 01/10/2014 - 20:09

Oh my! I had to giggle about your experience, especially the last part when you were forced to put on another coat after spilling half the can! Been there, done that. You did a great job at improvising and I'm impressed you could keep the cost so low. I really like the dark color. Great job!

My project with coastal theme

Submitted by Anonymous (not verified) on Sat, 04/02/2016 - 08:12

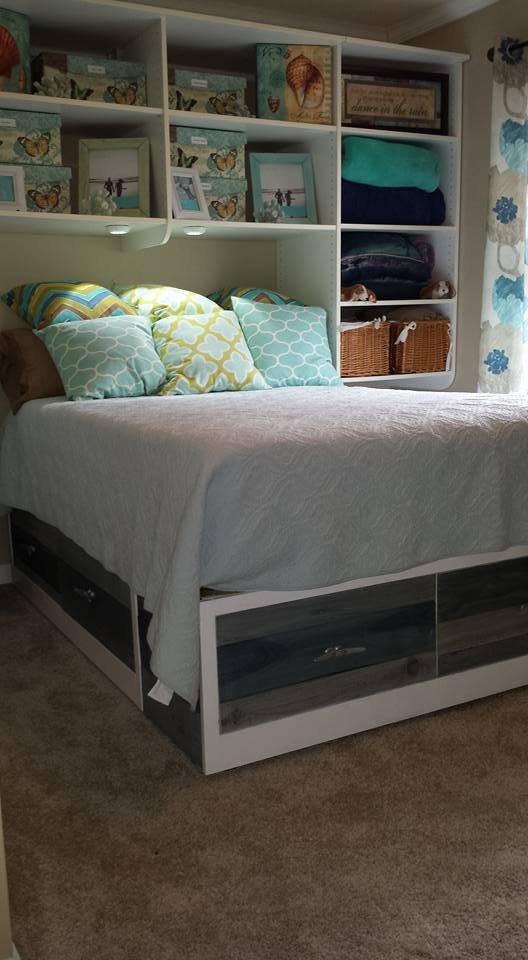
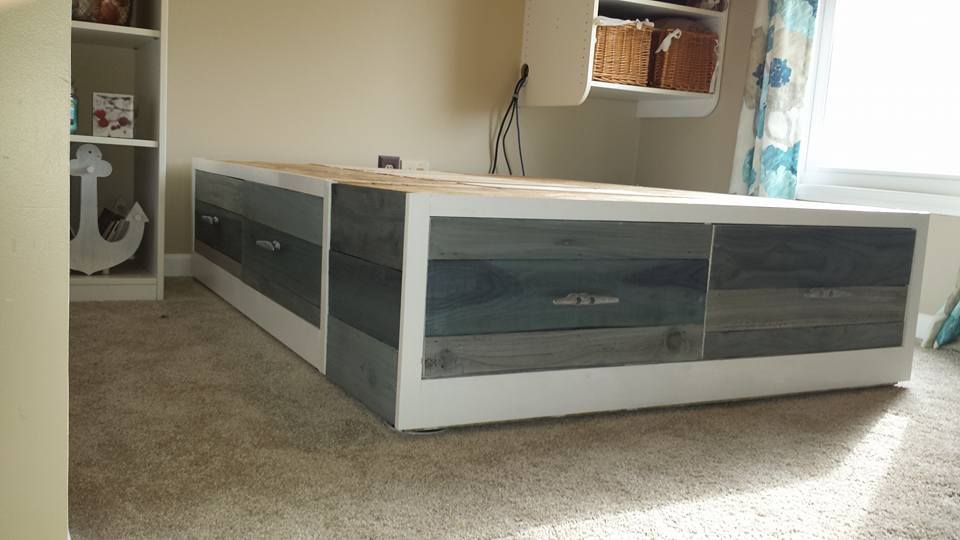
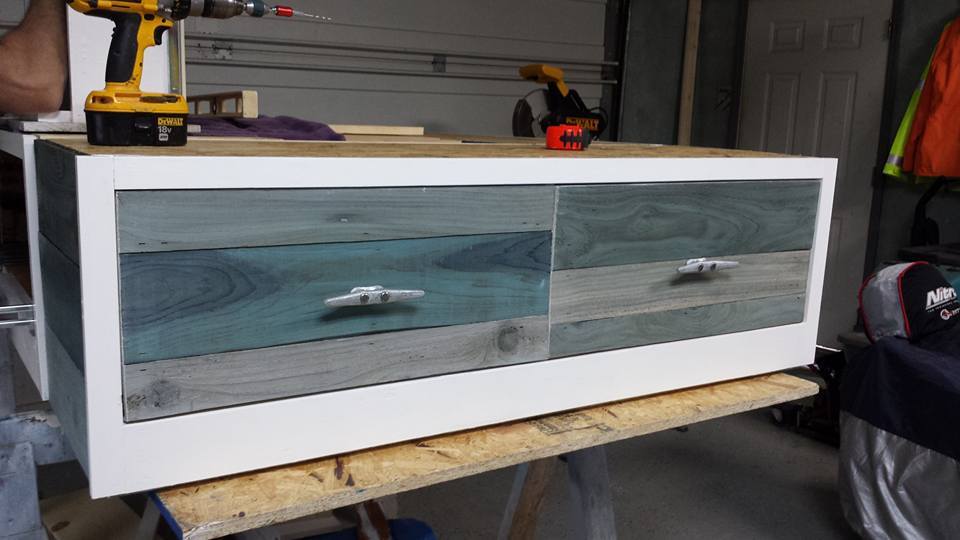
My Brandy Scrap bed with drawers, with a coastal theme. Made from scrap left over from an accent cedar wall. Originally stained with vinegar and steel wool and added some white wash and blue wash for color!

Estimated Cost
$200
Estimated Time Investment
Week Long Project (20 Hours or More)
Finish Used
Vinegar and steel wool with white wash and blue wash
Recommended Skill Level
Starter Project

Waterfall Framed Grand Console Table

Submitted by Anonymous (not verified) on Sun, 08/06/2023 - 14:00

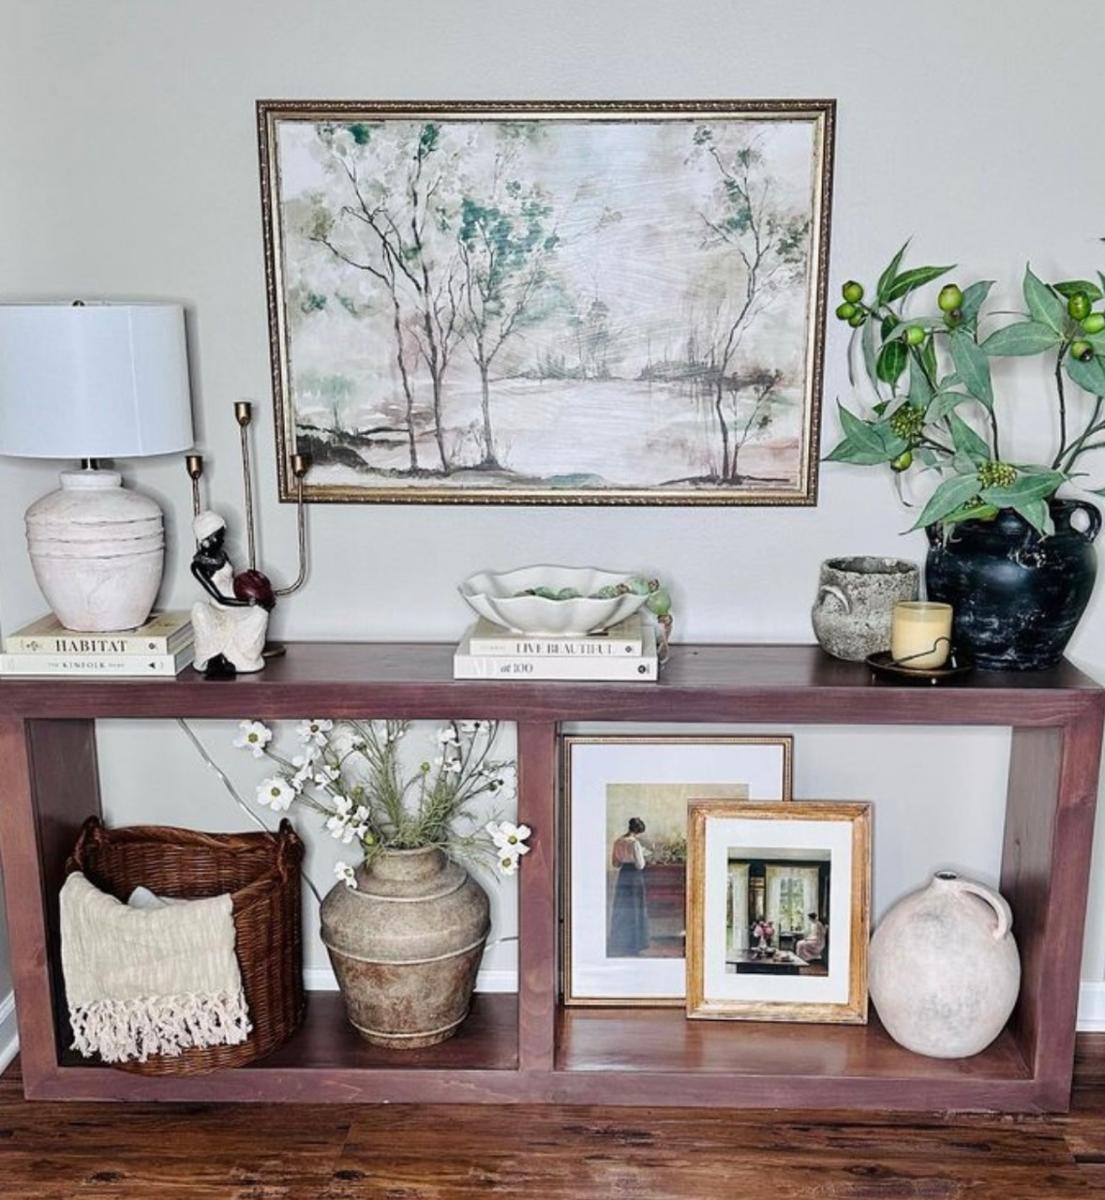
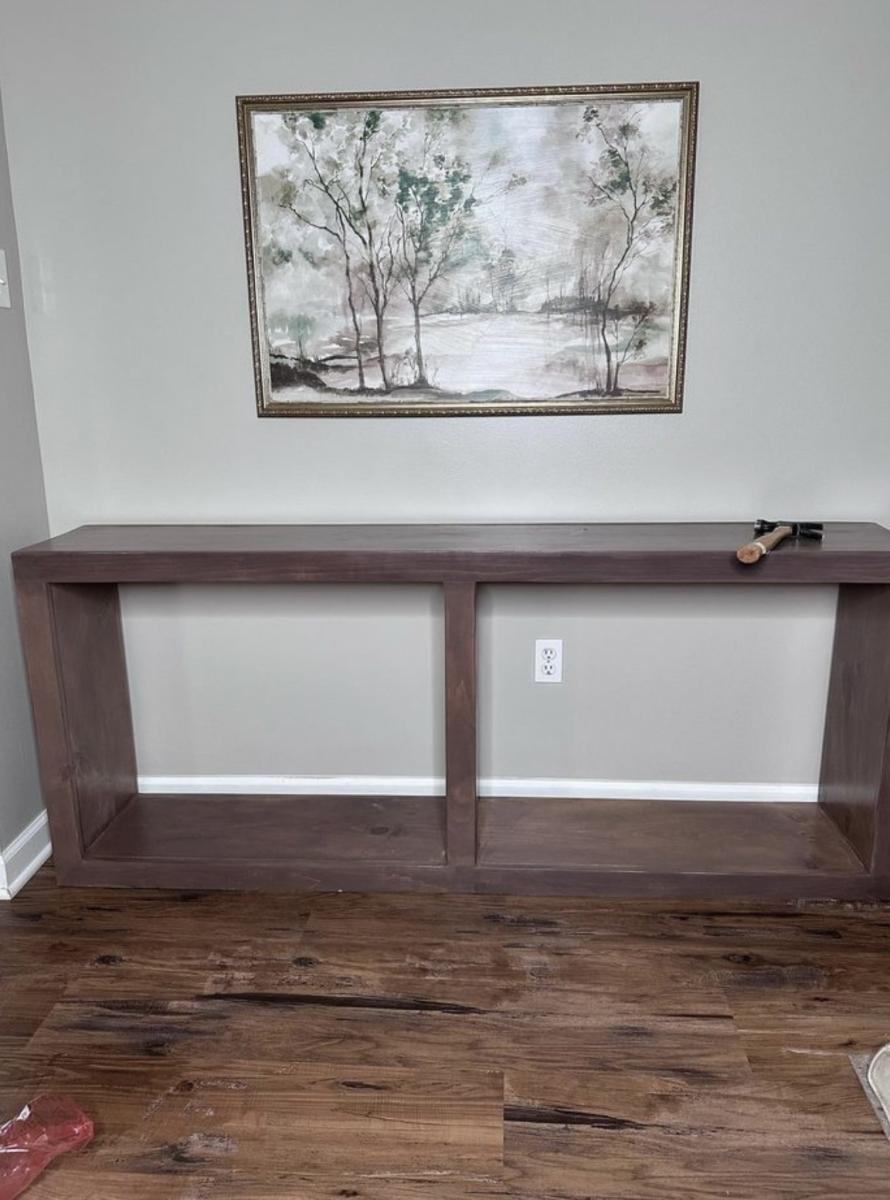
Stunning Waterfall Console Table Build by lipsticksandsawdust on Instagram

Comments

Easy Kitchen Island

Submitted by khewatt on Fri, 03/23/2012 - 19:35

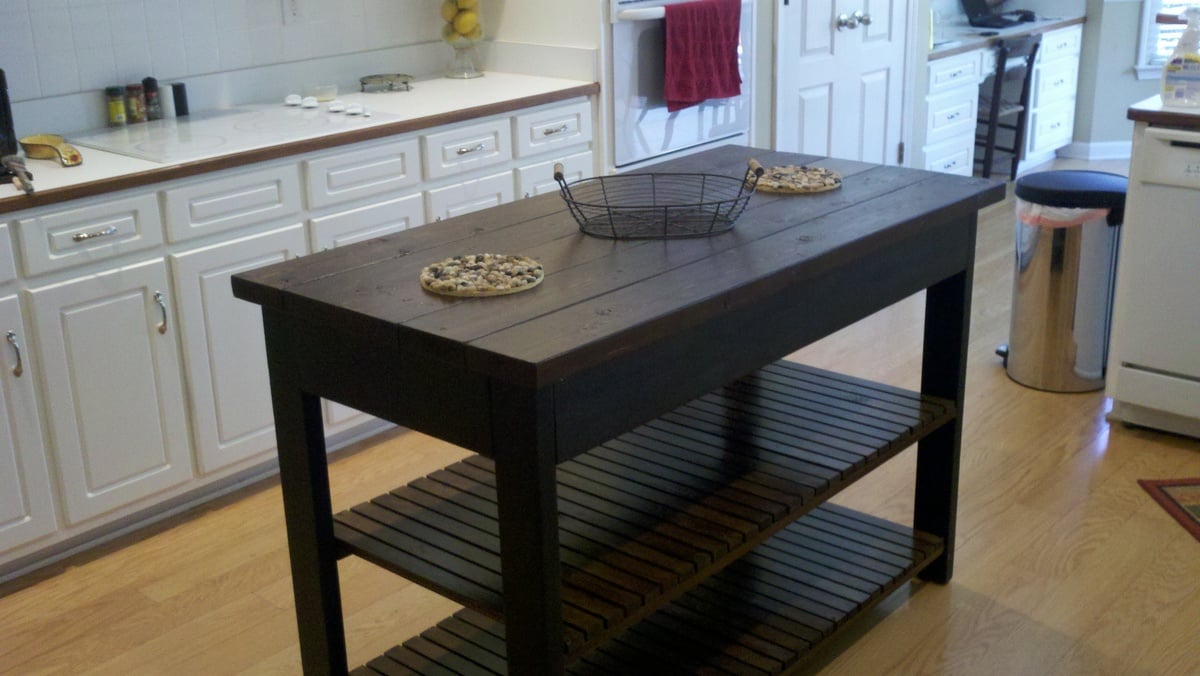
An easy to build and very sturdy kitchen island. My father and son constructed the island itself. I stained and painted the island. The construction was relatively easy. Painting and staining were easy, but time consuming because of dry times.

Built from Plan(s)
Estimated Cost
$125
Estimated Time Investment
Weekend Project (10-20 Hours)
Finish Used
Stain- Minwax Wood Finish- color: special walnut
Paint- Behr Premium Plus Flat Enamel- color: Beluga
Polyurethane- Minwax
Recommended Skill Level
Beginner

Comments

Barn Beam Ledge - First Project!

Submitted by divertete on Sun, 01/12/2014 - 13:00

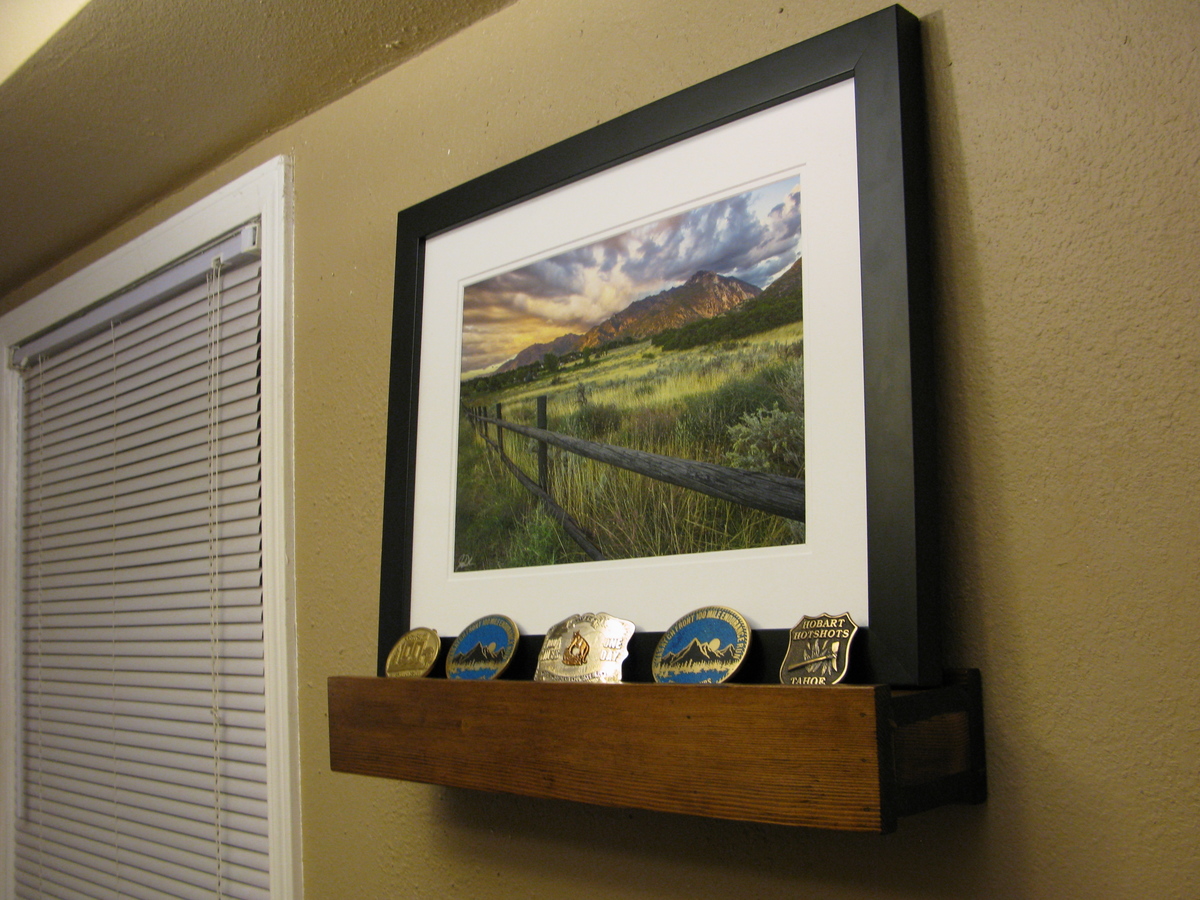
This was my first project since shop class in 7th grade (20 years ago)! Picked this beautiful shelf as a Christmas present to my husband to show off his hard-earned trophies from his ultramarathons (100+ miles of running). Next time I would make it a bit longer, and use end grain on the sides for a more even color. Came together easily, and can't wait for my next project! Picture is from Jay Dash Photography, of the Wasatch Mountains in Utah.

Built from Plan(s)
Estimated Cost
$30 (including supplies)
Estimated Time Investment
Afternoon Project (3-6 Hours)
Finish Used
Minwax conditioner followed by Minwax dark walnut stain (one coat), and semi-gloss poly
Recommended Skill Level
Starter Project

Comments

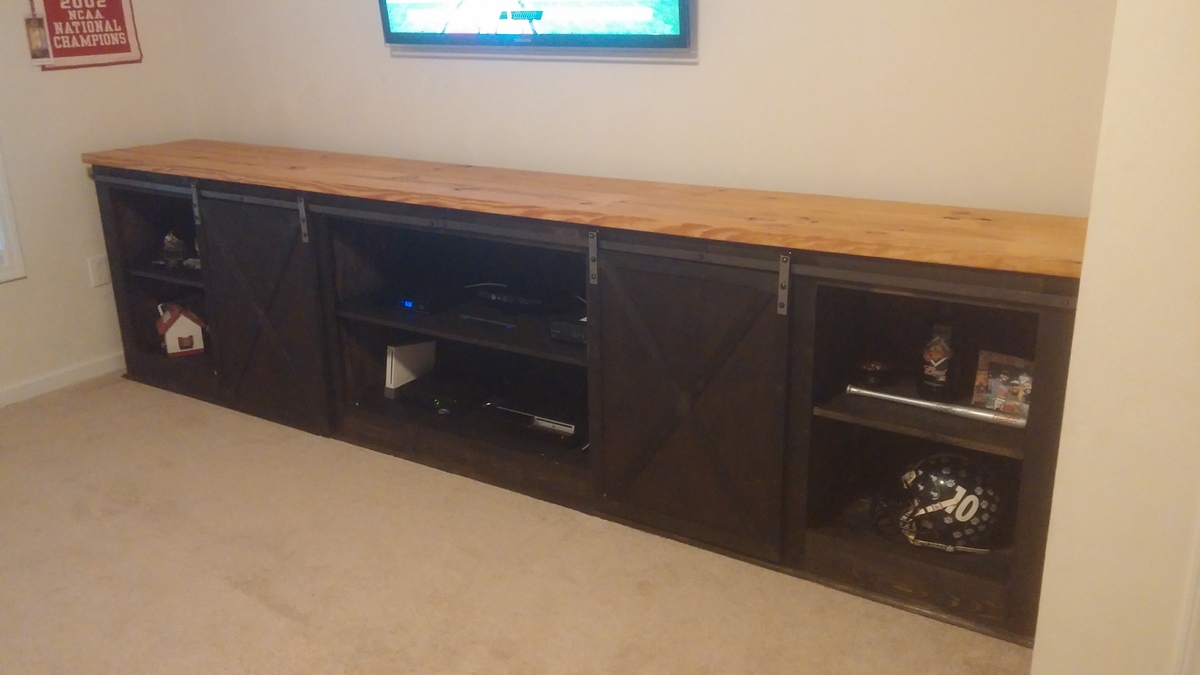
Barn Door Entertainment Center

Submitted by Anonymous (not verified) on Mon, 04/04/2016 - 19:27

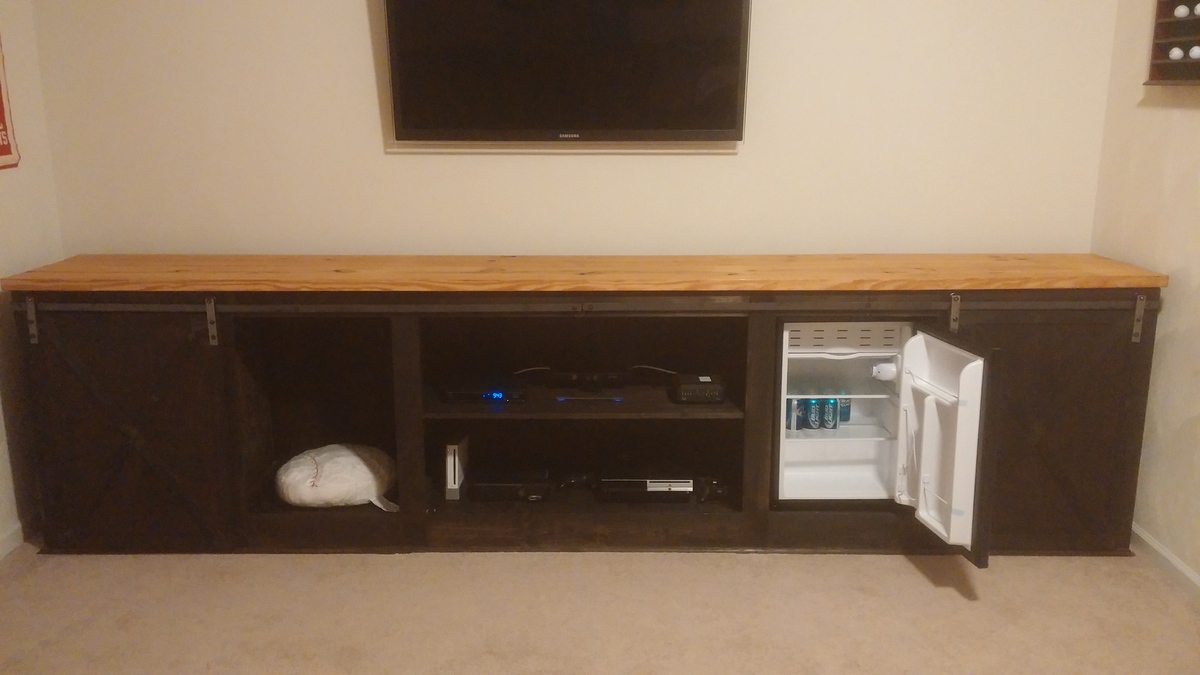
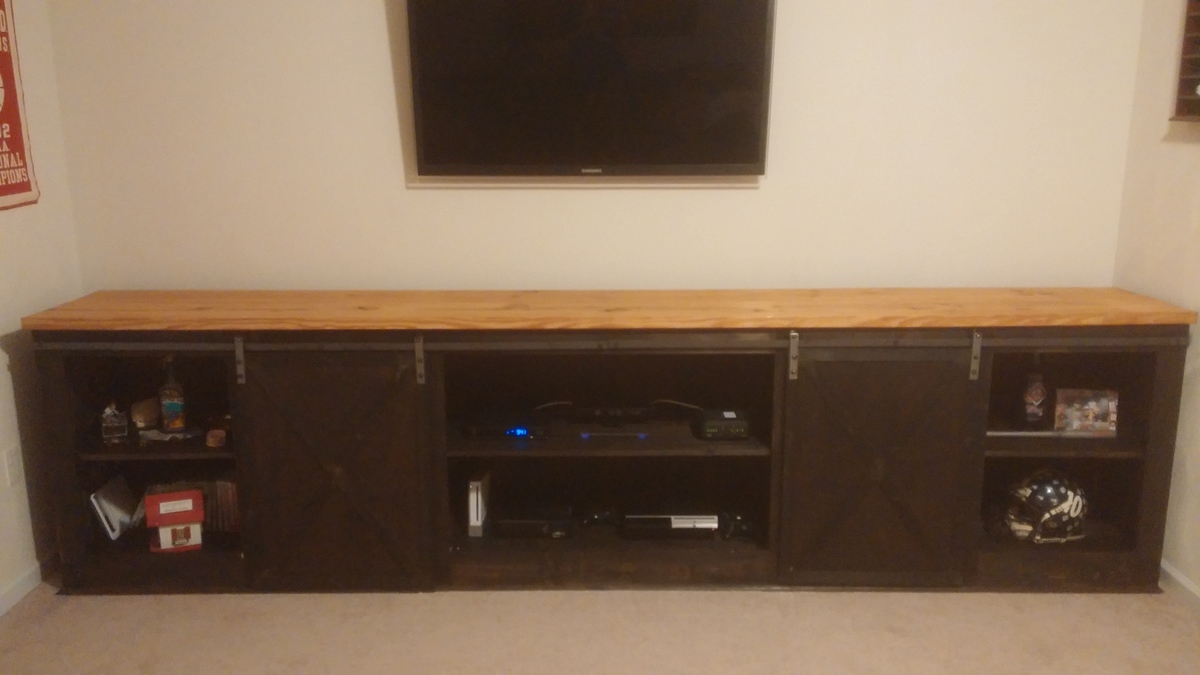
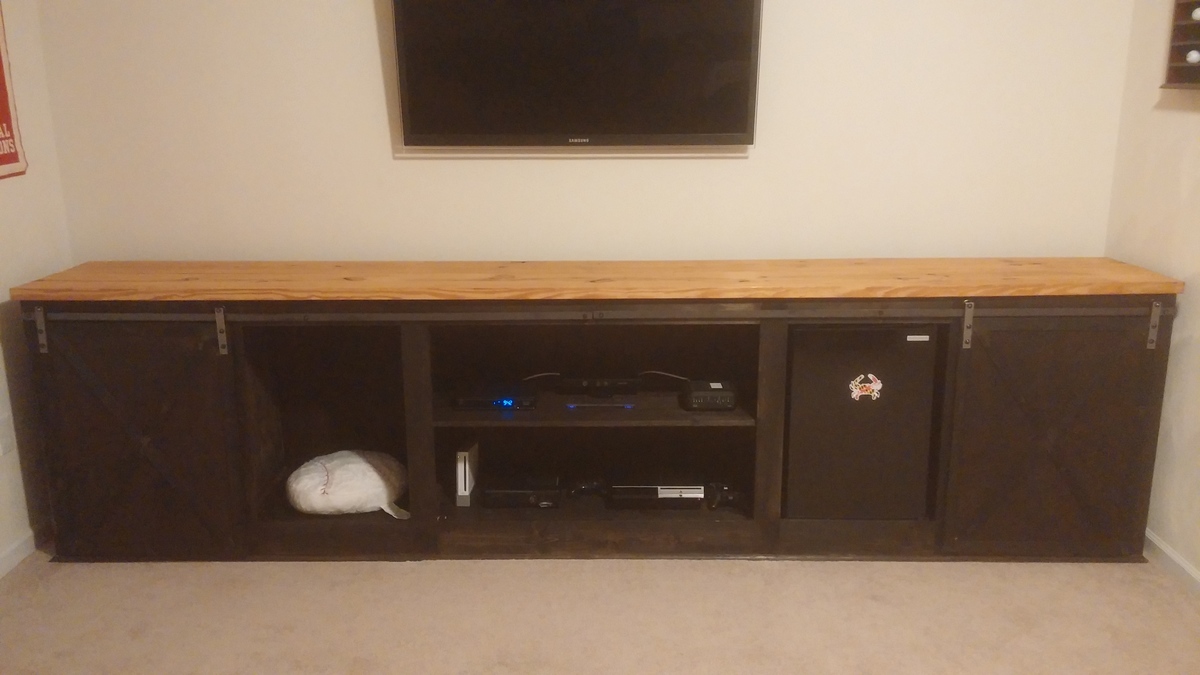
I took the Grandy Sliding Door Console plans and added another middle section to make the entire plan fit the nook in my man cave. I manipulated the plans to have openings without shelves to fit a mini fridge and an area for blankets (currently in the wash). Total length is 12 ft and height is 37.5 inches high (36 inches + the top). I tried to stain it to match another table in the room and it worked out pretty well.

Built from Plan(s)
Estimated Time Investment
Week Long Project (20 Hours or More)
Finish Used
Minwax Ebony for the face/base and Minwax Colonial Maple for the top.
Recommended Skill Level
Intermediate

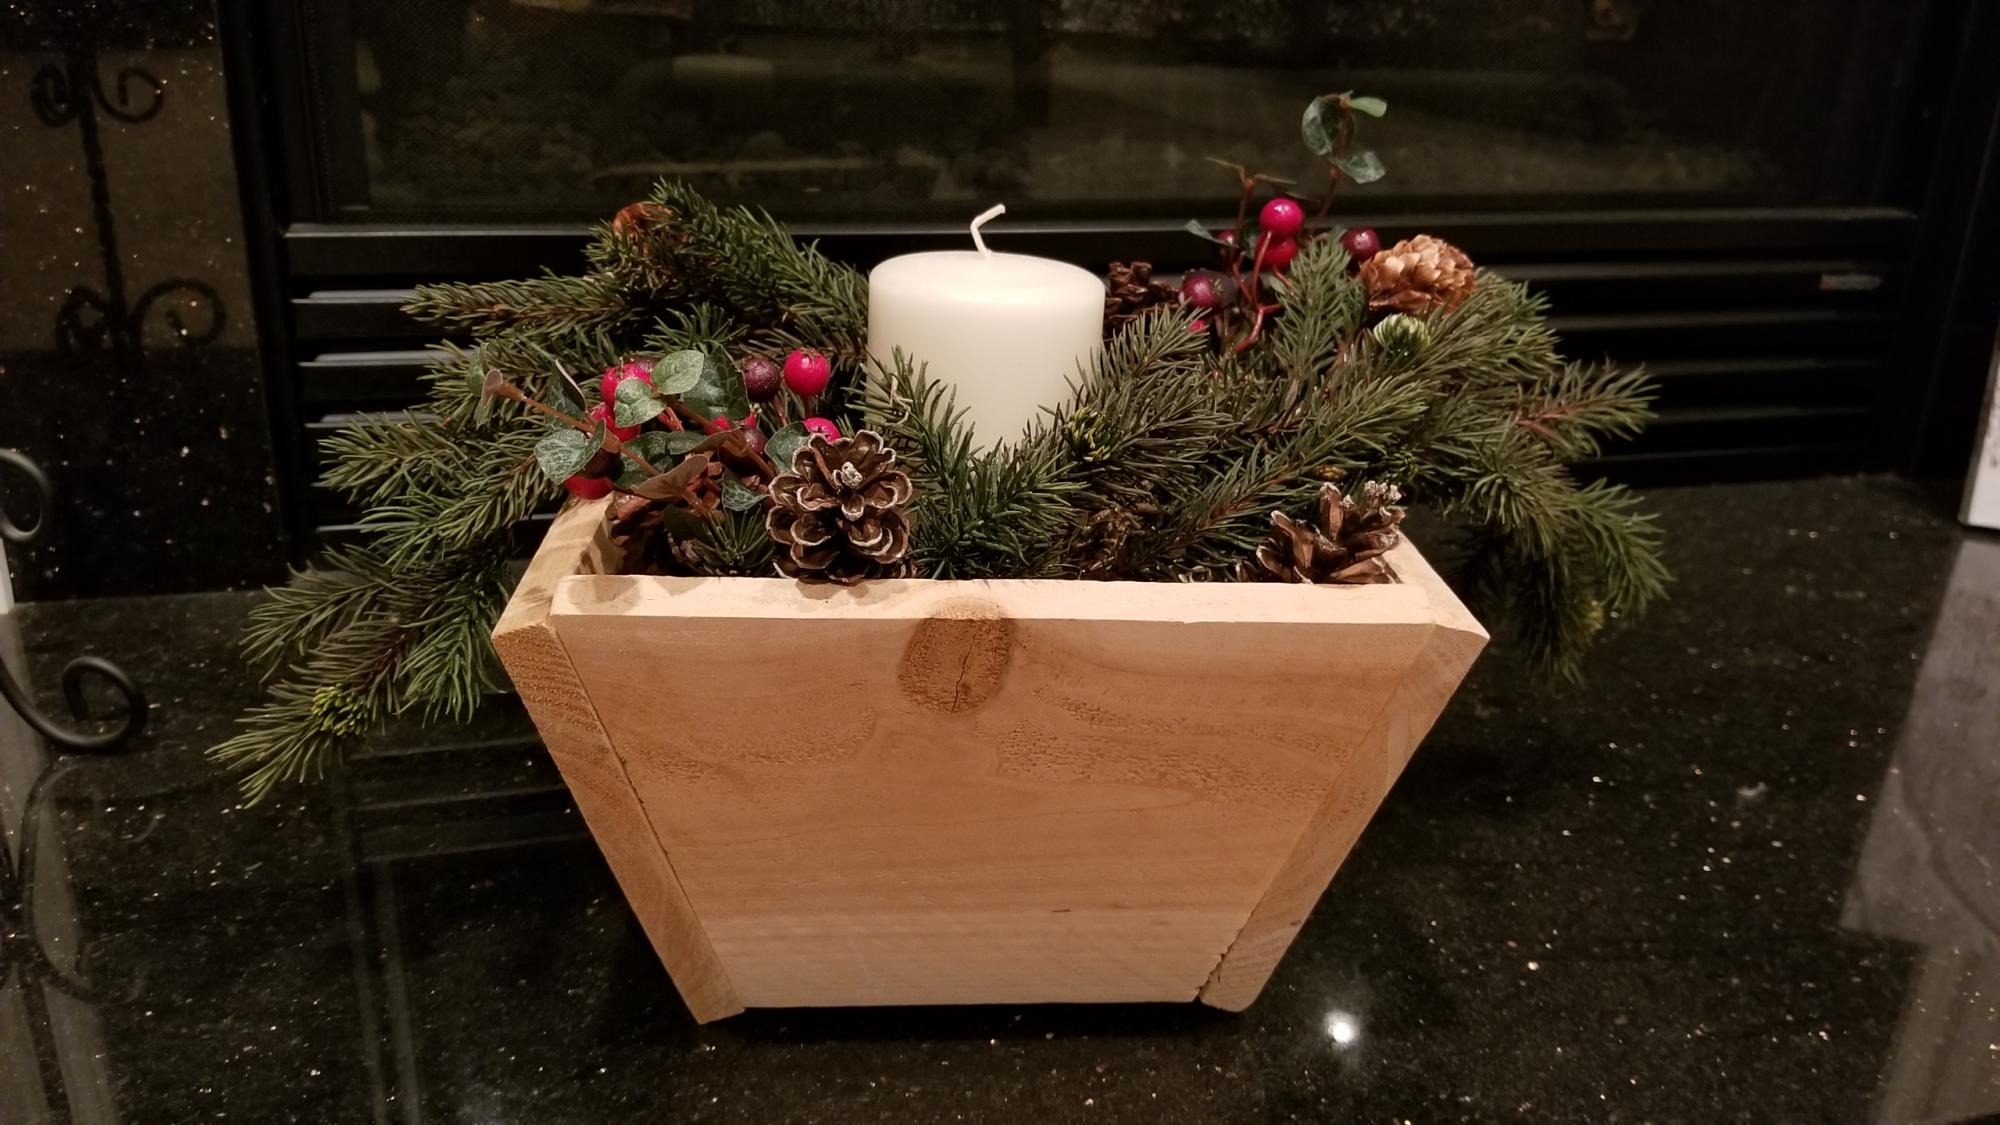
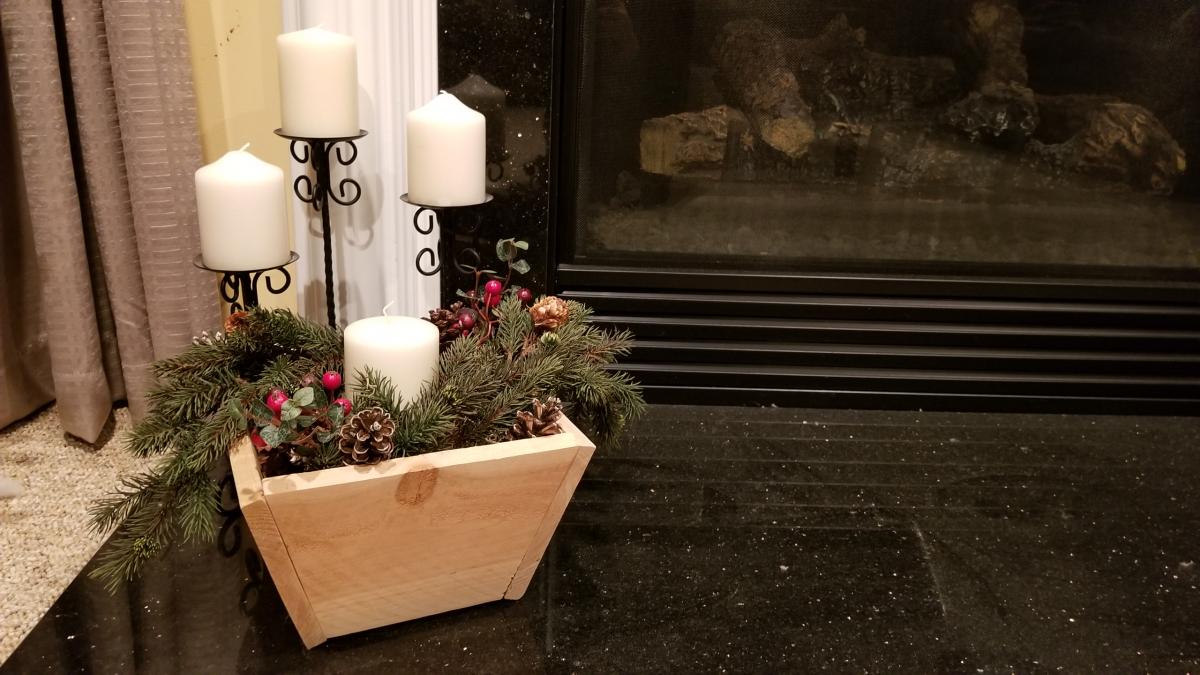
Christmas Cedar Planter

Submitted by LampAtFeet on Tue, 12/10/2019 - 19:21

I loved the plans for the cedar planter. It was a quick build and it's such a versatile item. I left the wood natural to give it a more rustic look. I'm planning to make a longer planter to use as a gift basket for Christmas gifts. 

Estimated Cost
$2
Estimated Time Investment
An Hour or Two (0-2 Hours)
Finish Used
Wipe on satin polyurethane
Recommended Skill Level
Beginner

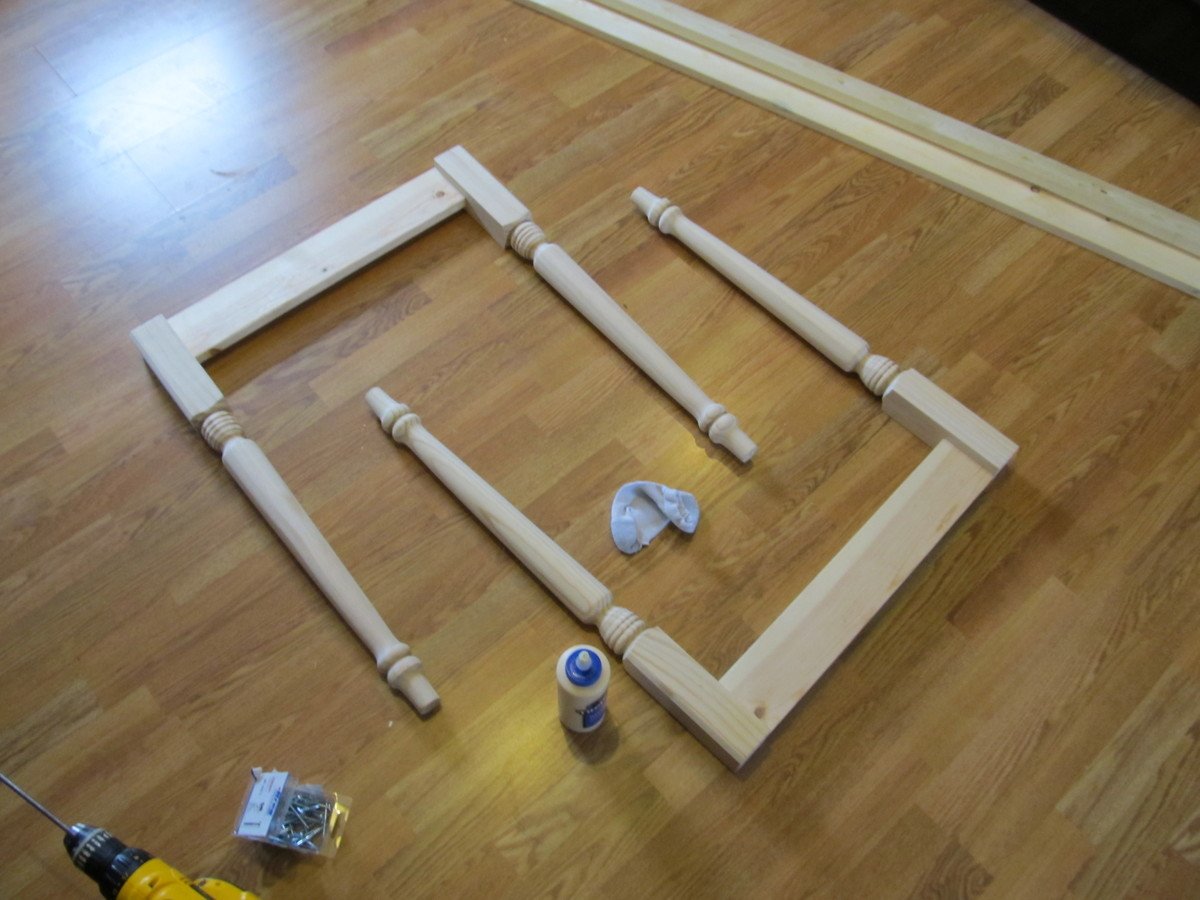
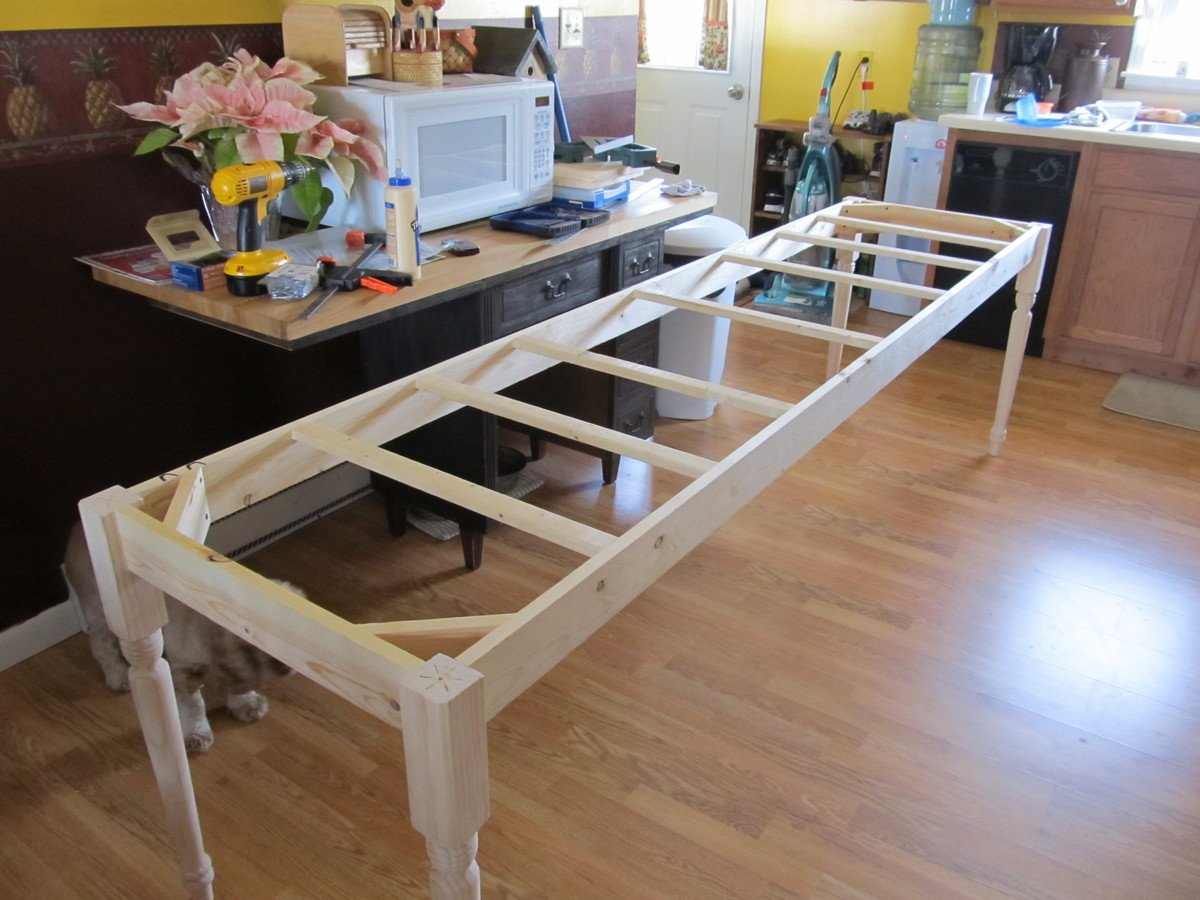
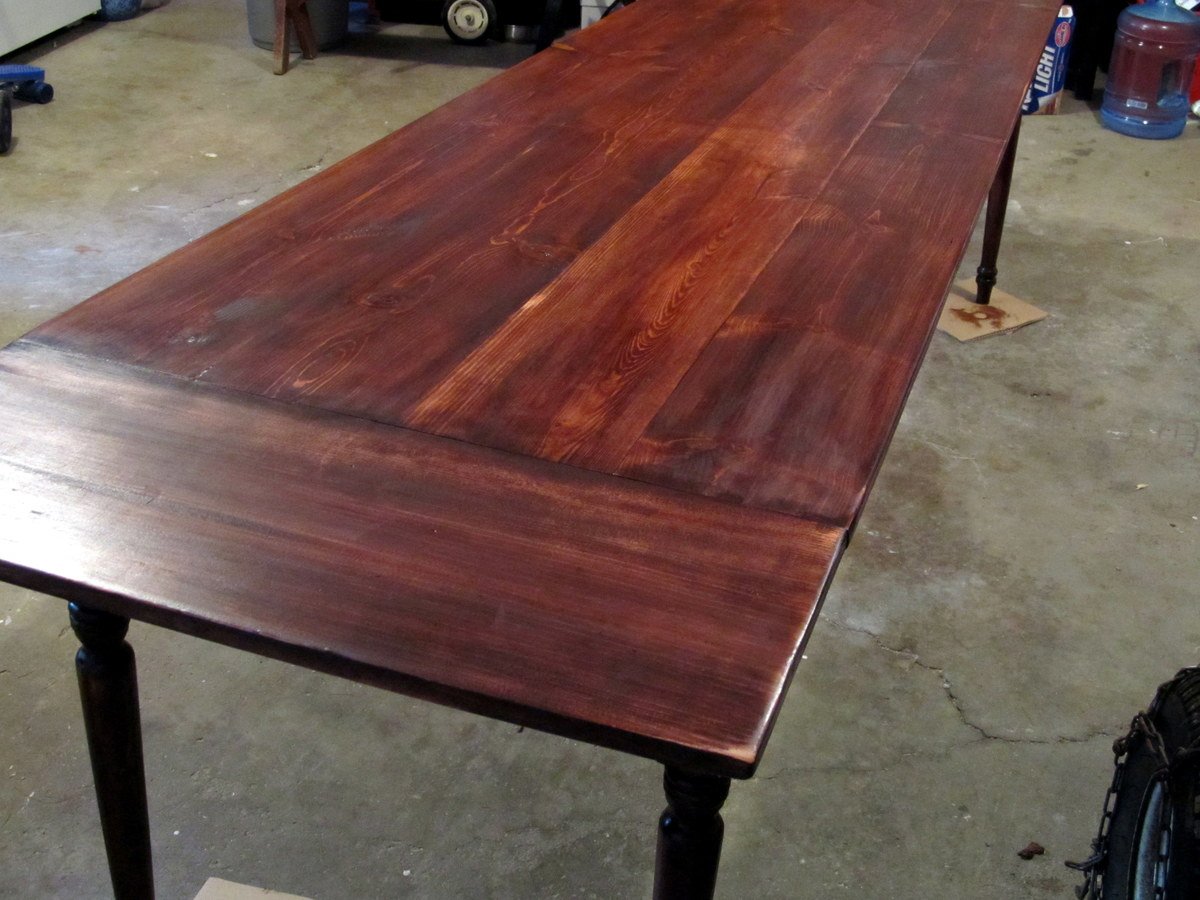
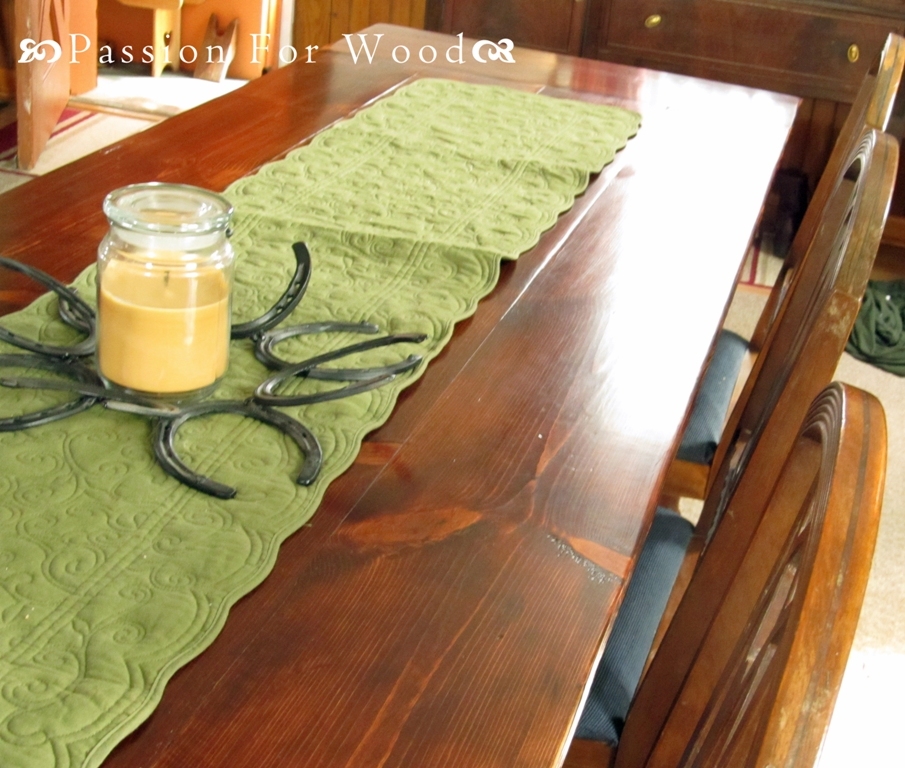
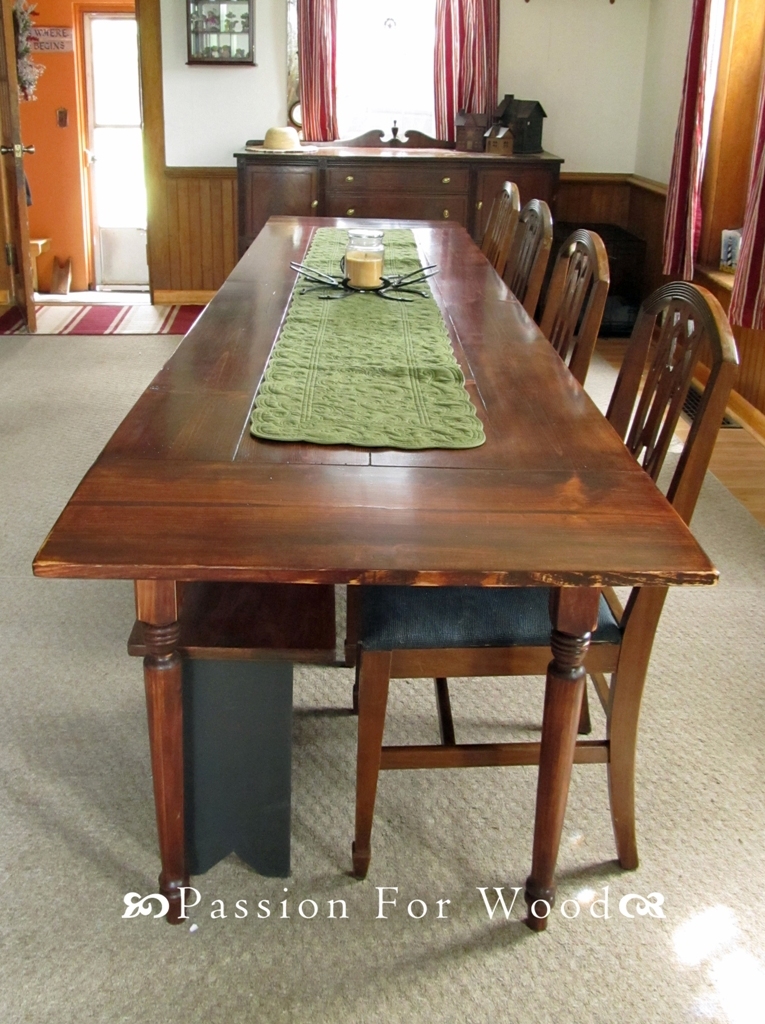
Whitney's Turned Leg Farmhouse Table

I worked up the plans in my head for about a year before my mother finally got around to having me build her 10 foot farmhouse table. That's right, this bad boy is TEN FEET LONG! And it was one of the simplest things to construct!. I used 8 foot 1x8's for the length of the table (used 4, making the table 29" wide) and 1x12's for the breadboard ends. We also splurged and purchased turned legs for $15 a piece at Blue. It really made the table extra special. Totally cost, with finishing supplies came in under $150.

Things I would change if/when I do a table of this size again:
1) I would never make a BB end so large again. I would stick to a 1x6 or smaller. With such a large size we worry about children putting too much pressure on the ends.
2) I will make the legs removable. It was a bear trying to get this table into the house. Thankfully the width was just narrow enough!
3) I won't tackle this in the winter months! Construction of the table took only a few hours but finishing in freezing temps took weeks waiting for warm-ish temperatures.

Built from Plan(s)
Estimated Cost
Less than $150
Estimated Time Investment
Weekend Project (10-20 Hours)
Finish Used
Sand, sand, then sand some more! 2 coats of Minwax Mahogany Gel Stain. 2 coats of poly on legs/base. 4 coats of poly on table top with 0000 steel wool sanding between coats
Recommended Skill Level
Intermediate

Comments

Square Modern Farmhouse Table

Submitted by Cheli on Wed, 01/15/2014 - 08:57

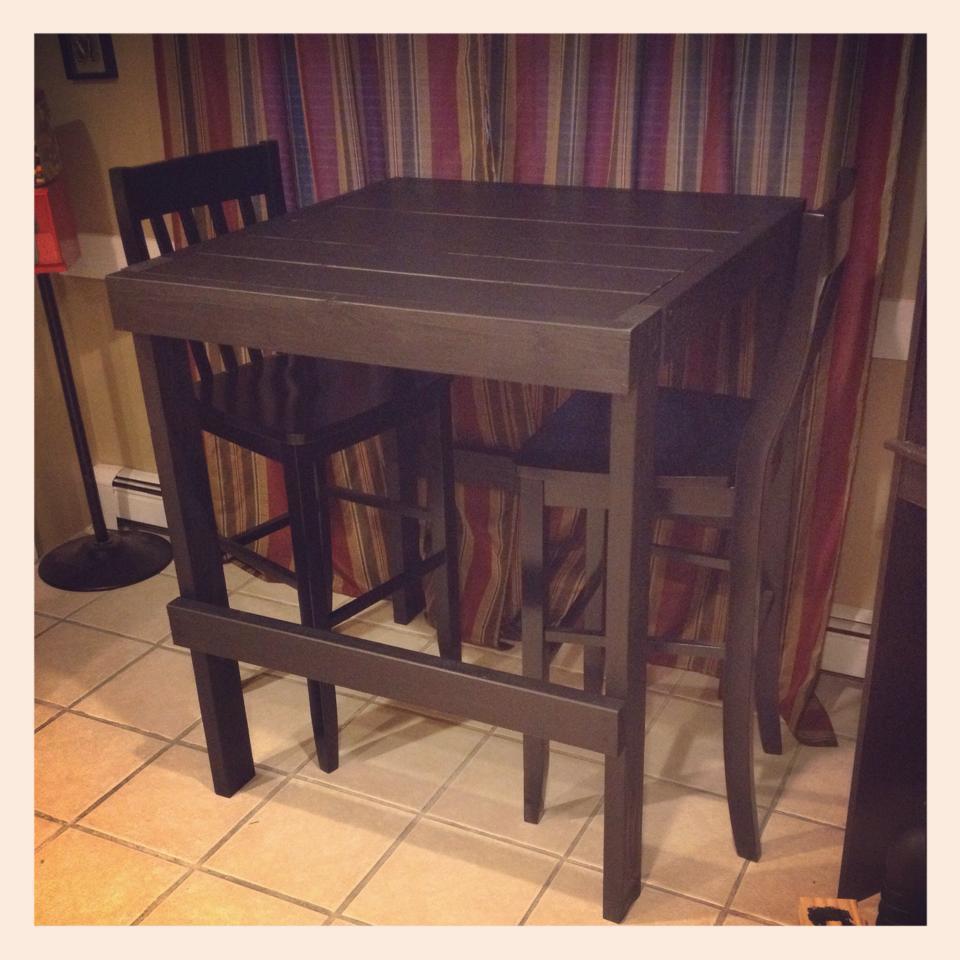
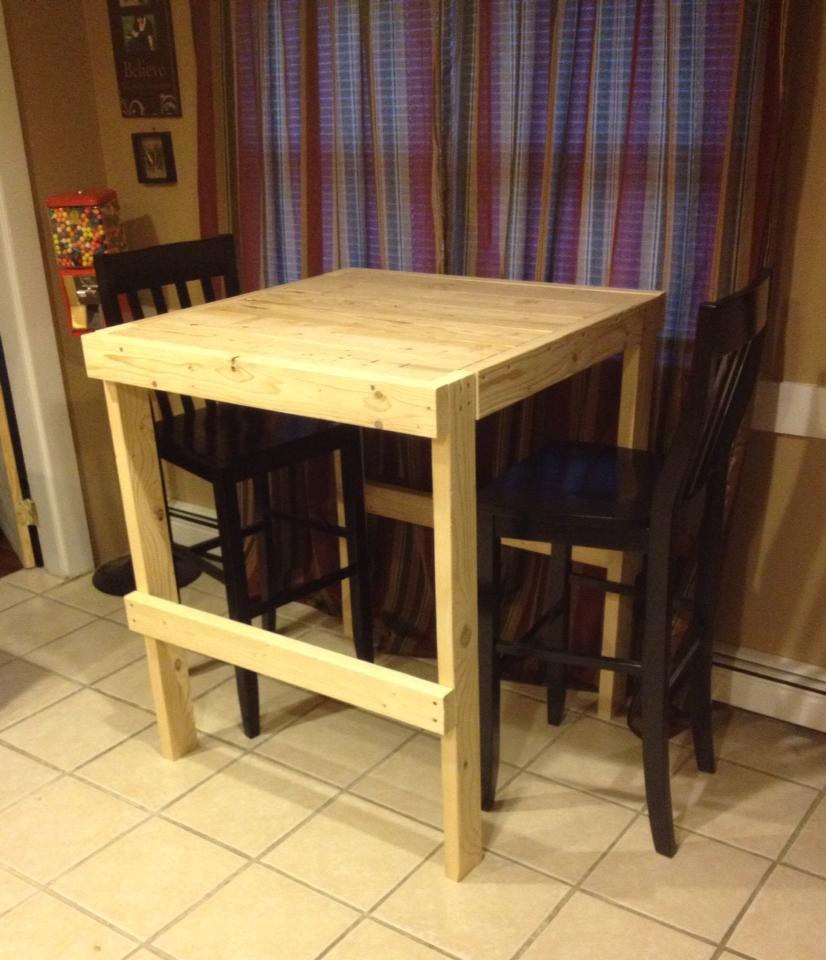
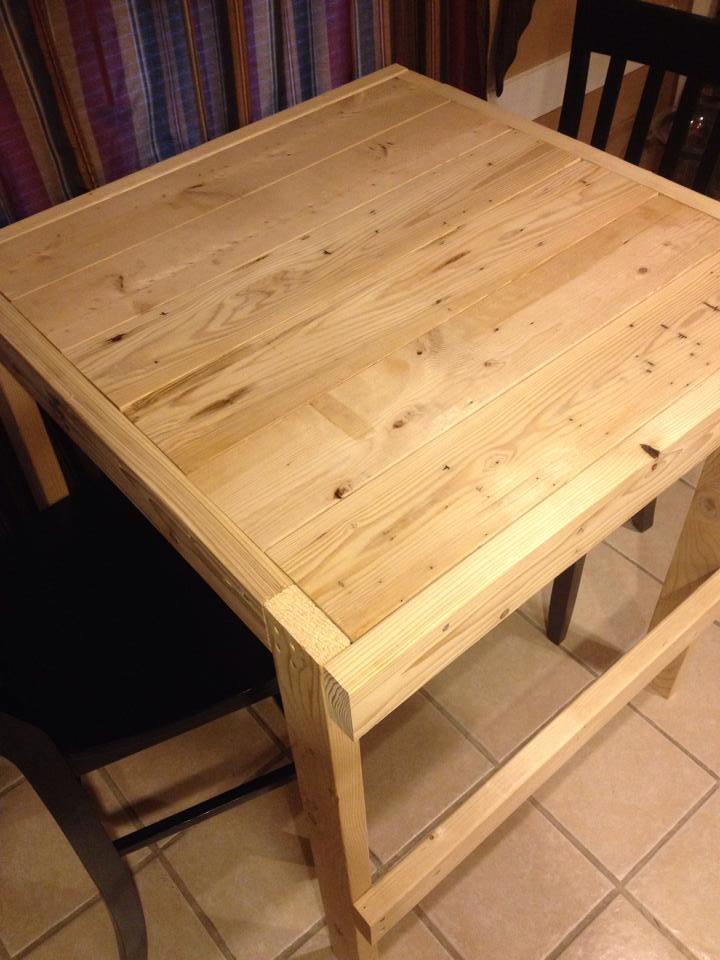
I modified this pattern to use with tall bar stools I already had. I built it 42" high and added a foot bar along the bottom for added stability since it's tall. The foot bar is only across the front and back so the stools can still slide in on the sides.

This table is exactly what I was looking for and I couldn't be any happier with how it turned out.

Estimated Cost
$50 (This cost doesn't include the paint I already had)
Estimated Time Investment
Afternoon Project (3-6 Hours)
Finish Used
I painted with three coats of black eggshell paint. I haven't put a finish on it yet but I plan on using a couple coats of Minwax urethane.
Recommended Skill Level
Beginner

Dining Room Table

Submitted by RetroFit on Thu, 04/07/2016 - 18:18

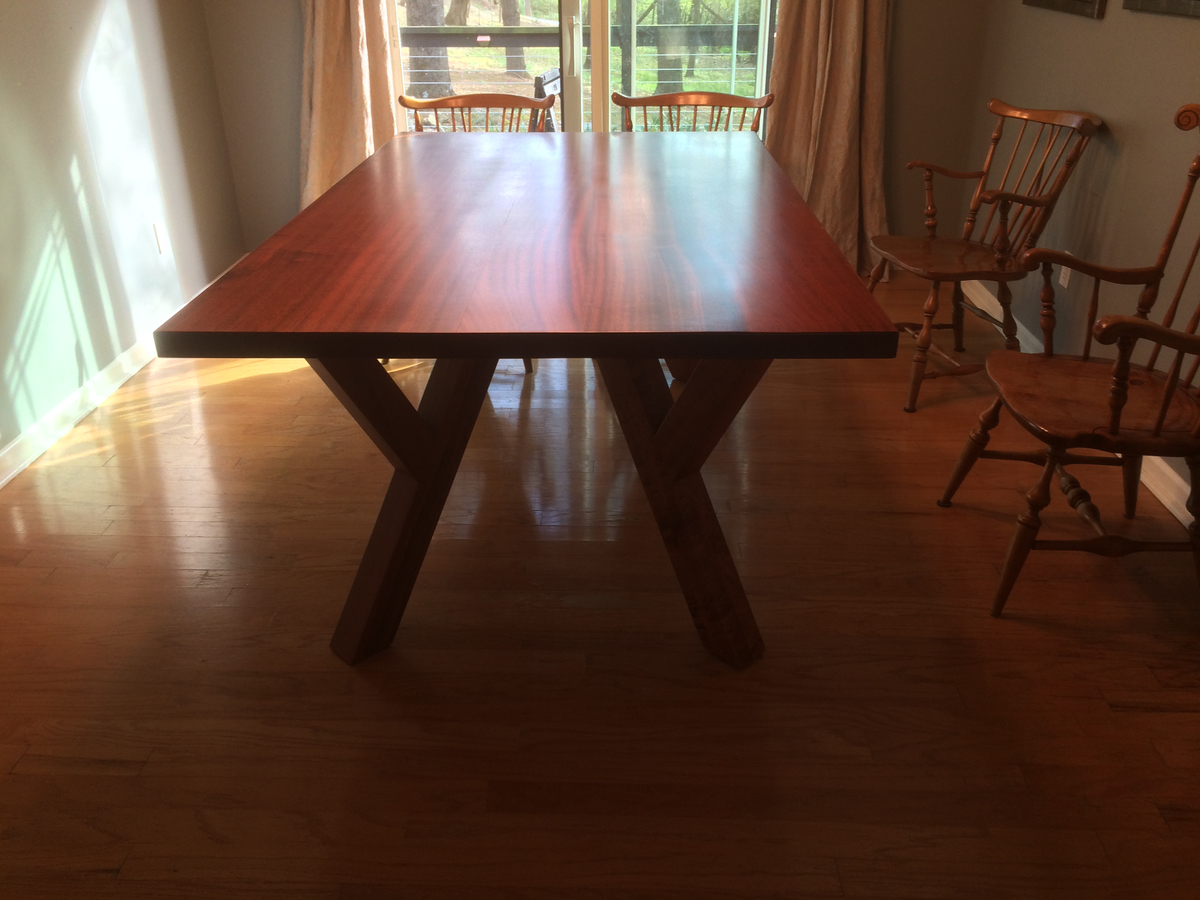
This is our first real furniture project. We wanted a large enough table to be able to sit 10 people comfortably around without the table legs getting in the way of the people on the corners. We are really happy with the way this turned out. Each leg was joined with a double floating mortise & tennon. The overall dimensions are 47" wide by 80" long by 31.5" tall.

Estimated Time Investment
Week Long Project (20 Hours or More)
Finish Used
Danish oil and Polyurethane.
Recommended Skill Level
Intermediate

Comments

Brandiville

Sun, 04/10/2016 - 04:26

I would be very interested in the plan for this table. Do you mind sharing? It is beautiful!

Toy makeup set

Submitted by mandee on Sun, 12/15/2019 - 15:23

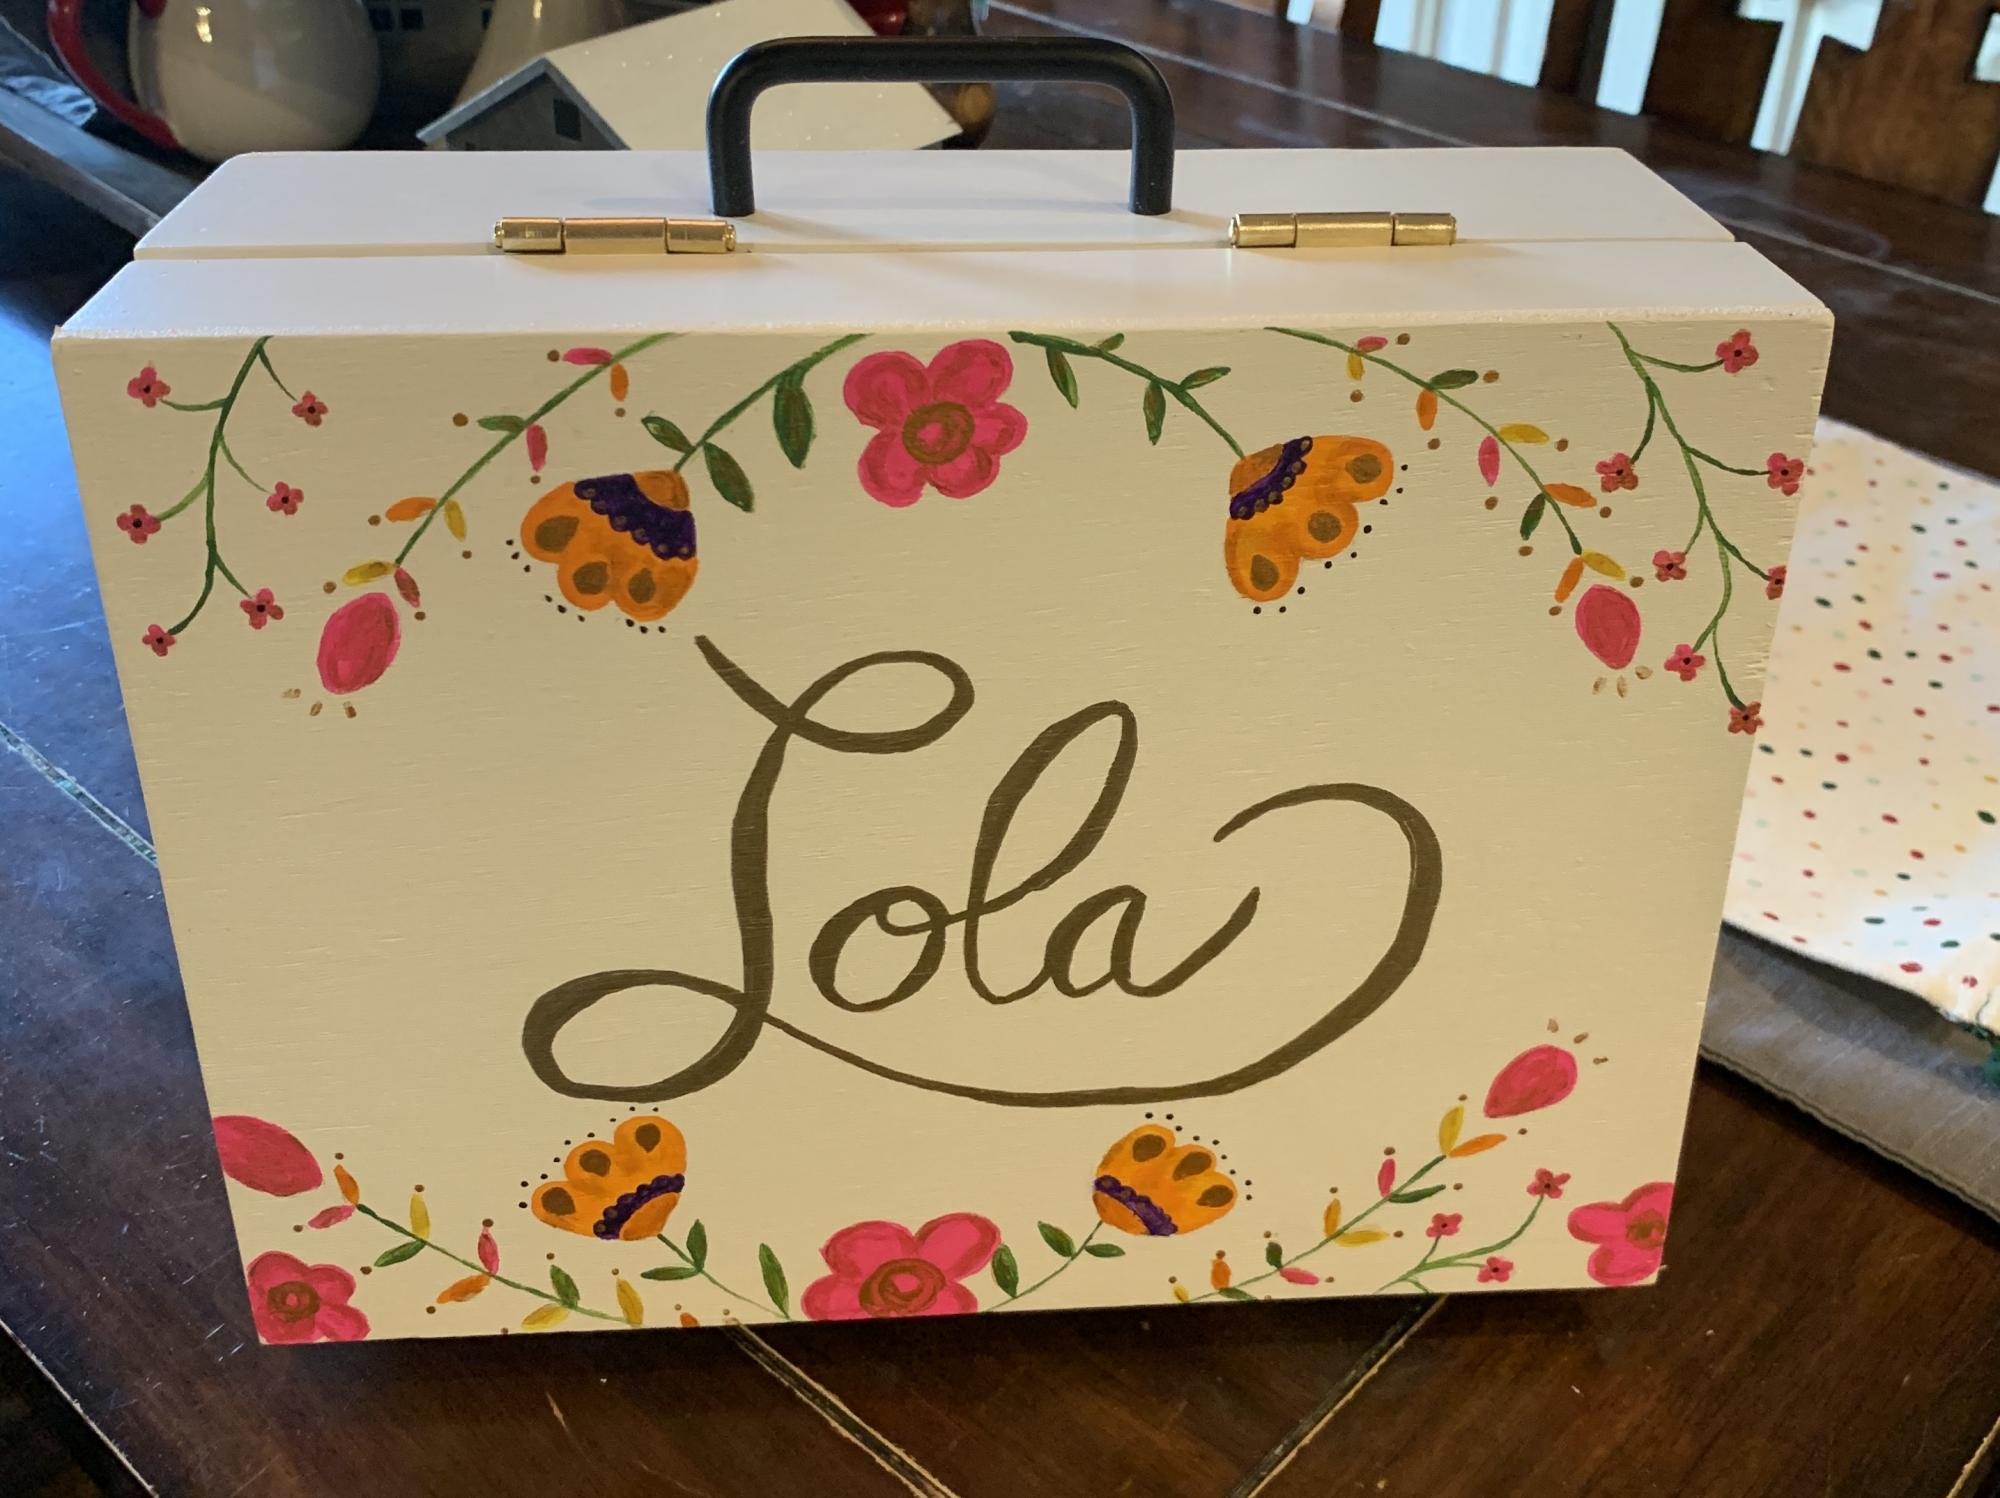
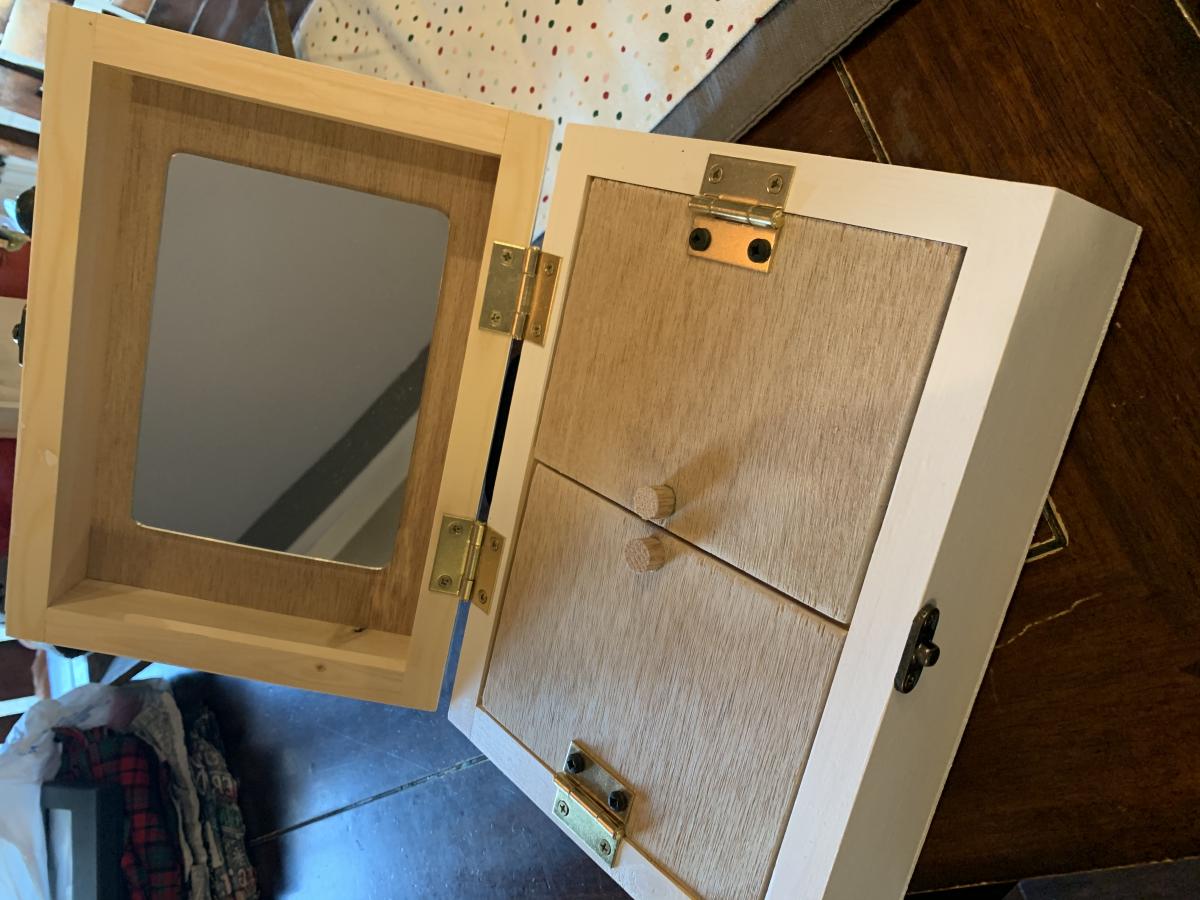
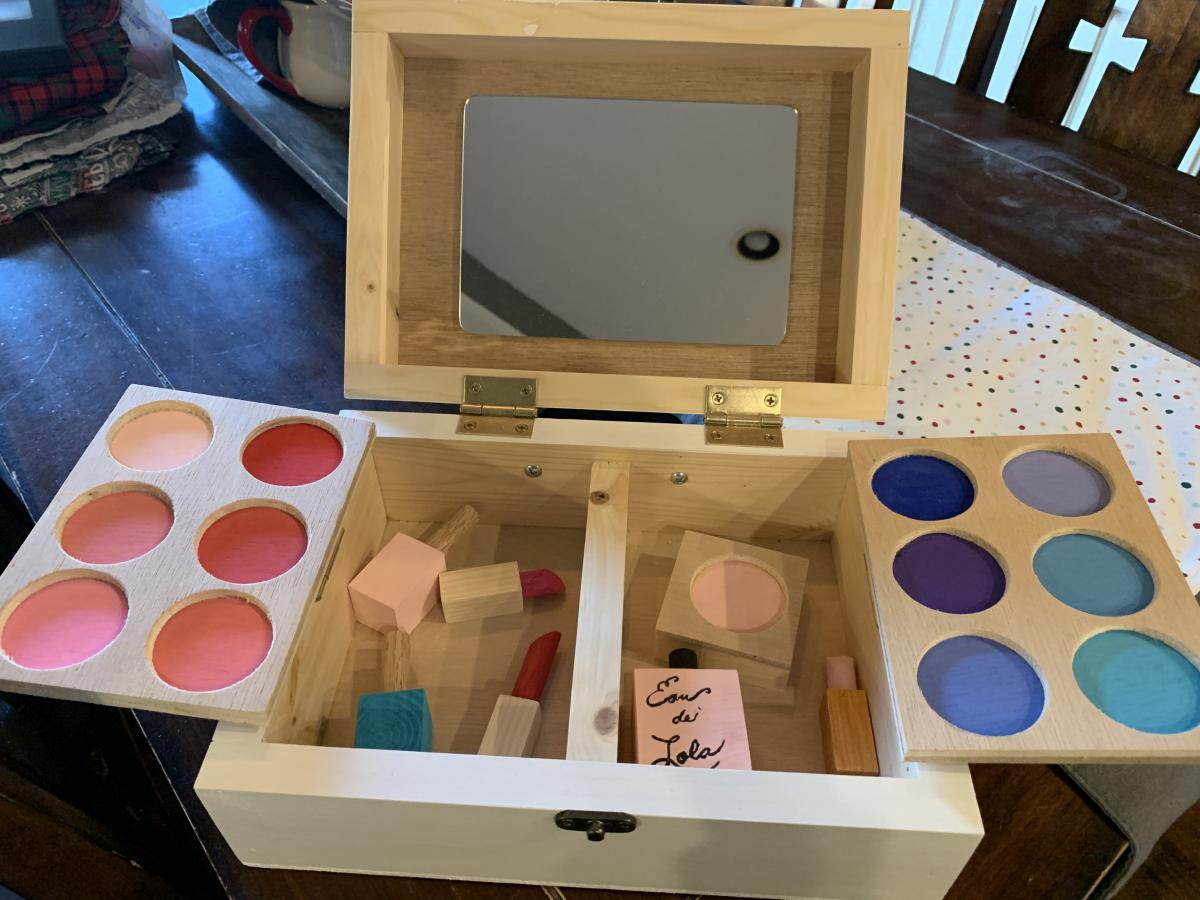
I made this for my almost 2 year old niece for Christmas this year. 

Built from Plan(s)
Estimated Cost
50
Estimated Time Investment
Weekend Project (10-20 Hours)
Recommended Skill Level
Intermediate

Lazy Bench

Submitted by Anonymous (not verified) on Sat, 08/19/2023 - 10:53

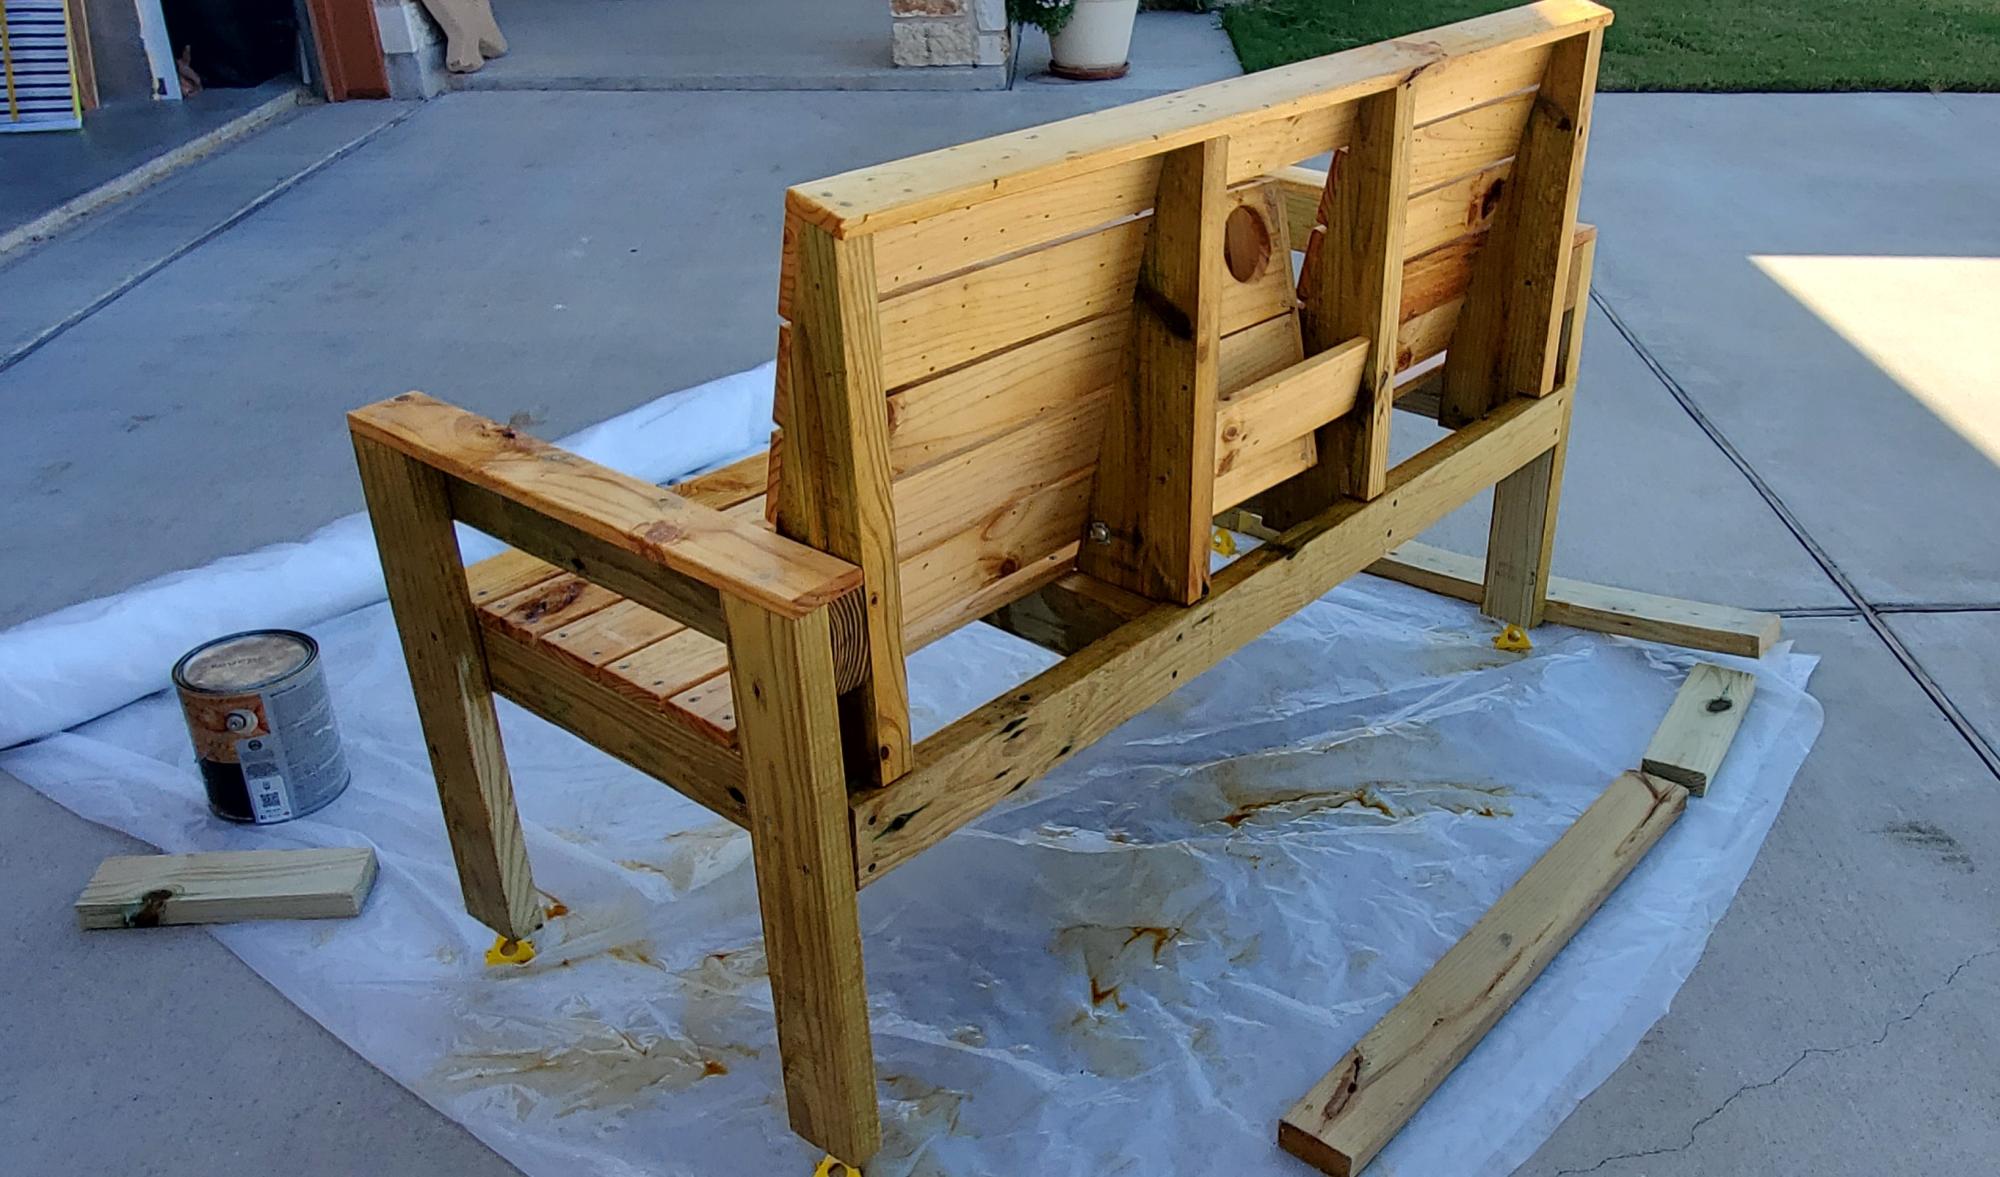
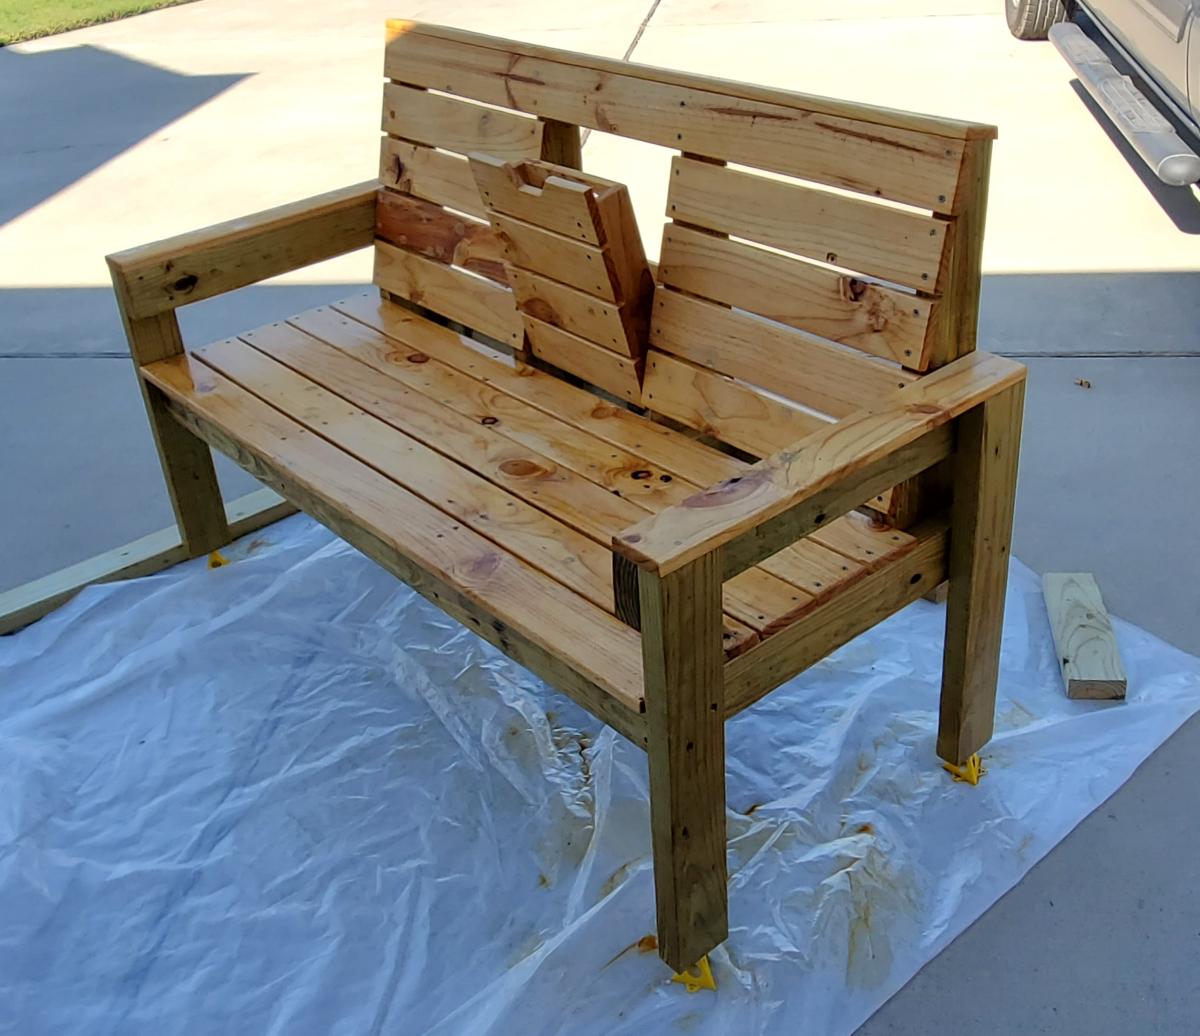
Built this Lazy Bench over the course of one weekend. Had to make some modifications to the way the arm rest / cup holder moves, but overall happy with how it turned out.
When I build this again - I gave this one away as a donation to our local Catholic Radio station - I'll make a bigger point to make sure that all four of the back supports are exactly the same, and that I pre-drill the carriage bolts that secure the cup holder before I start assembling.

UTtanker

Back