Community Brag Posts

My daughter's beautiful dress up wardrobe

This project was very much needed in my house! My daughter loves playing dress up and is obsessed with all things pink and princess-y. It has been driving me crazy that she doesn't play dress up as much as she wants to, though, and the reason why is because we didn't have a good way to store/display her things. Up until we built this it all stayed in this storage bin, but since you had to pull it out in order to even see it, she never played with it. So once I saw this plan I knew it had to be ours. I'm so glad we did it! It turned out beautifully!
My husband built it (his second woodworking project), and, like his last project, he did a great job. No complaints or issues at all. I primed (although I doubt that was necessary) and painted it. I actually did all of the painting other than the letters before he built it, and that turned out nicely. My only complaint was the letters. I bought some stencils from Hobby Lobbby and used a smaller brush to paint them on. For one thing I wish I had of been more careful and paid more attention to how straight the letters were. For another, although you can't tell unless you're up close, there are spots where the paint pooled up under the stencil. My husband sanded it down as much as he could without messing it up, but it's still there a little. I'm no painting expert so I'm not sure how to go about doing this without having that happen. Even with those things, though, I'm so happy with it, and my daughter has been happily playing dress up all week!
Estimated Cost
$30 for lumber
Estimated Time Investment
Afternoon Project (3-6 Hours)
Recommended Skill Level
Beginner
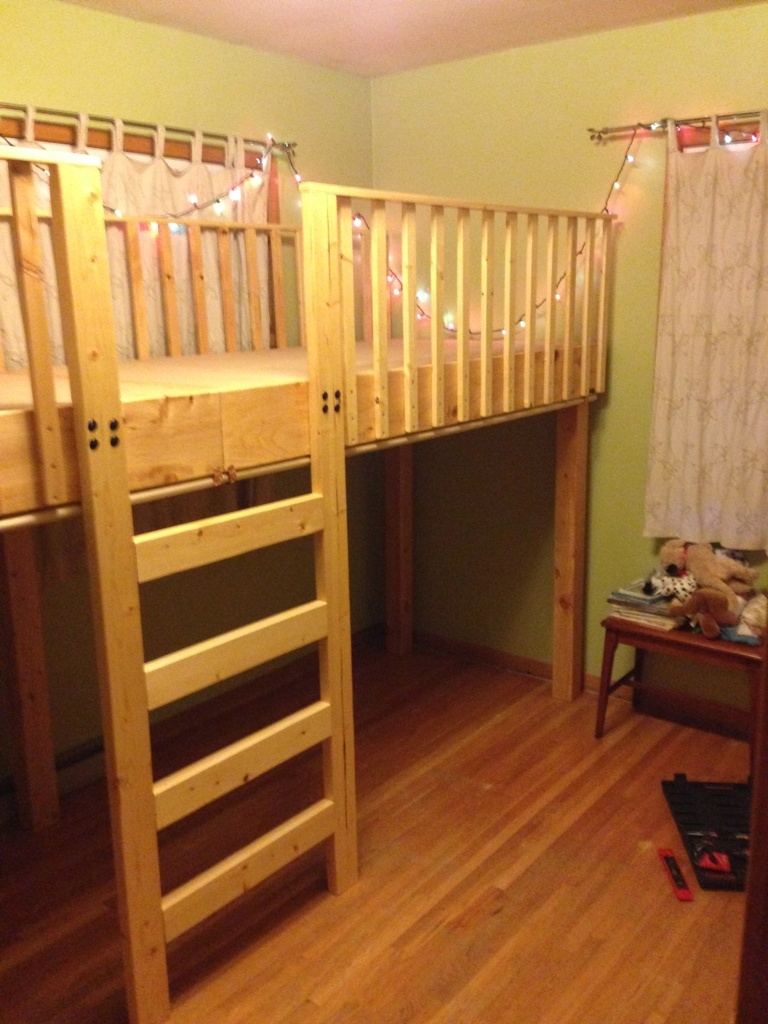
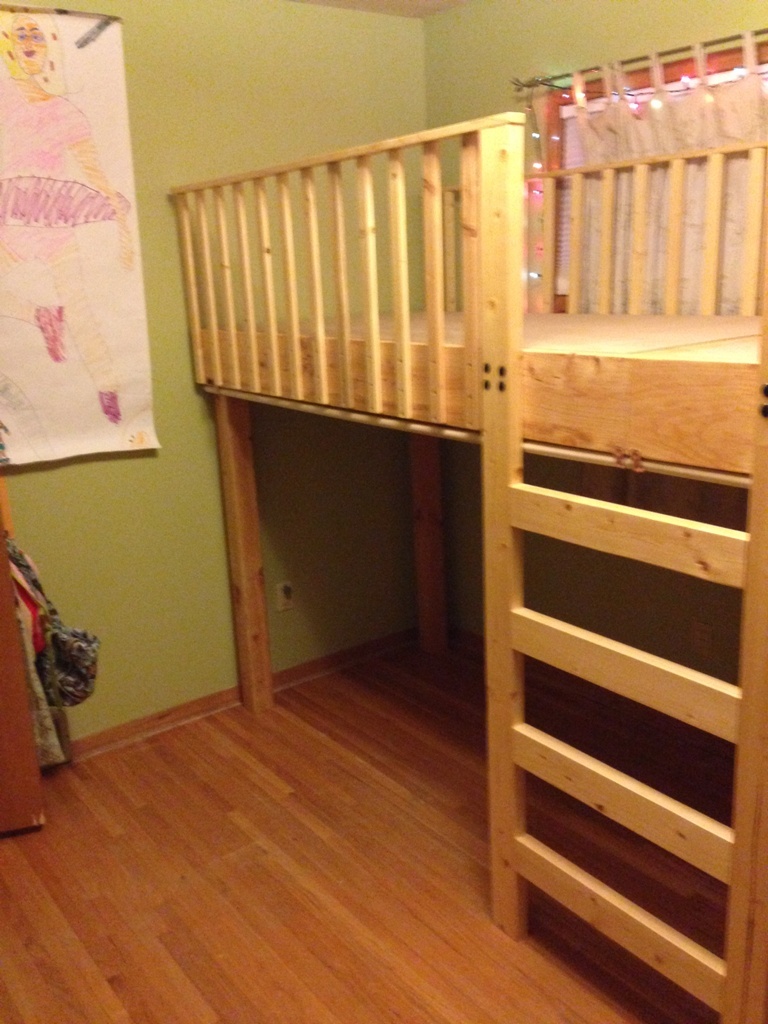
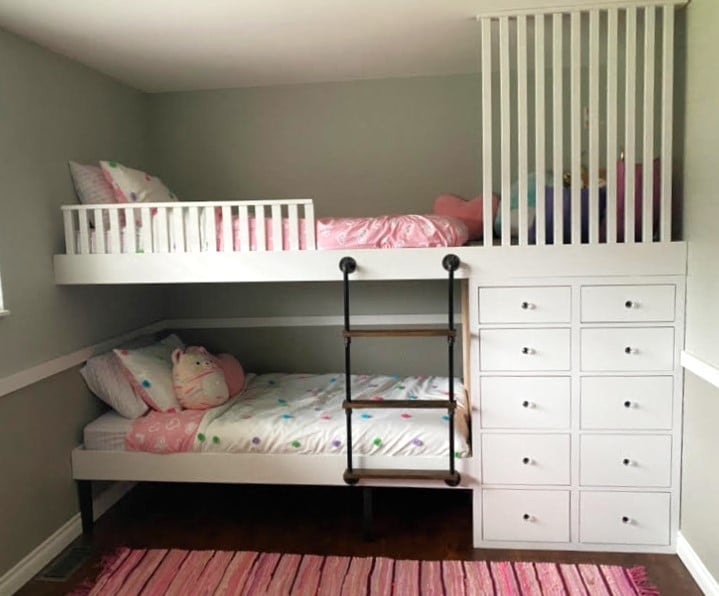
Double Twin Lift Bed.

My sister asked me to look into building a double loft bed for my two nieces, since the younger was outgrowing her bed and found a plan for one from "The Hand Made Home". http://www.thehandmadehome.net/2011/08/how-to-build-a-loft/
I didn't love how their plan had a rope ladder and no center support in back, so I changed that up. Took around 50 hours work time total, but was a lot of fun and both of my nieces totally loved it, so it was well worth the time and energy! :-)
Estimated Time Investment
Week Long Project (20 Hours or More)
Finish Used
4 coats of Minwax Satin Polyutethane
Recommended Skill Level
Intermediate
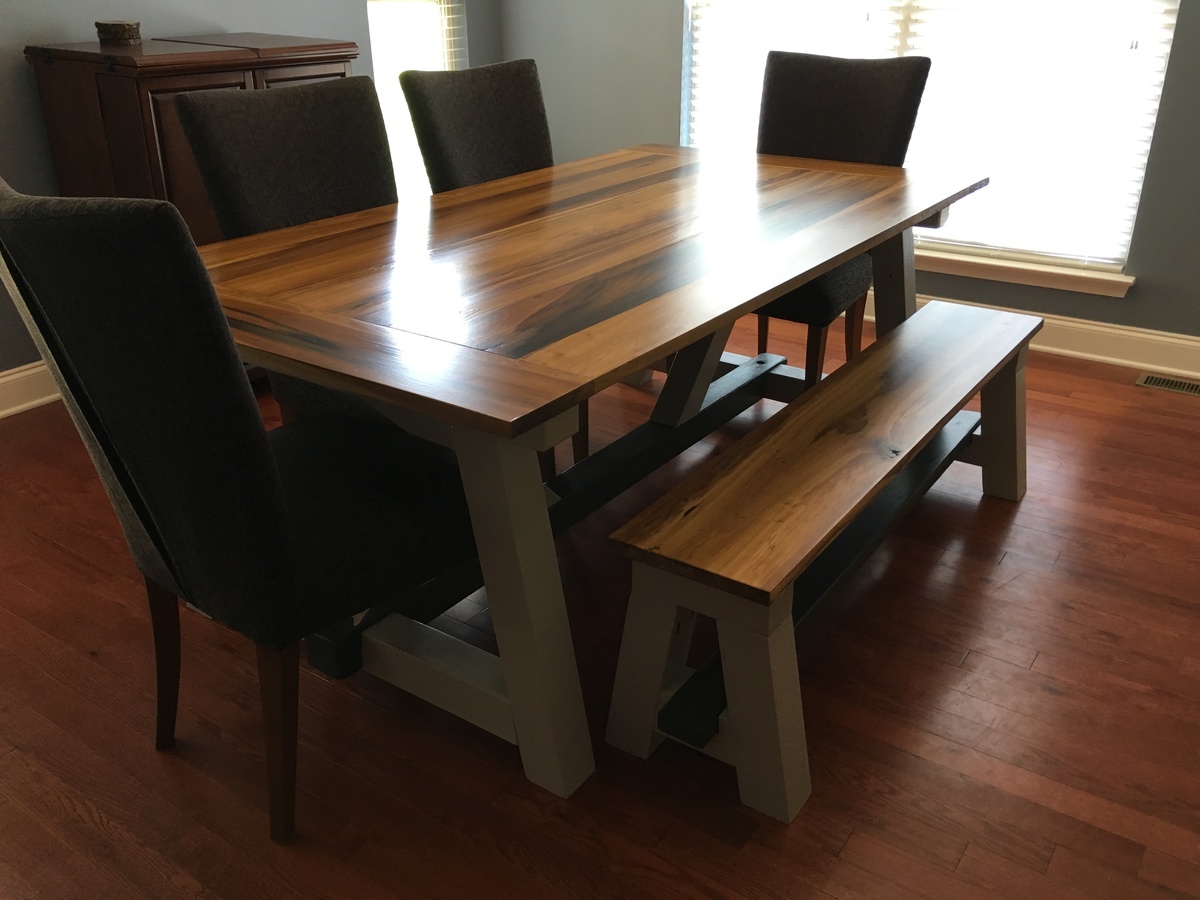
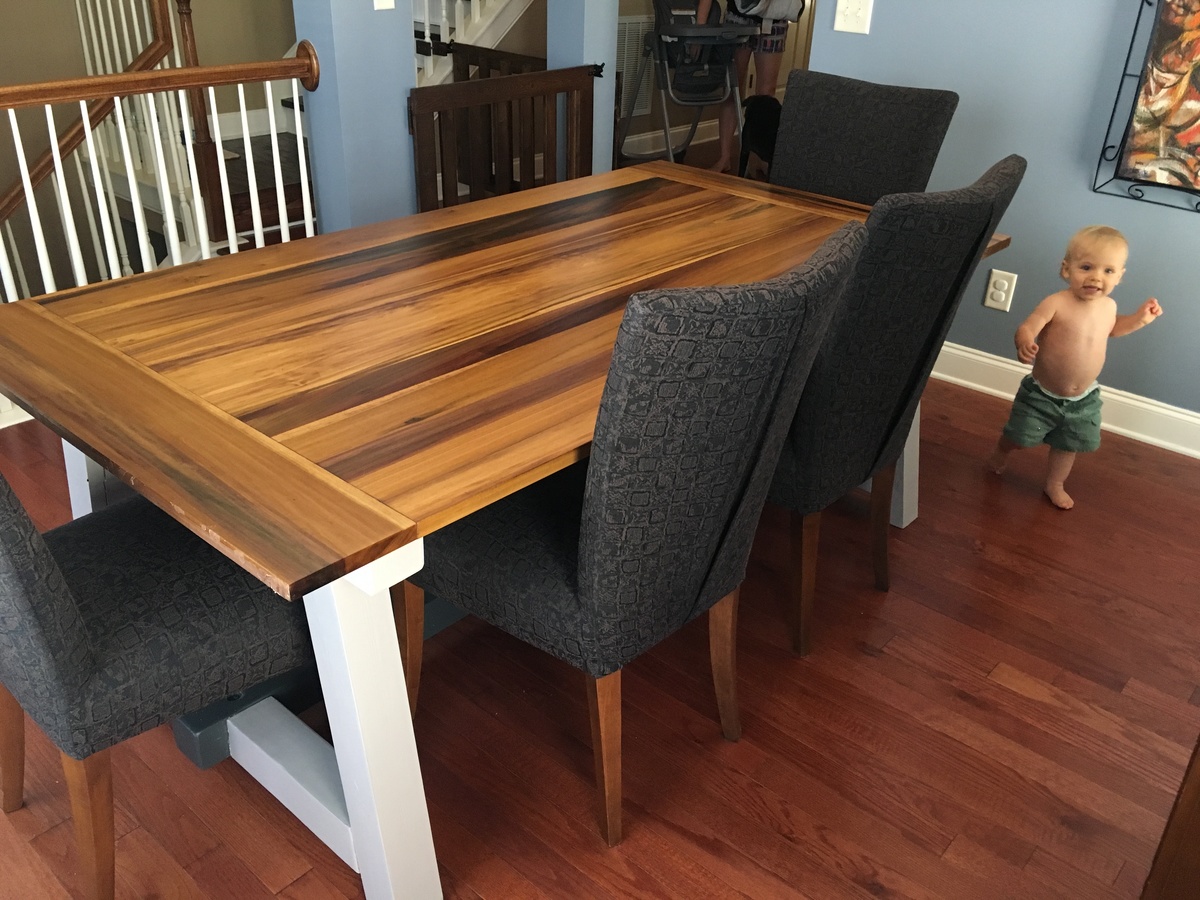
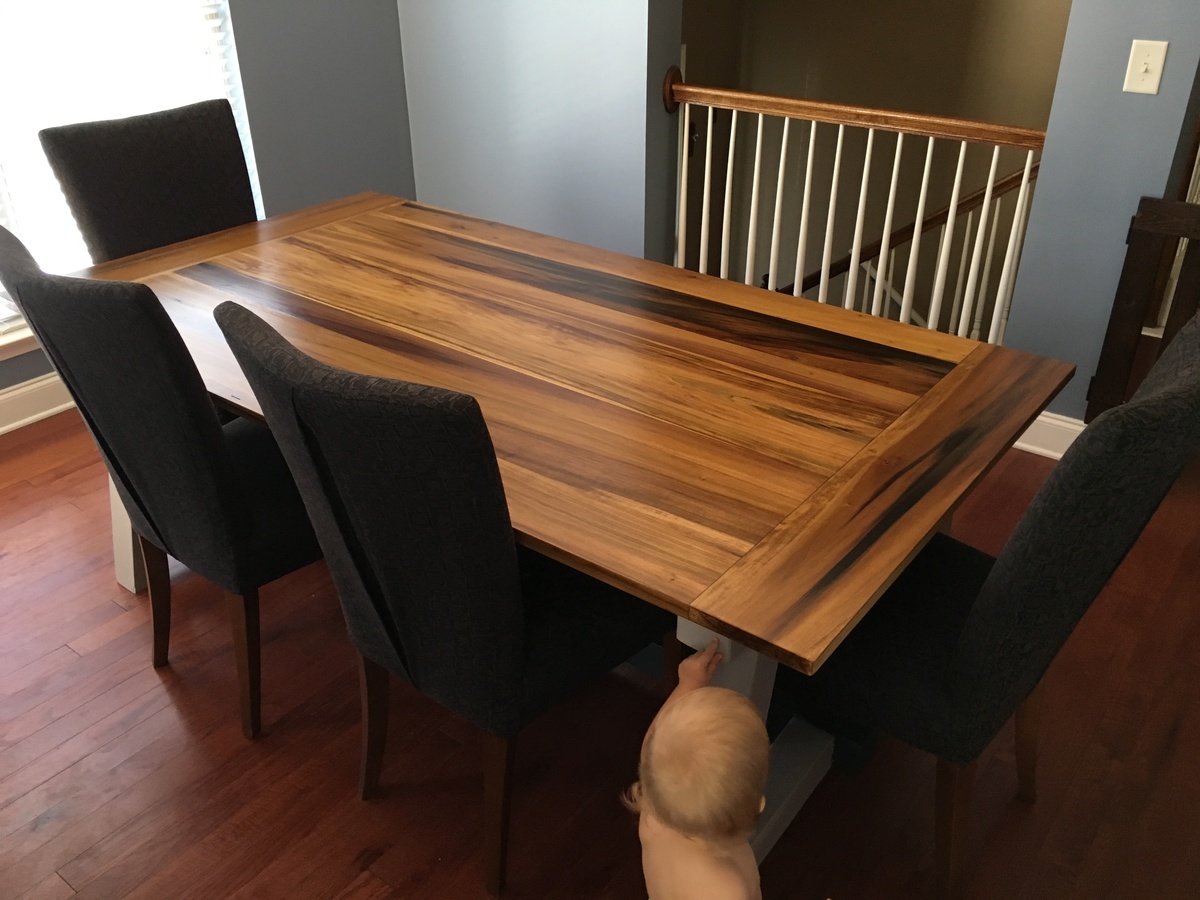
Poplar Truss Table
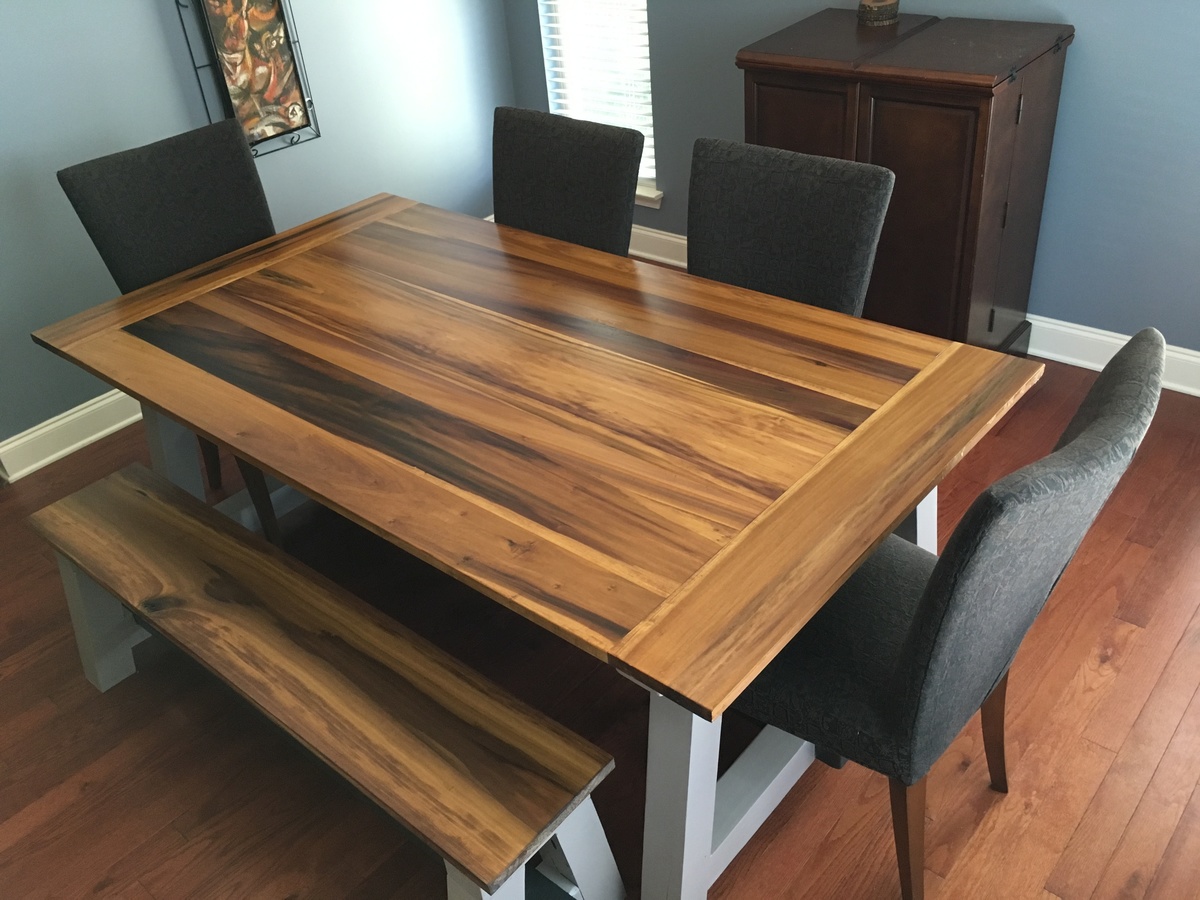
Was planning to build the table from smooth cedar... But at the lumberyard I happened across this beautiful batch of 5/4 poplar and adjusted on the fly. The tabletop is actually a crazy assortment of widths... 6, 8, 4, 12, 4, 8, 6 (respectively). Kregged, sanding like the dickens, two coats of light stain (cause I love all the ribbons/grain in this top) and fought with the poly for a few days to get it smooth. Decided to paint the base cause the broad grain of the pine base wouldn't match the top. My wife picked the little accent color for the stretchers on the base and that added some nice contrast. I didn't intend to build a bench at the start, but I had enough wood and the remaining 5/4x12 poplar top was too pretty not to use!
snagged the 4 chairs on Craigslist too. Really rounded out the set.
Built from Plan(s)
Estimated Cost
$300
Estimated Time Investment
Week Long Project (20 Hours or More)
Finish Used
A custom blend of stains, Helmsman Spar
Recommended Skill Level
Intermediate
Rustic x hall tree
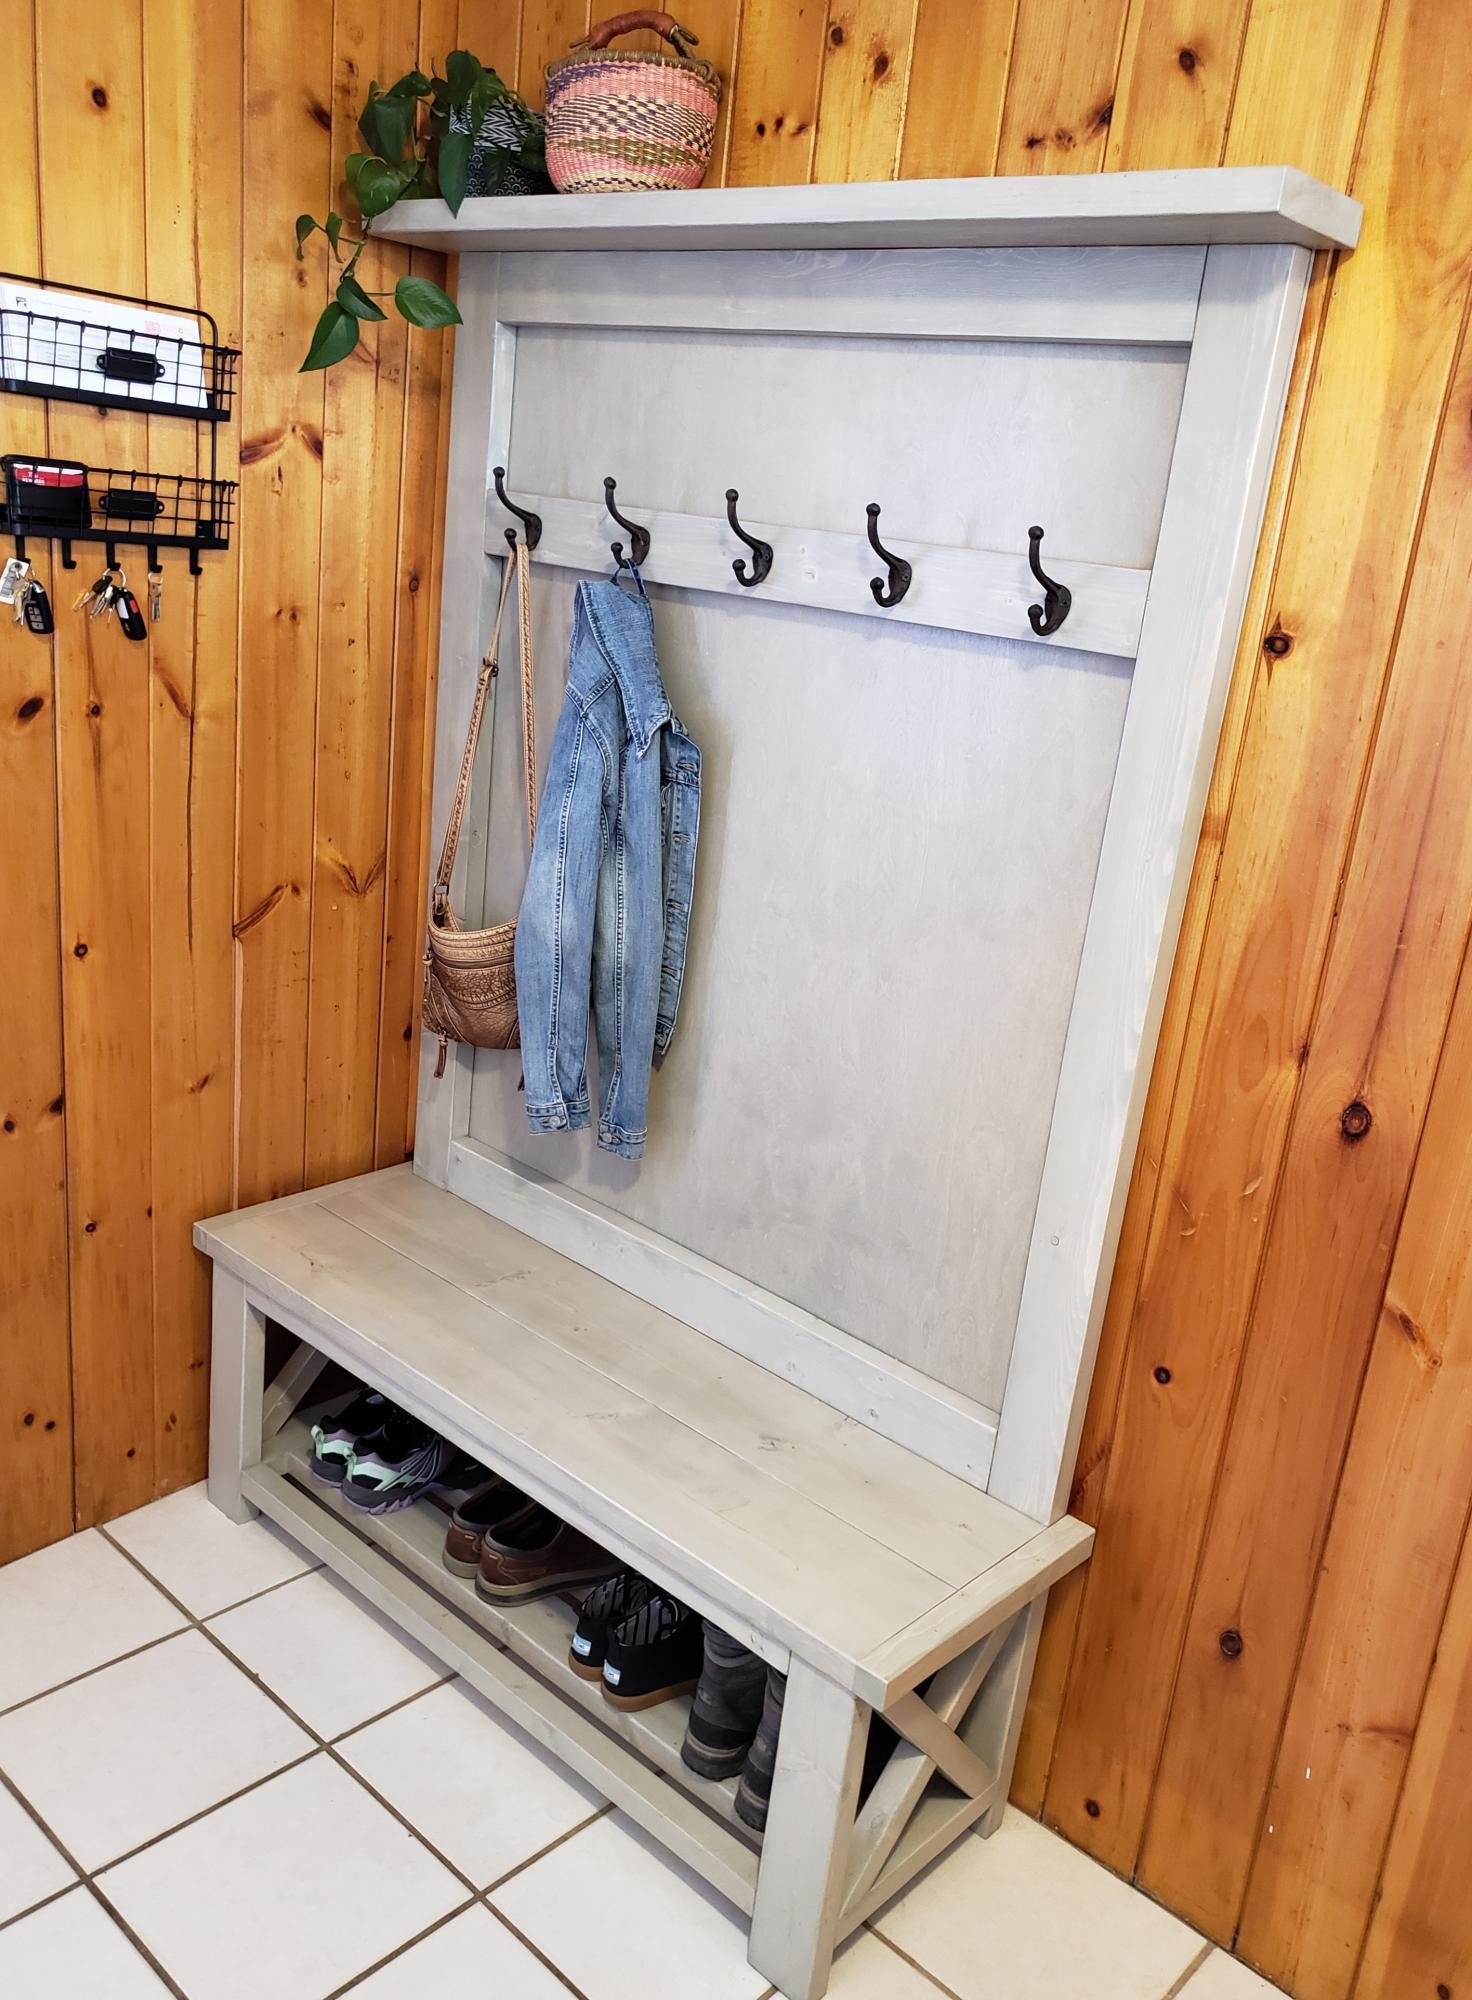
This was my first project and was a great one for someone just starting out. I really enjoyed the building part but was disappointed in how the stain turned out. I stained it with sunbleached by varathane but then made the mistake of finishing it with an oil based polyurethane which turned the color slightly green.
Built from Plan(s)
Estimated Cost
150 CAD
Estimated Time Investment
Day Project (6-9 Hours)
Finish Used
Sunbleached by varathane with a polyurethane finish.
Recommended Skill Level
Beginner
Wood Christmas Tree
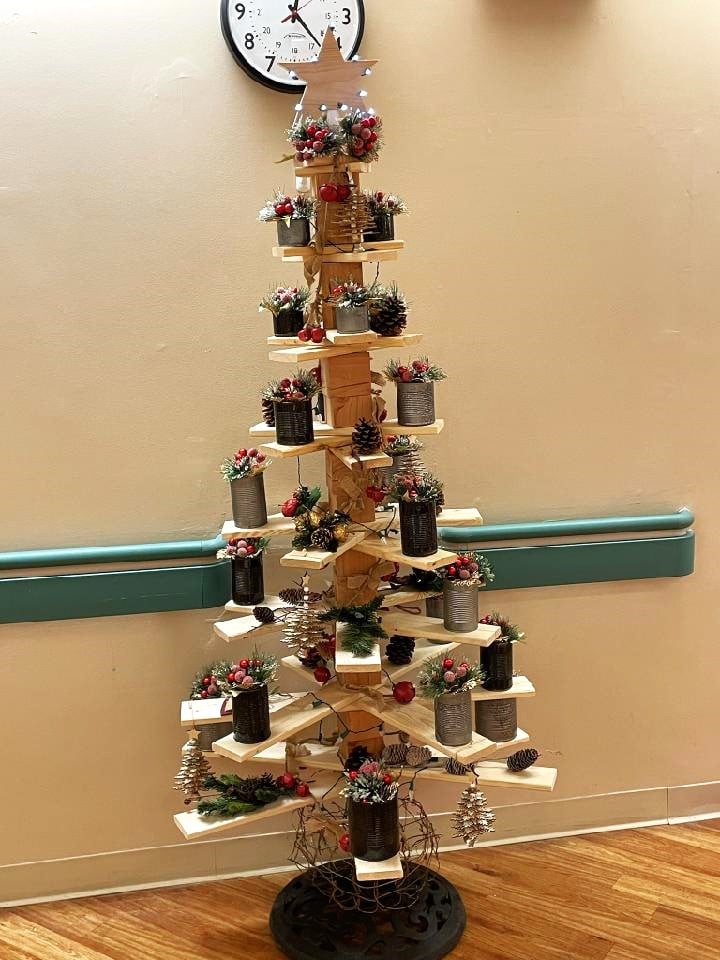
Christmas tree for hospital when my wife works. We used 1x4 lumber with 4x4 spacers. She painted tin cans and put greenery in them and we cut a star for the top with a scroll saw.
Wendell Londsey
Seasonal And Holiday
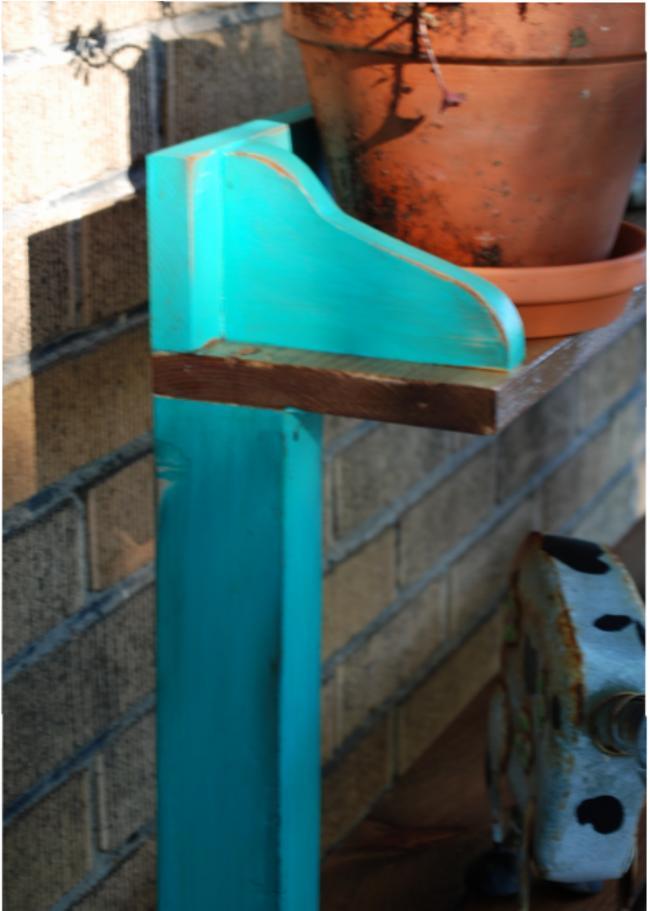
Simple Potting Bench
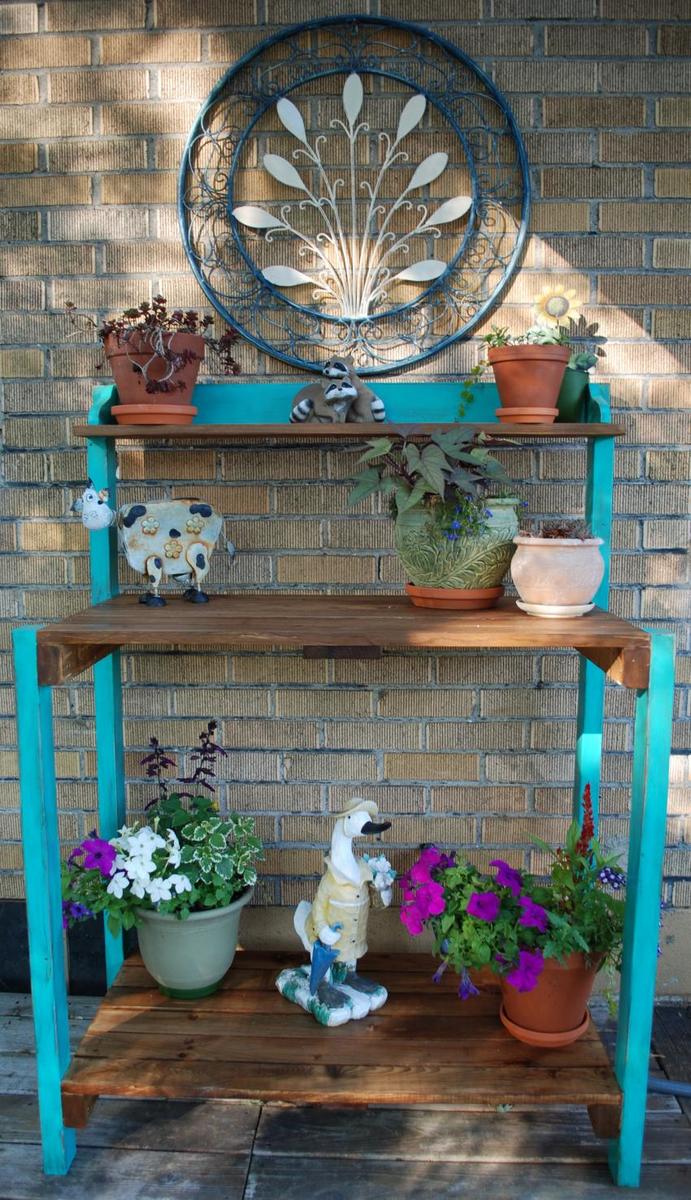
This is a very simple weekend project, it took longer to put the finish on than to build it. It is made out of spruce and pine shelves. The finish is done with homemade vinegar steel wool stain for the shelves and paint for the legs. We distressed the legs by sanding and wiping stain in some areas. Finished with 3 coats of exterior poly.
Estimated Cost
50
Estimated Time Investment
Afternoon Project (3-6 Hours)
Finish Used
homeade stain , paint , varathane diamond outdoor finish
Recommended Skill Level
Beginner
Comments

Sun, 07/29/2012 - 15:37
Potting Bench plans
I love the potting bench that you want to build from the Southern Living magazine.
How can I get my hands on those plans?
Apothecary Console
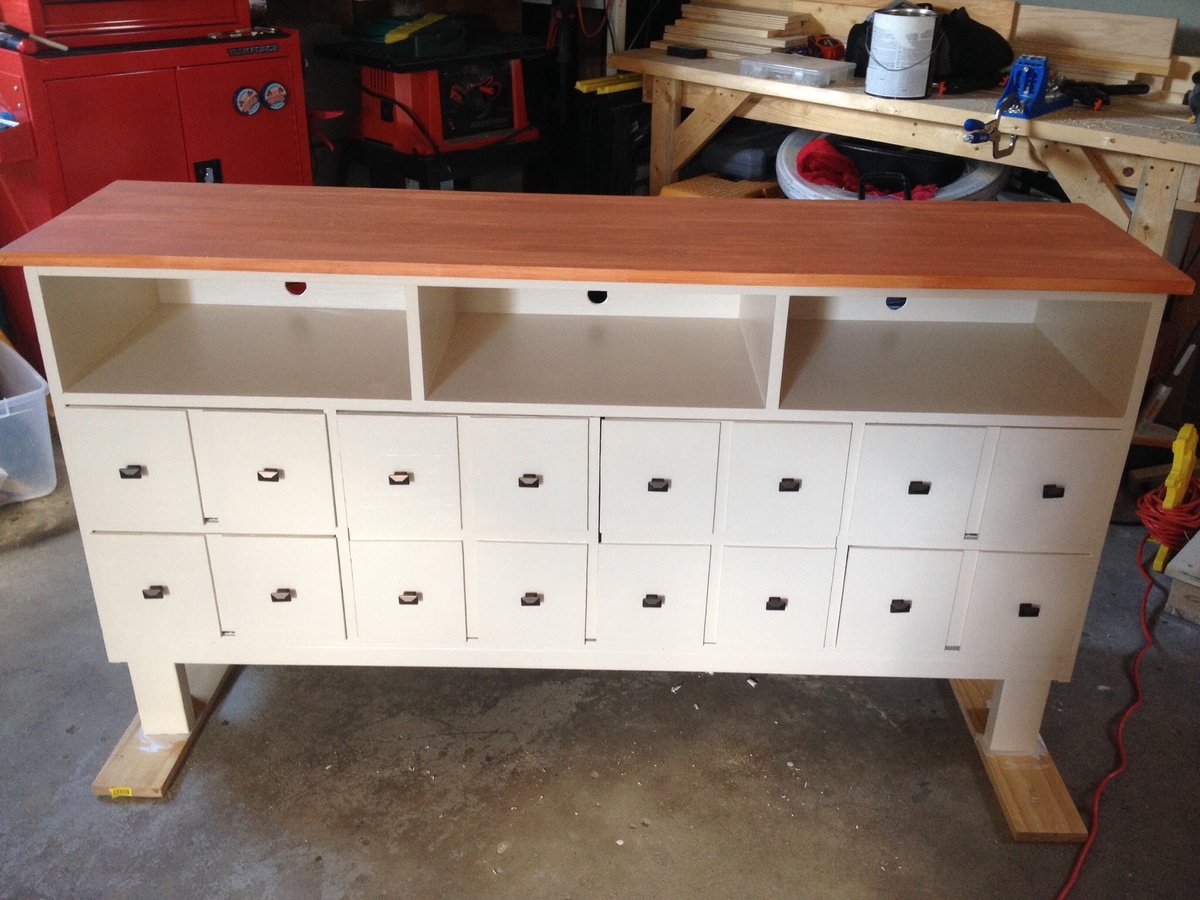
Built straight off the plans except I added drawer slides.
Built from Plan(s)
Estimated Cost
250
Estimated Time Investment
Week Long Project (20 Hours or More)
Recommended Skill Level
Intermediate
Re-tie-r-ment Ottoman
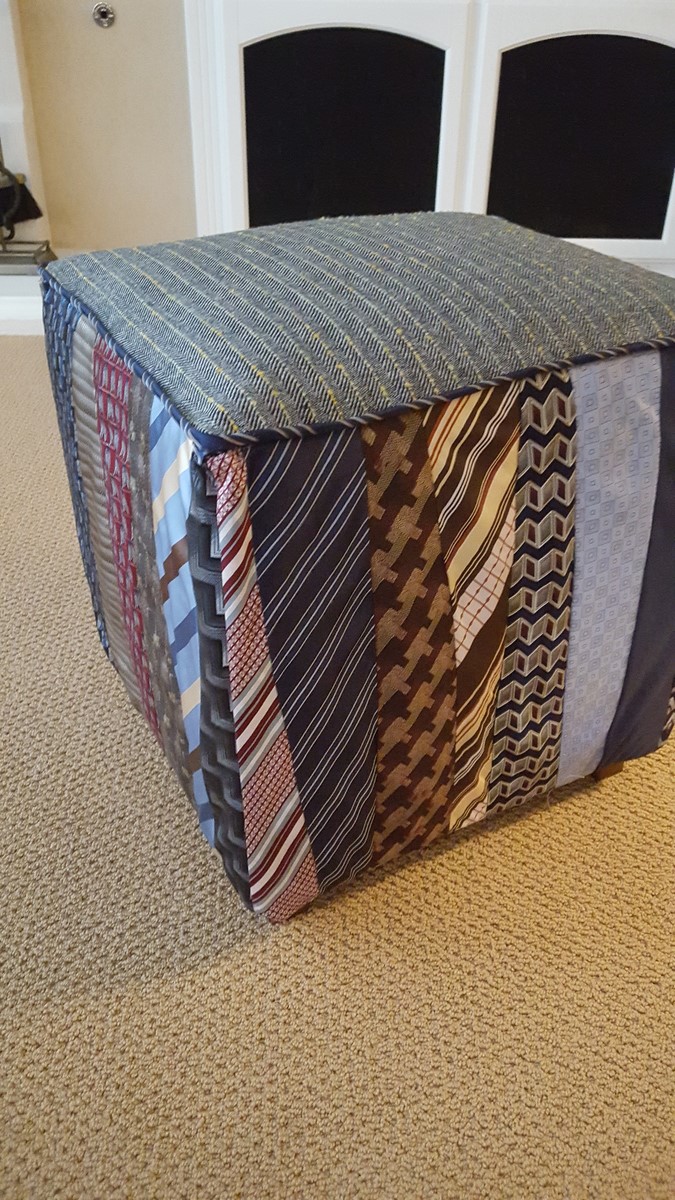
Use those ties and a suit you aren't using anymore now that you are retired! Sit back and relax!!
Built from Plan(s)
Estimated Time Investment
Weekend Project (10-20 Hours)
Recommended Skill Level
Beginner
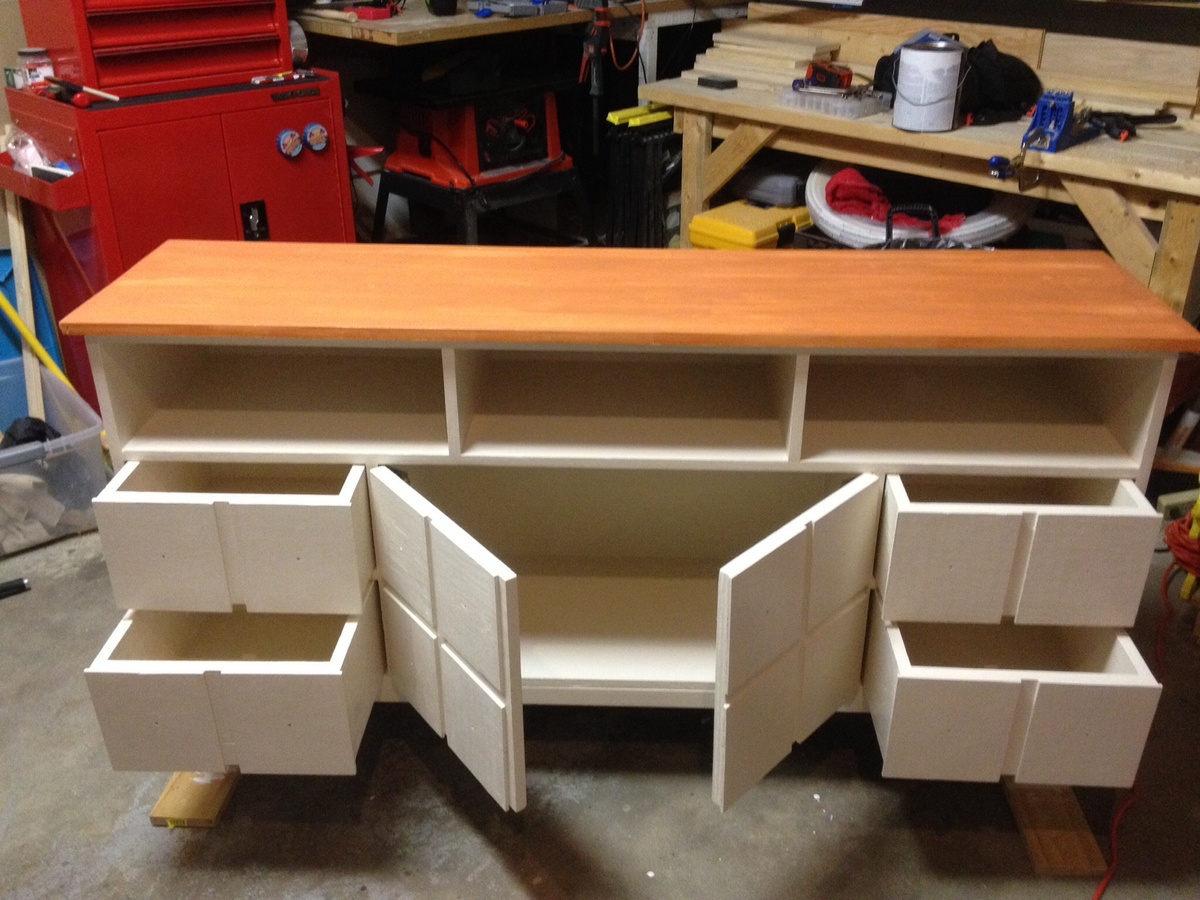
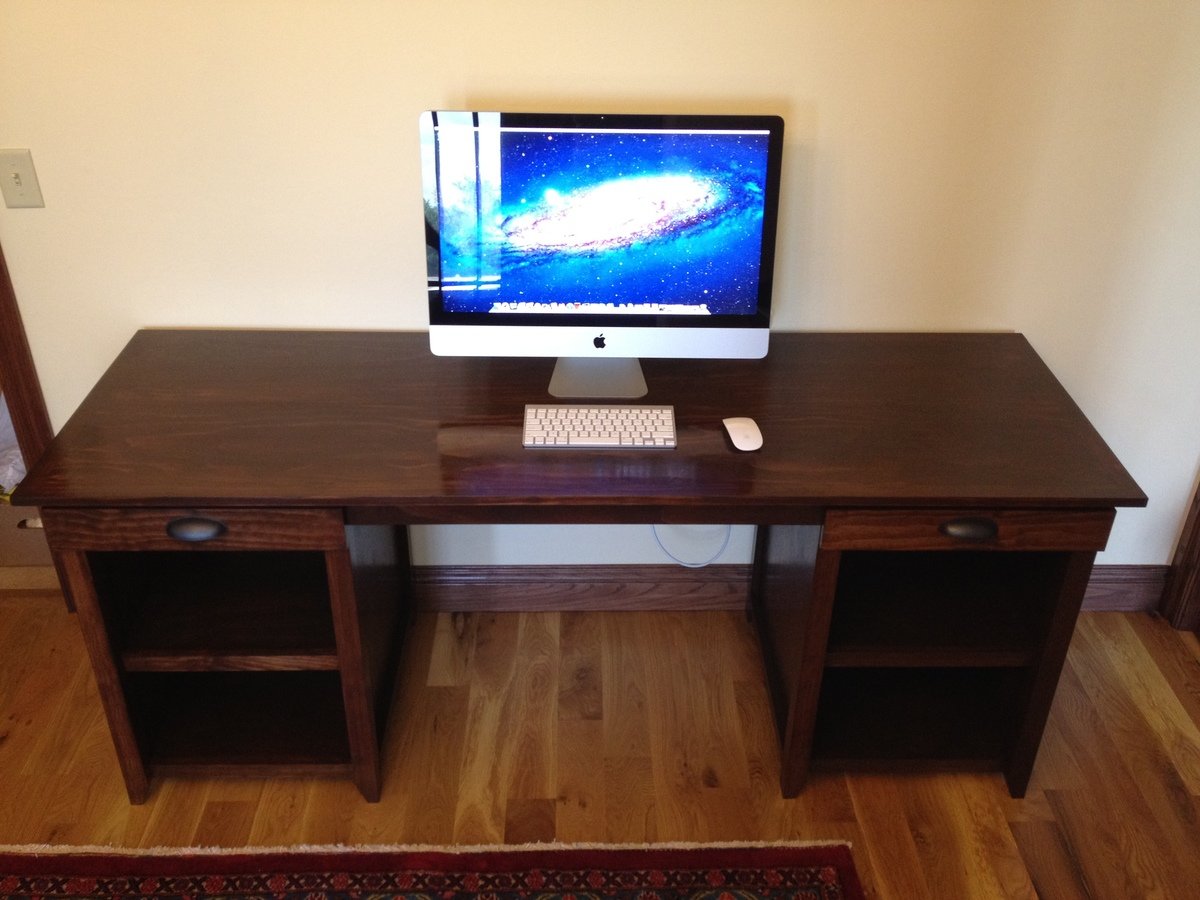
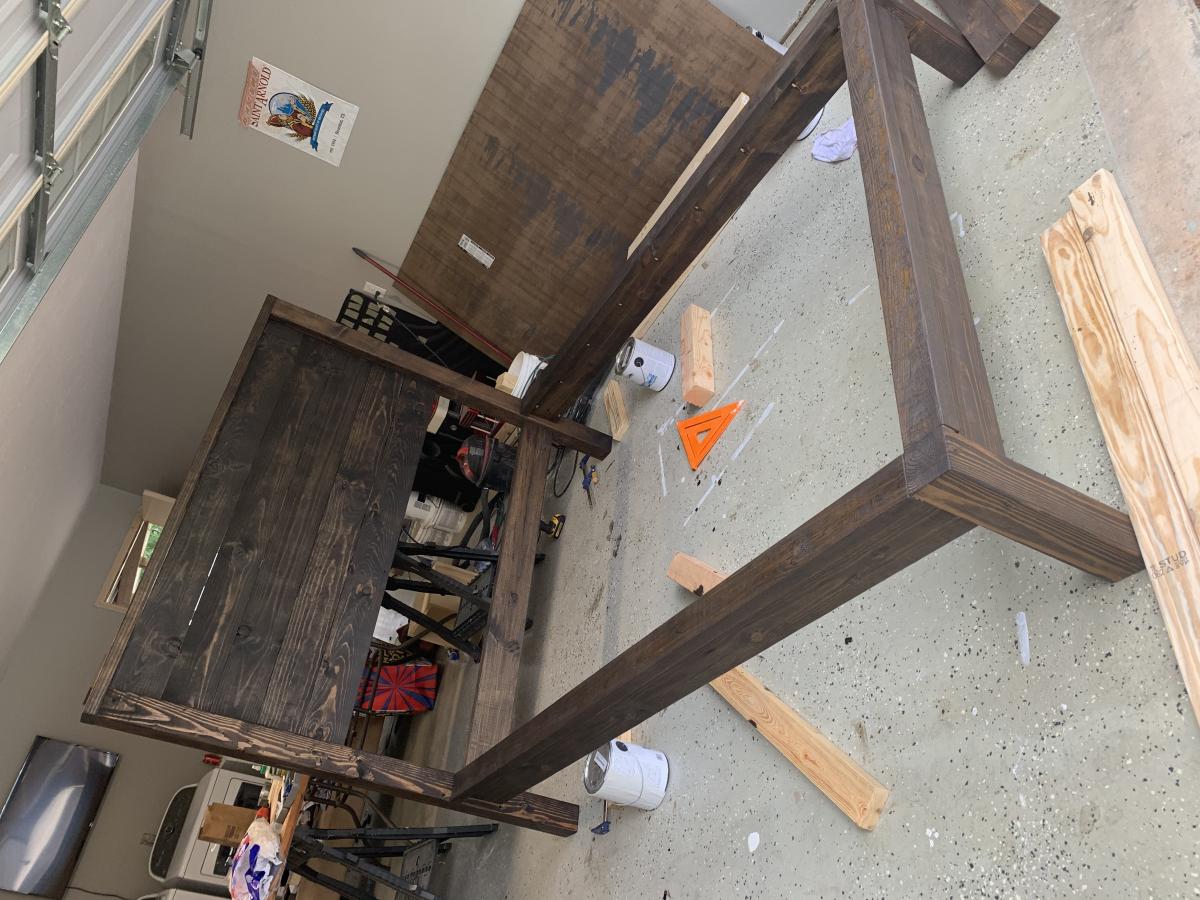
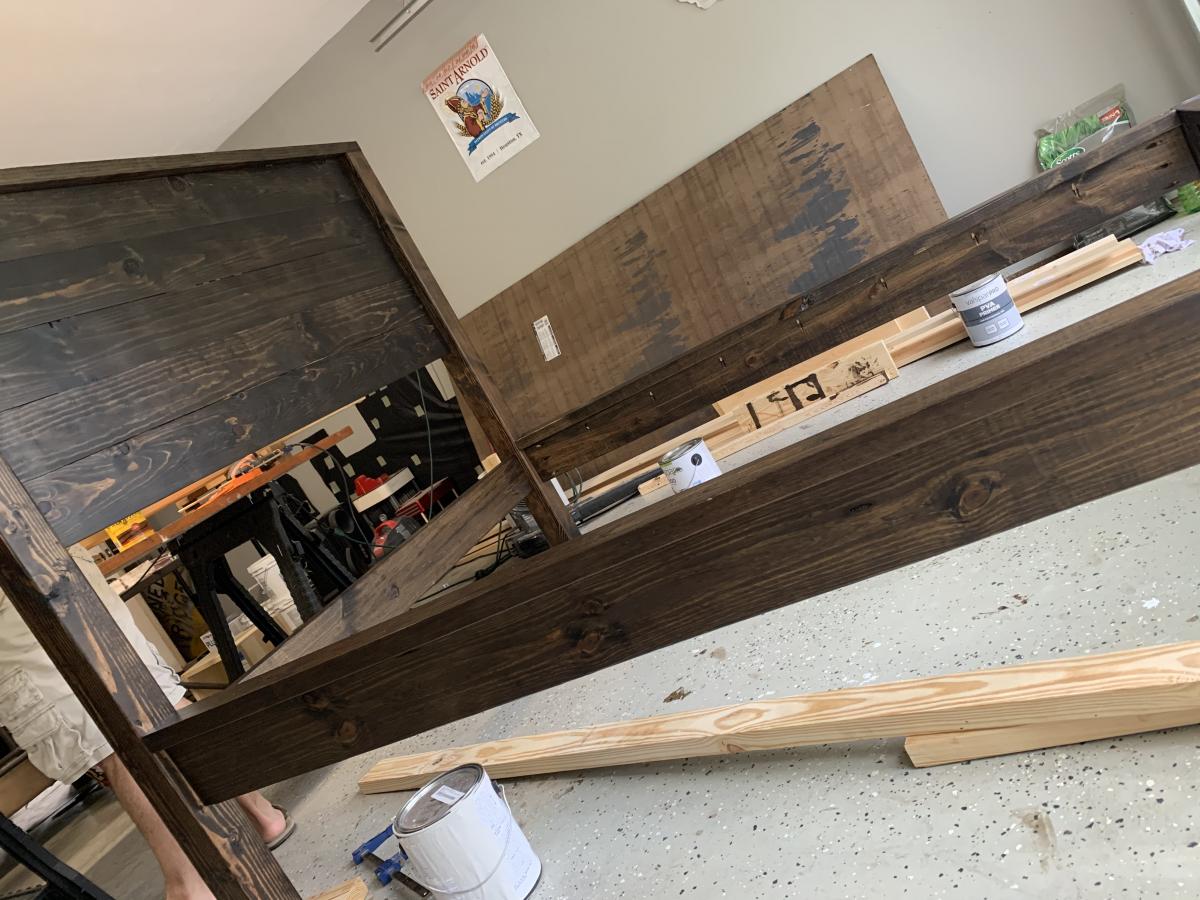
Double Drawer Channing Computer Desk
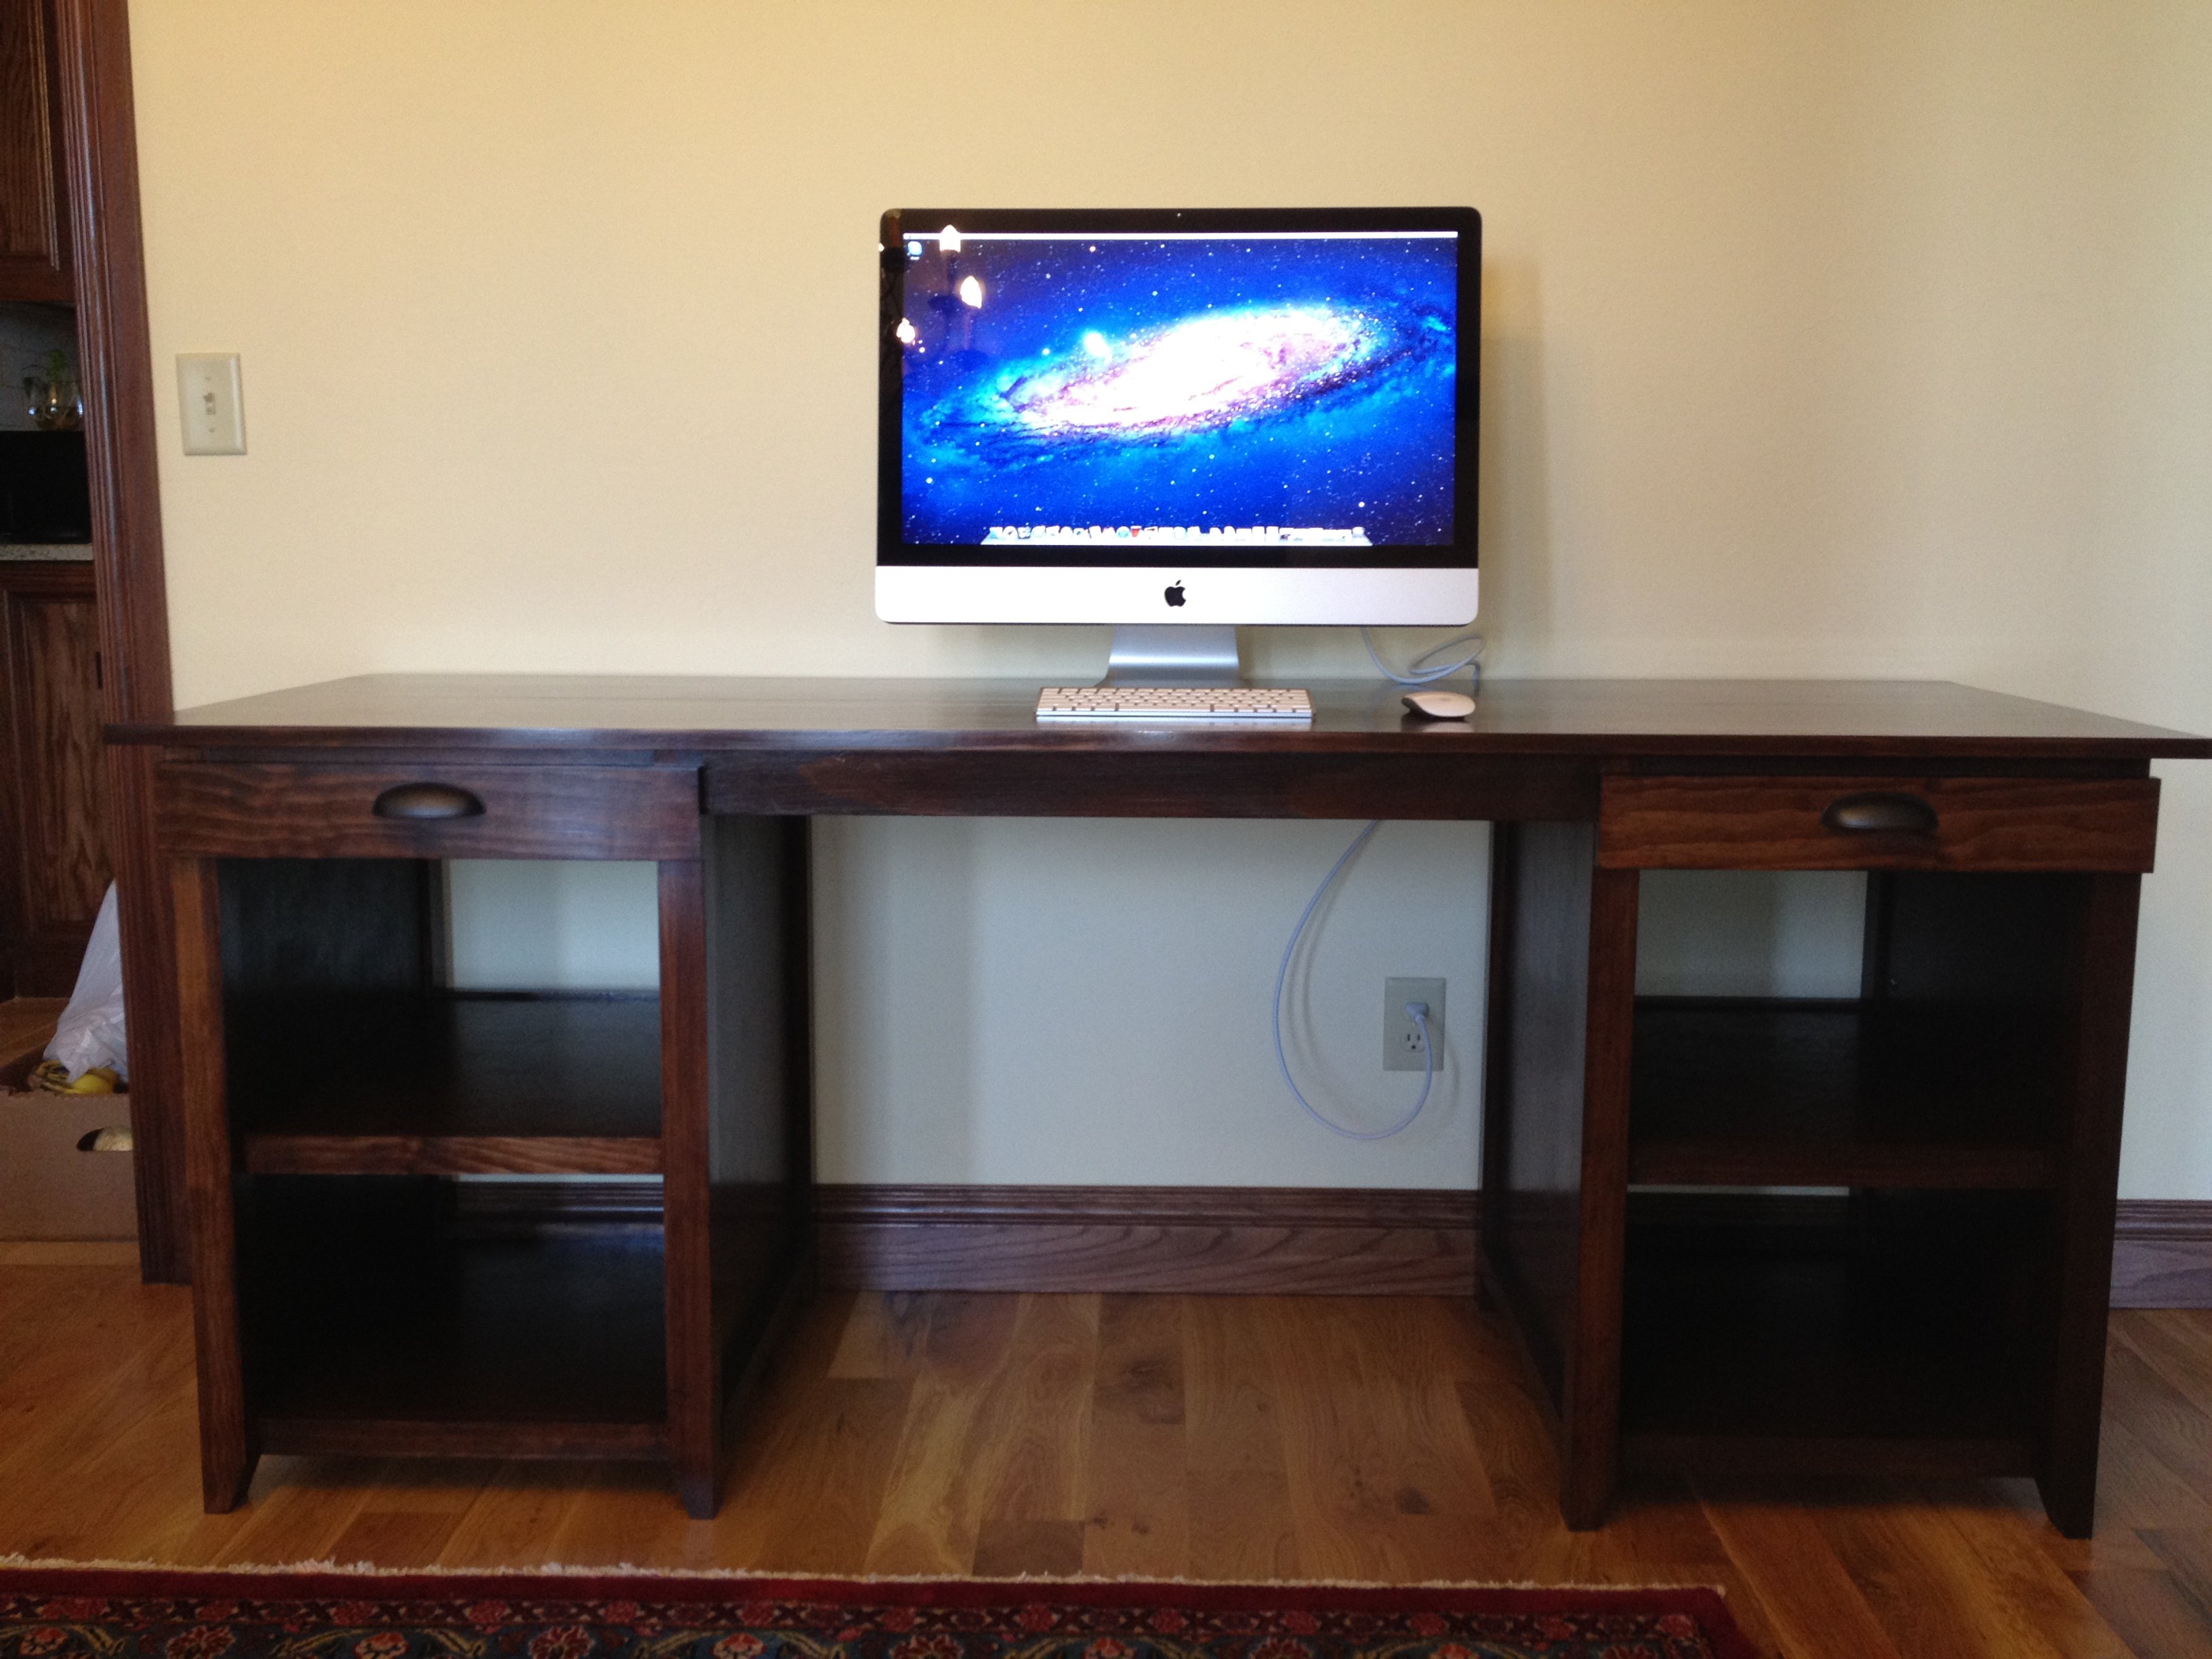
We made some alterations to Shanty2Chic's design. Rather than one side open we made two cabinets with drawers. It made it a little longer and deeper than expected but we are still happy with the desk.
We have a six month old baby, so we build during naps and when we can convince grandma to watch her.
Built from Plan(s)
Estimated Cost
$200
Estimated Time Investment
Weekend Project (10-20 Hours)
Finish Used
Minwax American Walnut and Briwax.
Recommended Skill Level
Intermediate
Comments

Sun, 07/01/2012 - 16:21
Your desk is awesome
Wow, this looks amazing! Looks better than what you would see at a furniture store, and the finish is so beautiful! Awesome job.
Wed, 08/22/2012 - 20:44
Ji, If you are finishing soft
Ji,
If you are finishing soft woods, especially pine, it is woth the few dollars it costs to but some pre-finish wood conditioner. The conditioner will help eliminate the irregularities in stain color on soft woods. It doesn't really cost too much and it really does help eliminate blotches, streaking and helps get a more consistent color.
Modern Craft Table for Two

This was my first project! I love this site. My husband and I needed a work space we could share. I loved the width of the craft table so I extended it to the full 8ft of plywood available and added a support shelf. Voila! Table for two!


Built from Plan(s)
Estimated Cost
$400
Estimated Time Investment
Week Long Project (20 Hours or More)
Finish Used
Red Mohogany
Recommended Skill Level
Beginner
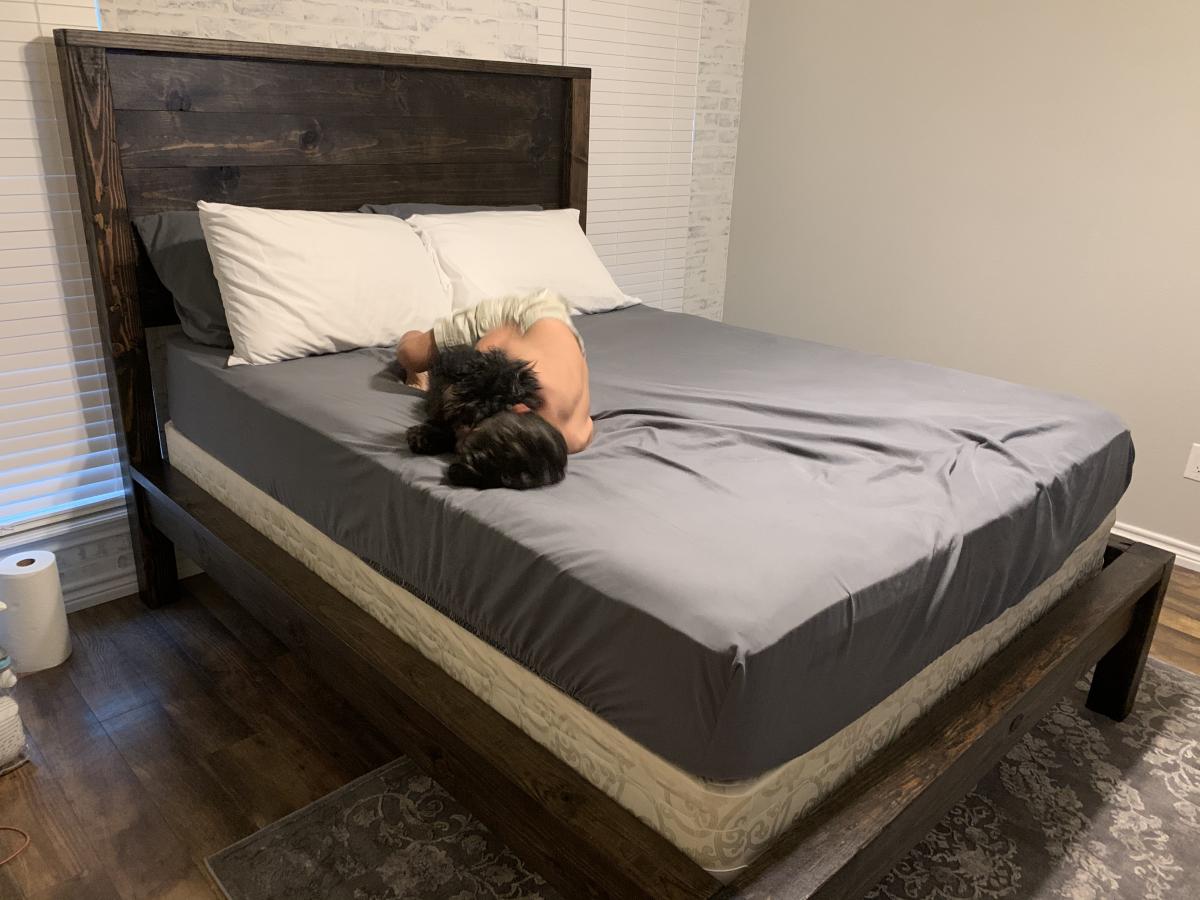
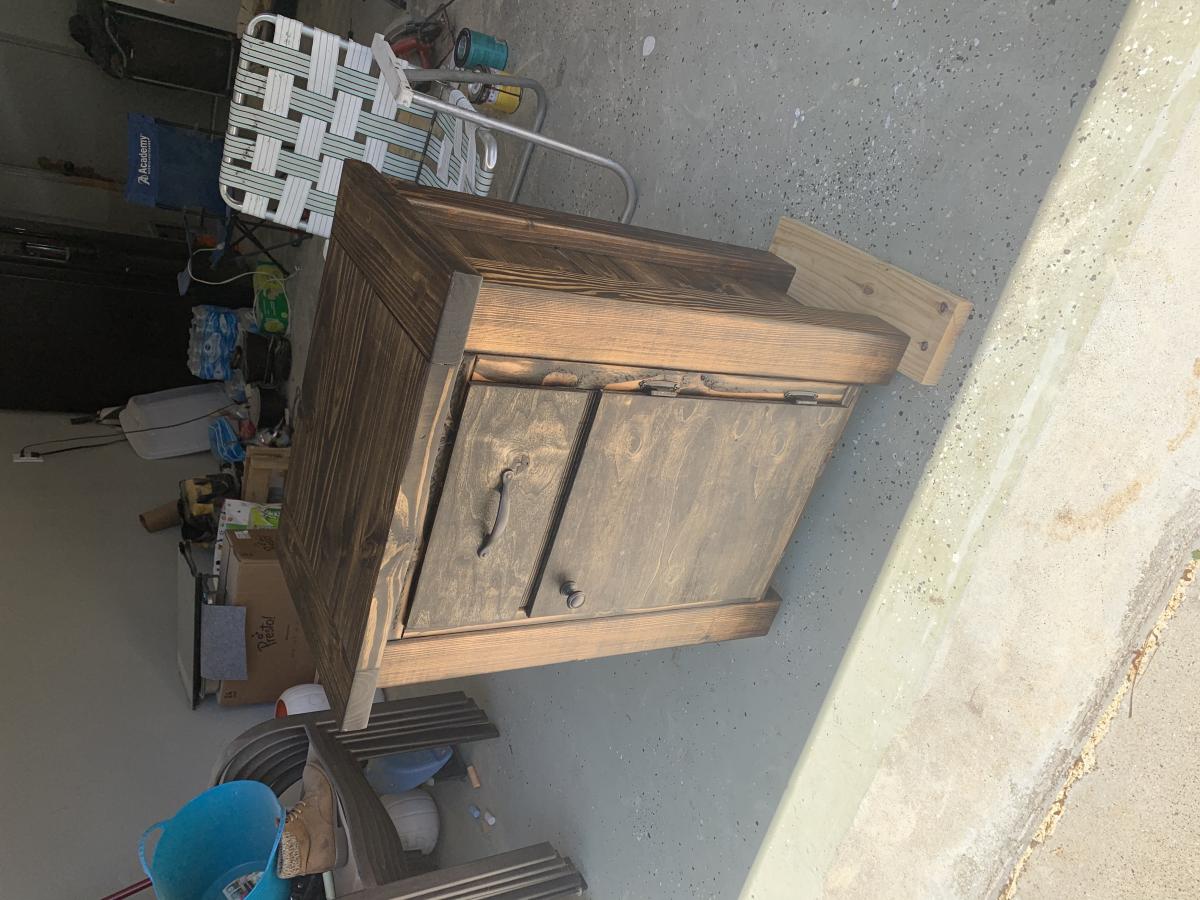
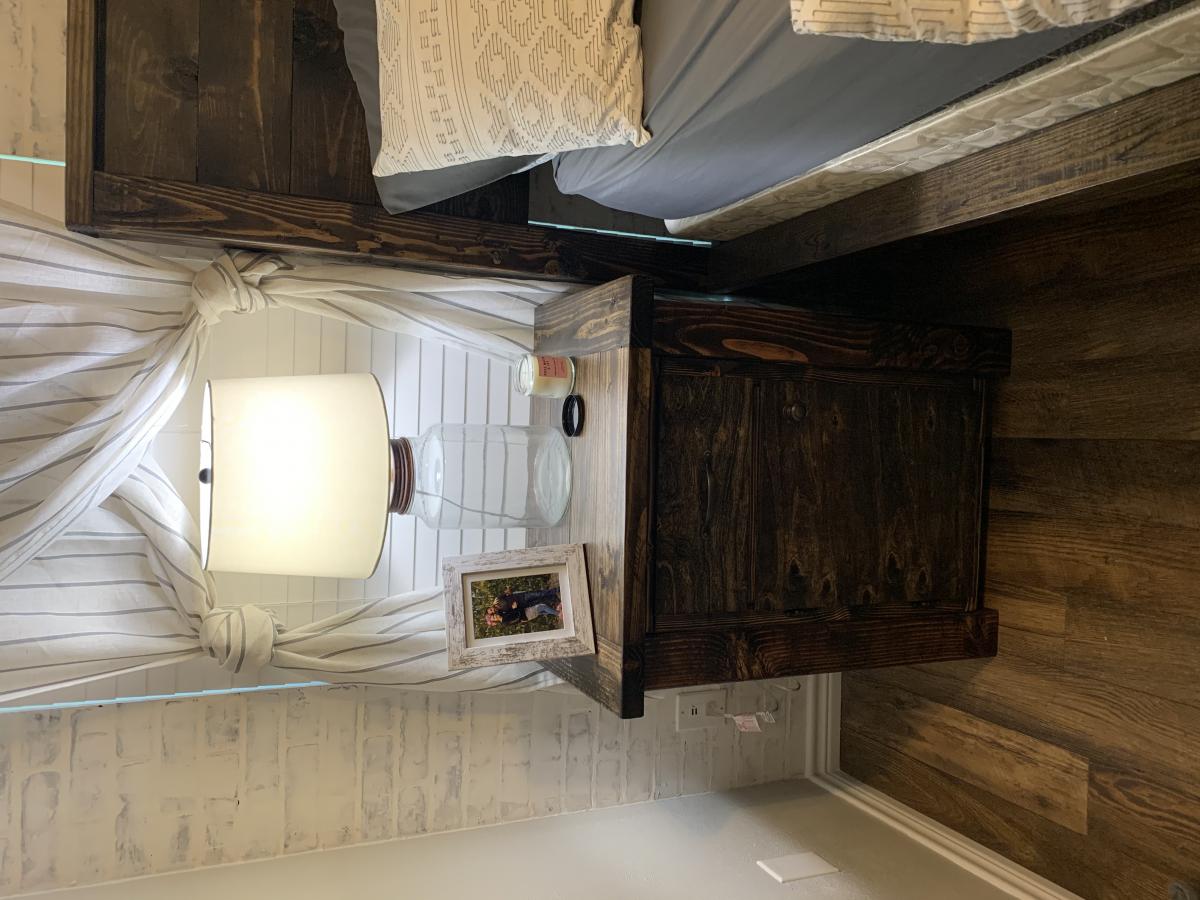
Modified Modern Farmhouse Bed Frame

My husband and I built the Modern Farmhouse Bed Frame, but we modified it. We wanted a taller bed, so we cut our 4x4’s at 18” instead of what the plans called for of 14”. We stained it in Minwax - Dark Walnut and used Polycrylic in Clear Matte to finish it. We also made our own matching nightstands as we preferred taller and different ones than the ones shown as the matching set on this site. We are so in love! The bed is super sturdy!
Built from Plan(s)
Estimated Cost
125
Estimated Time Investment
Weekend Project (10-20 Hours)
Finish Used
Minwax - Dark Walnut and Polycrylic in Clear Matte
Recommended Skill Level
Intermediate
Comments

Mon, 05/11/2020 - 10:58
This is a really beautiful…
This is a really beautiful set! I like the taller height too!
Tue, 06/09/2020 - 14:30
So pretty! Did you modify…
So pretty! Did you modify the plan to allow for a box spring?
DIY Armoire Cabinet
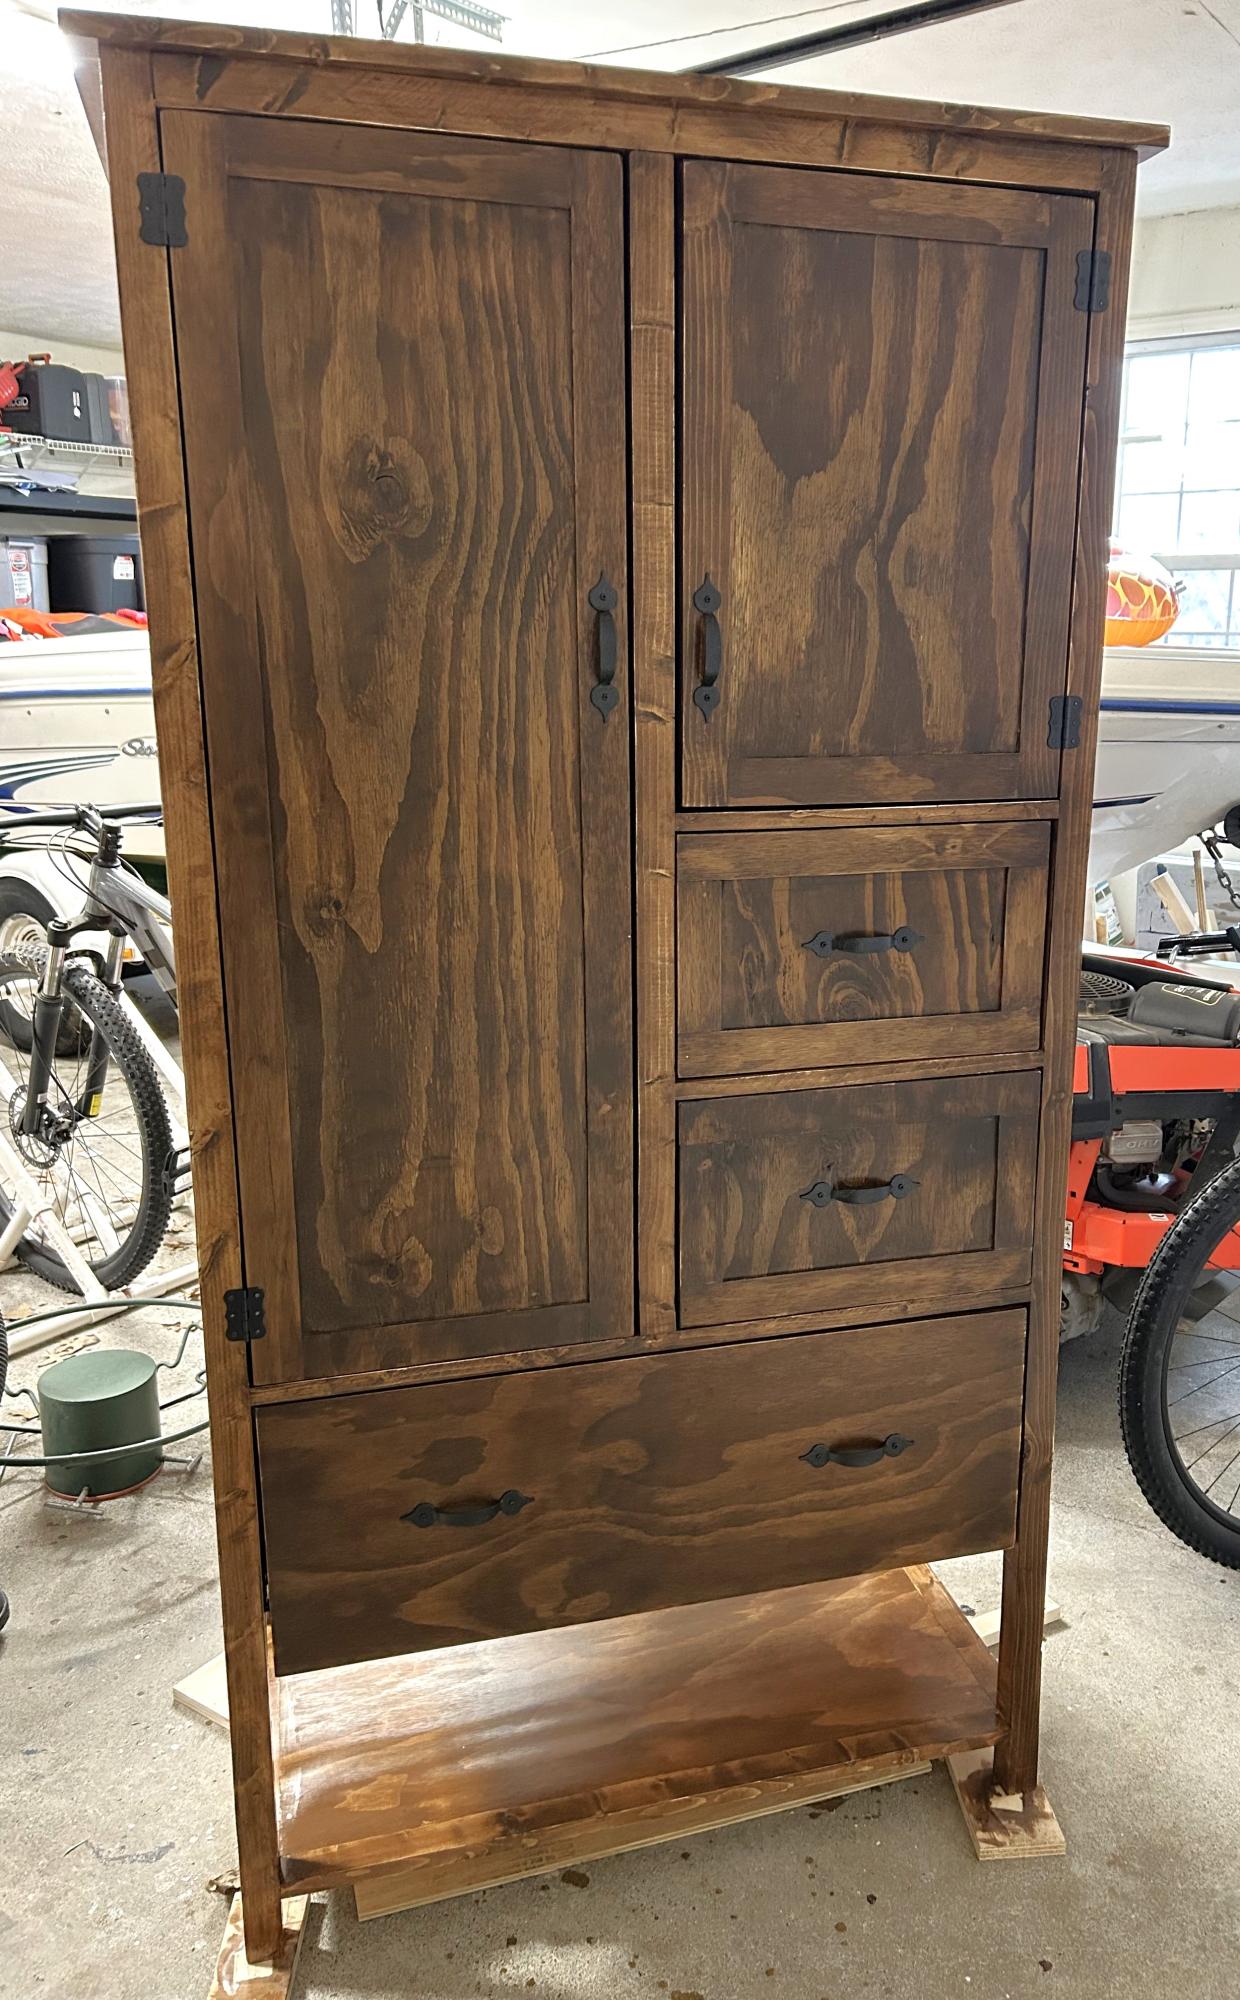
After searching for a long time for a storage piece to fit the space I needed I finally decided to build one! Thank you for the plans! (Of course I had to size it down and adjust it to fit my needs.) Absolutely love it!
Patricia Cable
Built from Plan(s)
Craft Desk

I found some measurements from this site and another site in order to build my craft desk. Thanks Ana
Recommended Skill Level
Intermediate
Comments
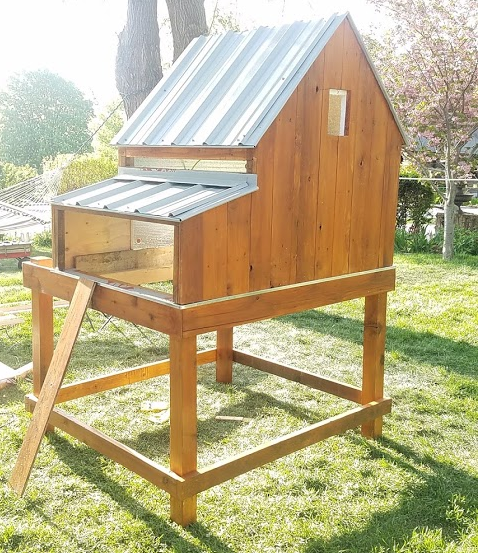
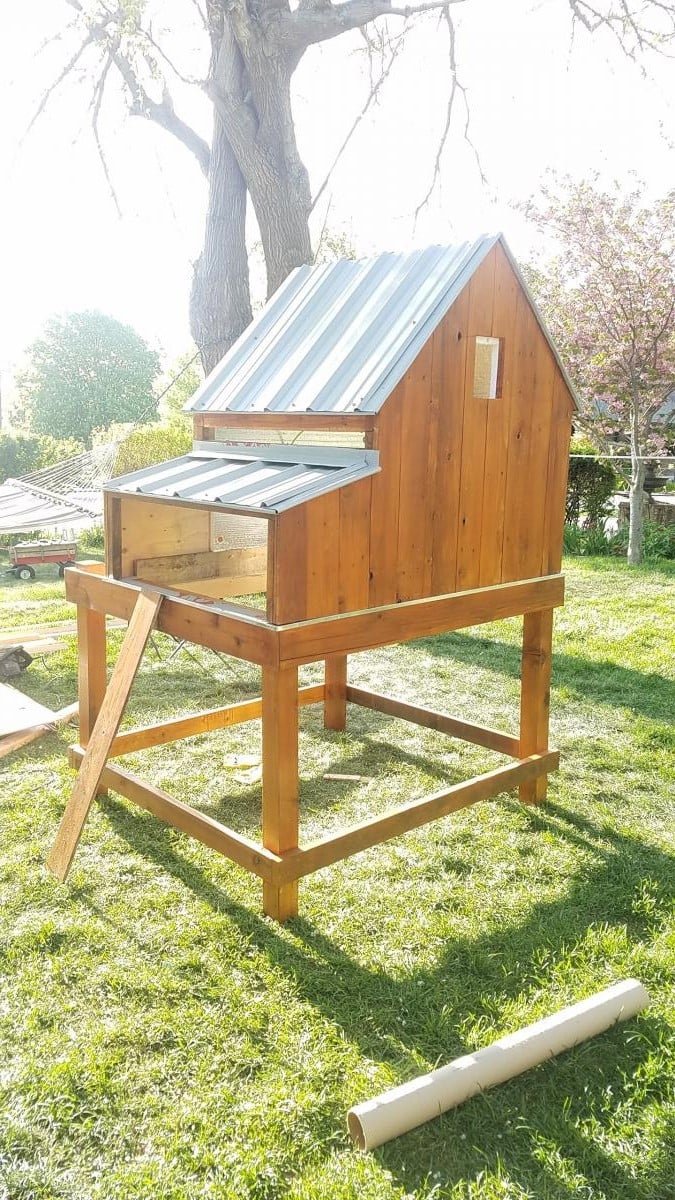
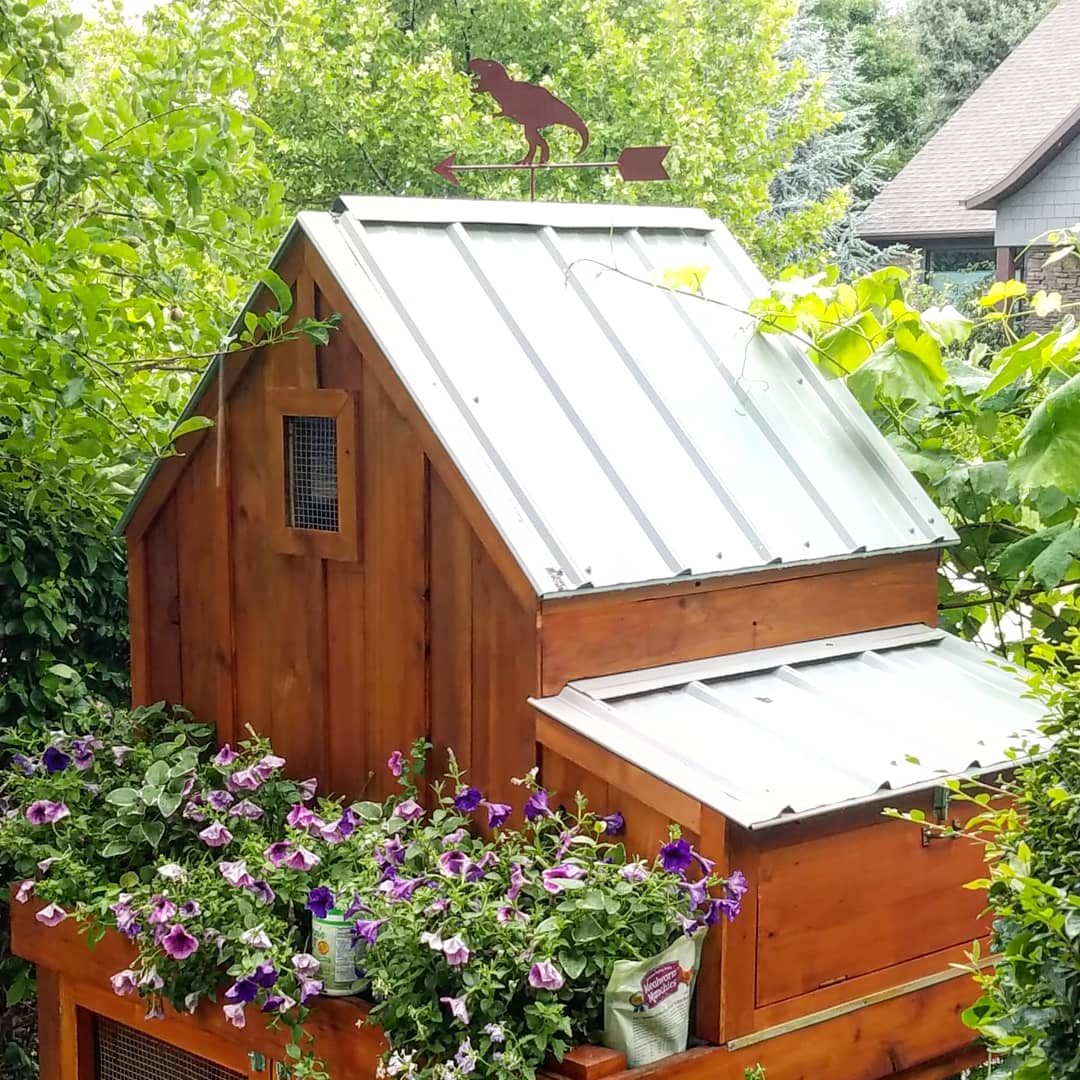
chicken coop
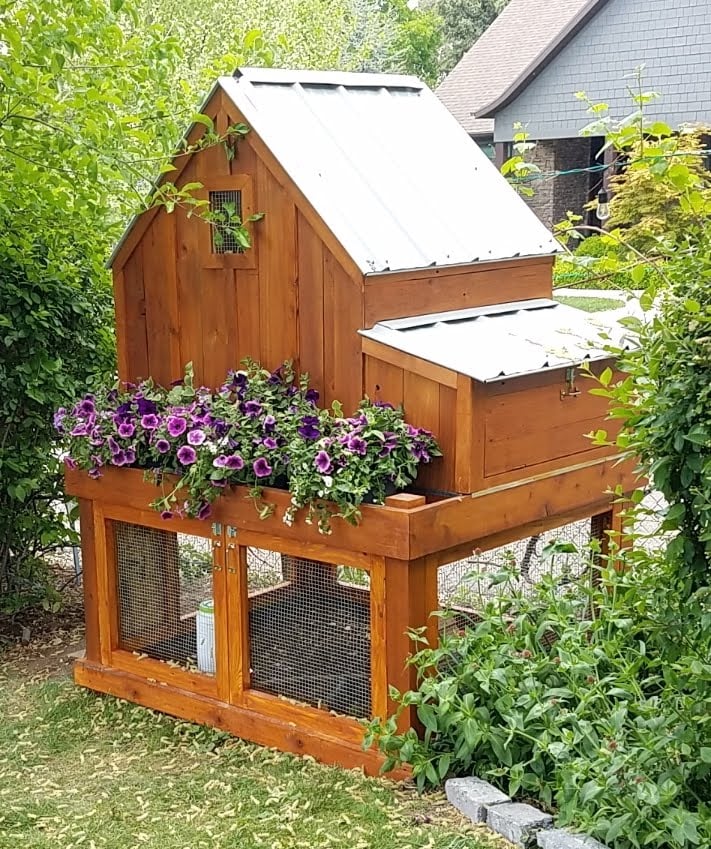
Modified to make the coop bigger and the planter smaller. Added 1" foam insulation on the inside and changed the design to use the "deep litter" method. This means the coop bottom goes all the way to the bottom of the support beam rather than using a removable tray. Added a steel roof with a ridge vent at the top. The chicken run under the coop is lined with buried hardware cloth so no animals can dig under the coop. All hinges are mortised and doors flush mounted. The coop is wired for power for a heat lamp. The planter is lined with a metal tray. The coop can be separated into two pieces so you can move it or rotate the top 180 deg if needed (so you can get to the eggs from the left or right side). Great plans, thanks Ana!

Built from Plan(s)
Estimated Time Investment
Week Long Project (20 Hours or More)
Finish Used
cedar deck stain. Olympic. brand
Recommended Skill Level
Advanced
Comments
Tue, 05/12/2020 - 15:09
Amazing! Thank you so much…
Amazing! Thank you so much for sharing a photo, this is truly beautiful!
Sun, 09/27/2020 - 14:42
Do you have the exact…
Do you have the exact measurements that you used for this one?
Dresser Bunk Built-in
It started with the rustic rolling dresser. I wanted to try to build a dresser, but my girls needed a bunk bed. I modified the dresser to support a bunk bed. 2 little nooks for the girls, rock solid beds and a beautiful dresser.
HisAndHersOriginals
Built from Plan(s)
Comments
Tue, 01/09/2024 - 08:36
Great bunk and dresser design!
Love how you incorporated the dresser, it looks amazing!
Entryway shelf
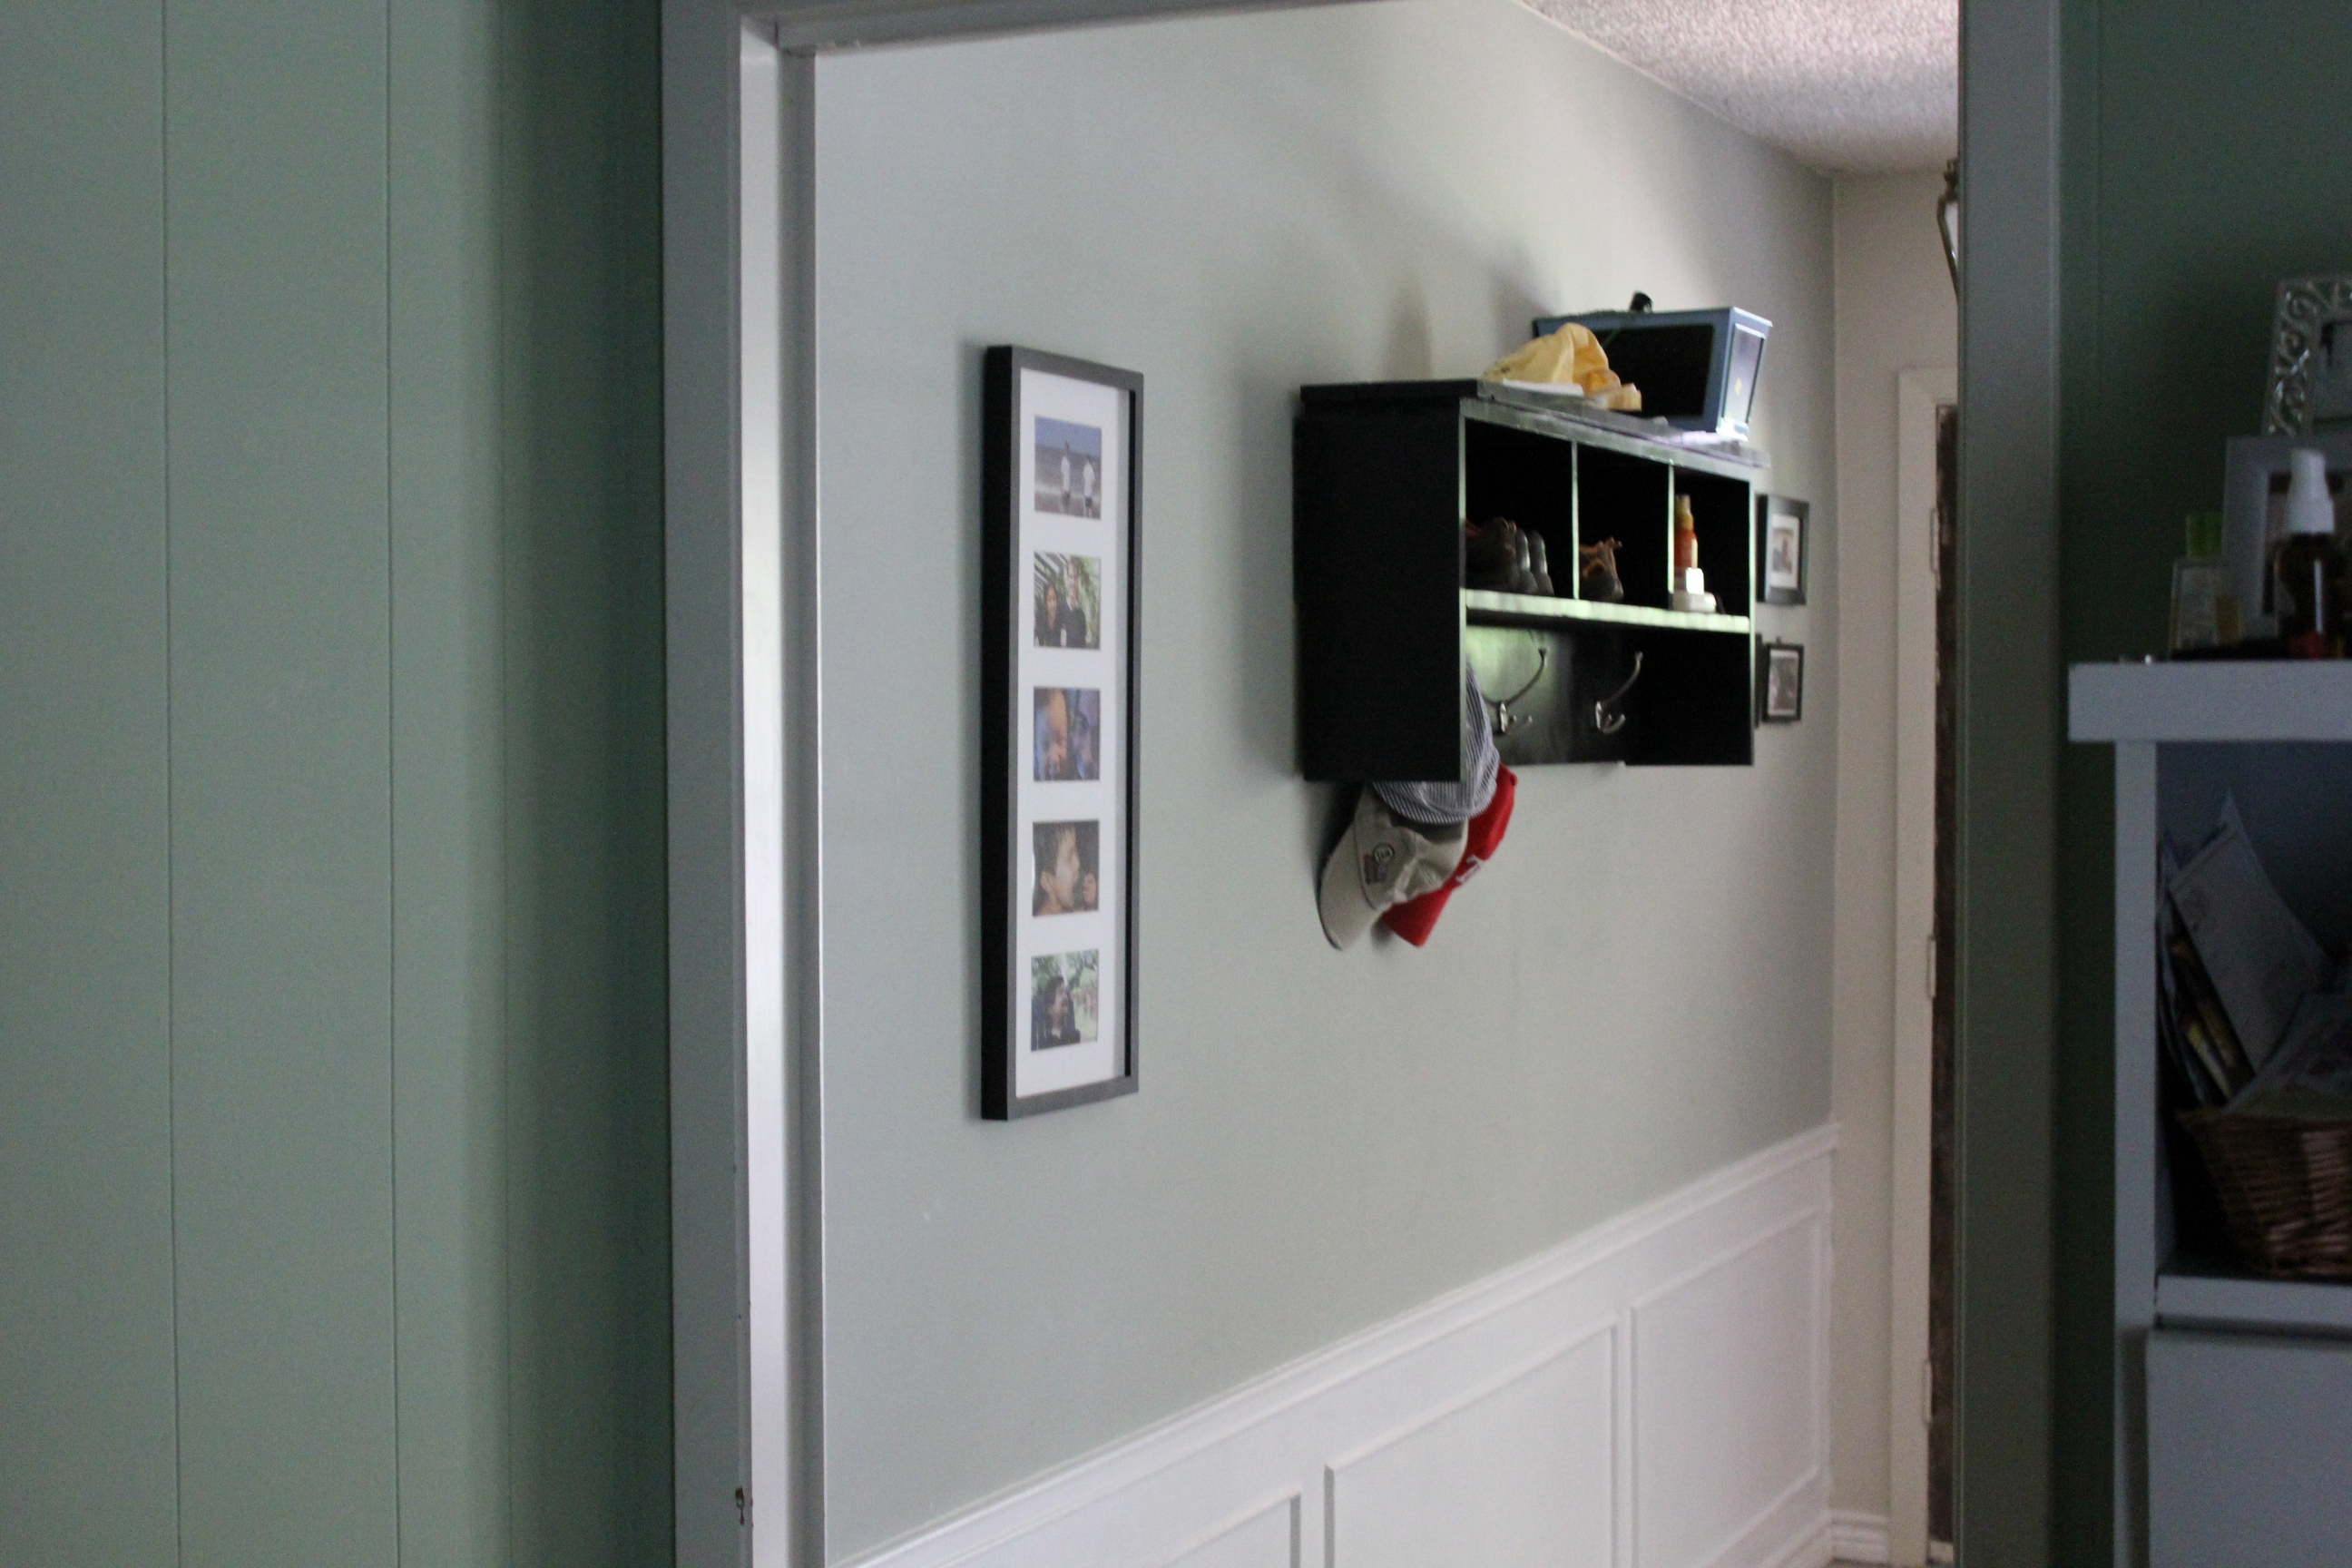
I built this ages ago but never got around to posting. This was my first build to replace a coat tree that my baby was using to pull himself up with. Hanging it up was more difficult than building it! The amount of storage on this thing is amazing.
Built from Plan(s)
Estimated Time Investment
Afternoon Project (3-6 Hours)
Finish Used
I used Valspar black spray paint.
Recommended Skill Level
Beginner
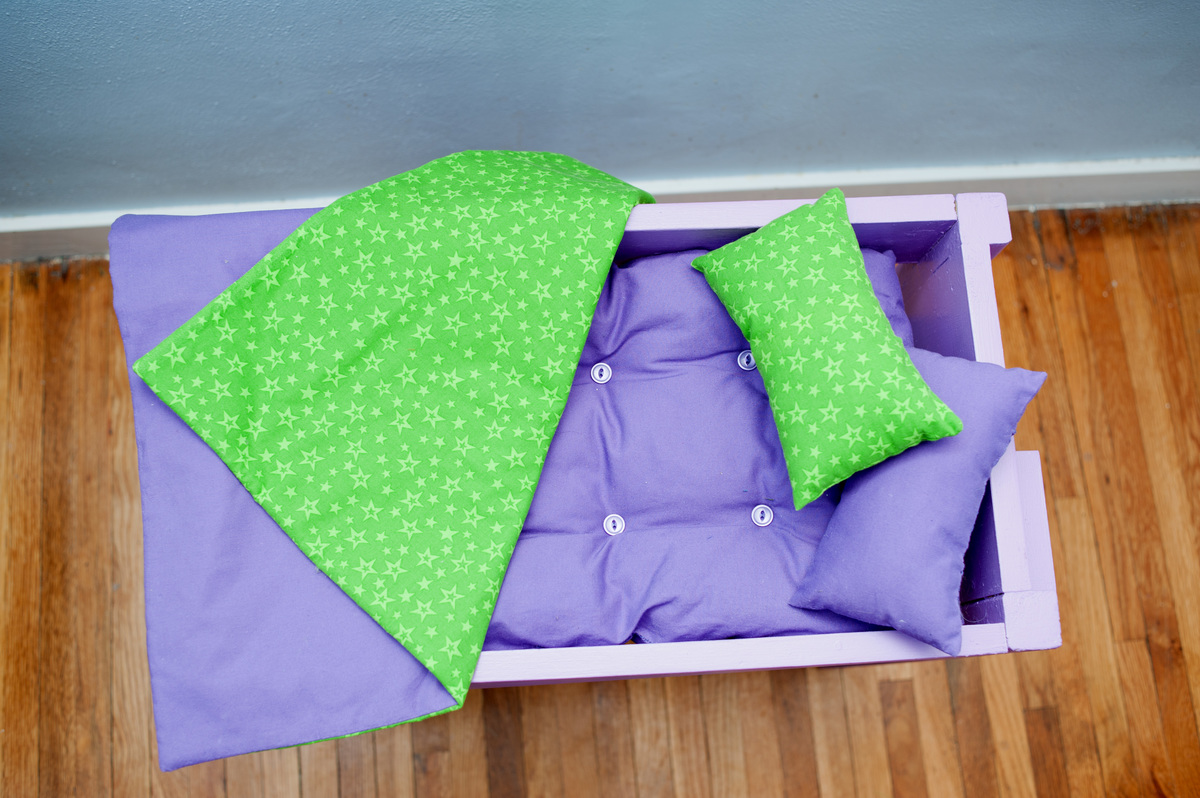
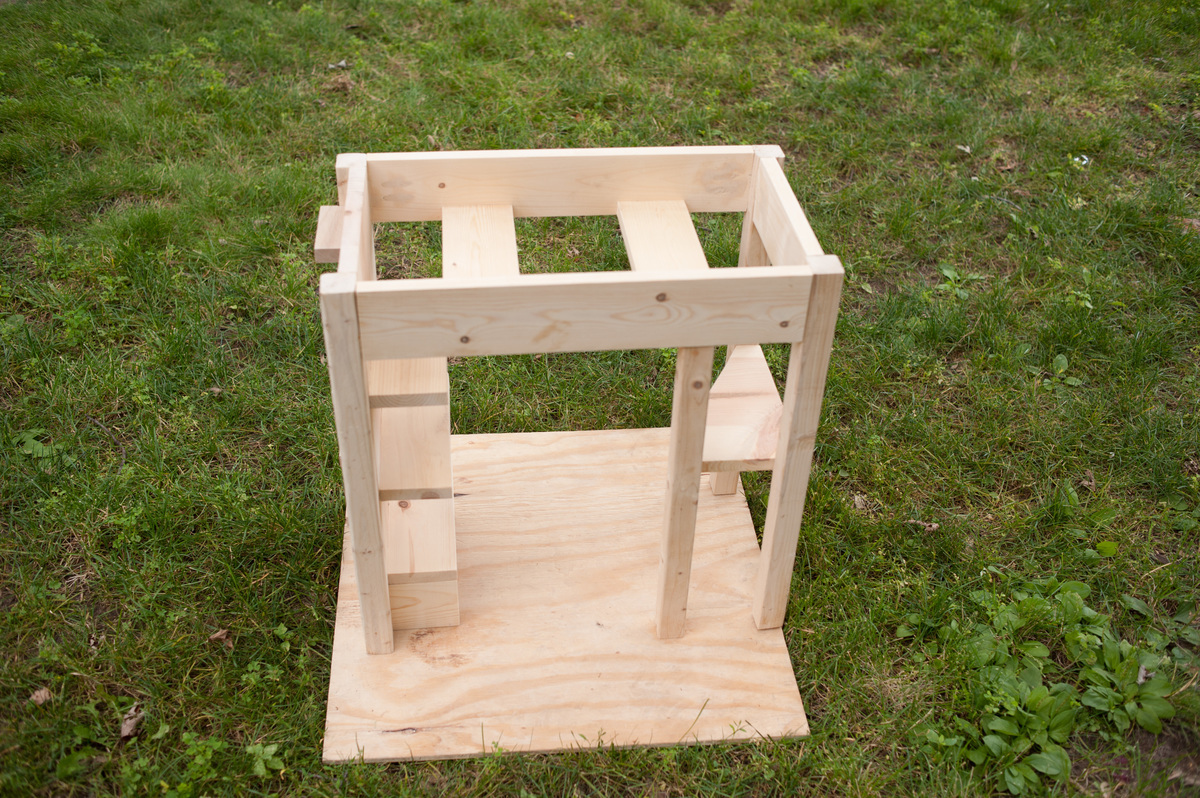
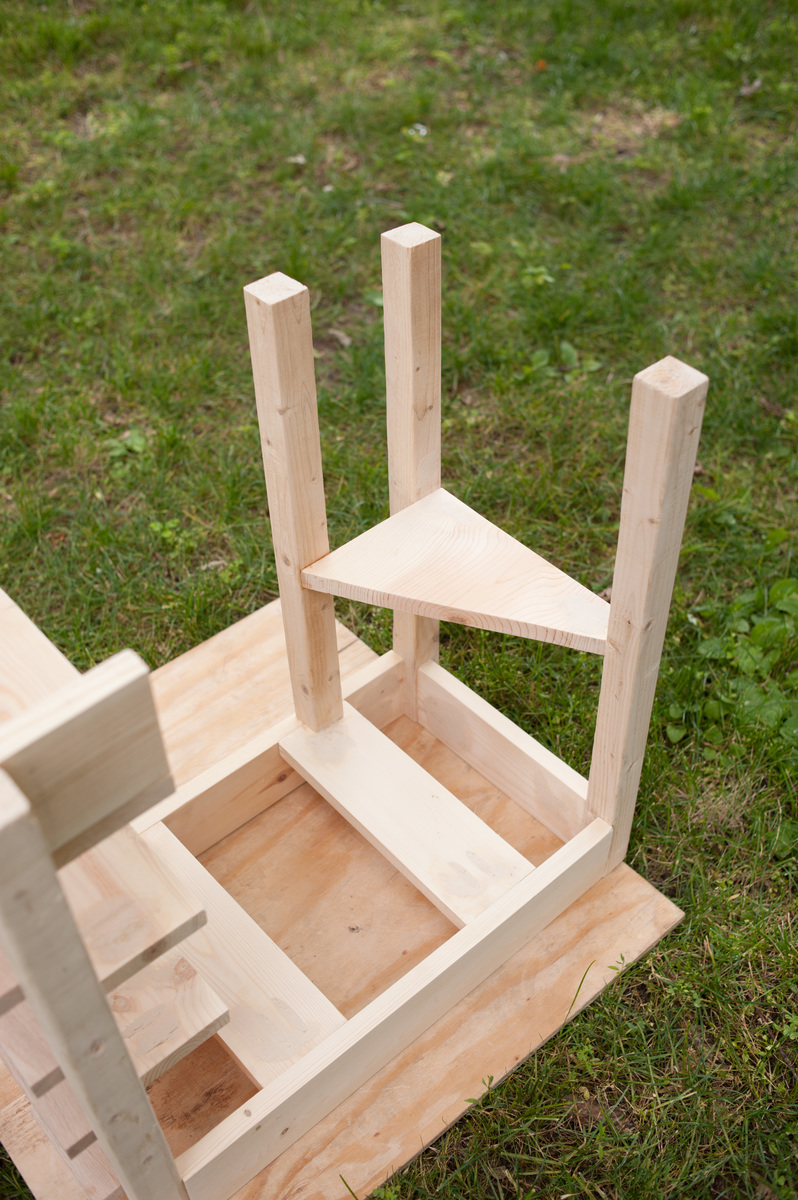
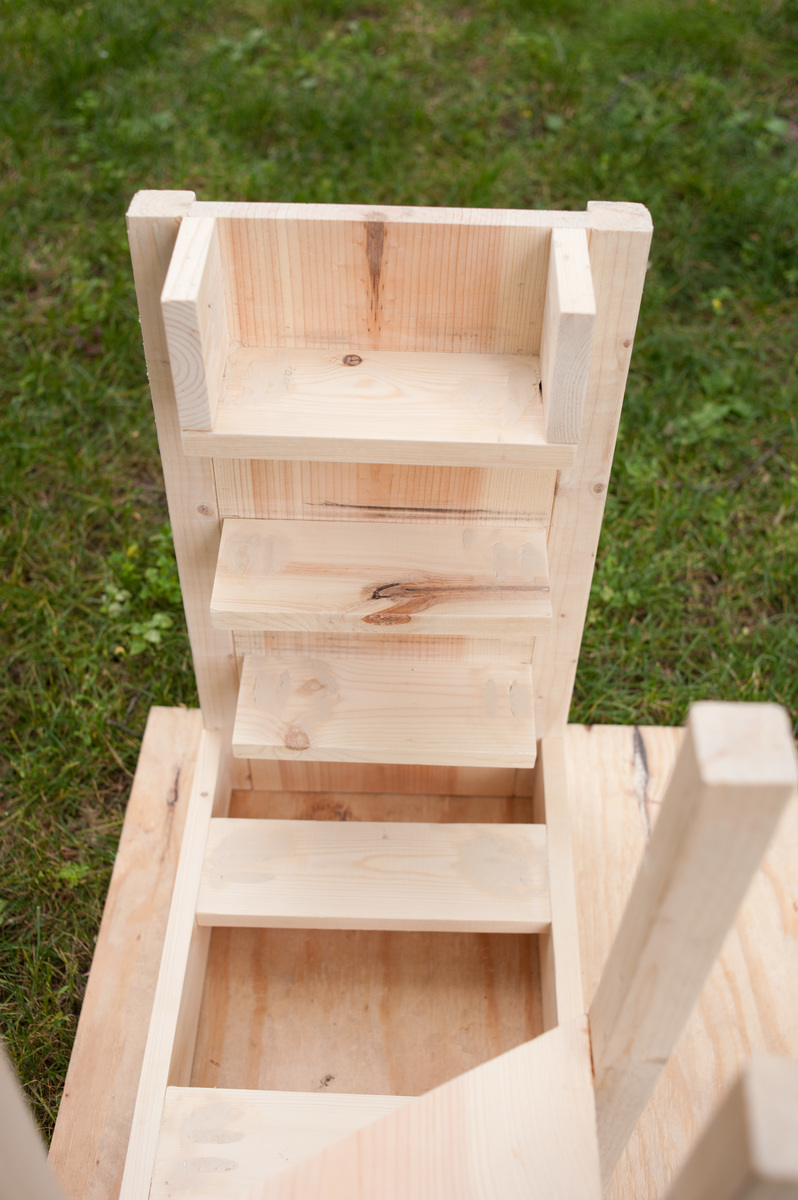
loft bed for 18" doll
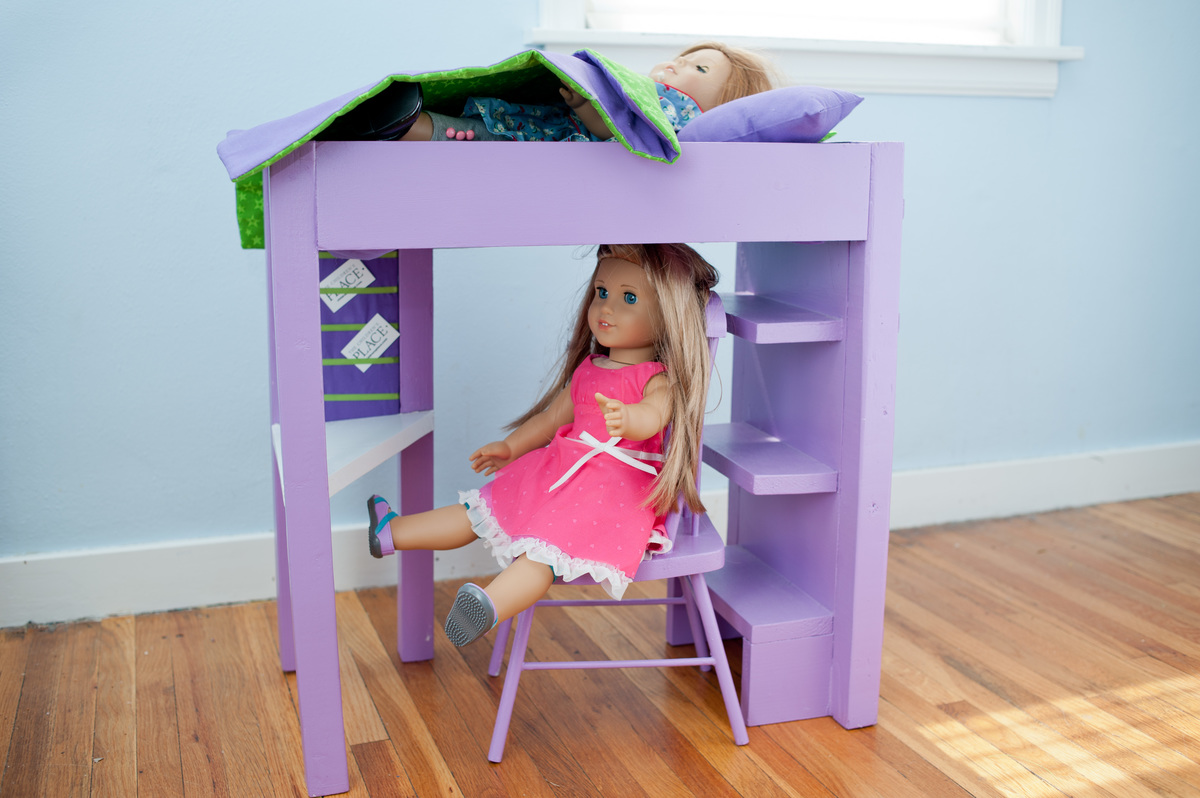
My daughter had asked about American Girl doll beds two summers ago. She looked at several plans on this site and chose this one.
A huge thanks to my neighbor who lent me his compound miter saw.
My 9 yr. old son and 10.5 yr. old daughter helped with pocket holes and screws. The were also helpful in determining next steps when I got "stuck".
Started this project last summer. By fall, when life got crazy, stopped the project. Finished details this spring.
Note: Chair was a garage sale find and repainted.
I'm a recovering perfectionist. If I wasn't so particular, I probably could have finished this in a weekend, but it took me much longer.
I attached photos of the finished bed and before painting. I'm very visual...hoping the photos will help someone else.
I have a few more photos. If anyone needs to see more views, please feel free to contact me.
Hoping to build more projects before my neighbor needs his saw back!

Estimated Time Investment
Weekend Project (10-20 Hours)
Finish Used
sanded, primed, behr interior semi-gloss (color: daylight lilac).
(Thank you Little Stuf for the plans)
(Thank you Little Stuf for the plans)
Recommended Skill Level
Beginner
Cubbies Caddy
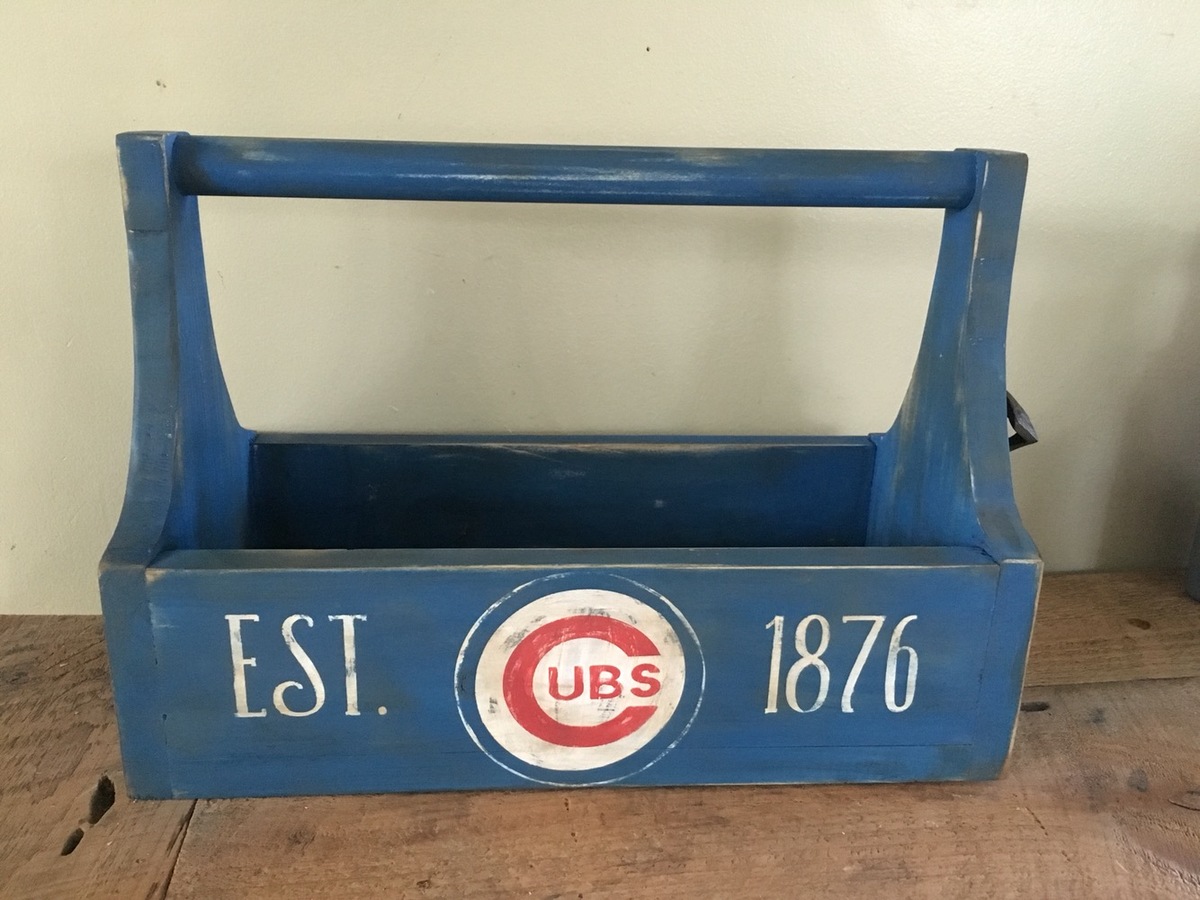
Just a fun tool caddy for the sports lover (Cubs or other teams) out there. It has a beer opener on the side so you honestly don't have to move when cracking open a cold one. Be it soda or beer that doesn't require you to twist it off.
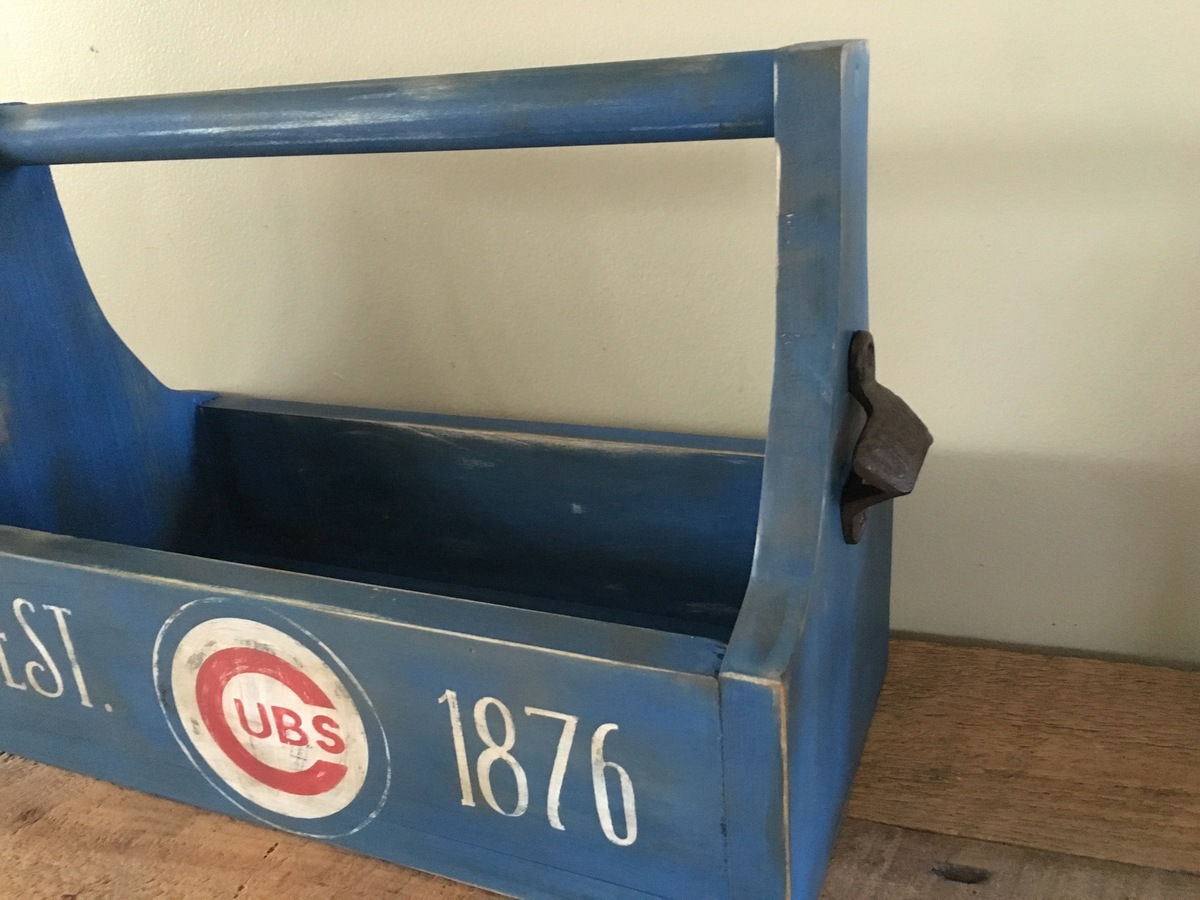
Estimated Cost
10 dollars
Estimated Time Investment
An Hour or Two (0-2 Hours)
Finish Used
Chalk paint
Recommended Skill Level
Beginner
Garage Shelves attached to walls on 2x3
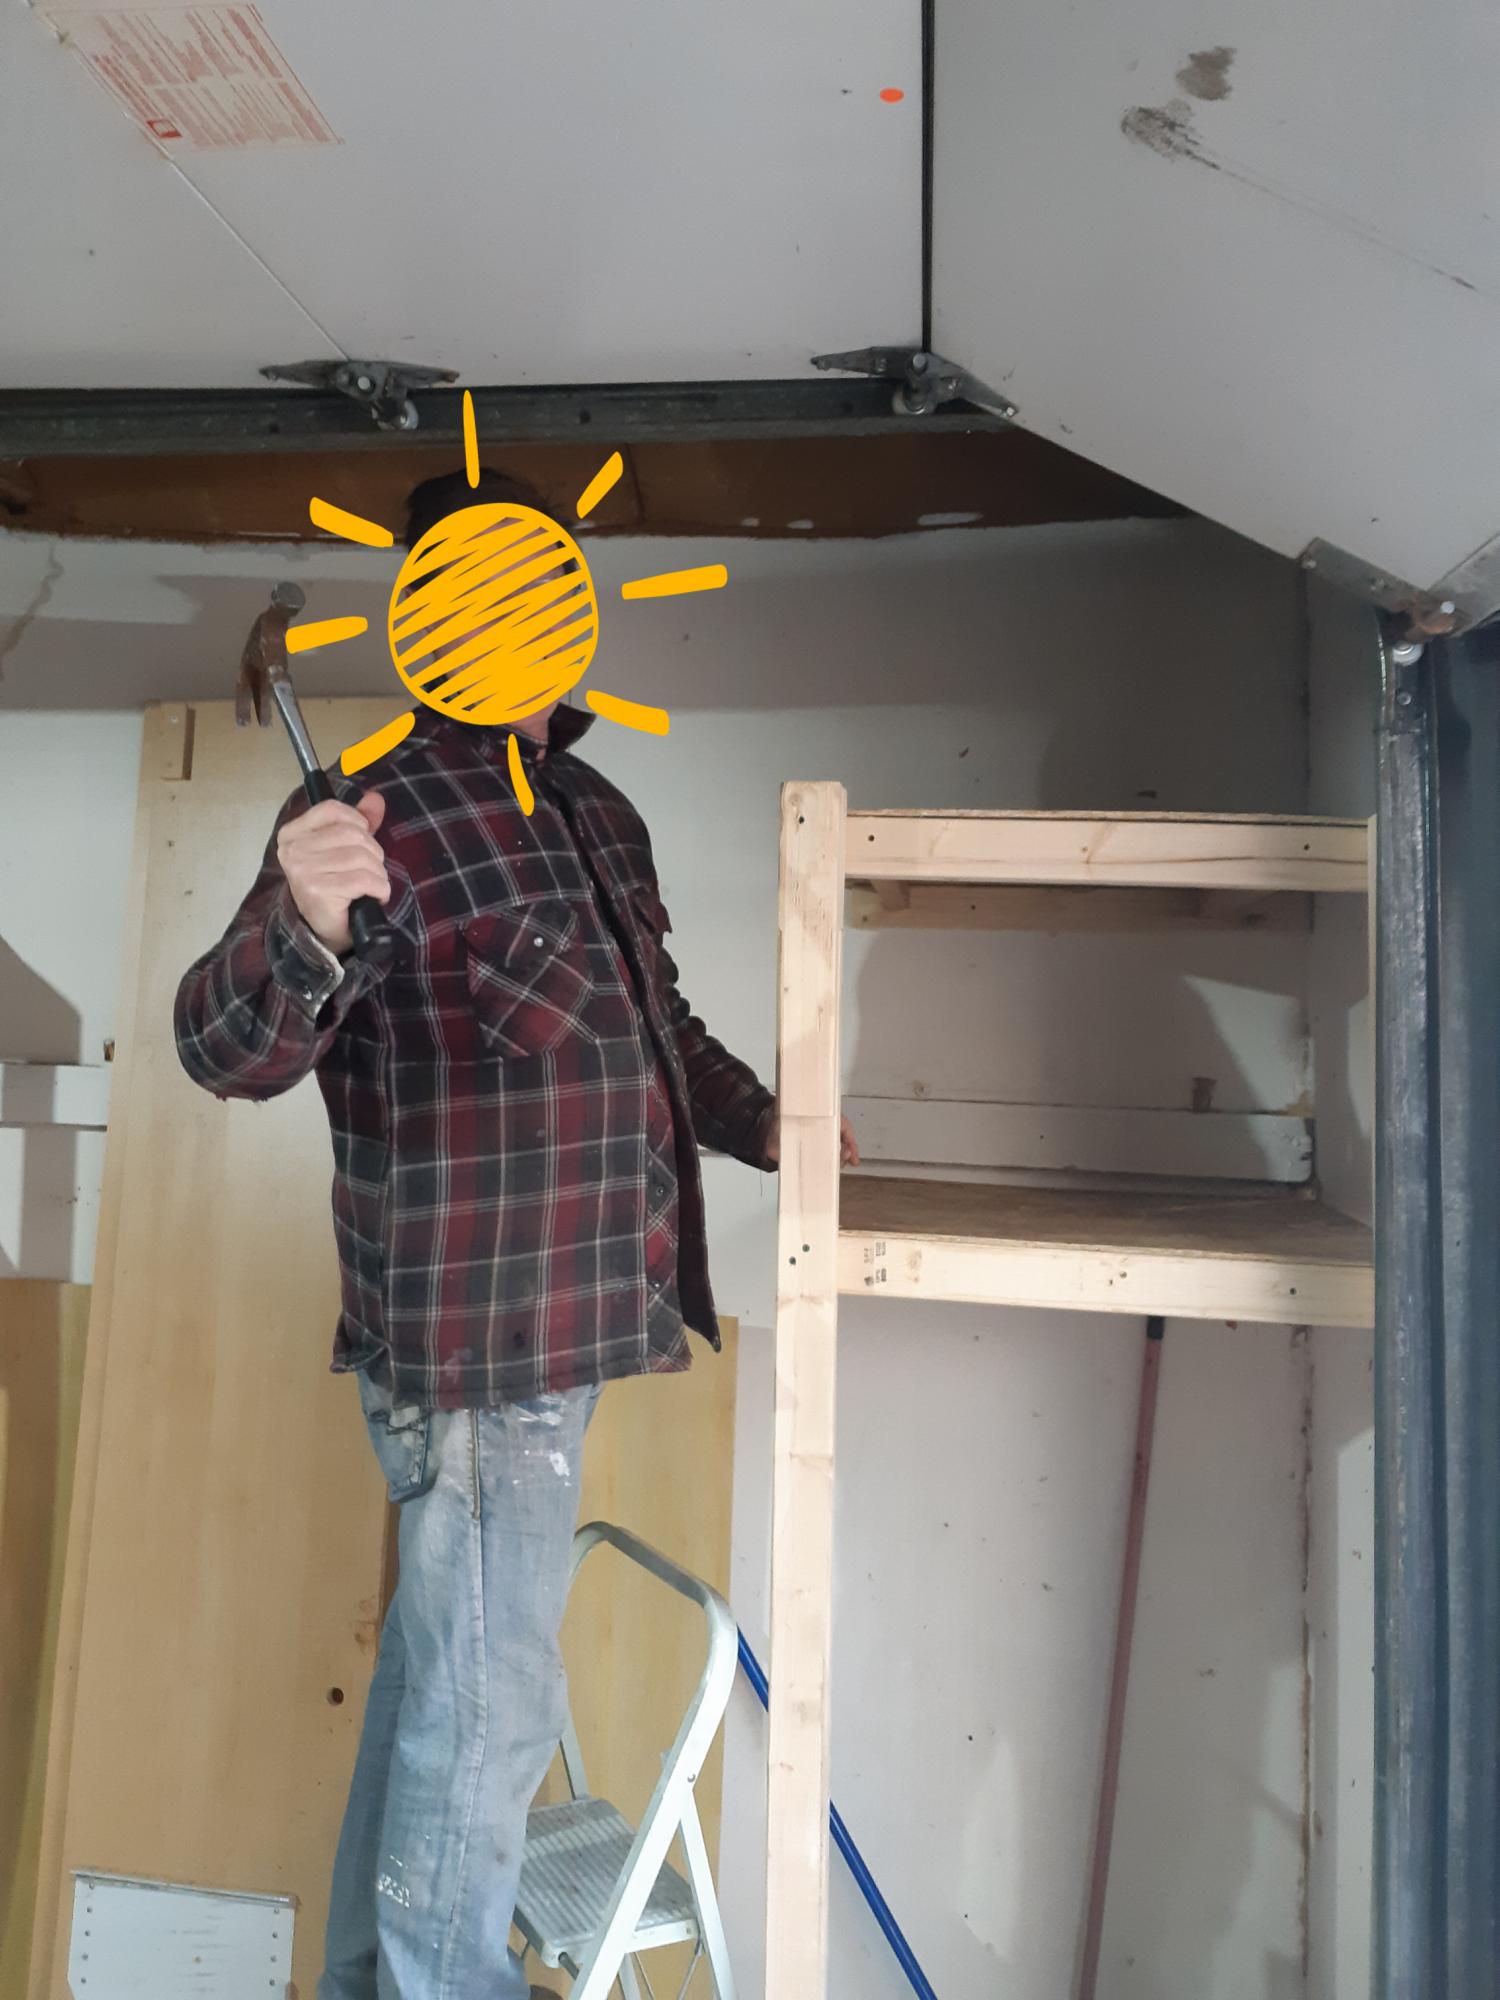
We used this idea to renovate the garage, painted it and then we decided to go with different dimensions and make a dedicated place to put the BBQ inside.
We used the basic structure idea and modified it to create more shelves with different sizes, heights and widths to match our needs.
We used 2x3 mostly and for smaller shelves items like spray cans, paints and lighter stuff, 2x2's
We screwed pocket holes likes (without pocket) for the crossings, spaced at 3 for each 8 feet and for the base we used OSB 0.25 inches, then nailed or screwed the base to make it more solid.
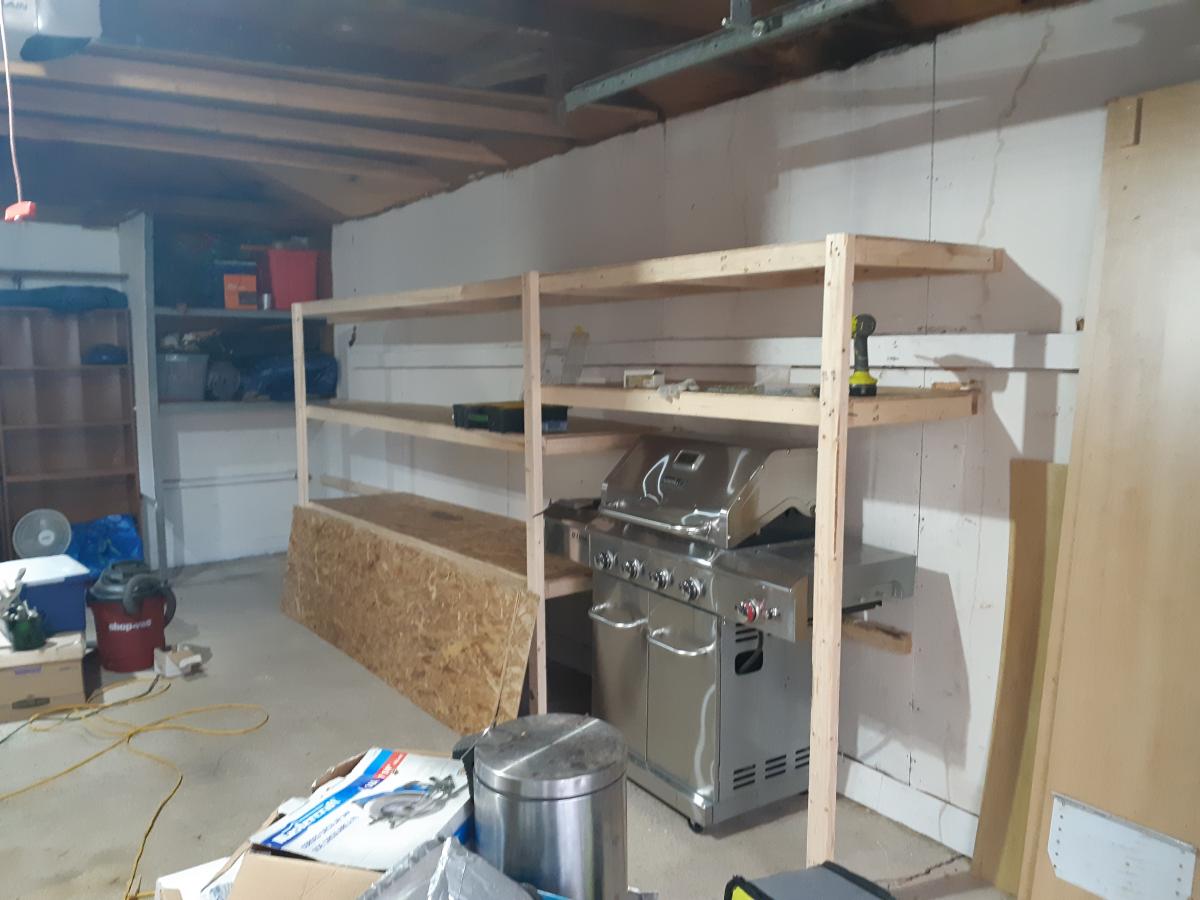
Built from Plan(s)
Estimated Cost
60$
Estimated Time Investment
Afternoon Project (3-6 Hours)
Finish Used
Storage for totes, tools and house items
Recommended Skill Level
Starter Project