Community Brag Posts
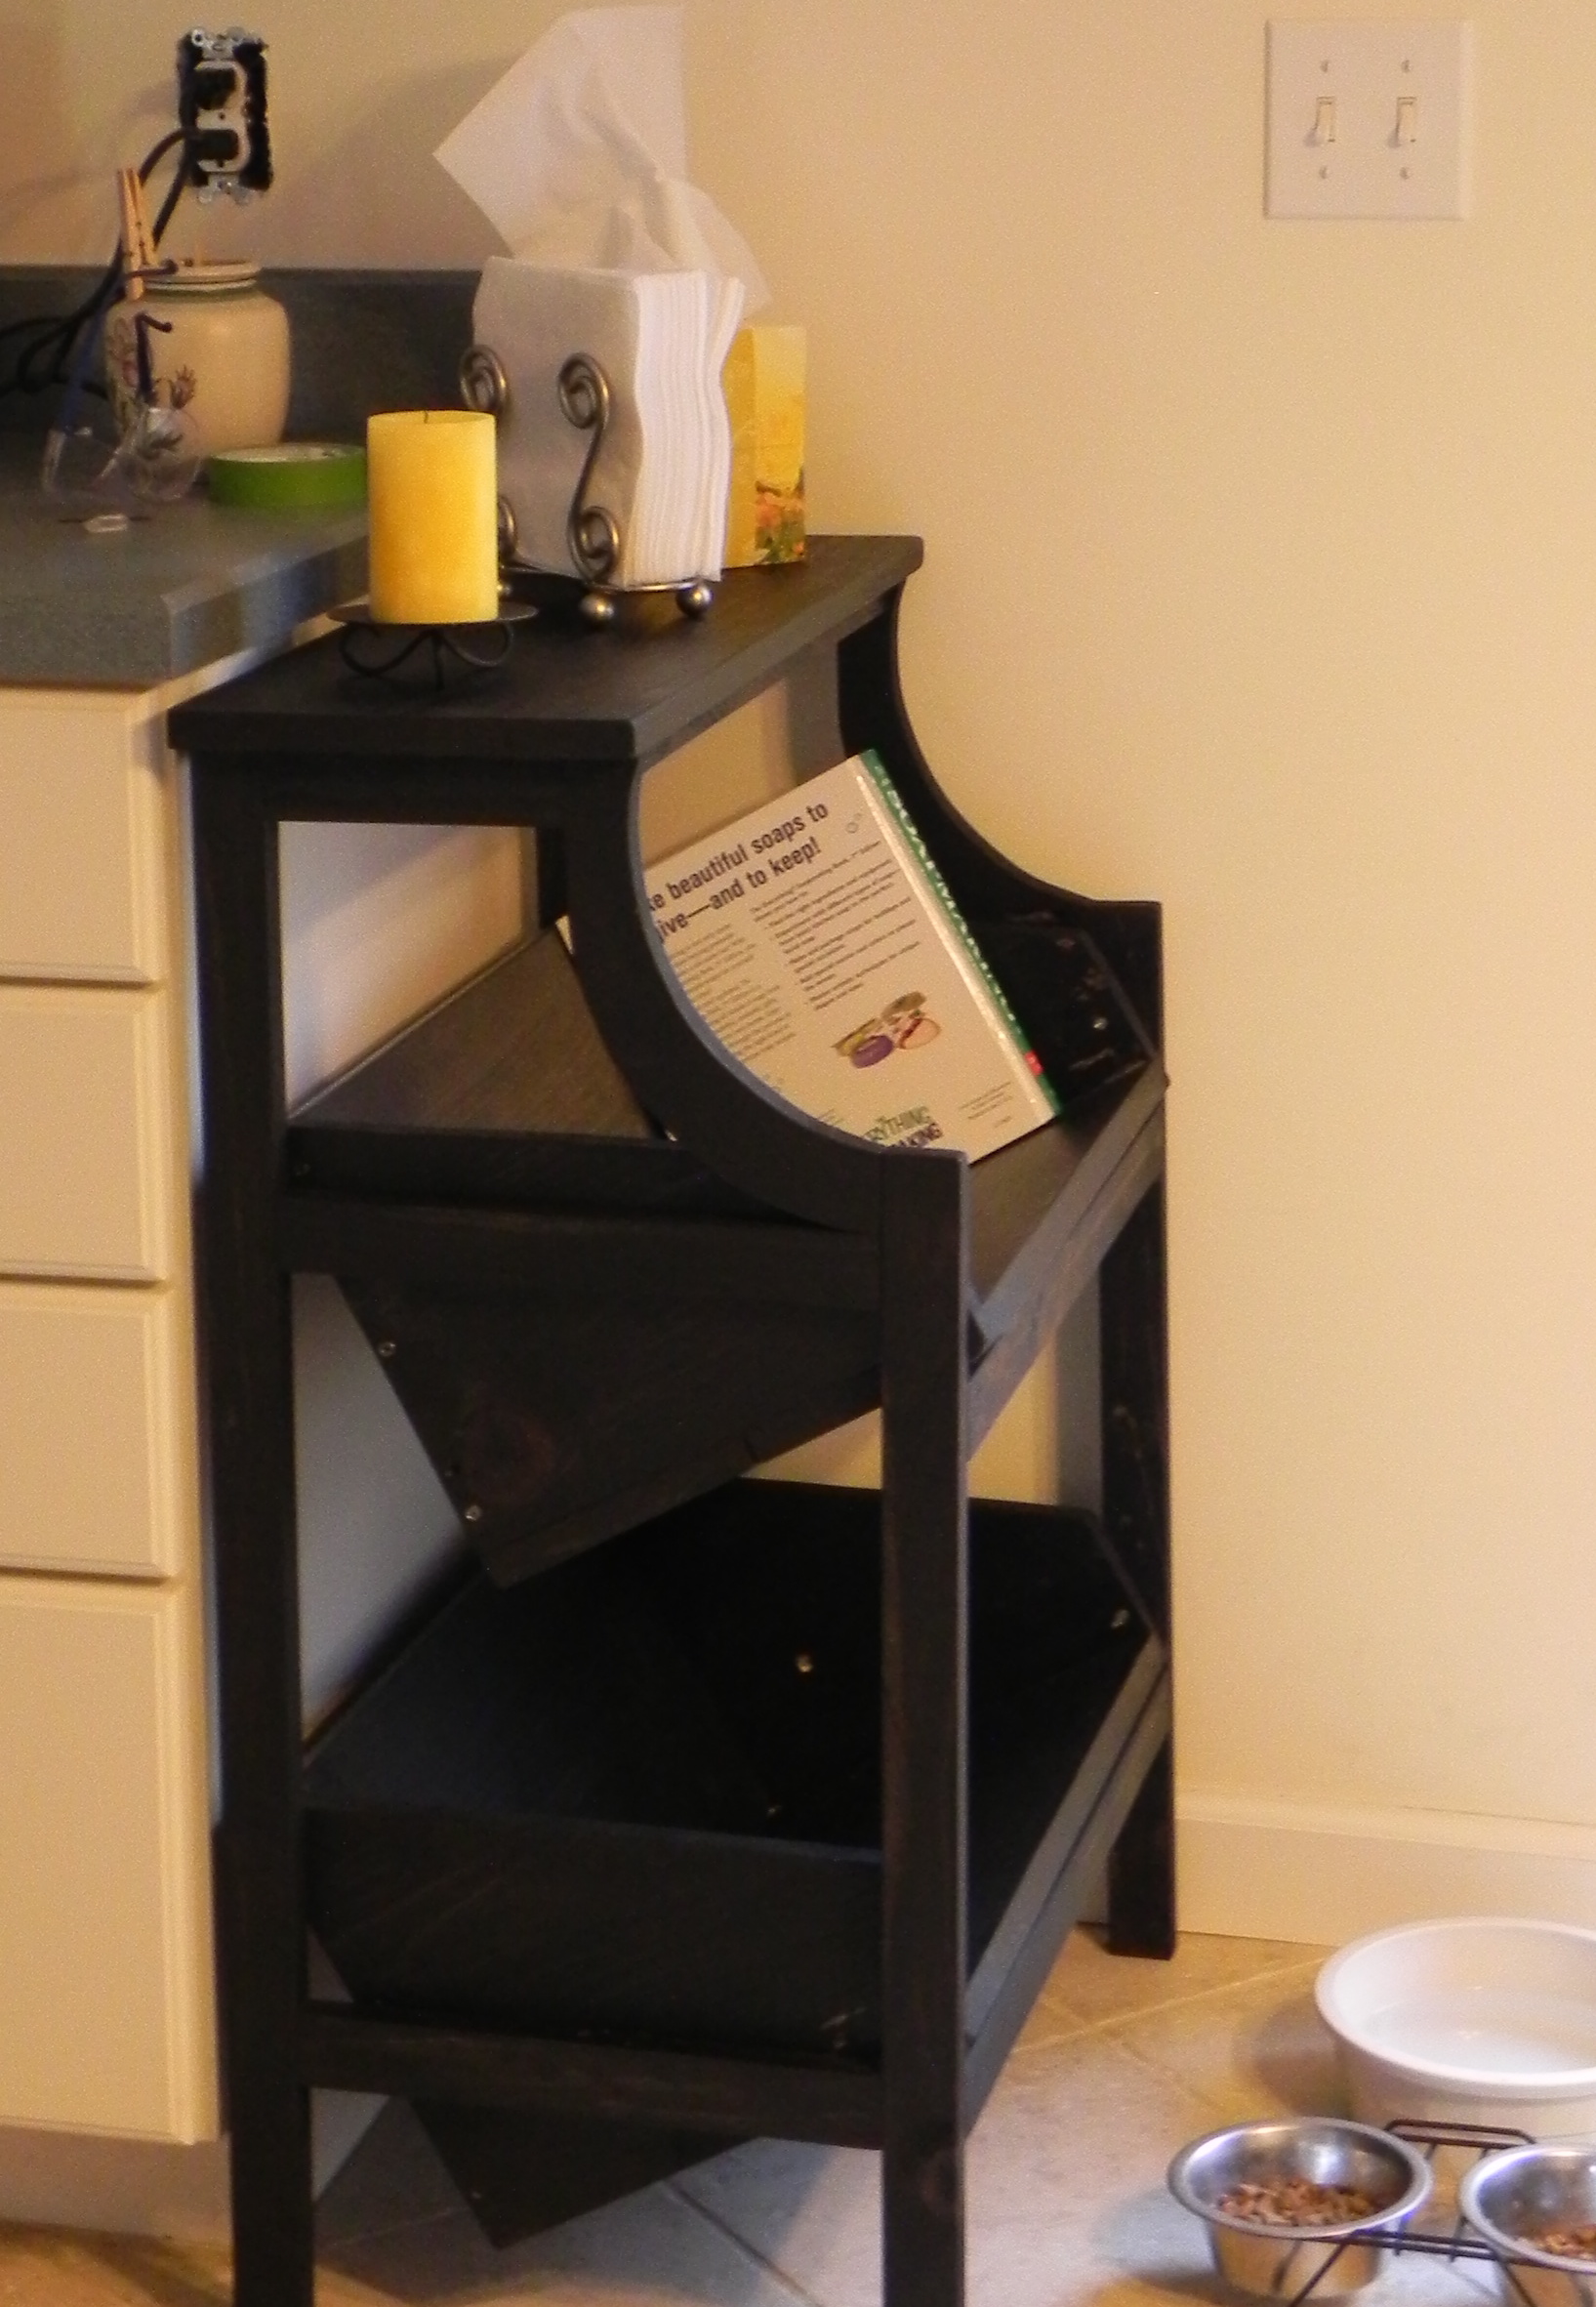
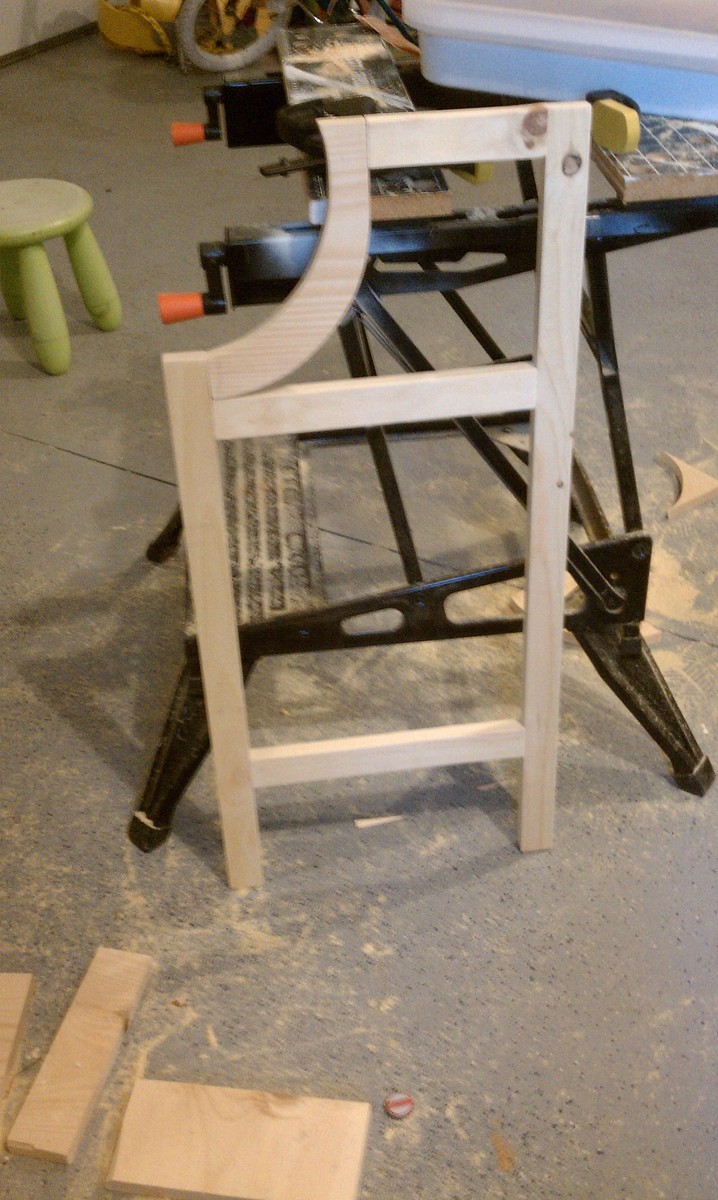
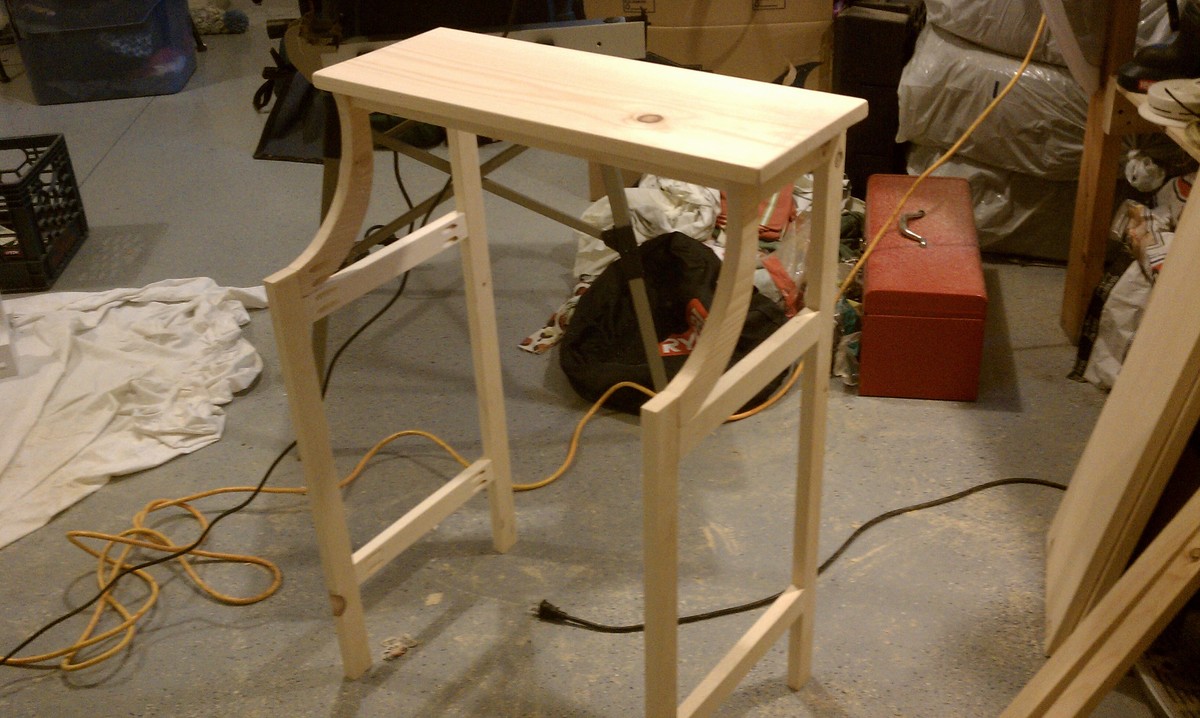
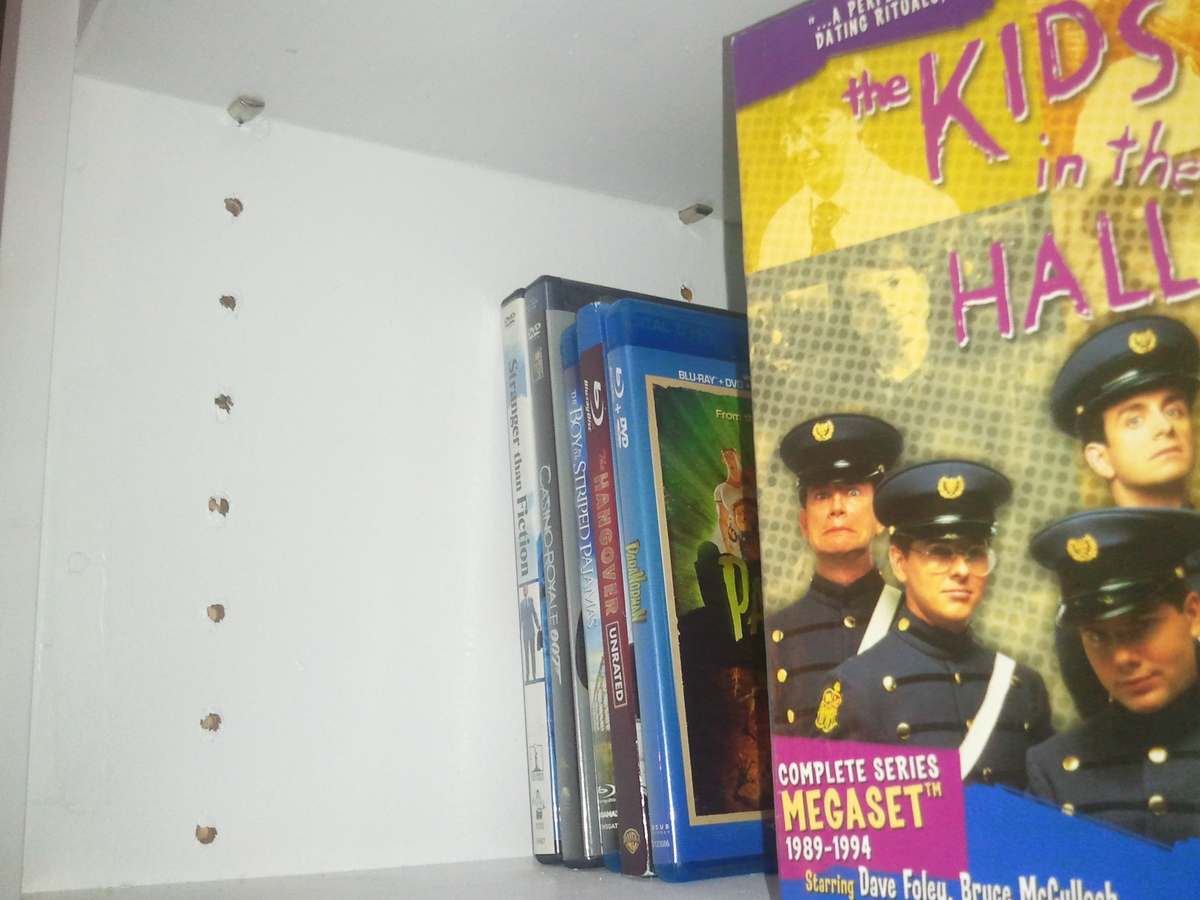
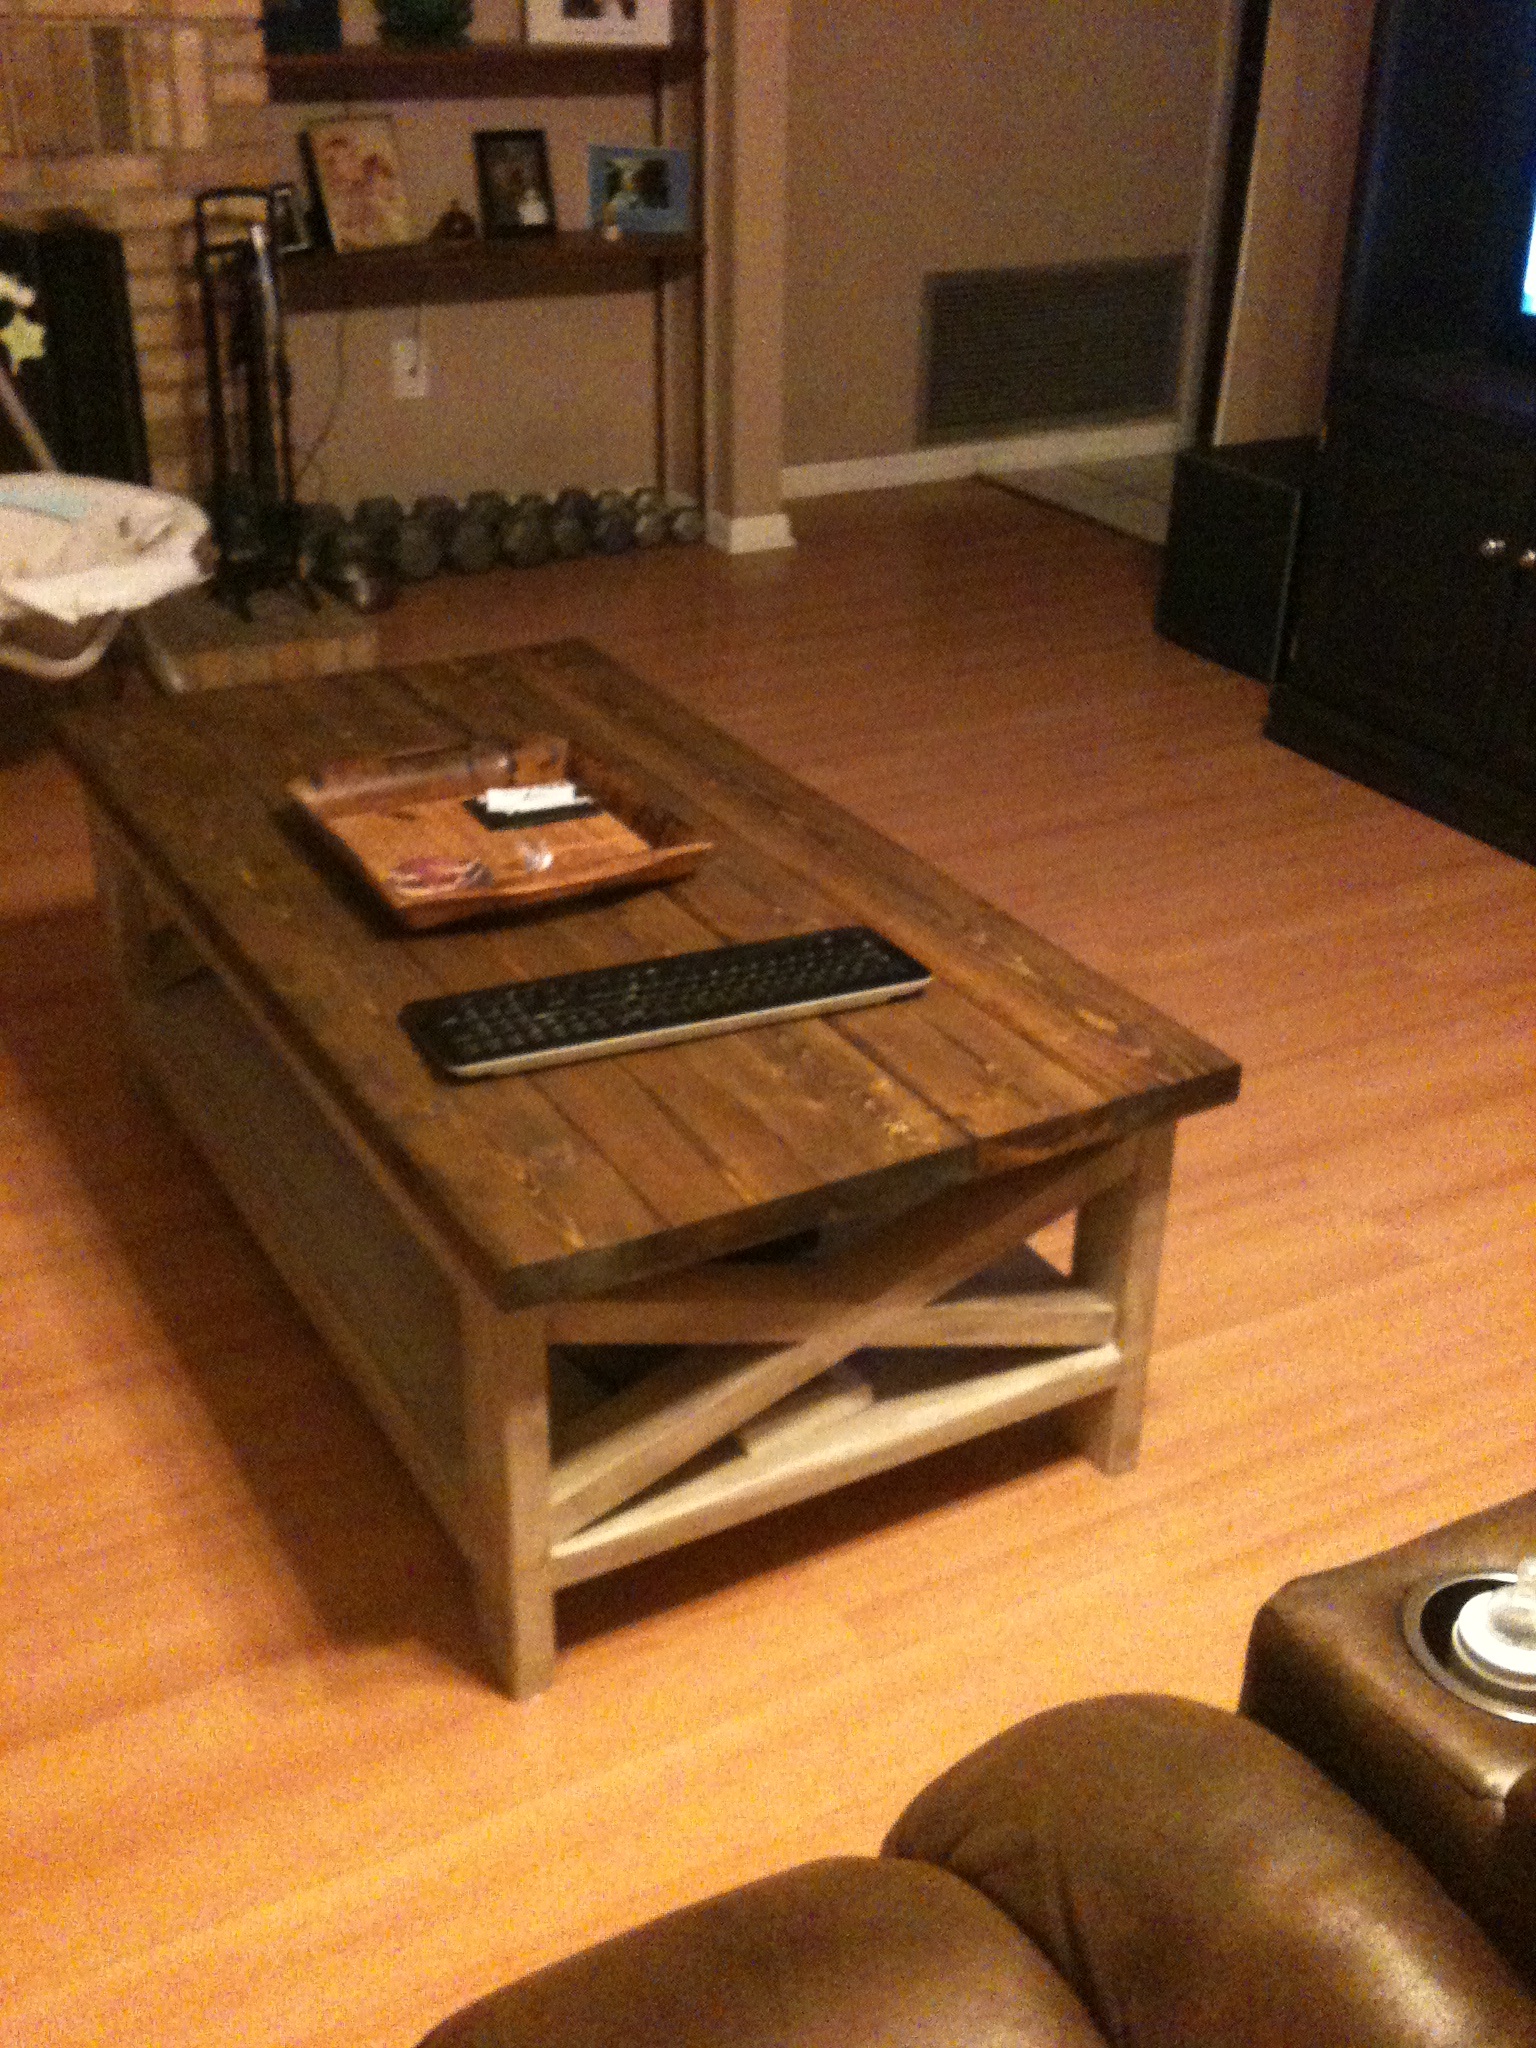
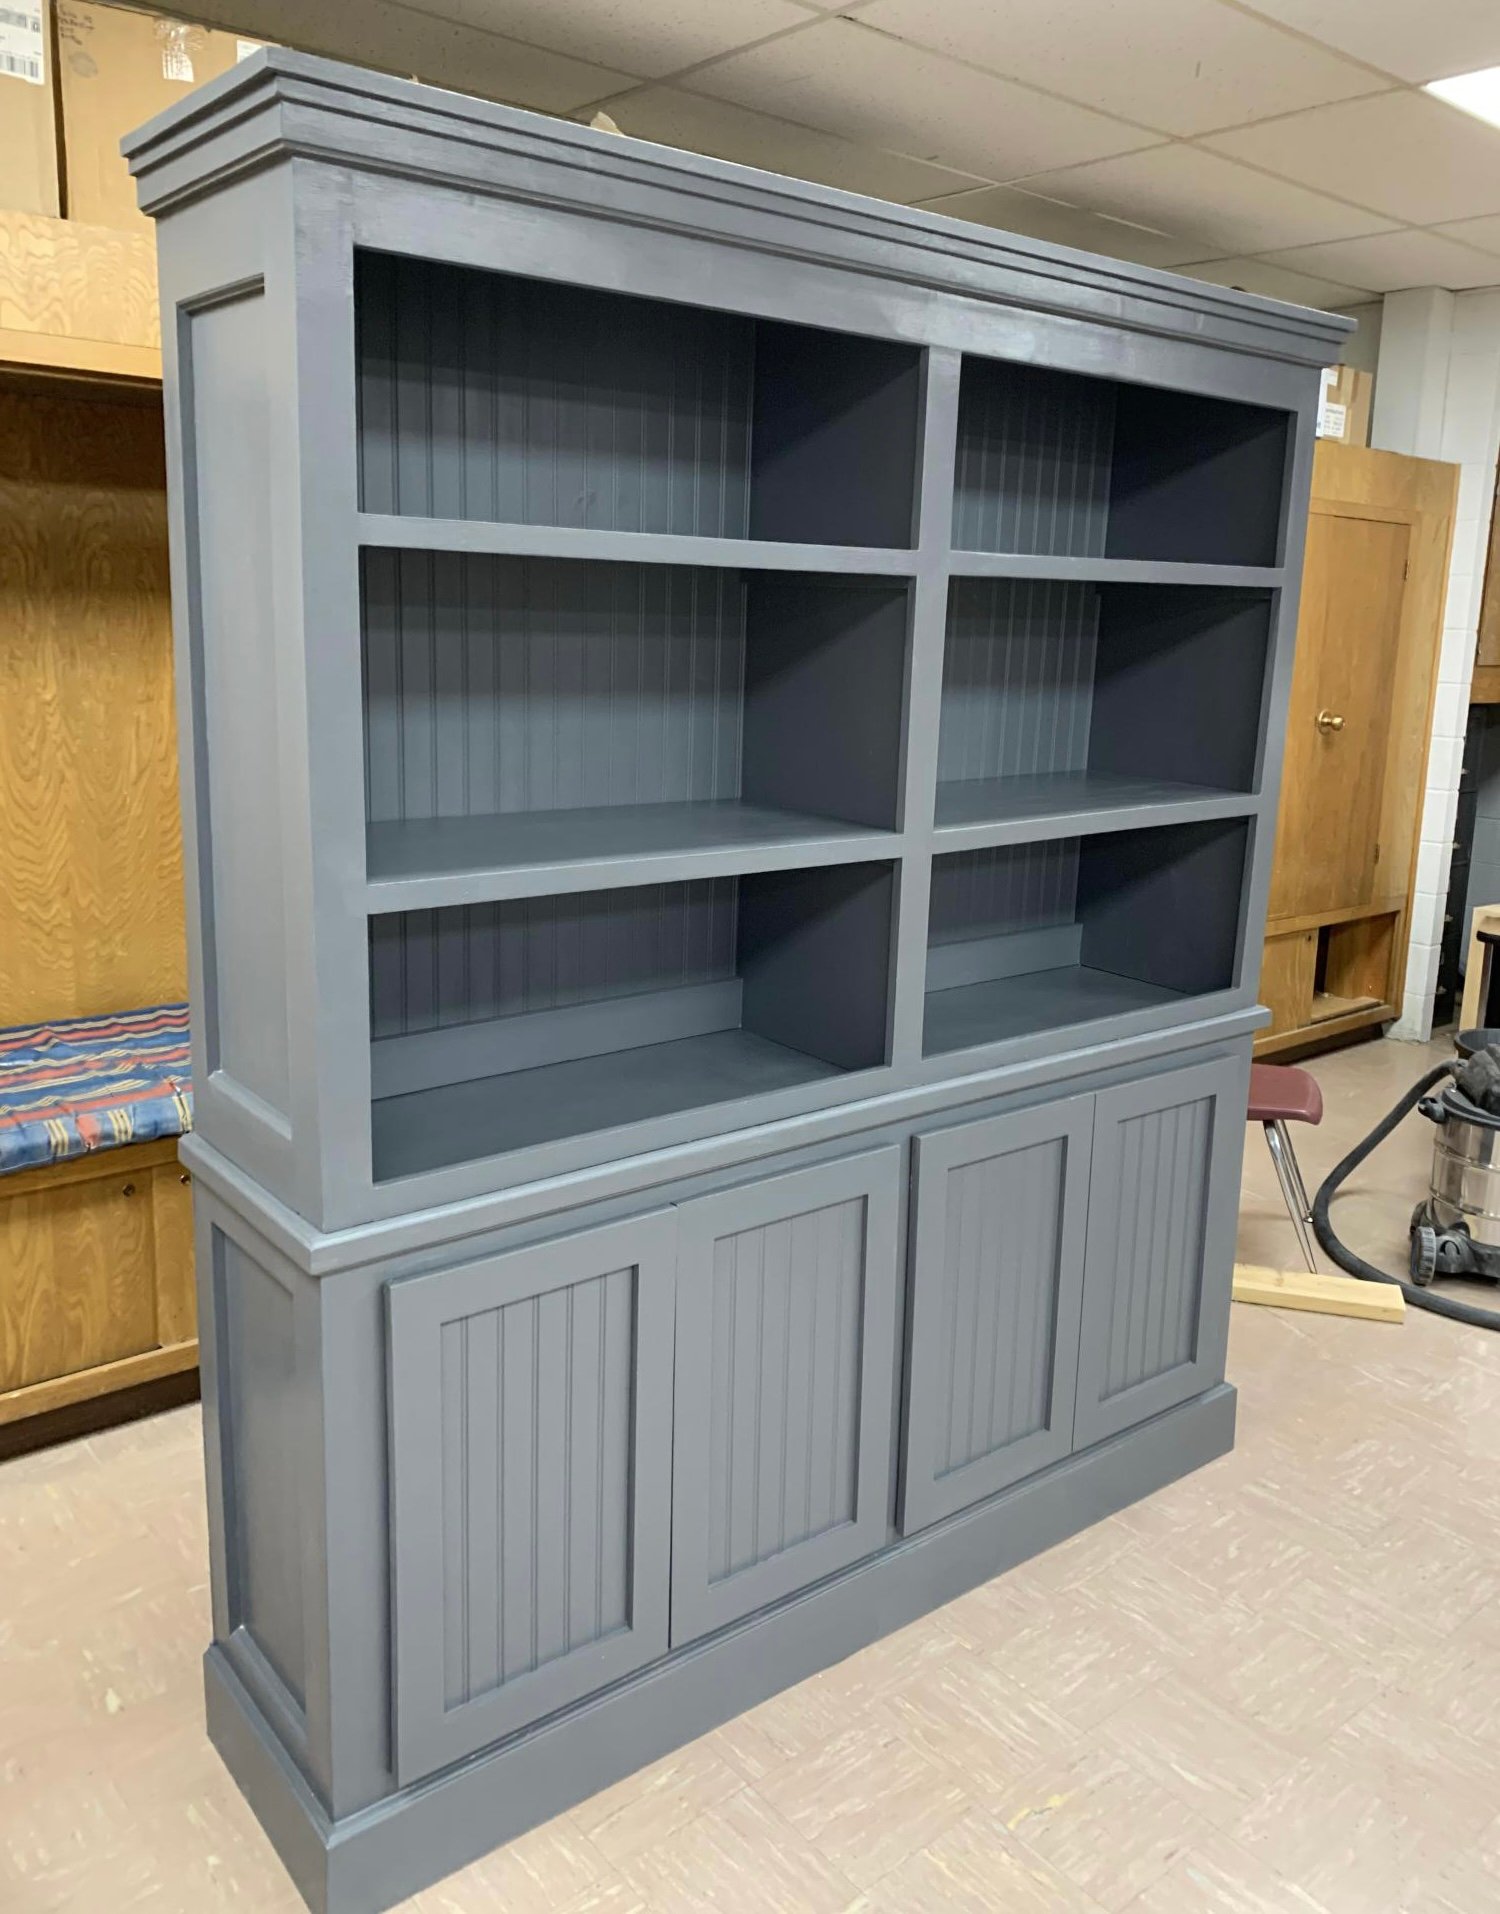
Console Bookshelf
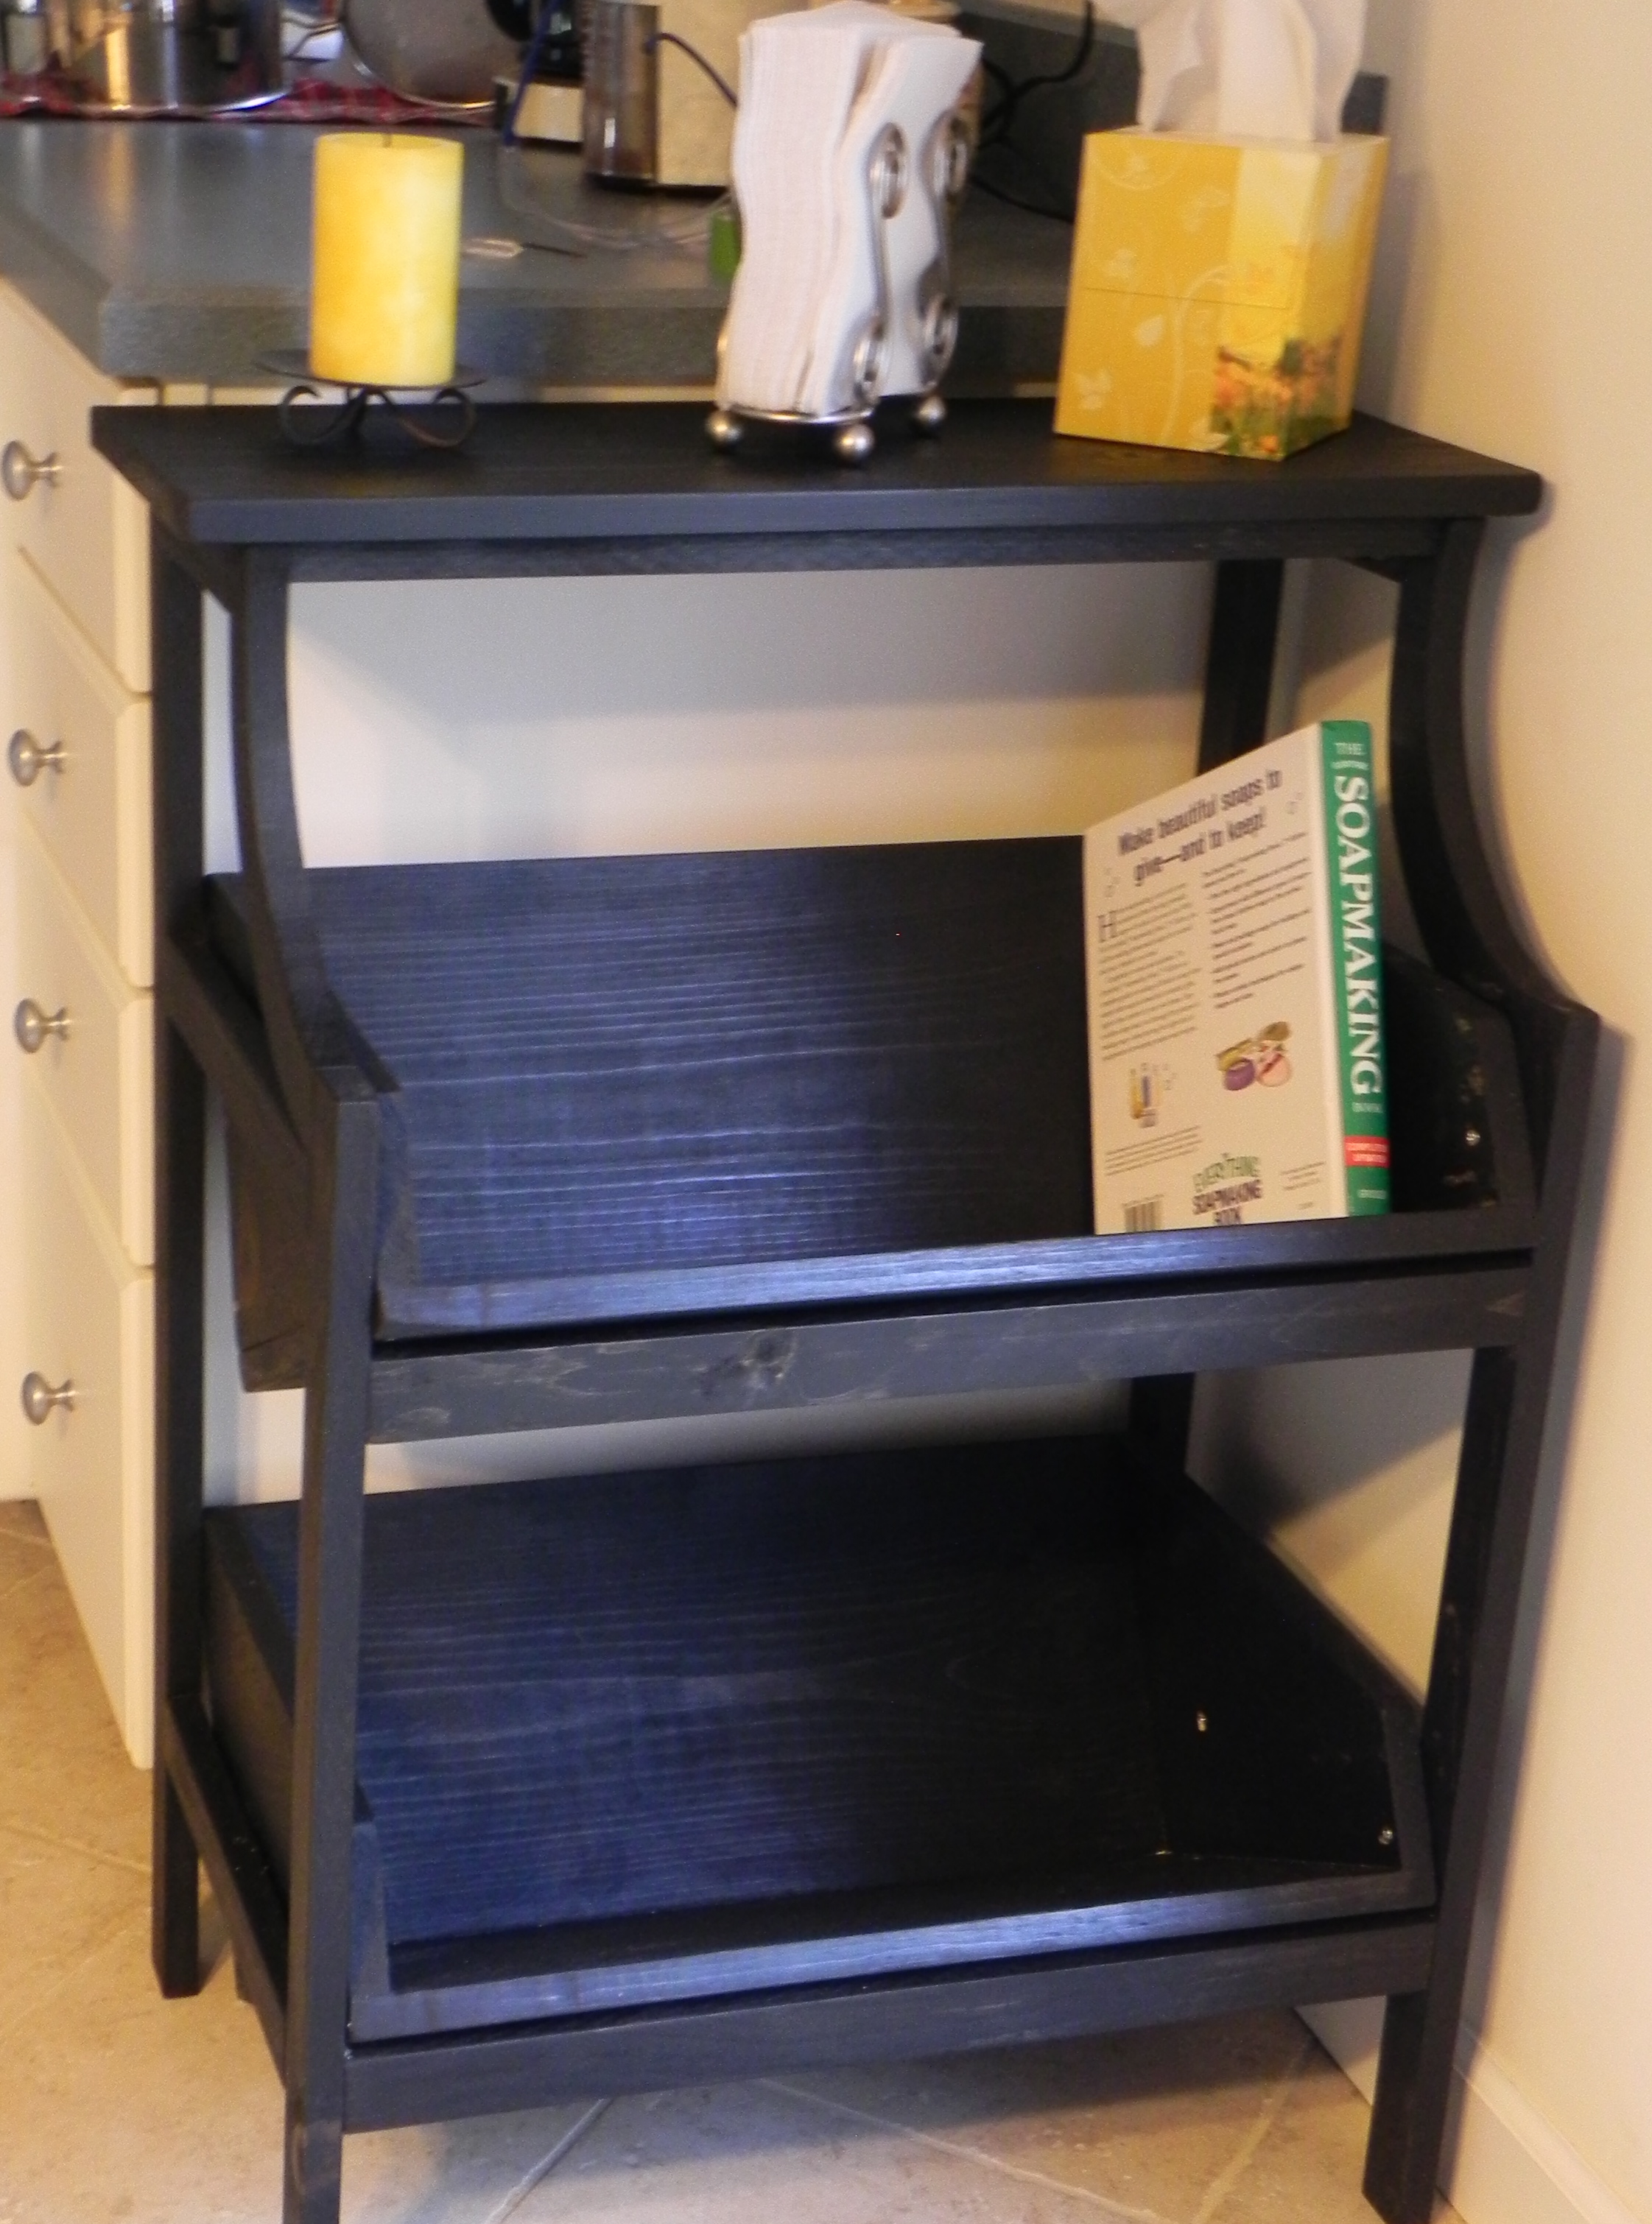
A bookshelf to help with the everyday clutter in our kitchen.
Built from Plan(s)
Estimated Cost
$50
Estimated Time Investment
Day Project (6-9 Hours)
Finish Used
Used MinWax Ebony stain and rub on poly
Recommended Skill Level
Beginner
Comments
Sat, 11/05/2011 - 12:07
Turned out great!
Glad to see someone build this plan--have been considering it, but wanted to see a finished photo. Thanks!
Sun, 05/26/2013 - 11:04
how wide?
The plan shows a total width of 39" but that's a bit too much for me (I'm mostly just wanting to store reference books next to my desk and don't need that much space). I like the proportions on your build, can you say how wide it is? (I'm assuming it's not 39", unless you have some massive countertops!)
Thanks.

Fri, 06/21/2019 - 13:44
Love this in the kitchen! …
Love this in the kitchen! Great job! So glad you sent in a brag post! Thank you!
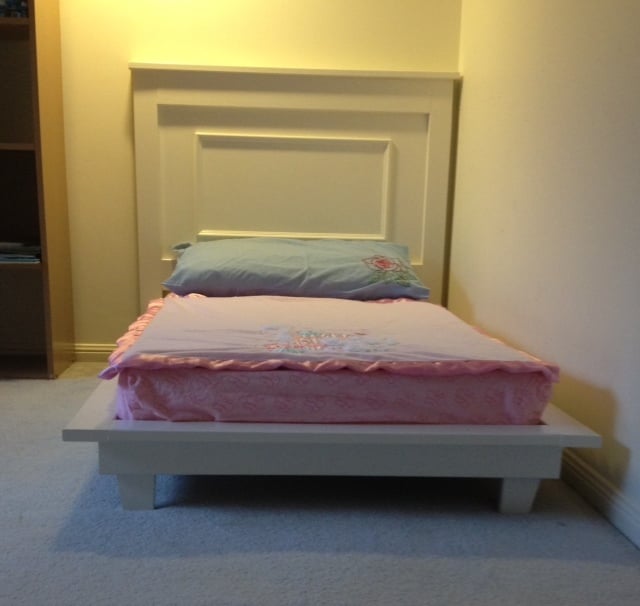
Fillman Toddler Bed
First build and totally happy with result . The excitement and smiles of our 18 months old grand-daughter was worth every effort !

Built from Plan(s)
Estimated Cost
$20 Aud
Estimated Time Investment
Weekend Project (10-20 Hours)
Finish Used
Acrylic White Gloss
Recommended Skill Level
Starter Project
Comments
Thu, 10/24/2013 - 01:42
Thank you Ana for sharing
Thank you Ana for sharing your resources and providing the encouragement to try new things .

Thu, 10/24/2013 - 13:20
Super Cute
Love this bed! What a super cute room for your grand-daughter! Looks totally professional, would never guess this is a first build -- Great job!
Octagon picnic table
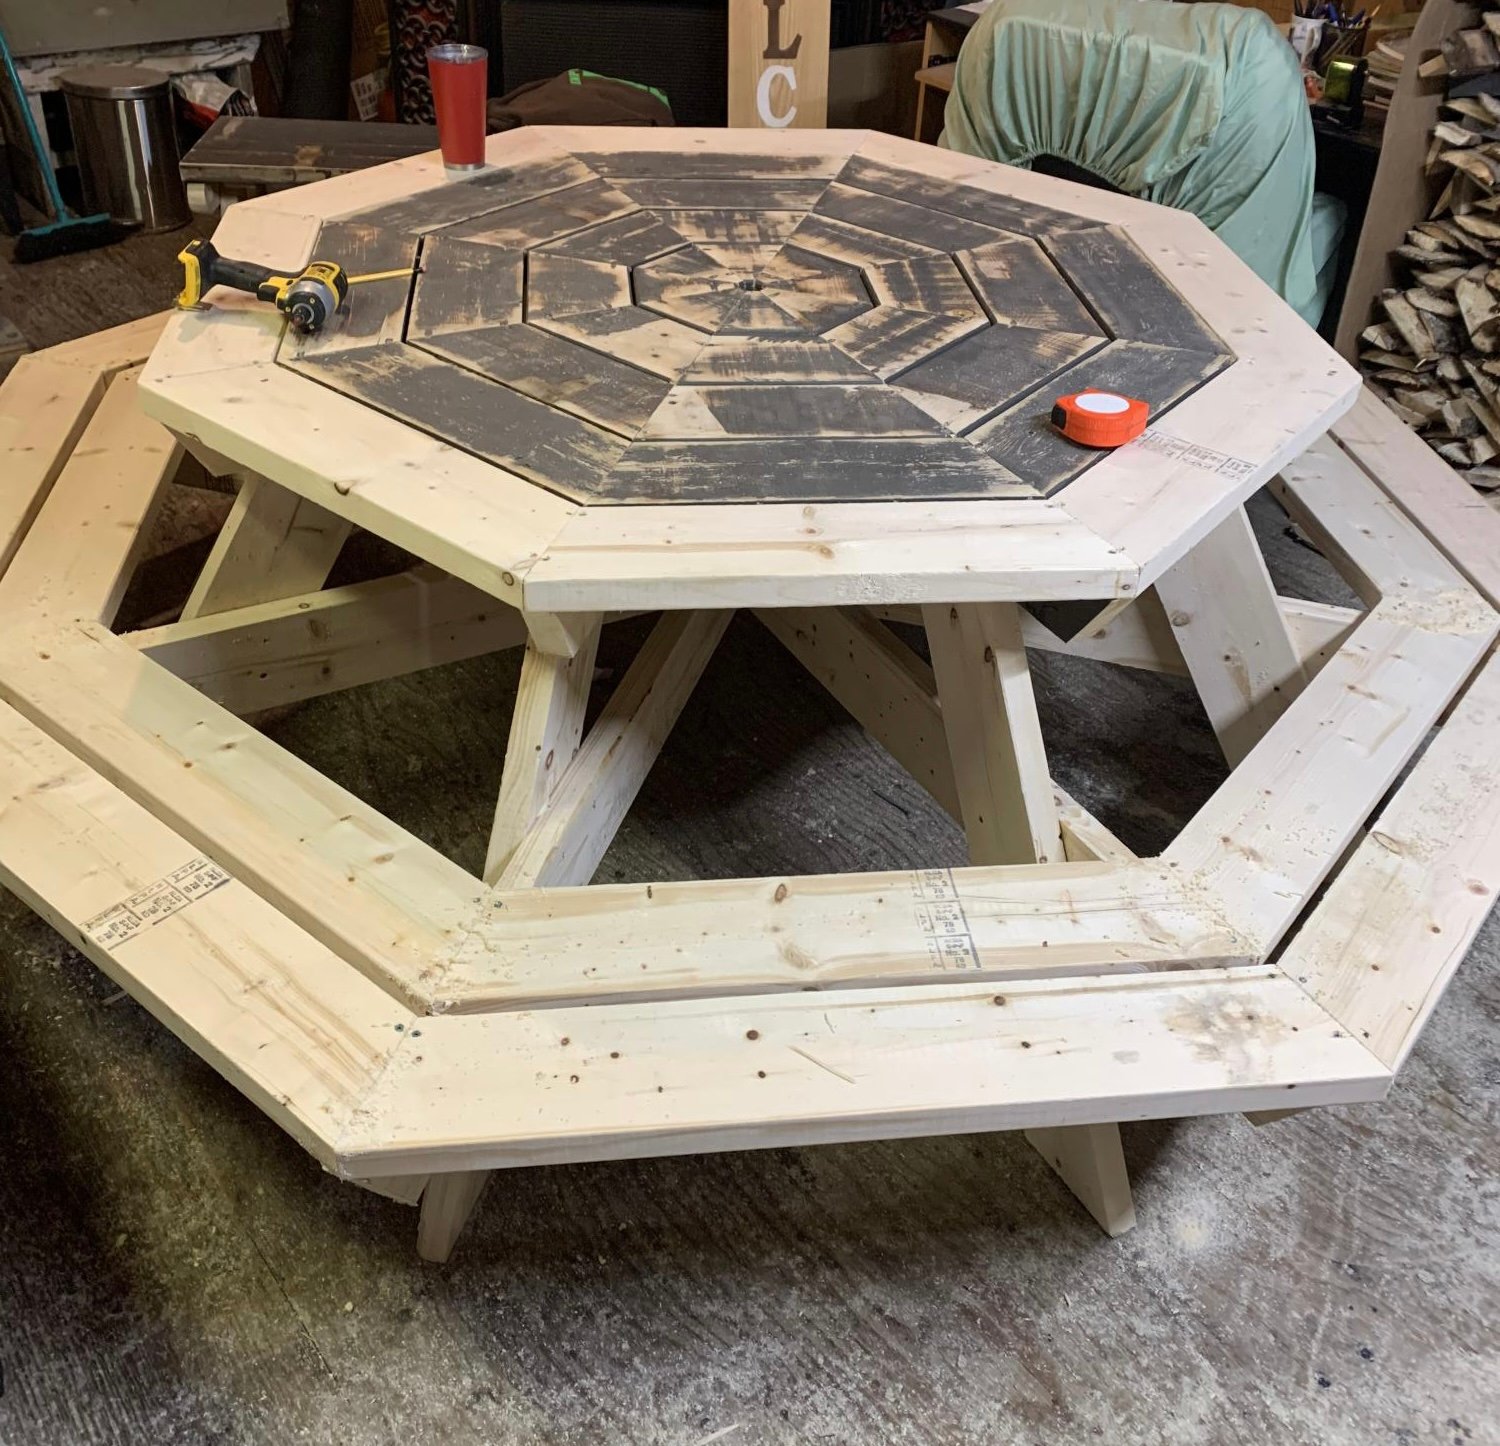
Great project . Easy plan to read .
Built from Plan(s)
Comments
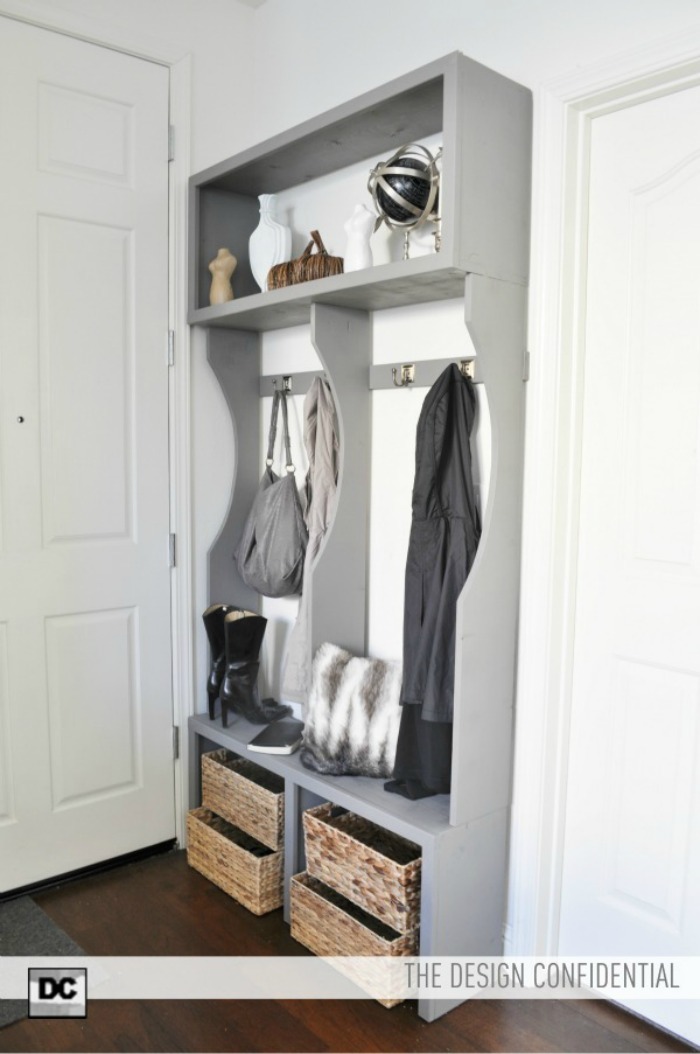
Entryway Locker System
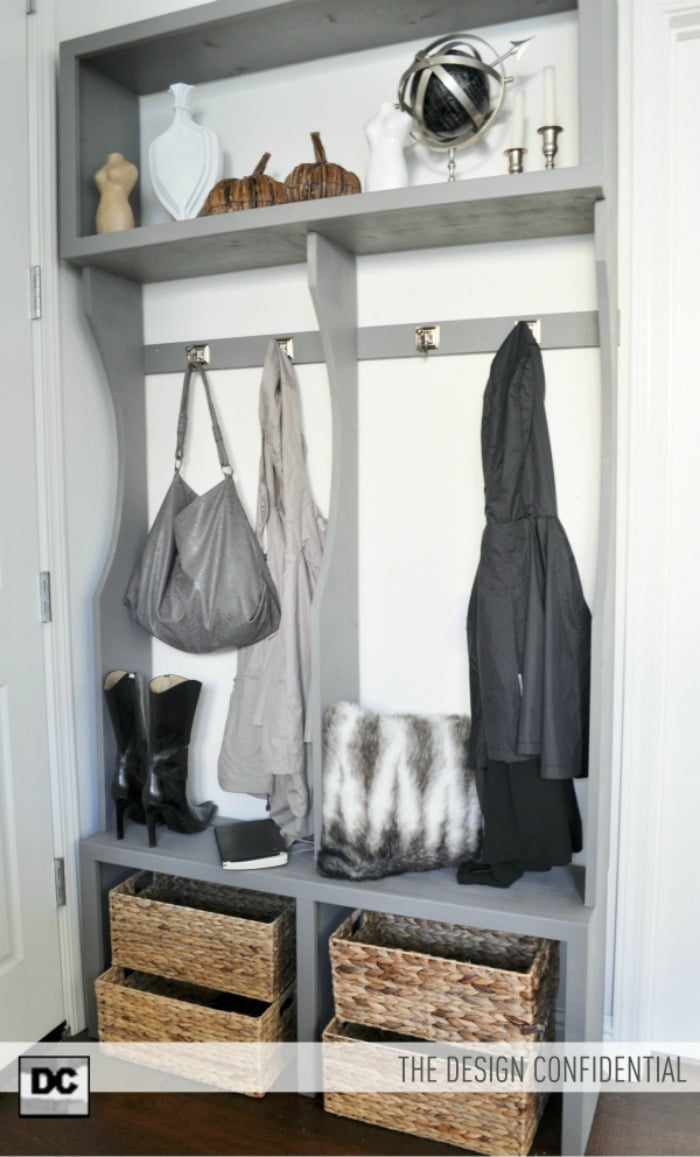
I fell head over heals in love with Ana's Smiling Mudroom Project... but alas I have no mudroom in my home and no available closet to transform. *Sad Face* I do however have exactly the depth of a 1x10 between my front door and entryway wall. *Happy Face*
I modified her plans to fit a more narrow profile... (much more narrow) and also shortened it to about half the width.
I couldn't be happier with the finished product and I'm happy to share the modified plans with any of you who also lack a mudroom or any sort of entryway organization whatsoever!
Modified Mudroom Plans for an Entryway Locker System can be found here! Yay
Built from Plan(s)
Estimated Cost
$40
Estimated Time Investment
Afternoon Project (3-6 Hours)
Finish Used
Zinc by Martha Stewart for Home Depot in Eggshell
Recommended Skill Level
Beginner
Comments

Wed, 11/09/2011 - 17:47
I still can't get over this...
I just love it! Wish I had a spot for even THIS. BTW, Can I steal your boots? PLEASE?! :-)
Mon, 11/14/2011 - 05:37
Great job!
It looks amazing! I love the shelves on the bottom for the smaller baskets. I'm still working up the courage to build this one!
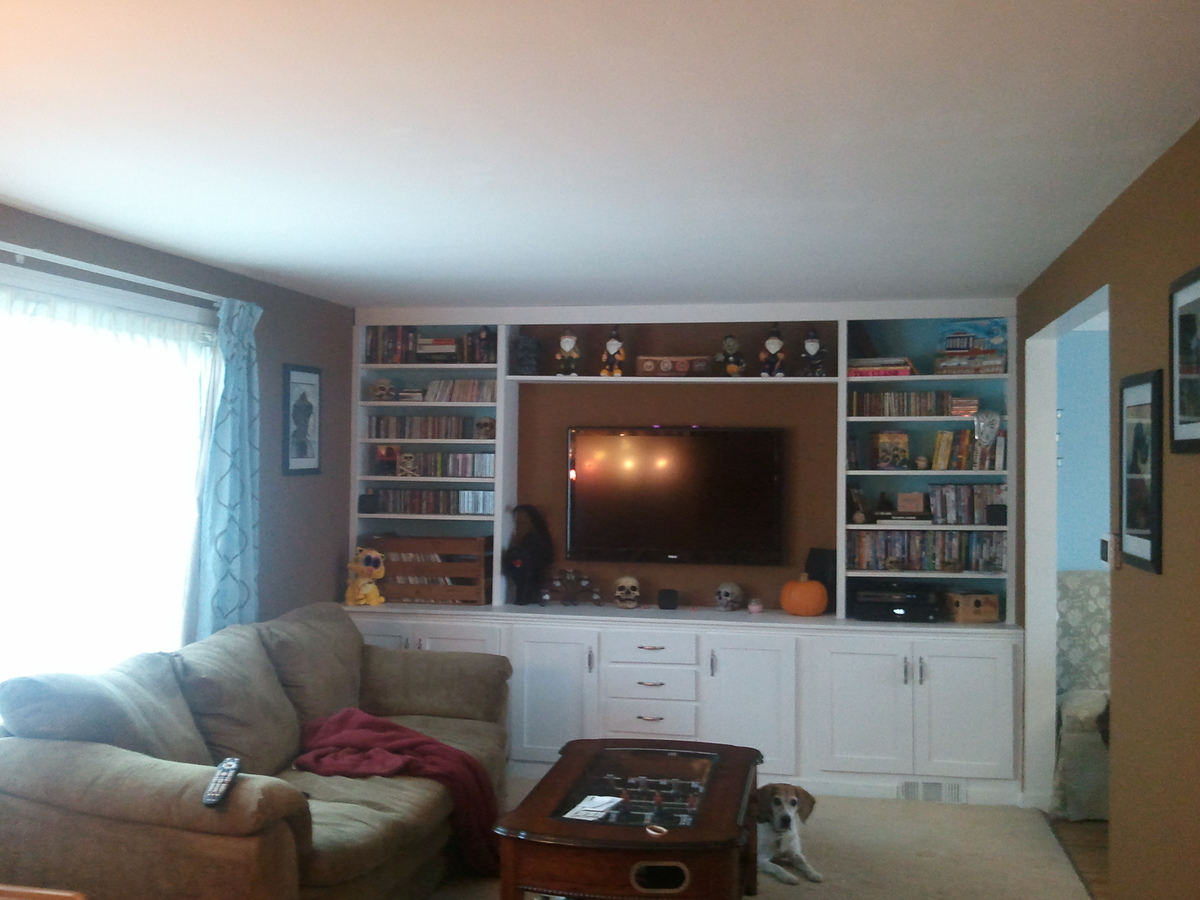
Super Storage TV Wall
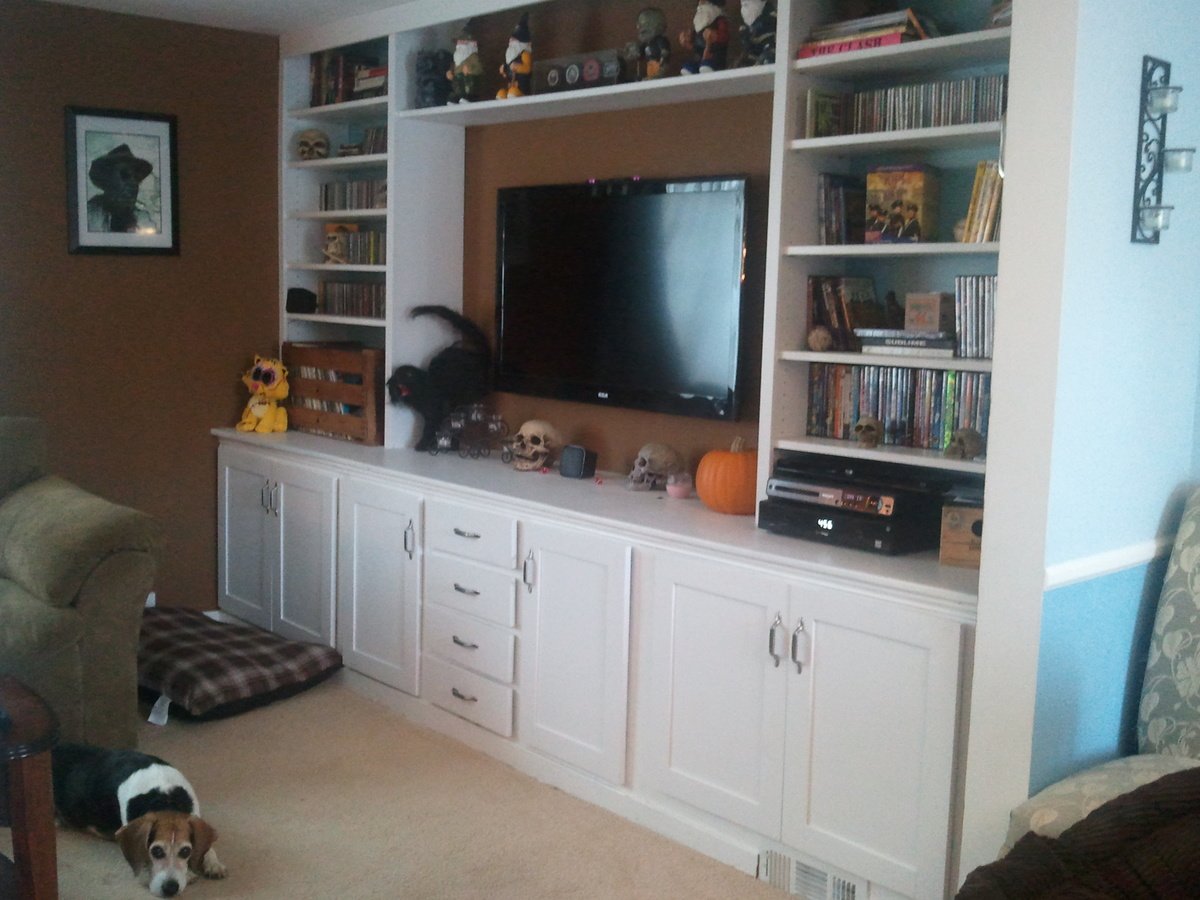
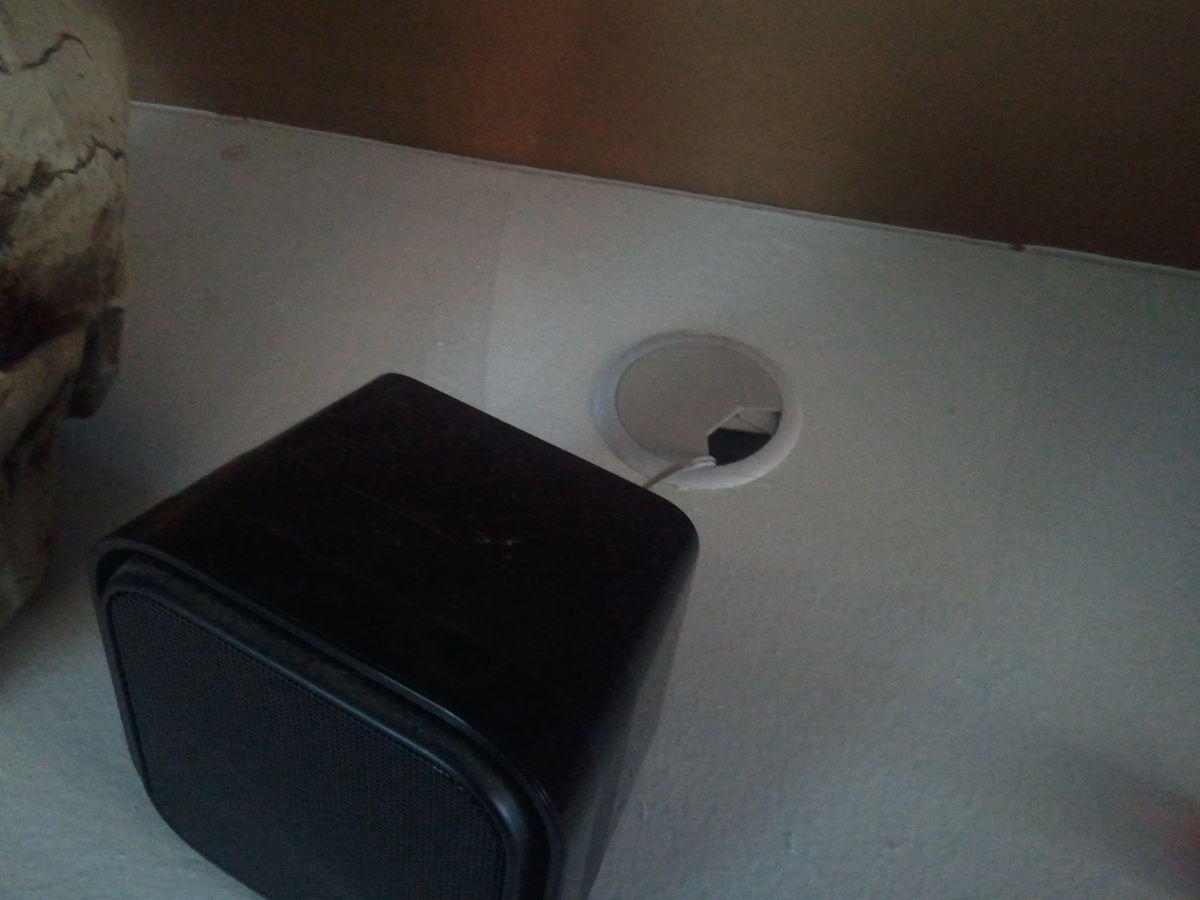
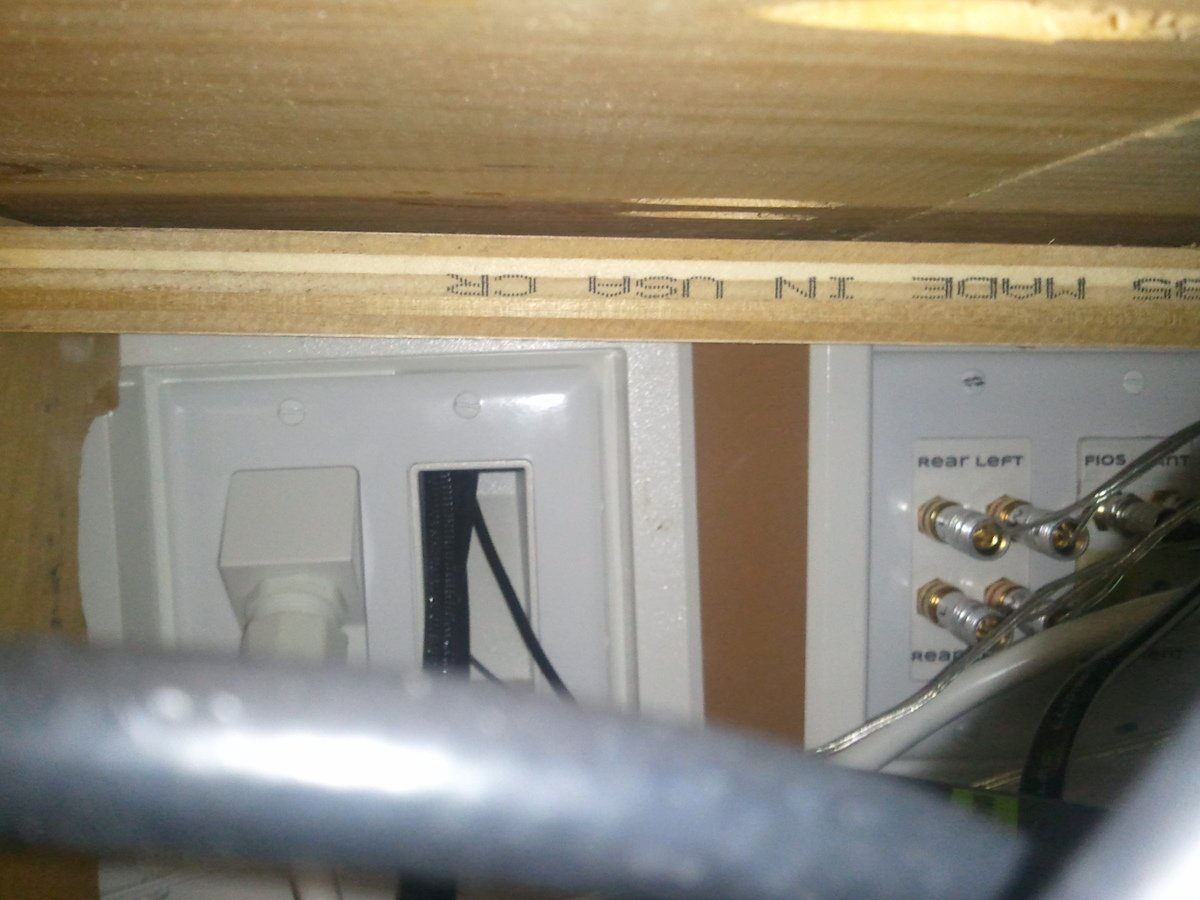
This took me about a year to complete, start to finish, but there was a lot of downtime. I started by running the wires through the wall and taking the opportunity to add a ground to the outlet on this wall.
The bottom cabinets are from Ana's kitchen cabinet base plans, but they are a little shorter, shallower and do not have a toekick cut out. My hope is that this will serve as good practice to do an entire kitchen!! I built these based on my modified plans, pulled back the carpet (there is hardwood under them that I intend to expose at some point), popped off the baseboard, and installed these as if they were kitchen cabinets. The top is 6 pieces of whitewood 1x12's "Kregged" together - I wish I had used plywood but an entire piece would still not be long enough, so that was awkward either way. There is a simple piece of molding under the edge of the "countertop". At that point, not much got done all summer and we just had base cabinets with no uppers and no doors.
More recently, I finally got more time to work on this and created the upper shelves. I just kinda winged these. A whole bunch of 1x12's, I cut 4 the height of what I needed (about 5', from the countertop to the ceiling) and I made a bunch of shelves cut to size. I wound up making more shelves than we needed, but I put shelf pin holes in the vertical pieces so all of the upper shelves are adjustable! I used a kreg shelf pin jig and it worked great. The middle shelf above the TV was cut and added after everything else since I knew it would've been more difficult to calculate the length than to just measure after everything was in. I added some molding to cover up some things that didn't quite line up perfectly and to beef up the vertical pieces (1x2's make 'em look a little wider and cover the edges of the shelves). We finally have storage for all of the cd's and dvd's!!
I was a little nervous to do the doors, but the post for how to do doors came out at a perfect time. Turns out the hardware I bought way at the beginning was pretty cool and let you adjust up/down, distance from the cabinet, and left/right a few mm each way just by turning a screw. I'm glad I went with the fancy self-close-soft-close ones! I'm also in love with the handles I found.
I had some issues with the drawers and they don't slide perfectly, I think it's mostly a squareness issue. I'm planning on getting the kreg drawer jigs before I do the kitchen. I got the fancy soft close ones to see how they'd work to see if I want to use them in the kitchen, if I can't do a better job then I might opt for the cheaper ones!
I have intentions of adding crown molding to this room and that will go across the front of this when I do. I added a 1x4 across the top that can act as a base when we finally get around to that.

Built from Plan(s)
Estimated Cost
800
Estimated Time Investment
Week Long Project (20 Hours or More)
Finish Used
Lots and lots of white paint. I wound up using a spray enamel for the upper shelves in attempt to make them less sticky after finding out that latex paint doesn't really work well for shelves. I've also learned that the paint with the primer in it is my new favorite type of paint.
Recommended Skill Level
Advanced
Comments
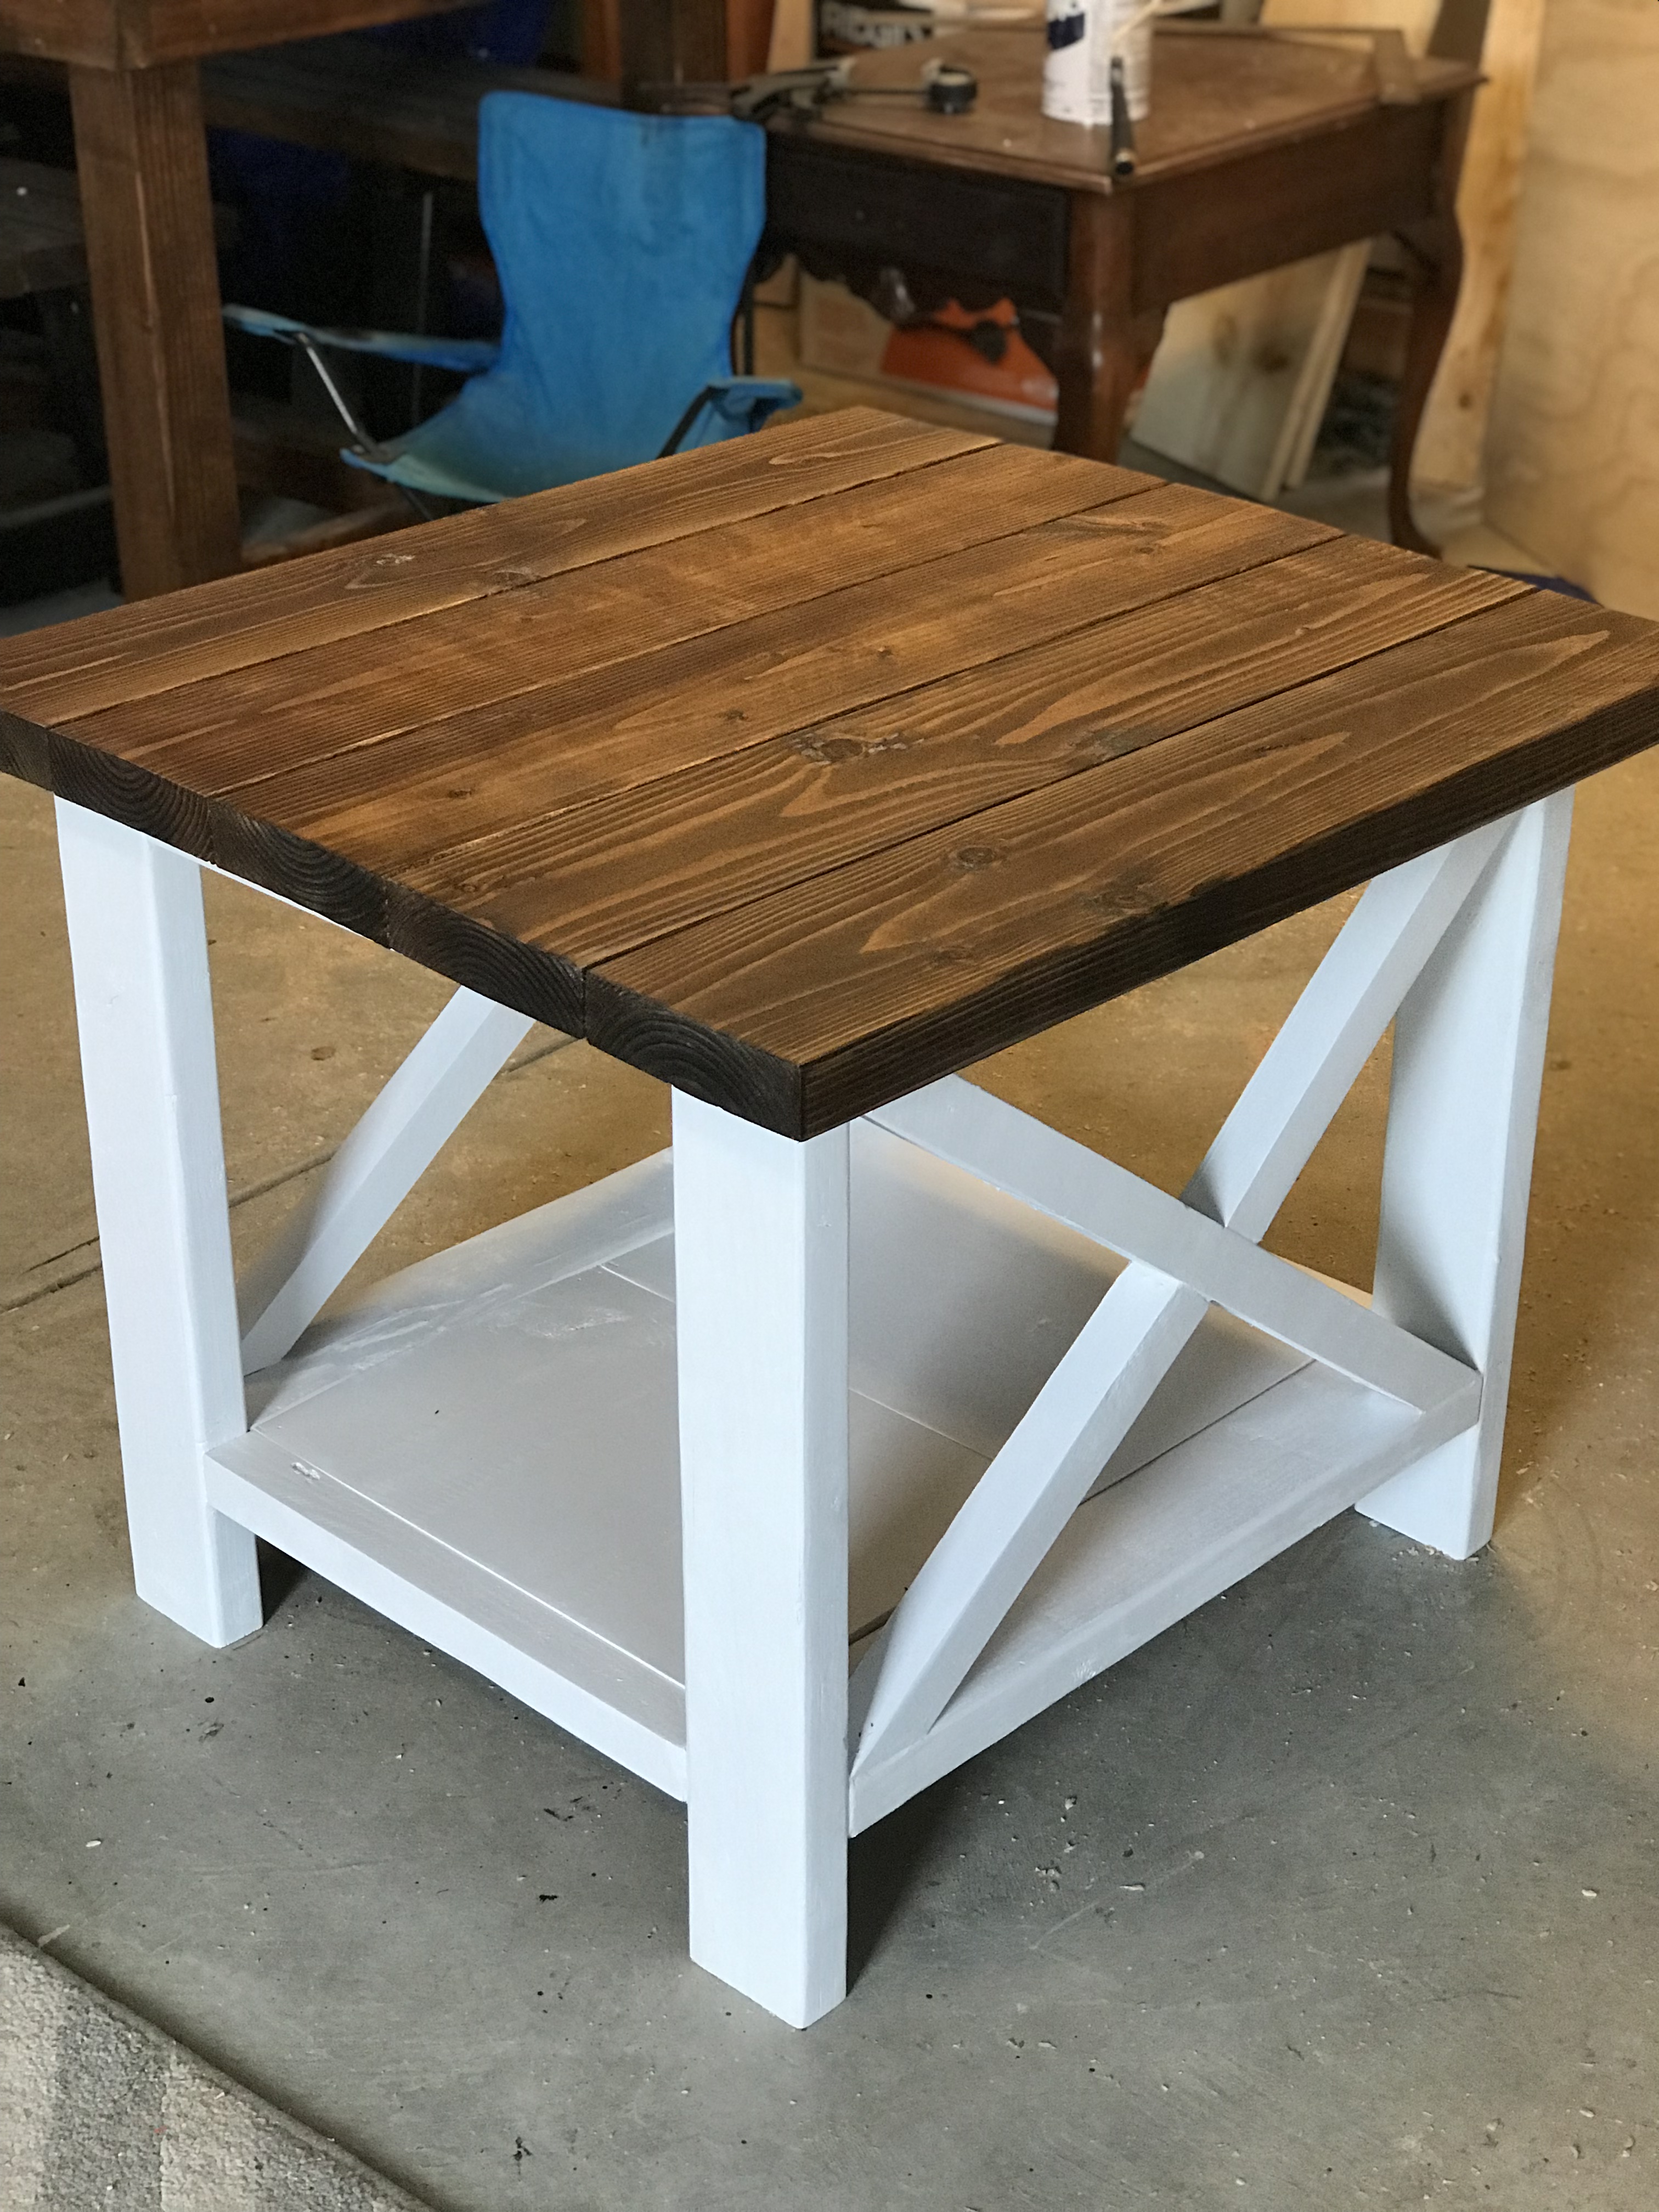
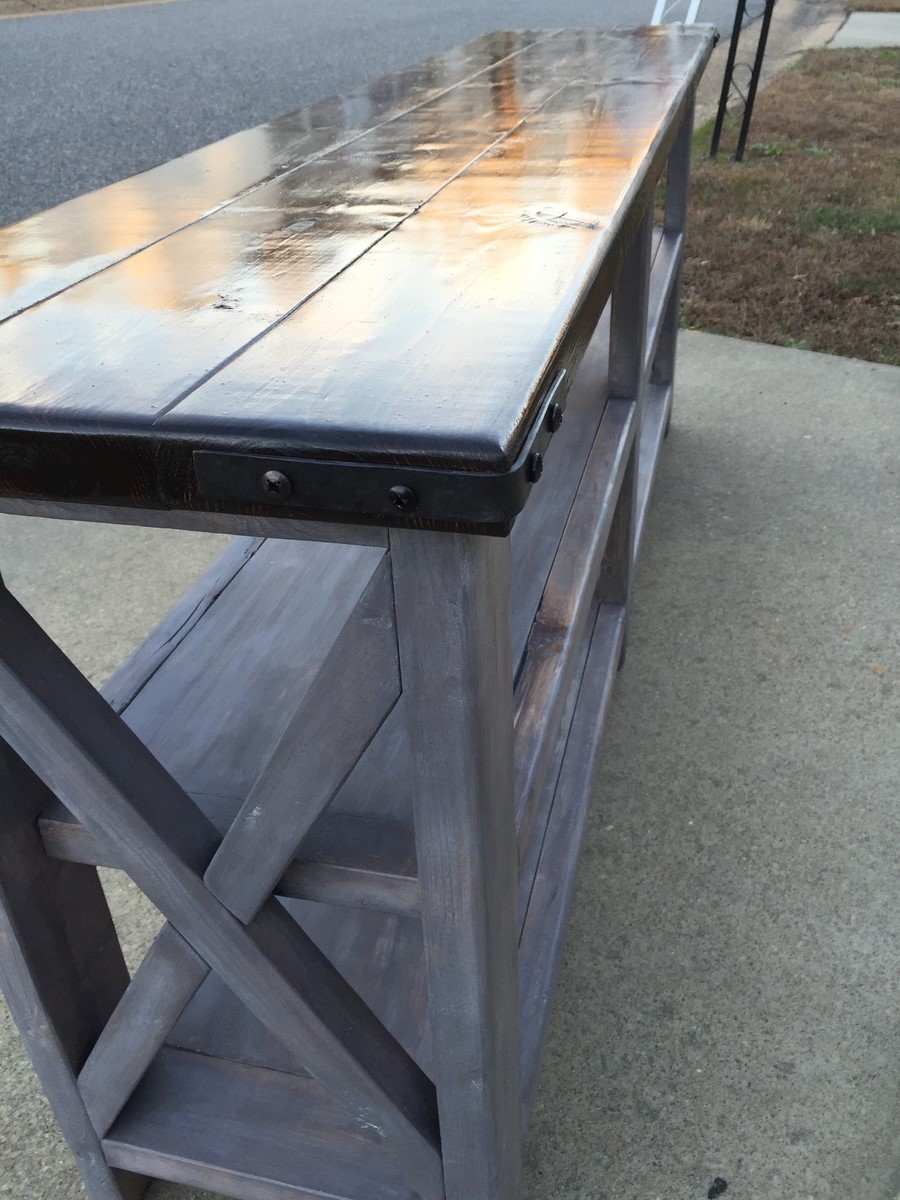
Rustic X coffee table and side table
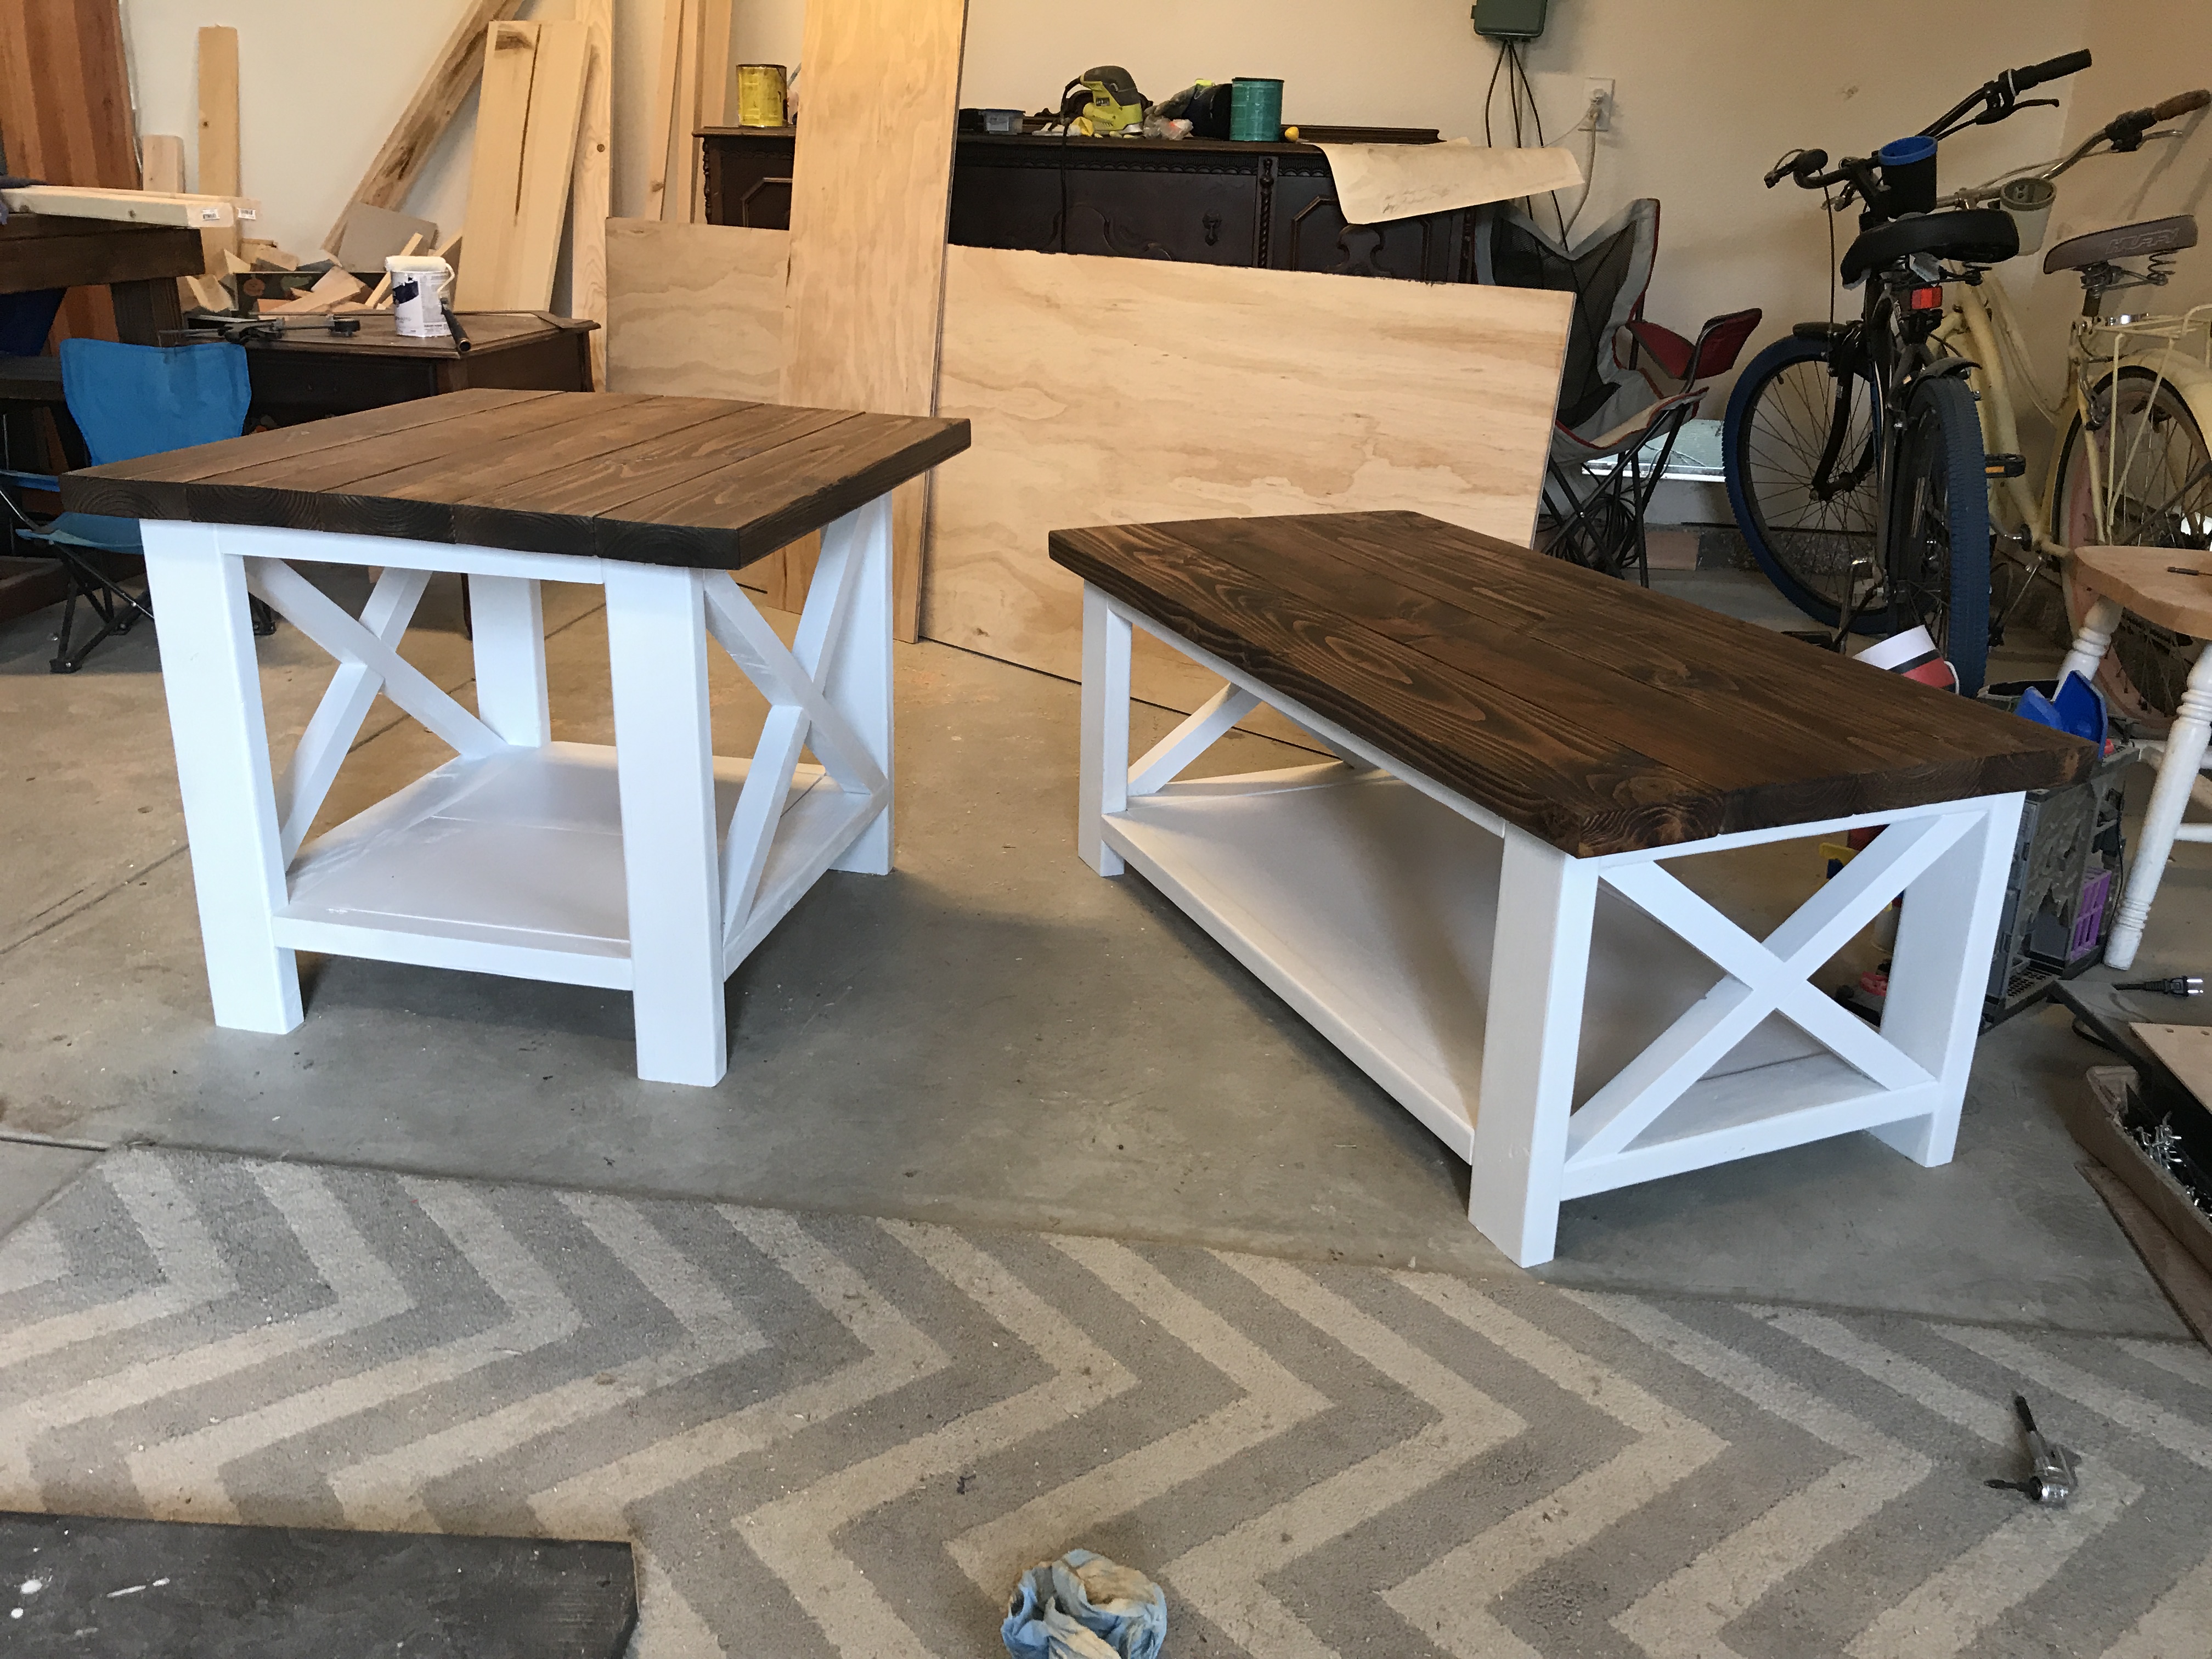
I made these tables from the Ana White plans but for the side table I made it a bit larger to fit the space it was going to be going in. Stained the top varathane Dark Walnut and the bottom I painted white.
Built from Plan(s)
Estimated Time Investment
Weekend Project (10-20 Hours)
Recommended Skill Level
Intermediate
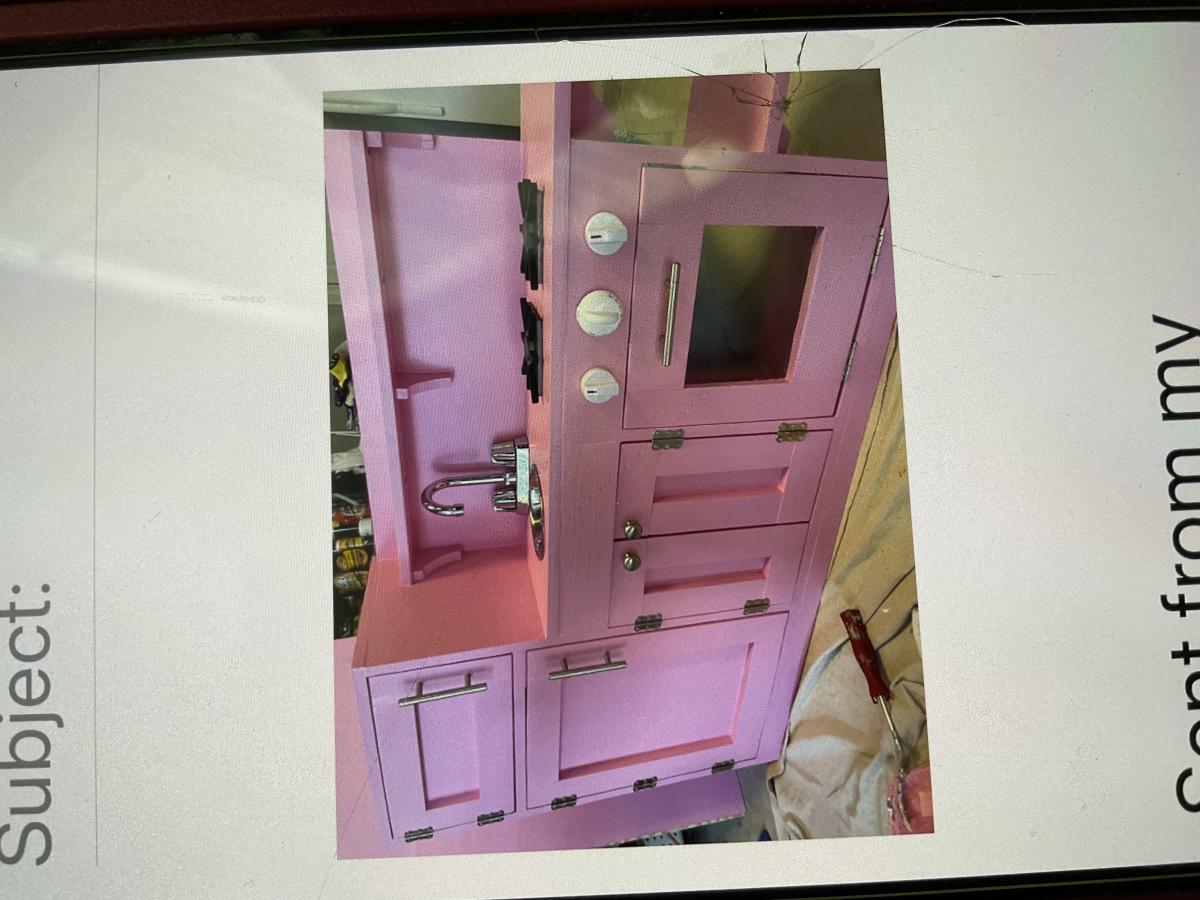
Toddler Kitchen
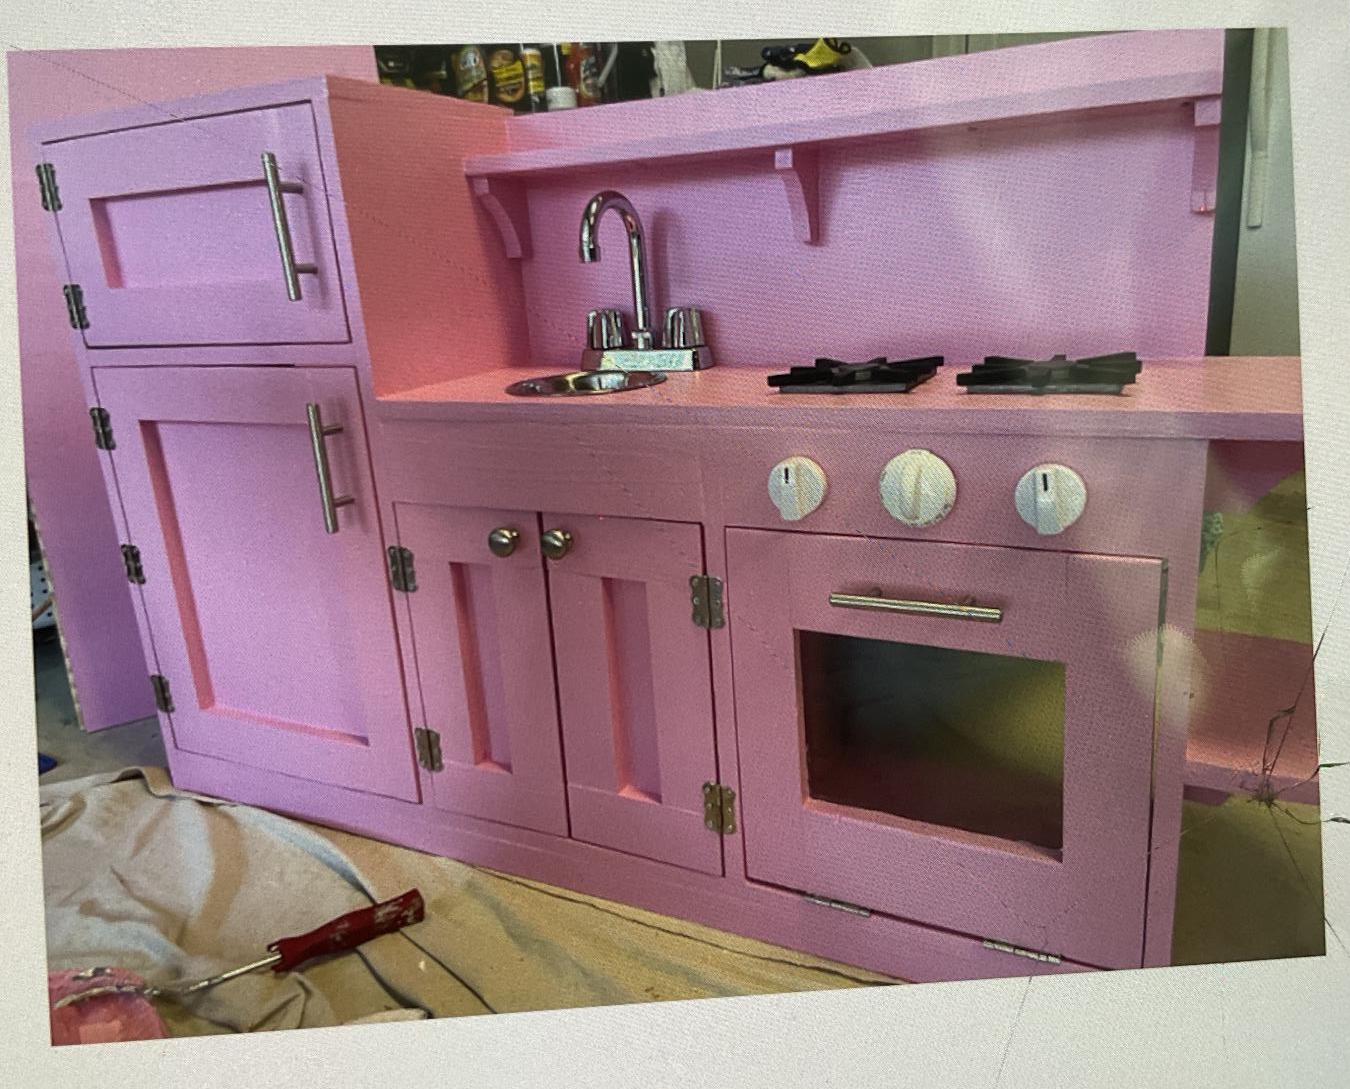
Granddaughter wanted a Pink kitchen for Christmas, so what does Meemaw do ?? She goes to your website and does her research. I completed this kitchen in probably less than 2 weeks.
She abstained loved it, and no one in the family could believe Meemaw built this…
Many thanks..
Built from Plan(s)
Comments
Fri, 03/10/2023 - 13:27
Love the pink!
This is adorable, you are an amazing Meemaw, thank you for sharing!
Wood Tilt-Out Trash Bins
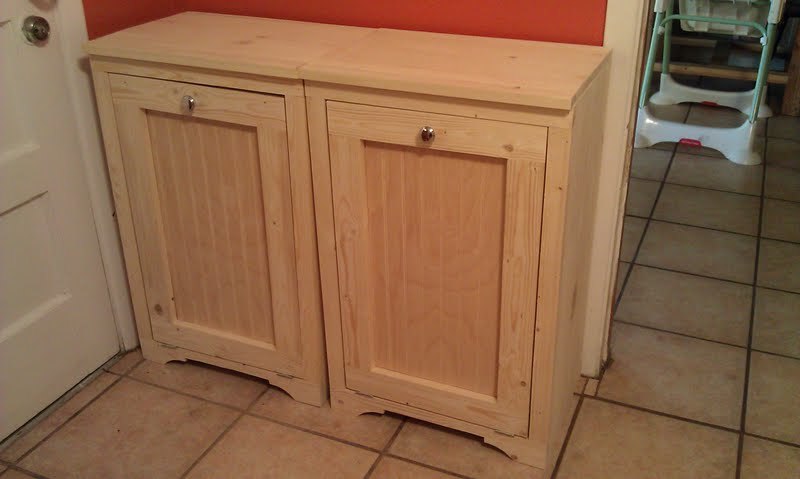
These two trash bins were very easy and fun to make. Plans were very easy to use and made the project very easy to build.
Built from Plan(s)
Estimated Time Investment
Afternoon Project (3-6 Hours)
Finish Used
No finish yet.
Recommended Skill Level
Beginner
Comments
Mon, 11/21/2011 - 17:04
where's the plans for the project
I can't find the plans for this project.Where do I click?
Mon, 11/21/2011 - 19:01
Wood tilt-out trash bins
Click on where it says From Plans: Wood tilt out trash bins. its a link =)

Tue, 11/22/2011 - 07:26
NICE!
This came out really beautiful! I'm thinking of building two like this for our hampers which we keep in our bedroom. We really don't have another place to put them and this is so much nicer looking! Of course, I'd have to modify it so the clothes can breathe. Certainly worth looking into...
Fri, 02/24/2012 - 08:31
You gave me an idea!
Seeing these 2 sitting side by side gave me an idea for our trash & recyclables. My husband & I want to make one of these for our trash, but now I am thinking it would reduce the clutter from the recyclables. Thanks for posting. They look great!
Sat, 12/15/2012 - 10:54
Wood Tilt out trash Bin
This was a great project. Very easy to follow...until I got to the door. There are no instructions for the door and no link to a video. Now I have to try and "wing it" which I think is going to make my trash bin, which is a christmas present for my wife, look like trash. I only have this weekend to do this but maybe someone else will be saved by adding the directions for the door. otherwise, thanks for the great step by step.
Tue, 06/16/2015 - 18:29
Dual Tilt Out Trash/Recycle Cabinet
Does anyone make and sell these? I am looking for a dual trash cabinet.
Tue, 06/16/2015 - 18:29
Dual Tilt Out Trash/Recycle Cabinet
Does anyone make and sell these? I am looking for a dual trash cabinet.
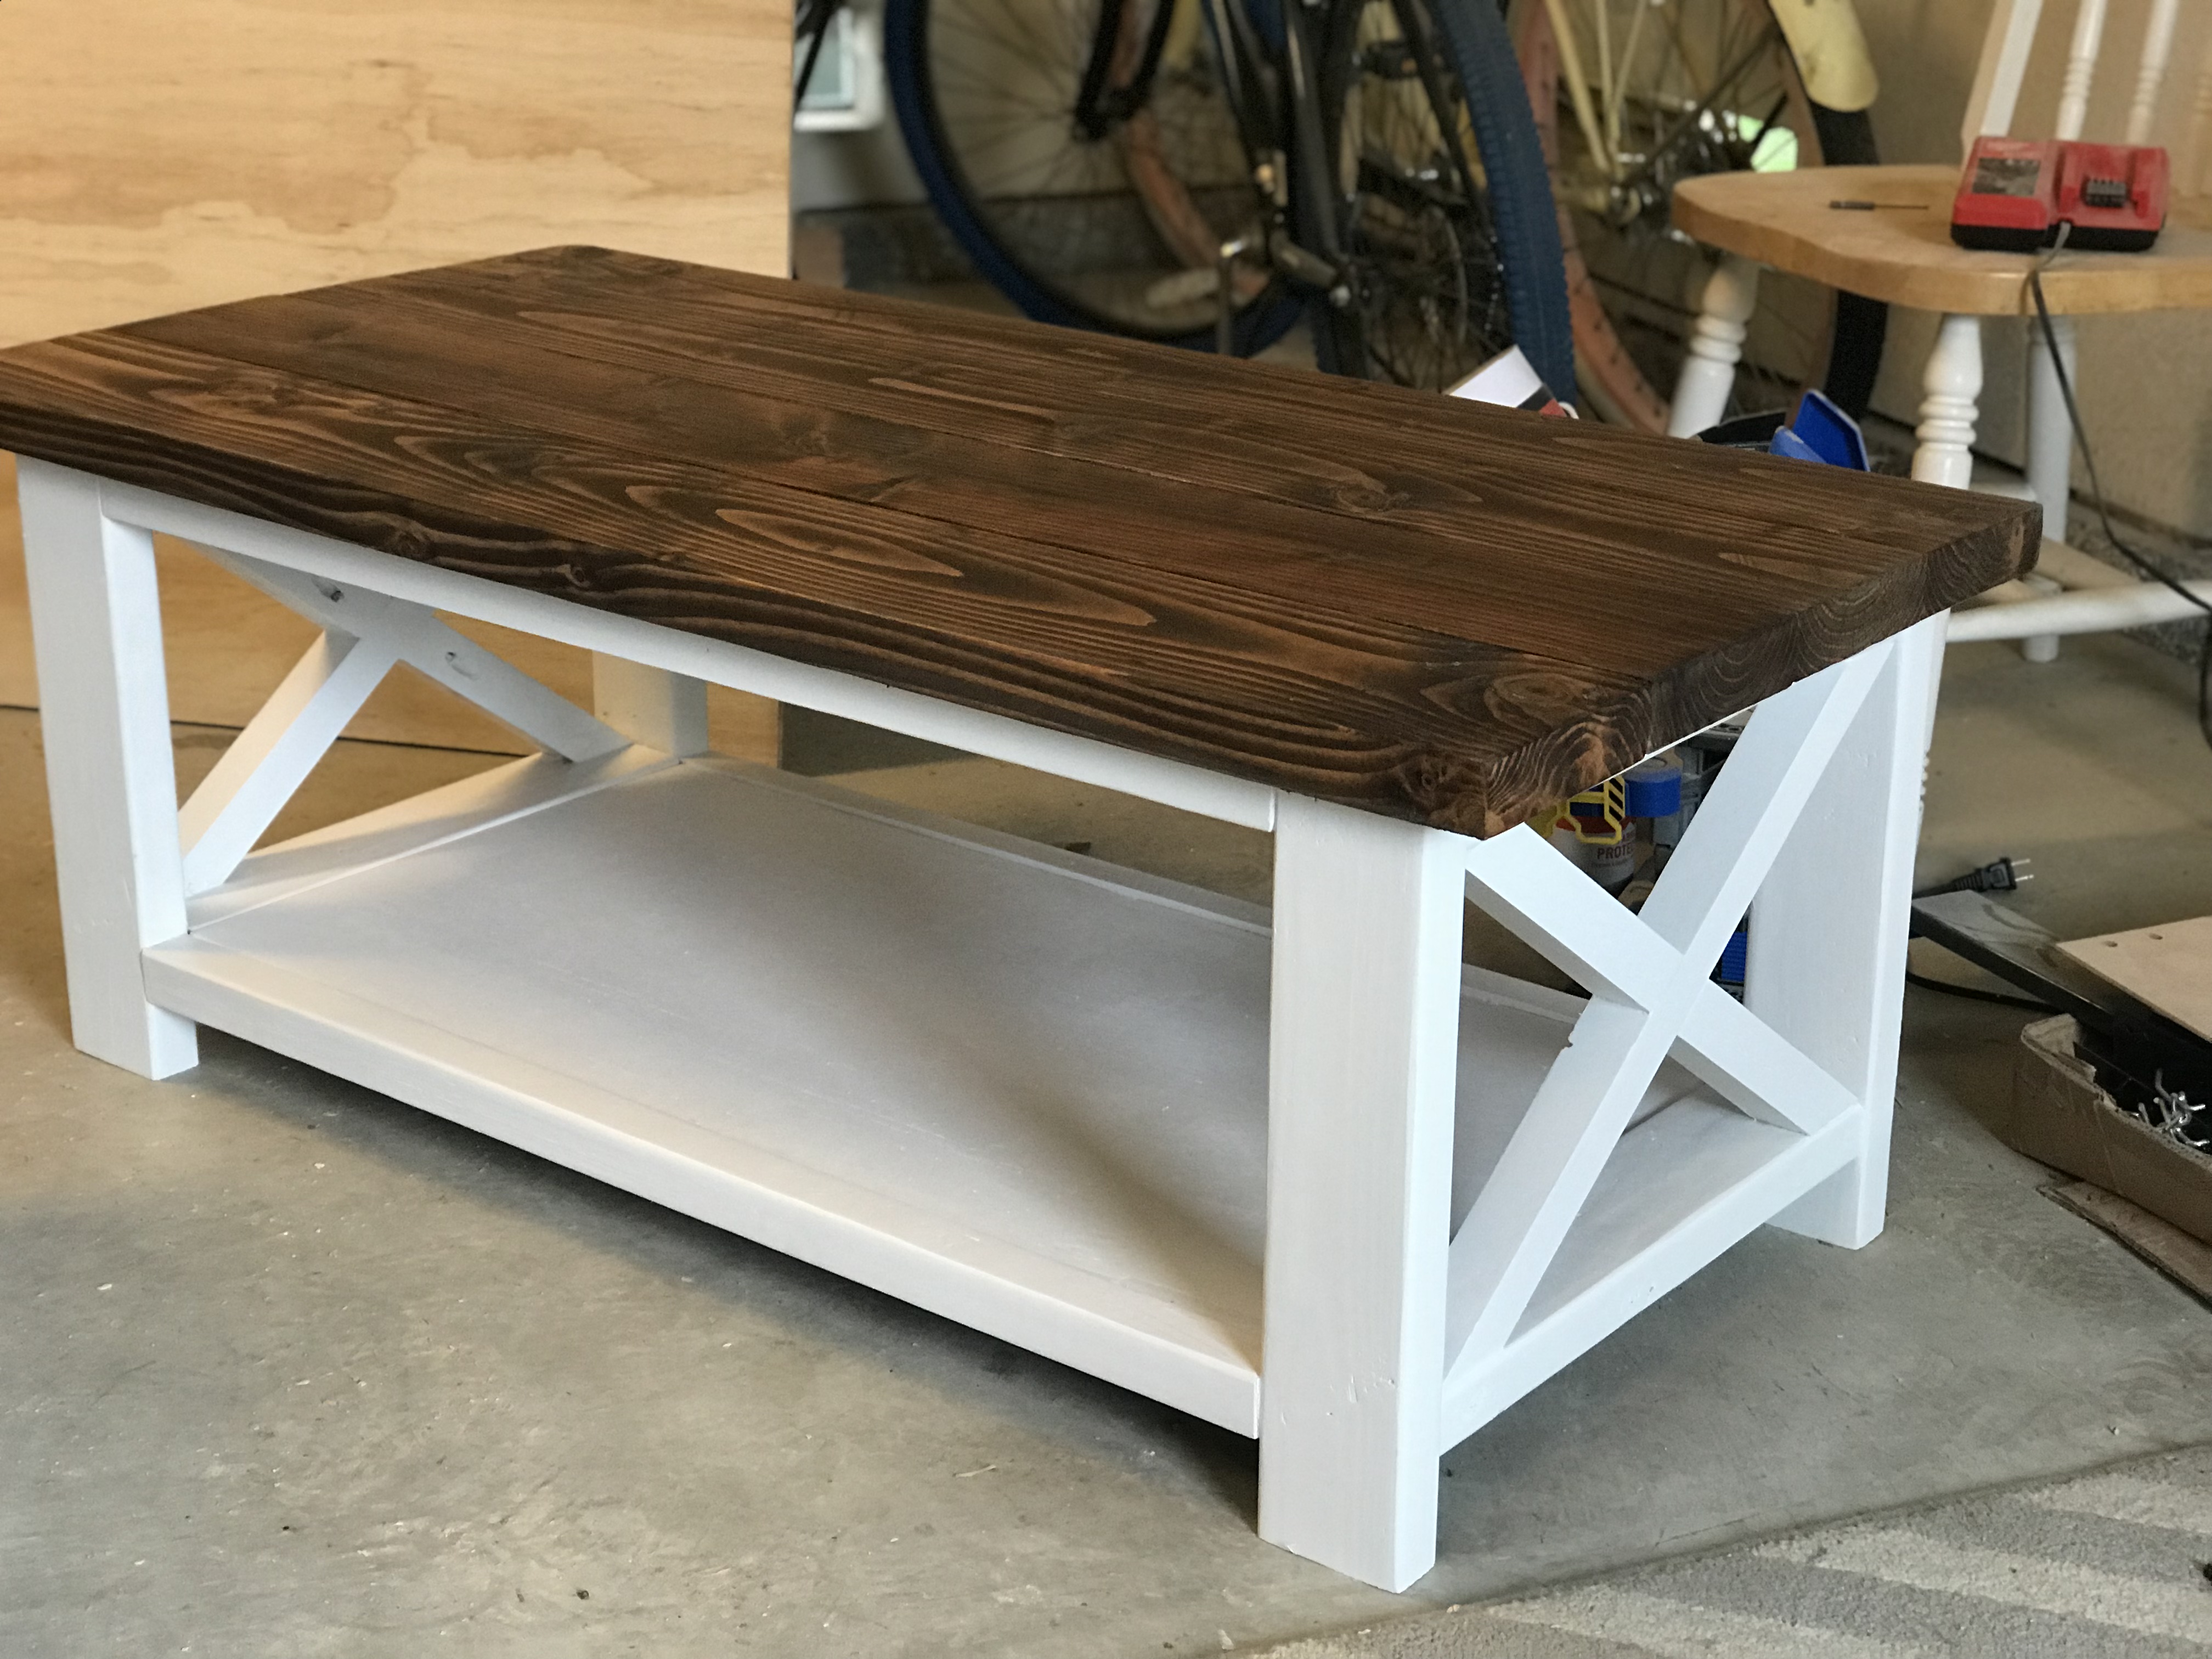
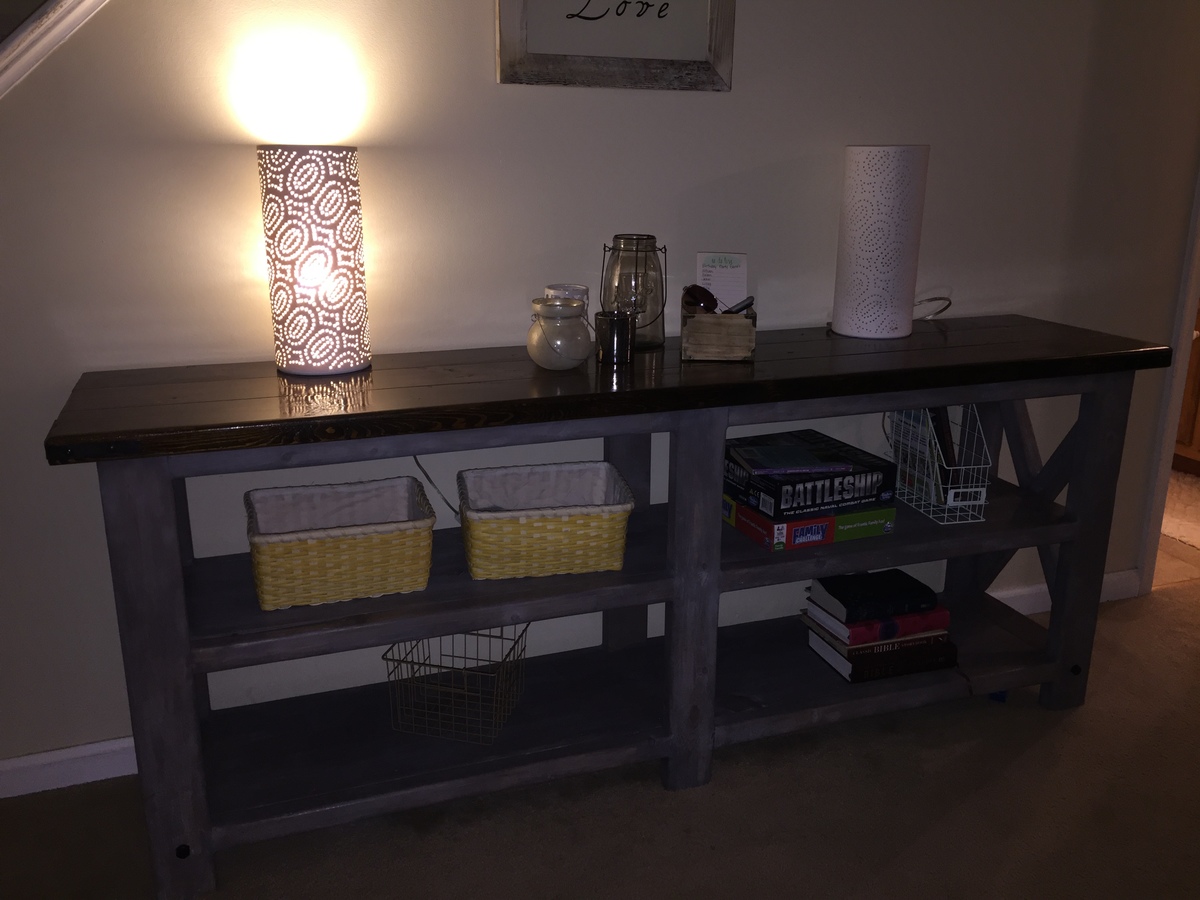
Rustic X coffee table
I love this site. We needed new furniture in are house and didn't want to spend a bunch of money. Finding the Rustic x plans was a life saver.
Estimated Cost
$100
Estimated Time Investment
Weekend Project (10-20 Hours)
Finish Used
White paint and kona stain.
Recommended Skill Level
Beginner
Small Chicken Coop with Planter
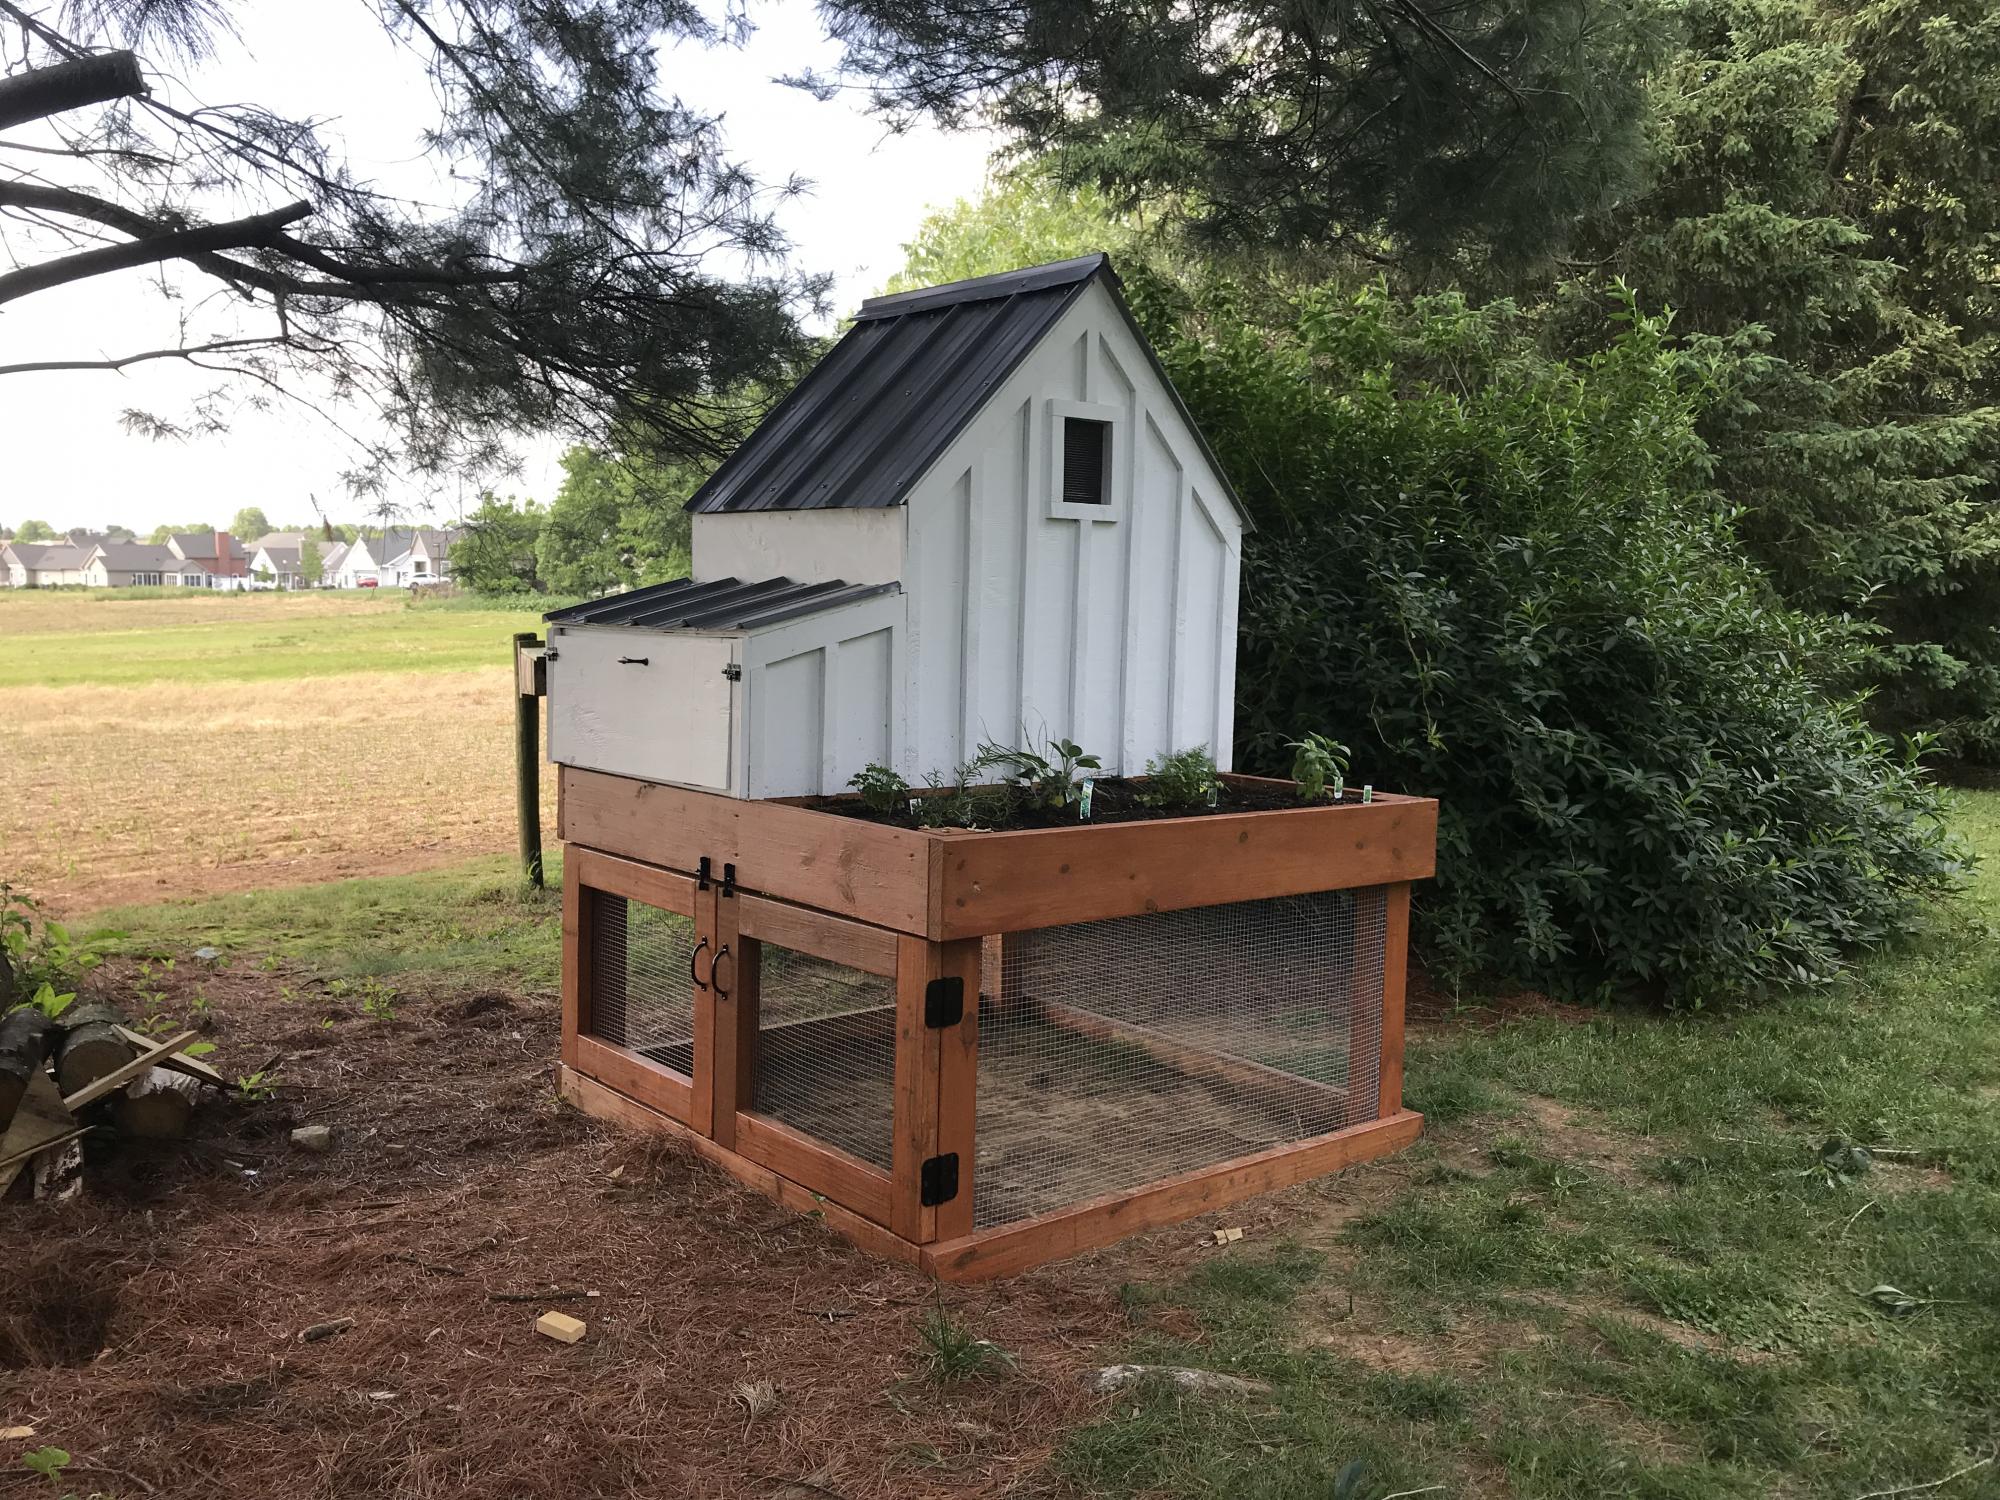
Great plans! Fun project
Built from Plan(s)
Estimated Time Investment
Weekend Project (10-20 Hours)
Recommended Skill Level
Advanced
Comments
Sat, 05/25/2019 - 19:34
Farmhouse Chicken Coop
Your chicken coop is beautiful! I love the farmhouse feel of it! Thank you so much for sharing a picture! Ana
Farmhouse Entryway console
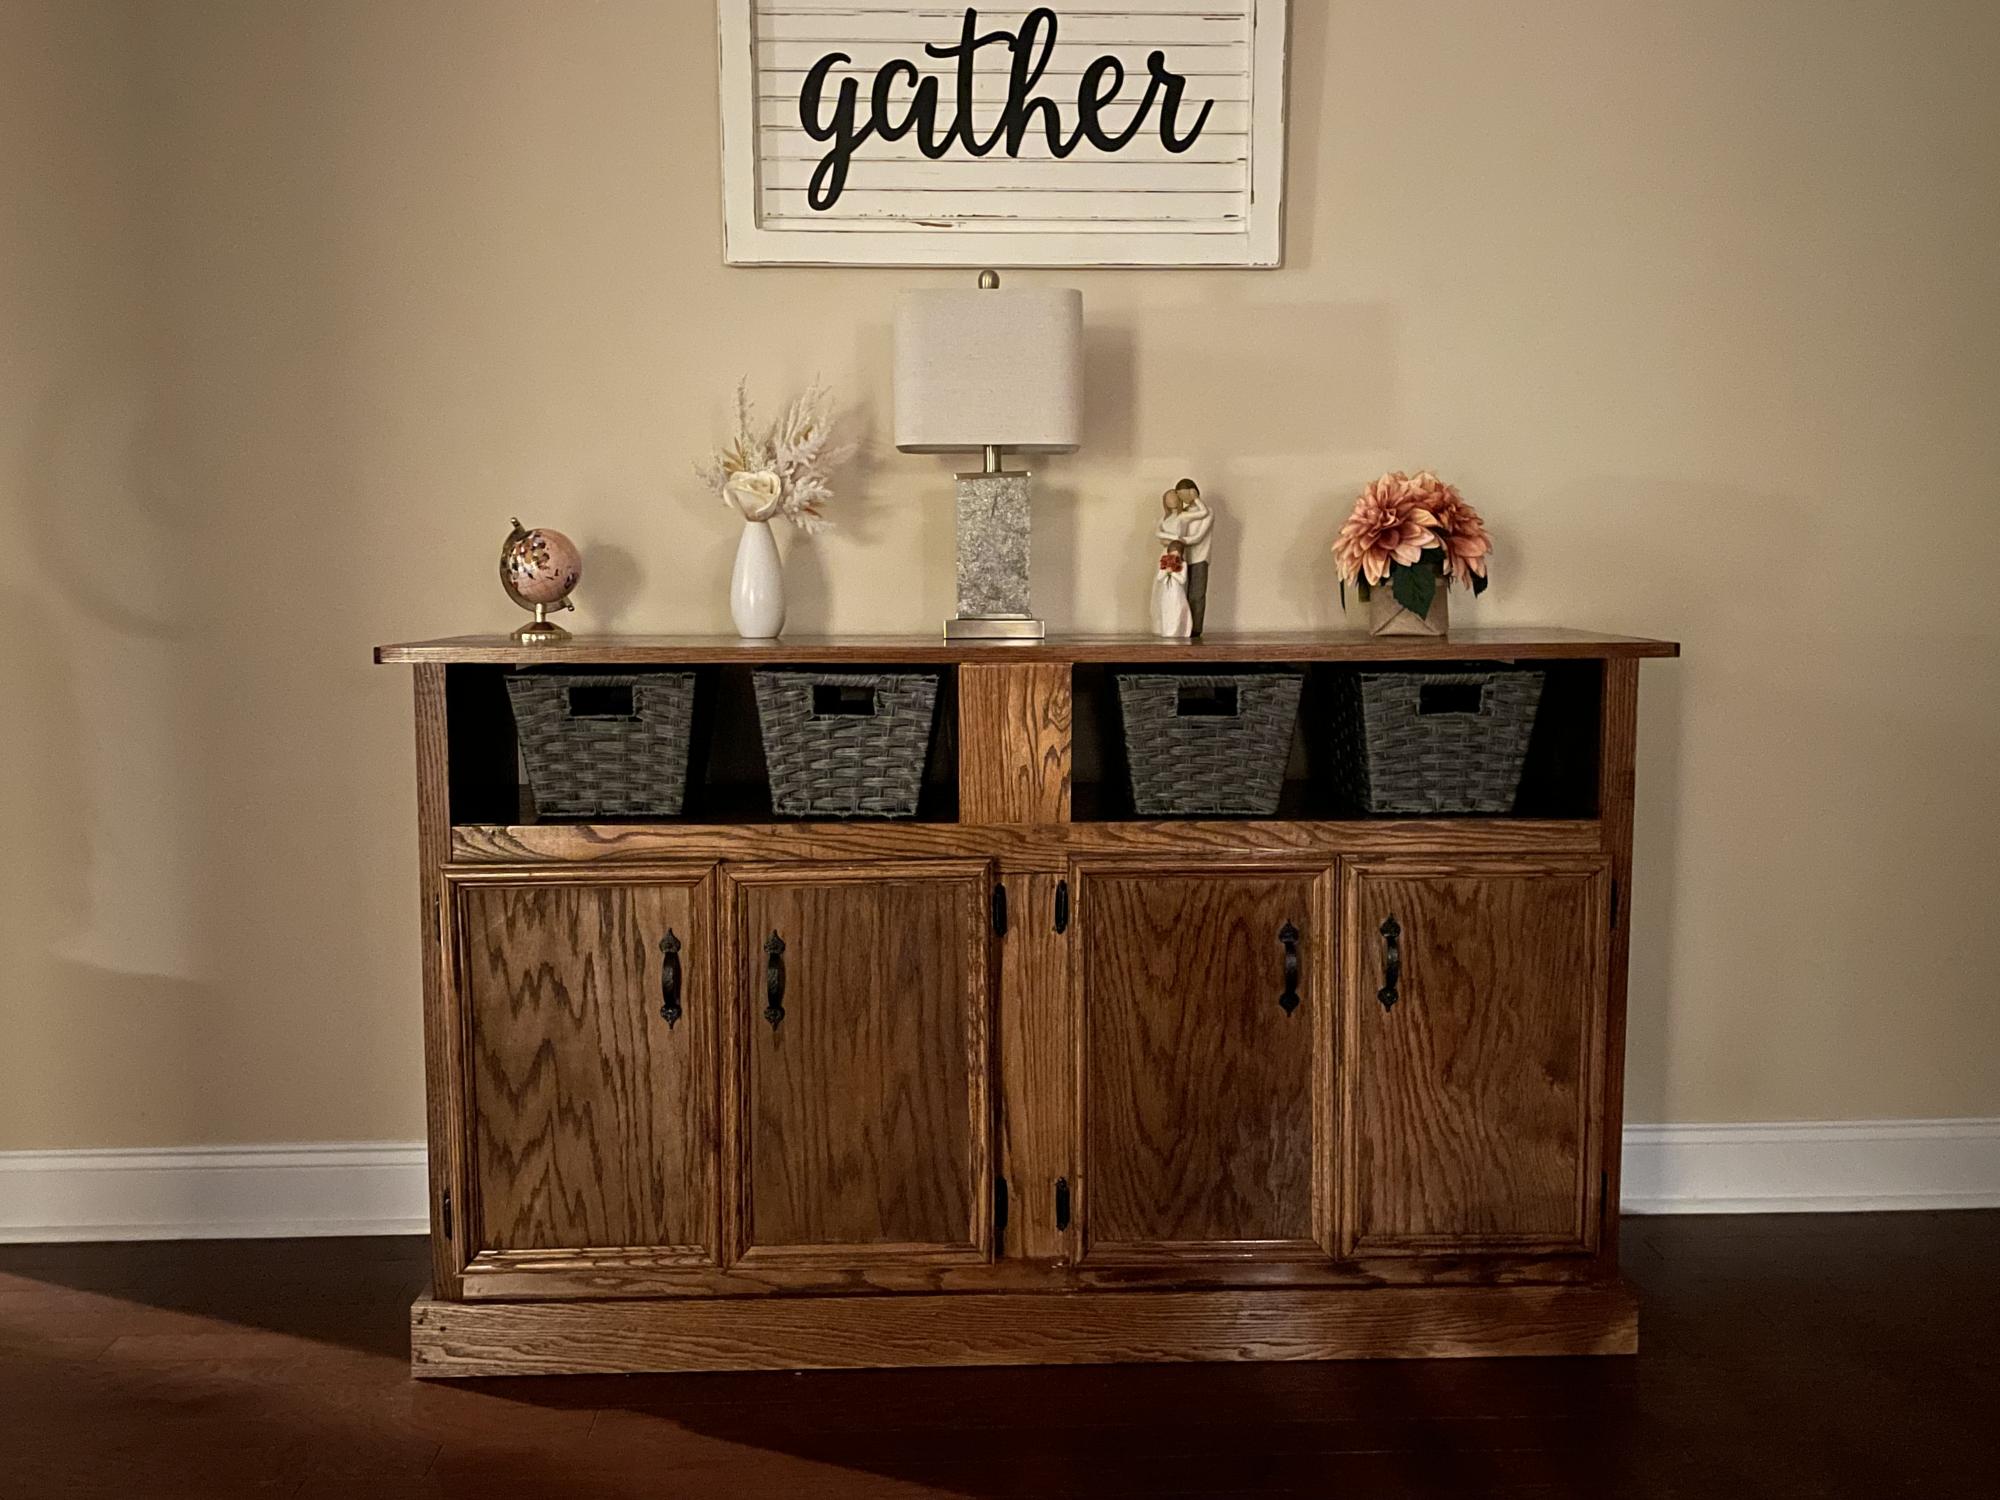
I saw these plans several months ago and finally got the time I wanted to make it. I chose oak because it’s the best and prettiest stained. I love the way it turned out!
Built from Plan(s)
Comments
Fri, 03/17/2023 - 19:49
Stunning oak console!
Absolutely beautiful, love the finish! Thank you for sharing.
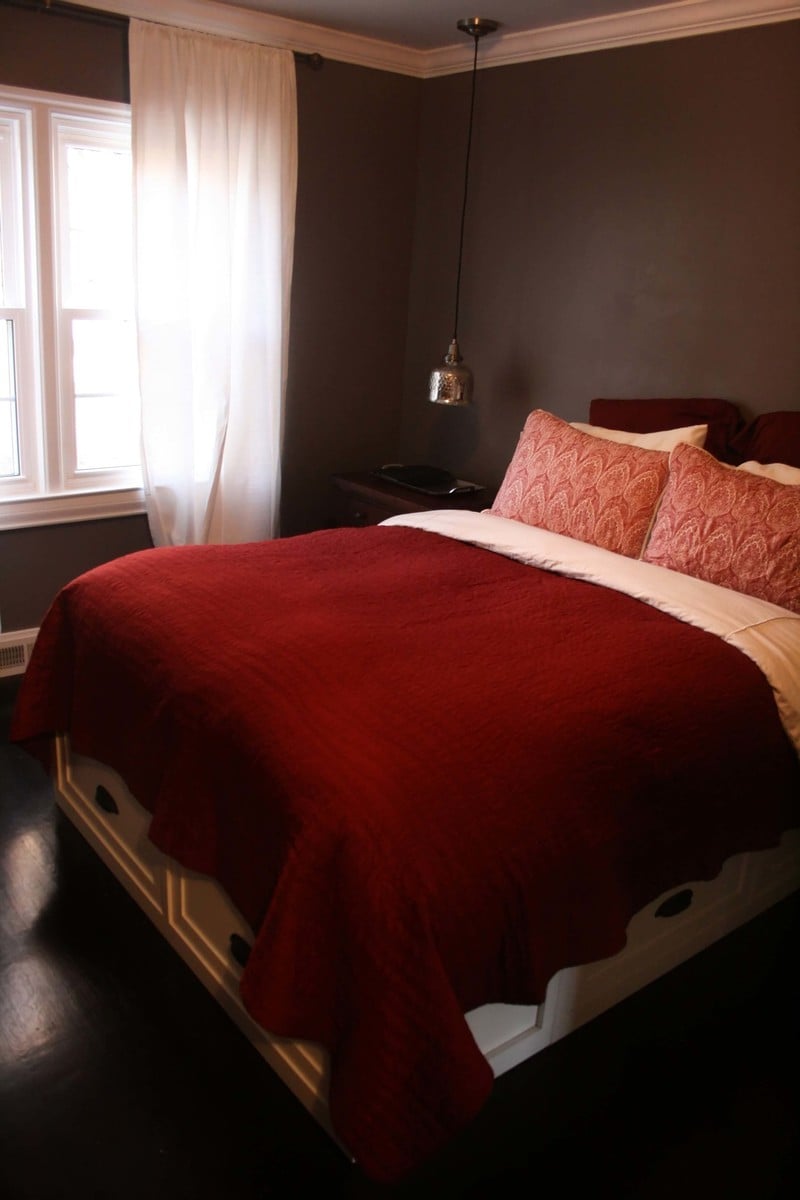
I love my new bed! Thanks Ana!
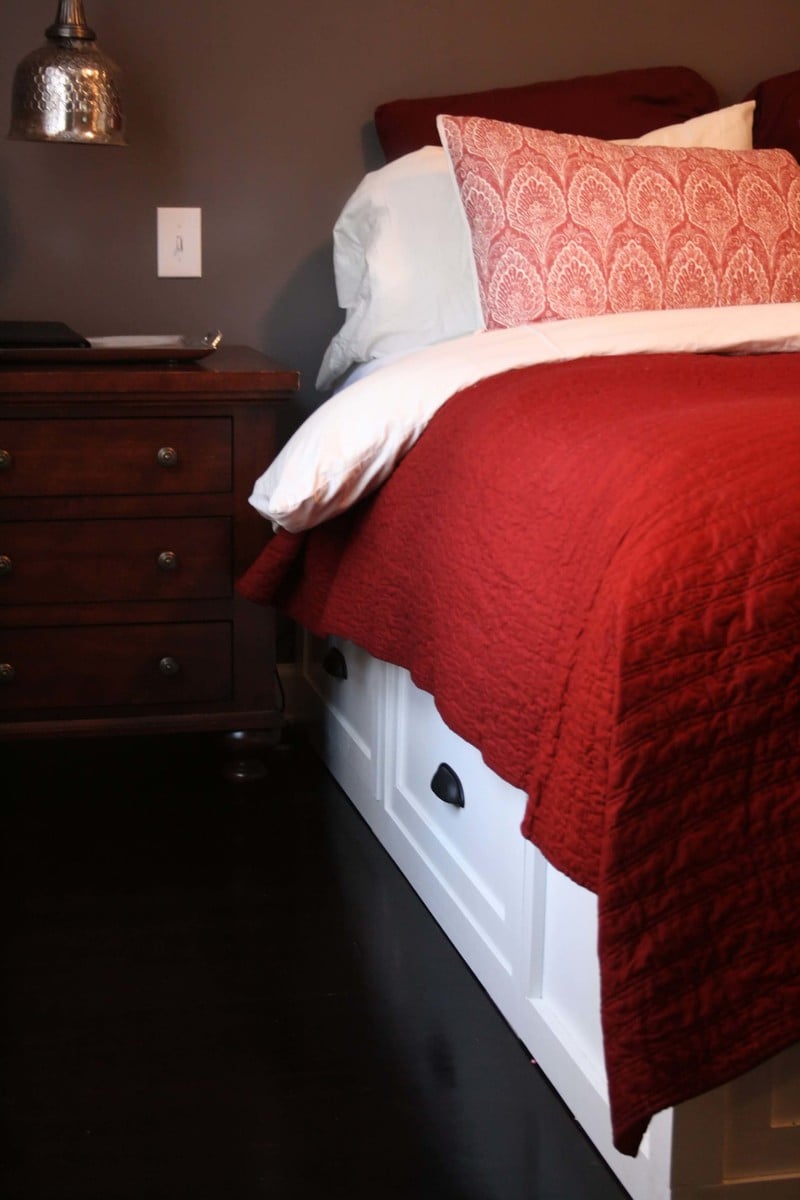
While doing some renovations on our house we gave our kids the largest bedrooms while my husband and I took the smallest. We desperately needed extra storage in the Master bedroom since not even a dresser would fit. The Queen Sized Storage Bed plans were the perfect solution and the bed looks gorgeous! More details on my blog...
Built from Plan(s)
Estimated Cost
$350
Estimated Time Investment
Week Long Project (20 Hours or More)
Recommended Skill Level
Advanced
Comments
Fri, 12/02/2011 - 08:26
Beautiful
WOW, we've been trying to find the time to complete these same plans and seeing your results make me want to put it on the top of our list. Your bed is BEAUTIFUL!!!!
But the hanging lights next to your bed and your flooring also add to the beauty. Would you mind sharing where you got these two items? Thanks!
Fri, 12/02/2011 - 13:28
Thank you!
engineer2mommaof2: Thanks for your kind words about our bed. We love it too! The lights are mercury glass pendants from Pottery Barn. Our hardwood floors are red oak that were original to our home (built in 1939). A couple months ago we sanded them down and stained them a dark walnut. The dark color is gorgeous...but pretty hard to keep clean with young kids around since they show every speck of dirt. Good luck on making your bed. Go for it! You won't regret it!
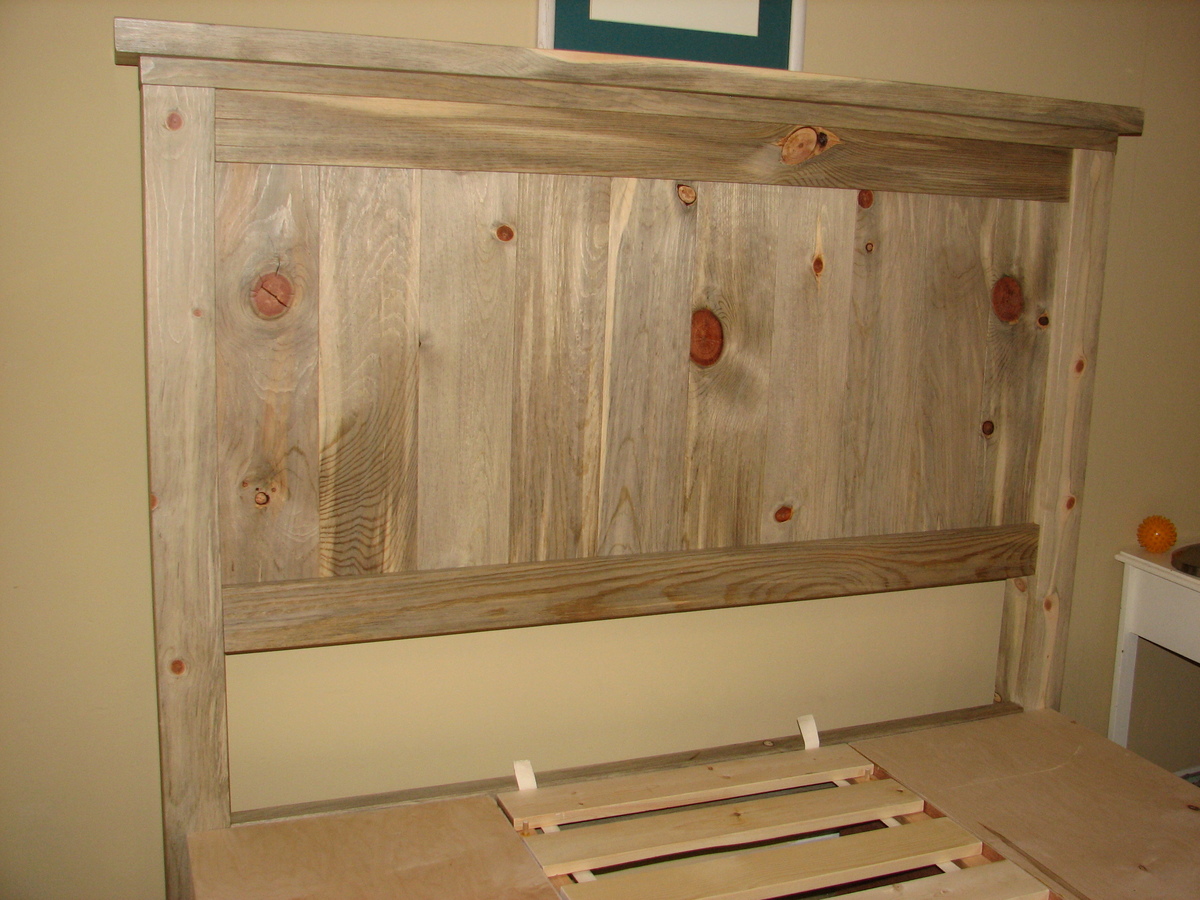
Blue Stain Pine Farmhouse Storage Bed
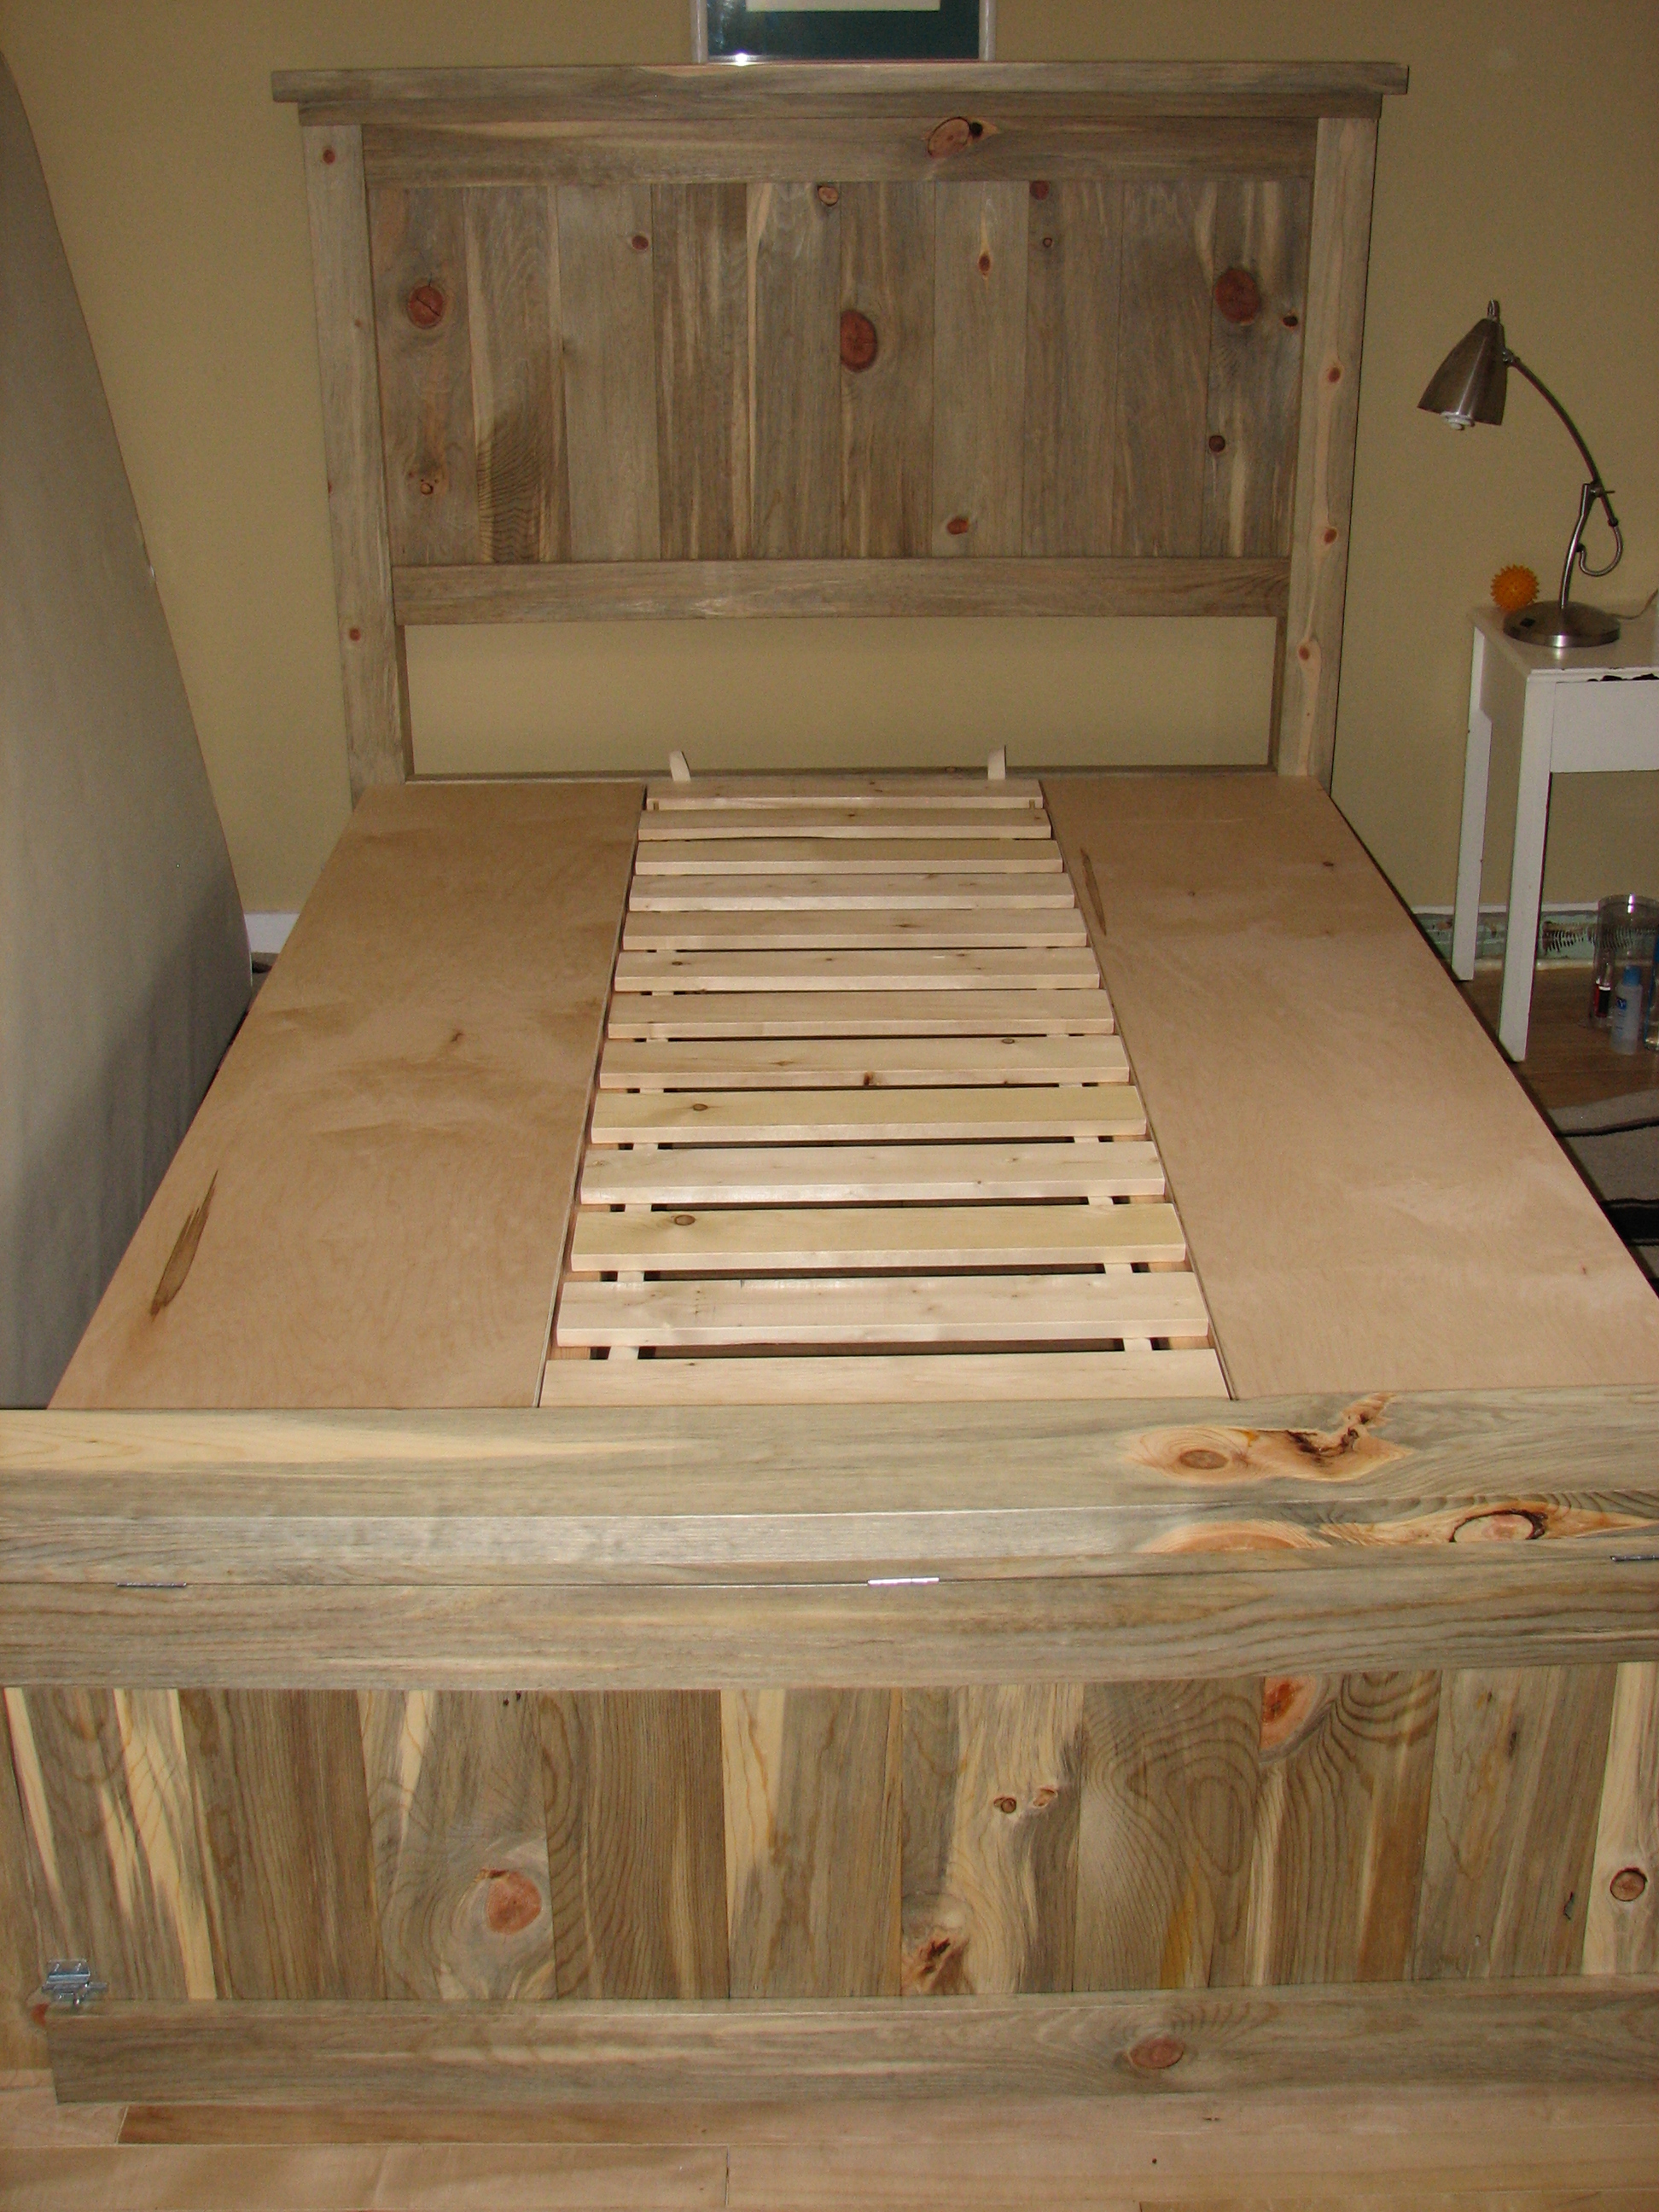
This project was inspired and guided by the plans for the
Farmhouse Storage Bed with Hinged Footboard by birdsandsoap.
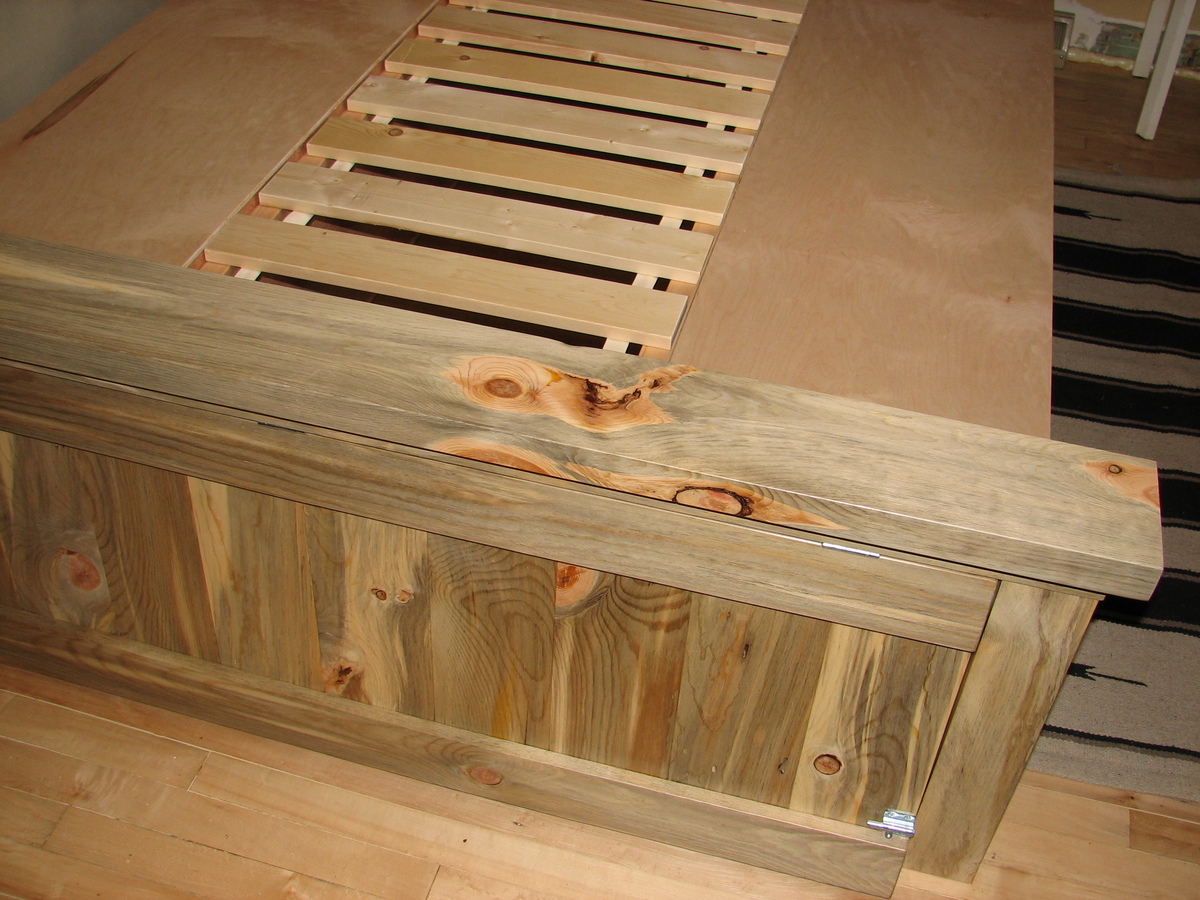
The most visible parts, head and foot board, are made of beetle-killed blue stain Lodgepole pine, locally sourced and milled.
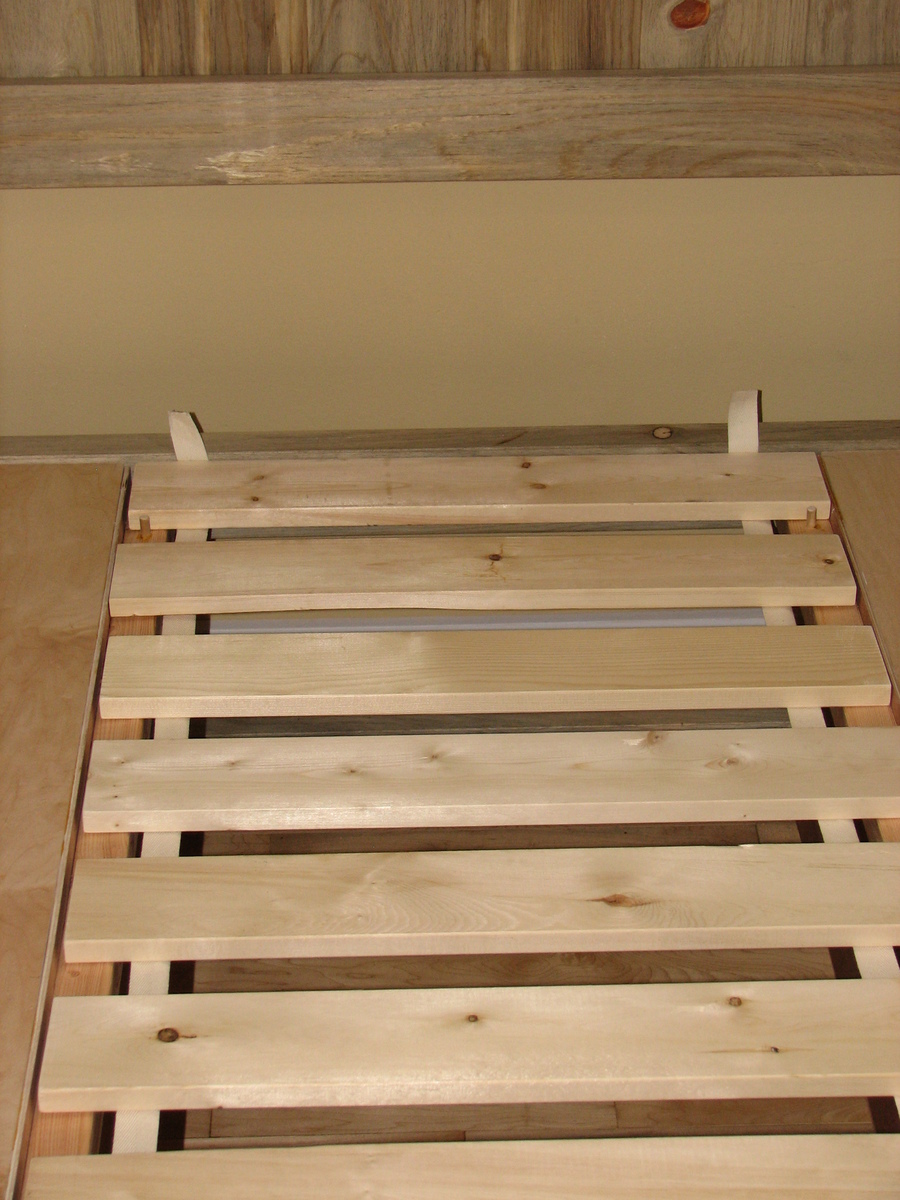
The boxes are made of 3/4" maple plywood and rest on a frame of 1 by 2's. I am still working on the 6 drawers, which will have blue stain pine fronts as well.
The bed slats between the boxes are stapled to webbing and the first and last slat are held by dowels drilled into the supporting rails to prevent the slats from sliding around.
Knock-down design - by removing the few (non-loadbearing) screws that fasten the head/foot boards to the boxes, the bed can be disassembled into manageable/movable components.
Built from Plan(s)
Estimated Time Investment
Week Long Project (20 Hours or More)
Finish Used
AFM Safecoat PolyureSeal BP - Satin
Recommended Skill Level
Intermediate
Comments

Bunkbed
I built this for my grandkids. It took me several weekends to complete to this point. I made a few changes from the original and still have the drawers to complete but overall its about finished.

Built from Plan(s)
Estimated Time Investment
Week Long Project (20 Hours or More)
Finish Used
Water based paint
Recommended Skill Level
Intermediate
Comments
Mon, 01/22/2018 - 10:41
Beautiful!
I love how bright and vibrant you made this! It looks absolutely beautiful! I'm working on a bunk bed for my two young daughters now and I liked seeing how you tweaked the plans a bit- I'm doing something similar. Thanks for sharing!
First bed frame.
I work at a lumber yard, and this was built with "garbage" door jambs.
Built from Plan(s)
Estimated Cost
$70.00
Estimated Time Investment
Week Long Project (20 Hours or More)
Finish Used
Rustolium wood stain. Kona.
Recommended Skill Level
Intermediate
Shanty Side Board and Hutch
This is the Shanty Chick Side Board and Hutch that some of my high school students chose to build. It is going to the Texas state contest in Corpus Christi next week.
Built from Plan(s)
Comments
Fri, 03/24/2023 - 10:06
Beautiful work students!
This is amazing, love the finish! We just shared it to our Facebook page, it is quite popular :)Thank you for sharing and good luck!
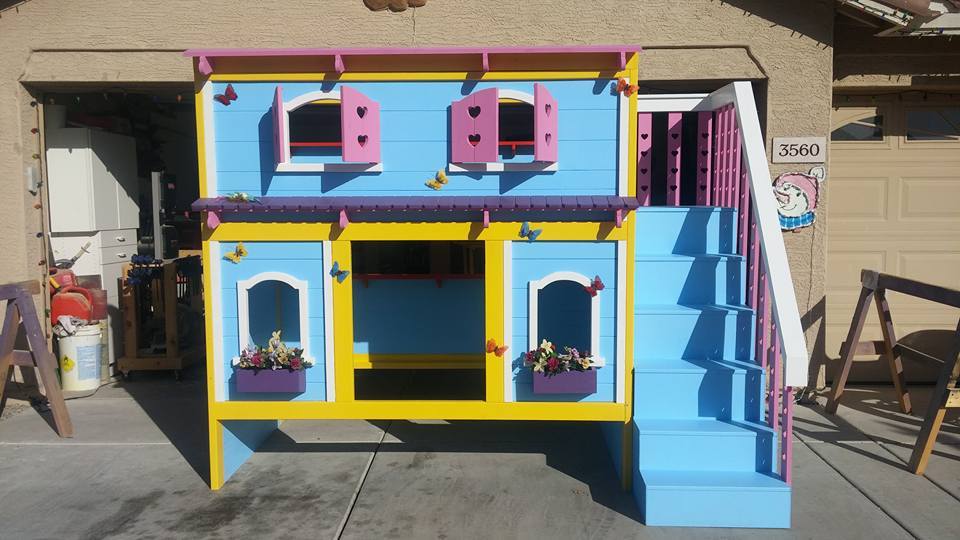
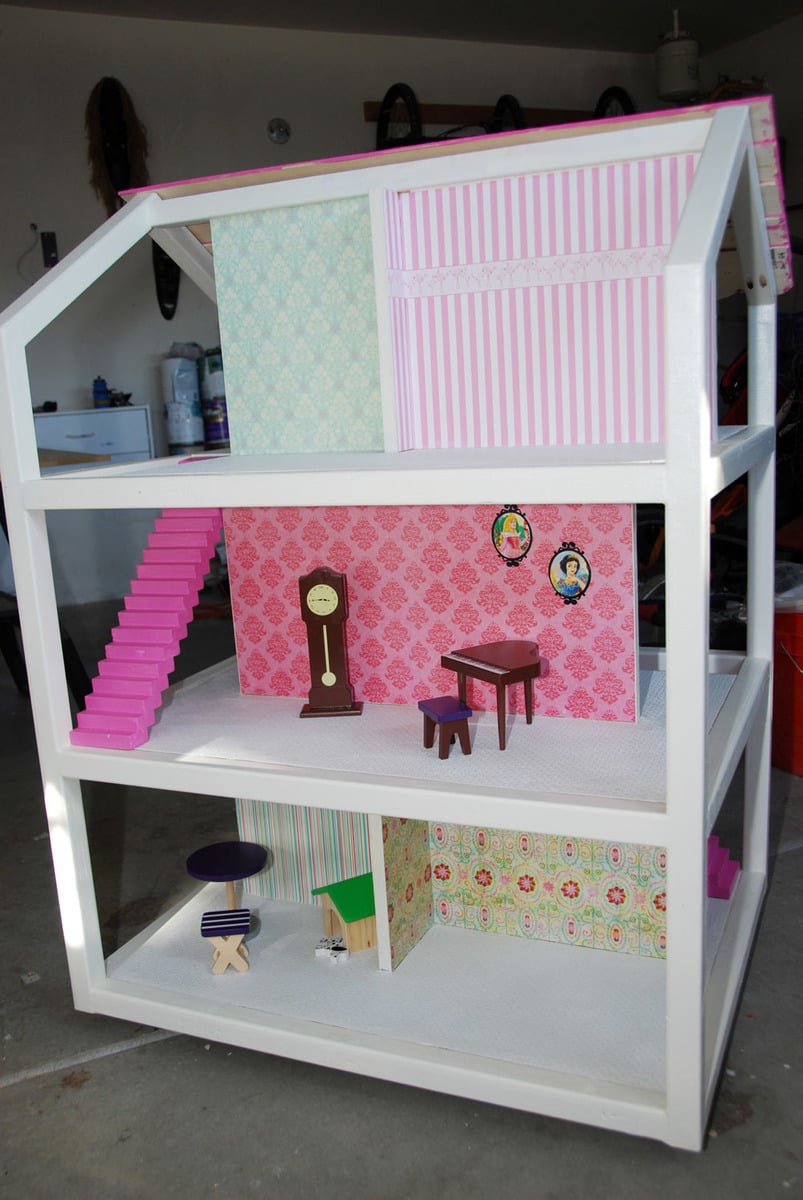
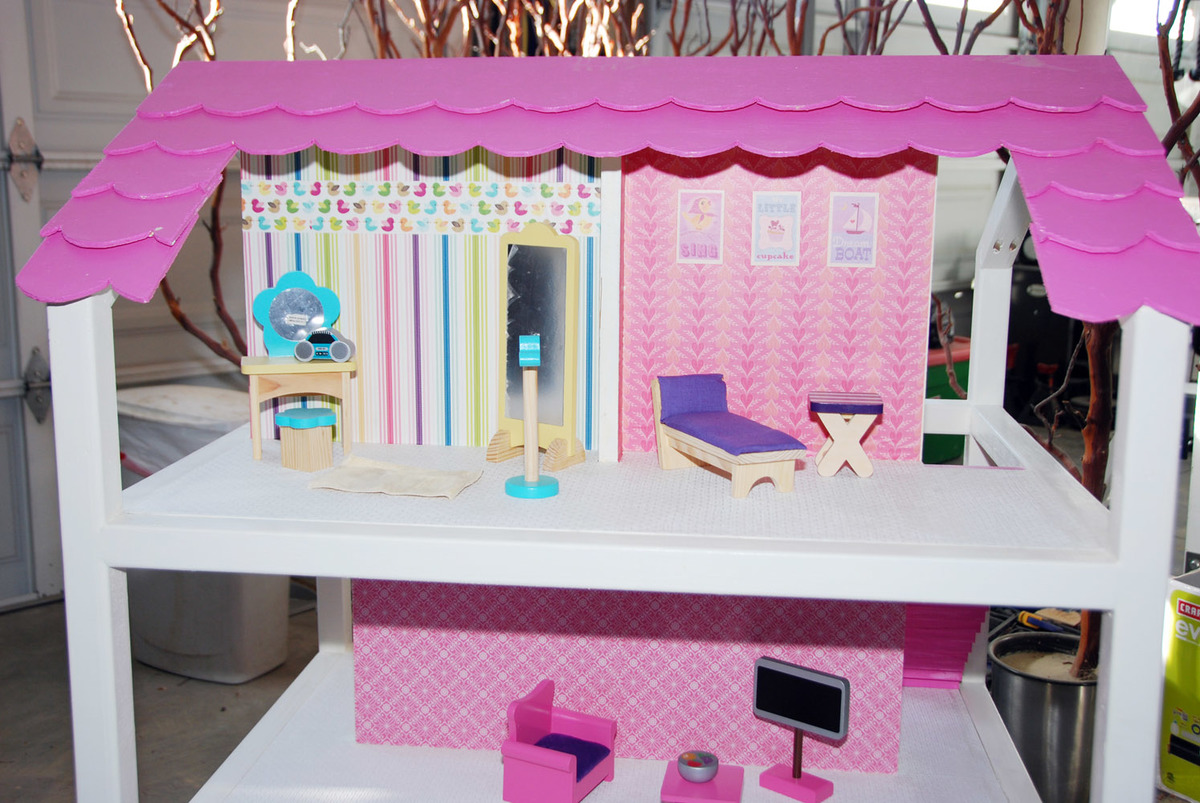
DIY KidKraft Chic Dollhouse
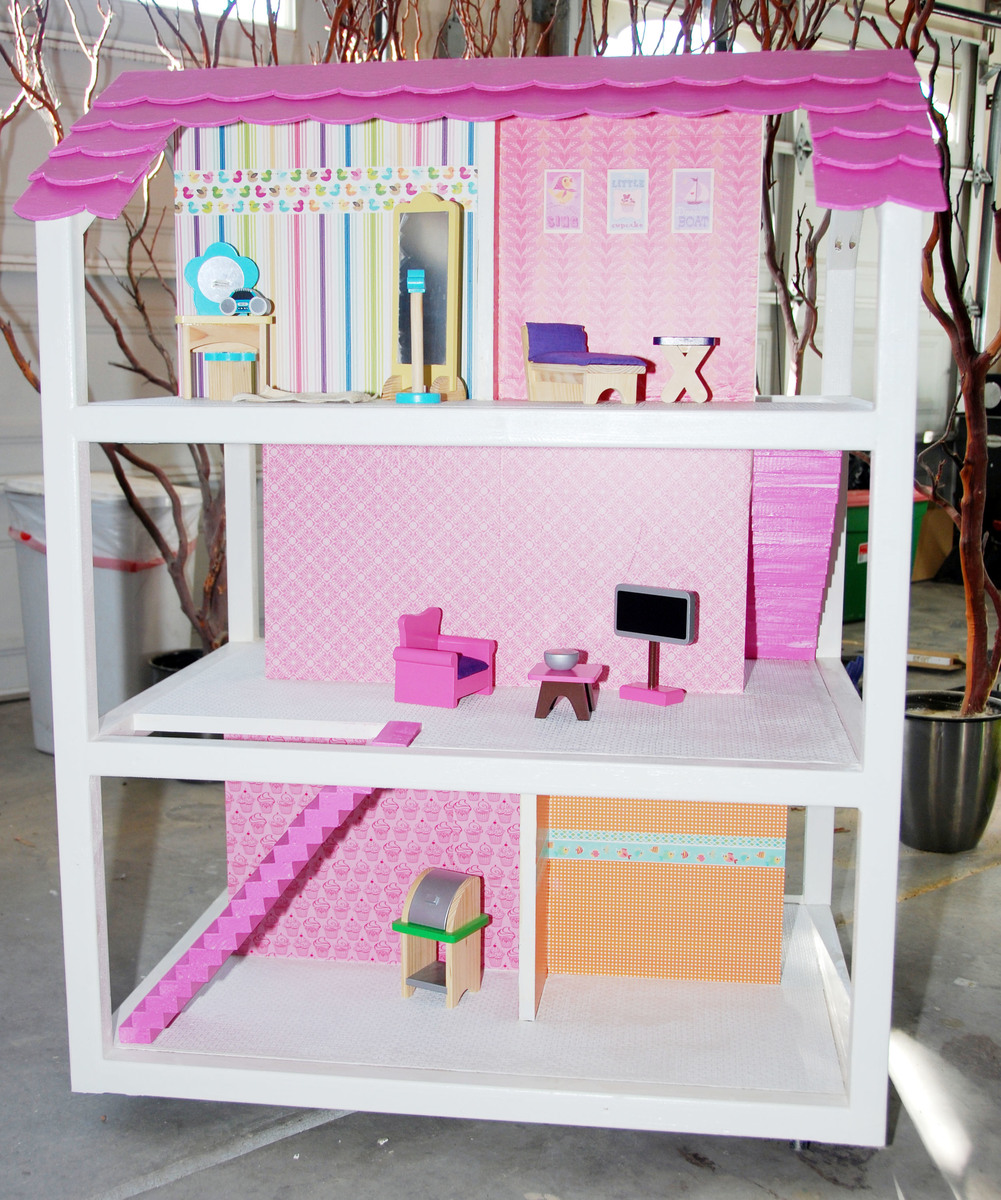
We're short on money this year so we decided to make our Christmas gifts for the kids. The KidKraft Chic Dollhouse is perfect for my daughter, but it's soo expensive. I used Ana's plans to make one that matches the decor in her room. This dollhouse is so sturdy, we can definitely use it as a bookshelf when she grows out of it!
Content was too heavy to post to please visit http://blog.prettyinprints.com/2011/12/diy-kidkraft-chic-dollhouse/ to see the entire thing (:
Built from Plan(s)
Estimated Cost
$100 with paint & floors, $60 or less without
Estimated Time Investment
Day Project (6-9 Hours)
Finish Used
Antique white high gloss for the frame, pink high gloss for the roof & stairs, decoupage walls, decoupaged textured (and paintable) wallpaper from Lowe's for the floors.
Recommended Skill Level
Intermediate
Comments

Tue, 12/06/2011 - 14:30
Thank you!!
Now we just need to figure out how to hide it until Christmas (:
In reply to Thank you!! by prettyinprints
Wed, 12/07/2011 - 06:42
Tough one
In somebody else's garage perhaps?
Mon, 12/19/2011 - 07:35
Thanks for the pics!
I'm currently working on this dollhouse, so it's fantastic to see one that another reader has completed. Sometimes I look at what Ana has come up with and think, "Is it possible for someone else to make one that looks that awesome?"
Thanks for proving it can be done. Your dollhouse looks amazing!
As far as hiding it, I second using a neighbor's garage. I remember my brother and I scouring the entire house when we were young, looking for Mom and Dad's secret Christmas stash. Good luck keeping it hidden!
Wed, 12/21/2011 - 08:23
Thanks for the inspiration
We are almost done making our girls house and needed some more ideas on how to finish it. Yous looks great.
Sat, 12/31/2011 - 00:16
Excellent plans
Made this for my daughter this Christmas. It was perfect. She loved it. I know she will get years of use out of it. Thank you so much.
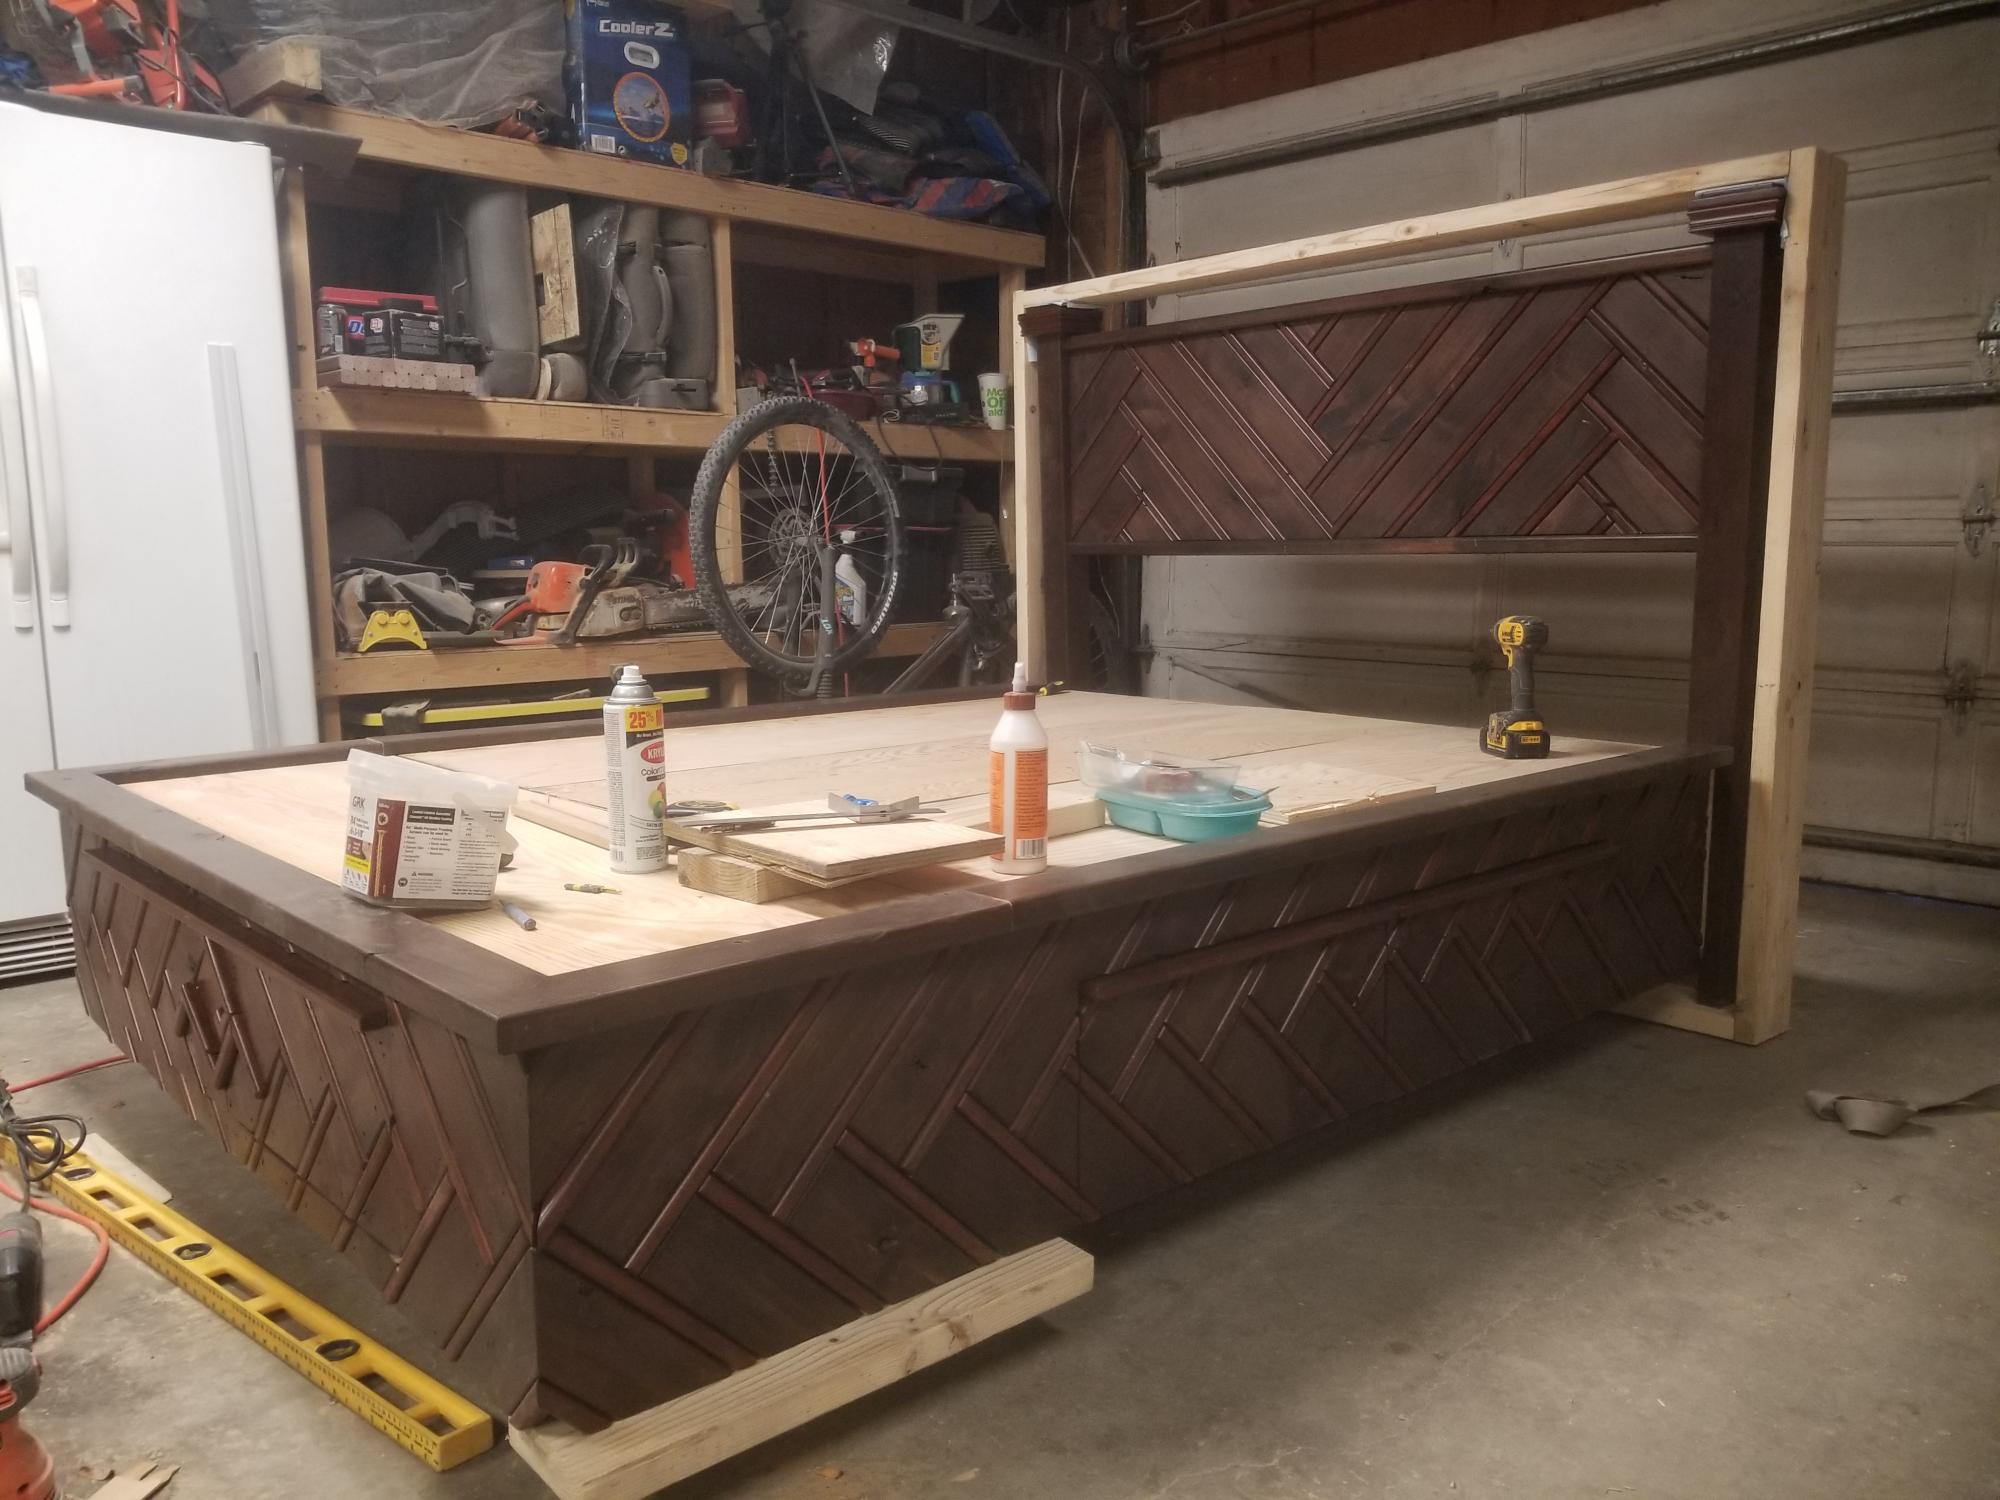
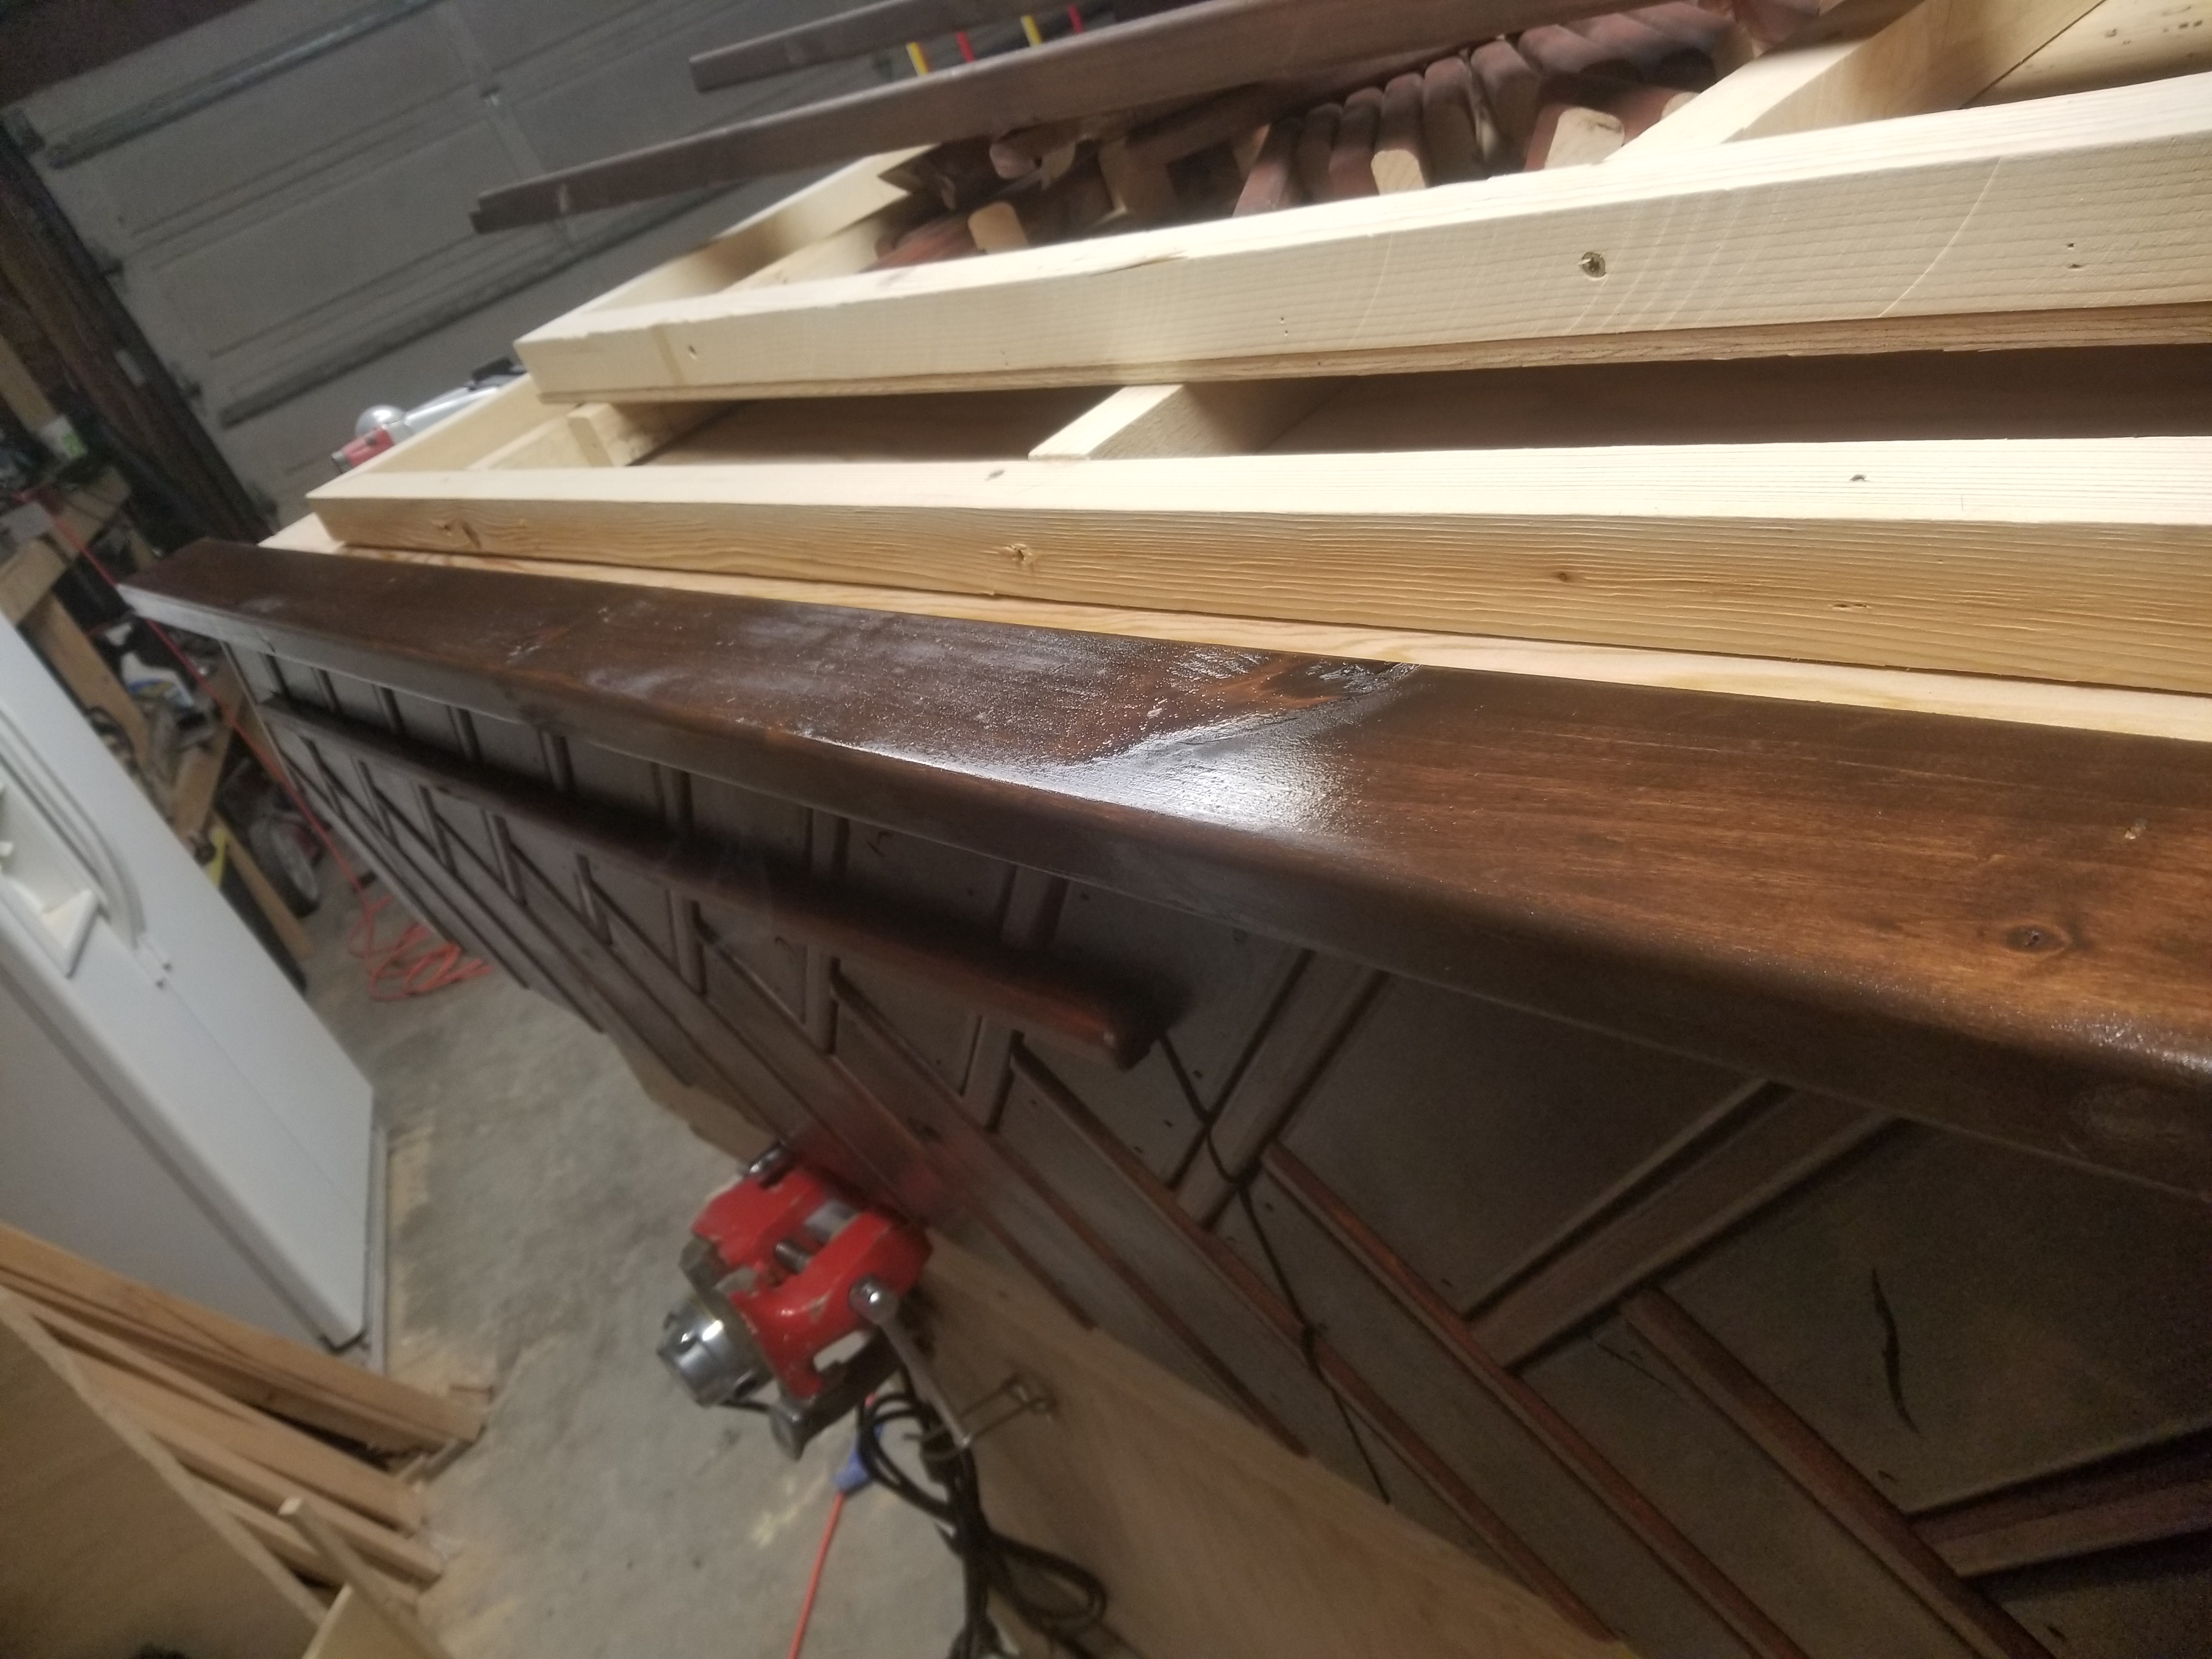
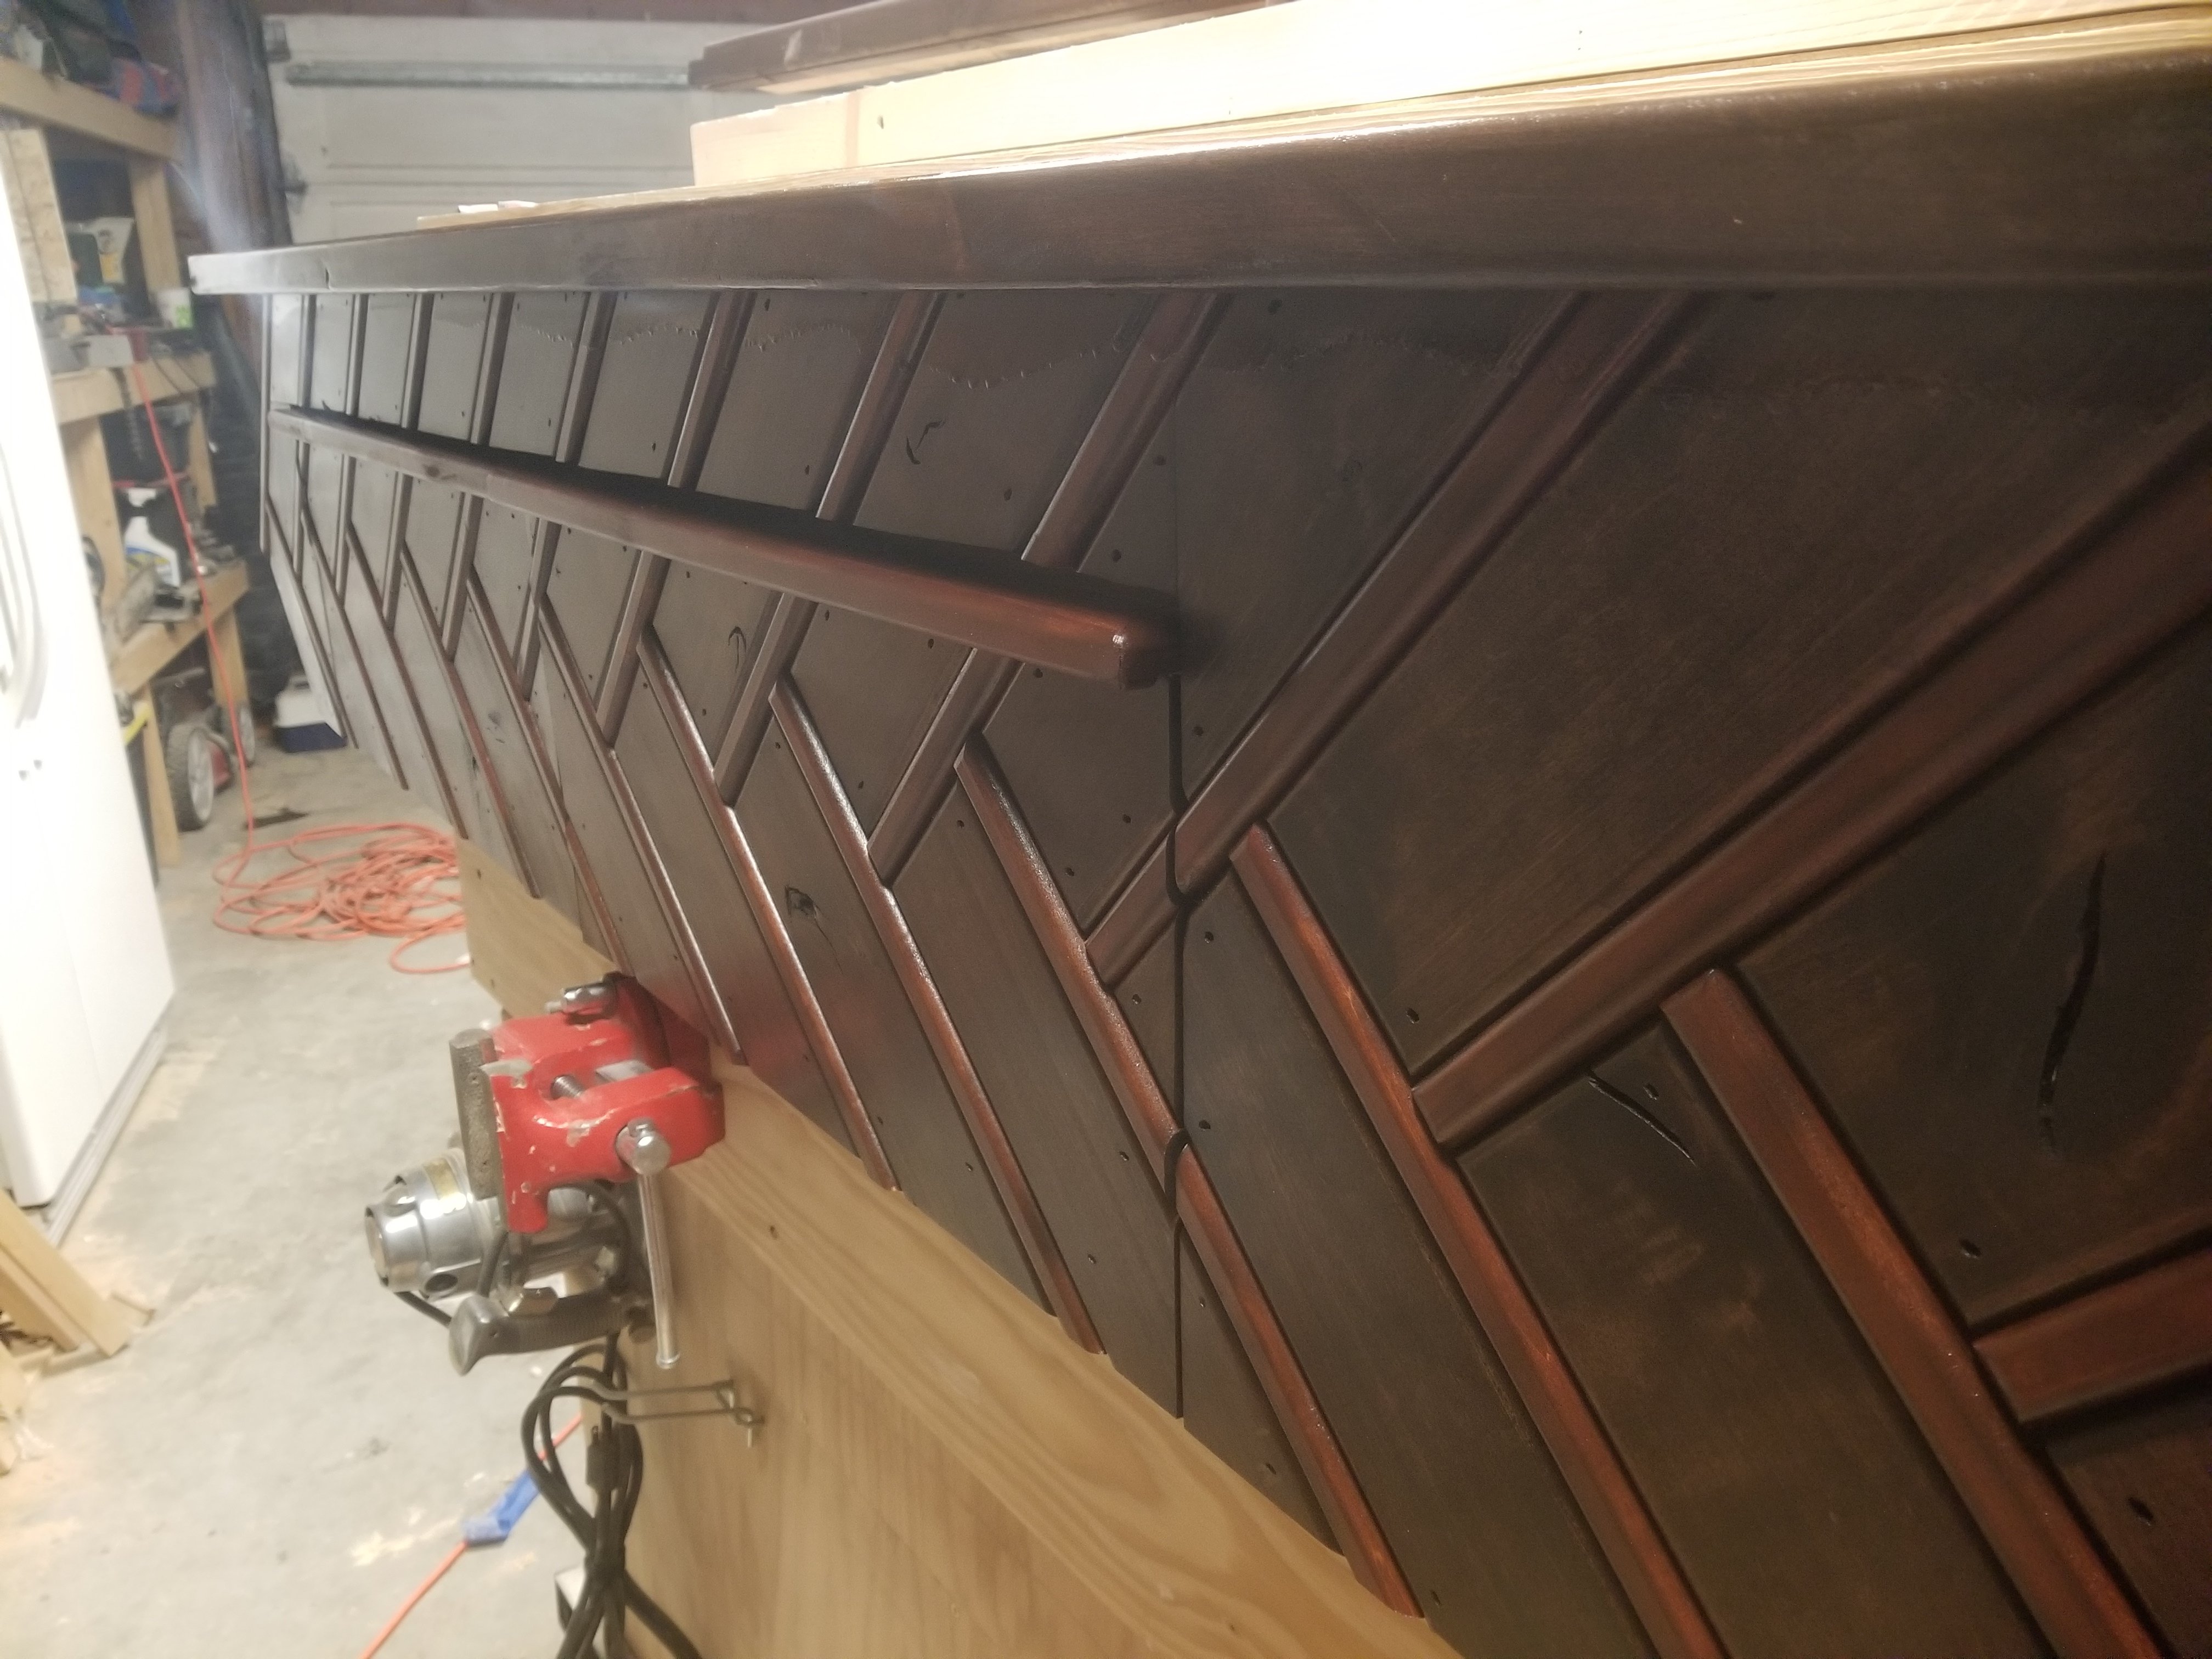
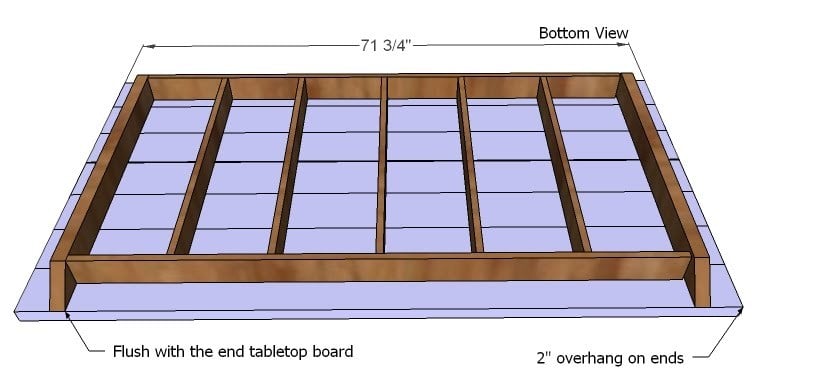
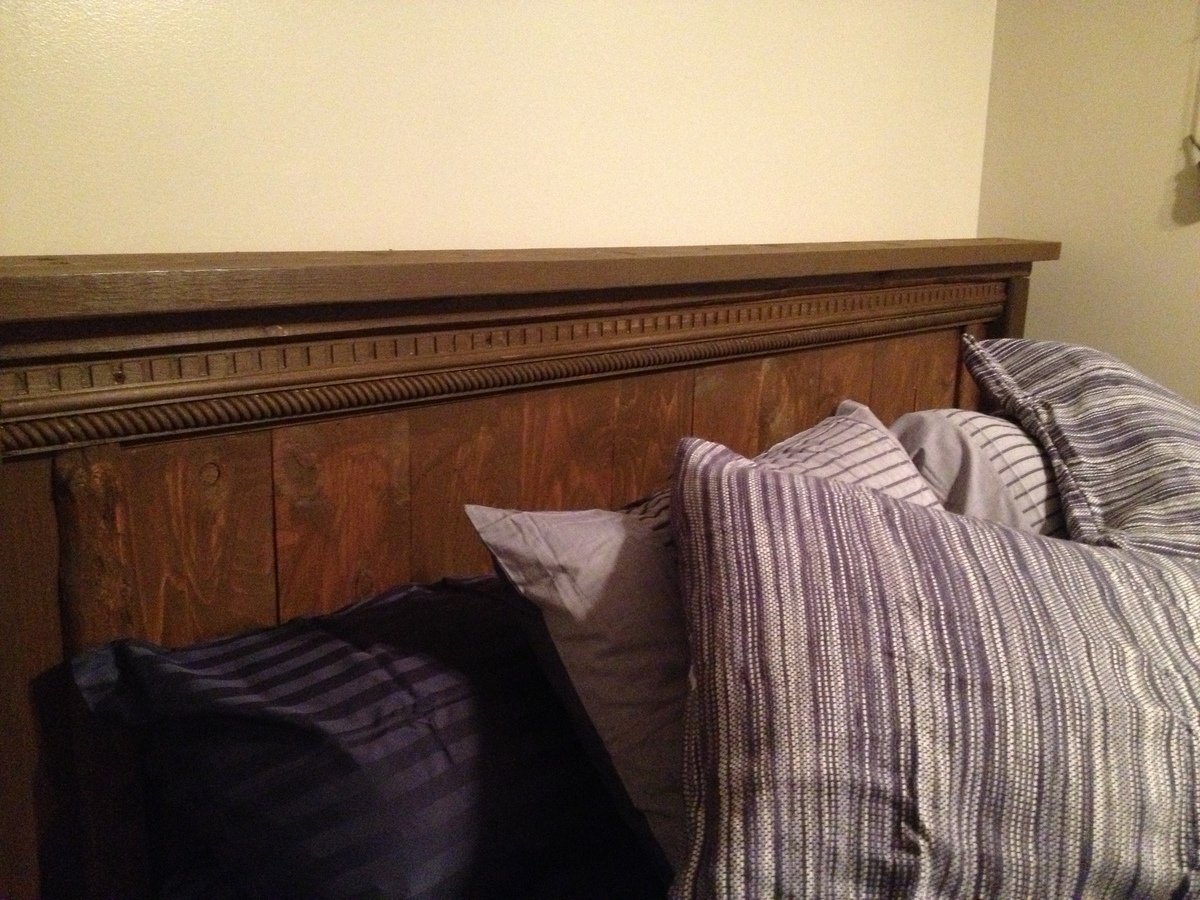
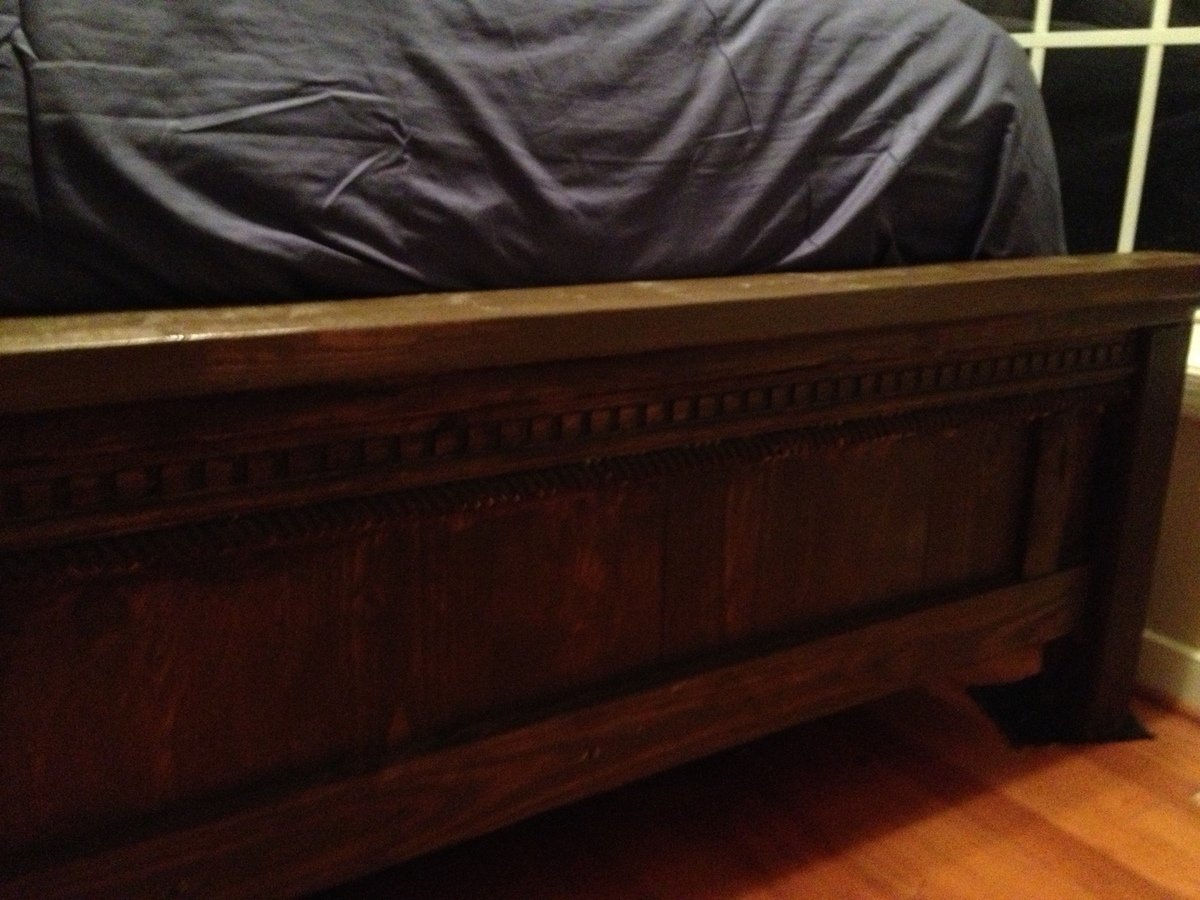
King size farmhouse bed

Used cedar for the planks in the headboard and footboard
Added some common trim pieces like the rope
Built the frame as described in the Queen plans - found that a standard metal ammo can on its side is the perfect height to set up the side panels at the corners.
Used 2x4 studs for the cross slats, but set them on their side to give some added height.
Used minwax Walnut stain - really looks nice on the cedar - just one coat for the cedar
Waxed top of the footboard
Stained a small footstool using Walnut.
Kingsize version is a monster - very solid, no movement or creaking
Estimated Cost
$400
Estimated Time Investment
Week Long Project (20 Hours or More)
Finish Used
Minwax Wipes - Walnut
Recommended Skill Level
Beginner
Comments
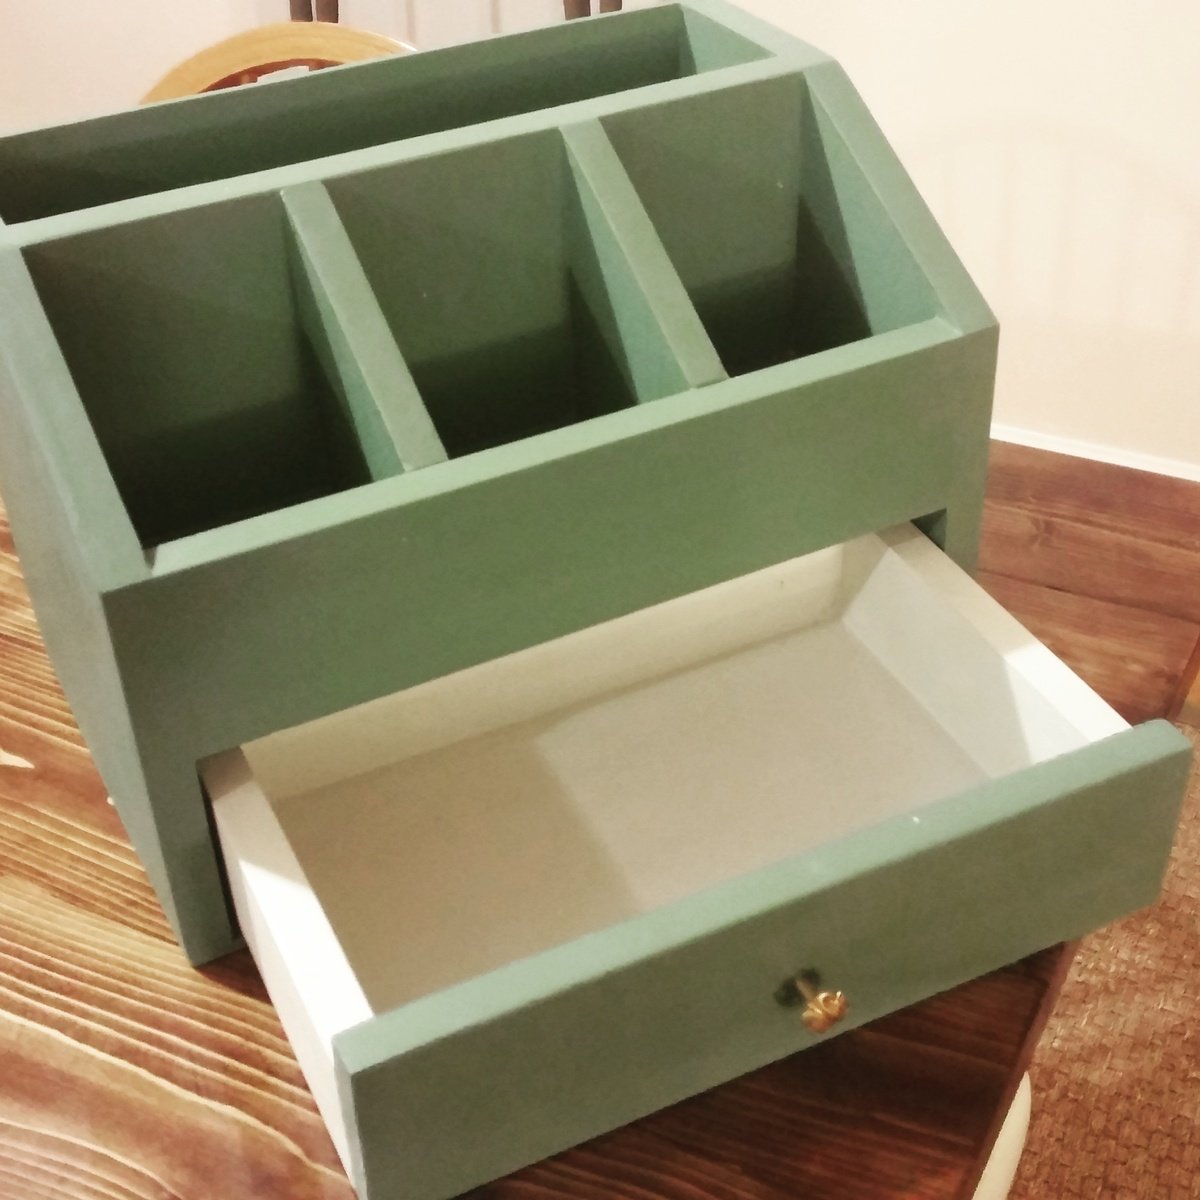
Desktop Organizer
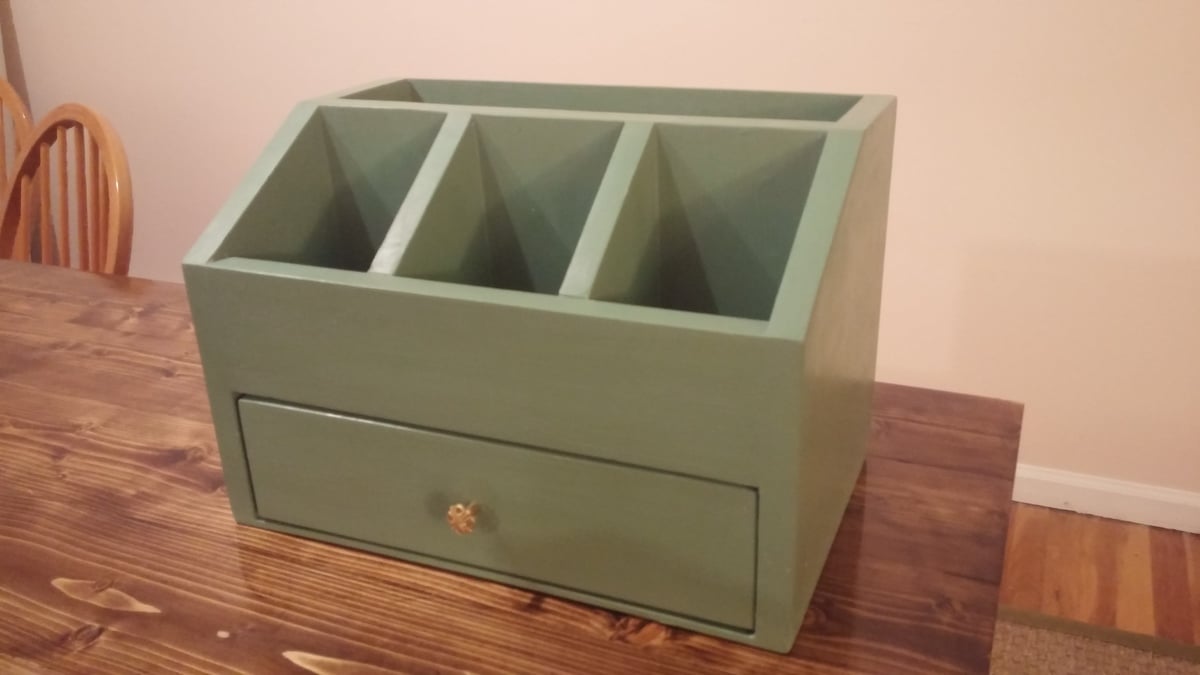
Built this in an afternoon with scraps left from other projects! Using it at at work on my desk. Added 1/4" plywood to base to close up drawer space. Felt strips on bottom of drawer makes the drawer slide out very nicely.
Built from Plan(s)
Estimated Cost
Wood scrap project. Bought drawer pull for $2 and a paint sample from Lowe's.
Estimated Time Investment
Afternoon Project (3-6 Hours)
Finish Used
Valspar paint sample in "Prickly Pear" shade. Furniture wax over paint.
Recommended Skill Level
Beginner
Comments
Ana White Admin
Fri, 02/24/2023 - 08:58
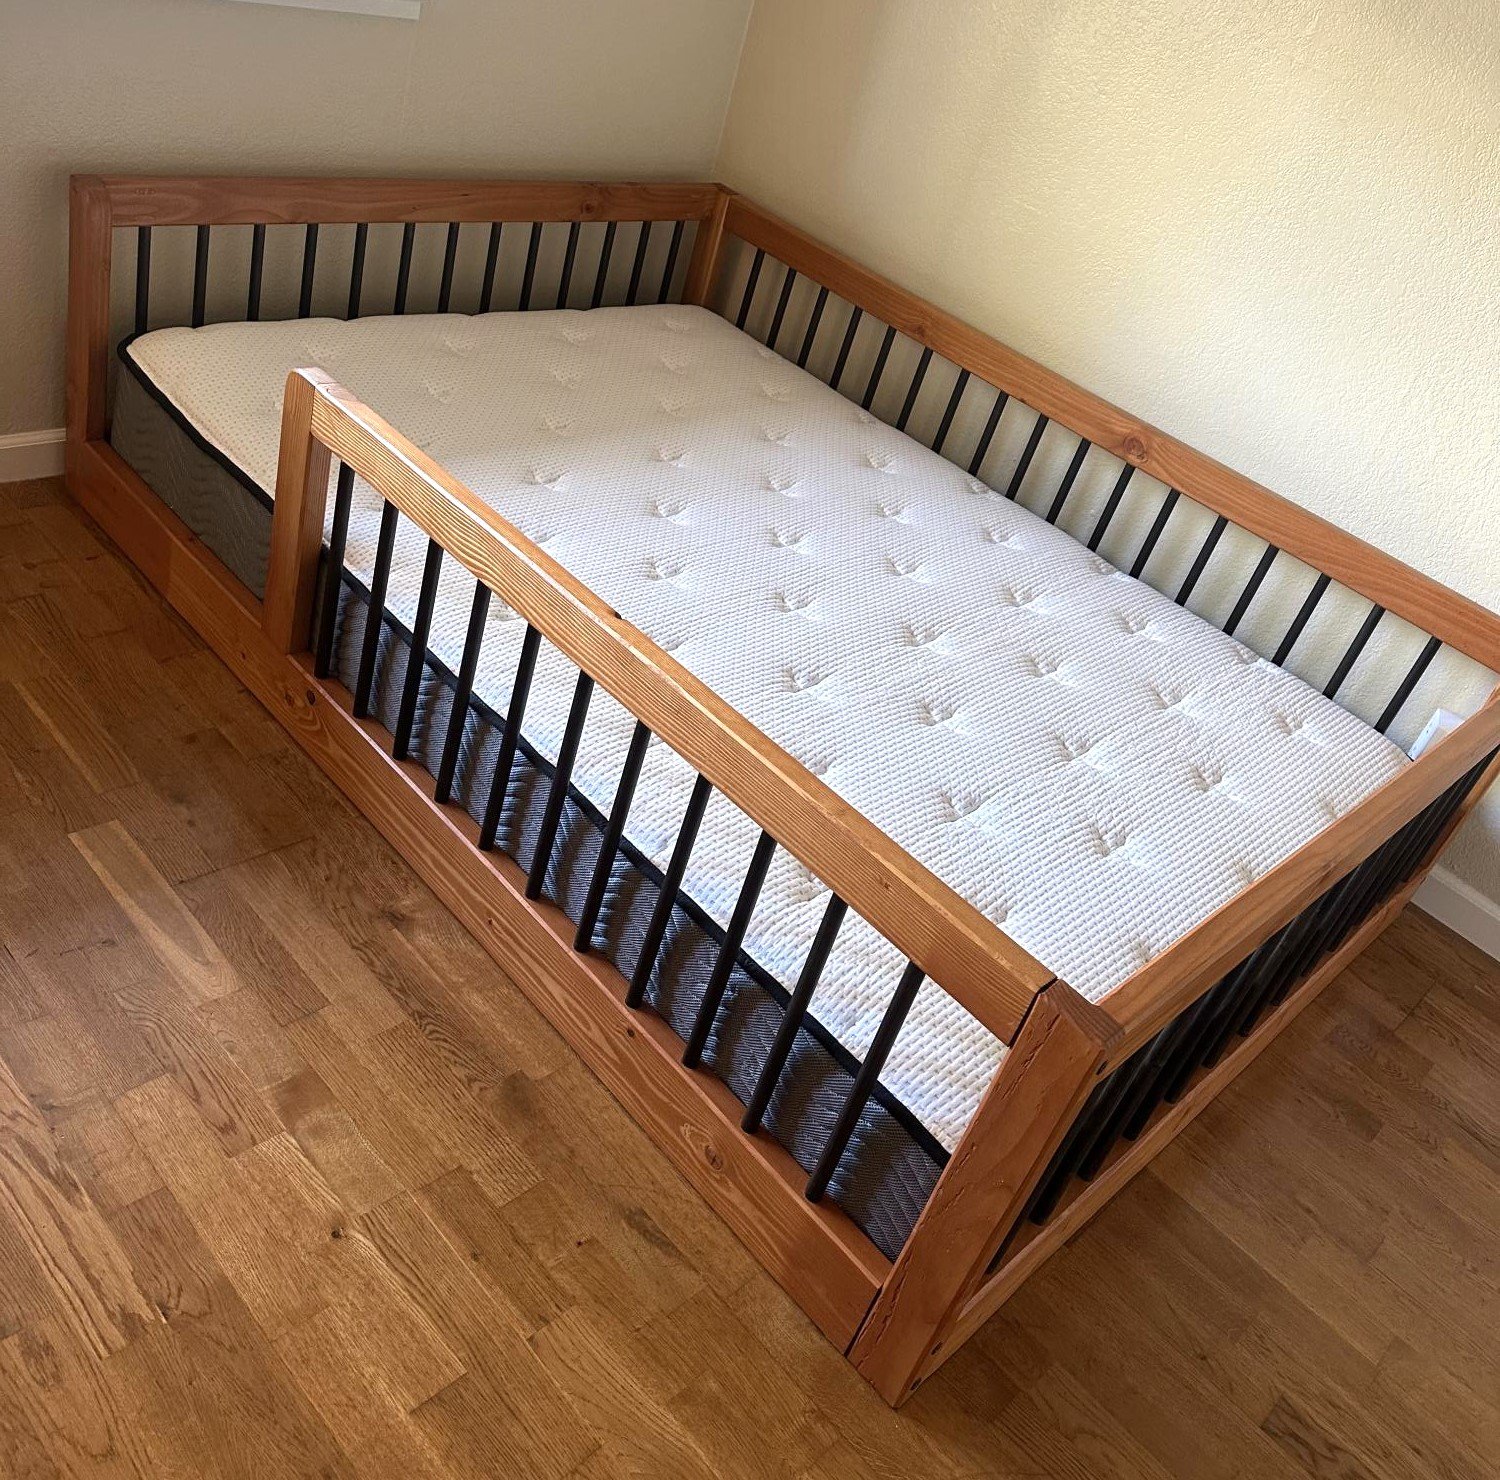
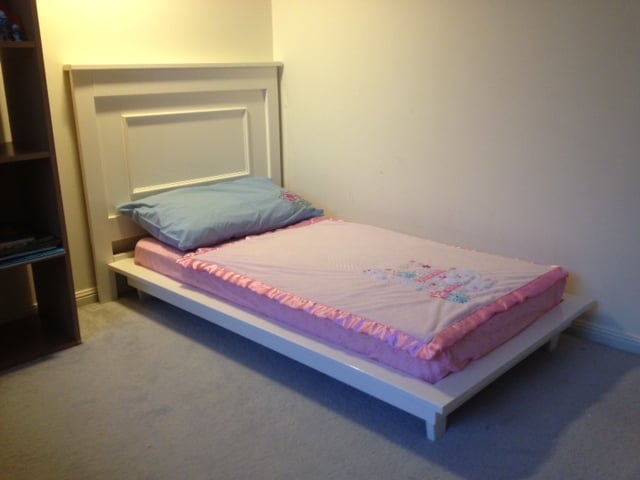
Beautiful montessori style bed!
Super cute, thank you for sharing!