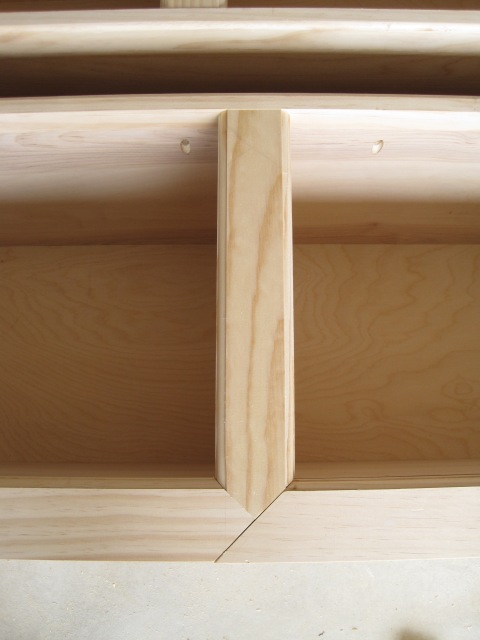
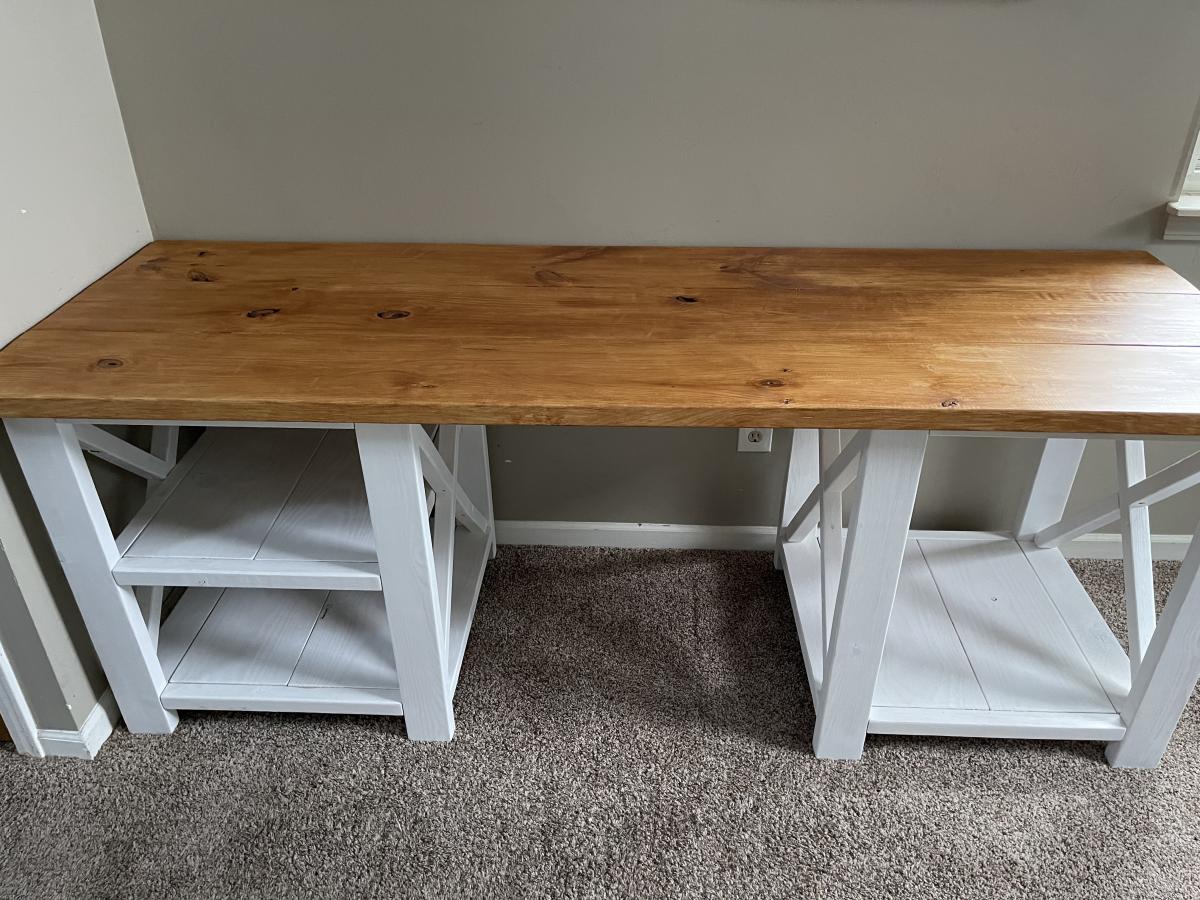
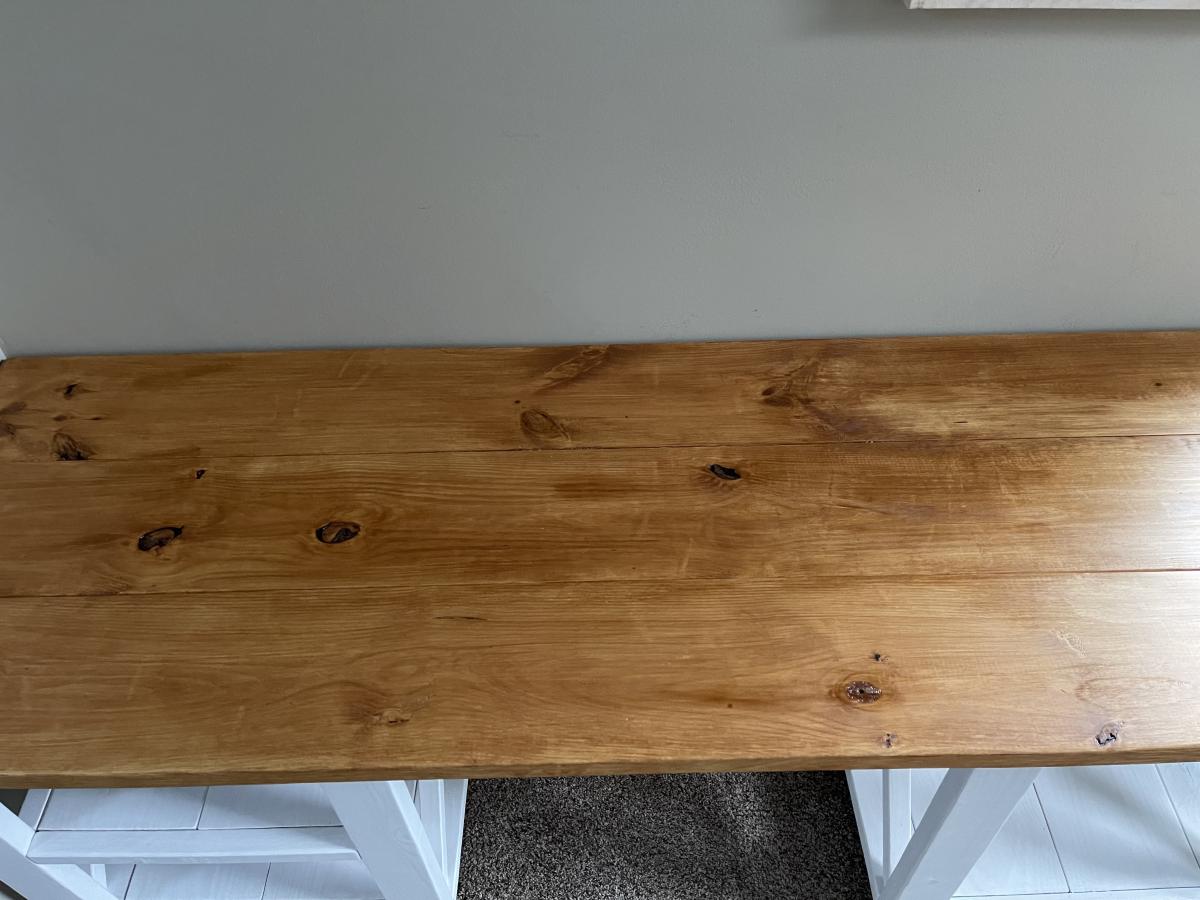
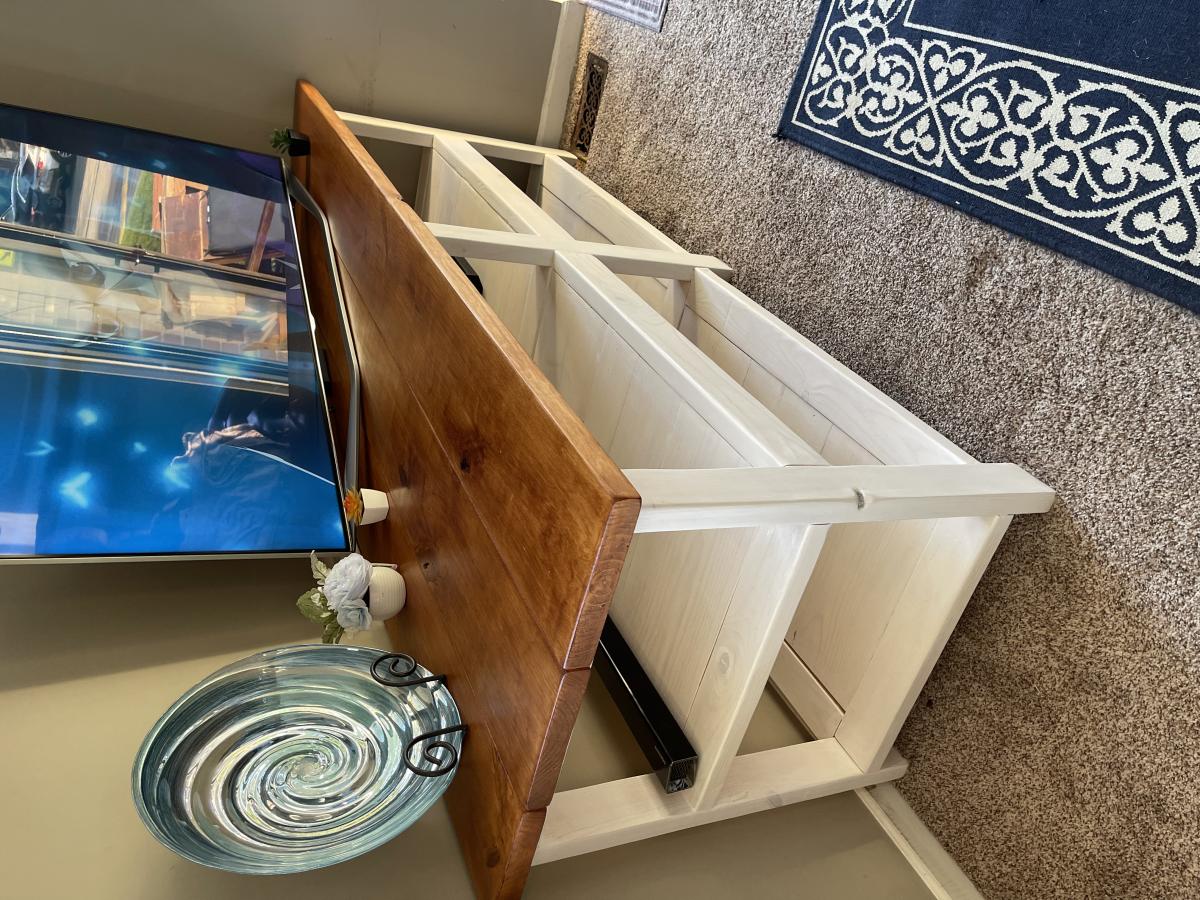
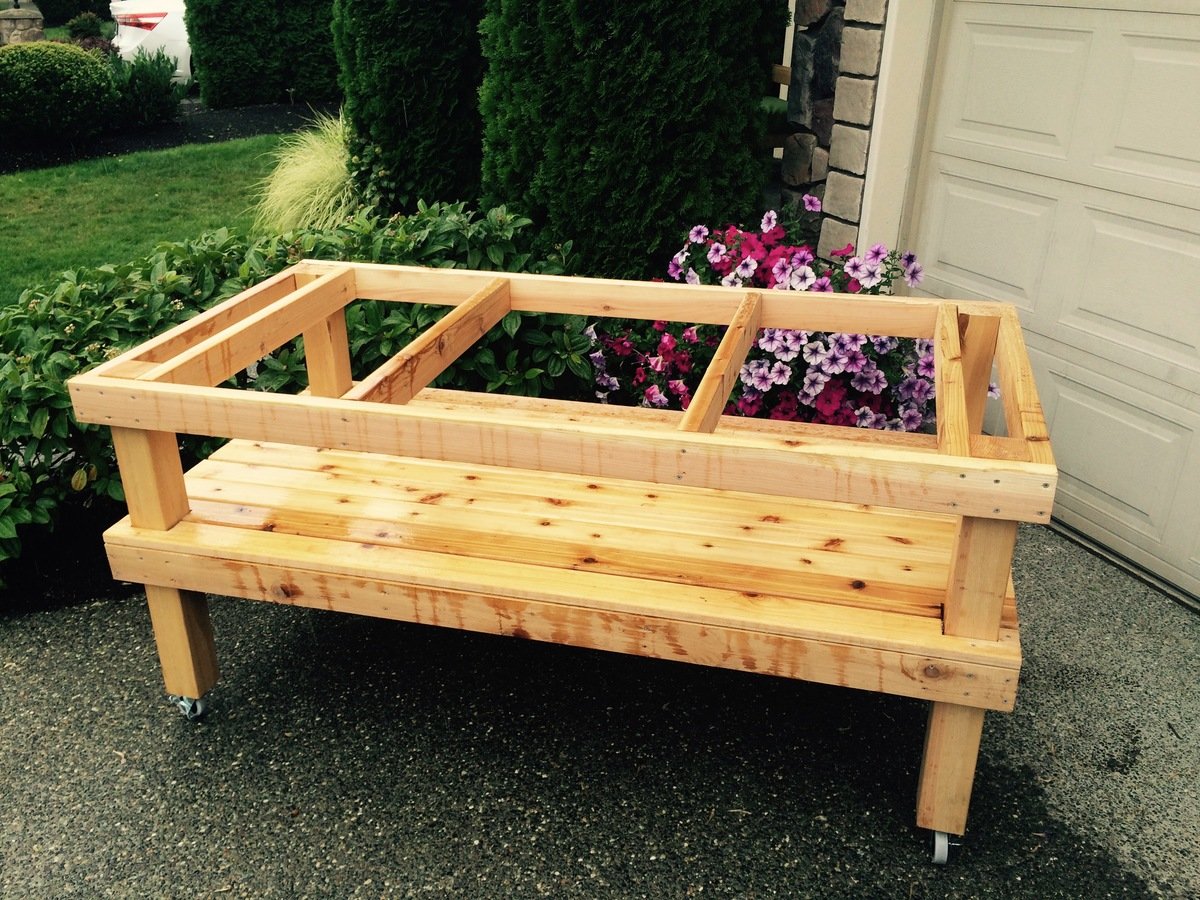
Truss and Beam 4x4 Table
Love my table, I’m still working on the benches.
by Melonie
Built from Plan(s)
Love my table, I’m still working on the benches.
by Melonie
or maybe I should say DDIFM?
Dad, do it for me?
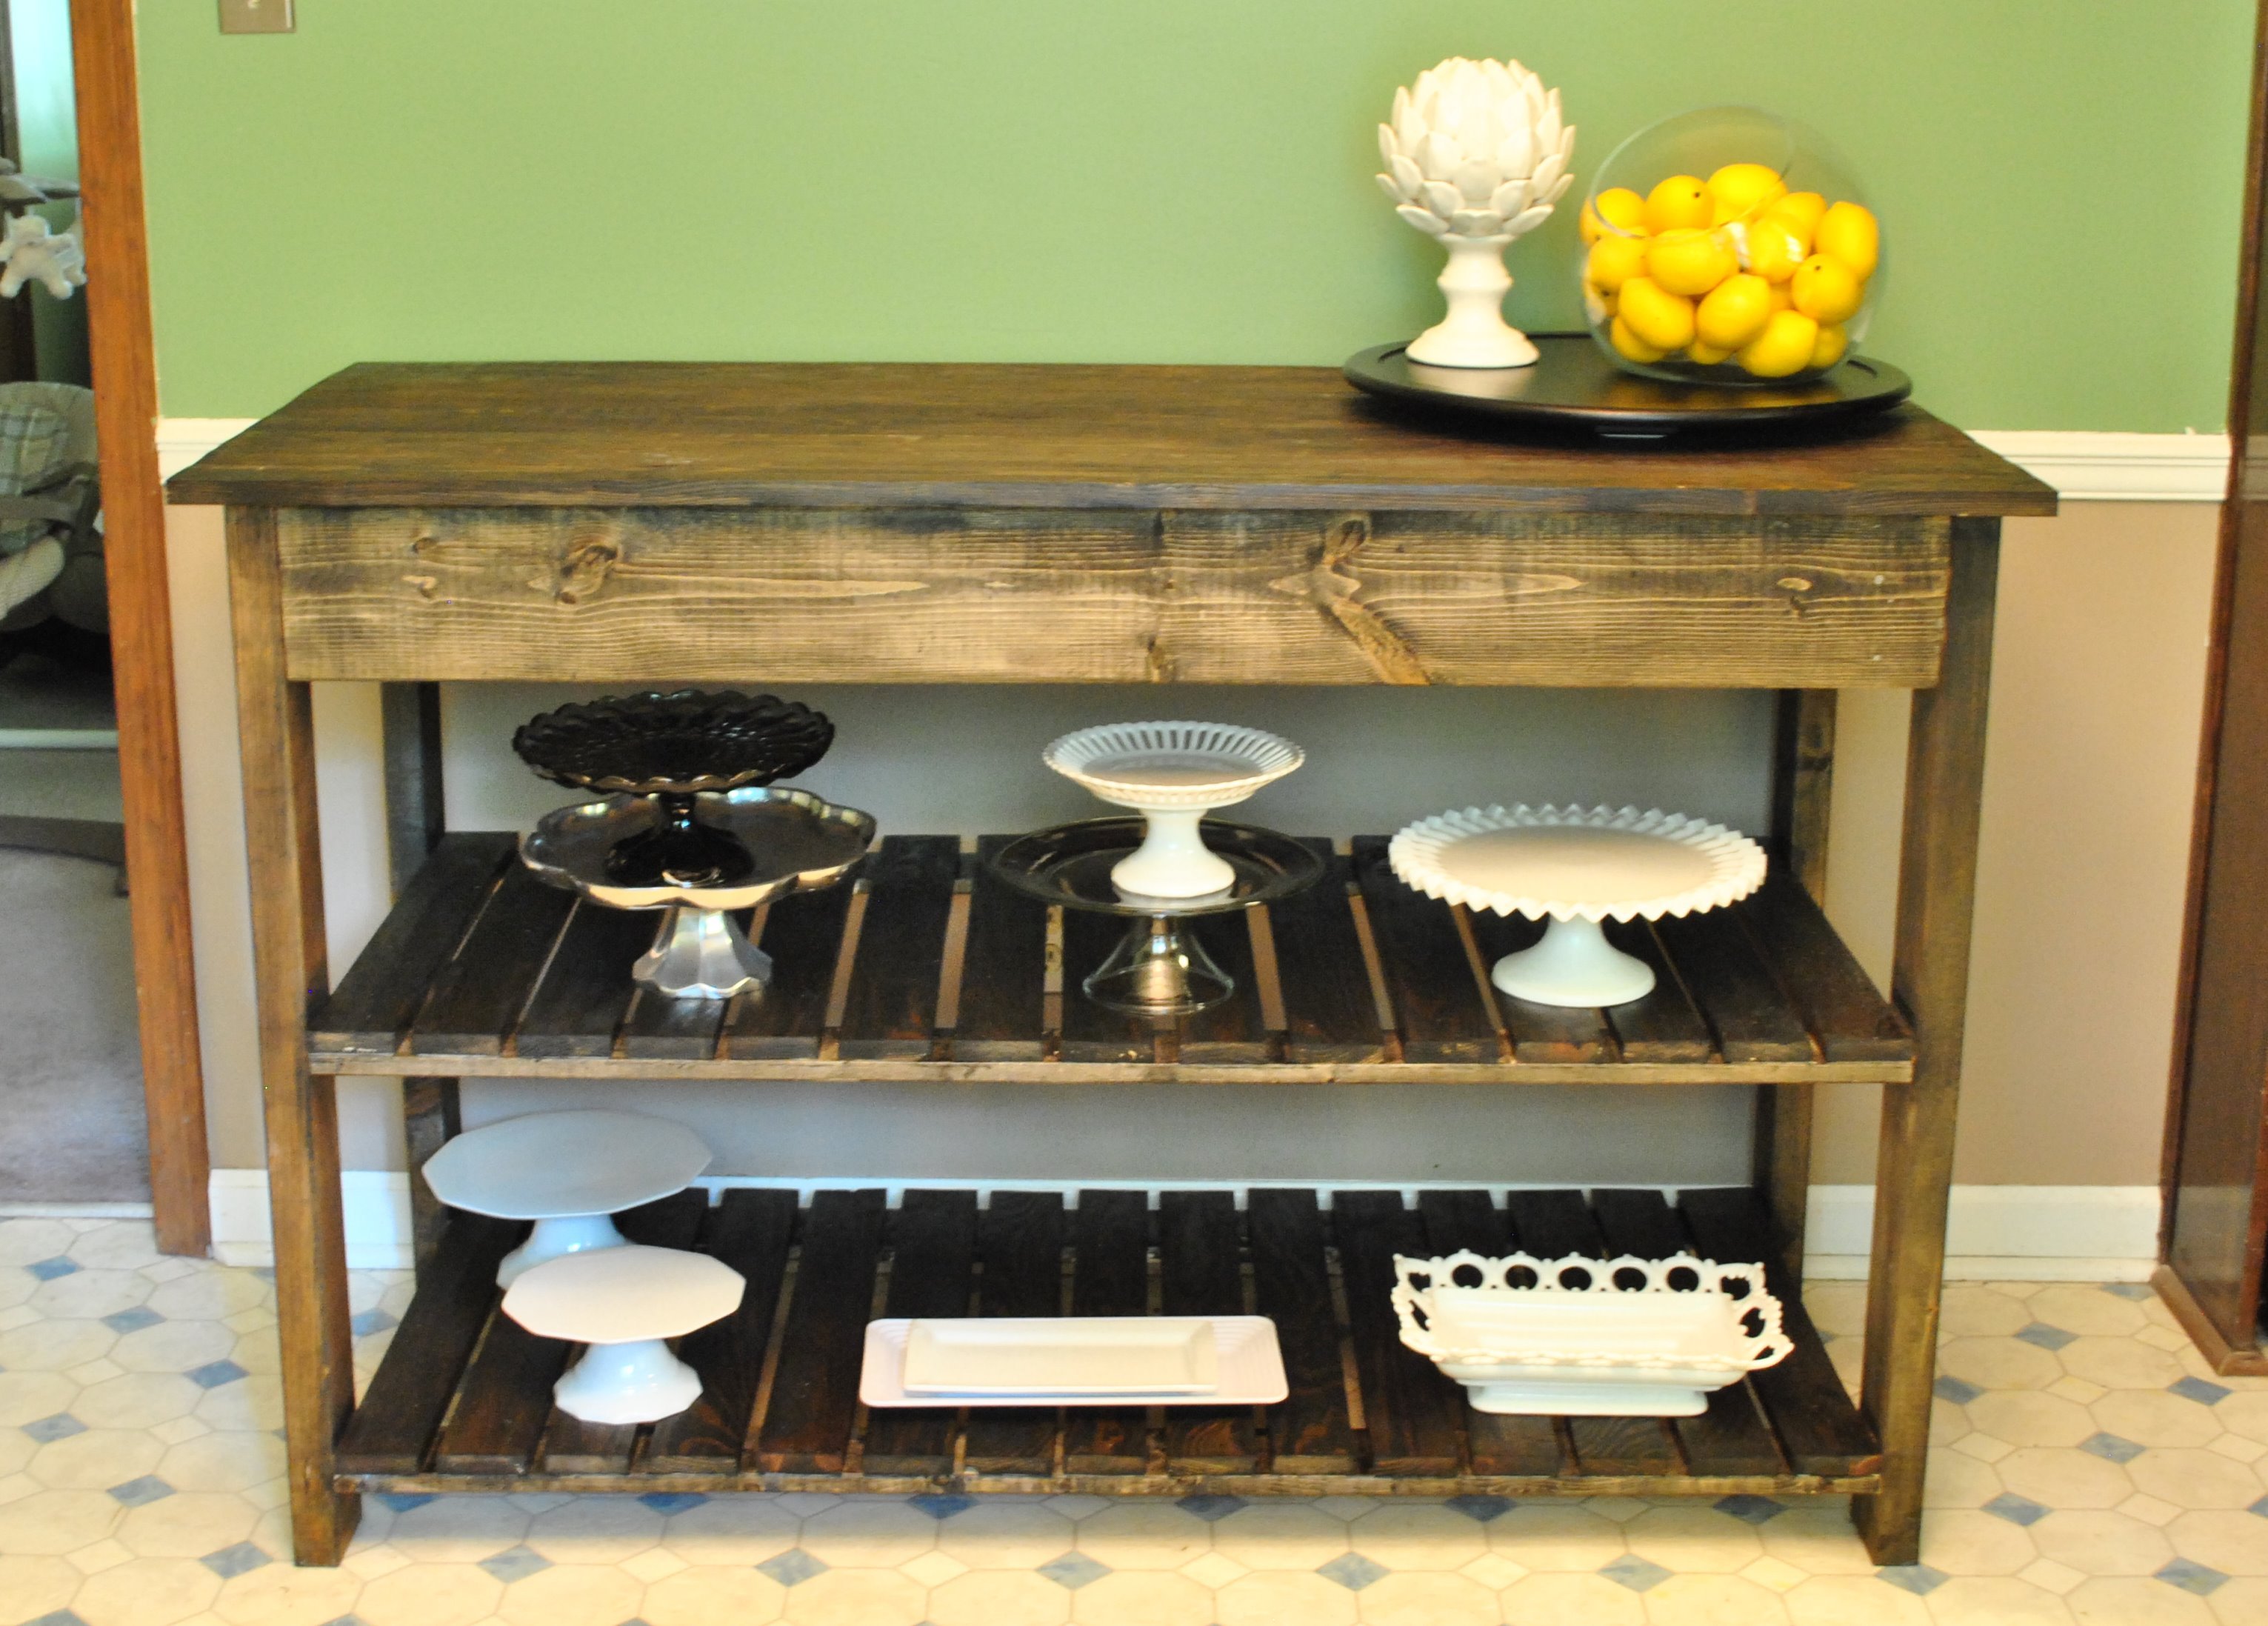
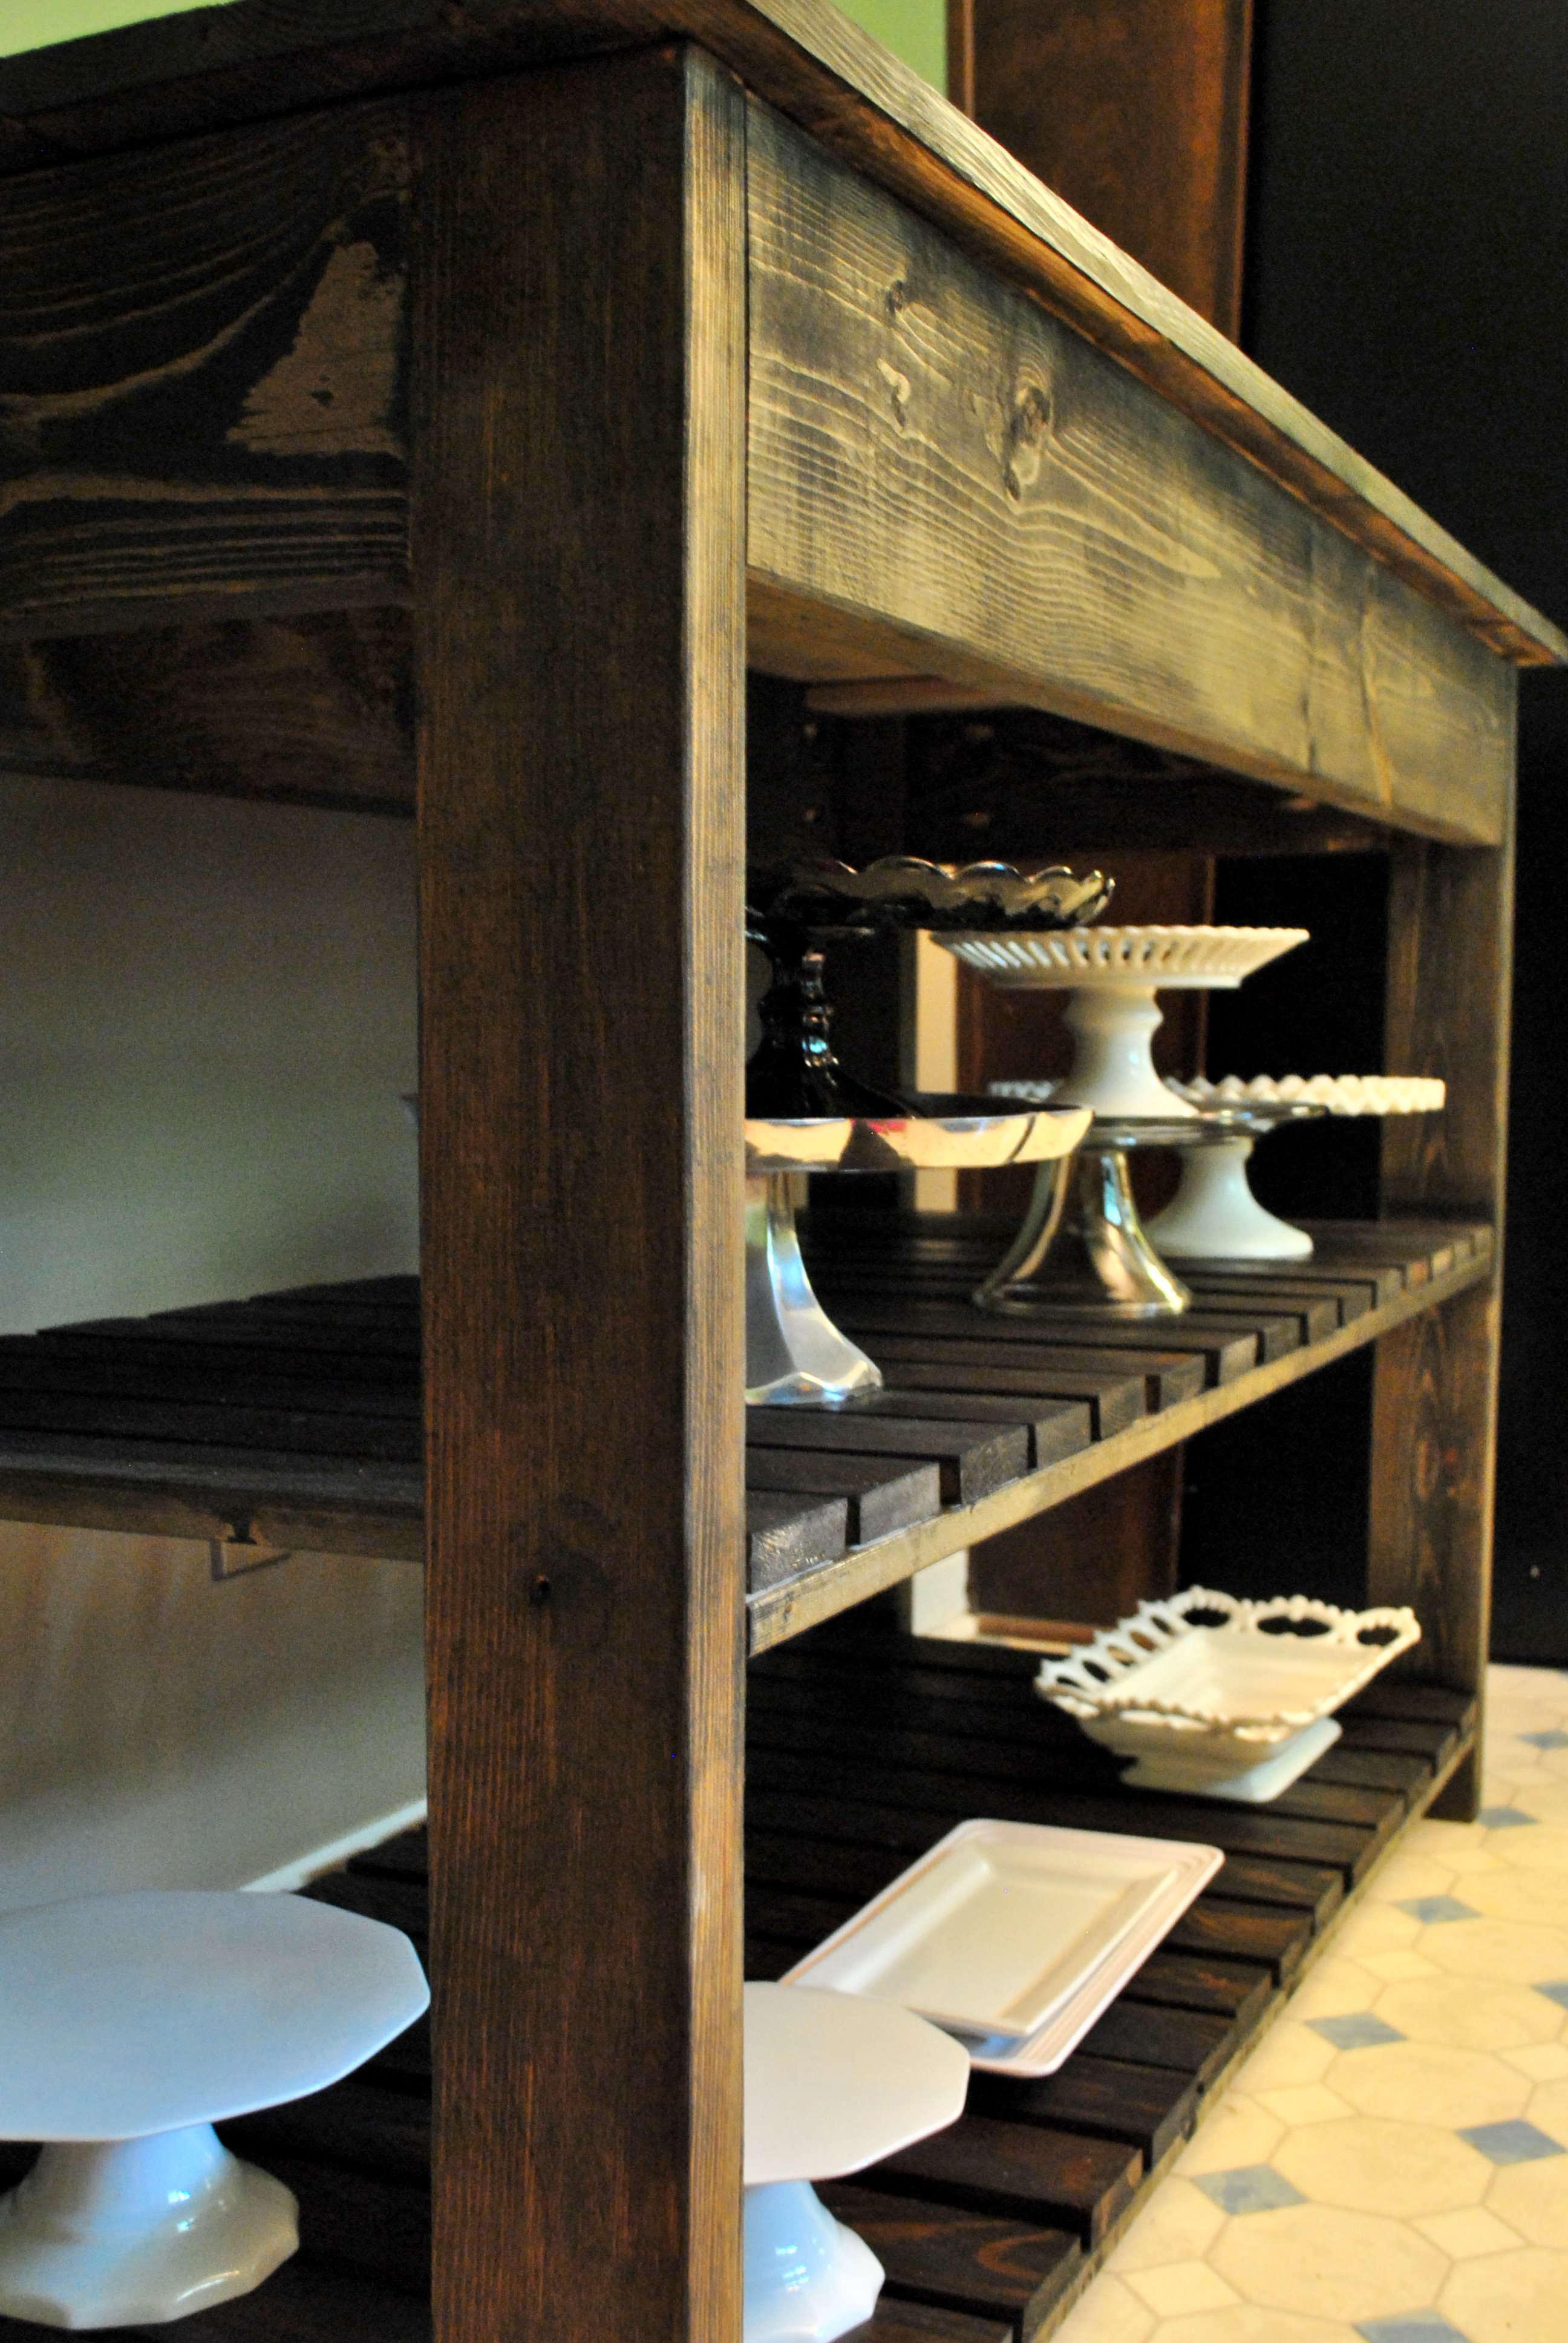
I really needed a place to store my cake plates...
other than their current home on top of our fridge.
The rattling and shaking that went on every time we opened the freezer
was about to give me a heart attack.
I found this beautiful table that was constructed DIY
from plans on the anawhite website and fell in love.
So my dad got to building, and sanding, and building, and staining. Then he brought me this gorgeous table last weekend. I can't stop staring at it. I am obsessed with the wood grain. The slats. The perfect handmade storage solution. The contrast between the dark wood and my mostly white serving pieces. The height. The endless entertaining possibilities.
I promise the pictures do not do it justice...
Thank you for the great idea!
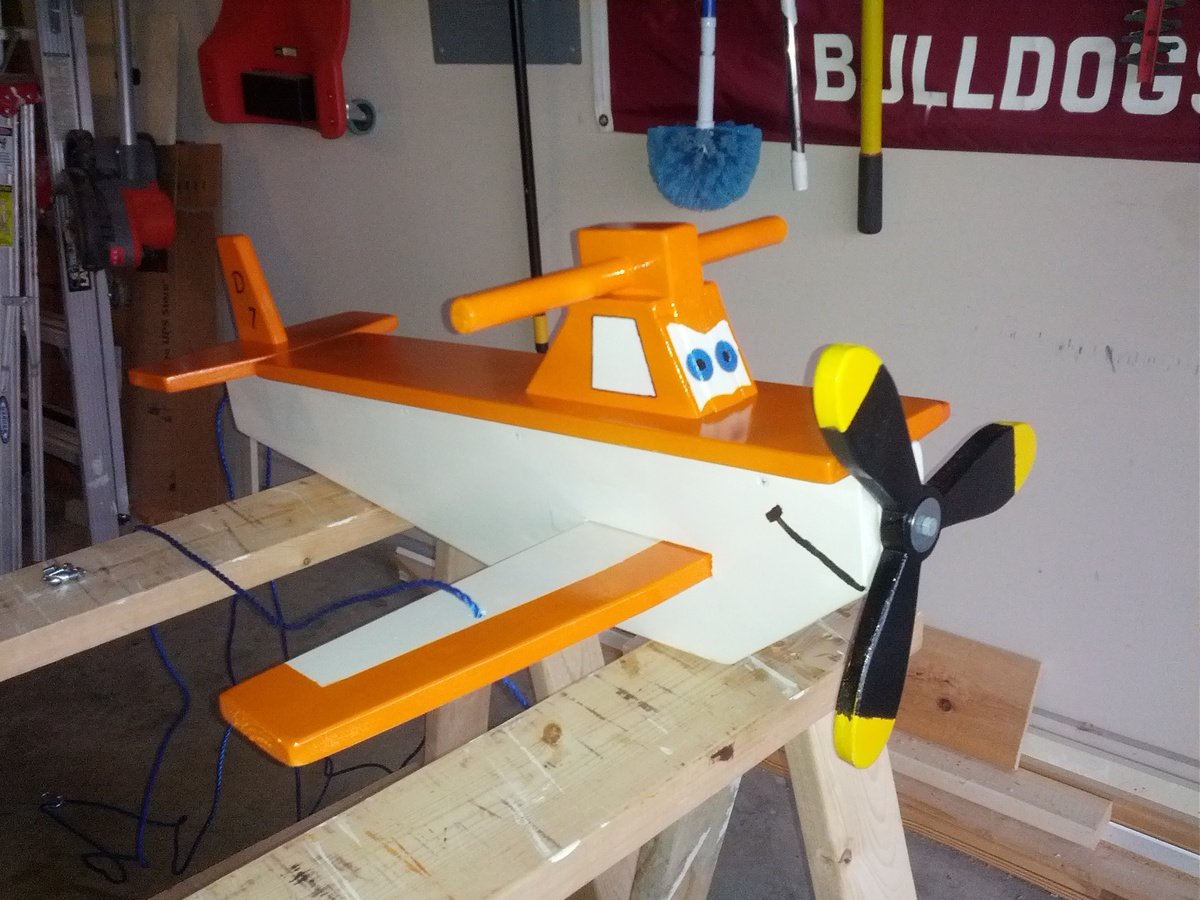
I built this for my nephew's birthday.
I took the child's airplane swing and modified it to look like the character from Disney's Planes.

Sun, 08/11/2013 - 05:55
This is soooo cute, your nephew is going to love it!! I love how you gave it a Disney character's face!
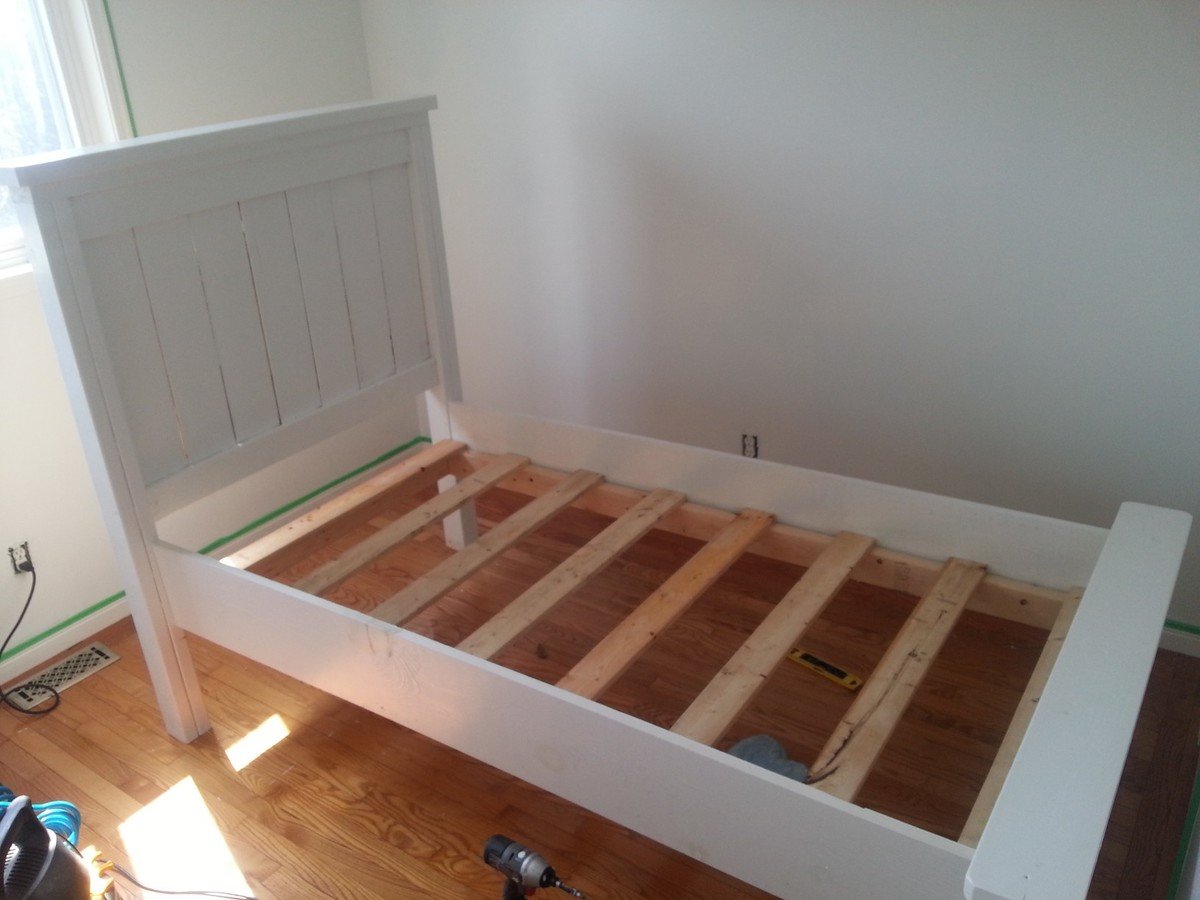
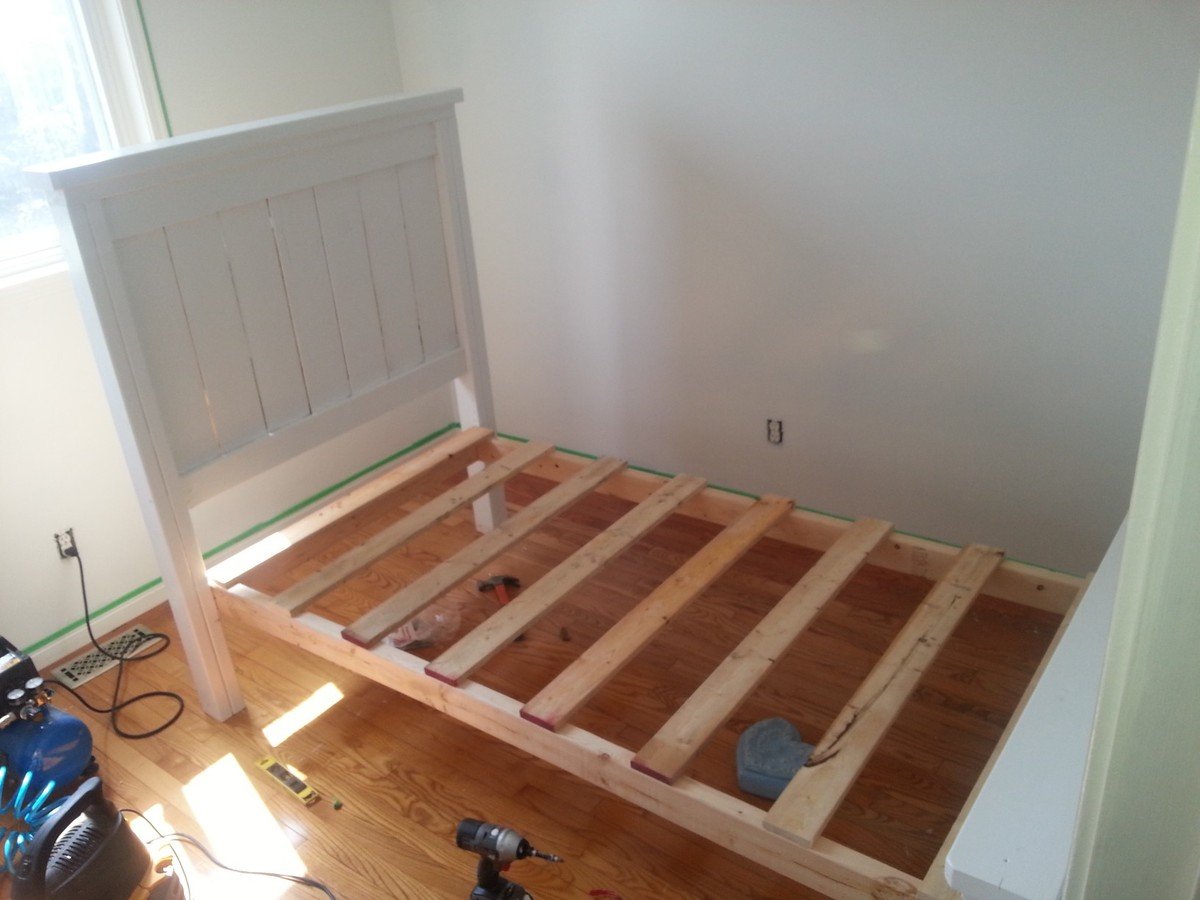
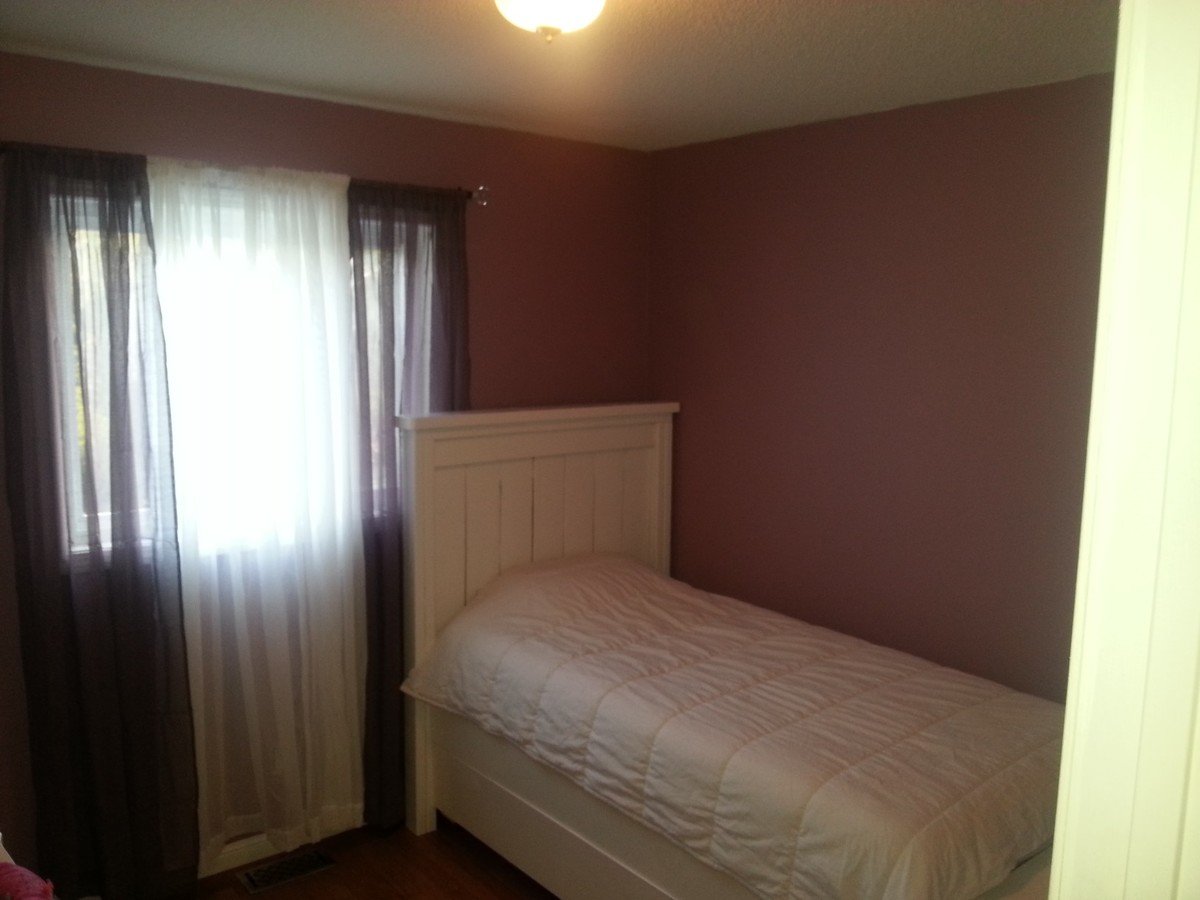
Took the farmhouse plan and added a Trundle. Was initially going to build two farmhouse beds for my two girls, but thought adding the Trundle would free up some much needed floor space. The girls love it!


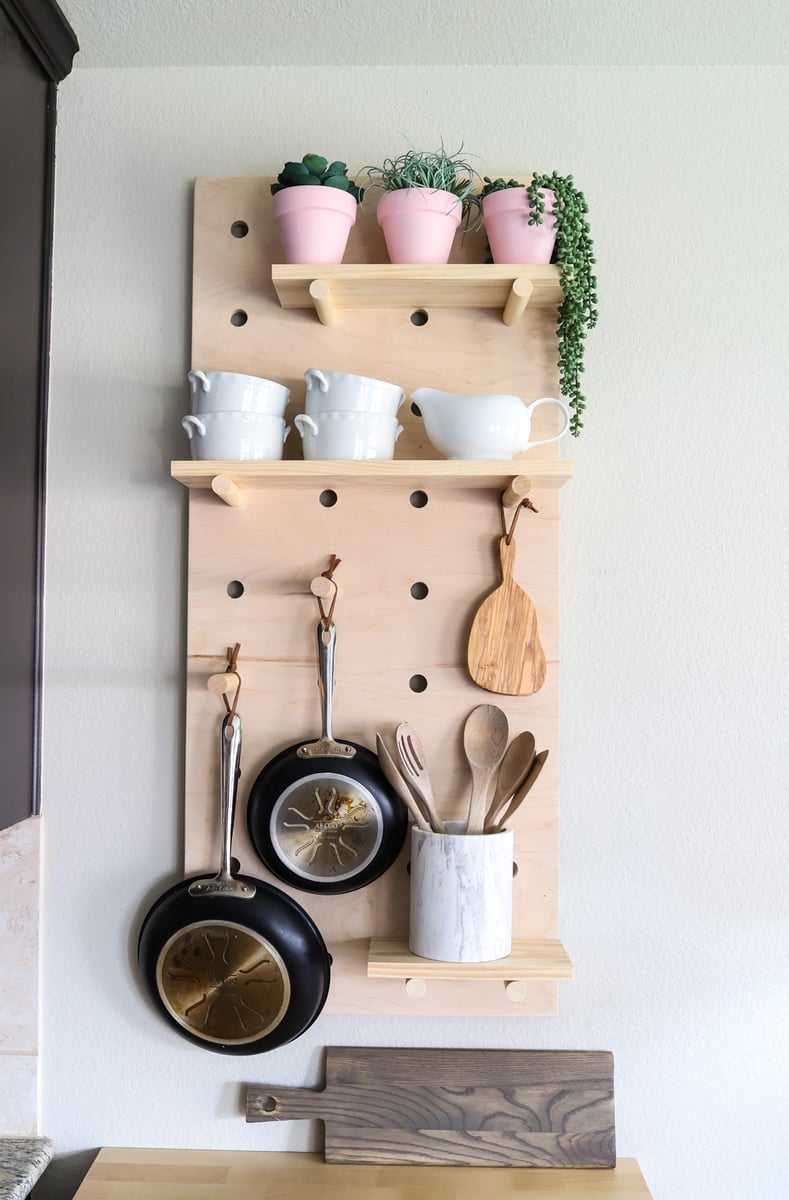
Hi Friends!
Jen Woodhouse from The House of Wood here.
I'm going to share with you how to create these Oversized Pegboard Shelves. If you’re short on cabinet or drawer space in your kitchen, this wall-mounted oversized pegboard shelf is a clever and stylish solution. It’s renter-friendly too! What more could you need?
Be sure to tag me @jenwoodhouse if you share photos of your build on social media. I'd love to see it!
You can get all the details for this build on my website jenwoodhouse.com
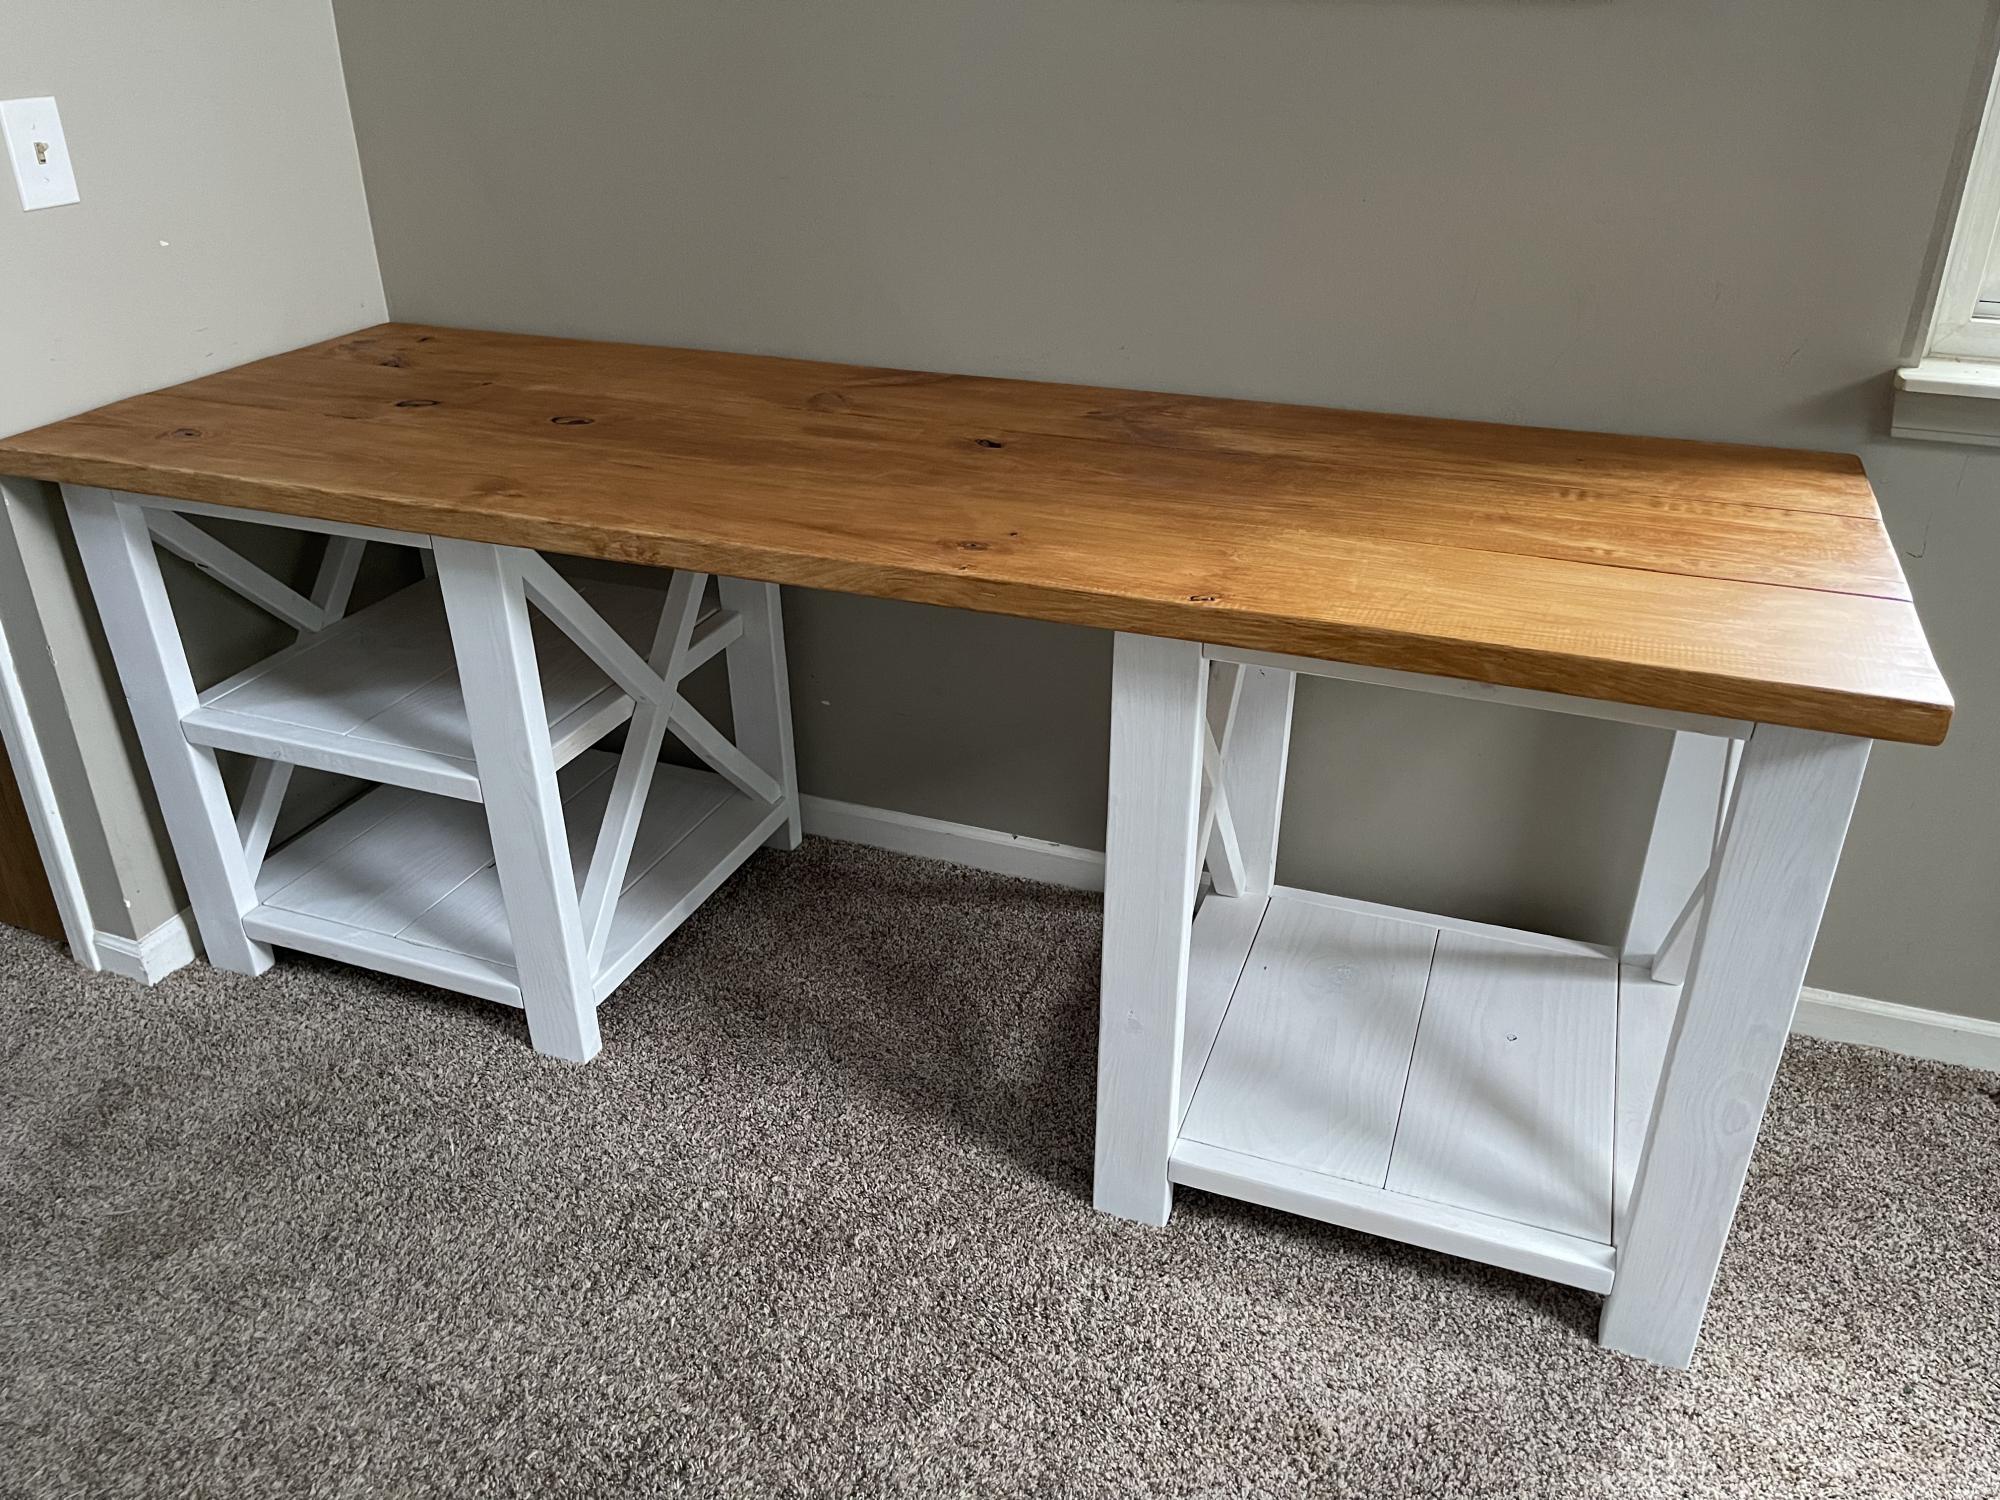
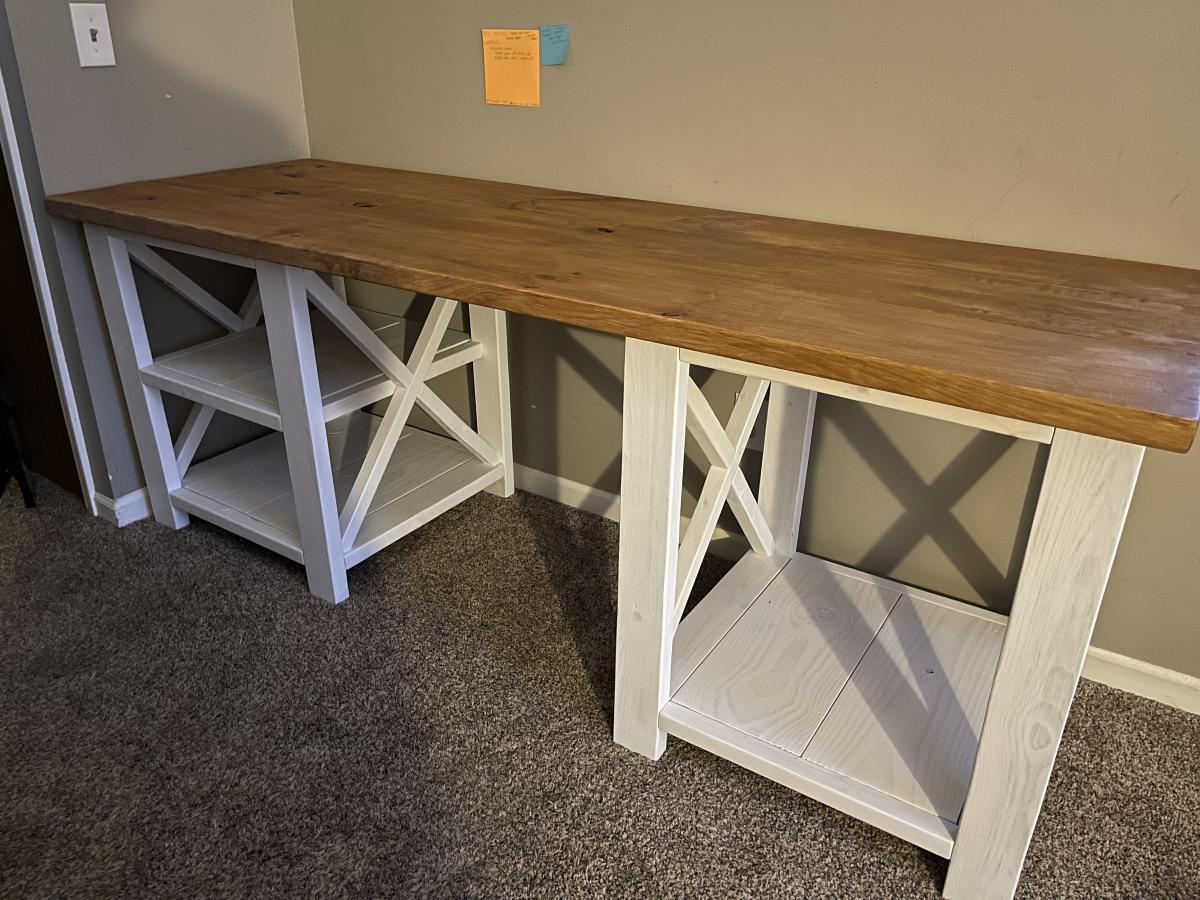
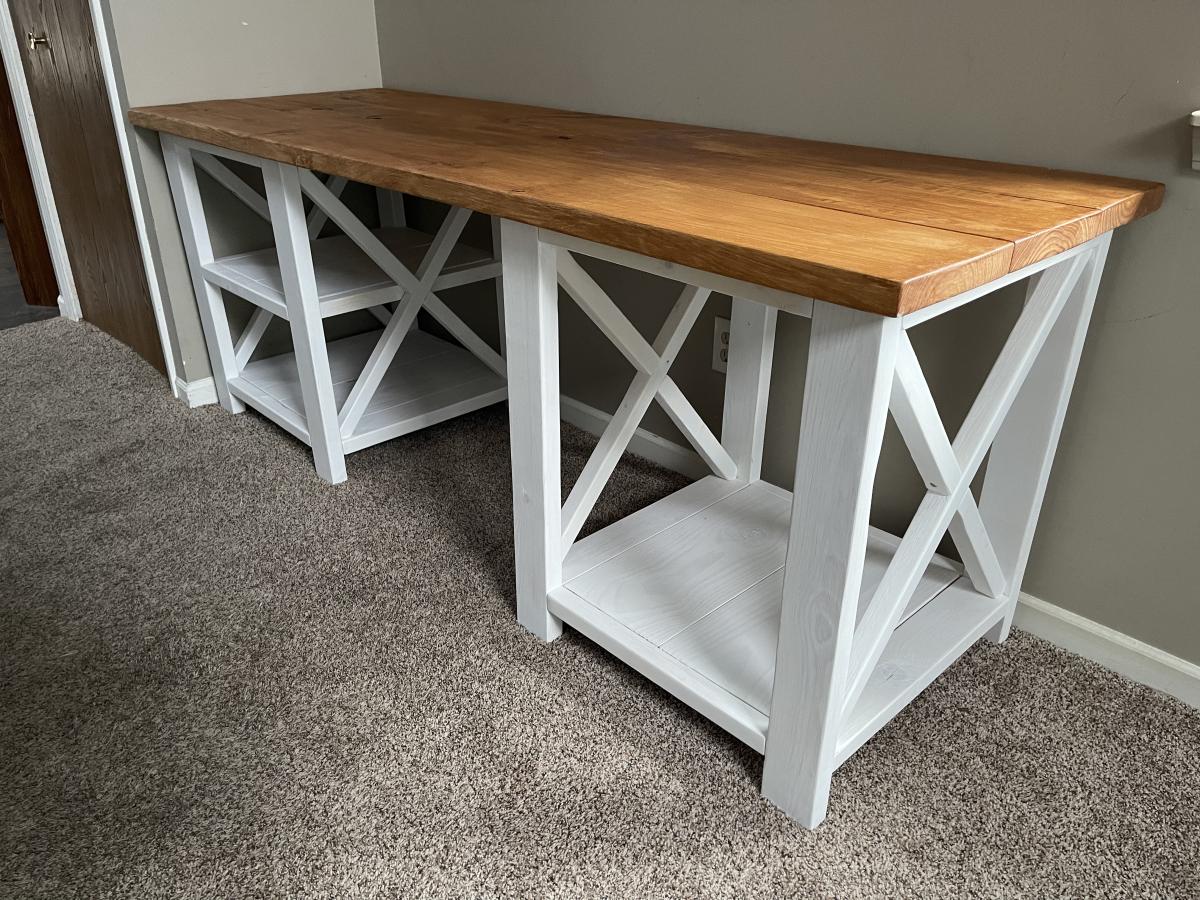
Modified the Rustic X Desk plan to include an additional shelf. Eventually the whole wall where this is now will have a matching tv stand, and dog kennel with barn doors will go in between them
Mon, 05/09/2022 - 15:53
Just got the tv stand finished. I’ll be posting pictures soon… And getting a bigger tv now that it looks so small!!!! 😂
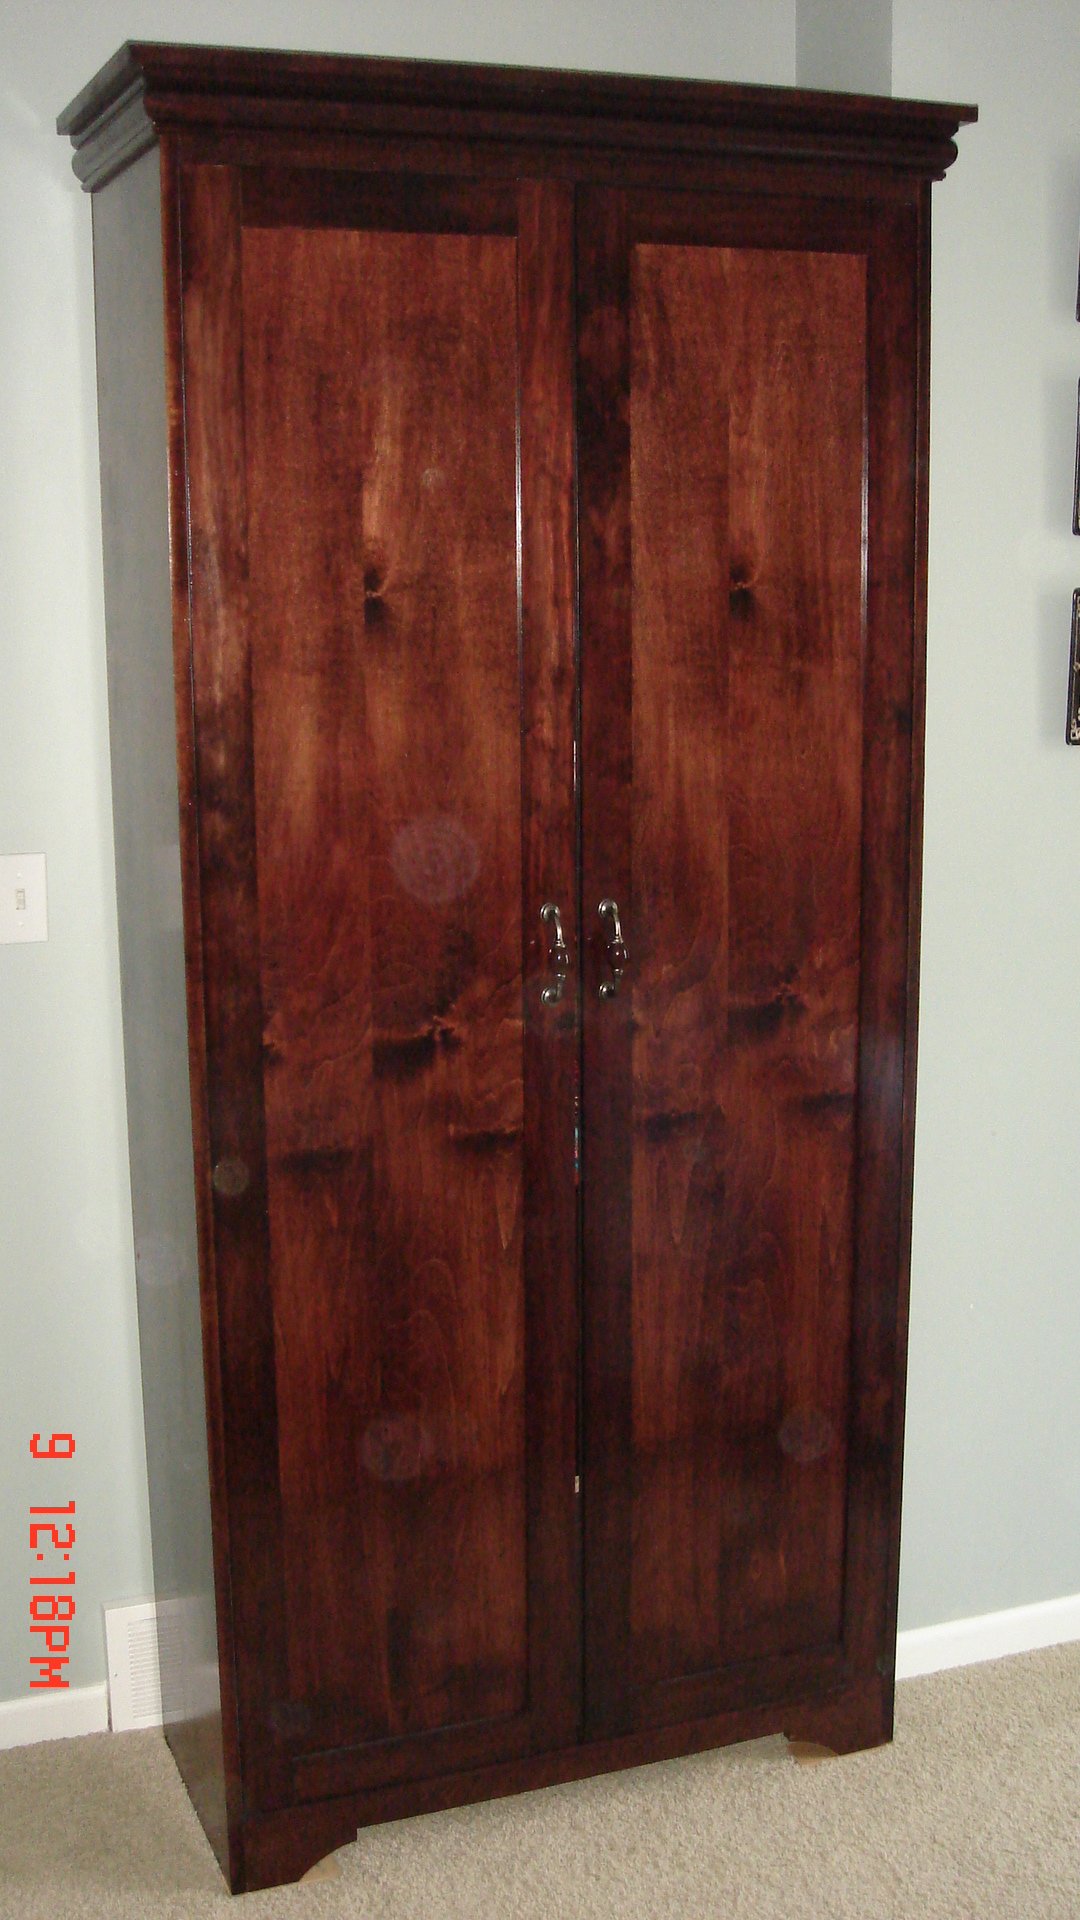
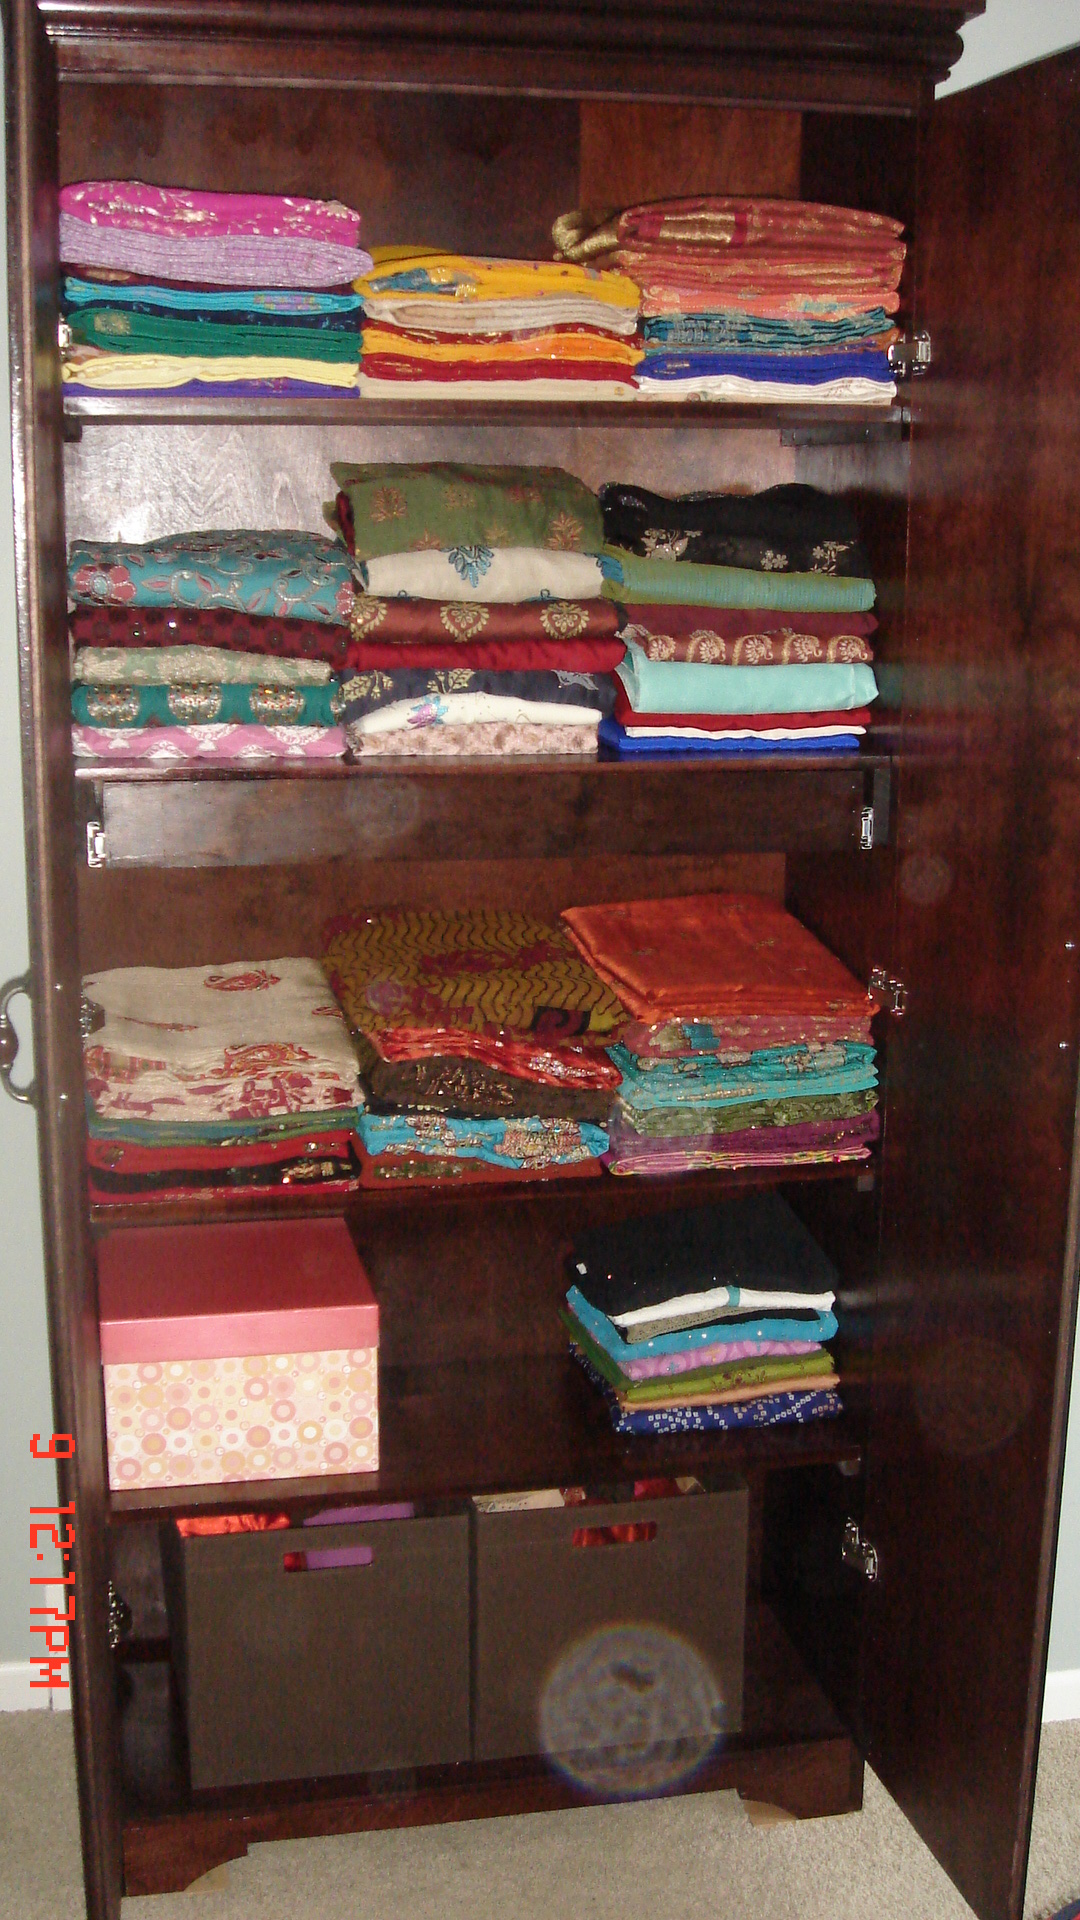
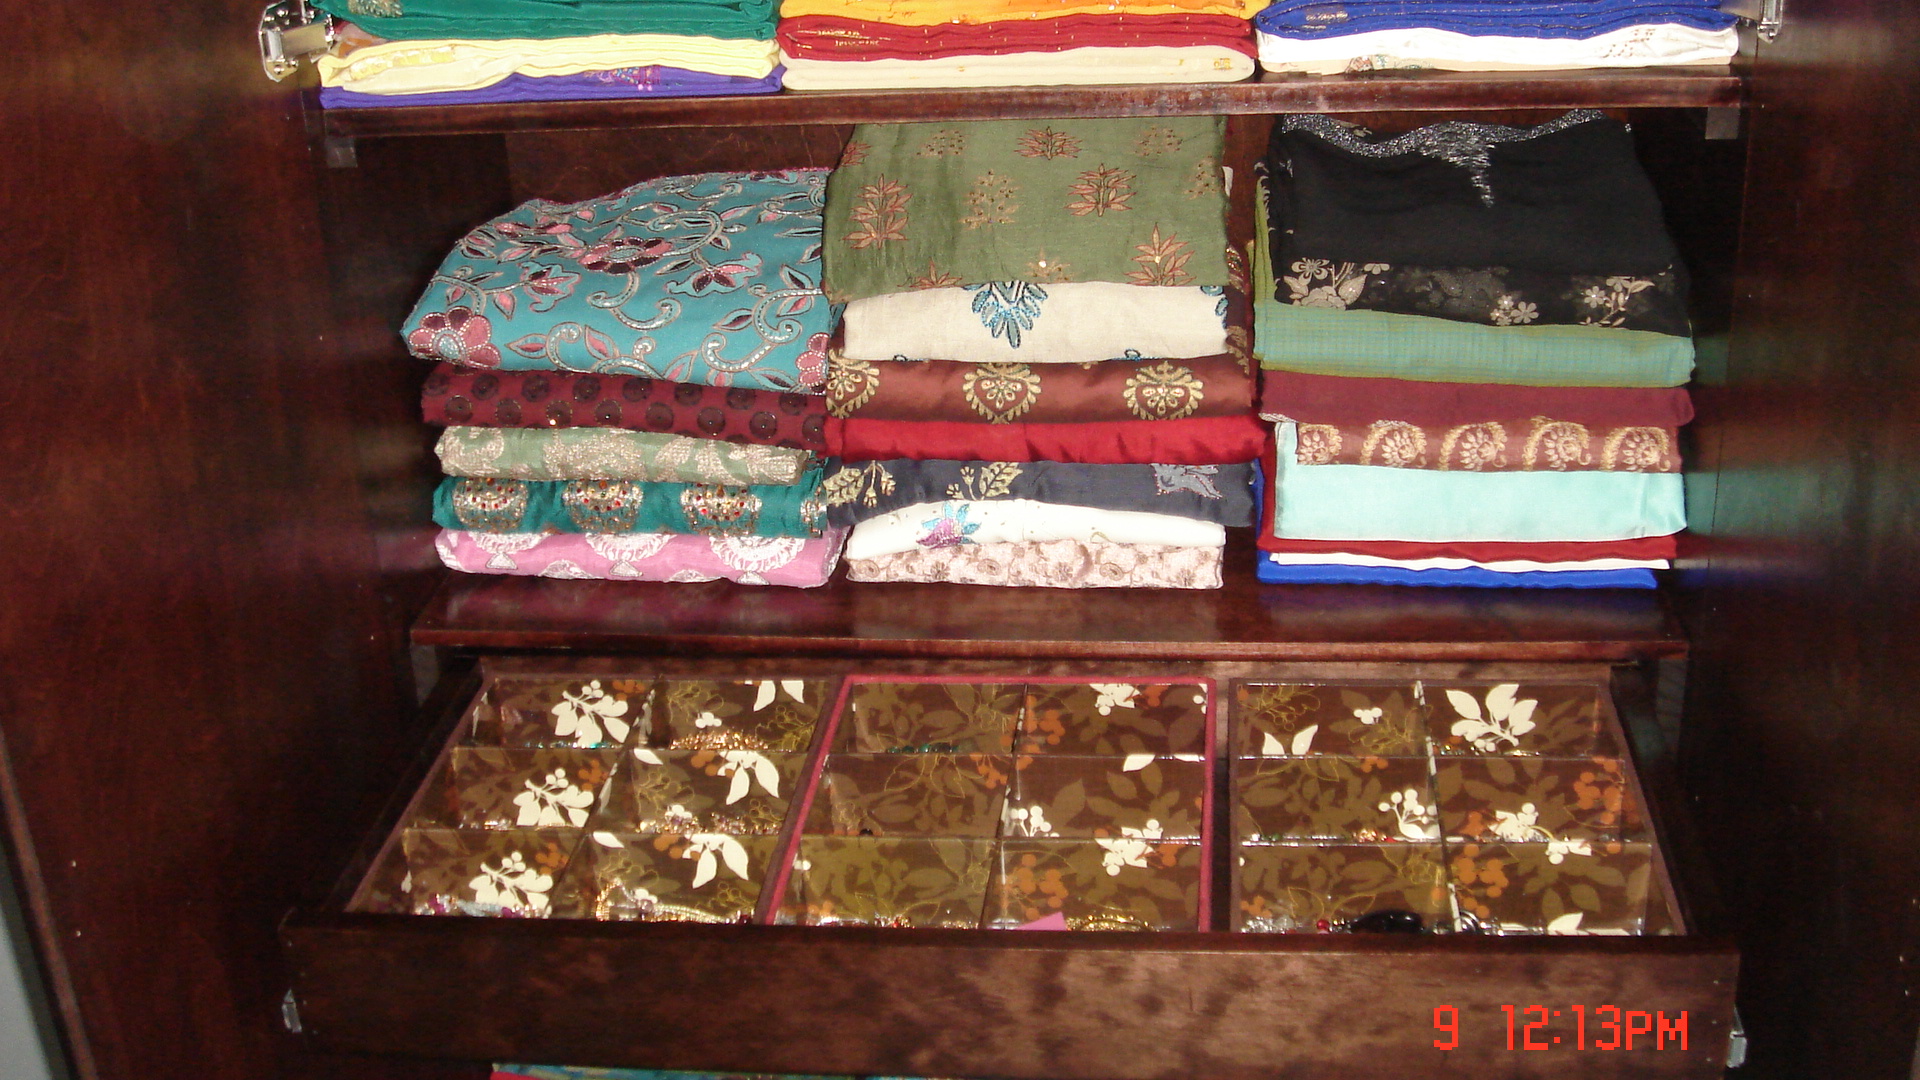
Second project we under took after stumbling over this blog. The armorie fit well in our bed room and has enough space for all my Indian sarees. Added a jewelery drawer in the middle. Love your blog Ana, thanks for the great work you do. Next project is to build a bed to match the armorie.
Sat, 07/09/2011 - 18:42
Love the finish and detail, beautiful inside and out. The jewelry drawer is a super idea! Super job- Love it! :) J
Sun, 07/10/2011 - 09:34
It's beautiful! I had posted a comment earlier, but the site must have eaten it.
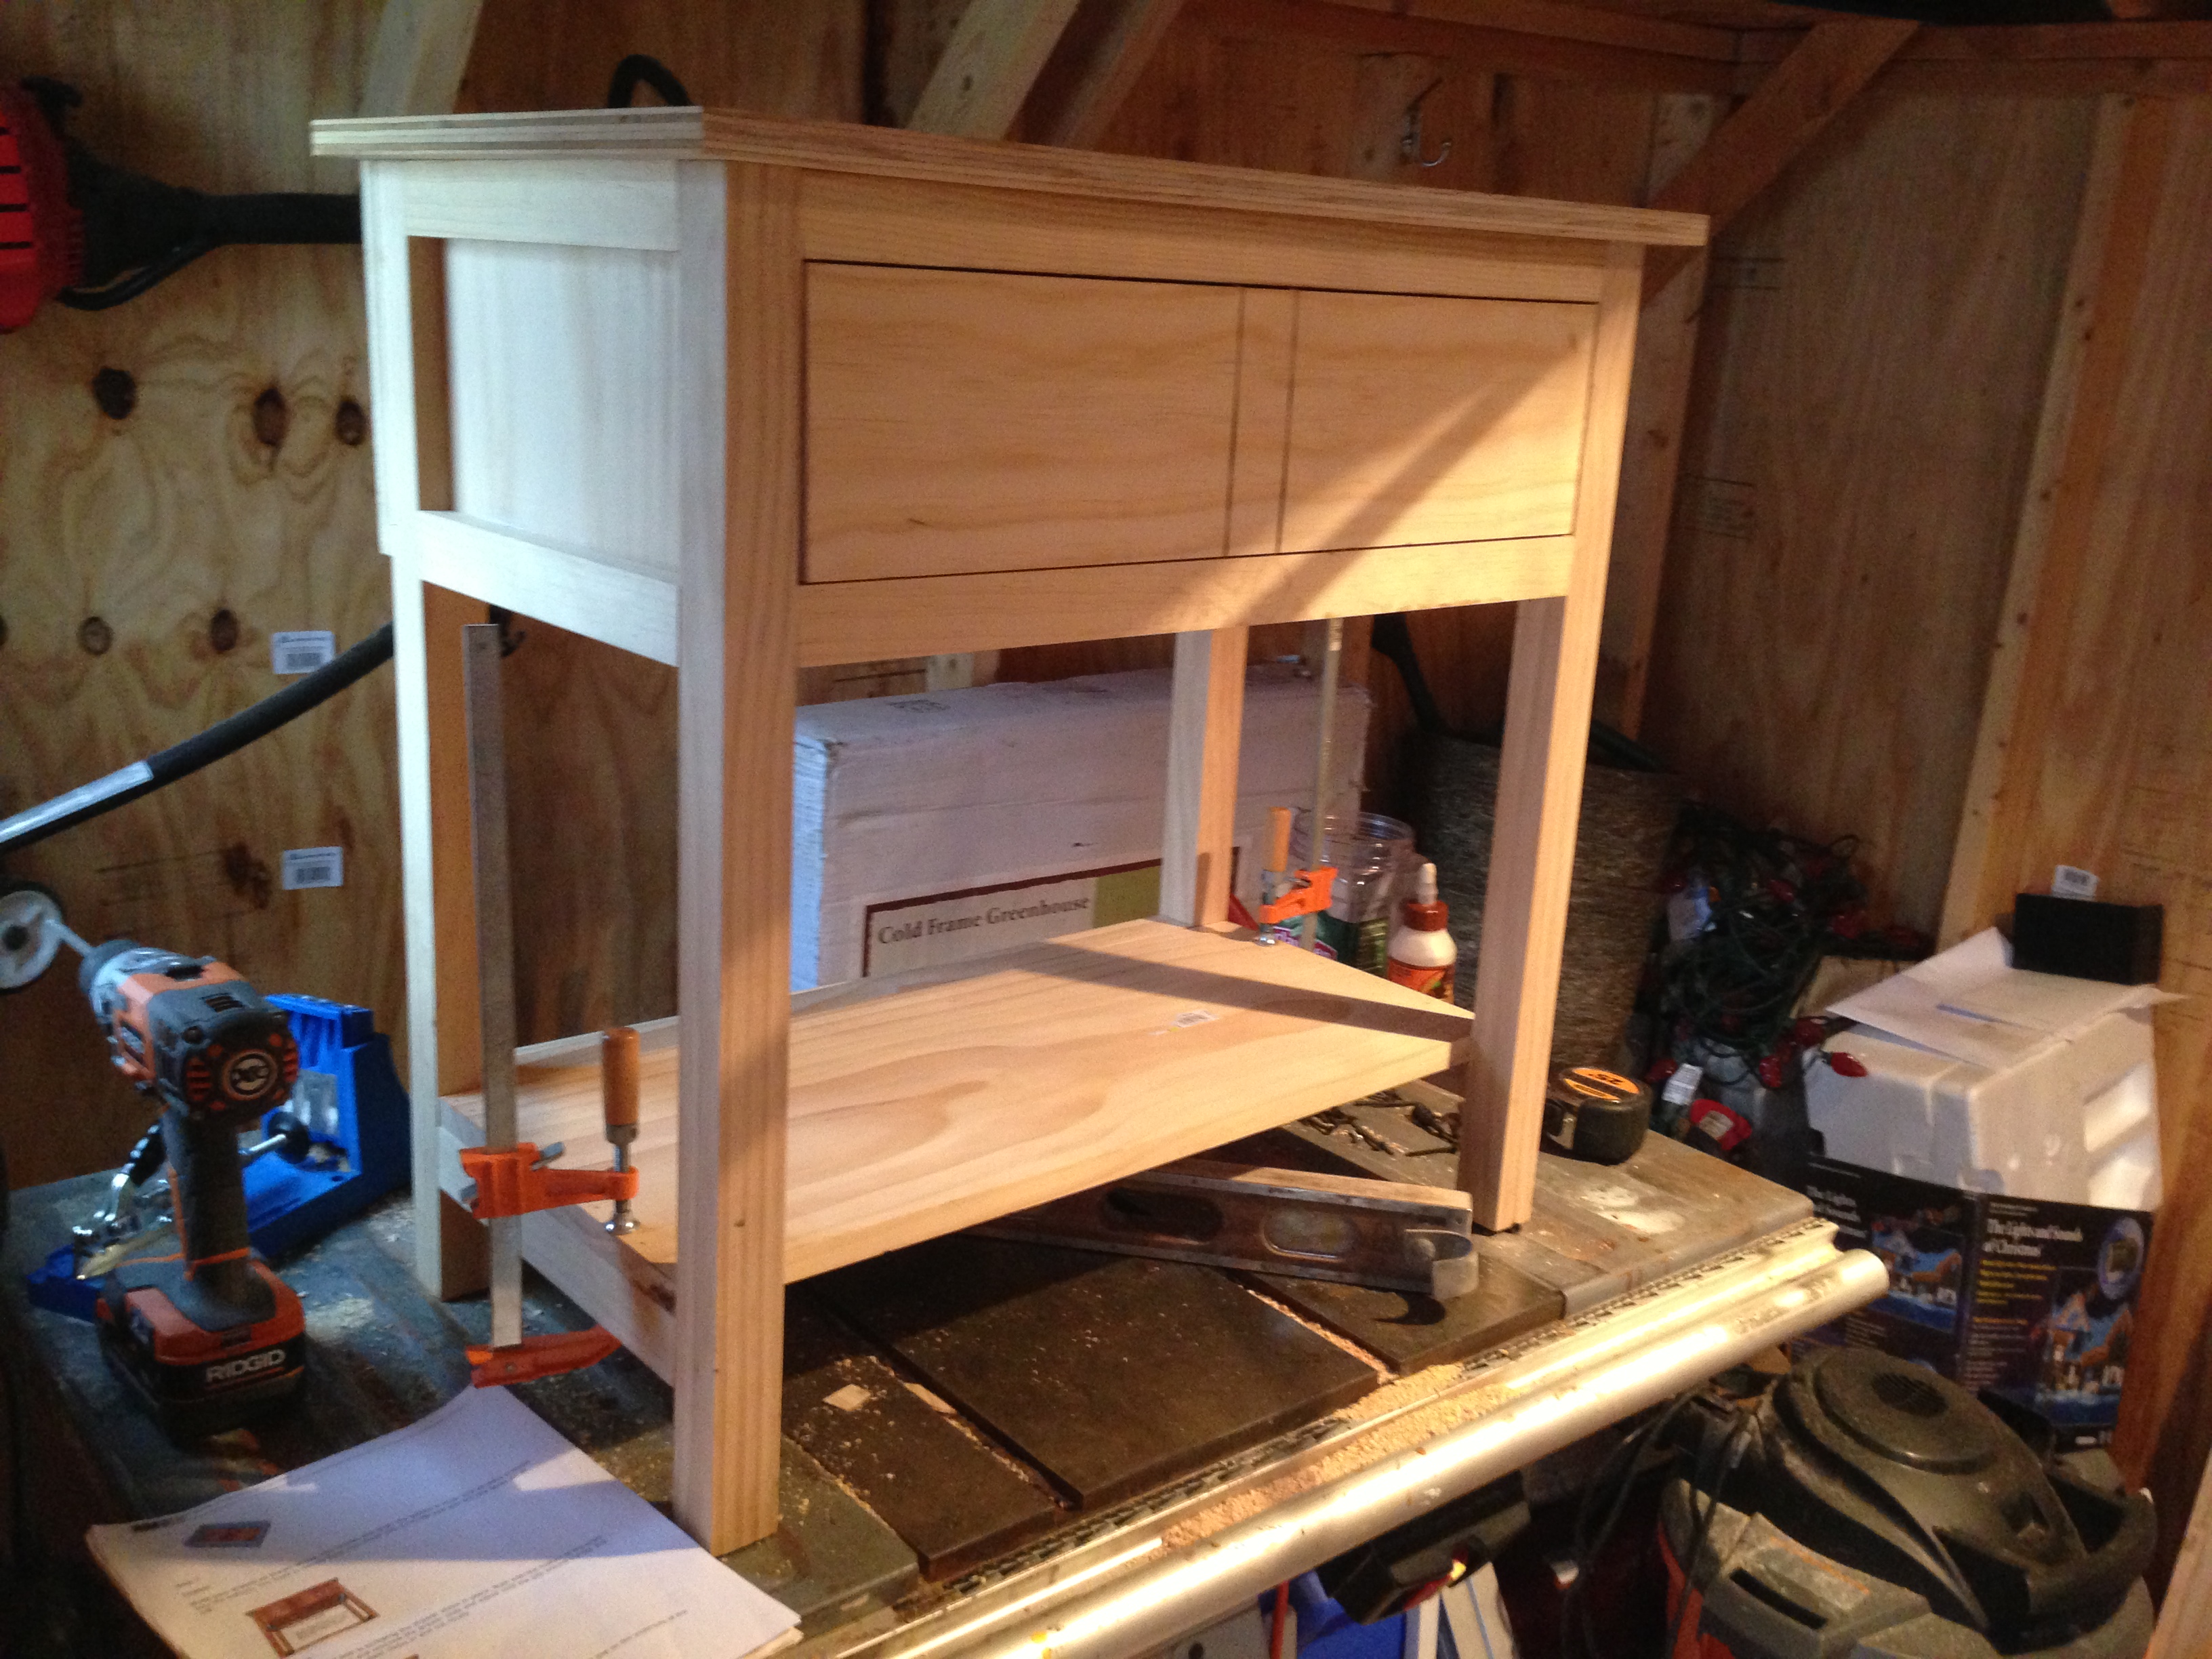
this project it was nice and easy to do it I had make the farm house bed then I saw this night stand and I had to have it
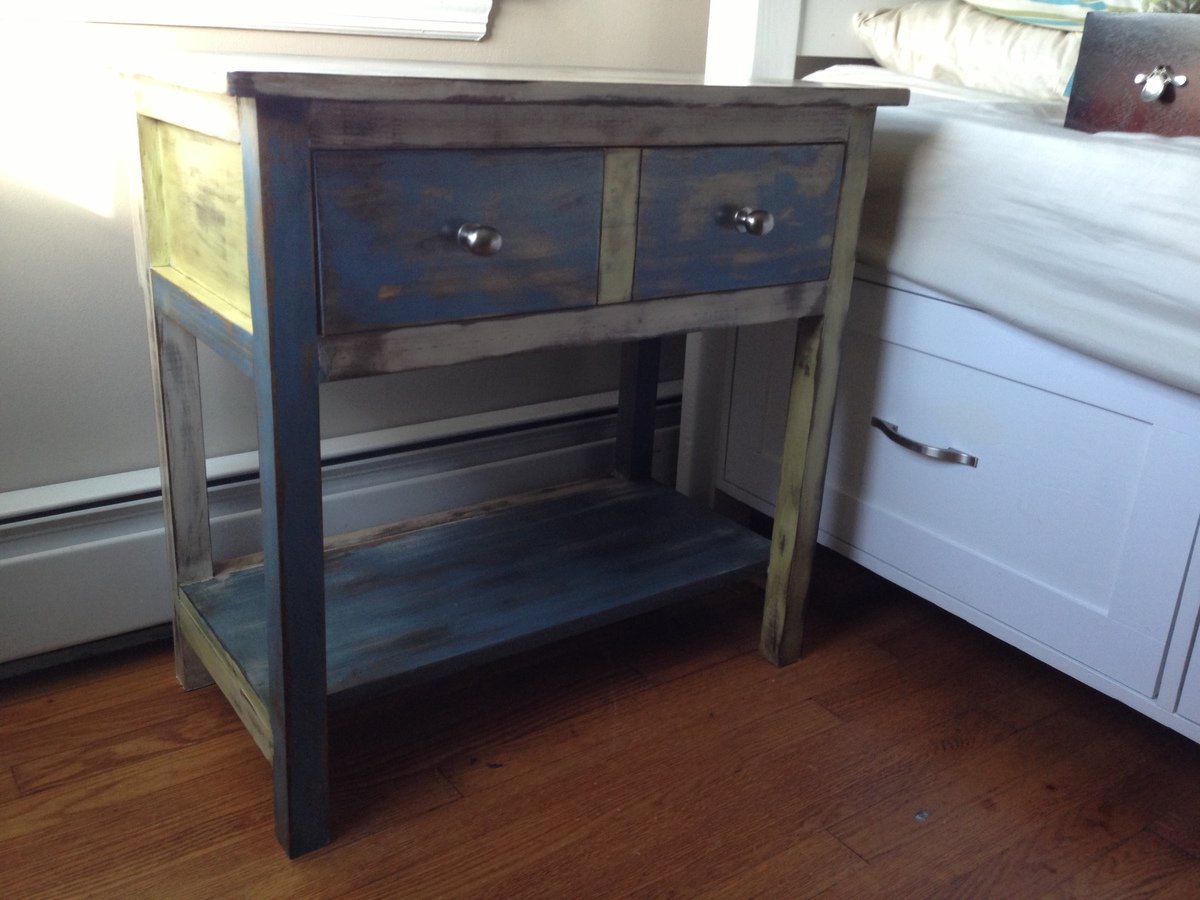
Mon, 08/12/2013 - 20:31
Oooh, I love the finish you applied to it! It looks so cool. Great job!
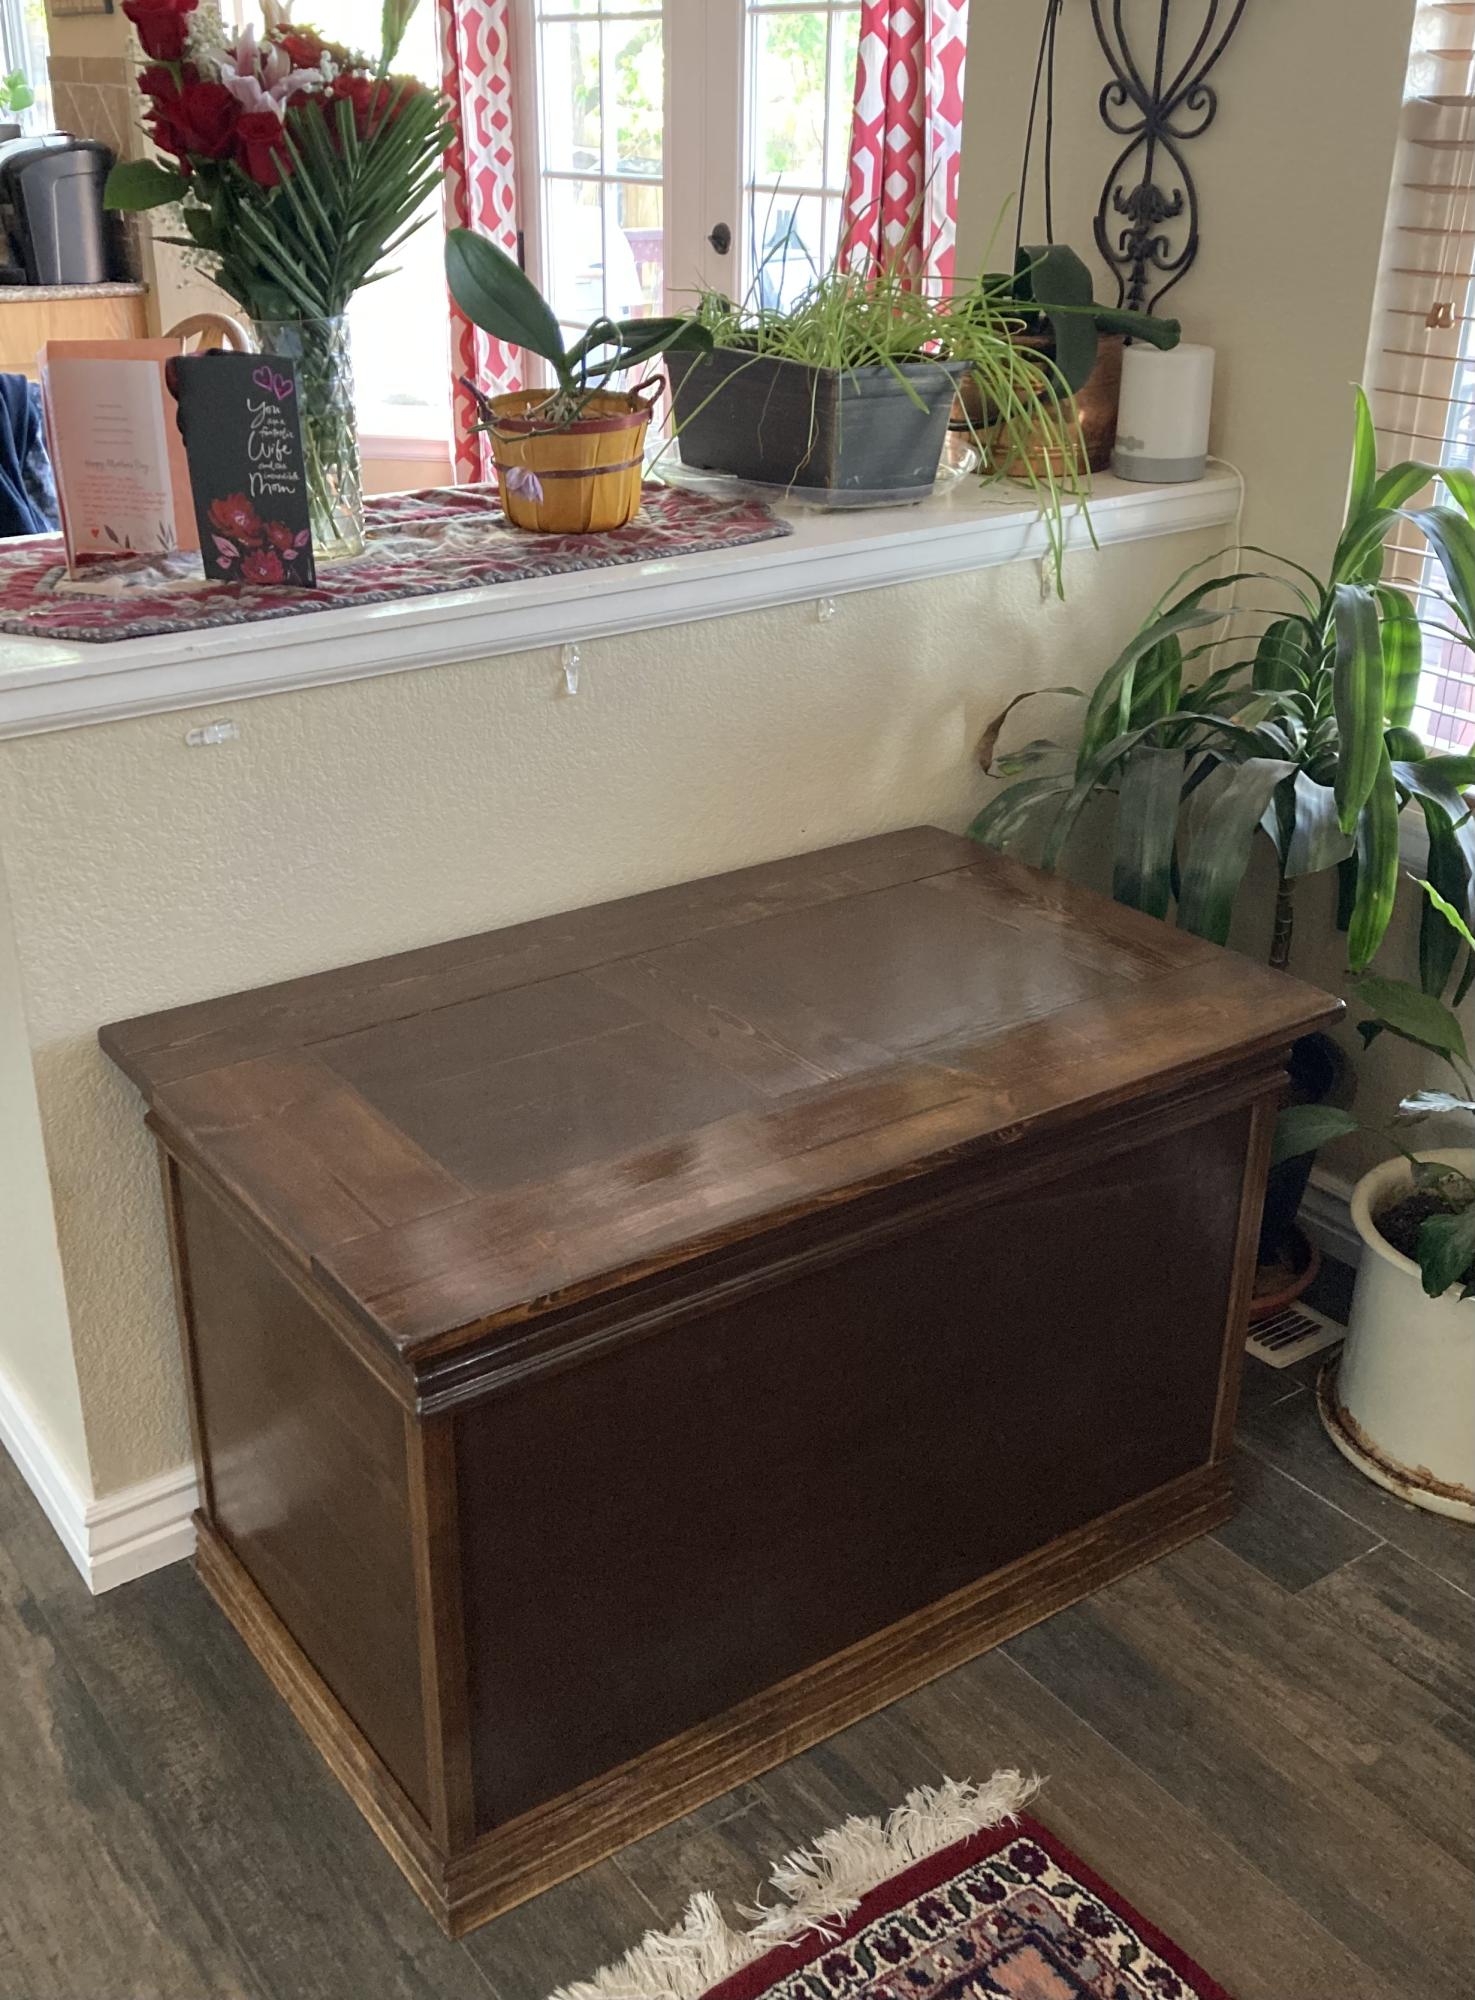
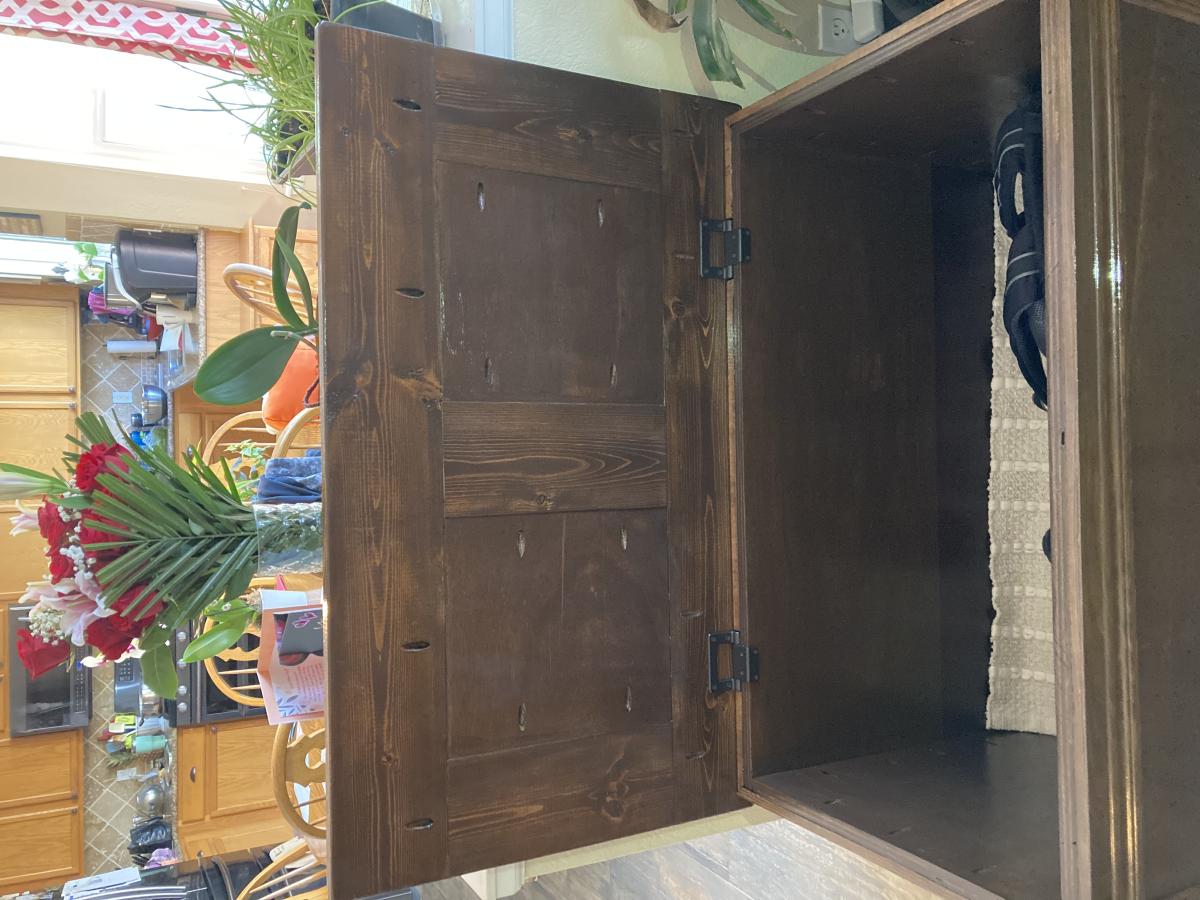
This project held two purposes: Father’s Day and my husband’s shoes/backpack. This was the perfect way to get them off of the floor and into something beautiful!
Both of my teenage kids help with different aspects of the build.
I will list what hinges and handles I used after reading all the other posts on this Becca Trunk.
I did make my carcass taller and longer than the plans to hold my husband’s items plus some couch blankets. I have 4 supports on the bottom instead of three. I only used 3/4” hard plywood. I added an inch to each side of the lid, so it was easier to open. There are 2 coats of stain and 2 coats of 3x interior gloss poly made by Varthane on this trunk. I sanded with 320 sandpaper in between each coat of poly.
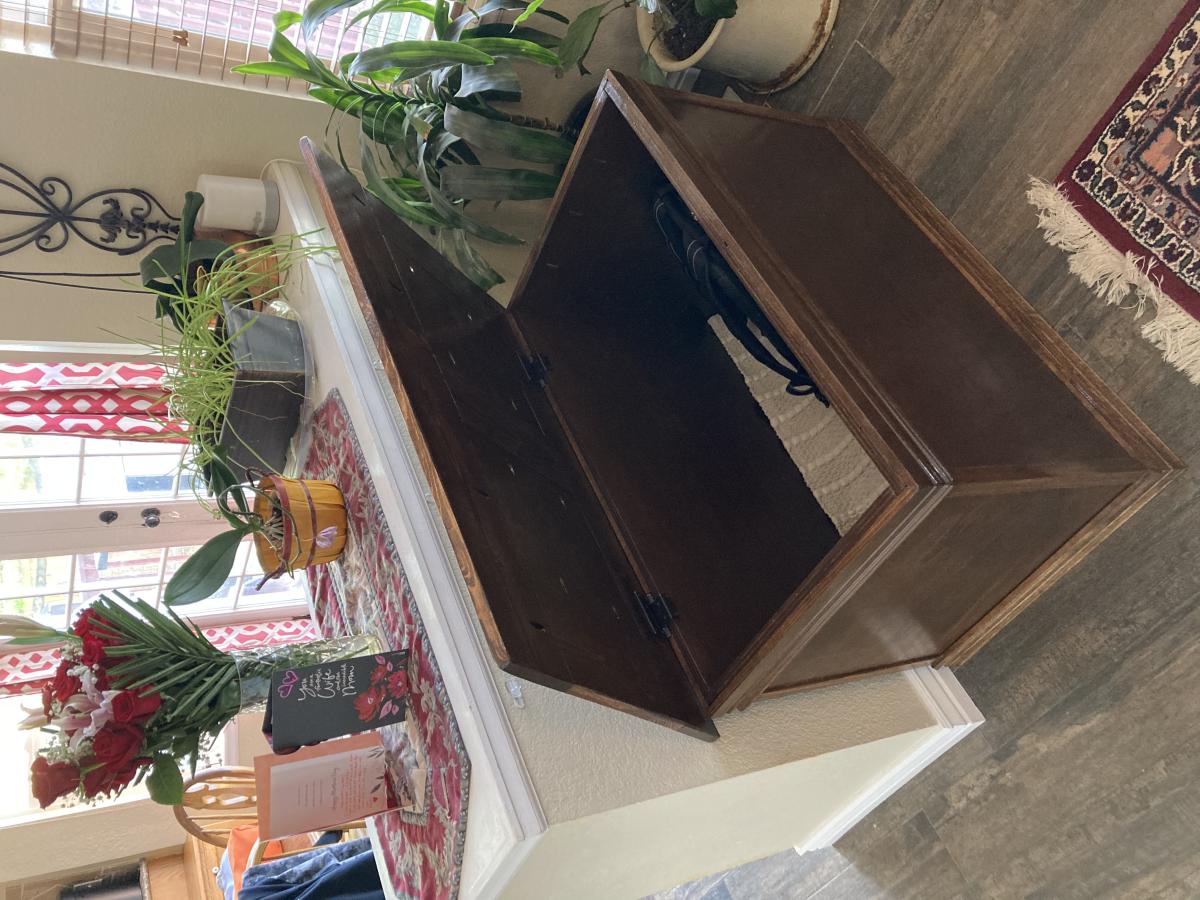
After reading all the posts about hinges, soft closing and looking at each picture, I came up with Torsion Hinges by Rockler. These hold up the lid at all different angles and give a soft close once lowered to a certain point.
I installed 2 sixty pound bronze torsion hinges with the assistance of their Hinge Jig. That helped me to make my lines and pre drill marks without guessing. Rockler has several videos on them and how to install, plus several on YouTube. I bought them on Amazon for less than the site and sold by Rockler. I did chisel out a small rectangle of the molding and it was easier than I thought. I was so nervous after building it all and now cutting some out of it, but it worked! I did one and my son the other one. The Rockler Jig was very helpful lining all this up. My hinges are 6” in from each side of the trunk. I set the lid in the right spot and drew lines where the hinge jig rest in my chiseled spots. Then flipped it over and lined up the jig again on the lid and knew where my holes were going.
I have just received my 3 set of handles. The others were not chunky enough for the size and the proper look.
Adonai Hardware "Phebe" Antique Iron Drop Pull (Supplied as 2 Pieces per Pack) - Black Powder Coated. I also got these on Amazon.
This trunk took time, but it was well worth it. So beautiful and worth it. My husband was so surprised and also knew it was for his shoes/backpack. He appreciated all the detail that went into it and lived that the three of us built it together for him.
Thank you Ana and Shanty 2 Chic for the plans and pictures. They are always so helpful. I have made many of your builds and I am learning from each one. Thank you again.
Blessings,
Jennifer
Mon, 05/16/2022 - 08:26
What a special piece, it is so pretty and sure to be cherished for years! Thank you for sharing:)
Mon, 05/16/2022 - 18:30
Thank you, Ana. I appreciate your kind words. You have really inspired me and you prepare myself and others for success with your plans and especially the videos. I have learned a lot from you! Thank you!! Blessings, Jennifer
Mon, 05/16/2022 - 08:26
What a special piece, it is so pretty and sure to be cherished for years! Thank you for sharing:)

It's an awful eye sore builder's always seem to put in the most obvious places even when there's an attached garage, or a basement, or even a large closet somewhere.
Solution: Build a frame out of 2x2's around the panel. Build a smaller frame out of trim (or whatever you like as a picture frame). Attach the smaller frame to the frame on the wall with self closing hinges (ok, maybe paint everything first, lol) and insert a photo or painting of your choice.
Unfortunately you can't do anything about placement, hello 1 inch from my countertop and cabinets (also preventing me from building more upper cabinets on that wall)
But, it's better than staring at that ugly gray box :)


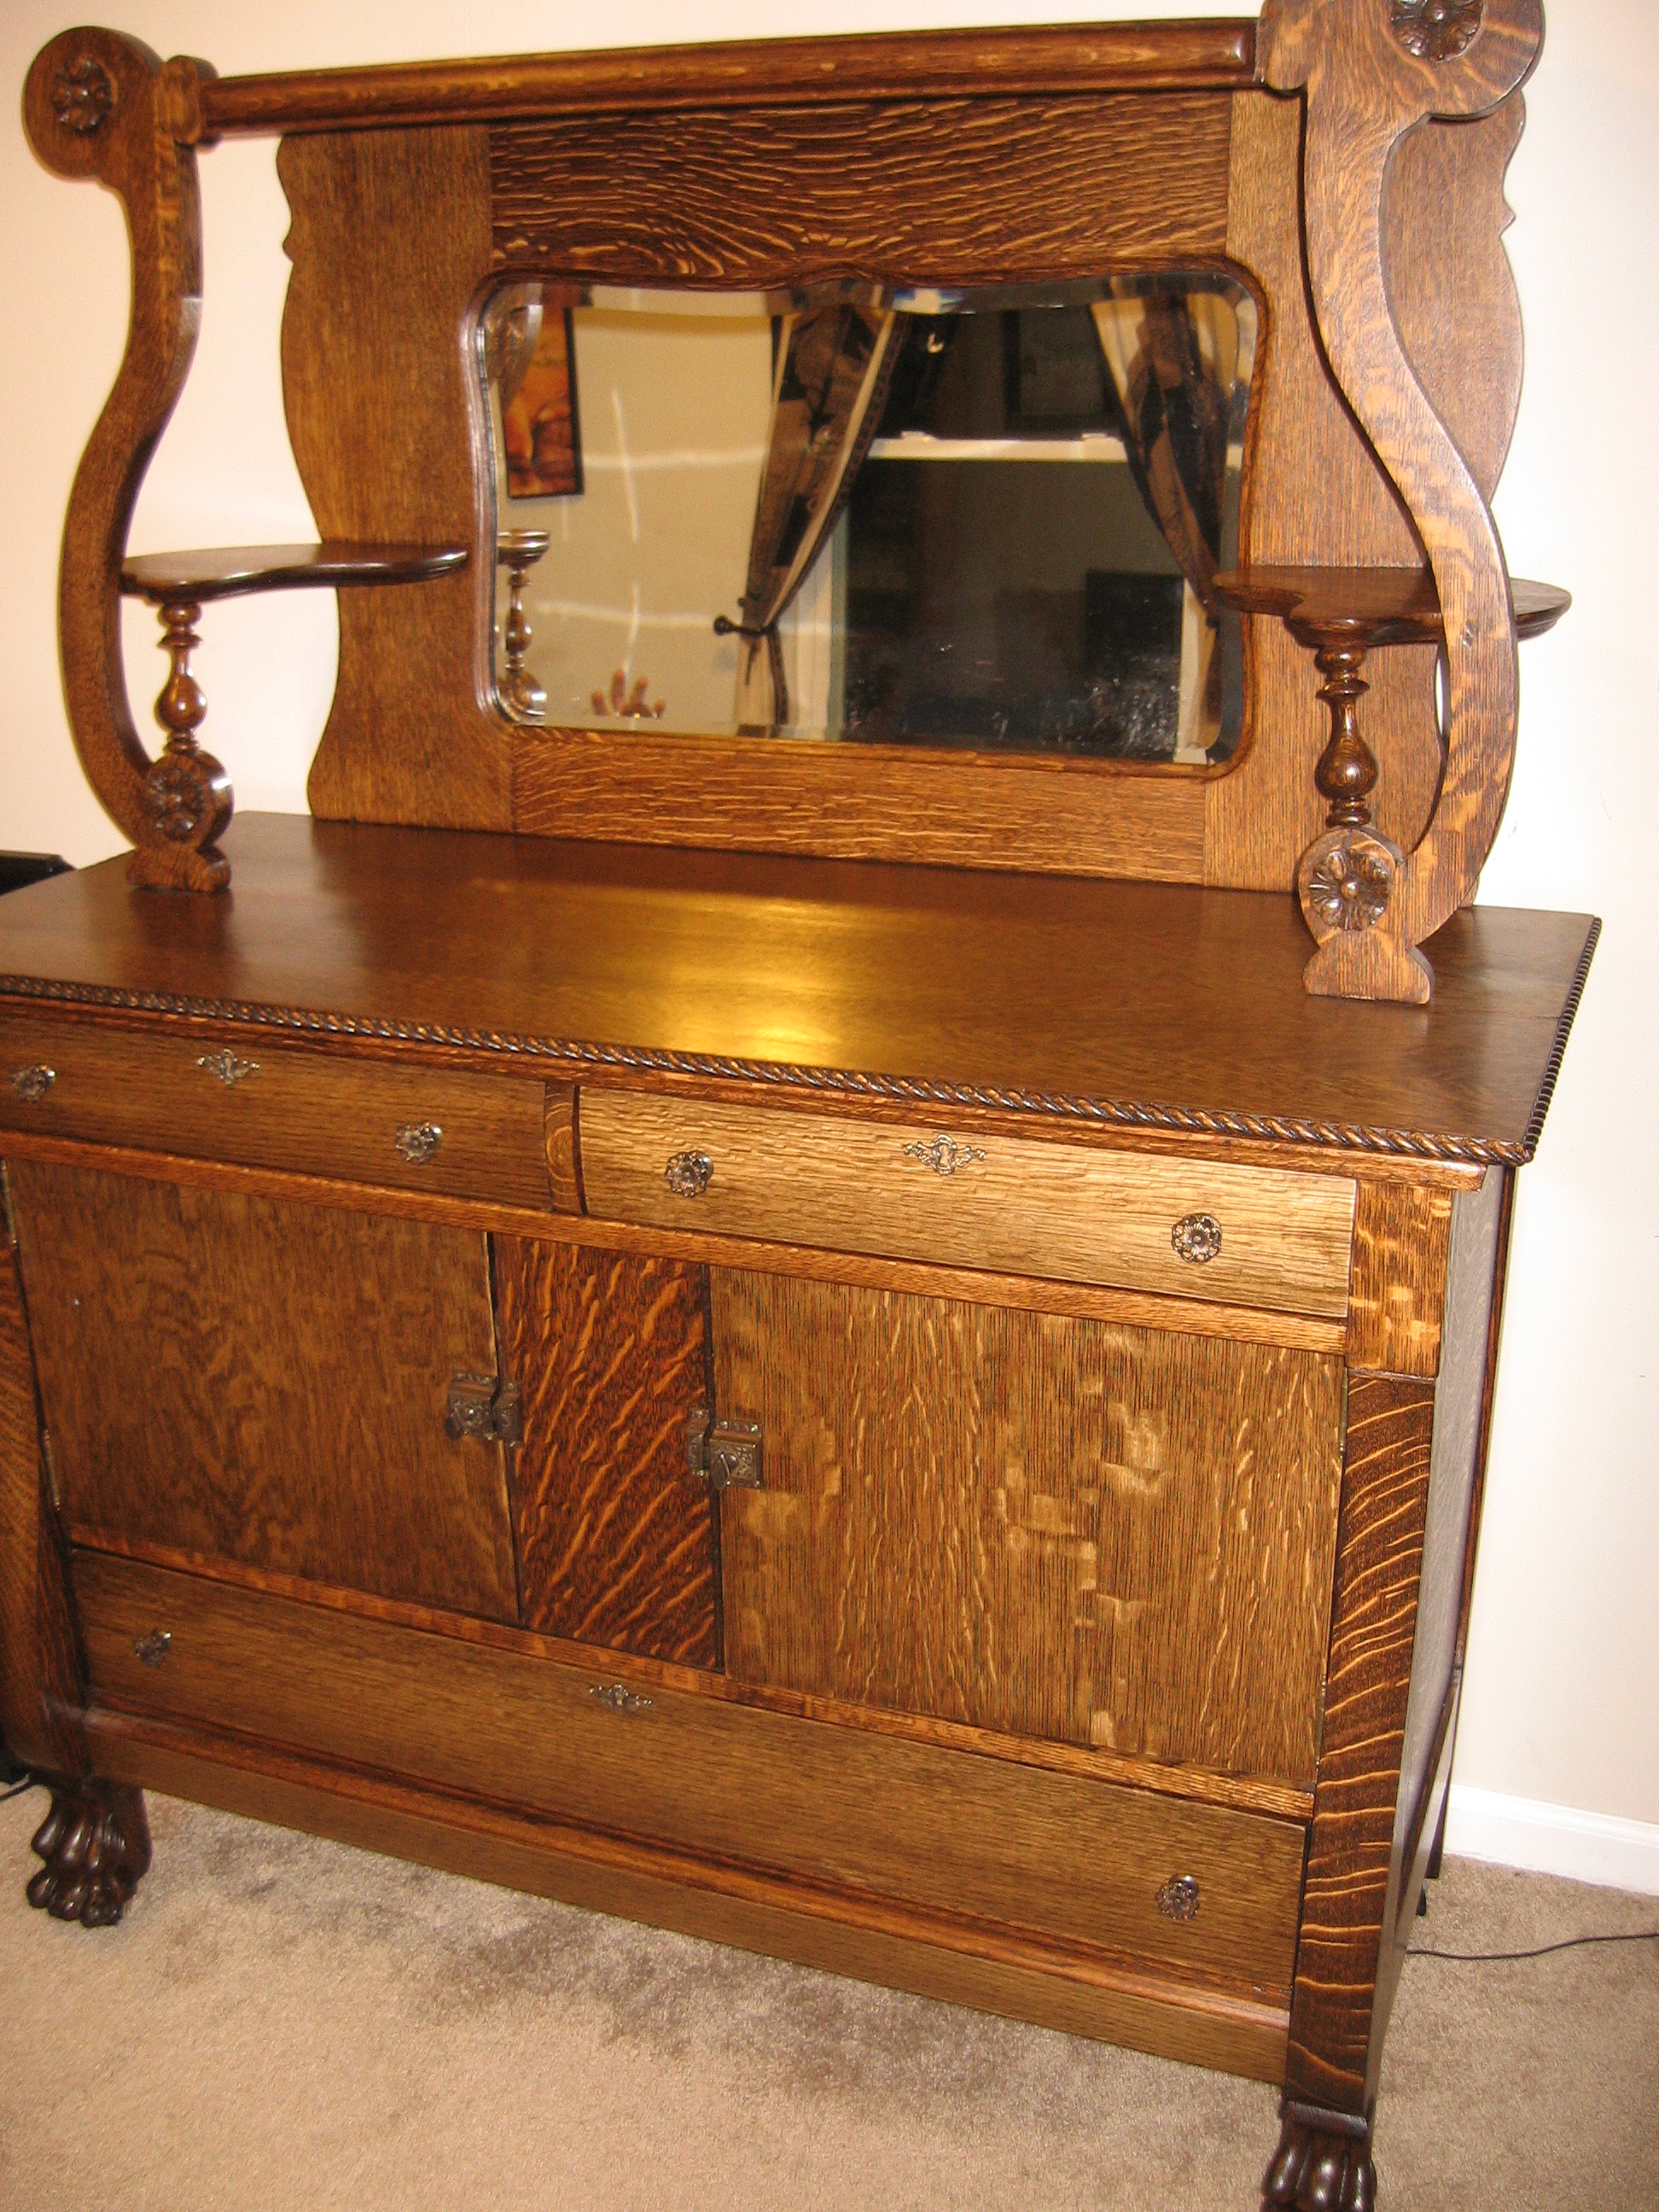
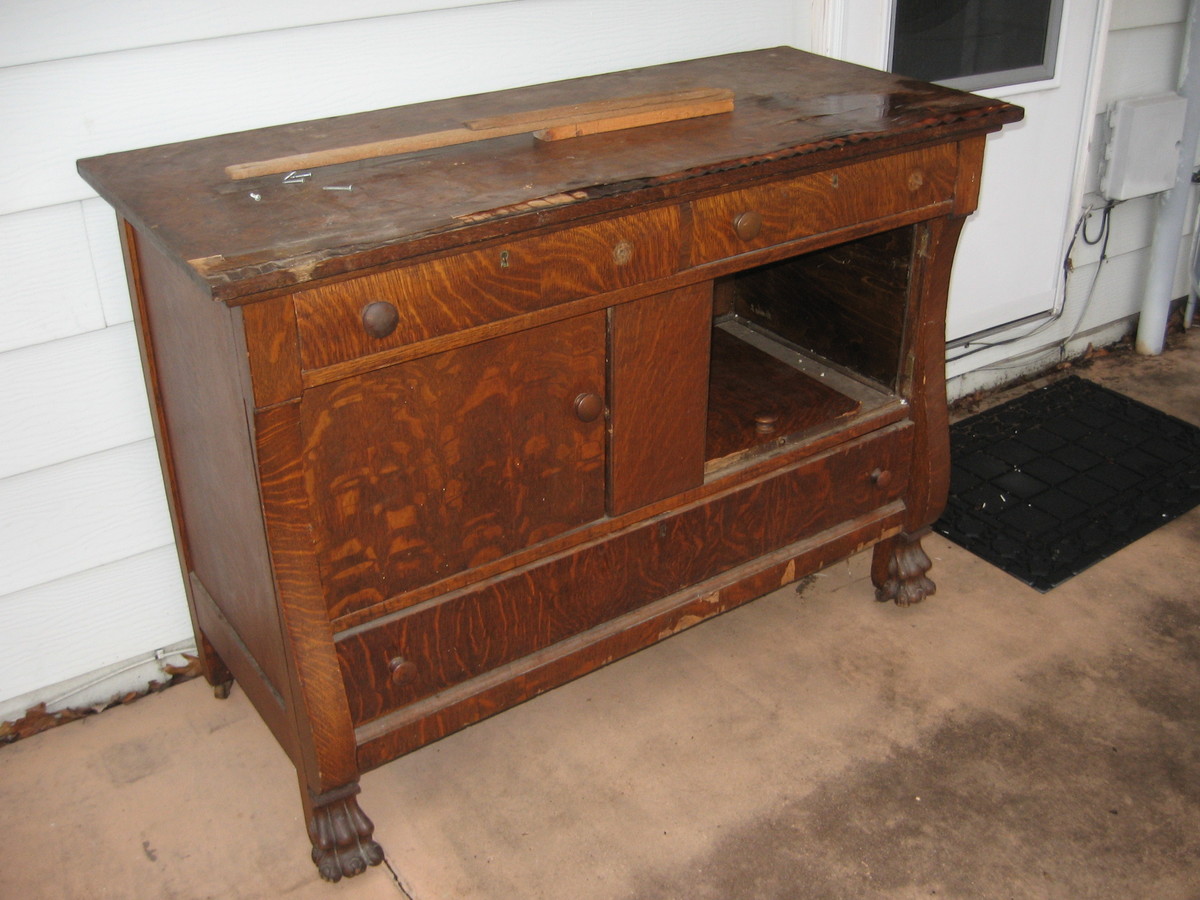
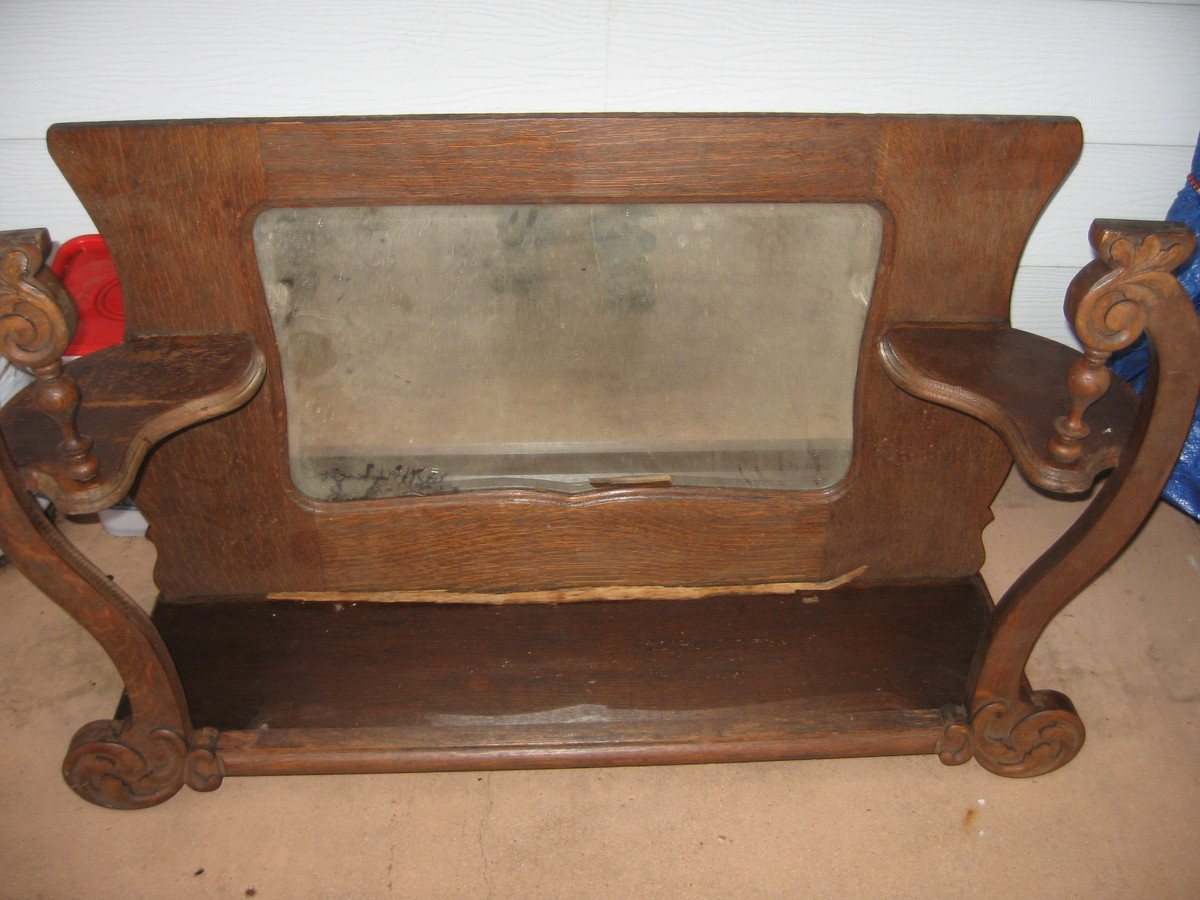
I found this buffet on Craigslist. I bought it from a young lady that told me her grandmother owned it prior to passing. It had obvious water damage, especially to much of the veneer.
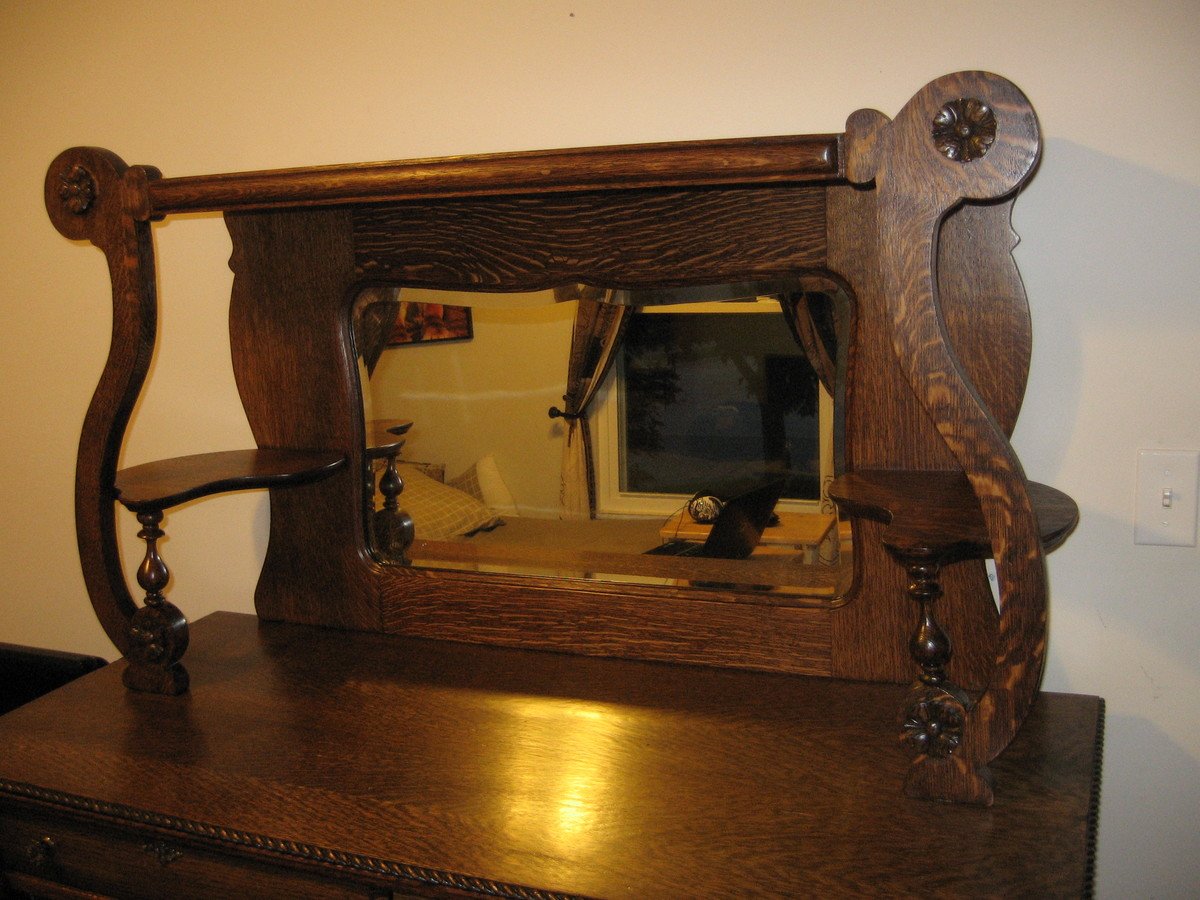
Starting with the top portion, the mirror was removed. The silvering was shot and I shipped it to Madison Glass in Nashville, TN. I stripped it and repaired the cracks and splits it had. The appliques were all broken and brittle. These were replaced with four new oak rosettes. It was stained and polyurethane was applied. I made a new back to cover the mirror when I got it back.
The bottom section was in really bad shape. The water damage had ruined all of the veneer on the top of the bottom section. It also had an obvious sag. I took the top of the lower section off. I used a plate joiner and wood glue to put these back together. I then flipped it over to fix the sag. A 3/4" section was missing. So I used some oak rope trim to make up the difference.
I rebuilt all of the drawers which included new bottoms. I replaced the drawer stops. The cabinet door were all broken so I made new ones using 3/4" oak plywood. I put the nicest side facing in and put new veneer on the door front. In fact the fronts to all of the drawers received new veneer. I also rebuilt the entire inside with 1/4" oak plywood and oak trim. I also put new casters on the piece. I then stained and applied poly to the base.

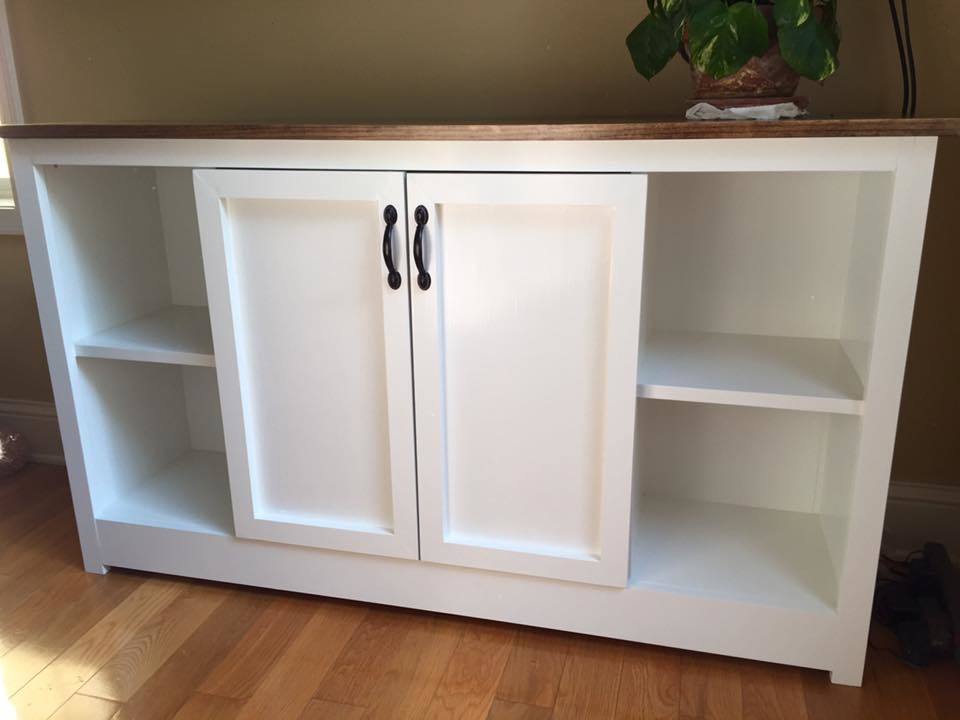
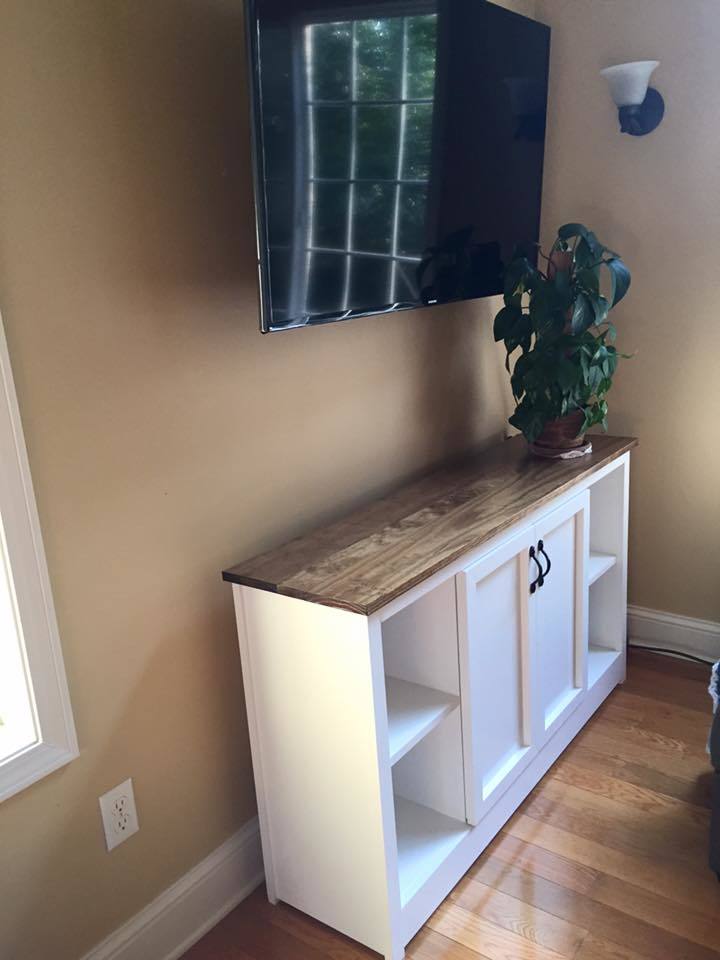
I based this off of the farmhouse media console plans, but made a lot of changes with dimensions, doors, etc. Originally we wanted the doors to slide sideways instead of opening outwards... but we couldn't figure out how to do that and still make it look nice! Very easy to build. I am happy with the end product!
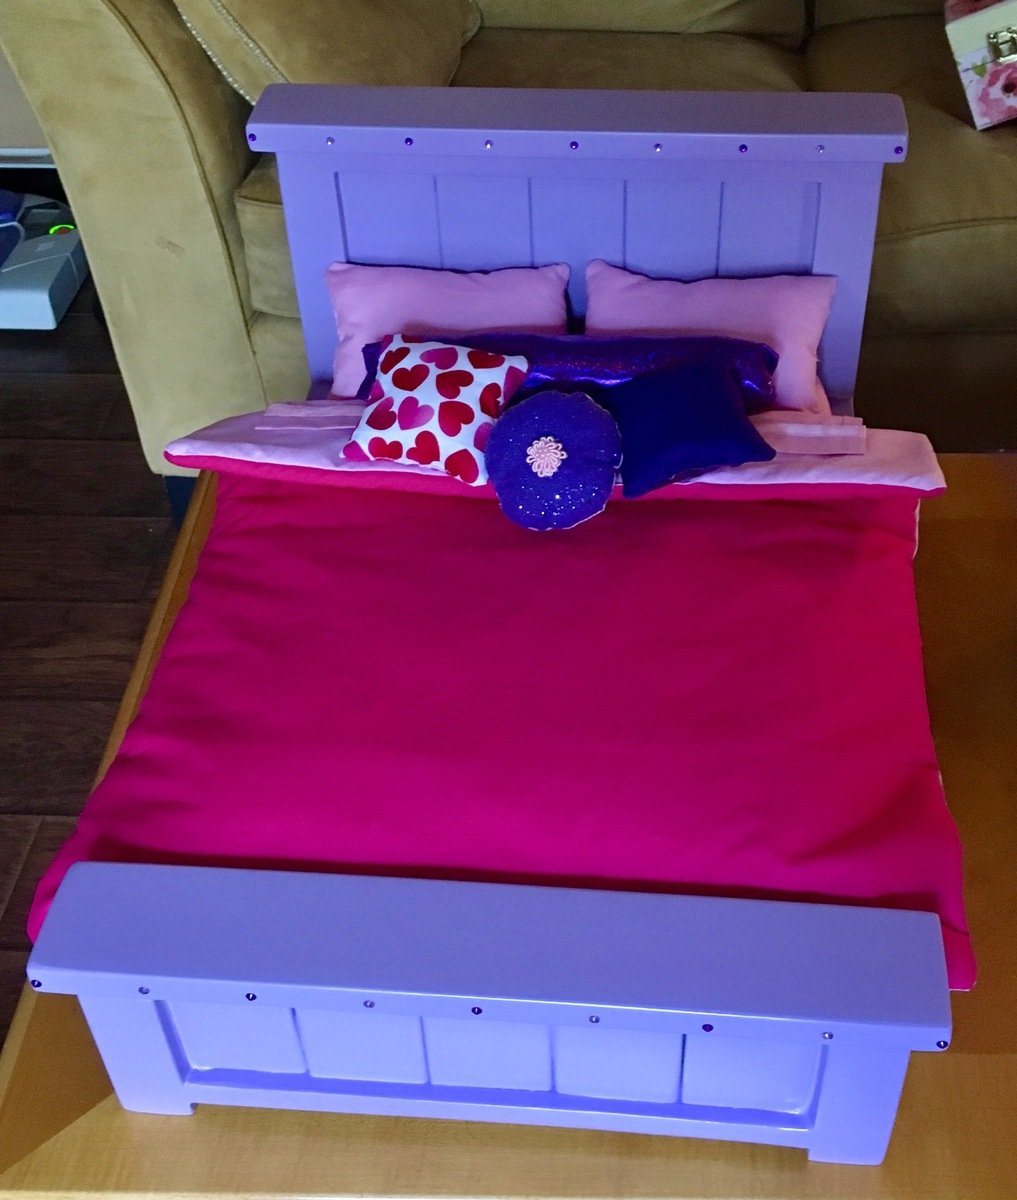
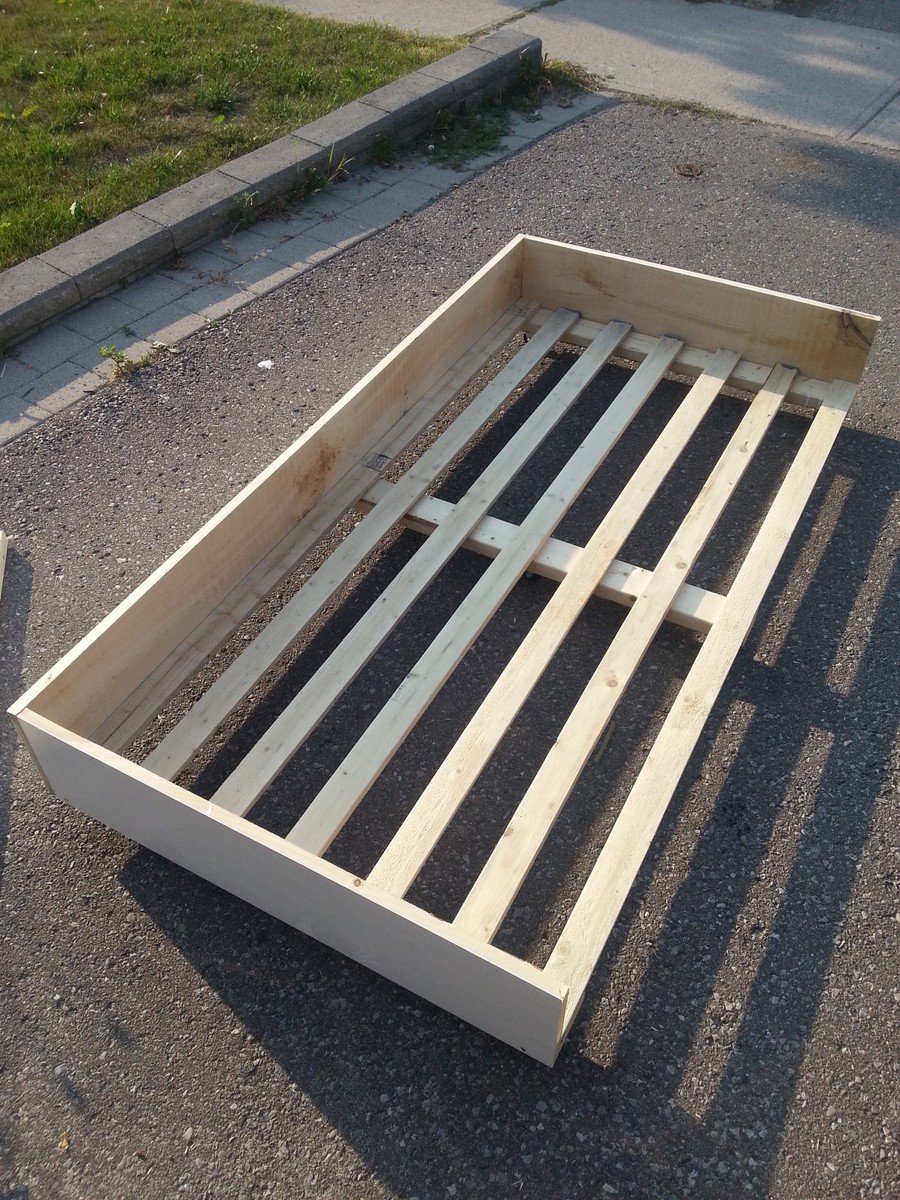
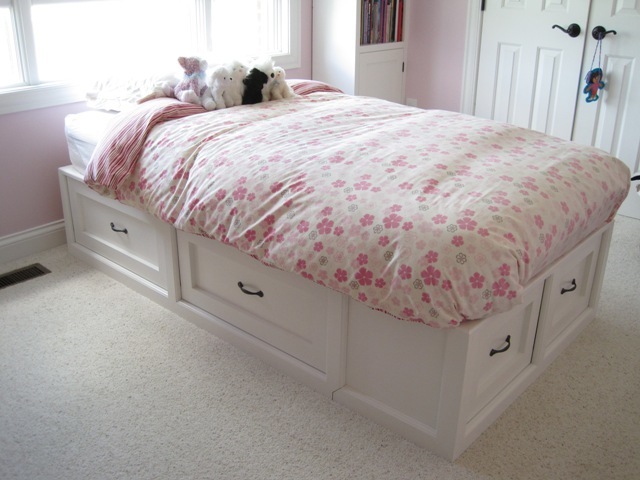
Wow! I’m so pleased with how this turned out!! Super easy and mostly done with scraps left over from other projects. Was able to get the bed and bedding completed for under $30. Smaller (and cheaply made) beds on the AG website cost well over $100. Thanks to this plan, I’m able to give my niece a birthday gift that will last her for years...maybe even generations.
Sun, 08/12/2018 - 10:57
The only reason I listed this as an “intermediate” skill level is because of the sewing portion of the project. Covering the mattress and sewing the bedding (since there’s no plan for that part of the project) isn’t really a no-brainer sewing project.
We wanted a new bed - but couldn’t find exactly what we wanted. Then I came across your plans & my husband just ran with it. I’ve gotten tons of compliments too.

This is the bench that got me started! My very first Ana White project and I love it! Oh, and I'm also addicted! I've come a long way since this build and most importantly, so have my tools!


This was my first project built from this site and I absolutely LOVE this table! Thanks Ana White!

Mon, 08/19/2013 - 17:10
Nice work. I've been meaning to take pics of the one I did, which I paired with the exact same Tobias chairs. Love the look of modern and rustic together.
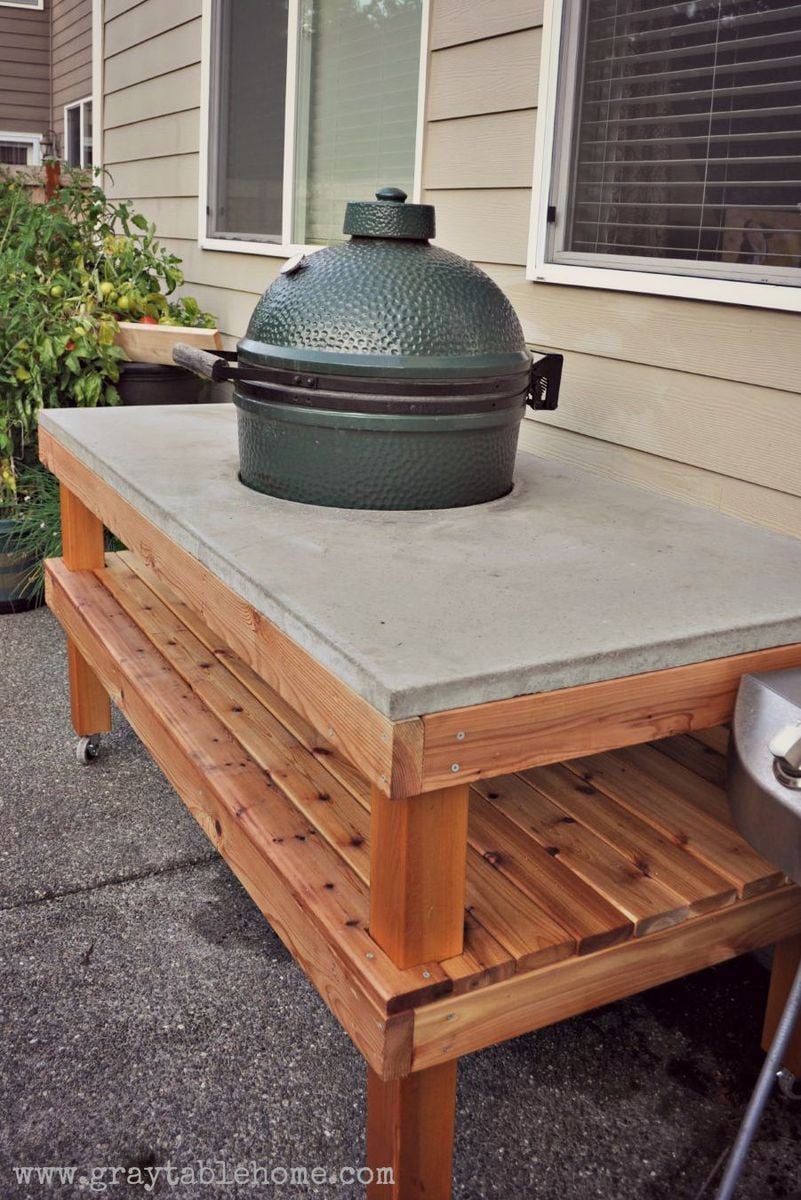
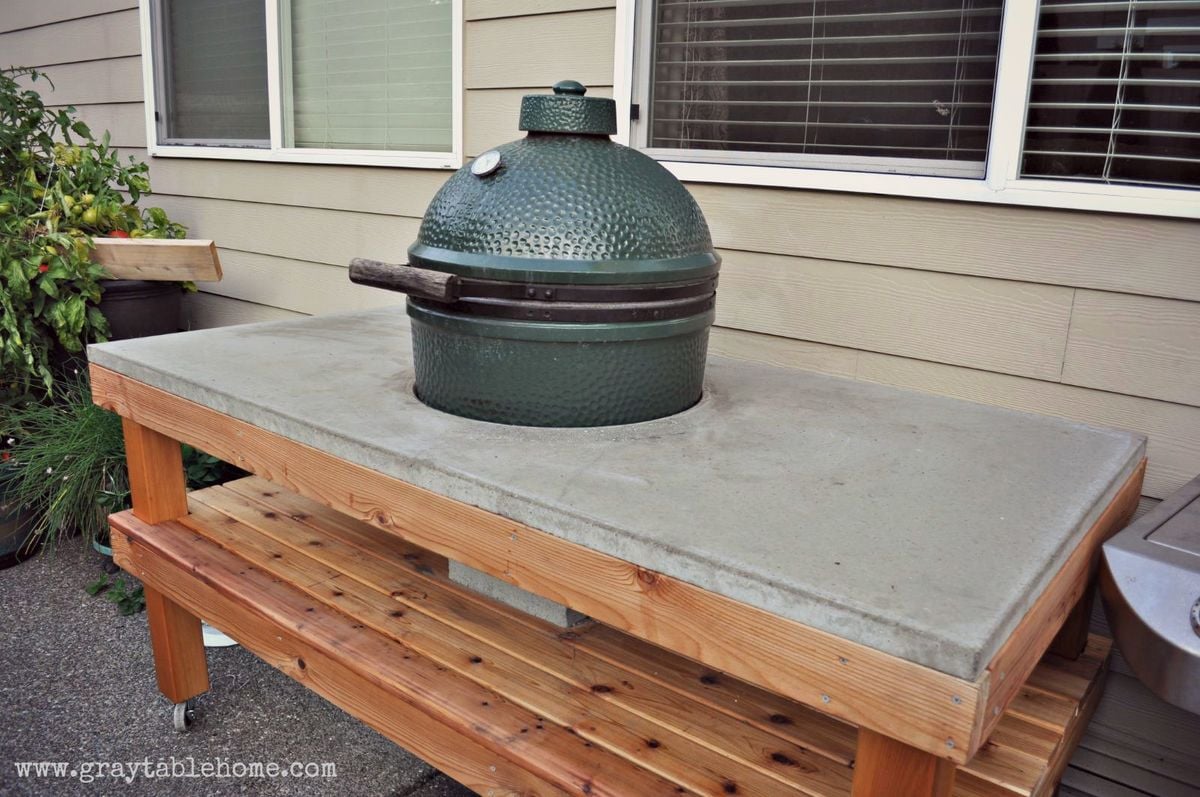
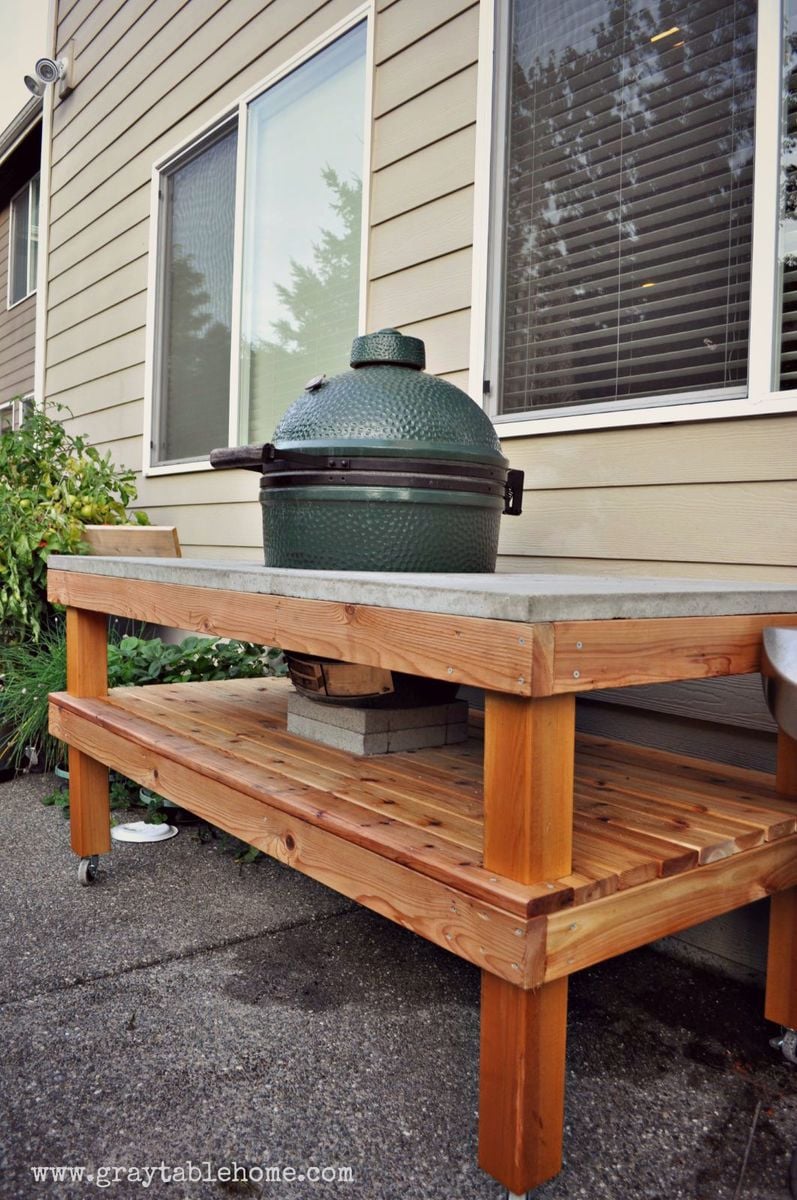
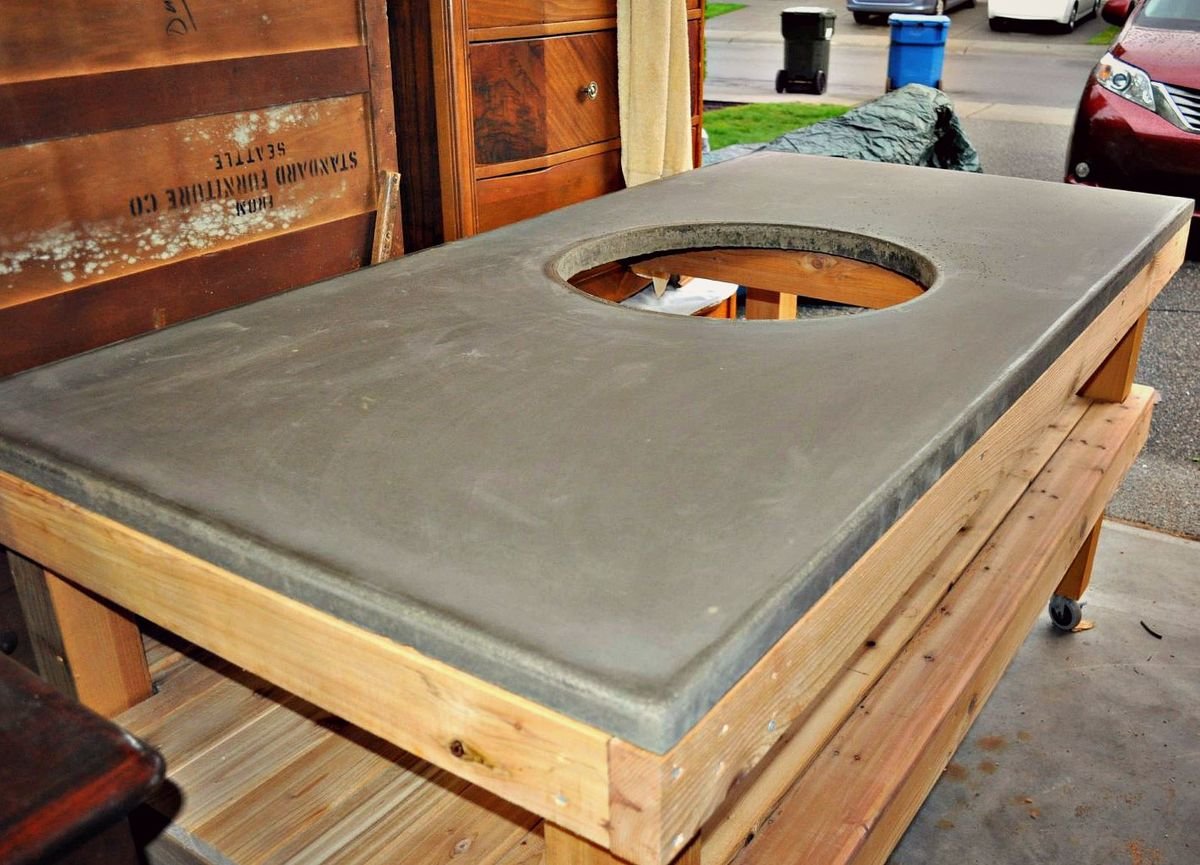
This grill table took a weekend to build. The base is made of cedar and top is concrete. More information on how to build this table is available on my blog.
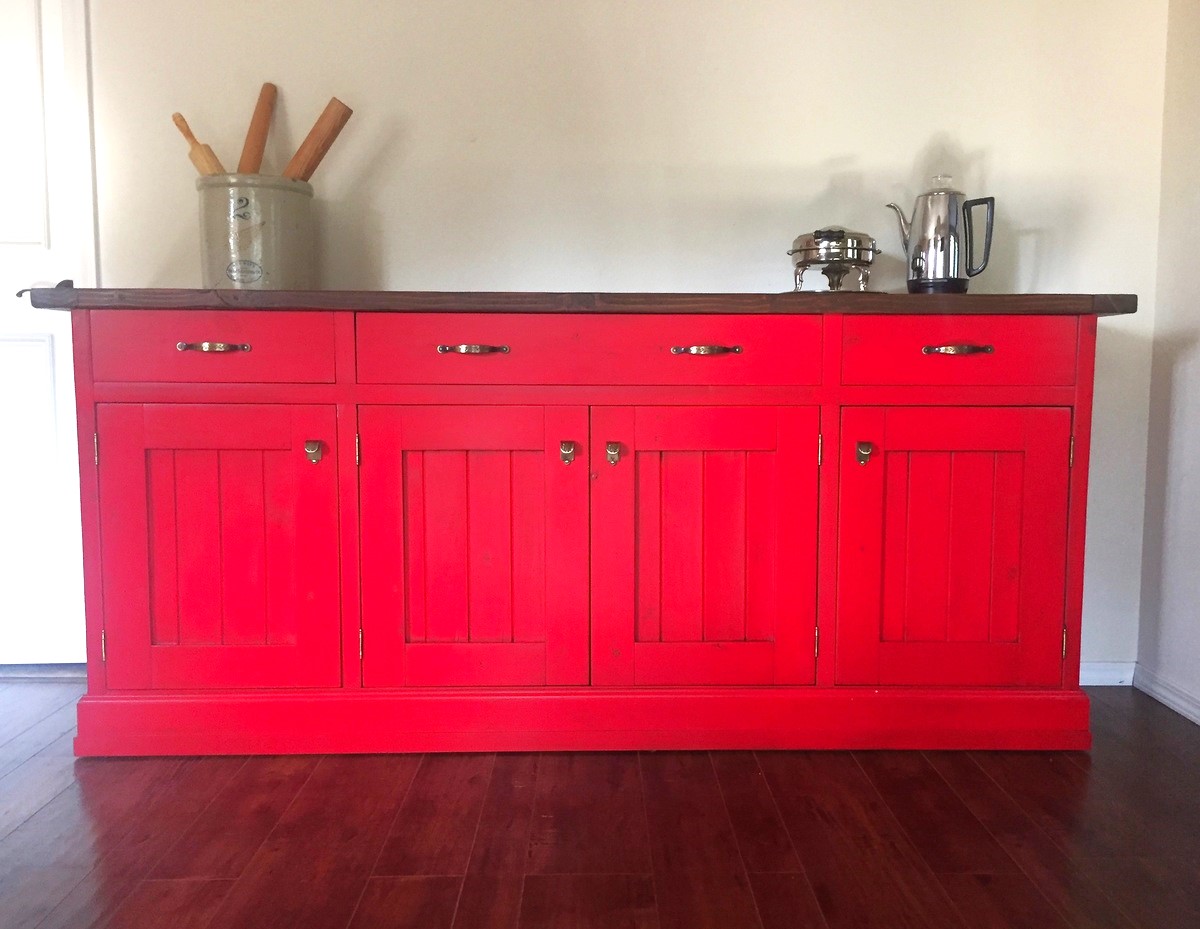
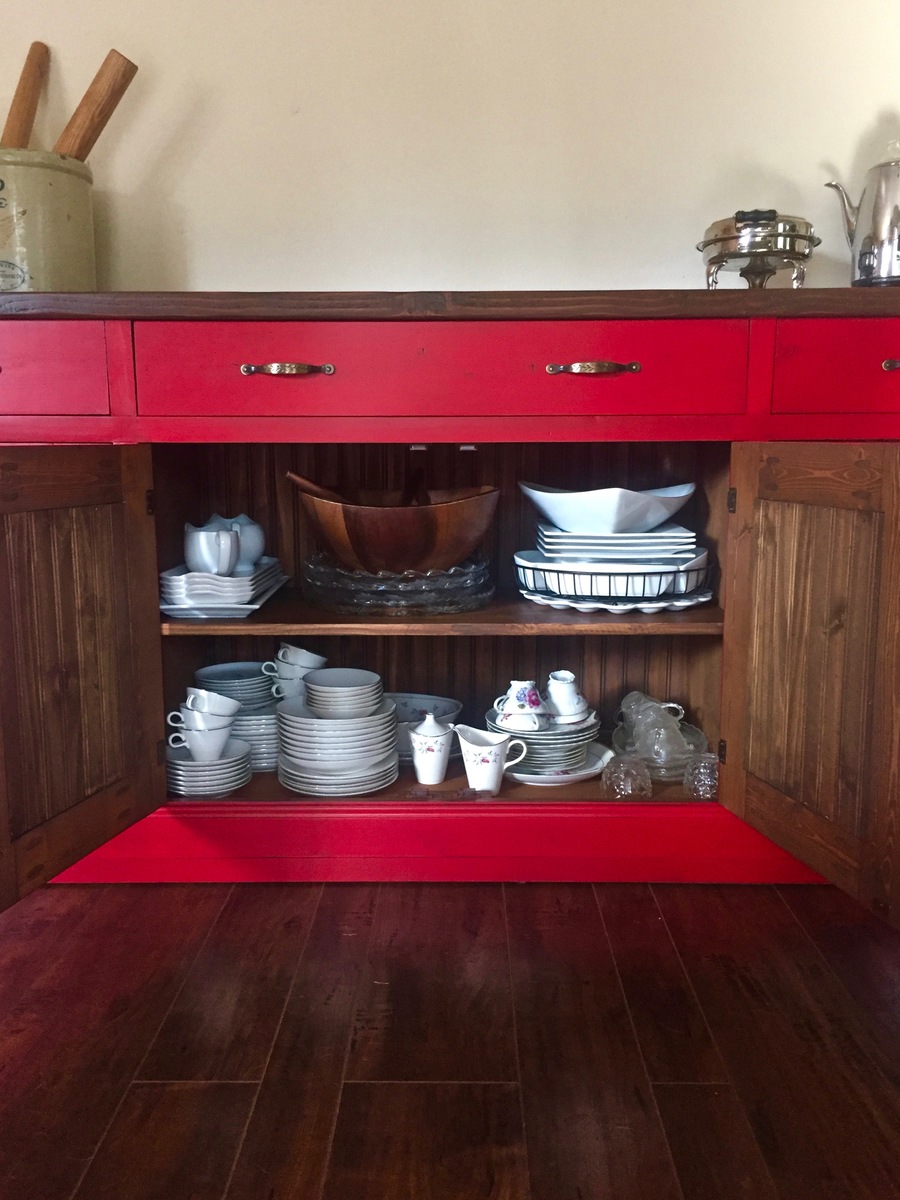
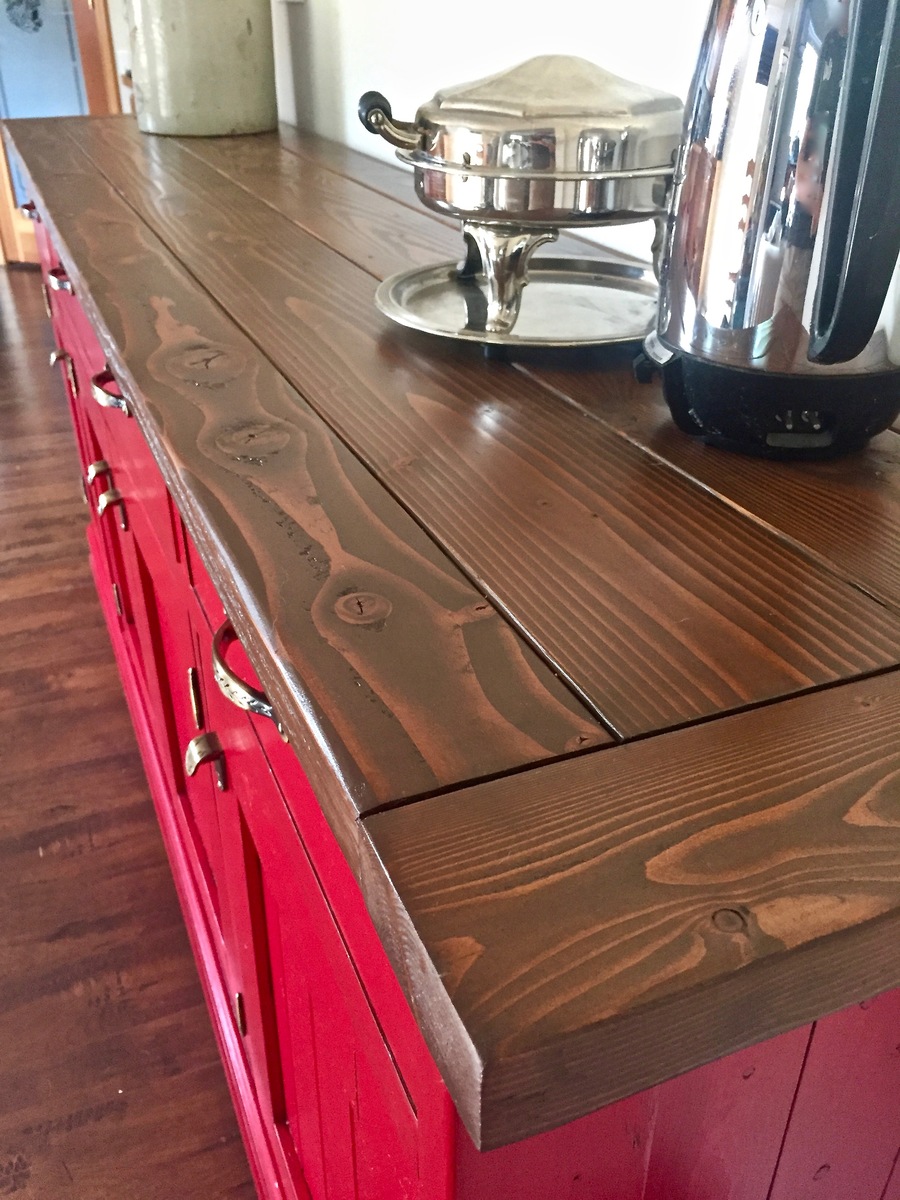
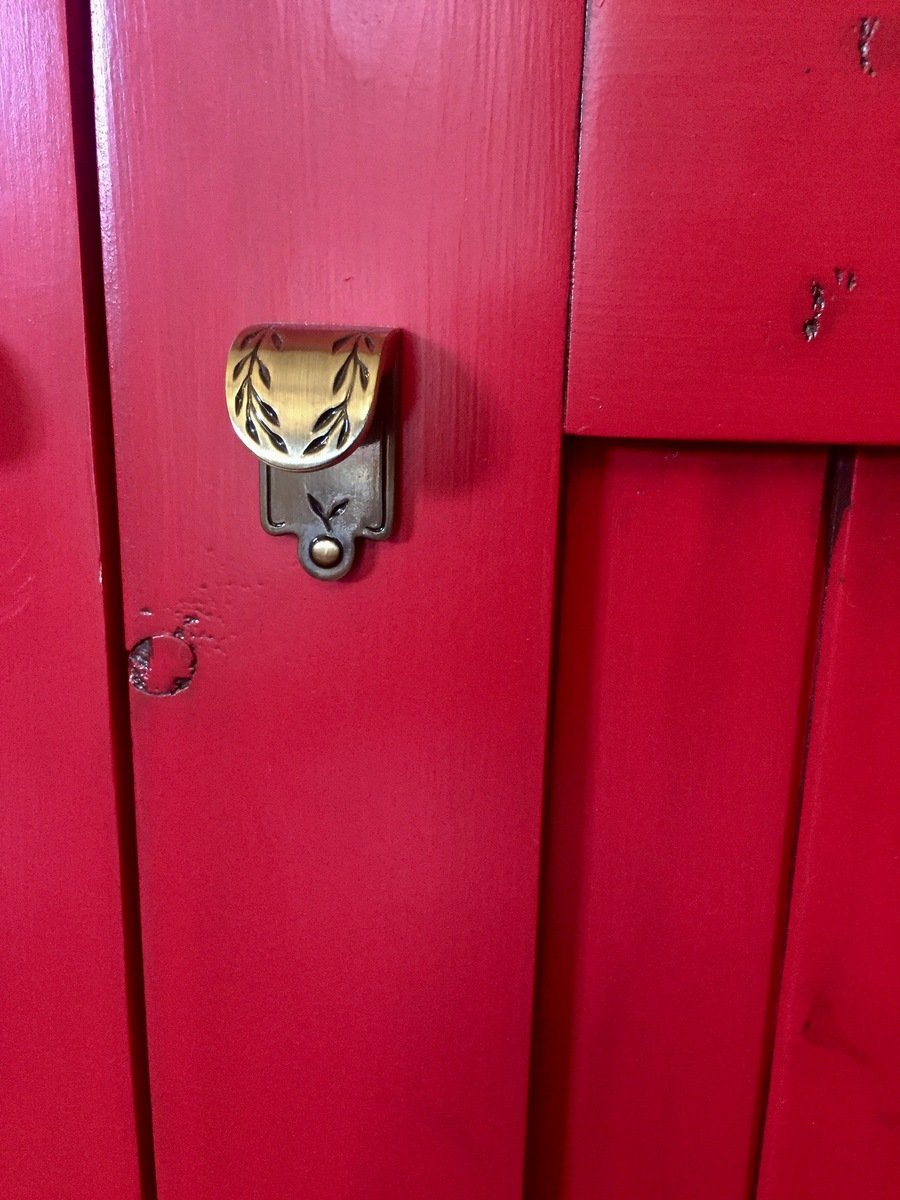
I was on a mission to find just the right buffet to house Grandma's china and infrequently used serving dishes. Countless searches in second hand stores, hours scouring Offer-up and Craigslist, and even some regretable purchases all led to the building of this magnificent buffet. I found a build plan for the planked wood sidboard, printed it and started in. I had always planned on painting it and wanted a rustic look so decided on budget friendly lumber. The frame and top of the unit is made from fir and the drawers and doors from pine. The door insets and the back of the unit is pine beadboard. The top and interior of the buffet is finished in GF Antique Walnut Gel Stain. I used a wipe-on polyurathane on the interior of the buffet and the inside of the drawers. I choose an amazing shade of red for the exterior of the buffet: GF Milk Paint in Holiday Red. It was my first experience with milk paint and it was a pleasure. It went on so smooth and brush-stroke free. After two coats of Holiday Red milk paint I applied a single coat of GF High Performance Top Coat in satin finish. This really enhanced the color of the Holiday Red and served as a base for a glaze application. I mixed the GF Antique Walnut Gel Stain with ten percent mineral spirits and glazed the entire buffet. I got into all the nooks, crannies and knots and left a thin coating on the face of the unit. I loved the buffet before the glaze, but now I was head over heals. The buffet was finally finished off with two coats of High Performance Top coat. Mission accomplished!
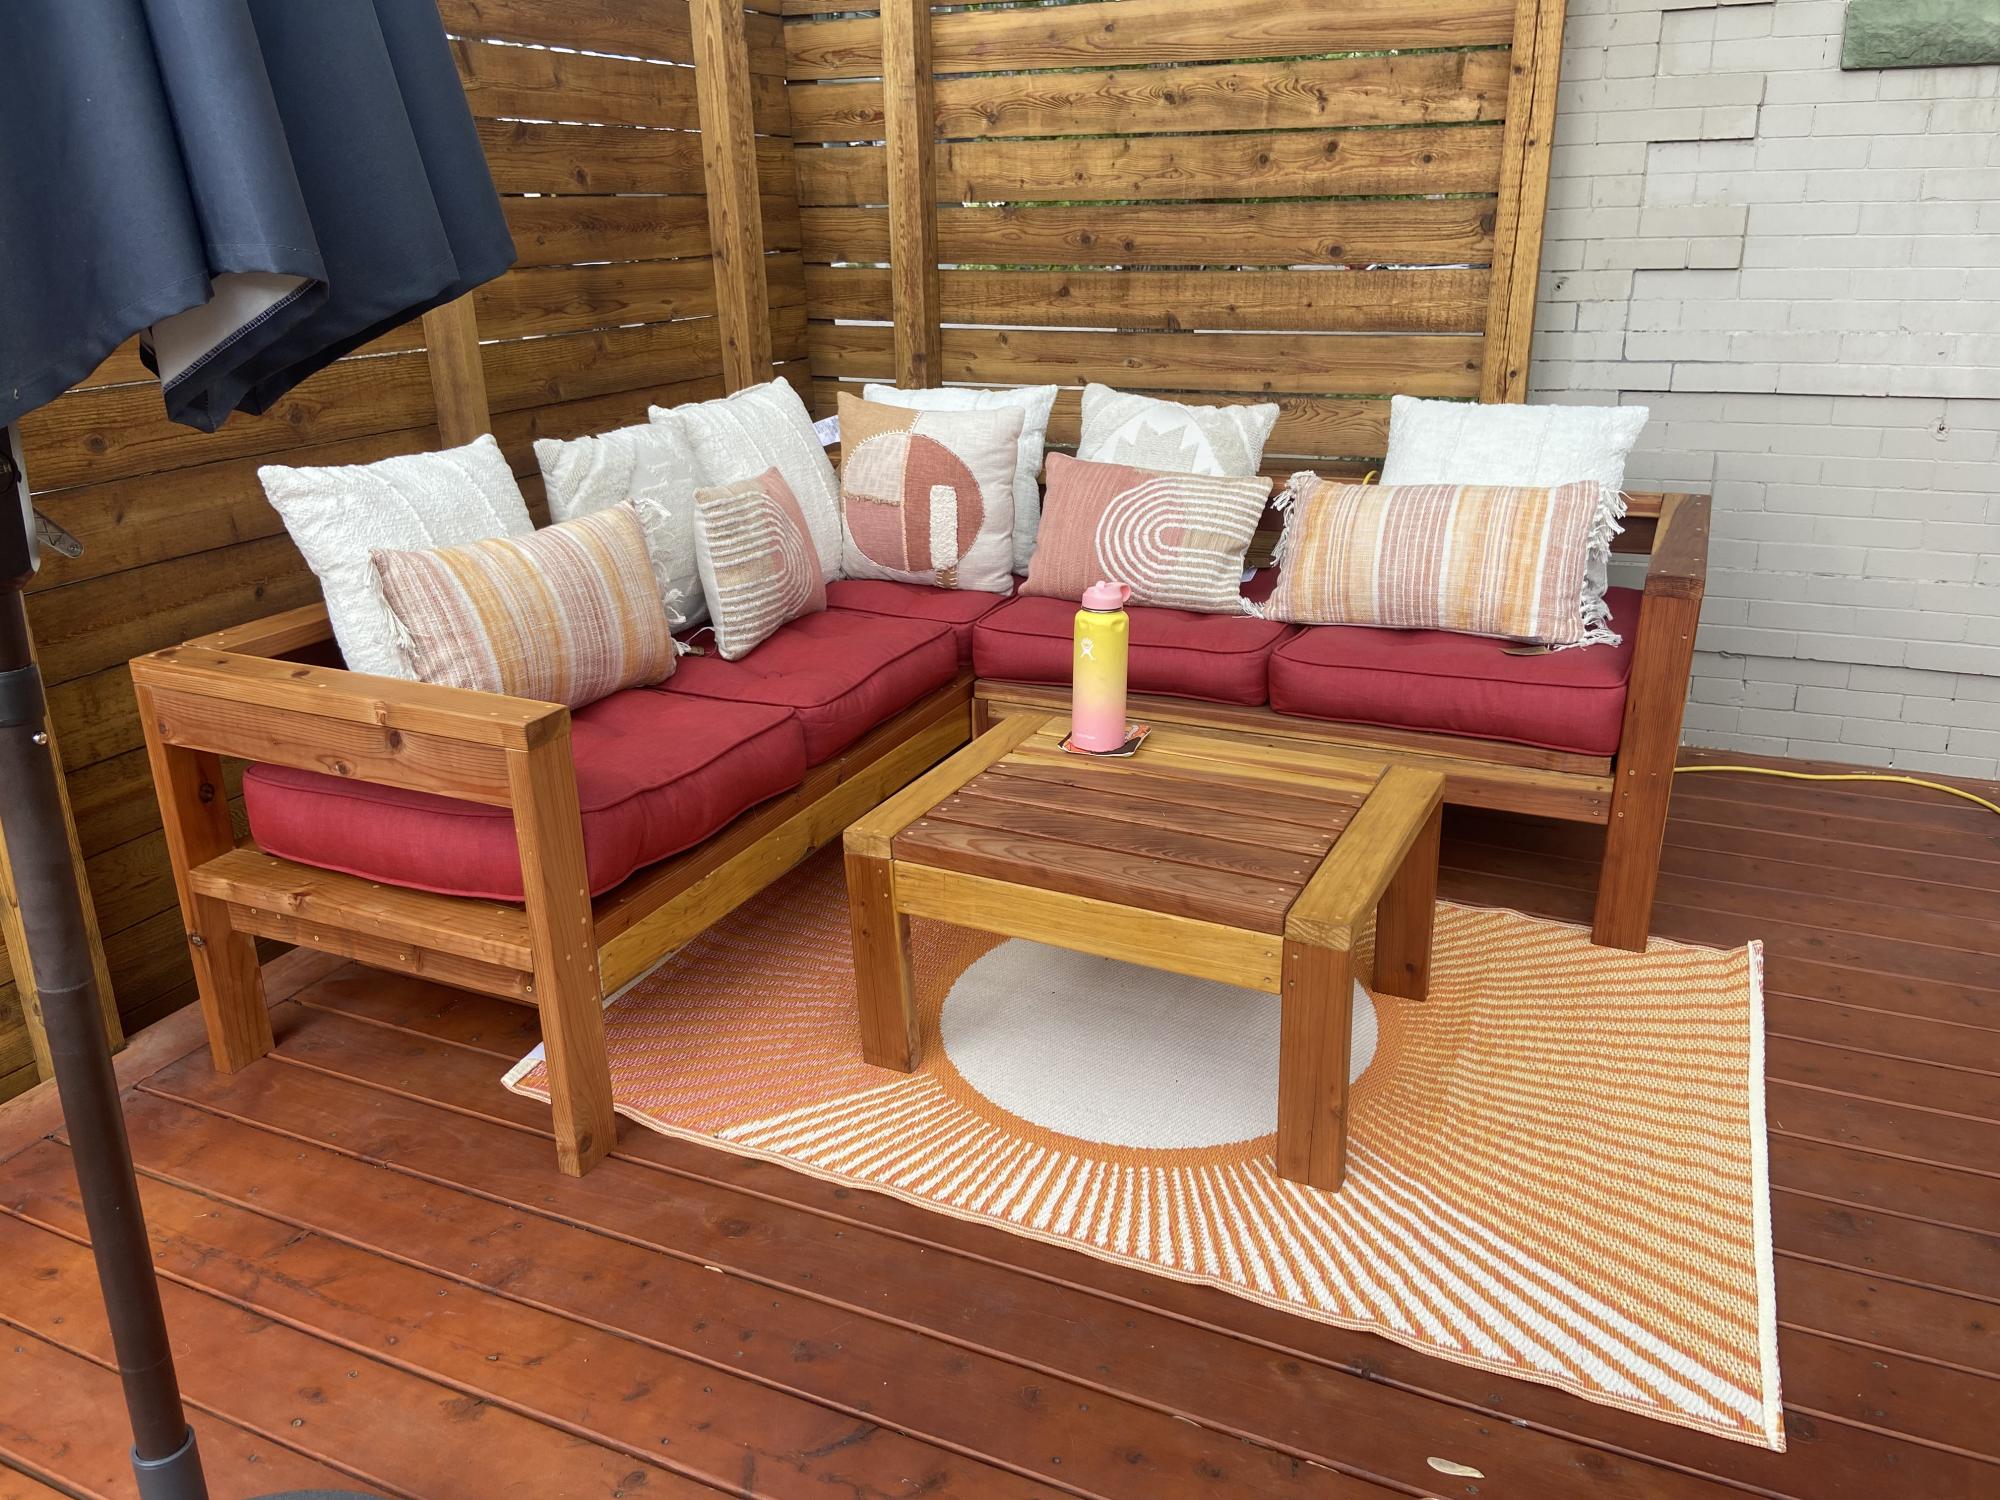
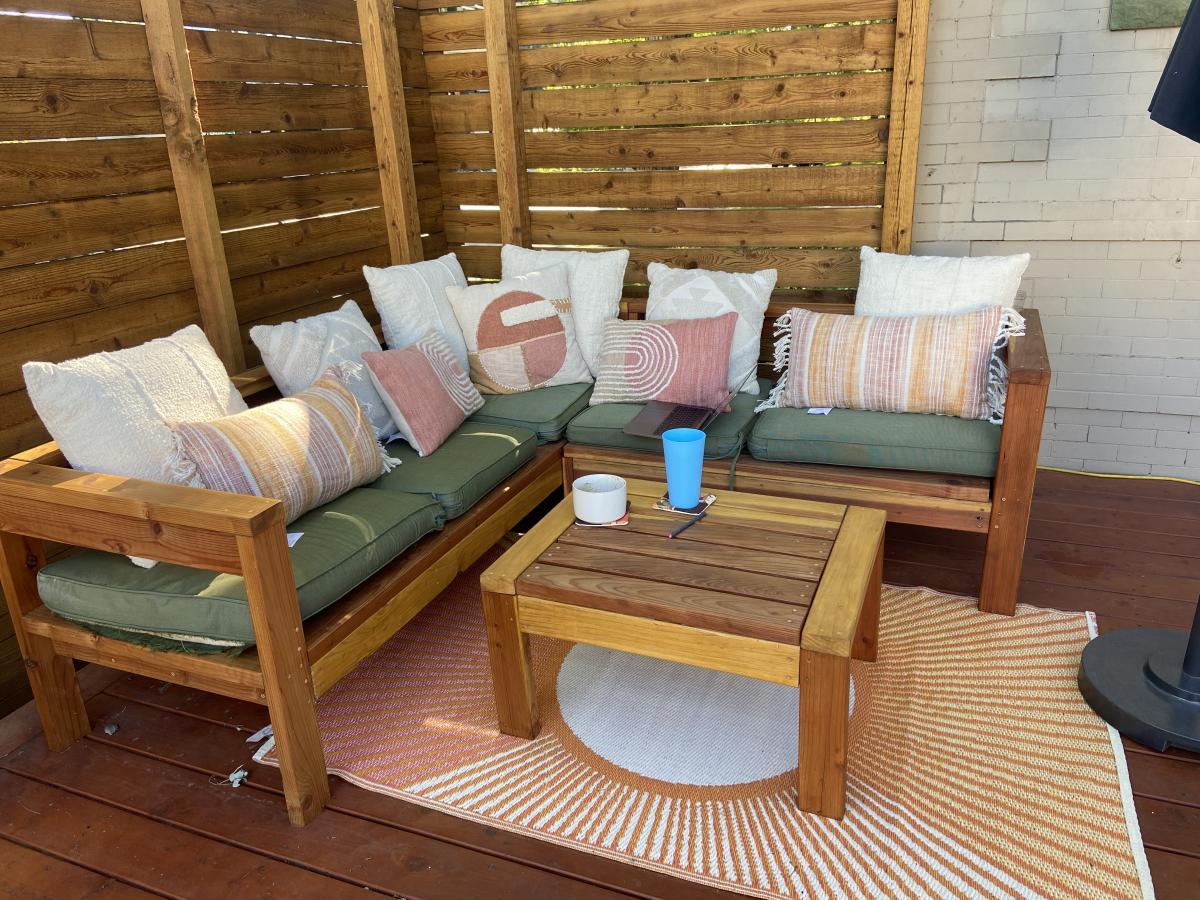
I built the two piece sectional + table and adjusted the sizing so the lengths of the sectionals pieces are the same.
Turned out amazing. So much fun building this and I can’t wait for my next project!
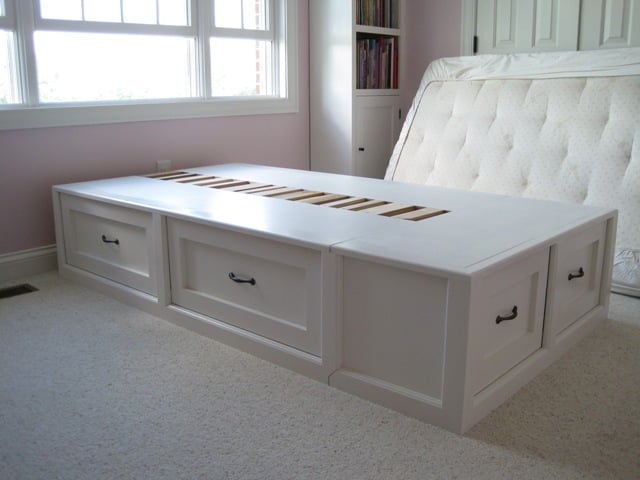
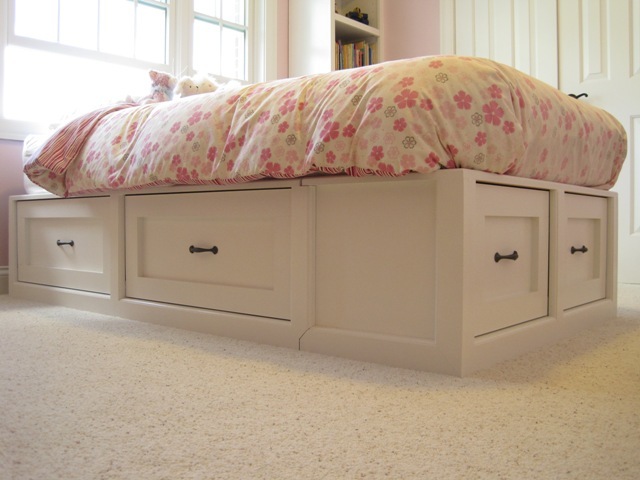
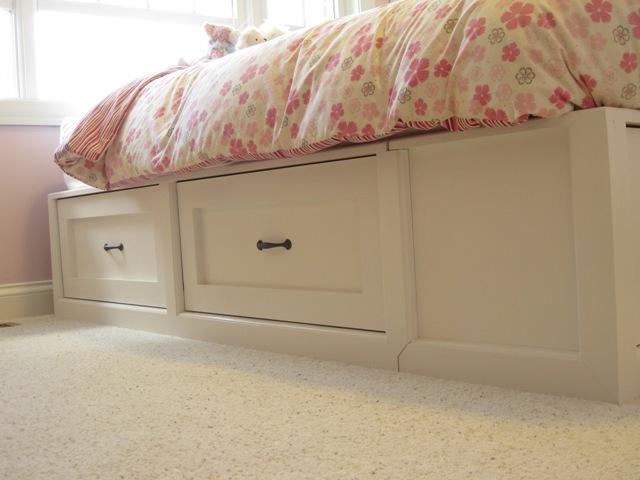
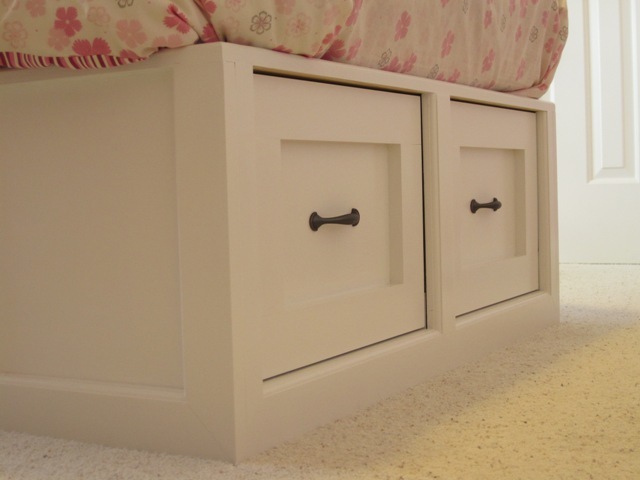
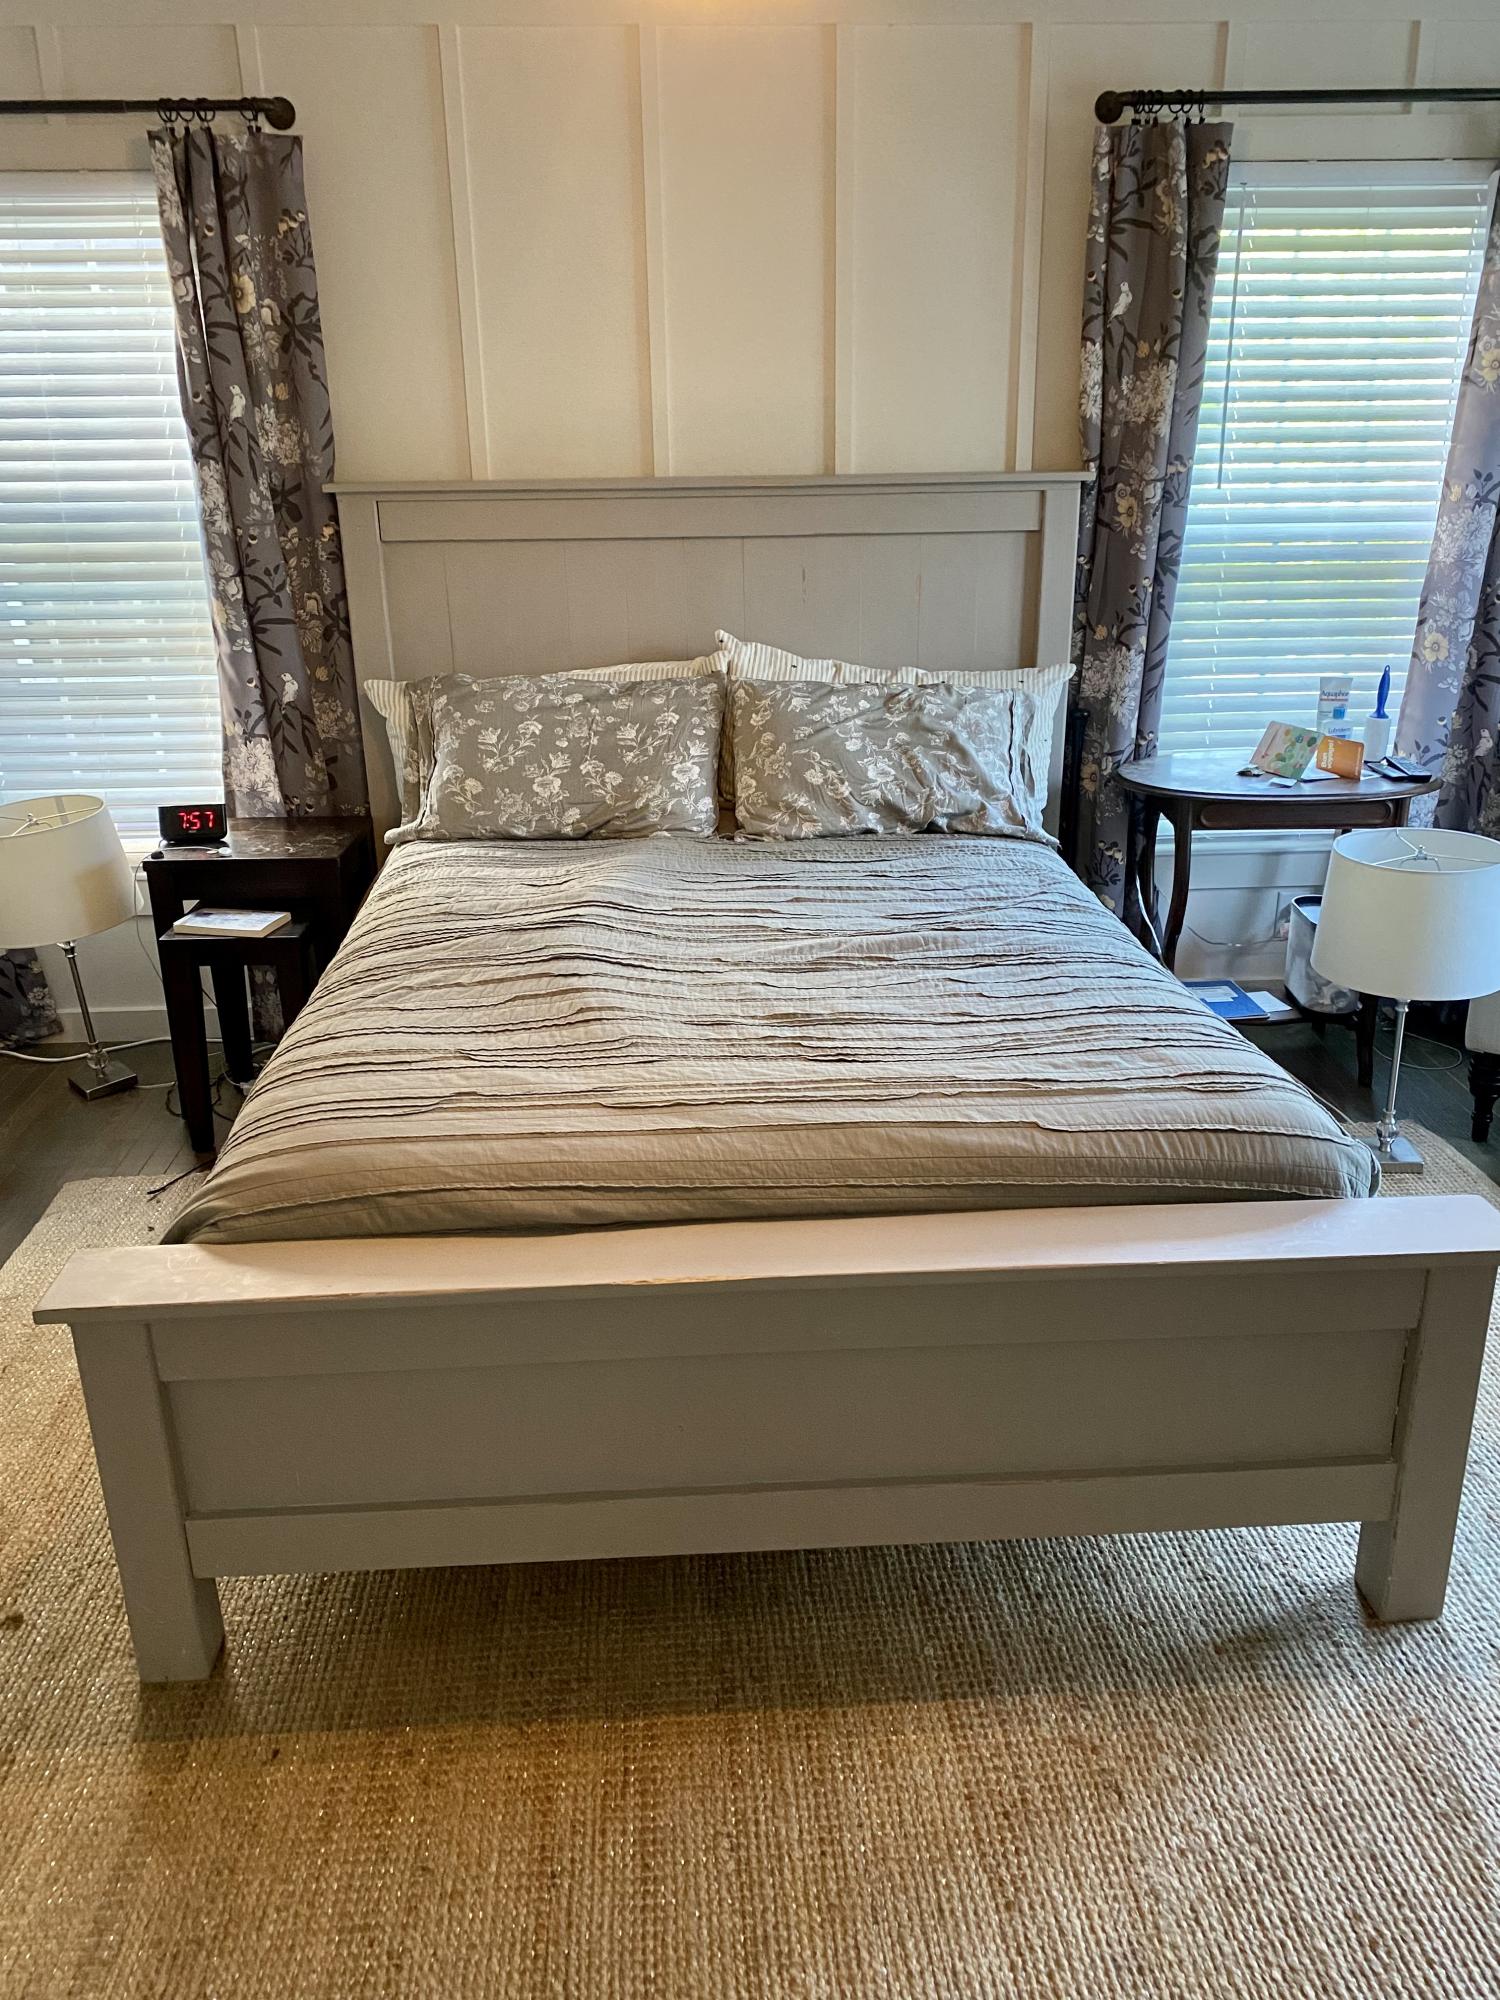
I love how this bed turned out! I wanted some of the extra detail that the Pottery Barn version had--like routered edges, which proved to complicate matters from Ana's plan. I also needed this in a twin, so I looked at Ana's Brookstone twin storage bed for some advice as I planned this build as well.