Raised Garden Bed Planters and French Tuteur

I built some French Tuteur’s for the garden.
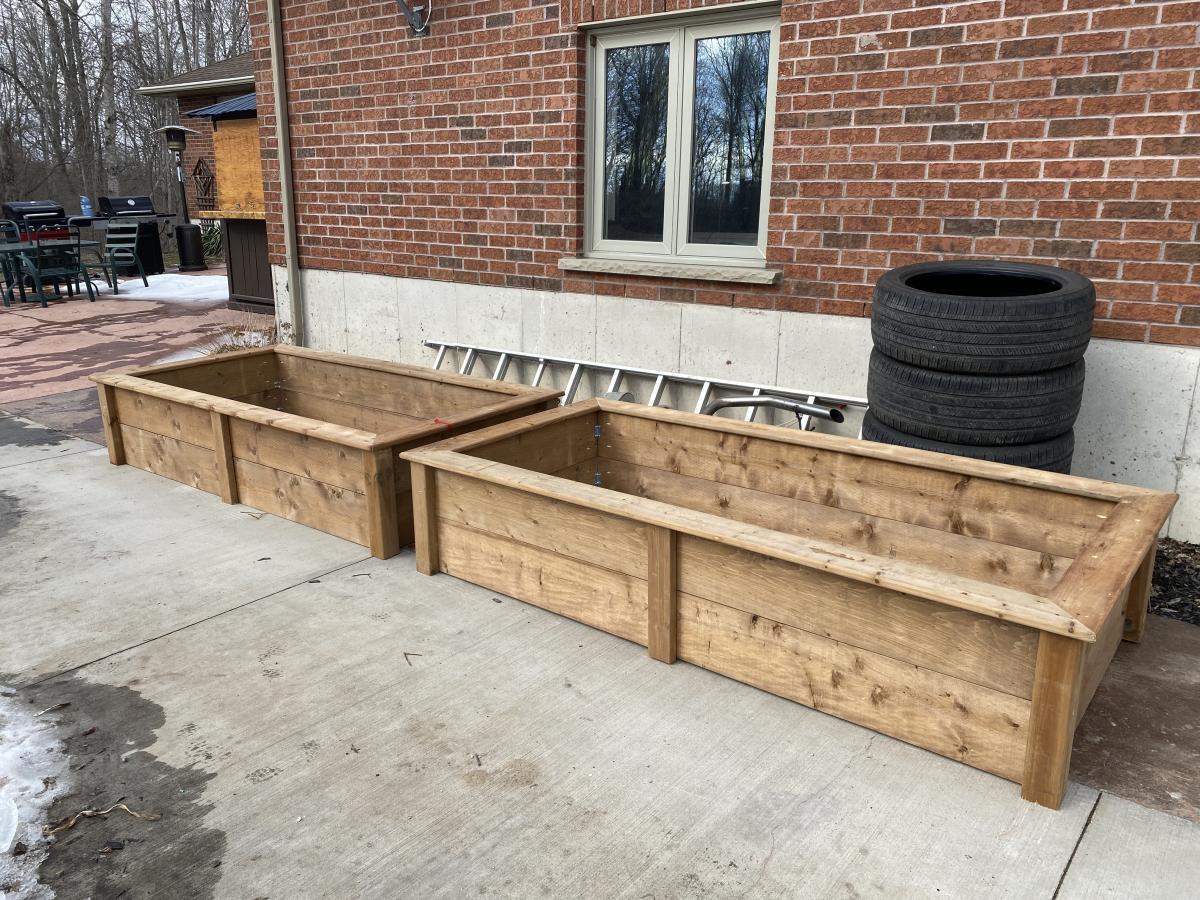
Fresh and ready for my new raised beds.
Built from Plan(s)
I built some French Tuteur’s for the garden.
Fresh and ready for my new raised beds.
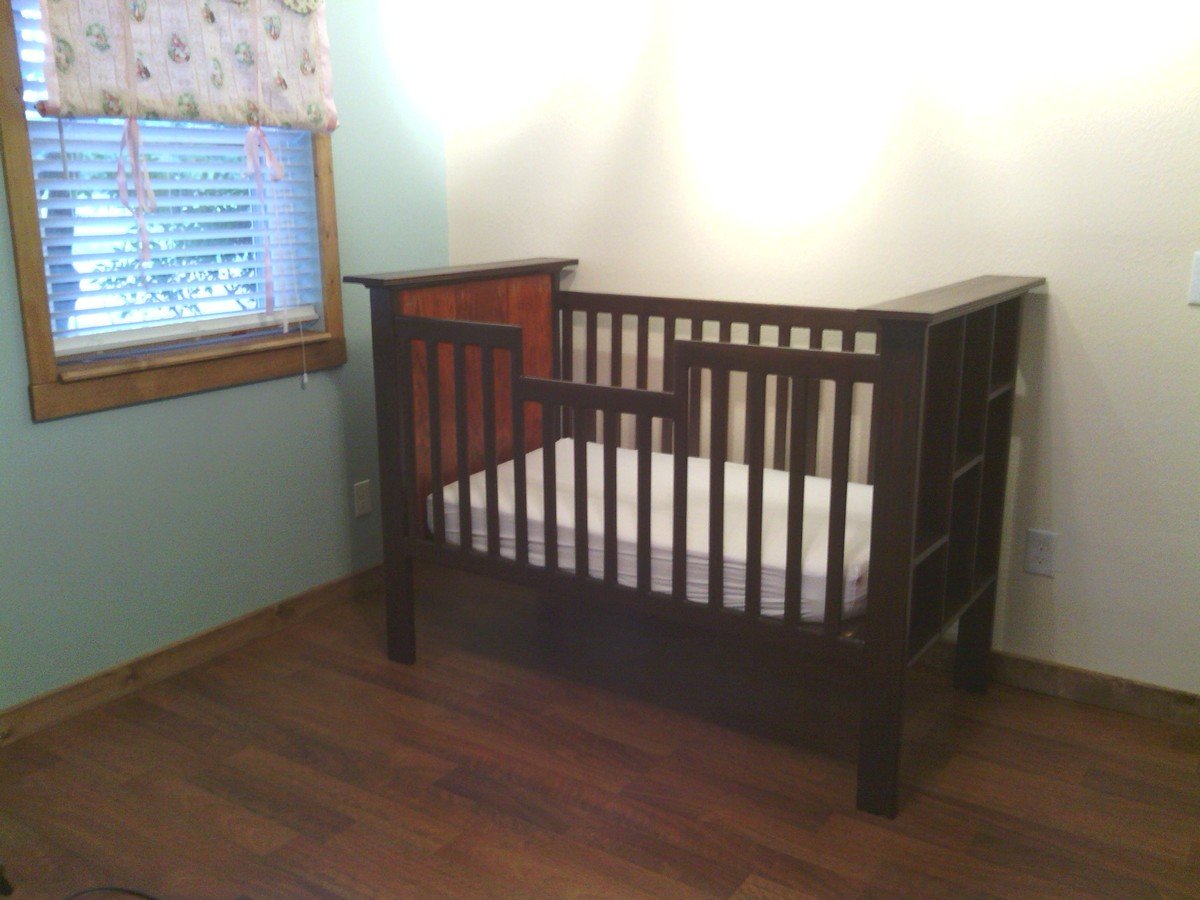
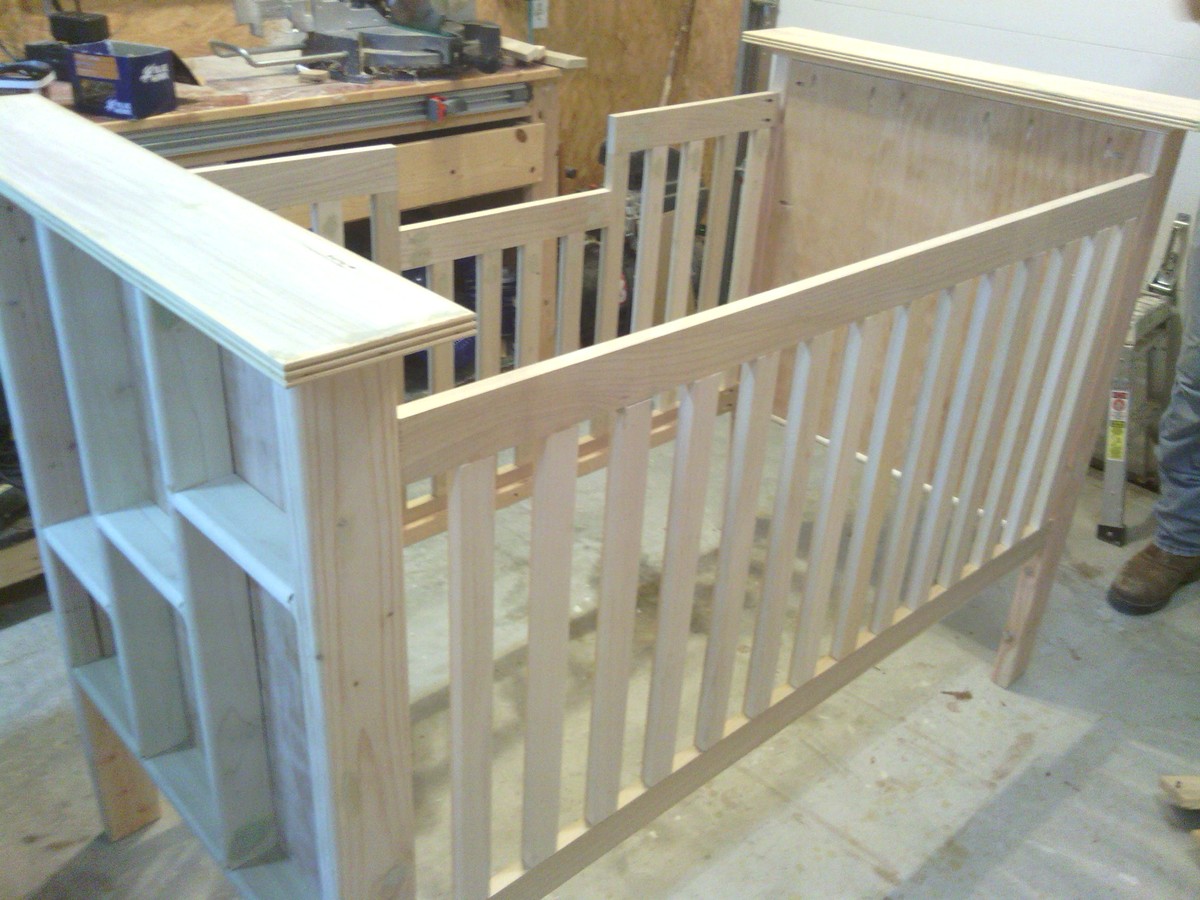
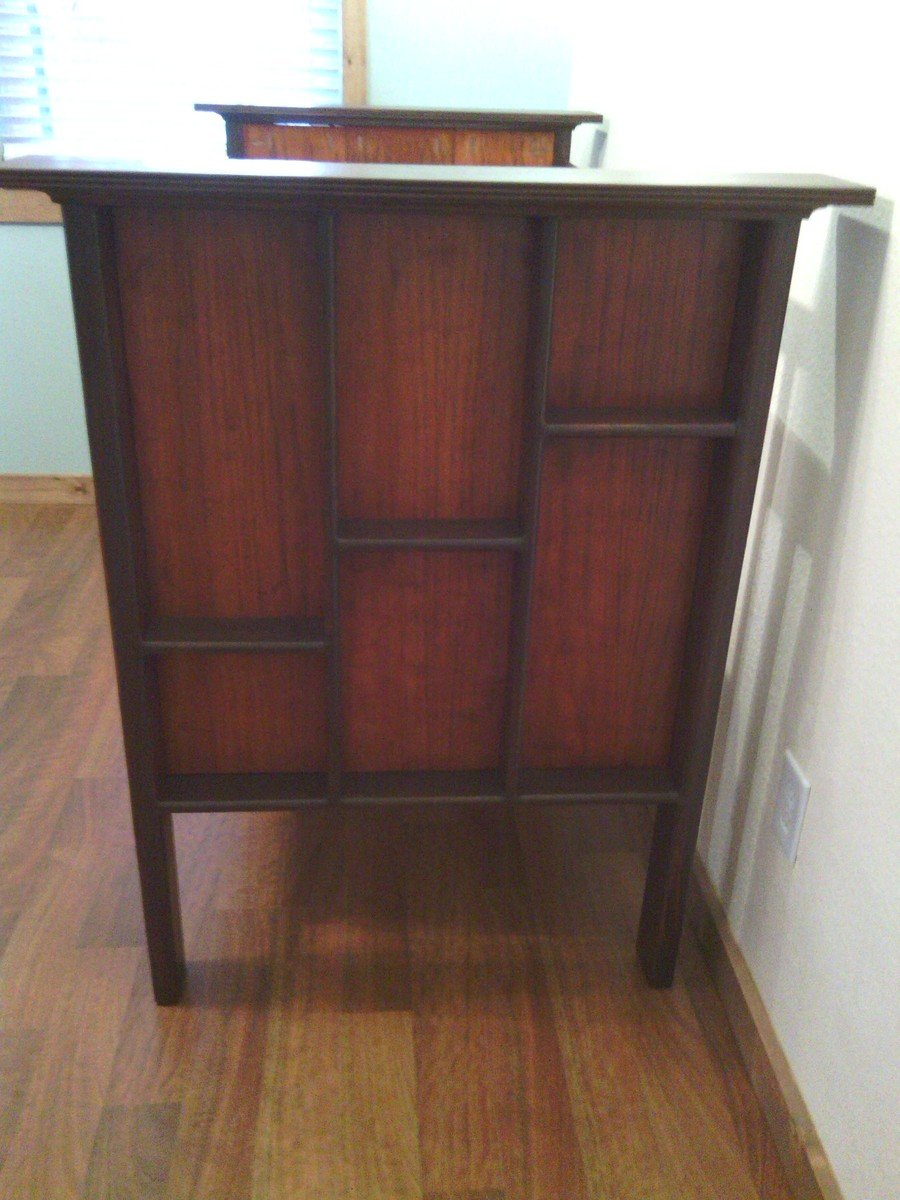
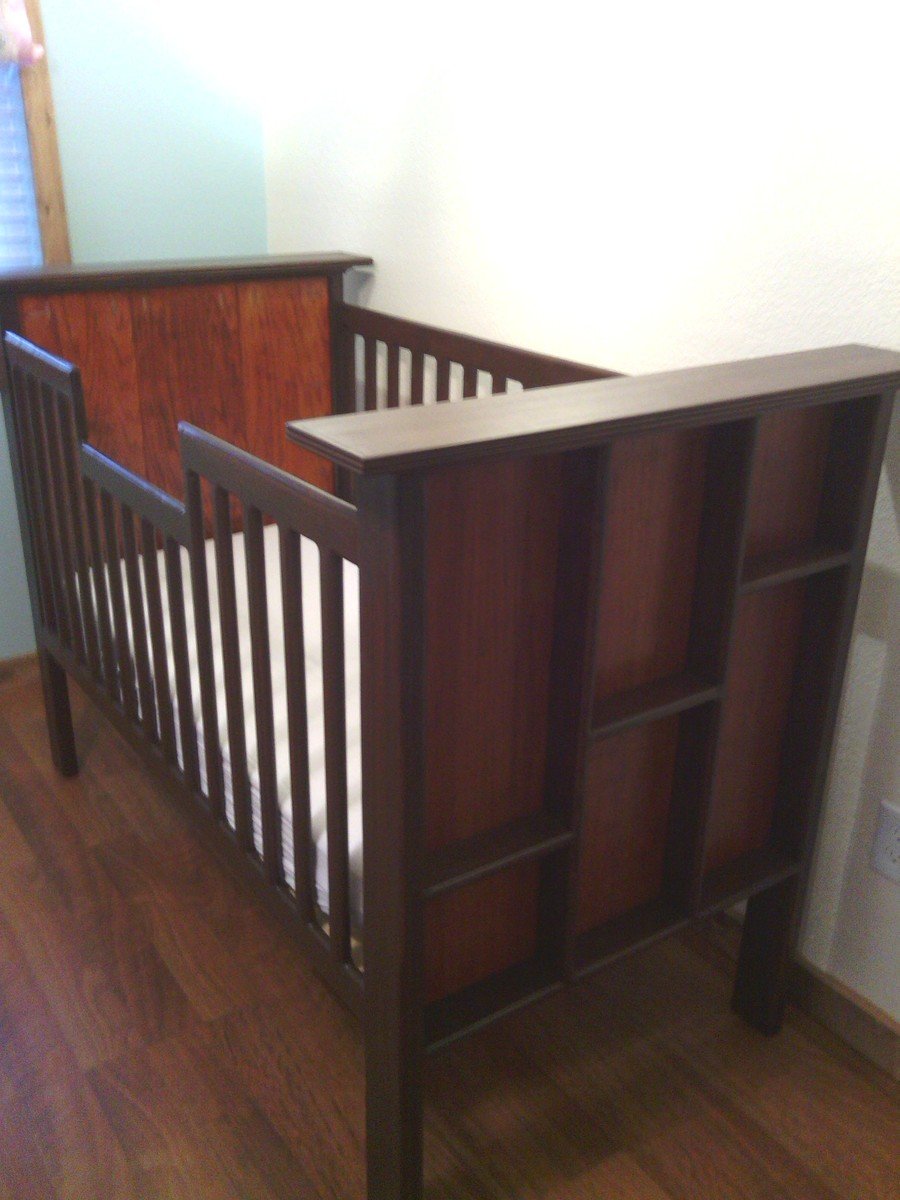
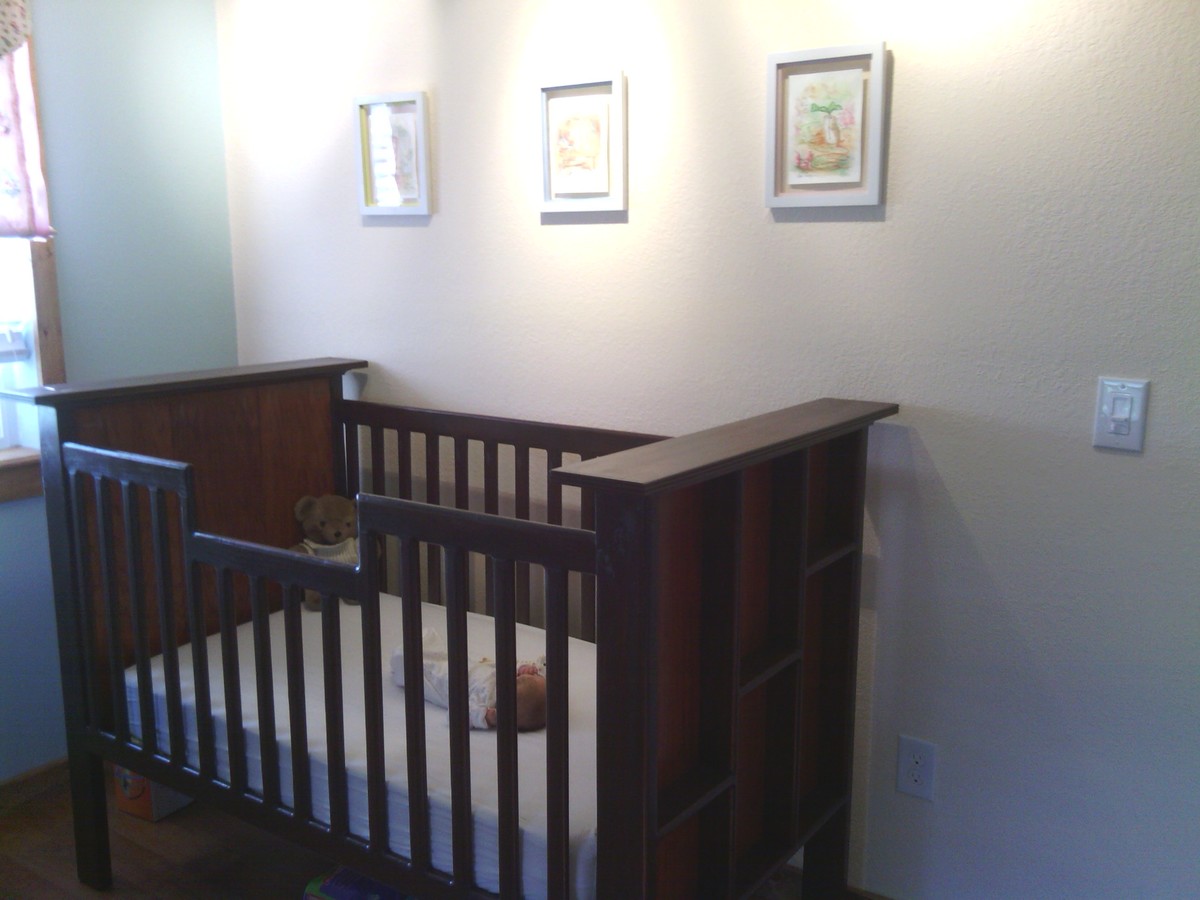
My husband recently designed and built our daughter's crib. After looking online and measuring another crib to make sure he had the rail spacing just right he came up with a plan and built it over a few weekends. He also built the changing station and will later build an armoire for her room as well.
Tue, 07/30/2013 - 18:53
Beautiful!, I've been searching the web for plans to build a crib and haven't found any, would you mind sharing yours?, I think it looks amazing!
We had some additional kids coming over and I needed to build them quickly.
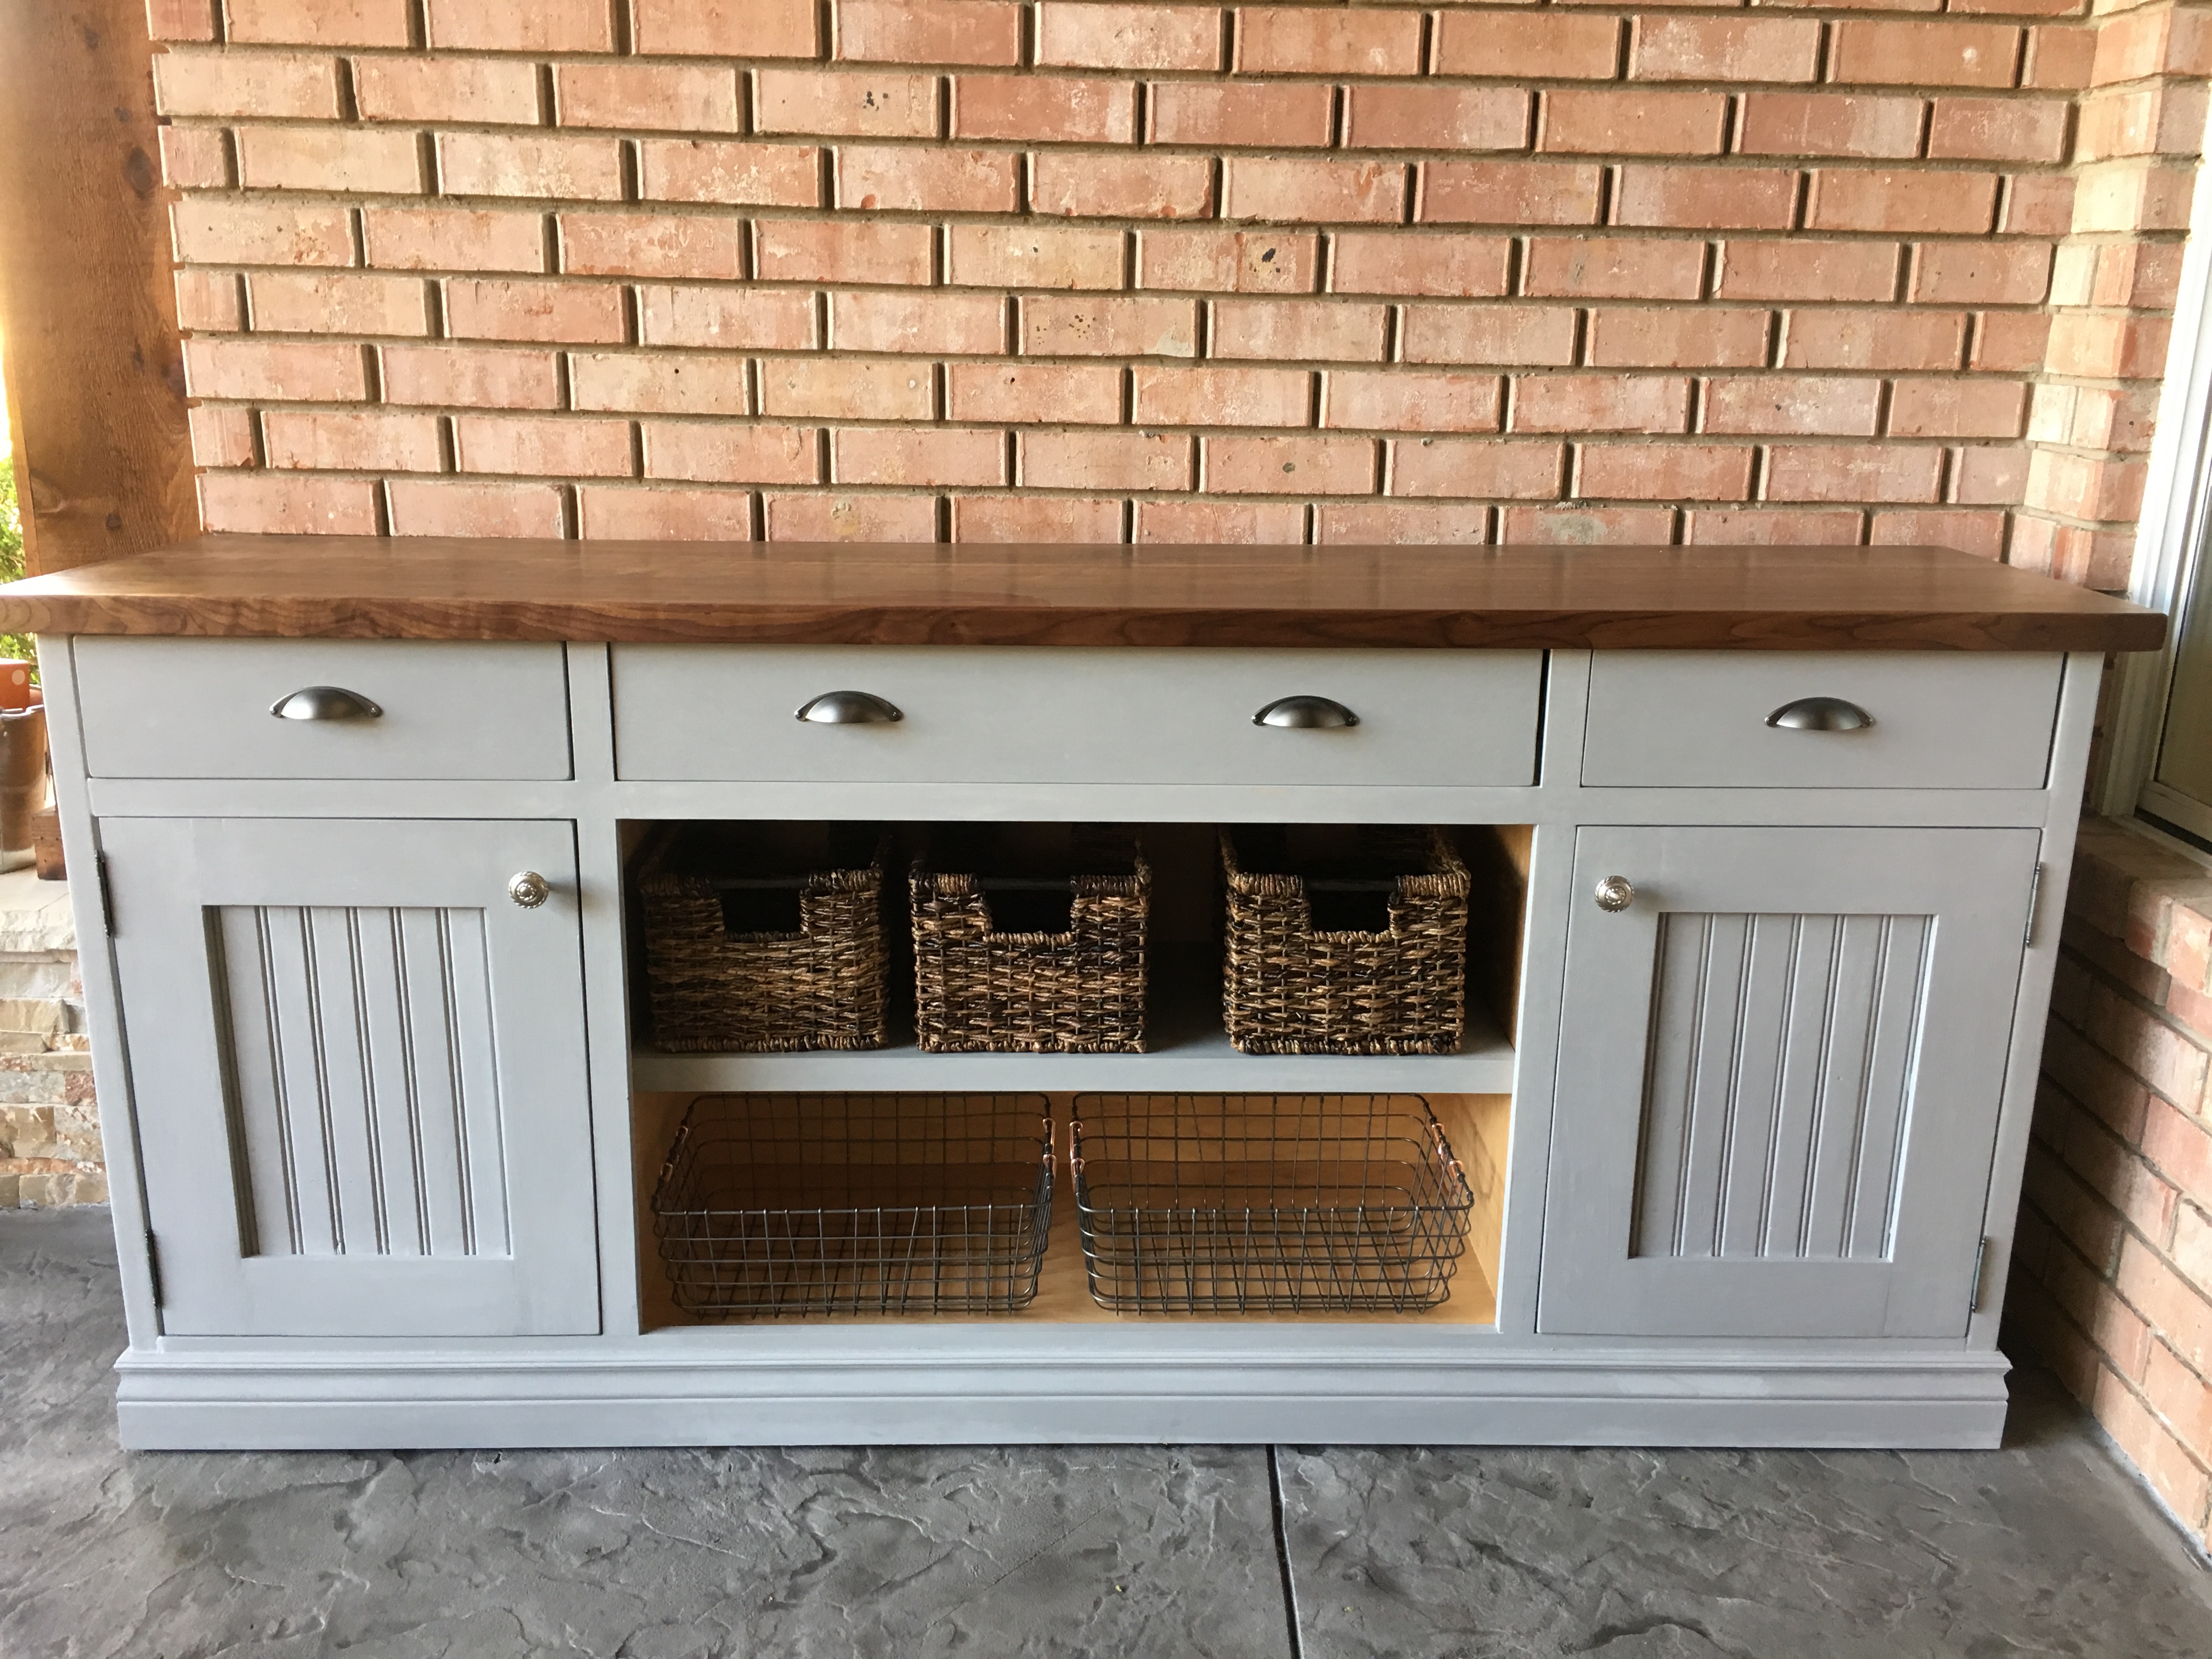
This was a piece made by my husband for our outdoor living/patio area! Love how it turned out--and the walnut top was worth the extra money. Same wood that he used to make a fireplace mantle in the same outdoor area. The plank doors were leftover pieces we used to cover a ceiling, and created a great result. Found the Annie Sloan paint (Parisian Grey, I believe) and wax on a Buy/Sell Facebook site in our neighborhood and saved a little money.
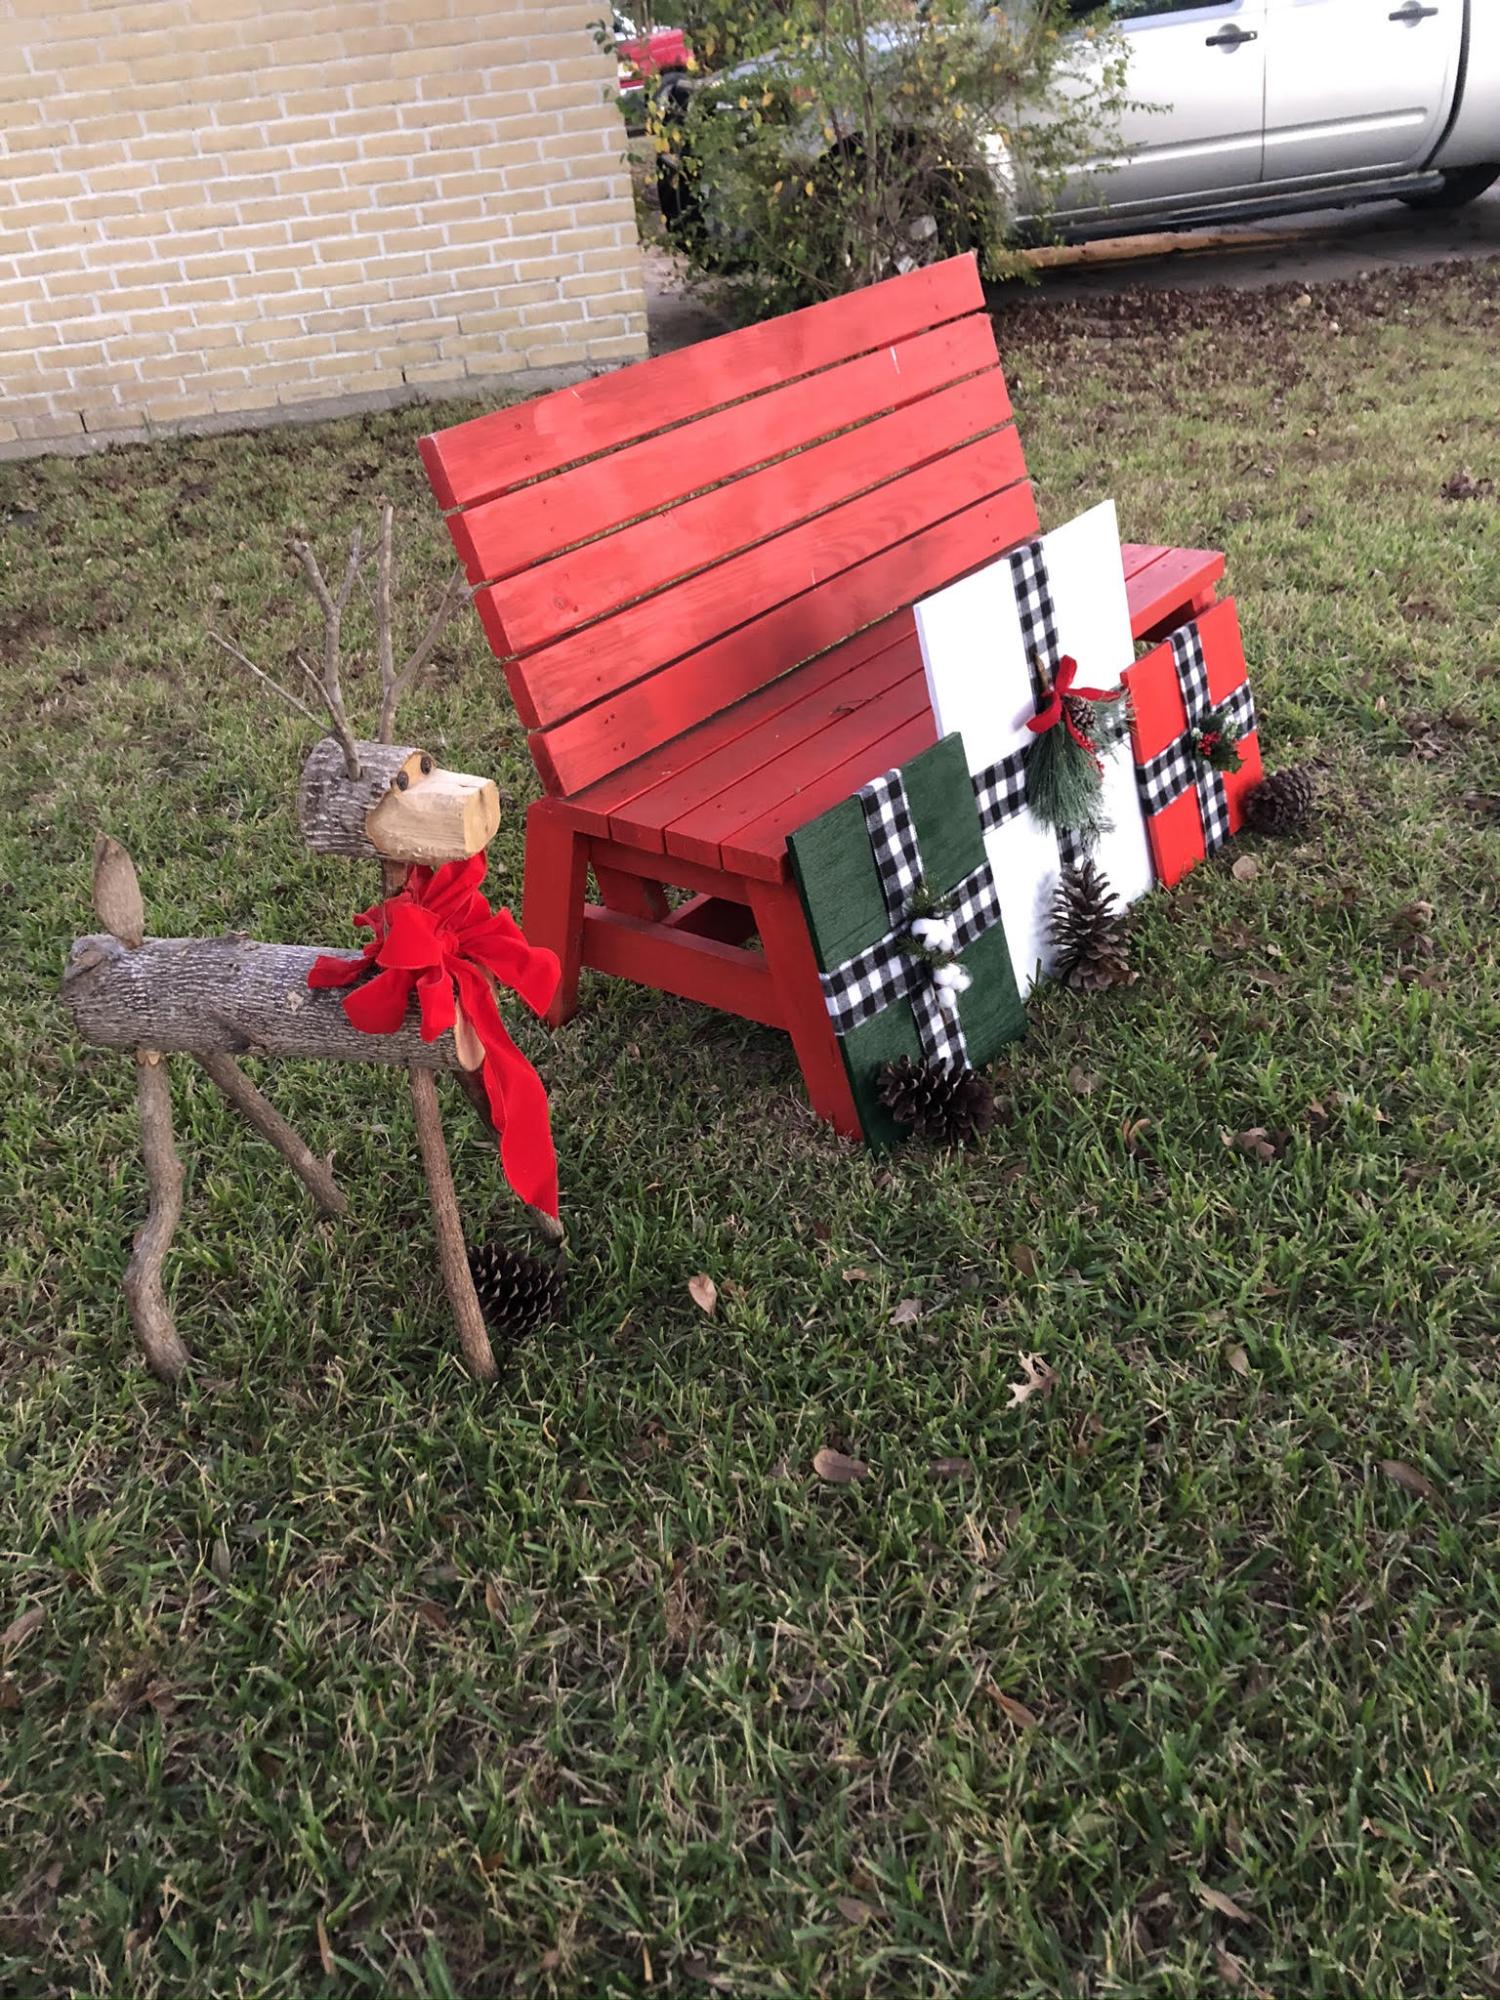
Picnic table that converts to bench.
by Larry
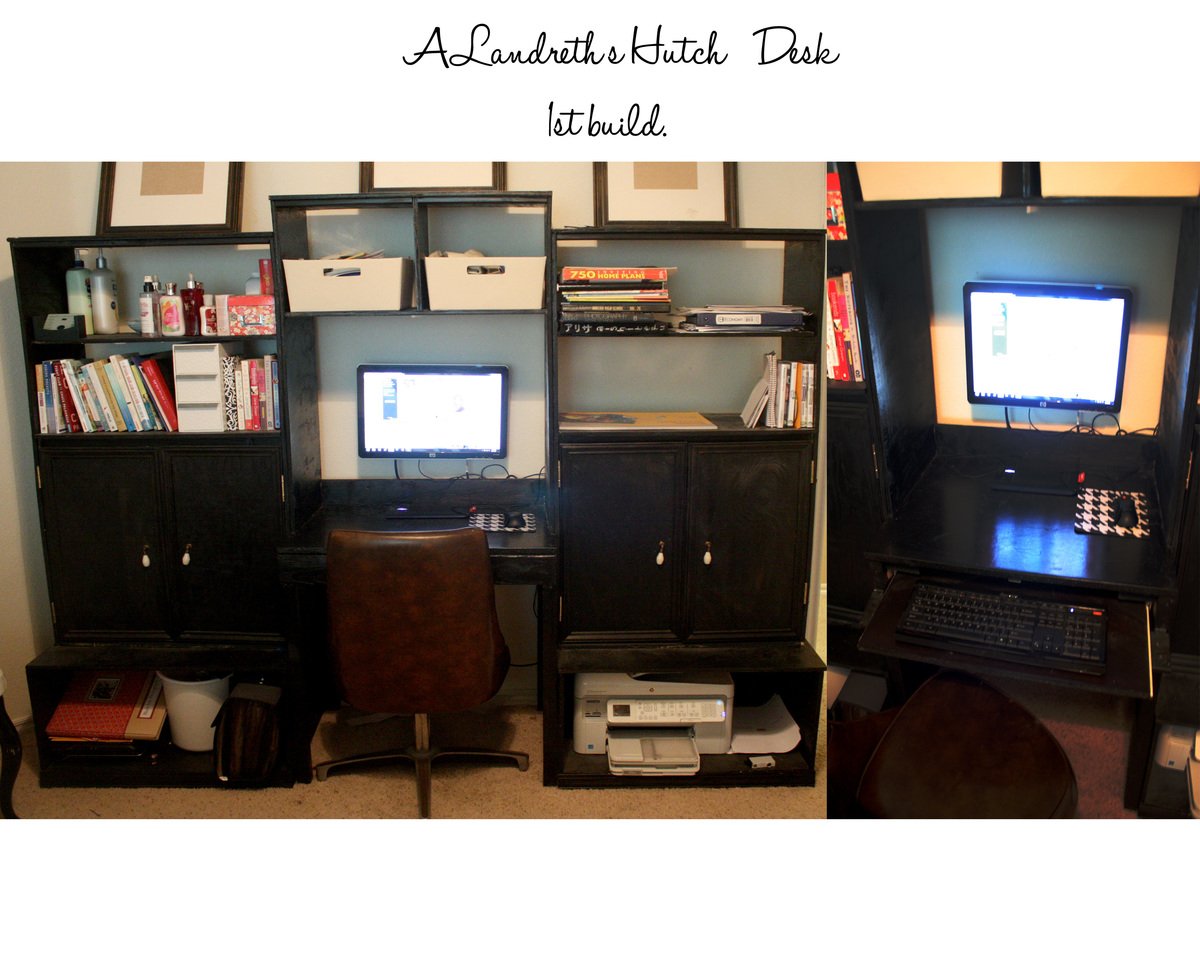
We love this desk and customized the heck outta it.
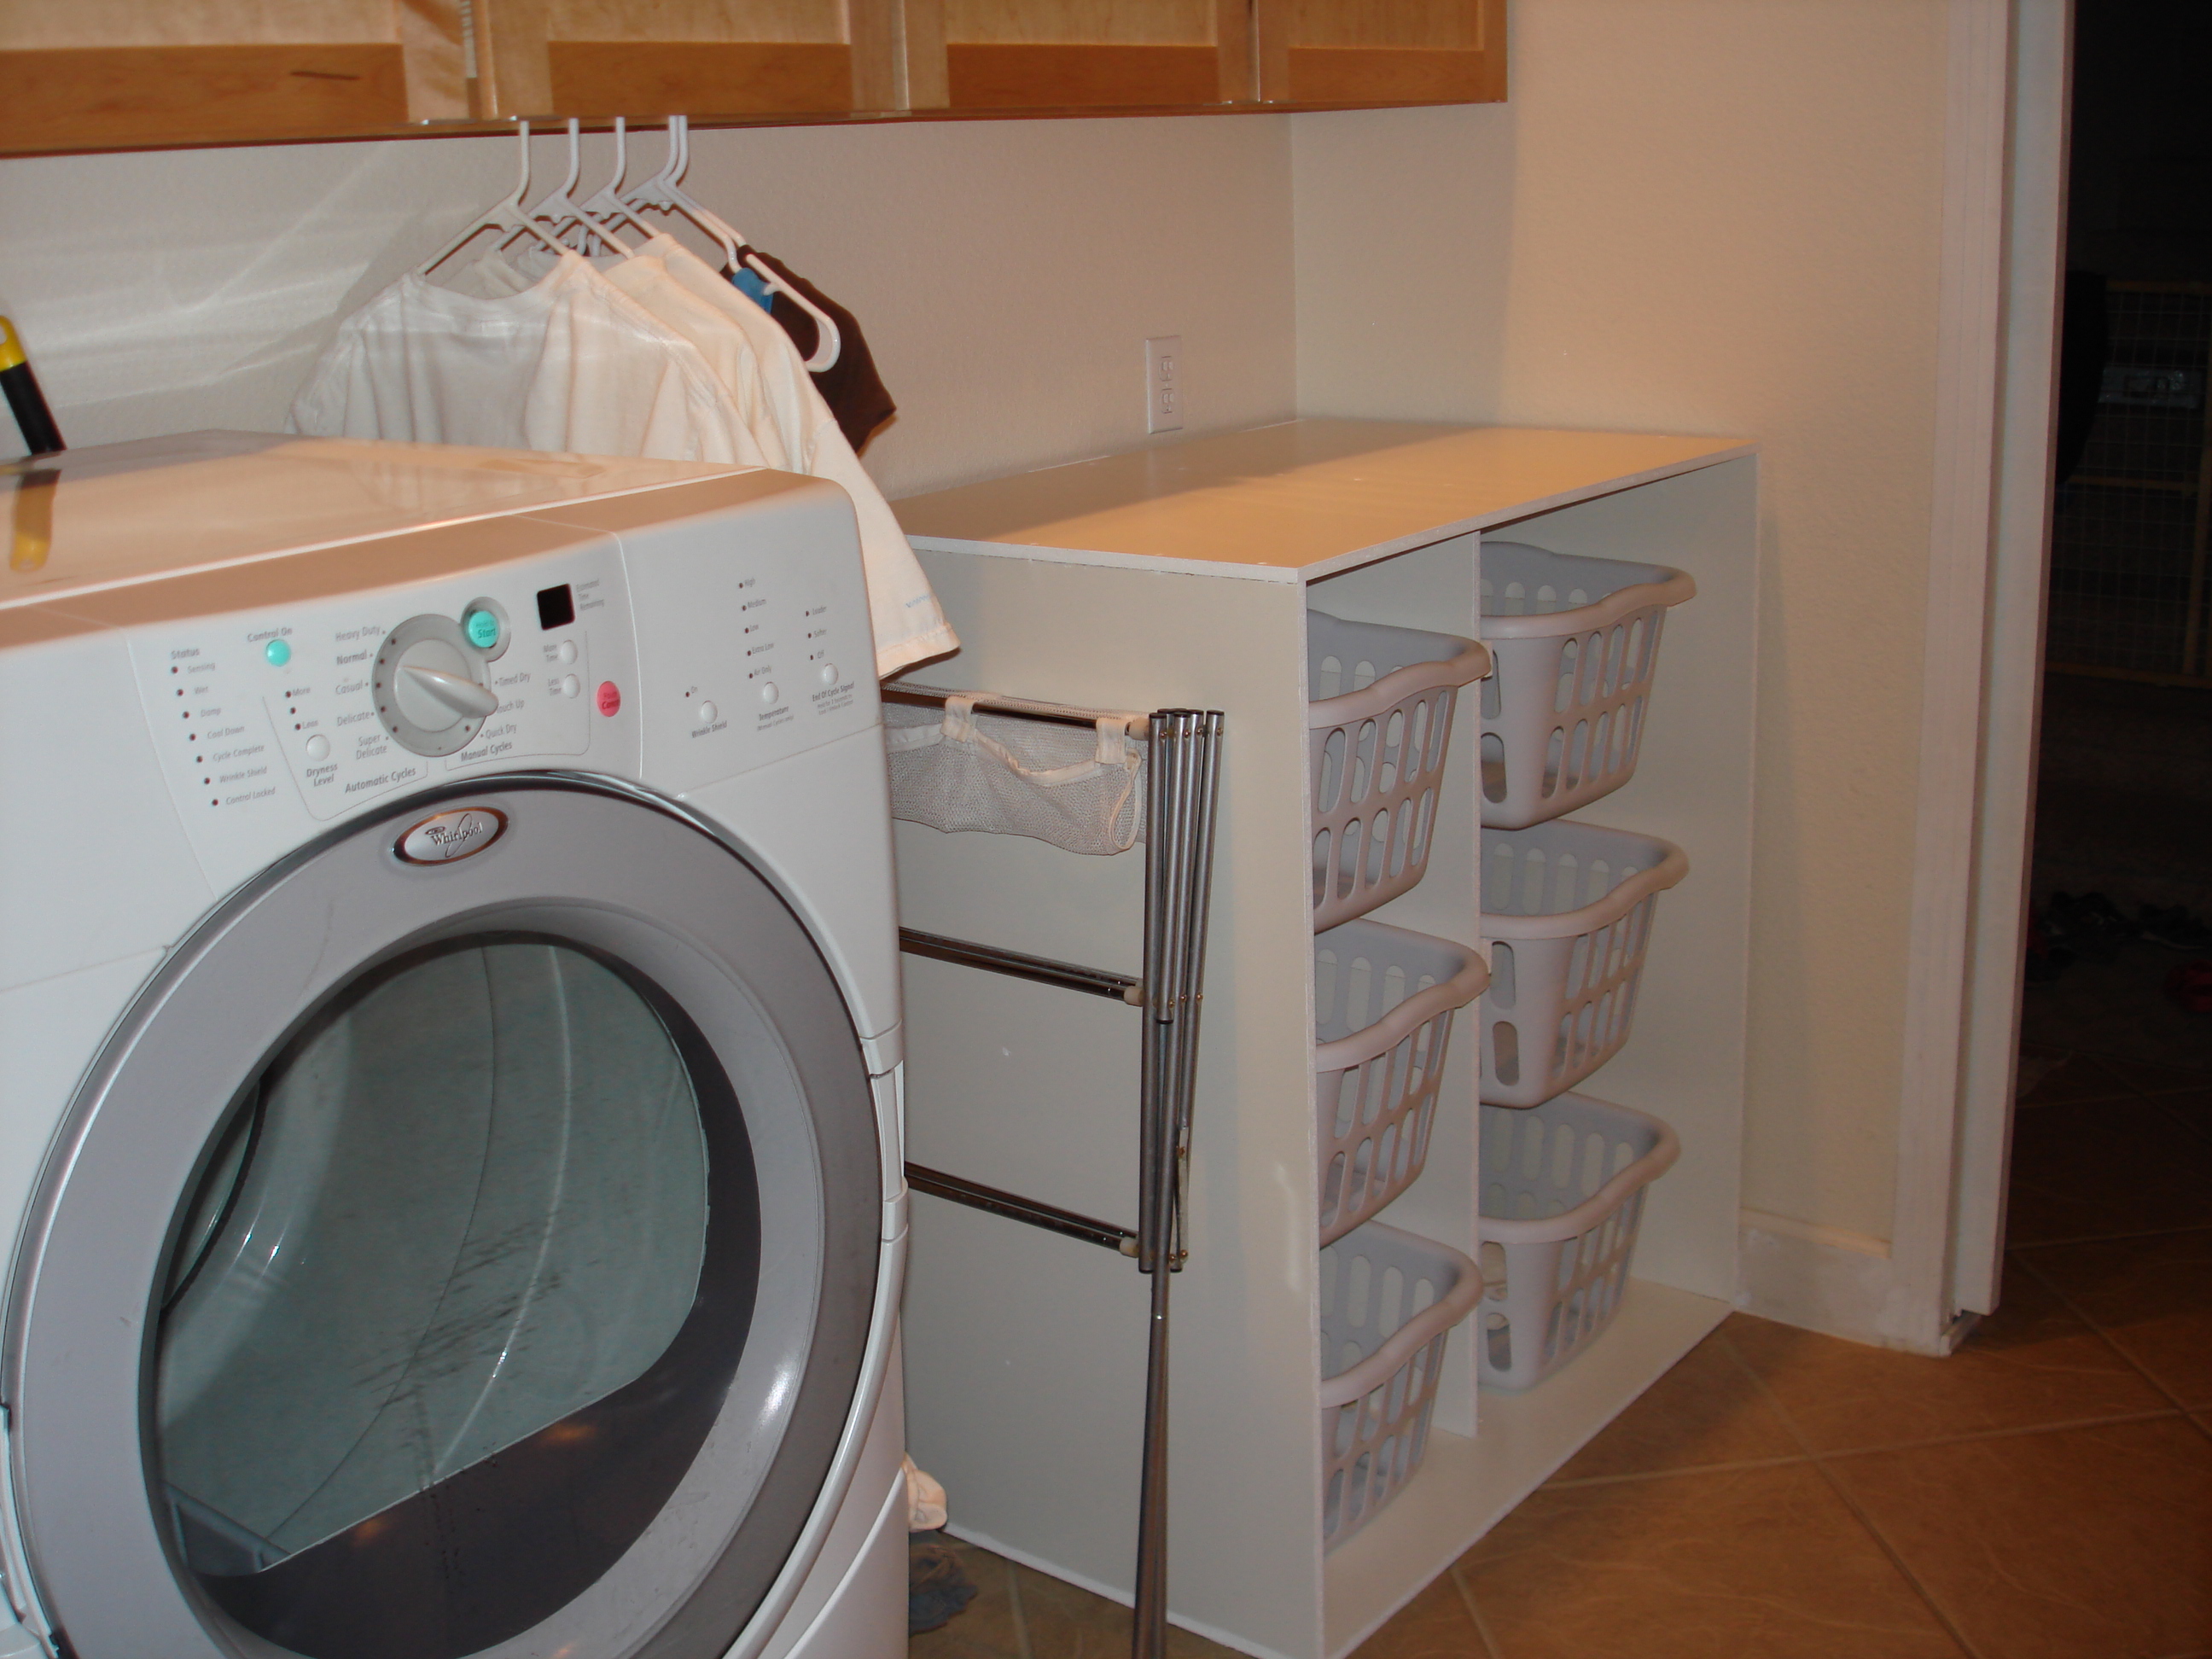
My overly ambitious first project, a laundry sorter! (Modified from Shanty2Chic plan: https://www.shanty-2-
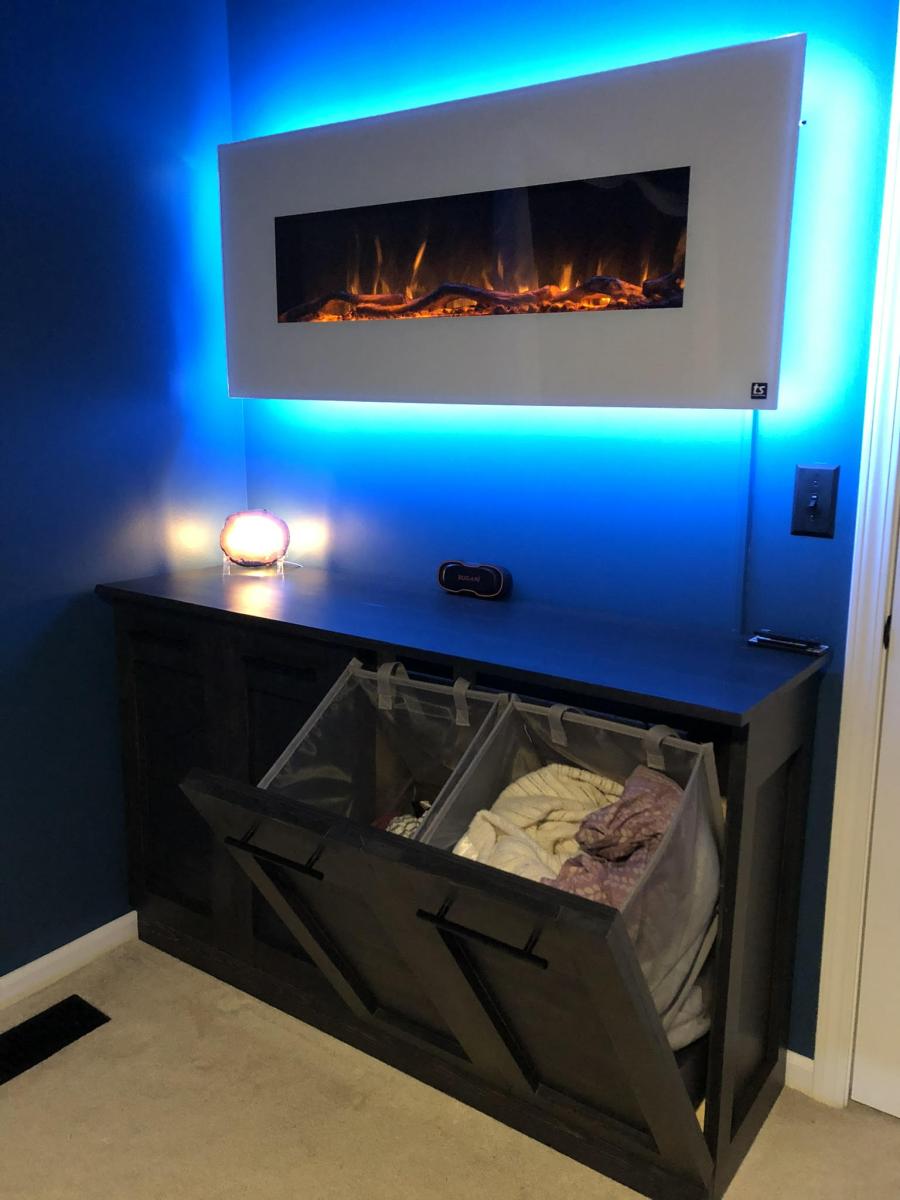
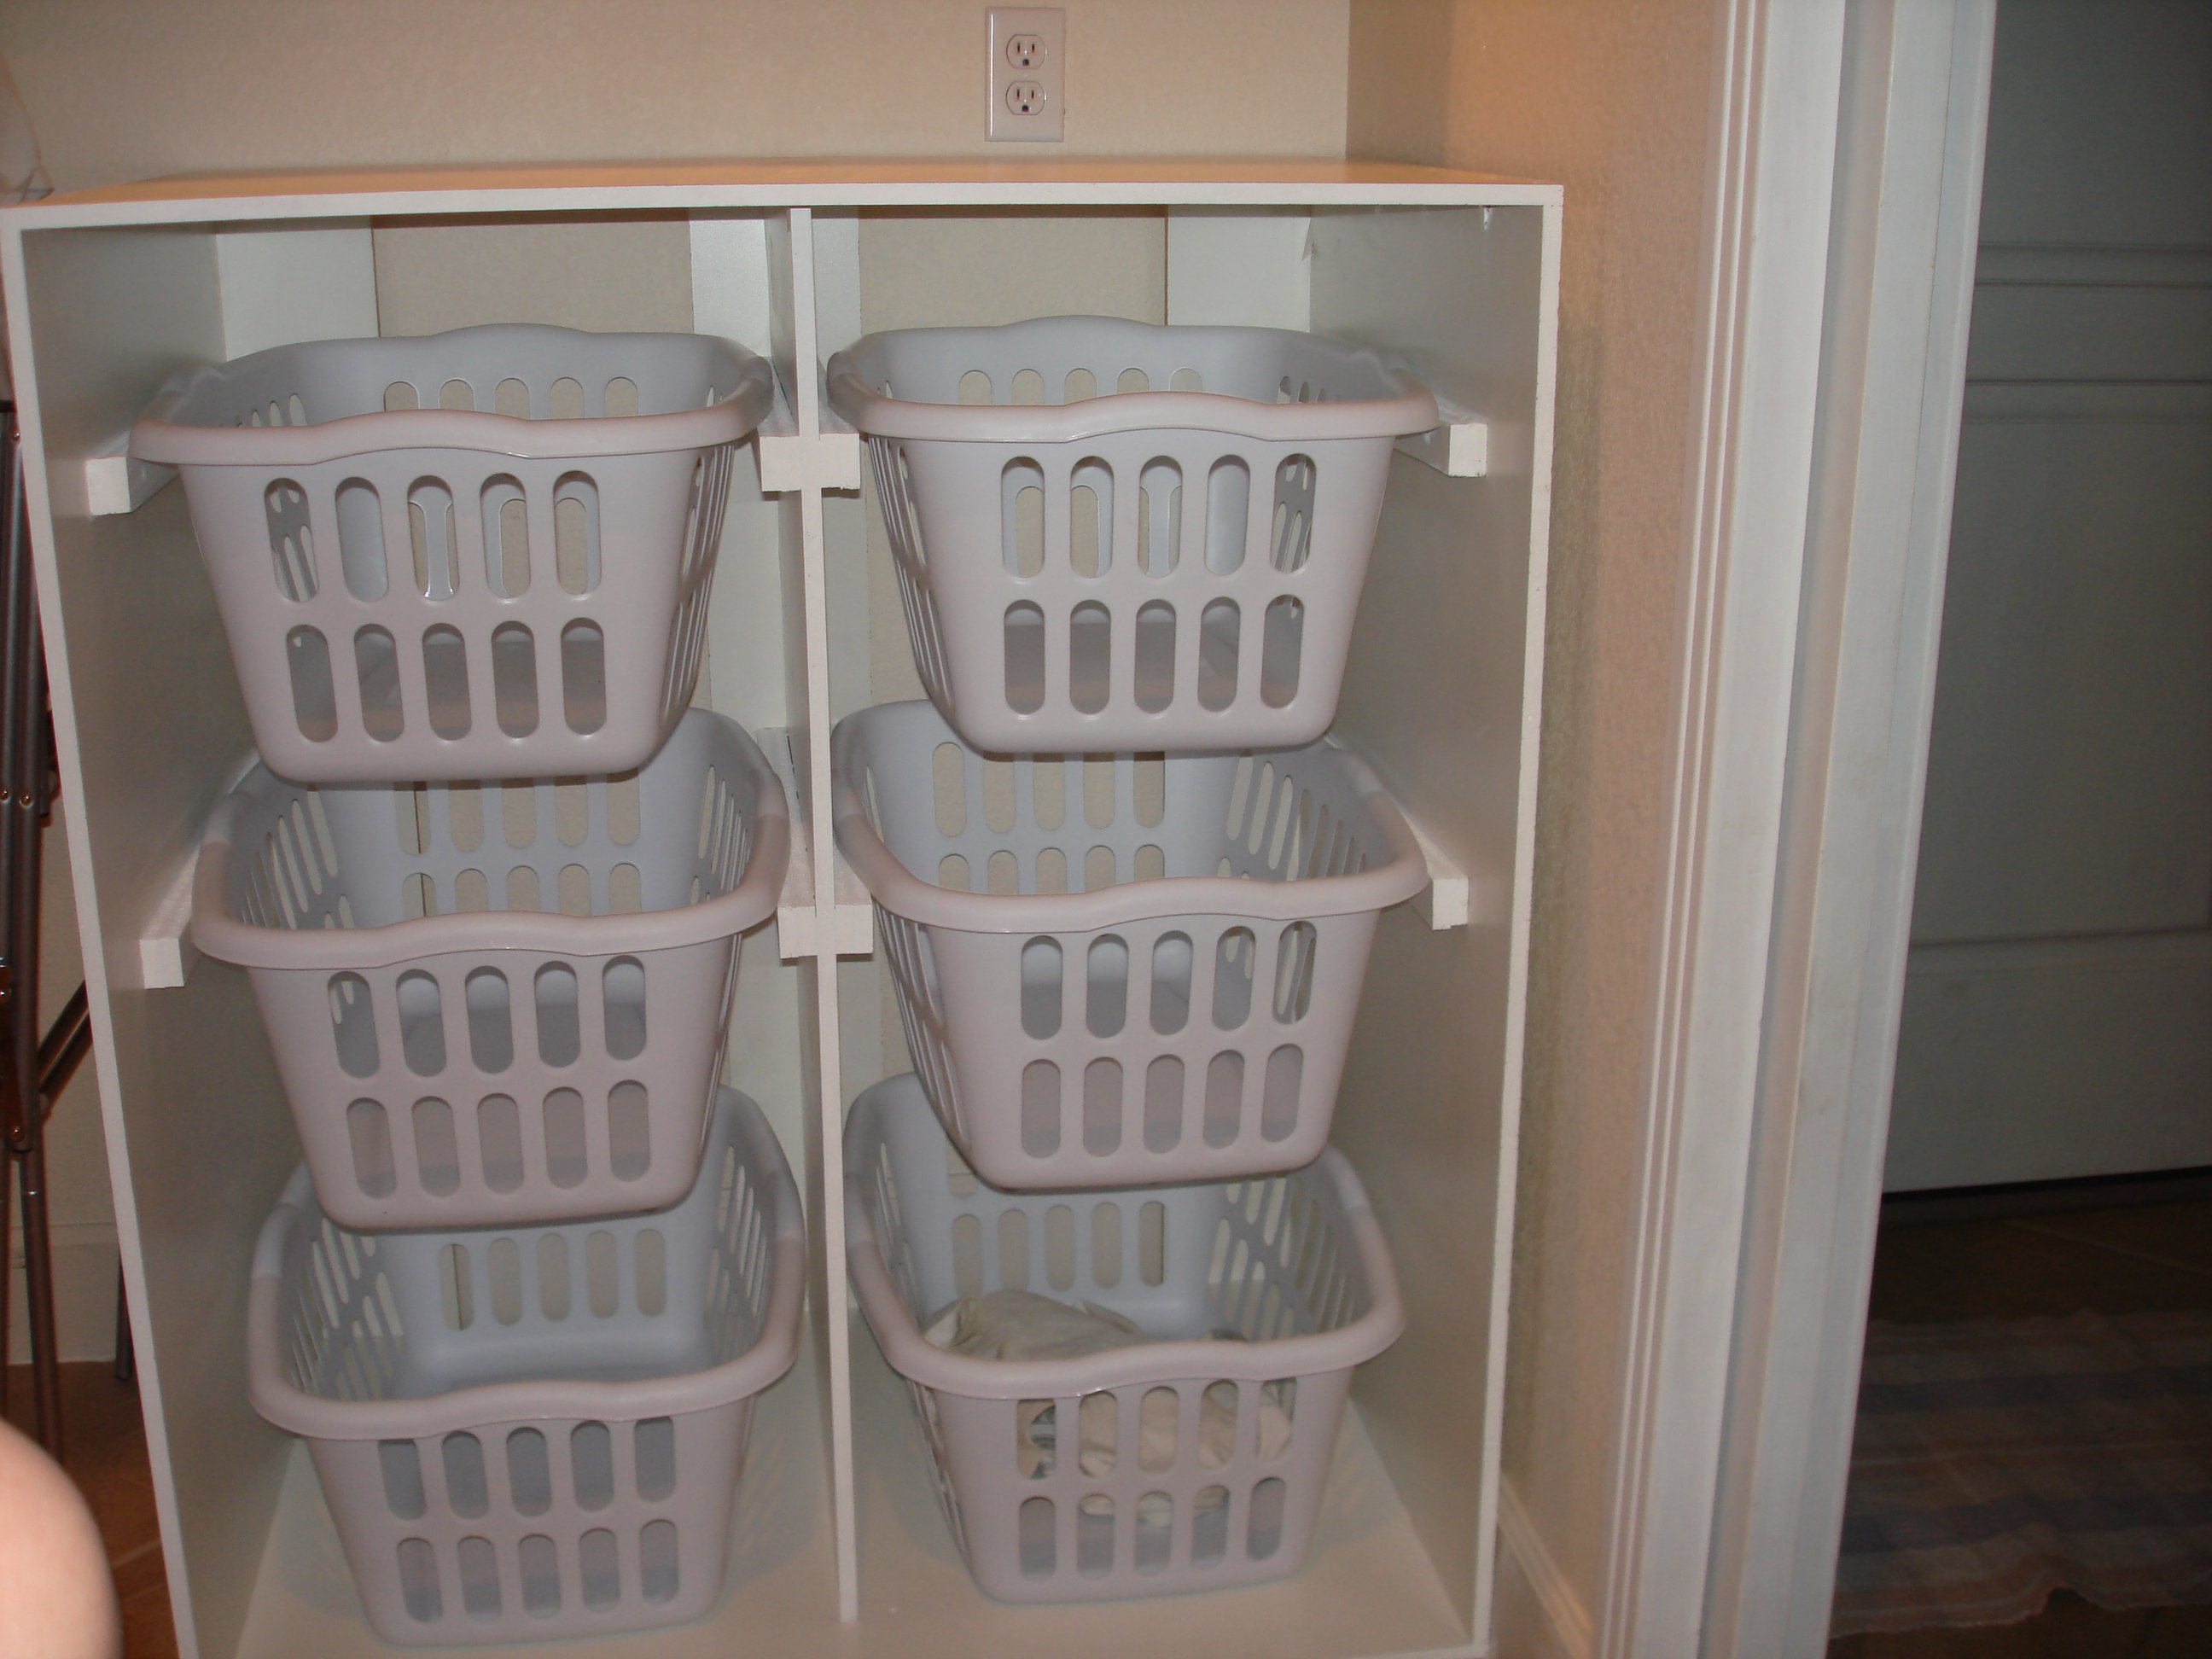
As the Superkids are getting older, I'm slowing trying to reclaim neglected areas of our home and make them a bit more stream lined and organized.
(I love organization! It is another true passion of mine.)
Anyway, while Stumbling I ventured upon the site Ana-White.com loaded with FREE easy furniture plans. Upon seeing a laundry storage option, my heart fell for a clean and crisp laundry basket sorter.
Previously, in my laundry area was this chrome rolling cart which housed my mismatched laundry baskets and other miscellaneous items. It was sturdy and served it purpose.
Now, I have all beautiful white baskets all lined up ready to sort all my laundry. Thank you to Superman who surprised me on Father's Day by cutting all the pieces for me so we could get it all screwed together. I love it!
- Purchased 6 laundry baskets at Wal-Mart @ $2.75 each.
- Scrap Melamine in white left over from another project.
- Left over drywall screws.
- Some light weight Spackle.
- 1 small bottle of craft paint from Hobby Lobby on sale after the holidays for 19 cents.
Wed, 08/24/2011 - 11:07
I love this one in the other direction. I also love that the baskets are set back a bit in the cubby so that a spring rod with a curtain can be placed across the front to hide the whole thing from company.
Will you post your measurements on here so I can duplicate it?
thanks!
Mon, 06/25/2012 - 22:07
I have a rolling cart with 4 bags that my family can just drop their Clothes in. I've been admiring these baskets dressers for some time. I notice you left a little more room between each basket. How is that working for getting dirty clothes sorted for you? How much extra space did you put between them compared to Ana's original plan?
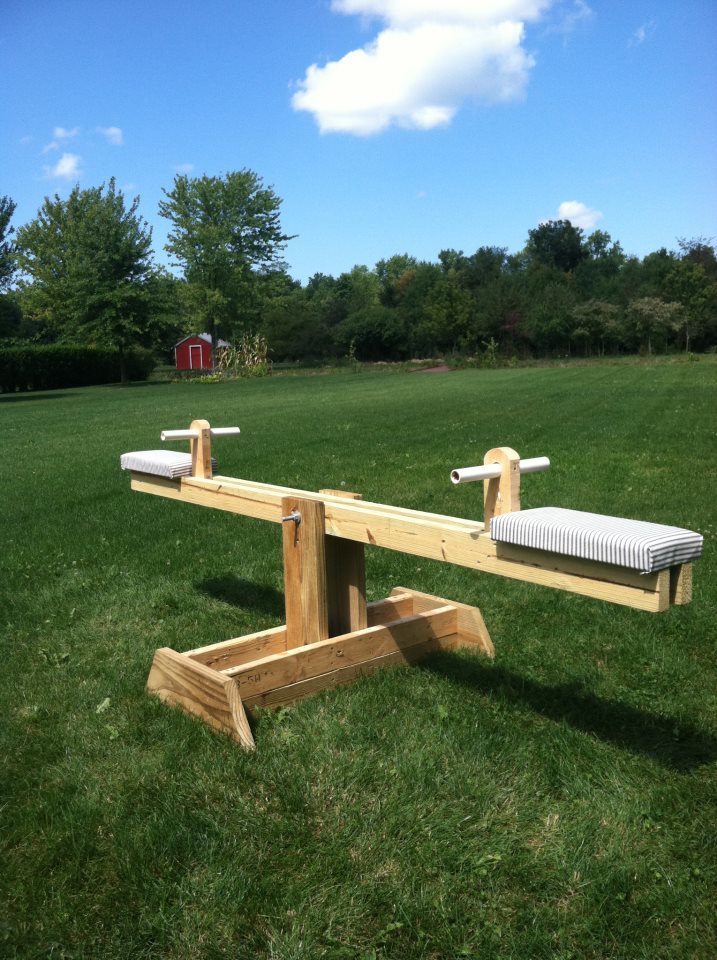
This is one of the cheapest projects for my kids I have ever completed!! And the most rewarding. I think everyone of my neighbors has been on the teeter totter...including adults :) My kids just love it and I am thinking of making a few for my nephews for Christmas. I was able to find all the wood I needed in my scrap pile. I had the PVC pipe and bolt already also so all I had to make a trip to the store for was the foam for the seats. My son helped me build this in an hour. I liked the unfinished look so I just sprayed it with a little Thompson Water Seal. Thank you Ana White!!
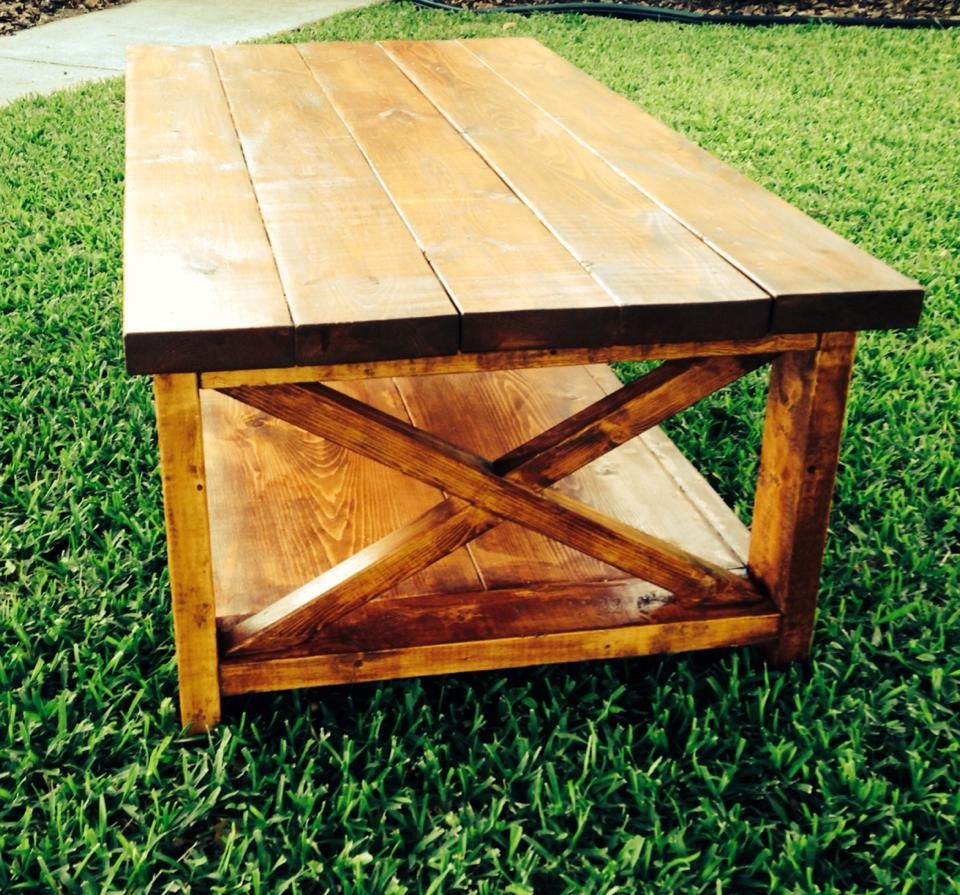
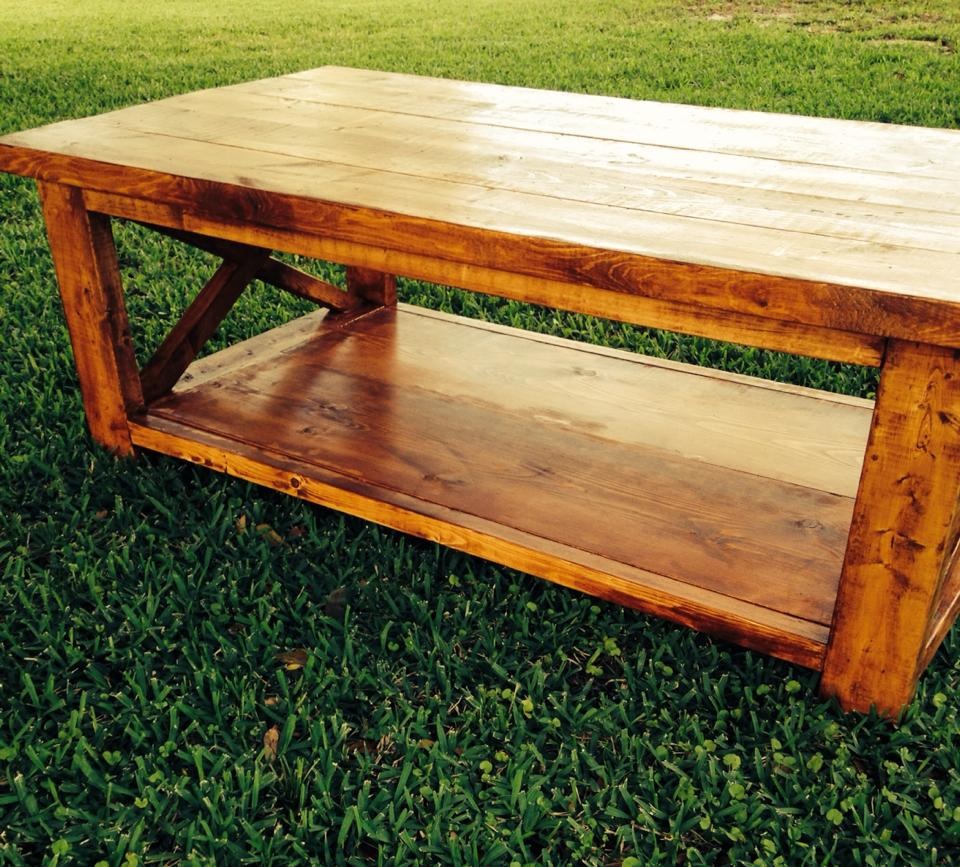
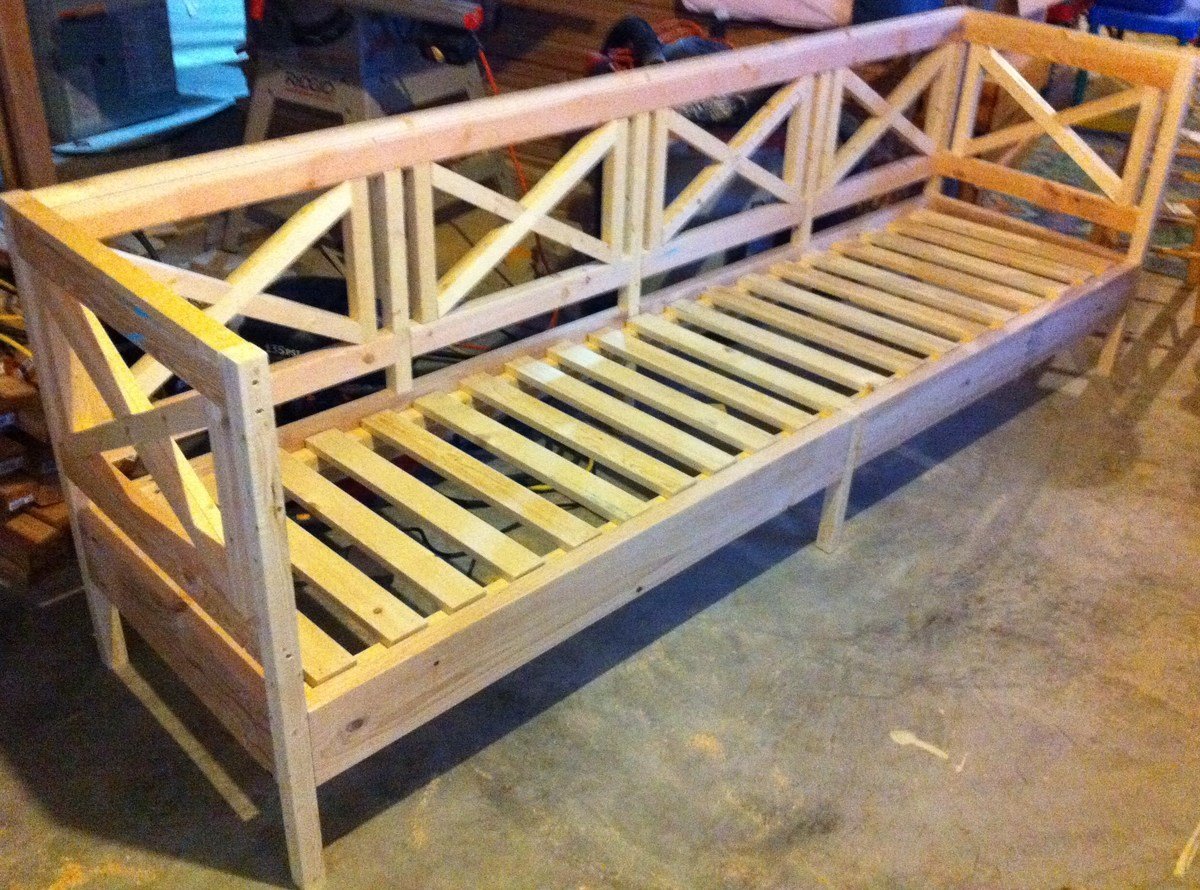
Built this for our living room. It's strong enough to withstand the daily rigors of a 4 and 5 year old. I built this last year, and have done several more since then.
Sun, 08/23/2015 - 13:02
These X's were the bane of my building existence during this project, but wood filler covers a multitude of mistakes.
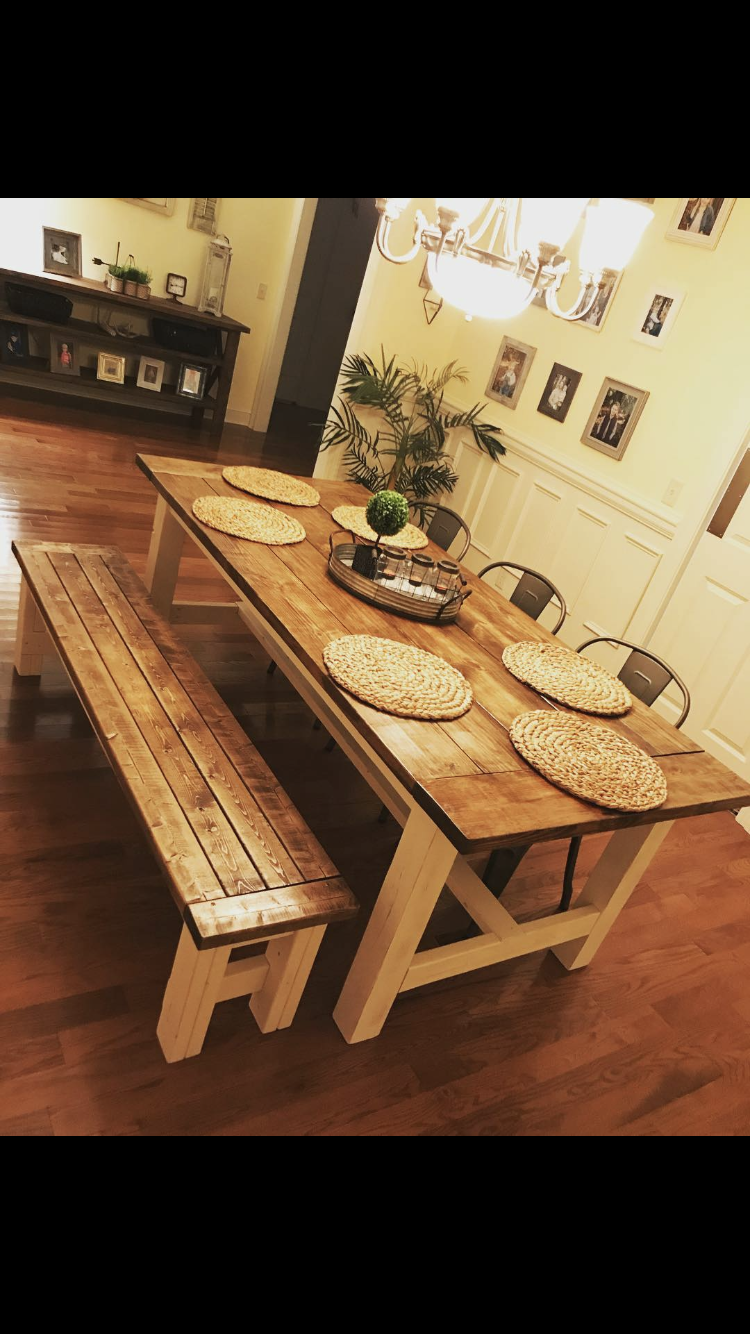
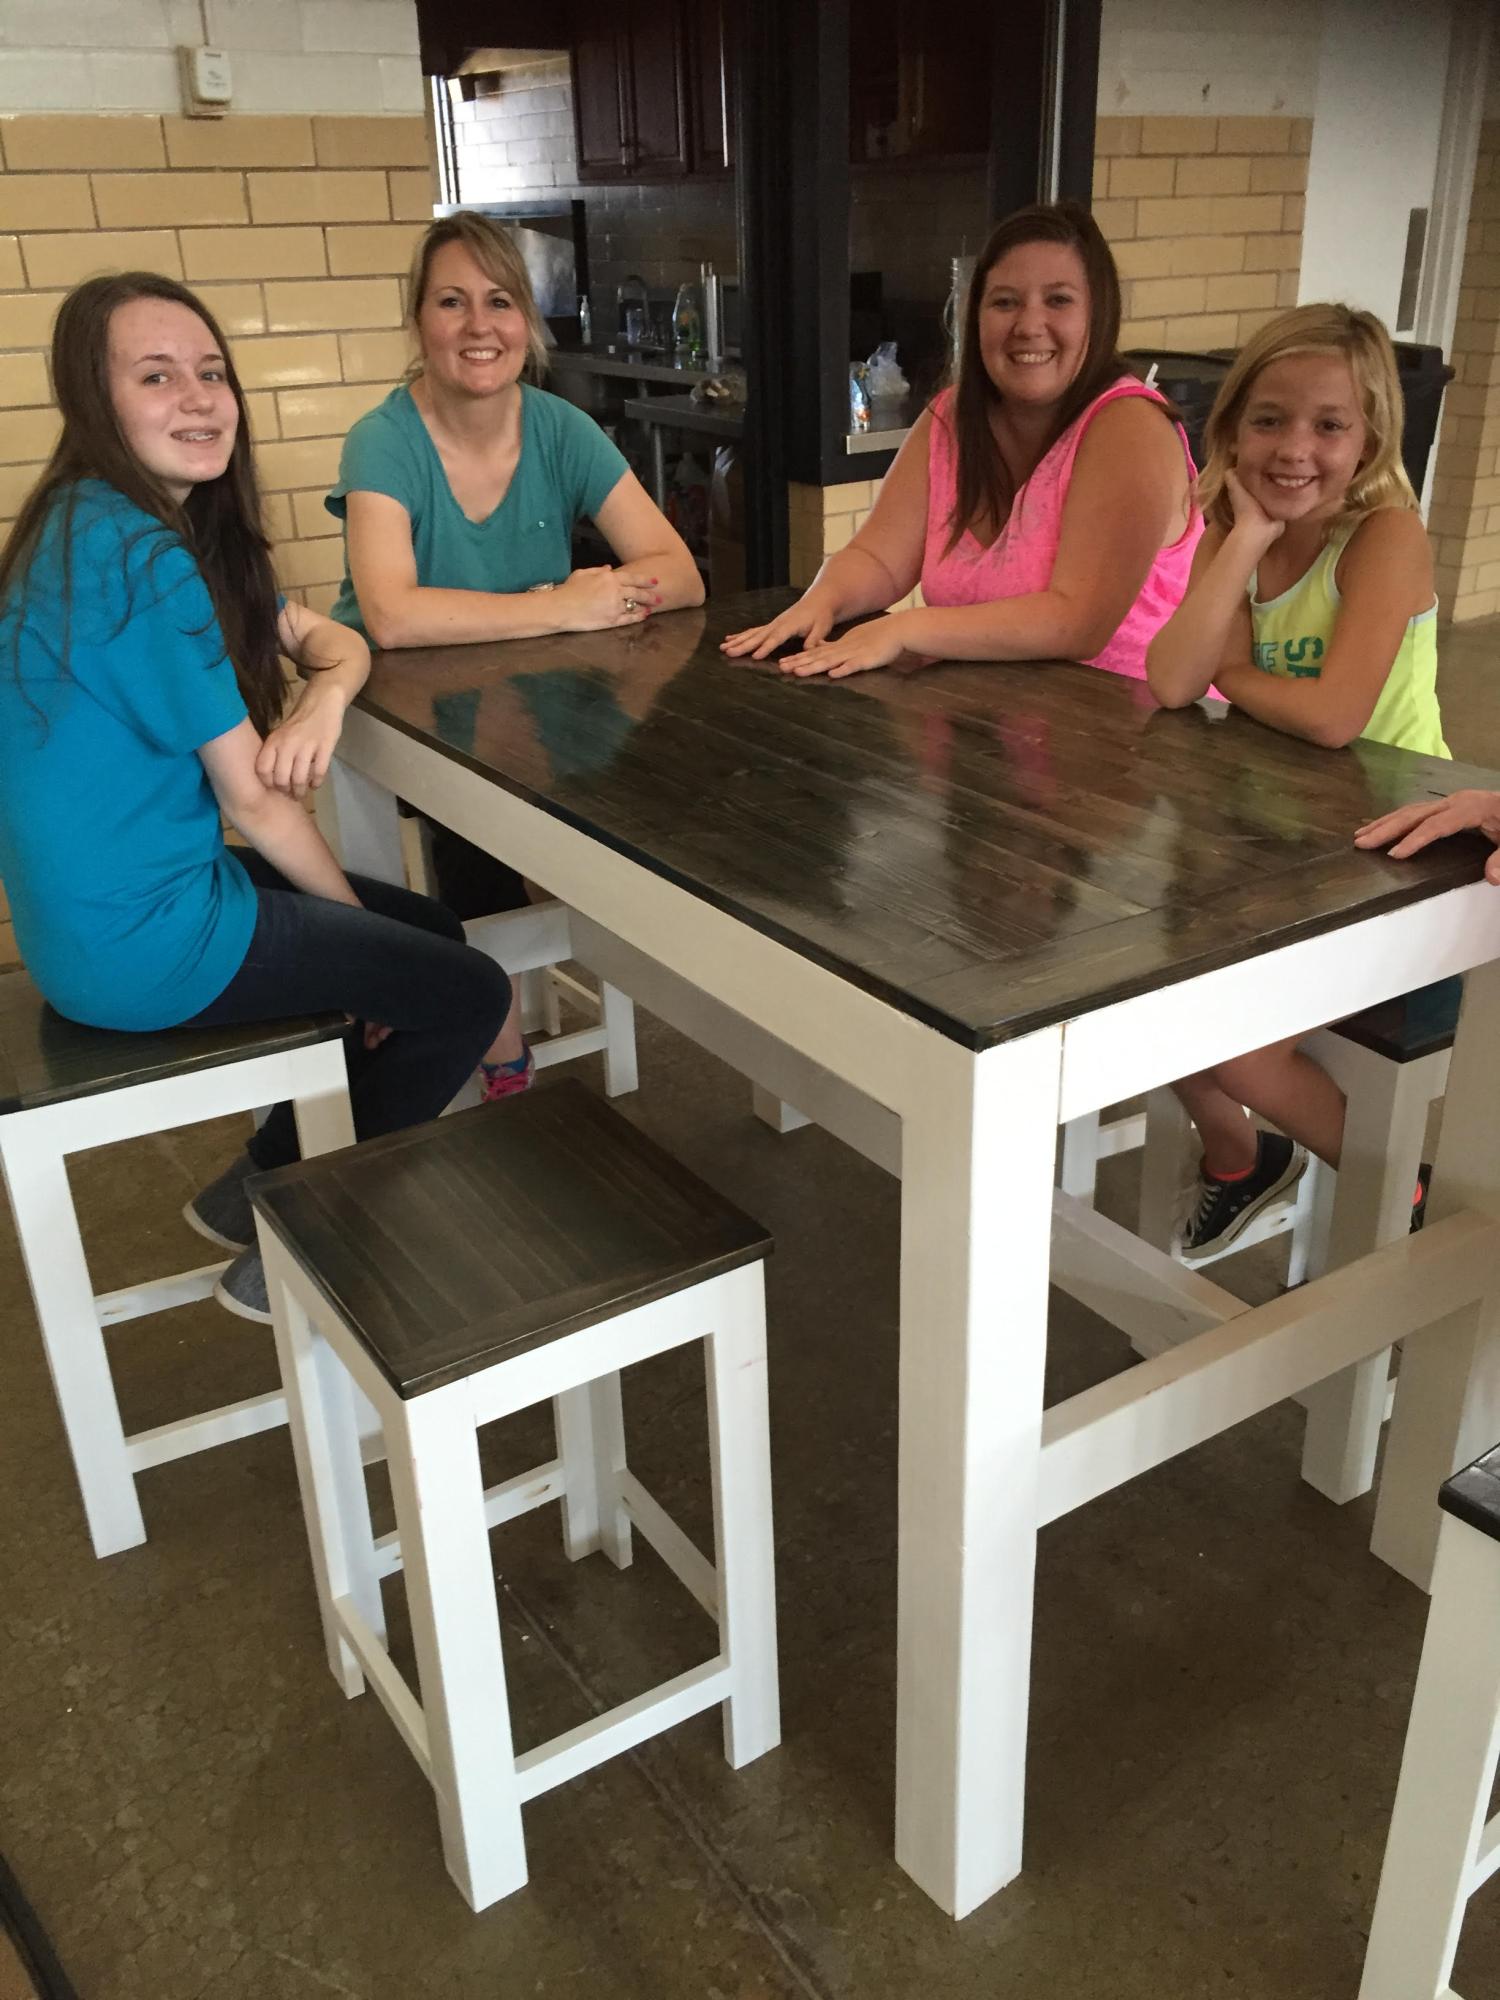
I built the table and bench with the plans on this site and it turned out great. My finace stained the top with a miniwax stain and spray painted the bases white and distressed them. Also applied polyurethane to the stained tops. Probably have $100 invested in this project.
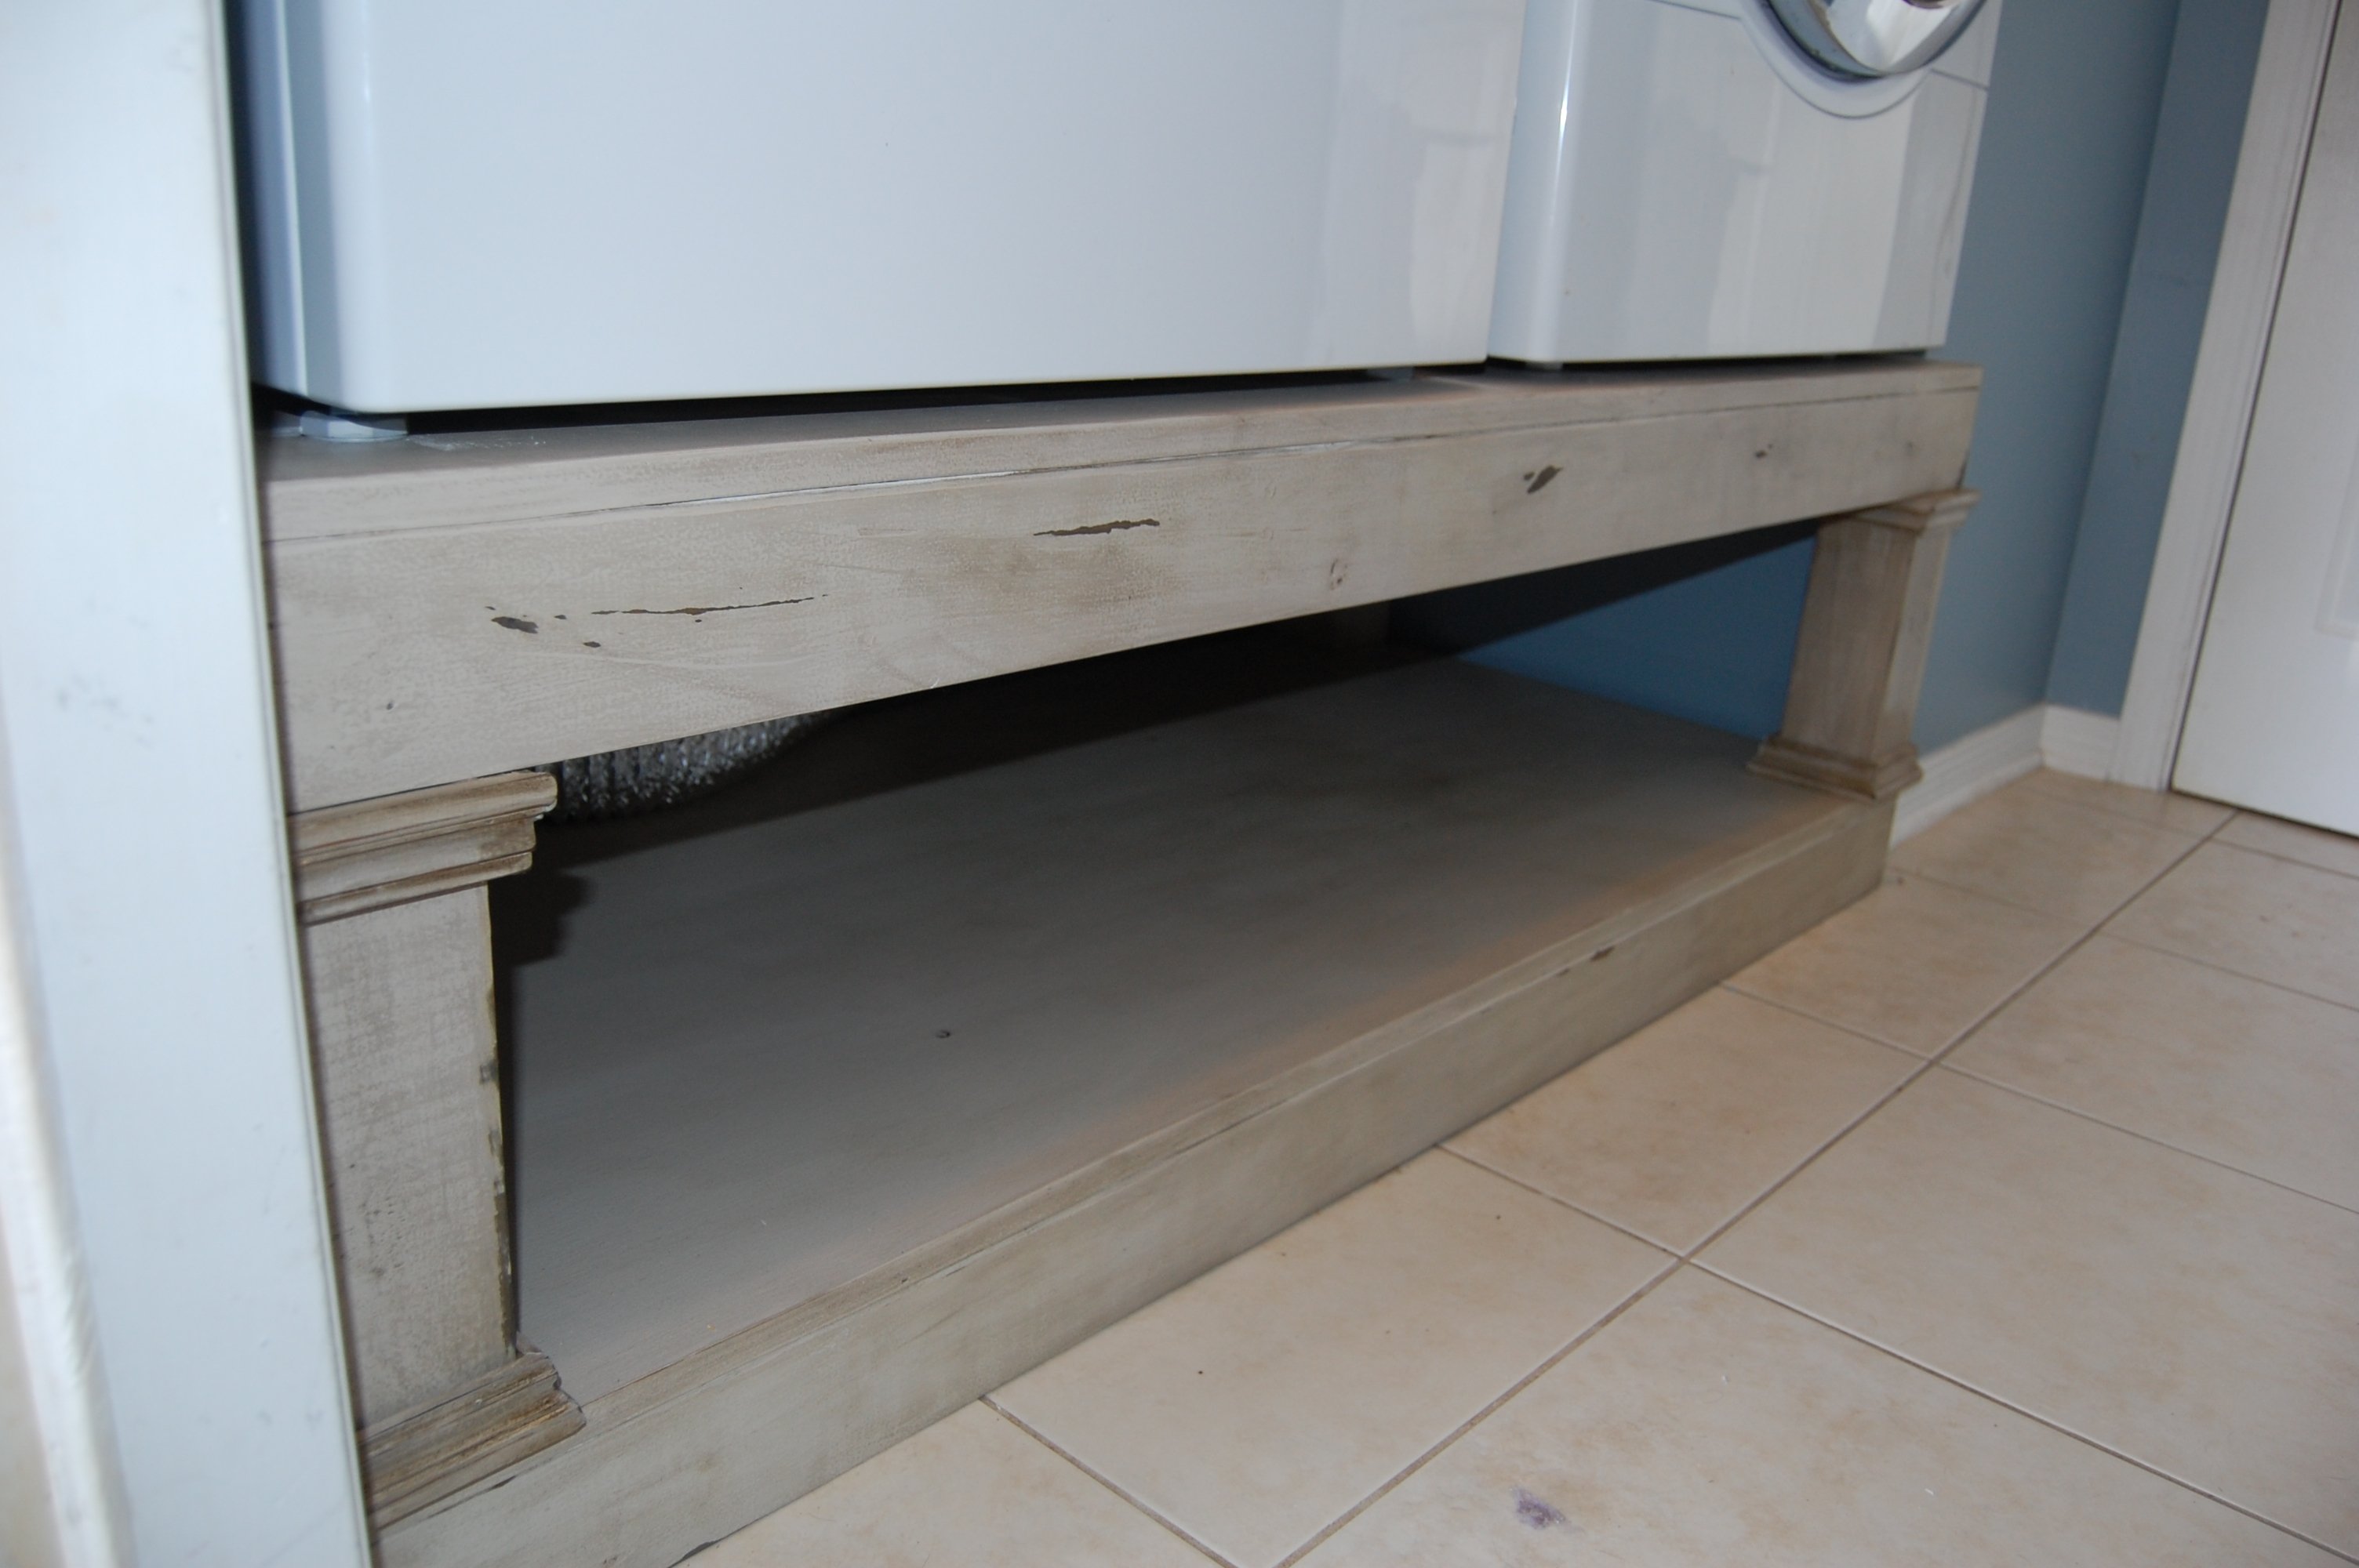
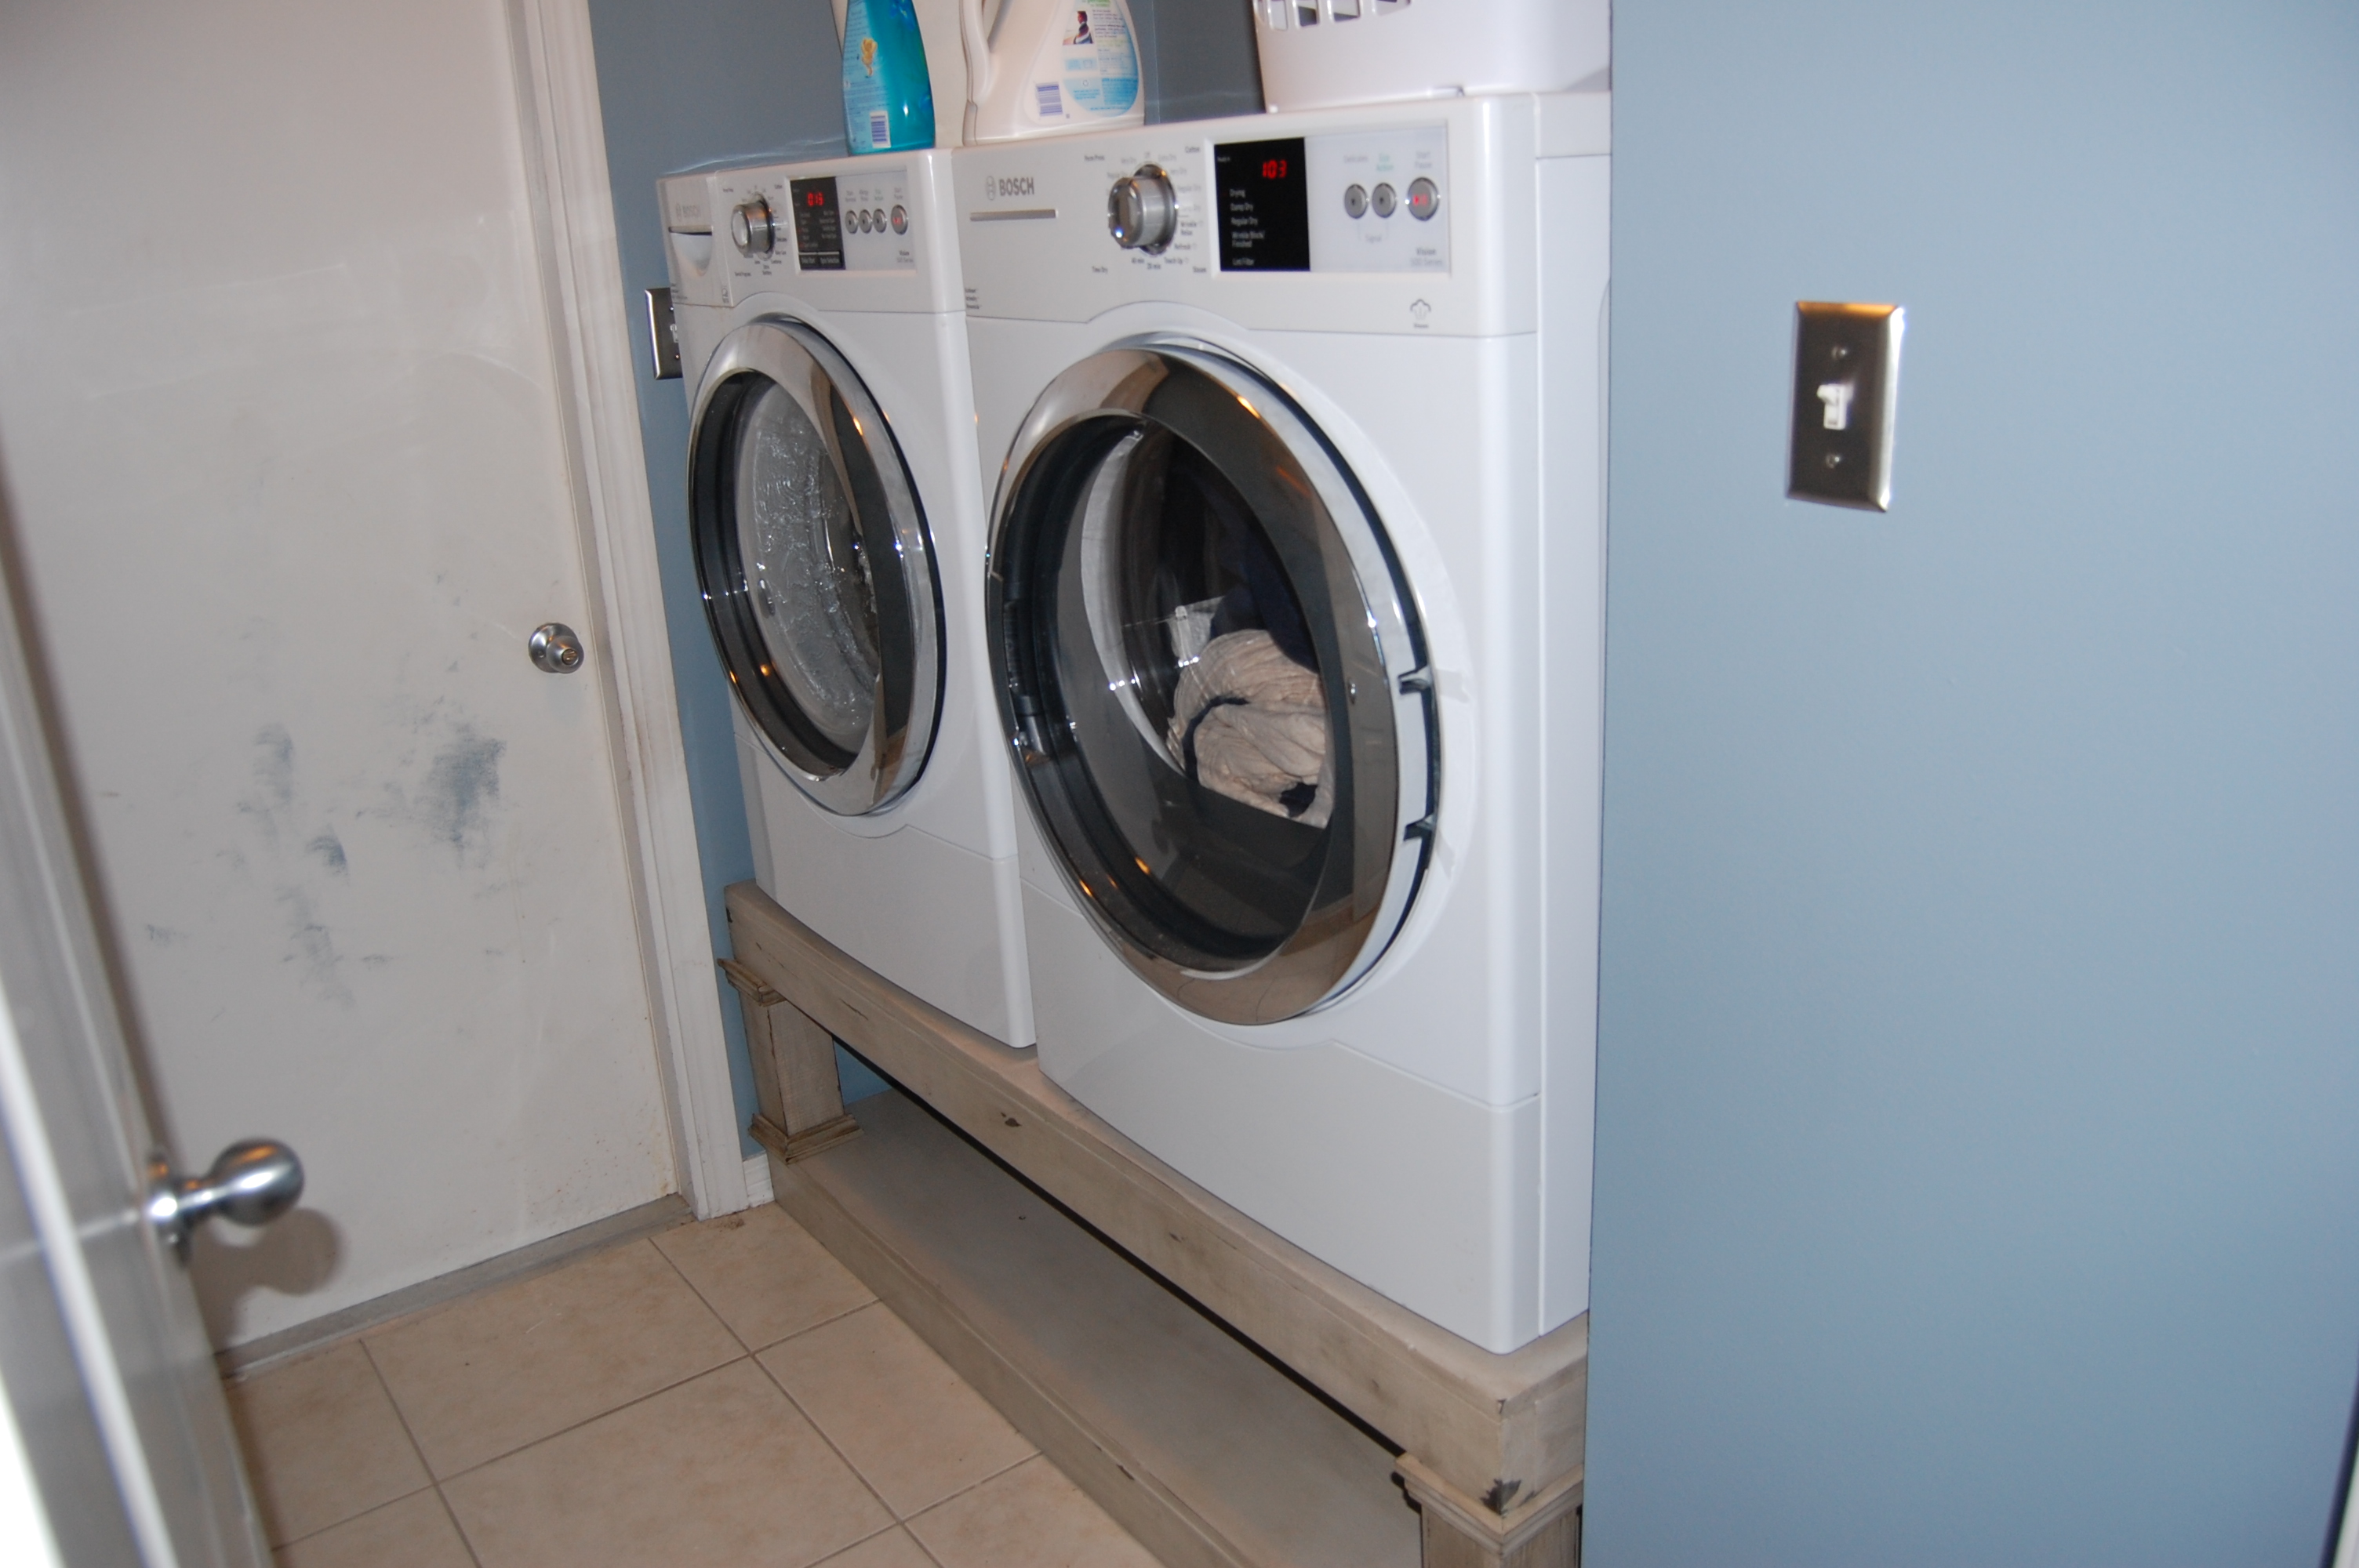
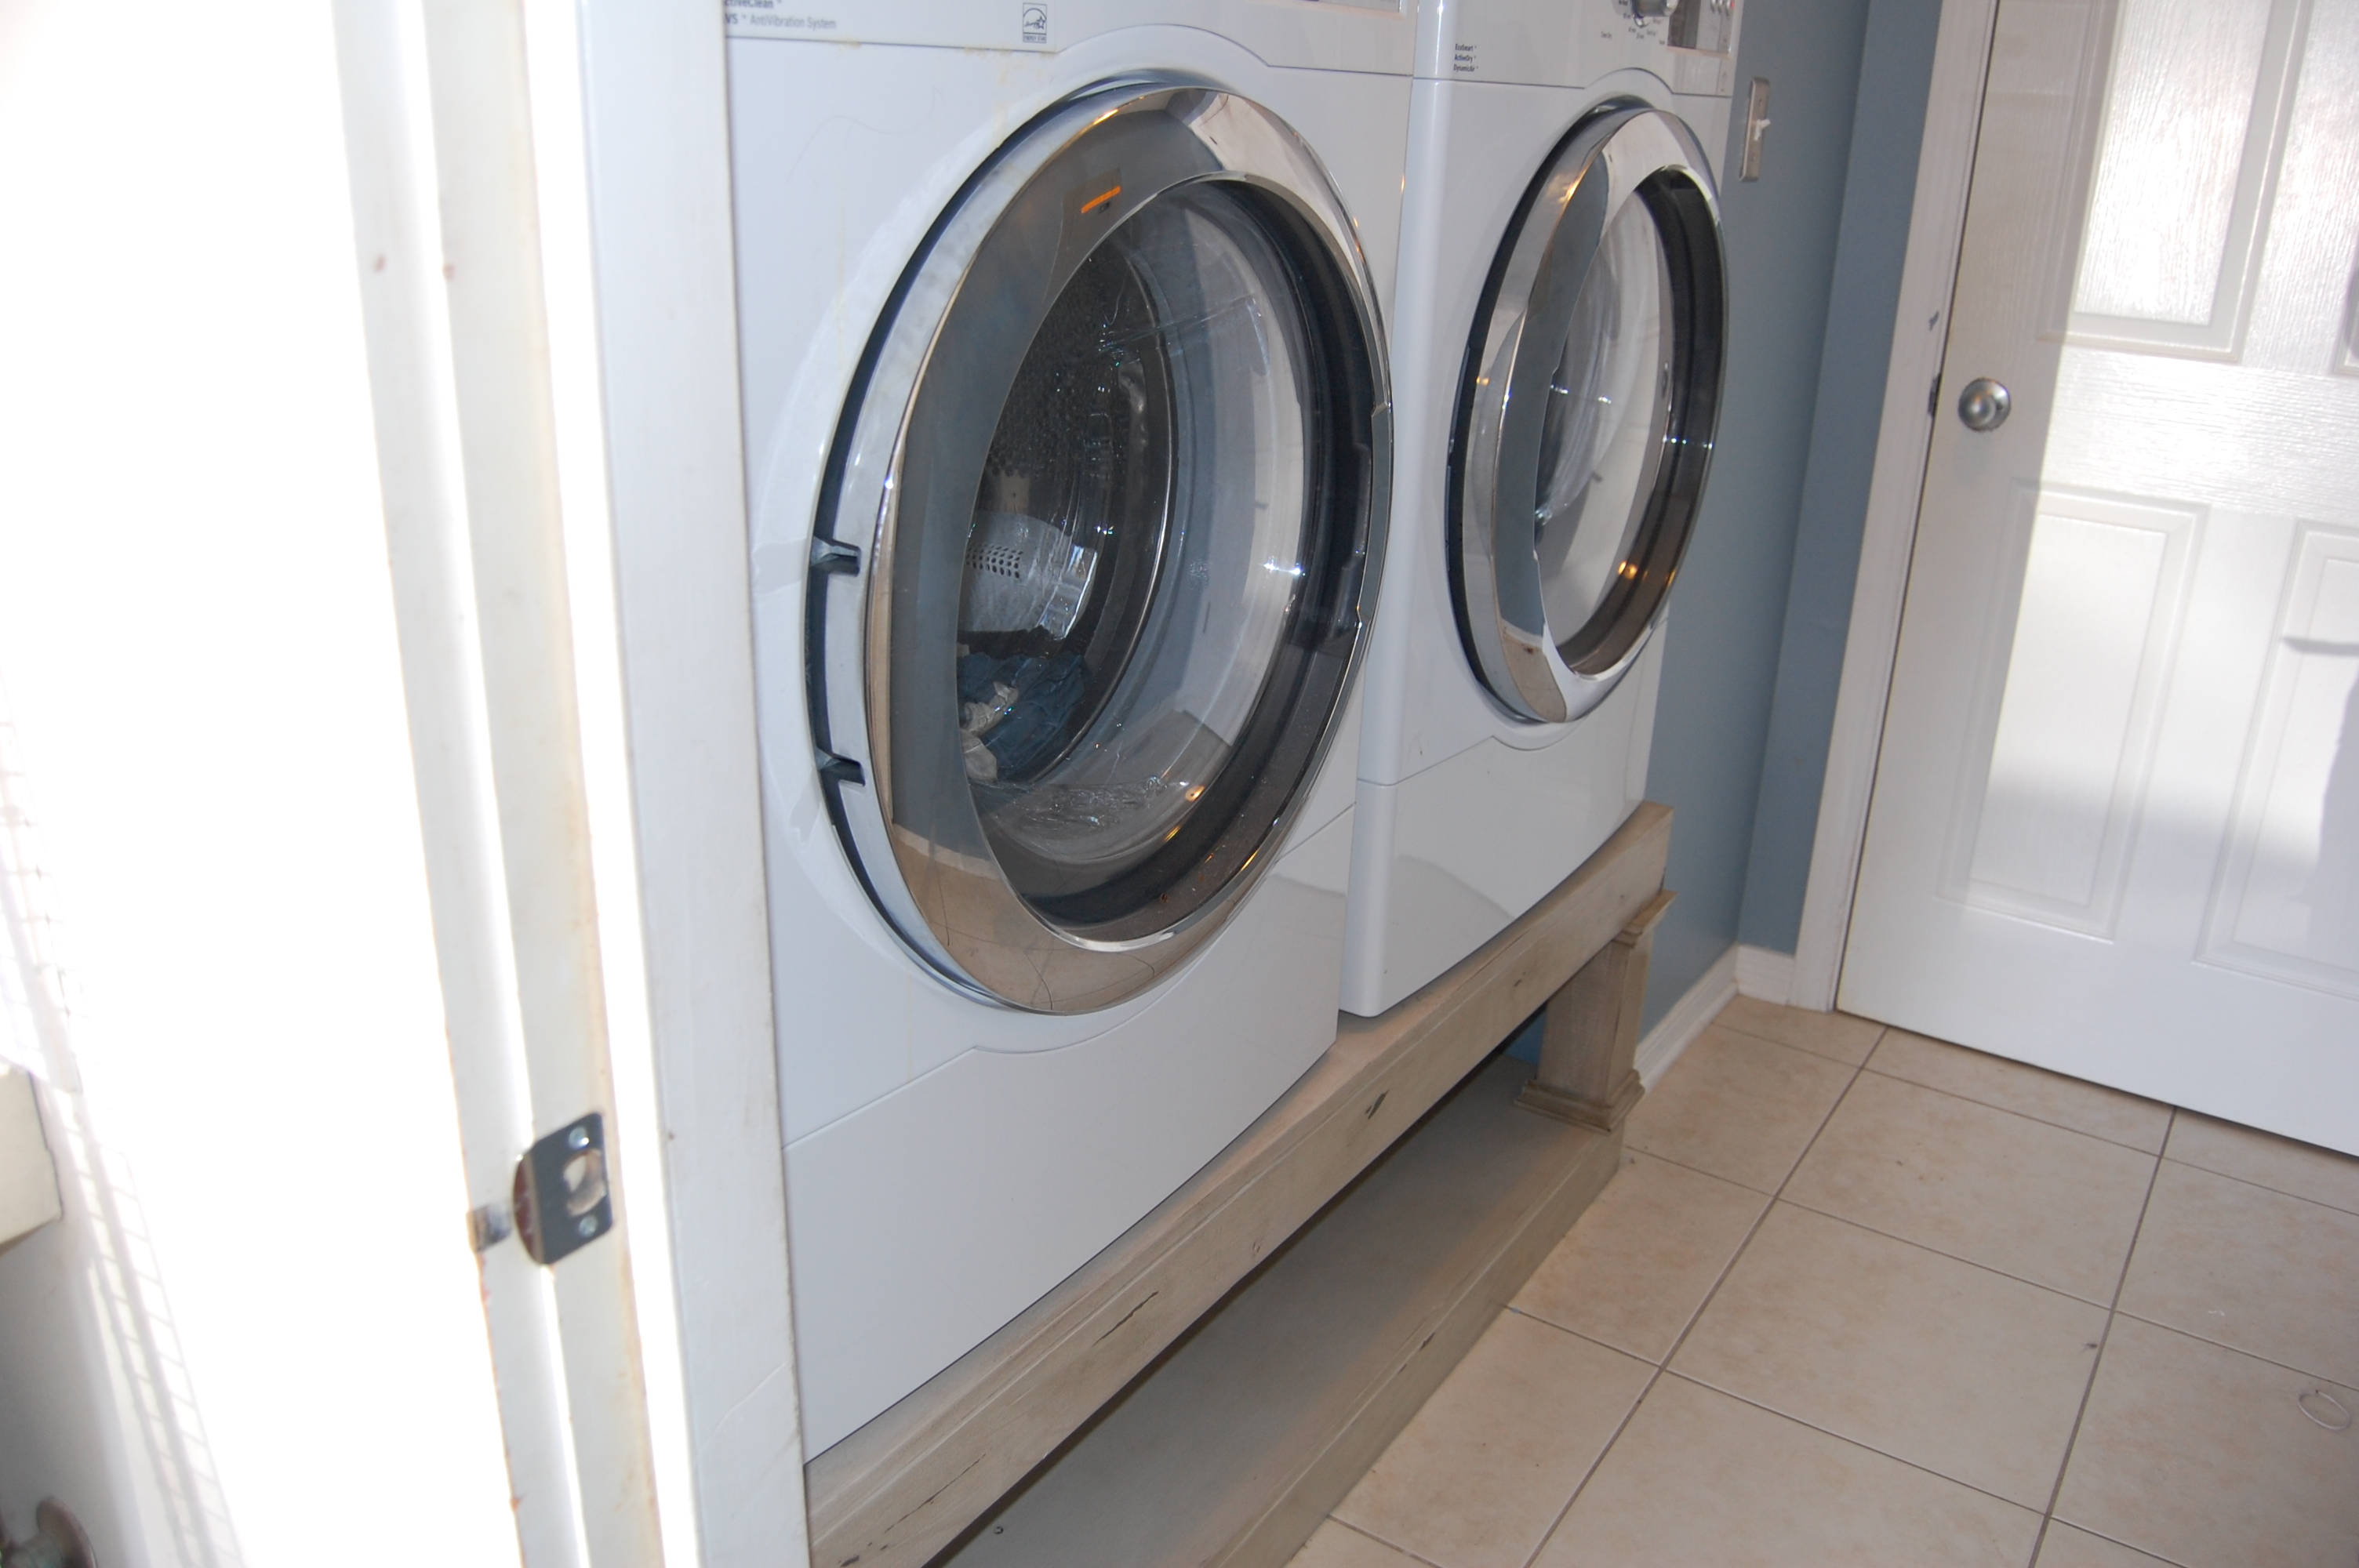
I feel in love with these plans as soon as I saw them, but didn't have front loading washer at the time. So...I talked hubby into buying me a new house, which meant I had to have new washer and dryer, now I have my pedestal..and I LOVE it. It was soo easy to build. The hard part was getting heavy washer on it, thankfully hubby and teenage son are strong!
Thu, 07/14/2011 - 10:32
Good job. And I love how you finally got your pedestal! My daughter fell in love with this, too. It's on my build list for my next visit!
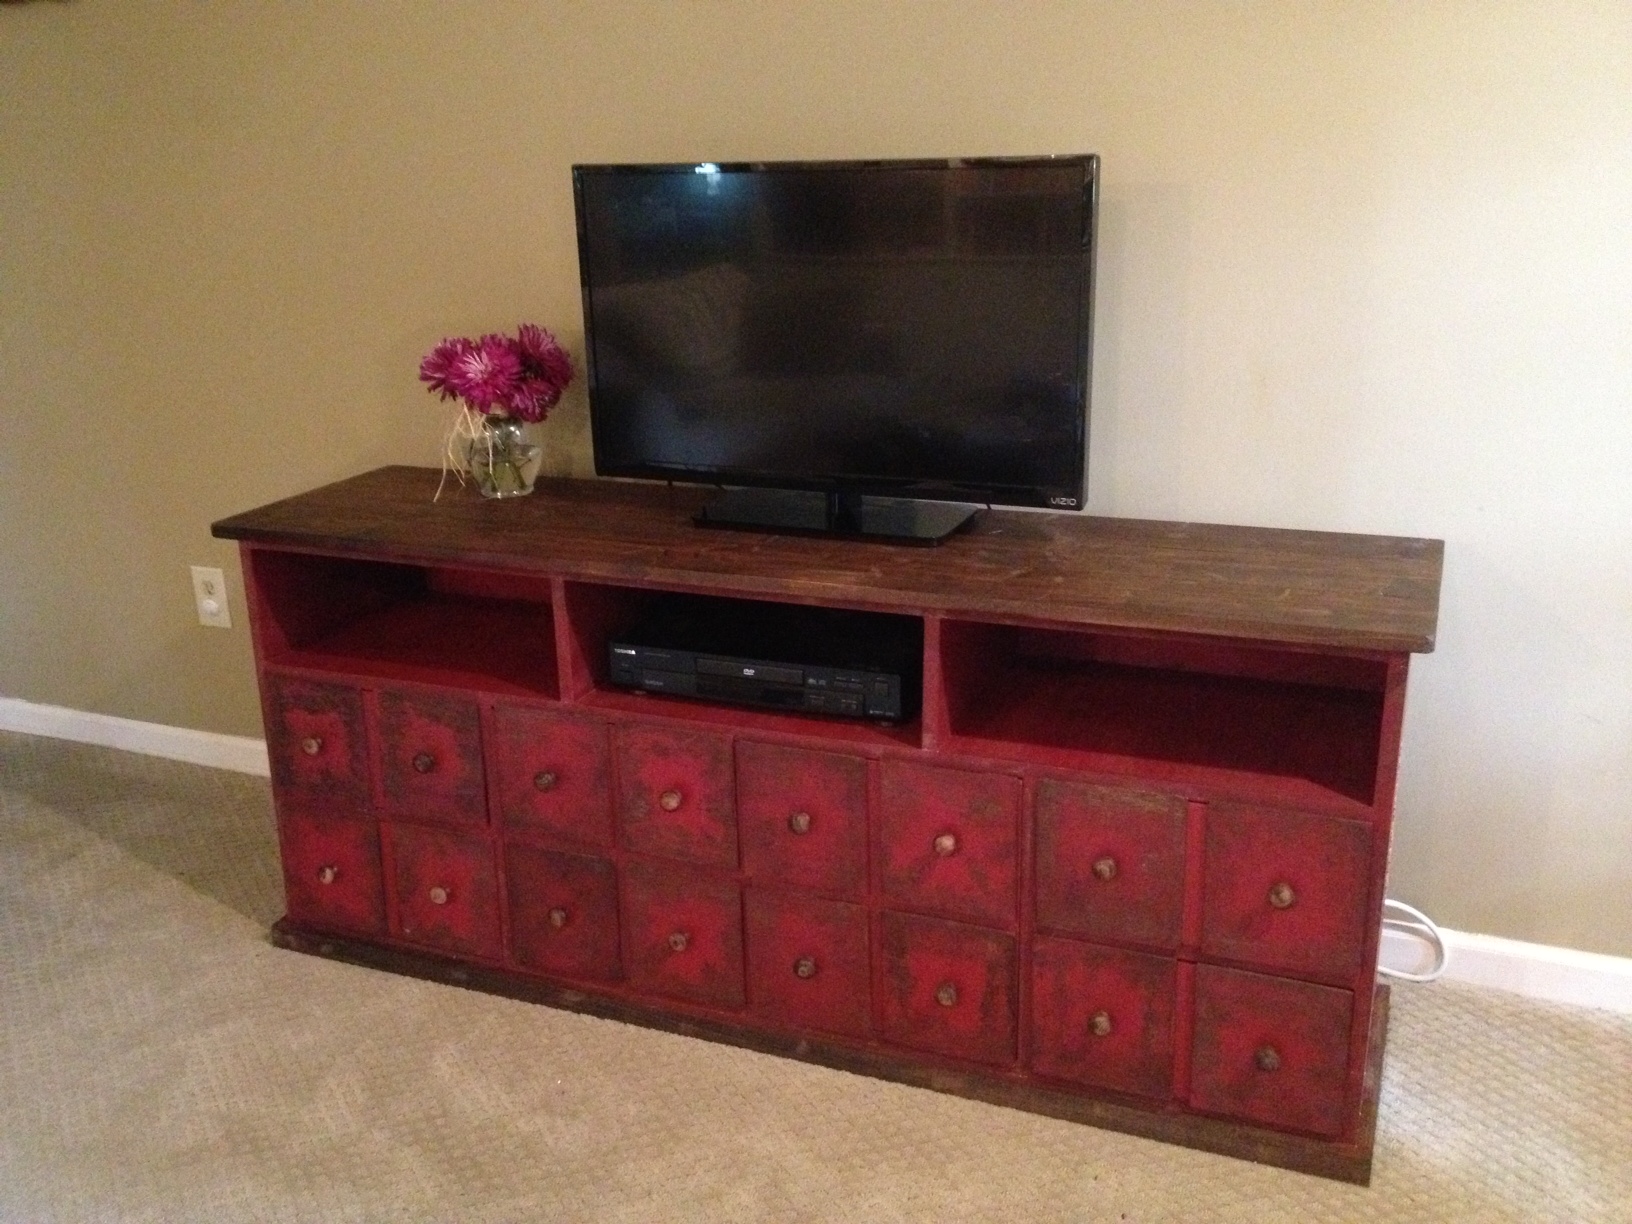
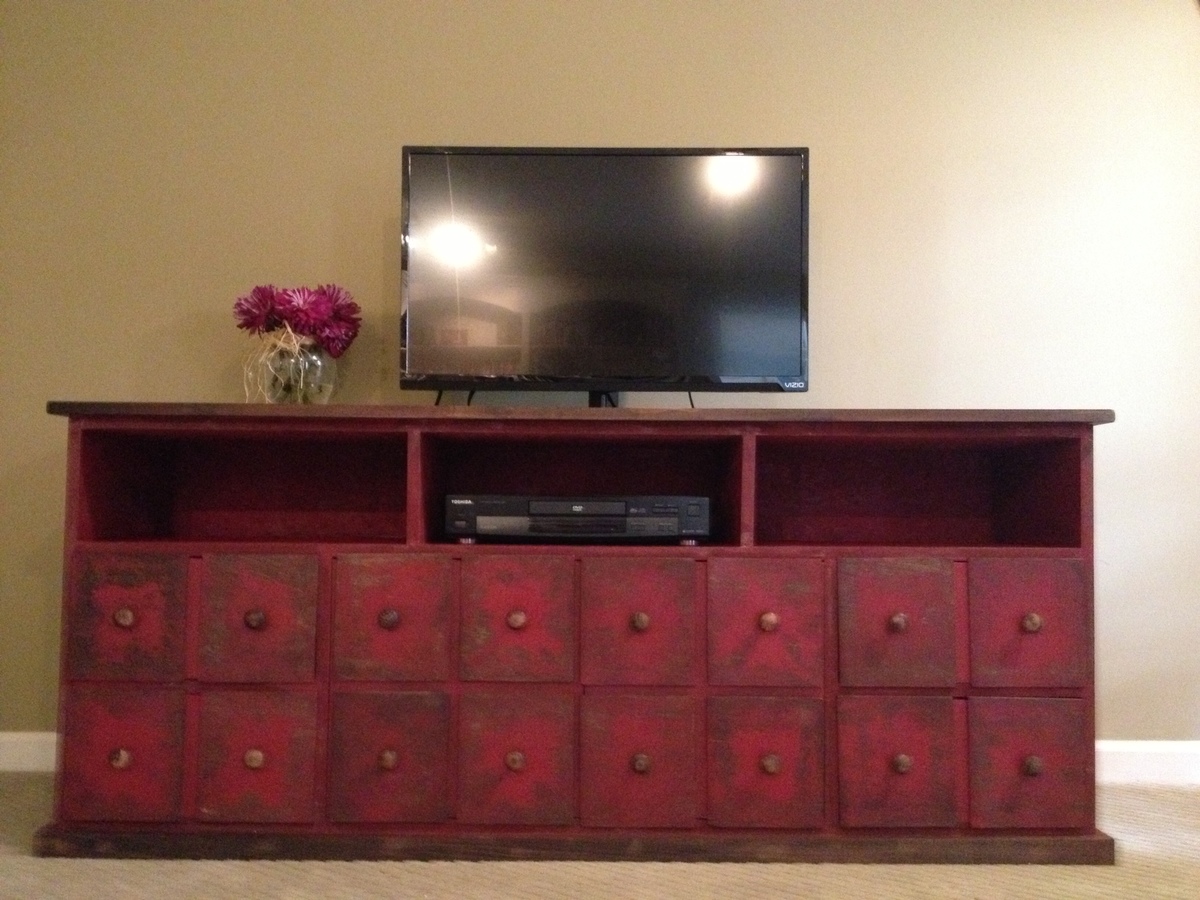
Apothecary Media Console Table. No modifications to plans.
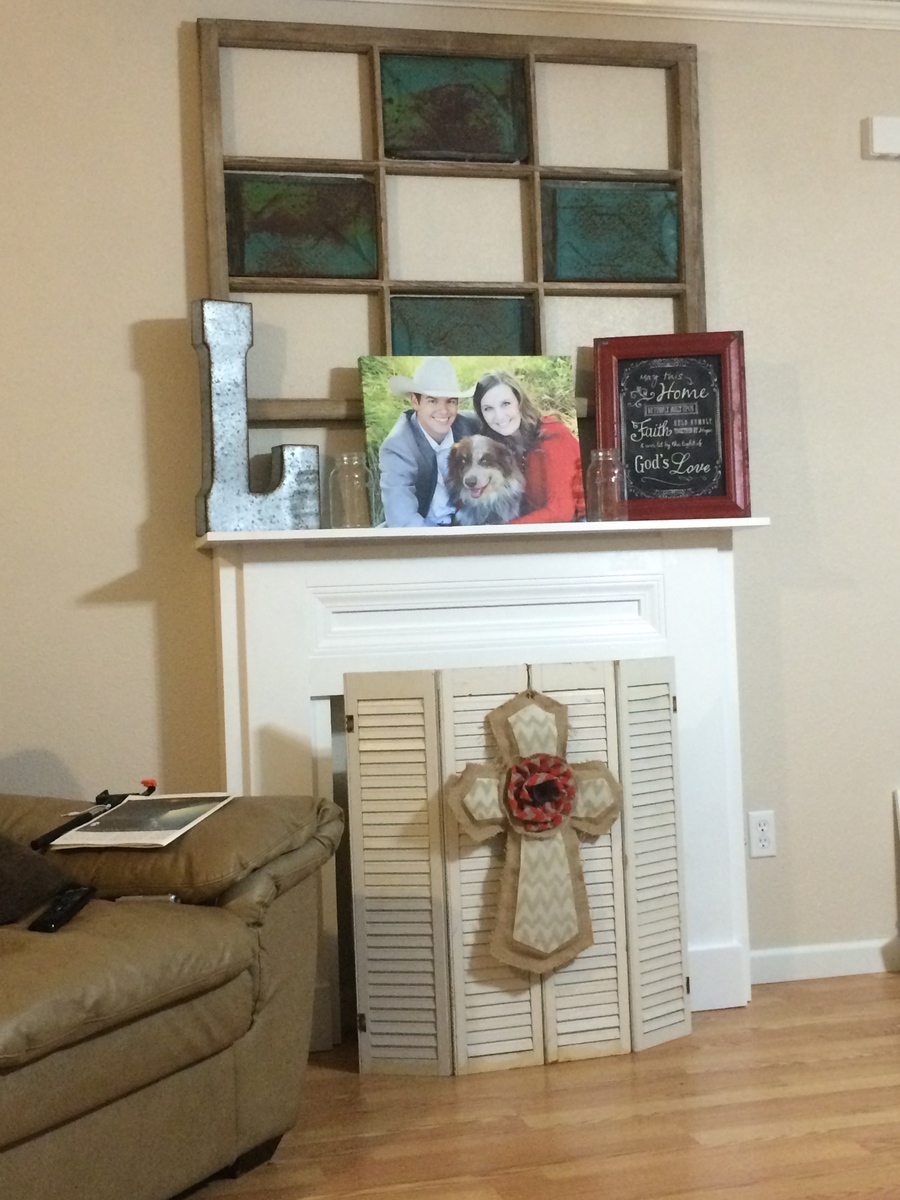
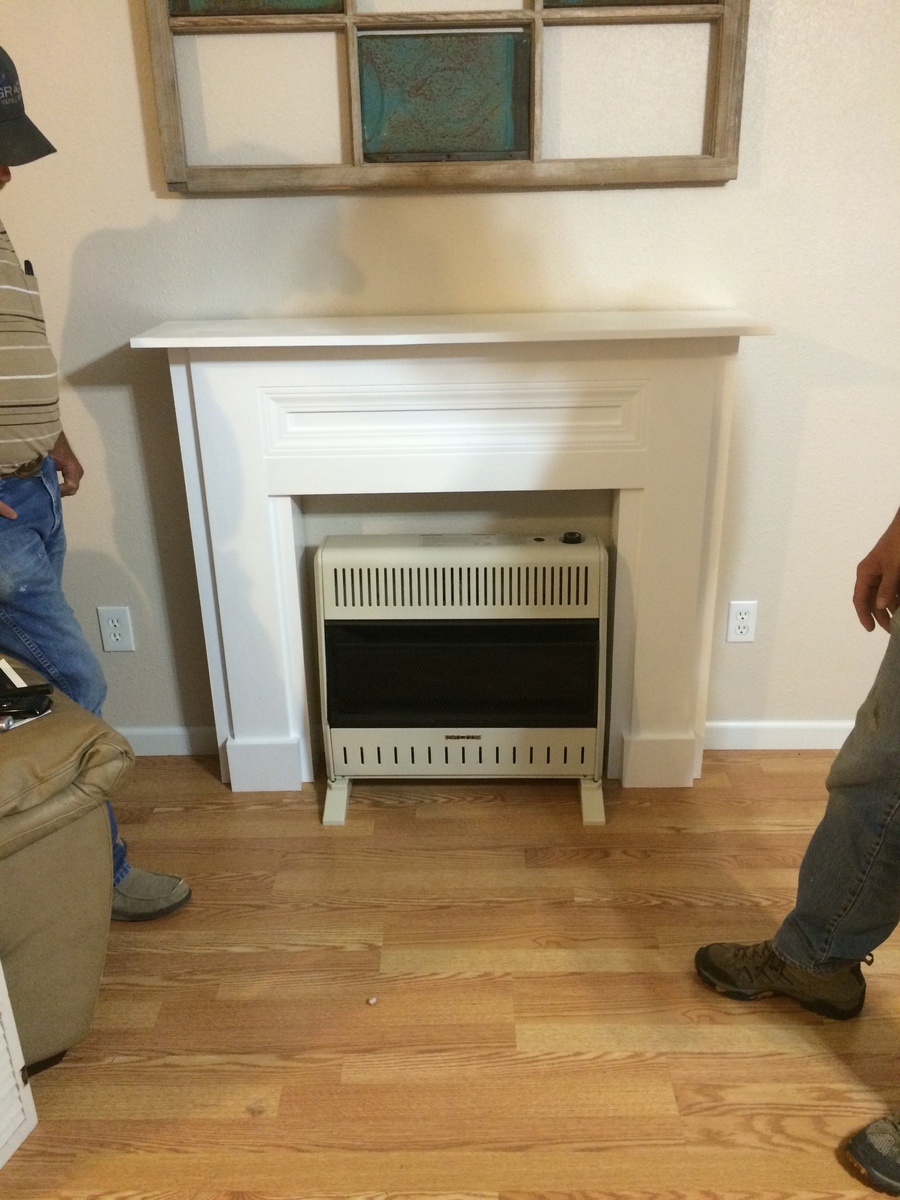
So I LOVE this mantle. I totally can't take any credit for this project. My sweet hubby built this for me for out anniversary to go around a gas heater in our living room that I just couldn't stand to look at anymore. We recently purchased our home and inherited an old, not-so-attractive, gas heater. I couldn't stand it any longer, I wanted something to go around it to decorate ;) So here is what we have! I LOVE IT!!!
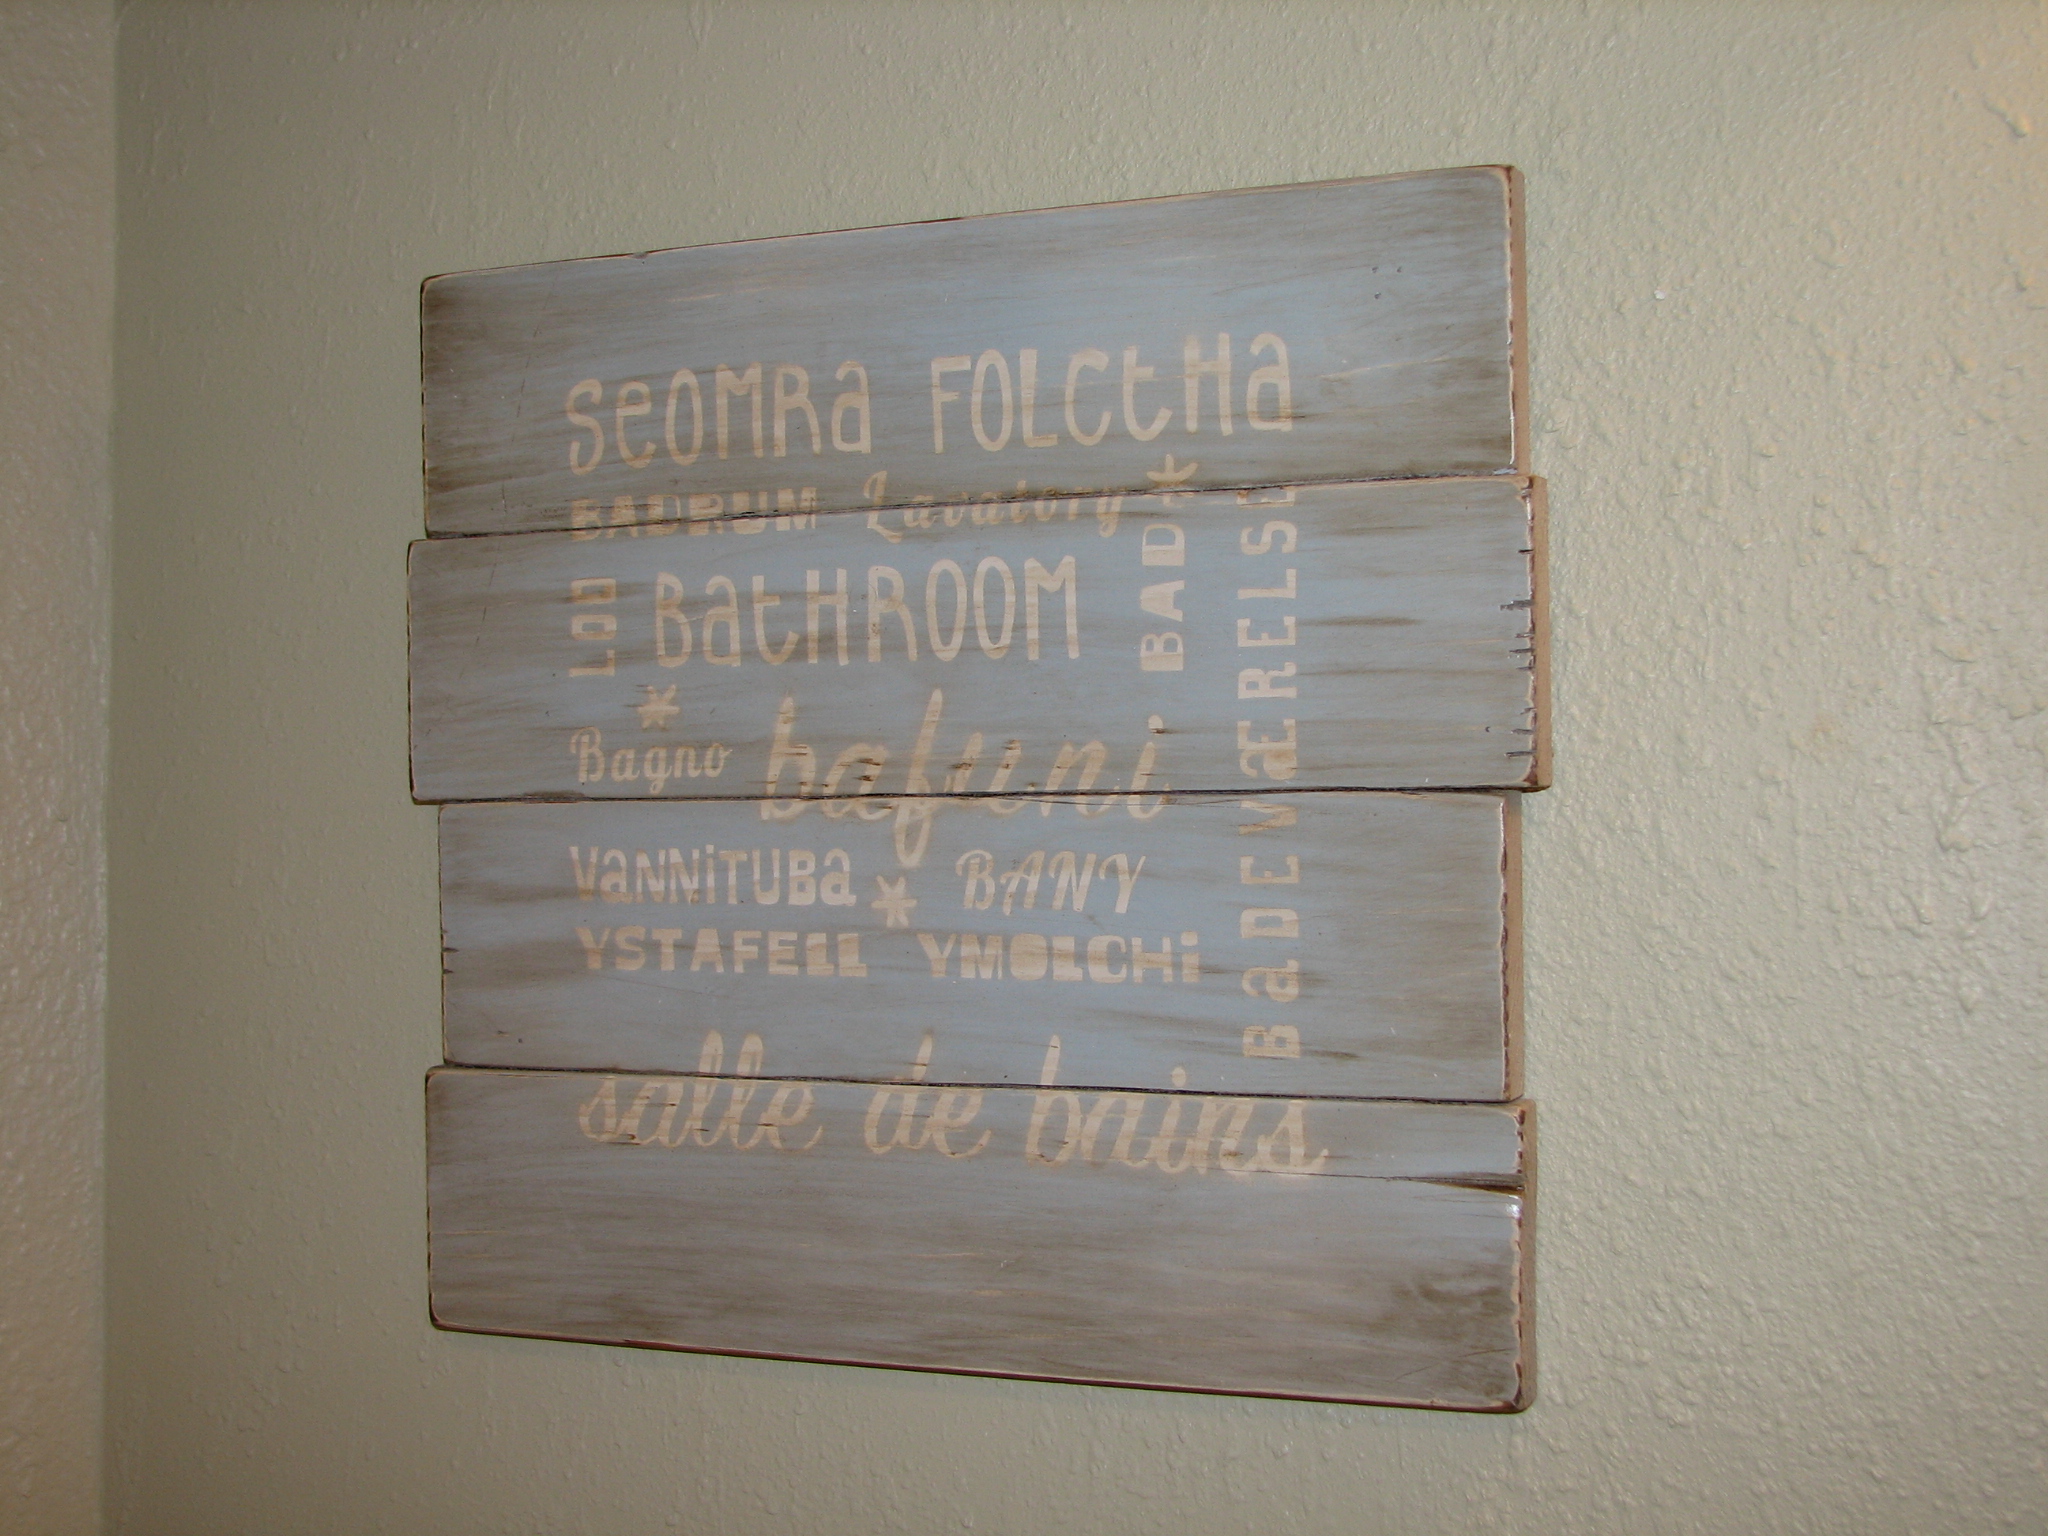
I've been wanting to create some bathroom decor....here it is!
Thu, 06/30/2011 - 17:14
I love it. How did you put the words on it? I does not look painted.
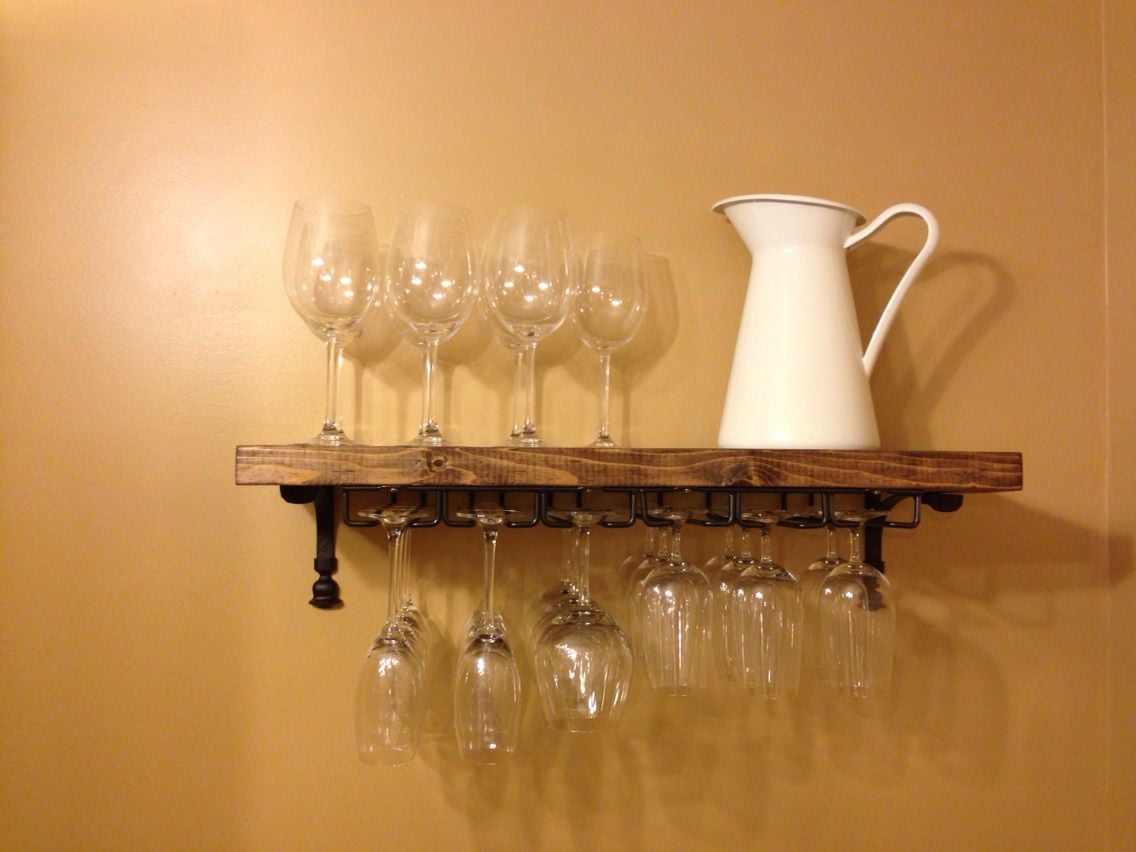
I made this after seeing the Rustic Wood Entertaining Shelves on the Pottery Barn website. I fell in LOVE with the wine glass rack, but $80 was way too much for me. I had some leftover 2x6s in the garage, so I Kreg jigged them together to make the shelf. I found some under cabinet mount wine glass racks at Bed Bath & Beyond for $10, so I bought them and spray painted them with Rustoleum oil rubbed bronze, and attached them to the bottom of my shelf. I found some shelving brackets at Home Depot and used those to hang the shelf on the wall. I could not be more proud of my wine glass rack/shelf!
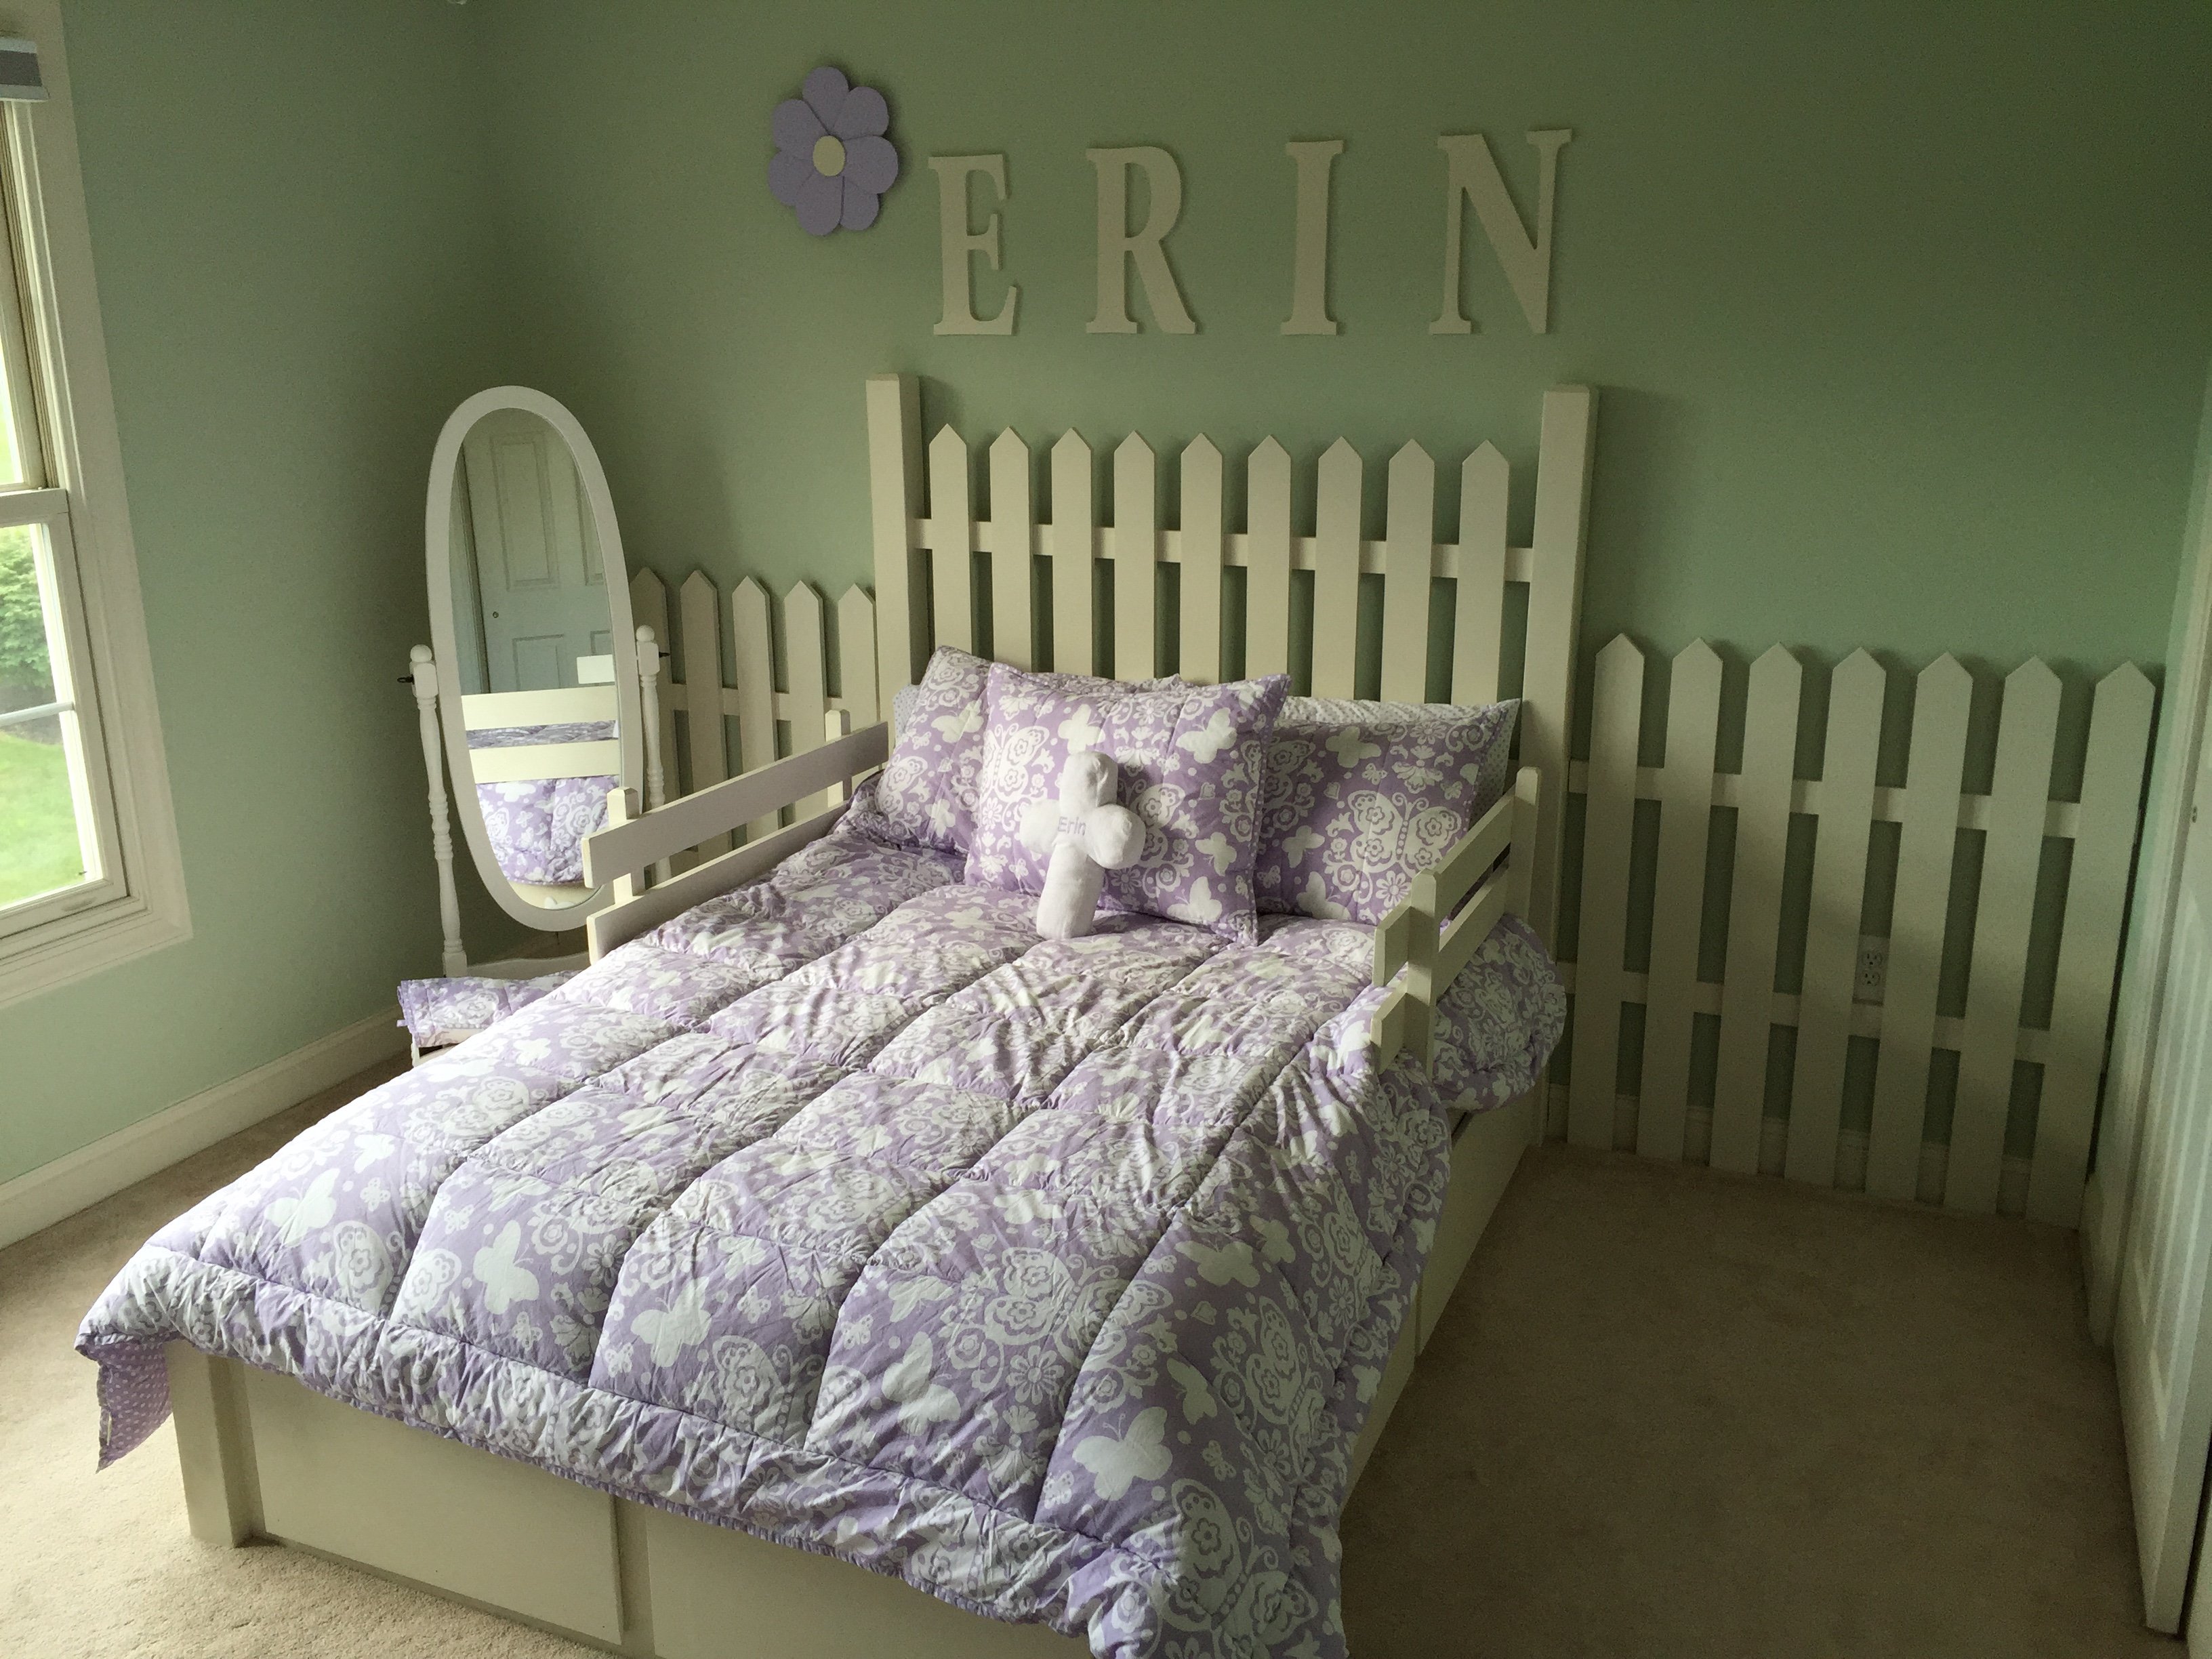
As you can see, the theme is a little different then the original, but the storage remains! Because of the room I actually made the side drawers the full length of the bed, and put false fronts on the end.
Built this for my daughter and my grandkids. Love your site. Have built many projects from your plans.
by Donny
I started giving much needed attention to my deck and found Ana's plan for this bench. I modified it slightly to make it longer (for four seats instead of three).
Comments
natasha
Sun, 06/02/2024 - 09:43
Did you use plans for the…
Did you use plans for the obelisk?