Community Brag Posts

Lap Table for my 4 year old son

Submitted by kristyzed on Wed, 10/08/2014 - 19:49

I altered the plans slightly starting with the desk's top.  I had extra 1 x 12 on hand so I worked the dimensions around that.  The height and width is the same, only the depth is changed. This was a very simple and enjoyable build.

Built from Plan(s)
Estimated Cost
$15 since I already had the 1 x 12 used for the top on hand.
Estimated Time Investment
An Hour or Two (0-2 Hours)
Finish Used
I used Minwax Early American all over, and Behr Blue Ocean for the letters and outline.
Recommended Skill Level
Beginner

Tablet or iPad Holder Retro TV Style

Submitted by boughtasaw on Fri, 01/20/2017 - 06:55

I loved the idea of this as soon as I saw it and decided to make it as as my daughter loves to watch cartoons on my ipad while sitting in her high chair eating her breakfast etc, 

I added a cap that can cover the end when it is not in use, a back and also painted it a very dark grey with gold accents on the feet, controls and also the little plaque I made.

My daugher cristened it "My TV" and loves it.

I am no longer allowed to play cartoons for her without "My TV".

Another great plan !

Onto the next one.

Estimated Cost
$0. I had pieces of wood leftover from other projects.
Estimated Time Investment
Afternoon Project (3-6 Hours)
Recommended Skill Level
Beginner

Comments

Chicken shed

Submitted by diegaeb on Wed, 10/07/2020 - 08:32

I had started this project last year in September and finished it finally 2020 in March because I get my chicken then.
I did modify the chicken coop a little bit due to the material I got.
The instructions and most of all the cutting list I like best!

Antje

Built from Plan(s)
Estimated Time Investment
Week Long Project (20 Hours or More)

Comments

Daybed With Three Trundle Drawers For Storage

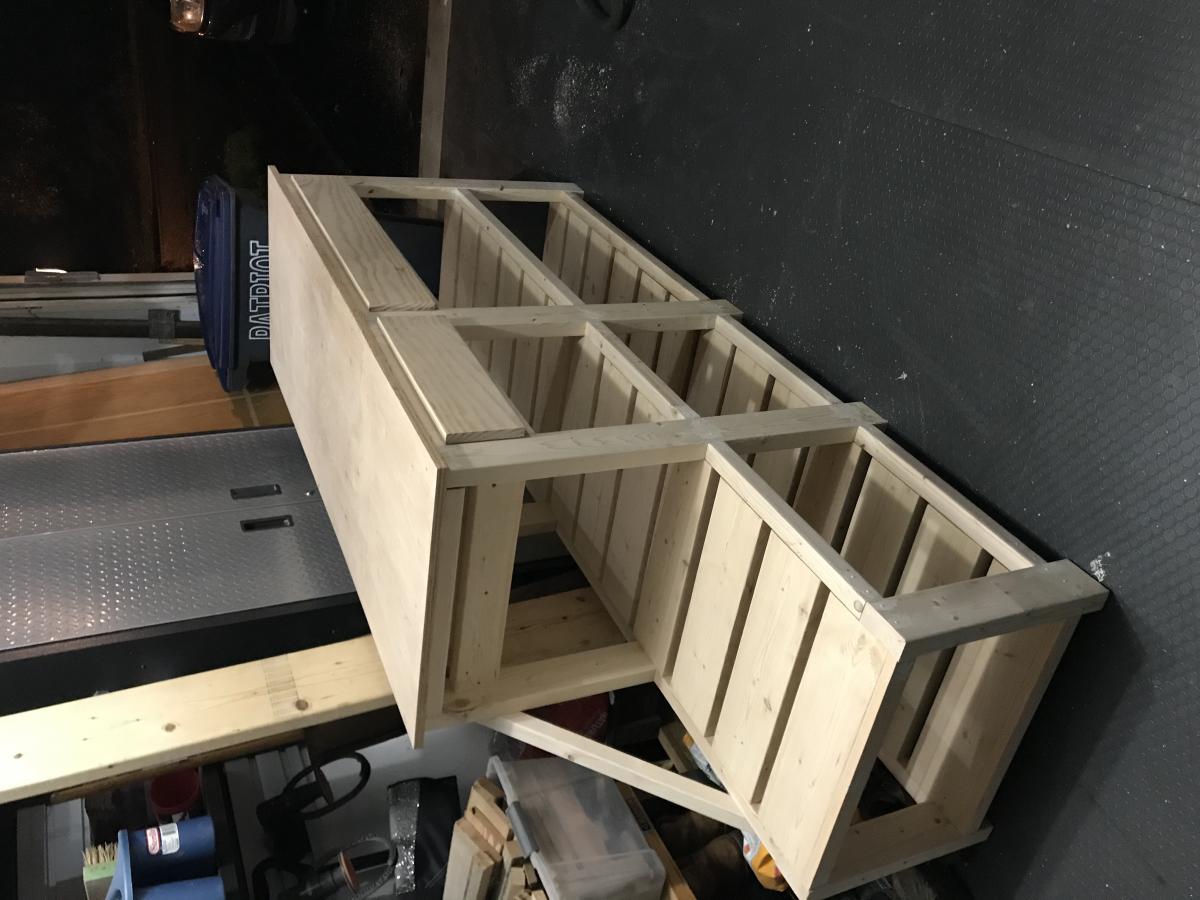
This was my first ever project! I had never even operated a circular saw before this--so if I can do it, so can you!

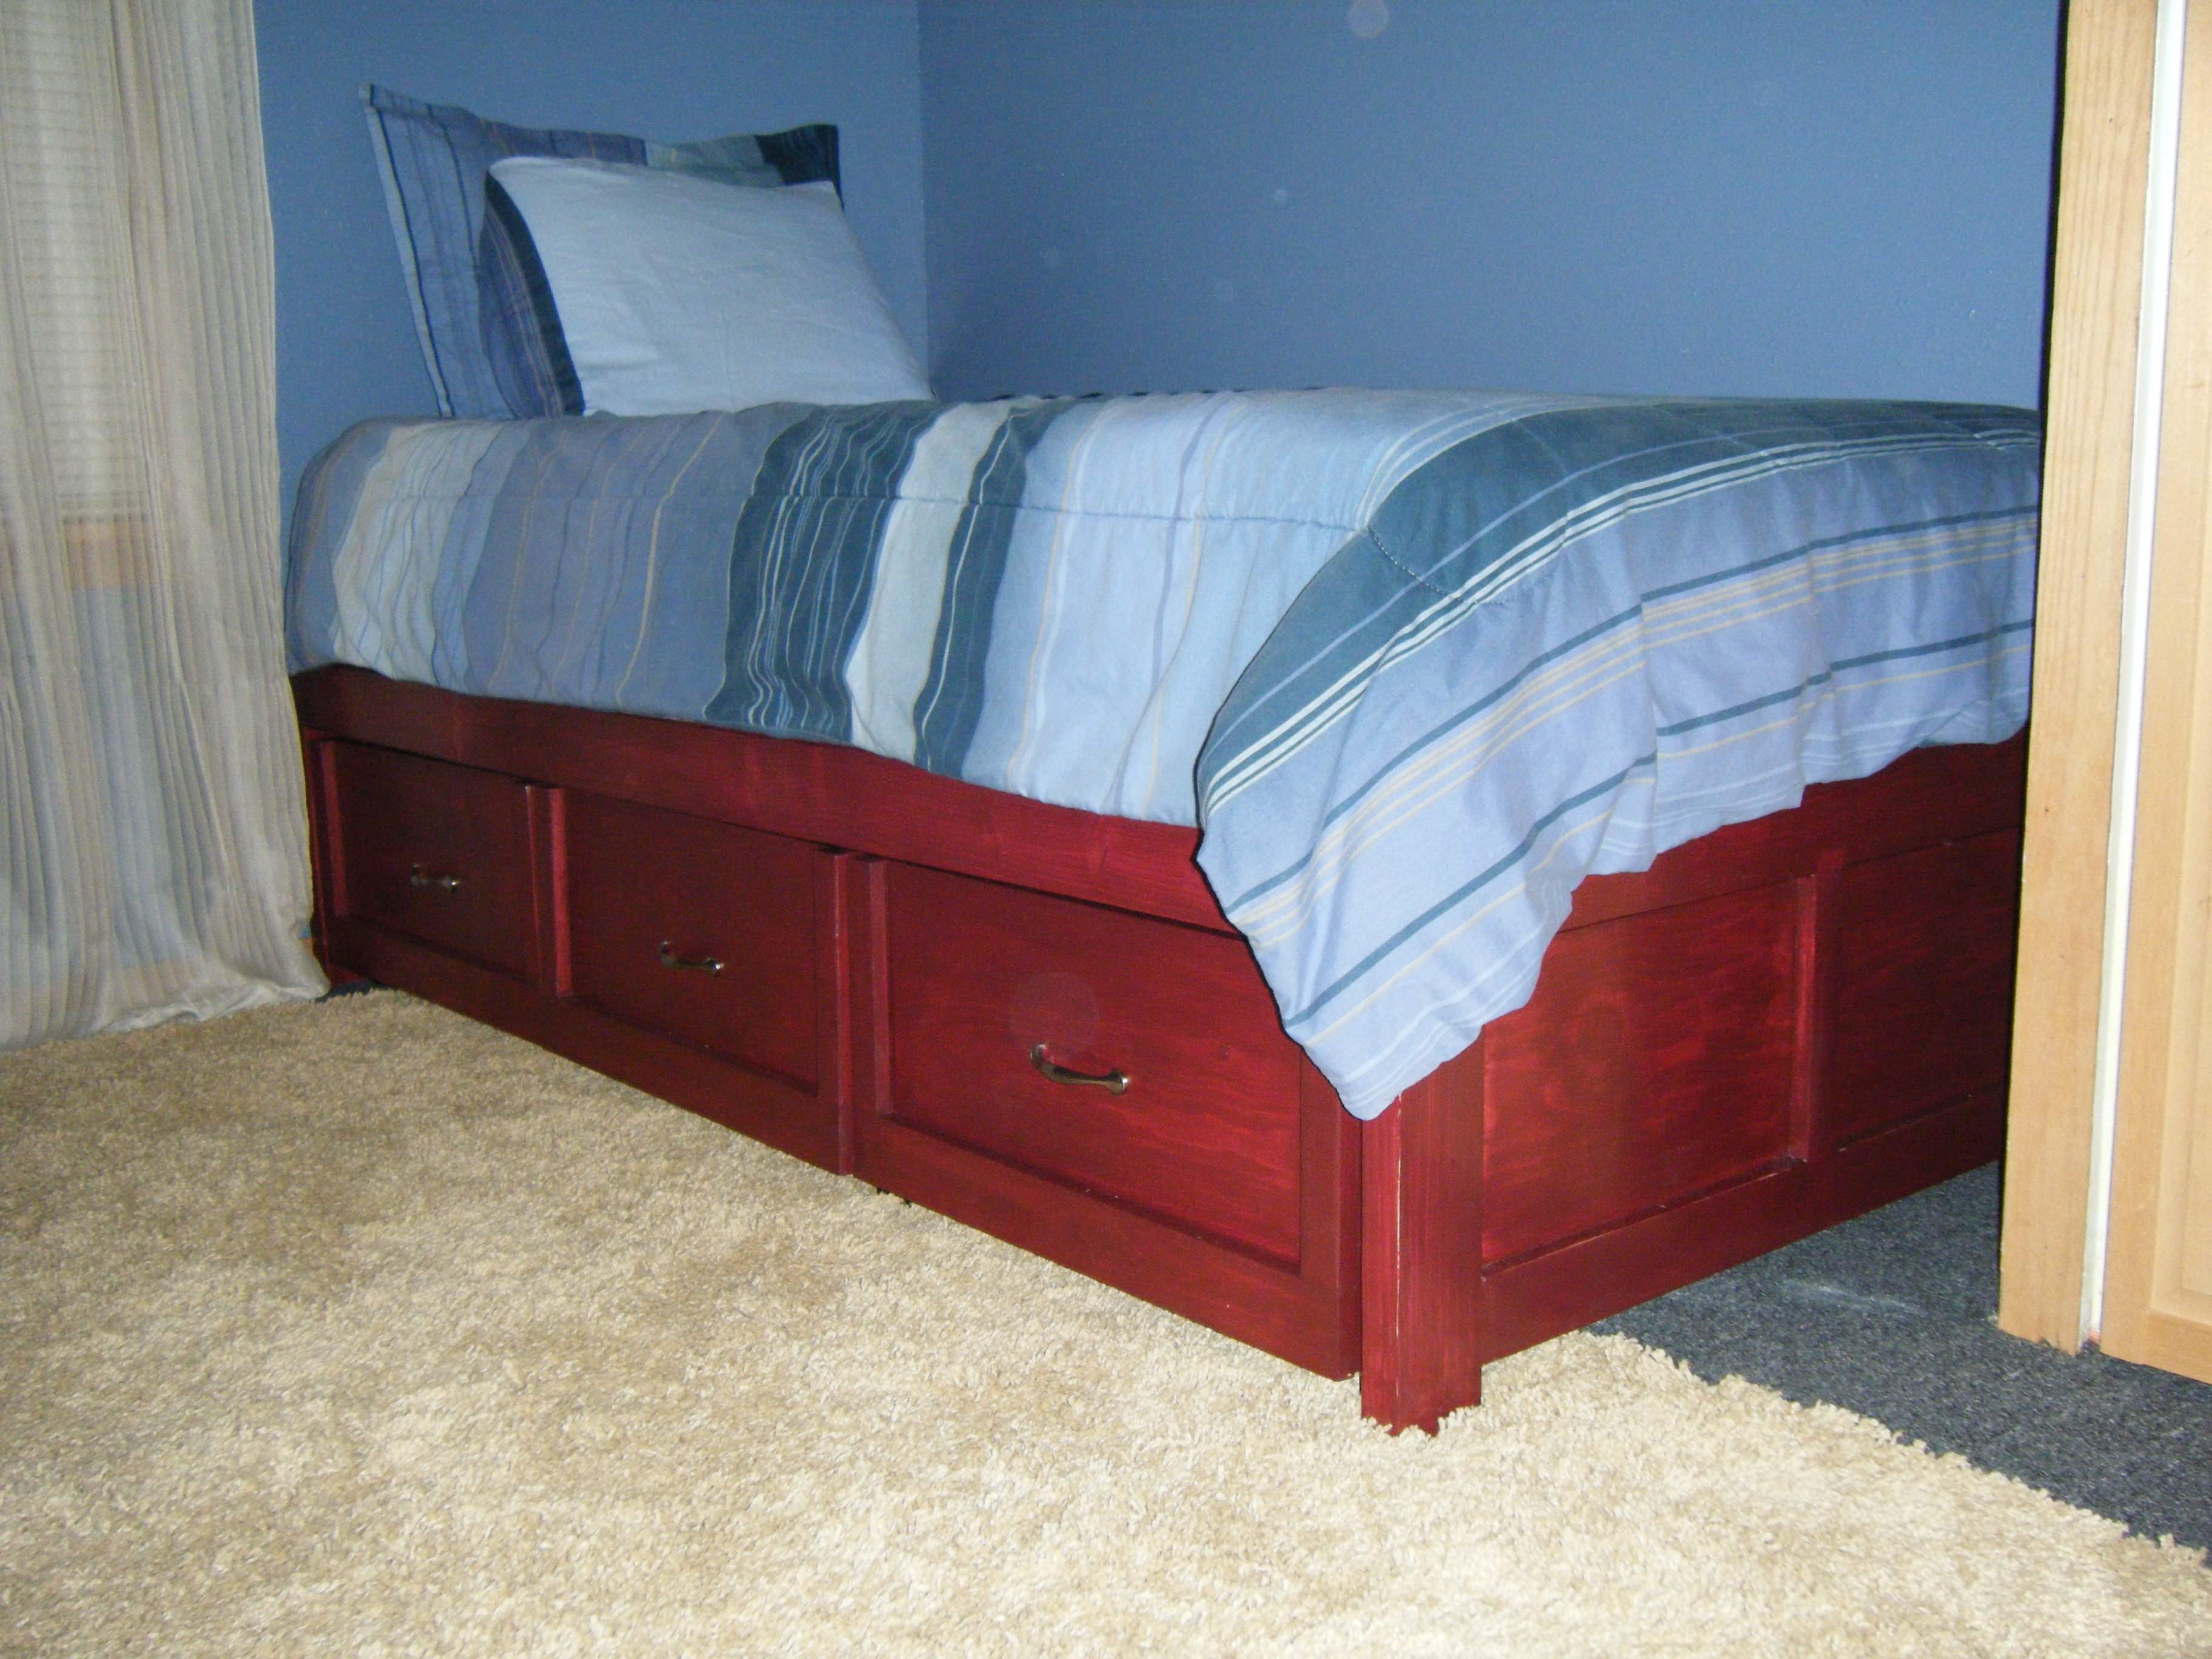
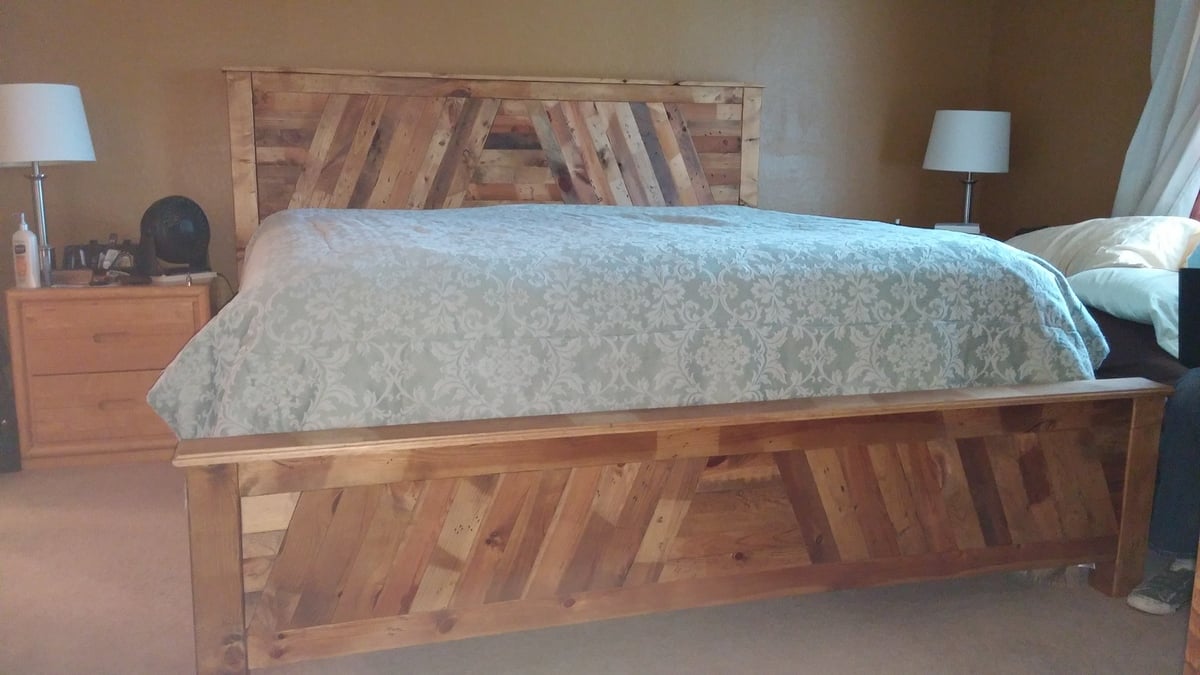
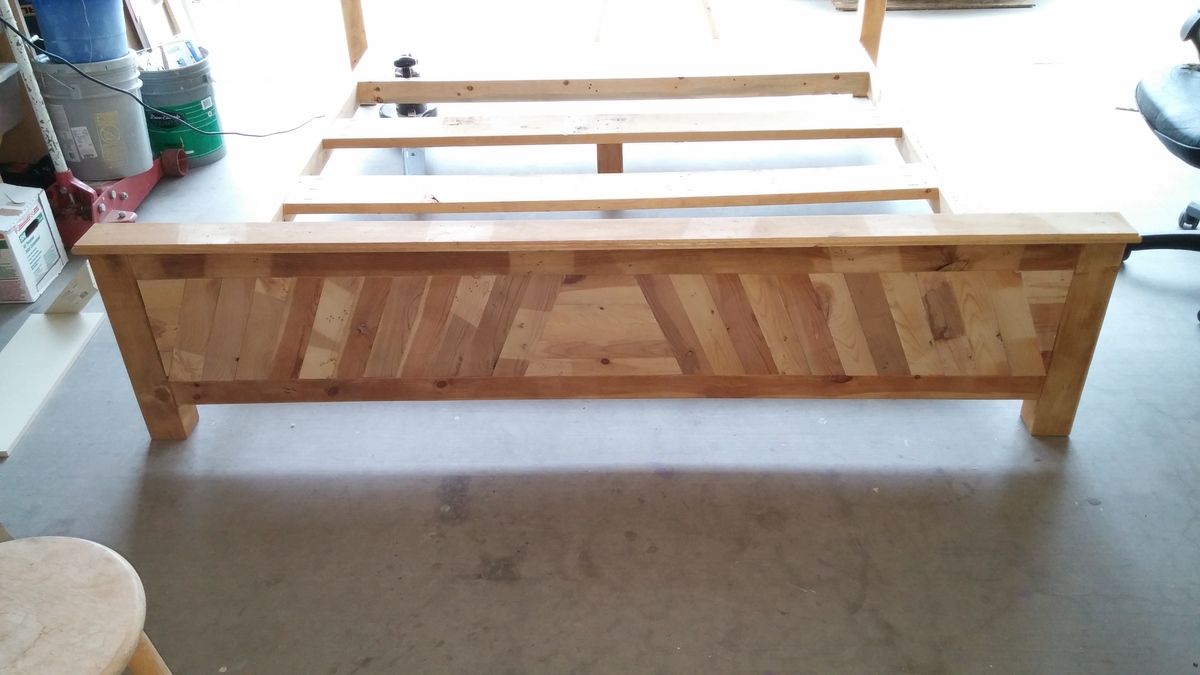
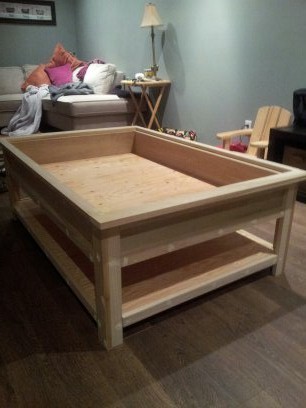
I made this for my son for his 13th birthday. Because he was getting older, I thought it was time for him to have some nice things in his bedroom. I felt that what he had before was "junky." I couldn't find anything that I liked on craigslist that was also in my budget, so I did a Google search on how to build your own bed, and I ended up here on Ana-White.com!

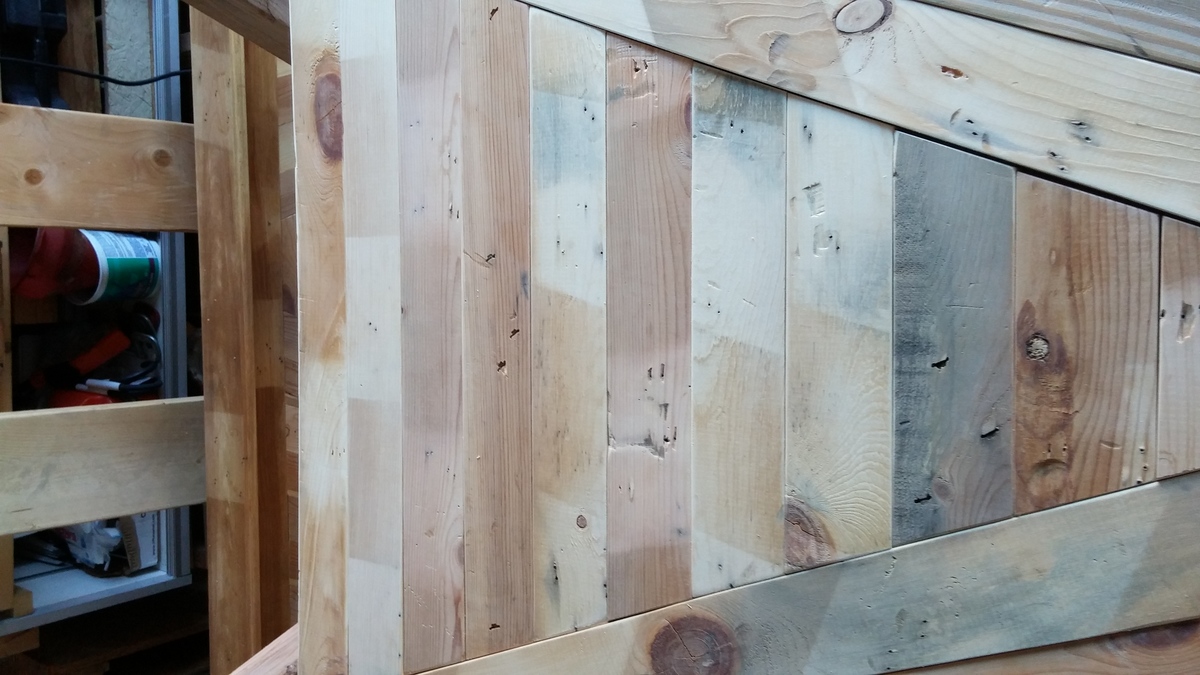
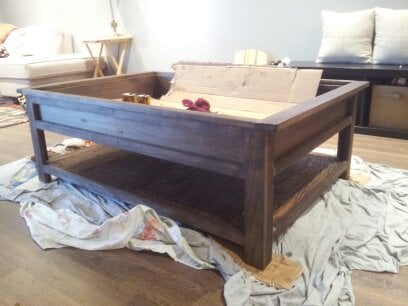
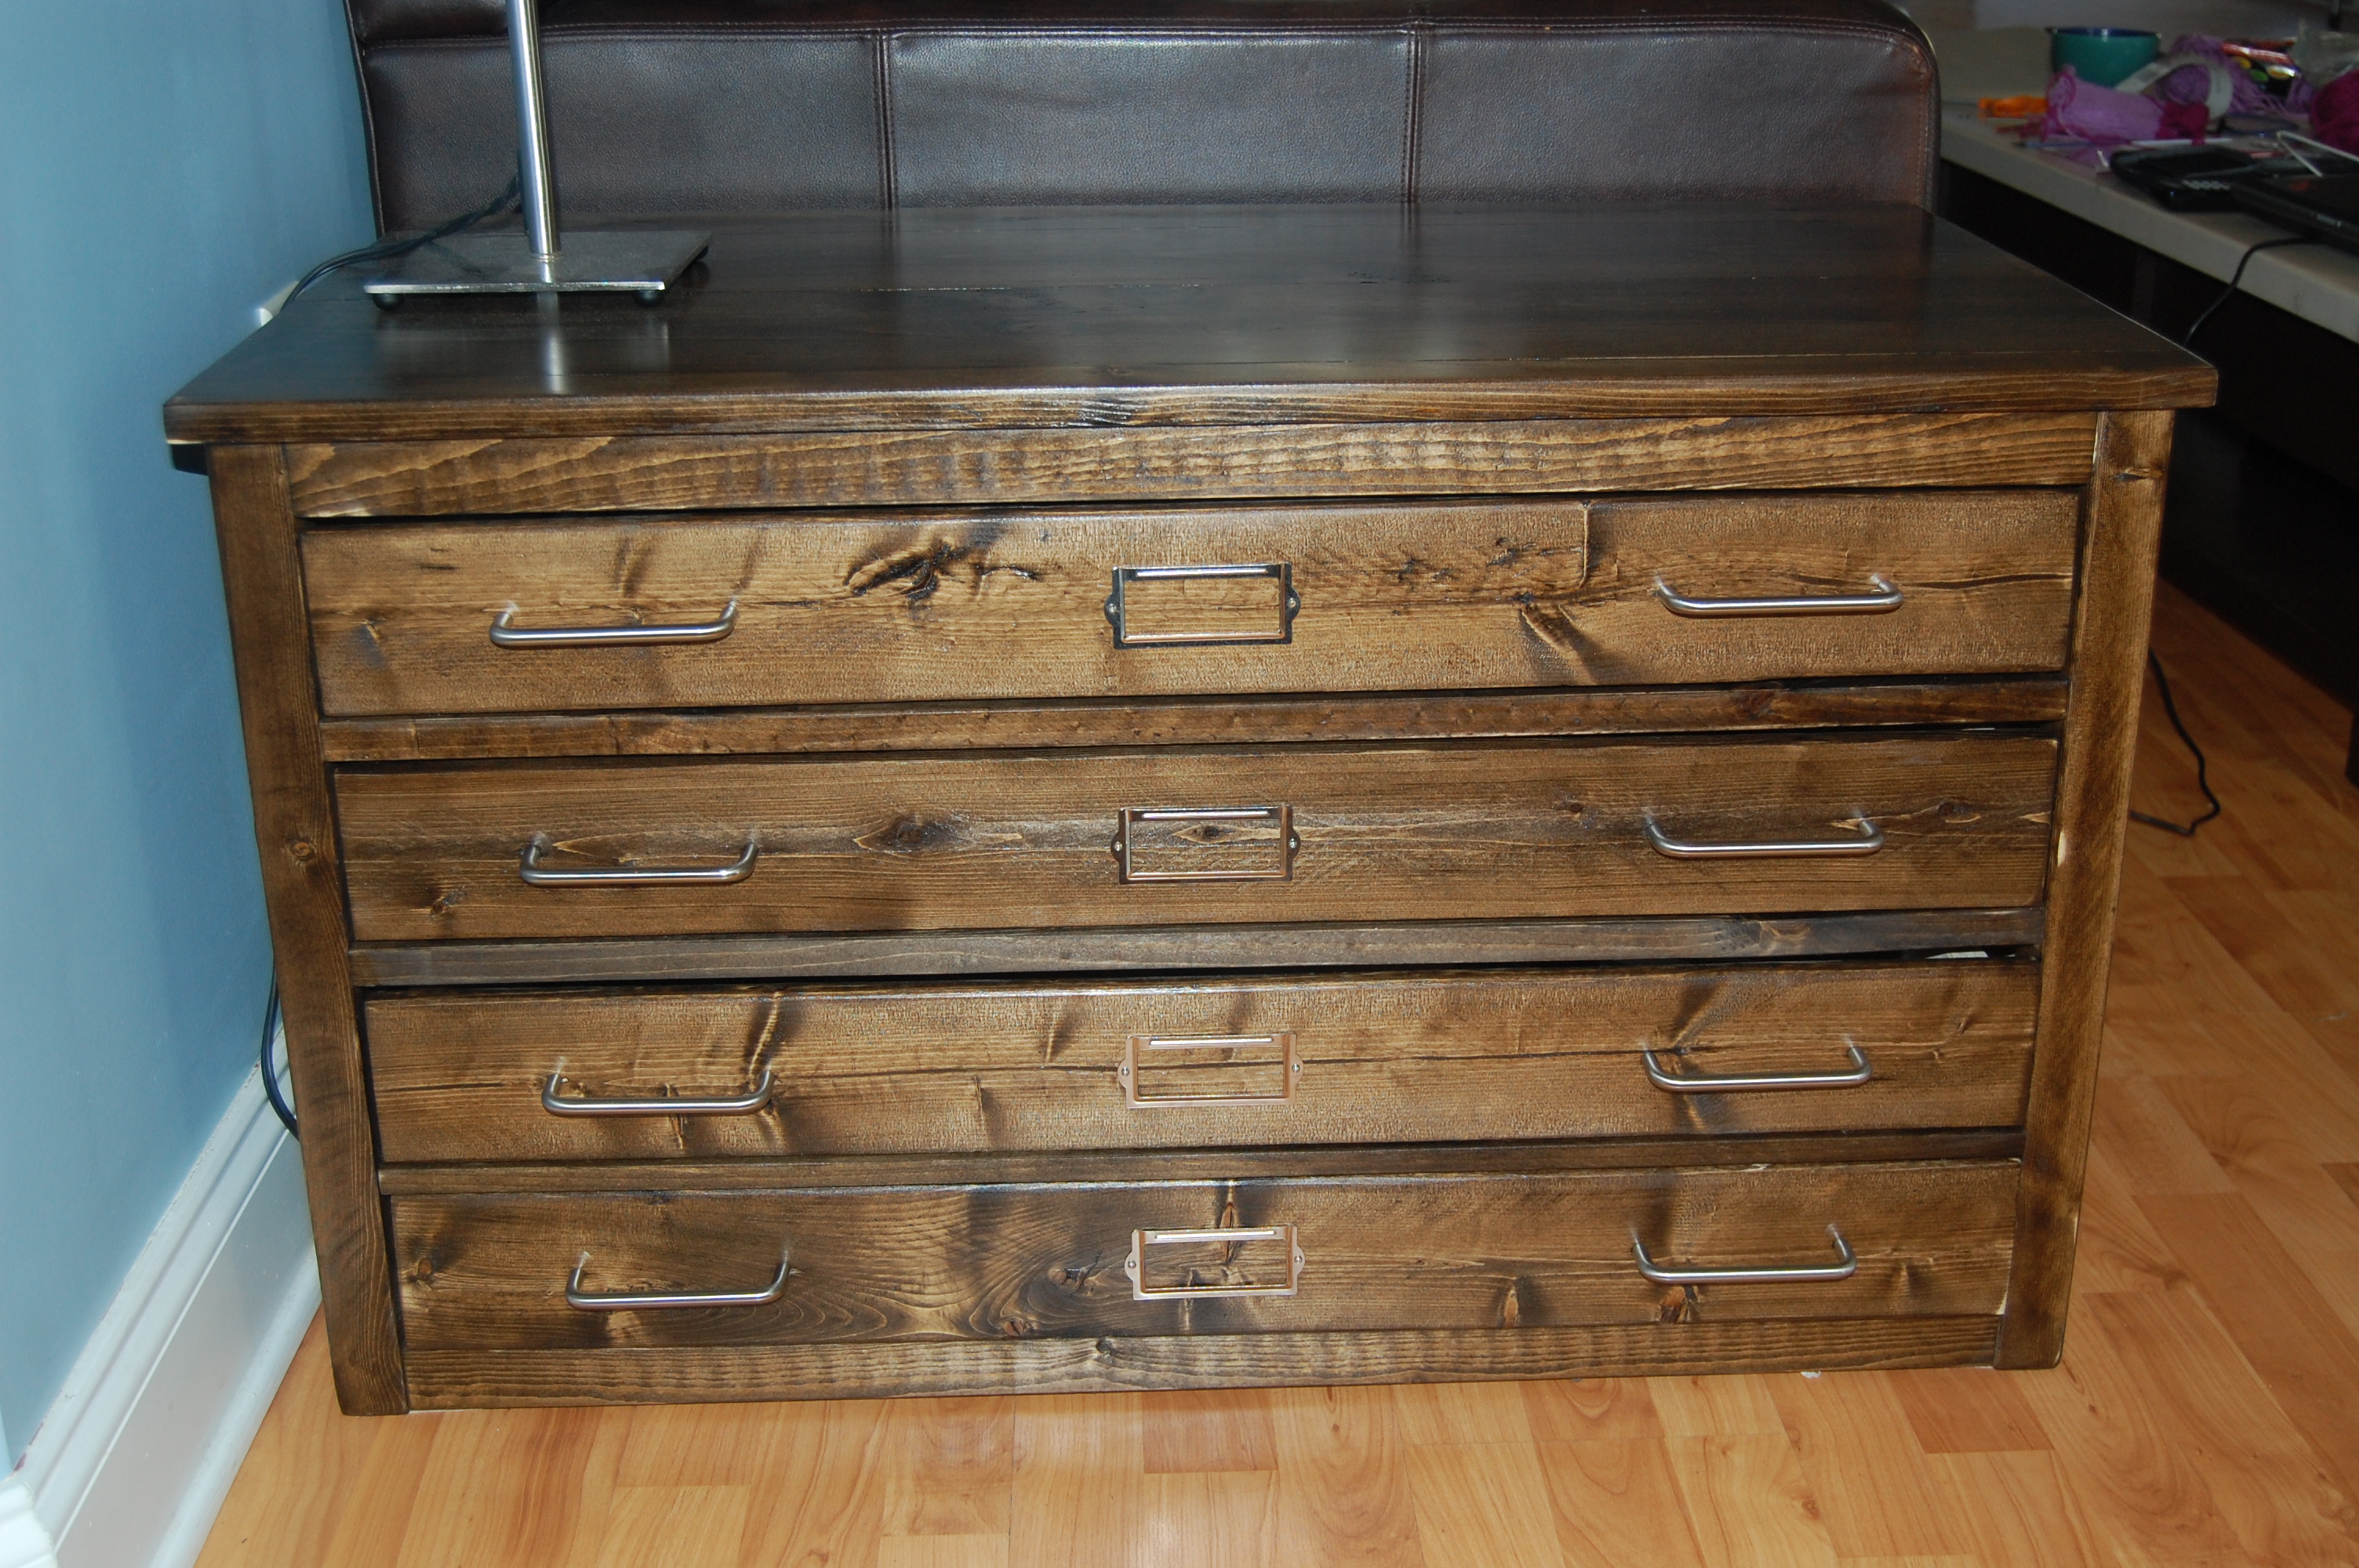
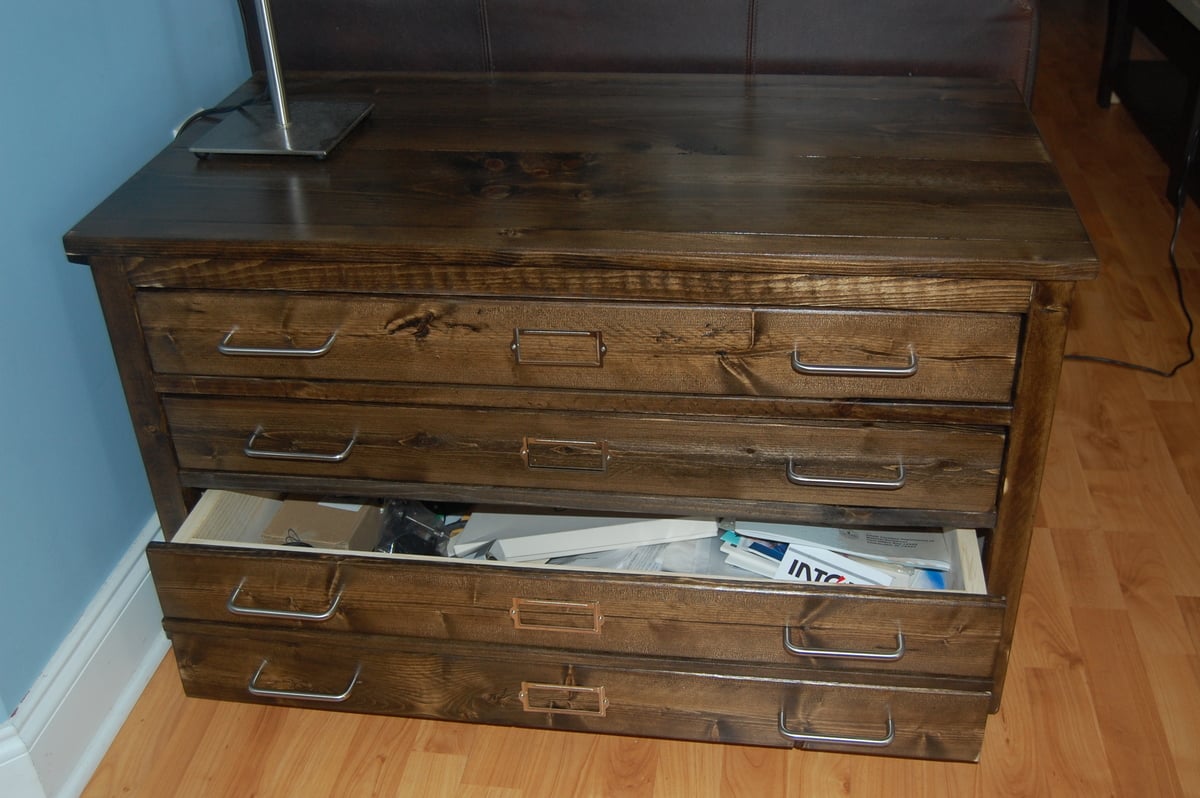
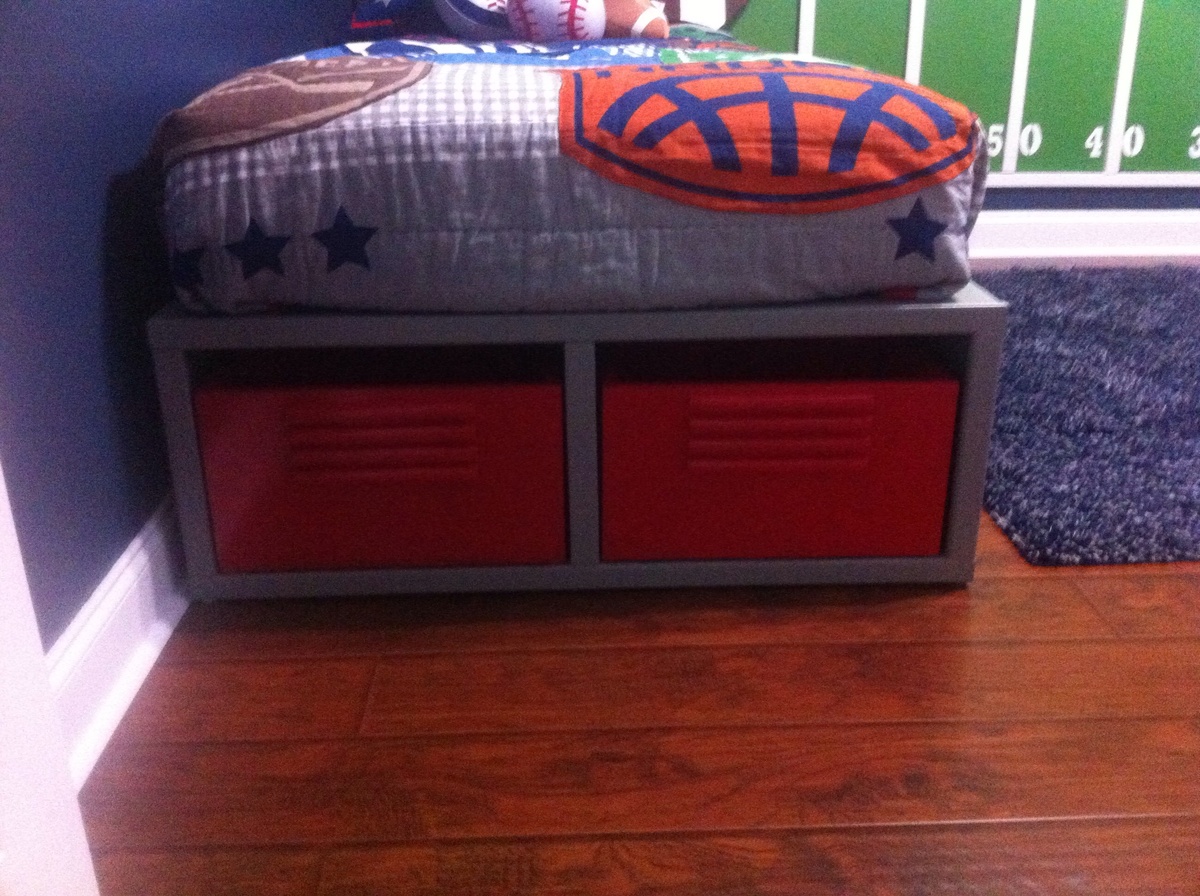
I had a lot of fun making this project. It's definitely a confidence booster. There is A LOT of storage in this bed as well. Those drawers hold so much, that I was able to eliminate my son's dresser, and still have room left over.

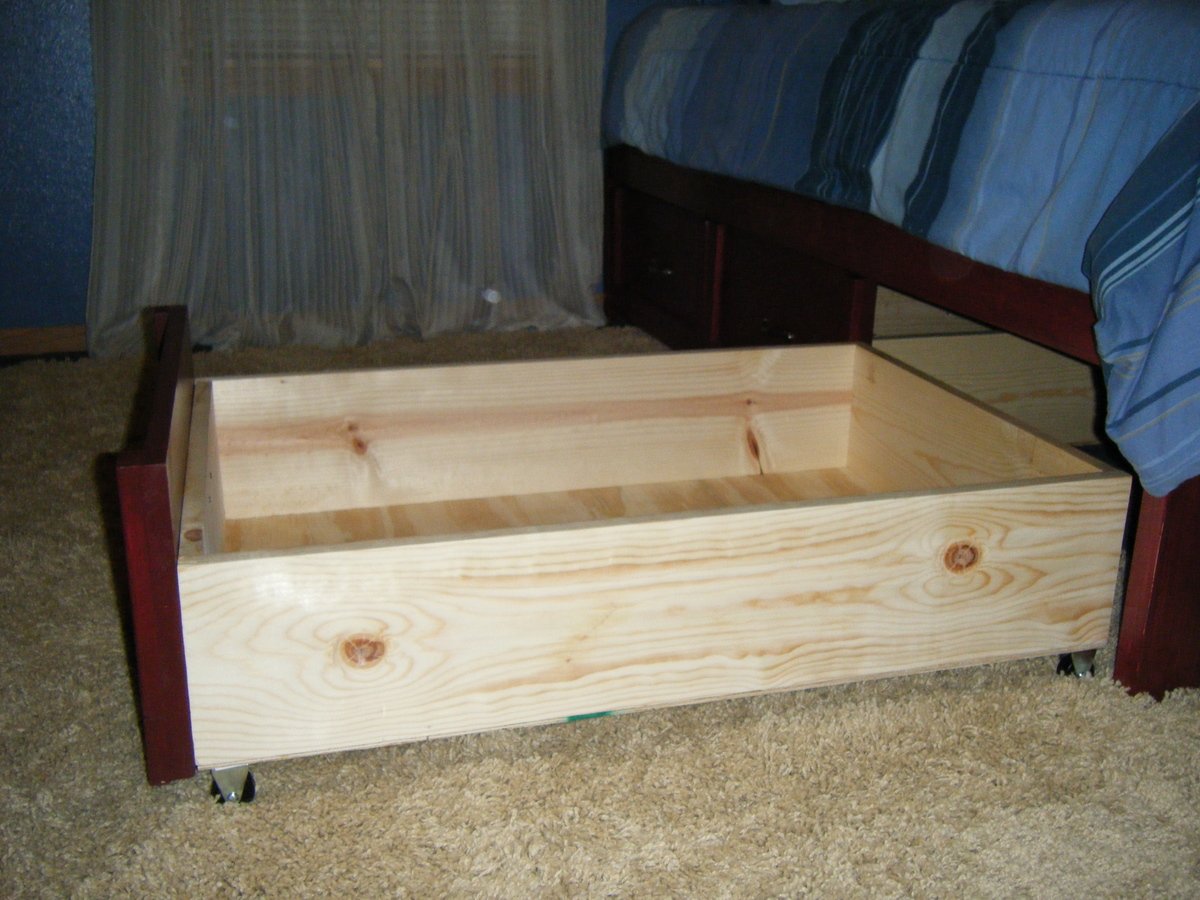
Now for some technical details. For the caster wheels I used 1 3/4" wheels, but if you can't find those, 2" wheels would also work.

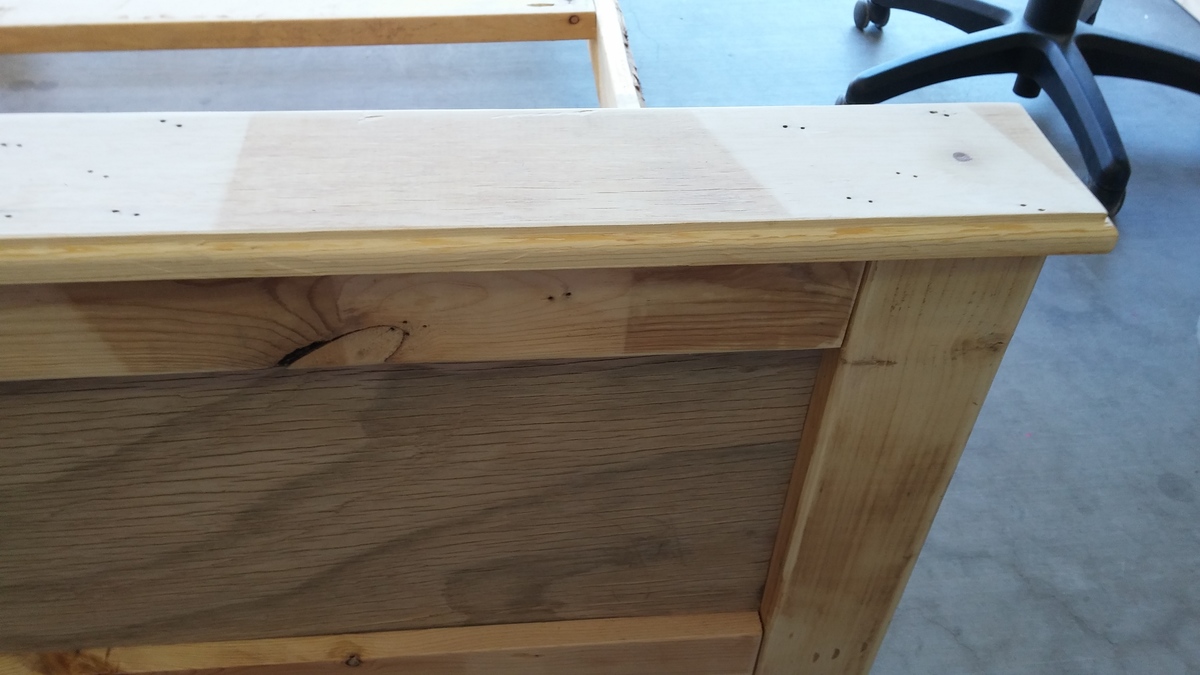
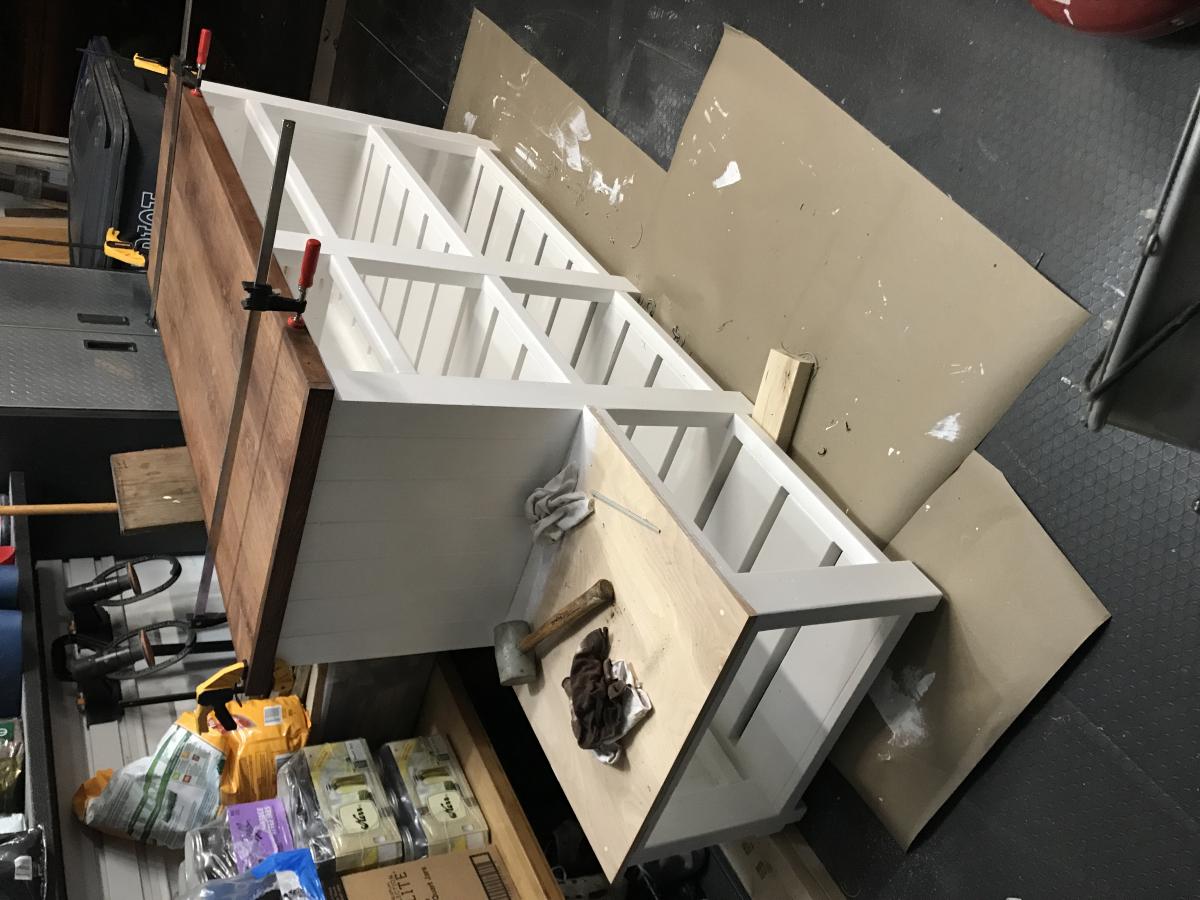
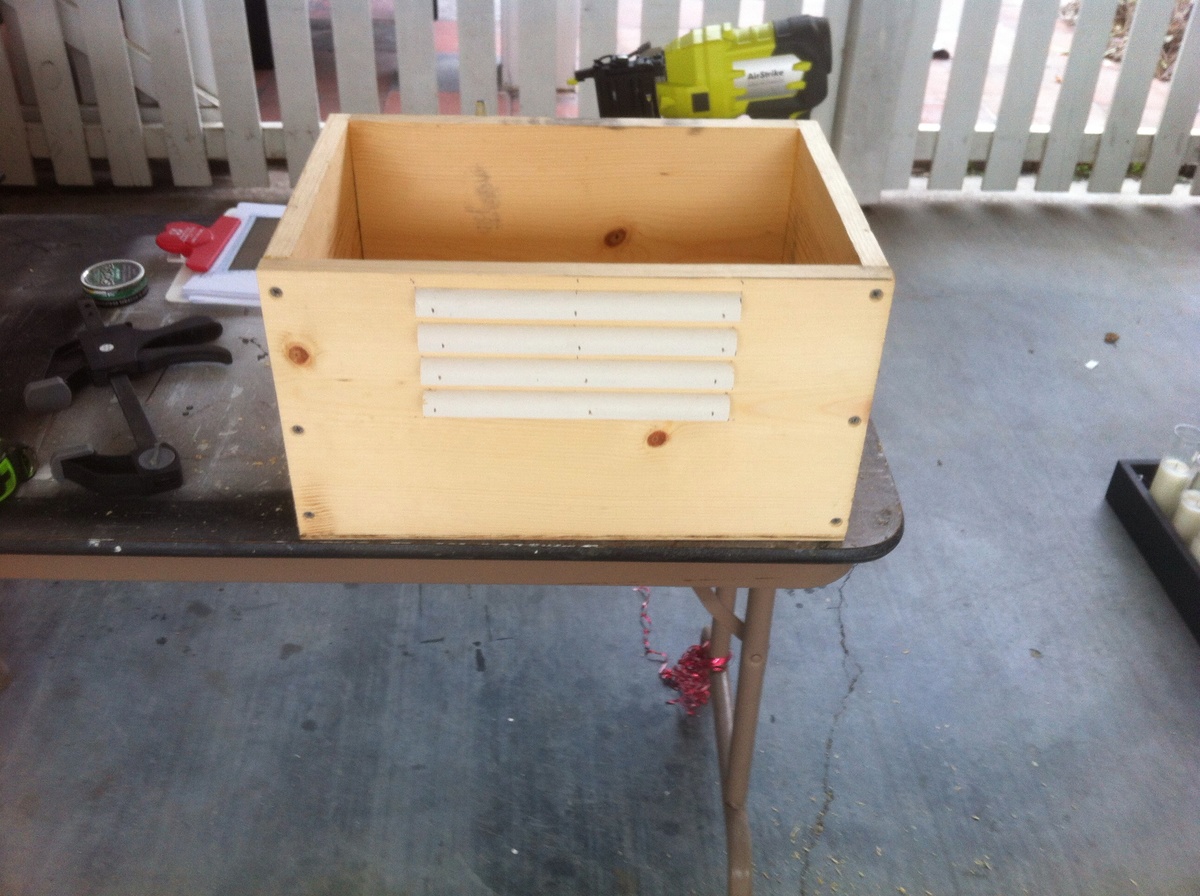
For the drawer bottoms, I used glue and brad nails. I found an inexpensive hand-powered staple gun that works with staples or brad nails. I wanted it to hold well, so I spaced the nails a couple of inches apart.

For the drawer pulls, I bought six 1 3/4" screws and drilled all the way through both the drawer face and the board behind it. On Ana's post, she mentioned that you could put the handles on the drawer faces before attaching them so that you would only have to drill through one board, but I wanted to have the option of changing the pulls in the future.

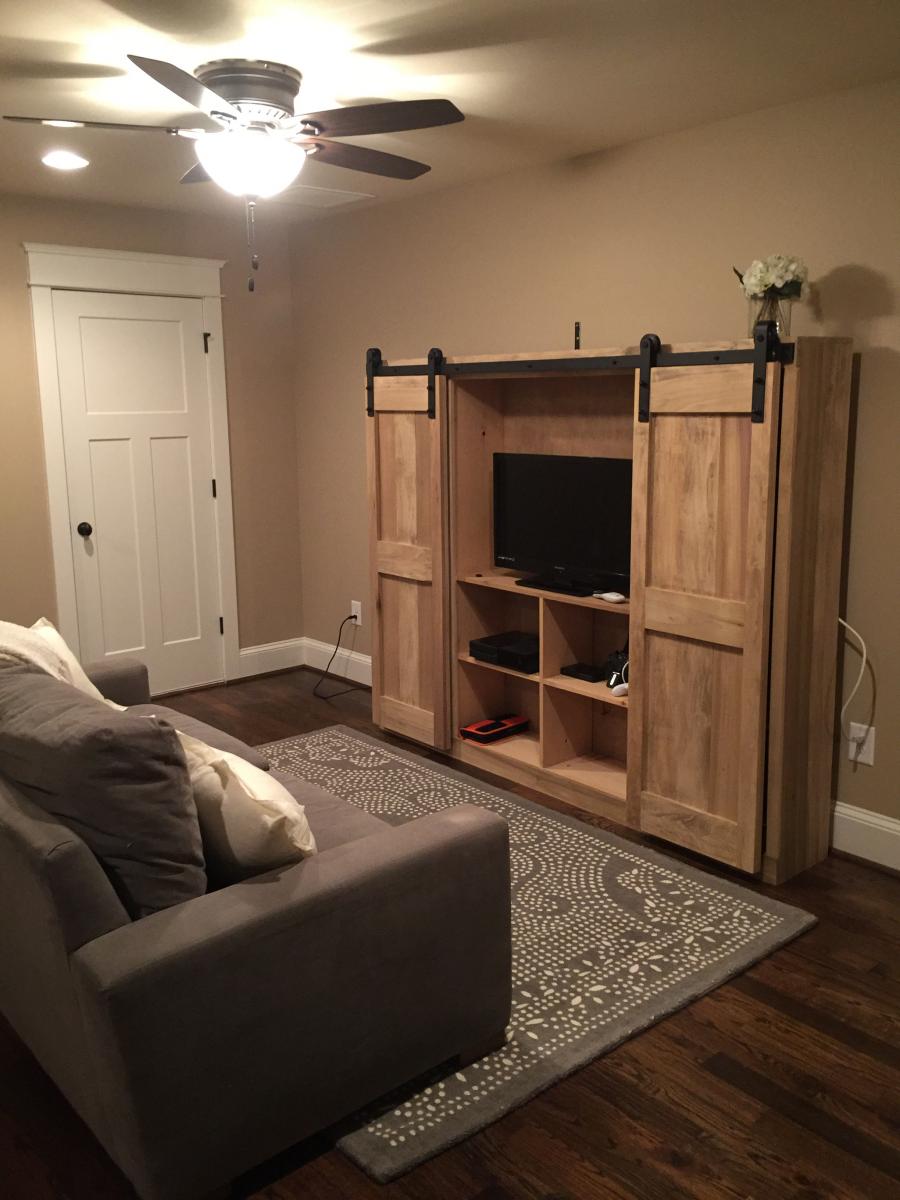
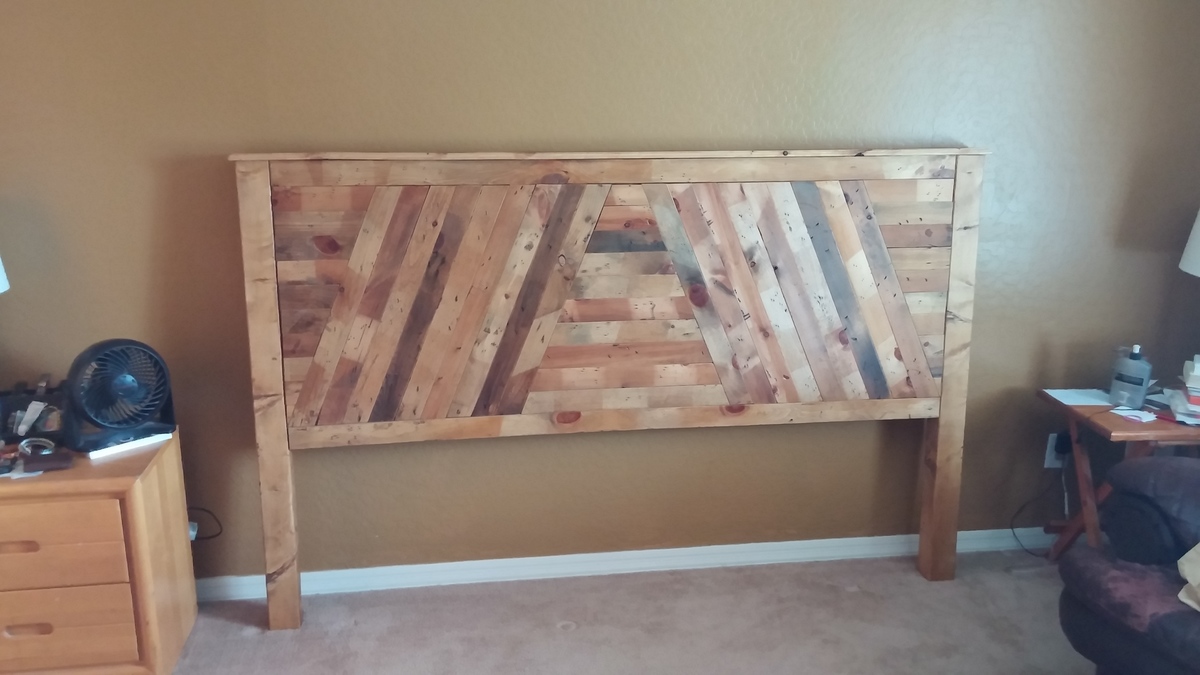
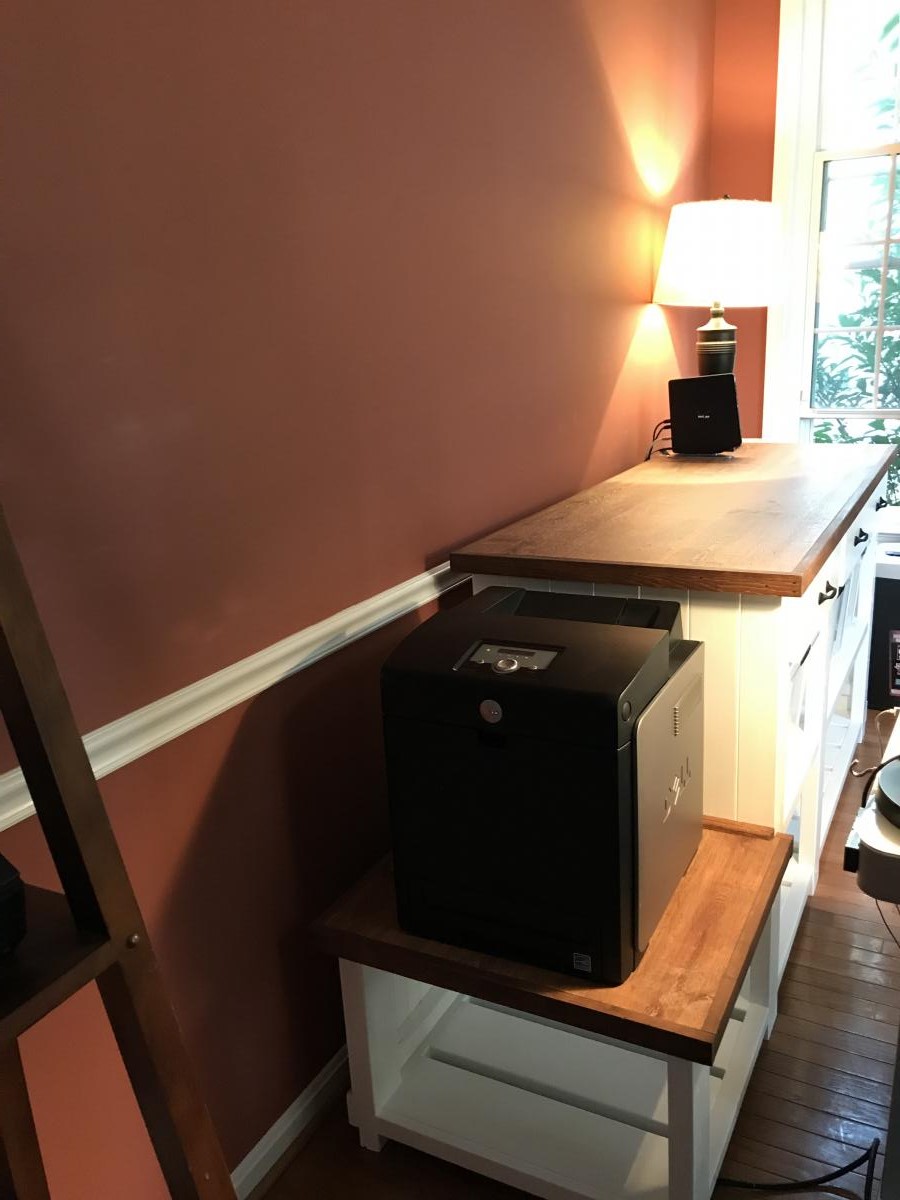
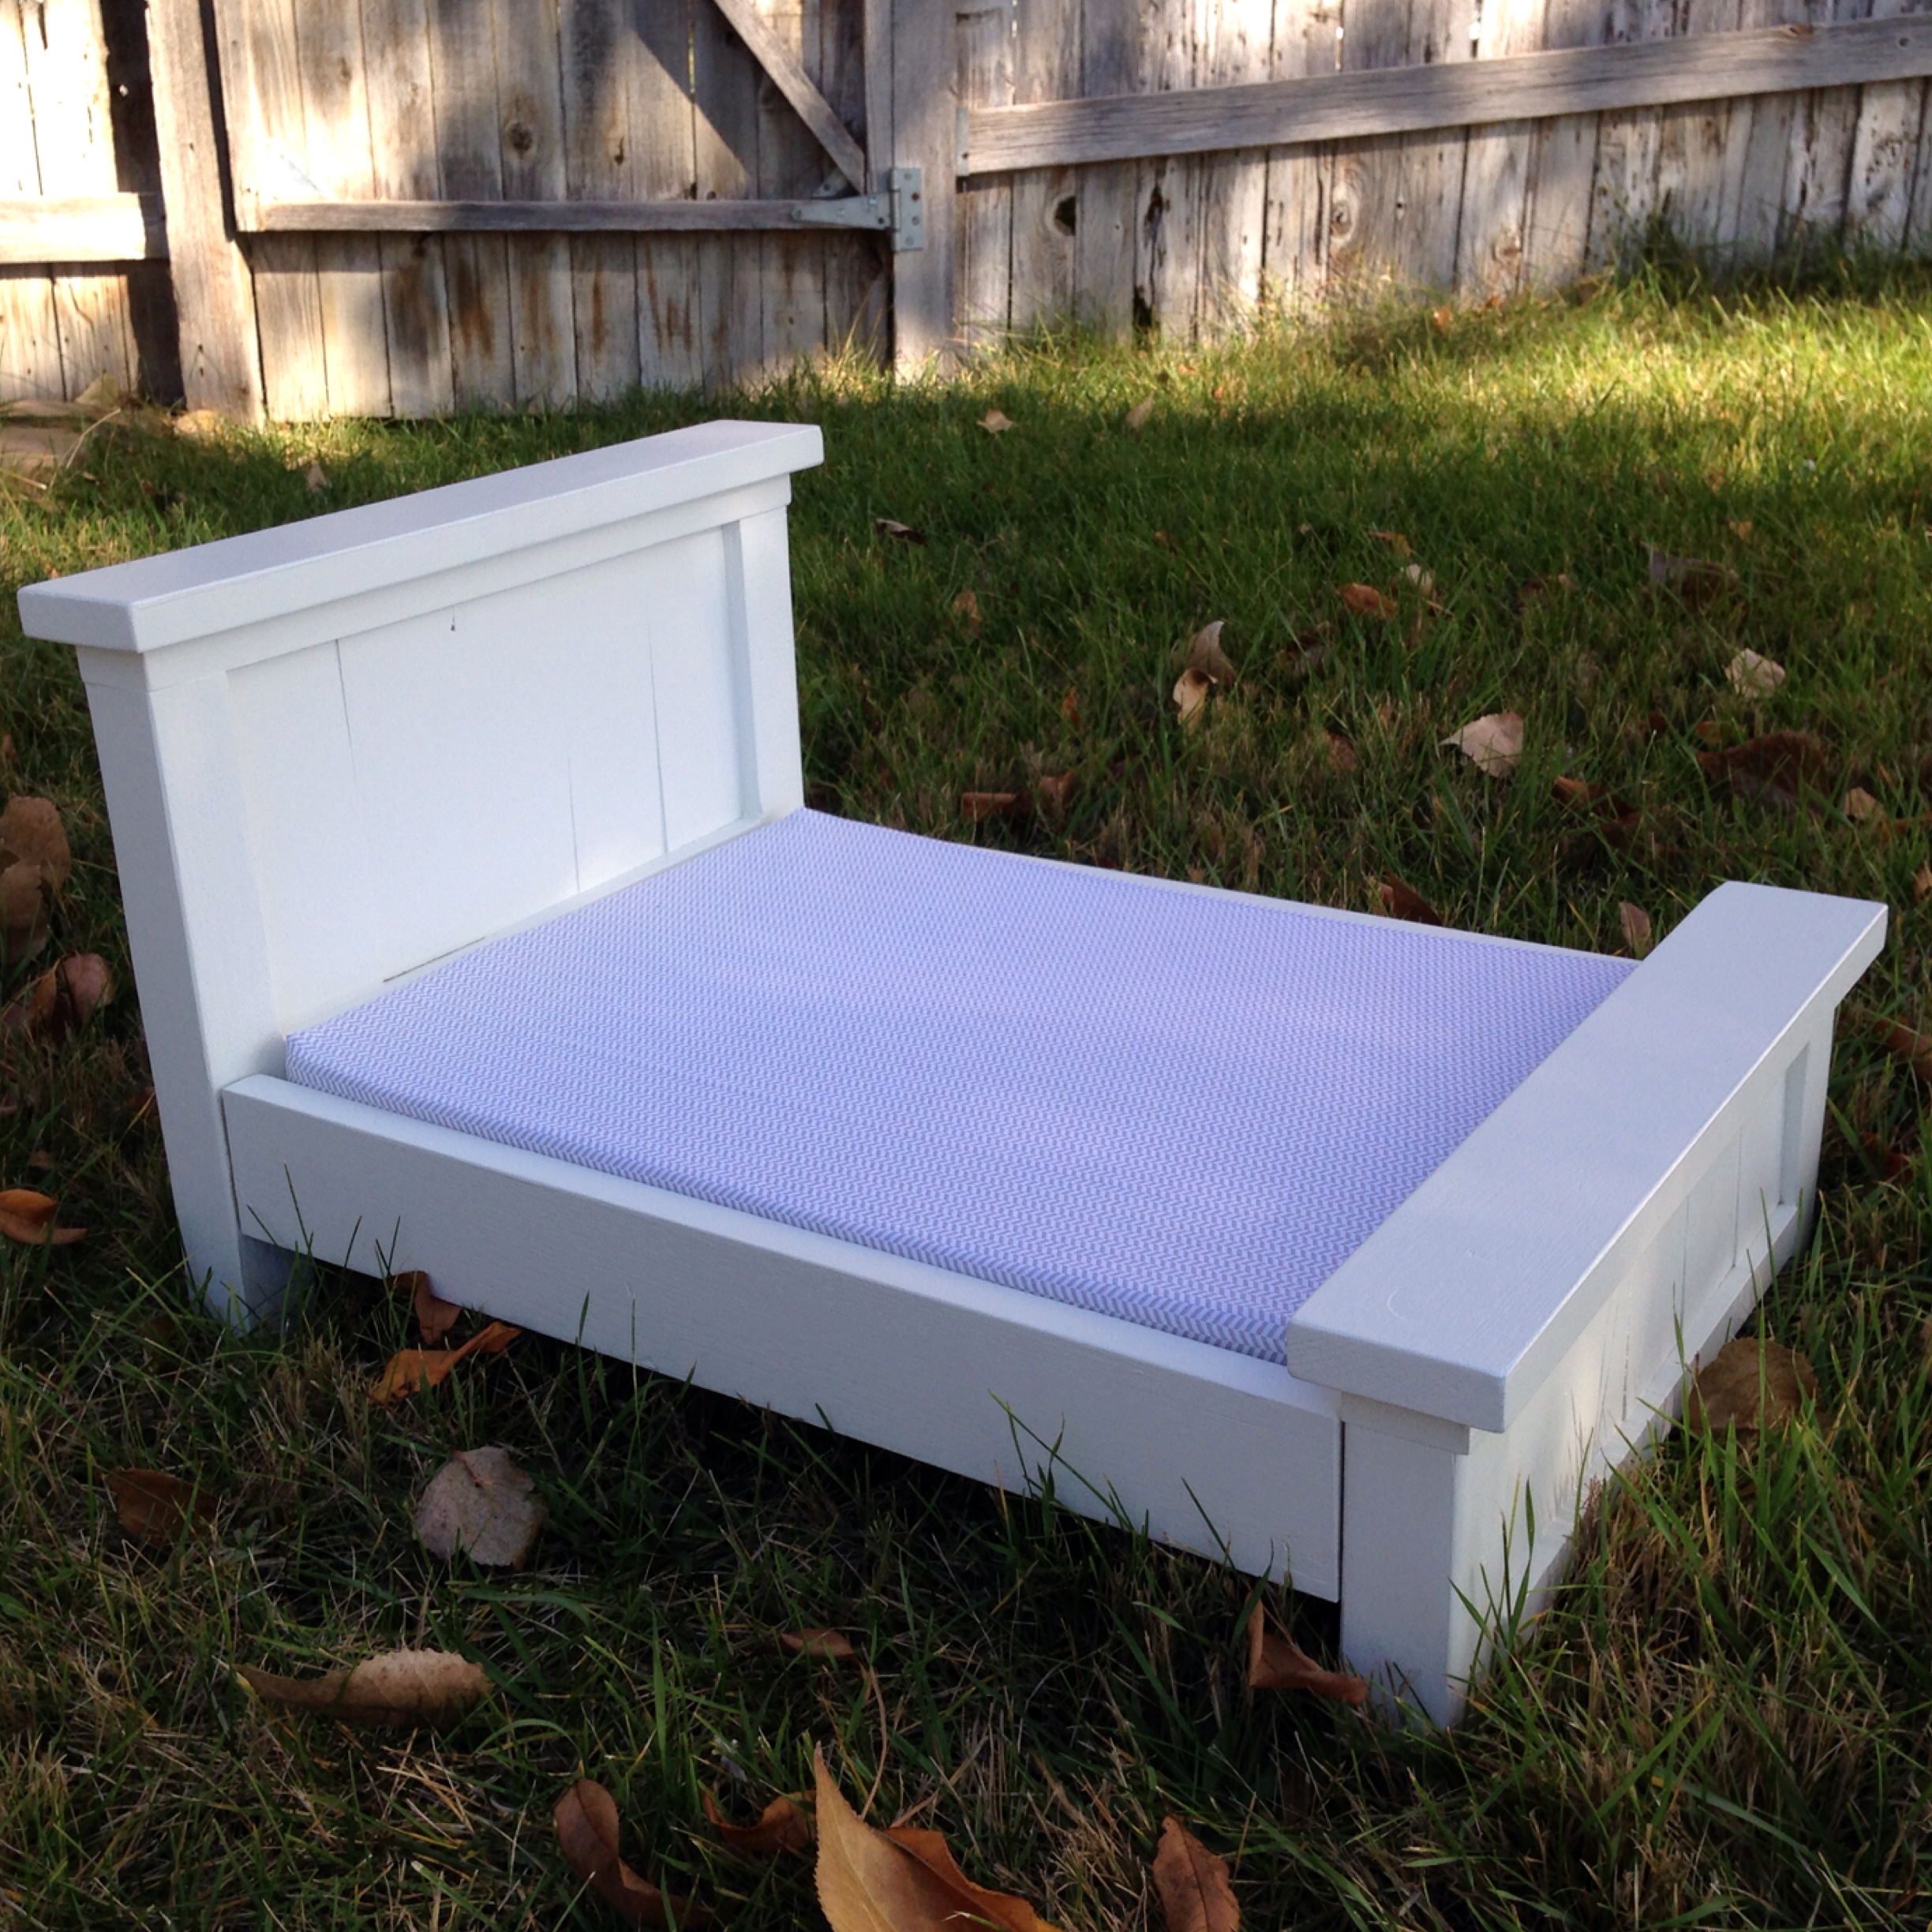
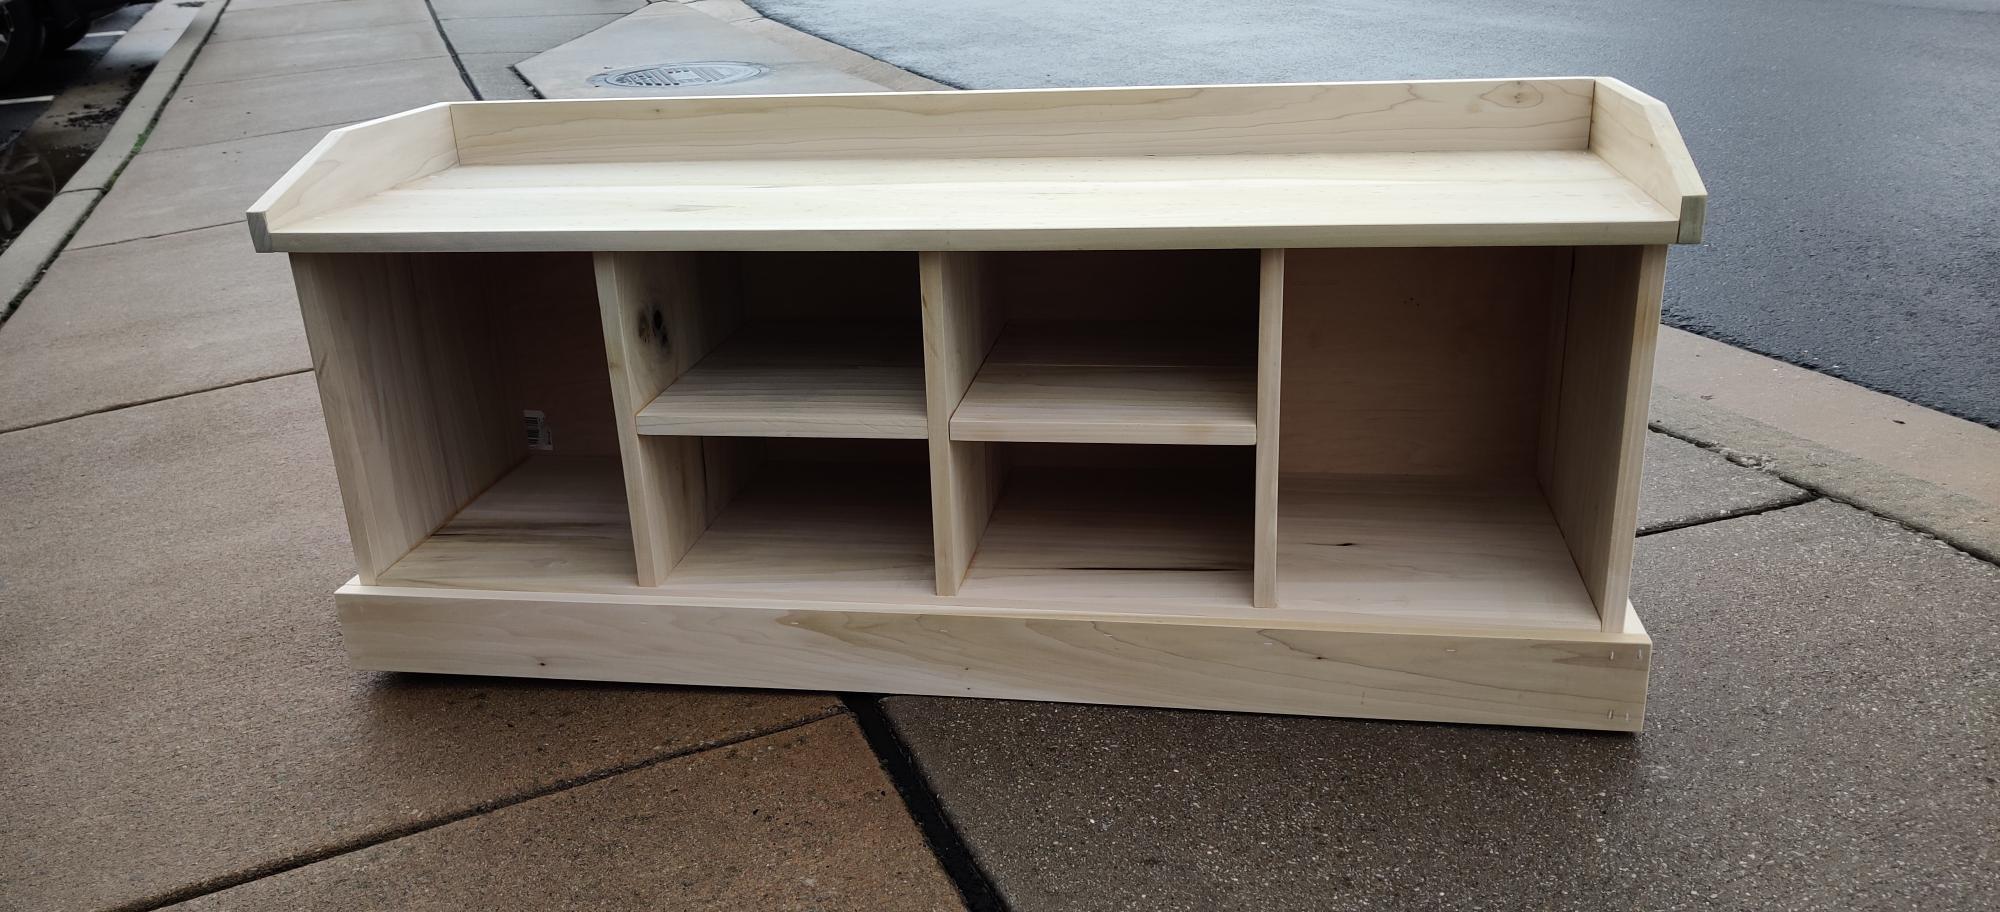
That's it! I am really happy with the way this bed turned out, and my son was very excited that he had such a cool bed that his mom built for him herself. To go along with this bed, I also built a Large Cubby Bookshelf With Adjustable Shelves Happy building!

Estimated Cost
$150
Estimated Time Investment
Weekend Project (10-20 Hours)
Finish Used
First, I used Minwax's water-based pre-stain wood conditioner. After waiting about 15 minutes, I sanded the wood again using 220 grit sandpaper. Then I used about four coats of Minwax's water-based "Sangria," to get the darkest color with that particular stain that I could possibly get. You have to allow 2 hours drying time between coats, and 3 hours after the final coat. Finally, I used 3 coats of Minwax's water-based polycrylic, again allowing to dry two hours between coats. I also lightly sanded with 220 grit sandpaper between coats of the polycrylic.
Recommended Skill Level
Beginner

Basement storage

Submitted by sergey on Sun, 10/12/2014 - 16:34

Hi Ana,

Thank you for the wonderful idea about storage shelves.

I made one with some modifications. Total lenght is 4 m, height 2 m and depth 50 cm. The columns and beams are from 40x60 mm, the shlves are 110x20 mm. Pine wood was used and the photo shows bare wood without protective layer. It will be covered with colourless protection.

Keep up the good work!

Estimated Cost
~200€
Estimated Time Investment
Day Project (6-9 Hours)
Recommended Skill Level
Starter Project

Sliding Door Cabinet for TV

Submitted by Anonymous (not verified) on Mon, 01/23/2017 - 18:55

This Project took about a day and a half.  Hardware was from amazon for about $70 plus another $30 for additonal rollers since the set only comes with metal bar and 2 rollers.  Stained in Weathered oak.  Its built with poplar wood.  This was about $400 to build with all the hardware.

Built from Plan(s)
Estimated Cost
400
Estimated Time Investment
Weekend Project (10-20 Hours)
Finish Used
minx weathered oak
Recommended Skill Level
Intermediate

Comments

Play Kitchen

Submitted by Anonymous (not verified) on Sun, 10/11/2020 - 16:33

Play kitchen made from a mix of oak and oak-veneer mdf, with stickers on the burners and knobs.

Estimated Time Investment
Week Long Project (20 Hours or More)
Finish Used
Beeswax on top, milk paint for base
Recommended Skill Level
Intermediate

$20 Planter Boxes

I built these as one of my first project with the Kreg Jig...It worked great! I stained them with the left over sample cans of my behr deck stains from when we were deciding what to put on the deck. They turned out to be great and the perfect size for our deck!

Built from Plan(s)
Estimated Cost
$20 each
Estimated Time Investment
An Hour or Two (0-2 Hours)
Finish Used
Behr solid deck stain
Recommended Skill Level
Starter Project

Comments

2nd Project Bed fit for a King

Submitted by dadto3kids on Thu, 10/16/2014 - 10:35

Second project using completely reclaimed wood.  The plans were easy to follow and I made a few minor modifications.  I swapped out the two 2 X 4's inthe middle of the frame for 2 X 6's and added a center foot to each of them for center support.  I had a hard time finding larger shims and was about to make my own when I grabbed a few pieces of scrap 1 X 3 and started to make the design you see on the footboard. My wife like the look so much that I repeated it on the headboard.  Looking forward to making some nightstands that will match the look of the bed. The boards used to be nailed together as temporary fencing that is what created some of the color variation in the wood and I tried to create some sort of a pattern by alternating light and dark.

Built from Plan(s)
Estimated Cost
$20 for stain and polyurethane
Estimated Time Investment
Week Long Project (20 Hours or More)
Finish Used
Minwax Golden Oak and satin polyurethane
Recommended Skill Level
Beginner

Comments

brickton

Fri, 10/17/2014 - 05:37

This is really nice. I have to admit I was underwhelmed by the original plan when I saw it, but this is beautiful. Really nicely done. 

Snow man Porch Art

Submitted by Mike F on Wed, 01/25/2017 - 06:56

Snowman for the porch!


I found these posted on a blog a few months back but I forgot the blog that I saw them on. 

Estimated Cost
$20
Estimated Time Investment
An Hour or Two (0-2 Hours)
Finish Used
Provincial stain and white enamel paint
Recommended Skill Level
Starter Project

Swiveled Bookshelf with Mirror and Cork Board

Submitted by miki0225 on Tue, 01/01/2013 - 19:49

I saw a cabinet like this on Pottery Barn's website (for $600) and I knew I wanted to build it for my 12 year old niece and could do it cheaper. I have only built one other thing so I am a beginner. I do not recommend this as a first project because if it wasn't for my husband figuring out the "lazy susan" part and fixing a couple other "oops" then it would not have turned out as great as it did.

I started with the plans for the 5 Cube Tower Bookshelf and then went from there. I ended up with only 4 shelves because of a miscalculation on my part. I cut off the legs and added crown molding to the top. Used plywood for the 3 layered base and quarter round for the decorative look. The base is heavy, which I wanted because of the 2 pegs on opposite sides for hanging things (she's 12 and purses, scarfs, clothes...there is no telling what will be hung there). I added molding to both side of each opening so that as it spun things would not slide off. I have no explanation for the lazy susan because my husband figured all of that out.

The Cork board and mirrors were easy. I bought the cork in a pack of 4 squares at Walmart and the mirrors in a pack of 6 squares from Lowes. We placed and glued them on before adding the molding around the edge. Fyi: I tried to use the $5 full mirror from Walmart but it was to wide. I bought some cute buttons and cut off the loop part to glue flat metal tacks to the back. She now has decorative thumb tacks. I painted it white and then top coated it with polyurethane.

We absolutely love this and so does she. It is in her room and I think looks amazing. Can't wait to share my next projects that are almost complete.

Estimated Cost
$125
Estimated Time Investment
Week Long Project (20 Hours or More)
Finish Used
White paint and polyurethane
Recommended Skill Level
Intermediate

Comments

Mandy3689 (not verified)

Wed, 01/02/2013 - 01:19

So great! I just found this at PB Teens last night and thought NO WAY! For $600!!! I had exactly the same idea as you did.... Build a 5 cube tower and make it spin. Ana rocks! Thanks for sharing!

Patio Furniture

Didn't want the yellow but the wife talked me into it. Looks fine thou. I used 2x 4 instead of the lighter wood. I like the heavy dutyness as I'm kind of heavy. Yes I used pressure treated lumber (I know cancer) But hey last longer.

wink

Estimated Cost
$60.00
Estimated Time Investment
Weekend Project (10-20 Hours)
Finish Used
Yeller paint
Recommended Skill Level
Beginner

Dining Room table and chairs

Submitted by Anonymous (not verified) on Sun, 01/29/2017 - 06:22

I was only going to build the table, but after I found this chair and decided to make the 8 chair set. Great descriptions a d plans. 

Built from Plan(s)
Estimated Time Investment
Week Long Project (20 Hours or More)
Recommended Skill Level
Intermediate

Comments

Farmhouse Console Inspired Design with Vinyl Floor Plank Top

Submitted by mowbratb on Mon, 10/19/2020 - 10:16

Started with the Farmhouse Console design and ended up modifying a bit but still wanted a similar look of the console. This was my first time building a piece of furniture so not too hard, just more time. Here are my changes: 37" height (12" height between shelves plus drawers and 1" top) 23" base width (wanted to use for storing clear bins) 25 3/4" top width 65 3/4" main top length 22 1/2" lower top length (wanted to a place for my printer with storage for paper below it) 88" (full top length) 34" interior width large section (2 bins for each shelf) 18" x 2 interior width for smaller sections (1 bin for upper and lower) 18" x 4 1/2" drawer opening 34" x 4 1/2" drawer opening 1 - 32 11/16" w x 21 1/4" drawer with 18" Everbilt full extension ball bearing slide set 1 - 16 11/16" w x 21 1/4" drawer with 18" Everbilt full extension ball bearing slide set Additional Notes: - Used Pine/Spruce Edge V planks (.25" thick, 3.5" width) for sides and back - Used 2x4 for drawers with 1/2 birch plywood for bottom and 1x6 face (19" and 35" long) - Assembled with pocket screws, GRK finishing screws and glue just like the farmhouse console instructions. - Had to modify the location of the 2x6 slats for the two center legs to account for the change in length to keep the 1" space between them. As noted in the title, I experimented by making the top using lifeproof vinyl "Trail Oak" floor planks glued on top of 3/4" birch plywood and trimmed it with 1 x 2 stained to match the vinyl flooring. I'm pretty happy with the turnout but was prepared to use 2/6's if it didn't look the way I envisioned.

Built from Plan(s)
Estimated Cost
~$350
Estimated Time Investment
Week Long Project (20 Hours or More)
Finish Used
1. White color, used Valspar Cabinet Furniture paint. Didn't prime underneath as the product says you don't need to but I wished I had. Took 2-3 coats to cover properly. https://www.valspar.com/en/products/interior-paints-primers/cabinet-furniture-oil-enriched-enamel
2. Top surface: Lifeproof 8.7 x 47.6 Trail Oak vinyl flooring planks, used 6 of the 7 planks from one box ($60)
3. Top Trim: Varathane (1 part Honey mixed with 2/3 part Dark Walnut) to match the vinyl planks
4. Applied brown caulking in cracks between vinyl floor planks and trim
Recommended Skill Level
Intermediate

Train Table

Submitted by Nolan on Thu, 01/03/2013 - 08:42

This was the first project I did from Ana, and the plans and directions were excellent. My son is 20 months old with a Thomas the Tank Engine obsession....I had told my wife I would make a train table for him for Christmas and this was the one she found. The little man was extremely excited on Christmas morning, and it turns out I ended up building a babysitter in the process.

Built from Plan(s)
Estimated Time Investment
Weekend Project (10-20 Hours)
Finish Used
I stained the project with Minwax dark walnut 2716 (2 coats). Each coat was rubbed on with a cotton cloth, and excess was then wiped off after 10-15 mins. I used Minwax fast drying satin sheen polyurethane (3 coats) to finish. I used a foam brush to apply the poly and sanded between coats with 400 grit sandpaper.
Recommended Skill Level
Beginner

Farmhouse Doll Bed

This was my first build and it went super smoothly.  I added the suggested support underneath, since I know without a doubt that my daughter will try to sit on it at some point.

Estimated Time Investment
Weekend Project (10-20 Hours)
Finish Used
Paint: Valspar semi-gloss in Promenade (after spray-on primer and a lot of sanding)

Mattress: Foam from a home decorating store covered in fabric. Installed a zipper so that it can be removed and washed if need be.
Recommended Skill Level
Beginner

Poker table

Submitted by Trishalado on Wed, 02/01/2017 - 06:46

Over the course of a couple months, my husband and I created this beautiful poker table based heavily on the Benchmark Octagon Table plans found here. The farmhouse style base was essentially the same although the size was modified slightly to better accommodate our poker table top that was completely custom. We even created slide out cup holders that work perfectly.  So much wonderful inspiration from both here and Pinterest that gave us wood working virgins the confidence to tackle our first project together. 

Estimated Cost
$500+

I've saved all the receipts but hesitant to add it up as I know there were an insane number of trips to Home Depot! Also, because I am new to this we had to make a significant investment in tools. It's worth every penny and more.
Estimated Time Investment
Week Long Project (20 Hours or More)
Finish Used
Saman waterbased stain (three parts Iron Earth and one part White Wash colours the top and it's finished with multiple coats of Saman water based Matte lacquer. The base is painted with Rustoleum Chalk paint first with charcoal and Aged grey and then covering with Linen White. Once dry the edges were lightly sanded to reveal the grey and black giving a distressed look.
Recommended Skill Level
Intermediate

Entryway Bench and Storage Shelf with Hooks

Submitted by DC_Idaho on Fri, 10/23/2020 - 10:37

I took your entry way plans, went to my local saw mill and bought some rough cut poplar, and got to work. I started this project for my wife and was able to get the entry way shelf built. When I showed a co-worker what I was doing she asked if I would build her a bench with a few customizations. I took a break from doing the bench for my wife and made the bench for a co-worker, btw, I totally under sold the bench($200). The pictures show what I came up with, smaller shoes on the inside and boots on the outside. I still have to build another bench to match my wife's entry way shelf with coat hooks :)

Estimated Cost
$600
Estimated Time Investment
Week Long Project (20 Hours or More)
Finish Used
Stain and diluted off-white paint
Recommended Skill Level
Intermediate

Comments

Map drawer for Erin

Submitted by Quartney on Fri, 01/04/2013 - 13:16

My husband needed a place to store his stuff--maps, yes, but also cords, hard drives, and other things he didn't want the kids to get into. I took the coffee table plan, essentially cut it in half, then raised it up to fit four drawers. The best part was that I only made three drawers--the bottom one is extra-tall to fit his extra-tall stuff, but it has false drawer fronts. I also opted to skip the caster wheels.

Estimated Cost
$160
Estimated Time Investment
Week Long Project (20 Hours or More)
Finish Used
Minwax Wood Finish in Jacobean
Recommended Skill Level
Intermediate

Comments

Bander

Fri, 01/04/2013 - 20:22

It looks wonderful. I have not yet attempted a project with drawers, are they difficult to get right?

Quartney

Sun, 01/13/2013 - 17:28

Thank you! Well, I've made one project with drawers that was fairly straightforward, and these drawers were more difficult, so I can't really say how hard drawers are! Like everyone advises, you have to make sure the drawer box is square ...

Storage bins

Submitted by DIY JEFF on Sat, 10/25/2014 - 13:03

Needed storage for the twin storage beds I built and came across this plan. I just modified it a bit. Used shoe moulding to give the bins a locker door look. 

Built from Plan(s)
Estimated Cost
10.00 each
Estimated Time Investment
Day Project (6-9 Hours)
Finish Used
Home Depot Bear Gloss Trim paint
Recommended Skill Level
Beginner