Duck-Egg blue kitchen Island w/ Butcher Block Top
![](/sites/default/files/IMG_20150610_072449914_HDR_0.jpg)
Used Annie Sloan duck egg blue paint and glued 1x2s end up to make a butcher block top
Art cart!
i used furniture glide feet instead of wheels. I put the plexi on hinges. All scrap materials except for hinges.
Hi Ana and family,
A couple of months ago I contacted you to see if you had a video on how to build a Turntable/media console out of 2x4s with a picture for inspiration. I did get feedback and it really helped. Thank you so much for always being available to help.
Sun, 12/26/2021 - 17:42
That turned out awesome, so happy to help, thank you for sharing!
I have recently started working with wood and I love it!!! It started with a few little cubbies, then a small primitive cabinet and today I built my farm table and I absolutely LOVE it!!! I kind of combined plans,,used the size of the narrow farm table and did the basic frame of michaelas kitchen island
I built this using scrap 2x2s and 1x4s that I ripped down to the appropriate sizes. Also instead of using pocket holes I counter sunk the screws and filled with wood filler.
Upgraded the original to fit the style of our living room. Just a few dollars more in wood. Changed the frame setup as well.
Very busy so I only have time to do a little bit at a time so I have no real idea how long it really took to build. All I know is the finishing took the longest: 2 coats black painted lower with 2 coats stain on the (custom color) and 2 coats polyurethane on the top piece.
I used the Rustic Kitchen Island plans to build this. I made my own modifications making the draw and the shelves the entire width of the unit. I also used 1x2’s behind the X’s to give it more of a barn look.
After a rough start when my MDF beadboard flew off the roof of my car in a huge gust of wind and tore in half... and the lumber yard not selling 1x3's so I had to use a 1x4 for the header.... my boys were really excited to see their new bookshelf this morning. I omitted the bun feet for now, and elected not to do a cutout on the header.
The MDF I used is 1/4 inch beadboard because my local lumber store didn't have 1/4 inch plywood in stock. I love how it looks, and it didn't add a lot of weight. The price was comparable to 1/4 inch plywood too. But it did tear and luckily one of the pieces was long enough to use as the backing. Barely.
Except for the footer pieces and backing which were nailed on, the whole thing was built with my new Kreg jig! :-)
I built cedar raised beds out of cedar decking, 3 pieces 5/4" x 6" x 8', actual dimensions were 1" x 5.5" x 8', plus 1 - 2 x 4 cedar. I made 48" x 96" boxes. I cut 1 of the cedar deck pieces into 2 - 48" long pieces. For the corners, I cut the 2 x 4 into 8 - 5.5" long pieces. I then screwed 2 of the 2 x 4 pieces together to form a 4 x 4 block. I used these as the inside corner to screw the decking to. The total cost was $60 to build 2 cedar beds. The other option would have been to make them double height, by cutting the 2 x 4's 11 inches long. This is more expensive then the boxes Ana did, but I could not find cedar fence slats, they appeared to be Northern White Pine which would have deteriorated quickly. I obtained the lumber from Lowes.
I omitted some of what was called for in the original plans at ana-white.com. I wanted only a headboard. I then opted to go without the plywood backing when I found out that my local Home Depot's cutting area was not cutting due to the machines needing to be repaired. I added an extra piece of wood to the legs to accommodate attaching the bed frame. The finish is Varthane Red Oak and sealed with Minwax Polycrylic in Satin.
My mom is very happy to be getting these two headboards for her spare room. (The other one is still on my work table in the garage awaiting assembly and final finish!) Thanks for great plans to work from Ana!
I used my CNC machine do add custom details to this build , this thing is huge ! The hardware was a bit tricky to track down the parts but not hard to assemble at all.
At the beginning I was not sure to succeed in the drawers so I did no regret it .
I decided to doing another one .
My brother was happy to take my fist one.
Thank Ana White
Mon, 12/27/2021 - 11:56
Those are amazing and the drawers look perfect, way to go!
I LOVE the farmhouse table! Ours is an "almost farmhouse" since we didn't do our top with individual boards. For the table top, we used hardwood plywood and select pine 1x2 for edges. To get the Farmhouse look with a stain effect, I brushed on Minwax Express color in Walnut to get the appearance of long boards, applied 5 coats of poly, and put 2 coats of primer and paint on the legs of the table we already have. We attached the tabletop with glue and screws.
This fun patriotic caddy was created with some small modifications to the plans that inspired this project : Ana White's Soda Caddy . I added a space for napkins to my version.
Sun, 08/11/2013 - 19:20
I love how you modified the compartments fit the napkins!
This was a pretty easy build. This was my first project and this looked like a pretty straightforward plan. I read over it several times before deciding what to do. I didn't like that it was held together using only screws. I anticipated that these beds will be moved several times over their lifetime and I did want to hassle with the screws stripping out the wood. Instead I used a 3/8 bolt and washer/nut set up so I could take the bed apart without worrying about stripping out the wood with screws. This necessitated drilling several large unsightly holes at the connection points. To help disguise this I trimmed it out using door casing and finished it out by staining the whole bed. The result was a classic look that will last my daughter's lifetime.
I will note that I changed a few parameters. I routed and the edges including the slats with a rounded corner edge. I used a 2x6 for the top cap of the head/footboards. With the addition of the trim work and bolt hardware, this did change the overall cost of the project. Total cost was probably close to $200. Had I stuck strictly to the plans I would have been closer to $100.
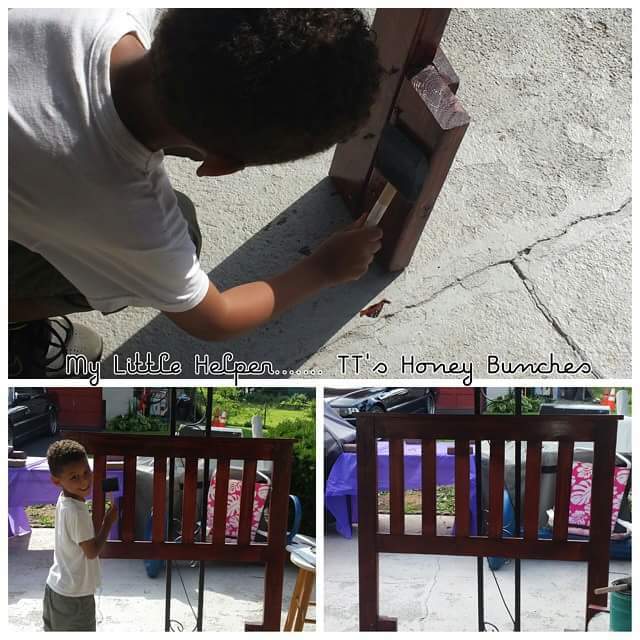
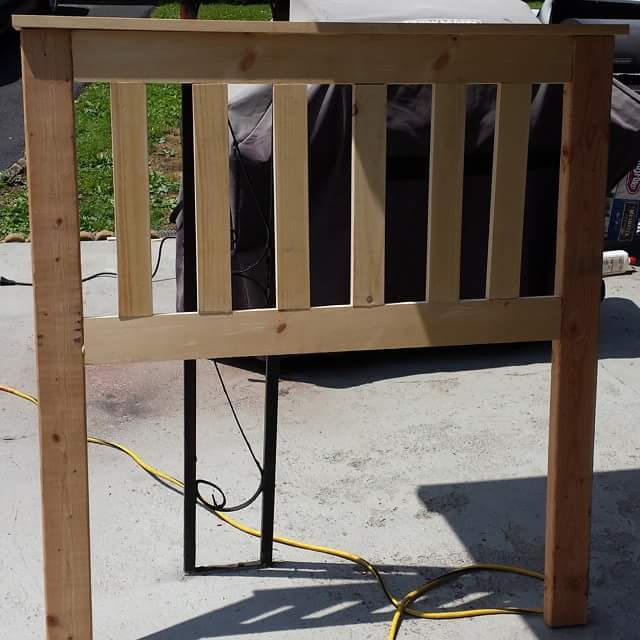
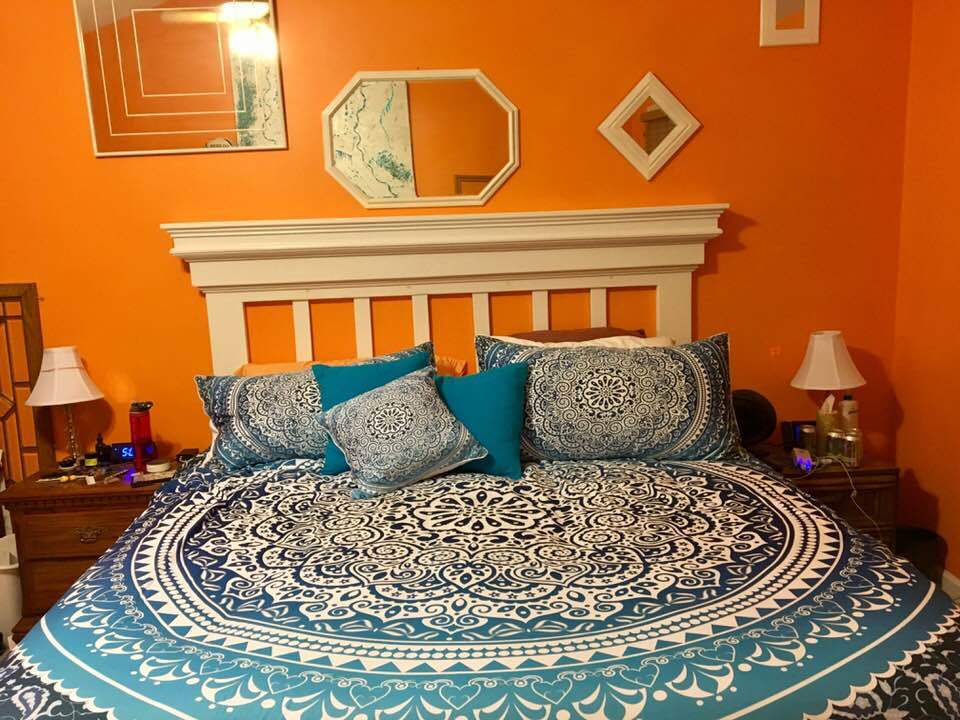
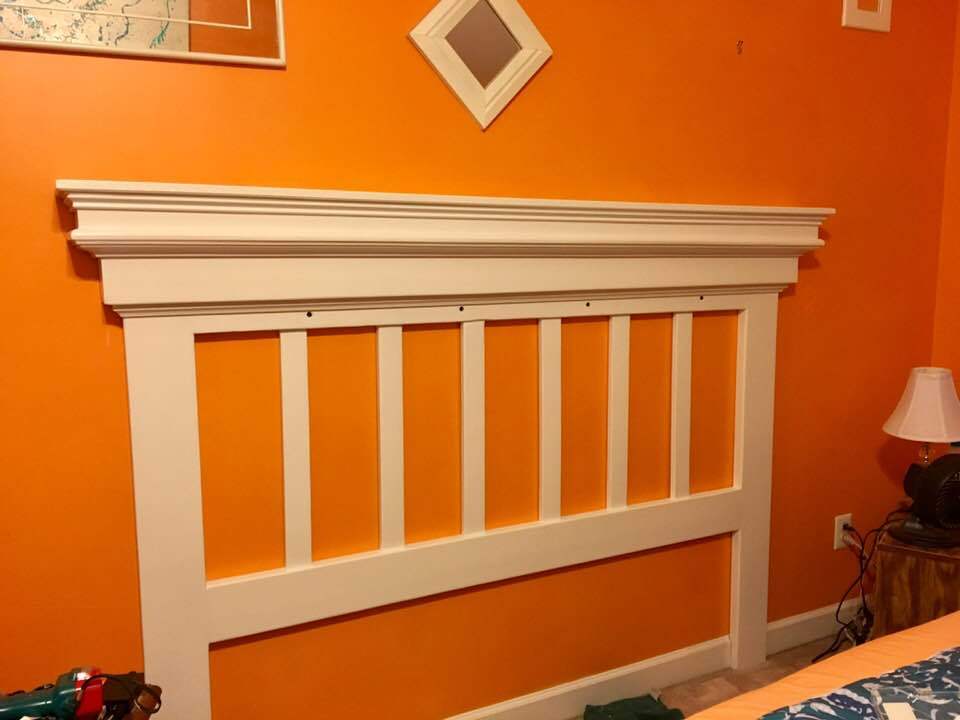
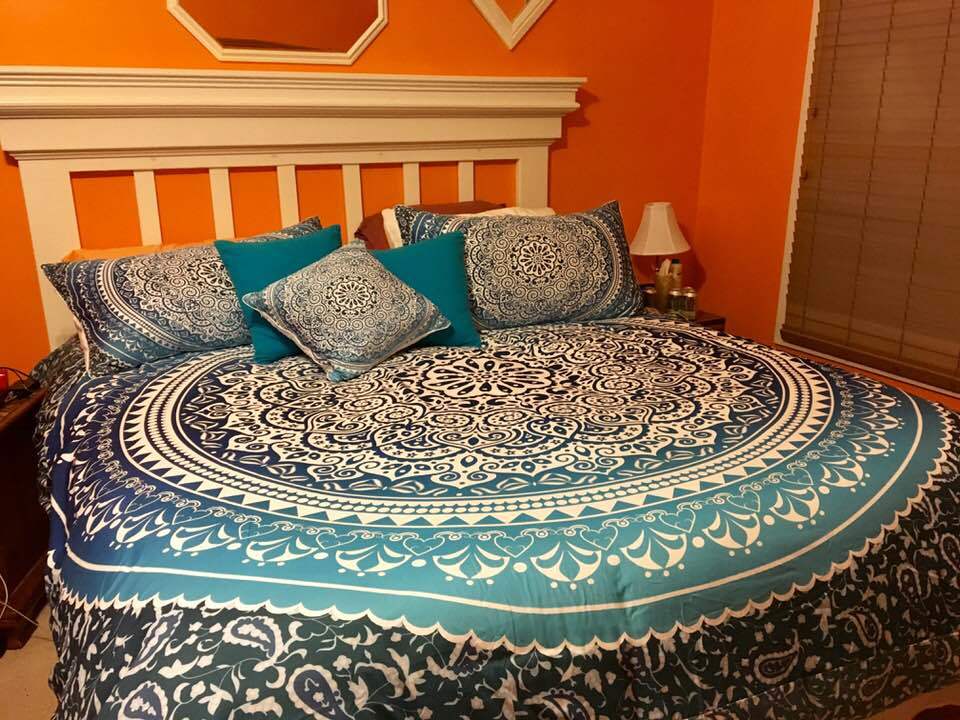
We went with the mission style headboard and used 1x2 posts instead of a solid or upholstered backboard. We also converted the designs to accomodate our California king mattress.
The designs on the site are for a queen sized bed, which is 60"X80". The "H" frame of the headboard is 66" wide (two vertical 2x6's and a 54" horizontal piece). Our California king mattress is 72"x84". So that's 12 inches wider than a queen. As such, we simply adjusted everything up by 12". So, insead of a 66" wide H frame, we made it a 78" H frame and so on.
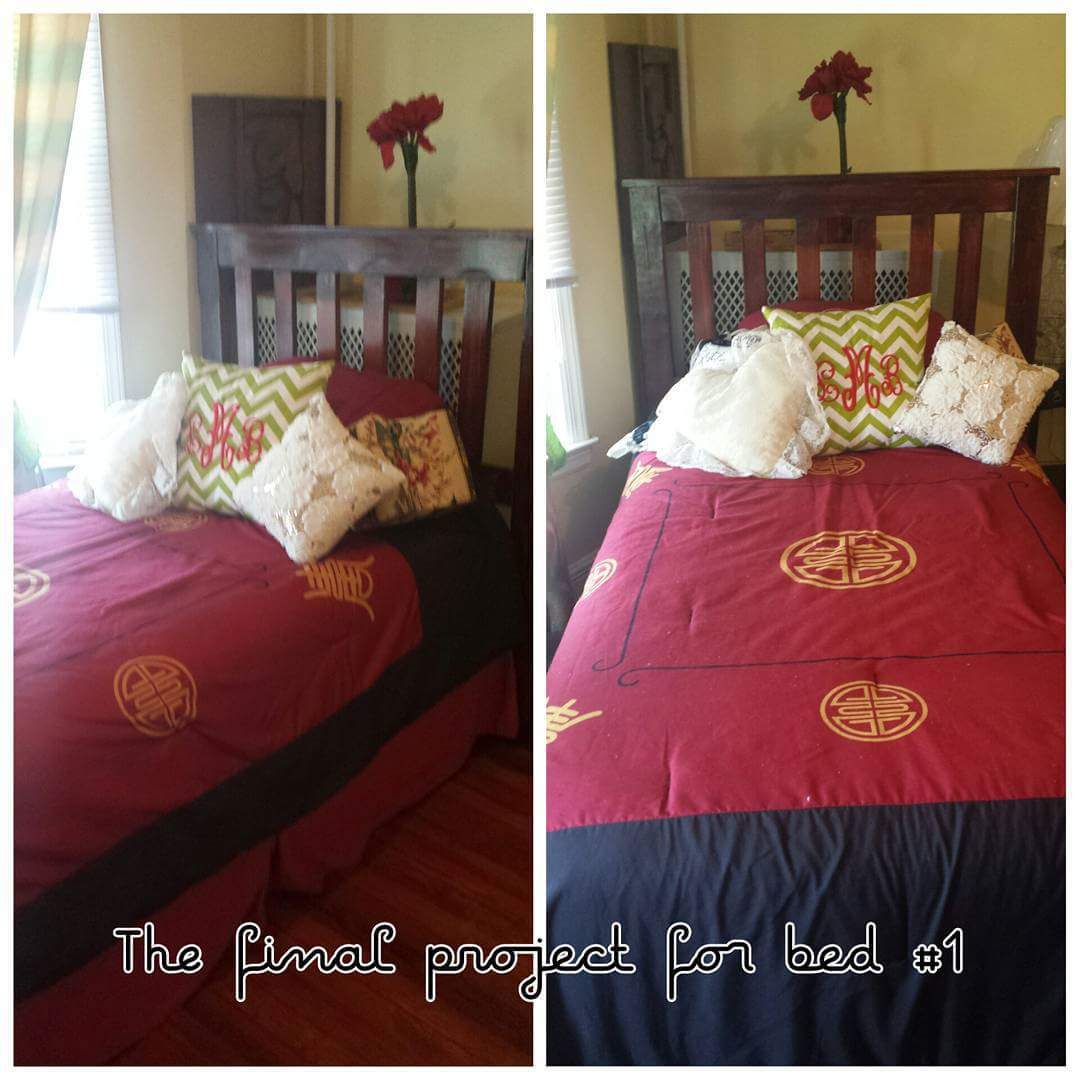
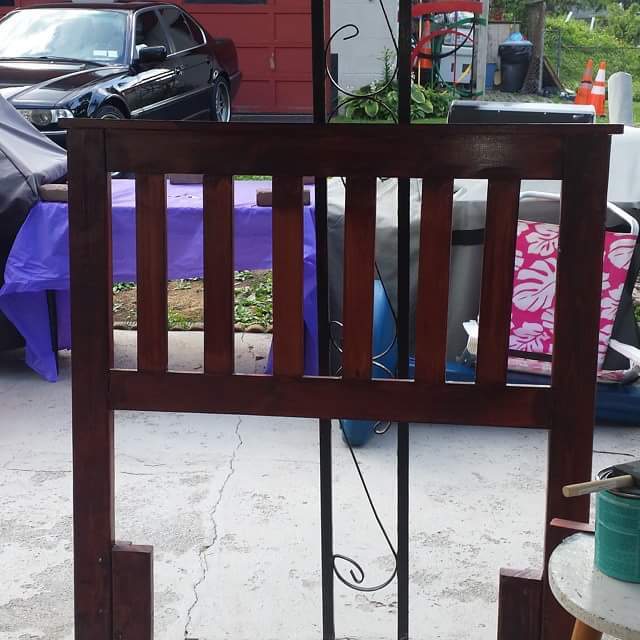
It took just one day to build. But we used an entire container of woodfiller to conceal the joins, nail/screw holes and knots, lol. Then we used 2 coats of primer and sanded between coats. Then used 3 coats of latex semi-gloss paint, sanding in between each coat. The wood filler, paint, sanding and drying time is what caused the project to be more than just a weekend thing.
Hi Ana,
I live in the UK and really enjoy the range of projets you show on your website. Only been doing DIY woodworking for about a year and you have helped enormously.
I built this console table in time for Xmas and really pleased with the result. The plans you provide are perfect, simple, easy to follow and give just the right amount of detail. It means only wood needed for the project is bought and little is wasted. The videos you produce to accompany the plans are exactly what is needed. It is so helpful to see the suggested order of building the project and also as a check to see what each stage should look like.
Thanks again for all your efforts, they really are appreciated and best if luck for the new year and hopefully, many more projects.
Tue, 12/28/2021 - 11:27
Beautiful job, thank you for the kind words! Love your finish choices and added hardware accents, beautiful build!
I used a combined/modified version of the Logan and Kristen's modified version as well. The opening in the middle houses the mirror currently, but was designed to fit a 27" flat panel tv when Ceira is older (maybe, LOL). I used regular pine to build it. I built it in two pieces (top and bottom). I couldn't put a back on it, as the heater (baseboard) is there, as well as outlets, and I didn't want to have to move either one. I adjusted the top portion to be slightly wider to cover the distance between the wall and the base bookshelves. This actually worked out well, as when we do eventually install a tv, we will be able to install and hide the wiring easily, and without having to add/move electrical outlets. I made sure to attach the shelves to the studs behind the wall as I am convinced some child, at some point will attempt to climb them. :)
Things I learned from this project - paint BEFORE assembling. This was a huge pain to get inside all of the upper shelves after it was already installed. Also - I hadn't had the carpeting installed at the time I built the shelves (it came about 2 weeks later). Make sure you either do your flooring first, or keep enough scrap flooring to cover the space behind the bottom shelves and under the radiator. Fortunately, I had enough (this time).
I used Ana's plans and only made one adjustment. I could not cut the 50 degree angles on my miter saw so I just borrowed the "V" design from one of her other plans. This table is really heavy and sturdy. A helper is necessary to flip the table top back and forth.
I used flat stone and a masonry circular blade for the base of the corner posts. I also used 2 x 4's for both layers of the top boards. It was a lot of fun to build.