My laundry basket dresser
I started with the standard laundry basket dresser but went with shelves. I thought that the baskets would last liner this way. The baskets used are from IKEA and sit on felt runners to keep the noise down.
I just started wood-working and found this to be a really nice build. I did, however, adjust the height of the desk legs from 31 inches to 36 inches, because I am 6'6" and felt I needed the leg room. I used 4 Severe Weather 2 1/4in x 2 1/4in x 36in Colonial Treated Deck Spindles from Lowes at $2.88 each for the legs. I also, added the drawer dividers to help organize the storage space. Otherwise, I stuck to the plans.
Severe Weather 2-1/4-in x 2-1/4-in x 36-in Colonial Treated Deck Spindle http://www.lowes.com/pd_7954-432S2236T15N_4294610196__productId=3185415&Ns=p_product_qty_sales_dollar|1&pl=1¤tURL=%3FNs%3Dp_product_qty_sales_dollar%7C1&facetInfo=
Stainless Steel Drawer Pulls http://www.homedepot.com/p/Liberty-8-5-6-in-Steel-Bar-Cabinet-Hardware-Appliance-Pull-117060-0/202023671?MERCH=REC-_-NavPLPHorizontal1-4-_-NA-_-202023671-_-N
Por ser principiante me tomo 2 fines semanas.
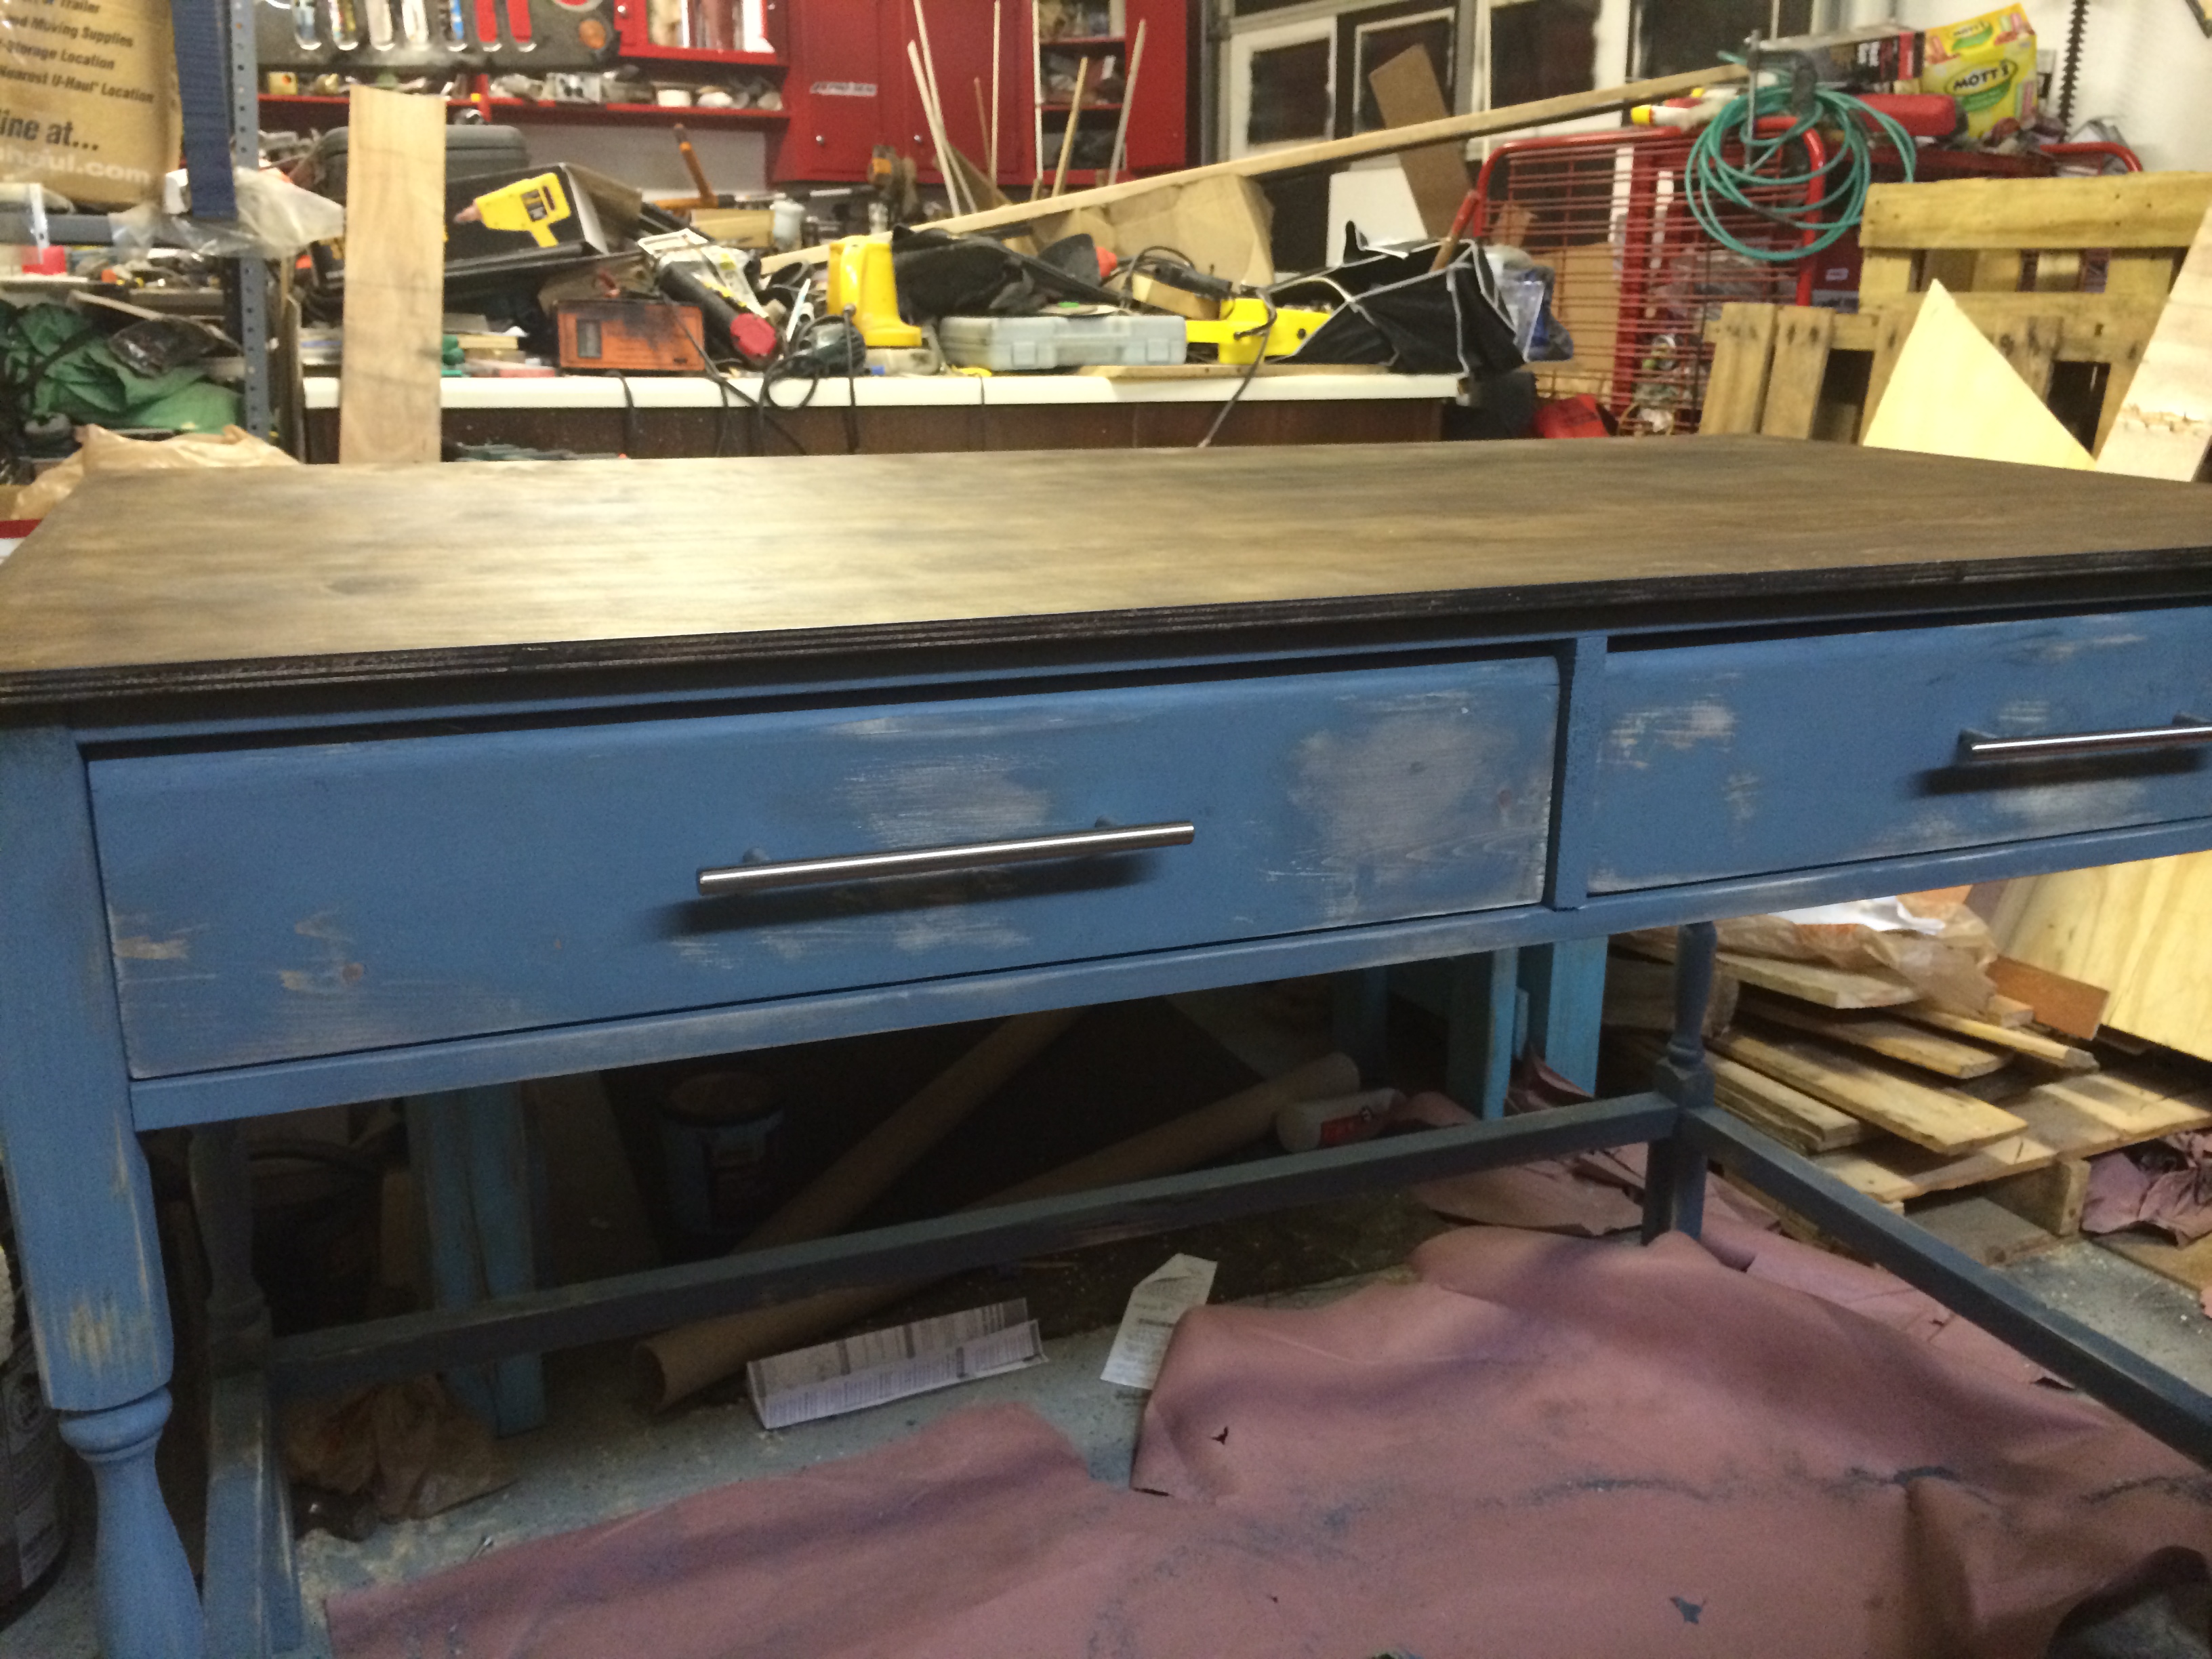
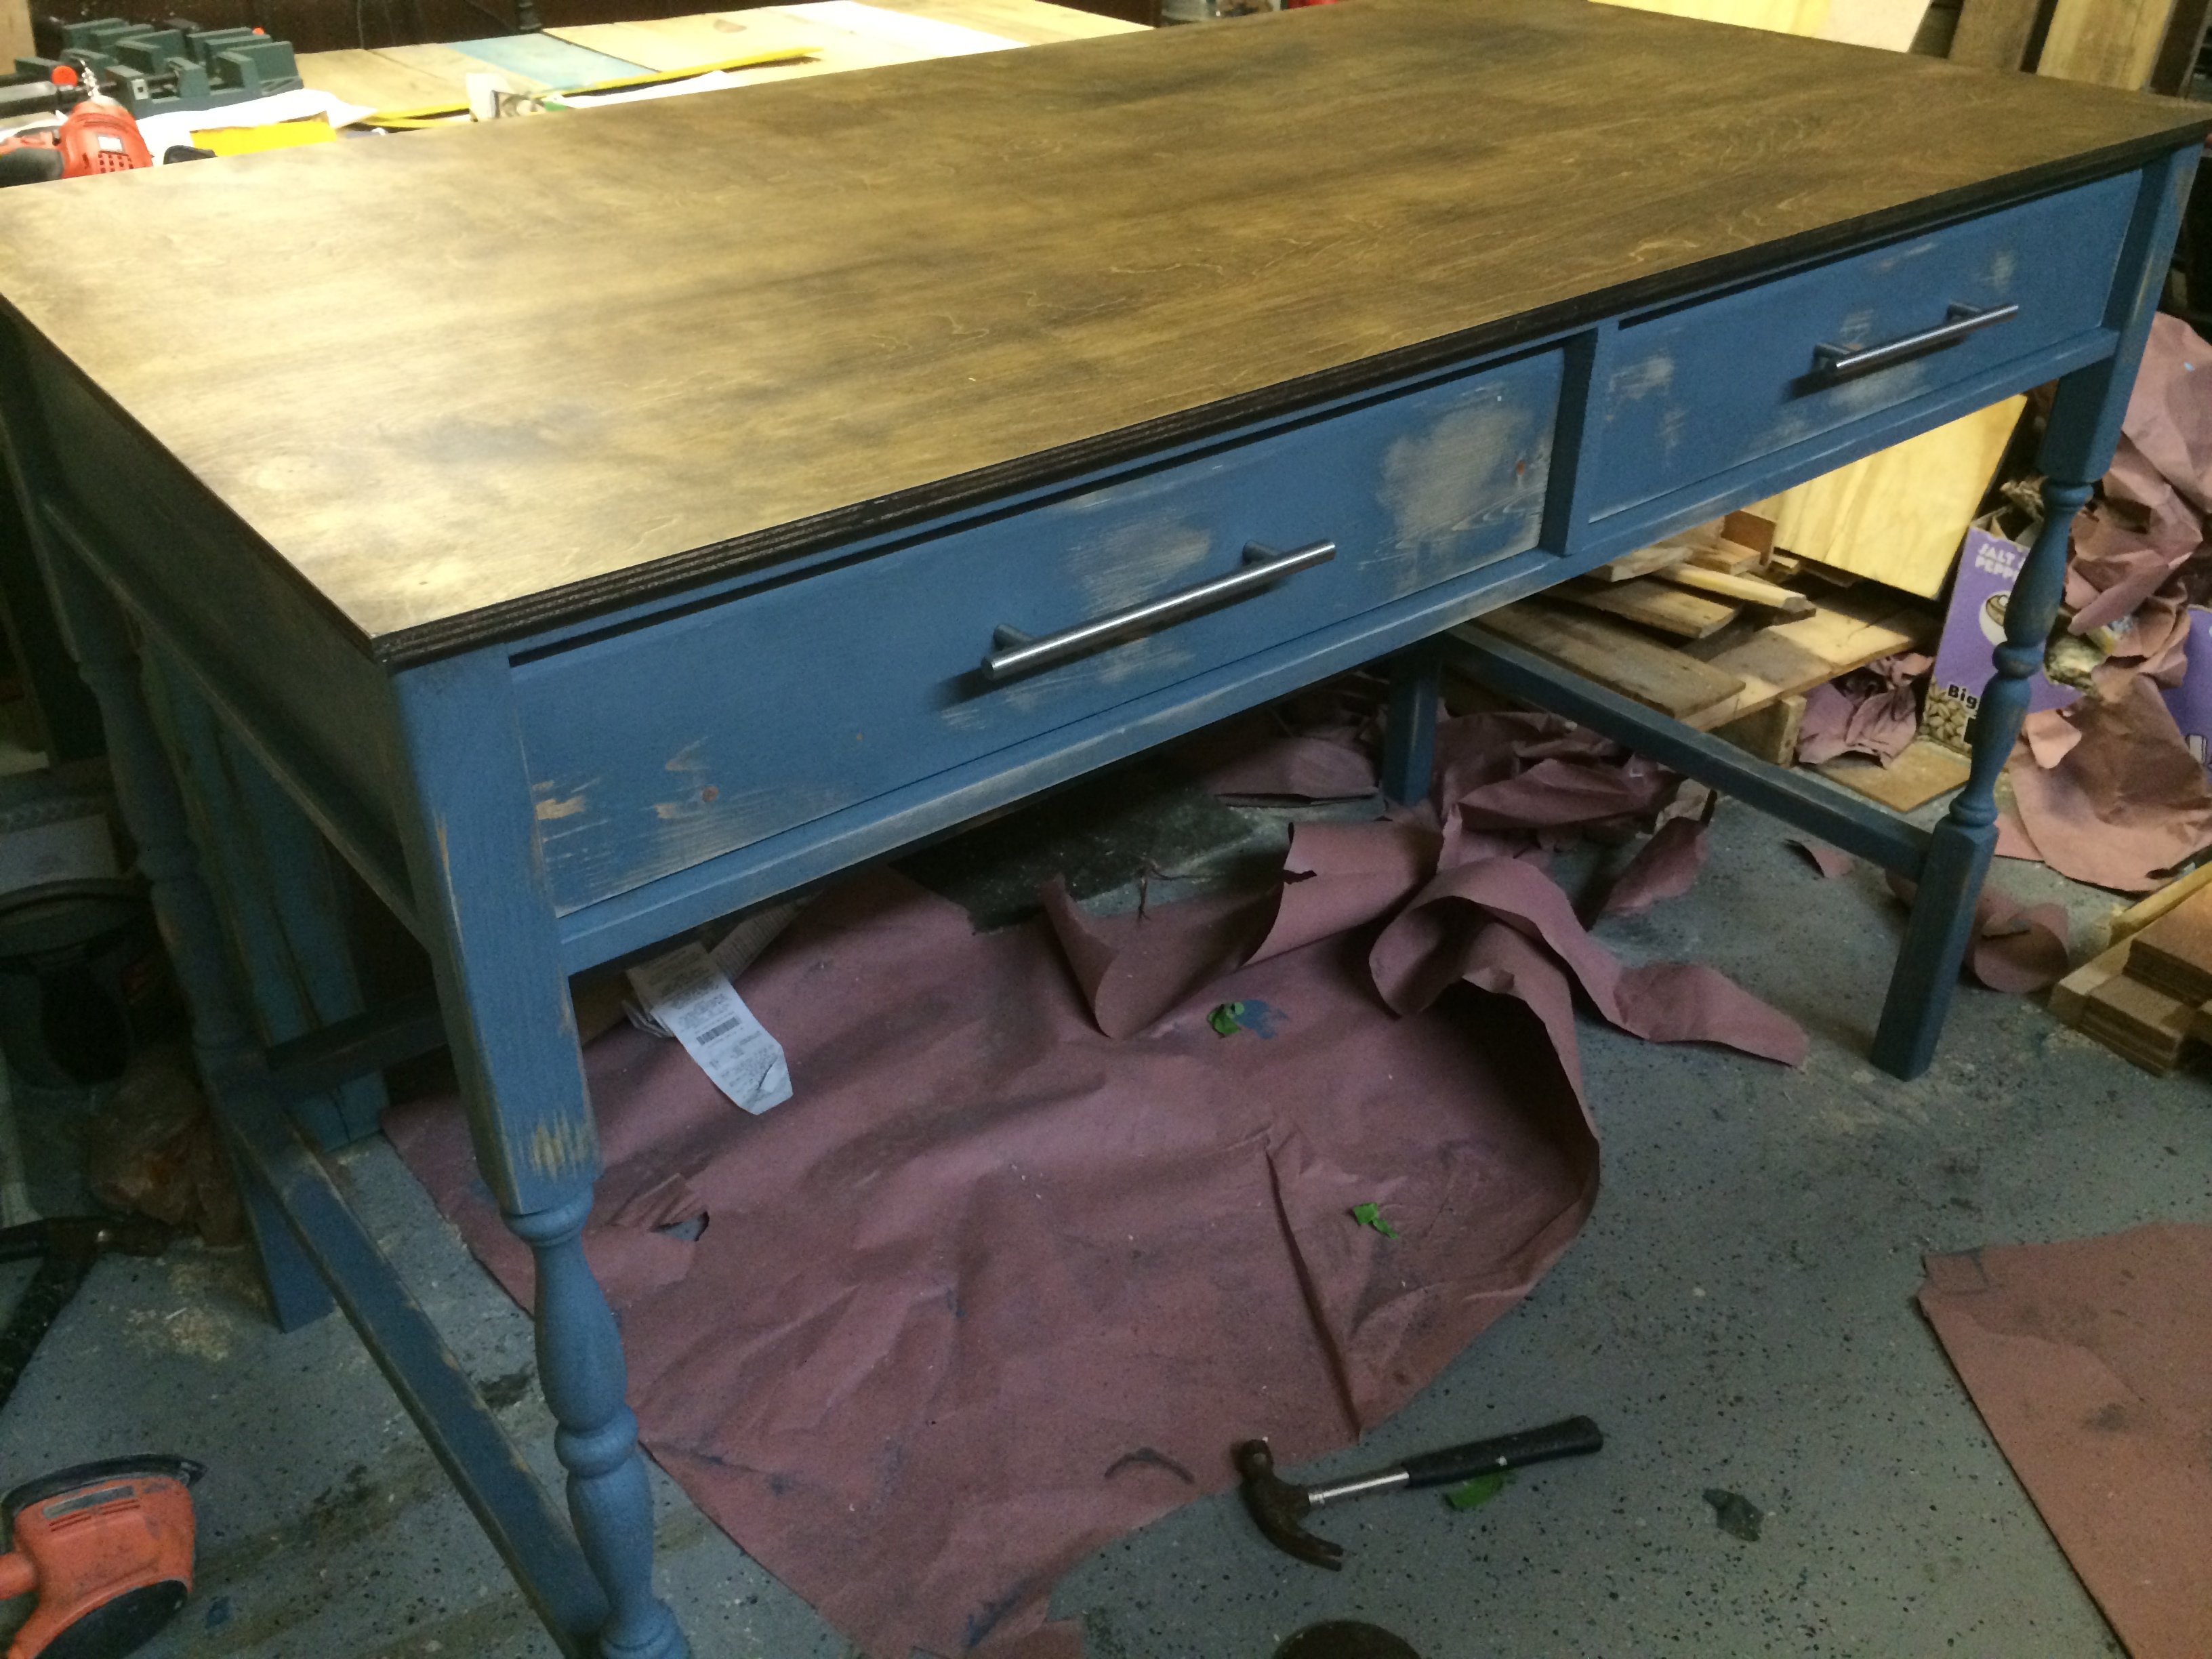
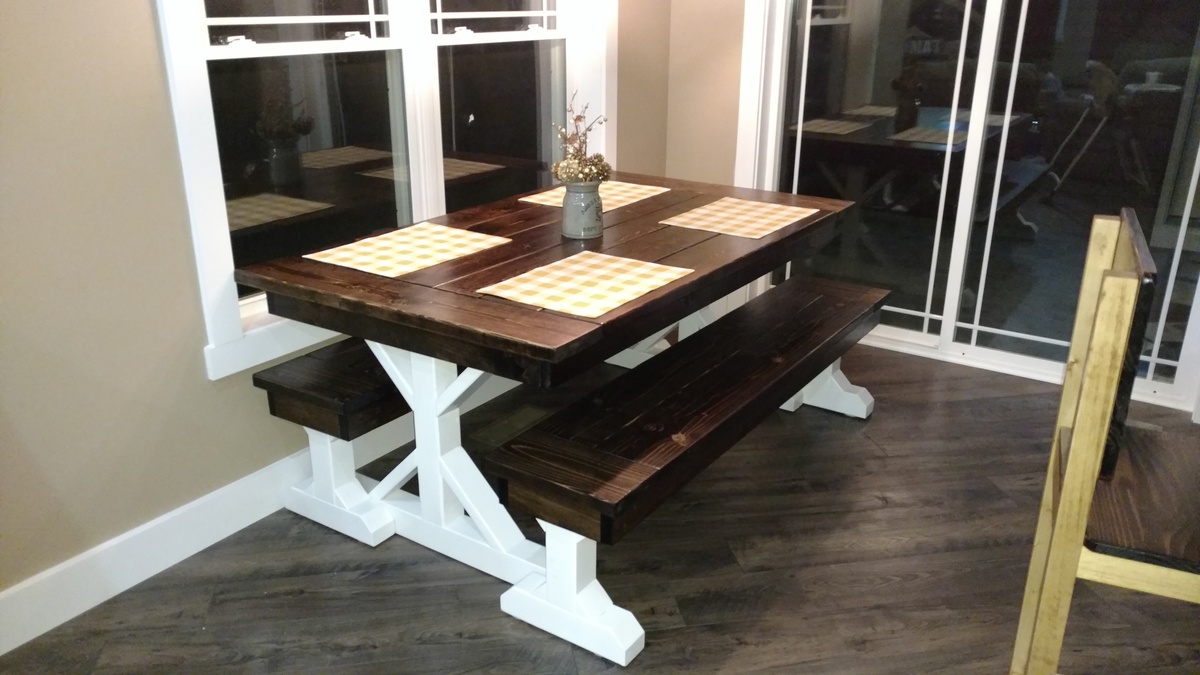
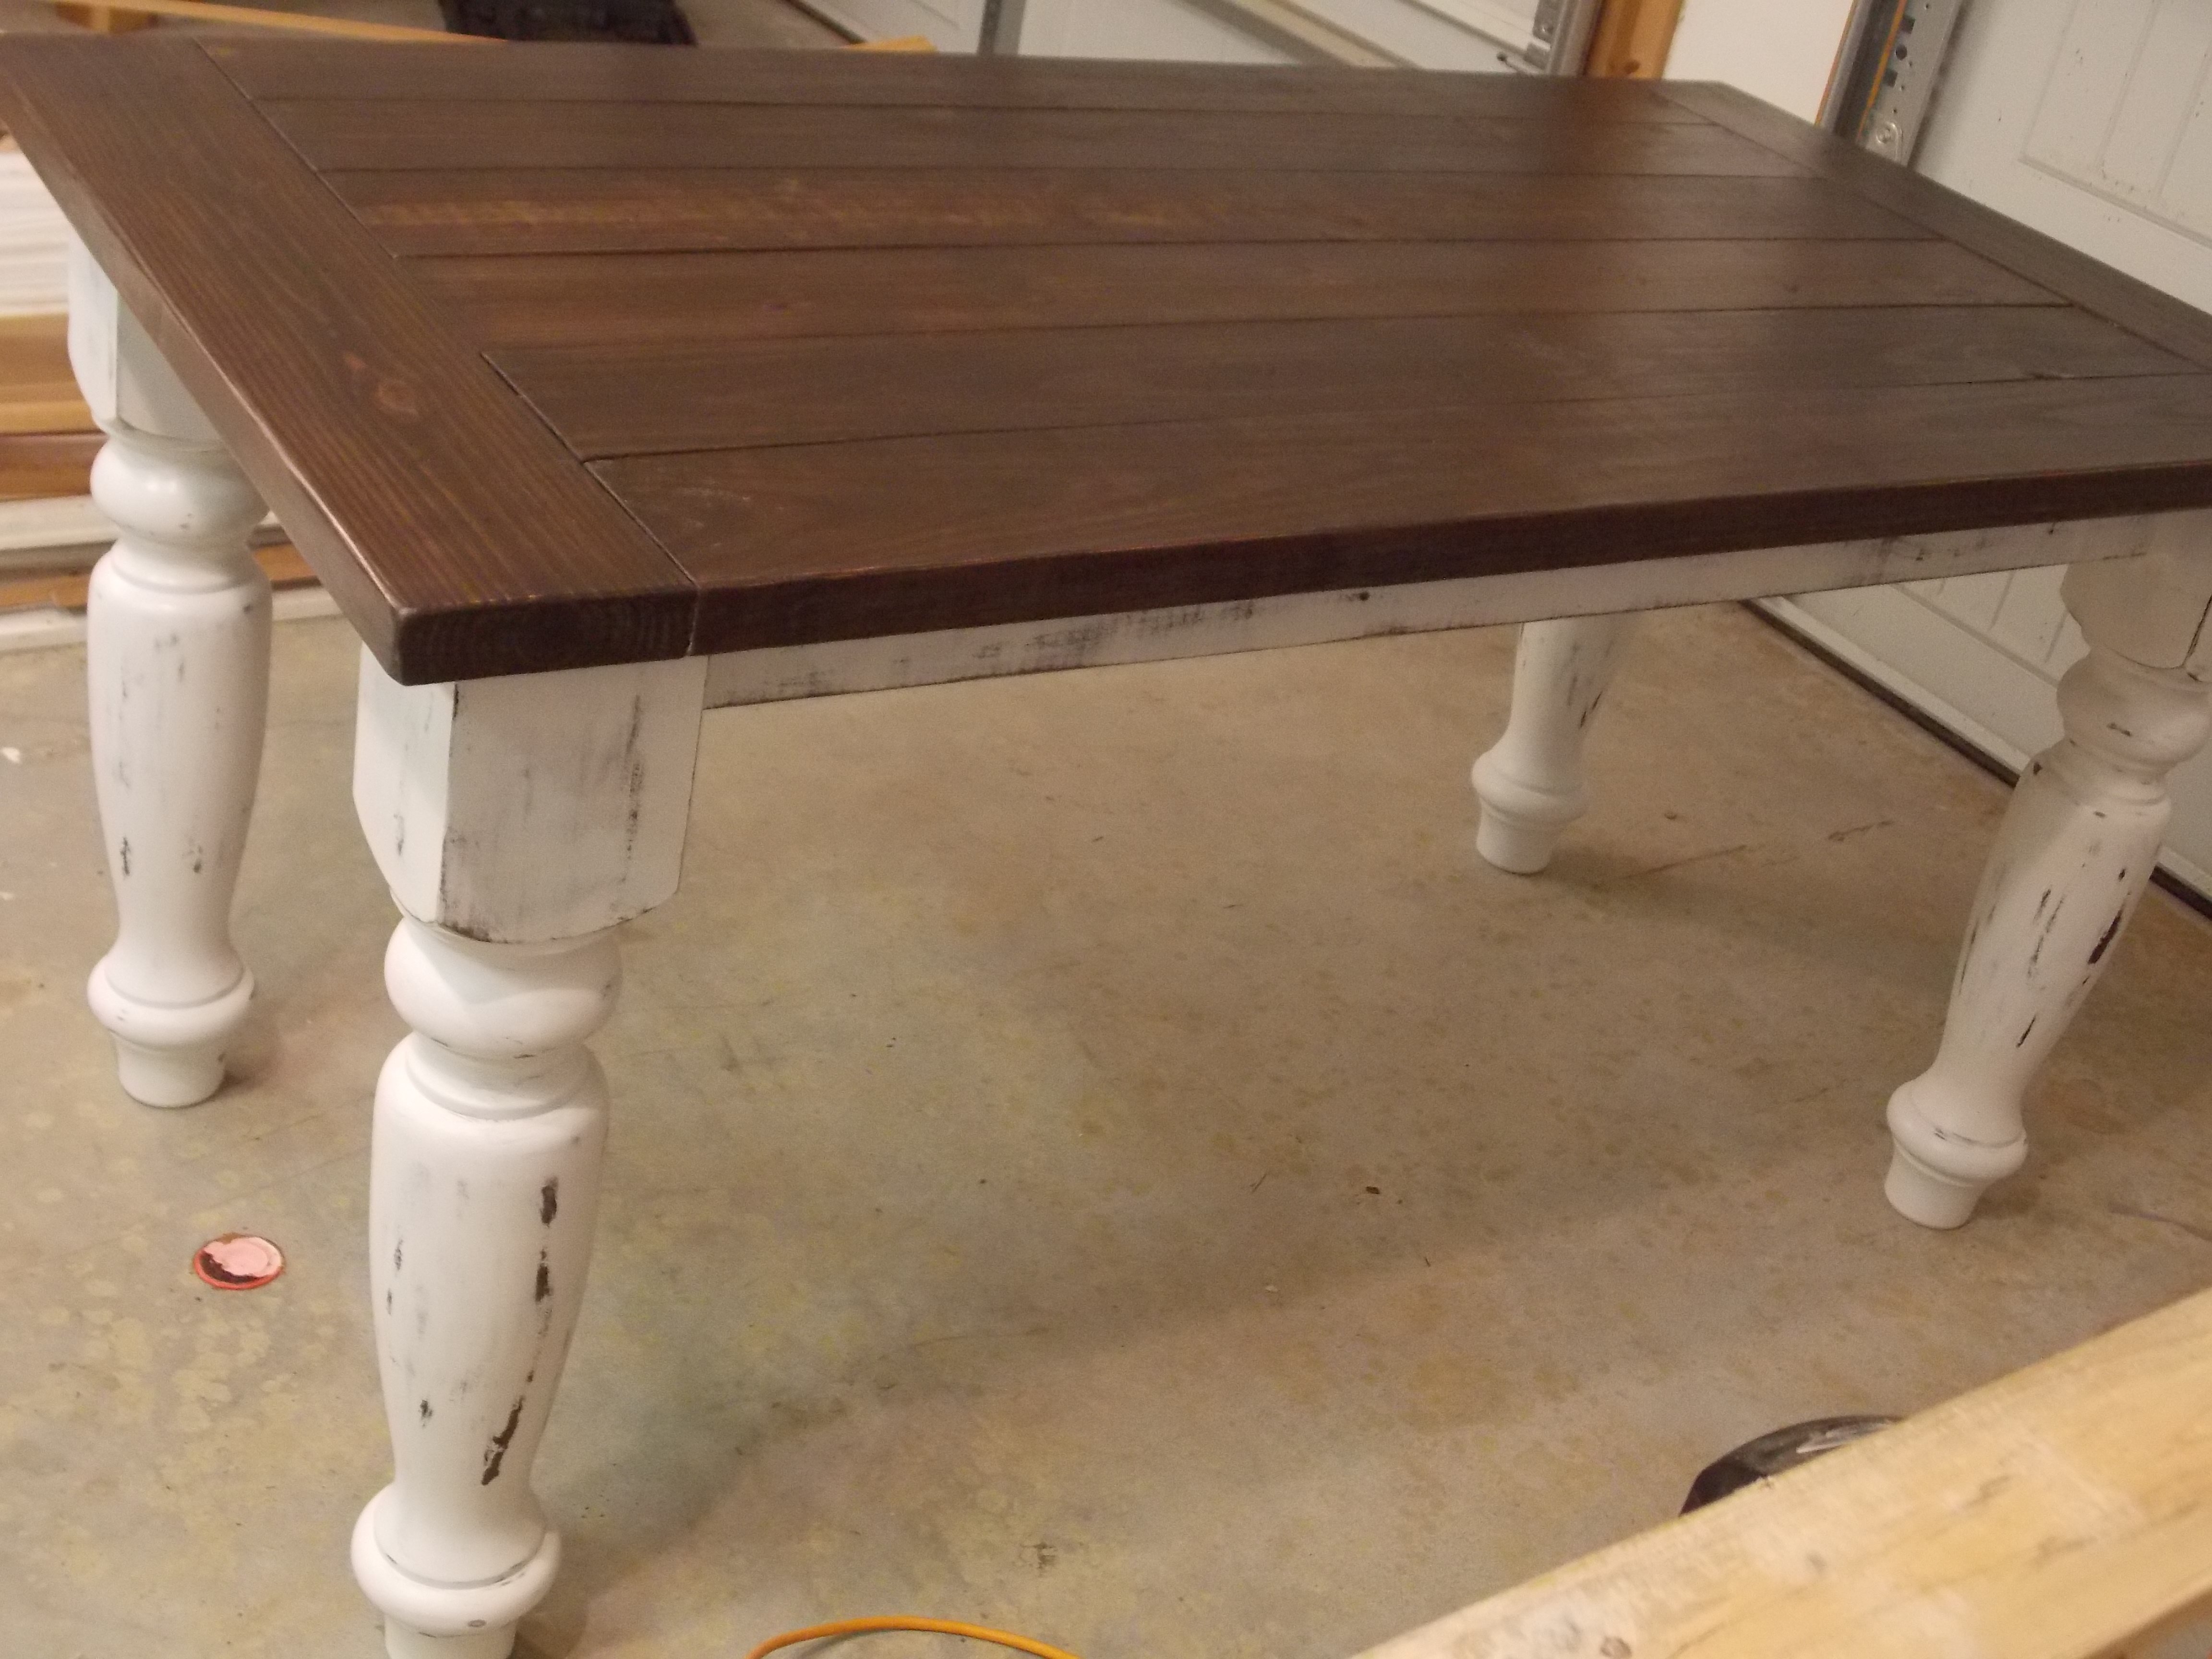
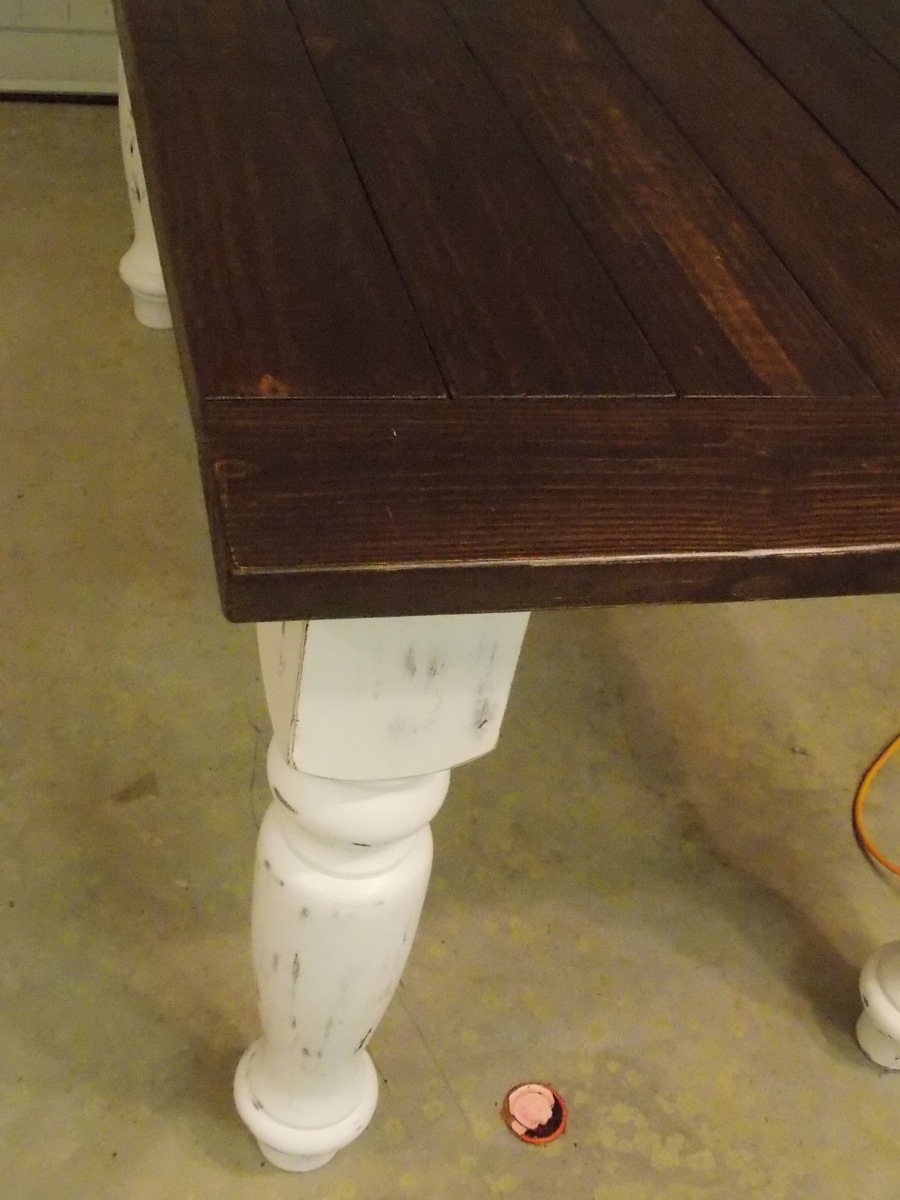
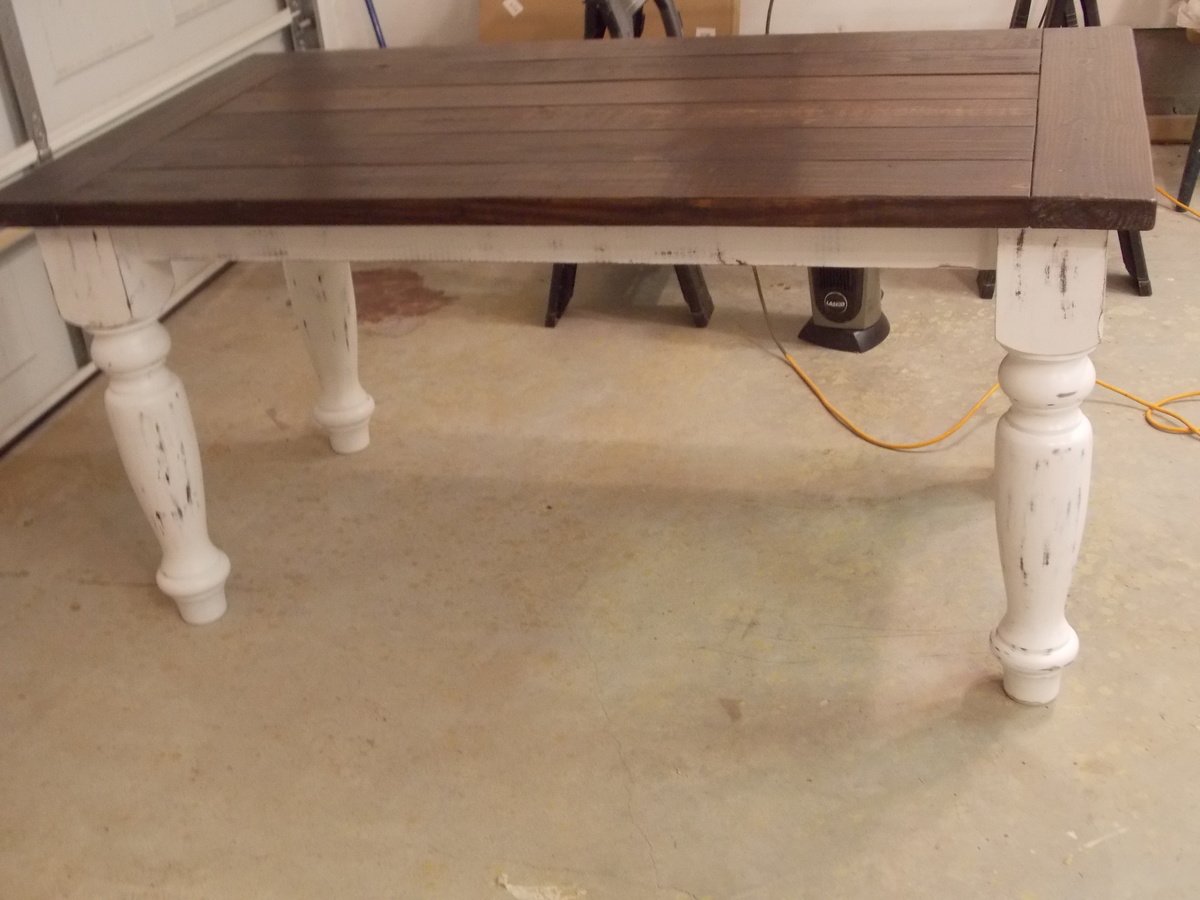
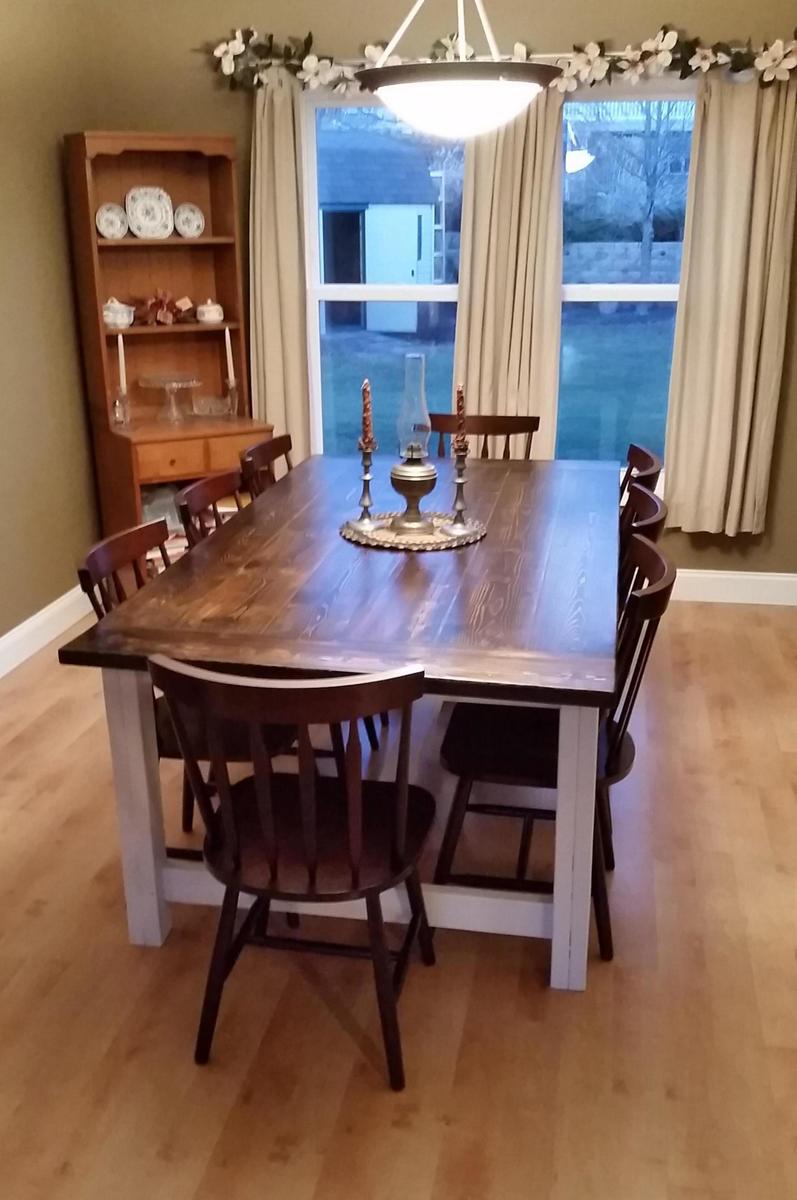
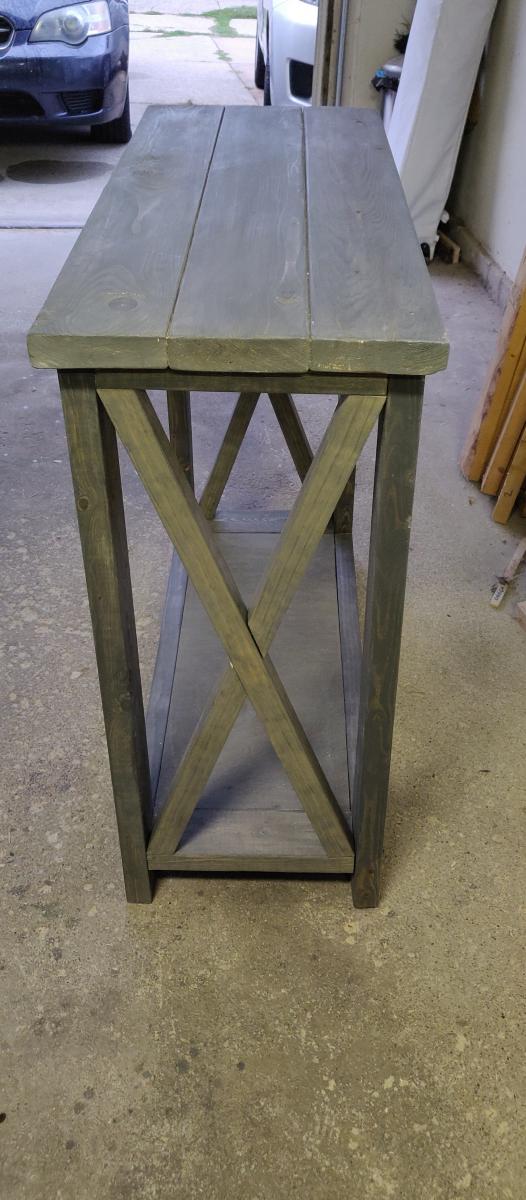
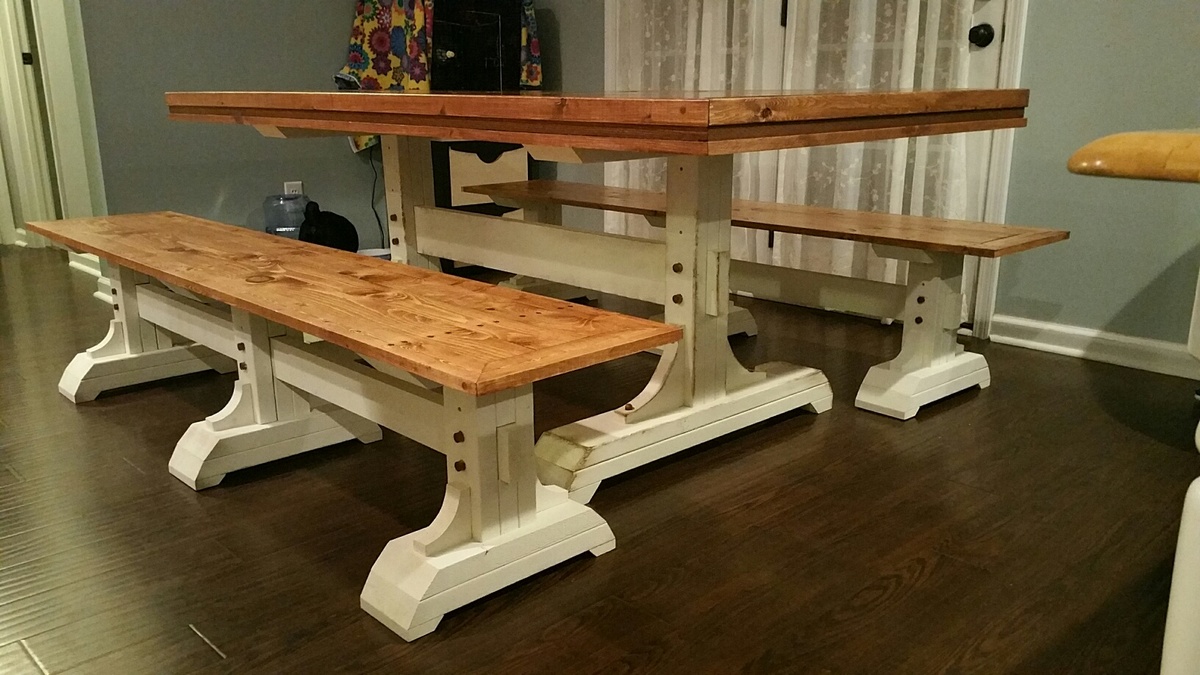
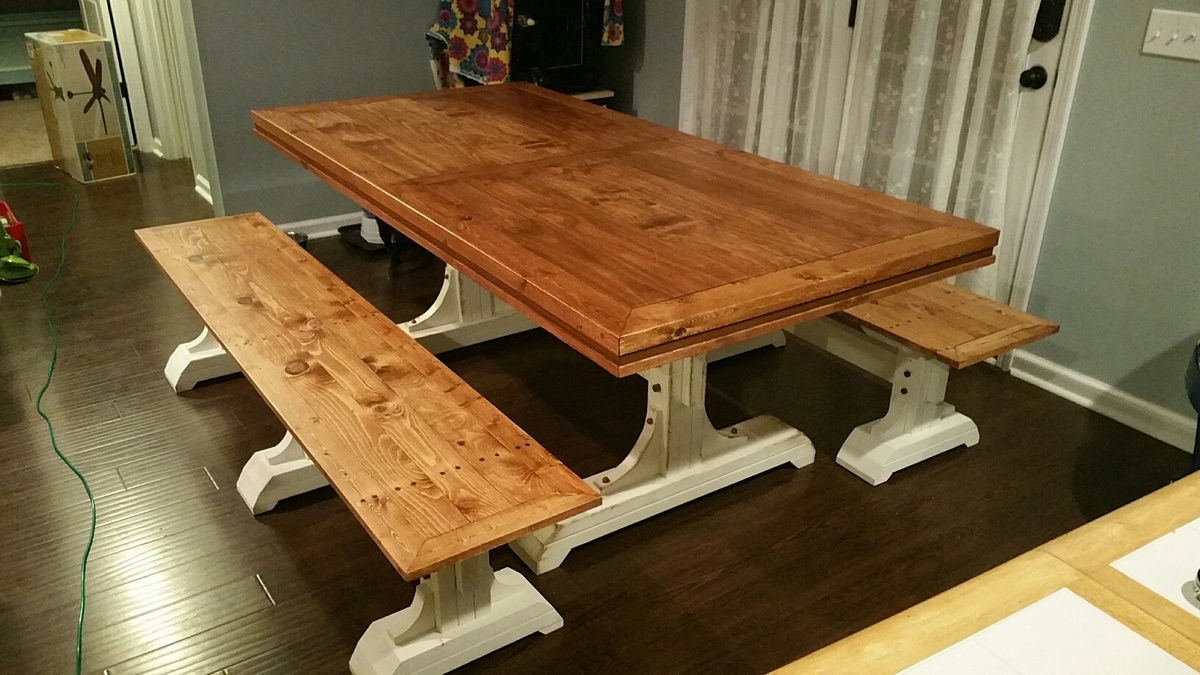
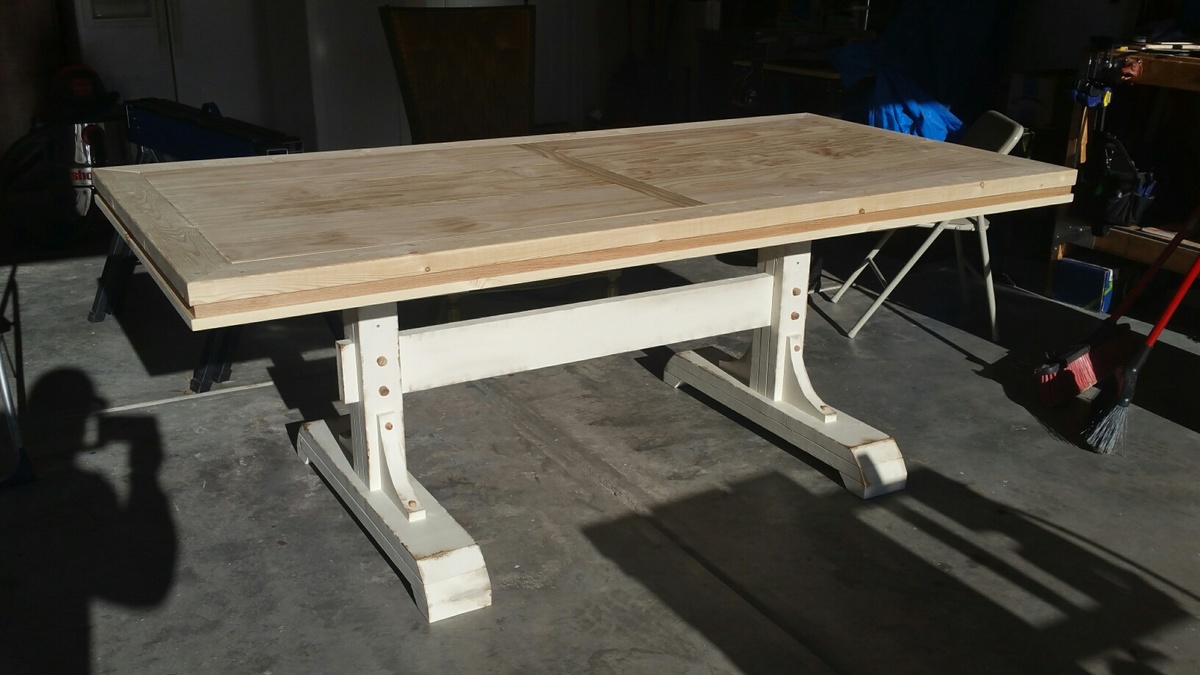
I love how this table turned out! This table was built for a friend of mine who wanted a rustic farmhouse table with "fancy" legs. The legs and apron are painted white and distressed. The table top is stained 2 x 6 pine. We love it! Thank you so much for the plans Ana! The legs are 5" turned maple legs. First, I painted the legs and apron "java brown" and then using Minwax furniture paste wax, I applied wax to the areas that I wanted to distress. After two coats of satin white paint, I distressed the legs using 220 grit sandpaper. Two coats of wax and the legs were silky smooth! The top is 2 x 6 yellow pine. I used two coats of Rustoleum dark walnut, one coat of sanding sealer, a final sanding with 220 grit sandpaper and two coats of wax. Love it!!
Tue, 12/04/2012 - 21:13
That turned out great! I love those legs and the distressed look.
Wed, 01/02/2019 - 10:25
I built this for a friend but as far as I know she is still using it and gets many complements on it.
I built everything above my couch using scraps from my garage. The "family" and hearts were cut out of a scrap piece of 1x12. The frames were made using my worst 1x2 and 1x3s. I sprayed them with stain and then paint and finished them by sanding them down.
DIY Farmhouse Table
Build for niece. Easily converts to left or right handed desk. I'm a lefty and initially built to suit for me....then moved the footboard from back to front and turned that baby around....none the wiser lol
This was the 2nd piece of furniture my husband and I have ever made. We recently moved to the country and I wanted a large, functional piece for our bedroom. I studied Ana's plans for the freestanding garage shelves and then modified those with my own custom ideas - ie, used two 2x8's instead of four 2x4's for the shelves. We bought cheap lumber and had to deal with some twisted boards but in the end, it turned out perfect for our space! The goal was to get the TV at this exact height and to give us some room to display photos, etc. I absolutely love the contrast of the walnut and the espresso stains - we can't stop looking at it! :)
My kids' old bookshelf ran out of room and their books ended up on the floor. I built these using the four cubby bookshelf design and adjusted the shelves for different heights as some of their books are extra large.
Modified the console table by height (approx 39"), length (approx 40"), and eliminated the middle shelf. I can't put an accurate $ estimate since I bought wood for three projects and this was one of them.
I made my first project from your website this week. Here's a picture of the finished work. Thanks for supplying your plans. They are really helpful. - Doug Davis
I saw this adorable scooter on Ana's website and thought it would be perfect for my godchild's 1st birthday! (my kids are a little too big for it otherwise I would have made it for them as well). I didn't read the entire post before I started so I didn't read that you should use harder wood to avoid chipping and all that but it still worked out okay, certainly not perfect but a fun gift that I was proud to give.
The multiple paint colors added time as I was always retouching one color up and then going back to another color but that was more me being sloppy than anything.
Sat, 01/19/2013 - 20:30
Where can I get the plans for this skooter. I would love to make this for my granchildren
Thu, 02/07/2013 - 11:25
Here is the link for the plan to make the scooter.
http://ana-white.com/2012/05/plans/charlie039s-scooter
Otherwise you can just search under keyword "scooter" and find the plans that way as well.
Good luck!
Entryway pew bench
Tue, 09/23/2014 - 17:21
I couldn't seem to get the blog link up: some more additional photos on there.
The legs and trim were made from 2x4 that I cut down to size with the table saw. Plywood from a chicken coup I made from Ana''s chicken coup plan was used for the shelf base.
This was my first ana white project. I didn't take great photos. I also modified the bunk a bit for small children. I added a bunk right on the floor and made the legs slightly longer so that there was some headroom. After the kids grew a little, we switched it back to just the clubhouse with some room underneath for storage/playing. First time using pocket holes too.
My railing inspired by Ana White’s. Thanks for the inspiration, Ana. - Ross Fasano
For my boyfriend's oldest niece, who is 13, I decided to make a jewelry stand for Christmas this year. I thought it would be fun to make a triptych with a place for earrings in the middle and necklaces on the sides, sketched out a basic design and got started building.
For the details on how to build it, check out my blog: http://homeandawaywithlisa.com/blog/2012/12/18/triptych-jewelry-stand.h…
Although I loved the original plans I had a much smaller space to put this in, so 10ft was not an option. So I cut it down to a more managable size and I think it came out great. Let me know what you think. Great plans and I love the site!
I started learning woodworking several weeks ago and came across your video and plans for the Farmhouse Counter Stool. It was easy to follow, and I love how it turned out! I made one first as a test, and I think I'll make three more. Thanks Ana!
Fri, 09/25/2020 - 14:57
Welcome to the woodworking community, it looks fantastic! Thank you for sharing:)