Big Kids Picnic Table
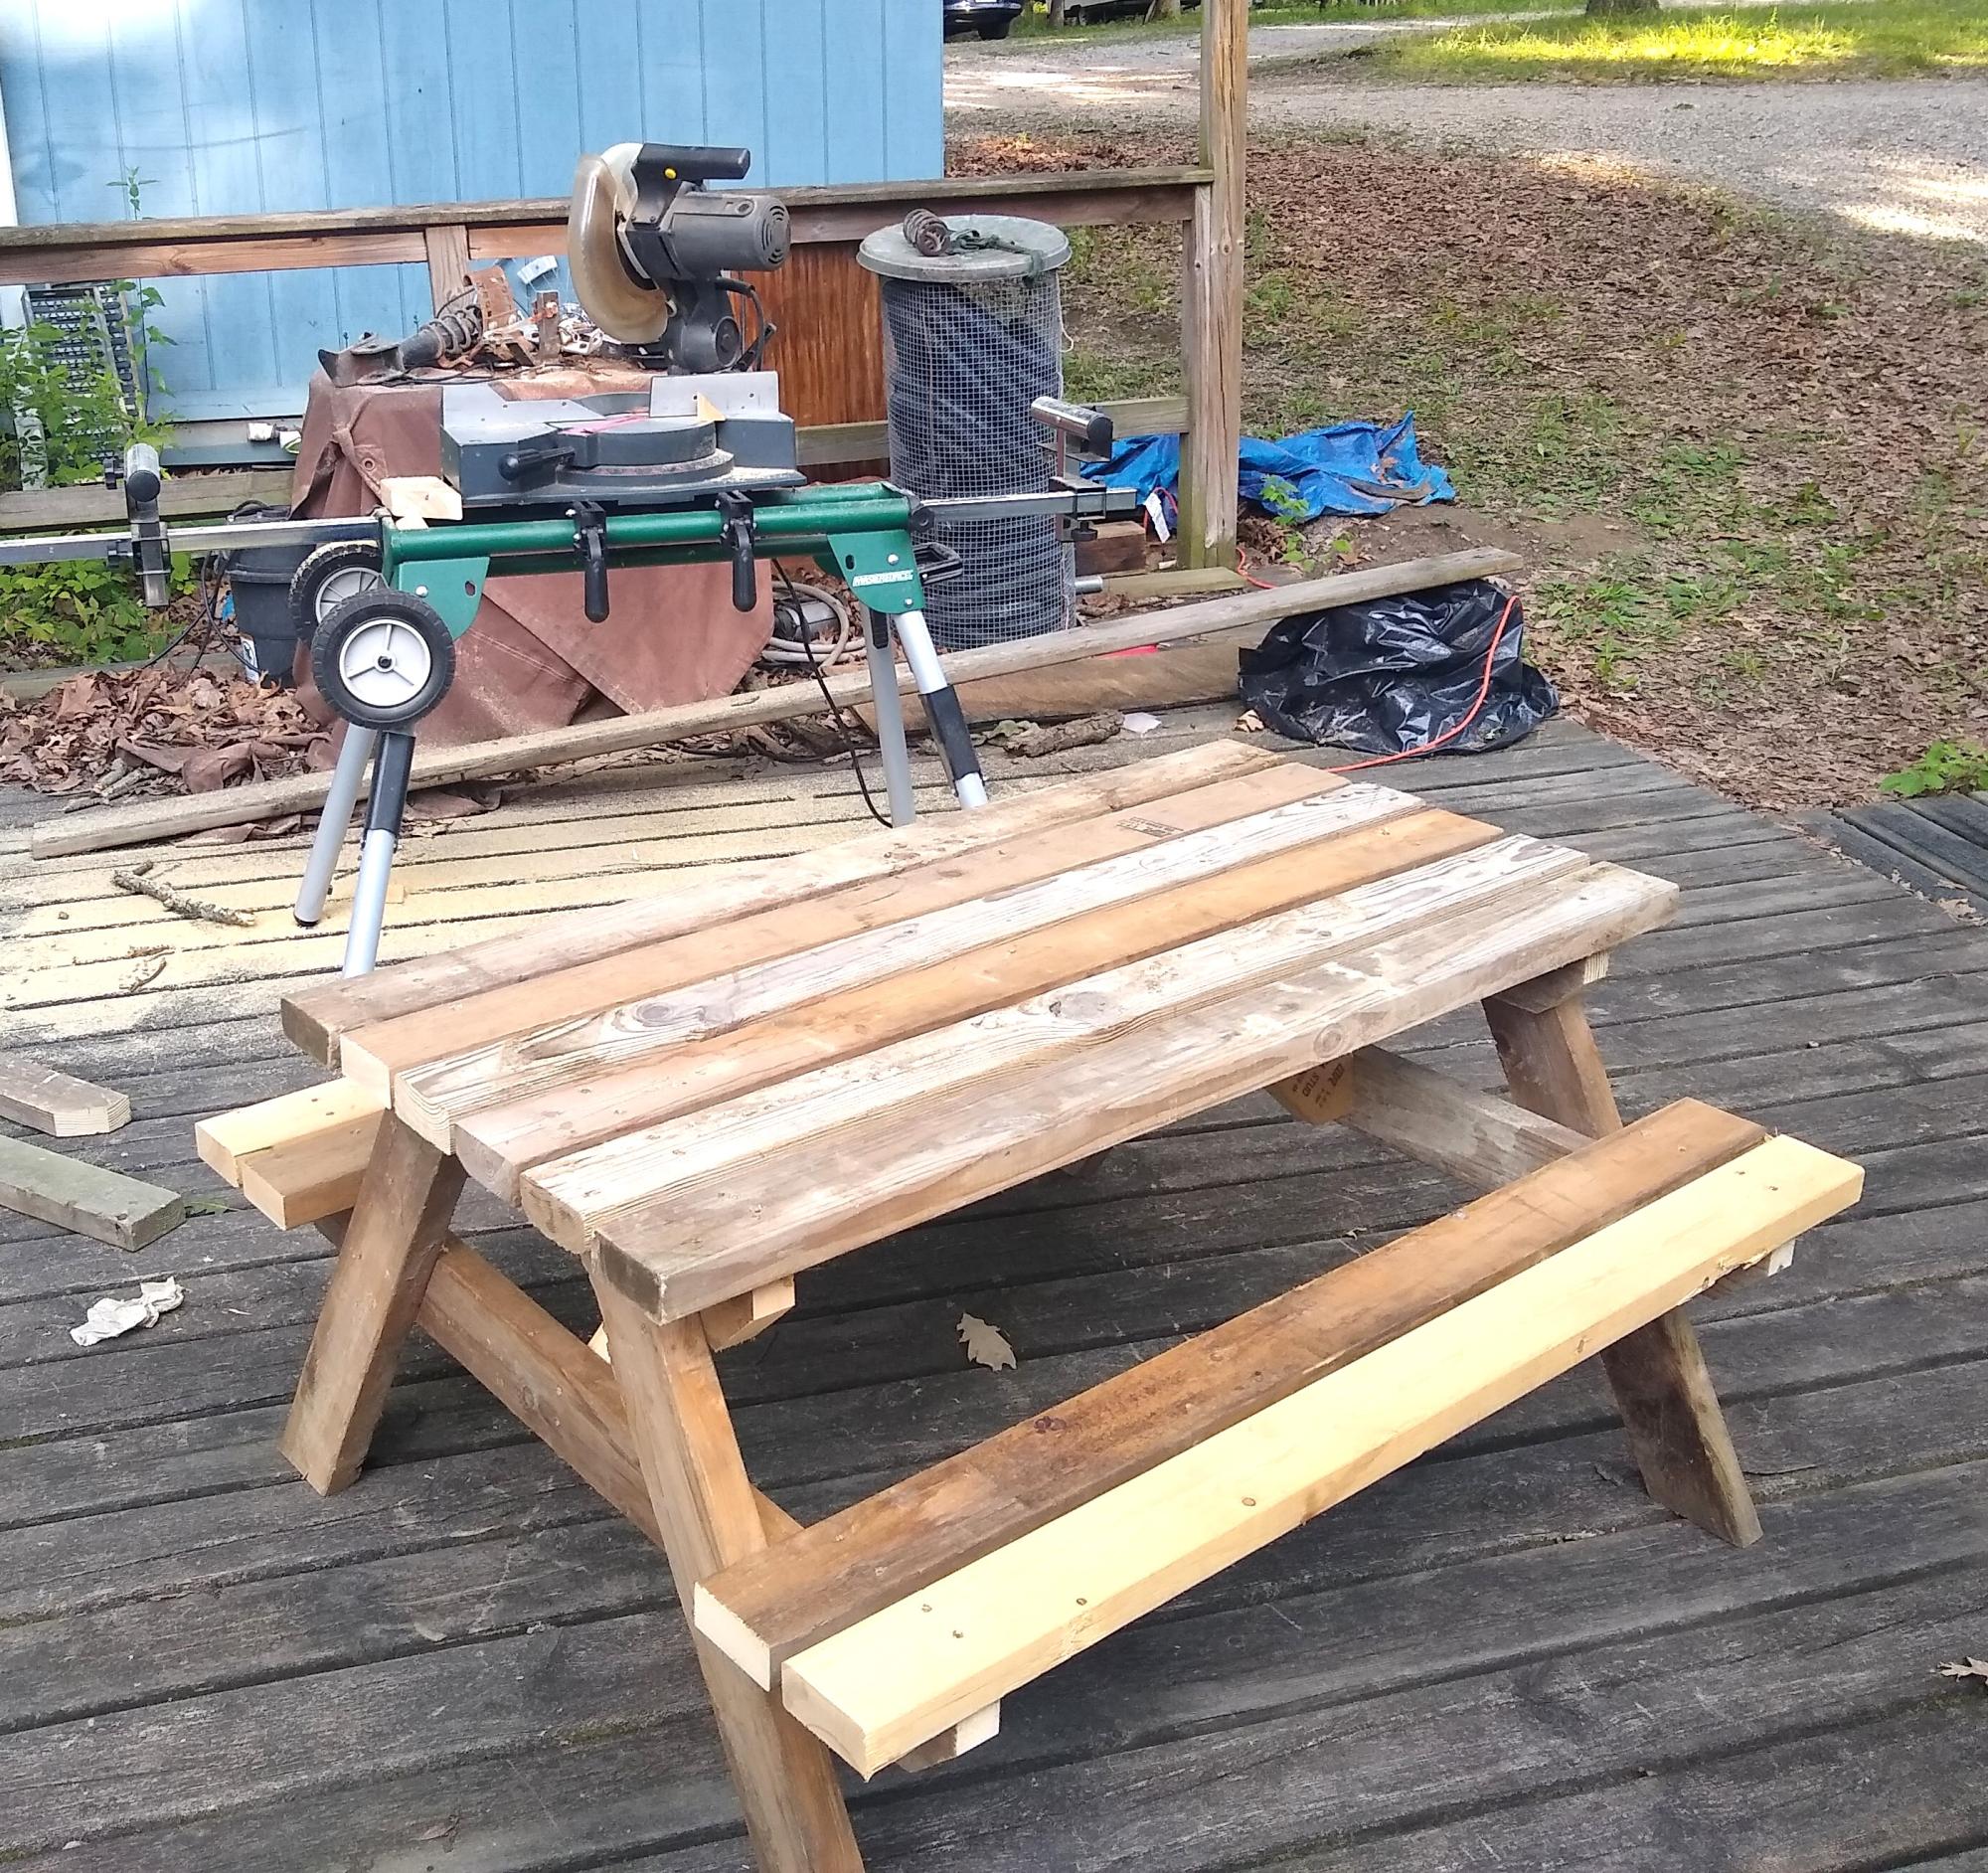
Thank you Ana for your work and making your plans available for free!
My table is based on your Big Kids Table, modified to use available free scrap wood.
tcphillips
Built from Plan(s)
Thank you Ana for your work and making your plans available for free!
My table is based on your Big Kids Table, modified to use available free scrap wood.
tcphillips
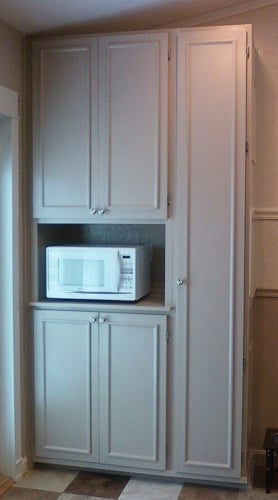
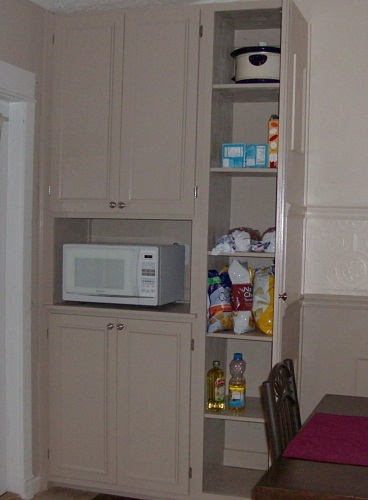
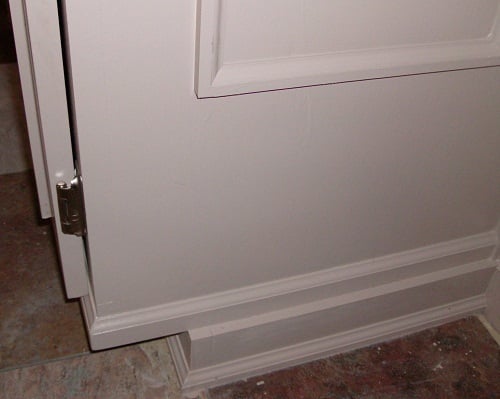
Pantry cabinet, with lots of room, Ana-inspired. We combined ideas from the Momplex kitchen, simple armoire, and benchmark storage, and we are super pleased with how this turned out. We built it in 2 pieces, attached together and then secured to the base and wall studs so it’s a ‘built-in’. Then we added lots of trim and painted to match the dining room. The opening at the left is large enough to fit pretty much any size microwave, and there’s a dedicated outlet behind it in the opening. The shelves are spaced wide enough apart for tall cereal boxes, tall bottles, and chip bags to stand upright. Overall finished cabinet size is 48" wide and 95 3/4" tall. This took us several days to complete. Since the doors are tall and kind of heavy, we added the Blum cabinet door dampeners from Rockler (these things really work!). Ana, thank you so much for the inspiration. I don’t think we would have tried this if it wasn’t for you. We love our new pantry!
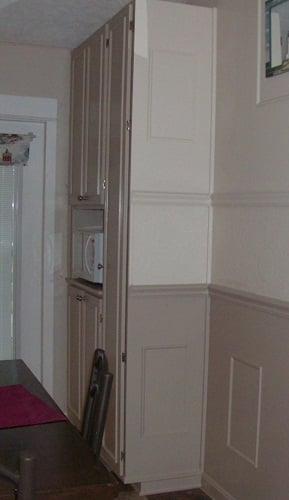

Sat, 07/21/2012 - 07:44
It looks amazing! What a great idea to add it as a built-in. Nice modification for the microwave.
My first project! it took me longer than it should have but I had never used a jig saw or hinges before. The kids were 2&3 (now 3&4) and they LOVE them!
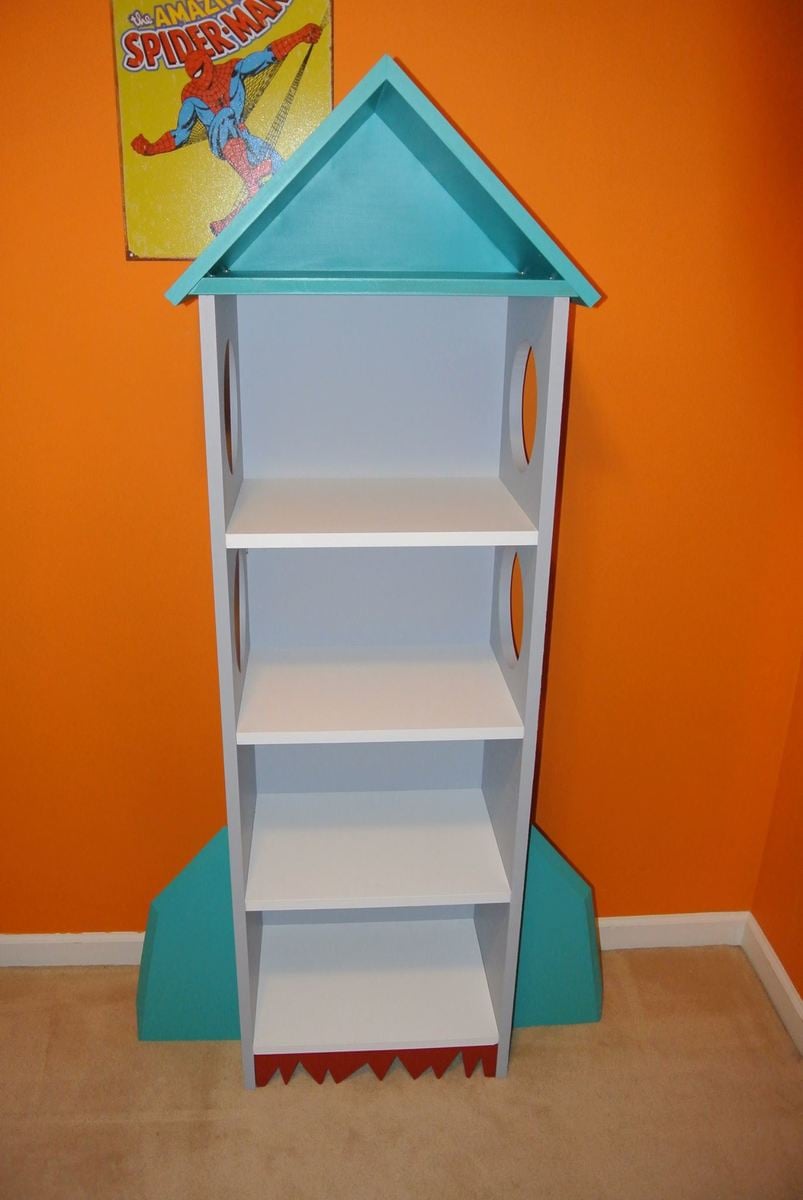
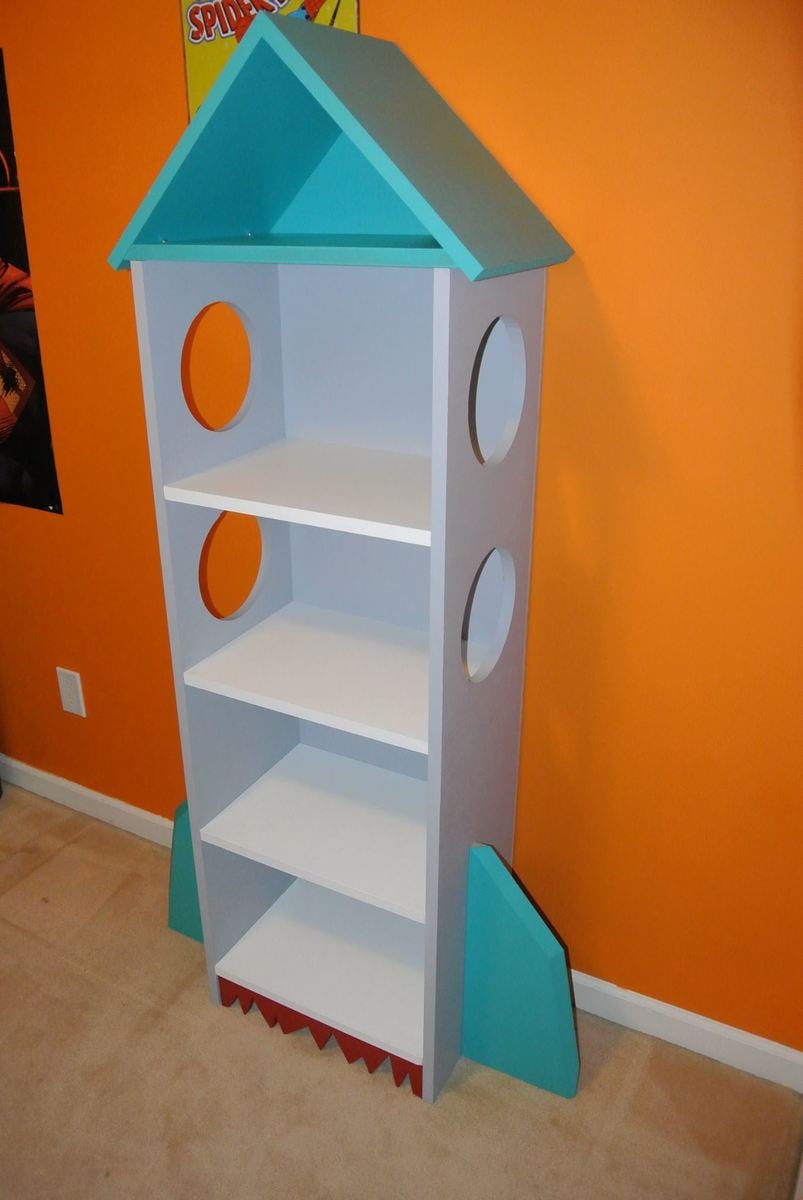
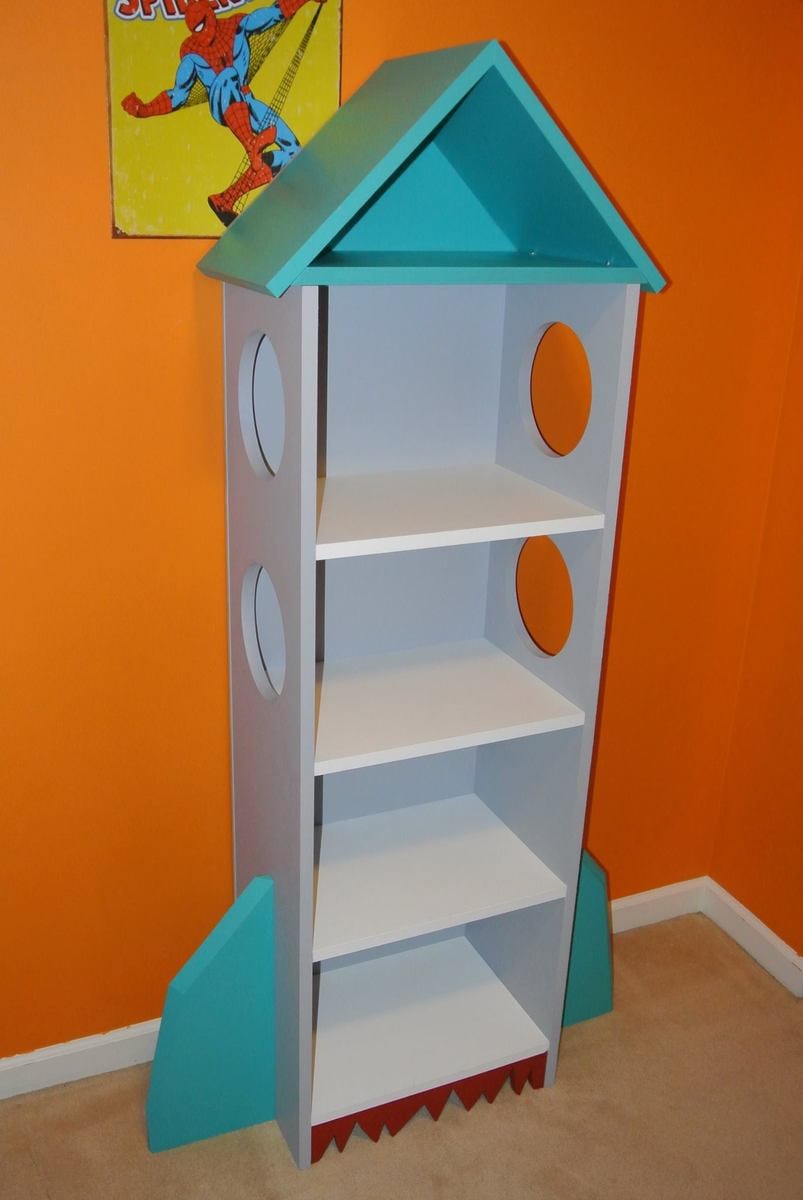
Rocket Bookcase
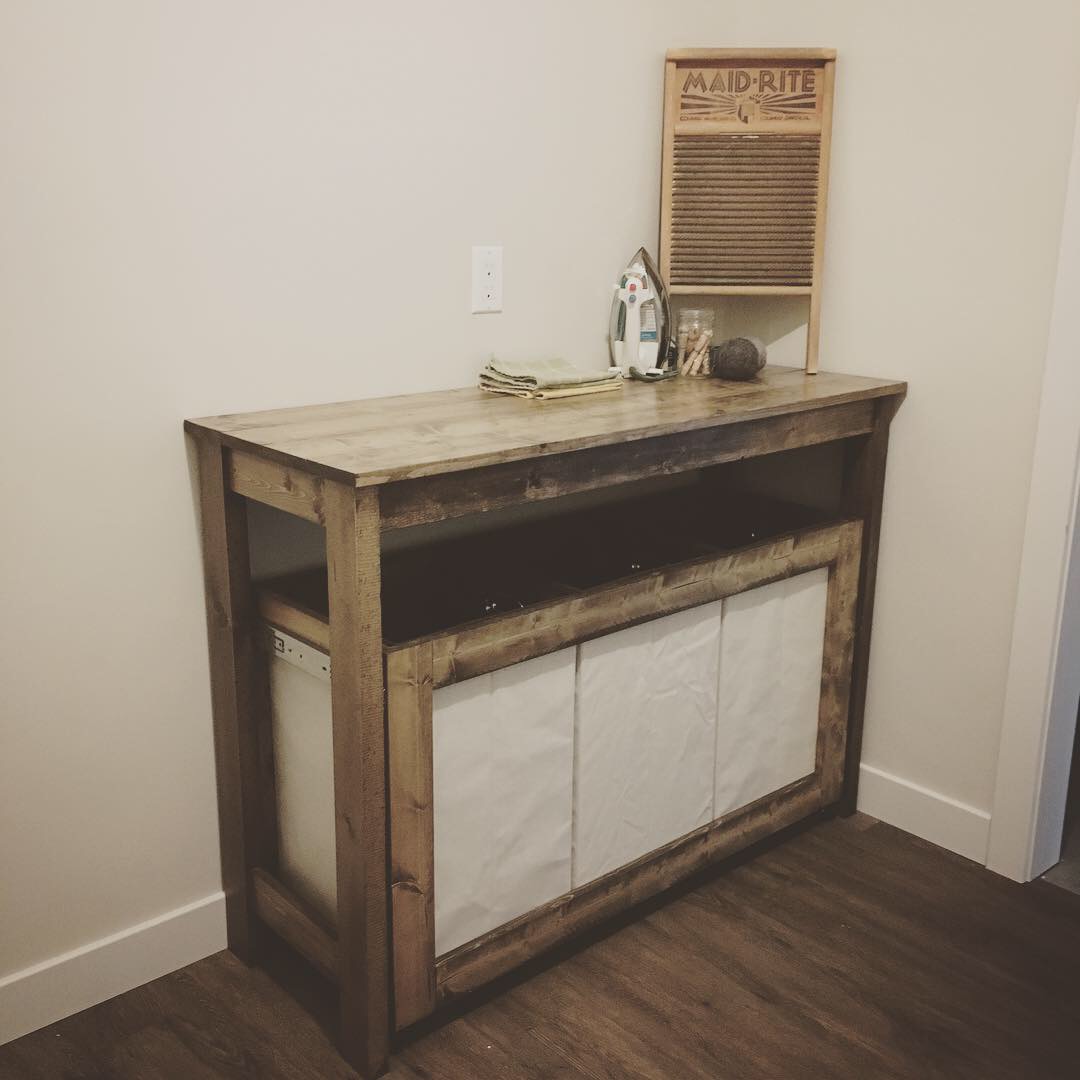
This plan was a lot of fun!! I have been wanting a laundry sorter for some time now and this one fits in my laundry room perfectly!!
The pull out works awesome!!

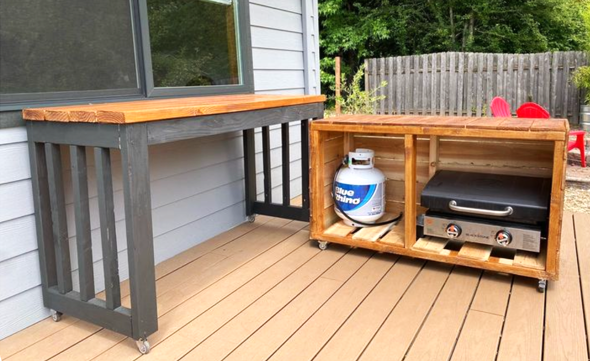
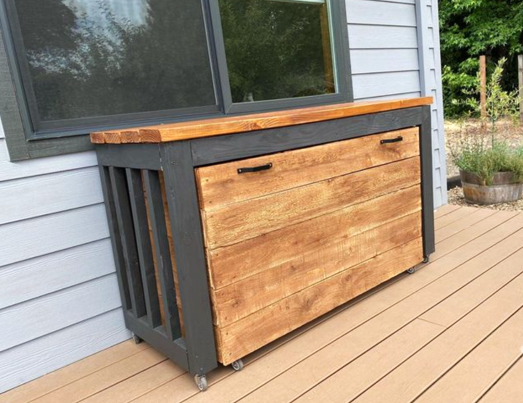
Nesting Grill Station
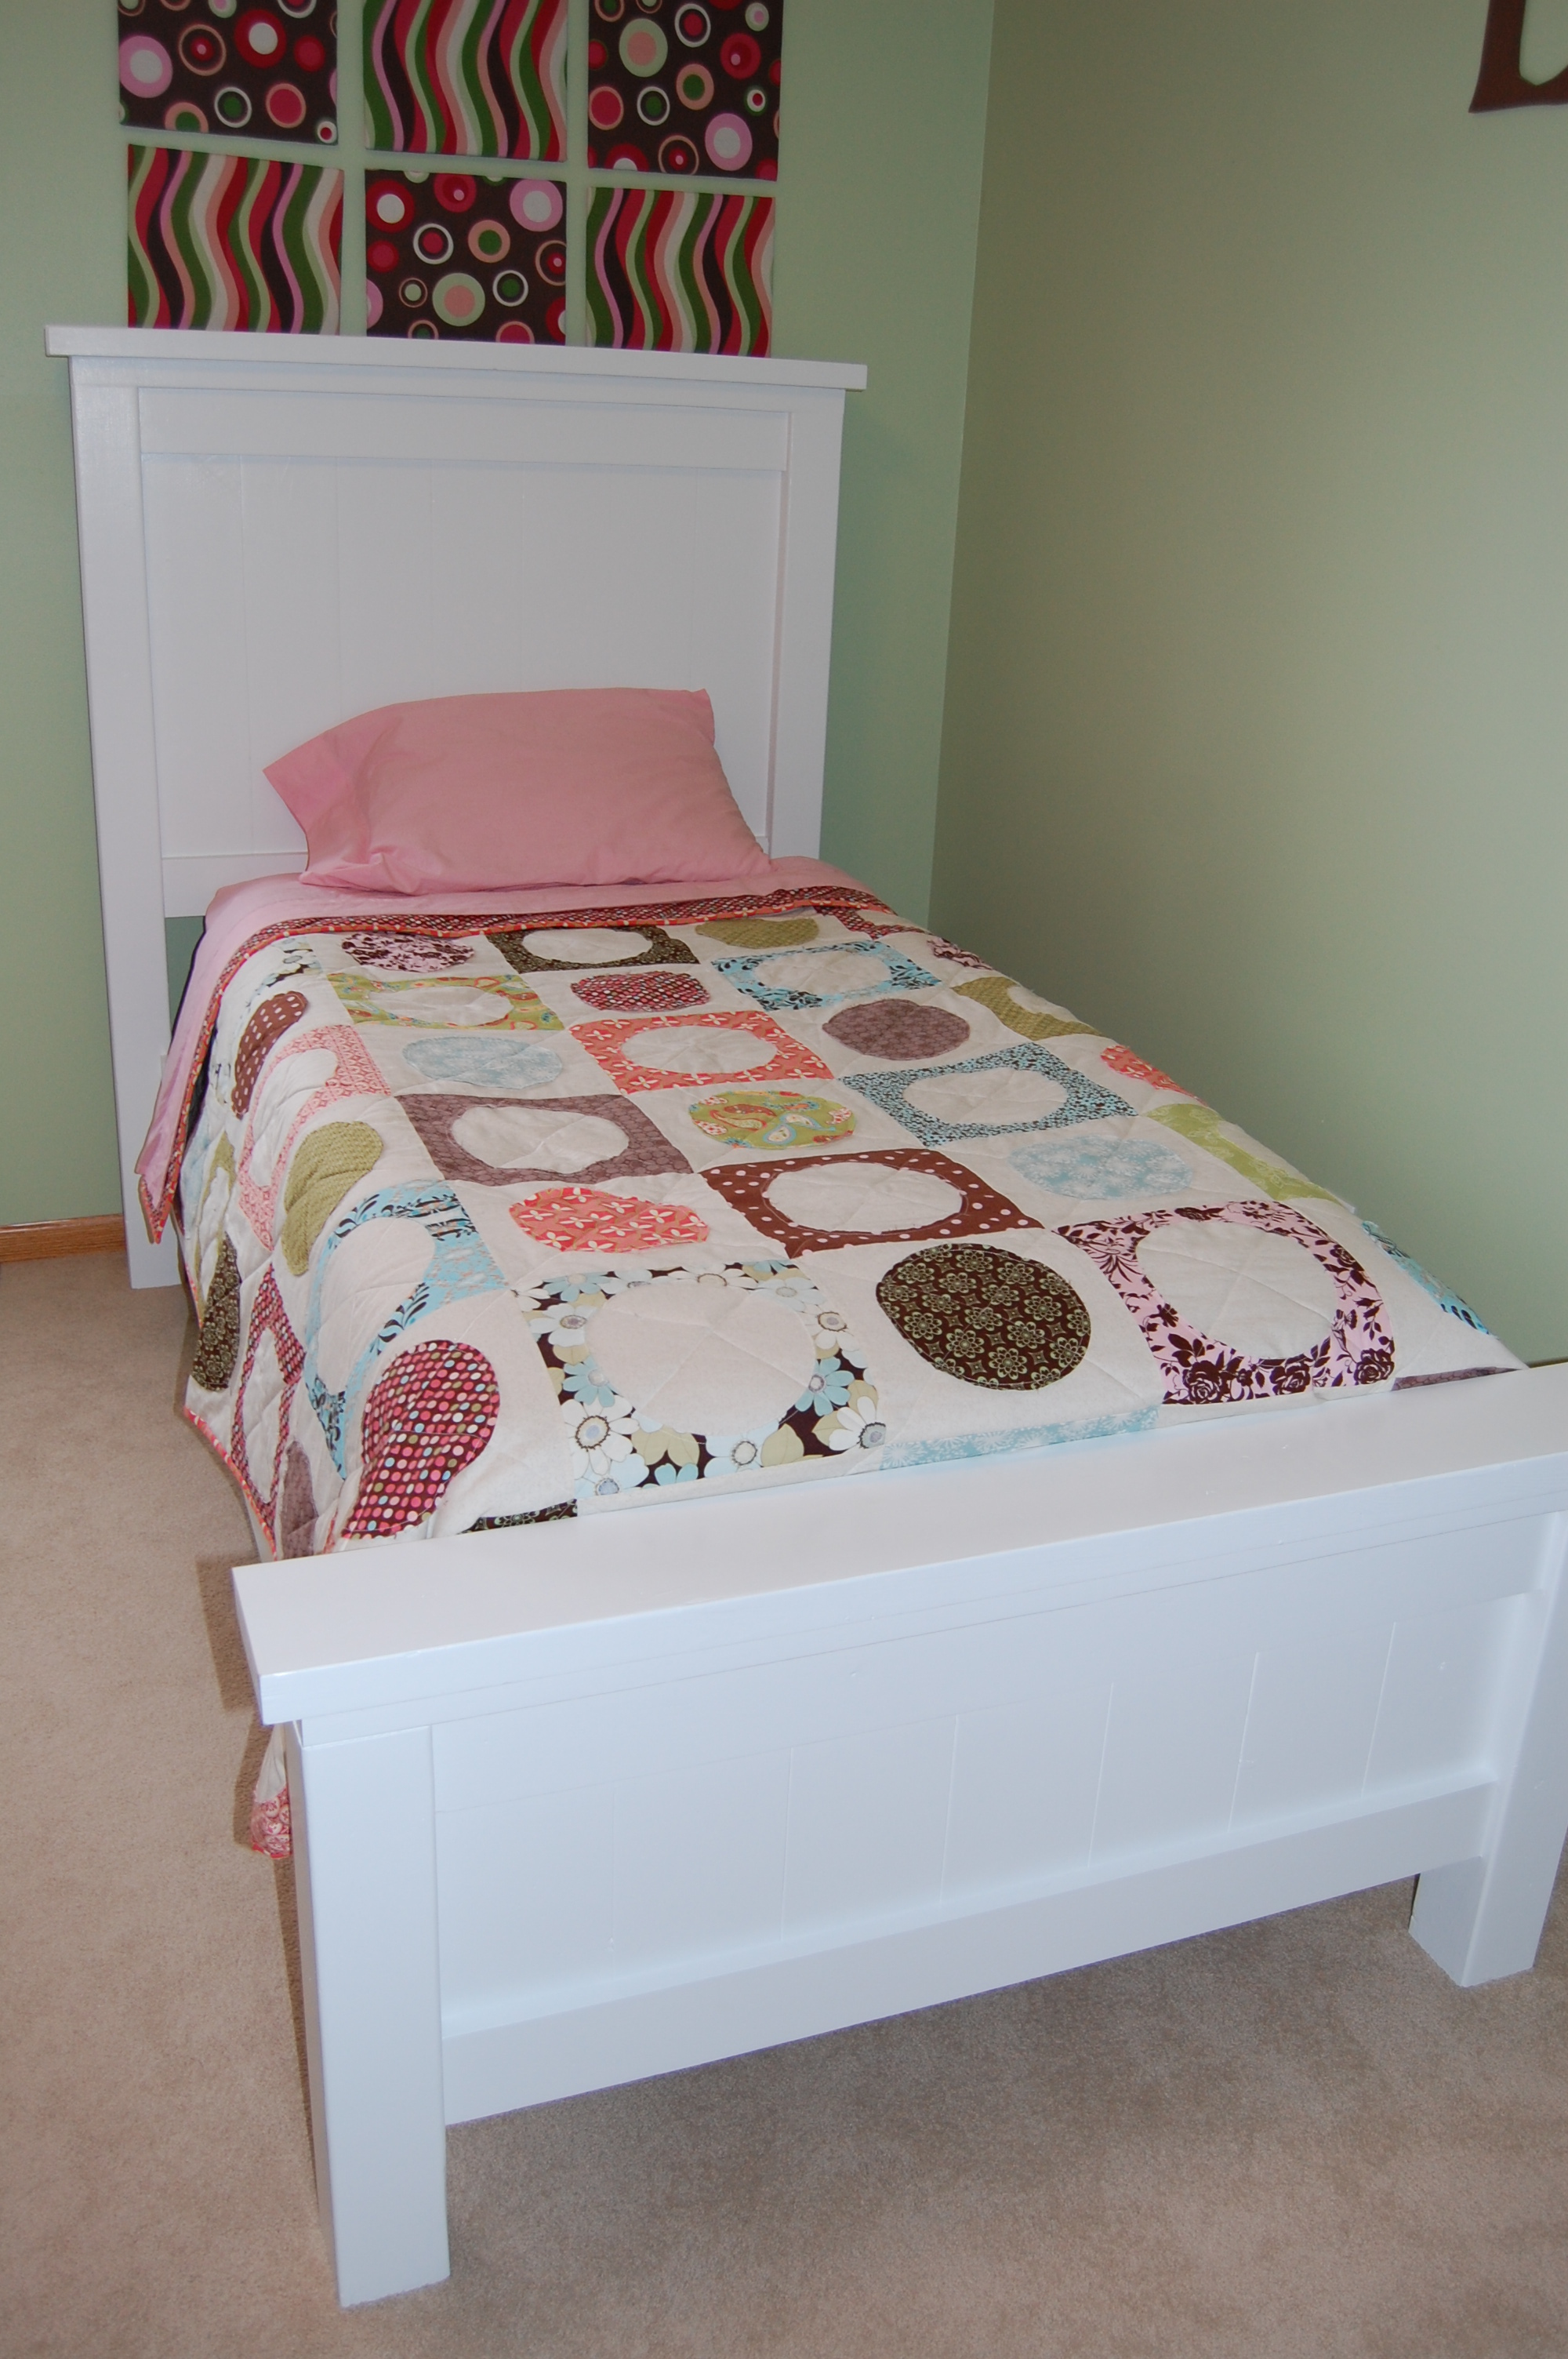
My daughter learned to climb out of her crib so we rushed to the furniture stores to find her a bed. I was very disappointed in the quality we found. I had this project in the back of my mind but didn't know how quickly I could get it done. It was really quite easy and we got her in her new bed in no time! She loves it and I think it was better than anything we saw in a store and way less expensive!! I even made the quilt for her.

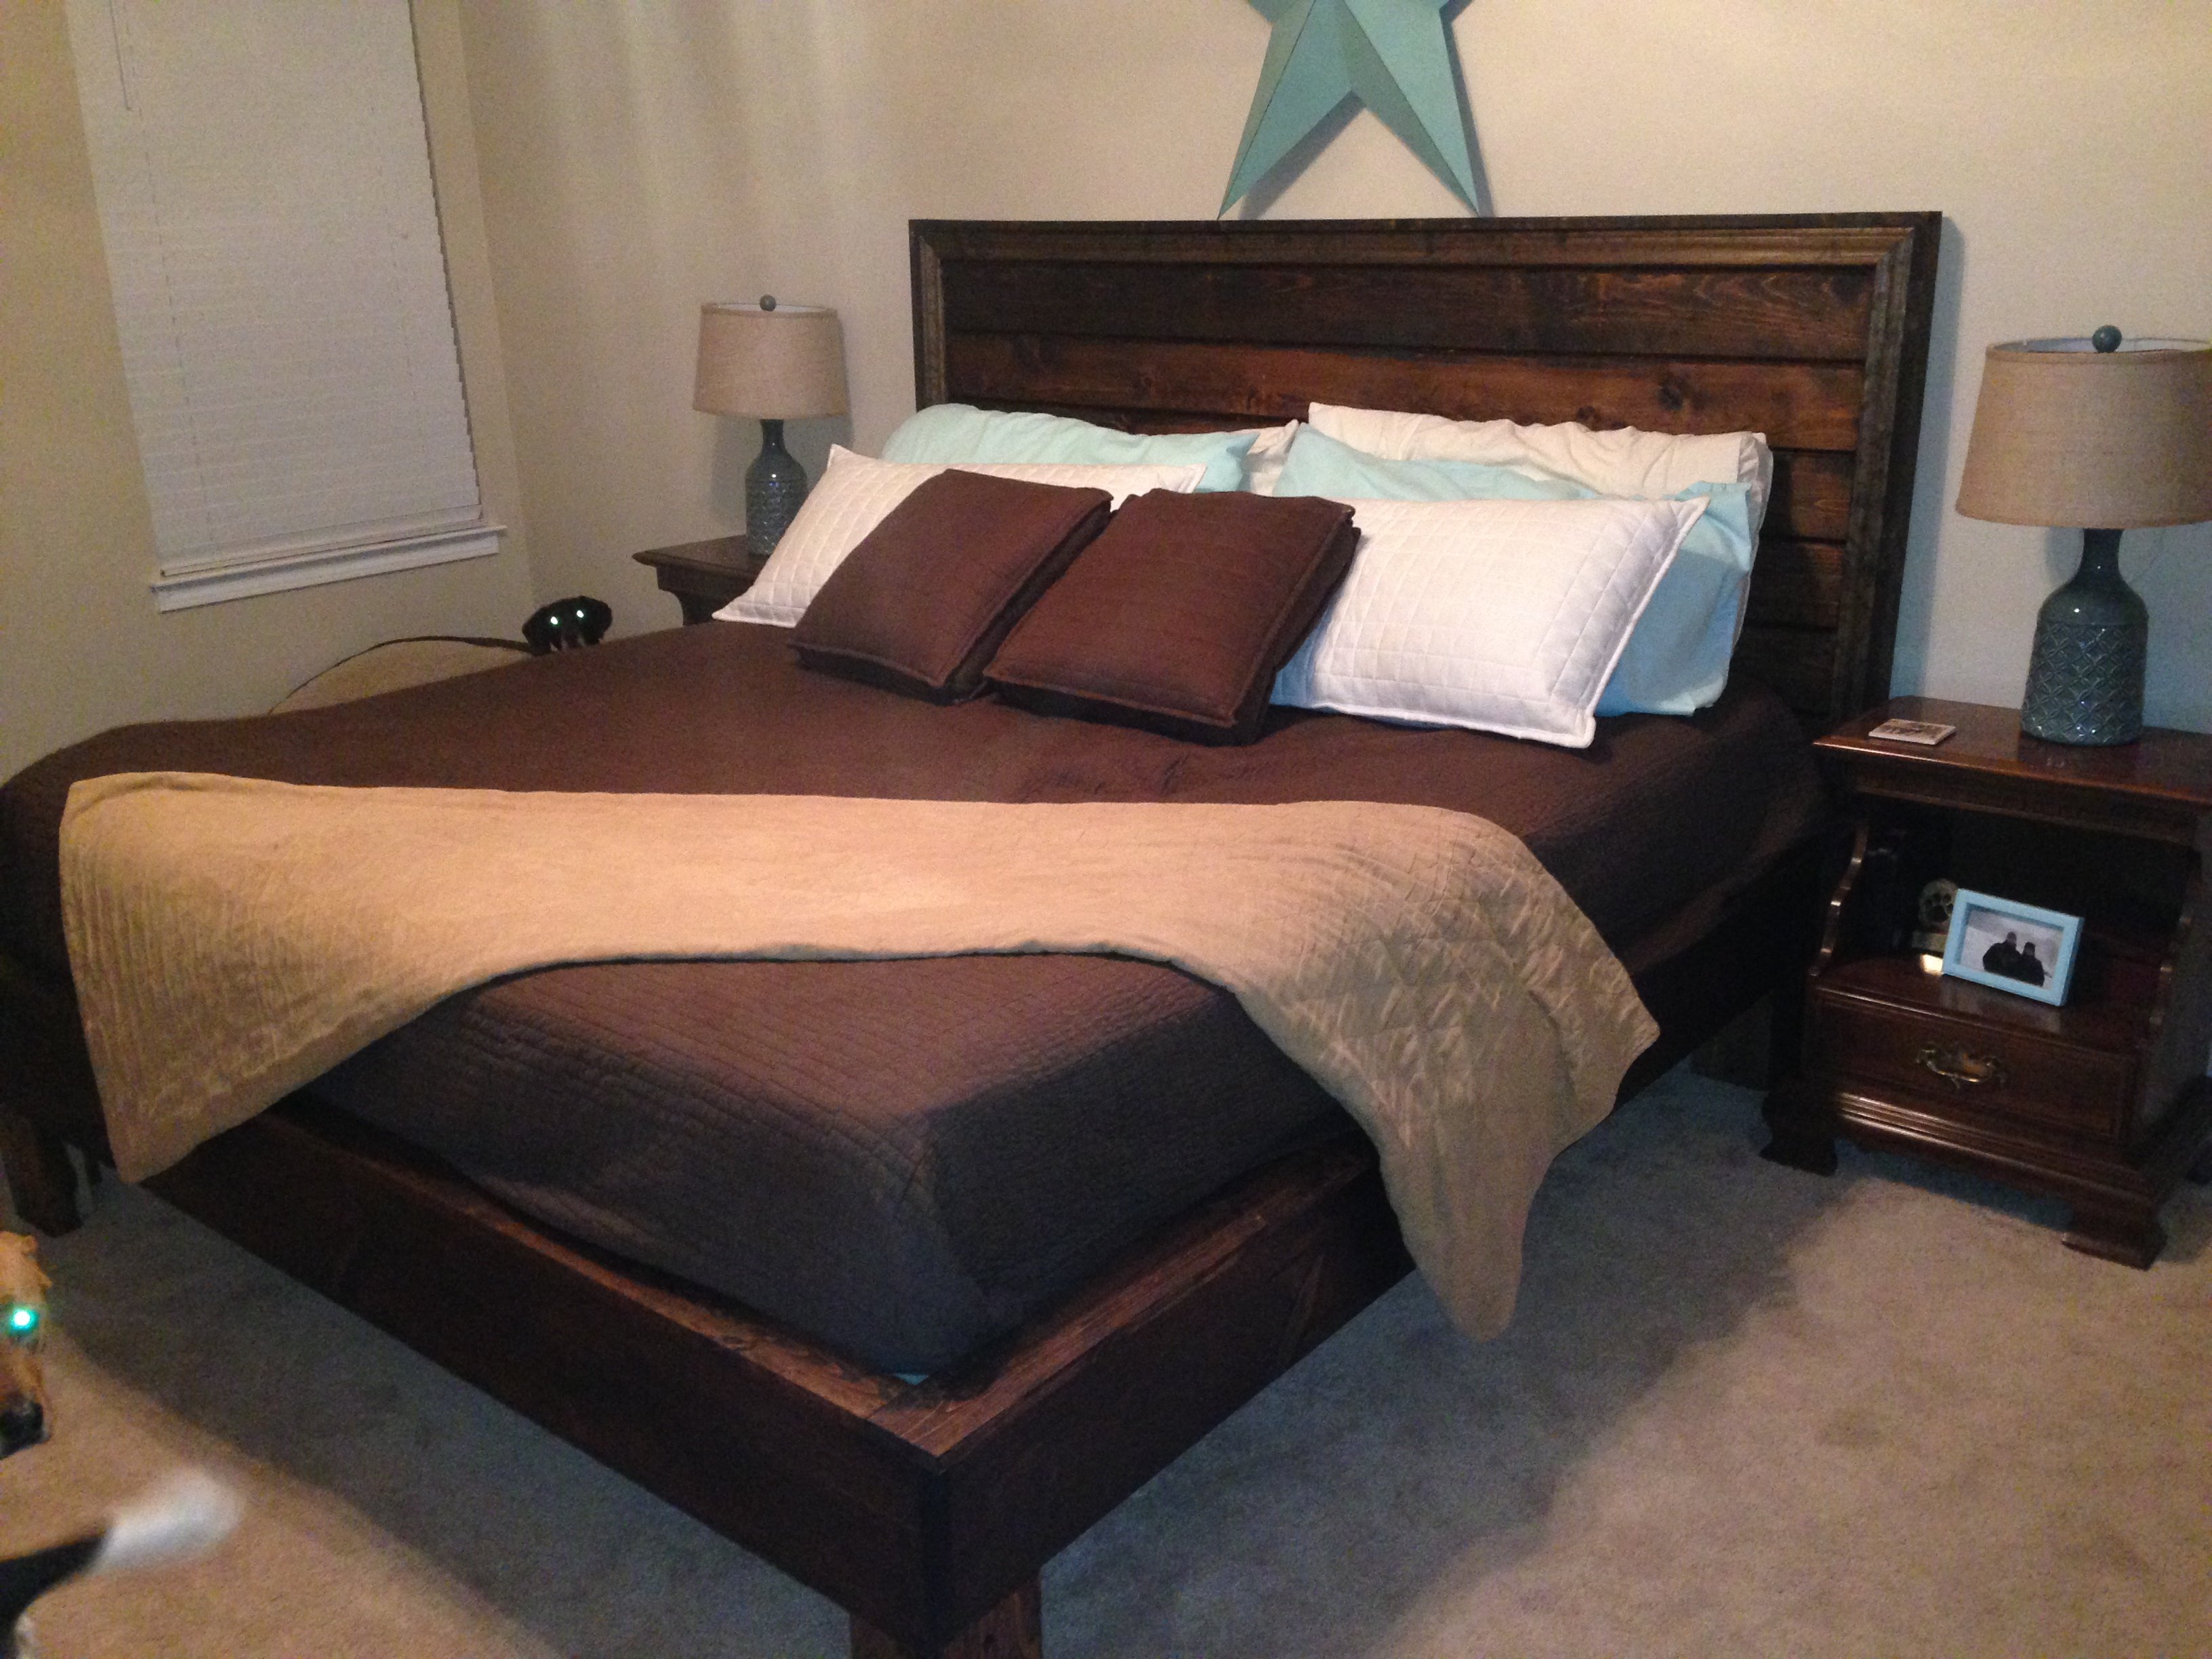
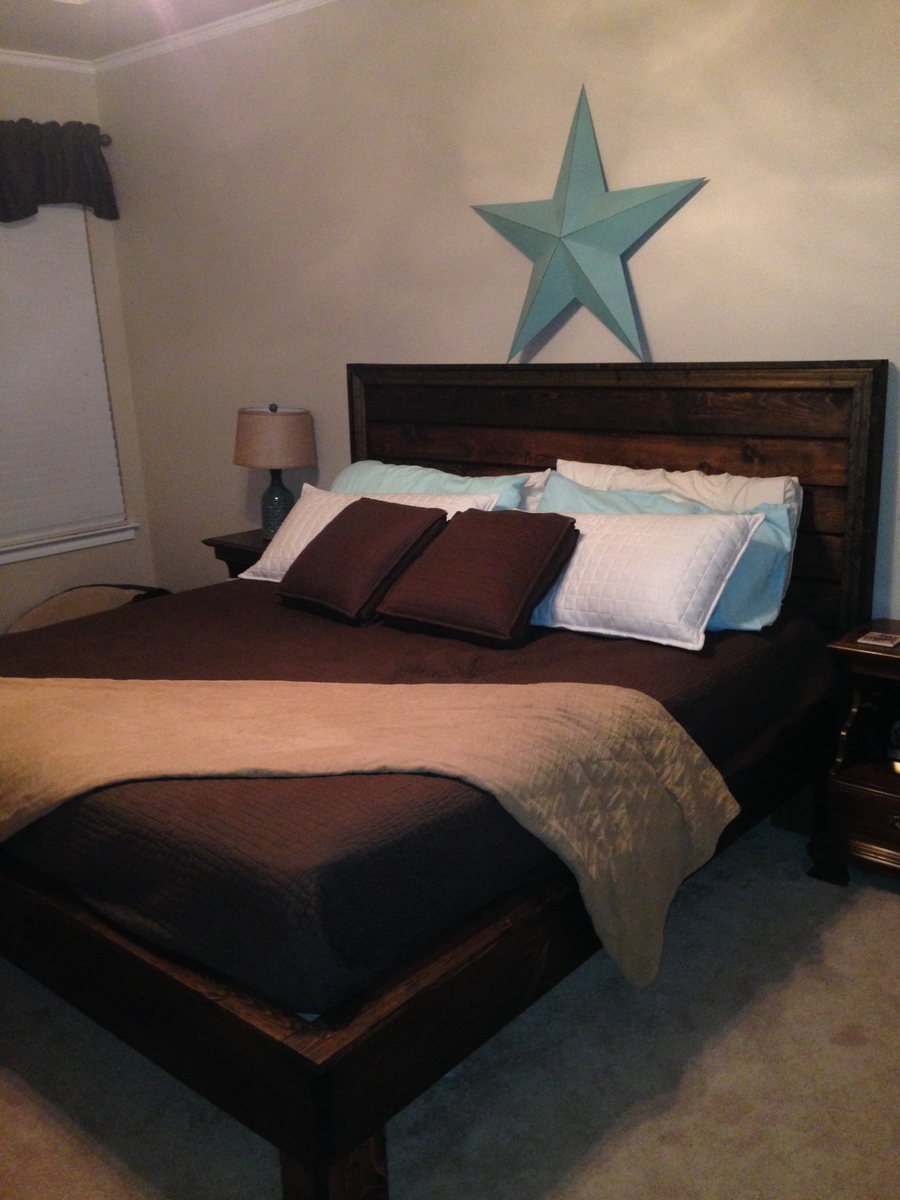
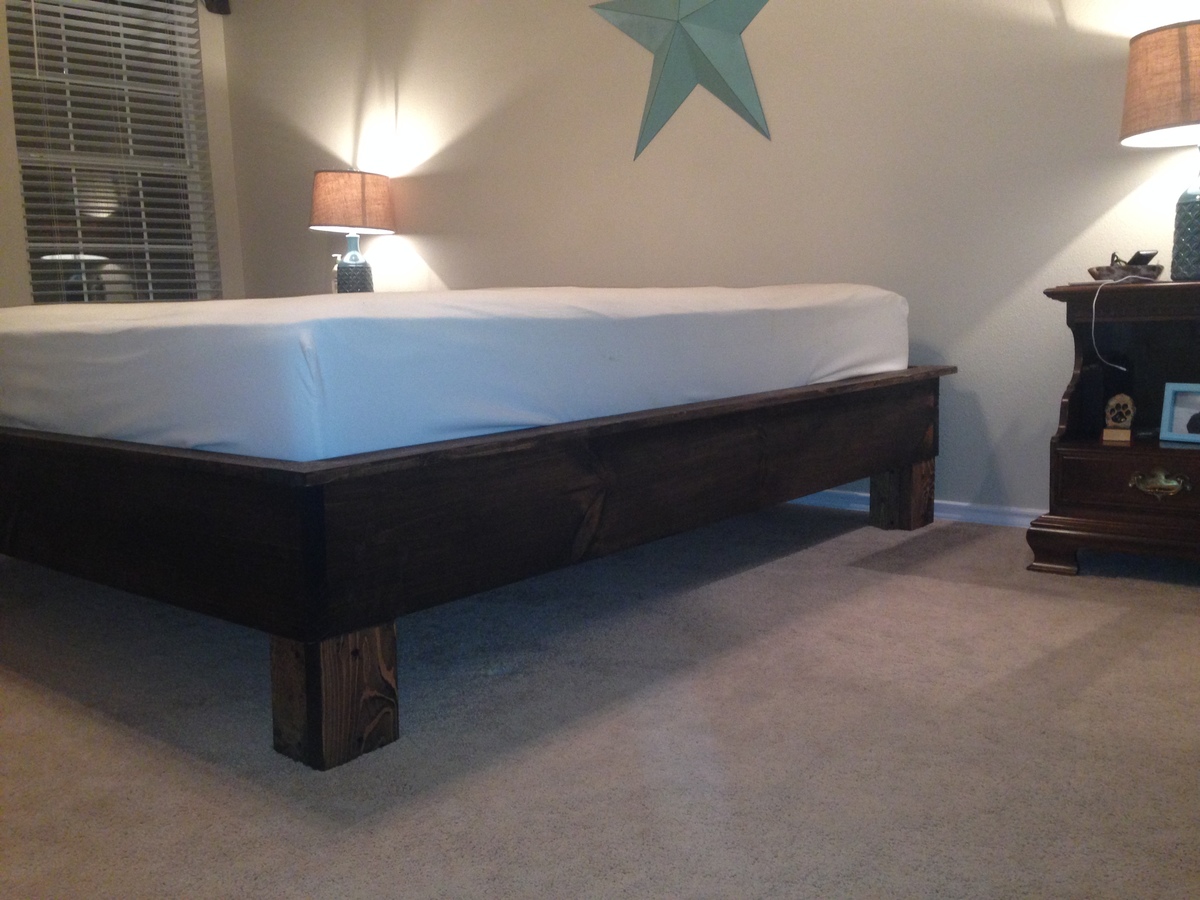
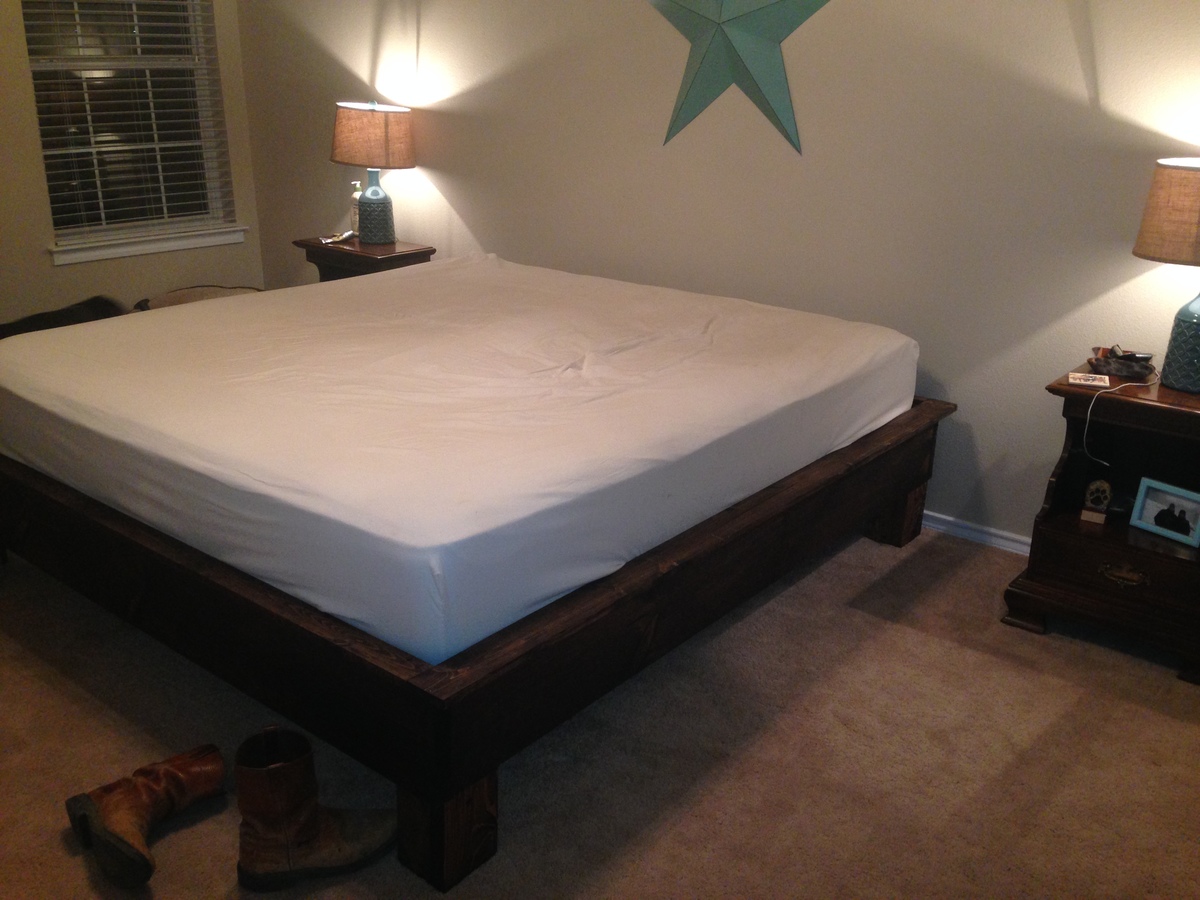
I took these plans (http://ana-white.com/2012/01/plans/hailey-platform-bed) and adjusted the size for a king size bed. I beefed up the sides with 2x10's instead of 2x6's and extended the trim to 1x4's instead of 1x3's.
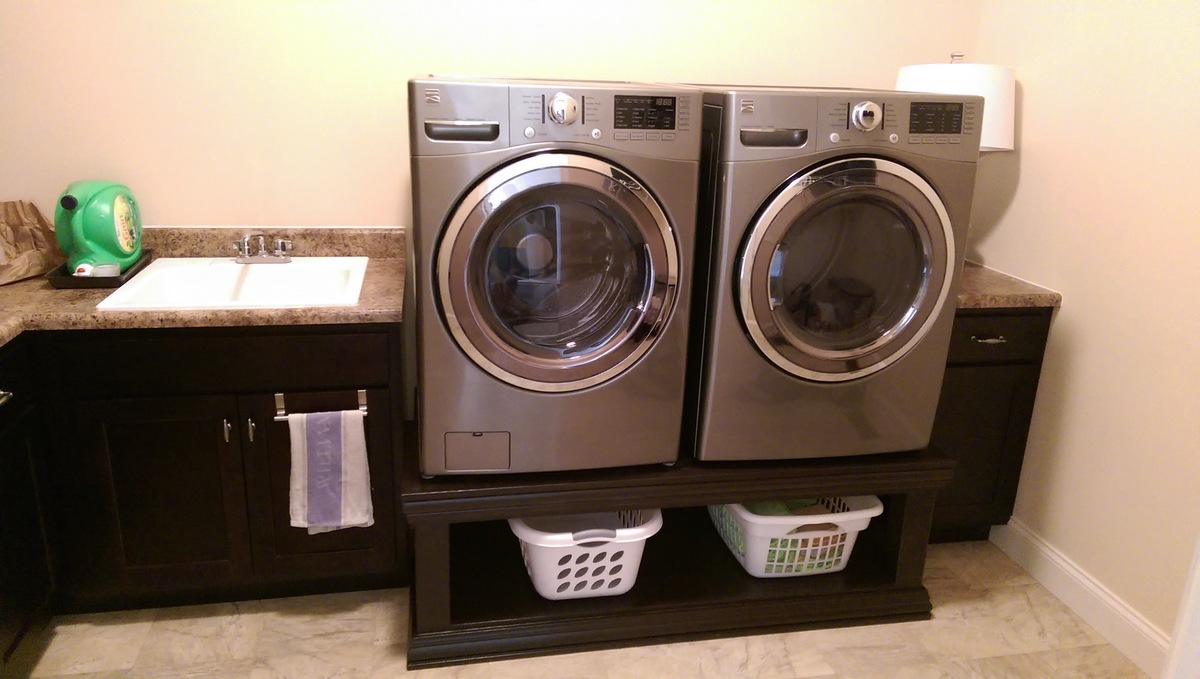
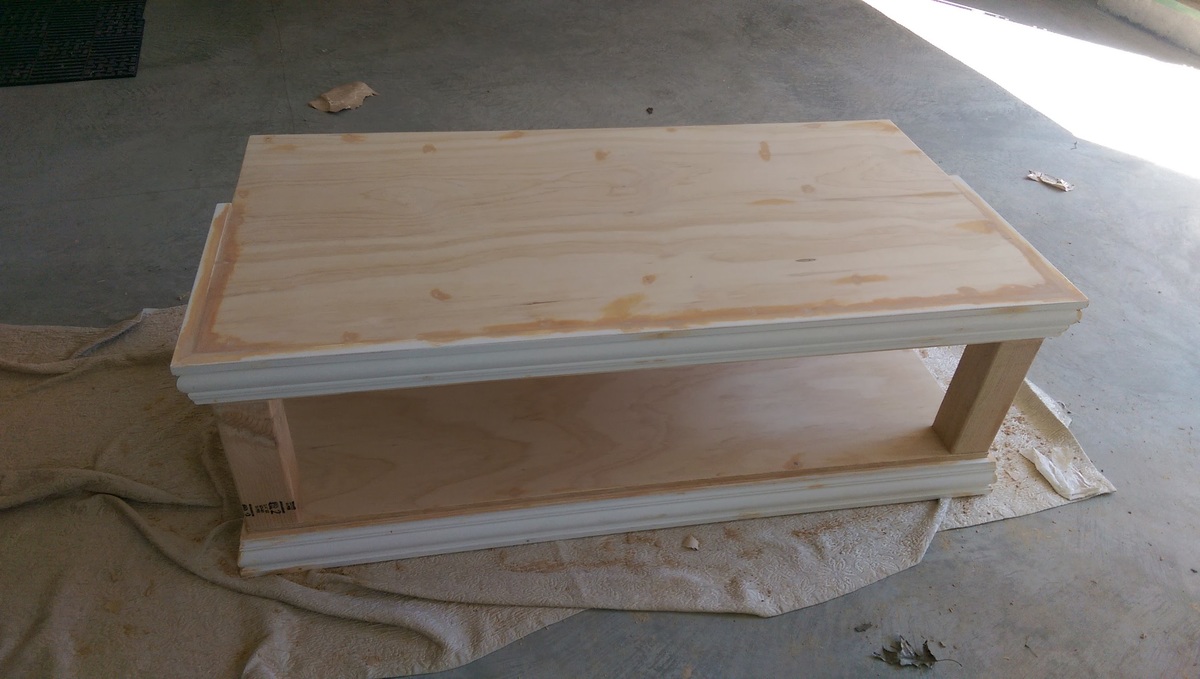
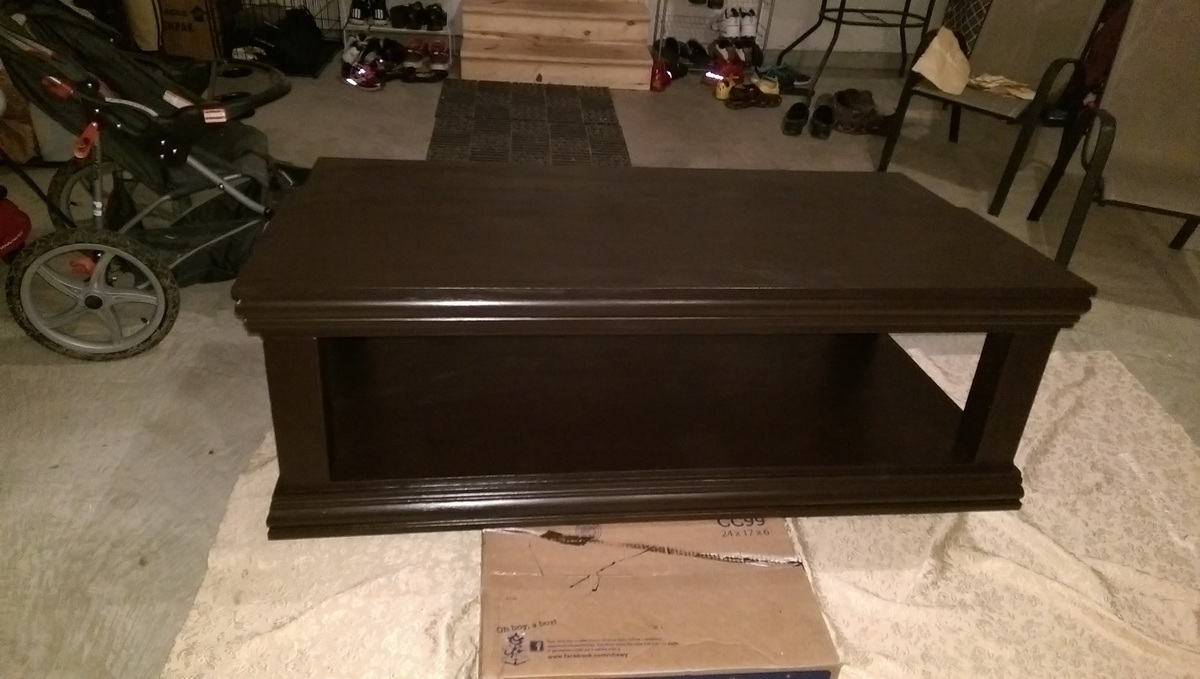
I similarly was looking for something to store laundry baskets underneath and didn't want to shell out $500+ for pedestals that were less functional. Without being particularly handy, this was a relatively easy DIY project that turned out great. Adding the baseboard trim made a big different in the overall look and the dark paint to match our cabinets helped in pulling it all together. We made the height 12" (instead of 11") for the storage component and cut the width by 2 inches to allow room for the baseboard trim to wrap around the side. Otherwise it was built the same as the original design without the extra trim.
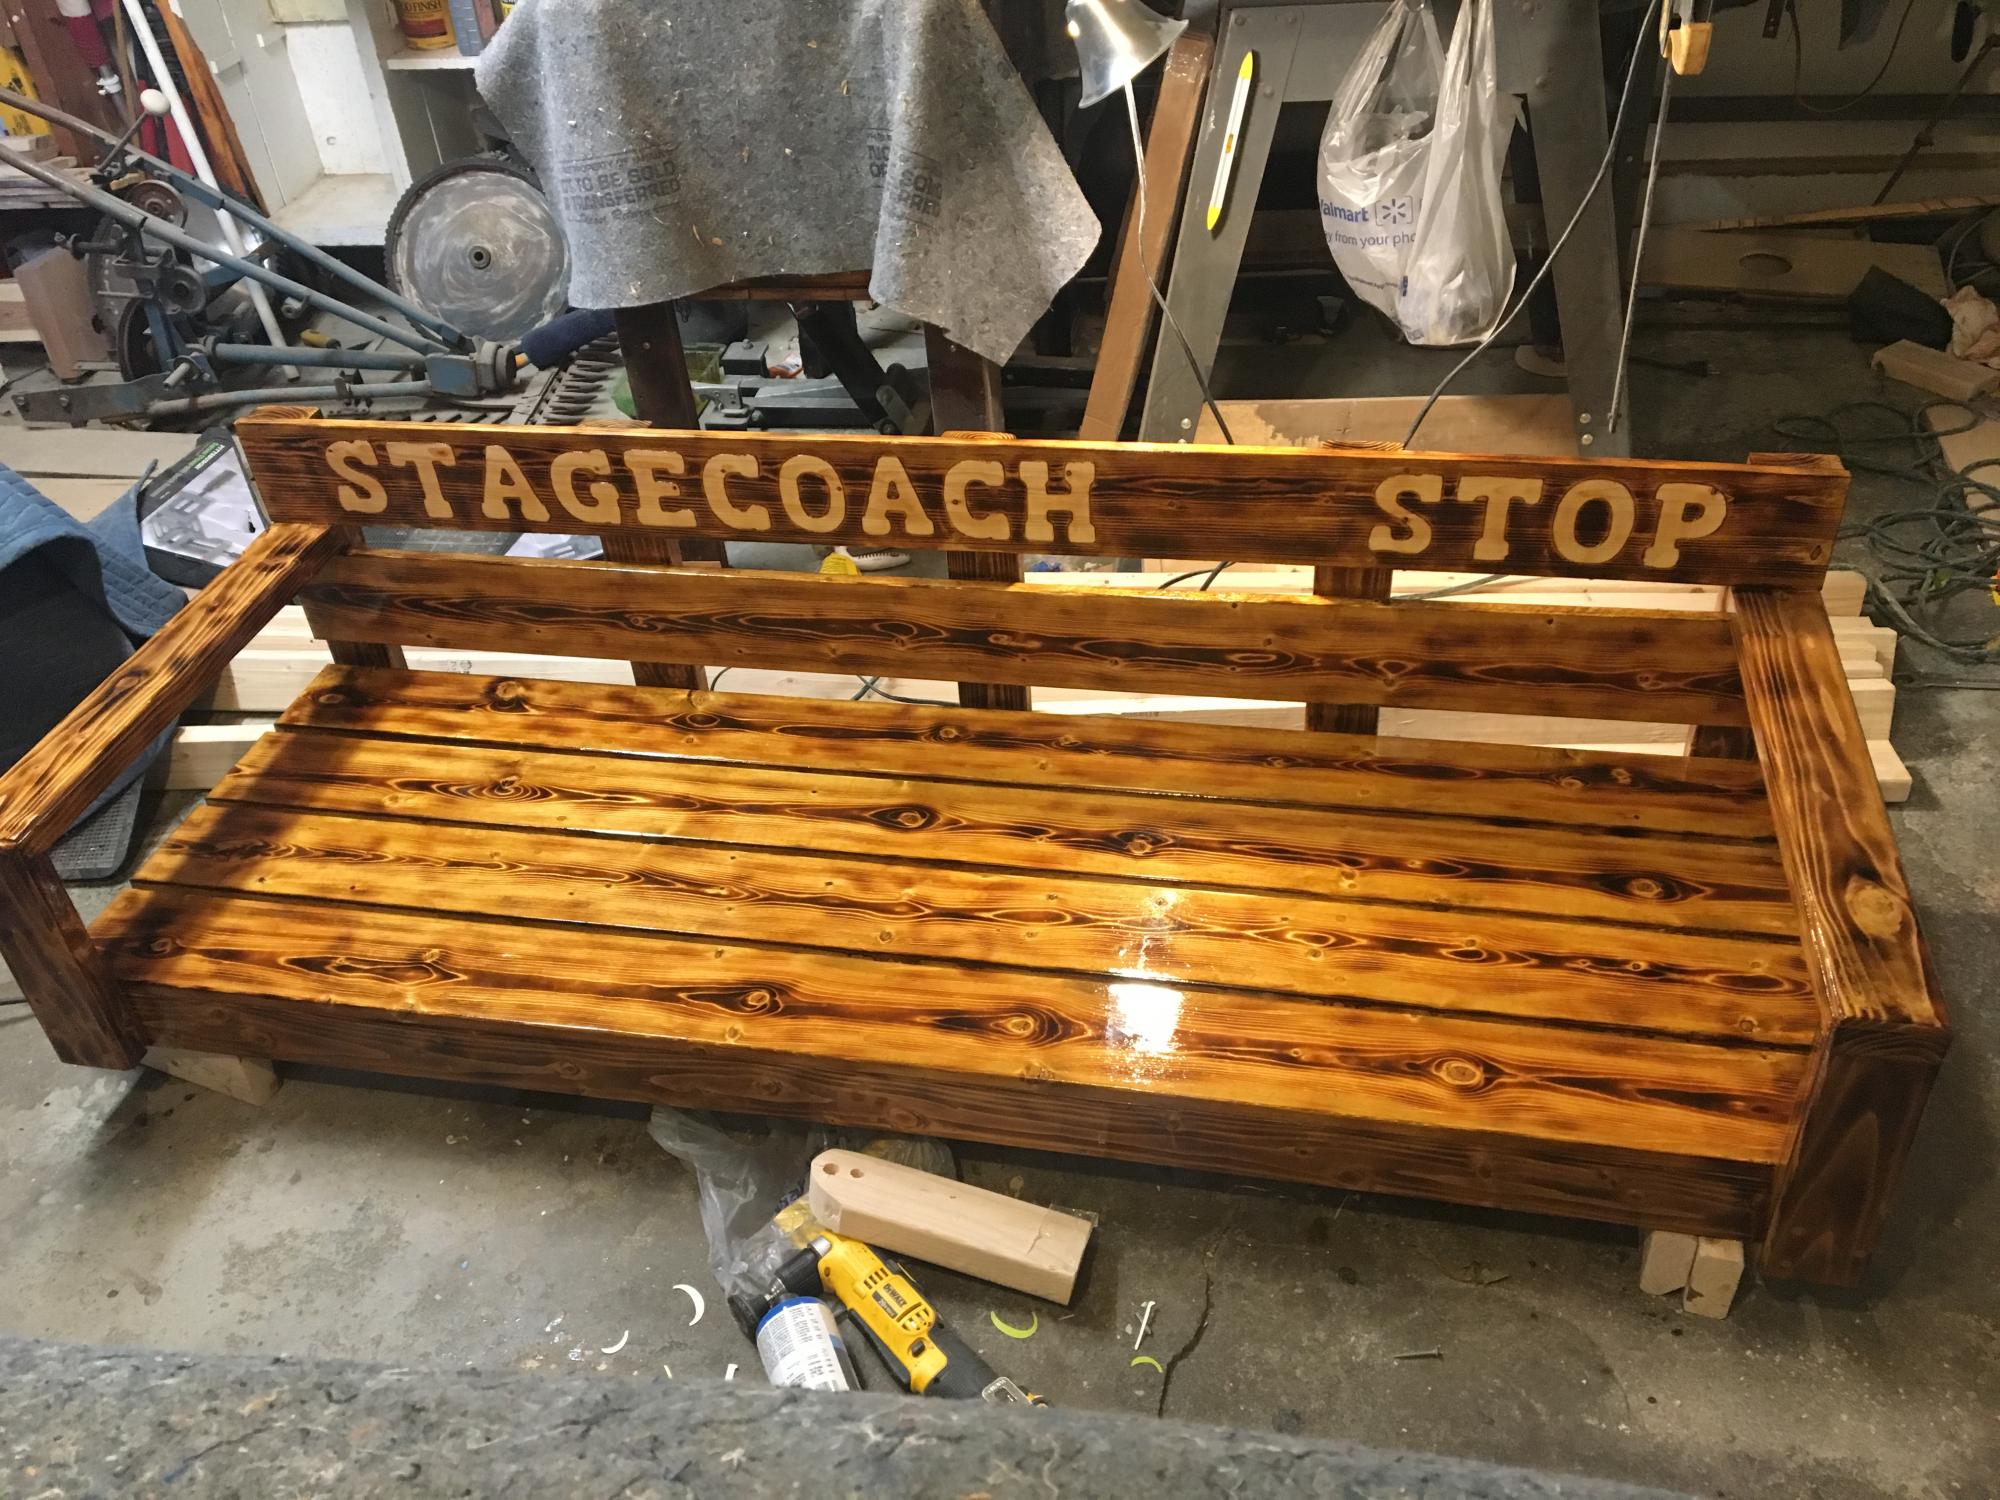
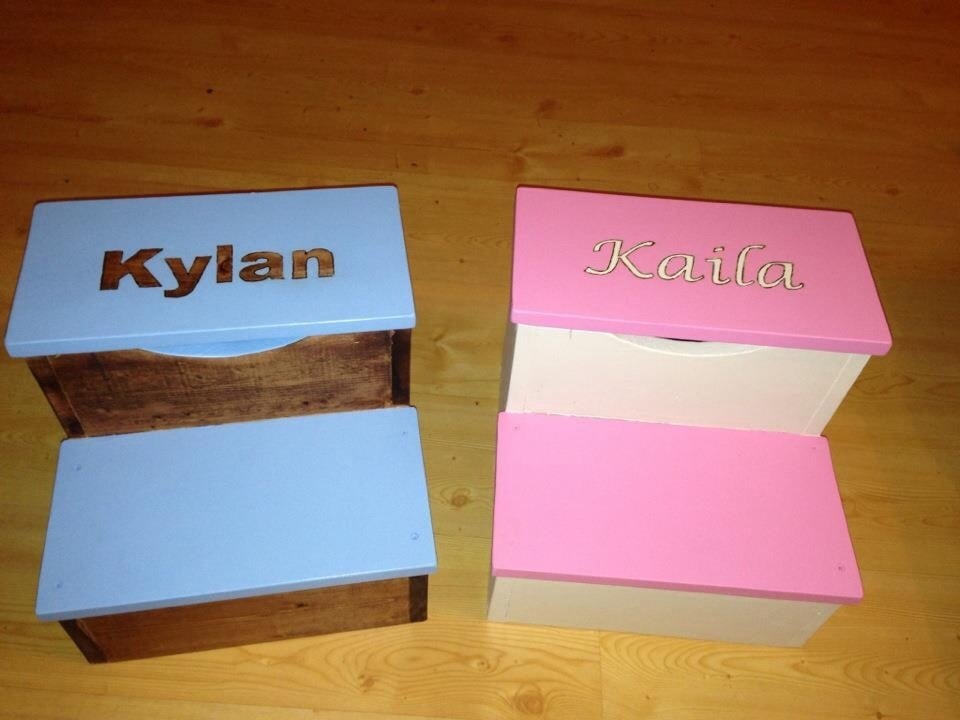
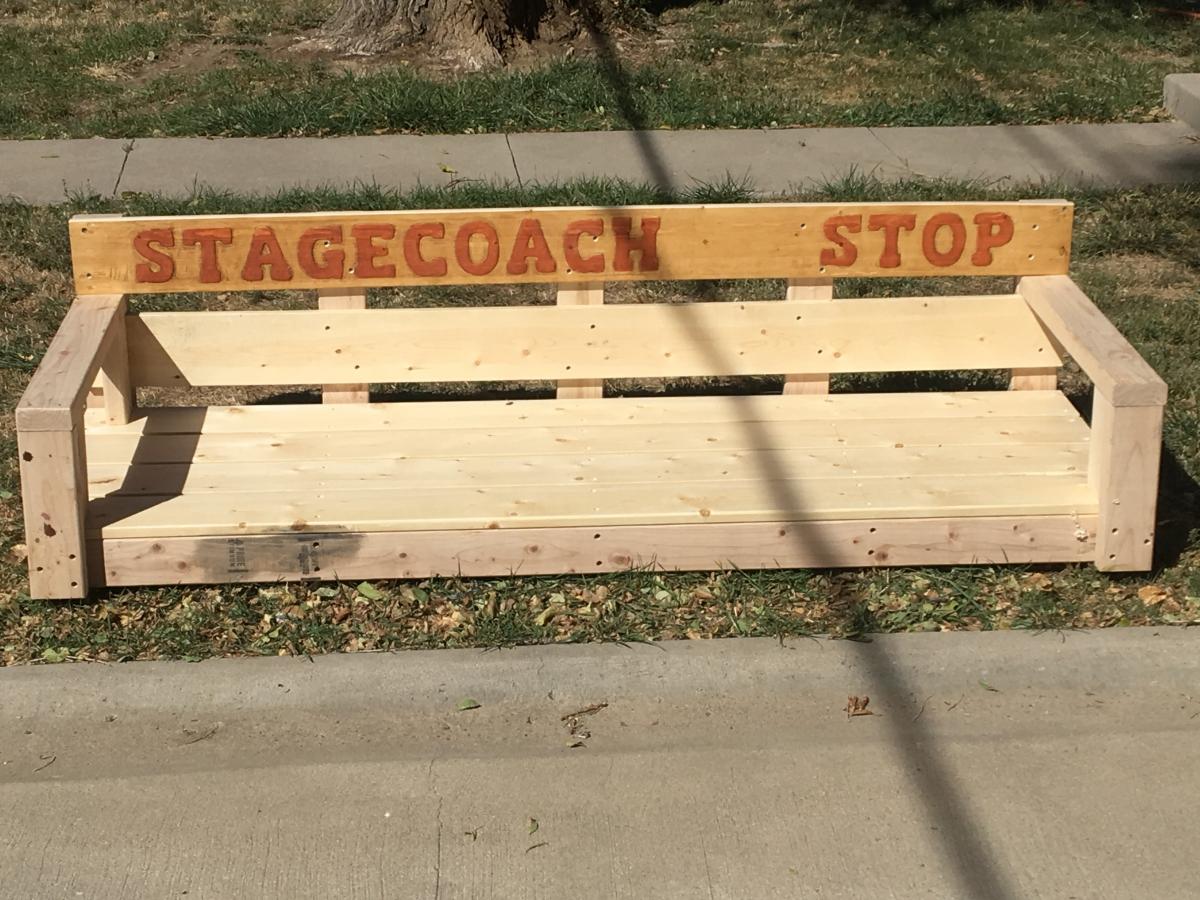
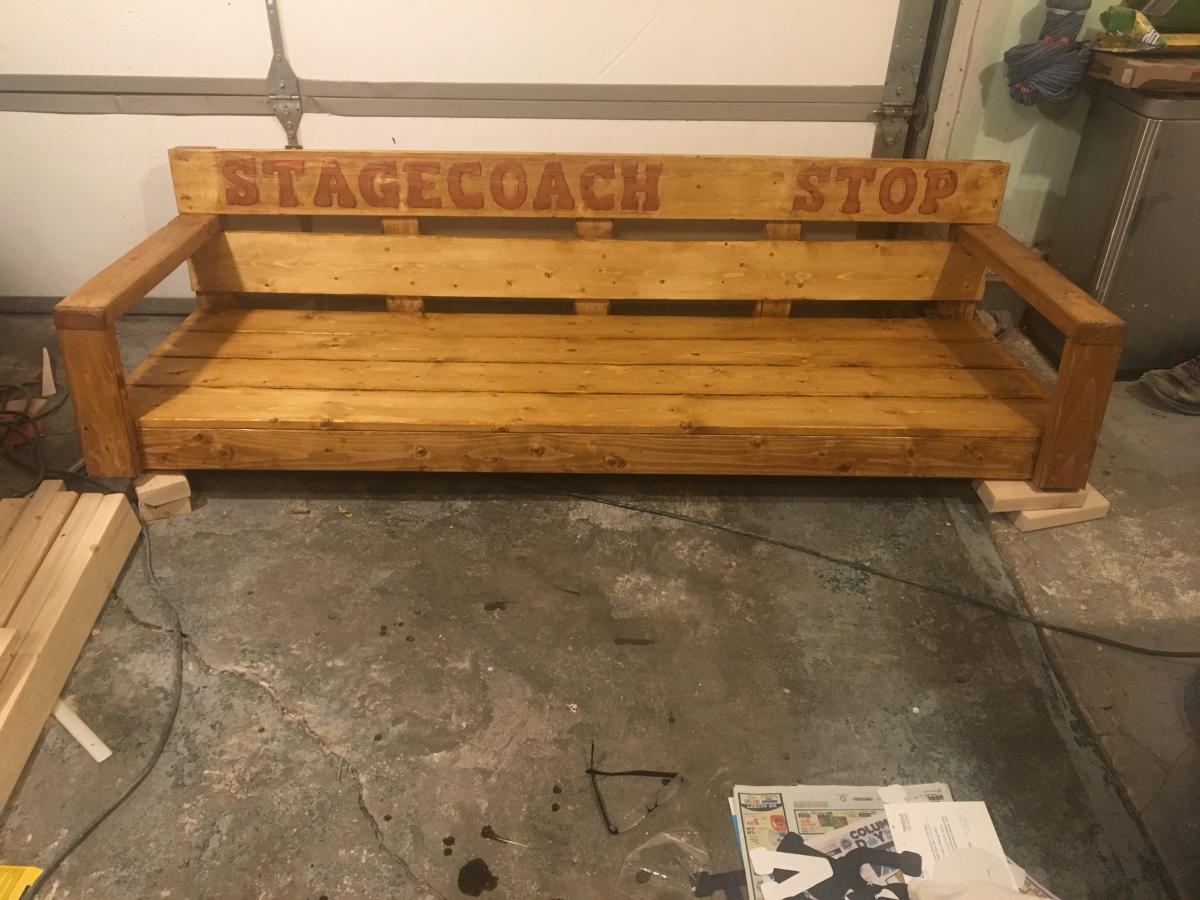
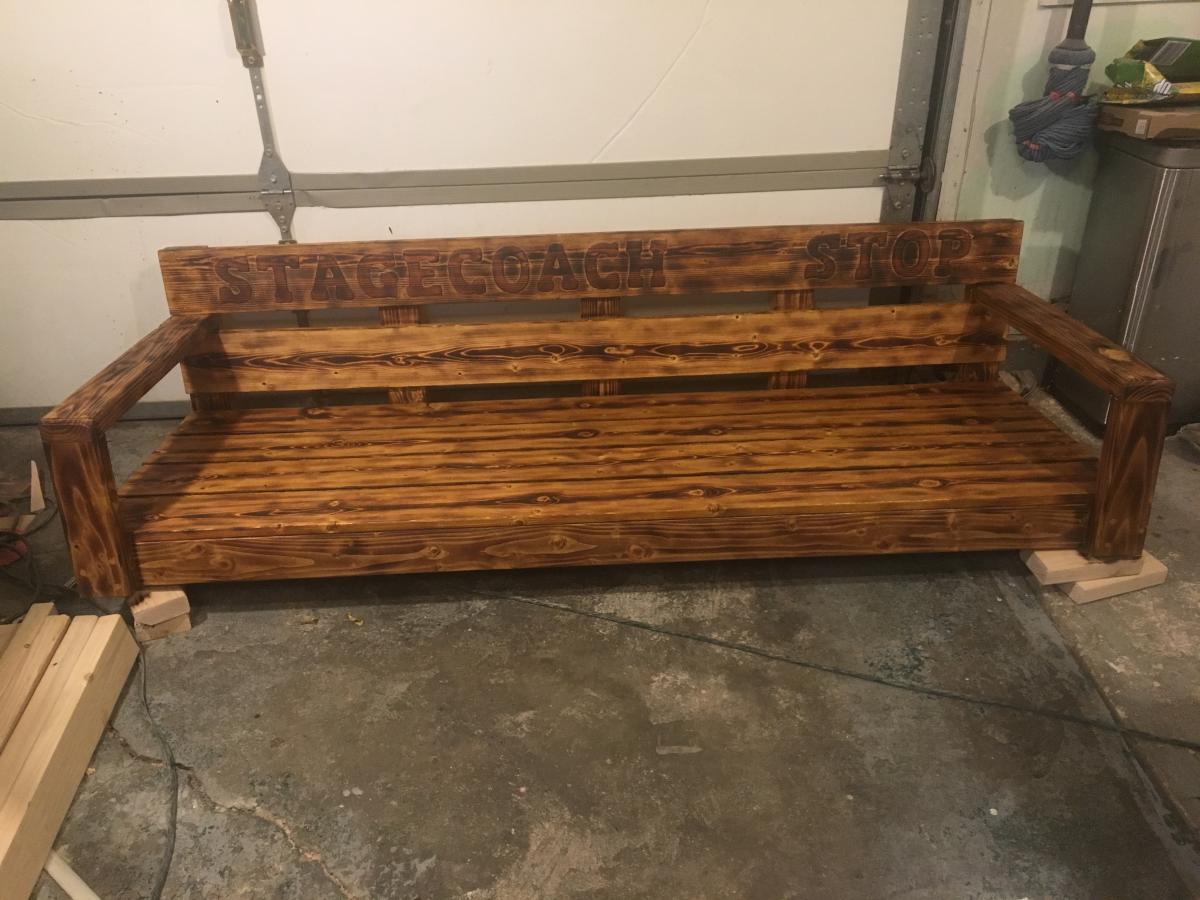
When I got it all put together it just seemed to be missing something,so I went back and routed the name of the name of the bnb that I made it for.It was still missing character so I took the torch to it and finally stained it.I think it has character now maybe?


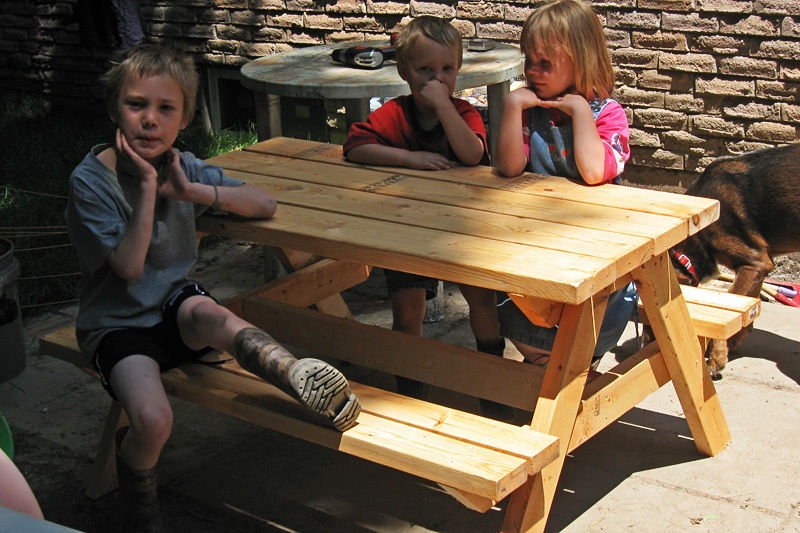
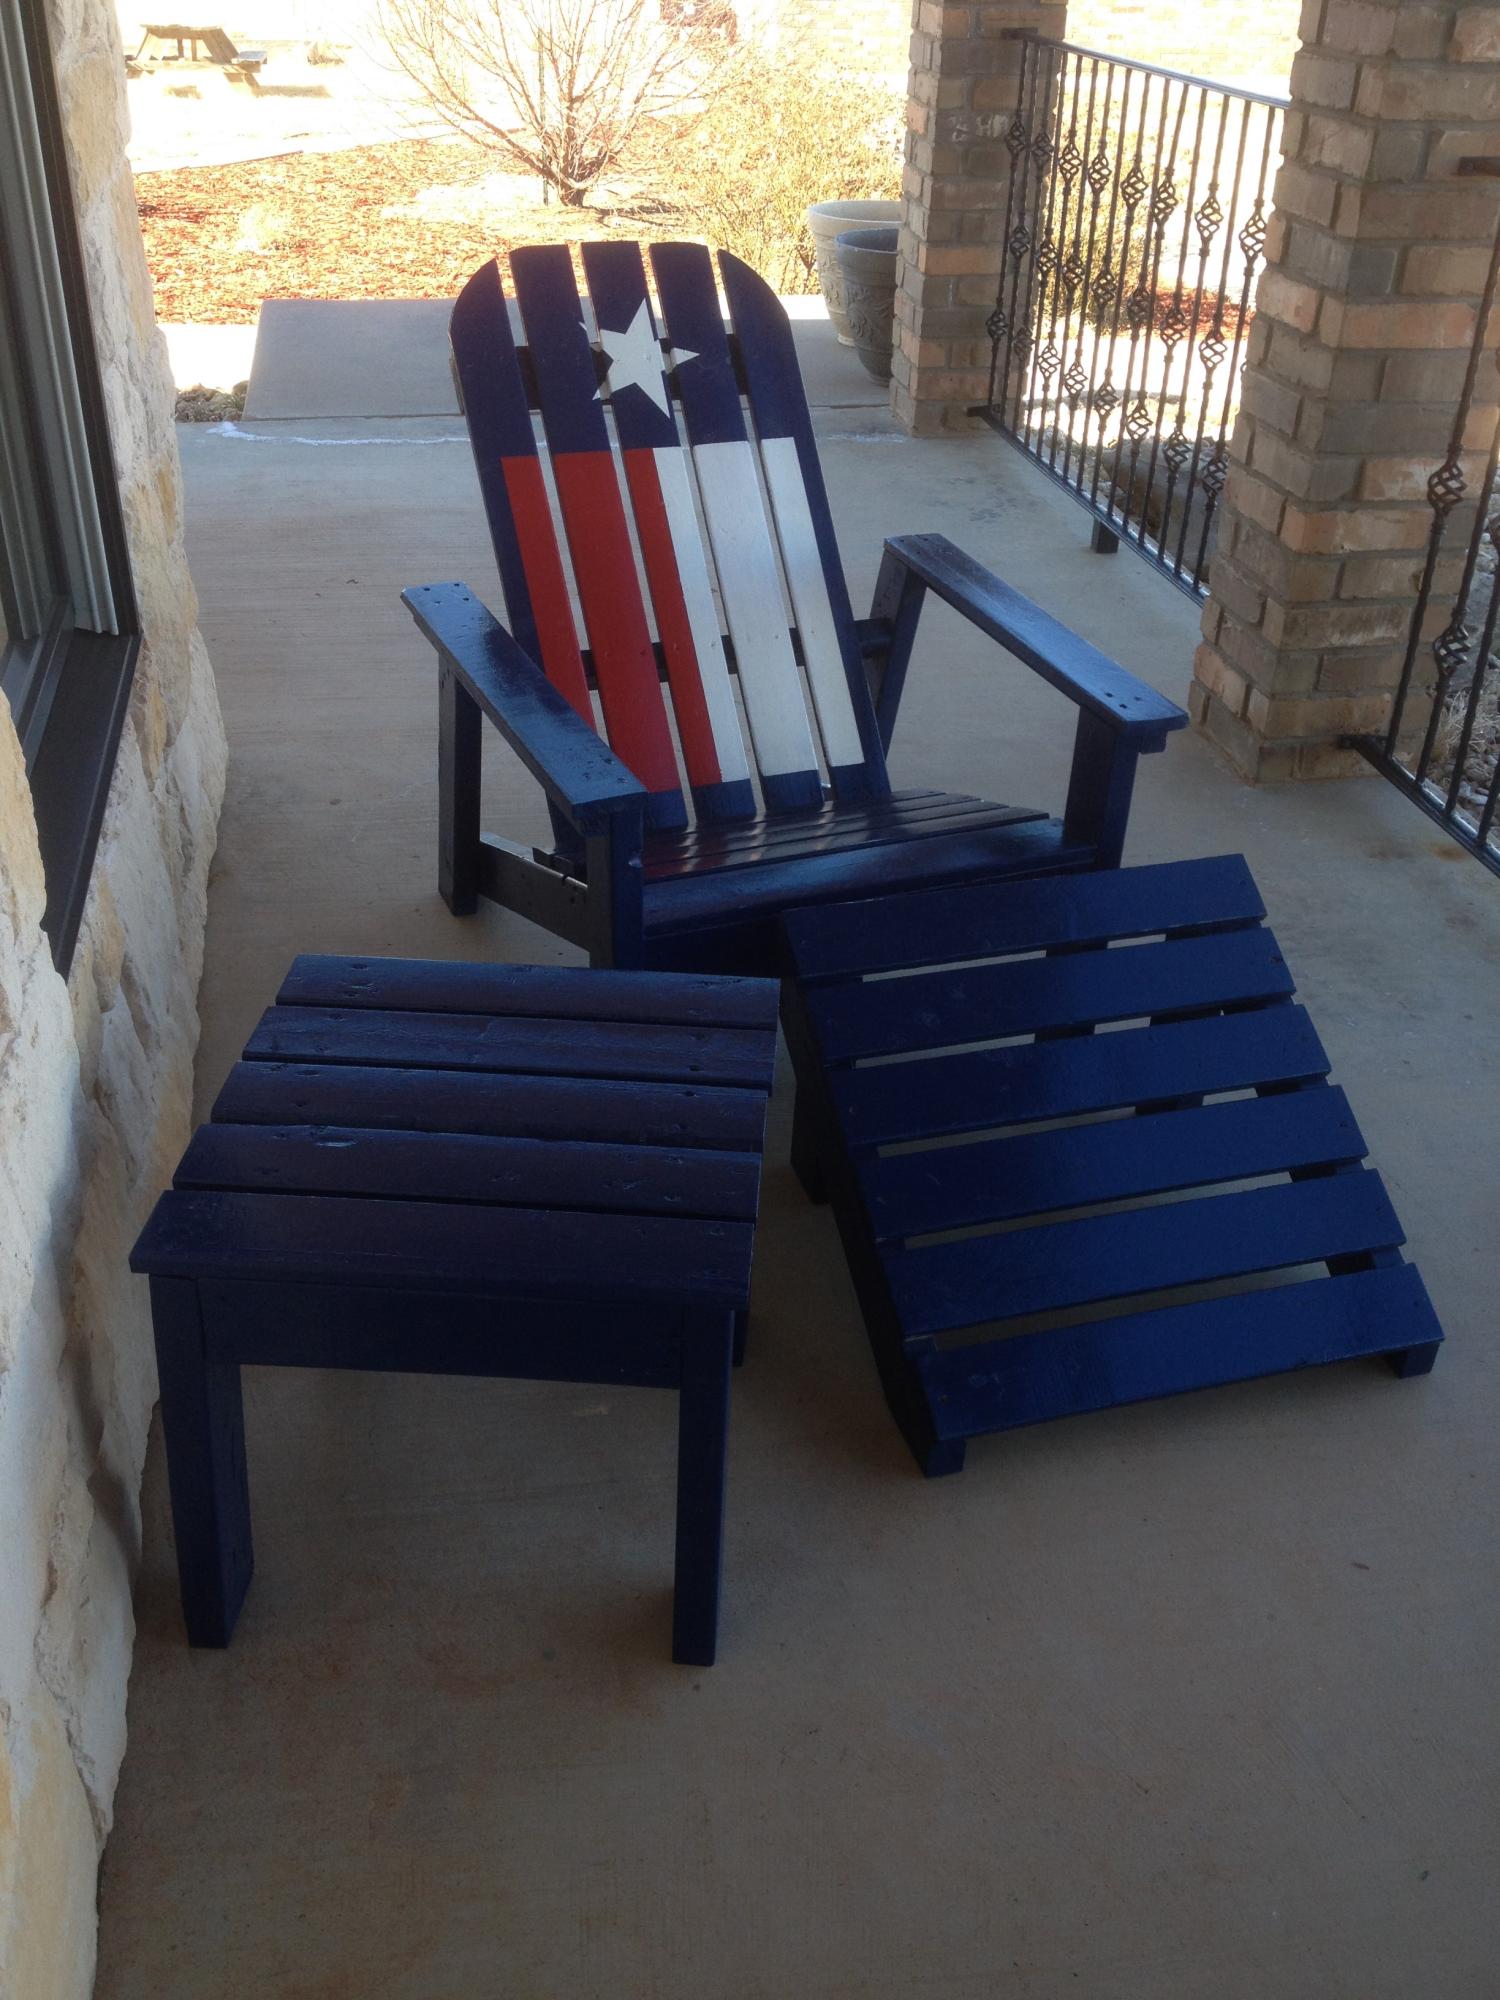
After I saw the bigger kid picnic table, I knew I HAD to make this ! I did change the measurements slightly, but I don't recall how now (I made this a year ago).
With a little project oversight, my son built and painted this chair which went on to win 1st place in his division at the local 4-H show!
I saw the plans for this project and decided I wanted to do something of the sort. I tweaked the plans a bit and made it longer and took out the drawer. My favorite part about it is Annie sloans chalk paint. Look into it, it's great stuff.
I used untreated pine for this project and painted with benjamin moore exterior paint.
I modified the back a little and I love how it turned out. I also added an extra brace against the back of each leg that fits under the seat for more support.
Very easy to build. I love the plan.
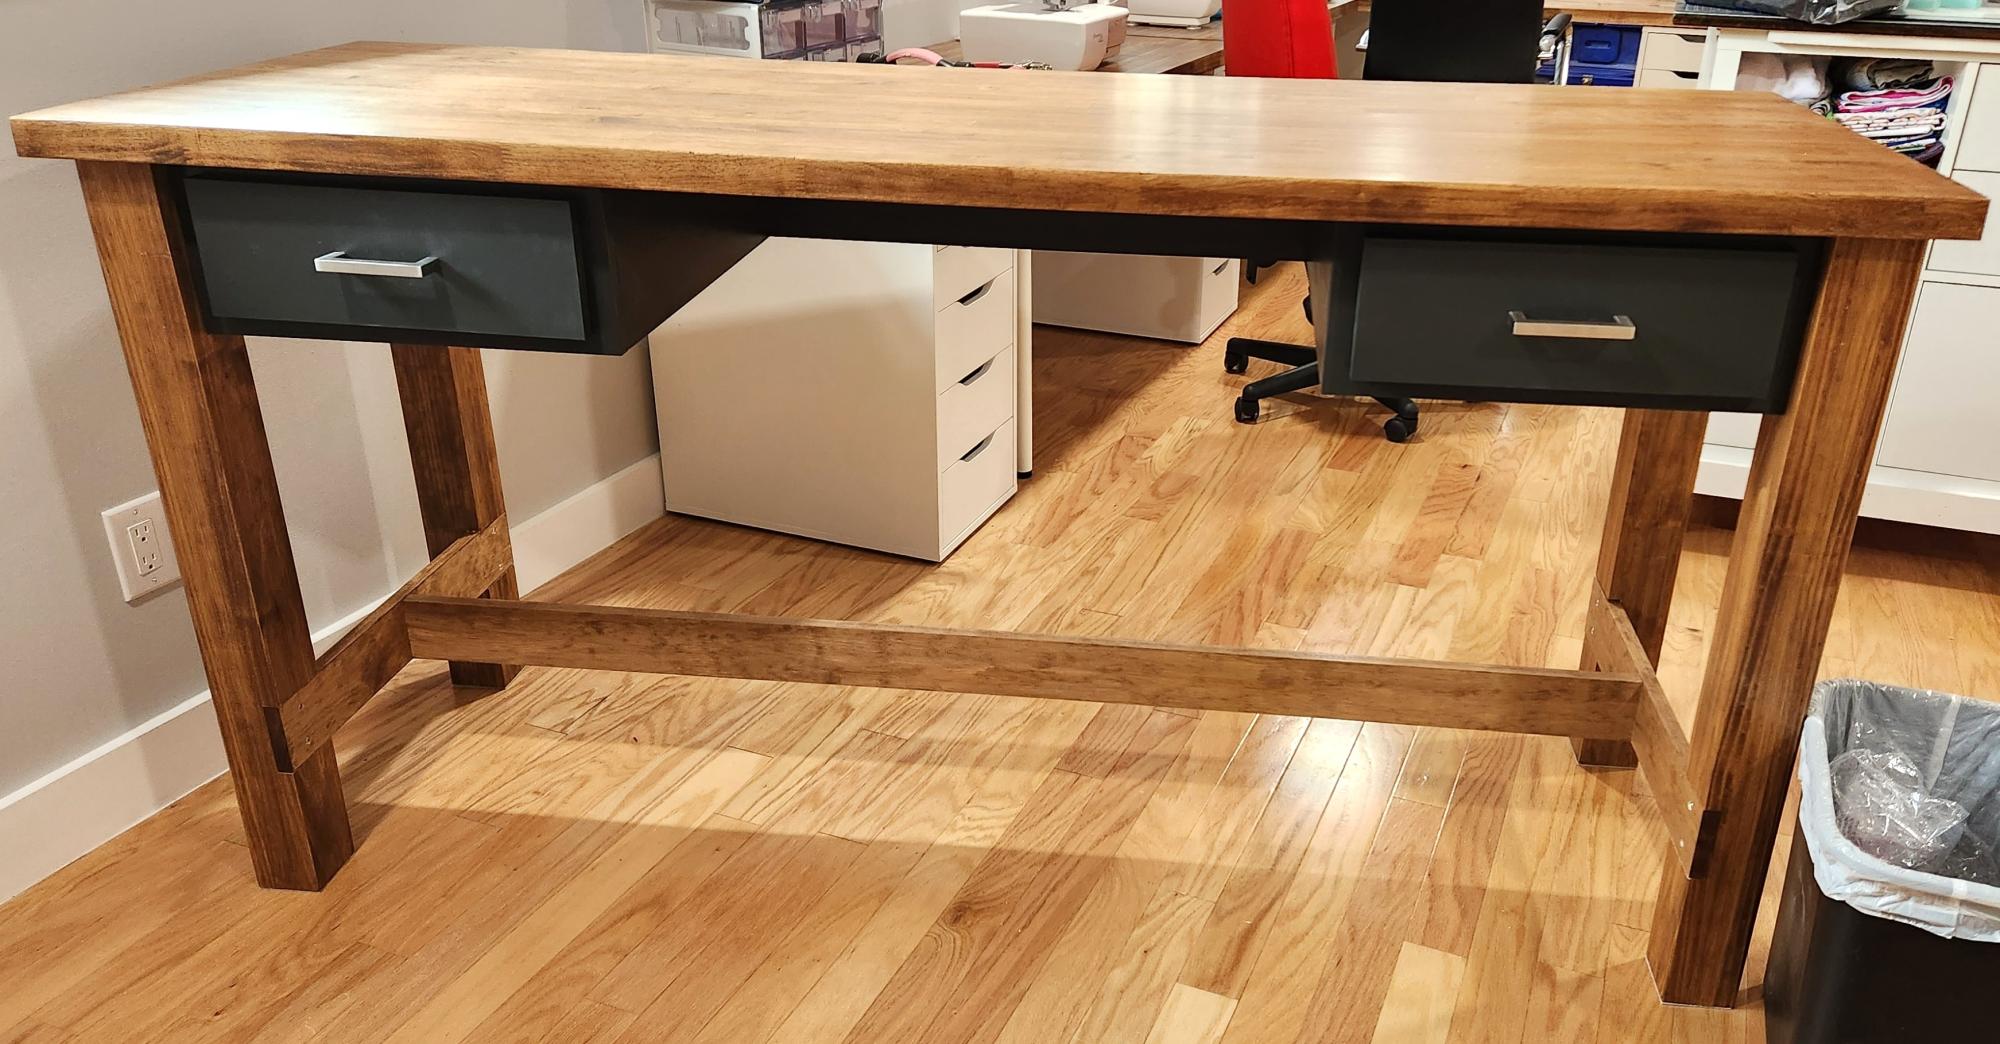
We modified the size slightly and separated the drawers so I can sit or stand at it in my art studio.
Suzanne E
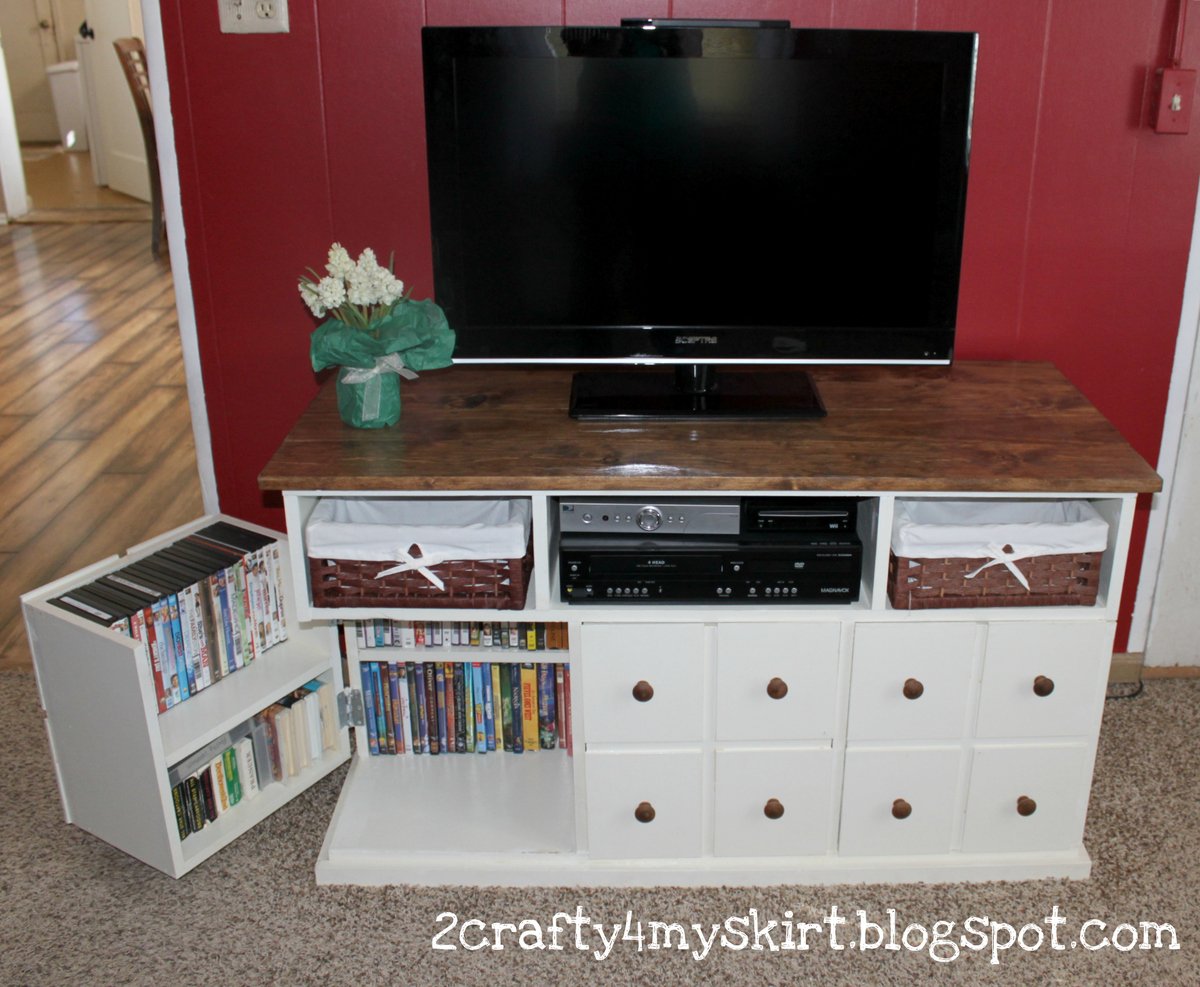
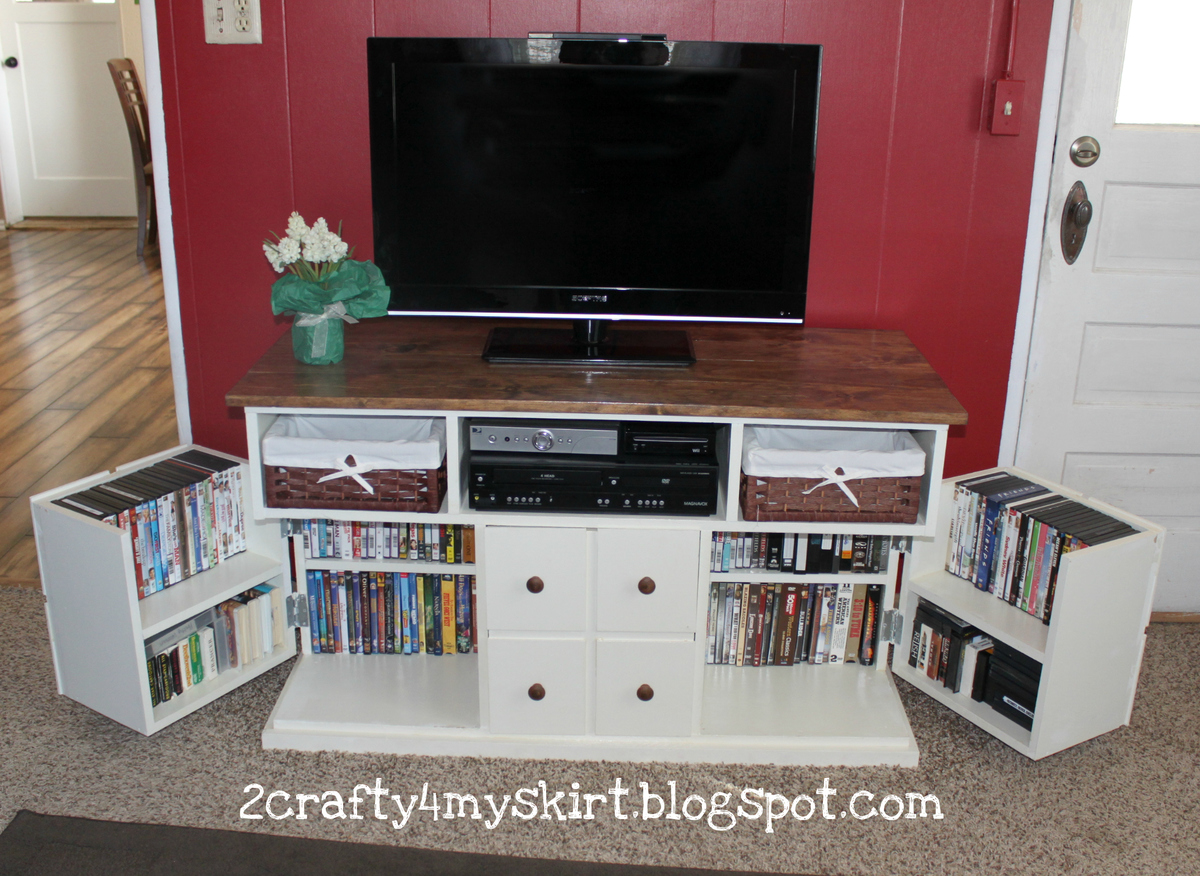
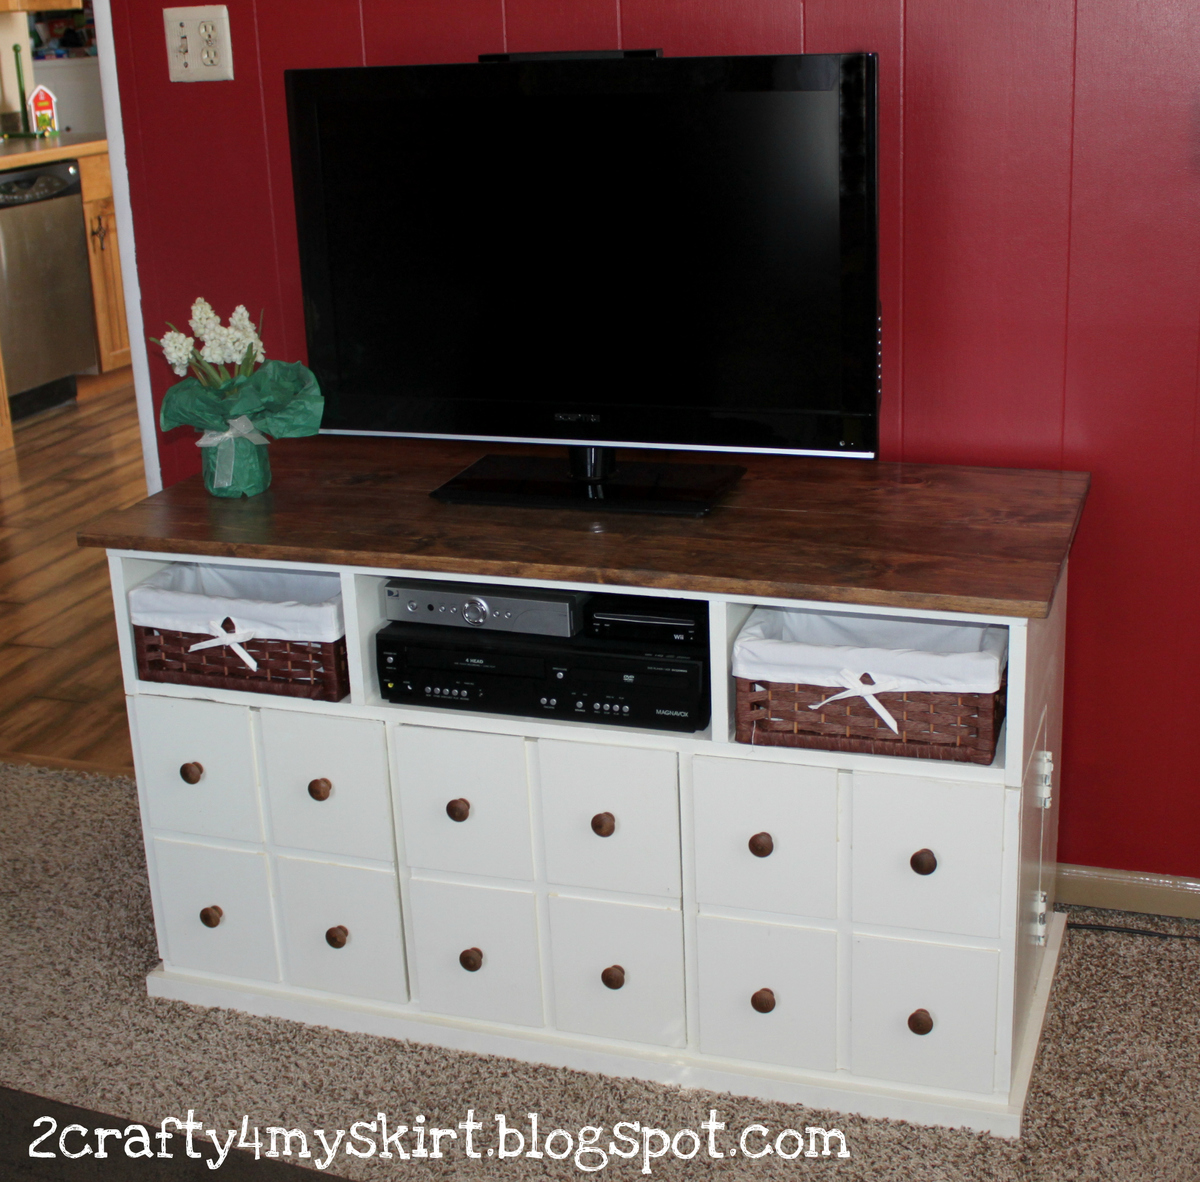
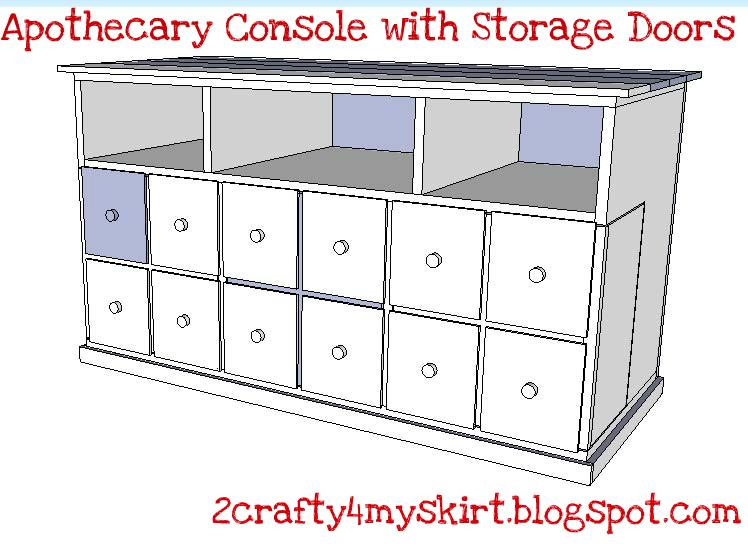
This console features the style of the Apothecary Console and the functionality of the Console with DVD Storage Doors. I drew my own my plans by combining Ana's plans for the Apothecary Console and the Console with DVD Storage Doors. You can view my plans by visiting my blog at www.2crafty4myskirt.blogspot.com or by clicking the plan link below.

Sat, 03/17/2012 - 19:50
That's a really awesome cabinet. I love the look of the apothecary, and wouldn't have thought to design the doors like that for the added storage.
Sun, 03/18/2012 - 02:30
Really like this build. Just wanted to let you know there are a couple of mixed up letters in your blog address at the very beginning of the post...so it sends you to a different site.
Adore the cabinet! Thanks for sharing.
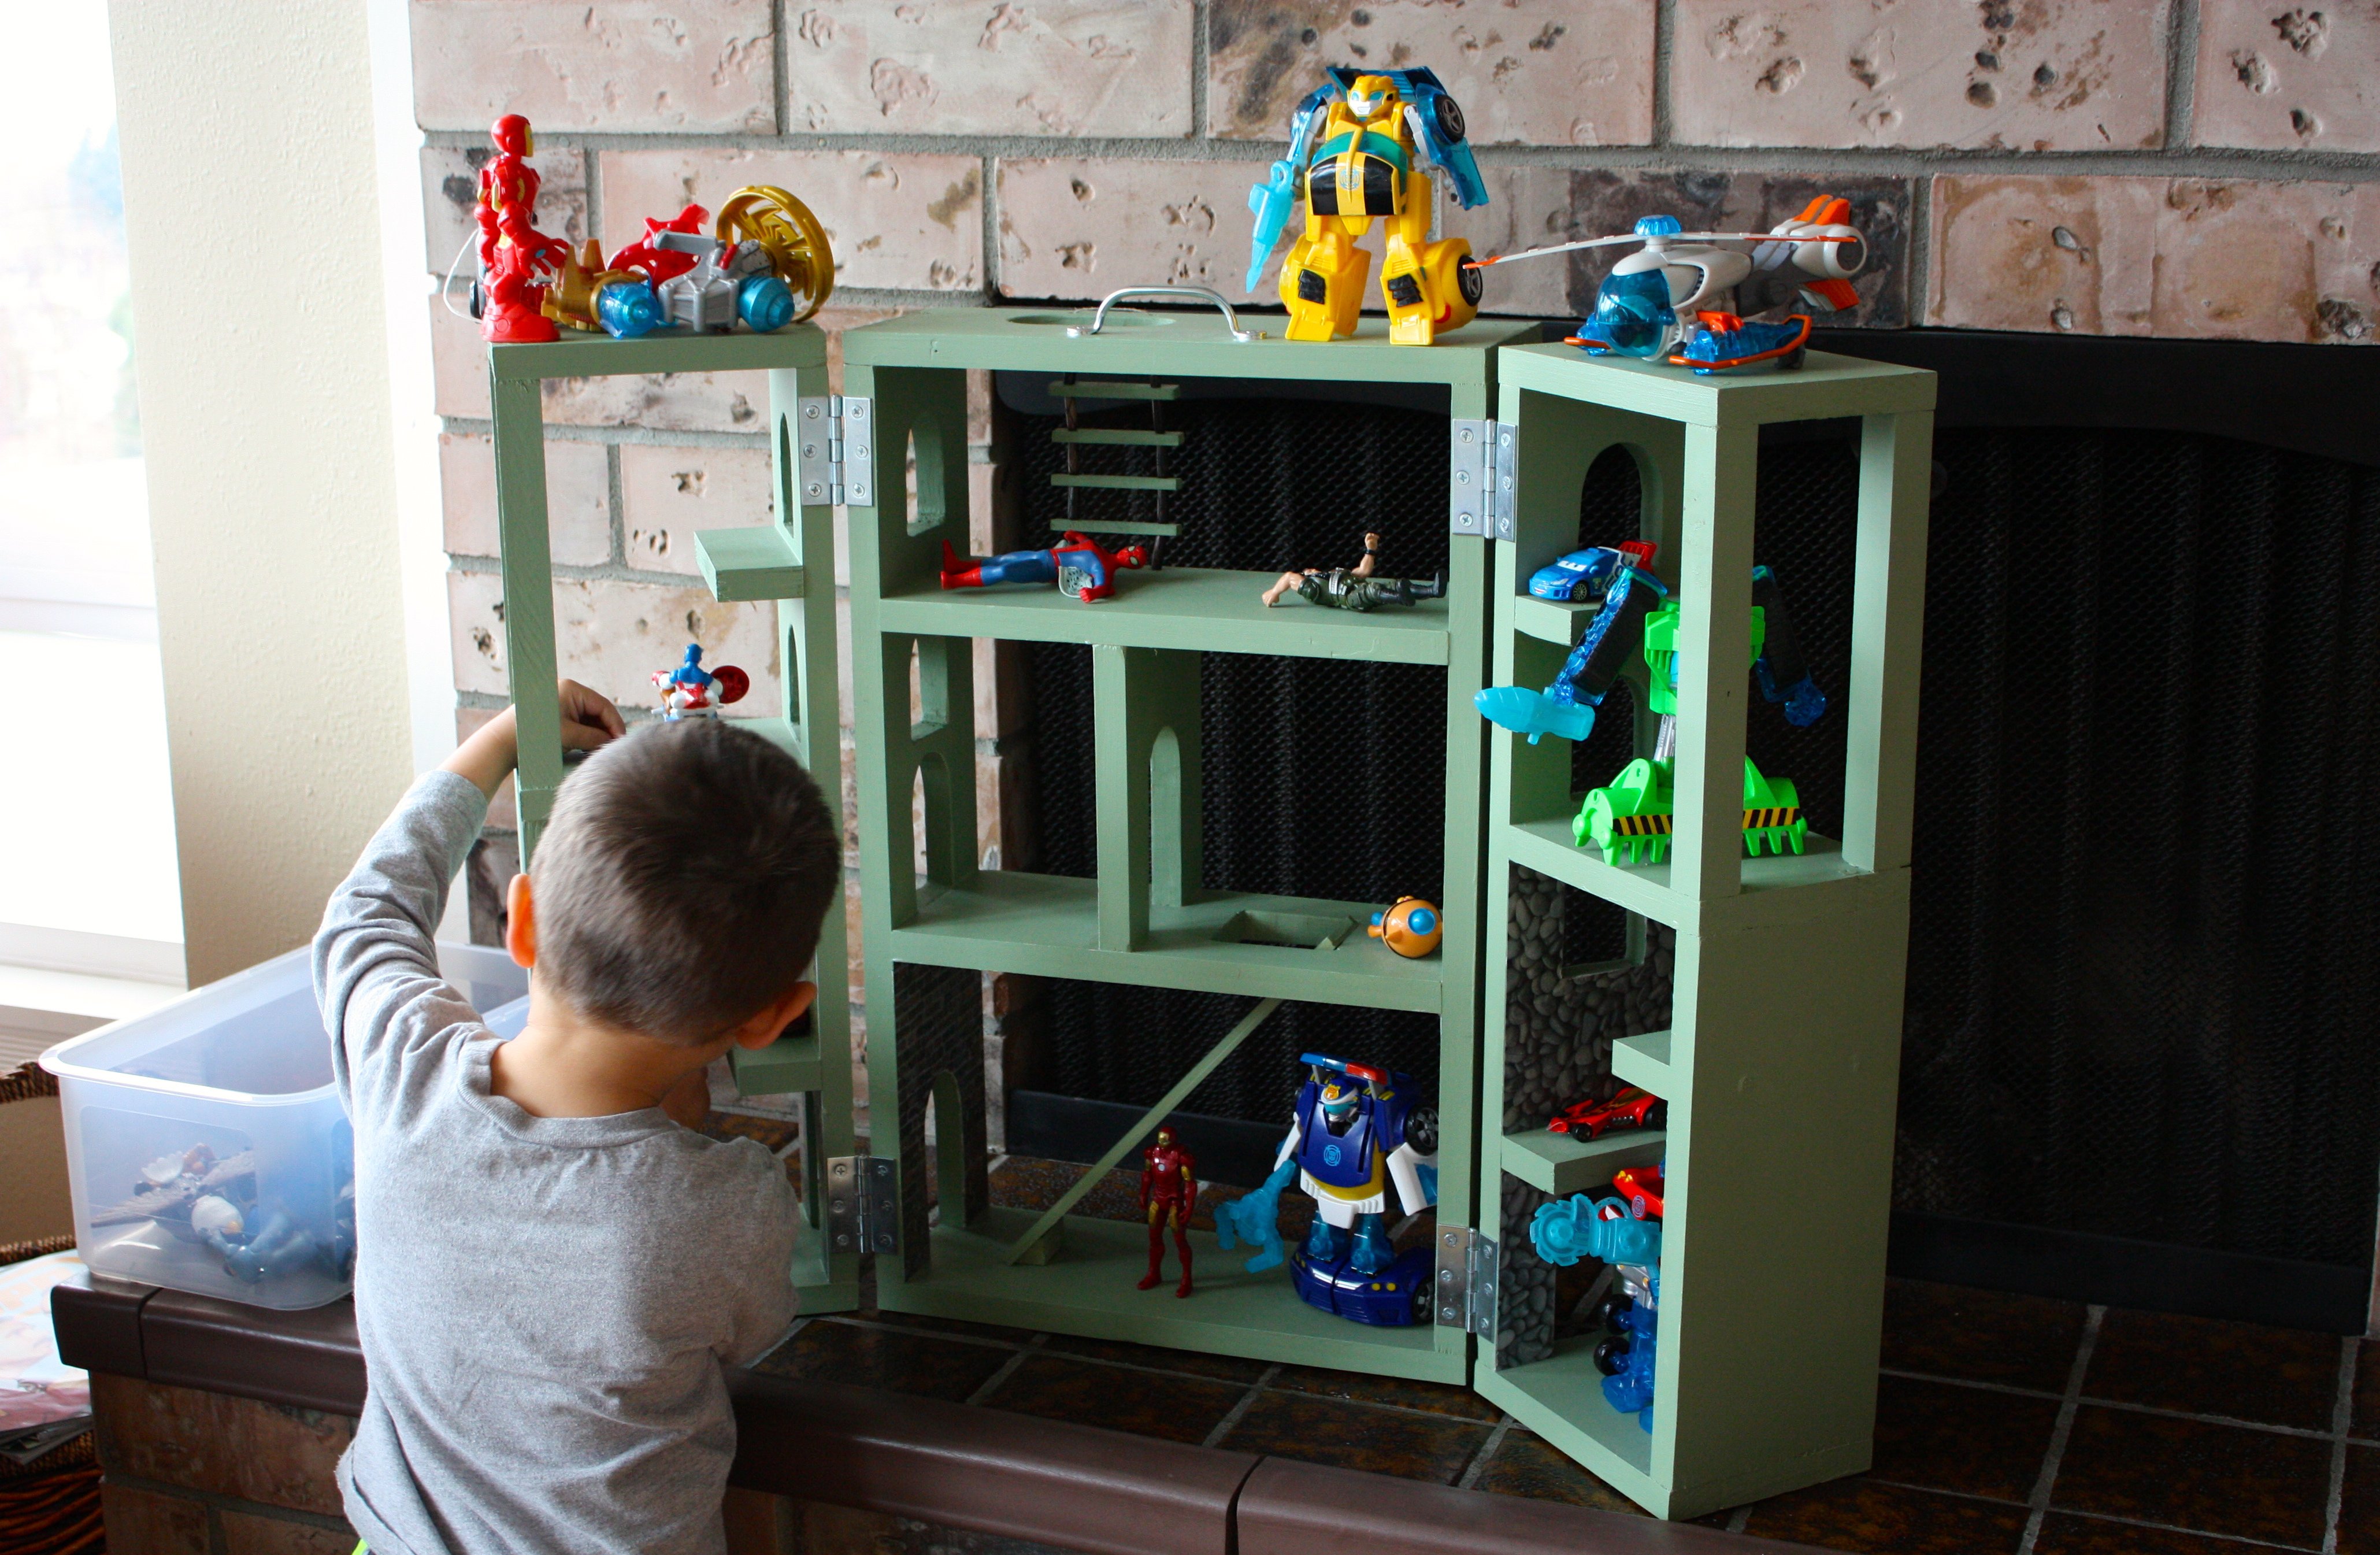
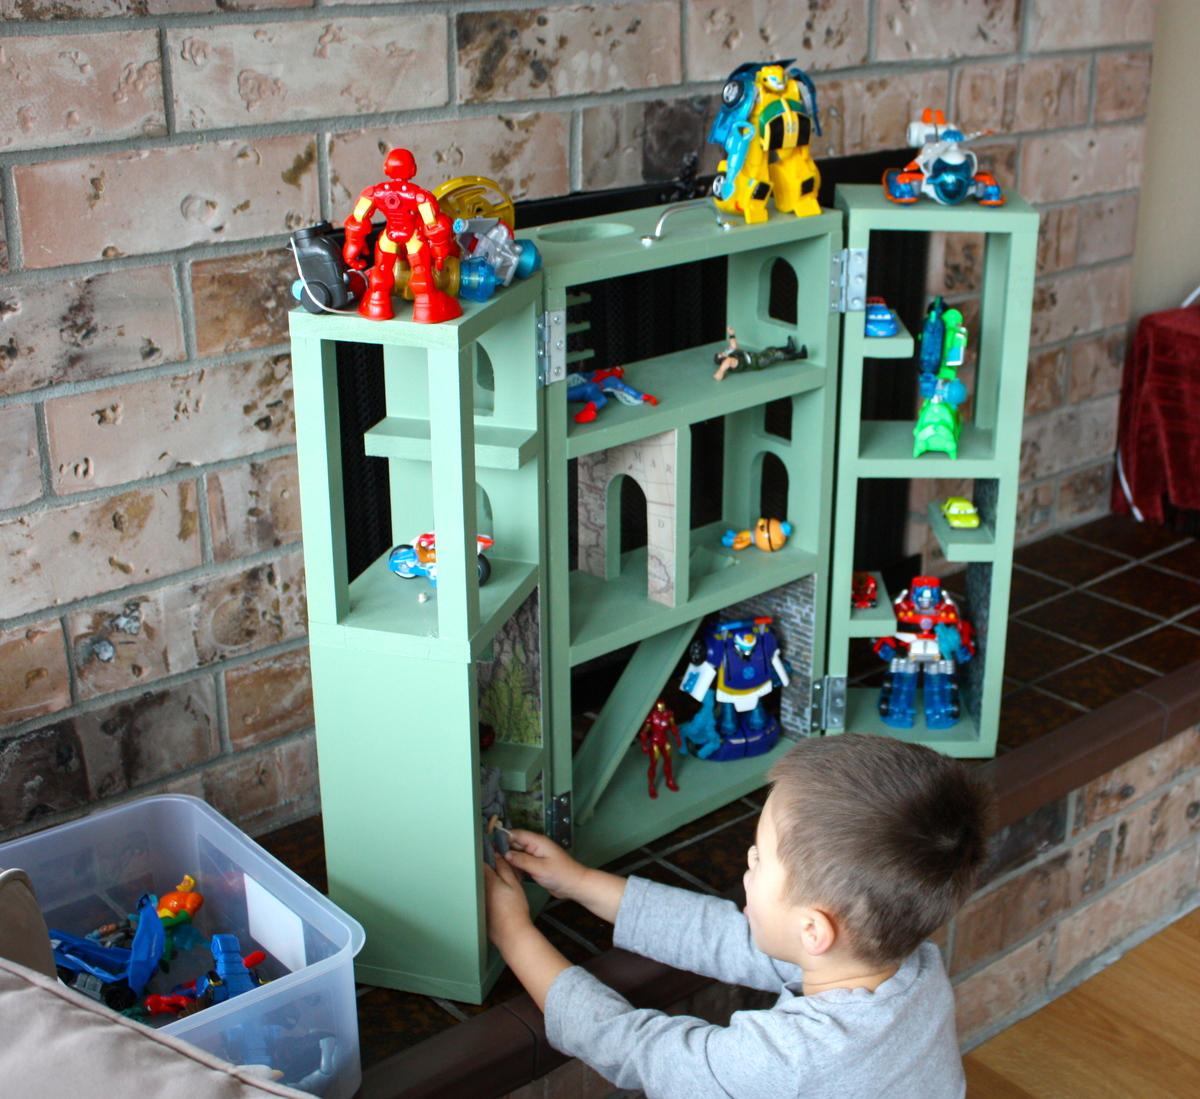
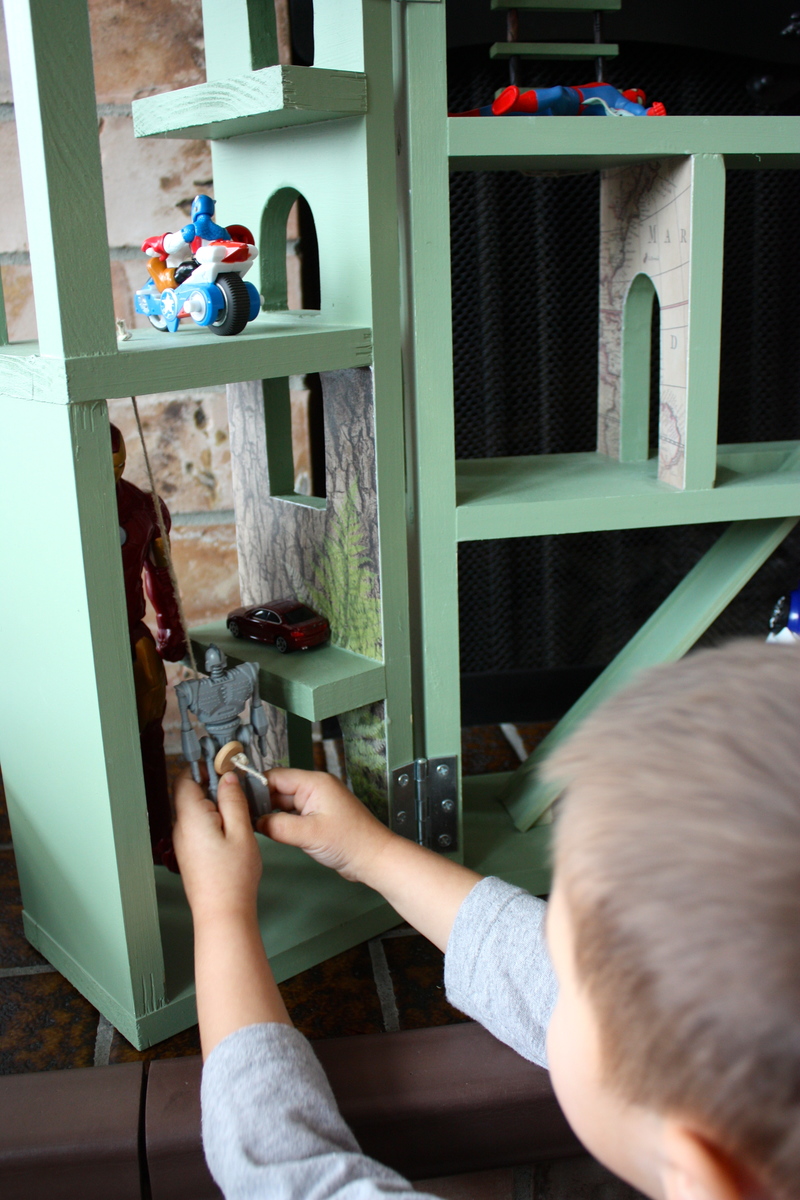
When my 4 year old son perused the toy catalogs that came in the mail prior to X-mas, one thing was certain - he loved all the towers and buildings being advertised for action figures. However, I refused to buy one more plastic piece of junk that inevitably breaks after a couple of uses. When I found these plans, I knew they were perfect! My husband and I worked on this together, he's much steadier with our jig saw. I fitted my drill press with a hole cutter for the tops of the arched doorways. We added a rope swing and green paint to the original design. I had trouble knotting the twine for the ladder at even intervals so I used some cylindrical wooden beads I found from an old necklace to use as spacers. It doesn't close up as tightly as we'd like, but we can still get the clasp closed. I decoupaged some of the inner walls with scrapbook paper for fun scenes: maps, brick walls, pebbles, bark, and forest. It was a fun project for us and it's been fun watching him! He has played with this tower nearly every day since he opened it up X-mas morning!
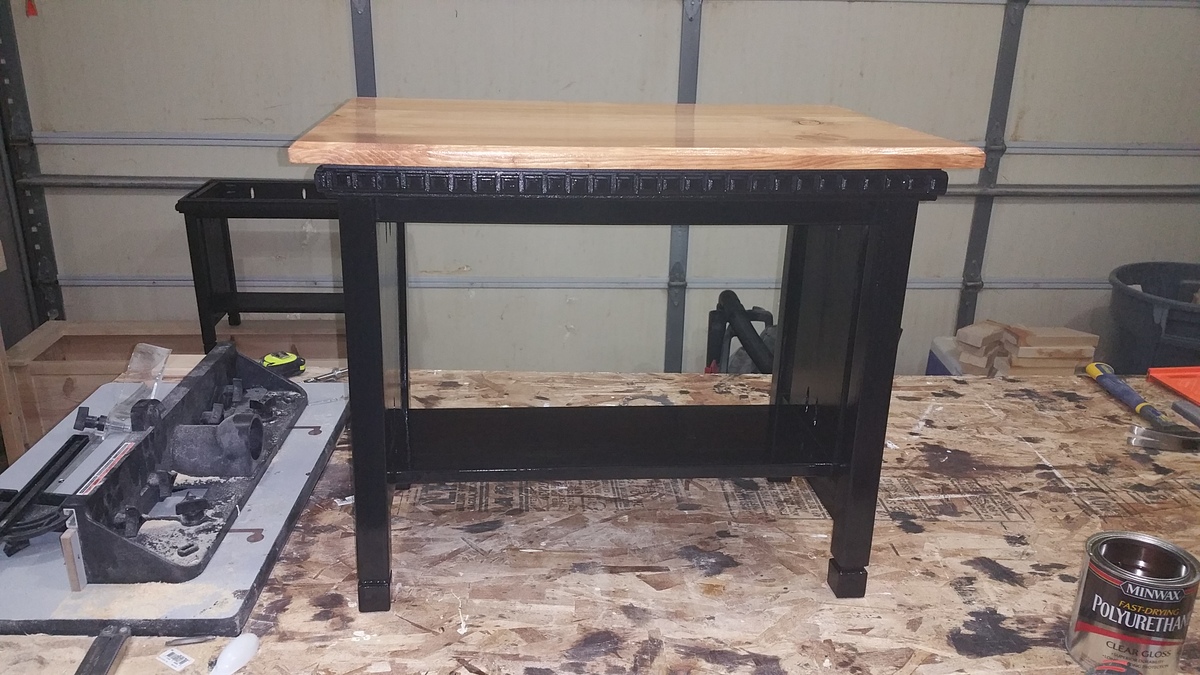
Handcrafted amish side table. Easy to do

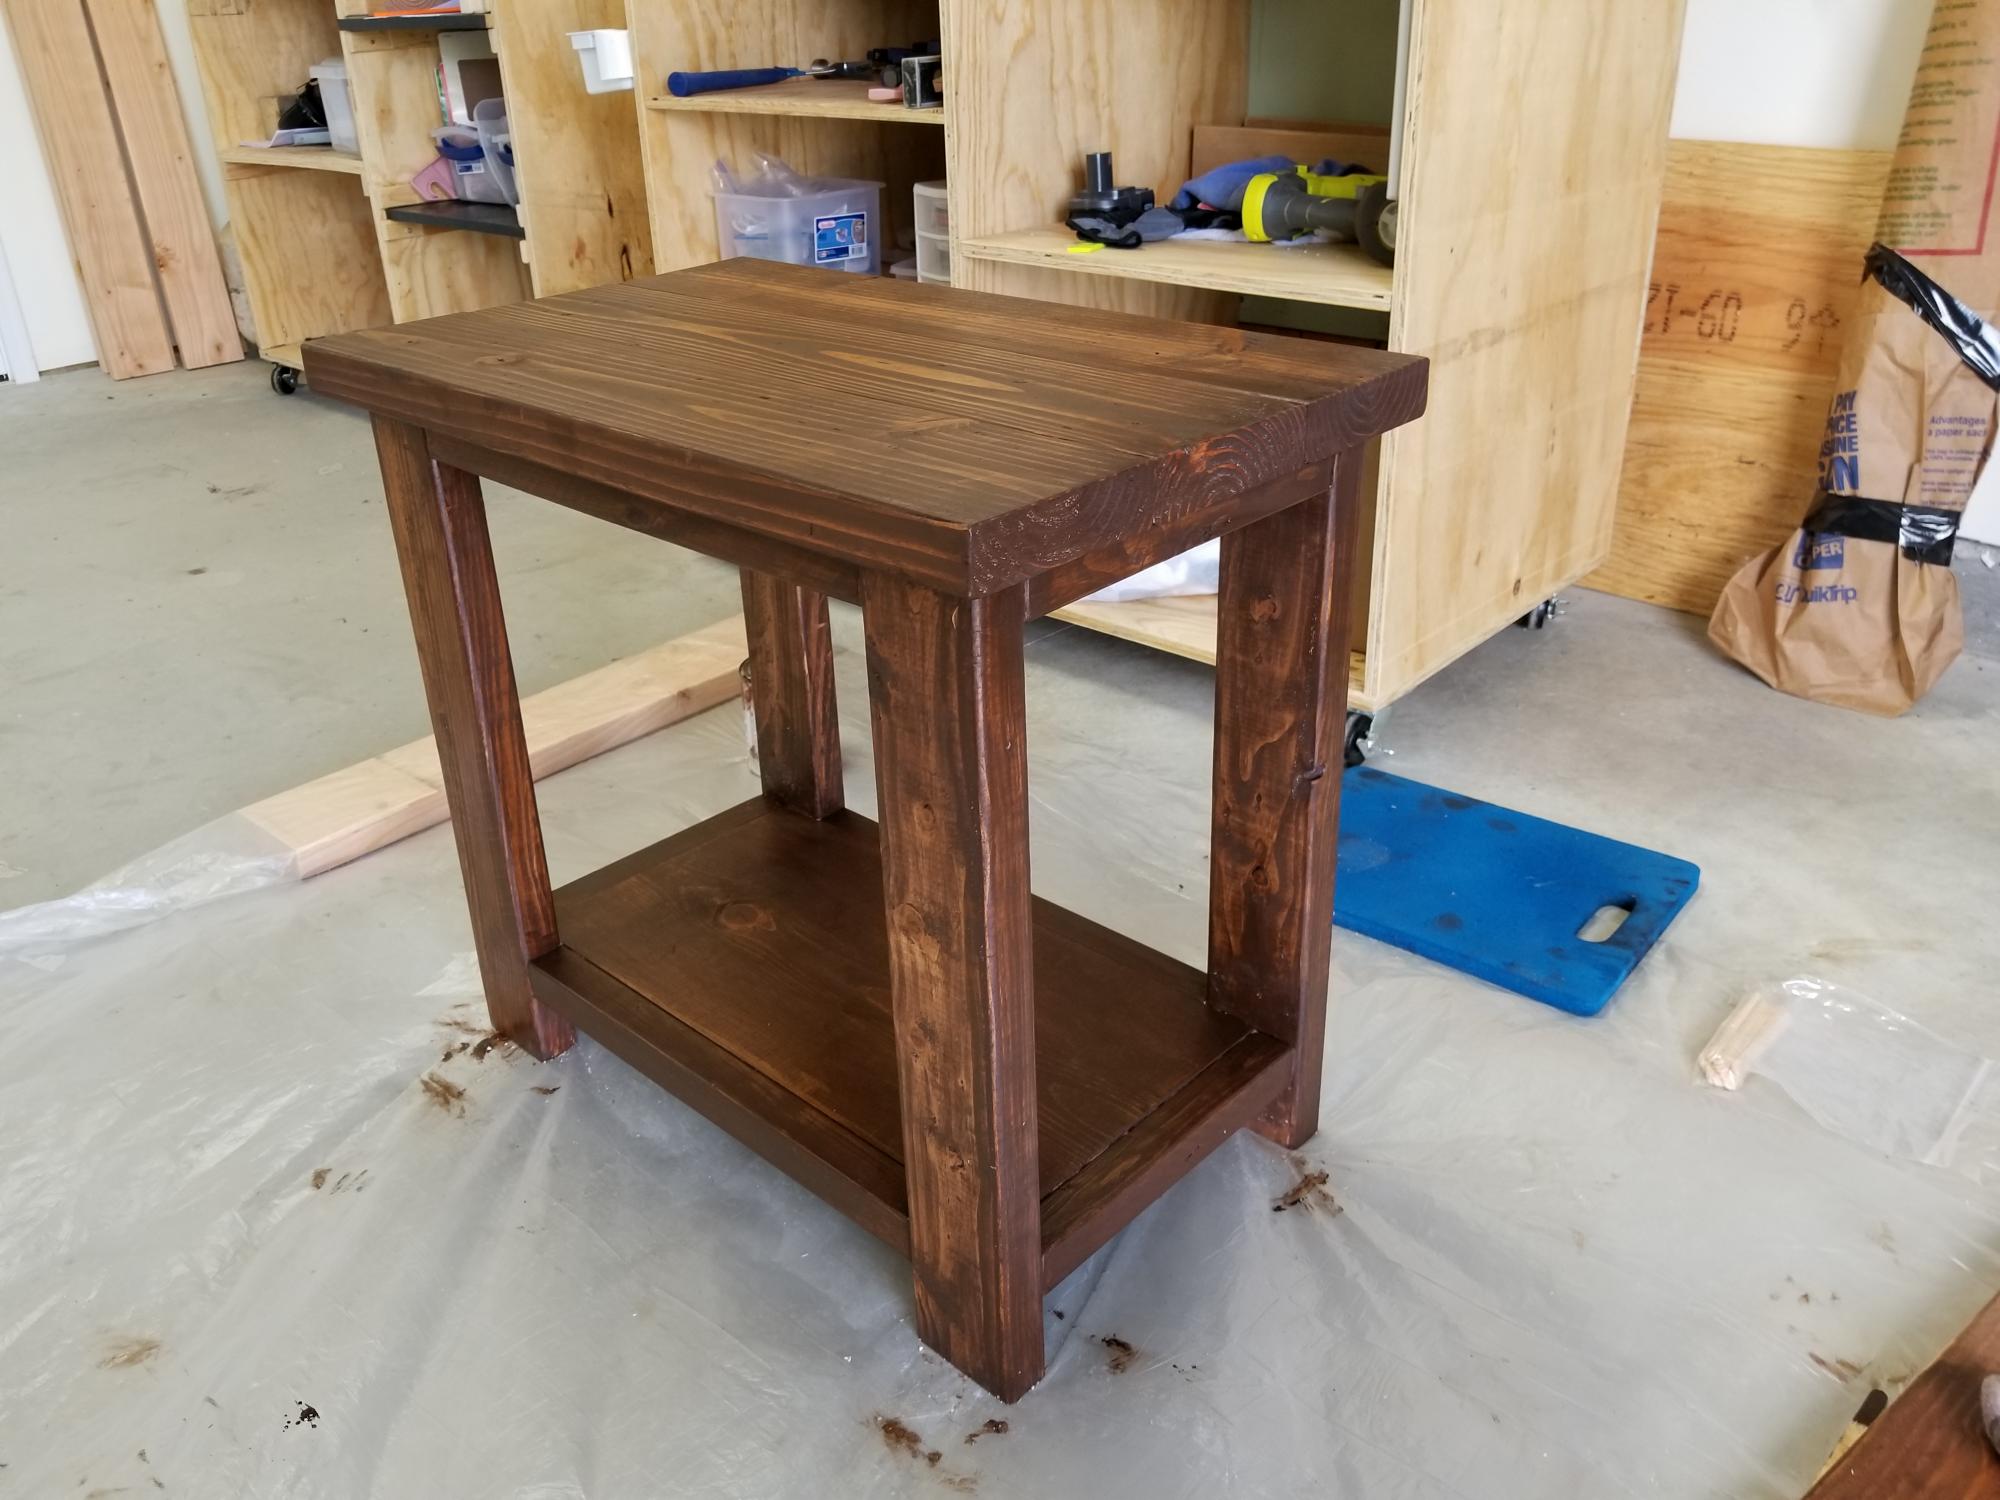
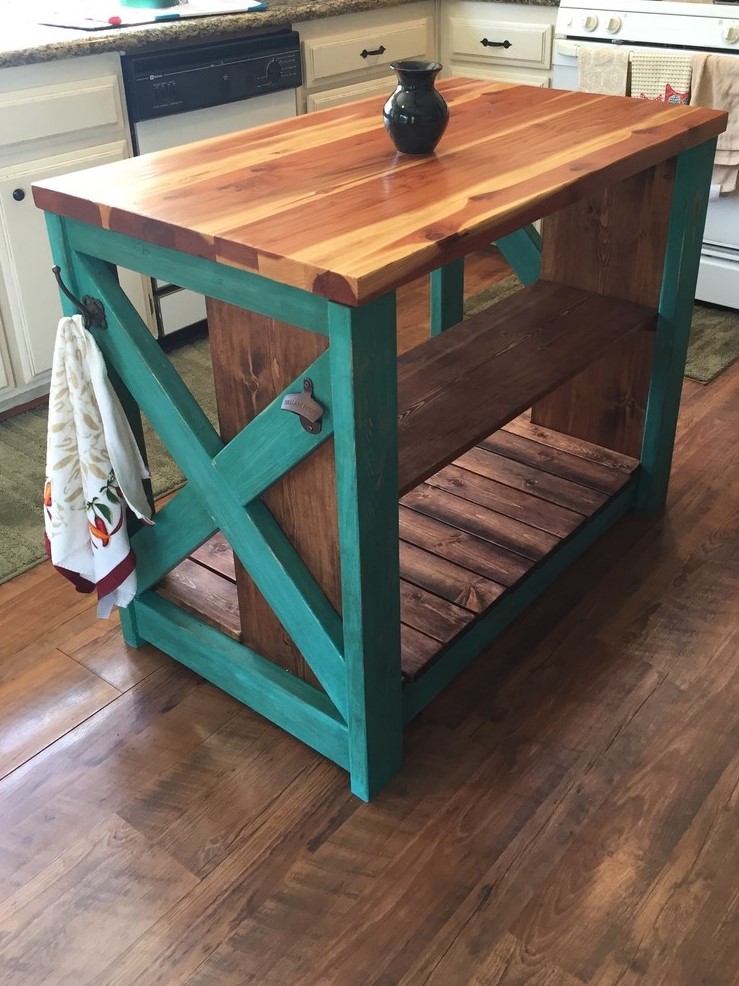
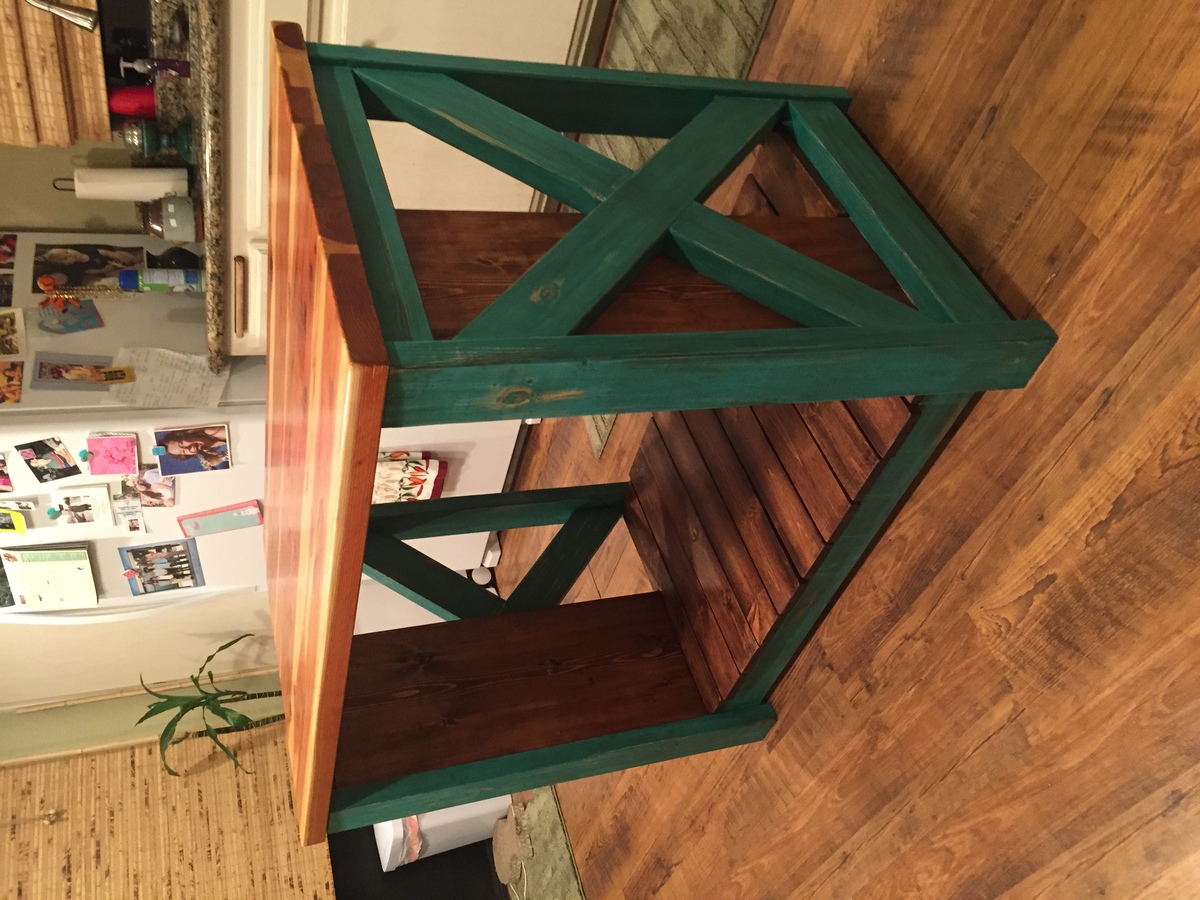
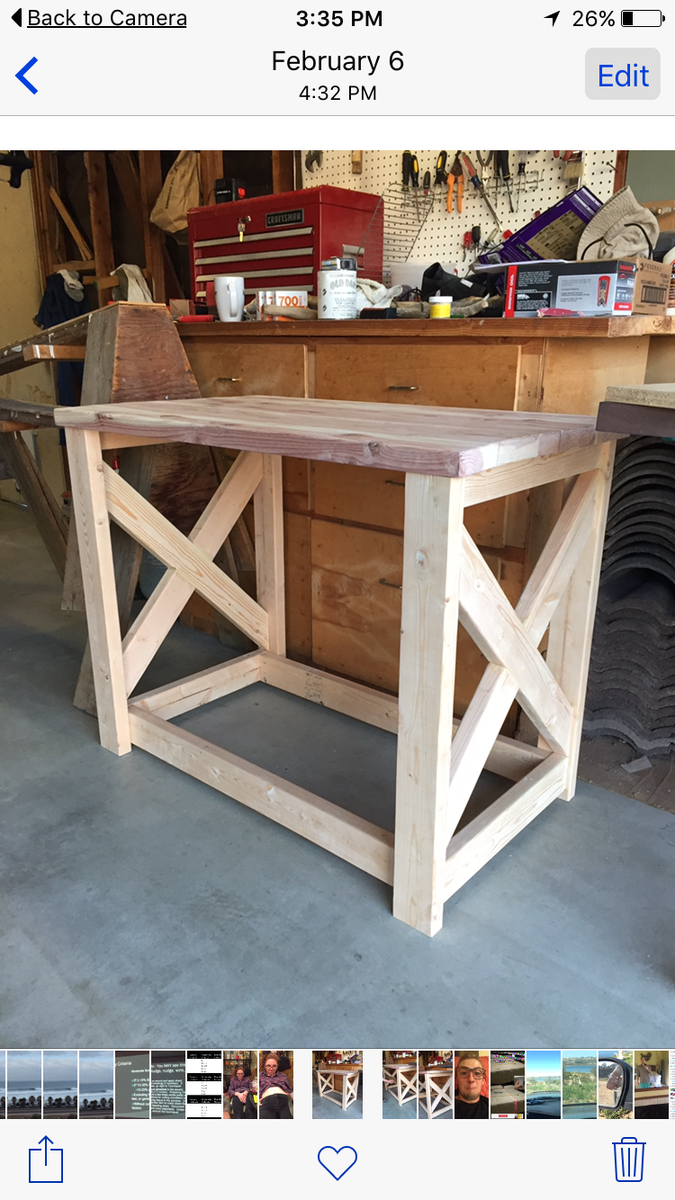
I built this for my son's first apartment to match the Rustic X Coffee Table I built. His living room is small so I needed to make a narrower version of the end table. Because of this, I decided to not build the "X". It turned out great! Thanks Ana!
Loved your simple plan! I had 8x2 boards from our pergola we tore down and they worked great!! Thanks for sharing the plans.
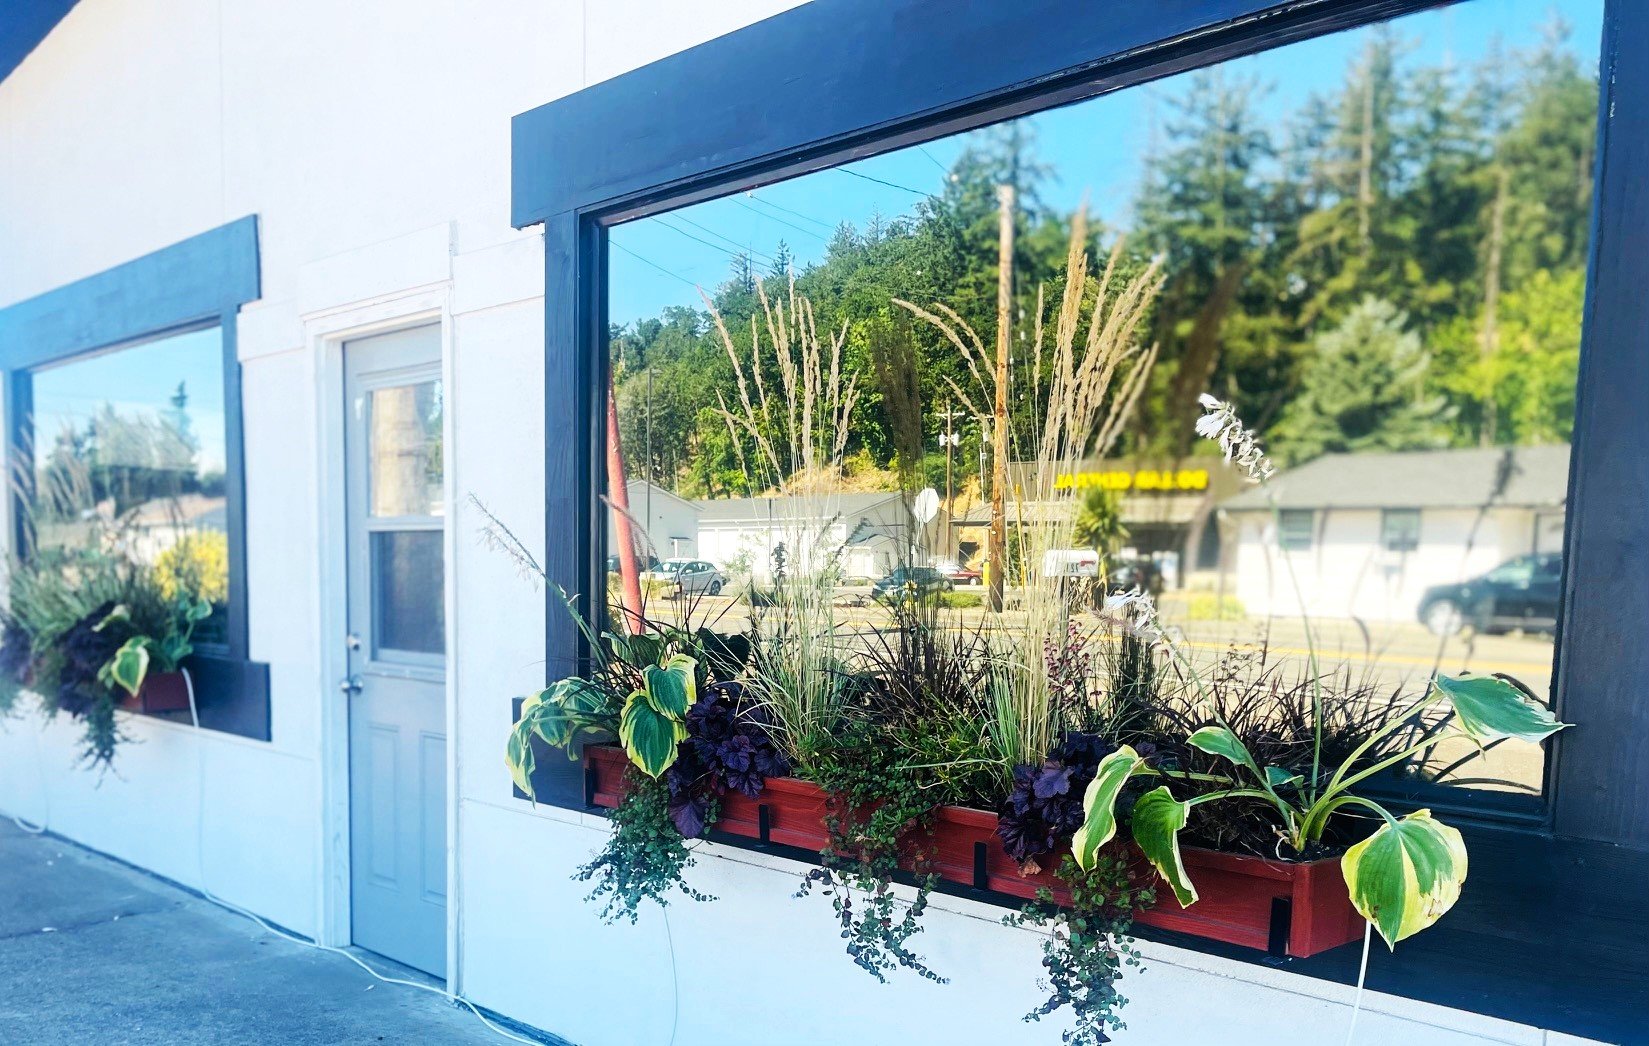
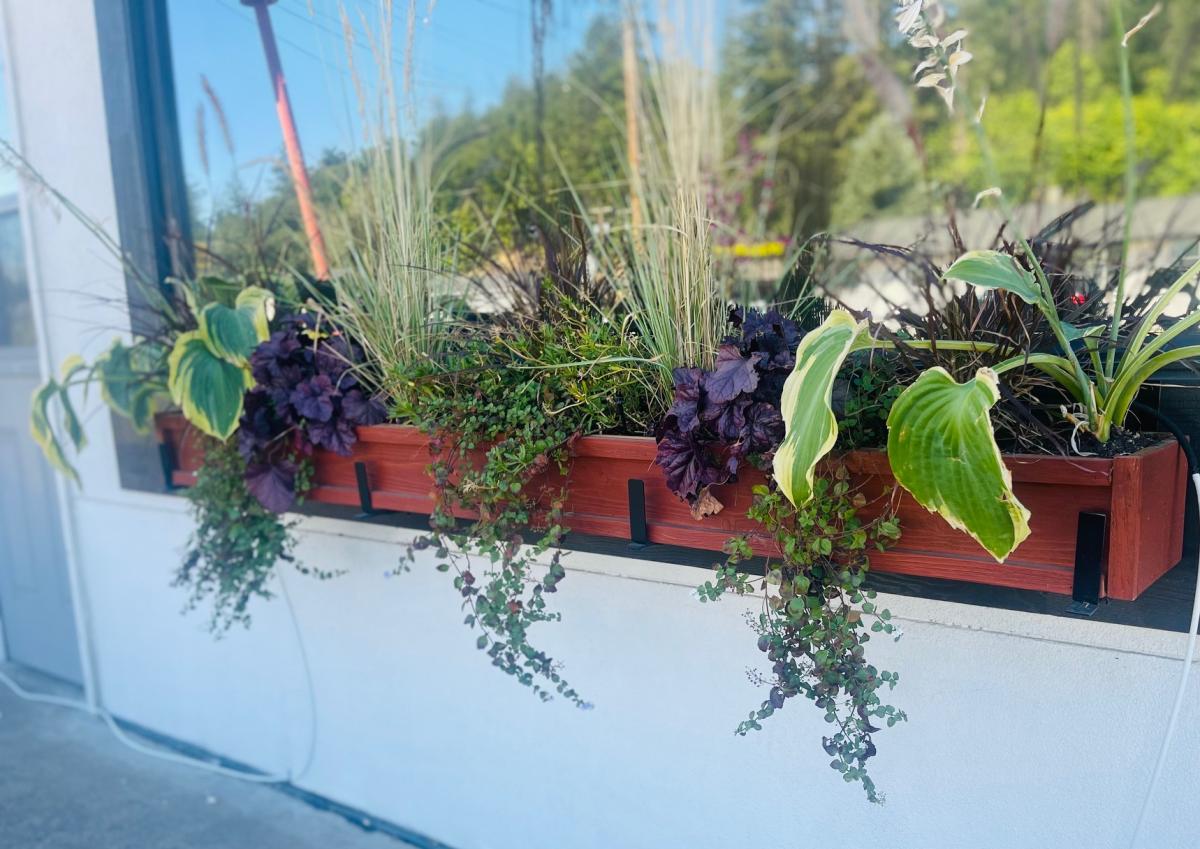
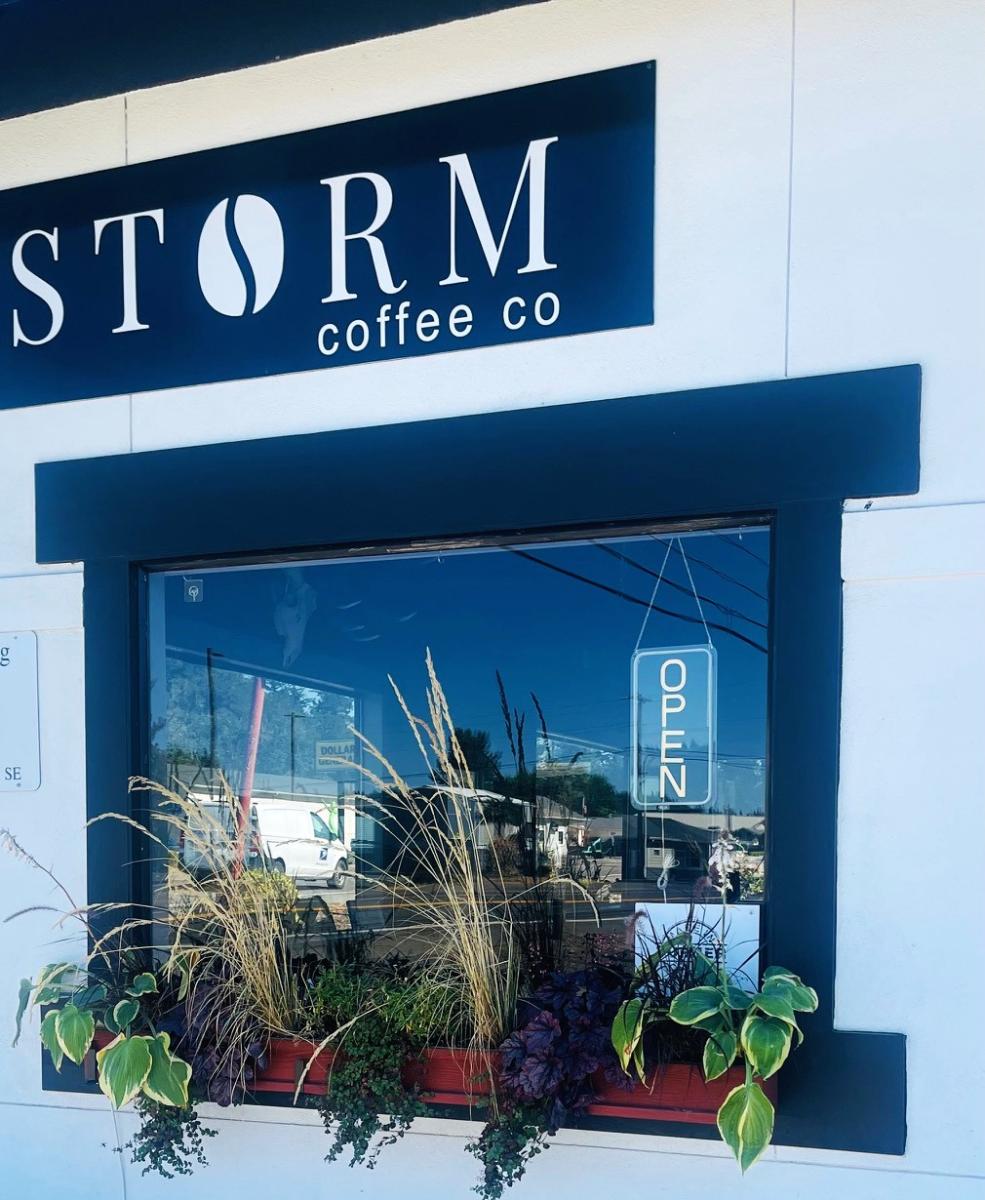
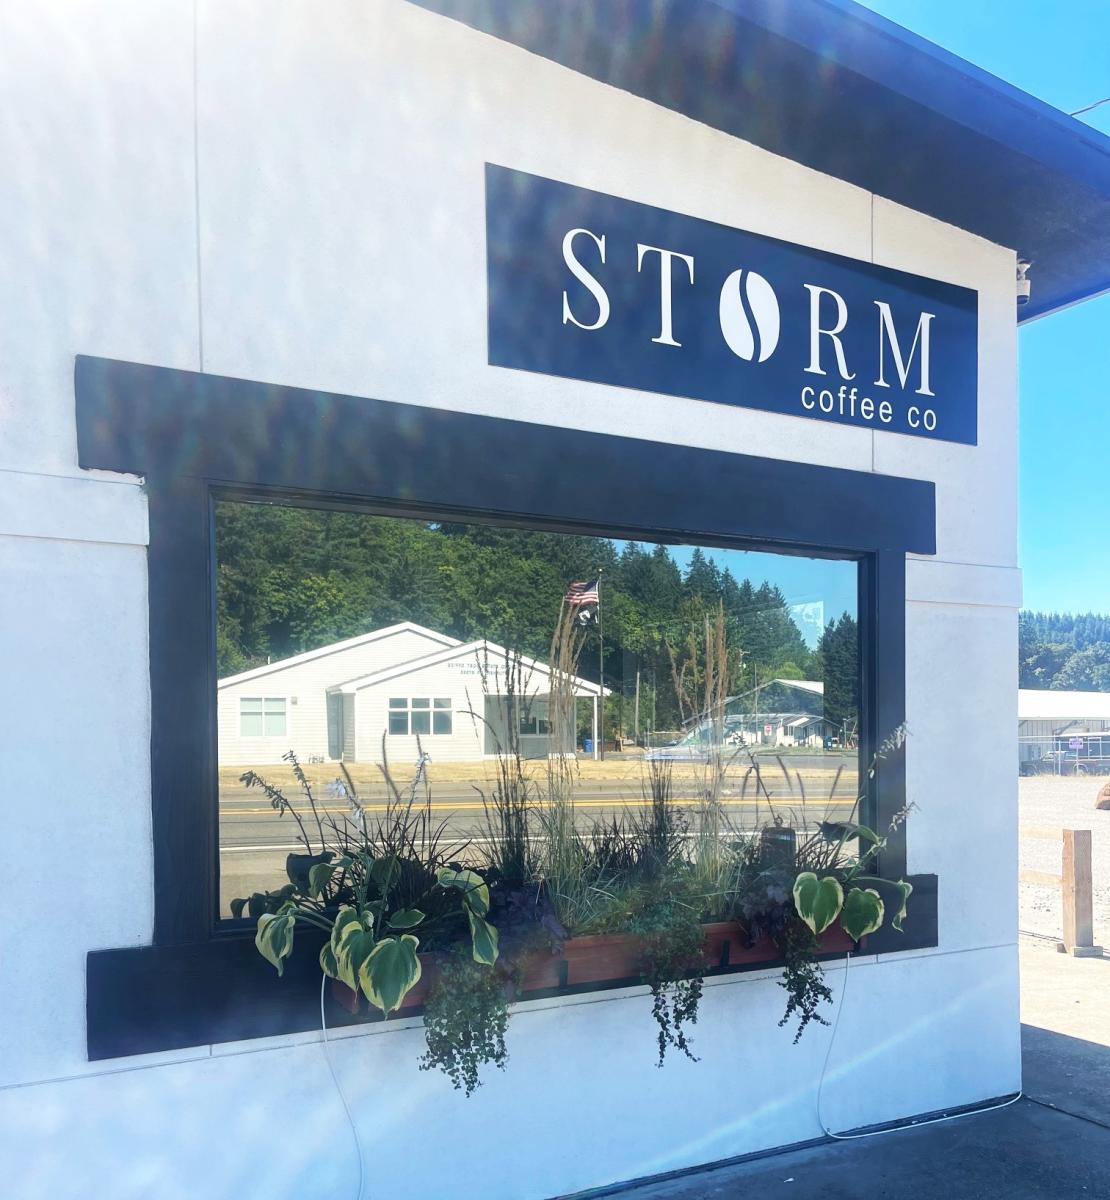
Backyard Therapy