Community Brag Posts
Bookshelf

Bookshelf for my son.
Forward facing bookshelf
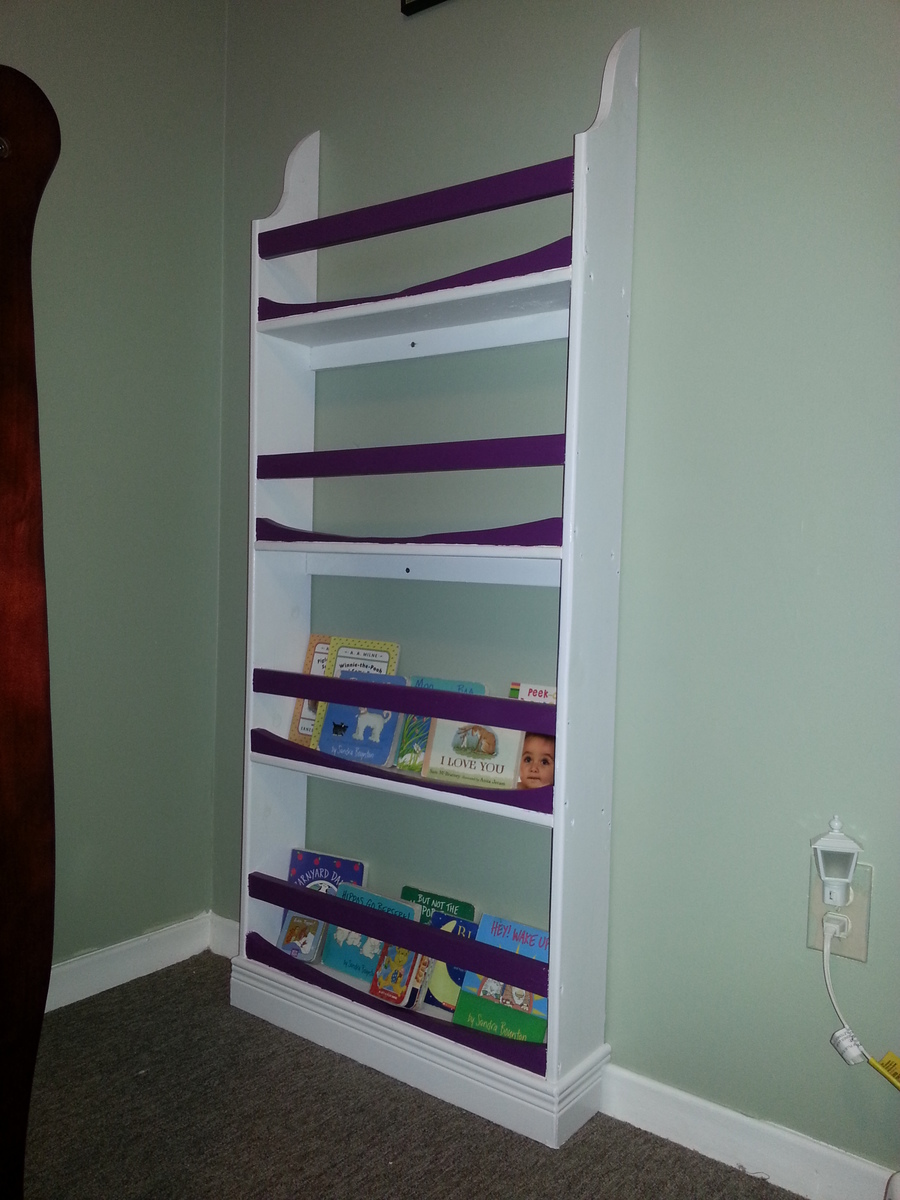
This was my first build and I think it turned out pretty nice. I had been considering a new bookshelf for my daughter's room for some time because the one we had was large and clunky. This takes up significantly less floor space which makes her room seem so much larger.
The hardest part of this I found was cutting the arches out of the 1x2s. I noticed a lot of other people omitted that part, but I thought it was a neat way to add some interest so I really wanted to keep it. Unfortunately, they aren't exactly symmetrical and the cuts were very jagged. But I knew I was going for a dark paint in those spots so with a little bit of sanding you can barely tell.
Speaking of paint, I didn't realize how much even a small quart was going to cost me, and I bought two colours! But it was definitely worth it I think. The white with plum purple accents is really sharp, and my daughter loves it. In fact, I'm already planning on building a complete bedroom set for her in the same colour scheme. Hopefully it works out.
Thanks for taking a look! :)
Comments
Sat, 04/19/2014 - 06:19
Love the accent
Love the accent colour!!
I've been trying to figure out how to throw in a pop colour, this is it! Thanks!
Modern Farm Table with a Twist
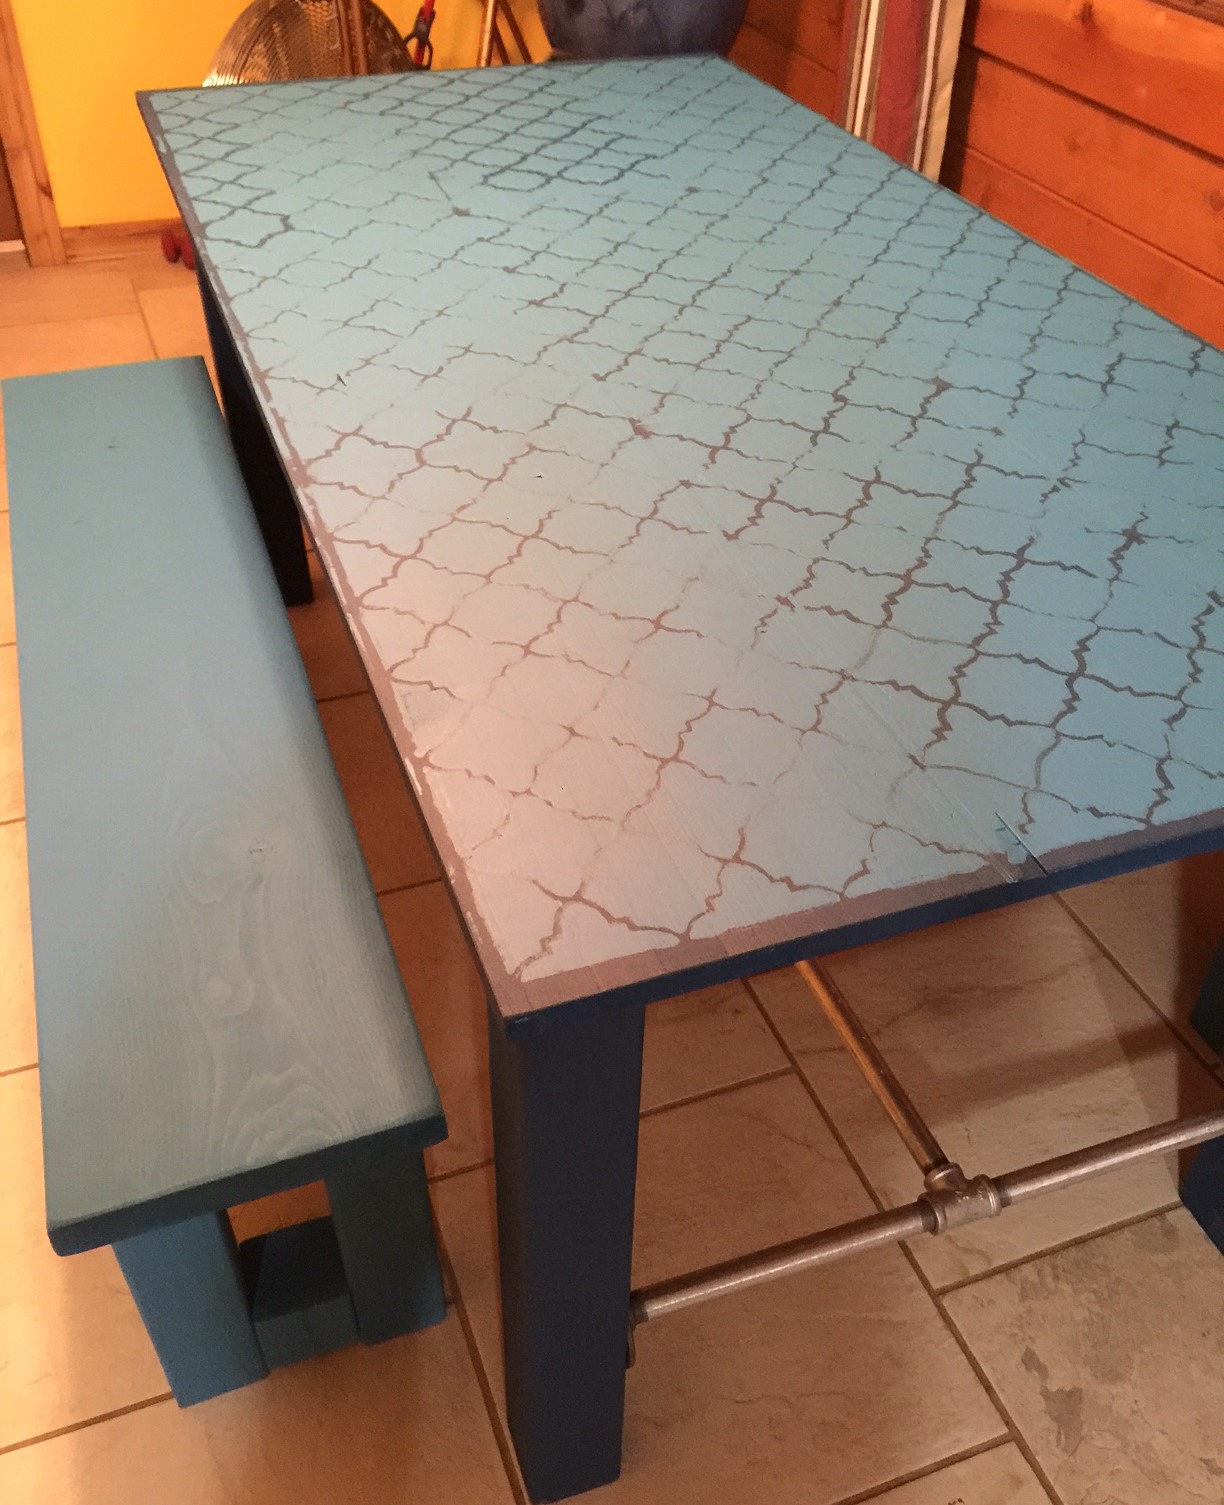
We wanted to build a farm table with benches to accommodate a few more people in the same space. This plan was easy to use. We modified a couple of the supports to metal piping to change the look up. We also painted the table and used a stencil to create a old world feel to it. It was a very fun project!
1 Qt Galapagos from Behr
Minwax Polycrylic Semi-Gloss Finish
Tile stencil for table top
Toy Storage Box
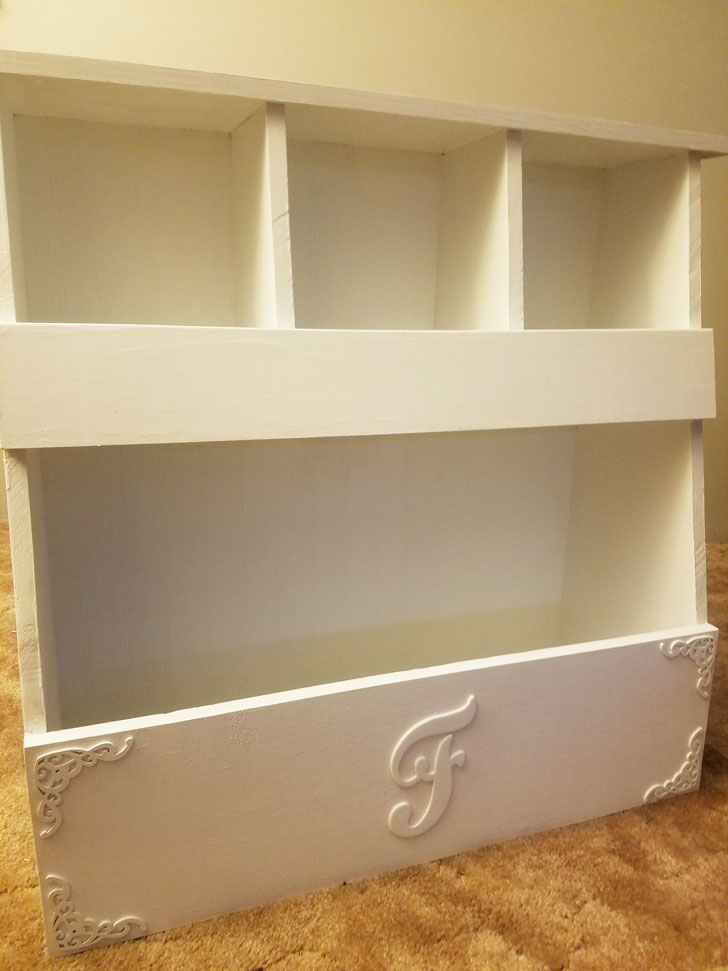
I made this project for a co-worker who is expecting. I was a bit worried about just using nails and glue, so I used pocket holes except for on the front pieces. To add storage capacity on the top cubbies, I trimmed a 1x6 by an inch, as I thought that it would be a good balance. Overall, it turned out well and she loved it.
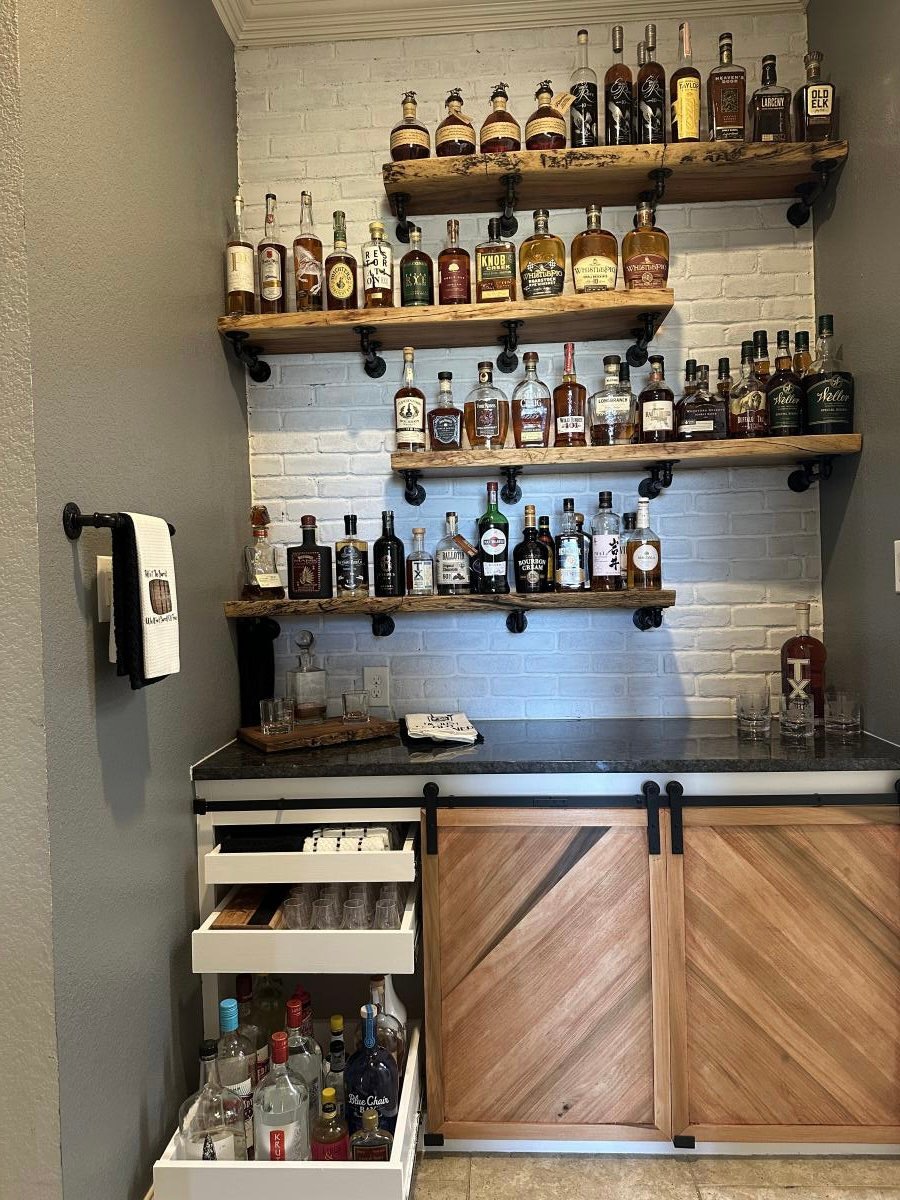
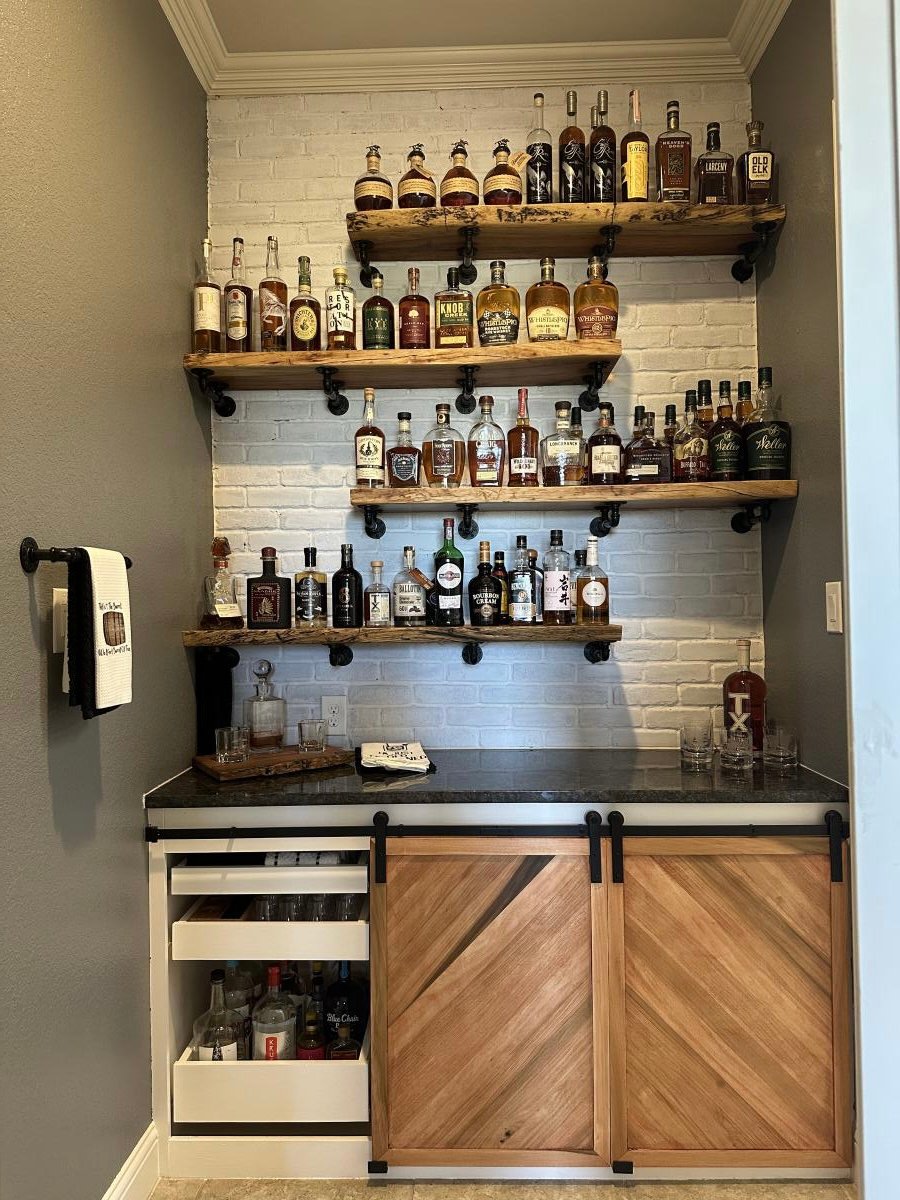
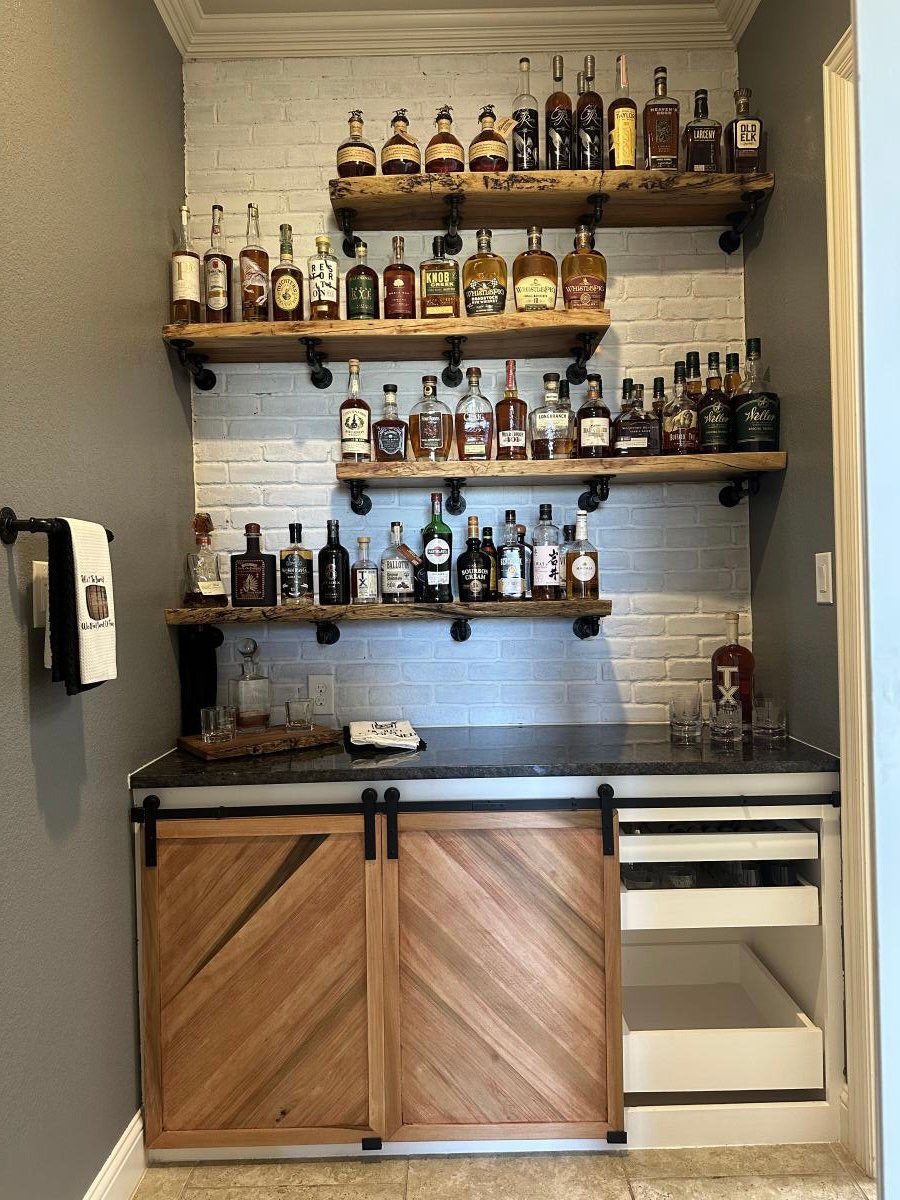
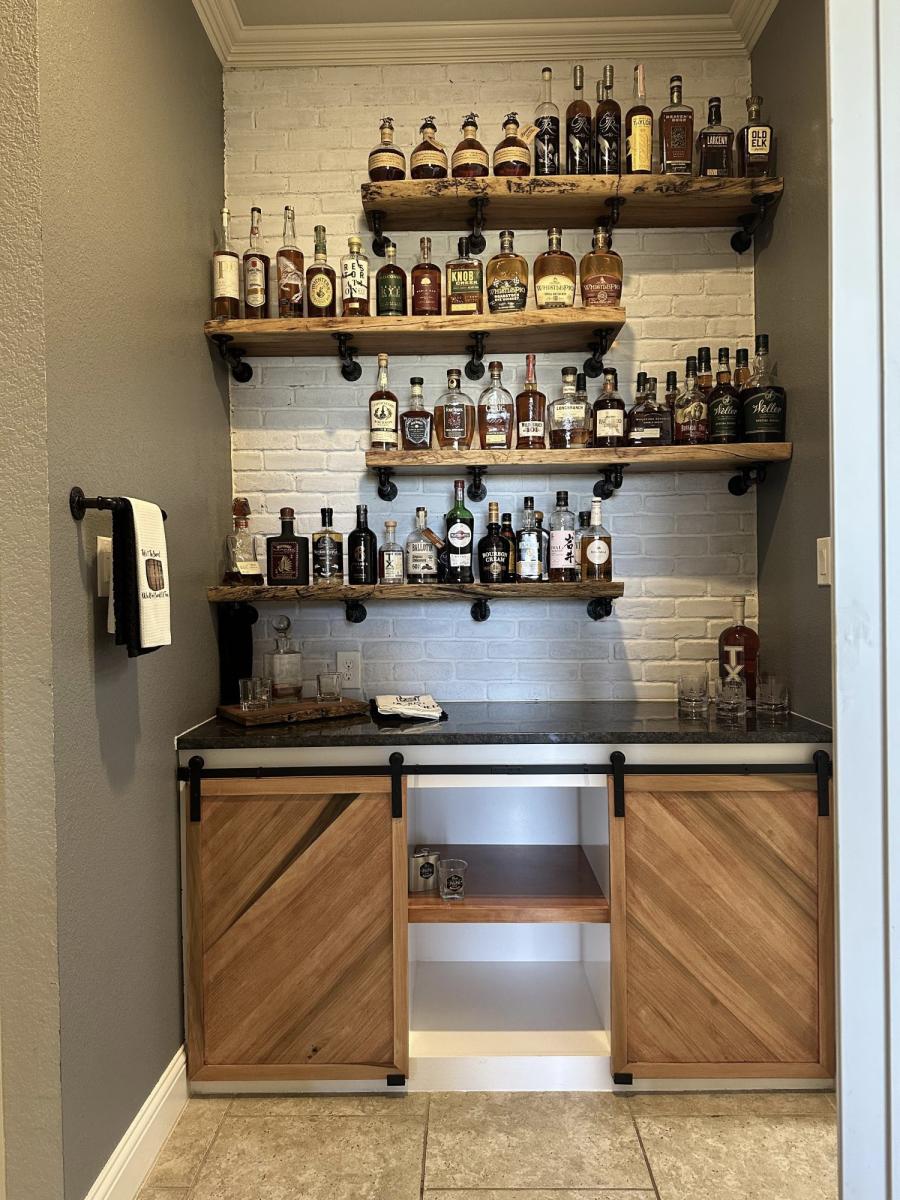
Desk to Bar
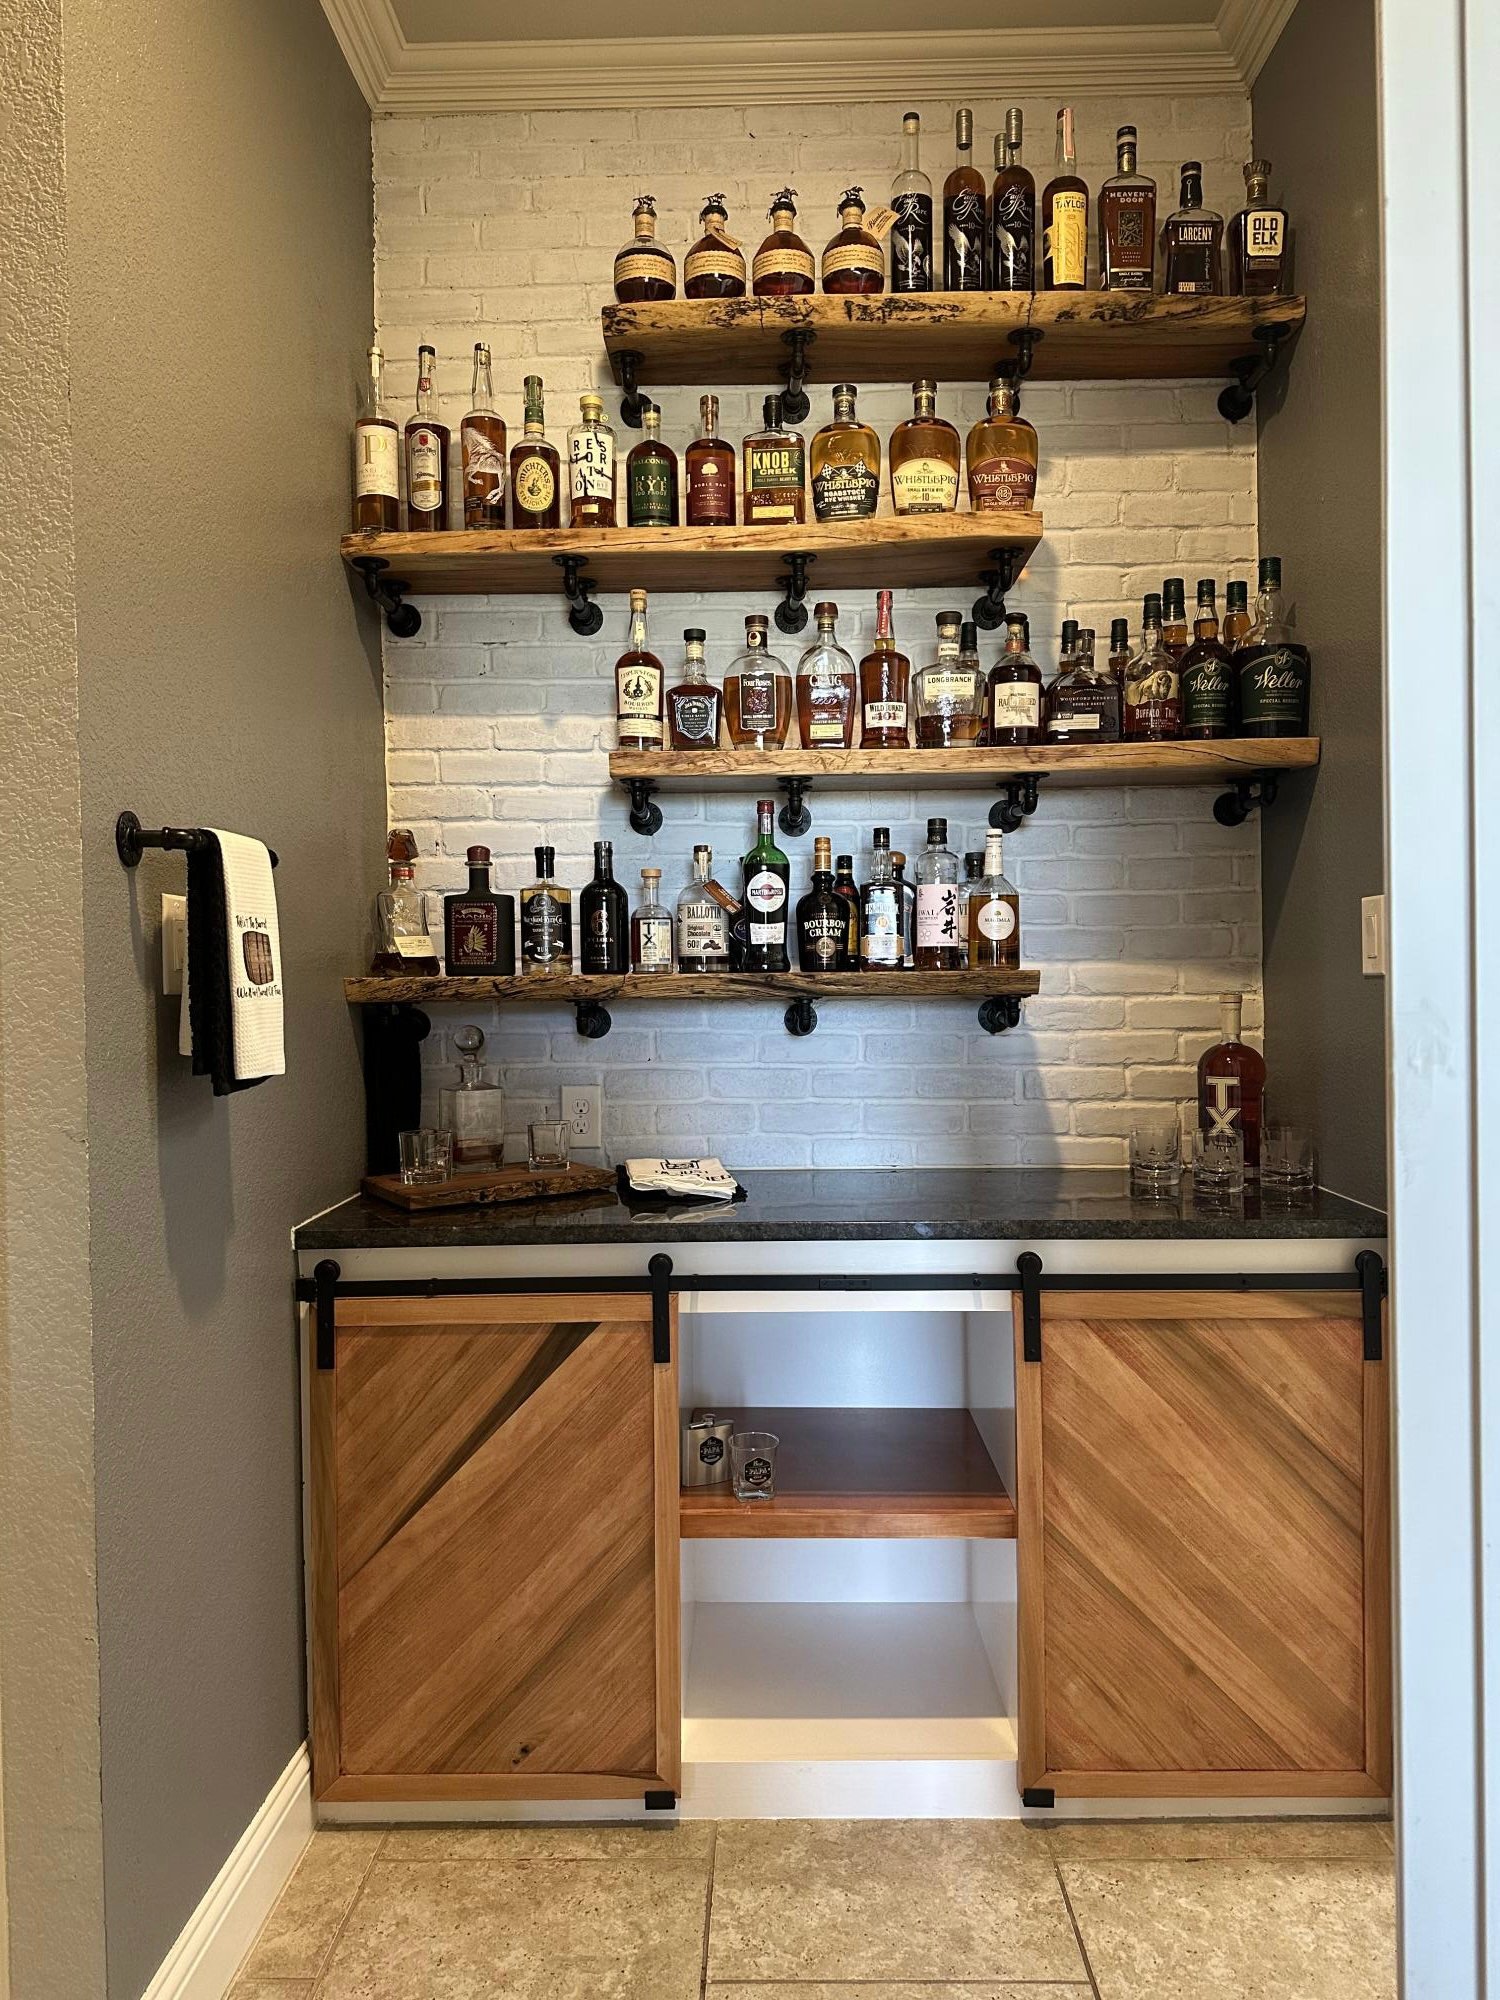
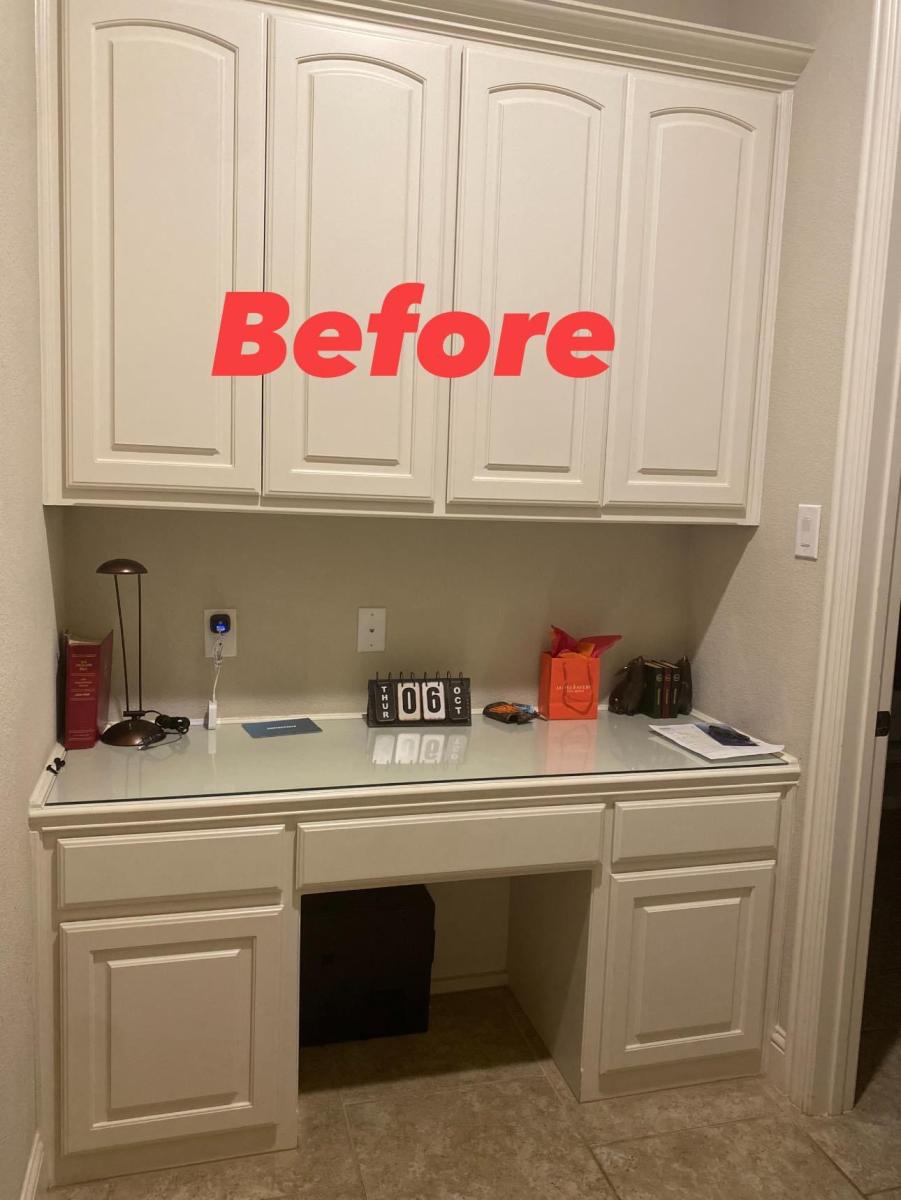
The desk was no longer functional once both of us were working from home and converted other spaces to full offices. We both enjoy fine whiskey and bourbon and wanted a space to entertain and display our collection. This was by far our most challenging but rewarding DIY build yet.
Comments
Fri, 03/03/2023 - 11:51
Stellar upgrade!
Stunning work! I love all the details and pull out shelf addition, wonderful!
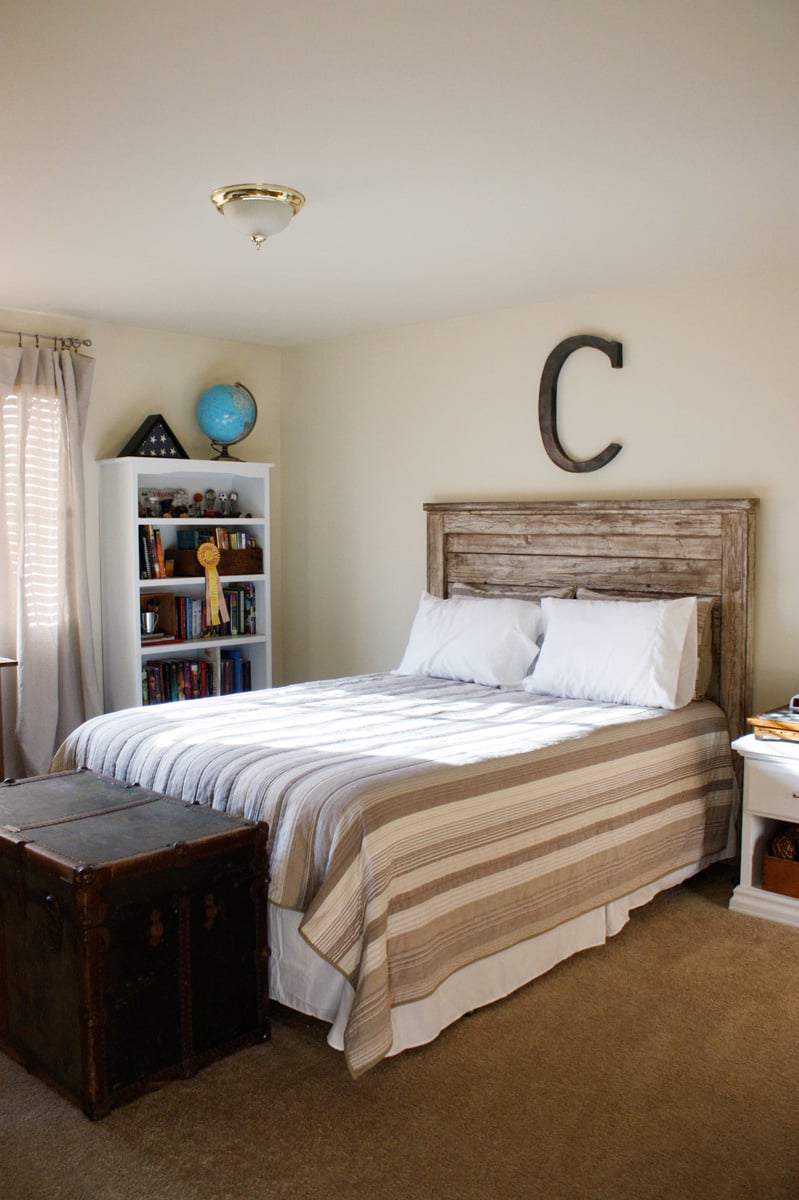
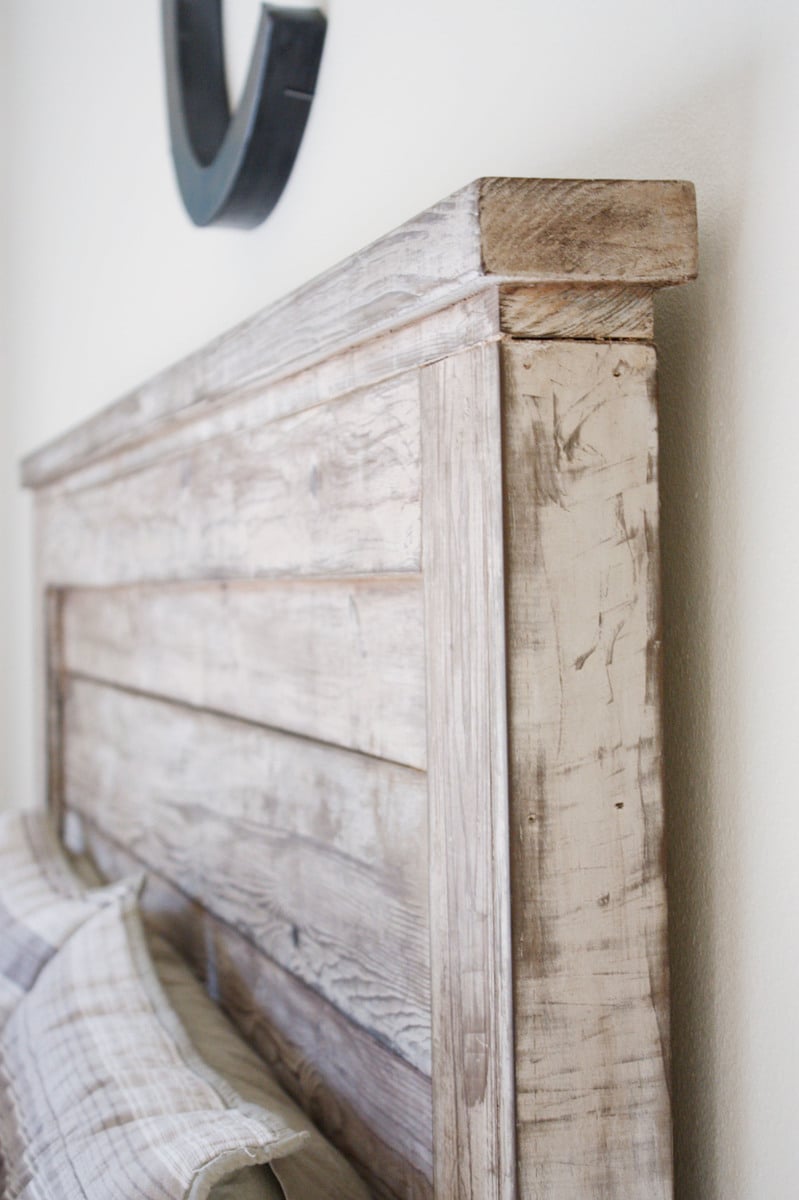
Rustic Headboard
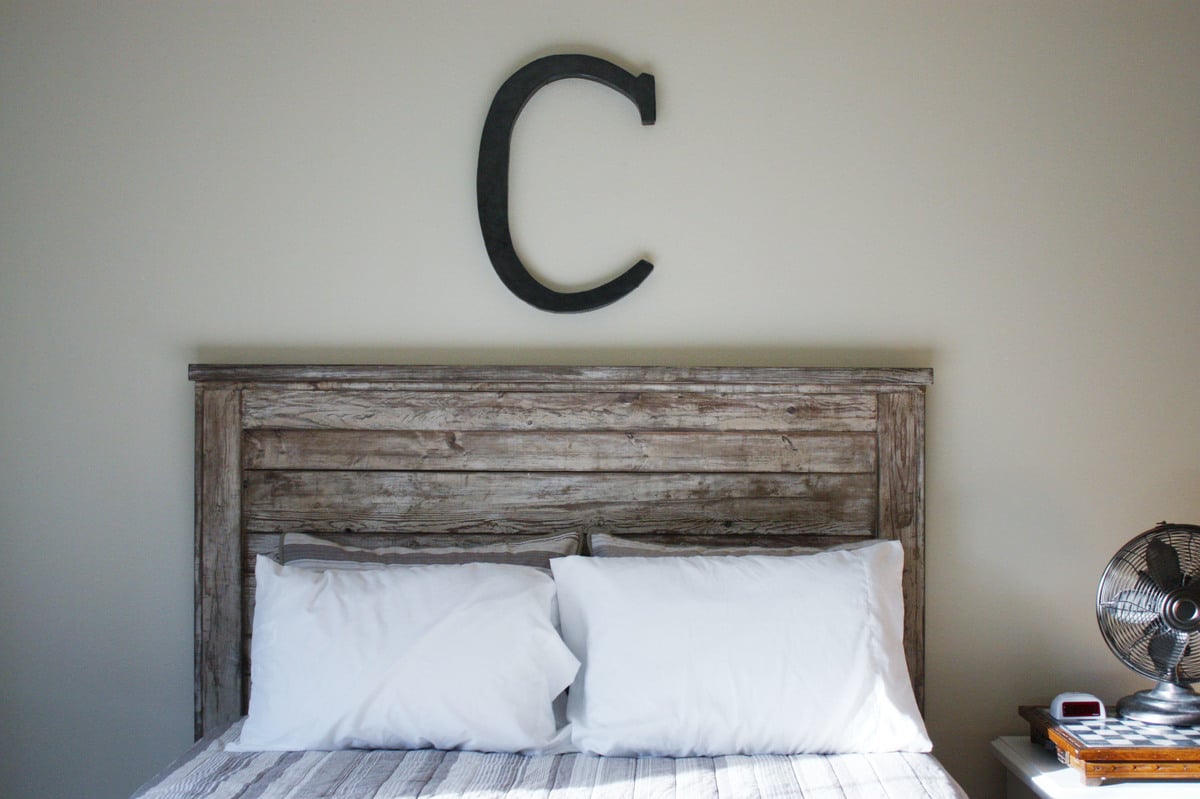
Rustic headboard built in an afternoon. Total cost was only $35!
Comments
Wed, 11/09/2011 - 12:46
slightly modified
I thought the 56 in headboard was a little excessive. So I cut it down a foot. If you decide to do this take 6 inches off the top and the bottom so it looks portionally correct. Another thing I did that was not mentioned in the what I have read so far was use kregs joints to connect the inner panel. If you build it from the back you will not see any joints except the top ones on the foot board. I patched them with that elmers patch stuff and are no longer visible. Minus all the sanding I built two beds in a half day.
Wed, 11/09/2011 - 15:52
Are the legs the same?
I was thinking of doing this headboard for the farmhouse storage bed. Did you use 4x4s or build the legs the way they are in the plan? I have several 3x3s for legs that I was planing on using with the kreg. How easy was it to get the boards lined up with the kreg?
Wed, 11/09/2011 - 19:56
Reply:Are the legs the same?
The legs are the same as the plan. I don't have a kreg jig so the bed is nailed and screwed together instead. Hope that helps! -Brook
Thu, 11/10/2011 - 06:48
To die for
Your finish is to die for. I could just look at it all day long. I'm weird like that. Fab job!
Tue, 11/15/2011 - 11:40
ok.thanks for your reply. But
ok.thanks for your reply. But did you sand like 80-120-220 grit . thanks
Wed, 06/06/2012 - 12:37
Brown or grey-ish finish?
Congratulations !!! and thanks for inspiring us by posting these photos of a terrific job!
I was just wondering..how did you manage to get the perfect light brown - chocolate tint shown on these photos??
I've followed the process described (oxidized the wood using tea followed by steel wool/vinegar mix) to the point. However, the result is grey tinted. even tried applying the process to different types of wood and applying less mix..even sanding it after the project dried and applying the clear wax..Same GREY result..
Please help!!
Wed, 06/06/2012 - 13:26
Wood
Different woods will give a different finish. This project turned out a little browner than the other times I've used the tea/vinegar treatment. Probably because it was previously painted and then stripped. You can also buy dark wax that will help change the color. You might try finding a stain that is the color that you want and staining your project. Good luck!
Thu, 08/23/2012 - 06:39
Rustic Headboard
I just made the rustic headboard with new pine boards. Can I get this look with the tea and vinegar? How was it done? Thanks.
Wed, 07/10/2013 - 12:53
was it pre primed pine
where does the white come from in your wood. did you strip pre primed pine then tea and oxidation? thanks,ante
Thu, 03/01/2018 - 16:39
Wow, I love the finish you
Wow, I love the finish you gave this piece! Absolutely beautiful! Well done.
Mon, 12/07/2020 - 10:14
Anyone have plans for the…
Anyone have plans for the sides and footboard for a queen?? Please and thanks! :)
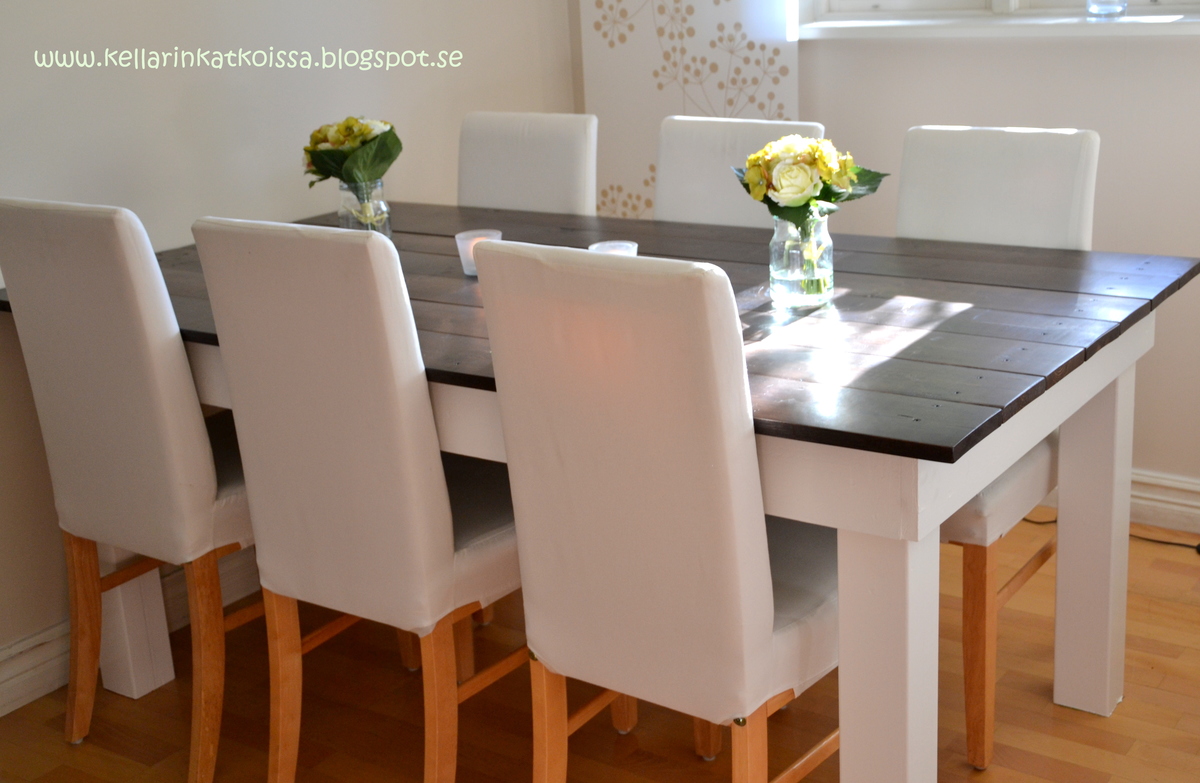
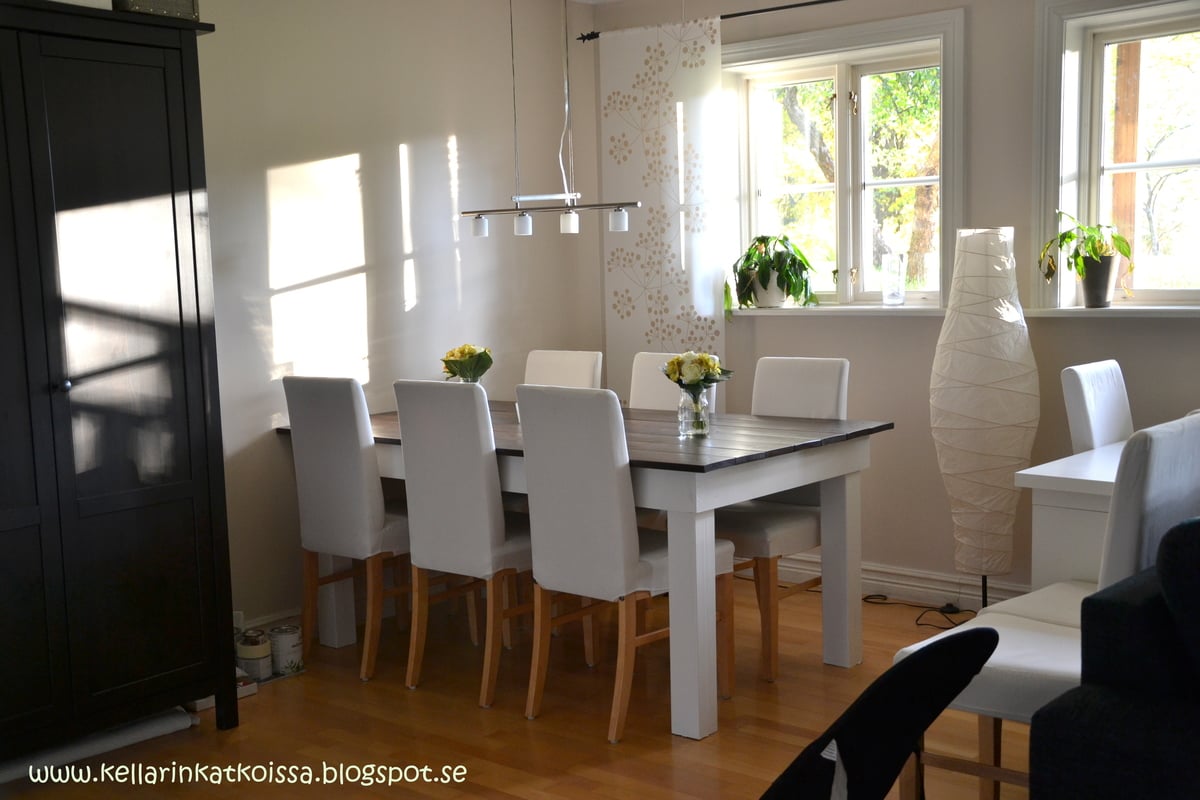
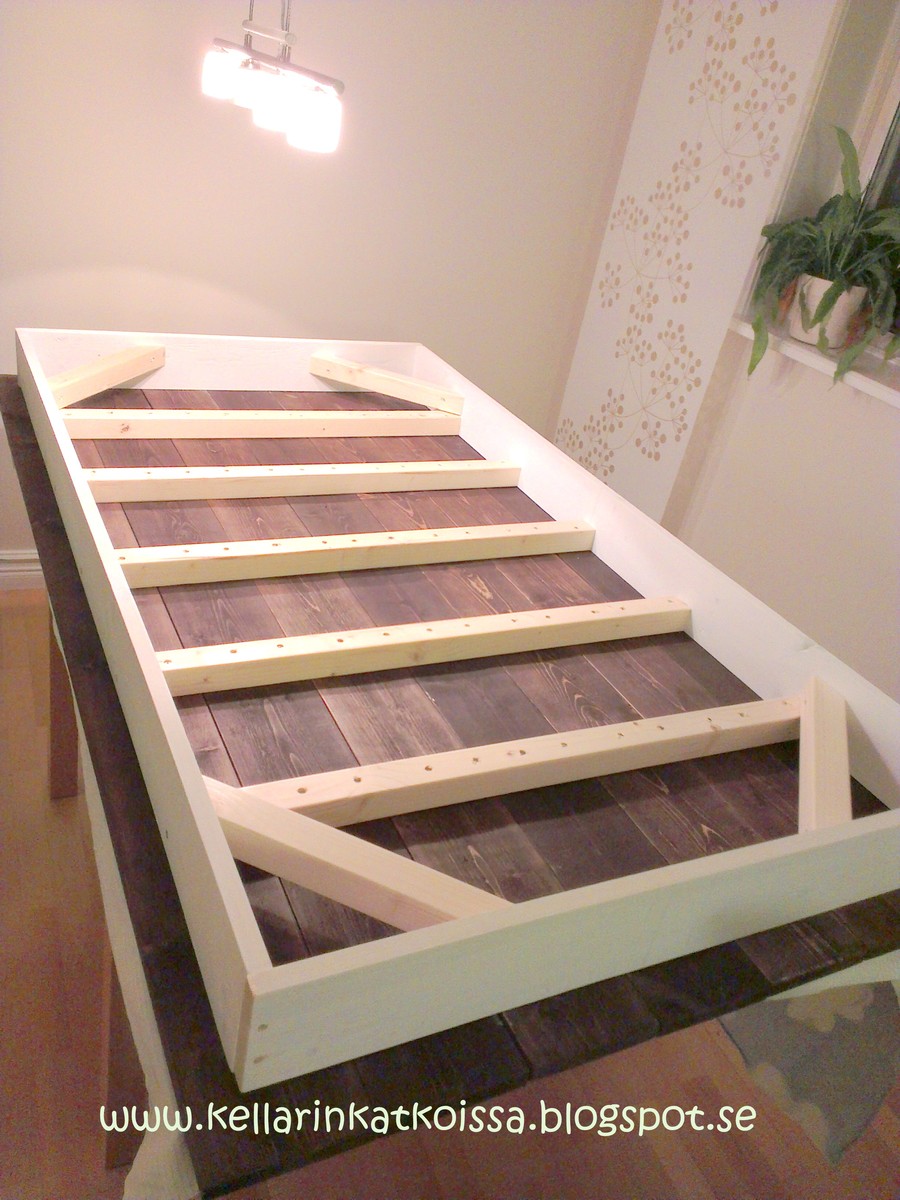
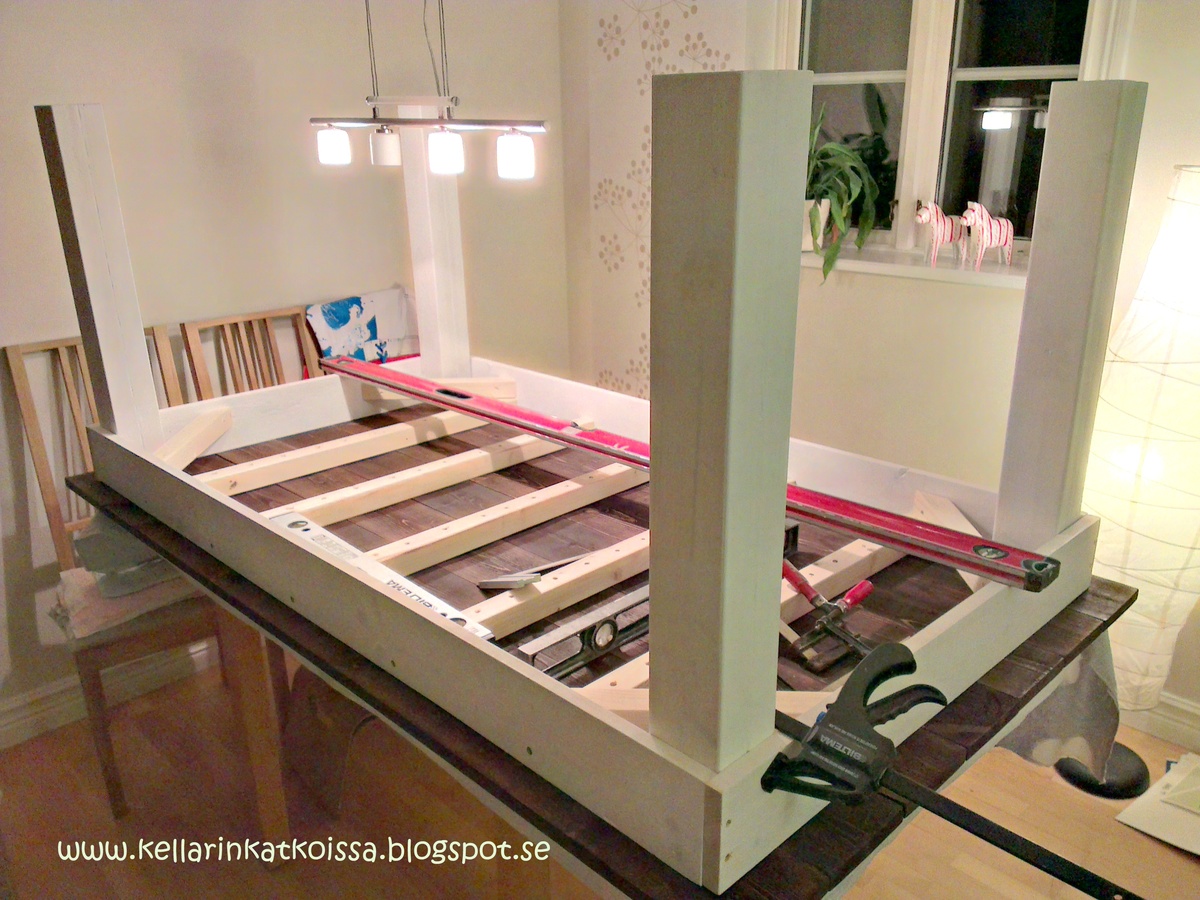
dining table
We got idea from here, but we had to make our own plan for table to make it fit in to our home.. and we just love it :)
more in my blog http://kellarinkatkoissa.blogspot.se/2013/10/tee-se-itse.html
Comments
Sat, 06/20/2015 - 11:18
about how long did you make
about how long did you make your table so that you could fit 3 chairs on each side?
you table is stunning
Planked top Coffee Table with recycled legs
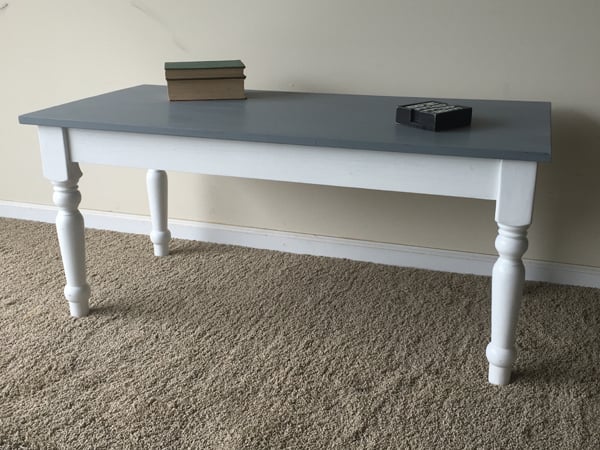
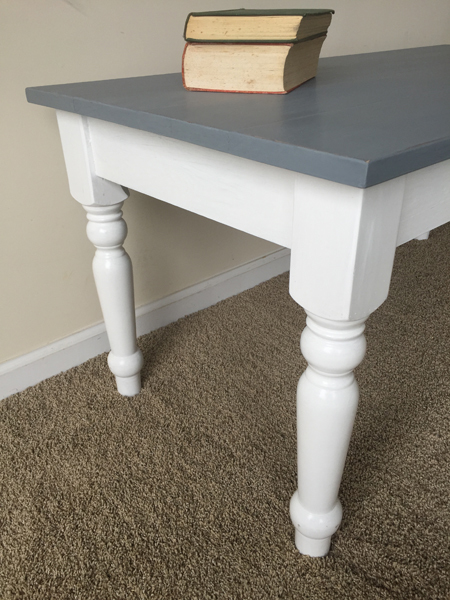
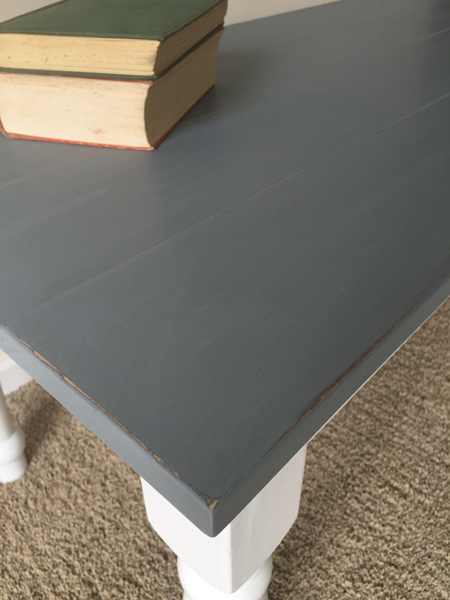
I found an old coffee table with stained legs for $10 on one of those app "for sale" sites. Sanded them down and with two pieces of 1 by 4 for the apron and 2 pieces of 1 by 6 for the top made this table. Apron is No2 whitewood and Top is select pine. Top was stained in a dark color (Varathane Kona) and then painted gray and sanded back to show some of grain and stain through. Total cost of new table about $60 (most expensive part was the select pine for the top at around $35)
Work table / desk
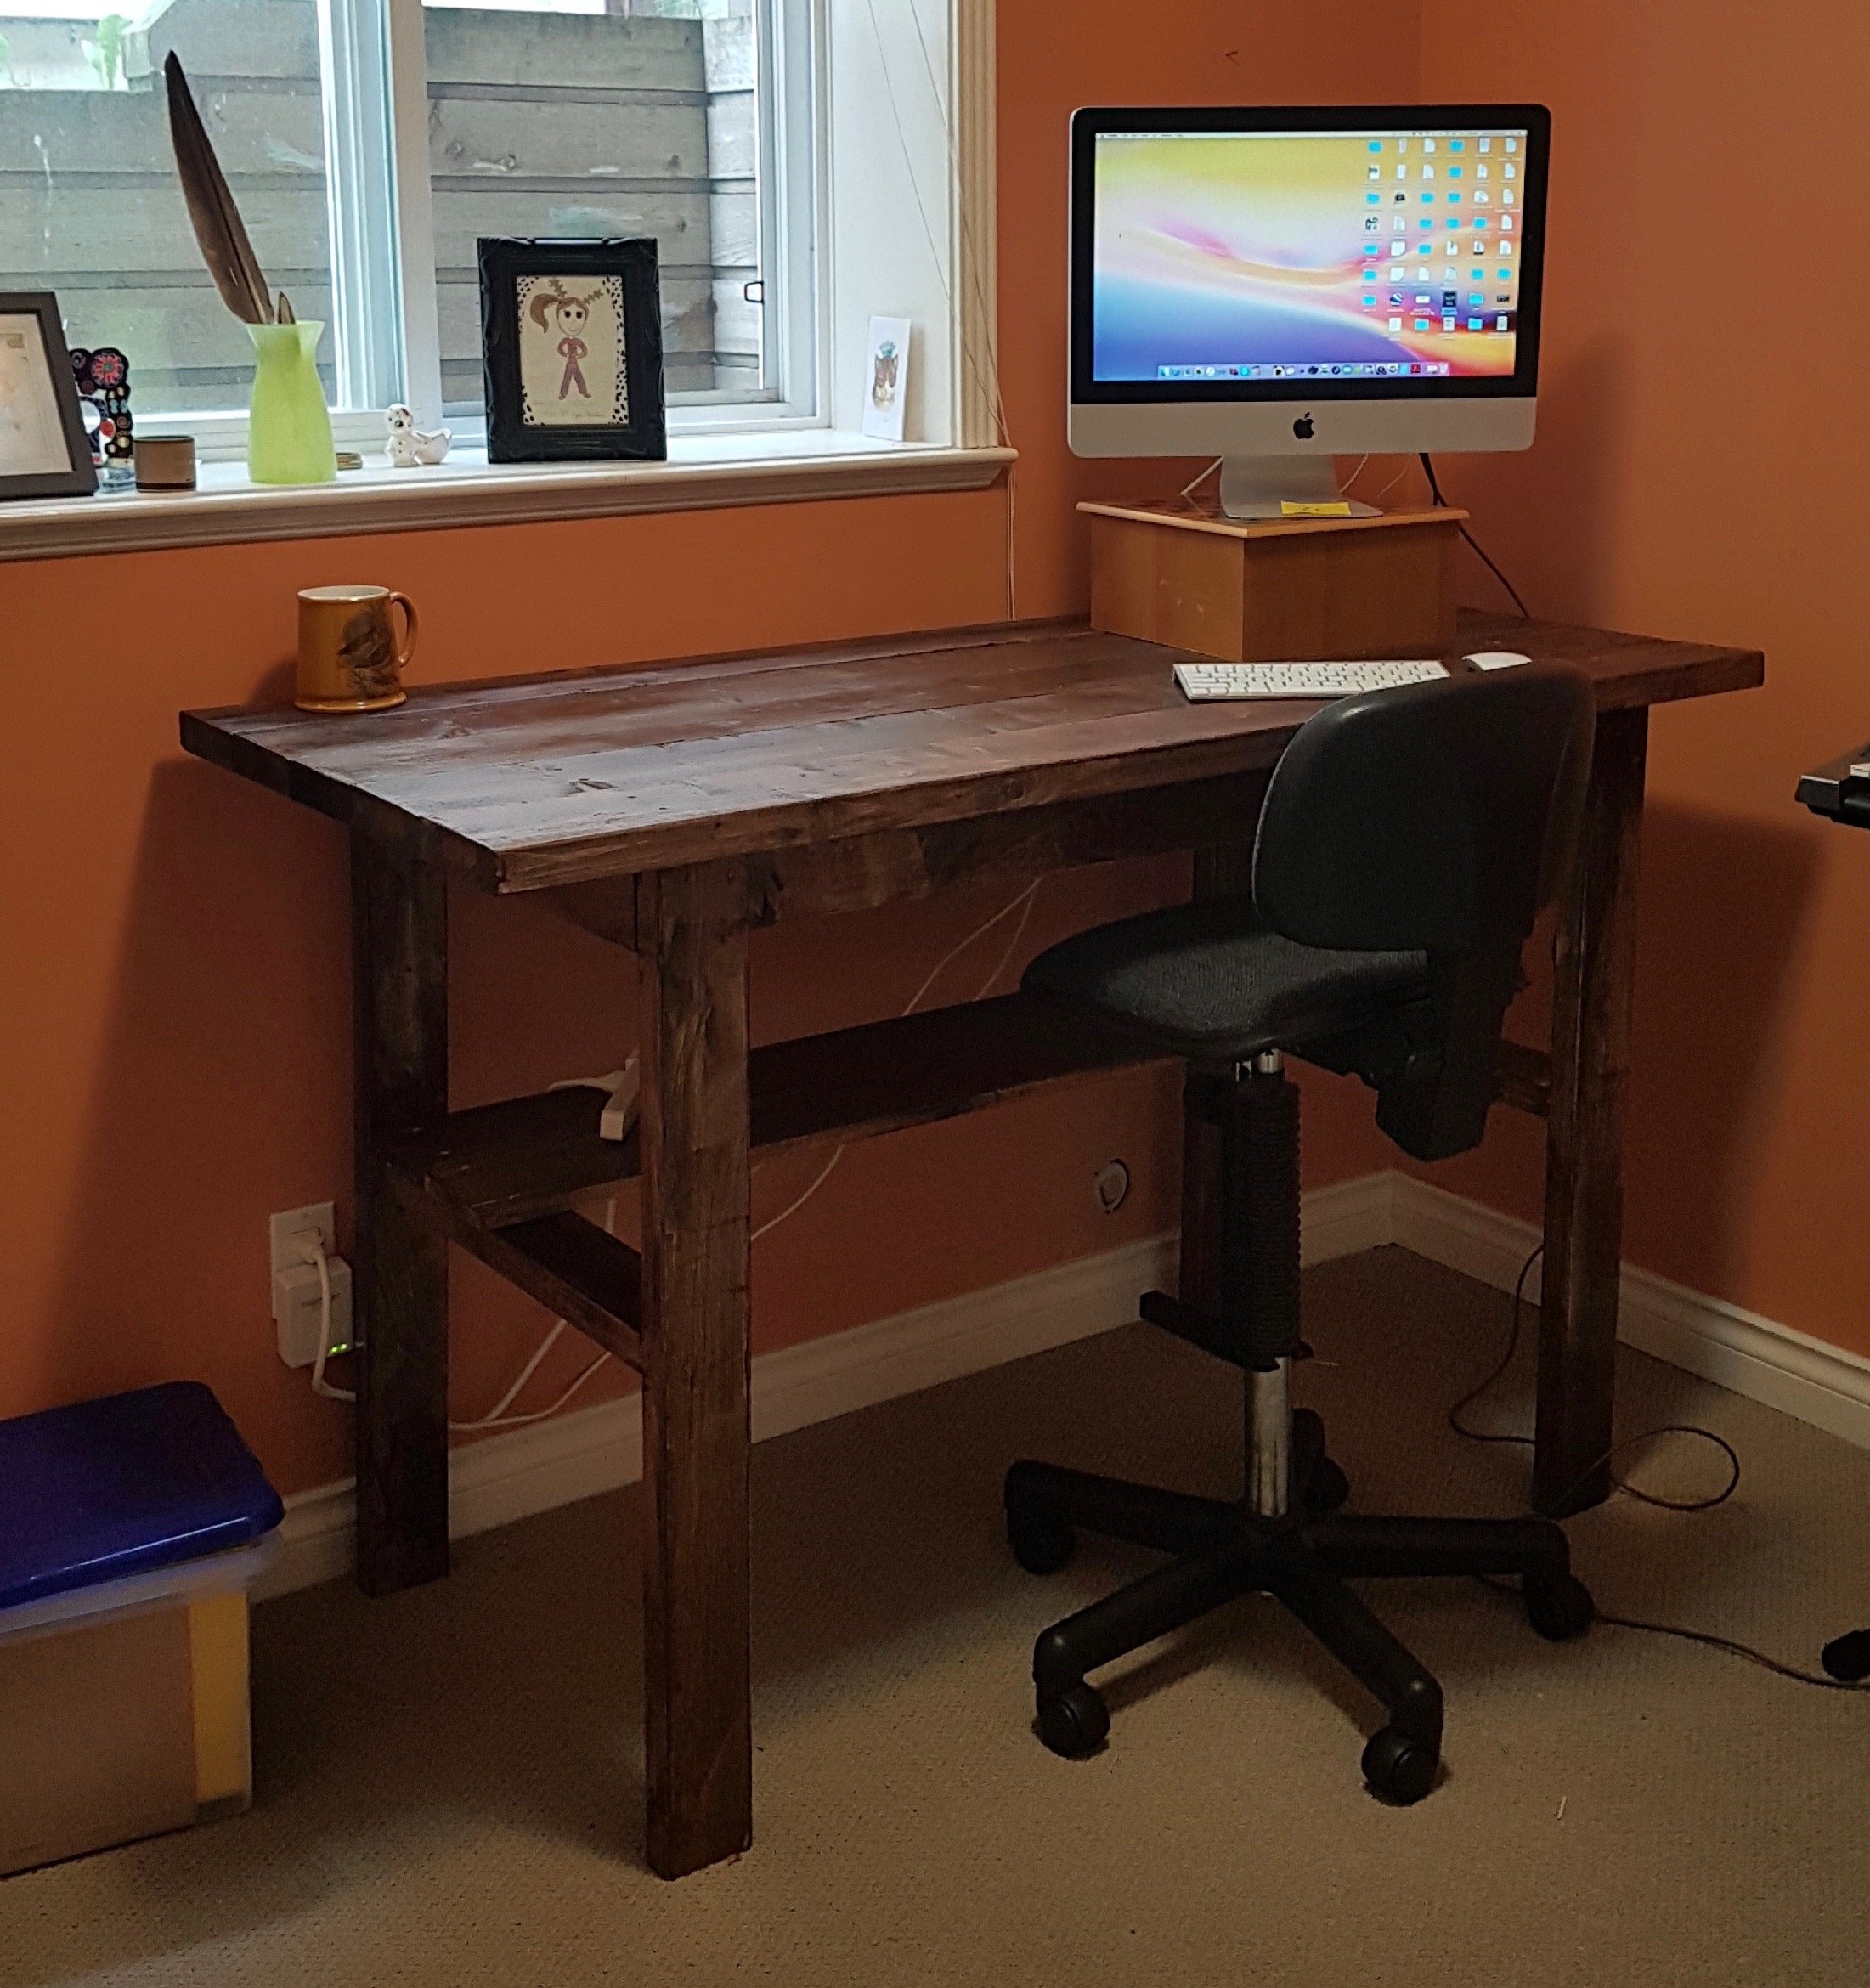
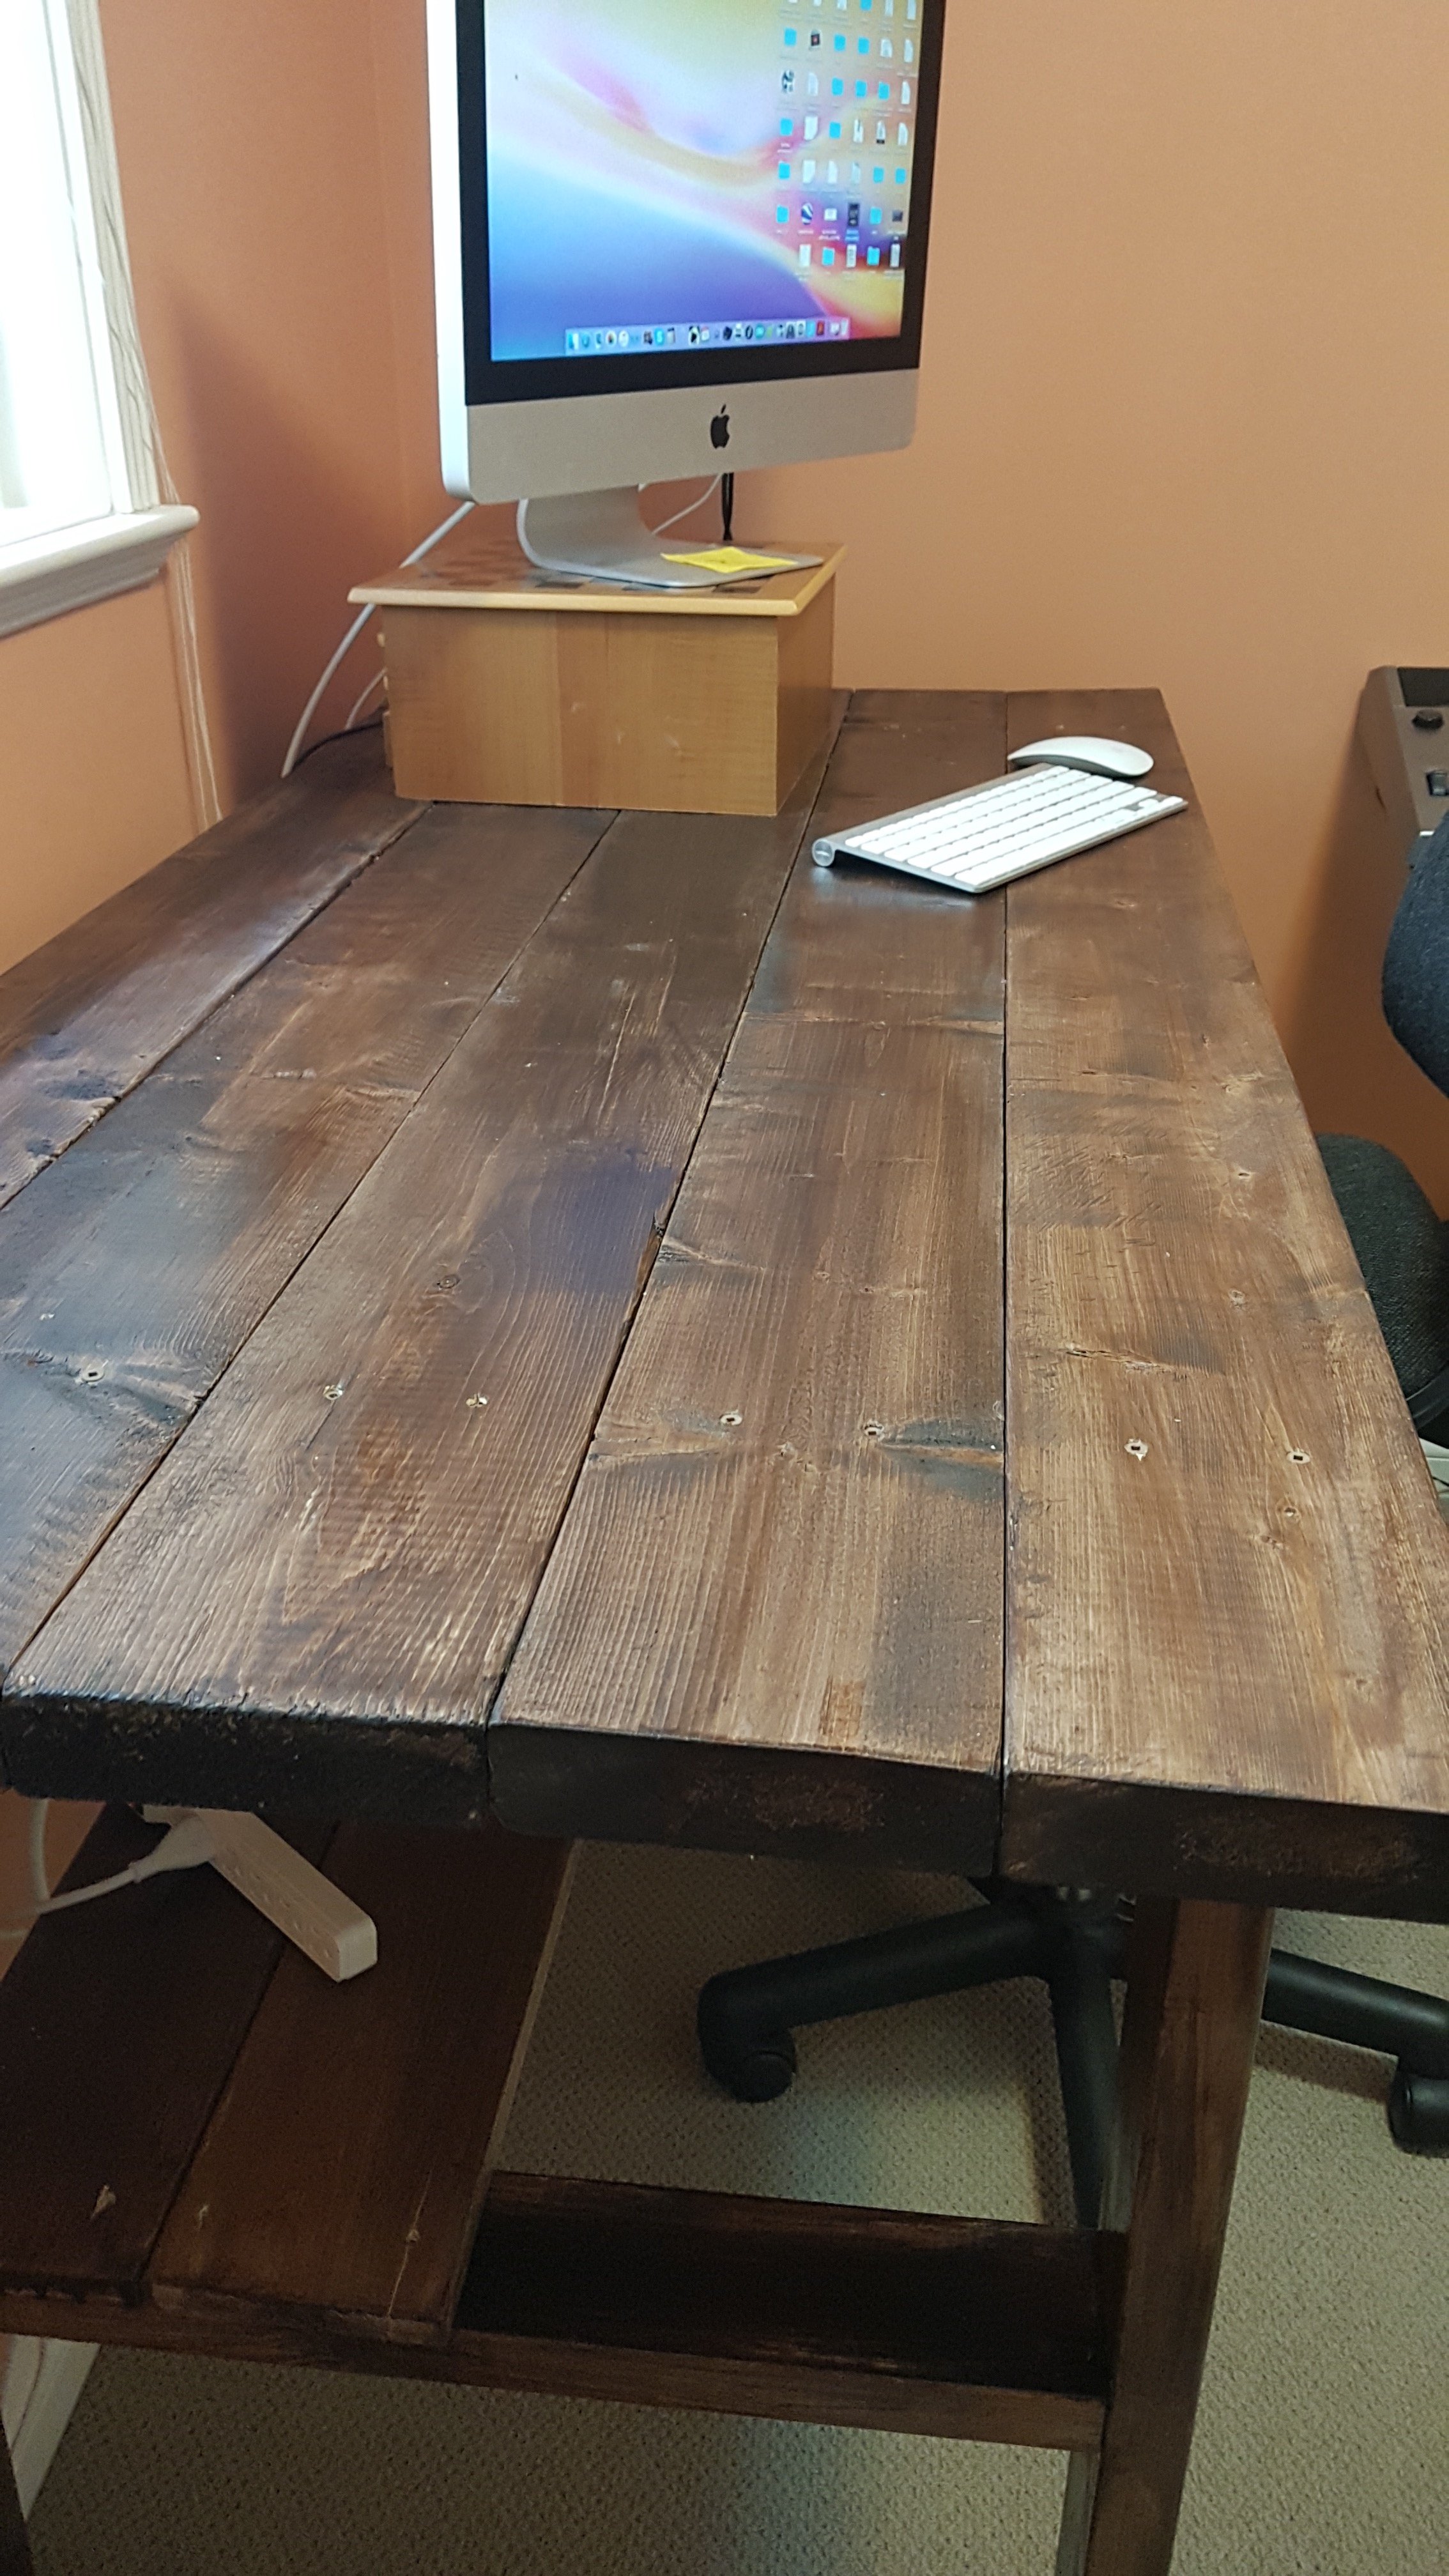
I created this work table by modifying the Beginner Farm Table. I made it counter height and added a shelf underneath. It is 5 feet long and the top is five 2x6 boards. The shelf is 1x6 boards.
I purchased 4@ 2x4s and 3 @ 2x6x10 - I got the store to cut those in half (5' lengths). I cut the 2x4s on a miter saw.
This is my first project. It probably took a bit more than 6 hours given I was learning to use the saw and trying to find the tools to do the job.
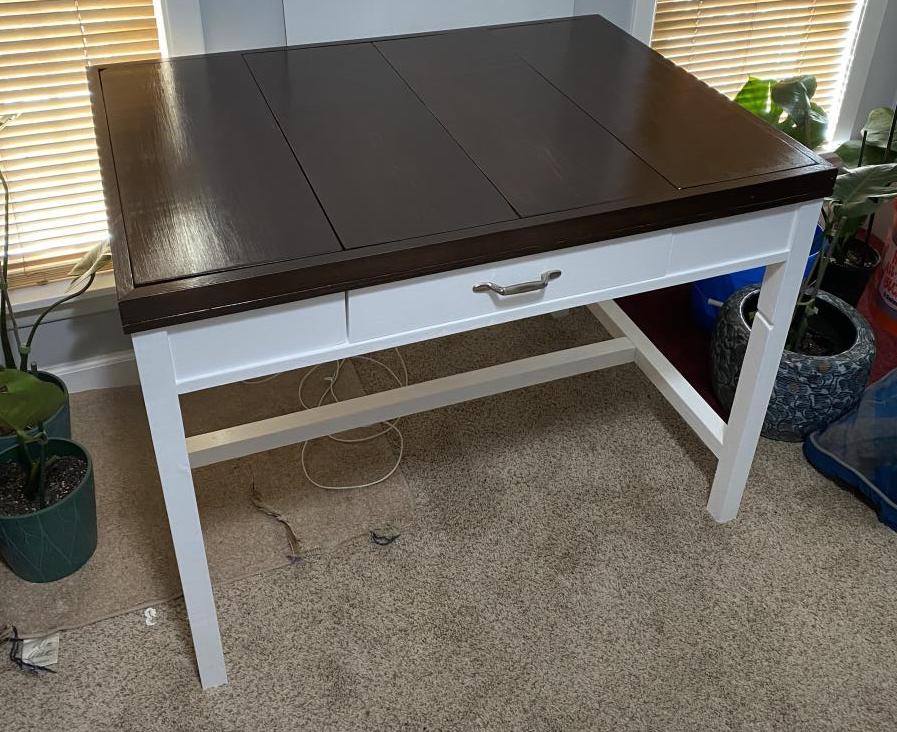
Hidden Puzzle Table
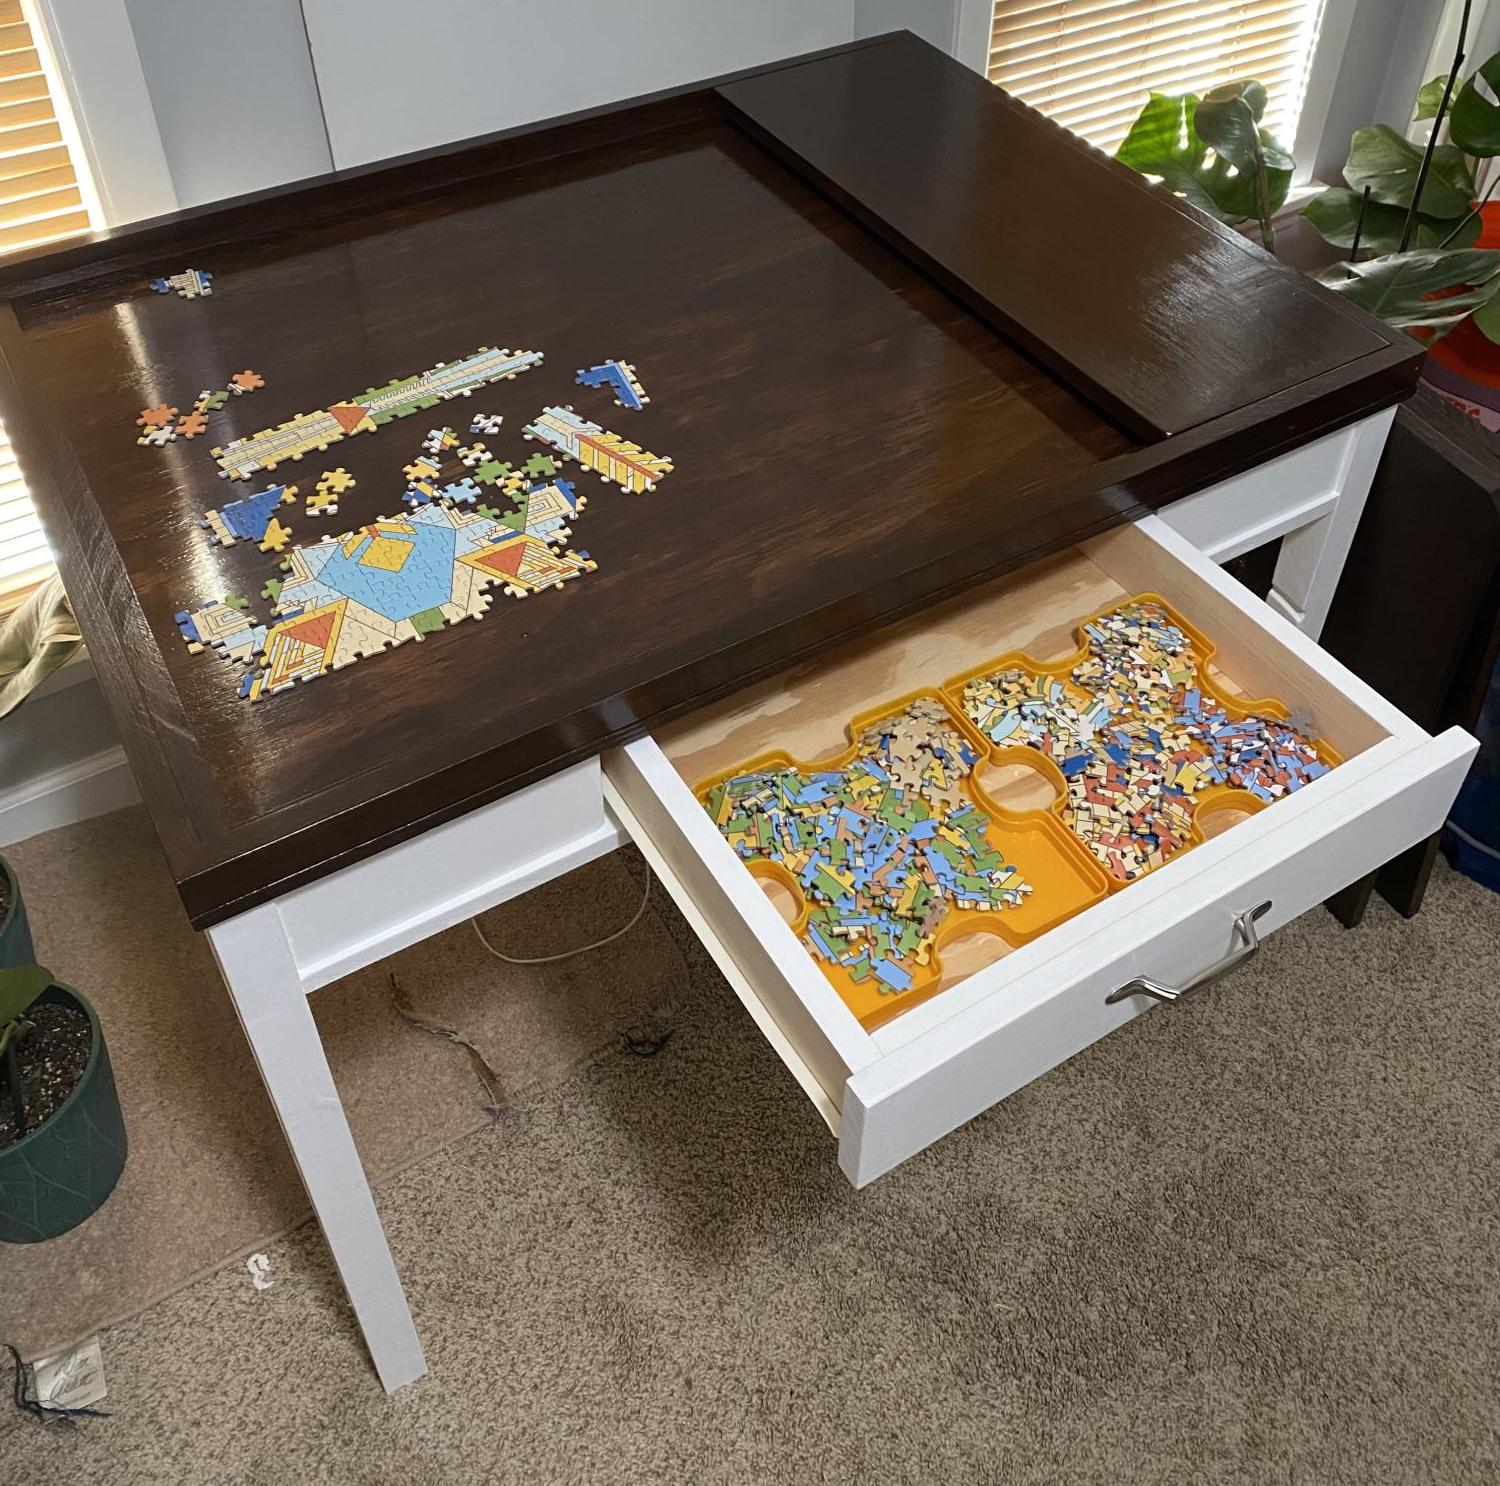
I wanted a table that would protect my puzzles from puzzle piece eating dogs, so I used this Ana White desk plan and built a frame on top to hold the cover panels. The drawer is perfect for holding puzzle pieces during a build.
Comments
Fri, 03/10/2023 - 13:28
Wonderful adaptation!
This is so smart for puzzles, thank you so much for sharing!
Flip Top Coffee Table
Needed a sturdy coffee table and this plan was perfect. Doubles as a bench, extra storage in the hidden cubby underneath the flip top, holds football fiesta platters, beers, and when the parties not in full swing, I'm using as a sewing table as well. Love it. Used my Kreg jig for entire assembly so super sturdy and easy too. Modifications: 1x6 Pine boards, jigged together. love the look of pine and after assembly, meticulously sanded so feels like one piece of wood. Used the hidden hinges. Bottom shelf I made out of leftover 1x4's, to match the top. width is 36 inches. Had to fit in a tiny living room. Did add support to the bottom shelf, 2 1x2's under the 1x4's....my dog has already crawled onto the shelf.


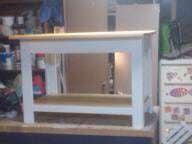

Kilz white primer 2 coats, and Behr Ultra White for legs and apron.
Comments
Wed, 11/23/2011 - 04:25
Awesome job!!! Love
Awesome job!!! Love it!!!
The natural wood look with the white looks so sharp!!!
Sun, 02/05/2012 - 02:36
thank you so much! Glad you
thank you so much! Glad you liked it, I love the contrast too!
Since it's essentially a holder for hubby's beer and snacks this kind of top can take a lot of abuse and still look great
Tue, 02/21/2012 - 18:57
Fantastic!
I love the look of this augmented plan. The 1x6 boards looks super sleek.
Can I ask you a question? I'm building this bench as my very first building project, and so far it is quite wobbly. I attached the shelves with one pocket hole in each corner through the shelf piece. You mentioned that yours is super sturdy. How did you attach the shelves?
Thanks! - Victoria
Wed, 02/22/2012 - 22:57
Victoria, I made each side as
Victoria,
I made each side as a frame, looked like 2 rectangles and 2 squares. Those were both kregged together...then I put those frames, front, back and 2 sides together kregging those together. The shelves are all kregged in too. I don't know if that helps or not. I've used mine for extra seating.
good luck, angie
rustic x sofa table
I love this site. We needed new furniture in are house and didn't want to spend a bunch of money. Finding the Rustic x plans was a life saver.
Big Ol' TV Stand
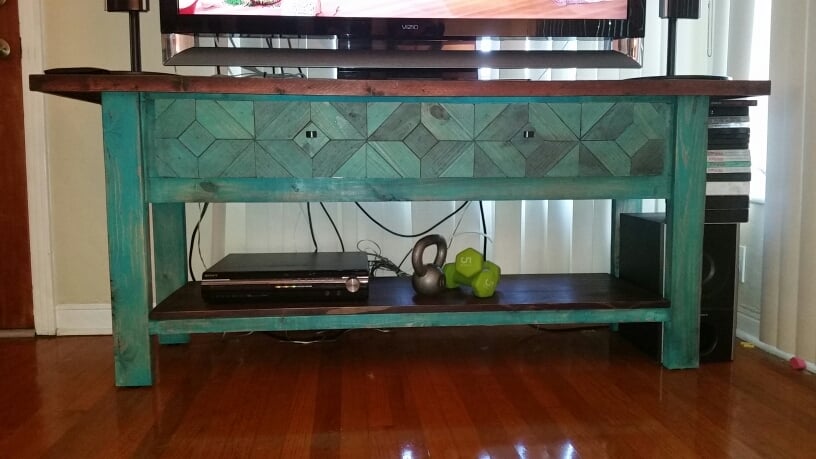
Instructions for the Ridge Media Console Table were easy enough to understand after one read-through.
I changed up the front-drawer face to go along with other decor in room fun, satisfying project.
NOTE -- Measure your electronics. The drawer is supposed to hide all wires and electronics for a clean look, however, the plans give a 13" drawer space. The dvd/tuner I own is approx 14.5", therefore I have to store it on the bottom shelf. I guess it's time to upgrade to blu-ray.
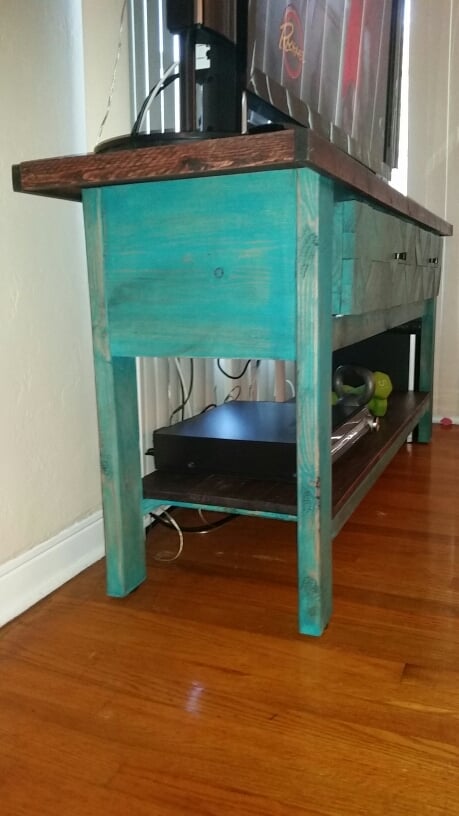
wood, kreg screws, nails
Comments
Mud room bench
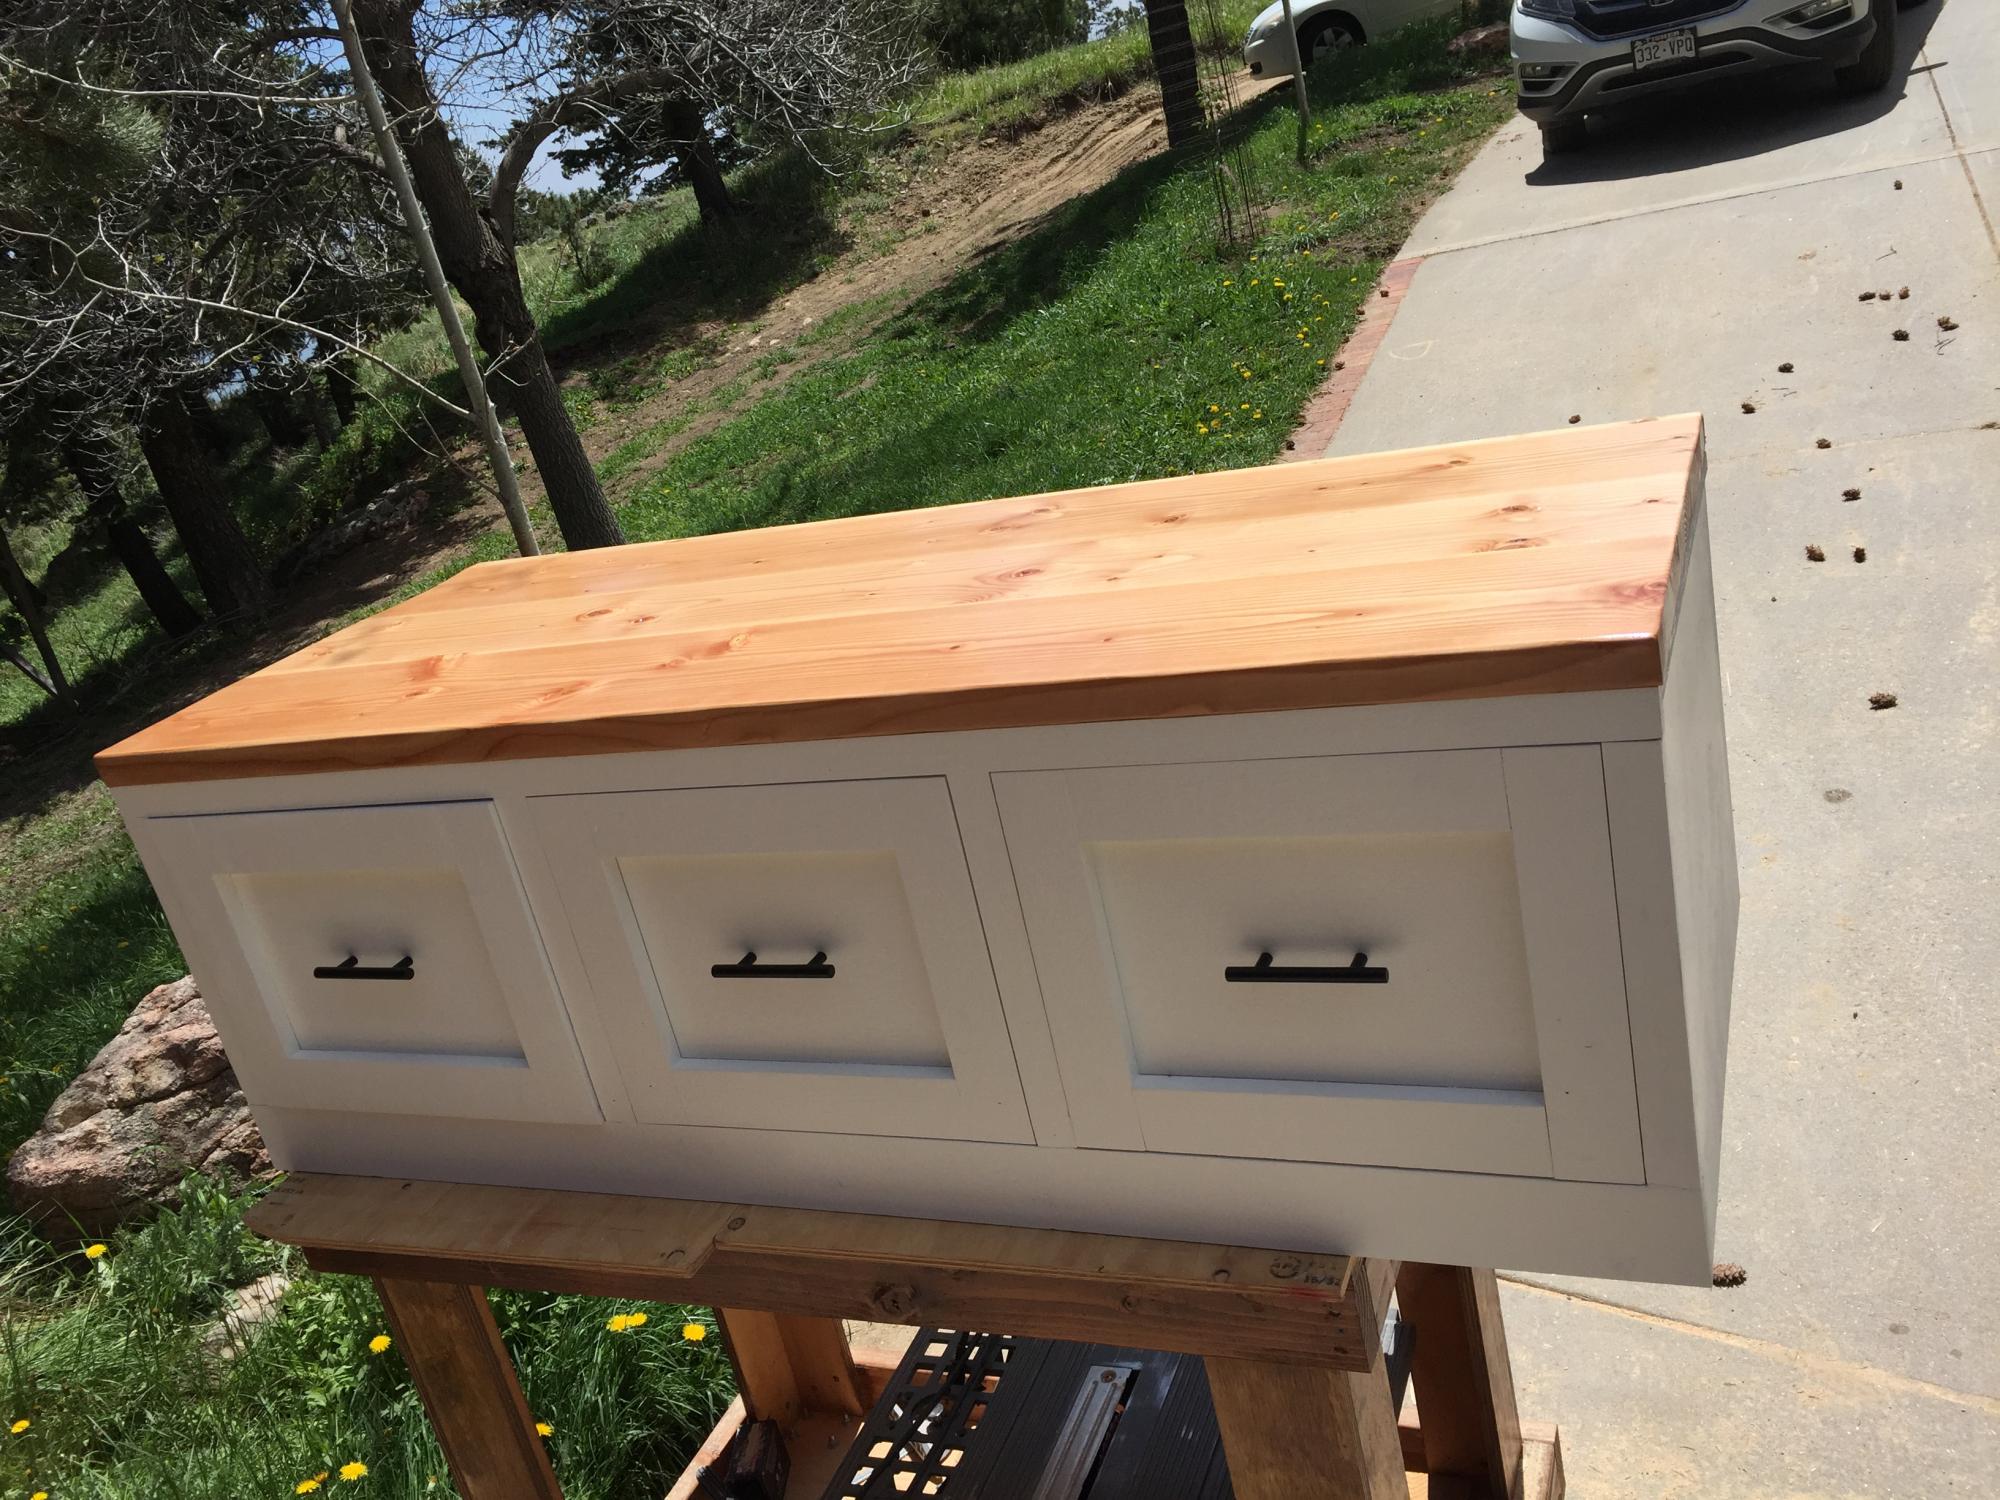
Mud room bench
Comments
Fri, 04/17/2020 - 04:59
Kreg Tools
I always wanted to build several projects you developed, but never had the time. I do now... With nothing to do and nowhere to go I went to Lowe's and bought every Kreg tool they sell after watching your videos about how to use them/what they do. So far, very impressed with Kreg. My first project is the mud room bench (with cabinet and coat hangers). Live near a hardwood mill in a town where lumber and wood products are a main industry so materials are good, plentiful, and cheap.
Bench storage
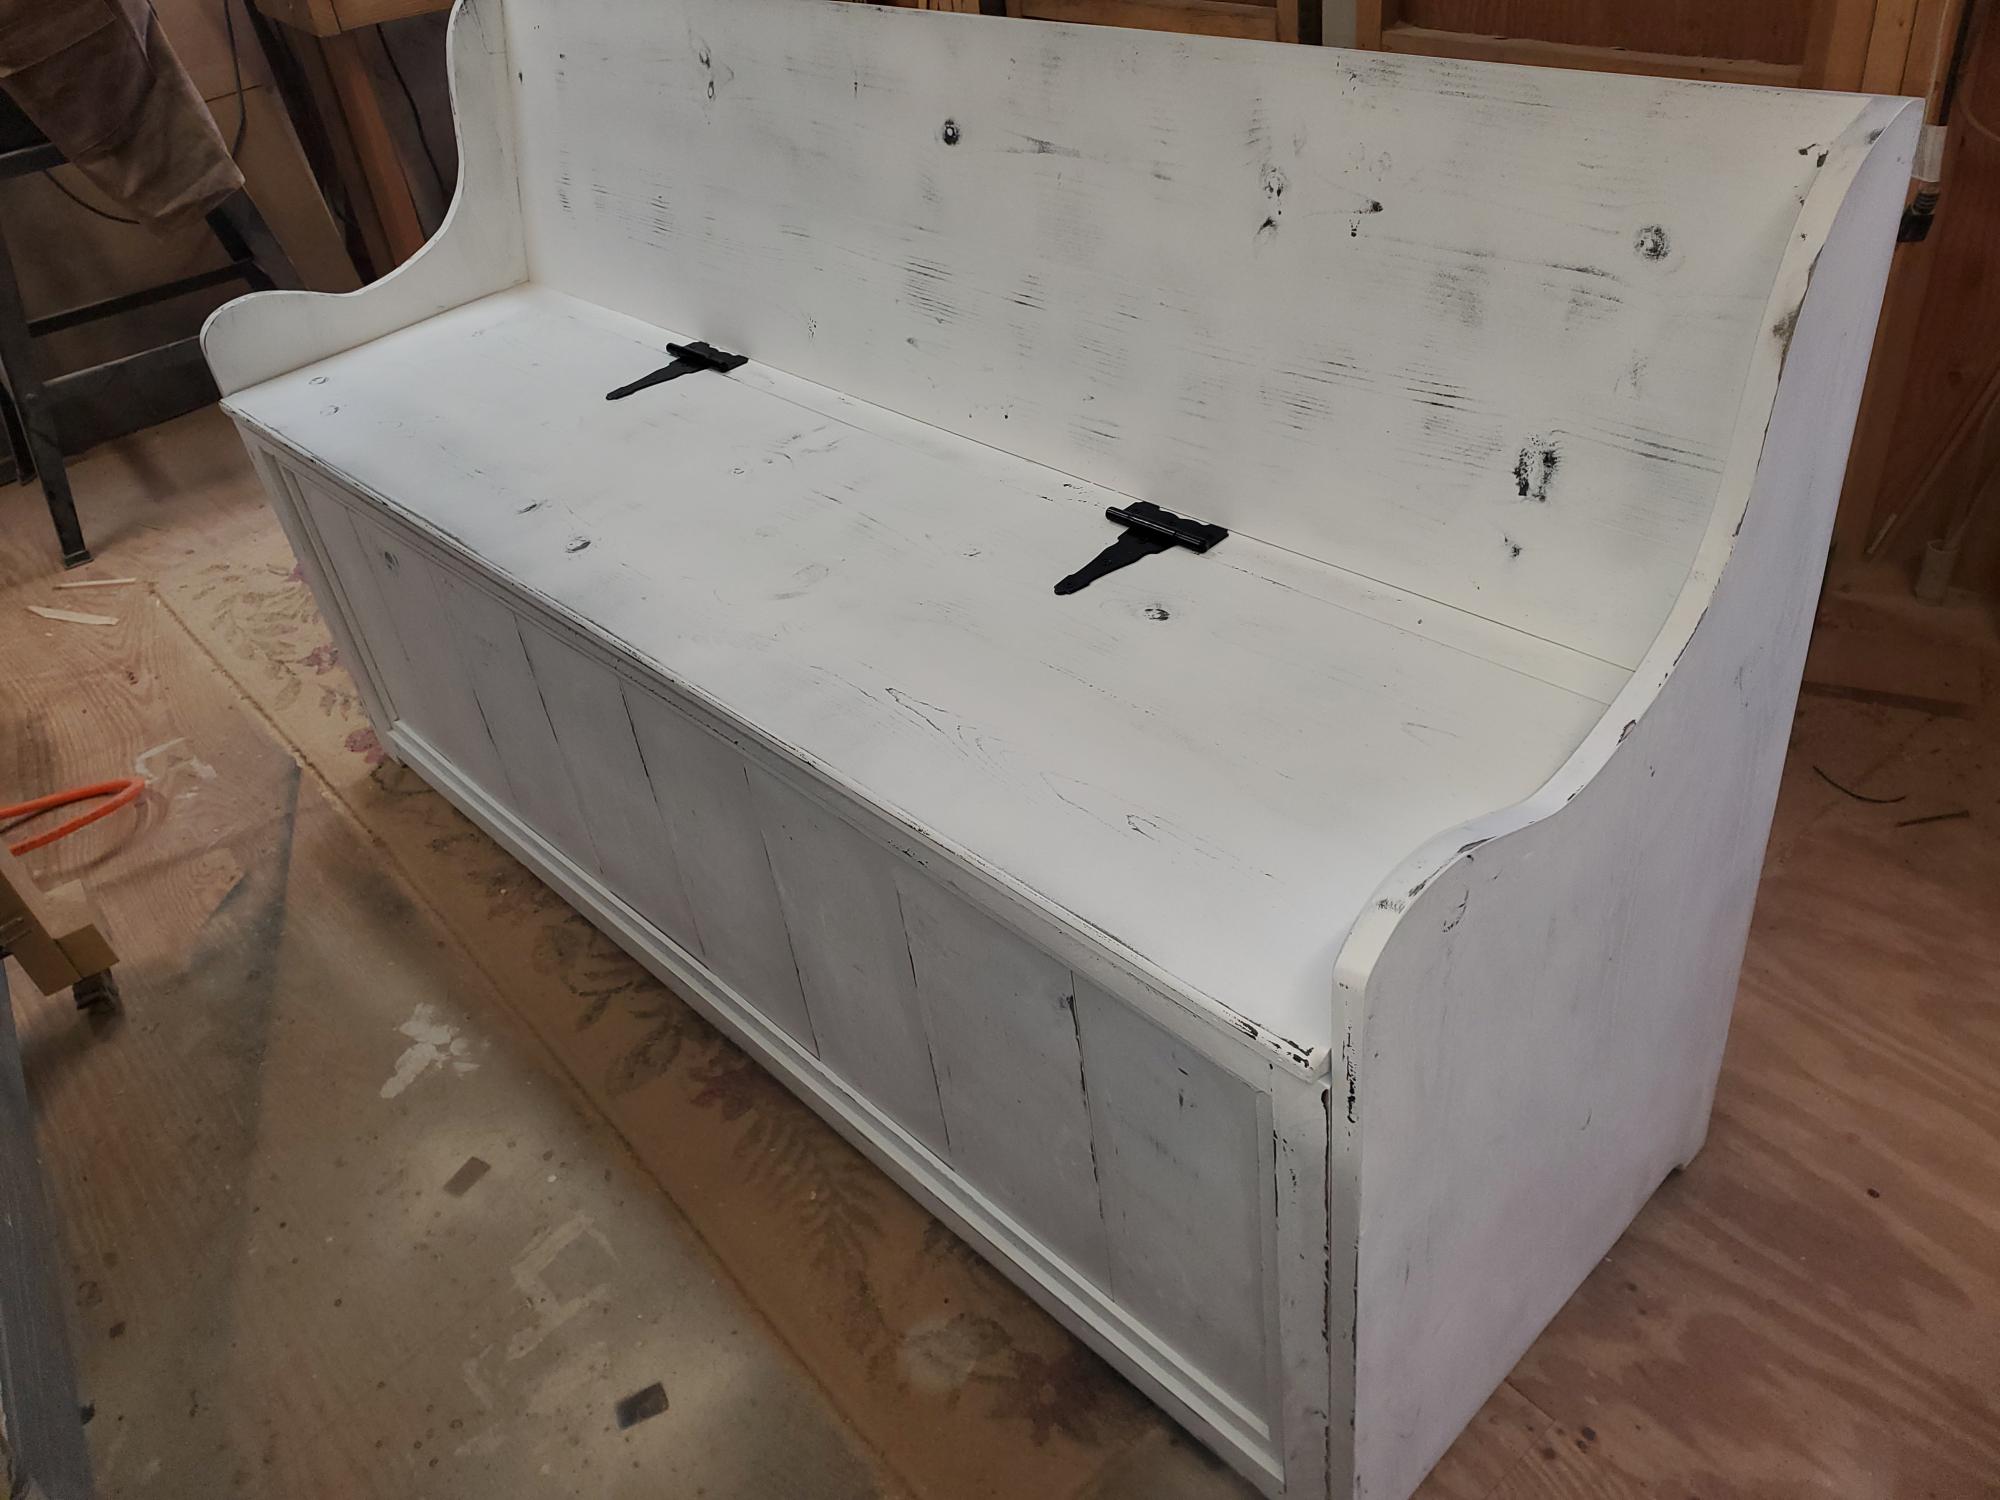
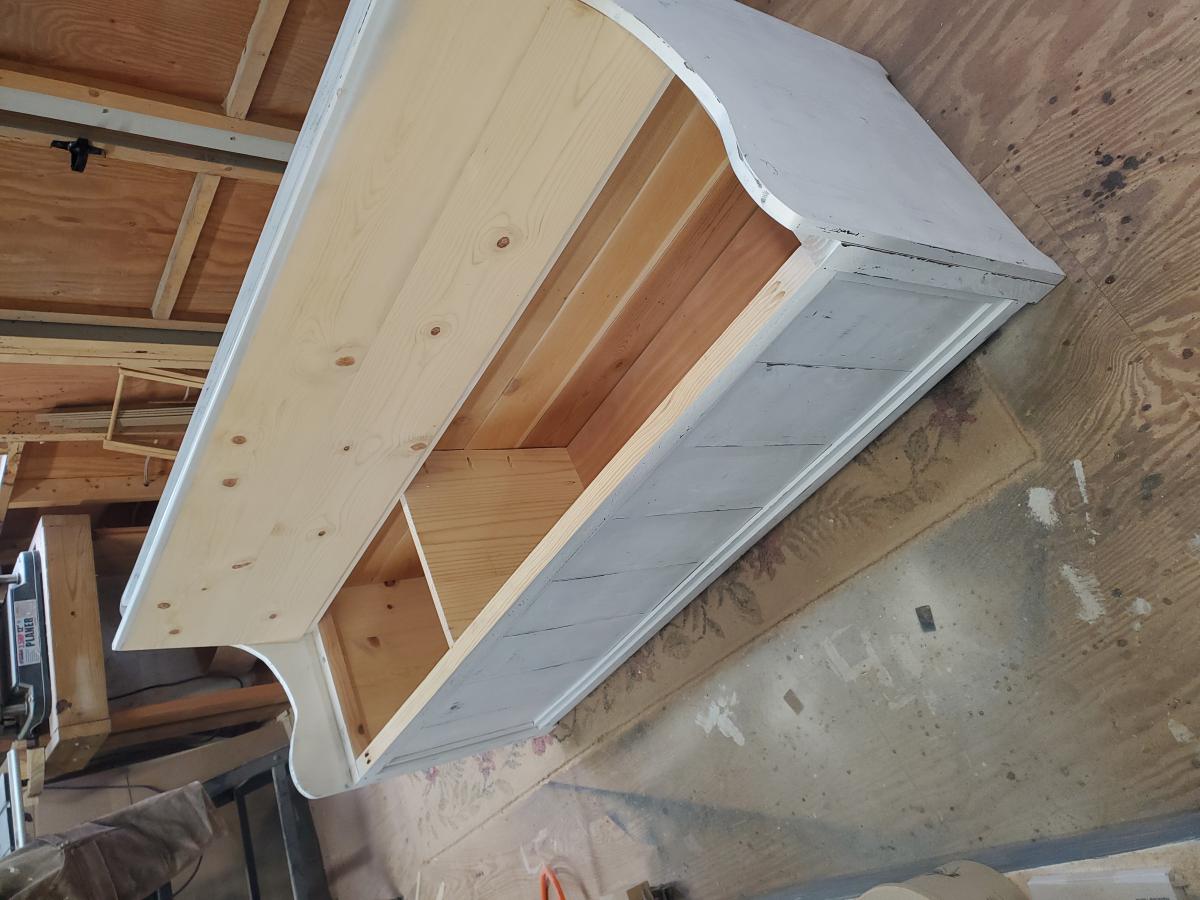
Built for a game room. The customer wanted it rustic white. With 1/3,2/3 split storage one for toys the other side for storage.
Comments
Perfect!
I went round and round trying to figure out what type of shelving to install in our kitchen to go above a cabinet below that will be topped with a rough live edge pine slab (not yet completed). I stumbled across your industrial chic shelves post, found an old board laying around the yard and whalla! As always, thanks for this amazing site!!
Comments
Thu, 12/22/2011 - 12:44
Great!
Hi! Love how your shelves turned out. I was just wondering how much weight these shelves would hold. Looking at yours with plates on them, it seems like they hold quite a lot!
Did you use larger L-brackets or the same size that Ana used?
Thanks for posting your shelves!
Patrick's Jelly Cupboard
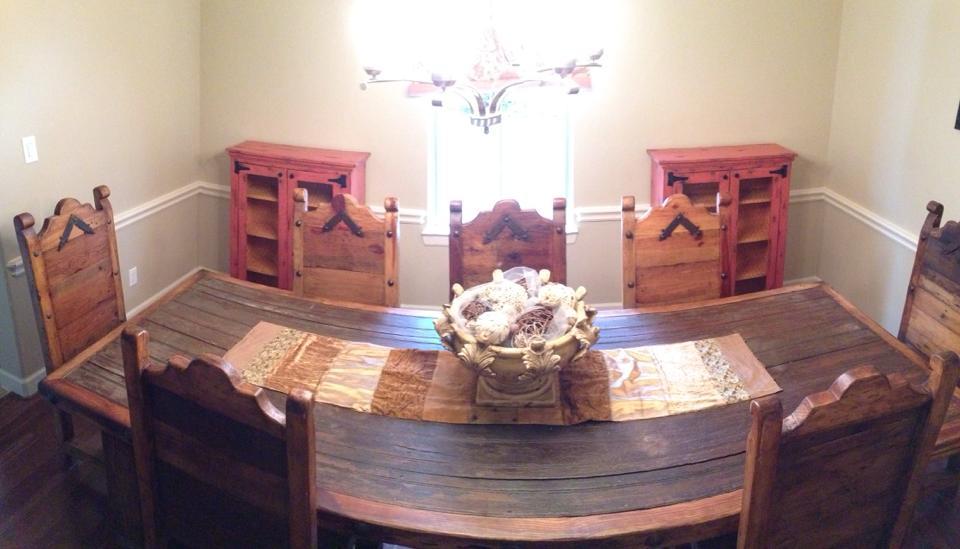
I am built two of these cupboards for my dining room. I am calling them pie safes though. Making two added twice the work but I only had to think through the steps once.
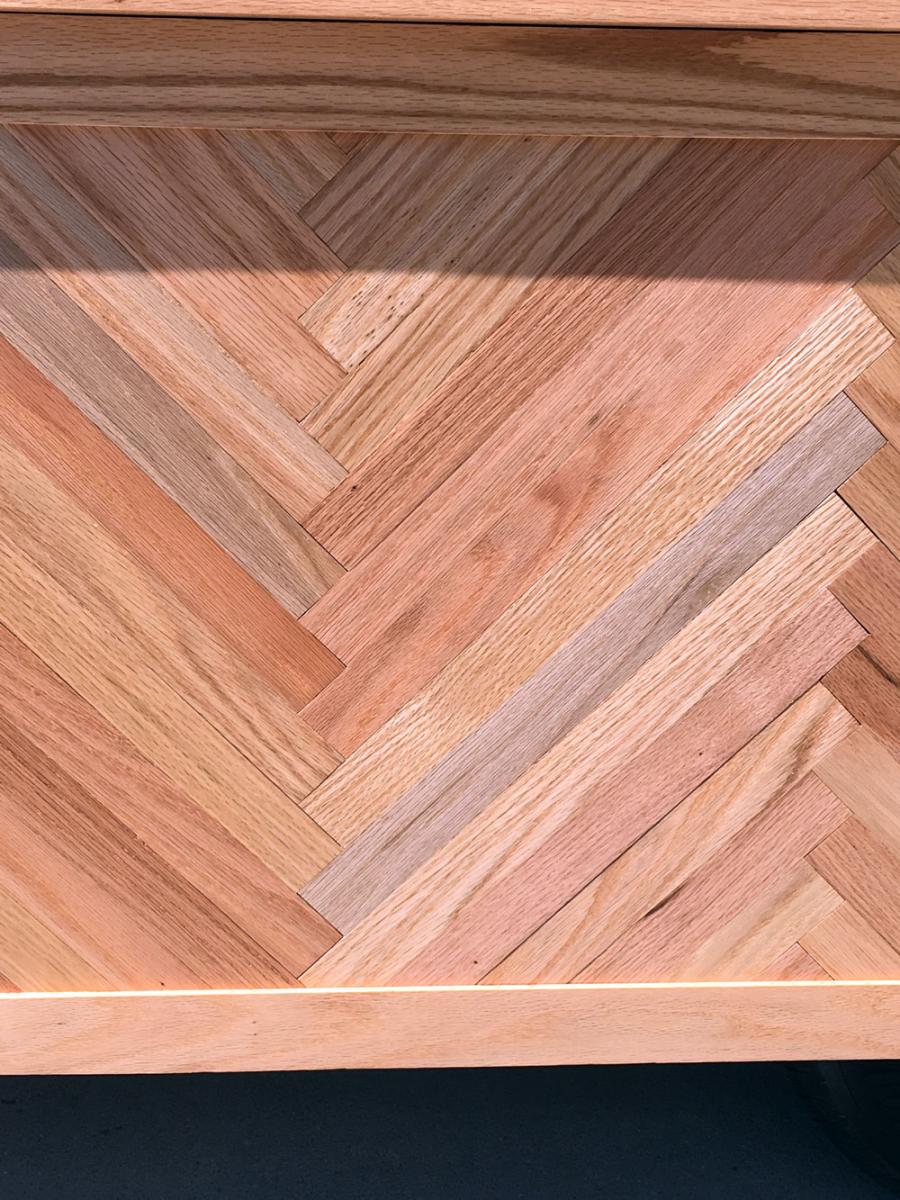
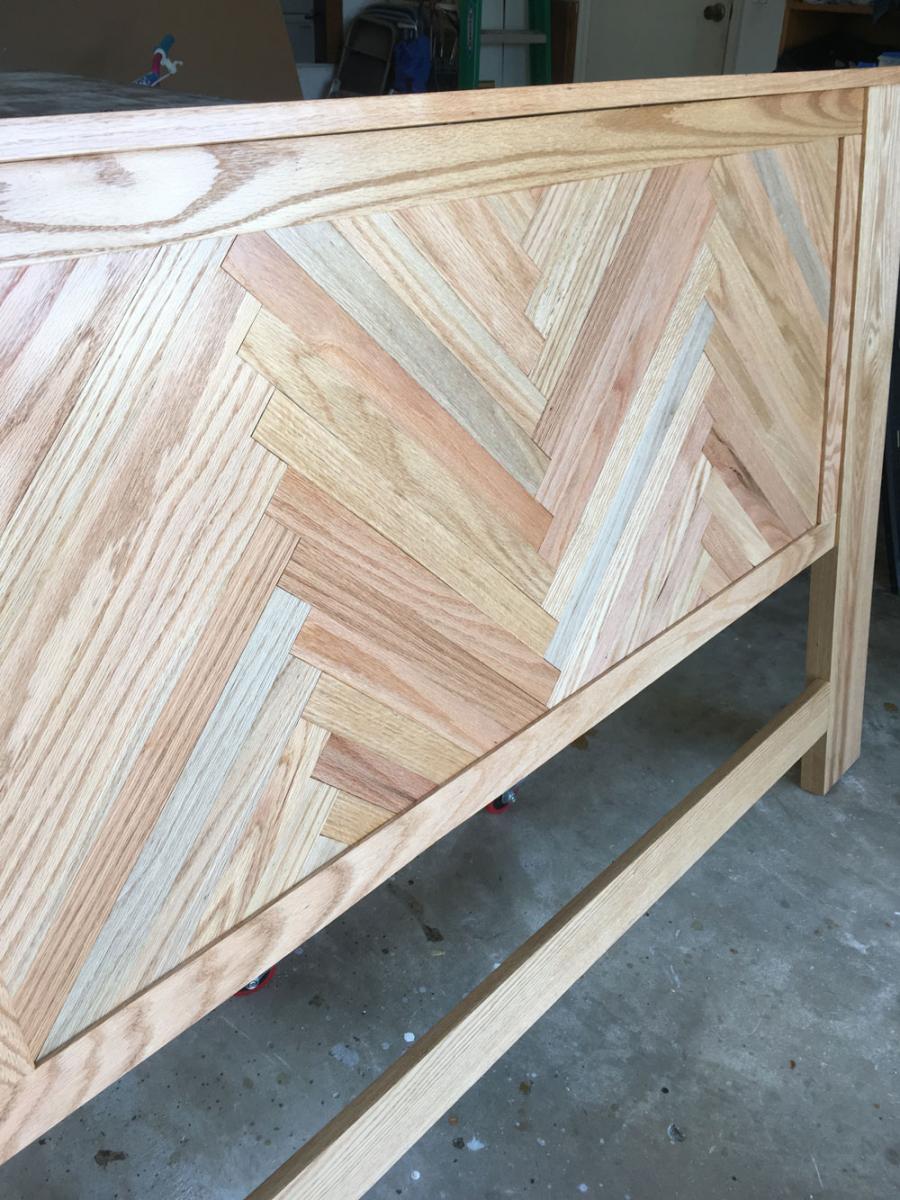
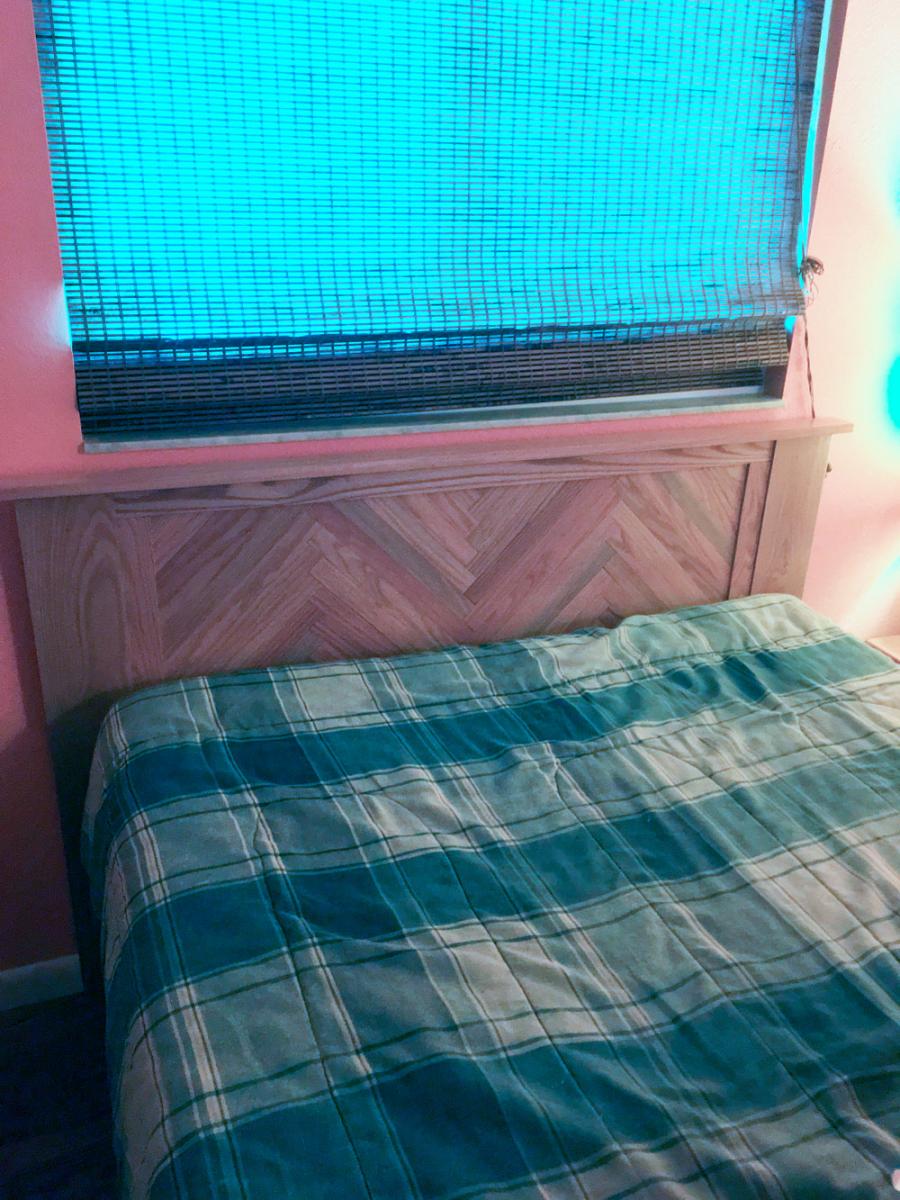
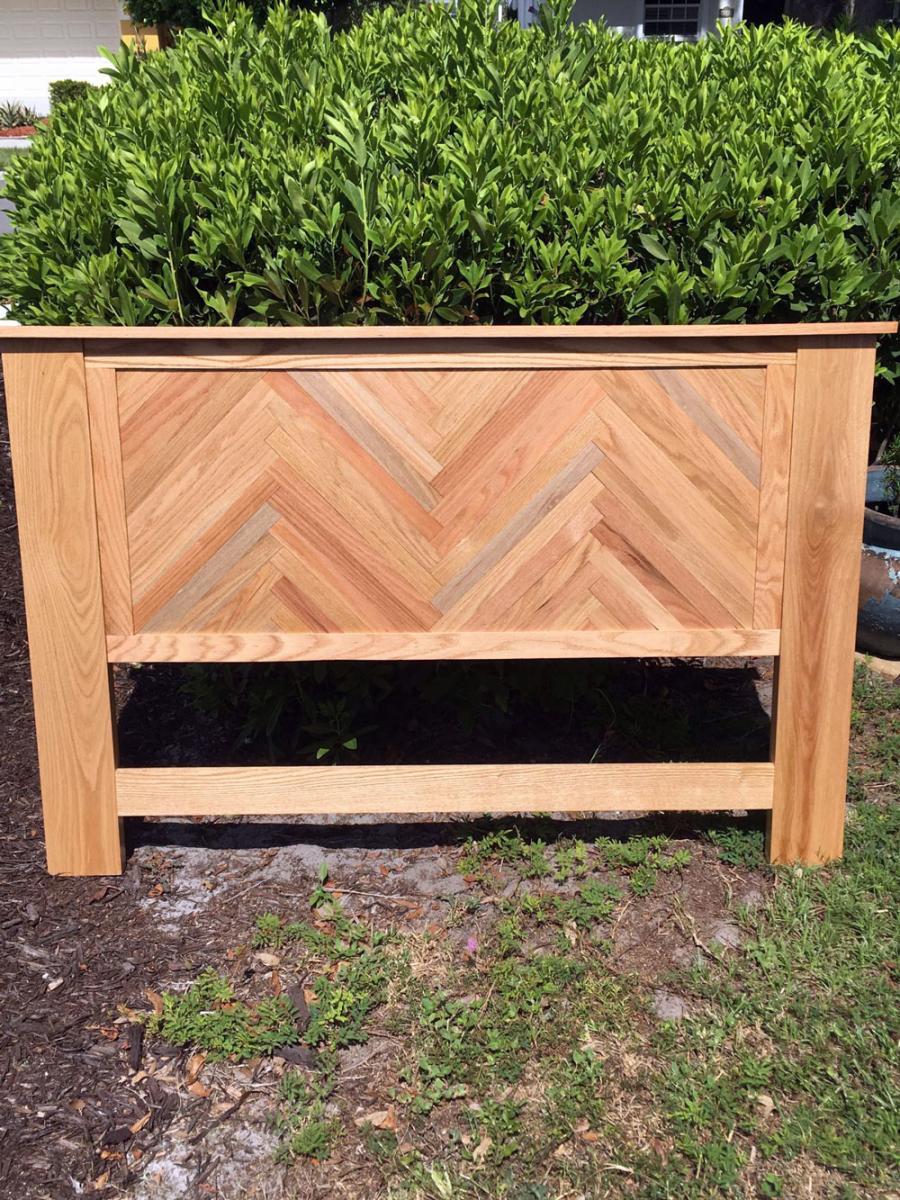
Red Oak Headboard with Herringbone pattern
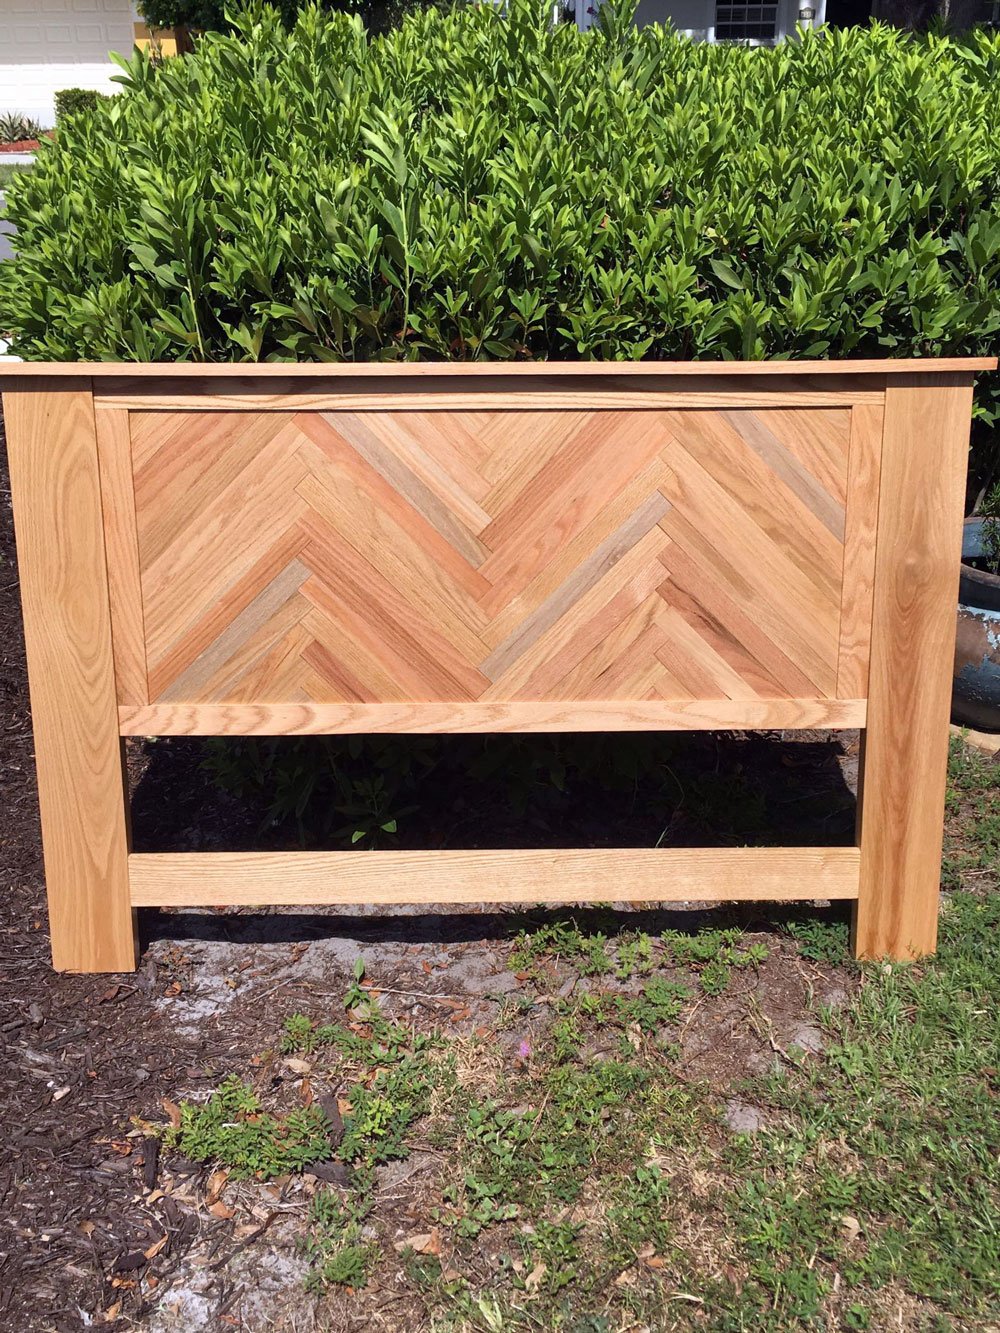
Created a headboard for my guest room bed. Used red oak slats to create the herringbone effect and regular red oak boards for the frame and legs. Natural shellac and sealer used as the finish. No real plans used, but can provide the dimensions to anyone who is interested.
My fireplace
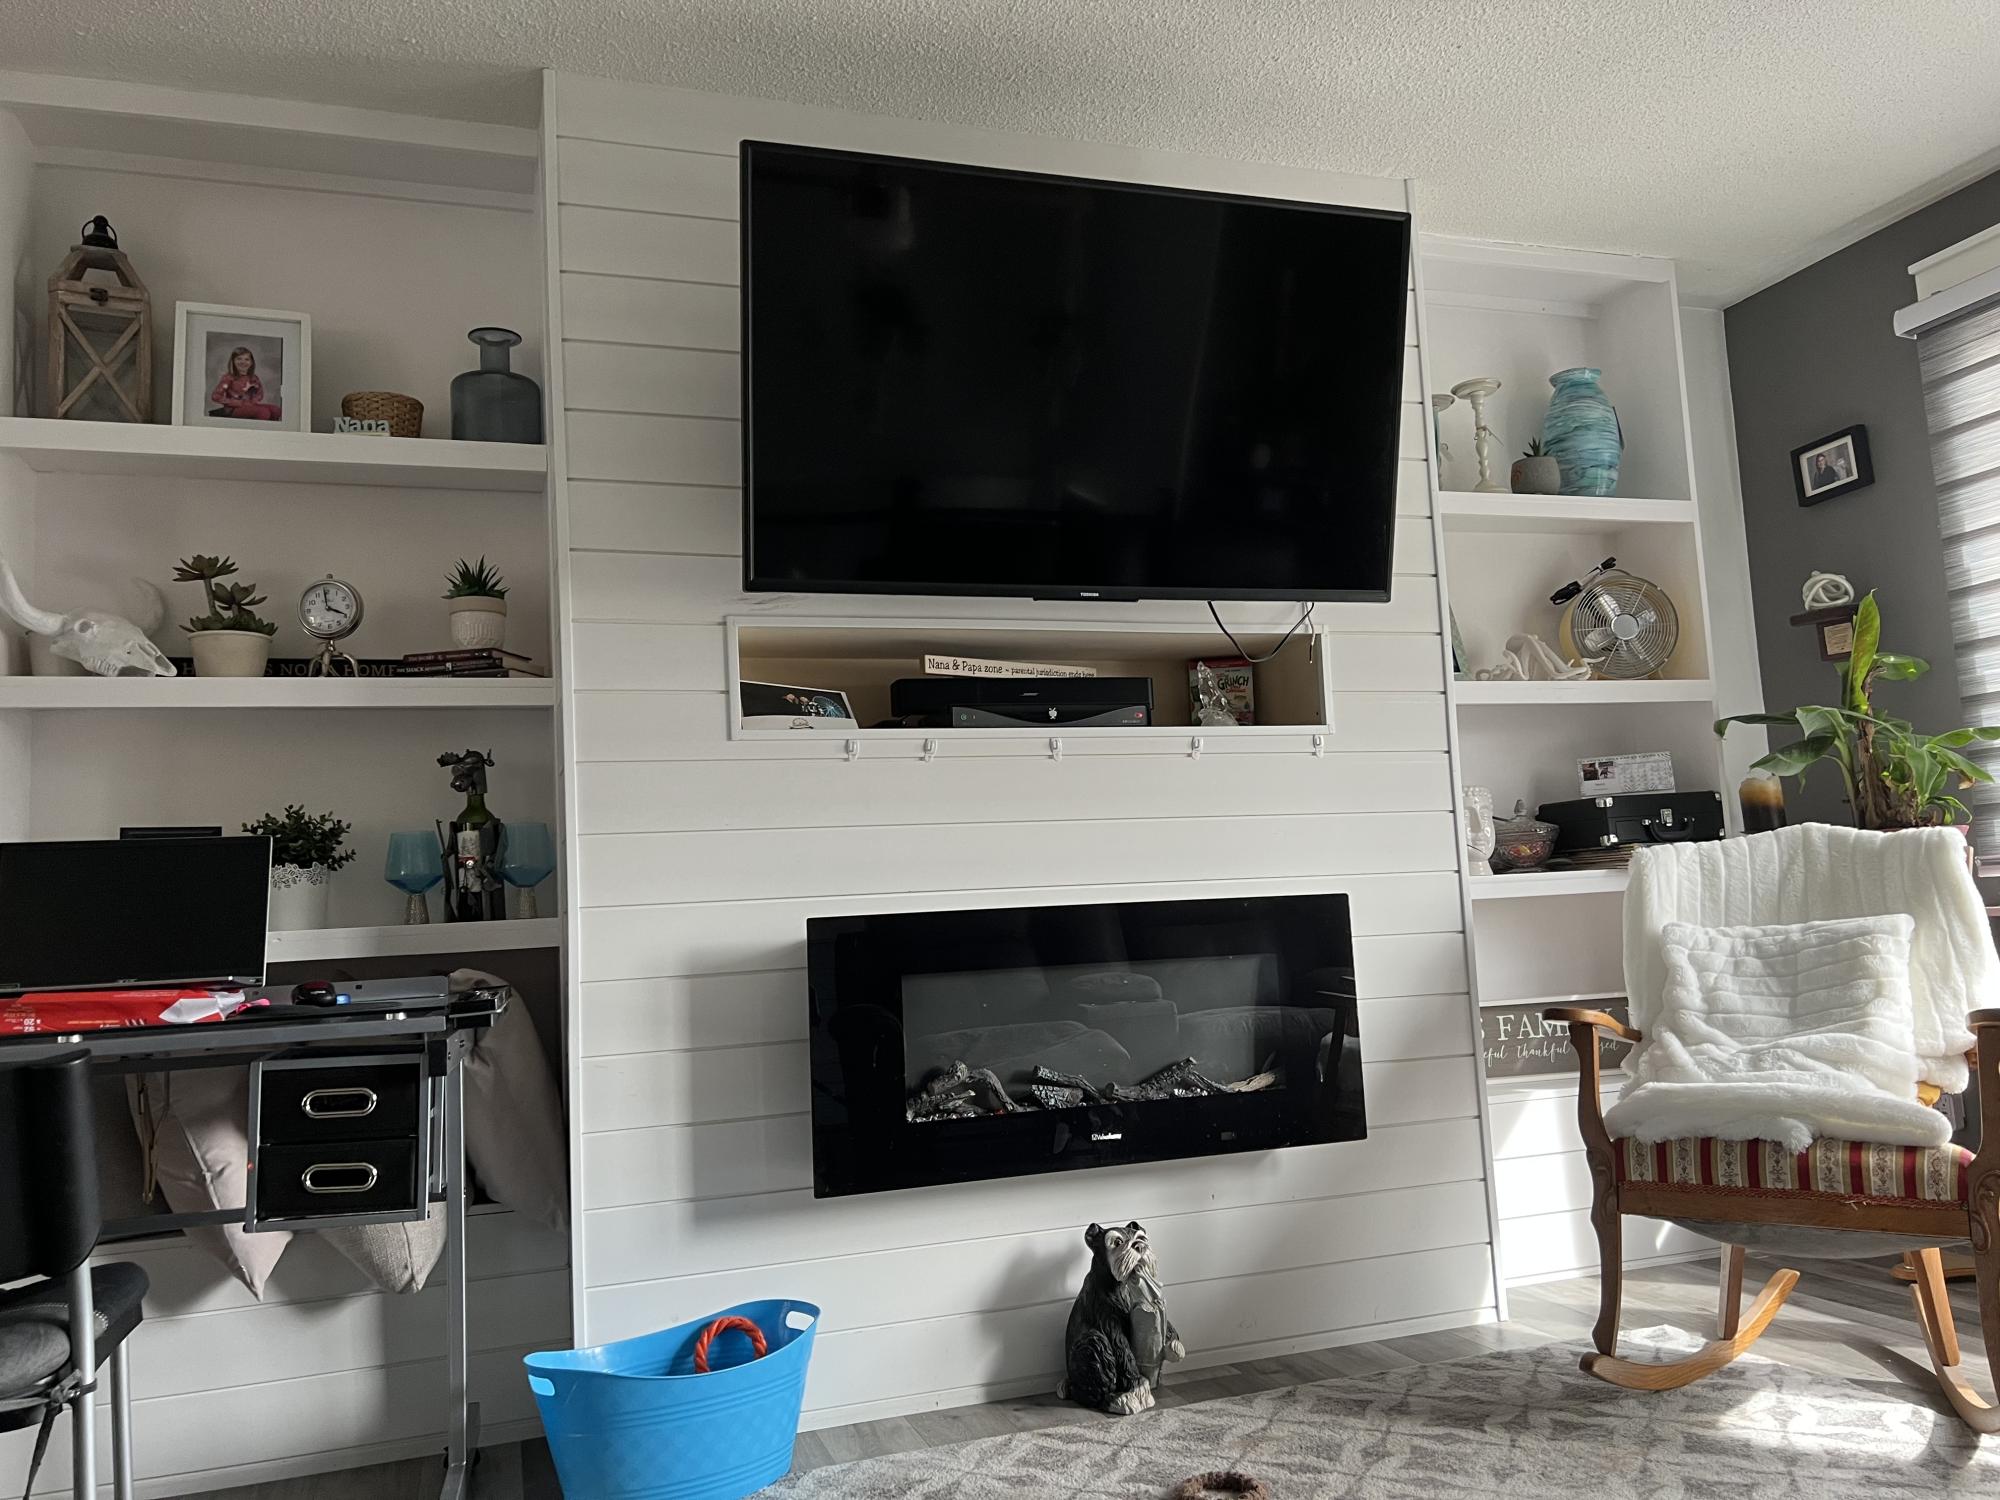
My wife wanted a fireplace in our main living room, then we added the shelving on each side
