Community Brag Posts

Wine Rack

Submitted by Bredimi on Tue, 02/07/2012 - 15:35

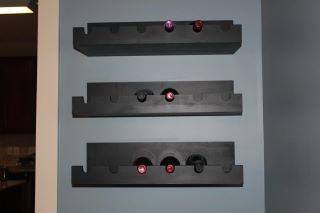
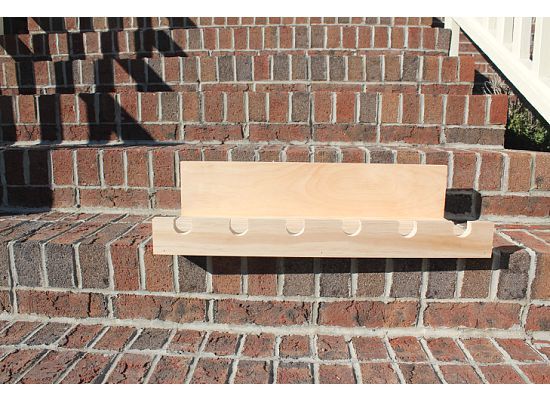
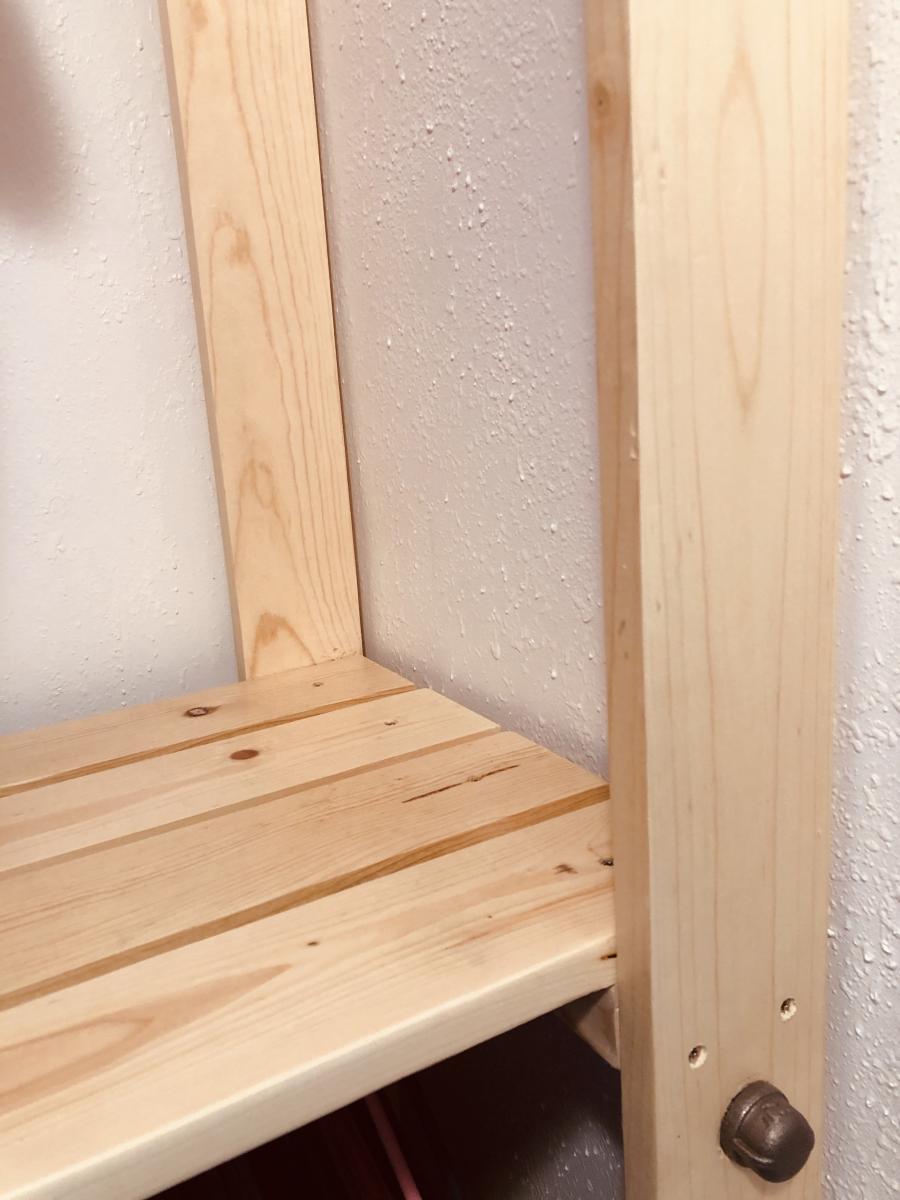
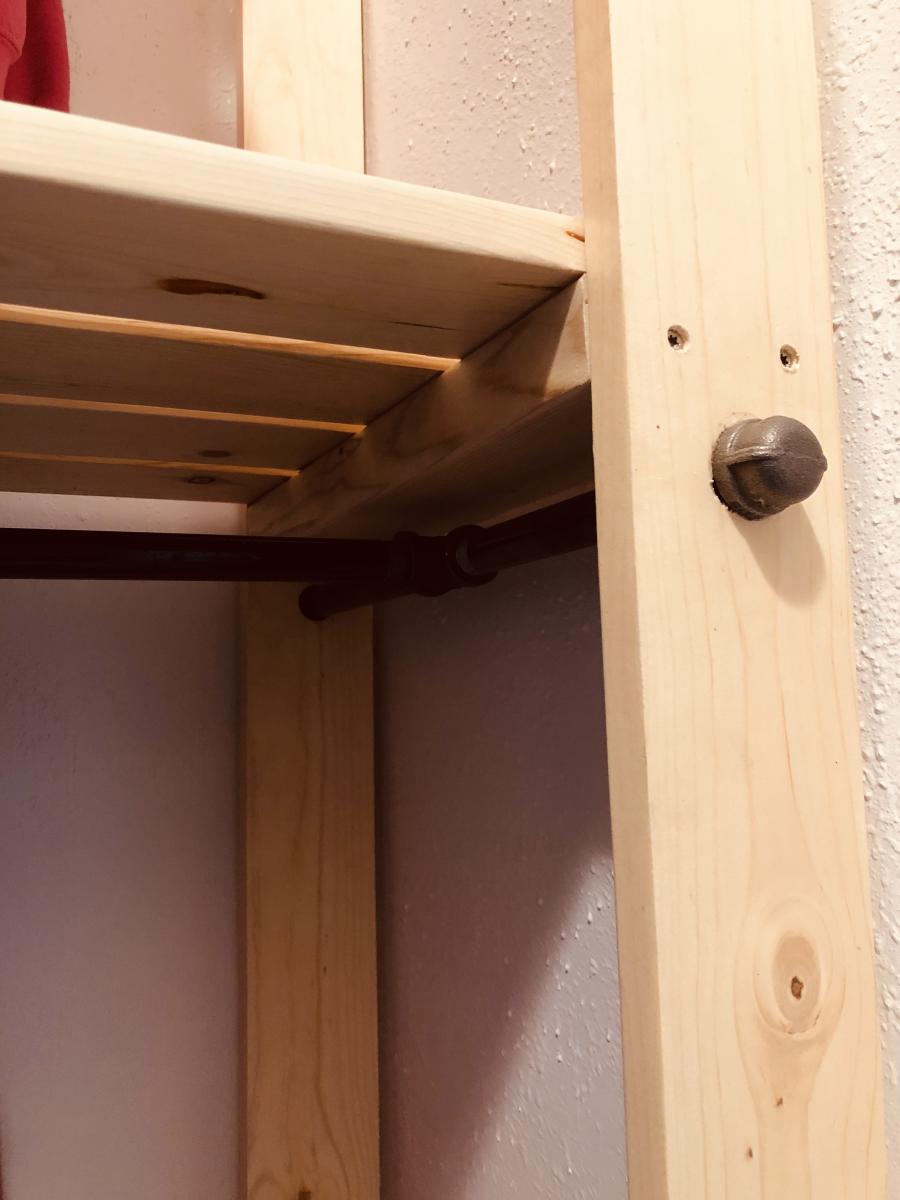
I loved the Holman Entertaining Shleves from Pottery Barn, however, I didn't like the price. Taking the $10 ledge plans and modifying them, I set out to make my own. I used a 1 x 10 (bottom), 1 x 6 (back) and a 1 x 3 (front). They are 23 7/8 inches long to get the 3 shelves out of 6 foot boards. To get the holes to hold the top of the bottle, I used a 1 and 1/4 inch forstner bit. Since I had gift cards left from Christmas I splurged on the wood and bought the select pine.

Built from Plan(s)
Estimated Cost
I had gift cards, but my out of pocket expenses for the 3 shelves was $22.89
Estimated Time Investment
Afternoon Project (3-6 Hours)
Finish Used
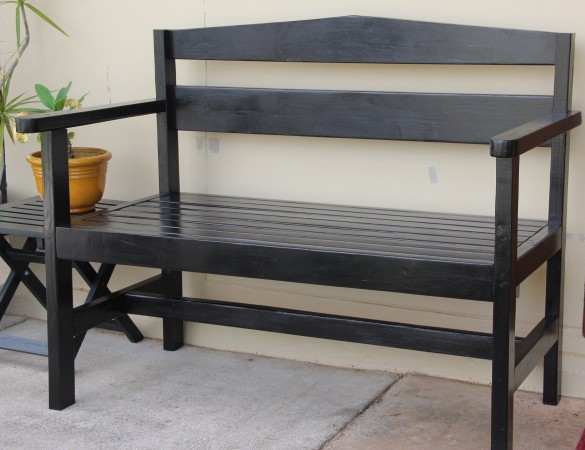
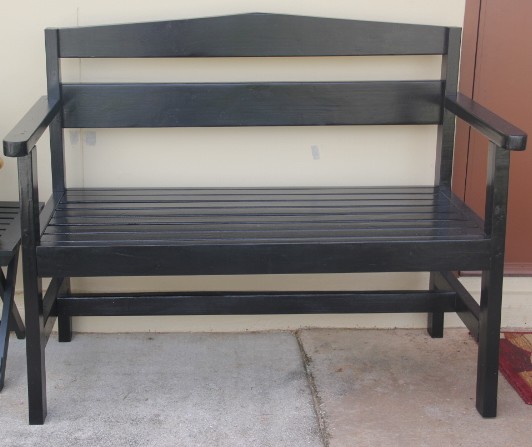
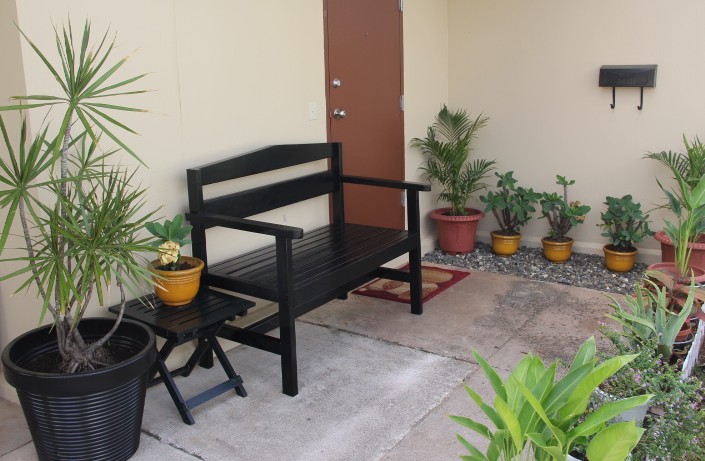
I painted them Valspar Lincoln Cottage Black
Recommended Skill Level
Intermediate

Comments

babysteps

Tue, 01/14/2014 - 10:55

I love your adaptation of the original design. I have been looking for an example of someone who made this plan into a wider shelf. Has it held up well? I was worried about the stress on the joints when you make it deeper. Has yours handled the weight of the bottles?

My "almost" outdoor sofa

I have been looking for something to add extra seating to my deck while also filling an awkward corner that I have never been able to find prefab furniture to fit. This build reminded me a lot of the large X bench that Ana made for her cabin (that I also built for my front porch.) It is super simple and so sturdy. I can't wait to sew cushions for it and build the second half.

Estimated Cost
$30-$40
Estimated Time Investment
Afternoon Project (3-6 Hours)
Recommended Skill Level
Starter Project

Coffee table and console table

Submitted by Anonymous (not verified) on Mon, 10/07/2019 - 14:07

Made for daughter from your plans,made console longer and a little higher.

Estimated Cost
$80 for coffee table,$60 for console table
Estimated Time Investment
Weekend Project (10-20 Hours)
Finish Used
VarathaneBriarsmoke and wax Cloth application one coat then finishing wax
Recommended Skill Level
Beginner

Factory Cart Coffee Table

Submitted by Syndee on Fri, 02/10/2012 - 22:11

(Sorry my photos aren't the best, there is a black spot on my lens which shows up on some pictures.)

I had a lot of fun making this! I'd been wanting a vintage factory cart for over a year when I found this plan on Pinterest which led me here. I wanted to get a rustic industrial look so I made the table in the picture from the Ana White site that is stained and not the green one. After getting the base built, my husband and I decided we wanted it taller (since we have a dog who would love to sniff at whatever we put on it). And while I'm at it, why not add some storage? So I added more 2x4s and attached them to both the base and additional 1x6s. I put the 1x6s on the front and both sides, leaving the back open. I flipped the whole thing over, put the casters on and added plywood to the bottom of those 2x4s. then added two small boards give support to the plywood, which created a storage shelf. I then sanded and stained it and finished it off with two coats of semi-gloss poly. I did not counter-sink my screws or used wood filler as I was going for the rustic industrial look and I love the way it looks. It is very sturdy, too. I have moved it all around, slid it on its side trying to get some decent pictures and its just as sturdy as ever.

Built from Plan(s)
Estimated Cost
< $100
Estimated Time Investment
Weekend Project (10-20 Hours)
Finish Used
Stain color is Kona. Two coats of poly.
Recommended Skill Level
Beginner

Comments

A letter shelf

A built these shelves for my nieces birthdays. I reversed the color schemes to keep them separate. The plans provided are great! I would certainly use the added 1 x 2 supports if hanging on the wall because the shelf is heavy (about 14 pounds).

Built from Plan(s)
Estimated Time Investment
Afternoon Project (3-6 Hours)
Finish Used
Valspar paint sample from Lowes
Recommended Skill Level
Beginner

Garden Bench

Submitted by sidman on Tue, 02/14/2012 - 02:50

When I saw this we had to build it. Hope you like!

Estimated Cost
45.00
Estimated Time Investment
Day Project (6-9 Hours)
Finish Used
Painted black with a poly coating.
Recommended Skill Level
Starter Project

Comments

Margaret Kubiszyn (not verified)

Tue, 02/14/2012 - 07:11

I love this, but the link to the plans is broken!

Beach Cottage Dresser

Submitted by Emendia on Mon, 12/23/2013 - 23:18

This was my first dresser. The original plans say to lay the dresser on its back and center the drawer fronts then nail in place; in my opinion it is faster and more accurate to hold them in place and have a helper nail them in place. Also, the original plans suggest a certain jig for installing the slides which requires a locking c-clamp to hold the jig in place. Well, in my opinion the locking c clamp, along with a magnetic small torpedo level is faster and easier than the jig. A six in steel rule with a slider clamp is also helpful.This was fun project - learned a lot!  Thanks Ana & Patrick!

Estimated Cost
$250
Estimated Time Investment
Weekend Project (10-20 Hours)
Finish Used
DIY chalk paint, knobs from World Plus Market, and lightly distressed along edges so antique white primer would show through along edges. Base for chalk paint is latex plus calcium carbonate. Be sure to dissolve chalk in water before mixing into paint! I did two coats of antique white tinted primer, followed by two coats of chalk paint, then sealed with wax Also, the chalk will whiten your final color, so buy paint a couple of shades darker than what you would like your final finish to be.
Recommended Skill Level
Intermediate

Comments

Emendia

Tue, 12/24/2013 - 08:23

Oh, another lesson I learned: The drawers are made by attaching drawer fronts to the boxes. This makes the front 1.5 inches thick - this means most drawer knobs won't fit unless you use a Forstner or spade bit to bore a hole on the back side of the drawer face - in turn you may need to do this before you assemble the drawer!

Big girl bed

Submitted by Anonymous (not verified) on Fri, 03/04/2016 - 18:33

Farm house two toned, rustic twin size bed. 

Estimated Cost
$70-$80
Estimated Time Investment
Day Project (6-9 Hours)
Finish Used
Stain with a top coat of white simi gloss
Recommended Skill Level
Intermediate

Closet remodel Shelves

Submitted by Anonymous (not verified) on Sun, 10/13/2019 - 13:15

My master closet was a mess when I moved in and something needed to be done. I moved the doorway to create more space in my bedroom and closet. I found this lan and modified it try needs. It works great!!

Note: It is much cheaper to purchase the long pipes and have Home Depot cut them down to the right length.

Estimated Cost
150
Estimated Time Investment
Weekend Project (10-20 Hours)
Finish Used
Water based poly
Recommended Skill Level
Intermediate

My new sewing table!!

Submitted by sattaway on Sun, 02/19/2012 - 20:46

I consider this my first build...notice the ribbon rack and painter's ladder shelf also in the photo. Those were just confidence boosters to help me tackle the craft table I've been asking my hubby to build me for years. I just got tired of waiting, and decided to give it a try. With a 2 and 6 year old in the house, this took me a few weeks to complete...building during nap time and forgoing sleep on some evenings just to get it done. :) The drawers were by far the trickiest part of the whole thing. My first attempt was with 16" euro side mount slides, and I couldn't get the drawers in because they are inset under the tabletop. I ended up going with just a regular side mount drawer slide ($4.30 per drawer). The bookcases and the drawers are just your standard white cabinet paint, but the tabletop is finished in Martha Stewart's Potter's Clay textured paint (Hacienda) with a top coat of polyurethane. I also made the table top twice as thick by gluing 2 pieces of plywood together and screwing them together through the bottom piece. The height of the table is perfect for cutting fabric...no more backaches from bending over a table to cut fabric. I can't wait to move on to my next project! :)

Estimated Cost
$150
Estimated Time Investment
Weekend Project (10-20 Hours)
Recommended Skill Level
Beginner

Comments

Sandie

Mon, 02/20/2012 - 14:28

Great job! I love it when women finally figure out that they CAN build! Everything looks great!!!!

Shoe Storage Flip Top Bench - First Attempt at "Woodworking"

Submitted by rskeels on Thu, 12/26/2013 - 07:48

This is my first attempt at building and your website made it possible. There were a couple of mistakes, I admit. This was especially true with the finish. I did my best, but I'm a little impatient with letting things dry.

I am also having a difficult time estimating how long it took to build as I am the sometimes proud father of 3 boys...aged 2, 4, and 5....resulting in frequent stopping, starting, and intermittent chasing down the street. I need an exterior lock on the garage.

Thanks so much for your website Ana.

Estimated Time Investment
Day Project (6-9 Hours)
Finish Used
Minwax English Chestnut - Two Coats
Minwax Jacobean - One coat
Minwax Polyurethane
Recommended Skill Level
Starter Project

Comments

Sewing Table

Submitted by cjlaw on Mon, 03/07/2016 - 06:30

Sewing tables are quite expensive, the cheapest I've seen was about $160. I decided to make one myself. I spent about $30 for all the wood, bolts, and nuts that I used to make it.

Estimated Cost
About 30 dollars for all supplies.
Estimated Time Investment
Afternoon Project (3-6 Hours)
Recommended Skill Level
Beginner

West elm knock off coffee table

Submitted by Anonymous (not verified) on Sat, 10/19/2019 - 00:36

This is the first piece of furniture I have built that I want to put in our house. I used a lot of our tools for the first time. It was really fun and definitely took me a long time but learned a lot in the process. I used all scrap wood from old fencing & old projects. And I had to make an opening for storage on one side! What do you think? :)

Estimated Cost
$50-60
Estimated Time Investment
Week Long Project (20 Hours or More)
Finish Used
Wood stain with a mix of royal blue unicorn spit and polyurethane top coat. I had to use a wood hardener as well because the old wood I used had some dry rot. It worked well but it changed how the stain took to it a bit
Recommended Skill Level
Intermediate

Argie Bedside Table (Nightstand)

Submitted by mstarnes on Fri, 02/24/2012 - 09:40

Used the Argie Bedside Table plans, but instead of using plywood for the top I used 1x4's joined together. Painted it a semi-gloss black and put the stainless pull on the drawer front

Built from Plan(s)
Estimated Cost
$75
Estimated Time Investment
Afternoon Project (3-6 Hours)
Finish Used
Semi-Gloss Black Paint
Recommended Skill Level
Intermediate

Two Drawer/Shelf Modern Nightstand

Submitted by asalex1217 on Sat, 12/28/2013 - 19:58

Great design, easy to follow!

Estimated Time Investment
Weekend Project (10-20 Hours)
Finish Used
black glossy paint
(*be sure to sand well!)
Recommended Skill Level
Beginner

Comments

Child's Picnic Table

A lot of detail and time spent in painting this, but I am very happy with how it turned out. I used wider boards for the top to accommodate the hand drawn and painted flag. So glad that it is finally done!

Built from Plan(s)
Estimated Time Investment
Week Long Project (20 Hours or More)
Recommended Skill Level
Beginner

Bunk bed shelf

Submitted by dkkachik on Tue, 10/22/2019 - 09:31

My daughter asked me for a shelf near her bunk bed to put books, glasses, pen, etc. on.  I found this plan and made it that day.  Self cost less than $15!!  She loves it.  It was super simple to do!  

Estimated Cost
$15
Estimated Time Investment
Afternoon Project (3-6 Hours)
Finish Used
Gloss spray paint
Recommended Skill Level
Starter Project
Back