Miter Saw Station / Tools Chest
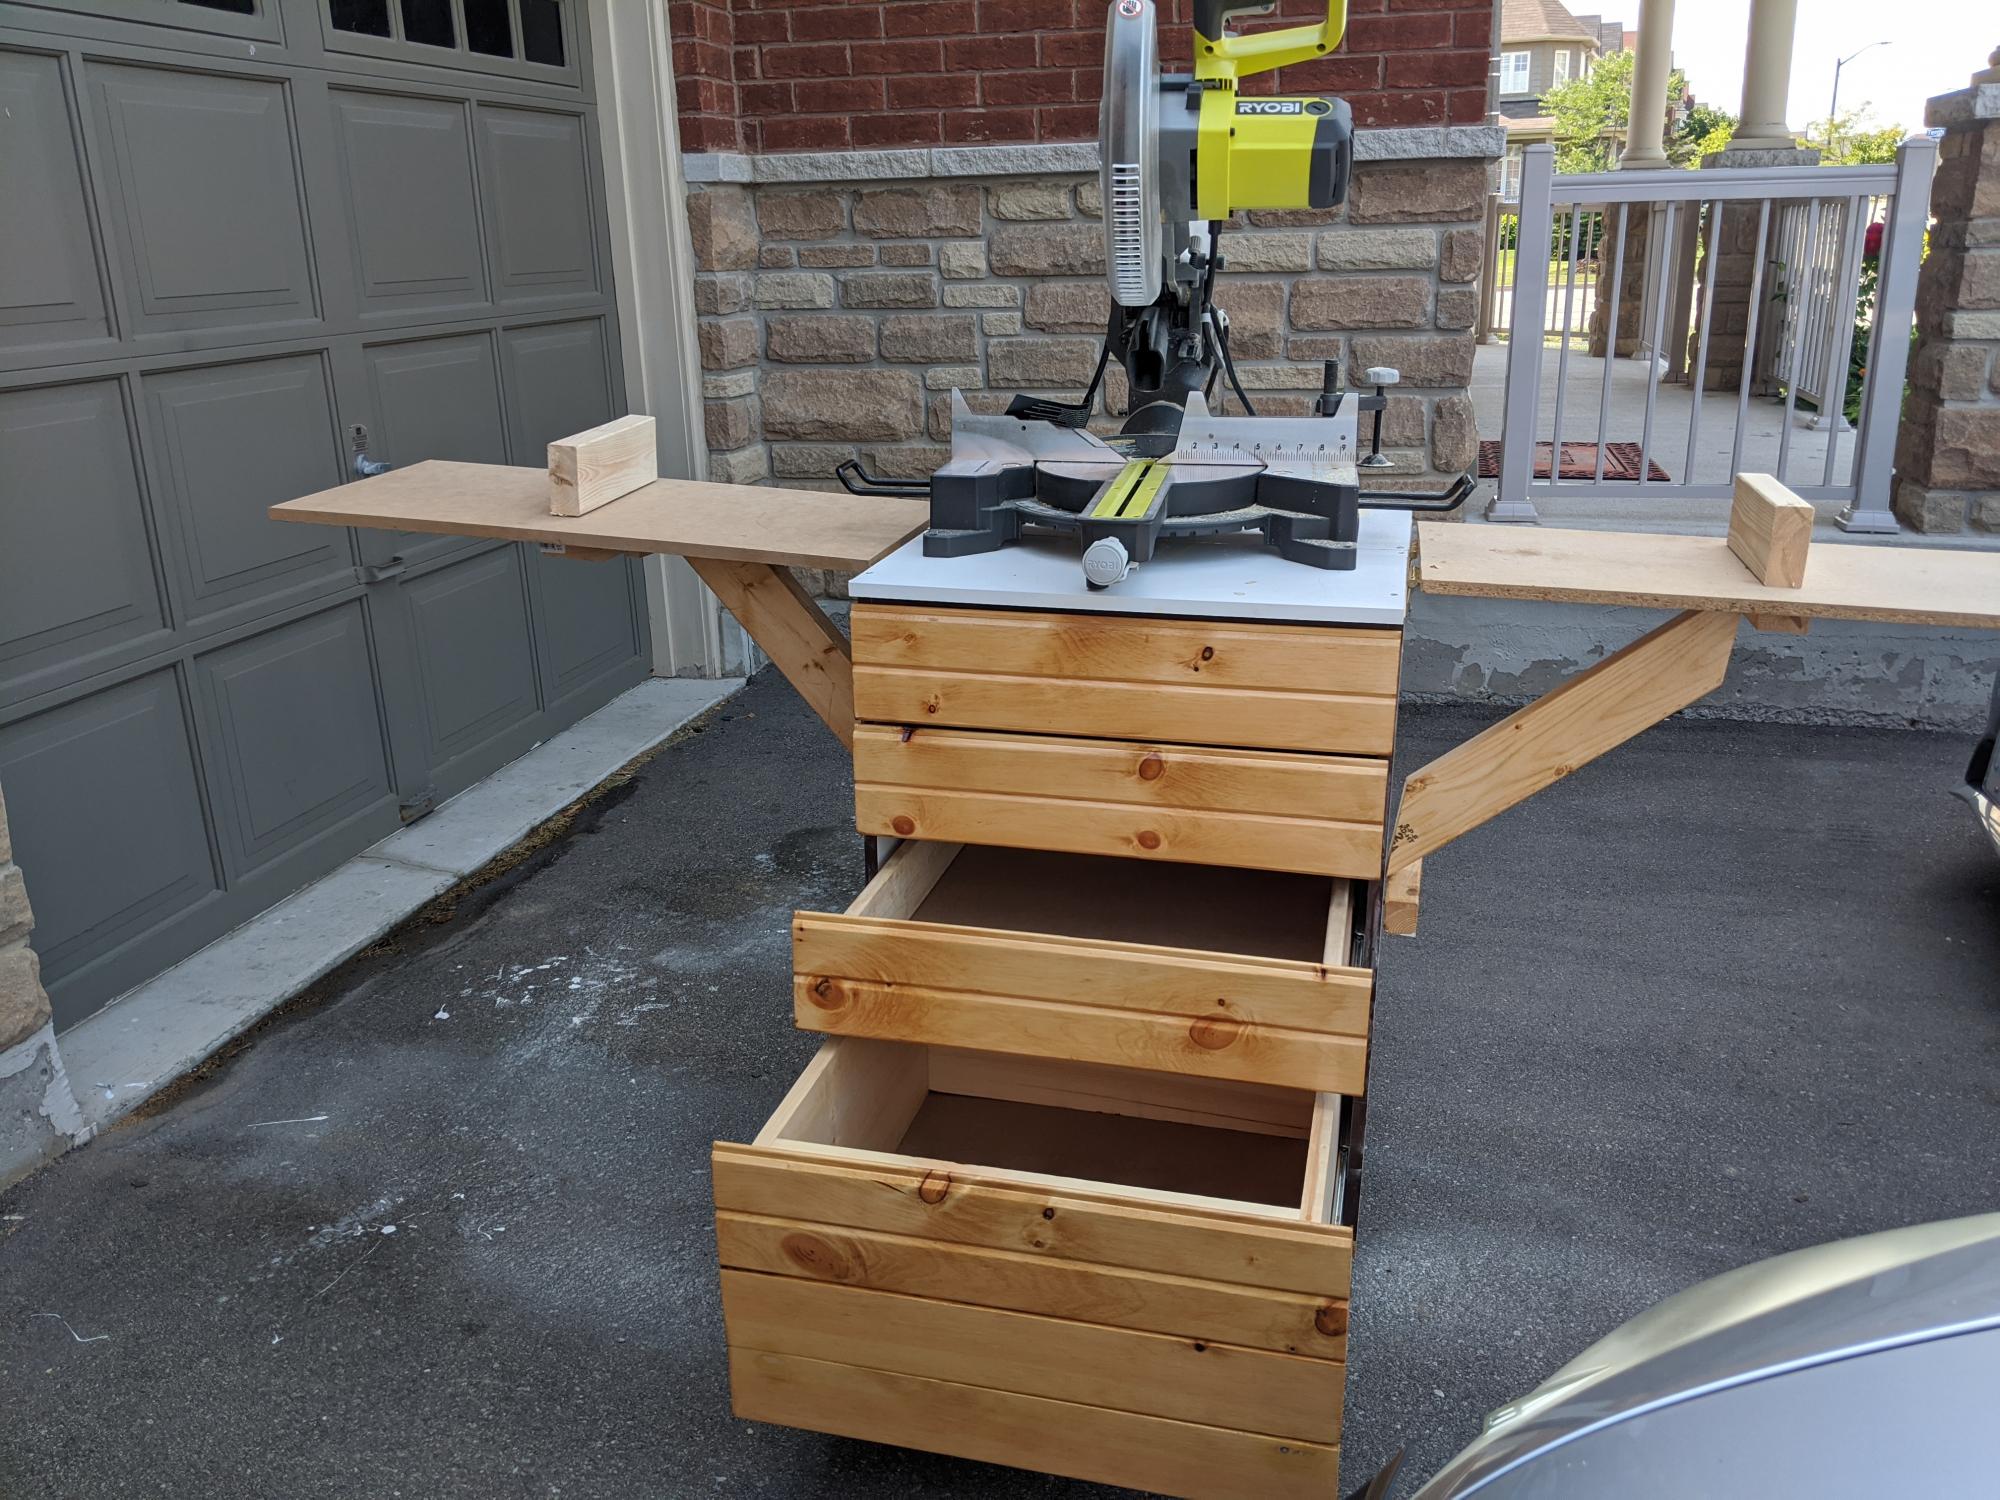
Miter saw cart with tools chest
Built from Plan(s)
Miter saw cart with tools chest
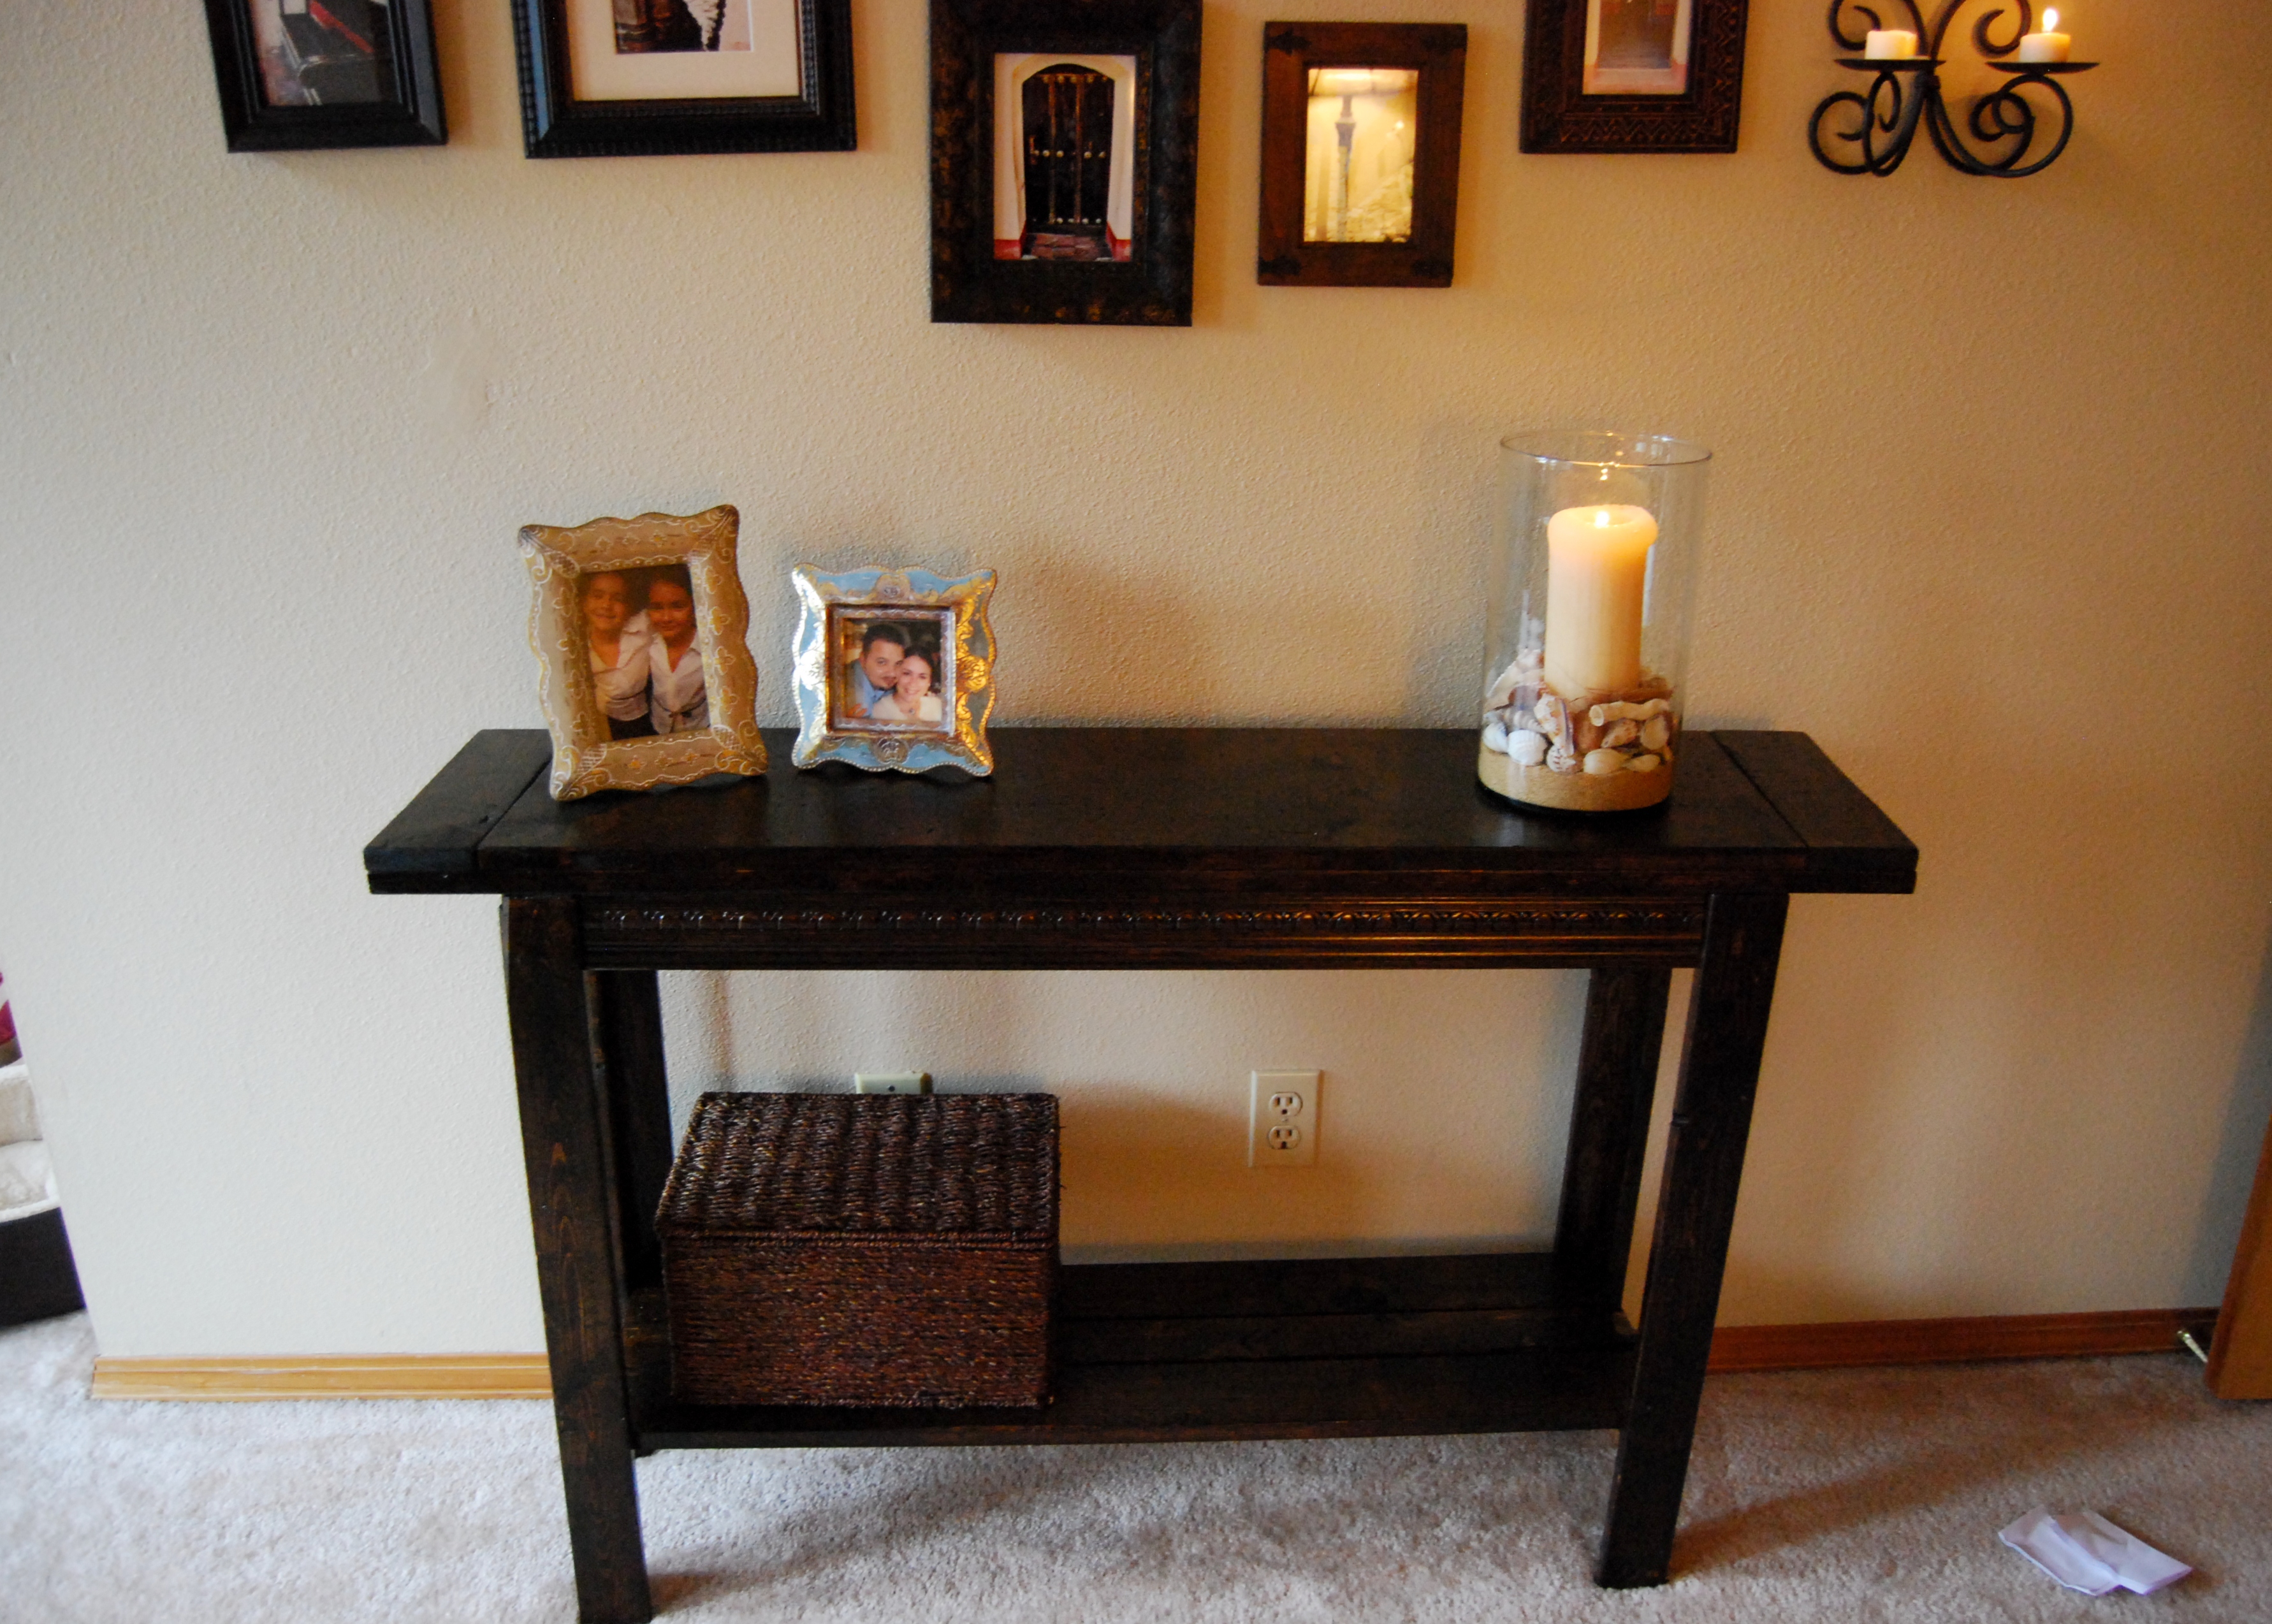
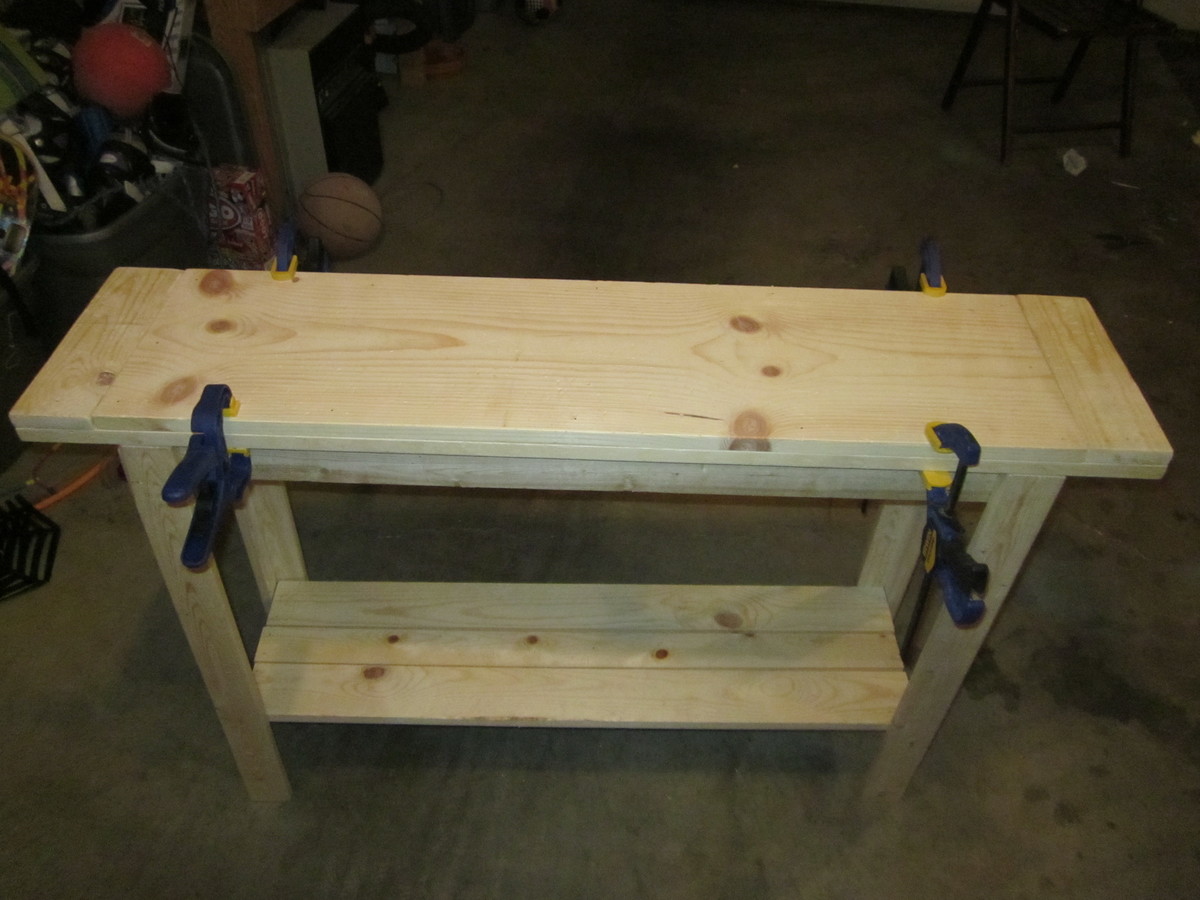
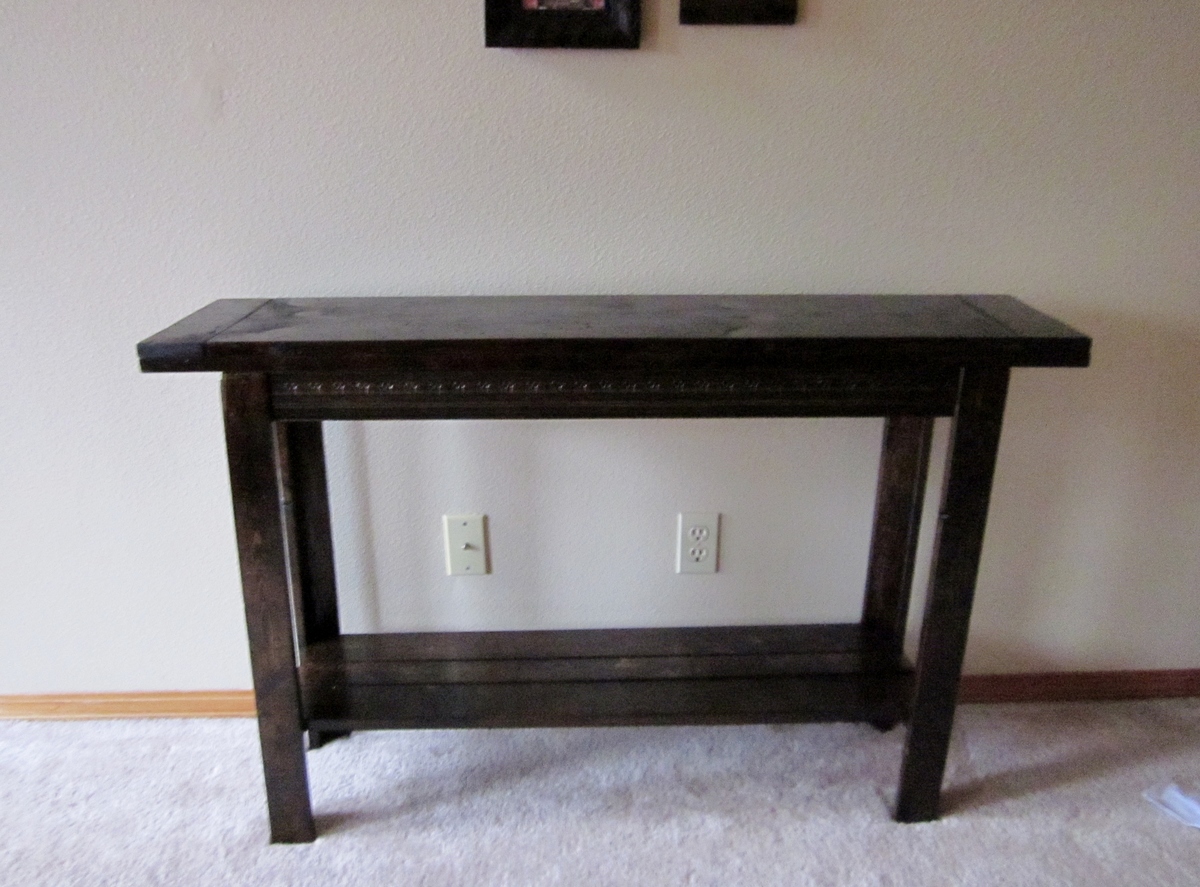
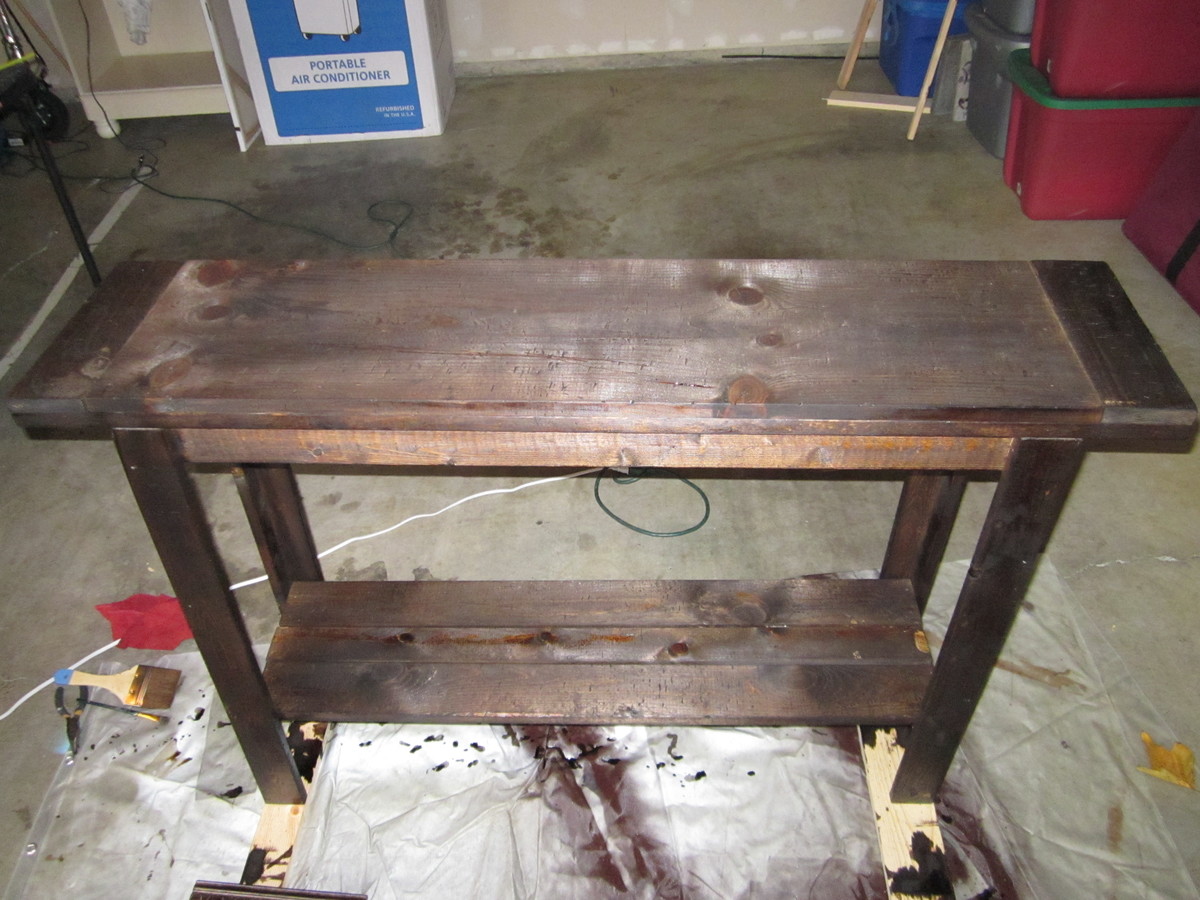
Here is my first woodworking project. I followed the plans (that were so user friendly) for the cheap and easy console table. I spent 40 in material only because I bought a 8 ft board of decorative molding for the aprons that cost 20 bucks. I used a circular saw (that was scary and fun) and I hand nailed everything. Ugh My hands are sore. I really am in love with Spanish Colonial furniture and really dont have 300-3000 dollars to spend on a piece.
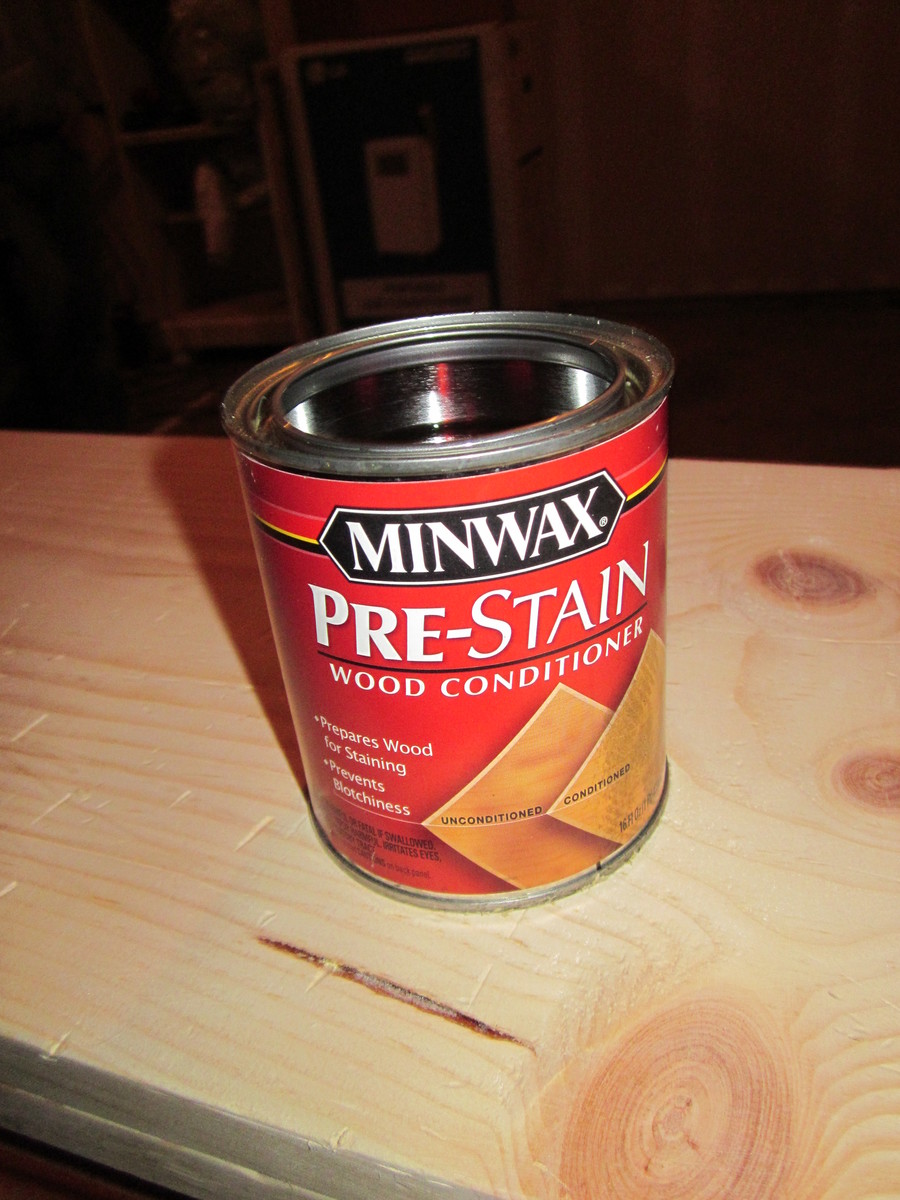
I beat the peices of wood with a metal chain and gouged it with the back side of a hammer. The kids had fun helping me with that! I also added more boards to the bottom shelf. Then used a wood conditioner. The stain i used is a dark walnut 2 coats and a satin poly on top.
This was the best web site for me!

Months ago while browsing online I stumbled across a cool coke bottle opener. I had no idea what I would do with it but I knew I had to have it! So after months of procrastination I finally decided it was time to use it.
I found a cheap esky at kmart and decided that I would be able to make an esky stand and use the coke bottle opener on it. So after a trip to Bunnings for some new timber I got to work. It only took about a week to get it done including staining it.

In reply to Love it by Drew N Heidi 07
Wed, 09/03/2014 - 08:00
Thank you so much. I had so much fun doing this build. Some builds can feel like they are dragging on a bit but this one was fun every step of the way.
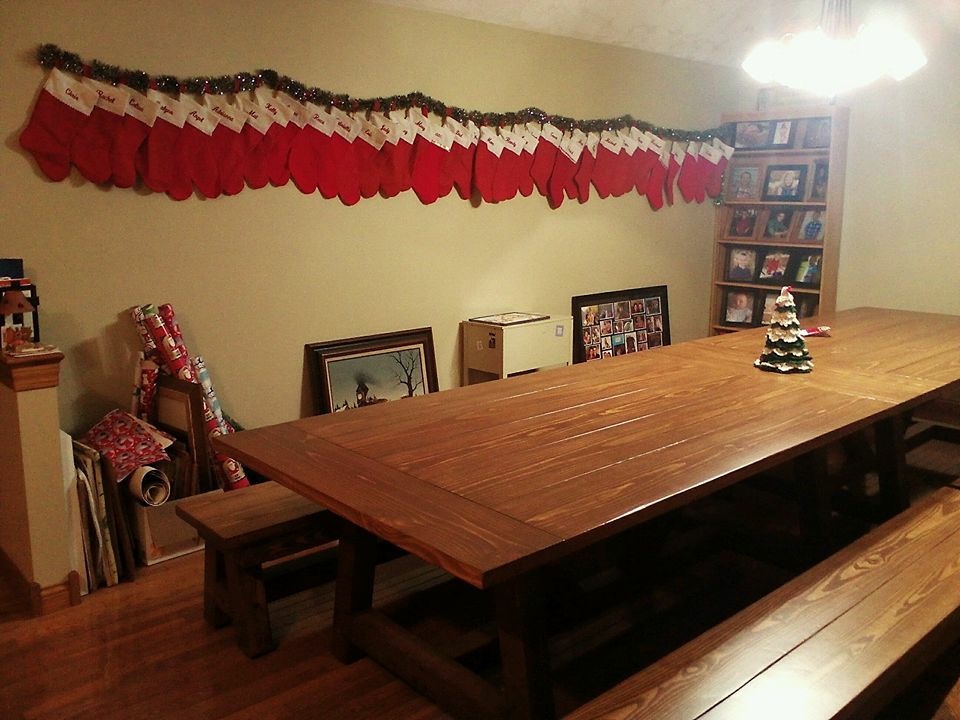
I am one of 11 children. My parents purchased a new home this summer that had a huge dining room. I new exactly what I wanted to do for them for Christmas. I collaborated with several of my brothers to build them the tables and benches. I used sketchup to modify the design and then to create a cutlist. My brothers and I worked on the project over several weeks as time permitted. The results are 2 tables that measure 14'4" long and 44 inches wide and benches to match. All the material was purchased at Menards.
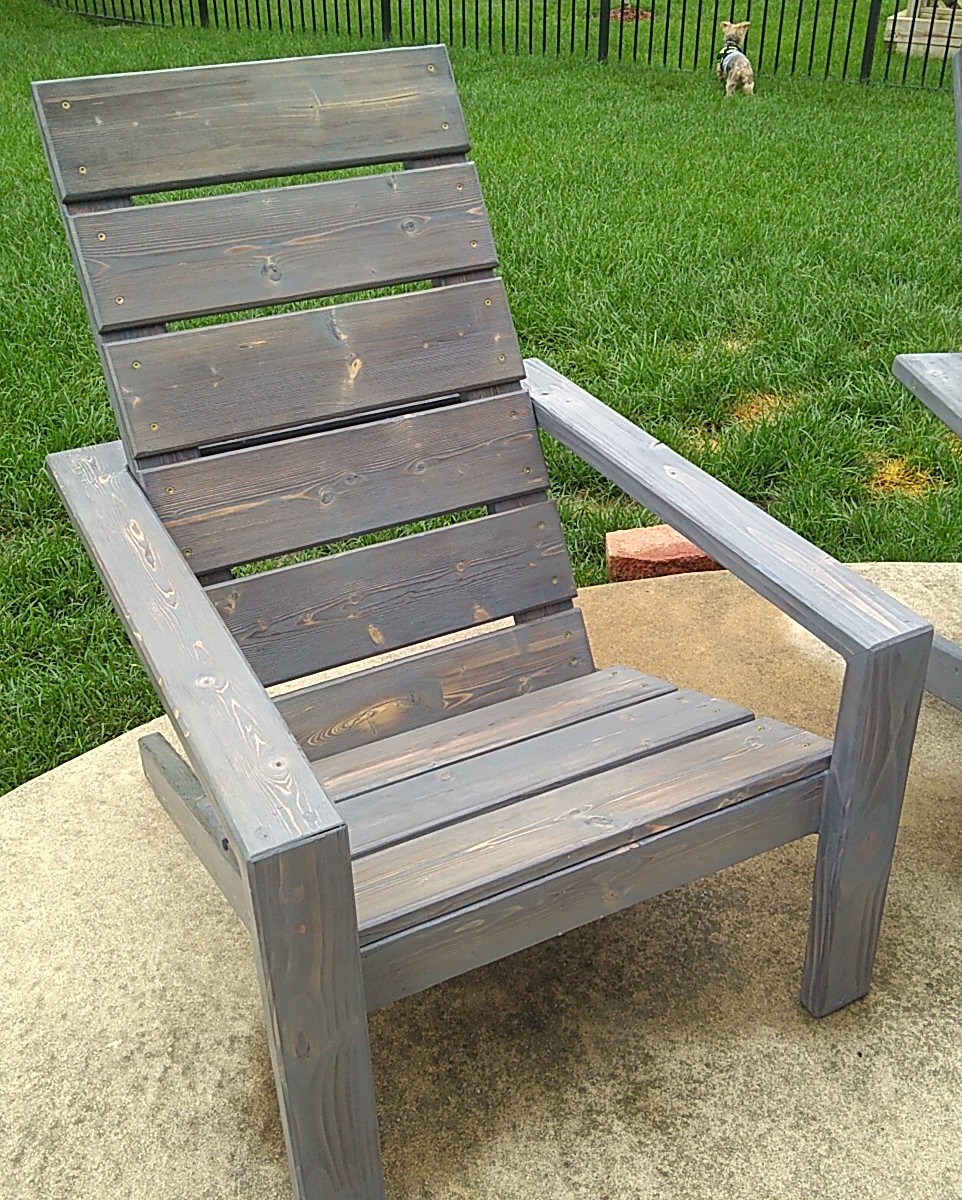
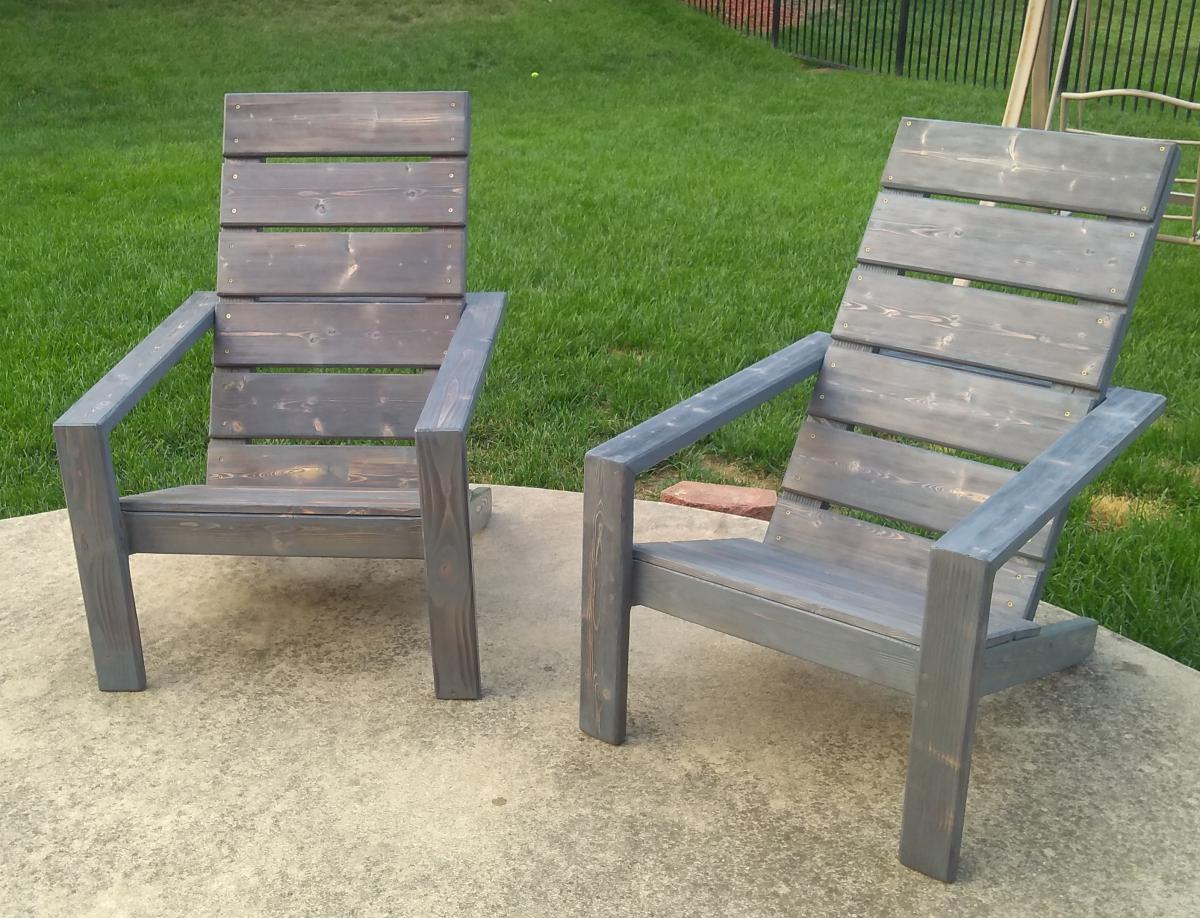
Chose 1x6 instead of the 1x10s in the plan and made the back supports a few inches taller to support my head laying back. 1st chair came out great however the second chair I made the seat wider just under 24in wide (had all the 1x10s precut to 24in at home Depot to easily transport them home.) My knees feel less cramped when sitting down in the wider chair.
Since I used warped scrap wood I had laying around I milled the 2x4s with jointer and planer. Way too much work honestly.
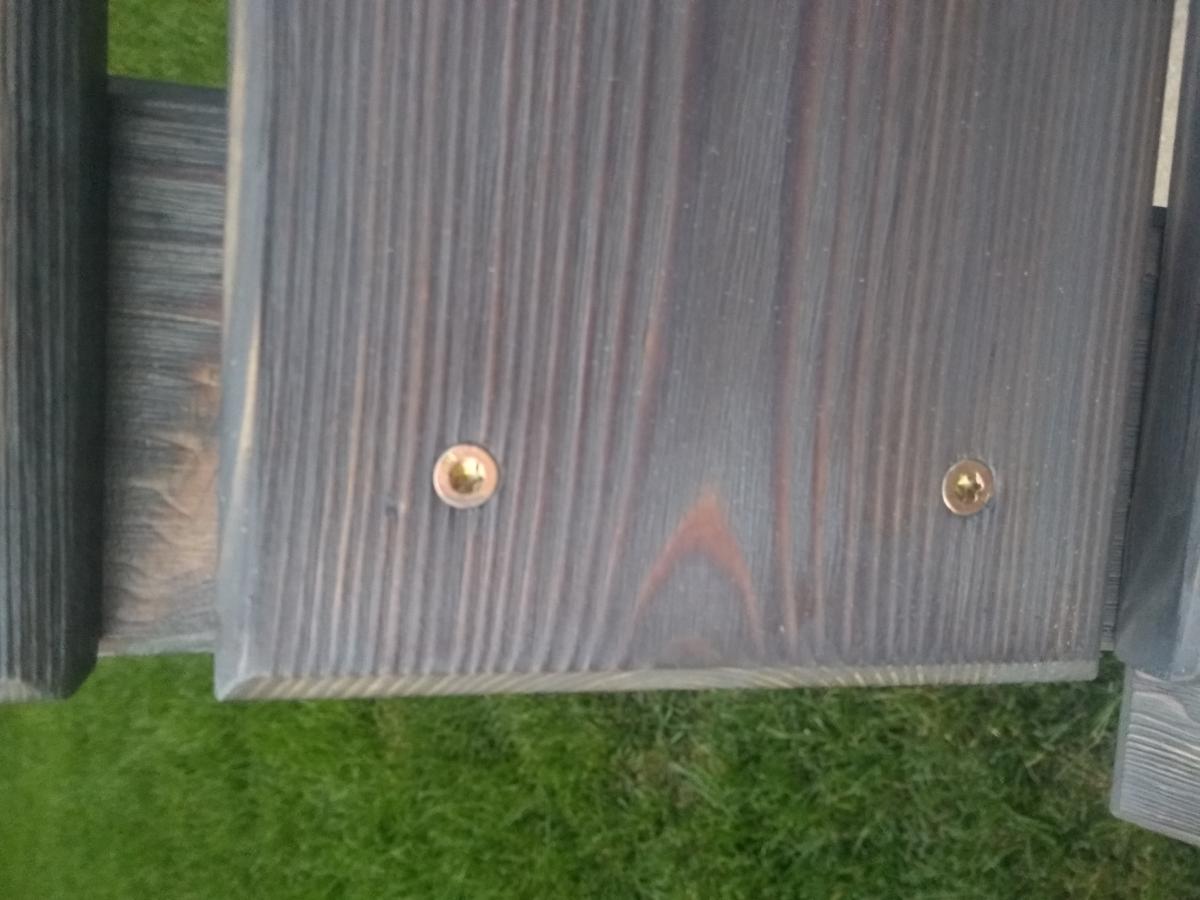
Glued and assembled the frame with dowels, Routed a 45° bevel on all edges then finished and sealed all faces before assembly. I used untreated lumber so I sealed all faces before assembling to give it a better chance of surviving on my uncovered patio. I also used a thick epoxy on the feet base that touch the ground to prevent rot.
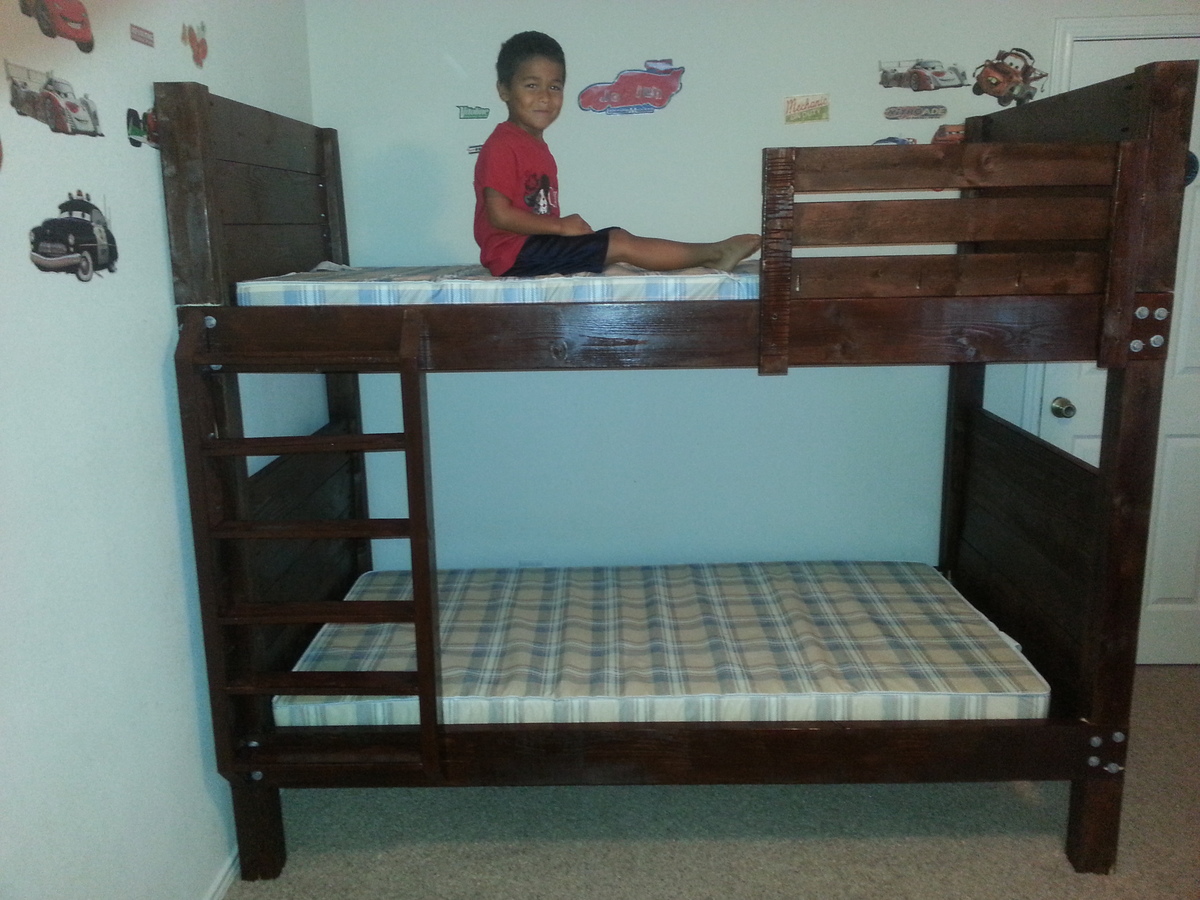
I built the loft bed and bookshelf for underneath.
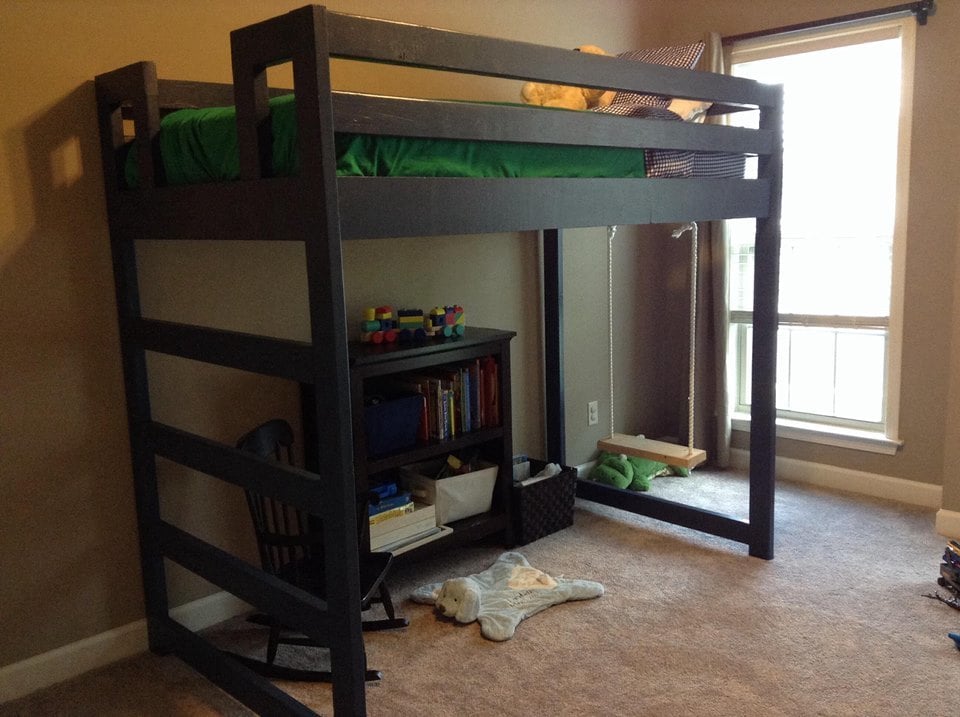
My little boy asked for a "big boy bed with a ladder", and we wanted to make good use of space in his room, so I built this loft bed. I continued the 2x4's down one side instead of adding stairs, and raised the height of the bed a bit. I added space in the middle of the ladder section for him to have room to climb in safely. I also added a rope swing on the bottom, where he now spends much of his days looking out his window.
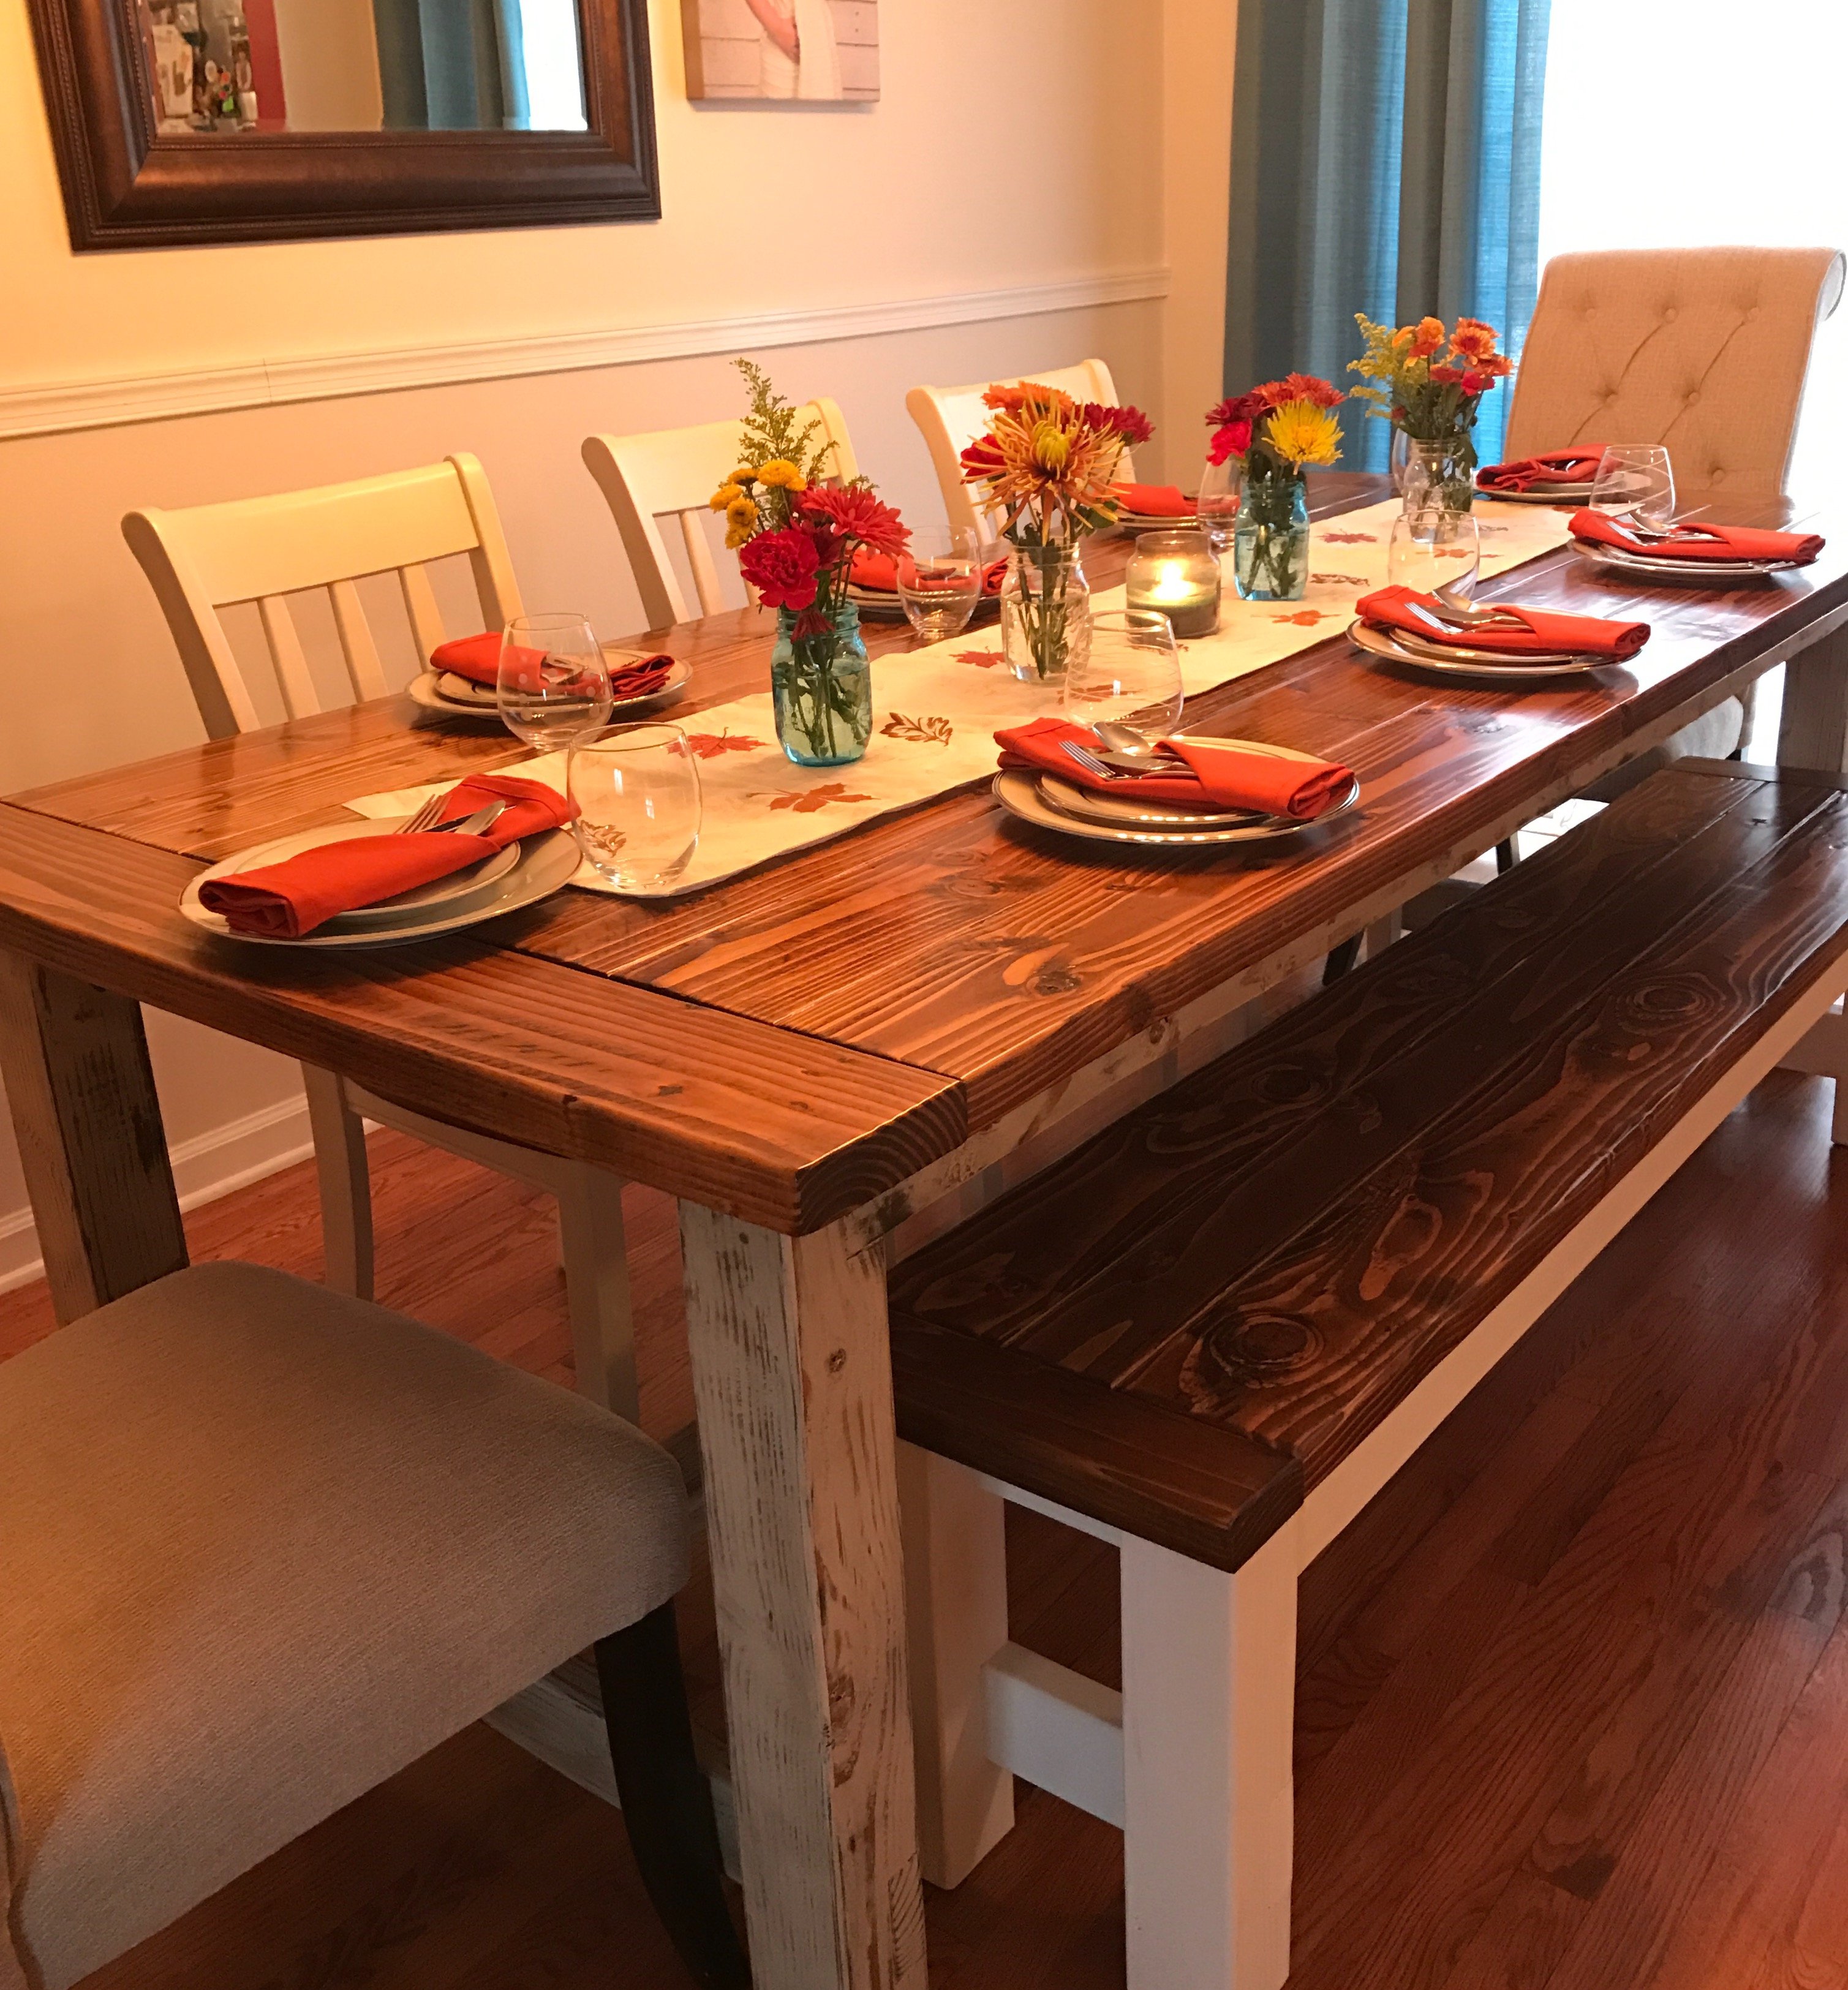
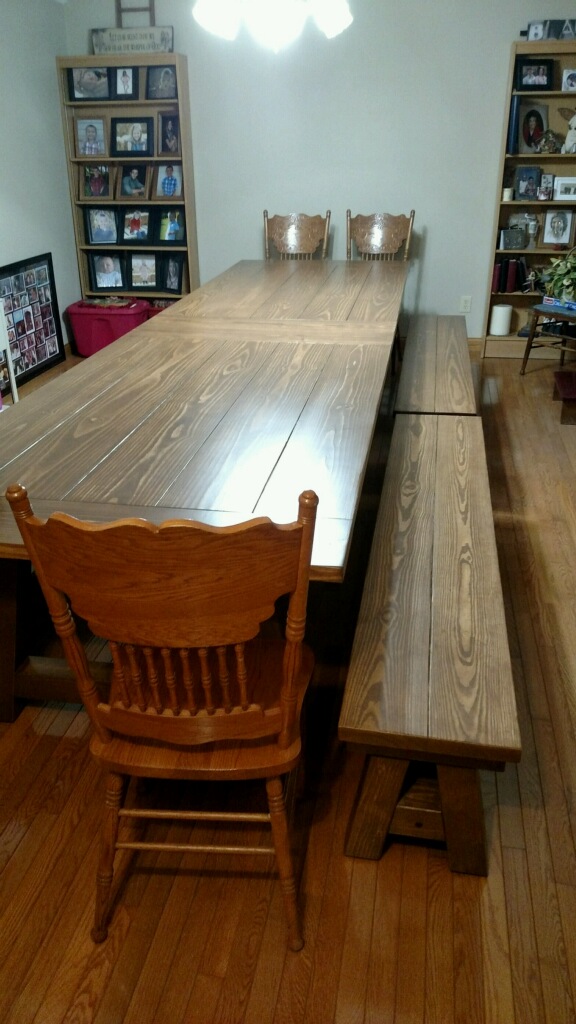
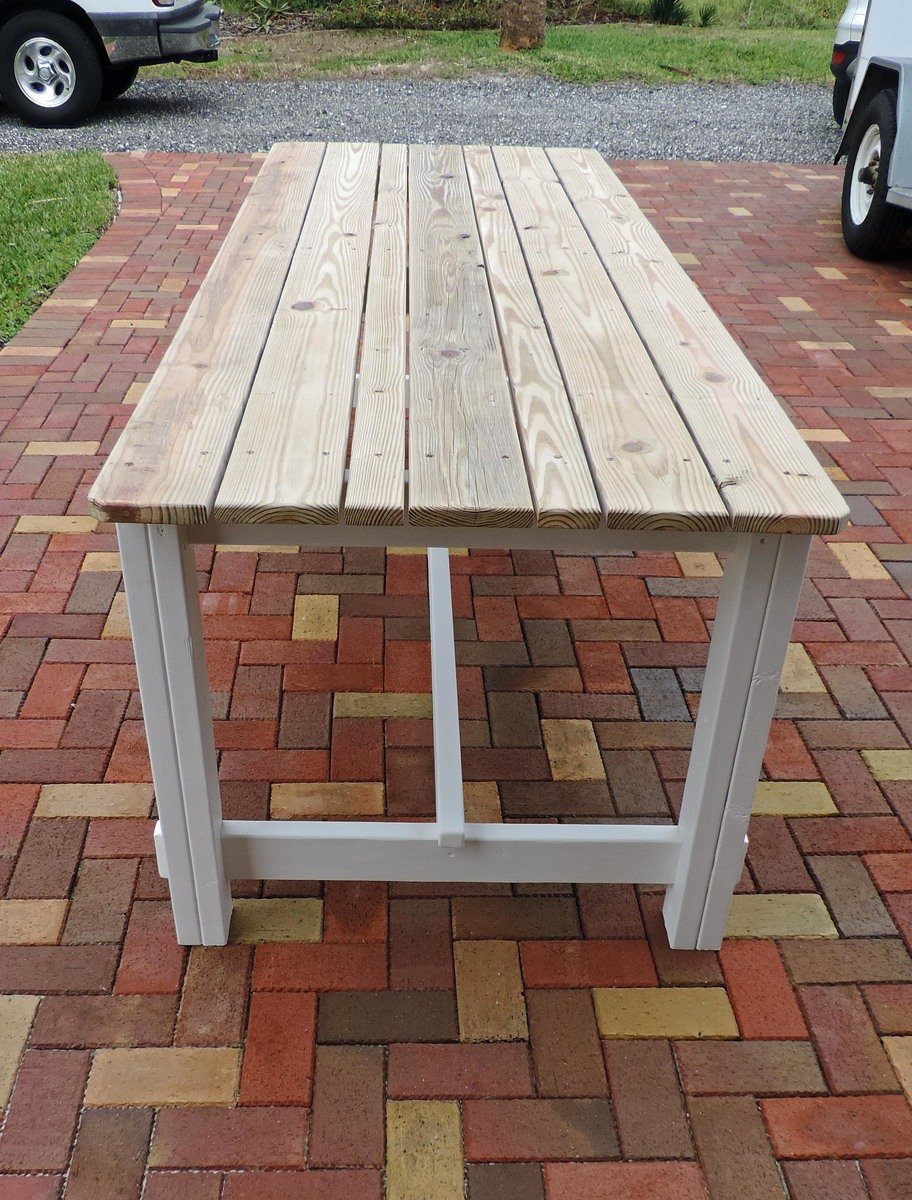
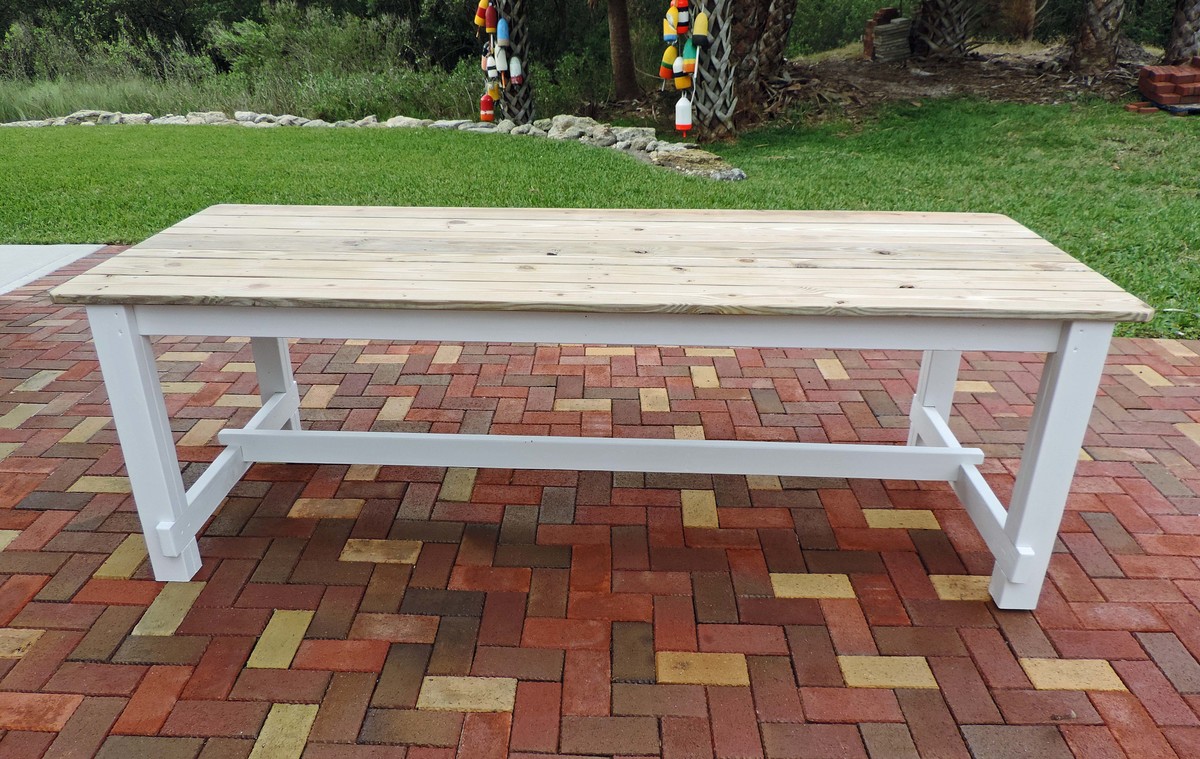
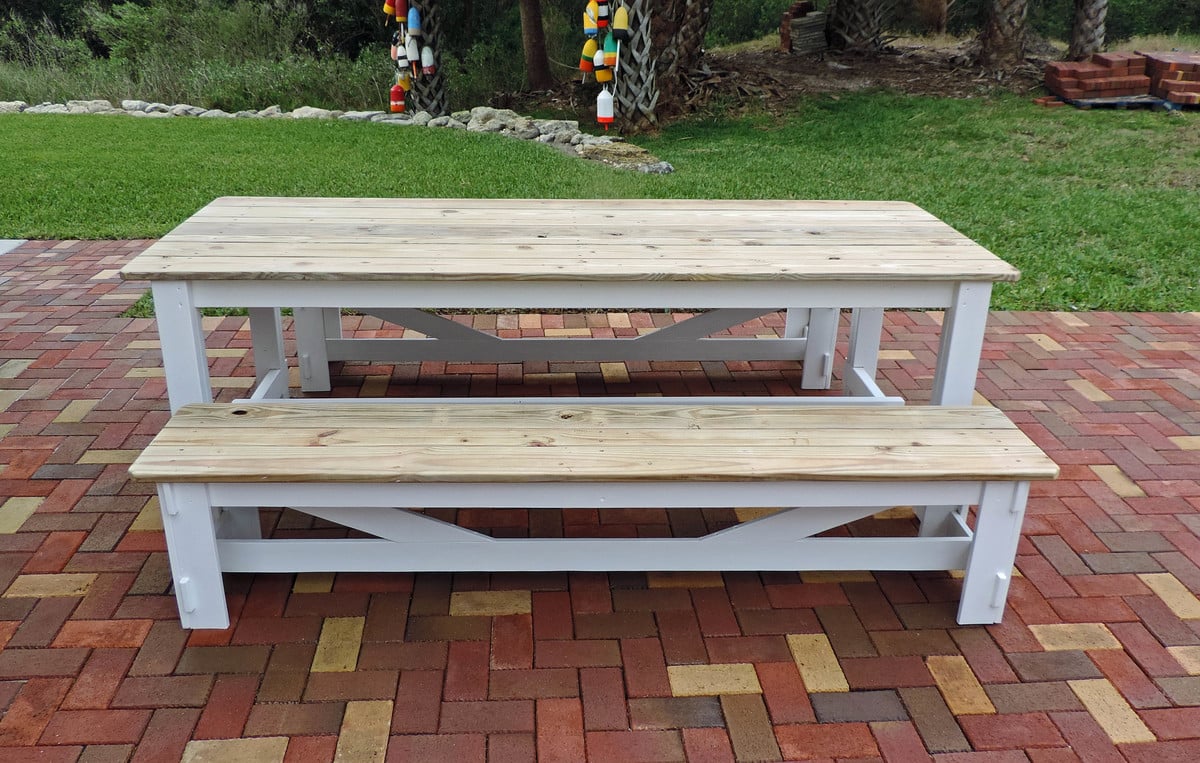
Awesome plans for the farmhouse table. Very easy to follow and the pictures were very helpful. It took longer due to my schedule but the top took about four day to poly. The bench is also from Ana White.
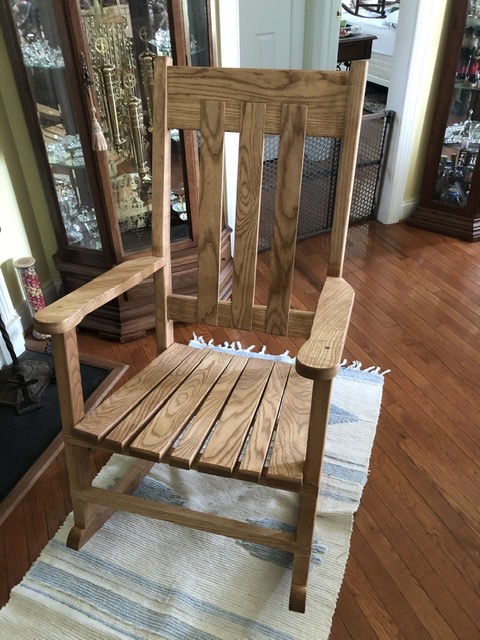
Getting ready for retirement, so I thought I needed a rocking chair.
No plans, just built what looked and felt right.
Thu, 03/18/2021 - 01:27
Lovely chair. Nice proportions. Would like to copy it. Have you got any plans, sketches, or dimensions to share?
Fri, 02/10/2023 - 13:10
Love this rocking chair! Do you have any dimensions or plans. I would live to take this project on. Thank you.
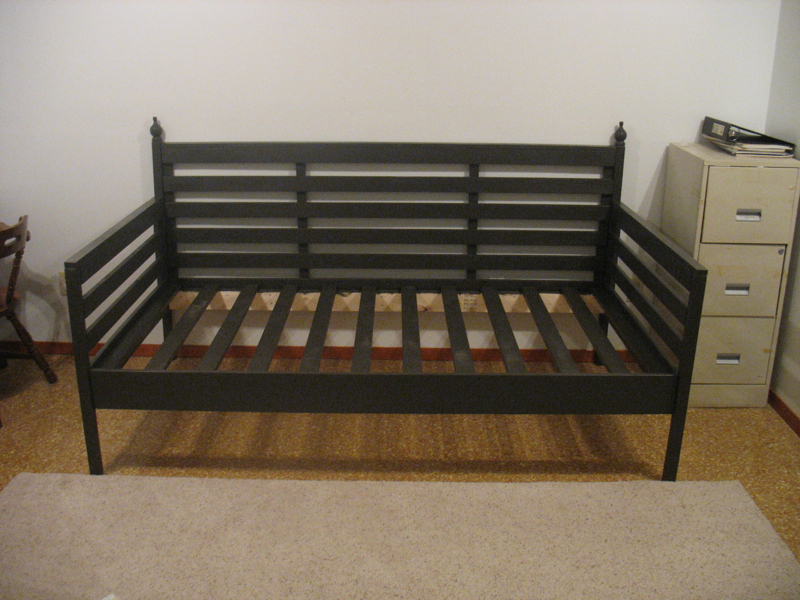
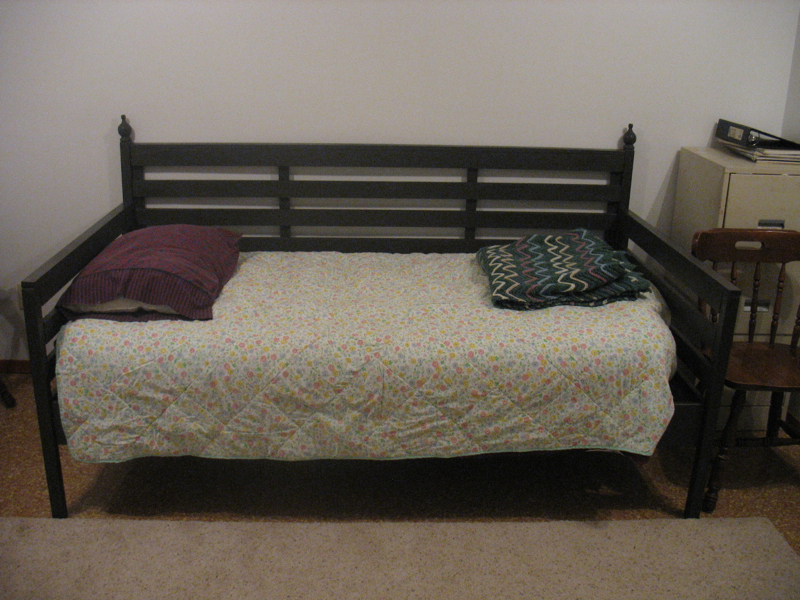
I chose to modify the outdoor daybed with canopy for my finished basement, to replace a secondhand sleeper sofa.
The only power tool I used was a drill, including screwdriver bit -- with hand tools it took longer, but wasn't impossible.
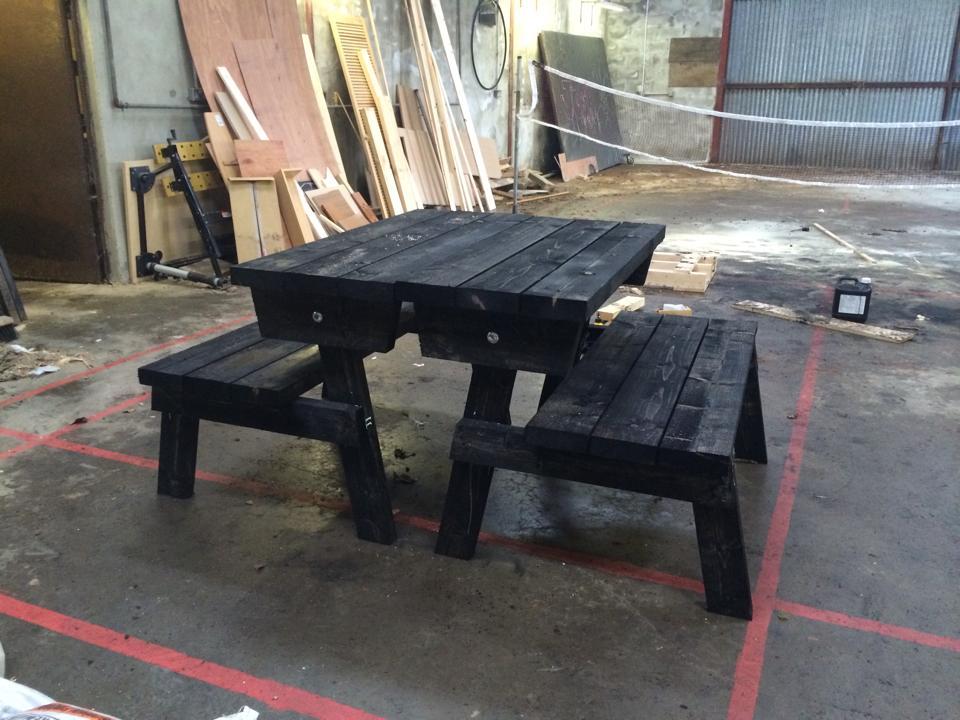
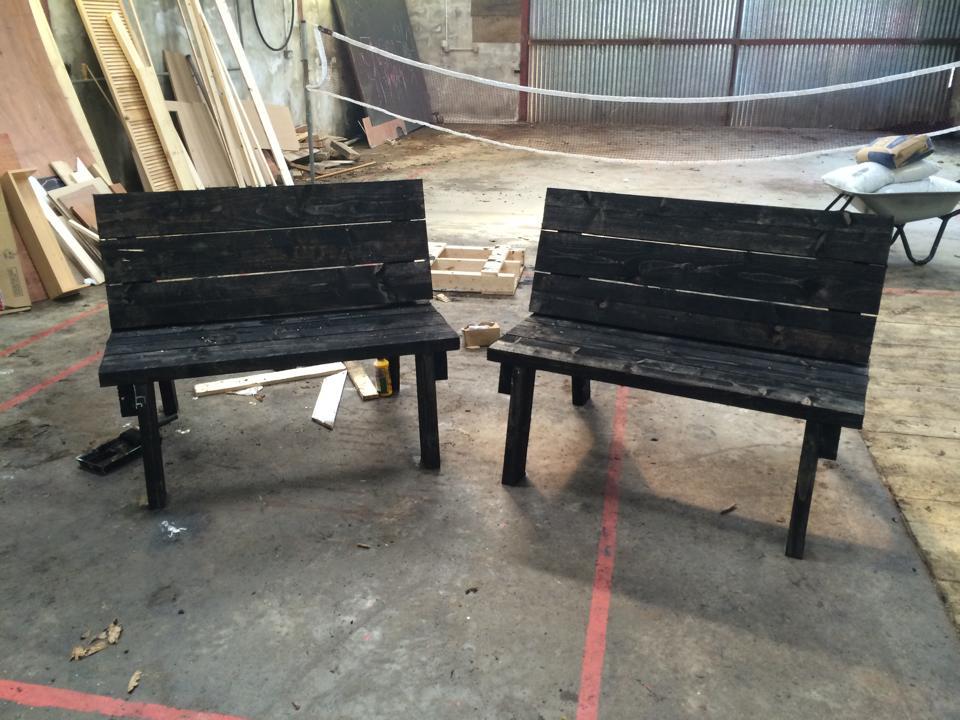
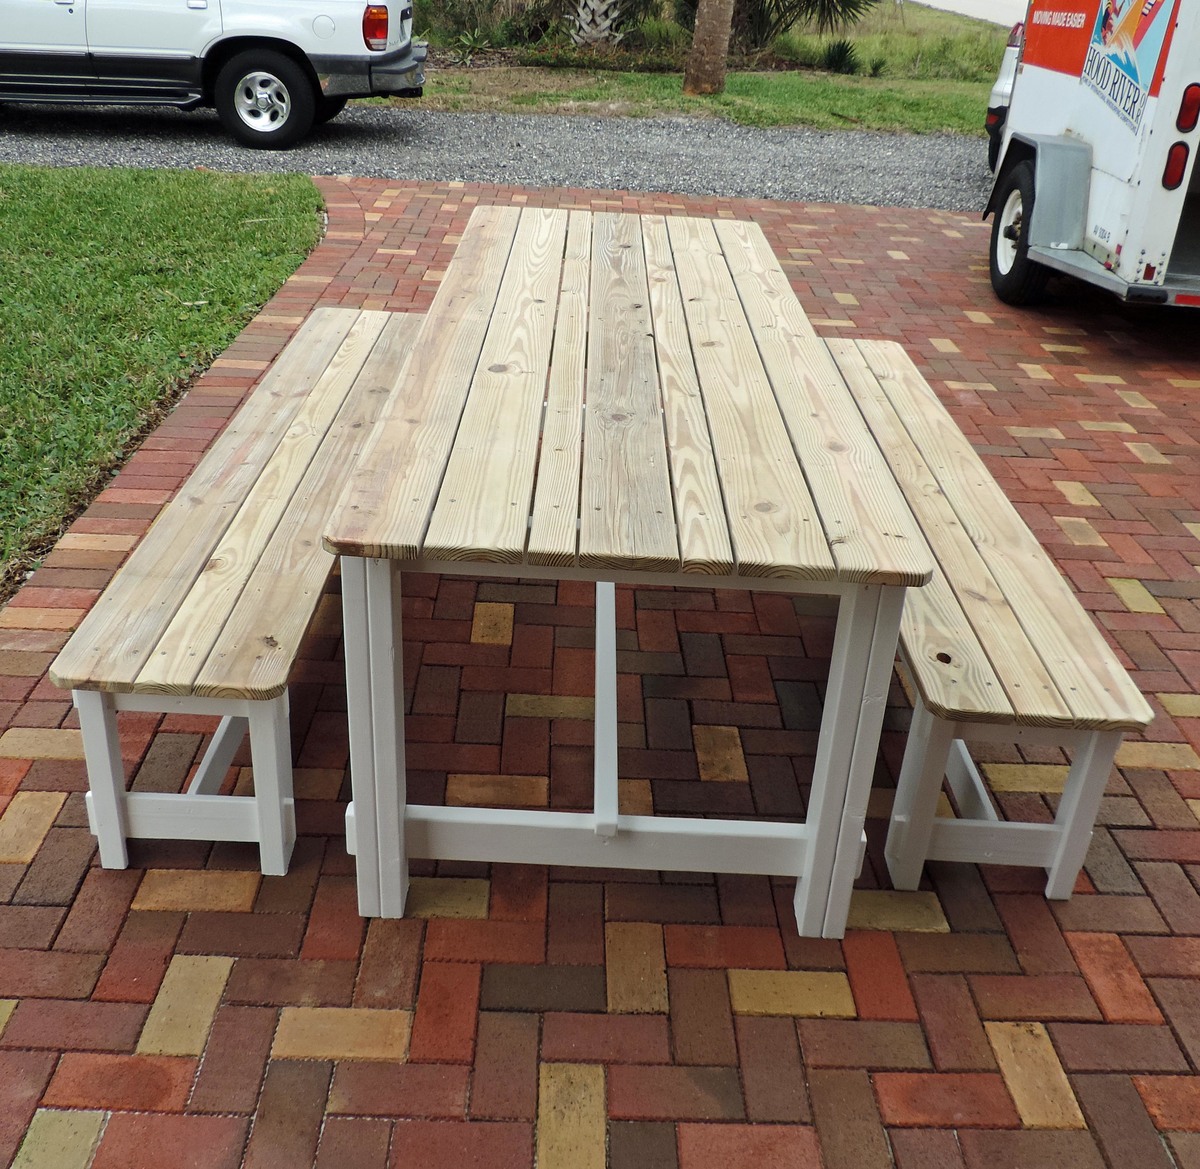
Picnic Table that Converts to Benches
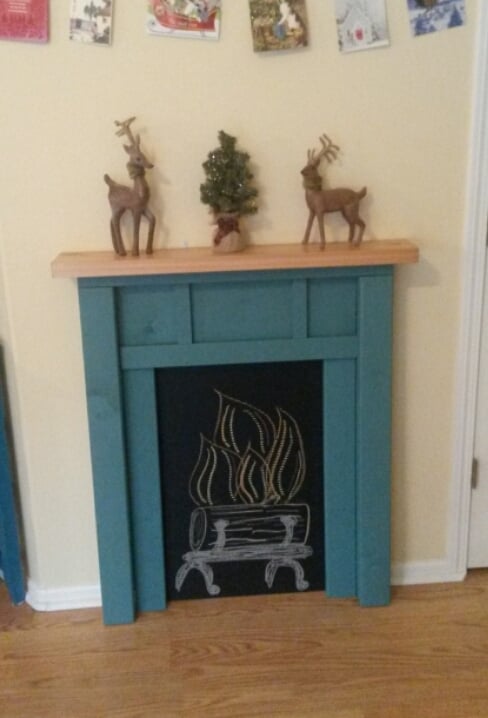
After living in a house with a fireplace for 7 years, we recently moved to a house without one. When unpacking the Christmas box, our boys asked where we would hang our stockings this year and that got me thinking about how much I'd like a mantle for the holidays. After searching online, I found Ana's plan (of course she has one!) and scaled it down to fit the one small open wall in our living room. I didn't trust myself to cut an even arch, so I used an idea from another brag post and added architectural elements with leftover 1x2 & 1x3 to a 1x10 (which was a better size for our scaled down version) Lastly, I knew I wanted a chalkboard backing, but having no scrap plywood, I covered a large piece of cardboard with chalkboard contact paper and tacked it on the back before installing. Super happy with how it turned out and look forward to using it for many years to come!
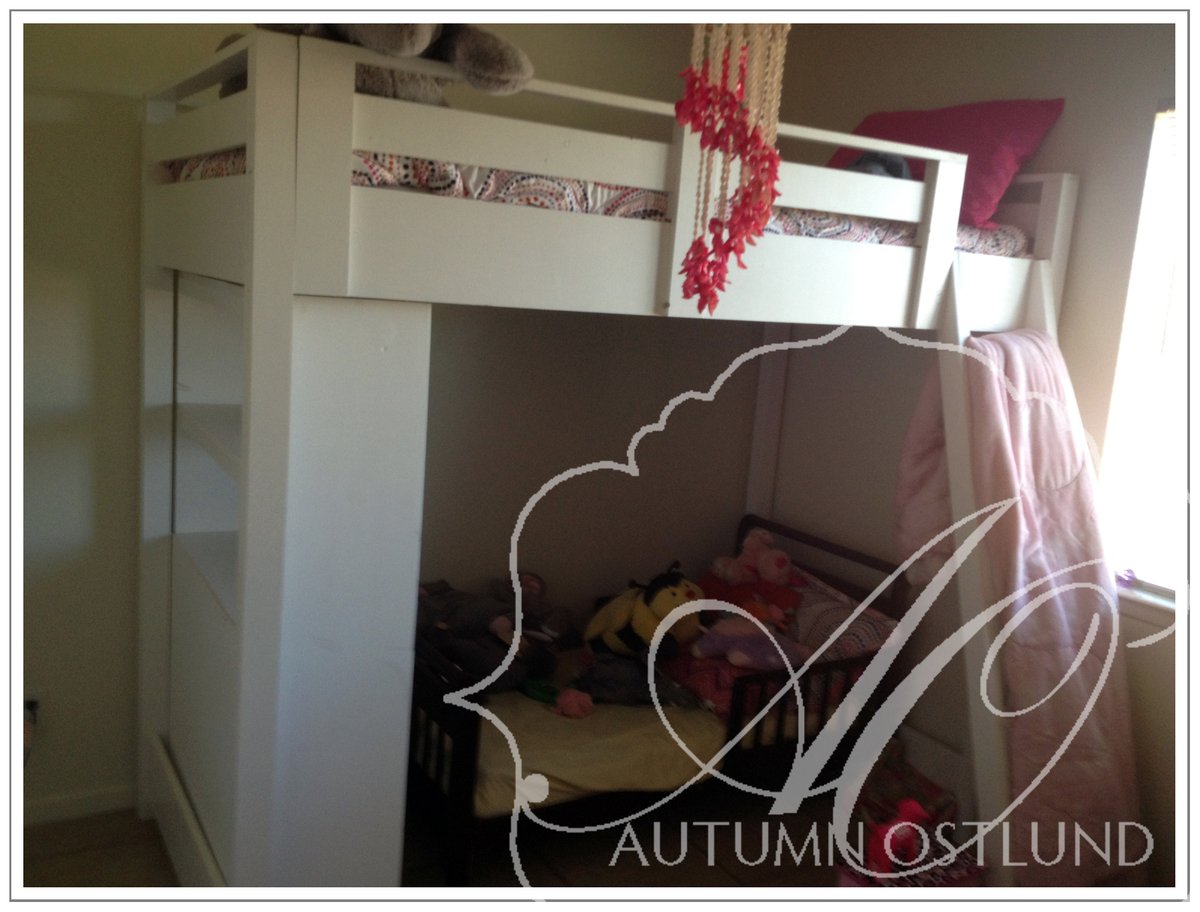
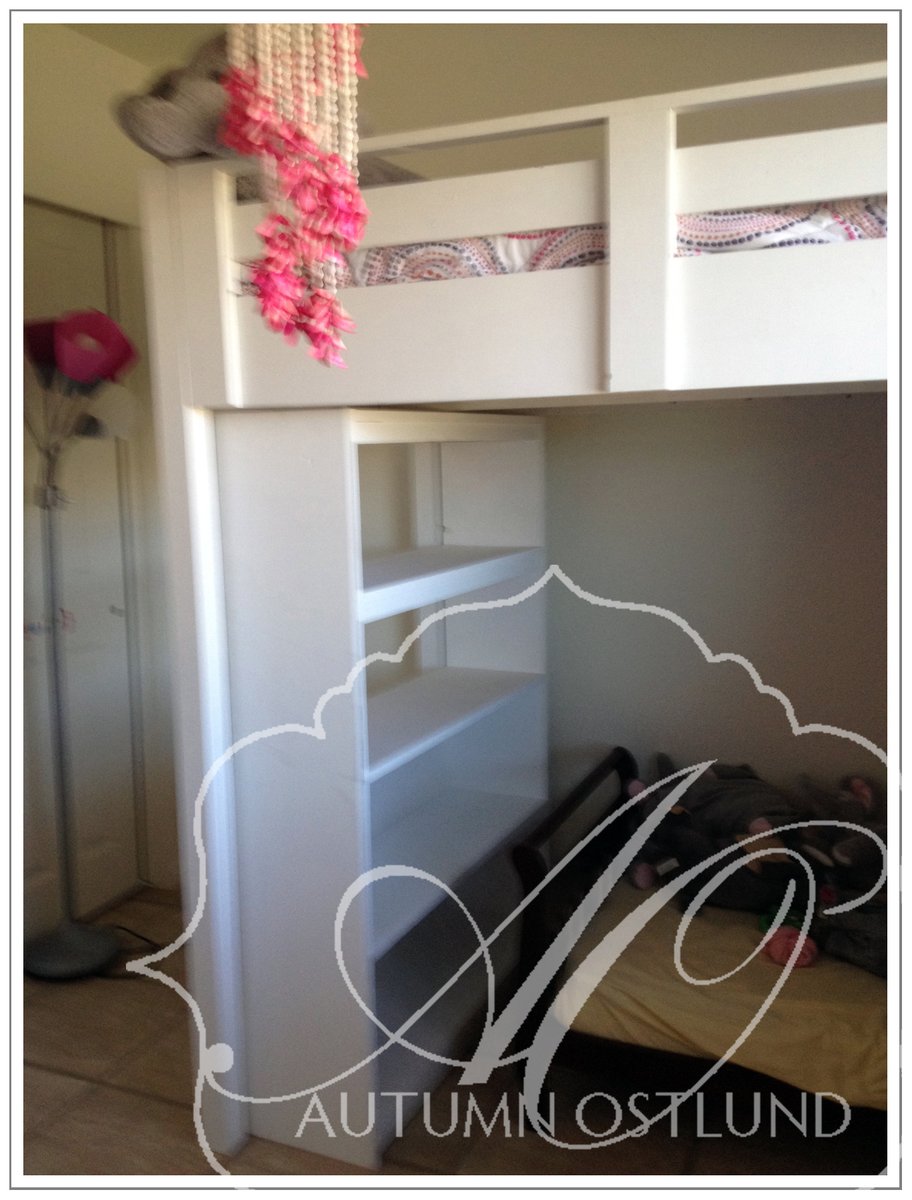
This was a build for a client's daughter's new bedroom. The clients added lights to the head board but I could not post the pic. I also built a cute bedside table mostly out of remnants of the bed to match.

When I couldn't find the exact right size wood that I needed, I grabbed a piece of bamboo from my wood pile. When I ripped it in 2 pieces, there was this cool edge that resembled inlaid wood. I avoided staining it because it would have "muddied" the edge. I applied a transparent glaze on it, which kept the edge look intact. I had never worked with bamboo before -- I love it, as it required little sanding and took the finish beautifully.


I made some slight udjustments on the ladder and rail. Other than that i folllowed the plans and flew through this project. My mother in laws boys love it.
Modified the plan to be suitable for outdoor use. Built for a daughter who did not want the look of a traditional picnic table. Use the X bench plans on this site for the benches. Top is recycle 5/4 decking lumber.
Modified from plan listed. Width is only 36 inches. Height in picture is 30 inches but I cut down before delivery to 25 inches. 25 inches is a better fit for elementary school kids. Top is 1/2 inch birch plywood.
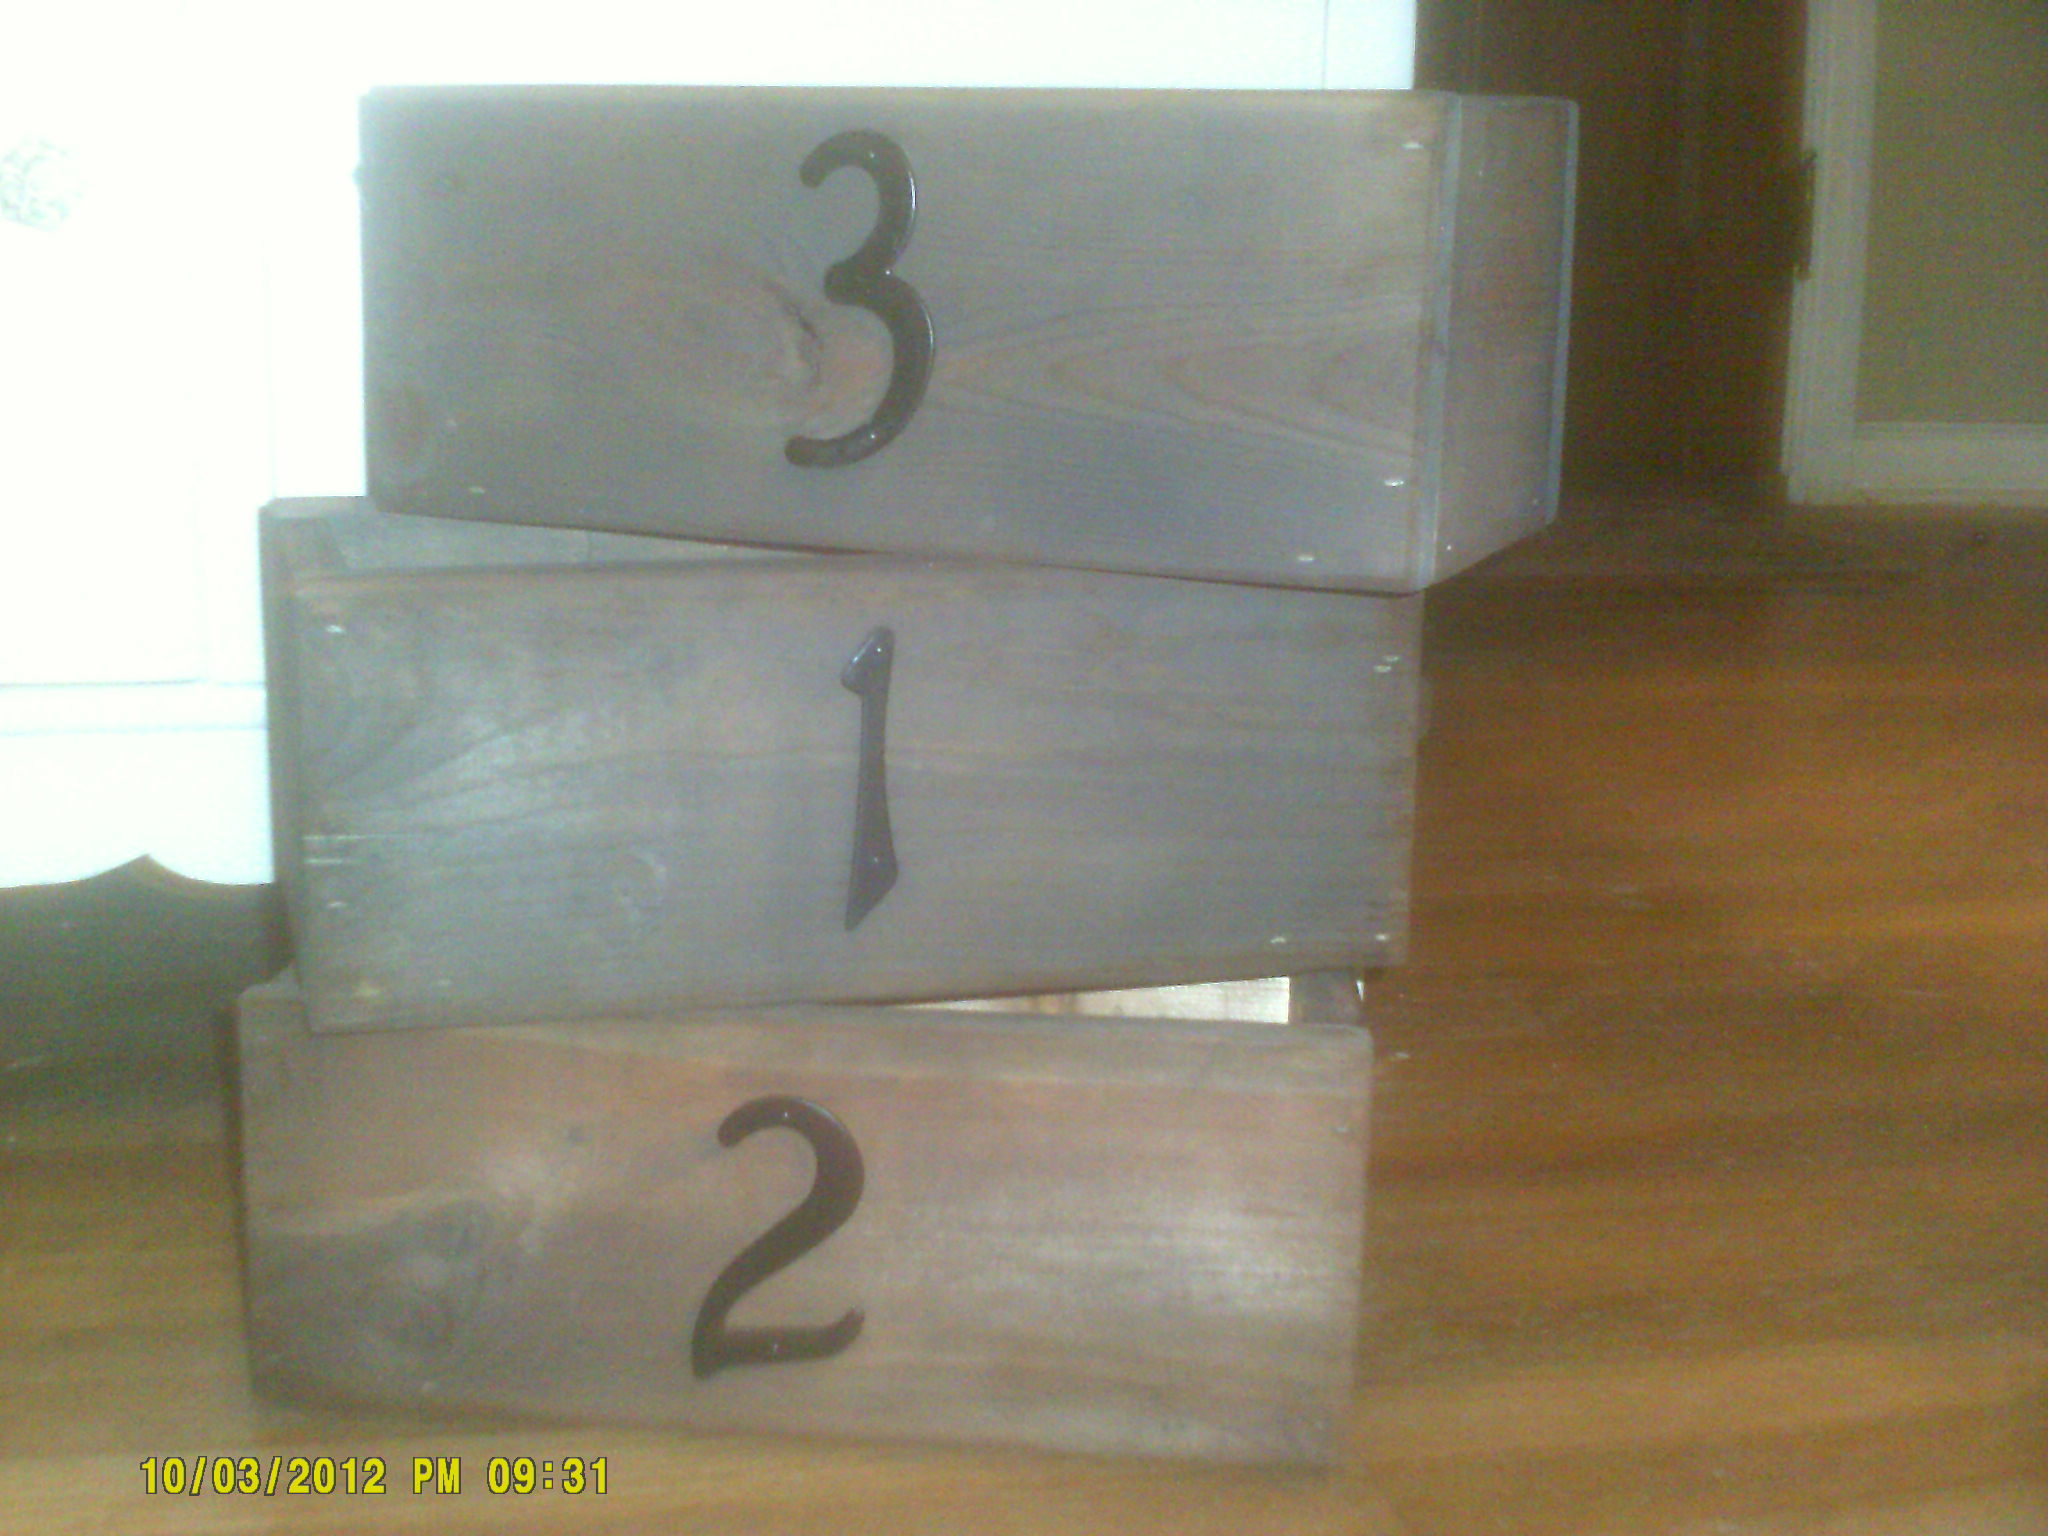
This is the first project my husband let me use the chop saw on.* I used some old 1x6's (3/4 in x 1 1/2 in) leftover from a chicken coop he built that had been on the floor and already had some nail holes in them - I figured that was was pretty close to pallet wood. He turned this from a beginner project into an intermediate because he made me measure and cut each side and end to custom fit the bottom of the box as as all my "pallet wood" boards were warped (does that make sense?) So make your life easier and use new boards! With his help it took about 25 minutes per box to cut and assemble. Putting a finish on was a little tricky because the wood just wasn't okay with some leftover iron acetate I had, so I just used Ana's black tea trick and they turned out perfect in about five minutes. My husband says this is an excellent first project for a beginner because a lot of furniture you build is simply A BOX, just bigger. We also built the laundry basket dressers the next day because I'd learned the concept of building a box! and I am having a great time learning to build. Really wish I'd taken wood shop in high school. Good thing my husband did.
* We built the laundry basket dressers and I dutifully assisted in the building of the Rustic X console table and I am so excited to post pictures, I just need to get some better ones!
Took about five hours to make and $25, looks very nice and have been asked to make more by others who have seen it.
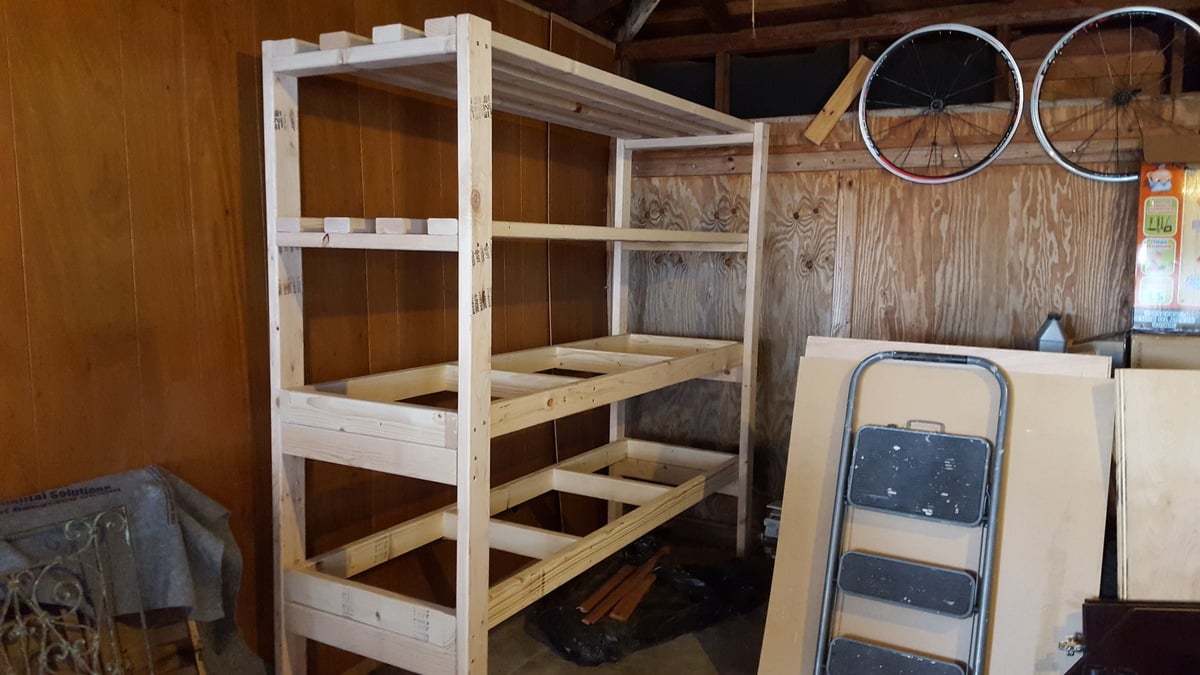
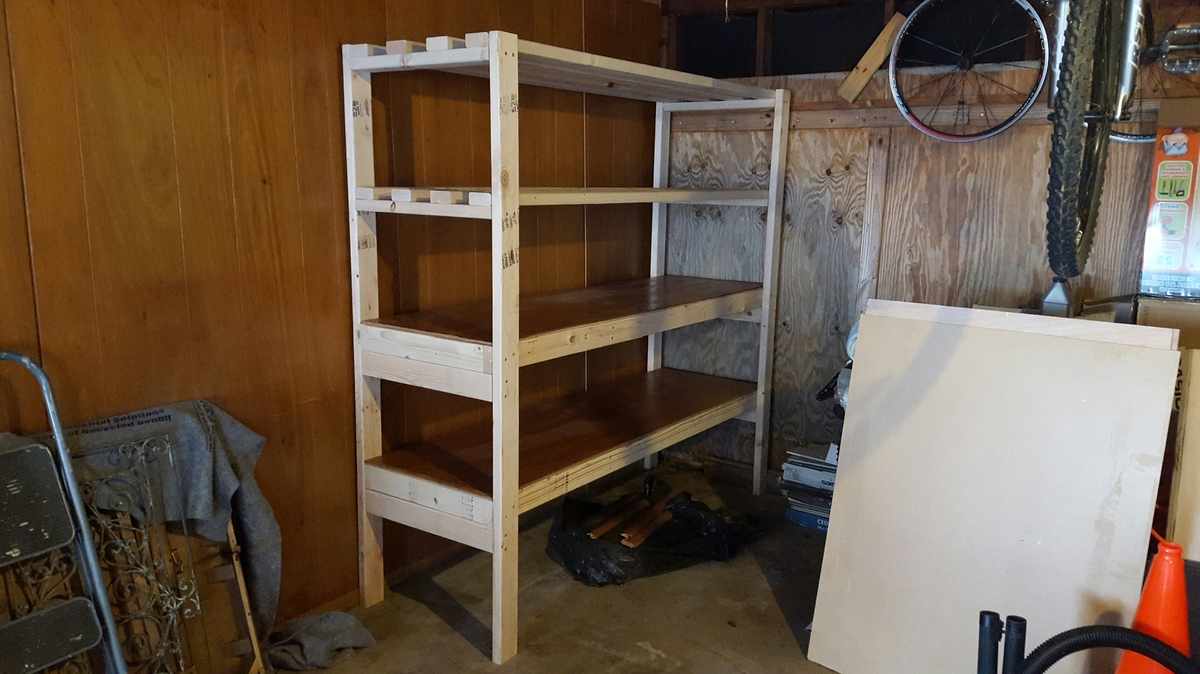
Slightly modified bottom shelves to be heavy duty. Used salvaged 60yr old mahogany paneling for shelves surface.
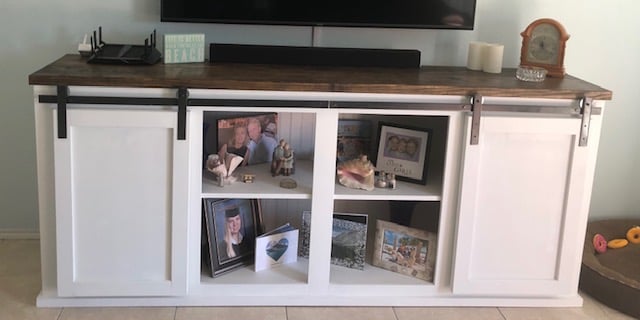
It was fun to build this and i took my time over several weekends. Not being in a hurry probably helped me figure stuff out before actually doing things. I will probably remake the door as these are thick and probably to heavy. We will probably end up doing something decorative with the doors once we decide if we are making new ones or not.
