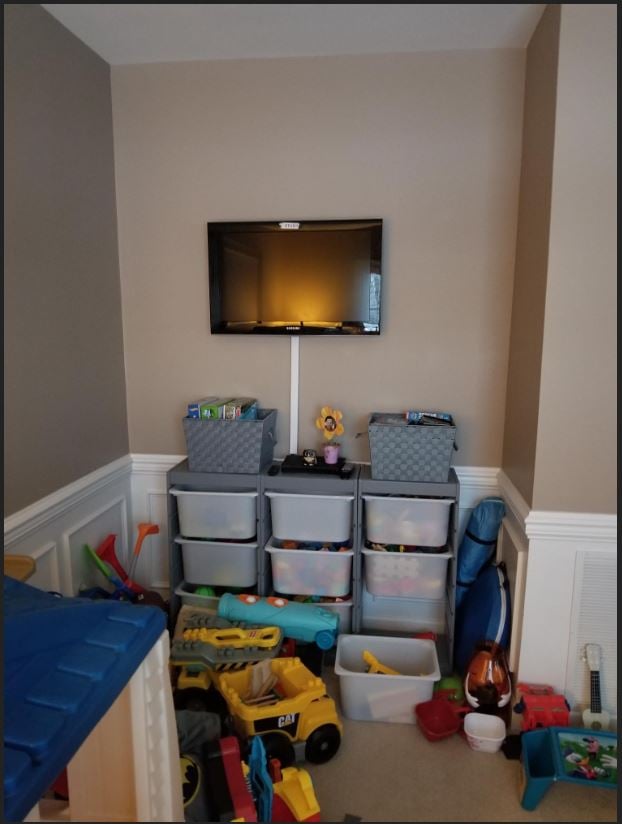
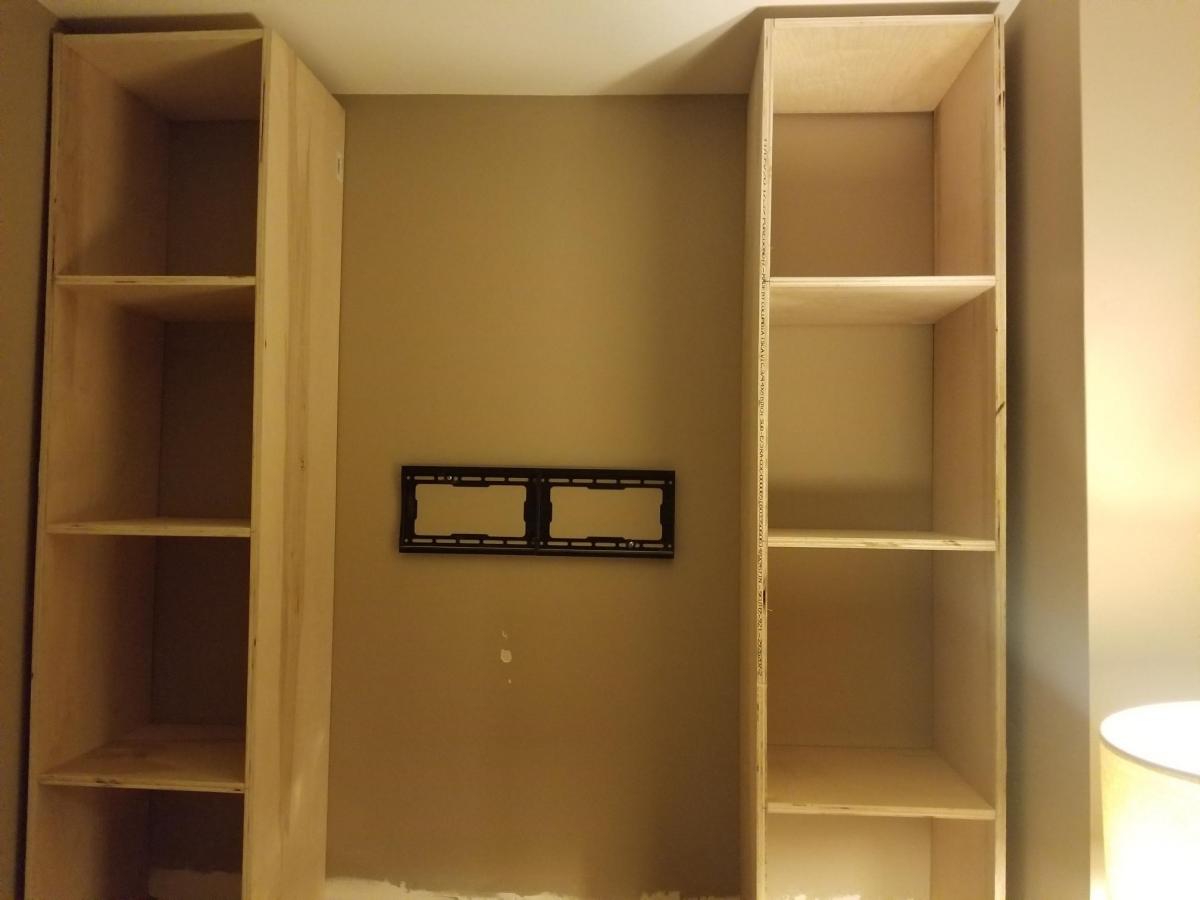
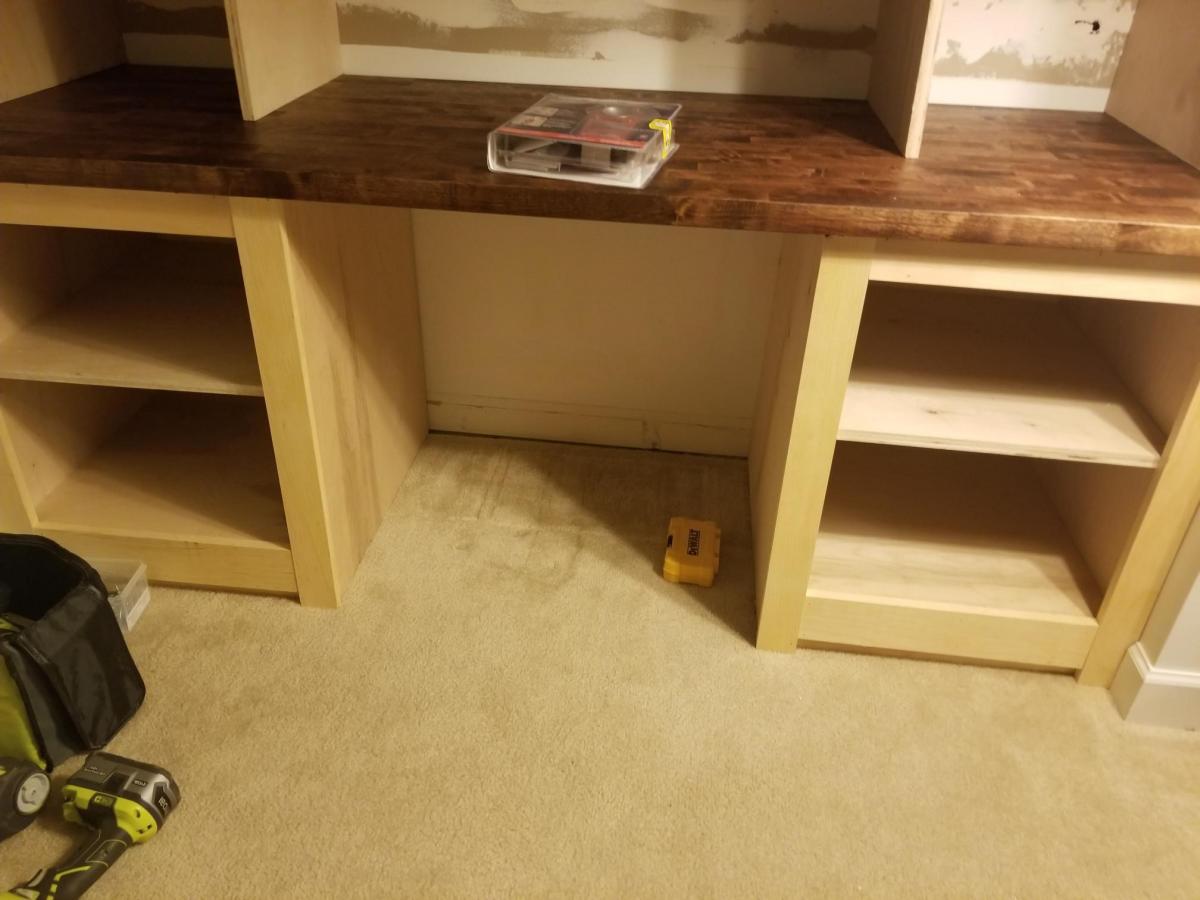
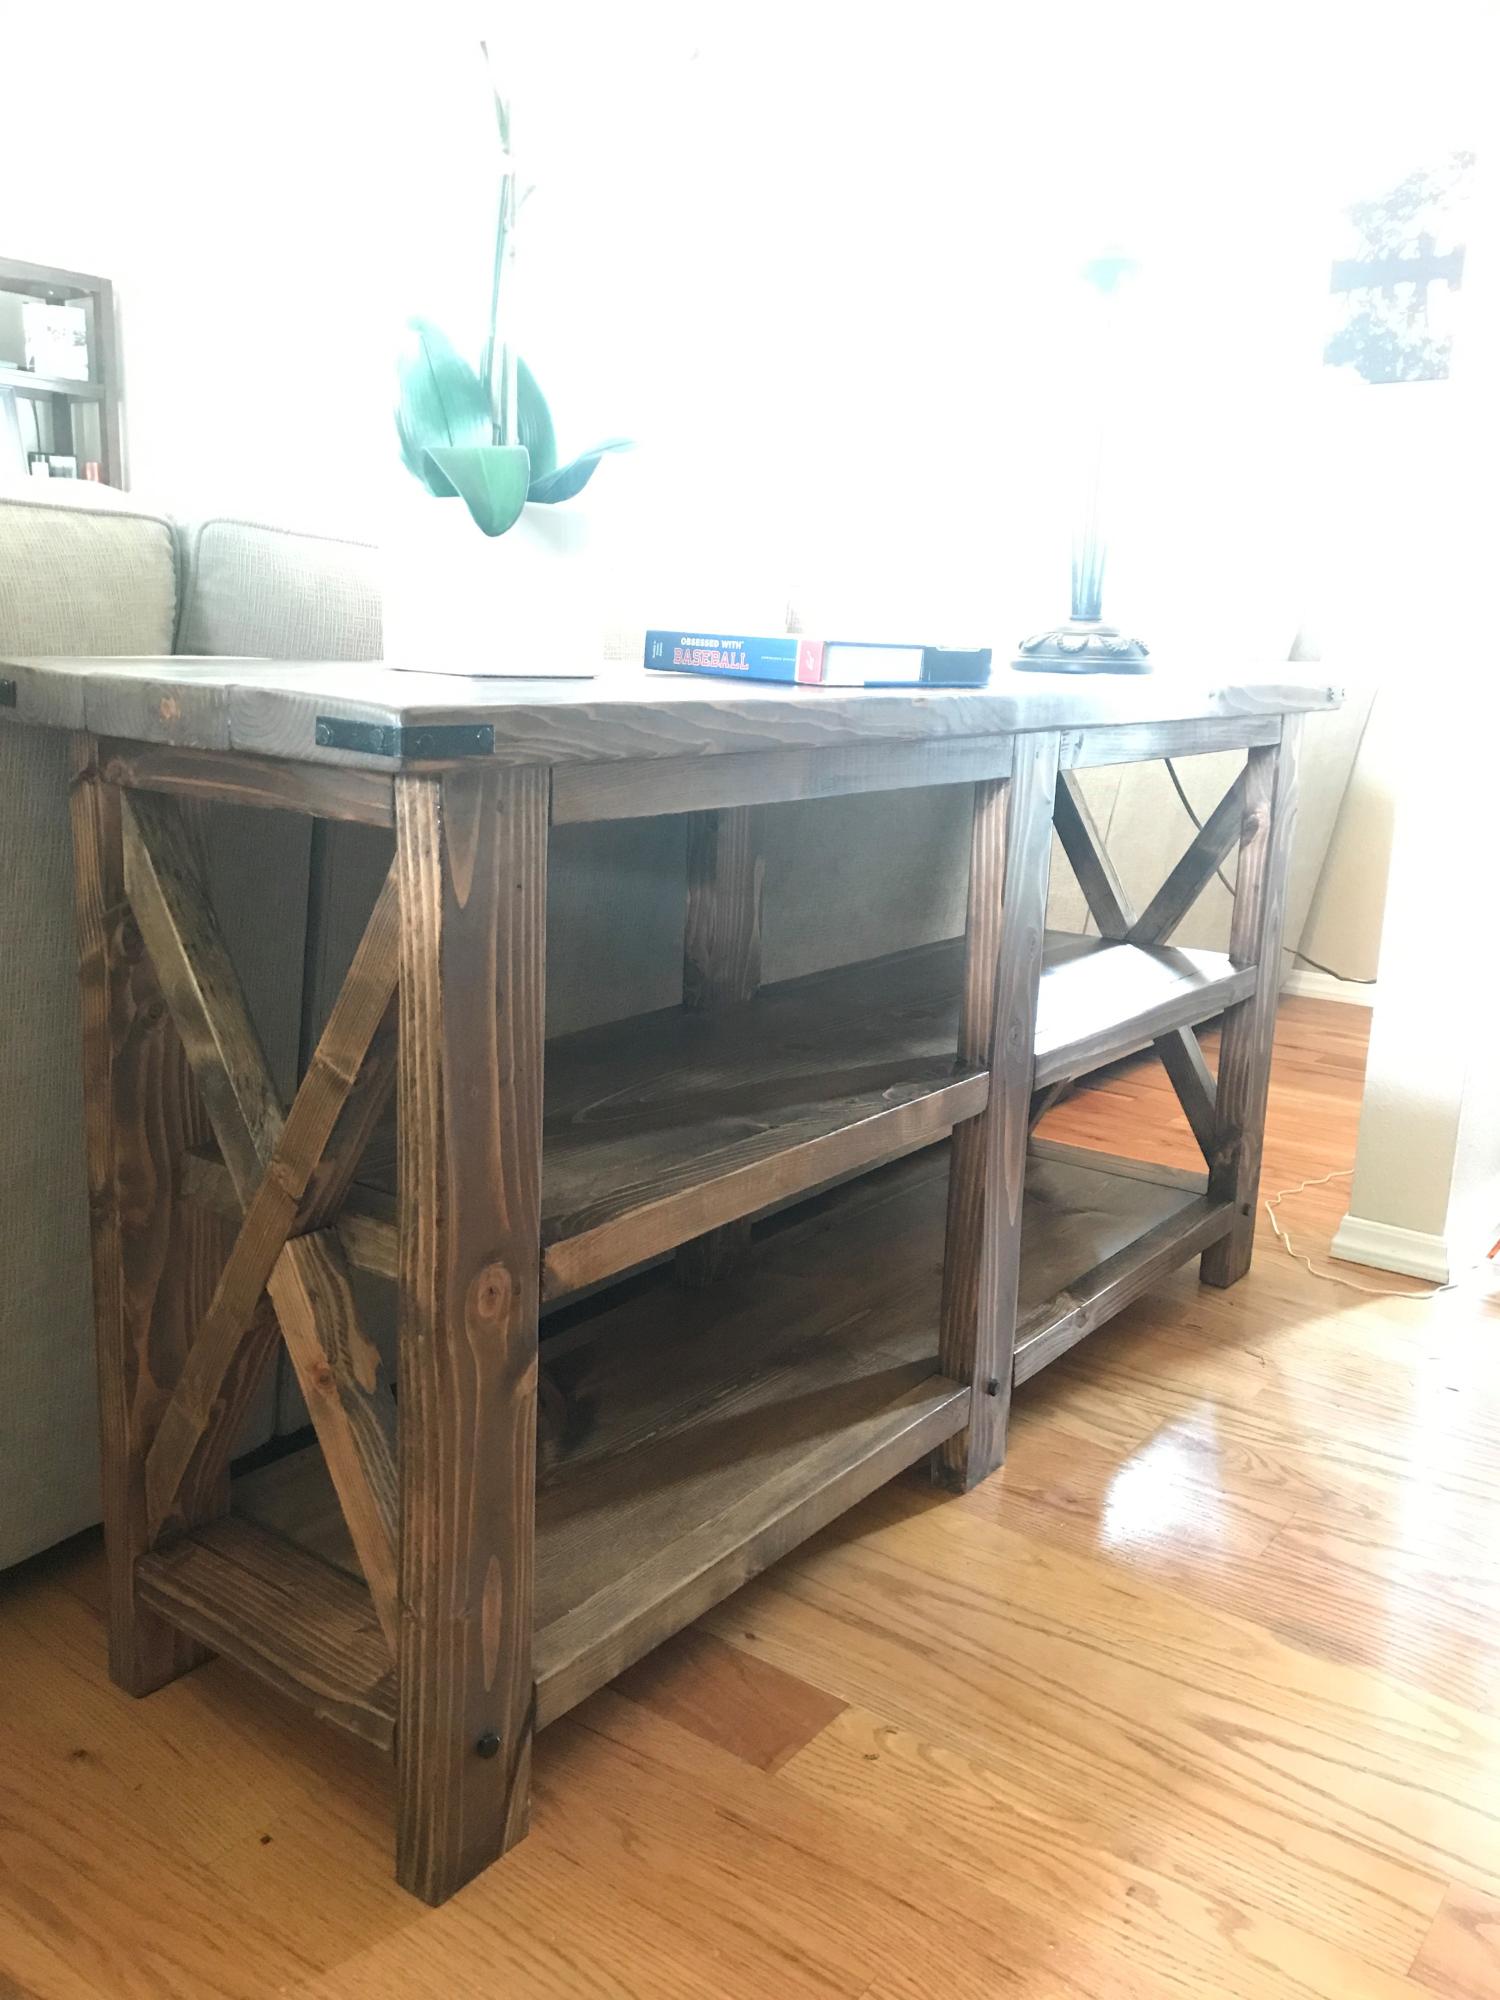
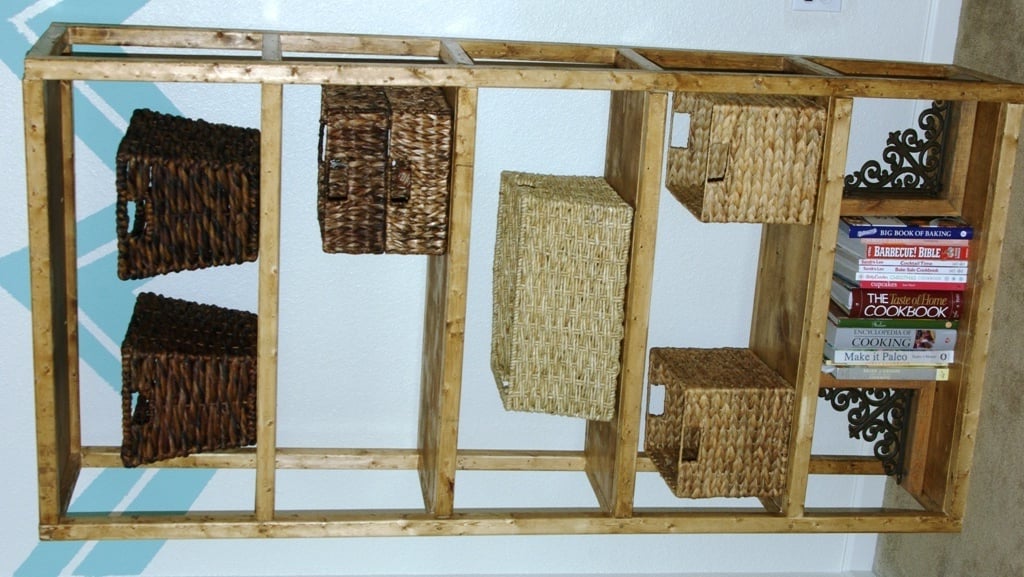
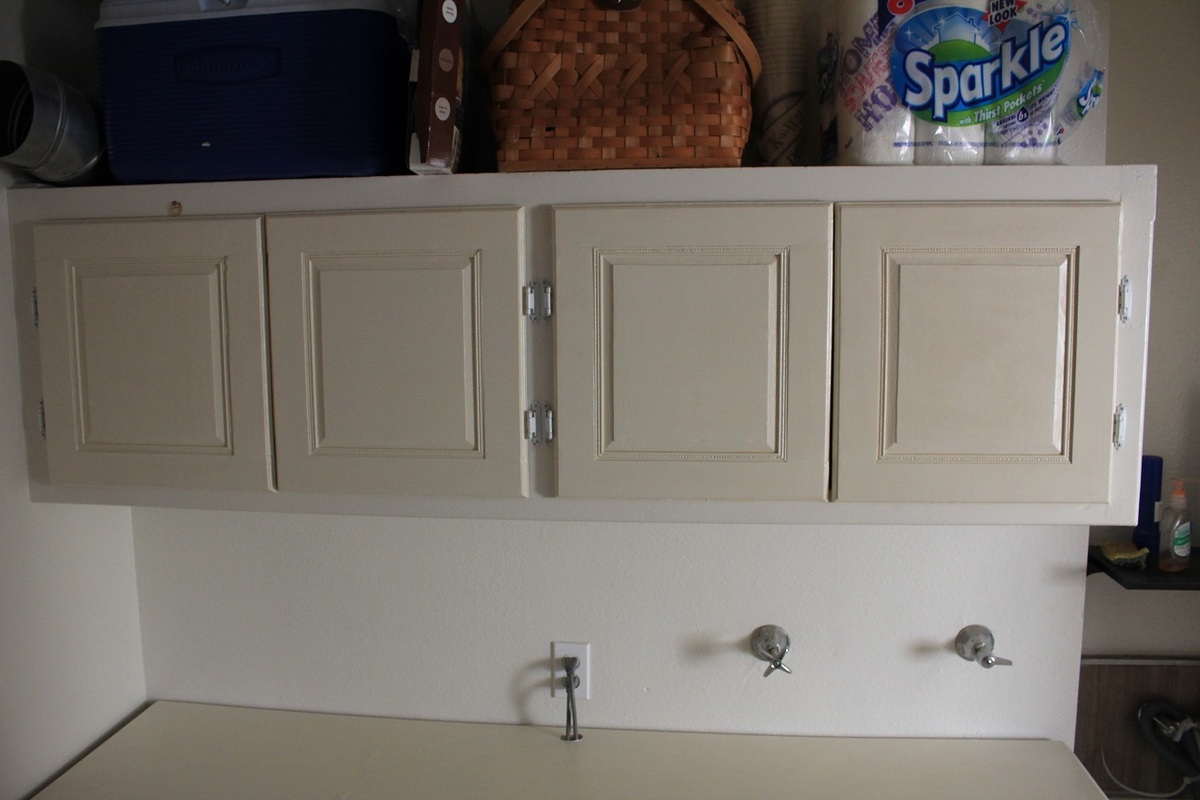
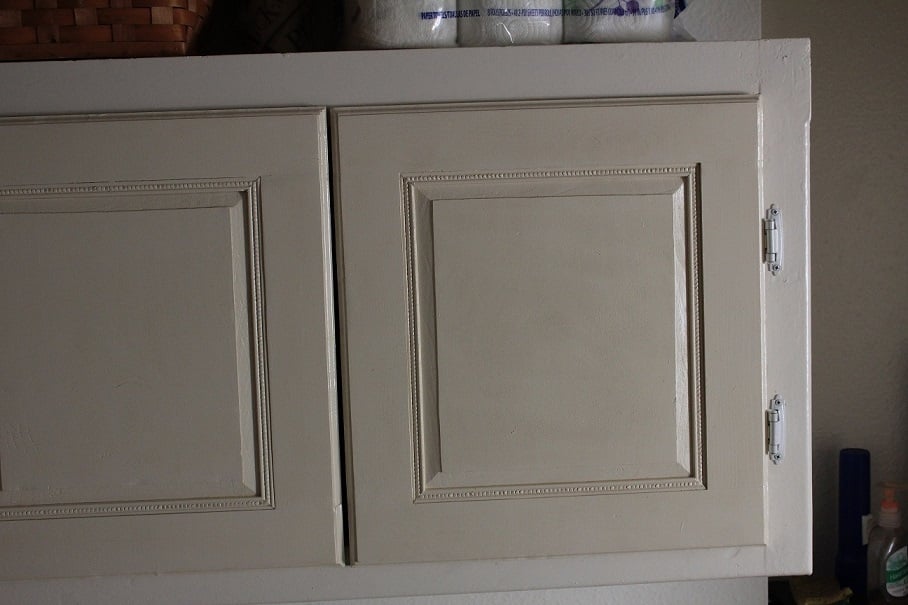
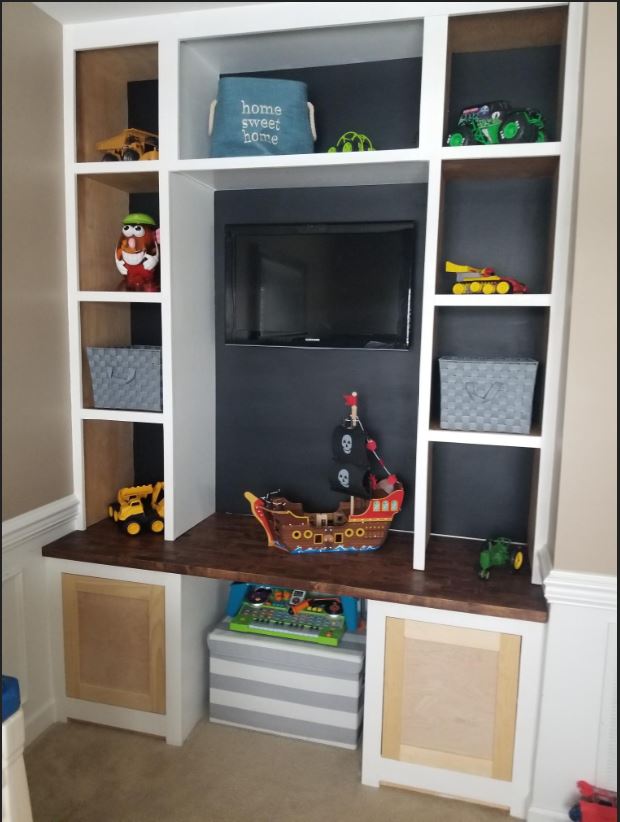
Community Brag Posts

Outdoor Bar

I used two of Ana's designs (the Potter's Bench and the Recycle/Garbage tilt out design) to make this outdoor bar. The containers can hold the beverage of your choice (I found metal ones and used ice to keep things cold). It was a big hit at the party and makes serving much easier. Thanks Ana! Keep up the good work.

Estimated Time Investment
Week Long Project (20 Hours or More)
Finish Used
I stained with Walnut stain. I used cedar for the wood, and a $100 piece of Bluestone for the top.
Recommended Skill Level
Beginner

Comments

DIY Indoor Playground

Submitted by Leann on Sat, 11/12/2016 - 08:45

I built this project by myself.  My husband helped move the large pieces when I connected them, so one person really can tackle this project!   I had a combination of scrap wood from new home construction on hand and store bought lumber.  Most of my time was spent sanding, sanding, and more sanding, especially with the construciton grade lumber.  Yes, it was worth it!   I used tongue and groove wood for  upper level flooring and bridge.  It really made it easier to put the floors together.  I connected all the tongue and groove pieces with a snug fit and used my brad nailer to secure it down on the perimeter of the floor.   Therefore, not every peice had to be screwed down.

Estimated Time Investment
Week Long Project (20 Hours or More)
Finish Used
All the green paint is chalkboard paint! It seems to be working out quite well. I added inexpensive wood drawer pulls (as hooks to prevent poking an eye out!)) to hang costumes inside. I also cut the ends of the wood at an angle and sanded it to prevent sharp and pointed corners. Spacing around windows and the bridge was intentional to have that rustic look, yet allow for feet and hands to get in there for climbing. I need to add the monkey bars but definitely need help.
Recommended Skill Level
Intermediate

Comments

Wall mounted bottle opener - rustic

Submitted by Ulrike on Fri, 07/31/2020 - 09:44

Quick and fun little project. Had everything laying around the house except for the actual bottle opener.

Estimated Cost
$5
Estimated Time Investment
An Hour or Two (0-2 Hours)
Recommended Skill Level
Starter Project

Floating Corner Entertainment Stand

This is a corner entertainment stand. I didn't have a plan to follow so I made it up as I went. The dimensions are 40" L xW and 27" tall. It has a base hidden underneath it help support the weight and is also screwed into wall studs to prevent tipping. The angle for the front cross section is 22.5 degrees. I made this for a friend. She is going to paint it unfortunately. Materials cost only around $120. 3 sheets 3/4" plywood, some 1x2s and a couple hinges and cabinet knobs.

Estimated Cost
$130
Estimated Time Investment
Weekend Project (10-20 Hours)
Recommended Skill Level
Intermediate

Comments

Justin G (not verified)

Sun, 01/06/2013 - 04:49

This is REALLY a nice looking corner unit. In our living room, the ONLY place for the tv is in the corner. I have a prebuilt unit now that cost me quite a bit, and we hate it. Its all modern with glass shelves. This corner cabinet is EXACTLY what I want to build. I have a 1 year old so having doors to hide the electronics is a must.

I would VERY much like to build this. Are there any more detailed pictures or a plan I could download? Ive been searching for the last few days an just cant seem to find anything that catches my eye like this one.

Looks great!!

Wounded Marine

Sun, 01/06/2013 - 06:18

The shelves are made out of premium plywood. For the top, bottom, and the middle shelf, I measured and cut out on pieces of plywood. Then used plywood for the "walls" of the unit. I trimmed it with 1x2s. The doors are also plywood. I just rabbit jointed nice wood for the frame of the doors. Underneath the the TV stand is a 2x4 set back a little bit to give it that floating looking. It is anchored to the wall on the inside of the unit with screws going into the studs of the wall. I hope this makes since.

arod718

Thu, 09/05/2013 - 19:13

Is it possible to get dimensions of the stand and what you based the base from. I would like to build the Ana version for my wife because of the storage it has. Thank you, best site ever.

Simple Round Table

Submitted by mtairymd on Sat, 08/02/2014 - 14:15

This project was built with a round top from a broken table and two 2x4’s. The top in this project is 30 inches in diameter. However, the designed can be scaled up or down based on your top diameter and/or desired table height. See drawing and video for build instructions.

Build Instructions:
http://www.instructables.com/id/Simple-Round-Table/

Video:
https://www.youtube.com/watch?v=CZGR2giAIv8

Drawing:
https://drive.google.com/file/d/0B21TbB8gGNQbeG96QVdsNGNKZHc/edit?usp=s…

Estimated Cost
$10 since I had the free top
Estimated Time Investment
Afternoon Project (3-6 Hours)
Finish Used
Paint
Recommended Skill Level
Starter Project

First furniture attempt

Submitted by Anonymous (not verified) on Tue, 11/15/2016 - 08:45

Additional inspiration from here http://www.mylove2create.com/2015/07/farmhouse-storage-bed.html?m=1

Access to storage area under mattress via sliding doors at foot. Soft-close slides on all drawers and storage access. Modified plans for king mattress. Head and foot board attached using bolts and threaded inserts for easy disassembly. 

Estimated Time Investment
Week Long Project (20 Hours or More)
Recommended Skill Level
Beginner

Studio Desk

Submitted by Anonymous (not verified) on Mon, 08/03/2020 - 11:27

Custom build Studio Desk

Estimated Cost
$450
Estimated Time Investment
Weekend Project (10-20 Hours)
Finish Used
Maple
Recommended Skill Level
Beginner

Outdoor Bar

Submitted by jenitsch on Sat, 10/13/2012 - 14:58

This is my first project. I'm so happy with the results. We turned this potting bench into an outdoor bar. :)

Built from Plan(s)
Estimated Time Investment
Weekend Project (10-20 Hours)
Finish Used
Outdoor stain.
Recommended Skill Level
Starter Project

DIY Rustic Console Table

I made this shelf quite some time ago. I changed quite a few aspects of it as I went a long and I am quite happy with the finished product. Thanks again to Ana for the rockin plans.

Built from Plan(s)
Estimated Cost
75
Estimated Time Investment
Weekend Project (10-20 Hours)
Finish Used
Minwax: Jacobean, espresso, special walnut, weathered oak.
Recommended Skill Level
Beginner

Joy Sign

Submitted by Anonymous (not verified) on Fri, 11/18/2016 - 09:11

Had some leftover v groove planks from building a plank wall in son's room, so decided to make Ana White's cute Joy sign.  Had trouble finding a boxwood wreath that I liked, so ordered one from Home Depot.  It came in only 2 days.  Super simple and super cute.

Estimated Cost
$20.00 for wreath.
Estimated Time Investment
An Hour or Two (0-2 Hours)
Finish Used
I used iron acetate on planks, sanded lightly, then finished with weathered grey stain over it. Used scraps of wood and liquid nails to attach boards together.
Recommended Skill Level
Starter Project

Comments

Loft Bed with Shelves

Submitted by KeithO on Thu, 08/07/2014 - 09:38

This build was not hard, but just took time. The plans were perfect. Clear, easy to follow and correct. 

Materials cost about $400. 

This was a fun project because my 8 years old son got to help build his bed. I used a brad nailer to hold many pieces together after they were glued. Not a must, but it made the build a lot easier.  It also came in very handy when making the shelves.

We also added IKEA LED lights underneath the bed for a cool effect.  

Built from Plan(s)
Estimated Cost
$400
Estimated Time Investment
Week Long Project (20 Hours or More)
Finish Used
Behr paint - Myth color
Recommended Skill Level
Intermediate

Mini Farmhouse Bedside Table

Submitted by Anonymous (not verified) on Mon, 11/21/2016 - 18:35

We (my husband and I) recently gave our tween daughter's bedroom a complete overhaul and needed an affordable and pretty nightstand for the room. After searching online and in stores, we could not find one that we liked for a price we wanted to pay, so we opted to build.  These plans were very easy to follow and allowed us to create a functional bedside table that was just right for the space.

Estimated Time Investment
Weekend Project (10-20 Hours)
Finish Used
Two coats of Behr Premium Plus Ultra Interior Paint & Primer, Sheen: Satin, Color: Polar Bear. 2 coats of Minwax Polycrylic Protective Finish Clear, Sheen: Satin
Recommended Skill Level
Beginner

Narrow console table

Submitted by Anonymous (not verified) on Tue, 08/11/2020 - 06:19

First build! Love the way it turned out! Used stain in color “Briarwood”.

Estimated Cost
$50 (wood is expensive in PA right now)
Estimated Time Investment
Afternoon Project (3-6 Hours)
Finish Used
Briarwood
Recommended Skill Level
Beginner

Toybox built from A/B plywood, for son's 1st birthday.

I built this toybox for my son's first birthday. It took about a week to do, starting and stopping. I got Lowes to cut the plywood for me, and screwed everything together. Wood filler filled the countersunk holes, and a coat of primer and two coats of paint finished it off.

After everything dried, my wife added the name and crown in vinyl cut out using her Cricut.

Built from Plan(s)
Estimated Cost
$60
Estimated Time Investment
Weekend Project (10-20 Hours)
Finish Used
Kilz2 and 2 coats of latex paint.
Recommended Skill Level
Intermediate

FancyX Table WITH Ice Bucket Mod & Benches

Submitted by SaraLodise on Sun, 08/10/2014 - 06:43

My (excited!) first time building a piece for someone else. This table was made as a housewarming gift for some awesome friends. Many people contributed to material cost and my husband and I put it together.

The table is made out of all cedar to deal with the southern rain and sun (we haven't had a dry day since we delivered it a month ago, so you get a wet but sunny picture - yay hurricane season)

We modified the plans to incorporate two planter buckets for icing drinks and such. This required us to make two longitudinal frames instead of the one used in the original plans. We spaced the frames just enough to fit the planters down in them, then added short 1x2s between them to support the planters. Before boarding the top 2x6s together, I made rough cuts for the openings. When it was all together, my husband used a 2" router bit to clean up the edges of the holes.

Made the 8 foot FancyX benches to have as much seating room as possible for lots of friends and family. Looking forward to using it more when the weather dries up a little.

Estimated Cost
$325 in lumber
Estimated Time Investment
Week Long Project (20 Hours or More)
Finish Used
none
Recommended Skill Level
Advanced

Comments

Michelle901

Tue, 06/02/2020 - 14:29

Hello! Do you happen to have the plans you used to make this table? I can't find plans that incorporate the ice bucket inserts and the fancyx table. Thanks!

Upsized to 8x4

Submitted by Anonymous (not verified) on Fri, 11/25/2016 - 17:26

Ended up making mine 8x4 to fit between 2 windows on the side of the house. I put in a paver base and then built a 2x4 floor with three quarter inch plywood. 

I drew everything our first so I knew what to order from HD. I followed the plans basically but used 2x4s in the frame of the walls and back. I just used plywood on the back wall. We also can't get cedar fence planks in south Florida, only 6 ft pine pickets, so I made due. 

The roof I had to measure once the frame was up, just to be sure.  Also used a 2x6 as the cross brace on the front...wanted to make sure it was strong enough to prevent the doors from pulling in and sagging, since they're bigger. 

Tools:. Pocket hole jig is a must. And I did this completely solo, so air nailers were a 100% must. Frame nailer and Brad nailer with various size nails. I still may add angled brace 2x4 across the top interior to hold the square. Shingled the roof and added a little $9 solar powered light bulb, with a little panel wired to the roof. Works well. Still needs sealed and shingles trimmed but I get a lot of compliments on this thing. Turned out very impressive. 

Cost of everything.....around $400. Time, doing it solo seriously took like 3 days...probably about 25 hours for everything excluding paver base. 

Built from Plan(s)
Estimated Time Investment
Week Long Project (20 Hours or More)
Recommended Skill Level
Intermediate

Mimi's Faux Mantle

Submitted by Medurrant on Wed, 10/24/2012 - 20:34

This has been a project all summer and I was so excited to find that Ana had made a mantle. I had to make it bigger and I had so much fun making it! Thank you Ana!!!

Estimated Cost
$80.00
Estimated Time Investment
Week Long Project (20 Hours or More)
Recommended Skill Level
Intermediate

Comments

qapaul

Mon, 01/04/2016 - 10:12

Could you let me know which pieces you had to adjust to fit your fireplace? If possible, if you still know the width changes? I'm a new wood worker, but would love to try and adjust this to fit our fireplace, ours looks to be the same size as yours. Thanks for your time!!

Paul

Office Desk

This was my first table project. I needed additional desktop space in my home office. This table was easy to build.

Built from Plan(s)
Estimated Cost
$25
Estimated Time Investment
Weekend Project (10-20 Hours)
Finish Used
All wood was sanded prior to putting it together. I drew a cross in the middle of the table and then stained it. I printed the text and then traced it onto the tabletop with a pen. I colored in the text with black paint. The base was painted all black, sanded, and then stained. Table was sealed with poly.
Recommended Skill Level
Starter Project

Rustic X End table

This was my first attempt after finding the site. I was so happy with the ease of the plans and the way it turned out i made the dining table

Estimated Cost
$20
Estimated Time Investment
Afternoon Project (3-6 Hours)
Finish Used
Steel wool and white vingear
Recommended Skill Level
Beginner

Modern Farmhouse Bed

Submitted by pcarroll on Mon, 08/17/2020 - 05:21

King size bed. Aged the maple headboad per the plan, but then sanded to lighten the effect and sealed with a finishing wax. Trim is white milk paint.

Built from Plan(s)
Estimated Cost
$200
Estimated Time Investment
Day Project (6-9 Hours)
Finish Used
Aging product per the plan for the maple, followed by a light sanding and then finishing wax.
Recommended Skill Level
Beginner

Modified Brookstone desk

Submitted by JoanneS on Mon, 10/29/2012 - 18:37

My son asked me to build him a narrow desk for his bedroom, with lots of drawers. This desk is a modified version of the Brookstone desk, with 7 drawers on the side and a pull-out writing surface (inspired by the pull out surface LadyGoats added to the Mod bar wine grid base – Gina’s pictures from her blog were really helpful!) The top measures 16 ¾ x 48 (top is a 1x12 and 1x6 edge joined with pocket holes). Lots of pocket holes on this one, because it’s stained and I didn’t want to fill nail holes. For the color we were trying to match the PB small printers desk Chestnut color. The pulls are antique bronze from Lowes. The drawers slide directly on the wood, because I knew I wouldn’t have the patience to install 8 sets of drawer slides ;) used ¾” S4S and 1x2 to hold the drawers. The drawer bottoms and the wood all got a coat of soft wax, and they slide nice and smooth. This took about 20 hours to build and finish over a long weekend. My son said he thought it looks amazing, which is the best part!

Estimated Cost
$155
Estimated Time Investment
Week Long Project (20 Hours or More)
Finish Used
I wanted the finish kind of rustic, so I didn’t use wood conditioner. Finished with 1 coat Minwax water based stain in Dutch Chocolate, 1 coat Minwax water based wipe-on poly, and a coat of soft wax.
Recommended Skill Level
Intermediate

Comments

LisaTen (not verified)

Tue, 10/30/2012 - 07:09

This looks awesome! Love those drawers, colors, handles-everything!

JoanneS

Tue, 10/30/2012 - 07:29

Thanks LisaTen! This was a fun build, especially since it was for my son, the college student :) :) (proud Mom smiles)

JoanneS

Sat, 11/03/2012 - 10:35

Thanks Gina! I'm glad you like the desk, and especially glad you added your link to the tutorial. :) I couldn't have done the pull out without it! I can't wait to see your desk, I'm sure it will look awesome!

benjaminrogers

Thu, 09/05/2013 - 07:49

JoanneS,

I think I've just found my design for my fly tying desk! I was wondering how wide you made the drawer base and how tall each drawer is?

Thanks,

Ben

JoanneS

Wed, 09/11/2013 - 02:19

Hi Ben,
Sorry I'm so late replying, I just saw I had this comment. The drawer base on this is 16 1/4" wide, and each drawer is 2 3/4" tall (a 1x3 with 1/4" plywood as the bottom). I'm kind of a spreadsheet geek, so I have all the measurements and cut lists in an Excel file. If you would like to have these, please send me a message via "contact" on my profile, and I'll reply with the attachment. Thanks for commenting, glad you like the desk! :)
Joanne