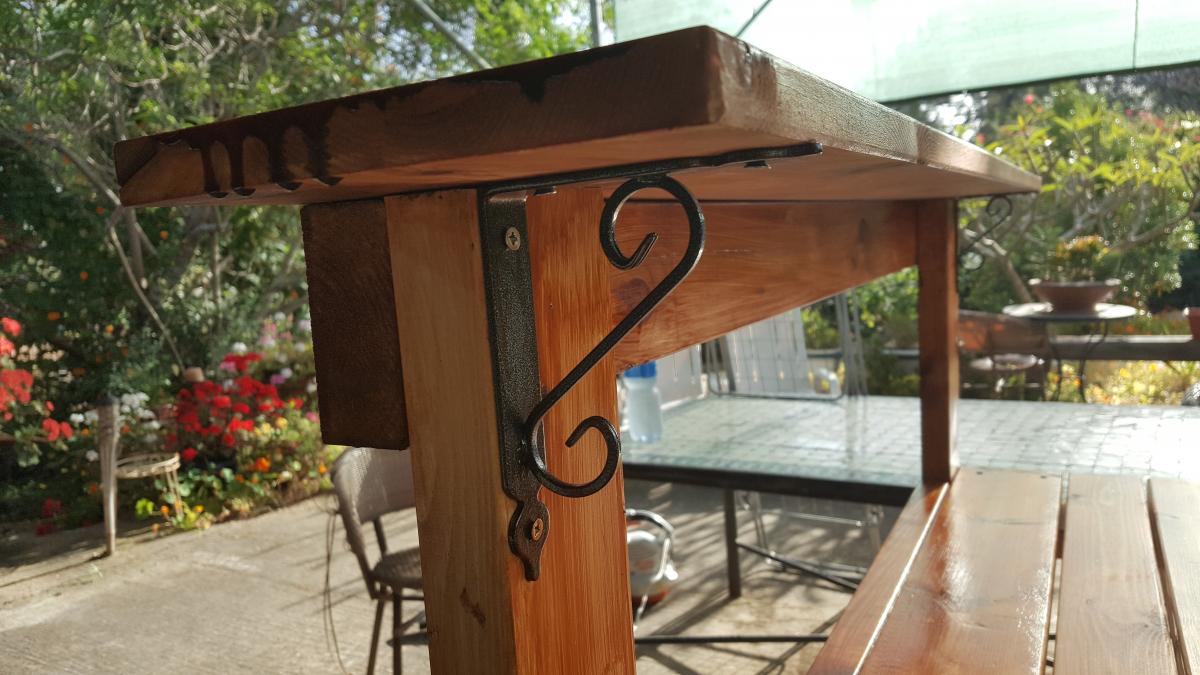
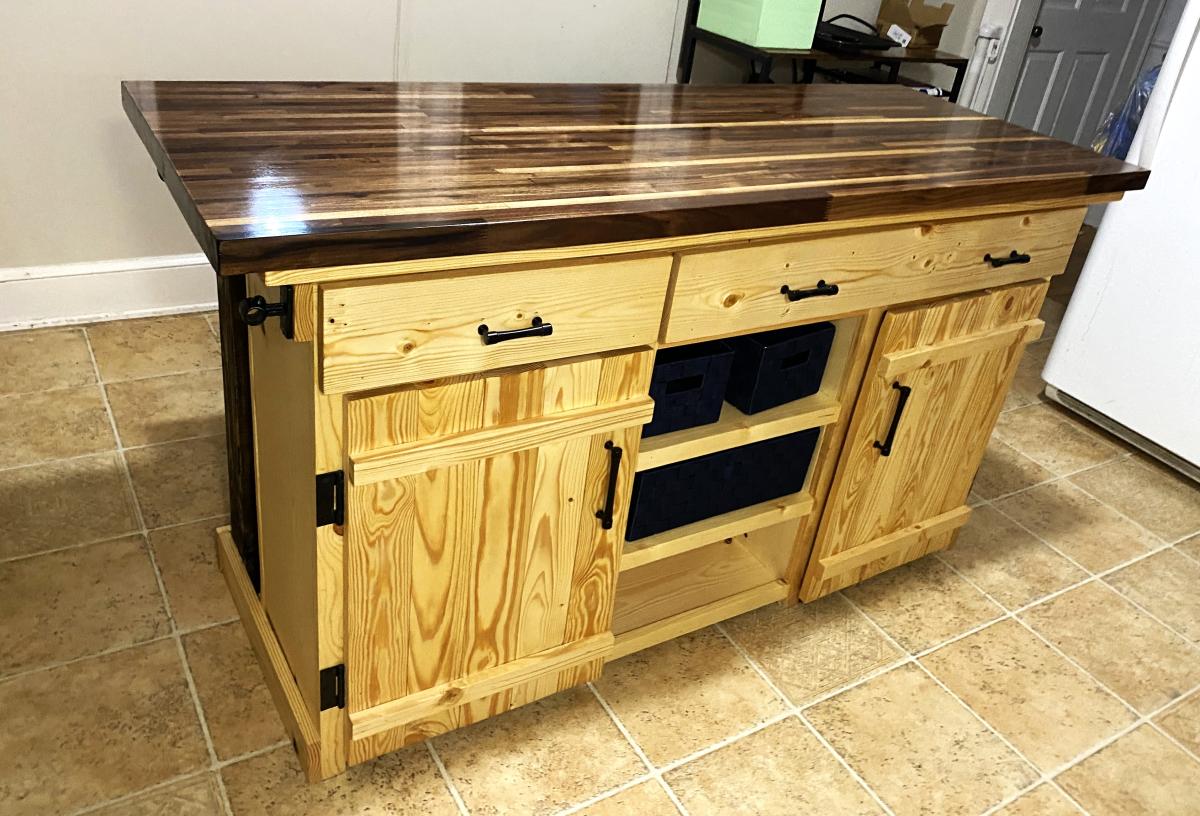
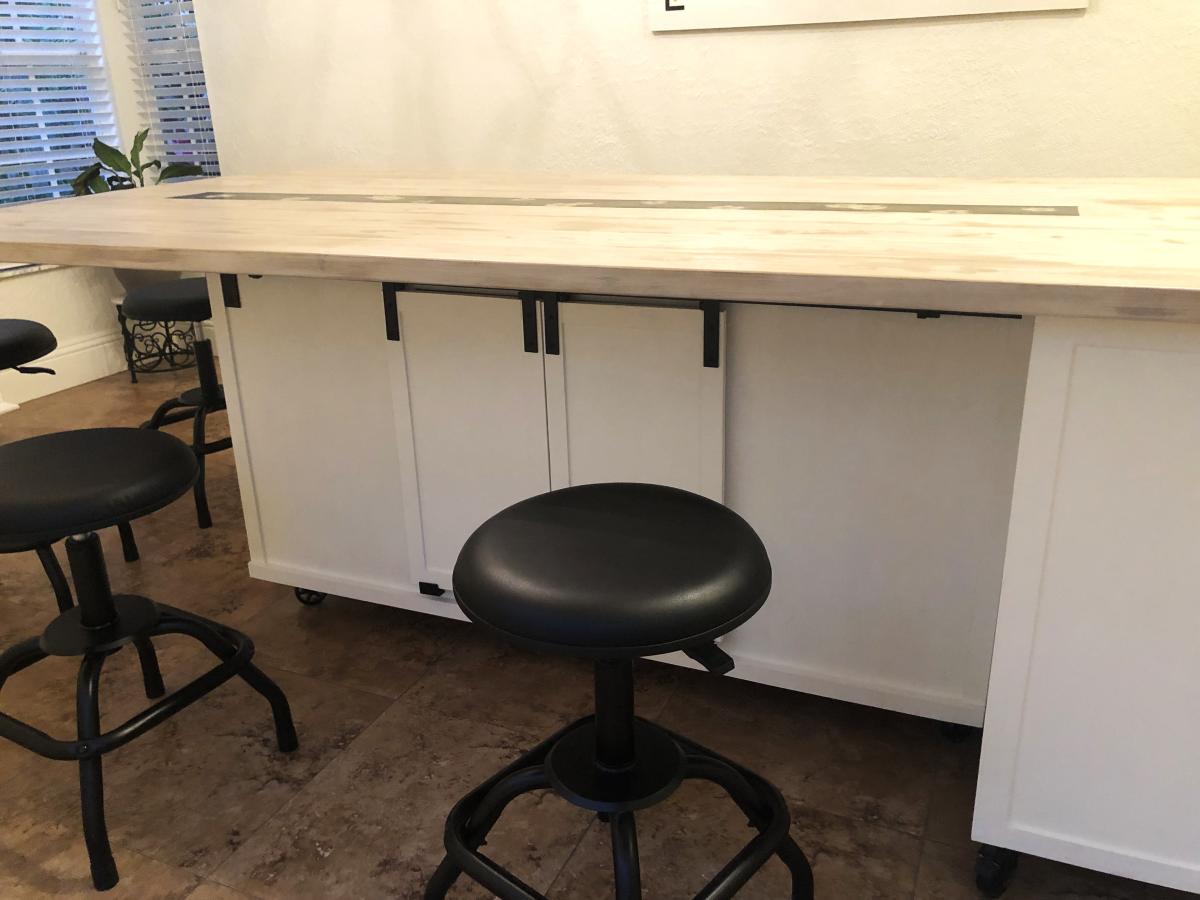
DIY Chef Island
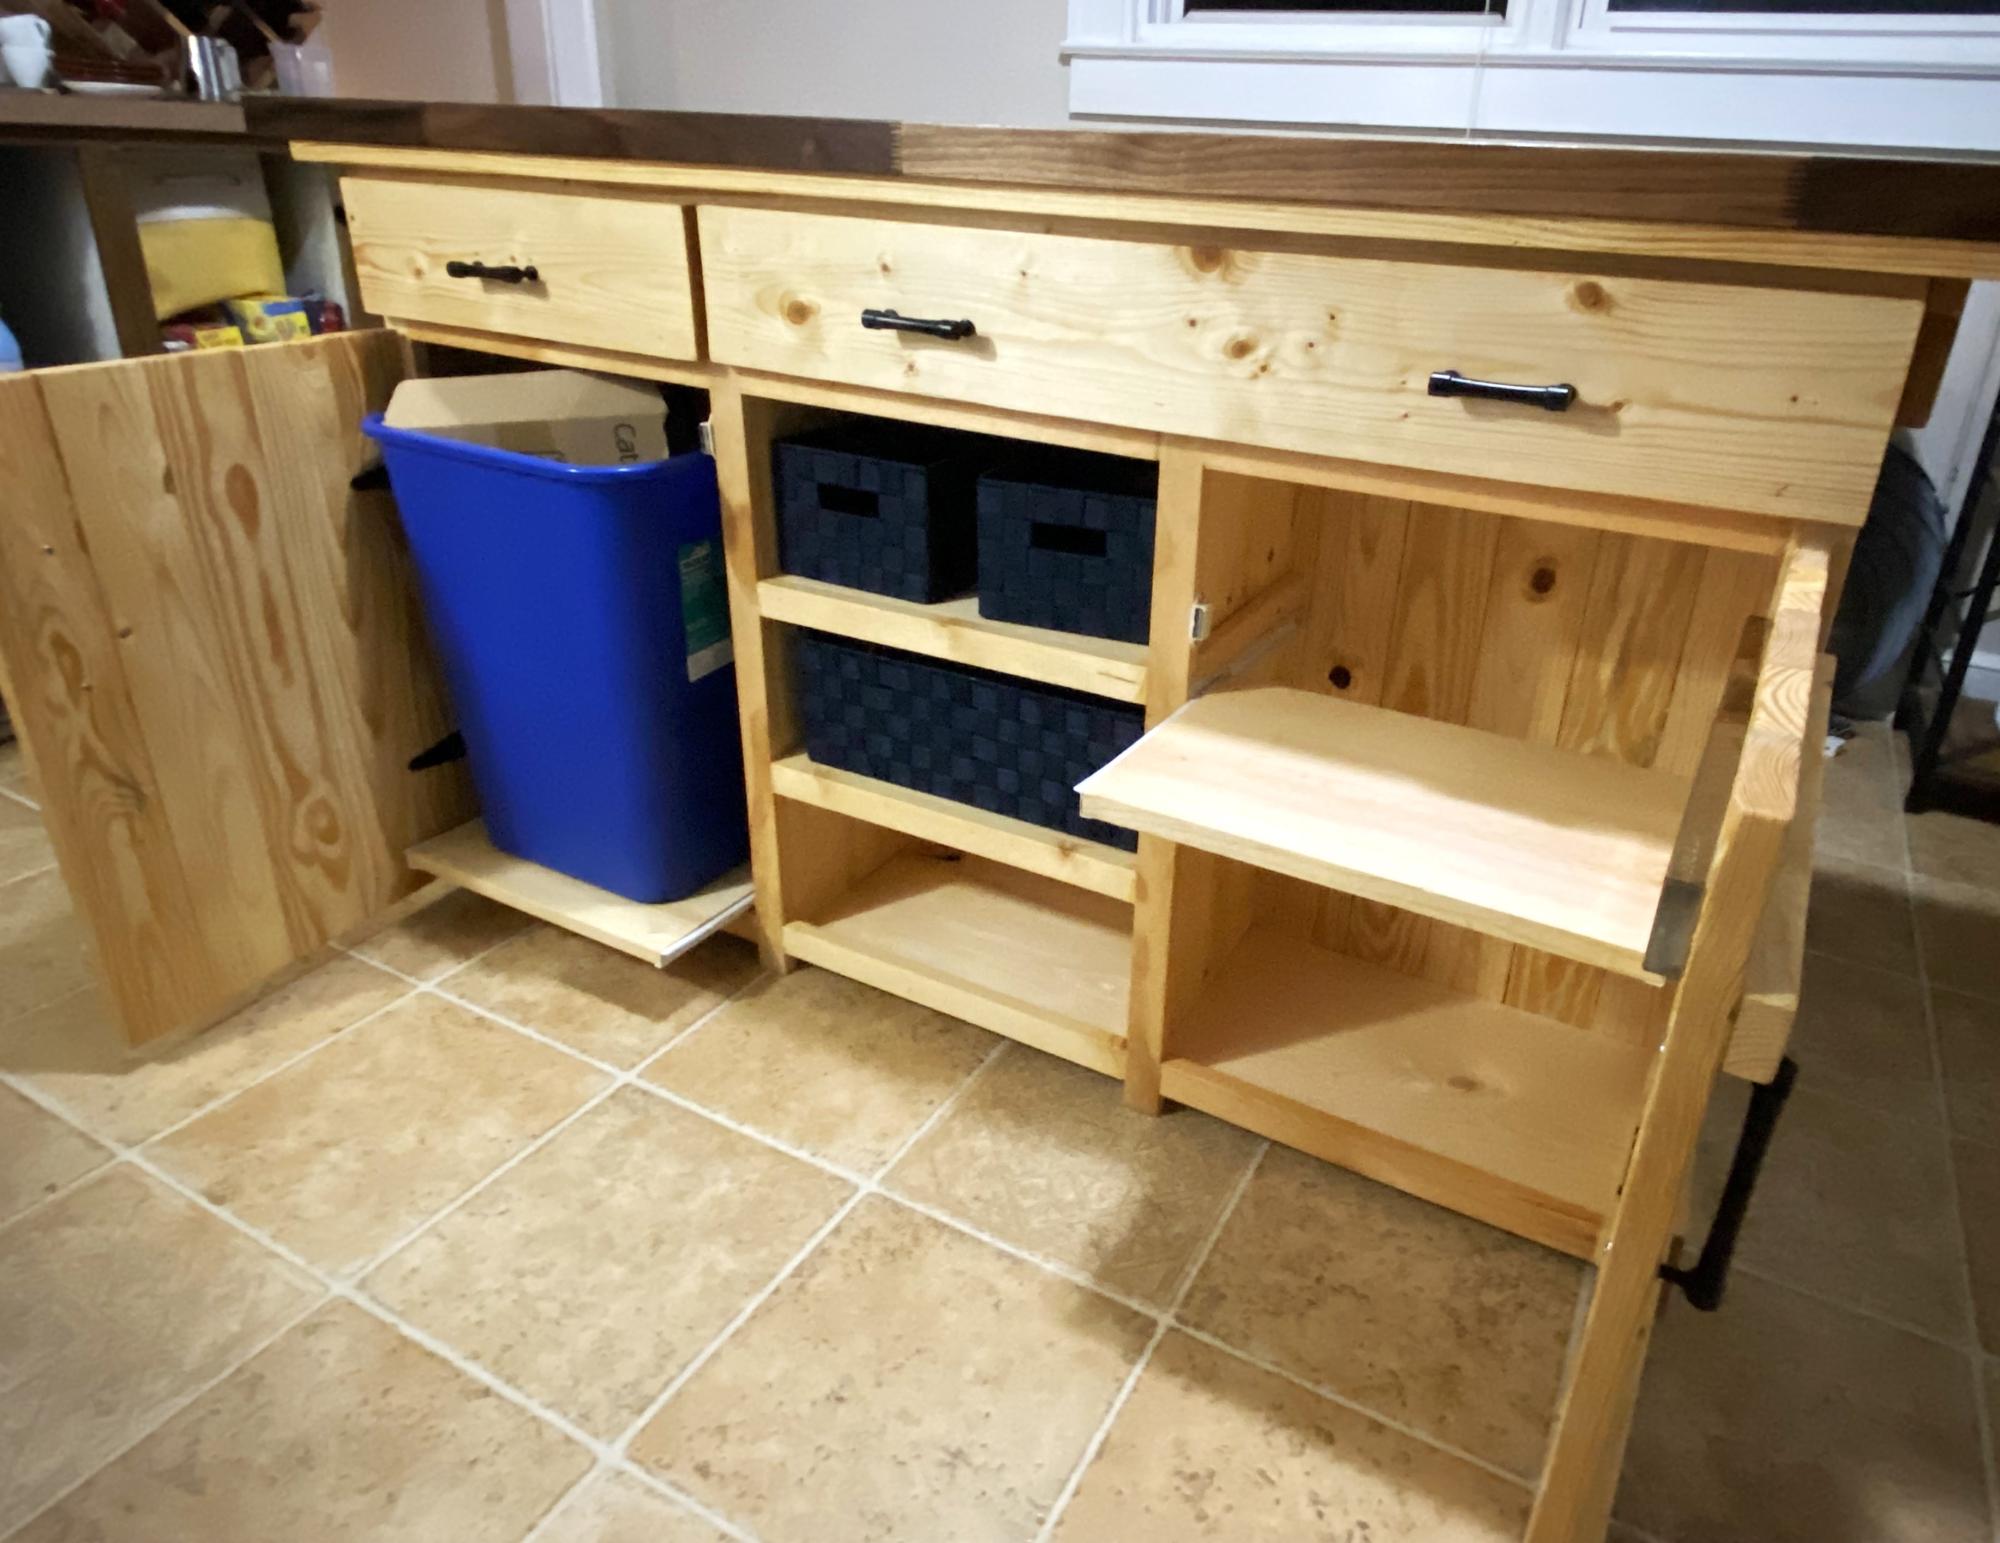
This was a labor of love for my son’s Christmas gift. He wants to be a chef and all he has wanted was an island in our kitchen. Thanks Ana for such an amazing and simple (enough) plan.
Built from Plan(s)
This was a labor of love for my son’s Christmas gift. He wants to be a chef and all he has wanted was an island in our kitchen. Thanks Ana for such an amazing and simple (enough) plan.
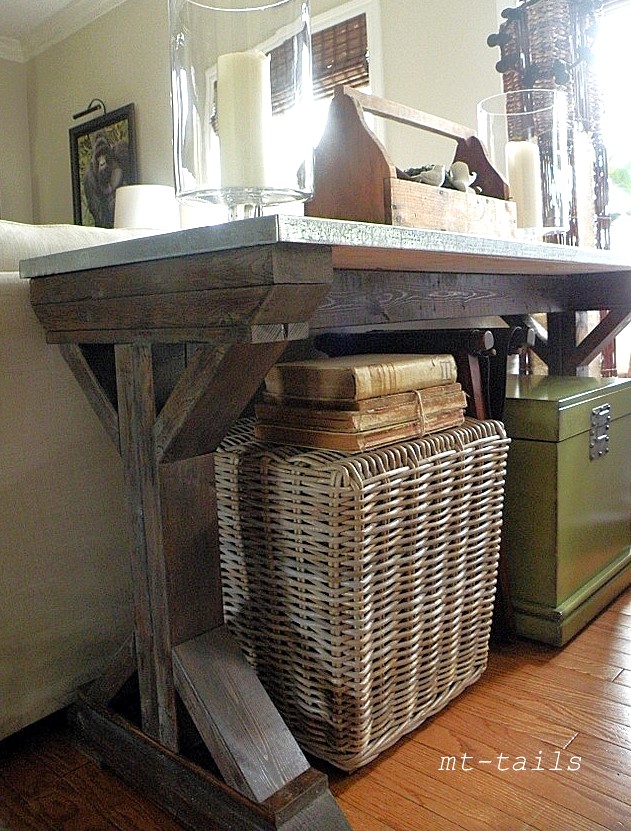
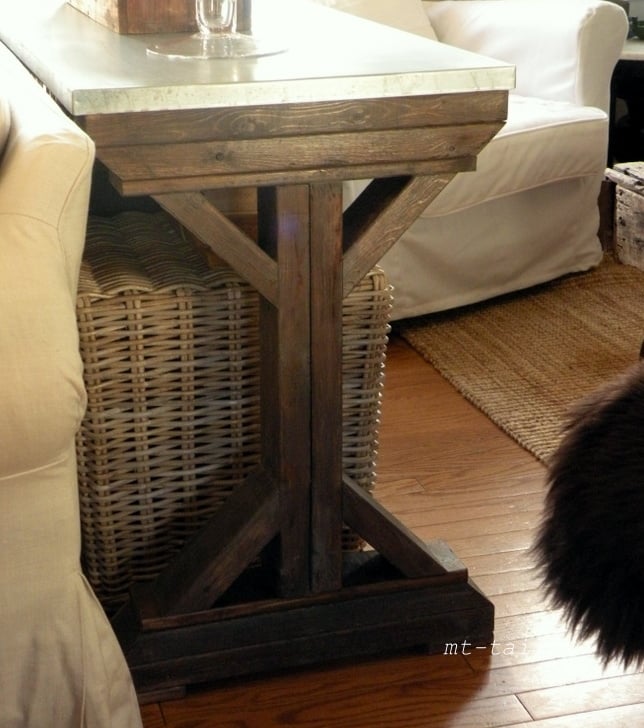
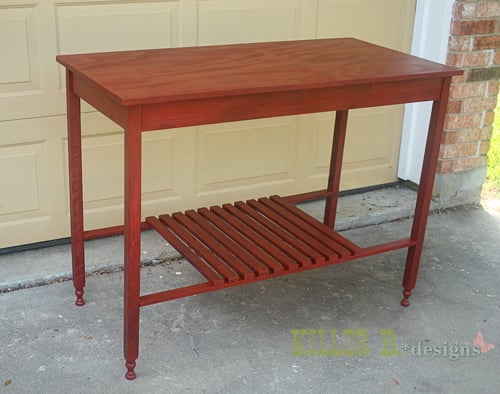
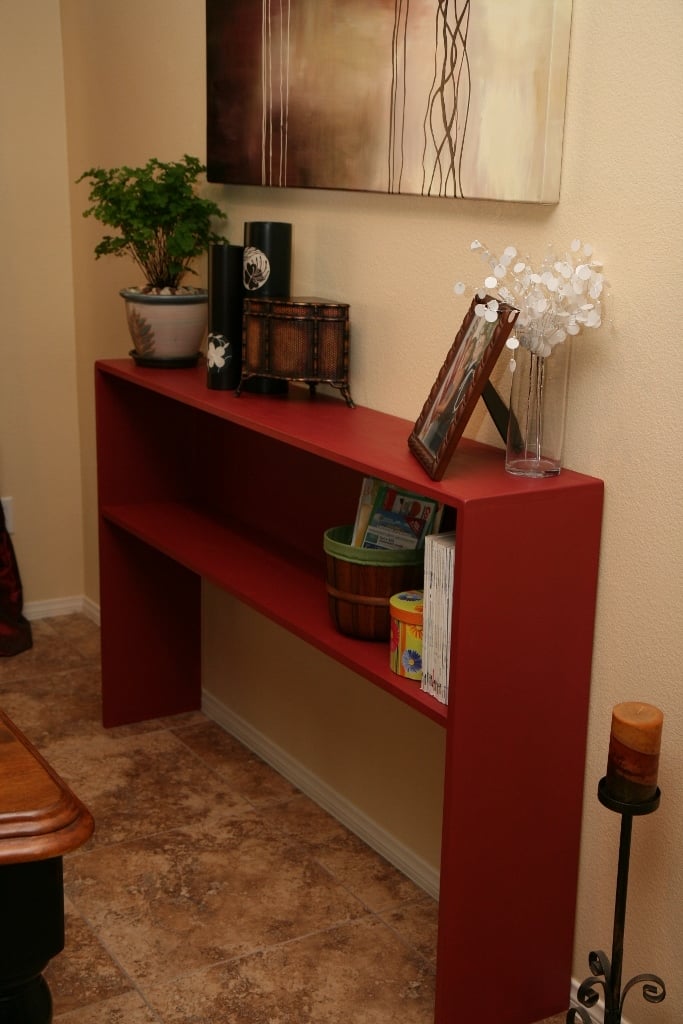
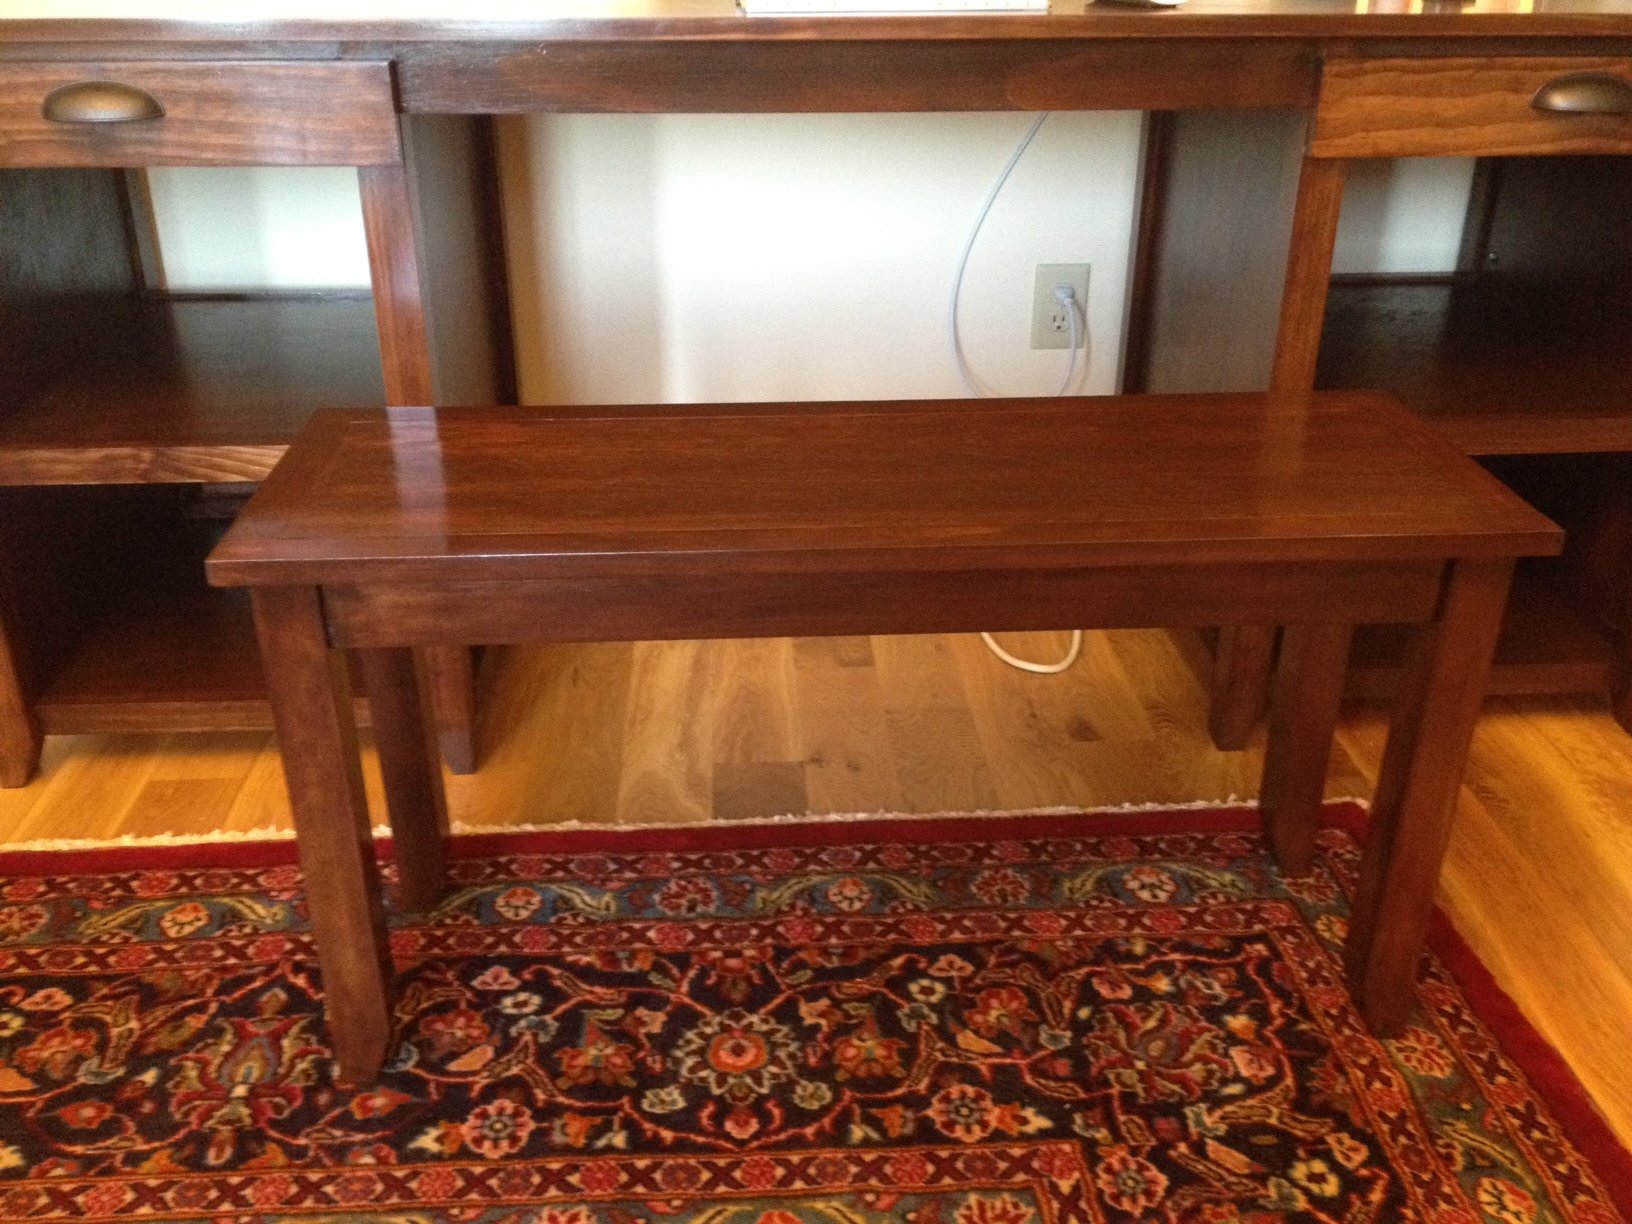
I found this plan for the fancy farmhouse table on Pinterest and decided to tweak it to work as a console table.
Mon, 07/02/2012 - 14:46
Absolutely gorgeous. And what a great idea to make it a console. I am trying to figure out if I can fit it anywhere in my house. I really want to know about the top. Did you cover it in metal. I would love to hear what you did.
Sat, 10/20/2012 - 20:49
I would really love the measurements for this console table if that's possible.I'm also doing the farmhouse kitchen table and this goes great with it & my open floor plan :)If I'm unable to get the measurements from you can you provide me with someone who has them or another link maybe... Thanks

In reply to DIY Farmhouse Console Table by HeatherM3569 (not verified)
Sun, 10/21/2012 - 15:42
If you click over to her blog (link provided above), she has a lot of additional information. In the post, it says, "We needed a table 55"w x 19"d x 30"h."
Mon, 07/27/2015 - 06:54
Console table looks great! What is the top made out of and how did you do the fabrication/install?
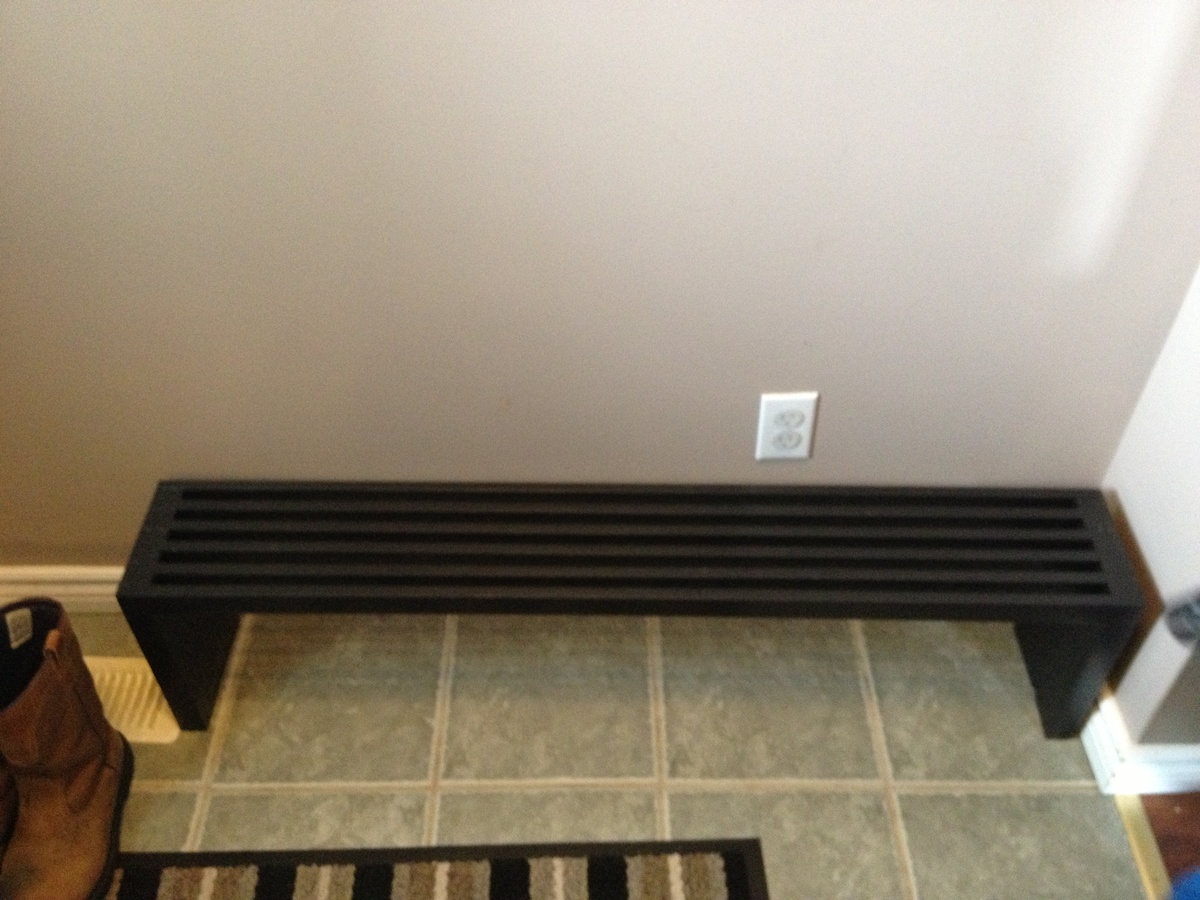
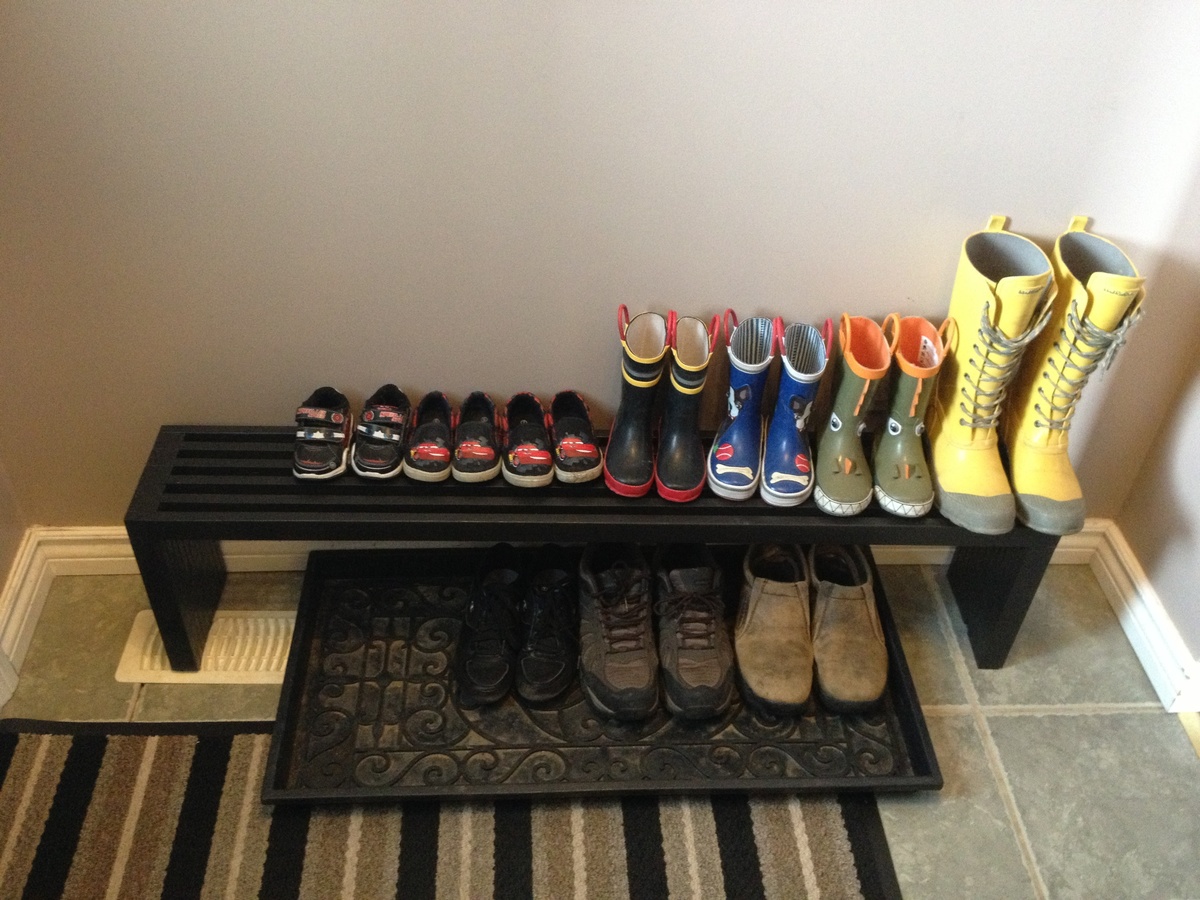
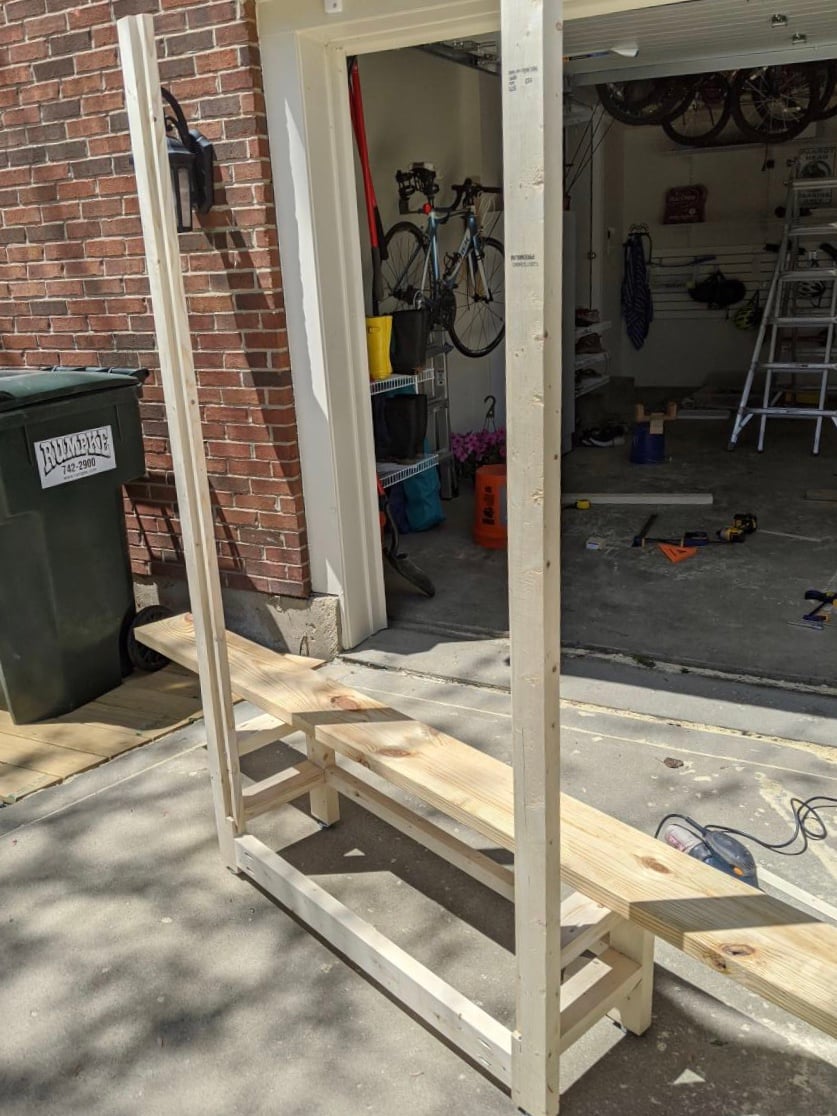
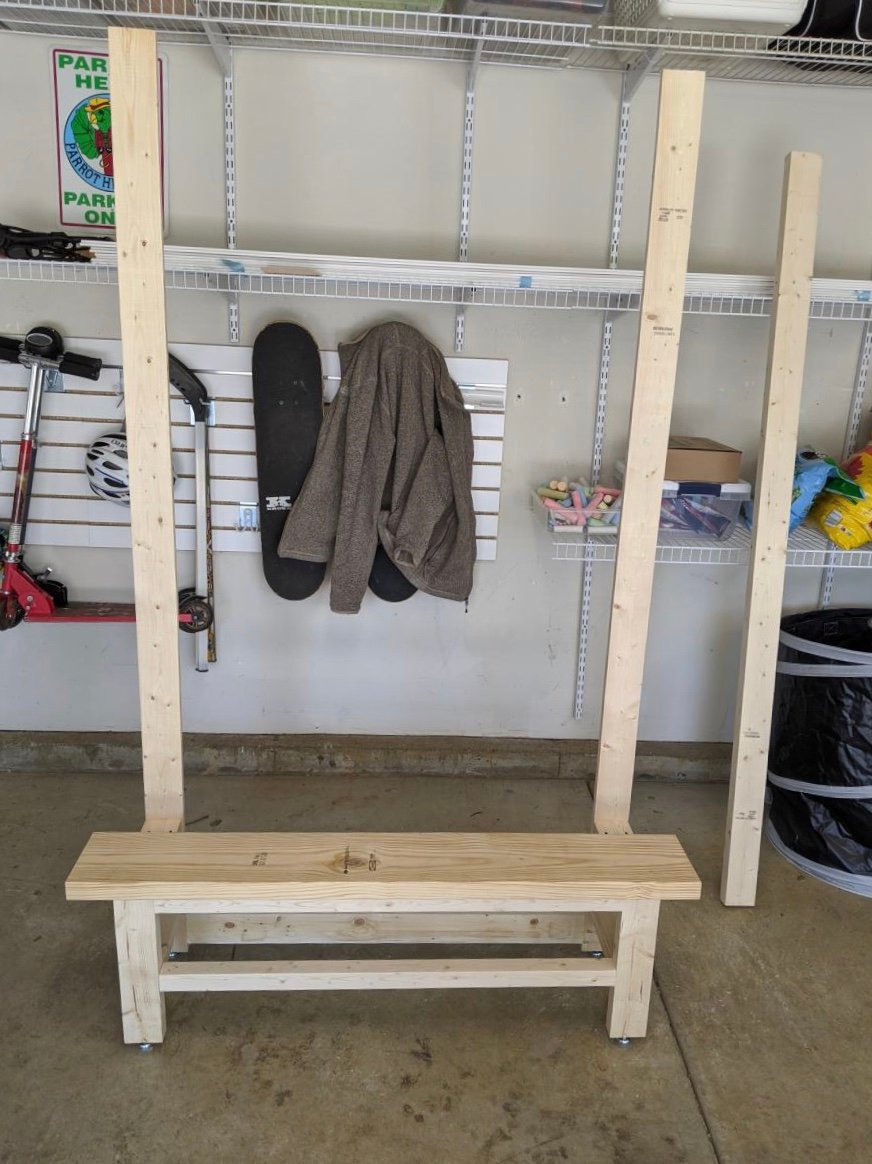
For our first project, my boys and I decided we wanted to build a shoe shelf for our front foyer. We loved the design of the modern slat top bench so adapted it slightly to fit our needs. Here's how it turned out.
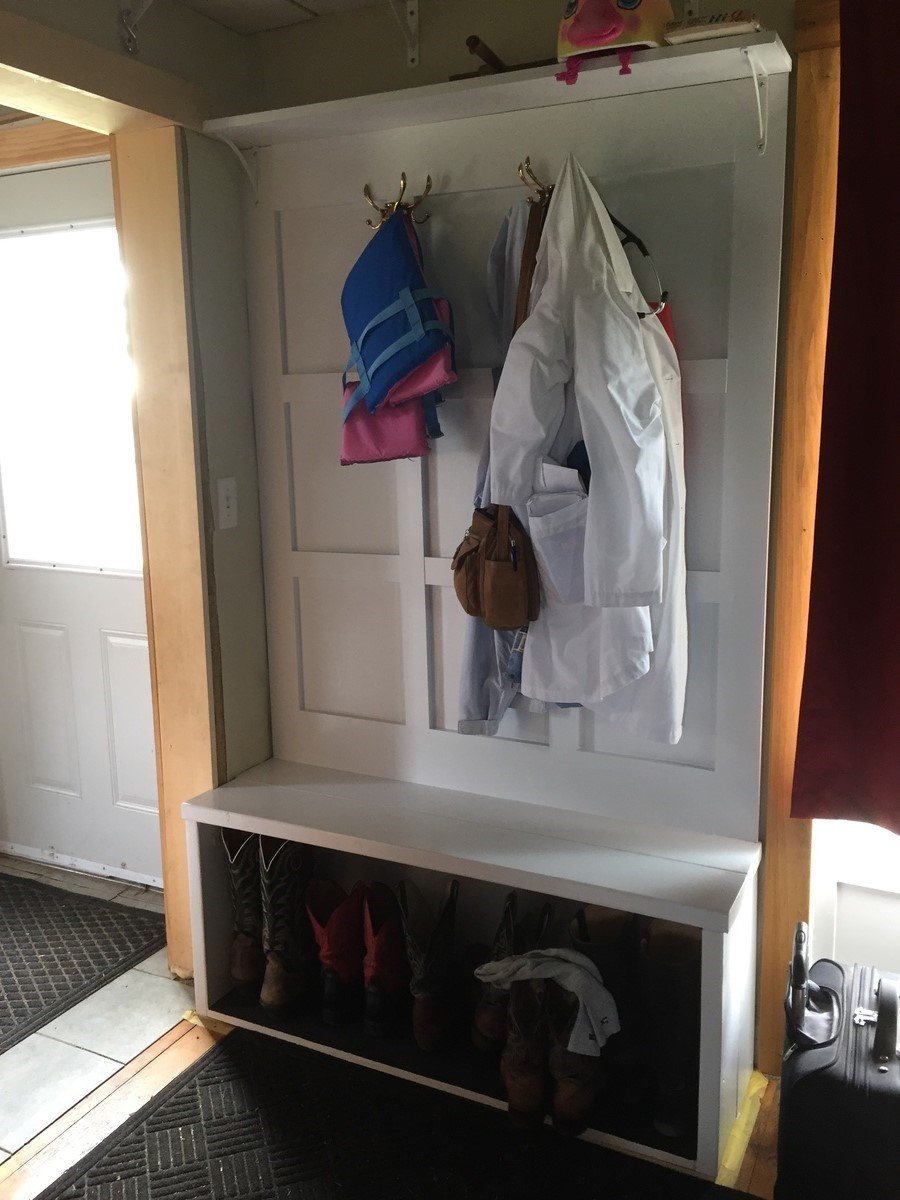
Altered plan somewhat to make it heavy duty seating when needed. 18" inside height is necessary for hubby's boots especially. Room for my lab coat too! It suits our 100 year old, nearly closet-less farmhouse well.
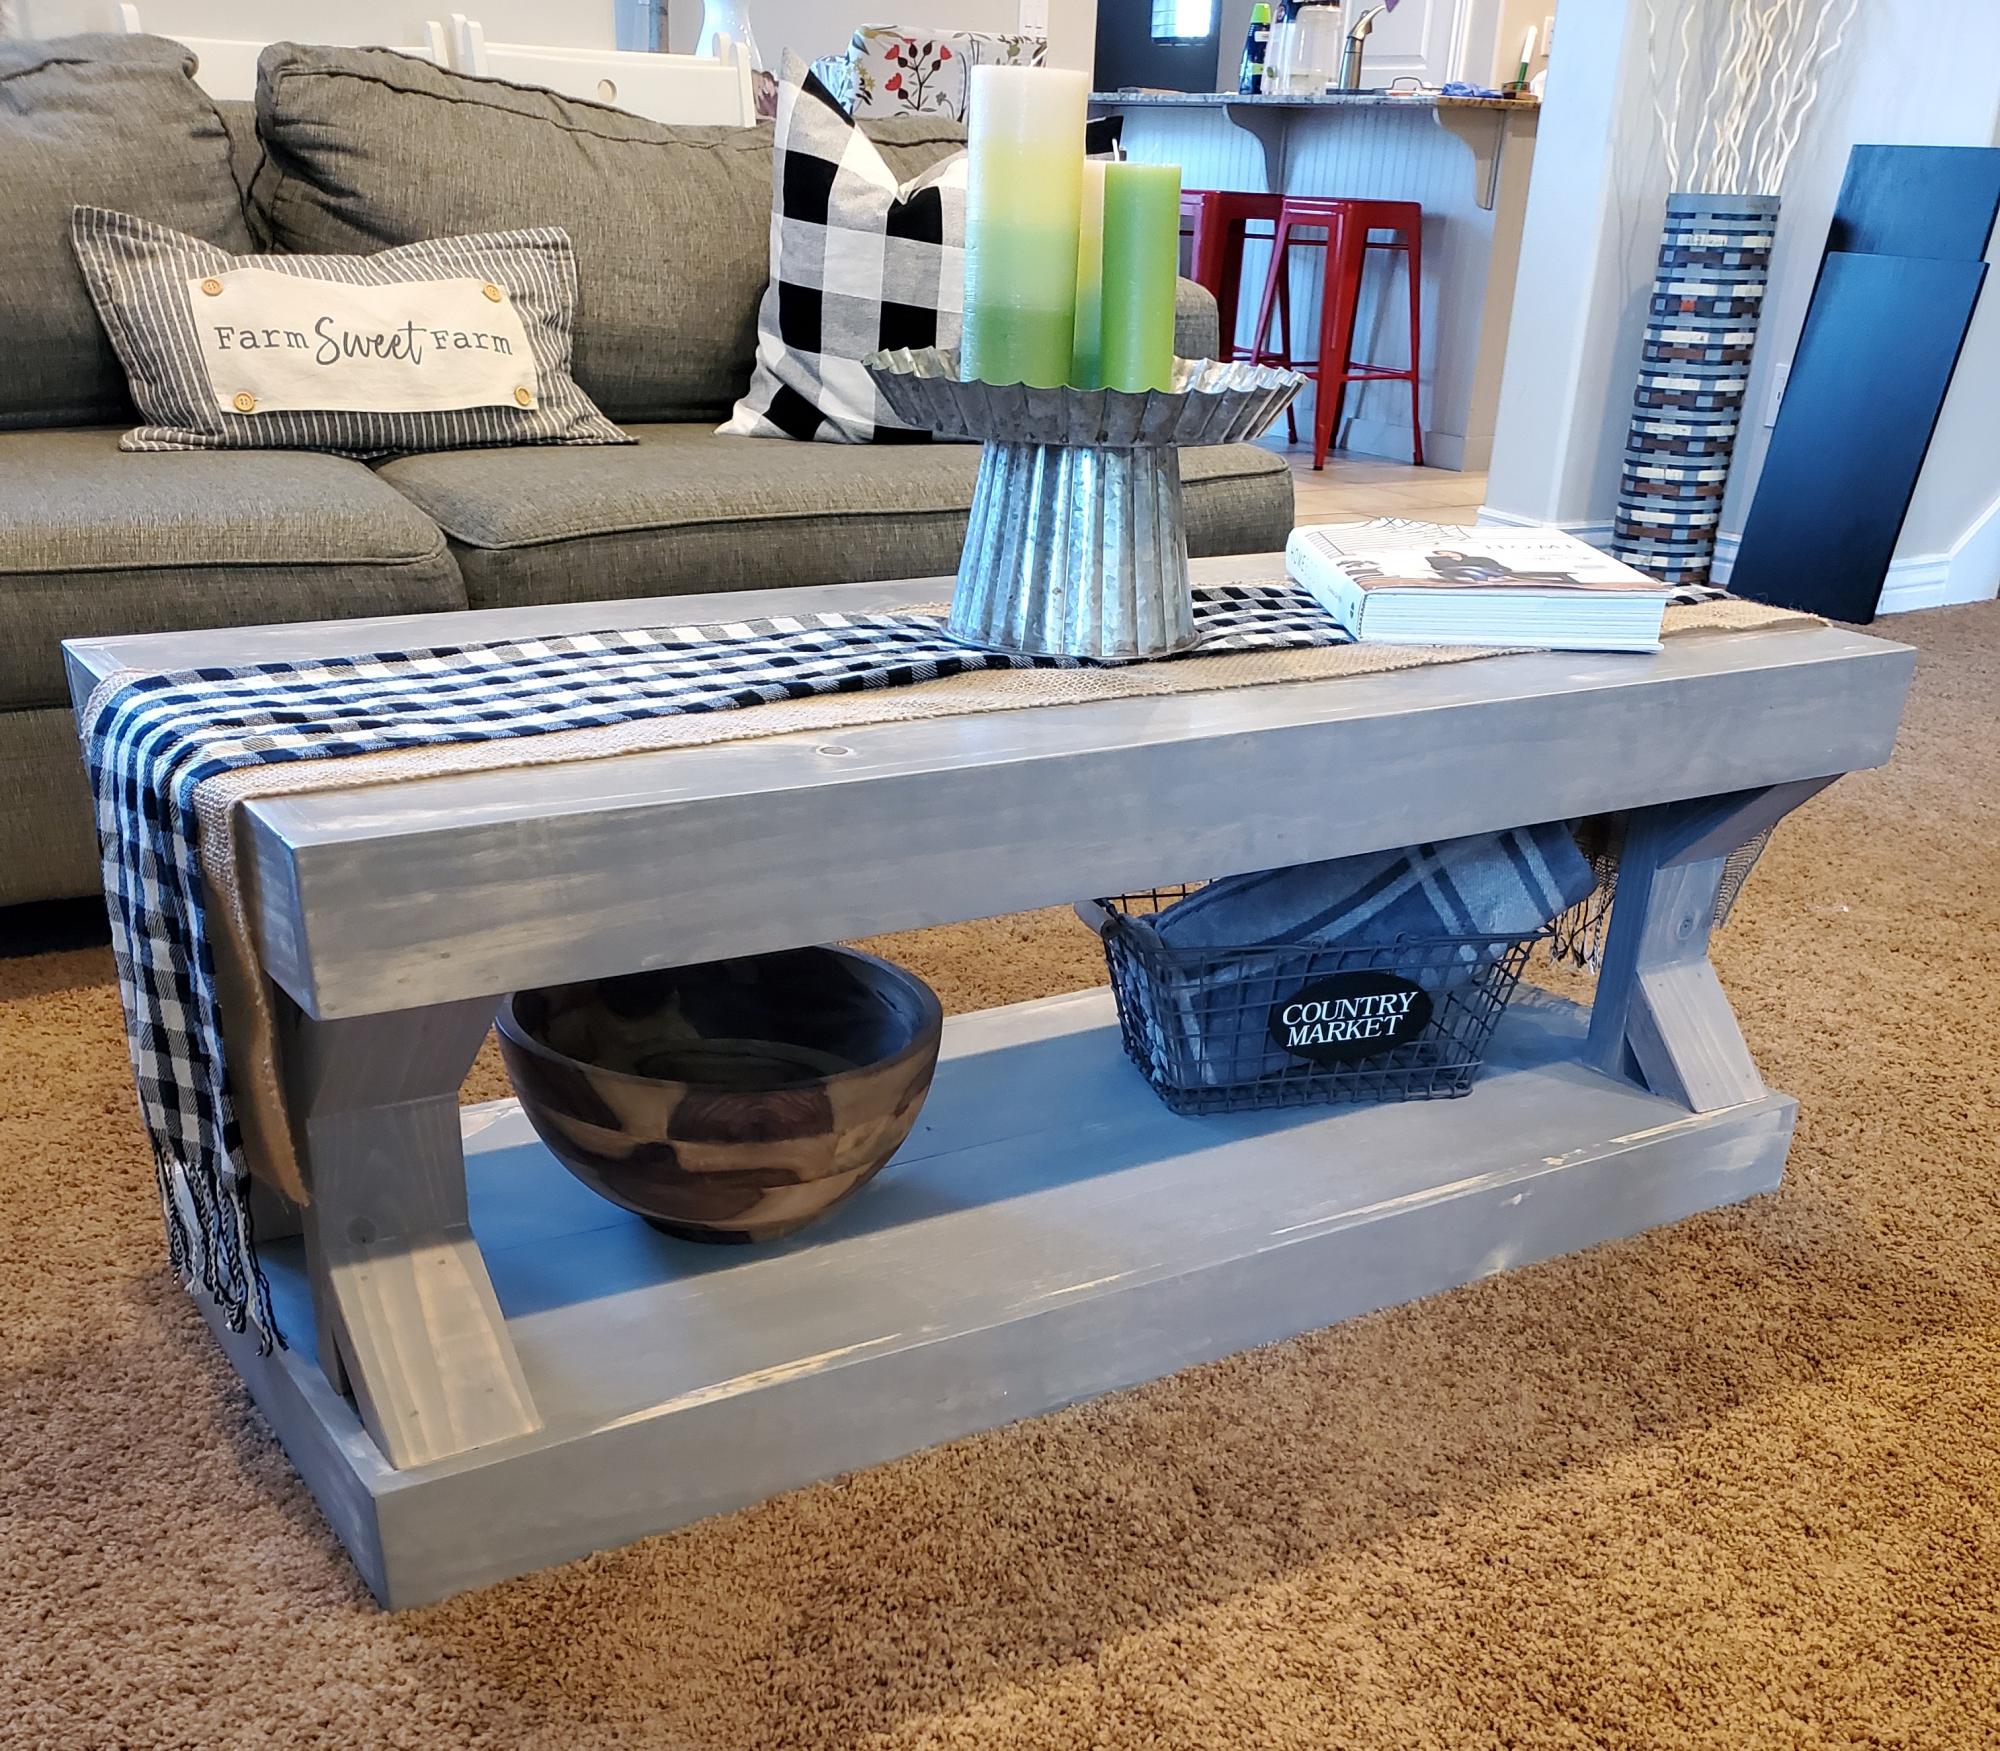
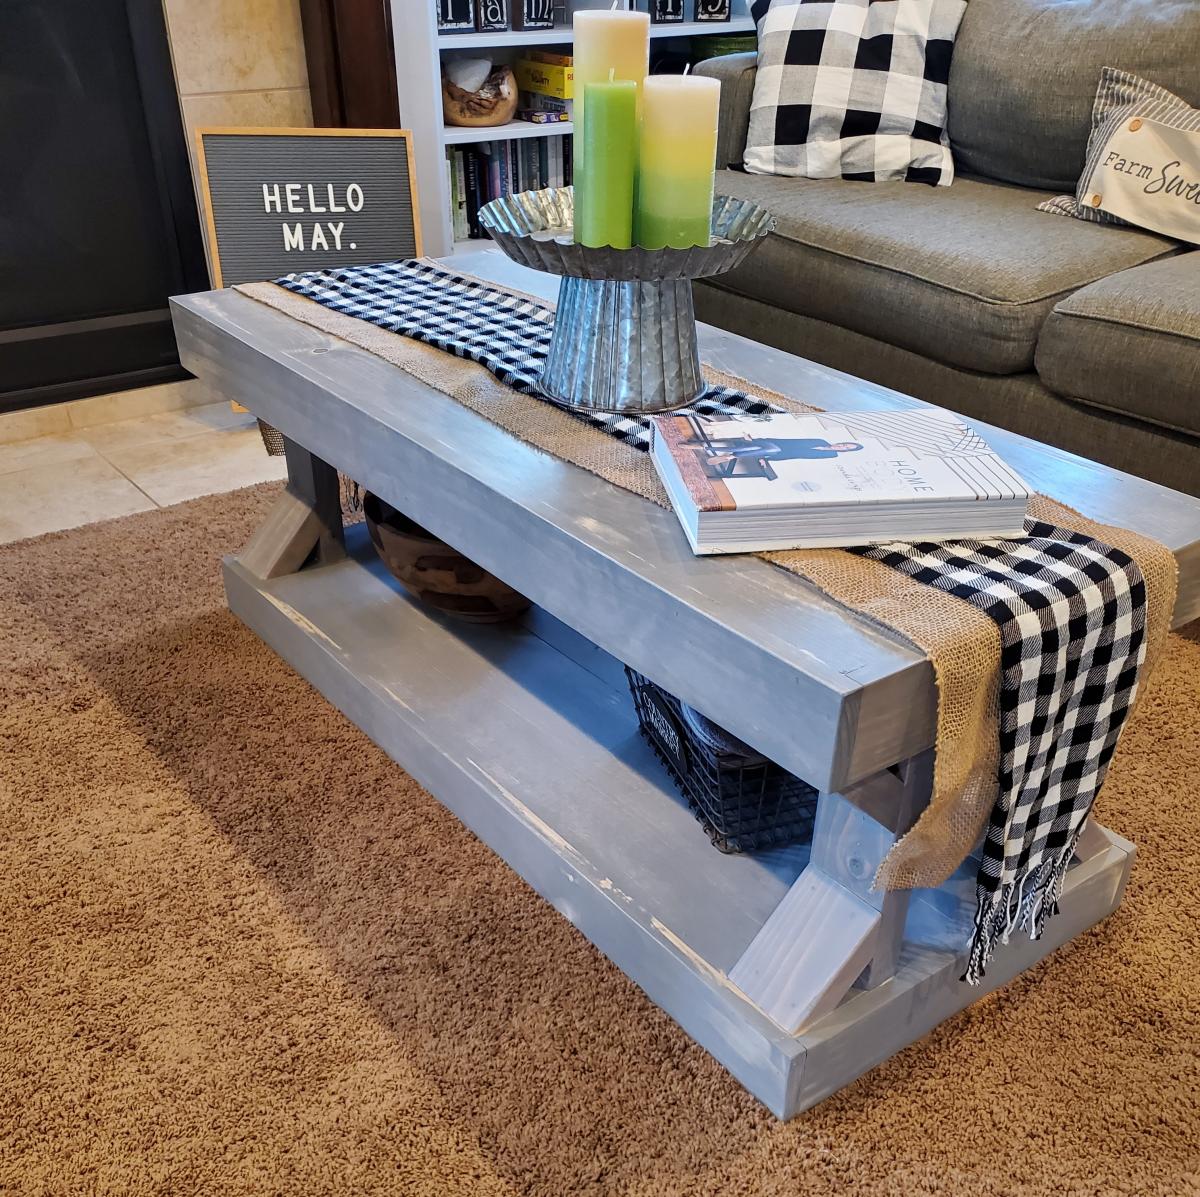
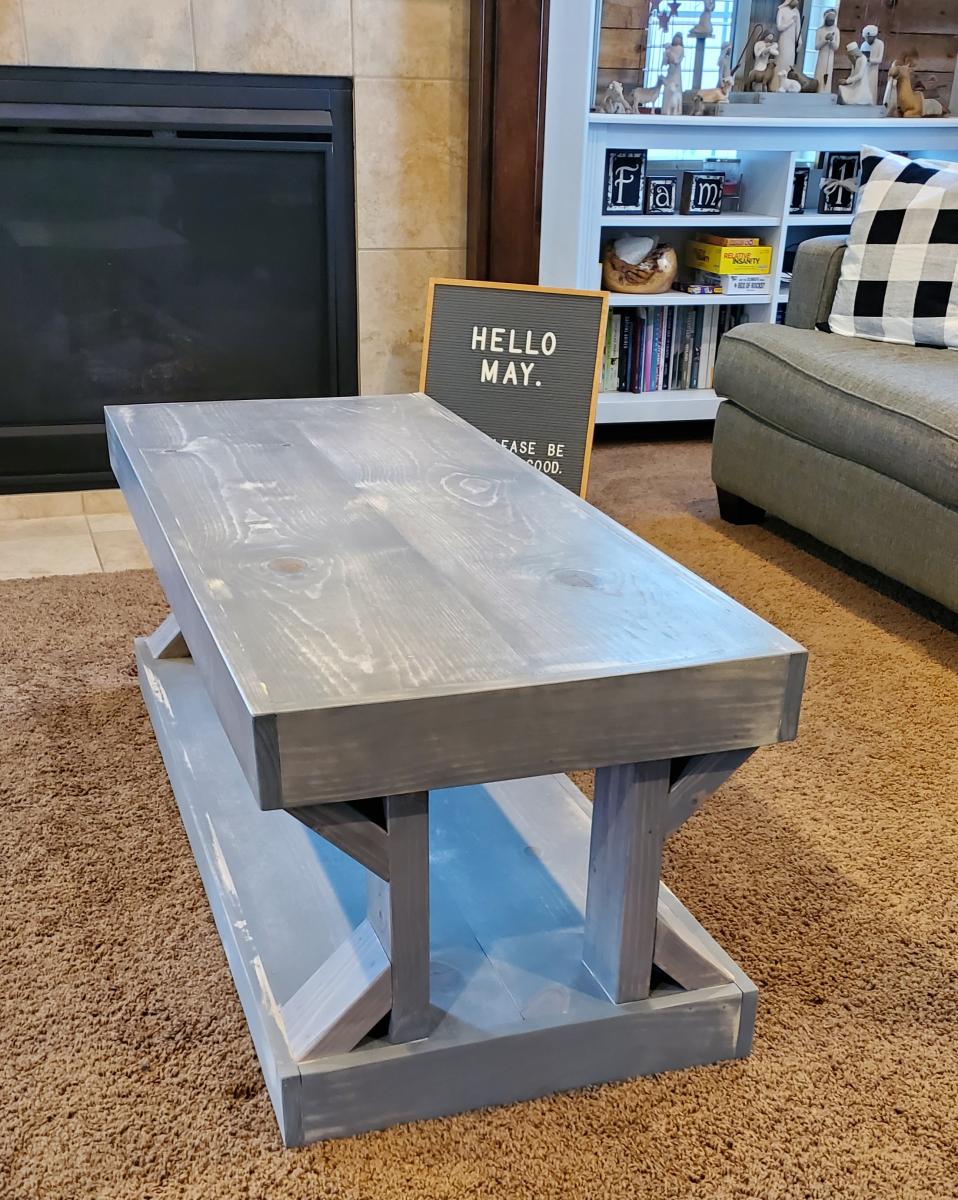
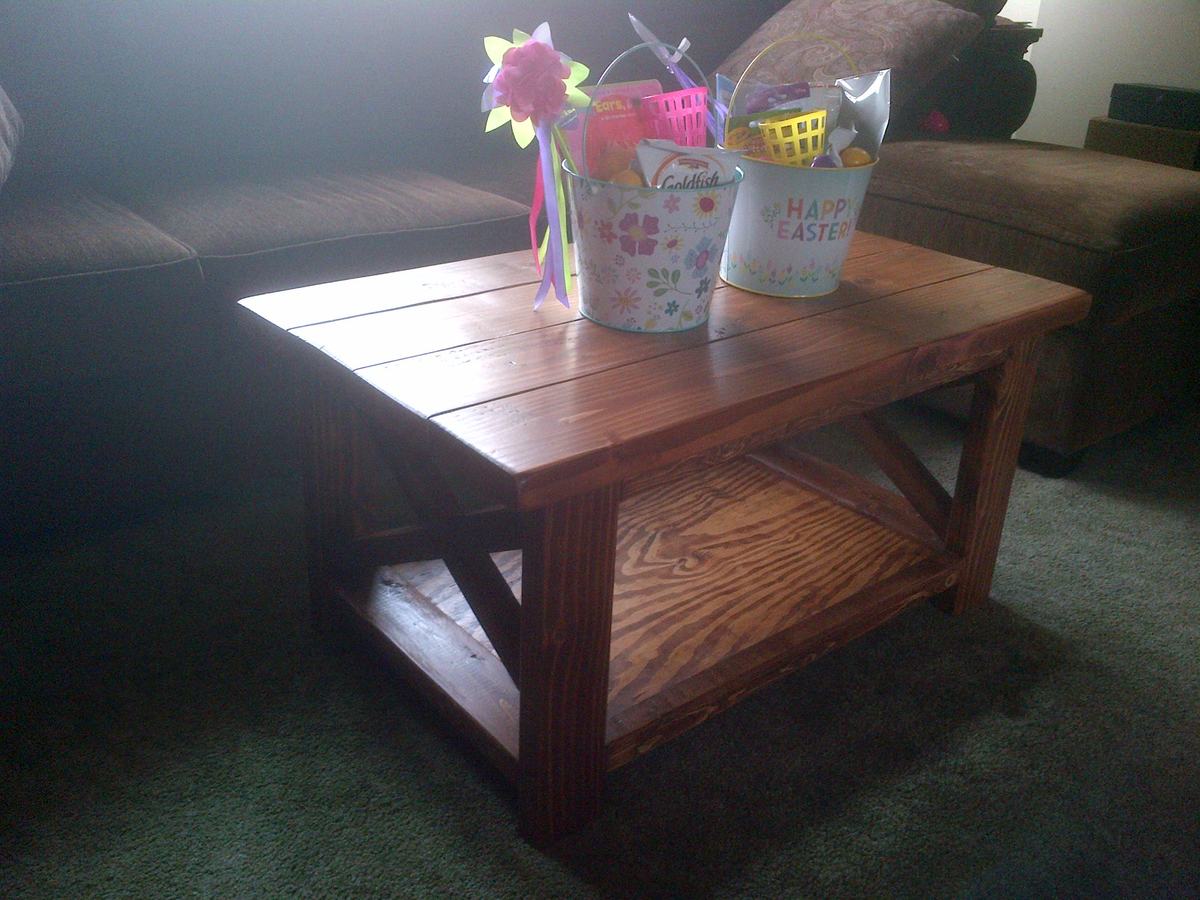
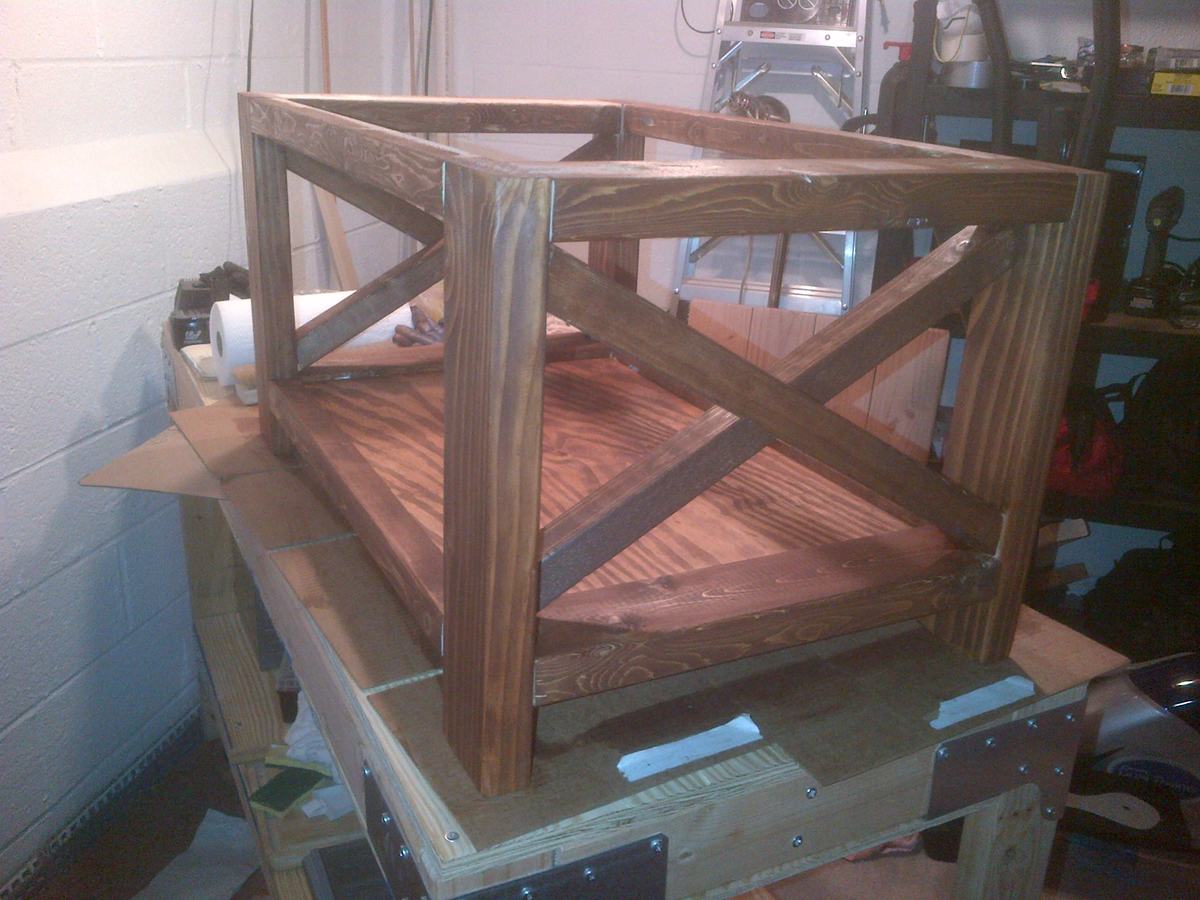
My sweet wife wanted a new coffee table so I decided to build one for her. Thanks Ana White, mission accomplished!
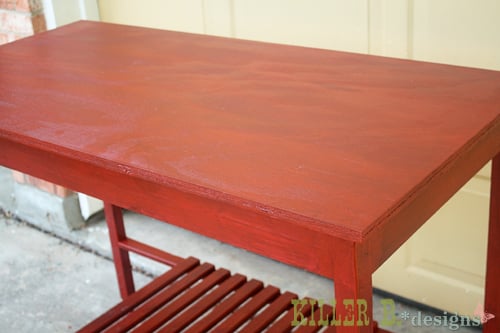
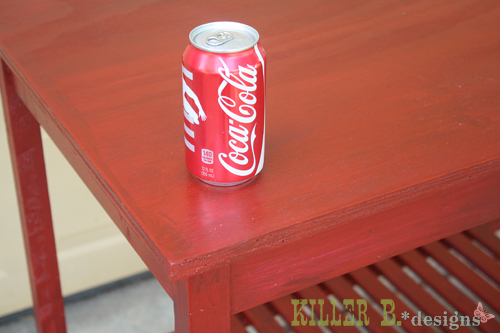
A friend of mine was looking for extra counter space, and asked me to build a kitchen island, but with a few modifications. He wanted space on the end to slide two stools, so I used fewer slats. After I finished the build and the first coat of paint, he decided it was 3" too short. So, I got creative and used some stair spindles to create decorative feet! I'm actually really glad for the mix-up, because the feet give it so much character. I layered on the paint by starting with a coat of plum, then a coat of cherry, and followed it up with a glaze mix with oak stain. Then three coats of spray on poly and it was done.


This is a bench that I have built for a friend of mine to fit exactly in her entry way. I made it in the spirit of the Pottery Barn furniture that she already has. I used regular Douglas Fir found at anywhere lumber is sold.
The bench was put together using mostly 2-1/2″ pocket hole screws. I use my Kreg Pocket Hold Jig to drill the holes, but any jig should work.
See the link for detailed instructions.
Was made using 2x4 plans from Ann-white web page. Thanks for the idea
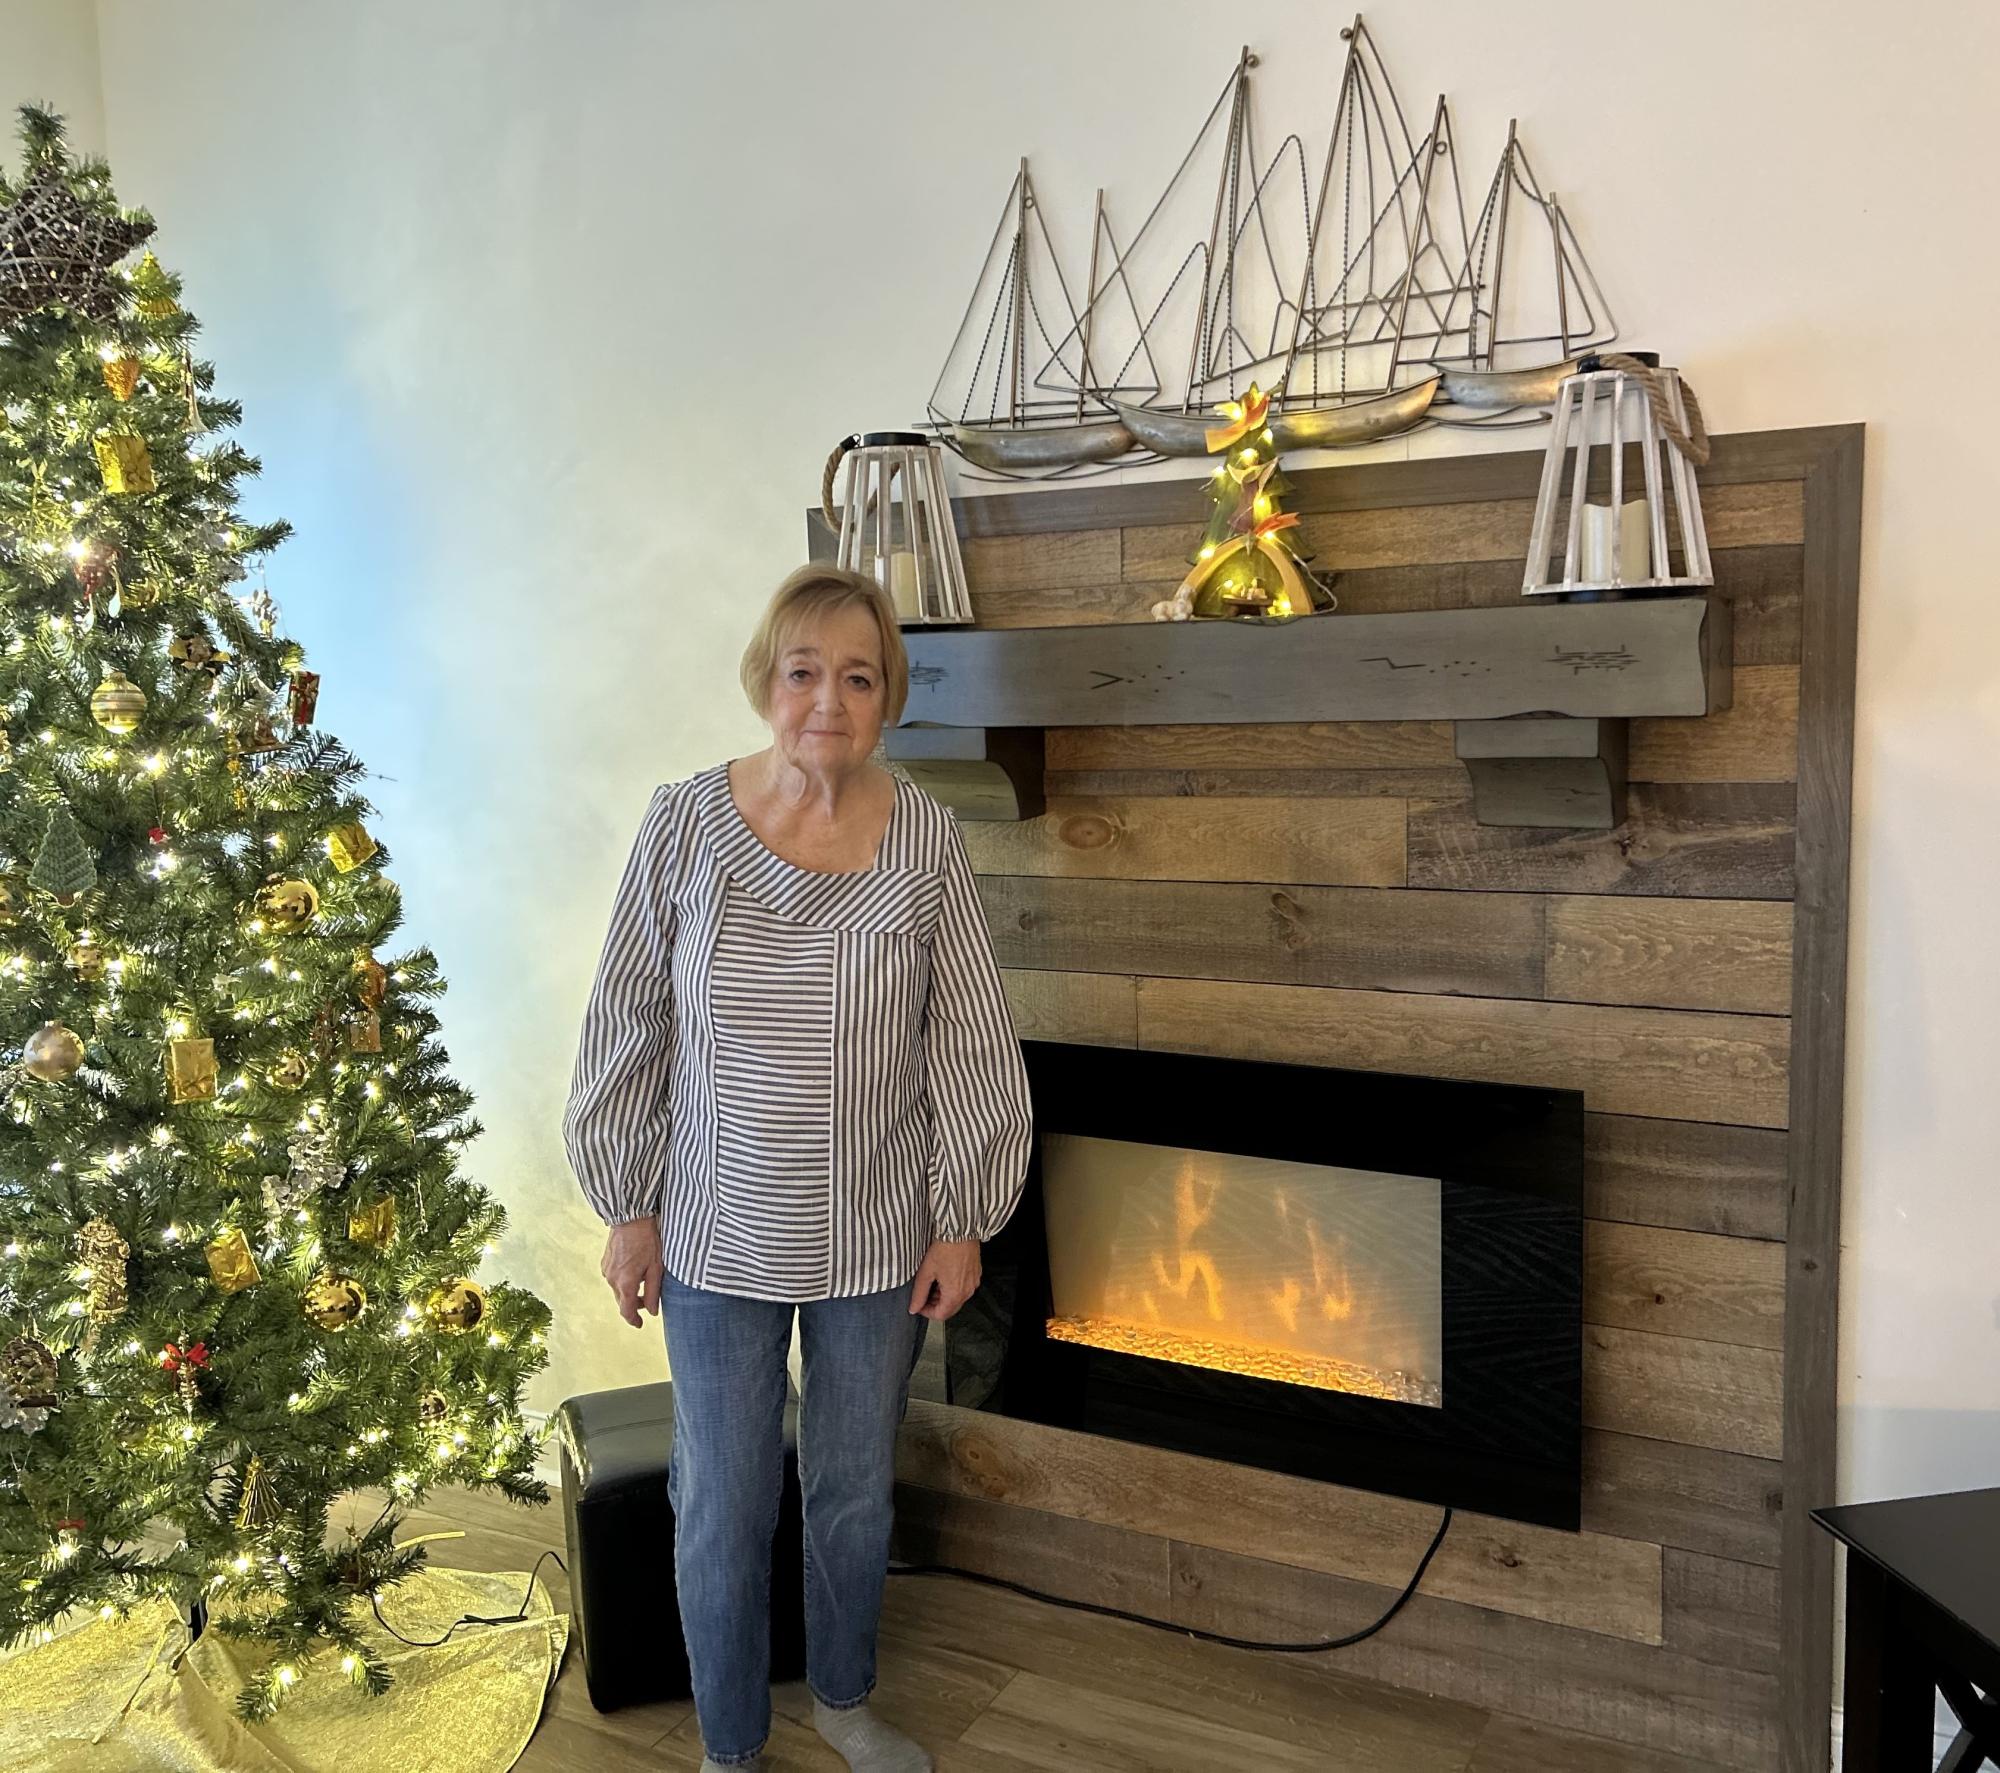
My wife and I wanted to do something with our surface mounted . Then came up with this design.
Bob Cousineau
Mon, 01/08/2024 - 09:48
Gorgeous fireplace accent wall, love the design for a surface mount option!
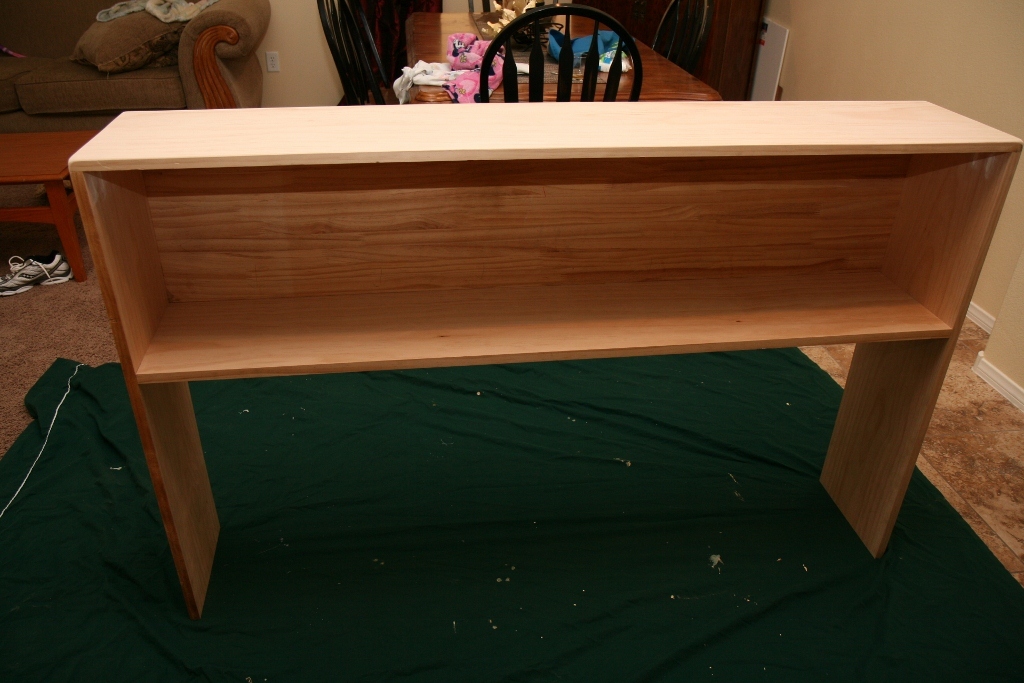
This was our first project using the Kreg Jig K4 pocket system. We wanted a simple and affordable project to learn how and practice using this tool. I also wanted a narrow buffet table to fit in our formal dining area, which I could never find in stores, so making one seemed appropriate.
The only difference from the original plans is that the sides are 37 1/4" and the back is a 1x14 @ 58 1/2".
Thank you for this simple yet elegant console table plan!
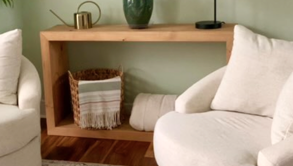
This was the second coffee table I've built using Ana's plans and I'm so grateful for this website! The plans are easy to follow and adapt for truly "custom" furniture and a fraction of what you would pay for similar pieces in a store or online.
I adapted the plans to make the table a little shorter and I only used four 2 x 6 boards for the table top instead of five so that it would fit in with our couch a little better.
I saved a little bit of money by using furring strips for the 2 x 2s and I opted for 3/4" plywood for the bottom shelf.
The Kreg Jig (i get by with the little R3 but I'm hoping to upgrade someday soon) is invaluable for projects like this.

Tue, 09/09/2014 - 07:36
Hello,
I'm looking to scale back the project to fit into my living room - do you mind sharing your final dimensions?
Thanks!
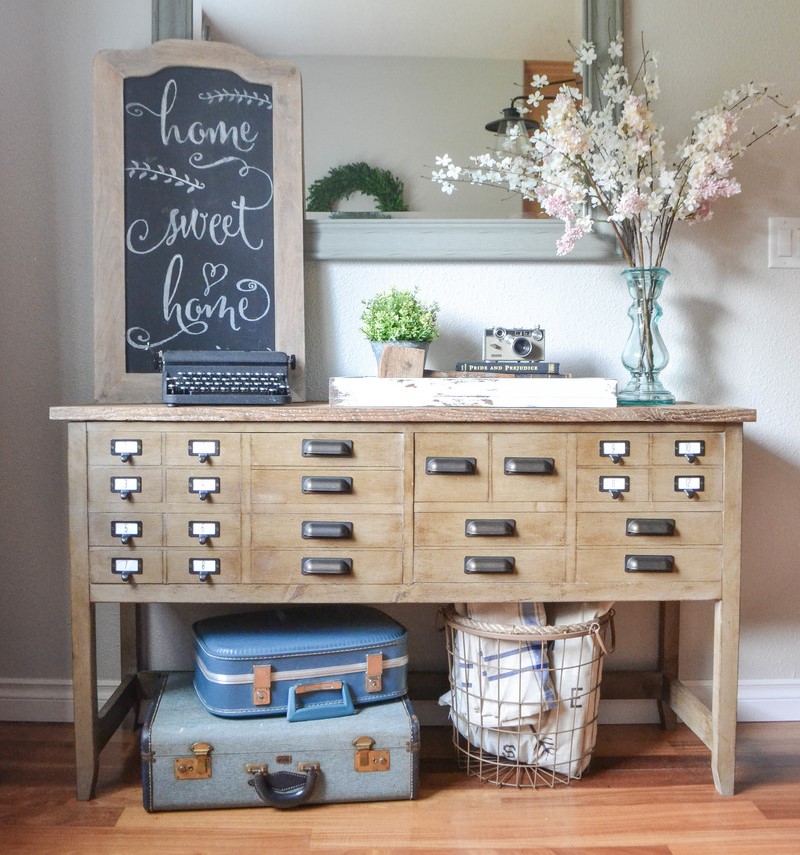

Gorgeous waterfall framed wood console by Jessica!
After building the computer desk from Shanty@Chic's design. We decided to make a simple bench that matches. It is about 36" long (which is long), but we wanted both kids to be able to sit in front of the computer at the same time.
Cost was low except more Minwax stain and a 1"x3" for the trim on the bottom. Most was built from scraps desk material and we have a ton of extra wood we saved from the trim carpenter when we built our house last year.

This is my first project using a Kreg Jig. Went together in about half the time of previous projects. I love it. Thanks for sharing the plans!
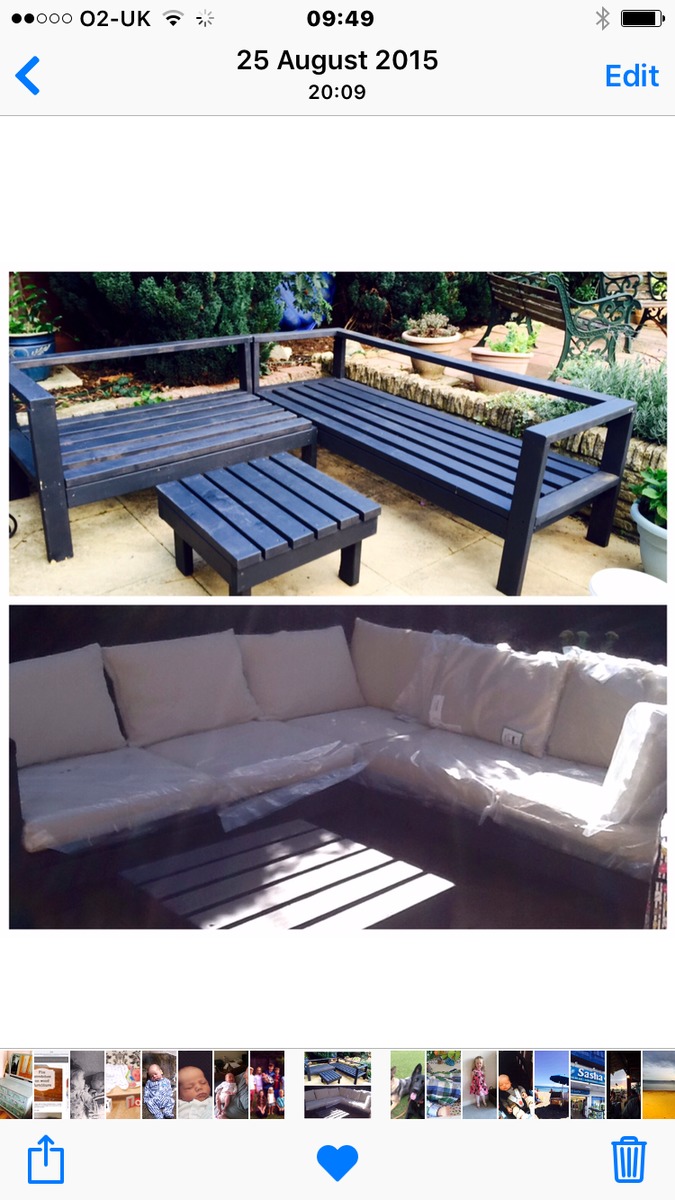
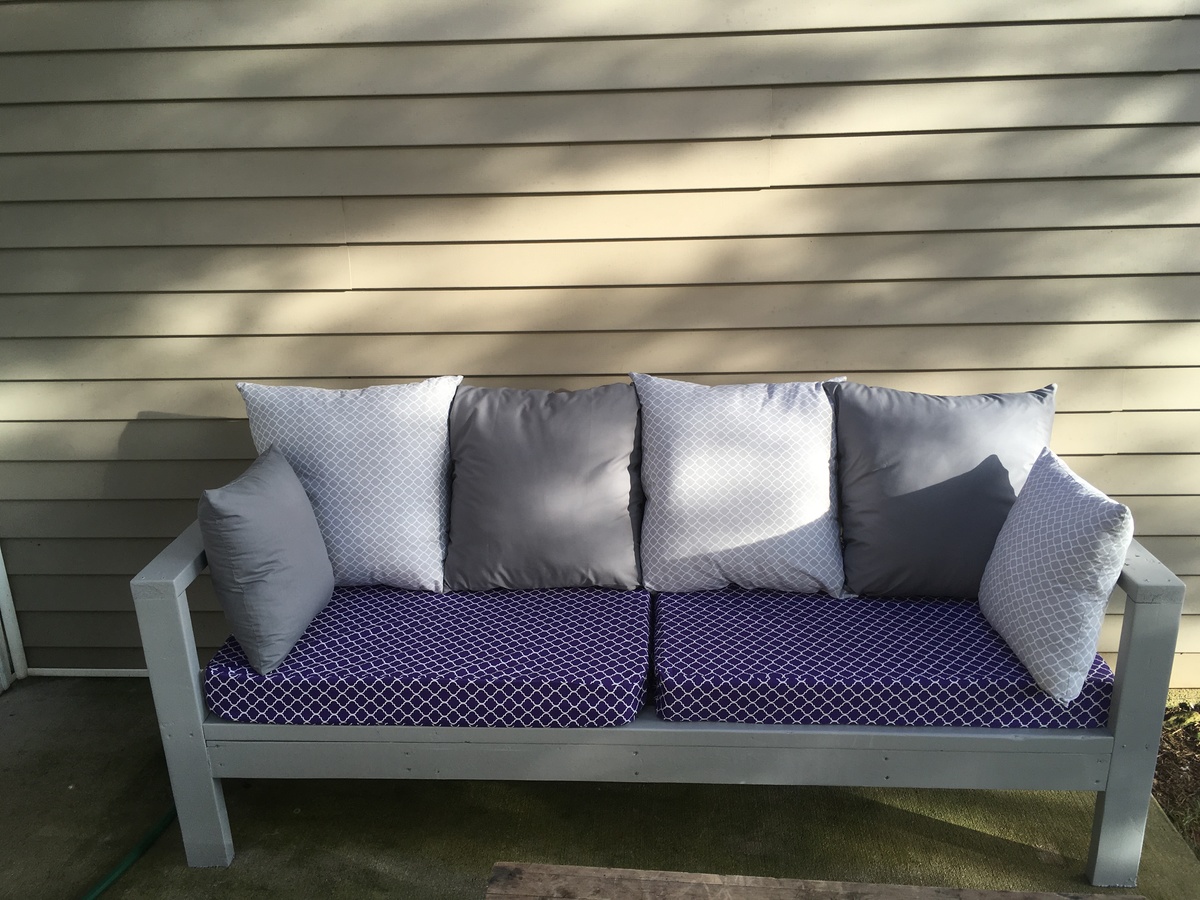
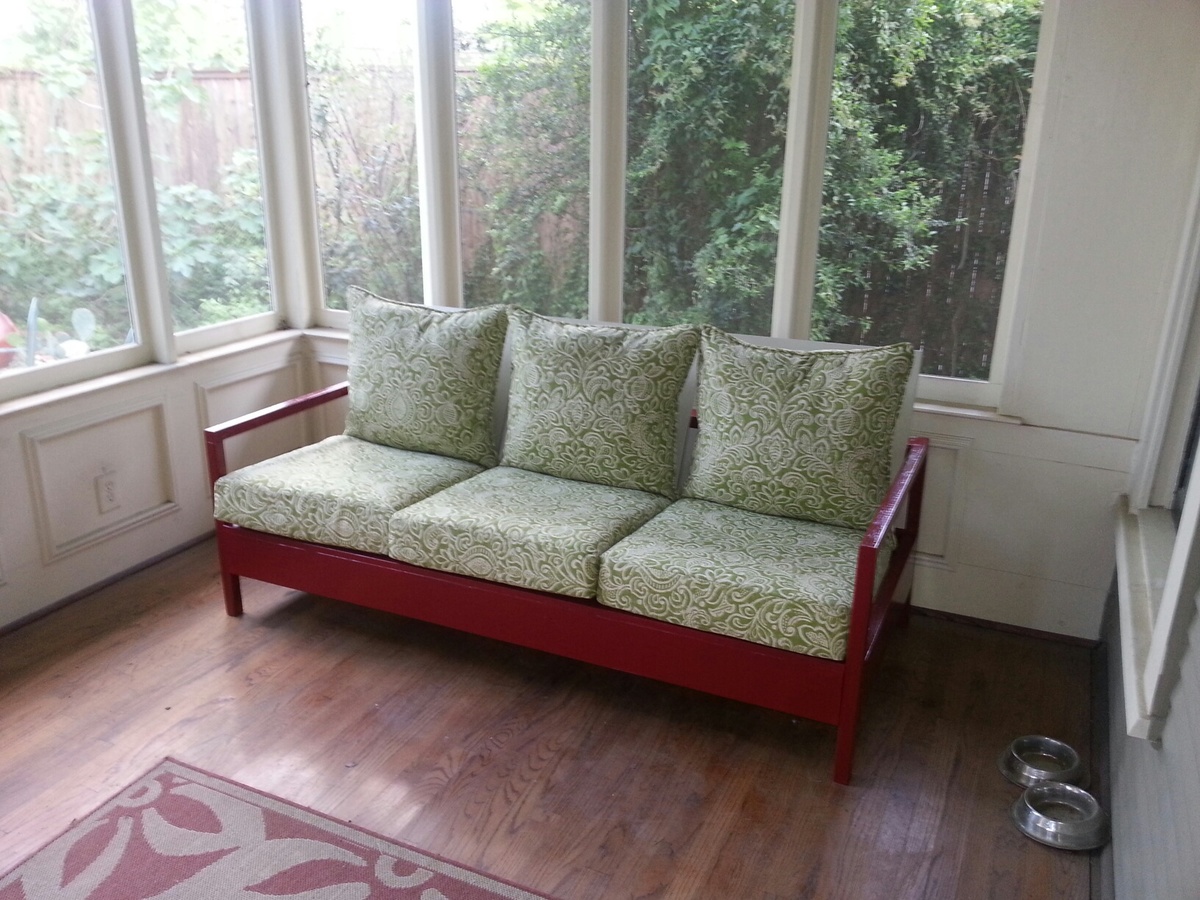
Hi. I'm I the uk. I saw your video on how to make this sofa. I showed my hubby. He said ( you'll never be able to do that). Red flag to a bull. Ha ha. I. So proud of myself. It was really easy your plans are very easy to follow . I bought the cushions from ikea . Just one problem . The gray British weather. Rain Rain and more rain. I'm looking into something to protect the feet from the wet.
Stephanie Harvey. Age 61
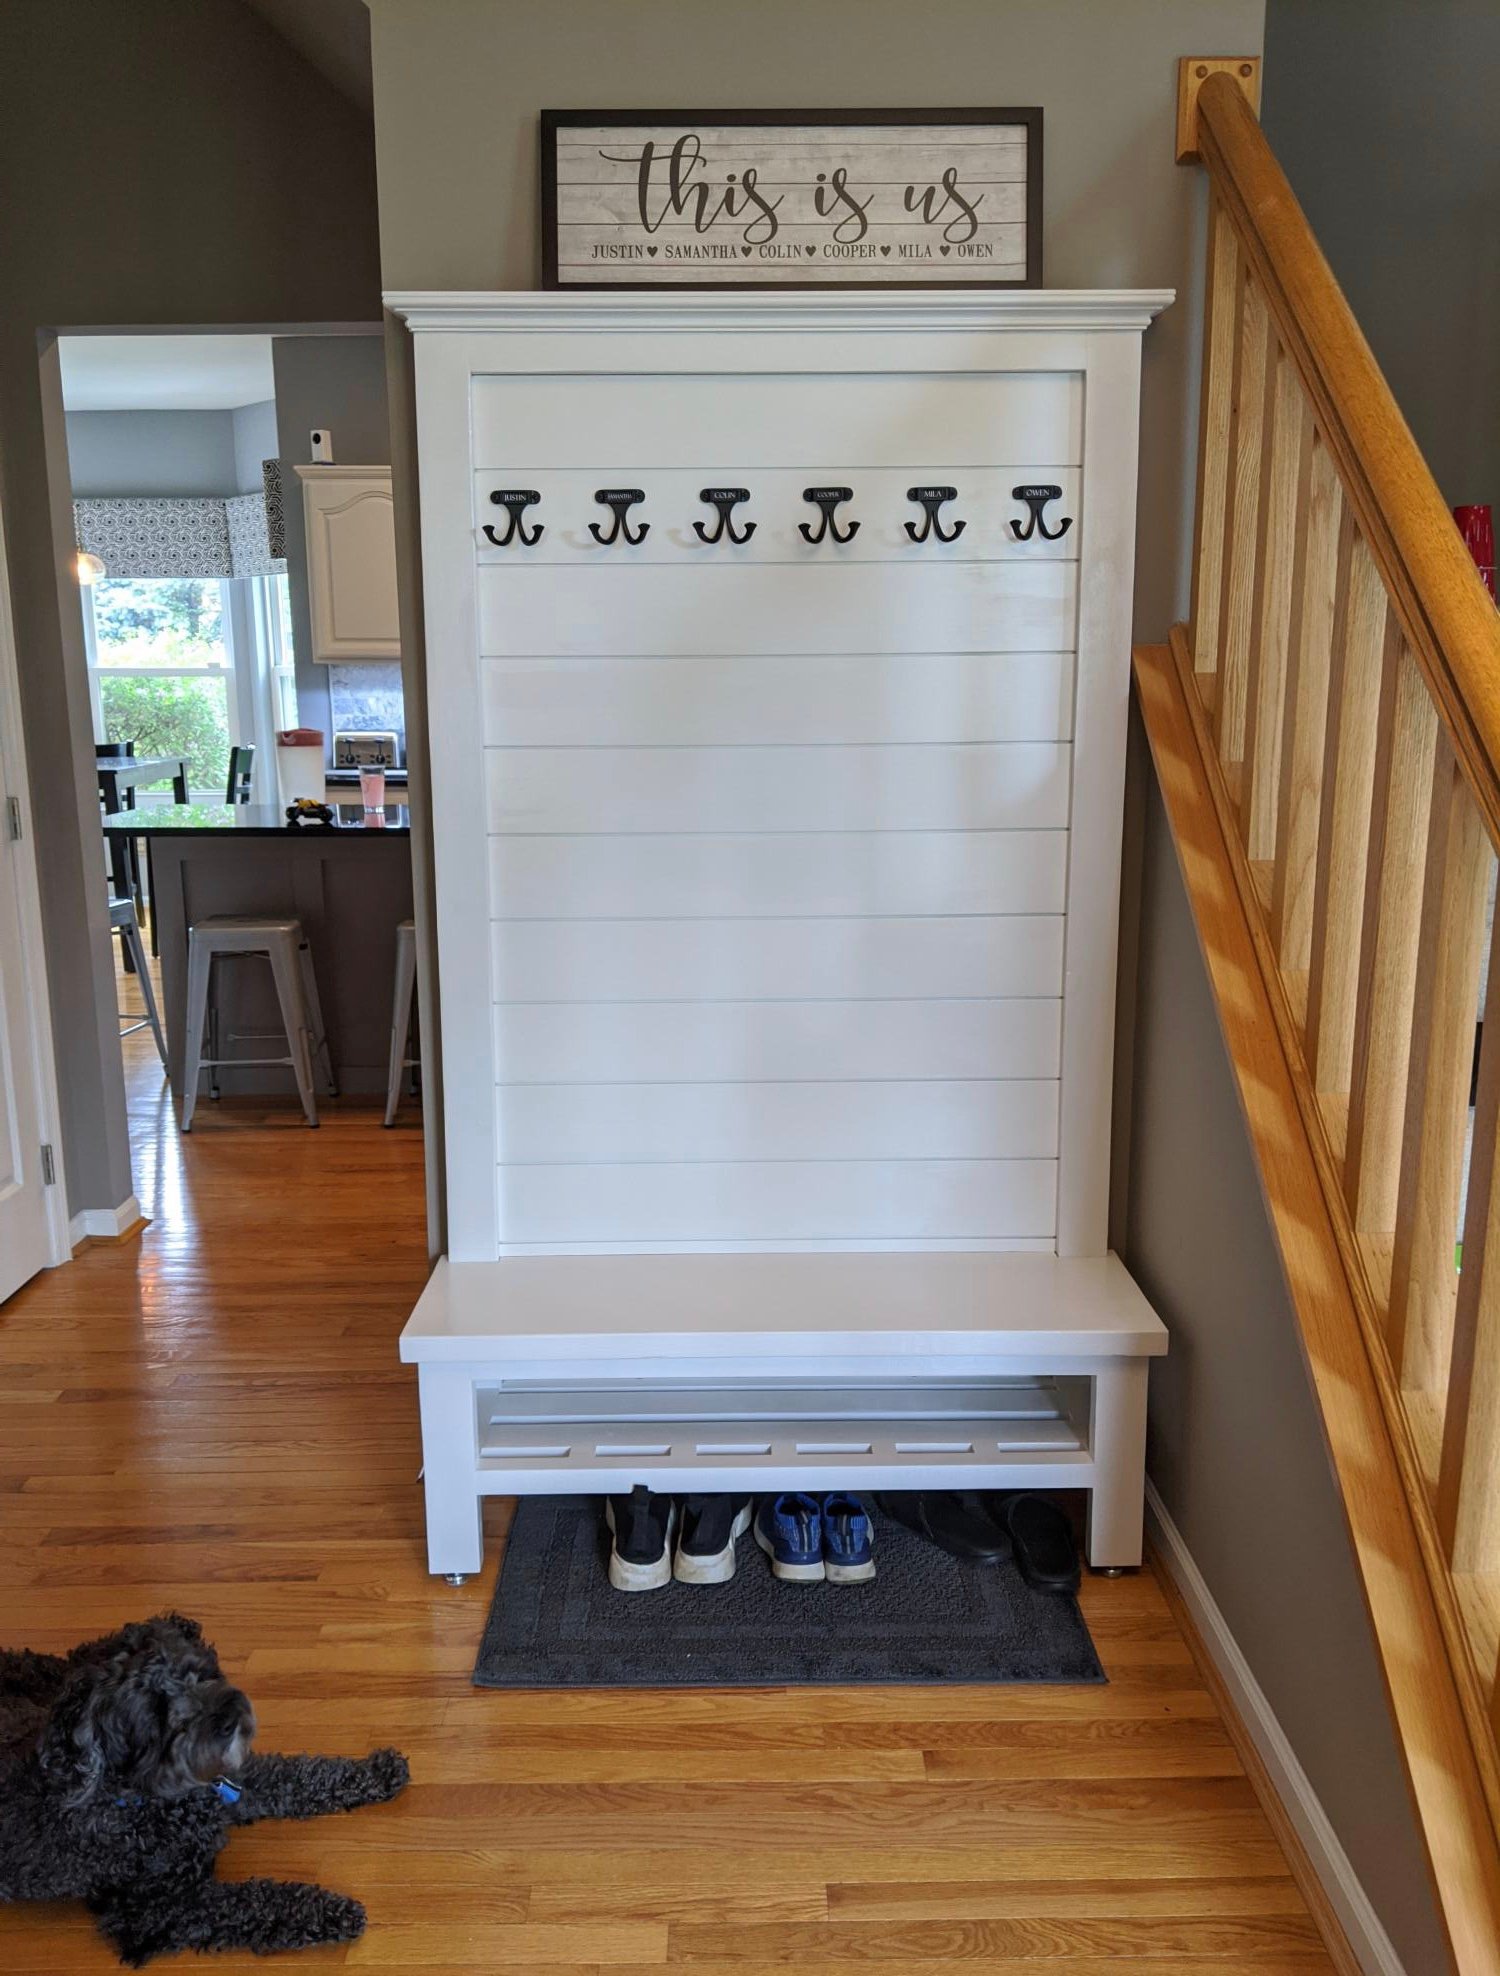
This is a great design! I made a few changes to suit our needs: 1. Raised the shoe shelf so shoes can also be kept on the floor 2. Added a few spacer blocks on the shoe shelf to prevent the 1x1 from spinning since there's only enough room for one pocket screw per side. 3. Cut a rabbet in the back of the tall 2x4s to accept the tongue and groove shiplap 4. Used tongue and groove shiplap (pre-painted white from Lowes) 5. Topped with crown molding 6. 6 hooks so everyone has their own hook (although I can see this getting very crowded in the winter) The wife loves it and got me a lot of brownie points right around Mother's Day!

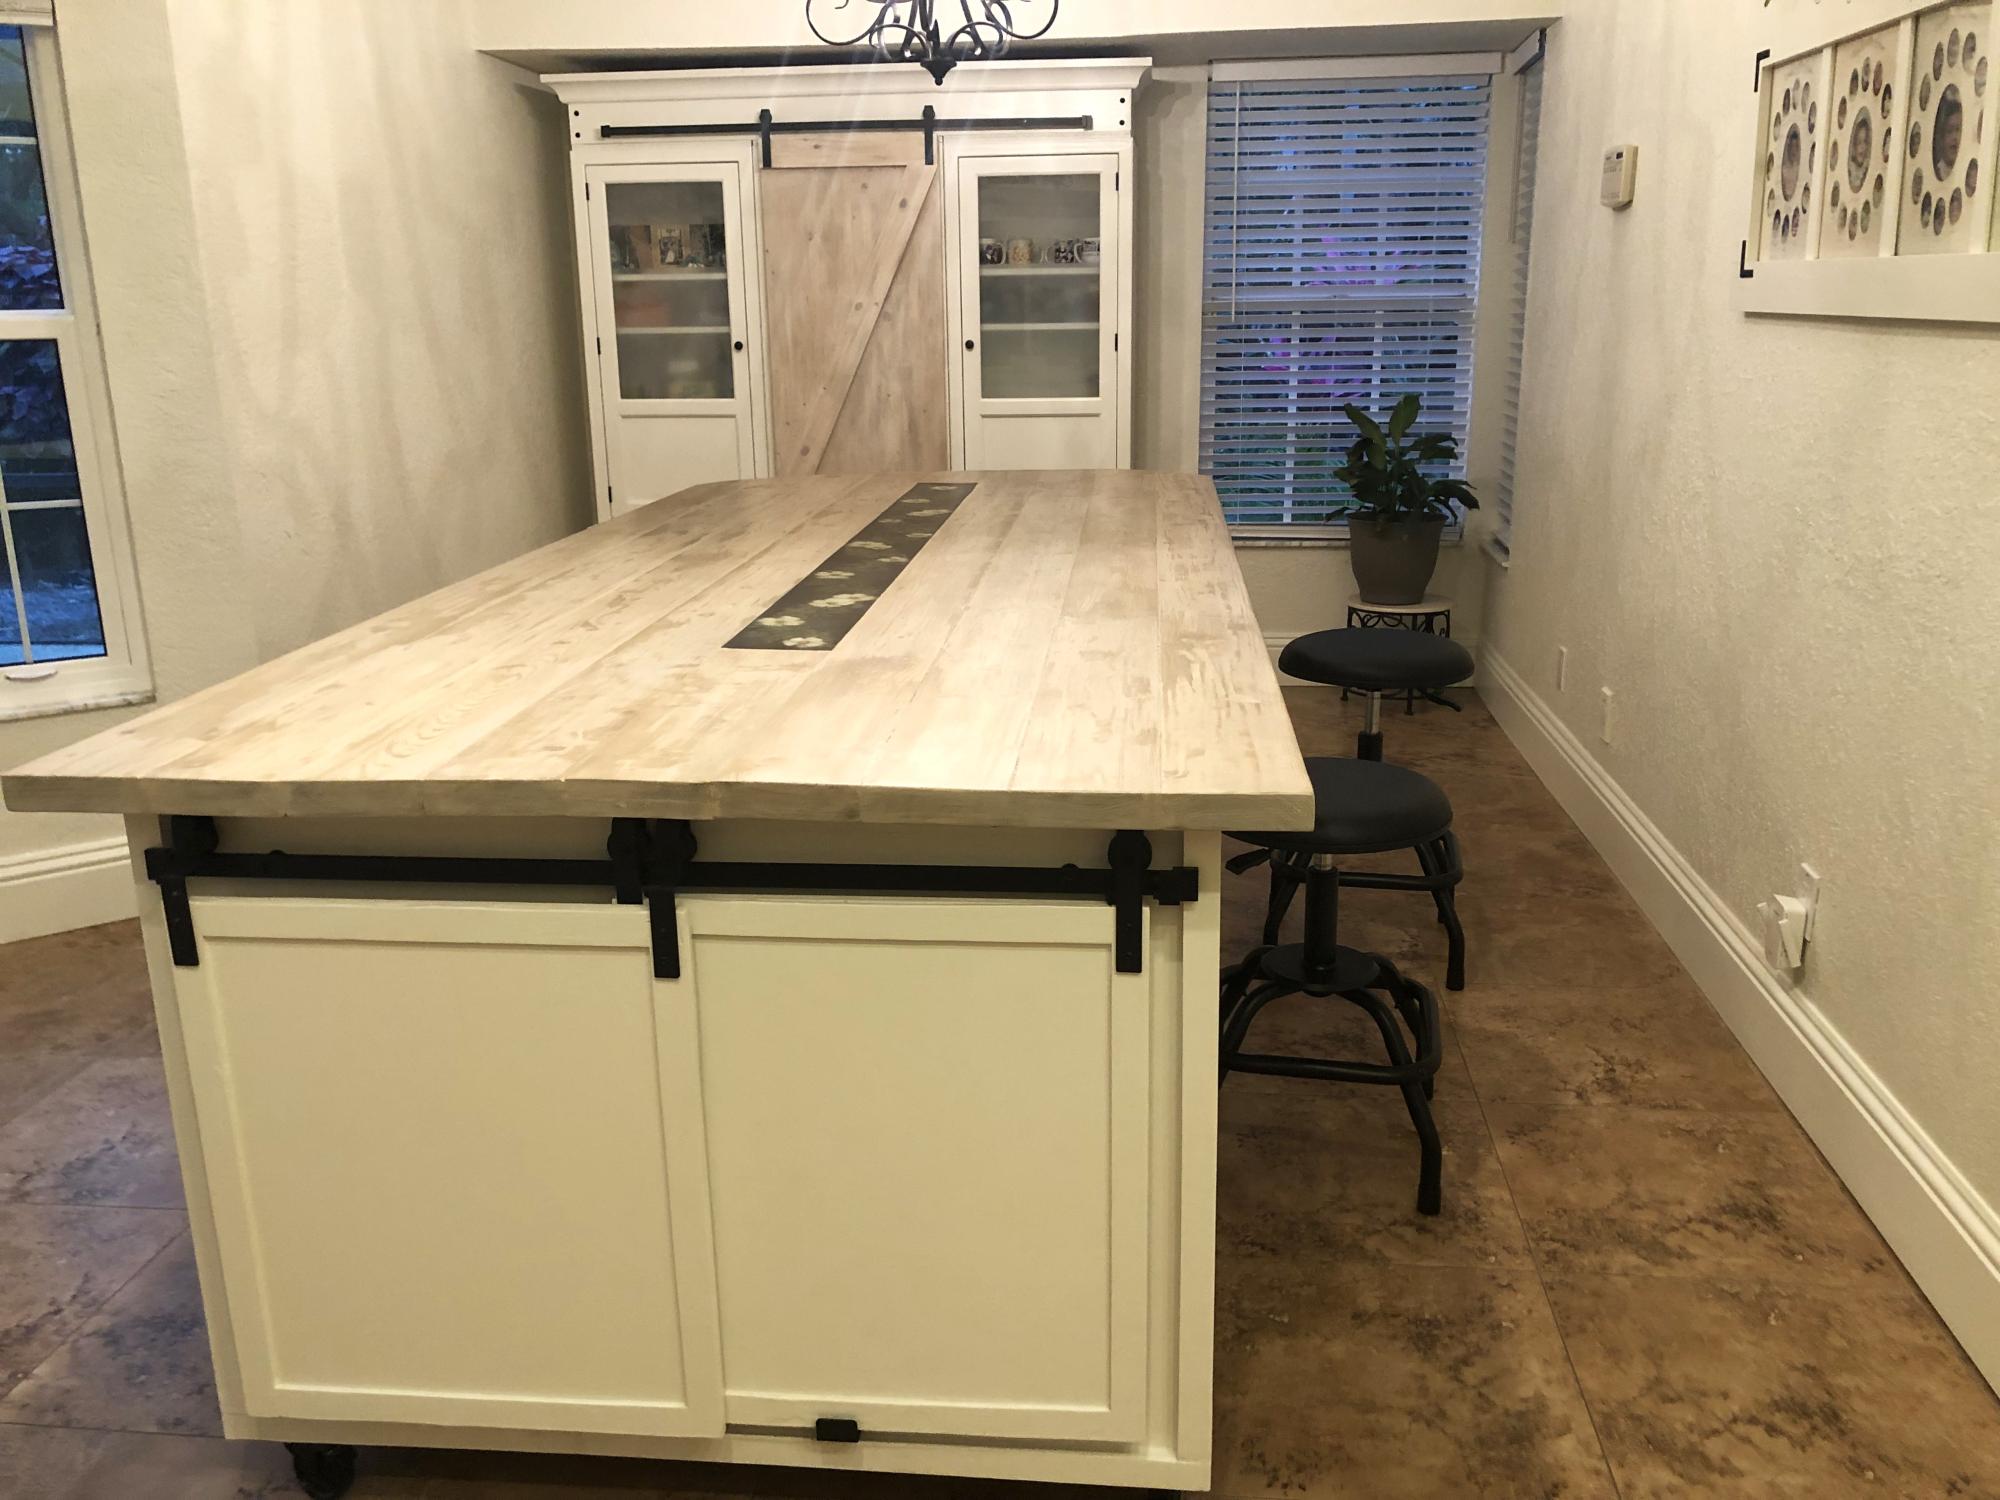
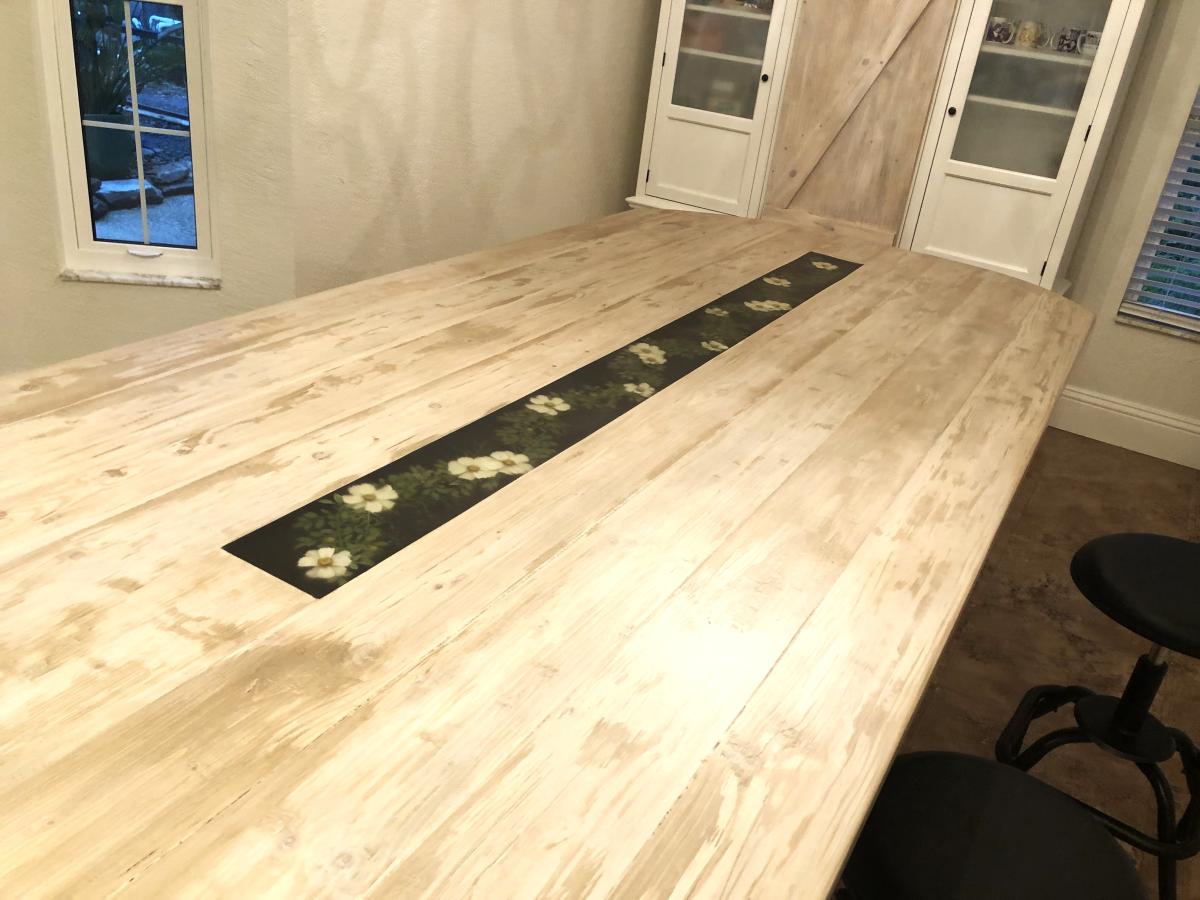
So I made a 4ft and a 6ft put them on casters joined them like a “T” shape, it is a moveable kitchen island dining table! The top has epoxy in the middle with flowers to give it some pop! Everyone loves it that comes over! Thanks for all your ideas on your site; it was my inspiration!!!

Taking the top of solar footlights & glued them to the top of a painted lamp cover then add the fishing line to hang & presto chango! You now have a hanging solar lantern for under $7!

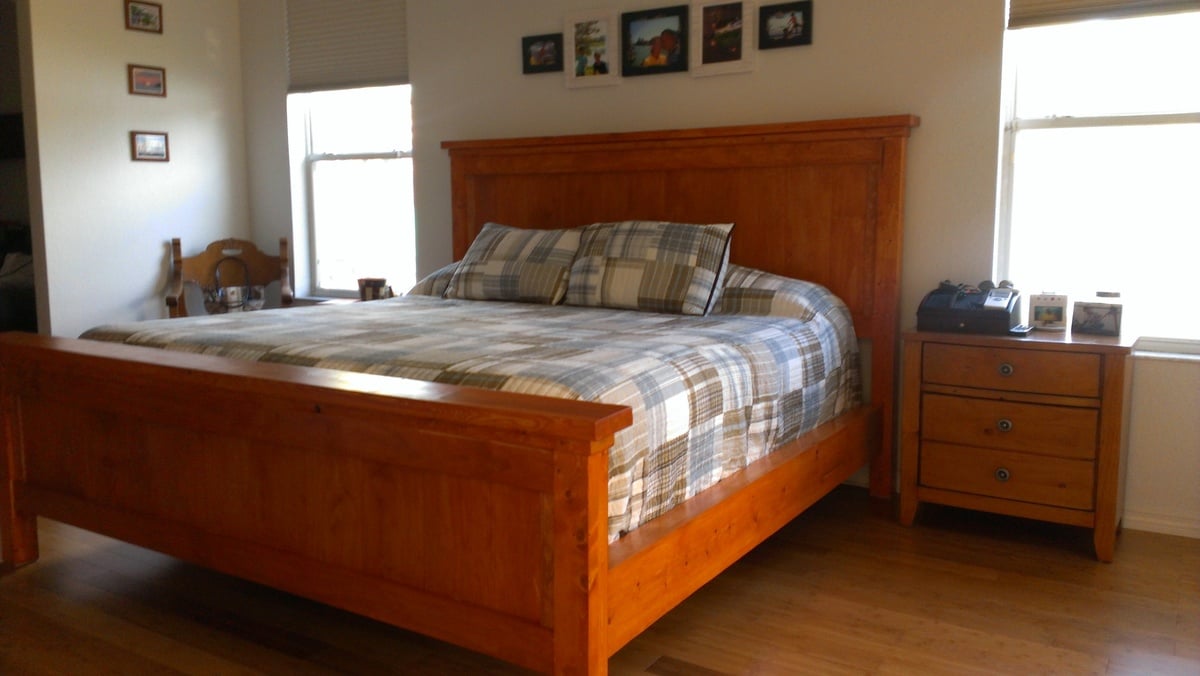
King size Farm House Bed. Project took about 30 hours of work (1-3 hours per night). Built with White Board and Pine woods. Pine was used for the head and foot boards slats. We made the mistake of making our bed head board and foot boards 6 inches too wide (mental brain fart). So our options where to scrap or figure something out. After some thought we decided to place a step on the running boards using a 1X3 (pine). The effect was stunning. Also added "vine" vertically to the end of both foot and head board, it looks better in person (you'll have to zoom into image). We took care in sanding all boards, staining using Wood preconditioner, then Minwax Colonial Maple, and then Semi-Gloss Minwax Polyurethane. We love the sturdiness of the bed! as our friends that have seen it have continuously repeat "It's beautiful, this is how furniture used to be made" couldn't agree more!
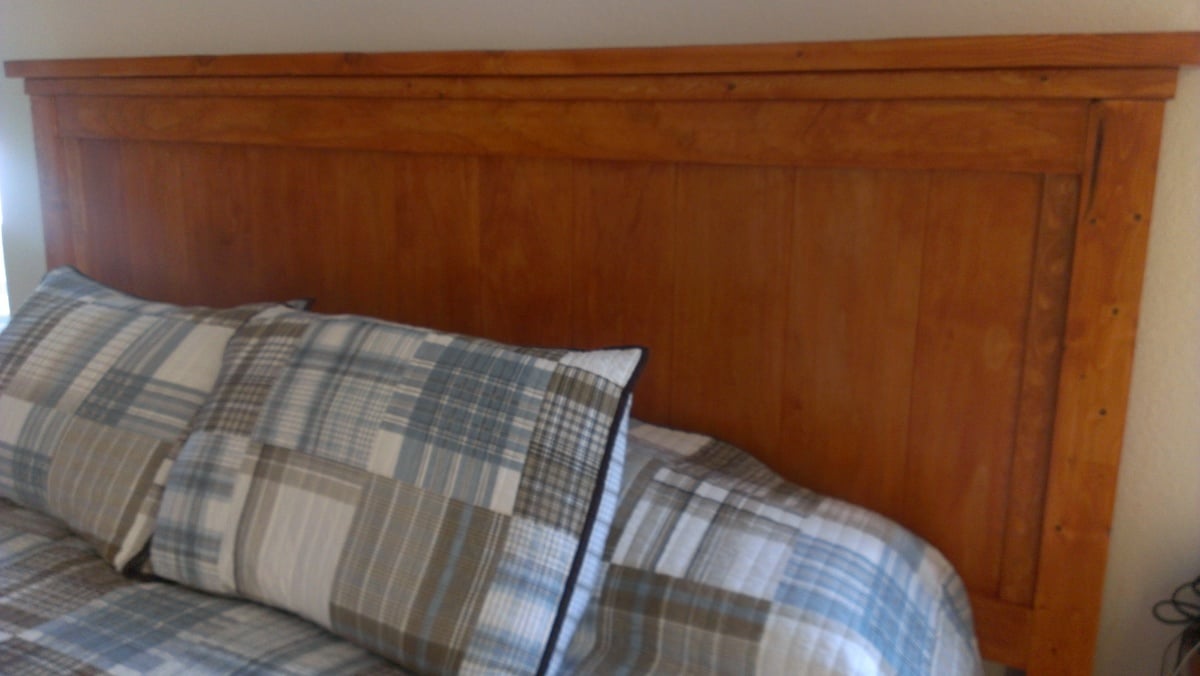

Fri, 04/25/2014 - 08:45
This is a great bed. I love the idea of a step. It looks professional.