Community Brag Posts

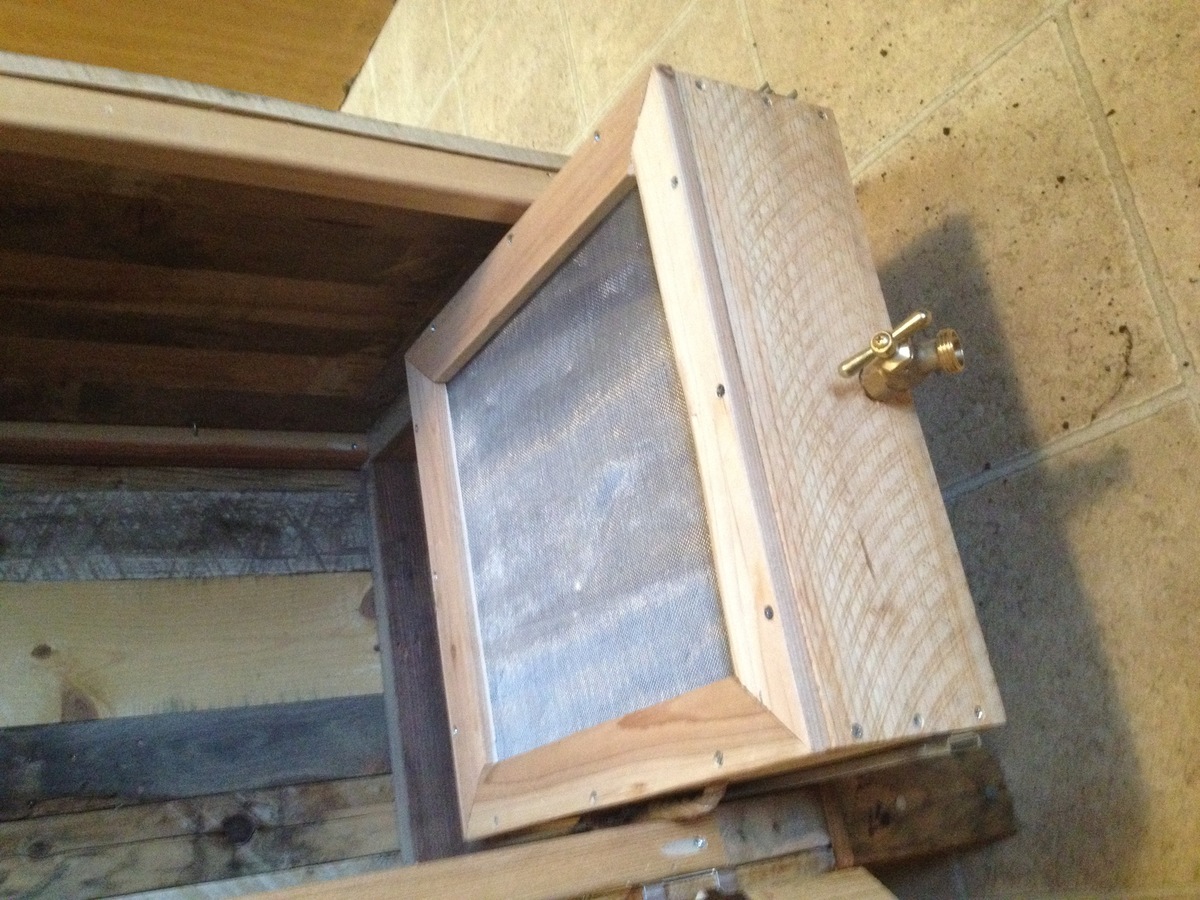
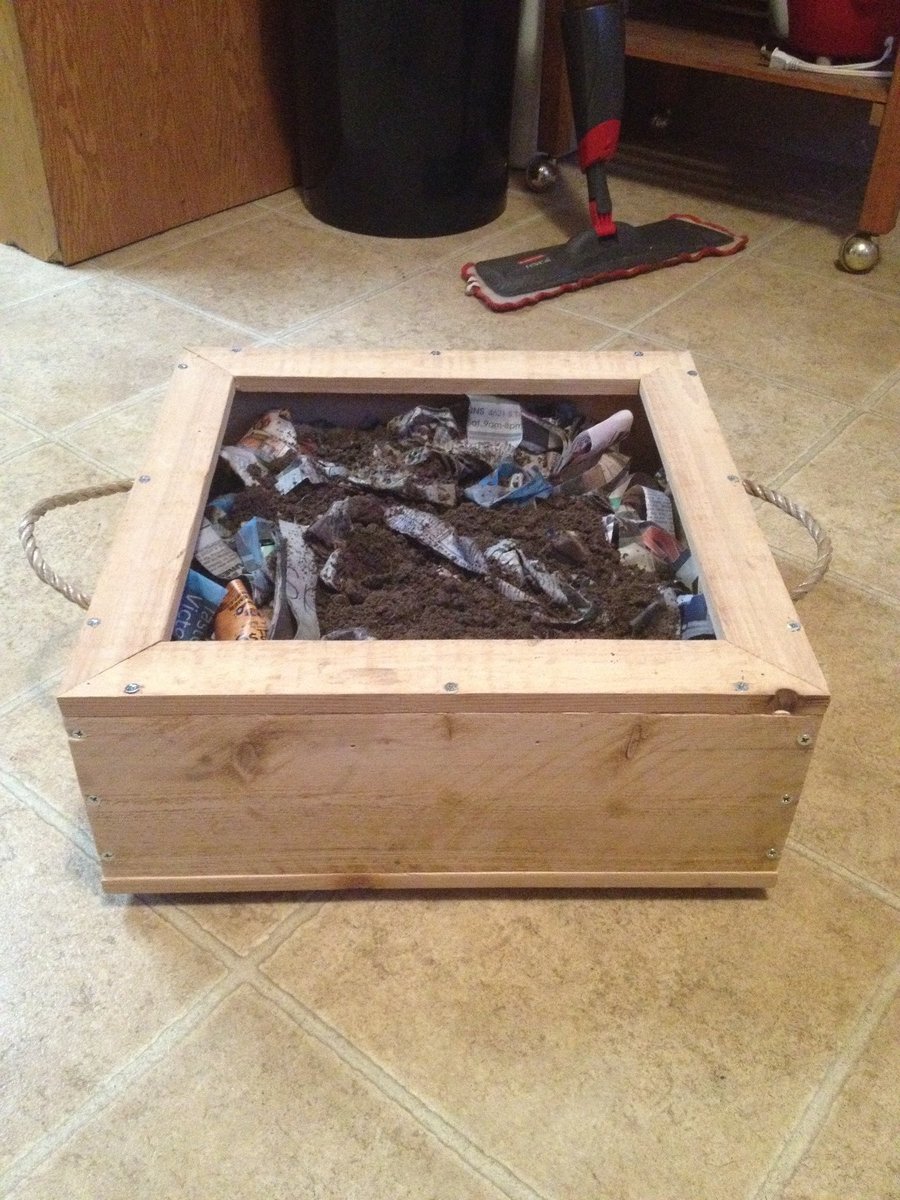
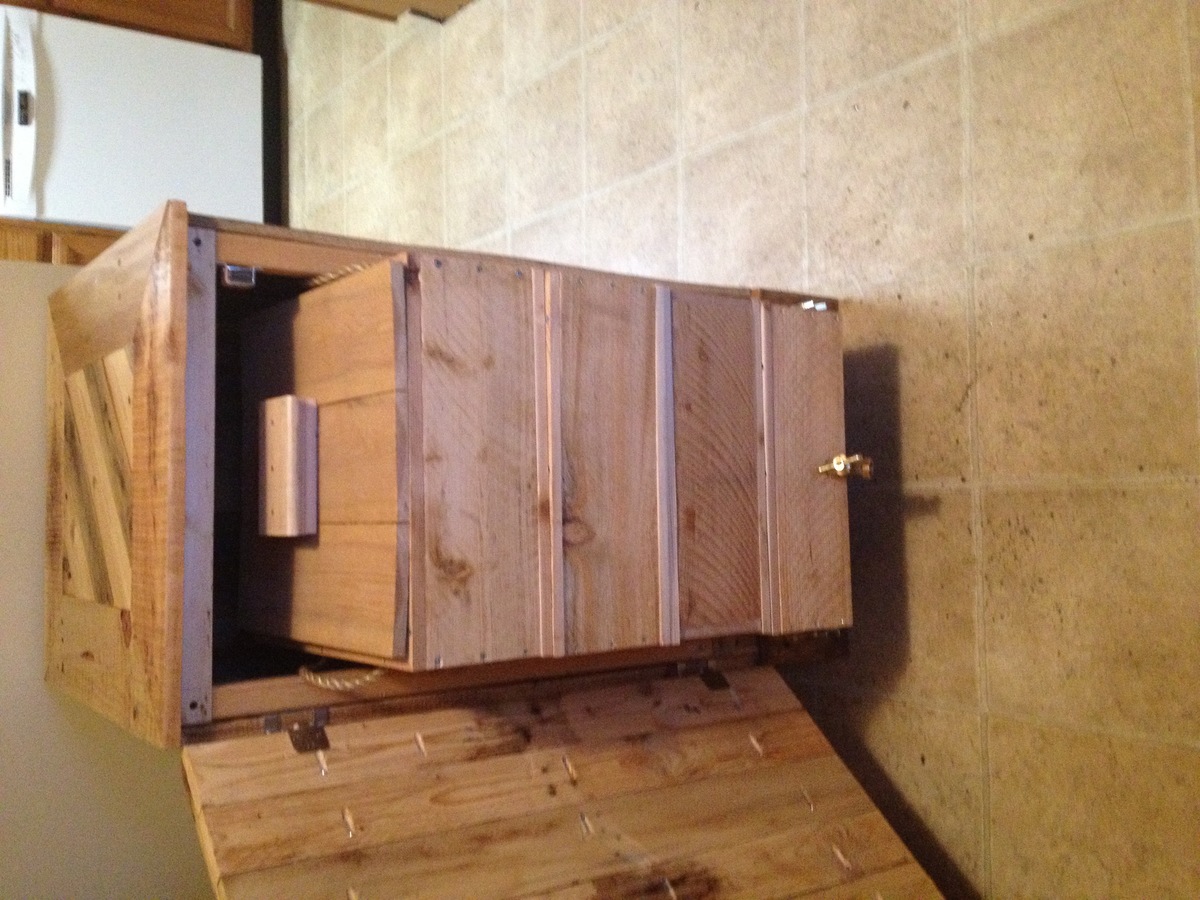
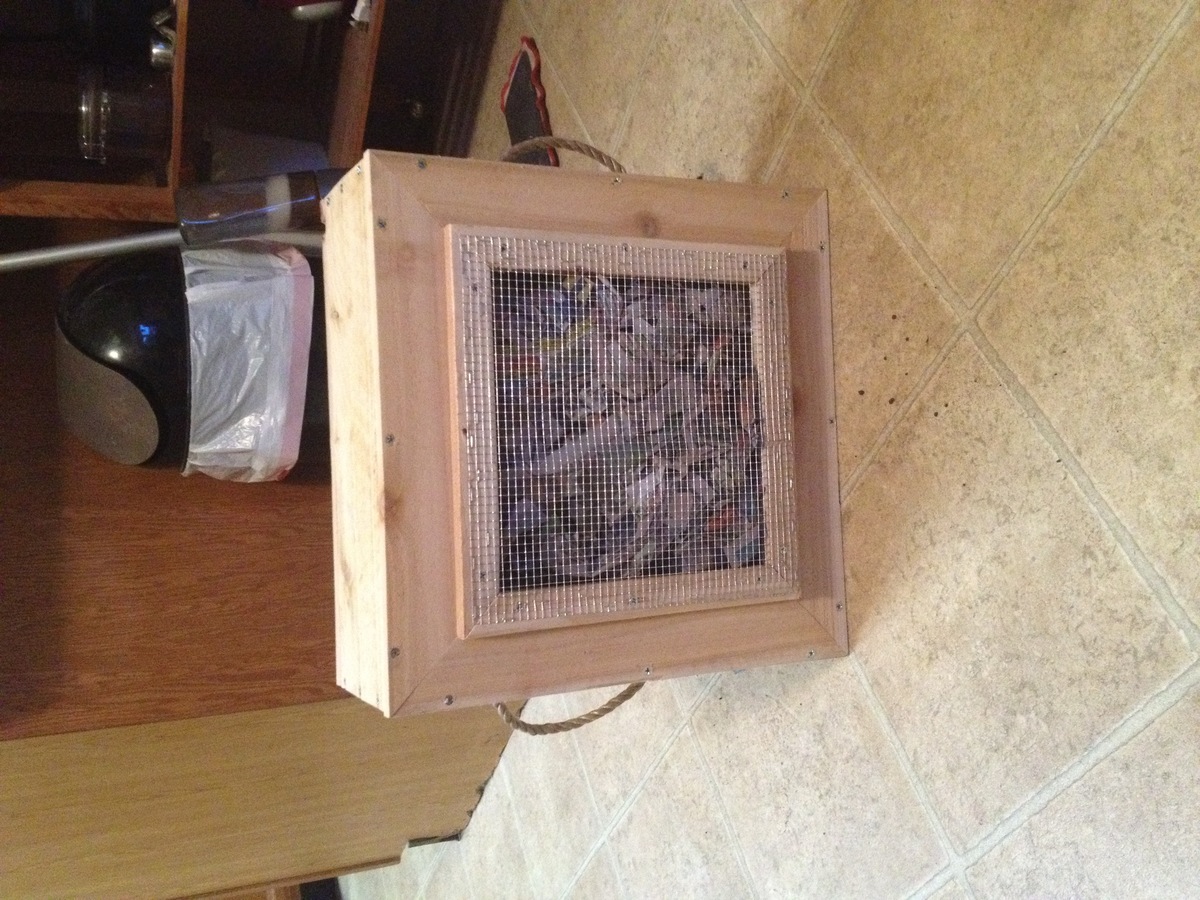
Worm Composter Bins with Cabinet
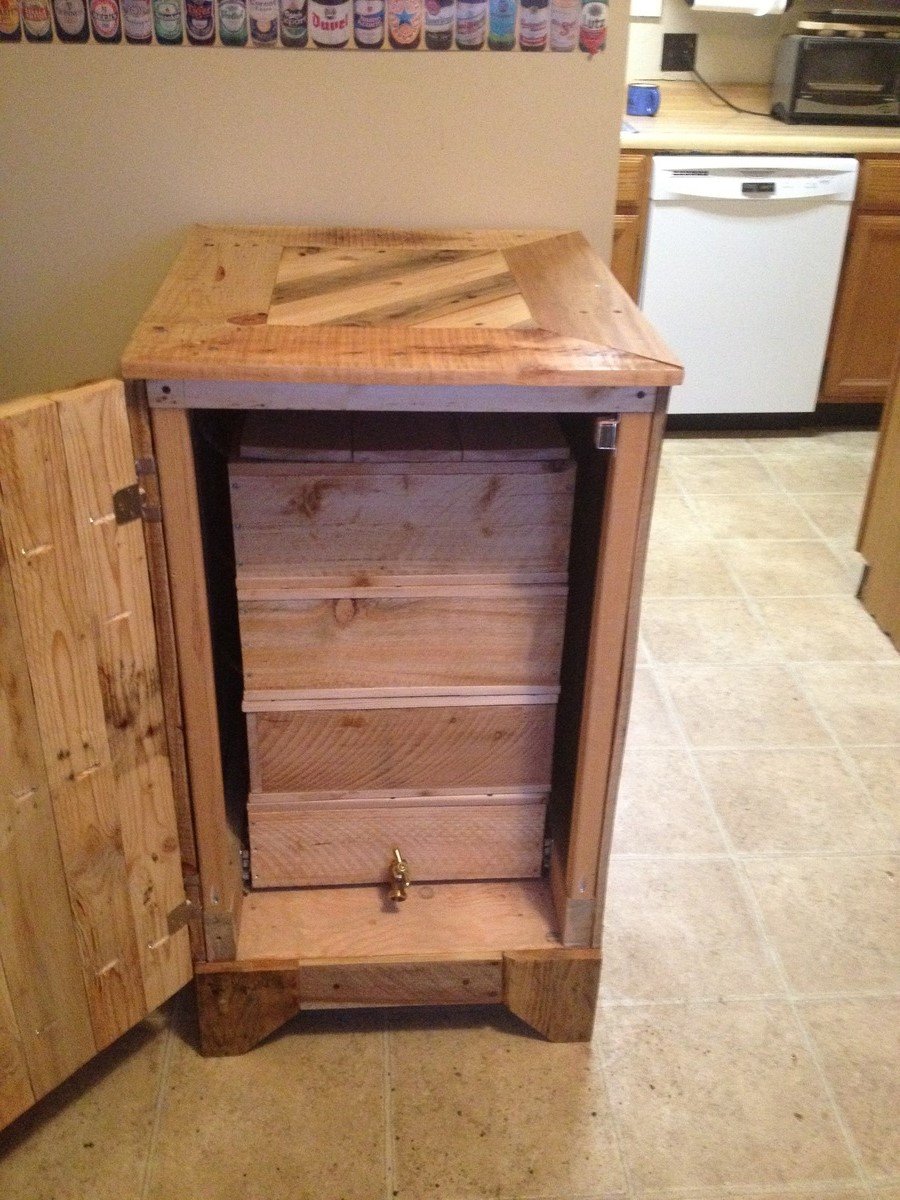
I made the worm composter from Ana's plan and built a cabinet out of old pallets. The stack of worm composters drawers slide in and out of the cabinet on a heavy duty drawer glide set. I used cedar fence board. For 3 bucks a board, it was worth the work to rip them down and sand them. The bottom drawer has a tray built out of old flashing and slopes towards a hose bib in order to collect the worm tea. I designed the drawer insert out of cardboard and cut it out of flashing, using a pop rivet gun to put it together, sealing the seams with flashing caulking. The drawer has a sheet of aluminum window screen under the top square of cedar.

Estimated Cost
50
Estimated Time Investment
Week Long Project (20 Hours or More)
Finish Used
Some free varnish from the County Drop and Swap recycle center
Recommended Skill Level
Intermediate
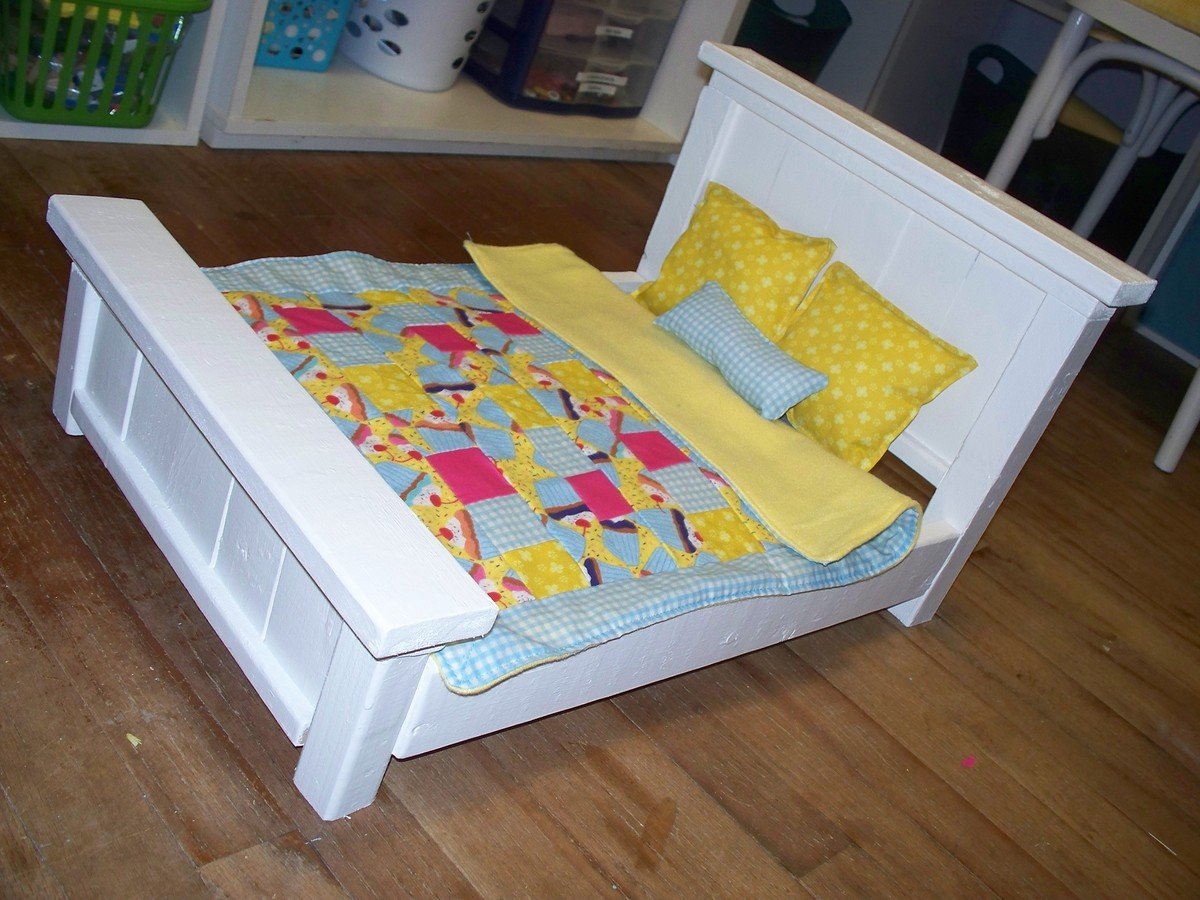
Montessori bed
Was a little challenging at first but I was able to pull it off and it came out to be perfect
Built from Plan(s)
Comments
Shelf for daughter's room
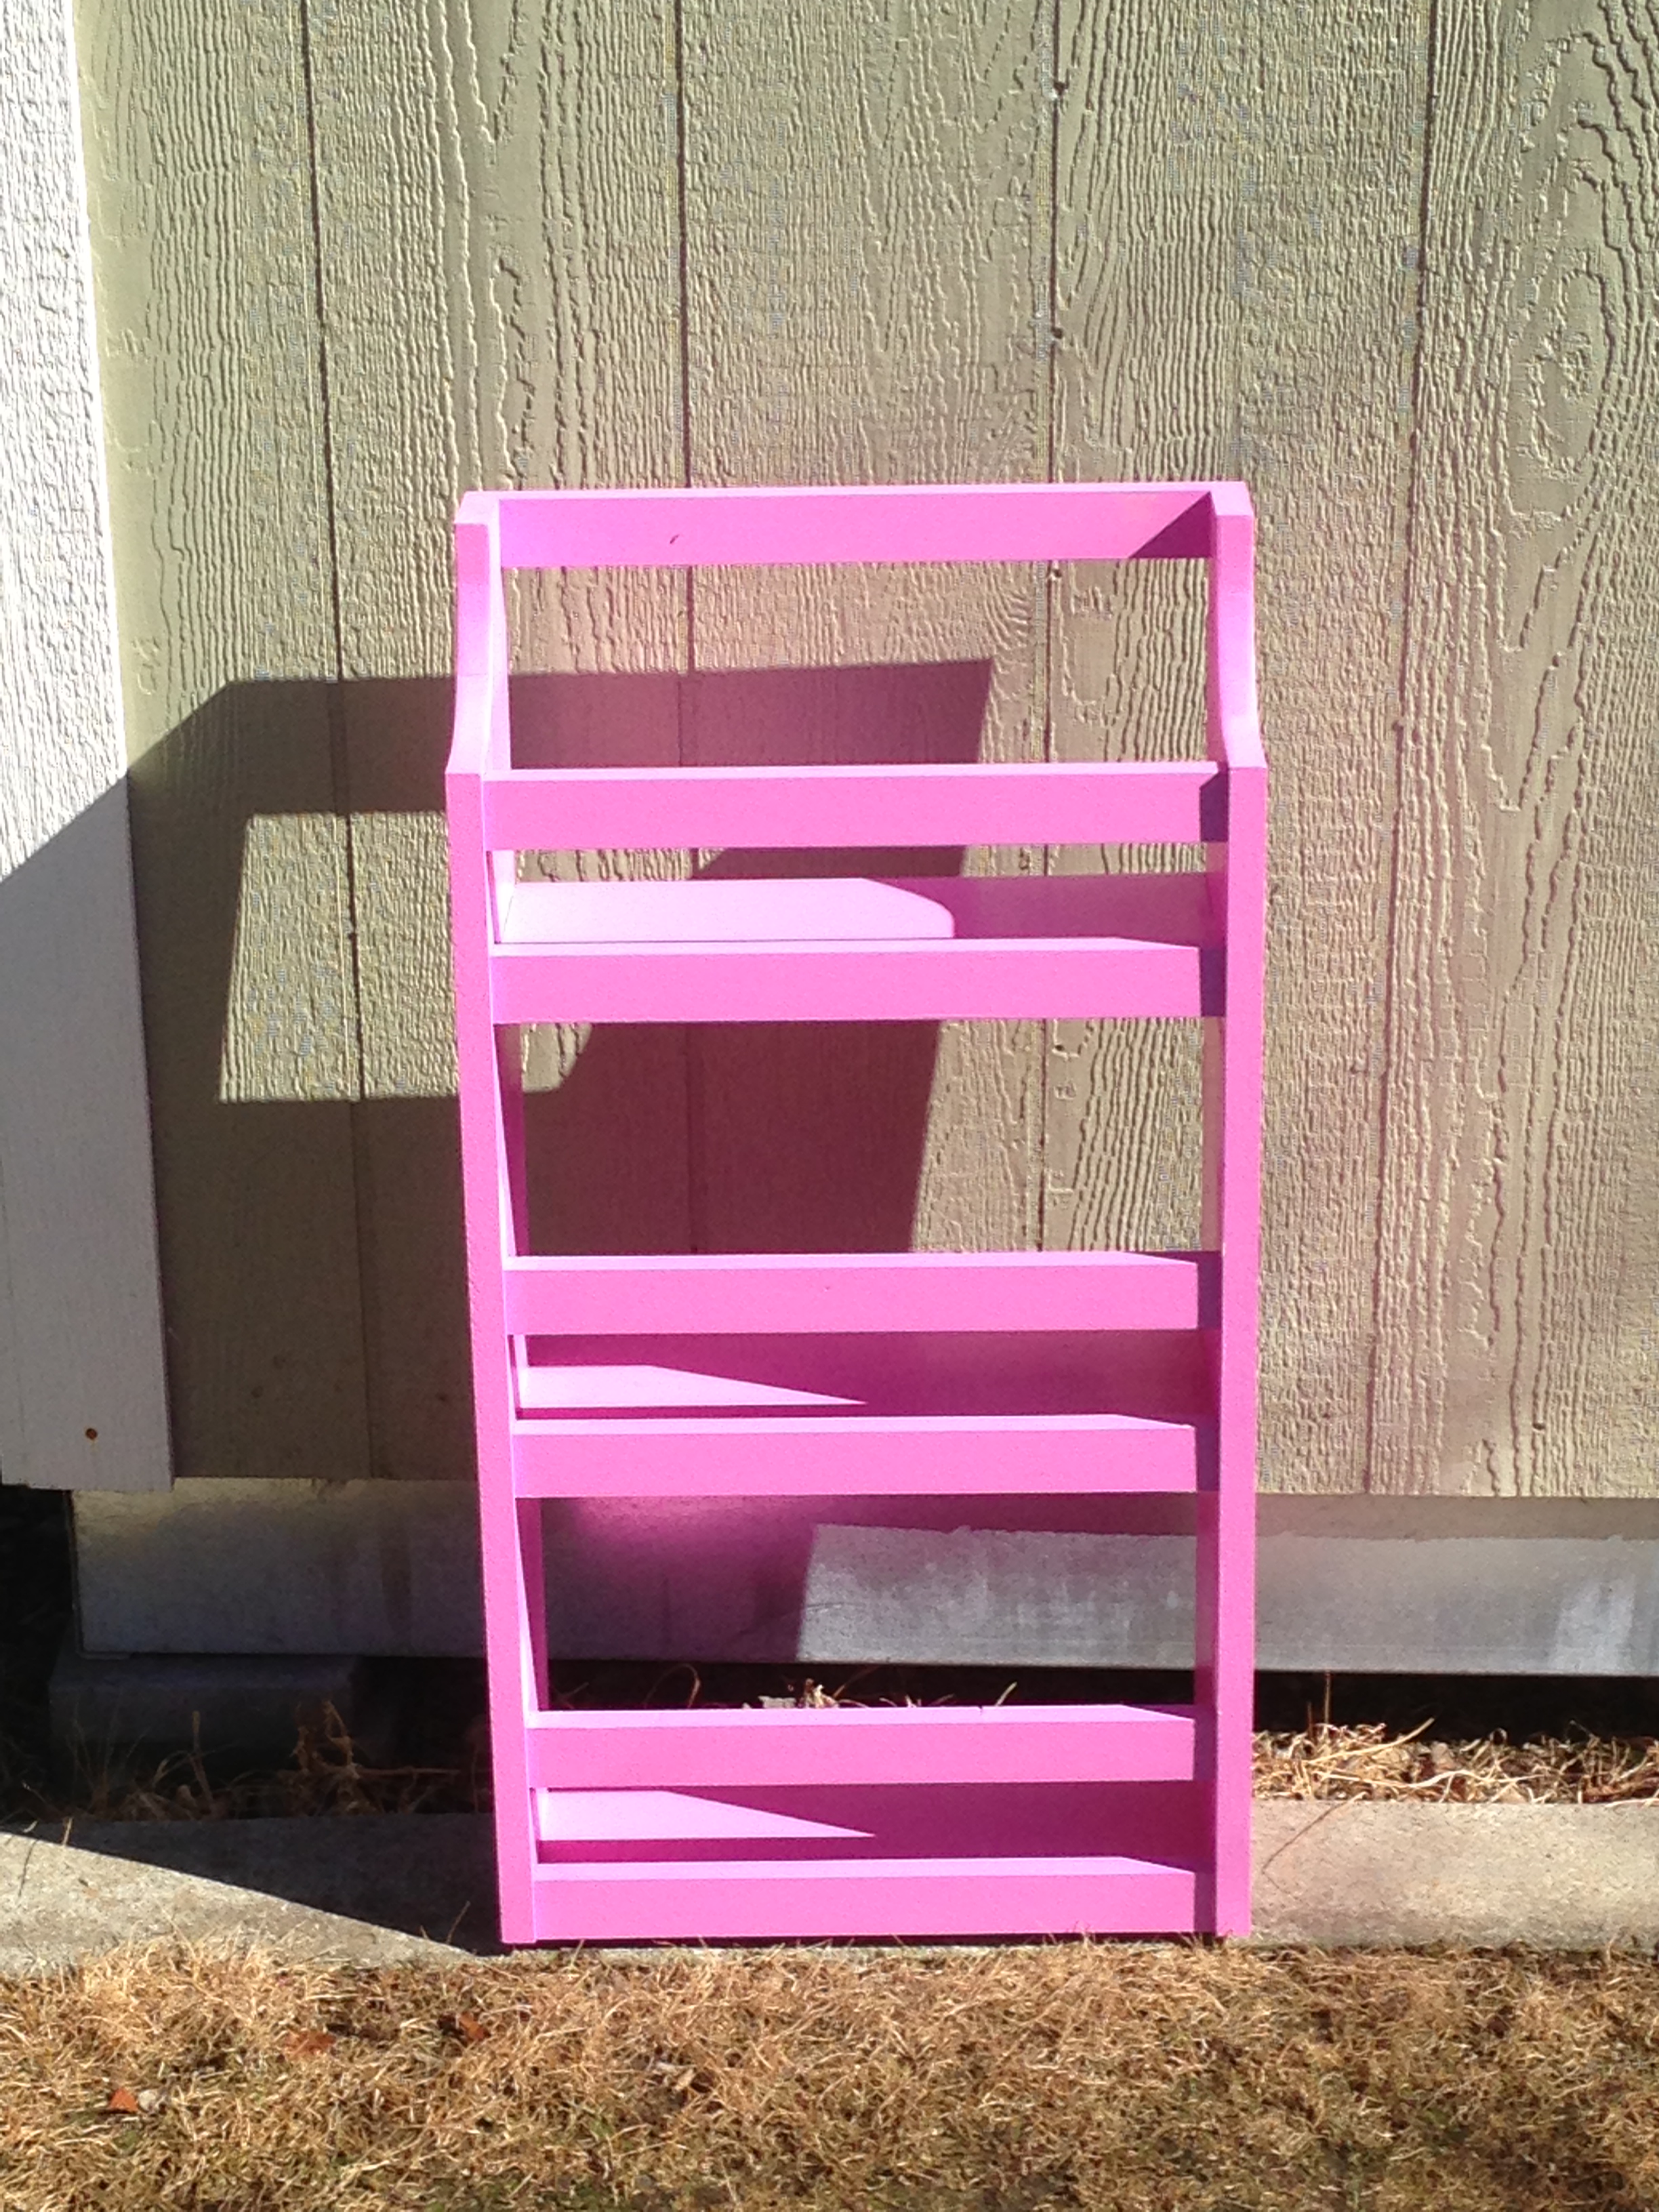
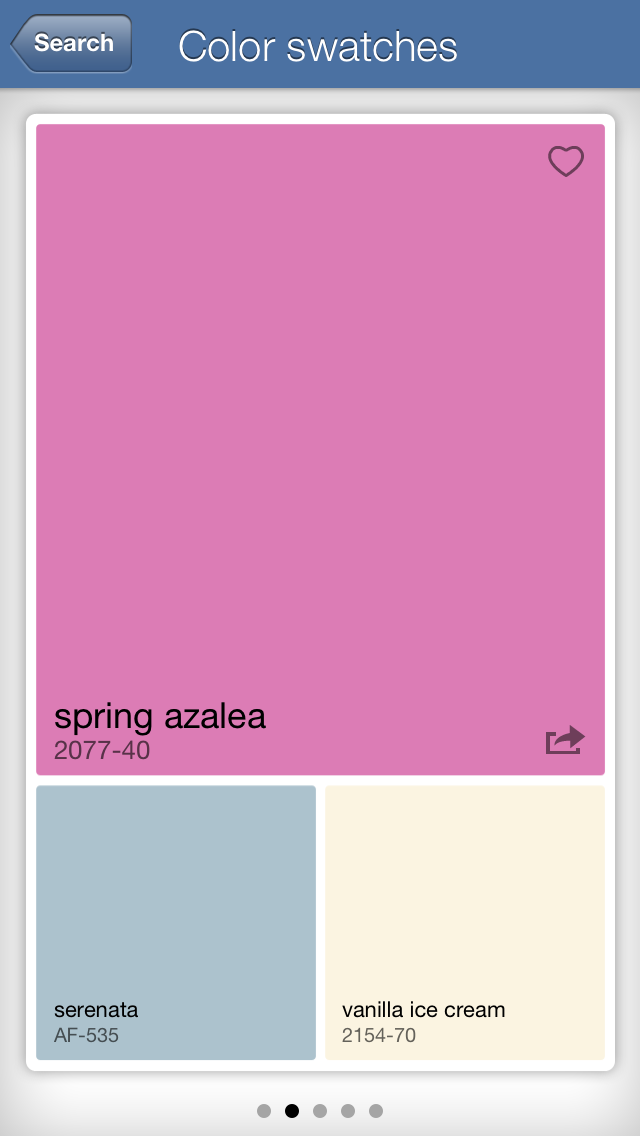
My wife and daughter wanted a shelf for her room - had to be pink. All I had to go on was a picture from a Pottery Barn ad. It's made from poplar and was my first kreg pocket hole project.
Estimated Time Investment
Afternoon Project (3-6 Hours)
Finish Used
Had to be pink. I listed the paint above in the additional images section.
Recommended Skill Level
Starter Project
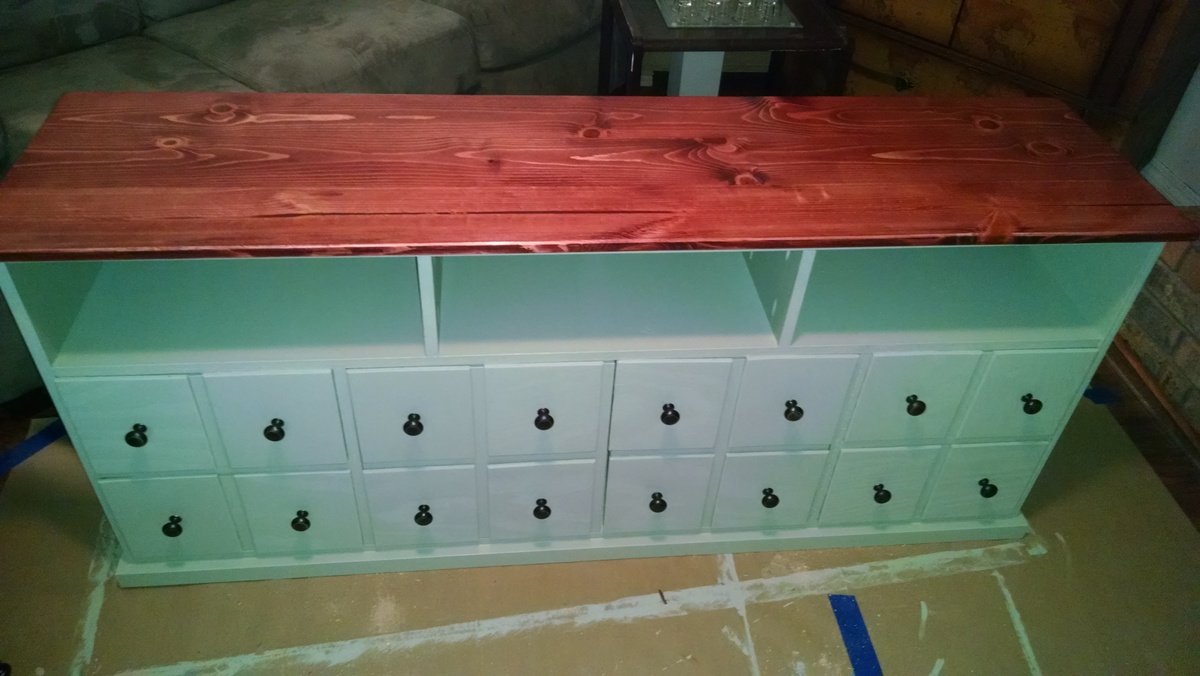
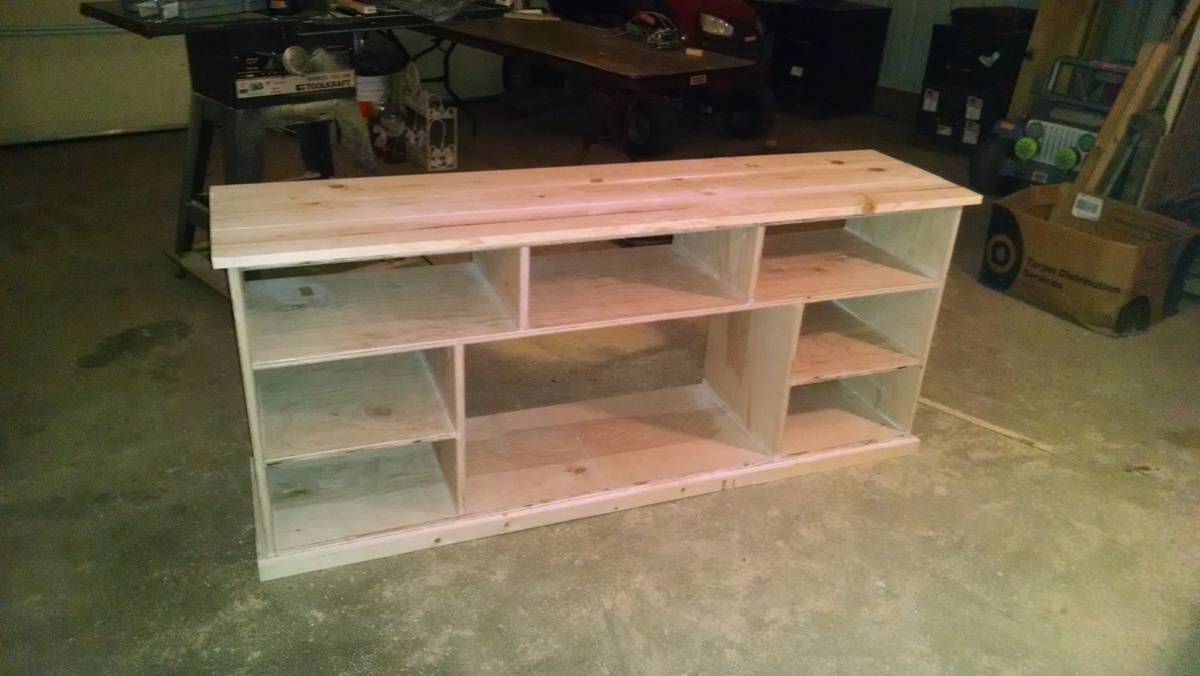
Apothecary Media Console

This was my first real build and it was a lot of fun. My girlfriend helped me out from time to time even though it was brutally cold in my un-heated, uninsulated, detatched garage.
We used a sagey green for the paint and 2 coats of gloss poly on the top. Added holes in the back with a hole saw for wires and cables. I stacked the false fronts and drilled them for the knobs all at the same time for consistency.
All in for about $210 including $40 in knobs, but I did make the drawers out of some scrap I had laying around.
The pocket hole joinery makes this pretty easy, but I'd highly recommend a table saw for consistent cuts and deminsions. Also, definitely use lay out lines and double check for squareness before driving the screws during assembly. Take your time, and enjoy the process. It starts to look very much "diy" in that not good "ummmmmm..." kind of way before the end where it all comes together.

Built from Plan(s)
Estimated Cost
$210-$250
Estimated Time Investment
Week Long Project (20 Hours or More)
Finish Used
Sagey paint and gloss poly over red stain on the top.
Recommended Skill Level
Beginner
Latest Project
Built this for my mother in law. Was so excited how it turned out.
Built from Plan(s)
Comments
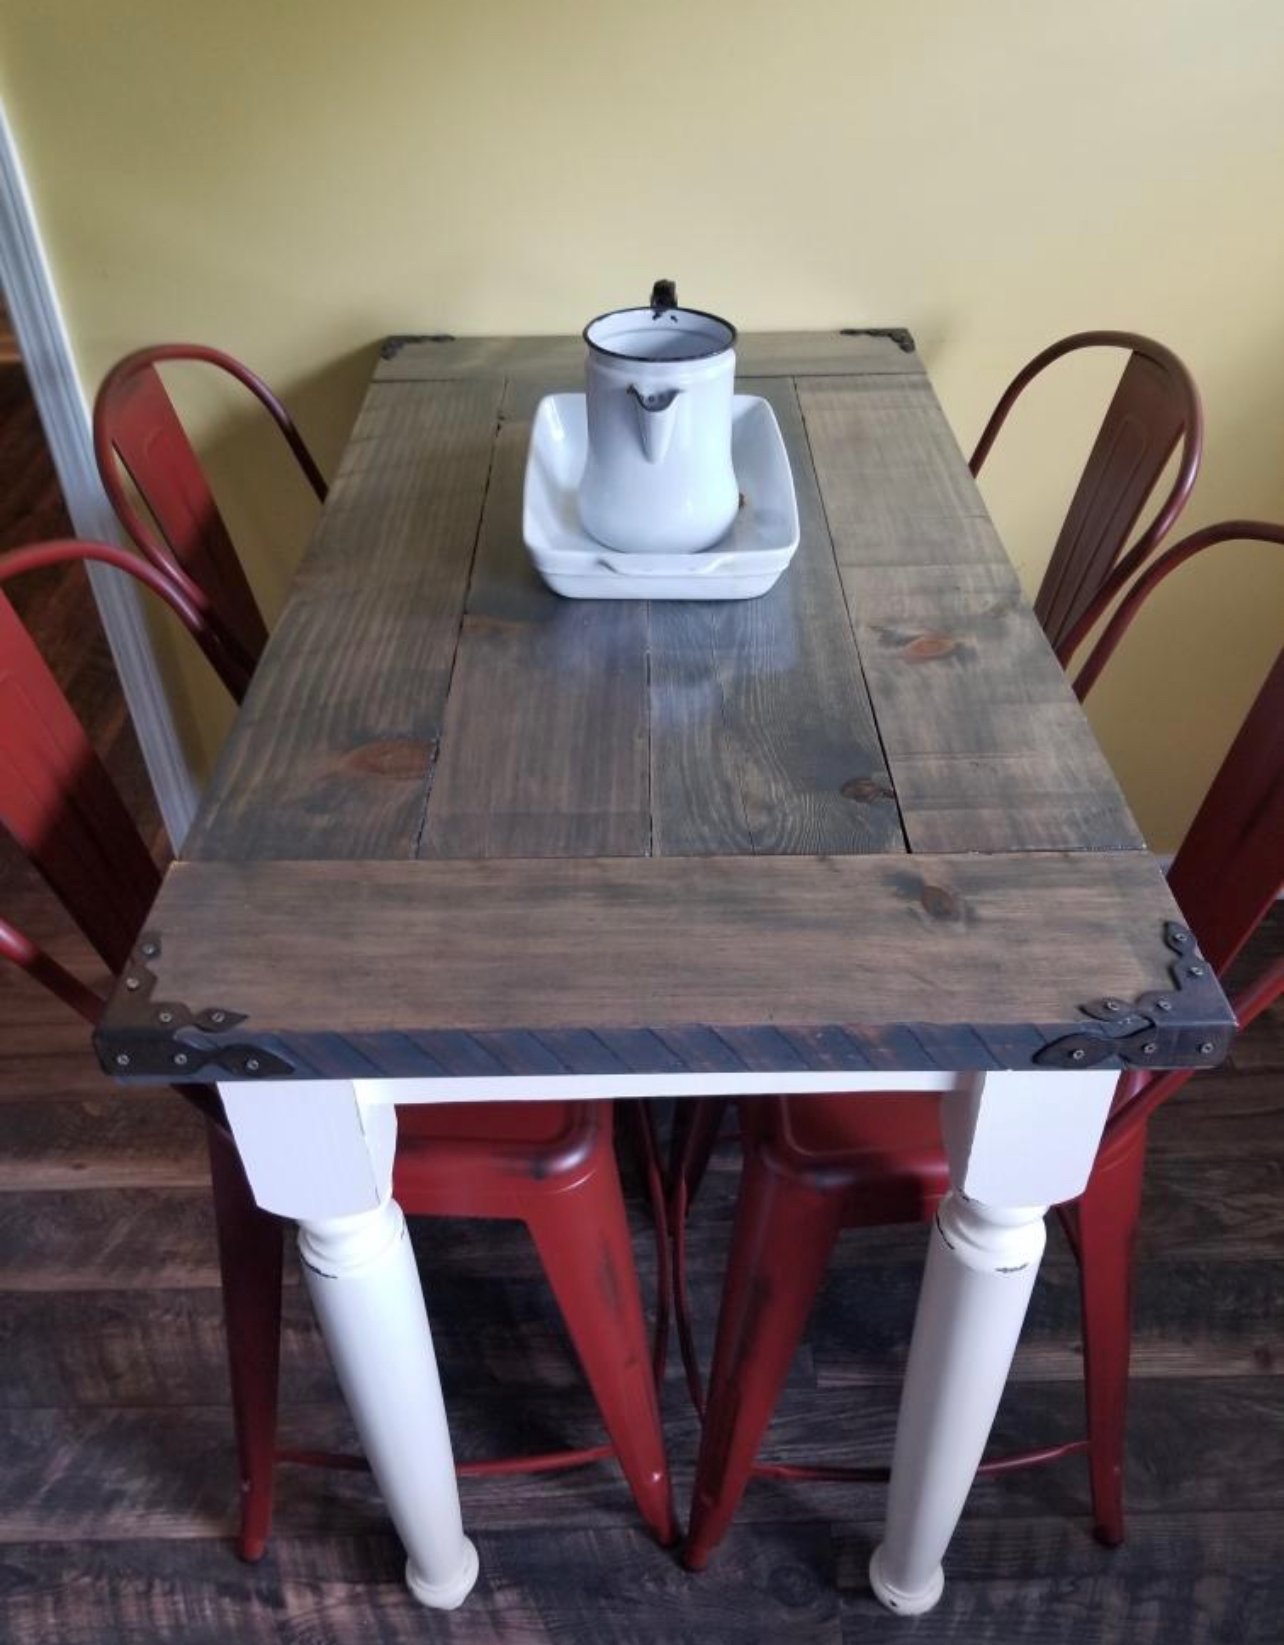
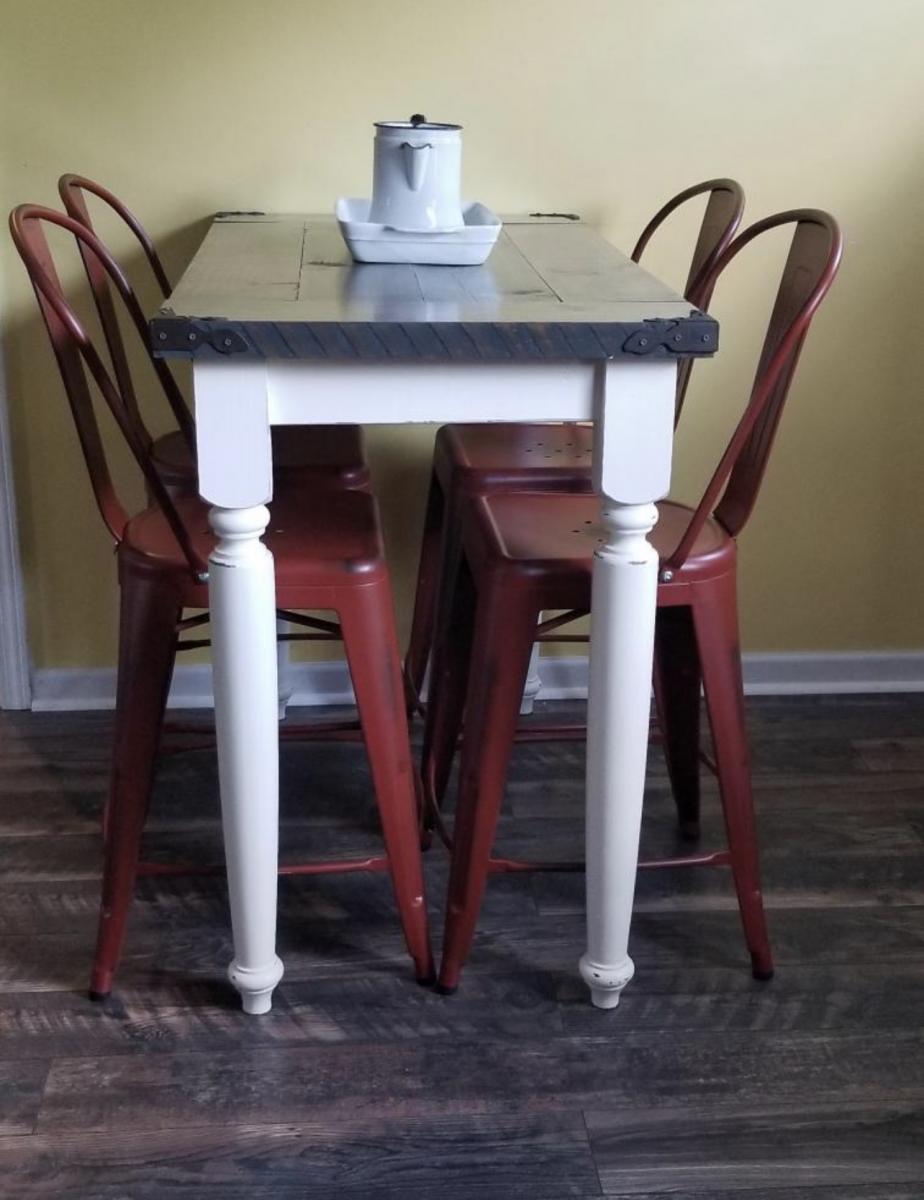
First Build at the Farm
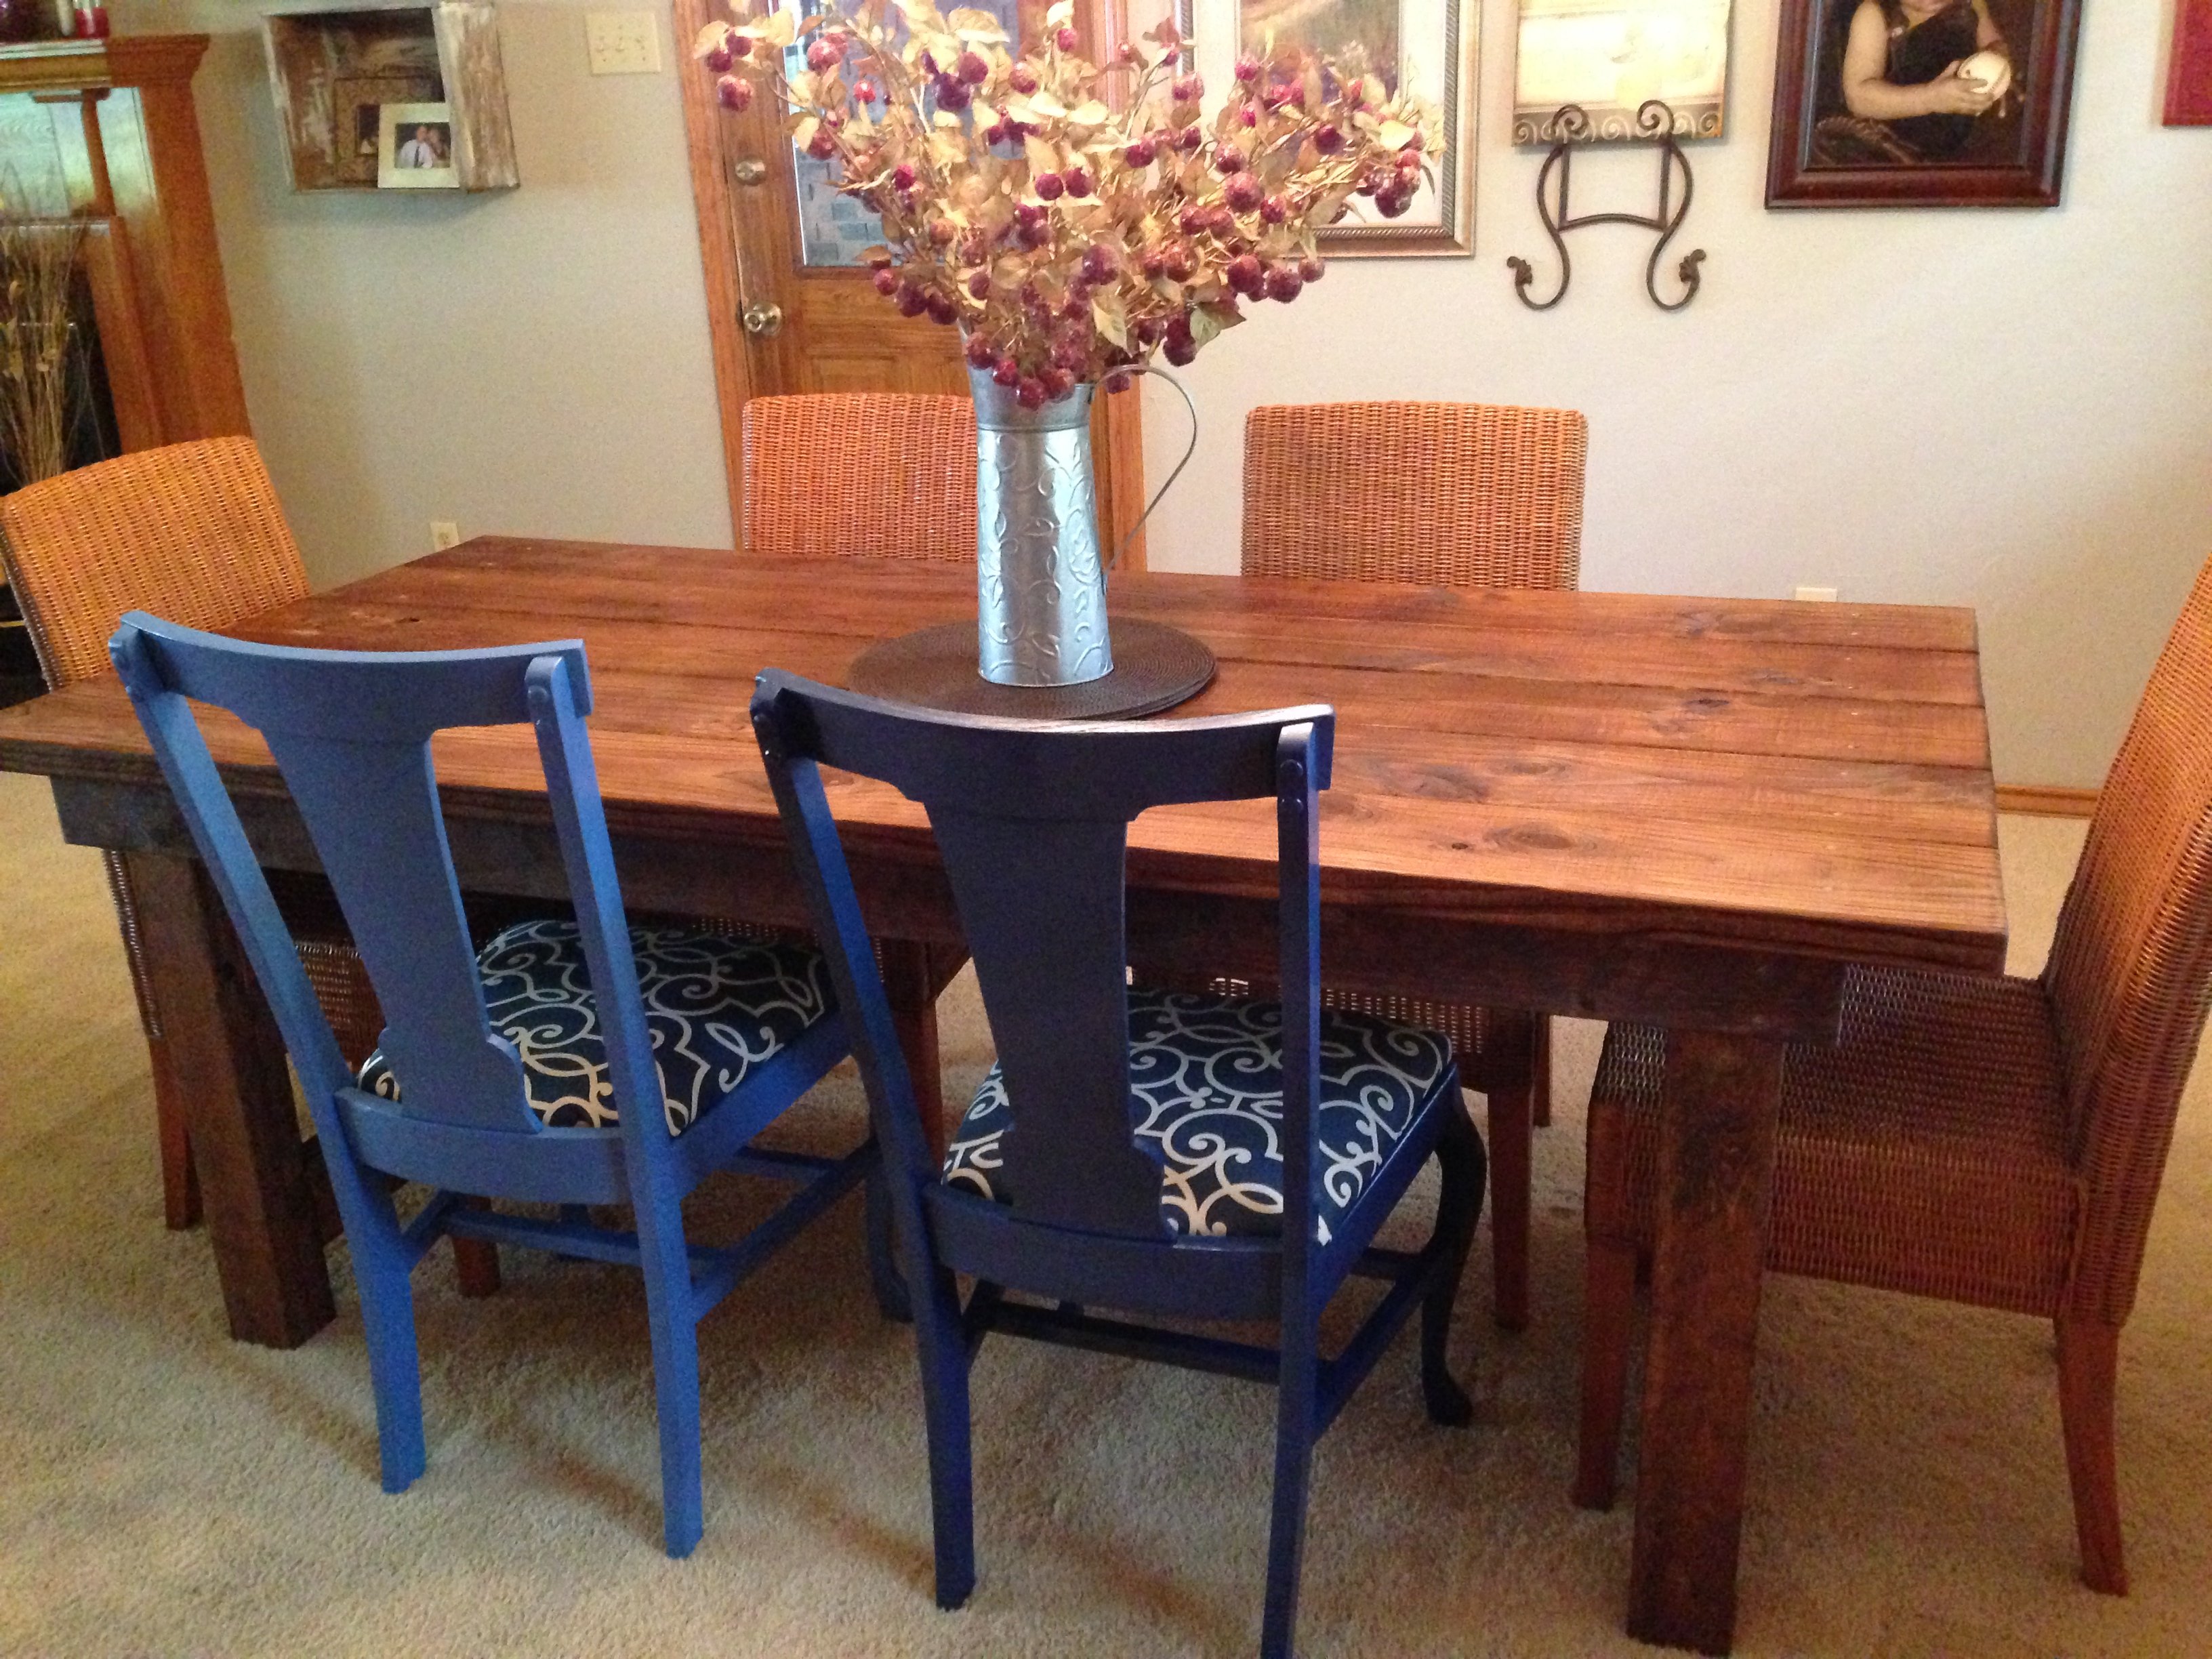
We just moved to a farm and luckily the house has a wood shop! So we chose to do this farm house table as our first build at our new house. It was so much fun....and it was a great project for my husband and I to work on together! Total working time was about 10 hours, that did not include the time it took for the stain to dry and the poly to set. I am incredibly impatient and probably applied the poly over the stain too early, but with a project like a "rustic farmhouse table", the imperfections from my haste go unnoticed. Next build: barn doors.
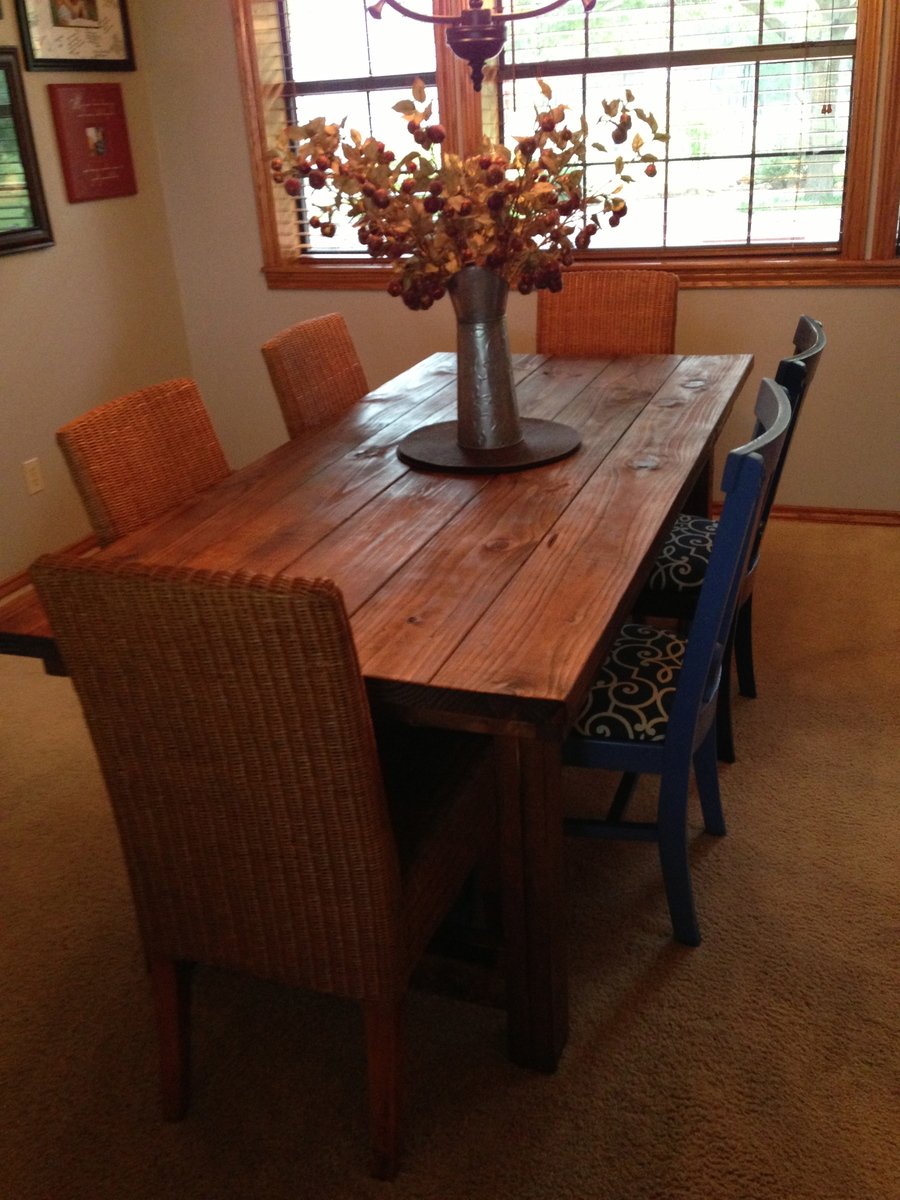
Built from Plan(s)
Estimated Time Investment
Weekend Project (10-20 Hours)
Finish Used
Minwax Early American, 2 coats. Top coat of Minwax Wipe on Poly, 3 coats.
Recommended Skill Level
Beginner
Custom Sutton Outdoor Bar Stools
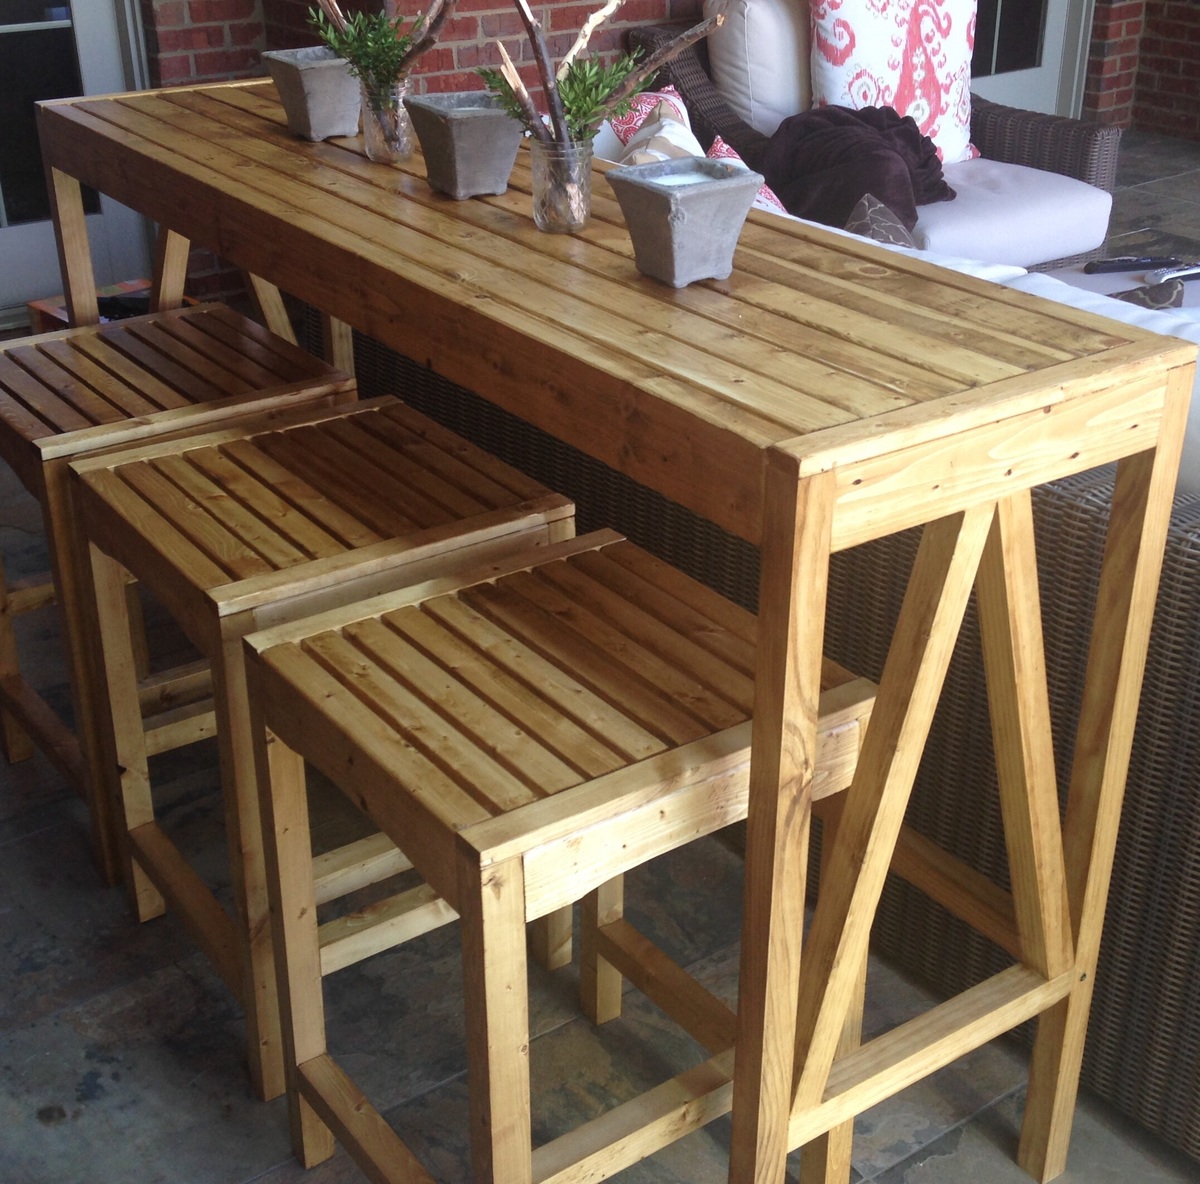
My first brag post!
UPDATED: New photo with bar and stools on covered porch. Very happy with how it worked.
We wanted the Ballard Sutton Console Bar Table and three stools to go with our outdoor furniture. Unfortunately, that little package was going to run about $2,500. Decided instead to see if I could build the things and make up my own stools to match. So basically by studying the picture a little bit figured out my plan. Then the stools are more or less a mini version of the table with a couple modifications.
I haven't itemized the bill, but built 3 stools for about $50, and the table was a little less. Incidentally, I can never find decent common 2x2s, so I have started ripping 2x4s into two 2x2s, and they come out clean, sturdy, smooth, and most important, straight!
Stained them using MinWax Puritan Pine to try and get the new teak look we wanted. Not too dark -- wiped the stain after 5 minutes.
Have the stool plans if anyone is curious!
Best regards!
cstarliper

Estimated Time Investment
Weekend Project (10-20 Hours)
Finish Used
Minwax Puritan Pine
Spar Urethane Satin Clear Finish
Spar Urethane Satin Clear Finish
Recommended Skill Level
Beginner
Comments

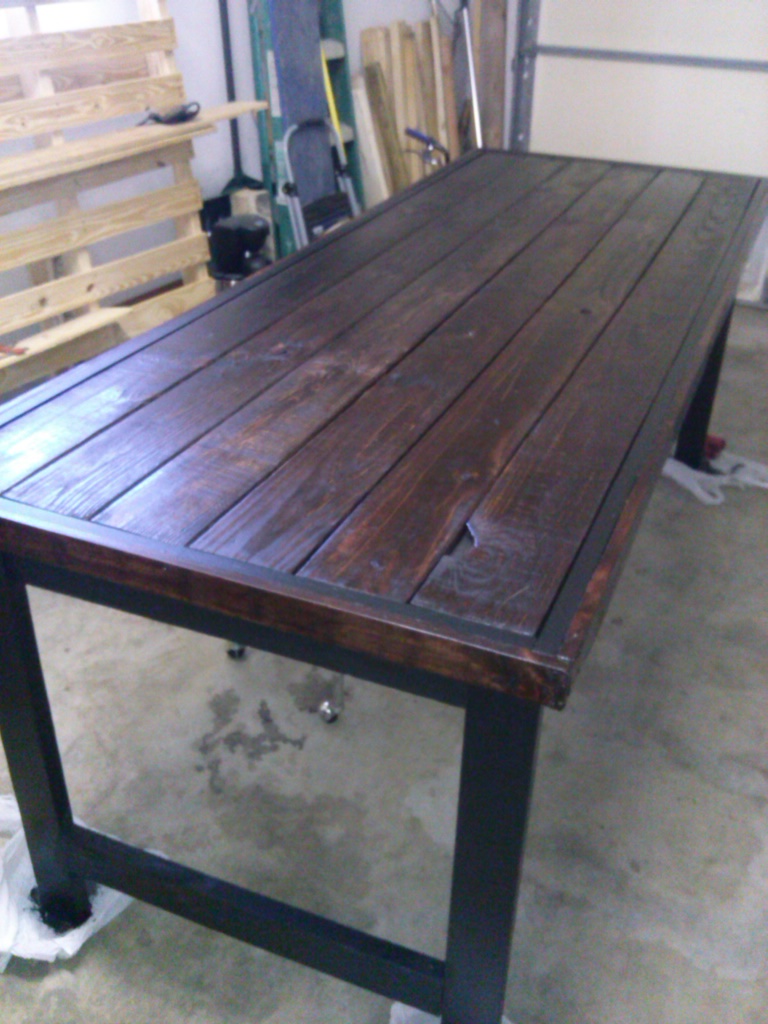
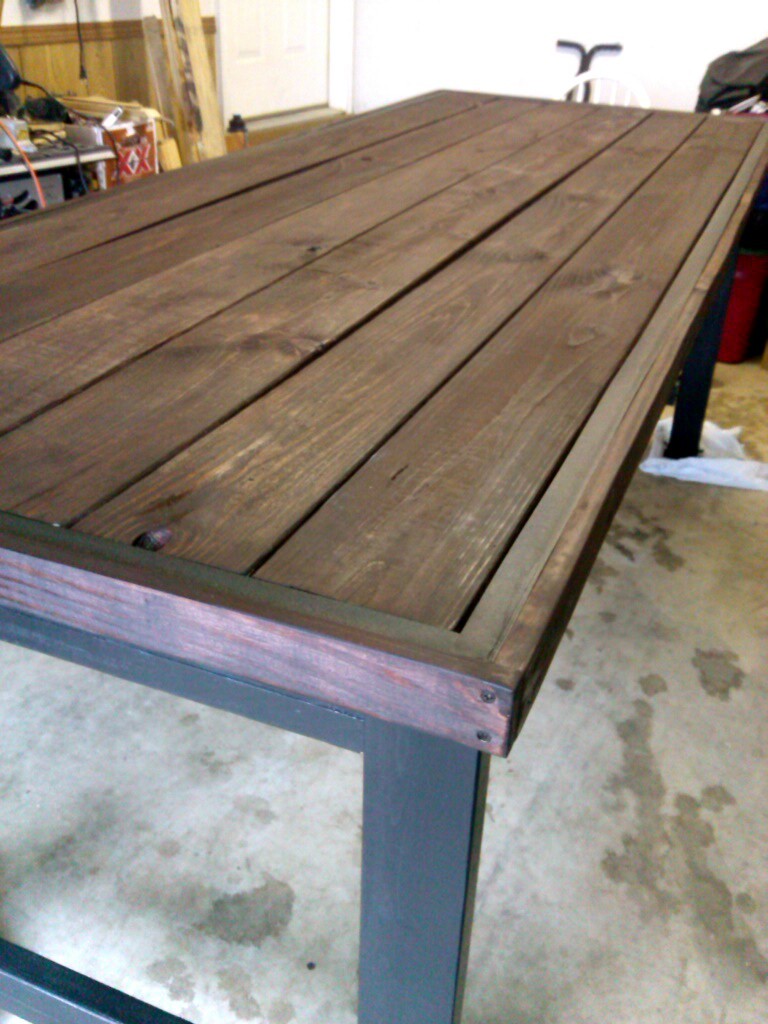
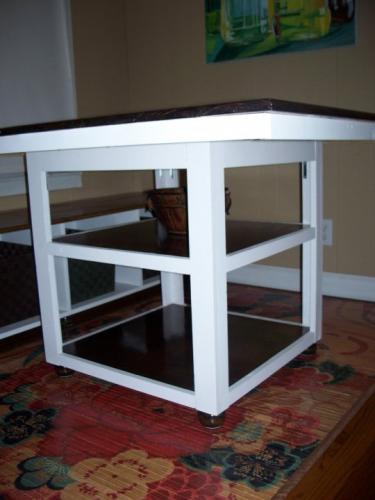
Counter height table/ island
This table was built using wooden counter height legs purchased from Home Depot. The top was 3x6 natural pine cut from Stinking Creek Tennessee. The boards were rough cut lumber from a saw mill. I ran the boards thru a plainer. We left the saw marks on the edge, but sanded the rough part off. The apron is 2x4 wall studs purchased from Lowe’s. I screwed it all together with pocket hole screws and wood glue. The corner decorative metal pieces are from Hobby Lobby. The metal bar stools were ordered from amazon.
Comments
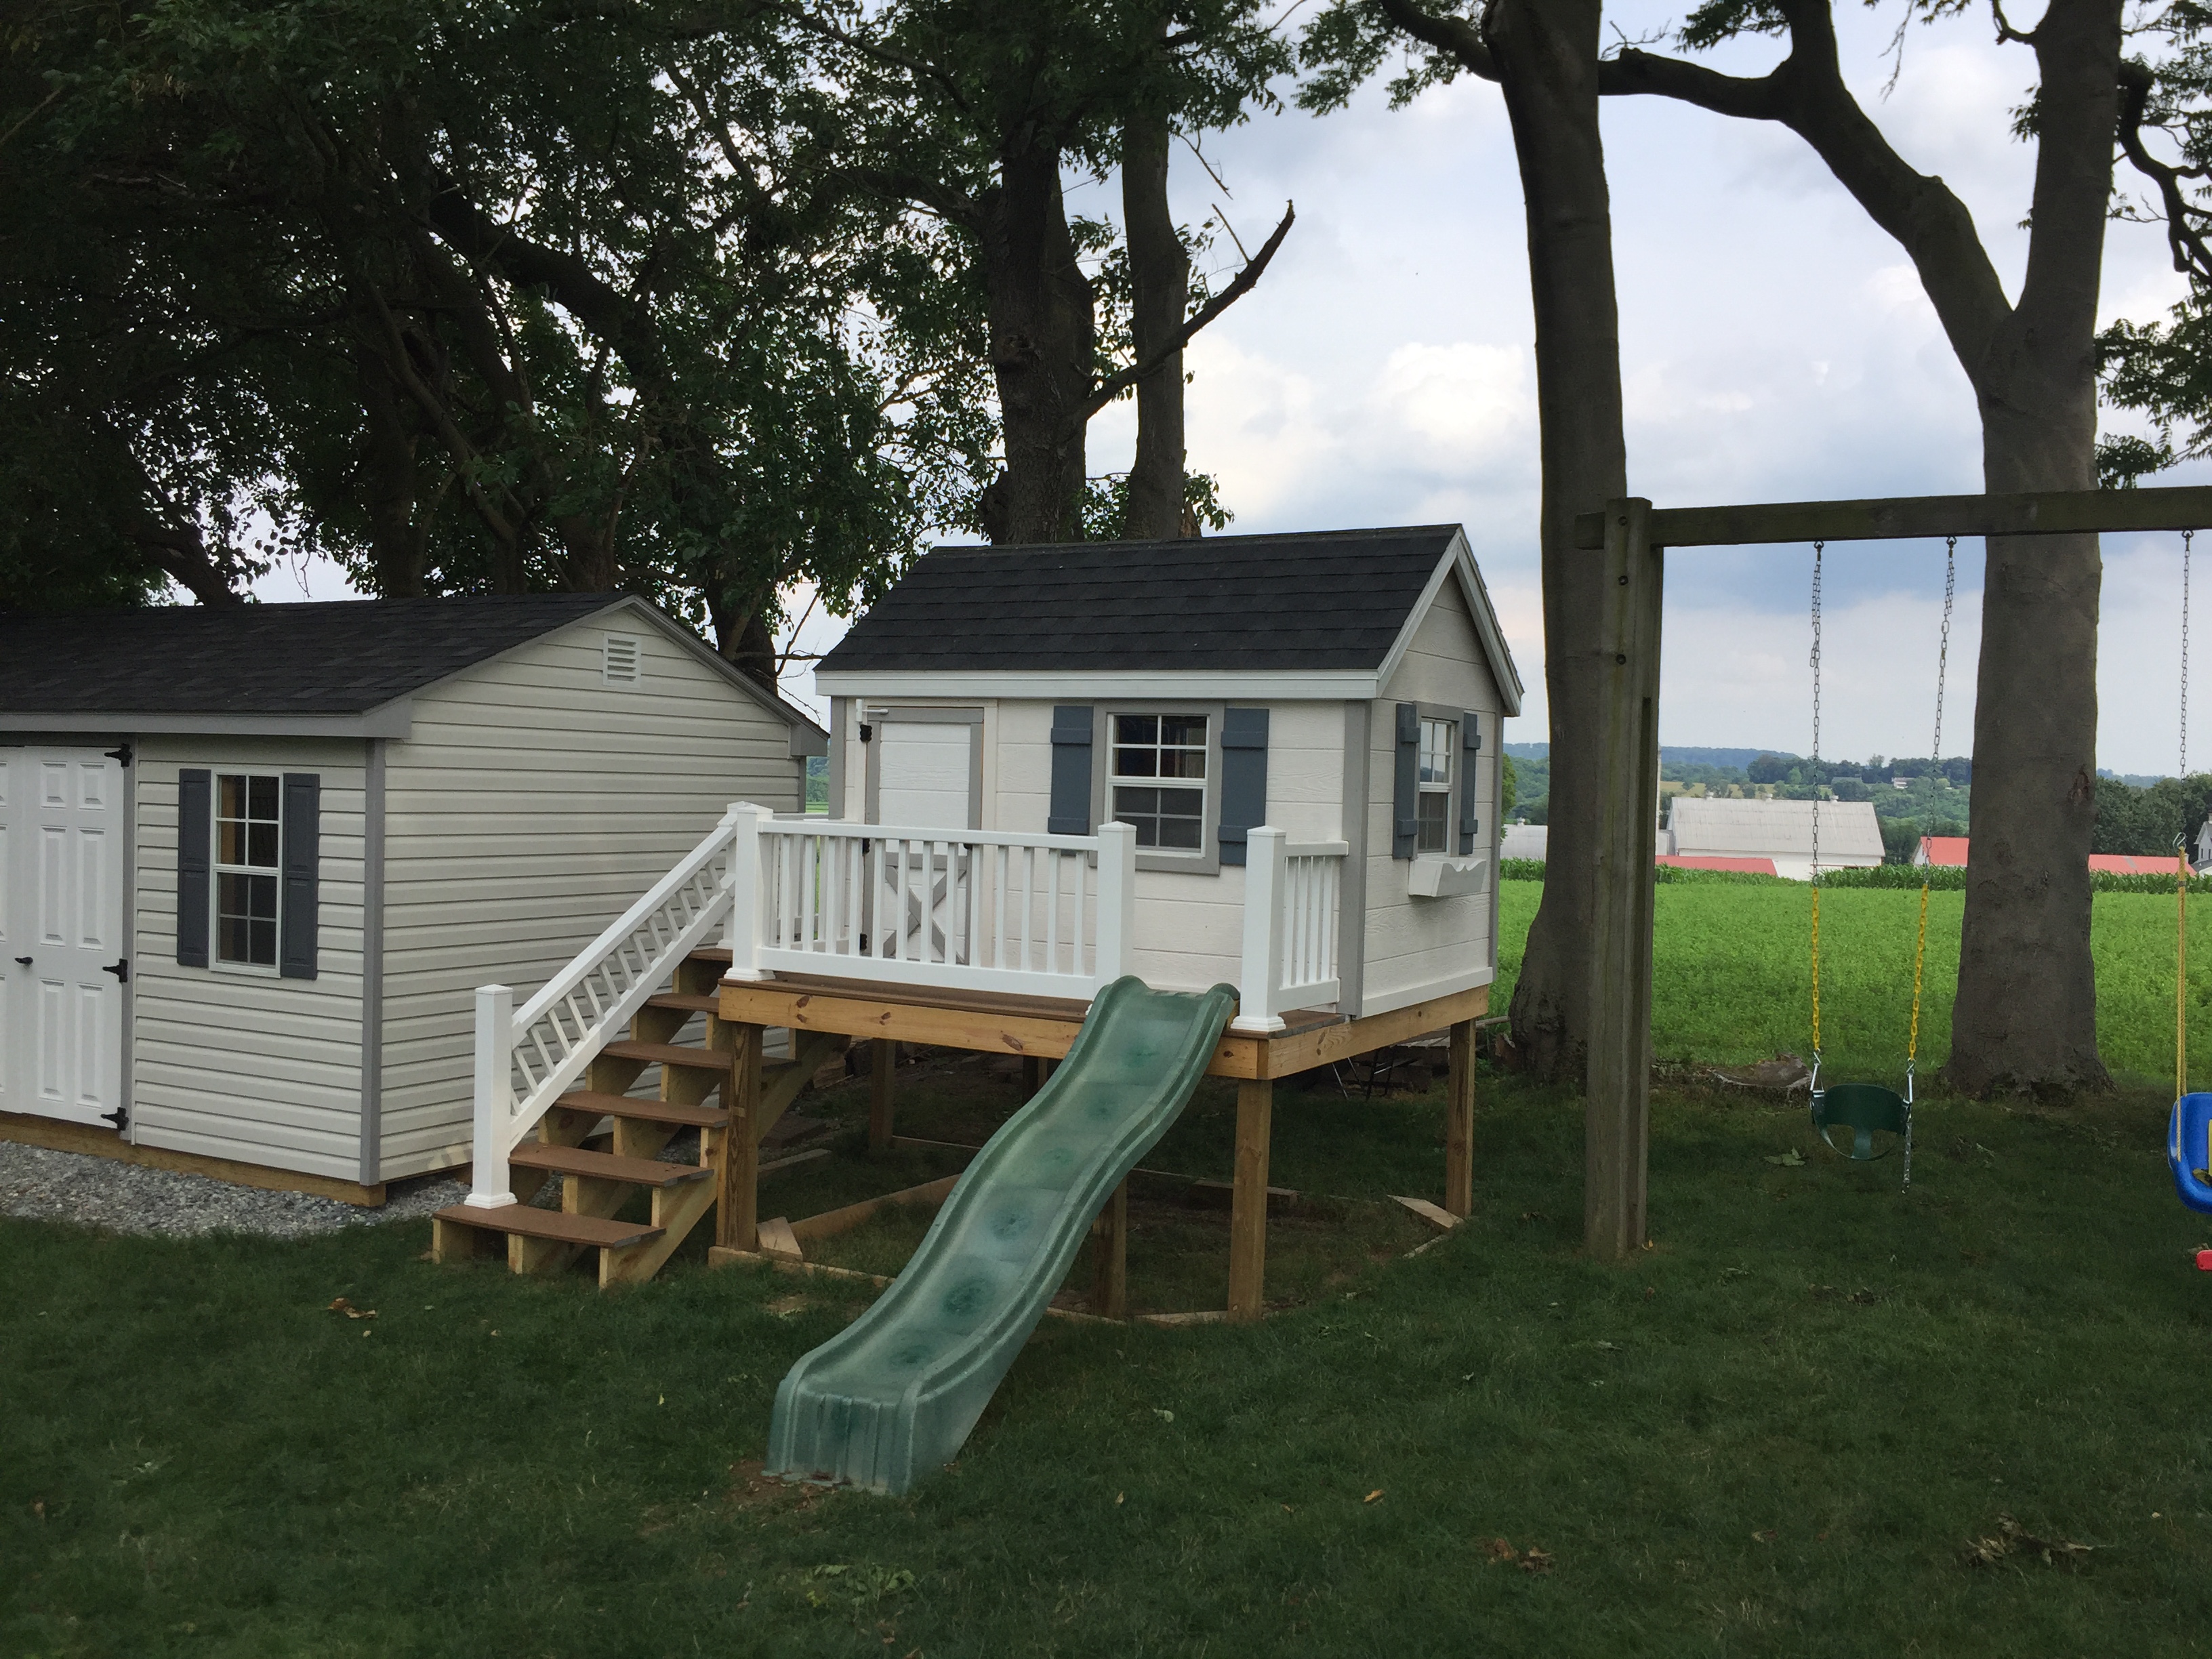
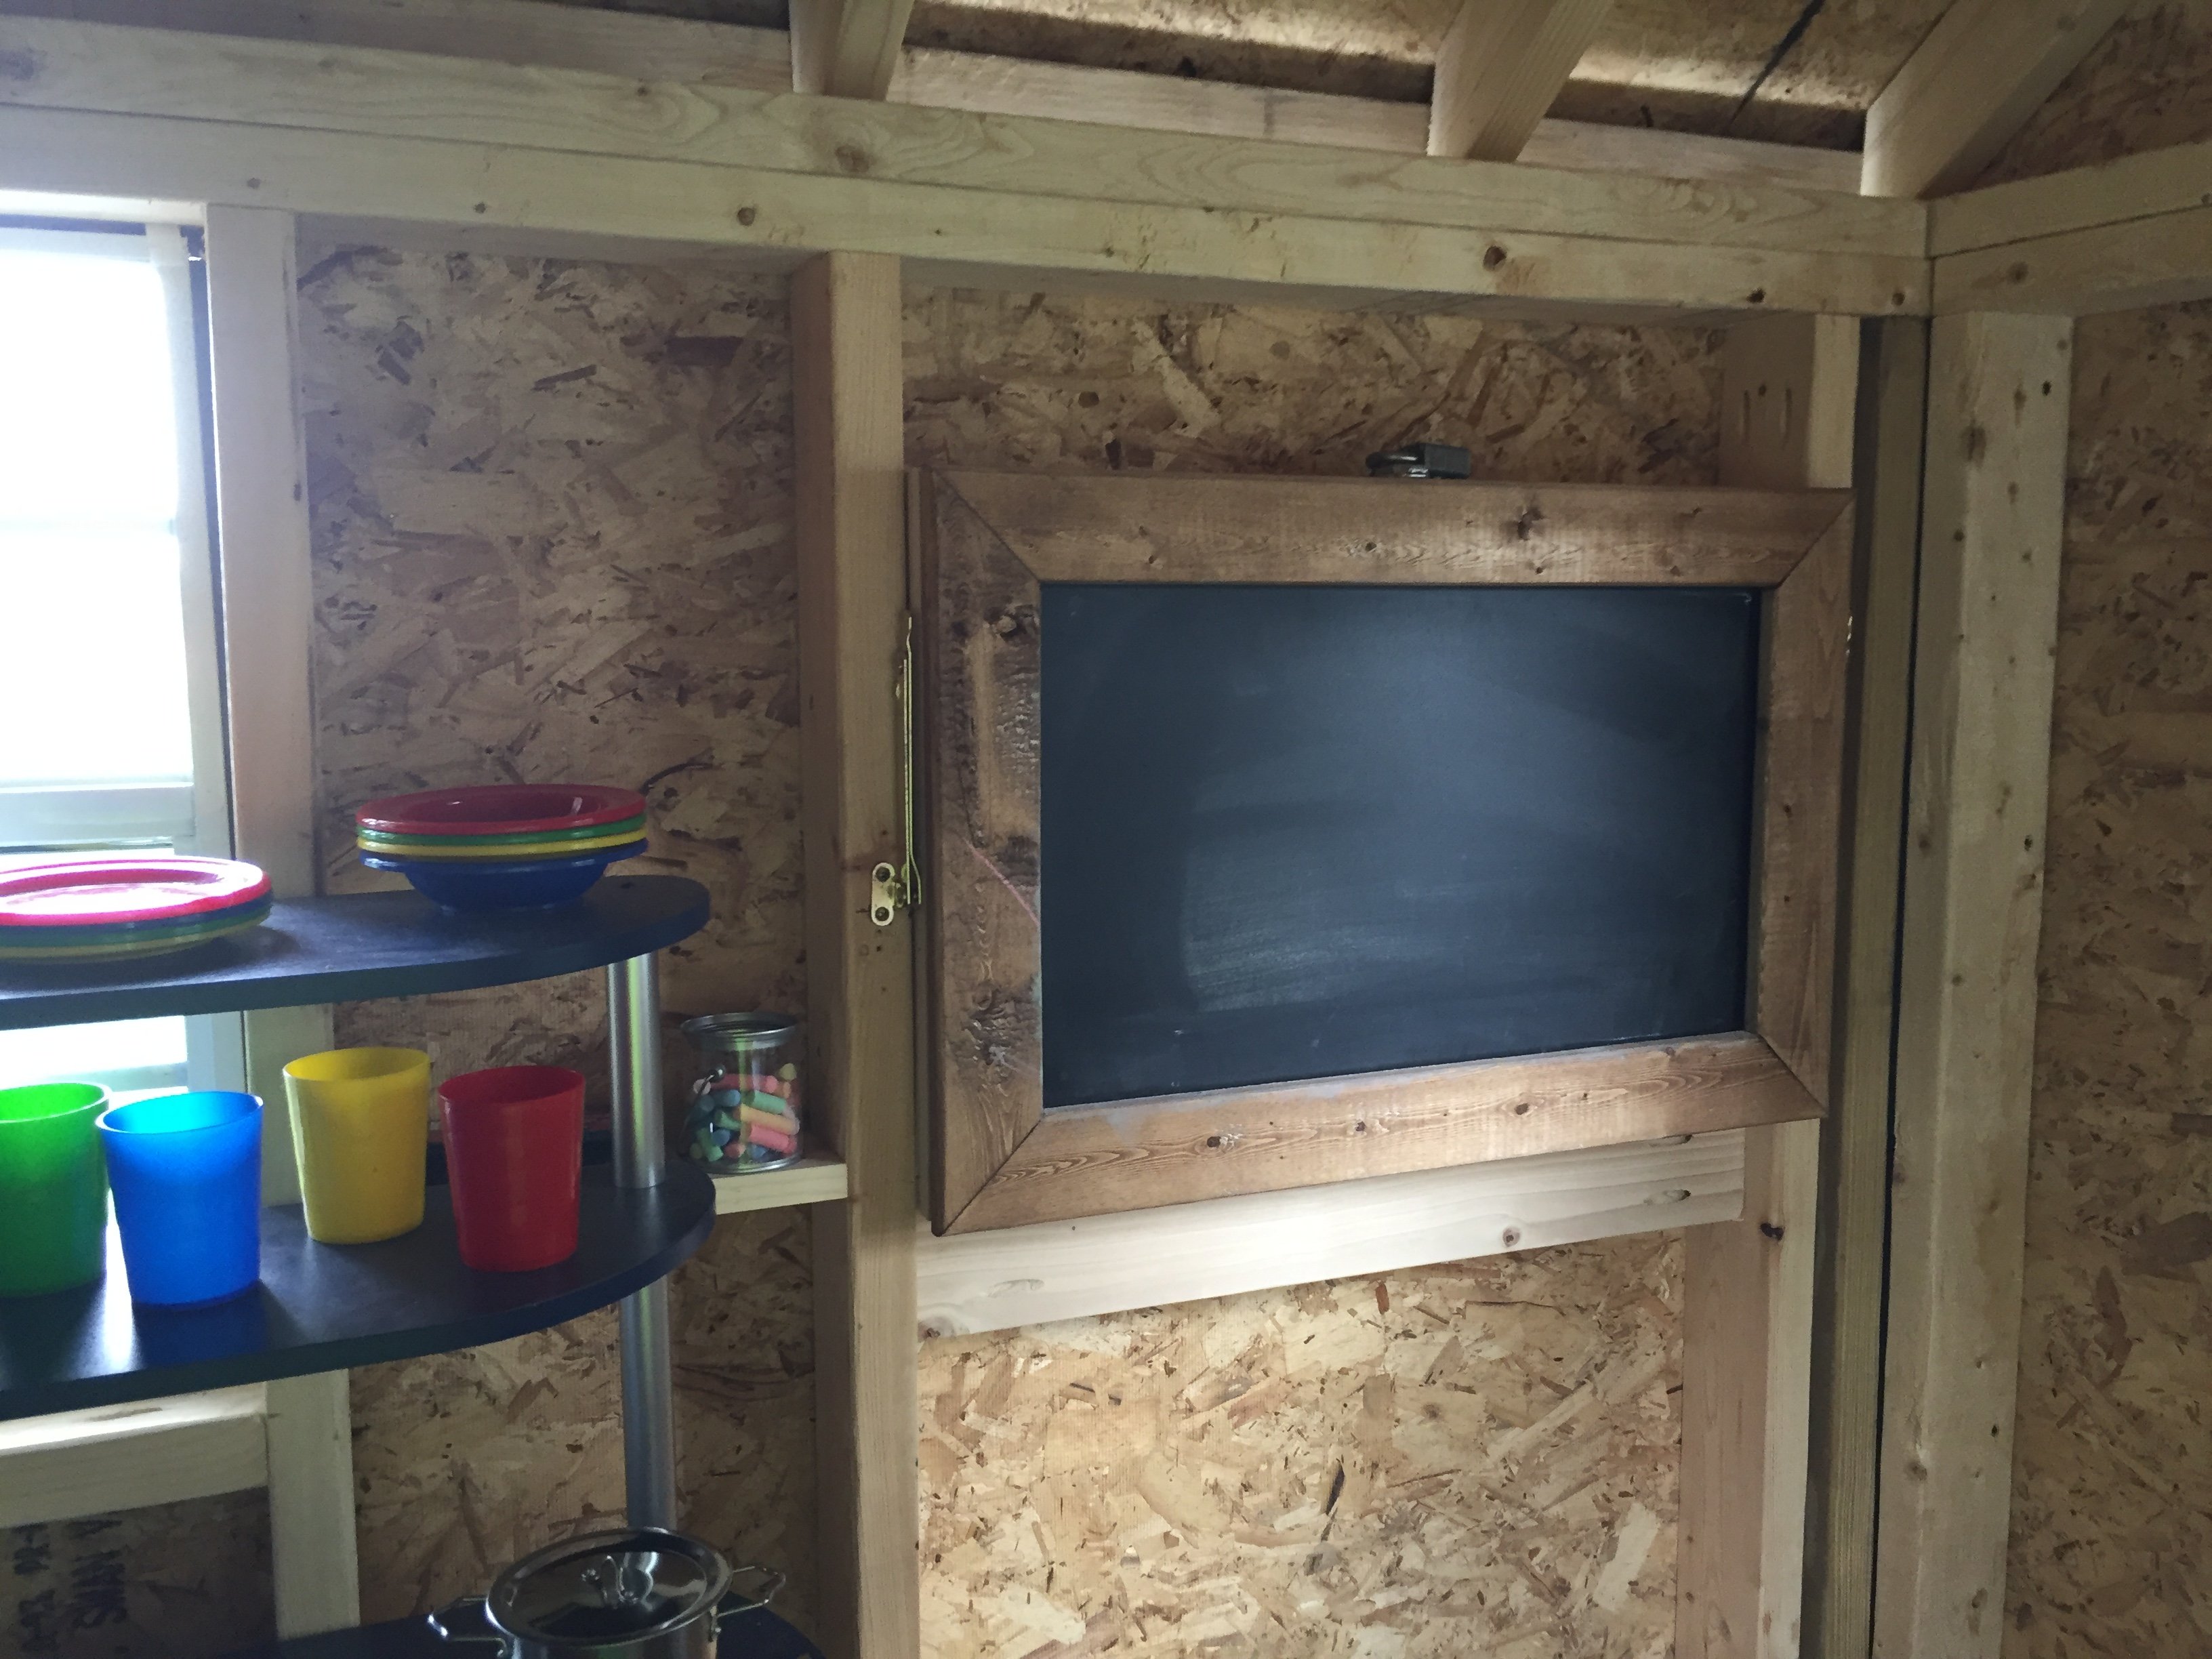
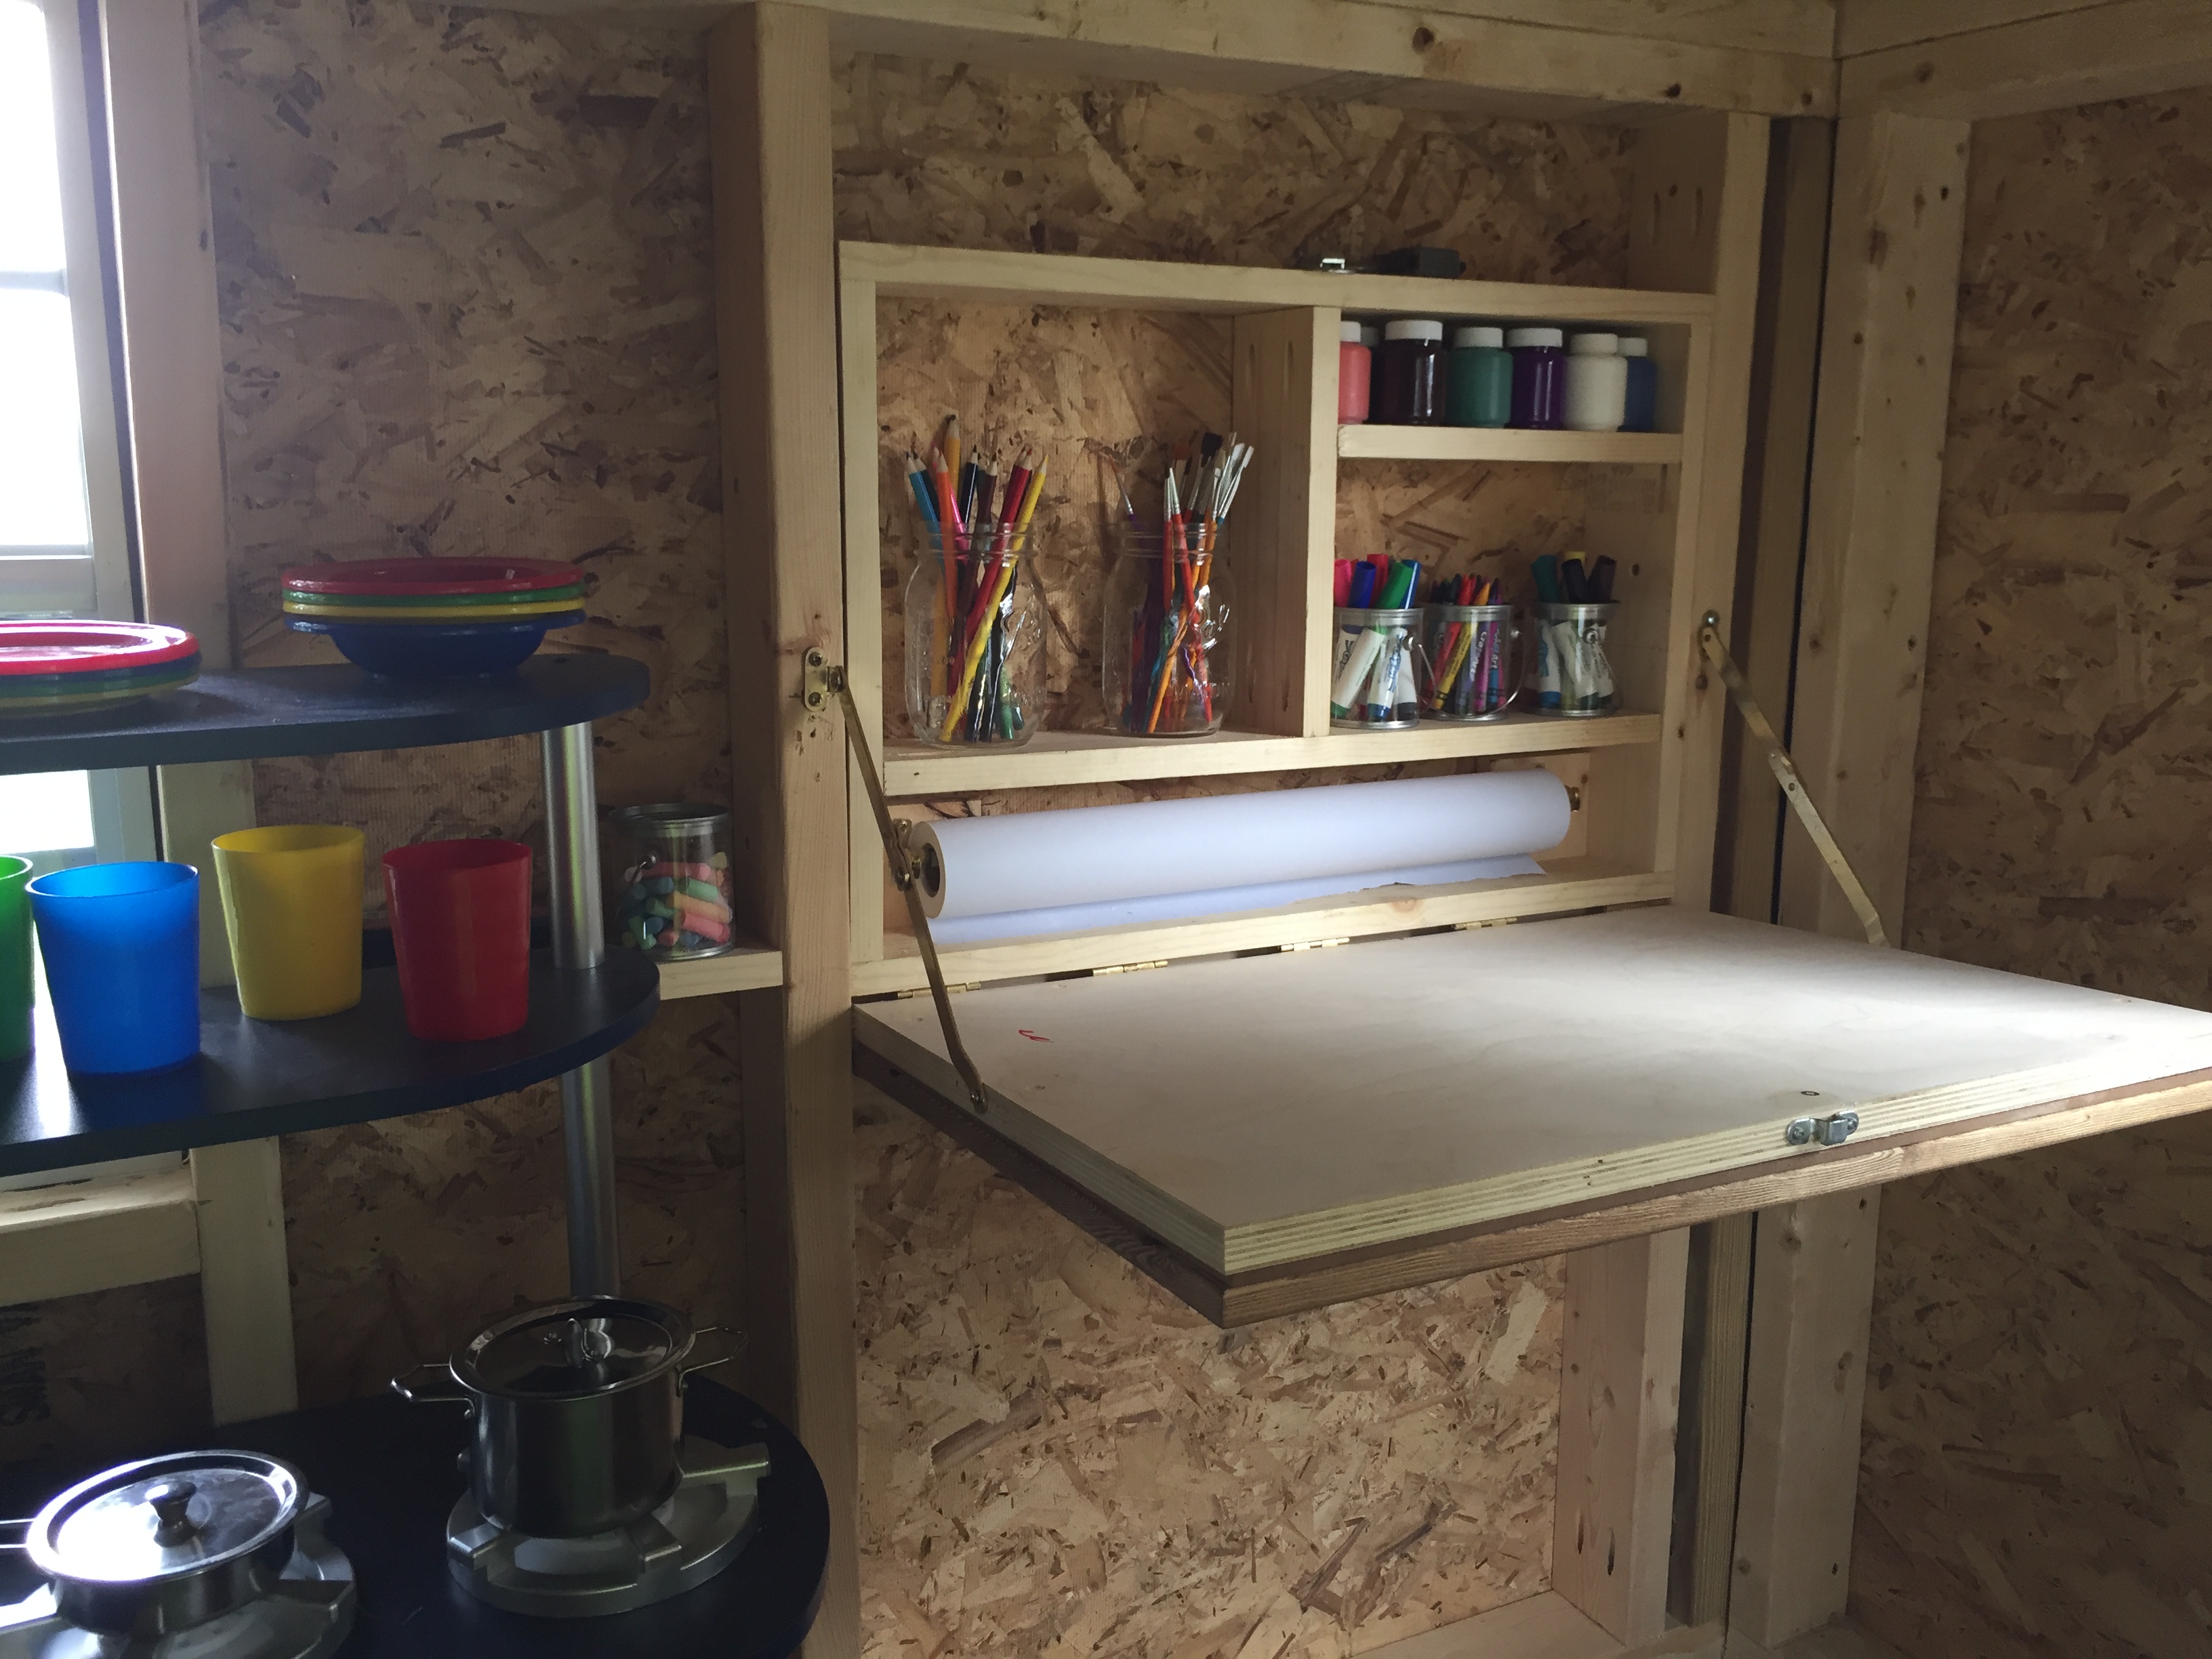
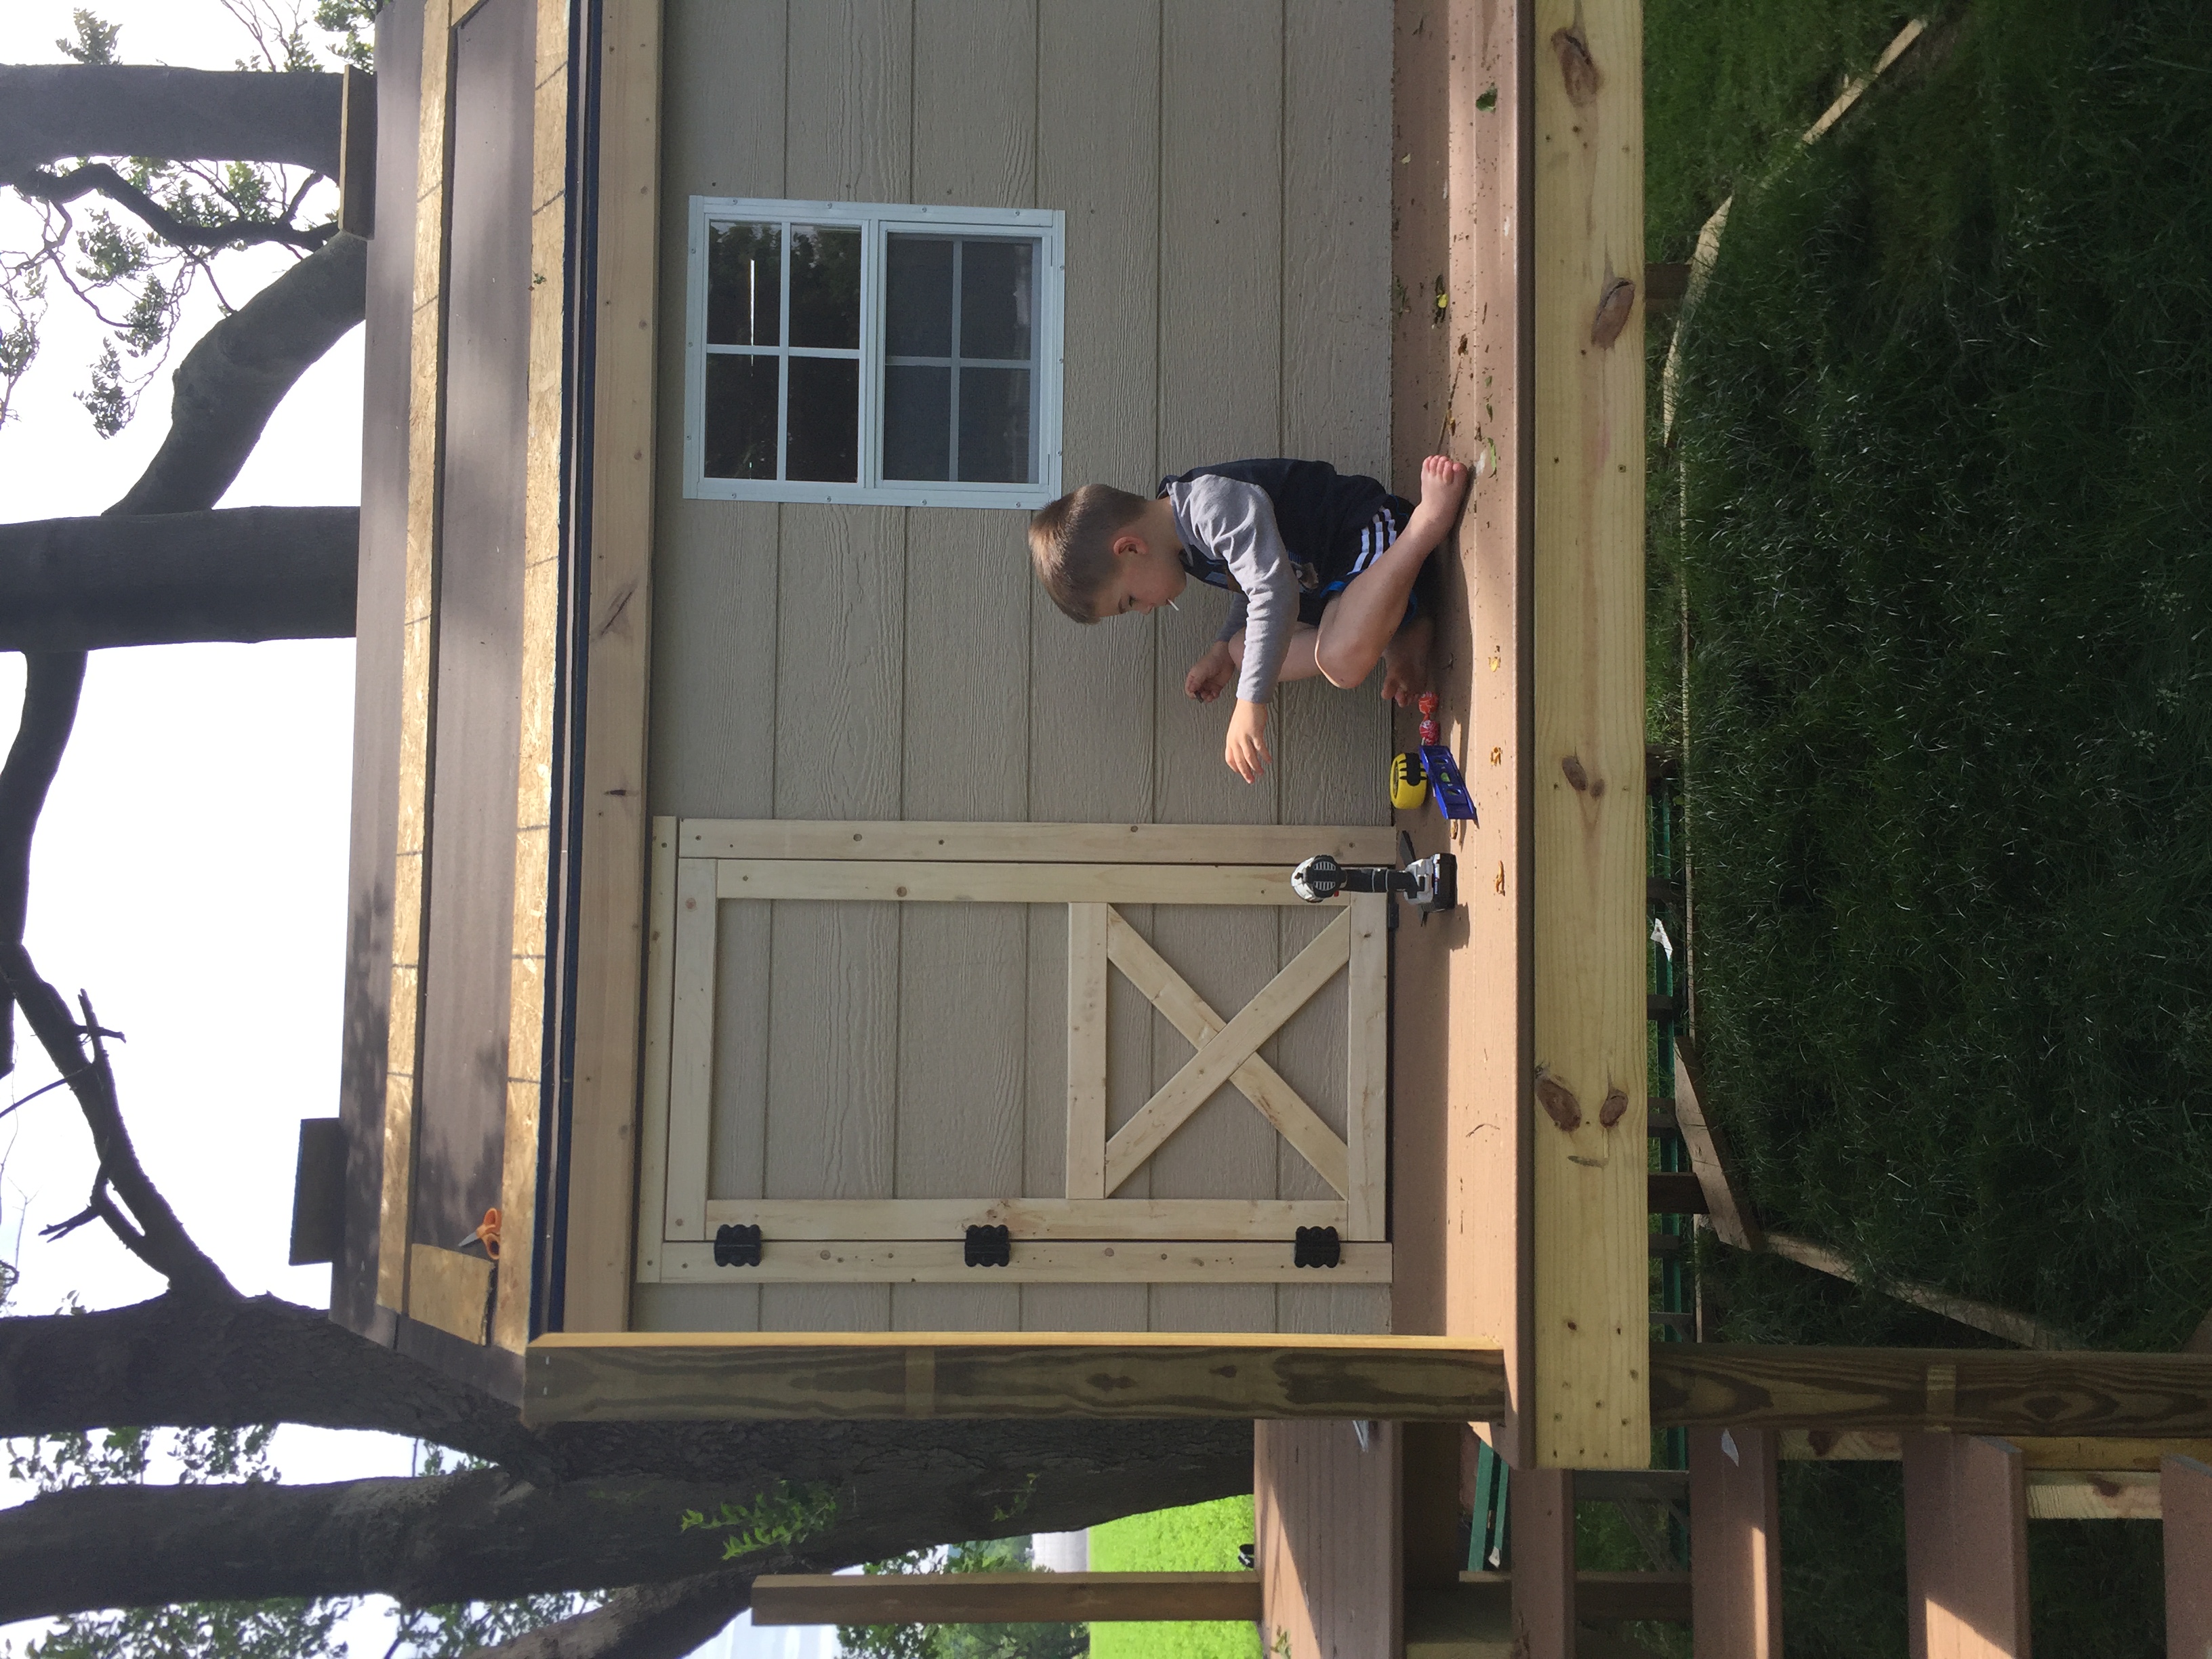
Going crazy in California

This is a base loft bed which was my first project. I used raw pine for everything, and then stained. I added the flip top desk, and cubbys on the back wall as well for more storage. But then one of friends had an old play ground set, which he was selling at a ridiculously low price! Due to the pool and BBQ island however, it did not make sense to put these in the back yard. SO, I decided to take down the ladder and give him a rock wall! Both my son and daughter absolutely love it! I am now going to build the platform on the foot of the bed for the slide. More to come!!!! ;)
Estimated Cost
$200
Estimated Time Investment
Week Long Project (20 Hours or More)
Finish Used
Minwax stain
Recommended Skill Level
Beginner
Comments


2x4s on the ends and 1x4s in the middle.
I made the ends with 2x4s and the middle with 1x4s. The most expensive thing was the seat cushions.
Built from Plan(s)
Estimated Cost
The wood was about 70 dollars.
Estimated Time Investment
Week Long Project (20 Hours or More)
Finish Used
Stain
Recommended Skill Level
Beginner
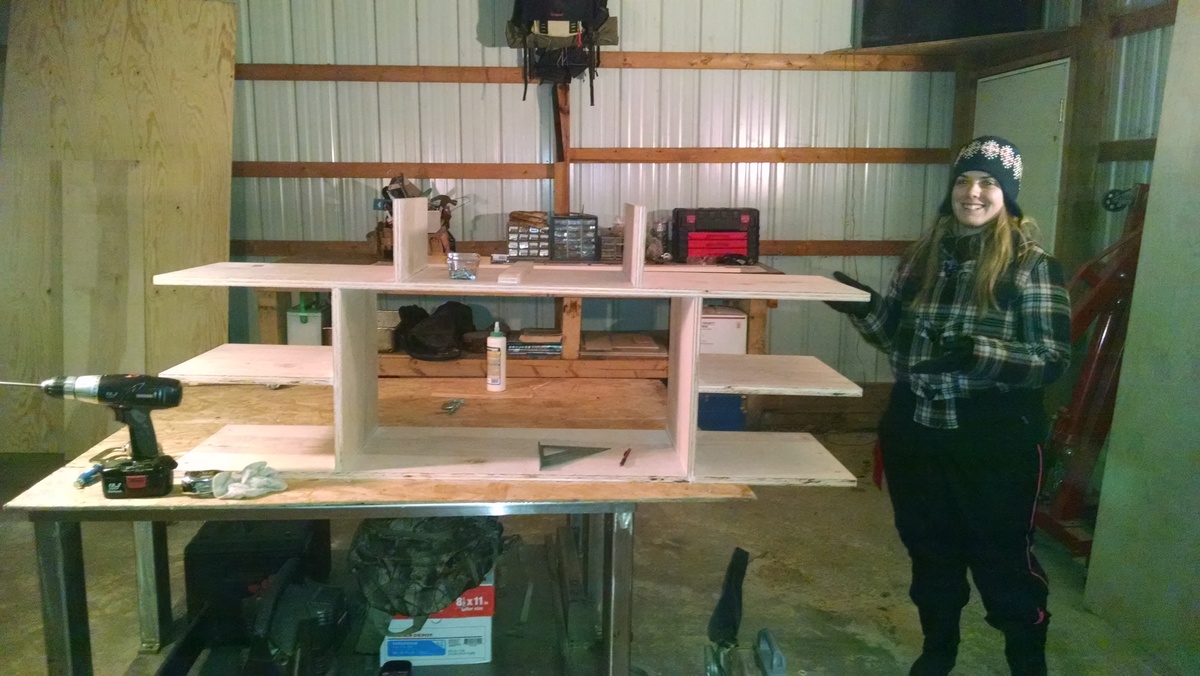
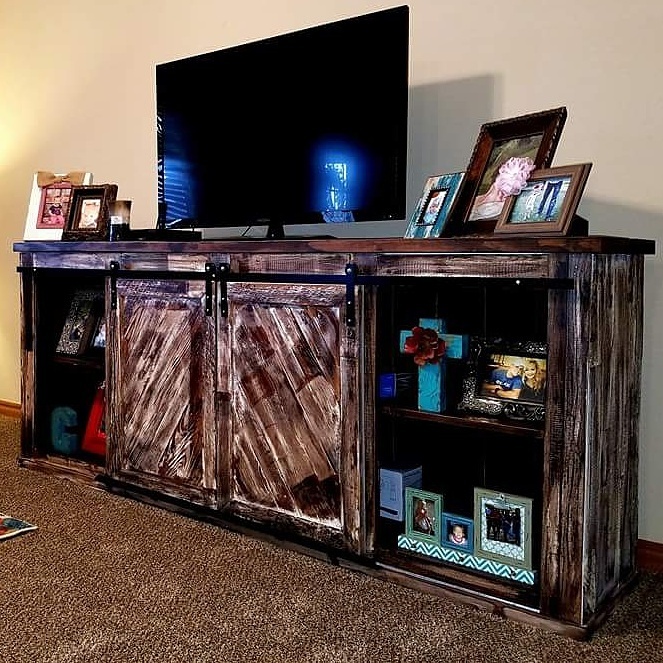
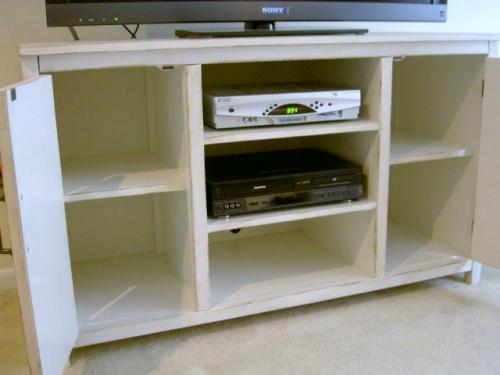
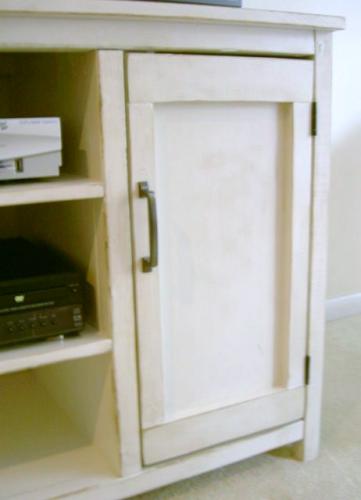
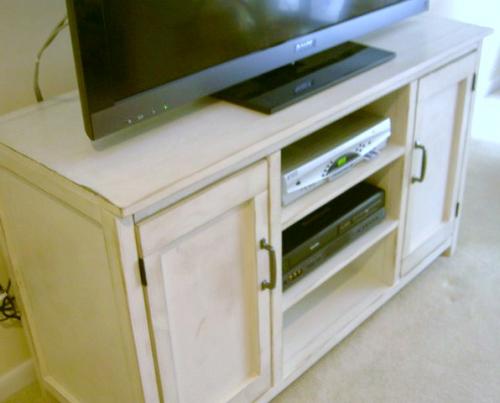
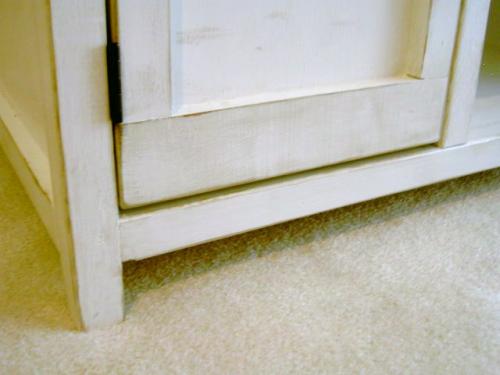
media cabinet
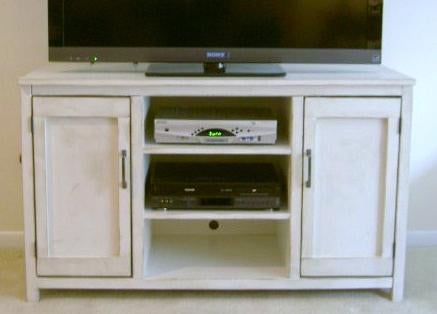
Custom size media cabinet. Two doors with interior shelves. Three open shelves for media components.

Built from Plan(s)
Estimated Cost
$140.00
Estimated Time Investment
Weekend Project (10-20 Hours)
Finish Used
1. one coat primer
2. two coats Behr off white, satin finish
3. distressed with 120 grit sandpaper on mouse sander
4. stain Minwax special walnut
5. two coats Minwax clear satin poly
2. two coats Behr off white, satin finish
3. distressed with 120 grit sandpaper on mouse sander
4. stain Minwax special walnut
5. two coats Minwax clear satin poly
Recommended Skill Level
Intermediate
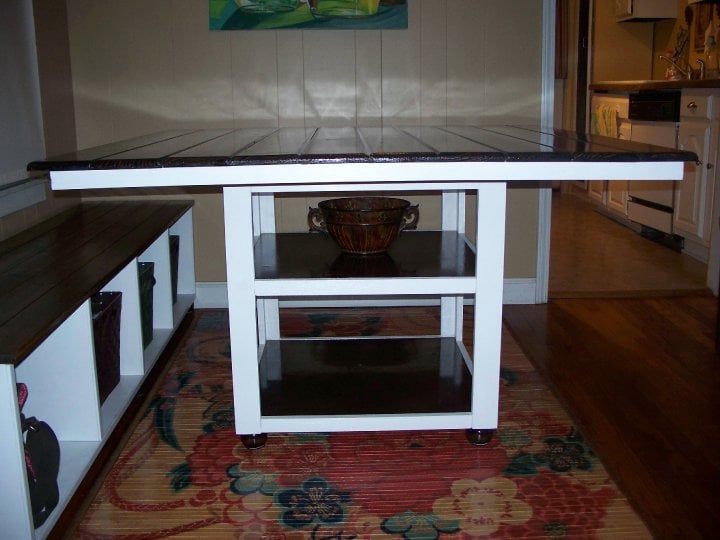
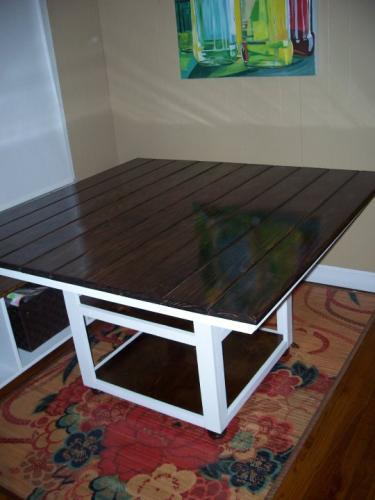
Our long awaited media cabinet!
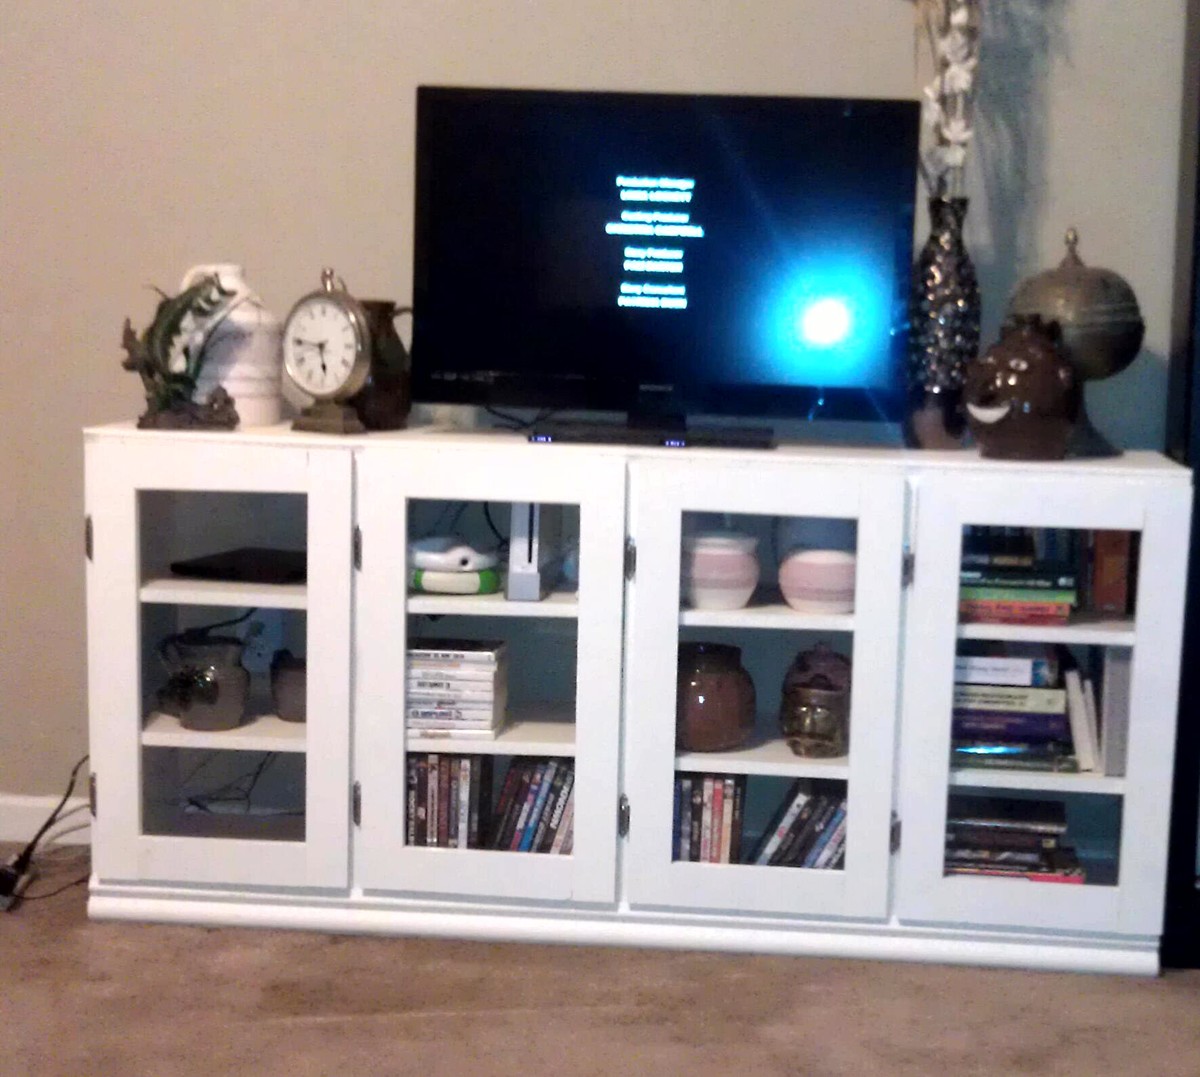
My husband and I built this together over the course of three months. We would grab an hour here and there when we had the time.
I am notorious for my numerous "projects", but my husband is so patient and he usually indulges my curiosity. We both learned so much building this, and even though he feigns indifference, I can tell that my husband is just as proud as I am of the end result. We are absolute beginners and my critical eyes can find many imperfections, but I can't help but be amazed that we actually built this thing - this is huge for us!!
We plan to build the rest of the wall system eventually (piece by piece), but I couldn't wait to share.
Thanks Ana for giving us so much of yourself!!
P.S: Lumber wise you get what you pay for - even if you are painting, go for the higher quality plywood and craftboard. The price premium is well worth the frustration it will save you - especially if you are a beginner like us.
Built from Plan(s)
Estimated Cost
$250
Estimated Time Investment
Week Long Project (20 Hours or More)
Finish Used
Vintage white from the Allen Roth Collection - Valspar Paint
Recommended Skill Level
Starter Project
Comments
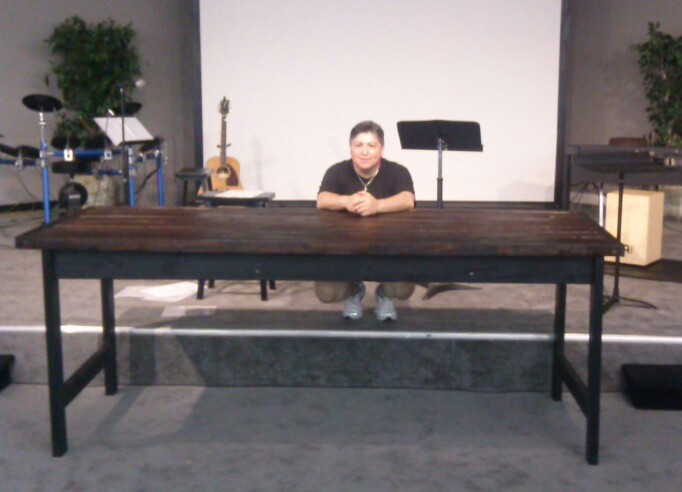
Scrap wood Buffet table
Built this 8' x 3' buffet/serving table from scrap wood gathered from work. I bought (2) 2x4's for the legs and the 1" particle board for stability under the slats on top. Finished with Red Mahogany and Polycrylic. It was built as a gift for my church and will now be used for Easter Service for Communion. One of many projects I've made and very happy with how this turned out.
Estimated Cost
$30 for wood - $17 for paint - $6 for stain - $5 for sandpaper. Total spent - under $60.
Estimated Time Investment
Weekend Project (10-20 Hours)
Finish Used
I used 6 1x6x12 scrap gathered from work - we get a lot of pallets of product so scrap wood is easy to come by. Used the same scrap wood (ones less desireable for the table top and ripped 1" strips to size for the sides of the top.Secured the legs and table top using a Kreg Jig. Then finished the table using Red Mahogany and Polycrylic (1 coat) for the top and sides - and semi gloss black paint for the table legs and apron.
Recommended Skill Level
Intermediate
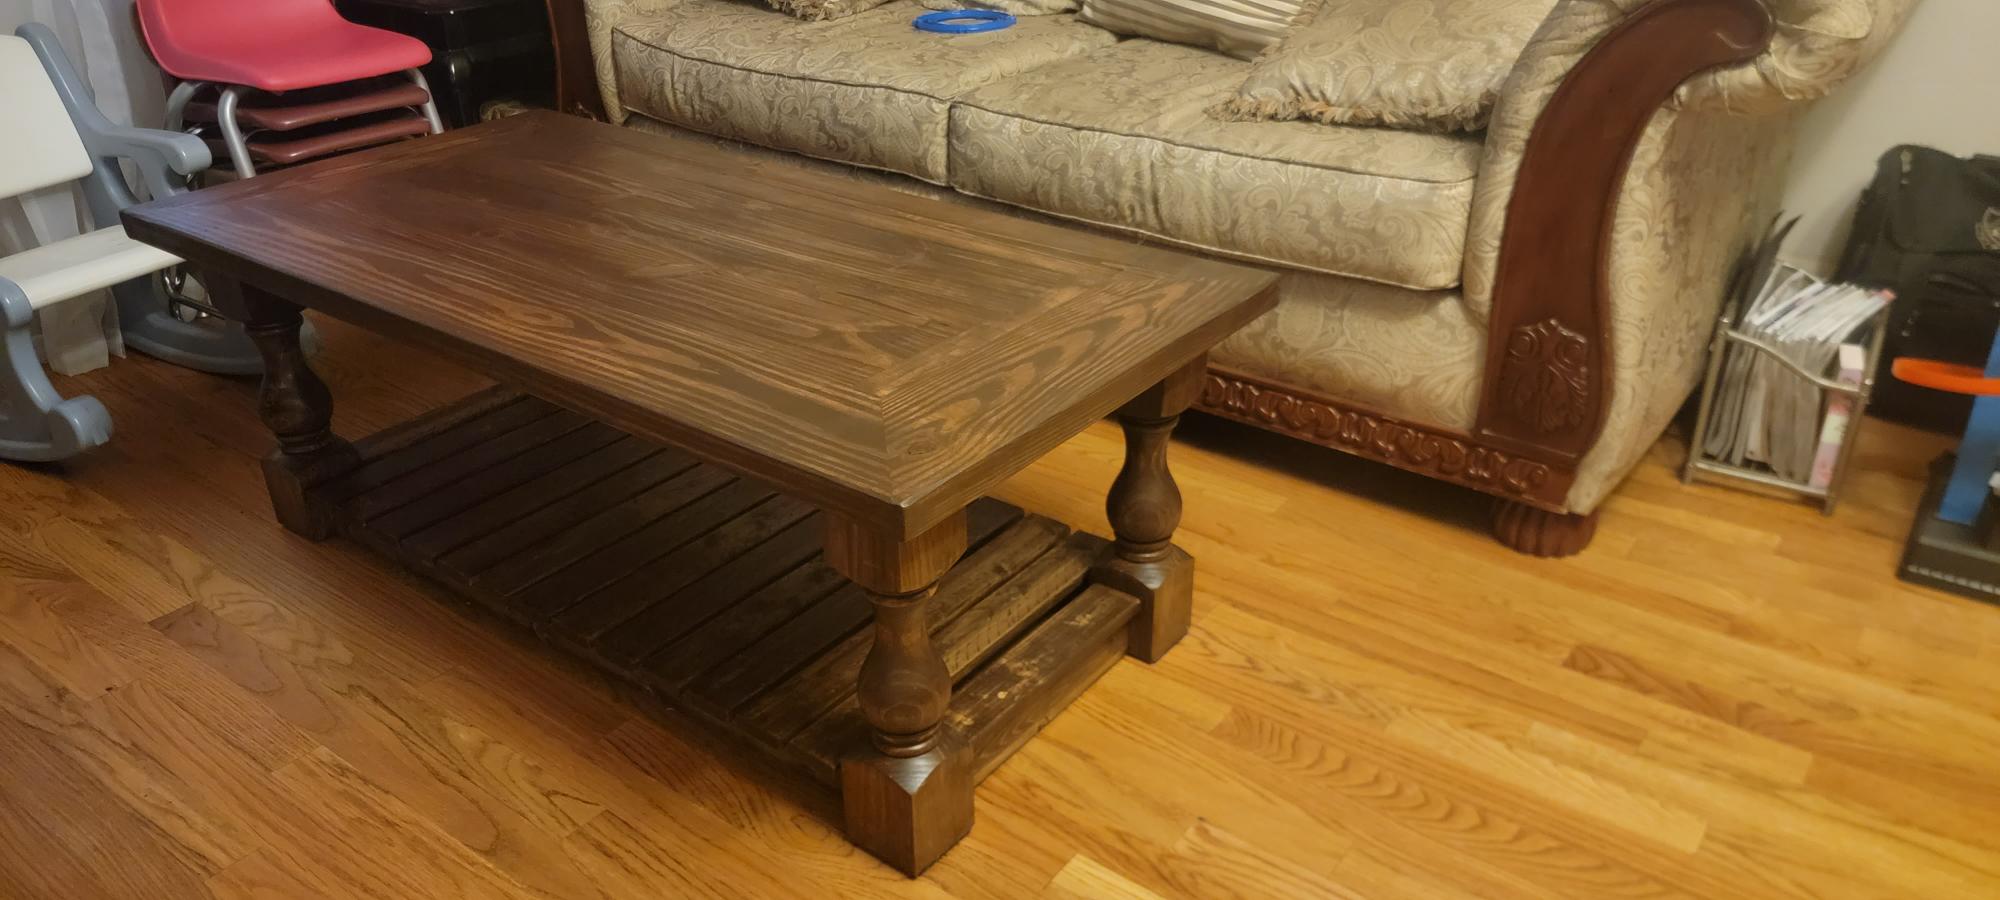
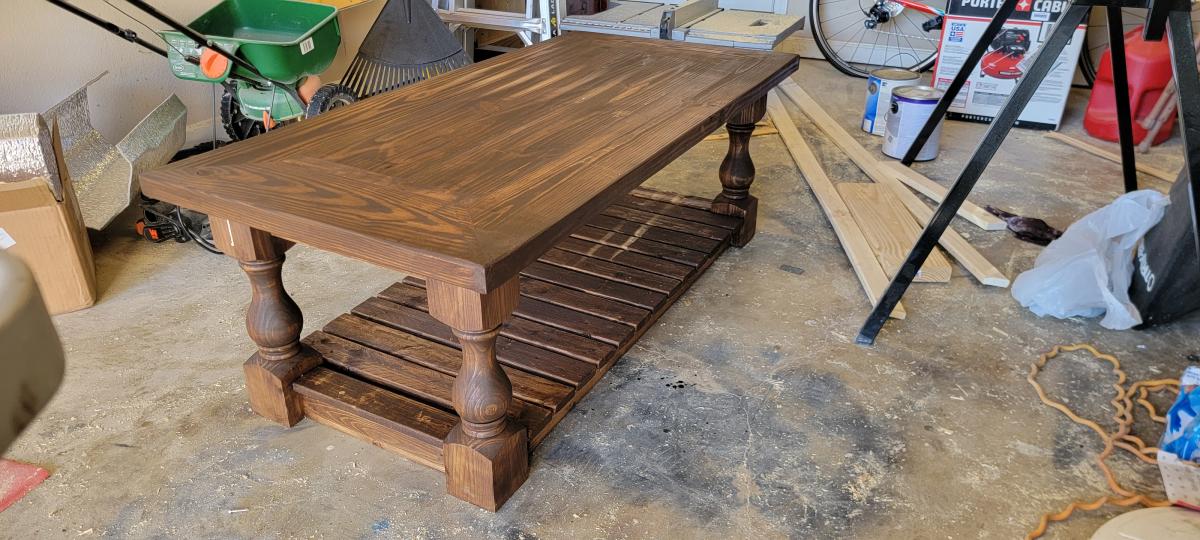
Chevron Coffee Table
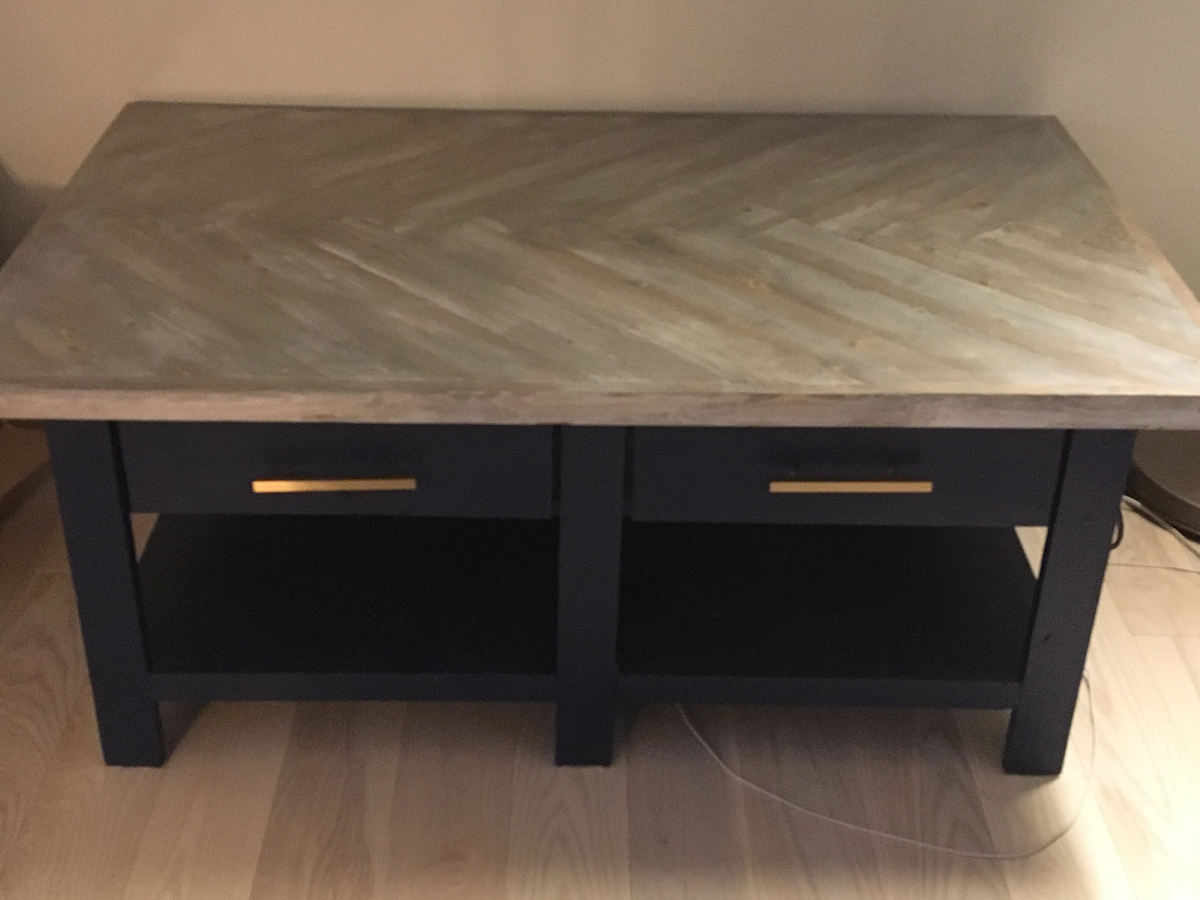
Based off of Ana Whi'te Benchright Coffee Table with a chevron/herringbone table top
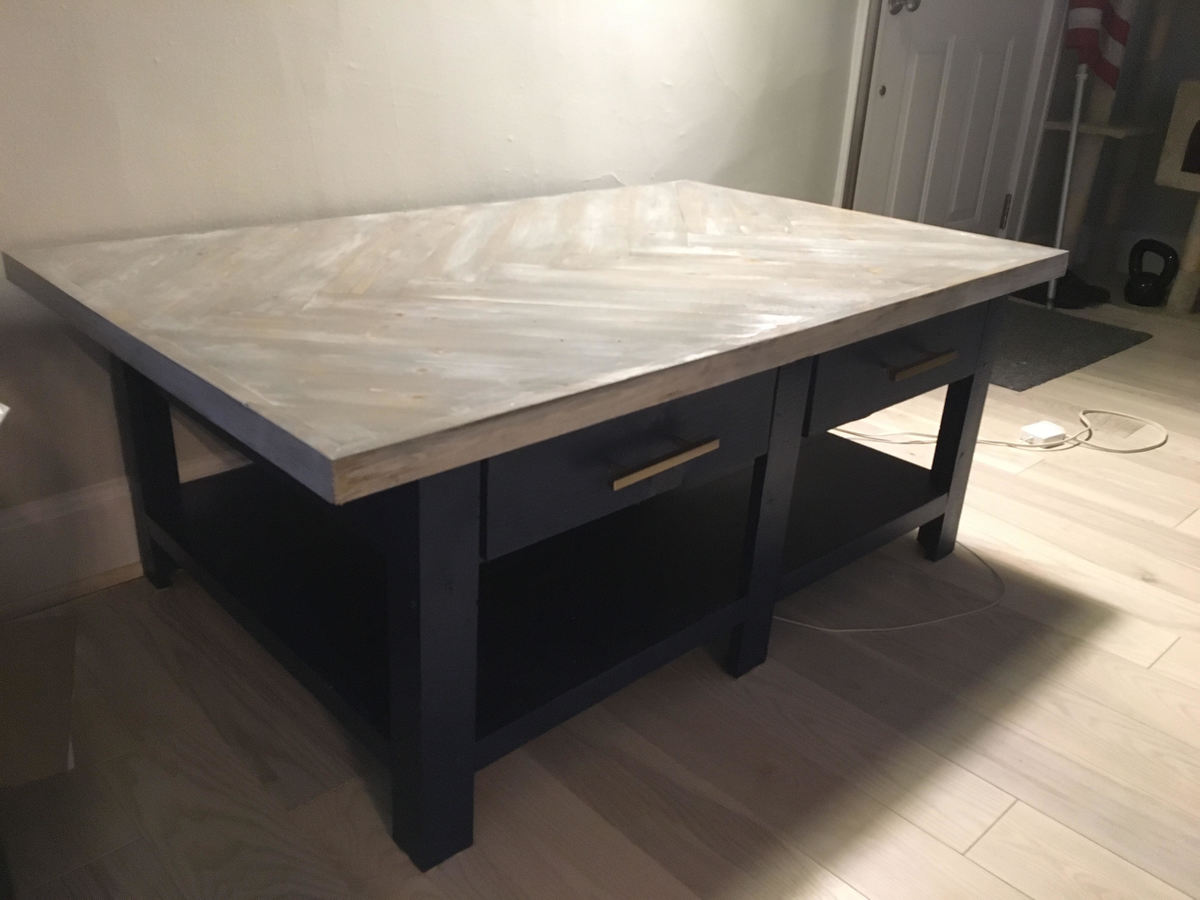
Built from Plan(s)
Estimated Cost
$200
Estimated Time Investment
Weekend Project (10-20 Hours)
Recommended Skill Level
Intermediate
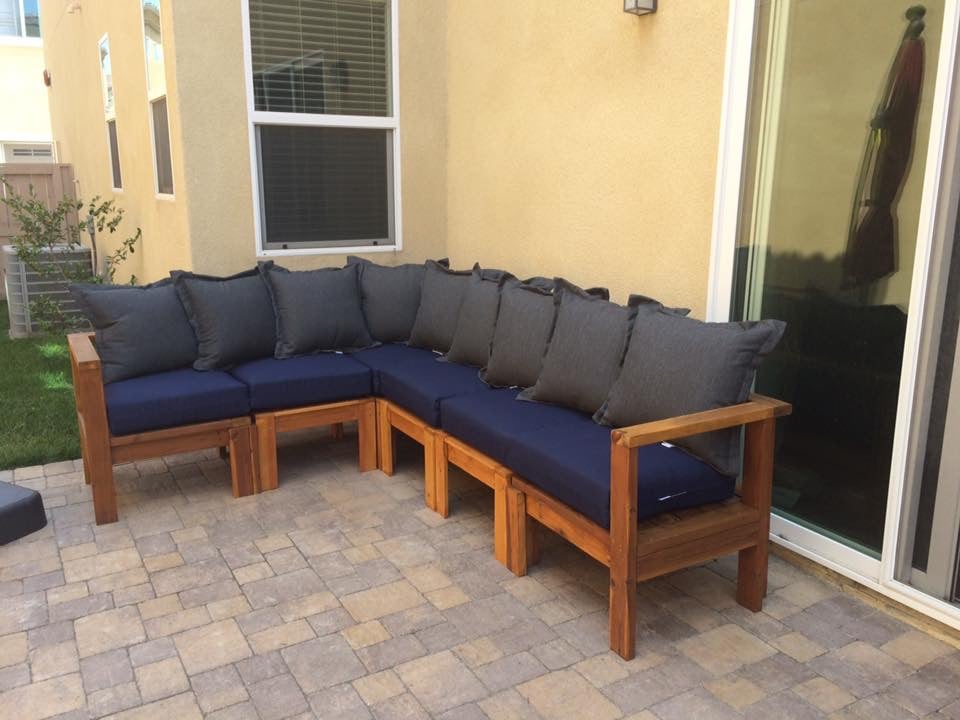
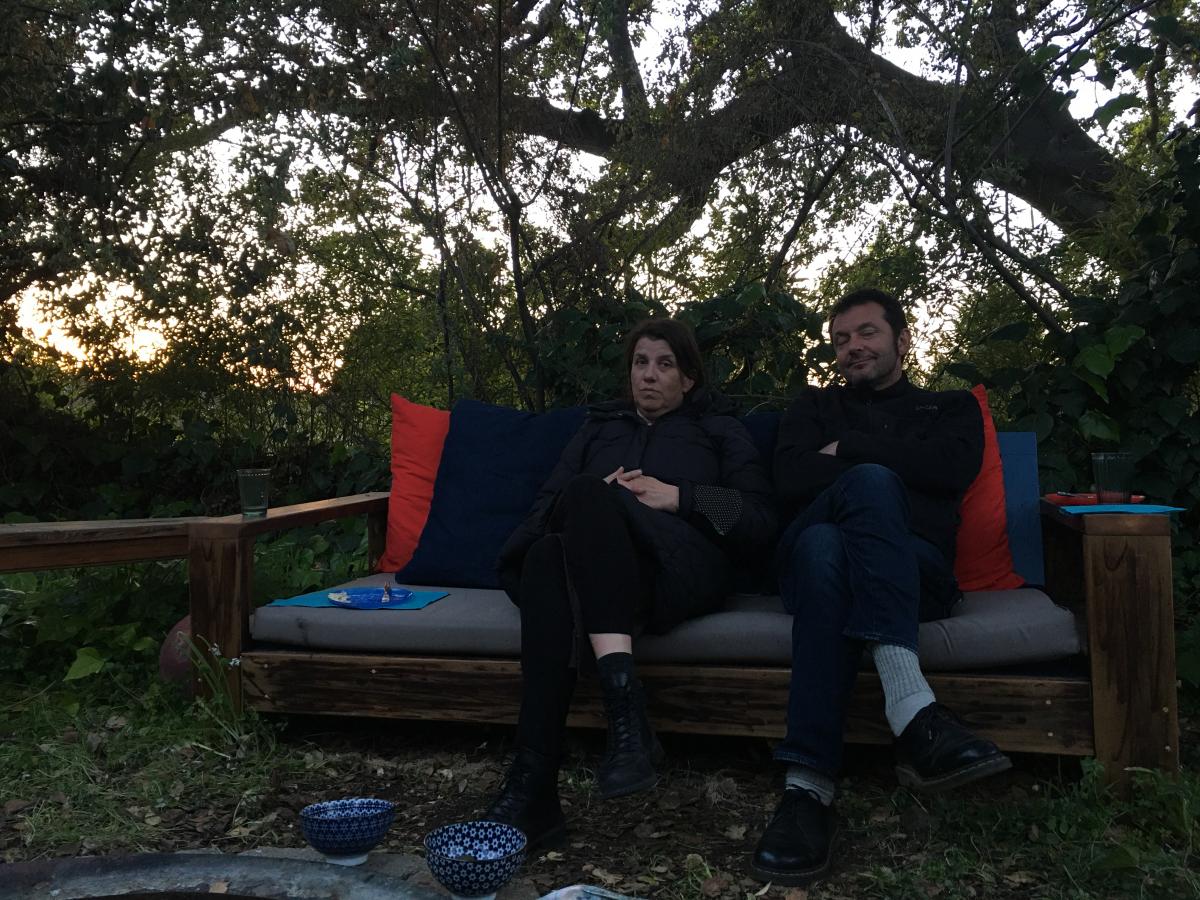
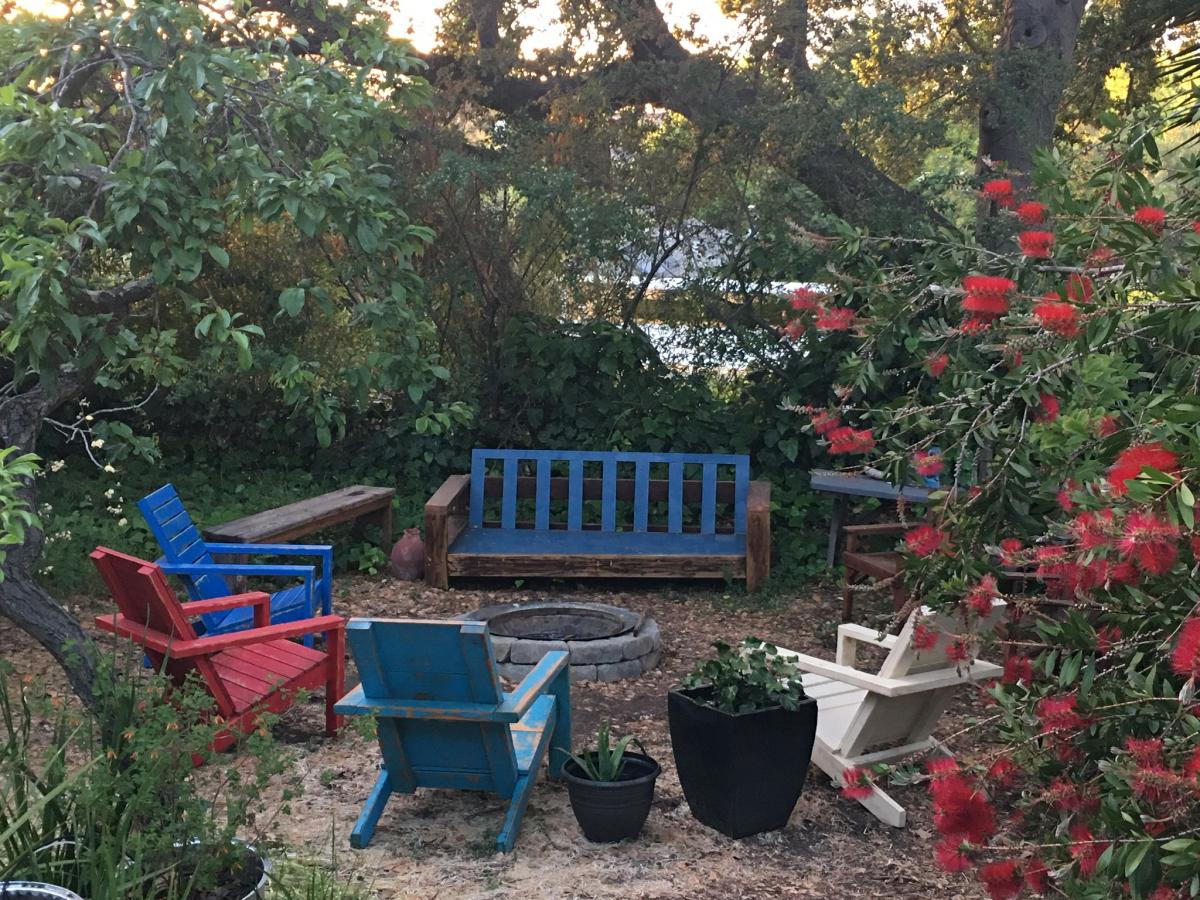
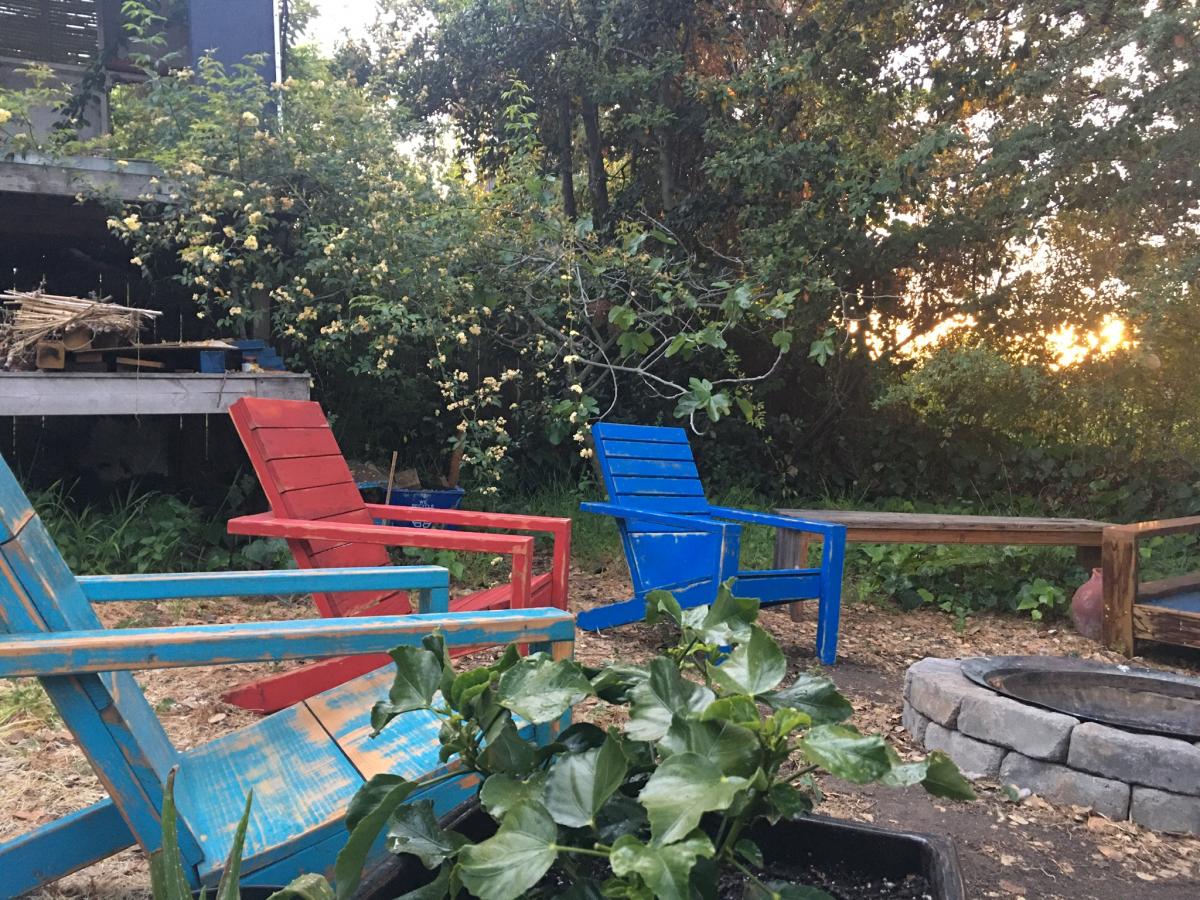
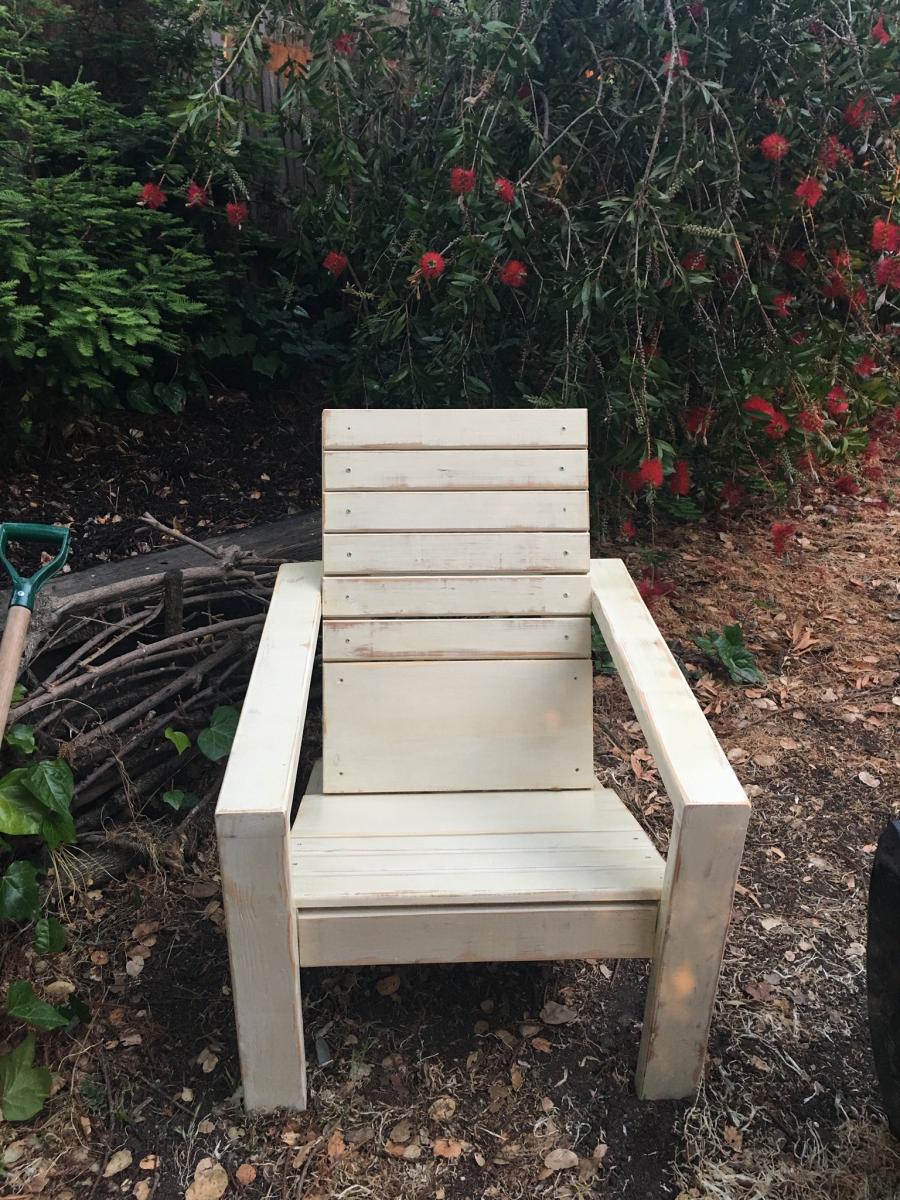
Adirondack chairs and bench
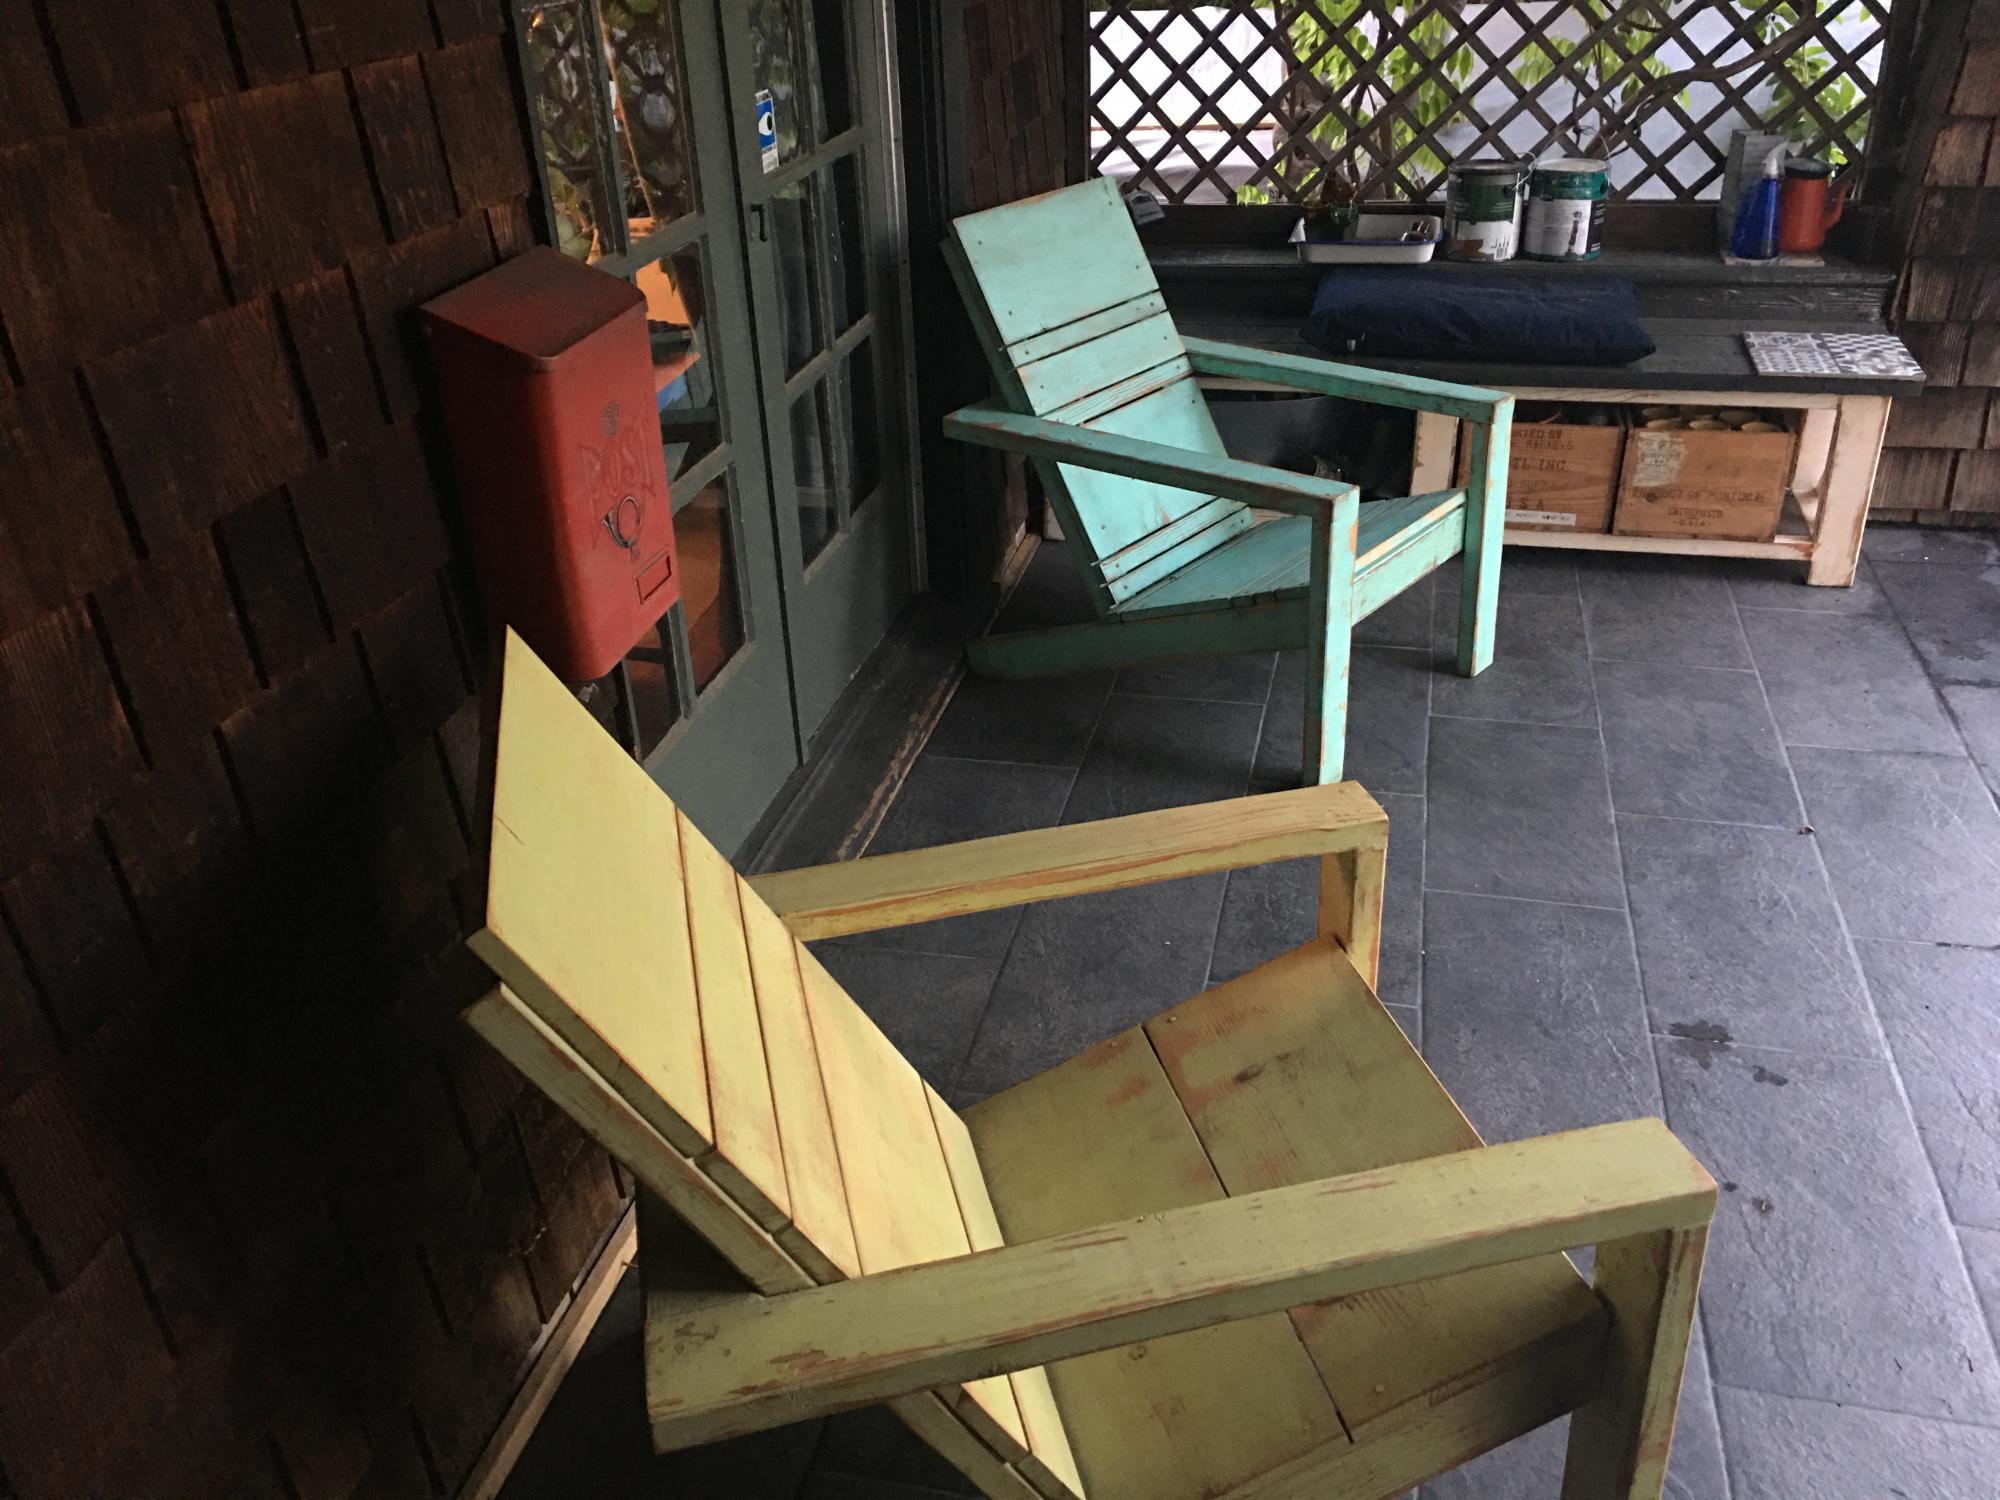
A year and a half long Covid at home and eating and entertaining outdoors encouraged us to transform our back yard into an outdoors living and dining room.
It was also the perfect excuse to finally use all the scrap wood we had lying around and turn it into these super comfy chairs. Add pillows and blankets and we have a cozy back yard that we love to spend time in.
We used this occasion to finish ends of paint cans to paint the chairs in different colors and scraped the paint down for a weathered look, then finished it all with a couple of coats of varnish. Each chair’s back is slightly different depending on scraps we had on hand. We love Anna’s simple and practical plans and instructions!!!
Built from Plan(s)
Comments
Tue, 10/05/2021 - 10:06
Wonderful use of material and extras!
Love the alternating look and colors, very attractive and inviting!
Storage Table and Bench
My 1st project! Came up with bench plans myself and modified Ana's Pottery Barn Storage Table plans.
Built from Plan(s)
Estimated Time Investment
Weekend Project (10-20 Hours)
Finish Used
White Paint, Minwax Stain (Dark Walnut) & Polyurethane
Recommended Skill Level
Beginner
Comments
Ana White Admin
Sun, 03/07/2021 - 10:02
So awesome!
Love this and the cute inside additions!