Community Brag Posts
Parson Bookcase
I made the taller version of this plan. 2x2's are my arch nemesis! Never again will I build something primarily using 2x2's because they are SO wonky! I tried to find the straightest boards possible but still it didn't make for a very good bookcase. I would recommend building this if you have a table saw & you can cut your own 2x2's! It will suffice for storage in my craft room, but I am not sure if it will hold up during all of our moves, because my husband is in the Army!
Built from Plan(s)
Estimated Cost
$50-$60
Estimated Time Investment
Day Project (6-9 Hours)
Finish Used
Early American Stain & Poly
Recommended Skill Level
Intermediate
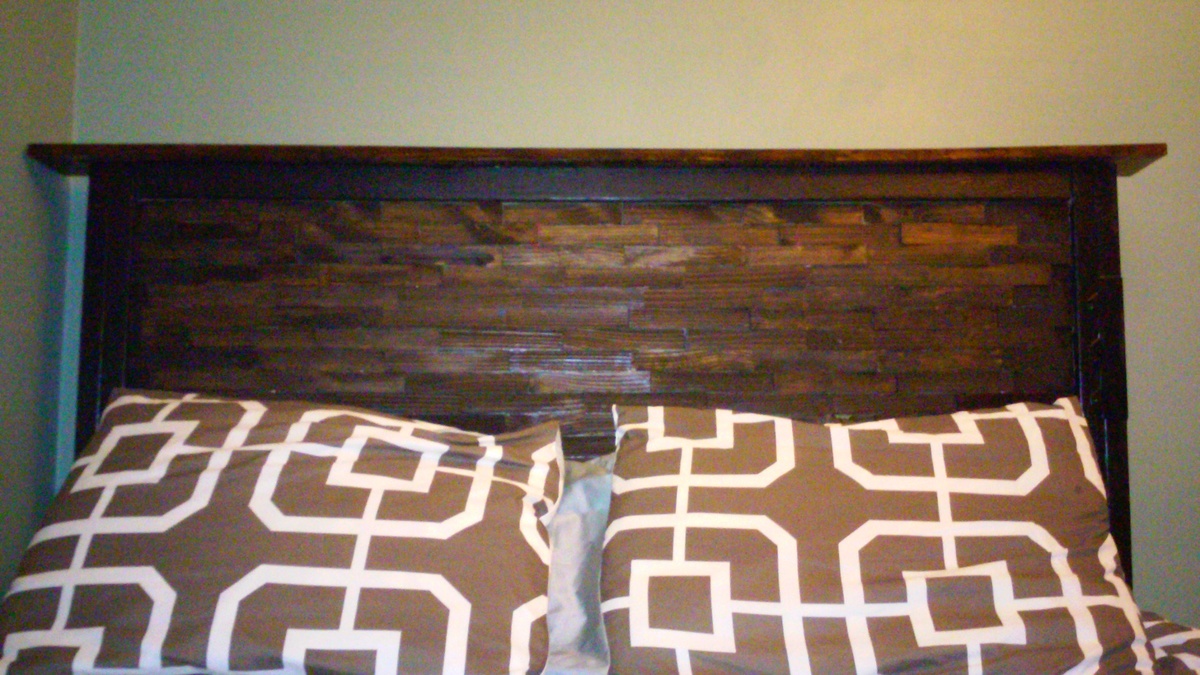
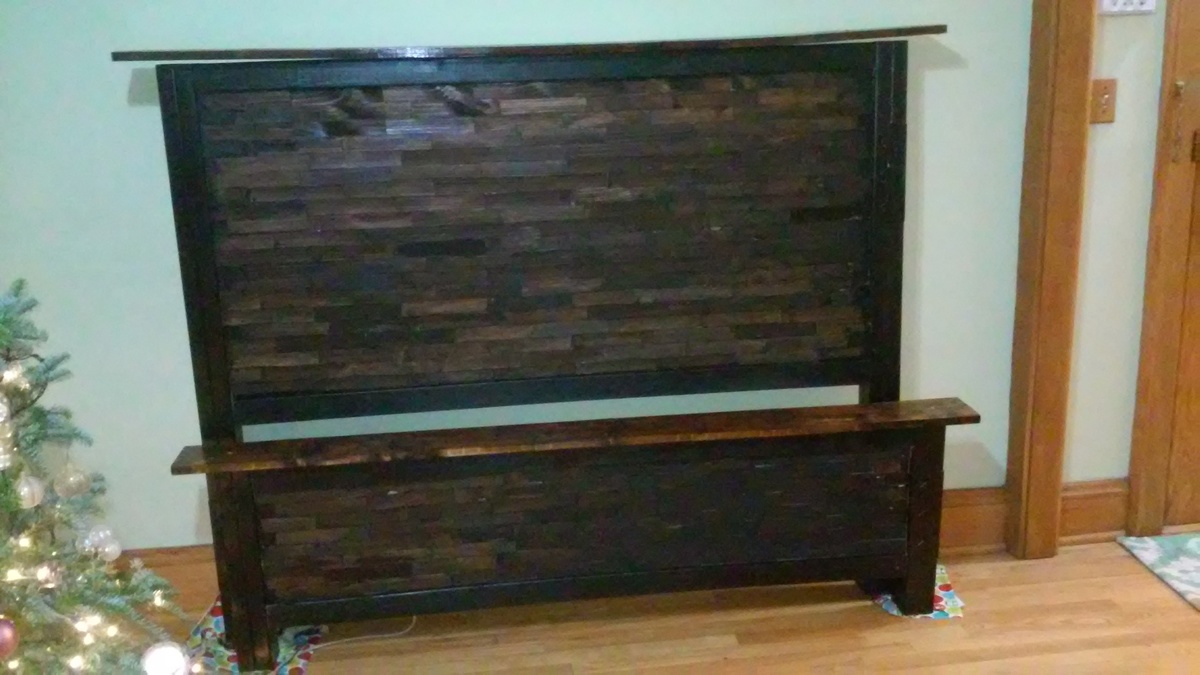
Shim Bed!
I have been working on this project intermittantly for months now. It is so amazing to have it finally finished and have it fit my style perfectly. Those shims took forever to apply. I stained them first and then attached them with wood glue to both the headboard and footbard.
I made a few modifications to the aesthic though none of the cut lengths. Instead of using 4X4 posts I used 2x4's and attached them with metal brackets to give it a slight industrial feel. I also painted the framing black and the posts black and stained the top 1X6 and 1X12 siderails the same color as I stained the shims which I thought tied it all together and made it look warm and rustic.
I did not build out the wood frame but instead used the metal frame I had already to set the bed down inside. I am really happy. Thank you Anna for this plan! I never would have thought I could pull something like this off!
Built from Plan(s)
Estimated Time Investment
Week Long Project (20 Hours or More)
Finish Used
Black Rustoleum paint and Minwax espresso stain.
Recommended Skill Level
Intermediate
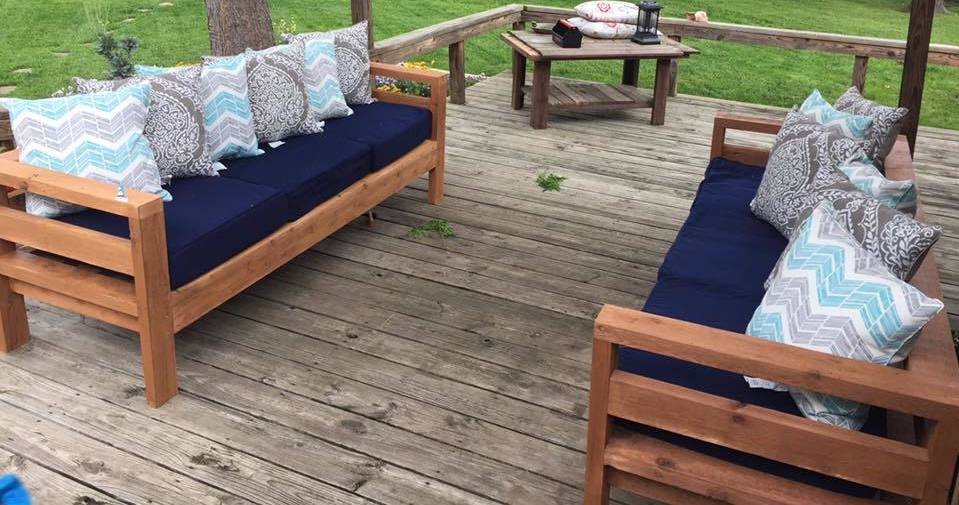
Outdoor Seating
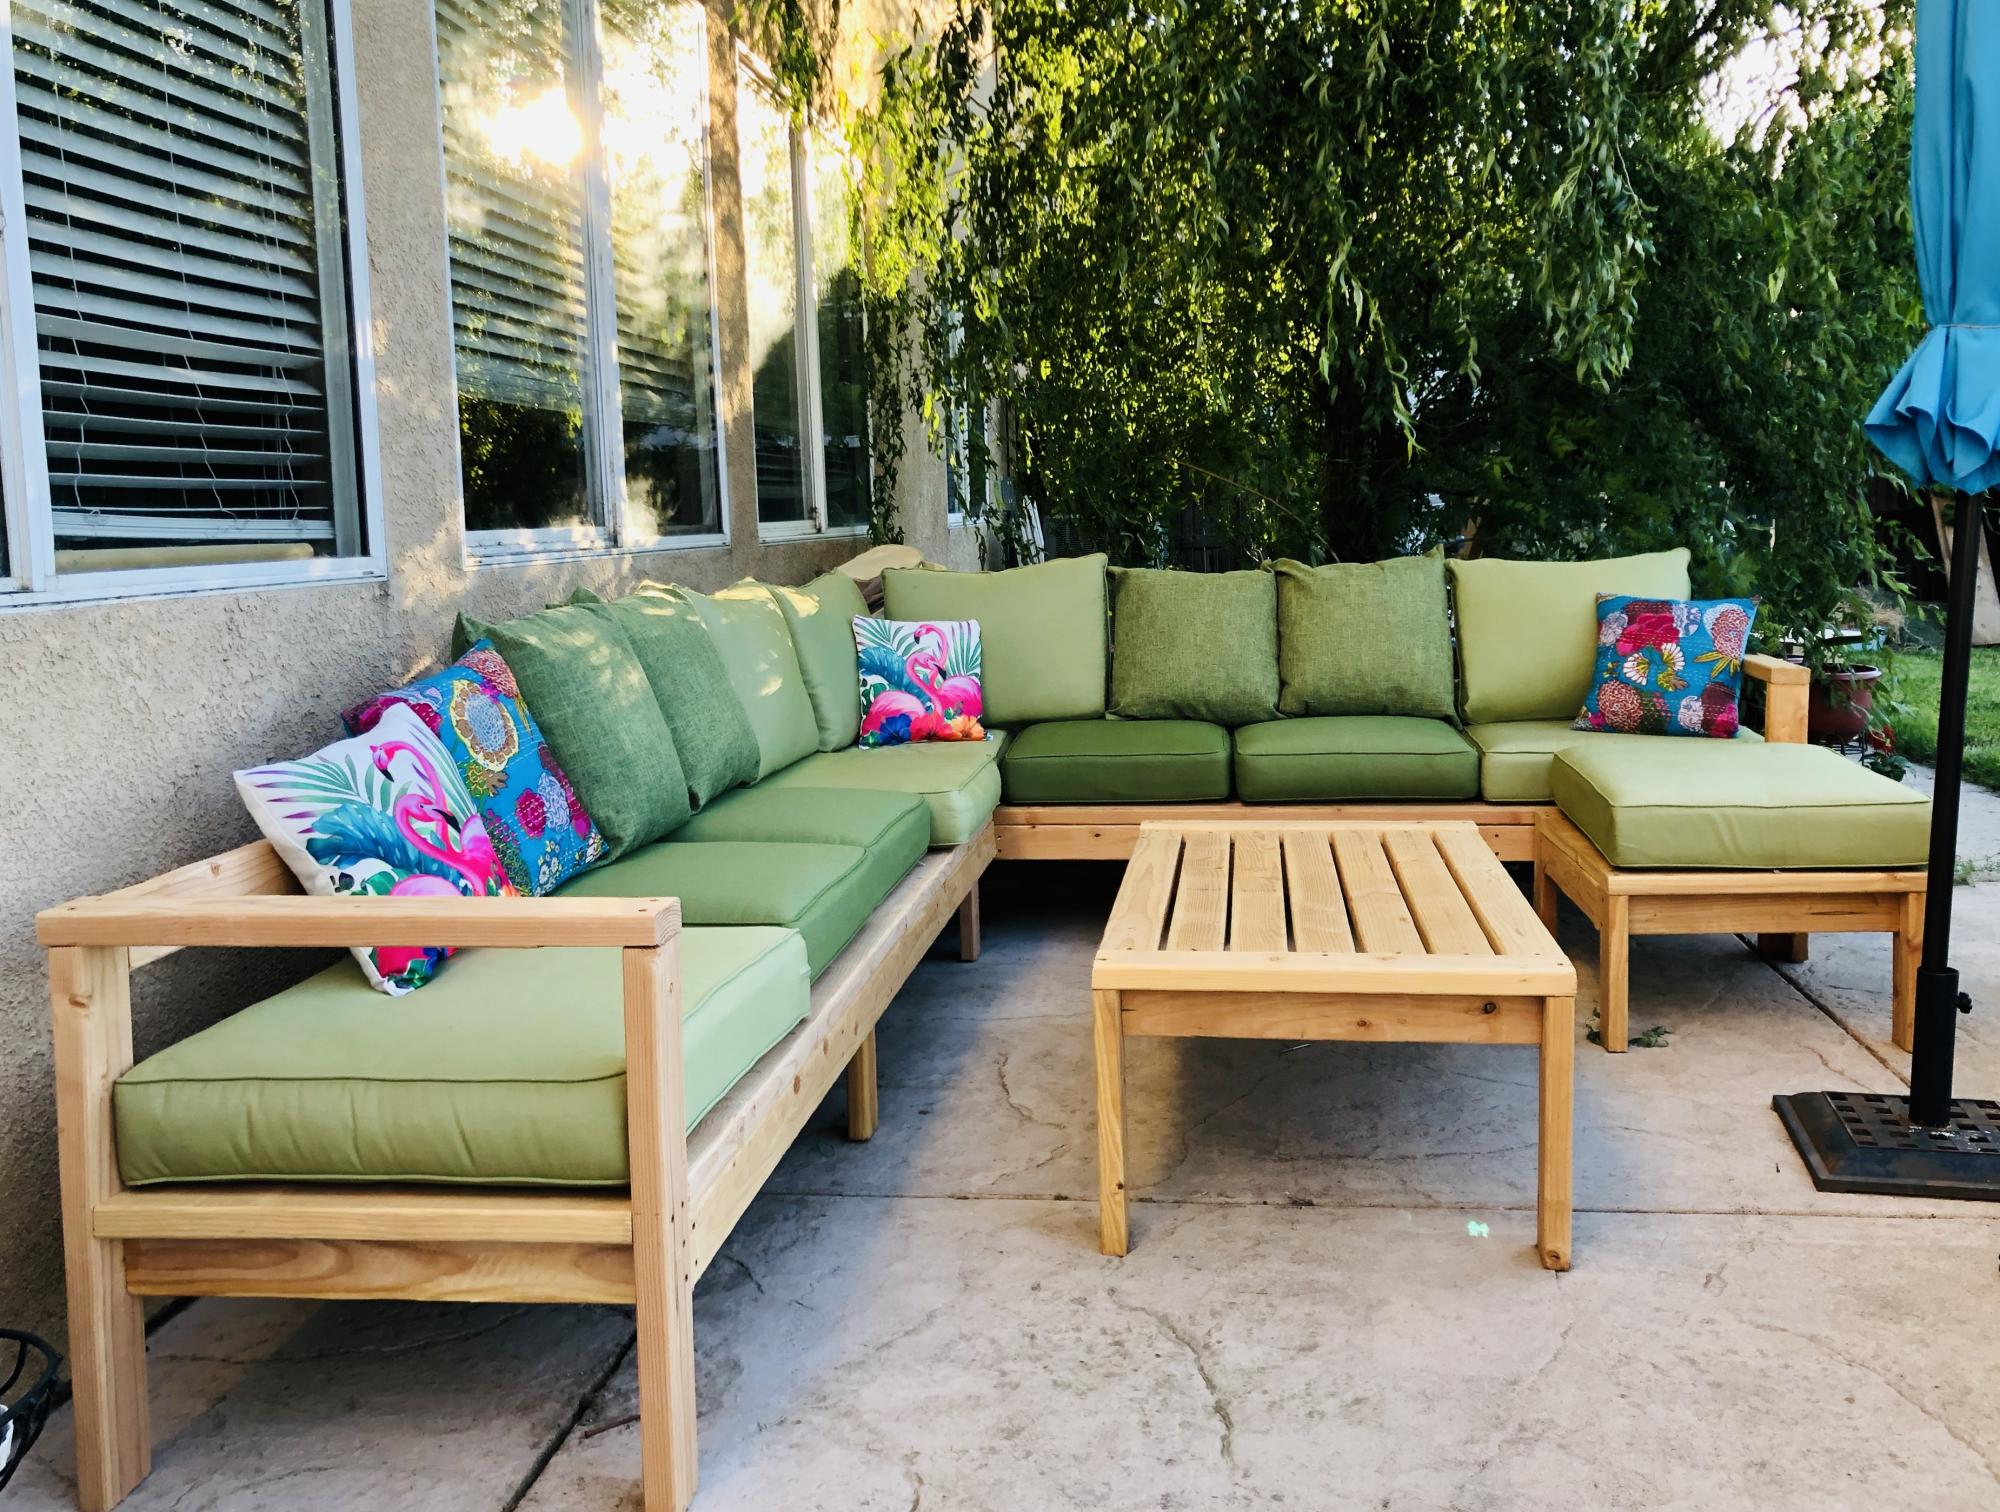
I made this in a weekend to add seating to our back patio area -- I AM IN LOVE WITH IT!
The whole family hangs out here, it has given us a great place to spend outdoors during lockdown.
I picked up the cushions on craigslist, so the cost of the entire project was kept super low.
I will be staining and sealing it soon, I am so happy with how it turned out! Thanks Ana :D
Built from Plan(s)
Estimated Cost
$300
Estimated Time Investment
Weekend Project (10-20 Hours)
Recommended Skill Level
Intermediate
Comments
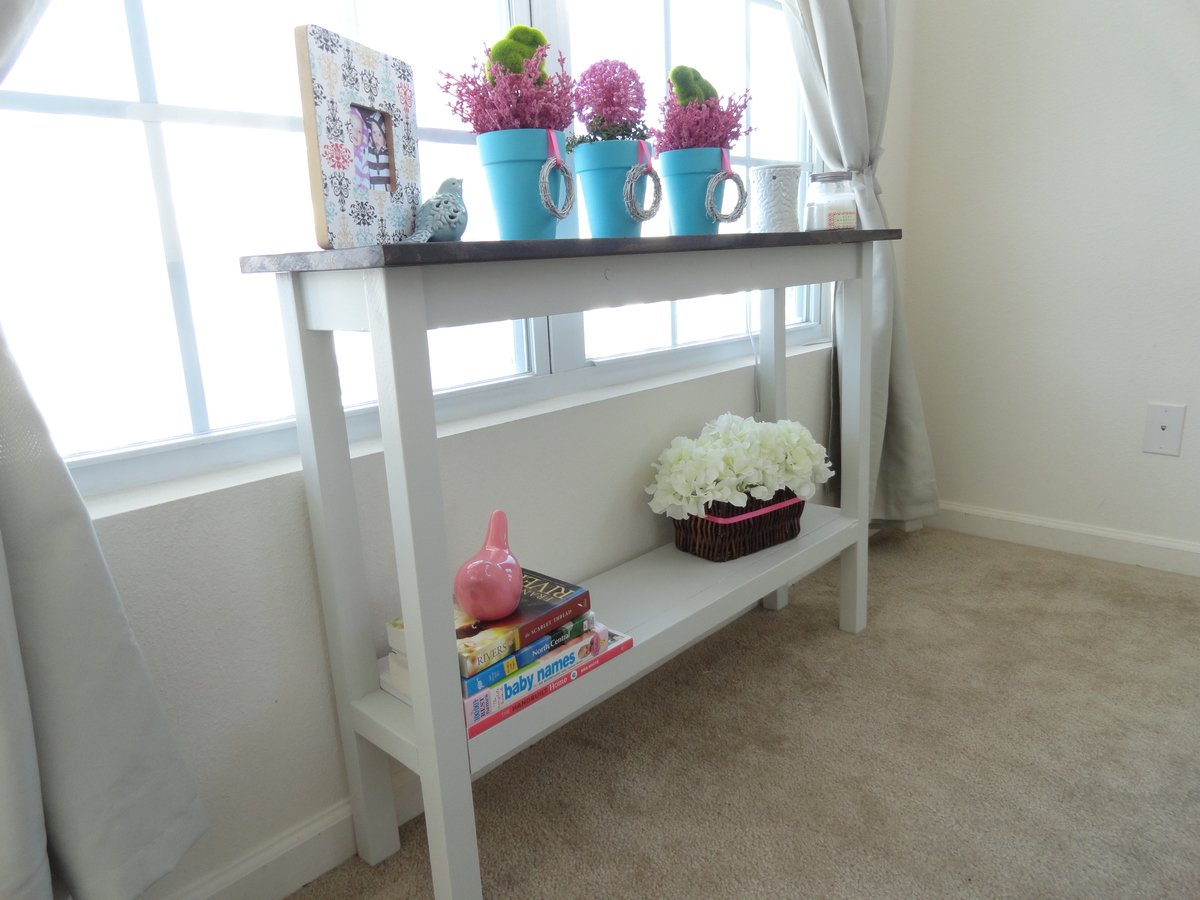
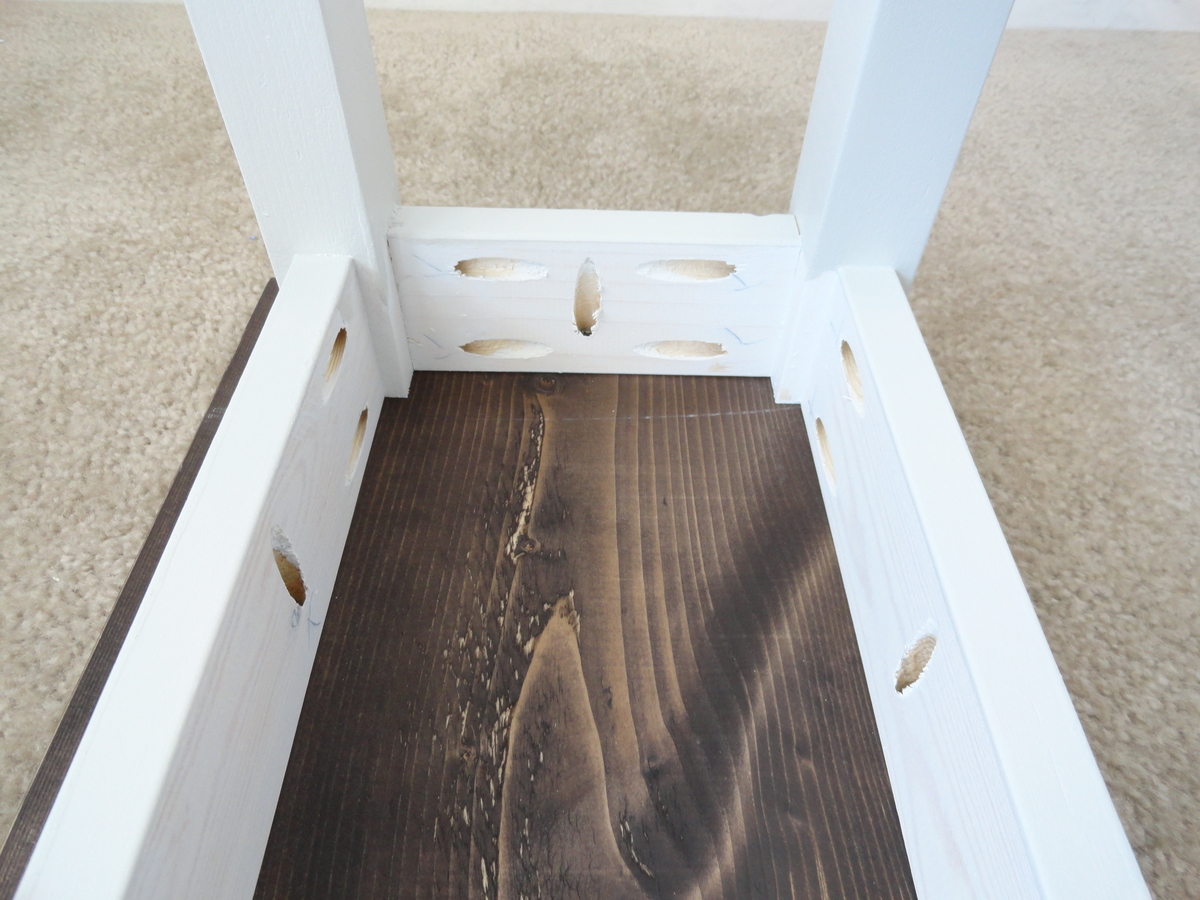
Narrow Console Table
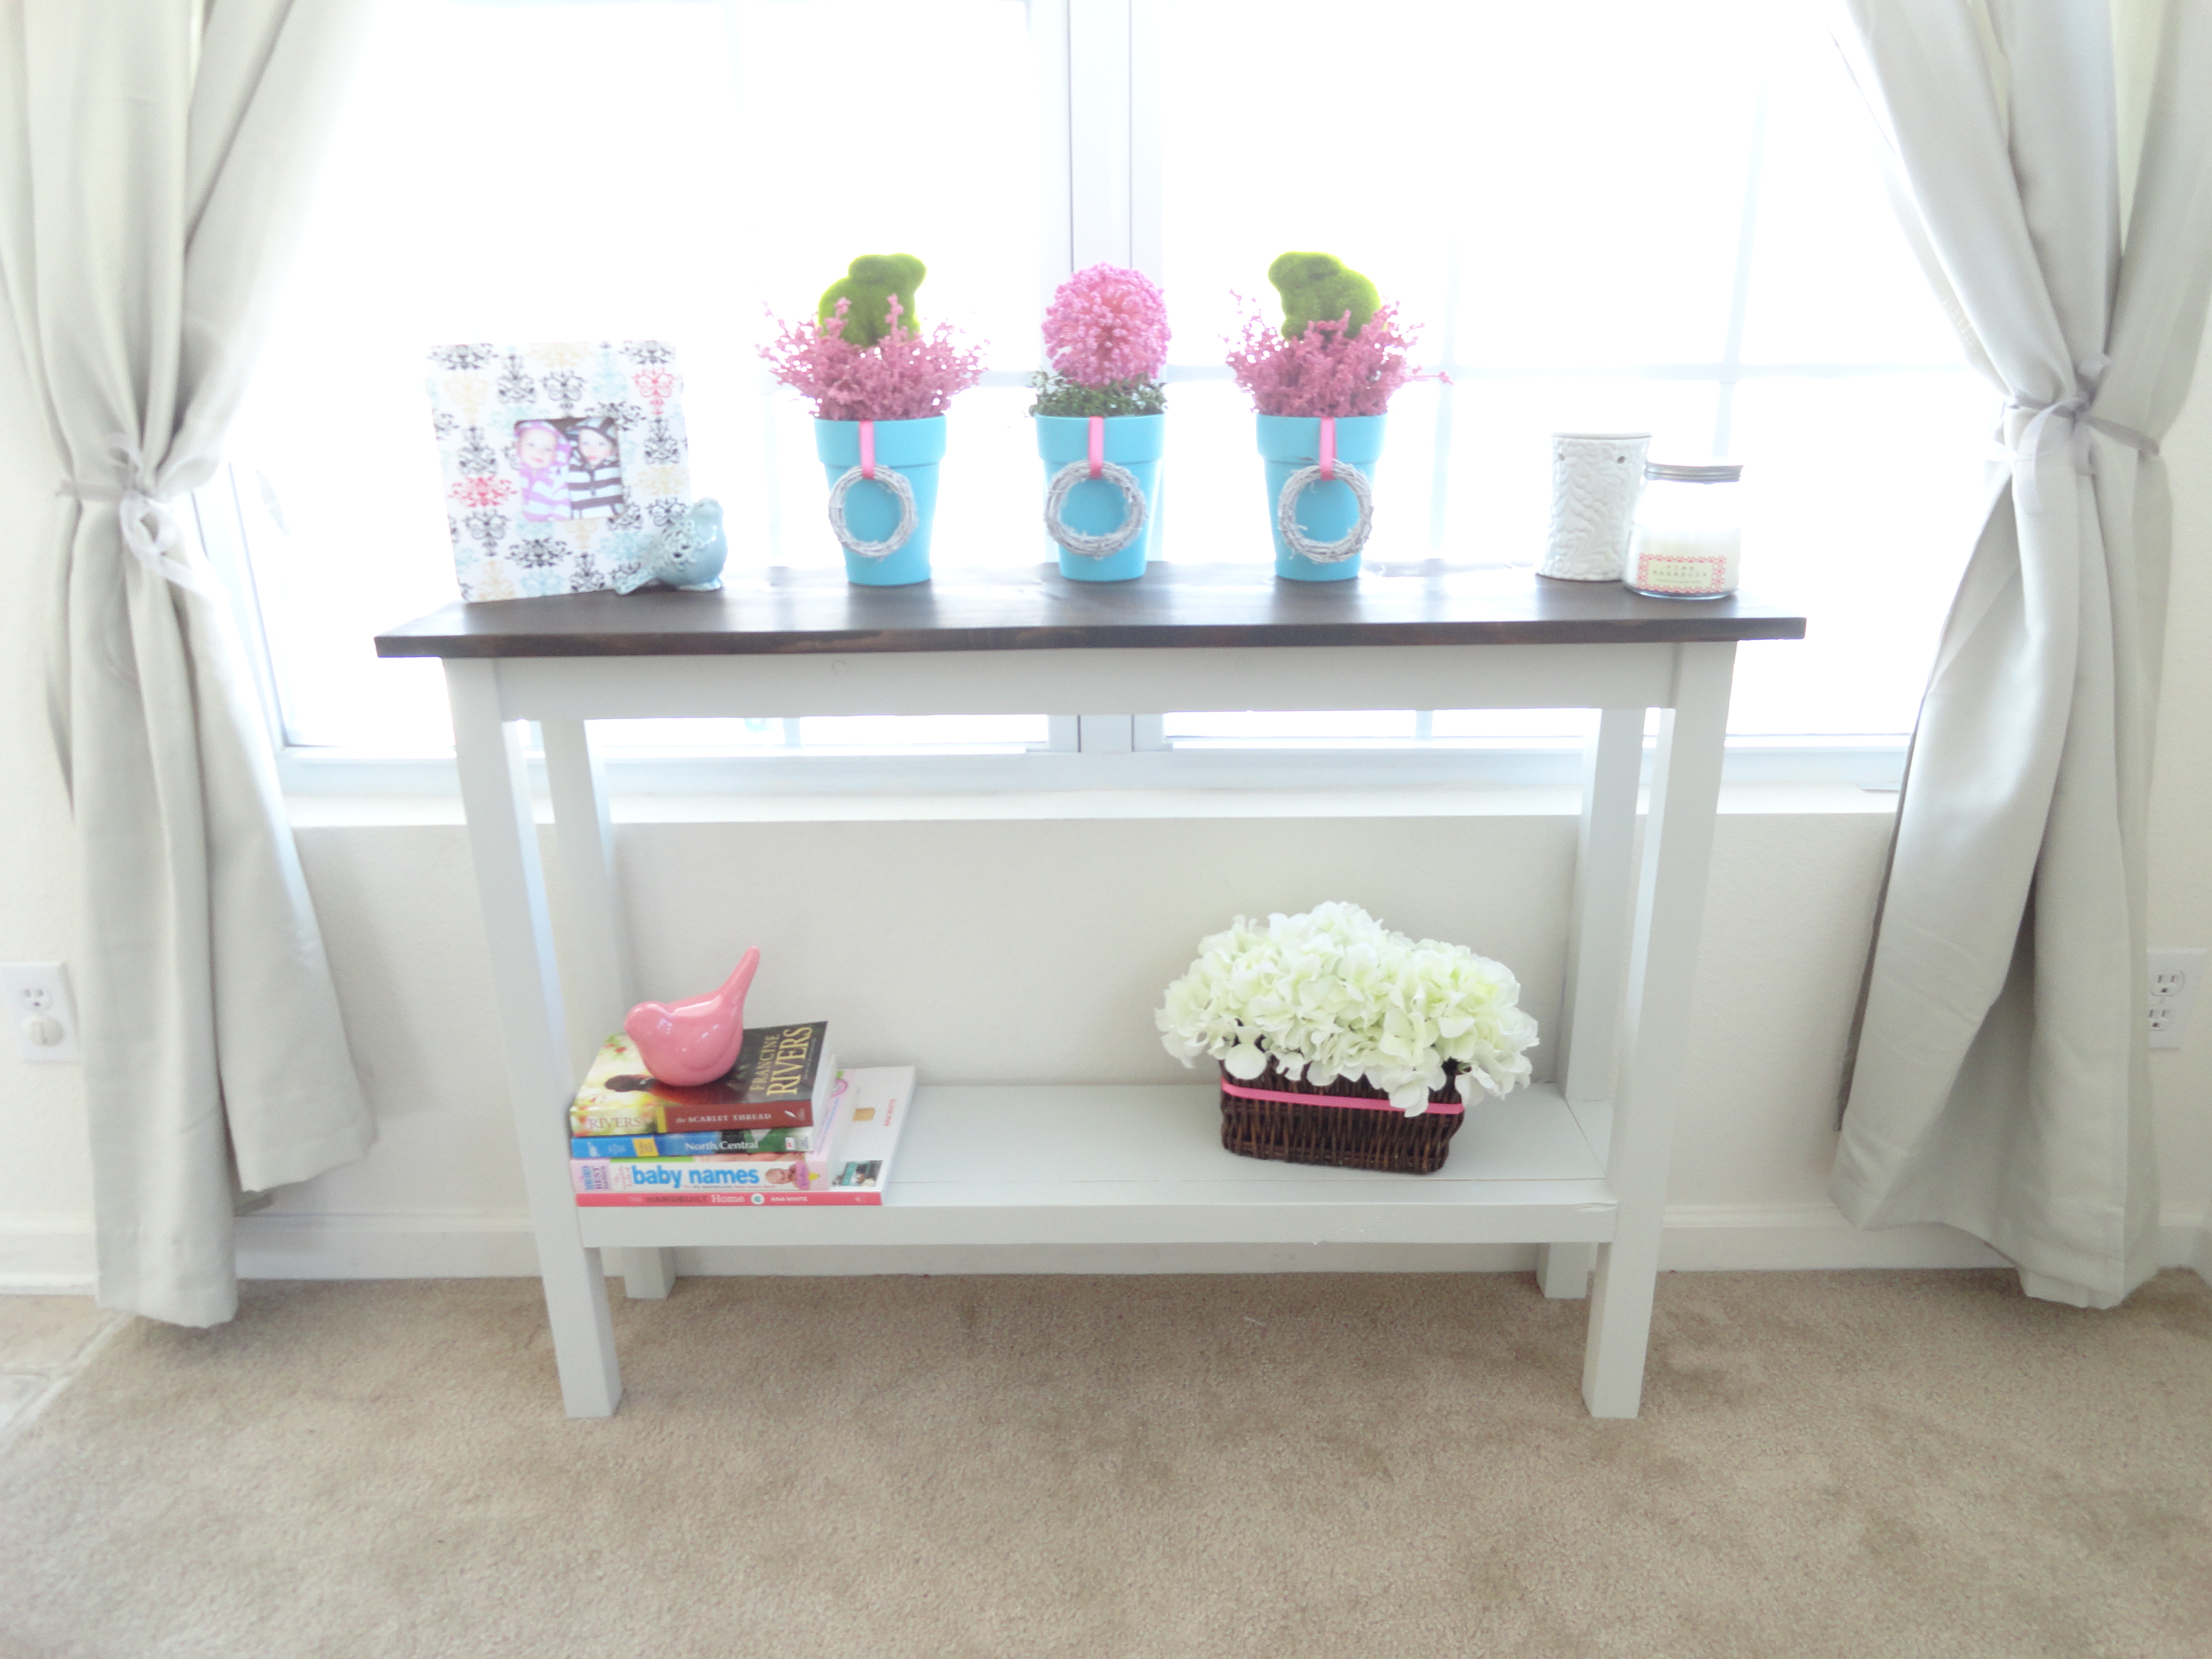
I built this table after seeing a similar one on your site. Mine is built with 2x2 legs, a shelf, and just one piece of 1x12 for the top. I was wanting something for in front of my window but this one is to small so I will eventually build a bigger one for in front of my window and move this one. Thanks for the inspiration!!
Estimated Time Investment
An Hour or Two (0-2 Hours)
Recommended Skill Level
Beginner
Comments


Mon, 01/31/2022 - 03:53
Narrow Console Table Plans
Would you have the plans/dimensions you used to build this table? It looks just the right size I need. Thank you!
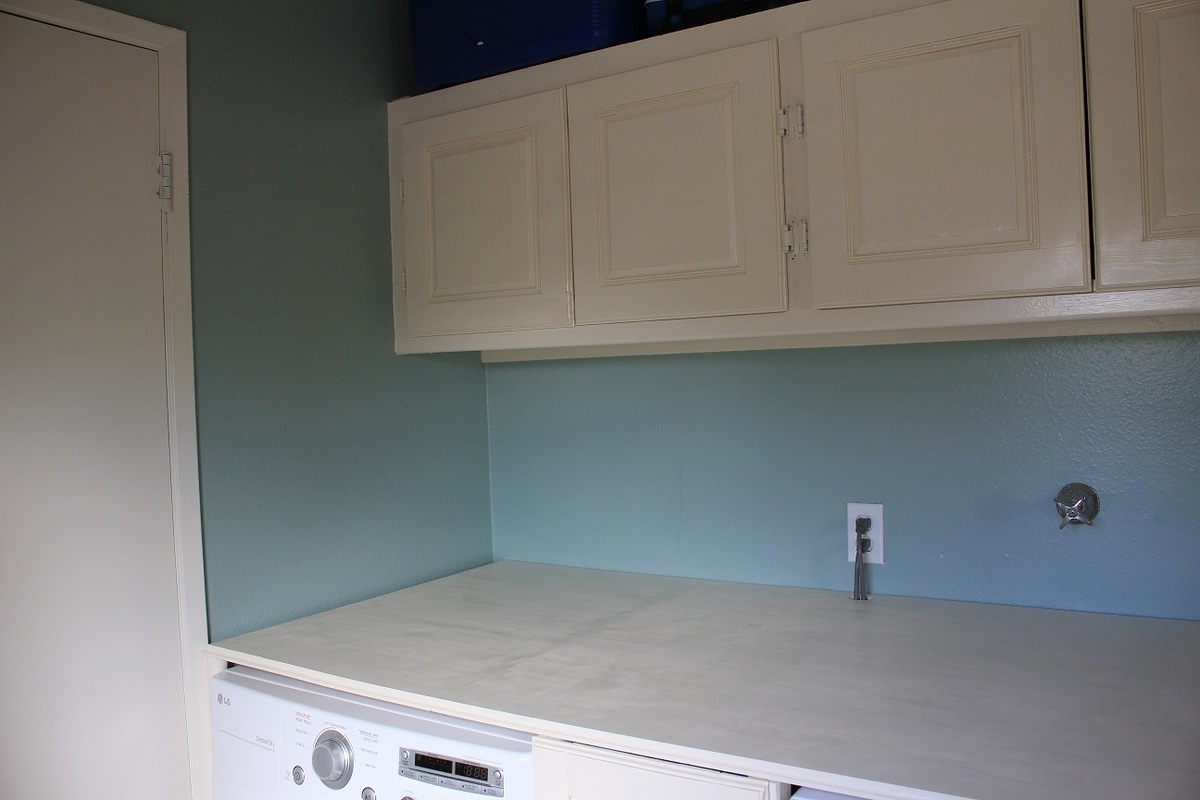
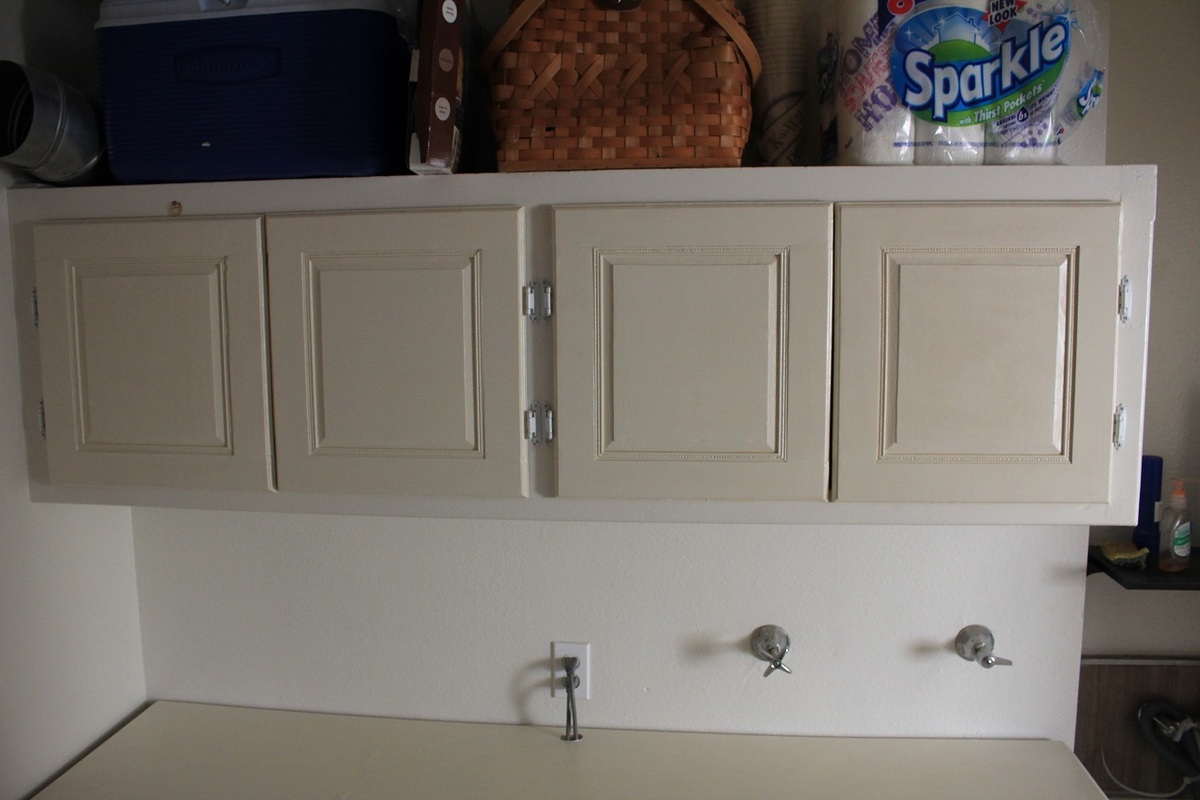
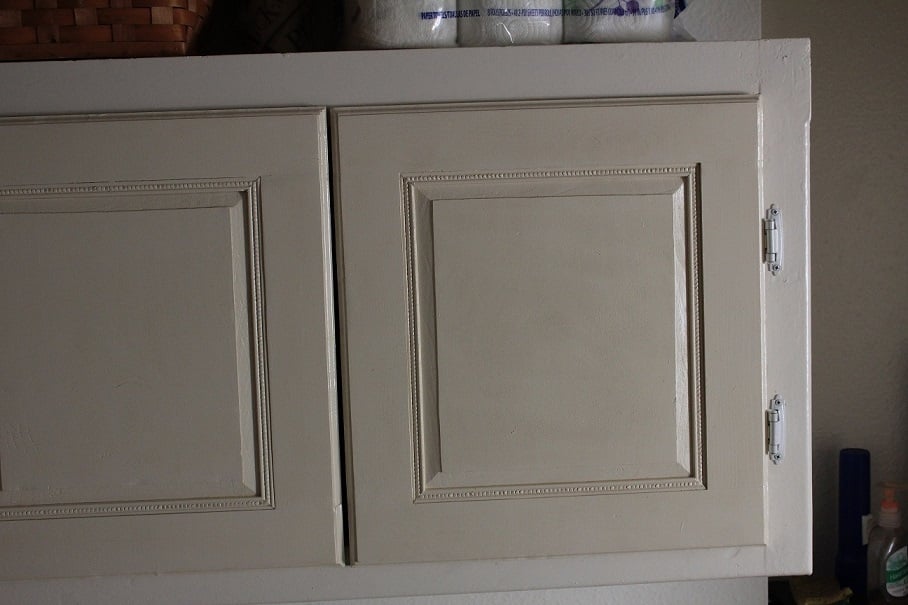
Laundry Room Makeover

This project is the coolest. The laundry room was a sad sack of disorganization, open cabinets (who took off the doors??) and no surface to work on. The dog food sat in its' bag in between the washer and dryer. Here's a video of the makeover: https://www.youtube.com/watch?v=xIi2Ay2vXEE
Used Ana's tut on making raised panel doors, and purchased tiny trim moulding to fancy it up. I also routered the edges to give detail. I LOVE these doors! I created the dog food pull out bin to match it all so the food is concealed. In hindsight, I should've sprung for better bigger wheels because we have 50 lbs of food in there and it's a little difficult to pull out when filled all the way. It's just a cardboard box lined with a trash bag and painted white on the outside.
Table top was made from plywood and scraps. It's more useful than I thought. Very nice to have a solid surface to put stuff on. Routered the edge of the plywood for a more finished look, though I'm not sure that's wise with plywood. I love that the cabinets are now closed and I painted the room so it looked more fiished. Yay for $75 room makeovers!


Estimated Cost
$75
Estimated Time Investment
Week Long Project (20 Hours or More)
Finish Used
paint, poly, paint spray gun
Recommended Skill Level
Intermediate
Comments

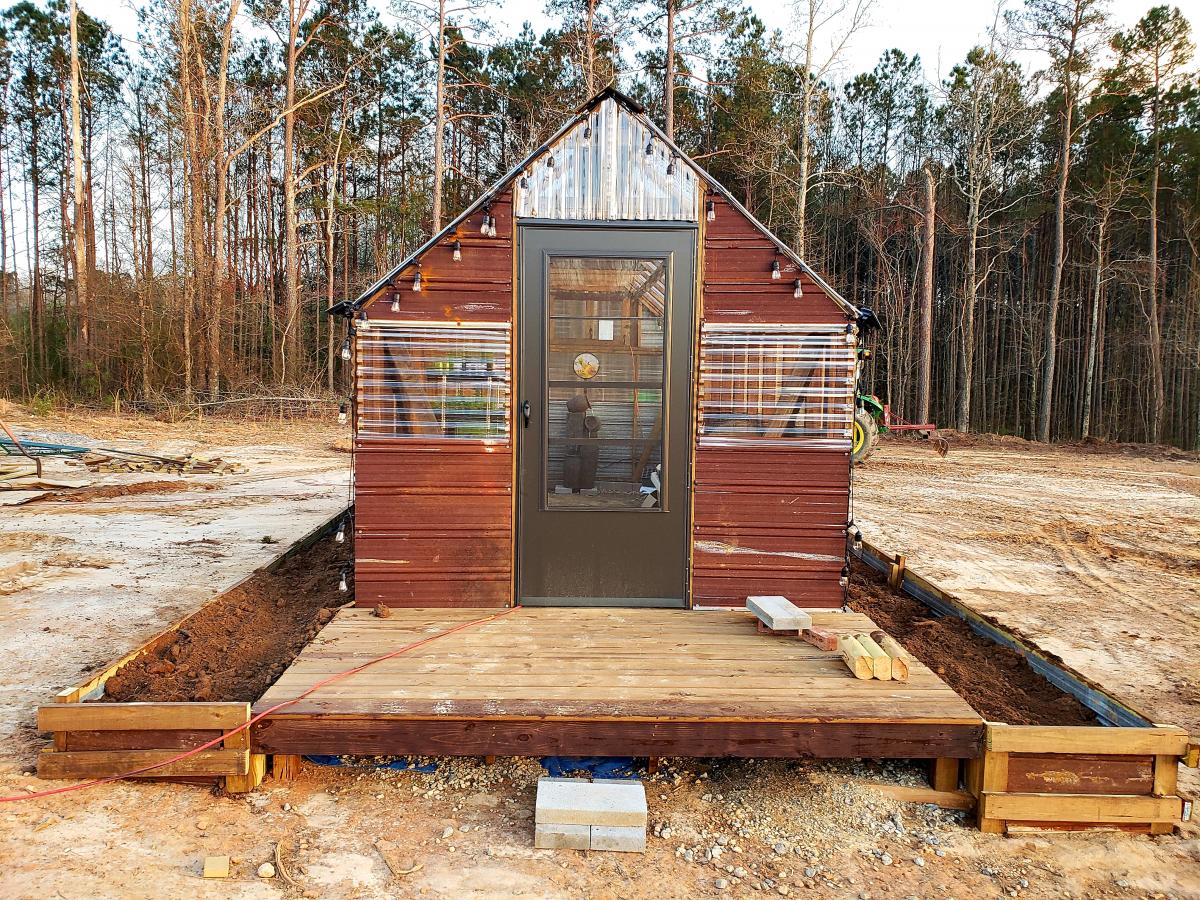
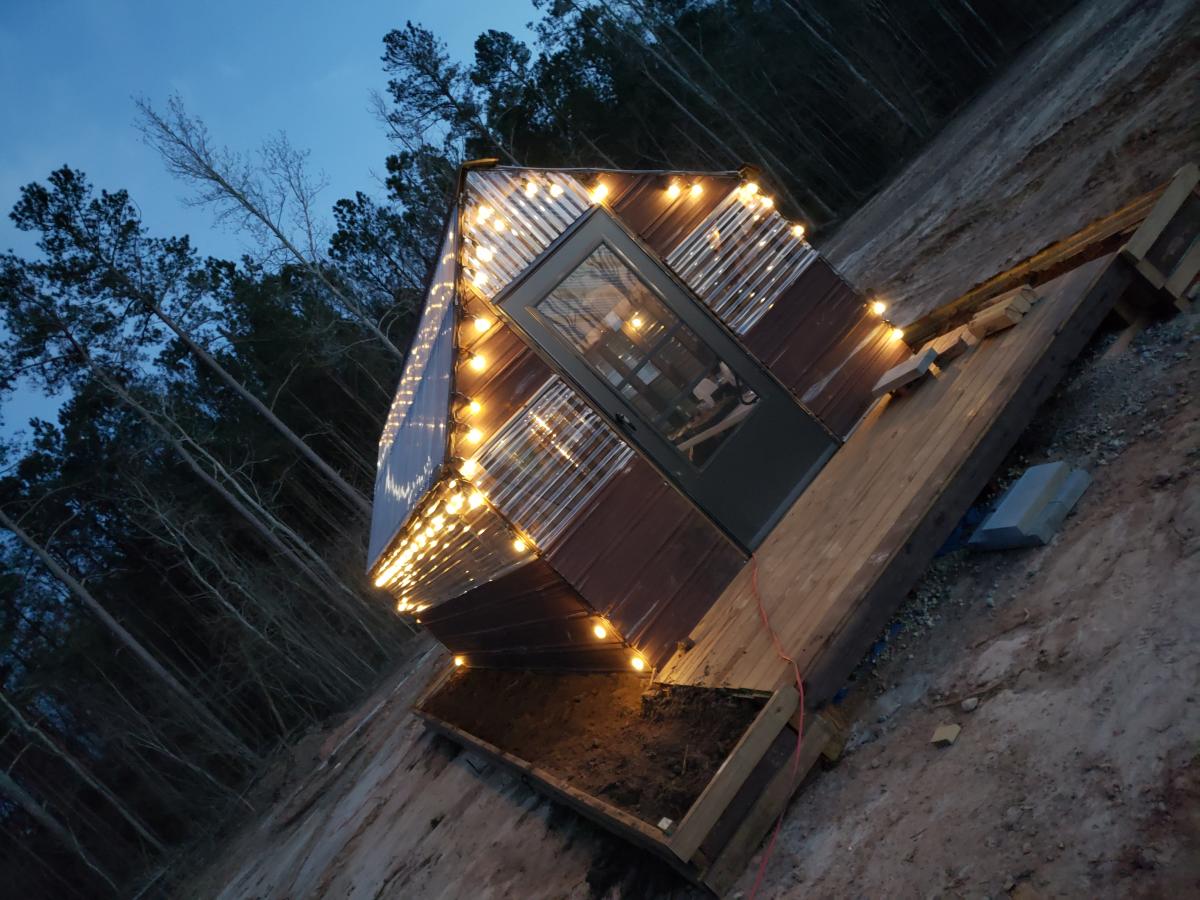
Greenhouse
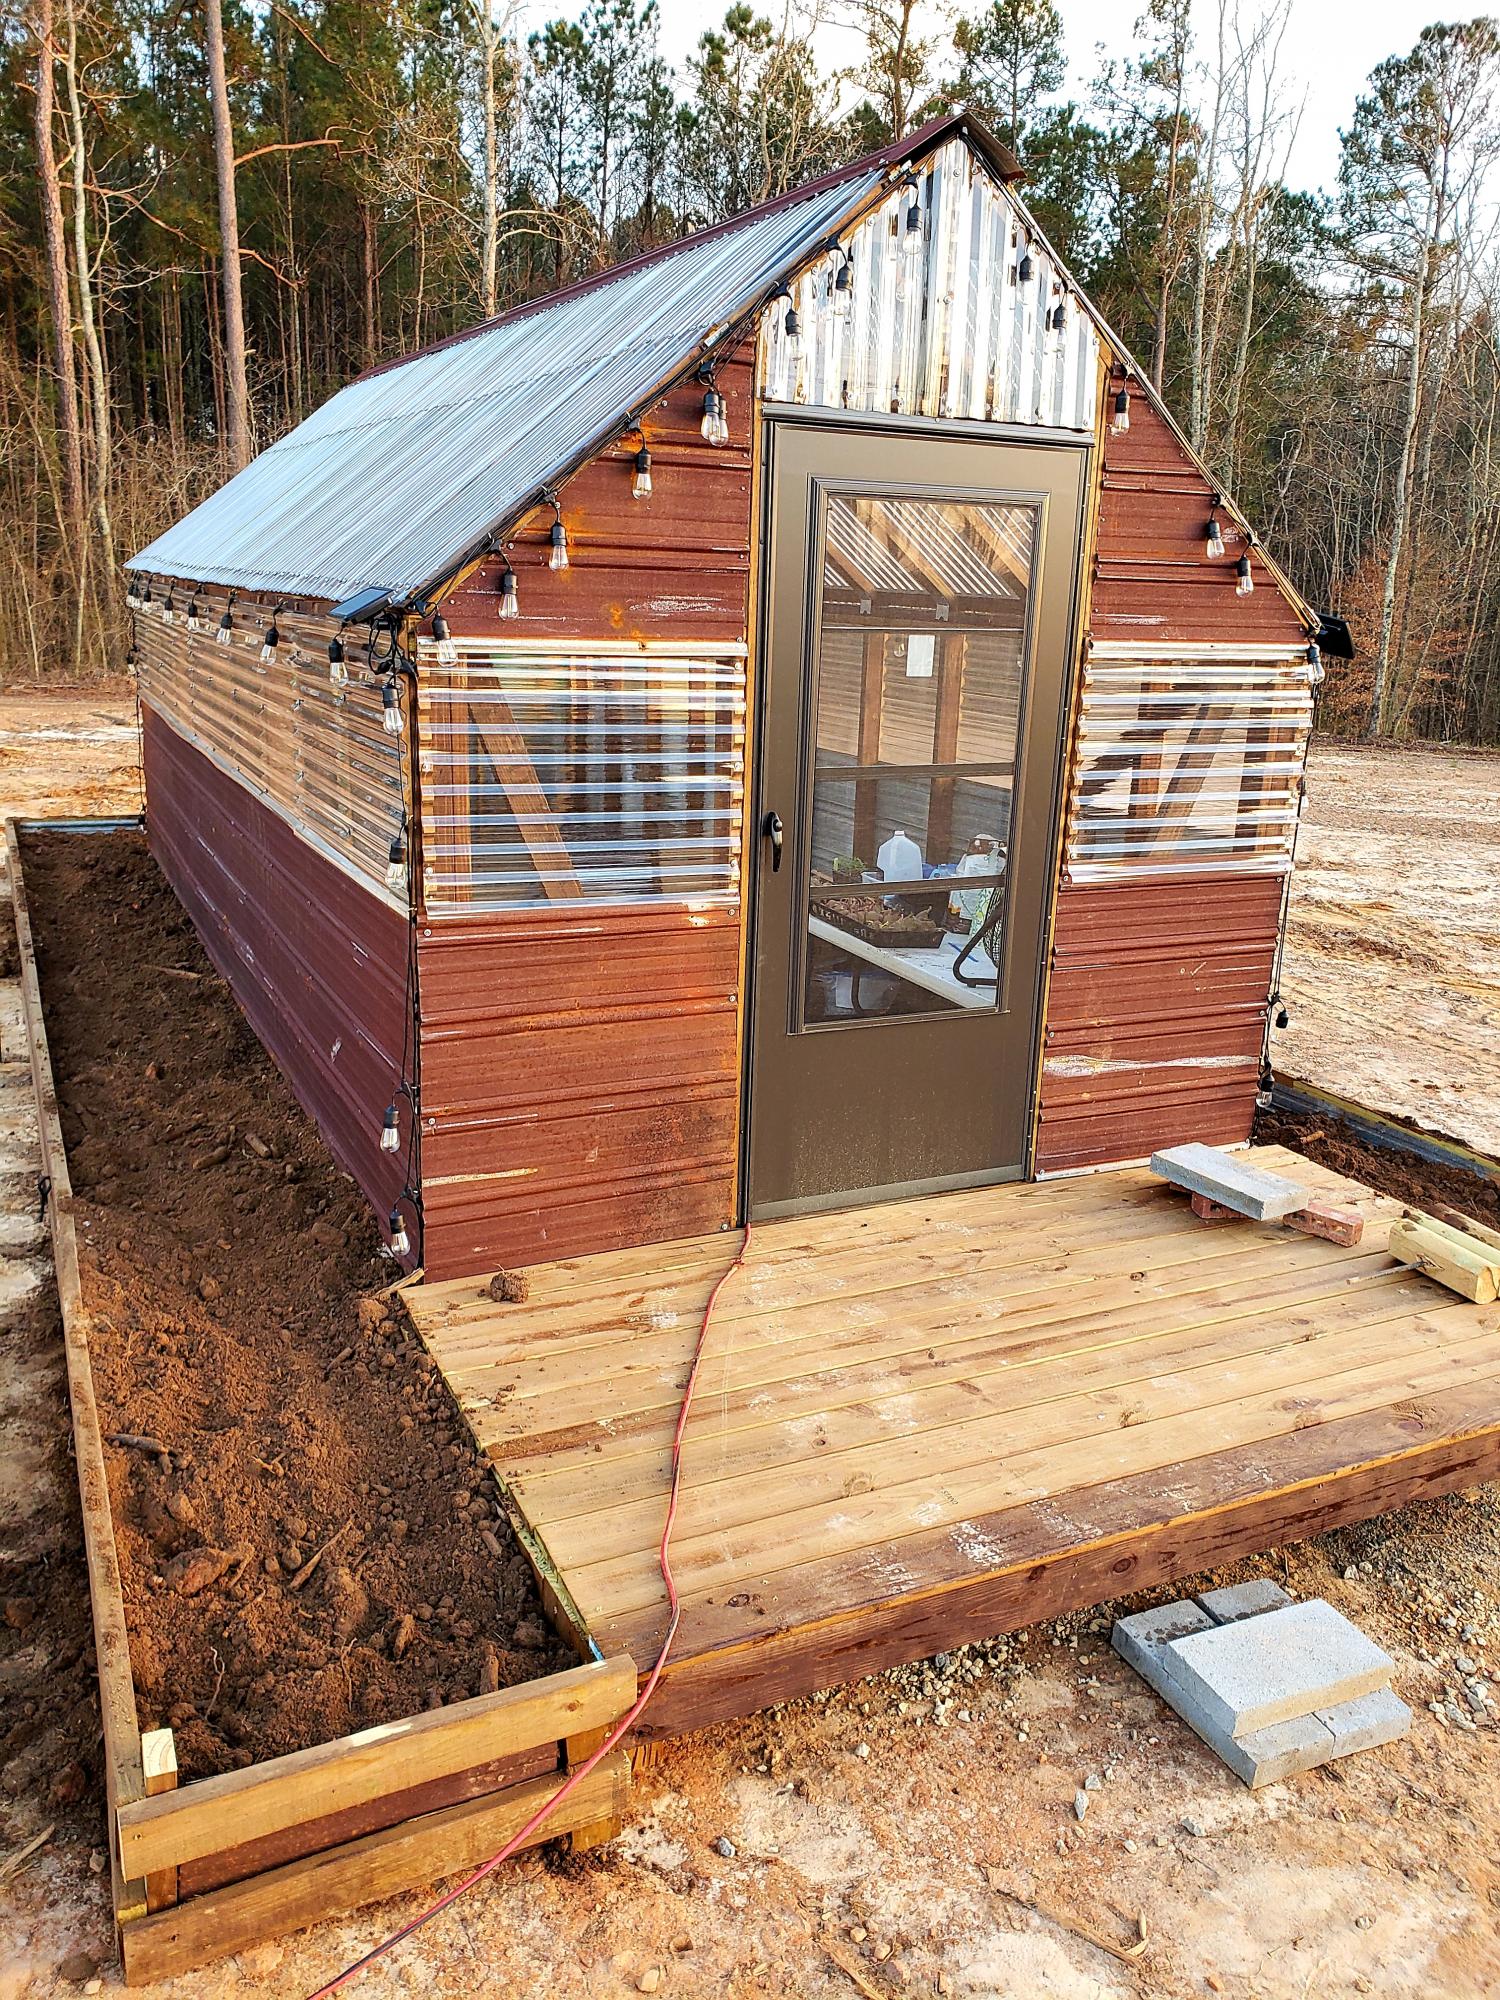
Gabled Greenhouse completed with upcycled tin roofing. Extended the greenhouse to a 20' long structure.
Comments
Thu, 04/01/2021 - 16:59
Superbly done!
Love this, excellent use of the tin, the outside beds are a great addition!
Cedar Planters
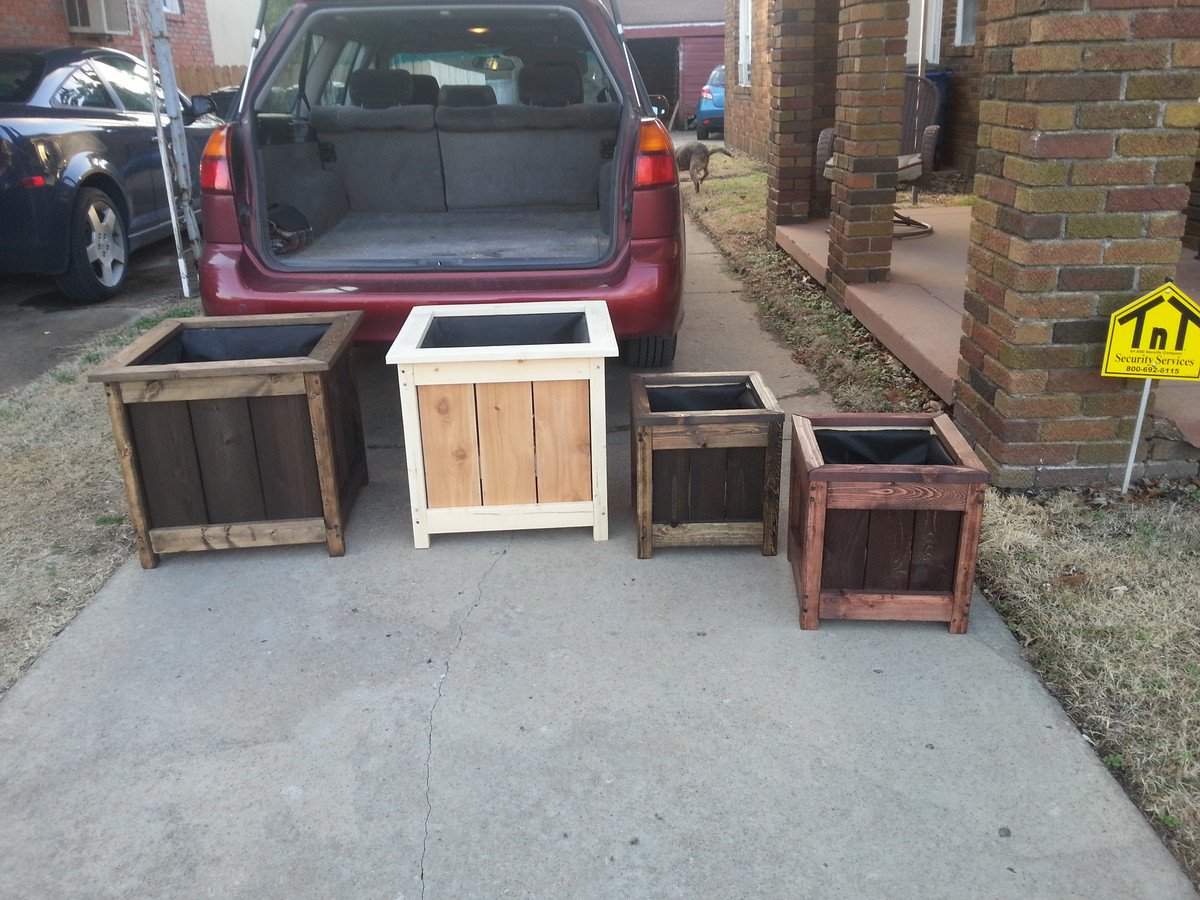
Built these for Christmas presents for the family. Used the 5 1/2 in wide pickets for the big ones. Used the 3 in wide pickets for the small ones, and cut everything else to scale. I don't have a kregg jig so I just screwed them in from the sides. Doesn't look quite as nice, but is plenty sturdy. I also added the mitered top like many others have.
The dark ones are Java Bean stain, the one is raw (obviously), and the other is Red Mahogany stain.
Built from Plan(s)
Estimated Cost
~$20 a piece, the smaller ones were slightly less
Estimated Time Investment
An Hour or Two (0-2 Hours)
Recommended Skill Level
Beginner
Outdoor 2x4 Sofas
Super simple build! Thanks for the plans!

Built from Plan(s)
Estimated Cost
$120 for wood (per sofa), $12 for screws, $25 for water seal, $150 for cushions (per sofa)
Estimated Time Investment
Day Project (6-9 Hours)
Finish Used
Sanded with 120-grit sandpaper, two coats of Thompson's Water Seal (transparent).
Recommended Skill Level
Beginner
Comments
Wed, 06/05/2019 - 08:39
Hi this looks beautiful! I…
Hi this looks beautiful! I was wondering where you bought your cushions?
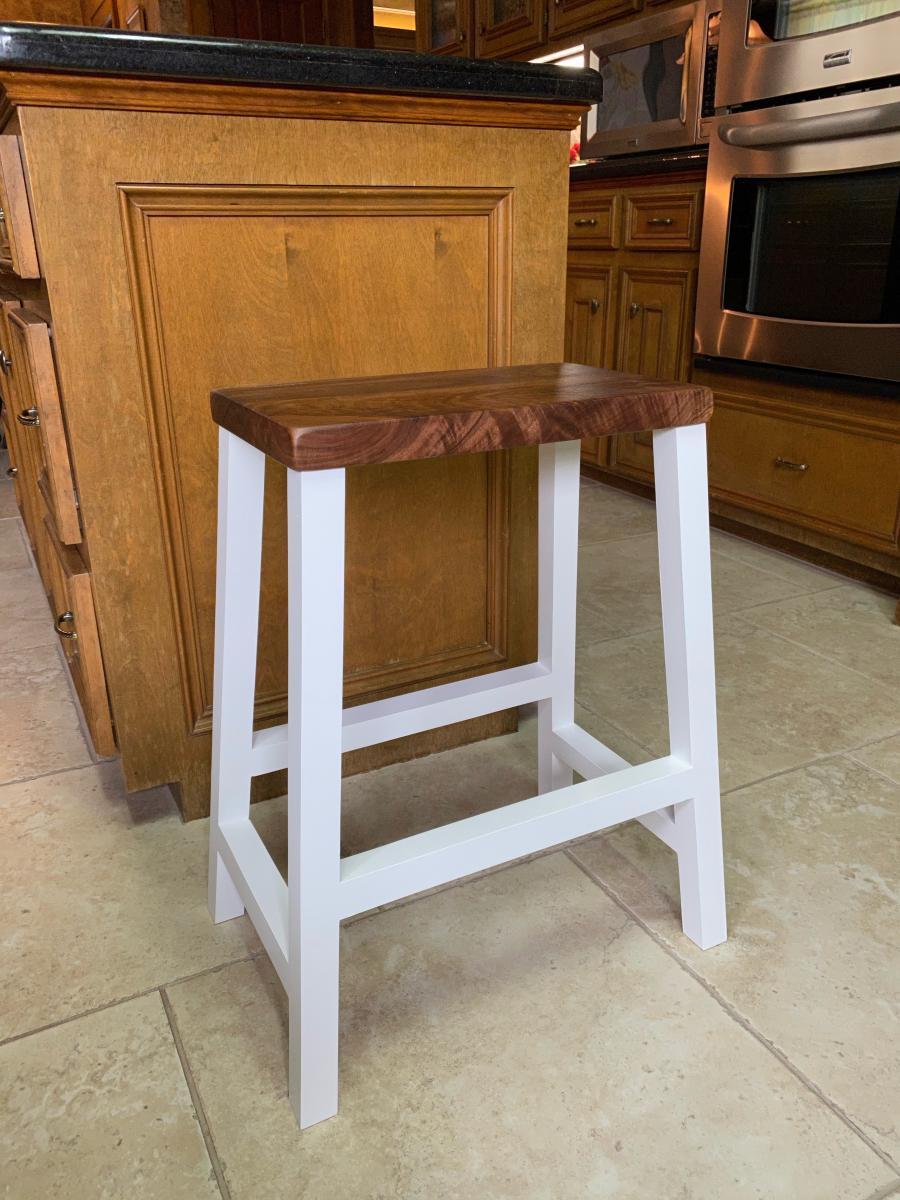
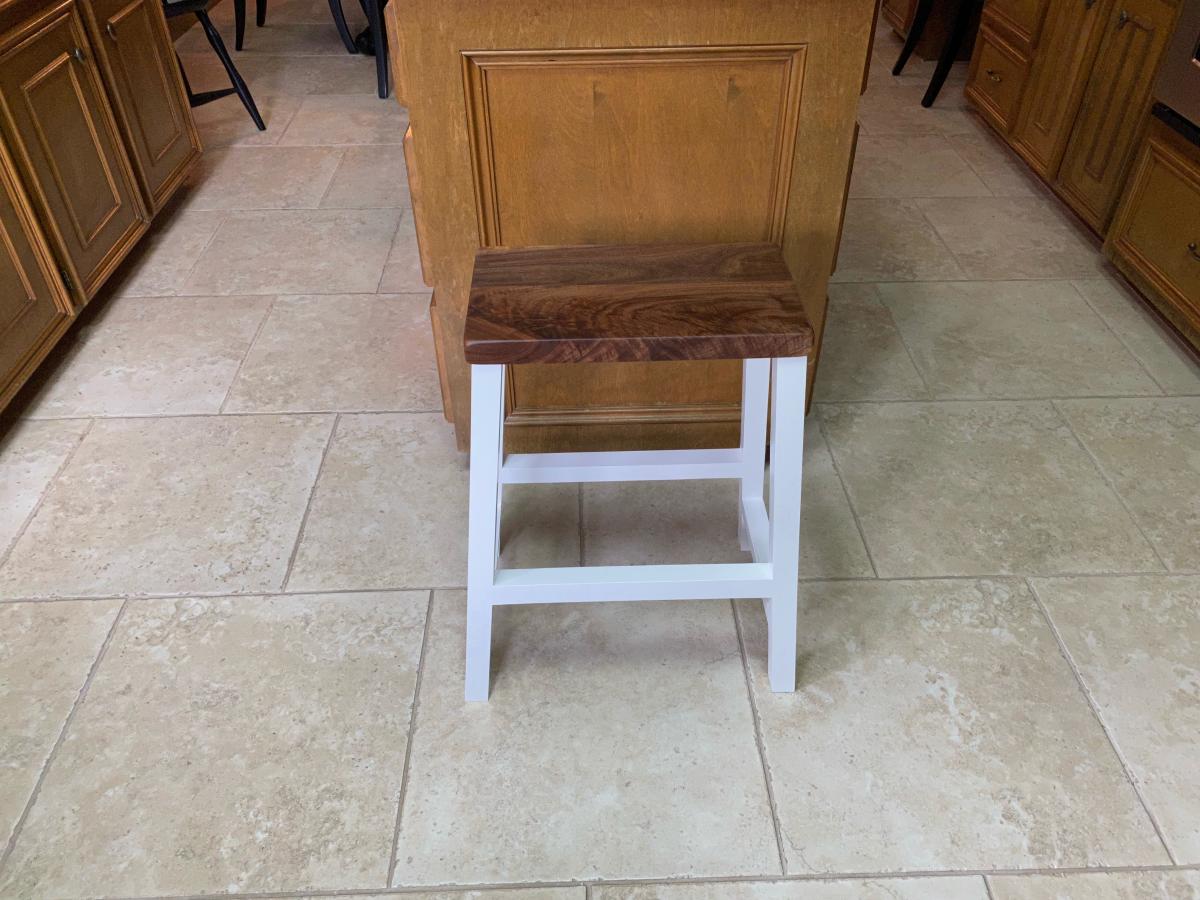
Farmhouse Counter Stools
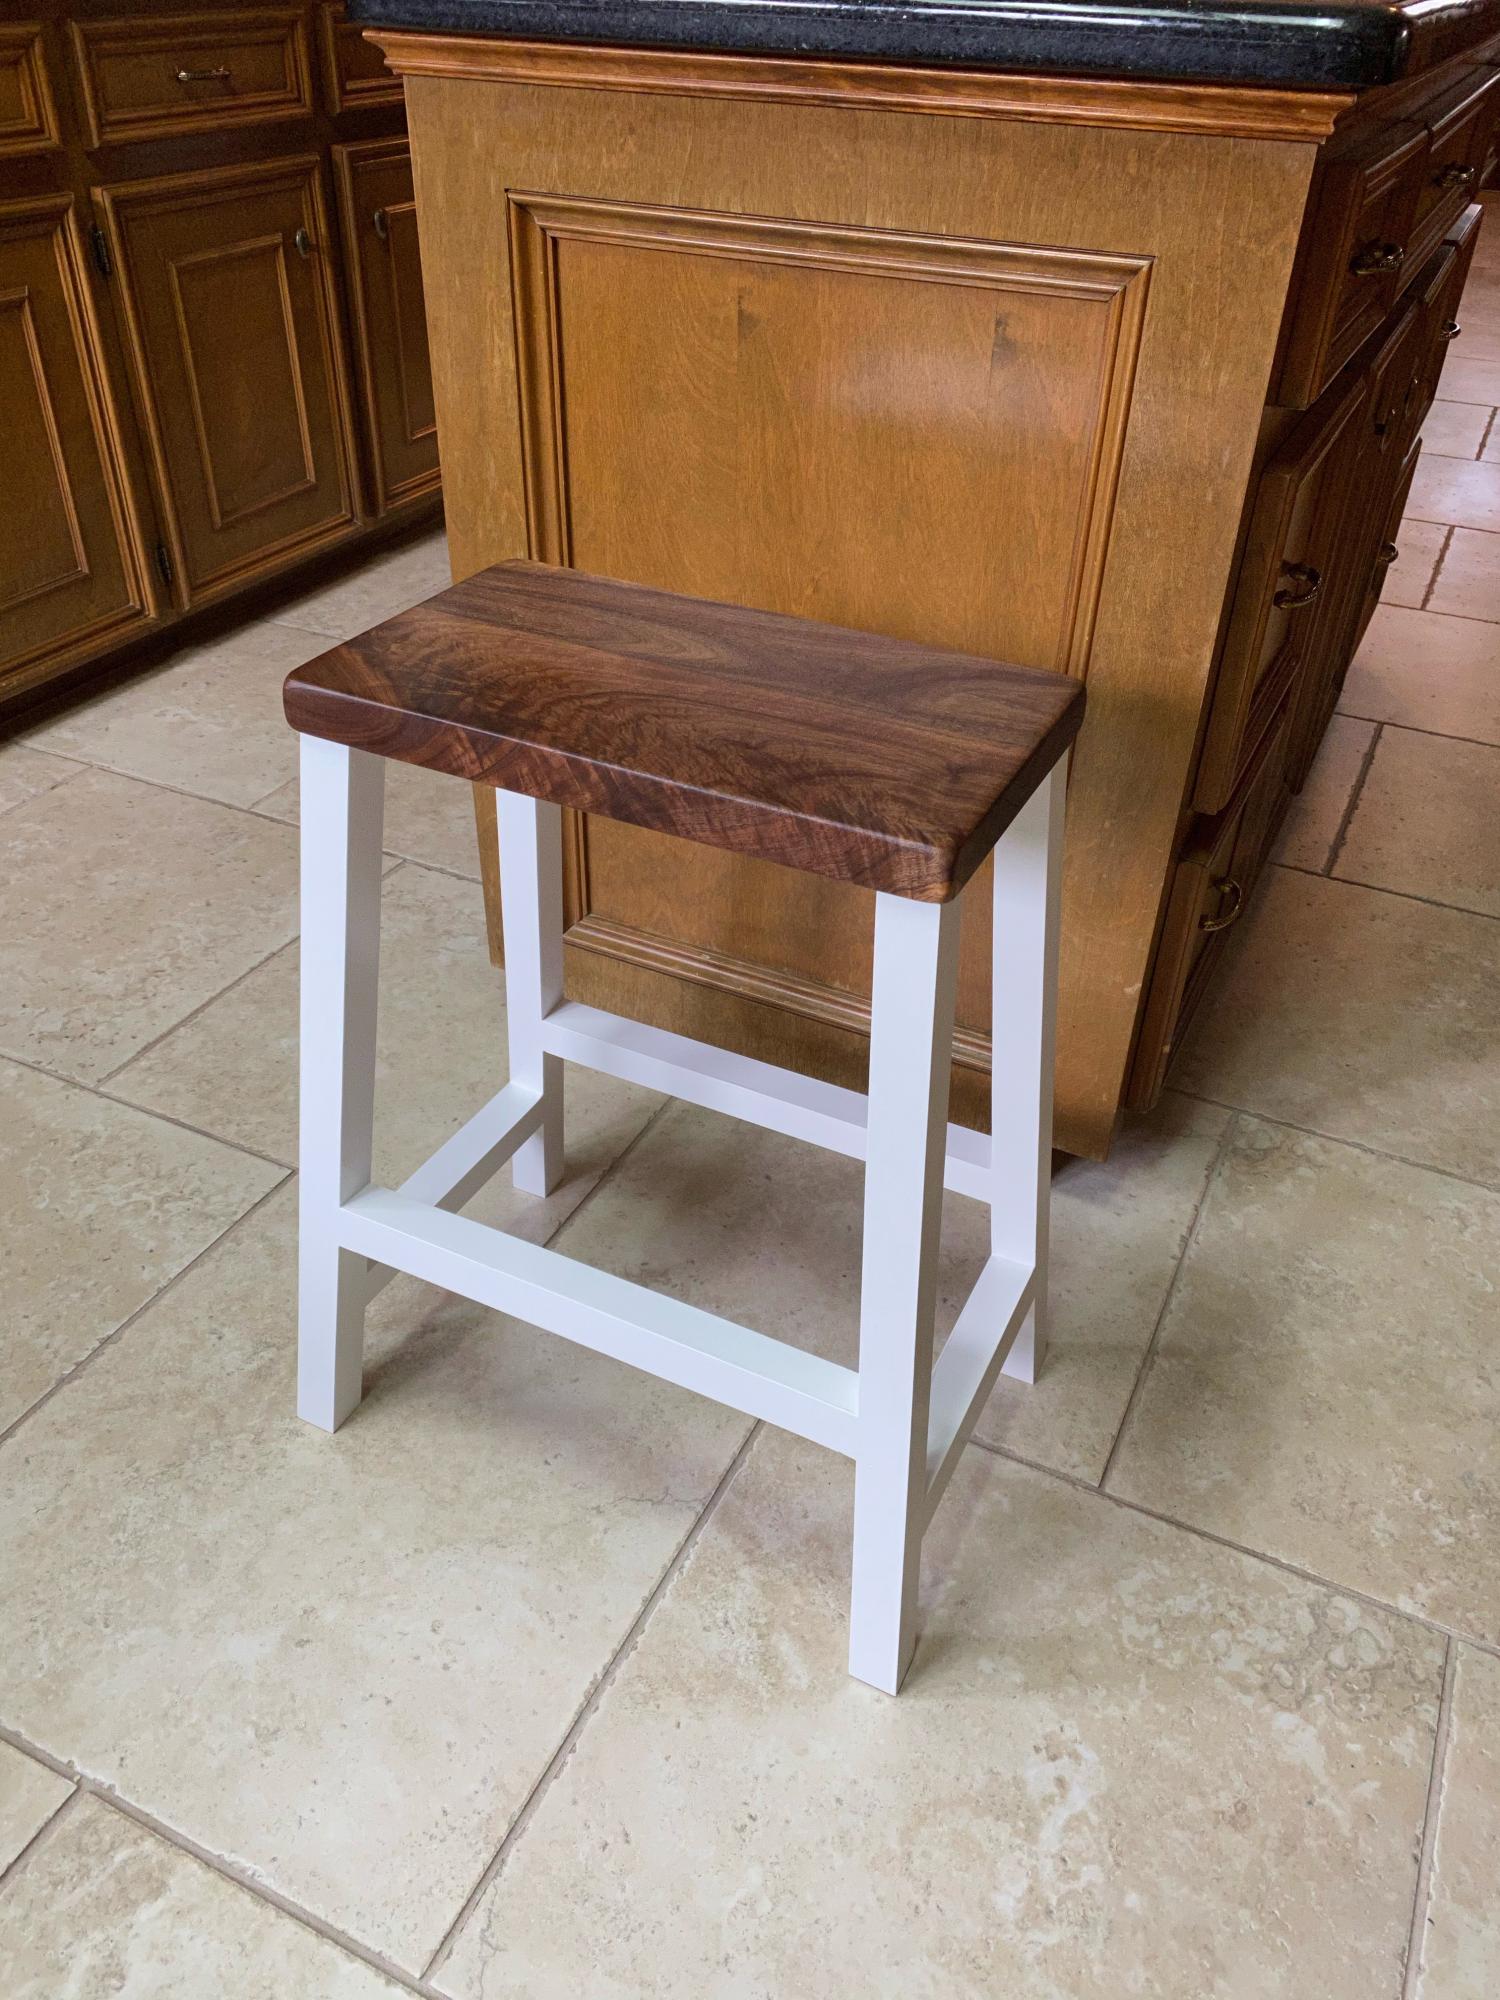
Hello Ana,
I wanted to let you know I really appreciate your website and the DIY plans. I am an avid woodworker, and I saw your farmhouse counter stool plans a couple of months ago in one of the emails y’all send out, and I thought I’d try out your plans. I made the frame of the chair out of pine and painted it with white milk paint. I made the seat out of Walnut. I honored your plans, but made the seat 1/2” bigger in length and width so as to overhang the frame 1/4” on all sides. I attached the seat with figure 8 fasteners, since I did not want to drill through the solid walnut and plug the screw holes. The plans were very straightforward, and I thought it was easy to build. You have such awesome ideas and plans - thanks for the inspiration!
I have attached a couple of pics.
Thanks again!
Ken Monson.
P.S. - I plan to try some of your other farmhouse plans in the next few months.

Built from Plan(s)
Estimated Cost
$0, I had all the wood and finish in my shop
Estimated Time Investment
Weekend Project (10-20 Hours)
Finish Used
White Milk paint for the stool frame and Danish Oil for the stool seat
Recommended Skill Level
Intermediate
Comments
Whitewashed Queen Headboard
Built this headboard for my fiancee as her valentines day gift.

Built from Plan(s)
Estimated Time Investment
Afternoon Project (3-6 Hours)
Finish Used
Whitewash- White paint mixed with water
Recommended Skill Level
Beginner
Comments

Tue, 03/19/2013 - 21:36
The headboard is nice. But
The headboard is nice. But what I want to know is where she got those colorblock pillowcases???
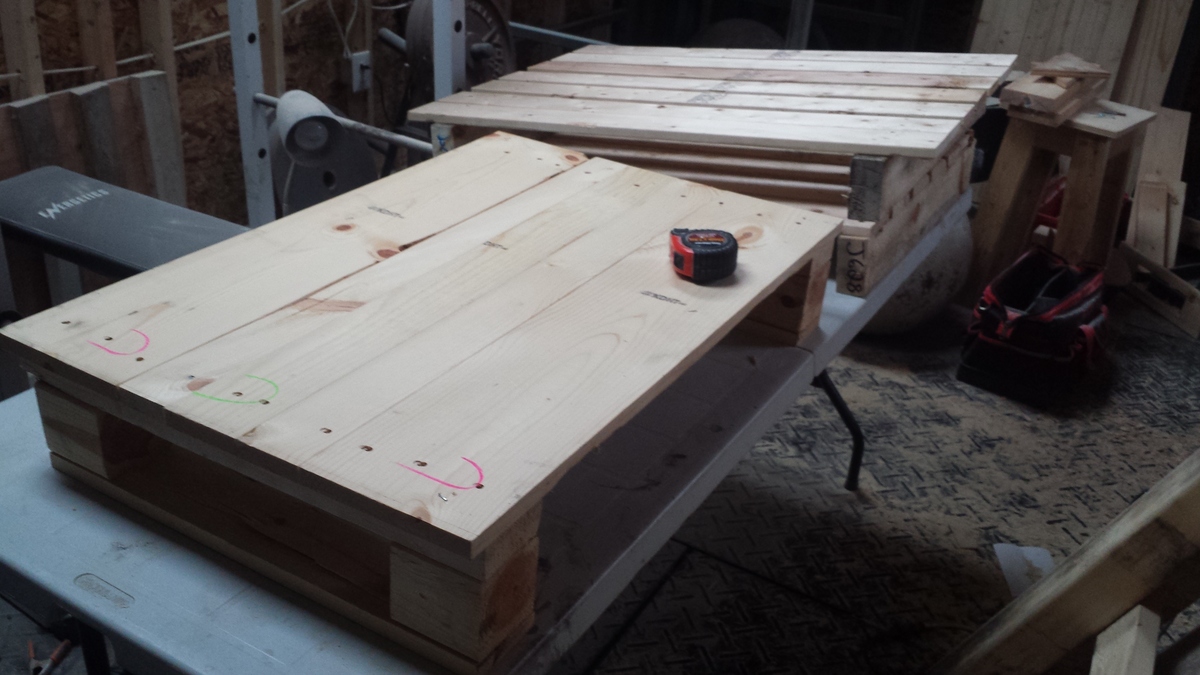
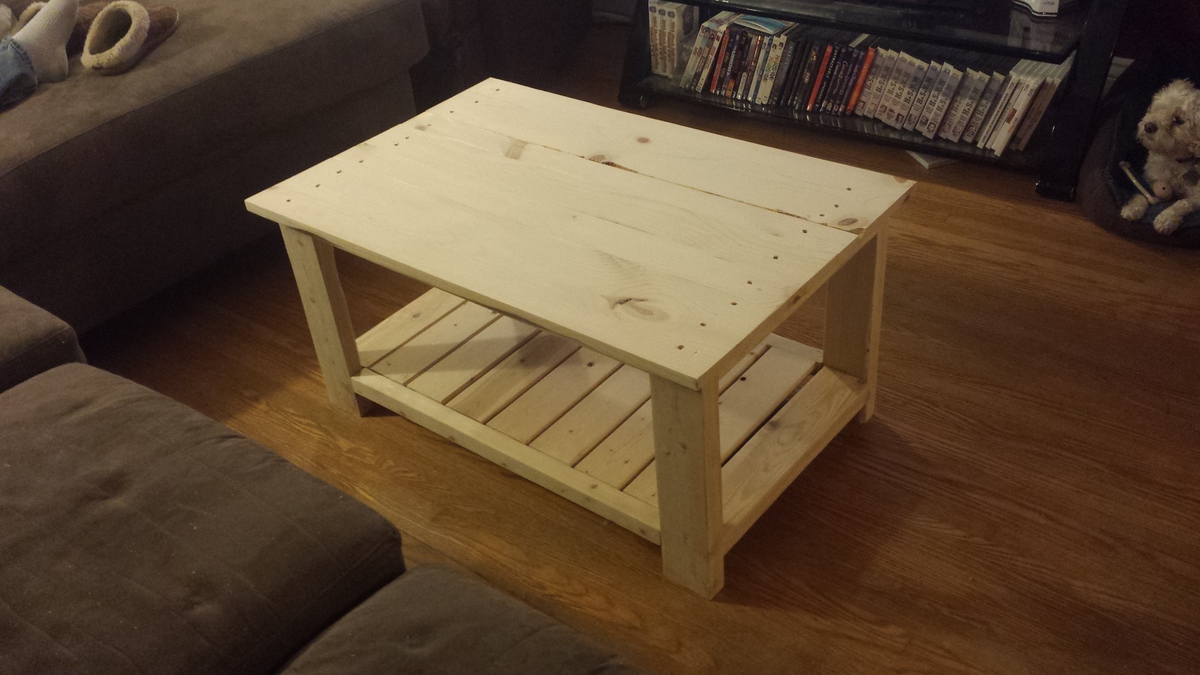
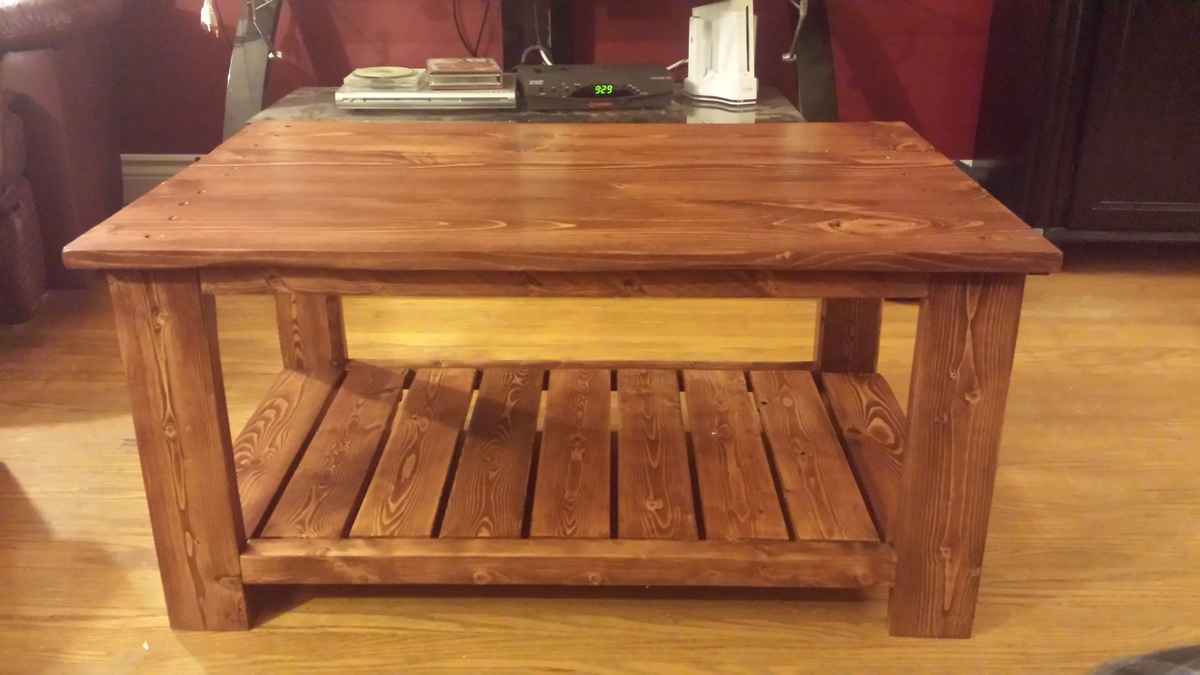
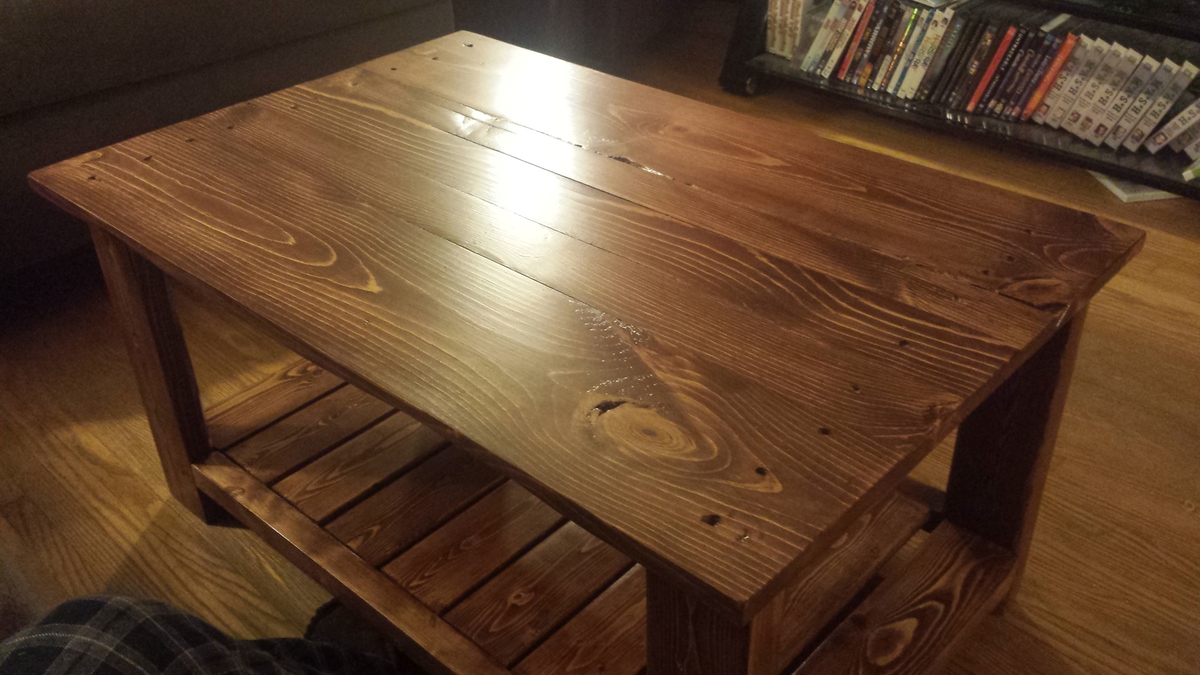
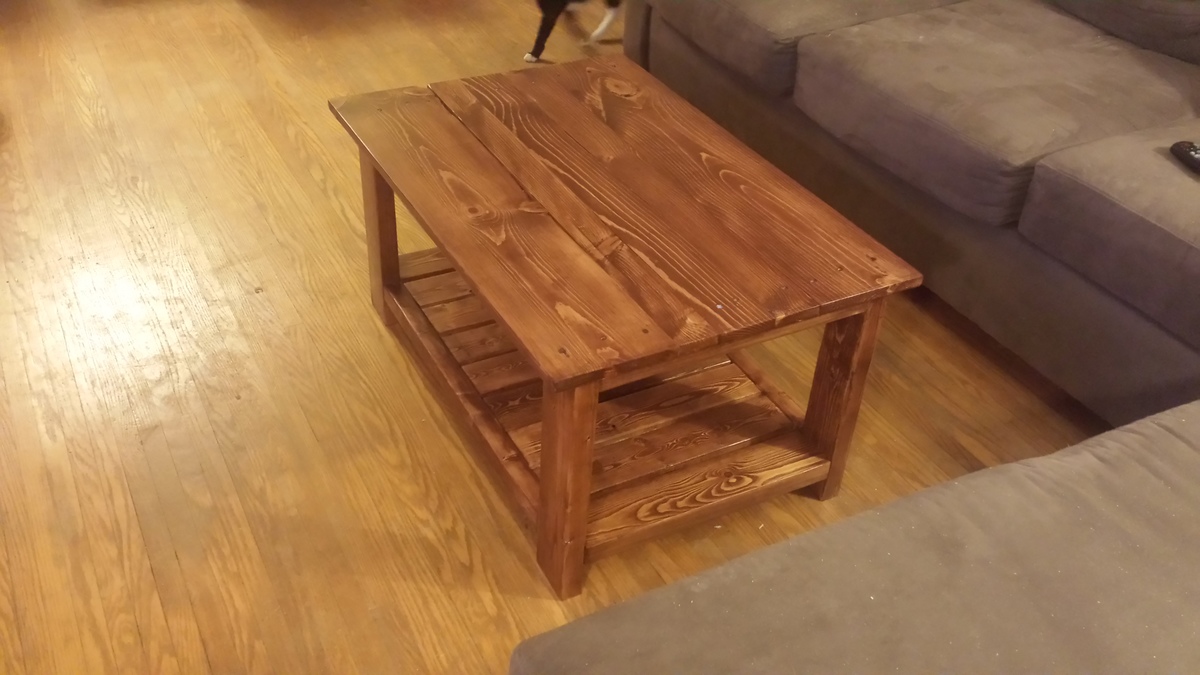
pallet coffee table
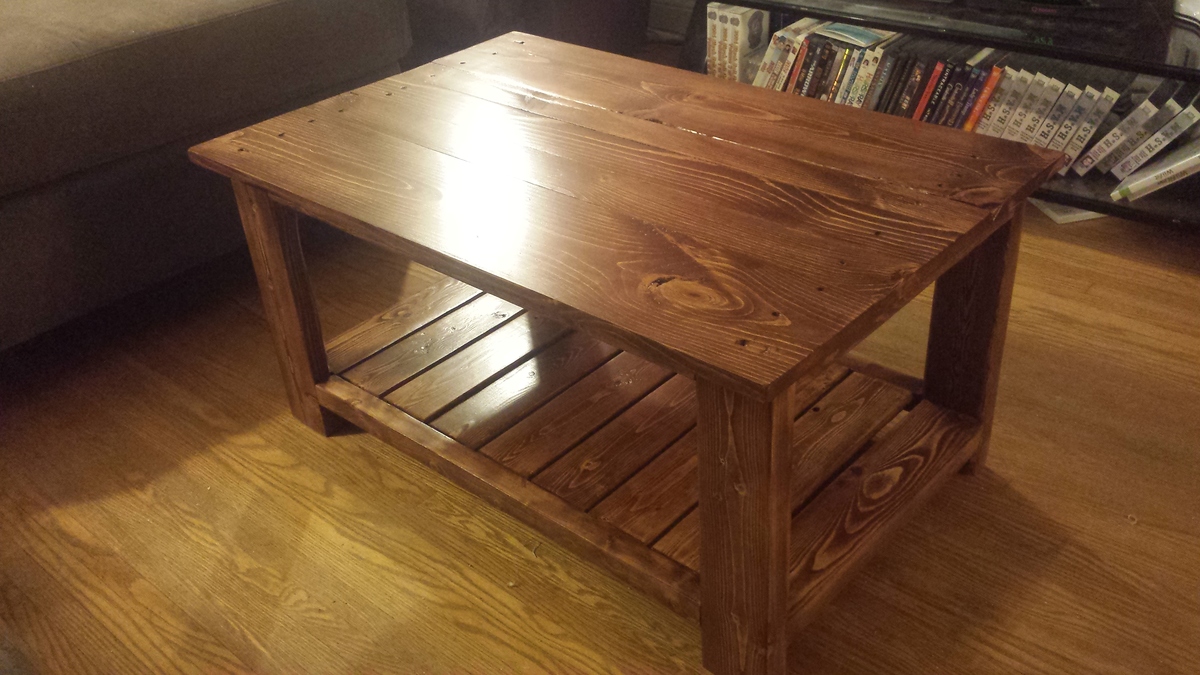
Built this project almost entirely of reclaimed pallets. I was able to keep the one skid almost entirely intact for the top and salvaged to 1x4 boards from the other skid for the bottom shelf. Th 2x4's came from yet another skid. My total investment was about $2. Finished with American Walnut stain and a satin polyurethane.
Estimated Cost
$2
Estimated Time Investment
Day Project (6-9 Hours)
Finish Used
American Walnut stain and varathane diamondcoat polyurethane in satin
Recommended Skill Level
Intermediate
Comments

Wed, 01/28/2015 - 14:54
Looks great !!! I bet if you
Looks great !!! I bet if you could make more you could sell them and make a good profit.
Sun, 02/01/2015 - 09:45
Thank you very much! I
Thank you very much! I actually did end up selling this one within a few hours of posting it online.
I find these types of projects to be the most gratifying as the force me to exercise my creativity more than some other projects.
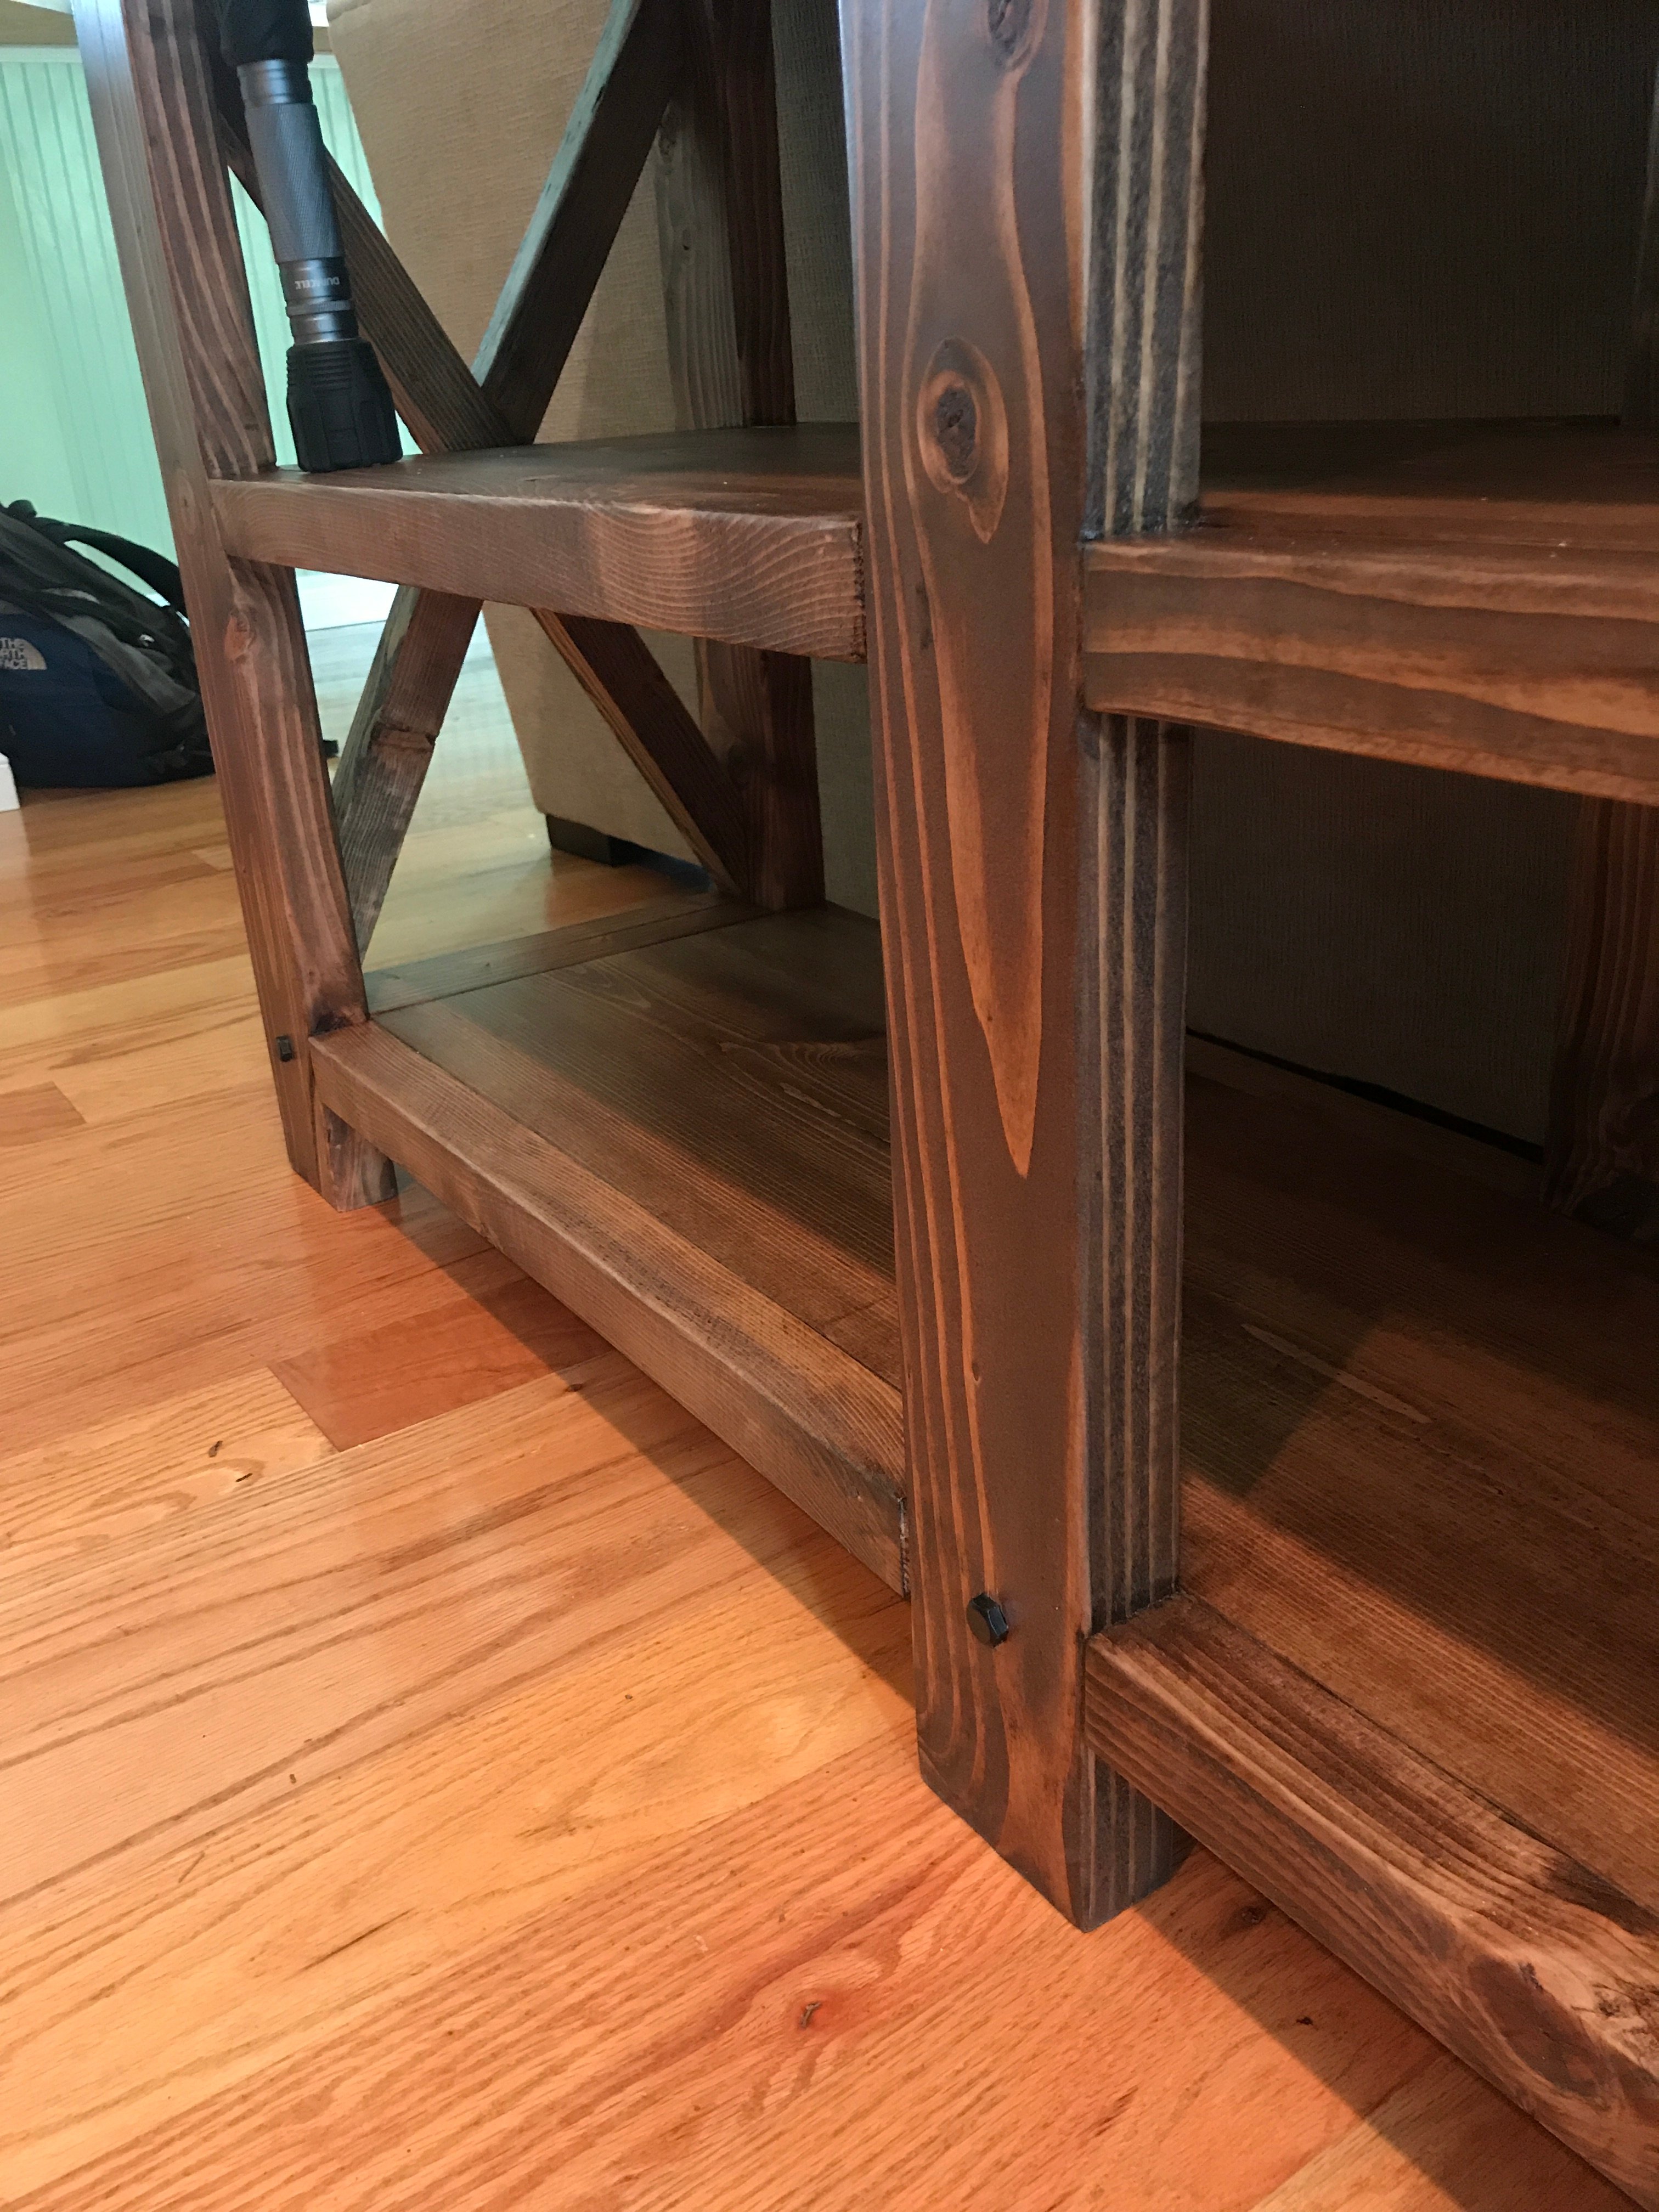
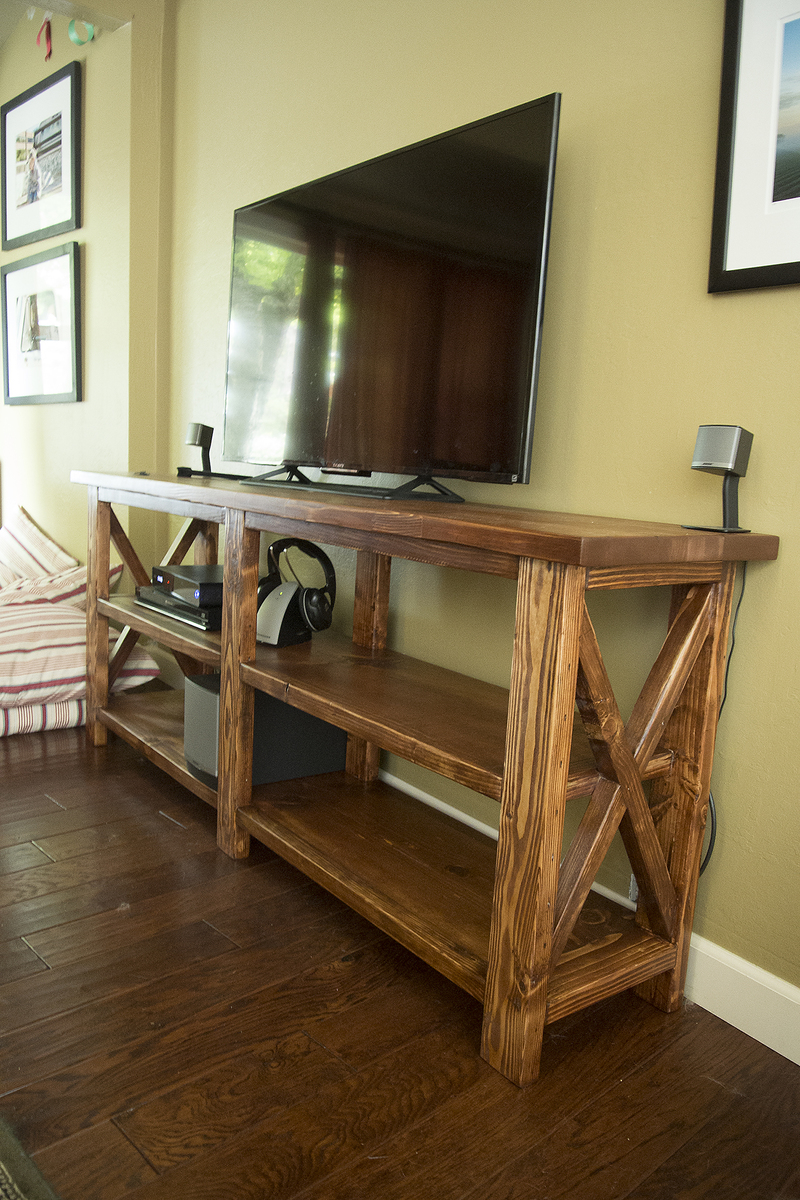
Sage the Blind Lab's Rustic X Consol and Matching Coffee Table
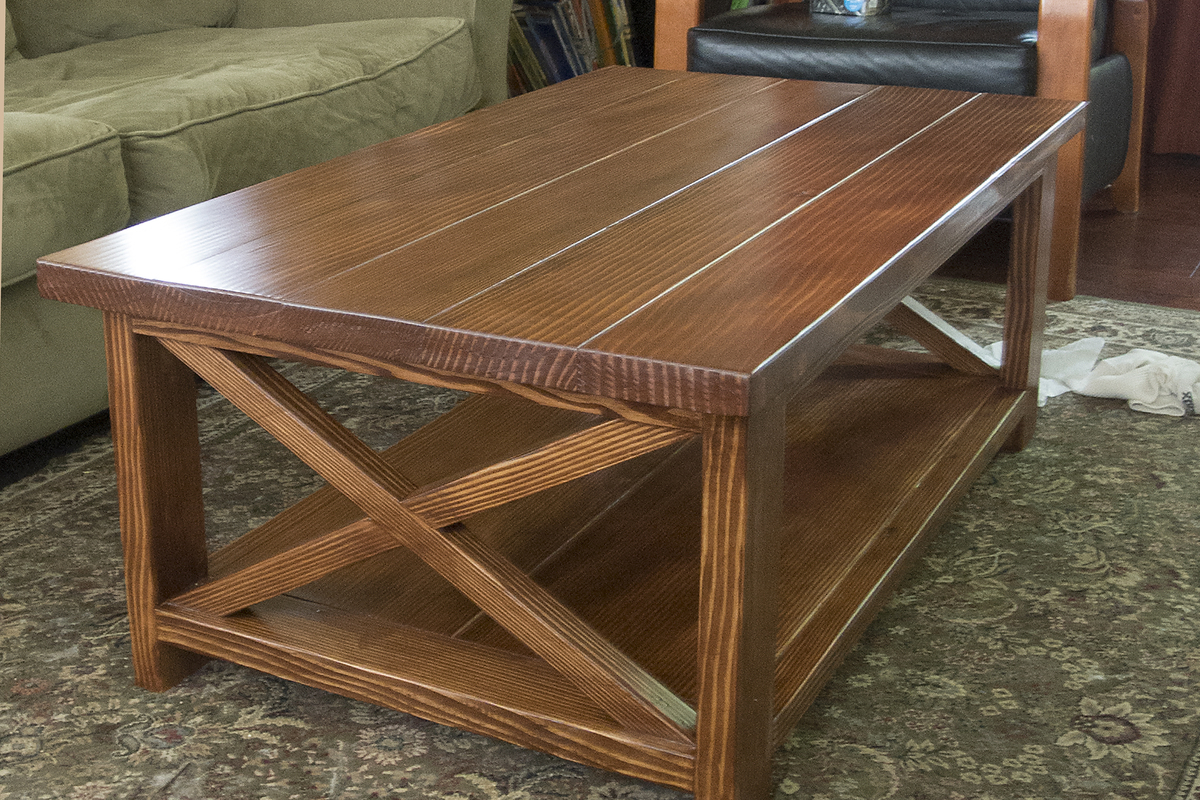
Our Tv veiwing area was a disaster. I found the console plans on ana's website. I had no Idea what a Pocket Hole was until I bought my lumber and a Kreg Jig. This was the result! Had so much fun I made us our first nice coffee table. Great plans, Thanks Ana.
Estimated Time Investment
Week Long Project (20 Hours or More)
Finish Used
Stain and Wipe on Poly
Recommended Skill Level
Intermediate
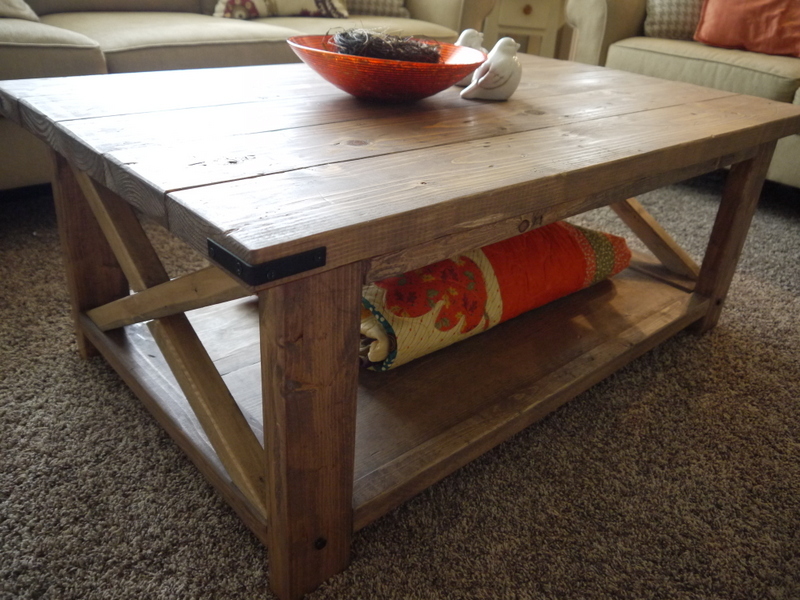
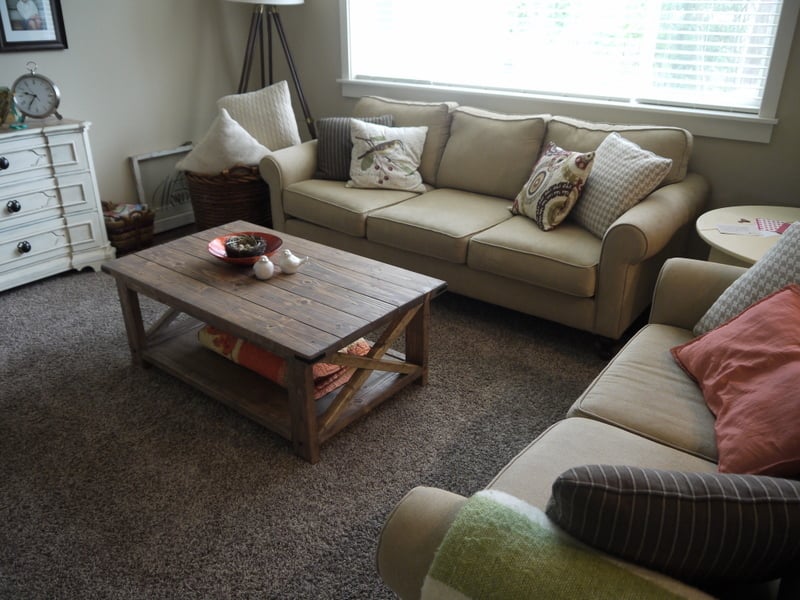
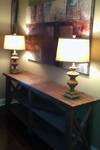
Red Hen Home's Rustic X Coffee Table
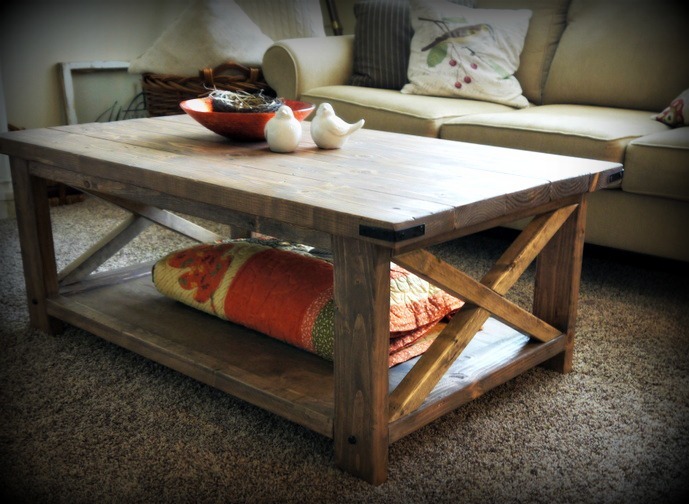
Slightly altered Rustic X Coffee table to make it 46" long. Cutting the X's was tricky; I had to do it by hand with a table saw! I could wish for a miter saw that cut 30 degrees ;-)

Built from Plan(s)
Estimated Cost
$50
Estimated Time Investment
Afternoon Project (3-6 Hours)
Finish Used
Custom mix of Minwax Antique Walnut and Weathered Oak. Finished with 3 coats of hand-rubbed polyurethane.
Recommended Skill Level
Beginner
Comments

Thu, 03/21/2013 - 09:16
Great job!
Looks really nice. So does the whole room. Might I ask where you got the table clock sitting on the dresser?
Wedding Pew Bench
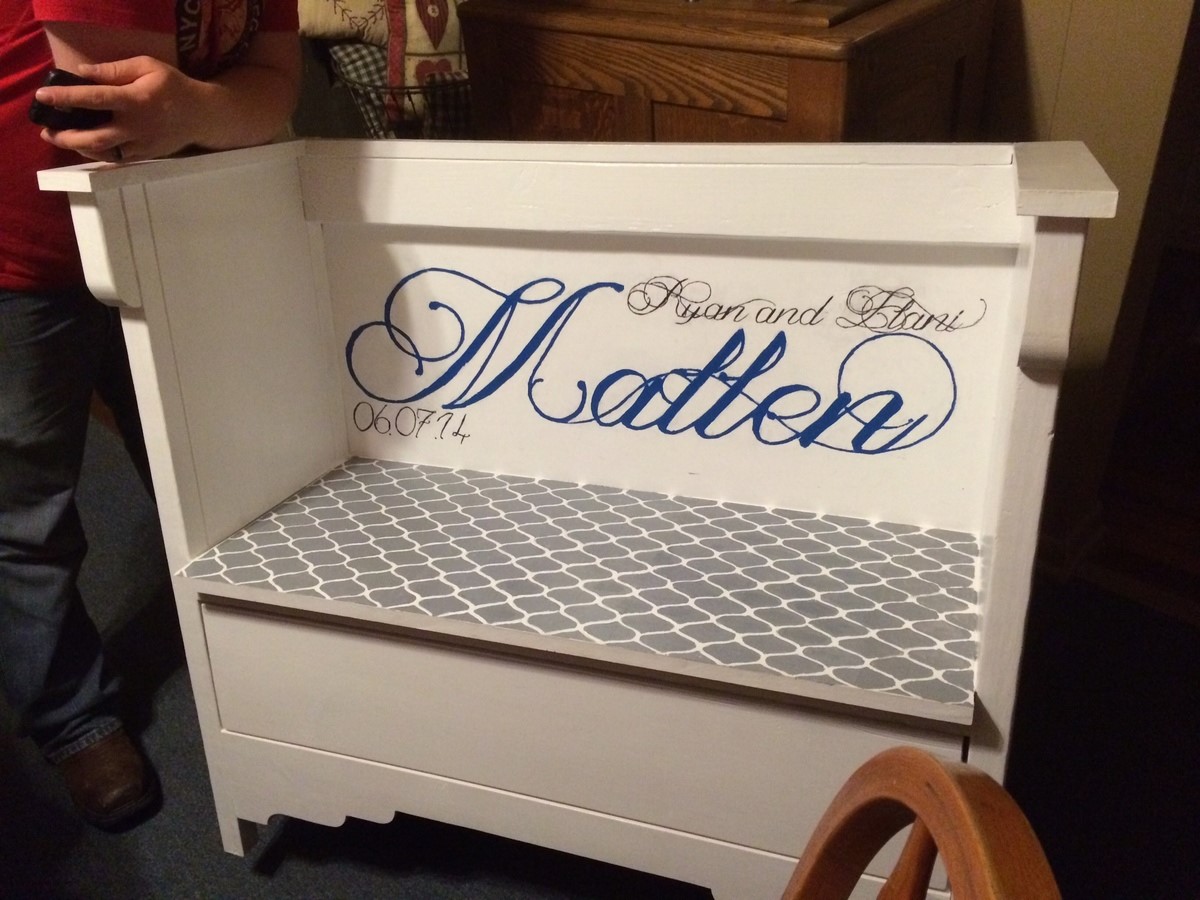
This is a bench my mother and I made from an ana-white.com.
Built from Plan(s)
Estimated Time Investment
Weekend Project (10-20 Hours)
Recommended Skill Level
Beginner
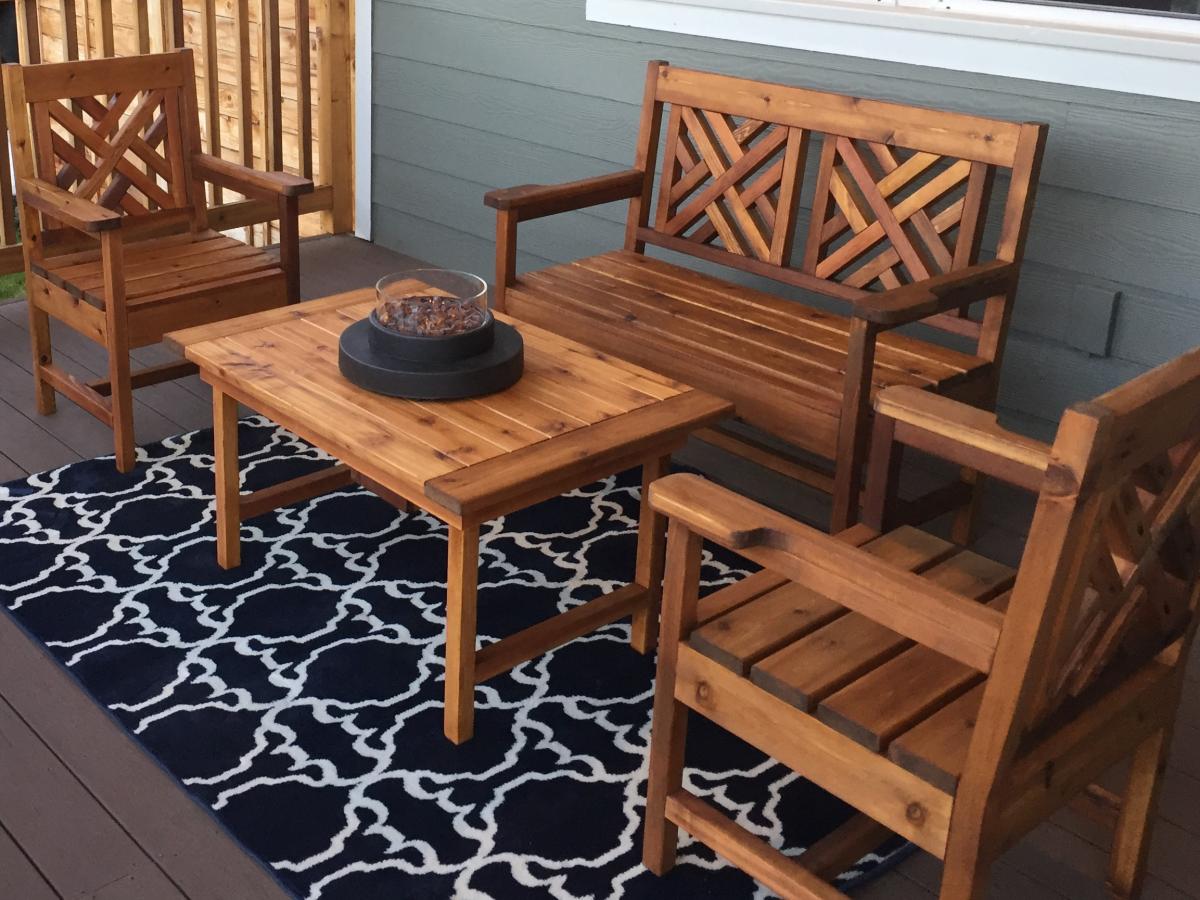
Woven Back Bench, Chairs, plus a table
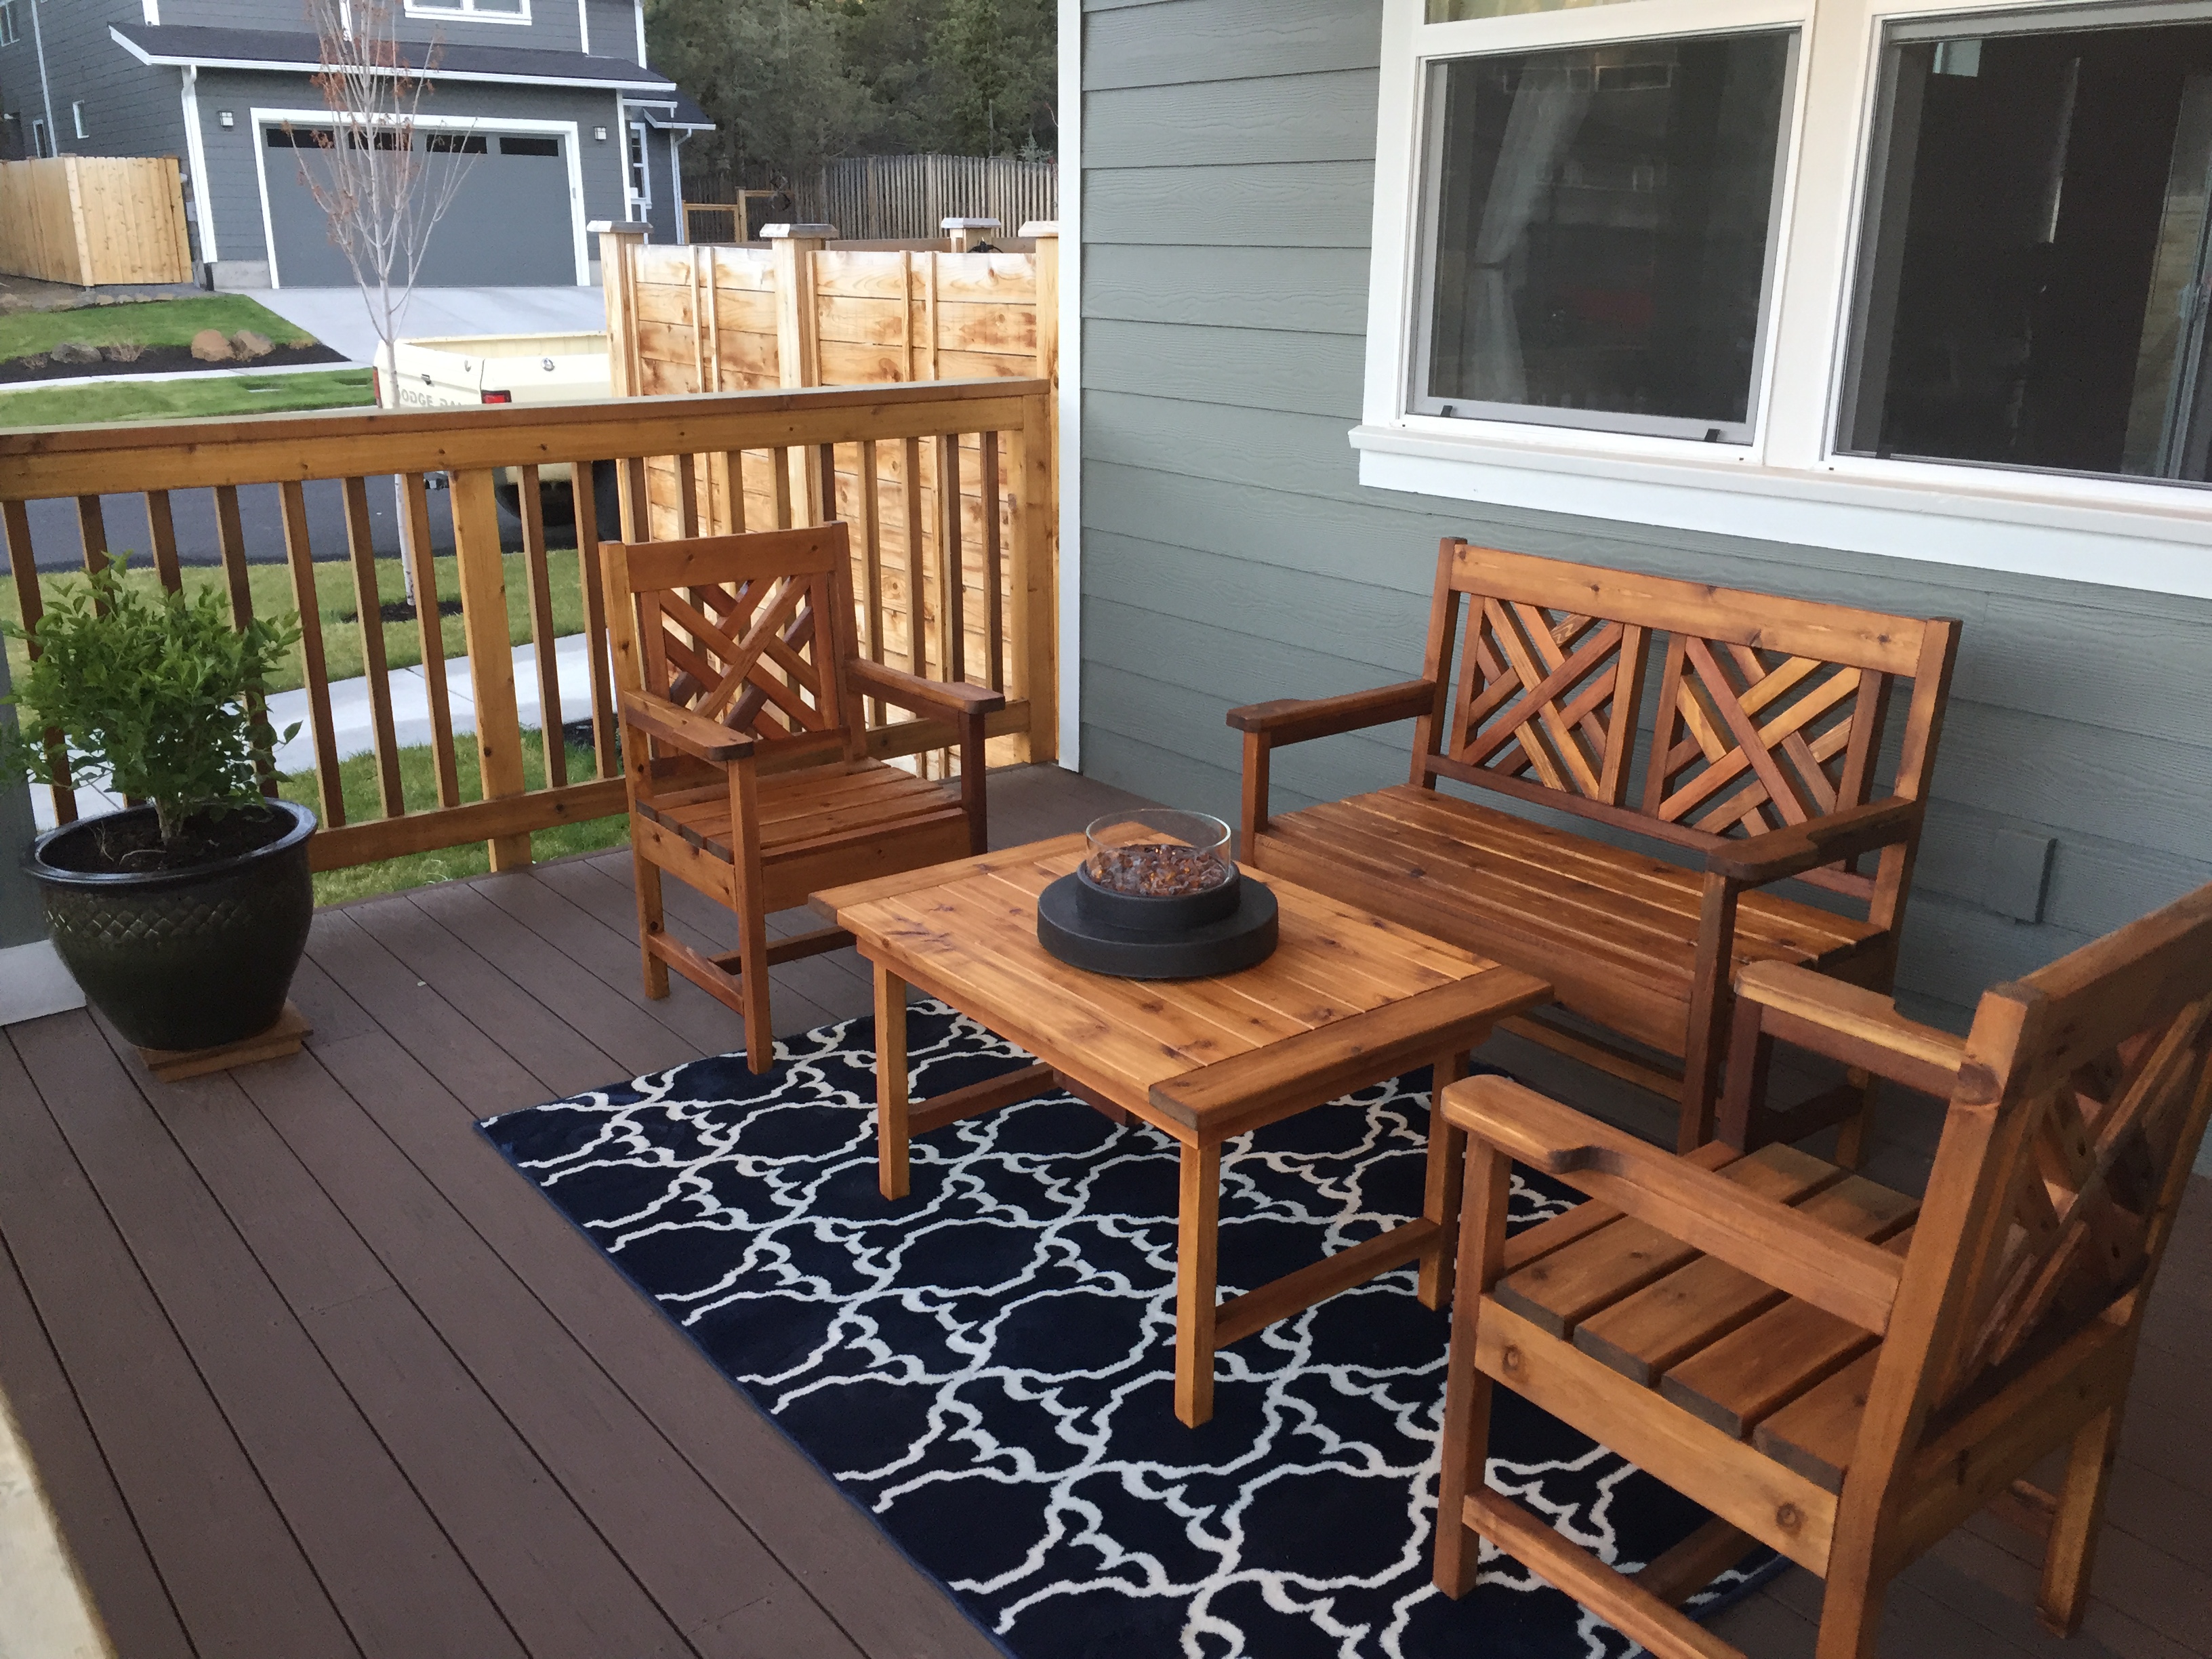
Adapted the woven back bench plan into two chairs. Talk about a ton of pocket holes!
Table with a small propane gas fixture.
Built from Plan(s)
Estimated Cost
$110
Estimated Time Investment
Weekend Project (10-20 Hours)
Finish Used
Olympia Elite Rustic Cedar outdoor stain, single coat so far.
Recommended Skill Level
Intermediate
Comments
2 X 4 Adirondack Chair Season
2 X 4 Adirondack Chair Season
I'm so tired but i can't stop doing this chairs.
It's fun and gives me satisfaction when it's done
Here is just part of the orders that i got this week.
I'm taking a break, having coffee and resting a bit. Much more sets to do
Thanks Ana White for this beautiful chair plan
Estimated Cost
50/60 Canadian dollar
Estimated Time Investment
An Hour or Two (0-2 Hours)
Finish Used
Behr waterproof stain and sealer
Recommended Skill Level
Beginner
Comments
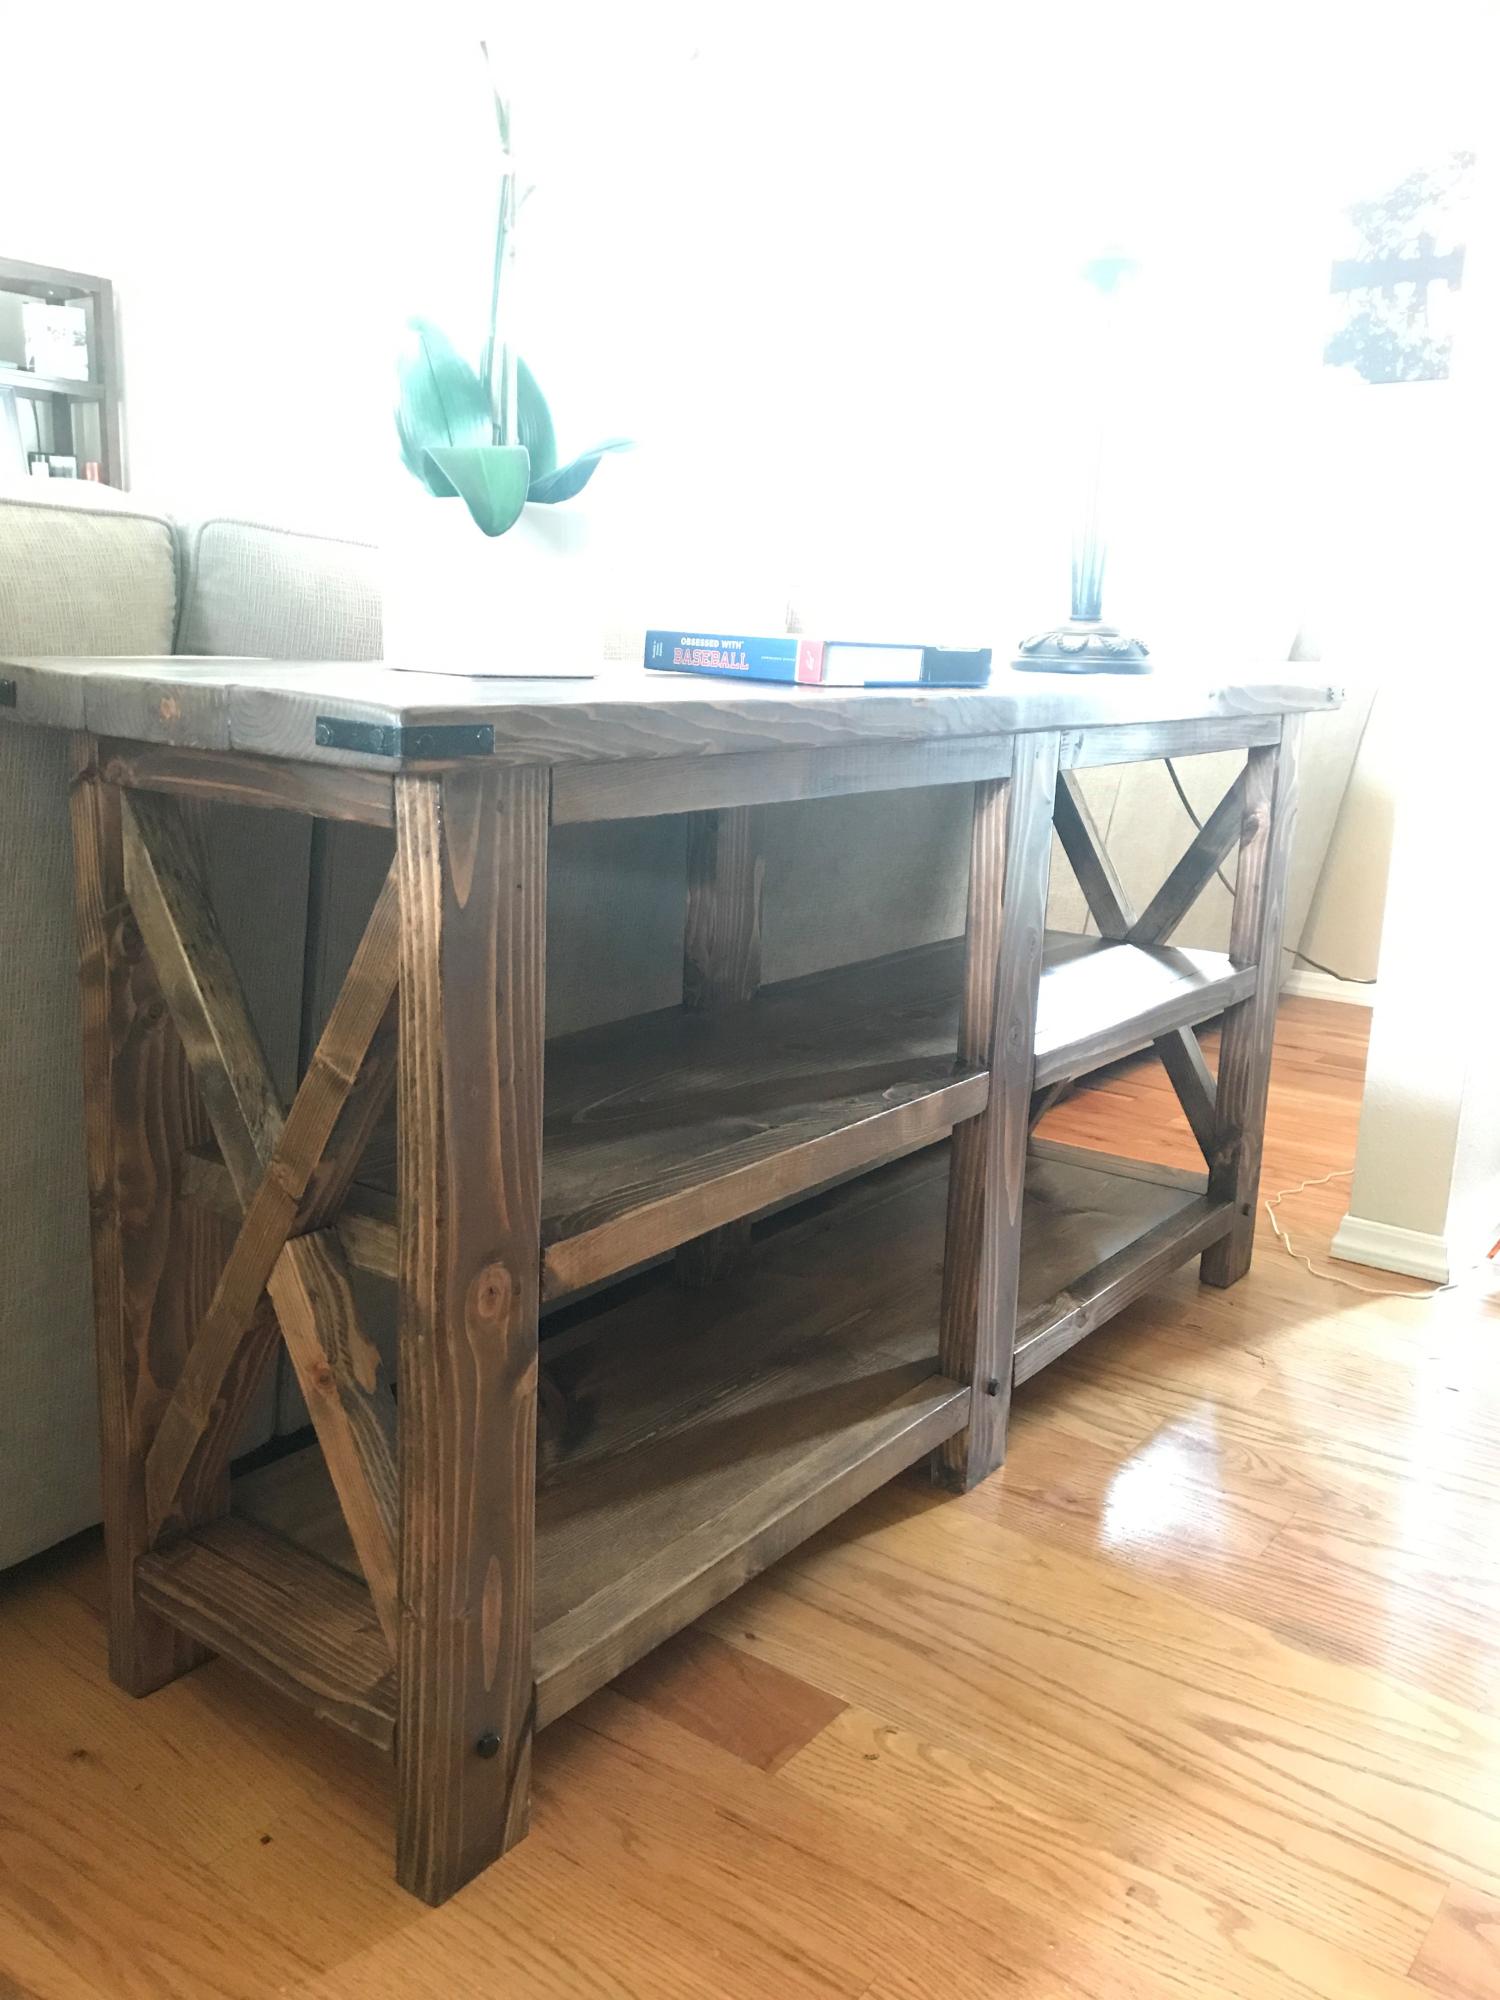
Rustic Console - My 1st Project
This was my first project, and although large, probably the easiest I have built since. It was really simple, although I do know some things I will do differently next time.
Built from Plan(s)
Estimated Cost
$80
Estimated Time Investment
Day Project (6-9 Hours)
Finish Used
Steel wool dissolved in vinegar with pre-tea stain
Recommended Skill Level
Beginner
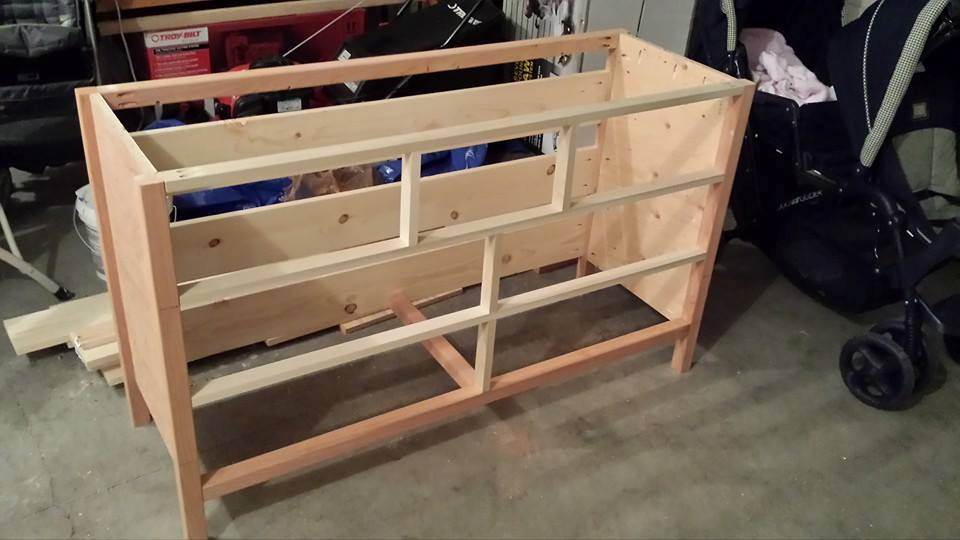
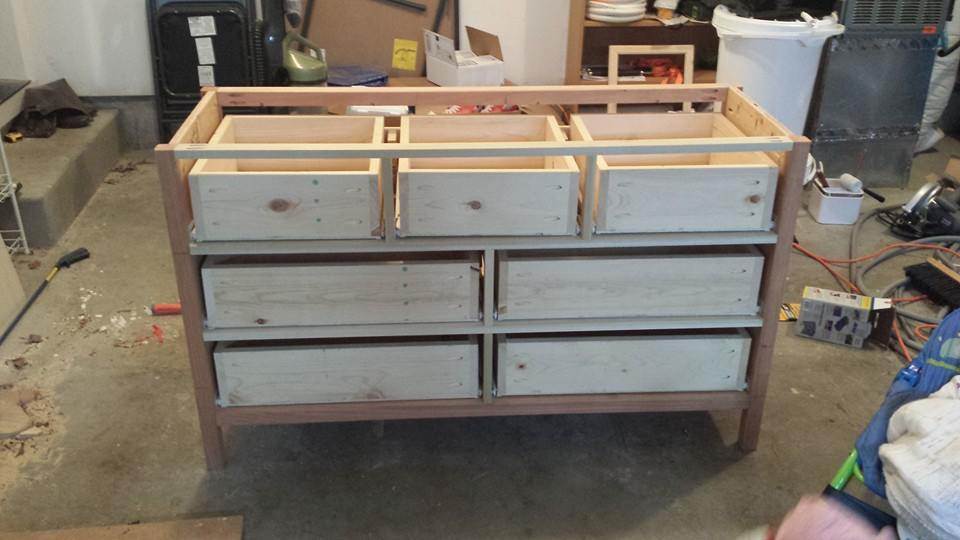
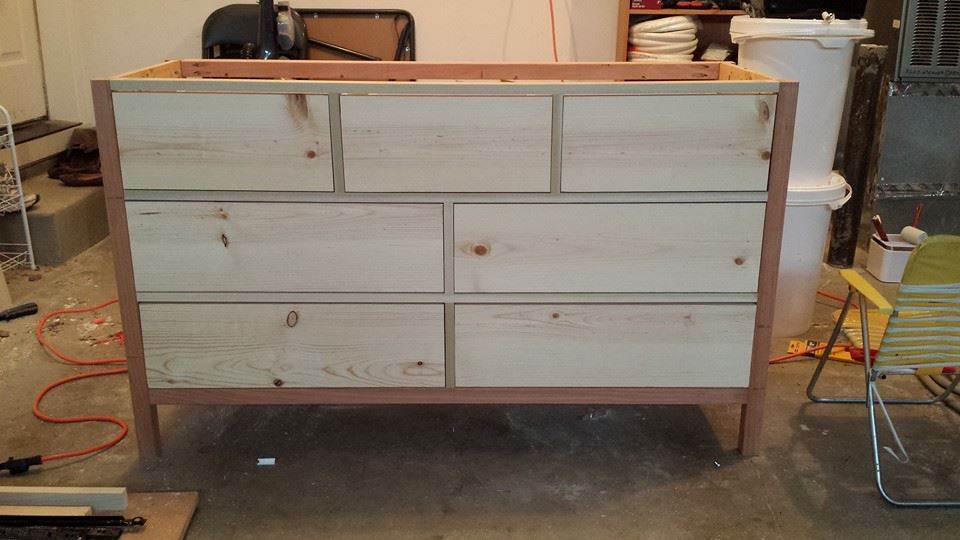
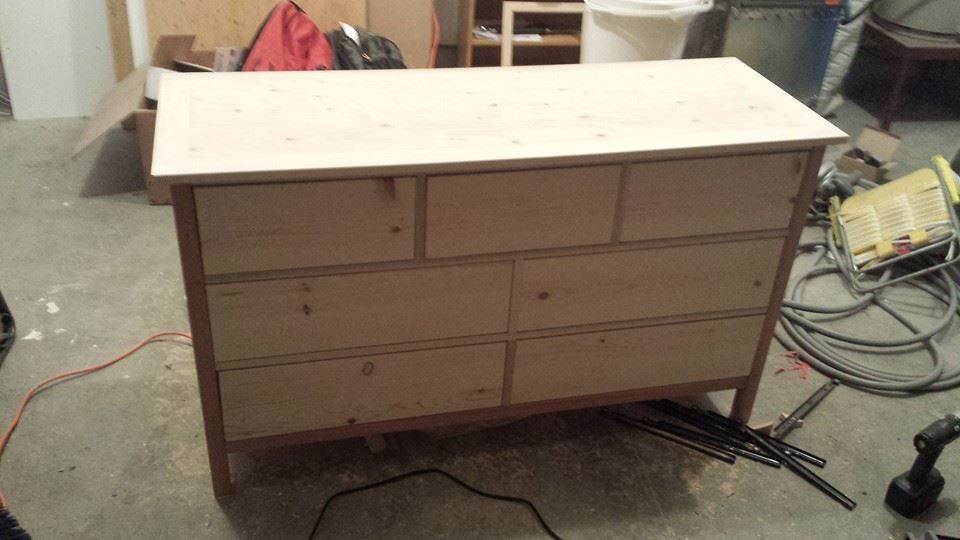
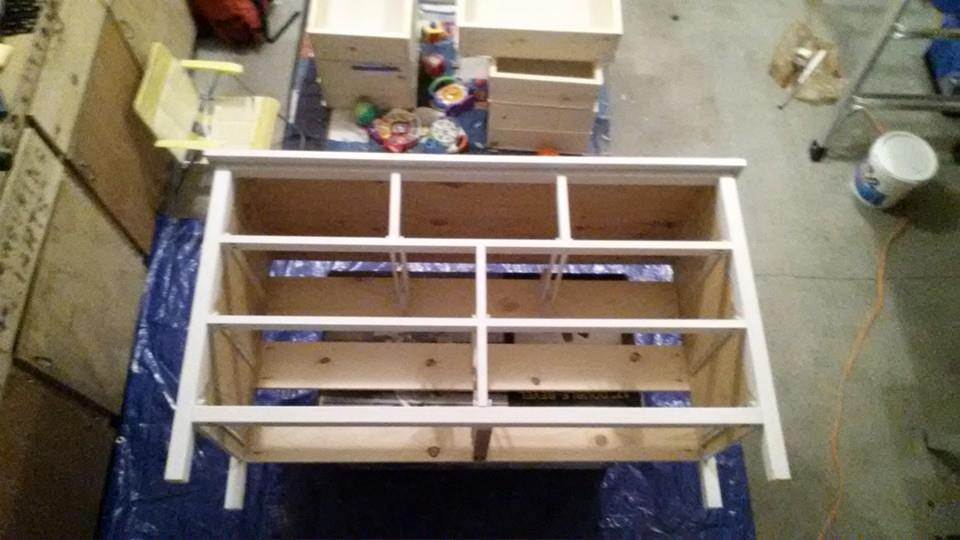
My Extra Wide Simple Dresser
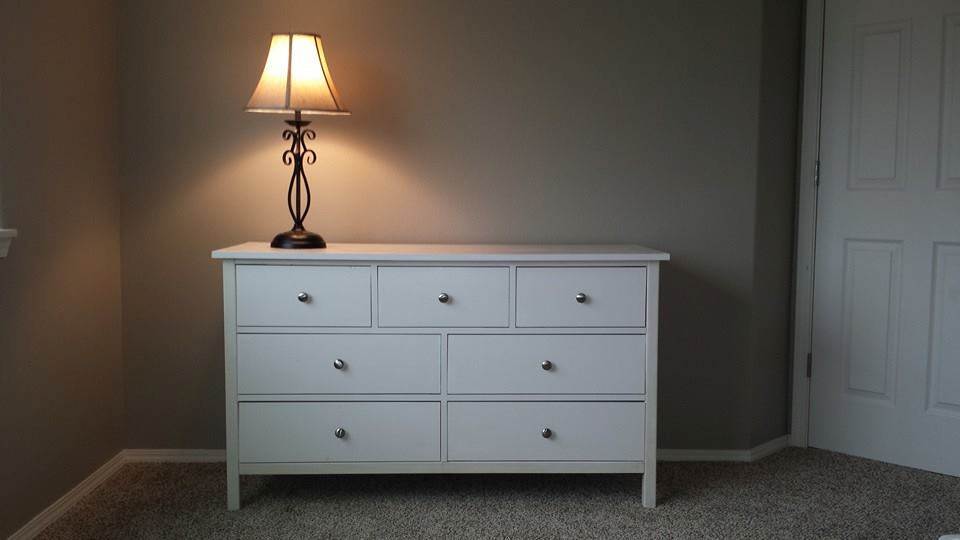
This is the first dresser that I have ever made. There was a learning curve, but not much. It was a lot of fun and I hope you enjoy it!
Built from Plan(s)
Estimated Time Investment
Weekend Project (10-20 Hours)
Finish Used
Egg White Paint with Minwax® Polycrylic® Protective Finish on top
Recommended Skill Level
Beginner
Comments
Tue, 02/16/2016 - 10:40
what kind of wood did you use
what kind of wood did you use to build the drawers? i have used 1X6 and 1X8 as per the plan and the drawers dont fit in the frame. sliding doesnt work properly. plewase let me know, thnks
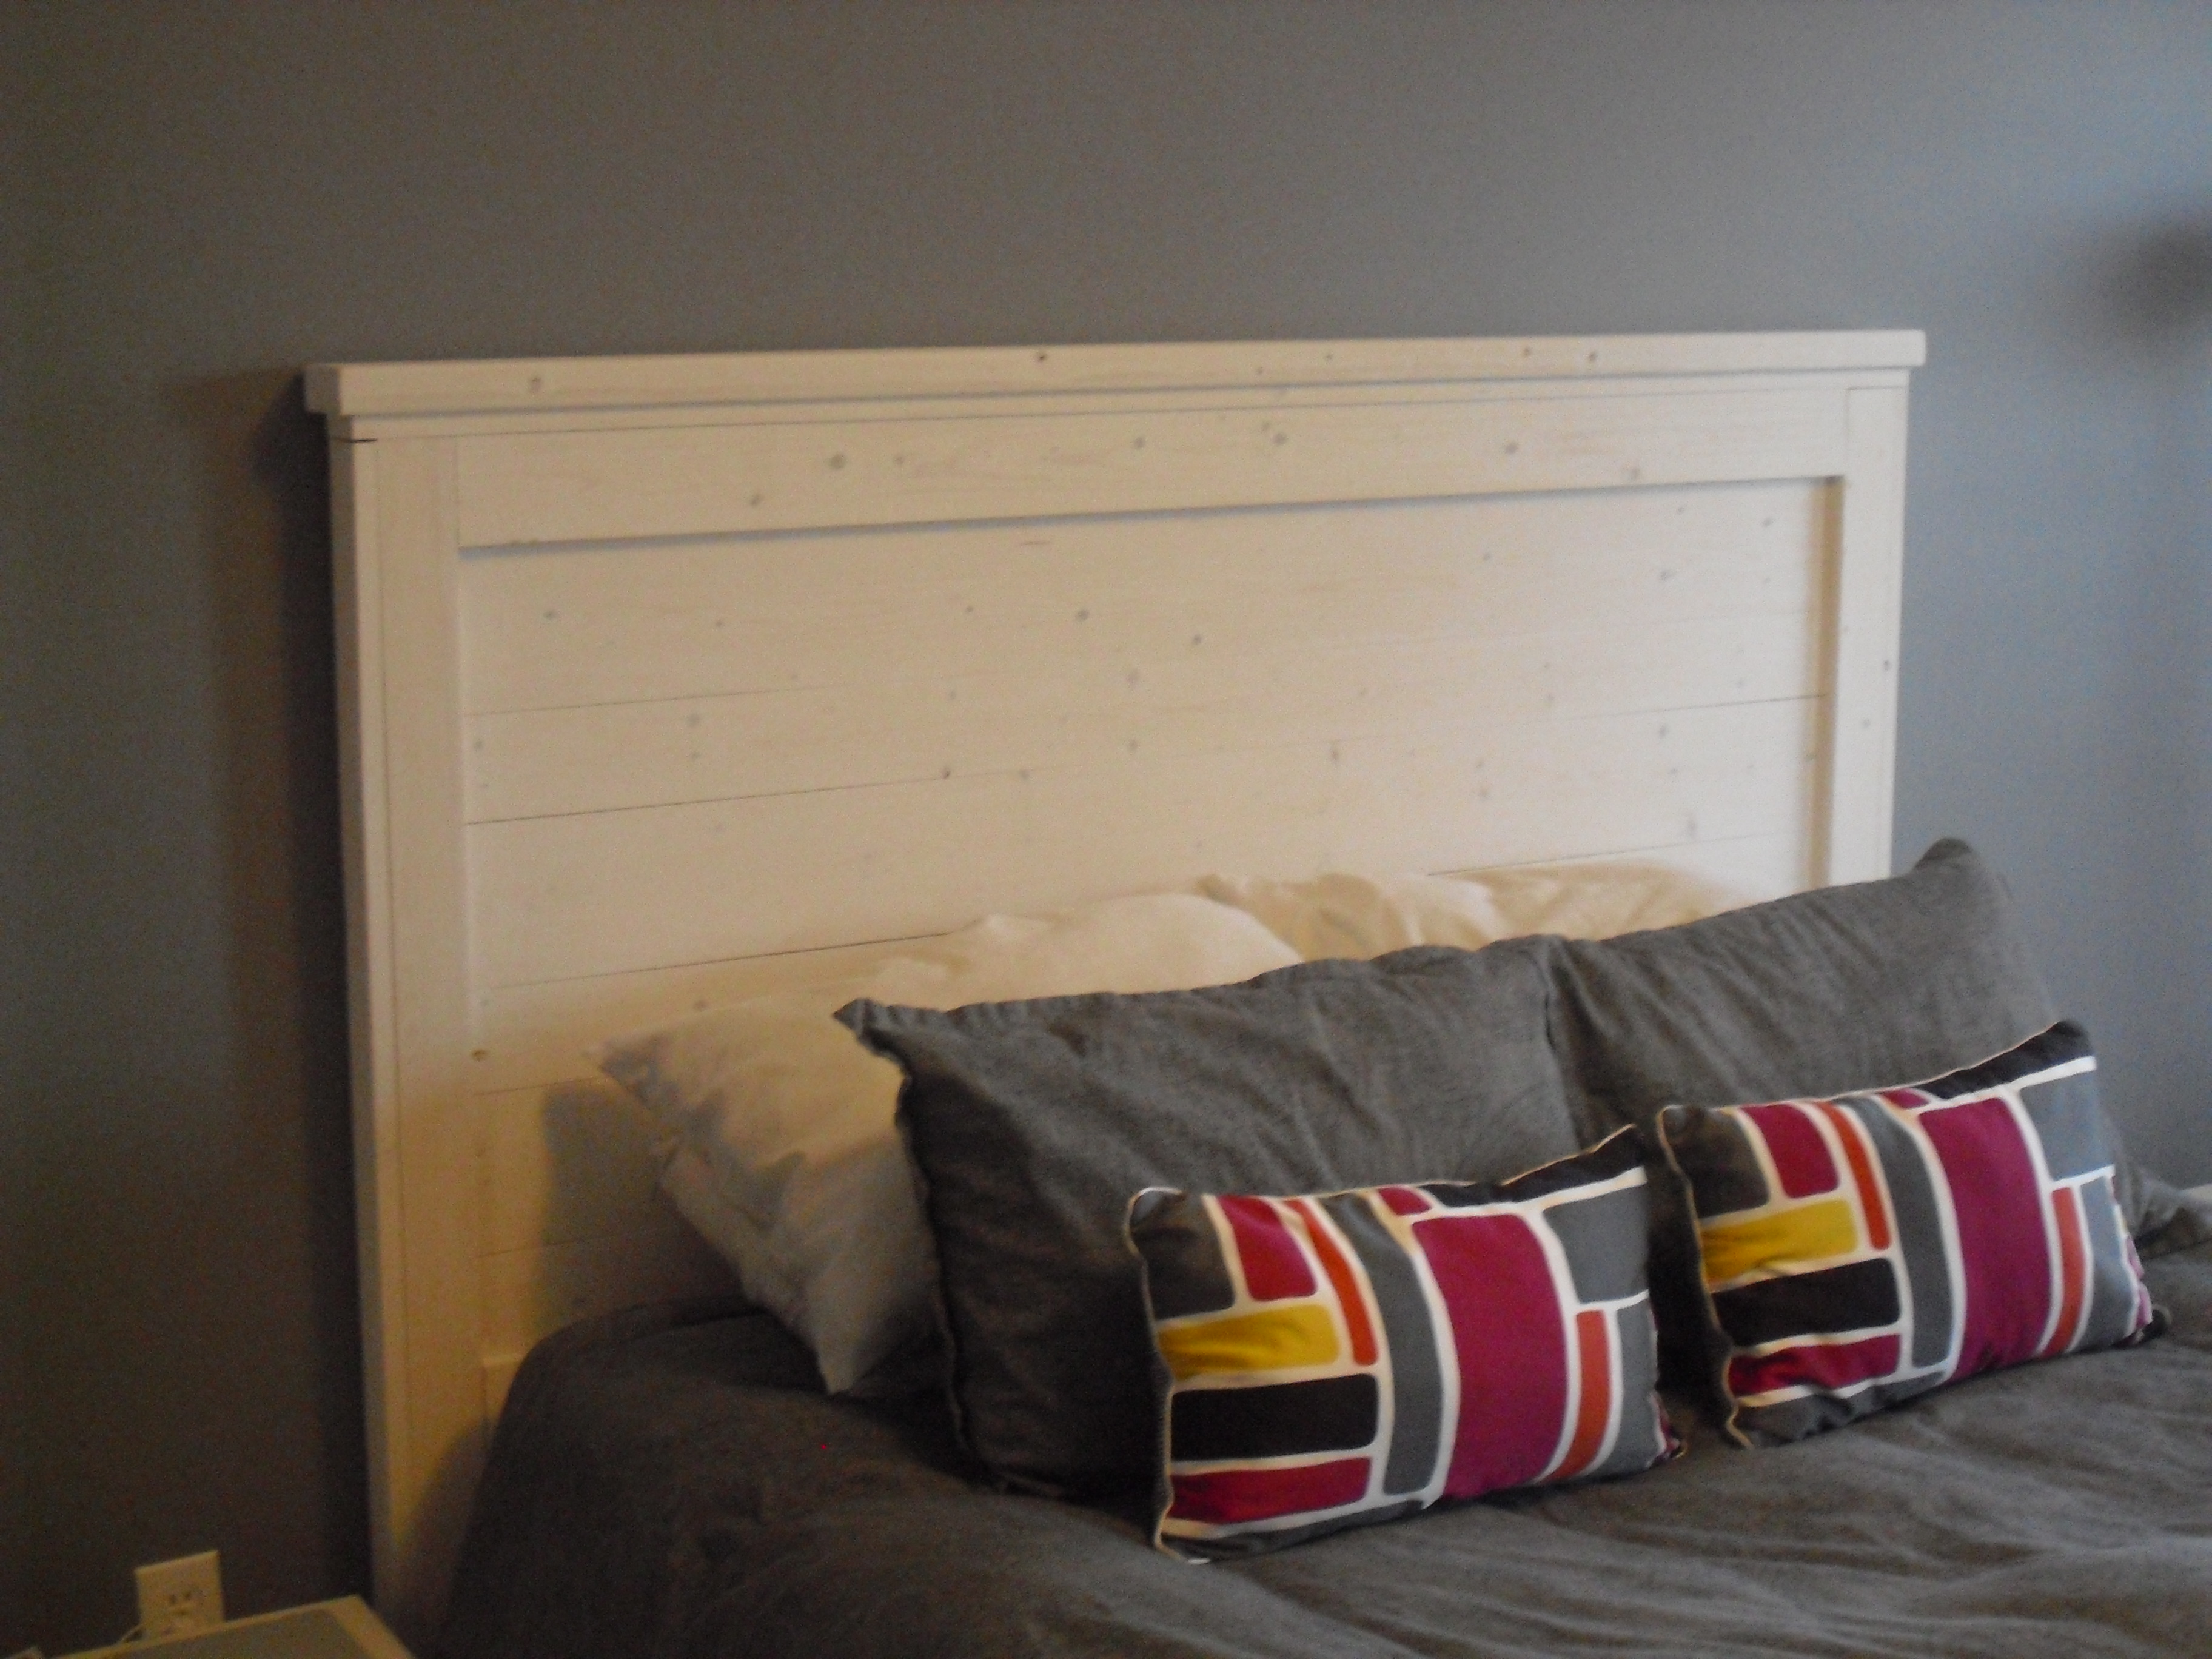
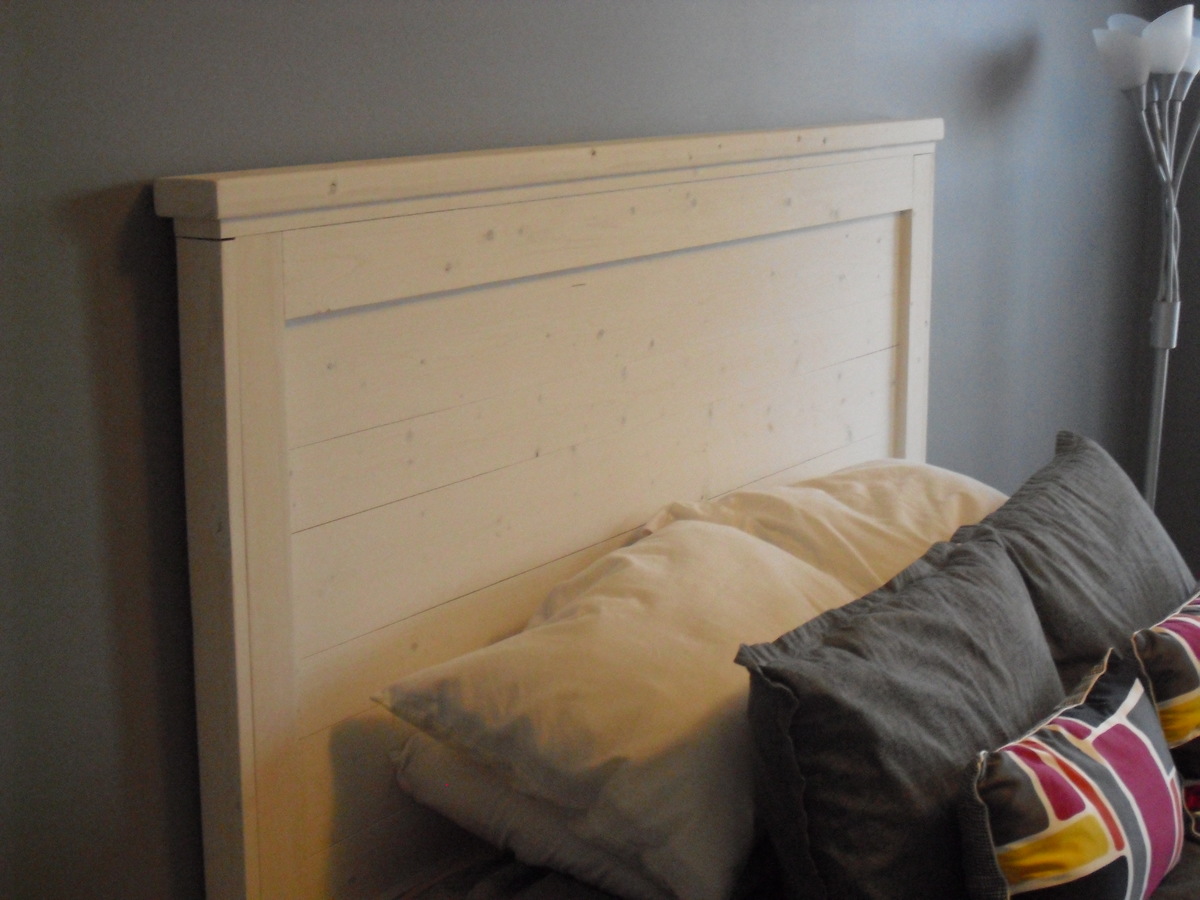
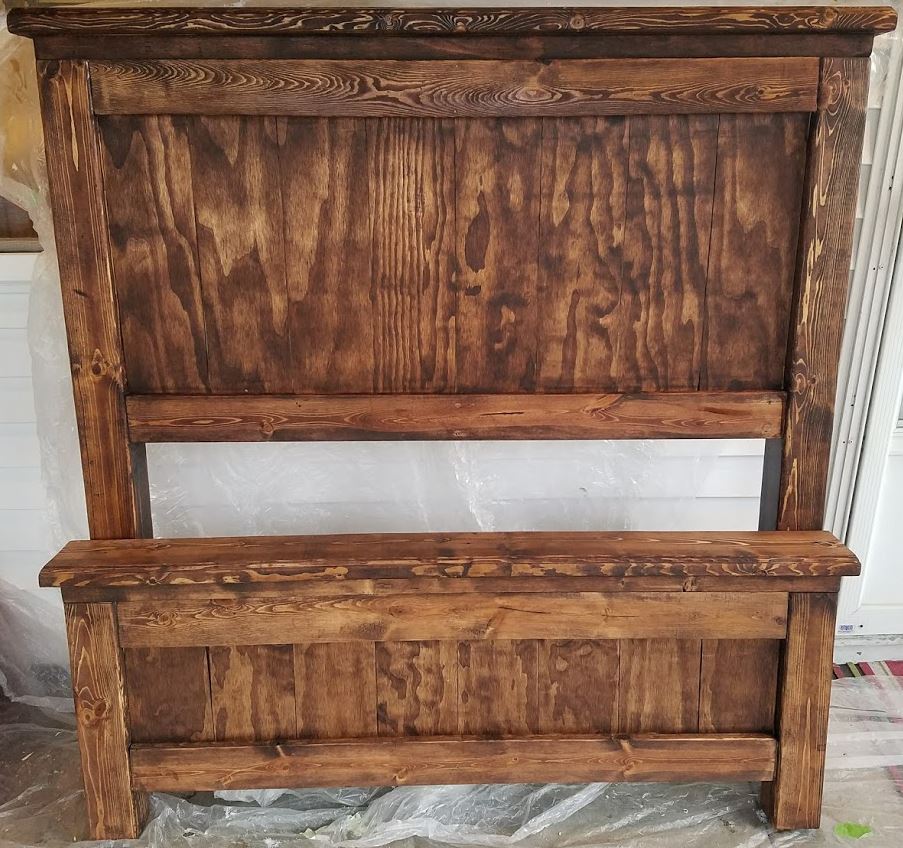
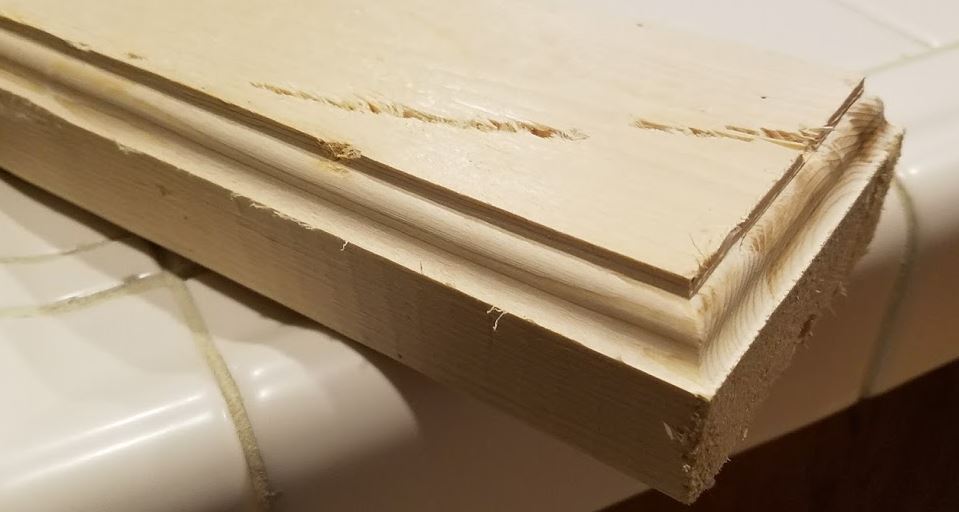
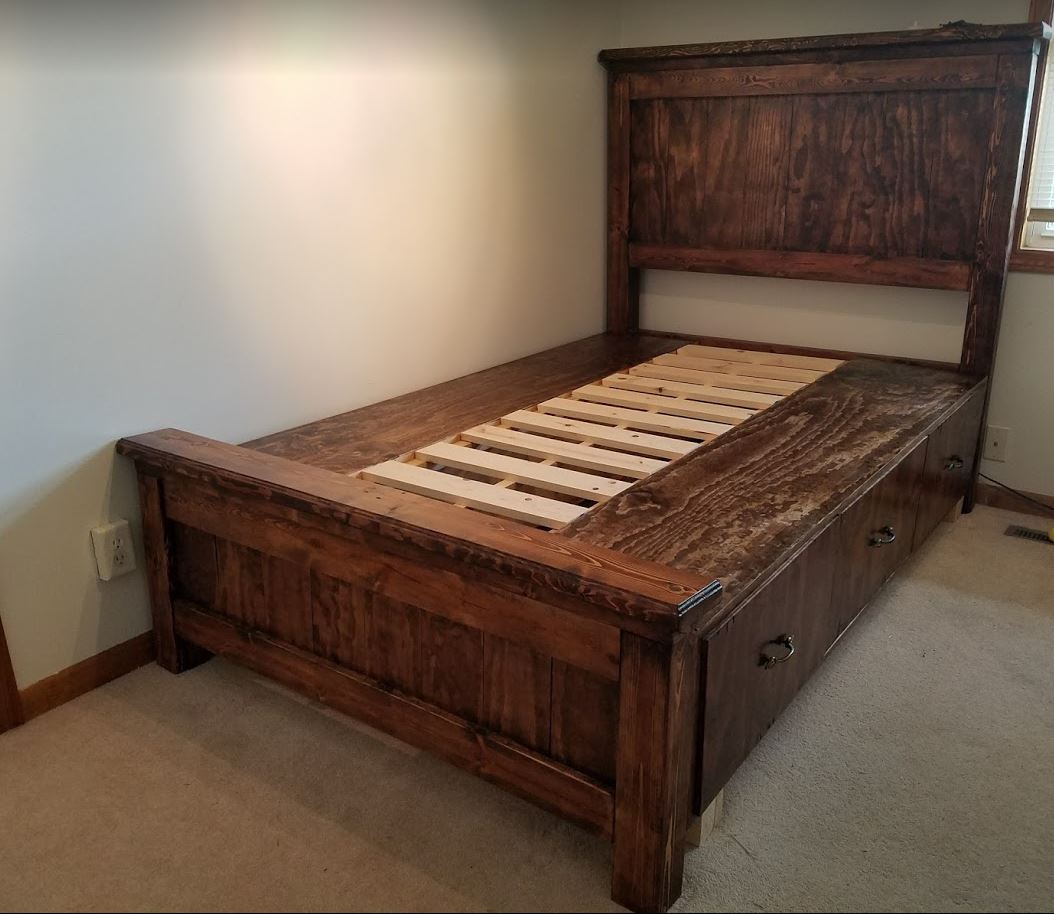
Stained Full for Daughter

This was my very first woodworking project that didn't involve making a sign or wooden cutout; so very gratifying to see it all come together. I enjoyed adding some simple touches from other users (planked head/footboard) as well as my own (router ogee cut around the head and footboard tops). Very happy with how it turned out and we will see how well it sleeps!
Estimated Cost
$400
Estimated Time Investment
Week Long Project (20 Hours or More)
Finish Used
Stain with Poly
Recommended Skill Level
Beginner