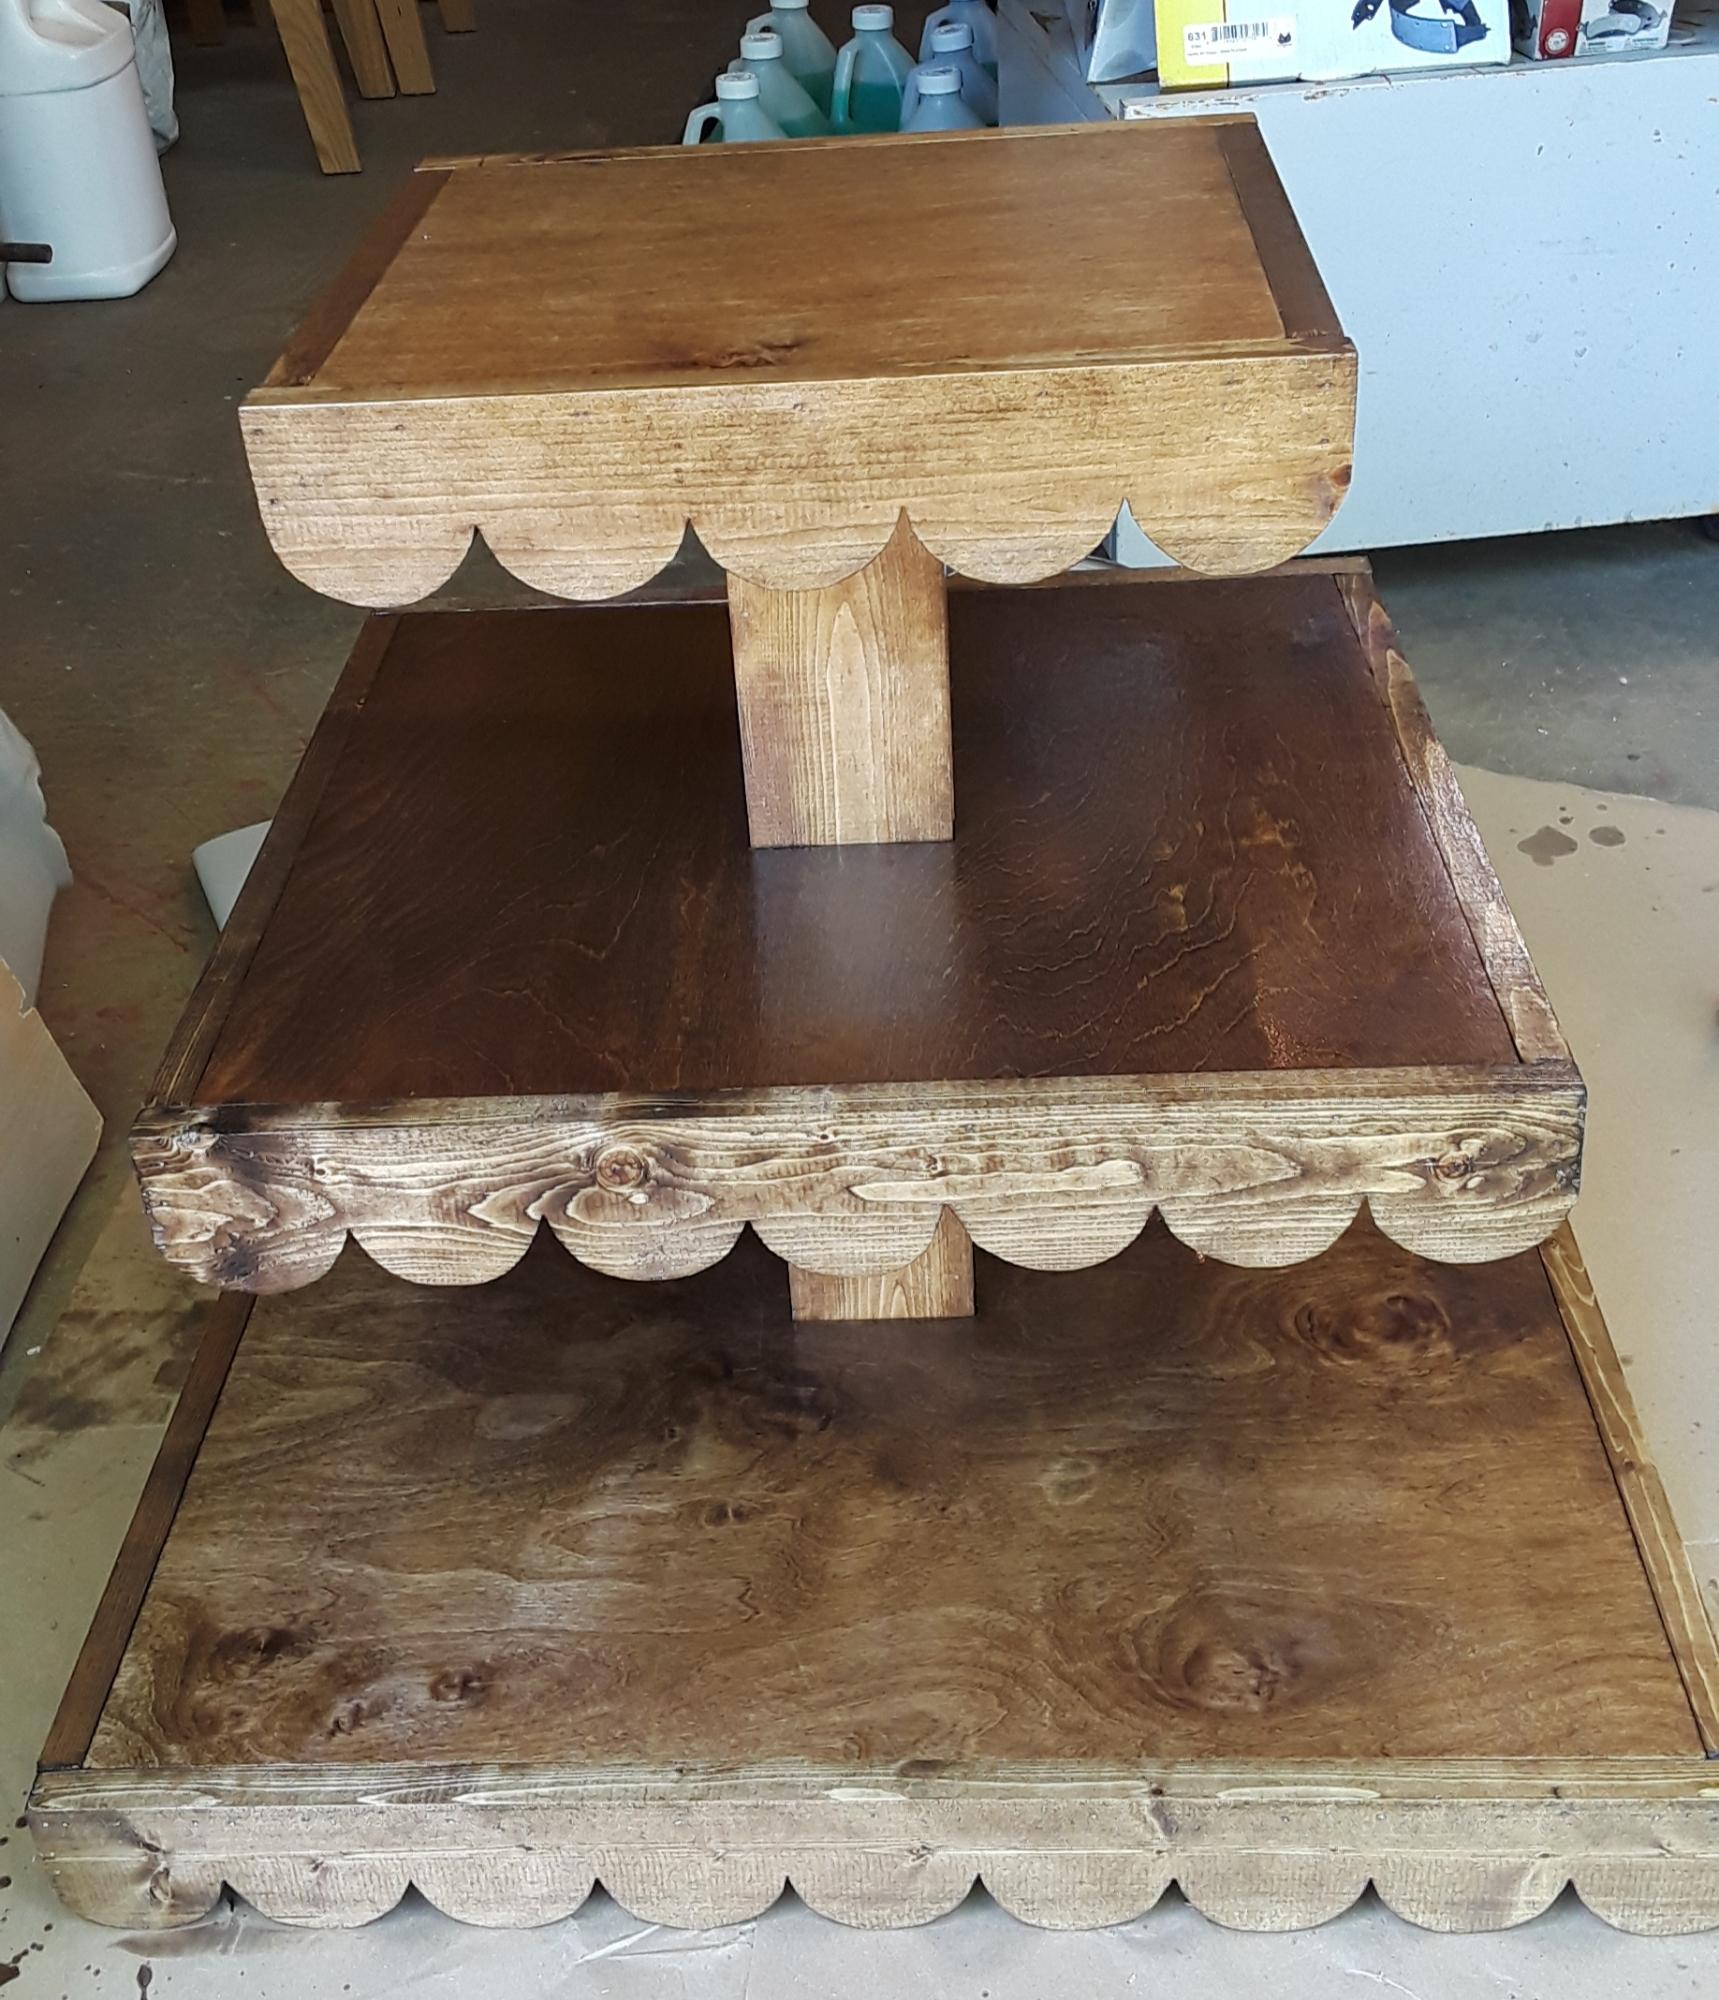
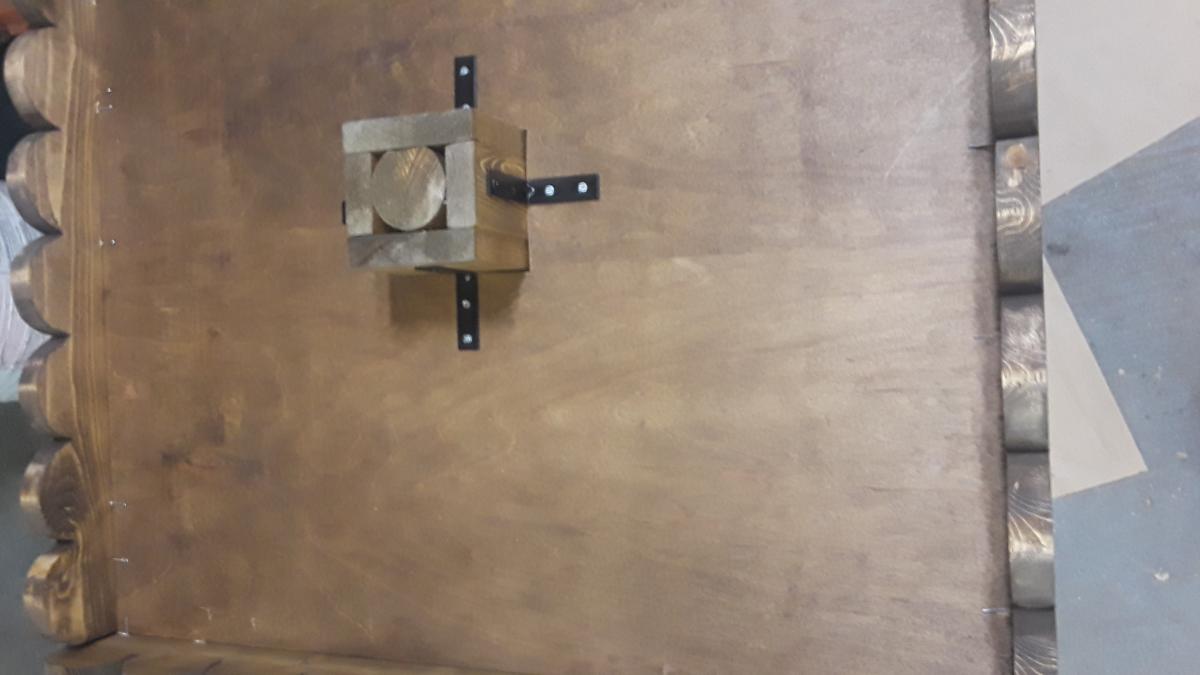
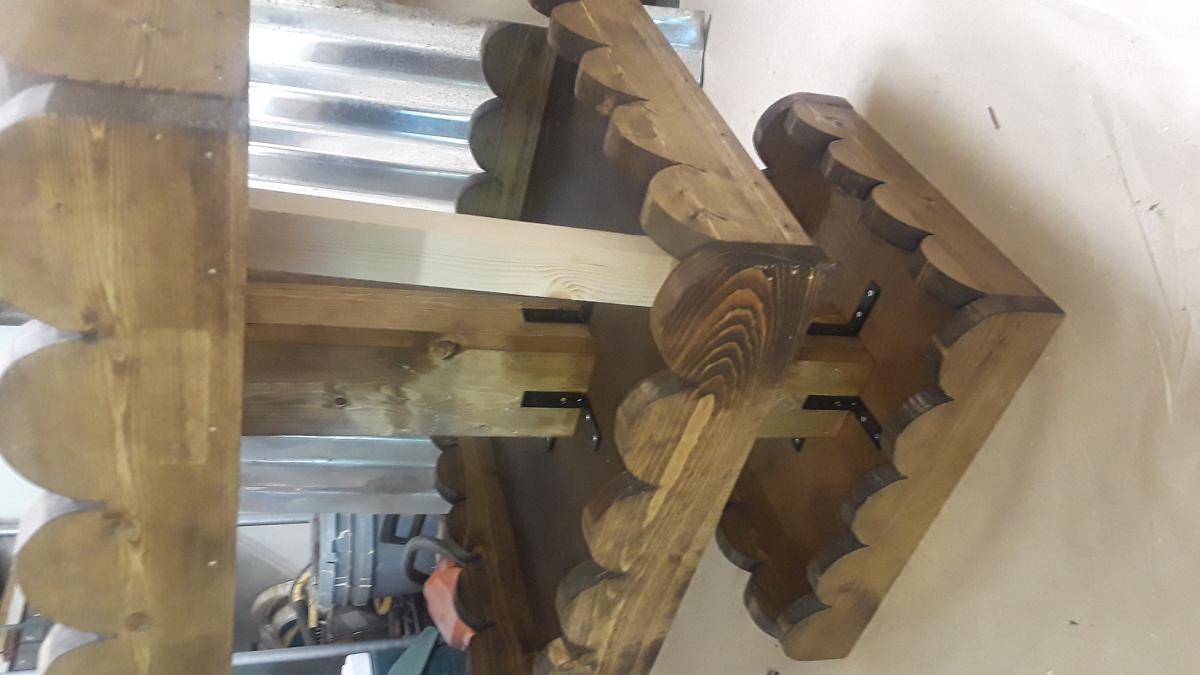
Rustic Cupcake Stand
This plan has detailed instructions attached.
Built from Plan(s)
This plan has detailed instructions attached.
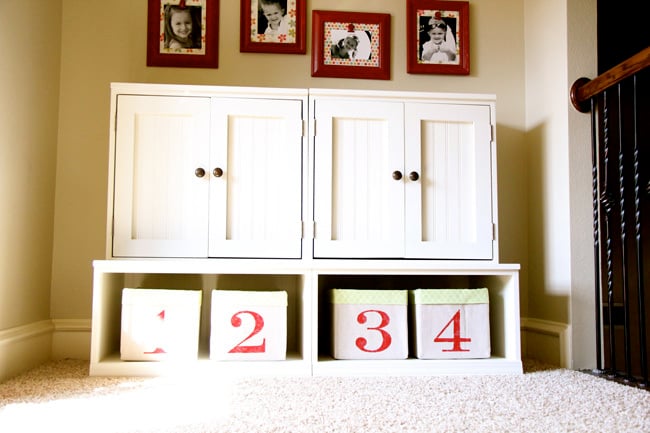
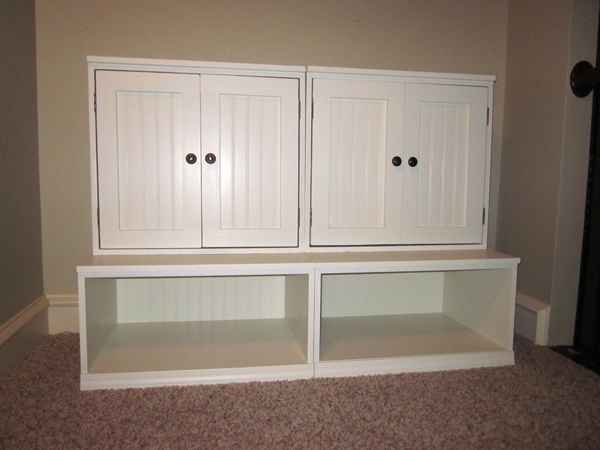
I used Ana's plans for the open cubby base and hutch with doors to create my storage system for the playroom. I had Lowe's rip my 2 sheets of 3/4" MDF and I made the smaller cuts with my miter saw. I used 1/4" white bead board panel for the doors and cubby backs. I built the pieces in 1 day and painted the next. It was simple and fun! You can see more details at http://www.shanty-2-chic.com/2011/07/storage-for-the-playroom.html!
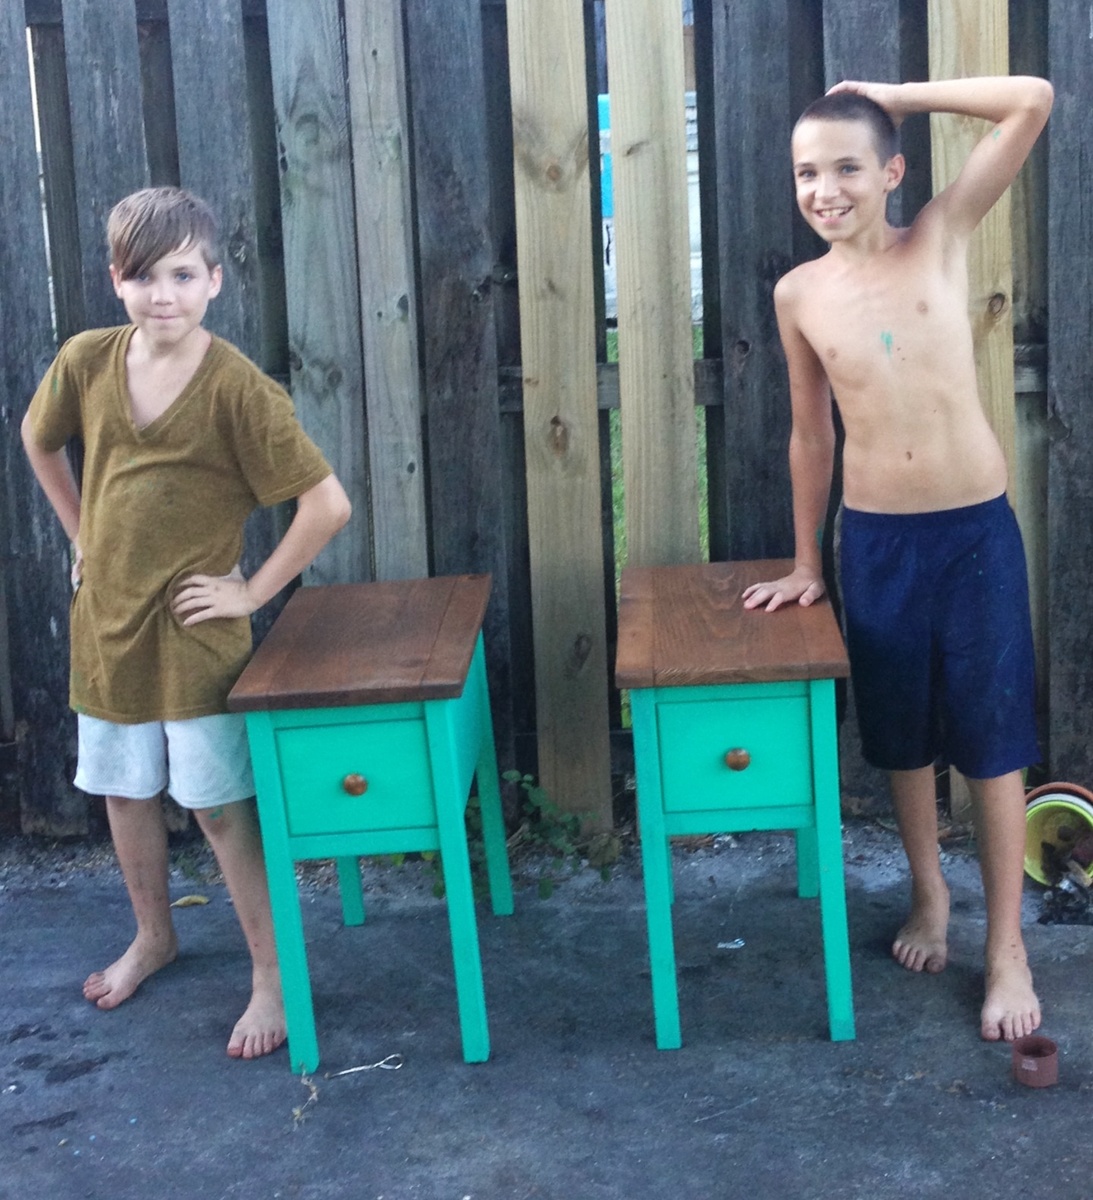
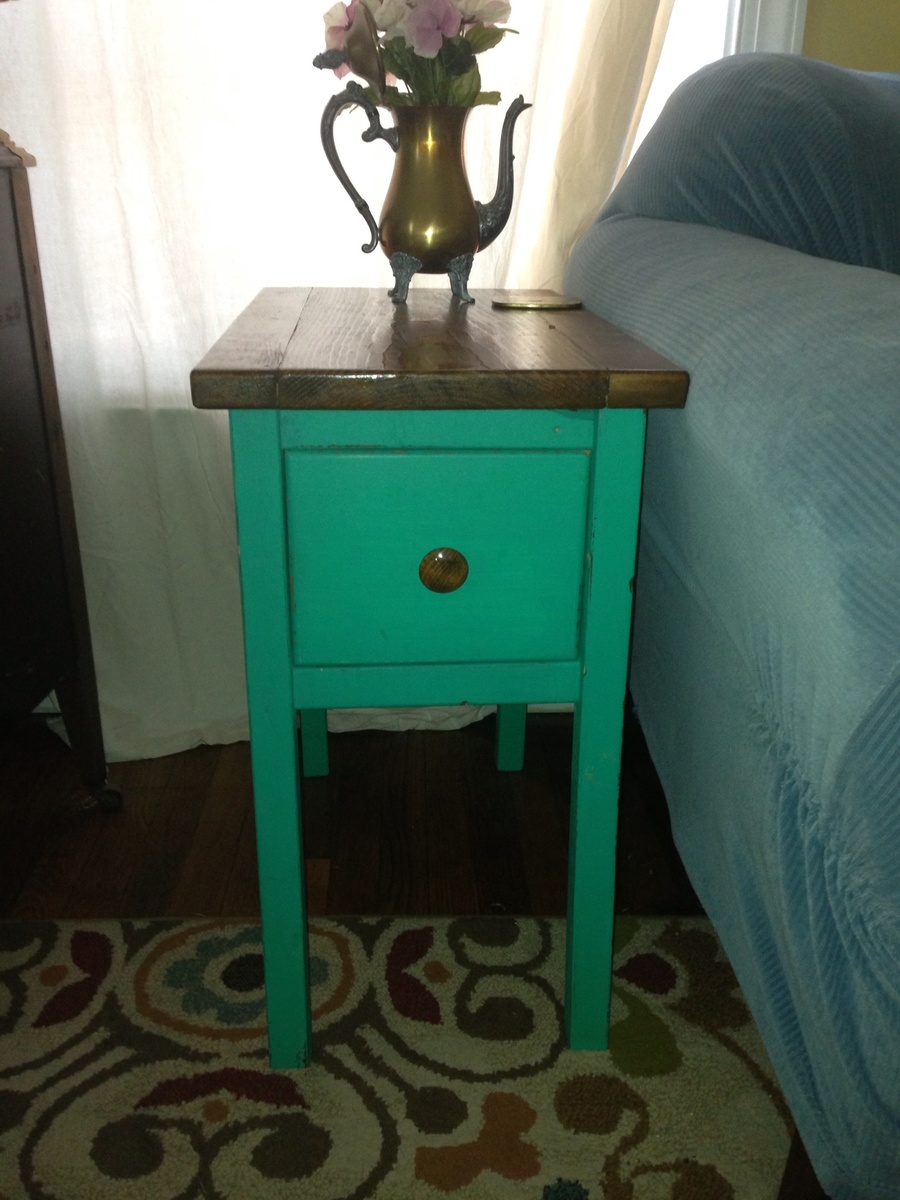
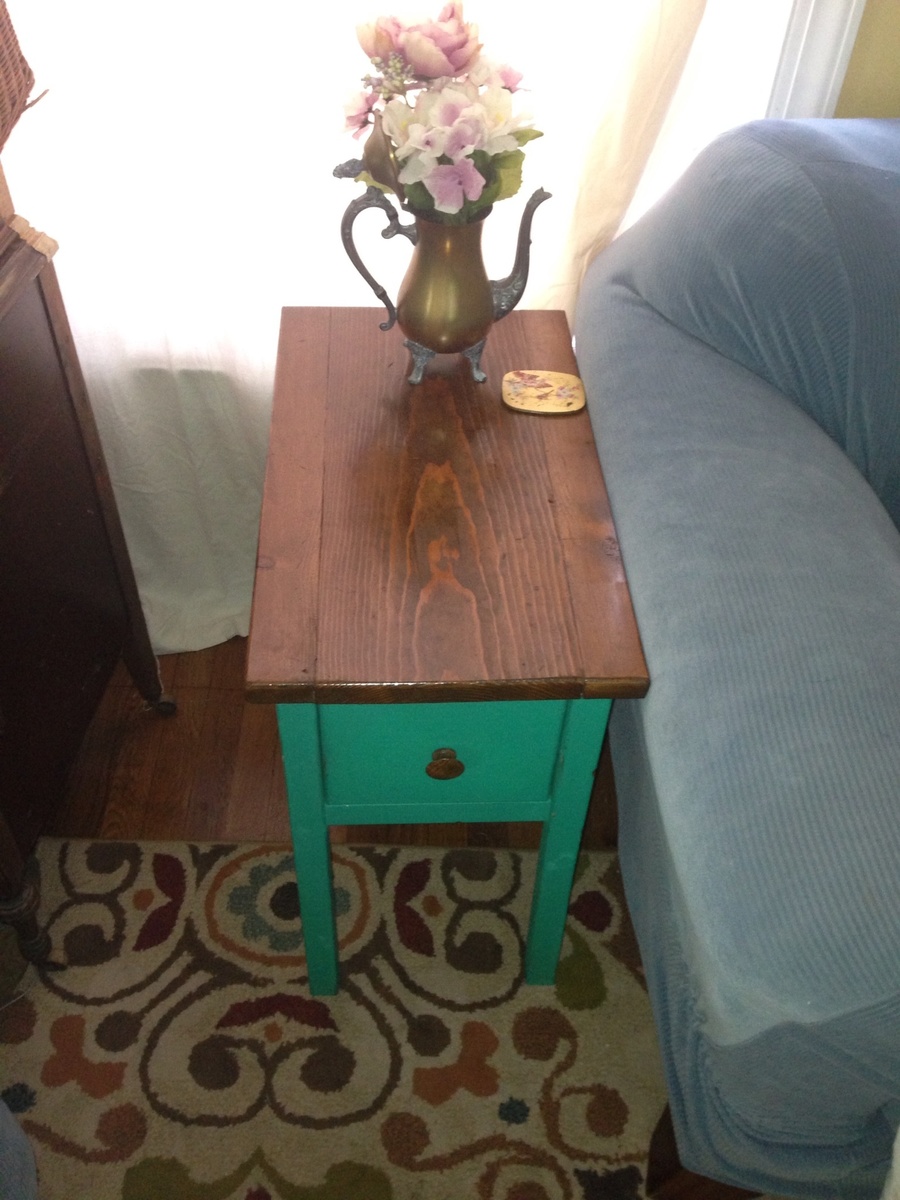
My kids (11 & 12) made these in about 3 days. We have to work during my 2 yr olds nap time so I would say 6-8 hrs total. We always have a lot of scrap wood lying around so this was a great way to use it up. Unfortunately, sometimes when using scrap wood, it is not always the exact measurements that you need but some plan reworking and measuring as you go can fix that. On this particular plan, the only thing we changed was the thickness of the top and a little fudging on the drawer box. We also used our router to round over some or the edges and we made our own drawer tracks along the bottom w/ scrap furring strips. Honestly, those studs you see in the picture, did most of the work and since their skill set usually involves a reference to the newest video game out, I would say this was defiantly a simple project! ;-)
Wed, 08/14/2013 - 16:47
Thank you! I showed them you comment. As you can tell from their studley poses, they are not lacking in the ego department ;-)
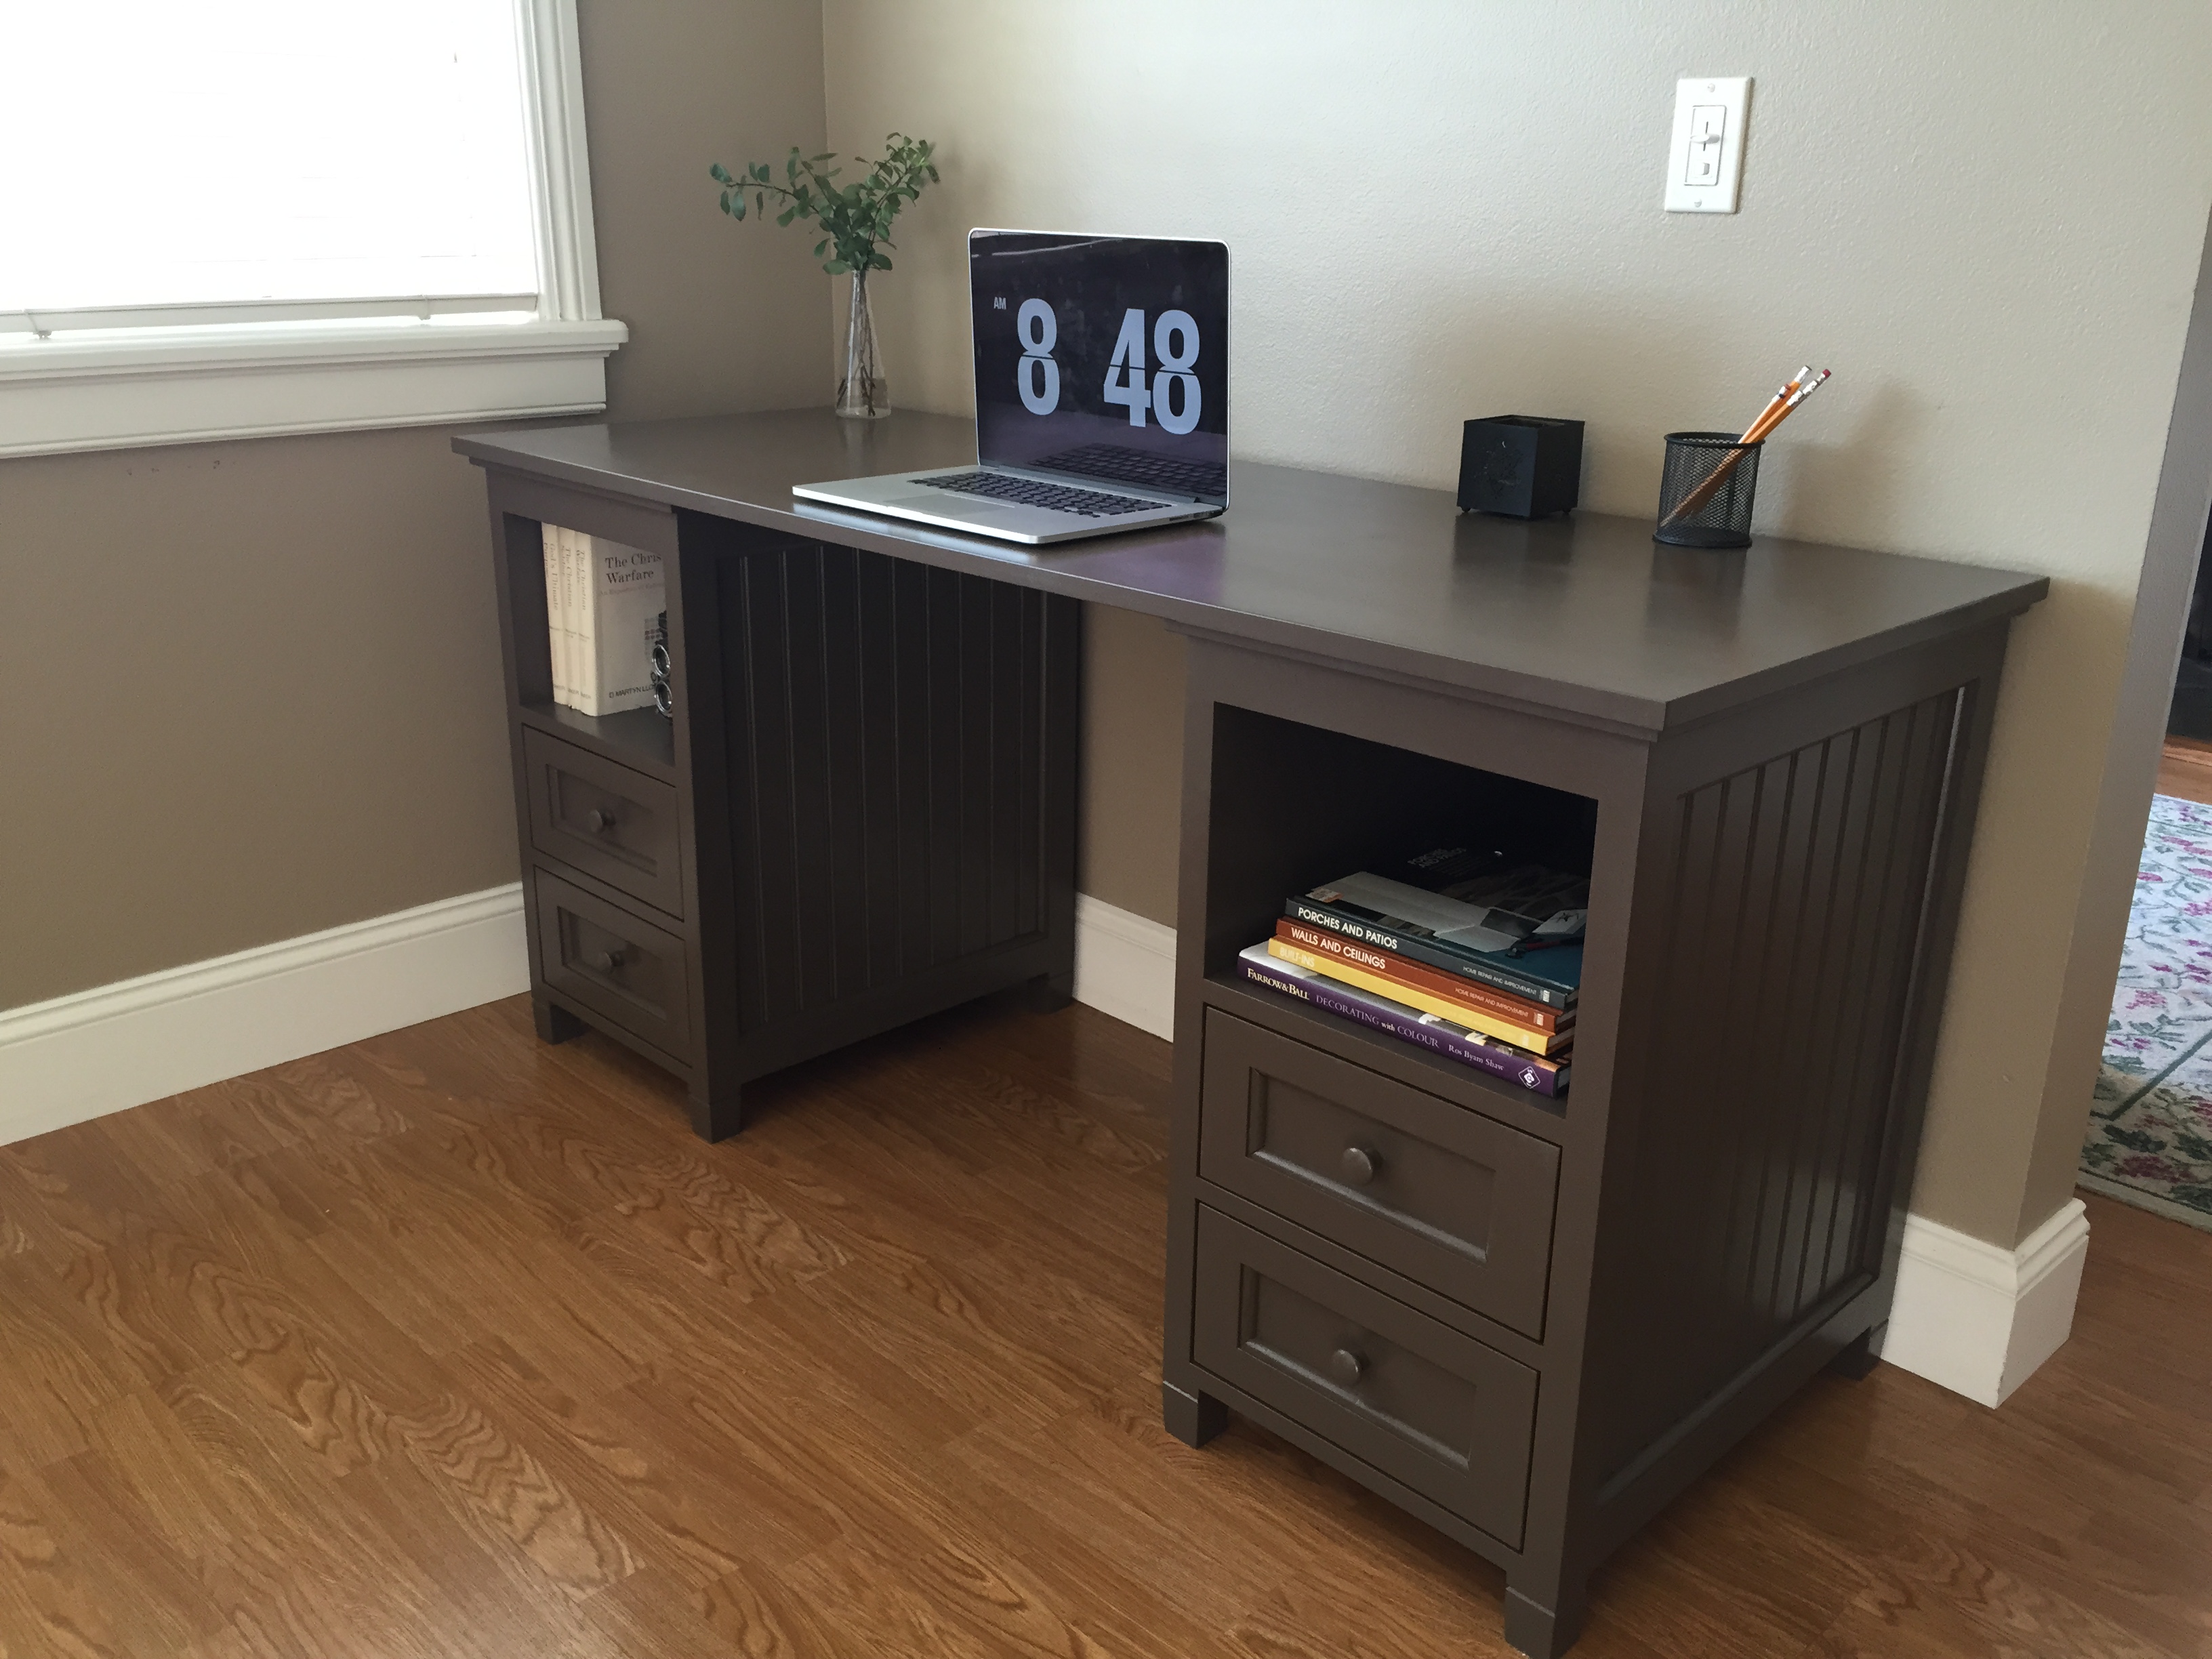
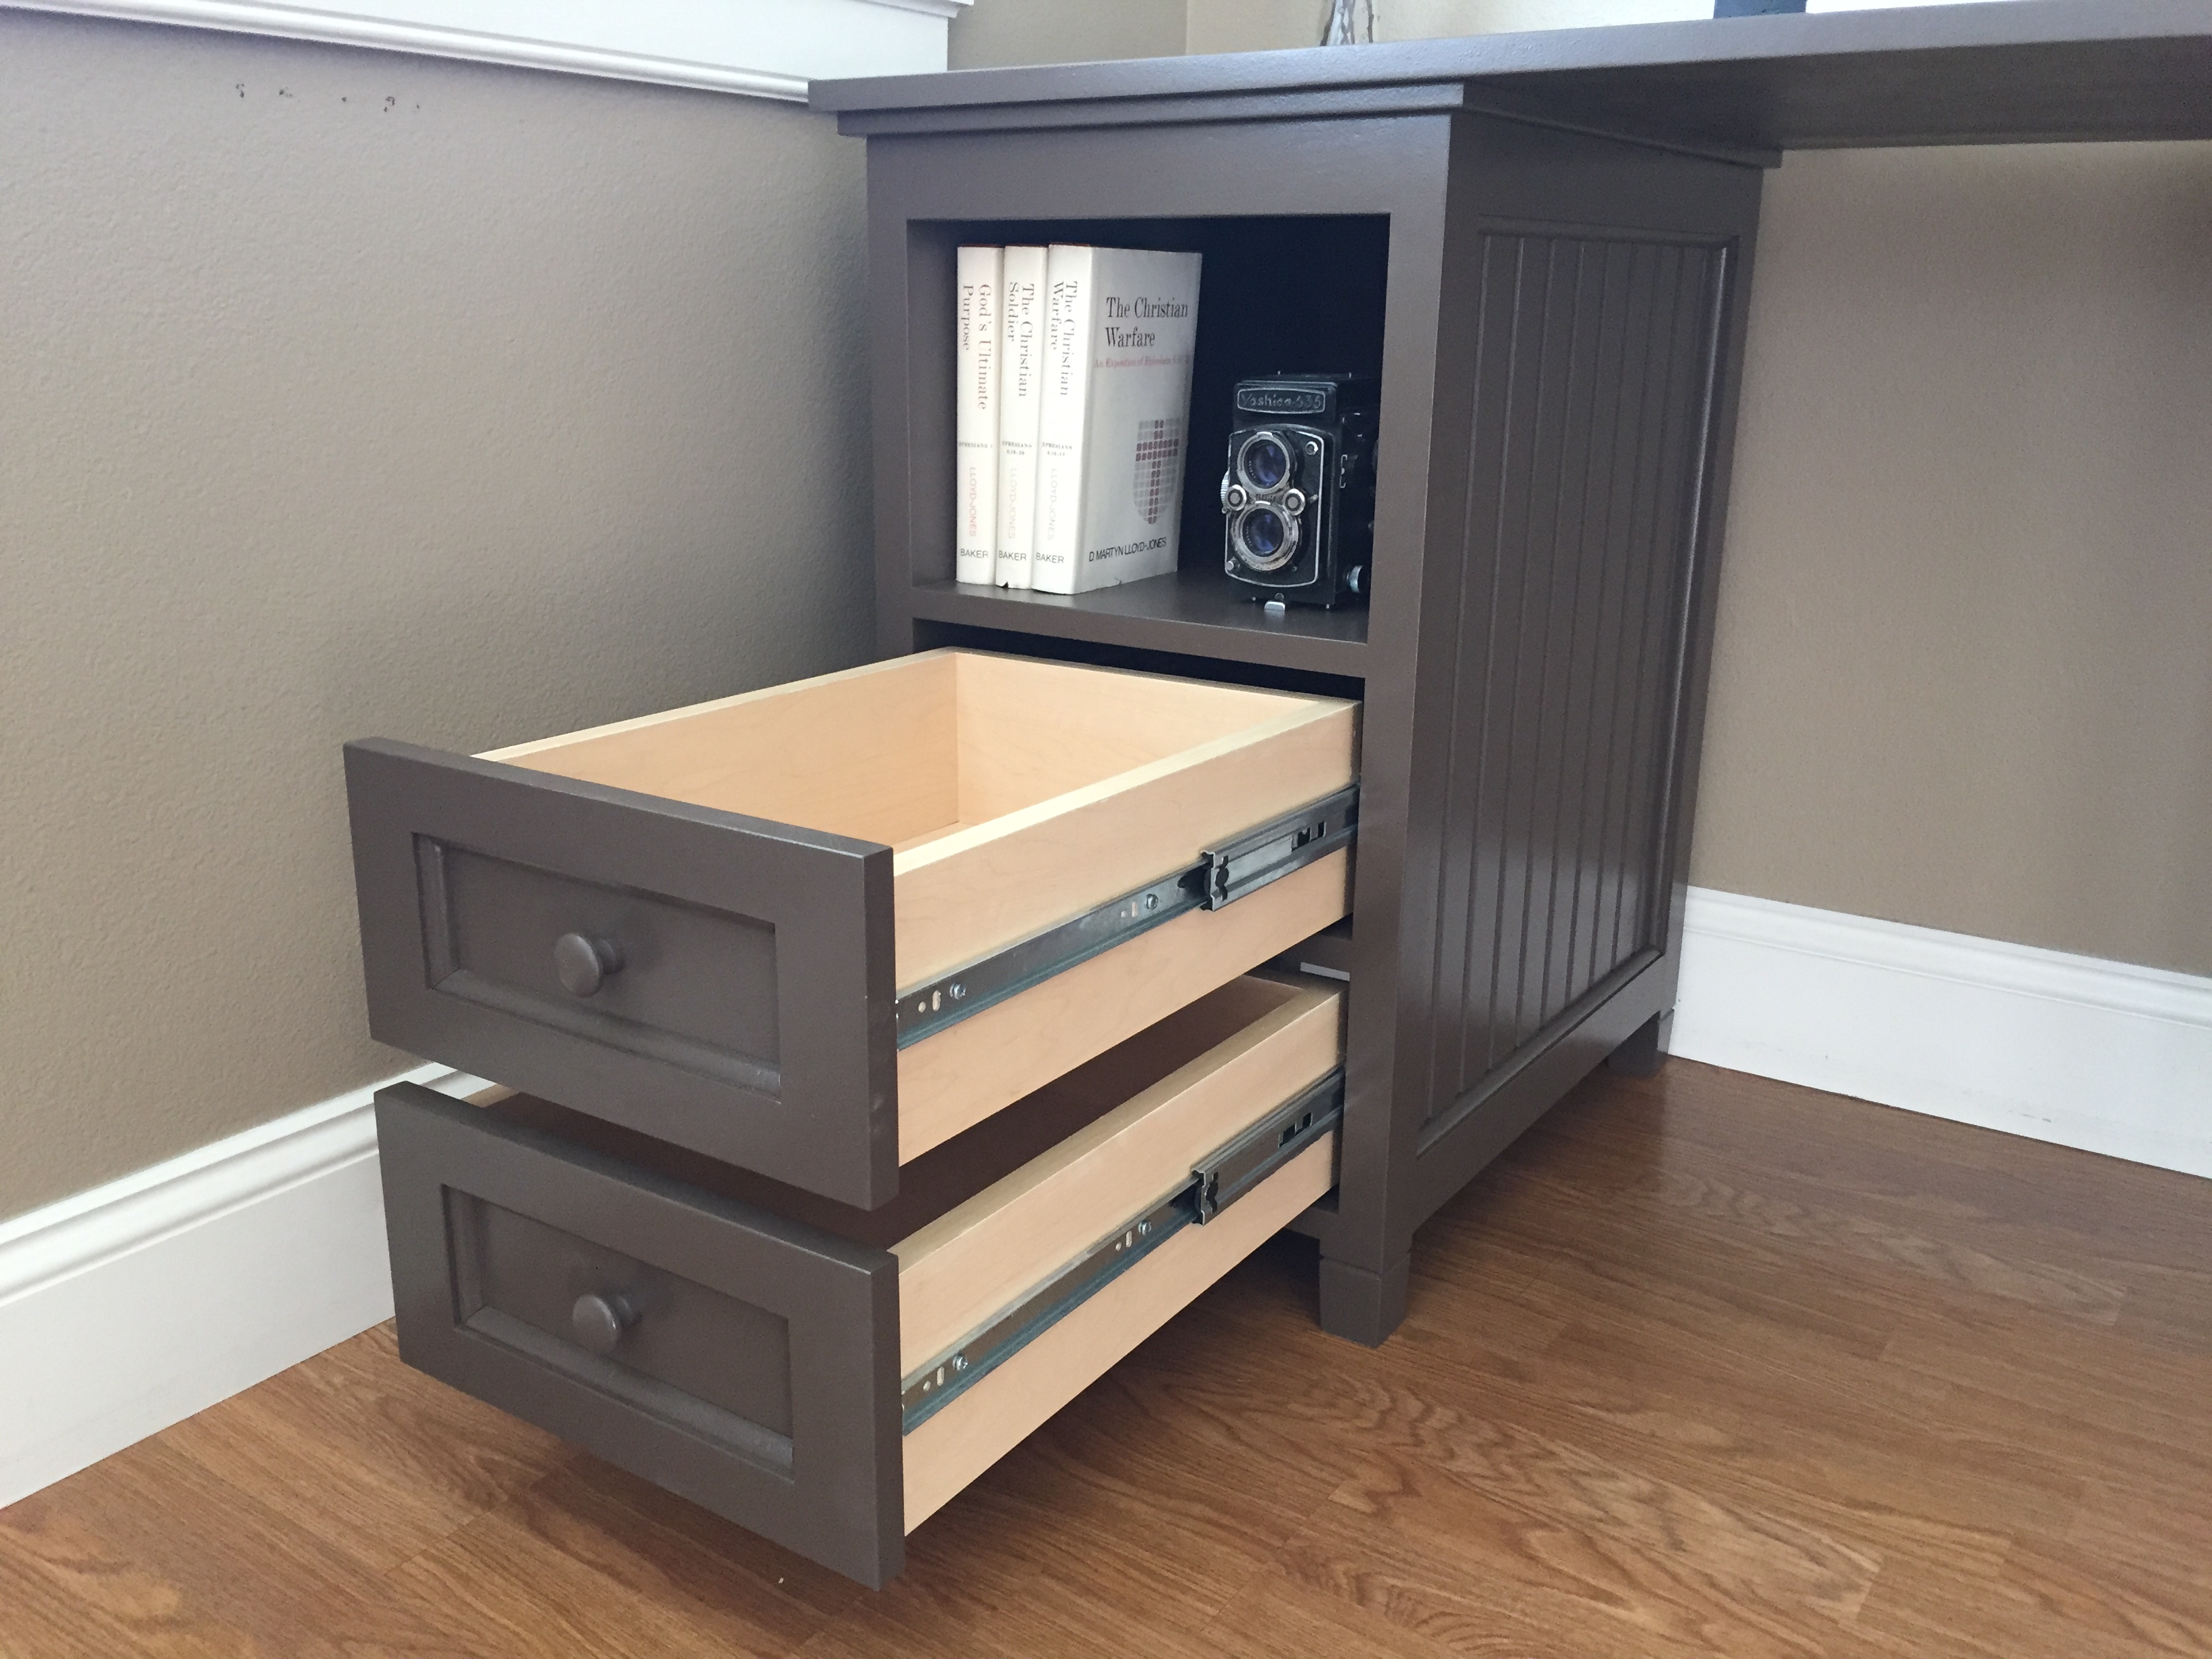
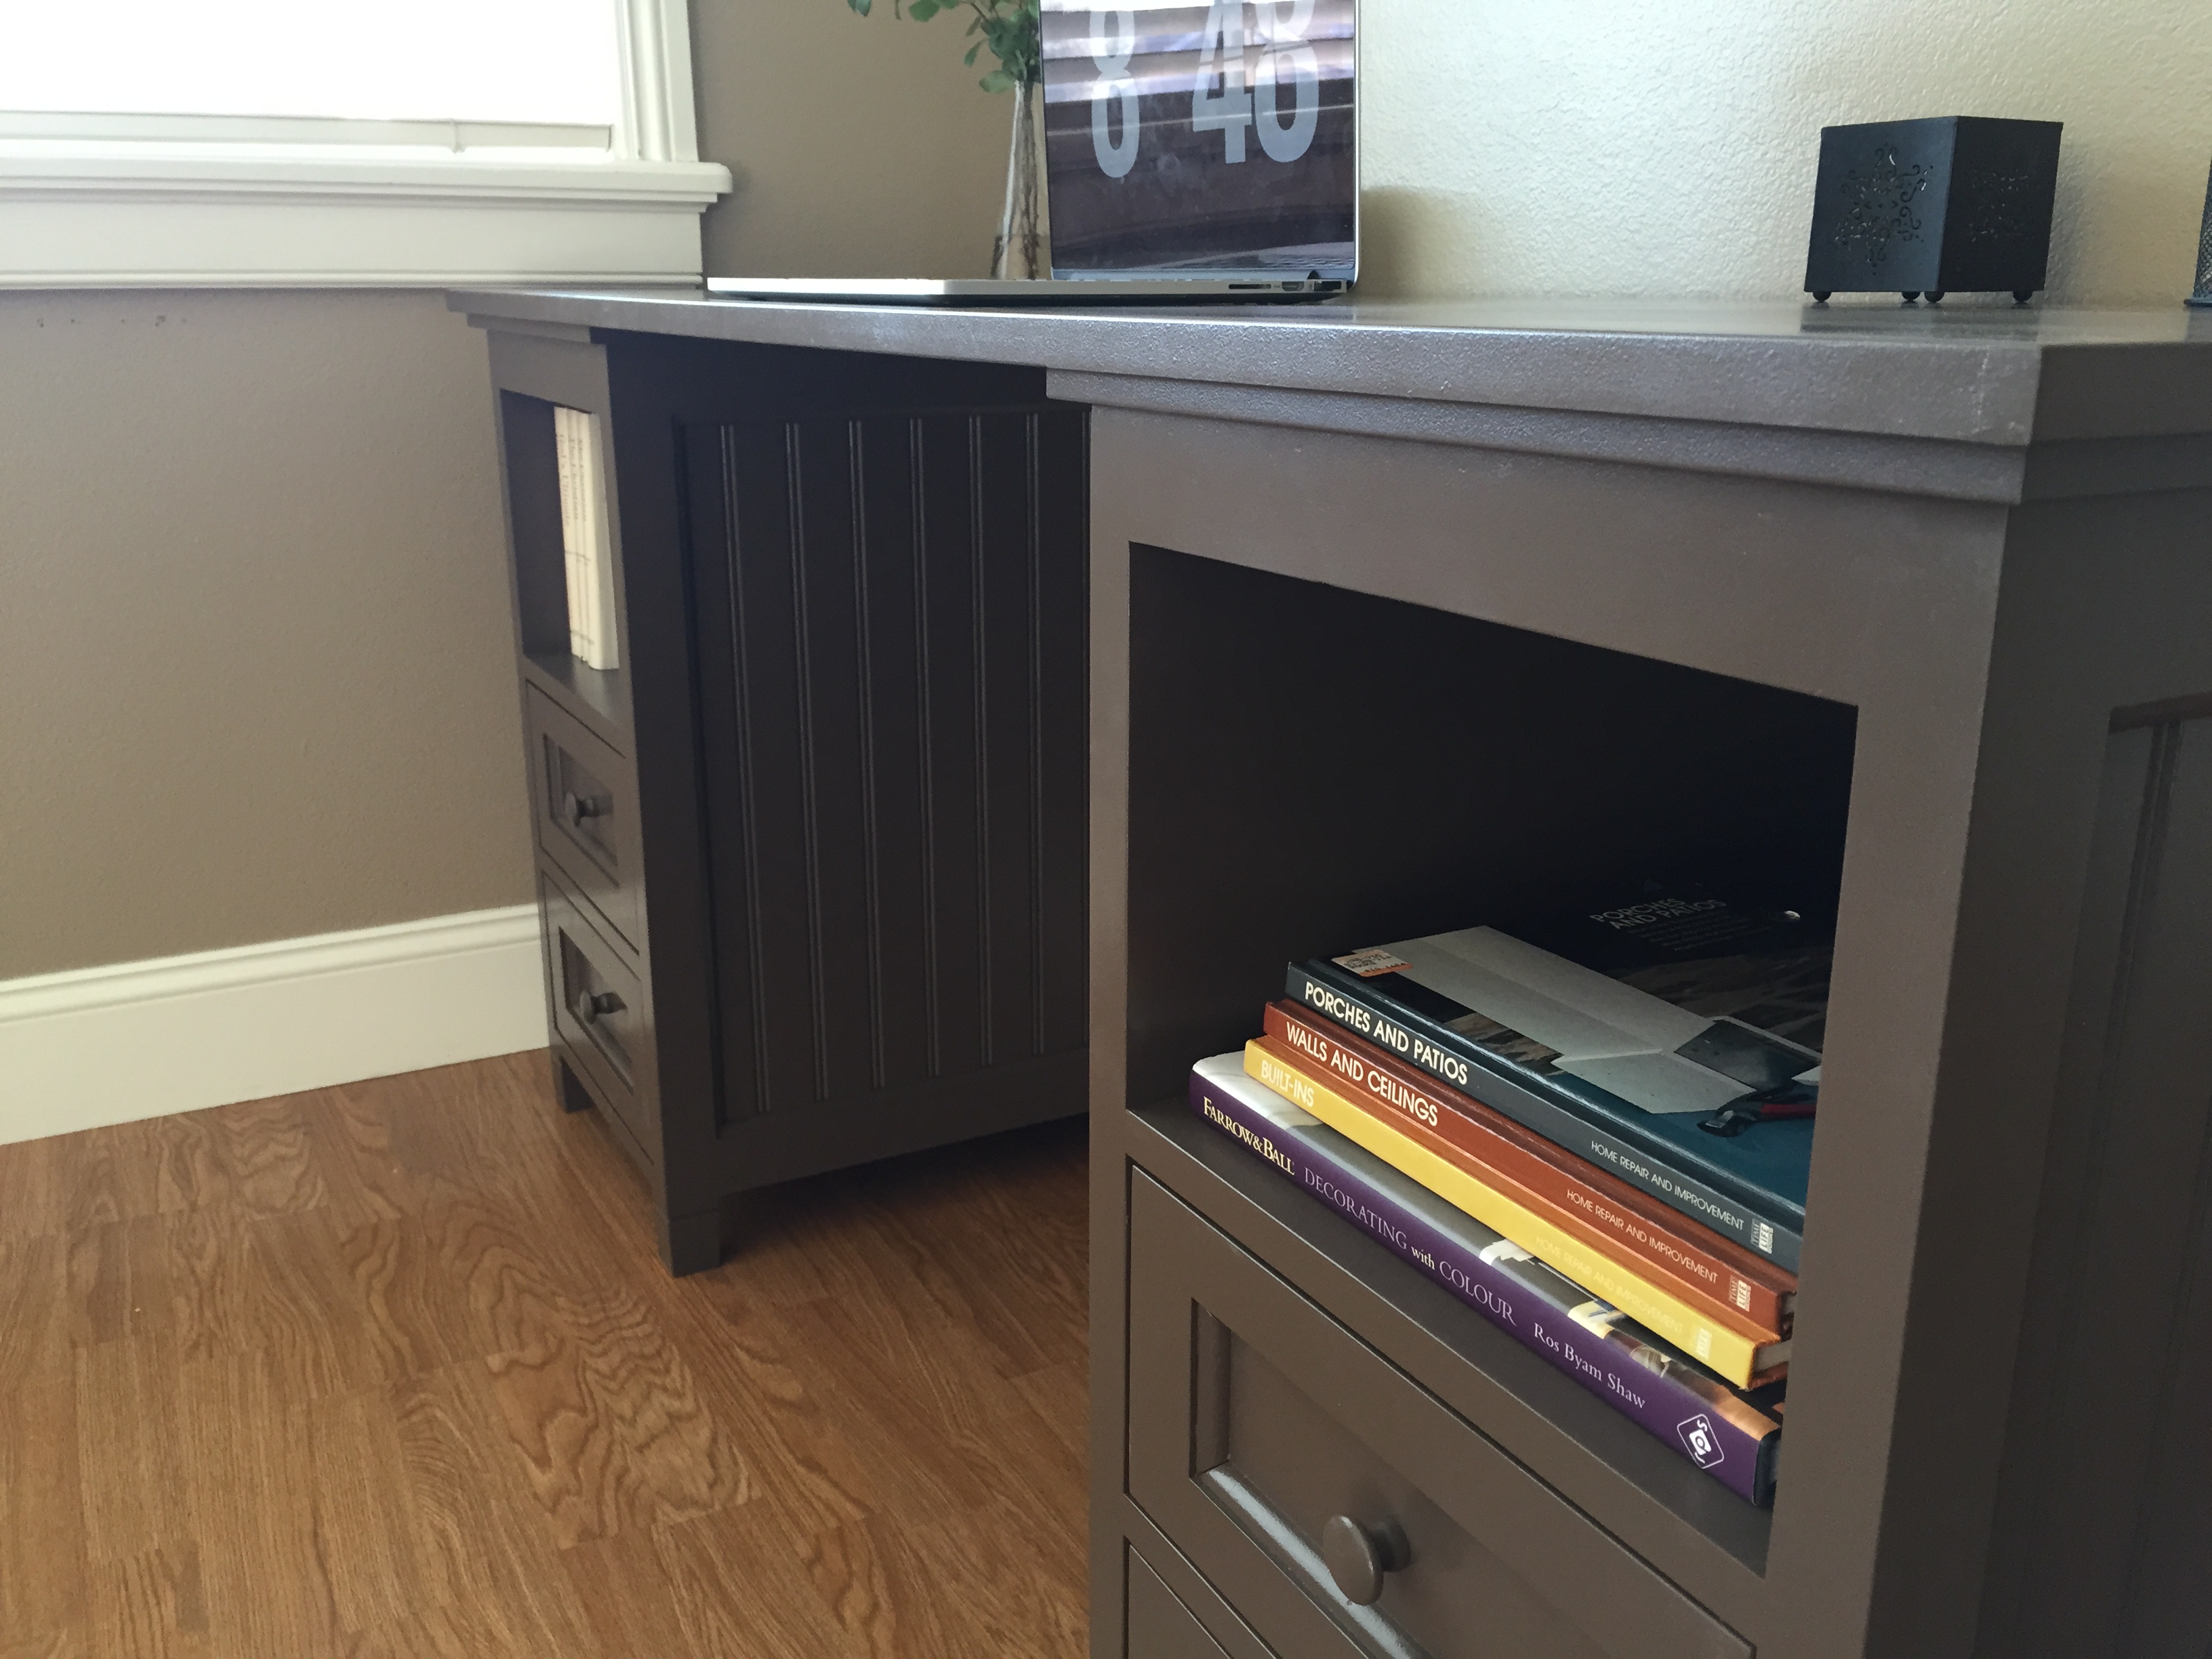
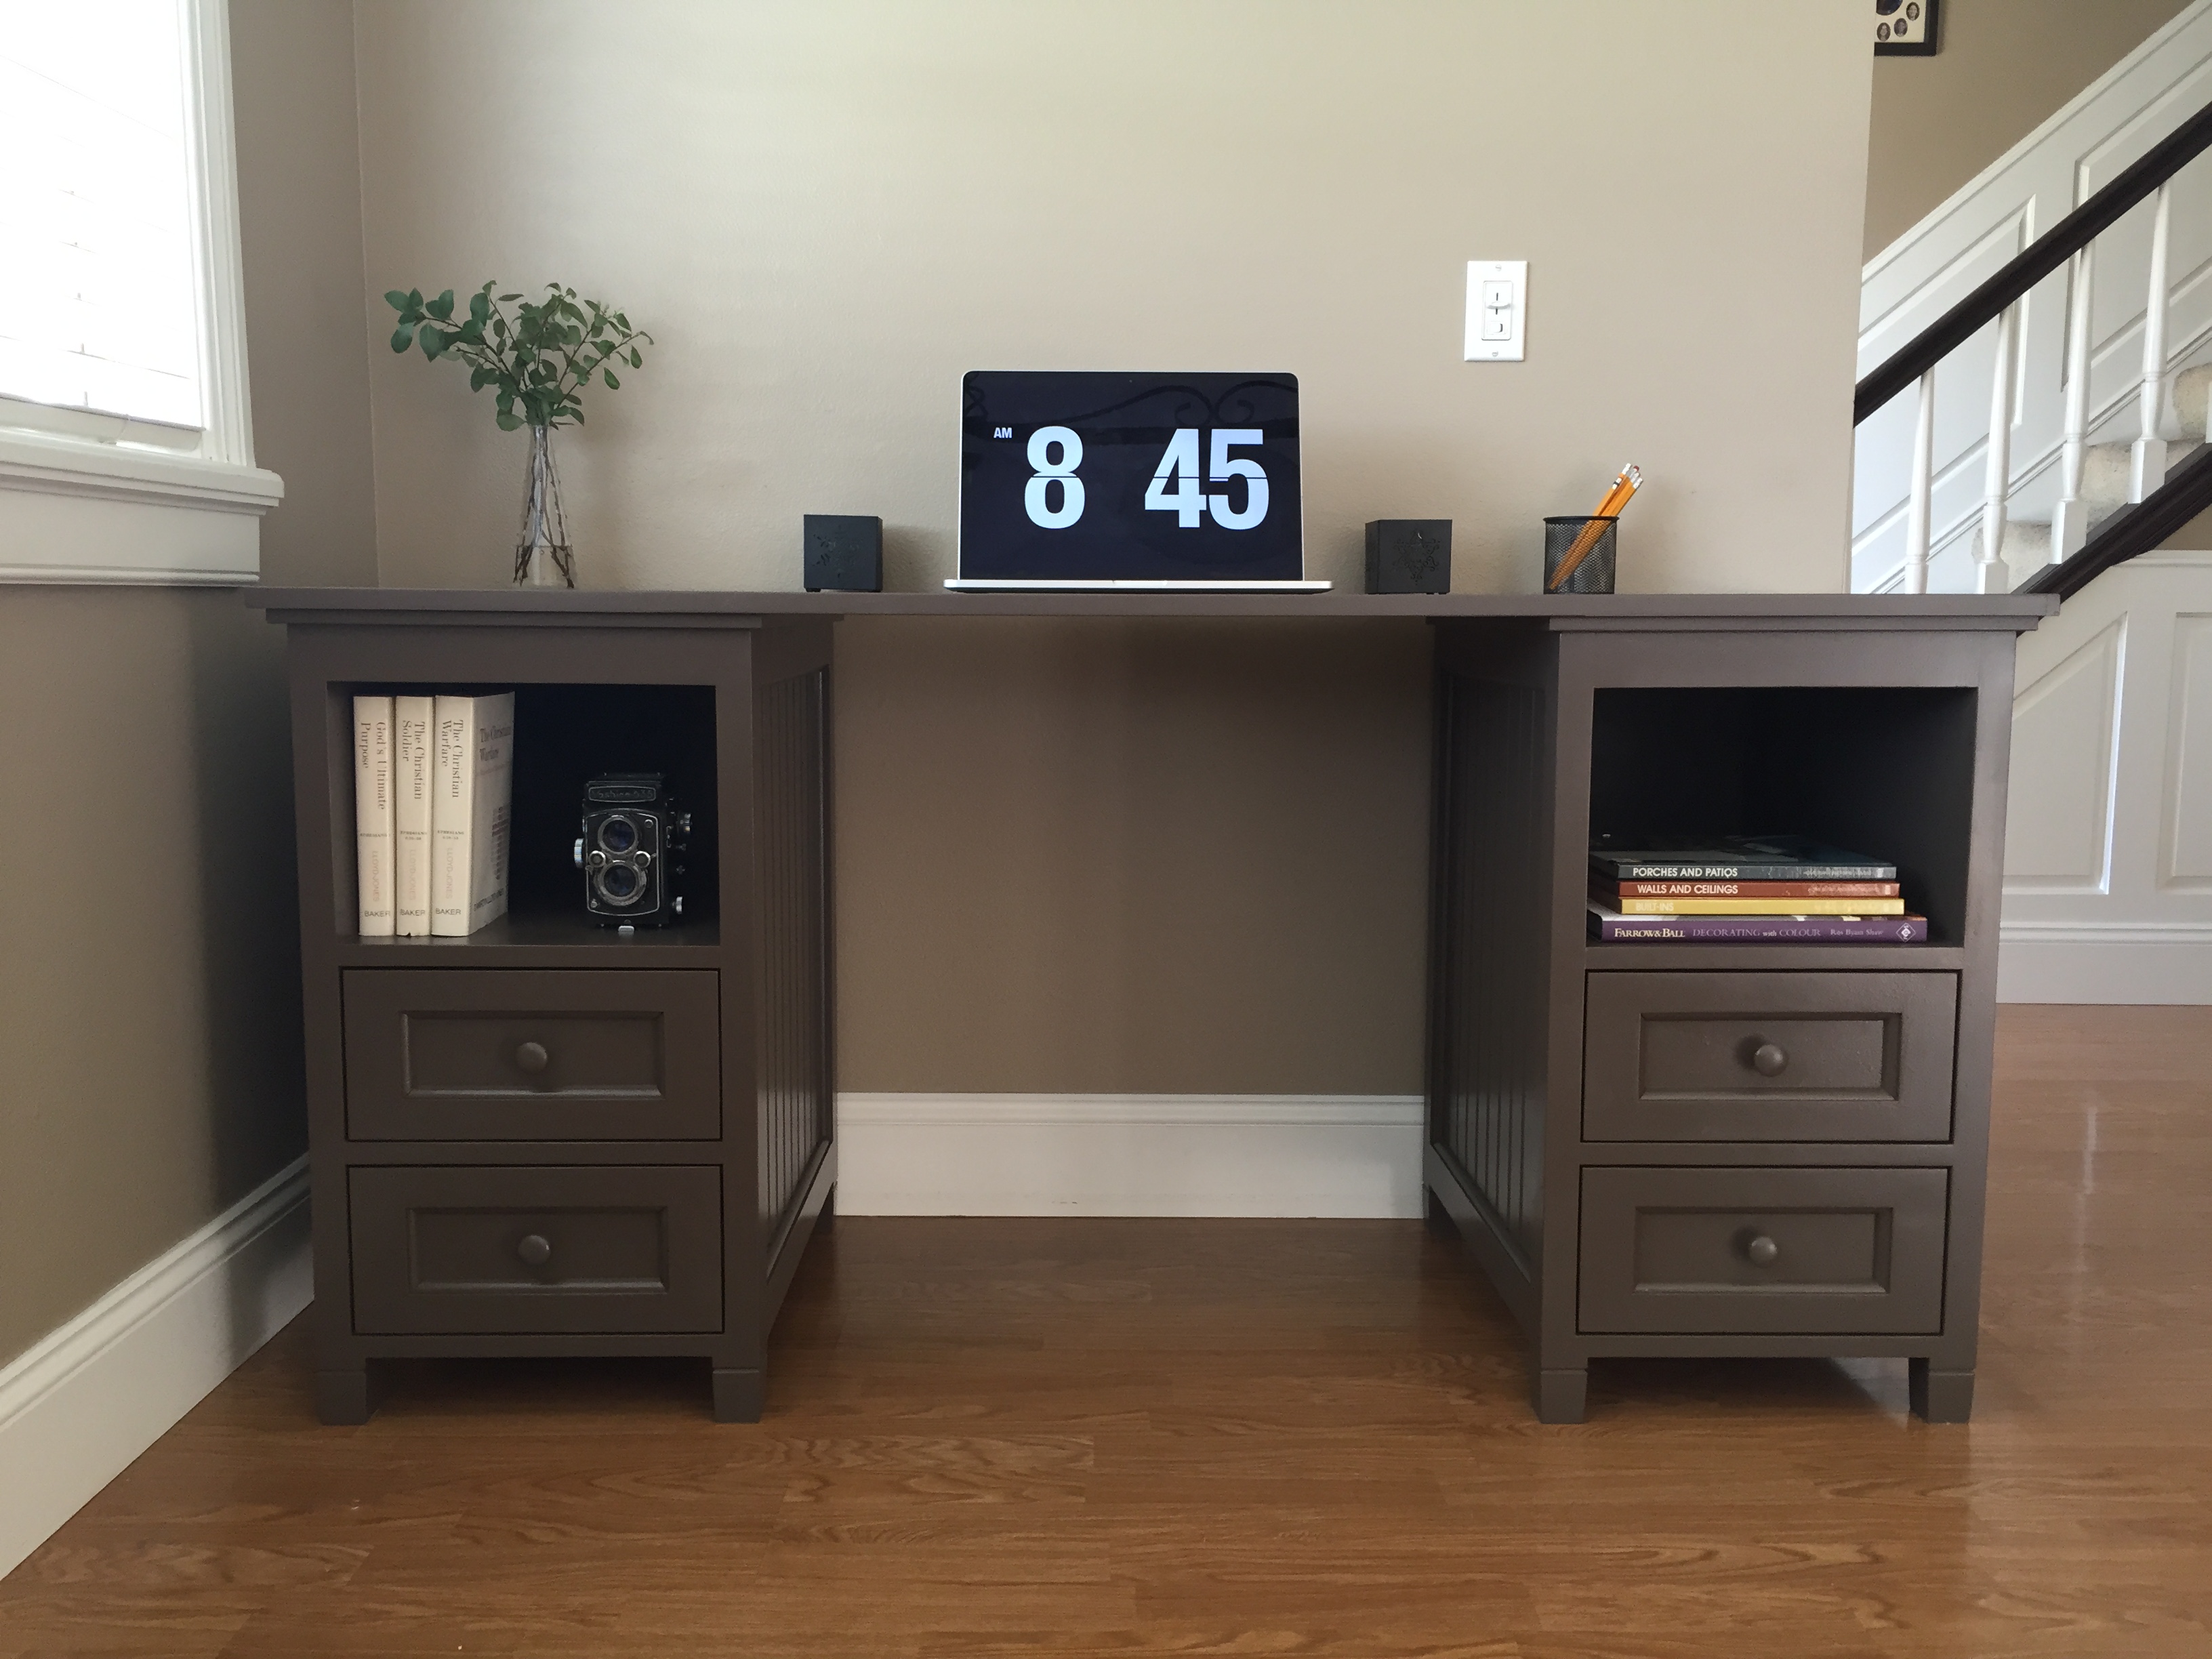
Here is a desk I recently built. It is a Pottery Barn piece. It features full extension drawers slides and simulated maple melamine drawer interiors.
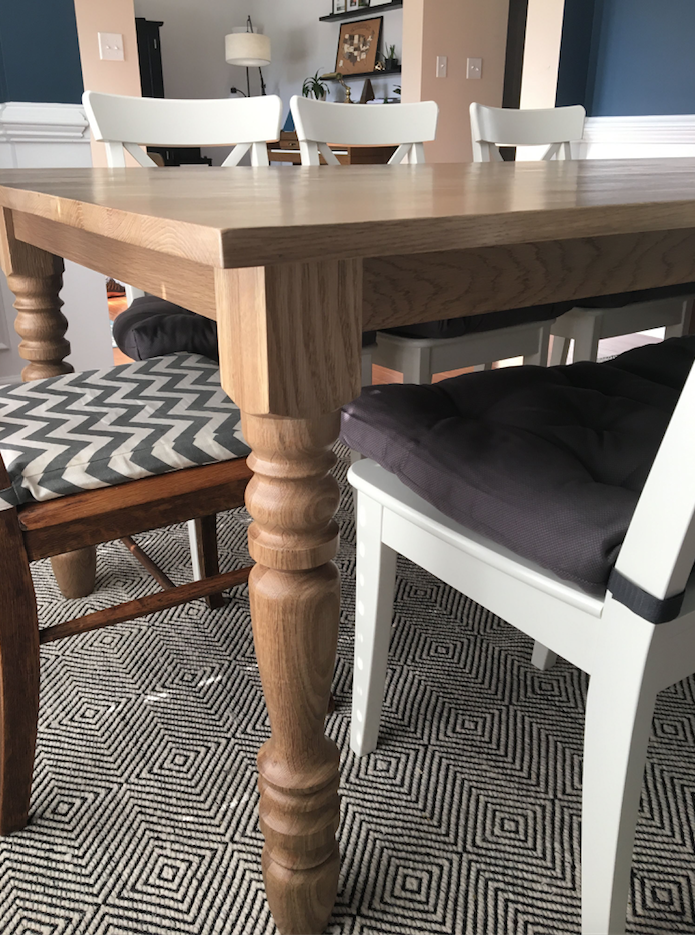
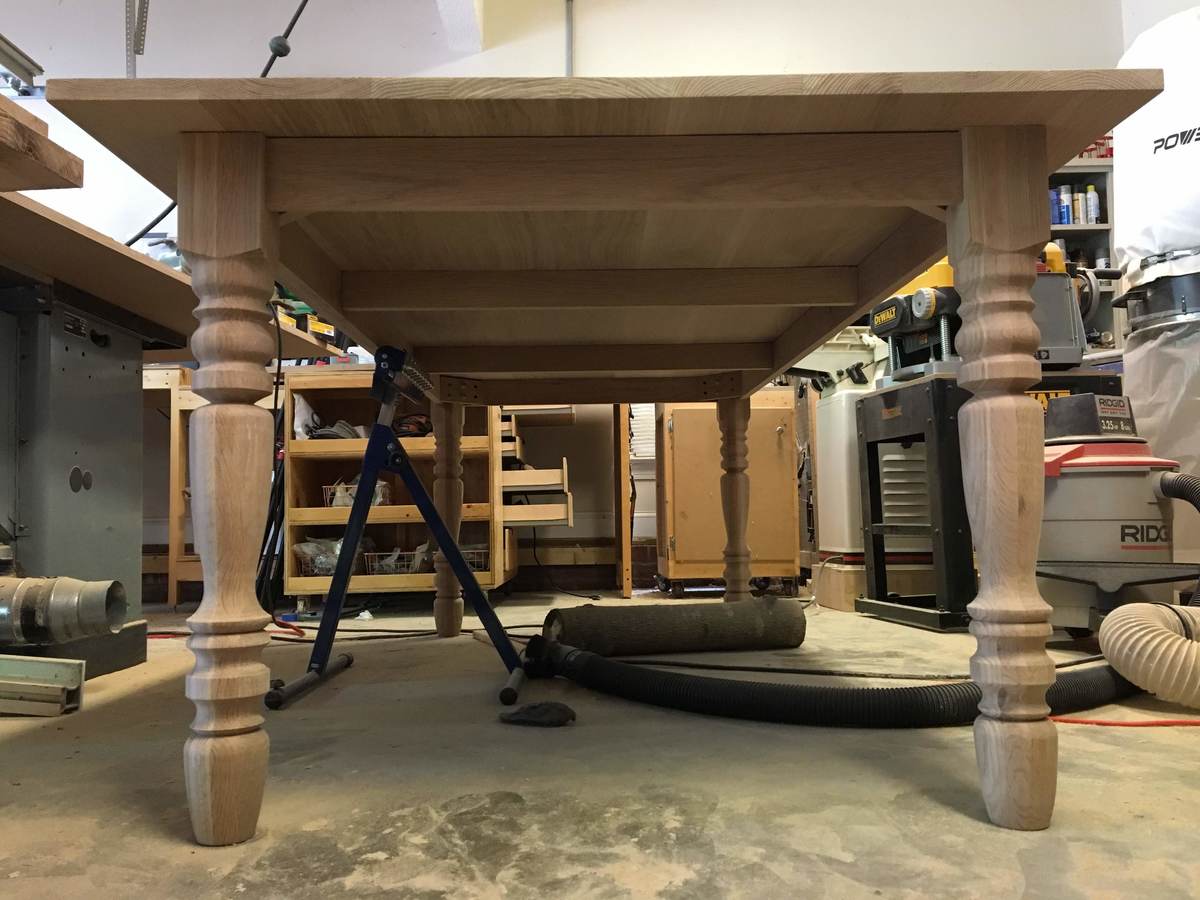
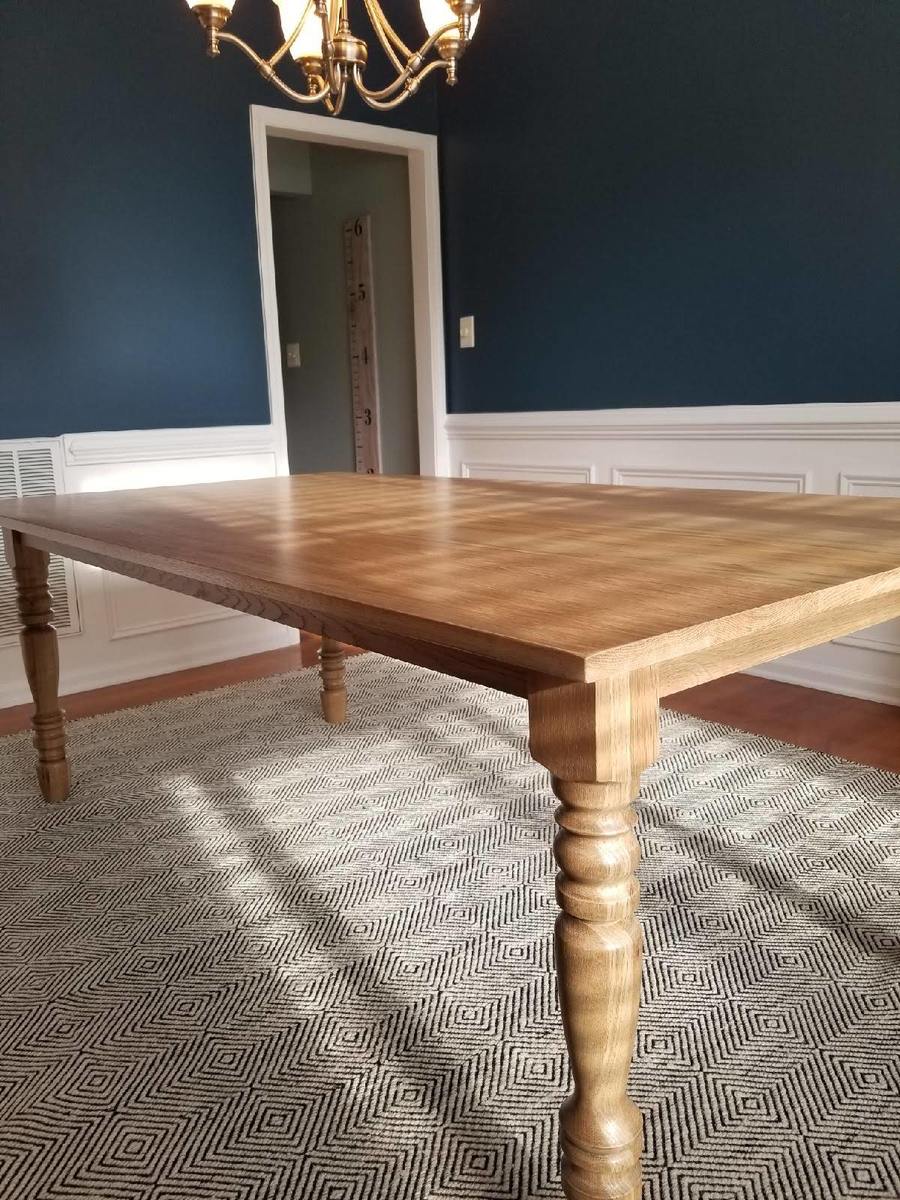
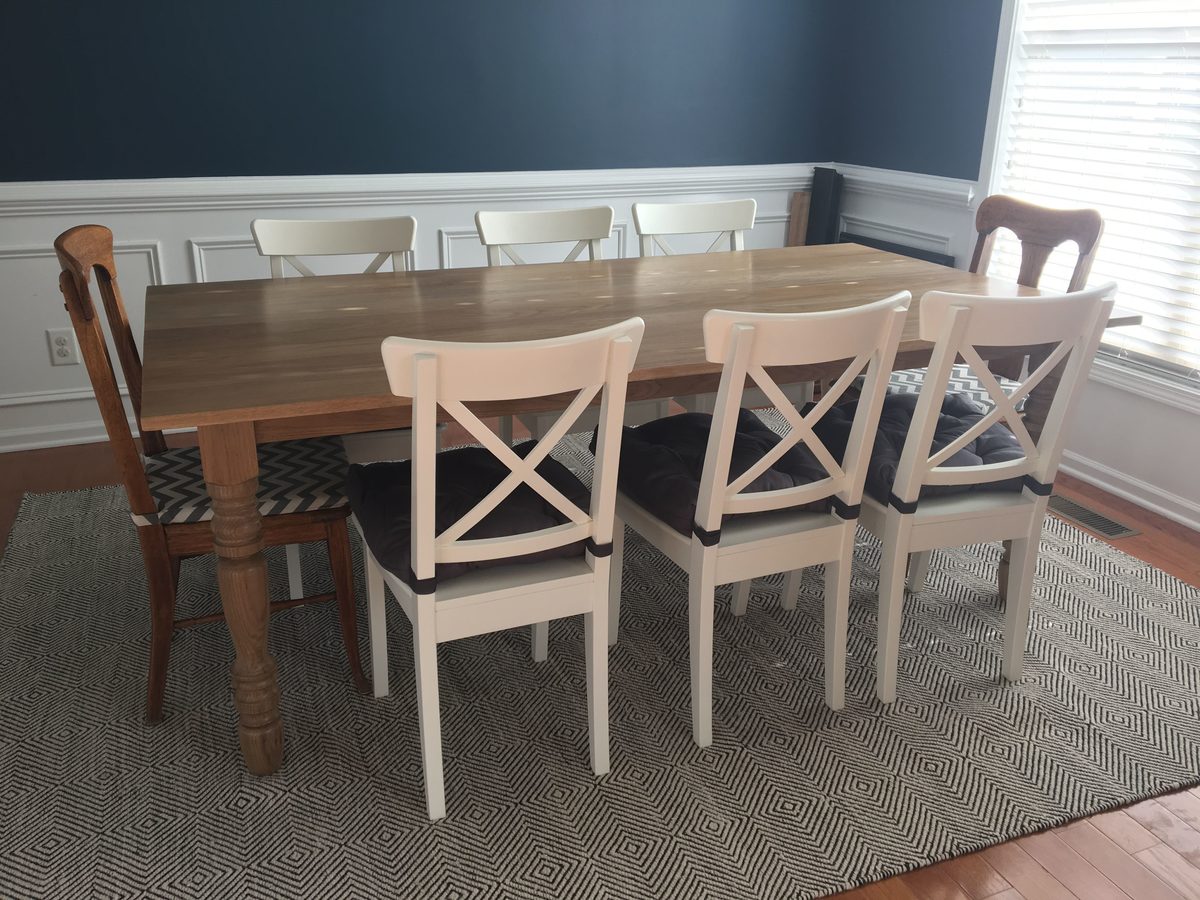
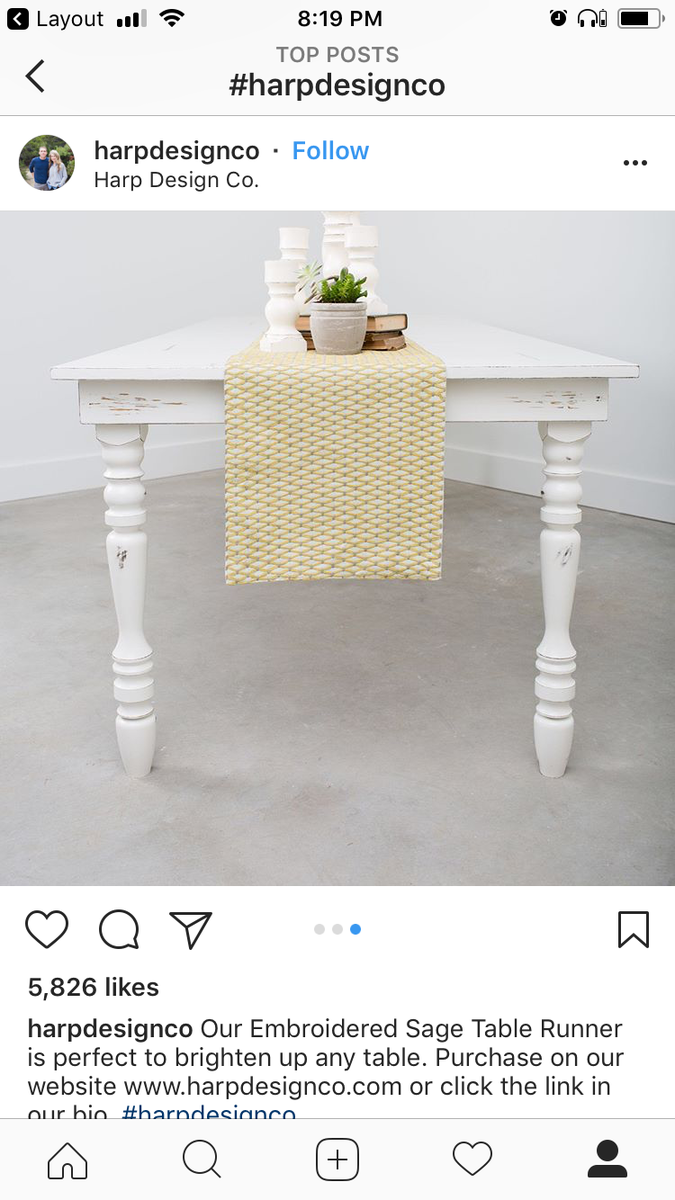
A friend of mine loves the tables by Harp Design Co. but she wanted changes made to it such as the apron being inset, removable legs, oak wood, specific finish, etc.
She hired me to make her one and it's been an exciting build! I built it from a pile of raw wood, turned the legs, etc.
My favorite thing to do is to inpsire others to reach beyond what they're comfortable doing - that's why I post about my projects through my website so other people will feel like they can do it too! https://theprojectlady.com/how-to-build-a-harp-design-table/
I'd rate the level of build as intermediate, but really anyone can make it easier or harder. The most challenging part is the legs - do something more simple, hire someone to make you some, order them online, etc. The posts I created for this table are in-depth but don't let that intimidate you!
Happy Building Friends!
Used a light stain to feature the cedar.
by Lawrence and Pat!
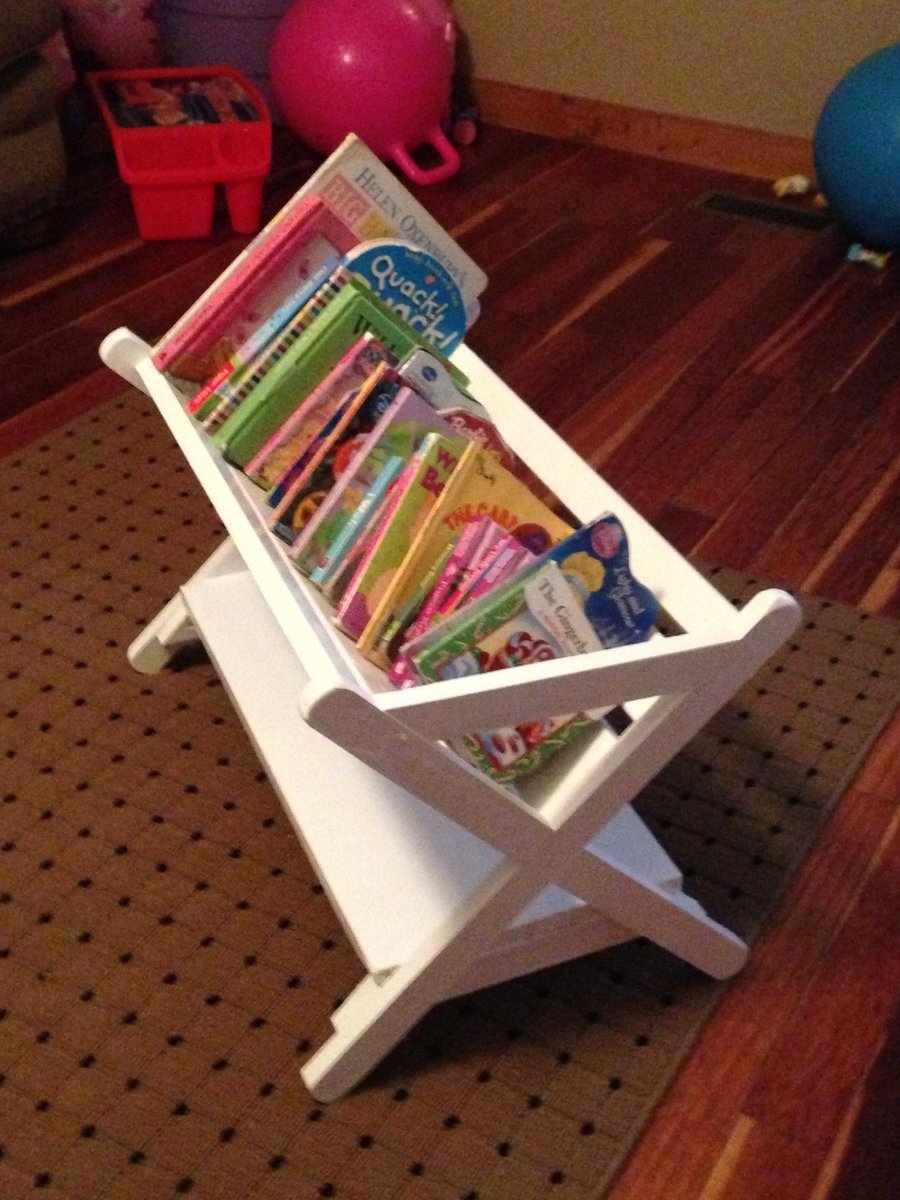
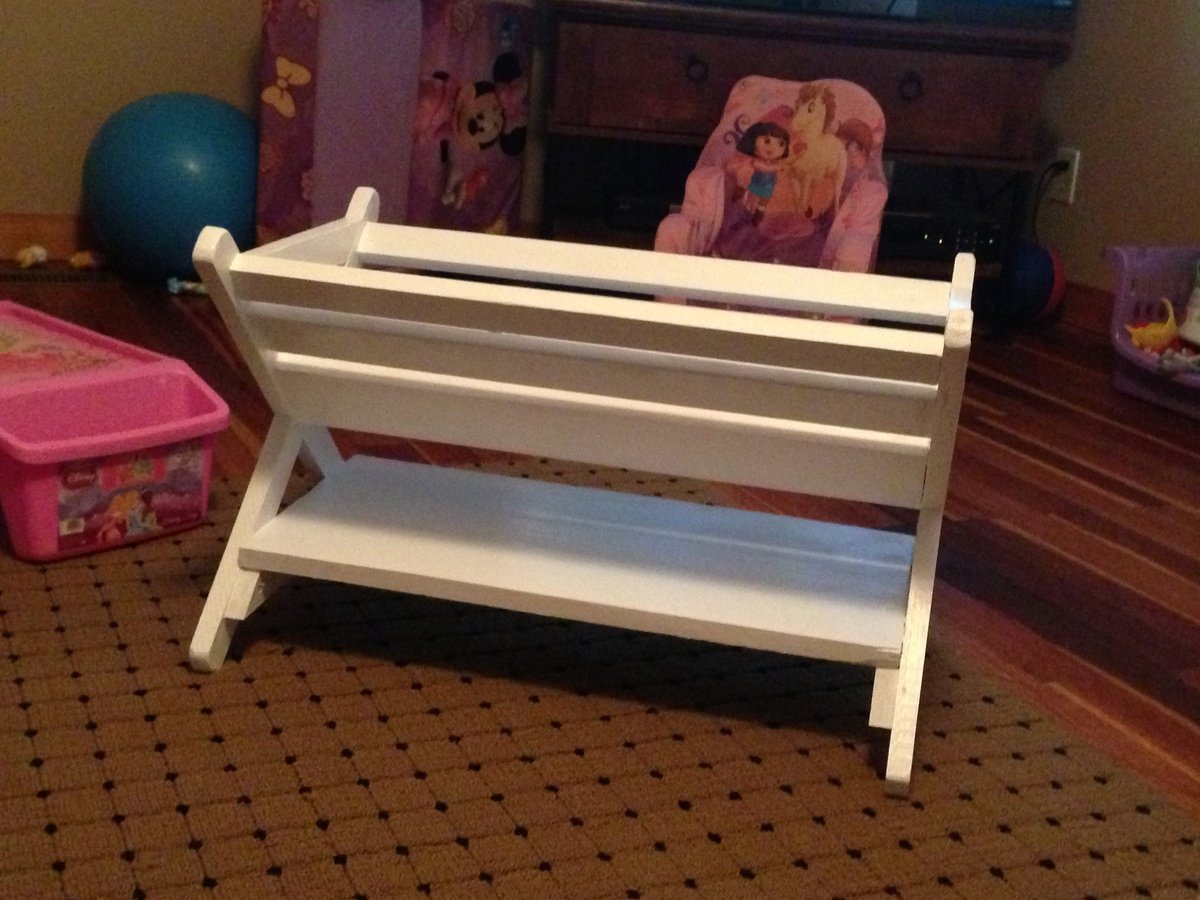
SImple and easy to make. I had leftover wood so all I had to buy was 1x2"s. I'd say the total cost was $15. It's sturdy and holds a lot of books.


Loved building this :) think it came out great. Only thing is i wish i had the screws ana talks abt bc the boards split over and over :( what kind of screws do u use ana? Also couldnt find 2 3/4 deck screws, only 2 1/4"

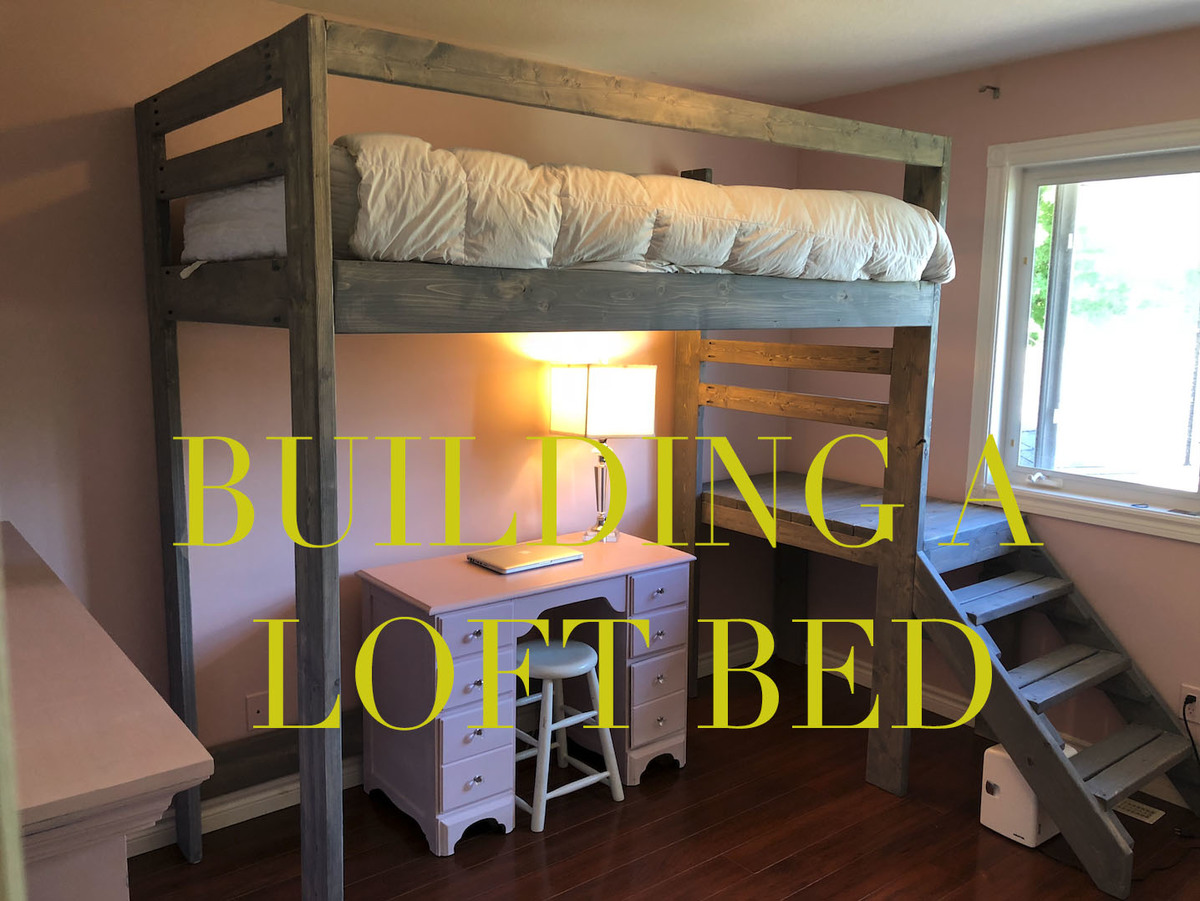
This is my youtube video of me building the loft bed.
Instagram: @gardners_garage
Thanks Ana for your plans. I used them but made just minor adjustments to the height to suit my daughter.
Having your website defenitly made things easier, from picking up the wood to the cuts!
Thanks!

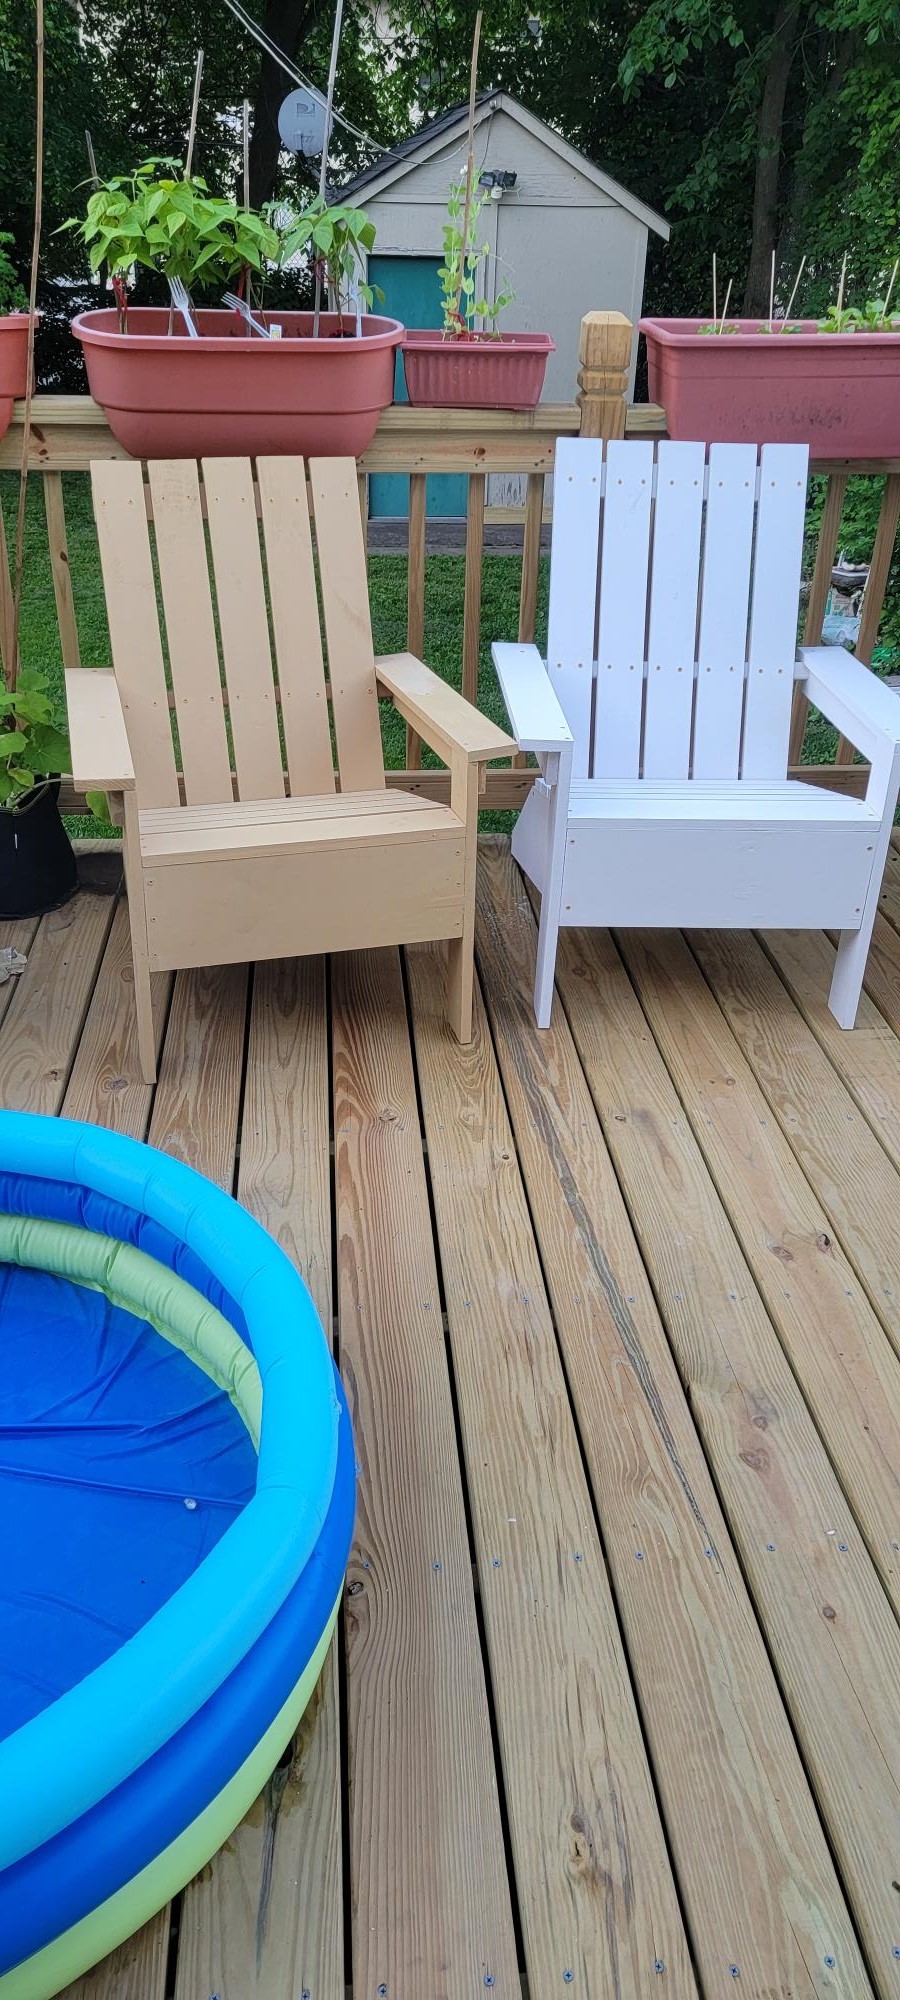
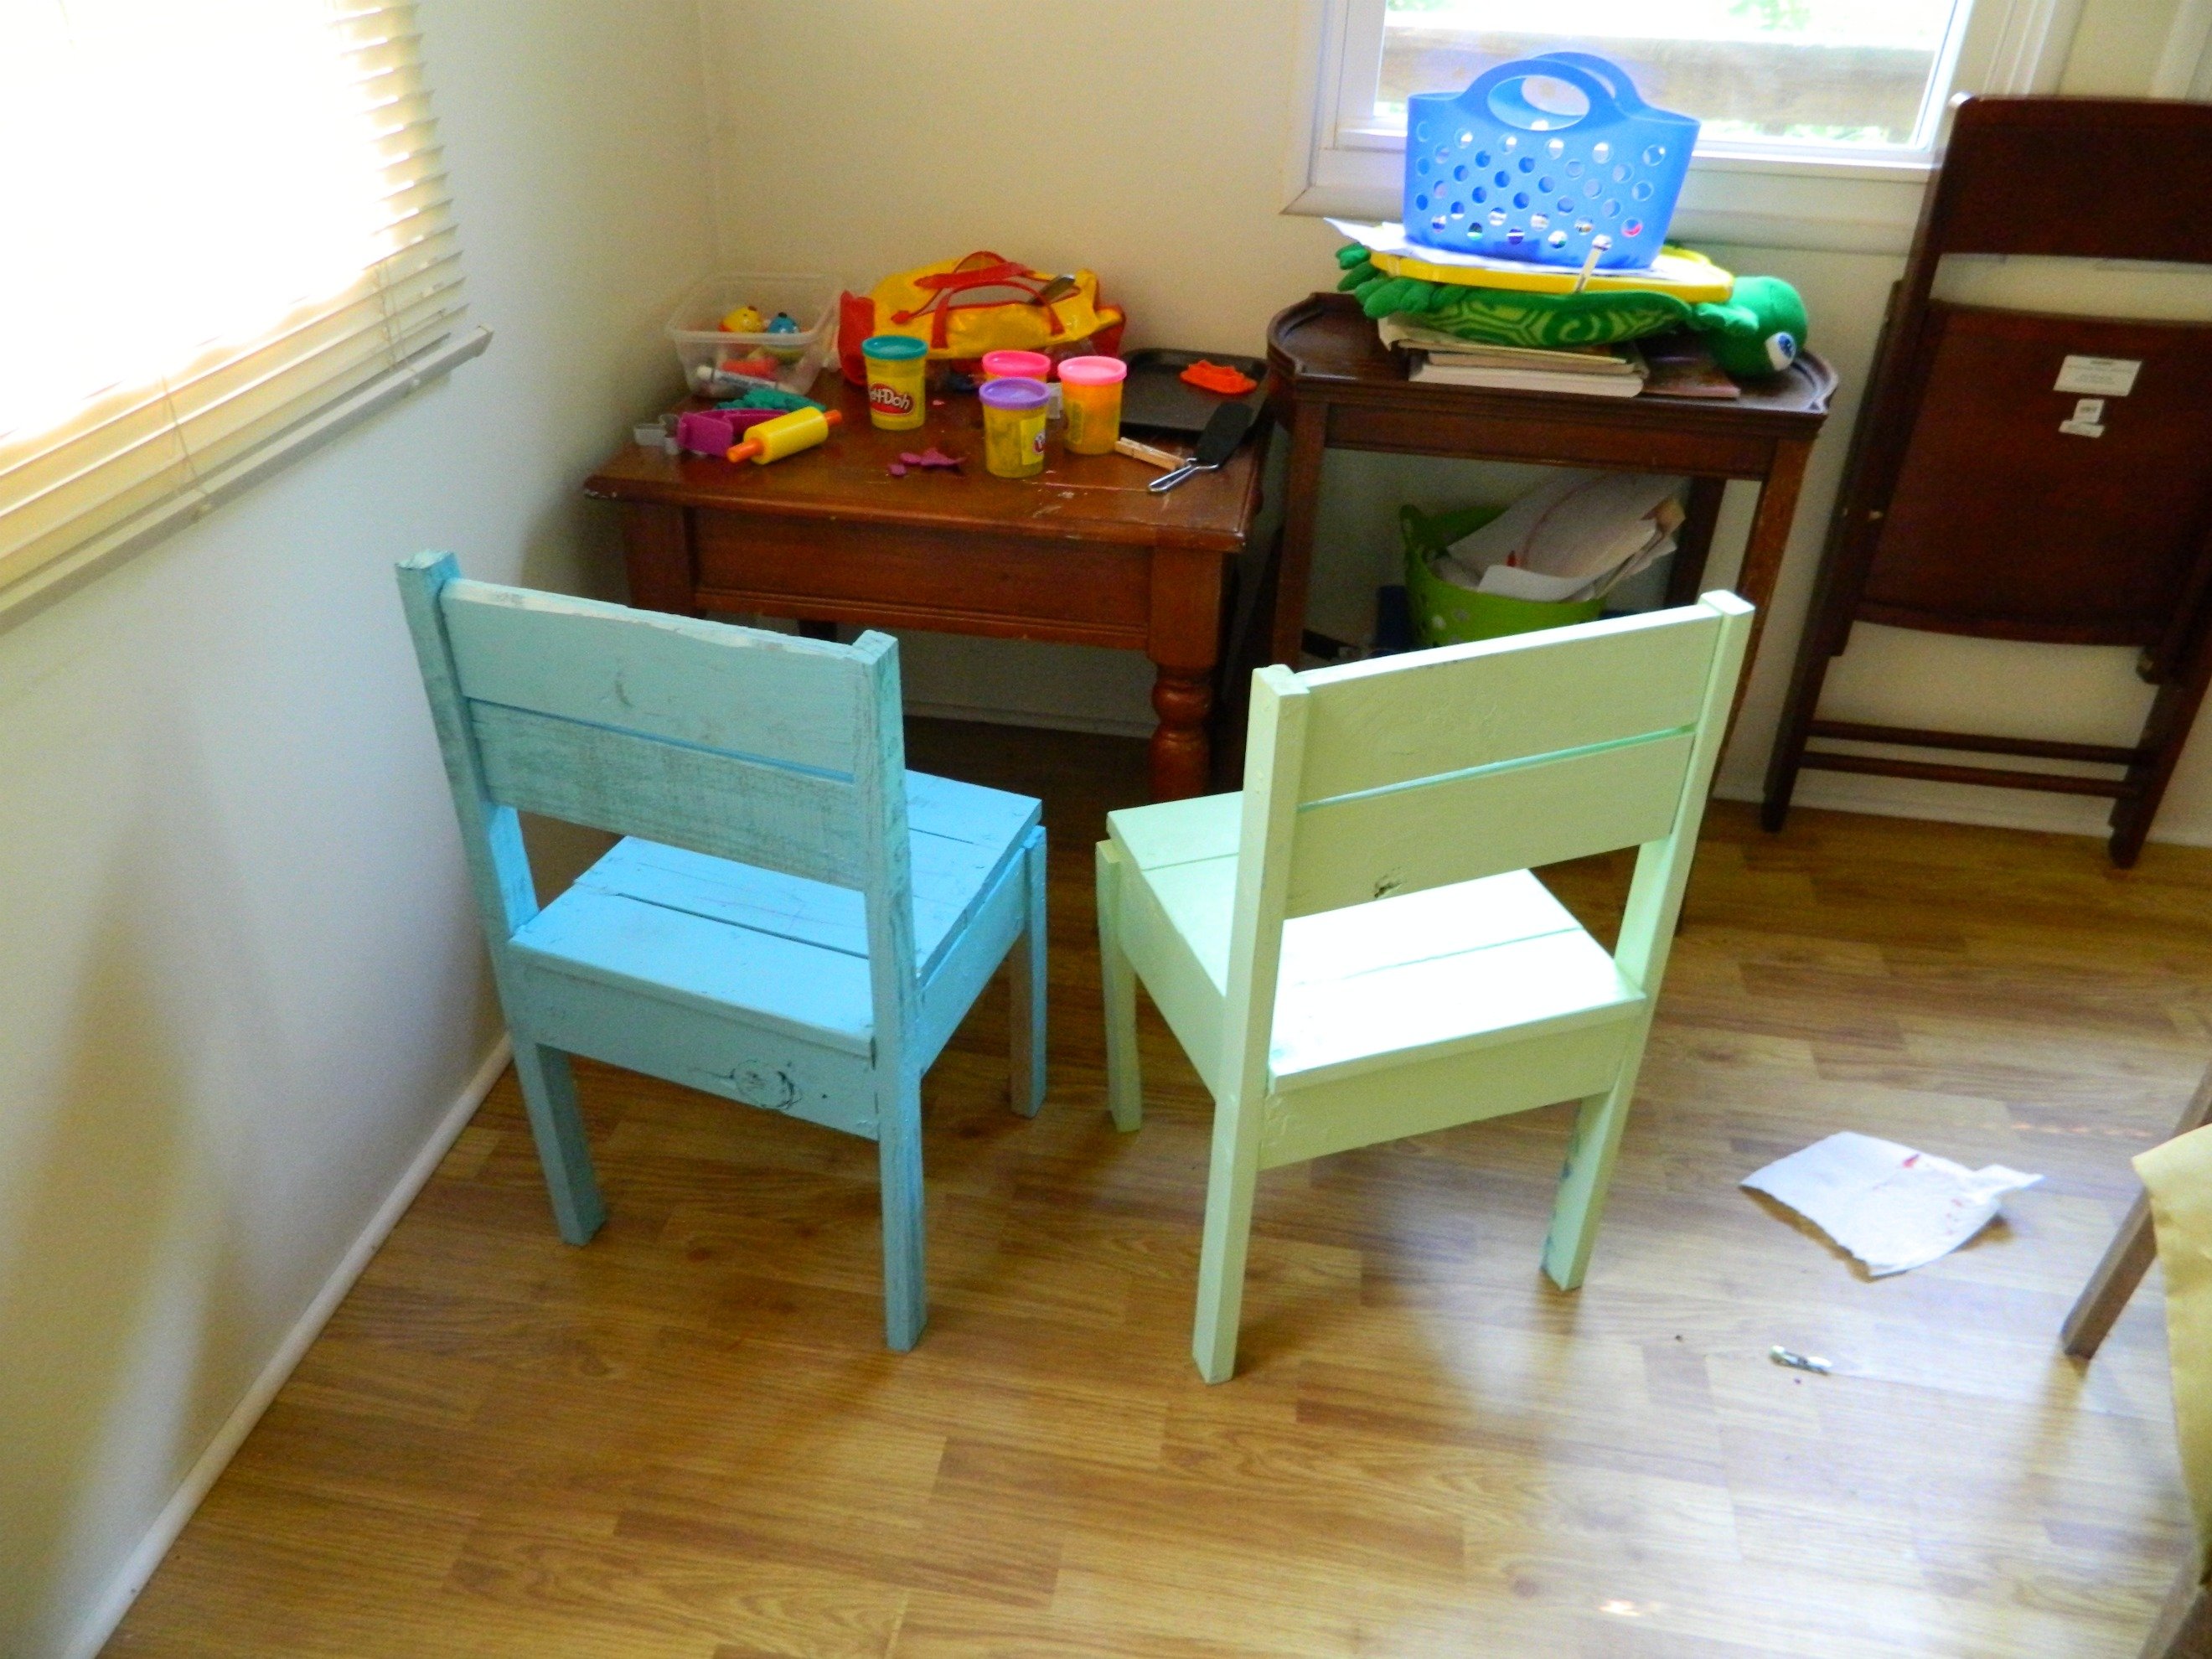
Loved building these chairs. Last year I built 5 of the smaller ones for my grandchildren.
Carol Schiffman from West Orange. NJ
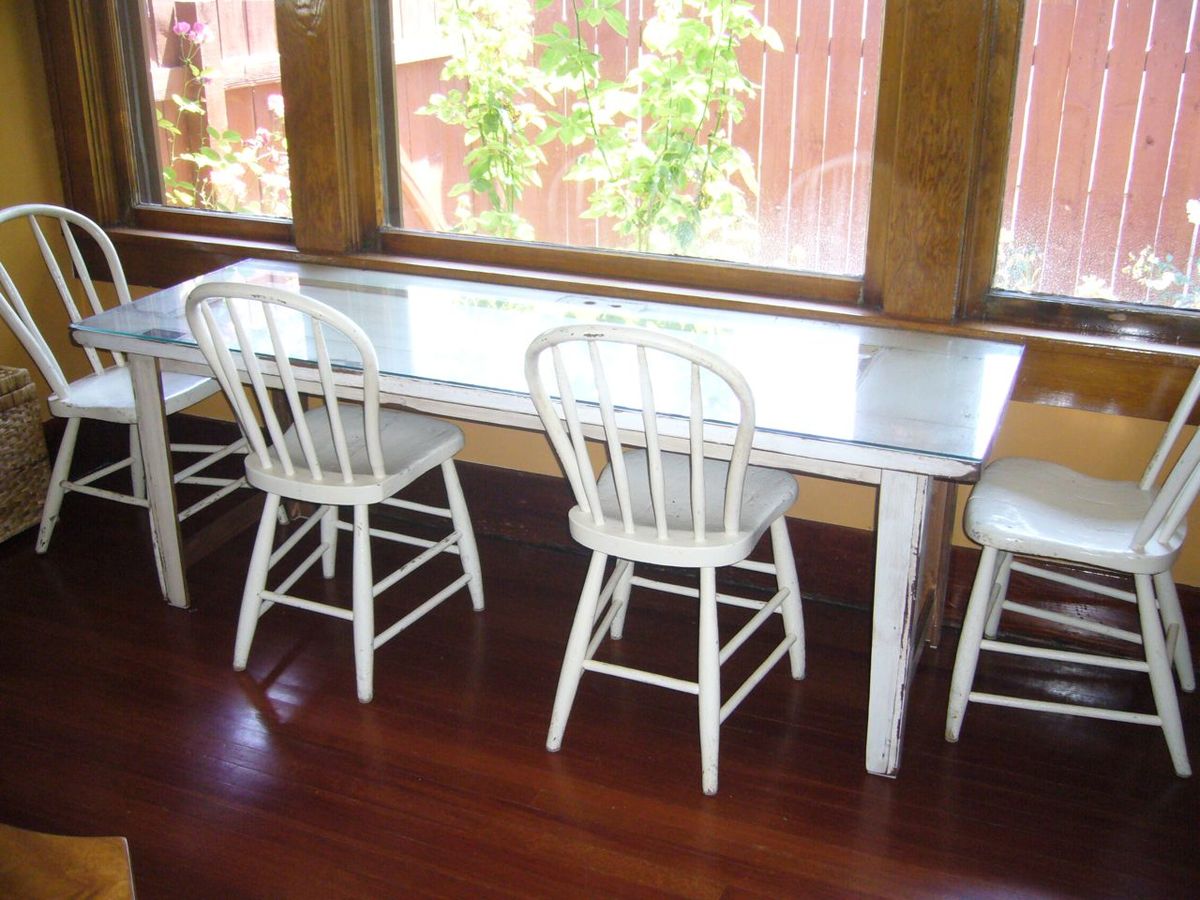
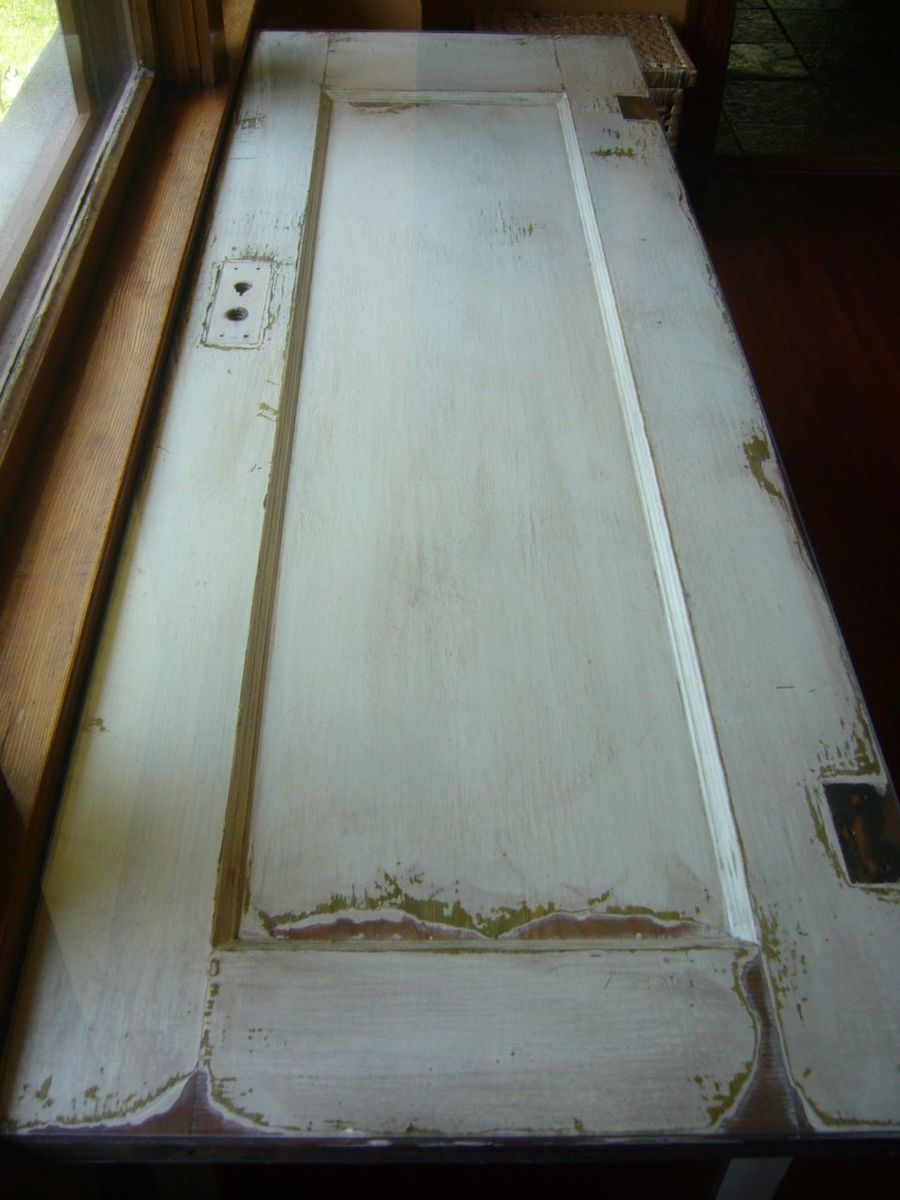
My husband and I took the Narrow Farmhouse Table and modified it for a school table for our children. We used two old doors we had left over from remodeling our 1925 craftsman home. One door is the top, and the rest is lumber culled from the other door. A fun, free, one-day project.

Sat, 07/16/2011 - 08:17
Did you put a glass top on this to make a flat surface? I was thinking that the recess in the center would make a good place for displaying artwork, etc. under glass.
In reply to Did you put a glass top on by Pam the Goatherd
Sat, 07/16/2011 - 13:24
Yes, the kids will be using the table for school, so we needed a flat surface. The inset from the door will have all kinds of fun things placed in it throughout the year!
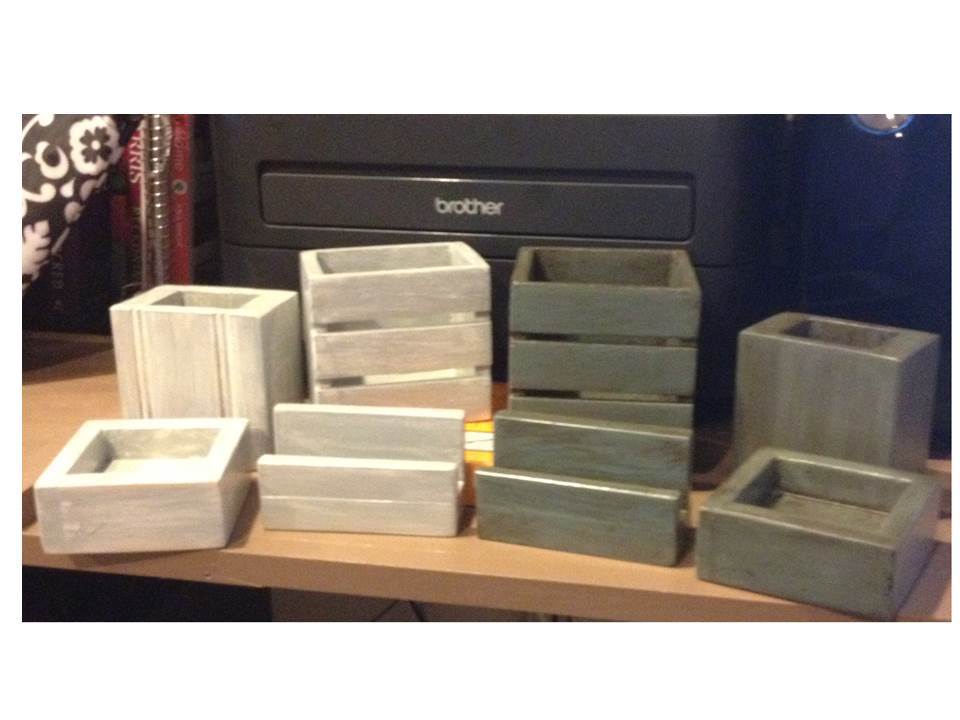
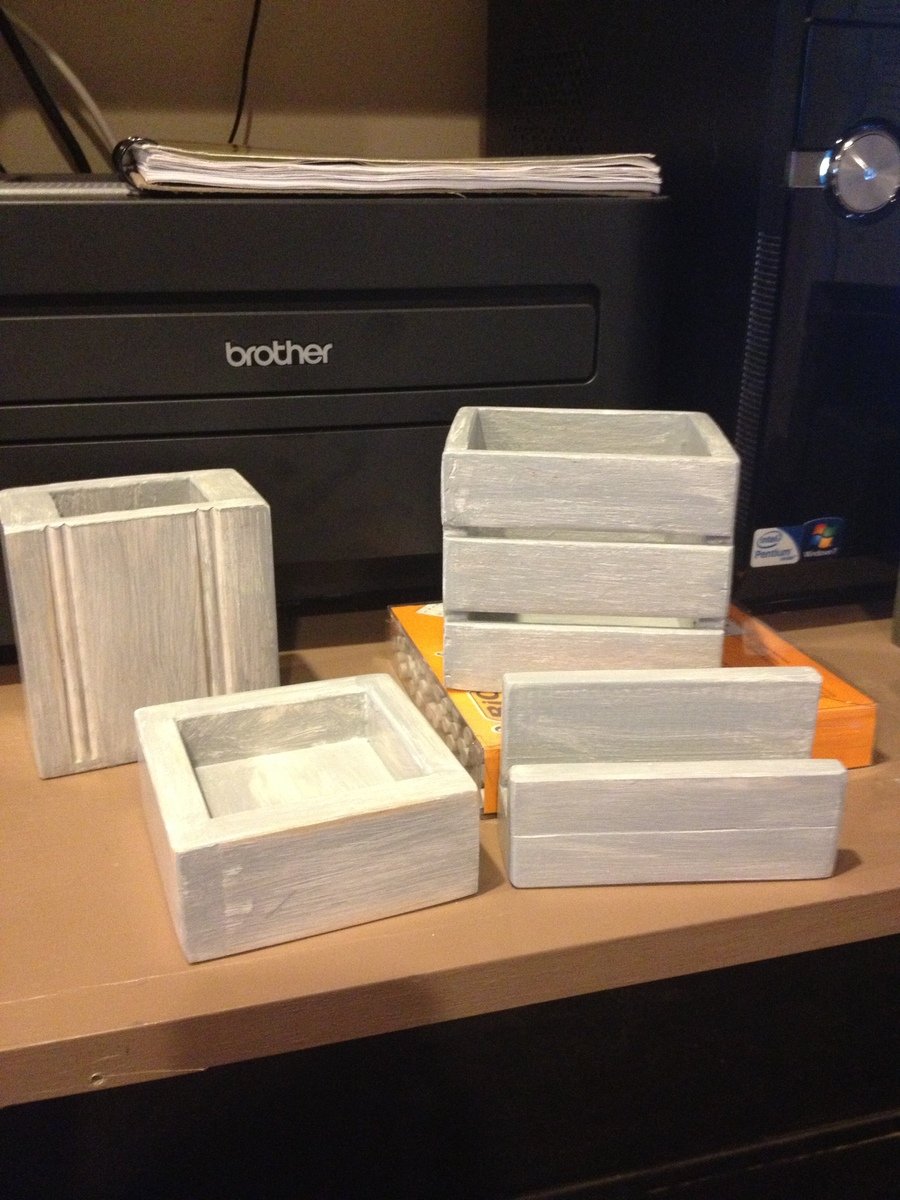
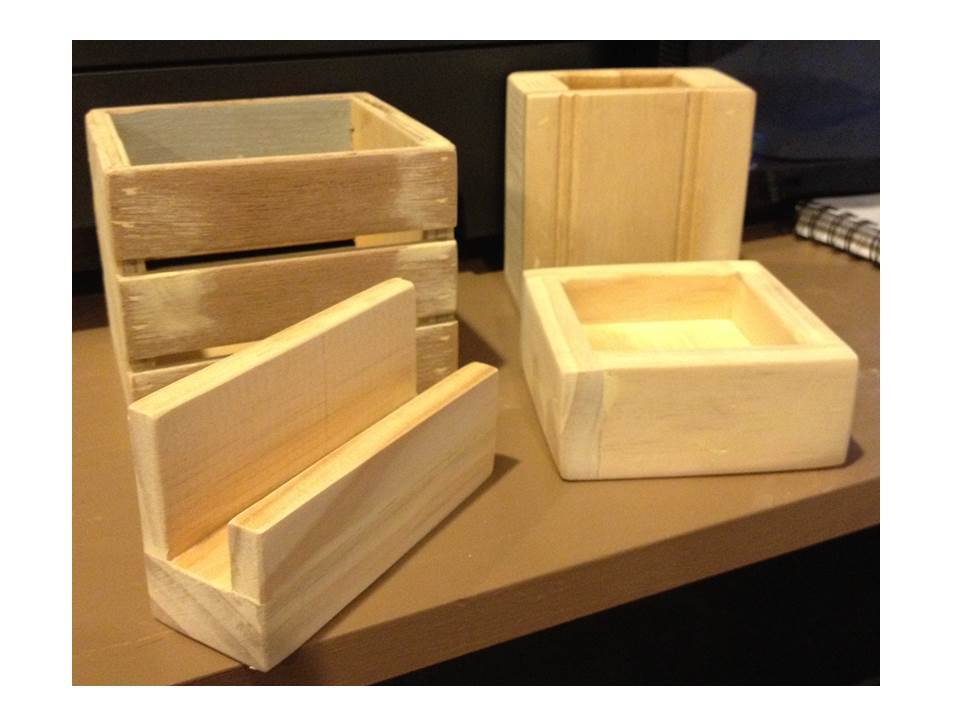
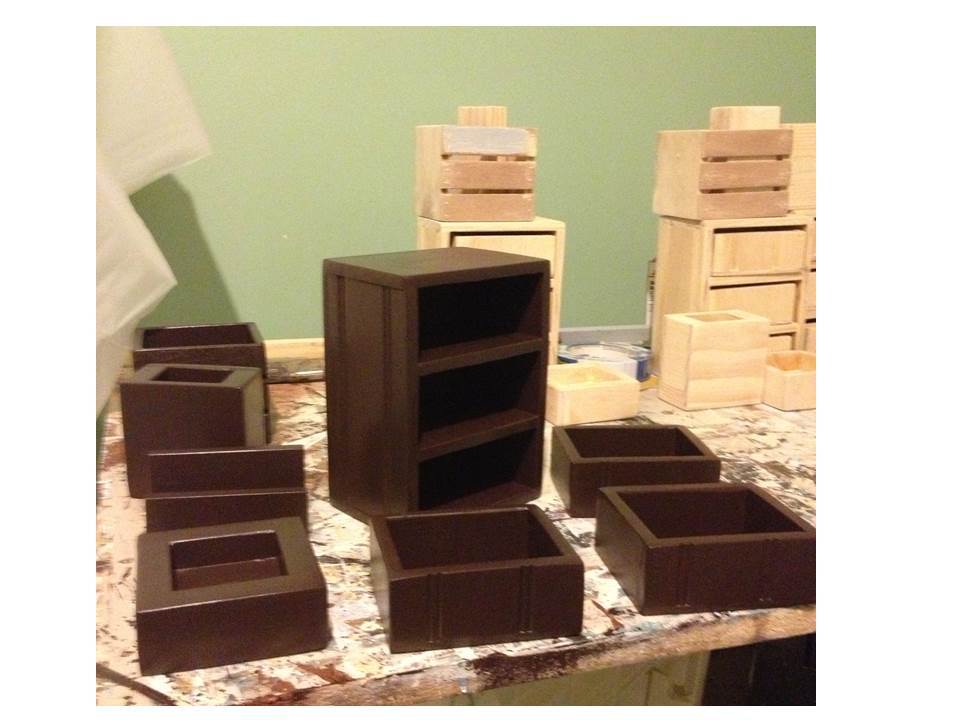
These were the inspiration pieces for the 1-Board cedar desk accessory set plan. These were made entirely of scrap wood. These sets are all painted, they will be gifts for the girls at work.
The wood for these is some 3/8" plywood (crate and pencil cup sides), 1x2 (bottom of business card holder and ends of pencil cup), some 1/2" x 1 1/2" craft board (sides of paper clip trays, business card holder), 3/4" plywood (bottoms of paper clip trays), some small squares of Wainscoat paneling (sides of gray pencil cup), some 1/4" plywood (bottom of pencil cup), some 1" strips of some old painted lauan (old project, pulled apart and the wood is being repurposed) and a couple of little pieces of 1/2" x 3/4" S4S (fronts of business card holders).
You can see the mishmash of different materials in the shot of an unfinished set, and also the stack of them waiting in the wings on my work table (it's starting to look like a Jackson Pollock painting :) heehee)
All the paints and materials were left overs from other projects. I hadn't decided on the finishes yet while I was building. These would be even easier to make if I had finished all the pieces first!
It was fun building these, it's great to be able to take something that may have gone in the bin, and make it into something lovely. I'm hoping the girls like these!
I've got a cube drawer plan in the works (a 1-board cedar with 2 drawers, and also have measurements for a 3-drawer from 3/8" thick craft board and 1/4" plywood, like the one on the table). I'll get to those soon.

Mon, 08/19/2013 - 20:40
Thanks for sharing your pictures and plans for the desk accessories and trinket box. What great ideas for inexpensive gifts for people on you list!

Tue, 08/20/2013 - 15:09
Thanks Linda! I've absolutely had a ball planning and working on these! I'm so glad you like them! :)

Fri, 08/30/2013 - 17:57
I love when something is functional and adorable (and affordable to boot)! This is great; I am sure you'll have very many happy recipients of these cute desk accessories!
Thu, 08/22/2013 - 13:25
Yvonne, thank you for the nice comment! :) I'm working toward my goal of finding things to make from all the left-over wood in my garage. I didn't realize how much had accumulated. Really I am having a ball doing this! I did go buy some more cedar pickets though, I'm going to work on the 1-board cube plan this weekend. :)
Entryway console without base pieces to more closely match my other furniture.
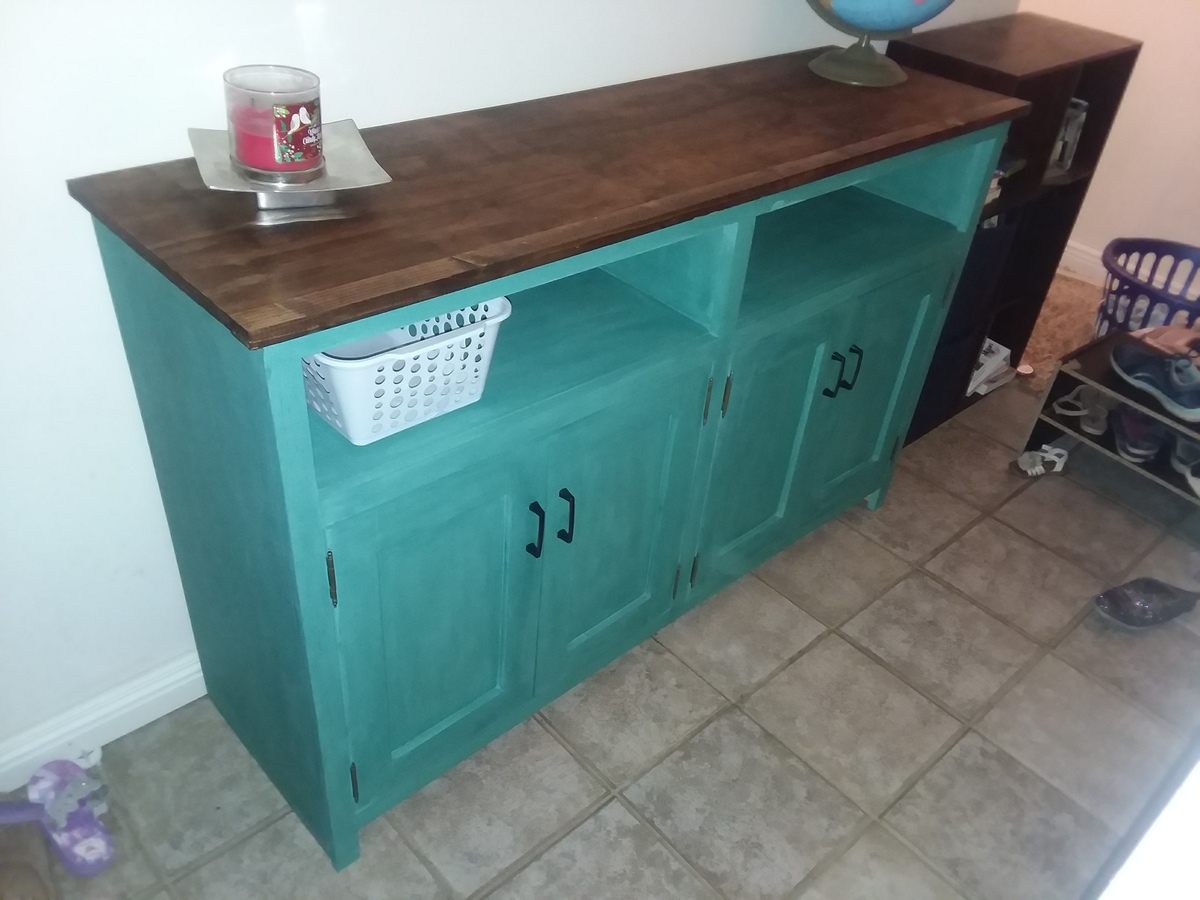
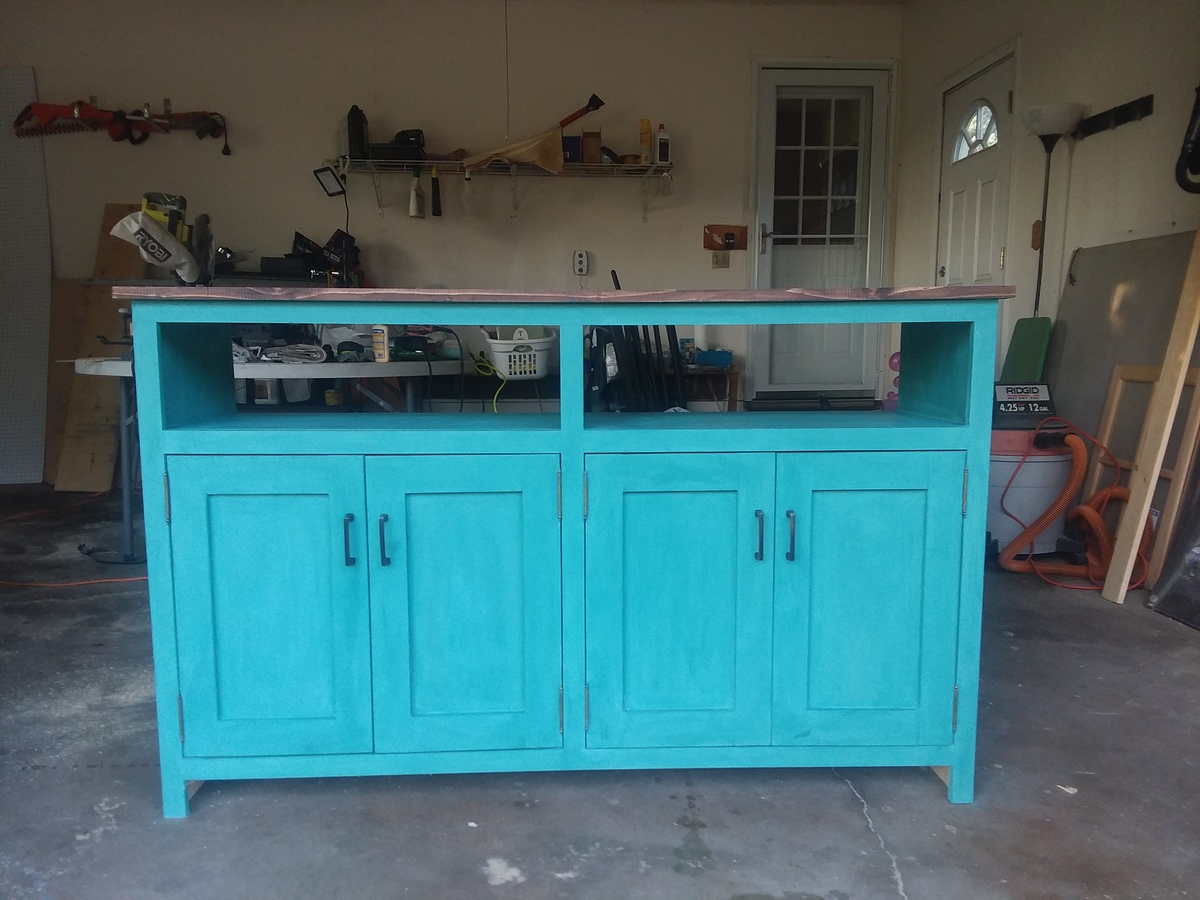
Love how this turned out! Thanks Ana!
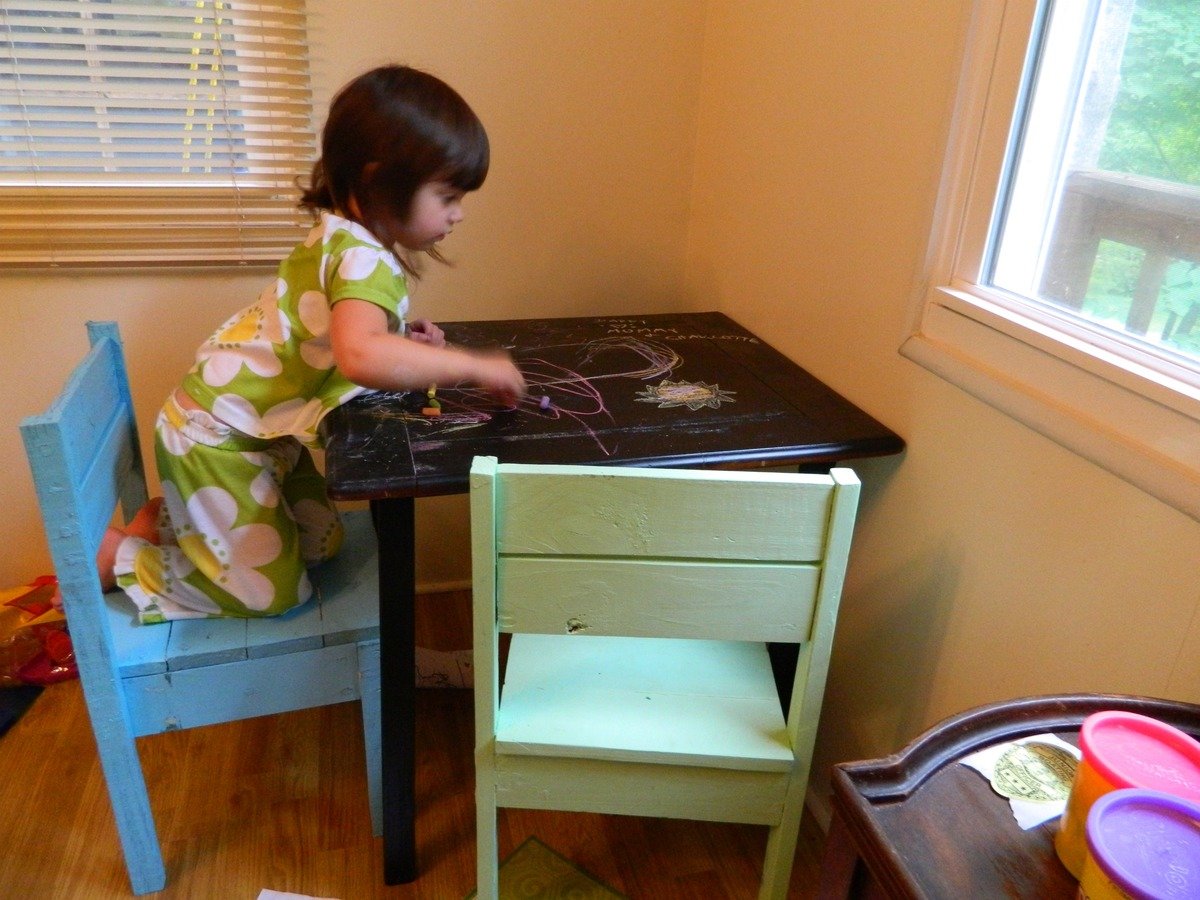
I already made the stack-able chairs for my daughter, but she was using an end table for an art table and her chairs would not fit under it. I took the old legs and frame off of the table and built the clara table frame. I kept the original table top. I then spray painted the legs black and for the top I used chalkboard spray paint which I found at Michaels. She now has a fun table that can be used for art projects and she can draw right on it. The before photo below shows the original table. I took the spindle legs, painted them different colors, and I will be using them for a bench to go with a new dining table I am building.
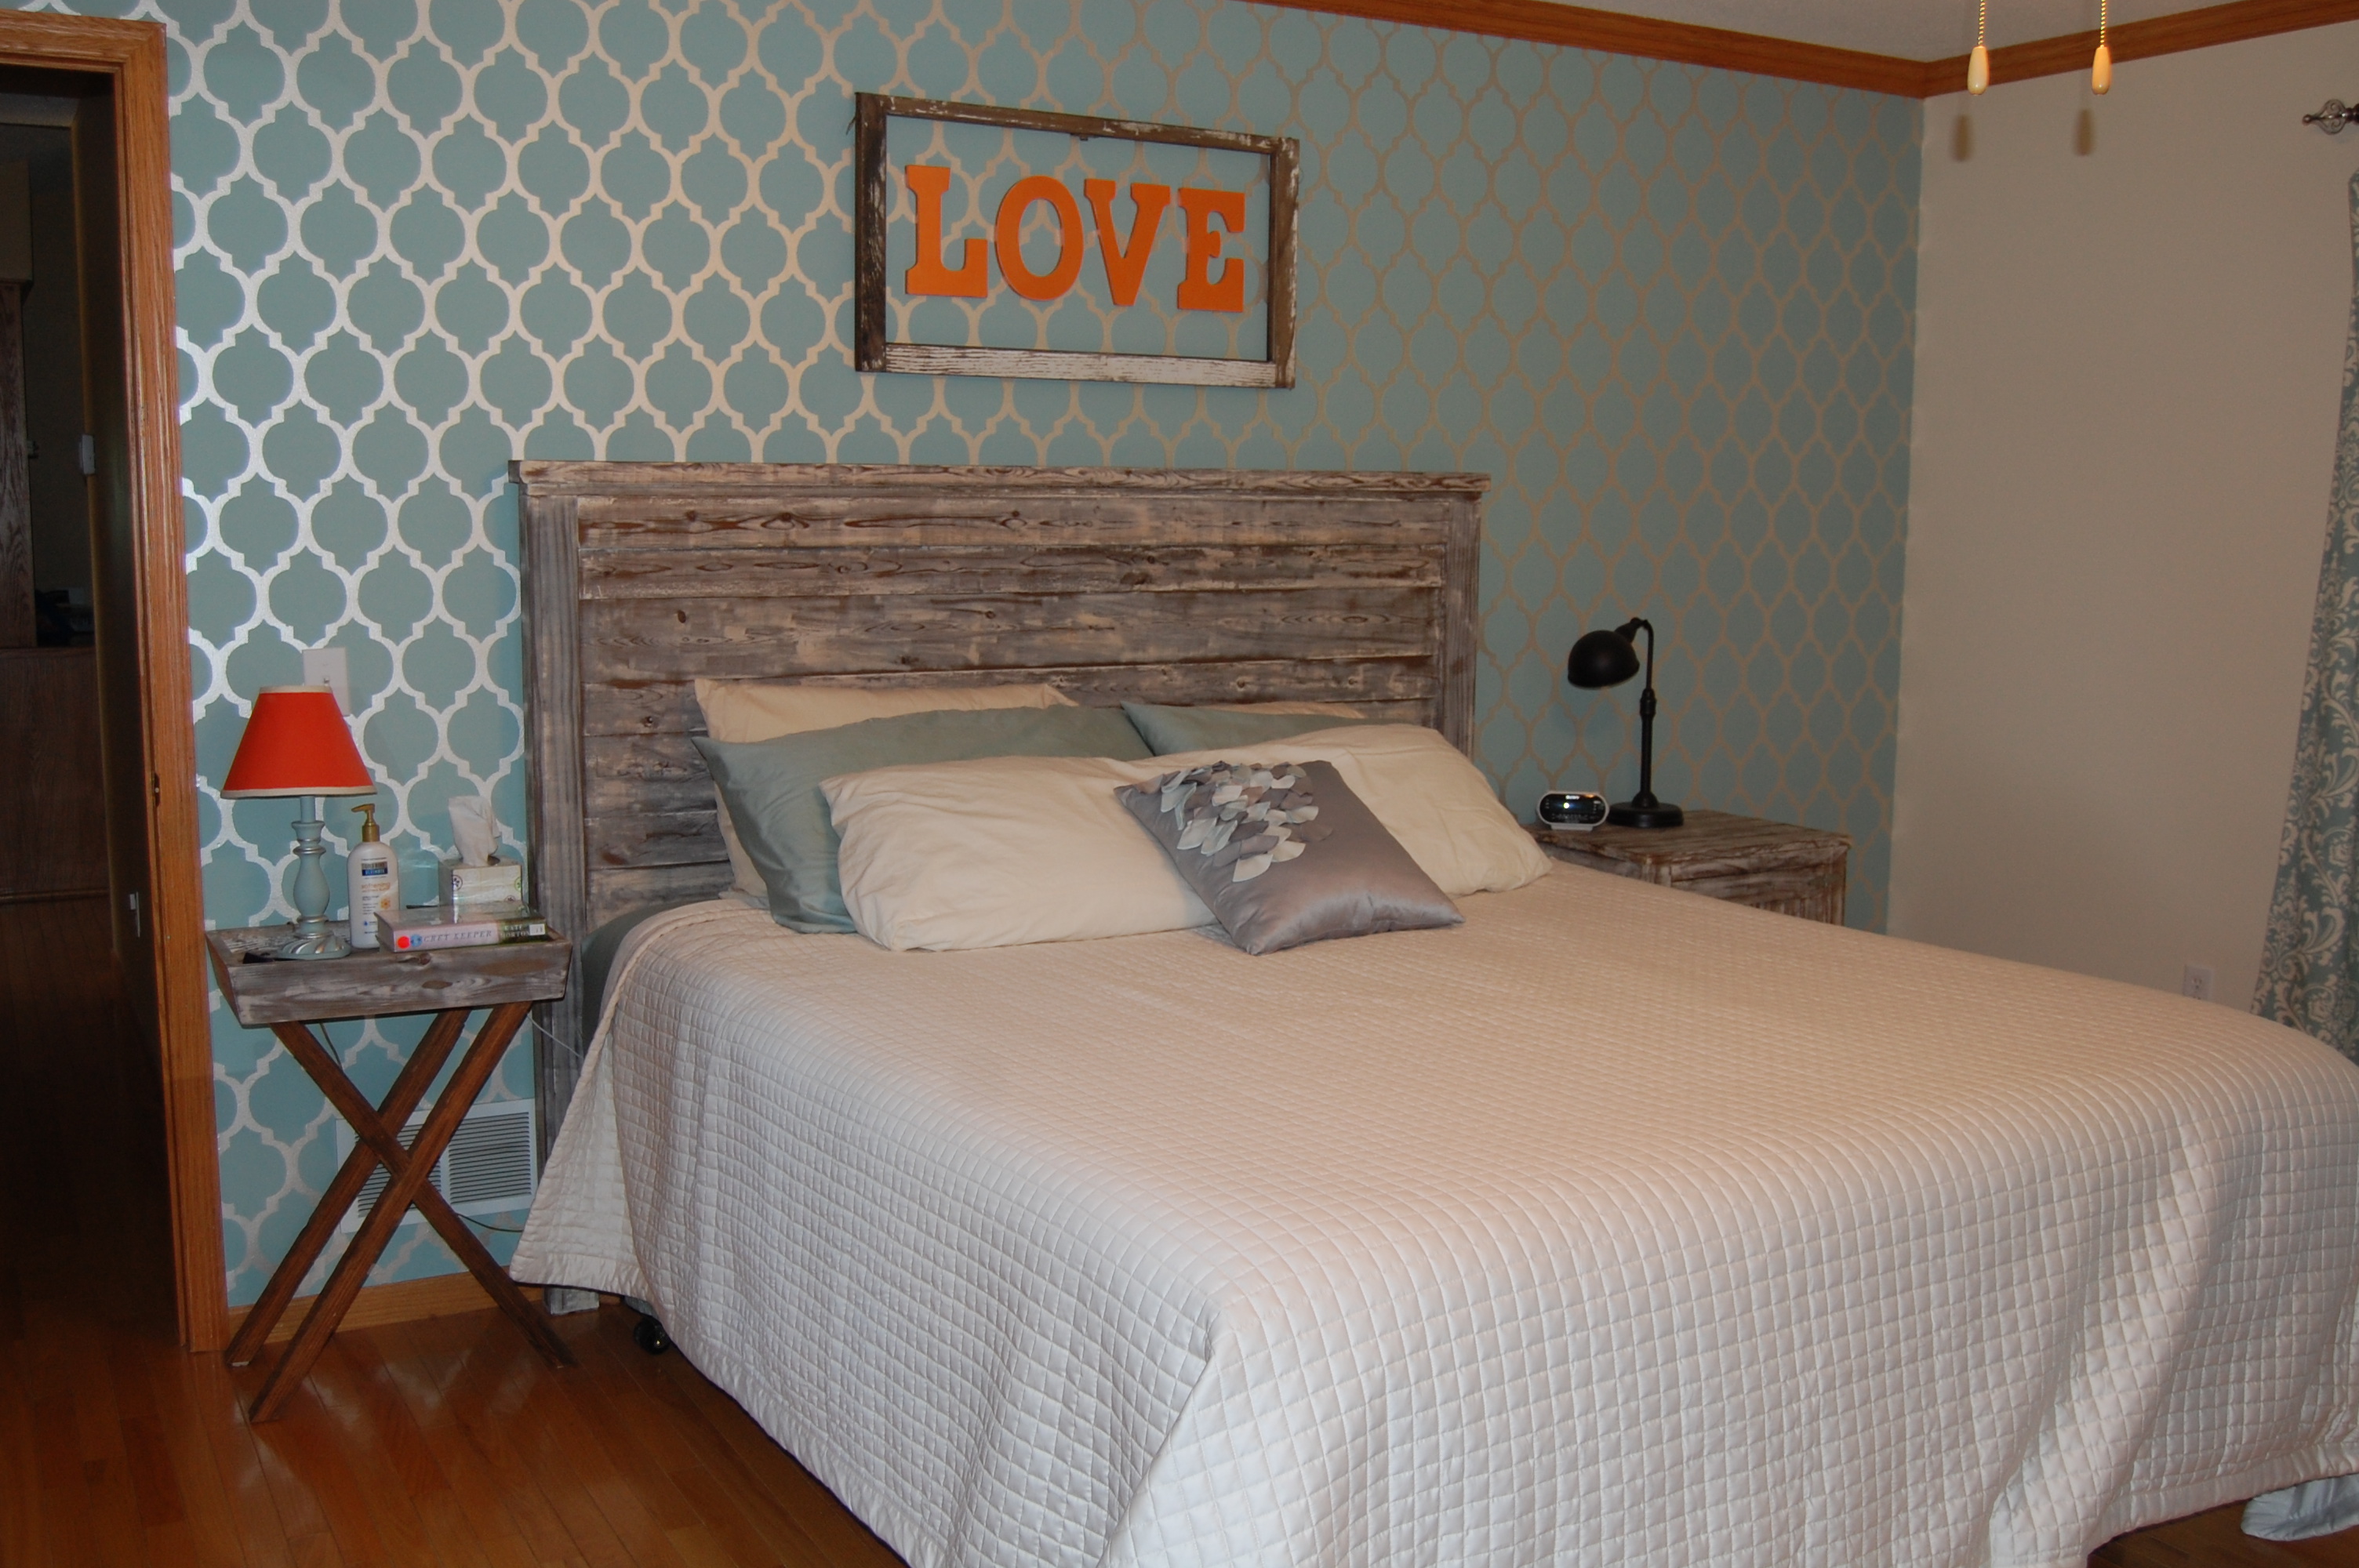
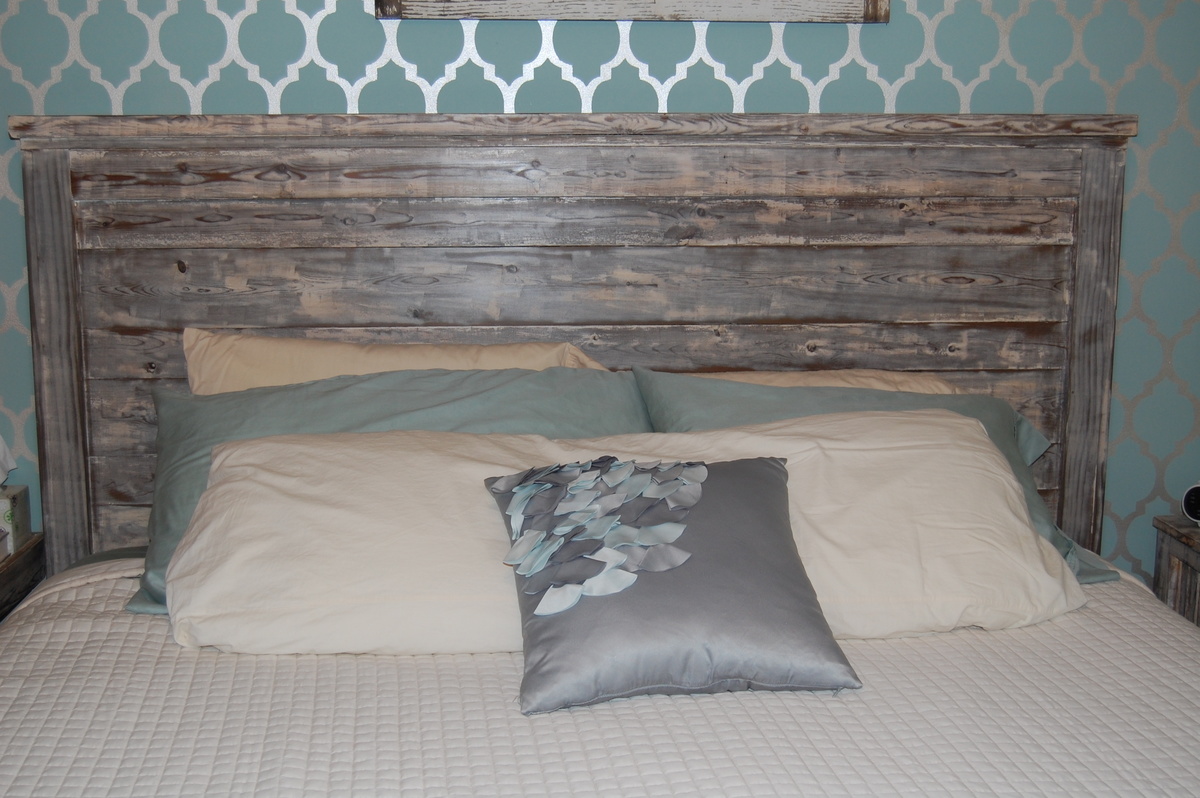
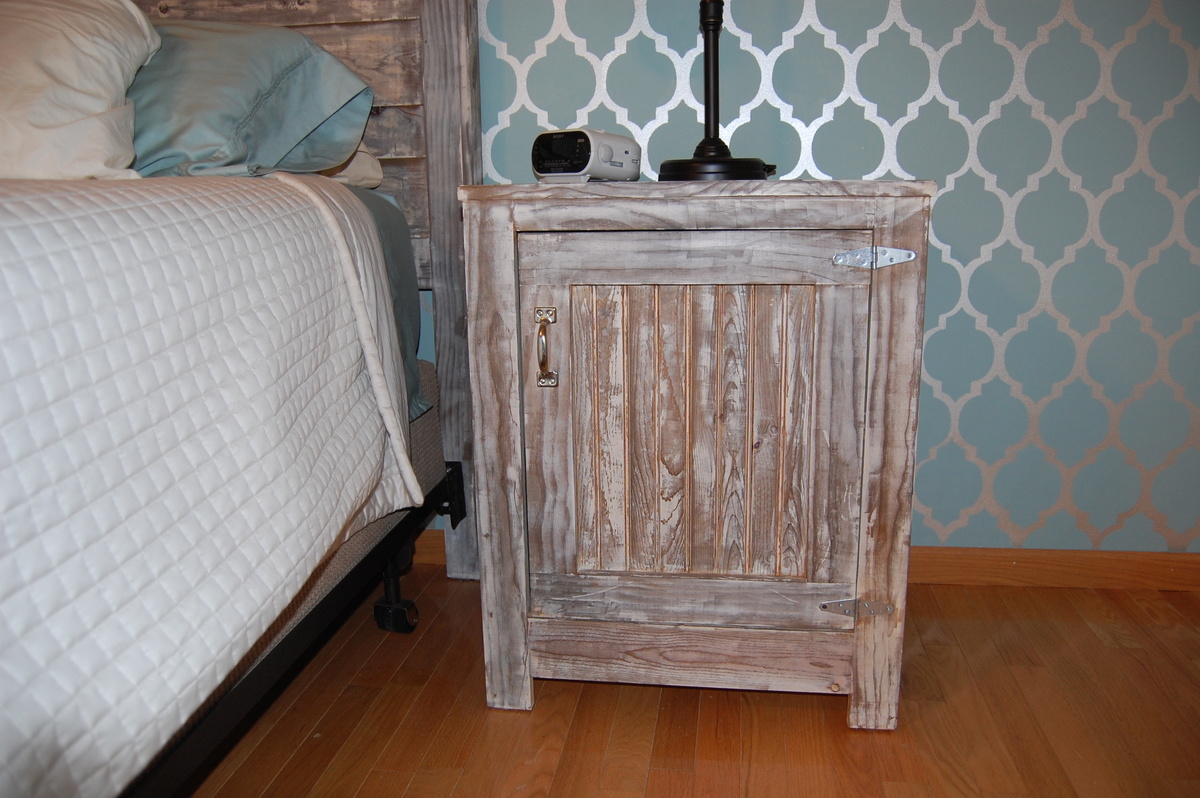
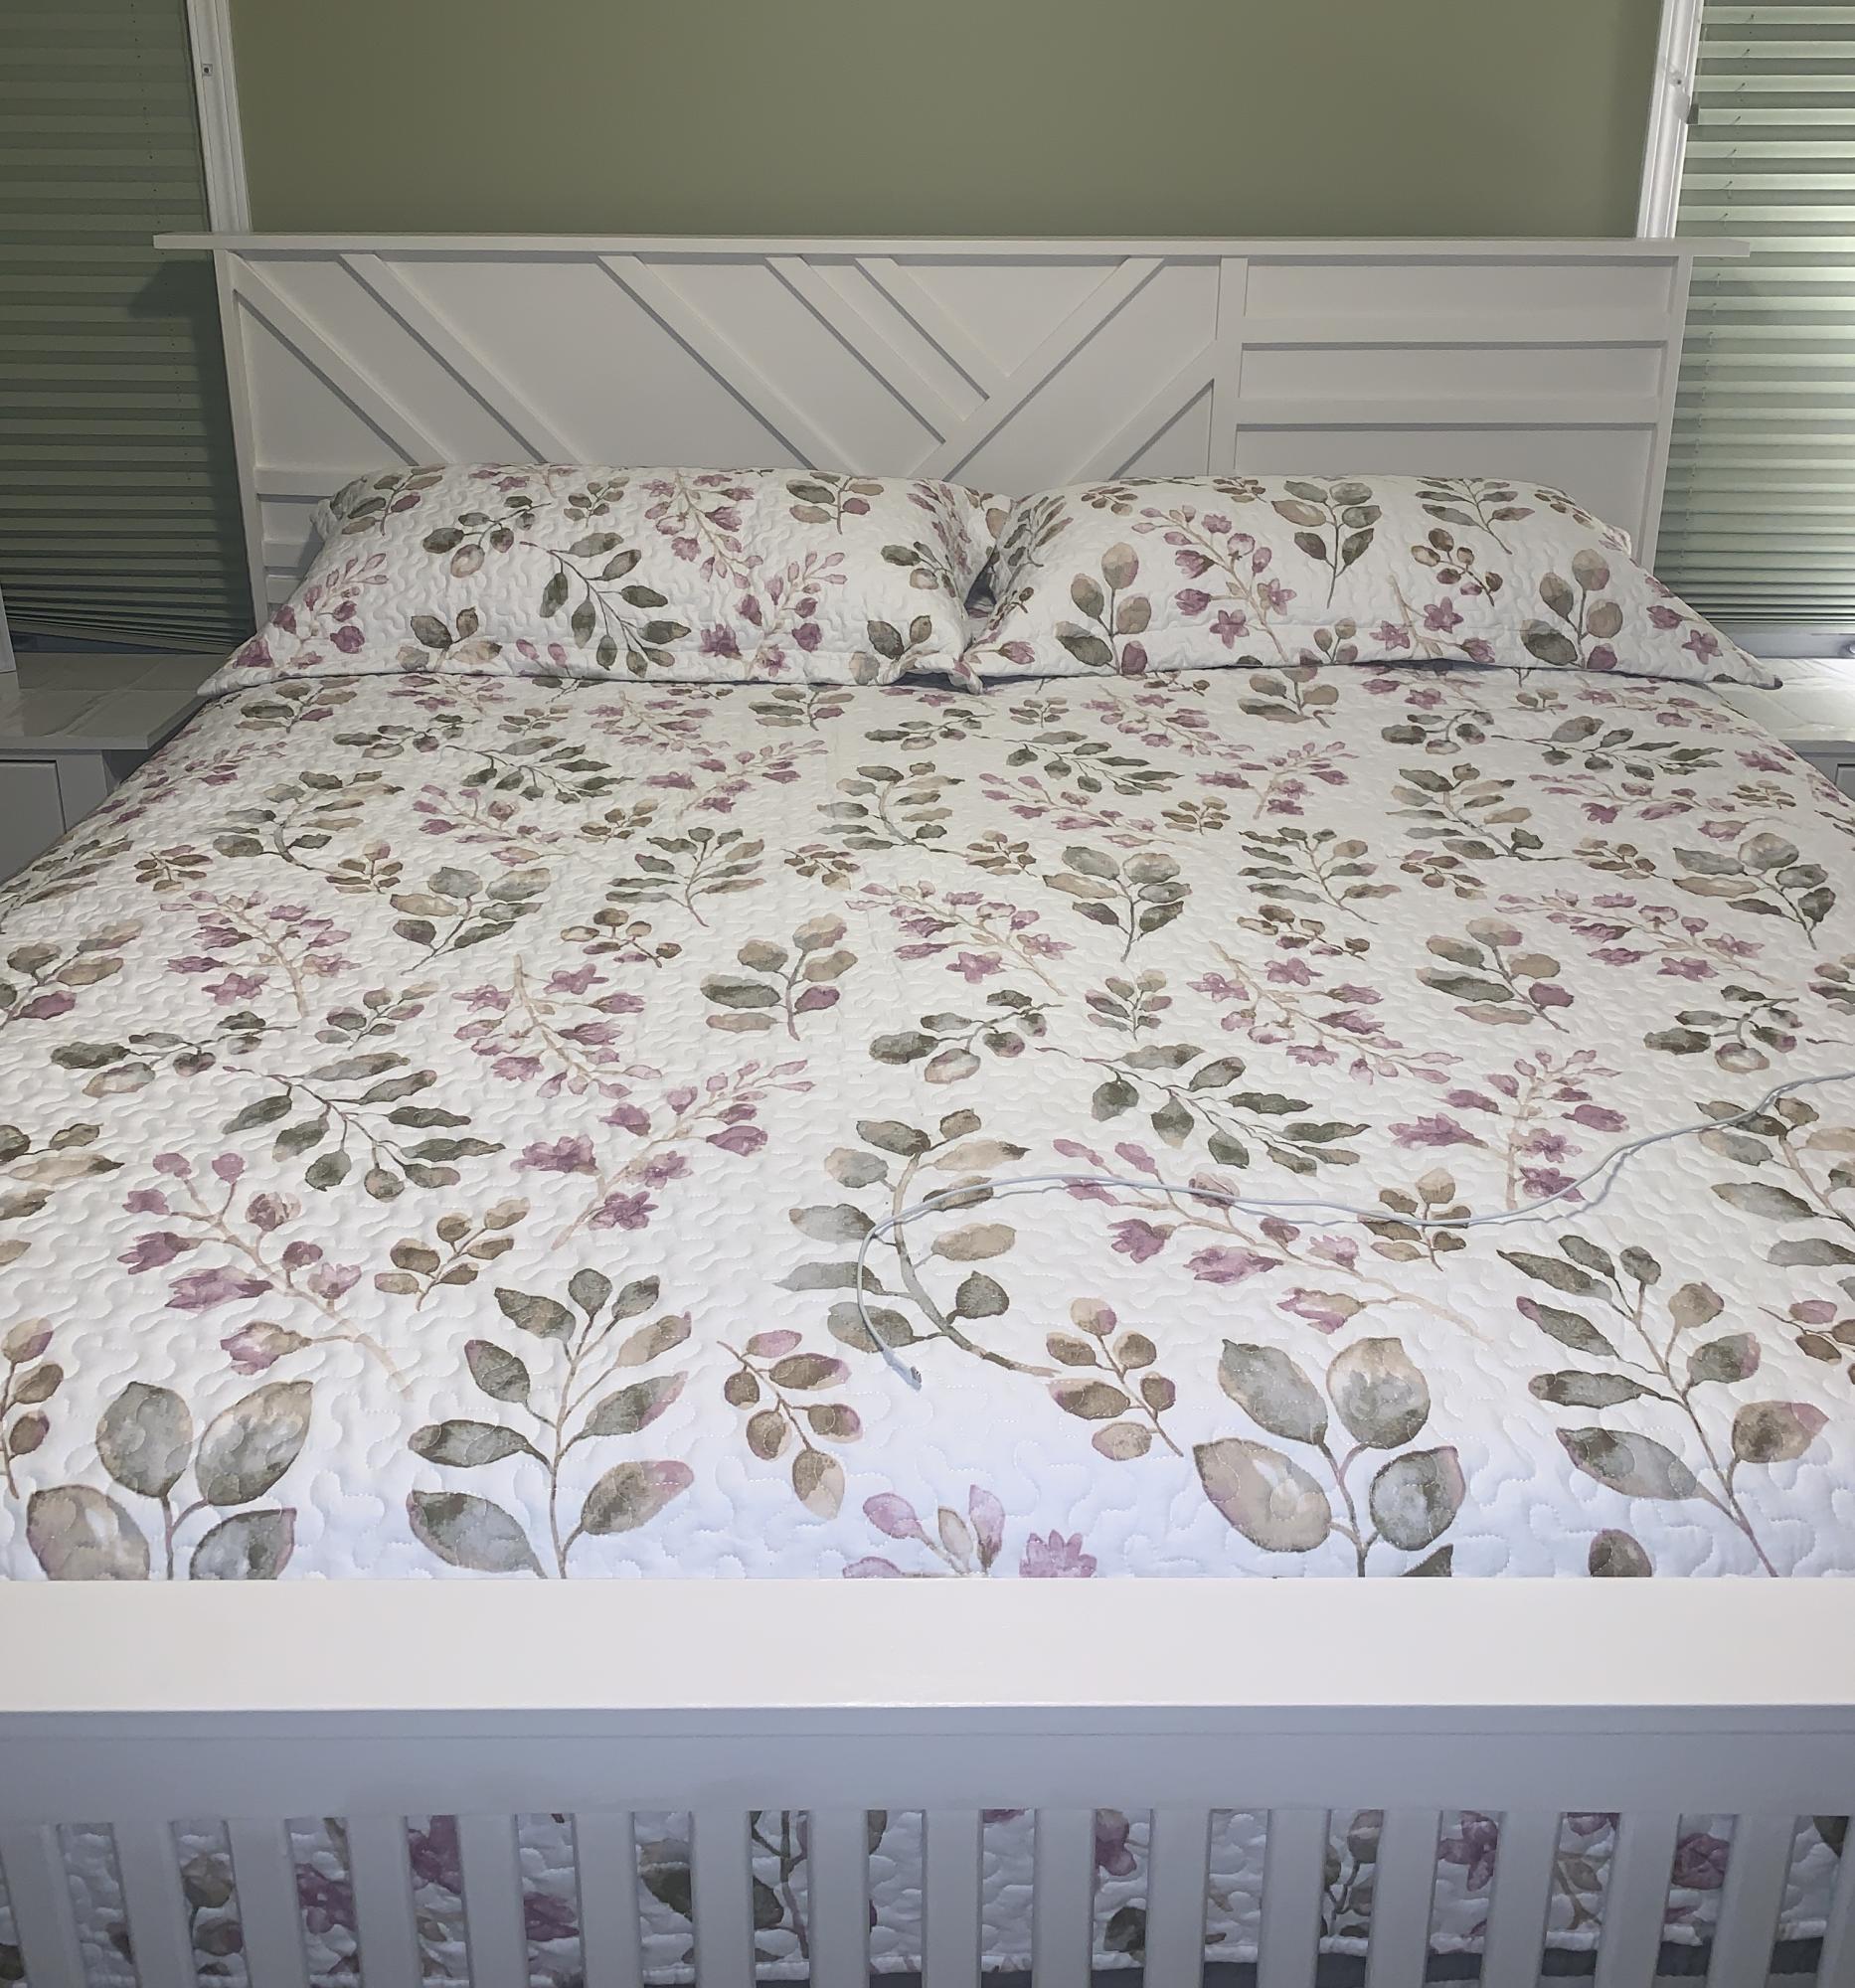
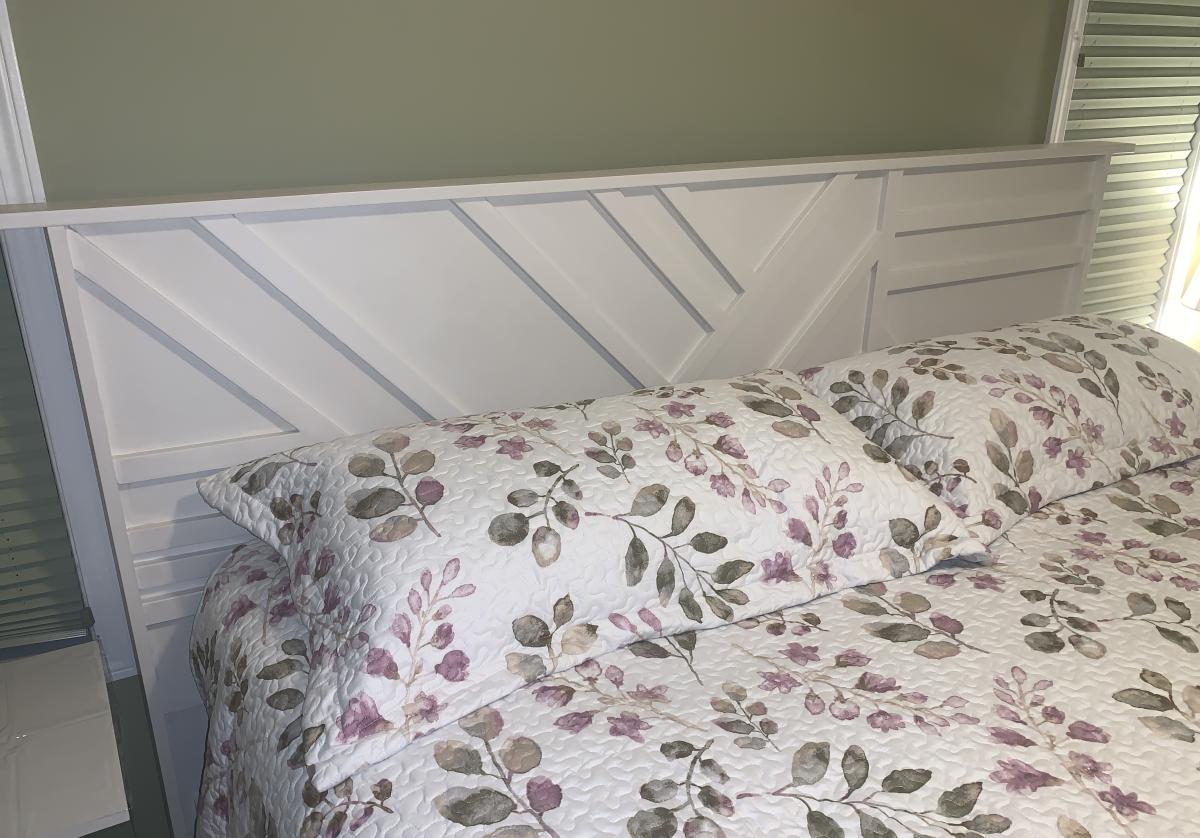
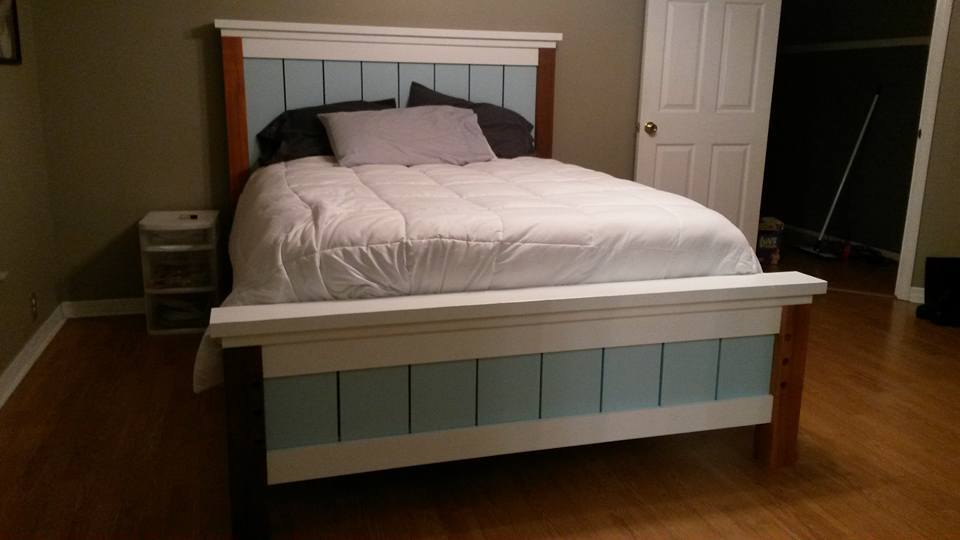
After living in the basement with our young children for the first few years after moving into our new home, we were ready to claim the master bedroom on the main level. We made it a winter project and re-did the whole room (good-bye lavender walls). We made the headboard from Ana's "Reclaimed Headboard" plans and one of the night stands from the "Kentwood Nightstand" plans! We love the final look and saved ourselves a TON of cash in the process.

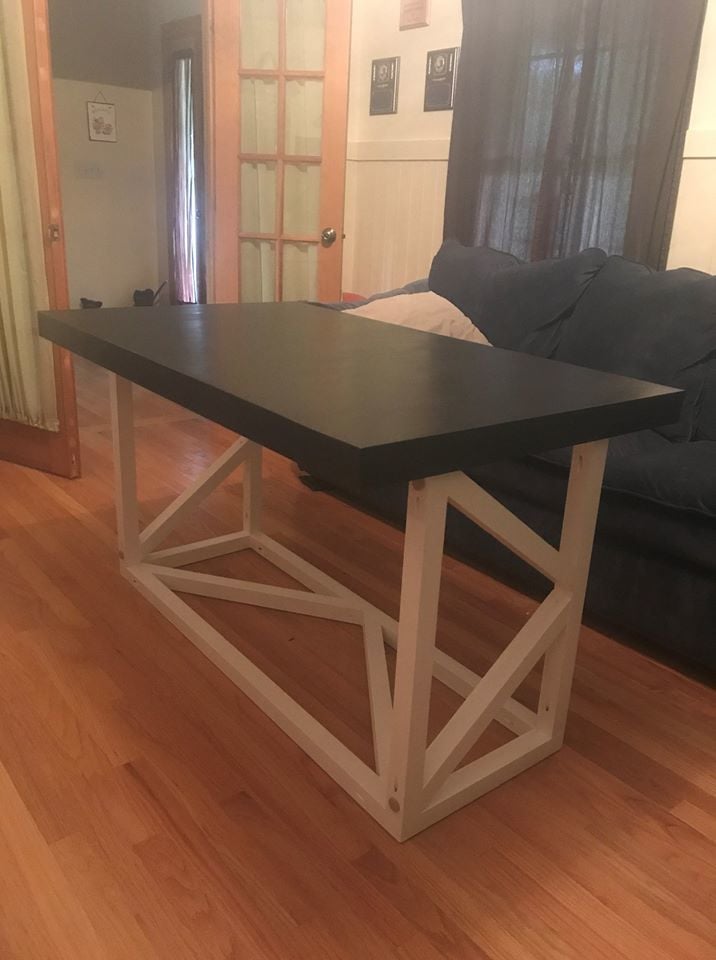
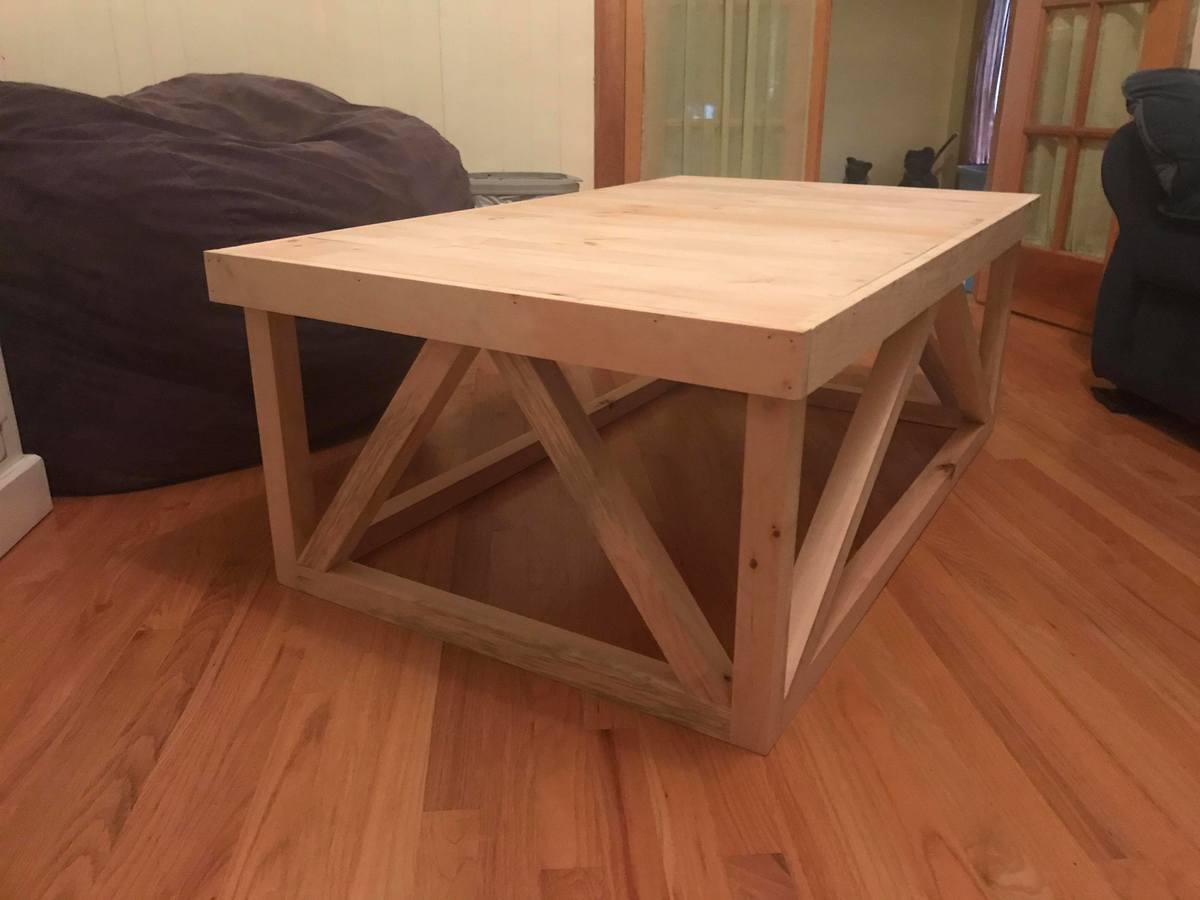
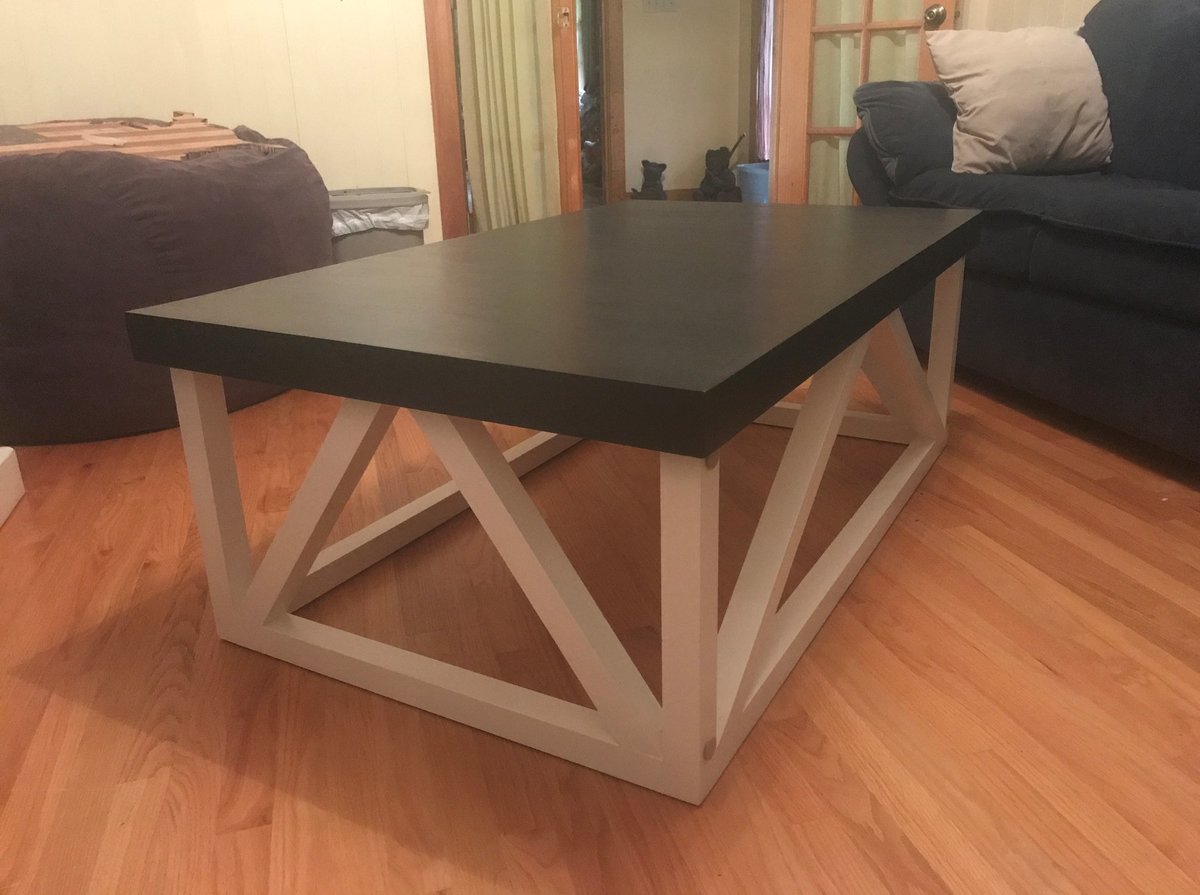
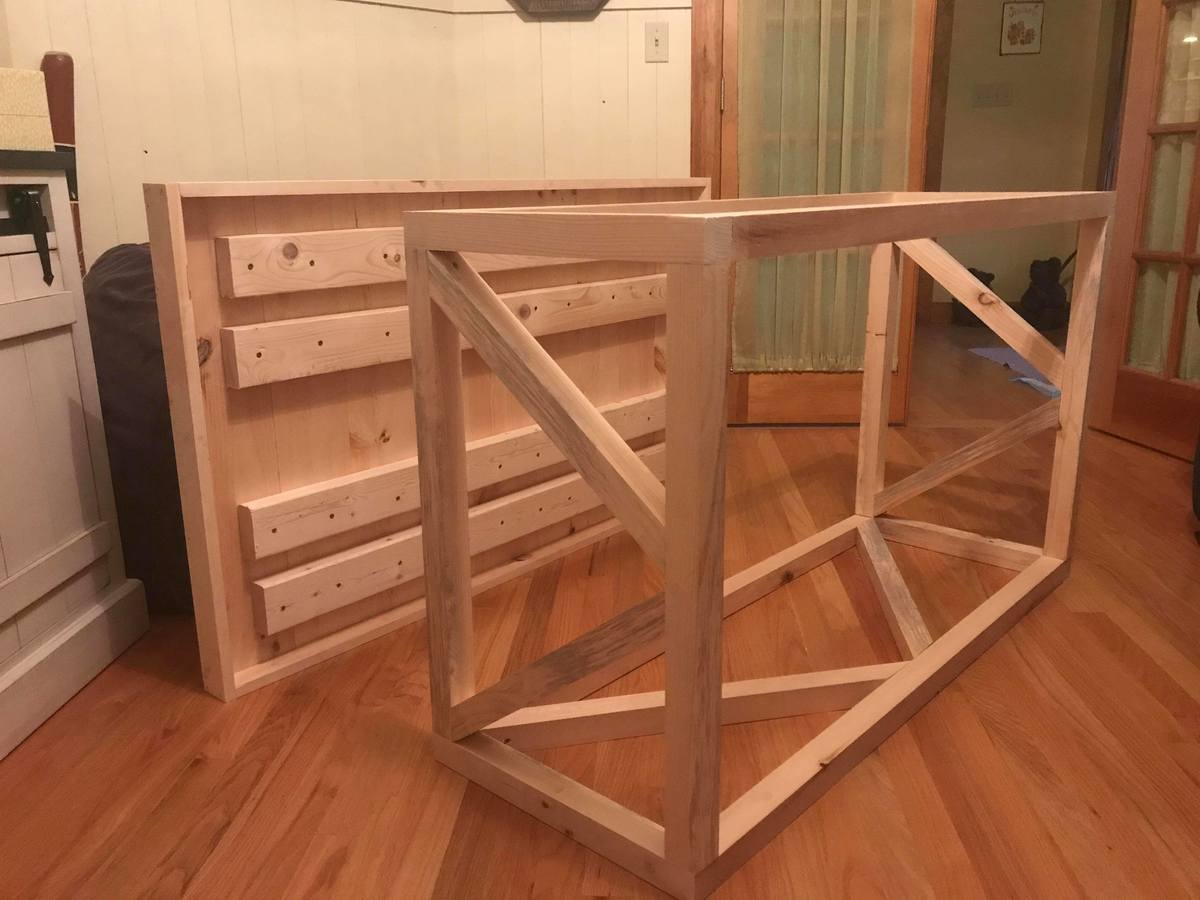
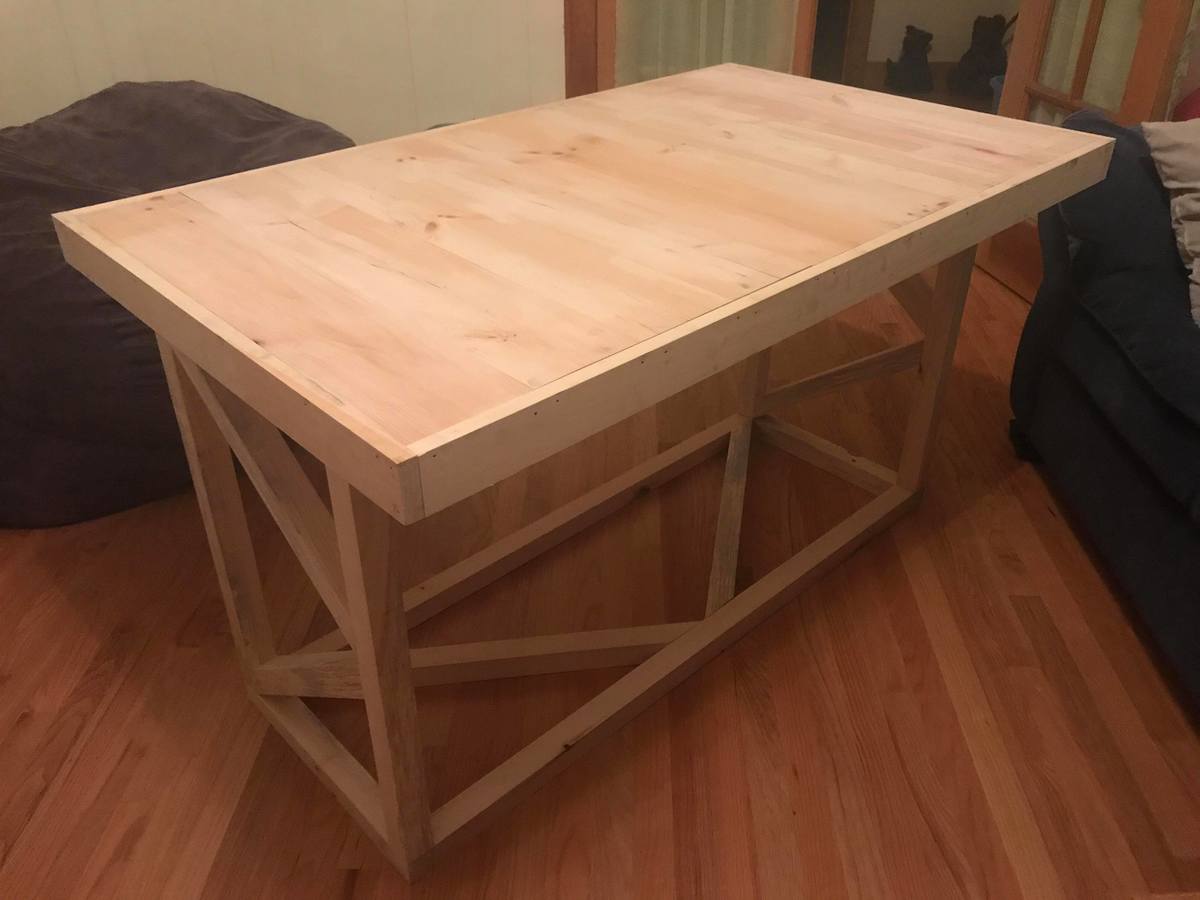
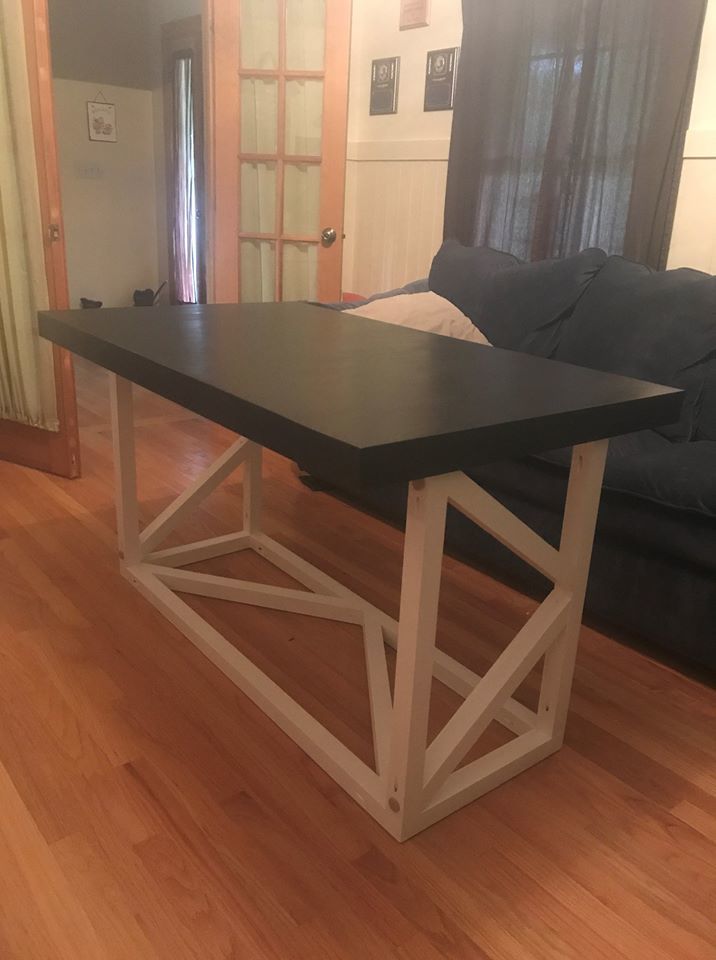
My wife was interested in a coffee table that we could also use for playing games or company for meals, and naturally we found just the thing on Ana White's website. I got some 2x2 pine from a lumberyard after not being happy with box store lumber. The table top is made of pine glued together. I decided to put the 2x4s underneath which gave some heft to the top so it does not wobble. It fits tighter than I would want, so lesson learned for me I should have paid more attention there. Since we wanted to paint the piece I went with the pine top. If it were going to be displayed somewhere else in the house, or stained, I would have chosen a harder wood for the top. The nice part of this plan, I could easily build another nicer top to go with the base if I wanted too.
Sun, 10/14/2018 - 15:15
Thanks Ana! What a great surprise hearing from you directly. I appreciate it. :-)
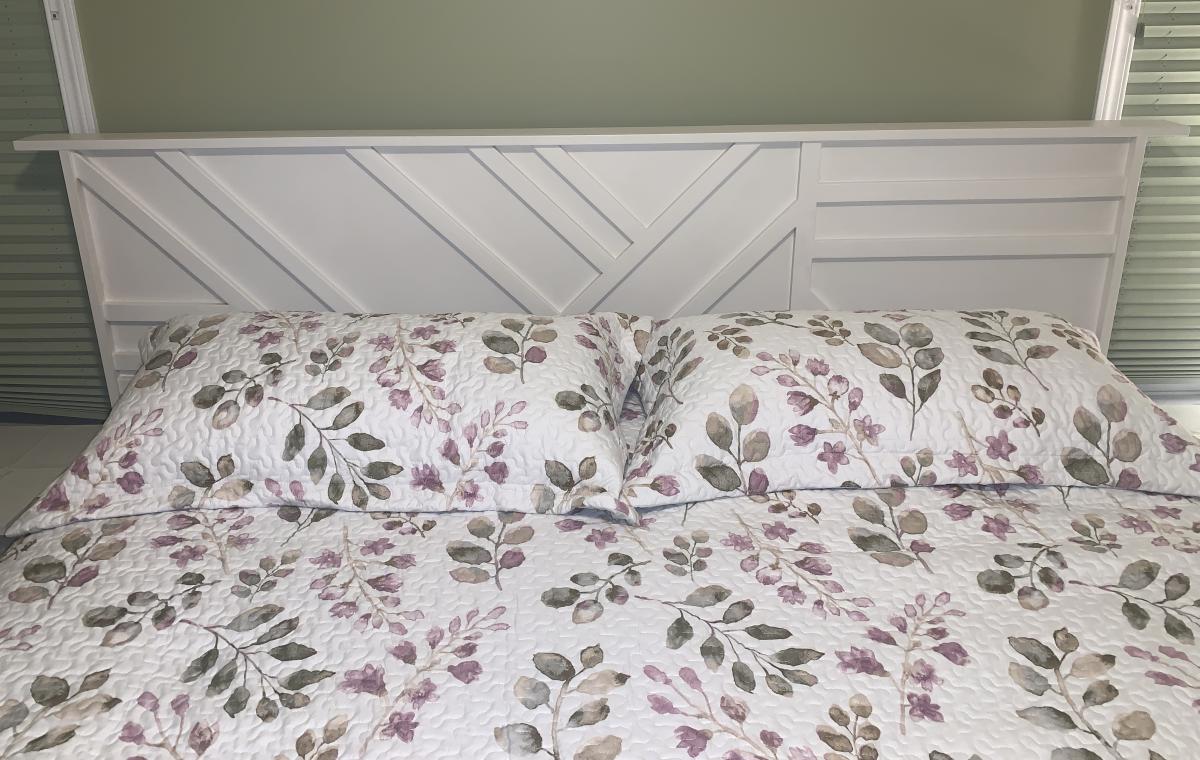
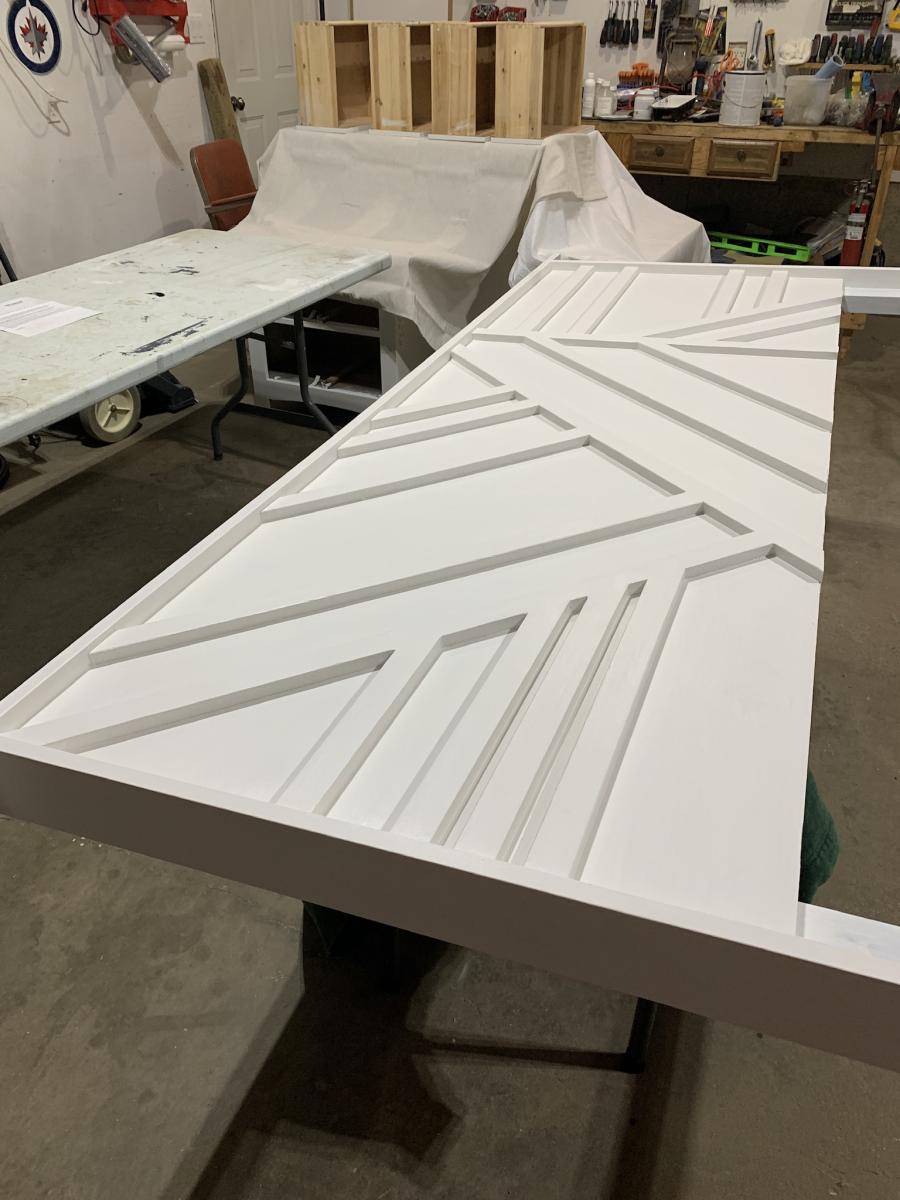
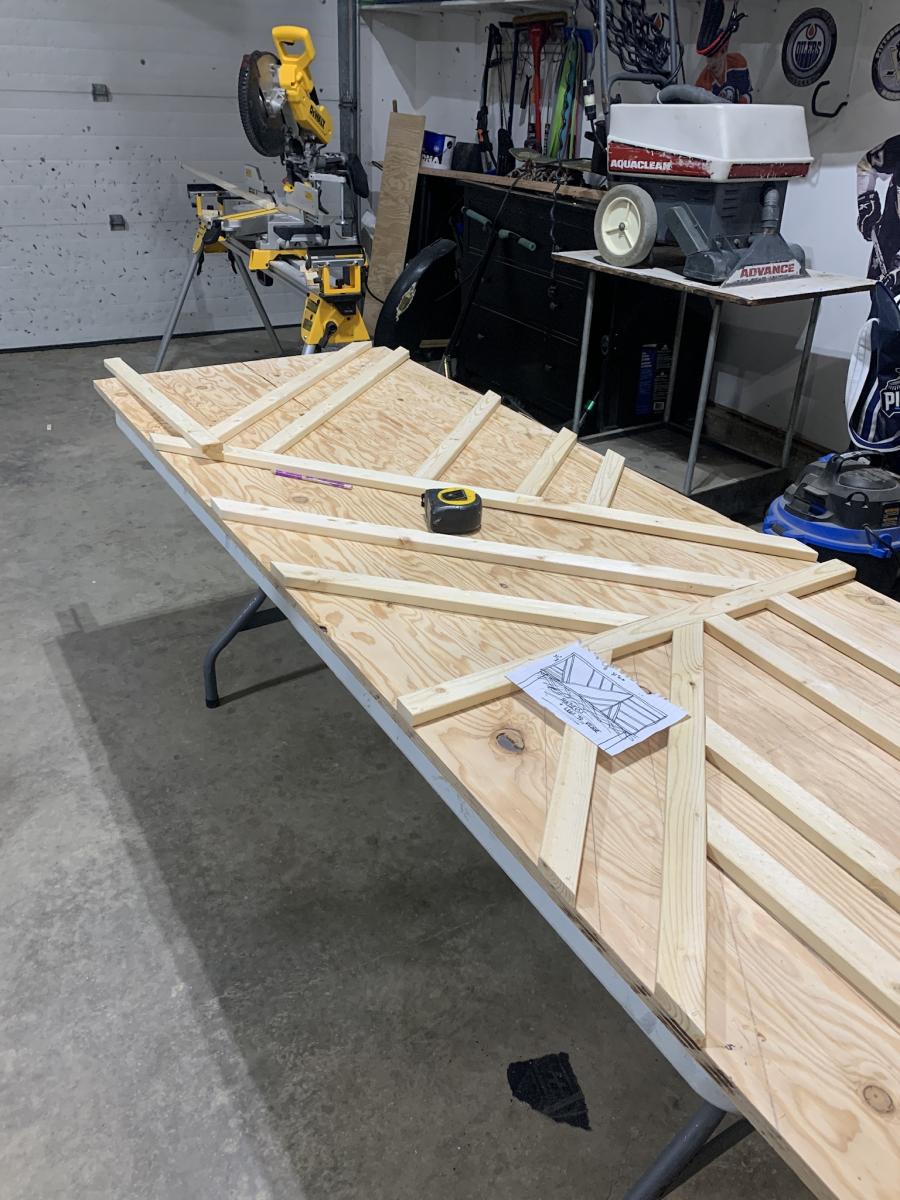
I followed the instructions for the Modern Geo Headboard but adjusted them to fit my bed frame because I don’t have a platform bed. I’ve refurbished pieces before but this is the first one I have actually built from scratch. It’s certainly not perfect but I’m so happy with how it turned out. Lots of satisfaction in knowing I built this and it cost a fraction of the similar one I wanted to buy in store. Thank you for the inspiration.
-Teena

This was our first build project! We spent the most amount of time picking the color than we did on the actual assembly. We extended the back 2 legs 36 inches to accommodate the window frame and shelf.
Mon, 07/25/2011 - 09:02
This is beautiful! I have a garage full of these windows and I have been trying to figure out things to do with them before my husband decides to throw them out.
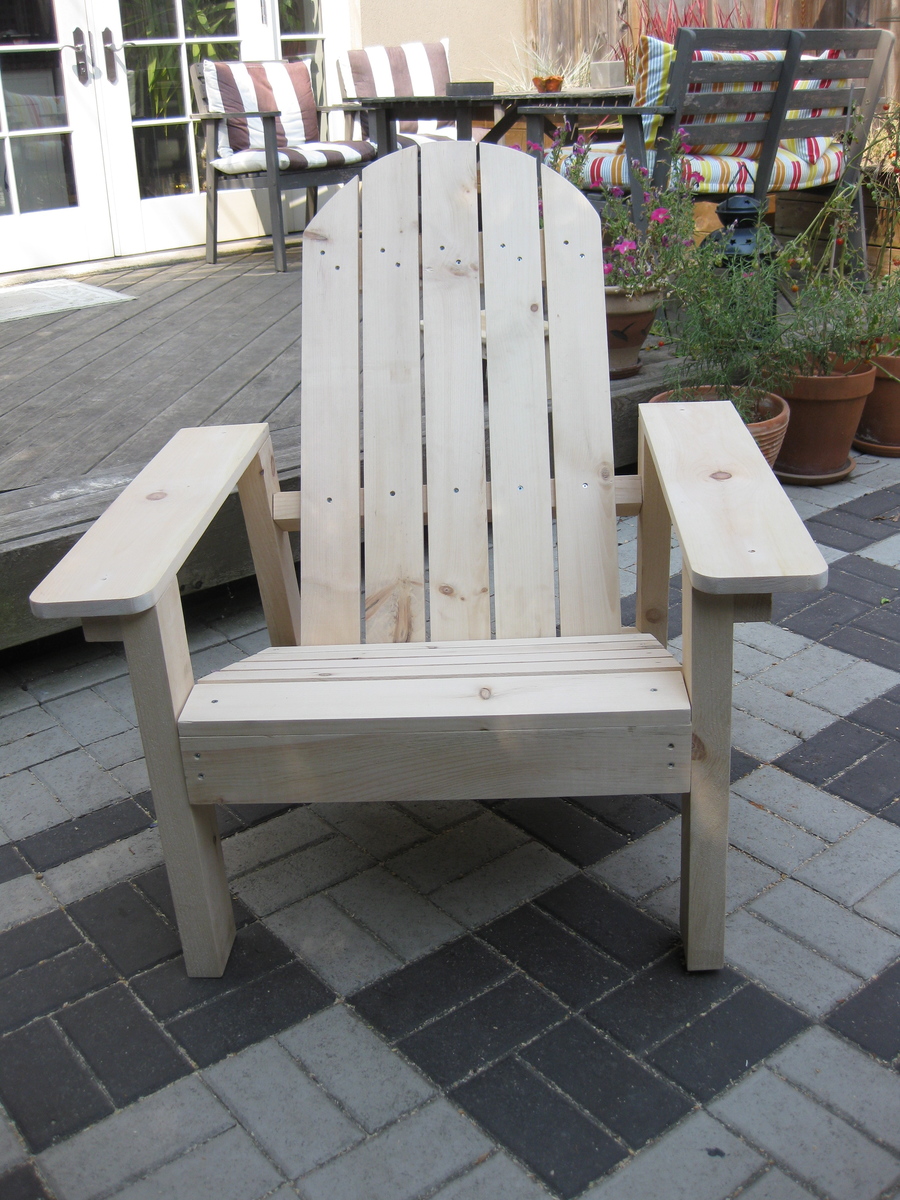
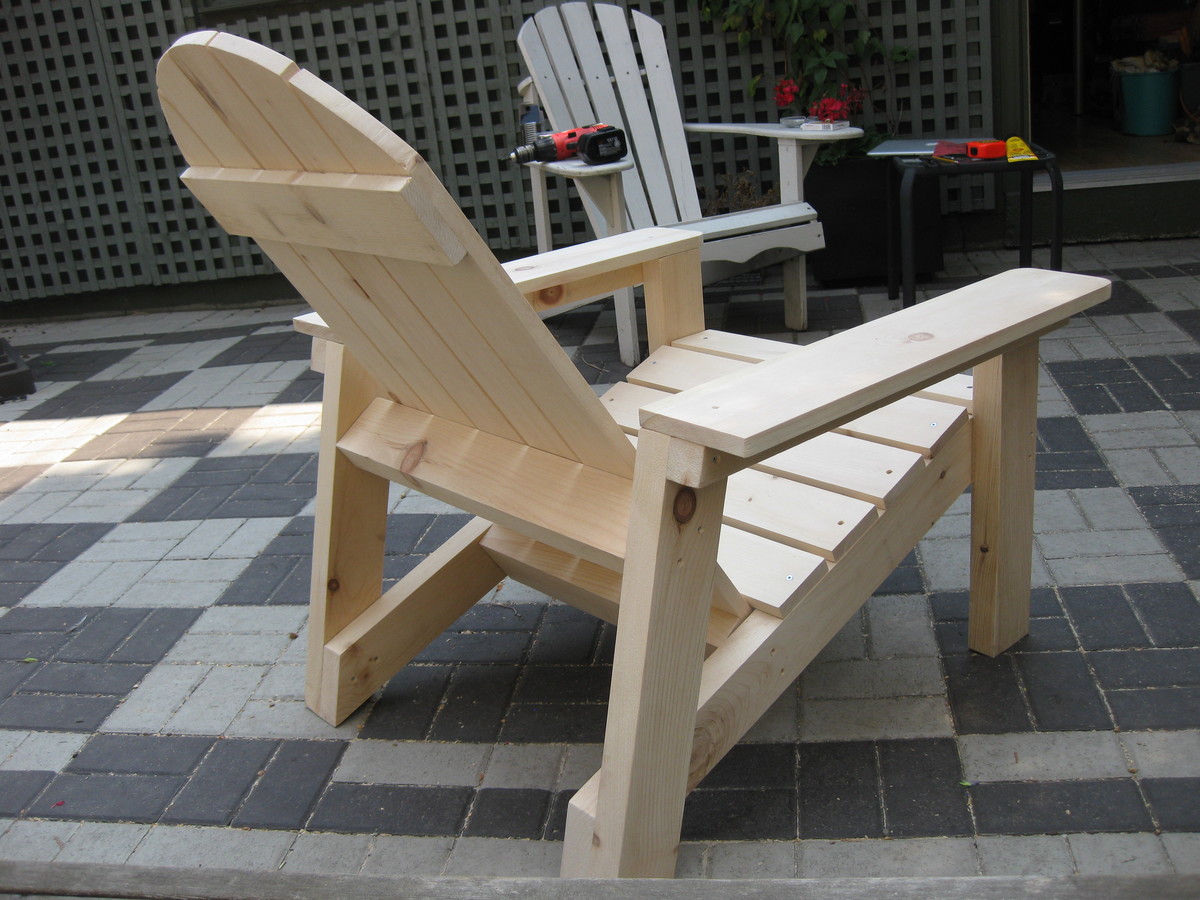
This Adirondack chair was done in pine. I followed Ana's plan, with only one modification ... went with a wider armrest. I thought the wider armrest would be handy for resting a drink.


Comments
Ana White Admin
Tue, 05/10/2022 - 07:03
Darling!
Love the rustic finish, just beautiful! Thank you for sharing.